You don’t have access to view this content.
Yama Mountain Gear 1P Cirriform Min Tarp Review
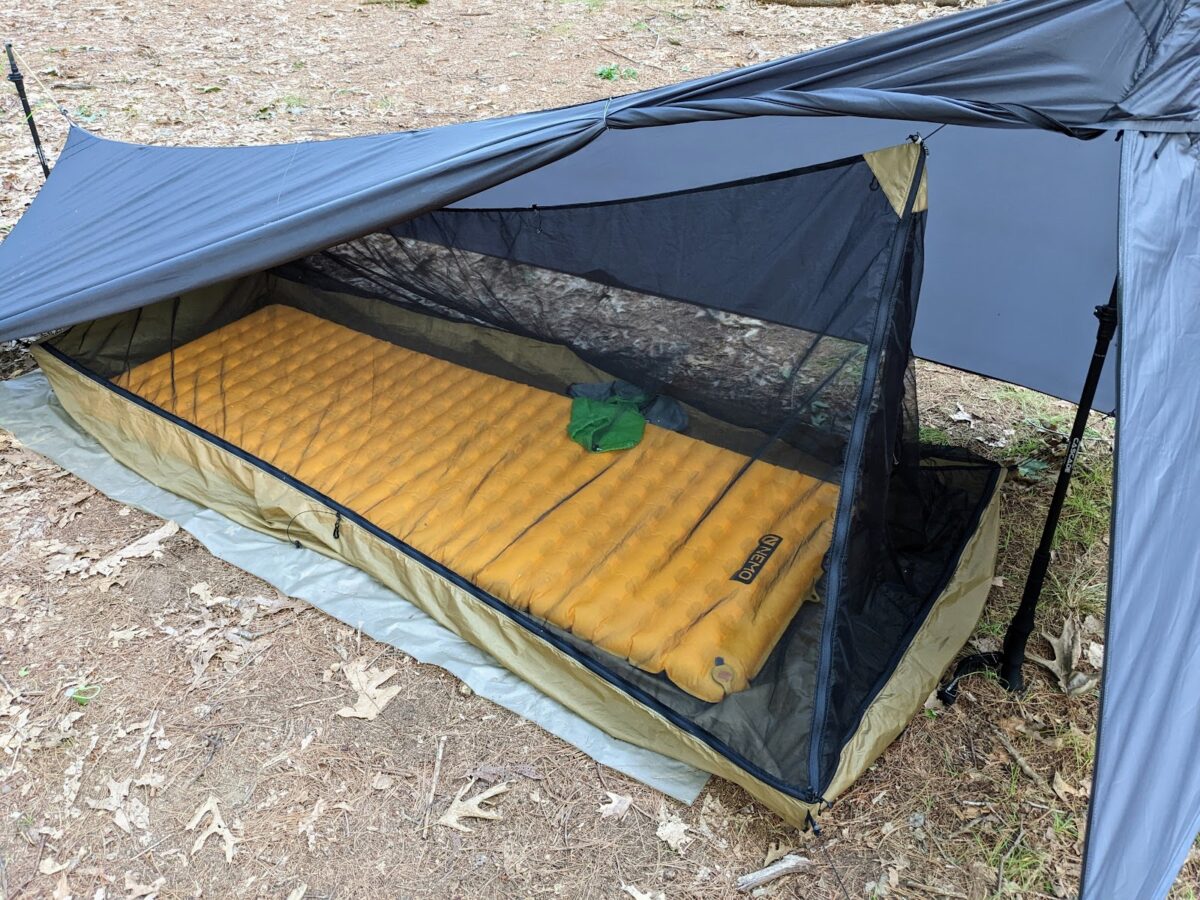
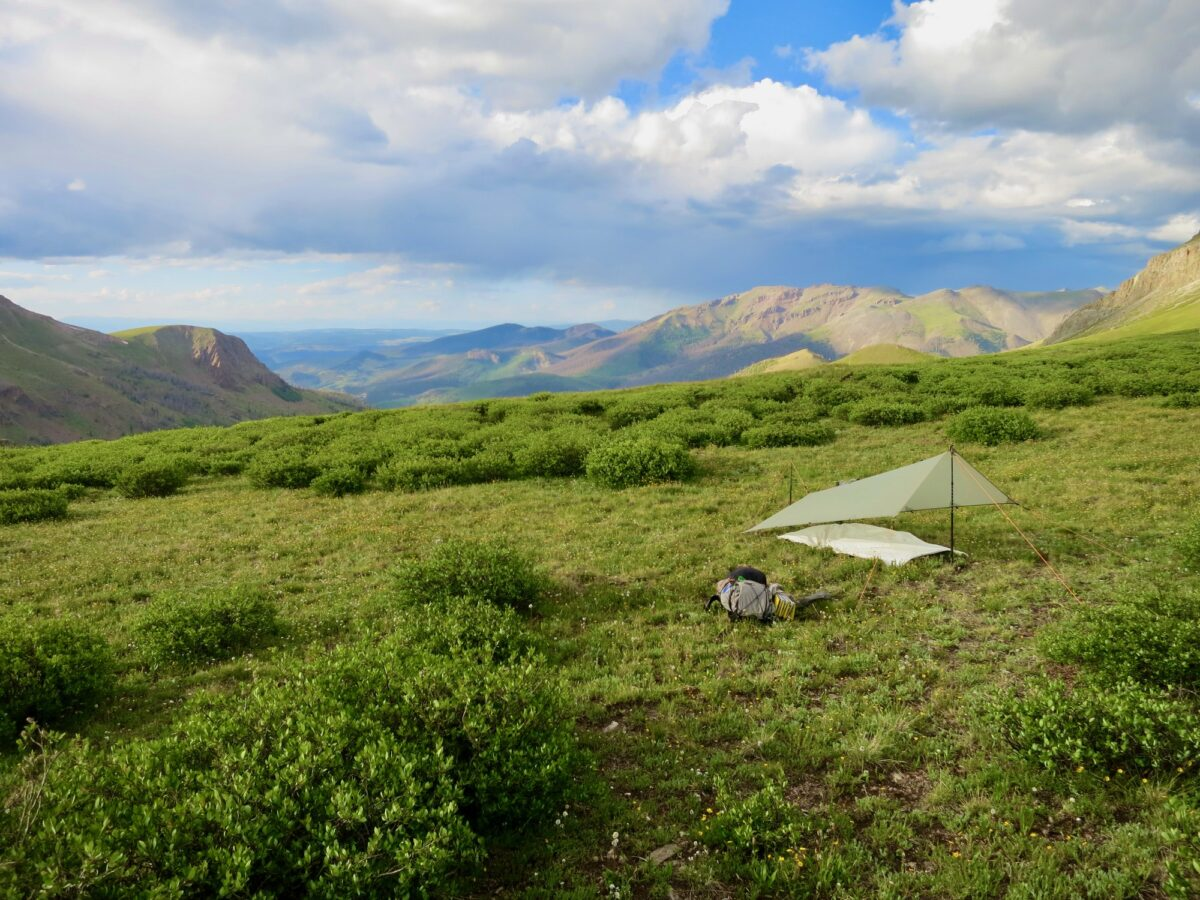
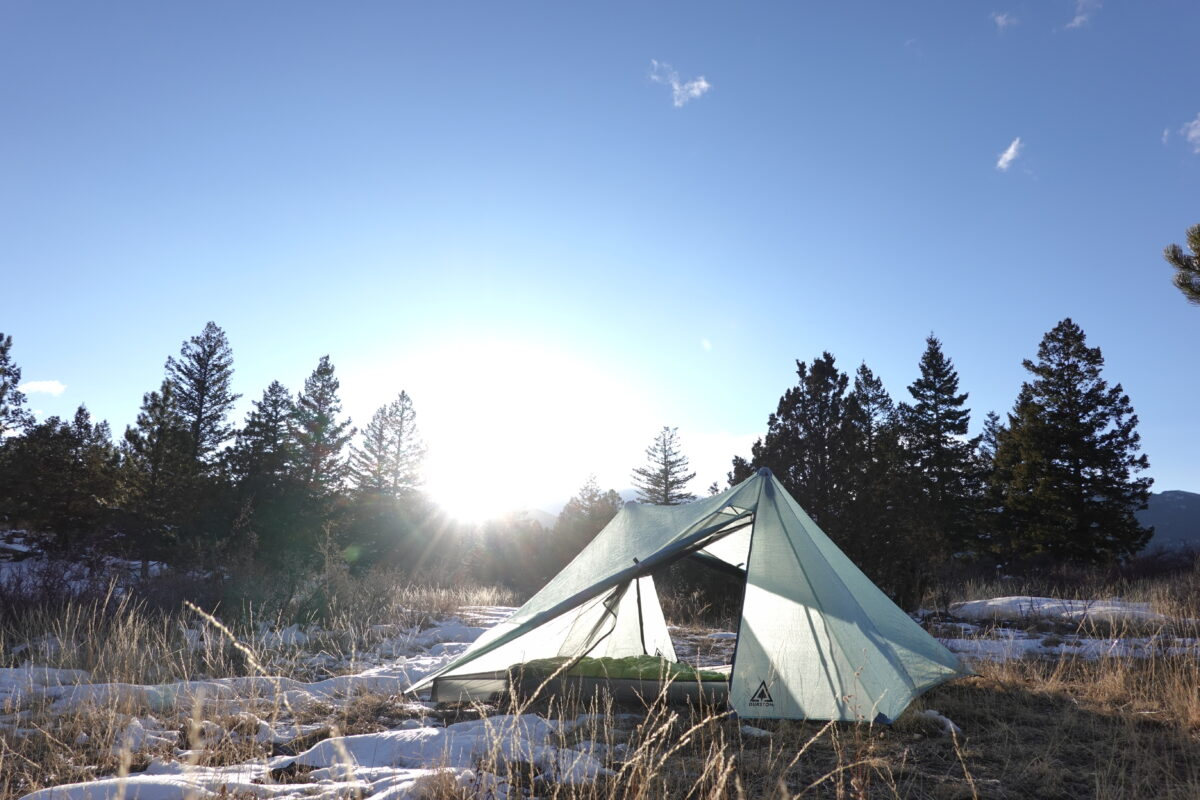
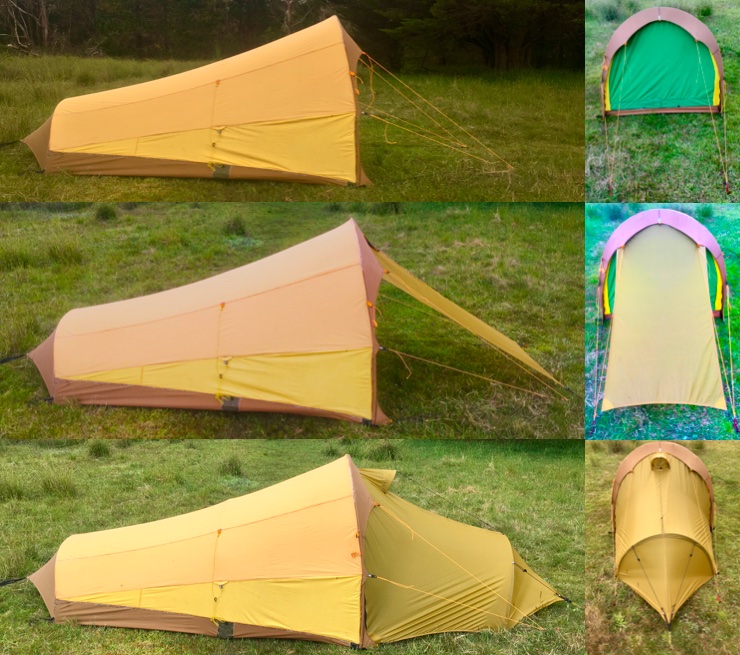
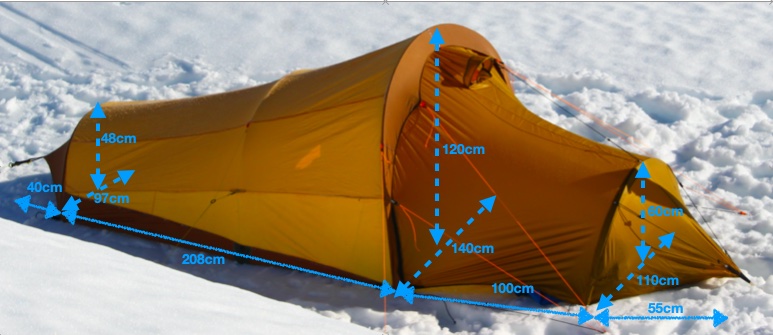
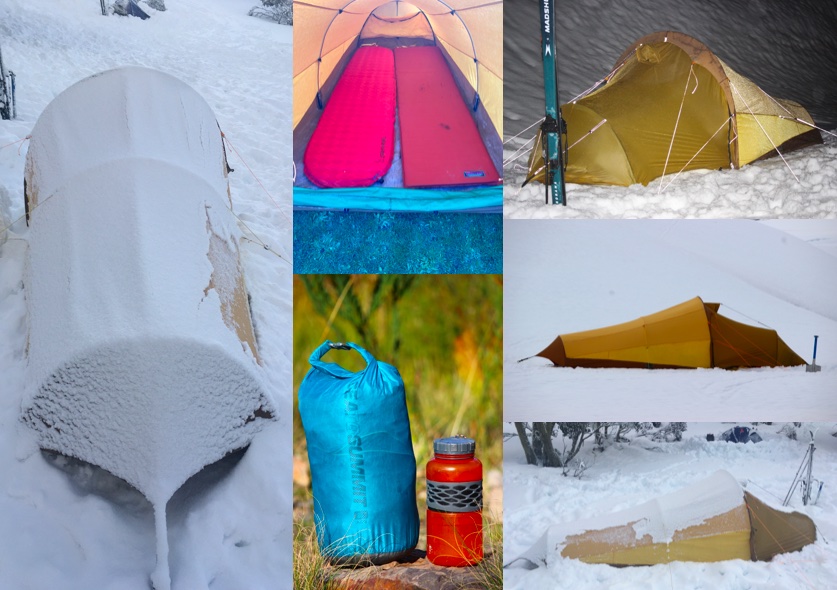
The Yama Mountain Gear 1P Cirriform Min Tarp ($210 in silpoly) is a one-person, 2-trekking pole, side/end-entry full-perimeter tarp shelter.
The Yama Mountain Gear 1P Cirriform Min Tarp ($210 in silpoly) is a one-person, 2-trekking pole, side/end-entry full-perimeter tarp shelter.
You don’t have access to view this content.
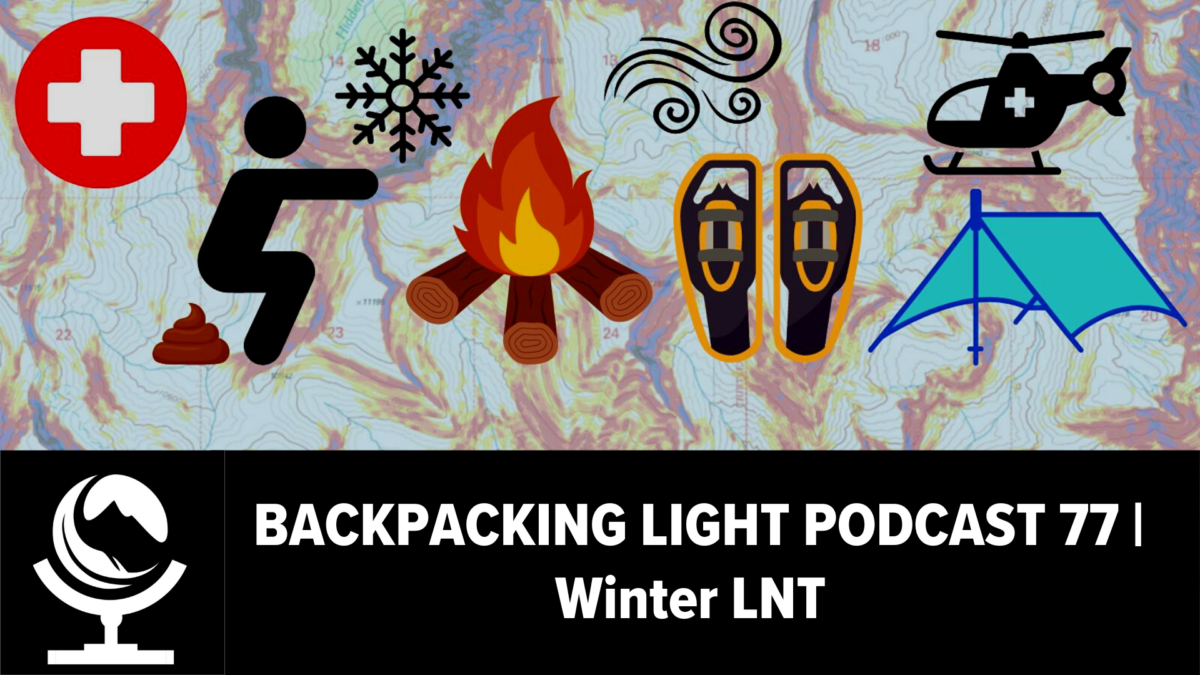
In this episode of the Backpacking Light podcast, we’re going to examine some of the principles of Leave No Trace in the context of winter backcountry travel, with a focus on planning, pooping, and campfires.
In this episode of the Backpacking Light podcast, we’re going to examine some of the principles of Leave No Trace in the context of winter backcountry travel, with a focus on planning, pooping, and campfires.

How to Subscribe
Apple Podcasts | Spotify | RSS
More Episodes
Backpacking Light Podcast Index
Credits
Executive Producer - Backpacking Light; Show Director and Host - Ryan Jordan; Producer - Chase Jordan; Theme music: Look for Me in the Mountains written by Chris Cunningham and Ryan Jordan, performed by Chris Cunningham (acoustic guitar, lead and harmony vocals, harmonica), Chad Langford (upright bass), and Tom Murphy (mandolin), produced by Basecamp Studios in Bozeman, Montana.
Feedback / Tips / Questions
podcast@backpackinglight.com
More Backpacking Light
Sign up for the Newsletter. Become a Backpacking Light Member.
Disclosure
Sponsorship Policy: Backpacking Light does not accept compensation or donated/discounted products in exchange for product mentions or placements in editorial coverage, including any podcast episode content not excplicitly identified as sponsored content. Some (but not all) of the links in these show notes may be affiliate links. Learn more about affiliate commissions, influencer marketing, and our consumer advocacy work by reading our article Stop wasting money on gear.
In today’s episode of the Backpacking Light podcast, we are going to explore vapor barrier systems for the hands and feet.
In today’s episode of the Backpacking Light podcast, we are going to explore vapor barrier systems for the hands and feet.
How to Subscribe
Apple Podcasts | Spotify | RSS
More Episodes
Backpacking Light Podcast Index
Credits
Executive Producer - Backpacking Light; Show Director and Host - Ryan Jordan; Producer - Chase Jordan; Theme music: Look for Me in the Mountains written by Chris Cunningham and Ryan Jordan, performed by Chris Cunningham (acoustic guitar, lead and harmony vocals, harmonica), Chad Langford (upright bass), and Tom Murphy (mandolin), produced by Basecamp Studios in Bozeman, Montana.
Feedback / Tips / Questions
podcast@backpackinglight.com
More Backpacking Light
Sign up for the Newsletter. Become a Backpacking Light Member.
Disclosure
Sponsorship Policy: Backpacking Light does not accept compensation or donated/discounted products in exchange for product mentions or placements in editorial coverage, including any podcast episode content not excplicitly identified as sponsored content. Some (but not all) of the links in these show notes may be affiliate links. Learn more about affiliate commissions, influencer marketing, and our consumer advocacy work by reading our article Stop wasting money on gear.
A curated guide to backpacking food ideas, meals, ingredients, strategies, skills, podcasts, forums, research, education, product recommendations, and more.
Backpacking food is just as important for the success of a trip as the gear you bring. But backpackers commonly treat food ideas, choices, preparation, gear, and storage as afterthoughts.

There are various options for preparing and storing backpacking food and an abundance of gear to help you accomplish whichever strategy you choose. Making sense of it all can be a bit overwhelming. But as with all things related to backpacking, it is worth spending the time to become informed about your options and aware of which ones are the best for you and your specific trips.
This article is one of Backpacking Light’s curated gateway pages (a trailhead, so to speak). Here, you’ll find information and resources about backpacking food ideas, cooking gear, and food storage techniques.
We’ve got resources to help you dial in nutrition and calories per ounce, techniques and cooking equipment for preparing food in the front country and backcountry, and information about different backpacking food ideas, choices and storage strategies.
About this Trailhead: Curated and maintained by our staff, this Trailhead page includes an overview of the topic and links to information and resources on the Backpacking Light website. Those resources may consist of gear reviews, technology and testing, research, skills articles, online education (webinars, masterclasses, or other types of online courses), podcast episodes, forum threads, product recommendations, and other discovery tools, including our Gear Finder, Gear Shop, and Site Search engine.
Table of Contents • Note: if this is a members-only article, some sections may only be available to Premium or Unlimited Members.
Depending on if you’re doing a multi-week thru-hike or a quick overnight trip, your food choices will vary significantly and might depend on:
Figuring out what works best for you will come with time, experience, the advice of others, and trial and error. Perhaps the biggest two considerations are:
These links provide consistent, data-driven, nutrition-first answers to these questions.
It’s also worth making sure you will actually eat the food you plan to bring with you. Altitude and exhaustion can both make backpacking food hard to choke down. Read this article for some insights on how to choose food you’ll actually eat:
There are three methods to resupply on long trips.
Supplying and re-supply at grocery stores, general stores, and gas stations is a very common way of handling backpacking food. It requires the least amount of prep upfront and provides the greatest flexibility and often the lowest pack weights. The downsides are it can be the most expensive option, and choices are often limited at small-town grocery stores. And of course, on serious wilderness excursions, there aren’t any stores.

But you don’t have to only look for stores along the way. You can always use grocery stores as a supply depot before you leave, and bring along or send yourself the meals you prepare.
Becoming adept at recognizing which grocery store brands, meals, and snacks require the least amount of repackaging, are shelf-stable or safe to keep unrefrigerated for days at a time, and are easy to cook or consume in the backcountry is something that will come with practice and the advice of others.
Tap into our community’s expertise for help with this:
The next step is preparing and packaging the foods that you’ll be bringing along.
The most common ways of preparing meals for the backcountry are dehydration and freeze-drying. Each method has pros and cons. Check out this forum post:
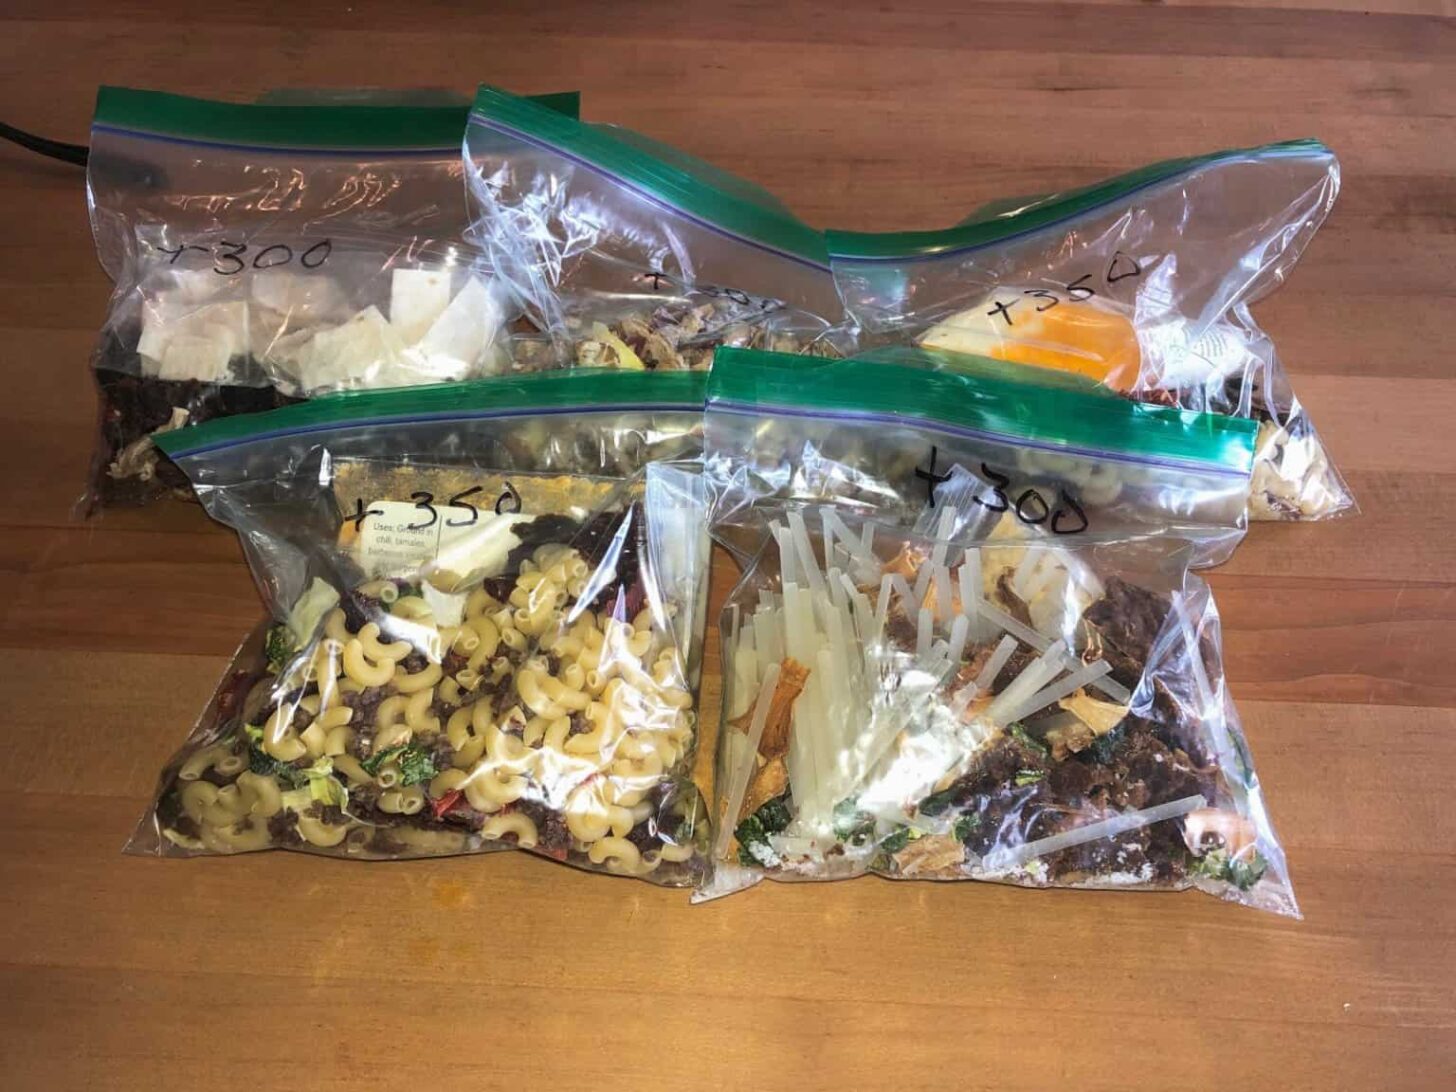
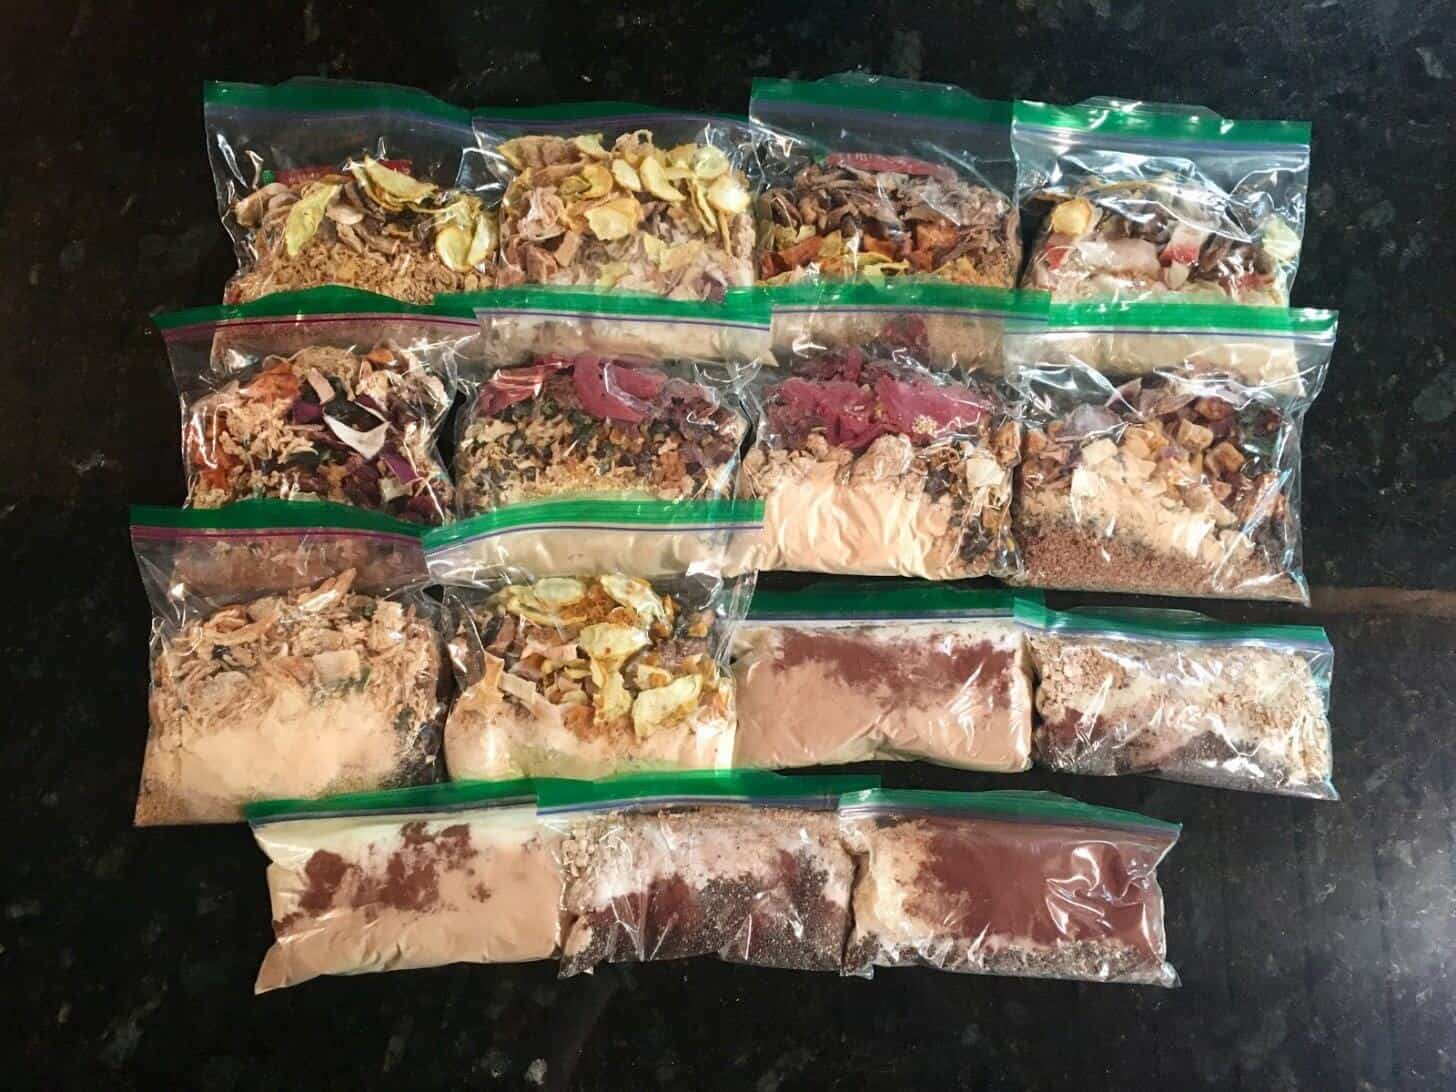
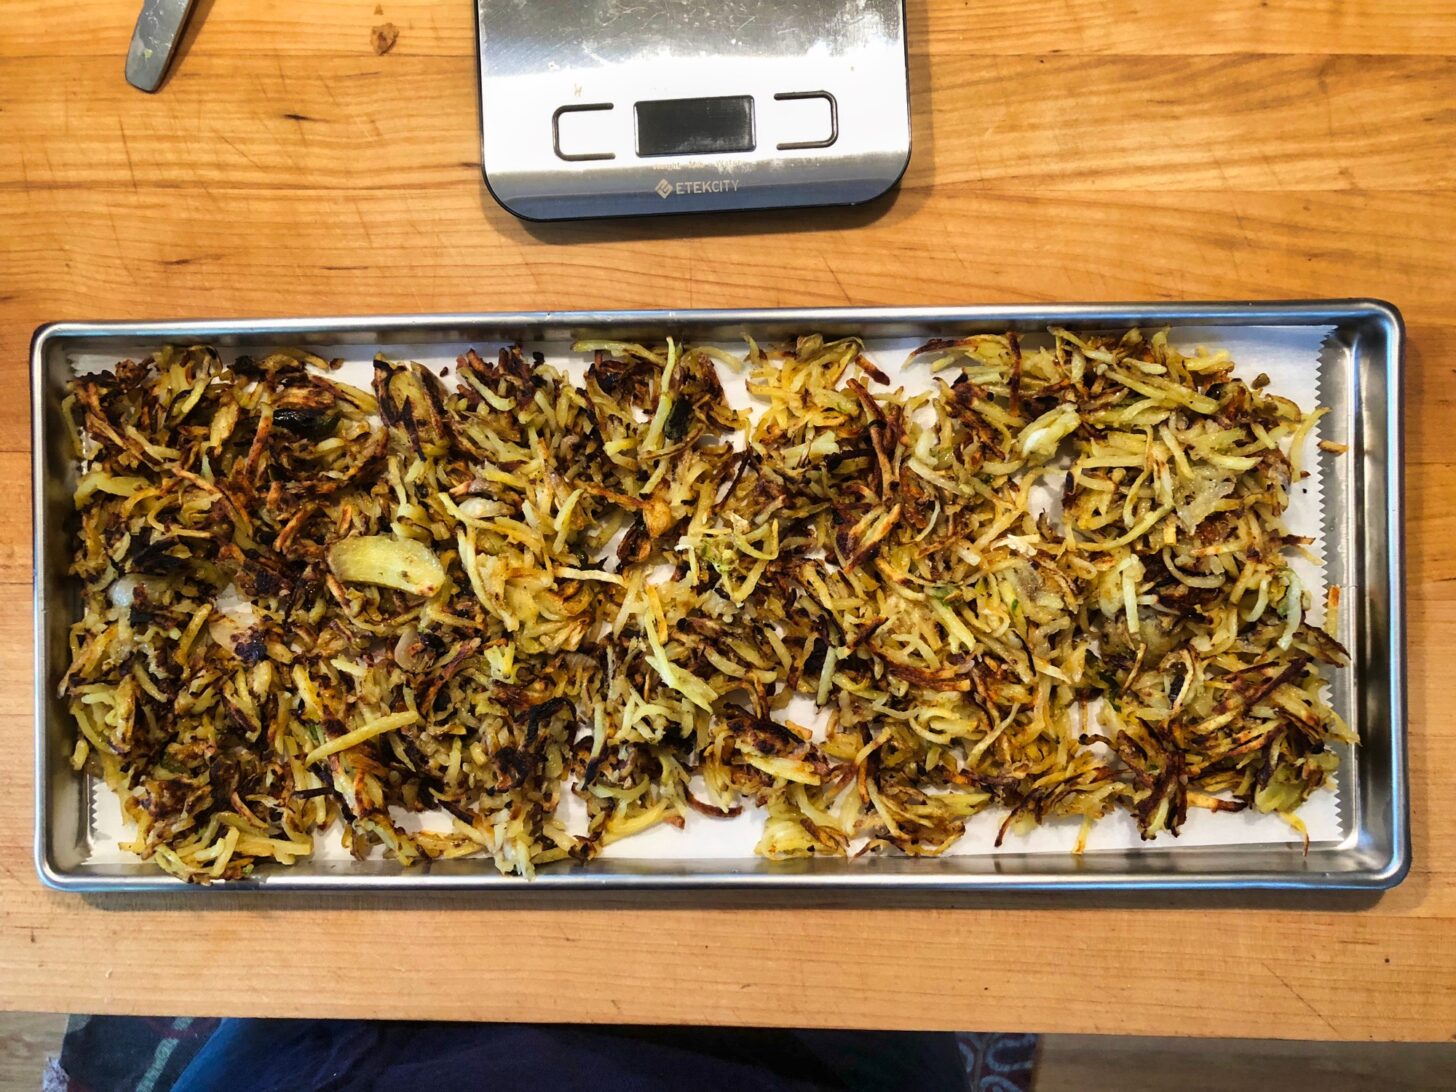
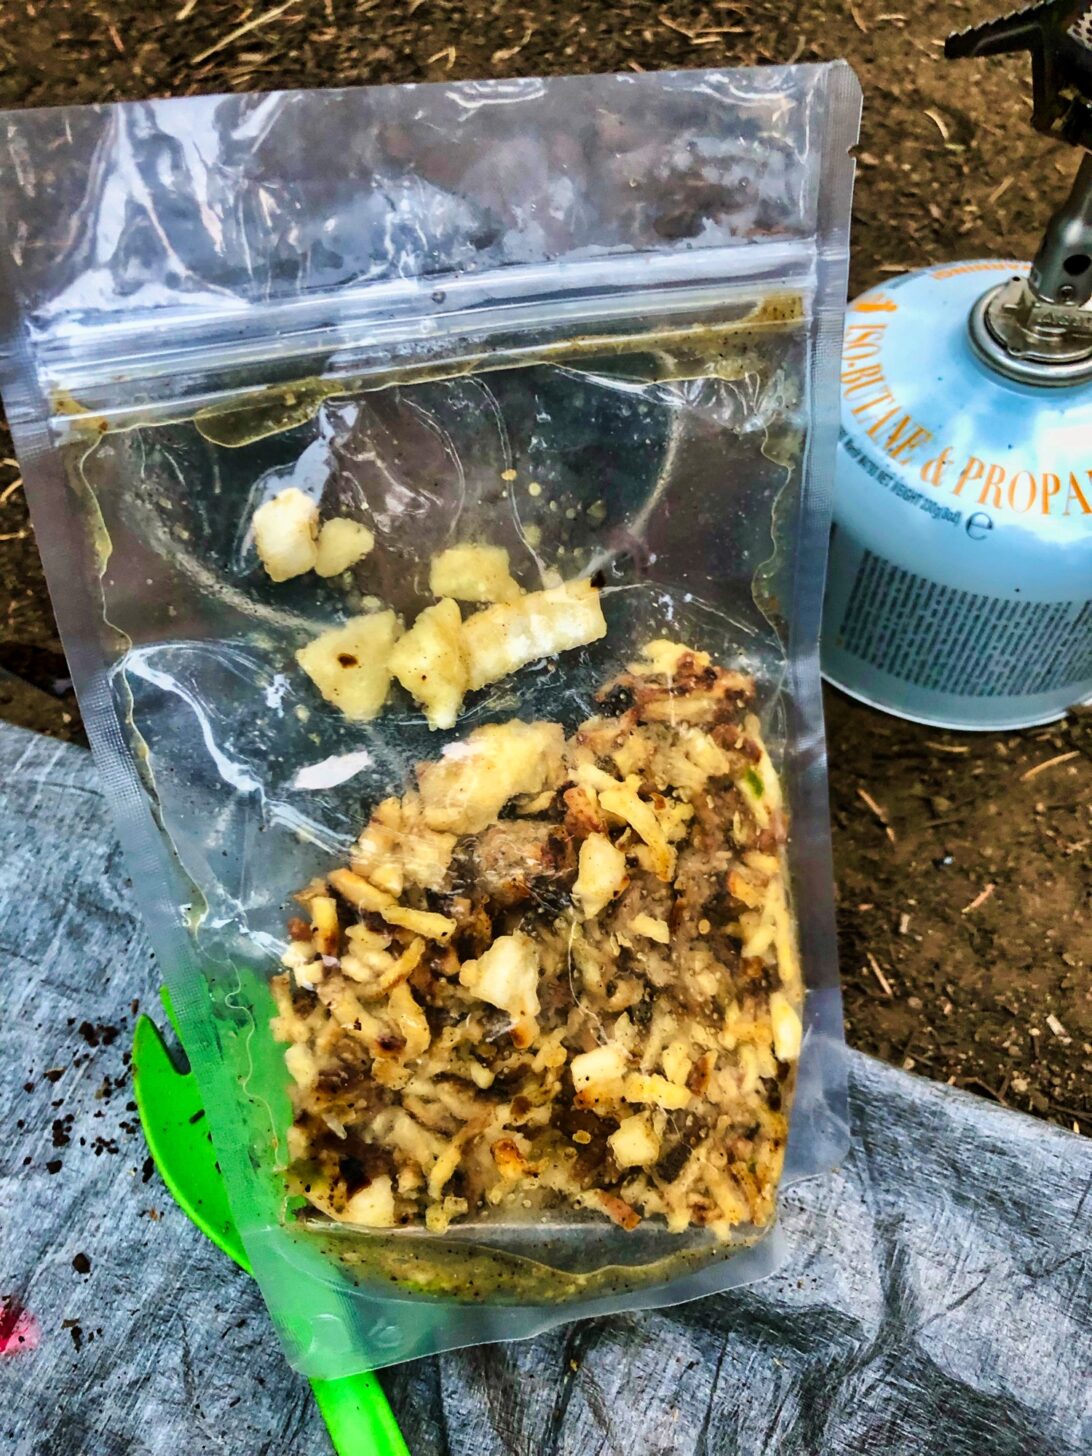
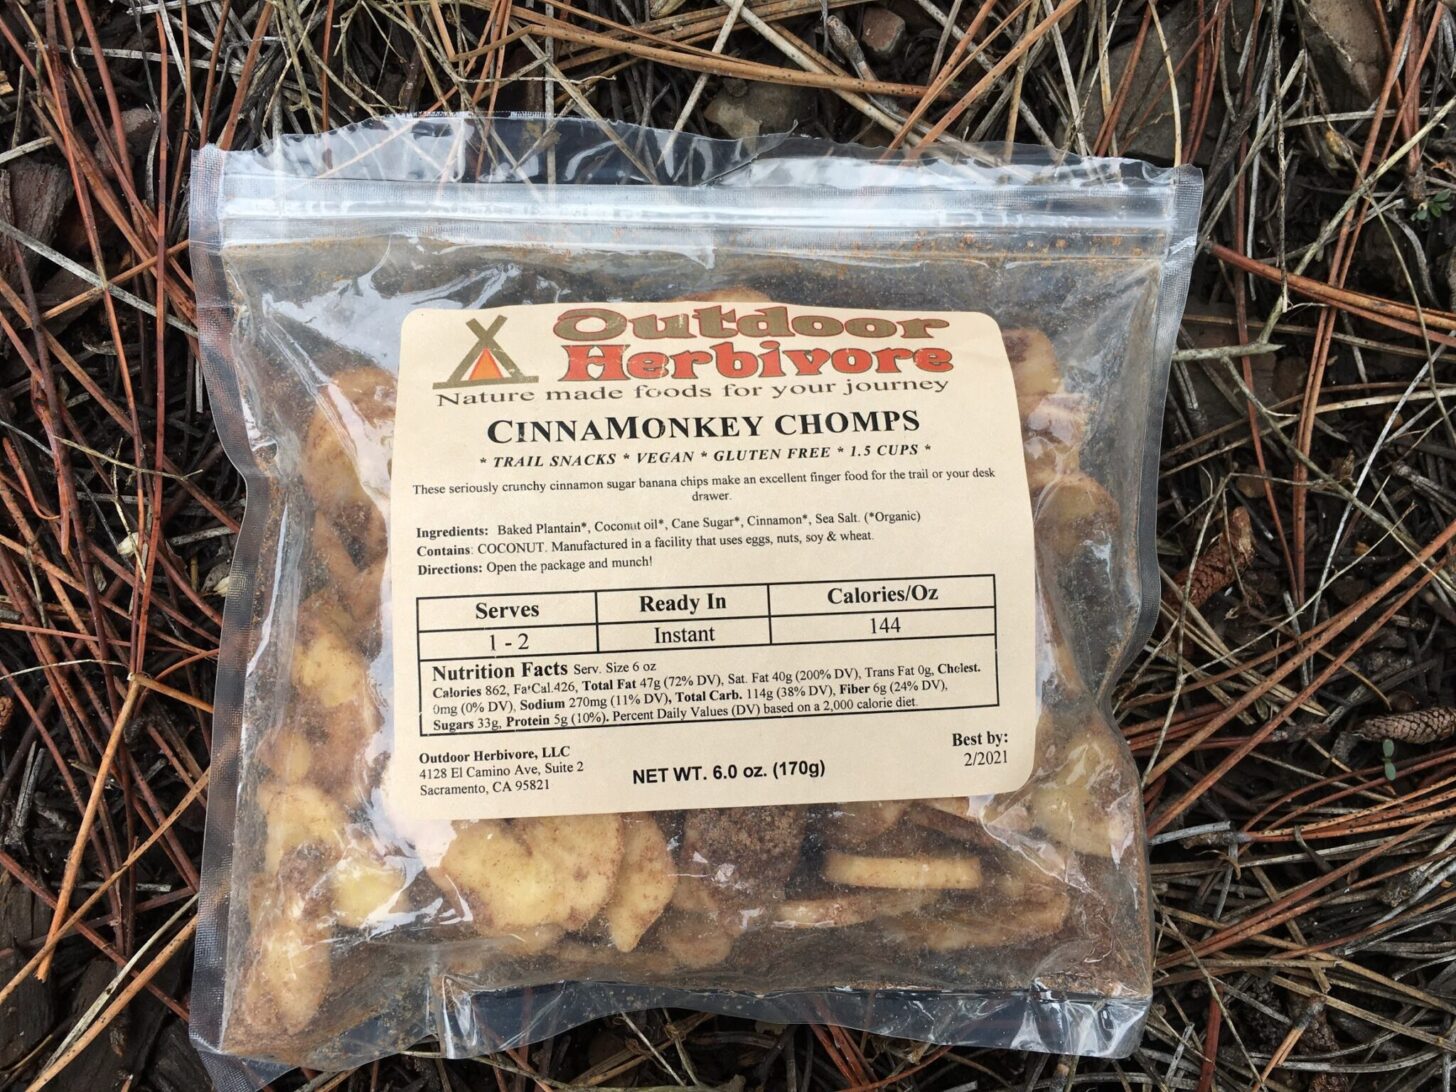
Dehydration is the least cost-intensive way of preparing backpacking meals at home. Some backpackers use kitchen ovens to dehydrate food (an imperfect method) and others purchase inexpensive dehydrators (a much easier and safer approach).
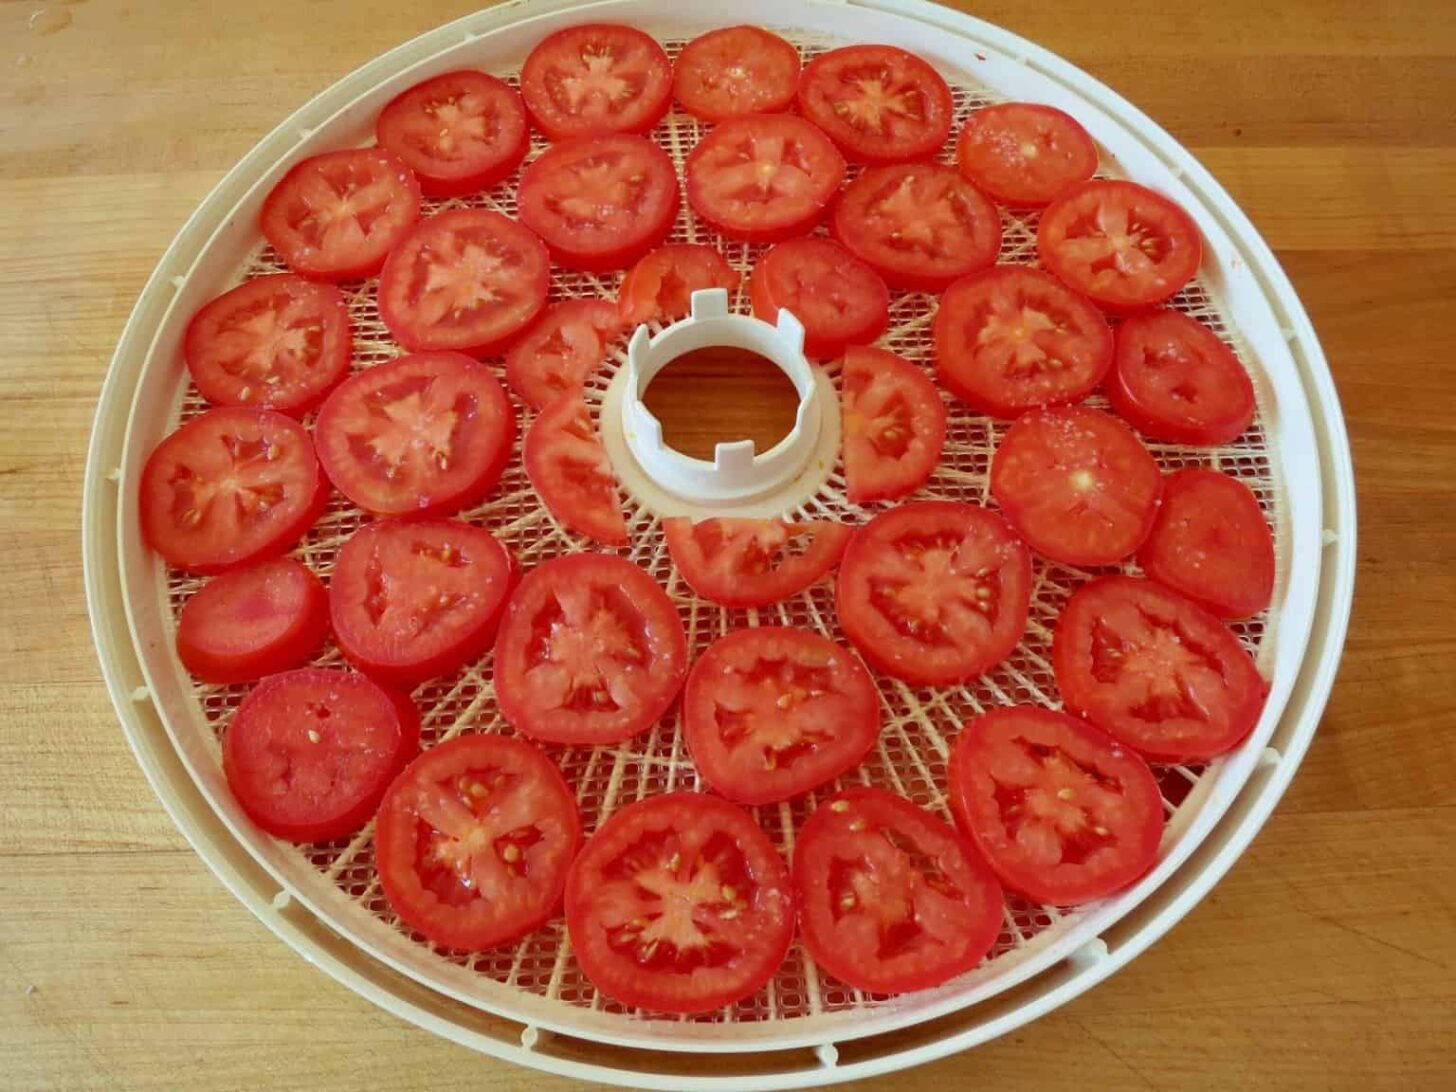
But dehydrated meals can sometimes take a long time to re-constitute, and each food item comes with its own dehydration methods, challenges, and drying times. For this reason, if you are going to prepare backpacking food in a dehydrator at home, you must dehydrate each ingredient individually and then combine the ingredients in your packaging after they are dried.
Drew Smith’s article on food dehydration is a user-friendly and comprehensive entry point into dehydration:
Once you’ve dehydrated your food, storing it properly is important so you don’t end up with rancid or spoiled supplies while in the backcountry. Drew’s article (above) also covers this point.
And don’t miss these other Backpacking Light resources on food dehydration:
Here’s a trip report that illustrates a food strategy using dehydrated ingredients in action:
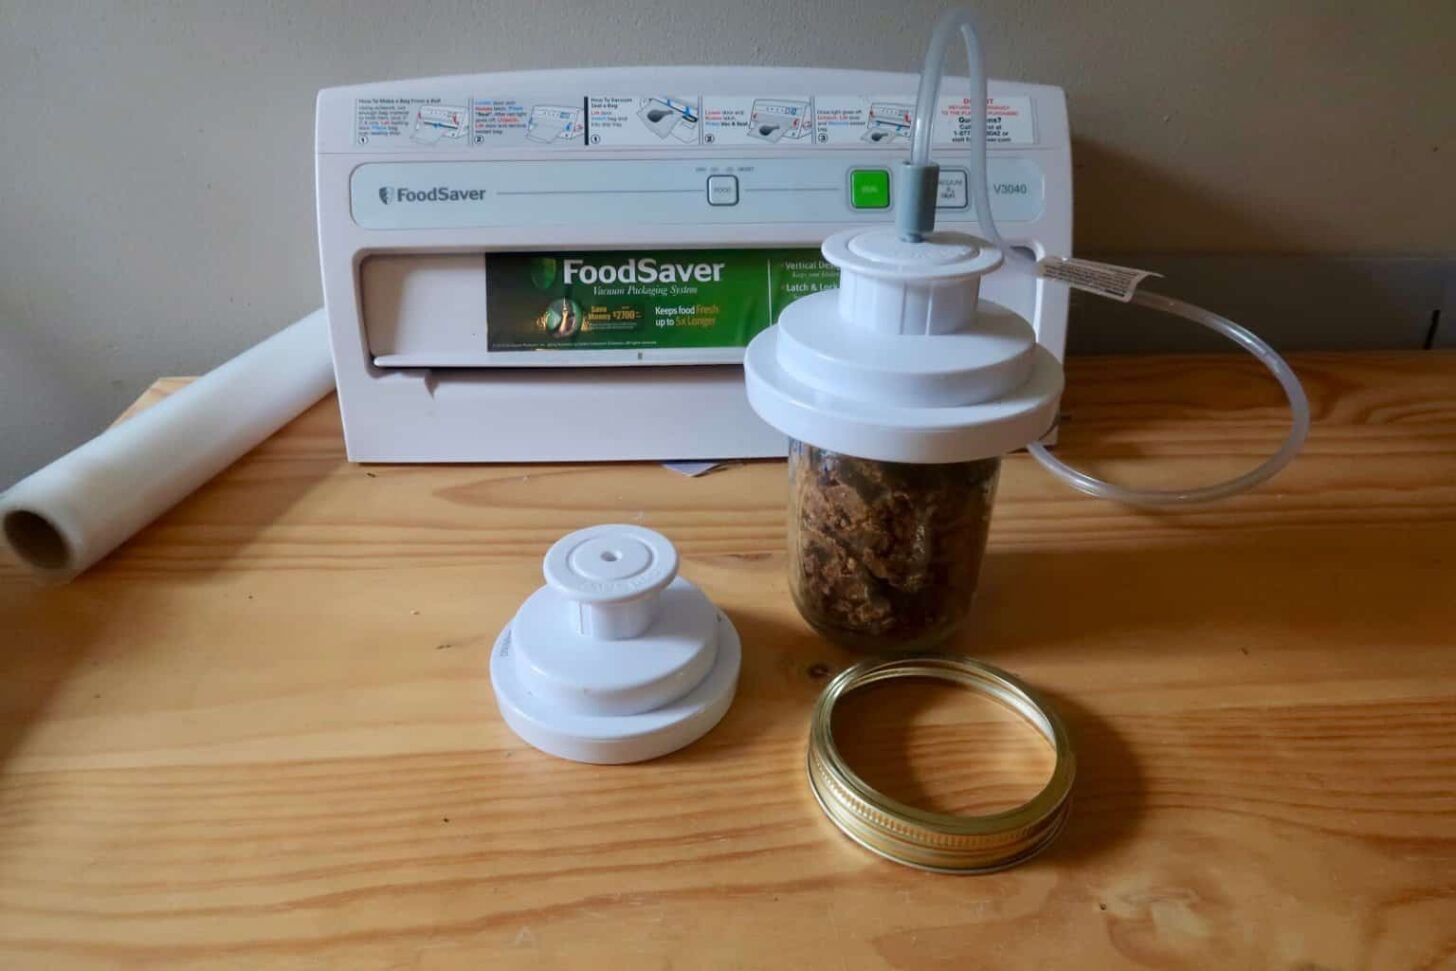
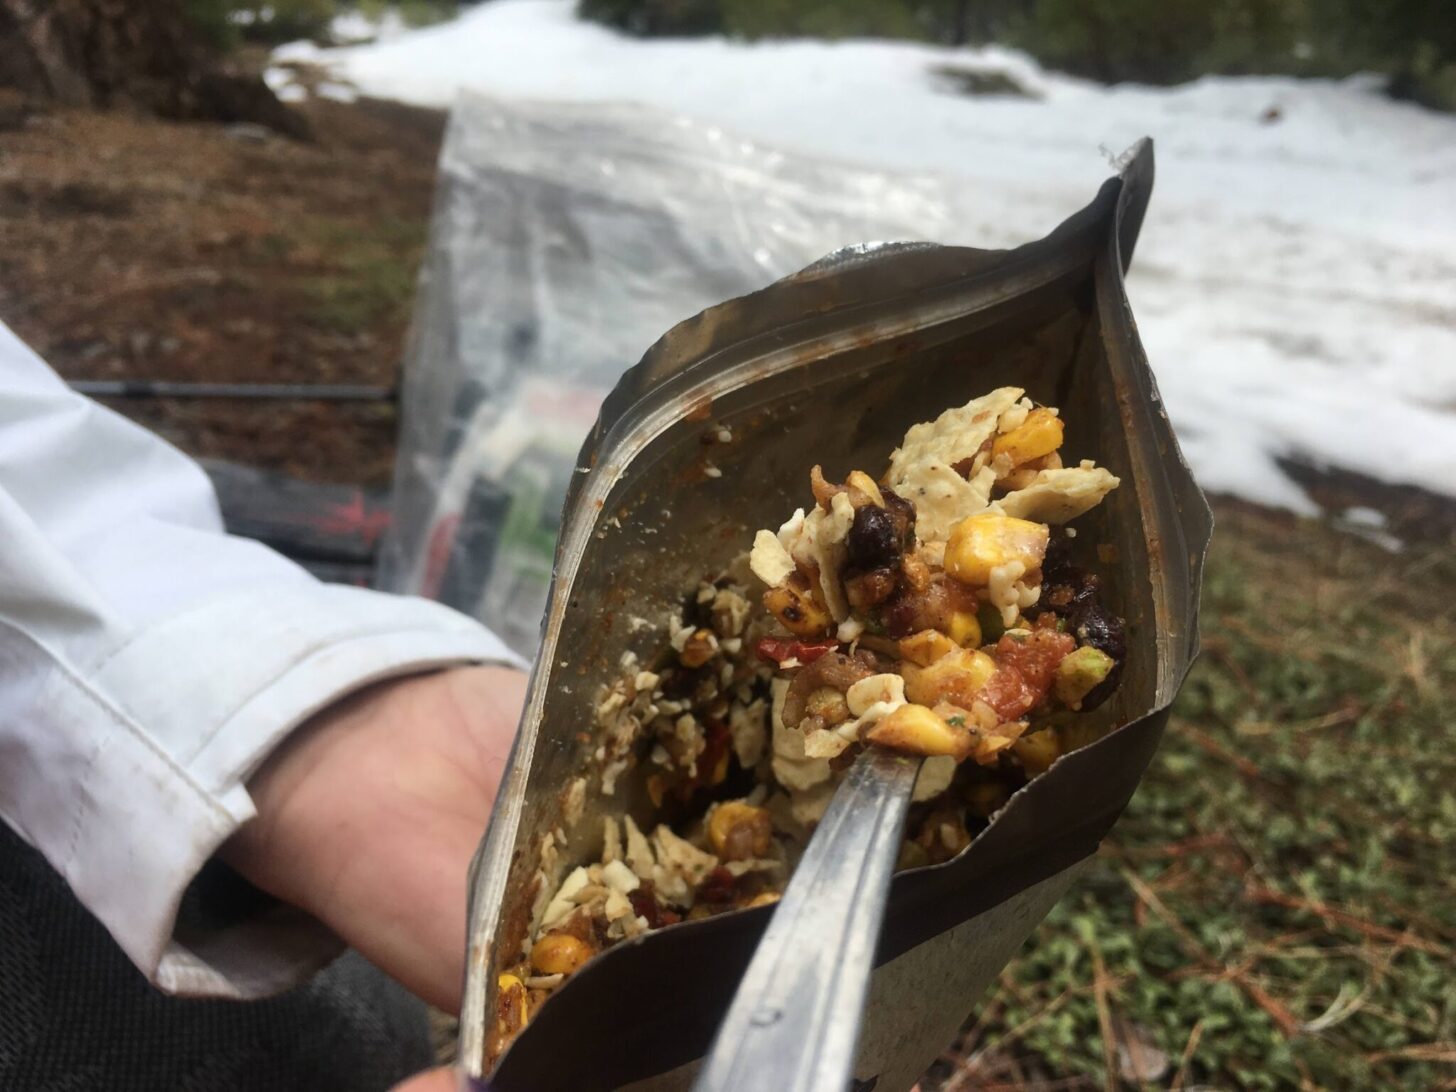
Freeze-drying is an incredibly effective way of preparing backcountry meals. Freeze-dried backpacking food is lighter and reconstitutes better than dehydrated food, and it often preserves flavor and texture better as well. As a bonus, you can prepare freeze-dried meals as meals – in other words, you can cook or buy a meal and freeze-dry it all together rather than by individual ingredients as with dehydration.

The downside to freeze-drying is the gear needed – a freeze-dryer – is prohibitively expensive for the average backpacker. We recommend splitting the cost with one (or more, ideally) friend and then preparing meals together in bulk for your adventures together.
Here’s our review of a freeze-dryer that fits in your garage:
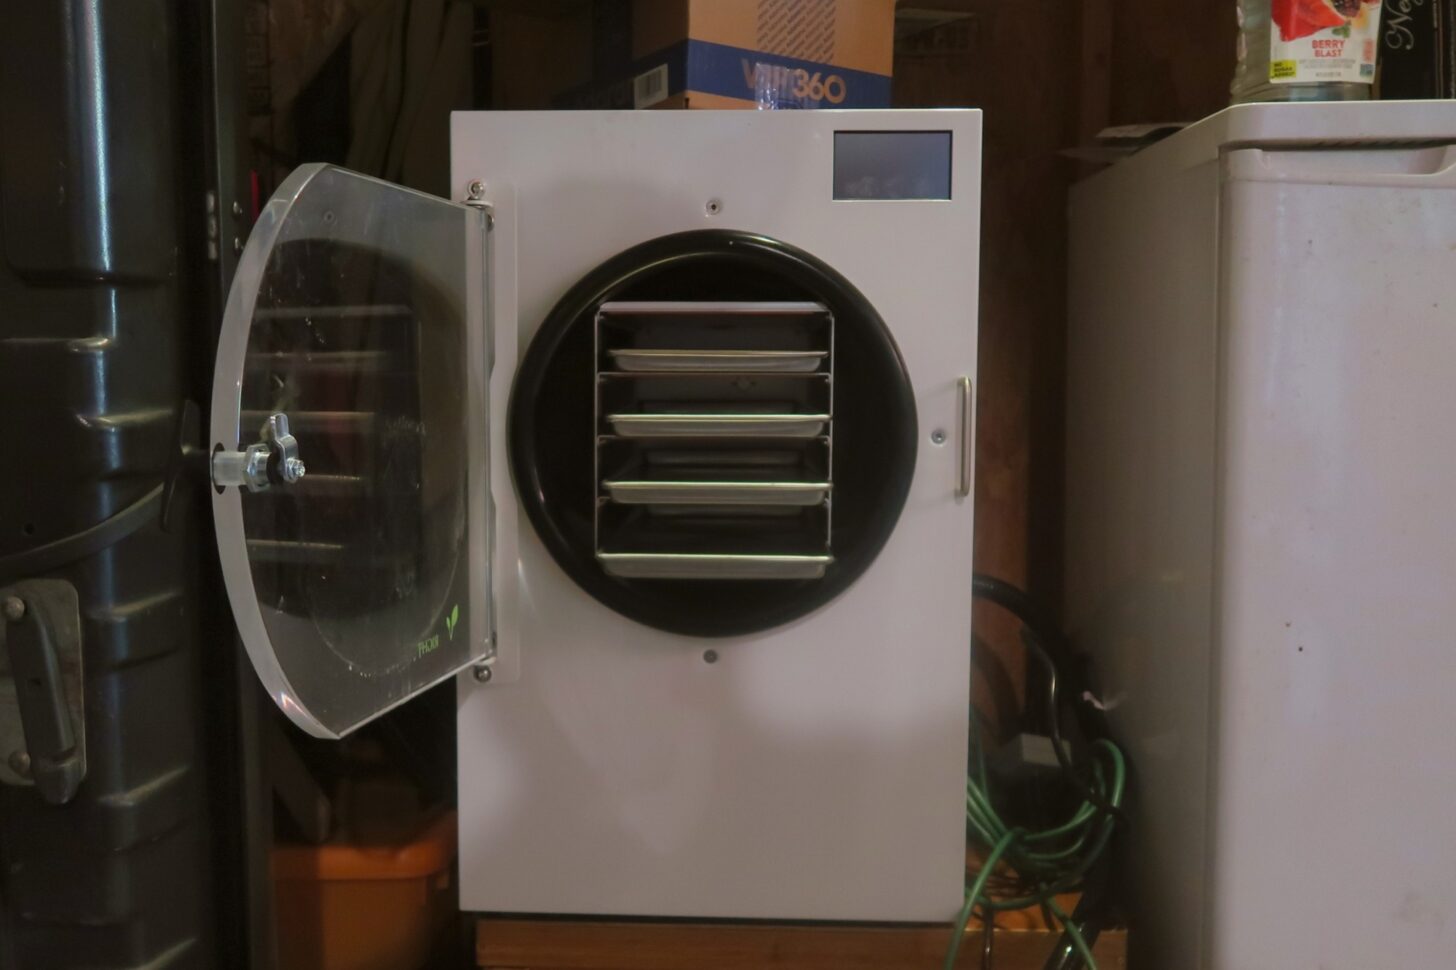
And don’t miss Drew Smith’s ongoing exploration of the Harvest Right Home Freeze Dryer as he explores the science behind freeze-drying and the recipes that are possible with it.
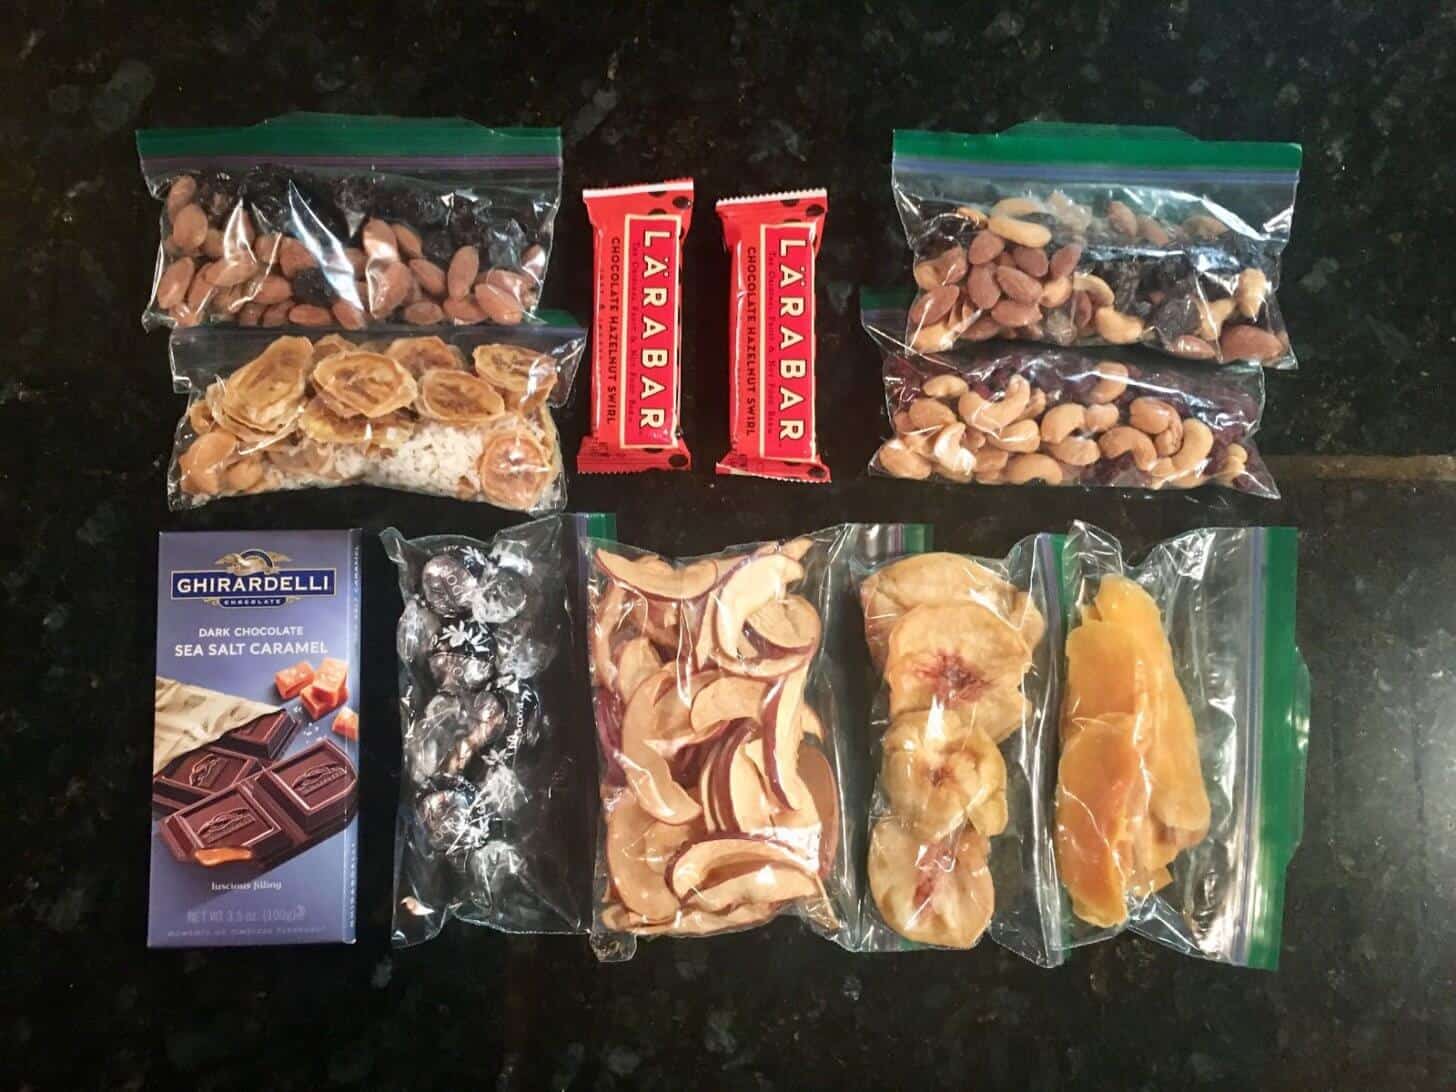
Packaged backpacking meals
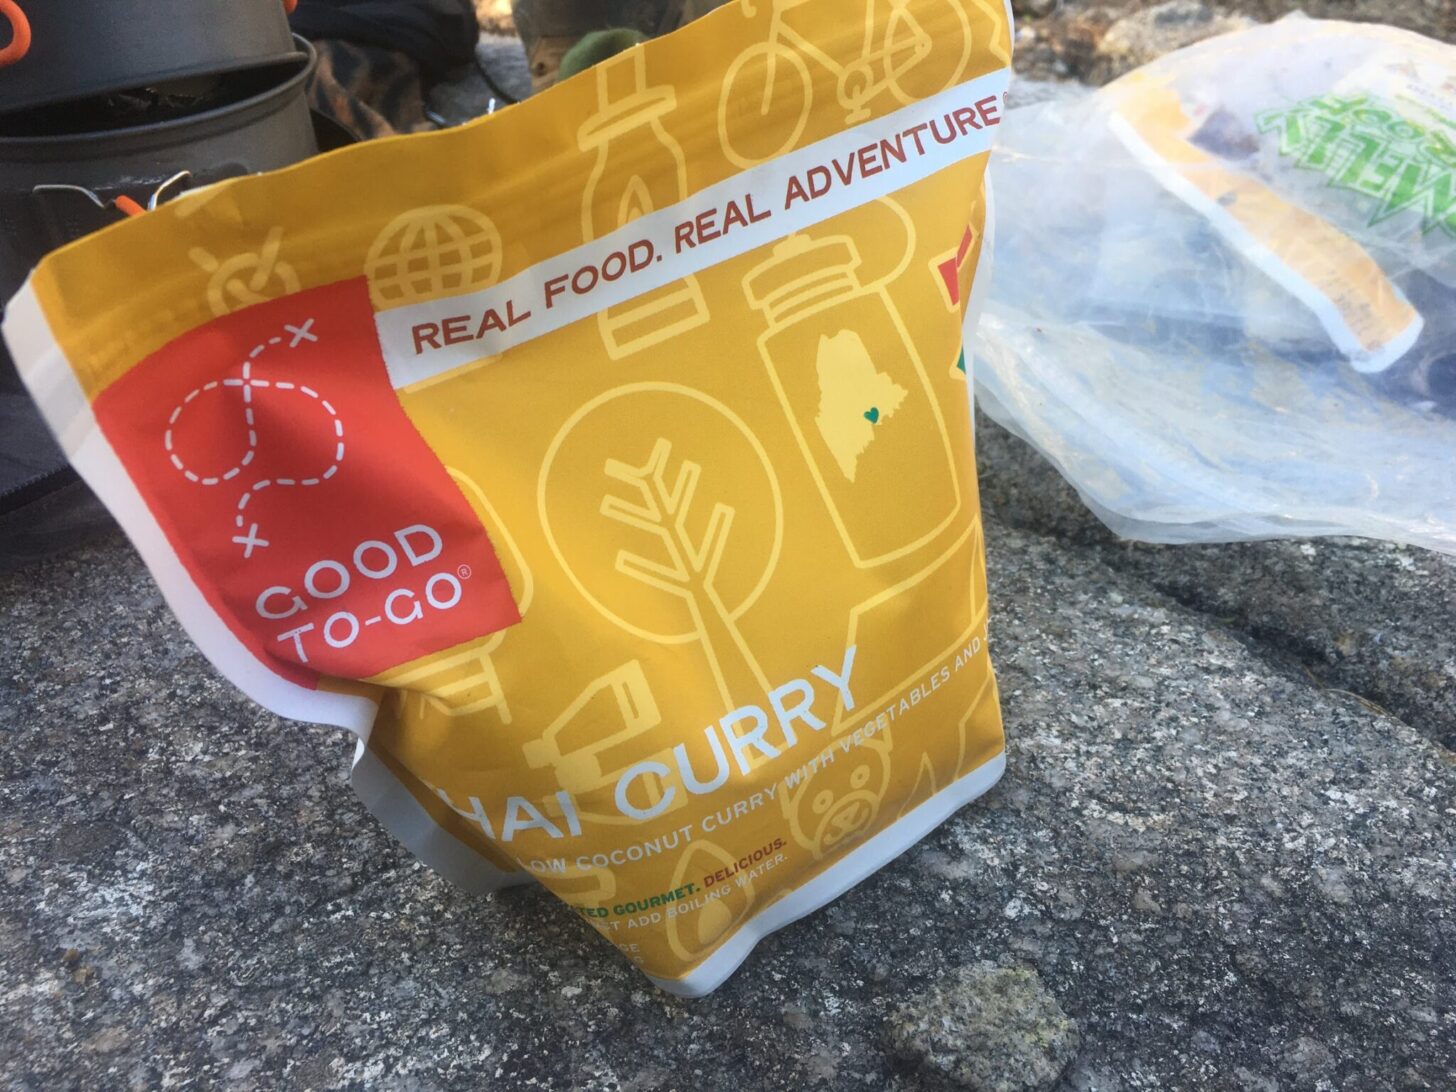
If making your meals isn’t your thing, there is an abundance of freeze-dried and dehydrated backpacking meals to choose from. In the last several years, several new companies have entered this market and provided backpackers with a surprising variety of meals and options for those with dietary restrictions, allergies, or picky palettes. In other words, you don’t just have to stick with Mountain House or Backpacker’s Pantry anymore (though even these meals have improved in the last few years).
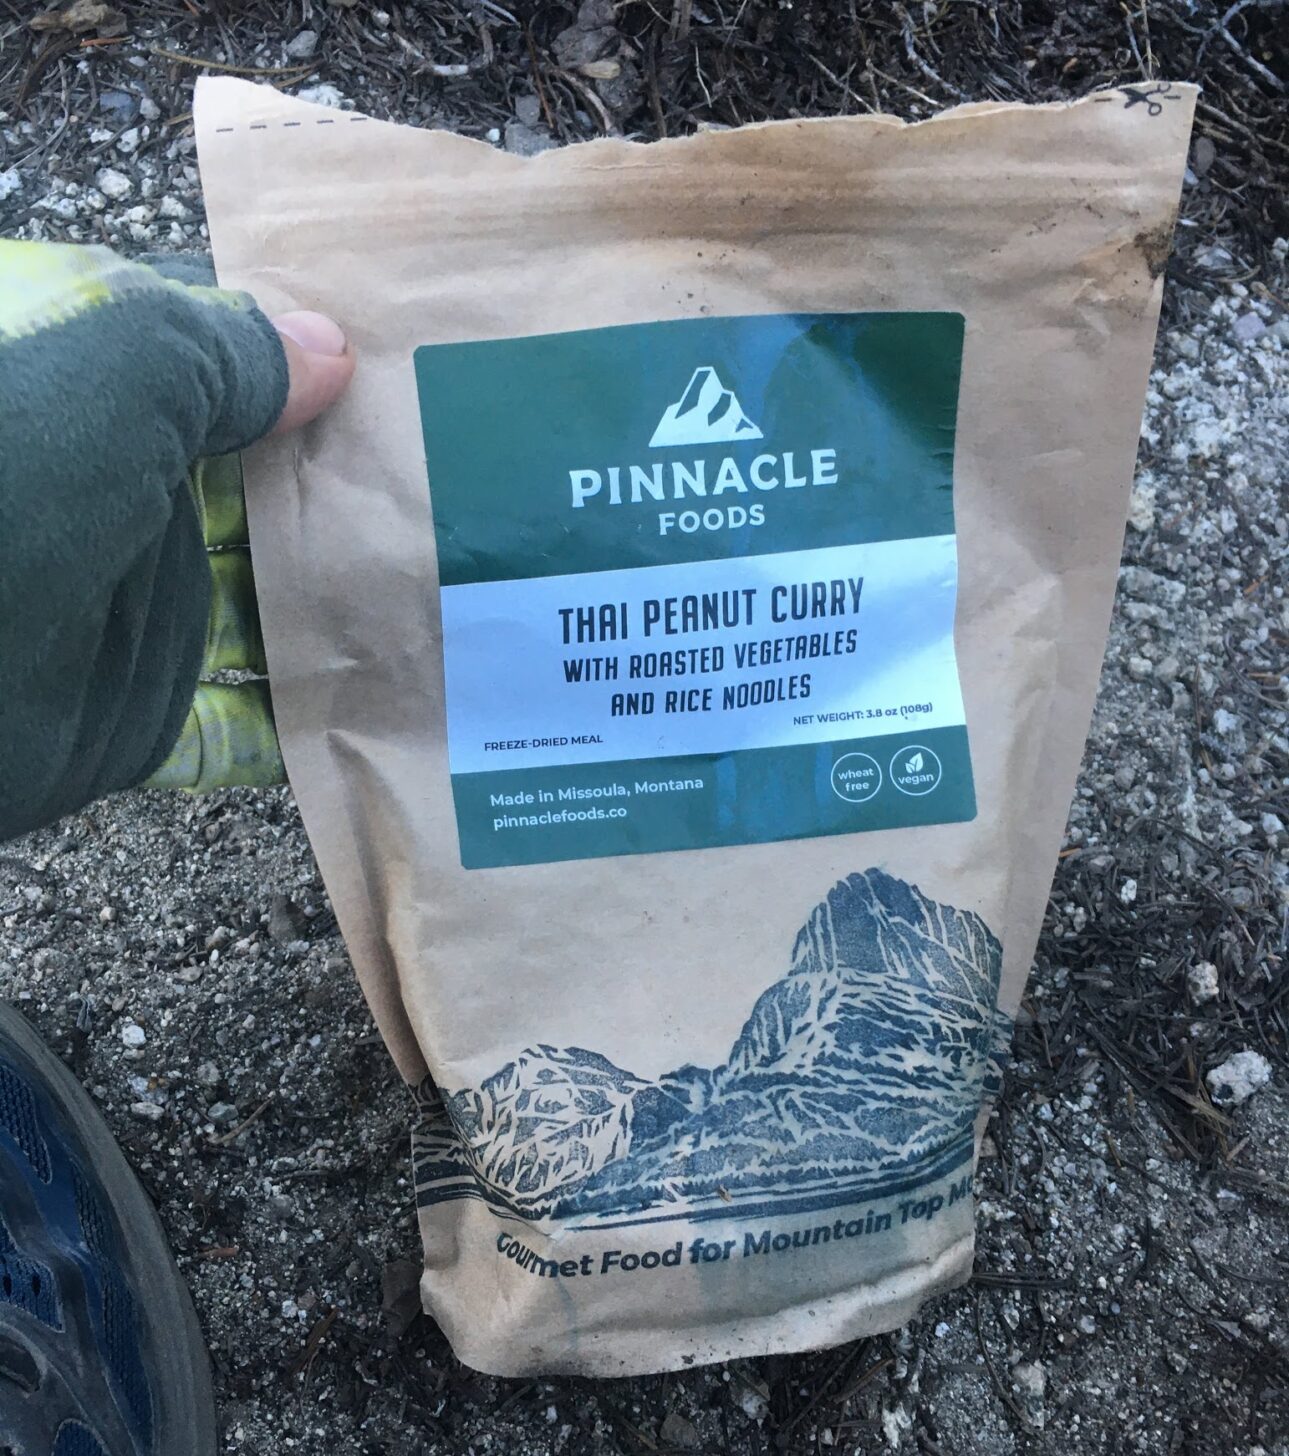
These meals can be a bit pricy, especially if you’re eating one or more per day on a weeklong trip. But by mixing them in with homemade meals, you can bring costs to a reasonable level. There’s something to be said for the convenience of buying a packaged meal well in advance of your trip, especially for those short on time and kitchen space.
Backpacking Light has spilled a lot of ink on packaged freeze-dried and dehydrated meals over the years. Explore it here:
Several packaged backpacking meals showed up in our 2021 Staff Picks article:
The following article isn’t about food per se, but it does feature three backpacking food makers – Good To-Go, Food for the Sole, and Pinnacle Foods:

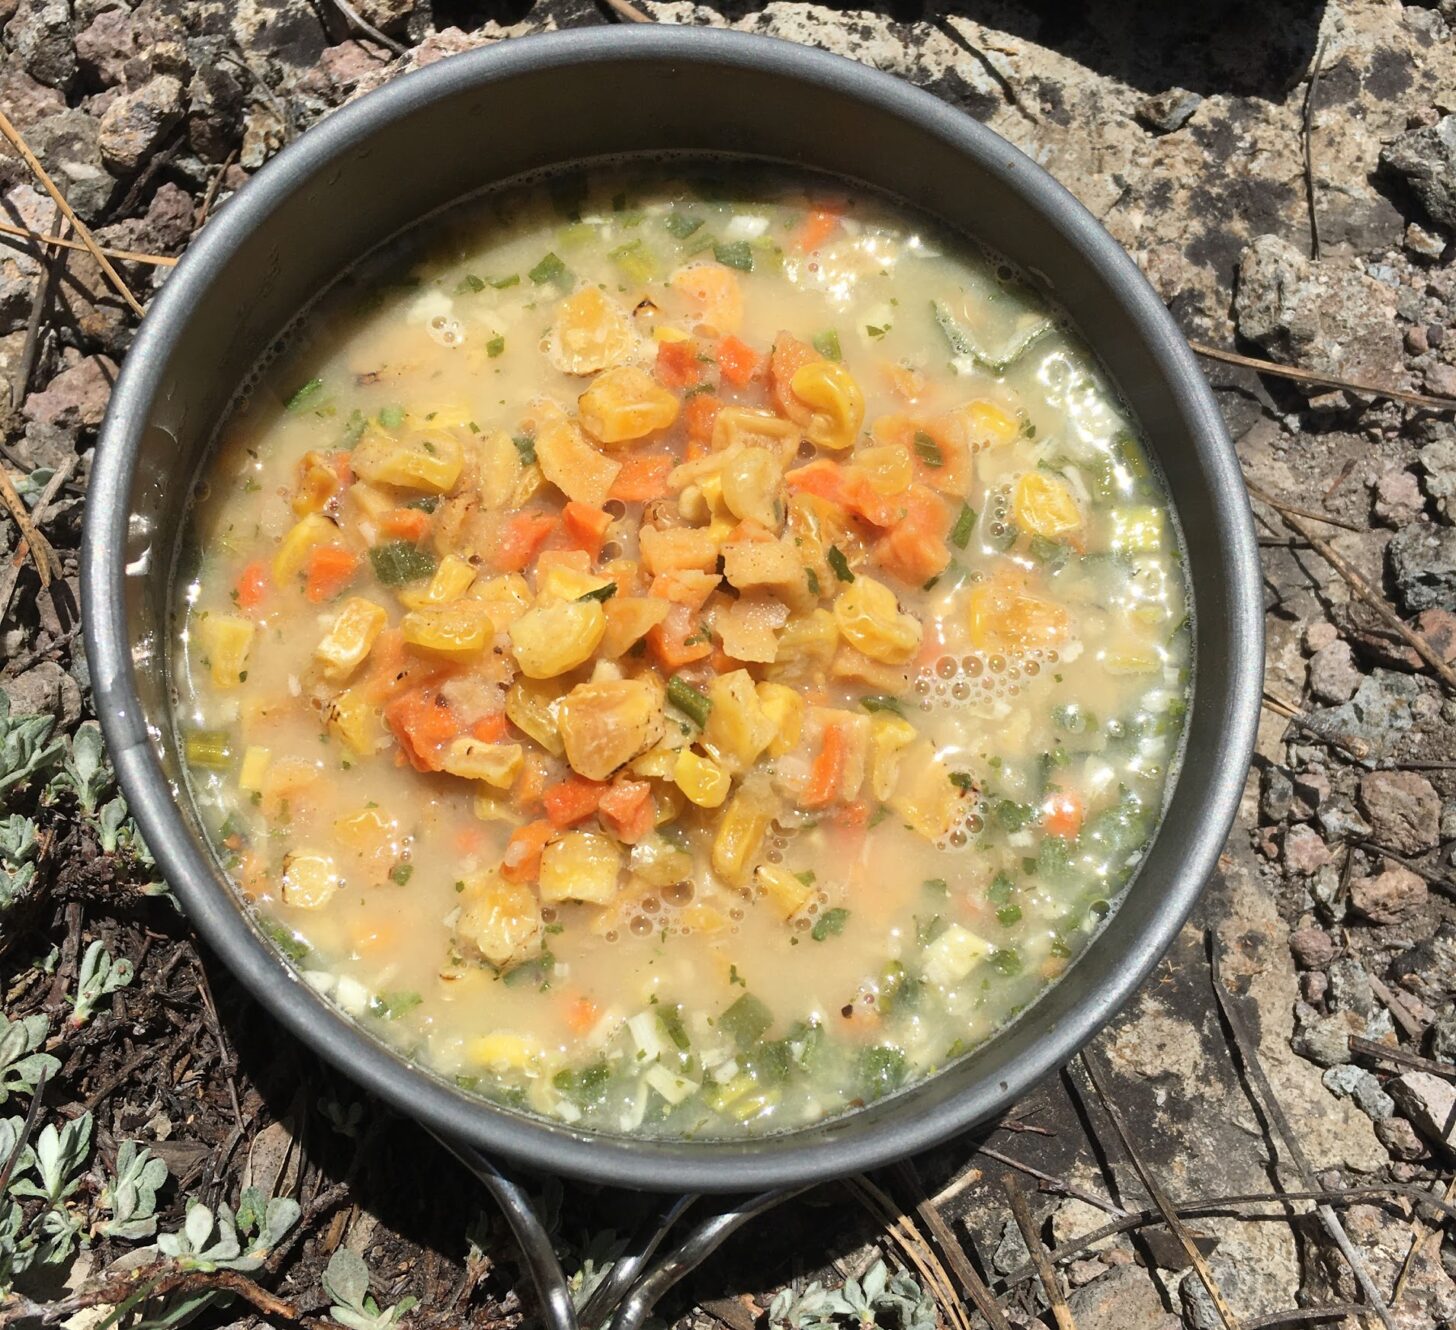
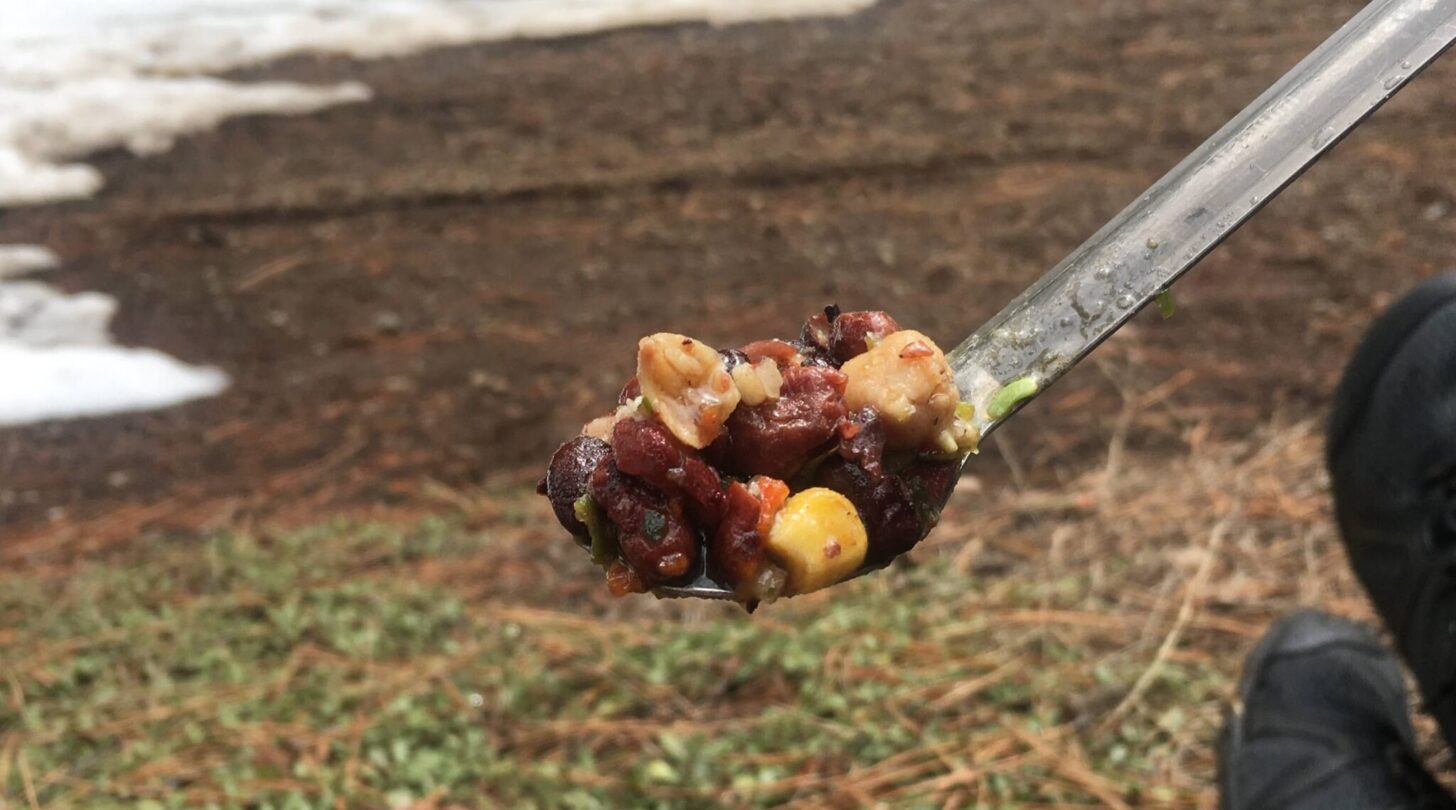
When preparing food in the backcountry, the options are cooking or cold-soaking. Both have tradeoffs, with cold-soaking being the lightest and arguably the most simple option. But the comfort of a hot cup of coffee or a warm meal at the end of the day can have psychological benefits for some hikers. Many backpackers prefer this comfort over shaving a few ounces off a base weight.
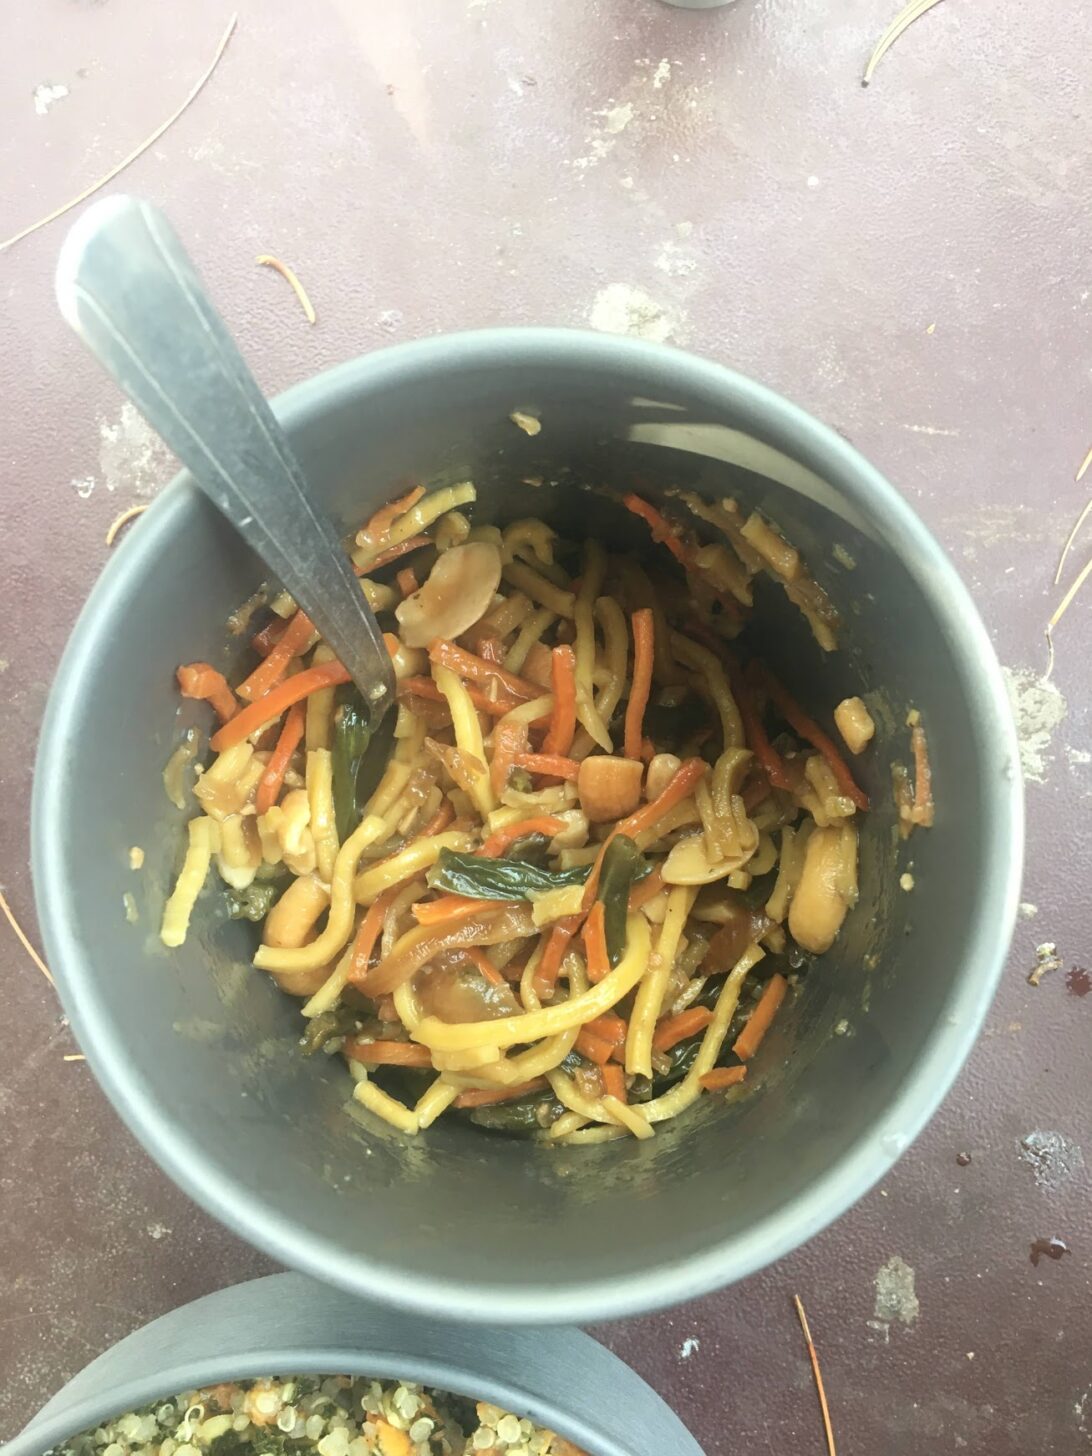
Cold soaking is exactly like what it sounds like – put dried ingredients into a container and add cold water to rehydrate the contents. Rehydrating takes significantly longer than using hot or boiling water, and there are some limitations on what ingredients rehydrate best using this method. But for a lightweight and simple approach to preparing meals, it’s hard to beat cold-soaking.
Here are some cold-soaking tips from our community:
While cold-soaking has become more common in recent years, particularly among thru-hikers, most backpackers still opt to cook their meals in the backcountry. The most common cooking method is to bring water to a boil using a stove before pouring the water into a bag containing a dehydrated or freeze-dried backpacking meal.
Cooking in this style often eliminates the need to do dishes. But some meals do involve putting ingredients into your pot at some stage of the cooking process, which, unfortunately, means doing dishes – unless you don’t mind having tuna-flavored coffee with bits of pasta the next morning. Details on the gear needed for cooking are covered later in this trailhead.
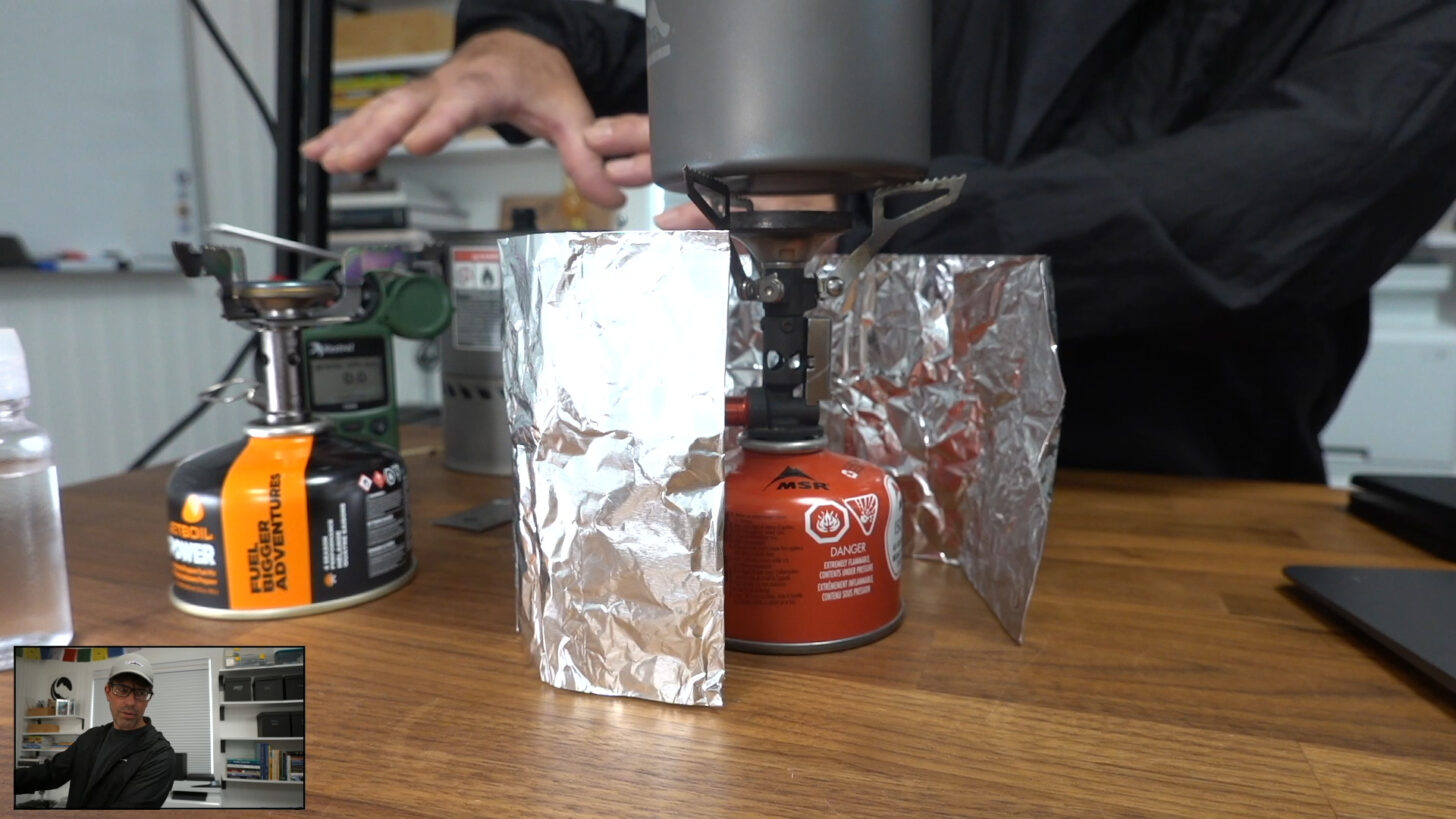
If you’re not cold soaking, then you’re going to need a stove to boil water for your meals. There are many different types of stoves to choose from, but upright canister stoves, integrated canister stoves, remote inverted canister stoves, alcohol stoves, or wood-burning stoves are the most common for lightweight backpacking. We could probably do a whole trailhead just on stoves alone, so some of this information will be abbreviated out of necessity.
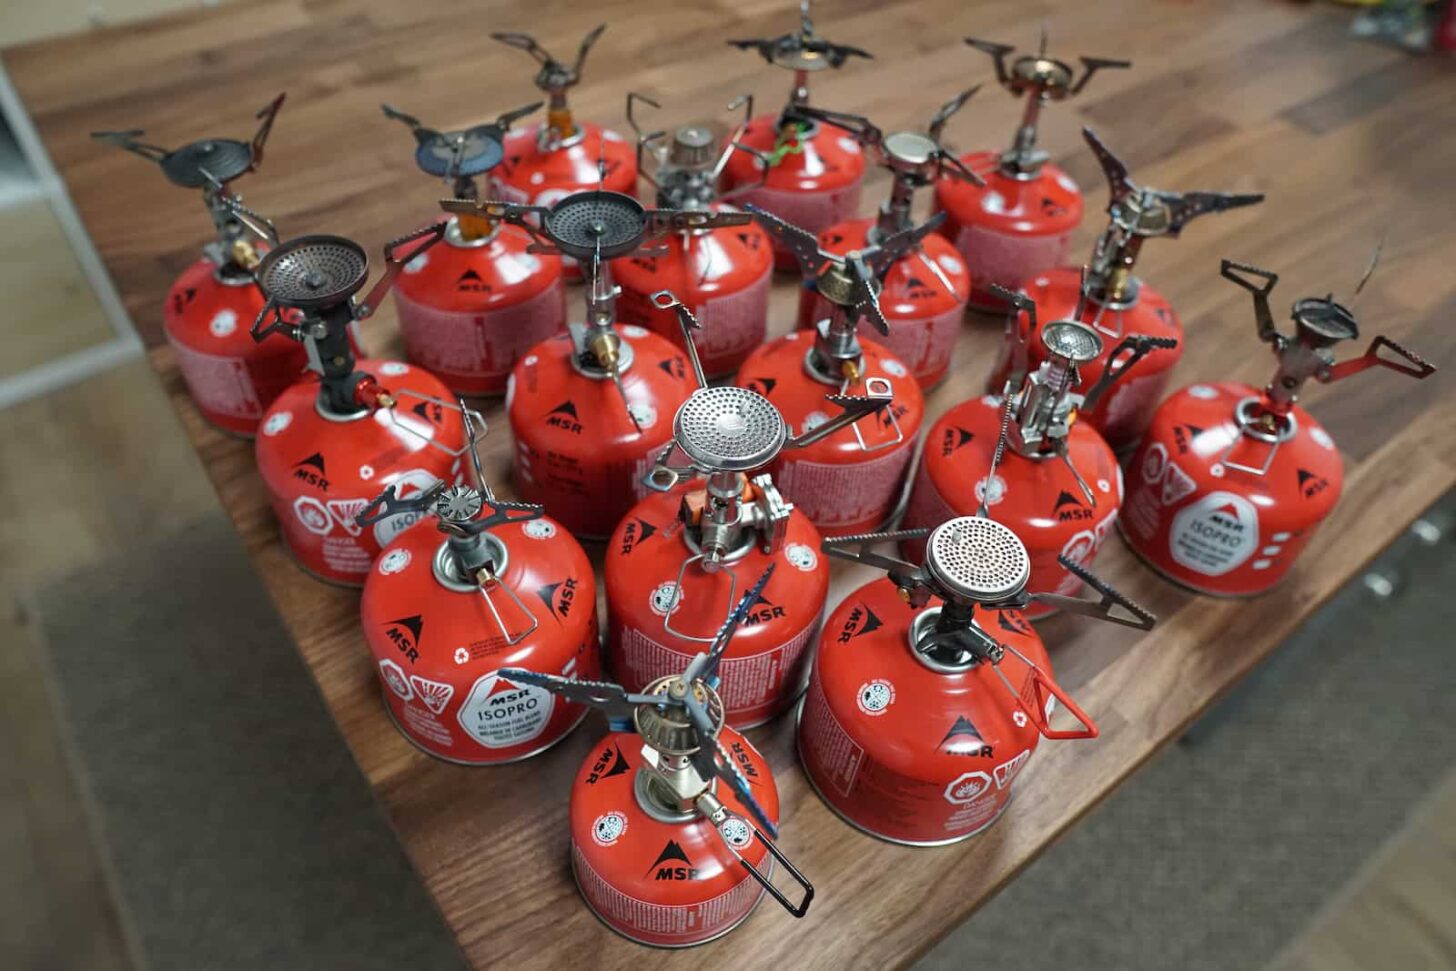
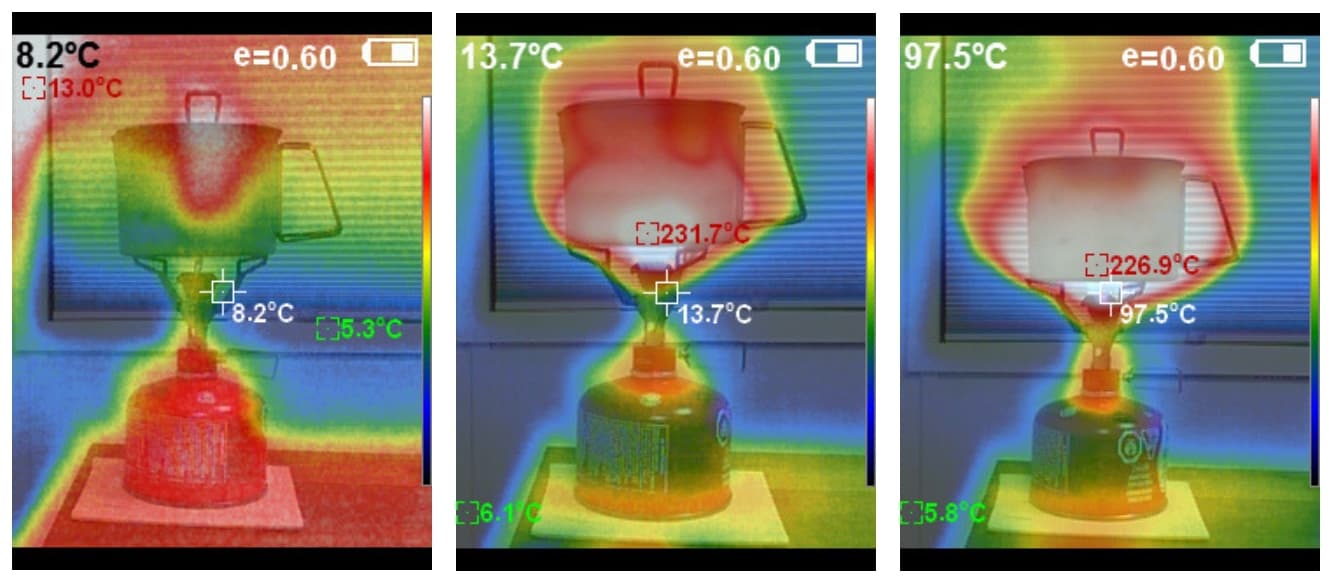
Upright canister stoves, integrated canister stoves, and remote canister stoves all use a fuel canister (usually but not always a blend of isobutane and propane). With a remote inverted canister stove, the pot and stove assembly are separate elements. The stove assembly screws into the fuel canister, and the post sits on top of the stove assembly.
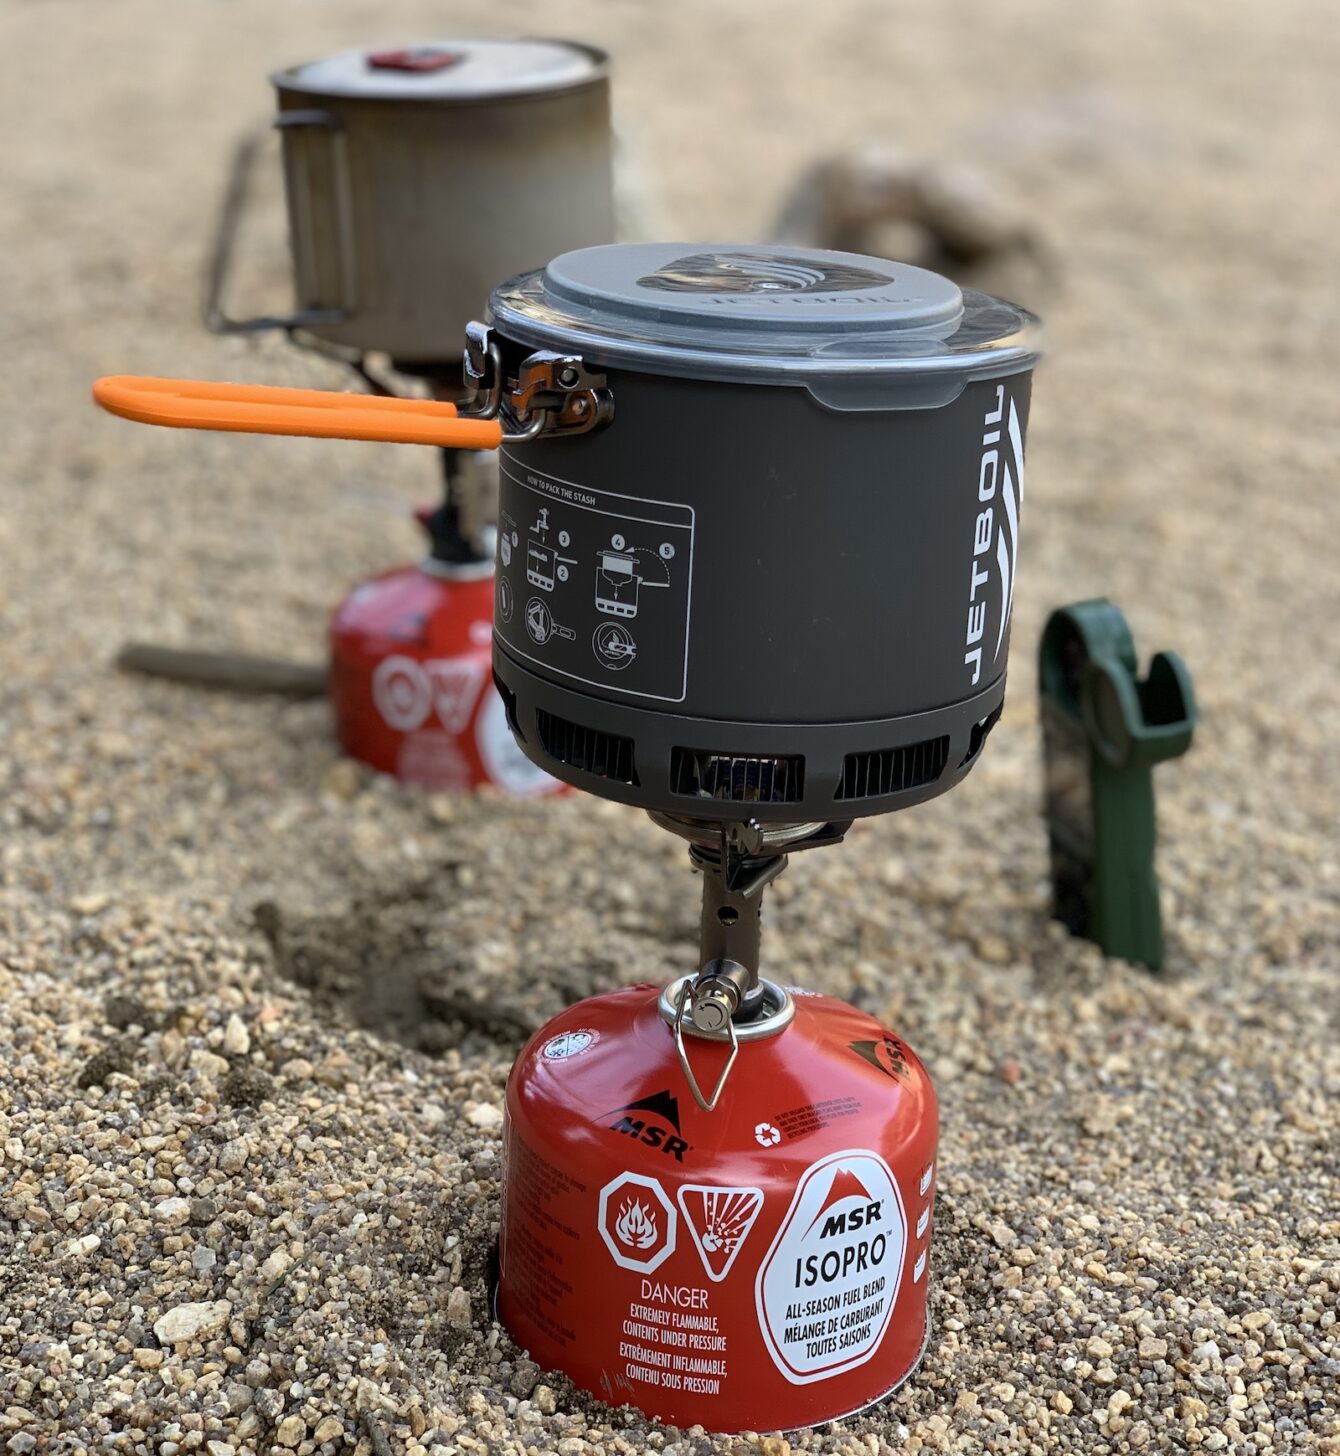
An integrated canister stove uses a pot that is combined with the stove elements for greater wind protection and heat transfer. The downside is these types of stoves are usually heavier than the pot/stove combo used by upright canister stoves.
With a remote canister stove, the stove assembly is connected to the fuel canister via a fuel line. The upside to this system is that the fuel canister can be turned upside down to burn liquid fuel instead of gas – an advantage in cold conditions.

Our StoveBench protocol and gear guide combine to form a comprehensive body of work on modern upright canister stoves. It’s a go-to resource for anyone in the market for a new upright canister stove:
And don’t miss Roger Caffin’s long-running series on the development of his remote inverted canister stove. These articles have taken different forms over the years, but all are instructive:

And finally, check out this article where Ryan Jordan applies the StoveBench protocol to the Jetboil Stash, a recently released integrated canister stove.
Alcohol stoves use denatured alcohol as a fuel source. They tend to be very light, and the fuel is readily available in places that may not sell fuel canisters. But they are not allowed in some land management units because they are hard to put out once lit, and can be a hazard if knocked over.
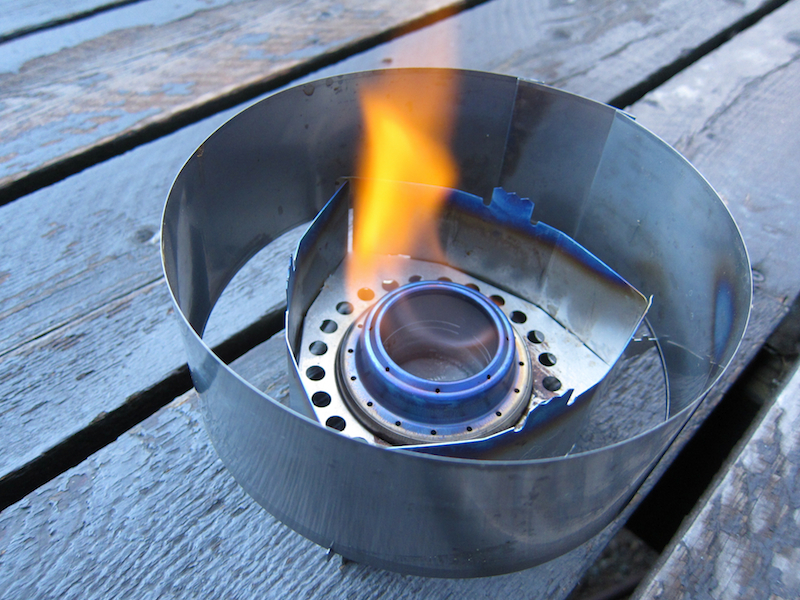
They also have less focused flames than canister stoves, so they can take longer to boil water. They can also be subject to performance degradation in windy conditions. Still, they have their proponents, and for good reason. They are light, simple, burn cleanly with little-to-no odor, and are easily created/modified by MYOG enthusiasts.
Solid fuel stoves burn chemical tablets as a fuel source. They are extremely light, as is the fuel, but they can make a strong chemical smell and are highly susceptible to performance loss from wind.
Wood stoves are just what they sound like – small stoves that burn wood as a fuel source.
Explore some Backpacking Light content on alcohol stoves and wood stoves here:
Backpacking stoves of all types are impacted to some degree by wind. Listen to this podcast to learn why, and what you can do about it.
Even if you’re cold soaking and don’t need to bring along a stove, you’ll still need a container to rehydrate your meal. Repurposed food containers – such as those which originally held gelato or peanut butter – are the most common option. Some backpackers use mylar food bags or the bags the cold soak meals were originally sold in.
Simple titanium pots are the lightest option for cooking and last for decades. If your cooking involves more complex meals cooked in the pot, then products with some type of non-stick coating will make post-dinner clean-up much easier.
Pots come in all shapes and sizes, and some have added technology like heat exchangers. baffles, or lids that screw down. What pot you choose is dependent on your favored cooking method, the amount of food you cook or water you boil, and the weight/space needs of your packing system.
For most backpackers, a basic spork – of titanium or heavy-duty plastic – is all that is needed to eat in the backcountry. In a hobby focused on minimalism and efficiency, bringing along a fork and a spoon just doesn’t make much sense. For those who typically eat out of freeze-dried backpacking meal packages, there are longer-handled spoons to make reaching the bottom of the bag an easier task.
Some backpackers prefer to bring along (or carve while on a trip) wooden chopsticks instead.
Editors Note: Andrew Marshall here. I can’t let this section go by without indulging in a small rant about my biggest pet peeve in backpacking, which is sporks. Sporks fail basic functionality tests as both forks and spoons. They have tines that are too small to be effective as a fork and large slots which make them ineffective as spoons. My two cents? Just use a spoon. I dare you to find a food you will eat routinely on a backpacking trip which demands the use of small spork tines. It’s possible to extrapolate this concept into a larger debate around specialized vs. multi-use gear. I’ll leave that for another day. (Your mileage may vary…)
Properly storing your food is essential to keeping wildlife safe, ensuring that future campers don’t have issues with habituated wildlife, and making sure that you don’t have a trip ruined after your food is eaten by a bear.

Hanging food was, for many years, the go-to method of securing food in the backcountry. But even in the best of circumstances, it has its drawbacks. Finding the right tree and branch can be time-consuming and often impossible, depending on where you are backpacking.
Cords can damage trees, and squirrels and other rodents sometimes climb down the cord and gnaw through the thin fabric of bear bags. And in many land management units, hanging food is not allowed.
For all these reasons, bear hanging is slowly falling out of favor. However, the method still enjoys great popularity east of the Mississippi, where deciduous forests with overhanging branches are more common.
Products like Ursaks and bear canisters offer near-certain protection for your food if used properly and eliminate the hassle of finding trees appropriate for hanging.
The list below is not comprehensive by any measure, but it does represent a good starting place. Every brand listed here makes quality gear that we or our contributors have tested and can recommend.
Backpacking food is an intensely personal choice, and variations in preparation and cooking spring from those initial choices. Our advice is to try a bunch of different food and food strategies and see what you like before investing heavily in gear. We also recommend that you make use of our forums and the collected wisdom of our community.
Link Disclosure: The brand links below link to our brand gateway pages, which provide an index to articles, gear swap listings, and member reviews related to that brand. Likewise, all links on this page will direct to original content created by Backpacking Light. You may find affiliate links elsewhere on our site (read our disclosure letter here), but we don’t use them on this page.
If you found value in other related resources at Backpacking Light that you’d like to share with our community, please post them in the comments section below. No external links or resources, please – this trailhead is designed to be an index of content at Backpacking Light.
DISCLOSURE (Updated April 9, 2024)
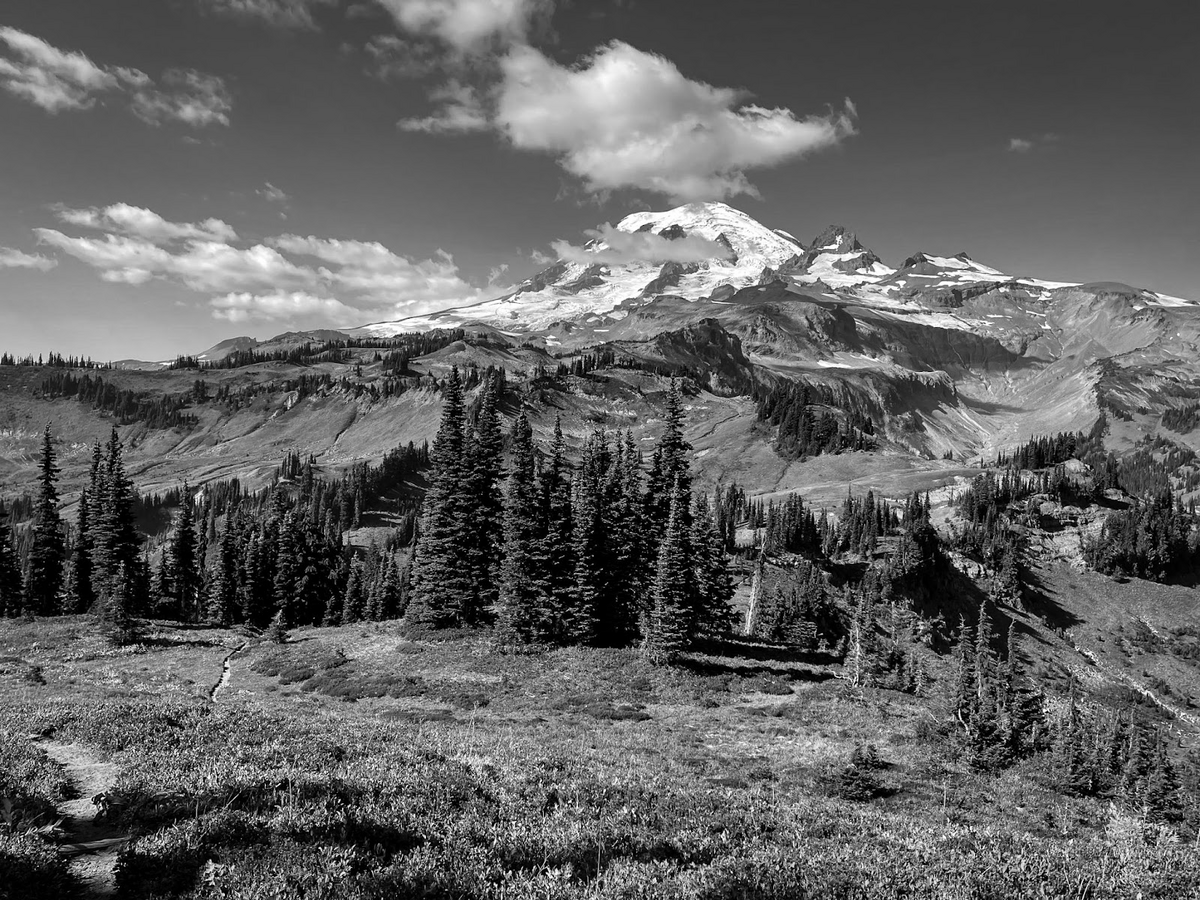
Nikki Stavile returns to Colorado finding her home state changed but finds solace in the unpredictable mountains along the Colorado Trail.
You don’t have access to view this content.
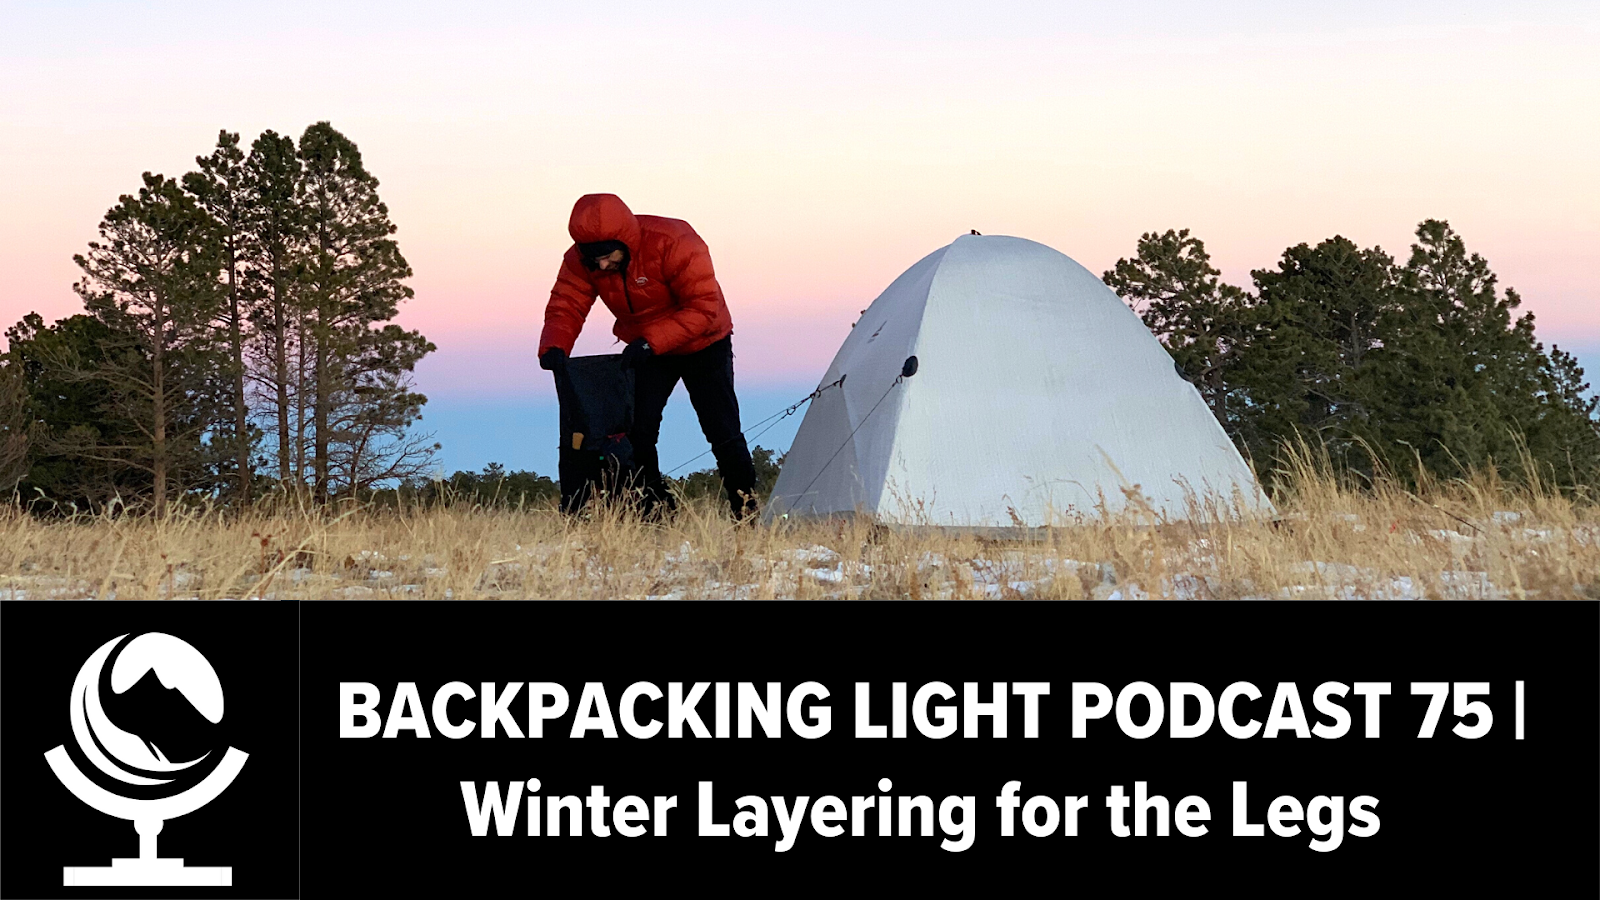
Much attention is paid to layering for the torso, head, hands, and feet – but the legs are often ignored. However, during winter conditions, an intentional layering strategy for the legs can make the difference between comfort and misery. For mild winter conditions, a layering strategy may look similar to a 3-season lower body layering system. However, when temperatures drop below freezing, and snow and wind increase, the strategy needs to change a bit. Listen to this episode to explore some of these strategies so you can stay warm and comfortable when the mercury drops.
Much attention is paid to layering for the torso, head, hands, and feet – but the legs are often ignored. However, during winter conditions, an intentional layering strategy for the legs can make the difference between comfort and misery. For mild winter conditions, a layering strategy may look similar to a 3-season lower body layering system. However, when temperatures drop below freezing, and snow and wind increase, the strategy needs to change a bit. Listen to this episode to explore some of these strategies so you can stay warm and comfortable when the mercury drops.
How to Subscribe
Apple Podcasts | Spotify | RSS
More Episodes
Backpacking Light Podcast Index
Credits
Executive Producer - Backpacking Light; Show Director and Host - Ryan Jordan; Producer - Chase Jordan; Theme music: Look for Me in the Mountains written by Chris Cunningham and Ryan Jordan, performed by Chris Cunningham (acoustic guitar, lead and harmony vocals, harmonica), Chad Langford (upright bass), and Tom Murphy (mandolin), produced by Basecamp Studios in Bozeman, Montana.
Feedback / Tips / Questions
podcast@backpackinglight.com
More Backpacking Light
Sign up for the Newsletter. Become a Backpacking Light Member.
Disclosure
Sponsorship Policy: Backpacking Light does not accept compensation or donated/discounted products in exchange for product mentions or placements in editorial coverage, including any podcast episode content not excplicitly identified as sponsored content. Some (but not all) of the links in these show notes may be affiliate links. Learn more about affiliate commissions, influencer marketing, and our consumer advocacy work by reading our article Stop wasting money on gear.
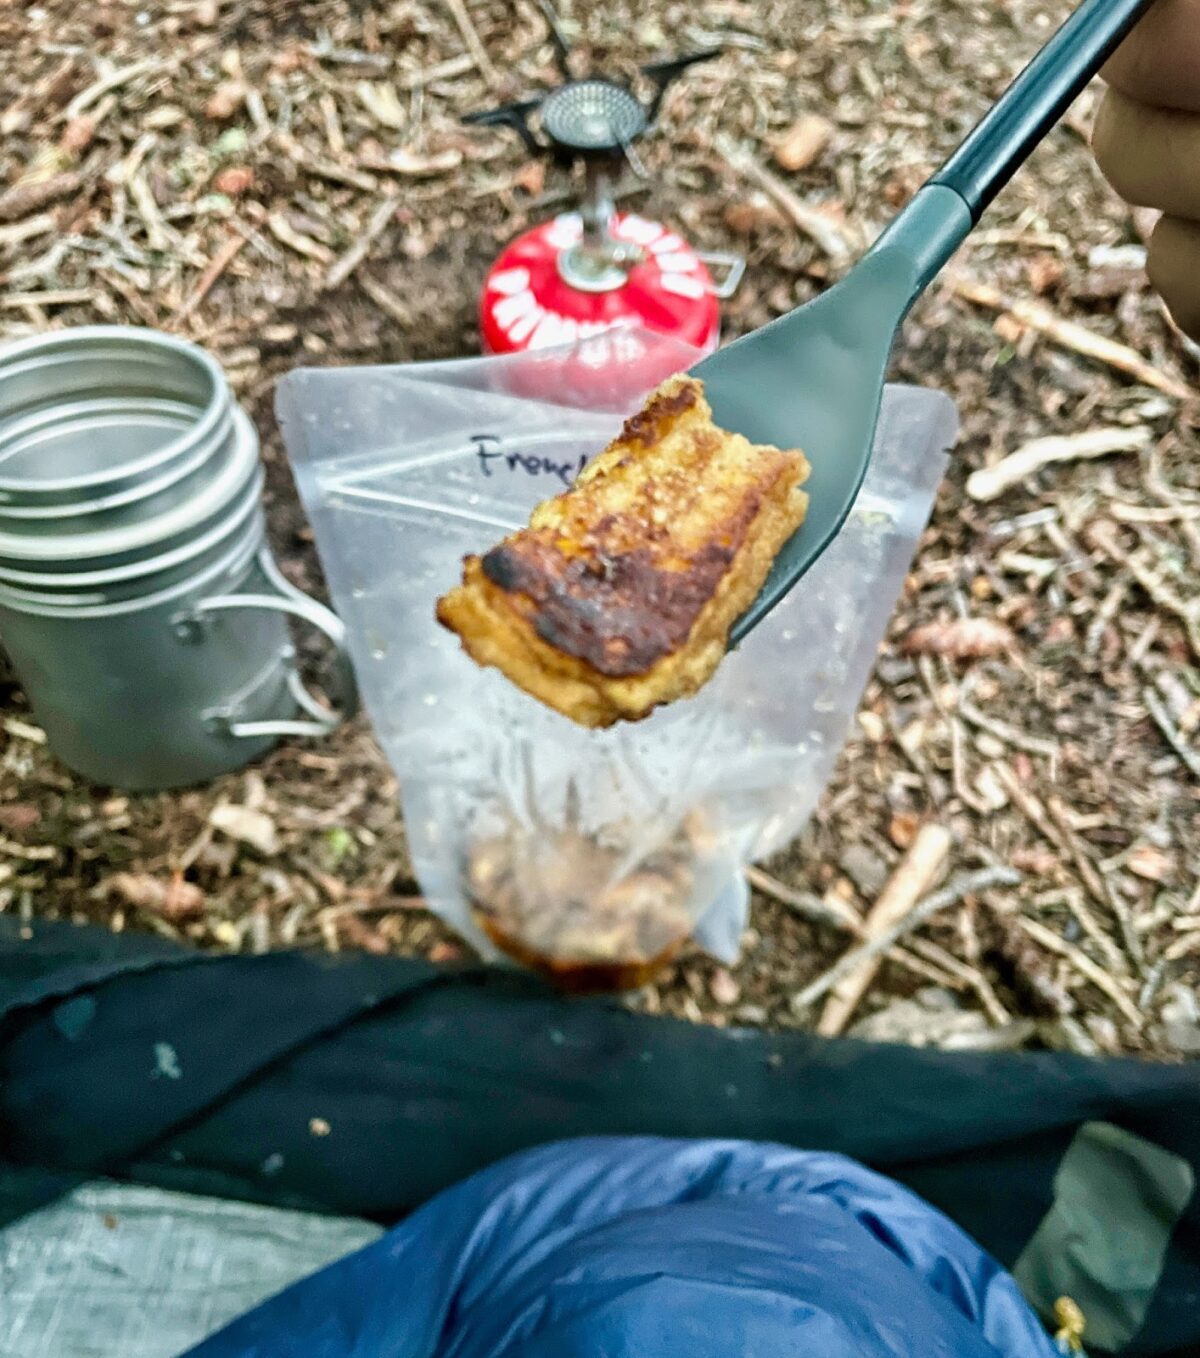
Drew Smith talks about the place of home freeze-drying in the wider context of trail food strategies, and attempts freeze dried french toast!
You don’t have access to view this content.
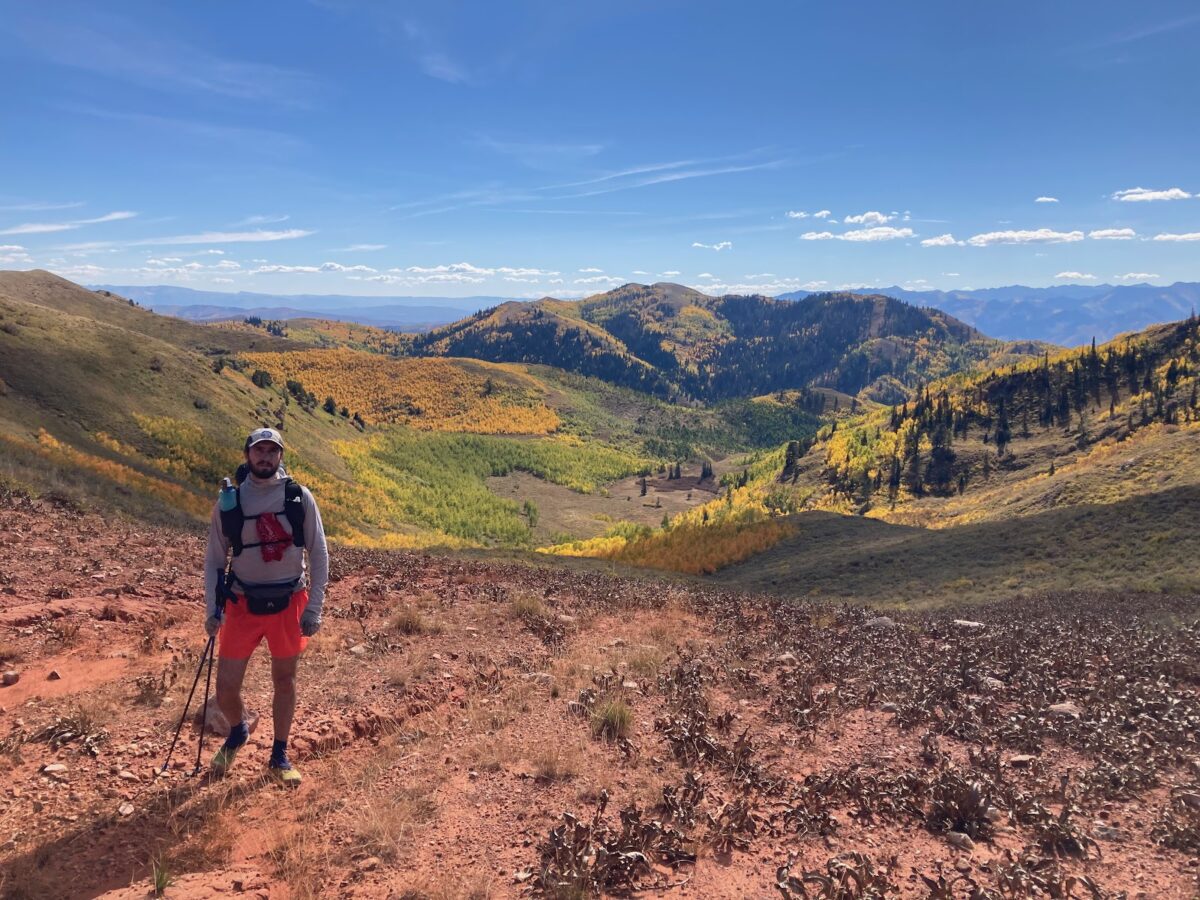
Ben Kilbourne explores the experience of moving fast through a vast mountain landscape and what you can learn from the experience.
You don’t have access to view this content.
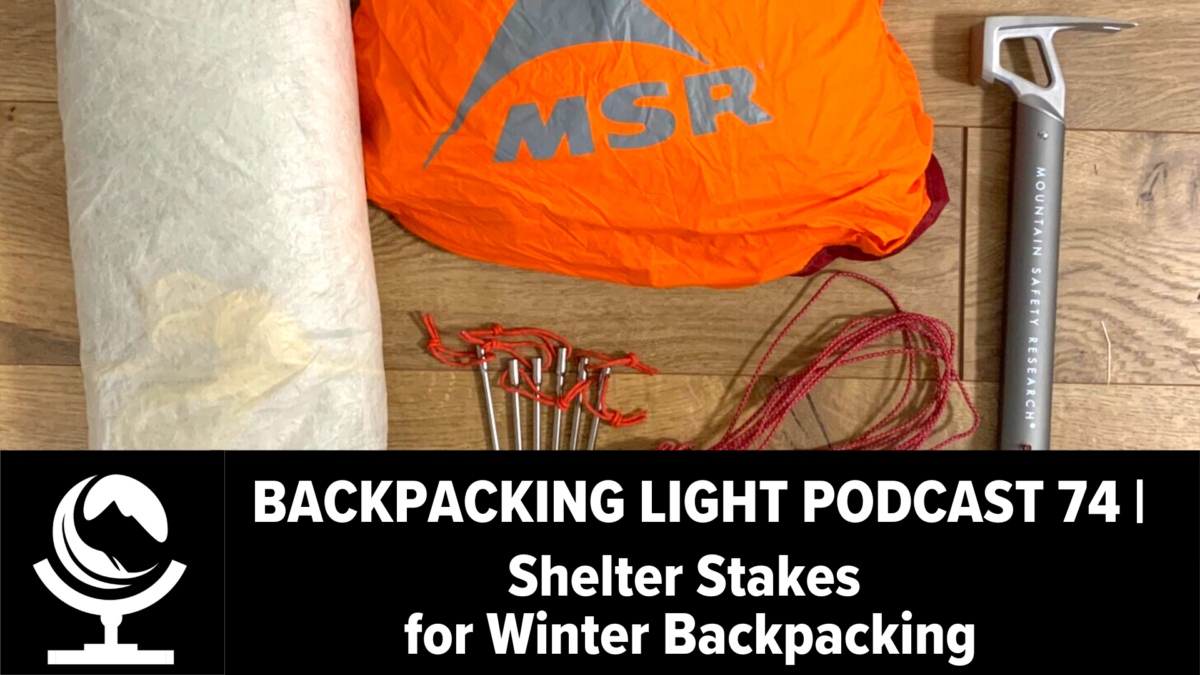
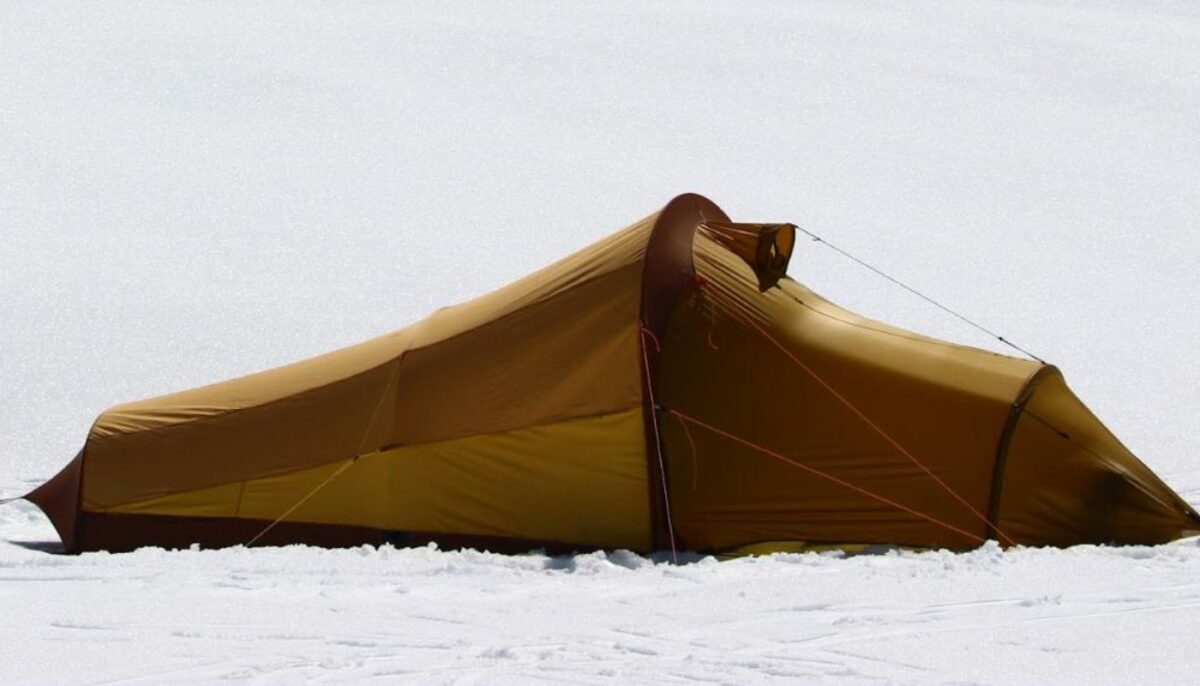
In this episode, we address winter shelter stakes for frozen ground, hard snow, and unconsolidated snow.

News:
Shelter Stakes for Winter Camping:
How to Subscribe
Apple Podcasts | Spotify | RSS
More Episodes
Backpacking Light Podcast Index
Credits
Executive Producer - Backpacking Light; Show Director and Host - Ryan Jordan; Producer - Chase Jordan; Theme music: Look for Me in the Mountains written by Chris Cunningham and Ryan Jordan, performed by Chris Cunningham (acoustic guitar, lead and harmony vocals, harmonica), Chad Langford (upright bass), and Tom Murphy (mandolin), produced by Basecamp Studios in Bozeman, Montana.
Feedback / Tips / Questions
podcast@backpackinglight.com
More Backpacking Light
Sign up for the Newsletter. Become a Backpacking Light Member.
Disclosure
Sponsorship Policy: Backpacking Light does not accept compensation or donated/discounted products in exchange for product mentions or placements in editorial coverage, including any podcast episode content not excplicitly identified as sponsored content. Some (but not all) of the links in these show notes may be affiliate links. Learn more about affiliate commissions, influencer marketing, and our consumer advocacy work by reading our article Stop wasting money on gear.
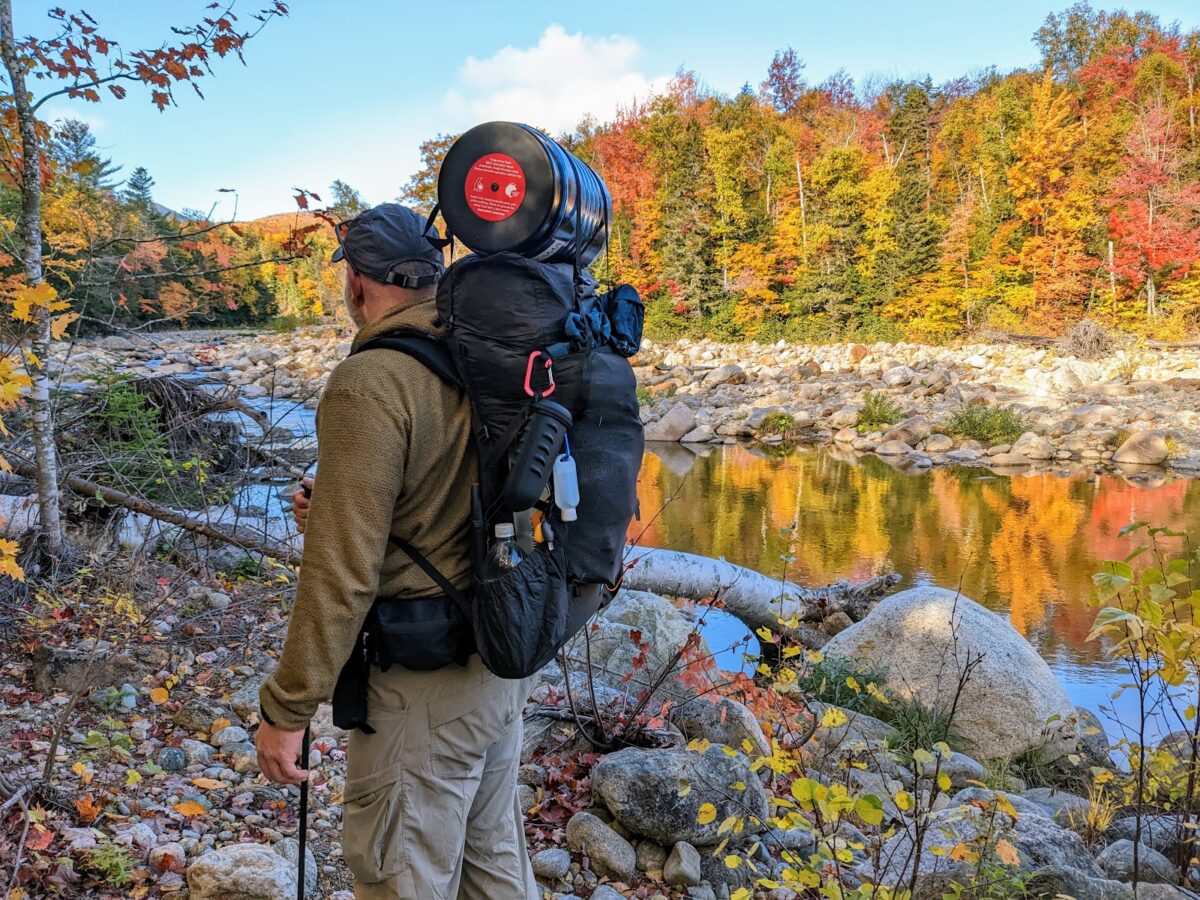
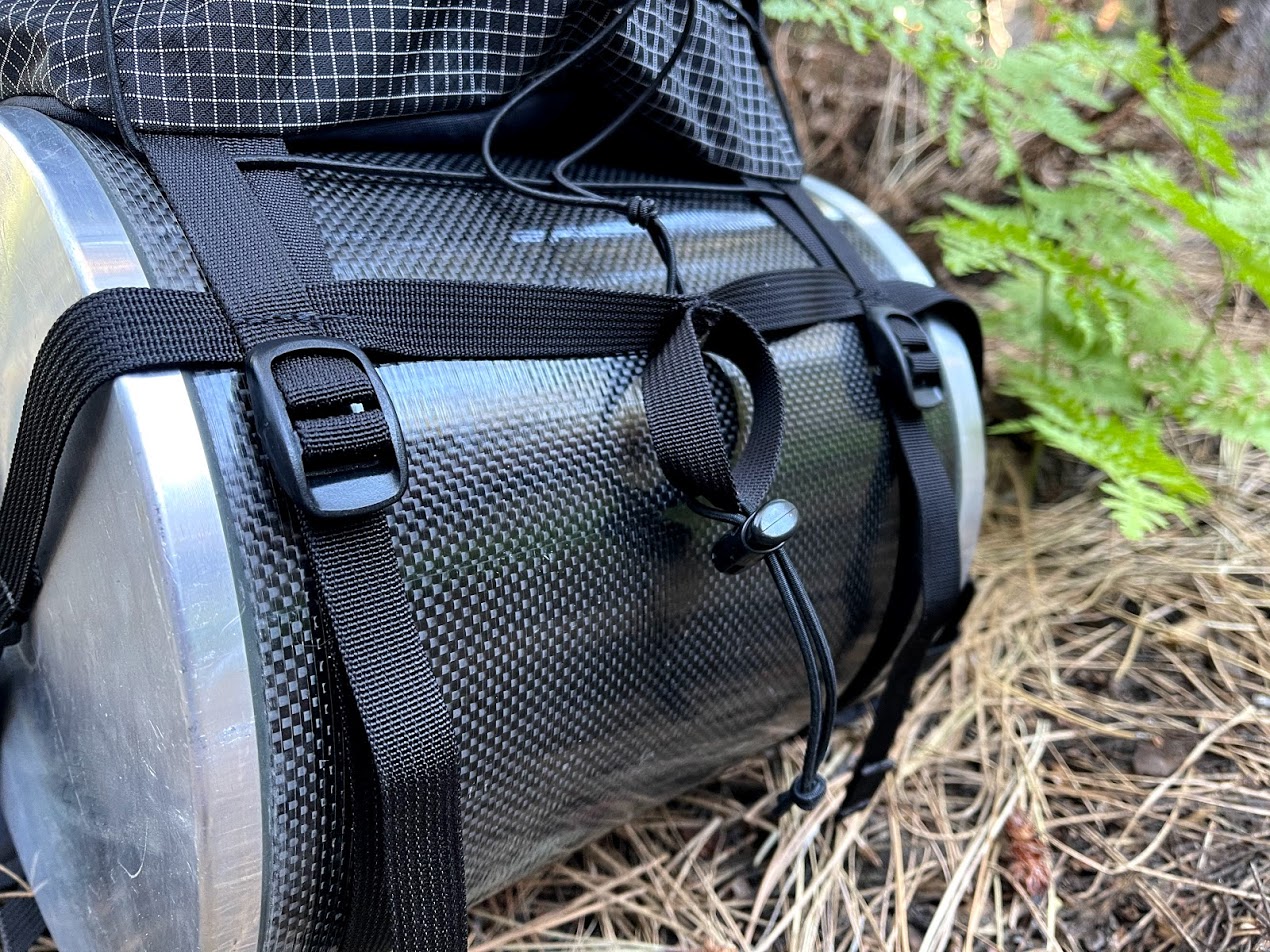
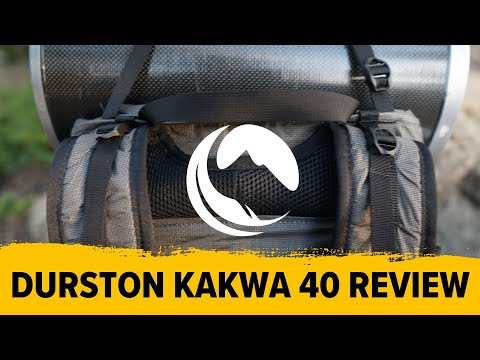
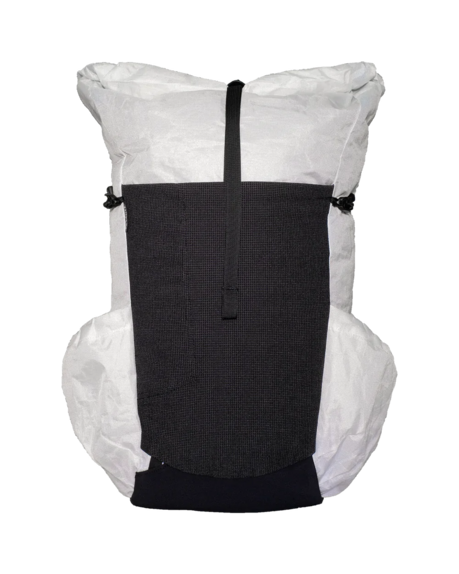
This review focuses on the modularity of the Superior Wilderness Designs Movement 40L backpack. In particular, the Movement has the ability to morph from a frameless to a framed pack with a suspension capable of carrying 35 pounds (15.9 kg) or so.
You don’t have access to view this content.
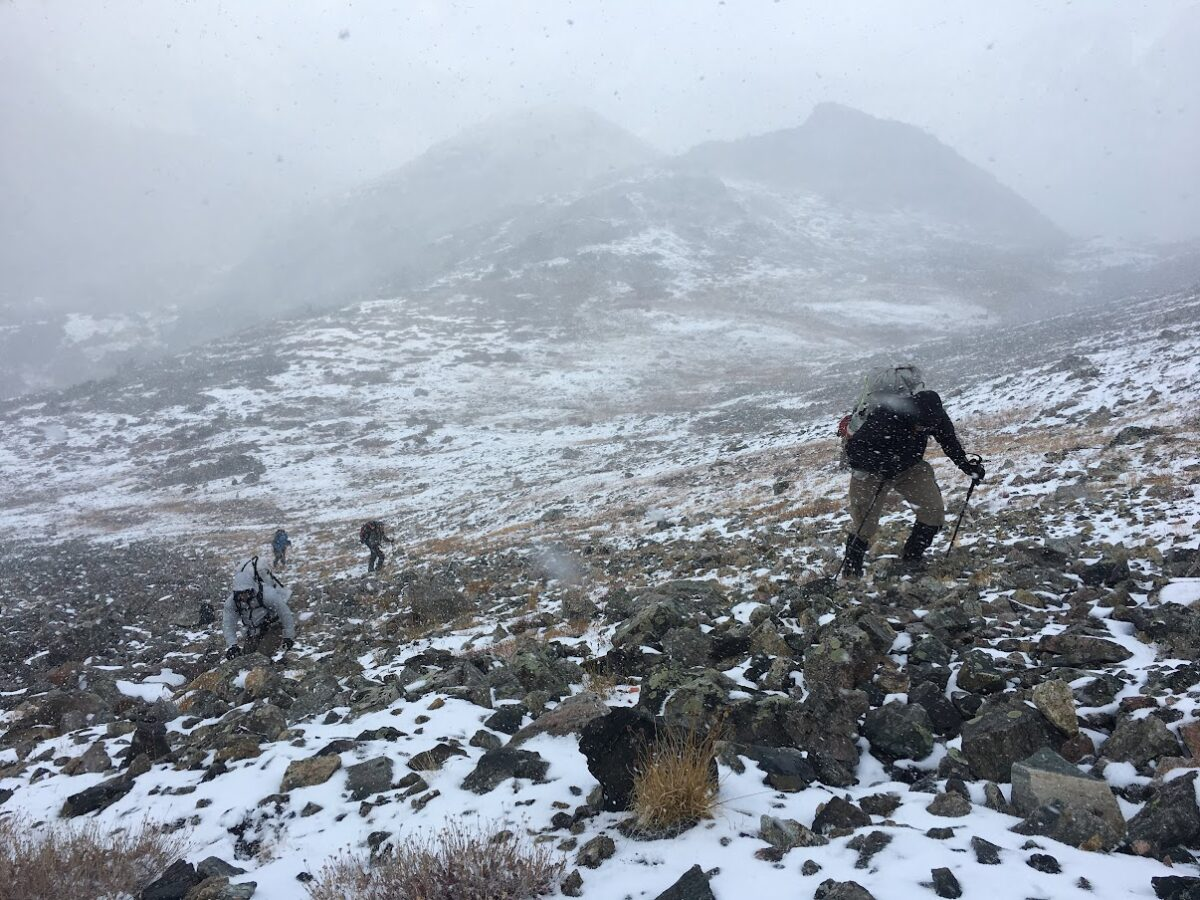
In this episode of the Backpacking Light Podcast, you’re going to learn about avalanche awareness in the context of winter hiking, snowshoeing, and ski touring.
In this episode of the Backpacking Light Podcast, you’re going to learn about avalanche awareness in the context of winter hiking, snowshoeing, and ski touring.

How to Subscribe
Apple Podcasts | Spotify | RSS
More Episodes
Backpacking Light Podcast Index
Credits
Executive Producer - Backpacking Light; Show Director and Host - Ryan Jordan; Producer - Chase Jordan; Theme music: Look for Me in the Mountains written by Chris Cunningham and Ryan Jordan, performed by Chris Cunningham (acoustic guitar, lead and harmony vocals, harmonica), Chad Langford (upright bass), and Tom Murphy (mandolin), produced by Basecamp Studios in Bozeman, Montana.
Feedback / Tips / Questions
podcast@backpackinglight.com
More Backpacking Light
Sign up for the Newsletter. Become a Backpacking Light Member.
Disclosure
Sponsorship Policy: Backpacking Light does not accept compensation or donated/discounted products in exchange for product mentions or placements in editorial coverage, including any podcast episode content not excplicitly identified as sponsored content. Some (but not all) of the links in these show notes may be affiliate links. Learn more about affiliate commissions, influencer marketing, and our consumer advocacy work by reading our article Stop wasting money on gear.
Highlights of 2022 – the most popular, most engaging content and featured highlights, forums, education, and more.
What a year! It’s time to reflect and celebrate our impact and growth as a community.
The following represents our curated selection of Backpacking Light highlights from 2022. Selections are based on a combination of page visit analytics, forum engagement, and Member feedback about the impact that the content has had on their growth and confidence as a backcountry user.
Member Access to the Backpacking Light Library
Many of the articles below are freely available to the public, while a Premium or Unlimited Membership is required to access the full content of others.
In addition, forum participation requires a Basic Membership, and all online courses are included as part of the Unlimited Membership.
Your membership fees help support the development of Backpacking Light article content, podcasts, education programs, live events, and more.
Become a Member Today
Table of Contents • Note: if this is a members-only article, some sections may only be available to Premium or Unlimited Members.
Curated and maintained by our staff, Trailhead pages include a comprehensive overview of a topic with links to information and resources about the topic on the Backpacking Light website, including gear info, skills, podcasts, forums, research, education, product recommendations, and more.
Trailheads provide an incredibly efficient way to dive deep into a particular topic, helping you identify and investigate the most critical issues about that topic.
Backpacks represent a conundrum for hikers wanting to save weight while maintaining comfort. Ultralight backpacking is not just about carrying a frameless pack (which has severe limits of load-carrying comfort) – it’s about using the right pack for a particular job, tailored to the physiology and hiking practice of the individual hiker. Our goal with the Backpacks Trailhead is to educate the user about backpack engineering and design in a way that allows them to study the pack market and evaluate individual products objectively.

The thru-hiker junk-food mentality focuses on cheap food and maximum Calorie-to-ounce ratio limits – which don’t sustain human health and performance in the backcountry over the life of the hiker. In the Backpacking Food Trailhead, we push back against that mentality with food planning resources that recognize the need for nutrition, macronutrient balance, DIY (make your own food) solutions, and various cooking styles. This provides the hiker with a more balanced and informed understanding of backpacking food that frees you from the dogma of today’s trendy diets and nutrition advice.
Gear Guides cover a collection of gear in a single category or related to a common theme.

We are constantly inundated with marketing messages about what gear to buy from brands, their ambassadors, and retailers. However, we’re more likely to trust recommendations from people who actually use the gear and can articulate why they chose that gear. Staff Picks provides diverse perspectives on how and why we choose the gear we actually use.
Most “gear awards” are given to products to feed publishers’ egos and maintain positive relationships with brands to cultivate advertising and affiliate marketing relationships. Unfortunately, recommendations made in this context may not be well-trusted by the consumer. When consumers weigh in as part of a larger collective voice, the influence and trust can be more powerful than a magazine or blog award. And out of this context was born the Backpacking Light Member’s Choice Awards.
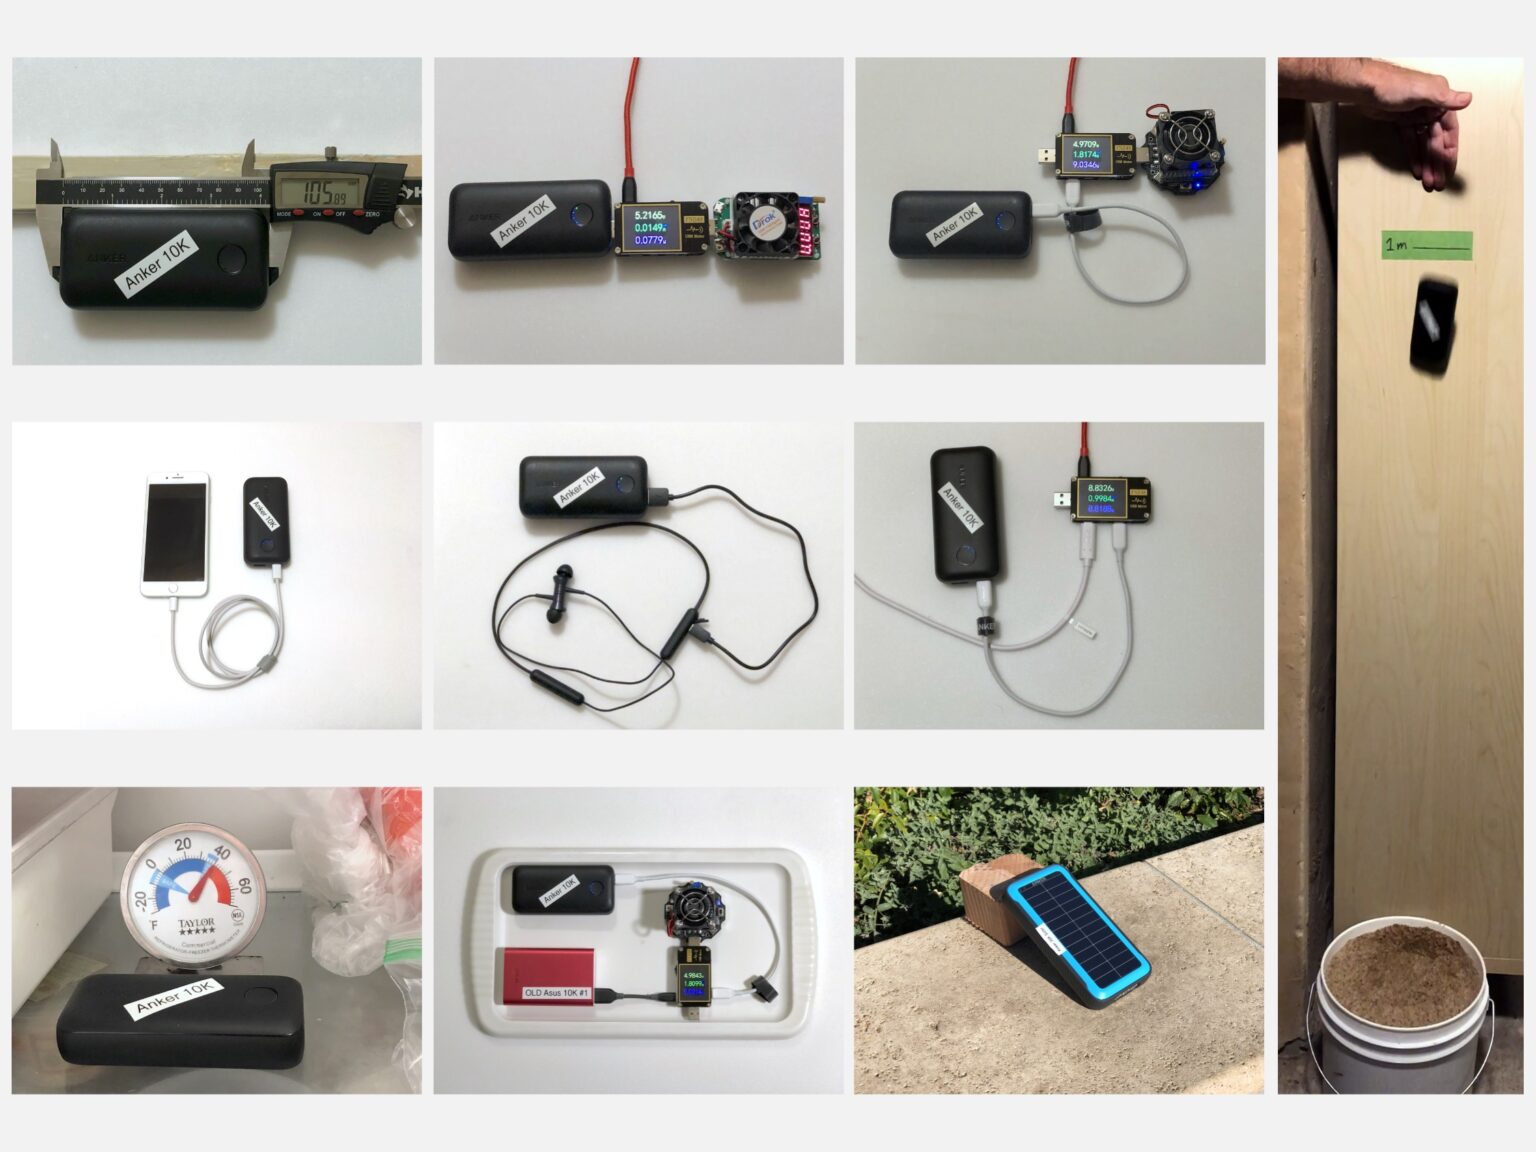
Power specification claims by manufacturers of portable battery chargers (PBCs), especially under the environmental stress of outdoor field conditions, can’t be trusted because the engineering quality of PBCs is so variable. We developed the BatteryBench protocol to uncover the true performance of PBCs. In this Gear Guide, we apply BatteryBench to the two most popular brands of chargers in the backcountry community: Nitecore vs. Anker.
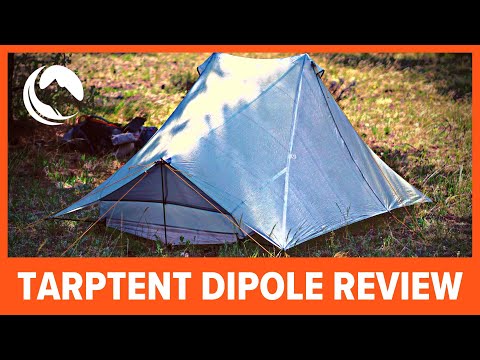
The top Gear Review categories this year were shelters and satellite communications, driven by the release of The Durston X-Mid Pro 2, Tarptent Dipole 2, Apple iPhone 14, Garmin inReach Mini 2, and Garmin inReach Messenger.
Many ultralight shelters suffer from two limitations: poor livability (e.g., a cramped interior with difficult entry/exit) and finicky pitching (e.g., unforgiving geometry). The Durston X-Mid Pro 2 tent solves both of those problems in an ultralight Dyneema Composite Fabrics configuration that offers an intuitive pitch and a roomy interior.

Carrying electronic devices like smartphones and satellite communicators (and the portable battery chargers to keep them running) unarguably adds value to the backcountry user, but not without a cost to pack weight and the pocketbook. However, as the capabilities of smartphones increase, they may be able to replace or complement the functionality of some of your other gear. In this article, we help identify the key issues for those who are on the fence about carrying the new iPhone 14 and a Garmin inReach-type satellite messaging device.
Where the aforementioned Durston X-Mid Pro 2 addresses the issues of livability and ease of setup, the Tarptent Dipole Li addresses, more specifically, interior volume and storm resistance. One of the most stormworthy ultralight shelters we’ve ever tested, the Tarptent Dipole Li bridges the gap between ultralight and functionally usable in 3-season alpine environments.
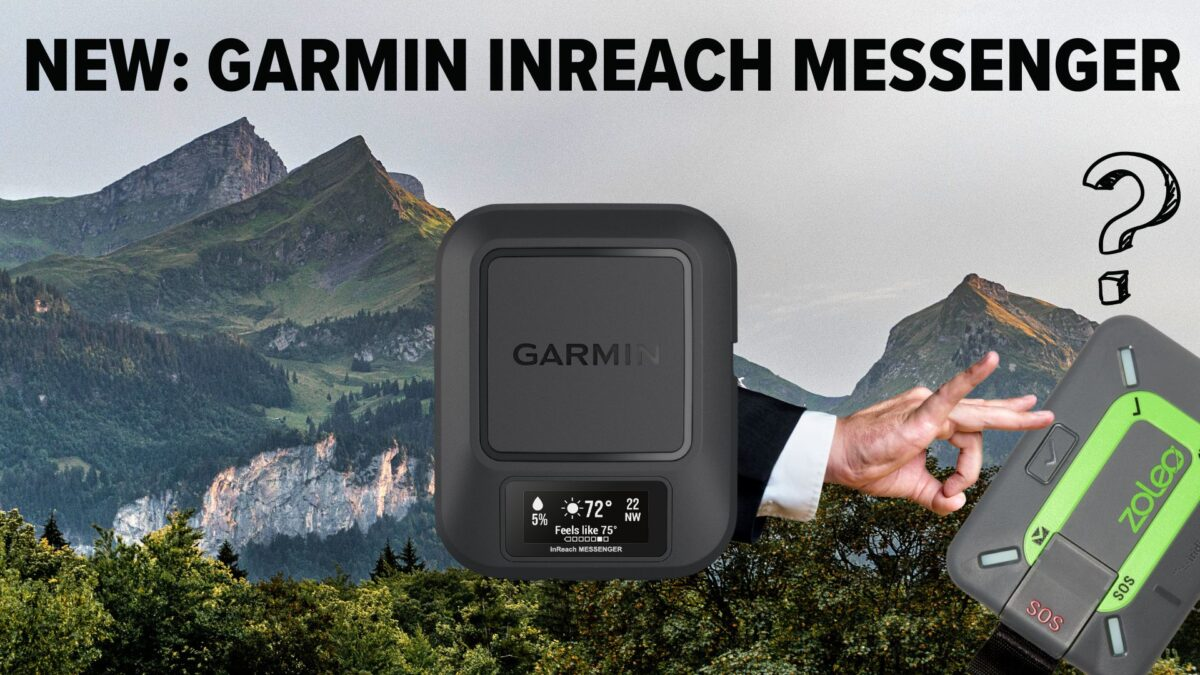
As popular as it is, the Zoleo Satellite Communicator lacks an informative on-device display, functional group messaging, reverse charging, and the use of tracking and weather forecasting without a paired smartphone. The Garmin inReach Messenger addresses all of these issues in this new satellite messaging device.

The Garmin inReach Mini received a welcome upgrade in 2022, including more capabilities as a standalone device, much-improved battery life, a higher resolution screen, an electronic compass, and Garmin Explore app integration.
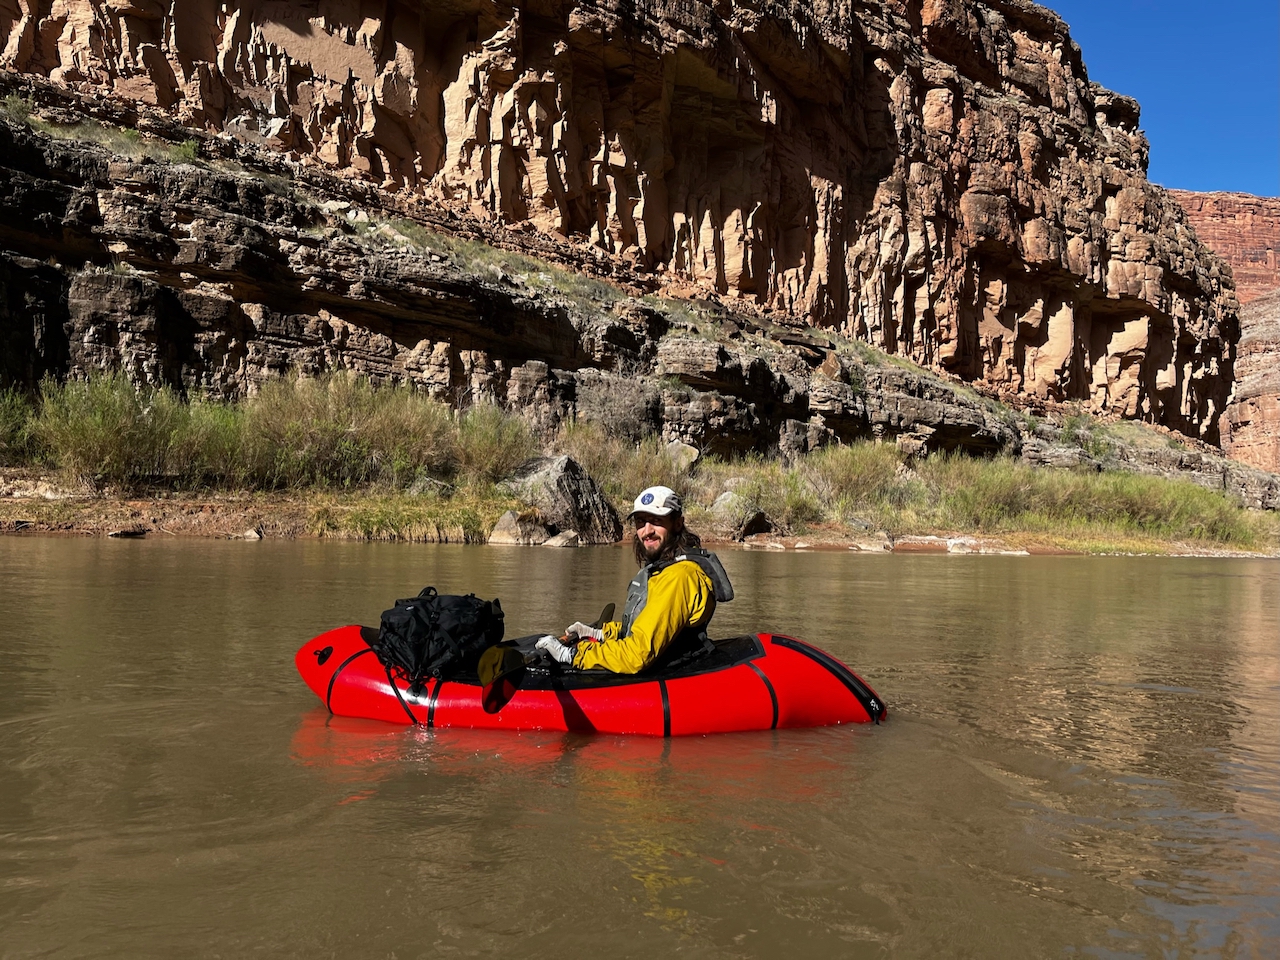
The Alpacka Refuge packraft may be the ultimate landscape traverse boat for the packrafting backpacker (or backpacking packrafter!).
If you’ve spent much time at Backpacking Light, you’ll know that we’ve built our reputation as a trusted source of gear information on our testing and research projects. This year focused on fabric performance and portable battery packs.
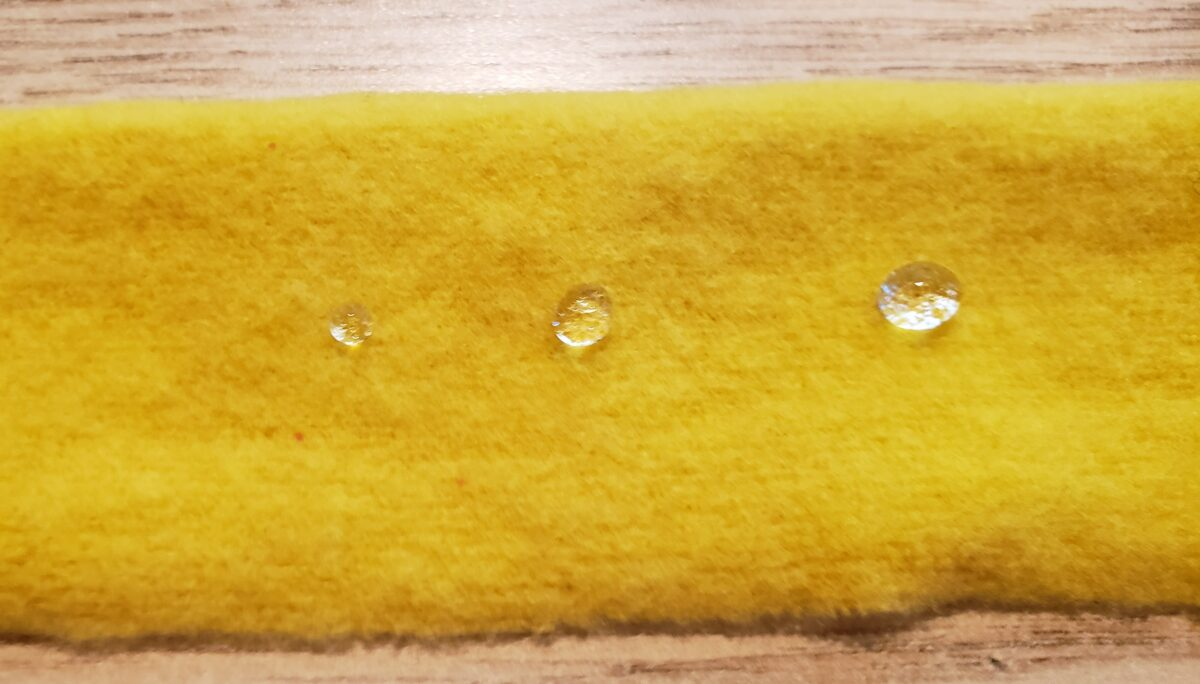
The role of wicking (and the outrageous manufacturer claims that surround it) is highly misunderstood. In this landmark test report, we uncover direct evidence that manufacturer claims should generally be met with skepticism.
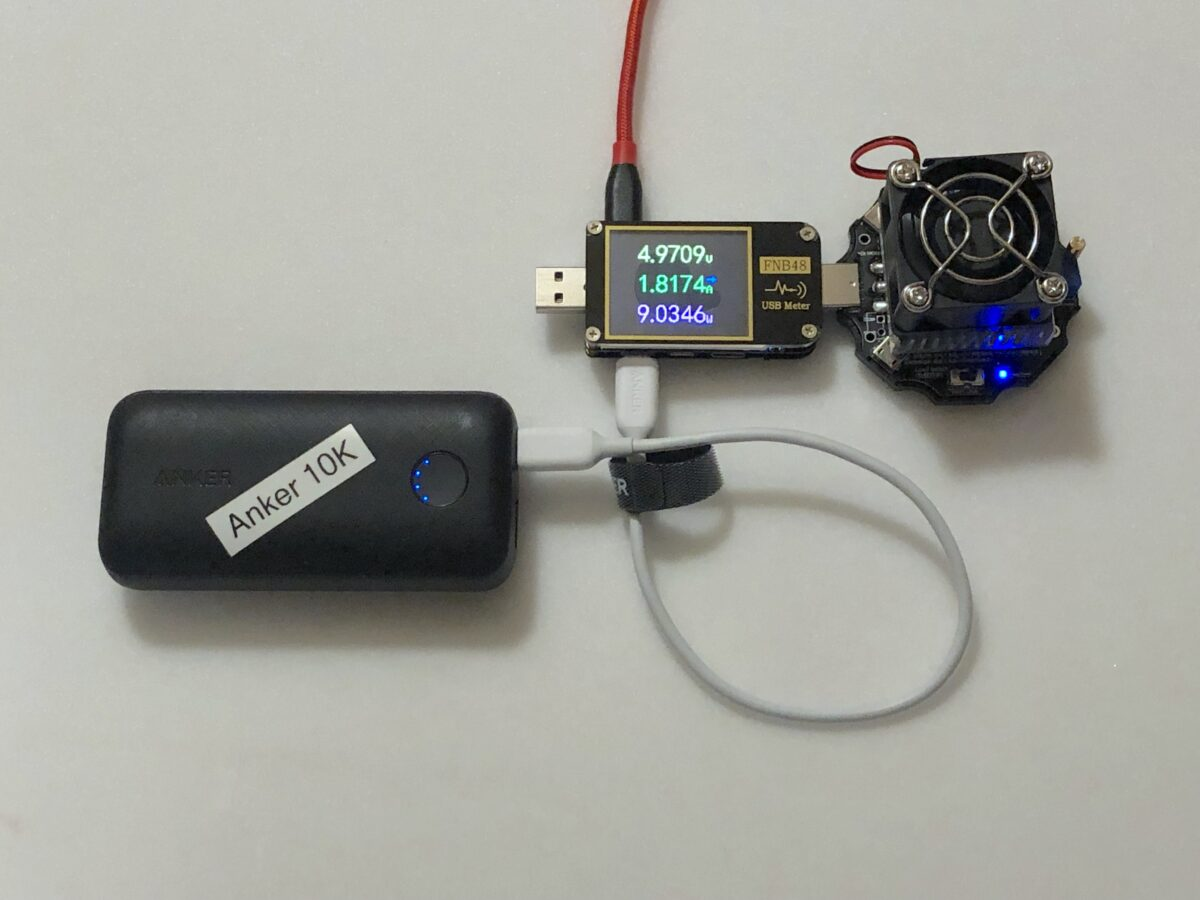
Evaluating the performance of portable battery chargers (PBCs) based on comparing their manufacturer specifications is inadequate, especially in the context of using them outdoors. Our new BatteryBench test protocol provides a framework for comparing PBCs in a more objective manner.
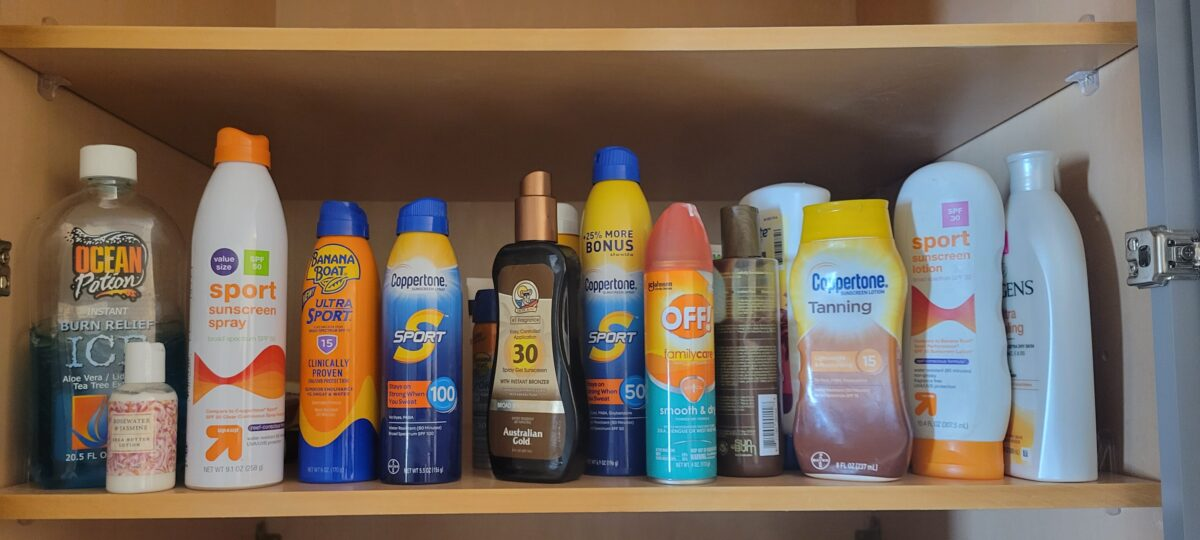
The outdoor sunscreen market is competitive, saturated, and rife with products that make dubious claims to be safe and effective. In this research review, we present a framework for discovering sunscreens that use safe and effective ingredients, along with best practices for backpackers hiking in high-UV environments.
Our top Skills articles of 2022 reflect our Members’ strong interest in navigation, food planning, staying comfortable in inclement weather, and being efficient while hiking.
The backpacking poncho gets a bad rap – even though it can function as a tarp and provides more ventilation than a rain jacket. On top of that, it has far fewer breakable features (read: zippers) than traditional rain gear. Used properly (and in the right context) a poncho can be more comfortable and protective than a $500 waterproof-“breathable” rain jacket.
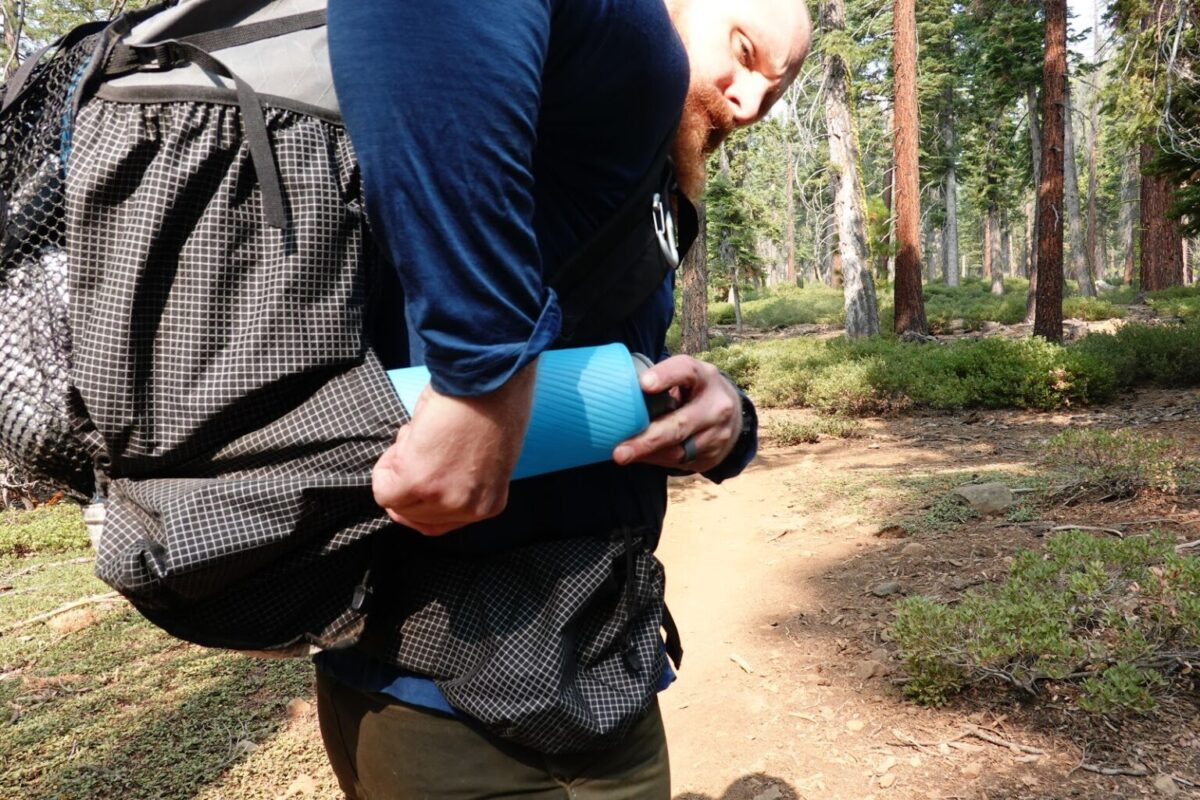
There is no perfect system that applies universally to every hiker. This overview of options for accessing water stored in or on your pack while hiking will give you some ideas to determine which approach works best for you.
Where Do I Put My Waterbottles When Backpacking? by Andrew Marshall
Imagine the satisfaction of arriving at your remote campsite, firing up your stove, and getting ready to eat your favorite meal from your favorite restaurant. Chipotle, Panda Express, or your local Thai restaurant? Here’s how.
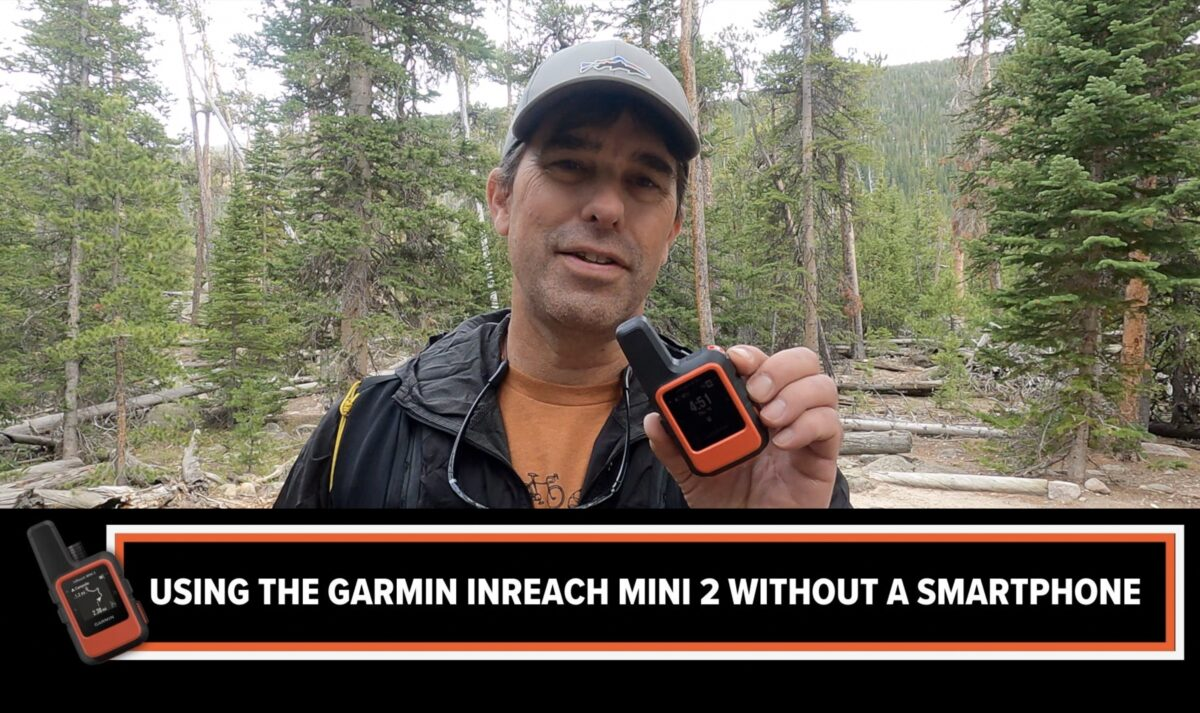
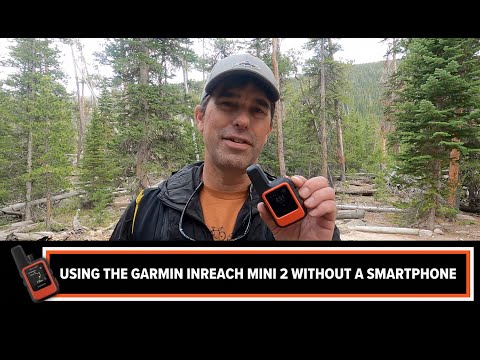
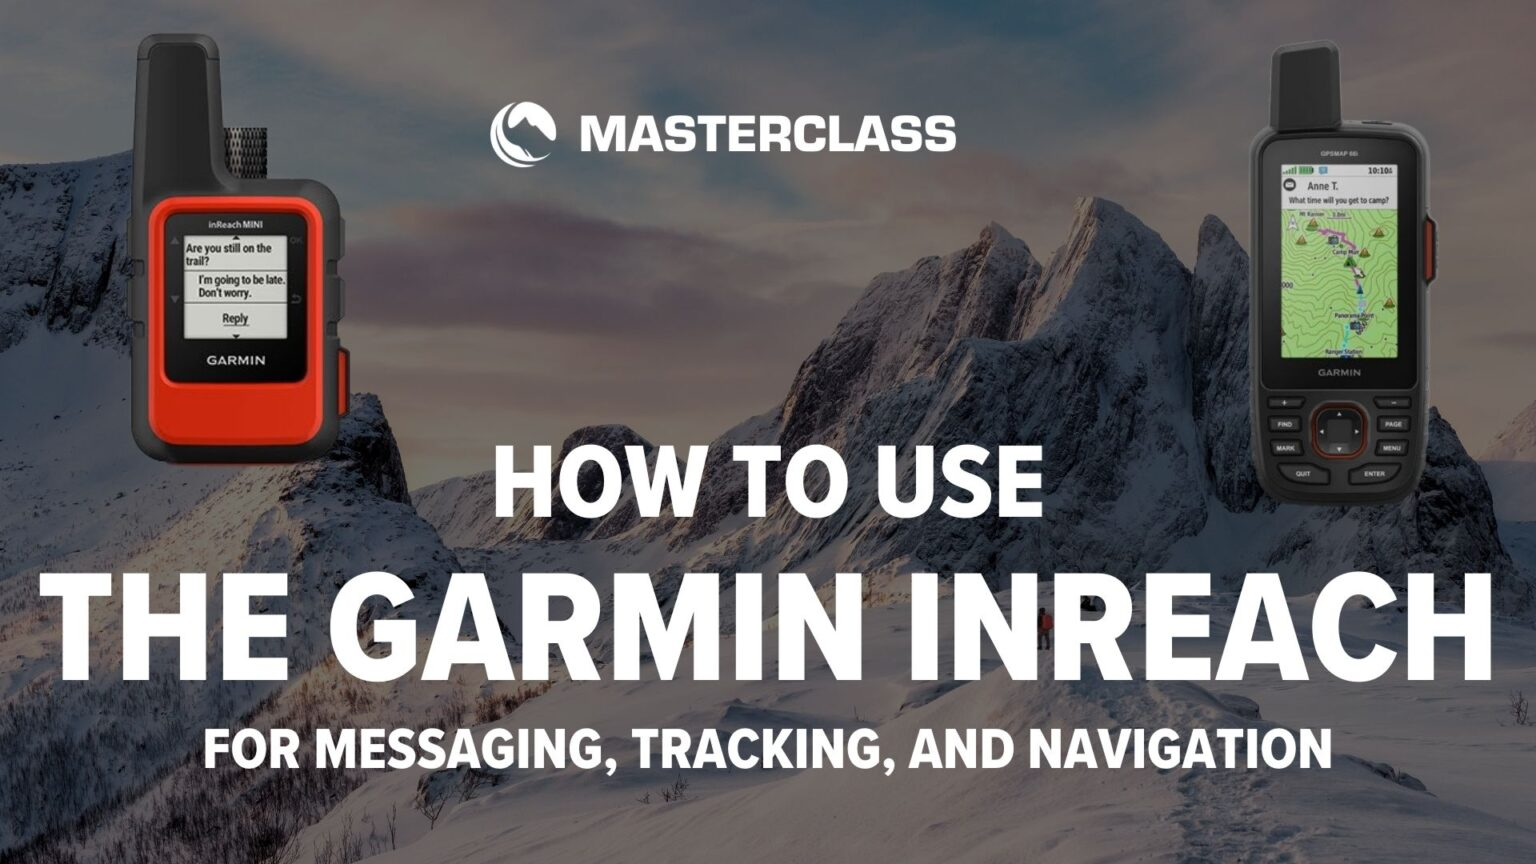
Learning how to use the Garmin inReach Mini (or Mini 2) satellite communicator without a smartphone opens up opportunities for overall battery management and more efficient messaging, navigation, and tracking.
Our most popular stories this year included an inReach-assisted rescue, reflections of a Pacific Crest Trail hike in the context of climate change, an international adventure in Africa, and a long-awaited Wonderland Trail adventure.

Sometimes the idea of pushing the SOS button on our satellite communicator is abstract enough not to think about it much. So reading first-hand accounts of real emergencies with real rescues can help drive home the point that these are incredibly valuable devices. In this story, the author writes: “I was suddenly seized by an inability to breathe: the world went black, and I was bent over gasping for air, then passed out and collapsed, falling into the marsh.” Find out how it ends.
Searching for grace and gratitude through the smoke, Drew reflects on his latest Pacific Crest Trail hike: “The trail has changed and it will continue to change. It is a living thing, and change is the essence of life. All we can do is keep moving and appreciate what good remains and work for more good to come.”
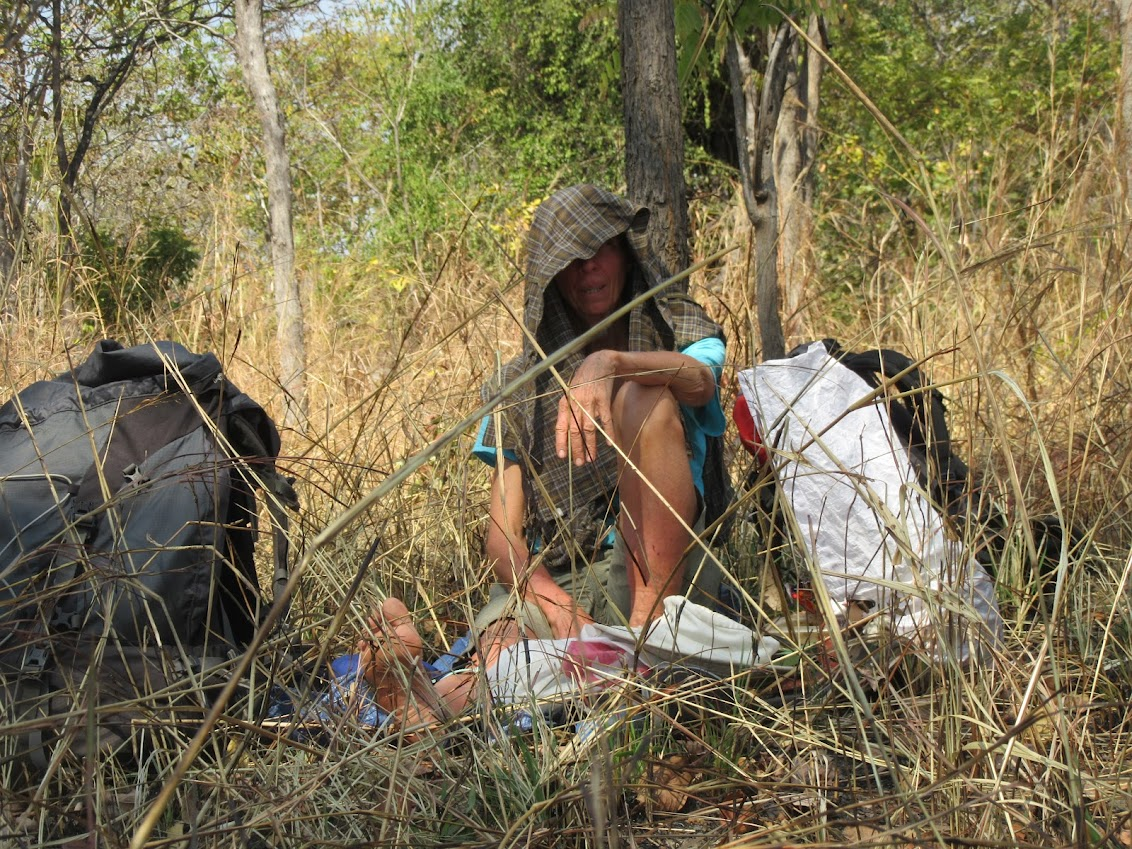
Heat, army ants, and stupendous views await Jeff de Graffenried as he treks through South Luangwa National Park, Zambia.
Andrew Marshall’s account of a Wonderland Trail thru-hike at the intersection of permits, wildfires, the birth of his son, and trauma.
Our Culture series explores ethics, trends, issues, and philosophy through essays and investigative reports.
Maybe not everything about ultralight backpacking has to be optimized.
Can an ancient Roman philosophy make you a better backpacker? It all depends upon your application.
Cottage backpacking gear makers face supply chain and logistical challenges but find fulfillment in other aspects of their operations.
Andrew Marshall explores an ancient life skill that is surprisingly applicable to backpacking – meditation.
Backpacking Light has a long history of publishing make-your-own-gear innovations created by its Member community, as well as an active MYOG Forum with some of the most sophisticated MYOG enthusiasts in the backpacking community.
An MYOG tunnel tent project using re-purposed fabrics from used gear.
The Backpacking Light Gear Shop provides curated lightweight and ultralight backpacking gear recommendations from our staff, contributors, product review team, members, and trekking guides. The gear featured in this section represents this year’s most viewed products.
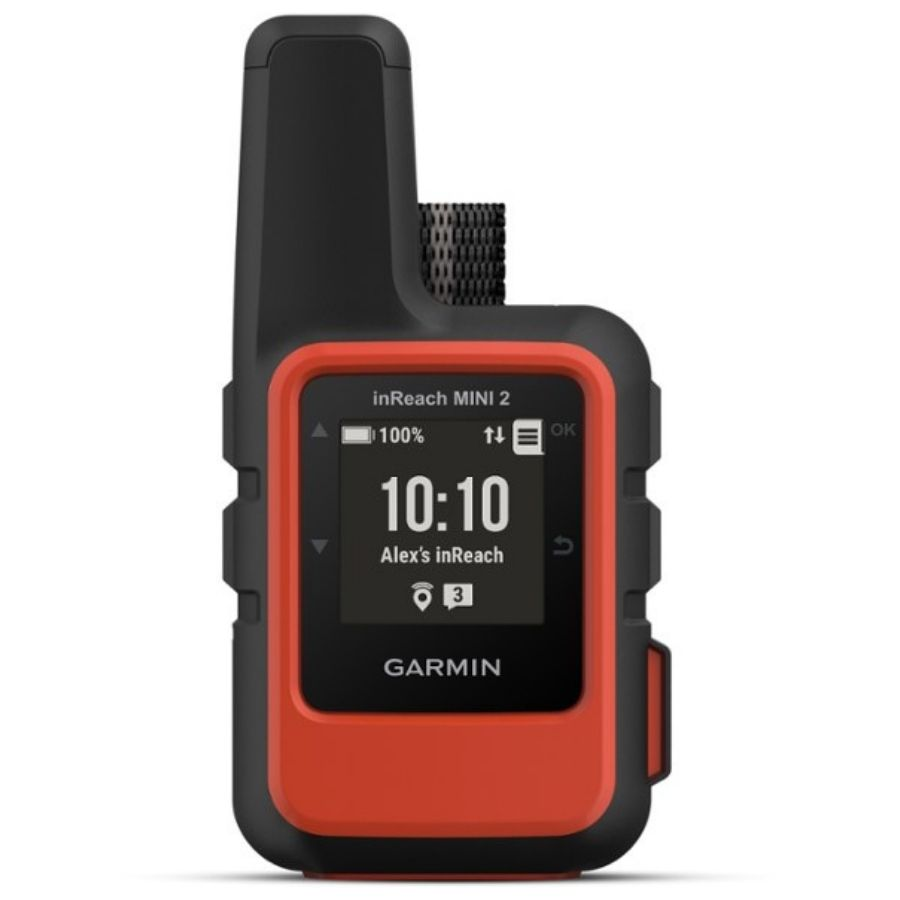
We recommend the Garmin inReach Mini 2 over any other satellite communications device because of its reliability, small size, and lightweight. Best paired with a smartphone, which vastly improves usability.
One of the most aesthetically beautiful Dyneema Composite Fabrics shelters we’ve ever used. The Locus Gear Khufu DCF-B is very stormworthy, easy to pitch, stable in high winds, sheds heavy snow well, and packs small. Pack extra stakes and guylines for above-the-treeline or four-season use.
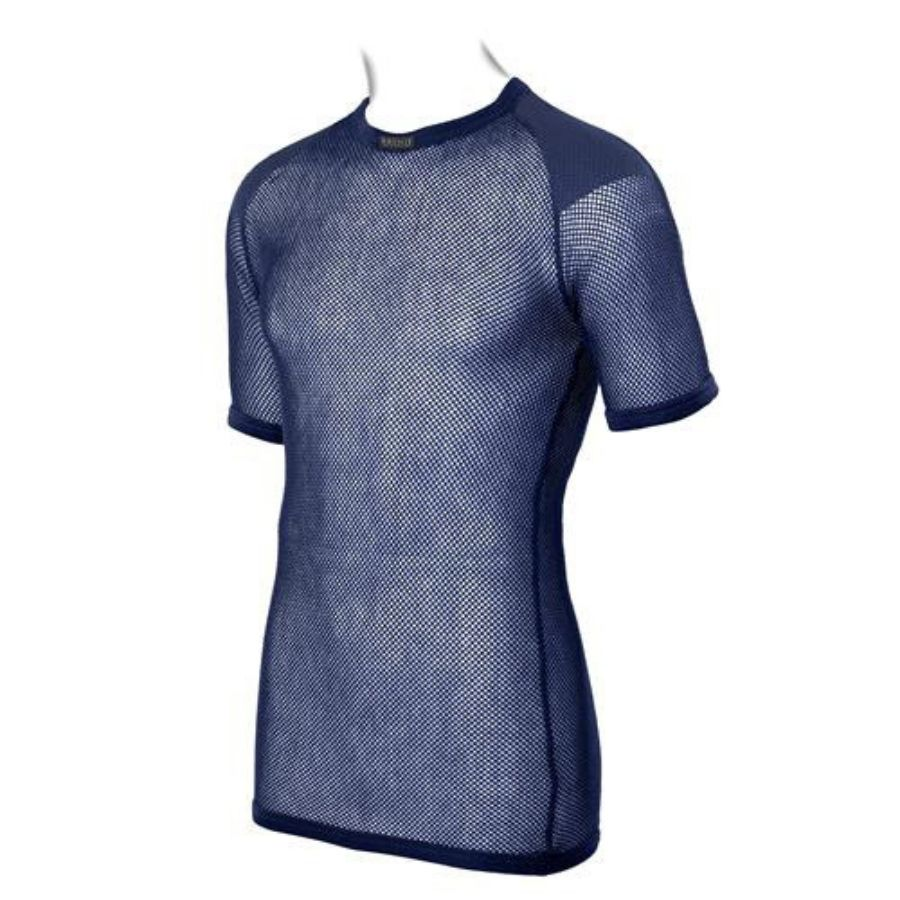
Brynje fishnet mesh provides a unique approach to baselayer fabrics. Extremely low water absorption and short dry times – much better than any wool or polyester knit we’ve tried – means they don’t get soaking wet from sweat during high levels of exertion.
Fishnet pores are large and pass moisture, and allow for very lightweight construction. Merino wool and polypropylene options are available – both are very comfortable against the skin without feeling clammy. This is one of our favorite winter base layers.
Our new Member Trip Report and Member Blog Post sections feature articles written directly by our Members for our Community. We launched this section to provide Members the opportunity to reach a wider audience (because not all site visitors monitor the forums).

Some of our most engaging and trafficked forum threads from 2022:
Our most viewed YouTube Videos of 2022.
Our most listened-to episodes of 2022:
Our most popular online courses of 2022 (by enrollment numbers).


A huge thank you is in order to our Member Community – you’re our raison d’être and your membership fees support the people and technology that allows us to produce all of this amazing content. We are honored as staff, contributors, authors, guides, and educators to be able to help you thrive in the backcountry through our writing, videos, podcasts, and teaching.
Happy New Year,
Backpacking Light Staff and Contributors (Roger Caffin, Pat Dunn, Jeff de Graffenried, Daniel Hu, Chase Jordan, Stephanie Jordan, Ryan Jordan, Ben Kilbourne, Matthew King, Brenna Kotar, Andrew Marshall, Warren McLaren, James Montavon, Rex Sanders, Stephen Seeber, Drew Smith, Anna Swarts, Mark Wetherington, Jessica Ulary, and Iago Vazquez).
We’d love to hear from you in the forum comments below – what was YOUR favorite content of 2022?
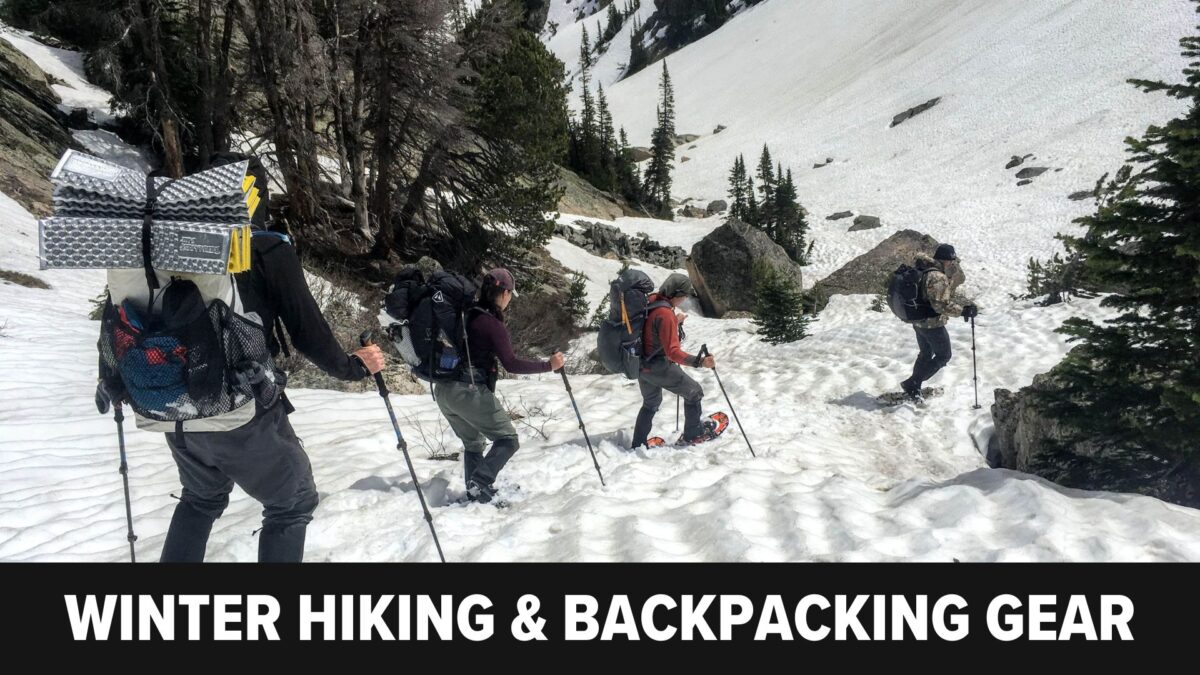
Interested in winter hiking and backpacking? In this webinar, learn how to use your existing kit, plus a few extra strategic items, to be safe and comfortable in the winter. Part 2 of 2.
I’d really like to try winter hiking, but I don’t really want to purchase an entirely new kit of gear.
This is the number one barrier to hiking and backpacking in the winter. In this 2-part webinar series, we’ll explore each of the eight major gear systems and help you identify what gear you need, at the bare minimum, when combined with your existing kit, in order to be safe and comfortable in the winter.
Part 1 (the previous webinar):
Part 2 (this webinar):
Become a Member Today to Access the Live & Recorded Versions of this Event
Backpacking Light Member Q&A Sessions are Hour-Long Members-Only Live Events – they are recorded and the recorded session will be made available to all members for a limited time after the live event has ended (and for Unlimited Members forever).
To access the live or recorded (video) version of this event, a printable slide deck for note-taking, and the related resources/downloads, you must be logged in with an active Basic, Premium, or Unlimited Membership.
DISCLOSURE (Updated April 9, 2024)
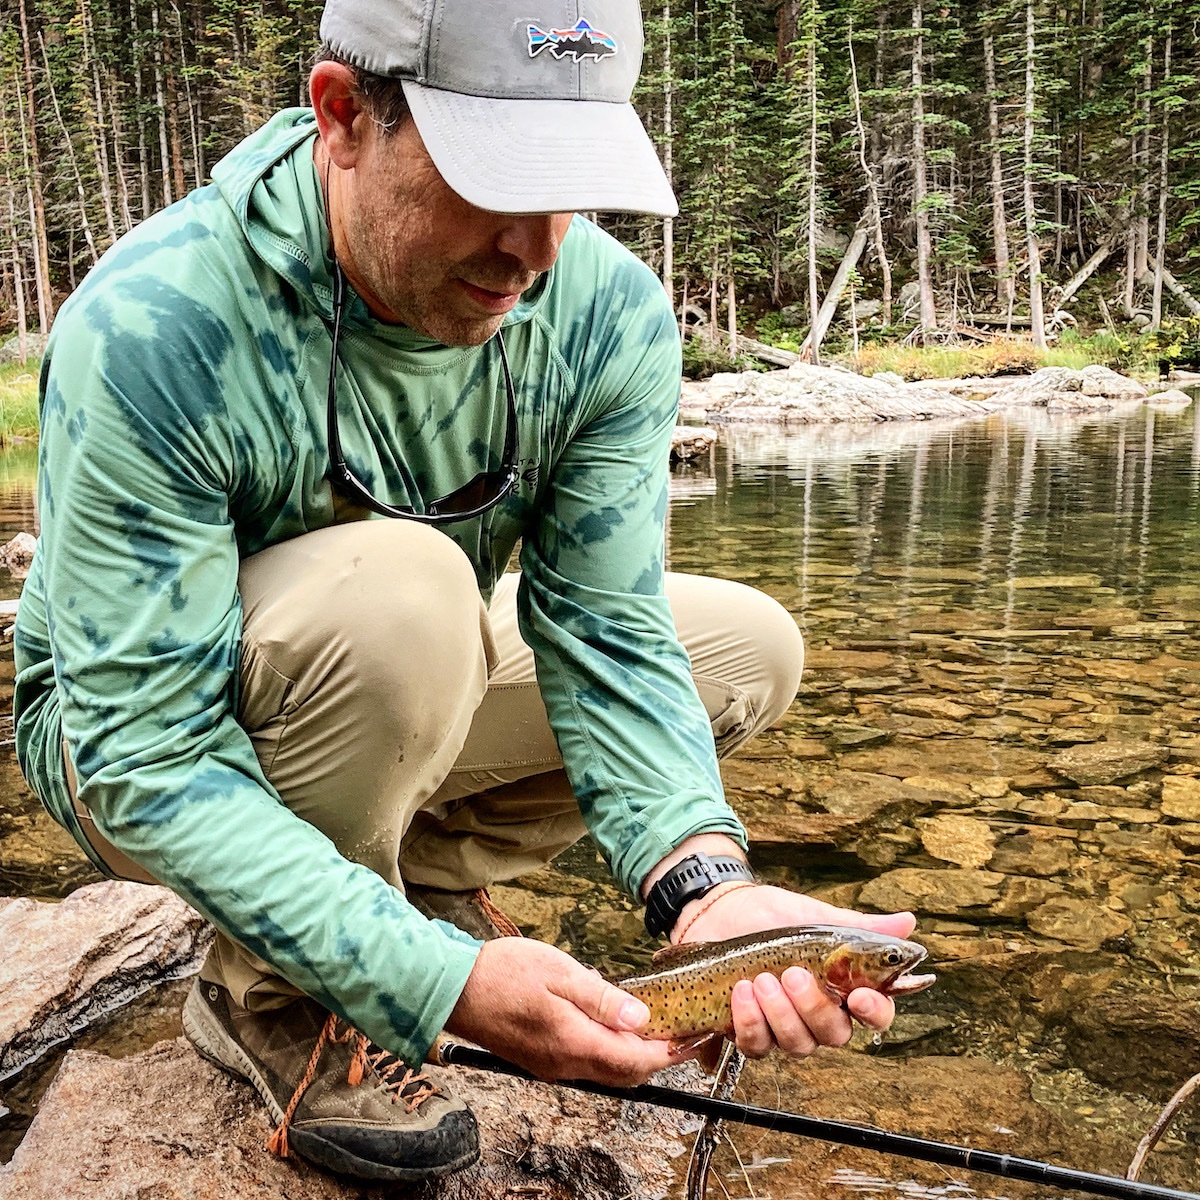
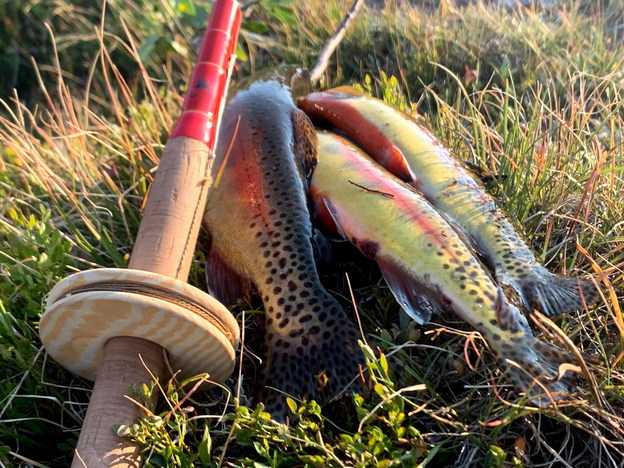
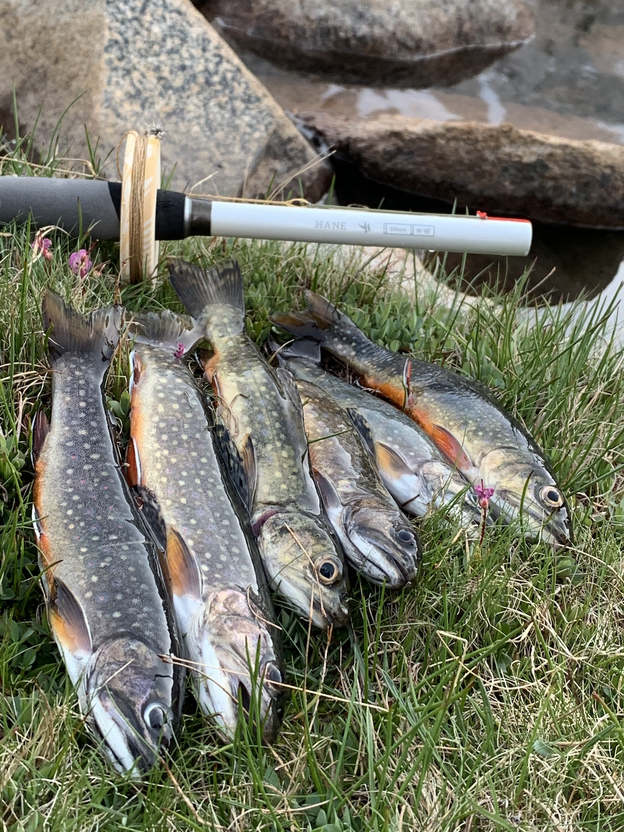
In this video overview, I present the five rods that I’ve been using over the past few years for most of my backcountry tenkara fishing. They include four models from Tenkara USA (including the new Satoki) and one model from Tenryu (the TF39TA) that remains the staple of my kit. In addition, I’ll walk through the basic gear I use and take while tenkara fishing on hiking and backpacking trips.
There are hundreds of makes and models of tenkara fishing rods on the market today. I’m not going to pretend to be an expert at using all of them! In this video overview, I present the five rods that I’ve been using over the past few years for most of my backcountry tenkara fishing. They include four models from Tenkara USA (including the new Satoki) and one model from Tenryu (the TF39TA) that remains the staple of my kit. In addition, I’ll walk through the basic gear I use and take while tenkara fishing on hiking and backpacking trips.
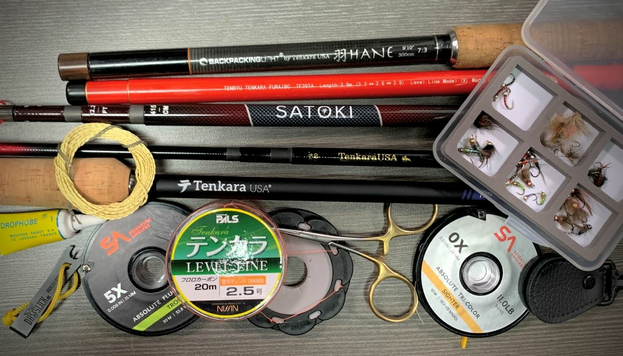

| make/model | handle length | closed length | extended lengths | pennies* | weight | unique feature(s) | best for |
|---|---|---|---|---|---|---|---|
| Tenryu TF39TA | 10 in | 14 in | 10 ft 10 in; 11 ft 9 in; 12 ft 9 in | 15.5; 16.5; 17 [1] | 2.8 oz | fiberglass content for smoother action in casting level lines and finer control over accuracy, extremely compact | expert fishers who predominantly use level lines, who want a very compact rod for backpacking |
| Tenkara Tenkara USA Hane (BPL model) | 8.5 in | 16.5 in | 9 ft 10 in | 46 [1] | 2.7 oz | short length for small streams, fast action makes this a very easy rod to cast, extremely compact, lots of power for big fish control | small stream backpacking, kids, beginners |
| Tenkara USA Rhodo | 9 in | 20.5 in | 8 ft 10 in; 9 ft 9 in; 10 ft 6 in | 15; 15.5; 15 [2] | 2.1 oz | light weight, short rod, very easy to cast | compact streams, delicate presentation of smaller flies |
| Tenkara USA Satoki | 11.75 in | 22.25 in | 10 ft 10 in; 12 ft 2 in; 13 ft 8 in | 26.5 [3] | 3.5 oz | very wide zoom range | larger fish, versatile enough zoom range and handle length for wide variety of streams, rivers, and alpine lakes |
| Tenkara USA Ito | 11.75 in | 25.5 in | 13 ft; 14 ft 7 in | 15; 15 [1] | 3.9 oz | long length, soft action | long lines, bigger rivers, alpine lakes |
Table Notes:
* The number of pennies (a measure of weight, where one penny = 2.5 grams) hanging from the rod tip, when the rod is fixed horizontally, that results in a deflection of the tip equivalent to one-third the rod length. Learn more at Tenkarabum.com. [1] Source: Tenkara Bum. [2] Source: Teton Tenkara. [3] Source: author (10 ft 10 in length only).
Browse our curated recommendations in the Backpacking Light Gear Shop – a product research & discovery tool where you can find Member gear reviews, Gear Swap (used gear) listings, and more info about specific products recommended by our staff and members.
Gear Shop » Backcountry Fishing
DISCLOSURE (Updated April 9, 2024)
An MYOG tunnel tent project using re-purposed fabrics from used gear.
Table of Contents • Note: if this is a members-only article, some sections may only be available to Premium or Unlimited Members.
In 1981, I bought an Early Winters Omnipotent SL. It took forever to get to sleep on my first night under its canopy, staring up, marveling at the taut architecture and complex construction. This three-pole tunnel tent, with its two Gore-Tex doors and integrated inner and outer, pitched in the blink of an eye, with just two anchors (e.g., stakes) for mild conditions.
Years later, I’d end up working as an outdoor clothing and equipment designer, conjuring up apparel, sleeping bags, packs, first aid kits, etc. But I never brought a tent to market.
Later rebuilding and/or renovating classic tents became a bit of a masochistic hobby, but I still hadn’t scratched that itch of creating one from the ground up.
I moved on from designing commercial outdoor gear, because I didn’t think the world need any new stuff, and worked for decades in the environment and conservation sector.
Yet when friends or businesses were throwing away broken or unwanted tents and parts, I said, “Wait, I’ll take those.” Thinking one day, I might get around to making a tent.
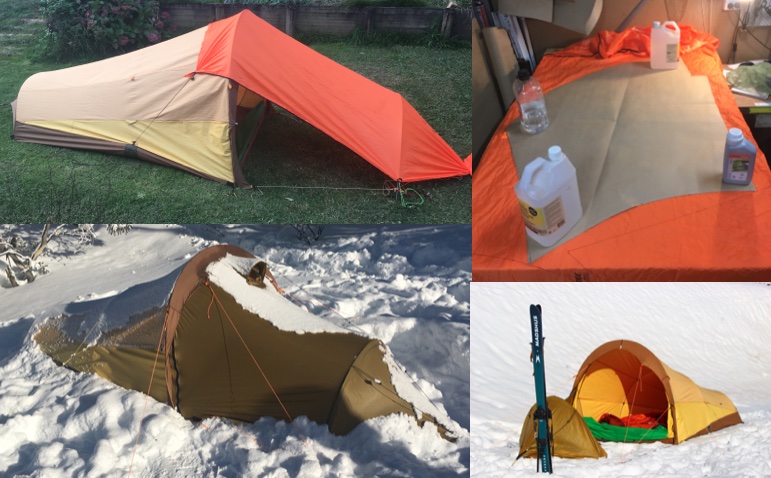
Finally, I bit the bullet. I have ‘Frankenstein’, a tent from the materials I’d accumulated. A new tent, yet one from old reused and repurposed fabric and components.
I couldn’t afford to make full prototypes; I only had barely enough of some materials to use them a single time. Once cut, there was no going back. I couldn’t order more.
This two-person shelter can quickly transition from a two-pole three-season bushwalking (backpacking) tent to a four-pole, fully vestibuled winter tent for backcountry ski trips.
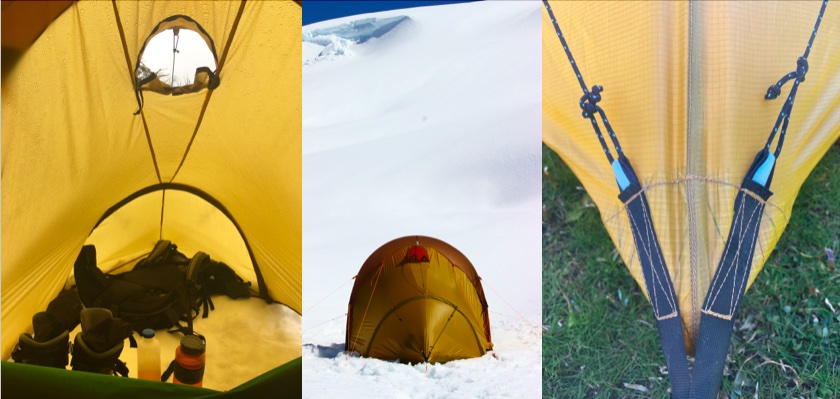
The single-skin construction uses full Gore-Tex tent laminate for the canopy and ends. This three-layer cloth has a polyester Nexus inner lining which can hold excess condensation in its fluffy non-woven structure until the Gore-Tex membrane has the capacity to pass it through to the outside. (Even if the poles should collapse, the tent would effectively become a two-person Gore-Tex bivvy bag.) A rear tension cone of coated nylon protects the low vent, so cool dry air is drawn in, to then rise out the much higher front vent where it escapes pulling moisture-laden hot air with it. A simple guyline on this top vent keeps it upright in windy weather.
Only three anchors are required in most conditions – one for the rear tension cone and two for the front tension flap. If wind or snow load is expected, there are plenty of other guy lines and anchor points available.
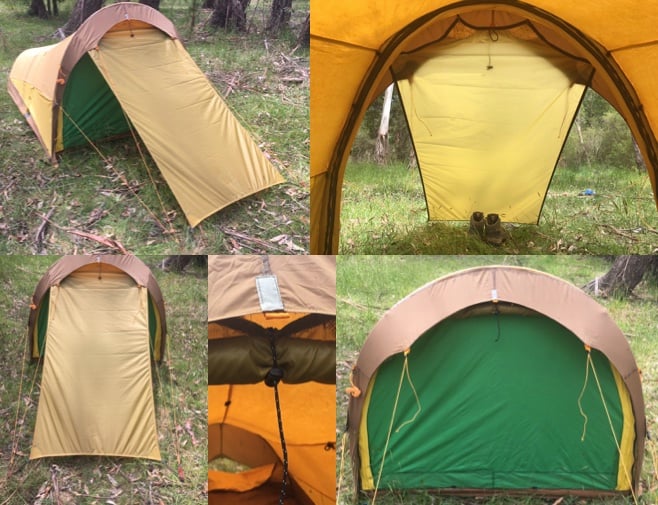
The completely zip-detachable winter vestibule has arched pole support to cope with snow load. It easily accommodates two rucksacks and two pairs of ski boots with oodles of space for protected and ventilated cooking, with simple egress/access via left or right sides. It only requires one peg to pitch, includes a small floor in the front tension cone, and a high zip-adjustable, hooded vent.
A clip-on summer vestibule, weighing a quarter of the winter option, can alternatively be employed, providing shelter for a vented front door, a weather-protected cooking space, and somewhere outside the tent to store muddy, wet boots. It uses no additional pegs, simply slipping over the existing front tension flap anchors.
Vestibules can be left attached to the tent if required. The summer version rolls up into the front eave, out of the way, until needed. The winter vestibule can be completely unzipped from either side. Its sides can be zipped opened and clipped to the centre vent guyline, but then quickly sealed if weather threatens.
The tent can also be easily used without either vestibule. A toggle on the front Gore-Tex door allows for the top of it to be partially opened for ventilation in all but horizontal head-on rain.
There are two internal mesh pockets for the storage of small items. Webbing loops are positioned to act as internal guylines if conditions warrant it. Metal zipper pulls have been replaced with reflective cord. Peg-out points are doubled loops of reflective cord so they accommodate either a ground peg or a ski as the anchor, without needing to add extra cord. The internal foot and head ends are both vertical, unlike other tunnel designs, specifically Scandinavian-inspired models, which often slope. This provides more livable space, and with both being Gore-Tex, there is less concern about the ends of one’s sleeping bag getting wet.
Although certainly not in the category of an ultralight shelter, the tent does offer huge versatility. It spans from a very spacious one-person, well-ventilated 3 season tent to a secure, windproof, and snow-stable Alpine haven for two people and all their gear.
And it does so in an environmentally responsible manner, with over 85% of the materials having been salvaged and reused from preloved tents and bivvies. Some of them are well over 35 years old. (Only the vestibules and front insect screen door employ virgin fabric.) The centre top ridge seam is the only seam I didn’t subject to my sewing machine.
The tent has been successfully field tested this year, although some refinements are under consideration.
Weights (total tent weights do not include stuff sacks or tent pegs, but do include guy lines):
Pegs (stakes):
Packed size:
Dimensions:
Fabrics:
Notions:
Guylines:
Poles:
I also drew upon a personal collection of materials I’ve hoarded over many years: cords, webbing, fabric swatches, plastic hardware, and the like. The Lawson Glowire guyline cord was left over from previous tent renovations I’d undertaken. In a reuse shop, I found an Aldi inflatable, something or other, that had long lengths of seam-free polyester fabric. I used it to fashion a prototype winter vestibule instead of cutting up my Silpoly. The original Marmot Twilight bivy tent stuff sack I trimmed down to become the new pole bag.
The ripstop silicone polyester, no-see-um netting, two-way separating zip, nylon and steel rings, etc., were sourced from Extremtextil, out of Berlin, Germany. Other zips, mini line locs, etc., were found at Tier Gear from Tasmania, Australia. I was pleased with the service from both suppliers.
Not only was I cobbling together a collection of reused materials, but I would also do the same with the design. All design is iteration. It stands on the shoulders of what has gone before. I have personally owned 20 tents that I can think of, including quite a few I have renovated or rebuilt.
In particular, I’ve always been entranced by my Early Winters Omnipotent. My three-pole Superlight (SL) version (serial number 286) has protected me through some wild storms the world over. I’ve also picked up an early version of the iconic four-pole Omnipotent from eBay (serial number 1151).
I later acquired a pre-loved Early Winters Light Dimension – the first outdoor product ever made from Gore-Tex, plus its big brother, the Winterlight. The problem with the latter two is although they have both easy access doors, neither has a vestibule to store wet and muddy gear nor to cook in when there’s rain or snow about.
Marmot Mountain Works (as they were originally known) decided to make what they considered a better mountaineering version of the Light Dimension. They dubbed it the Taku. Although only made for about five years – 1979 to 1984 – they’d forged an enduring reputation for being a lightweight yet tough, single-skin Gore-Tex alpine tent. (When Kelty set out to make an expedition tent (what became their Windfoil), they openly acknowledged that the Marmot Taku and the Early Winters Winterlight were their inspiration.)
Some years after Marmot stopped producing the Taku, Bibler introduced their version in Toddtex, which they dubbed the Phoenix. And later, Marmot themselves made the Taku rise from the ashes, though in their proprietary Membrain waterproof breathable (WPB) fabric. (Editor’s note: it has existed since under various model names. Consider today’s iteration, the Hammer.)
But for all its never-say-die qualities, the Taku didn’t have a vestibule either. But having picked up an original two-pole version (no. 322) with broken fibreglass/graphite poles, I renovated it and appreciated its ability to spill wind and cope with snow load.
It should be noted that the Stephenson Warmlite 2R was the original muse for the Light Dimension, whose success spawned so many imitations, single and double skin.
The Garuda Mountaineering Emeishan also intrigued me. Founder/designer Bryon Schutz described it as one of his favourite designs. It was basically a Taku with a large fixed front vestibule. But I’ve never seen one come up on eBay.
A discarded double-skin Sierra Designs Super Flash that I refurbished accompanied me to New Zealand and Patagonia, proving very sturdy in wind and snow, but requiring a design hack to make the tiny vestibule useful. For many years I used a Chouinard Comet. A single pole, single skin tent, coated with ‘Sealcoat’ Hypalon, which was considered so tough it was faced to the outside of the tent. It had excellent low-high ventilation. But again, no real vestibule.
Australian brand Wilderness Equipment has long made their First Arrow, and espoused its wind deflection and low-to-high ventilation. Years ago, I had an Ultimate Equipment Peapod II. It was poorly ventilated, but so very wind resistant that often I would be fast asleep as many of the tents around me had collapsed in wind storms.
The Sierra Designs Convert 2 is probably the nearest tent, currently for sale, that vaguely aligns with a (hybrid) tunnel that has a removal vestibule. The Exped Polaris is the only tunnel (also a hybrid) on the market with a 3-layer waterproof breathable ePTFE (expanded polytetrafluoroethylene) single skin.
But, in short, I guess I was attempting a Taku/Winterlight/Emeishan, with an Omnipotent style zip-off vestibule.
I prefer tunnels for their ease of pitch and ability to deal with high winds.
The finished tent looks simple enough, but belies the inordinate time that went into its design and construction.
A vast amount of hours, probably days, in fact, went into unpicking seams from old shelters so I could recover their fabric, webbing, cords, etc., from which to craft my tent.
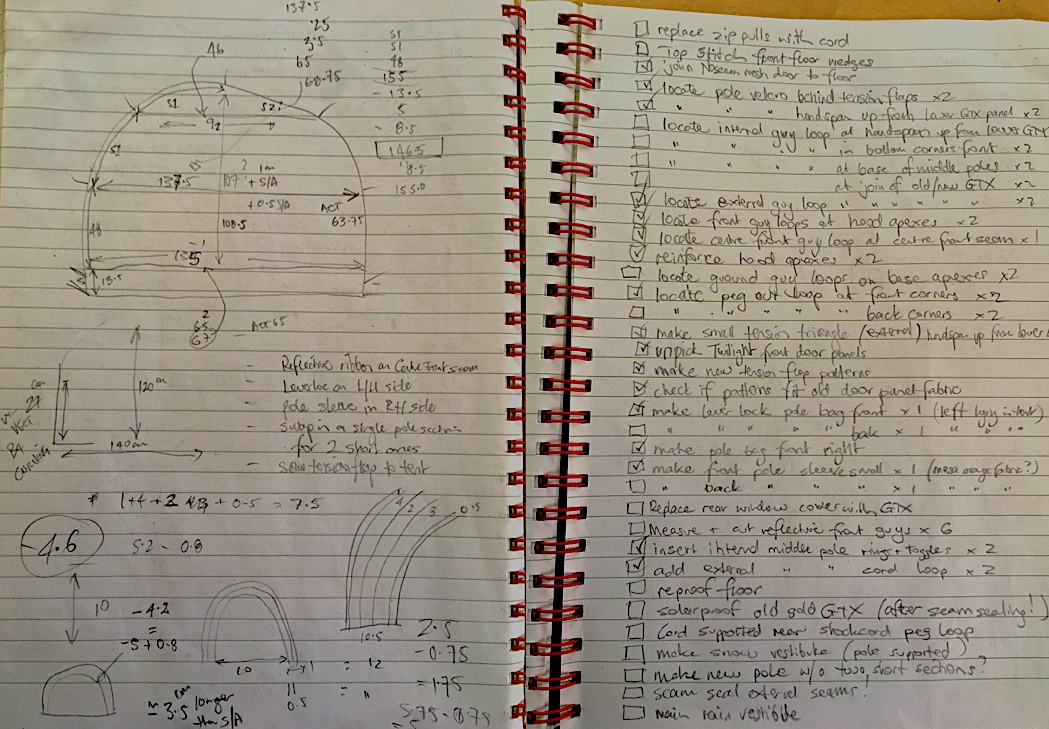
I experimented with numerous tunnel pole designs by drilling holes in a length of wood, roughly the widest width of what my tent floor would be. Straight poles flexed into shape, pre-curved pole sections, gothic arch (one bend), flat top arch (two bends), and hybrid gothic arch (three bends), such as Roger Caffin uses for his tents. I played with a mix of old North Face poles that I believe were from their June Bug and Mayfly tunnels, various Sierra Design and Wilderness Equipment aluminium poles, Early Winters and Marmot fibreglass poles, and others of unknown parentage.
For the main front pole I settled on pre-curved poles by Yunan, with floating connectors (instead of fixed ferrules, the connector is an independent piece threaded between two sections of pole), and I swapped in more curved sections to replace some straight sections. I hack-sawed off the pole tips and filed smooth their ends.
Although all four poles were different, I labelled them with thin wraps of cloth tape in a numbered sequence from rear to front.
Each of the four poles fits the tent differently. The rear pole slips through a loop of reflective webbing at the inside top of the rear arch and sets in a webbing pocket in one corner. It is tensioned into place in the other corner, by my rendering of the LeverLock idea, which was developed by tent designer extraordinaire, Mike Scherer, for the Kelty Windfoil.
Similar story with the main front pole, except it first slips through a broad but short pole sleeve, only about 200mm (8 inches) long. It is then pulled over the pole and held in place, same as the rear pole, by the downward curve of the tension flap fabric. In windy weather, there are six velcro tabs that also wrap around the front pole. These align with the three upper guy lines on each side.
The middle pole, which is only required if snow loading or high winds are anticipated, can be easily fitted inside the tent after it is pitched. It seats into a webbing pocket on each side, that in turn, sits on top of an external pad of kevlar-reinforced Cordura-type material to protect the tent floor taffeta from abrasion at this pressure point. This middle pole is held firmly in place against the Gore-Tex canopy by one tab of Velcro, and four 12 mm (0.47 inches) nylon tent rings and T-bars. External guy lines are sewn directly through the webbing that’s holding these rings and bars, which in turn are on existing seams.
The winter vestibule pole is inserted into a pole sleeve, made from 70 denier nylon taffeta on one side and 210 denier packcloth on the other. A reflective tab indicates where to insert the pole, and it is pushed through to a sealed pocket (again reinforced with a Kevlar-infused fabric) on the far side. It too, was tensioned with a LeverLock-inspired strip of webbing.
Once I was happy with the pole configuration, I needed to match possible tent heights and widths to the recovered materials I had available. I set up the poles on the backyard lawn, like a 3D wireframe tensioned out with cord. And took lots of measurements. Lots. I only had one shot at this. Gore-Tex tent Nexus fabric hadn’t been produced since the mid 1980s (if you exclude Bibler’s proprietary Toddtex.)
As it was, I had to join most of the reused fabrics together to give me the sizes I needed. Even after unpicking seams, I still only managed to scrap in with millimetres to spare, in some instances. On occasion, I had to reduce my seam allowance to get the fabric to fit the patterns.
The construction adage “measure twice, cut once” rang in my head constantly. I experimented with various catenary cuts for the different seams and assembled sections to test them out, unpicking them when the tension wasn’t taut, and re-measuring. But I was also very conscious of weakening my important structural seams by adding too many lines of needle holes. This is especially true when creating a single-skin tent, as there’s no redundancy, such as you get with a double skin tent.
This uncertainty of the end result necessitated a slow, cautious approach. And oodles of double-checking of my measurements. I made copious notes and was luckily aided by having a roll of pattern-making card, onto which I could transpose my calculations, and go back to when I needed to correct something. It was all pencil and paper, no computer-aided design (CAD). But eventually, with some trepidation, I did commit to cutting the fabrics. And for the most part, I am happy with the outcome.
I found I needed to take pages and pages of pre-production notes, so I could get the correct construction sequence clear in my head. A couple of times, I swore loudly when I realised I’d have to unpick my work and start over again, because pieces had been assembled out of their required order. The front door, and winter vestibule pole sleeve assemblies were the most complicated to plan ahead. The winter vestibule alone has 33 individually cut pieces of fabric, which are combined with 41 individual components (zips, cords, webbing, buckles, etc.).
Sometimes having a break from the project helped me rest and clear my befuddled brain. If the lapse was too long, I’d forget crucial steps and end up reinventing the wheel all over again. The notes helped keep me on track and act as illuminating memory joggers.
Once I had the main tent assembled, I commenced work on the vestibules, with the winter one first. I positioned rucksacks, boots, and stoves in front of the tent and draped cloth over the poles to ensure I had the sizing right. I wanted a roomy vestibule but not so large that it was too unsupported during a snowstorm. Again, copious measurements. Even so, I had to unpick my prototype vestibule several times as I experimented with patterns to give me the tautness I was seeking. I’d originally planned on adding guy-out points, but found that when these tensioned to the front peg-out point, they were as equally as good as if they were independently staked out. I redid the vent about three times, striving for a design that would offer maximum airflow but minimal egress of rain and snow during inclement weather.
The rear peg-out point borrows from a system Early Winters used very successfully to keep their tents taut. Thick shock cord in a double loop is joined with a fisherman’s knot. A non-stretchy cord guyline tugs this shock cord tight and keeps the tent under tension, and adds redundancy should the bungee cord ever fail, (I still have the original 40-year-old shock cord in my Omnipotent.) Where I don’t employ plastic guyline tensioners, I use my old standby of a taut-line hitch knot to get the same effect.
For many fabric seams I used a simple felled seam. I sewed the face fabrics together, serged them with a four-thread overlocker. Then pulled the seam firm and topstitched the assembled seam to sit flat. Where I could, I ‘shingled’ these seams so that moisture would easily run off them, rather like roof tiles or shingles. This is the same construction that was used by Early Winters and Marmot for their Gore-Tex tents. That the inner lining of Gore-Tex laminate is a non-woven polyester Nexus probably helps here, by adding a low stretch structural strength to the canopy seams. (Curiously back when Cannondale – yes, the bike company – made integral double-skin backpacking tents, they also espoused the virtues of overlocked seams).
I used the same seam construction for the Winter vestibule, with its 30 denier 45 g/sqm Silpoly and it has held up very well so far.
Corners on the Silpoly vestibules were reinforced with facings of Kevlar-threaded clear X-pac fabric, that I had serendipitously discovered in my collection of fabric remnants. Prior to discovering the small sheet of X-pac, I had reinforced the 70 denier taffeta with 210 denier packcloth remnants. I used variations of the Box X stitch to reinforce points of stress. I also reinforced the vestibules’ long outside edges with grosgrain, painstakingly unpicked and reused from other tents.
I chose a Gutermann polyester thread. Available in Australian sewing shops simply as ‘Extra Strong’ M 782. They recommend it as suitable for “heavily stressed seams” because it is “particularly robust and tear-resistant.” It is very tough – I can’t break it with my hands. Polyester is less absorbent than nylon, whilst being more UV resistant. I used an NM 110 needle on my 37-year-old Pfaff 463 industrial sewing machine – and it was a refurbished unit when I bought it! (NM = “number metric” and 110 means 1.1 mm (0.039 inches) thick.) I sewed everything with this thread and needle, from the gossamer Silpoly to multiple thick layers of webbing.
Where required I did use pins to secure assemblies of materials together. Given the long lengths and the curves involved, I tend to pin at a right angle to the seam allowance, as this enables me to sew gently over the pin without removing it. My seam allowance is 1 cm (0.39 inches).
Seams were externally sealed with Gear Aid Seam Grip WP. However, I sealed the tent in the middle of winter when daytime temps were less than 10 °C (50 °F), and some of the sealant went white, instead of remaining clear. Function appears unimpaired though.
The same cannot be said for the floor of the tent. It is a very robust 70 denier taffeta. I’m pretty sure I have now reproofed it three times with Gear Aid Seam Grip TF Tent Fabric Sealant (previously known simply as Tent Sure) polyurethane coating. Combined with the double-sealing of some seams, and looking at my early notes, I suspect all this sealing may have added roughly 200 g (7 ounces) to the overall tent weight. But alas, half of the floor still appears to be leaking. In the past, I’ve had very good results from Tent Sure. Maybe the initial application in cold weather is the problem. I’m not looking forward to the very considerable re-work involved in replacing the floor if I can’t resolve the issue. I’m in two minds about buying some brand new 40d TPU coated nylon (10,000 mm or 394 inches of hydrostatic head) or repurposing a floor from another tent.
Design is often known as the ‘art of compromise’ – like trying to walk the trapeze between competing needs.
For example, I would’ve loved to have had a much deeper eave on the front tension flap. That would’ve allowed the front door to have been partially zipped up, increasing ventilation in foul weather without a protective vestibule. And a bigger eave would protect muddy boots left at the base of the door. But I needed the vent in the winter vestibule to be as close to the apex of the tent as possible to maximise the Venturi effect and more easily exhaust warm, moisture-laden air.
In a related vein, I initially designed the winter vestibule with a single centre-top seam, as this created a de facto ridgeline, better for snow and rain to roll off. But when I fully tensioned the whole vestibule out, I noticed the ridge seam pulled tight all the way into the vent, causing the base of it to dip down. I redid the patterns, so there were now two ridge seams that aligned with the seams of the top vent. The vent is tensioned better, but I’ve ended up with a small flattish section on the top of the vestibule. Again compromise, choosing the lesser of two evils.
I had considered opening the doors to the side, or the top, so they didn’t create a mound of fabric on the floor when unzipped. But in the end decided that maximum door size (better access and ventilation), symmetrical opening (same for both sleepers), and no bundled door stuffed into a pocket in the roof of the tent (which would’ve impeded the function of the high apex venting) were better choices. I developed a cord toggle system that could secure either the Gore-Tex or mesh door or both to keep them tidy.
If I’d settled for a fixed vestibule instead of a removable one, I could’ve eliminated the weight of the joining zipper, but given that it also doubles as the left and right access zipper for the vestibule, such weight savings probably wouldn’t have been that much.
I was also limited by the age of the reused materials I was deploying. They are not as light as the state-of-the-art fabrics available today. And my reused fabrics are bulkier too. Once I had the majority of the main tent crafted from reused materials, I did allow myself the luxury of using virgin fabric for the vestibules. (After I purchased that fabric, recycled Silpoly then came onto the market.)
And if not limited by the quantity of reused materials, I might’ve gone for a little more length and possibly even a bit of extra width. But there would’ve also been the added weight and packed bulk from that option.
The old Sierra Designs waterproof-breathable Hocus Pocus fabric was selected as the cover strip to protect the door zippers. Near the base of the door, the hemmed edge is prone to curling on itself and not retaining the preferred shape and size to weatherproof the zips fully. Maybe this has occurred because I probably didn’t have enough cloth to cut it all ‘on grain’, and there may be some bias stretching occurring, or it is just a trait of the fabric.
I would’ve preferred to have had the main front pole canted forward and be less vertical, but was limited by the length of Gore-Tex canopy fabric I had to work with, and also didn’t want to add any unnecessary seams that would increase weight and reduce structural integrity.
Opting for a single-skin Gore-Tex design gives me a very windproof shelter, but it means on cold, still nights, I have less warmth than offered by a double-skin tent, and possibly encounter a greater dew point/condensation issue as a result.
This tent has thus far been exposed to:
The weather encountered during this field testing can be summarized as follows:
Strengths
Limitations
Not much, really. The effort was a massive amount of time. But then again, The North Face Assault 2 in FUTURELIGHT waterproof breathable fabric retails in Australia for $1,700 AUD ($1,099 USD). The Exped Polaris in their VentAir waterproof breathable material is only available by special order and listed at $1,799.95 AUD ($1,164 USD). So I spent time, but certainly saved money.
I should’ve retested the water-tightness of the repurposed tent floor after reproofing it, before attaching the tent upper to it. Annoyed, I forgot to do that.
Maybe the ITW Nexus Lineloc 3 LL might’ve been a better choice for tensioning cords with gloves on than the mini Line Lock I used.
I made the zip strip (the strip of fabric that holds the tent-half of the winter vestibule zipper) from silpoly for lighter weight and compatible tension with the rest of the vestibule. However, it is tricky to seam seal the seam join between the silicone-coated fabric and the polyurethane-treated material. A non-siliconised fabric would’ve been a better choice.
I will replace the rear guyline’s plastic ring with the same metal ring used by the front guylines.
I hadn’t realised that liquid seam sealant applied to seams around reflective patches negates the reflectiveness underneath the sealant. I’d do wider patches next time to allow for this.
Initially, the plan for the pole sleeve of the winter vestibule was for it to be on the exterior. But as I assembled the sleeve, facing the PU side outwards so the pole would slide through more easily, I realised having this ‘stickier’ side out would attract snow and rain. So I had to invert the entire sleeve construction, to have the slippery silpoly uppermost for best snow shedding. Alas, this means the pole feeds in from the opposite side of the front and back poles.
In seeking to maximise the access and egress under the vestibules to the front door, I purposely reduced the amount of fabric on the lower end of the front tension flap. As a result, the flap doesn’t pull as tight over the pole at this point, and there is a small amount of slack in the Gore-Tex canopy here. Adding a partial pole sleeve or sewing my middle guyline pullout directly to the tension flap might improve tautness.
I may revisit how I have done the sidewall mesh pockets. They are reasonably roomy as they are, but small items can get a bit lost if too much is stored in the pockets. Will ponder improvements as I use the tent.
I am in awe of those folk who boldly and enthusiastically take on MYOG projects without any prior sewing or design experience. I am so impressed with the amazing results they achieve using their humble kitchen table, garage, or living room floor as their cutting table. Incredible. They might just be the Alice Holubar, Mike Pfotenhauer, Daniel Shurman, or Bill Moss of the future.
My pathway into MYOG has been somewhat more of a chartered course. Under the tutelage of my dad, I learnt to sew on a Singer treadle human-powered machine as a teenager, making my own crude gear. Years on, seeking a break from my chosen profession of Outdoor Education, I went off and gained formal tertiary training in clothing design and production. I then worked in outdoor retail so as to understand the decision-making that buyers undertook when selecting their kit. I also completed a post-graduate University course in design, in general.
I was fortunate enough to spend about seven years as the in-house designer and product manager for Paddy Pallin, Australia’s oldest outdoor gear provider, back when they had their own on-shore factory. Later, as a freelance designer, I did a heap of work for Berghaus, the European brand, including a redesign of their premier Extrem mountaineering range.
During latter decades in the sustainability sector, I lectured in eco-design, worked on recycled textile projects, and also managed a community reuse centre. These days I’m back in outdoor education. In my limited spare time, I repair and renovate legacy outdoor gear. I also curate a kind of web museum showcasing heritage outdoor clothing and equipment at Outdoorinov8.com.
I’ll use the tent for a bit before I make too many revisions. Apart from the leaking floor, all other aspects are so far performing well. I have plenty of other reuse projects awaiting in the wings. Among them, a three-layer Gore-Tex anorak, again made from salvaged materials and components; a Marmot Pocket Gopher down sleeping bag, circa 1983, of which I want to replace the ancient delaminating Gore-Tex outer with some new Pertex Endurance; an internal frame pack design, based off the circa 1981 The North Face Moraine, which weighed a mere 1.8 kg (3.96 pounds) for its 82 L (5,000 cubic inches) capacity. More ideas than I have time.
I’m pleased to see that many firms are using recycled materials in their products, as well as promoting repair, reuse, and longevity. If we wish to continue enjoying our magical natural world, we’ll need to do all that, and more.
Interested in winter hiking and backpacking? In this webinar, learn how to use your existing kit, plus a few extra strategic items, to be safe and comfortable in the winter. Part 1 of 2.
I’d really like to try winter hiking, but I don’t really want to purchase an entirely new kit of gear.
This is the number one barrier to hiking and backpacking in the winter. In this 2-part webinar series, we’ll explore each of the eight major gear systems and help you identify what gear you need, at the bare minimum, when combined with your existing kit, in order to be safe and comfortable in the winter.
Part 1 (this webinar):
Part 2 (the next webinar):
Become a Member Today to Access the Live & Recorded Versions of this Event
Backpacking Light Member Q&A Sessions are Hour-Long Members-Only Live Events – they are recorded and the recorded session will be made available to all members for a limited time after the live event has ended (and for Unlimited Members forever).
To access the live or recorded (video) version of this event, a printable slide deck for note-taking, and the related resources/downloads, you must be logged in with an active Basic, Premium, or Unlimited Membership.
DISCLOSURE (Updated April 9, 2024)
Andrew Marshall’s account of a Wonderland Trail thru-hike at the intersection of permits, wildfires, the birth of his son, and trauma.
You don’t have access to view this content.
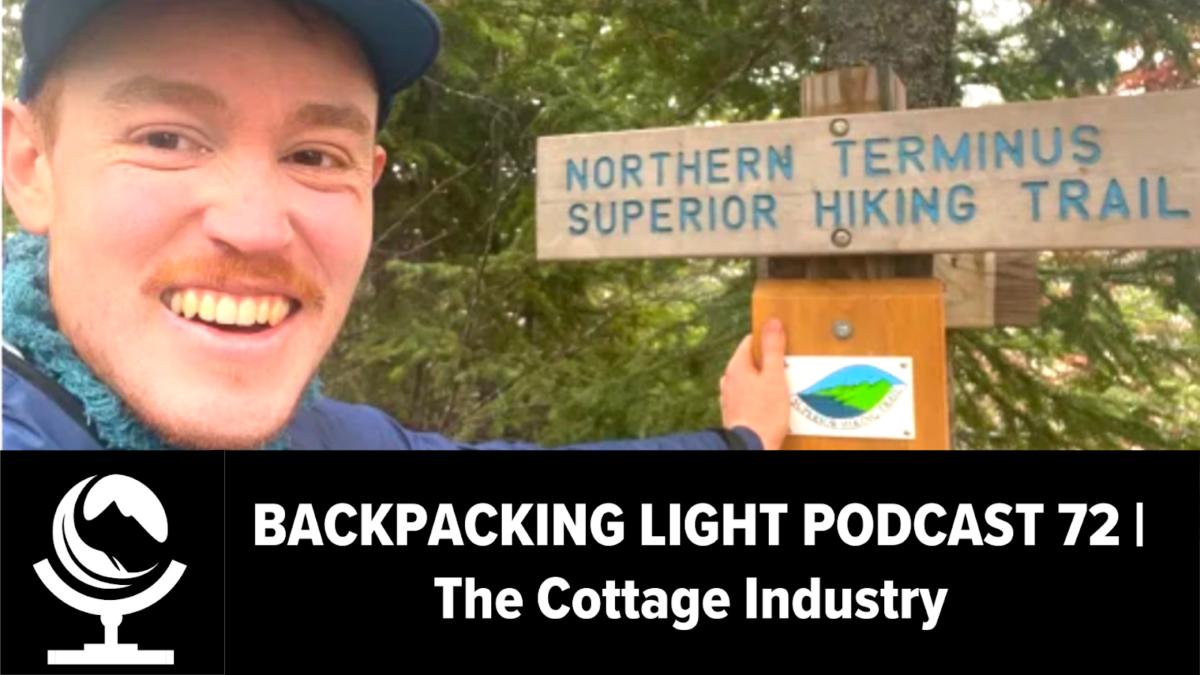
In this episode we talk to Garage Grown Gear CEO and co-founder Lloyd Vogel where we’ll be diving into the outdoor gear cottage industry.
In this episode we talk to Garage Grown Gear CEO and co-founder Lloyd Vogel where we’ll be diving into the outdoor gear cottage industry.
How to Subscribe
Apple Podcasts | Spotify | RSS
More Episodes
Backpacking Light Podcast Index
Credits
Executive Producer - Backpacking Light; Show Director and Host - Ryan Jordan; Producer - Chase Jordan; Theme music: Look for Me in the Mountains written by Chris Cunningham and Ryan Jordan, performed by Chris Cunningham (acoustic guitar, lead and harmony vocals, harmonica), Chad Langford (upright bass), and Tom Murphy (mandolin), produced by Basecamp Studios in Bozeman, Montana.
Feedback / Tips / Questions
podcast@backpackinglight.com
More Backpacking Light
Sign up for the Newsletter. Become a Backpacking Light Member.
Disclosure
Sponsorship Policy: Backpacking Light does not accept compensation or donated/discounted products in exchange for product mentions or placements in editorial coverage, including any podcast episode content not excplicitly identified as sponsored content. Some (but not all) of the links in these show notes may be affiliate links. Learn more about affiliate commissions, influencer marketing, and our consumer advocacy work by reading our article Stop wasting money on gear.
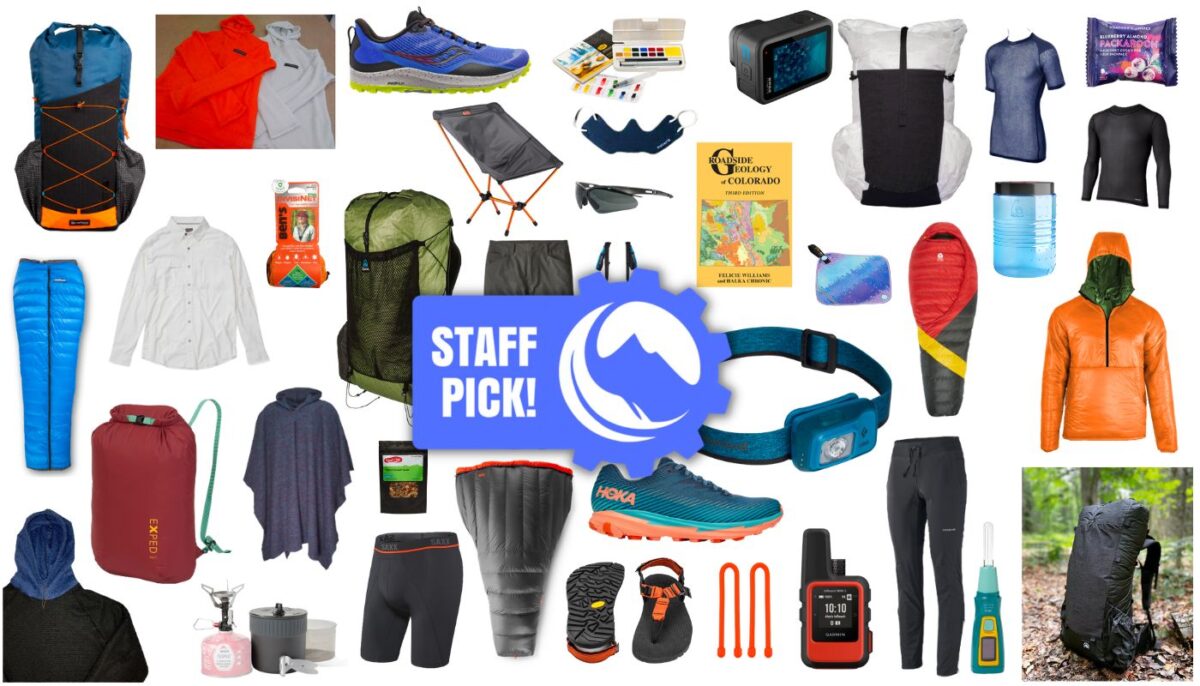
Updated: Click here for 2023 Staff Picks. Each year, our staff selects their favorite backcountry gear from the past year, and we look forward to you sharing your favorite gear of the year as well in the forum comments below!
Each year, our staff selects their favorite backcountry gear from the past year, and we look forward to you sharing your favorite gear of the year as well in the forum comments below!
This year’s Staff Picks contributors are:
Table of Contents • Note: if this is a members-only article, some sections may only be available to Premium or Unlimited Members.
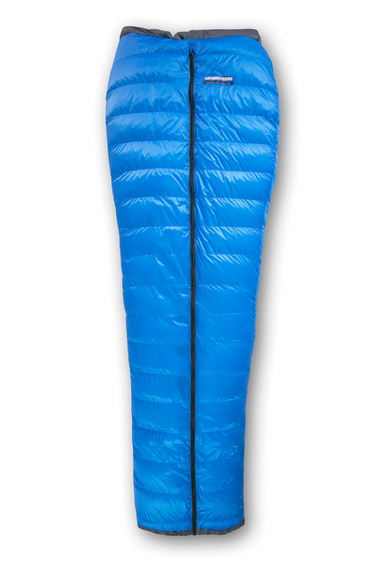
After testing way too many sleeping bags, I decided that the Feathered Friends Flicker UL 20 Quilt Sleeping Bag is the most versatile and comfortable bag I’ve used in a long time. This bag is stuffed full of 14.7 oz of 950+ down and weighs a total of 25.2 oz in a size regular. I’ve never before used a sleeping bag that remains comfortable throughout such a huge range of temperatures. When zipped and cinched, this bag is cozy down to 15 degrees Fahrenheit on a warm pad. When opened into blanket mode, it’s comfortable up to about 60 degrees Fahrenheit. That’s a gigantic comfort range. Throughout most of that range – 30 to 50 degrees Fahrenheit – I use it like a quilt. The zipper remains underneath me, zipped up only to mid-thigh. I secure the snaps at the draft collar and then let the upper body area of the quilt sprawl. Then I sleep like a baby. – Ben Kilbourne
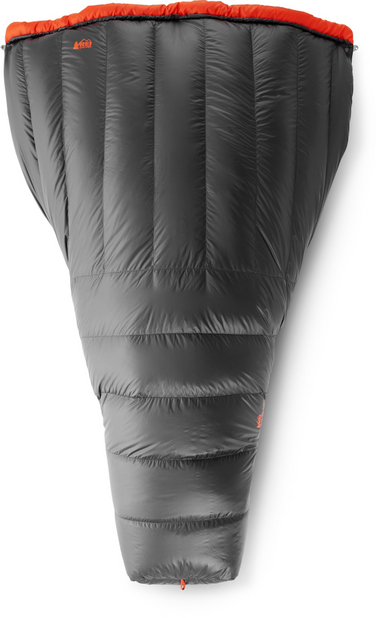
I finally switched to quilts this summer, and the REI Magma 30 Trail Quilt hasn’t left much of anything to be desired for me! See our REI Magma Trail Quilt review. – Mark Wetherington
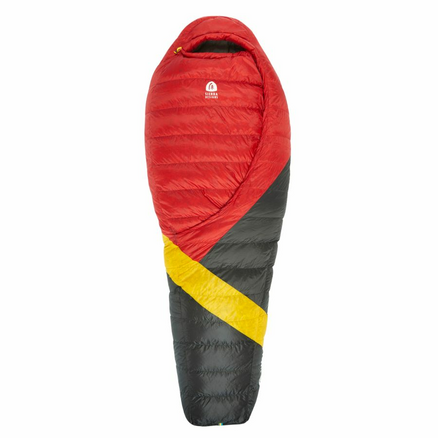
I really love the Sierra Designs Cloud 20 sleeping bag even though I’m saddened that some of the down has leaked out over the years. I love the zipperless design because it feels less constricting and more like a regular bed while still being plenty warm. – Anna Swarts
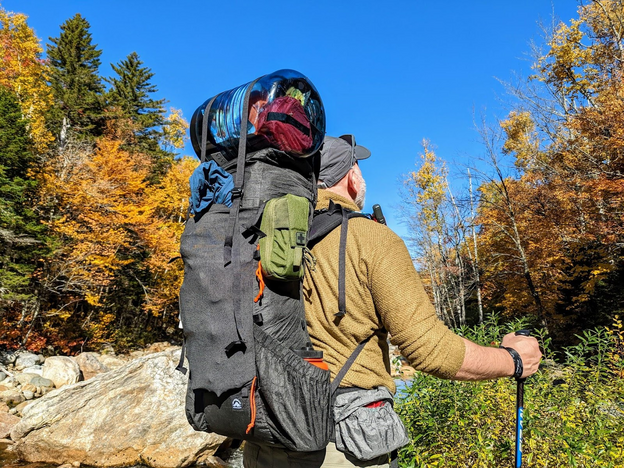
I love the modularity of the SWD Movement Pack. I can go from frameless to framed at very competitive weights to the rest of the popular packs in the lightweight category. I can attach a myriad of things to it, from bear cans to snowshoes or skis – pretty much any gear one takes backpacking. The versatility of this pack is fantastic. And it’s a great company to deal with. – Iago Vazquez
The Pa’lante V2 is the perfect backpack for my summer trips up to four days (for me and my current kit). See our Pa’lante V2 Backpack review here. – Mark Wetherington
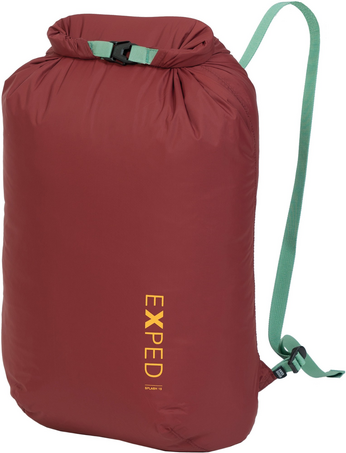
The Exped Splash 15 is simple, it’s light, and it does two things well: keeps your stuff dry and serves as a daypack for side trips. Lashed to the bow of my packraft, it kept everything dry yet accessible on a 3-day trip down the Rio Chama. It was on deck and ready for canyon side trips. 15 L is plenty big enough to carry a rain jacket, water bottle, snacks and phone. On backpacking trips I’ve used it as a stuff bag for my quilt, and I could put a few more items in there if needed for river crossings. It’s small enough to stuff some clothes in and make a pillow. So far, the only drawback I’ve discovered is that I can’t really use it to carry my Tenkara rod on fishing side trips. – Drew Smith
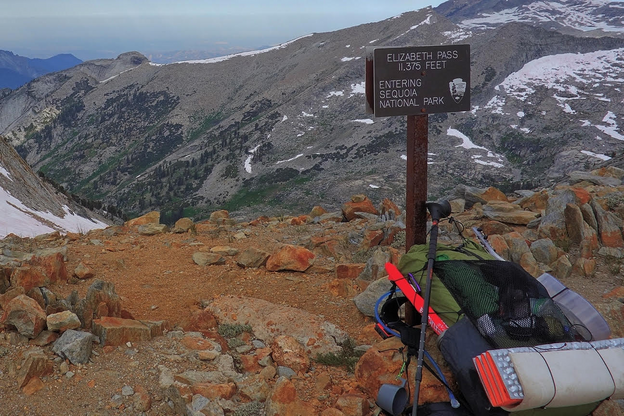
The ZPacks Arc Blast pack has been around for a while, and I expect most BPL readers are aware of it. But there is a good reason for its longevity: it is a framed pack that weighs less than many frameless packs. Arcing the frame keeps the pack away from my back and allows air to circulate, a feature I prize on hikes through the desert and other hot places. Although the frame looks dainty, I have loaded the pack up with as much as 11 L of water. This is not a practice I recommend, but the pack survived, and so did I. The pack has also survived many miles of bushwhacking with only a few small tape patches to show for it. Perhaps more surprisingly, it has survived baggage handlers on a dozen or so flights. There are plenty of great new packs out there, but none have yet convinced me to move on from the Arc Blast. – Drew Smith
I carry a lightweight load on most trips. I’ve been using various frameless packs for the last several years, and I have learned that while I am very comfortable with a total pack weight of 16 pounds, I’m only acceptably comfortable at 18 pounds and thoroughly uncomfortable at 20 pounds or more. I decided to try a pack with a lightweight frame and have found the Atom Packs Atom+ to be a great solution. Mine is the 40-liter size, just slightly larger than a Gossamer Gear Kumo (my go-to frameless pack). The frame helps transfer weight nicely to the plush 3” tall padded waistbelt, which I prefer over a more structured hipbelt like my kid’s ULA Ohm. The side pockets are very easy for me to reach. My pack is the standard production model (in blue/black/orange with shoulder pockets and a bottom pocket). I’d probably rather have a custom model in more understated colors, and I’d eliminate the shoulder and bottom pockets but this pack is working great for me. See our review of the Atom Packs Atom here. – Matthew King
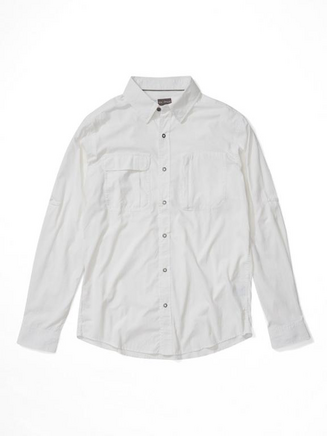
The ExOfficio BugsAway Long-Sleeve Shirt has served me very well this year. It is amazing for hot weather hiking, keeping the sun off while venting as much as possible. It also came in clutch on early summer trips in the Rockies when the mosquitos were really swarming. I got mine used on the BPL Gear Swap, and it has been worth every penny. – James Montavon
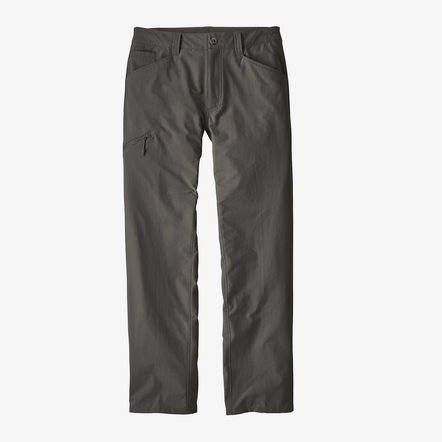
After experimenting with a variety of other trekking pant brands the past few years, I returned to my favorites – the Patagonia Quandary Pants. The newer versions are lighter, have better four-way stretch, and are more comfortable to wear when wet (less binding). – Ryan Jordan
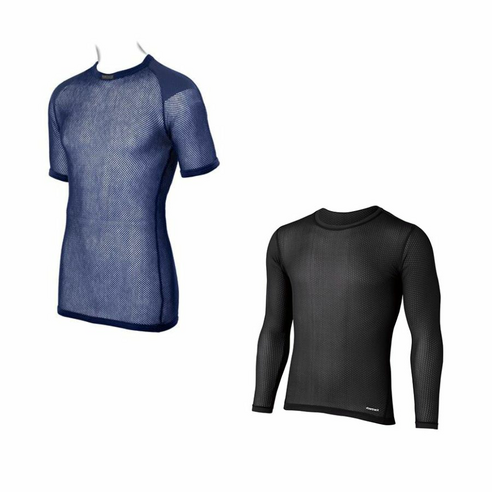
This Staff Pick is a base layer combo – a Brynje polypro mesh (short sleeve for hot weather, long sleeve for everything else) plus a Finetrack Elemental Layer (hydrophobic polyester with very high air permeability and very lightweight). The Finetrack Elemental Layer serves as a wind block and modesty cover for the Brynje mesh in both winter and summer. But it’s only available in black, which is unfortunate for summer use. See our review of Brynje mesh here. – Stephen Seeber
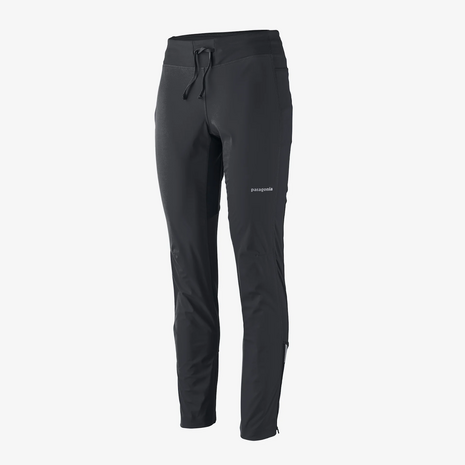
These lightweight wind pants are incredibly comfortable for hiking in cooler temps. They cut the wind but are still breathable. The stretchy soft-shell fabric moves with you, and there is even room to wear Capilene base layer pants underneath for the winter season. I Love how light they are! (Around 244 grams). Zippered ankles are handy for changing out wet socks or layering over my Nordic boots. I Have been wearing a version of these pants mainly for snow activities since the early 2000s, and really love seeing how they’ve evolved in construction and that Patagonia has continued to make this a lighter, more comfortable fit. Friends who have visited and joined us for outdoor activities have been intrigued about my pants and usually ask to stop at our local outdoor store on the way to the airport so they can grab a pair to take home. I’m hoping my Santa brings me another pair, preferably blue, hint hint. – Stephanie Jordan
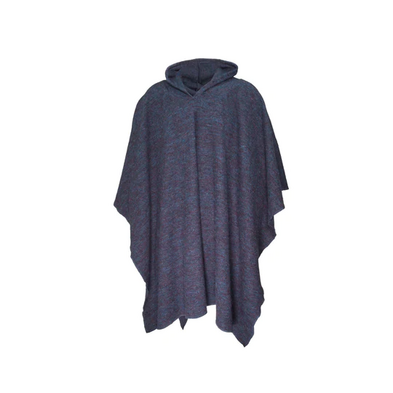
Last year, I chose the Appalachian Gear Company (AGC) ALL-PACA crew sweater as one of my staff picks. The alpaca fiber AGC uses results in a garment that may be up to 2X warmer than a comparable merino wool garment. The ALL-PACA fabric’s relatively open weave traps a lot of heat for its weight. So when AGC announced the new ALL-PACA Poncho, I was intrigued by the thought of combining alpaca fiber with a multi-functional and traditional garment. I wasn’t disappointed. I swapped out my sweater for the poncho and found myself much more likely to hike in the cool mornings and evenings without having to stop and de-layer. The poncho also makes an ideal camp pillow or additional sleep-system layer at night. In cold, humid environments, I lay it on top of my quilt to migrate the dew point away from my down, and in the hot summer months, I use it as a minimalist blanket. – Andrew Marshall
Alpha Direct is my go-to mid-layer insulating fabric. My testing shows that two layers of 60 gsm Alpha Direct have the best warmth-to-weight ratio of any Alpha Direct fabric. I asked Farpointe to make me one, and now the Farpointe Alpha Duo is a standard product for them. I only wear it when temps are less than 15 °F. Otherwise, a single 60 gsm layer is sufficient. Their website shows it with a hood. Mine is hoodless. – Stephen Seeber
The Timmermade Alpha Direct 4004 Hoodie is a very light, packable, and versatile layer. Quality sewing. I really enjoyed working with Timmermade as well. – Iago Vazquez
The Ben’s InvisiNet Head Net was a non-negotiable necessity on our late summer hikes this year. One minor note: it’s best used with a brimmed hat to keep the mesh away from your ears. I found that wearing the net over my bare head allowed the mesh to touch my ears, and while the mosquitoes weren’t able to fit their bodies through the net, they were able to bite my ears through the pores! This net weighs a mere 0.7 ounces and costs less than $15, so you get a lot of bang for your buck! – Daniel Hu
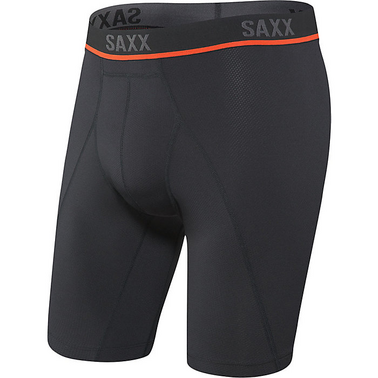
The Saxx Kinetic Light-Compression Mesh Boxer Brief is made for men who need the support of a brief as well as the chafing protection of a boxer brief. Basically, Saxx has built a ball hammock into a semi-compression, wicking, and 4-way stretch boxer brief. Breathable mesh panels hold your balls in place comfortably and also divide them from your legs, successfully preventing the dreaded sticking sensation. This underwear (and there’s zero hyperbole in this statement) has been life-changing for me. – Ben Kilbourne
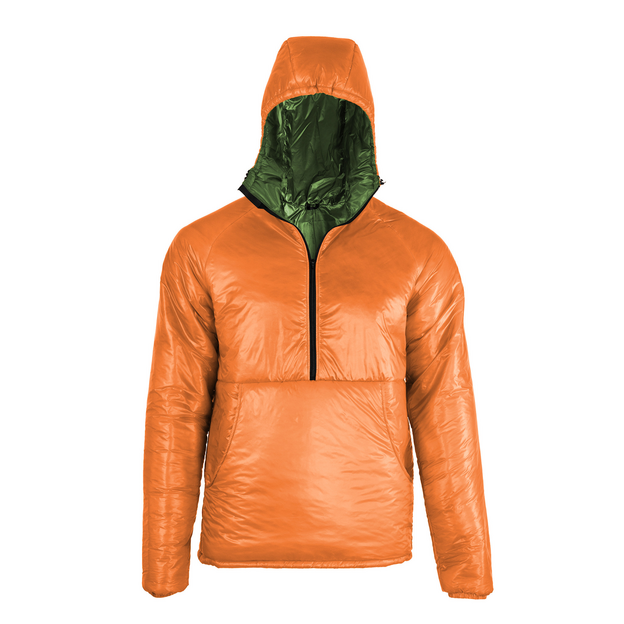
I’m entering my third winter wearing the Englightened Equipment Torrid APEX Pullover. I take care of it (no aggressive stuffing or laundering), and continue to remain impressed by its ability to retain loft over the long term – it’s proven to be much more durable than I anticipated. At 8.5 oz, it’s light enough for summer backpacking but lofty enough as a day-use insulating layer for our Rocky Mountain winters. – Ryan Jordan
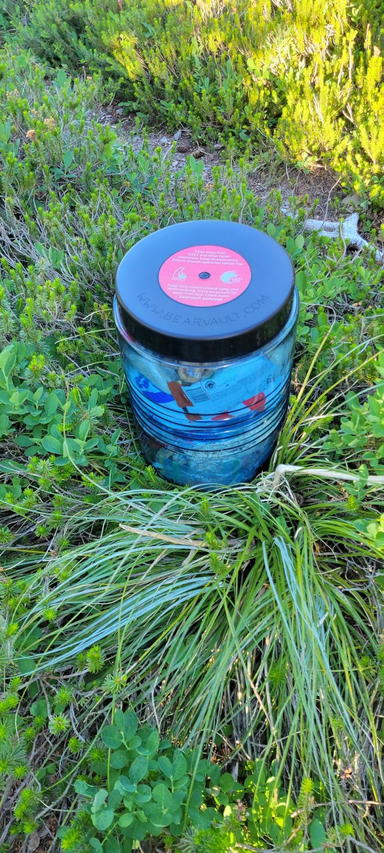
The Bearvault BV500-Journey (see my review here) got a lot of use this year in the Washington Olympics. We took this bear canister for many miles through bear territory and even saw bears a mere quarter-mile from our campsite. While we fortunately didn’t have to deal with a bear intruding on our site and supplies, the canister gave us peace of mind and held up great through our adventures. On shorter trips, I’ve used the Bearvault BV450-Jaunt with similar results. Bear canisters aren’t exactly light (the BV500-Journey is 2.5 lb), but they are necessary when traveling through bear country, and Bearvault’s products have been reliable and easy to use. – Daniel Hu

I heard about Heather’s Choice Packaroons from Andrew’s Year of Lentils, and they have been my favorite snack on almost every backpacking trip since. They are a little too good sometimes: my wife and I debate over who should get the last bite more often than not. They are calorie dense and easy to eat while walking. Vegan backpacking snacks can get boring with only so many combos of oats, peanut butter, and chocolate available, but packaroons get creative with flavors like orange vanilla and snickerdoodle. We got the Christmas flavors once they went on sale in January and are already looking forward to ordering the eggnog and peppermint packaroons again. – James Montavon
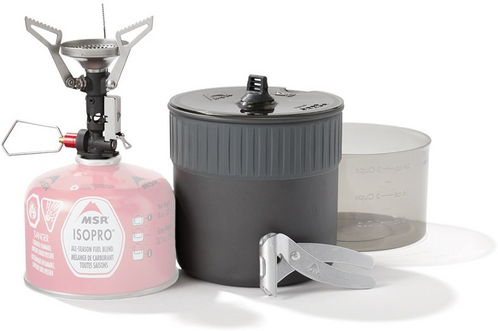
The MSR Pocket Rocket 2 Mini Stove Kit was a pandemic purchase but it brings me joy every time I use it. The MSR Pocket Rocket 2 is one of the most highly-rated stoves based on BPL’s StoveBench testing. The ease of use and how neatly it packs away make carrying it and cooking with it a dream! I’ve shown new backpackers this stove, and their feedback has generally been along the lines of: “I always thought stoves were complicated and intimidating, but now I think I could bring one and cook on my trip.” – Anna Swarts
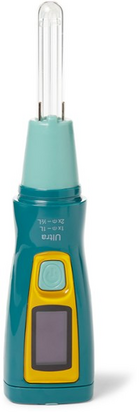
I’ve owned the Steripen Ultra for nearly five years and have used it extensively. I’ve been impressed at how much water I can treat on a single battery. In addition to backcountry water treatment, it’s been great for traveling overseas when local urban water quality is dubious. – Anna Swarts
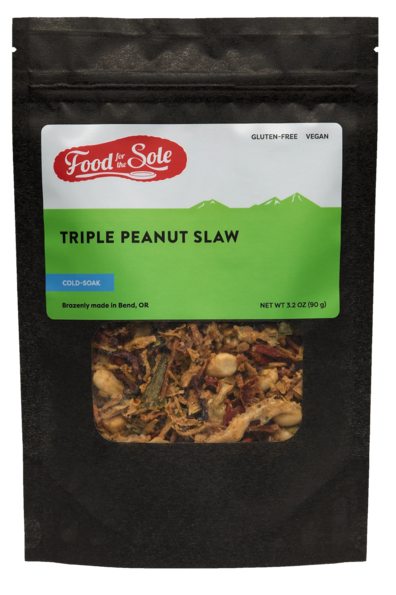
This Staff Pick is a little sad for me. I struggle with appetite issues while backpacking. I find cooking in the backcountry to be an unwelcome chore. I was excited when I read Andrew Marshall’s review of Food for the Sole Triple Peanut Slaw because it contains many of my favorite ingredients and it hydrates without heat. I was thrilled to find the dish just as tasty as Andrew described it. I was pleased with how little time it takes to rehydrate. This dish contains an impressive 178 calories per ounce! Sign me up! For me, it’s a perfect backpacking meal. The sad part is that Food for the Sole has closed its doors. I have one unopened bulk pack of Triple Peanut Slaw that I look forward to enjoying next summer in a beautiful location. – Matthew King
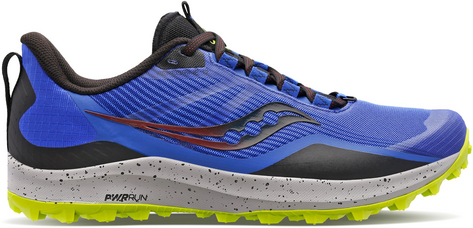
The Saucony Peregrine 12 is the first trail running shoe I’ve been truly excited about in a long time. What sets this trail running shoe apart from others I’ve been using is the foam. Saucony’s PWRRN foam is fairly firm, so with every step I feel like the shoes are springing me forward. Shoes with softer foam, such as the Altra Lone Peak 6, for example, make me feel as if every step is draining my energy. This PWRRN foam also lasts a long time. I’ve put about 300 miles of running and backpacking on my first pair of Peregrine 12s, and they aren’t even remotely packed out yet. The 5 mm lugs are also still going strong, although the upper is now wearing a bit. This shoe has a rock plate, too, so precise foot placement isn’t always necessary. I find this feature to increase my comfort over a 25+ mile day because my feet aren’t getting beat up by rocks. With all these features I would expect this shoe to be heavier than it is, but it’s only 9.7oz in a men’s size 9. Additionally, this shoe fits securely without being constricting, so it’s amazing for scrambling, plodding, and running alike. Despite it having the classic pointy toe of most running shoes, it fits wide enough in the forefoot that my third and fourth toes never find the end. I can’t say the same for any Salomon or LaSportiva I’ve ever worn where my first toe is an inch from the end and my fourth toe is right up against the end. The low drop (4 mm) also probably contributes to this shoe’s scrambling ability – I’ve found shoes with a higher drop to feel tippy on off-camber terrain. I’ve used the Peregrine 12 for runs between trips as well as off and on-trail backpacking in the rocky and rugged Uintas, Wasatch, and Wind Rivers. I found them to be by far the best shoe I’ve ever used in any of these terrains that I’ve frequented over the years. – Ben Kilbourne
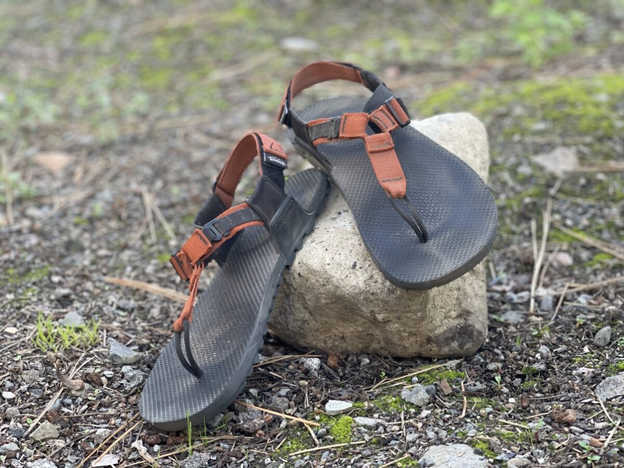
I tested the Bedrock Sandals Cairn Adventure Sandals all summer long in 2022 (see my review). If you hate hiking sandals, these aren’t going to change your mind. If you are on the fence, give them a try. The through-the-toes webbing design removes the pressure across the bones of the foot that you get in over-the-top sandal designs. The upshot? Fewer (read: none) repetitive use injuries of the kind I used to get while wearing Chacos. The minimalist midsole isn’t for everybody, but the outsole is Vibram and plenty aggressive for wet and dry on-trail conditions.
Many a fellow Bedrock user and I stopped to chat about them on the trail – and I can’t remember the last time I had a piece of gear that caused those kinds of mutually exciting conversations. Bonus points – I get compliments on them while wearing them to the grocery store or pretty much anywhere else in my small mountain town. – Andrew Marshall
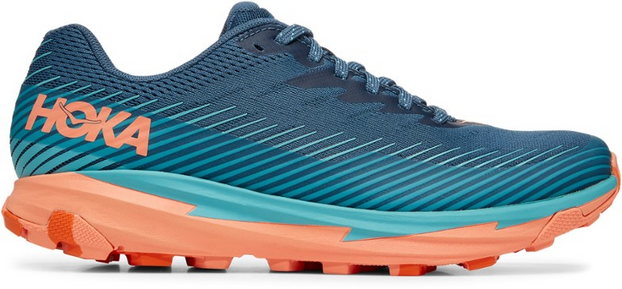
The HOKA Torrent 2 Trail Running Shoes are comfortable with a wide toe box. Ryan likes the Speedgoats, but their stack height is a little too high for me. I’ve proven them rugged – I’m on my second pair after several hundred miles while carrying a light pack. We hike varied terrain, and these have given me great traction on gravel, slick rock, mud, ice, and snow. Fits a pair of microspikes comfortably in winter. Just enough cushioning so I can avoid errant rocks but still feel what’s going on underfoot. My favorite hiking shoe for technical, rocky trails. – Stephanie Jordan
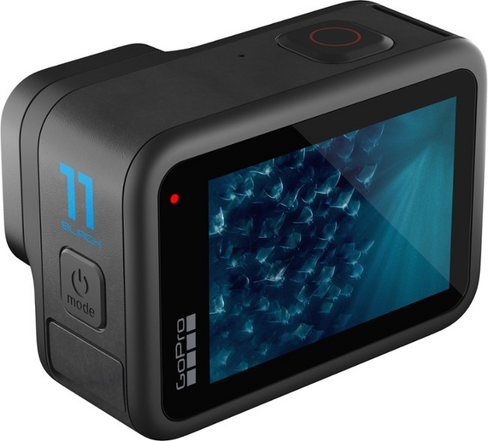
With the addition of 4K at 120 fps slow-motion capability, the GoPro Hero 11 Black has finally evolved into the action camera I’ve been wanting for decades – but for a very specific purpose. I want to observe trout underwater in their native habitat. Previous versions of the GoPro haven’t provided the image quality or slow-motion capabilities that I’ve wanted. My simplest rig for underwater filming simply involves tying the camera to a large fishing swivel attached to a piece of Lawson Glowire and tying the Glowire to the end of a trekking pole, which I use to control the location of the camera. I then allow the stream current to rotate the camera as needed. Not a very sophisticated rig, but I’m getting the footage I need to observe trout underwater. This has the potential to become a dangerously addictive hobby. In 2023, I’ll be exploring other types of housings, lens filters, and more to make the images prettier. But here’s a preview of a raw, out-of-camera clip I captured in the Rocky Mountain National Park backcountry in a stream full of brook trout. – Ryan Jordan

The Black Diamond Astro 300-R Headlamp is new for me in 2022, replacing my old first-generation Spot. I went with another Black Diamond because I loved my last one so much. This one is rechargeable – I wanted to give a nod to sustainability (in terms of fewer disposable batteries). It recharges via a micro-USB charge port and a single charge provides me with plenty of camp chore light for several days. It is bright enough for night walking and I love the dim light for reading in bed at camp or at home. I wear this lamp every day, not just for camping, so having a comfortable and easily-adjustable elastic headband is a plus! My favorite part is the Brightness Memory so I don’t have to fiddle with it every time I use it and the fact that there are three blue lights on the side that let you know when the battery is getting low. Those three blue lights also stay on for a few seconds after turning it off, which gives you a chance to tuck it away in your tent stow pocket. At 2.65 oz it’s certainly light enough to be the only headlamp I need for both frontcountry and backcountry use. – Stephanie Jordan

The Garmin inReach Mini 2 has finally evolved into a highly capable satellite communicator. An improved device user interface, much better battery life, nicer screen, integration with Garmin Explore, and the ability to use it more effectively without a smartphone make it my favorite satellite communicator when weight and versatility are the top priority. Learn more and watch my interview with Garmin. I also added content to my How to Use the Garmin inReach Masterclass this year with updates for Garmin inReach Mini 2 users. – Ryan Jordan

Visit your library! What a great tool for printing out paper maps and/or photocopying sections of maps before a trip. I always have a paper map as a back-up for digital navigation tools. It also serves double-duty as entertainment when in camp and I can fantasize about future trips where I’ll explore a far-flung basin, summit a remote highpoint, or finally get to an off-trail subalpine lake to fish. – Mark Wetherington
I use Nite Ize Gear Ties to attach my trekking poles to my pack or to attach pockets and such to the outside of the pack. And unlike bungee and cord lock options, they don’t come undone.
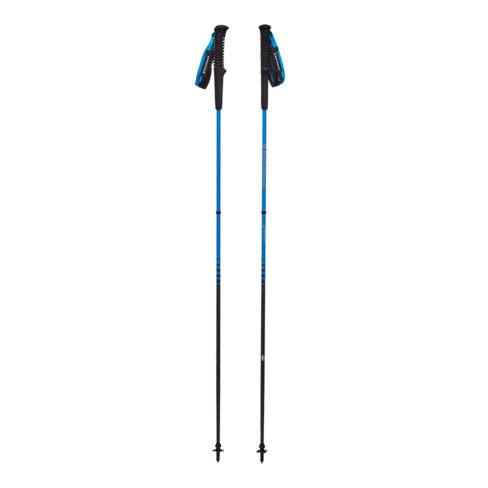
I fell in love with the Black Diamond Distance Carbon Running Poles primarily for their small-diameter foam grip handles. The larger grips on my old trekking poles gave me severe hand cramps along with cold hands (because I had to grip them so tightly) and the Distance Carbon Running Poles alleviated the problem right away. They may be the lightest swing-weight trekking poles on the market (89 grams per pole), which make it well worth giving up the collapsibility of my old trekking poles. – Stephanie Jordan
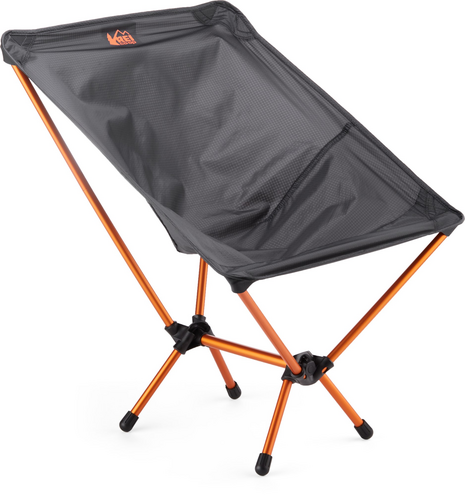
Everyone’s got their luxury item (or two, or three) and one of ours is the REI Co-op Flexlite Air Chair, which adds an extra pound of weight to your pack but pays dividends in comfort when you reach your campsite. It’s comfortable and easy to set up, and we’ve been taking it on nearly every trip for several years. The metal poles are durable, as is the ripstop nylon seat. I suspect in the future, technology may give us a slightly lighter design, but until then, we’ll keep using these ones! See our comprehensive chair gear guide and Ryan’s very detailed review video comparing the REI Flexlite to a Helinox Chair. – Daniel Hu

I love my Kula Cloth! The amount of toilet paper I have found behind rocks and in the woods around my get-out-of-dodge wilderness area is unreal. So gross. We do need good hygiene while we are out there and this will help you accomplish just that after you tinkle and is a better option than shaking it off or using toilet paper. Use the non-irritating antimicrobial side to wipe and use the snap to hang from your backpack to dry. The sun also helps to sterilize any bacteria on the cloth. The smooth side is waterproof and comes in bright fun designs. Makes for a great holiday gift for all your hiking squatter friends! They will thank you for helping them pack in and out less toilet paper and practice better Leave No Trace. Not convinced? Watch the video here on how to use a pee rag. – Stephanie Jordan

One of my favorite things about living in the mountain west is that the drive to the trailhead is amazing in itself. The book Roadside Geology of Colorado makes road trips around Colorado so much more fun and interesting. It also deepens my experience in the backcountry, far away from the features described in the book, because I can try to pattern what I’m seeing with what I’ve learned from this book, and then check my answers when I get home. It’s fun when I guess right and can know what happened millions of years ago just from looking at rocks, and when I’m wrong (often) I get to learn more and understand the challenging concepts of geology and geography deeper than before. – James Montavon
In every gear choice, a key factor is a balance between the gear taking care of you and you taking care of the gear. An item that performs somewhat better than the alternative but requires much more of an investment in time and attention is not necessarily a good choice. That’s how I feel about sunglasses. Ryan has made the case for backpacking in a top-notch pair of photochromic shades. I’ve gone that route, most recently when daughter #2 used her guide discount to get me a nice pair of Smith polarized photochromic shades. The view through them is great. But they get dirty easily, are hard to clean, are not very scratch-resistant, and the frame is wonky from me parking them on my hat. They work well, but only if I pay attention to them. I don’t want to pay attention to sunglasses.
The Kleenguard V30 Nemesis Polarized Safety glasses have optics that are 90% as good for 10% of the price. I can buy a case of 12 for what the Smiths cost. When they get scratched, crushed or lost, I just grab a new pair from the box. I spend zero time and attention on them.
I still have the Smiths and use them for driving. And when I park at the trailhead, I leave the Smiths in the car and put on the Nemesis. – Drew Smith
The OuterU faceGlove TS shields my nose from the cold for only 0.45 oz. My nose tends to head to frost nip or worse before the rest of my face. With this, I can avoid a full face covering and its attendant loss of unrestricted breathing. It’s always with me for winter hikes or skiing. – Stephen Seeber
My wife bought me the Outside Inside Backpack Watercolor Kit on a whim while I was gearing up at REI for a thru-hike of the Wonderland Trail. As an illustrator, I have a cobbled-together travel watercolor kit, but there’s something to be said for a case, pad, paints, and brush all designed to work in conjunction with one another. The brush that comes with the kit is more than serviceable, and the paper is surprisingly good quality. The paints are middling, but it’s easy enough to pry out the cakes and replace them with your own if/as you grow more serious about painting. If you are seeking a more intimate way to connect with the sights you see while backpacking, this is a good way to do it. – Andrew Marshall
What are your favorite pieces of outdoor gear from 2022?
Tell us what you loved and why in the forum comments below!
DISCLOSURE (Updated April 9, 2024)
In today’s episode of the Backpacking Light podcast, we’re going to talk about how to use multi-layered sleep systems to stay warmer on multi-day trips in cold weather.
In today’s episode of the Backpacking Light podcast, we’re going to talk about how to use multi-layered sleep systems to stay warmer on multi-day trips in cold weather.

</ br>
How to Subscribe
Apple Podcasts | Spotify | RSS
More Episodes
Backpacking Light Podcast Index
Credits
Executive Producer - Backpacking Light; Show Director and Host - Ryan Jordan; Producer - Chase Jordan; Theme music: Look for Me in the Mountains written by Chris Cunningham and Ryan Jordan, performed by Chris Cunningham (acoustic guitar, lead and harmony vocals, harmonica), Chad Langford (upright bass), and Tom Murphy (mandolin), produced by Basecamp Studios in Bozeman, Montana.
Feedback / Tips / Questions
podcast@backpackinglight.com
More Backpacking Light
Sign up for the Newsletter. Become a Backpacking Light Member.
Disclosure
Sponsorship Policy: Backpacking Light does not accept compensation or donated/discounted products in exchange for product mentions or placements in editorial coverage, including any podcast episode content not excplicitly identified as sponsored content. Some (but not all) of the links in these show notes may be affiliate links. Learn more about affiliate commissions, influencer marketing, and our consumer advocacy work by reading our article Stop wasting money on gear.
 Loading...