by Andrew Marshall and Ryan Jordan
Introduction
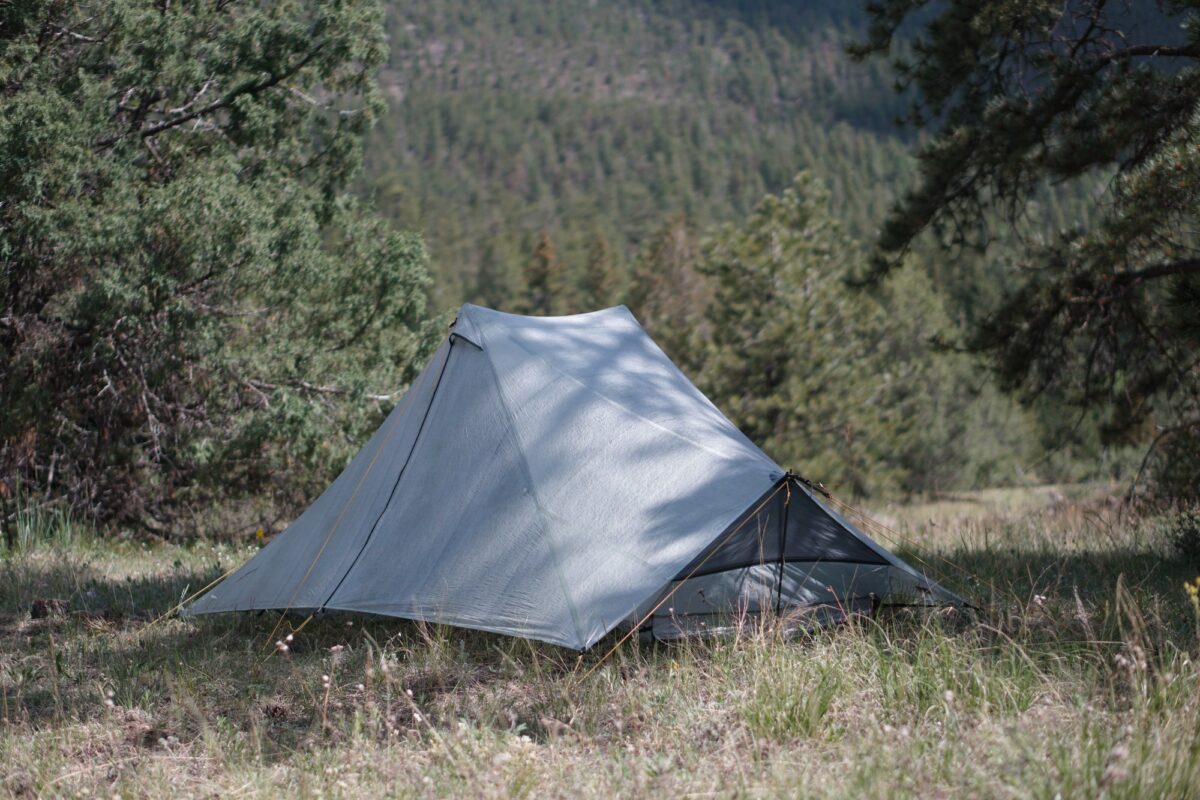
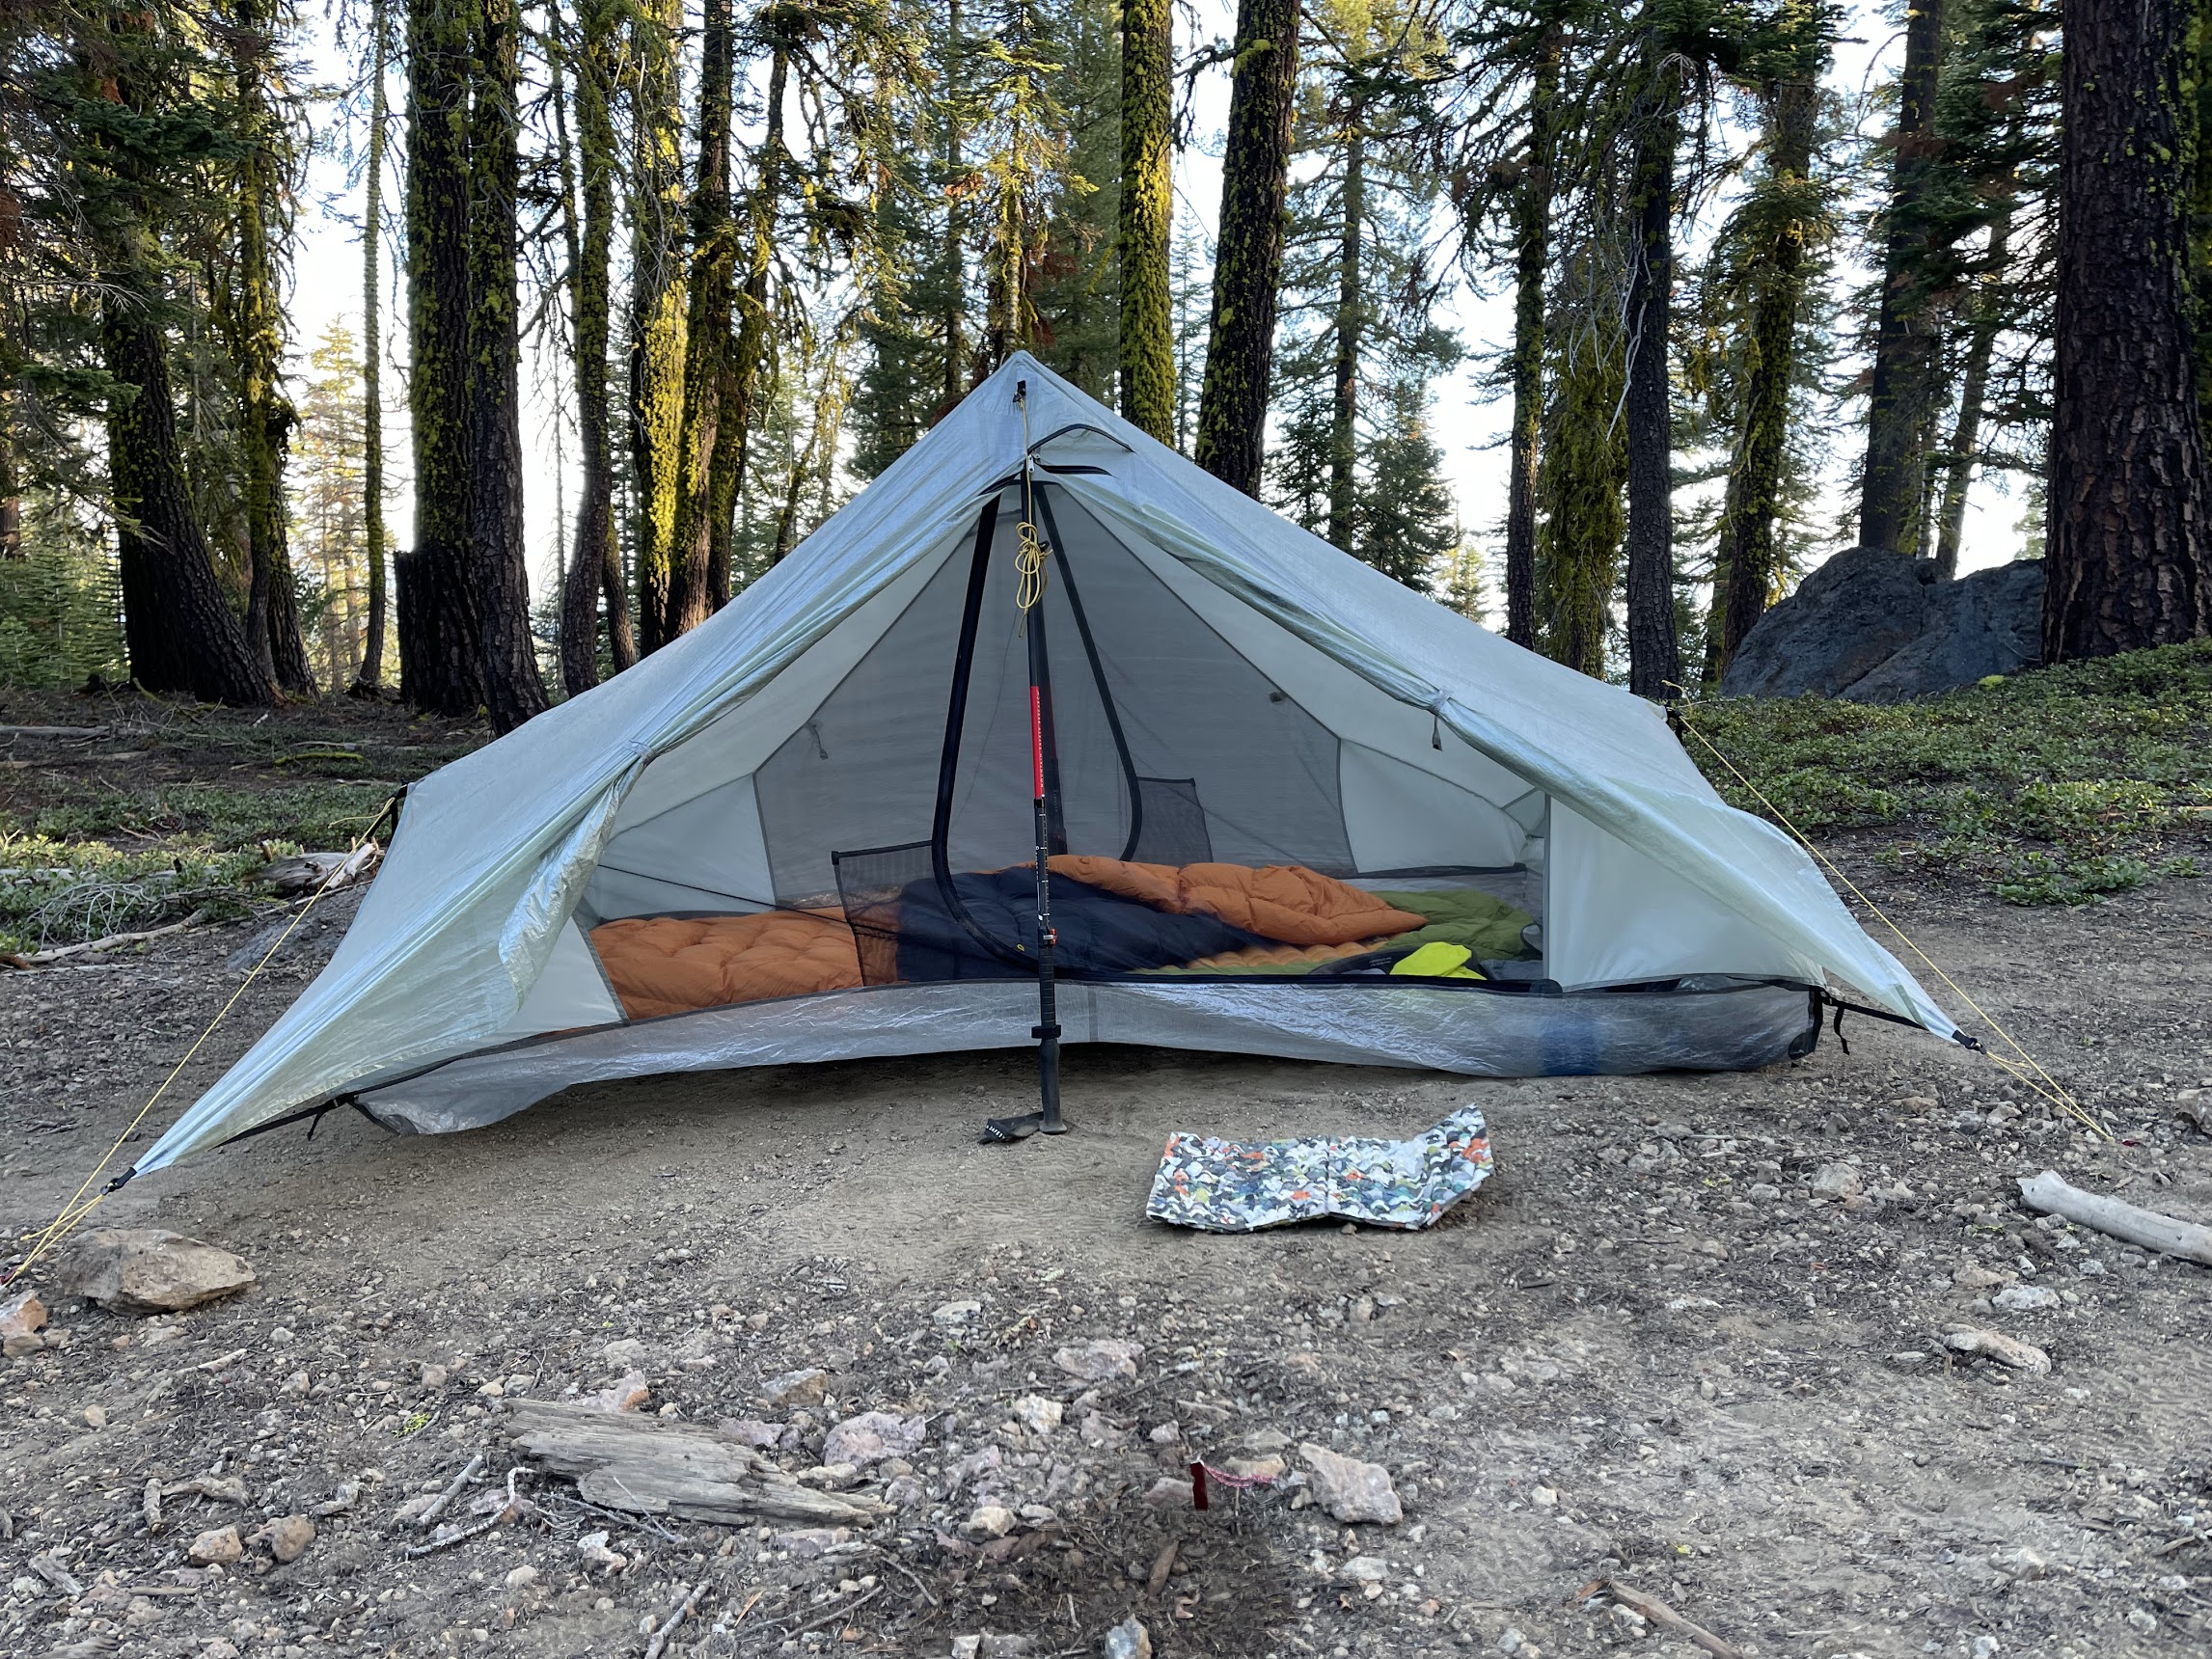
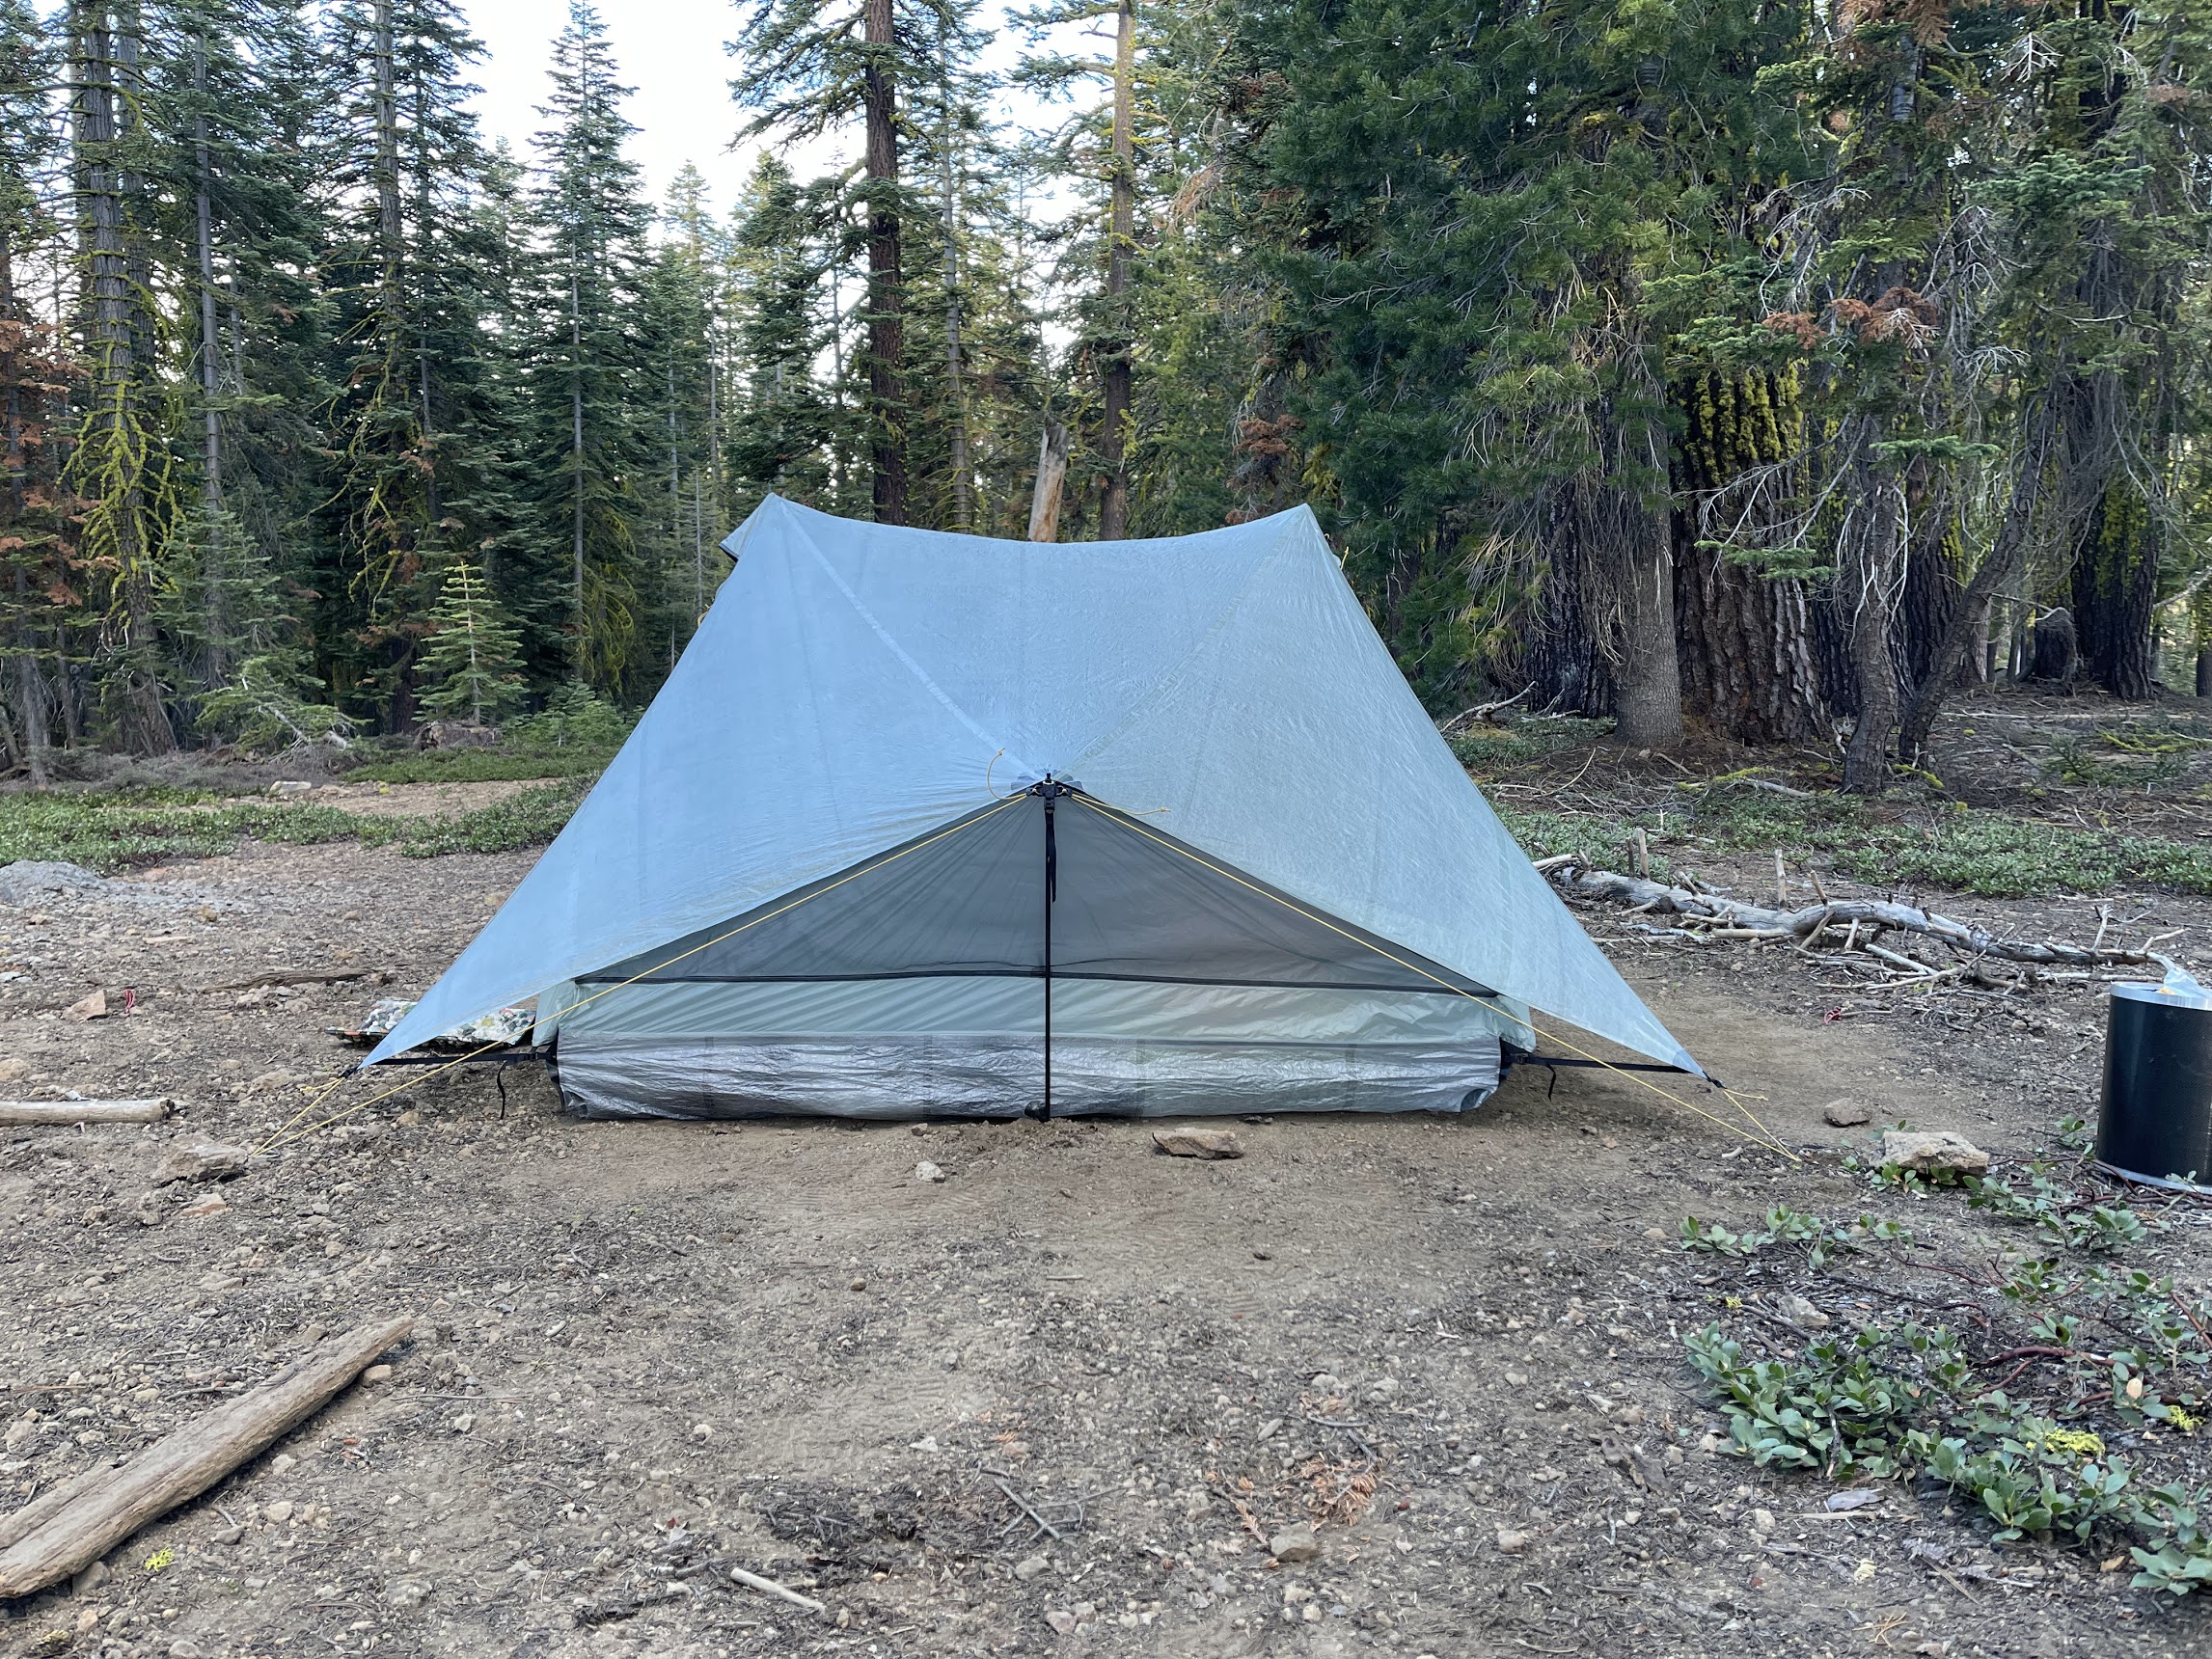
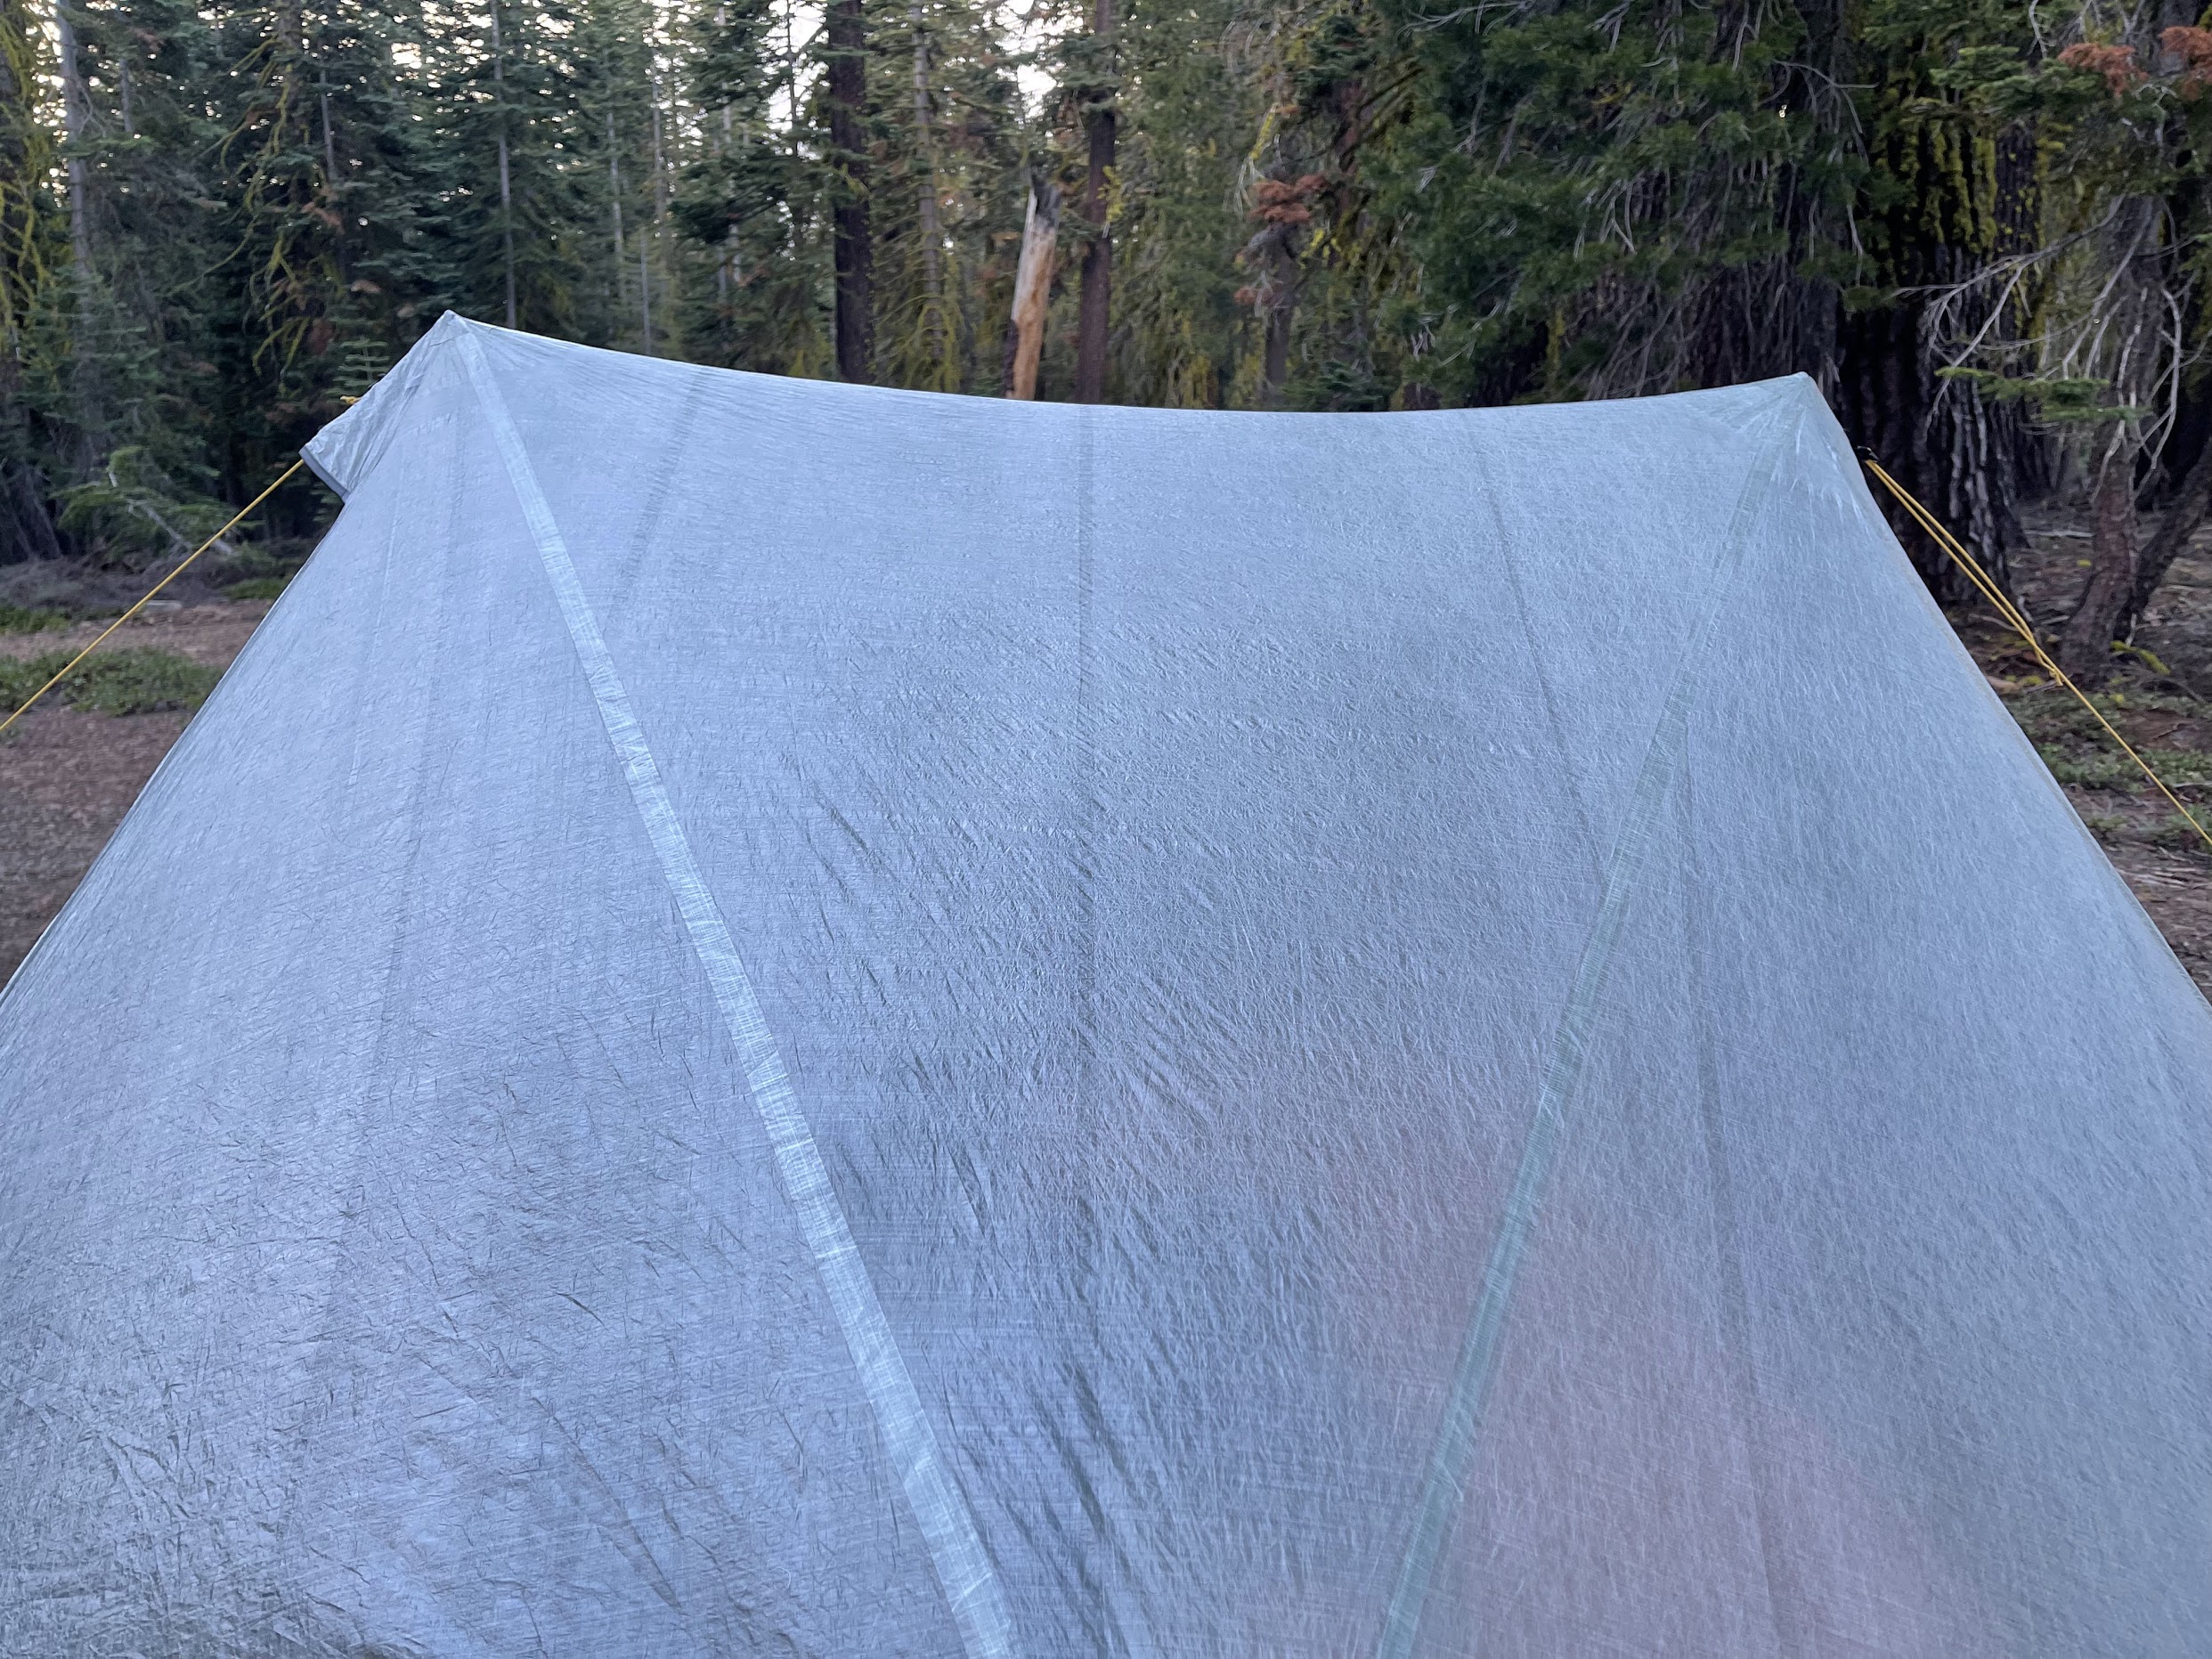
The Tarptent Dipole 1 Li (22 to 23 ounces / 0.62 to 0.65 kg, MSRP: ~$699) and Tarptent Dipole 2 Li (26 to 27 ounces 0.74 to 0.77 kg, MSRP: ~$799) are both modified A-frame, double-trekking-pole, double-vestibule, double-door, side-entry, single-wall, Dyneema Composite Fabric (DCF) shelters.

The Dipole line represents a continuation of Tarptent’s use of supplemental poles (i.e., extra poles in addition to the trekking poles) to add volume and support to trekking-pole shelters. Dipole tents have several features that make them unique among two-pole, double-door shelters:
- they can maintain a stable structure with four stakes
- they can maintain a stable structure while both vestibule doors are open and the shelter is in a four-stake configuration
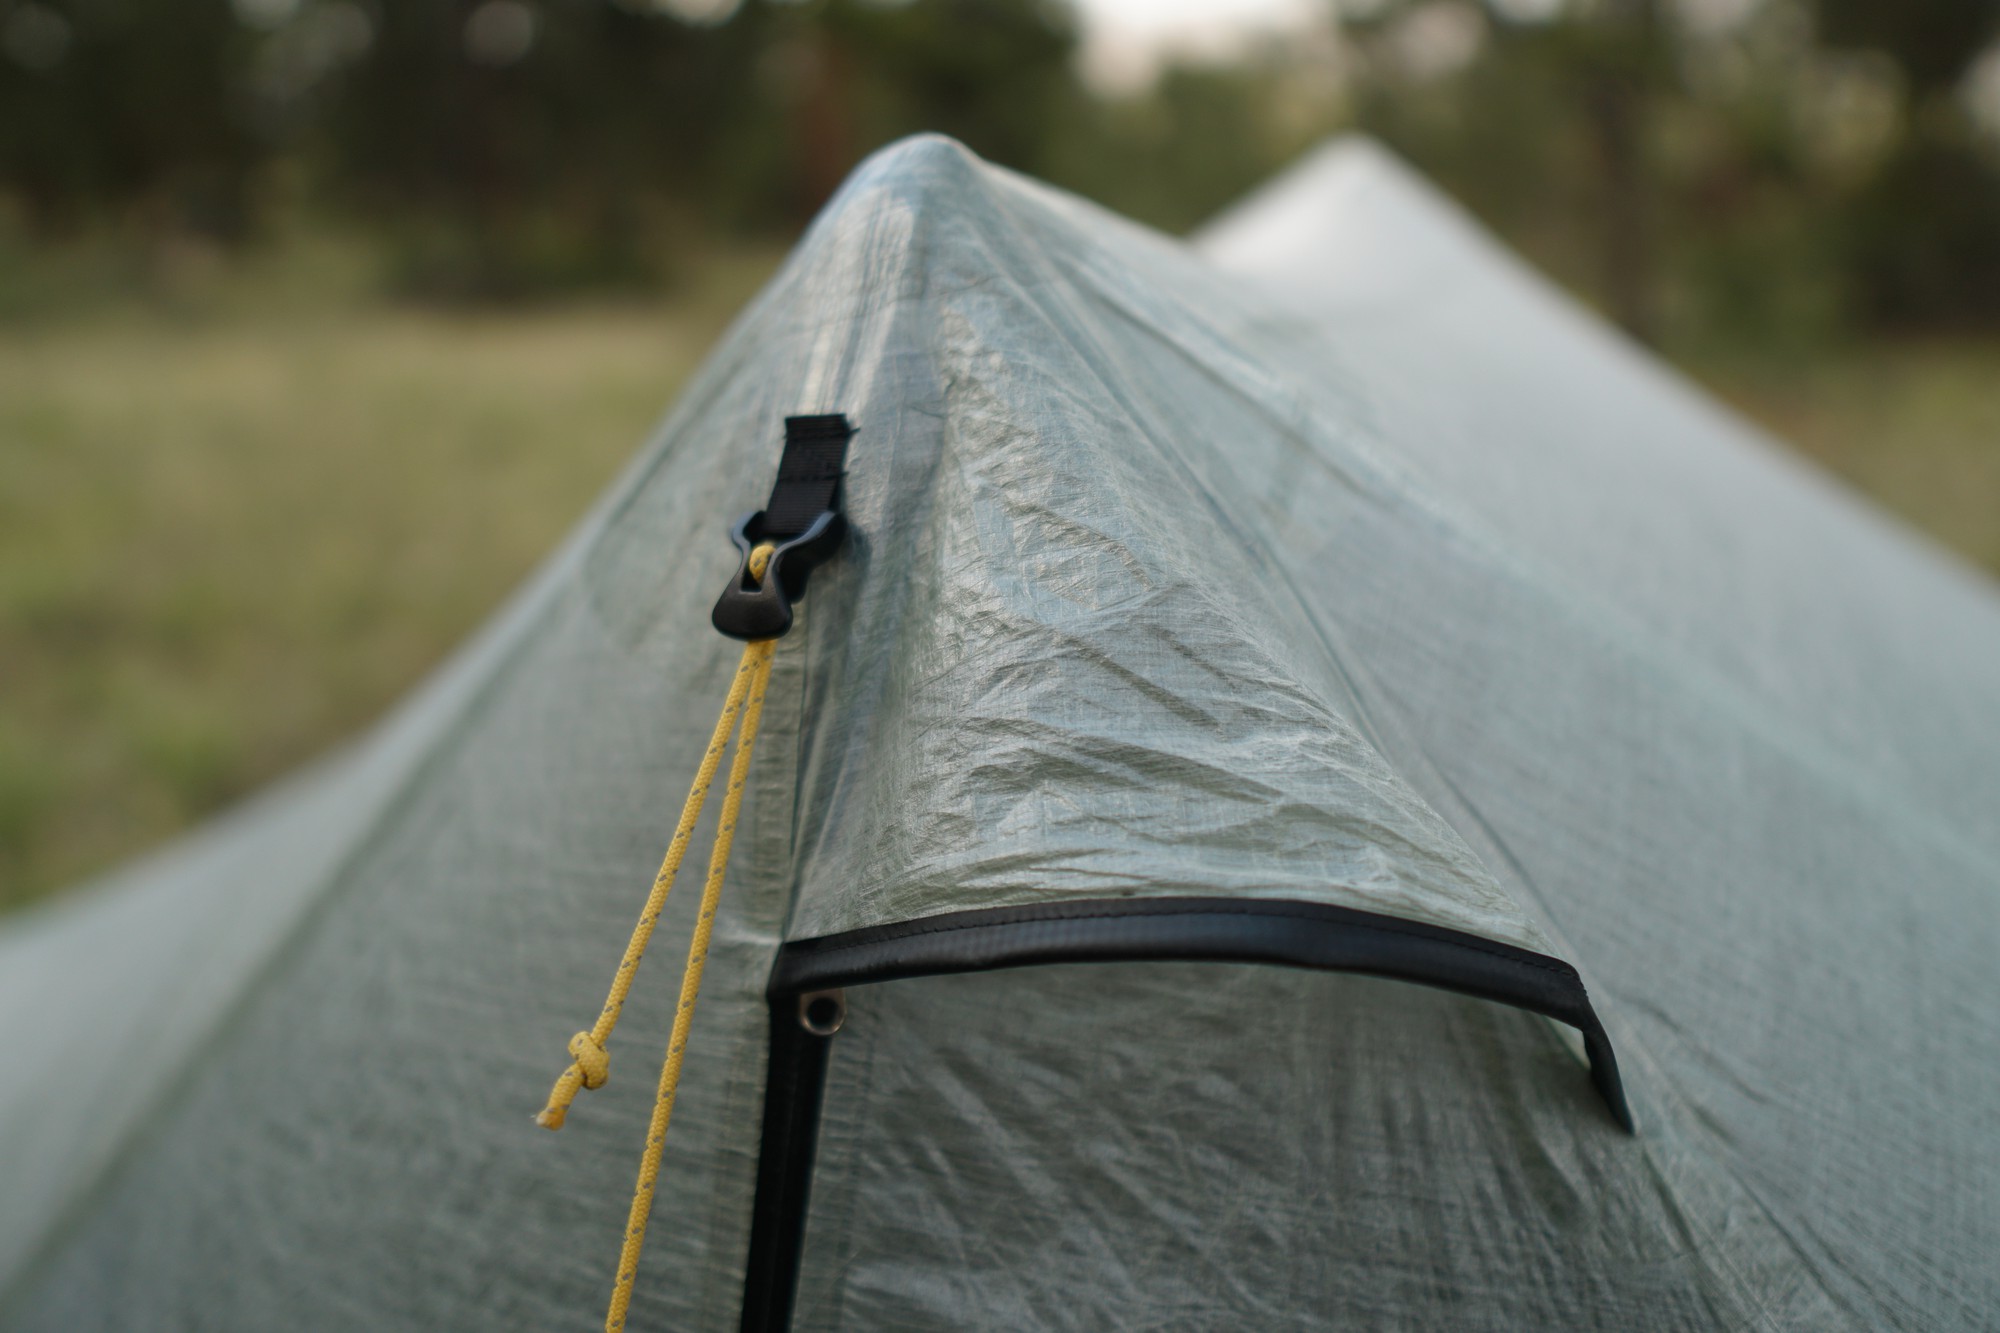
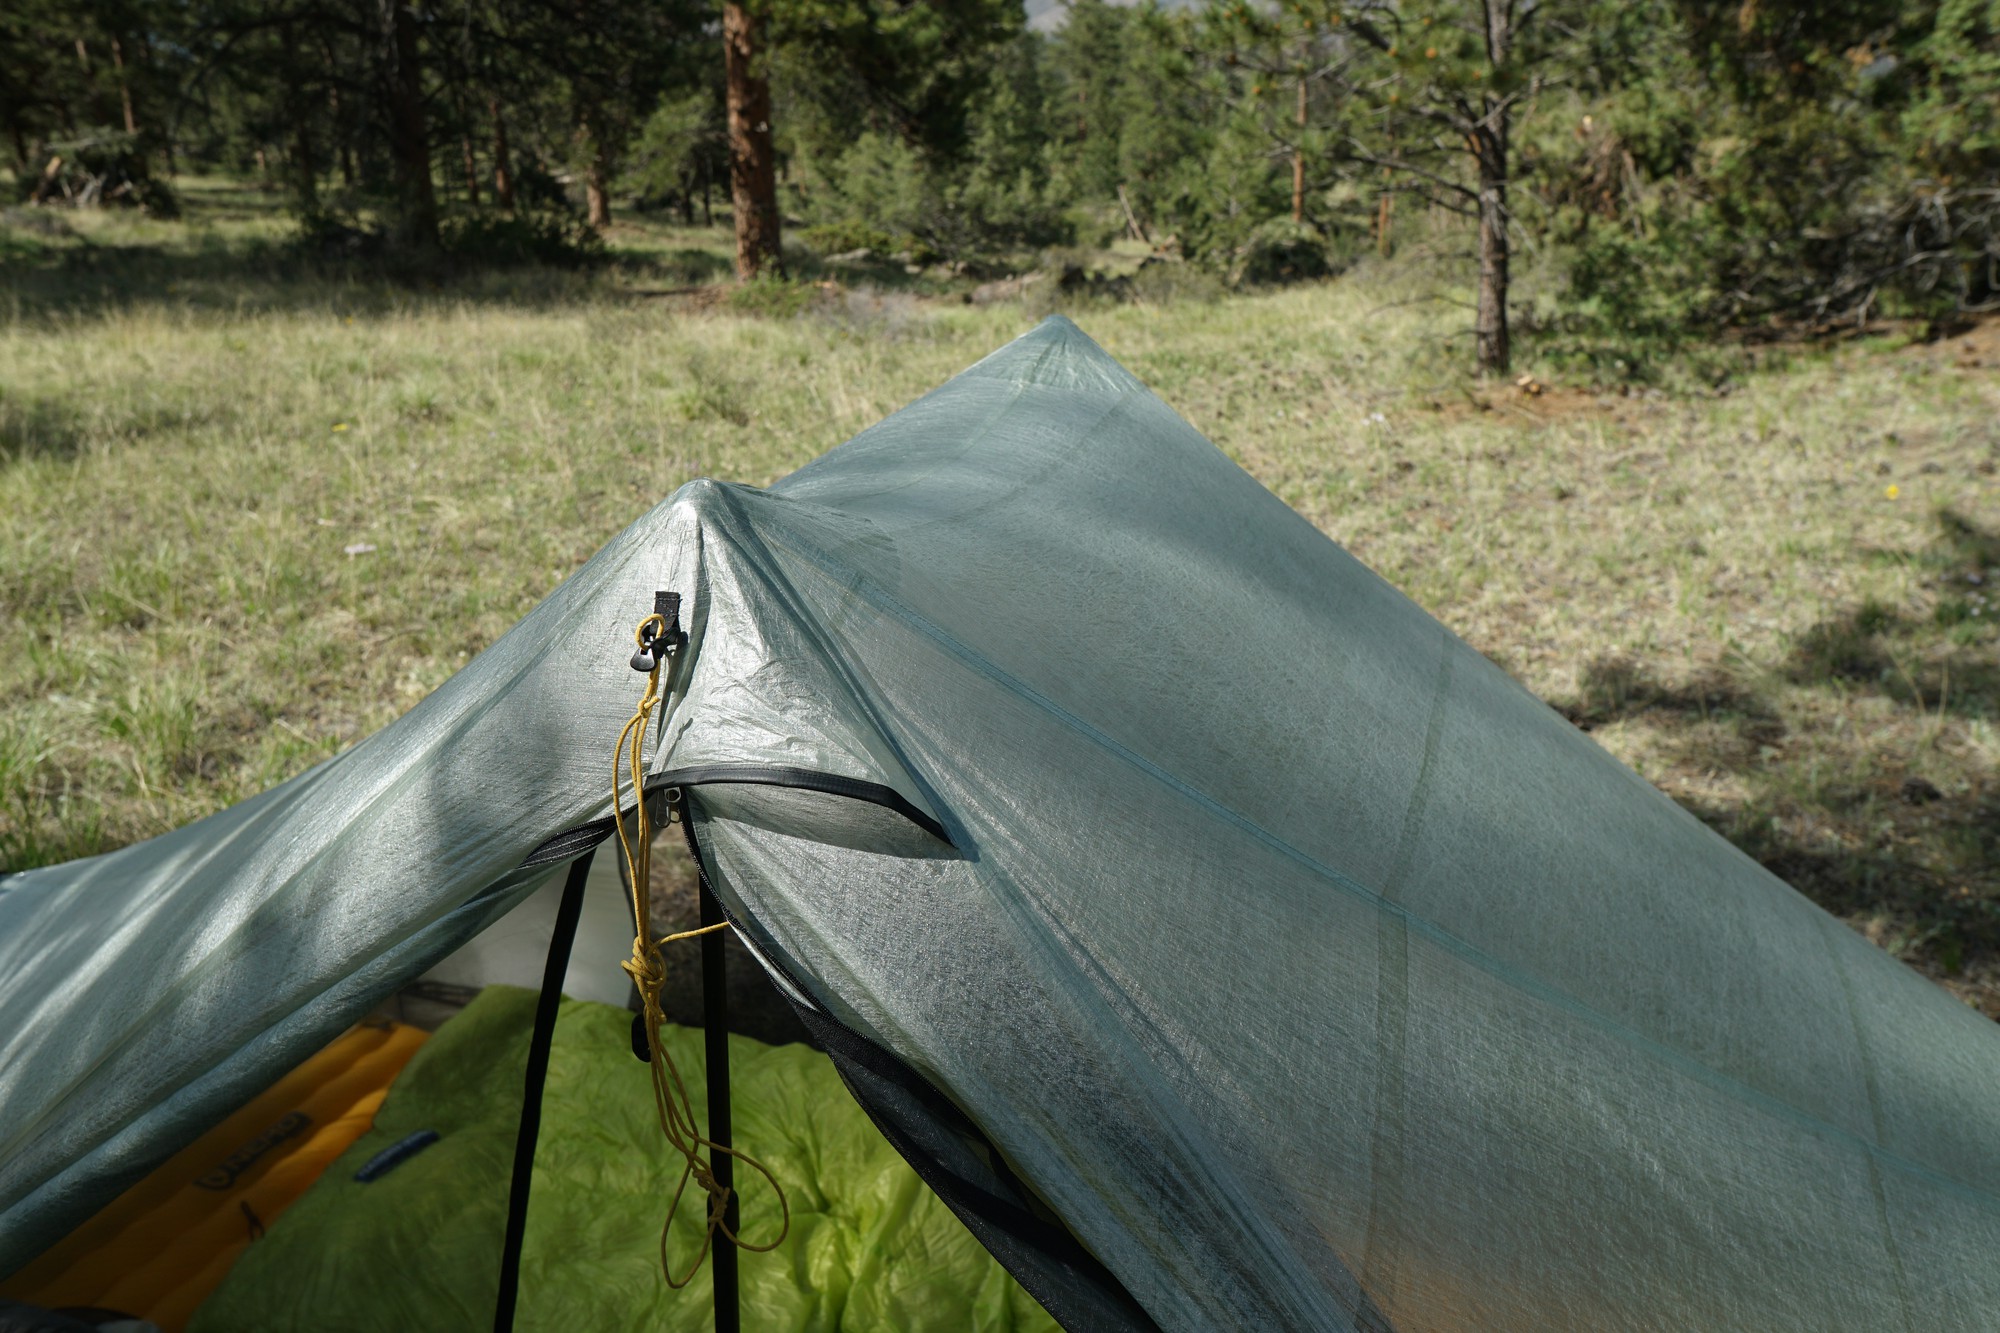
- they feature collapsible, removable, 21-inch (53 cm) carbon fiber struts at the head and foot that add a noticeable amount of interior livable volume while supporting the tent structure (and allowing the first two points above to be a reality)
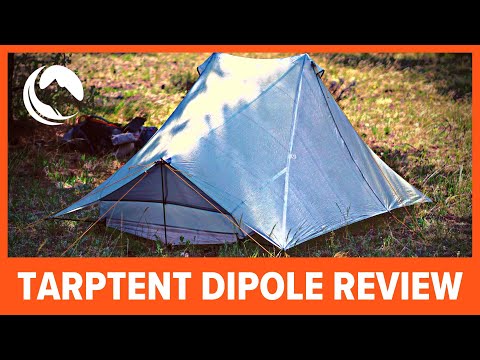
Watch the Video
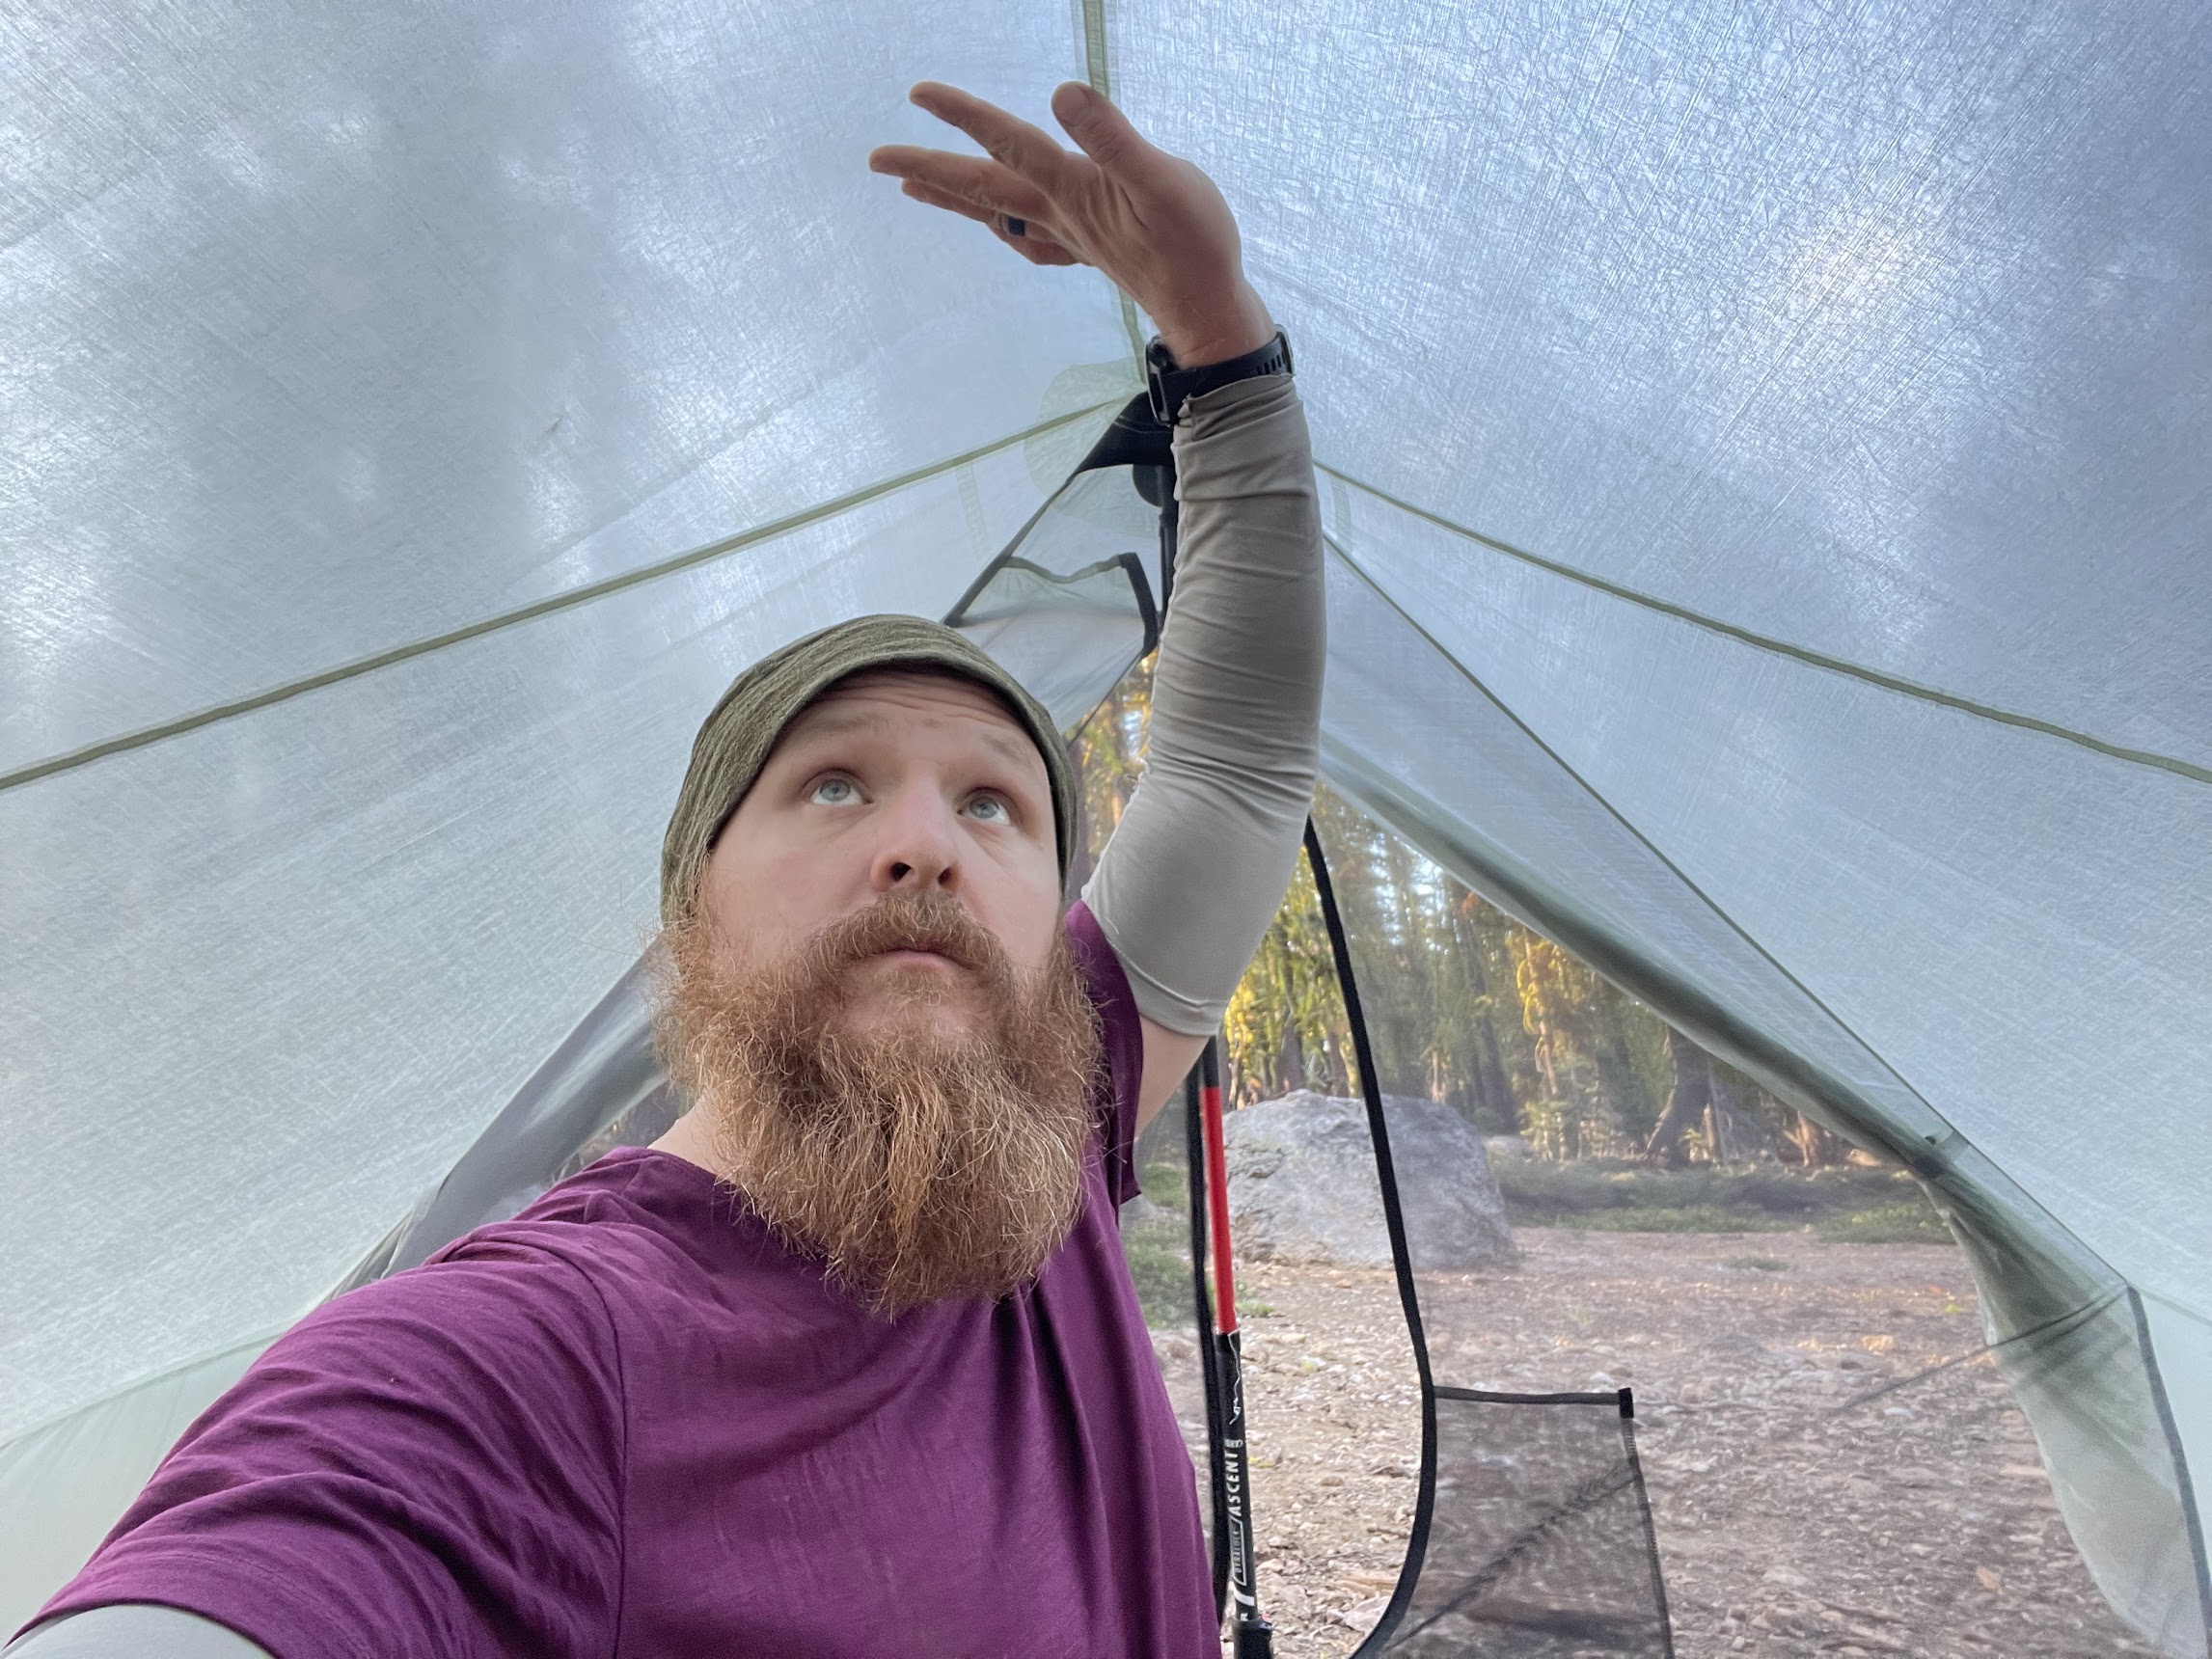
Watch Ryan Jordan’s video review and tour of the Tarptent Dipole 1 Li and Dipole 2 Li:
Highlights
- weight*: Tarptent Dipole 1 Li – 22.6 ounces / 0.64 kg (*pre-production prototype)
- weight*: Tarptent Dipole 2 Li – 26.3 ounces / 0.75 kg (*pre-production prototype)
- can maintain a stable structure in mild weather with four stakes
- vestibule doors are not part of the structure (both doors can be open at the same time without losing tension/stability)
- 21-inch volumizing end struts (Easton 3.9 carbon fiber) create large amounts of interior livable volume
- end struts are removable and collapsible to 13 inches (two-section, shock-cord connected)
- vestibules are 17 inches (43 cm) deep, expandable with an optional line from lower zipper pull tab to apex guyline stake (Tarptent includes hardware and guyline to accomplish this)
- Dipole 1 Li apex height: 43 inches (109 cm)
- Dipole 2 Li apex height: 45 inches (114 cm)
- Dipole 1 Li width x length: 36 x 84 inches (91 x 213 cm)
- Dipole 2 Li width x length: 58 x 88 inches (147 x 224 cm)
- single-wall design with condensation drain vents
- canopy/fly material: Dyneema Composite Fabric CT1E0.8, 0.55 oz/yd2
- floor material: Dyneema Composite Fabric CT2K.18, 1 oz/yd2
- zipper-type – canopy – YKK #3 AquaGuard
- zipper-type – interior mesh – YKK #3 coil
- catenary curved ridgeline
- mesh panel on either end, backed by a sil-poly panel that can be opened and closed from inside the tent for ventilation/weather protection
- Dipole 1 Li fits one long/wide pads and users up to 6 feet 8 inches (203 cm)
- Dipole 2 Li fits two long/wide pads and users up to 6 feet 10 inches (208 cm)

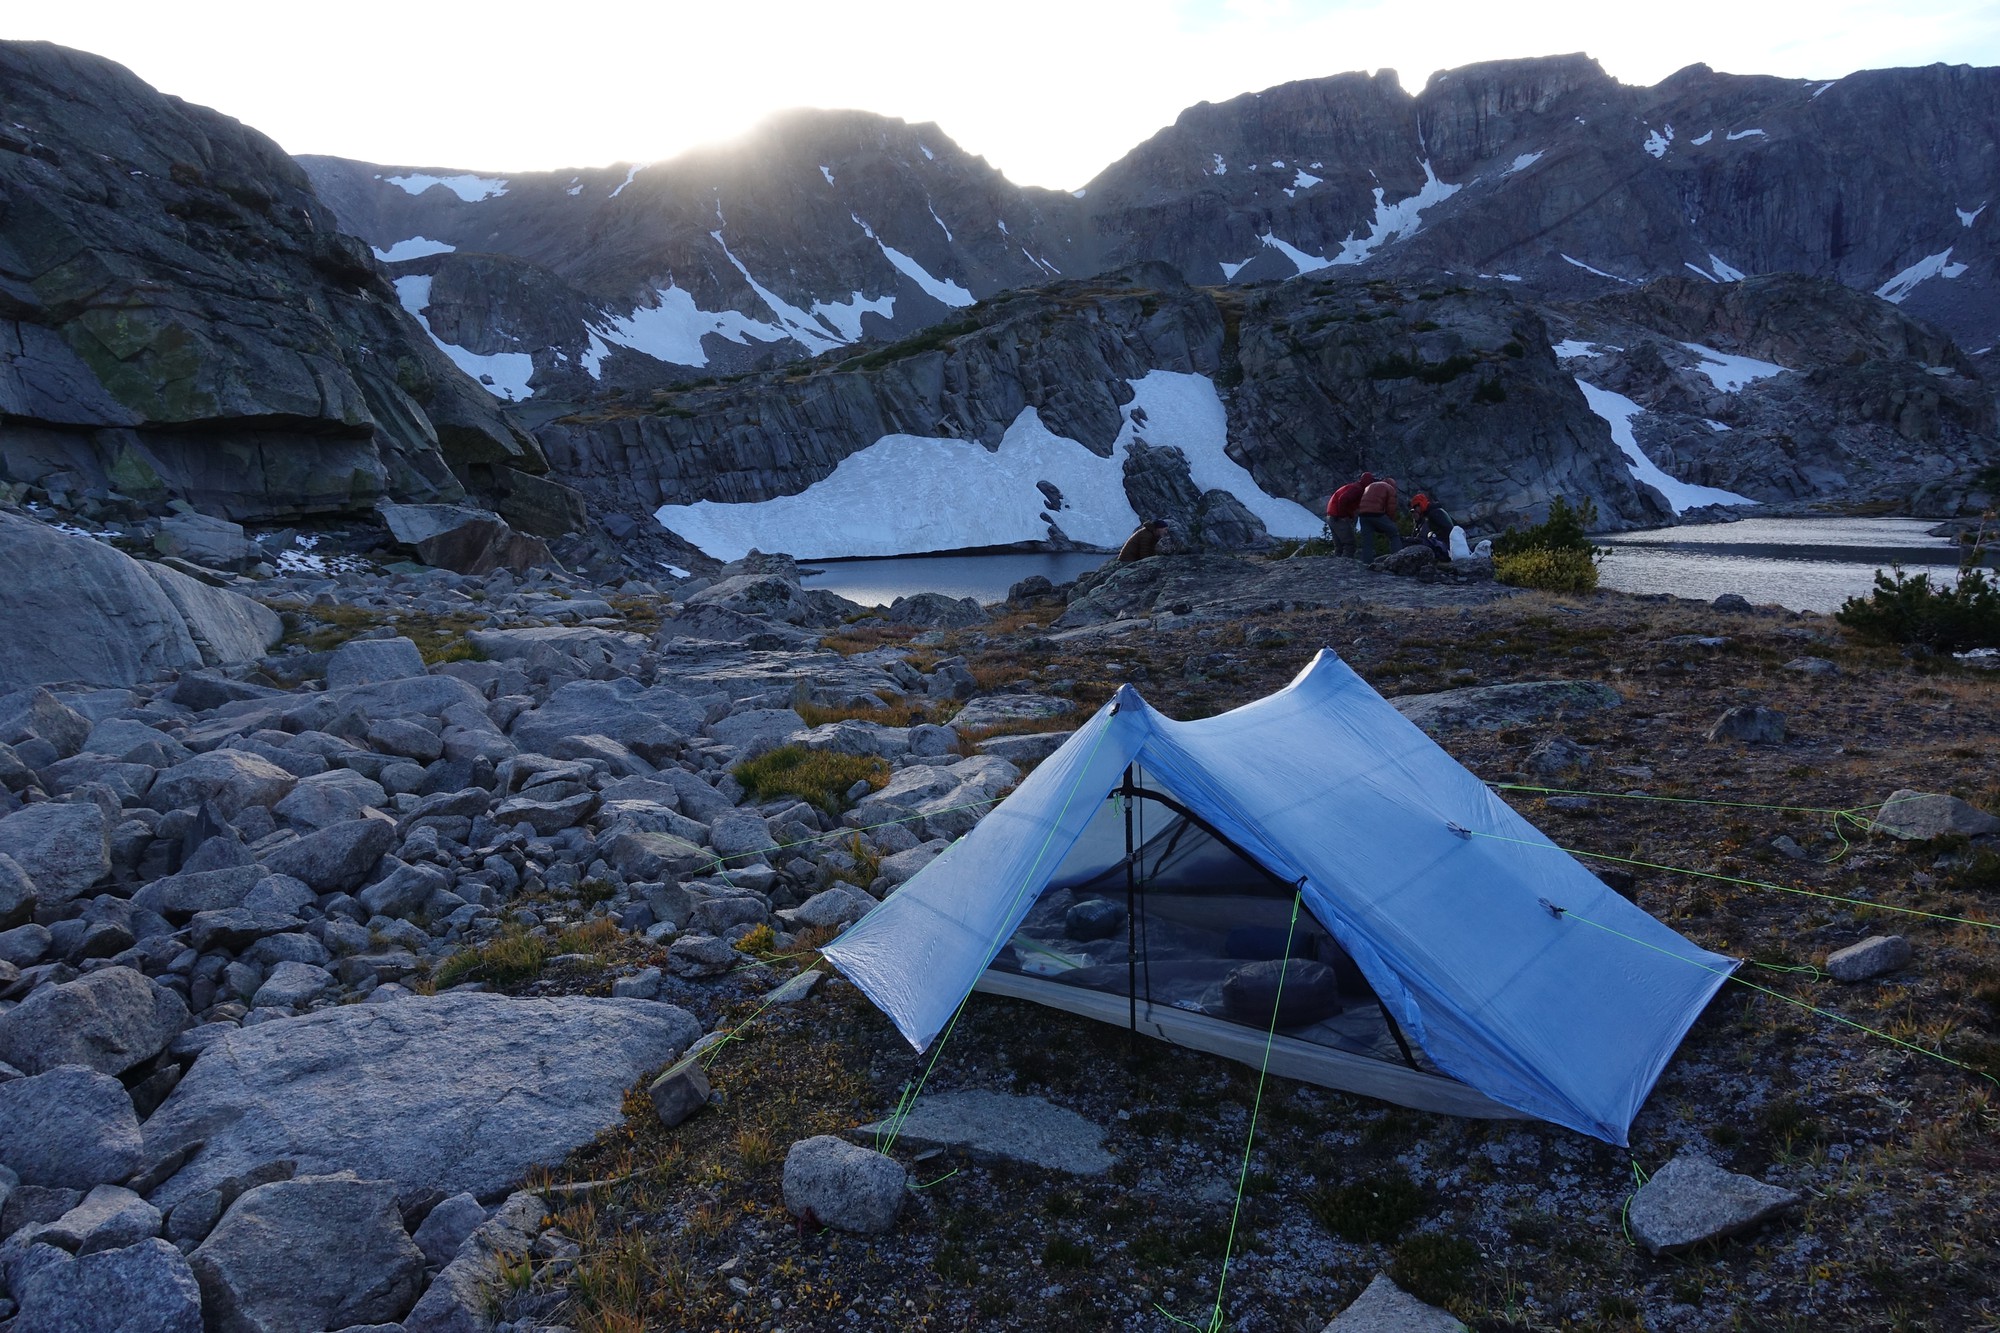
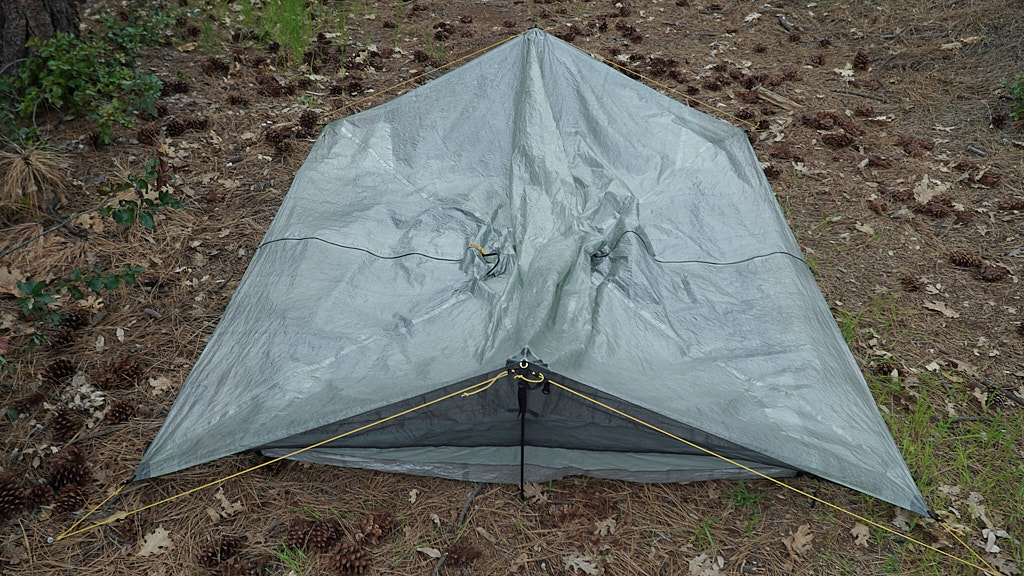
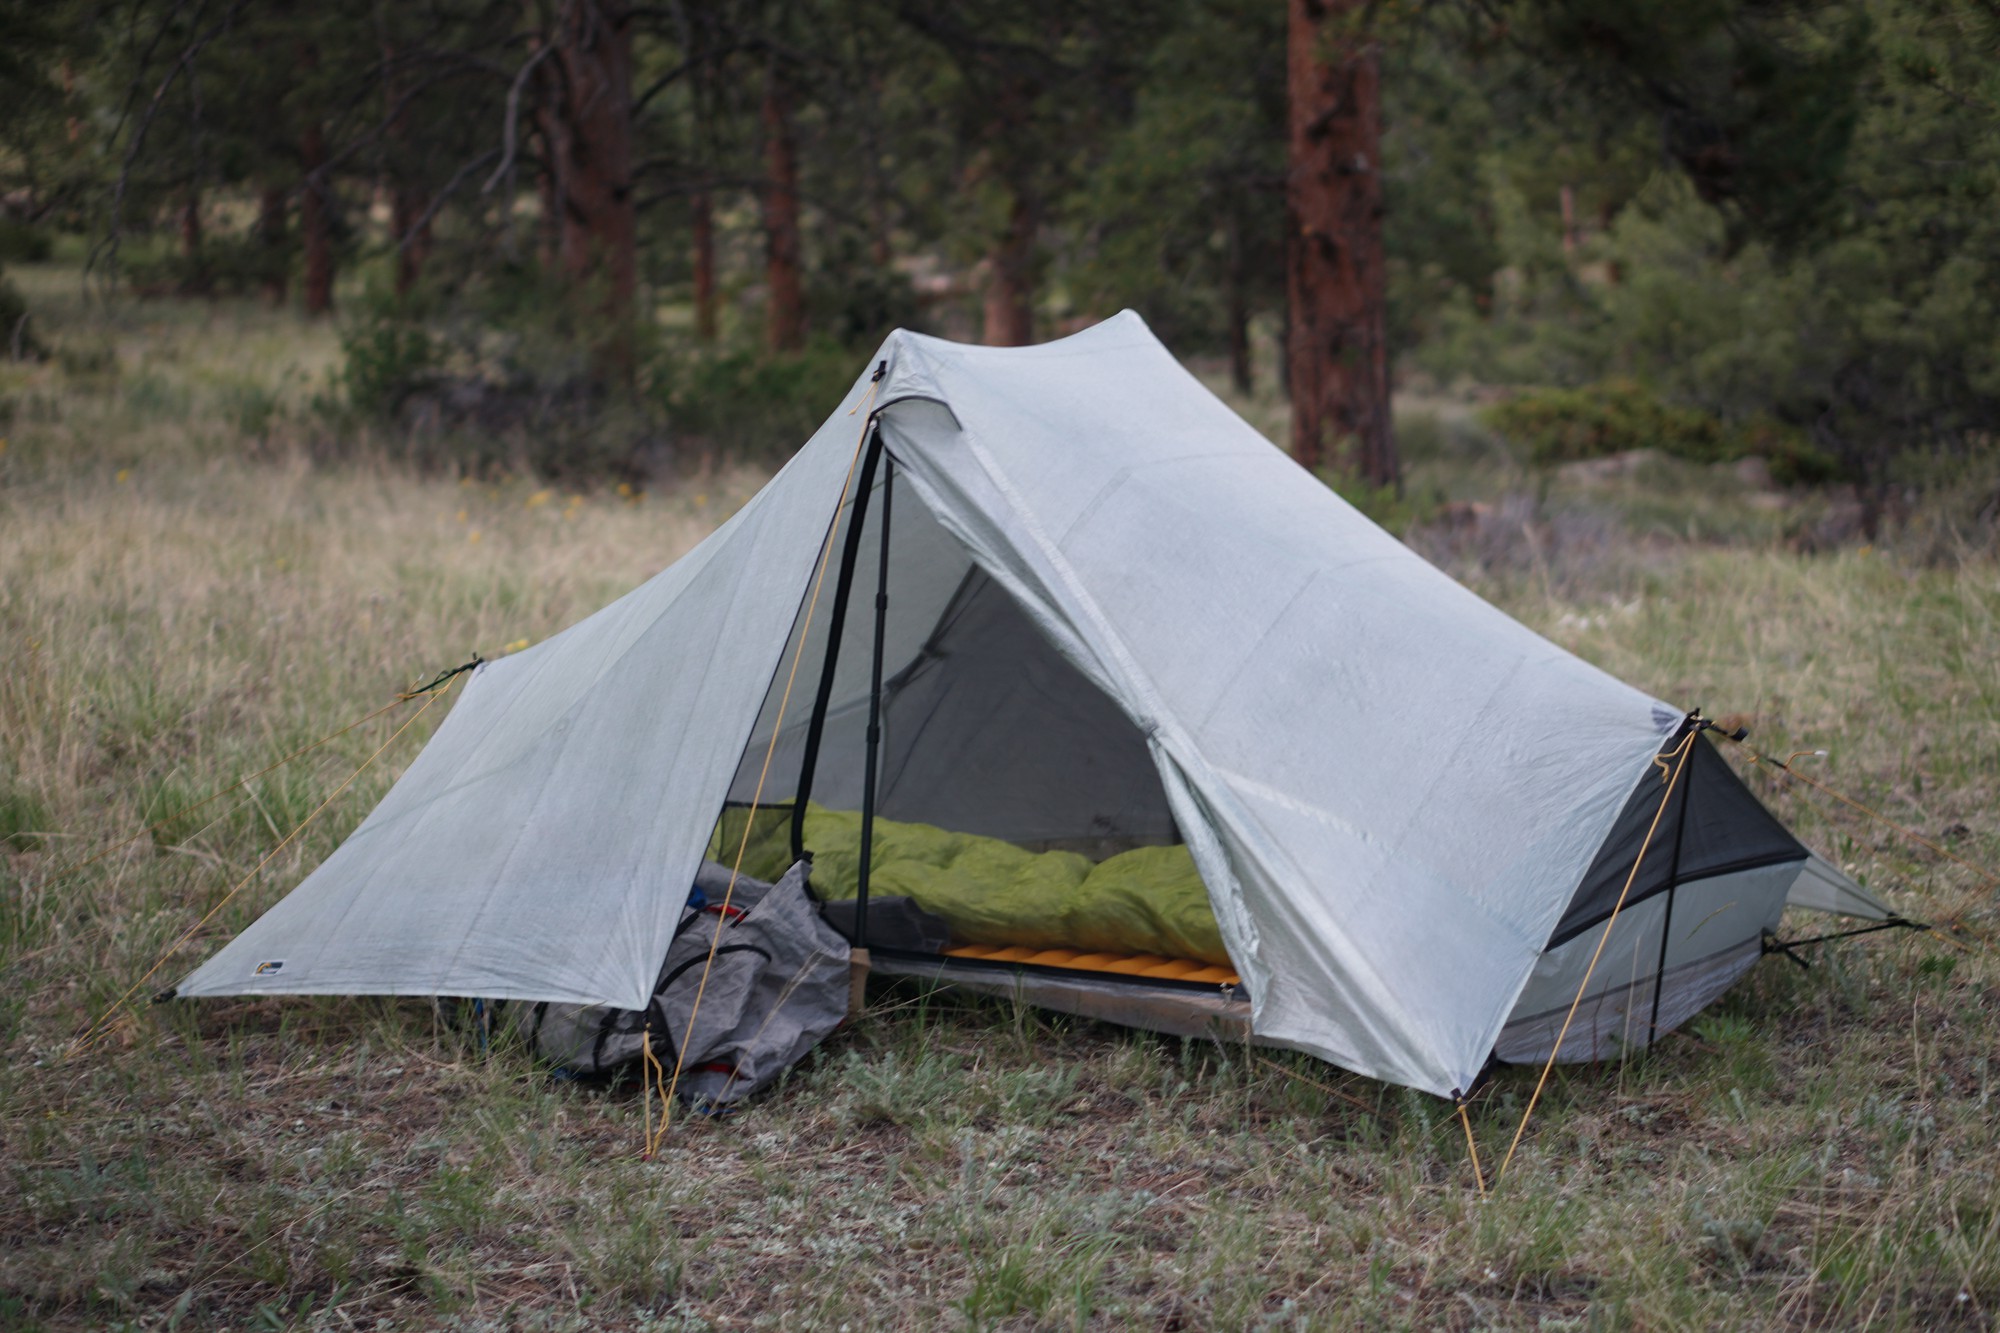
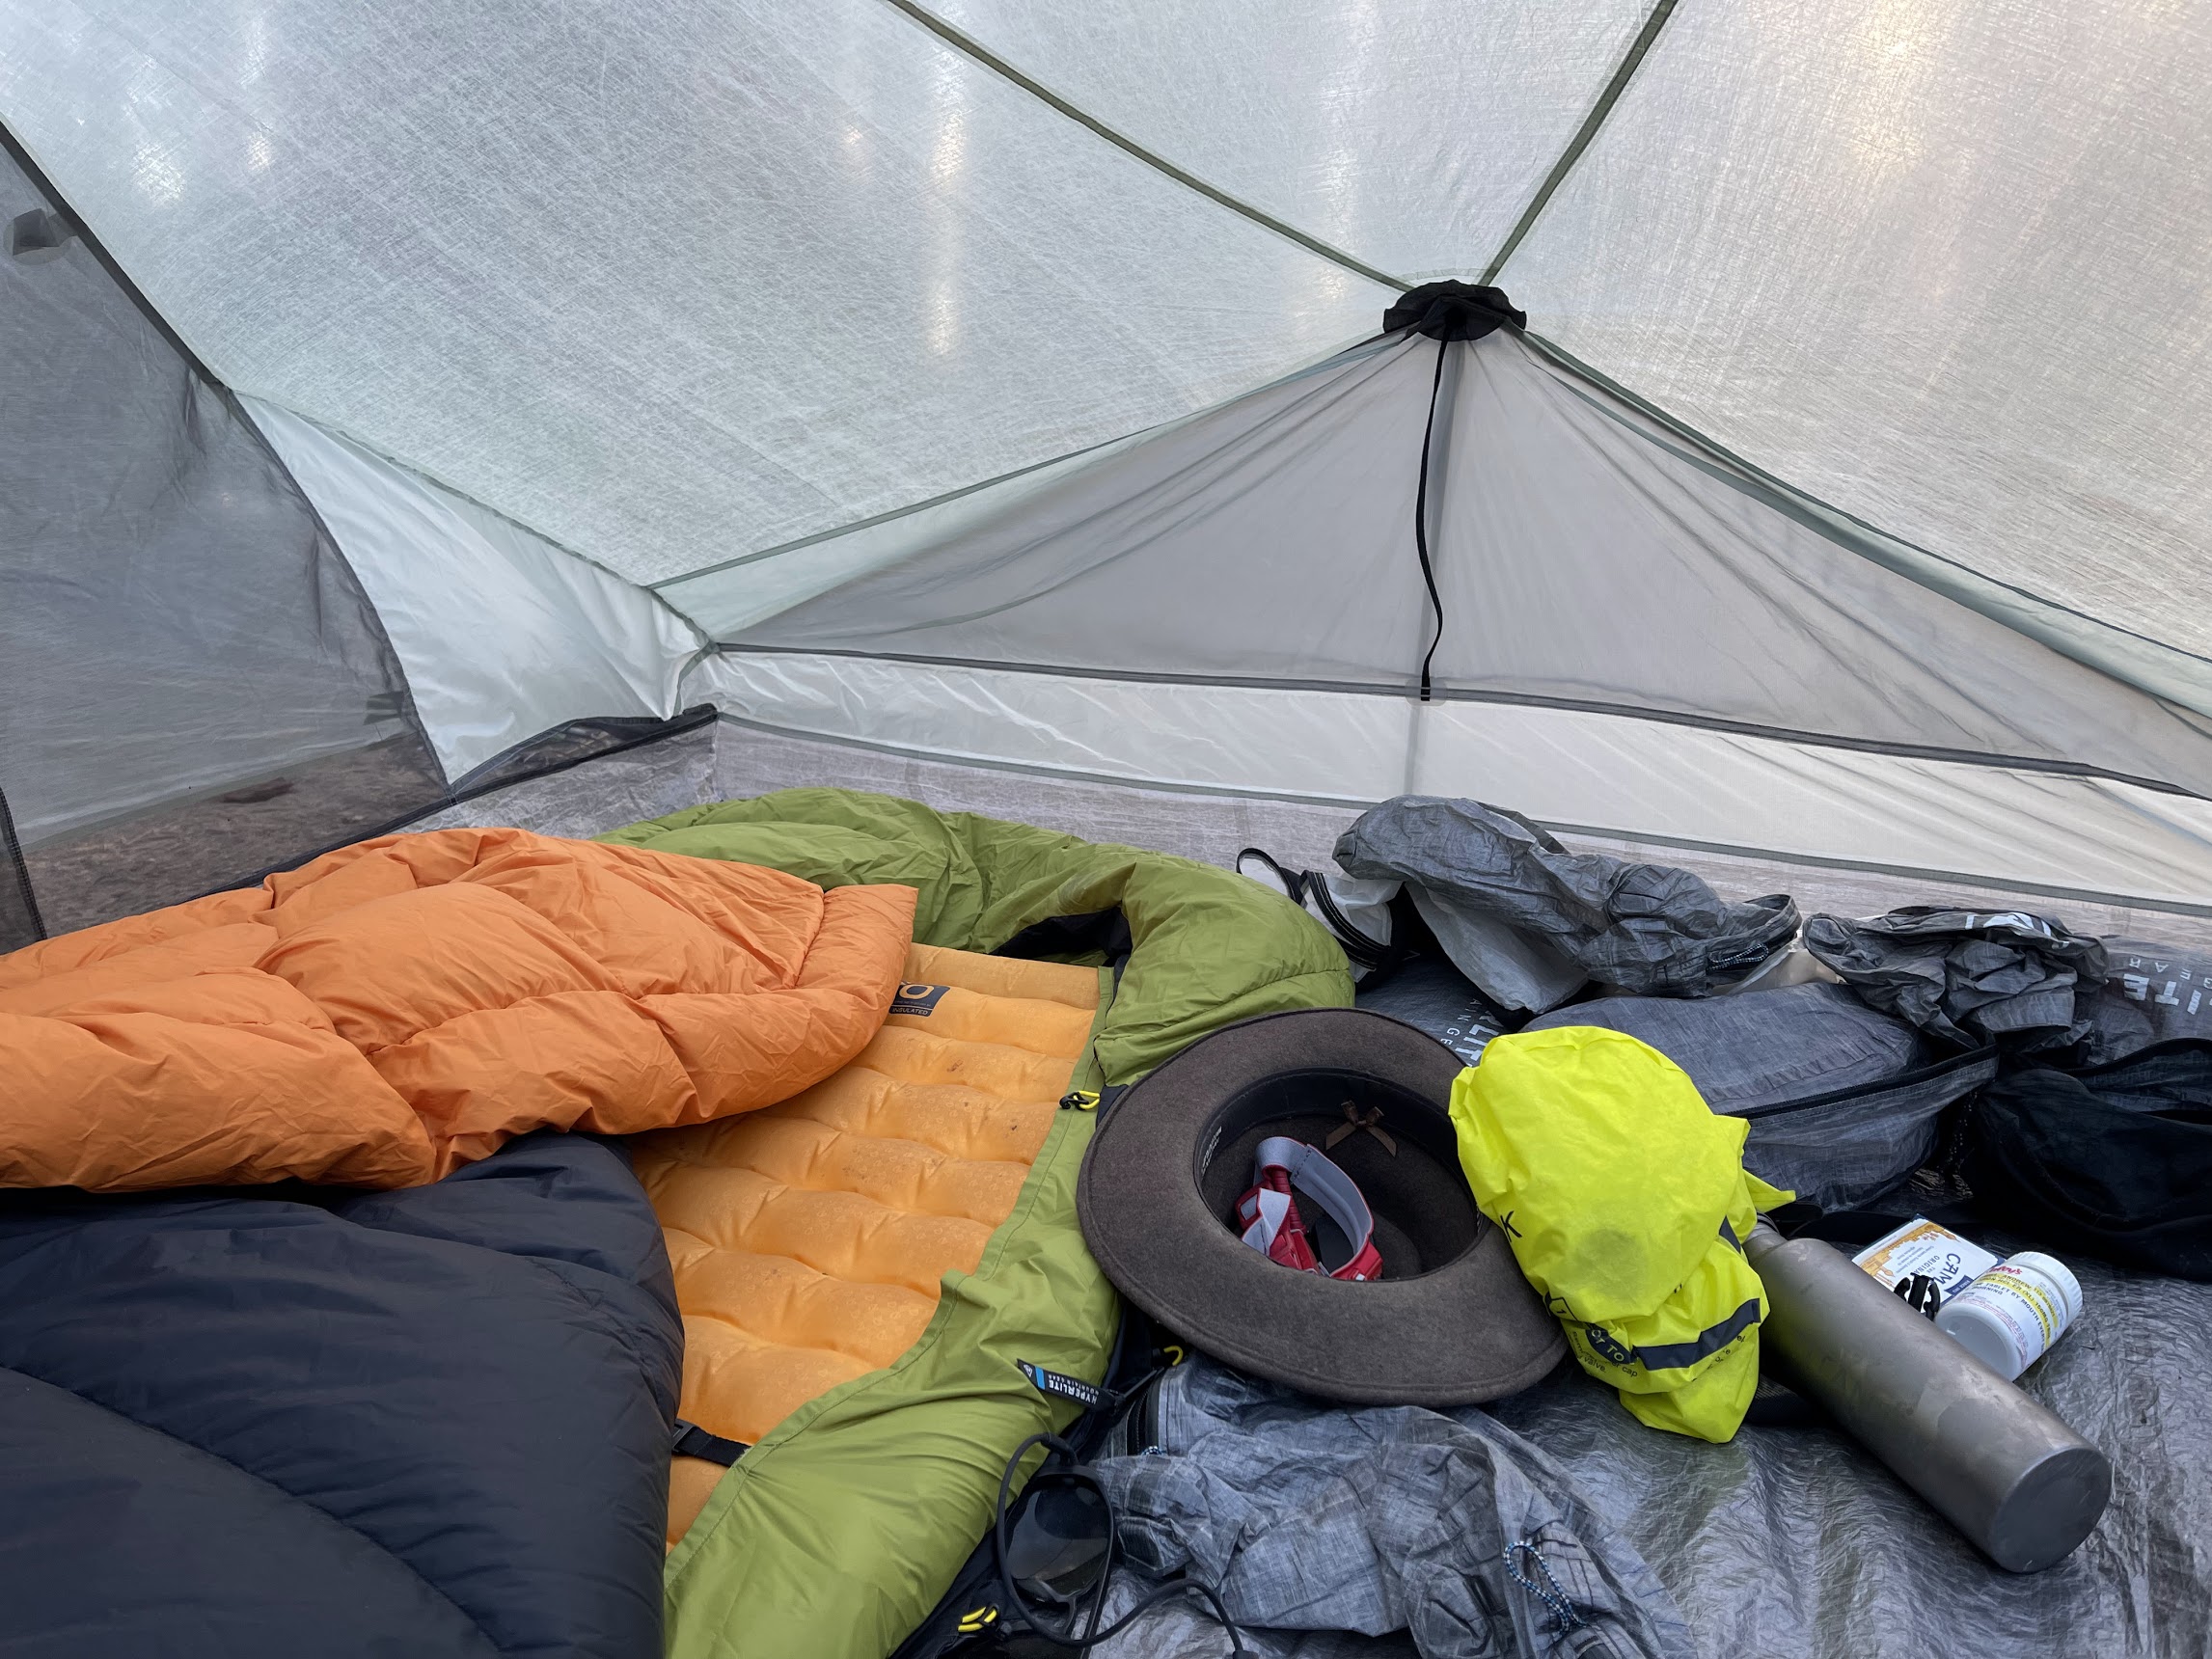
A Tarptent Dipole 1 Li in the Colorado Rockies. Photo: Ryan Jordan.

Testing context
We tested the Tarptent Dipole 1 Li and Dipole 2 Li on three below-the-treeline overnight treks in June of 2022 in the Sierra Nevada and Colorado Rockies. Both shelters were subjected to light wind (with gusts up to 10 to 20 mph) and moderate-to-heavy rain. We were interested in getting initial impressions on ease of setup, livability, structural integrity, condensation resistance, and weather protection.

Test samples vs. final product
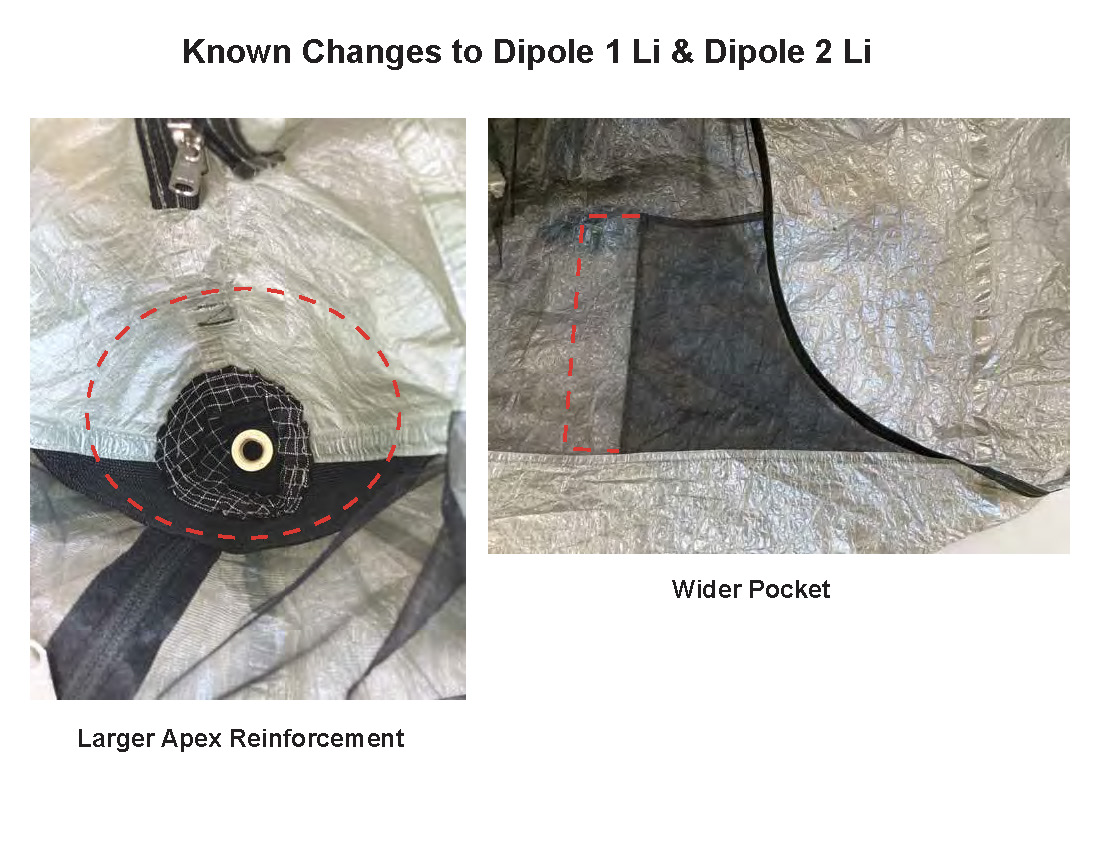
The samples that we tested are late-stage prototypes. Tarptent is still making adjustments to the Tarptent Dipole 1 Li and Dipole 2 Li, and some of the features visible in the photos in this article will be changed by the time the product gets into consumers’ hands. Currently, changes will include:
- very small pattern edits on the vestibules to tighten them up at the hem, especially on the Dipole 2 Li
- larger apex pole cap reinforcements
- top of the mesh reinforcement that is currently black ballistic nylon will also be changed to the lighter 210D w/Dyneema grid
- wider interior stow pockets
- the MSRPs listed above are estimates
First impressions
Setup and structure
The Tarptent Dipole 1 Li and Dipole 2 Li have a rectangular footprint, which makes site selection easy – certainly easier than site selection is for the Stratospire Li or ProTrail Li (non-rectangular shelters).
Setup is simple (for a trekking-pole supported shelter) but the order of operations is important – watch the video above for a setup demonstration.
Setup instructions:
- Insert the end struts.
- Stake the two corners of one end of the tent to bring tension to the fly edges between the top of the strut and the stakeout point.
- Repeat for the other end, ensuring a rectangular configuration that brings tension to the vestibule door bottom edges.
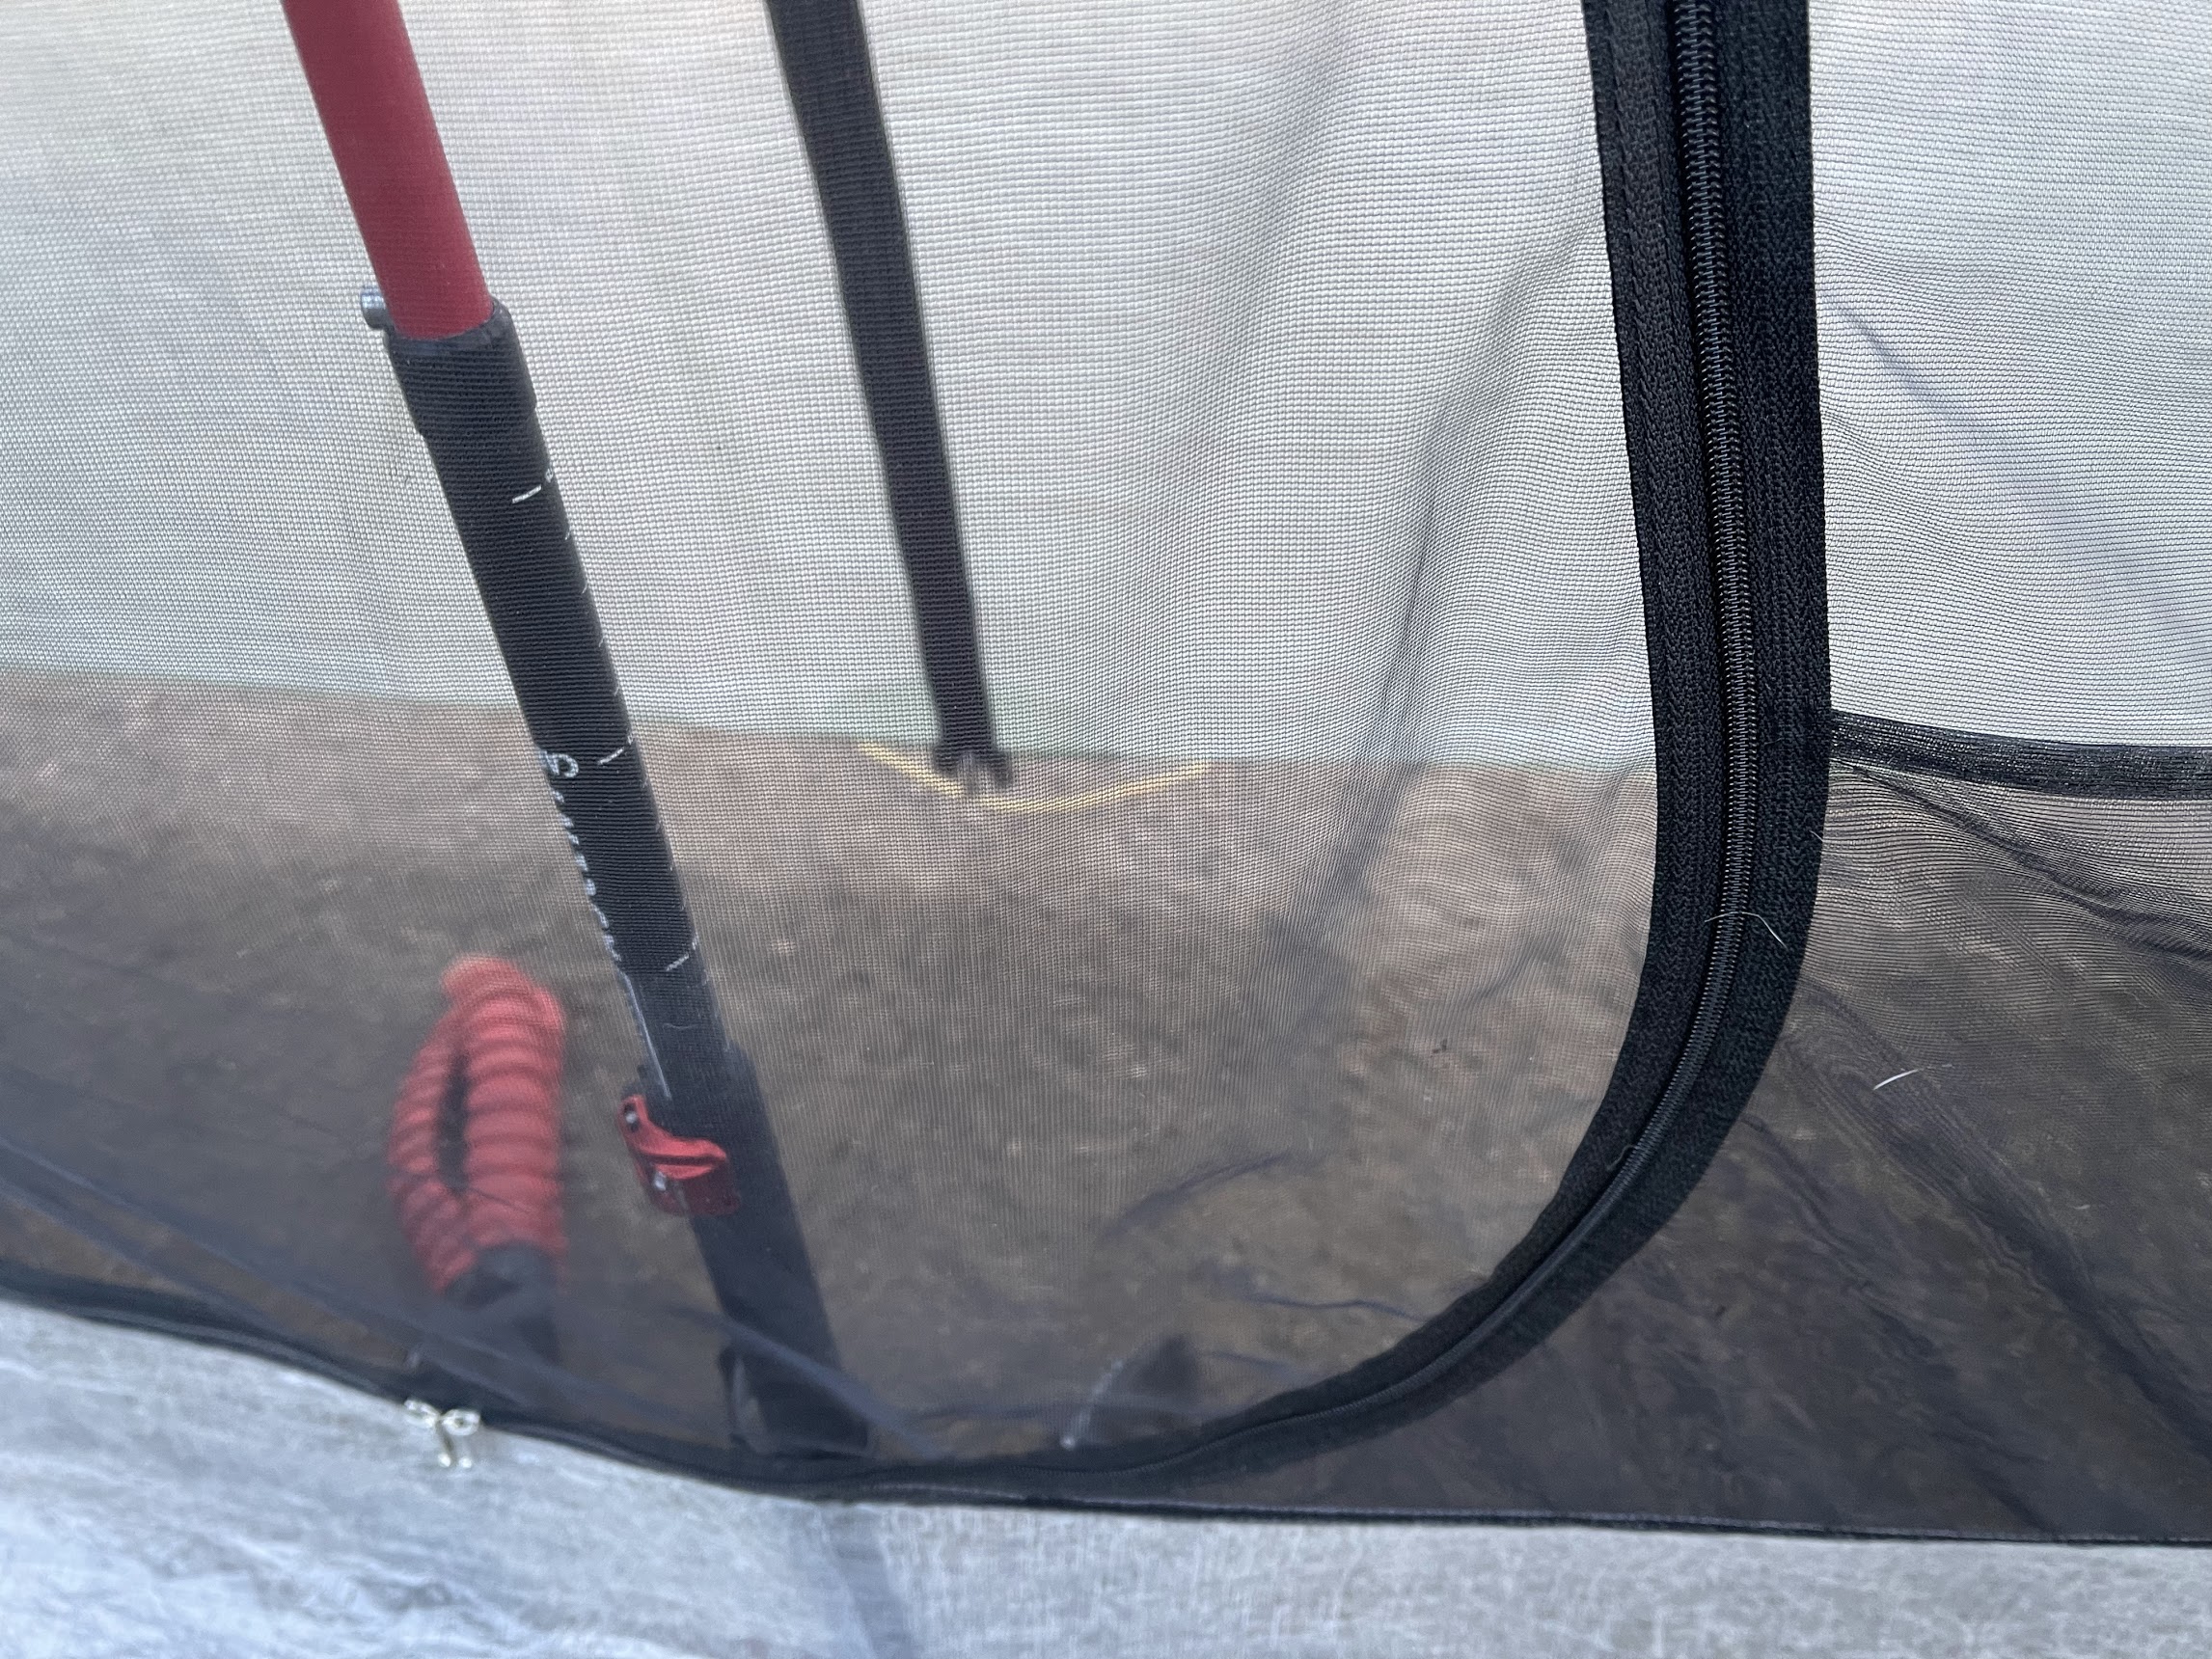
- Unzip one vestibule zipper from the top, insert a trekking pole (tip up) – 43 inches (109 cm) for the Tarptent Dipole 1 Li and 45 inches (114 cm) for the Tarptent Dipole 2 Li. Zip up the zipper.
- Repeat – insert the second trekking pole into the opposite vestibule.
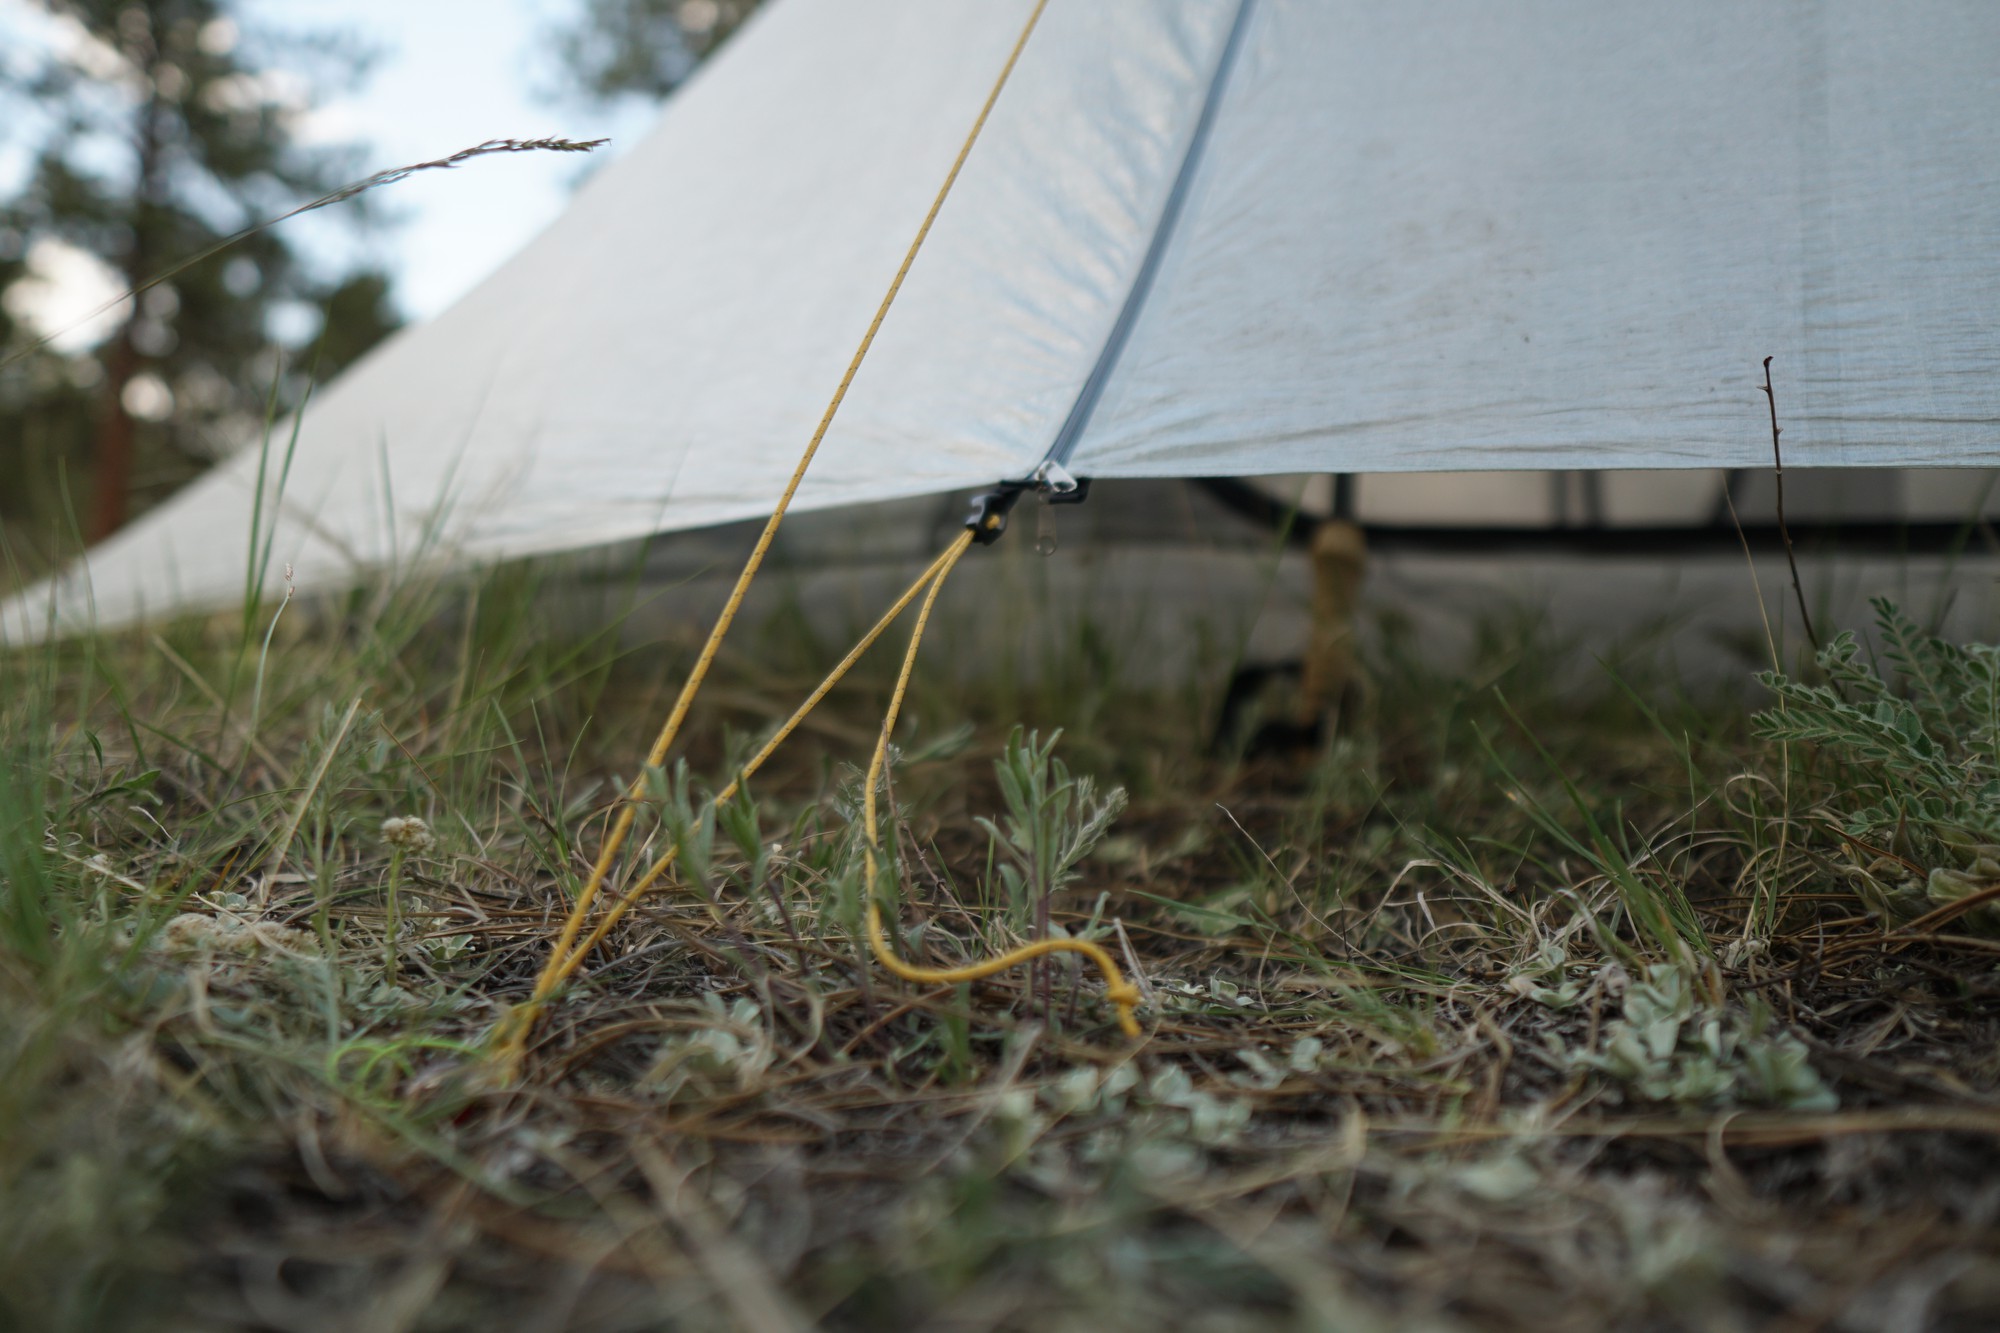
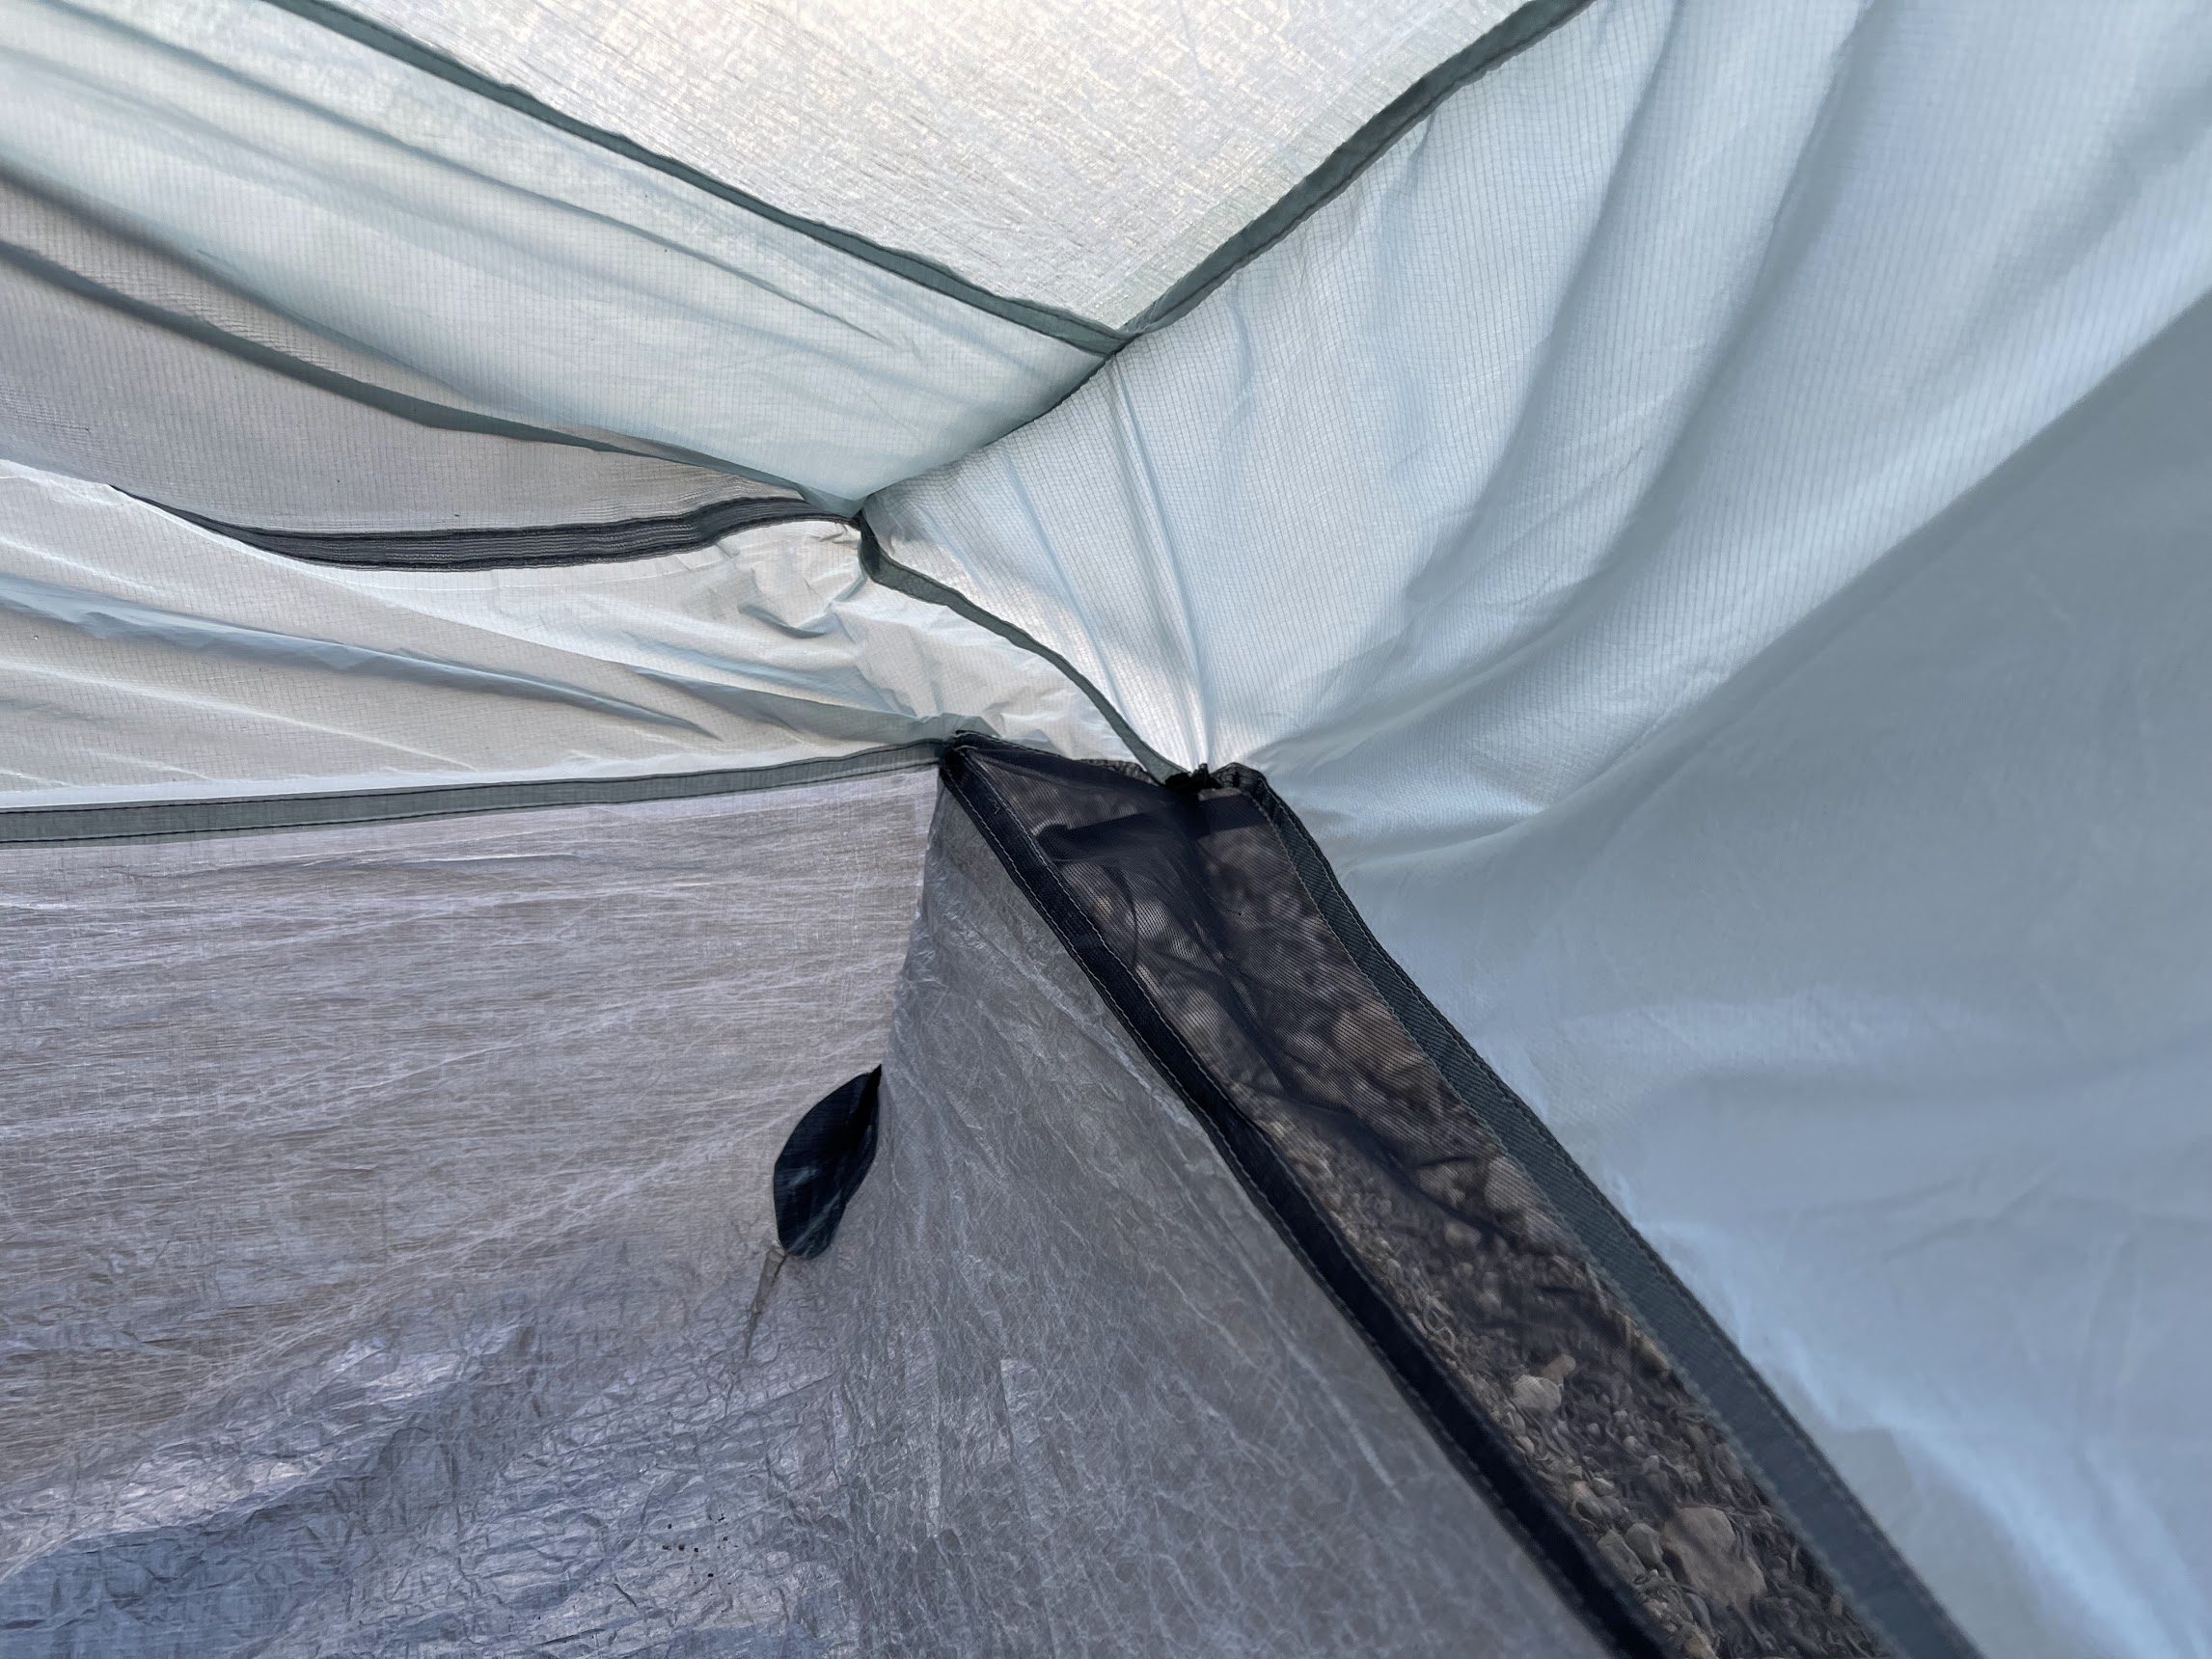
- Reset corner tent stakes as needed so they are parallel with the corner seams (i.e., 45-degree angle off the parallel lines of the tent bottom edges).*
- Make sure the bottoms of the end struts are inset slightly relative to the tops, to ensure that downward falling rain doesn’t enter the end vents.
- Tighten the corner guylines.
- Tighten the guylines at the tops of the struts – this step brings the entire tent into a final state of tension. At this point, minor adjustments to pole height and position, corner tension, and corner stake location may be necessary to bring the tent into a taut stake if camping on uneven ground with minor irregularities.
*Tarptent recommends a 45-degree angle for the corner stakes (i.e., the guylines should be parallel to the corner seams). We found that a slightly wider than 45-degree angle works best for creating tension along the edges at the ends of the shelter. The photo below illustrates a pitch on uneven ground that hews very closely to the 45-degree guyline recommendation.
Note just a slight amount of slack on one of the end edges – so slight that I (Andrew) didn’t notice it until I was reviewing my photos. Adjusting the angle of the corner stakes to be slightly wider solved this issue in Ryan’s pitches (as noted in the video above).
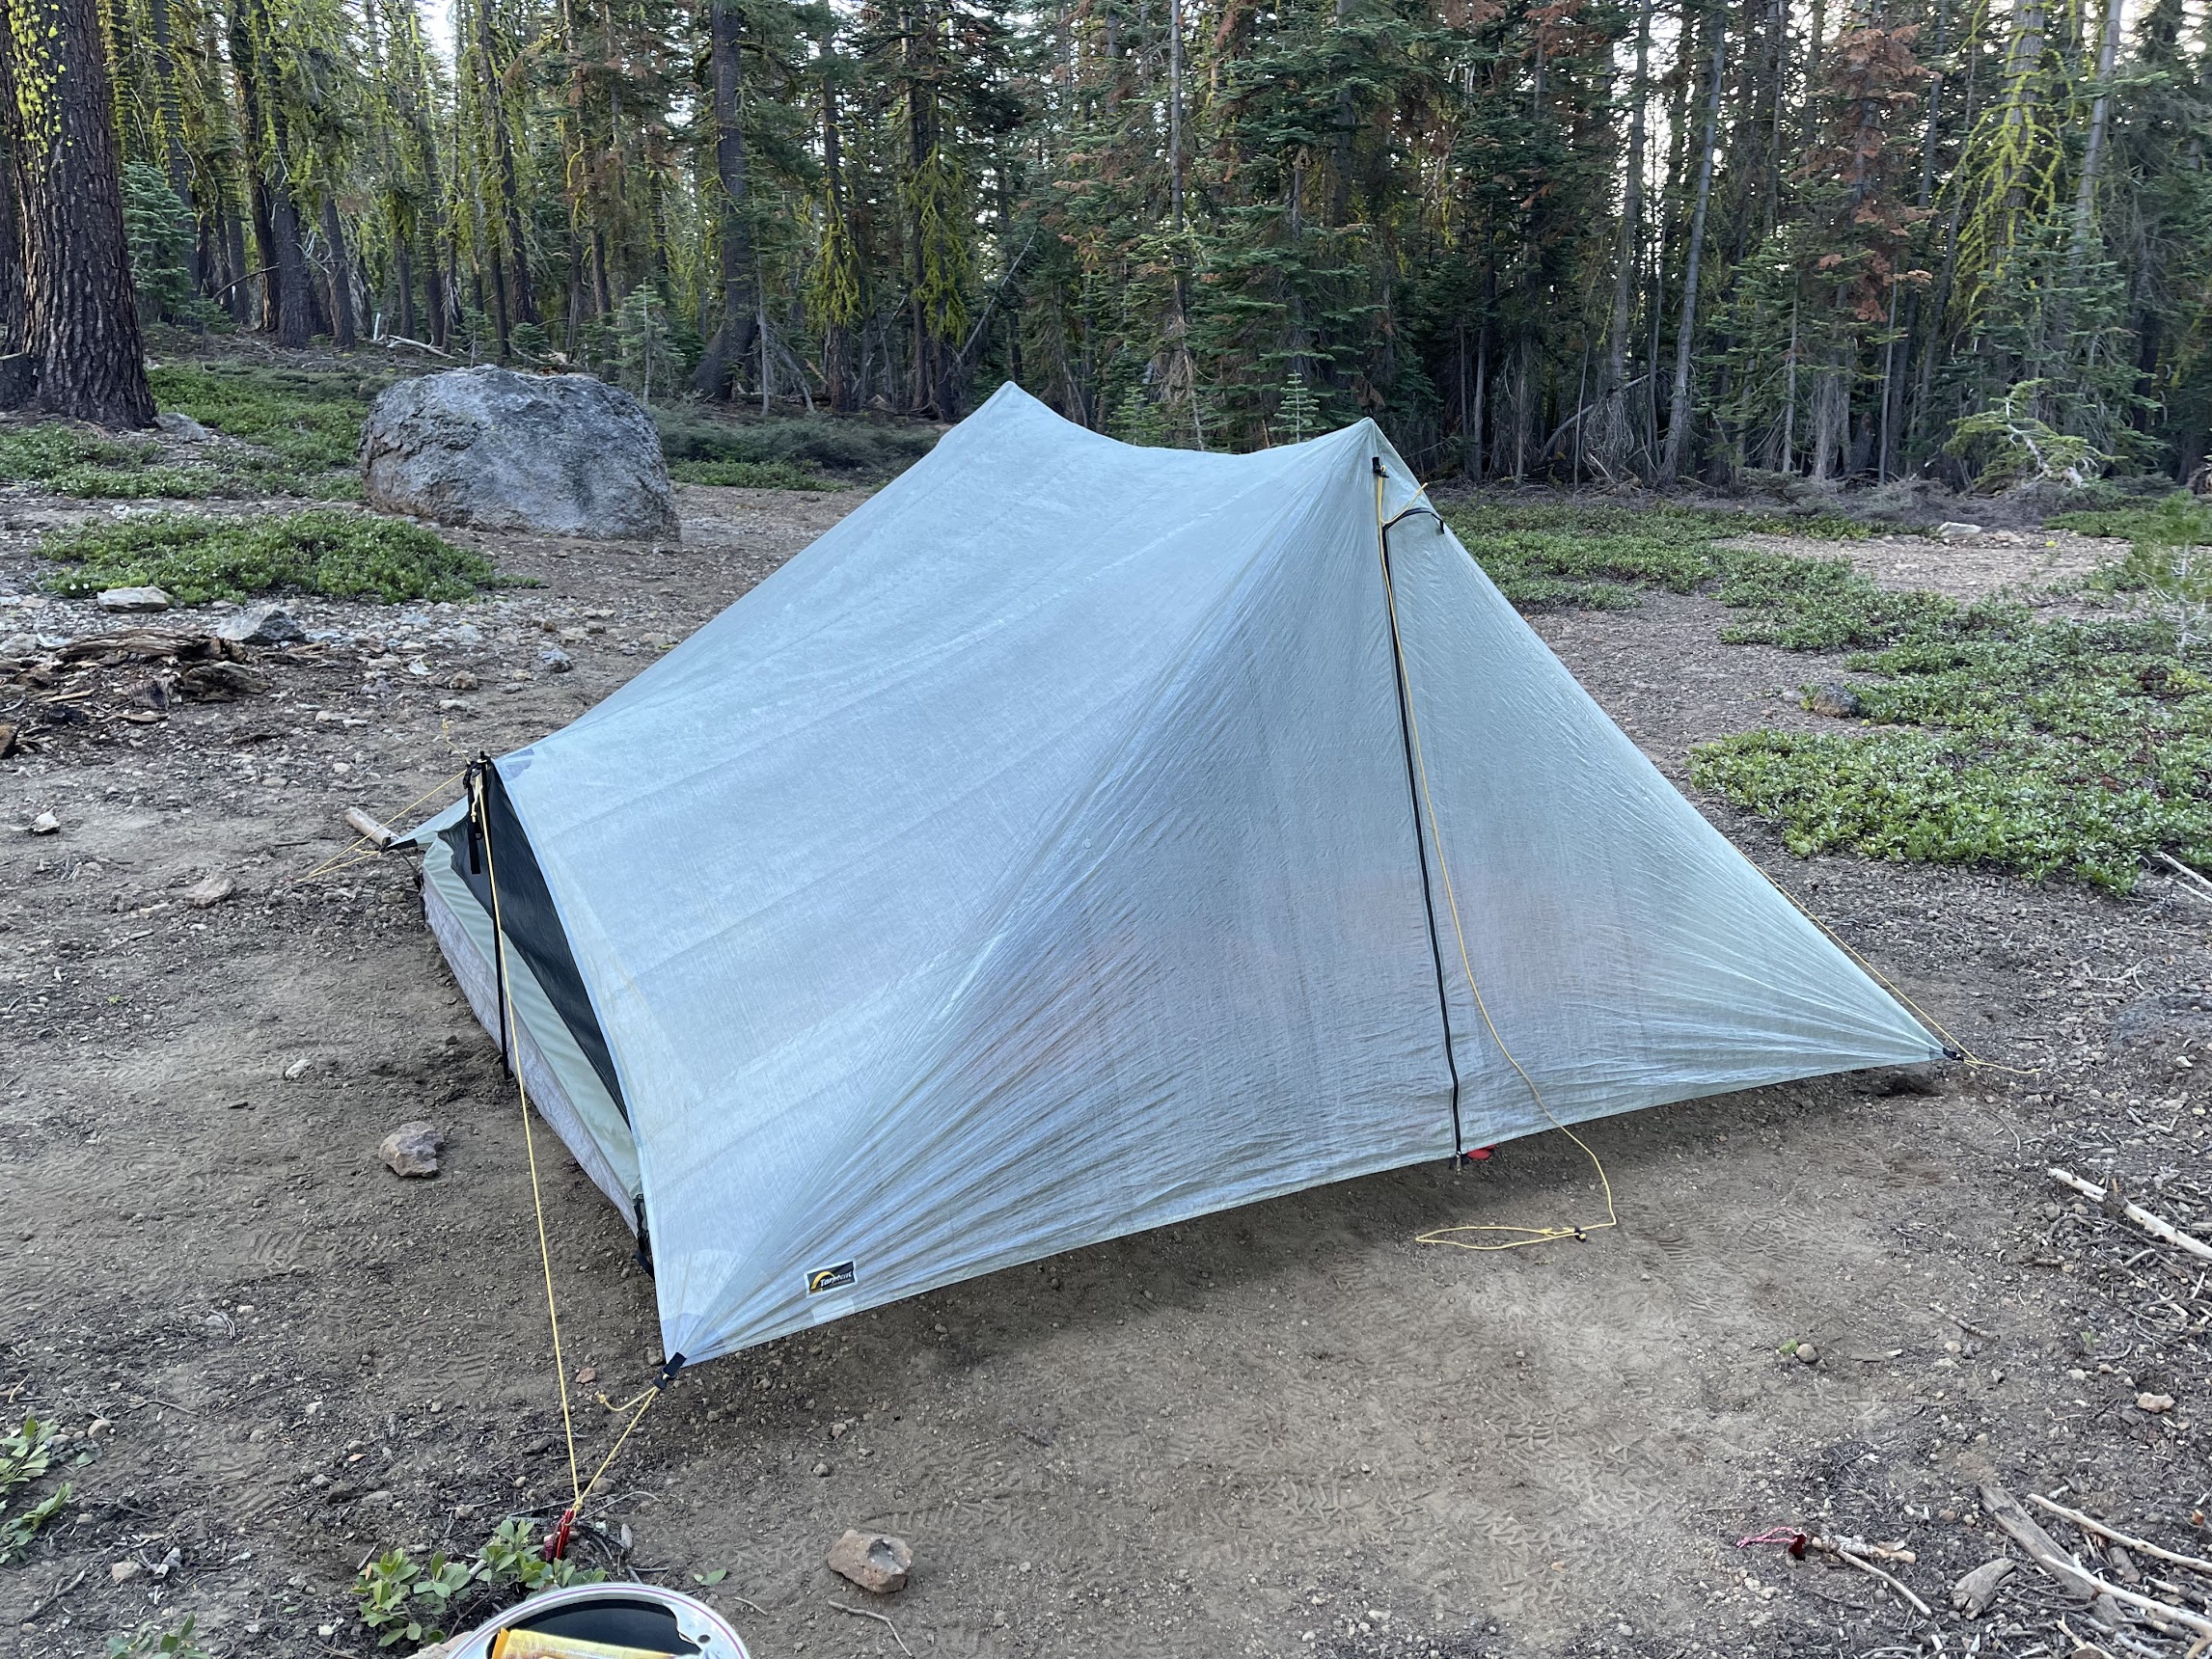
The tension created by the end struts and their triangular guyline system allows the Tarptent Dipole 1 Li and Dipole 2 Li to maintain a stable four-stake pitch that does not incorporate the doors as a load-bearing element. The upshot is that both vestibule doors can be open and rolled back without losing tension.
We experienced moderate rain and light wind below treeline in our testing, and are confident that the Tarptent Dipole 1 Li and Dipole 2 Li can handle those conditions without collapsing or letting in water. In heavy weather, four additional stakes and guylines can be deployed – two along the axis of the ridgeline and two running from the end struts. The symmetrical nature of the tension forces in the Dipole shelters is a real strength of the design (see our email interview with Henry Shires at the bottom of this article for more on this).
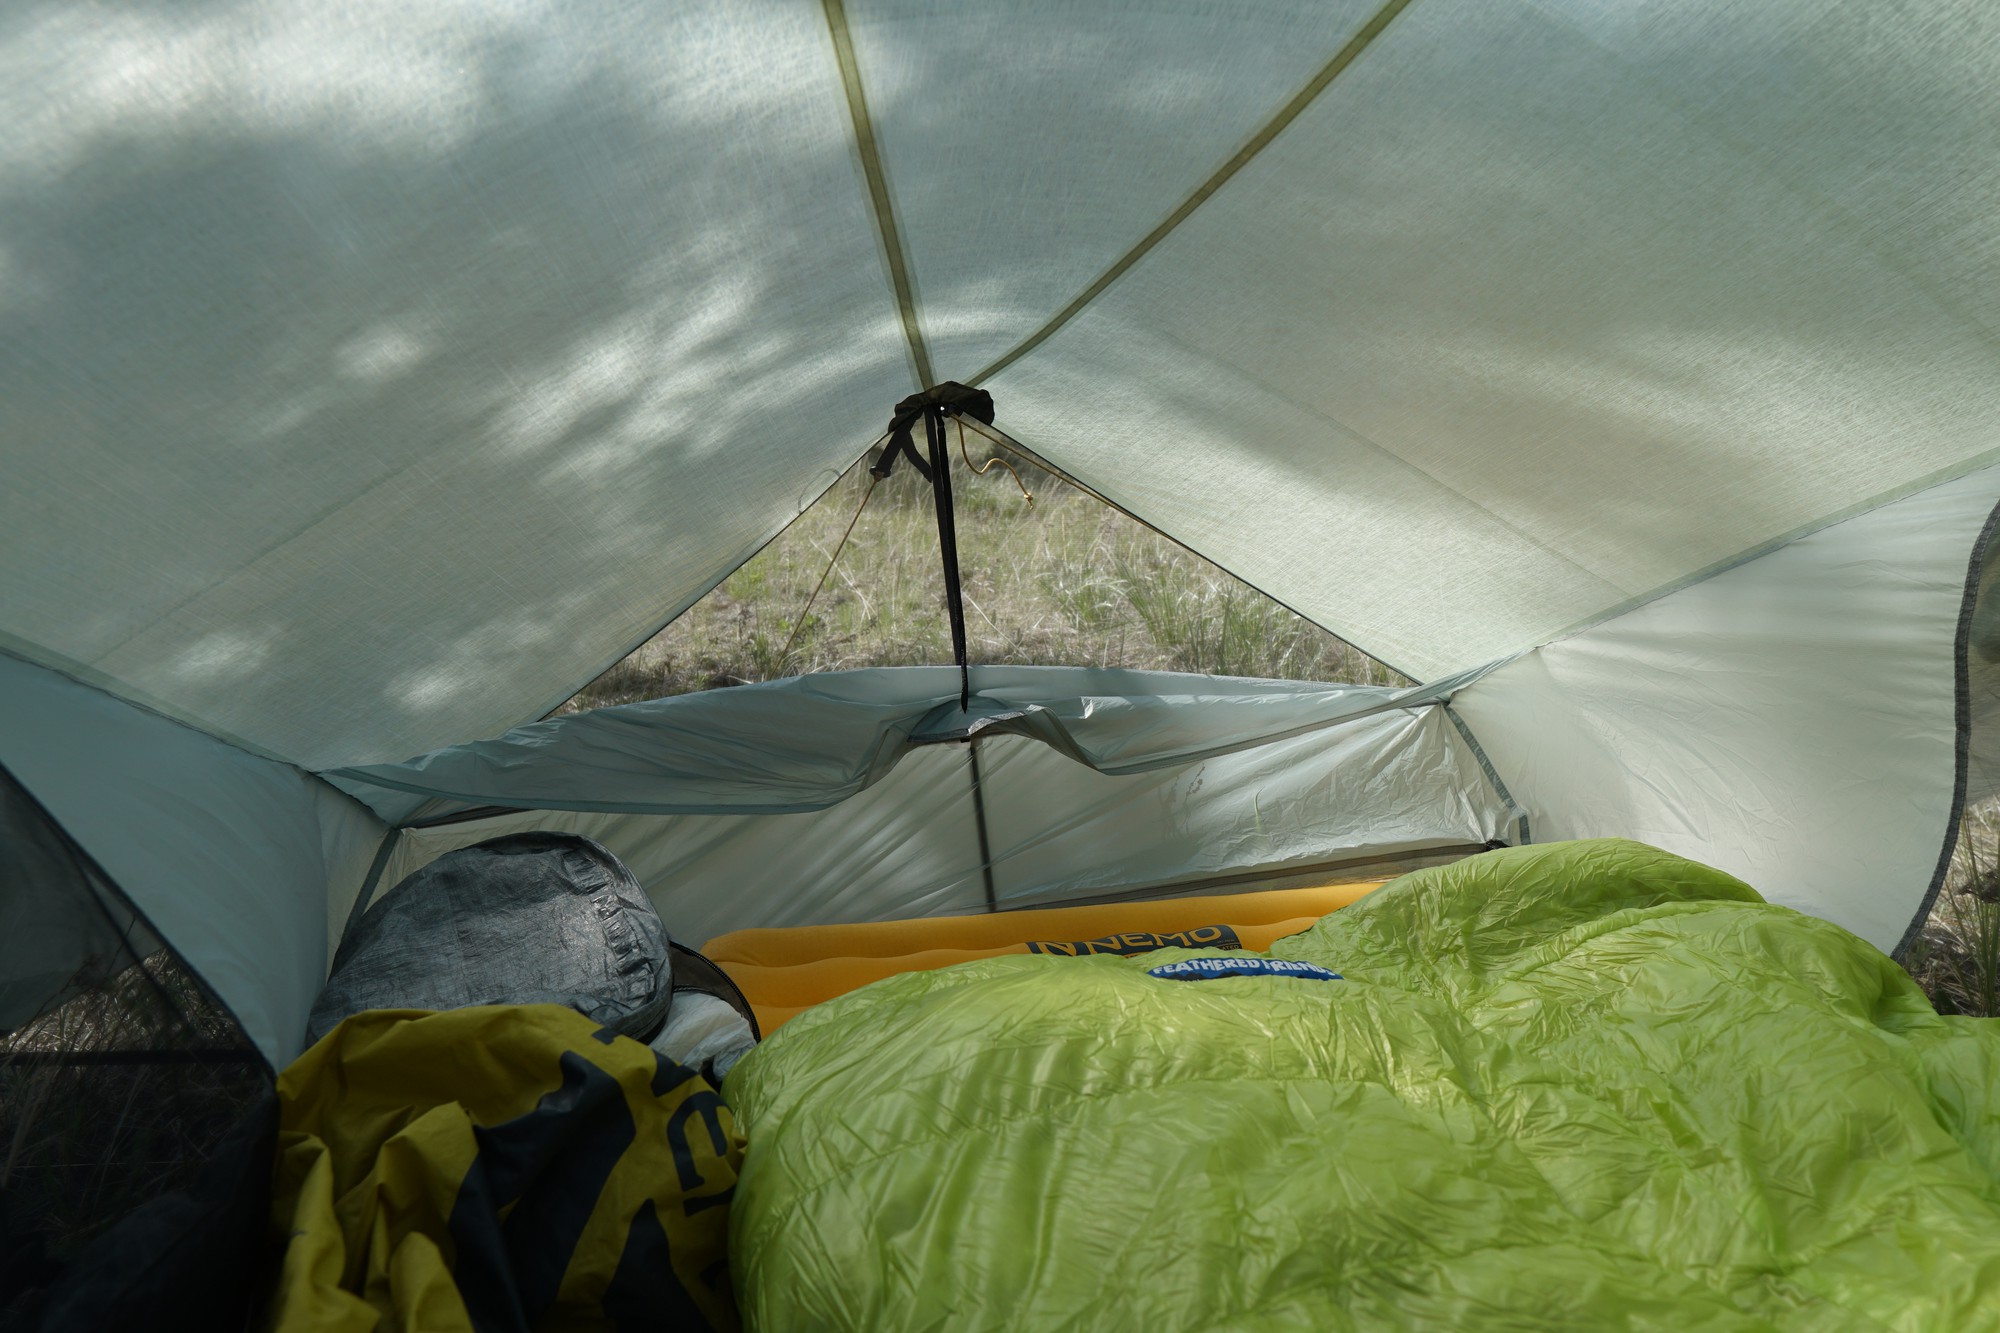
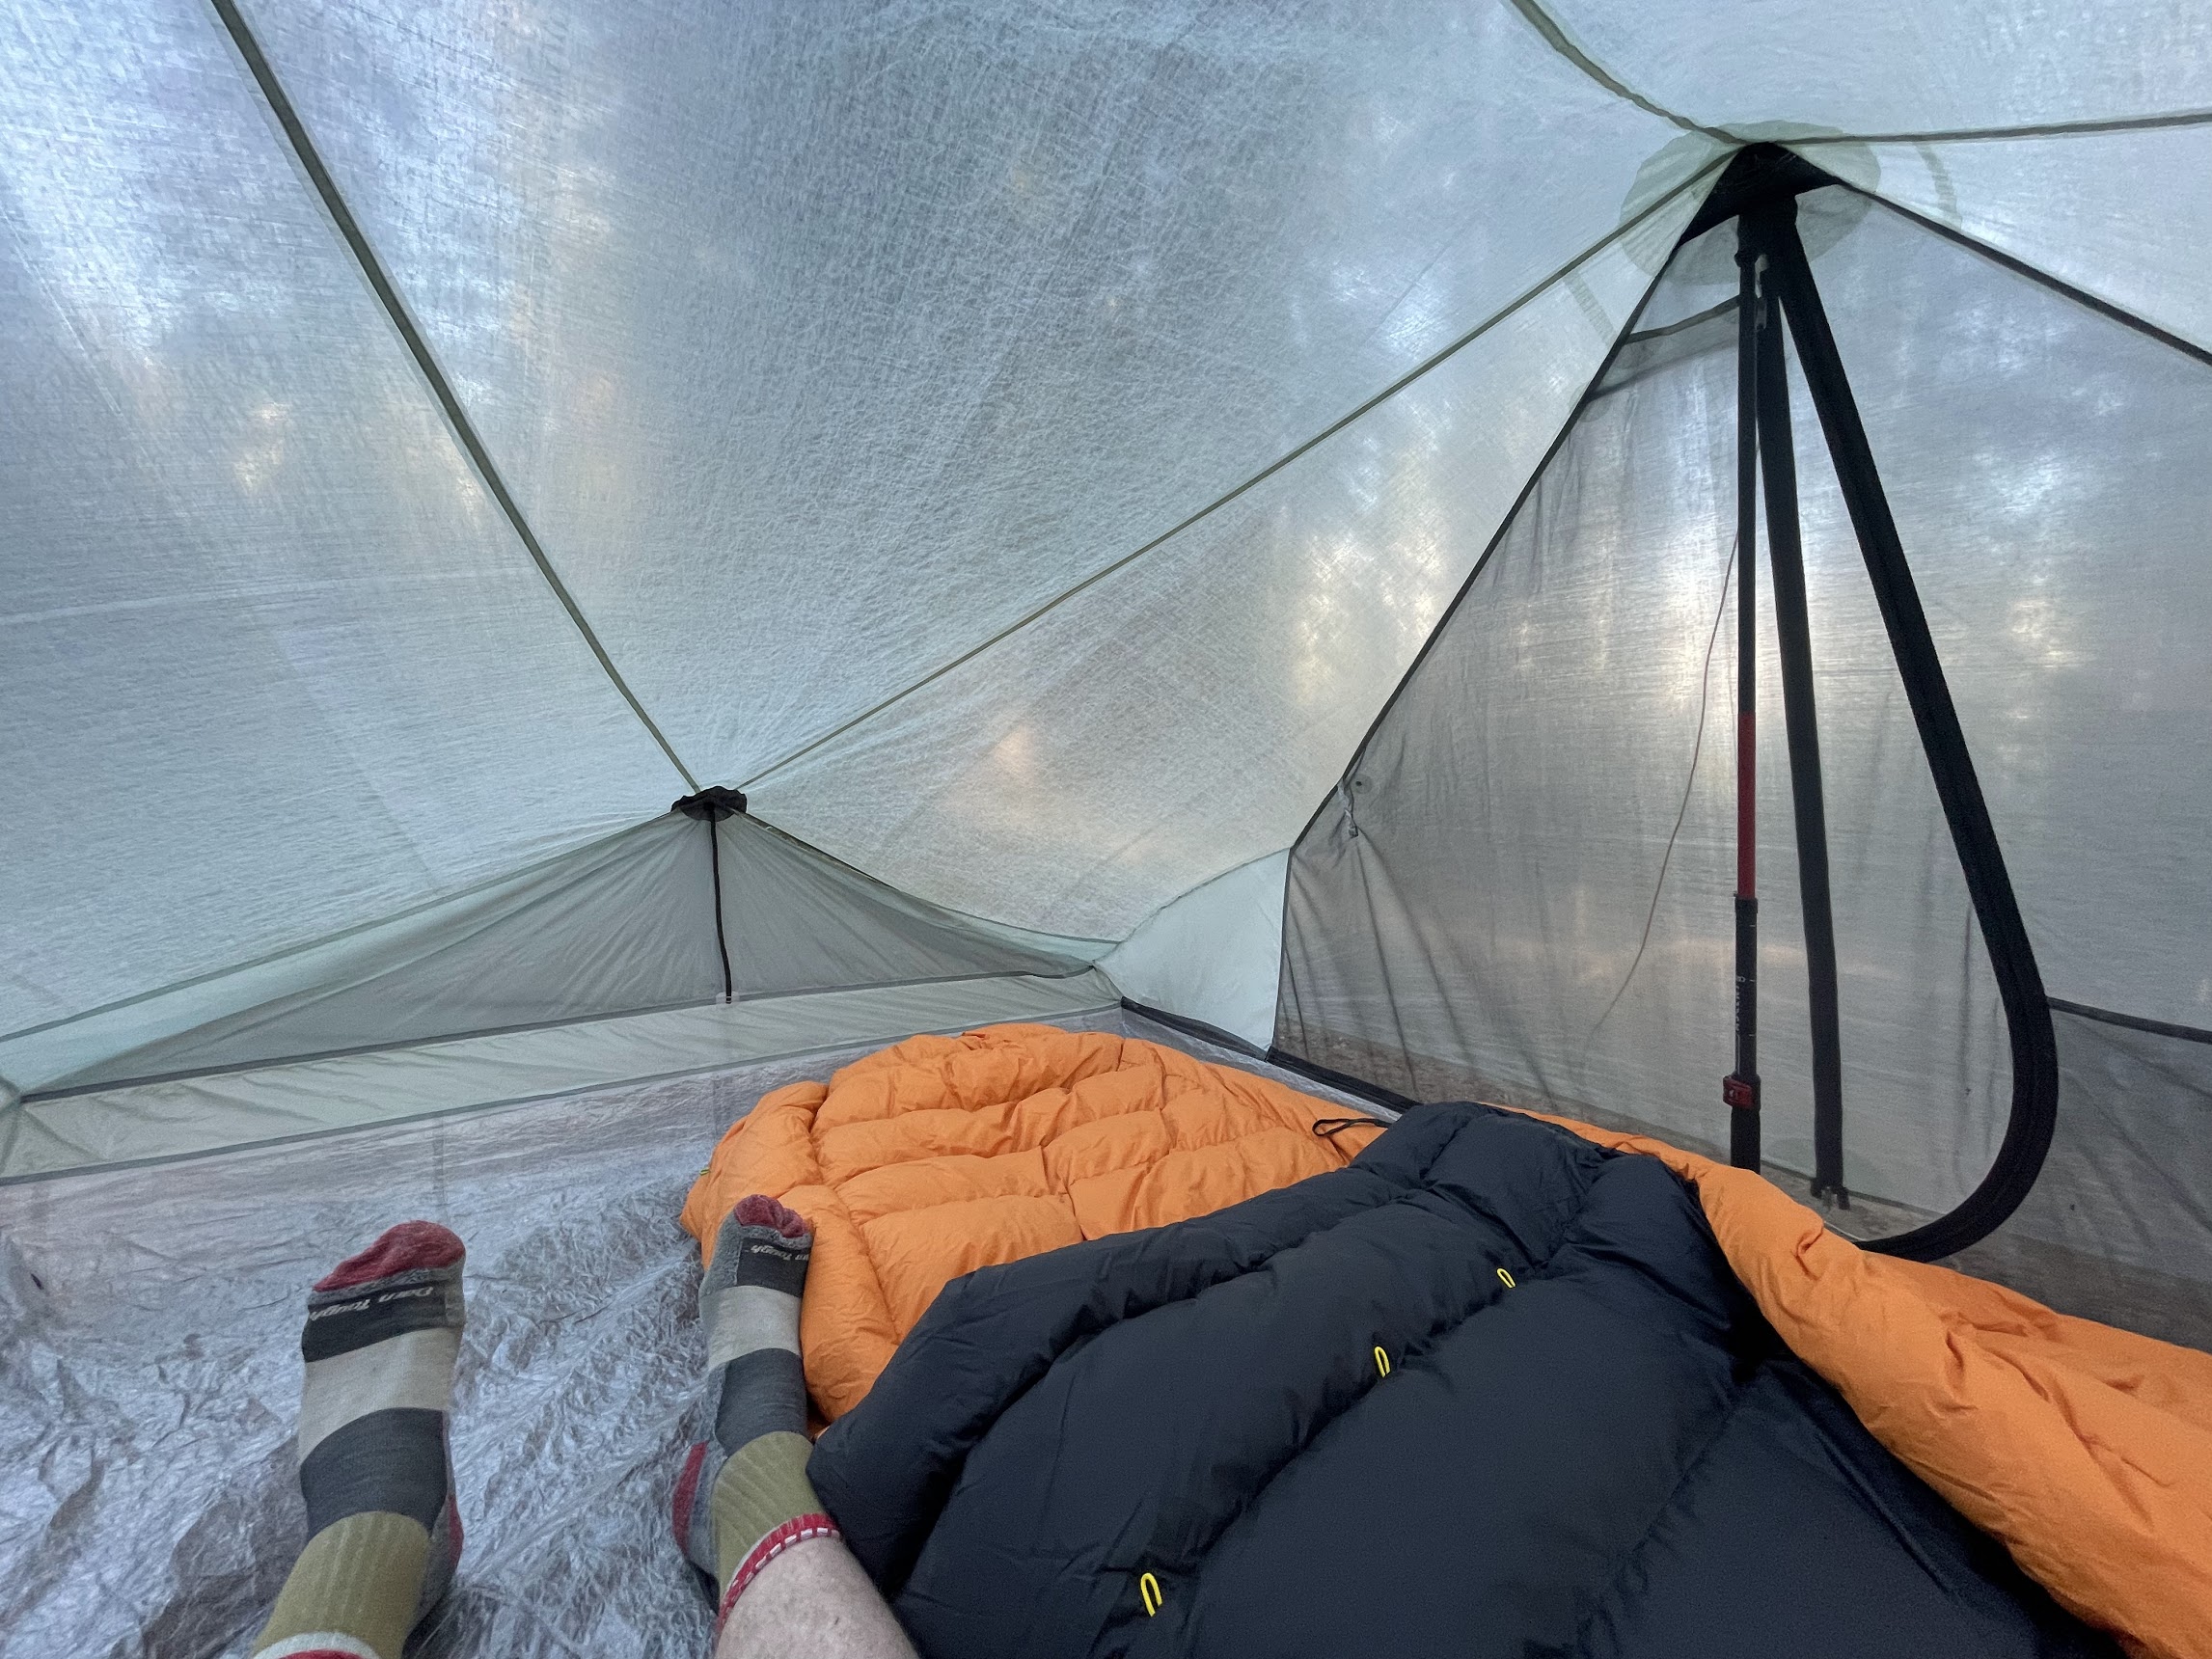
Livability and interior volume
There are several other features that we’ll explore more fully as we continue to review the Tarptent Dipole 1 Li and Dipole 2 Li:
- vestibule size and depth
- vent placement and design
- condensation drain placement and design
- end vent/window design and stormworthiness
- packed size and packability
- trekking-pole placement in terms of livability
- performance and stability in high winds/heavy rain/under snow load
- inner mesh door size and placement
Ryan touches on these performance issues in the video above.
But in this First Looks review, we are concentrating on the two features that stood out the most in our initial handling of the Tarptent Dipole 1 Li and Dipole 2 Li. The first was the four-stake design that allows both vestibule doors to be open without losing tension.
The second standout feature is the livable interior volume present in both shelters. The ends of the shelter are 21 inches (53 cm) tall – tall enough that feet will not rub against the shelter ceiling when sleeping pads inevitably slide down towards the end of the tent. The width and length are both designed to accommodate larger hikers. We are not tall (Andrew is five feet six inches and Ryan is five feet seven inches) but we are confident that Tarptent’s claim of comfort for backpackers six feet eight inches and over is not an exaggeration.
We believe that the Tarptent Dipole 1 Li and Dipole 2 Li are the roomiest trekking-pole-supported shelters for their weight that we’ve ever tested.
Comparisons
This is not a comprehensive comparison – that will have to wait until we can put the Tarptent Dipole series through long-term field testing. The purpose of this comparison is to help place the Tarptent Dipole 1 Li and Dipole 2 Li (specifically the Dipole 2 Li) within the category of two-pole, two-door, single-wall, Dyneema Composite Fabric shelters. No shelter in this comparison has the end struts and correspondingly totally vertical end panels of the Tarptent Dipole 2 Li, so we won’t waste time repeating that in every comparison.
Another noteworthy thing about the Tarptent Dipole 1 and 2 is that both shelters feature a slightly hourglass-shaped bathtub floor. In the specs above, we list the bathtub floor dimensions as follows:
- Dipole 1 Li width x length: 36 x 84 inches (91 x 213 cm)
- Dipole 2 Li width x length: 58 x 88 inches (147 x 224 cm)
But in fact, the Dipole 2 Li narrows slightly in the center to 50 inches (127 cm) and the Dipole 1 Li narrows in the center to 28 inches (71 cm).
Readers are encouraged to elaborate further on the differences and similarities between all four shelters in this comparison – and the pros and cons of each – in the comments section.
Tarptent Dipole 2 Li vs. Durston Gear X-Mid Pro 2
The Durston Gear X-Mid Pro 2 is the only other two-person, two-pole, double-pole, double-door, single-wall shelter currently on the market that is claimed to be pitched with a minimum of four stakes. (Another one is the Sierra Designs High Route 1 but that’s a one-person shelter.)
The Durston Gear X-Mid Pro 2’s floor footprint is slightly longer than the Tarptent Dipole 2 Li – 90 inches (229 cm) for the X-Mid Pro 2 vs. 88 inches (224 cm) for the Dipole 2 Li. But the Tarptent Dipole 2 Li is significantly wider at 58 inches (147 cm) at the ends and 50 inches (127 cm) at the middle vs. the X-Mid Pro 2’s 48 inches (122 cm). The final weight of the Dipole 2 Li is still pending, but the Durston X-Mid Pro 2 is likely to be ~5 ounces (142 g) lighter than the Dipole 2 Li. The Dipole 2 Li easily fits two long/wide (25 inches / 64 cm) sleeping pads – this is not possible in the X-Mid Pro 2 without deforming the shape of the inner tent.
The Durston Gear X-Mid Pro 2 is ~$100 cheaper than the Tarptent Dipole 2 Li. There are differences in overall design between the two shelters. The biggest difference is that the X-Mid Pro 2 is based on an asymmetrical design (offset poles and an inner tent that is diagonally oriented relative to the canopy). The Tarptent Dipole 2 Li is symmetrical – poles are oriented opposite of each other and the inner tent is parallel to the canopy. These design characteristics have implications for pole placement, stability, and the wind and rain performance of both shelters in their four-stake configuration.
For more on this, see our interview with Henry Shires, below.
Tarptent Dipole 2 Li vs. Zpacks Duplex
The Zpacks Duplex is still one of the most ubiquitous double-pole, double-door, single-wall DCF shelters. A noteworthy difference between the Duplex and the Tarptent Dipole 2 is that the Duplex needs eight stakes minimum to be considered ready for mild wind and rain. The resulting forest of guylines can be a little overwhelming at a small campsite.
It is assumed in our community that the Zpacks Duplex does not fare well in high winds. However, we think it’s mostly attributable to user error – the Duplex is a difficult shelter to pitch properly and securely in stormy weather, but with up to 14 stake-out points, it can be done. We think the Tarptent Dipole 1 Li and Dipole 2 Li will fare better than the Duplex in this regard – it takes much less effort to achieve an extremely taut pitch with the Dipole than with the Duplex.
The Duplex has large doors with the support poles taking up space right in the center of the doors. The Tarptent Dipole 2 Li also has centrally located poles, but smaller, offset doors so the pole is not in the way, particularly if the user angles the poles to one side. The Duplex is more than a foot (30 cm) narrower than the Dipole 2 and weighs ~8 ounces (227 g) less than the Dipole 2.
Gossamer Gear The DCF Two
The Gossamer Gear The DCF Two weighs ~6 ounces (170 g) less than the Tarptent Dipole 2 Li. The DCF Two requires a minimum of six stakes for setup. Steeply sloping walls and a relatively small footprint make the DCF Two suitable only for hikers shorter than about 6 feet 1 inch (185 cm).
Like the Dipole 2 Li, the DCF Two has smaller doors to one side of the support pole (they are across from each other as opposed to offset from each other as with the Dipole 2 Li).
The DCF Two also stands out on this list for being tapered, with a head-end width of 48 inches (122 cm) and a foot-end width of 42 inches (107 cm) – so no room for two wide pads. It also has an apex height of 43 inches (109 cm) as compared to the Dipole 2 Li apex height of 45 inches (114 cm).
Final Thoughts
The Tarptent Dipole 1 Li and Dipole 2 Li are not the lightest double-door, double-pole, single-wall Dyneema Composite Fabric shelters available. From conversations with Henry Shires (owner/founder) and Rob Dunne (design engineer) at Tarptent, that was clearly not the design goal. Tarptent’s primary goals were to create usable interior volume and a stable minimum four-stake setup, and at this, it succeeded.
The Tarptent Dipole 1 Li and Dipole 2 Li are the roomiest shelters in their class – that class being single-wall, double-pole, double-door trekking pole-supported shelters in the 18 to 26 ounce (510 to 727 g) range. This liveable interior volume is a combination of apex height, floor width and length, and the unique end-strut design.
Four-stake setup is stable in rain and light winds and allows vestibule doors to be open without losing tension. Tarptent’s secondary goal was to maximize ventilation and minimize condensation buildup. We like the design features they’ve implemented with this in mind, but we will need further field days with these shelters to accurately judge condensation management.

Photos


Where to Buy
- See the Tarptent Dipole 1 Li and Tarptent Dipole 2 Li at the Tarptent website.
Tarptent Dipole 1 Li and Dipole 2 Li design notes: an interview with Henry Shires
Ryan Jordan: Using the four-stake setup without apex guylines, I’m able to achieve pretty good stability the tighter the guylines are tightened. In our forest soils here, the six-inch stakes are not holding this level of tension on the Dipole 2 Li, so I’ve been using eight-inch stakes.
That said, I’m pulling [up to] 15-20 pounds of tension on each stake – that’s a lot. I can pull significantly less by using apex guylines, which is to be expected. But I wanted to get a feel for your expectation of stability with and without apex guylines in terms of use cases for wind speeds.
Henry Shires: Yes, agreed that six-inch stakes are marginal in loose soil, especially for the Dipole 2 Li and that eight-inch [stakes] are the way to go. In my/our testing the 4-stake setup (assuming the stakes hold) is fine for low to moderate winds but, yes, the apex/vestibule lines are needed in higher winds if only to take some of the stress directed at the low corners by broadside winds.
As with most/all tents, more stakes are better than fewer stakes, and, yes, for real weather in exposed places the Dipole will want six of them. However, for many/most cases, at least in sheltered areas, four will be fine and I personally really like not having to work around guylines getting in and out.
RJ: Can you give us some info on what is exactly being patented?
HS: We are moving to patent the combination of the ability to stand with four stakes – provided by the dual inset pole structure and relatively large (17-inch) displacement between the ground level corners and apex points – and the mid-end foldable struts which provide the large increase in both interior volume and structural support.
As you know we’ve done plenty of trekking pole tents with end strut designs including the long discontinued Saddle 2 but all had vestibules that required staking (or, if rolled back, apex guylines in lieu of) for lateral support.
The Aeon Li was the first one [that] allowed for full front rollback with no apex line needed (and we have a patent for that one) but to the best of our knowledge, the Dipole has never been done before. I know you’ve played around with the [Durston Gear] X-Mid and [Sierra Designs] High Route designs which, at first glance, appear to be a four-stake setup but the asymmetry proves otherwise and my goal with this one is a true 4-stake setup and practical use (in most cases).
[Here are a] couple of graphics (below) showing the tension lines on the Dipole and X-Mid/High Route designs, both with full rolled back doors. Note that for stability what matters are the relative forces applied to apex points where the underlying vertical poles meet the canopy.
Unequal forces will cause some form of pole rotation and corresponding loss of fabric tension. I did not include a graphic of a simple four-sided square pyramid but that one would have four tension lines coming off the center apex pole and each would be at 90 degrees. For two pole tents, each pole has tension lines and at least one connecting tension line between them.
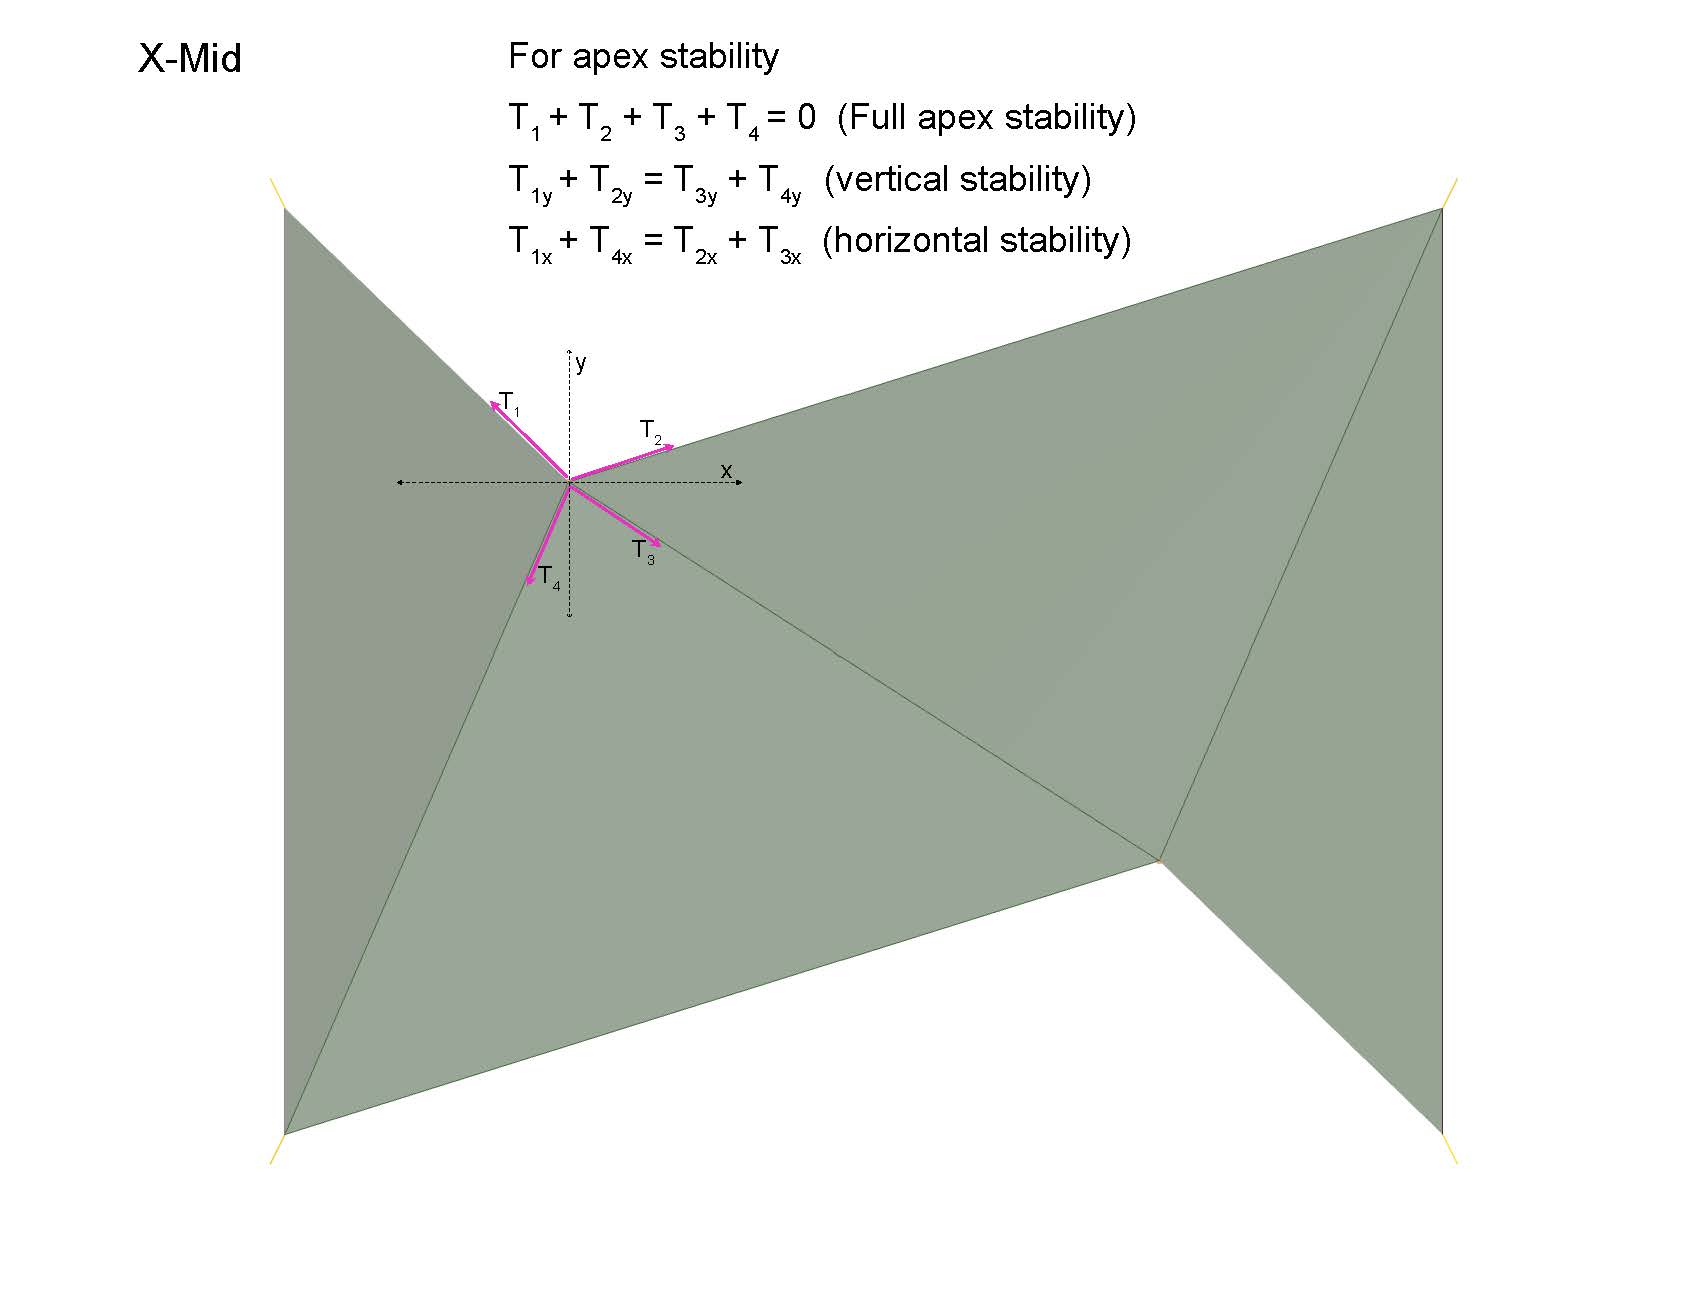
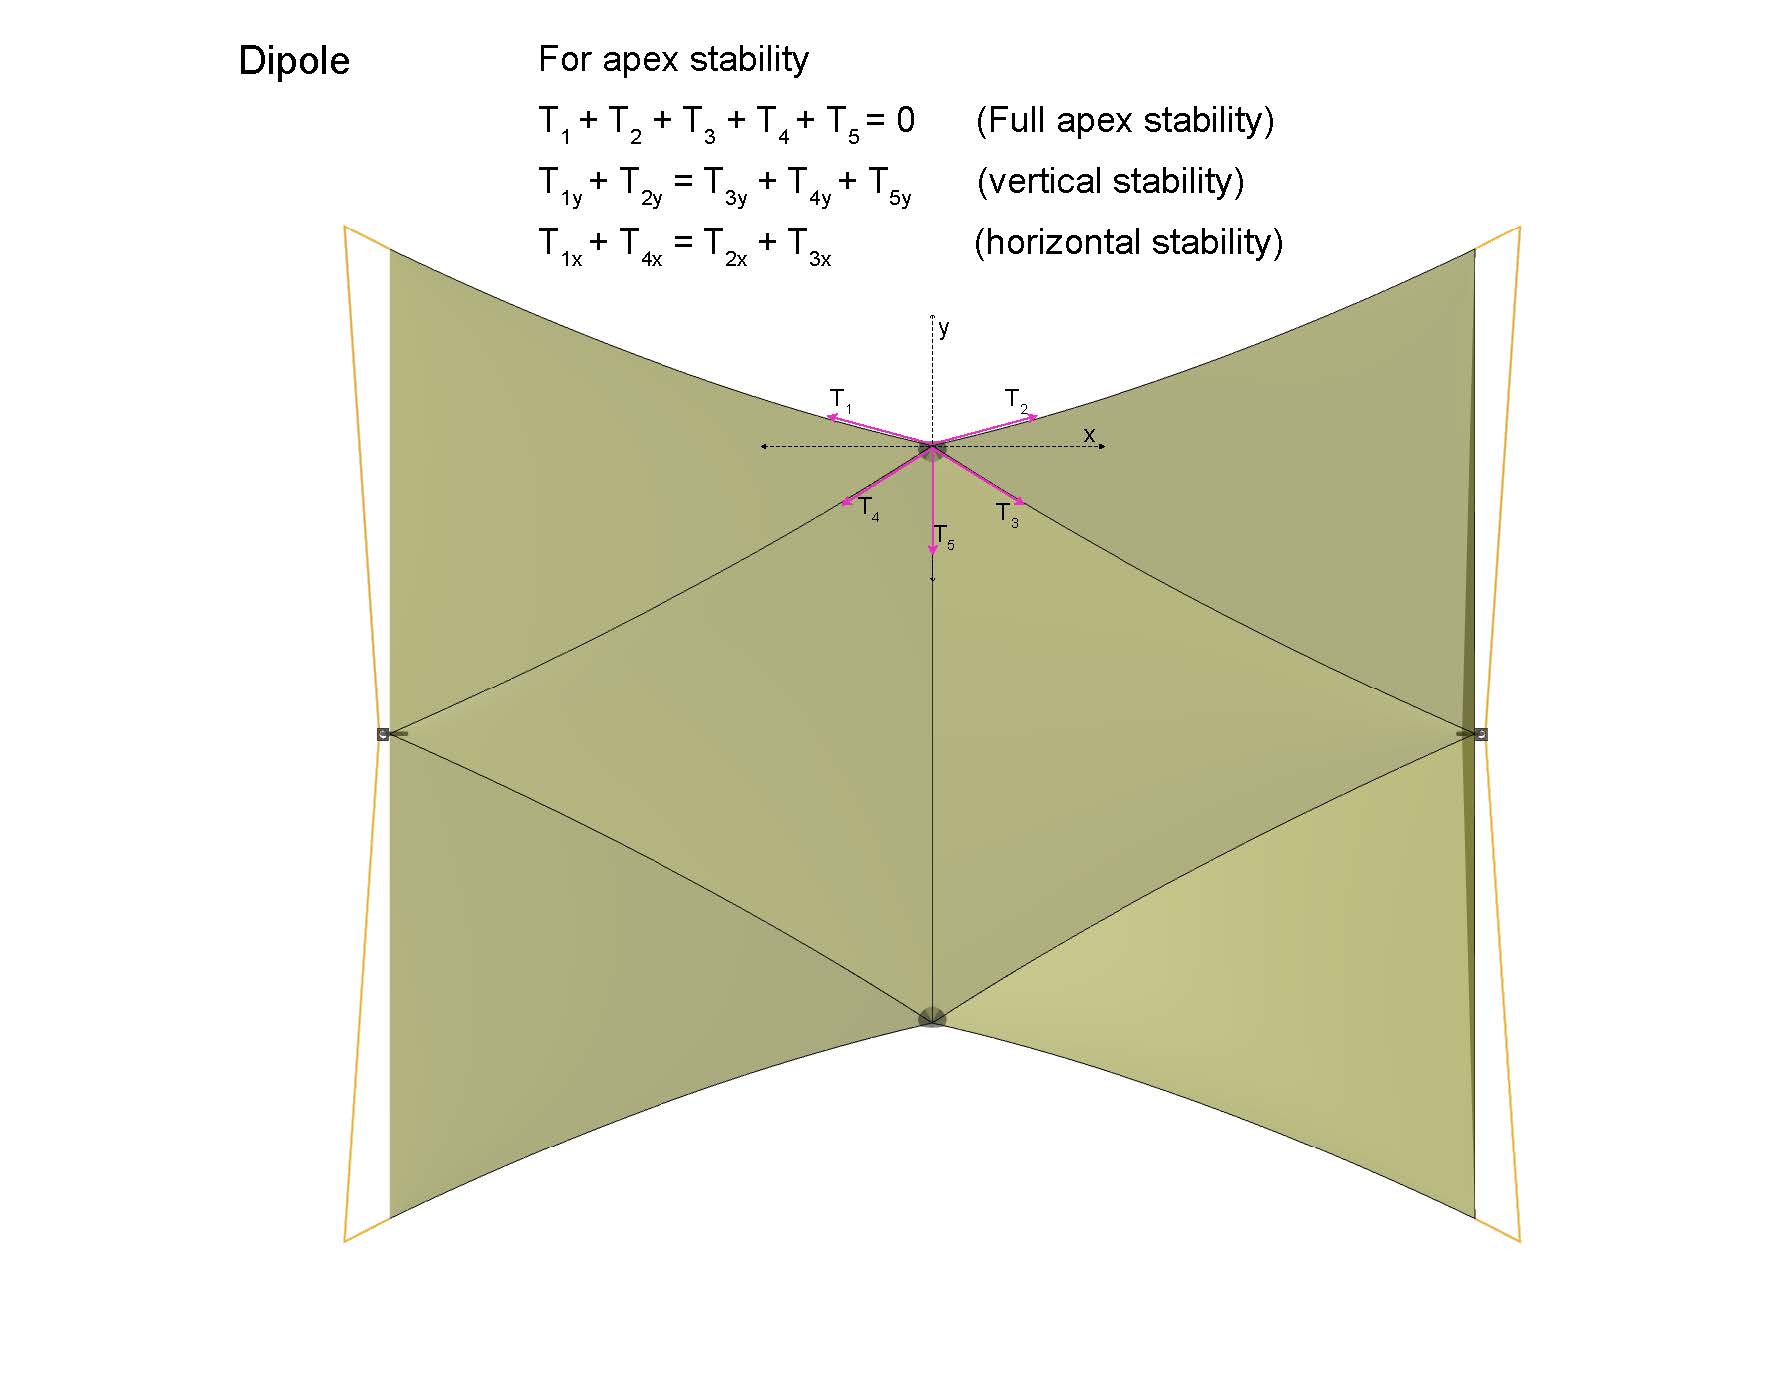
The inherent asymmetry of the offset poles in the X-Mid/High Route means there is no way to adjust the four corner tension points such that the sum of all the tension lines equals zero with the doors open in any sort of stable equilibrium. In the X-Mid graphic, note that all tension lines are at different angles and that the T3 tension line that runs between the two apex points is not independently addressable.
RJ: T3 is not independently controllable without apex guylines – and that makes the X-Mid a six-stake tent in all but a mild breeze.
HS: It is also the case that the long seam line carrying the T2 tension is a shallow angle and any deviations in the pole apex position aren’t resisted by corresponding changes in tension because that edge doesn’t need to stretch to accommodate the change.
RJ: There is notably different behavior in apex stability between the X-Mid and Dipole. On the X-Mid, T2y is indeed a very shallow angle. So it would seem intuitive to crank that T2 corner stake down hard, to bring more tension to T2y. However, the asymmetry causes an additional imbalance in all of the other tension lines because there are no directly opposite forces to T2y. It’s tricky and time-consuming in the field to sort this all out. Of course, the problem is sort of solved by just adding the apex guylines to the X-Mid.
HS: Adding an additional tension line (in the direction of the Y-axis as shown in the diagram) does inhibit an inward rotation and is the reason why the X-Mid is always shown that way.
In the Dipole, there is an additional inward tension line (T5). That line is resisted by the corner tension lines (T1 and T2) but is also addressable through the tensioning system at each mid-end strut which creates T3 and T4. The inherent symmetry of the Dipole – tension lines are equalized and at comparable angles – means that no additional apex tension lines are needed for low to moderate winds and doors can be fully rolled back.
RJ: I had the tent in a heavy thunderstorm yesterday and it otherwise stayed remarkably dry – the end vent construction is unique and effective. I like it. I was admittedly a bit nervous about not having an awning over these vents, but the inward-sloping struts kept rain from entering the tent.
HS: Yes, I too was nervous about that. Earlier versions of that system weren’t reliable but [Tarptent Design Engineer] Rob [Dunne] – thanks Rob – made that work well.
RJ: What’s at the heart of your design process for the Dipole series? What did you set out to accomplish?
HS: The pack and pad market [has] evolved over the years and we acknowledge the trend toward wider, thicker pads and narrower packs. The way we achieve [usable interior volume] on many of our tents is to deploy the PitchLoc structure. They are strong and effective but only foldable/packable down to 16 inches on the Notch and StratoSpire series and that length makes it hard to fit horizontally into many ultralight (i.e., skinny) packs.
To retain/enhance usable volume on the Dipole we moved to a foldable single strut structure that folds to 13 inches (and [is] easily detachable), a length much more viable for horizontal packing. The other goal for these was to enhance usable length and width such that both models would easily fit long wide, and thick pads – one in the Dipole 1 and two in the Dipole 2 – while still sleeping people at six feet eight inches or even taller. The completely vertical and relatively tall (21-inch) ends walls make that possible.
The other goals were a true four-stake setup and greatly enhanced venting – ends, sides, and apex venting.
Check this space for more notes and observations on the Tarptent Dipole 1 and 2 as we continue to field test these shelters over the coming months.
Learn More
Browse our curated recommendations in the Backpacking Light Gear Shop – a product research & discovery tool where you can find Member gear reviews, Gear Swap (used gear) listings, and more info about specific products recommended by our staff and members.
Gear Shop » Trekking Pole Tents
Related Content
- more Tarptent reviews and Tarptent-related content
- see the Durston X-Mid Pro 2 review
- check out what our community thinks of the Zpacks Duplex
- see what our community has to say about tent shopping in forum threads here and here
DISCLOSURE (Updated April 9, 2024)
- Product mentions in this article are made by the author with no compensation in return. In addition, Backpacking Light does not accept compensation or donated/discounted products in exchange for product mentions or placements in editorial coverage.
- Some (but not all) of the links in this review may be affiliate links. If you click on one of these links and visit one of our affiliate partners (usually a retailer site), and subsequently place an order with that retailer, we receive a commission on your entire order, which varies between 3% and 15% of the purchase price. Affiliate commissions represent less than 15% of Backpacking Light's gross revenue. More than 70% of our revenue comes from Membership Fees. So if you'd really like to support our work, don't buy gear you don't need - support our consumer advocacy work and become a Member instead.
- Learn more about affiliate commissions, influencer marketing, and our consumer advocacy work by reading our article Stop wasting money on gear.

Discussion
Become a member to post in the forums.
Companion forum thread to: Tarptent Dipole Li Review
The Tarptent Dipole 1 Li and 2 Li are rectangular DCF trekking pole tents with carbon end struts to boost interior volume and stability, and a four-stake footprint that eliminates the need for apex guyline tie-outs in mild weather.
Thanks so much for the review. Looks like a very well thought, livable design. Very interesting discussion with Henry Shires on the impact of asymmetric vs symmetric designs on apex stability. Charts make perfect sense from a mechanics standpoint
A note on the apex stability/number of stakes for the X-Mid:
Without getting into a time consuming physics discussion, the X-Mid is stable with 4 stakes from a practical use standpoint and that is how most people use it (e.g. a quick glance at the #xmid hashtag on Instagram shows the majority of tents being used without peak guylines). This is true because the peaks are located within the perimeter of the fly and thus when the pole is extended the various vectors will sum to zero on the peak. The 4 stake pitch of the X-Mid is quickly demonstrated here where it is obviously stable and practically useable with 4 stakes. This is quite different from the High Route where the apex is along the perimeter so there are no vectors along one side and guylines are mandatory.
The X-Mid 1 has always has very little need for peak guylines (just in high winds or to compensate for a poor pitch) which is why many users never use them (e.g. my wife hiked the 1100km Great Divide Trail and never used them once). Conversely, the original X-Mid 2 did benefit more from peak guylines in moderate winds but not because of uneven tension at the peaks but rather because the side panels are a fair size and steep which gives a larger profile to the wind. When this is combined with the greater stretch of a woven fabrics and only shallow vectors to oppose this wind force, there can be a need for a peak guyline to anchor against the wind. This is quite similar to the Dipole which also has large, steep sidewalls and only shallow vectors to anchor the apex against this. Both tents are stable in mild conditions while peak guylines are recommended for both in high winds. Also, second generation of the X-Mid 2 reduces stretch in the canopy and takes peak guylines from something people might use 30% of the time down to maybe 10%.
The closer comparison to the Dipole though is the X-Mid Pro 2, which is also DCF. With the smaller size of the X-Mid Pro 2 combined with low stretch DCF fabric, the practical need for peak guylines is much less and near zero. The tent is so stable without peak guylines (even in pretty decent winds) that we envision >90% of users will never use them and we don’t include any on the tent (just a loop in case some users want to add some). So it’s not inaccurate to say that X-Mid’s are ‘always’ shown with peak guylines and they are needed for practical use.
All of this can get quite academic, but the practical takeaways are:
1) Both tents can form a stable structure with only 4 stakes but most users will use 6 so the vestibule side of the doorways can be anchored.
2) The main benefit of a 4 stake pitch is not that more stakes is particularly onerous to put it, but rather than tents with 4 main corners require less guesswork in the pitch. Both tents share this benefit.
3) With both tents, the peak guylines become increasingly important as wind starts hitting the sidewalls. I expect the Dipole’s need for such guylines is at least as great as the X-Mid Pro 2 because it is a larger tent with a larger profile to the wind.
Anyways, I hope that clears things up. It was quite a surprise to read the X-Mid always needs guylines and it’s not practical to use it without them, when we have thousands of people out there doing exactly that.
> the 4 stake pitch of the X-Mid is quickly demonstrated here where it is obviously stable and practically useable with 4 stakes.
But you show it with 5 stakes with the door open — you add one more stake right before you open the door.
> I expect the Dipole’s need for such guylines is at least as great as the X-Mid Pro 2 because it is a larger tent with a larger profile to the wind.
But it’s actually a smaller profile. The Dipole 2 Li is 82 x 94 and you list the X-Mid Pro 2 at 80 x 100. In addition, there is much more faceting on the Dipole 2 and the average panel size is smaller and therefore lower wind profile.
In that example there is an extra stake added to hold the door flap after it is up, but it’s not required and not a peak guyline as you are saying are needed. If you want to see a 100% pure 4 stake pitch, you can see it here. I do add a stake at the door later in the video to hold the door flap in place, but that’s the same as the Dipole where it’s not needed for stability and not a guyline.
There are examples of guyline free X-Mid’s everywhere. Why not focus on more meaningful differences between these tents, like the greater width of the Dipole? It looks super spacious and it’s great it works with two wide pads. It looks like a nice tent.
As a long term Ultimid user, both of these tents, Dipole and X-Mid, are appealing. My question would not depend on the number of stakes required for a pitch in gentle conditions but how they compare to a pyramidal tent in high winds above-timberline?
In other words, would Ryan give up his favored pyramid for either one in those conditions?
Great offerings from great company(ies). Having a construction background meant being a builder of many things. I do appreciate innovative design(s) when applied to intended application(s). And yet the bar continues to be raised. Humble bows left and right. Just some thoughts. ~RL
Thank you Henry for designing a tent capable of accommodating 6′ 8″ hikers who don’t like sleeping with a facefull of fly fabric and damp feet.
Do you envisage offering this design in a woven fabric at a later date, or will it be DCF only?
What Henry calls the “faceting” of the Dipole canopy (smaller size, triangular shape, and symmetrical placement of the panels) means that it should be very good at avoiding permanent deformation and stretching of the DCF fabric due to tensioning that plagues a lot of other DCF designs. This is likely to be a big plus for long term durability and aesthetics.
My friends in Taiwan, where humidity is very high, are pretty excited about the large end vents on the Dipole.
Bravo! This looks like a really awesome, mature design. I think early adopters can buy with confidence that they will be getting a tent that is already well-tweaked.
For most users it won’t be problem, but for those who camp in sites regularly exposed to high wind, I expect that the Dipole, like the X-Mids, will still be fairly noisy, albeit certainly able to withstand the brunt of the wind force. Edit: Are there stake out points on both sides at the bottom of the door zips for really windy conditions/potential zip failure? It’s hard to tell from the photos here and on TT’s site whether there is just one stake out point on one door panel or whether there aren’t two, one on each panel? Having a dual tie out option for each panel on the side door would put less stress on the DCF wouldn’t it and provide a backup in case of zipper failure (a problem I’ve had on other DCF tents due to permanent deformation).
@Tim Cheek
I’d heartily suggest having a look at an octagonal mid design for the conditions you describe. Wind resistance is far superior to a rectangular or square mid, let alone these dual pole designs. (Not that the rectangular/square mids are a slouch by any means but they do tend to get noisy in high winds).
Awesome design for taller folks. A lot of thought must have gone into determining the optimal strut height. The top Dyneema panels have an angle that becomes more shallow towards the ends due to the height of the struts. Water can flow down the sides as the roof panels narrow as they extend, and pooling is avoided, but I wonder what happens with snow? Is the tent designed to be a three-season shelter, or can it take a bit of snow? I suppose one could gently tap the roof from the inside on the spot close to the struts that may be susceptible to snow accumulation in case of suboptimal pitch. Or perhaps this is just not an issue in the field. It would be interesting to find out.
Great preview. It seems like we’re in a time of significant innovation in the UL tent market, which is great to see.
Reading further, I’m a bit concerned by the amount of tension required when doing a 4 stake pitch. In the article you discussed needing to use 8″ stakes in loose soil. In some areas, I’ve been forced to pitch my tent (a TarpTent Stratospire 2) at least partially on decomposed granite where I was required to anchor corners or guy lines with large rocks rather than drive stakes into the soil. My concern is how viable will it be to use rocks (and extra cordage) with such a high tension? Does adding the 4 additional stakes lessen the required tension at the 4 corners?
I use 8 stakes on the SS2: 4 for the corners, 2 for the vestibules, and 2 for the peak guy lines.
I’m not sure TarpTent can patent the ability to stand with 4 stakes. Durston did it first (yes, I read Henry’s comments). Regardless, for me it’s quibbling over a bullet point on marketing material as I will almost always carry the extra stakes for storm worthy protection. That being said, I think the 10 or 12 stakes required to make a Duplex storm worthy is too much, and this combined with the steeply sloping sides has ruled out me ever purchasing a Duplex. (I still own one of the original TT Hexamid Twins, but it mostly takes up space in my closet now.)
> Do you envisage offering this design in a woven fabric at a later date, or will it be DCF only?
We’re not none with this design by any means.
-H
Good to hear. Thanks Henry.
> I’m not sure TarpTent can patent the ability to stand with 4 stakes. Durston did it first (yes, I read Henry’s comments).
The patent is for the overall geometry which includes the symmetrical tension lines (for 4-stake stability) and the end strut system for volume enhancement and faceting. As I understand it, the X-Mid patent has to do with relative positioning of interior to fly geometry and not for the fly geometry (which is actually just a widened SD High Route design sufficient to angle an interior).
>Are there stake out points on both sides at the bottom of the door zips for really windy conditions/potential zip failure?
Yes.
“[The X-Mid Design] is actually just a widened SD High Route design sufficient to angle an interior.”
Please cease with the misinformation about the X-Mid. It is not just a widened High Route to rotate the inner. There are other core differences such as in the relative peak position (along the edge versus internal) which give further differences in stability, panel slopes, stake and guyline requirements etc in addition to the differences in the floorplan.
I like where these designs are going. I have owned several small tents, the REI Flash Air 2, a Marmot tent albeit 3 person and the Tarptent aeon LI. I am finding that the aeon is on the extreme for me personally as the area on the ends is very minimal for head and foot space when you use an inflatable 3 in ch pad as I do. Both of these are very good options for what I will do next as after my coming trip I will sell my aeon and make a switch to one of these. I am really impressed with both companies and very thoughtful designs.
Whelp, there ya go. Design an Aeon with dipole end struts and yur all in
My first backpacking trip was in 1971 and since then I have gone without a tent most of the time. With the kids finishing college I have purchased 6 tents over the past few years. One of these tents was the original Drop Xmid p2. I’ve used it on the Wonderland trail and Trans Catalina Trail as well as a few short excursions in the Cascades – once when it snowed. Only once did I feel the need to use a ridge guy line. That was a very windy night on the beach anchored in sand. Thus I was quite surprised to read so much about the Xmid’s need to use apex guy lines for stability. So surprised that I felt a bit uneasy while reading the review.
Everyone has different tolerances for what constitutes “mild”, “moderate”, and “heavy” winds. My tolerance is pretty low when it comes to ultralight shelter stability. Having spent the majority of my wilderness camping nights during the spring and fall in the Northern Rockies of CO, WY, and MT, wind is a norm rather than an exception. After reviewing what we wrote and how we presented the review, I totally understand why @dscramer (Darryl C) is confused. As reviewers, whether for BPL or for any other place online, we need to qualify our claims. I hope to clarify this a bit in the rest of this post.
Here’s my experience with both the Tarptent Dipole 1 & 2 Li:
I generally consider “mild” wind to be steady wind less than 10 mph and gusts less than 15 mph. In this case, the Dipole 1 Li, Dipole 2 Li, and the Durston X-Mid Pro do “OK” (not awesome) without apex guylines. All three tents are pretty wobbly and noisy when it gusts to 15 mph. The Dipole fares *marginally* better than the X-Mid in this case, in terms of noise and the perception of deflection. No data here though, so take this claim with a grain of salt.
In what I identify as “moderate” wind, which I consider to be steady wind of 10-20 mph and gusts up to 30 mph, both tents *absolutely* need the apex guylines. As with every other 2-trekking pole tent I’ve used, accessory guylines at these wind speeds are essential. In this condition, if *just* the apex guylines are pitched, and *just* the four corner stakes, the Dipole is “a bit” more stable than the X-Mid Pro (again, in terms of noise and perceived deflection).
In *heavy* wind (steady 20+ mph and gusts to 40+ mph) – I only have ONE data point for each of these tents. On the X-Mid Pro, I staked the four corners, the 2 apexes, and the vestibule zipper (which was a different stake-out point than the apex). On the Dipole 1 and 2, I staked the four corners, the apex and vestibules (same stake), and the end struts. The Dipole 1 was the most stable (kind of obvious, it has the smallest fabric area here). The Dipole 2 was less noisy and had less apparent deflection than the X-Mid Pro, but the differences aren’t going to be noticed, and users probably won’t care if:
They purchased one over the other and don’t have side-by-side experience with both.
Again, I want to reiterate that both of these are great tents. Either one will serve you well in any condition appropriate for a trekking pole tent – which is *not* extreme winds or severe storms. Look elsewhere if you need shelter for those conditions!
Ryan’s comments are very helpful. Especially the definition of windspeed. This has been one of my gripes about previous reviews on BPL, especially of the X-Mids. So it’s very helpful to have numbers.
I’ve always considered 35 – 40+ mph as the lower end of the category of heavy winds. In Ryan’s terminology, winds above 40 mph would be considered extreme. Personally, I leave that term for winds above 60 – 70 mph, the point when most lightweight tents start to fail catastrophically.
Ryan’s comment about the conditions appropriate for a trekking pole tent is generally true, but there is an exception. Probably because it is an exception to the rule, it is predictably underrepresented (basically non-existent) on the market and not generally recognized as such. My own early experience suggests that a trekking pole supported small octagonal mid has best in class wind resistance and punches way above its weight, palpably superior to a rectangular mid like the Khufu or the Duomid. Since I now have three of these small octagonal mids (one in DCF, one in 30D silpoly, and one in 10D Korean silnylon), I hope to gradually collect data, with the use of a wind meter, to support my hypothesis/assertion.
As for the comparison between the Dipole 2 and the X-Mid Pro / X-Mid 2, seeing as how both designs are not intended for heavy winds but are rather intended as comfortable allrounders with good weather resistance, useability, livability, and weight, the choice between them really comes down to comfort, which is ultimately subjective and to be defined in multiple ways. Personally, I’d give the edge on paper to the Dipole. The symmetrical design is just so much nicer for a couple, the interior floor space accommodates two wide pads and then some, the ventilation looks very effective, the views out of the tent when both panels on both doors are rolled completely away will be great, etc.
There have been many debates between Henry and Dan over the past few years. The best response to a competitor’s product is to come up with your own design that trumps the other.
I came back to BPL to see what was up with the Dipole…I’m in the market for a double-dog shelter (yep…TWO adventure pups!) and am struggling with my decision.
I for one, having not been seriously backpacking in a few years, am super excited to see all this healthy competition! Henry and Dan both make amazing shelters, and frustratingly you guys are really just making my decision so. much. harder.
One for you. One for the dogs. easy peasy.
Ryan, thanks for taking the time to put together your post on the behavior of tents in the wind. This is difficult information to come by, and your posts over the years (e.g. this one) have been some of the only information available to help predict how various tents might fare in high winds.
For comparative purposes, how do the DR Li, Khufu DCF and Duplex do in mild, moderate and heavy winds?
Become a member to post in the forums.