
Introduction
People have been drying food for tens, perhaps hundreds of thousands of years. The reasons are straightforward and well-known – dried food is lighter and keeps longer.
Drying food to sustain us on long journeys is an ancient tradition. When you load your pack with dried food and hit the trail, you are just the latest link in a long chain of humans: nomads who are coming into the country, going down the road feeling bad, heading for that Big Rock Candy Mountain.
The earliest food drying technology – cutting food into small pieces and laying it out in the sun – costs almost nothing. It also works pretty well if you don’t mind entertaining the local fly population.
Simple dehydrators, consisting of racks, a fan, and a heating element (and a cover to keep the flies off) are a step up. They deserve a place in every hiker’s gear depot. You can and should use these effective tools to dry a wide variety of foods. I’ve written about why to dehydrate your own food and how to dehydrate food for backpacking previously.
Heat-assisted dehydration has its limitations though. Many foods – meats, eggs, various sauces – simply don’t rehydrate well. Even for those that do, some loss of flavor and nutrition is unavoidable during the drying process.
That’s why nearly all of us have used freeze-dried meals at some point during our hiking careers. Freeze-dried foods rehydrate readily, preserve taste and nutrition, weigh little, and store well for very long periods. However, freeze-dried backpacking meals are also somewhat expensive and available only as ready-made products through retailers. The quality and variety of retail freeze-dried foods have improved dramatically in the last decade or two. But you are still stuck with the choices that others have made for you. These choices are aimed at pleasing a mass or niche market in order to make a profit, they are not choices aimed at pleasing you.
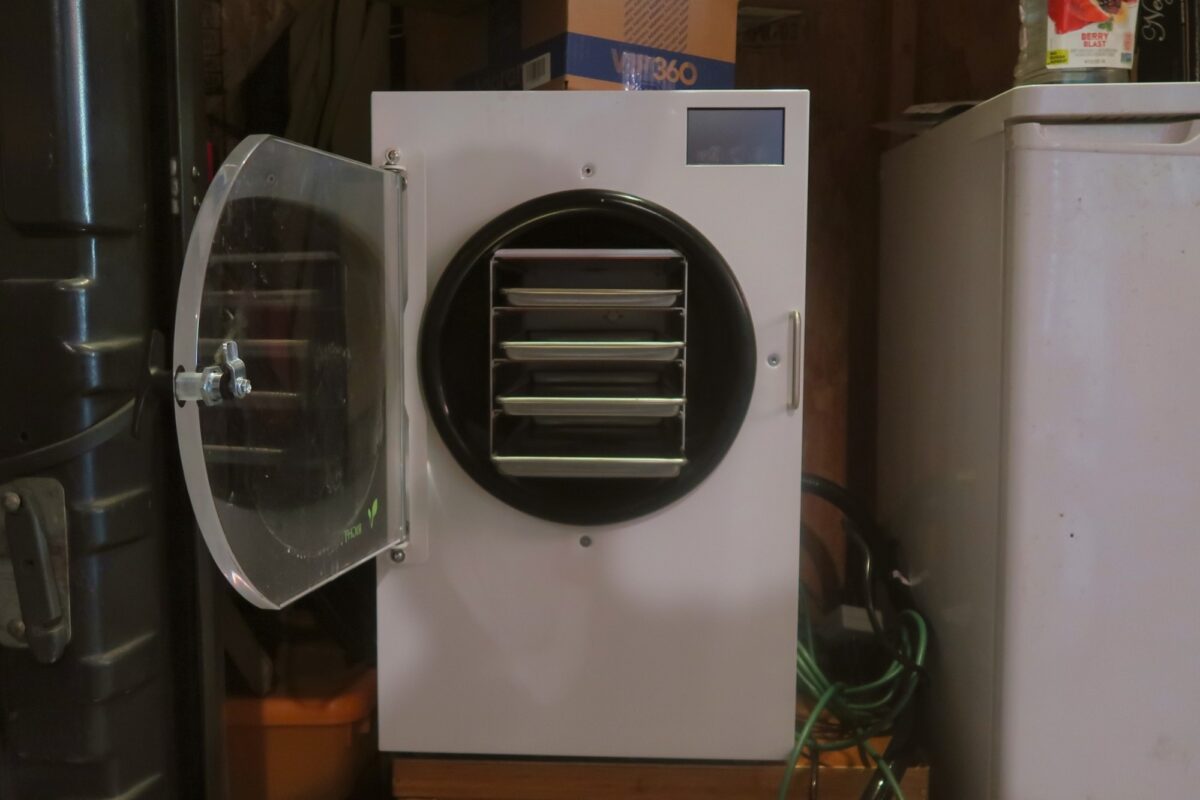
Backpacking Light owns a Harvest Right Home Freeze-Dryer unit. Ryan Jordan asked if I would be willing to use it and write a series of articles for Backpacking Light. (The fact that they were moving into a smaller space and no longer had a place for it may have had something to do with this assignment!)
In this first installment, I’ll tell you a bit about the history and general principles of freeze-drying foods. Each article will finish with a recipe and review of something I’ve freeze-dried. I am definitely up for challenges and testing new ideas. So if you’ve got an idea for something you’d like to see tested, hit me up in the comments section and I will see what I can do and report back.
History of Freeze-drying
Drying food is the process of reducing its water content. The fundamental difference between freeze-drying and dehydration is that during freeze-drying, water is removed by sublimating ice in a vacuum, and during dehydration, water is removed by evaporation of liquid water via heat.
This process has a surprisingly ancient history. Inca peoples, who invented the potato, also invented a low-tech method of freeze-drying. Potatoes were left out on freezing nights; ice and water would be squeezed out of them during the day. After a few cycles, they had freeze-dried potatoes (a dish called chuño) that stored very well.
Modern technology only began to improve on this process in the 1890s with the use of vacuum pumps and mechanical refrigeration. However, freeze-drying remained a fairly obscure niche technology until the 1950s and 1960s, when it began to be applied to pharmaceuticals and food preservation. Military contracts to Rich-Moor and Mountain House gave these companies a start in using freeze-drying for food preservation. Soon they began marketing freeze-dried meals to a peculiar subset of civilians who thought that carrying a heavy pack all day and sleeping on the ground at night was good fun.
Fundamentals
Although the meals are much better now than in the 60s (trust me on this), the fundamentals of freeze-drying have not changed. The basics are:
- Food is deep-frozen, typically to -20 °F (-30 °C) or so.
- A high vacuum is applied, causing bulk water to sublimate (that is, evaporate directly from its solid form without melting).
- While still under vacuum, the food is gently heated, removing additional tightly-bound water.
Key Benefits of Freeze-Drying:
- Because the food is dehydrated while frozen, it retains its form and volume, rather than collapsing as is the case with heat-assisted dehydration. Pores and interstitial spaces remain open, letting water back in during the rehydration process.
- Evaporation/sublimation takes place at low temperatures, thus volatile compounds are retained, preserving aroma and flavors.
- Oxygen is removed and the food is kept cold, thus oxidative damage is minimized, preserving color, flavor, and nutrition.
Those are the basics. I’ll expand on them a bit more in future articles.
Recipe: Sesame Tofu
This first recipe isn’t really a recipe. After I had done a couple of runs in the Harvest Right freeze-dryer with good results, it occurred to me to simply order some favorite take-out food and dry it.
Chez Thuy is a nearby Vietnamese diner that has been in business here (Boulder, Colorado) for over 30 years. Although my family members aren’t really tofu-eaters, we love the sesame tofu at Chez Thuy and always get it when ordering from them. I thought it would be pretty great to eat one of my favorite take-out dishes while hiking the PCT this summer.
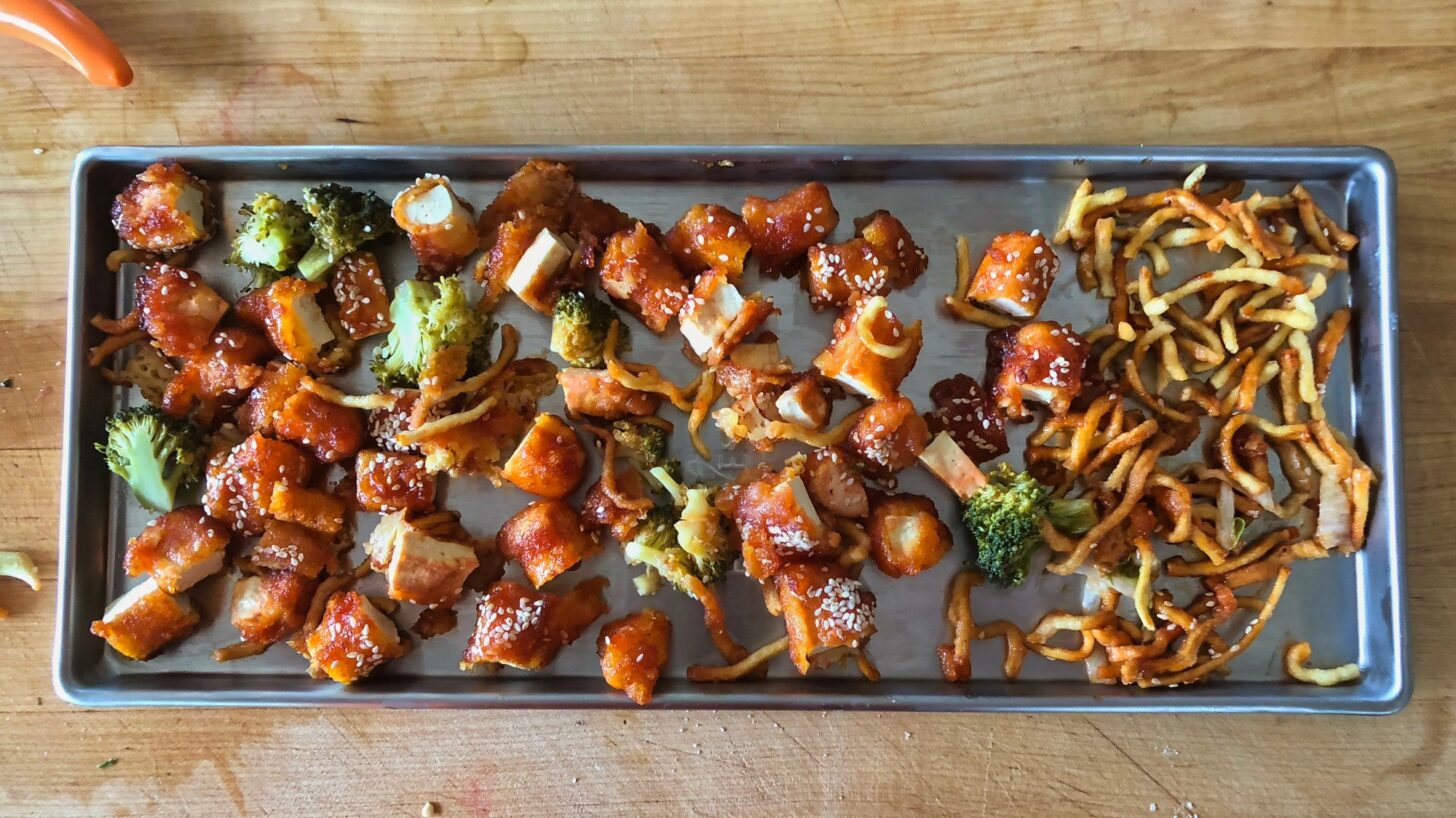
The dish consists of broccoli stir-fried in sesame sauce, along with fried breaded tofu and crispy noodles. I cut the larger veggie and tofu chunks into half-inch pieces to facilitate drying and rehydration and popped the dish into the freeze-dryer. It looked like this going in:
And a month later like this, about to go down:
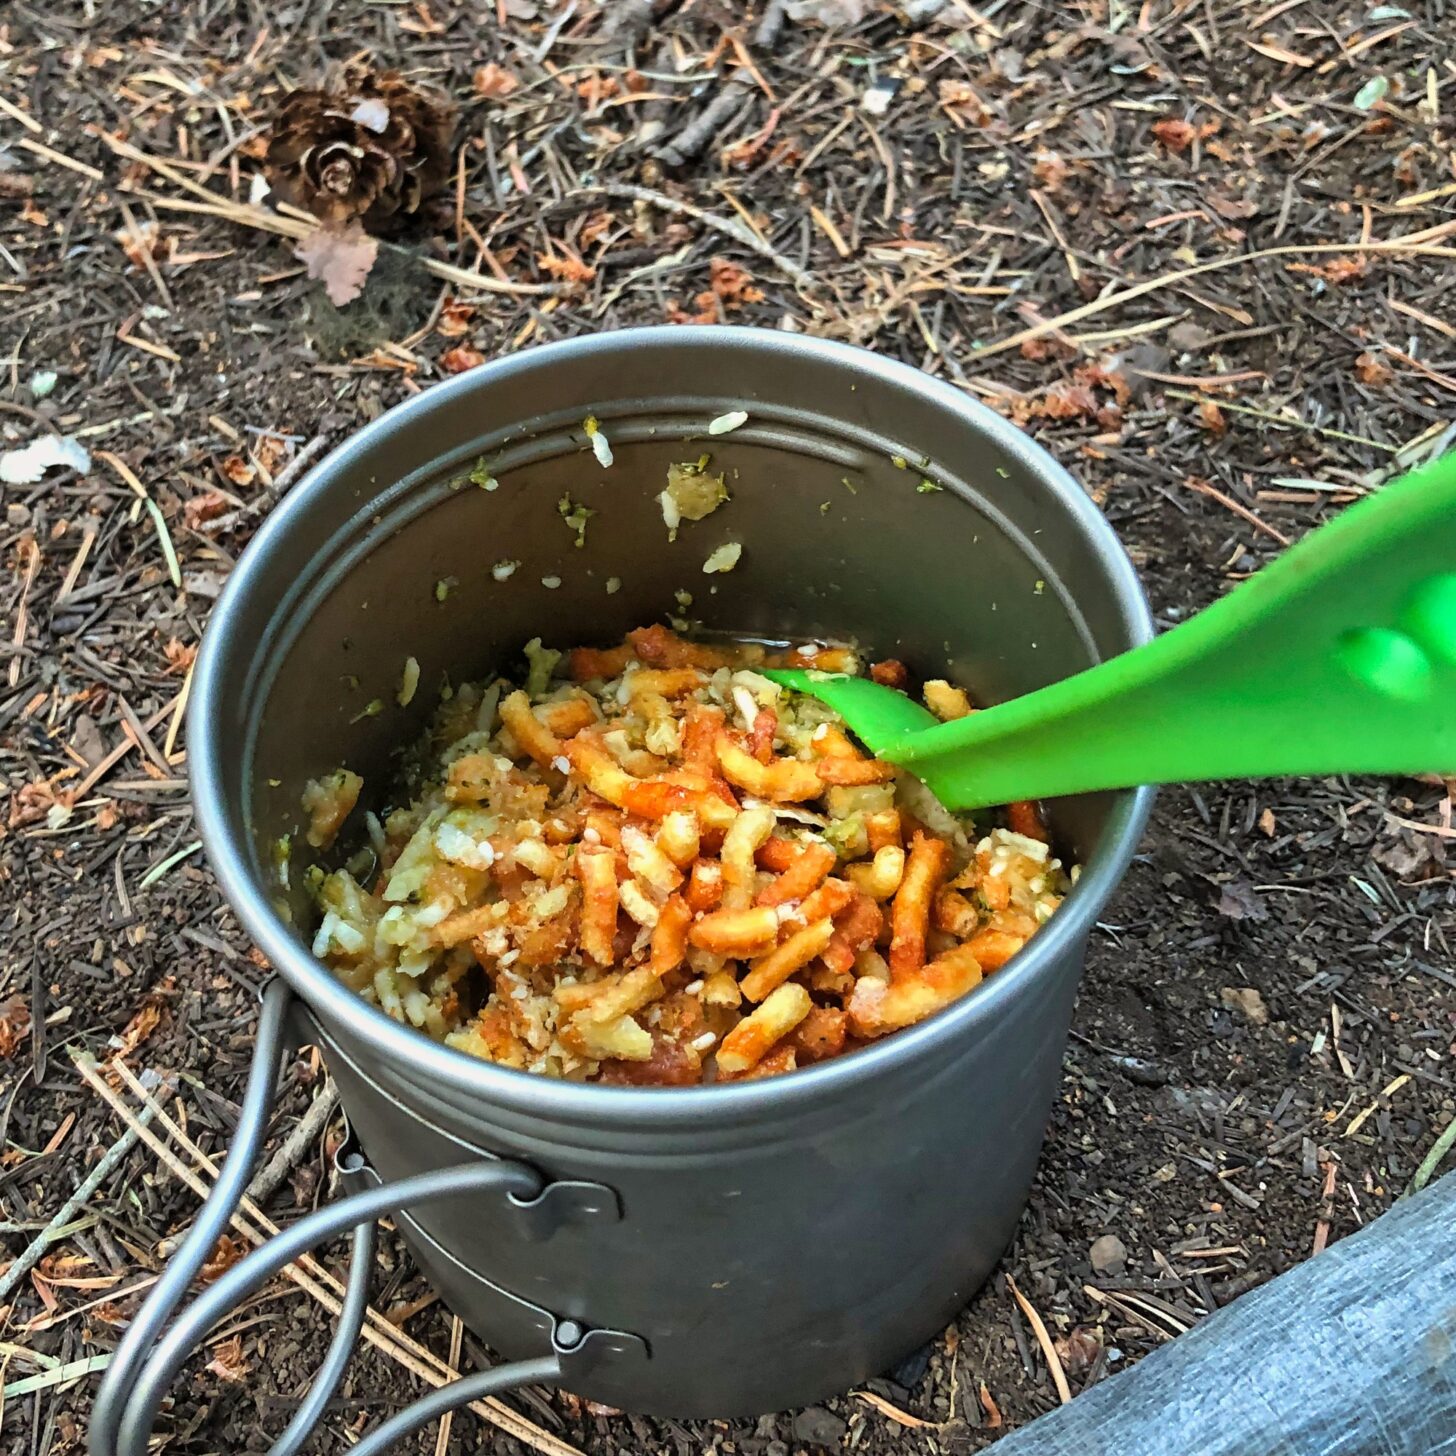
It did not disappoint, and this was a good thing. I was not in a good mental space to be handling disappointment. Hiking the NorCal – Oregon PCT this summer was mostly awful. There were far too many days of brutal heat, long water carries, and choking smoke. Being able to chow down on a first-class meal did not make everything all better, but it put a good end to a couple of really miserable days.
The flavors were there in all their glory. I held the crispy noodles back while rehydrating so that they retained their crunch. The biggest and most pleasant surprise was that the tofu was actually improved by the freeze-drying process – it was much less slimy, and the breading even retained its texture fairly well. This experiment was a total success, a 10 out of 10, and I will freeze-dry this again.
The possibilities here are nearly unlimited. Every long-distance hiker who gags down a pot of instant mashed potatoes begins to dream of town food. Freeze-drying take-out food lets you eat like a town stop glutton while you are still on the trail. That’s what I call winning.
In the next installment, I’ll go into more detail regarding the principles and practice of freeze-drying, and share the results of other culinary experiments. Talk to you then.
Learn More
Here’s a link to the Harvest Right Freeze Dryer model used in this series.
Browse our curated recommendations in the Backpacking Light Gear Shop – a product research & discovery tool where you can find Member gear reviews, Gear Swap (used gear) listings, and more info about specific products recommended by our staff and members.
Gear Shop » Food Preparation and Packaging
Related Content
- more by Drew Smith
- make sure to read Drew’s First Looks review of the Harvest Right Home Freeze-Dryer
- listen to our Making Your Own Backpacking Meals podcast episode
- get in-depth, well-researched recommendations on dehydrated backpacking meals here and here
DISCLOSURE (Updated April 9, 2024)
- Backpacking Light does not accept compensation or donated/discounted products in exchange for product mentions or placements in editorial coverage. Some (but not all) of the links in this review may be affiliate links. If you click on one of these links and visit one of our affiliate partners (usually a retailer site), and subsequently place an order with that retailer, we receive a commission on your entire order, which varies between 3% and 15% of the purchase price. Affiliate commissions represent less than 15% of Backpacking Light's gross revenue. More than 70% of our revenue comes from Membership Fees. So if you'd really like to support our work, don't buy gear you don't need - support our consumer advocacy work and become a Member instead. Learn more about affiliate commissions, influencer marketing, and our consumer advocacy work by reading our article Stop wasting money on gear.

Discussion
Become a member to post in the forums.
Companion forum thread to: Freeze-Drying Your Own Backpacking Meals: How to Eat Your Favorite Town Food on the Trail
In this freeze-drying installment, we discuss the history of freeze-drying and experiment with using a freeze dryer to prepare our favorite take-out town meal into the backcountry.
Quick couple of questions. Does each tray hold one meal? Do you vacuum seal after they are done or does the freeze dryer both freeze and vacuum seal. It seems like 3 days for 4 meals is a lot.
@Kevin Garrison – I’d say more like 2-3 meals per tray (roughly a quart volume), so 8-12 per run if fully loaded. A run typically takes 30-36 hr, so 1.5 days rather than 3. Yes the process is slow, but the hands-on time with the dryer is fairly minimal: check/replenish oil levels in the vacuum pump, close the drain, a couple of entries on the touch screen and then you walk away until it’s done. You’ll spend much more time prepping the food (even take-out).
The dryer does not do any food storage work. You can vacuum-seal, but I do that more for individual meals pre- trip. For longer-term storage I have been packing food in resealable mylar bags and tossing in a few oxygen-absorbing packets. I’ll address food storage at more length in a future installment as this is fairly crucial to maximizing the value of freeze-drying.
i’ve done some looking around and it looks like you can freeze dry with dry ice at home. anyone try it? might have to give it a go! especially since buy dry ice is way cheaper than buying a machine for $$$$ for the few times a year I’ll be using it
The dry ice (frozen CO2) will certainly freeze anything, but you will also need a vacuum pump to extract the water. and dry the food.
The point of freeze-drying is to avoid the movement of water from inside the food to the surface. That lets FD stuff rehydrate fast and taste better. The process of turning frozen water into vapour without a ‘wet’ stage is called sublimation. That is the secret.
Ordinary ‘dried’ food develops a thin shell of dried protein at the surface, and this changes the taste and can make rehydrating very slow. The protein is carried to the surface by the movement of the interior water.
The dried protein layer is often eaten before it rehydrates properly. It passes through the stomach and ferments in the intestines as it rehydrates.
Cheers
Become a member to post in the forums.