Introduction
Somewhere around the middle of 2007 I started experimenting with remote canister stoves. My Snow Peak GST-100 stove had failed in the middle of a 2-month long walking trip in France, due to the brass thread in the base stripping (due to the really crappy half-formed steel threads found on all such canisters). I had to buy a new stove, but the only stoves available nearby were rather heavy Campingaz ones. I resolved at the time to come up with a ‘universal’ connector. I succeeded to my satisfaction.
From there I experimented with many different stove designs, some more successful than others. Along the way I got the idea of actually making and selling a remote canister winter stove – but it had to be light-weight! I even bought a serious CNC machining centre for this. In July 2013 I started publishing a series of articles on my MYOG Remote Inverted Winter Canister Stove – which we will call V1. I made a lot of these, and sold 110 or more, mainly to BPL members. It was a lot of fun.
But for the sake of expediency I had used a commercial burner head for V1 (right hand stoves in photos), and really I wanted to make the whole stove by myself. Also, I wanted to use up several metres of expensive Ti tubing I had imported at the start. So I set to work on the design of my MYOG Ultra-Light Vortex-Burner Remote-Canister Winter Stove – which we will call V2 (left hand stoves in photos). This second series of articles saw publication starting around January 2016 or a bit later. I have made several dozen of those and sold all them too. (I still have some spare parts for servicing.)
But designing stoves is addictive. There is always some improvement possible. I imagine many BPL members will know the feeling. So this series of articles will present the development of my V3 Remote Inverted Canister Winter Stove. This Part 1 contains my meandering design thoughts; for pictures of the actual V3 you will have to wait for subsequent Parts, so bear with me.
Some Design Thoughts
It’s not essential, but it does help to have some goals when you launch a new project. Several things had come up which I thought needed looking at: dirt and wax, heat transfer stability, pot stands, stove size and more. I will go through these.
Dirty Canisters
Ten years ago canisters were filled in the USA and Europe, and the gas in a canister was generally pretty clean. If you inverted a canister you got fairly clean liquid fuel out the bottom which behaved itself in the burner. It vaporised, went through the needle valve and through the jet in a nice clean manner. It was reliable, and so were the stoves which used inverted canisters. The Coleman Xtreme stove with the Powermax canisters was a classic and very reliable design.

But not any more it seems. So many brands of canisters these days seem to be filled at some unknown Asian (mostly Chinese?) factory with cheaper unfiltered raw LPG feedstock. In addition to the expected butane and propane, you also get higher hydrocarbons (oils and waxes) and dust/dirt, and these are a problem for our stoves. If nothing else, they slowly block up the jet, reducing the 0.30 mm hole to something far smaller. This upsets the fuel/air balance in the stove and restricts the power. Photographing this is a bit tricky, but this shows a clean jet on the left and middle, and a dirty jet (dirt plus wax) at the same magnification on the right. I cleaned the muck out with a fine jet pricker. In addition, needle valves can get blocked, and dirt can get under the O-rings which seal various bits and sometimes makes them leak. Little flames start to appear in unfortunate places.
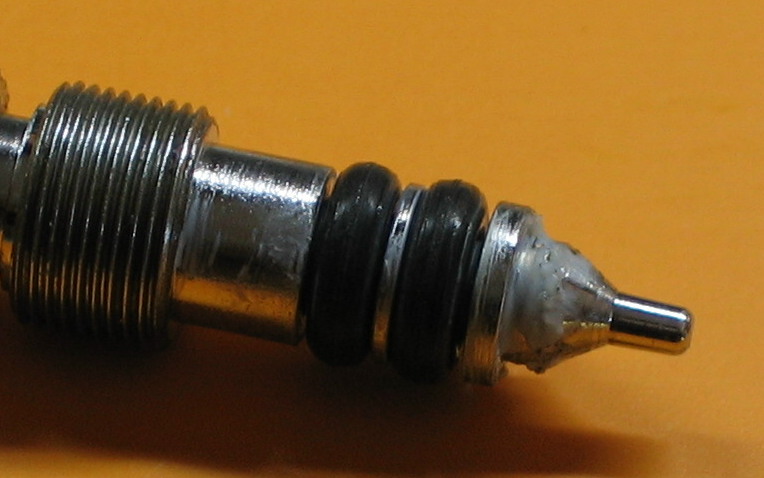
Wax collected on a Snow Peak needle valve, long ago
I must point out that these ‘dirty’ canisters are usually fine when used upright. The dirt stays at the bottom of the canister, safely out of the way but the waxes can still reach the needle valve. Perhaps the filling factories don’t know we sometimes invert the canisters, or perhaps the inverted-canister market is too small to be worth worrying about? Do the Chinese filling plants know what they are doing? I have good reasons to doubt this, when one of them claimed a canister had something like 72.34% n-butane in it. Such unblushing precision! Or maybe a total lack of understanding of honesty or integrity?
One trouble is that n-butane boils at the rather high temperature of 0 C. If you use a propane/n-butane canister upright at sub-freezing temperatures, you are likely to end up with 1/2 to 2/3 of a canister of n-butane just sitting there, not vaporising. The propane will have all gone, and your dinner will not be cooking. This was covered in Part 4 of Jerry Adam’s recent series, where he presented an alarming table showing how little propane is left in a canister by the time there is only 1/4 of the fuel left. This is why we use inverted canister stoves: the fuel ratios stay the same from beginning to end.
A bit of background information is relevant here: the Chinese stove market is huge. I am told there are whole villages dedicated to making the basic cheap steel upright canister stove (the big heavy one). These stoves never see the export market. So perhaps there is some logic in their using unfiltered LPG to fill their canisters: it’s cheaper and any dust or dirt at the bottom of the canister does not matter. It is just a pity that the Western greed for the cheapest possible wholesale price has killed the market for clean gas.
Sadly, I have to report that even western brands such as Primus seem to have some dirt in them these days – not as much, but I have had blocked jets while running on Primus Winter gas. Sad.
About all I can do at this stage is to make it as easy as possible to remove the burner and to get the jet out for cleaning. Actually putting a filter in-line is not easy, but I am thinking about it.
Thermal Instabilities
My preferred stove for winter use is a remote inverted canister one, and I have written two long series about the ones I have developed and sold: The Evolution of a Winter Stove (V1) and Vortex Winter Stove (V2). (The URLS are to Part 1 of each series.) The inverted canister design and its liquid feed avoids all the problems with canisters cooling below the boiling point of the fuel, but the design is not without some problems. The first, which is fairly minor, as that all such stoves need to be primed to get them going, and that means using the canister upright for a short while at the start. That means the propane concentration falls during practical use, but fortunately not by too much. The second problem is related to the first one: if you don’t prime the stove enough you may get some limited flaring, which can be exciting if you are in a small tent vestibule. However, I haven’t seen a canister stove flare more than 300 – 400 mm upwards, so that is not too bad. In practice any flaring seems to be under 100 mm high.
There is another problem which can make the flame on the V2 stove unstable, although this does not happen very often. I have seen it once, and one of my stove customers has seen it once or twice. It is a shade complex. I present it mainly out of academic interest, although it did influence my planning a bit.

Long needle valve on top of a V2 stove body.
When the stove burns everything gets hot. The Stove Body gets hot, and being aluminium it expands lengthways slightly. The very long needle valve inside the stove body acts as part of a Heat Exchanger: it forces the incoming liquid fuel into a thin layer between needle and bore, and this thin layer can absorb heat from the surrounding stove body very effectively. Normally the thin film of heated fuel also couples heat from the stove body into the needle valve so it warms up as well.
However, consider what happens if you get the thermal balance wrong. Yes, this is hard to do. The stove body heats up and expands. The incoming cold fuel cools the needle valve shaft down so it contracts. As the needle valve is anchored way back at the far right end by the thread, the tip effectively moves away from the valve seat. The net result is that the gap at the needle valve seat grows slightly – and the stove increases in power some more. So you turn the stove down a bit.
But the lower flame means that there is not as much heat flowing into the stove body from the burner and there is less incoming fuel to cool the needle down. The temperature of the needle starts to catch up (increases), the needle valve gap shrinks, and the stove turns itself down a bit more. This is called positive feedback: it makes things worse. So you turn the stove up a bit. Now go back two paragraphs.
Yes, this is hard to do, and experience shows that this does not happen very often. You have to get the incoming fuel to just the right temperature that the feedback system switches from negative (stable) to positive (unstable), and you probably need to have slightly inadequate thermal feedback as well. As I mentioned, I have only seen it happen just once in many years. But I dislike things which can go wrong. Also, it suggests that going for a somewhat shorter stove body might solve this. It could be lighter, after all, and it would prime (heat right up) faster.
Pot Stands

The pot stand which comes with the V2 stove is both stable and strong. If you have to melt lots and lots of snow in a big pot, that design is excellent. It is much more stable, with a far bigger support radius, than most any light upright stove. But it is a bit slow to set up if you just want a quick brew. Something a bit faster to set up would be nice.
The pot stand on the V2 does not require the use of the base board, but it is clearly preferable: it adds enormously to the overall stability. So that is an added complexity which maybe I could avoid. Also, the large base board is extra weight, and you have to clear a largish space for it to sit. Could I come up with a better pot support?
Warming Canisters
I will throw this in here for completeness, even though it is not really a ‘development’ issue.
When all we had was n-butane in Bleuet canisters and they could not be inverted, we had to resort to clever tricks for sub-zero use. It was quite common to wrap some very heavy gauge copper wire around the canister and run the ends up into the flame, and this was popularly known in Europe as the ‘Alpine Bomb’. Heat came down the wire and kept the n-butane boiling (ie above 0 C). This idea was quite popular with big-wall climbers who did NOT want to be fooling around with white gas on a Porta-Ledge at -10 C above a 300 m drop. Having sat on small ledges way up cliff faces, and having seen one or two accidents with white gas myself, I fully sympathise.
More recently there has been a move to use copper and aluminium strips as heat shunts instead of wire, and BPL member Bob Moulder has done a fair bit of work on this and popularised it here at BPL. Jerry Adams and Gary Dunckel and others have provided enthusiastic support. The metal strip is the easy bit; the hard bit is keeping it pressed tight against the canister for good heat transfer. Hook&Loop tape can be used for this: both nylon and other materials used for this can take over 250 C. You also need to curve the contact section of the strip to increase the contact area with the canister. (Bob Moulder claims that the contact does not need to be too tight if you insulate the contact area.)

My contribution here was fairly small: I found that a couple of turns of high temperature tape, suitable masked in the region of the strip, could hold the strip in place very nicely. Yes, the strip here can be removed for packing.
If you combine such heat shunts with the use of canisters containing iso-butane and propane (rather than n-butane and propane), some quite low temperatures can be handled with an upright stove, some way below freezing – if you have the skills.
Jerry Adams has written a bit about his experiments on the use of a strip of metal to warm the canister and about a second way he developed to warm up a canister. His second method uses a ‘bowl’ of aluminium foil to reflect IR radiation from the flames to the canister. He compared how fast each method worked, and it did seem as though the strip method could be slower to work compared to the reflection method. My own tests do show a noticeable warming from the radiation in some cases. However, on a long trip you might go through a fair bit of aluminium foil.

Other methods of warming the canister have been covered by Gary Dunckel in his recent article on Warming Canisters. When you put them all together, there is quite a range. But most of them rely on getting the stove started, which can be difficult, and you are still going to run out of propane towards the end. For my part, I like the bowl of water method. Liquid water is always above 0 C, which means the n-butane will be vaporising. It may not generate a lot of pressure, but you only need to get started.

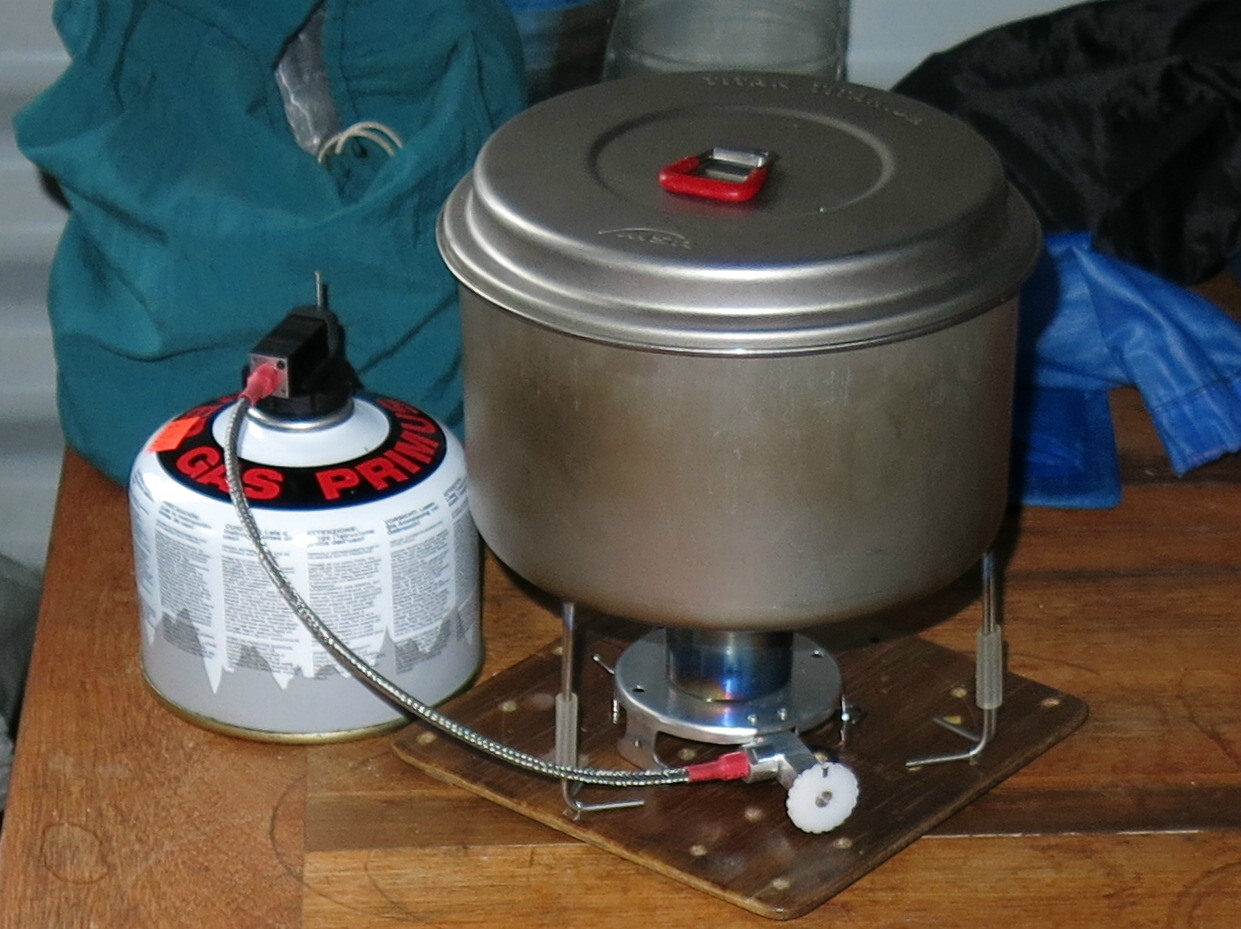
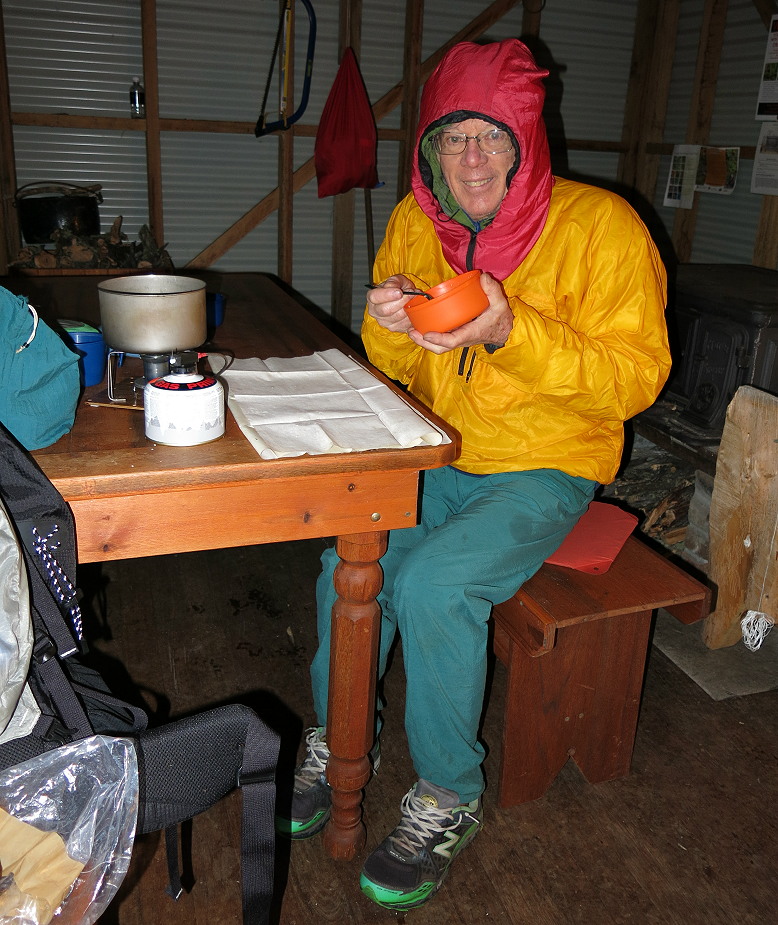
I saw on the web somewhere that some Norwegian ski-tourers had no hesitation about ‘warming their canisters’. They were using a long hose between the stove and the canister so they could put the canister on top of the cooking pot (right side) – while the stove was running. Even more exciting was the way they used the stove to warm the canister at the start (left side)! I am not sure I would risk letting the hose on my stoves get that close to the flames like that, but they got their canister warm. A second stove in the background (not visible here) seemed to be using the same technique, so maybe it was not just one person doing that. A Club tradition maybe? This was not one of Gary’s methods! (Source – the web.)
Some Experiments and Ideas
I was thinking about all this while cooking dinner in a tiny mountain hut after an all-day storm way up in the mountains. We had gone for 6 hours straight in hail, sleet and 100 kph wind with no food or rests, and I did not want to have to strip and clean my stove before we got some hot food. In fact I didn’t have to as the V2 stove worked just fine, but I was thinking about it. Ah yes: this was an early spring/summer trip, but our mountain weather is notorious. Bright sun and a clear blue sky to a heavy hailstorm in 2 hours.
Now normally I get the stove running on a gas feed with the canister upright, then after 10 – 20 seconds when the stove has warmed up a bit (‘primed’) I invert the canister. This time I simply moved the canister a bit closer to the stove inside the cover of the windshield so it absorbed some radiation. As a result it stayed up between +20 C and +30 C. It ran very well at that temperature (and so it should) – but I kept a very close watch on the canister temperature with the Touch Test. In truth, it did not show much sign of getting too hot: the ambient temperature was not exactly warm (it was below freezing, actually). I could adjust the temperature of the canister by moving it away from the stove as well. Note that in the photos here I have removed the windshield which had been wrapped around the stove and canister so I could get better photos.
With that idea working for several nights running, I got to thinking about the stove itself. The V2 stove body is quite long: it forms a long heat exchanger for the liquid fuel between the hose connector and the jet (see the 3rd photo above). But this long length is redundant if/when it has a gas feed. Then I started to wonder: does the rather long heat exchanger really need to be quite that long? On the V1 stove the heat exchanger is much shorter, but it works fine. Could the next generation stove body be made much shorter (and lighter) – more like the V1 perhaps? You can see how these ideas creep up on you.
Second thoughts and reading part 4 of Jerry’s article, about how fast the propane disappears, now leaves me rather doubtful about this technique. But it did lead to some thinking.
The tripod stand is very strong and stable, but it does take a little while to set up. Cold fingers make that even slower. Many similar stoves have some sort of combined stove leg and pot support, sometimes made of sheet metal and sometimes of wire. Could such an arrangement be made with hard Ti wire? I have a fair bit of (expensive) very hard 2.4 mm Ti wire on hand, and lots of left-over 2.4 mm hi-tensile steel fencing wire suitable for experiments. Bending such wire by hand in a reproducible manner is (too) hard, but I had previously made a precision bender for this gauge wire for this sort of thing. That’s what commercial wire-bending companies do. This should not be a problem.
A rather minor point is the direction of flow of the gas over the needle valve. On the V2 the flow is in the direction of the taper on the valve. That was always a tiny concern: if there was a lot of dirt in the fuel it could build up at the needle valve. Most other stove valves have the gas flowing the other way, against the taper, although that is generally (almost always) for ease of machining. It seemed to me that having the direction of flow be against the taper of the valve might make it a bit more self-cleaning. If blocked, briefly open valve a lot to blast the dirt off? Could I make the flow go against the taper as well?

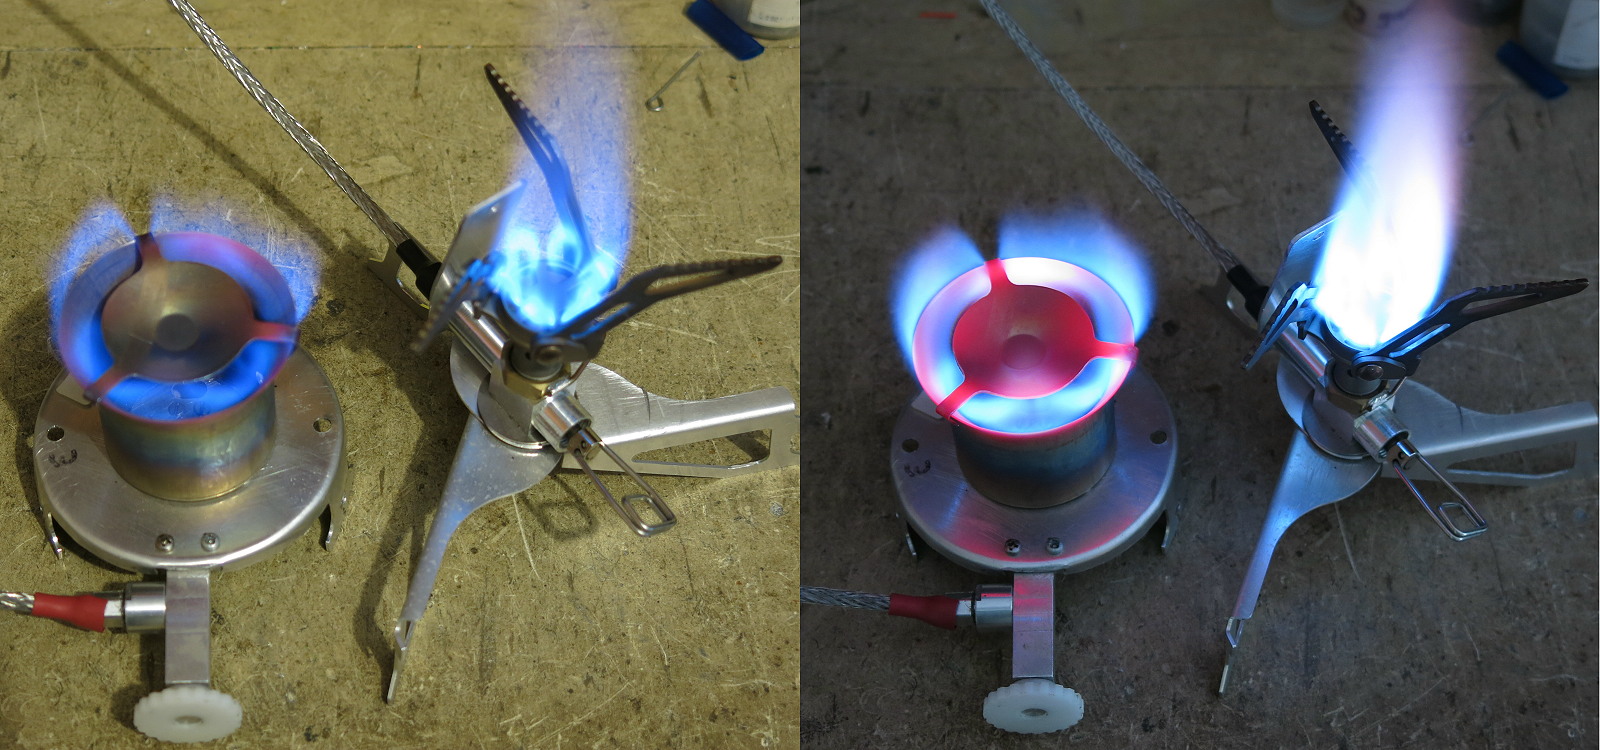
V2 stoves with the different canisters which can be used.
On the other hand, the Vortex Burner design works very well (shown above), the V1/V2 hose works very well, and the V1/V2 Canister Connection (works with screw thread, Campingaz and Powermax) has been proven over many stoves and years. They could be kept.
Next
This Part 1 is just the teaser or lead-up. Parts 2 & 3 will show the finished V3 stove and cover all technical details in good depth. Part 4 will cover an analysis of the heat flow through the V3 stove, with measurements from all over the stove, and graphs of temperature vs time, to show what happens.