In episode 95 of the Backpacking Light podcast we’re going to learn about the types of natural fibers that make up the fabrics we use for base layer and insulating apparel.
Episode Sponsor
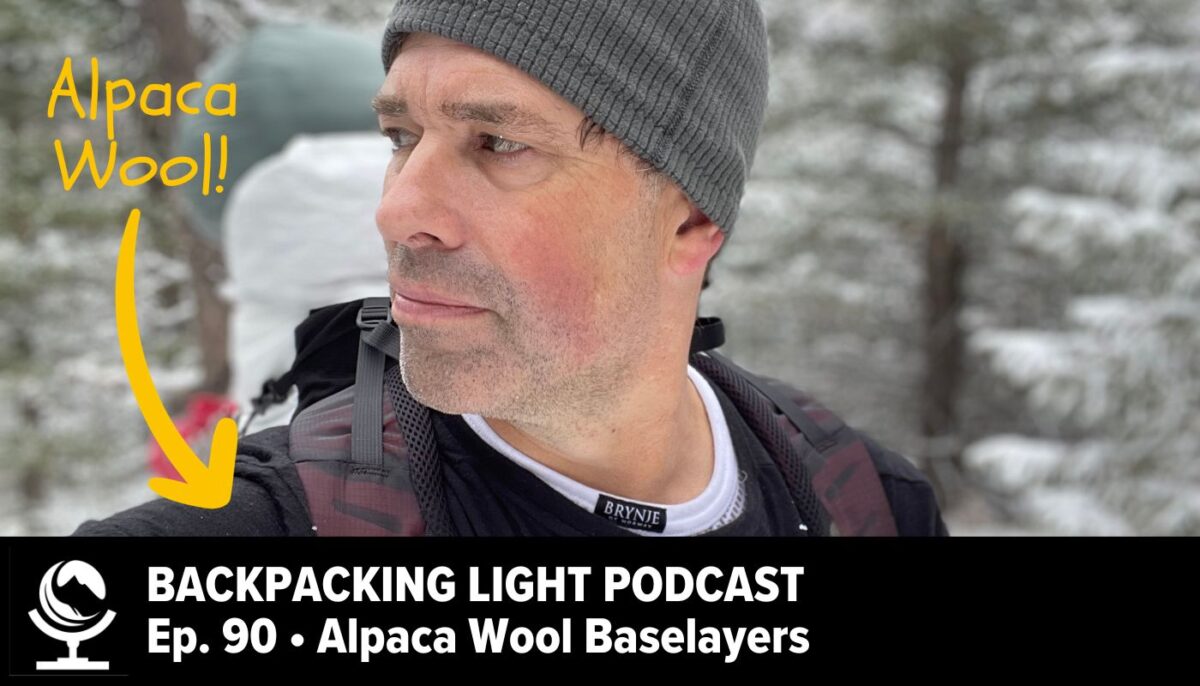
This episode of the backpacking light podcast is sponsored by ARMS OF ANDES, manufacturer of premium base layer apparel made with alpaca wool. Backpacking Light podcast listeners can enjoy 15% off with the coupon code ALPACALIGHT at armsofandes.com.
Listen
Summary
In episode 95 of the Backpacking Light podcast we’re going to learn about the types of natural fibers that make up the fabrics we use for base layer and insulating apparel.
triangular baffles made with reflective surfaces (isolate air movement)
horizontal aluminized surfaces that allow for convective air movement up and down the length of the pad
Main Topic: Fundamentals of Natural Fibers
The primary differences between natural fibers and synthetic fibers – source, moisture management, thermal properties, durability, comfort and feel, odor resistance, environmental impact, care and maintenance, cost
Comparing the structure of plant-based and animal-based fibers – cellulose vs protein structures, microscopic structure, absorbency vs thermal properties
Merino Sheep Wool vs Other Kinds of Wool – fiber diameter and fineness, crimp, strength and durability, comfort and feel, breathability and moisture management, odor resistance, price, and availability
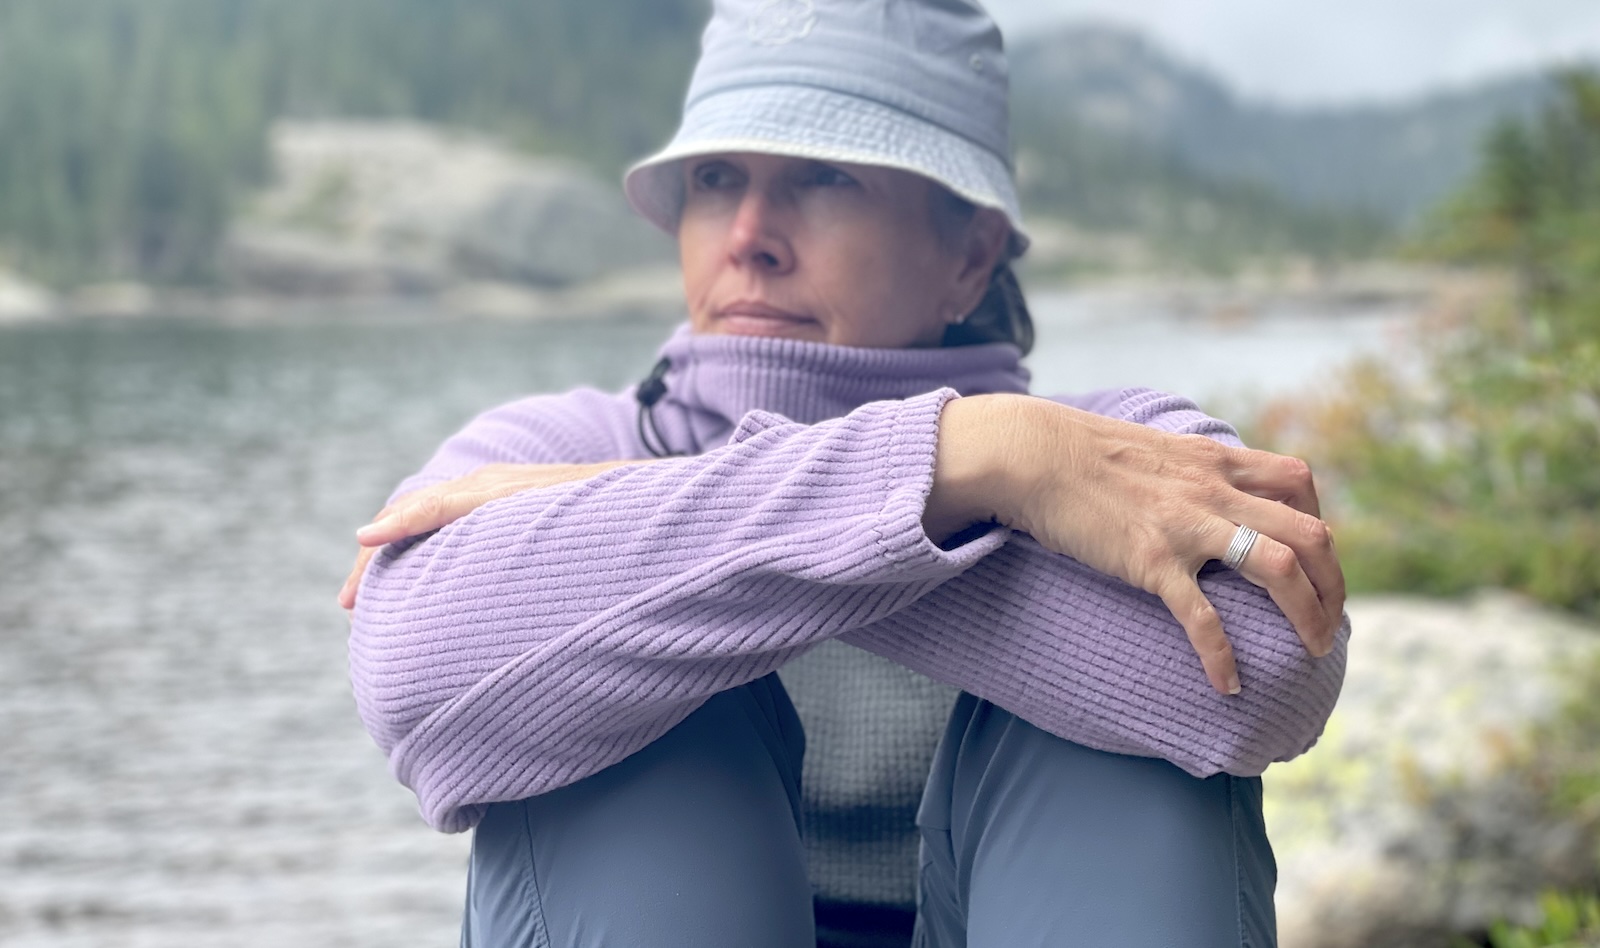
Merino sheep wool vs Alpaca Wool – fiber texture and softness, warmth and insulation, weight, moisture wicking and breathability, hypoallergenic properties, durability and elasticity, odor resistance, price and availability, environmental impact
Comparing and Contrasting Huacaya Alpaca Wool and Suri Alpaca Wool
Q&A
What’s the best baselayer that works with a waterproof-nonbreathable jacket like those from Lightheart Gear and Antigravity Gear?
What’s the difference between fishnet baselayers from Brynje and those from Wiggy’s and others?
Executive Producer - Backpacking Light; Show Director and Host - Ryan Jordan; Producer - Chase Jordan; Theme music: Look for Me in the Mountains written by Chris Cunningham and Ryan Jordan, performed by Chris Cunningham (acoustic guitar, lead and harmony vocals, harmonica), Chad Langford (upright bass), and Tom Murphy (mandolin), produced by Basecamp Studios in Bozeman, Montana.
Sponsorship Policy: Backpacking Light does not accept compensation or donated/discounted products in exchange for product mentions or placements in editorial coverage, including any podcast episode content not excplicitly identified as sponsored content. Some (but not all) of the links in these show notes may be affiliate links. Learn more about affiliate commissions, influencer marketing, and our consumer advocacy work by reading our article Stop wasting money on gear.
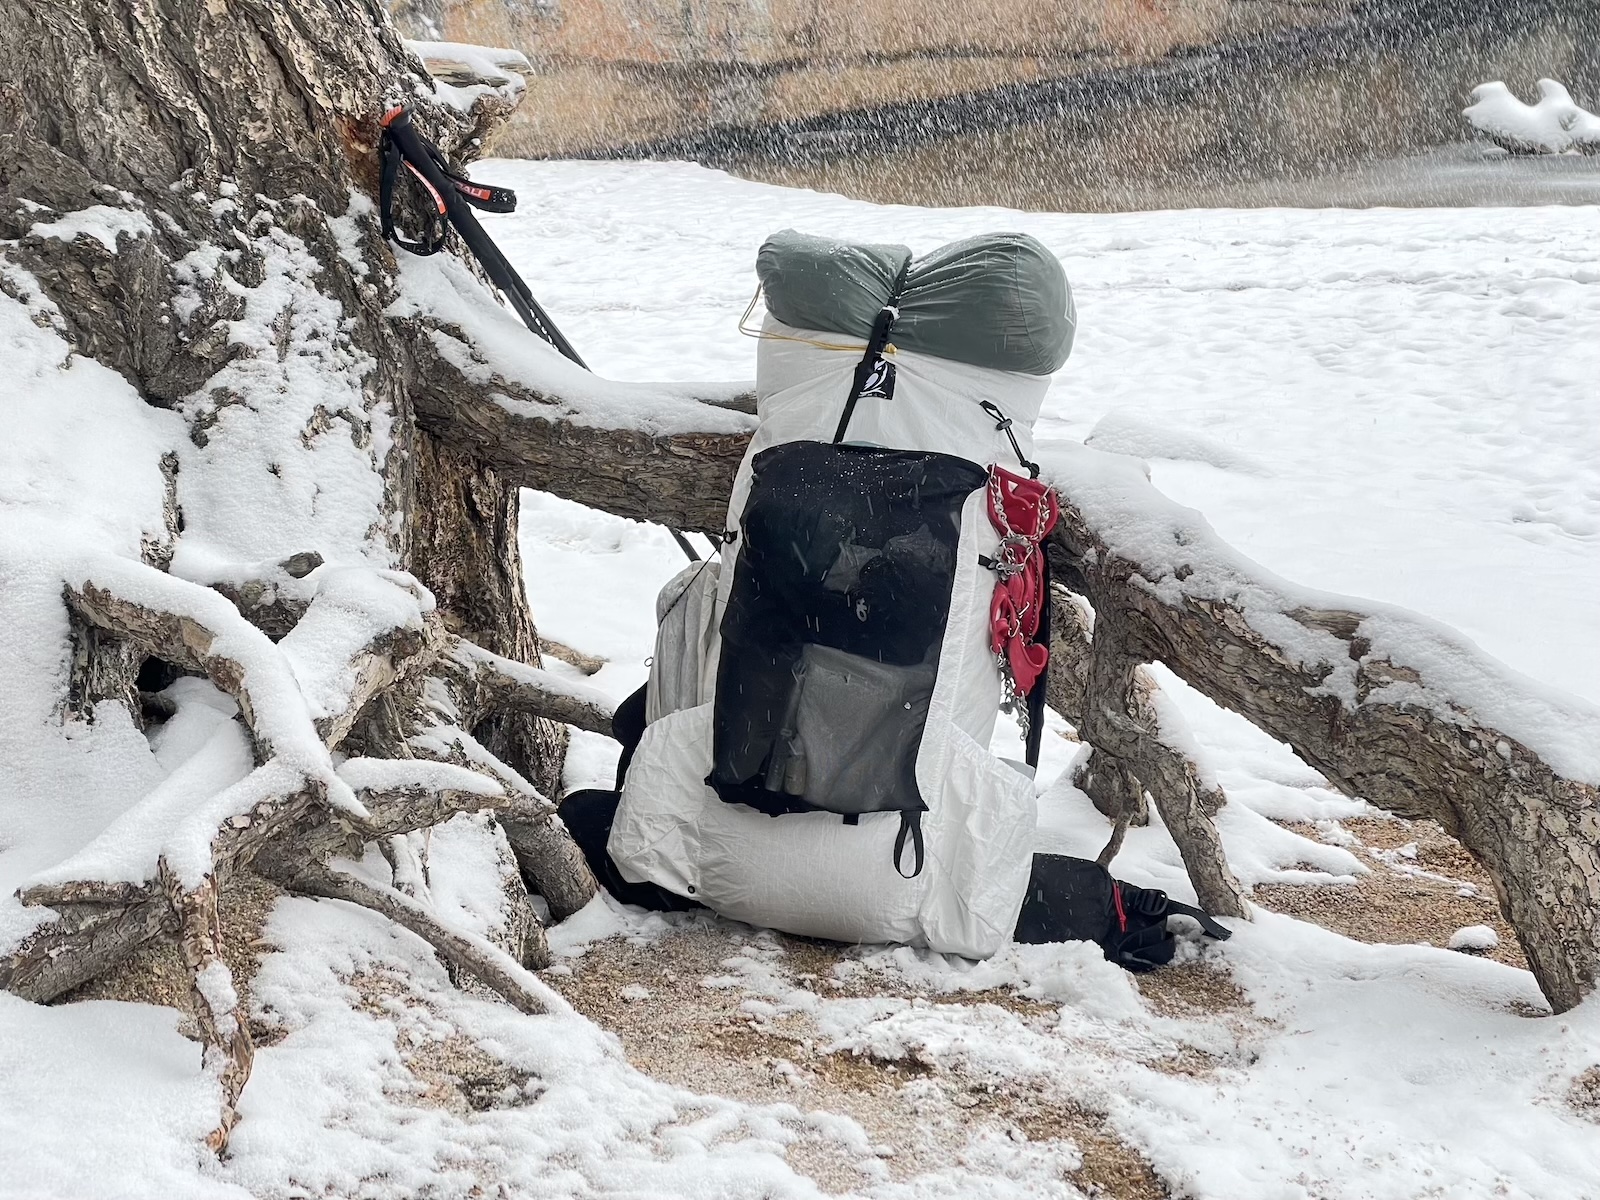
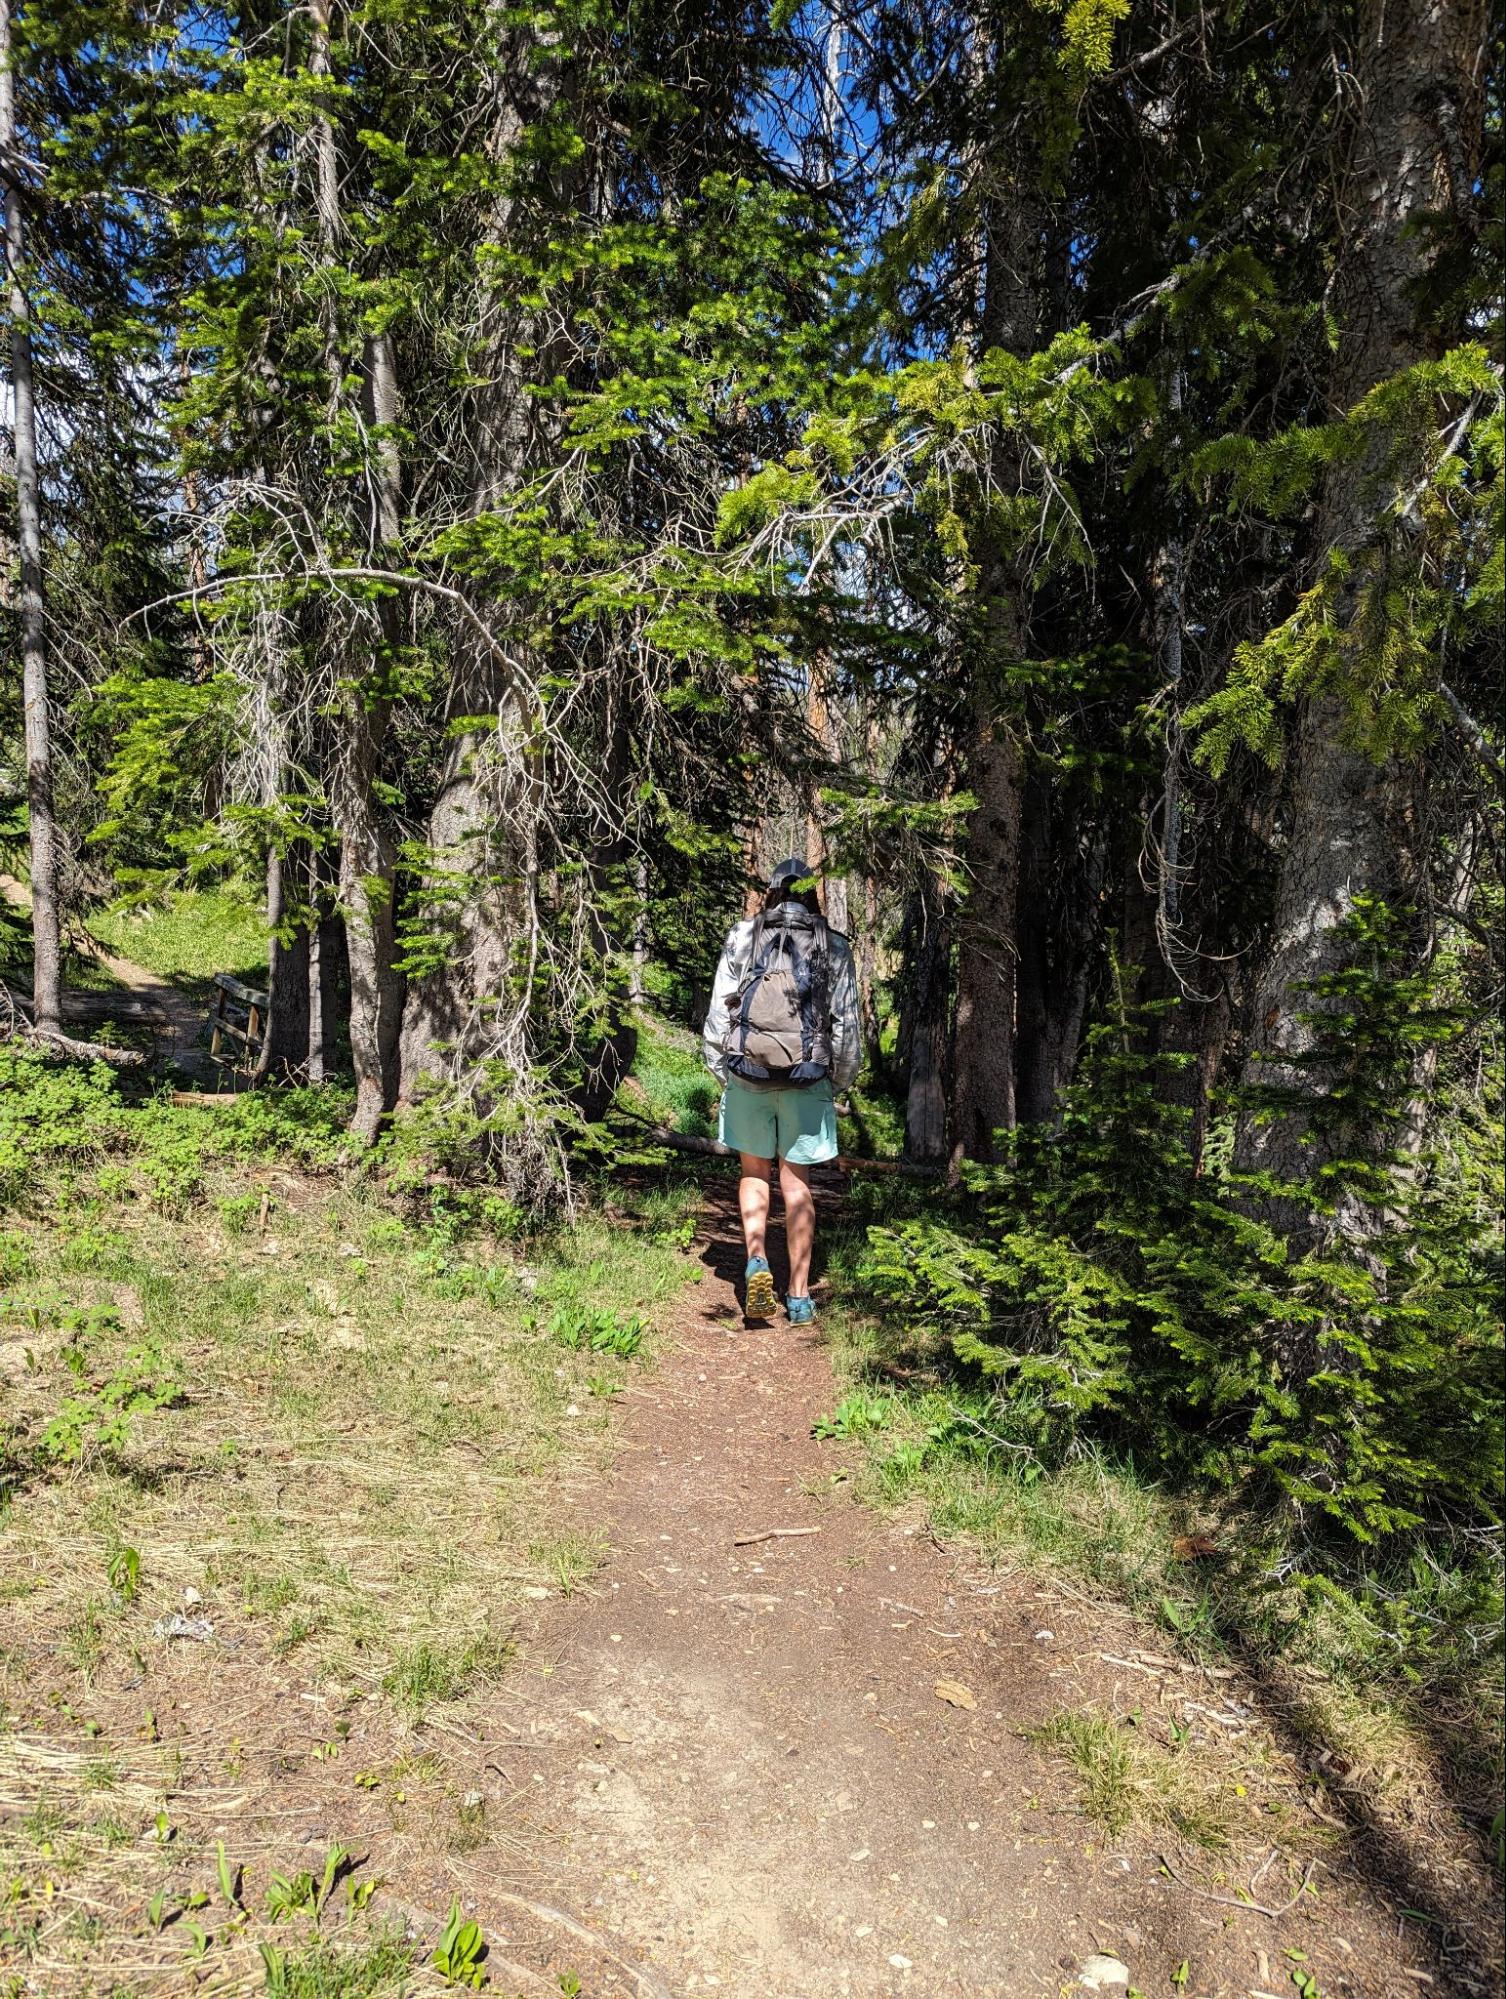
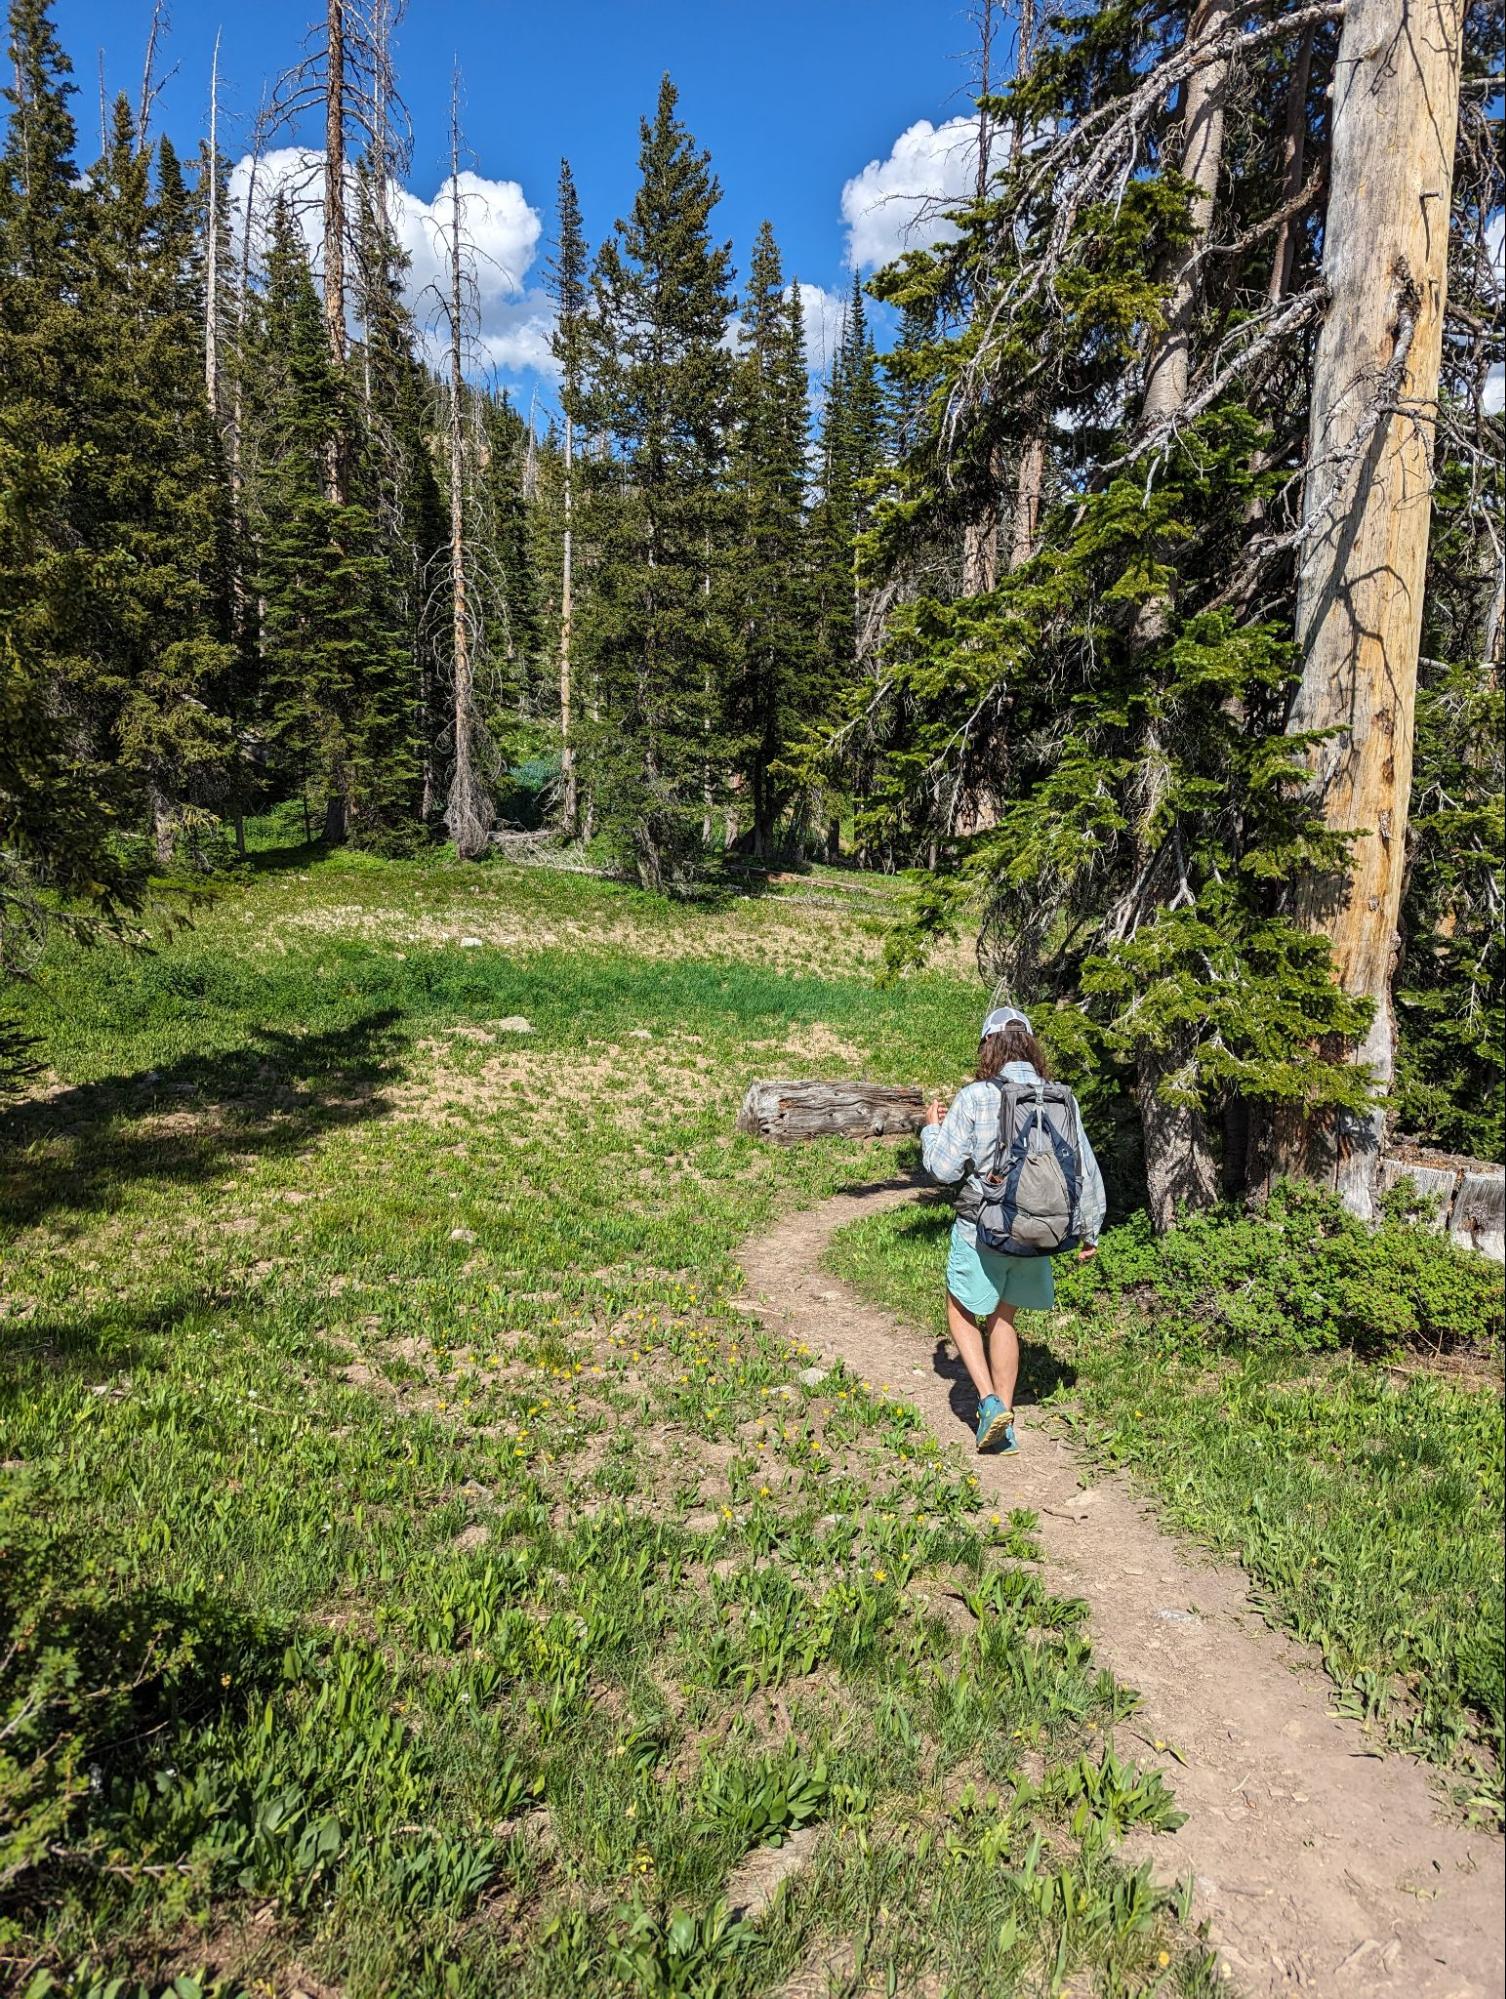
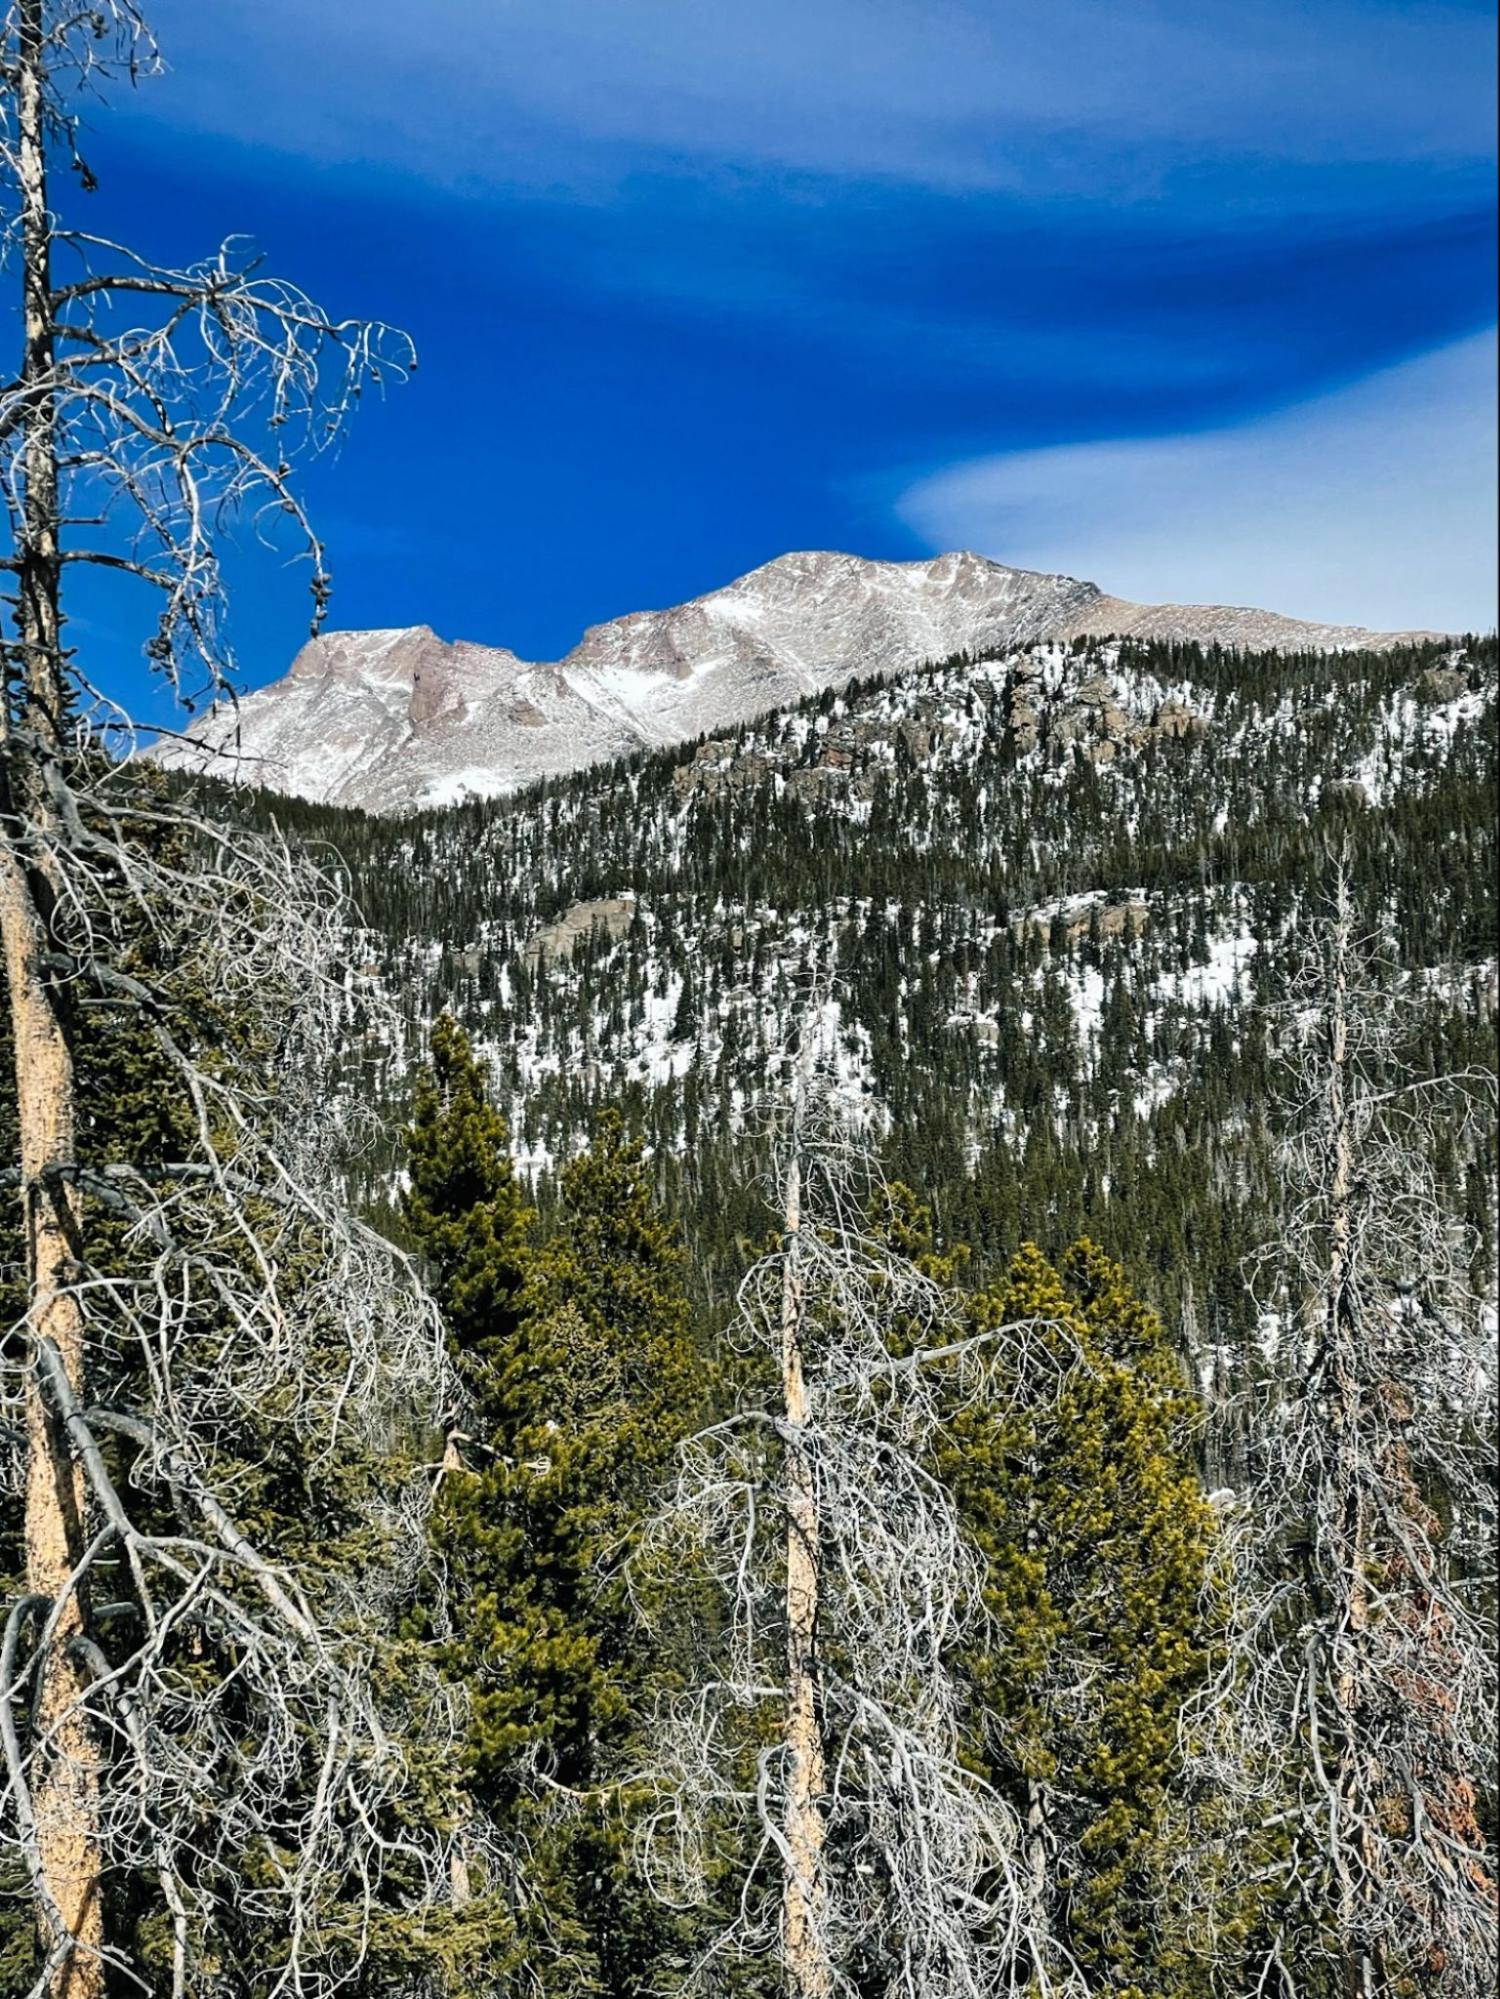
A curry dinner explodes during this overnight trek inspired by a winter storm warning.
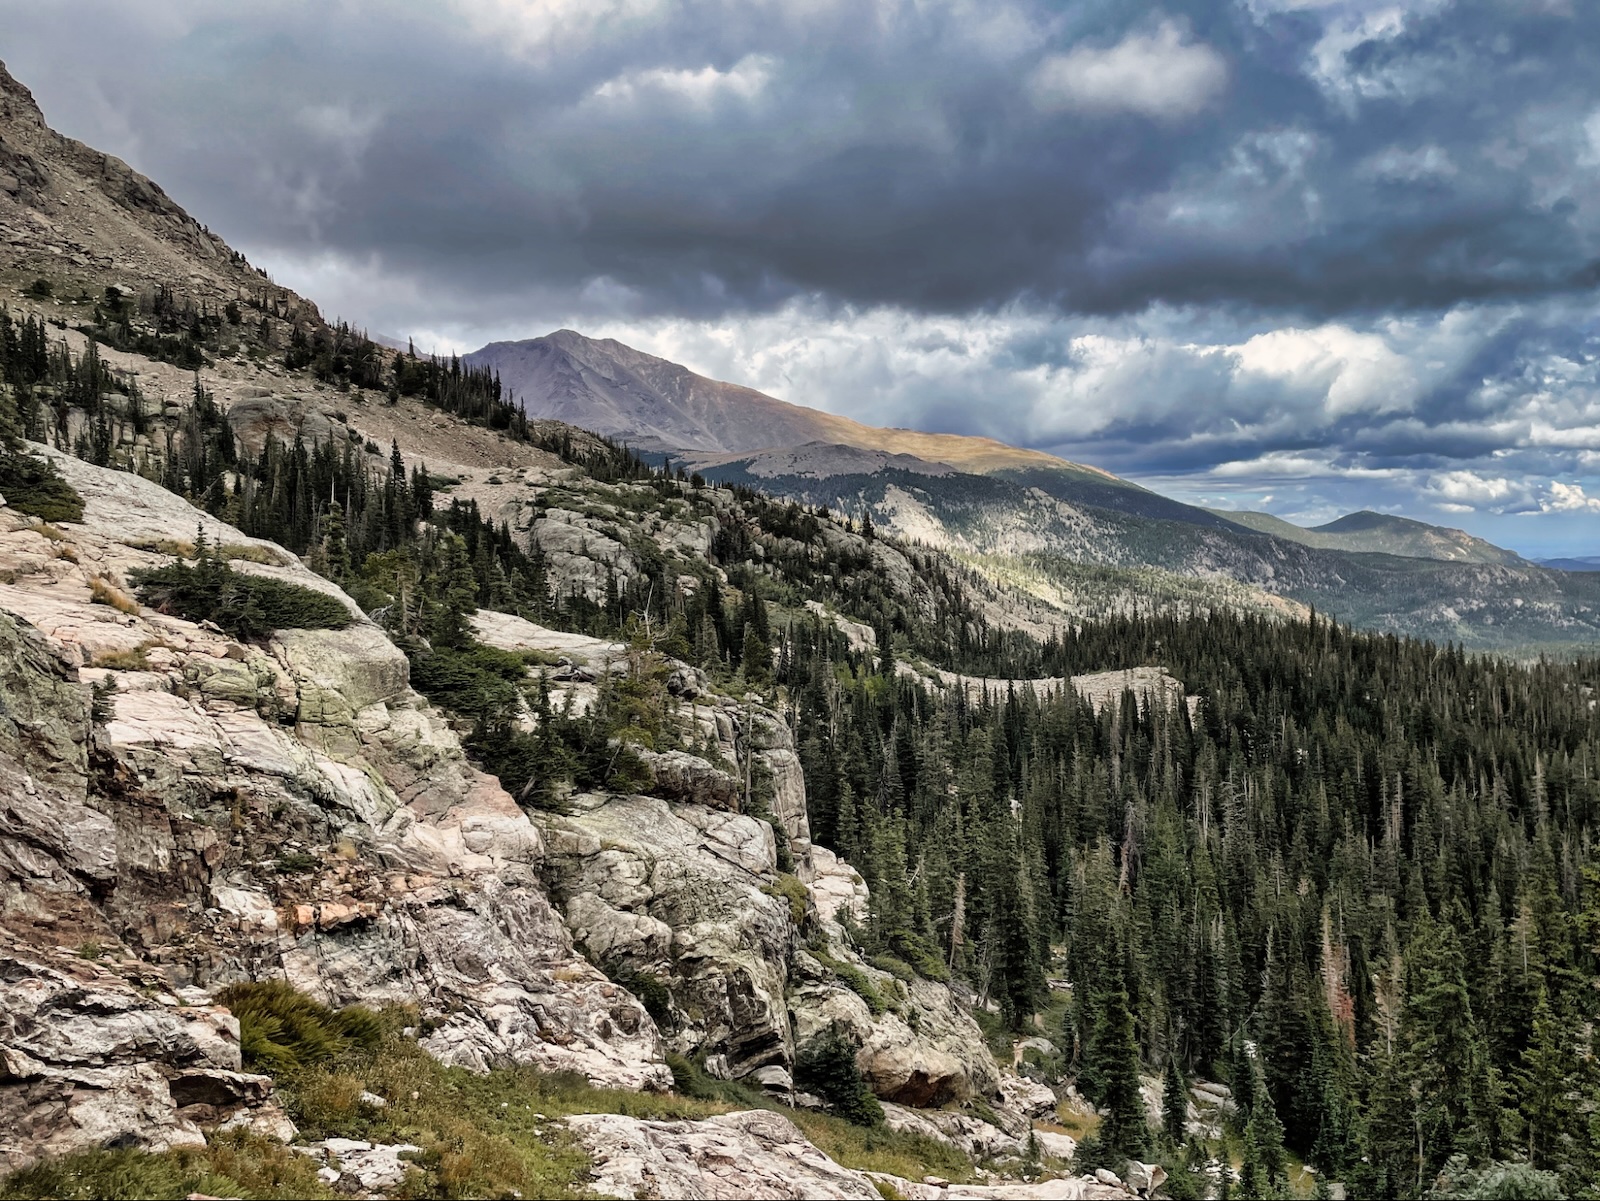
Stephanie dropped me off at the trailhead at dusk with my planned destination being a dry ridge about 600 feet of climbing higher. I had crossed this ridge once before on a previous trip and thought that it would make a nice campsite.
Although my trailhead was located within the confines of Rocky Mountain National Park, I soon exited the park boundary. I would need no reservations for camping tonight.
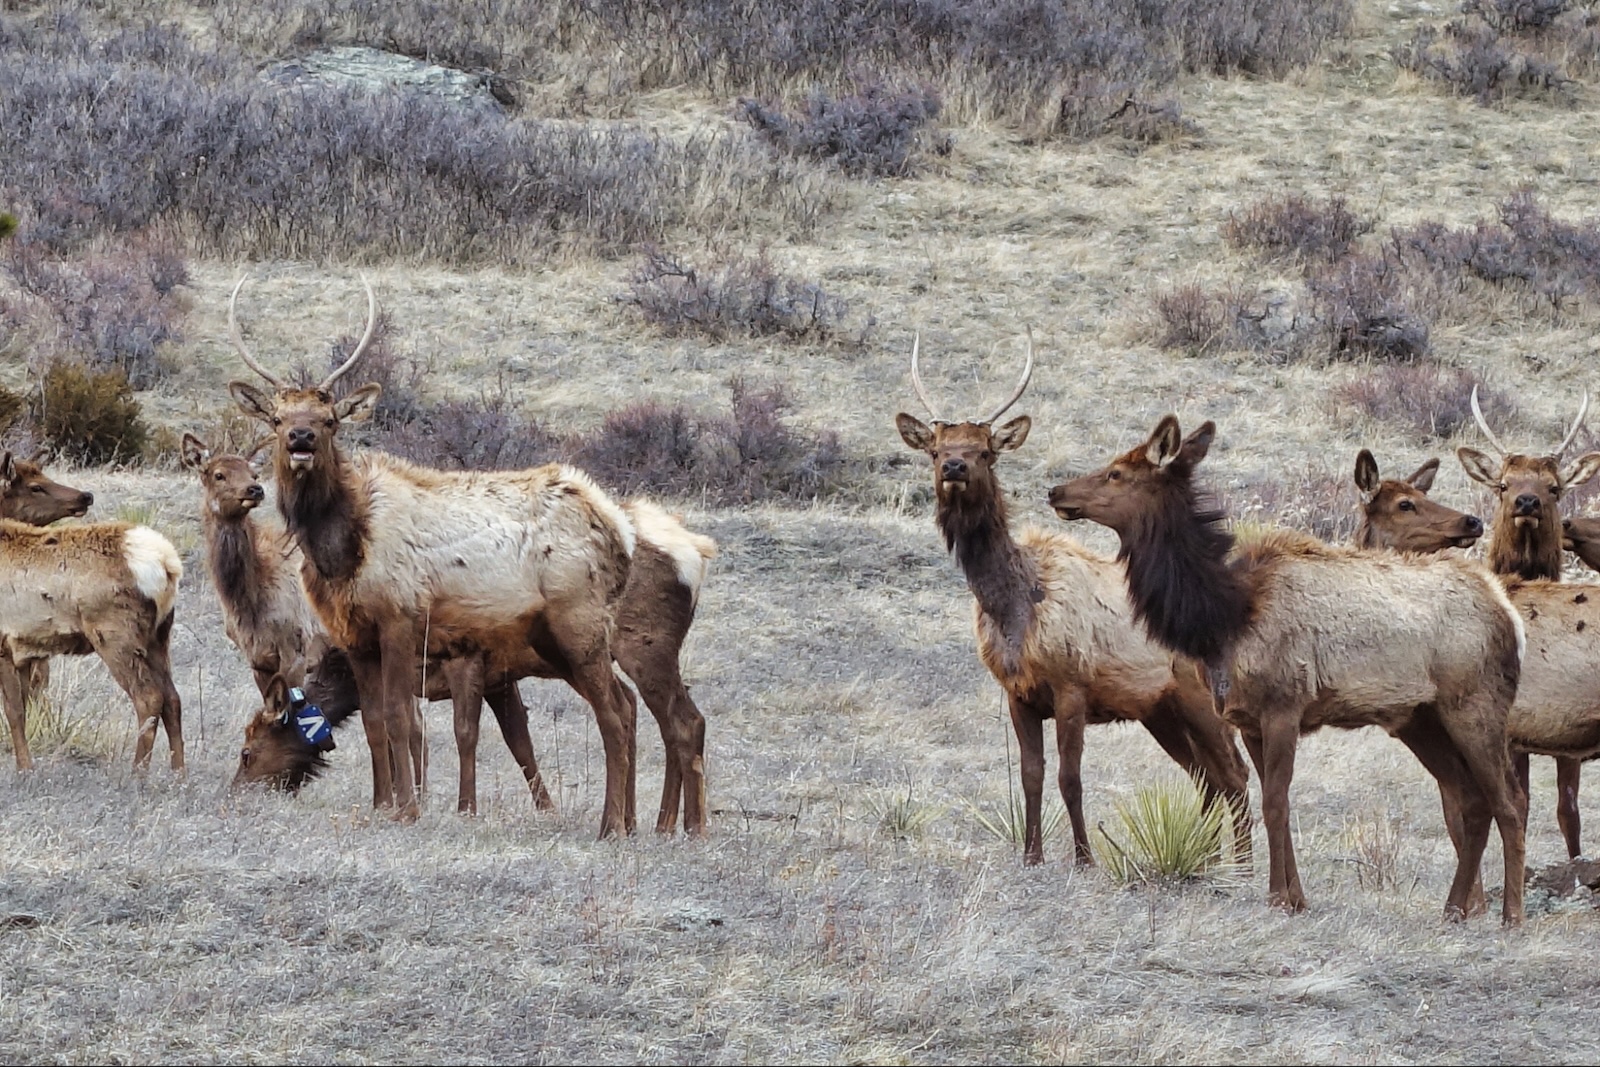
After 15 minutes of climbing, I stopped to make some pack adjustments and looked back down to the valley. A small herd of elk was feeding on meadow grasses, and the bull was bugling. A hundred yards upstream, a large cow moose was munching in the willows. Three deer were moseying along the valley trail between them.
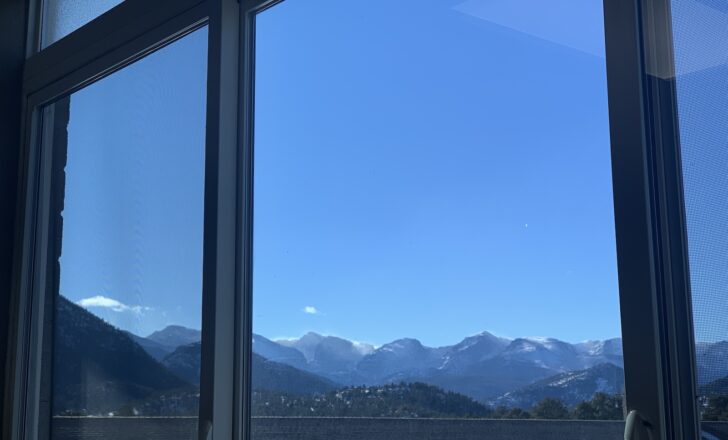
I feel fortunate to live in a place where I can be at a National Park trailhead within 10 minutes of my home, and where I can see big game animals every day. This morning, a herd of 300 elk walked through the parking lot of our apartment building. We watched them from our deck.
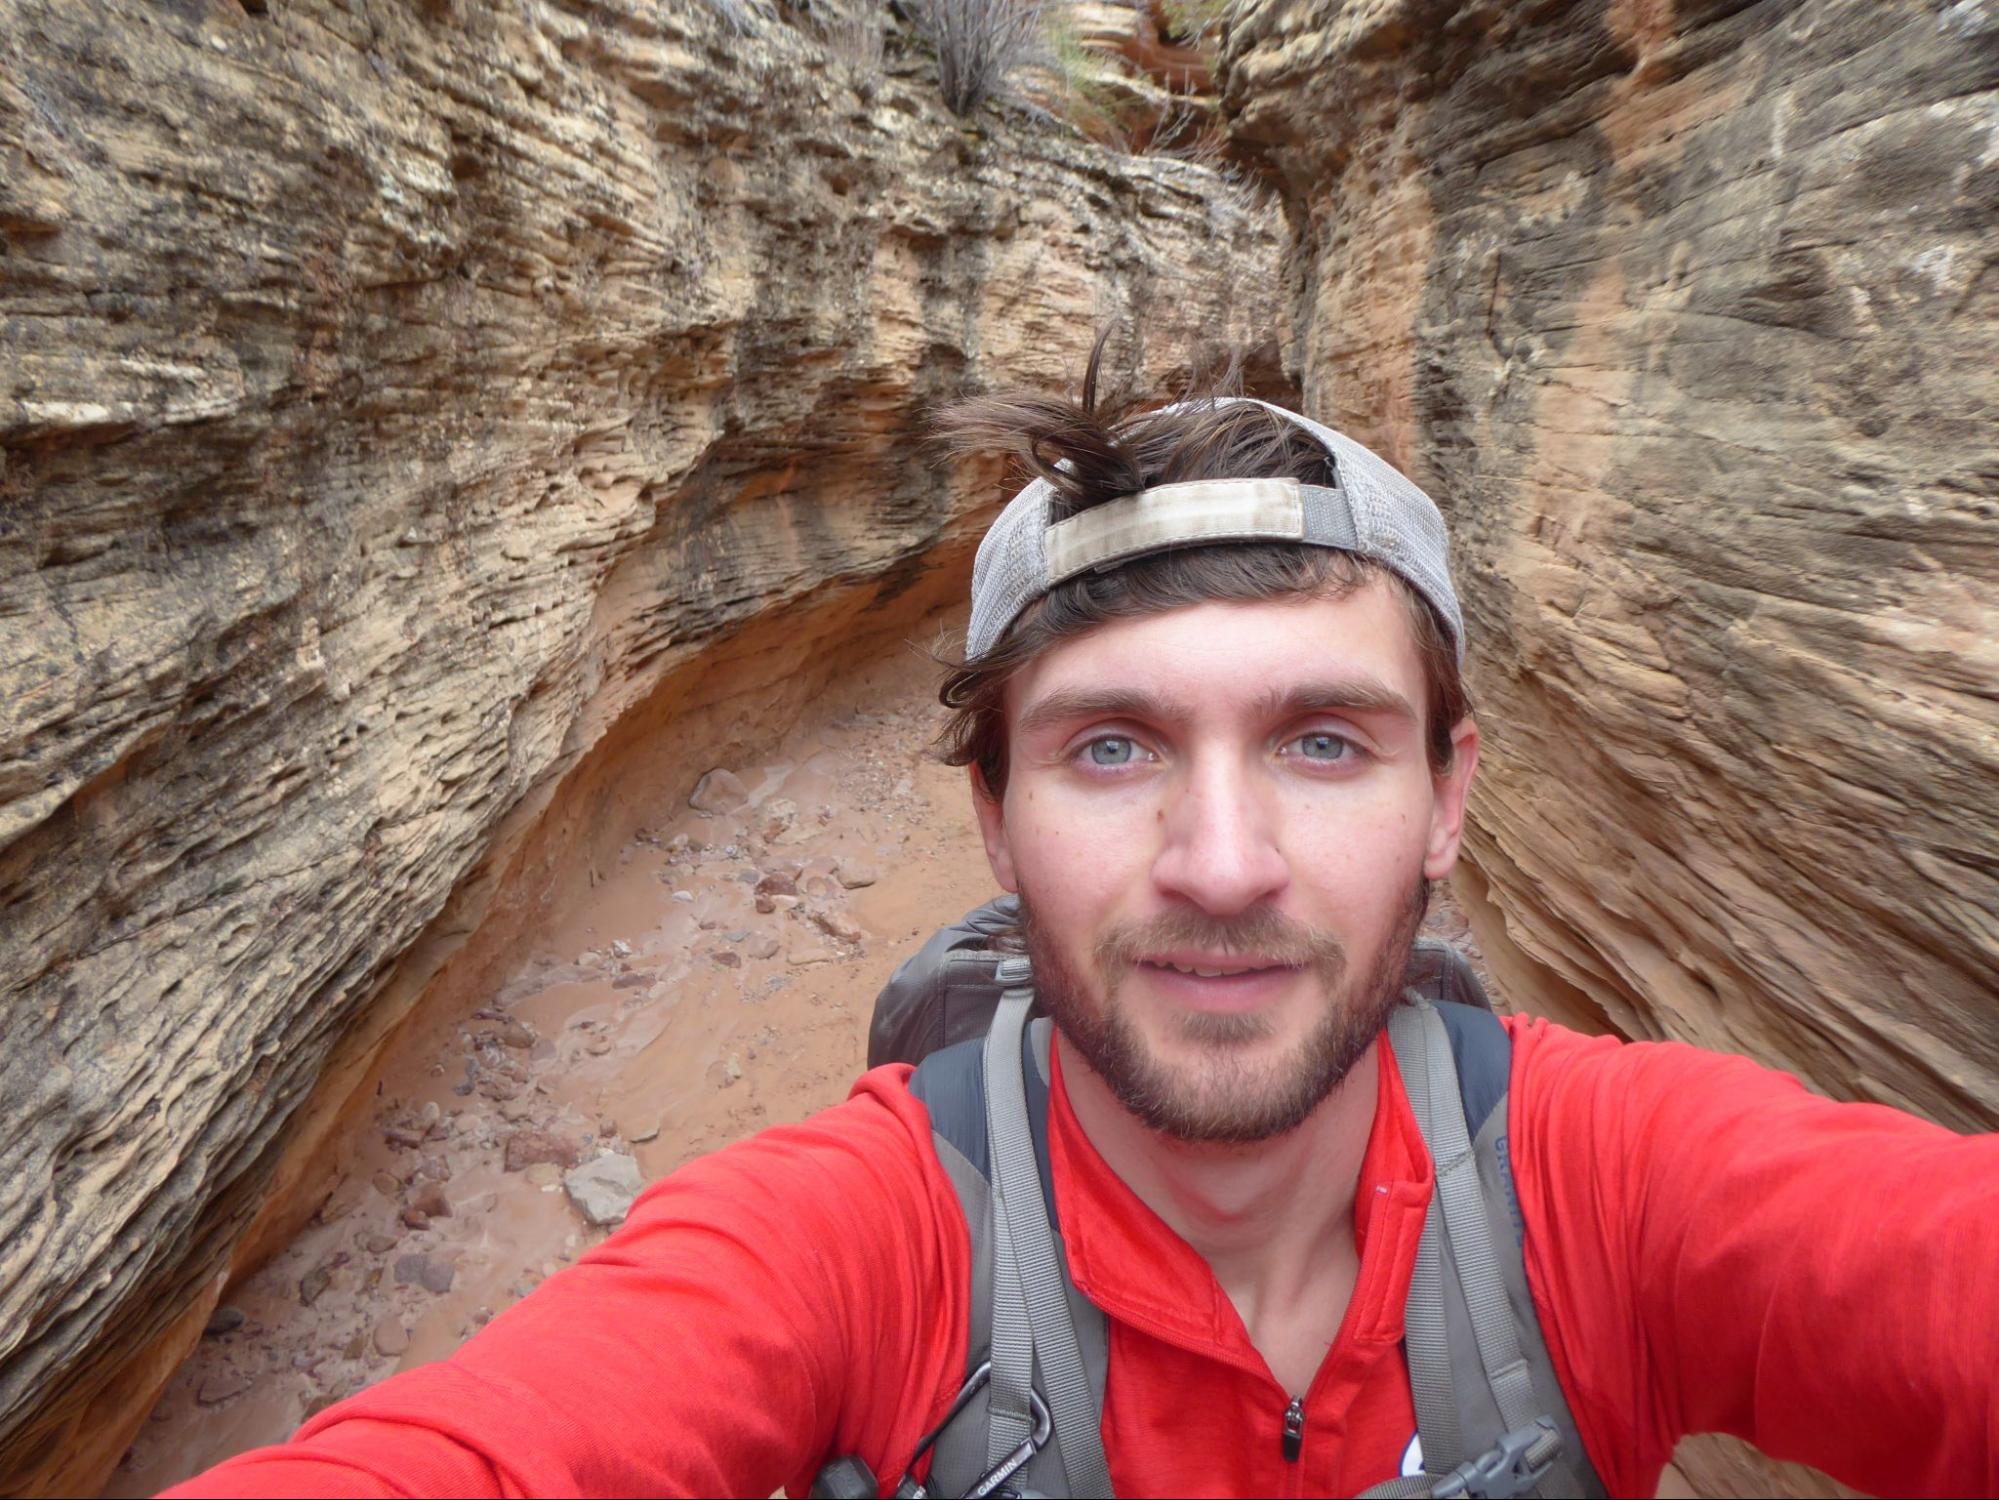
After adjusting my pack, I shed my rain jacket, as I was starting the steep climb to the ridge. The temperature was below freezing, but a fishnet tank top and an alpaca long-sleeve crew would be plenty of insulation while hiking uphill.
I placed my headlamp around my neck, I would need it soon.
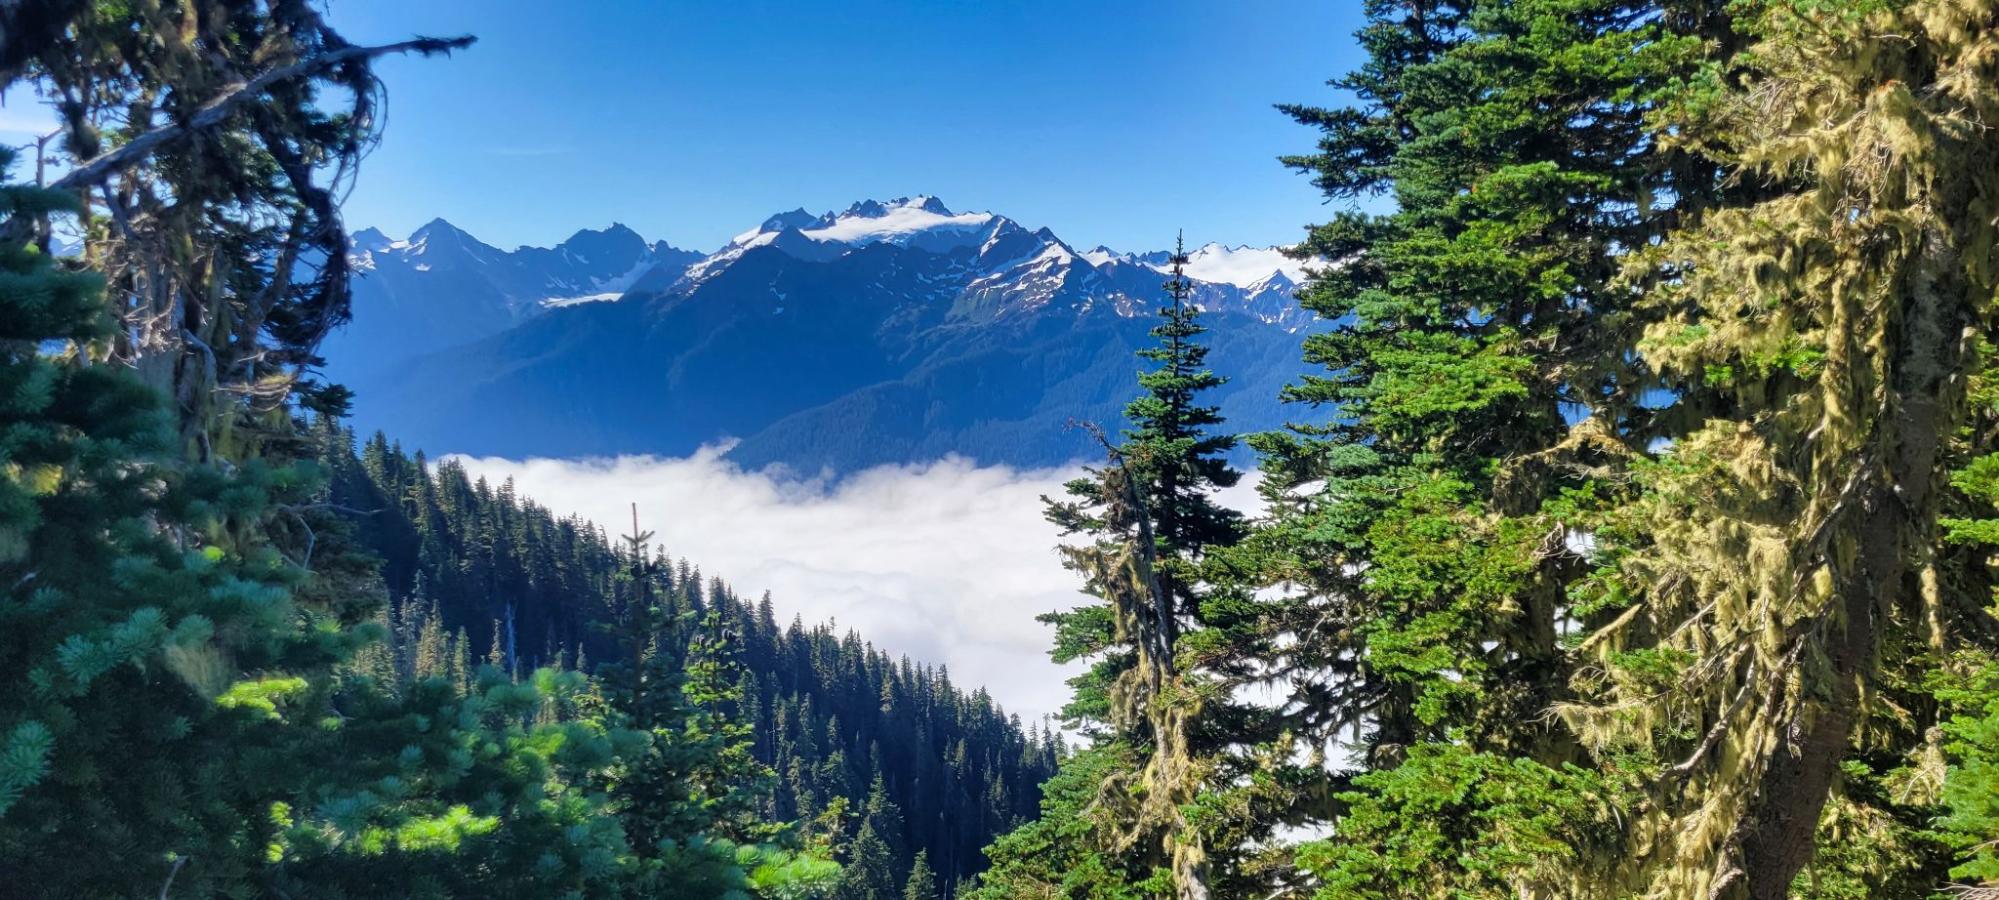
At the National Park-Wilderness boundary.
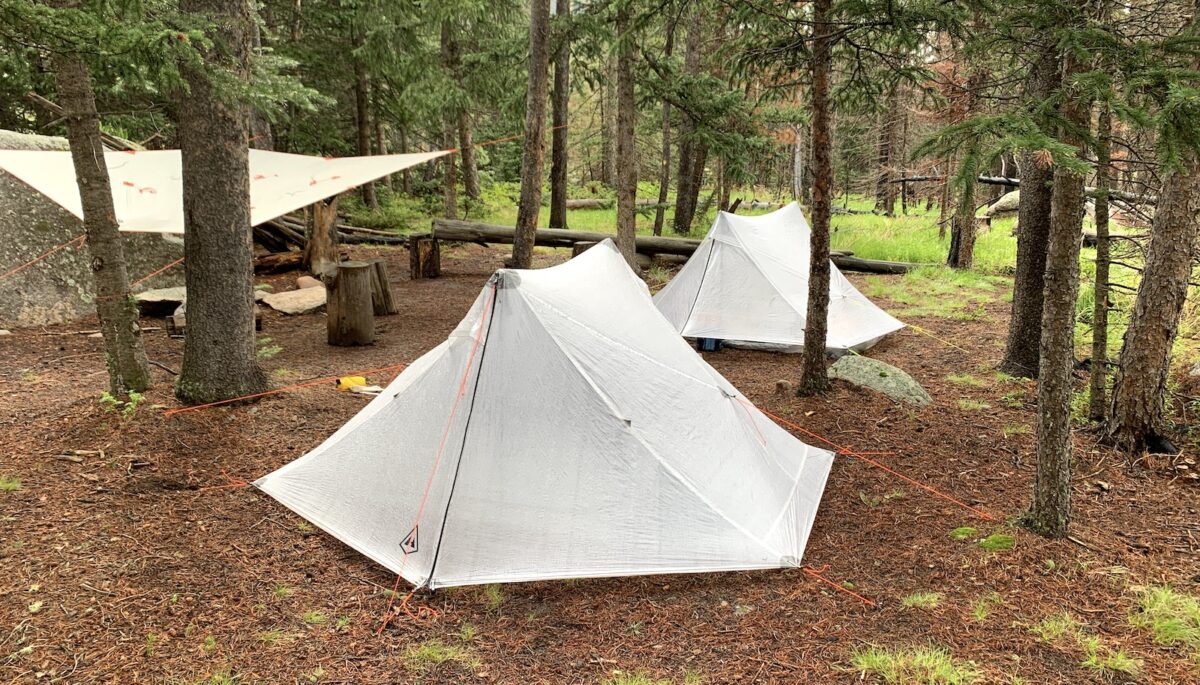
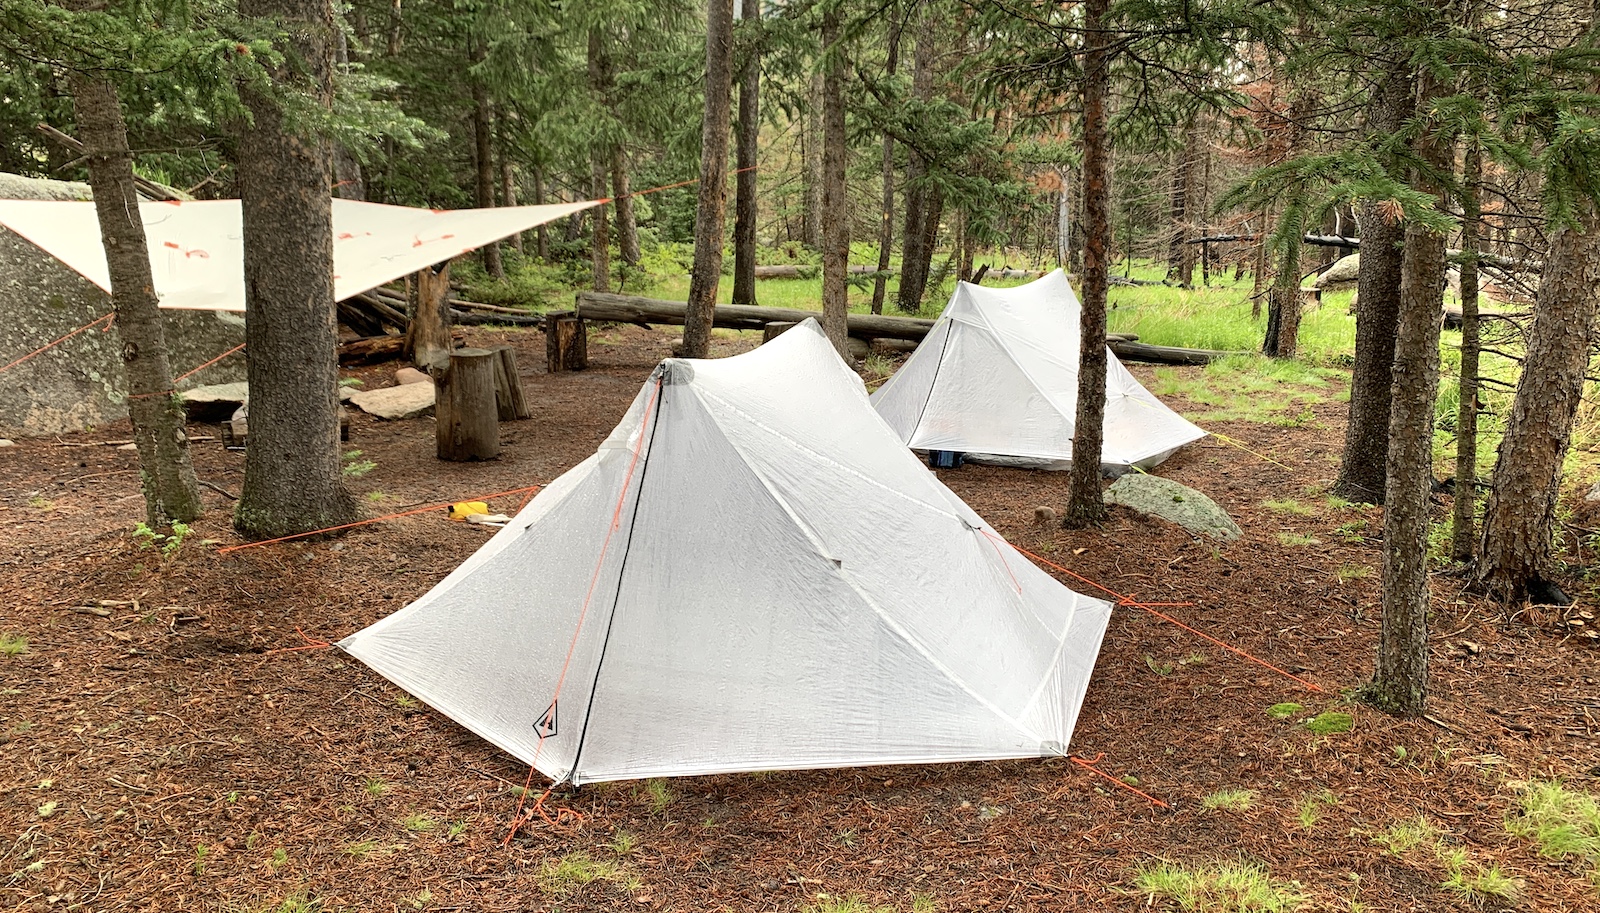
This would be a quick trip, less than 24 hours, and only about 9 miles. I had one singular purpose: collect more tent-testing data for my “How do ultralight double-wall tents perform in the winter?” project. Tonight’s home would be the Tarptent Dipole 1 DW.
I arrived at the crest of the ridge well after dark, but the rising full moon helped me avoid destroying my night vision, and my headlamp stayed off. After I found a spot to pitch, I clicked it on, flooding the area with 400 lumens of LED light, and removed my pack.
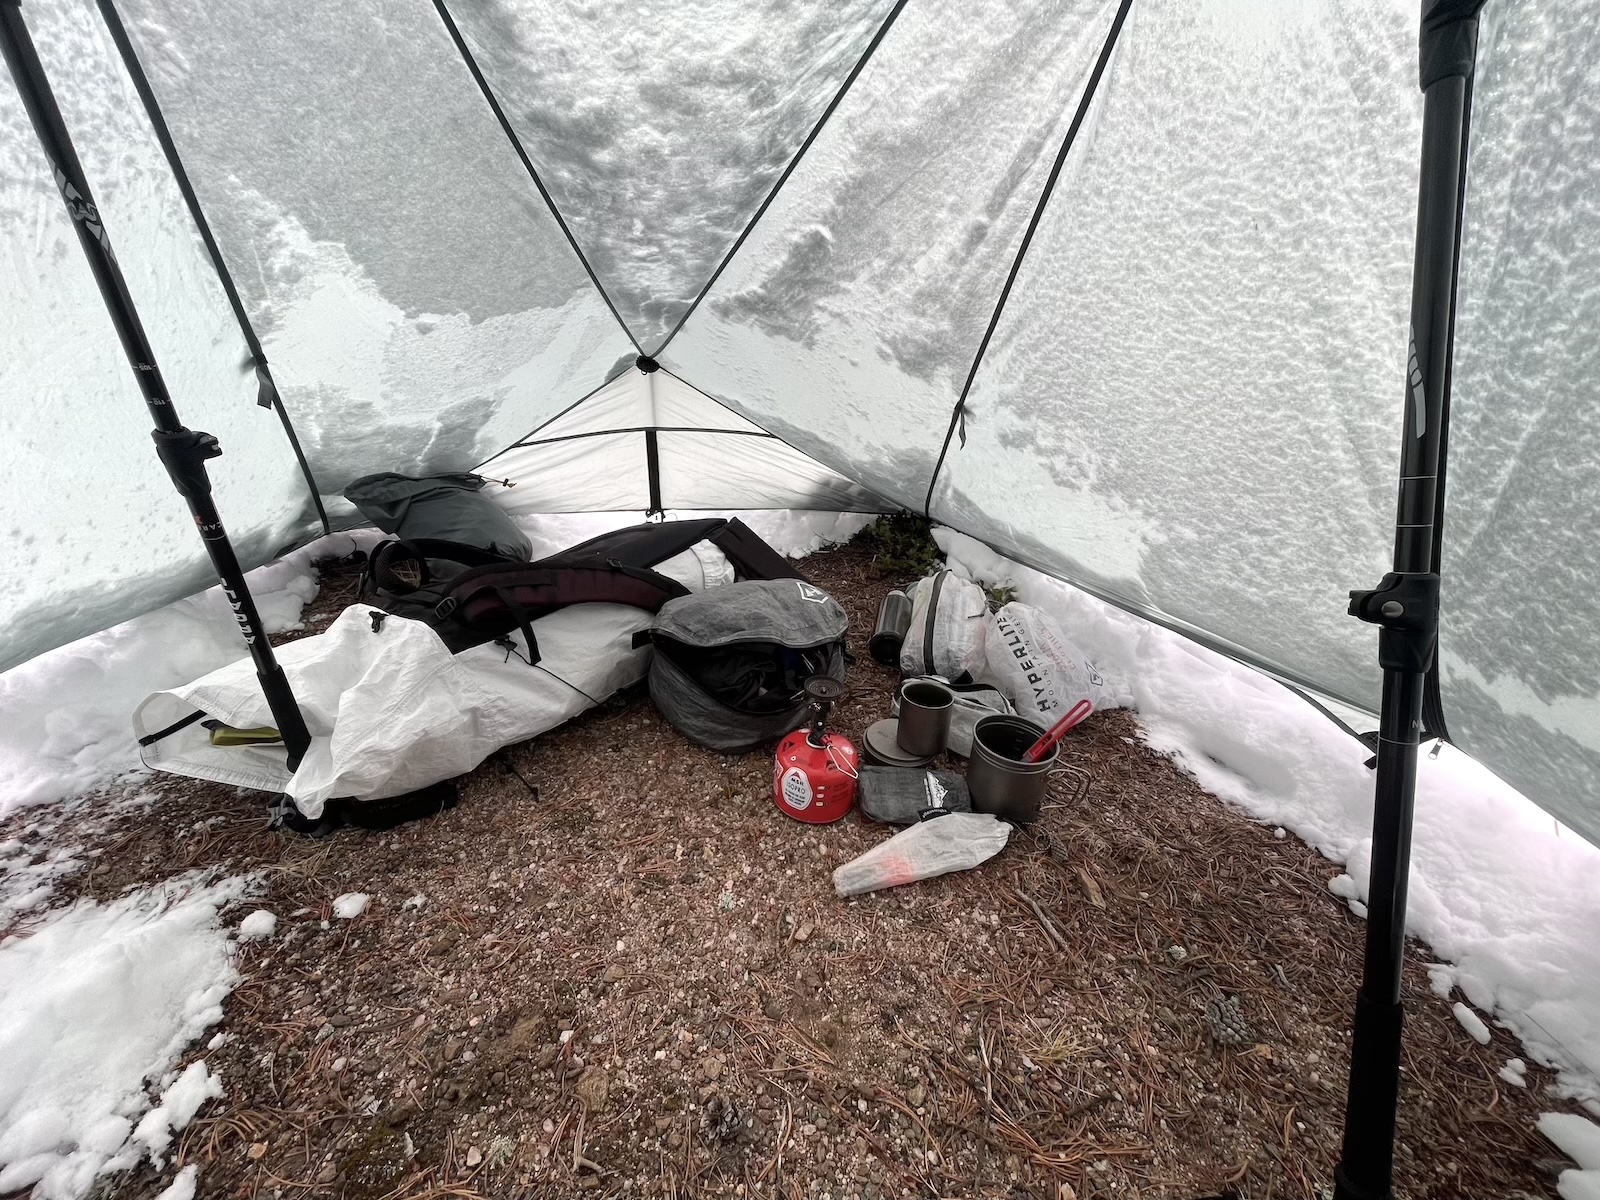
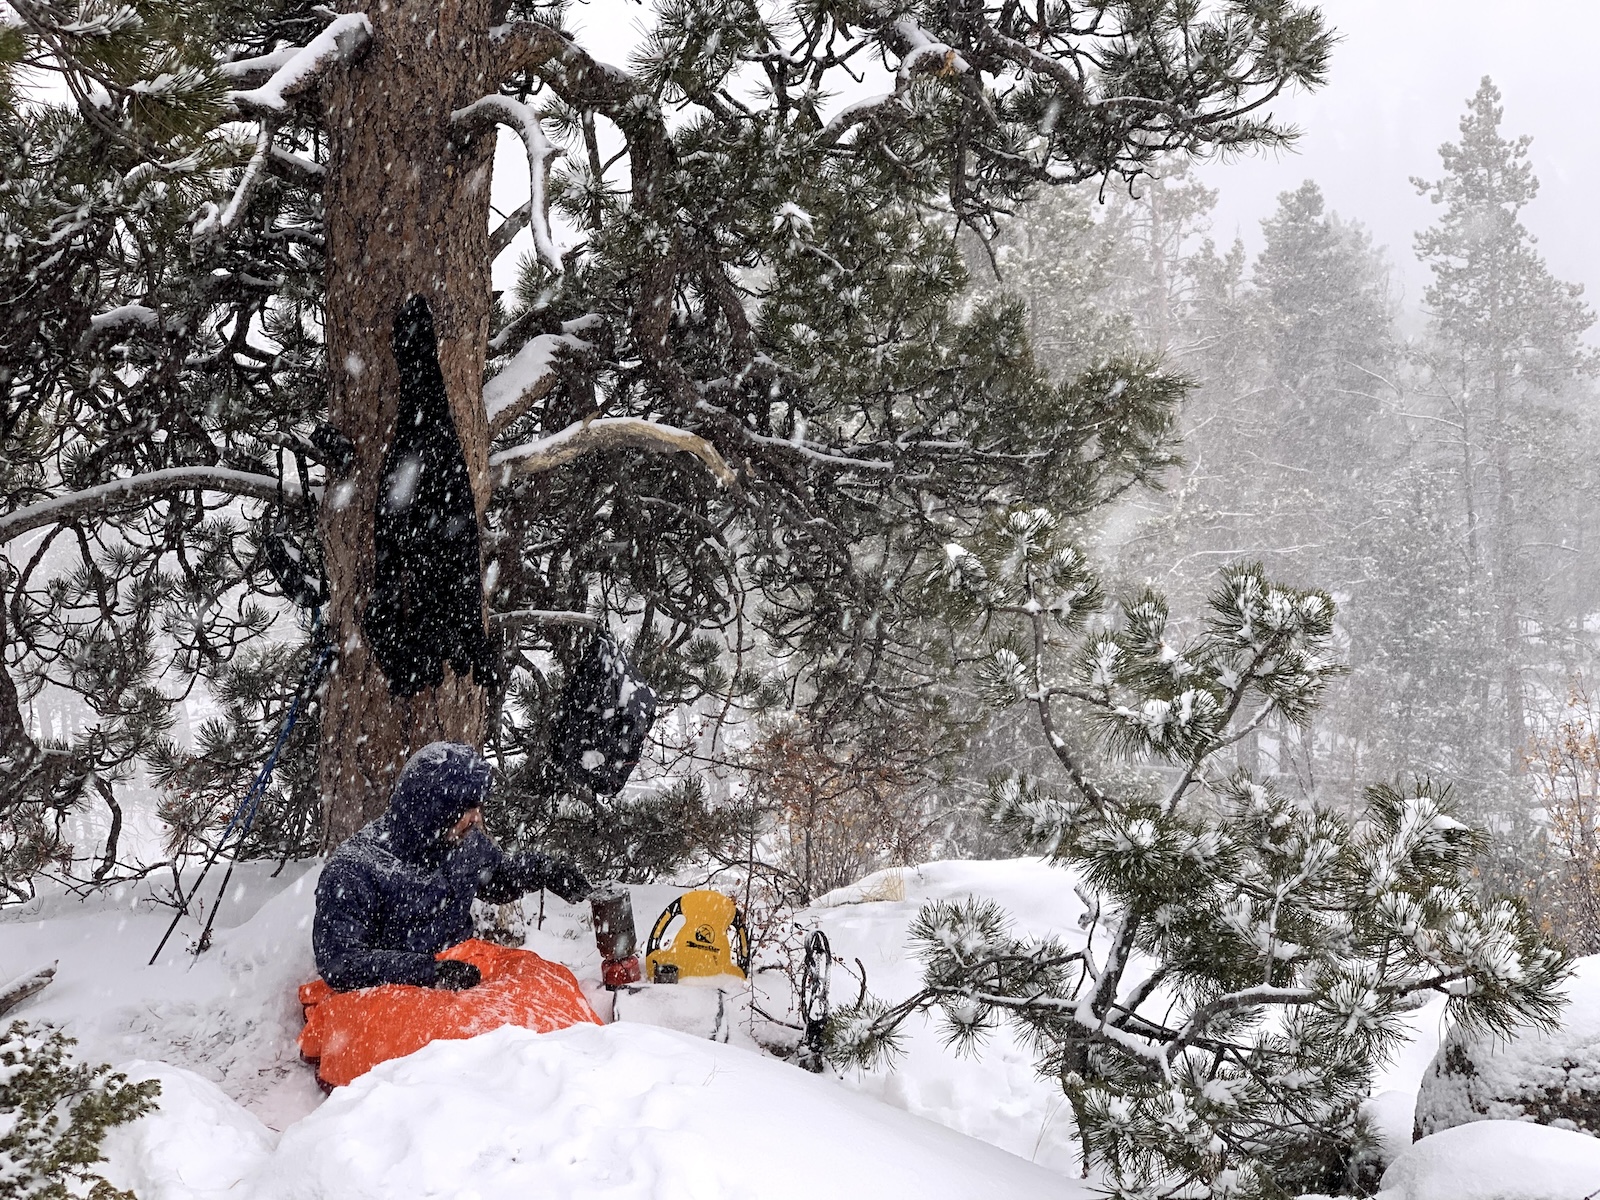
My campsite was nestled in a copse of pine trees – a mix of ponderosa and limber pines at about 8,600 feet. The forest floor was soft, duffy, and dry. That would change overnight. The winter storm warning issued a few hours ago called for heavy snowfall that would start in a few hours.
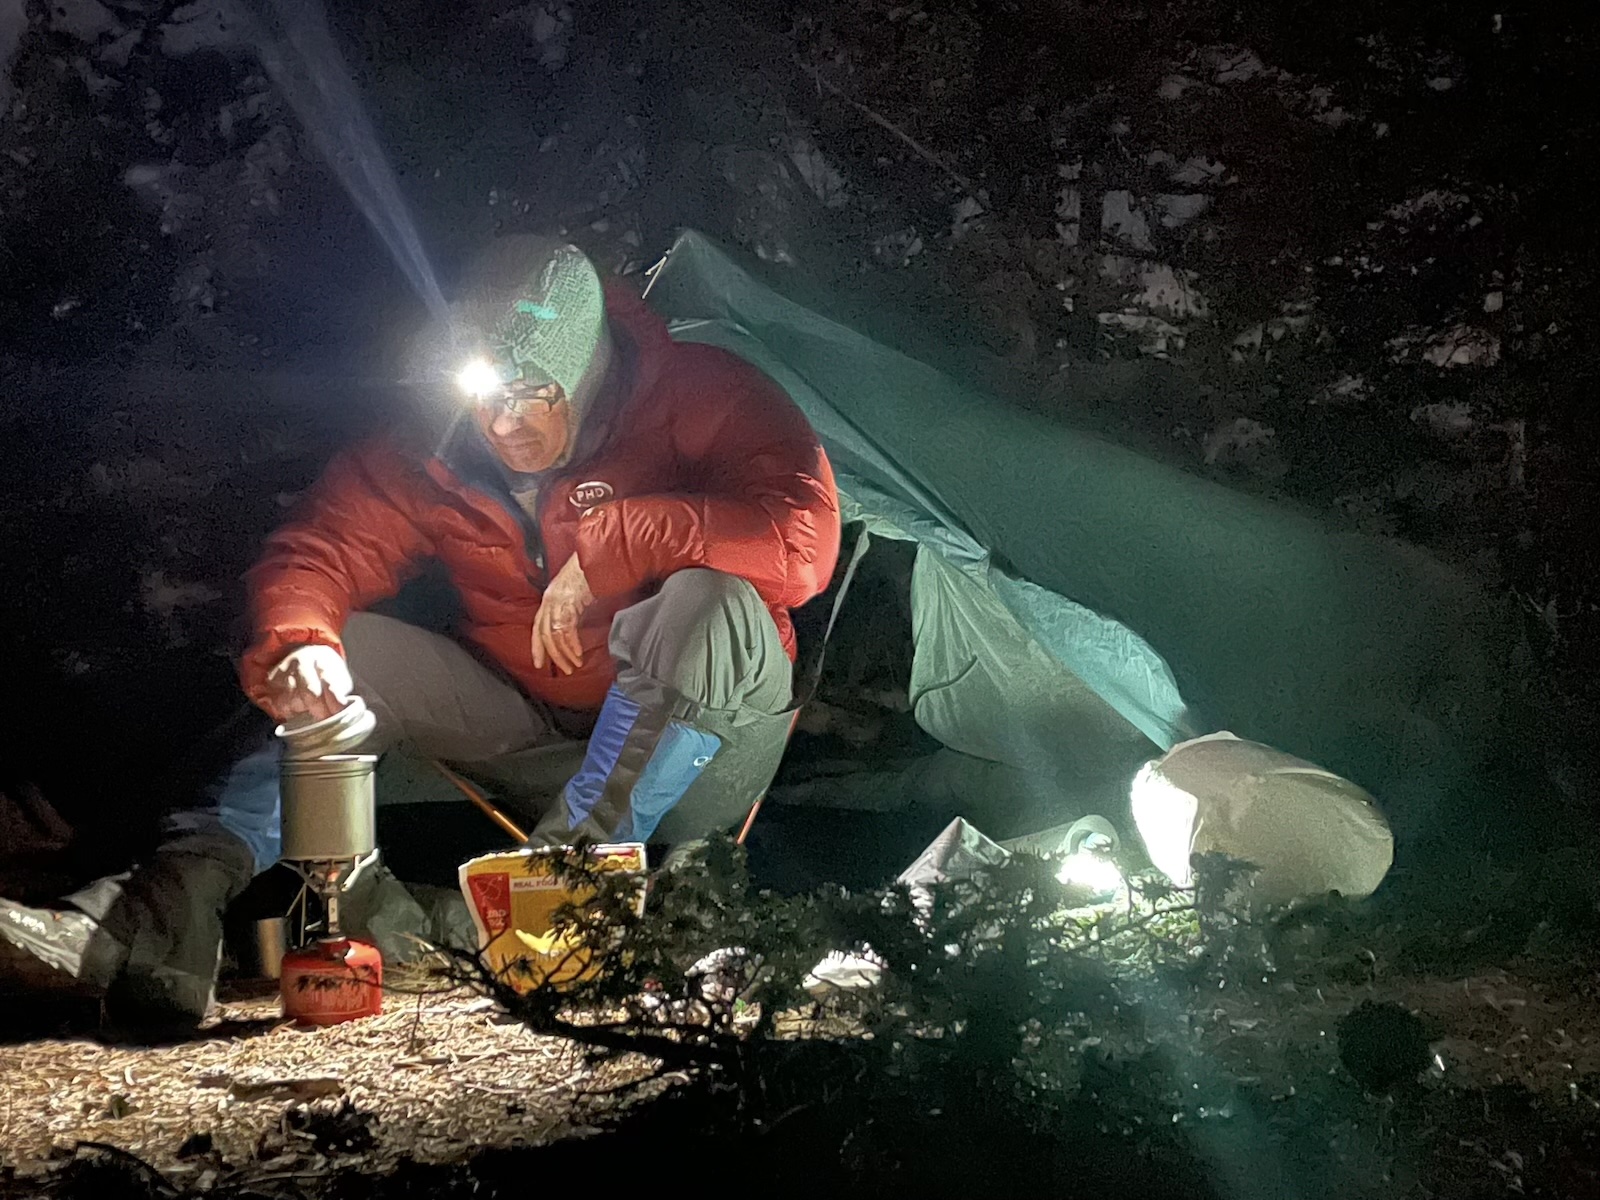
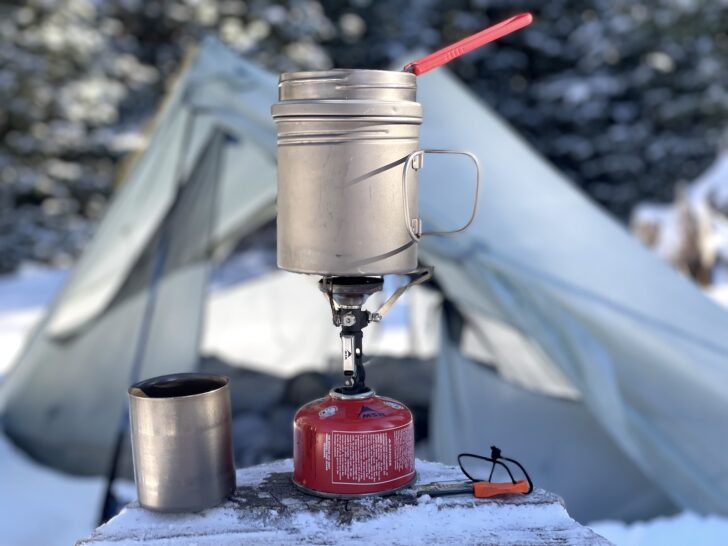
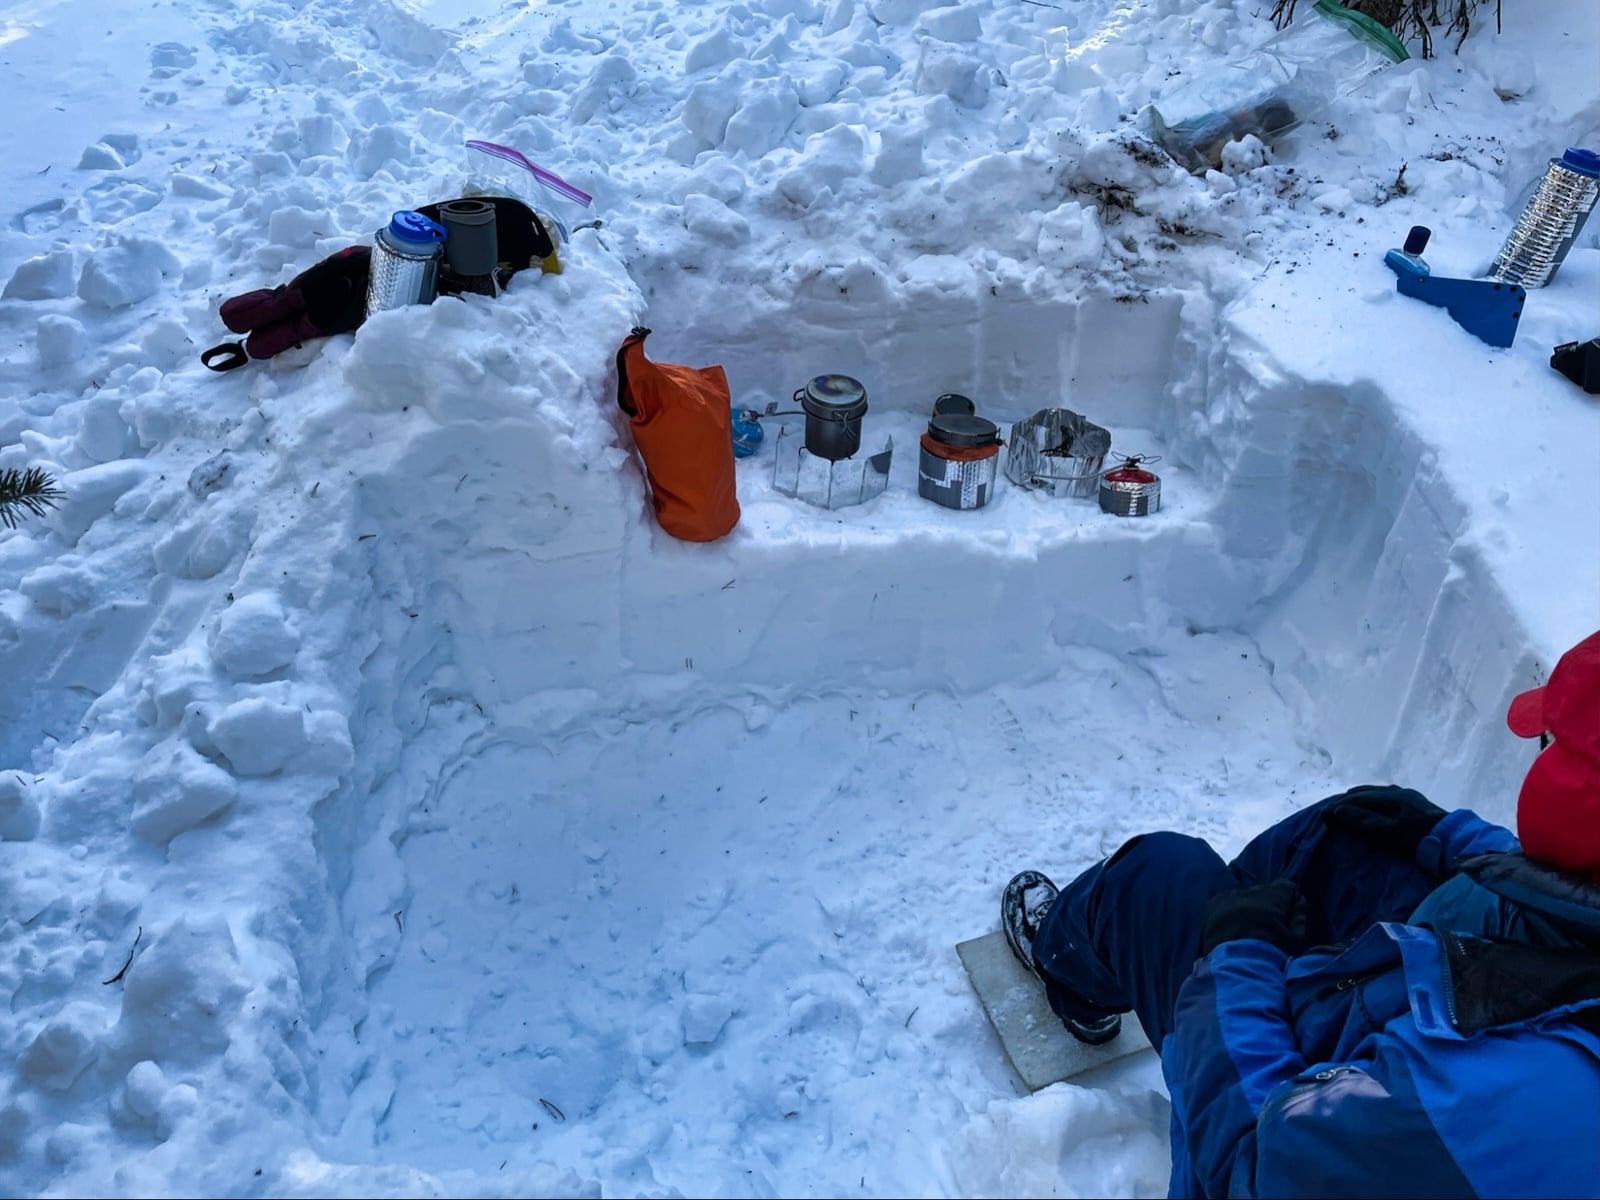
After pitching the shelter and setting up my bed, I boiled water for dinner – a package of Good To-Go Thai Curry. After filling the bag and sealing it, I stuffed it in my down parka while it rehydrated – a process I’ve done hundreds of times. I love the feeling of heat against my belly on a cold night.
Boiling water for Thai Curry.
For the next 10 minutes, I organized gear, made some tent guyline adjustments to prepare for heavy snow, and enjoyed the aura of the brightening moon as it rose above the tops of the trees.
And then, I felt an unusual amount of heat coming from my freeze-dried dinner.
When I realized what had happened, I panicked. My clothing was being soaked by food slop from a leaky bag. I opened the bottom of my parka hem and let the package fall to the ground, then started yanking my clothes off. First, the parka – with its inside fabric (and some insulation) fully soaked. My Alpha 60, alpaca, and fishnet layers were also soaked, as well as the tops of my underwear and pants. What a mess.
I figured on just washing my clothes out in the creek, but then remembered that I was dry-camping, and the nearest water source was an hour’s walk in the dark. I only had about 3 liters of water with me, so I did the best I could to wash as much out of the down parka as possible (the most critical layer). I was able to wash and rinse the fishnet and alpaca layers well enough, but the Alpha 60 layer was not salvageable. I used a wetted bandana to wipe the residue off my pants and underwear.
Through most of this process, I was cursing the zipper people at Good To-Go, thinking that maybe they had taken their Food Packaging 101 class online during the pandemic, compromising their education.
But after my clothes were washed, draped over limber pine branches, and starting to freeze, I realized that I was standing shirtless on a moonlit night in the middle of the forest with temperatures in the mid-20s F and dropping.
I started to laugh and then realized I was shivering.
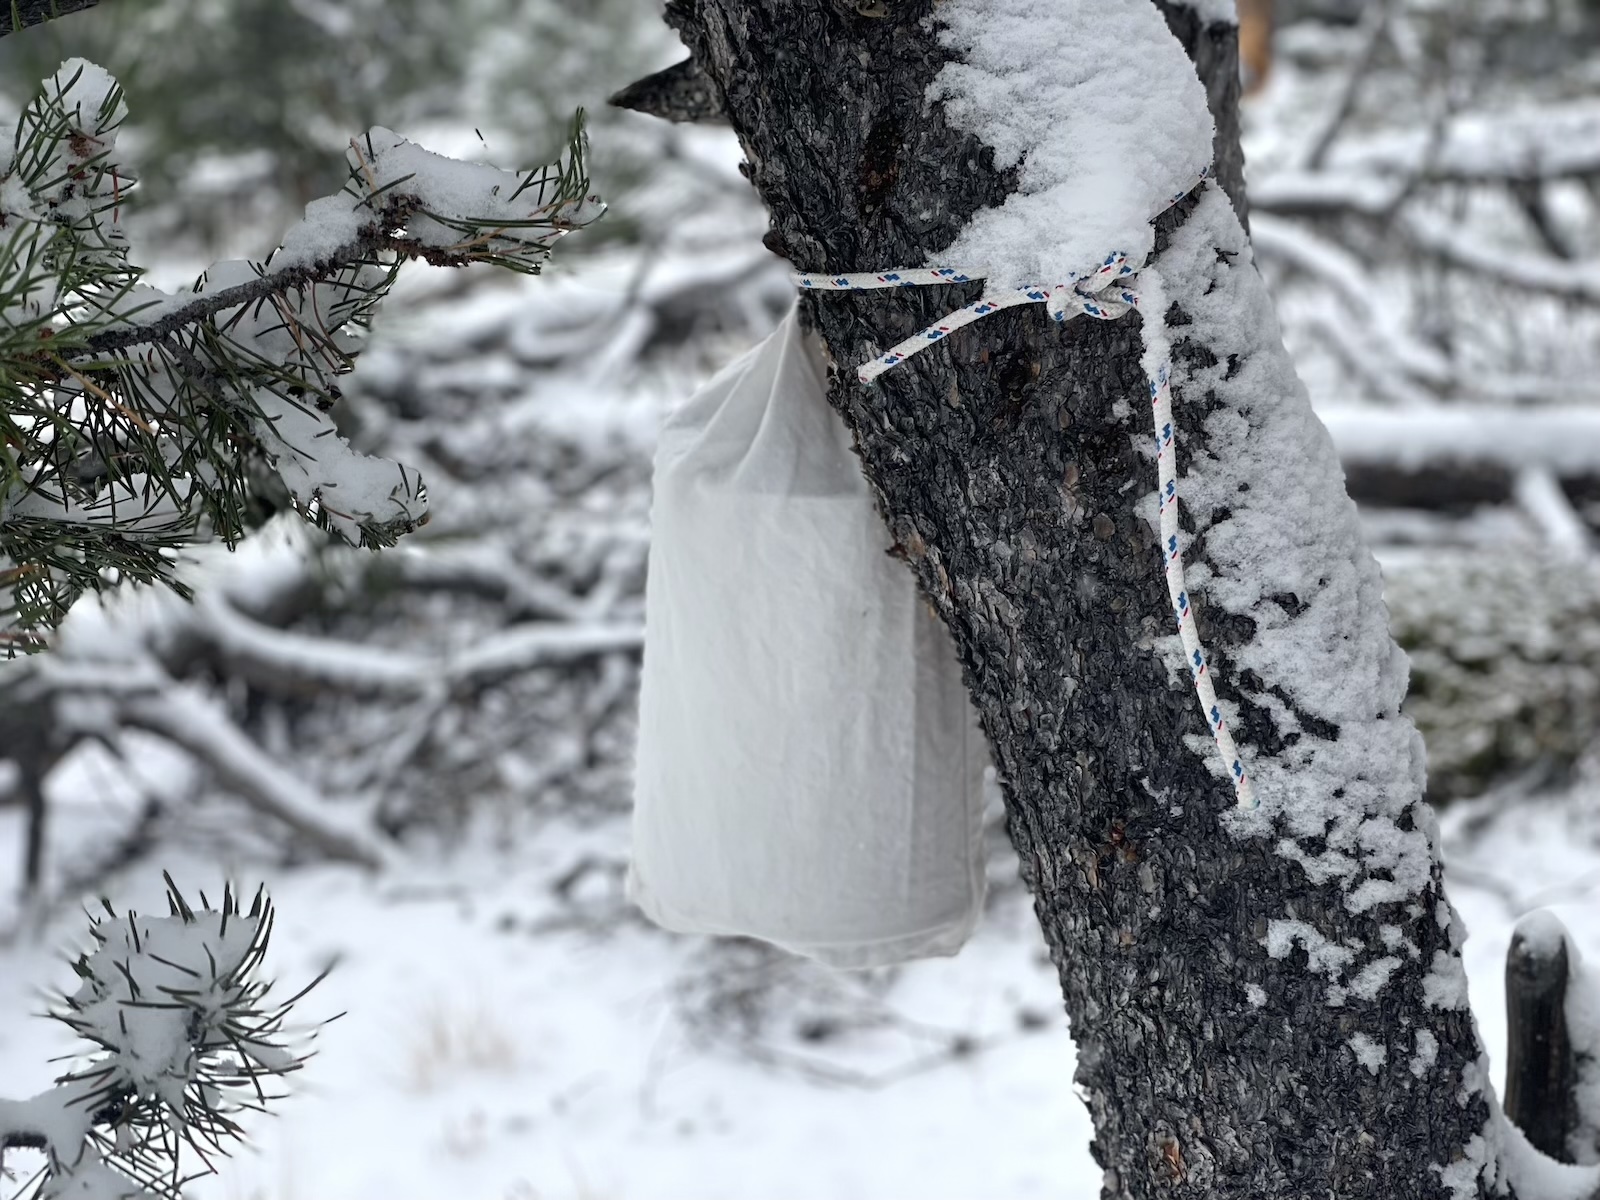
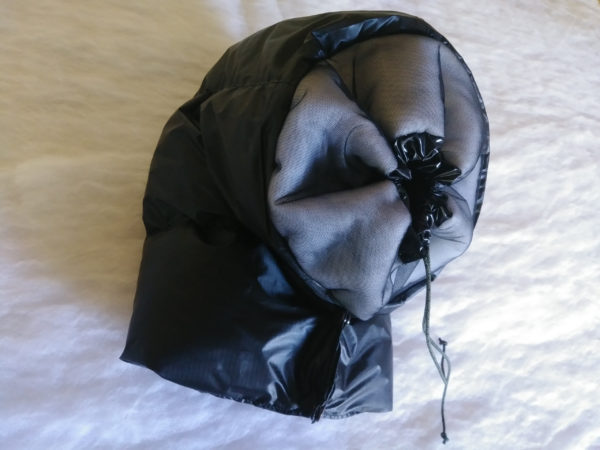
I quickly donned my curry-odored base layers and down jacket, wondering what the resident bears were up to (hyperphagia) and where they were (I saw no tracks on the way up to my camp). I stowed my Alpha hoody in a gallon ziplock and stuffed it into my Ursack.
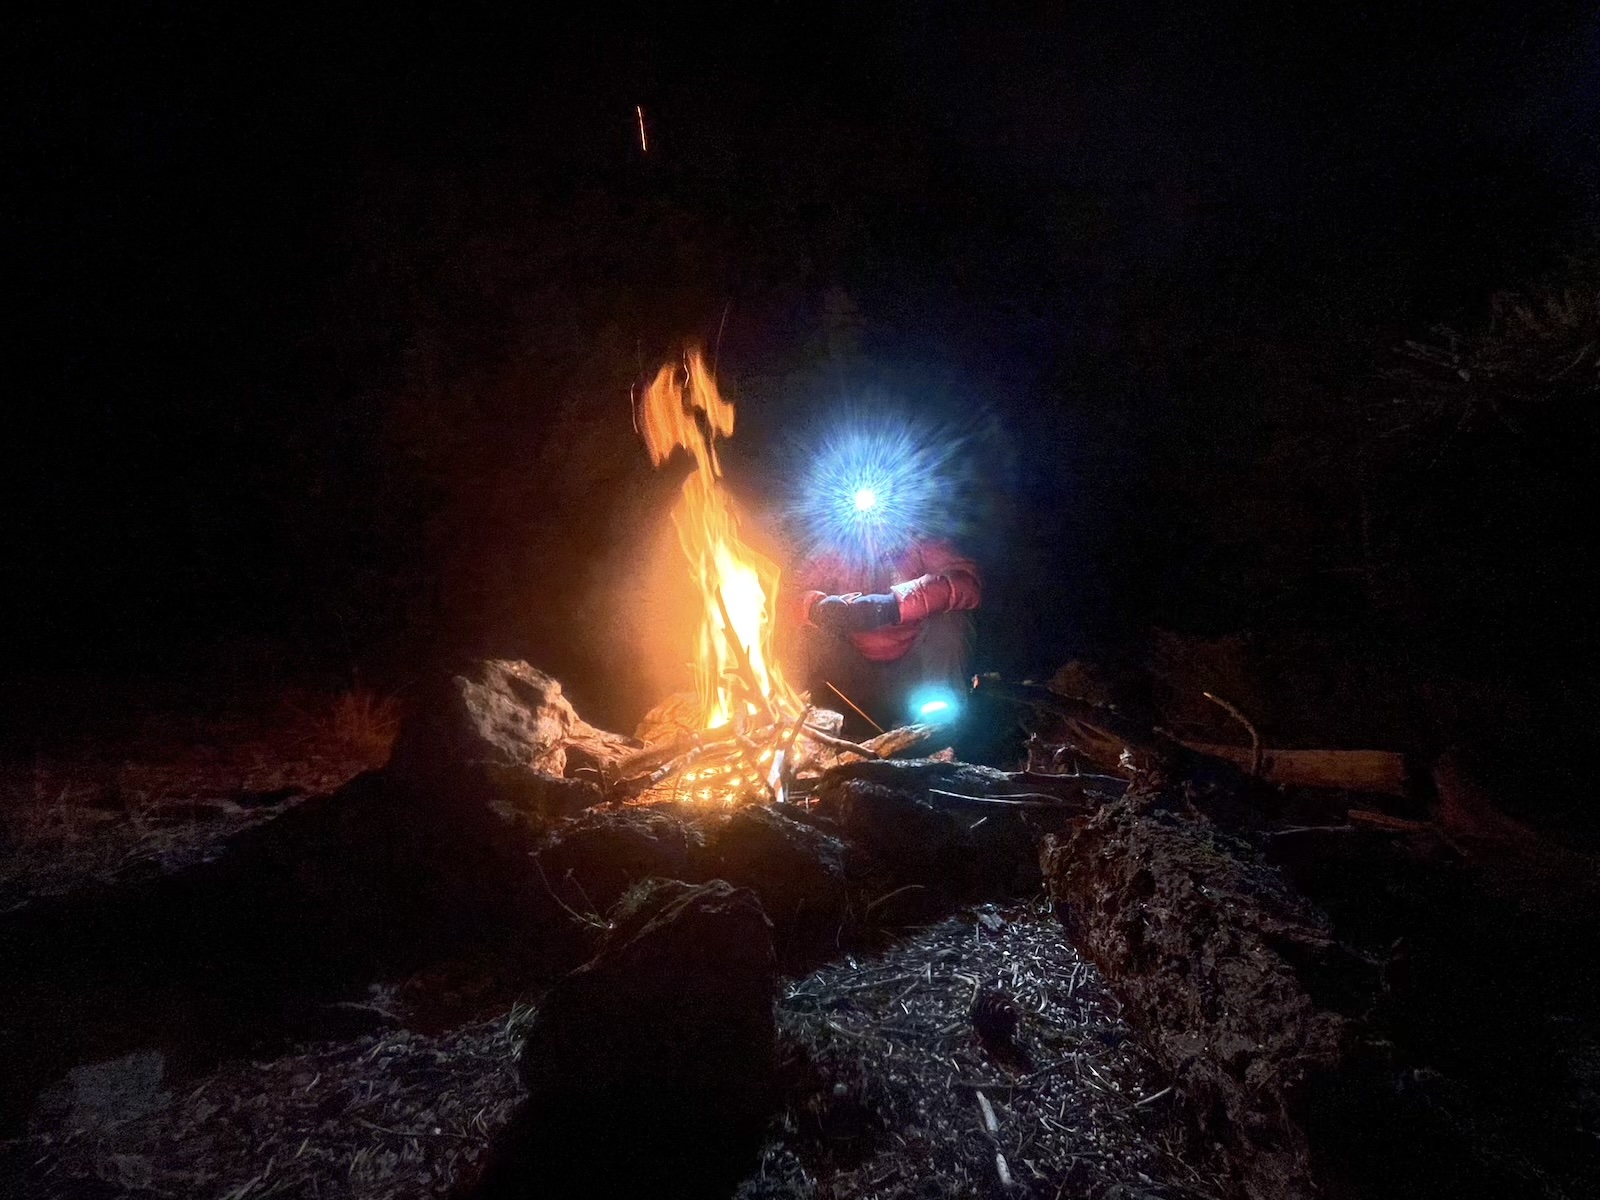
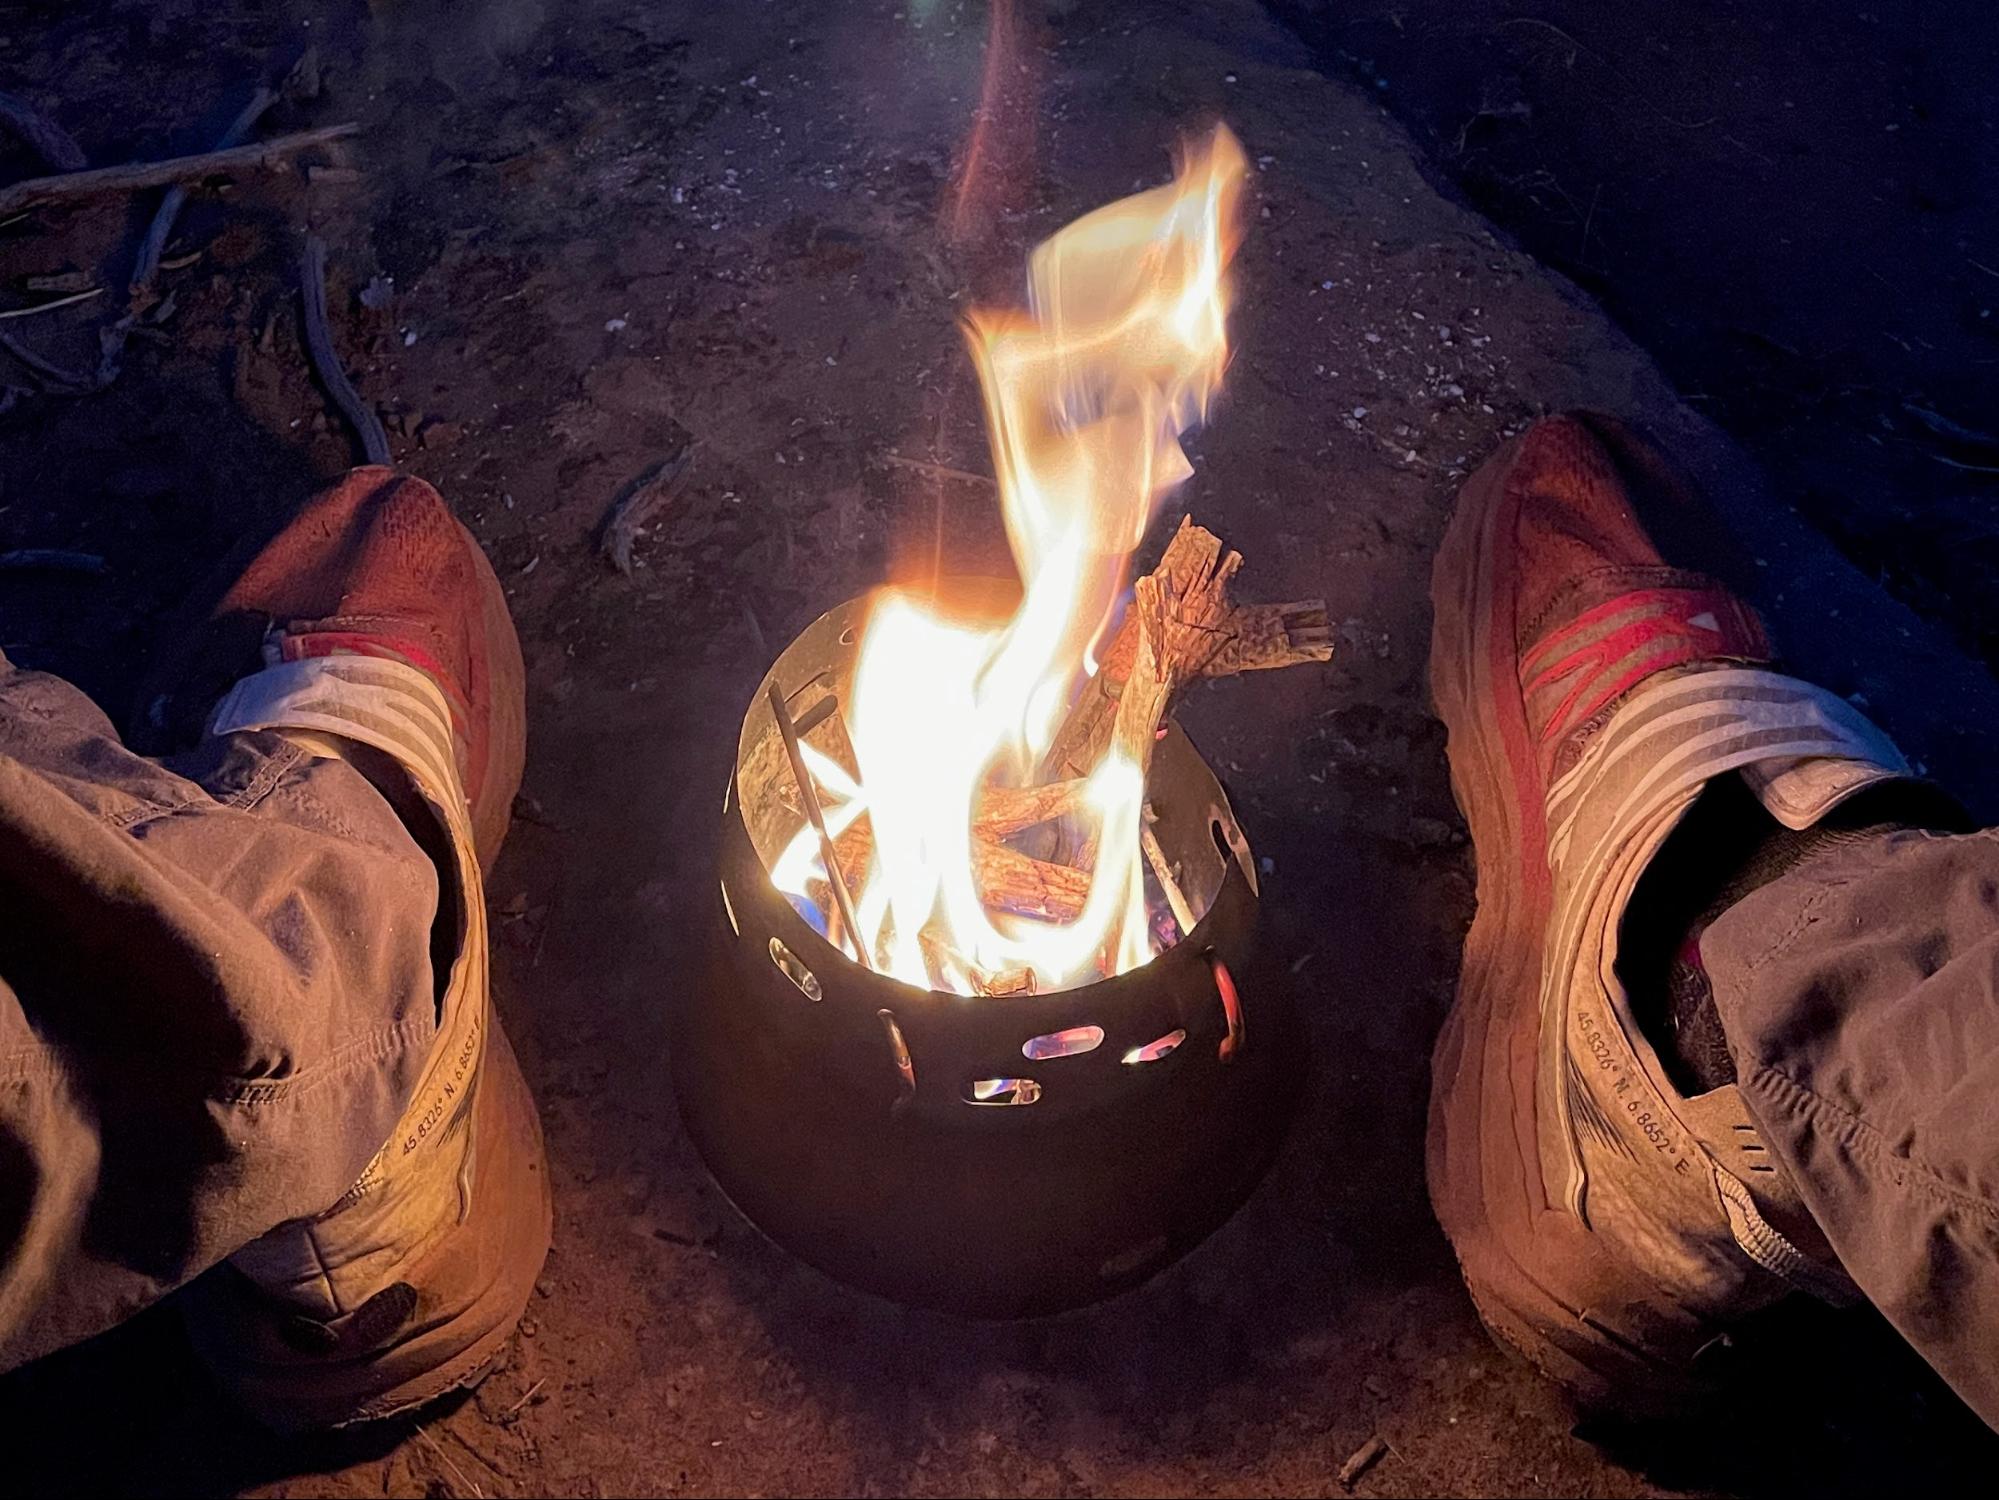
Still shivering, and now wearing half-frozen base layers against my skin, I started to gather wood for a warming fire (another advantage of camping outside the Park boundary).
Within 10 minutes, I had a nice blaze going, so I removed my layers again and spread them to dry in front of the fire, enjoying the radiant heat from the flames on the bare skin of my torso.
I spent the next hour warming up and drying clothes, and eating my now-lukewarm Thai curry. Which, incidentally, was quite delicious. Its flavor motivated me to forgive the zipper people.
Warming up by the fire.
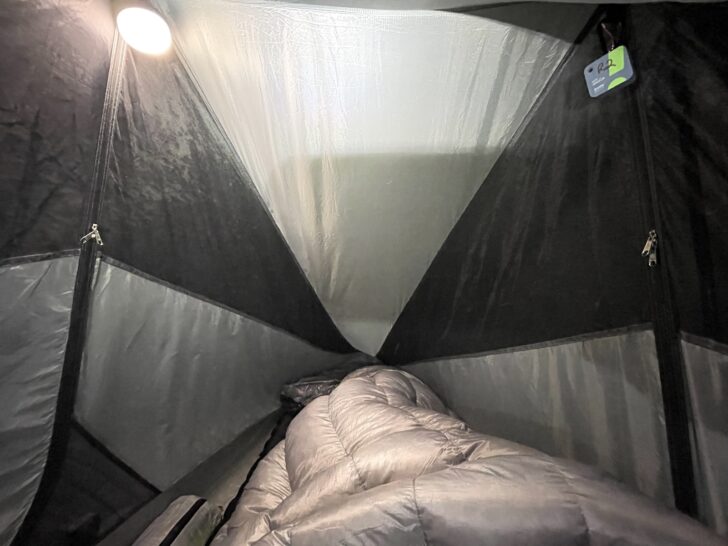
I spent a few minutes collecting data. The sky was clear, and the outside temperature was 23 degrees F. The temperature inside my tent – without me inside of it – was 28 degrees F. I was surprised and pleased that the tent fabrics were providing some protection against radiative heat losses to the clear night sky. I’d never seen a difference this dramatic in a single wall tent, or a tent with a DCF fly.
After my layers dried, I put them on again, doused the fire with sand, and retired to my tent.
I turned my lantern on 80s mood mode, and wrote for a while, a thousand words that would provide the first draft of the introduction to my Tarptent Dipole 1 DW Review. After half an hour, I collected some more data. Still 23 degrees F outside, but now a balmy 35 inside my tent. I made the decision not to sleep with my water bottles inside my quilt.
I stripped off my parka, cinched the collar of my quilt, and closed my eyes. I noted that the tent smelled like an Indian restaurant. I listened for the footsteps of a bear but heard nothing more than the gentle hooting of an owl a few trees down. That lone sound of the forest night lulled me to sleep quickly.
I had given some thought to the idea that my odoriferous state during hyperphagia season was not the ideal manifestation of LNT No. 6 (Respect Wildlife). But the idea of bagging camp in the dark and stumbling down steep terrain came with its own set of risks. I opted to stay and camp on this trip, in an area where black bear density is relatively low (I may have made a different decision if I were camping in grizzly bear habitat). While I do adhere to strict formulas in life-and-death situations (e.g., press the SOS button on my inReach if I break my leg with a compound fracture) or in situations where choices are easy (e.g., don’t camp within 100 feet of a stream or lake), the hazard-risk matrix becomes murkier when facing decisions where all choices are problematic.
I awoke a few hours later to the familiar sound of light snow pattering on the tent fly. The outside temperature was 24 degrees F, and the inside temperature was 36 degrees F. I wiped my hand across the inside walls of the inner tent. No condensation. I checked the humidity levels on my sensors. Outside: 95%, inside: 85%. I fell back asleep.
A loud whoosh woke me up at 2 AM. It startled and confused me at first. Then, I realized it was snow sloughing off the sidewalls of the tent. I shined my headlamp around and noticed snow accumulating on the tent fly. When camping in ultralight tents, I usually make a habit of banging the tent walls to knock the snow off, to avoid the inevitable snow loading that collapses trekking pole-supported tents during snowstorms.
I decided to ignore the accumulating snow instead. Let’s see what happens. I fell back asleep.
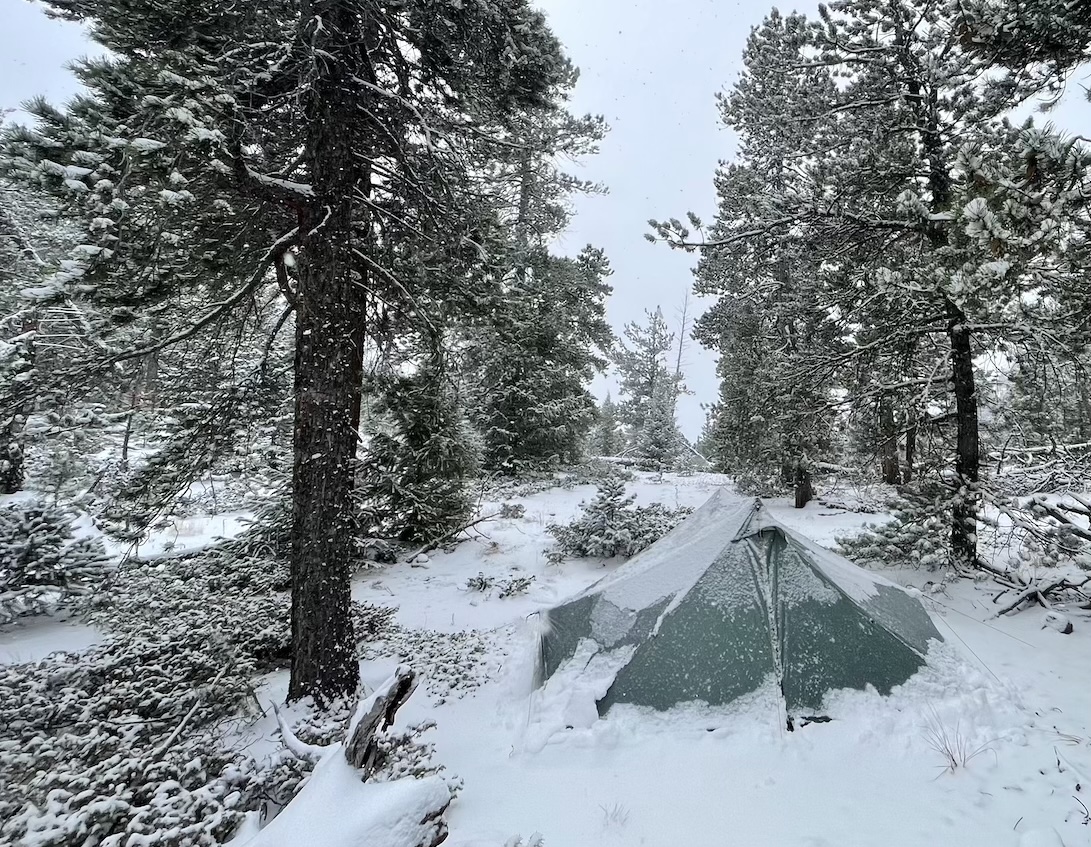
The whooshes came frequently throughout the night. Snow accumulated, and then avalanched, off both the sidewalls and roof panels of the Dipole 1 DW. I was surprised, and happy, thinking that this tent could become a legitimate candidate for a treeline winter tent.
And I was warm. In reviewing my sensor data the next morning, the inside of the tent was always at least 9 degrees F warmer than the outside air temperature, and the inside humidity never exceeded 95%. When I checked for condensation accumulation on the inner tent when I woke up at sunrise, I found nothing more than a very thin film of moisture.
When it was light enough to see without a headlamp, I unzipped the inner tent door and smiled at the snow that had accumulated around the vestibule perimeter. Our second winter storm! This is my favorite season for backcountry exploration.
Several inches of new snow.
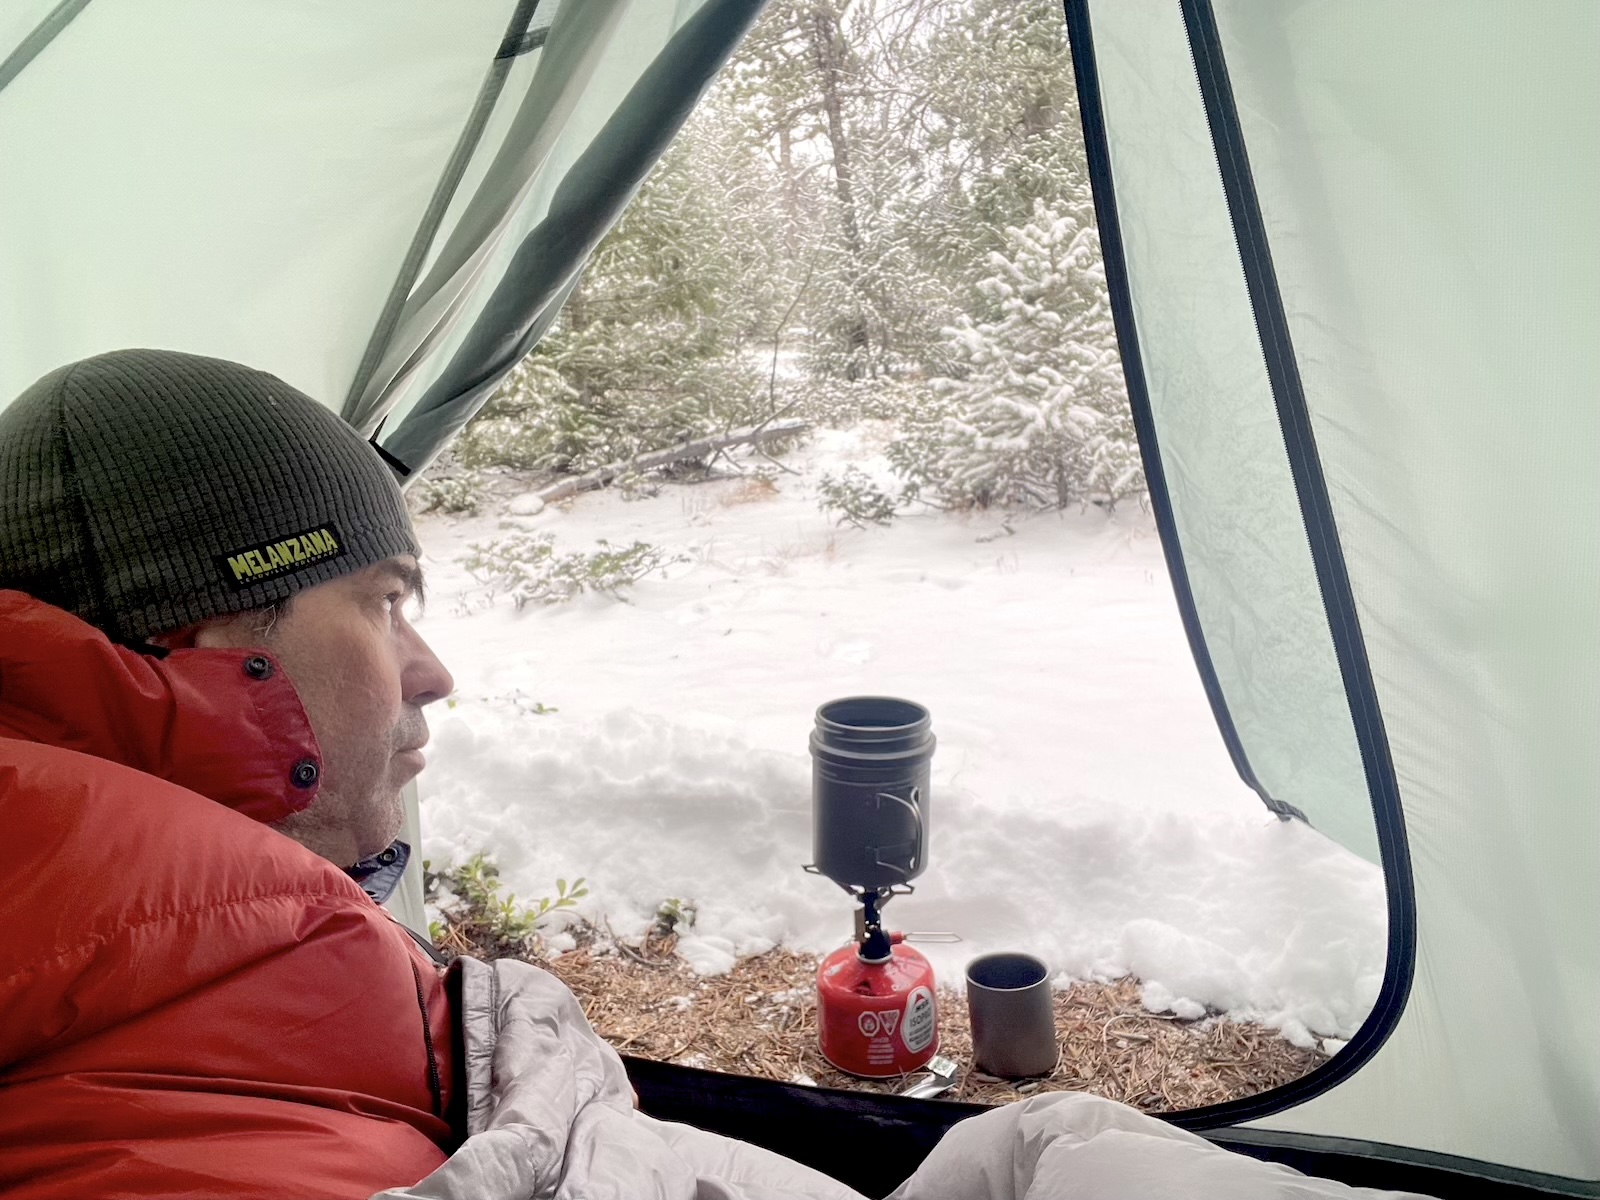
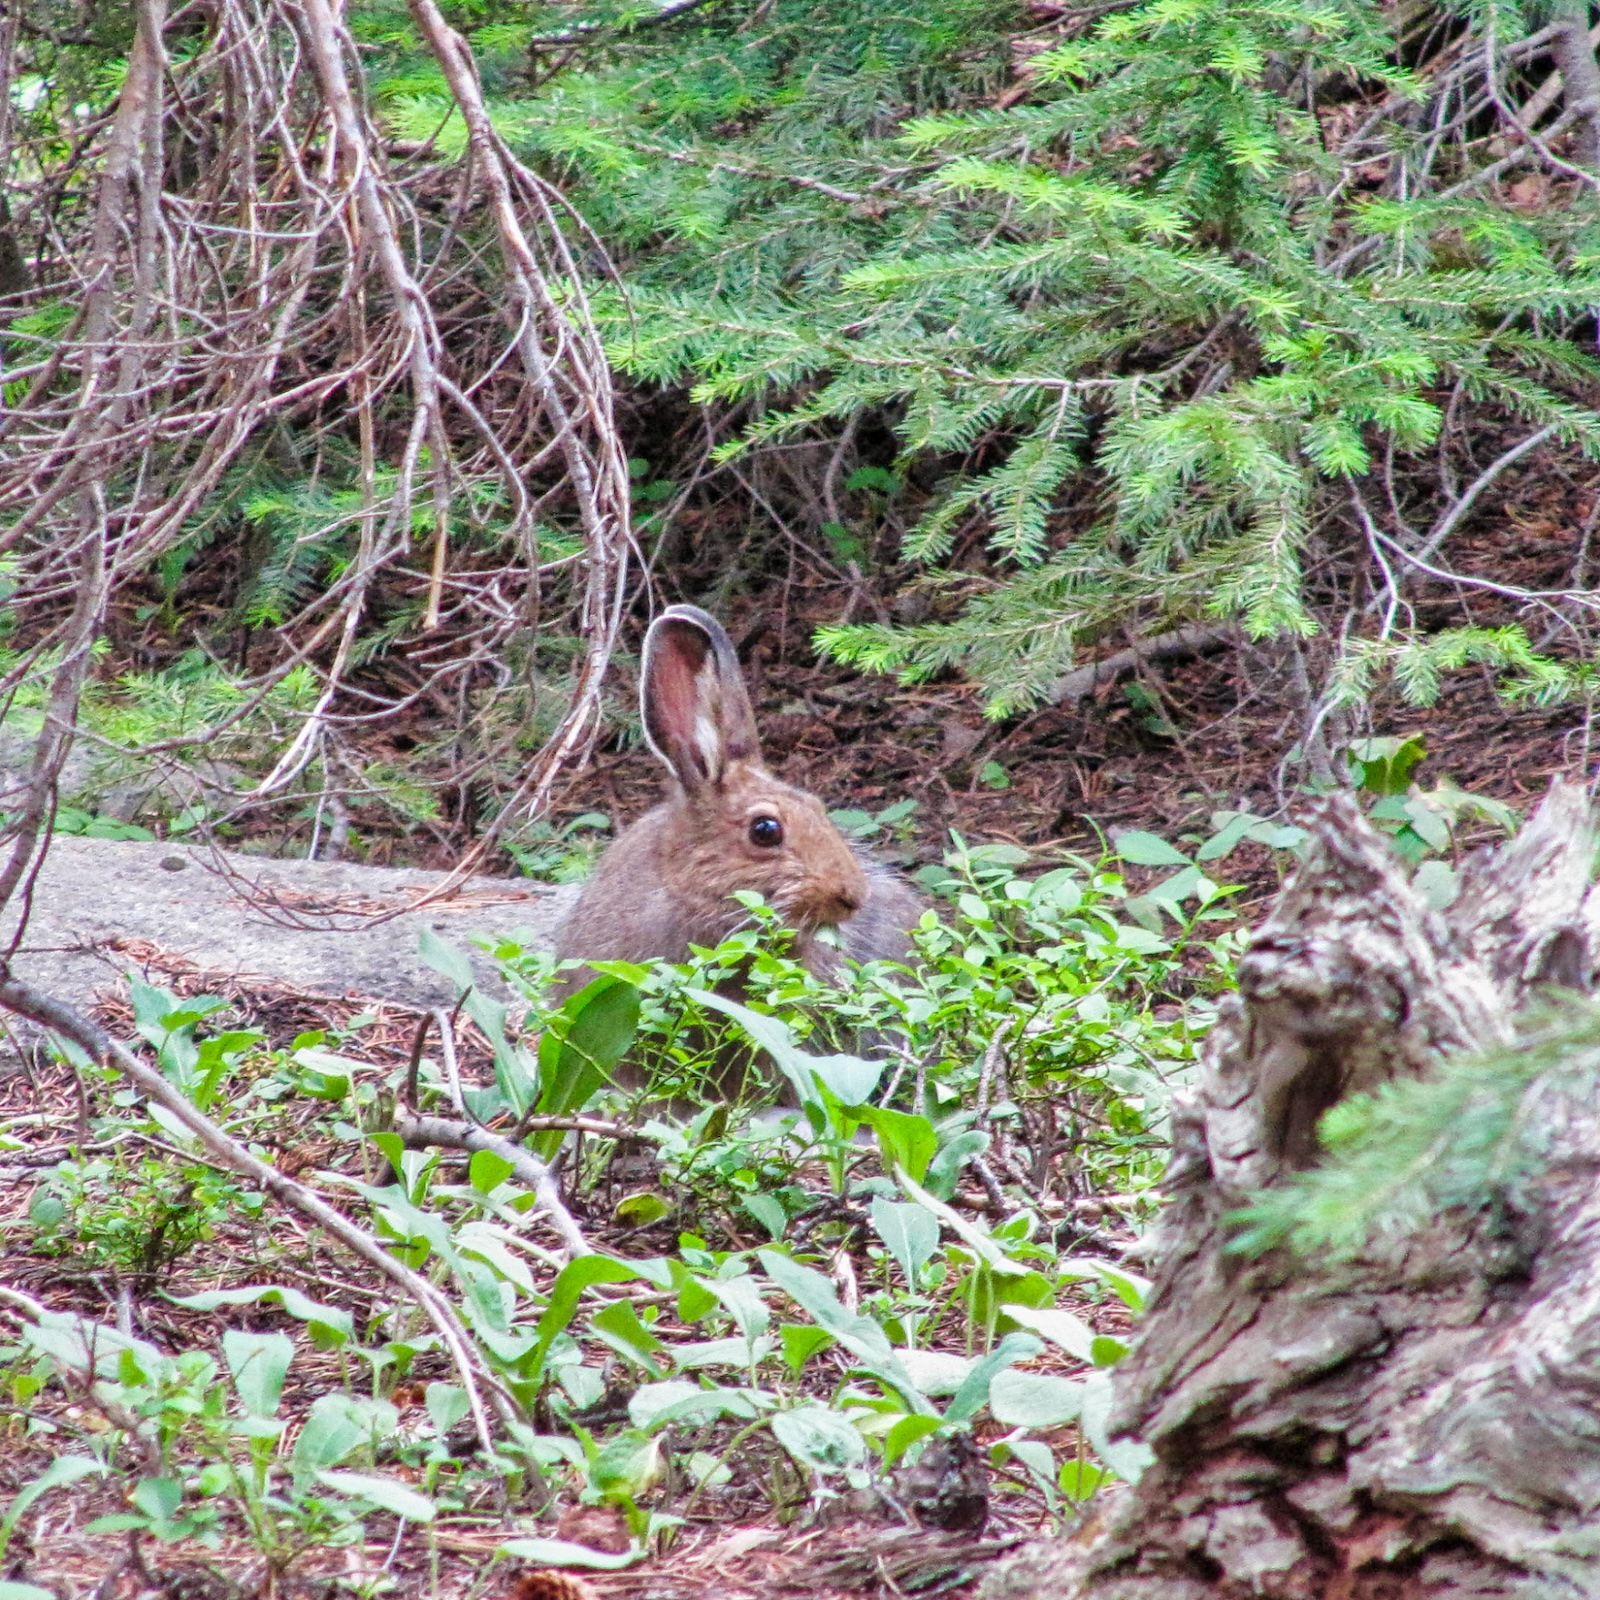
Remaining tucked inside my quilt, I managed to fill my BOT with water, light the stove, and start the first morning brew. I poured the first batch into my new mug, unzipped the vestibule, and watched the snow continue to fall as a brown hare twitched its ears from thirty feet away whenever I slurped.
I finished my coffee and reluctantly exited my tent to empty my bladder. The snow crunched under my down booties and heavy snowfall was starting to wet my curried alpaca pajama top. I hustled back into my shelter, zipped myself in, shimmied into my quilt, and fell back asleep as another whoosh of snow fell off the walls of the tent.
Snow accumulating on the vestibule doors of the Dipole 1 DW.
When I woke again, it was to another whoosh. I unzipped the door to the inner tent a little, peered out, and noticed that a few more inches had fallen. It was snowing heavily. I donned my parka, wrote a few hundred words more, and then felt the urgency to break camp so I could meet Stephanie and Chase at an afternoon rendezvous at an alpine lake in Rocky Mountain National Park.
I packed my quilt and pad, and not wanting to pack up or cook under falling snow, I unclipped the inner tent from the fly and packed it away. This left me with plenty of room under the fly to sit in my chair, cook a hot breakfast, and pack up my gear without exposing myself to the snowstorm.
Escaping the storm under the Dipole 1 DW fly, sans inner.
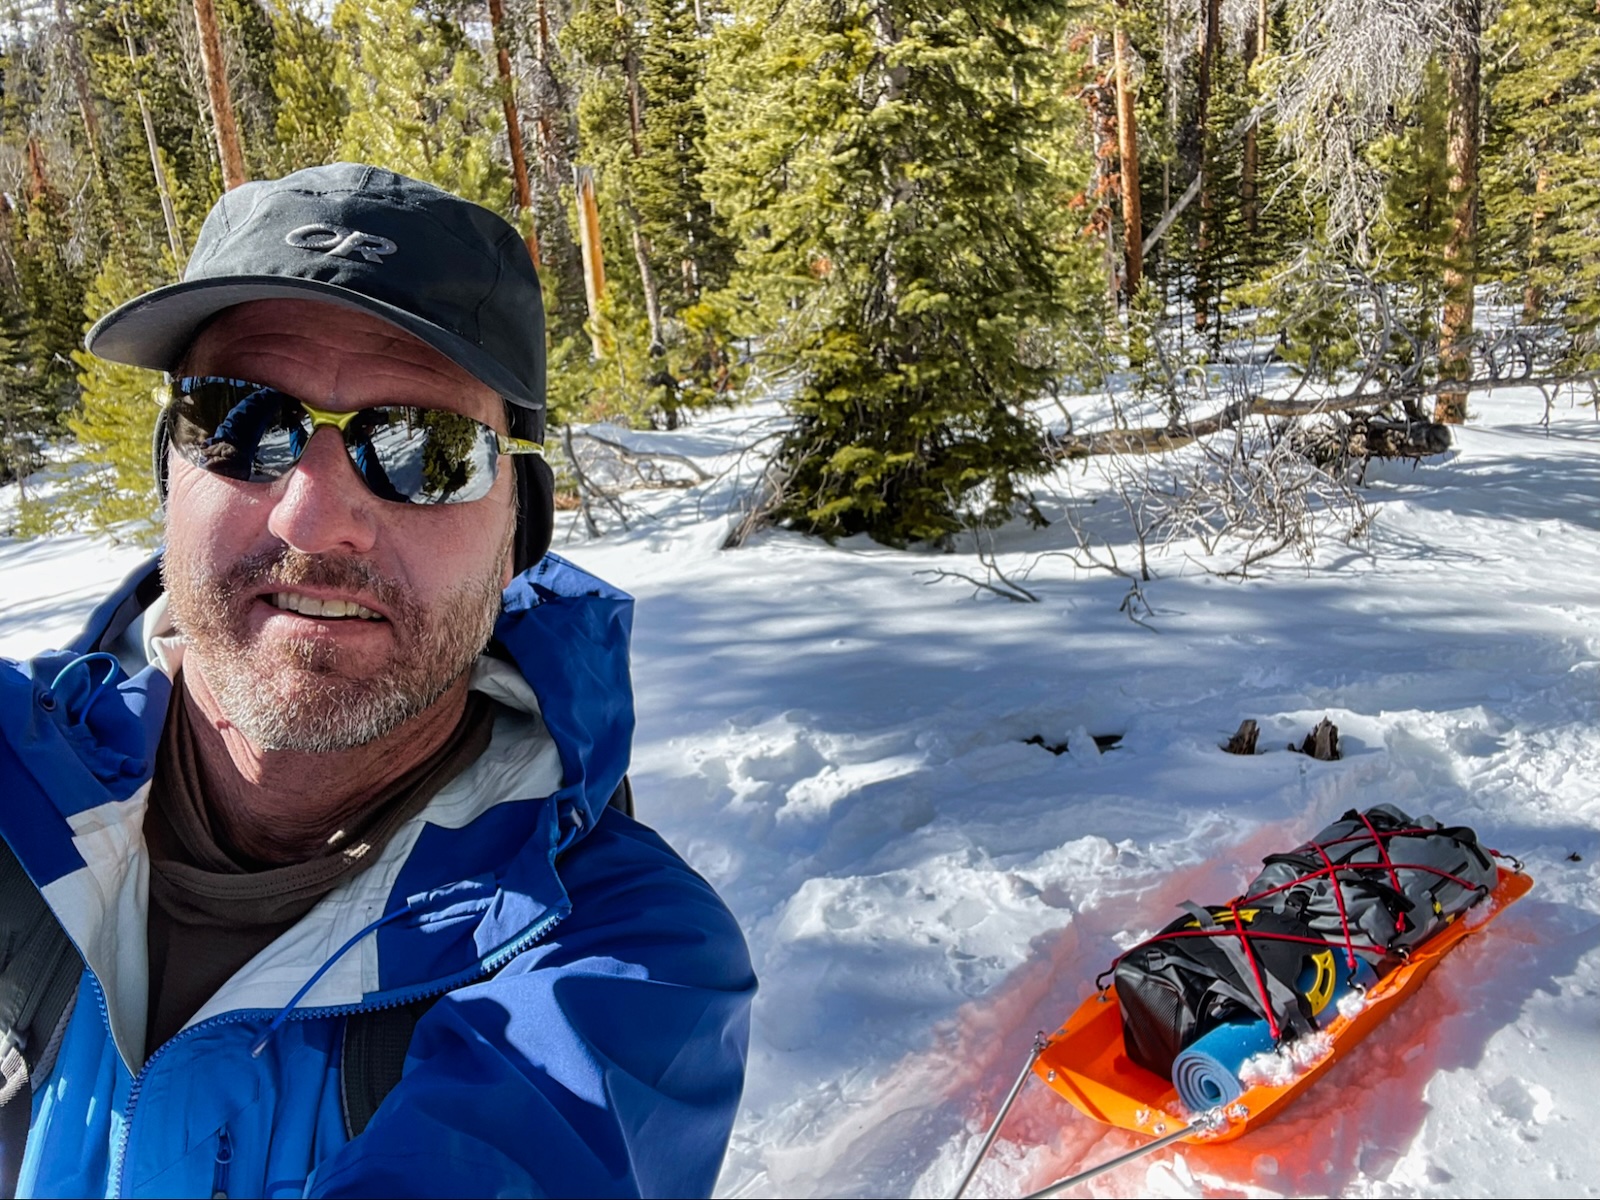
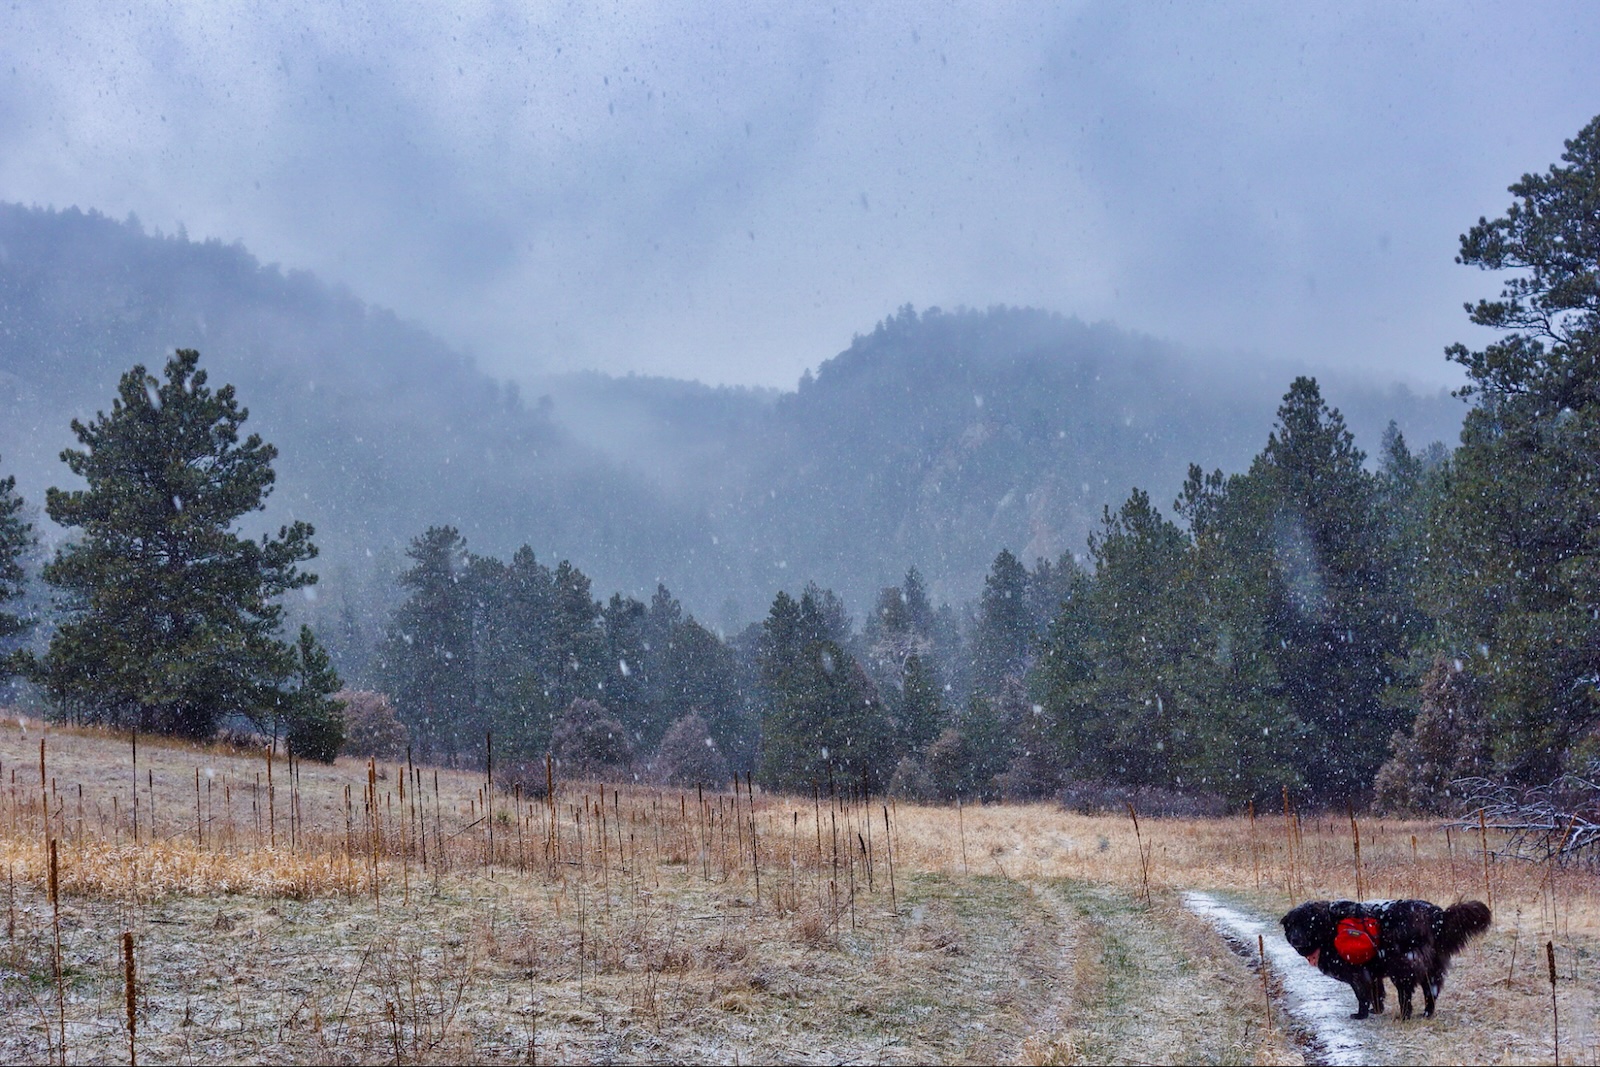
Finally, it was go time. Everything was in my pack except the tent fly, and I was dressed for trekking in blizzard conditions.
Within two minutes, I had exited the tent, unpitched it, packed it up, and was on my way. I started out wearing spikes but quickly removed them. The temperature was in the high 20s F and snow was balling underneath the crampons. The bare lug soles of my boots would fare much better for the rest of the day.
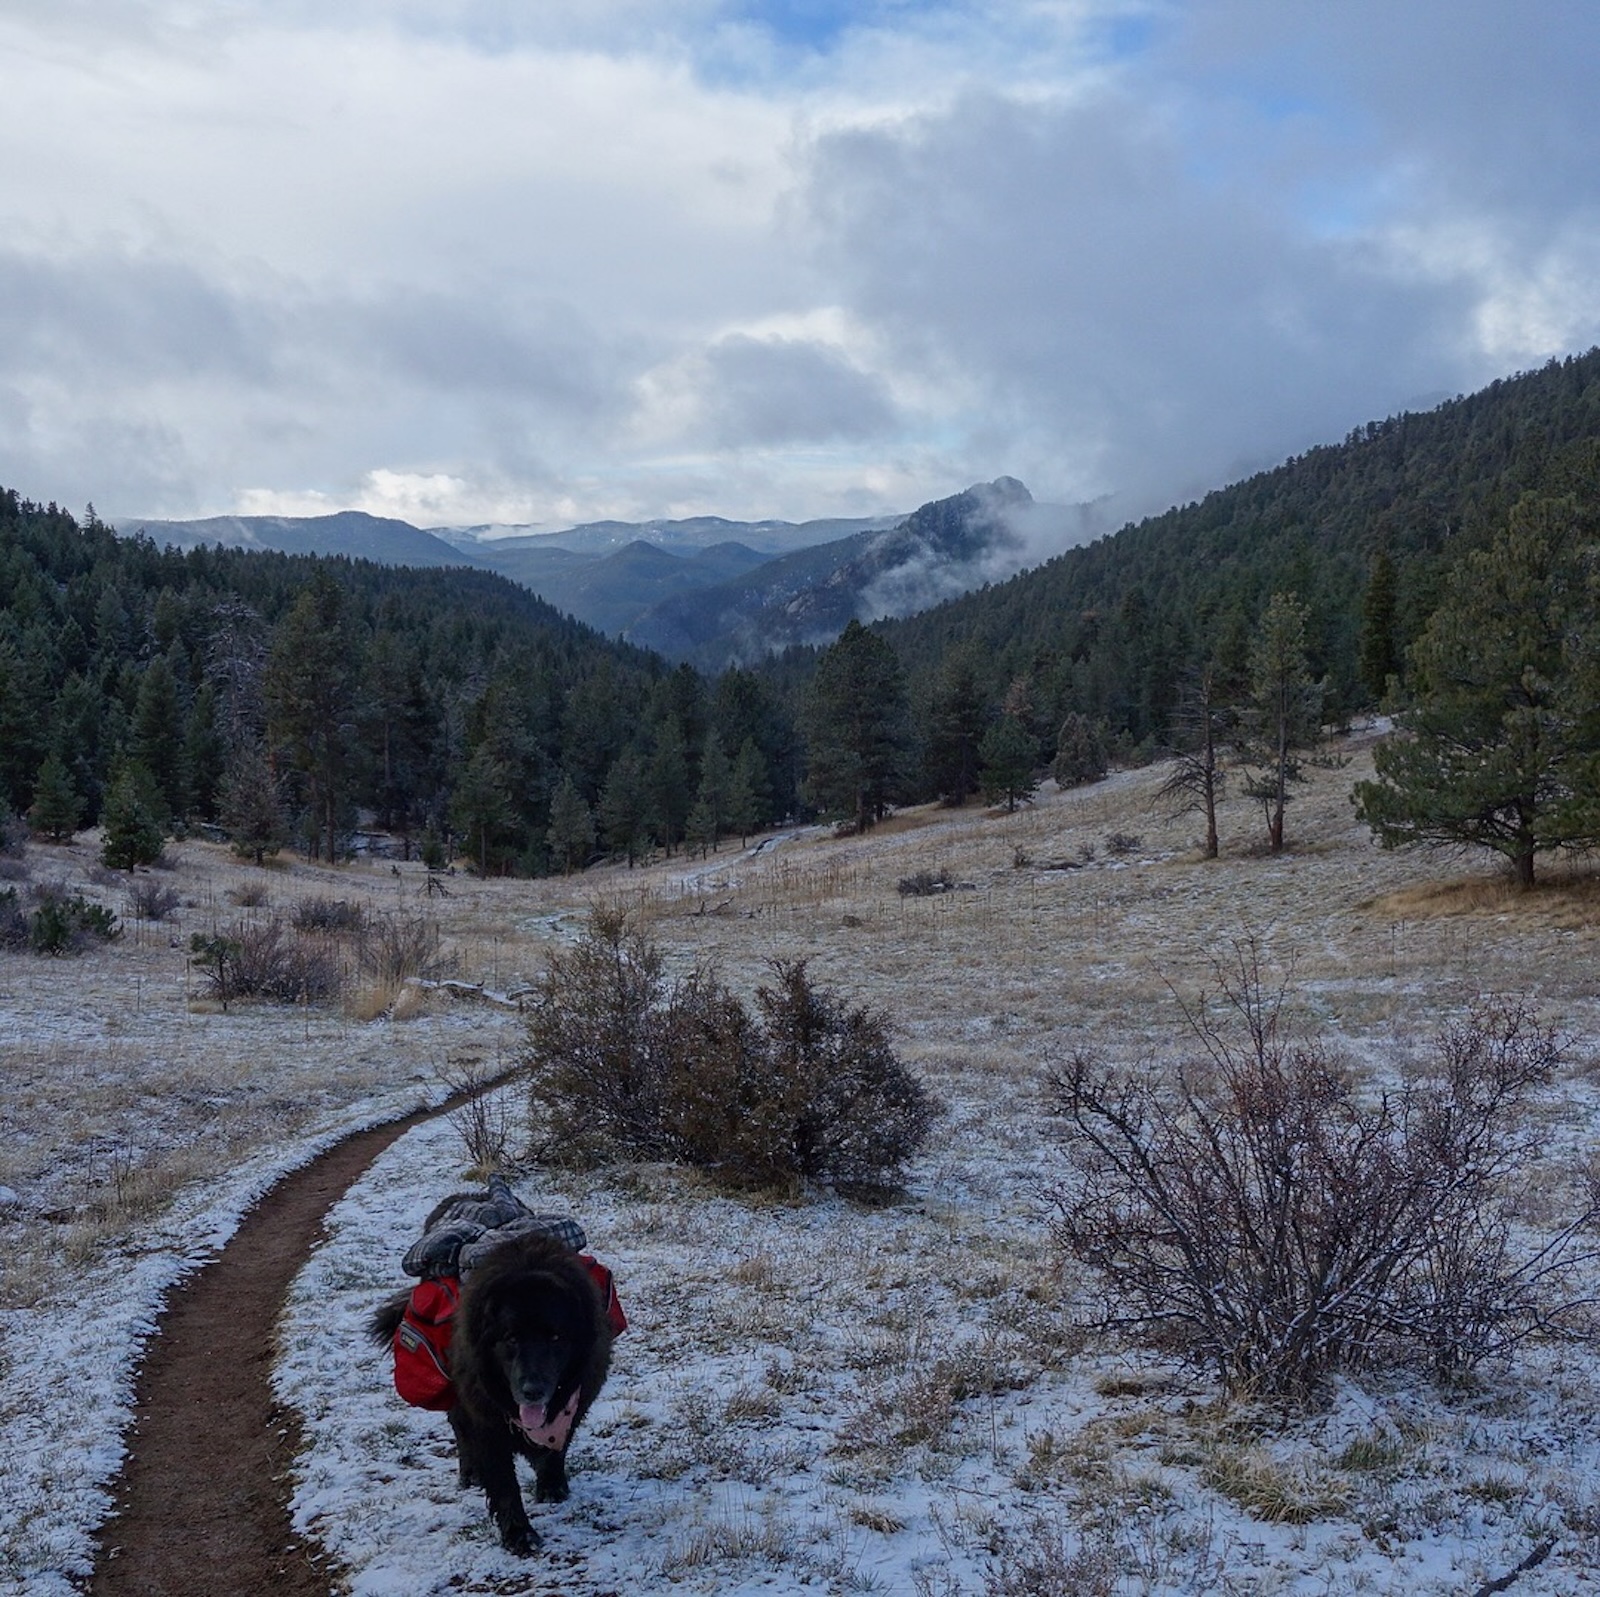
I staggered down the slippery slope back to the valley where I started my hike, keeping my eye out for bull elk and moose, who are sort of agitated this time of year. When I reached the valley floor and the trail, I moderated my pace to keep my heart rate well below my aerobic threshold. This hike was not to be a training-stress hike, as I was still recovering from the flu that I enjoyed on my last adventure a few weeks ago.
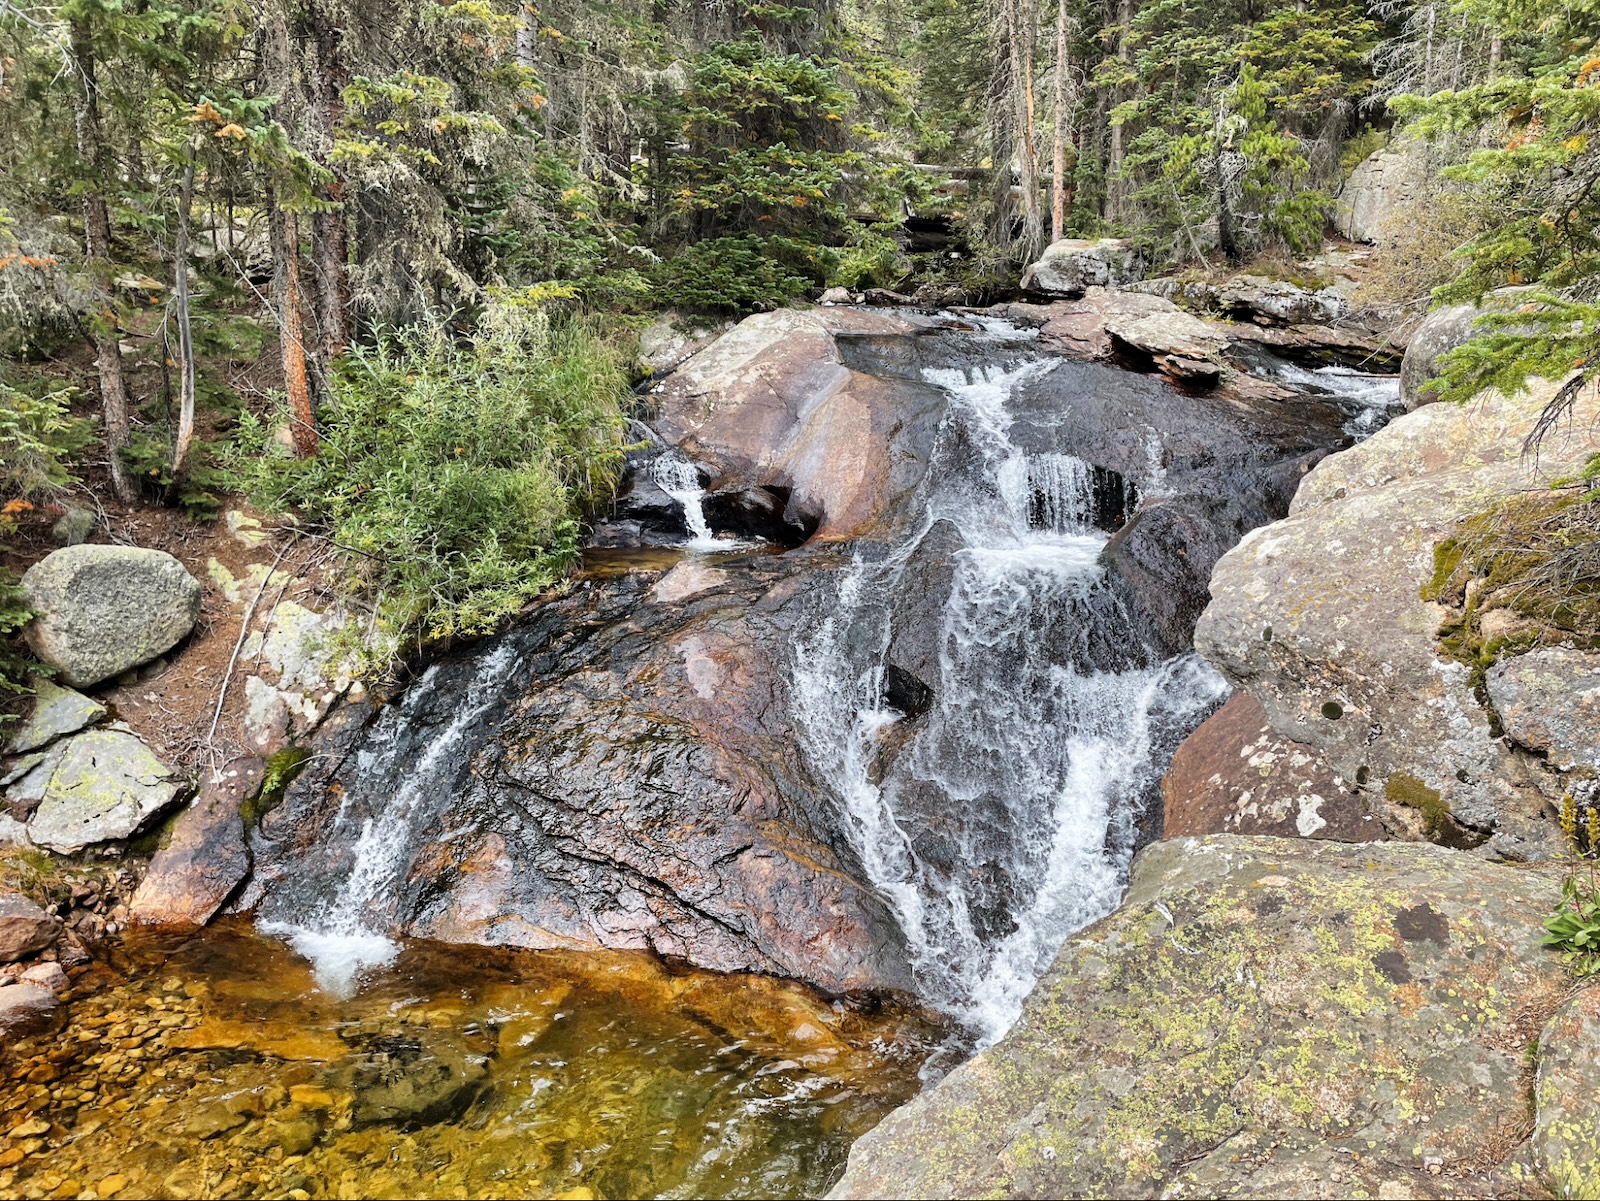
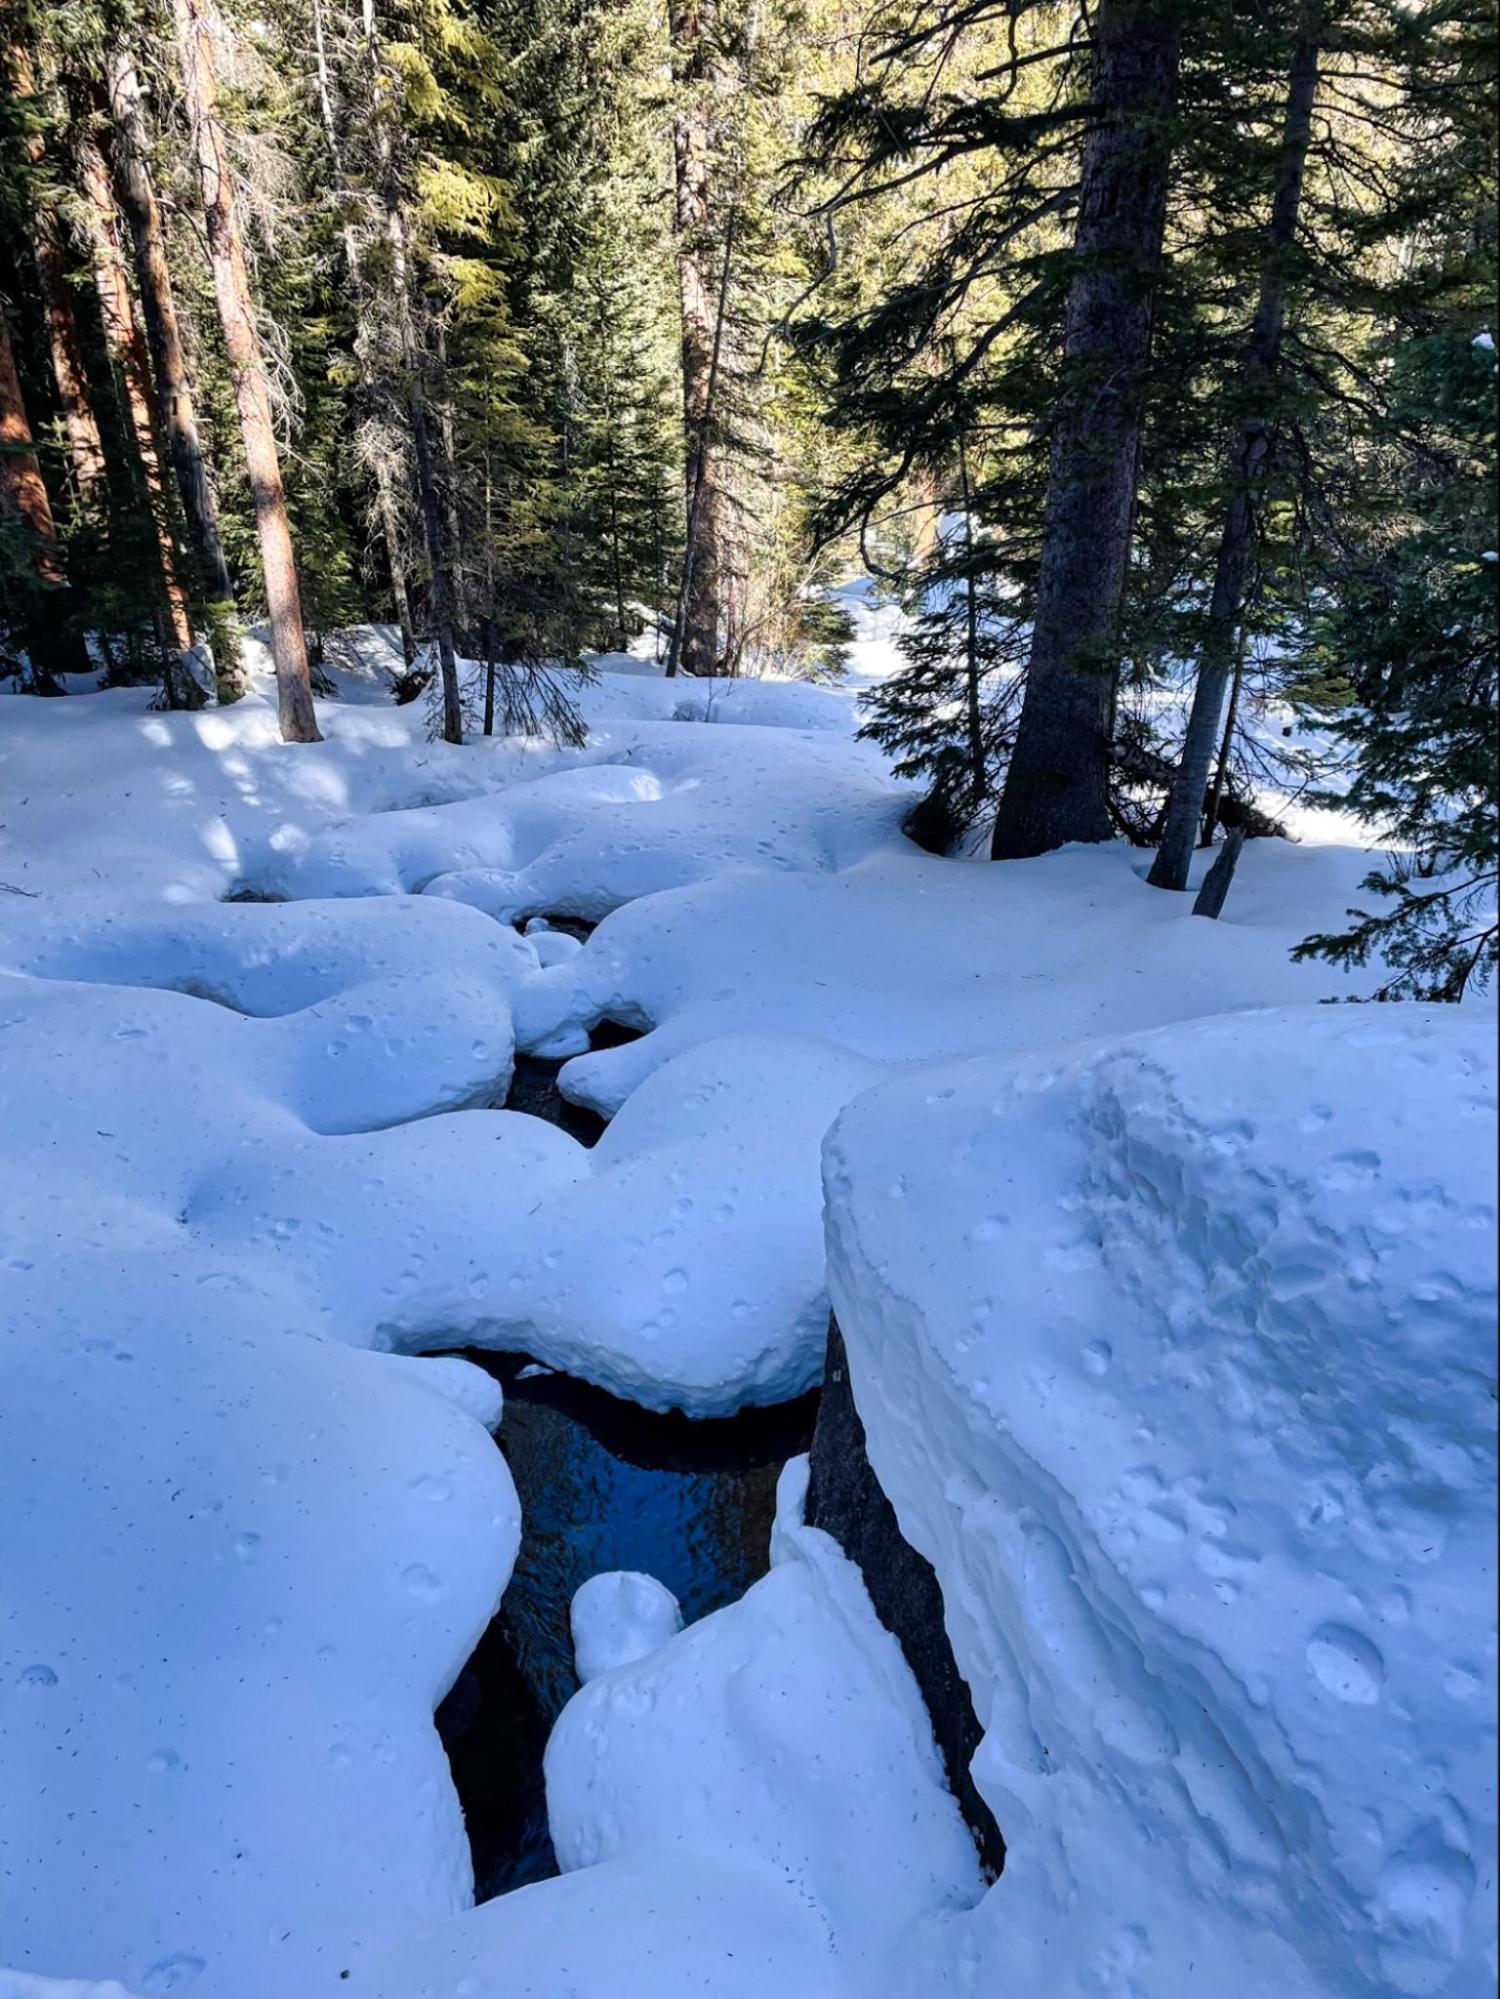
The snow eased up a bit as I crossed a stream and peered into its deep pools looking for trout. I spotted four and instantly regretted not packing my tenkara rod.
As I left the stream, the elevation gain met me. I monitored my watch continuously, to make sure I wasn’t overexerting myself. It didn’t take much for me to slow to a crawl as I climbed. As I watched my pace dip below 1 mph, I reminded myself that I was recovering from illness, and it was OK. Nevertheless, it was demoralizing.
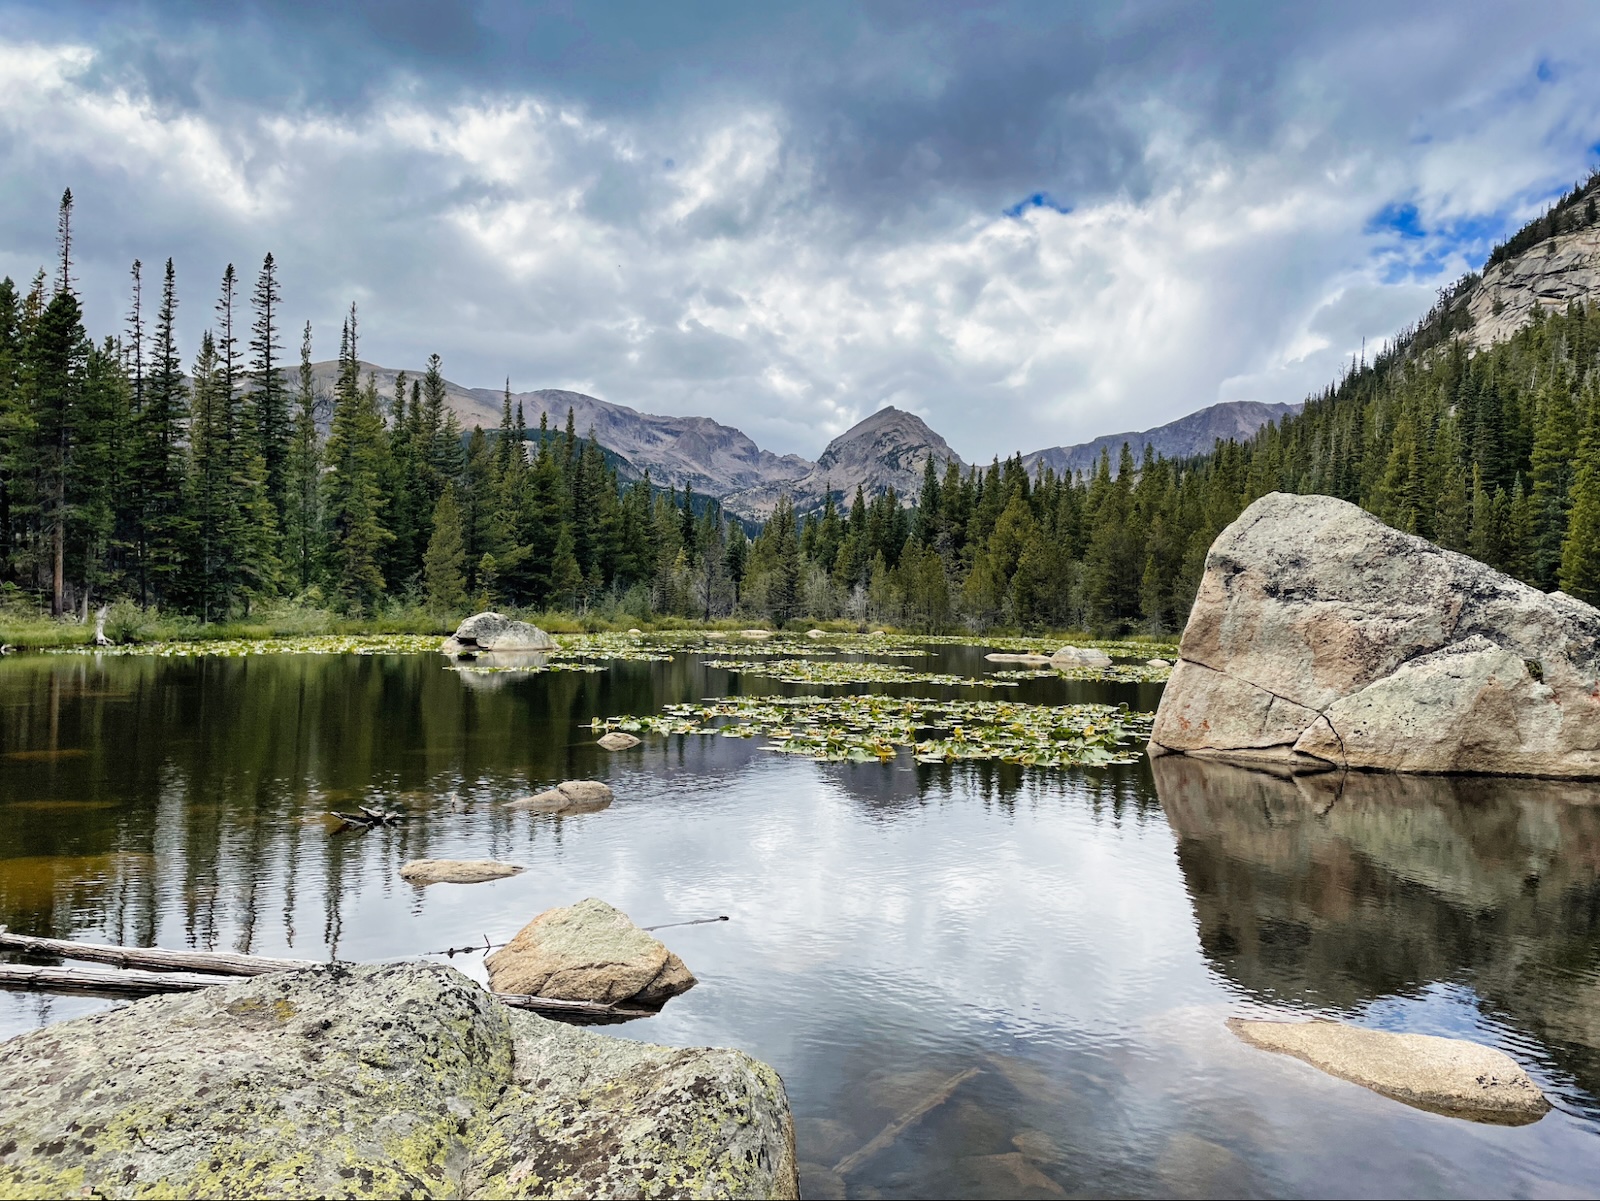
I didn’t take any breaks and just kept plugging along to Rendezvous Lake.
I arrived about a half hour before our meetup time, so I found shelter under a thousand-year-old bristlecone and fetched my stove.
It was late in the day, and I was trying to create new sleep habits, so I made a mocha cuppa with Swiss Miss and decaf, and discovered that it was a new, but immensely enjoyable afternoon drink!
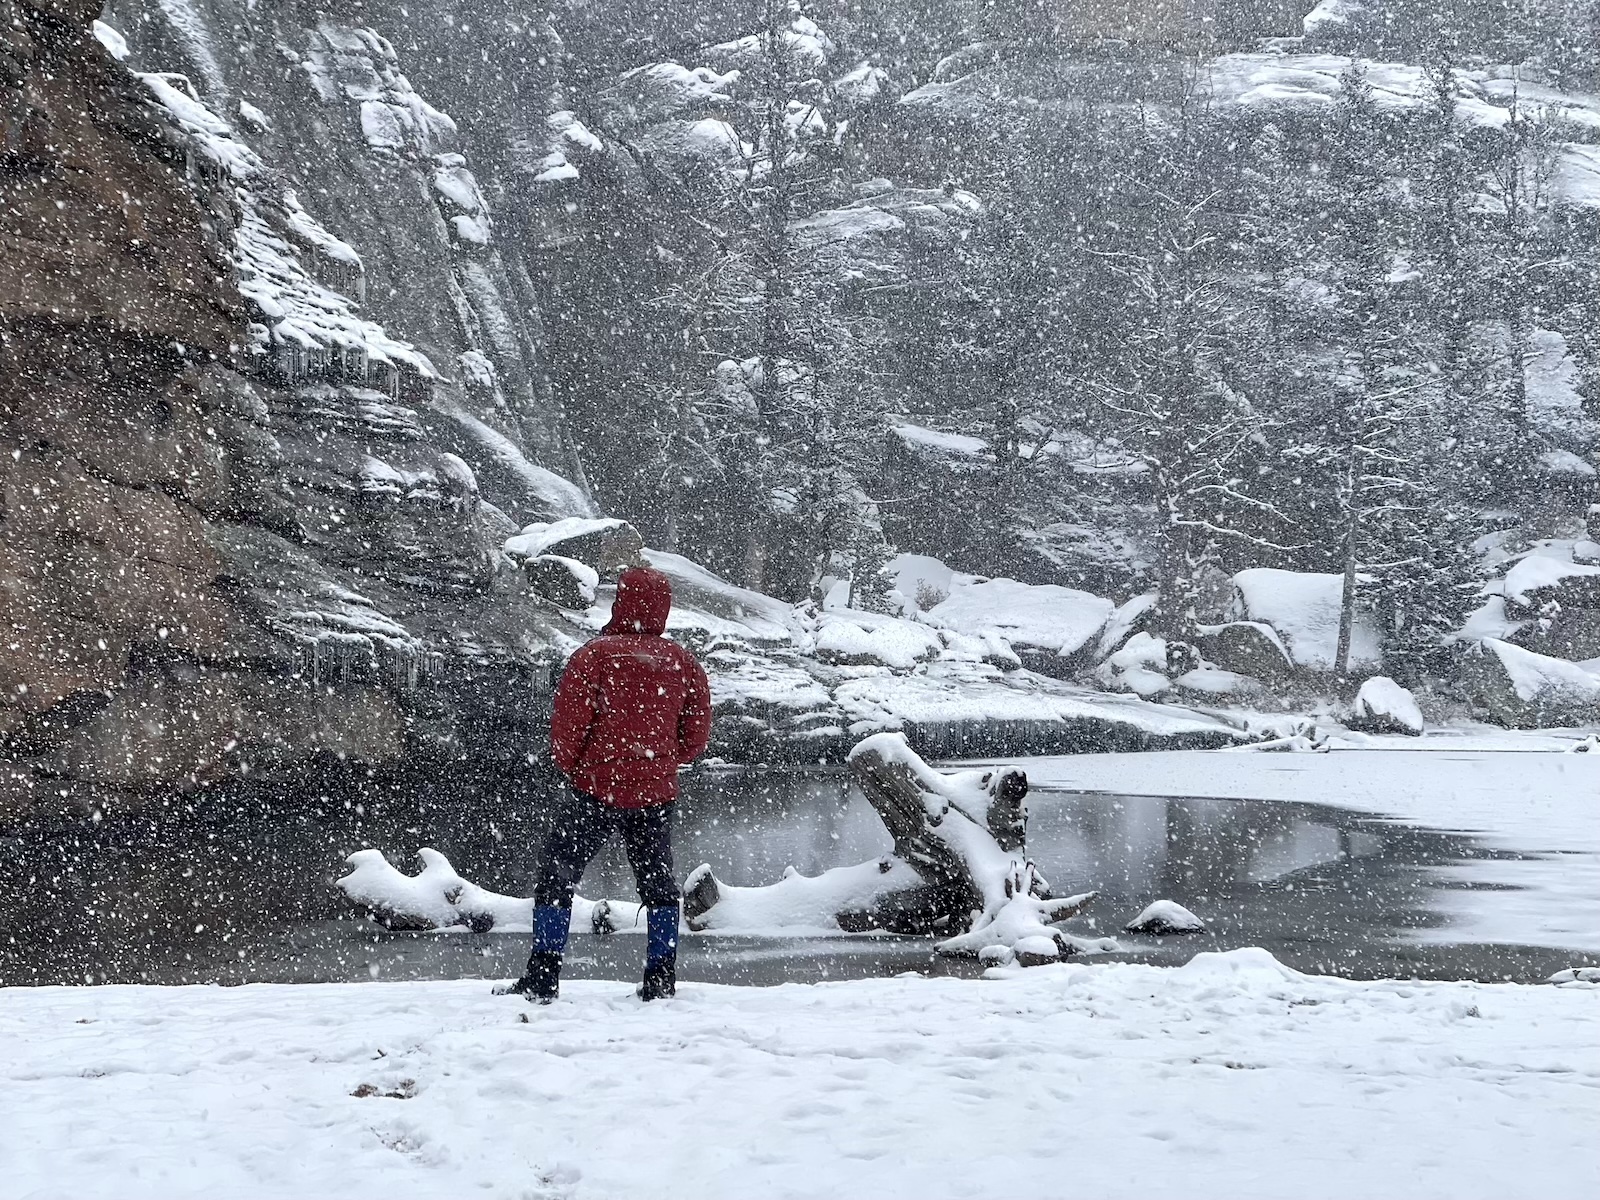
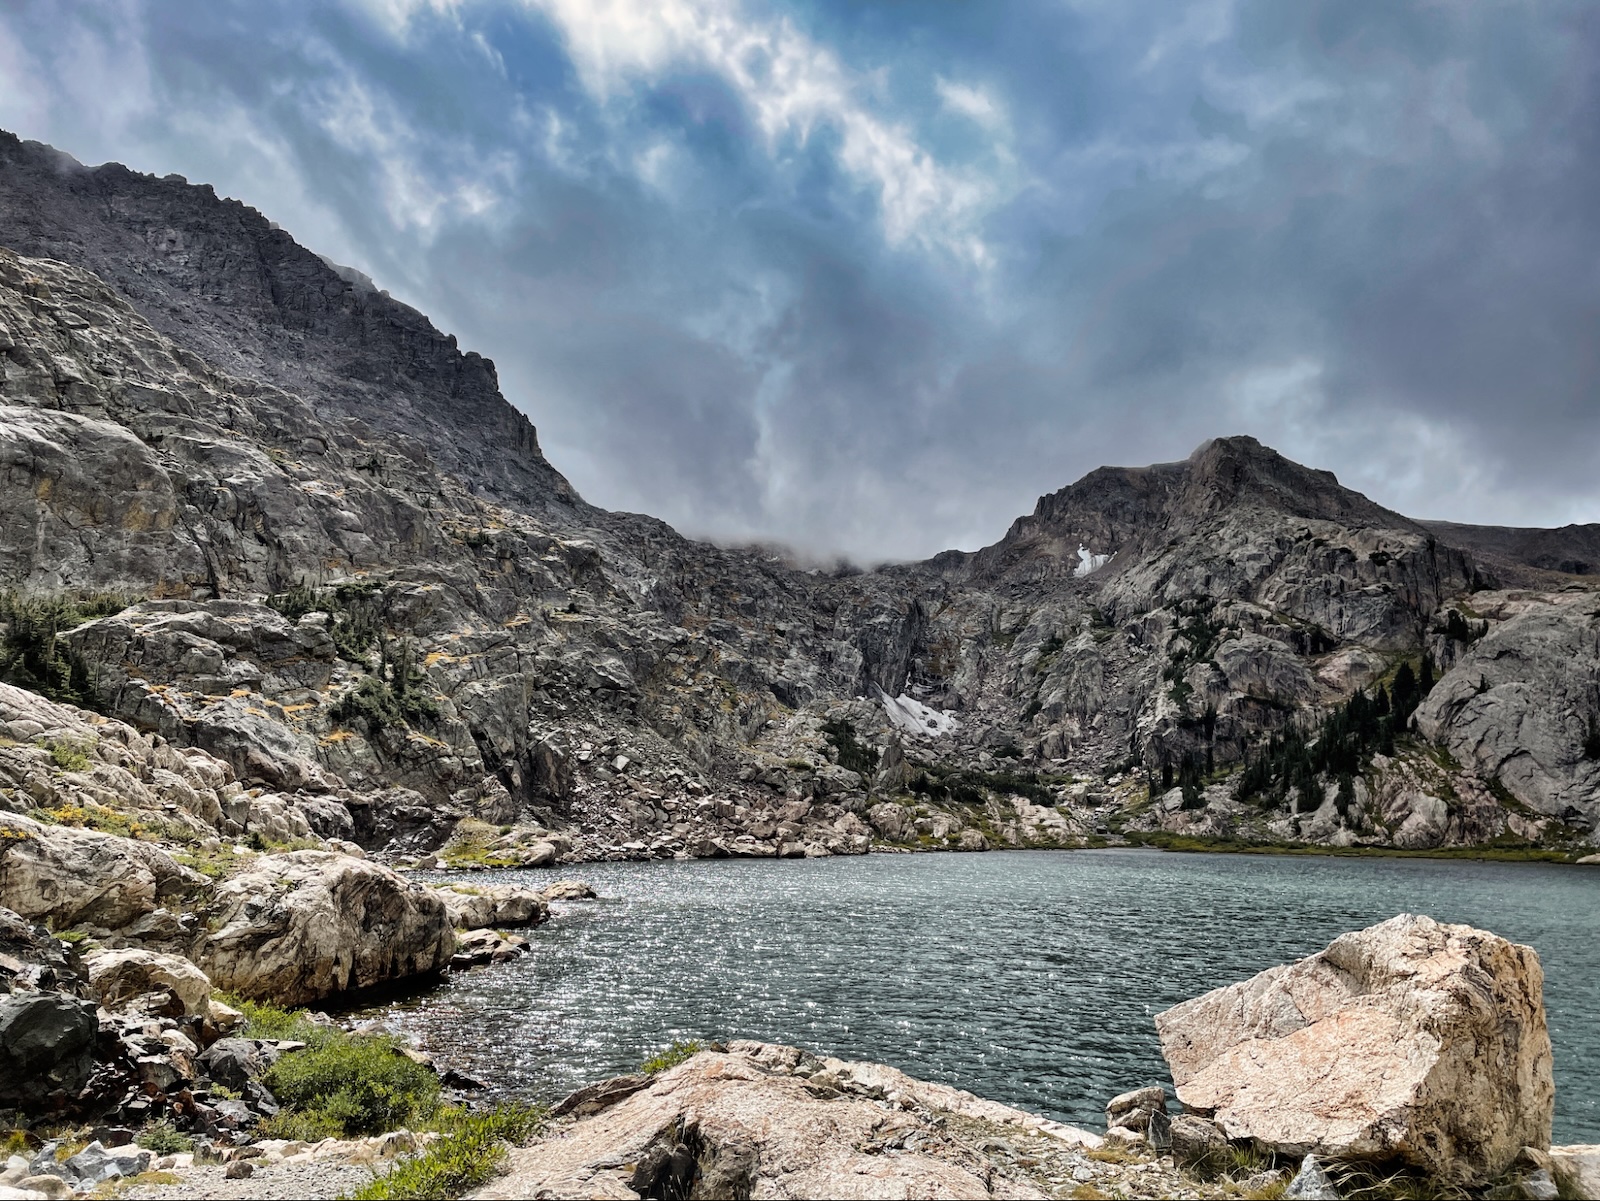
The snow started to fall heavily, so I donned my parka and meditated, alone, towards the small bit of water that remained unfrozen, focusing on the dripping icicles hanging from the rock cliff that framed the lake.
Meditating in the storm at Rendezvous Lake.
I caught some movement out of the corner of my eye to my right and peered through the fog-snow to the other side of the lake, where an apparition was emerging towards the shoreline. We waved at each other. In a few minutes, Stephanie and Chase greeted me and we snapped a few photos.
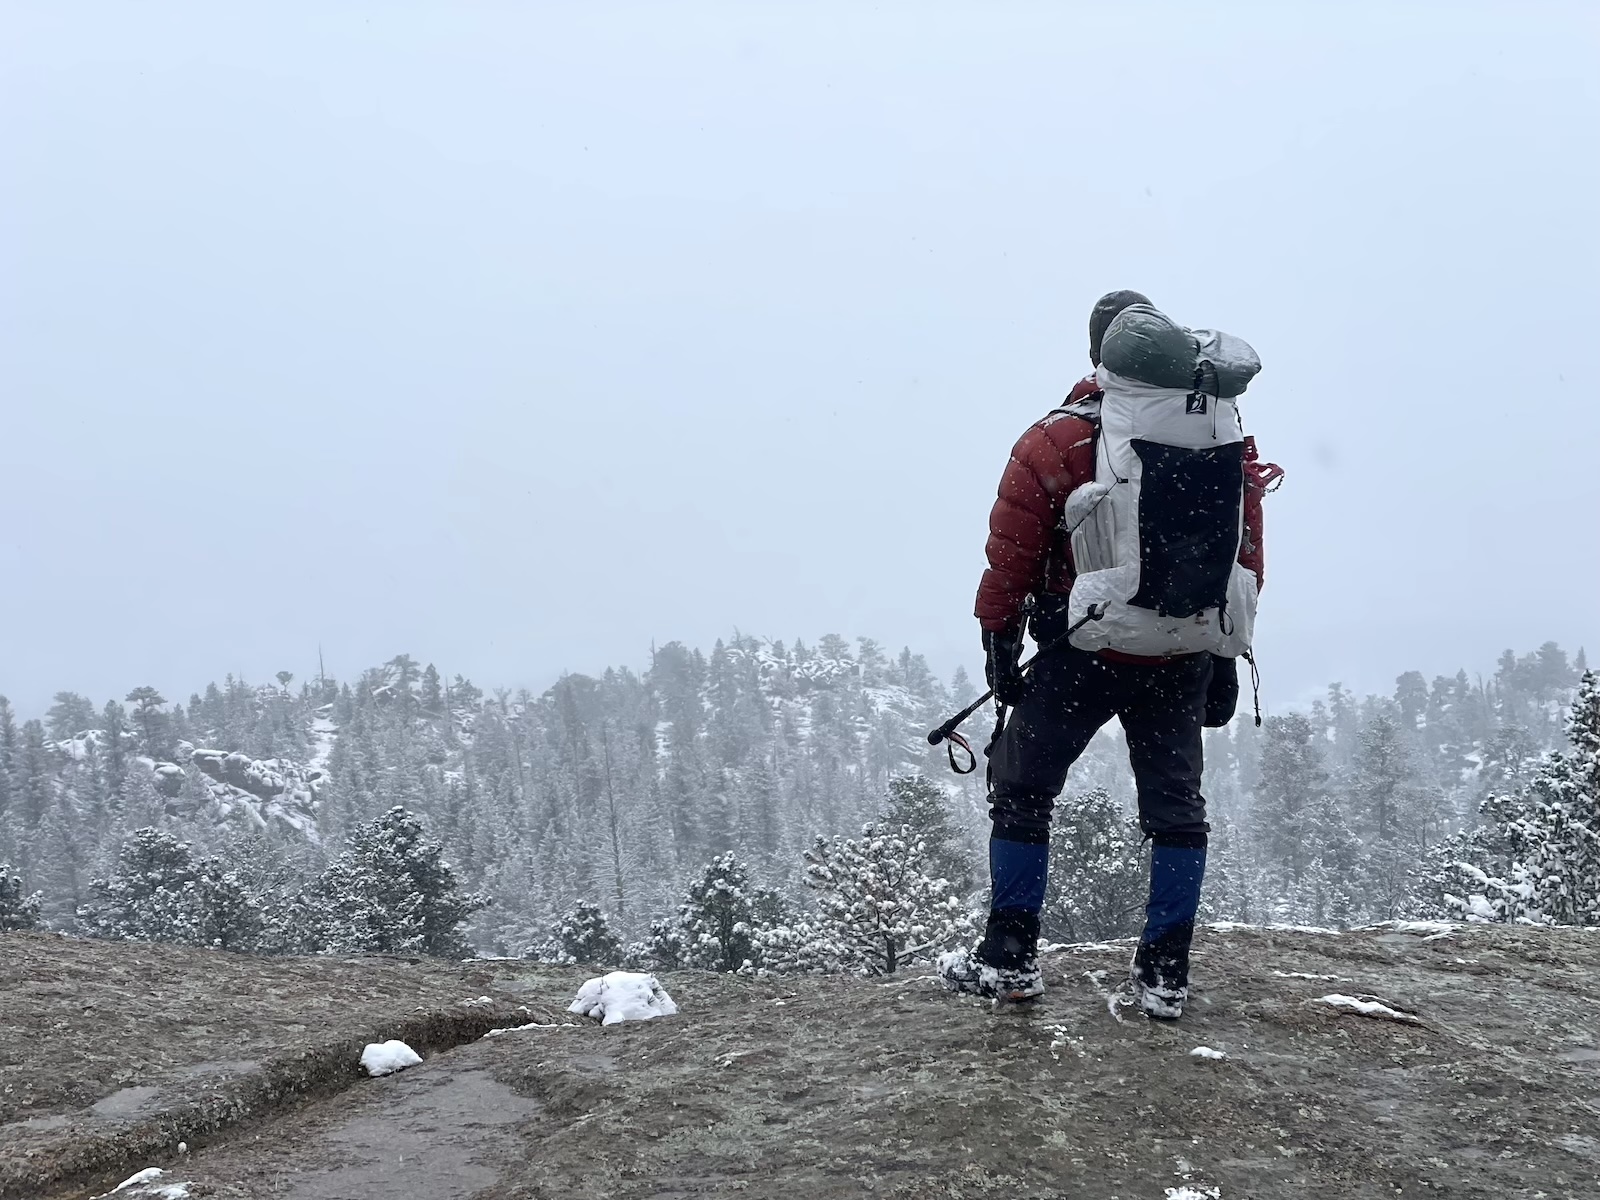
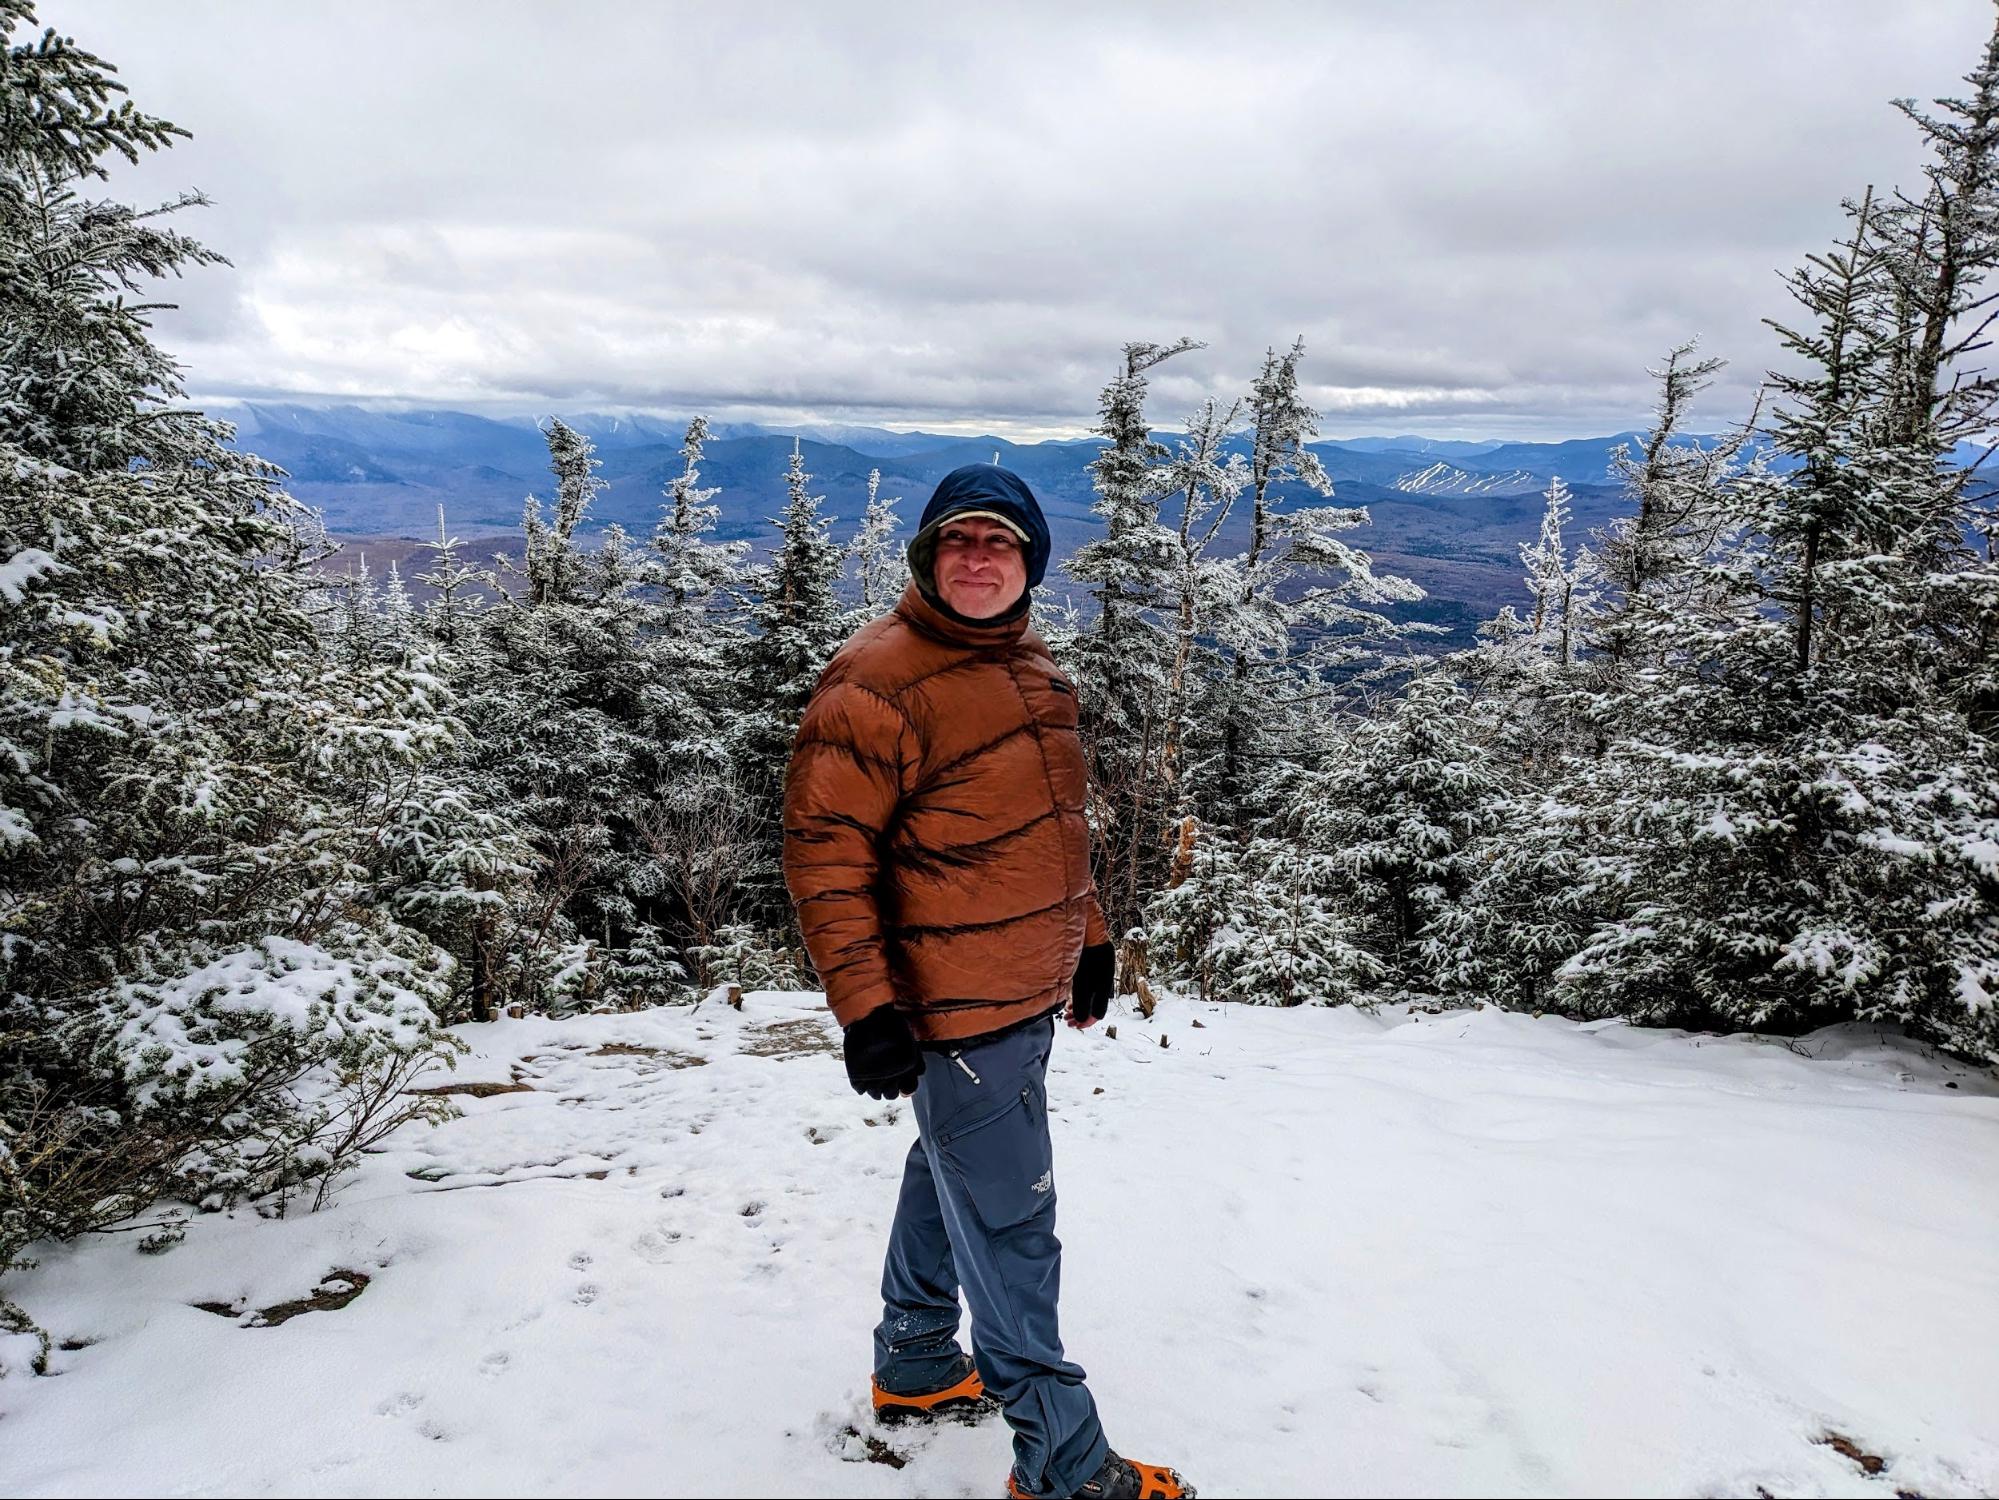
I was chilled, so I kept my down parka on as I slung my pack over my shoulder. I rarely hike in high-loft insulation, but today, I appreciated being warm and cozy during the final two miles of my hike down to the trailhead.
Hiking the last few miles in my parka as the temperature drops.
Gear Notes
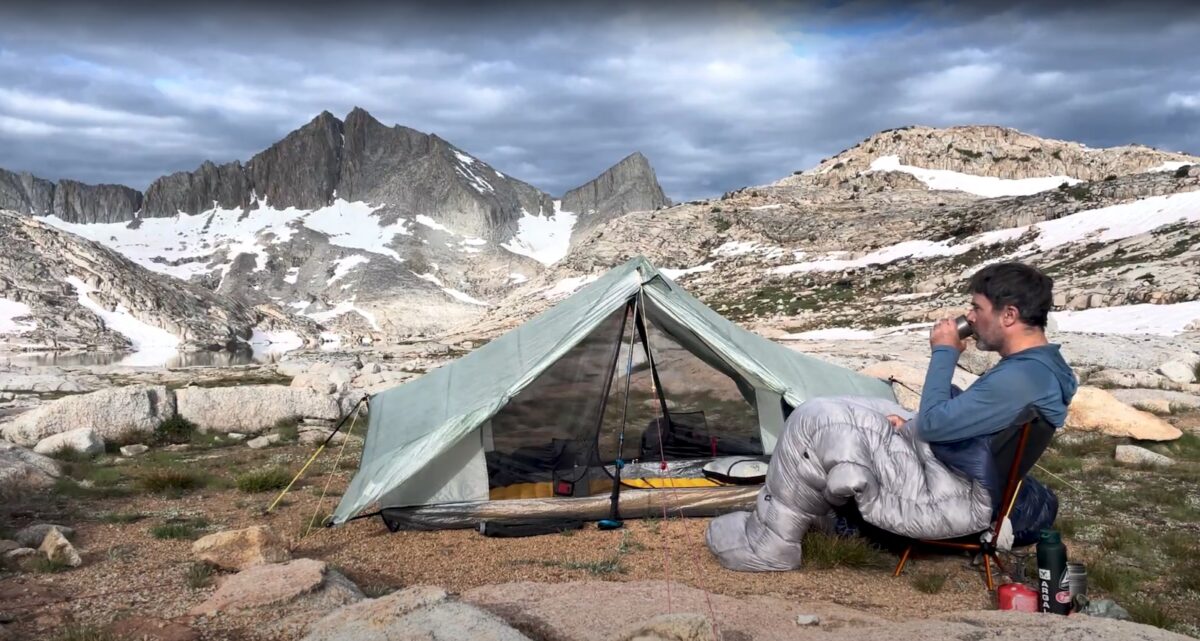
Shelter – Tarptent Dipole 1 DW. This trip really hit the sweet spot of comfort for an ultralight double-walled tent. Temperatures a few degrees below freezing, which allowed for temperatures inside the tent to climb to a few degrees above freezing with no condensation inside. Very impressive snow-loading and snow-shedding capability. No deformation of shelter under a moderate snow load.
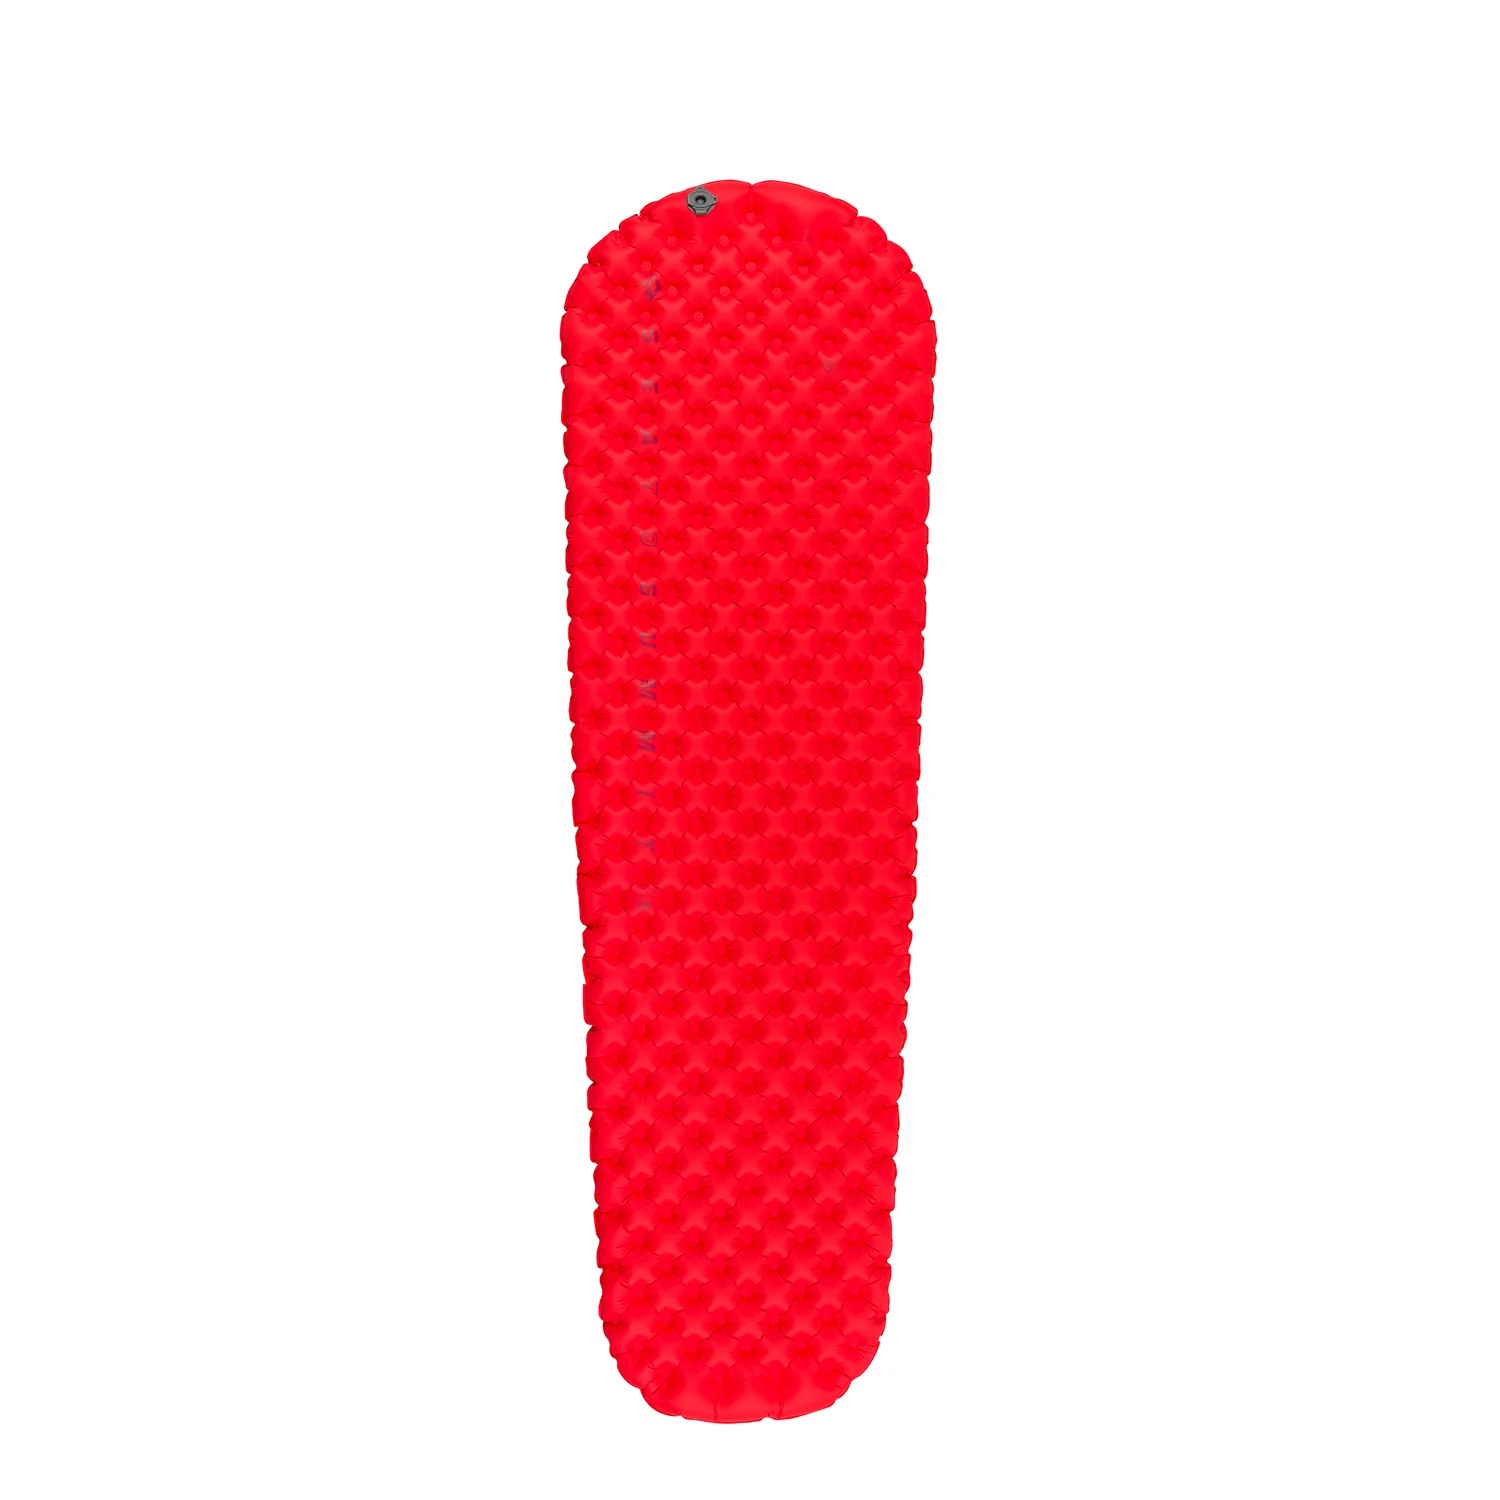
Sleeping Pad – Nemo Tensor Extreme. Although I appreciate the warmth of this pad in cold temperatures, it’s the stability (and how it translates to comfort for me) that I’m most excited about. A big step up in comfort over the Nemo Tensor Ultralight Insulated pad I’ve been using for the past several years.
Sleeping Bag – Hyperlite Mountain Gear 20 Quilt. Paired with a variety of high-loft winter insulating layers, this quilt is the core of my winter sleep system when I’m spending the night in a tent (and out of the wind) and am not expecting temperatures inside the tent to go below about 5 degrees F. The wide girth accommodates the added loft of my winter parkas and insulating pants.
Pack – Outdoor Vitals CS40. My first trip with this pack. It’s a little small for winter backpacking, but I didn’t have high-volume winter gear on this trip. It features a slim (as opposed to bulbous) packbag, a carbon fiber internal frame, and generously-padded shoulder straps, hip belt, and back panel. Tiny buckles were hard to use while wearing mitten shells.
Parka – PhD Yukon K Hoodie. My torso insulation of choice for temperatures down to about 15 degrees F.
Rain Jacket – Outdoor Vitals Tushar Rain Jacket. Nice fit and the fabric has a durable, stiff hand that makes this feel like a high-end jacket when you first wear it. Lack of ventilation features (tiny pit zips, a small mesh-backed chest pocket, and no ventilation control at the wrist cuffs) make for a clammy affair when working hard. Might be a good option for those who want durability but in a minimalist jacket design that spends most of its time in your pack and works well enough for the occasional rainstorm.
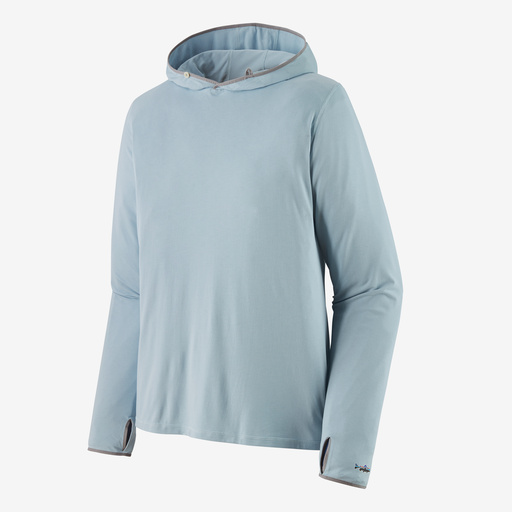
Base Layers – Brynje + Arms of Andes. I’ve been experimenting more with alpaca wool this season, and am finally ready to replace my merino layers with it. It has a slightly higher warmth-to-weight ratio and is more hydrophobic than my merino options. That means I can sense perspiration before it starts to wet out my base layer, which I have a harder time doing with Merino wool fabrics.
Mid Layers – Senchi Designs Alpha 60 Hoodie and Leggings. The warmth-to-weight ratio of Alpha 60 blows my mind. If not for its limited durability, the Alpha 60 Hoodie would be my favorite cool-weather hiking layer (worn over a Brynje fishnet t-shirt). However, I have to relegate this to a mid-layer that I take for cold-weather insurance. I do sleep in both, which makes for luxurious pajamas!
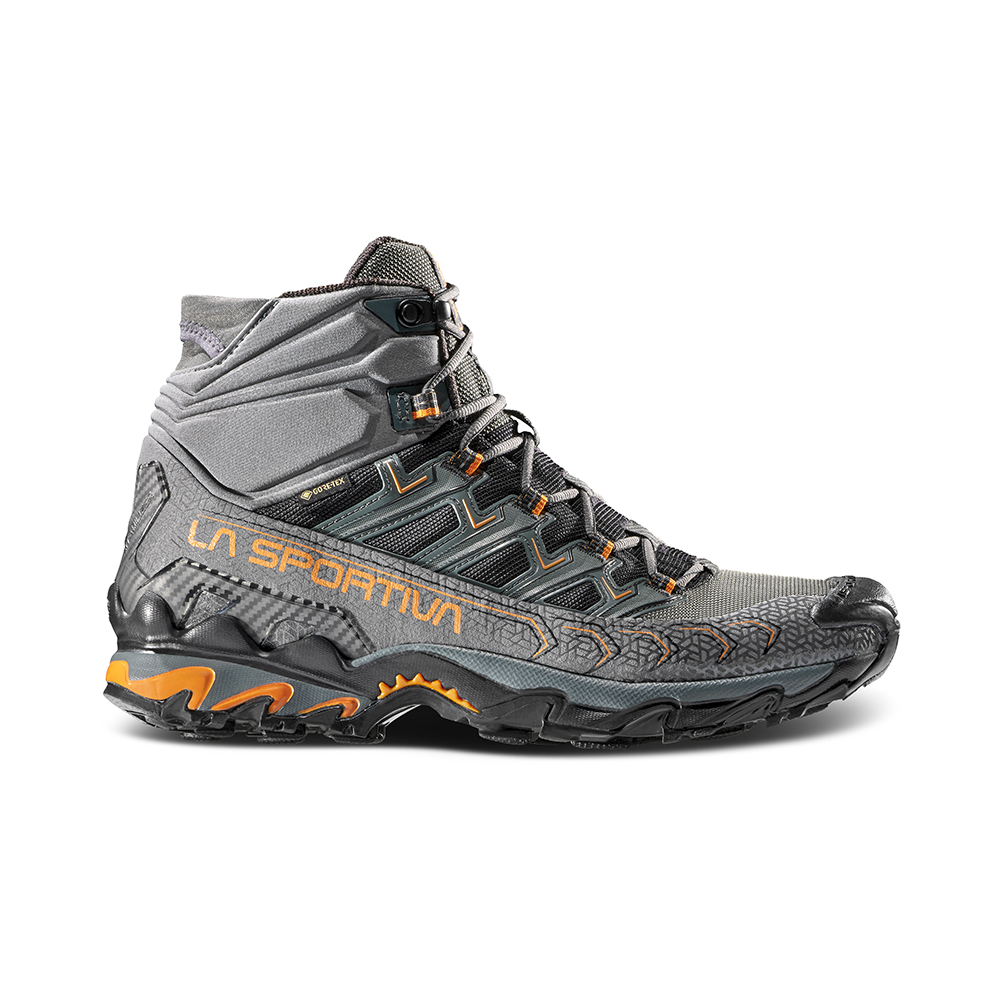
Shoes – La Sportiva Ultra Raptor Mid GTX Wide. The wide forefoot, very lightweight, and terrific traction on snow makes these my favorite boots for mild winter conditions. I sized them two sizes larger than my foot size to accommodate boot-weight hiking socks and a layer of Goretex socks if needed.
Gaiters – Outdoor Research Verglas. More nimble than OR Rocky Mountain High Gaiters, and lighter than OR Crocodiles, the Verglas is what a lightweight winter gaiter should be. It offers durability (Cordura lower) and security (straps instead of cords) that ultralight gaiters can’t provide.
Booties – Goosefeet Gear Down Socks. I bring these when I know low temperatures are going to be well below freezing, and only wear them for sleeping or hanging out in the tent. If the forest floor isn’t too covered with poky litter, I’ll just wear these outside during middle-of-the-night nature calls.
Firestarting Kit – Tinder-Quik + Firesteel. This was the first fire I’ve built in more than a year. I’m glad I still had a tiny firestarting kit tucked away in my “just-in-case” supply bag.
Gloves – Outdoor Research Flurry Sensor. My favorite cold-weather glove. The hydrophobic wool outer prevents light snow from absorbing into it, and the inner fleece liner is cozy. They fit me well and I can perform most tasks while wearing them. Very warm for their weight.
Overmitts – Outdoor Research Revel Shell Mitts. Essential when temperatures drop or I have to hike or deal with the tent or collect firewood in snowy conditions.
Lantern – Black Diamond Moji +Lantern. For 2.6 ounces, it’s a bit of an unnecessary luxury item in an ultralight backpacking kit but provides nice mood lighting both in and out of the tent during the longer nights of the fall and winter seasons.
Dinner – Good To-Go Thai Curry. An outstanding dish, just be careful with the bag zipper while rehydrating!
Tarptent Dipole 1 DW.
Outdoor Vitals CS40 Backpack.
Curry-stained clothing gets stored here overnight.
In today’s episode of the Backpacking Light podcast we’re going to talk about pressing the SOS button, as well as gear and best practices for backcountry cooking in ultralight style.
Episode Sponsor: Zoleo
Never worry about ‘no cell signal’ again! ZOLEO connects with your smartphone to provide seamless global messaging that follows you in and out of cell coverage – plus added safety features such as 24/7 progressive SOS alerting and non-emergency medical advice that you can count on! Use code BACKPACKING LIGHT to enjoy a FREE activation ($20 value) on your monthly service plan! Also, receive a free 6-month Gaia Premium membership when you activate your ZOLEO device by January 31, 2024.
In today’s episode of the Backpacking Light podcast we’re going to talk about pressing the SOS button, as well as gear and best practices for backcountry cooking in ultralight style.
In this Episode:
What’s New at Backpacking Light?
Enter the ZOLEO x Backpacking Light Giveaway before December 19 to win a free ZOLEO Satellite Communicator, one year of ZOLEO service, and a Backpacking Light Unlimited Annual Membership.
Watch our latest Office Hours event and learn about how to manage animal encounters in the backcountry.
We announced the dates for Trail Days Online 2024 – February 22, 23, and 24th! Interested in applying to become a speaker? Fill out the application here.
Forum: Rehydrate Meals in Your Pot (featuring Backpacking Light Member Monte Masterson’s idea for lining an eating bowl with aluminum foil to minimize cleanup)
Website: Trailcooking.com (owned and managed by Backpacking Light Member Sarah Kirkconnell)
Executive Producer - Backpacking Light; Show Director and Host - Ryan Jordan; Producer - Chase Jordan; Theme music: Look for Me in the Mountains written by Chris Cunningham and Ryan Jordan, performed by Chris Cunningham (acoustic guitar, lead and harmony vocals, harmonica), Chad Langford (upright bass), and Tom Murphy (mandolin), produced by Basecamp Studios in Bozeman, Montana.
Sponsorship Policy: Backpacking Light does not accept compensation or donated/discounted products in exchange for product mentions or placements in editorial coverage, including any podcast episode content not excplicitly identified as sponsored content. Some (but not all) of the links in these show notes may be affiliate links. Learn more about affiliate commissions, influencer marketing, and our consumer advocacy work by reading our article Stop wasting money on gear.
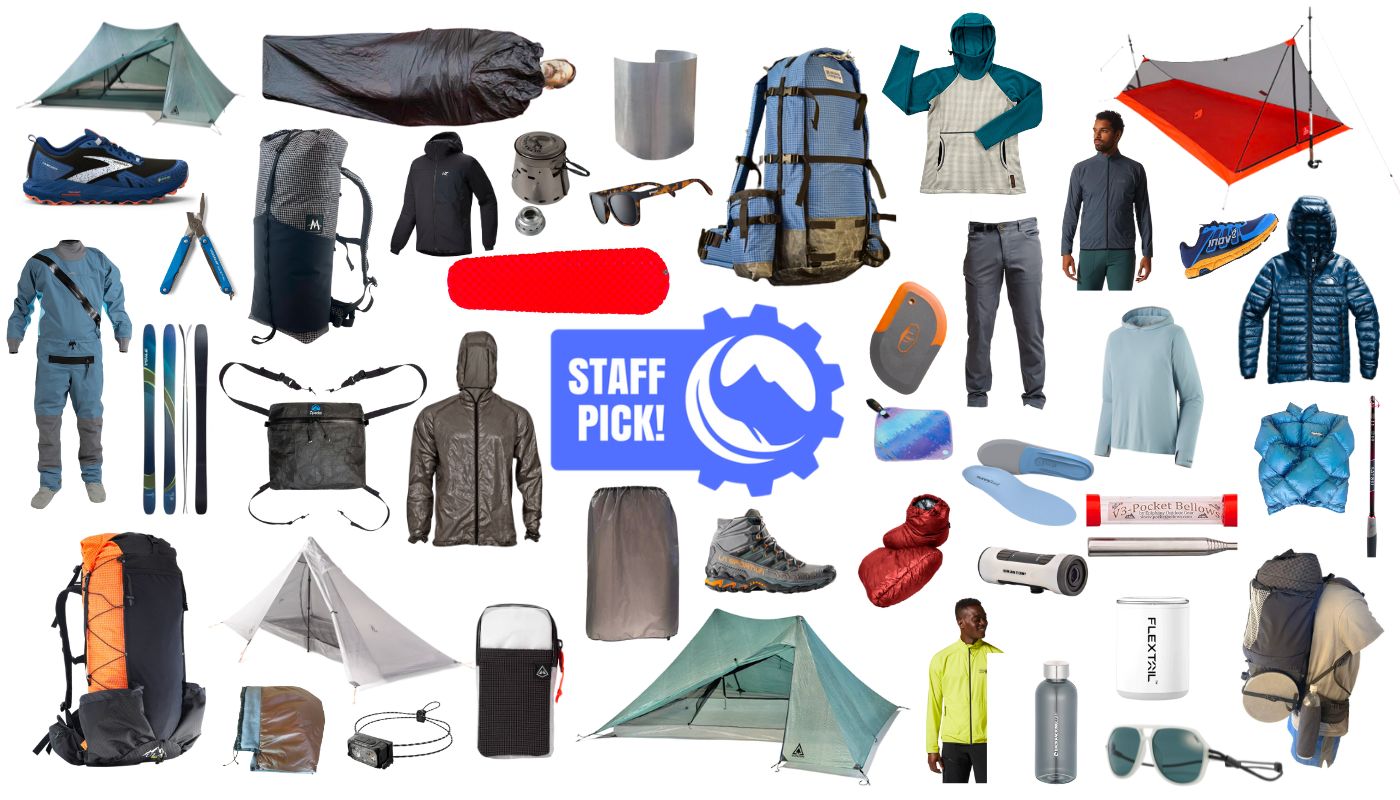
Our staff selects their favorite hiking, backpacking, and other backcountry gear that they’ve used over the past year – the next edition of our infamous Staff Picks!
Introduction
Each year, our staff selects their favorite backcountry gear from the past 12 months, and we look forward to you sharing your favorite gear of the year as well in the forum comments below!
Some of the gear chosen by staff, contributors, and grant recipients. Scroll through the article to learn more.
Our Staff
This year’s Staff Picks contributors are:
Matthew King – Community Moderator
Bill Budney – Contributing Author
Atif Khan – Contributing Author
Jeff de Graffenried – Contributing Author
Chase Jordan – Production Editor
Mark Wetherington – Contributing Author
Isaac Simons – Contributing Author
Drew Smith – Contributing Author
Ben Kilbourne – Contributing Author
Sarah Bennett – Contributing Author
Iago Vazquez – Contributing Author
James Montavon – Contributing Author
Ryan Jordan – Owner/Founder
Stephanie Jordan – Owner/Founder
Stephen Seeber – Contributing Author
Anna Swarts – Instructor
Table of Contents
Table of Contents • Note: if this is a members-only article, some sections may only be available to Premium or Unlimited Members.
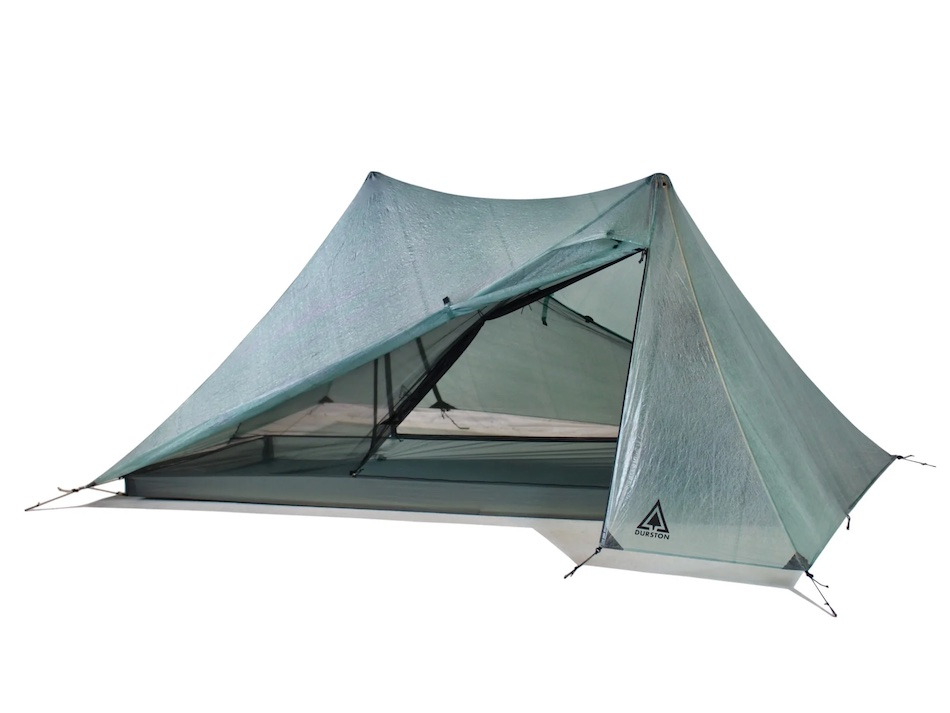
Durston Gear X-Mid Pro 1. Photo Credit: Durston Gear
As close as you can get to a one-size-fits all backcountry shelter. Luxuriously spacious, with ample vestibules and interior storage, the X-Mid Pro 1 boasts a thin and flexible Dyneema fabric that resists absorption during downpours, avoiding the sag and increased weight that such fabrics as silpoly take on with water. For a fully-enclosed trekking pole shelter, you can do no better. – Isaac Simons
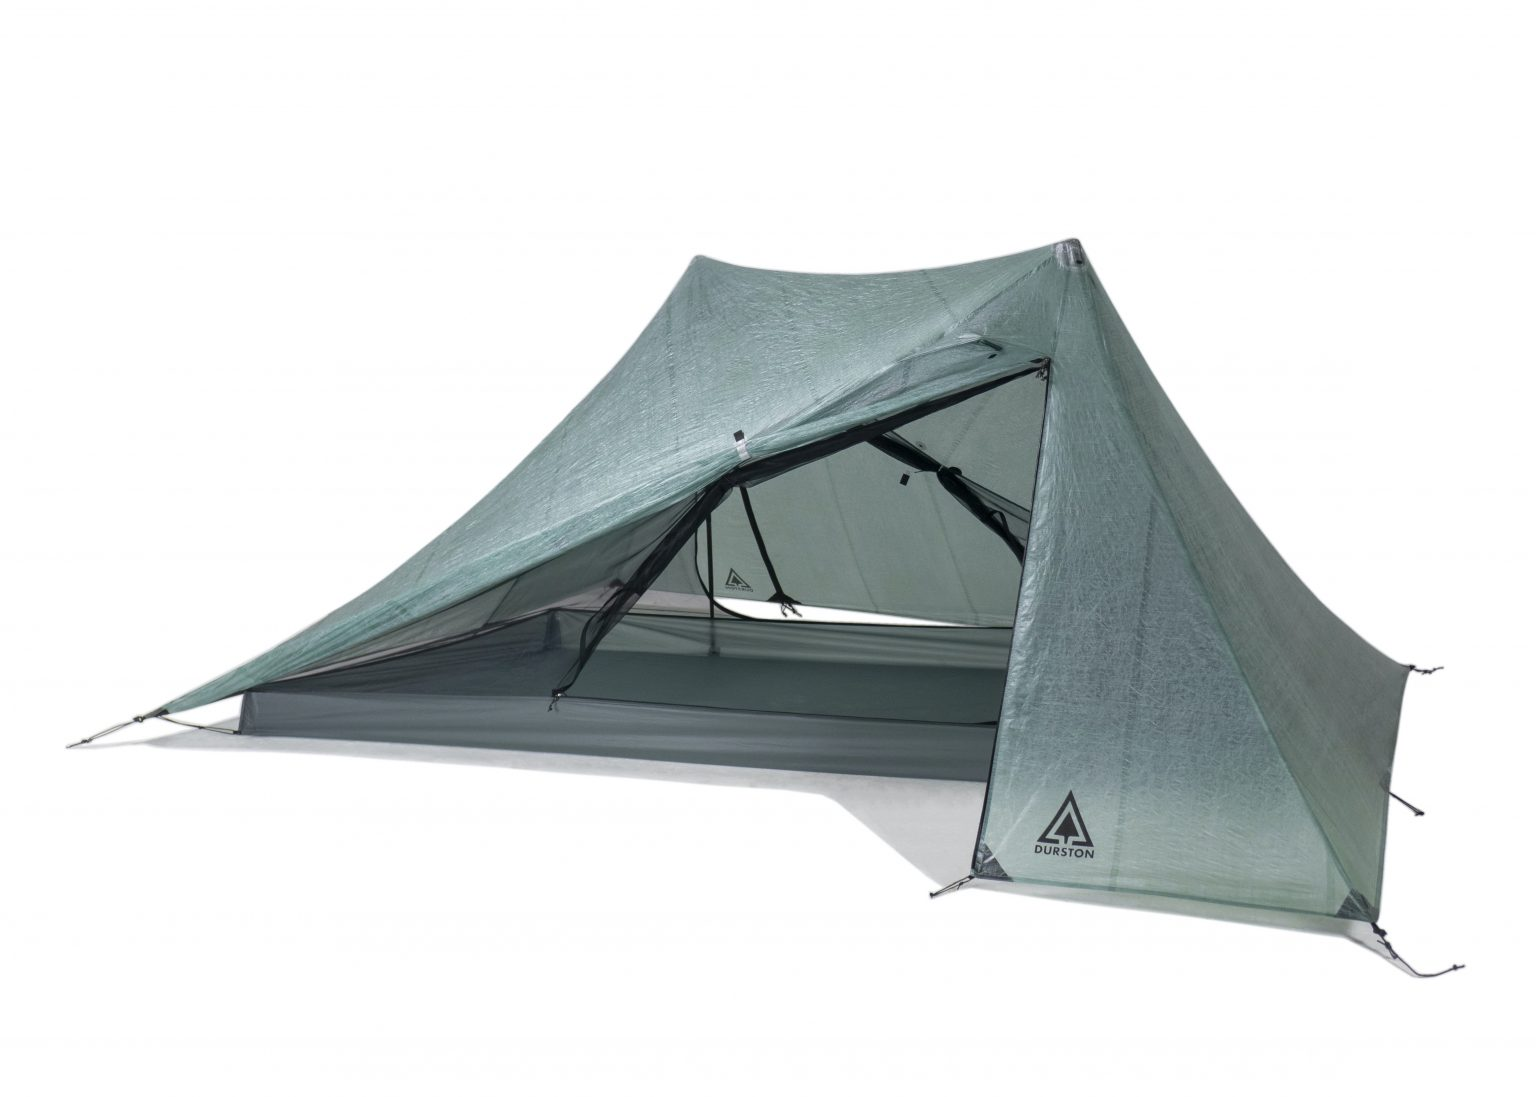
Durston Gear X-Mid Pro 2. Photo Credit: Durston Gear
This X-Mid Pro 2 is about as perfect as it gets for three-season backpacking in the Northern Rockies. Lightweight, roomy even with two people inside, handles storms well, and is easy to set up. I couldn’t be happier with this tent, whether I’m hiking solo or with a partner. – Mark Wetherington
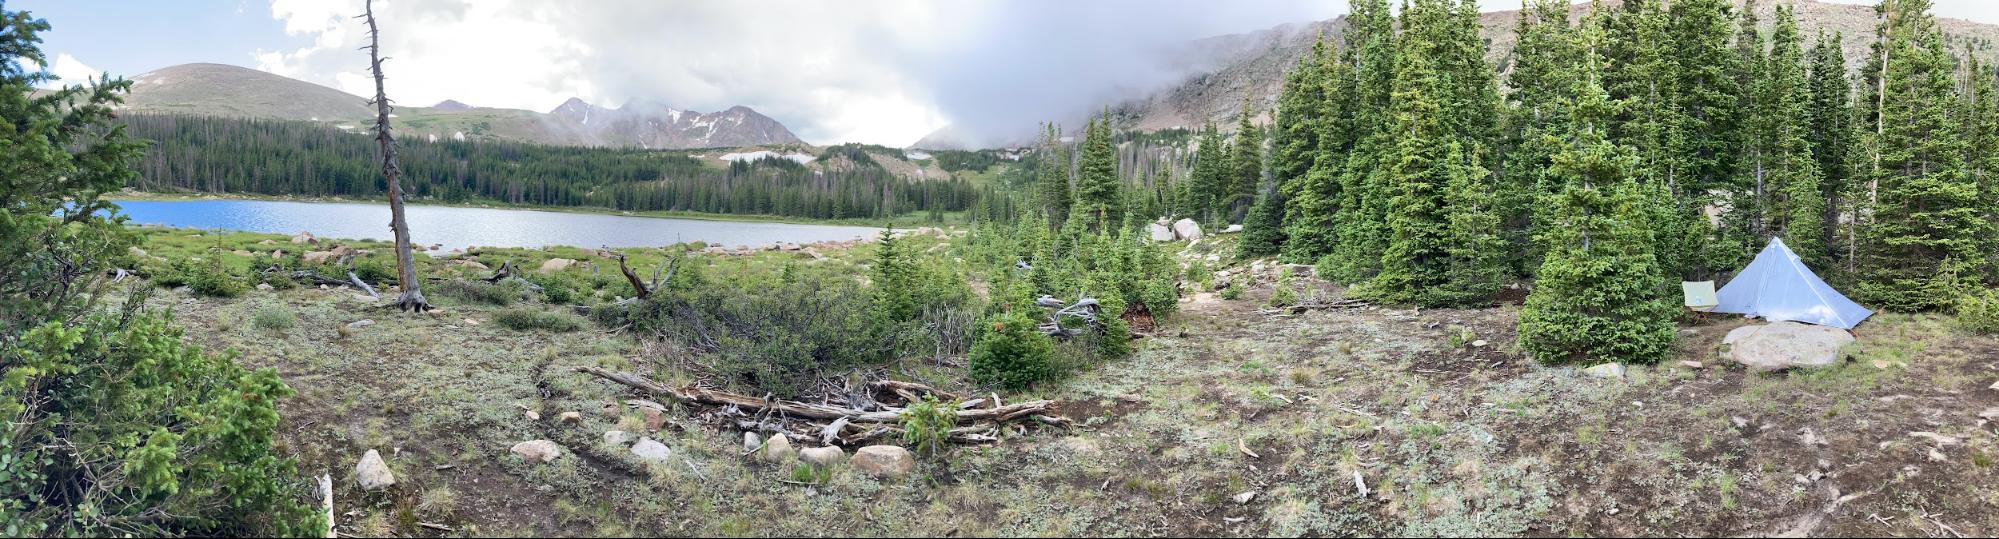
The Hyperlite Mountain Gear Mid 1 nestled next to a high lake in the Colorado Rockies. Photo Credit: Chase Jordan
When I’m choosing my shelters, ease and speed of setup is a key consideration for me – I don’t go on backpacking treks to set up camp, but often to spend time exploring, being inspired, or catching monster trout in alpine lakes. The Hyperlite Mountain Gear Mid 1 found its way into my backpack several times this year because of how easy it was to set up, with the integrated inner staying dry when pitching it in stormy conditions while providing added comfort during mosquito season. This is by far my favorite integrated shelter for these reasons – and I expect it to be one of the primary shelters I’m using for years to come. – Chase Jordan
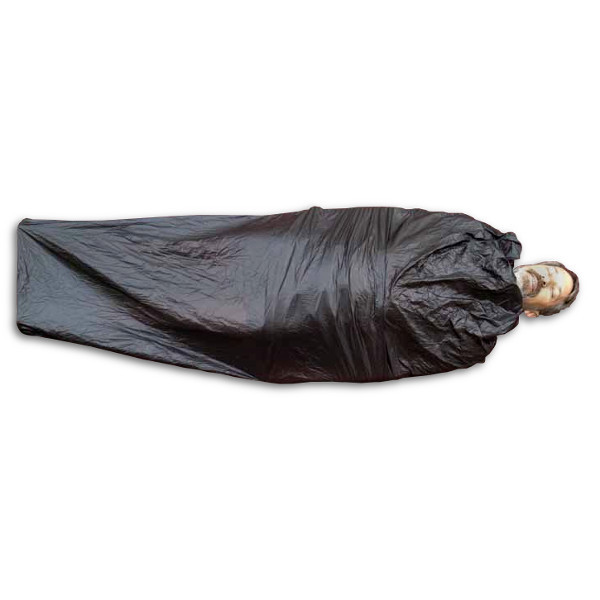
MLD markets the Mountain Laurel Designs Sleeping Bag Liner as a bag liner, but I find it to be an excellent minimalist bivy sack. It weighs in at 3.0 oz (85 g) and has no hood and no zippers. It is just a tapered cylinder of 10D nylon with a drawstring opening at the top. Despite this lightweight and simplicity, the liner does a number of things for me. It keeps drafts out of my quilt. It adds a few degrees of warmth. It is not waterproof, but is water-repellent enough to keep dew at bay when cowboy camping, and to stop rain splash when tarping. It keeps mosquitoes and ants off my body. It can be used as a lightweight bag on warm summer nights. Despite the lack of a zipper, I find it easy enough to pull down and exit from when nature calls. It lacks a hood, but the hood of my windshirt works just fine in that capacity when needed. Being a bag liner, it is cut slimmer than a true bivy sack: 54 in /140 cm circumference at the shoulder. Most bivys are > 70 in /175 cm. At 165 lbs/75 kg with a 20° F/-8° C quilt, I find it plenty roomy. If you are much larger or are using a warmer bag, you could find it too small. But if the MLD bag liner is not too small for you, it provides most of the functions of a true bivy sack for minimal weight and expense. It is very much worth considering as an addition to your sleep system. – Drew Smith
Sea to Summit Comfort Plus Insulated Air Sleeping Mat. Photo Credit: Sea to Summit
If your sleep system is preventing you from enjoying backpacking, the Sea to Summit Comfort Plus Insulated Air Sleeping Mat is the pad to get. I’m a female side sleeper that’s prone to lower back pain, and I have slept on this pad for weeks at a time without any back spasms. The trick is to overinflate the bottom and under inflate the top, so that one’s hips can sink into the pad without hitting the ground. At 29.8 oz, it’s on the heavier side for a backpacking mat – but as someone who needs the back support, the extra weight is absolutely worth it. – Sarah Bennett
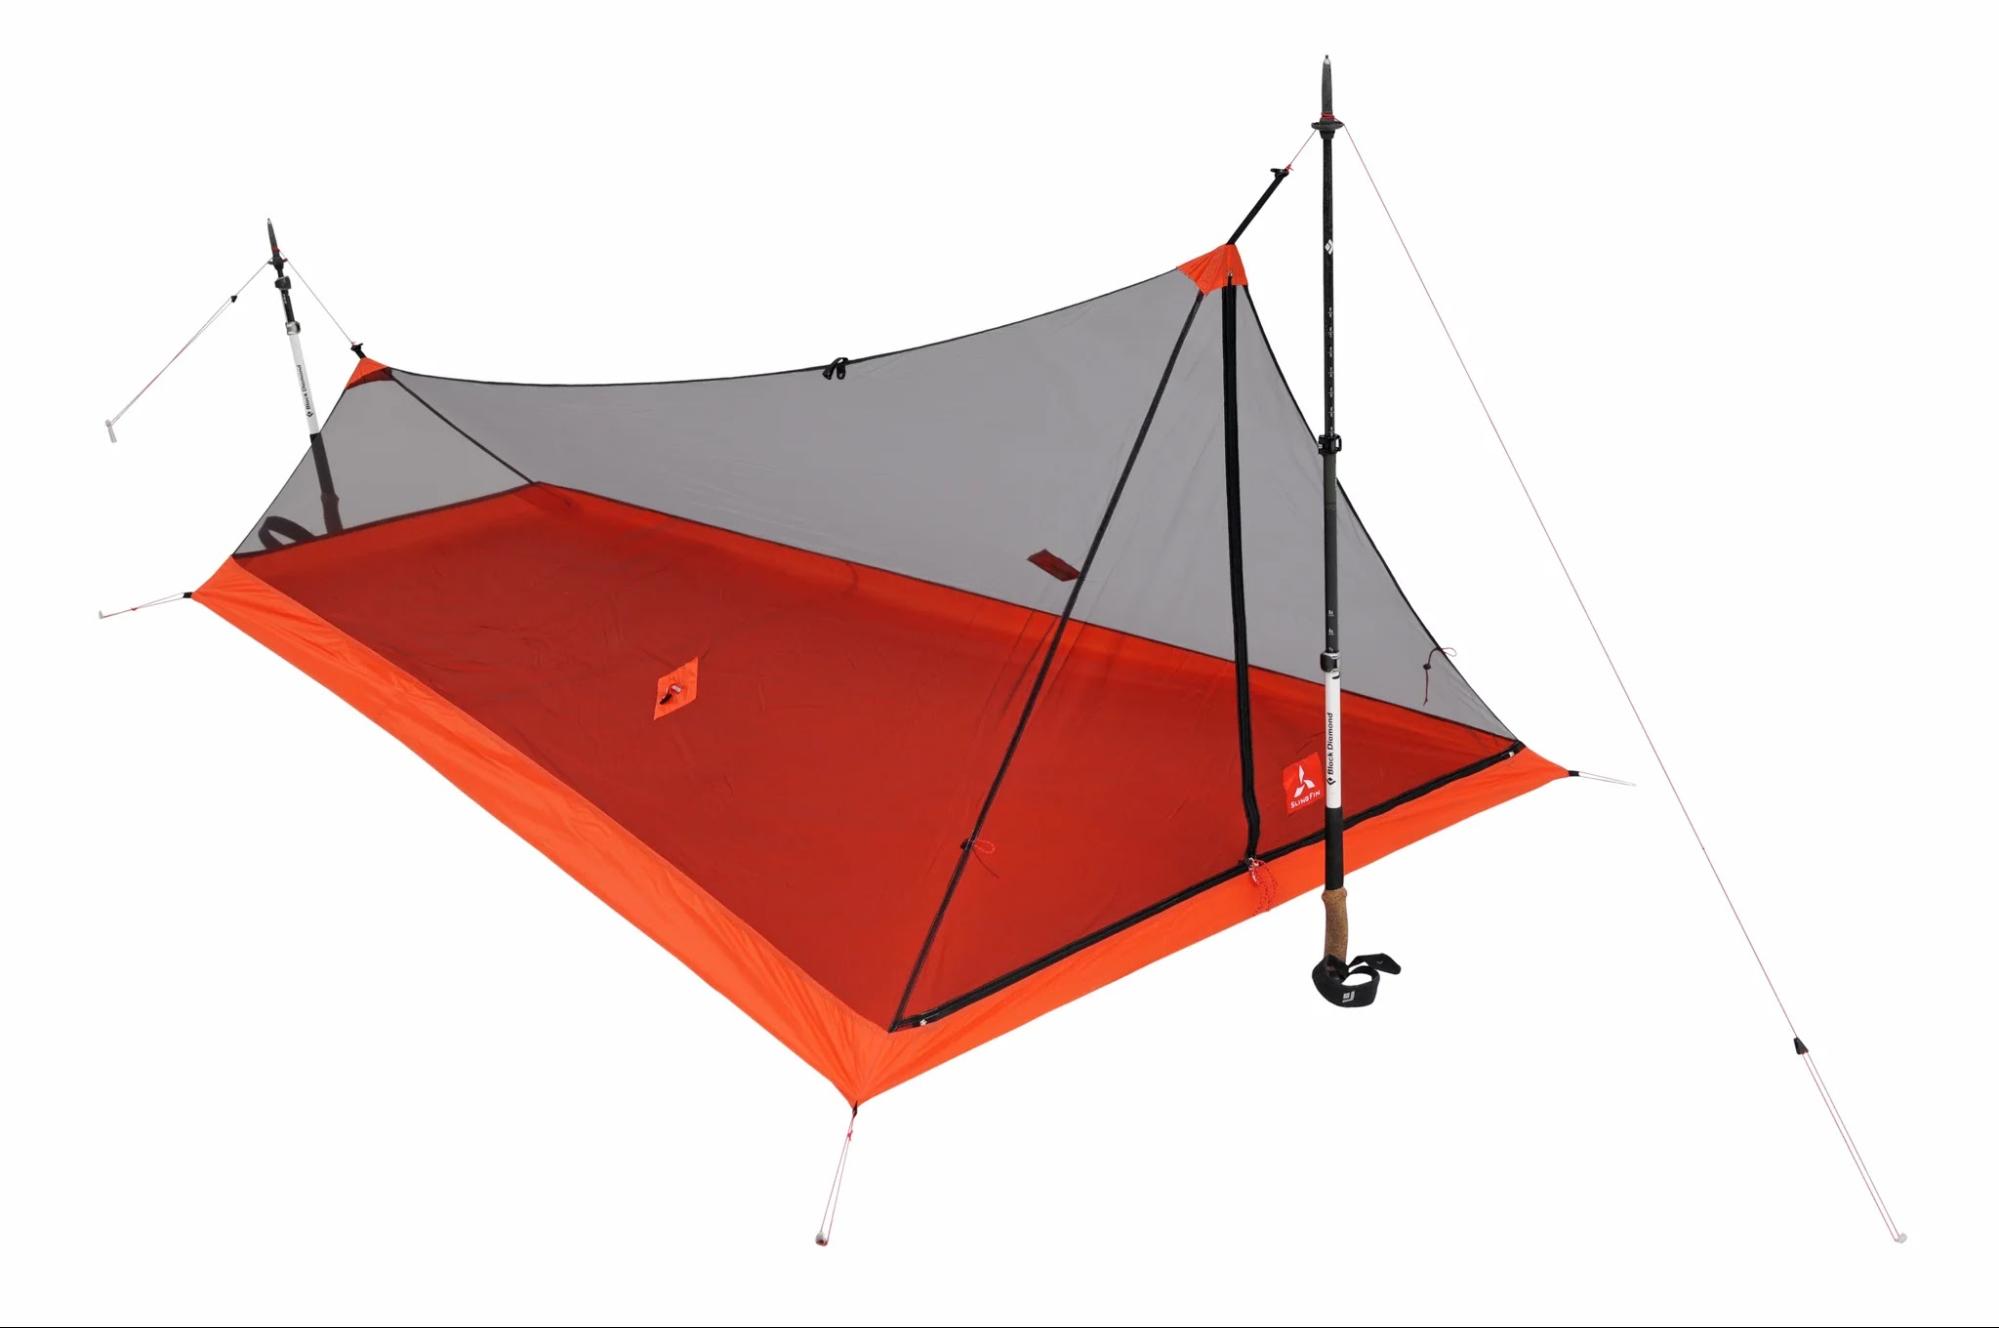
I purchased the SlingFin SplitWing Mesh Body as a standalone piece for my hike through Majete National Park in Malawi. I cowboy camped and needed an ultralight net in case there were mosquitos. There were, and this shelter worked great. It is ultralight, packs super small, and when others were swatting at mosquitoes all night, I was piecefully enjoying the view of the stars through the net. As a bonus, I can also use it with my HMG flat tarp too. – Jeff de Graffenried
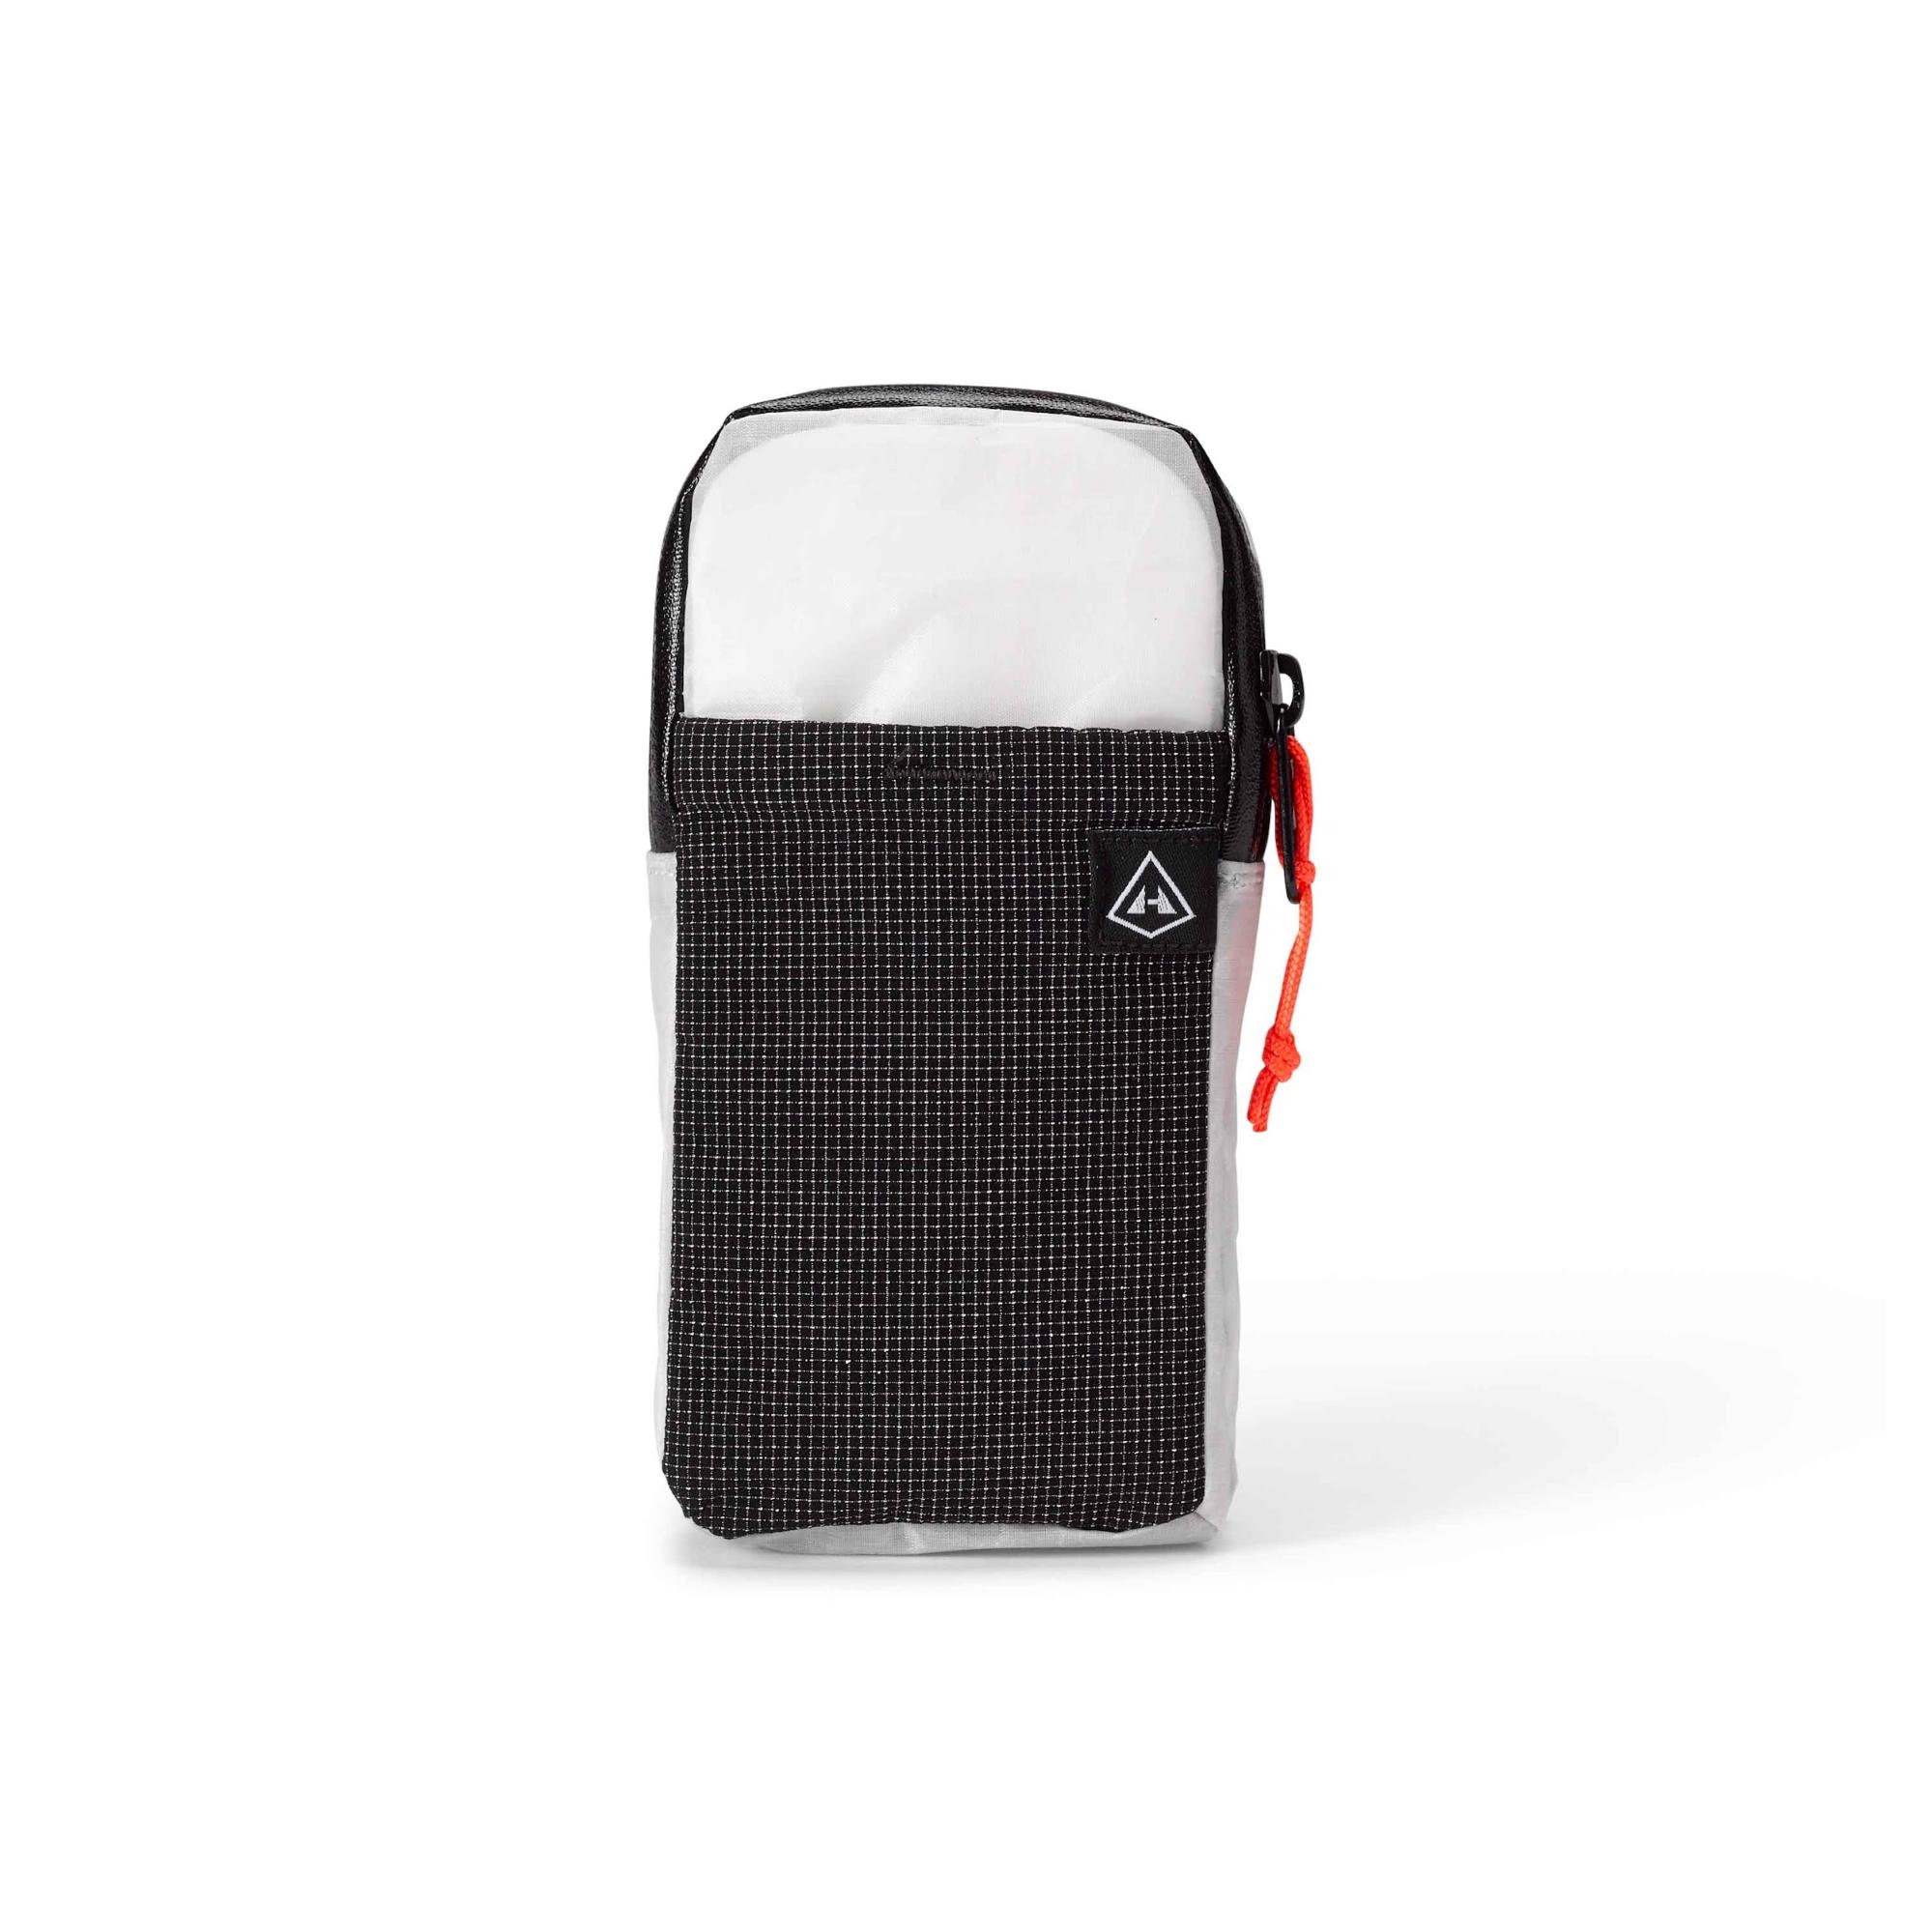
This item is so useful, I wore out the first one and had to replace it. This lightweight, waterproof pocket can hold two phones (if packed tightly together), and a recharger cord, etc. in the outside mesh pocket. It is durable, adjustable and I have found it an essential piece of gear. – Jeff de Graffenried
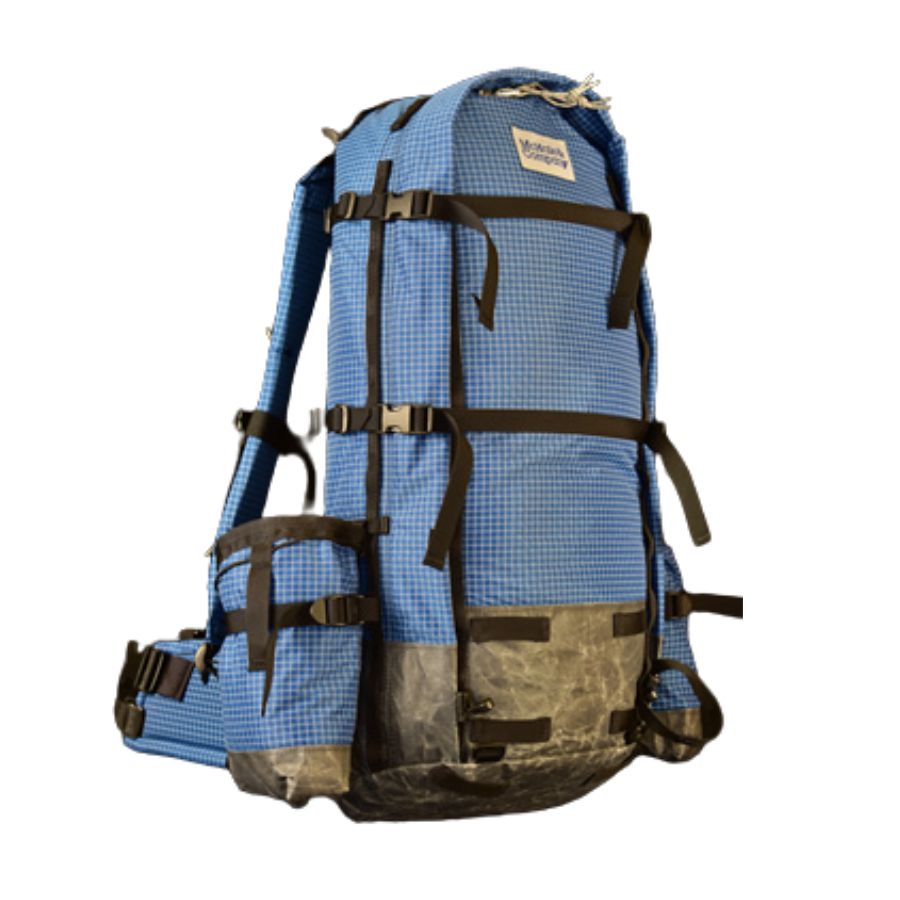
After owning several packs over the decades, I have settled on a custom-fitted McHale. This 1.9 lb internal frame works as a 50 L pack for weekend walks and expands into a 100 L desert crosser for 70 lb water and food hauls. – Atif Khan
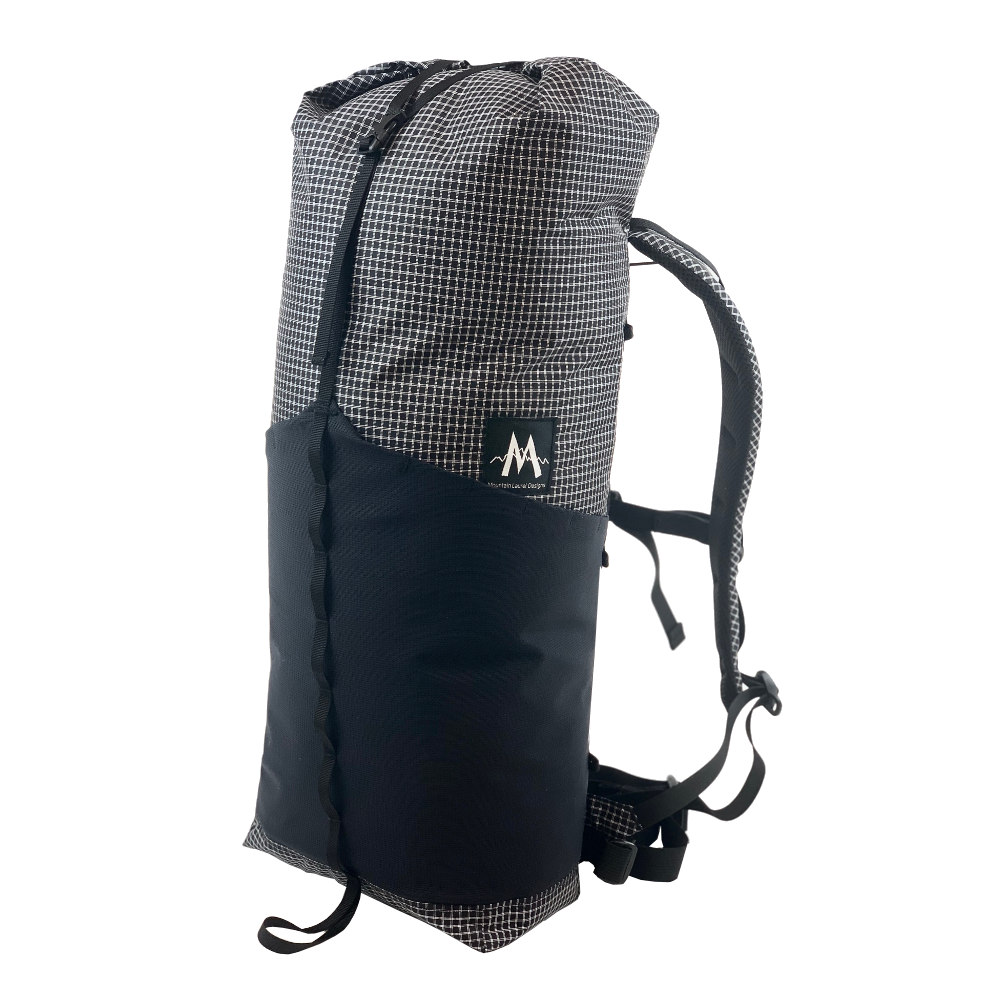
I think MLD makes the best shoulder straps in the business. The size of this pack is great for day hikes and has room for use as a light travel pack or for lighter overnight trips in the woods. The stretch wraparound exterior pocket is a great solution for flexible storage on the go. I thought I might not like having everything in one big pocket but it’s great for water bottles, snacks, a collapsed trekking pole or shell. – Matthew King
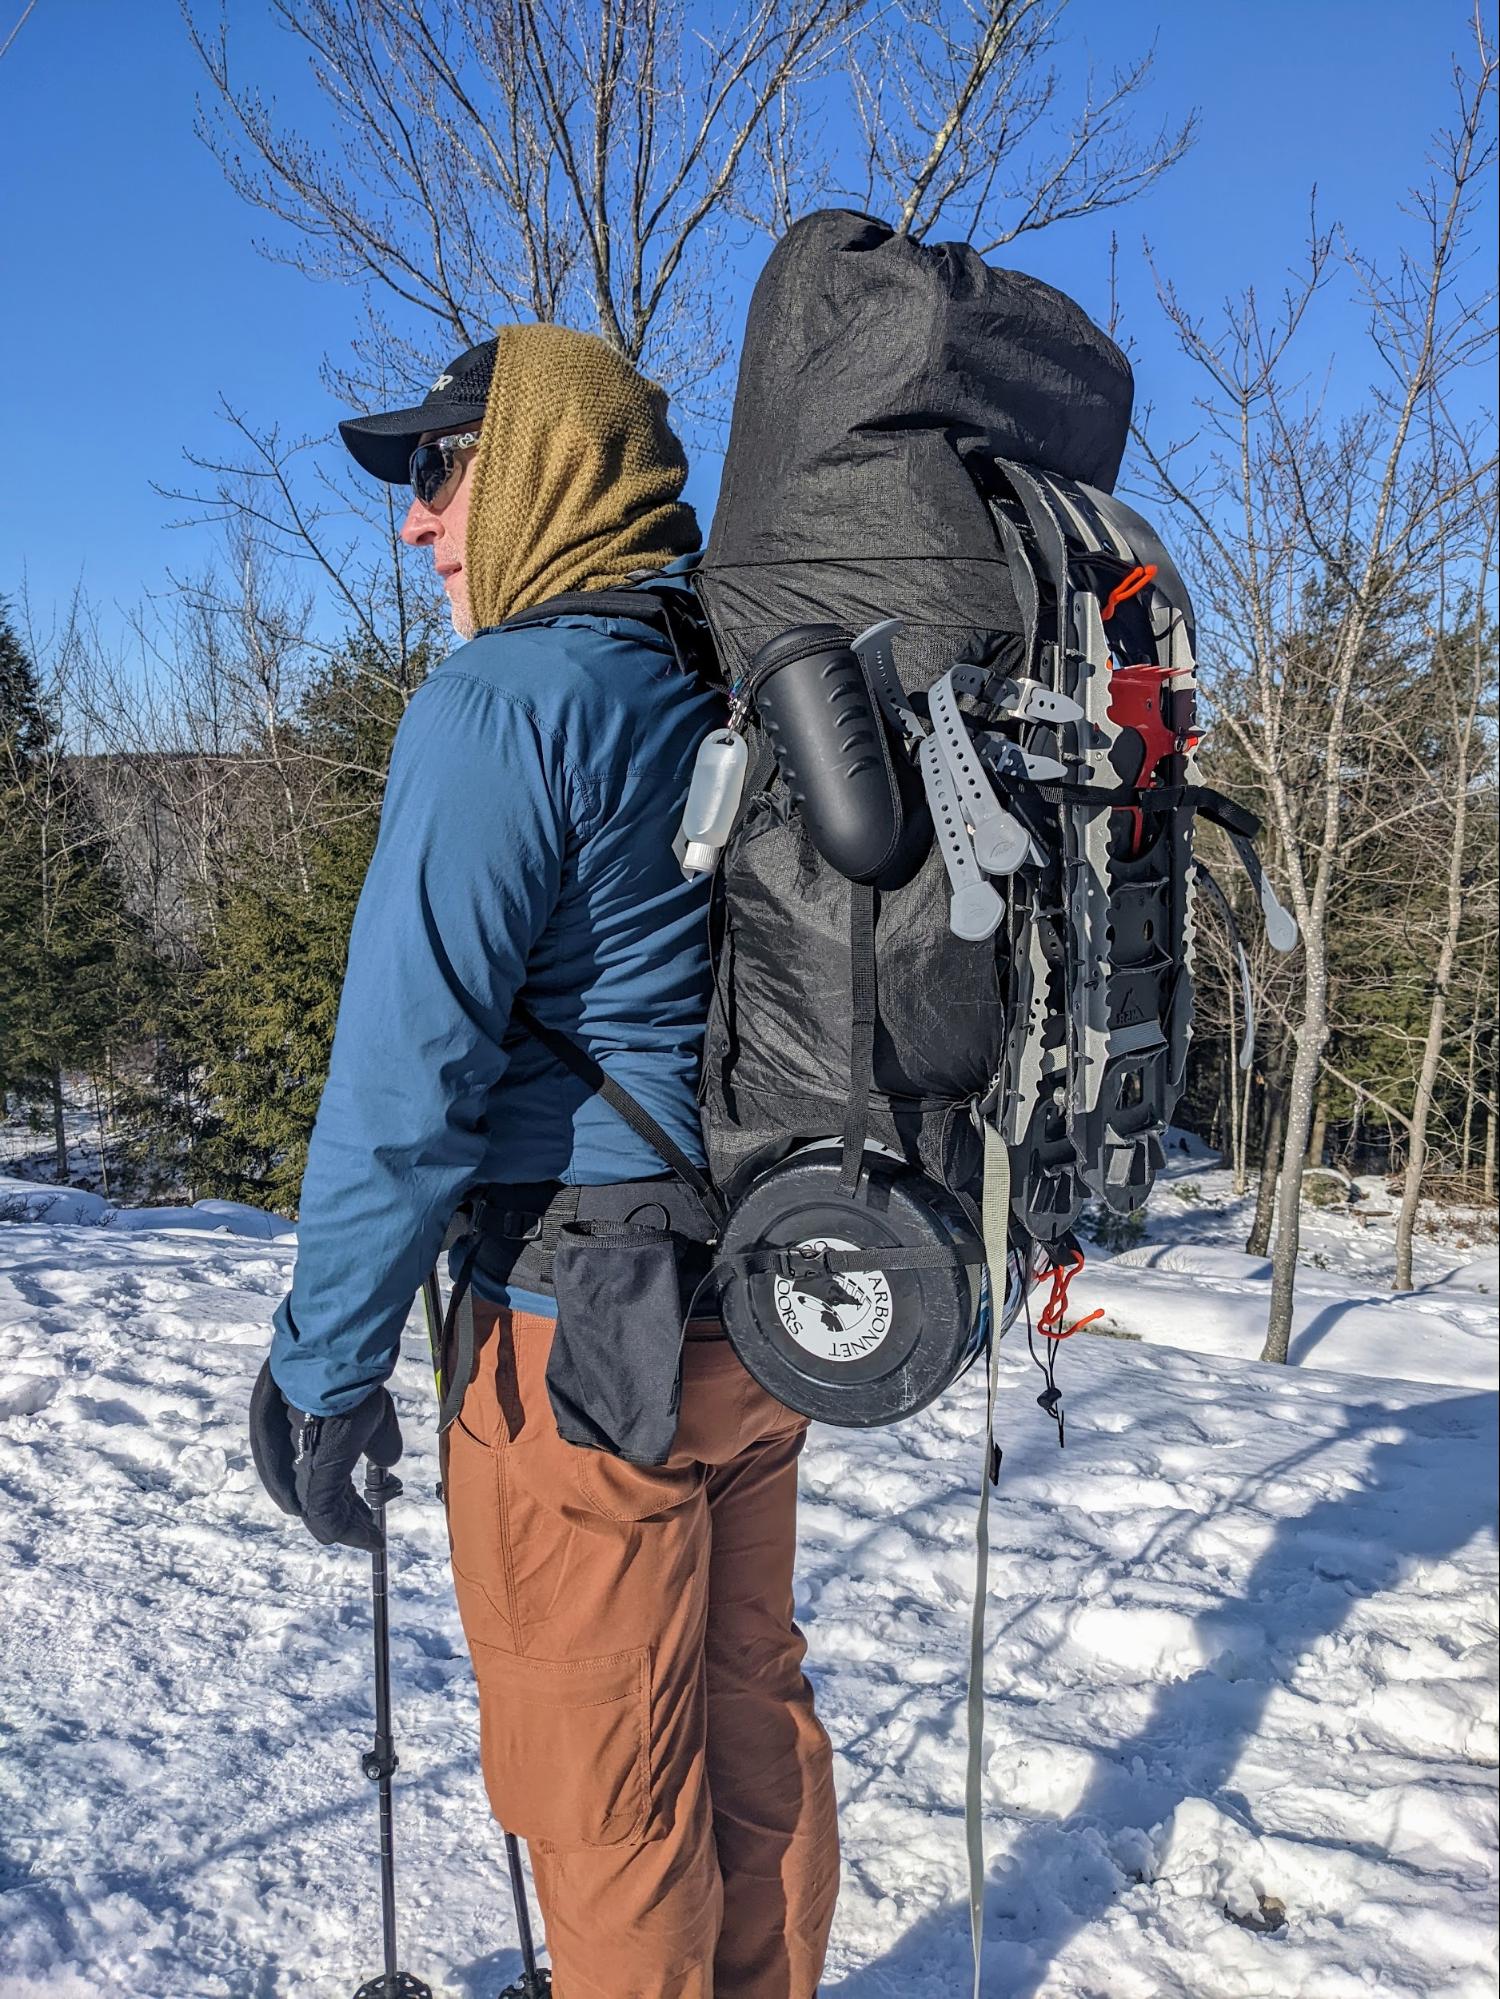
Iago Vazquez wearing his Nunatak Bears Ears Backpack on a snowy day. Photo Credit: Iago Vazquez
Backpacking in areas where bear canisters are required, the Nunatak Bears Ears line of packs provides comfortable “outside the pack” carry. I have carried up to 35 lbs in the pack without any discomfort. Additionally, this canister attachment option does not interfere with accessing the rest of your gear as opposed to lashing the canister to the top of your pack or placing it inside your pack. And finally, the water bottle pockets are highly accessible without interfering with hipbelt pockets or side pockets. – Iago Vazquez
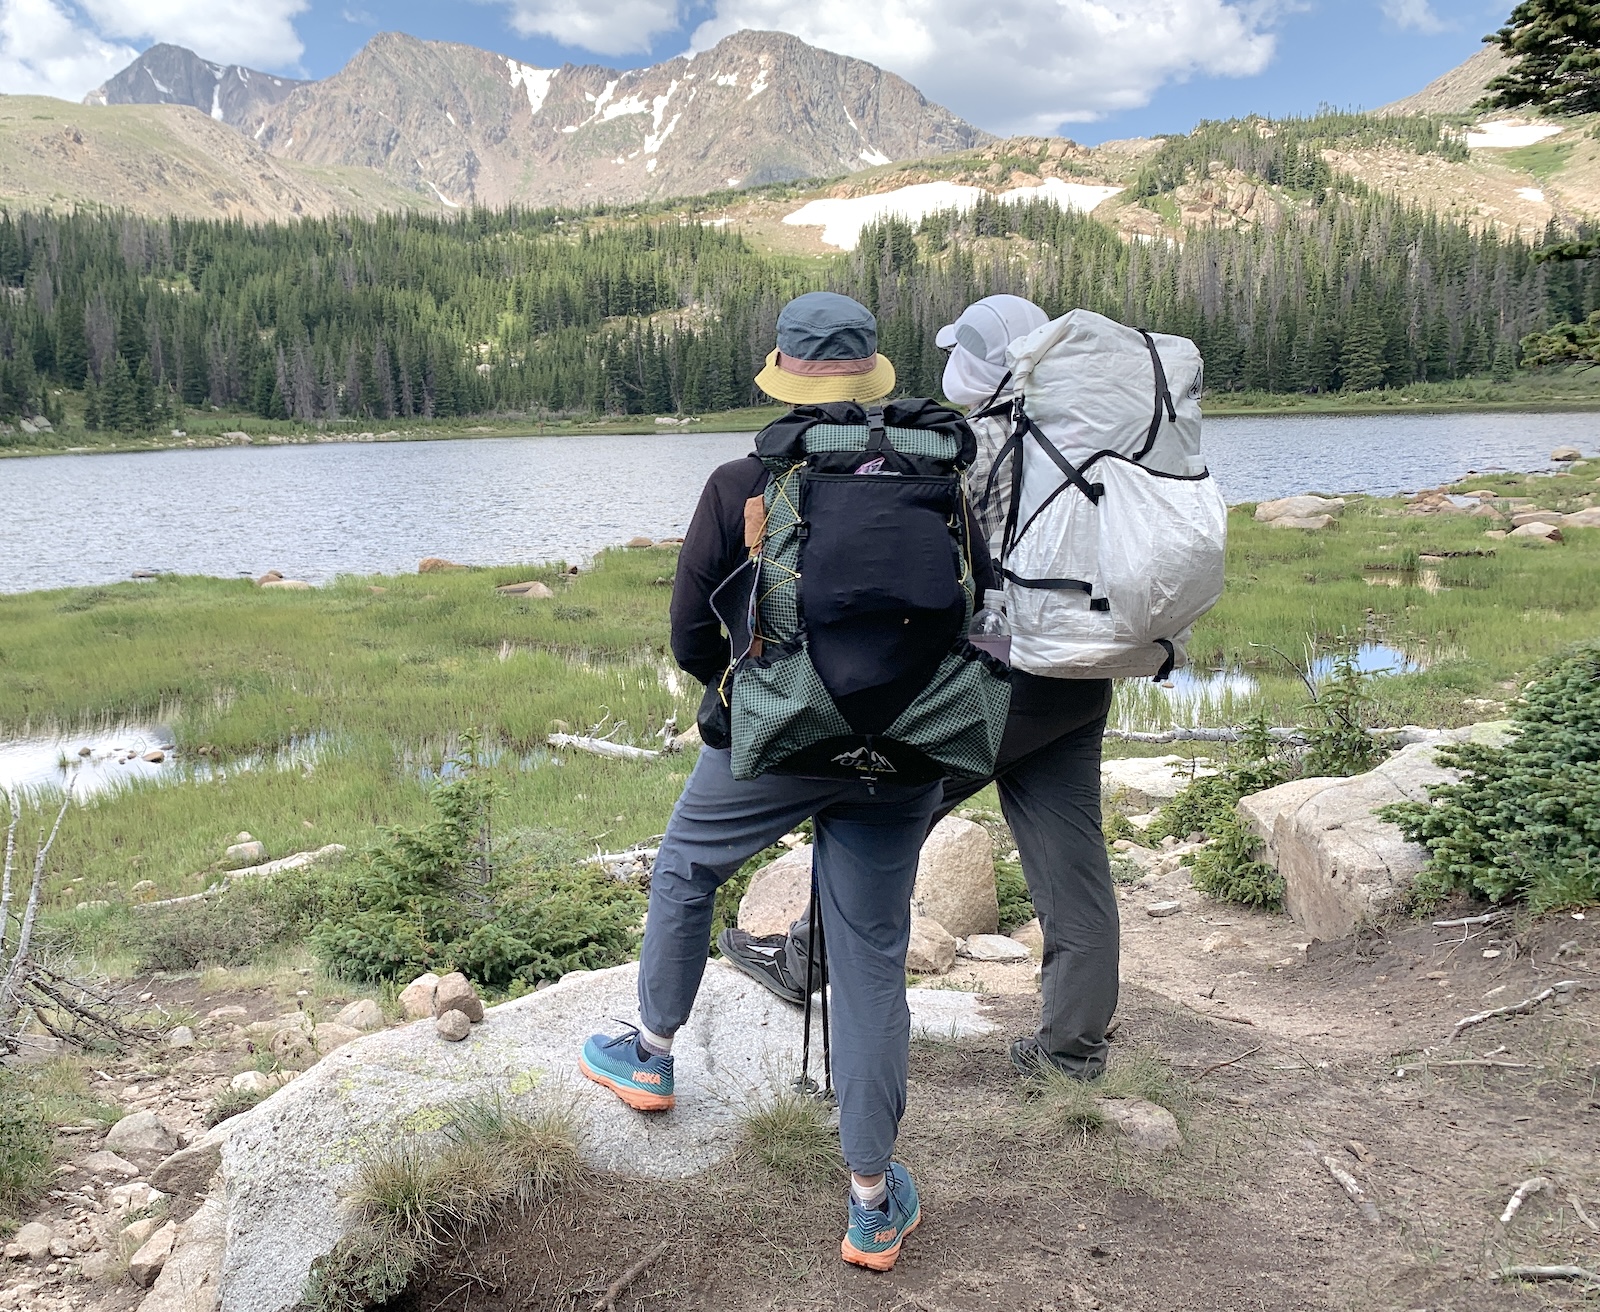
Stephanie Jordan wearing her ULA Ohm Backpack next to Chase and his HMG Northrim Backpack. Photo Credit: Ryan Jordan.
Unlike most Ultra-fabric packs, the ULA Ohm’s ripstop is highly water resistant. My gear survived torrential rains during a summer backpacking trip into Rocky Mountain National Park this summer – without a pack liner. Fine fit adjustments and a supportive but pliable frame make this one of the most comfortable packs I’ve worn, given my spondylolisthesis. – Stephanie Jordan
Learn more about the ULA Ohm Backpack in the Backpacking Light Gear Shop.
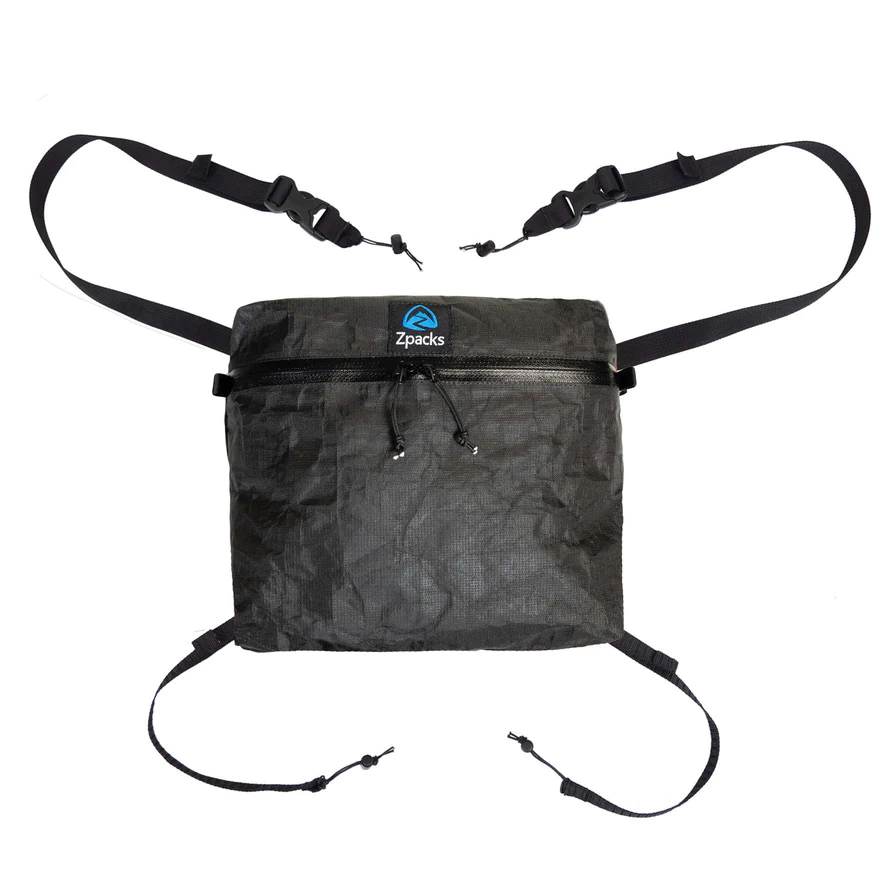
It is invaluable to keep a number of small pieces handy. I had no problem attaching the Zpacks Ultralight Multi-Pack to other brands of packs as long as the shoulder straps had some loops or daisy chains. Initially, I was clipping all four points, but eventually, I just decided to attach two on one side and the top one on the opposite side. This simplifies putting the backpack on and taking it off. – Iago Vazquez
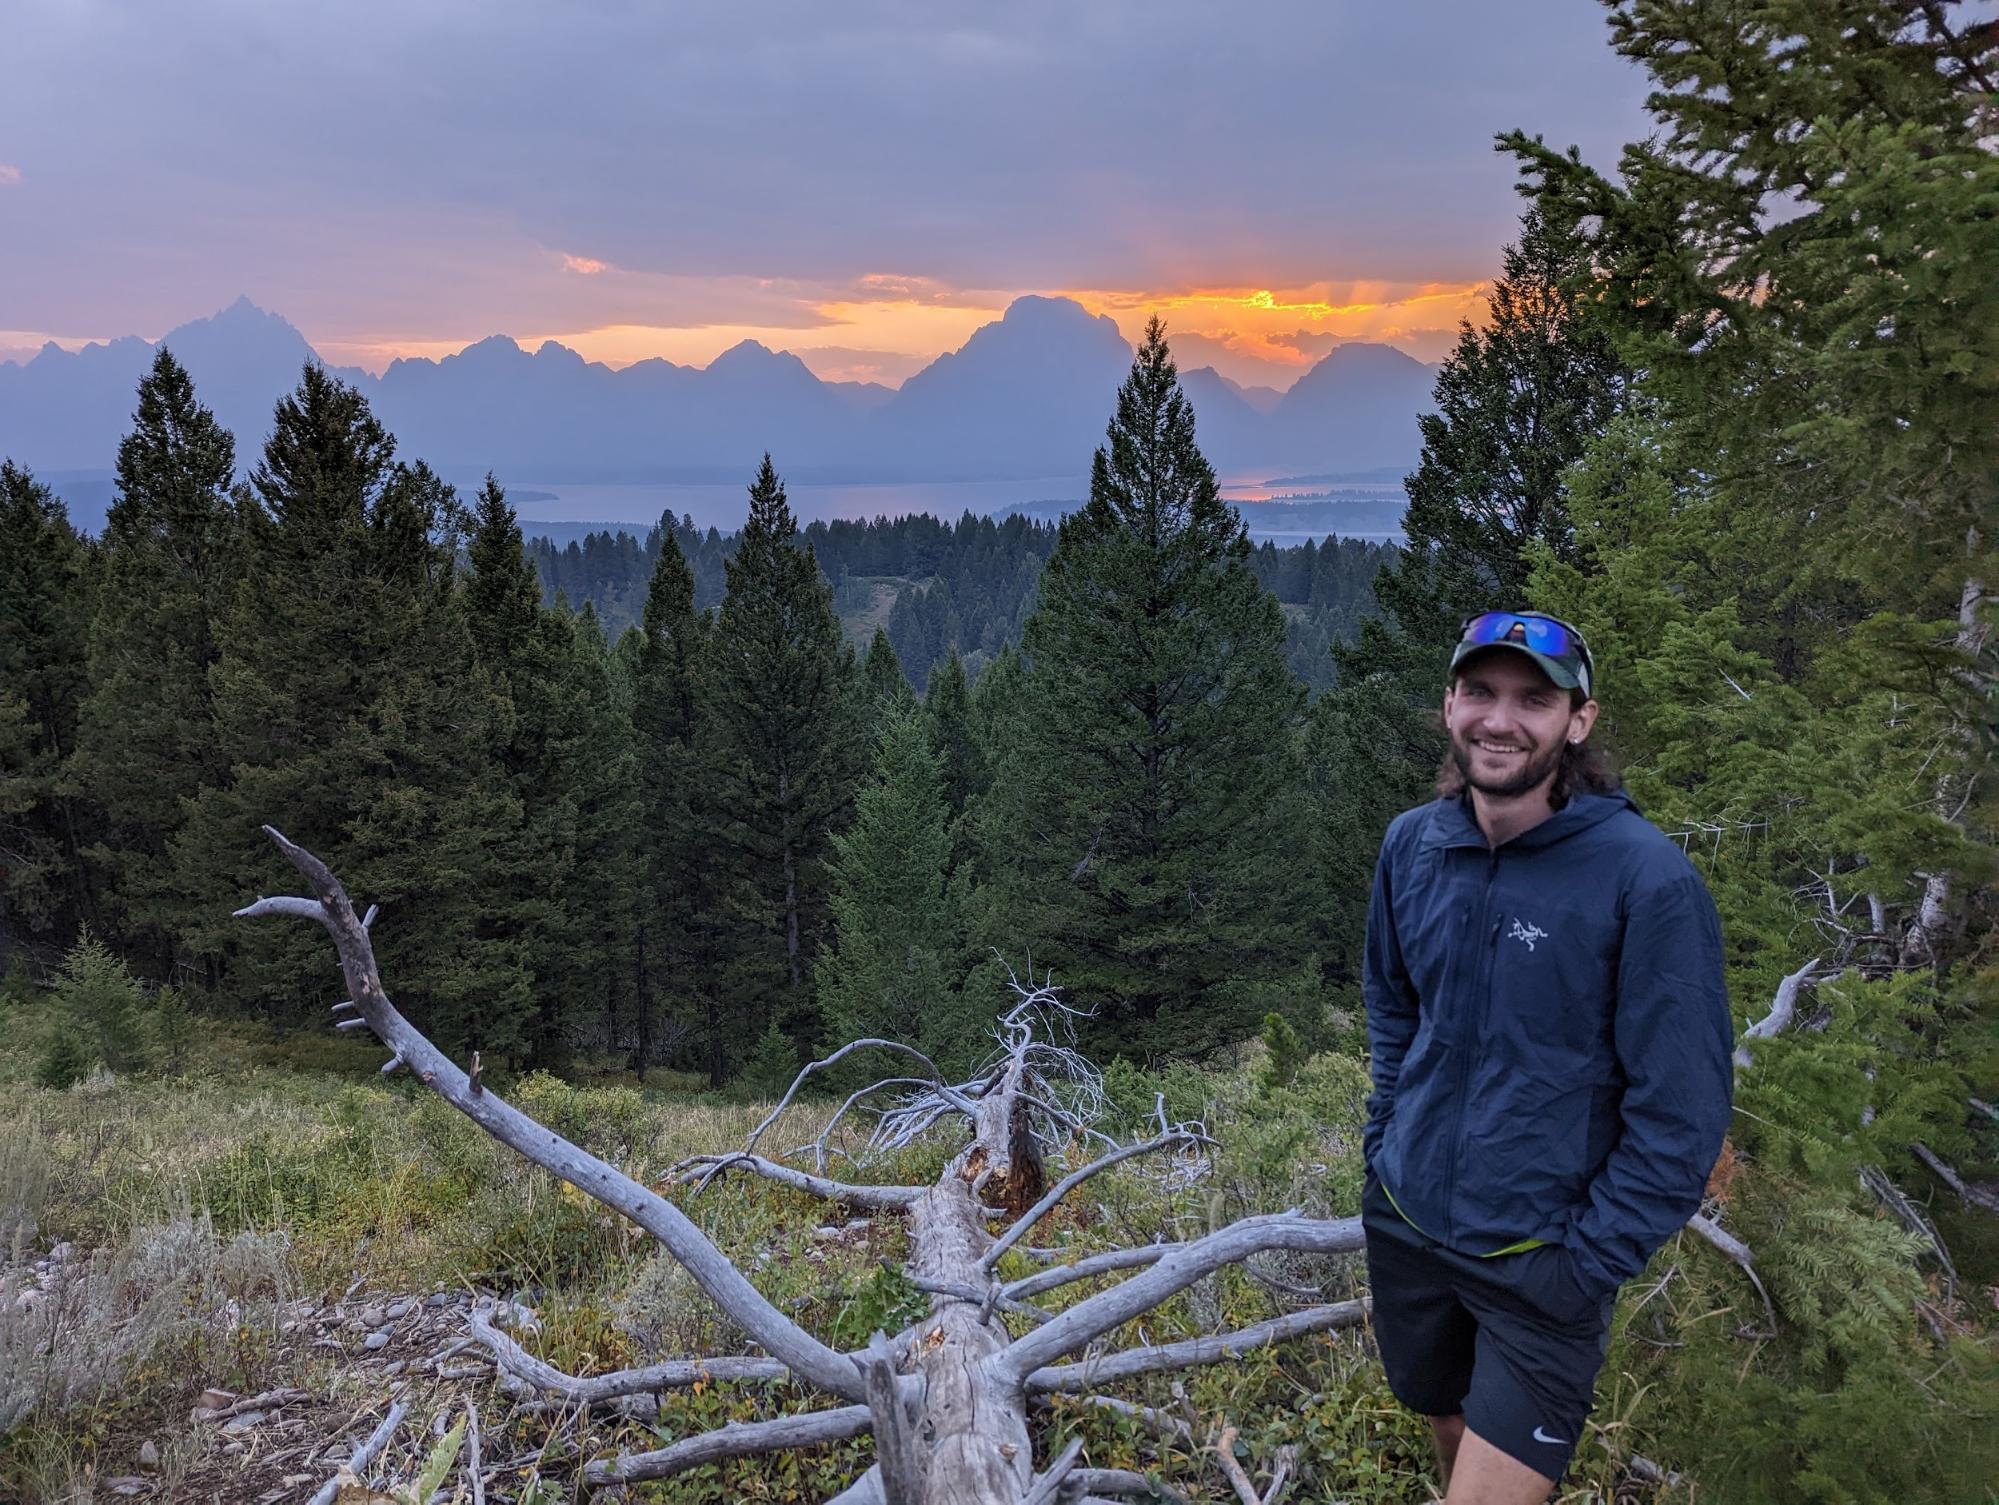
James wearing hisArc’teryx Proton LT Hoody during a beautiful mountain evening. Photo Credit: James Montavon
The Arc’teryx Proton LT jacket has been my favorite in the past year because it has a very large range of comfortable temperatures and activity levels. On warmer and drier trips, this is my only extra layer, replacing both a fleece and a rain jacket; on colder or wetter trips, it layers well with other gear and keeps me comfortable without sweating. – James Montavon
The Enlightened Equipment Copperfield Windshirt is a super ultralight 2 oz windshirt that squishes to the size of a tennis ball in my pack. I carry this in the Summer just in case. Extremely high MVTR and moderate CFM for an excellent balance of breathability and wind resistance. – Bill Budney
Looking like a cross between a shopping bag and a kilt, this nifty piece of kit carries the dual benefits of keeping your base weight low while enabling you to reenact your favorite scenes from Braveheart. If you’re a lightweight hiker who favors shorts over pants and quick-drying trail runners over boots, the rain wrap serves as a perfect compliment, covering that portion which would become waterlogged while hiking through rain and nothing more. – Isaac Simons
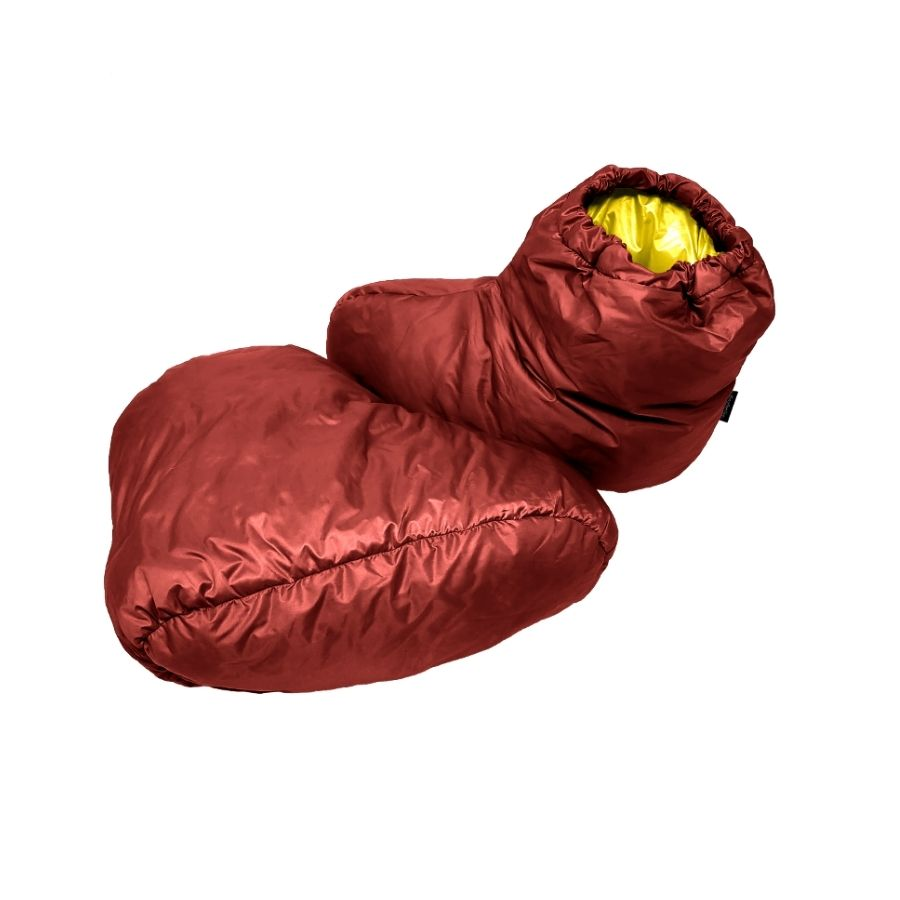
These were a real surprise. I purchased them to try out and to keep my feet warm on the trail. They do that wonderfully, but they are so comfy I wear them at home too. Who knew my feet had been looking for these little gems. As a bonus and with the elastic ankle band, they essentially disappear when packing. Stuff them into your sleeping bag/quilt so they are there when you need them, or into one another, or a tiny stuff sack, like the one provided by GFG. Either way they pack down so small you will not even know they are there. – Jeff de Graffenried
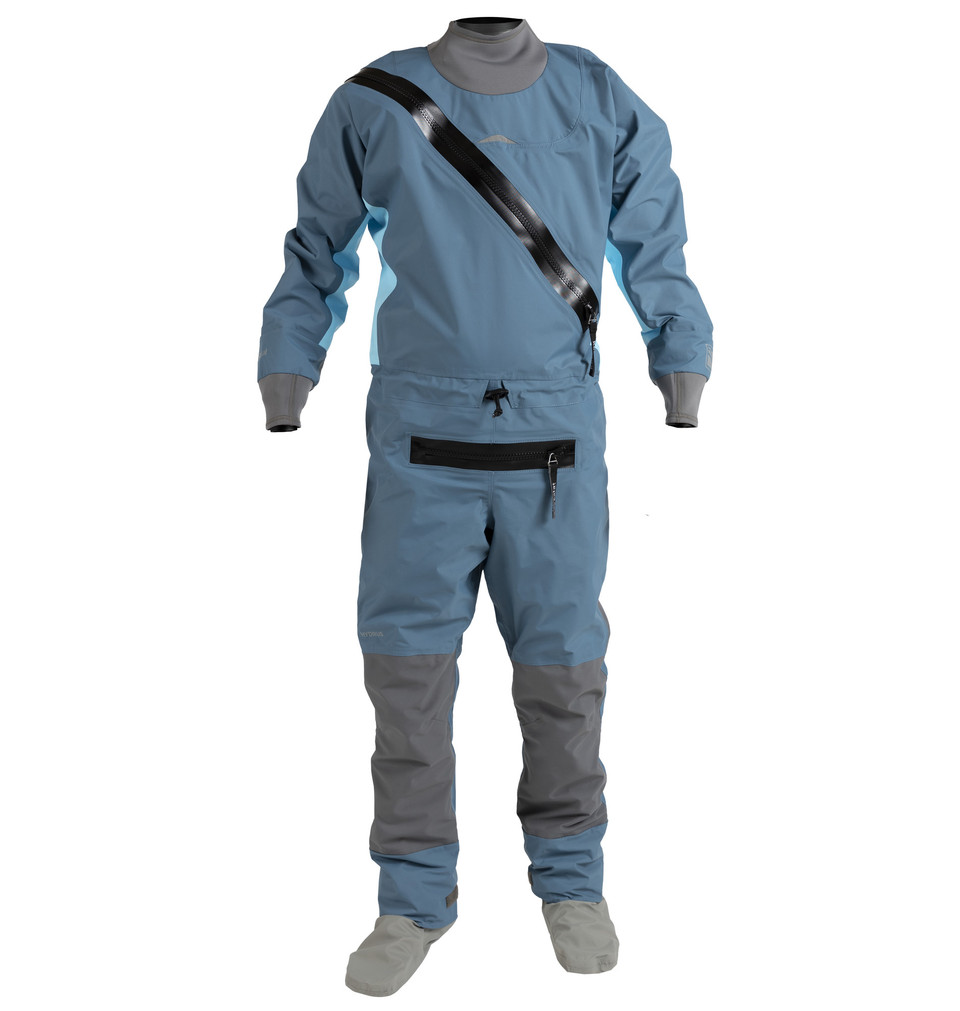
Kōkatat Swift Entry Dry Suit. Photo Credit: Kōkatat
Solid protection from cold air and water in a 2+ pound package. This light drysuit seems ideal for UL folks who are hiking a bunch just to get to the river. They make a version with socks, but I prefer the versatile no-sock version because it allows me to wear my hiking shoes on the river. Layer an alpha fleece underneath to stave off the Covid chills when paddling through remote parts of Alaska. – Ben Kilbourne
Melanzana is famous for long wait times and a purchasing process that requires scheduling in-person appointments months in advance at their Leadville, CO store. We happened to drop in one day, and I found a Melanzana Micro-Grid Hoodie in my size and color on their (small) rack of “in-stock” items. My favorite features are the high-rise neckline, hand-warming kangaroo pocket, long length, breathable grid fleece, and the fact that this incredibly successful company employs dozens of people in a tiny mountain town. – Stephanie Jordan
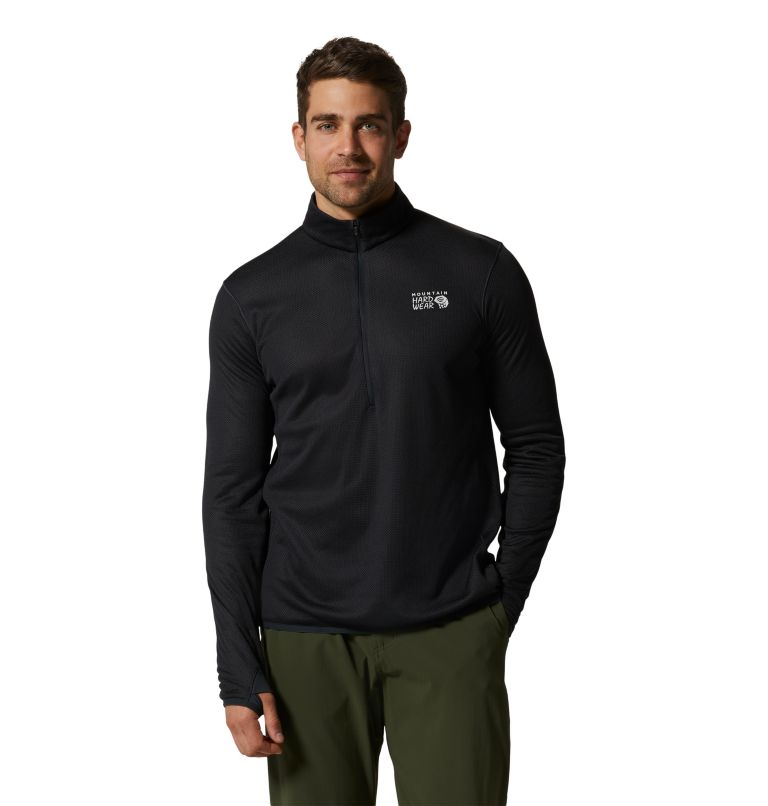
I’ve been wearing the Mountain Hardwear Airmesh Half-Zip everywhere. Looks great around town and performs well in a wide variety of conditions on the trail. I prefer the zipper for dumping heat when it gets too warm, and don’t need yet another layer with a hood. I might also like a Senchi Designs Alpha 90 Crewneck with Half Zip if I could get one (for most of the same reasons). – Bill Budney
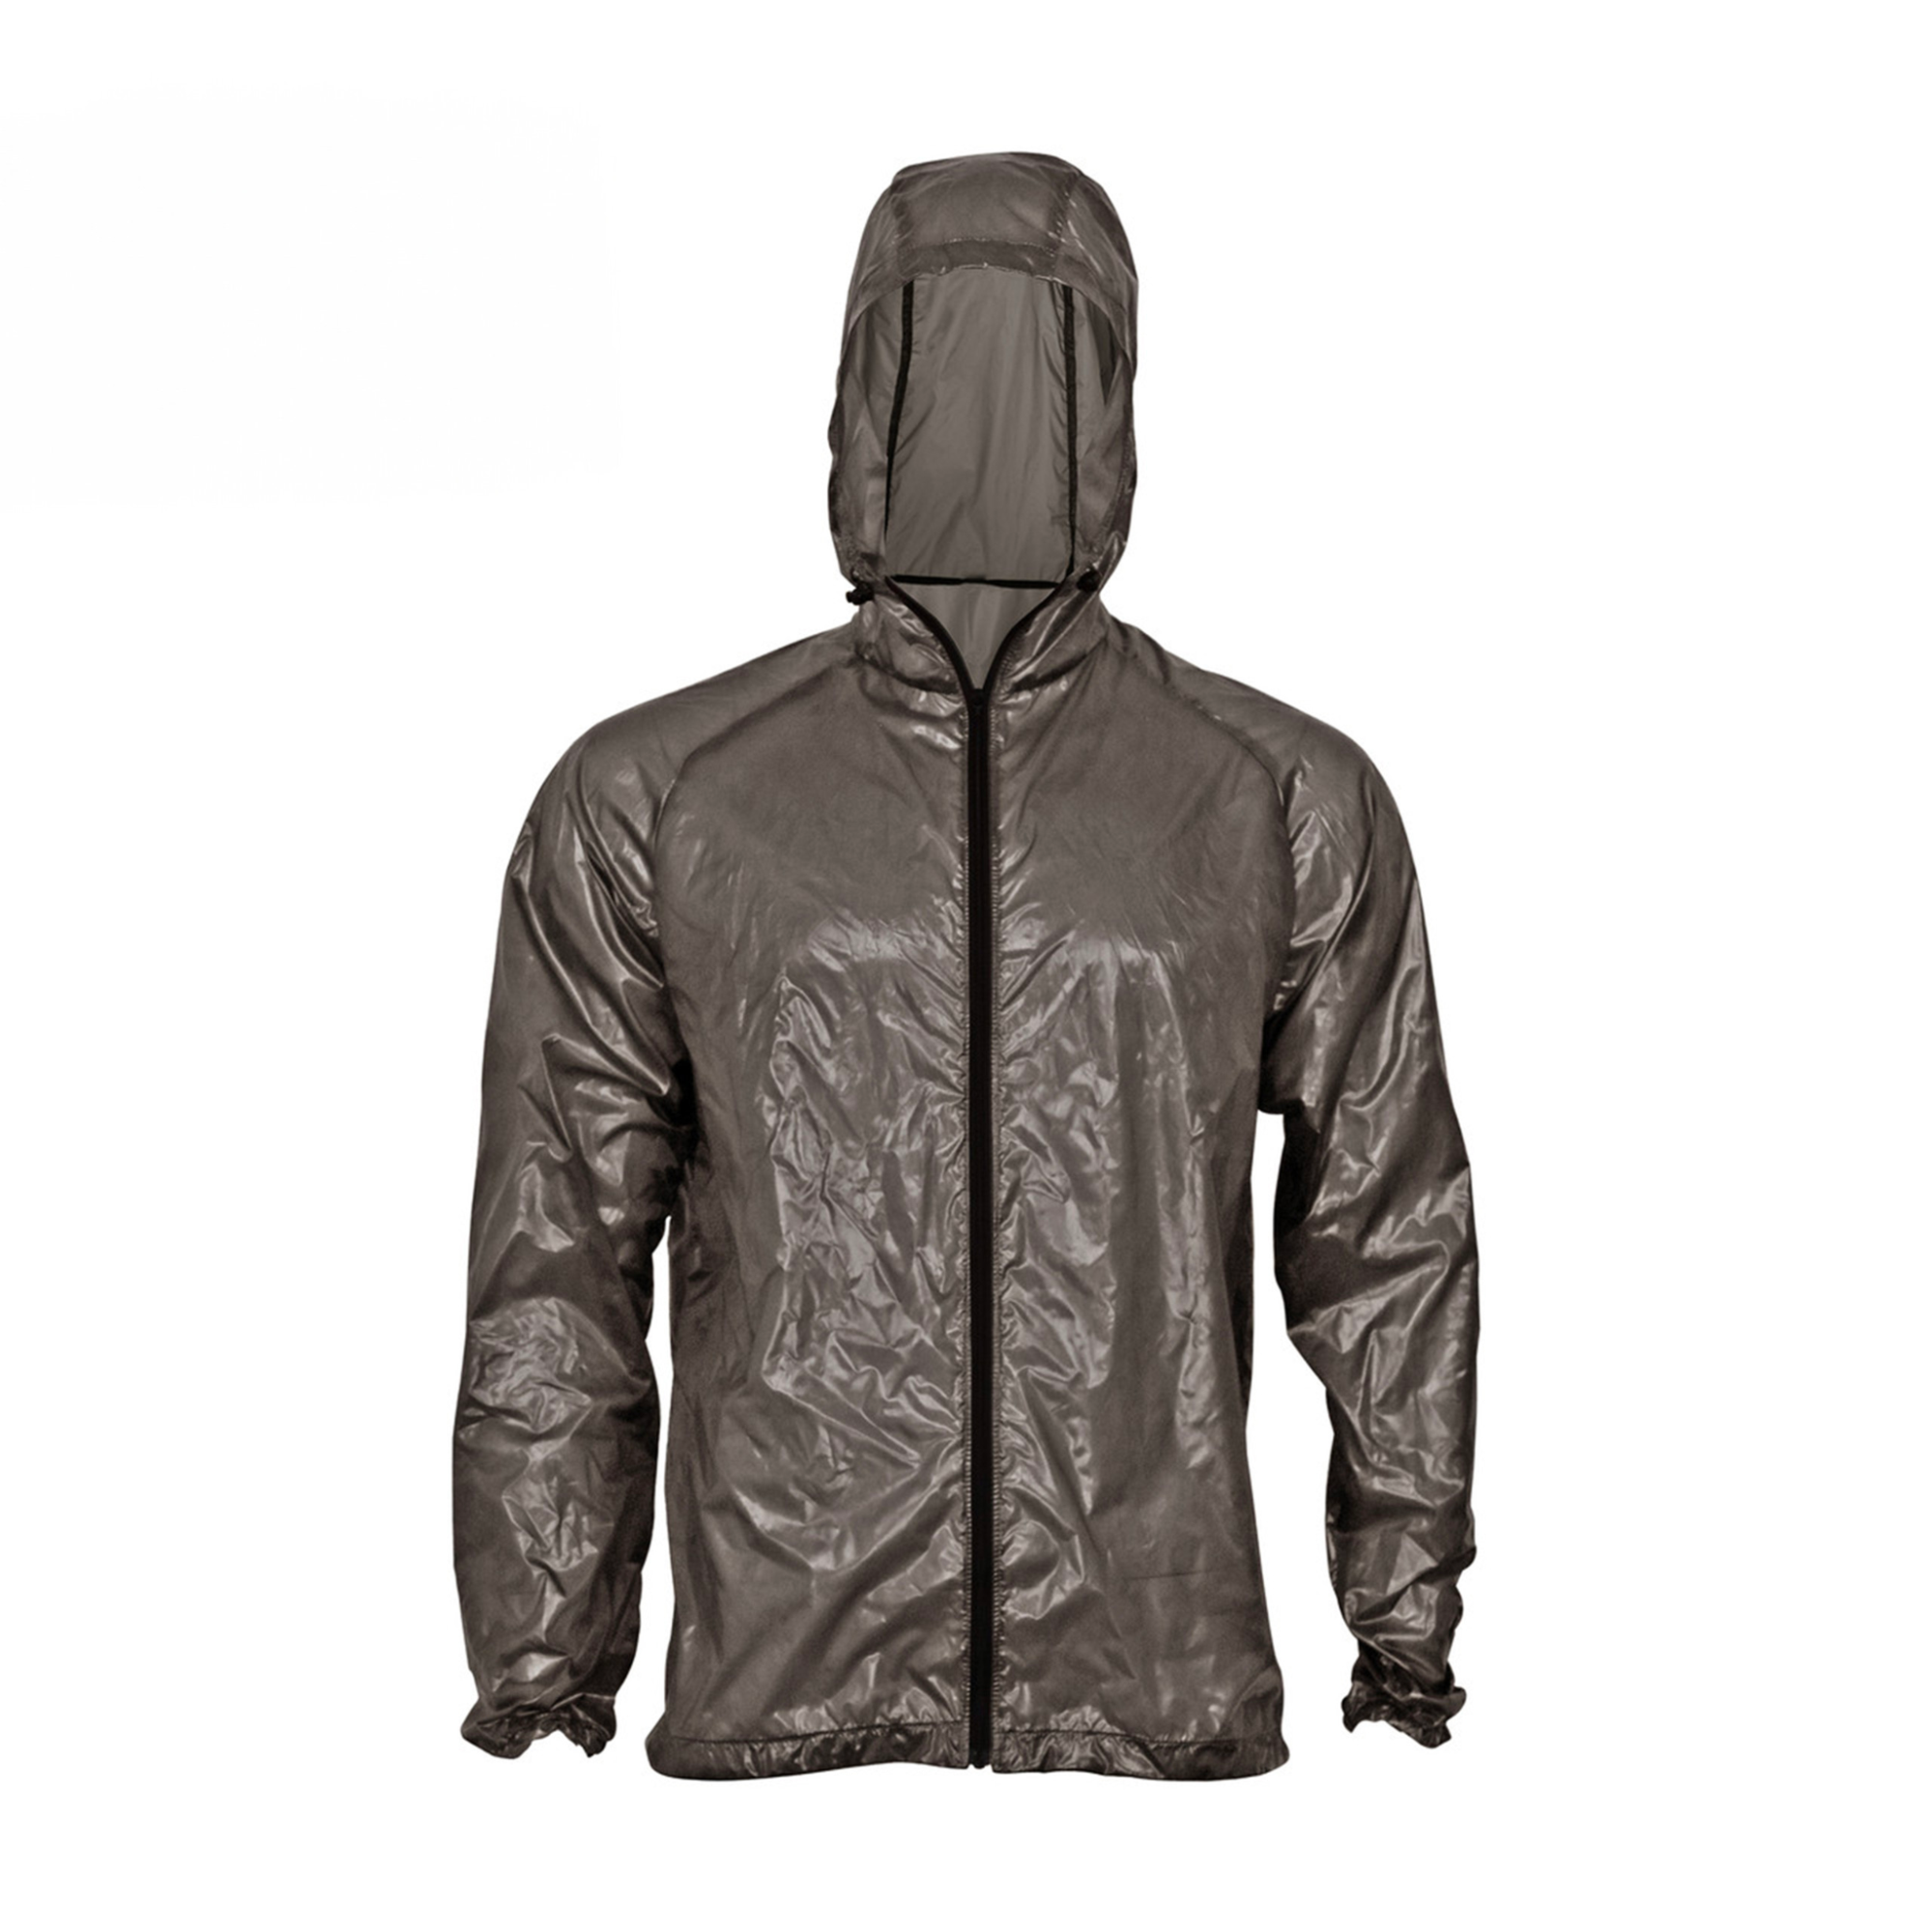
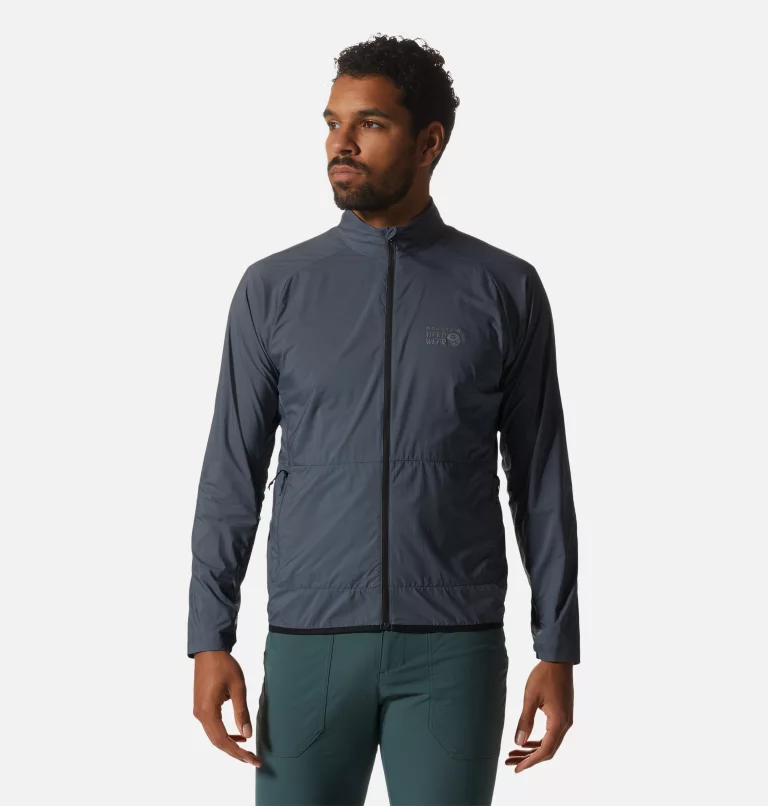
Mountain Hardware Kor Airshell Full Zip Jacket. Photo Credit: Mountain Hardware.
The Mountain Hardware Kor Airshell Full Zip Jacket is perhaps the best lightweight windshirt this year. Made of Pertex Quantum Air, it has extremely high MVTR and moderate CFM: The ideal combination for excellent balance of breathability and wind resistance. Weighs 5 oz, which is 2 oz less than the Black Diamond Alpine Start (which I also like). – Bill Budney
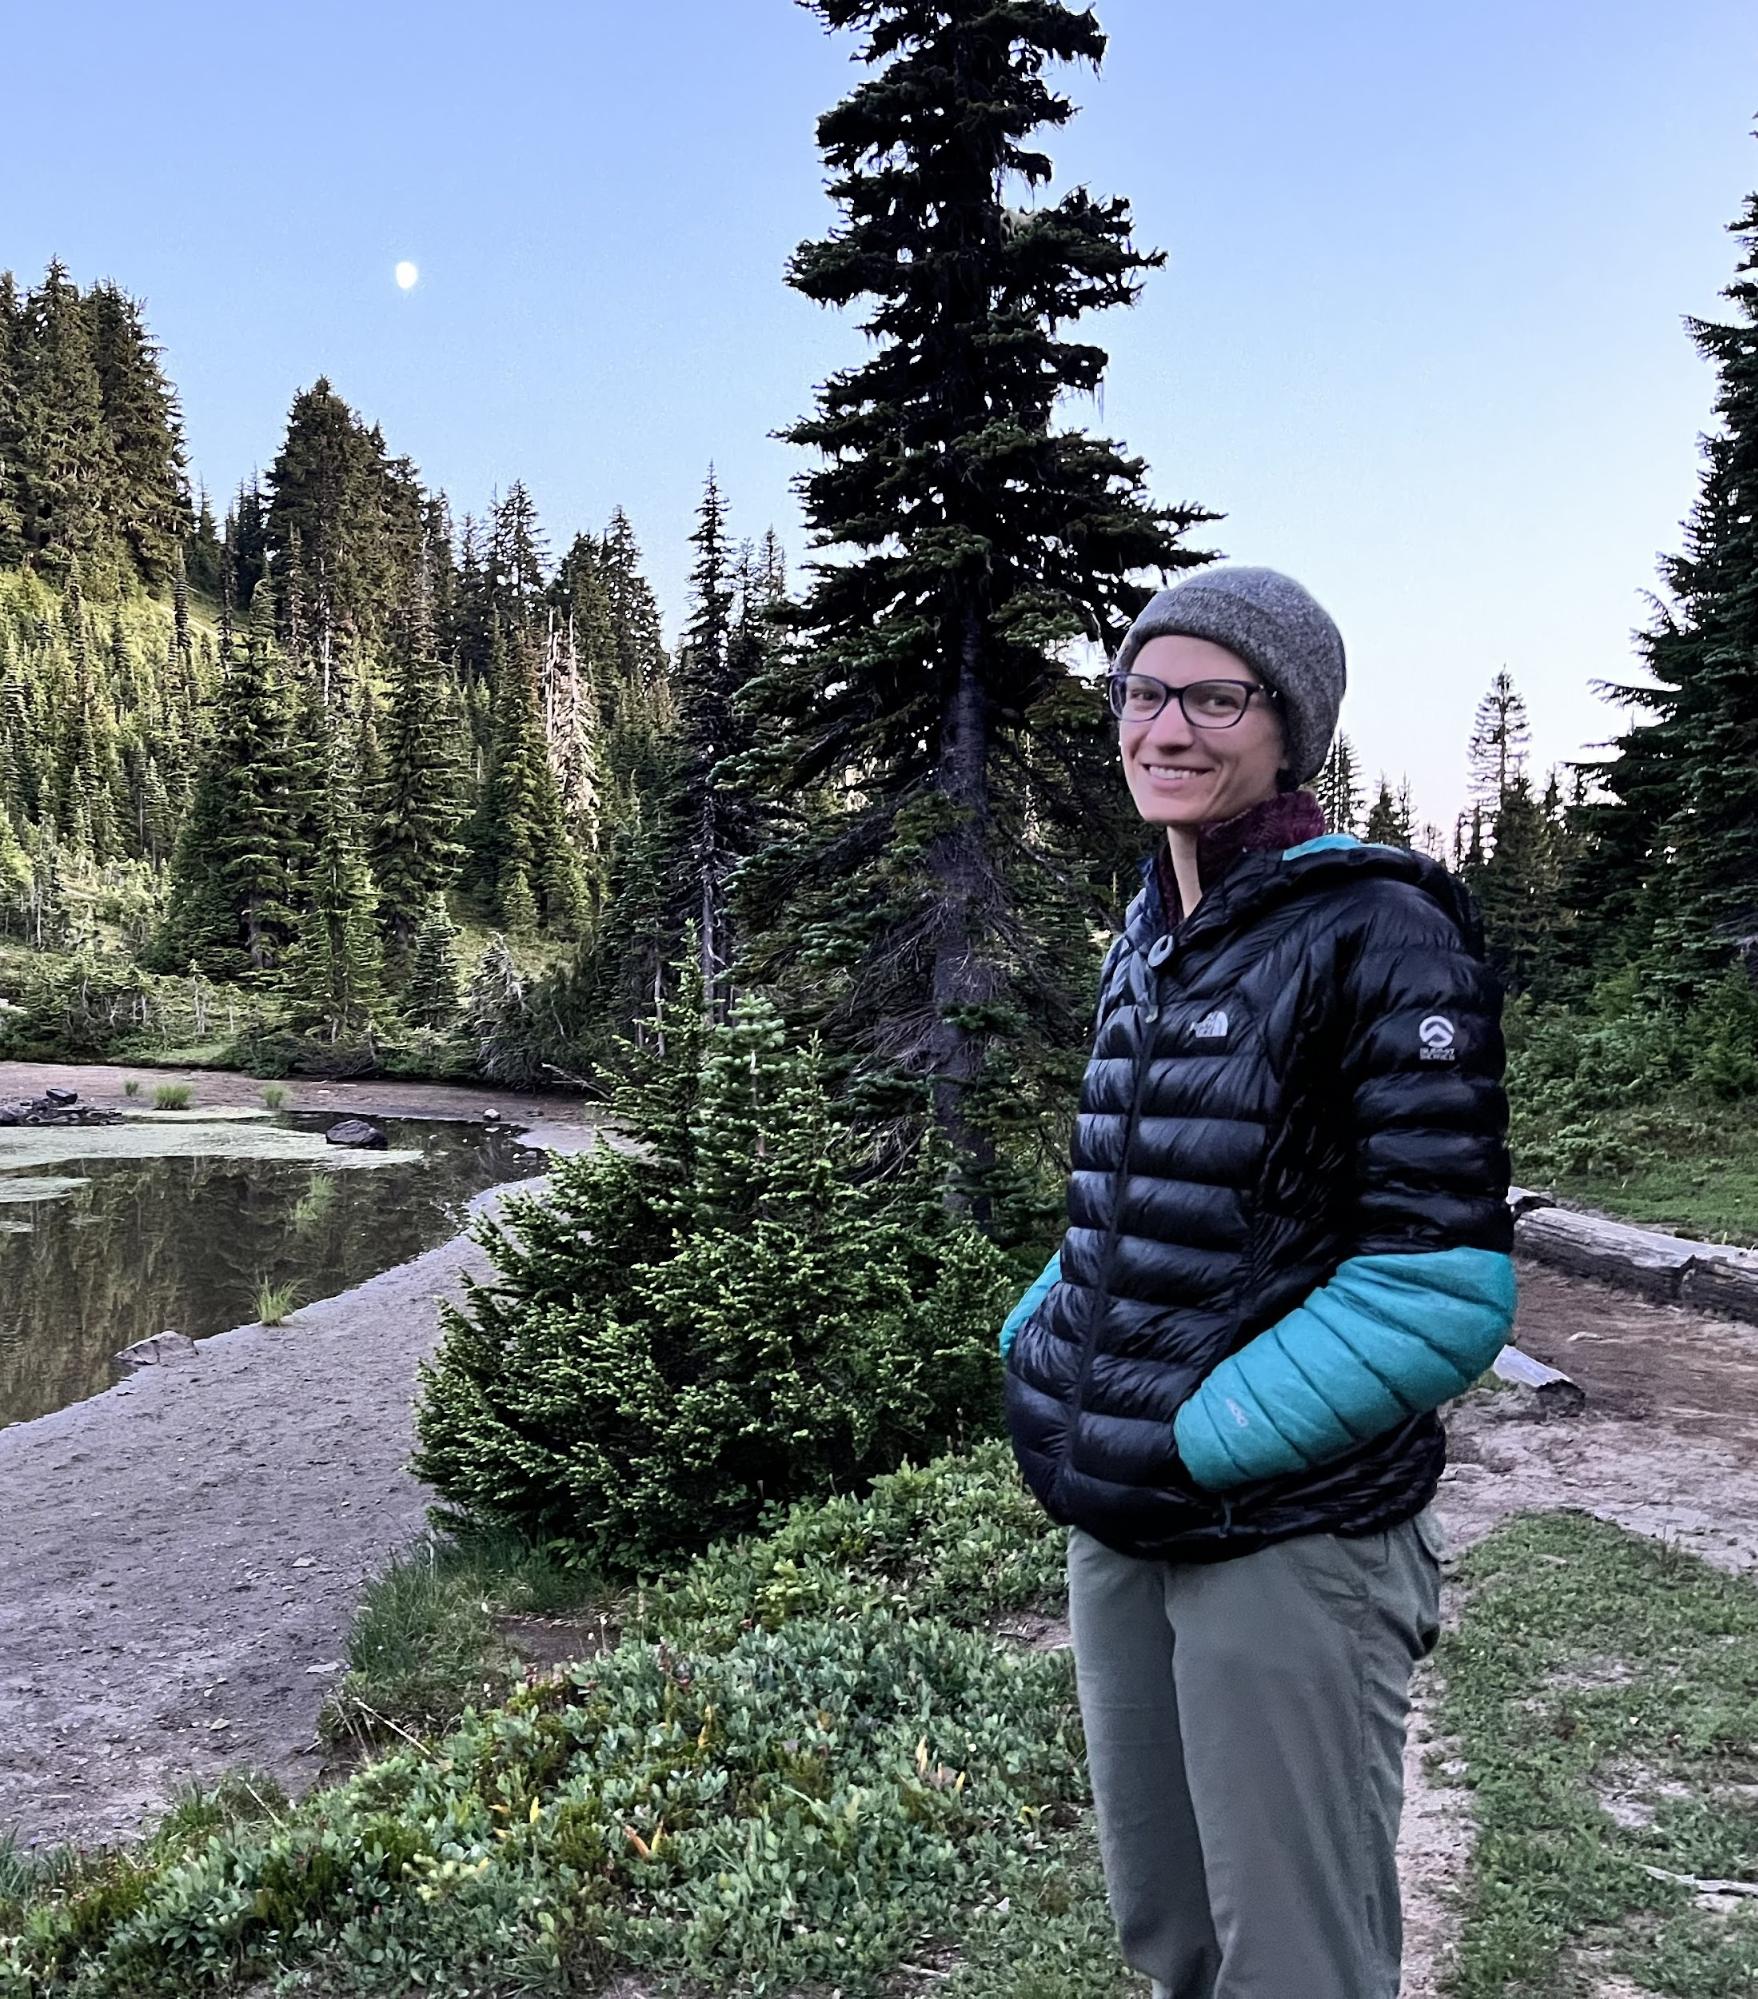
Anna Swarts wearing her North Face Summit L3 Down Hoodie. Photo Credit: Anna Swarts
While this jacket looks a bit shiny (I usually go for a more matte look), it more than makes up for it in coziness. I love that I can pull it down past my hips for added warmth, it has a nice deep hood, and that it fits closely for no drafts. – Anna Swarts
James Montavaon wearing his Outdoor Vitals Satu Adventure Pants. Photo Credit: James Montavon
These pants are my go-to pants for anything that’s too cool for hiking in shorts. I like the big side vents for when I want to spill heat quickly, and the cinch cords at the bottom of the pant legs can hook on to my bootlaces and make a decent seal to keep out snow. They also look nice enough that I can wear them in many settings. I took my tan pair as my only pants for a conference in London, then used them to hike in Iceland on the way home! – James Montavon
Whether it’s hiking during a thunderstorm in the Colorado Rockies, walking through the remnants of a tropical storm on the eastern seaboard, or hiking through sleet and snow in New England, this jacket has kept me dry regardless of the conditions. Plus, it’s manufactured from 77% recycled material and is manufactured without using long chain fluorocarbons for a more environmentally friendly rain jacket! – Chase Jordan
Patagonia Tropic Comfort Plus Sun Hoodie. Photo Credit: Patagonia.
I know this was recalled but I wear a hat under it anyways. I haven’t found anything cooler or more comfortable in the desert where I do most of my hiking. Love the fit, the hood is great and the long sleeves that cover my hands. I’m so happy to have three of these. – Matthew King
Iago wears his Timmermade SUL 1.5 Down Sweater in a snowy subalpine forest. Photo Credit: Iago Vazquez
The warmth/loft, weight and price ratio is outstanding. As an added bonus, you can have it custom tailored to your body type. While I often leave it home in the summer, it has gone on every cold weather trip. One may notice the lack of features. No zippers, no hoods, no pockets. This is intentional in order to enhance the performance over more popular urban fashion oriented pieces. Pockets could be detrimental, since stuffing pockets with heavy stuff can diminish loft. If I need a hood in camp, I just grab whatever I brought to insulate my head while sleeping in my quilt, which often is a beanie or down hoodie. Also, I prefer having my head insulated independently from my body, since it gives me more options for thermoregulation. And lastly, a zipper may make it easier to put the garment on and take it off, but puffy coats glide easily over other layers, so I do not particularly miss the zipper and I prefer the weight reduction of not having a zipper, plus draft baffle and zipper slider protection. If I need to vent via a zipper, I probably do not need heavy down insulation. Personally, it is the perfect insulating piece. – Iago Vazquez
Timmermade SUL Waterbear Hood. Photo Credit: Timmermade
When the weather turns cold, and bedtime arrives, I often sleep poorly from breathing frigid air. I found the famous Sockel on Backpackinglight, made one, and used it for some time. This year, I purchased a Climashield Waterbear hood. The front of the Waterbear hood tightens to form a small opening that can encircle your mouth and nose. When positioned satisfactorily, it warms incoming air. A very clever feature is the portion of the hood that tightens around your nose and mouth—insulation in this area is enclosed by mesh rather than a solid polyester fabric. The mesh supports rapid drying of the moisture from your breath that condenses on the cold hood surfaces. This product is not without drawbacks. The drawstrings are short, thin, and difficult to tie and untie, especially in the cold. The tiny snaps that close the hood around your neck are also tricky to use. I added a cord lock to control the strings and some Velcro to replace the snaps. I wish the hood opening could be secured so the Waterbear could be worn around camp without covering my eyes. Despite these design flaws, I have found it can work effectively, and the quality of my sleep has improved. – Stephen Seeber
Tough Outdoors Bug Net Jacket and Pants. Photo Credit: Amazon
Listen, you’re going to stand out. But I promise that the deeper into mosquito country you get, the more people will revere you as a complete genius. Over the summer, this Bug Suit let me sit outside, cook dinner and clean everyone’s dishes while my guests hid from the mosquito hordes in their tents. It’s reusable and lightweight, and it didn’t pollute my body or the environment with toxic DEET. I’ve even used it as an insulation layer under my rain pants and as a makeshift sun shirt. I don’t care what anyone says, I am absolutely obsessed with it. – Sarah Bennett
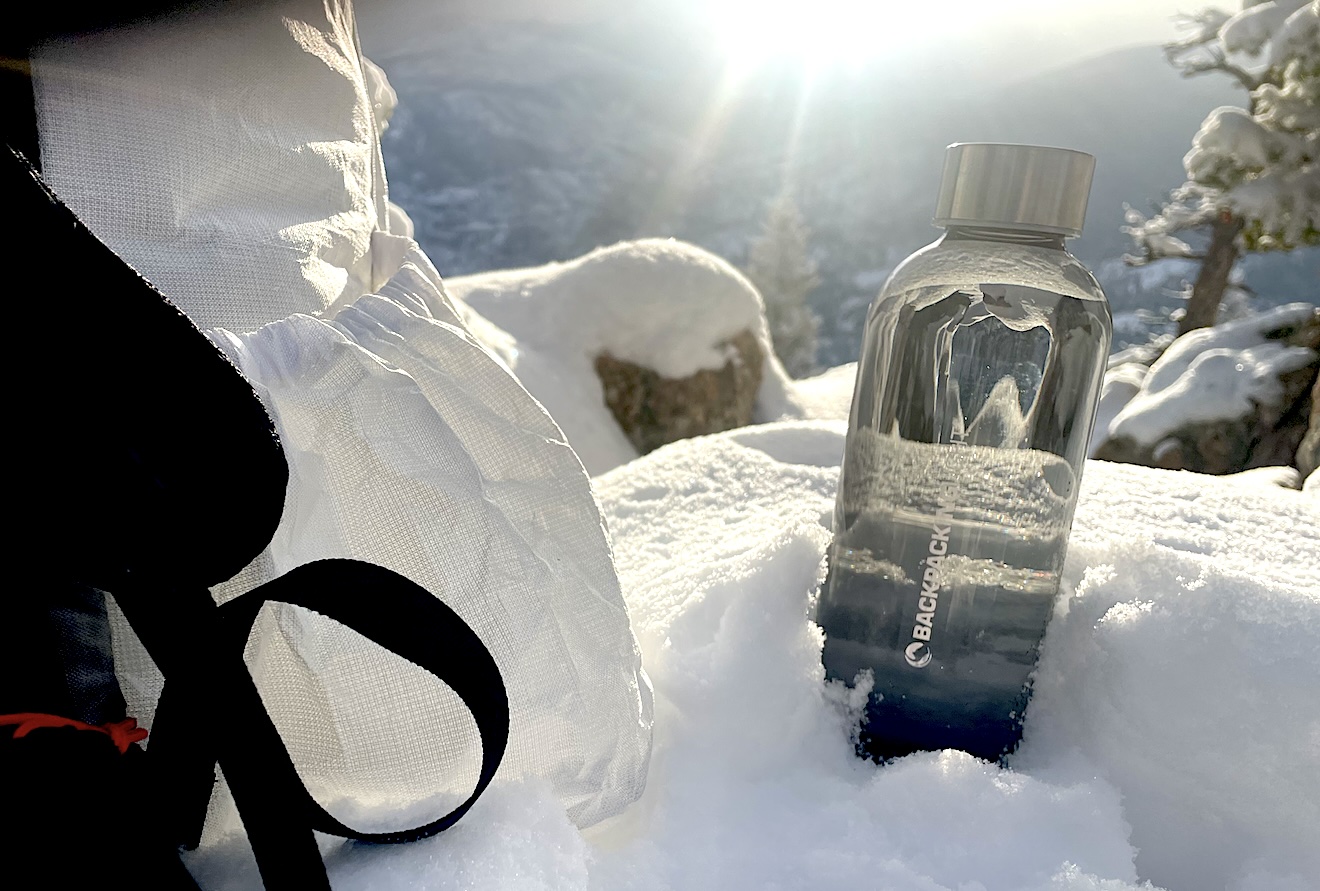
Backpacking Light Tritan Bottle. Photo Credit: Ryan Jordan
I’ve been trying to source a thin-walled Tritan bottle for years. I wanted something a little lighter and a little larger than a 16-oz Nalgene, and with a narrower mouth for easier glugging. This bottle size is perfect for me, and it fits well into all of my shoulder strap pouches. No more Smartwater bottle waste for me. – Ryan Jordan
Drew Smith cooking over his Trail Designs Caldera Cone Sidewinder Ti-Tri. Photo Credit: Drew Smith
The design of this backcountry classic has changed hardly at all in the decade-plus since I acquired mine. And why should it? The Caldera Cone system is versatile, light, compact and efficient. It is a masterpiece of elegant design and function. The Caldera Cone enables you to cook with alcohol, Esbit tablets or twigs. It can be ordered to fit a wide variety of pots from 0.6 to 2.0 L capacity. The components are stowed inside the pot, and the whole outfit will weigh in at 7 – 11 oz (200 – 300 g) depending on configuration.Sure, canister stoves are more powerful and convenient. I typically take my Soto Amicus on long hikes where I’ll be doing 20+ miles per day and resupplying. Canisters are now more readily available than fuel alcohol in trail towns. But for shorter trips, where making miles is not such a priority, I usually prefer the quiet and aesthetics of a well-designed alcohol stove system. I don’t mind waiting an extra three minutes for my water to boil while I watch the sun set and listen to birds sing. And I’ve especially come to appreciate the option of a wood fire in shoulder season. A small fire on cold early nights means I can spend another hour or two outside before retiring to the confines of my tent. With its gasifying insert and titanium ash pan, the Caldera Cone does not scorch the ground and it burns twigs down to a fine ash that can be dispersed easily. The stove enables something pretty close to a true LNT campfire.The Caldera Cone system is not the lightest, most powerful or most efficient stove system. But in the right context it is perhaps the most satisfying. – Drew Smith
Evan Willams Bourbon Whiskey. Photo Credit: Evan Williams
Many people consider whiskey to be a heavy luxury item incompatible with hiking fast and light. This belief is mistaken. An ounce of whiskey provides 90-100 calories of food energy. It is only slightly less energy-dense than dry pasta (106 Cal/oz). To be sure, whiskey calories are the emptiest of empty calories. But when you are out on a hike, especially a long hike, empty calories are a positive good. Whisky, unlike pasta, provides a number of benefits beyond calories. A few sips in the evening are an excellent way to put a mellow end to the day and facilitate sleep. If you want to make new trail friends, there is no better opener than offering a shot to your campsite neighbor. Whisky can also be pressed into service as a solvent, a disinfectant or a fuel, although it is not really very good at any of these tasks. Whisky is at its best when ingested internally in moderate amounts in beautiful outdoor settings with convivial companions. No one will mistake Evan Williams for a top-shelf whiskey. But it is not at all bad, and is in fact better than many nationally advertised brands. It is inexpensive and commonly found in trail town stores. Best of all, it comes in a lightweight unbreakable plastic bottle which can be reused and repurposed. If one were to design a whiskey specifically for hikers, it would look like this. – Drew Smith
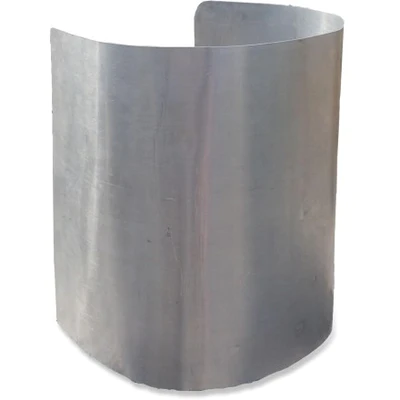
Six Moon Designs Ursack Aluminum Liners. Photo Credit: Six Moon Designs
Ursacks are by far my favorite way to store food and smellables in the backcountry. With Rocky Mountain National Park allowing Ursacks only with the aluminum liner, it’s a no brainer to add these to my kit. – Chase Jordan
Superfeet All Purpose Support Medium Arch Insoles. Photo: Superfeet
I have found something that works for me and it still works. This is a magic combination where my feet are comfortable when hiking. Quick drying, reasonable durability, good grip… I hope everyone can find a footwear setup that works as well as these do for me. – Matthew King
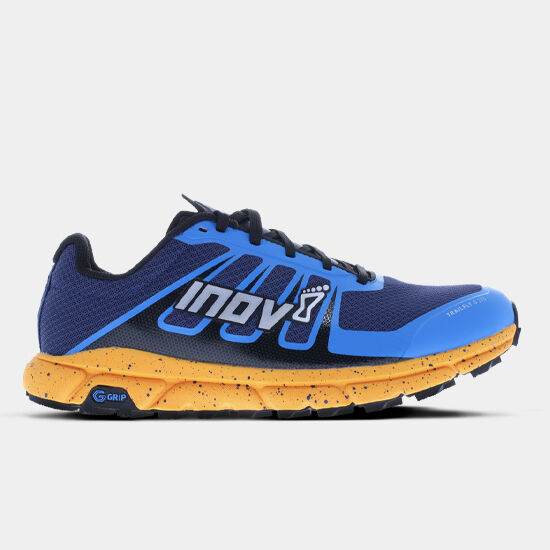
While such ubiquitous brands as Altra and Topo Athletic boast the California King of toe boxes, there are those backcountry outings which call for a narrower margin of error. Class 3 scrambling, for instance, as well as downhill trail running, benefit from a tighter fit and increased sensitivity to rapid directional shifts. For this, I’ve become a firm believer in Innov8, a UK-based shoe manufacturer. Their Trailfly G270 V2 boasts not only more letters and numbers than the average military fighter jet, but incredible traction, flawless responsiveness, and hardly more weight than you’d find in a bedtime slipper. The consequence of this, however, is that after a long day in the mountains your feet might feel a bit less like they’ve been lounging at the spa than they would with other brands. Still, when the terrain demands it, the trade off is well worth it. – Isaac Simons
La Sportiva Ultra Raptor II Mid GTX Hiking Boots. Photo Credit: La Sportiva
Built on a trail running last, a boot with waterproofing and a sticky sole that “works when wet” is practical footwear for the snowy terrain of winter and sloppy mess of spring. The fact that La Sportiva is releasing a mid height version of the Ultra Raptor GTX in a wide model means I get a much better fit with the multiple sock layers (heavy boot sock + Goretex sock) that I normally wear in the winter. No more cramped toes or grossly oversized boots! – Ryan Jordan
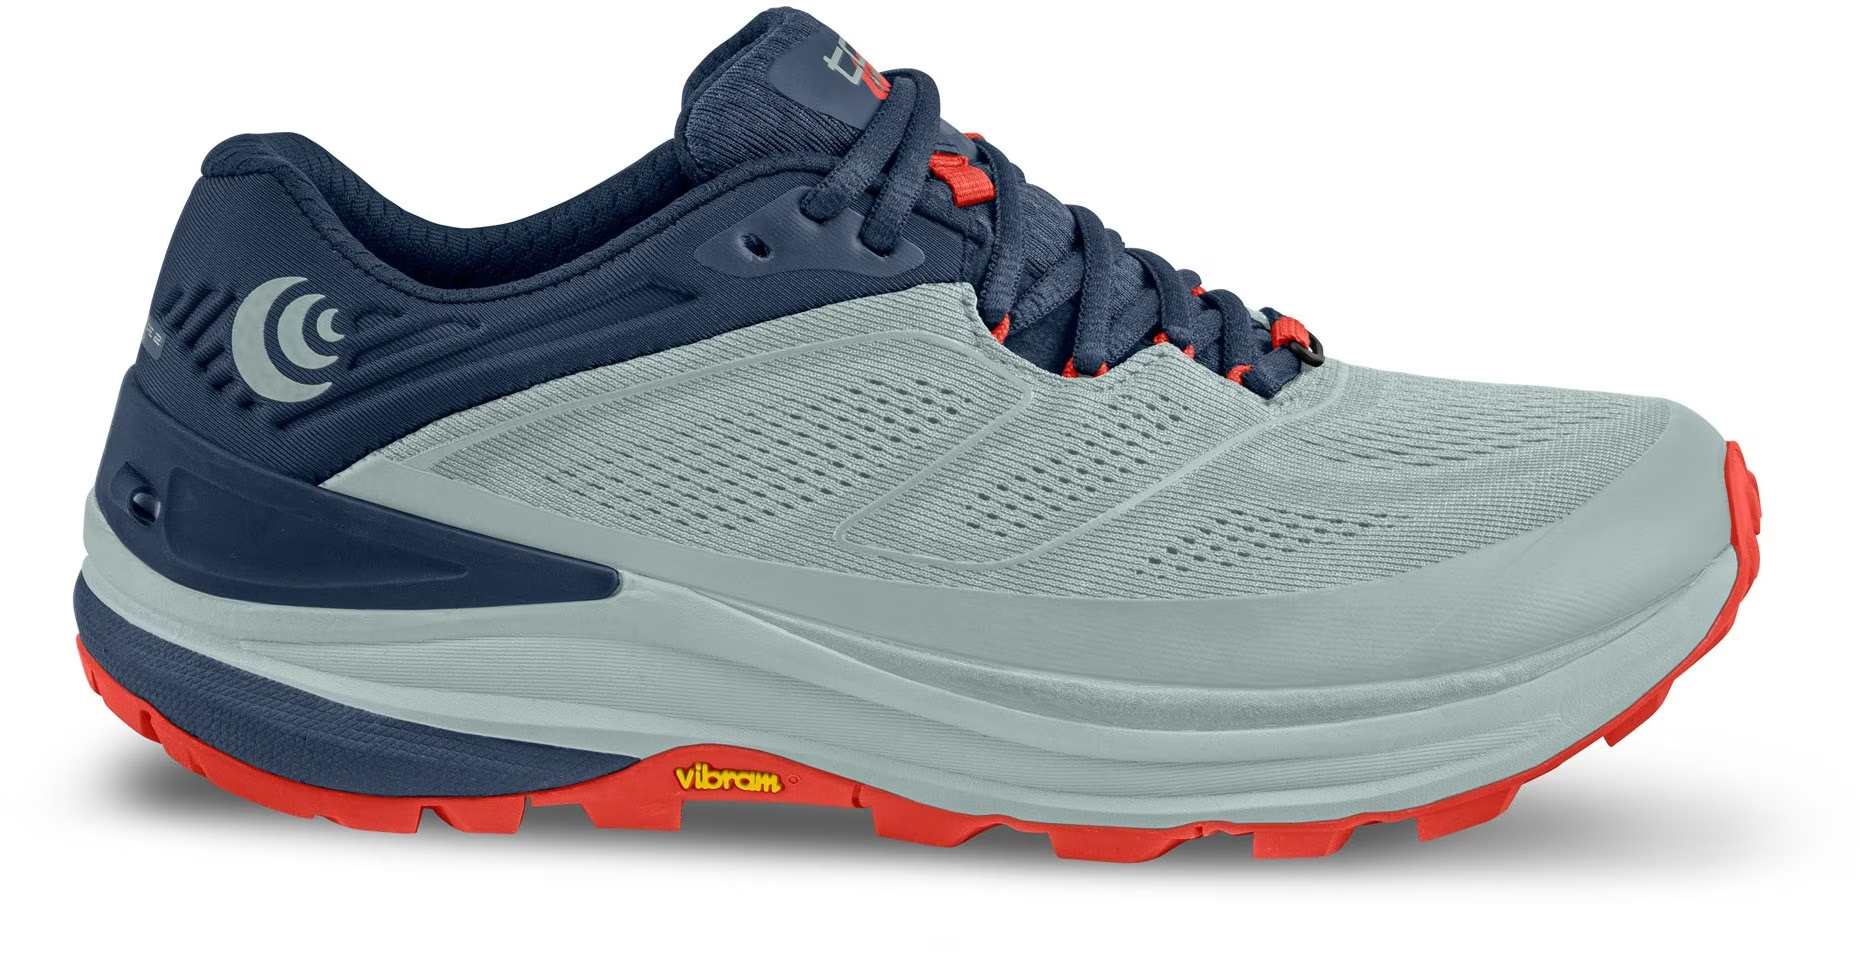
Topo Athletic Ultraventure 2 Trail Running Shoes. Photo Credit: REI
While all trail runner style shoes suffer from a lack of durability, especially when used for cross-country travel and scrambling on talus, I’ve found these to be one of the more long-lasting shoes. They’re great for the types of backpacking trips I do most often and are really comfortable on the varieties of trail and terrain in the Northern Rockies. – Mark Wetherington
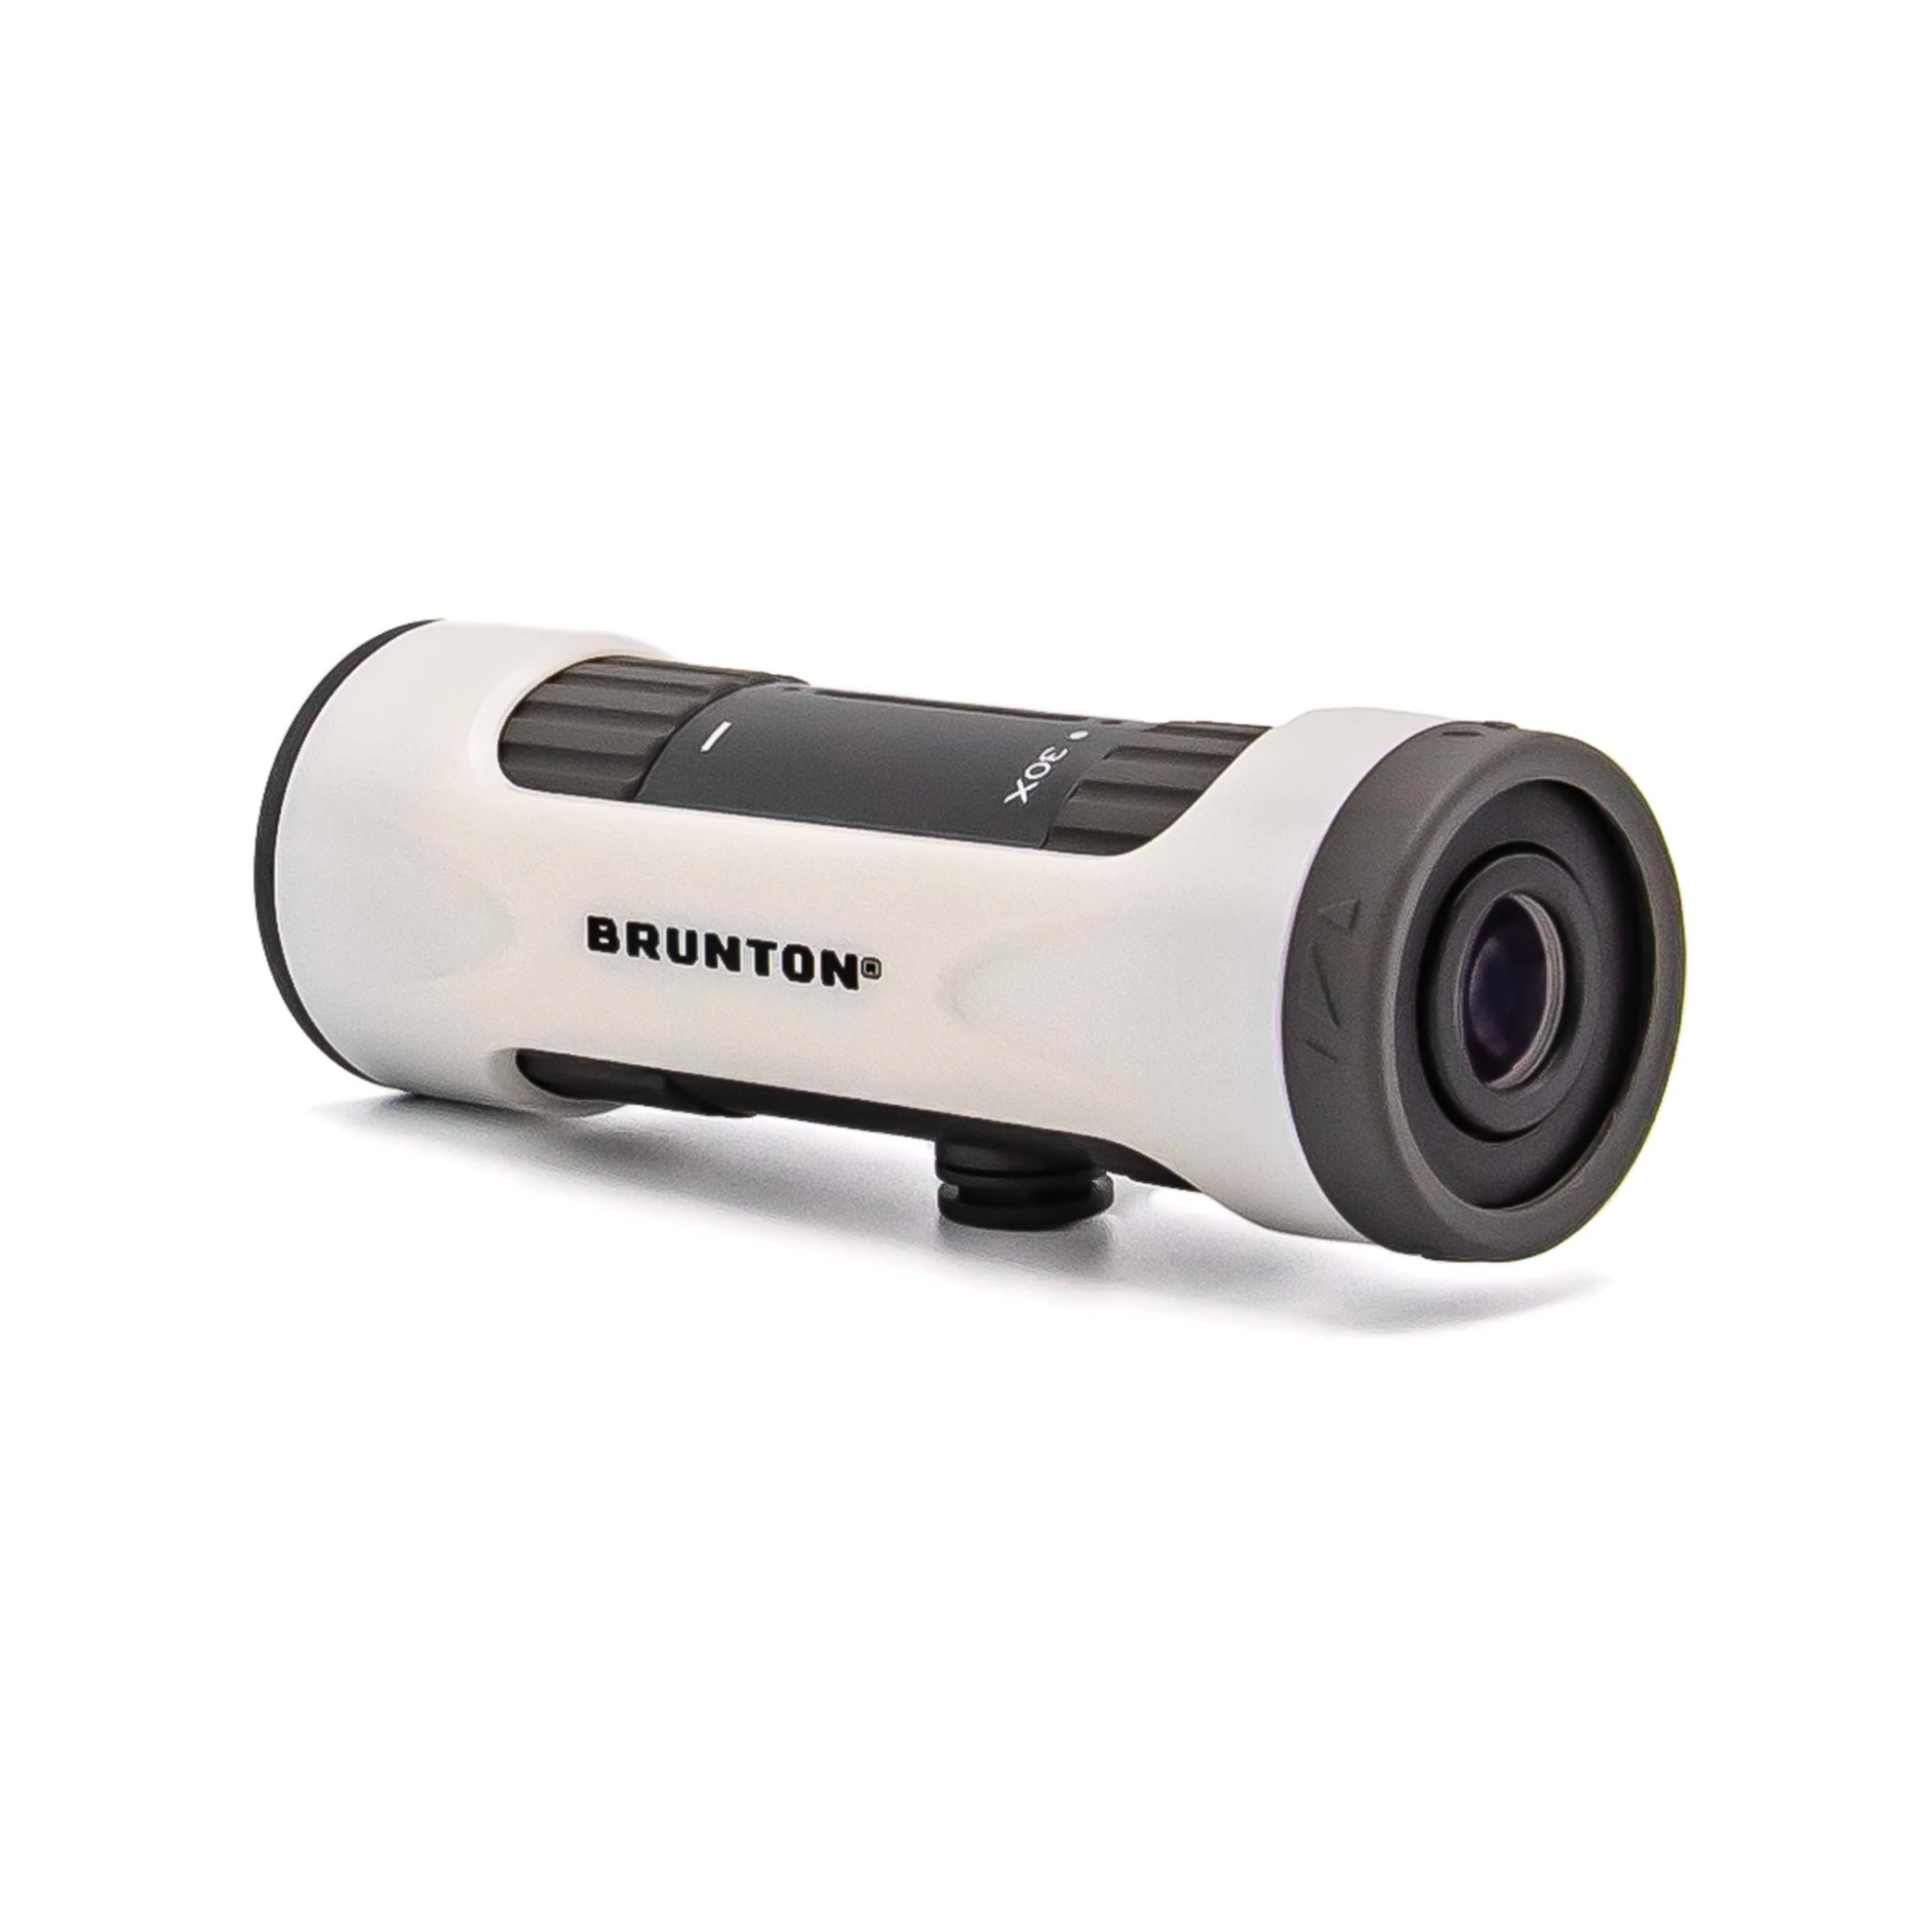
For only 1.8 oz (51 g), I can now save hours of unnecessary walking by identifying potential obstructions several kilometers in advance when exploring unknown and rugged terrain. – Atif Khan
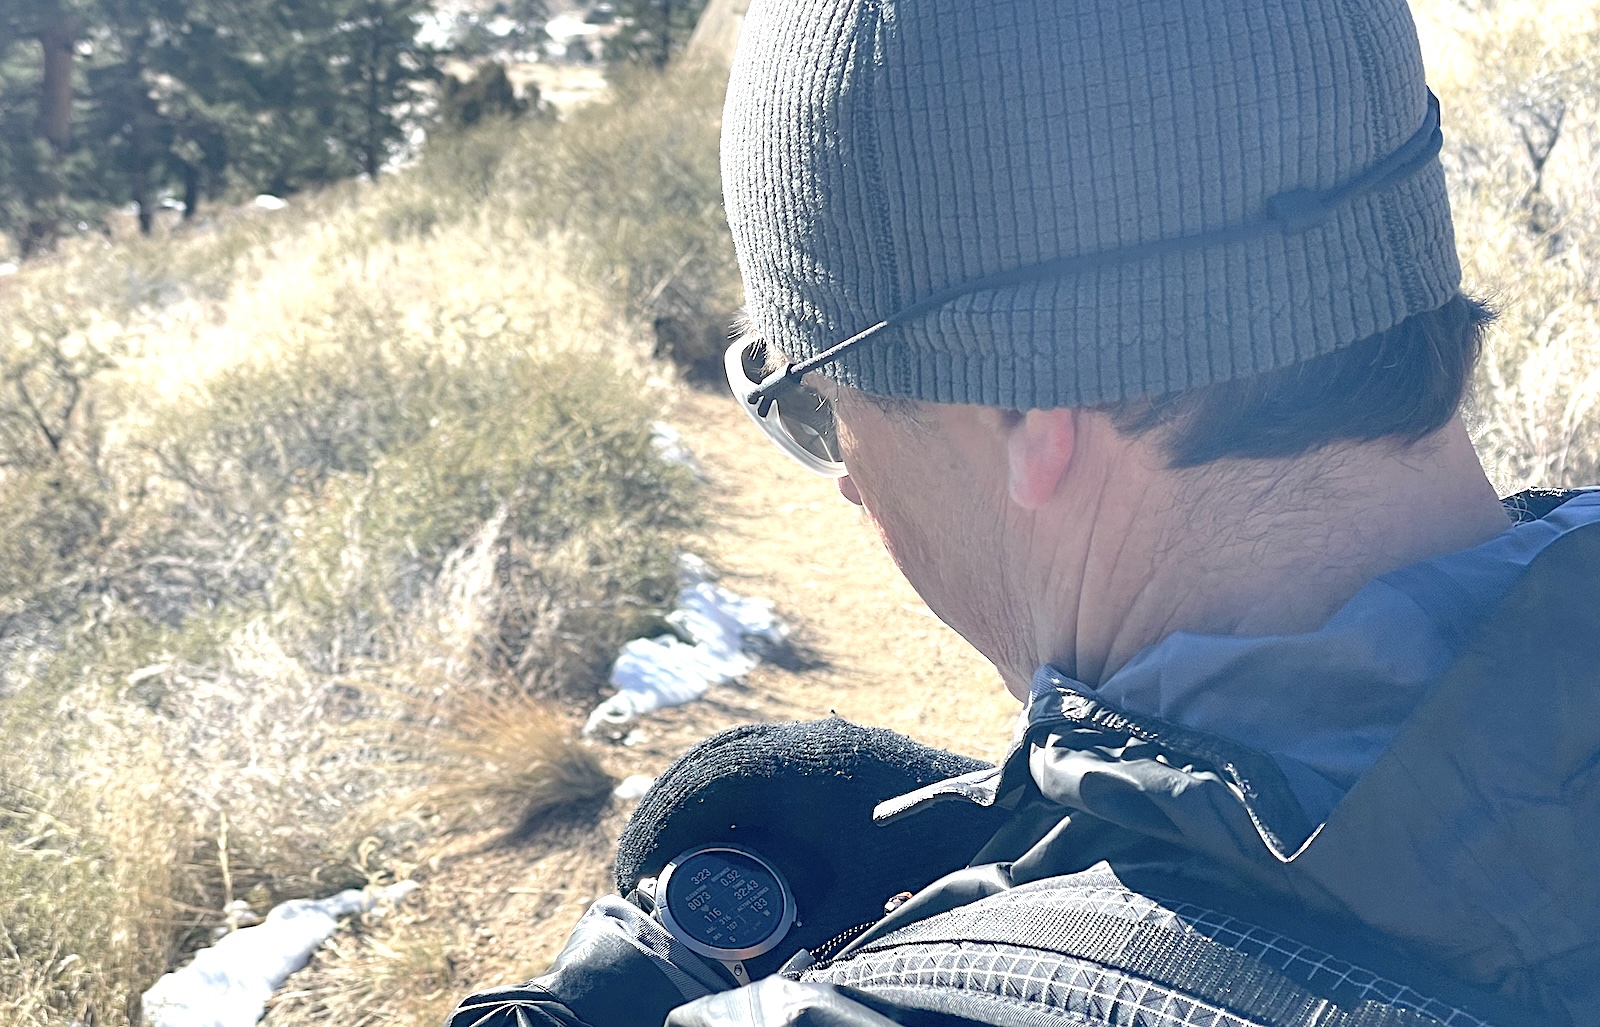
Ryan Jordan looking at his Garmin Epix 2 Pro Watch on a sunny day. Photo Credit: Ryan Jordan
After several years, I retired my Garmin Fenix 5XS and replaced it with the Garmin Epix 2 Pro. Functionally, they are quite similar: full ABC (altitude-barometer-compass), GPS (Global Positioning System), and physiological monitoring (heart rate, heart rate variability, sleep tracking, and blood oxygen concentration). However, the Epix represents an enormous performance upgrade for me. I opted for the 51 mm watch diameter, which translates into a nice big AMOLED screen and more than enough battery life for my longest expeditions. The Epix 2 Pro is always on my wrist and is an essential companion for both my training and research. – Ryan Jordan
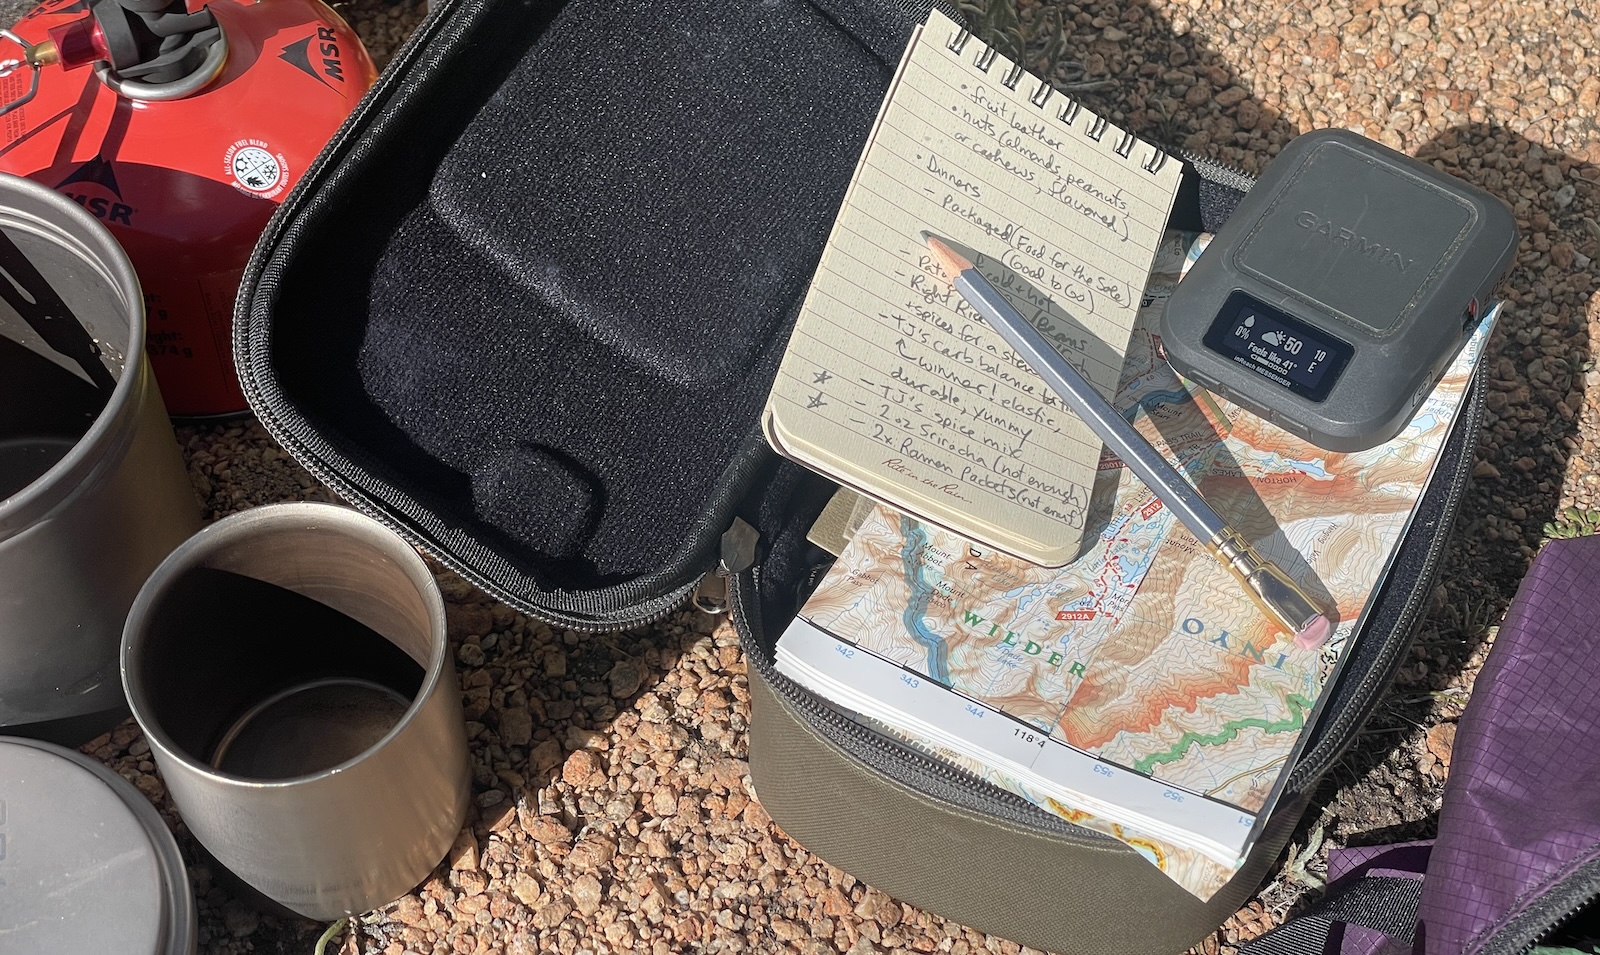
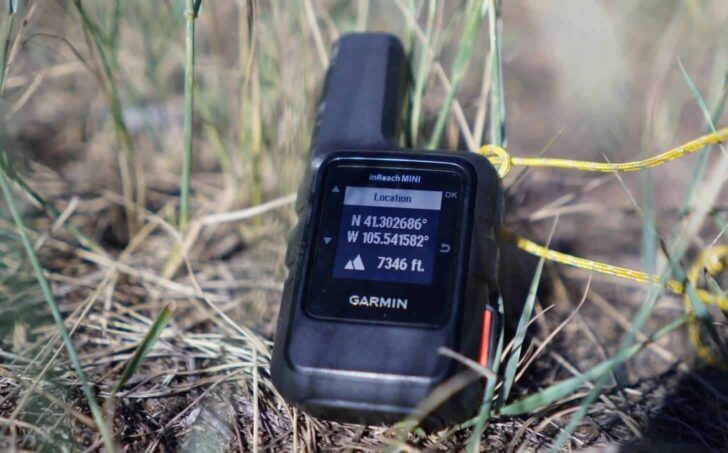
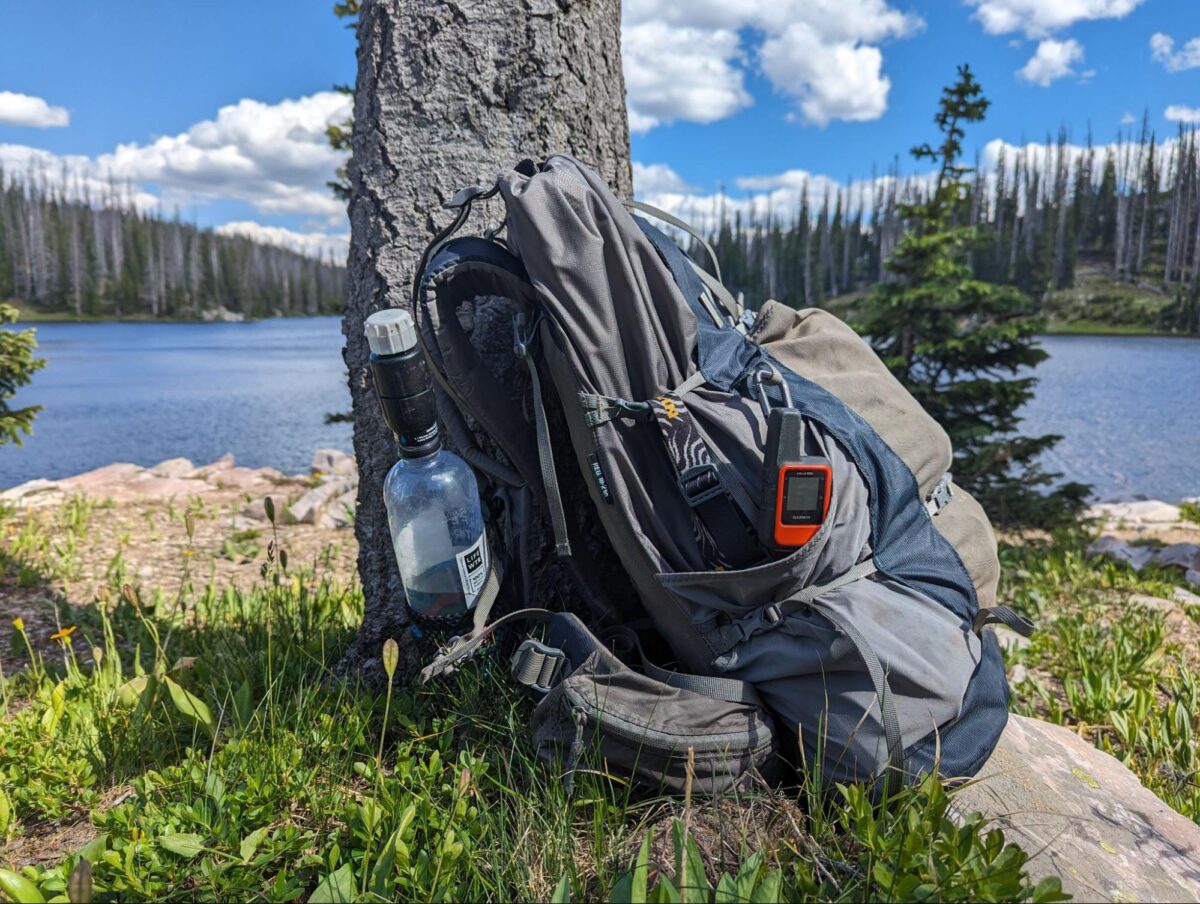
The Garmin inReach Messenger next to a notebook, pencil, map, and coffee cup. Photo Credit: Ryan Jordan
I made the switch this year from the Garmin inReach Mini 2 to a Garmin inReach Messenger. I find myself relying less on GPS devices and no longer need GPS navigation in a device other than my smartphone (which is a backup to my primary form of navigation, a map and compass). In addition, the inReach Messenger offers better battery life, reverse charging, and a slimmer, more pocketable form factor. – Ryan Jordan
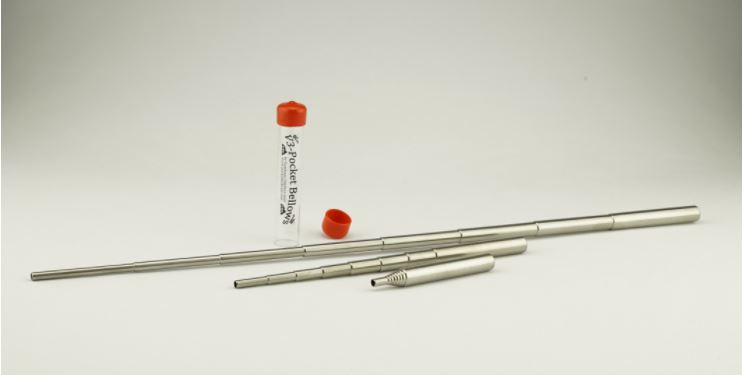
I don’t often make a fire in the backcountry, but when I do, this tiny tube is well worth the weight. It allows you to very precisely deliver oxygen where it’s needed. It works well enough that after accidentally leaving our real bellows at a yurt, we’ve just used this little guy instead for backyard and car camping fires. – James Montavon
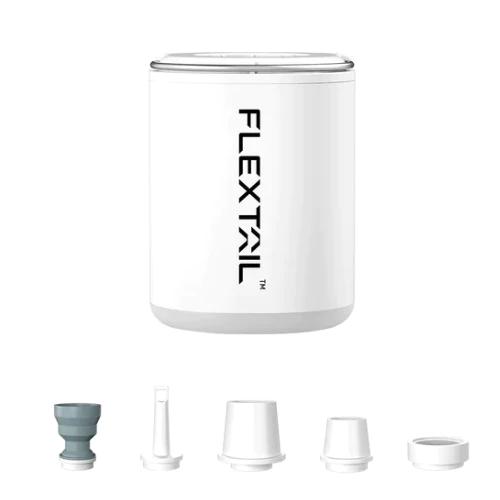
At the end of a long day on the trails, I have never looked forward to inflating my sleeping pad with my overtaxed lungs. So, I was delighted when pump sacks were introduced. Unfortunately, using a pump sack in my tent could be awkward and time-consuming, depending on the attachment mechanism. So, I was delighted when I saw that Thermarest was selling a little battery-powered pump for their sleeping pads. I bought one immediately and never looked back. However, I was unhappy that the pump was slow to fill the sleeping pad, and the pump lacked sufficient power to inflate the pad completely- I had to blow into the partially filled pad to reach full capacity. So, I was delighted when I read about the Tiny Pump 2X. I assumed the 2x meant it pumped faster than what I was using, and it did! It is powerful enough to pump the sleeping pad to full capacity. It also has a LED light so I can hang it up and illuminate all my tasks after the sun goes down. Be careful with the light; it uses more of the rechargeable battery than sleeping pad inflation. The only real drawback is that the pump blows so much air it is noisy. Don’t disturb your neighbors! – Stephen Seeber
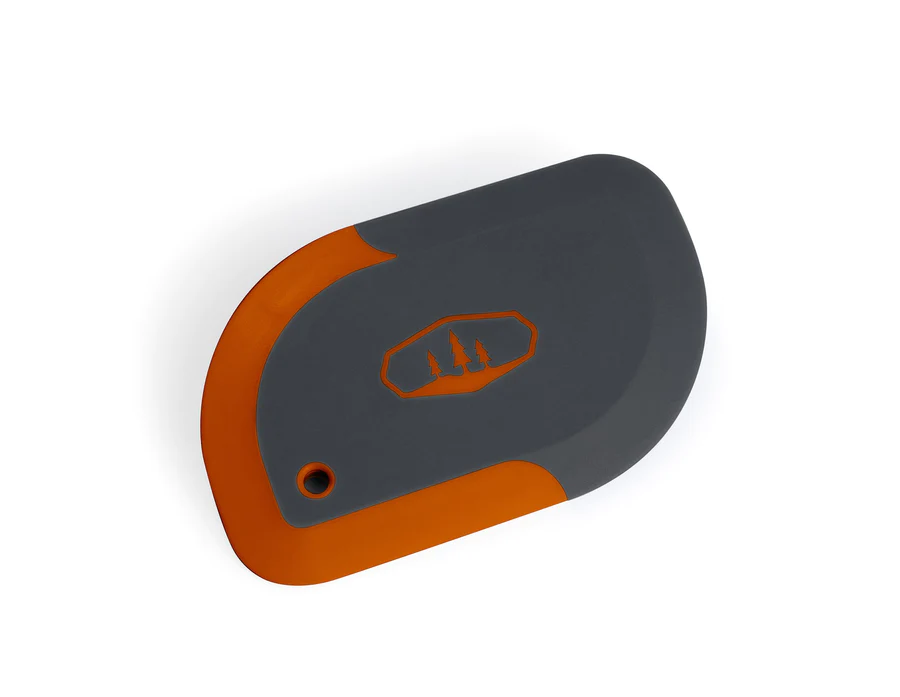
This little scraper is my favorite cleanup tool when I cook real meals on the trail. The silicone end acts as a spatula, letting me get every last morsel off of my pots and pans and into my belly. The plastic end is tough enough to scrape caked-on bits of food and the occasional burned bits off of the bottom of a pot, without actually damaging the pot. It’s basically indestructible and it comes with me on every commercial trip I run. – Sarah Bennett
Anna Swarts wearing her Goodr OG Sunglasses. Photo Credit: Anna Swarts
These hit the sweet spot for me as being high enough quality to have what I want (polarized lenses and clarity) while also being inexpensive. I love how they don’t bounce or slip off when I sweat or run. – Anna Swarts
Healthy Sense of Humor and Hype
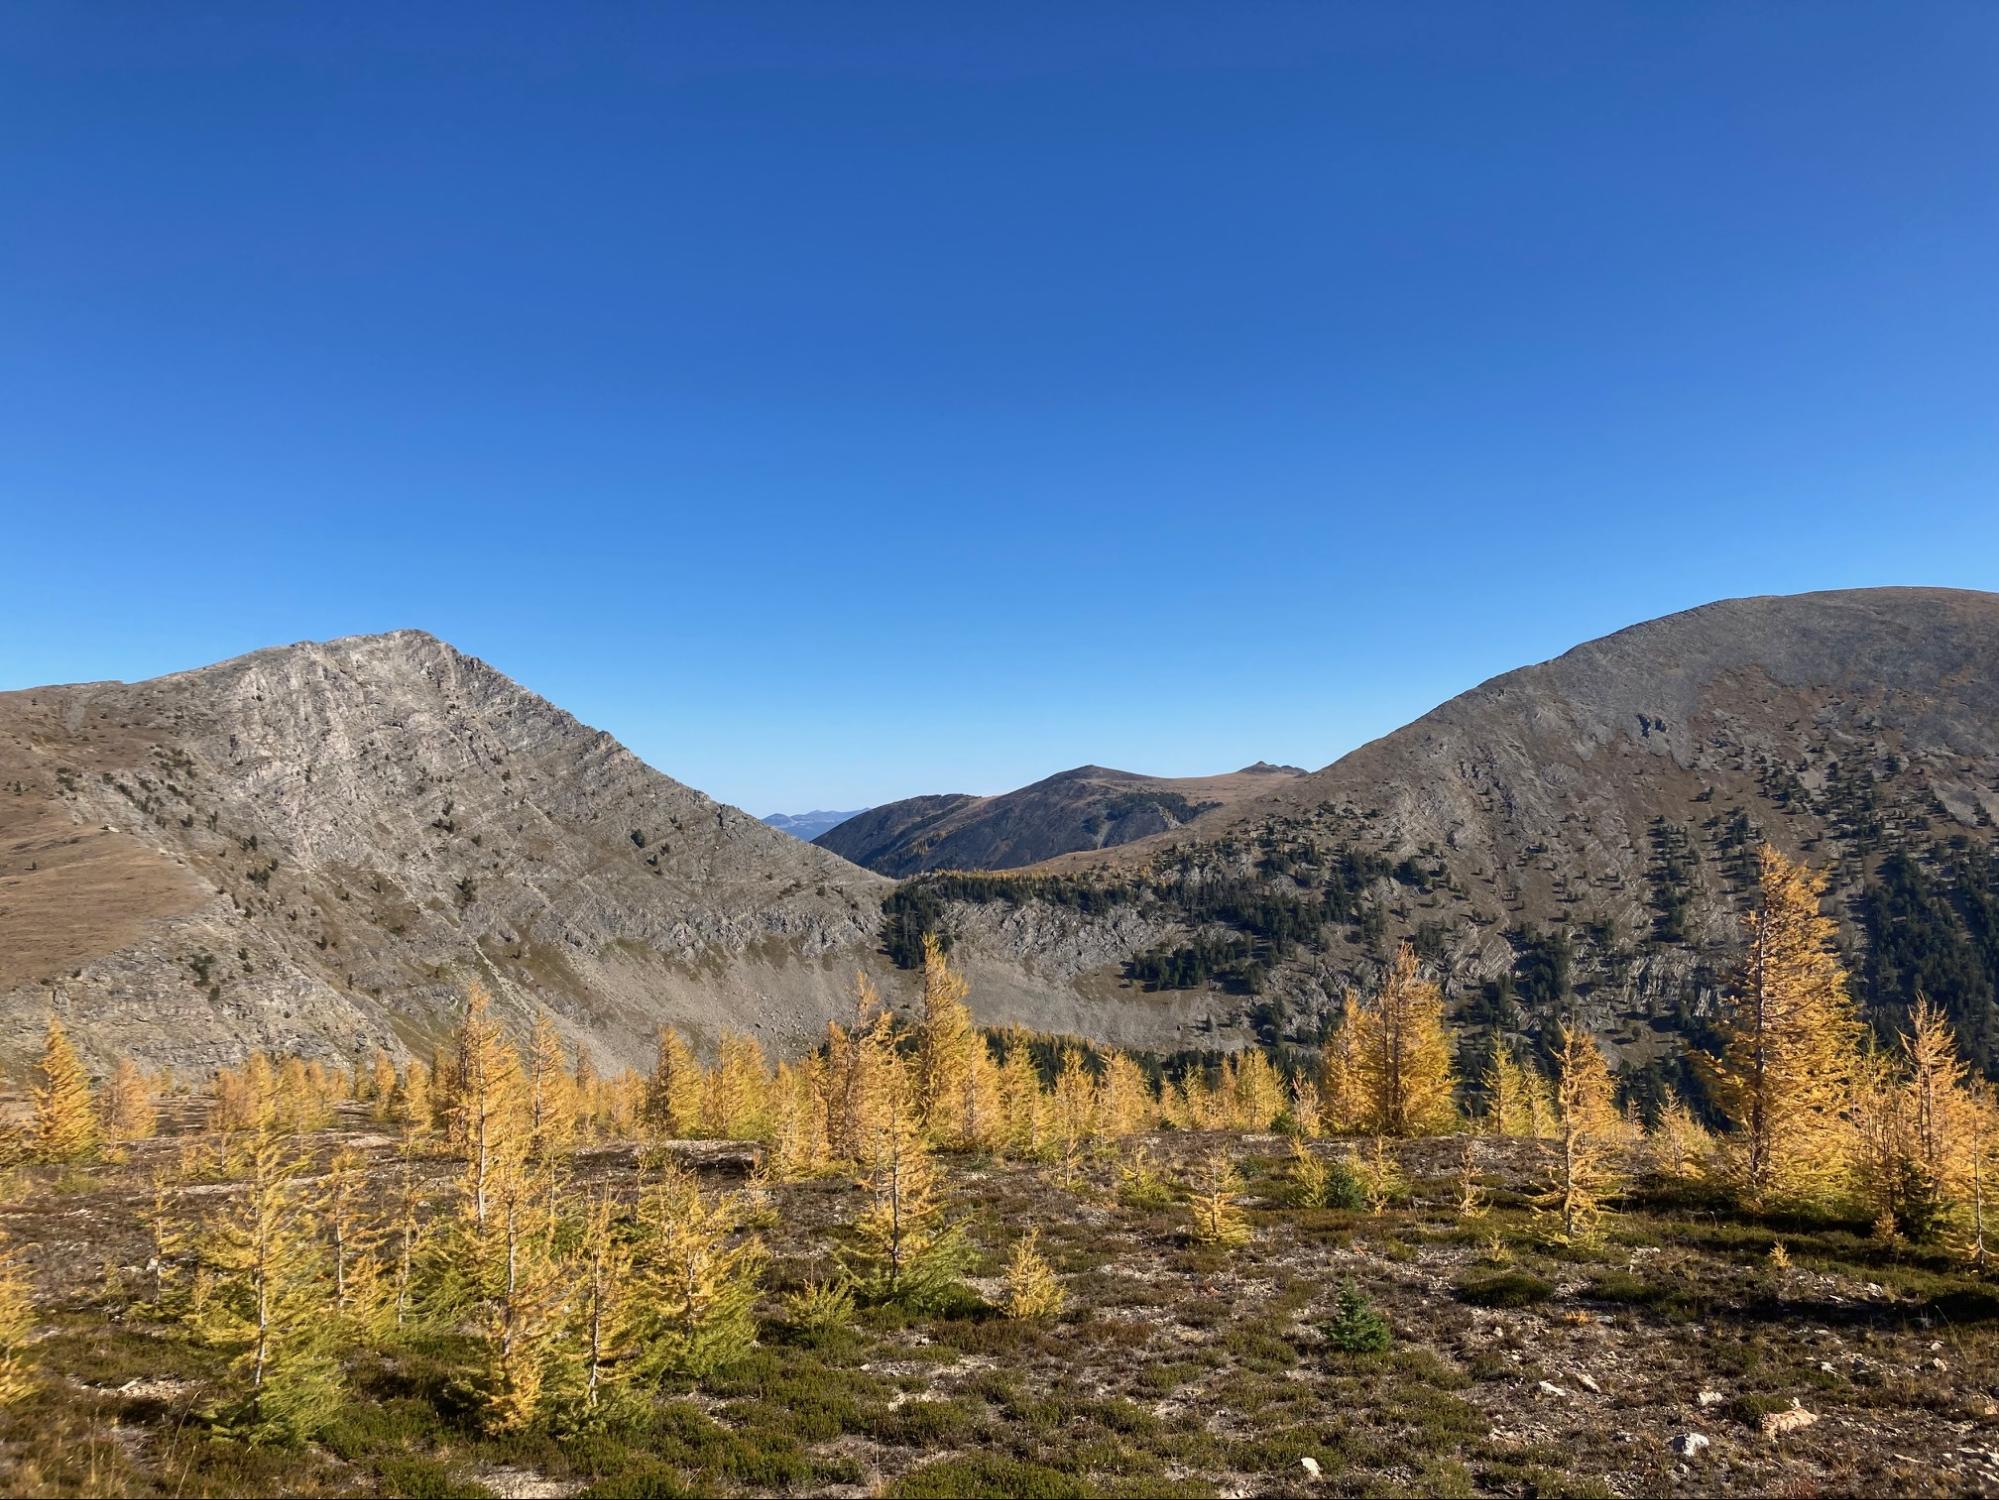
Larchapalooza! Photo Credit: Mark Wetherington
This year I wanted to get friends and acquaintances hyped about backpacking trips. I started hyping up a series of backpacking trips and dayhikes in late September that focused on seeing alpine larch in its golden autumn splendor and dubbed it “Larchapalooza” (photo attached). A second series of trips focused on visiting natural hot springs in early October, which was called “Soaktober”. This led to a lot more interest and enthusiasm (both in myself and others) than when it was “only” framed as a backpacking trip to a cool area. The power of branding, I suppose! – Mark Wetherington
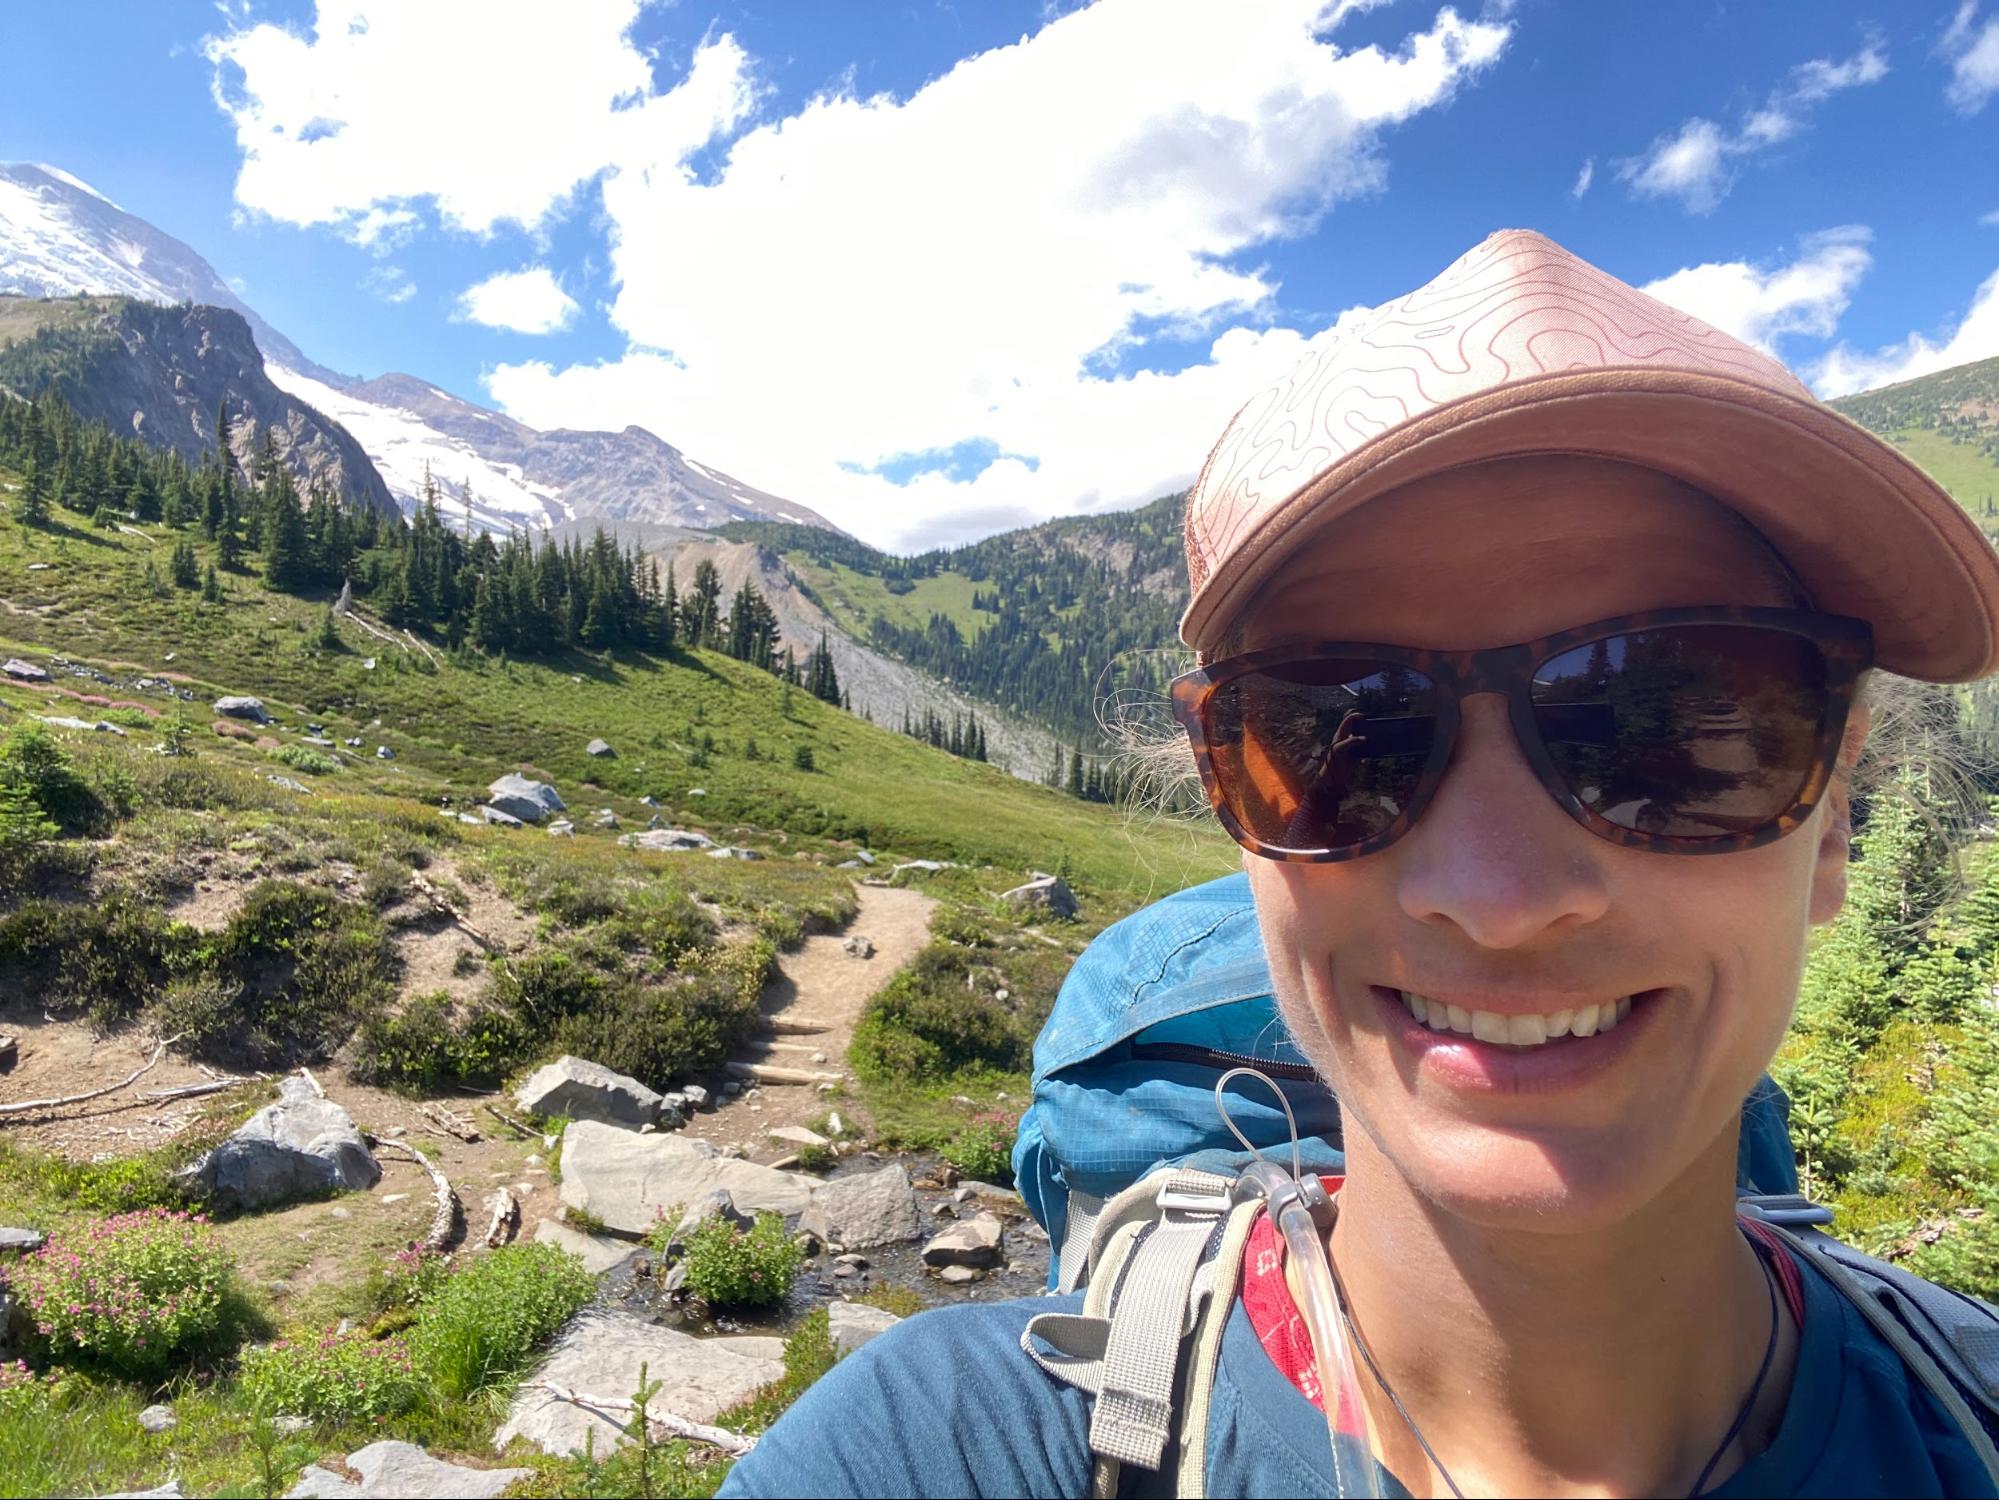
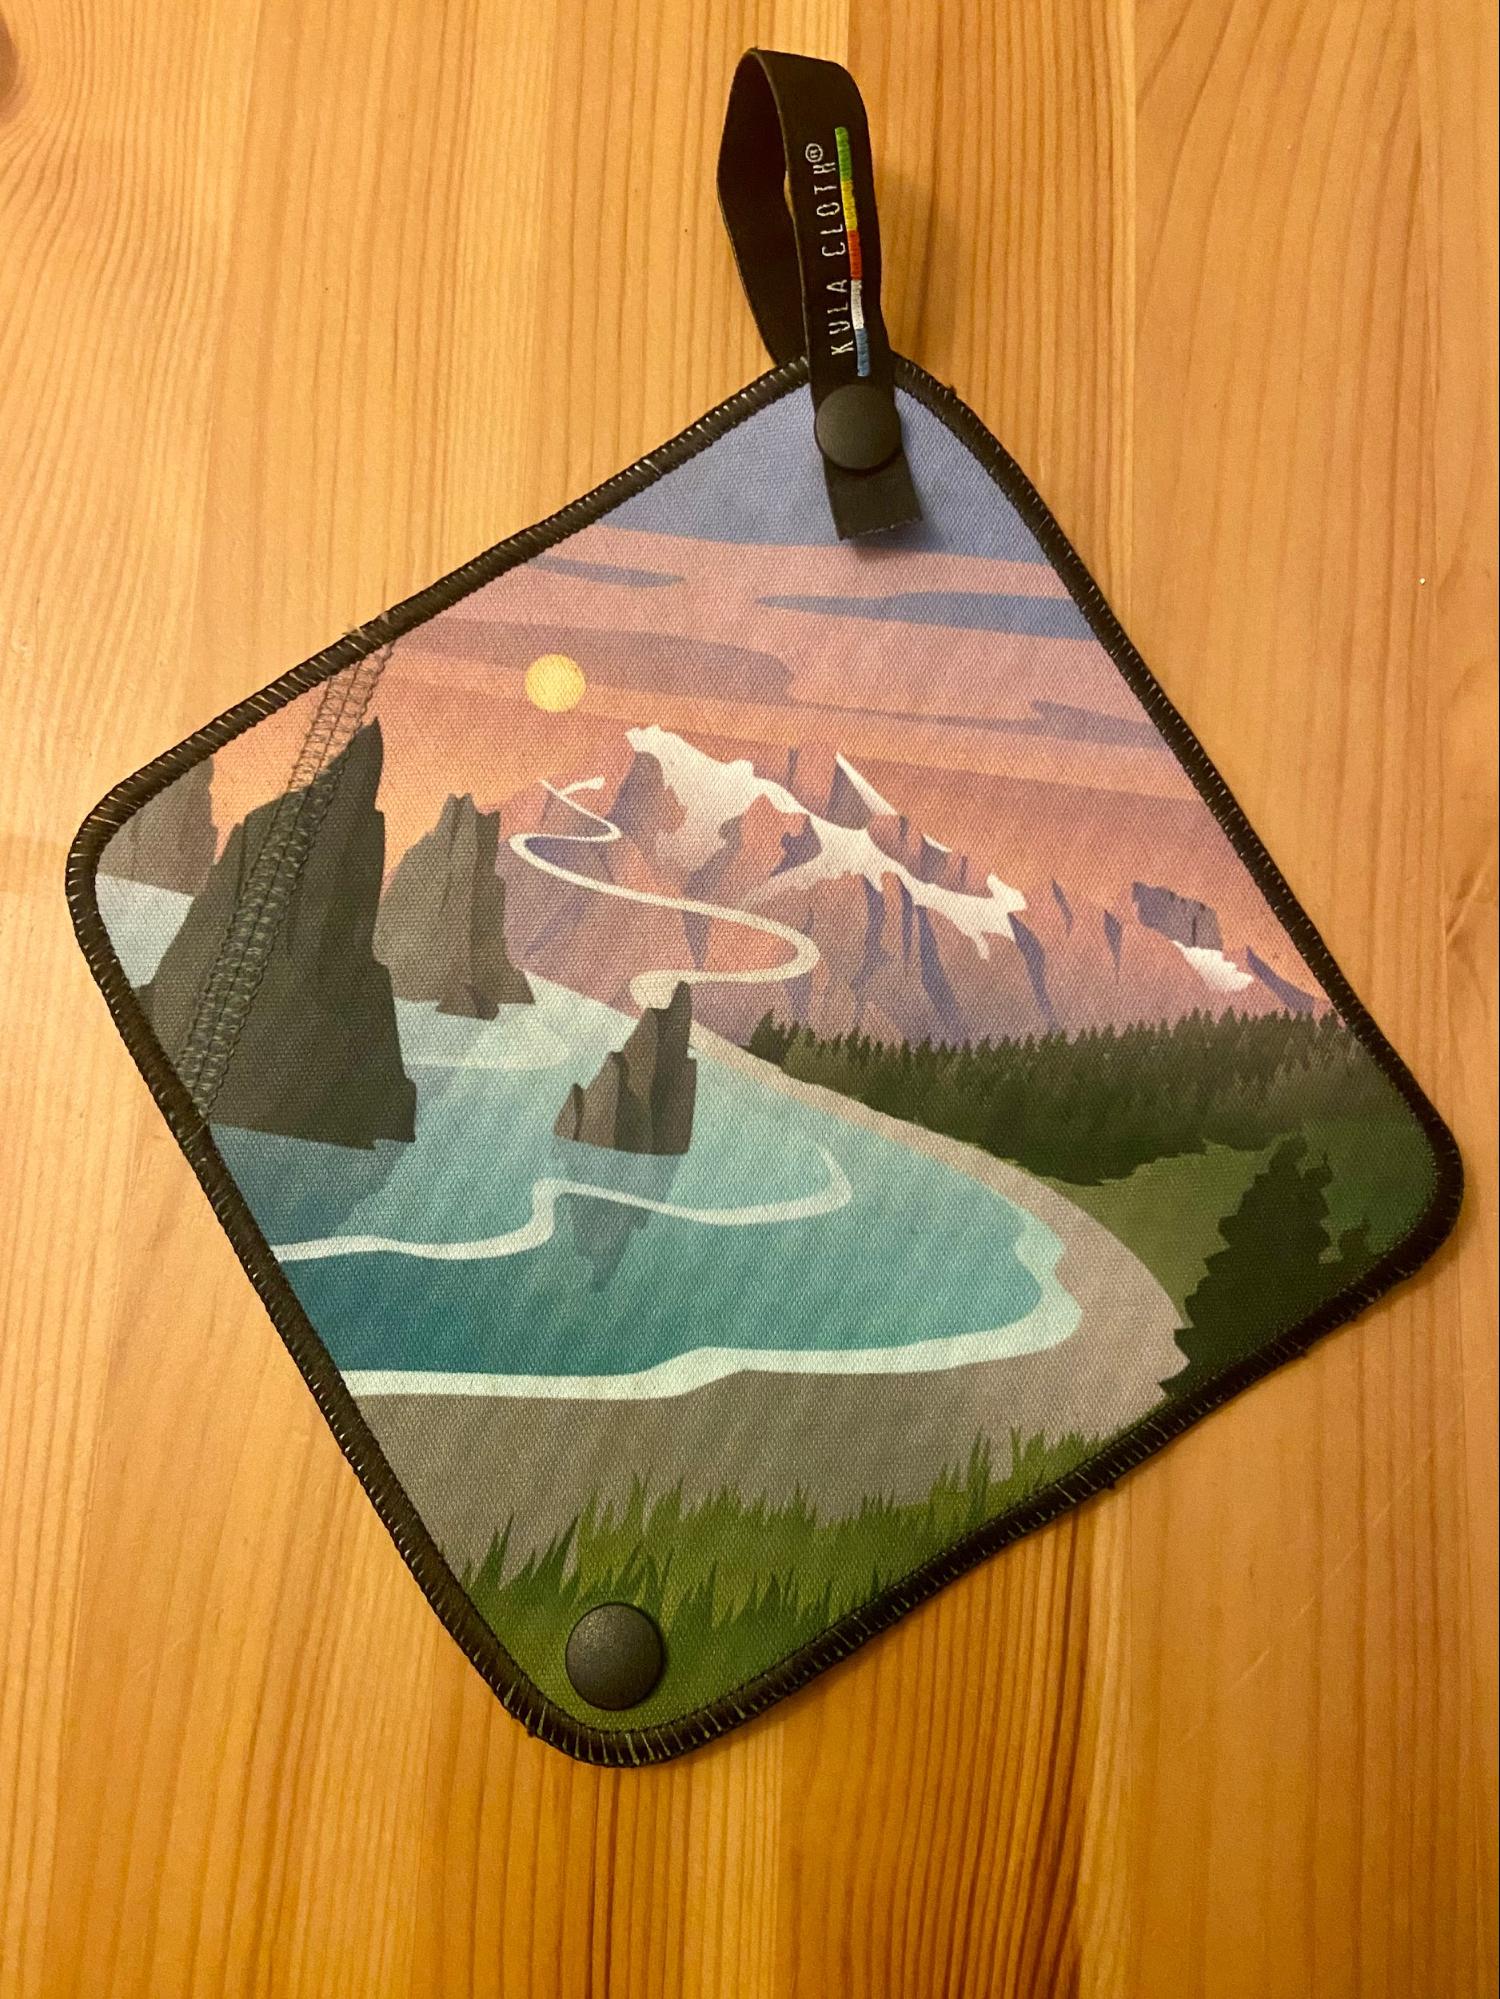
Anna Swarts’ Kula Cloth. Photo Credit: Anna Swarts
I went many years without one because I figured it couldn’t be that much better than the generic piece of cloth I had been using. However, I’m finding that it really is as great as everyone says. Not only does it feel more sanitary but it also has a fun design for one of my favorite trails (the PNT). Their customer service was top notch too! – Anna Swarts
Learn more about the Kula Cloth in the Backpacking Light Gear Shop.
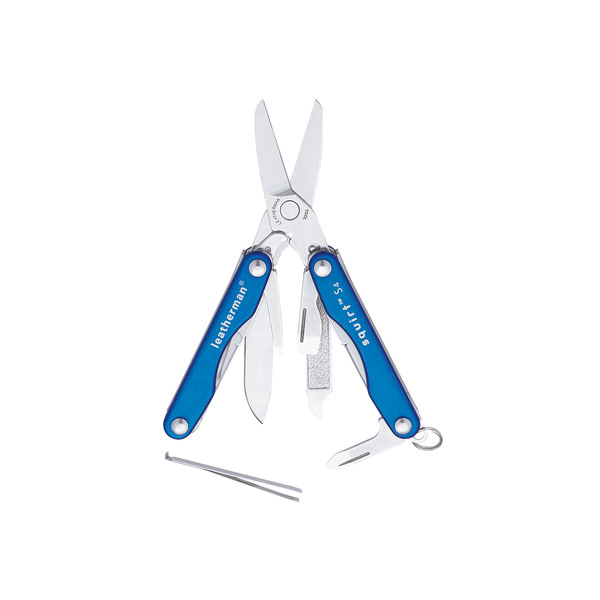
This is the lightest multi-tool with a plier I can find, weighing in at only 1.9 oz (54g). Having this tool in my kit helps simplify zipper repair while in the field. – Atif Khan
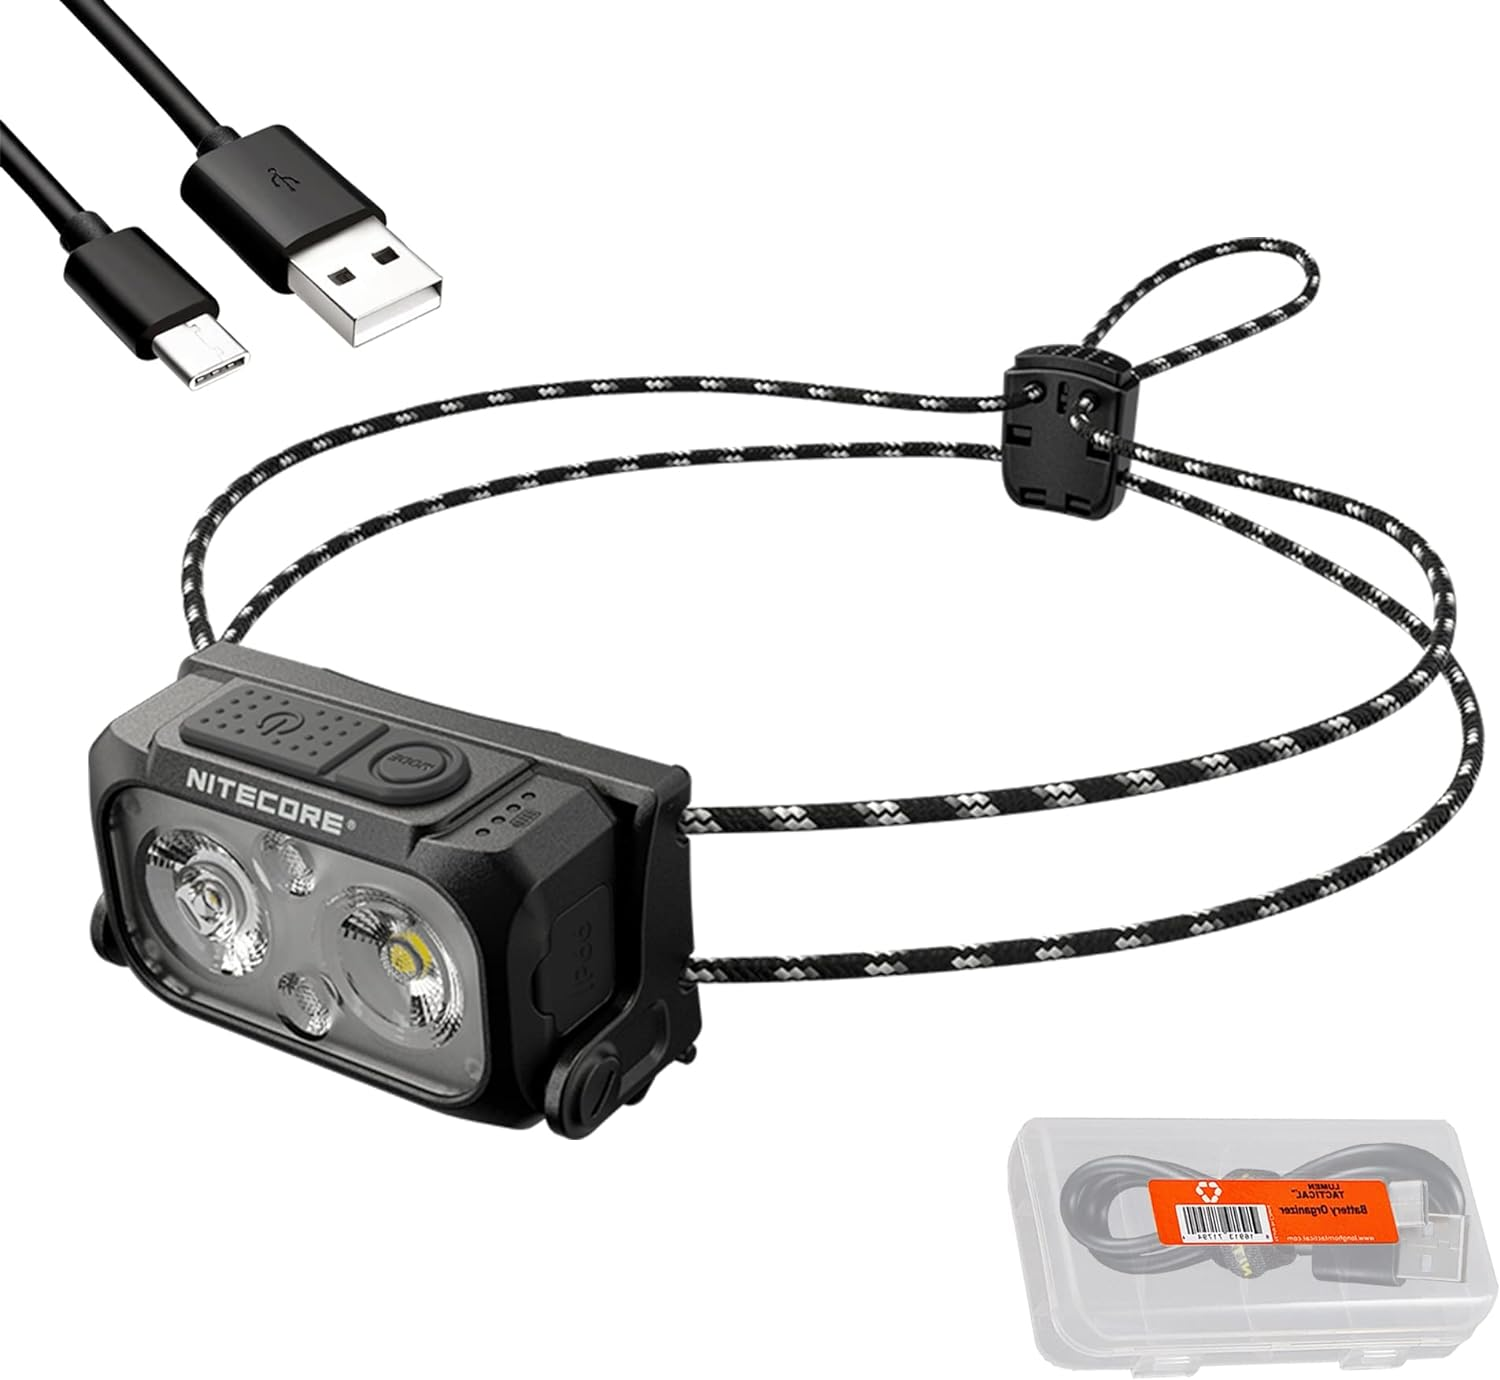
At about half or a third the weight of most similarly-rated headlamps, as well as comparable features, I can’t find a good reason not to take it on most trips. – Ben Kilbourne
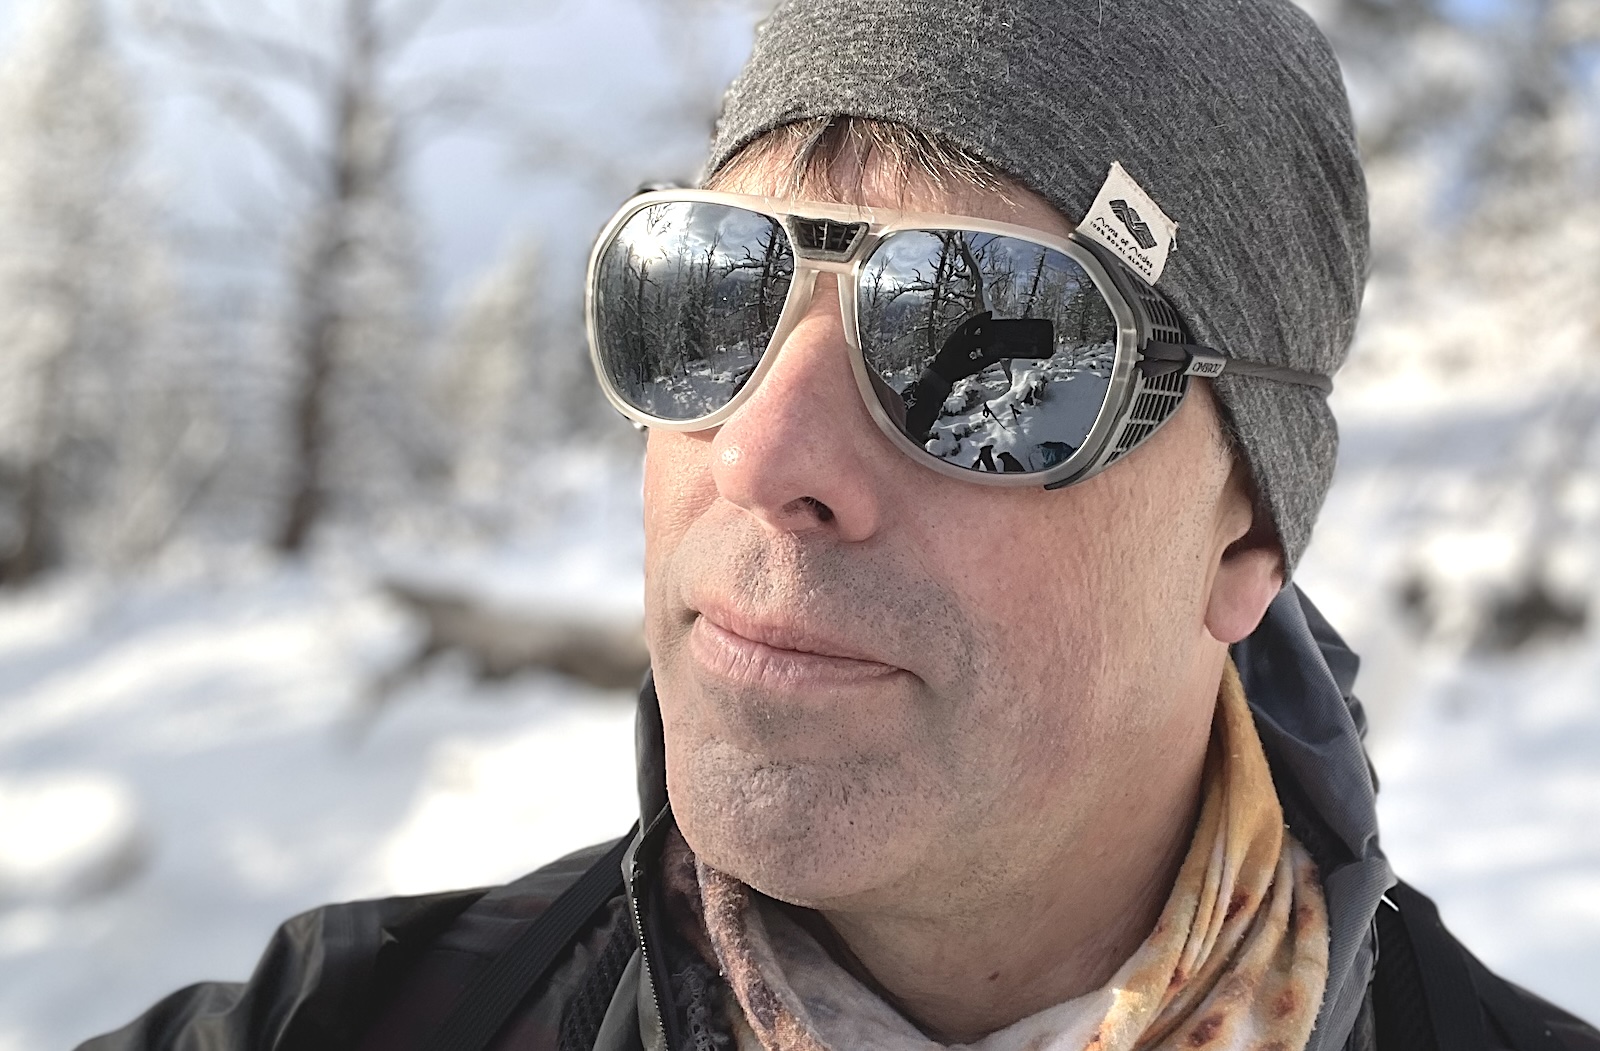
Ryan Jordan wearing his Ombraz sunglasses. Photo Credit: Ryan Jordan
After decades wearing conventional sunglasses, I smacked my head when I first put on a pair of Ombraz armless sunglasses. The concept is brilliant – no more interference with headwear layers, whether the cord is worn under or on top of my hats or hoods. A huge bonus are Zeiss Optics lenses for gorgeous clarity and polarization with no distortion. And they’re light! – Ryan Jordan
Learn more about Ombraz Sunglasses in the Backpacking Light Gear Shop.
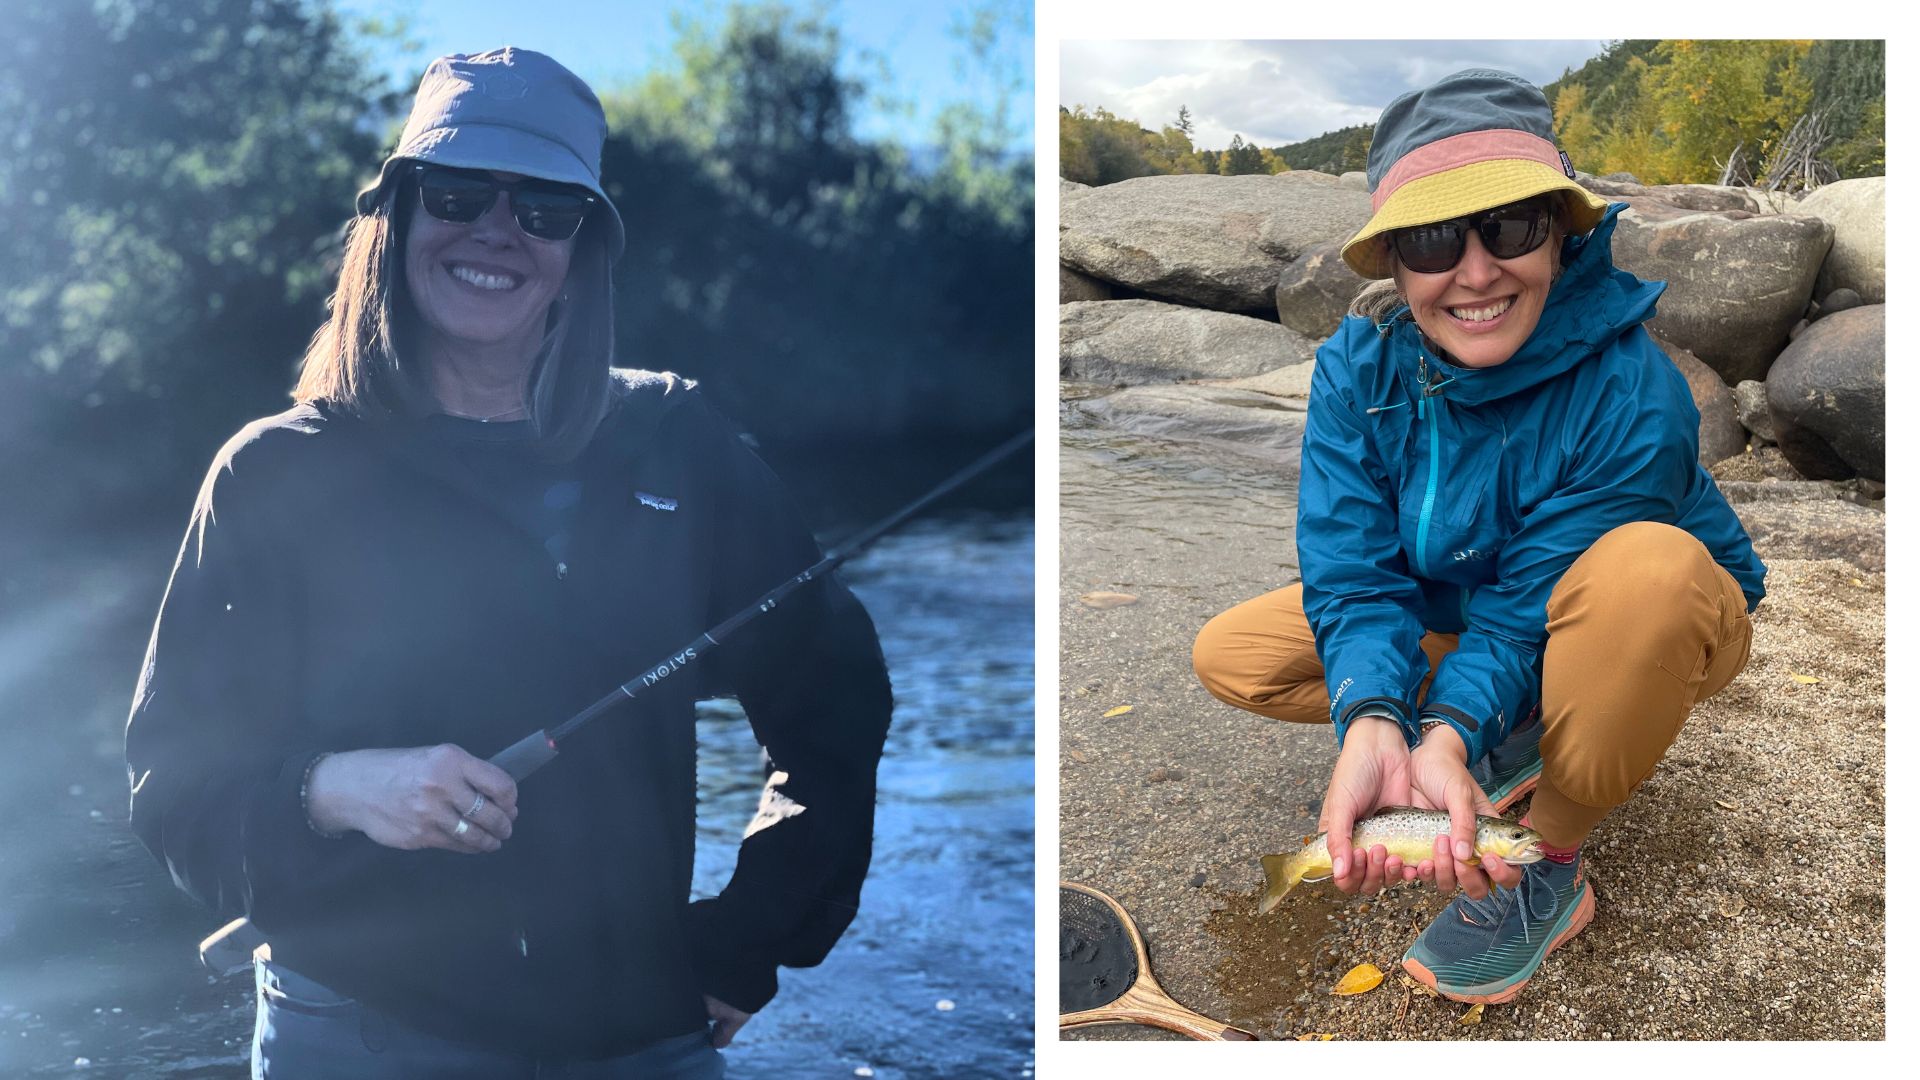
Stephanie and her catch with her Tenkara USA Satoki Rod. Photo Credit: Ryan Jordan
I’ve never been a fan of adjustable zoom tenkara rods in the past – too much fiddling and the longest lengths are often cumbersome. The Tenkara USA Satoki is easy to cast, and this year during high water on the Arkansas River (CO), it gave me the reach to find narrow feeding lanes of wary brown trout at dusk on the opposite side of the main current. – Stephanie Jordan
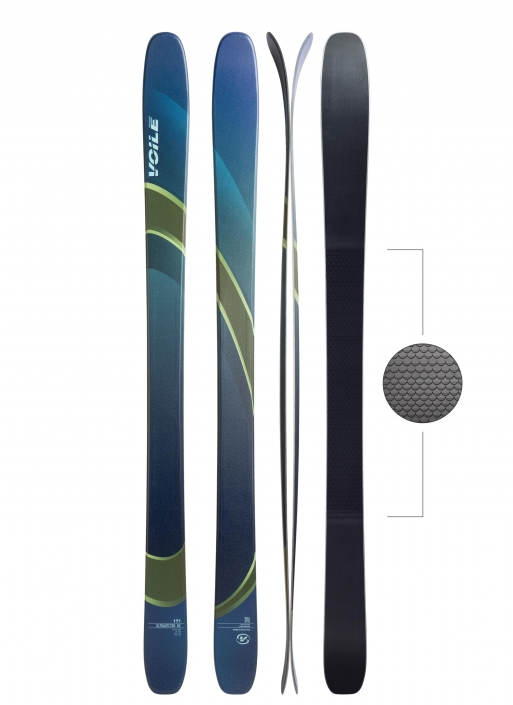
This is a super fun all-around backcountry touring ski with the added versatility of scales. It’s awesome for winter overnighters where you have a long approach over rolling terrain. Just leave the skins in the pack until you get to the steeper stuff. Voile skis are light, and these are no exception, but they’re also not too light. At around 1570 grams in a size 177 they’re in that sweet spot where they still perform well turning at speed in spring conditions. – Ben Kilbourne
DISCLOSURE (Updated April 9, 2024)
Backpacking Light does not accept compensation or donated/discounted products in exchange for product mentions or placements in editorial coverage.
Some (but not all) of the links in this review may be affiliate links. If you click on one of these links and visit one of our affiliate partners (usually a retailer site), and subsequently place an order with that retailer, we receive a commission on your entire order, which varies between 3% and 15% of the purchase price. Affiliate commissions represent less than 15% of Backpacking Light's gross revenue. More than 70% of our revenue comes from Membership Fees. So if you'd really like to support our work, don't buy gear you don't need - support our consumer advocacy work and become a Member instead.
Learn more about affiliate commissions, influencer marketing, and our consumer advocacy work by reading our article Stop wasting money on gear.
In today’s episode of the Backpacking Light podcast, we’re going to talk about wilderness emergency rescue from the very different and unique perspective of an air ambulance service operating in the Canadian Wilderness.
Episode Sponsor: Zoleo
For anyone who ventures beyond cell coverage, ZOLEO provides seamless messaging anywhere on Earth. Only ZOLEO automatically transmits messages via the Iridium satellite network, cellular, and Wi-Fi using the lowest-cost network available! Plus, safety features like progressive SOS alerting, non-emergency medical advice, check-in, weather forecasts, and location sharing provide extra peace of mind for you and everyone at home.
In today’s episode of the Backpacking Light podcast, we’re going to talk about wilderness emergency rescue from the very different and unique perspective of an air ambulance service operating in the Canadian Wilderness.
In this Episode:
What’s New at Backpacking Light?
November 22nd and 29th Newsletters – The relationship between the difficulty of a hike and the metabolic energetics of hiking.
Our guest this week is Miles Randell. Miles is the president of TEAAM Aeromedical, a very unique aeromedical rescue program operating in Canada. Miles and his staff are very experienced technicians in the areas of emergency services, advanced life support, and wilderness rescue. TEAAM is a nonprofit, membership-based organization that provides a pretty unique service to its members that has the potential to radically change how people are treated, rescued, and transported in wilderness emergency situations.
Executive Producer - Backpacking Light; Show Director and Host - Ryan Jordan; Producer - Chase Jordan; Theme music: Look for Me in the Mountains written by Chris Cunningham and Ryan Jordan, performed by Chris Cunningham (acoustic guitar, lead and harmony vocals, harmonica), Chad Langford (upright bass), and Tom Murphy (mandolin), produced by Basecamp Studios in Bozeman, Montana.
Sponsorship Policy: Backpacking Light does not accept compensation or donated/discounted products in exchange for product mentions or placements in editorial coverage, including any podcast episode content not excplicitly identified as sponsored content. Some (but not all) of the links in these show notes may be affiliate links. Learn more about affiliate commissions, influencer marketing, and our consumer advocacy work by reading our article Stop wasting money on gear.
America’s National Parks each have different food storage requirements for backpackers. This article discusses the requirements, various options, and focuses on what bear canisters are exemplary options, and why.
In today’s episode of the Backpacking Light Podcast we’re going to talk about a very unique way to enjoy tenkara fly fishing in the backcountry, and the idea of minimalism vs. performance minimalism.
Episode Sponsor
Today’s episode of the Backpacking Light Podcast is sponsored by Tenkara USA, America’s first and oldest producer of high-quality tenkara rods that reflect the simplicity and beauty of backcountry fly fishing. Backpacking Light Podcast listeners can enjoy 15% off your entire order with the coupon code BPTUSA15 at tenkarausa.com.
Listen
Summary
In today’s episode of the Backpacking Light Podcast we’re going to talk about a very unique way to enjoy tenkara fly fishing in the backcountry, and the idea of minimalism vs. performance minimalism.
Our guest this week is Bryon Powell. We don’t even know where to start with Bryon, he has been an Unlimited Member in the Backpacking Light Community since – get this – October, 2007 – more than 16 years! He’s one of the most inspiring people we’ve ever had the privilege of interviewing. Bryon’s the founding editor of irunfar.com and currently calls Silverton, Colorado, his home. He has a very, very long list of trail running and ultrarunning accolades, and is also a very accomplished backpacking and fastpacking practitioner. But what interests us the most about Bryon is his passion for backcountry fly fishing, and specifically, for tenkara fly fishing, and the extent to which he blends fly fishing and long-distance backcountry travel not only to maximize his enjoyment of vast wilderness landscapes, but his enjoyment of the fisheries that they harbor.
Executive Producer - Backpacking Light; Show Director and Host - Ryan Jordan; Producer - Chase Jordan; Theme music: Look for Me in the Mountains written by Chris Cunningham and Ryan Jordan, performed by Chris Cunningham (acoustic guitar, lead and harmony vocals, harmonica), Chad Langford (upright bass), and Tom Murphy (mandolin), produced by Basecamp Studios in Bozeman, Montana.
Sponsorship Policy: Backpacking Light does not accept compensation or donated/discounted products in exchange for product mentions or placements in editorial coverage, including any podcast episode content not excplicitly identified as sponsored content. Some (but not all) of the links in these show notes may be affiliate links. Learn more about affiliate commissions, influencer marketing, and our consumer advocacy work by reading our article Stop wasting money on gear.
A curated guide to Backpacking Light resources on how to plan a backpacking trip – gear, skills, podcasts, forums, research, education, and more.
Welcome to the Backpacking Trip Planning Resources Trailhead
How to plan a backpacking trip? That’s the biggest question – more than “what gear to use” or “what trails to hike” – that beginning backpackers ask. Planning a backpacking trip, even a short one, can feel overwhelming. That’s because there’s a large variety of tools and skills to learn, and it’s hard to know where to start.
This article is one of Backpacking Light’s curated gateway pages (a trailhead, so to speak). Think of it as a starting point. Here, you’ll find information and resources about how to plan a backpacking trip. We’ve got lists of our favorite software, gear guides for navigation and trip planning, video and podcast embeds, and other trip-planning resources. You’ll learn how to spot potential water sources on a map, how to anticipate elevation gain, how to plan for longer trips, how to identify great backpacking trails, and more. You might be planning your first backpacking trip or your 50th, but either way, we think you’ll find something useful.
About this Trailhead: Curated and maintained by our staff, this Trailhead page includes an overview of the topic and links to information and resources at the Backpacking Light website. Those resources may consist of gear reviews, technology and testing, research, skills articles, online education (webinars, masterclasses, or other types of online courses), podcast episodes, forum threads, product recommendations, and other discovery tools, including our Gear Finder, Gear Shop, and Site Search engine.
Planning a backpacking trip involves choosing the correct tools and strategies. Photo: Stephanie Jordan
Navigating this Trailhead
Table of Contents • Note: if this is a members-only article, some sections may only be available to Premium or Unlimited Members.
Backpacking Trip Planning Education at Backpacking Light
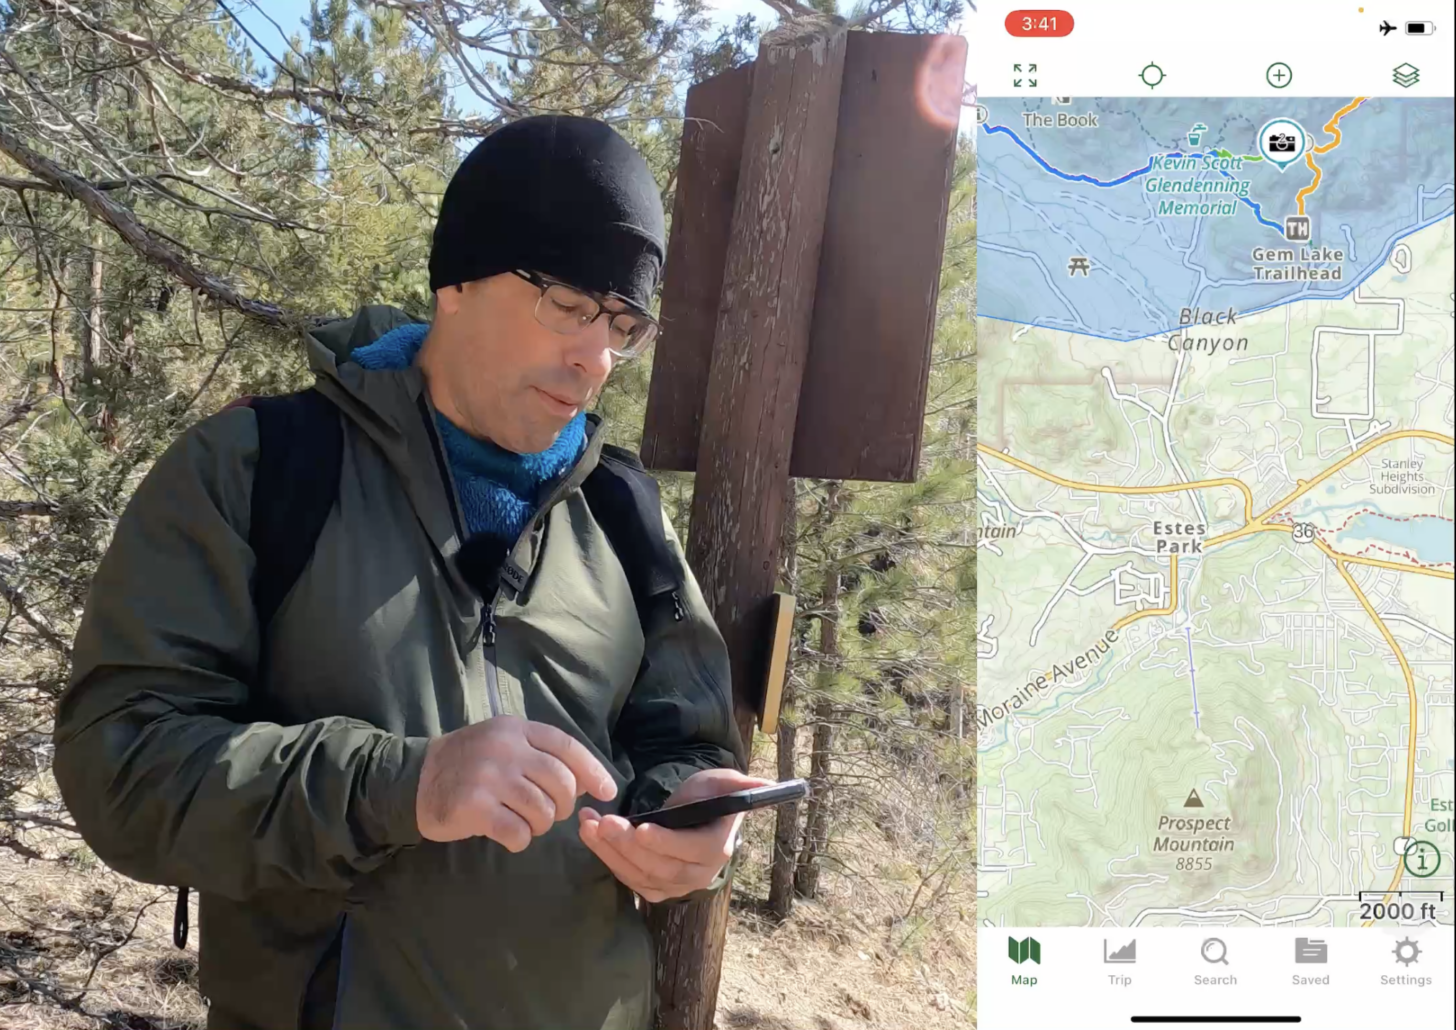
One of our preferred trip planning and navigational software tools at is Gaia GPS. The following material demonstrates how to use it, as well as other trip planning and navigational skills:
There are many software tools that are useful for planning backpacking trips. The following are examples of some that our staff and authors use on a regular basis, as well as some of the features that set them apart:
Gaia GPS Software – online mapping, beautiful map layers, premium version, very nice user interface, powerful route planning features, GPS import/export, desktop and mobile versions, and regular updates. In addition to route planning, we use this for real-time navigation on a smartphone as well.
Caltopo – Powerful and feature-rich mapping software. Also has a mobile app.
Fatmap -beautiful and user-friendly 3D maps that can download to your phone for offline functionality.
FarOut (formally Guthook) – trail resources for popular long-distance trails. The go-to choice for thru-hikers.
Orbit Satellite Tracking – a smartphone app used to monitor satellite positions, which can help optimize your use of a satellite communicator or GPS device.
Using digital tools like 3D mapping software can streamline trip planning considerably. Photo: Ryan Jordan
Trip Planning
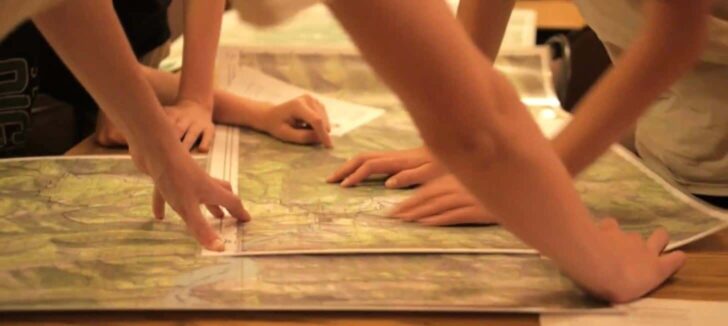
Our content library features several podcasts to help you plan your trip. If you are looking to supplement traditional route planning tools such as paper maps with modern digital tools to create a powerful and flexible route-planning system, check out:
Information from other trusted backpackers can be very helpful when planning a backpacking trip. Photo: Ryan Jordan
Backcountry Navigation
Whether you are using a GPS, map and compass, or an alternative navigational strategy when in the wilderness, know your gear and how to use it is very important:
The lightest and most reliable satellite messenger on the market is the Garmin inReach Mini 2. It integrates with the Garmin Fenix series of watches, allowing for fitness monitoring in addition to GPS and altimeter use.
When using electronics in the backcountry, managing your battery life is an important skill. To learn more about managing your battery life, check out:
The (recently updated) Garmin inReach Mini is the gold standard for light-and-functional satellite communicators, but more and more competitors are coming onto the market. Photo: Ryan Jordan
Stories about Backpacking Trip Planning and Navigation
Are you curious about how Backpacking Light authors are using software, electronics, and their navigational skills to assist their adventures? Check out these articles from backpacking
Check out a story about planning a solo backpacking trip for the first time:
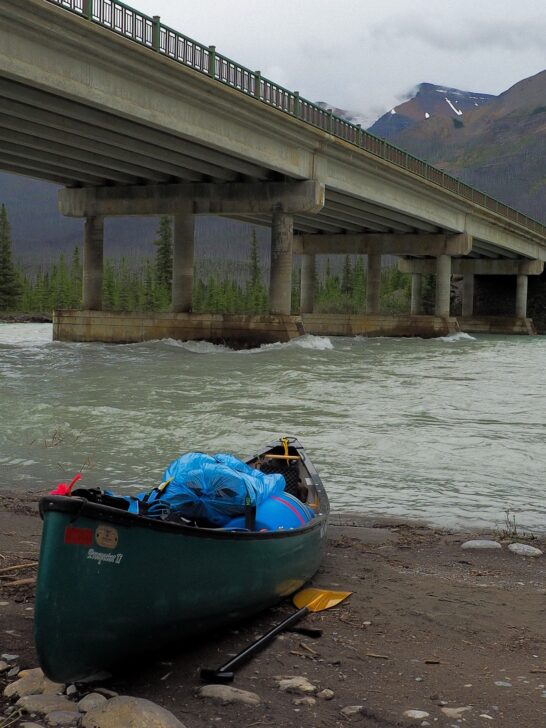
Navigation doesn’t just begin when you hit the trail, but when you have to get on the trail. Whether by bike or by bus, there are other ways to get to your trailhead.
Long time Backpacking Light author Emylene VanderVeldon’s story “Escape from COVID-19 at Corona Ridge” is a rollicking adventure tale with lots of good route planning details. Photo: Emylene VanderVeldon
What do Backpacking Light Members say about Navigation and Planning?
We have an entire forum topic dedicated to trip planning where you can solicit ideas and feedback about specific locations from other community members:
Browse our curated recommendations for navigation and electronics in the Backpacking Light Gear Shop. The Gear Shop is a product research & discovery tool to explore Member gear reviews, Gear Swap (used gear) listings, and more info about specific products recommended by our staff and members.
Planning a trip doesn’t have to be hard. It can be fun – especially with some help! Photo: Ryan Jordan
Help us Maintain this Page
If you found value in other related resources at Backpacking Light that you’d like to share with our community, please post them in the comments section below. No external links or resources, please – there are other places in our forums appropriate for that.
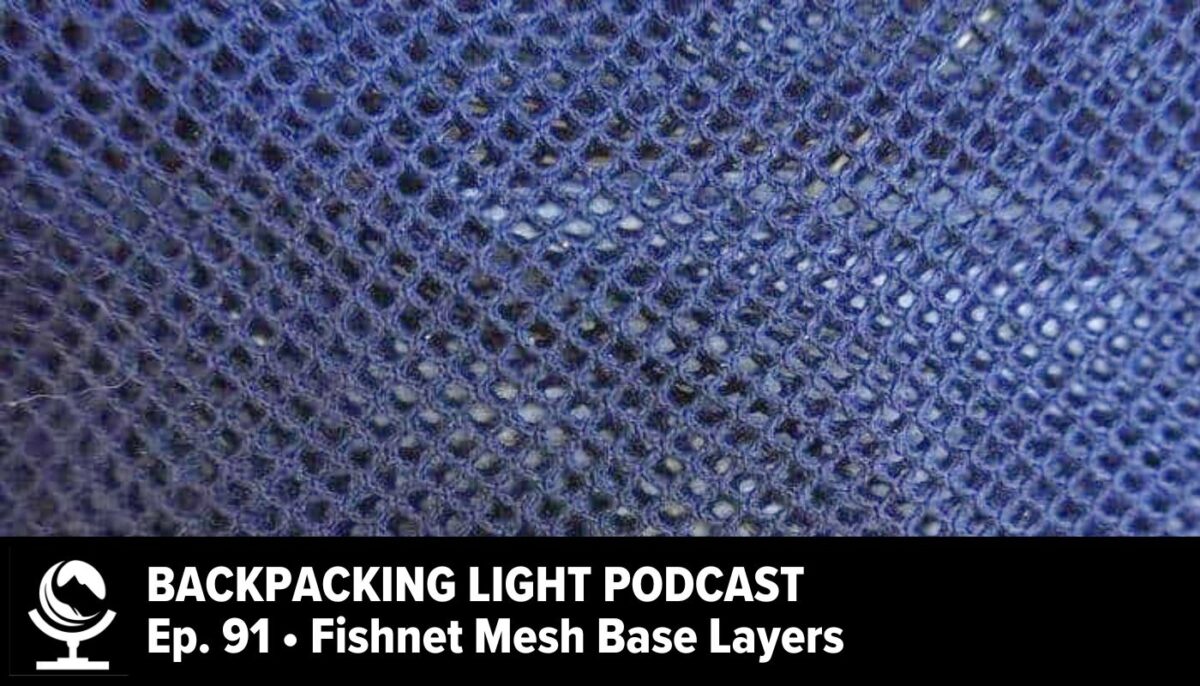
In episode 91 of the Backpacking Light podcast we’re going to talk about fishnet base layers and the Swedish ideal of lagom.
Episode Sponsor
This episode of the Backpacking Light Podcast is sponsored by BRYNJE, manufacturer of premium fishnet (open mesh) base layer apparel made with Schoeller polycolon and merino wool. Backpacking Light podcast listeners can enjoy 10% off with the coupon code BPL10 at brynjeusa.com.
Listen
Summary
In today’s episode of the Backpacking Light podcast we’re going to talk about fishnet base layers and the Swedish ideal of lagom.
Our guest this week is Jeff Jacobs of Brynje USA. Jeff’s dad was an Olympic nordic ski racer at the Oslo Olympics 1952, and at the time became enamored with the Scandinavian idea that a mesh, or fishnet-style base layer, was the optimal fabric design for wearing next to your skin in cold conditions during high exertion activities. Mr. Jacobs started importing Norwegian fishnet base layers to the United States, and his son, Jeff, picked up the torch and expanded the market through Brynje’s USA division. Jeff joins me today where we talk about the fundamental design of Brynje fishnet, the role of fiber types, and how fishnet is incorporated into layering systems for both cold and warm weather hiking and backpacking.
Executive Producer - Backpacking Light; Show Director and Host - Ryan Jordan; Producer - Chase Jordan; Theme music: Look for Me in the Mountains written by Chris Cunningham and Ryan Jordan, performed by Chris Cunningham (acoustic guitar, lead and harmony vocals, harmonica), Chad Langford (upright bass), and Tom Murphy (mandolin), produced by Basecamp Studios in Bozeman, Montana.
Sponsorship Policy: Backpacking Light does not accept compensation or donated/discounted products in exchange for product mentions or placements in editorial coverage, including any podcast episode content not excplicitly identified as sponsored content. Some (but not all) of the links in these show notes may be affiliate links. Learn more about affiliate commissions, influencer marketing, and our consumer advocacy work by reading our article Stop wasting money on gear.
In today’s episode of the Backpacking Light podcast we’re going to talk about four season tents, a new ABC watch that could dethrone the Garmin Fenix, and alpaca wool fabrics used for next-to-skin base layer apparel.
Episode Sponsor
This episode of the backpacking light podcast is sponsored by ARMS OF ANDES, manufacturer of premium base layer apparel made with alpaca wool. Backpacking Light podcast listeners can enjoy 15% off with the coupon code ALPACALIGHT at armsofandes.com.
Listen
Summary
In today’s episode of the Backpacking Light podcast we’re going to talk about four season tents, a new ABC watch that could dethrone the Garmin Fenix, and alpaca wool fabrics used for next-to-skin base layer apparel.
Our guests this week are Meli and Rensso Hinostroza, co-founders of the alpaca wool apparel manufacturer Arms of Andes. We have a wide-ranging conversation about alpaca farming, alpaca fiber characteristics, the performance benefits of base layer apparel made with alpaca wool fabrics, and the sustainability of alpaca wool vs. merino wool and synthetic apparel.
Executive Producer - Backpacking Light; Show Director and Host - Ryan Jordan; Producer - Chase Jordan; Theme music: Look for Me in the Mountains written by Chris Cunningham and Ryan Jordan, performed by Chris Cunningham (acoustic guitar, lead and harmony vocals, harmonica), Chad Langford (upright bass), and Tom Murphy (mandolin), produced by Basecamp Studios in Bozeman, Montana.
Sponsorship Policy: Backpacking Light does not accept compensation or donated/discounted products in exchange for product mentions or placements in editorial coverage, including any podcast episode content not excplicitly identified as sponsored content. Some (but not all) of the links in these show notes may be affiliate links. Learn more about affiliate commissions, influencer marketing, and our consumer advocacy work by reading our article Stop wasting money on gear.
The Publisher’s Gear Guide has been updated. This gear guide contains recommendations in various categories by Backpacking Light Publisher and Founder Ryan Jordan. This is the gear he actually chooses to use on his own trips.
The Publisher’s Gear Guide has been updated as of November 3, 2023.
From the Publisher’s Gear Guide: “My purpose with this gear guide is to share the gear that I’m currently using on my own backpacking trips and other outdoor adventures. Some of the products I discuss are those that have been in my kit for several years. Others are new to my kit this season.
Because this gear is the gear I choose myself (and often represents the gear that I’ve actually purchased with my own money), the selections here represent my personal recommendations of sorts.” – Ryan Jordan, Backpacking Light Publisher and Founder
Questions for the Community
Reply in the comments below:
What’s been your favorite gear this year?
Given that you may have multiple options within the same category, what are the use cases where you select one of your products over another?
The MSR Pro Bivy weighs less than 10 ounces (285 g). It’s a very compact, feature-less bivy sack that embodies the essence of bivy sack camping.
“They are the best of nights: they are the worst of nights. The modern lightweight tent has opened up the wilderness – but for an increasing number of people, the lightweight tent is just a bit too civilised. Can you really experience nature’s rawness from inside a zipped-up storm-flap? For those who want to bring a bit of old-fashioned pain and suffering back into the outdoor experience, the bivvybag is the place to be.” – Ronald Turnbull, The Book of the Bivvy.
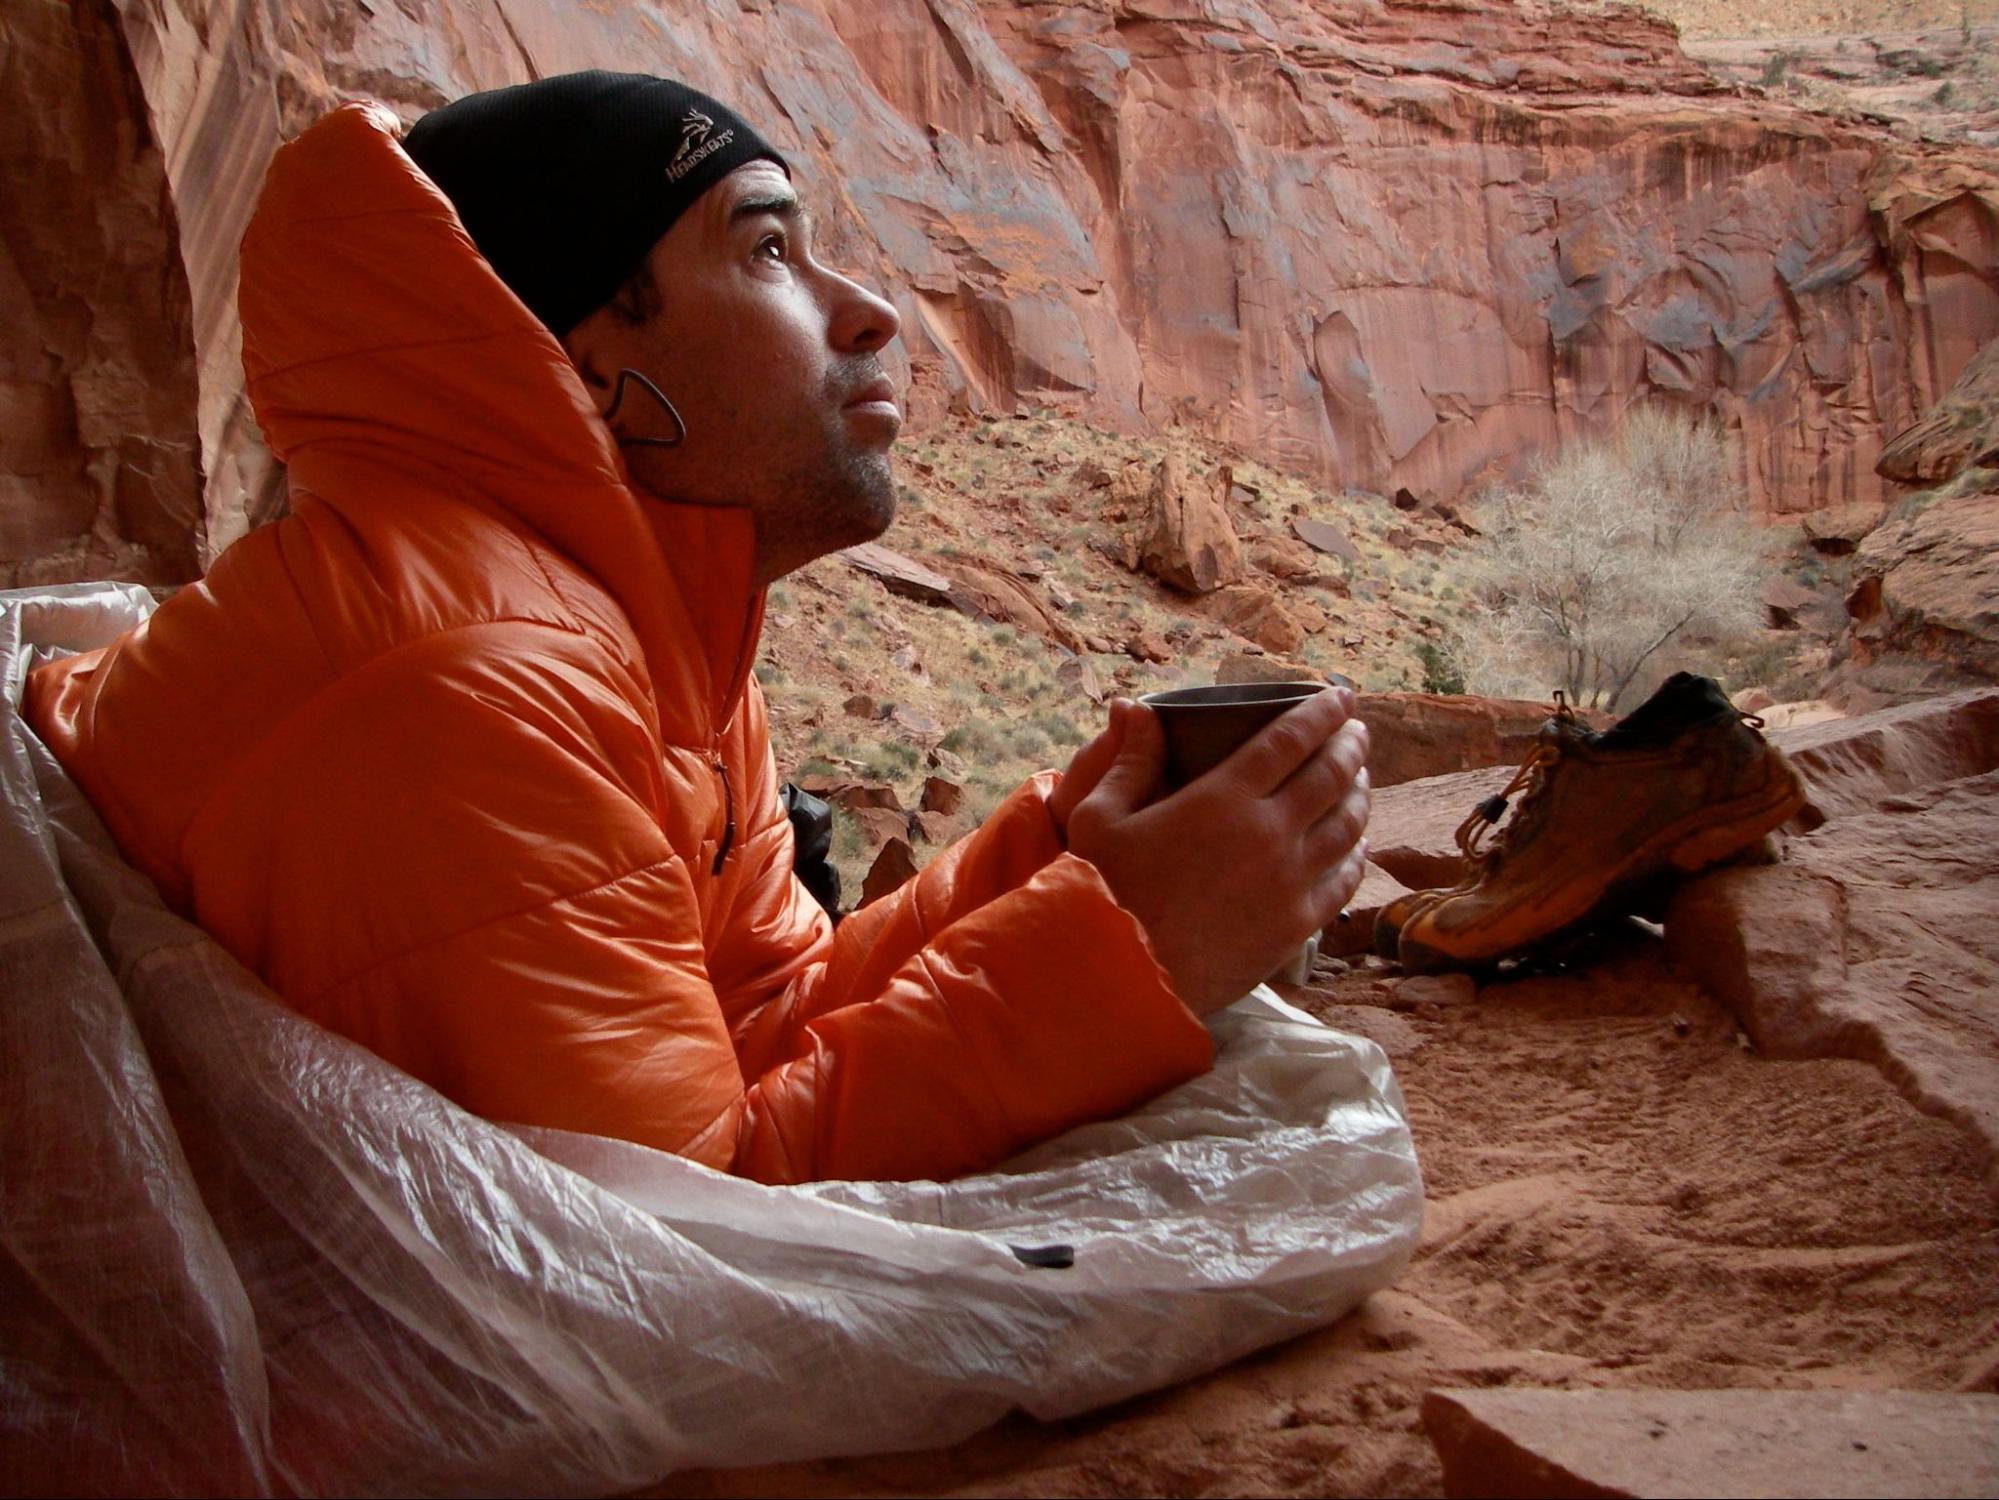
Bivy camp, Grand Staircase-Escalante National Monument, 2006. This was a simple, homemade bivy sack with a Cuben Fiber floor and Pertex Quantum upper, drawstring closure.
My experience camping in a bivy sack can be traced to the late 1980s when I started properly exploring the wilderness in Washington State’s Olympic Range. A bivy sack was the second shelter I owned (a blue plastic tarp was the first). Mine was made by Moonstone Mountaineering, fashioned from 2-layer Goretex that was both questionably breathable and questionably waterproof. These dubious qualities, combined with the fact that the Olympics enjoy more than 100 inches of annual rainfall, probably made for both pain and suffering. Interestingly, I remember very little of that. What I do remember are the nights spent in rainforests and meadow edges, atop basalt ridges and peak summits, and on platforms of ice carved into a glacier with my fiberglass-handled ice axe. They were some of the most memorable and rewarding nights of my entire life. Sure, some nights were wet. Many nights were a little chilly. But the discomfort never dampened the fond memories. Waking up to a baby goat sniffing my forehead. Outrageous sunrises. The solitude of sleeping in remote alpine perches large enough for only one human body.
It is from this context that I’m reviewing the MSR Pro Bivy sack, a modern day, 2-layer shelter bag devoid of features, and about as breathable and water-resistant as my Moonstone bivy sack from 40 years ago.
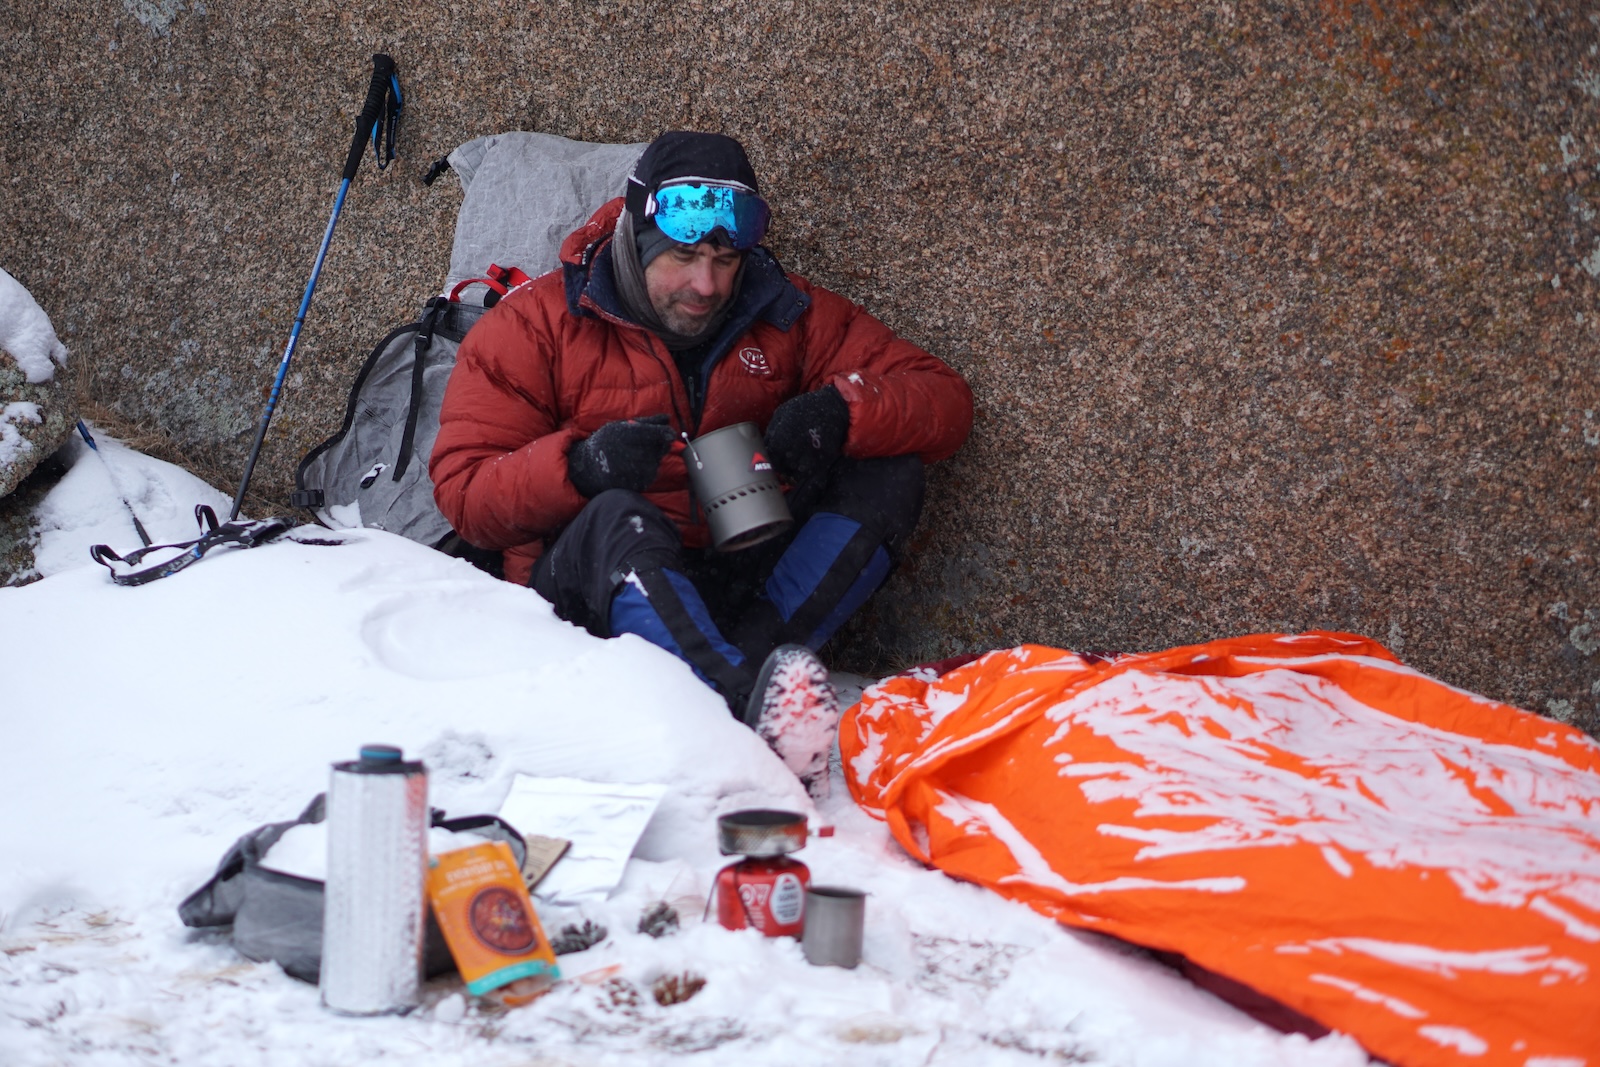
Sheltering behind a large granite boulder, Sherman Range, Wyoming. High temperatures in the 0’s °F.
MSR writes in its marketing copy for the Pro Bivy, “Designed for professional alpinists and serious adventurers…” Whenever I read something like this, I immediately translate it to “Saves weight by removing features that will result in pain and suffering unless you are a professional alpinist or serious adventurer.”
Specifications: MSR Pro Bivy
Length: 88 inches / 224 cm
Width: 36 inches / 91 cm
Weight: 10 ounces / 285 g
Packed Size: 8 x 4 inches (20 x 10 cm)
Upper Fabric: 20D ripstop nylon 2-layer breathable 1000 mm
Of course, this type of marketing may be attractive to those of us who pose as serious adventurers, even though we will invoke complex reasoning (even if executed by our monkey brain) to justify why we won’t be packing a bivy sack on our next trip!
That’s why I get a little worried about my faculties (mental or otherwise) when I get excited to use my bivy sack as my sole shelter.
To that end, the MSR Pro Bivy has re-ignited that excitement in this phase of my life. It reminds me of my 20s, when there was no decision-making matrix between choosing a tent, tarp, or bivy sack. The bivy sack always won.
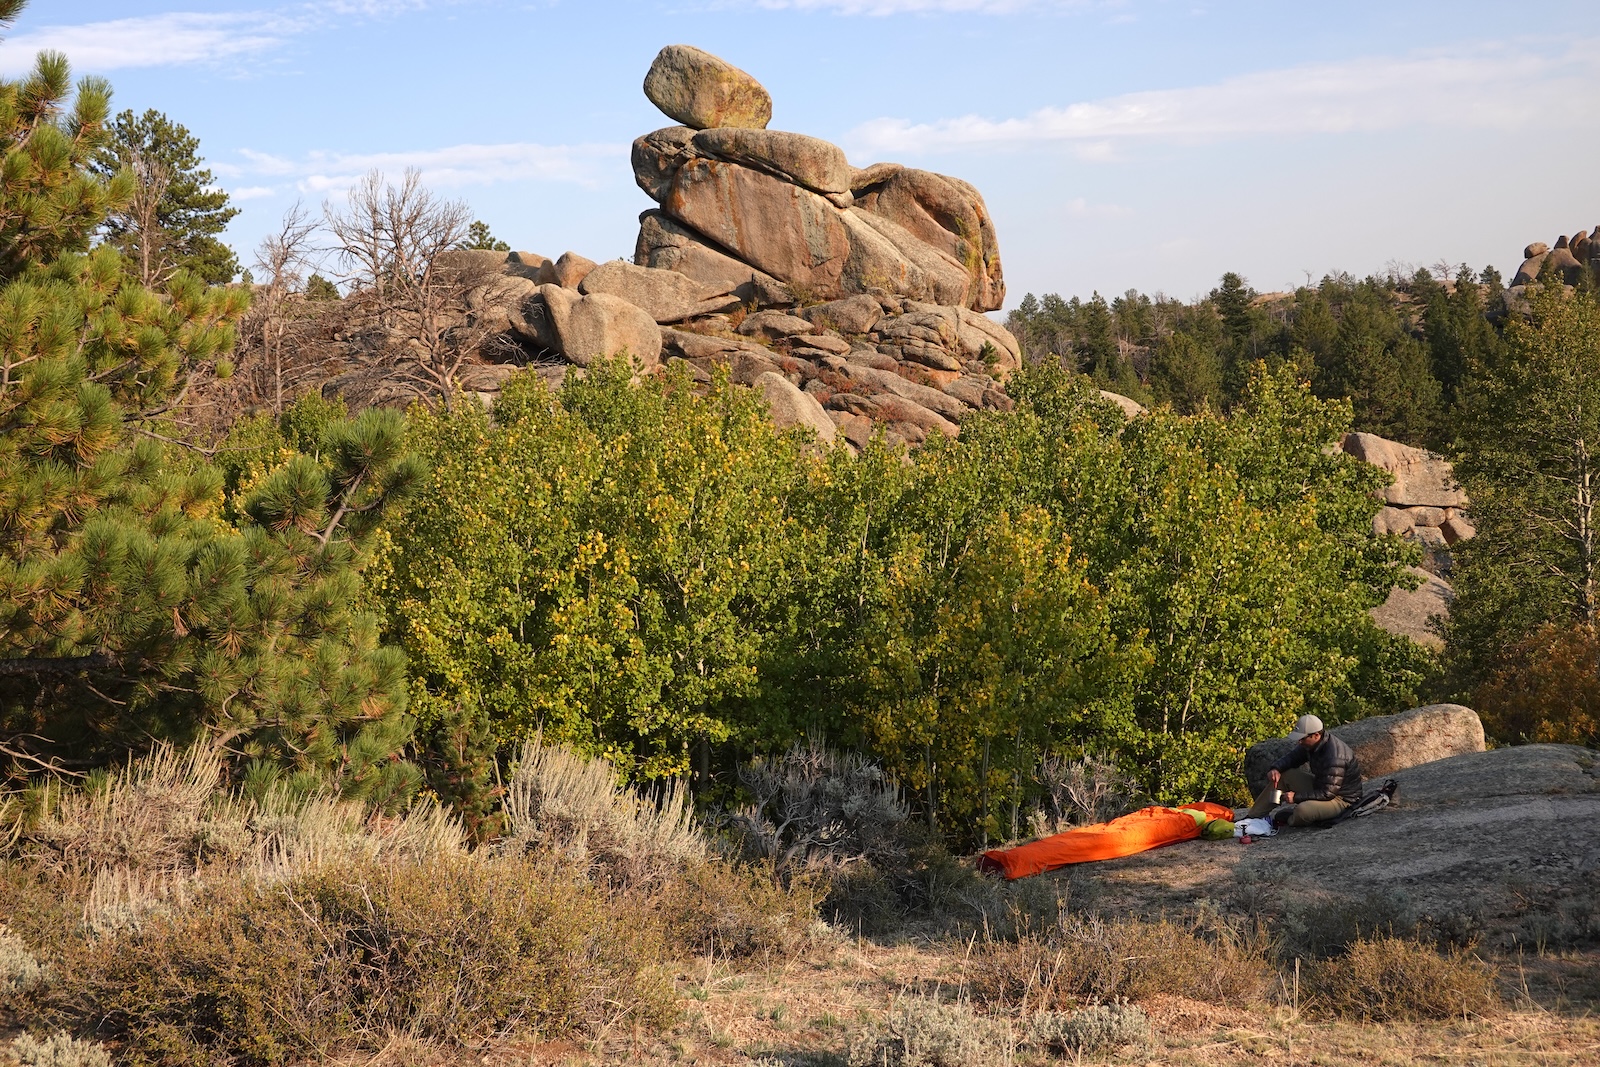
Bivy camping with the MSR Pro Bivy under a ponderosa pine, Wyoming.
Here’s why I love my MSR Pro Bivy vs. other bivy sacks I’ve used in recent years:
1. Its compact pack size. While it lacks the breathability and condensation management offered by other bivy sacks made with 3-layer waterproof-breathable fabrics, the packed size of the MSR Pro Bivy is tiny. I can stuff it into the smallest nooks and crannies of my backpack.
2. Its generous room for gear storage, thick sleeping pads, and winter sleeping bags. An 88-inch length gives me plenty of room for gear storage in the hood of the bivy (including, often, my backpack).
3. Its pitching and design simplicity. No stakeout points, no poles, no zippers. Just fabric. Nothing to break, fiddle with, or adjust.
Some of these features, of course, are also limitations. The 2-layer PU-coated fabric and lack of pole structure means the MSR Pro Bivy is not great at managing interior condensation. The zipperless design means that you are protected from the elements only by two overlapping layers of fabric at the hood end, exposing the bivy a little bit from rain, spindrift, and insects.
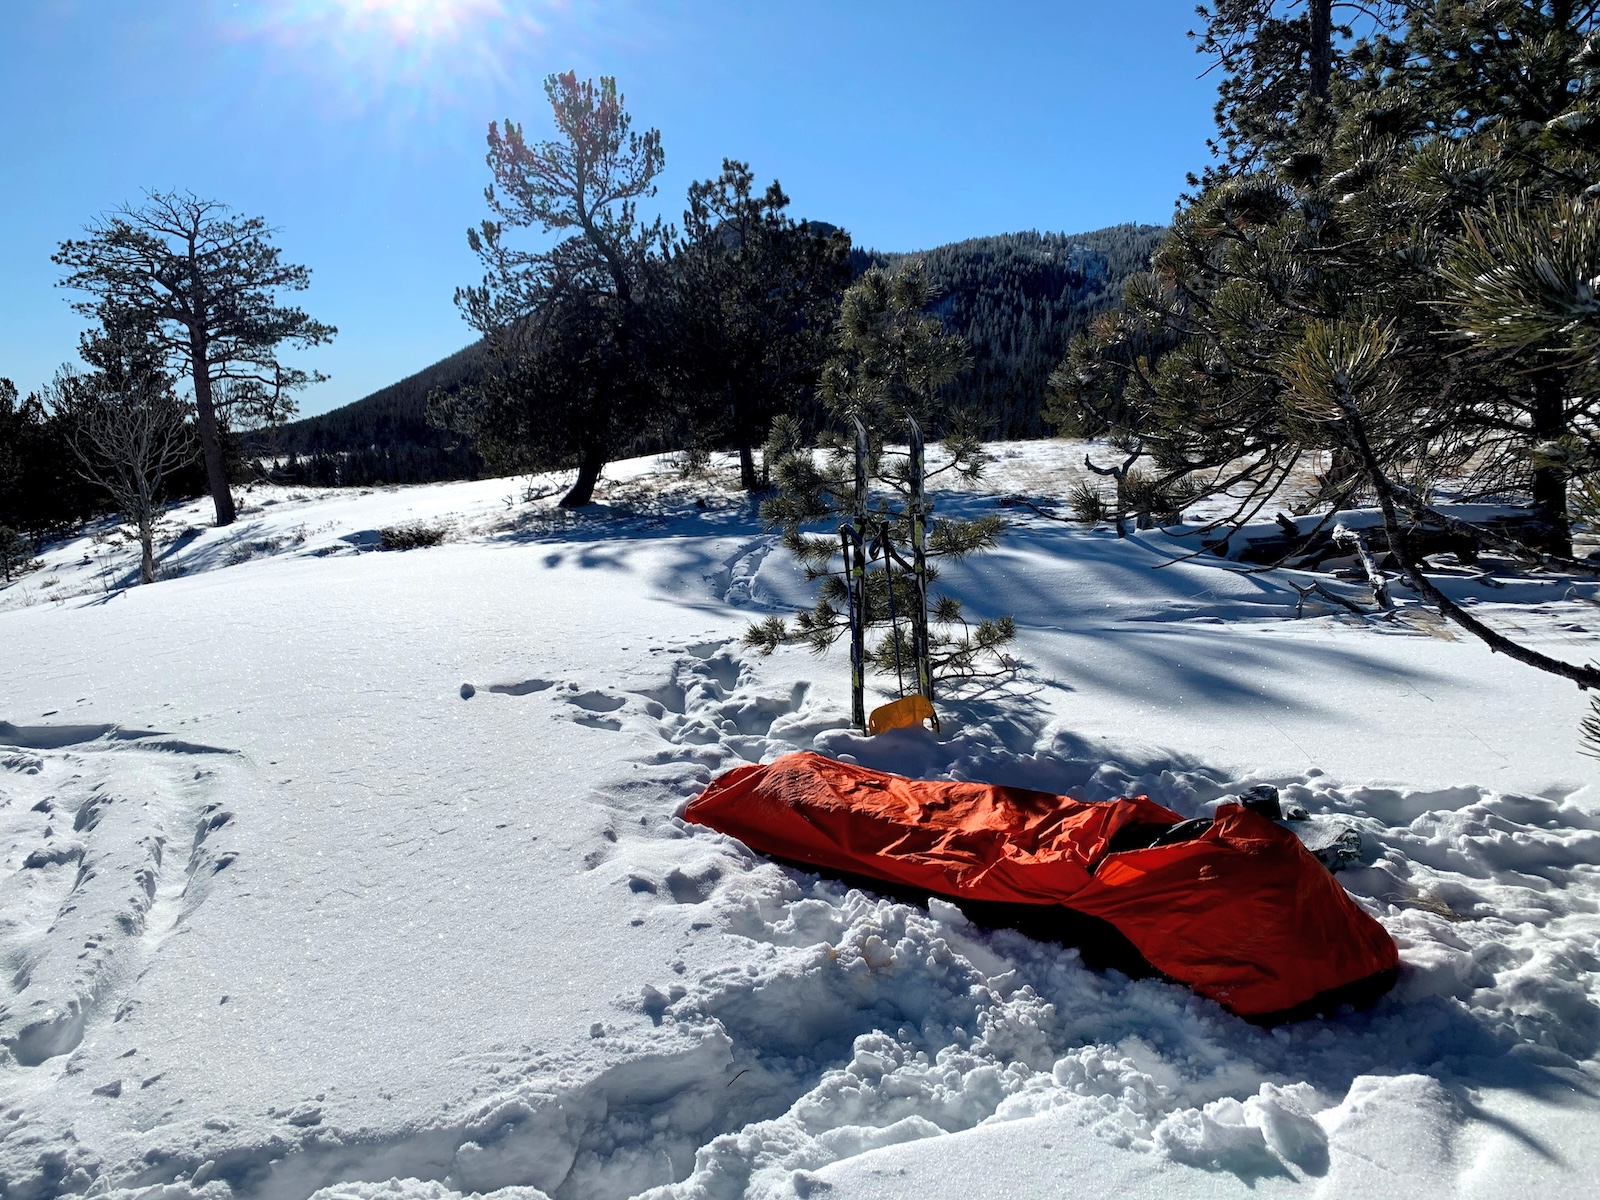
Bivy camp with the MSR Pro Bivy during a Wyoming winter ski trip.
But for me, these are the usual limitations of ultralight bivy sacks, and I’ll happily take them in exchange for a 10-ounce shelter that I don’t need to “pitch”.
In conclusion, if you’re shopping around for a full-featured bivy sack with poles and stake loops and mesh windows and zippers, you’re going to have a hard time justifying its weight and cost. Consider instead something like a Gossamer Gear Whisper (9.8 oz), ZPacks Plex Solo (12.3 oz) or a Durston X-Mid Pro 1 (15.7 oz), all of which will provide far better livability than any full-featured bivy sack on the market for less weight.
But if The Book of the Bivvy sits next to your favorite religious text on your bedside table, then the MSR Pro Bivy may be exactly what you’re looking for. Unlike other bivy sacks, which ruined bivy sacking for generations of users with bells, whistles, and features that make them feel more like really bad tents than really good bivy sacks, the MSR Pro Bivy embodies everything about bivy sack camping that makes bivy sack camping an immensely satisfying way to enjoy the backcountry.
Springtime bivy with the MSR Pro Bivy, Laramie Range, Wyoming.
Product mentions in this article are made by the author with no compensation in return. In addition, Backpacking Light does not accept compensation or donated/discounted products in exchange for product mentions or placements in editorial coverage.
Some (but not all) of the links in this review may be affiliate links. If you click on one of these links and visit one of our affiliate partners (usually a retailer site), and subsequently place an order with that retailer, we receive a commission on your entire order, which varies between 3% and 15% of the purchase price. Affiliate commissions represent less than 15% of Backpacking Light's gross revenue. More than 70% of our revenue comes from Membership Fees. So if you'd really like to support our work, don't buy gear you don't need - support our consumer advocacy work and become a Member instead.
Learn more about affiliate commissions, influencer marketing, and our consumer advocacy work by reading our article Stop wasting money on gear.
The Granite Gear Crown2 60 is a 60 liter capacity internal frame backpack that carries up to about 35 pounds comfortably and weighs around 2.1 to 2.5 pounds.
Introduction
The Granite Gear Crown2 60 is a versatile and inexpensive pack. At a weight of about 2.1 to 2.5 pounds / 0.9 to 1.1 kg (depending on size and configuration), it’s neither ultralight nor heavy. Considering that it carries up to 35 pounds (16 kg) comfortably, its load-carrying performance-to-weight ratio is reasonably high. It features an internal frame, an adjustable hip belt, and a 5-liter lid, all of which are removable. It has large mesh pockets on all three sides and a useful compression strap system.
Features and Specifications
Features
Padded adjustable hip belt with pockets (from 26 to 42 inches / 66 to 107 cm, removable)
Rated for a load-carrying capacity of 35 lbs (16 kg)
Large rear and side mesh pockets
Molded foam and mesh back panel
Load lifters
Compression strap system
Multiple attachment loops
Hydration compatible
Roll-top closure with over-the-top cinch for carrying a bear can
Weight
Torso Length
Pack Weight (including belt and frame sheet but not the lid)
Lid Weight
Total Weight
Short
2.1 lb (0.95 kg)
0.16 lb (0.073 kg)
2.26 lb (1.03 kg)
Regular
2.2 lb (1.00 kg)
0.16 lb (0.073 kg)
2.36 lb (1.07 kg)
Long
2.3 lb (1.04 kg)
0.16 lb (0.073 kg)
2.46 lb (1.12 kg)
Capacity
Volume: 60 L (3,500 cubic inches)
Weight: 35 pound (16 kg) maximum carry capacity
Materials
High-Tenacity Nylon (100D and 210D) with Barrier DWR
Compression molded polypropylene frame sheet
Description of Field Testing
The Granite Gear Crown2 60 was my first pack that saw extensive use. It served me well on a thru-hike of the Colorado Trail. I have since moved on to a smaller and lighter pack as my go-to pack, but the Crown2 60 still sees plenty of use due to its large volume and ability to carry comfortably across a wide weight range.
I have tested this pack on approximately 800 miles of mostly on-trail travel, across all seasons and most weather conditions. Testing environments and activities included the entirety of the Colorado Trail, multi-day desert backpacking, and cross-country ski hut trips. I have tested the carrying capacity up to the recommended 35 pounds (16 kg) limit, as well as stripped down as a day pack loaded with less than 5 pounds (2.3 kg) of gear. Its simplicity and highly adjustable waist strap mean that it is also the pack that I lend out most frequently, and this review will incorporate the feedback from other users who have borrowed my pack.
Performance Assessment
My performance assessment of the Granite Gear Crown2 60 is based on the following considerations:
Accessibility and Organization
Comfort
Durability
Stability
Accessibility and Organization
This pack has one large main pocket with a roll-top enclosure and cinch strap, with no internal organization. The sleeve that contains the removable internal frame ostensibly doubles as the hydration sleeve, with a small hook to hang a water bladder (which I use to clip my keys).
Externally, the Crown2 60 has three very large stretch pouches. The rear mesh pouch is easily big enough for a shelter, warming layers, or rain gear. The side mesh pouches (replaced in newer models with Robic nylon) are large enough to fit three 1L Smartwater bottles, but the mesh does not taper towards the front as dramatically as it does in other packs. The depth of the side mesh allows more gear to be stored securely at the cost of less access while hiking. If you do not have flexible shoulders, reaching the side mesh pouches requires taking the pack off or asking for help from a friend. I added a Zpacks Water Bottle Sleeve to one of the shoulder straps, which eliminated this frustration. Current versions of this pack also have a drawstring at the top of the side mesh pouches for added security.
The hip belt pockets are large enough to securely hold any small items that I need accessible while hiking. I have found that filling one pocket with all the snacks I expect to eat during the day leaves room in the other pocket for my phone, a map, a mini chapstick and sunscreen, and more. The zippers on these pockets are more easily pulled from a certain angle and can be difficult to operate one-handed if the pocket is mostly empty.
The last pocket is the completely removable lid, which adds 5 liters of extra storage. In my usage of the pack, I have never needed this extra storage, but when loaned out to friends, they used the lid with no complaints. The lid can be attached over a bear canister if needed, but it’s not required to secure a bear canister (which can be secured using top compression straps). Note: I have not tested this pack with a bear canister.
The Crown2 60 has two larger loops at the bottom of the pack that can be used to attach an ice axe, trekking poles, or shelter. It also has two smaller loops that are meant for attaching the removable lid, which are too small for larger items but are an easy place for a carabiner or cord attachment. It also has six compression straps, making for an adaptable compression system. The lower side straps can be threaded underneath the mesh pouches, or kept on the outside to secure the contents of the pouches. The upper side straps are 4 to 5 inches (10 to 13 cm) above the top of the straps and can be used to secure taller items like trekking poles. I also use this strap to secure my Garmin inReach Mini and headlamp.
Overall, the pack has lots of secure storage space, with an acceptable amount of storage accessible while walking. With the simple addition of a shoulder strap water bottle holder, the pack allows for easy organization and accessibility of all of my gear.
Comfort
This pack is very comfortable for my body type when used within the recommended weight range. The highly adjustable hip belt, internal frame, and harness work together well to pull the pack close to my body and transfer weight to my hips. Other testers included men and women ranging from 5’4” (1.6 m) to 6’ (1.8 m) tall, all of whom found similar results with my medium torso length pack.
The hip belt rubbed on my hip bones enough to leave them discolored by the end of a day of hiking, but never developed into open sores or became painful. While the hip belt fits most user’s hips comfortably, a two-strap system would give more freedom to dial in the fit by allowing the load to be better distributed across more hip belt surface area.
The shoulder straps are less than perfect; they are too thin to distribute heavy loads and the sternum strap is not well designed to position the straps comfortably. Above a pack weight of about 30 pounds (13.6 kg) they begin to cut into the wearer’s shoulders. However, at lesser pack weights, the hip belt takes almost all of the weight easily and the thin shoulder straps become a non-issue.
The sternum strap buckle is small enough to be frustrating to open or close with cold hands or while wearing gloves, and the thin strap connecting the harness to the bottom of the pack can at times rub on the wearer’s ribs. Lastly, the back mesh panel and air flow vents don’t significantly increase air flow – my back is sweaty while wearing this pack in most if not all conditions. The new version of this pack, the Crown3 60, has ditched the mesh for a molded foam back panel; time will tell if this fixes the issue.
If you remove the internal frame as advertised, the pack quickly devolves into a puddle of unstructured fabric. Do not buy this pack with the intent of using it frameless.
All that said, this is one of the more comfortable packs I have used for carrying less than 35 lbs. When fitted well to my body, it sits with all of the weight on my hips, and the shoulder straps simply pull the pack tightly to my body. On long mileage multi-day treks, I have never been uncomfortable using this pack in a way that a short strap readjustment could not fix.
In summary, it’s comfortable, but don’t expect to push it beyond its load-carrying capacity.
Durability
My Crown2 60 has lasted for hundreds of miles with impressive durability. The only damage sustained is a pinhole in the rear mesh pocket which has not grown bigger with time. All straps, buckles, and zippers are working and intact, even the delicate-seeming sternum strap buckle. The pack only shows its age and mileage on the rare occasions when the lid is attached, which has only a few dozen miles on it and still looks almost brand new. I am not particularly gentle with my packs, often sitting on them and taking them on rock scrambling or canyoneering expeditions.
Stability
The design of the hip belt, internal frame, and shoulder harness provides a stable pack that does not shift when rock scrambling or moving over downed logs. It feels like part of your body, moving with you as you move. Even if the weight is positioned awkwardly through hasty packing, it does a great job of distributing the weight to your body – because of the wide range of adjustability in the harness and compression system.
On an overnight backpacking trip to a hot spring, one friend asked to borrow a pack, and I happily offered my Crown2 60. It was not until we arrived at the trailhead that we realized the sheer amount of gear they intended to bring – including a 7+ pound (3 kg) Walmart car camping tent and a large bear canister. We did a shakedown to leave any unnecessary items at home, but still had a lot more gear than we were expecting. My wife and I gave our friends our smaller and lighter packs and I carried the Crown2 60 packed to its limits, likely right at or above 35 pounds (16 kg). While this was at the limit of comfort for the thin shoulder straps, the pack still hugged my torso well and I had no problems climbing over avalanche debris or fording streams.
On a separate trip to the Black Ridge Canyons Wilderness, I was able to climb and scramble with 10 pounds (4.5 kg) of water sloshing around inside the pack. While I have fallen many times while wearing this pack cross-country skiing, the falls were always due to my technique, not from the pack disrupting my balance.
Use Cases
This pack (in a size Medium torso length) is 35.2 ounces (1 kg) without the lid, which is 7 ounces (0.2 kg) heavier than my Mountainsmith Zerk 40. The Crown2 60 can only comfortably carry up to about 35 pounds (16 kg), which is on the lighter side for 60 L packs. This pack is not a finely-tuned scalpel for a hiker with a well-dialed-in kit. However, I find myself using it consistently for many situations in which it excels. These situations include winter hiking, long water and food carries, short trips, and as a loaner pack to friends.
Winter Activities
When backpacking or cross-country skiing in the winter, I love having the extra room to carry all the puffy insulation I need to stay warm. I can also carry heavier items, such as a large pot to melt snow. The compression straps and loops make attaching poles, snowshoes, and other winter equipment easy.
Long Water and Food Carries
When hiking in the Black Ridge Canyons Wilderness, this pack’s ability to comfortably carry a significant amount of water weight allowed me to travel much deeper into the canyonlands than with my Zerk 40 (which has a lower comfortable load-carrying capacity). It allowed me to finish the Colorado Trail in a COVID-shortened period by letting me skip multiple town days and rely on larger resupplies.
Short-Distance Trips
A quick overnight close to the car is a great opportunity to have a pack that can handle a six-pack, a little firewood, a four-person tent, or any other camping luxury.
Loaning to Friends
This pack is simple to use, and the wide range of adjustment on the hip belt means that anyone roughly my size can use this pack comfortably. It can easily handle a less-than-ultralight kit for trips that do not have long food or water carries.
Entry to Lightweight Backpacking
The same reasons this is a great loaner pack make it a great first entry into reducing your pack weight. My Colorado Trail thru-hike was the first backpacking I had done since the Marine Corps, where my body armor alone weighed more than my fully loaded Crown2 60. The easy learning curve of this pack makes it easy to recommend or gift to someone interested in starting to lighten their pack.
Comparisons
Pack
Granite Gear Crown2 60
REI Flash 55
Gossamer Gear Mariposa 60
MSRP
$200
$200
$285
Weight (Size M)
38 oz (1077 g)
42 oz (1191 g)
32.7 oz (927 g)
Capacity
35 lb (15.9 kg)
30 lbs (13.6 kg)
35 lb (15.9 kg)
Materials
Main: 100D High-tenacity nylon with NeverWet liquid repelling treatment, Bottom: 210D High-tenacity ripstop nylon with NeverWet liquid repelling treatment
100-denier ripstop nylon main body; 420-denier nylon bottom
100 denier Robic high-tensile strength nylon; select use of 200 denier Robic high tensile strength nylon, 70 denier double-rip ripstop nylon, Darlington Mesh, and Supreme Air Mesh
Frame
Polypropylene, removable
Steel, non-removable
Air Flow SitLight Camp Seat, removable
Exterior Pockets
5
9
7
Hipbelt
yes, load bearing, with pockets
yes, load bearing, with pockets
yes, load bearing, with pockets
Closure
Roll top
Roll top
Over-the-top
External attachment Points
2 ice axe loops, 6+ cinch straps
1 ice axe loop, 5 cinch straps
1 ice axe loop, 1 trekking pole attachement site, 2 cinch straps, multiple webbing tie on sites
The Granite Gear Crown2 60 balances good value, versatility, and lightweight functionality. With an MSRP of $219.95, it is often available at much lower prices during sales – I purchased mine new for $110, and it is currently available from Granite Gear for $120. It offers a wide range of uses, from winter overnights to extended backcountry ventures. For those seeking the most ultralight solution or needing to carry more than 35 pounds (16 kg), other options might prove more suitable. For me, the Crown2 60 saves me money and garage space by filling many roles in my outdoor adventures.
Photos
Following: a collection of random photos of the Granite Gear Crown2 60 in use on day hikes, winter trips, backpacking trips, and as a loaner pack.
Join Ryan Jordan and a demon virus on a trip that brings early-season winter to Rocky Mountain National Park.
The first snows of fall make me happy. I live at 7,500 feet above sea level, and my town is rimmed by mountains that are prettier when they’re snowy. While I appreciate their majestic rock faces, I like them more with a bit of white on them. Even more, I like experiencing early-season snow while hiking and camping in them.
Our office window is a portal to the 12,000-foot peaks of the Continental Divide in Rocky Mountain National Park. It’s distracting enough that I had to move my desk away from the window. Out of sight, out of mind.
So when the weather forecast started to go south, I started packing.
With a forecast of a few inches of snow, this trip would be my transition out of summer gear and into fall gear.
Gear Notes
Some of the changes I made to my hiking clothes:
Hiking pants – replaced thin polyester pants with warmer prAna Stretch Zion softshell pant
Hiking shoes – hung up breathable trail runners for La Sportiva Ultra Raptor Wide GTX Mid Boots, oversized two sizes to accommodate extra insulation, leave toes less constricted
I still carried a 20-degree down quilt for sleep, but since I was to sleep on snow, I opted for the NEMO Tensor Extreme Sleeping Pad and added a double-walled tent (Tarptent Notch Li with Solid Inner) for a few extra degrees of indoor temperature.
Other than that, I stuck with the majority of the rest of my summer kit, and it served me well enough. Next time, though (note to self): booties and puffy pants.
Trail Notes
When I left the 8,500-foot trailhead at around noon, it was 45 °F and cloudy. Four hours later at my destination (an alpine lake at 11,000 feet), it was 29 °F and snowing. The trail was dirt up to about 10,000 feet, then patchy snow. As I passed little streamlets here and there with tiny icicles dangling from their rocks, I chuckled a little bit, thinking, “C’mon, it’s not that bad yet.” I’d rethink that sentiment the next morning.
By the time I reached 10,500 feet, snow was sticking to the trail, and the mountains were silhouetted in the clouds.
Squirrels were frantically dropping pine cones and building their seed caches as if on a sunset deadline. A chipmunk scurried over my feet, cheeks full, while I was hiking. It tripped over my shoelace and careened off my shin in a slightly different direction than intended.
By early afternoon, the wind started to blow. Five miles an hour, then ten, then fifteen. I layered. First, the fleece hoody. Then, gloves. Then, rain jacket and pants. Then, rain mitts. Then, sunglasses (?) to avoid the stinging of snow in my eyes, in spite of the fact that the skies were darkening.
Camp Notes
My camp was located above the lake and somewhat protected in the trees. However, by late afternoon the temperature had dropped to 21 °F and the wind had picked up, gusting through camp at 20 mph. Wearing all of my clothing, I was starting to shiver, so I retired into my tent.
Tarptent Notch Li with solid inner.
I crawled under my quilt, brewed coffee, and listened to a podcast. I then napped, awakened here and there by the freight train sound of the wind on the 13,000-foot peaks surrounding my camp. A nearby tree was starting to sing and squeak, its lower trunk weakened by the presence of a 1-inch crack splitting its lower trunk. Fortunately, it was leaning away from me.
After darkness enveloped my camp, I mustered up the courage to exit my tent to cook dinner, not in the mood to spend any more time in the confines of the little tent than I had to. It was snowing harder now, so I set up my chair, hunkered under a light tarp that I’d pitched nearby, and boiled water. I meditated for the 18 minutes or so it took to rehydrate my meal under my parka, trying to will away the occasional shiver. After eating and cleanup, I checked my outside sensor: 17 °F. I retreated back to the tent with a full belly and the fatigue of the day’s elevation gain. Sleep came easy.
I use environmental sensors to collect data (temperature, humidity, dew point, barometric pressure, and vapor pressure differential) at various locations in camp and in my shelters. On this trip, I placed one sensor outside, and three more at various locations throughout the double-walled tent (see one on the upper right near the trekking pole in this photo) to observe the variability in conditions and how the data correlates to observed condensation. I added a little LED lantern (upper left) for a little cheer during the long night.
Two hours later, I woke up, coughing spectacularly and shivering, and a sense of dread came over me. Chase had the flu this week, and I thought I’d escaped it. But it was just incubating with me during my hike in and didn’t go rogue until the demon virus knew I was trapped in this mylar-and-UHMWPE winter coffin, far from the warmth of my bed back home.
It was a long night. Sleep came in spurts, 20 minutes here, 30 minutes there. Other than the 25-minute break for dinner and two late-night pee breaks, I would spend 16 hours in the tent.
Morning Notes
I woke up for good at around 8 AM. I could see blue sky through the paper-thin walls of my tent, but the wind remained belligerent.
Morning brought fresh snow, blue skies, and frigid temperatures.
I checked my sensors: 14 °F outside, 17 °F inside my tent. Too many hours spent in a prone position while battling the onset of the flu left my back sore. I had to get out of bed at some point, now seemed like a good time.
I was already fully dressed, so all I had to do was stuff my sort-of-warm feet into my sort-of-cold boots. After relieving myself, expelling the phlegm from my congested sinuses, and making a cup of hot coffee, the wind died. I took my coffee and quilt and walked the few hundred yards to the lakeshore. I found a dry rock, wrapped myself in my blankie, and let the sun and hot drink do its good work for the next half hour.
After the wind died down, the morning sun made me feel human again. My camp was in the trees below the large mountain on the right.
After eating a hot breakfast hash, I felt a little better, so I continued my work. Some gear testing, analyzing sensor data from the night before, a little writing, and some filming for a new module being presented during our current live online course cohort.
Finally, a little after noon, I packed up, messaged Stephanie with my pickup time and location, and started walking.
I would make it back just in time, virus in tow, and spend the next three days in bed.
Post-Trip Notes
It no longer surprises me how much colder the same temperature feels in October vs. July. A few things are going on here. The temperatures are sustained at colder levels for longer periods of time when days are shorter. The sun is lower, so there’s less radiative heat gain. Winds are stronger and more sustained. I have to remind myself time and again – don’t just pack for the coldest expected temperature – pack for the season. Reminder: booties and puffy pants (slaps head).
The Tarptent Notch Li with its solid inner tent is a fine fringe-season shelter. Its steep sidewalls shed snow well, and its small roof panels don’t really hold much snow before it sloughs off. However, DCF is a “cold” tent fabric (due to radiative heat loss), and the Notch solid inner tent is only partially solid – the upper sidewalls have large mesh windows in it. It’s not a warm combination, at least, not warm like a double wall tent with a polyester or nylon fly and full solid inner tent, which can offer interior temperatures that are 8 to 12 °F warmer than outside. In addition, while the solid inner kept the wind blowing under the fly out of my sleeping area, it did not prevent the ingress of fine spindrift throughout the night, and I found myself covered in a light dusting of snow and frost in the morning.
Cooking on an upright canister stove in breezy conditions (gusts of 5 to 12 mph atop the cut stump that was my cooking table) was fine. My water volumes were small (200 to 500 ml), and I kept my canister in my parka when not in use to keep it warm. I was using an MSR Pocket Rocket Deluxe (with no additional windscreen) and a Vargo Titanium BOT 700.
Not a winter stove, but good enough for winter conditions so long as the water volumes stay low and I keep the canister warm between boils.
I knew something was happening in my body before I started to show symptoms. The trail in was a steady, uphill drive (2,500 feet of elevation gain over about 6.5 miles). However, after two hours, something happened to my heart rate. The same grades on the first half of the hike that drove my heart rate into the 130s were driving my heart rate into the 150s during the second half of the hike. I saw this as a red flag, but ignored it, just thinking that the trail was getting steeper (it wasn’t). I didn’t really see the decay in my aerobic performance until I analyzed the data after my trip. In retrospect, I wished I had performed a heart rate variability (HRV) test the morning that I’d left. Almost without exception, I can predict the onset of sickness with an HRV test.
Drew Smith reflects on hiking in the places close to home as he explores a nearby mountain drainage during all seasons.
Most trip reports (mine included) focus on noteworthy locations — places that are some combination of remote, challenging, or distinctive. And although hiking may be harder in such places, writing about them is easier.
Photo: Drew Smith
But life, very much including the hiking life, is not always lived on the peaks. There is plenty of satisfaction to be found in just being in wild places, even if those places don’t have the biggest mountains, the tallest trees, or the showiest wildflowers.
If a place has pretty good forests, flowers, fish and fields, and it is close by, then you are lucky indeed. You have a retreat and a refuge, a place to go when you need to go someplace. You don’t need to make an expedition of it. Just grab your pack, chuck in some food and go.
I have the good fortune to live near such a place. It is a drainage that stretches from the Continental Divide down to the Great Plains. There are plenty of these along the Front Range of Colorado — but only one that does not have a road traversing its length.
I tend to visit in the fall, winter and spring. Summer is too hot in its lower elevations and wilderness permits are required in the upper basins – and they are usually snapped up weeks in advance.
Author’s Note:BPL’ers, especially those in Colorado, already know this drainage. I’m omitting place names to keep them out of search engines, not to tease backpacking humans.
Photo: Drew Smith
Fall
Photo: Drew Smith
Summer was leaving. Low clouds and high winds were sweeping away what drowse and lassitude still hung in the air. Time to get out before winter’s sharp discipline imposed itself.
Despite the forecast, permits for the high country were still in short supply. I could camp in a valley site near the creek for a day. After that I’d have to move up the basin. The ranger at the permit station gave me a wildly optimistic weather forecast along with a biffy bag and the LNT lecture.
The day hikers thinned out quickly after the first miles and first cascades. The aspens, still leafed out, began fluttering as the wind rose. The creek had long ago finished its business of carrying away snowmelt. It ran low but was still clear and confident, moving at a stately pace, in no hurry to now carry away the last of summer.
Photo: Drew Smith
I set up camp, then returned to the creek to enjoy a sun-warmed ledge. These were the last moments of summer, and I did what summers are best for: nothing. I did nothing, I thought nothing. I was perhaps no more sentient than the rocks that warmed and cradled me, the river that sang and danced before me. There was no desire to be anywhere other than where I was, to do anything other than what I was doing. Which was nothing.
Clouds and a cold creeping wind chased away that particular idyll. I migrated back up to camp. The map showed a pair of lakes maybe half a mile and a few hundred feet above, well away from any trail. The lakes would be scenic and interesting, and perhaps they would hold fish.
Photo: Drew Smith
I grabbed my Tenkara rod, snaked my way uphill through the forest, detoured around some outcroppings then dropped down to the lakes. They did not look full of fish. The lakes were satisfied to straddle the boundary between lake and pond, not caring how humans might classify them.
I sat, I waited, and I observed. Nothing happened. Nothing was good. Nothing was all I desired from this lake. The sun dropped and I returned to camp.
A break in the rain the next morning gave me a chance to pack up dry. The rain came and went on the hike upbasin, flung by a wind that was trying to whip up a sense of urgency. I resisted, or rather, ignored its prodding, stopping often to look around me, to go beyond looking, to actually see this place in its entirety.
When I arrived the lake was frothing. However the designated campsite was beneath a low outcropping and well-supplied with trees. I set up my tent, then strung my tarp in a strategic spot where I could monitor the cloud level on the divide while sipping hot drinks.
The rain slackened then stopped. The wind relaxed a bit. I had never visited the headwaters lake above. Now would be a good time. Ever hopeful, I packed my rod along with snacks and water.
Photo: Drew Smith
The lake basin was elemental: rock, water and wind. The divide ringed the water, dipping near to its surface. I stood in the open as long as I could, then retreated to the leeward side of a boulder and ate lunch facing downvalley. It was a blue sky day out on the plains. Small dense snowflakes whipped past my face. I could see summer, feel winter. Fall was here.
Photo: Drew Smith
Winter
The mountain forecast was sunny but windy. Not ideal, but waiting for a calm weekend might mean waiting all winter. Best to pack an extra layer and just go.
Dan had built his pulk the previous weekend and was eager to take it out. He doesn’t ski, so we strapped on our snowshoes and began shuffling up the well-packed trail.
Photo: Dan Schneider
The familiar sights passed by, familiar but changed. Sharp-angled outcrops were now sinuous mounds and bowls. The boisterous summer stream was subdued, its cascades encased in ice, its pools and runs tucked under a fleece blanket. Open forest had become a ciborium of snow-laden branches drooping over the trail, muffling all sound.
Photo: Drew Smith
Silence does not equal death though. Although the raucous calls of jays were gone, they were replaced by the cheerful recitations of chickadees. The snow itself recorded the continuing business of life, tracks of snowshoe hares, foxes, bobcats and the occasional squirrel criss-crossing the trail.
We arrived in camp around noon, set up our tents, and began digging out a kitchen as the wind rose.
We lounged around camp in our kitchen burrow, mostly out of the wind, mostly in the sun. Dinner was served as the sun went down, then a few shots of whisky as we prepared hot water bottles. We retired to our tents directly after, unwilling to face the wind on a February night.
Photo: Dan Schneider
Morning was sunny and windy. We had spent enough time in our tents. Side trails form a loop on the west side of the canyon. The forest opened occasionally to views of the dominant peak. Snow had long buried the cascades and falls draining upper basin lakes. It didn’t matter. We were out, we were moving.
Photo: Dan Schneider
We had brought one more dinner and breakfast, and could stay another night. That would mean spending 12 of the next 16 hours hiding from the wind in our tents. Best to pack up and go.
Spring
Spring is the saddest season in these parts. The weather is more about winter refusing to leave than summer coming on.
It’s good then to have a low-altitude destination close by, a place where you can put a pack on your back and walk without strapping anything onto your feet.
Photo: Drew Smith
The trail leads down the gulch, past the spring where an old sheepherder’s cabin slowly decays. The hoofed locusts are gone now but their big horned betters remain, and we startle a small flock at a narrow spot.
Reaching the meadow we turn east toward a favorable site. We are cut off by a steep-sided gully, one that was not here before the flood of 2013. The dog is getting older, she has to be helped down, then boosted up the far side. She does not balk or complain, would never be the one to hold us back.
Photo: Drew Smith
The morning sun is replaced by snow squalls. But it’s not too cold, not too windy, to lounge around a small fire wrapped in scents of pine smoke and wet snow.
A herd of elk filters into the meadow, upwind, unaware of our presence. The dog is on full alert. She quivers, a quiet whimper escapes, but makes no move to chase. The elk finally notice us but stay where they are, looking for something, anything to eat. They are in no condition to run. Without ever seeming to move, they melt back into the forest.
Photo: Drew Smith
The gully had consumed the use trail we followed down to the river. Everything there is still askew. Or maybe right where it is supposed to be. The old arrangement of boulders was no doubt the result of a previous 200-year flood. The new arrangement will in time seem natural and right.
But the hole where I could count on catching a brown trout is gone. It has not been replaced by a new hole with a new trout. We contemplate this, the dog and I, each in our own way, decide it is not so bad, and return through the dusk and the snow to our camp.
The Unbound 2P and Duplex Zip beg for a direct comparison. Both of them are six-panel, symmetrical designs with zip-access, side-entry storm doors, and both are generally pitched with a total of 8 tent stakes. They have similar footprints, similar weights, and offer similar levels of weather protection.
Introduction
The ubiquitous ZPacks Duplex, perhaps the most popular ultralight trekking pole tent for modern-day thru-hiking, has more competition today than in years past. With new Dyneema Composite Fabrics shelters from Hyperlite Mountain Gear, Tarptent, Durston Gear, Gossamer Gear, and others, thru-hikers and other backpackers who care about their shelter weight have many more options to choose from today.
The following table compares several Dyneema Composite Fabrics shelters. All of them are two-person, side-entry, dual-vestibule tents that are pitched with two trekking poles.
Model
Weight
MSRP
Hyperlite Mountain Gear Unbound 2P
24 oz
$699
ZPacks Duplex
19 oz
$699
ZPacks Duplex Zip
20 oz
$699
Gossamer Gear the Two DCF
21 oz
$589
Durston Gear X-Mid Pro 2P
20 oz
$679
Tarptent Dipole 2 Li
27 oz
$799
Bonfus Duos 2P
21 oz
$739
* The Gosssamer Gear The Two DCF pricing was current as of fall 2022. However, that model is currently unavailable.
The Hyperlite Mountain Gear Unbound 2P and ZPacks Duplex Zip were tested side-by-side in a variety of (mostly very wet) weather conditions.
The Unbound 2P and Duplex Zip beg for a direct comparison. Both of them are six-panel, symmetrical designs with zip-access, side-entry storm doors, and both are generally pitched with a total of 8 tent stakes. They have similar footprints, similar weights, and offer similar levels of weather protection.
We pose a variety of questions about these two shelters and go into detail about a head-to-head comparison of them in the following video.
Watch the Video
Outline (clickable timecodes are available in the video description at YouTube):
0:00 – Coffee
0:25 – Why is the Unbound heavier than the Duplex/Duplex Zip?
1:02 – Which tent is more stormworthy?
2:02 – Any differences in condensation resistance?
2:45 – Which tent would you choose (Duplex vs. Unbound vs. Gossamer Gear Two)?
3:25 – Will the Unbound dethrone your Dipole Li as your DCF tent of choice?
3:55 – Interior door battle: rainbow zipper or D-zipper?
4:23 – Which tent has better guylines?
5:13 – What tent stakes do you recommend with these tents?
6:18 – Which tent has better interior organization/pockets?
6:38 – What about adding peak guylines for stormy weather?
7:08 – Fold and roll vs. stuff (storage)
7:20 – Best vestibule door zippers/guylines?
7:39 – What’s the better tent for 2 people?
7:50 – Privacy, connectedness to nature (canopy fabric differences)
Executive Producer - Backpacking Light; Show Director and Host - Ryan Jordan; Producer - Chase Jordan; Theme music: Look for Me in the Mountains written by Chris Cunningham and Ryan Jordan, performed by Chris Cunningham (acoustic guitar, lead and harmony vocals, harmonica), Chad Langford (upright bass), and Tom Murphy (mandolin), produced by Basecamp Studios in Bozeman, Montana.
Sponsorship Policy: Backpacking Light does not accept compensation or donated/discounted products in exchange for product mentions or placements in editorial coverage, including any podcast episode content not excplicitly identified as sponsored content. Some (but not all) of the links in these show notes may be affiliate links. Learn more about affiliate commissions, influencer marketing, and our consumer advocacy work by reading our article Stop wasting money on gear.
The ZPacks Duplex Zip Tent is a 2-person, 2-door, 2-vestibule, side-entry trekking pole tent made with Dyneema Composite Fabrics. The ZPacks Duplex Zip weighs 20.4 ounces (577 g) and has an MSRP of $699.
Daniel Hu backpacks the High Divide Loop, one of the most beautiful hikes in Washington State and Olympic National Park.
The High Divide Loop (also known as the 7 Lakes Basin) is, in my mind, the most beautiful hike in all of Washington state. Nestled deep in Olympic National Park, this trail comes with spectacular views and is teeming with wildlife. If you’re looking at a map of the United States, touch your finger to the most northwestern point in Washington state, and you’ll be fairly close to identifying its location. The trailhead is 3.5 hours from my front door, meaning an early rise out of bed before dawn in order to get boots on the ground at a reasonable hour.
I’ve done this trip twice, and each time have marveled at the beauty of the Olympic mountain range. The “Enchantments” moniker has already been bestowed upon another region in the Washington Cascades, but in my mind it would be more fitting for the High Divide Loop! (Side note: explorers who have traversed the Enchantments may contend that it is a more beautiful experience, but having also twice hiked both trails, I stand by my words – nothing comes close to the High Divide Loop for me!)
The trail isn’t a simple walk in the woods, either: this loop is 19 miles long and comes with 4000 feet of elevation gain! I’ve most frequently heard of hikers treating themselves to a more leisurely two-night trip, but my experiences there have been just for one night. In hindsight, perhaps a more compelling reason to take two nights would be simply to prolong the experience in this magnificent area!
Beginning the Hike
The loop can be done either clockwise or counter-clockwise and since the elevation peaks at approximately the halfway point, neither direction is necessarily easier or more difficult than the other. I have only hiked it counter-clockwise, and the biggest determining factor was where our campsite was located along the trail.
The trail is well-maintained and I’d venture to say it’s nearly impossible to lose track of it. As with many hikes, the first several miles of trail are quite wide due to day-hiker traffic, but as you begin to penetrate deeper into the backcountry and gain elevation, the noise and bustle of your fellow humans will fade and give way to the gentle quiet of nature. It’s possible, if not likely that you could complete your entire hike without encountering another hiker until you reach the campsites, which makes the hike peaceful and calm, almost giving you a sense of ownership of the experience.
A view from one of the footbridges at the beginning of the trail.
The initial portion of the trail was gentle and relatively easy, but it was all uphill thereafter! Large fir trees towered overhead to provide shade as we crossed over wooden bridges beneath which streams flowed 20 or 30 feet below. Moss coated many features of the old-growth forest, and with tender ferns underfoot, we were reminded that on the other side of the High Divide flows the Hoh River into the Hoh Rainforest. The trees gave way after a few miles so that clouds could float in the open sky above Deer Lake, the first of many lakes we’d encounter. It was tempting to stop and take a long break near the water, but with miles of trail left, we continued on quickly to the High Divide trail.
Clear skies over Deer Lake.
Moss growing on trees along the High Divide trail.
The High Divide and Bogachiel Peak
Stepping onto the High Divide trail took us further up towards Bogachiel Peak, the highest point in this loop at nearly 5500 feet of elevation. We followed the curve of the mountains, trudging ever upwards and onwards. Climbing upwards over our heads, the sun began to exert its heat more fiercely, and we found ourselves sipping water more frequently. As we continued to hike, we were treated to spectacular views of the valleys (Bogachiel River flows to the south and the 7 Lakes Basin is on the north side of the trail) and mountains. Wildflowers sprinkling dots of color across the mountainside danced gently with any breeze. Despite the heat, we still found patches of snow glistening in the sun at higher elevations, even in early August. Our campsite for the night was at Lunch Lake, so after approximately 7 miles we turned into the Basin, just shy of the short trail leading to the top of Bogachiel Peak.
Bogachiel Peak in the distance. The trail has a bifurcation before the switchbacks, turning left takes you into the Seven Lakes Basin and continuing ahead leads up to Bogachiel Peak.
Pausing at the top of the Basin to enjoy the view, we then descended approximately half a mile towards Lunch Lake. As we drew nearer to our destination, we had reason to pause again after spying a bear ambling towards campsites at the nearby Round Lake. I did a quick double-check for my canister of bear spray as we surveyed the terrain, and then we continued on, keeping a wary eye towards the bear. By the time we reached our campsite at Lunch Lake (maybe 0.1-0.2 miles away), the bear had disappeared.
Camping at Lunch Lake
Lunch Lake was clear and refreshing, and we swam, fished, and enjoyed some trail beers, relaxing for a few hours before heading into our tents. The skies were clear, and the moon was in a phase that was favorable for astrophotography, so I set an alarm for the wee hours of the morning, and trudged back down to the lake to take a few pictures of the stars. The Basin is nestled deep in the Olympic Mountains, and gazing upwards at the expanse above, I saw the Milky Way hanging in the sky. An ethereal sight, resplendent in a veil of stars, and a reminder of the vastness of the universe.
The Milky Way over the 7 Lakes Basin.
No bears troubled our sleep or our food, but in the morning I awoke to a rustling outside of the tent, and stepping outside, found a fearless deer nibbling around our tents. It was clearly used to seeing humans and was unafraid of my approach, but soon pranced off, evidently preferring solitude over my company.
Mount Olympus, seen from the High Divide trail.
Heart Lake and Exiting the Wilderness
Instead of backtracking west to the bifurcation that allowed us into the Basin on the previous day, we took a 1 mile trail that took an eastward route that rejoined the High Divide trail about half a mile beyond Bogachiel Peak. Hiking along the ridge, we could peer down into the Hoh Valley, or turn our gaze upwards to the snow-capped Olympic mountains, with a wonderful view of Mt. Olympus. After enjoying these views, the trail continued to lose elevation for the remainder of our journey. Leaving the ridge, we headed northeast and encountered Heart Lake, where we stopped to refill our water supply. Crossing the creek, we descended back down into the forest, trading expansive vistas back for the trees and ferns. The last several miles are shaded from the heat of the sun, and while gentle, offer fewer views, and as we drew nearer to the trailhead, we again began to see a telltale sign of civilization: day hikers in flip flops!
Bridge Creek, emerging from Heart Lake.
A welcome treat at the end of the hike can be found after driving a few miles away from the trailhead, as the Sol Duc Hot Springs Resort is located nearby. We parked and paid for a 90-minute time slot reservation at the mineral hot springs, and felt the aches melt away from our bodies as we relaxed in the water.
This feature requires an active Backpacking Light Membership.
Premium Articles
You're currently viewing a free preview of a member exclusive premium article. Our premium articles include in depth journalism and insights from the Backpacking Light editorial team.
Get full article access by subscribing to a Premium or Unlimited Backpacking Light membership!