“…they never felt more powerful, or more fit, or happier about themselves and their bodies, than when they were thru-hiking.” – Nikki Stavile on femininity in the backcountry.
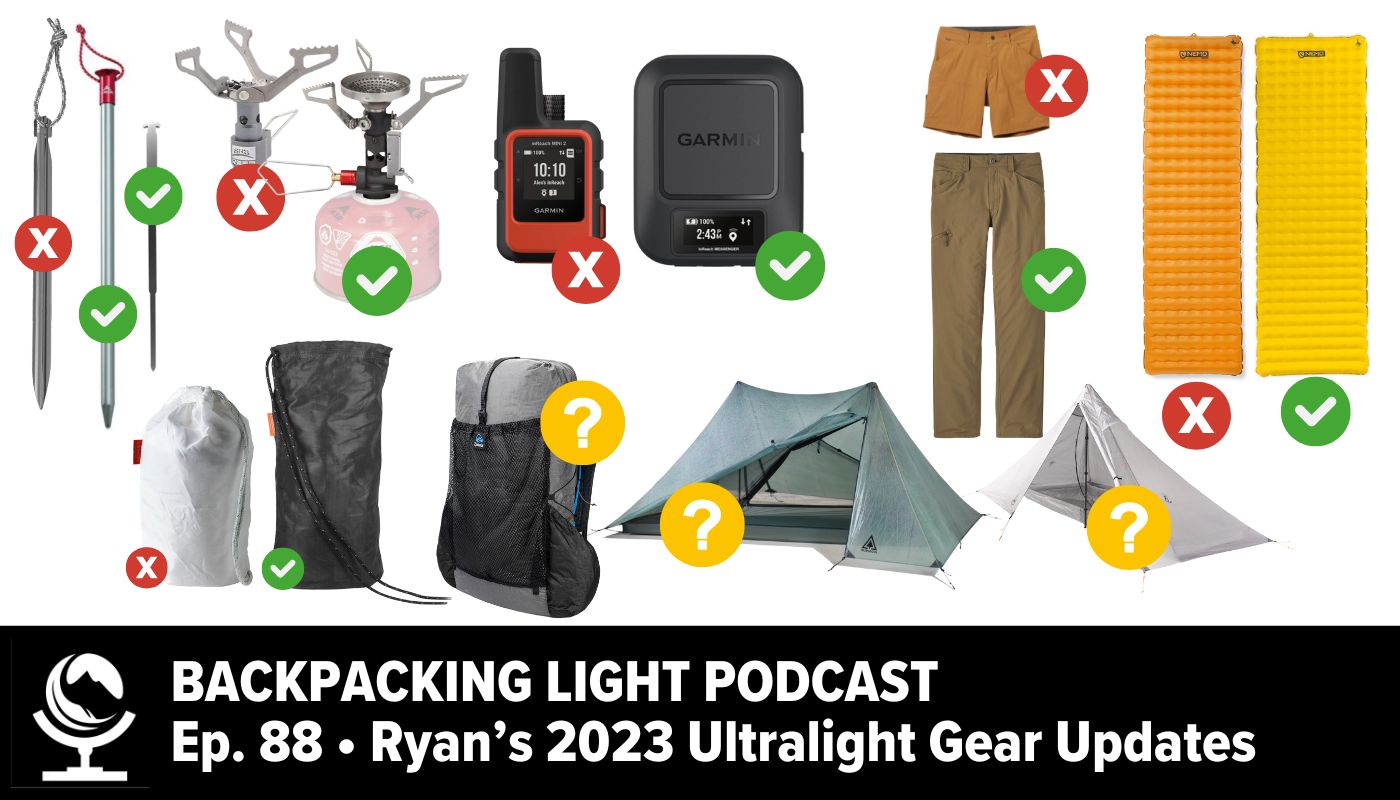
Episode 88 of the Backpacking Light podcast features nine pieces of gear from Ryan’s kit that he liked, didn’t like, and is sitting on the fence about.
Listen
Summary
Episode 88 of the Backpacking Light podcast features nine pieces of gear from Ryan’s kit that he liked, didn’t like, and is sitting on the fence about.
Executive Producer - Backpacking Light; Show Director and Host - Ryan Jordan; Producer - Chase Jordan; Theme music: Look for Me in the Mountains written by Chris Cunningham and Ryan Jordan, performed by Chris Cunningham (acoustic guitar, lead and harmony vocals, harmonica), Chad Langford (upright bass), and Tom Murphy (mandolin), produced by Basecamp Studios in Bozeman, Montana.
Sponsorship Policy: Backpacking Light does not accept compensation or donated/discounted products in exchange for product mentions or placements in editorial coverage, including any podcast episode content not excplicitly identified as sponsored content. Some (but not all) of the links in these show notes may be affiliate links. Learn more about affiliate commissions, influencer marketing, and our consumer advocacy work by reading our article Stop wasting money on gear.
The Hyperlite Mountain Gear Unbound 2P Shelter is a single-wall, Dyneema Composite Fabric, 2-person, 2-trekking-pole-supported tent with two vestibules, two side-entry doors, a weight of about 24 oz (g), and an MSRP of USD $699.
Episode 87 of the Backpacking Light podcast features highlights from our new Publisher’s Gear Guide – the gear that I actually own and use on my backcountry adventures.
Listen
Summary
Episode 87 of the Backpacking Light podcast features highlights from our new Publisher’s Gear Guide – the gear that I actually own and use on my backcountry adventures.
In this Episode:
Live Event: Office Hours Live – Friday, August 25 @ 6 PM US MDT – Gear system decision-making & gear recommendations from the new Publisher’s Gear Guide!
Executive Producer - Backpacking Light; Show Director and Host - Ryan Jordan; Producer - Chase Jordan; Theme music: Look for Me in the Mountains written by Chris Cunningham and Ryan Jordan, performed by Chris Cunningham (acoustic guitar, lead and harmony vocals, harmonica), Chad Langford (upright bass), and Tom Murphy (mandolin), produced by Basecamp Studios in Bozeman, Montana.
Sponsorship Policy: Backpacking Light does not accept compensation or donated/discounted products in exchange for product mentions or placements in editorial coverage, including any podcast episode content not excplicitly identified as sponsored content. Some (but not all) of the links in these show notes may be affiliate links. Learn more about affiliate commissions, influencer marketing, and our consumer advocacy work by reading our article Stop wasting money on gear.
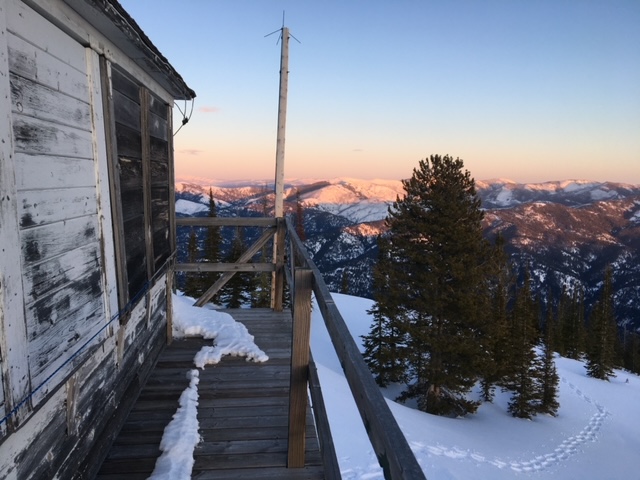
BPL author Mark Wetherington skis into a remote fire lookout tower in Montana’s backcountry on a chilly winter night.
Introduction
Moving to western Montana in November meant that unless I wanted to wait until spring to explore the jaw-droppingly beautiful landscape, I’d have to get equipped for oversnow travel. Since I’d moved to Montana specifically for its proximity to outdoor recreation, within a few weeks of arriving I’d acquired a pair of cross-country skis and a pair of snowshoes. In what I viewed as an omen from the winter gods, the security deposit from my previous apartment was almost the exact amount of a package deal from the local outdoor store for cross-country skis, poles, boots, and bindings. After a few day trips on skis to get the hang of this new (at least to me) mode of human-powered travel, I skied three miles into a US Forest Service rental cabin for my first overnight trip in Montana on winter solstice. Almost ten years later, that same cabin is often booked solid six months in advance, but I was able to book it for a weekend less than two weeks out.
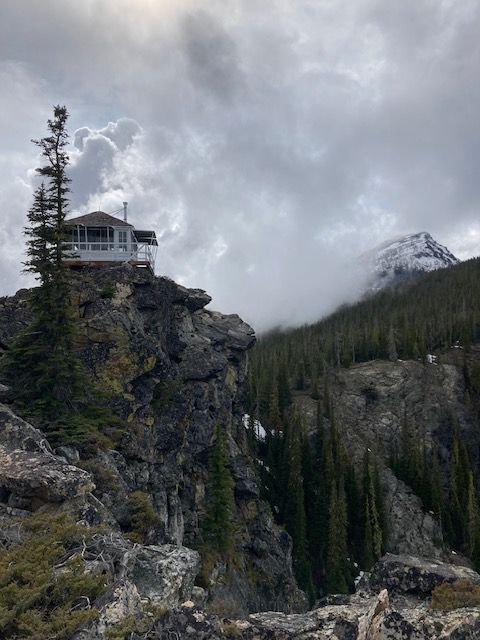
A view of the lookout in late spring which shows off its majestic location.
I spent the rest of that winter alternating between snowshoes and cross-country skis for my backpacking trips, staying in a Black Diamond Firstlight tent and slowly building up the winter camping skills that the temperate climate of the Southeast hadn’t allowed me to hone. The next winter, I made a grueling New Year’s Eve trip to a fire lookout (which I’ll refer to as “Magic Rock Lookout” to provide some semblance of anonymity) that involved snowshoeing approximately 5 miles and gaining over 3,500 feet of elevation. Since that inaugural visit, I’ve stayed overnight at that lookout over two dozen times and made at least as many day trips. I’ve helped with volunteer restoration efforts, packed out a broken Coleman stove, cut out trees across the trail, and split at least five times more firewood for the woodstove than I’ve burned. Friends jokingly call me “The Mayor of Magic Rock Lookout” and it’s likely not hyperbole to posit that other than the fire lookouts who were assigned there when it was staffed as an active lookout for fire suppression, I’ve probably spent more nights there than anyone else (the logbook for the lookout also supports this theory).
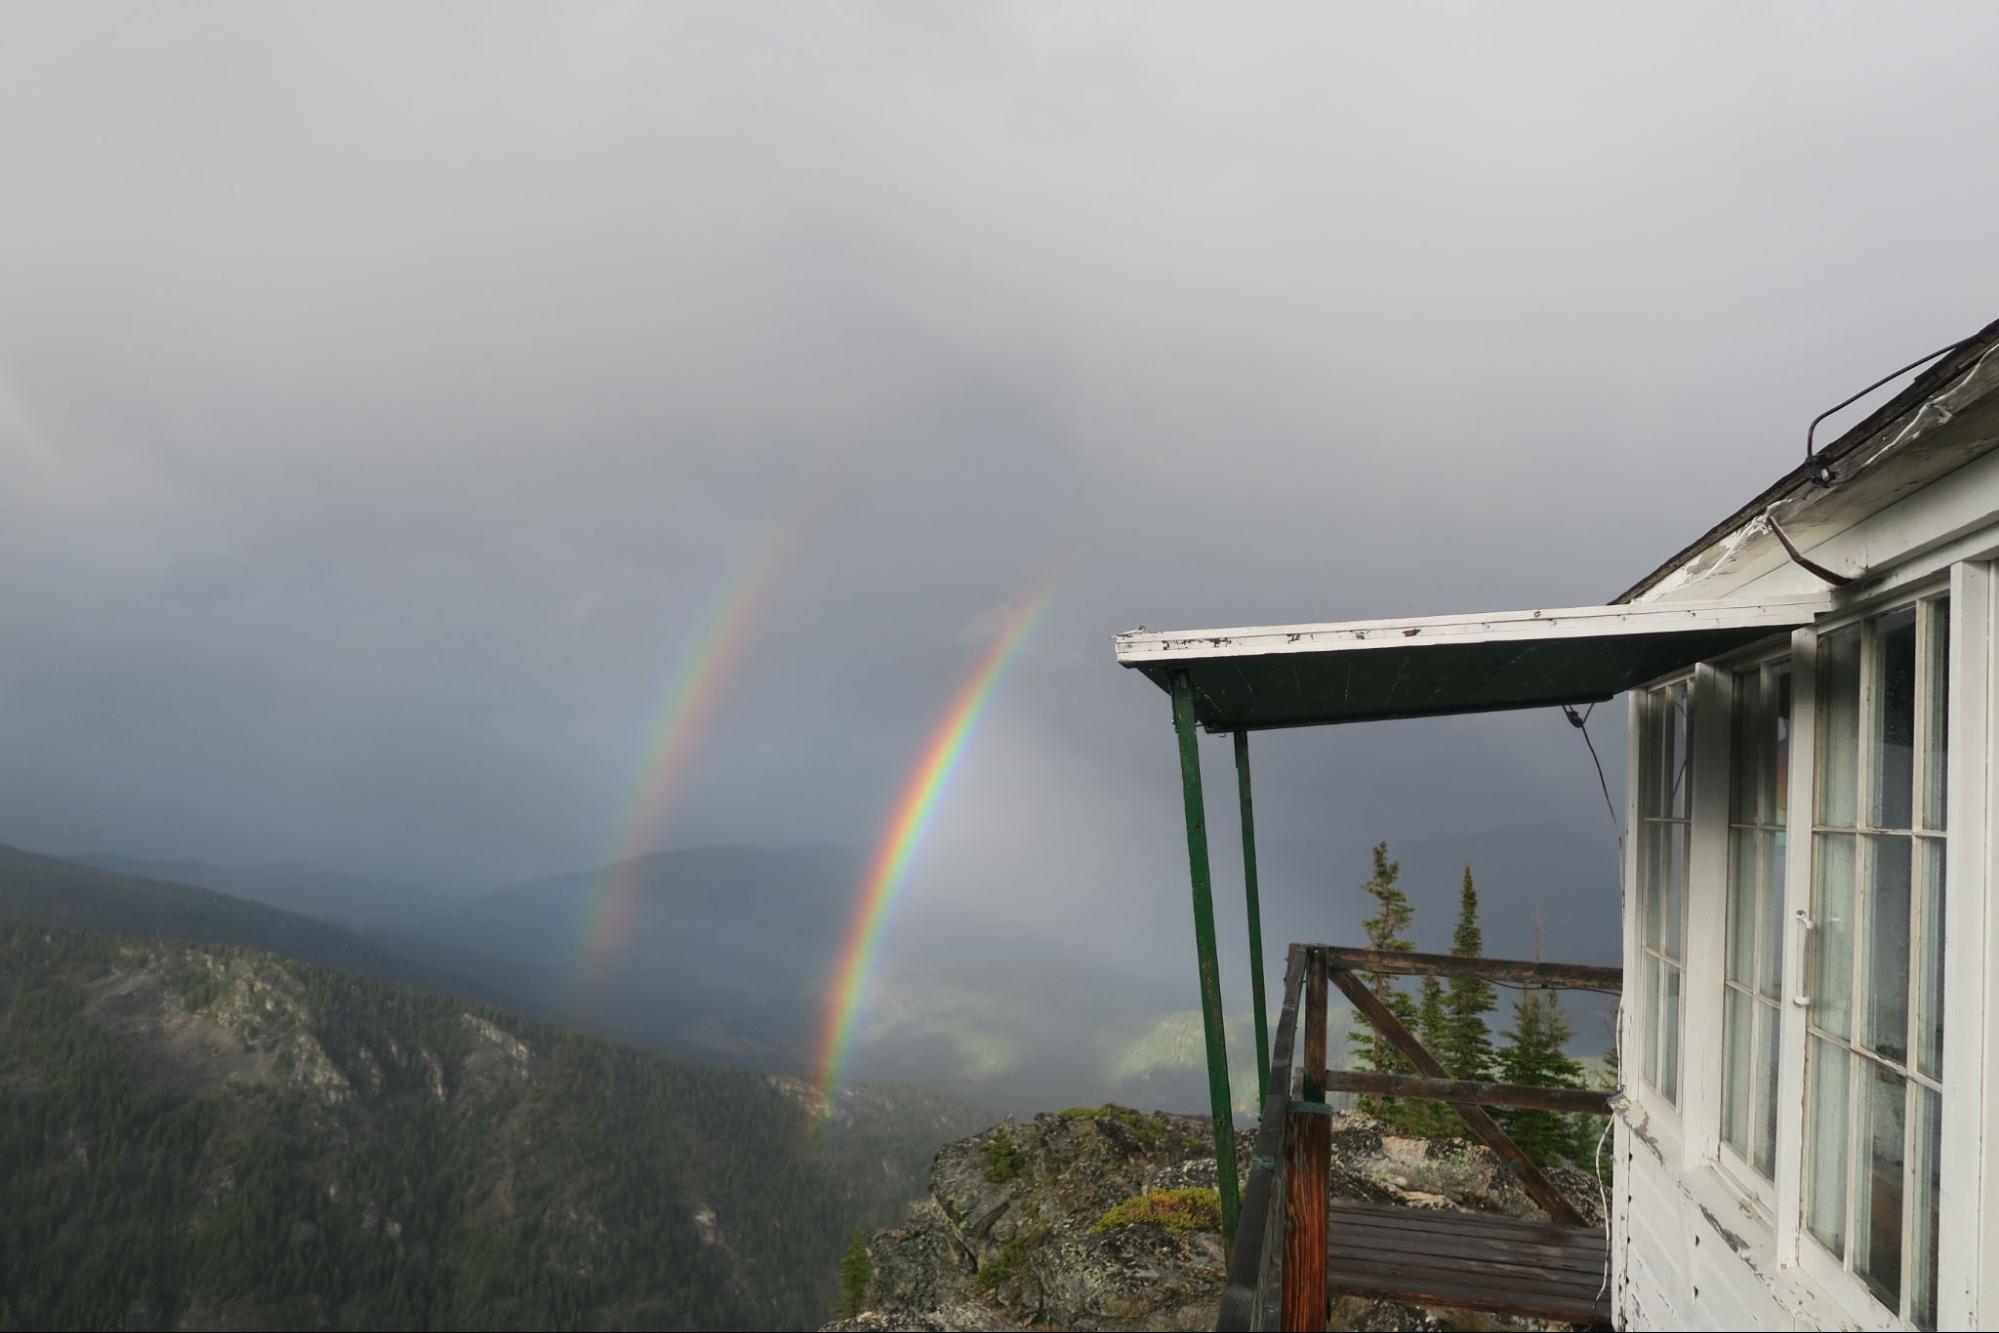
An early summer view of double rainbows from the lookout.
I’ve stayed at the lookout at least one night in every month of the year except December, which I hope to rectify later this year. Despite my initial attempt being aimed for New Year’s Eve, I only spent the second night of that trip – January 1st – in the lookout; the first night I spent in a bivy sack a quarter-mile from the lookout as I’d become exhausted and benighted and didn’t want to press on somewhat blindly toward the lookout (I was solely using a paper map at the time, GPS likely would’ve ensured I arrived at the lookout but also would’ve denied me a character-building experience). Unsurprisingly, the months I’ve stayed there most are when it’s easiest to access – roughly from when the snow melts until it piles back up again – and June is currently in the lead. After a particularly exhausting snowshoe visit, I swore off any future trips using snowshoes. I decided it was time for me to gain a new set of skills to access the lookout in winter: backcountry skiing.
The timing was great, as I’d lucked out earlier that winter and won a pair of skis at a raffle and was able to trade them in for store credit and ended up with a great pair of all-mountain skis that had Alpine Touring (i.e. backcountry skiing) bindings on them. A perfect set-up for what I was envisioning, which was more about getting myself into the backcountry as quickly as possible as I had no real interest in downhill skiing at ski resorts.
The Journey to Backcountry Skiing
Growing up in Kentucky with parents from south Georgia hadn’t exactly given me a lot of exposure and opportunities for skiing. I went a few times as a kid to a ski hill in Indiana, but skiing manmade, icy snow on runs with a maximum vertical drop of 300 feet didn’t exactly give me an incurable case of Ski Fever. I progressed at cross-country skiing quicker than I expected and appreciated the relatively low-cost of the activity as well as the fact that it could be done solo without seeming like one was taking unnecessary risks. Being able to easily access US Forest Service Rental Cabins was also a huge benefit, especially since as the years went on my winter backpacking trips largely became limited to those that involved cabins or hot springs.
Downhill skiing, perhaps the most critical skill outside of avalanche safety to have for safety while backcountry skiing, went a bit less smoothly for me and initially made me think I just wasn’t cut out for anything other than kicking-and-gliding through mild terrain on Nordic skis. The local ski hill had an excellent and economical beginner package, so I thought even though I was 30 and for all intents and purposes downhill skiing for my first time, and that given my general fitness and several seasons of cross-country skiing on my legs, I’d be able to gain the basic competencies and comfort level needed without having to invest too much time and energy. I couldn’t have been more wrong. At the end of the six days of skiing I did that season (first three days with hour-long lessons, then three days solo) I was only able to feel moderately comfortable going down groomed intermediate runs. I was able to enjoy myself, but overall found it to be about an even mix of humbling and discouraging. Backcountry skiing up to Magic Rock Lookout anytime soon felt about as realistic as skiing down Corbet’s Couloir in Jackson Hole.
My last snowshoe trip to the lookout – after a handful of times using this most exhausting mode of oversnow travel, I swore them off for future trips and committed to attempting a backcountry skiing trip.
I stuck to cross-country skiing the next few winters, enjoying many fulfilling multi-day ski tours, but fate once again intervened and a girlfriend convinced me to give downhill skiing another chance. She’d grown up skiing near Seattle and, oddly enough, had been a ski instructor in Jackson Hole for a winter. To describe her as an expert skier would be an understatement. Since I had a handle on the basics of skiing and she had a lot of patience, I was able to slowly progress over the next few seasons. With the ski hill only an hour away and season passes being as affordable as one could hope for in a state experiencing pervasive rural gentrification, I was able to get in a lot of ski days over the winters and eventually got comfortable enough to ski all the black diamond runs and most of the double black diamonds. Which, based on the estimation of her and other folks I skied with, meant that it was time to dip my toe into backcountry skiing if I still felt the urge.
And the urge was most definitely still present. Since I’d sworn off snowshoe ascents, it had been over three years since I’d visited in winter. The idea of visiting it in all its winter charm and then enjoying the descent on skis seemed too good to be true. The only minor issue was that no one else had a schedule that lined up with mine and doing my first backcountry ski trip solo seemed borderline reckless.
Working in my favor was the fact that none of the route to the lookout was in avalanche terrain and by heading up in mid-April the snowpack was more stable, effectively reducing the avalanche risk to zero. Also in my favor was the fact that I would be in familiar terrain, the days were long, and my fitness was as good as it had ever been. After getting three separate opinions from three different ski partners, one of whom had been to the lookout on skis recently, the consensus was that it didn’t seem too foolhardy given the context. With what was tantamount to a resounding endorsement, the anticipation for a weekend outing to a familiar lookout using a novel method of travel began to build.
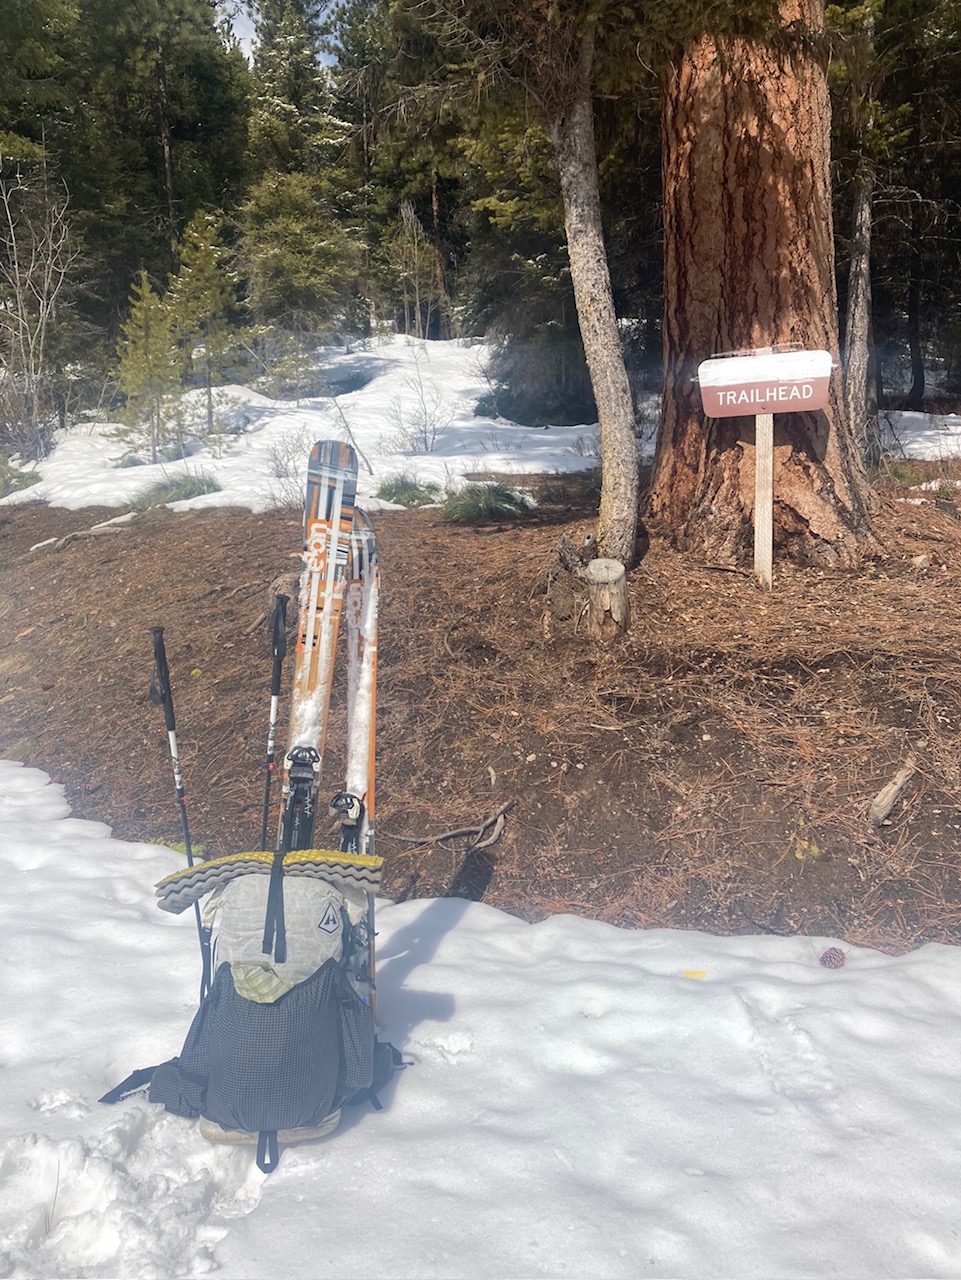
After a few miles of patchy snow that never allowed me to get into either a walking or skiing rhythm, I hit continuous snow at the trailhead and was able to ski through the forest the rest of the way to the lookout.
Ski Cabineering
Heeding a friend’s advice, I put the skins on my skis before packing up the car and heading to the trailhead. I made it less than a mile up the access road before I had to park at an impassable snow drift. For the next few miles, I’d alternate between skiing and walking in my ski boots when the snow became patchy or nonexistent. Things were starting to melt out down low, but as soon as I reached the trailhead the snow became consistent and I was able to duck into the forest and began as direct of an ascent as possible.
I was absolutely enamored by the sensation of skinning uphill through a beautiful coniferous forest. The sense of freedom and adventure was exhilarating. It just felt right to finally be using the backcountry bindings on my skis, adjusting the heel lifters when the terrain became steep enough to need them, and gliding up through the forest. It was exponentially more enjoyable than the slog of snowshoeing to the lookout. If going up was this much fun, then going down tomorrow was going to be euphoric, I thought as I smiled to myself. I took two leisurely breaks on the way up to air out my feet, rehydrate, and refuel. I maintained a steady but not hurried pace when moving and only hit a few slow spots where thin cover and/or micro-navigational issues had to be addressed and slowed me down. I arrived at the lookout in the early afternoon, roughly three hours after leaving the car.
Looking back at my skin track was supremely satisfying, as was knowing that gravity would be on my side when I headed down the next morning.
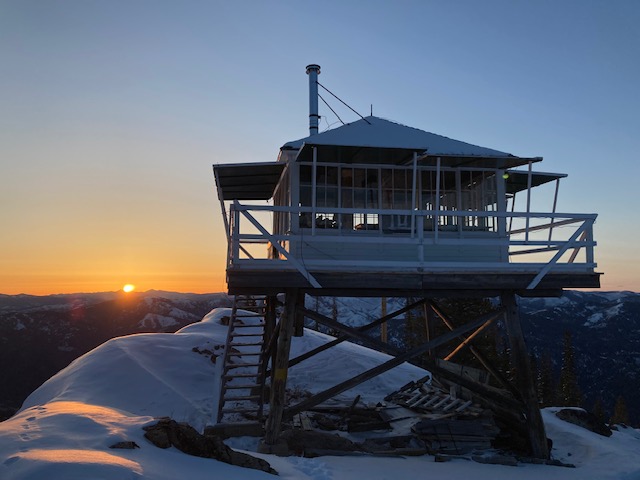
Reaching the lookout always brings me a sense of achievement and joy, but it was particularly thrilling to have reached it on skis. I was smiling from ear to ear as I set about the familiar tasks of opening up the shutters, sorting out my minimal gear onto the bed and table, and enjoying the expansive view from such an unlikely and inhospitable location. Without the lookout, the rocky promontory wouldn’t invite one to linger much longer than a lunch break, especially in winter. But with a simple building, no longer even used for its intended purpose, this spot became a hermitage of sorts. It is outfitted with a simple wood stove, a worn out mattress that is probably older than I am, random cookware, and two pairs of binoculars as well as an assortment of tools to help make minor repairs.
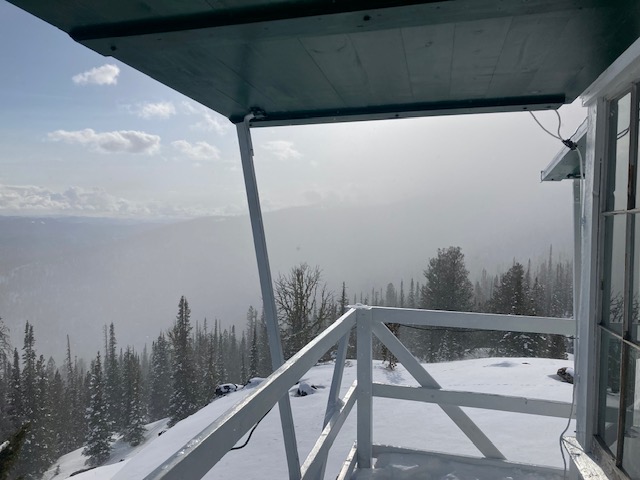
I was hoping this storm would bring in a few inches of fresh powder, but all it left was a dusting on top of wind-scoured snow.
As I settled into the lookout and began to melt snow for the evening’s cooking and hydration needs, a squall blew in. I was hoping for a few inches of fresh snow to ski down on, but the storm blew out as quickly as it came in. Views to mountains afar returned, with a few clouds swirling around to provide some dramatic ambience. I contemplated starting up the wood stove, but given the relatively scarce supply of wood and the mild temperatures I chose instead to just drink lots of hot tea and put on all my layers. I stretched out my muscles as much as I could and looked off the lookout’s catwalk to the slope I would be descending in the morning, visualizing my turns. The evening went by at a perfect pace and the sunset was pleasant, but the cloud cover prevented me from stargazing and I went to bed shortly after dark.
Sunrises at the lookout never fail to disappoint, but this one was particularly memorable.
Waking up at almost 8,000 feet in a room with a 360-degree view is always delightful, but the sunrise when I awoke was majestic beyond words. With a cup of coffee in hand, I walked around the catwalk to appreciate it al fresco before returning to my sleeping bag for some warmth and relaxation. I was in no hurry to leave, both for the obvious reason of wanting to prolong my time in such a magical spot and to let the snow warm up to make for a more enjoyable descent. The conditions weren’t quite right for corn snow to form, but I was hoping for things to soften up a bit before I headed down.
After a few hours, my eagerness for skiing got the better of me and I packed up my gear, closed the eight shutters, meticulously tidied the lookout and swept it out, and then finally got into my skis and pointed them downhill. The descent had moments of bliss, but it was clear within my first few turns that the snow was much too hard to make for enjoyable skiing. Lots of sidescraping was involved as I lost the elevation I’d gained the previous day. I skied cautiously – between the less-than-ideal conditions and the weight on my back, it seemed like it would be easy to take a fall.The descent was slow, as I told a friend after the trip to illustrate my timidity on the downhill: “I was just skiing for the car, not skiing for the gnar.”
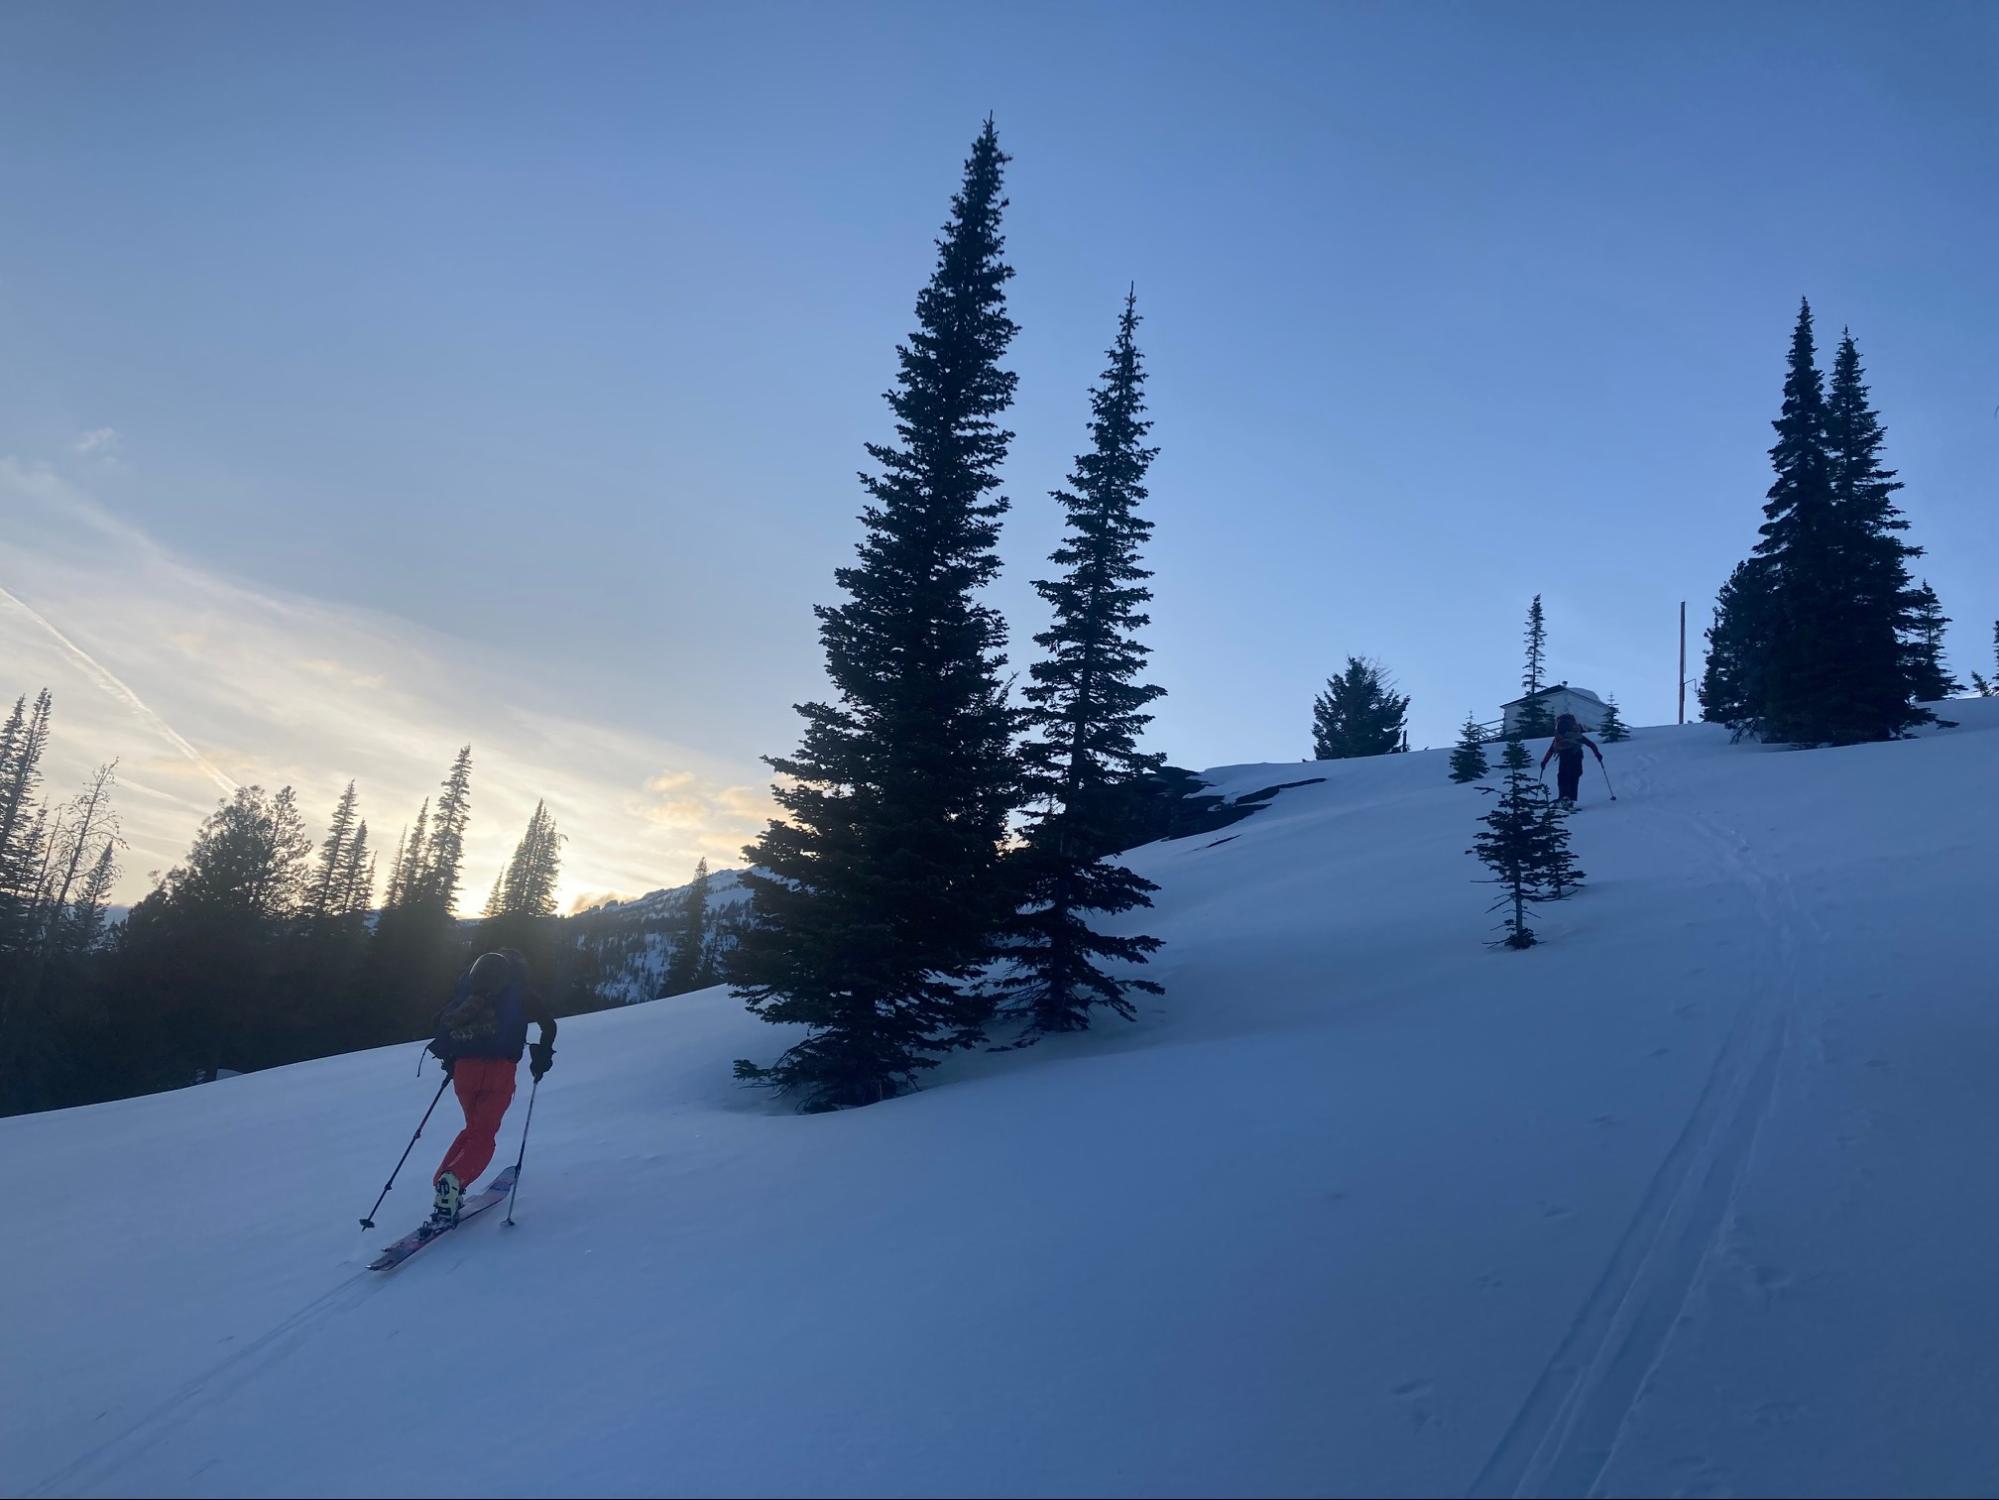
Although my trip lasted barely 24 hours, the deep satisfaction and sense of accomplishment had me buzzing for days. I couldn’t wait to go back and planned a return trip for the next weekend with those who had expressed interest but couldn’t make the initial short-notice trip. I’d ski up solo for a night, then ski back down to the road to “guide” two friends back up for another night. Sharing the trip with others, including one who’d visited the lookout on foot but not yet on skis, made an already enchanting experience even better.
The only thing better than backcountry skiing to a lookout is backcountry skiing to a lookout with friends.
Cozied up by a fire with friends and sipping wine while watching the sun dip below the ridge just west of the lookout was sublime beyond words. A clear sky even allowed us to glimpse some shooting stars before we went to bed. We took our time before leaving in the morning and the conditions had softened up the snow to where it allowed for enjoyable turns and carving through the trees on steep but not scary slopes. Although this will probably be my shortest season of backcountry skiing – it was all of a week long – I know without a doubt that it will be one of my most memorable.
Executive Producer - Backpacking Light; Show Director and Host - Ryan Jordan; Producer - Chase Jordan; Theme music: Look for Me in the Mountains written by Chris Cunningham and Ryan Jordan, performed by Chris Cunningham (acoustic guitar, lead and harmony vocals, harmonica), Chad Langford (upright bass), and Tom Murphy (mandolin), produced by Basecamp Studios in Bozeman, Montana.
Sponsorship Policy: Backpacking Light does not accept compensation or donated/discounted products in exchange for product mentions or placements in editorial coverage, including any podcast episode content not excplicitly identified as sponsored content. Some (but not all) of the links in these show notes may be affiliate links. Learn more about affiliate commissions, influencer marketing, and our consumer advocacy work by reading our article Stop wasting money on gear.
Different land management agencies have different difficulties obtaining a permit to plan and enjoy a backpacking trip.
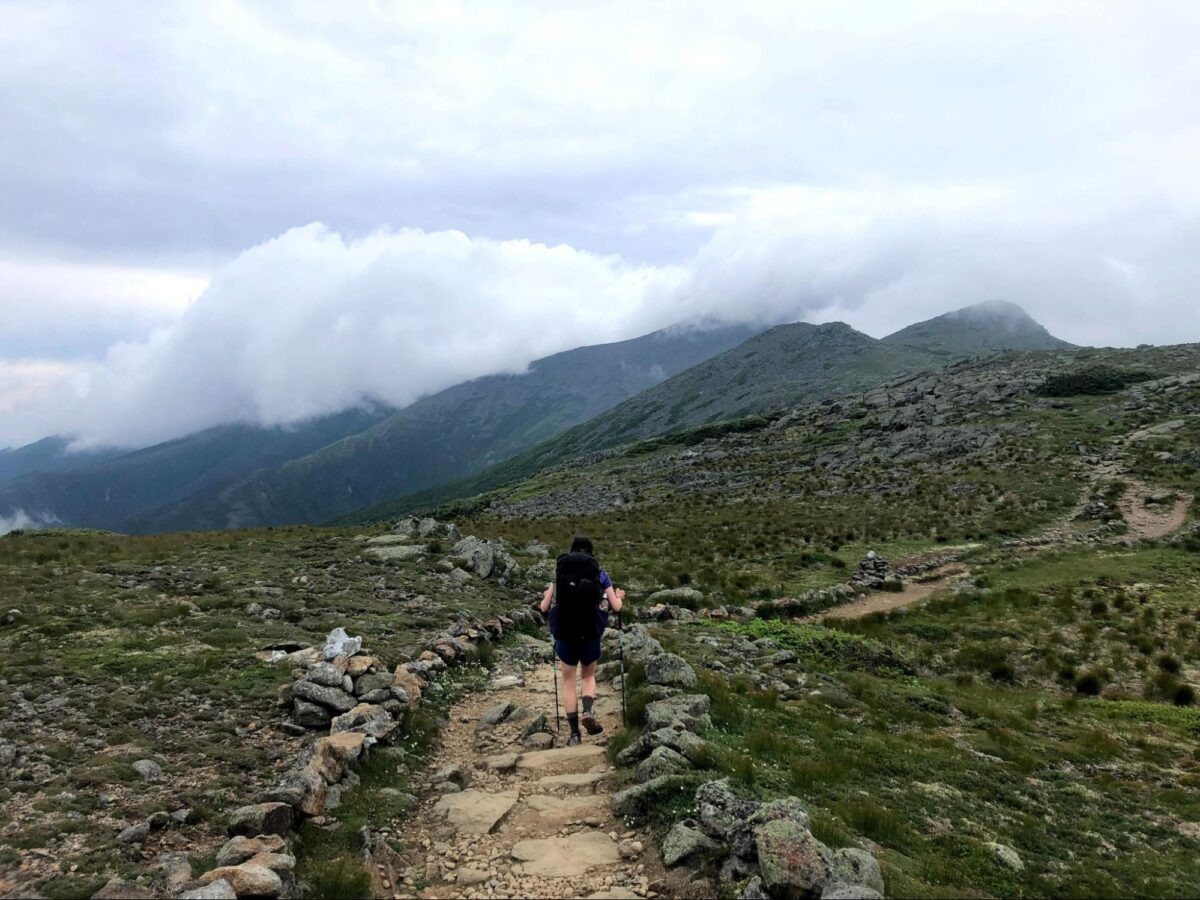
As a backpacker living in western Montana, needing a permit to go backpacking is the exception rather than the rule. Outside of Glacier and Yellowstone National Parks, you can arrive at pretty much any trailhead you want and hike into the backcountry for a trip of any length and destination of your choosing. Campsites in the national forests are almost exclusively first-come, first-served (aside from rental lookouts and cabins) and there’s no zone quotas or other restrictions limiting travel. In the mountain range where I do most of my backpacking, the luxury of being flexible in my destination if solitude is my priority is much appreciated. If I pull up to a trailhead and there’s a dozen cars and a Boy Scout troop van, I can easily just drive a half-hour to the next canyon and leave the crowds behind. But more often than not, even on holiday weekends, I can count most of the cars on one hand at all but the most popular trailheads. And, perhaps most importantly, based on what I see as a visitor – these areas don’t yet need permits to preserve opportunities for solitude and avoid adverse impacts to the landscape from concentrated visitation.
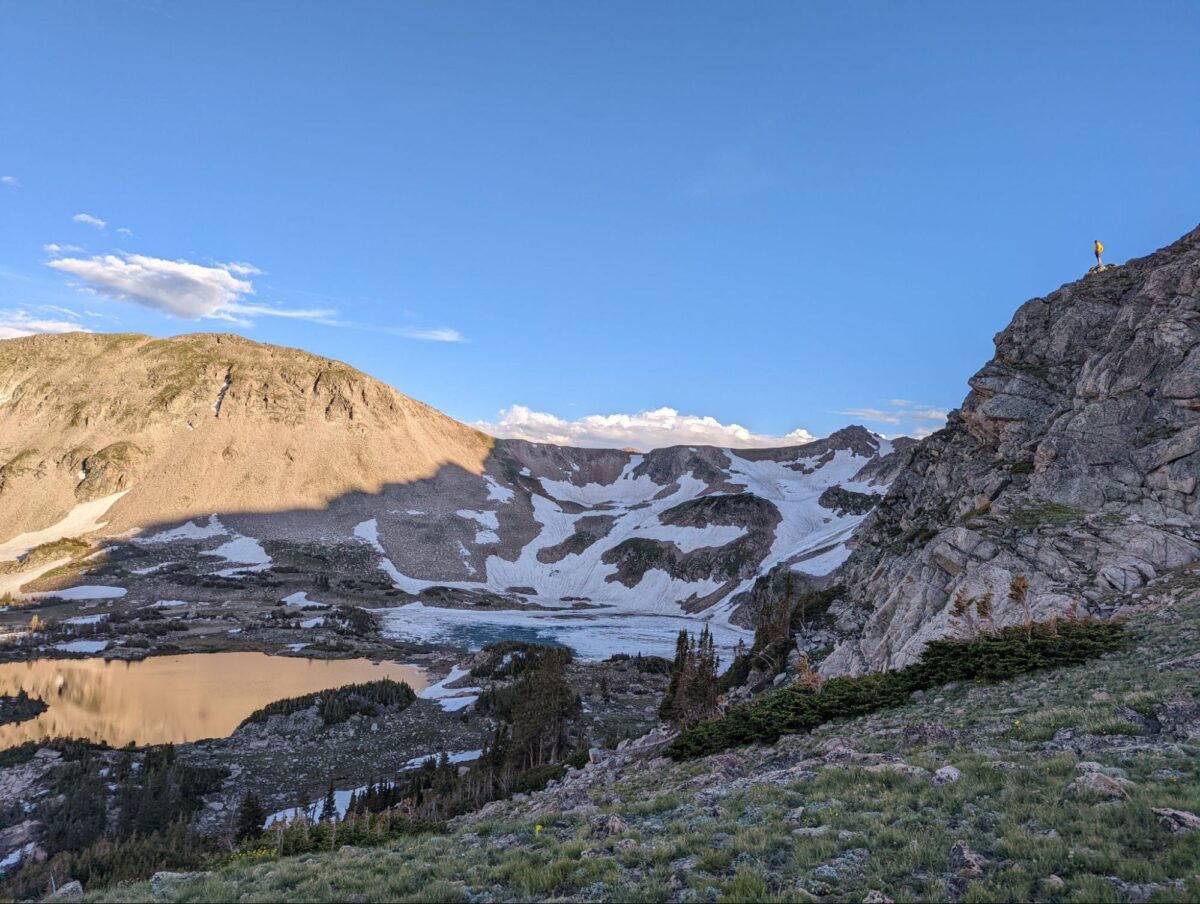
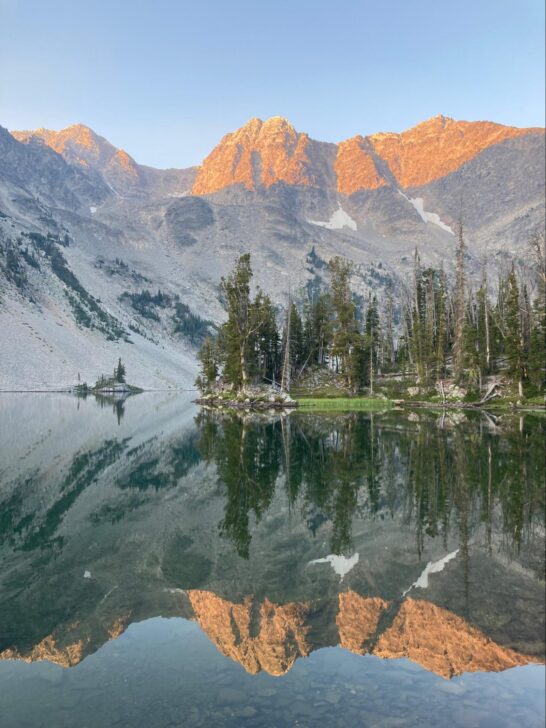
Without being bound to any permit itinerary, I was able to stay at this lake for two nights instead of just the one I’d originally planned on. Since it was midweek, I had the added bonus of having this lake to myself both nights.
Needless to say, this makes the browsing of maps and guidebooks and planning trips a productive pastime, since I won’t mind my trips derailed by the inability to secure a permit. Trips are derailed or don’t happen due to natural causes – fire closures, excessive smoke from wildfires, weather issues, or lack of time. And to be quite honest, I’ve become frustrated enough by the competitiveness and complexity of backpacking permits for national parks that I’ve stopped trying in recent years to even attempt snagging a permit for most “life list” trips and national parks. I’ve been lucky enough to have a friend who is more diligent and patient with applying for permits and have been lucky enough to tag along with him on trips to Glacier National Park in recent years.
Other than a trip in North Cascades National Park that was marred by five straight days of thick wildfire smoke, which irritated my throat and limited visibility to only a mile or so, I’ve never been disappointed by a backpacking trip. Even ones that have been rainier than I would’ve liked, or which ended prematurely for various reasons, or where the trails were in frustratingly poor condition they’ve have always had some elements of exploration and enjoyment which cause me to remember them fondly. Oddly, I have found myself increasingly disappointed by trips that don’t happen as a result of not getting a permit to even start them in the first place.
In 2022, the only place I can recall backpacking where I needed a permit was Craters of the Moon National Monument in Idaho where I visited for a lunar eclipse. Although the landscape is otherworldly, the limited options for backpacking, the harsh landscape and climate, and the burden of having to pack in all the water you need means that the demand for backpacking isn’t anywhere close to outpacing the supply. It is rare for there to be two groups backpacking at the same time in the entire 43,243 acre Craters of the Moon National Wilderness Area. The permit was a simple matter of stopping by the ranger station, receiving a brief orientation, providing an estimated itinerary and route, and then heading out to the trailhead. Prior to that, my most recent experiences with permits for backpacking were for Yellowstone National Park, Aravaipa Canyon Wilderness, and Capitol Reef National Park – in order of most to least competitive.
In 2019 and 2020 when I applied for backpacking permits for Yellowstone National Park, the permit reservation system was structured in a way in which permit applications were randomly processed in early spring before going to being processed in the order in which they were received. Under that system, which involved using a fax machine at the local library to submit the permit application, I was able to specify a wide range of dates, campsites I was willing to accept, and even the option of reversing the itinerary I had proposed. This option to indicate flexibility is likely what allowed me to be successful two years in a row at getting a permit for a four-night backpacking trip that included two nights at a campsite near a phenomenal hot springs.
Once the backcountry permitting system was moved to recreation.gov for 2022, along with the permits for most other federally-managed recreation units, the format changed. Users – which seems like a weird way to characterize potential backpackers yearning for amazing natural experiences – simply entered into a lottery and then received a time and date slot to log in and pick from the sites that were still available. Those who received a time and date slot earlier in the window were much more likely to get the trip they wanted than those who drew a later slot. I’ve never received one of the slots in the first half of the window after two years of trying. By the time I’ve been able to access the reservations, all the nights for that campsite for the entire season have been completely booked.
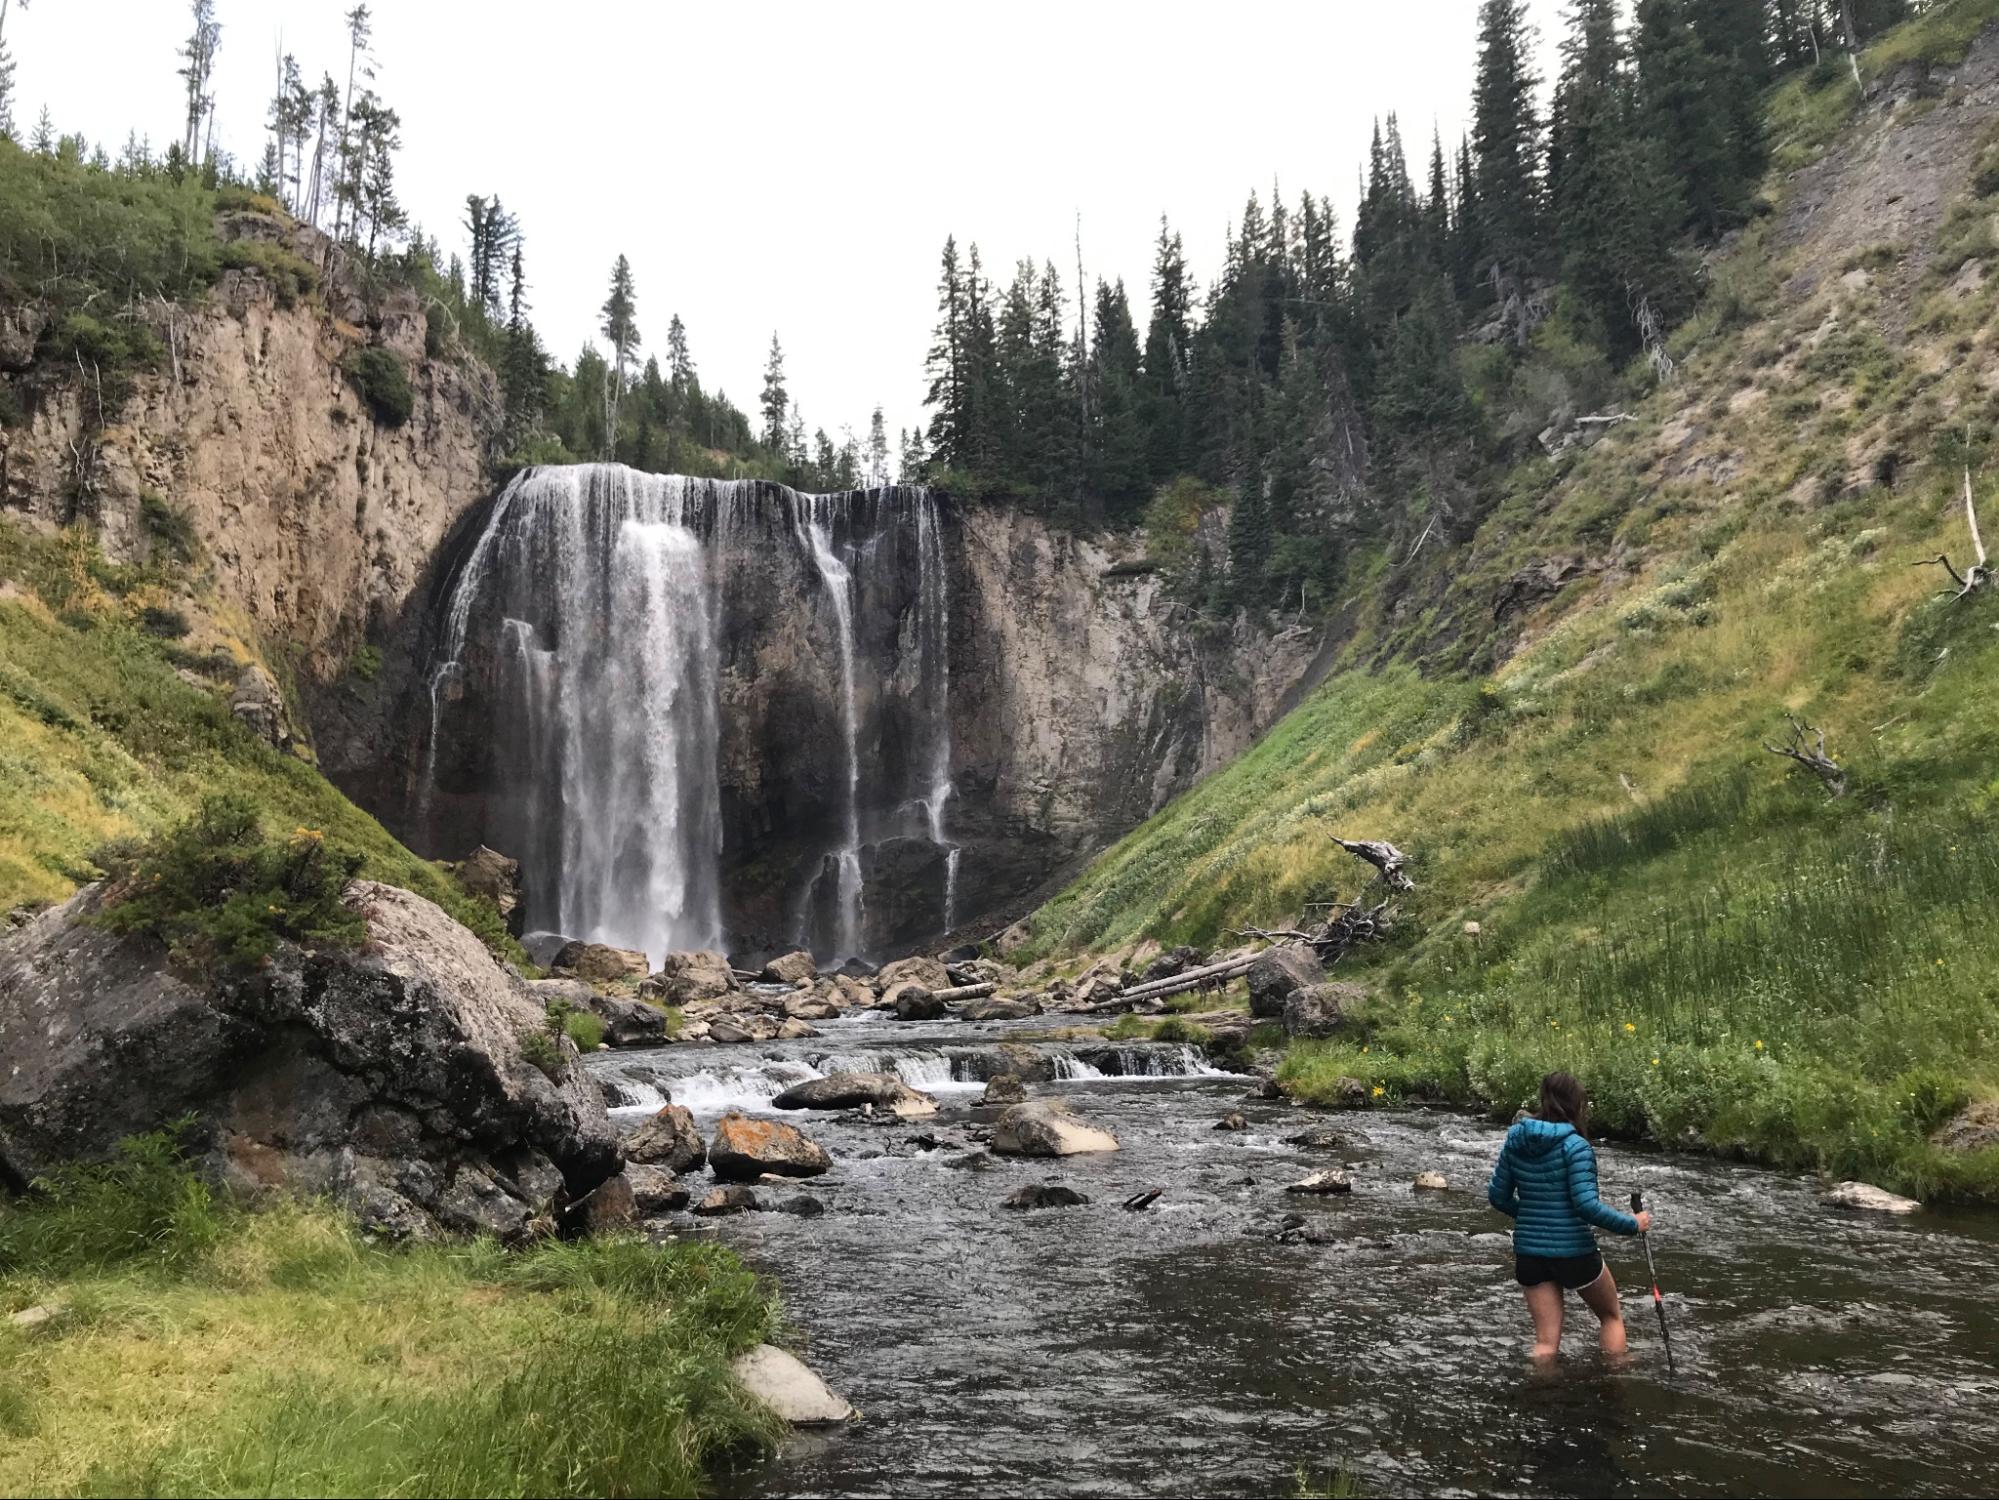
Almost to the most idyllic of the hot springs pools that line the stream below a waterfall in Yellowstone National Park. After the backcountry permit system became administered under recreation.gov, obtaining a permit became more challenging.
While I’m fortunate enough to be able to backpack with a degree of spontaneity that is rare in other parts of the country, and have been on many trips to incredible places in nearby wilderness areas, I do enjoy the level of planning and anticipation that comes with planning trips to national parks. The trip to Aravaipa Canyon Wilderness in 2019 did have a few nail-biting moments when trying to secure the permits for the three continuous days needed (the maximum allowed by the Bureau of Land Management), but overall it felt attainable. When browsing recently for both nostalgia and comparison’s sake, things appeared to be booked within a few hours whereas in previous years there was still availability days after the booking window opened.
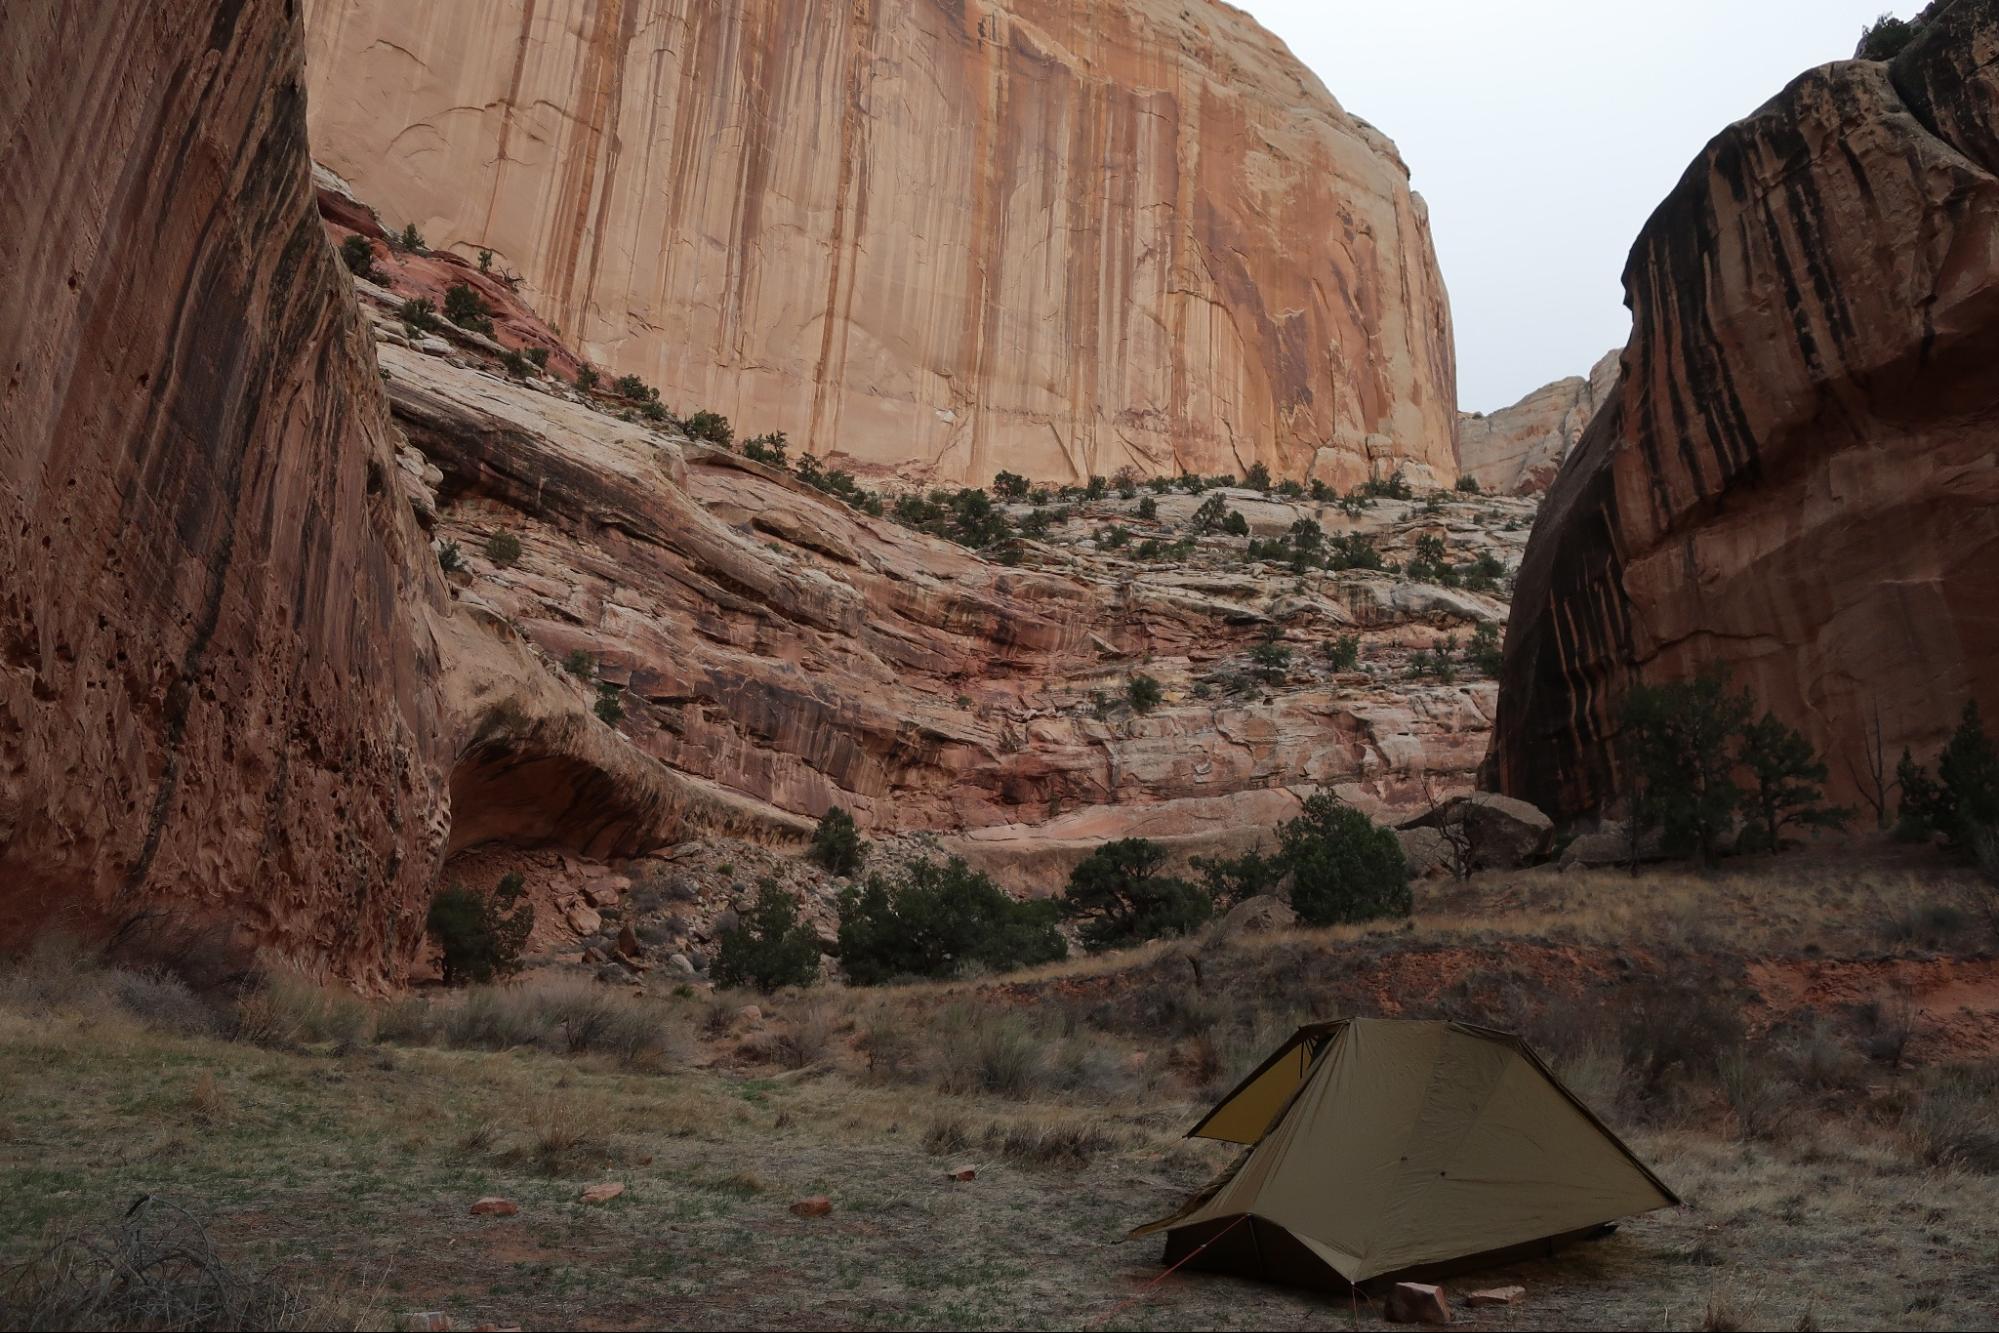
Backpacking in Capitol Reef National Park was an amazing experience and the permit process makes it easy to have a flexible itinerary.
While I’m more than content to primarily limit my backpacking trips to within a half-day’s drive of my home, I do have an urge to explore other landscapes. For those that are national parks, it seems like concentrating my efforts on those with less rigorous permitting processes – like Capitol Reef National Park – seems to be the best approach for someone like me who takes it personally when they can’t backpack on public lands due to onerous permitting requirements. I realize this selfishness and entitlement in my perspective, and I don’t relish feeling this way, especially since I can easily backpack in the Northern Rockies with little planning and only a few miles of driving. Where I feel the most sympathy is for those who don’t live close to public lands and have to plan their trips with an efficiency and economy that leads them to becoming reliant on obtaining a permit with a set date, set itinerary, and near-guarantee of incredible scenery (smoke and weather being the major variables). While the solution to visit a national forest or other that doesn’t require a permit is certainly an option for anyone who wishes to backpack, there’s less information on how to put together a comparatively outstanding trip for these places compared to a national park. The national park trips ostensibly provide much more of a “sure thing” if you can manage to snag a permit.
Perhaps the silver lining to this cloud created by permits is that backpackers will become more informed about, and involved with, the stewardship of national forests. By becoming aware of the amazing outdoor recreation opportunities on these public lands, and the challenges that face them (particularly deferred maintenance for trails), there might be more volunteerism among trail work organizations and discussion of how to utilize these resources without loving them to death and ultimately having them fall under the purview of permits as well.
Clinic & Trek: October ’23 – Live Skills Clinic & Guided Trek in Rocky Mountain National Park – Become an Unlimited Member to gain access to early enrollment
Executive Producer - Backpacking Light; Show Director and Host - Ryan Jordan; Producer - Chase Jordan; Theme music: Look for Me in the Mountains written by Chris Cunningham and Ryan Jordan, performed by Chris Cunningham (acoustic guitar, lead and harmony vocals, harmonica), Chad Langford (upright bass), and Tom Murphy (mandolin), produced by Basecamp Studios in Bozeman, Montana.
Sponsorship Policy: Backpacking Light does not accept compensation or donated/discounted products in exchange for product mentions or placements in editorial coverage, including any podcast episode content not excplicitly identified as sponsored content. Some (but not all) of the links in these show notes may be affiliate links. Learn more about affiliate commissions, influencer marketing, and our consumer advocacy work by reading our article Stop wasting money on gear.
In this episode of the Backpacking Light Podcast, we interview Morris Shawn, President of Roadpost and Zoleo, about satellite messaging and the evolution of the Zoleo Satellite Communicator.
Episode Sponsor
This Episode of the Backpacking Light Podcast is sponsored by ZOLEO. Backpacking Light podcast listeners get free activation – after receiving your ZOLEO device, activate it online using the coupon code BACKPACKINGLIGHT at Zoleo.com to waive the activation fee, which will save you $20 USD ($25 CAD).
Listen
Summary
In this episode of the Backpacking Light Podcast, we interview Morris Shawn, President of Roadpost and Zoleo, about satellite messaging and the evolution of the Zoleo Satellite Communicator.
In this Episode:
Durston X-Mid Pro 2 review updates (long-term performance)
Executive Producer - Backpacking Light; Show Director and Host - Ryan Jordan; Producer - Chase Jordan; Theme music: Look for Me in the Mountains written by Chris Cunningham and Ryan Jordan, performed by Chris Cunningham (acoustic guitar, lead and harmony vocals, harmonica), Chad Langford (upright bass), and Tom Murphy (mandolin), produced by Basecamp Studios in Bozeman, Montana.
Sponsorship Policy: Backpacking Light does not accept compensation or donated/discounted products in exchange for product mentions or placements in editorial coverage, including any podcast episode content not excplicitly identified as sponsored content. Some (but not all) of the links in these show notes may be affiliate links. Learn more about affiliate commissions, influencer marketing, and our consumer advocacy work by reading our article Stop wasting money on gear.
Daniel Hu discusses the question: How much should I spend on my backpacking kit, and how can I do so responsibly?
One of the great things about backpacking is that going out into the backcountry costs essentially nothing – I often remark that as far as activities cost, backpacking is free! On the other hand, backpacking gear can cost a person quite a bit of money.
I recall years ago that a friend expressed an interest in backpacking, and asked how much he might want to budget for gear. “Buy once, cry once,” was in the back of my mind when I told him he might spend anywhere from $300 to $1000, depending on the quality of the gear he purchased and how frequently he wanted to repair or replace items. I think for the ultralight folks, the initial and ongoing costs may be even higher than the average adventurer, since UL gear tends to require a premium and isn’t always as durable.
I consider myself to be a student of finance, and I’ve often wondered about the theoretical opportunity cost to a person’s net worth that backpacking gear presents.
Disclaimer: this article is not meant to present financial advice (because I am not a financial expert) – but I hope that it will spark some conversations and present an interesting perspective that may not always be considered. I am sure others will find ways to examine this topic differently and many different perspectives will emerge!
Here’s an easy example in my mind: let’s say a person spends $3000 on gear during year 1, and another $500 each year on replacing and repairing gear, as well as consumable gear (food, fuel, gas, permits and passes, etc). At the 10 year mark, you’d have spent a total of $8000.
But if that money had instead been invested in an index fund tracking the S&P 500 (which many consider to average 10% growth each year), the end result would be a balance of approximately $16,500, meaning the opportunity cost for a person’s net worth would be sacrificing around $8500 of interest. That might not seem like much, right? Surely it’s worth it.
The Hypothetical Hiker’s investments over 10 years (Calculator and Chart from calculator.net).
But let’s take an extreme example of a young person who starts early and continues this trend for 30 years. They would have invested a total of $18,000 over 30 years. This would have generated over $115,000 of interest if it had been invested, which I think would merit consideration from just about anyone.
The Hypothetical Hiker’s investments over 30 years.
So what’s the point? Does this mean we shouldn’t be buying gear? Give up backpacking so we can maximize our precious 401(k) accounts? I think, perhaps, it’s the opposite! Our years on earth are short, and money cannot be taken with us into eternity. There’s a balance to be made.
I remember years ago a flight across the continent and a conversation with a young couple next to me, who had just quit their jobs and planned to backpack across the world until the money ran out. “We’ve been saving for the past few years, and we really just want to explore while we’re still young,” the husband told me. “But,” I asked, “what does this do to your retirement plans?” He responded, “Well, to be honest, we’re probably pushing our retirement plans out by at least 5-10 years by quitting our jobs to go backpacking. But we want to live life to the fullest, and to us it’s a worthy sacrifice.”
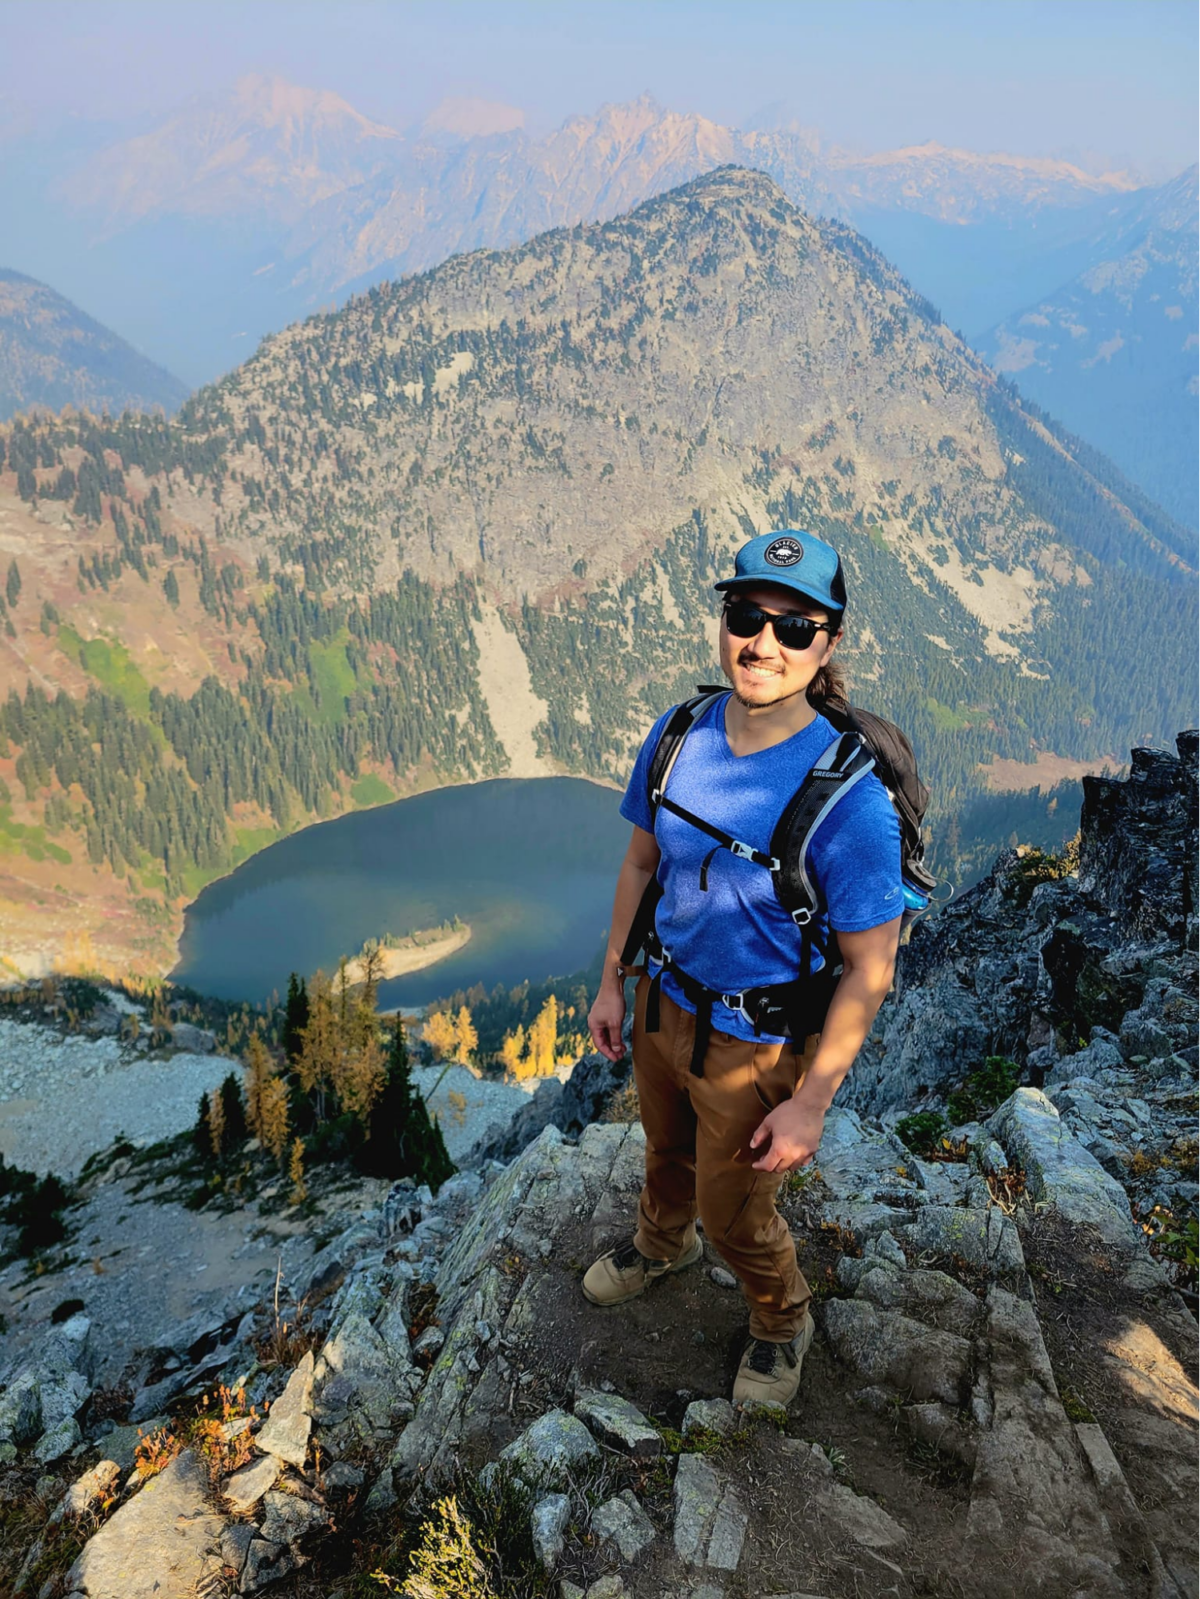
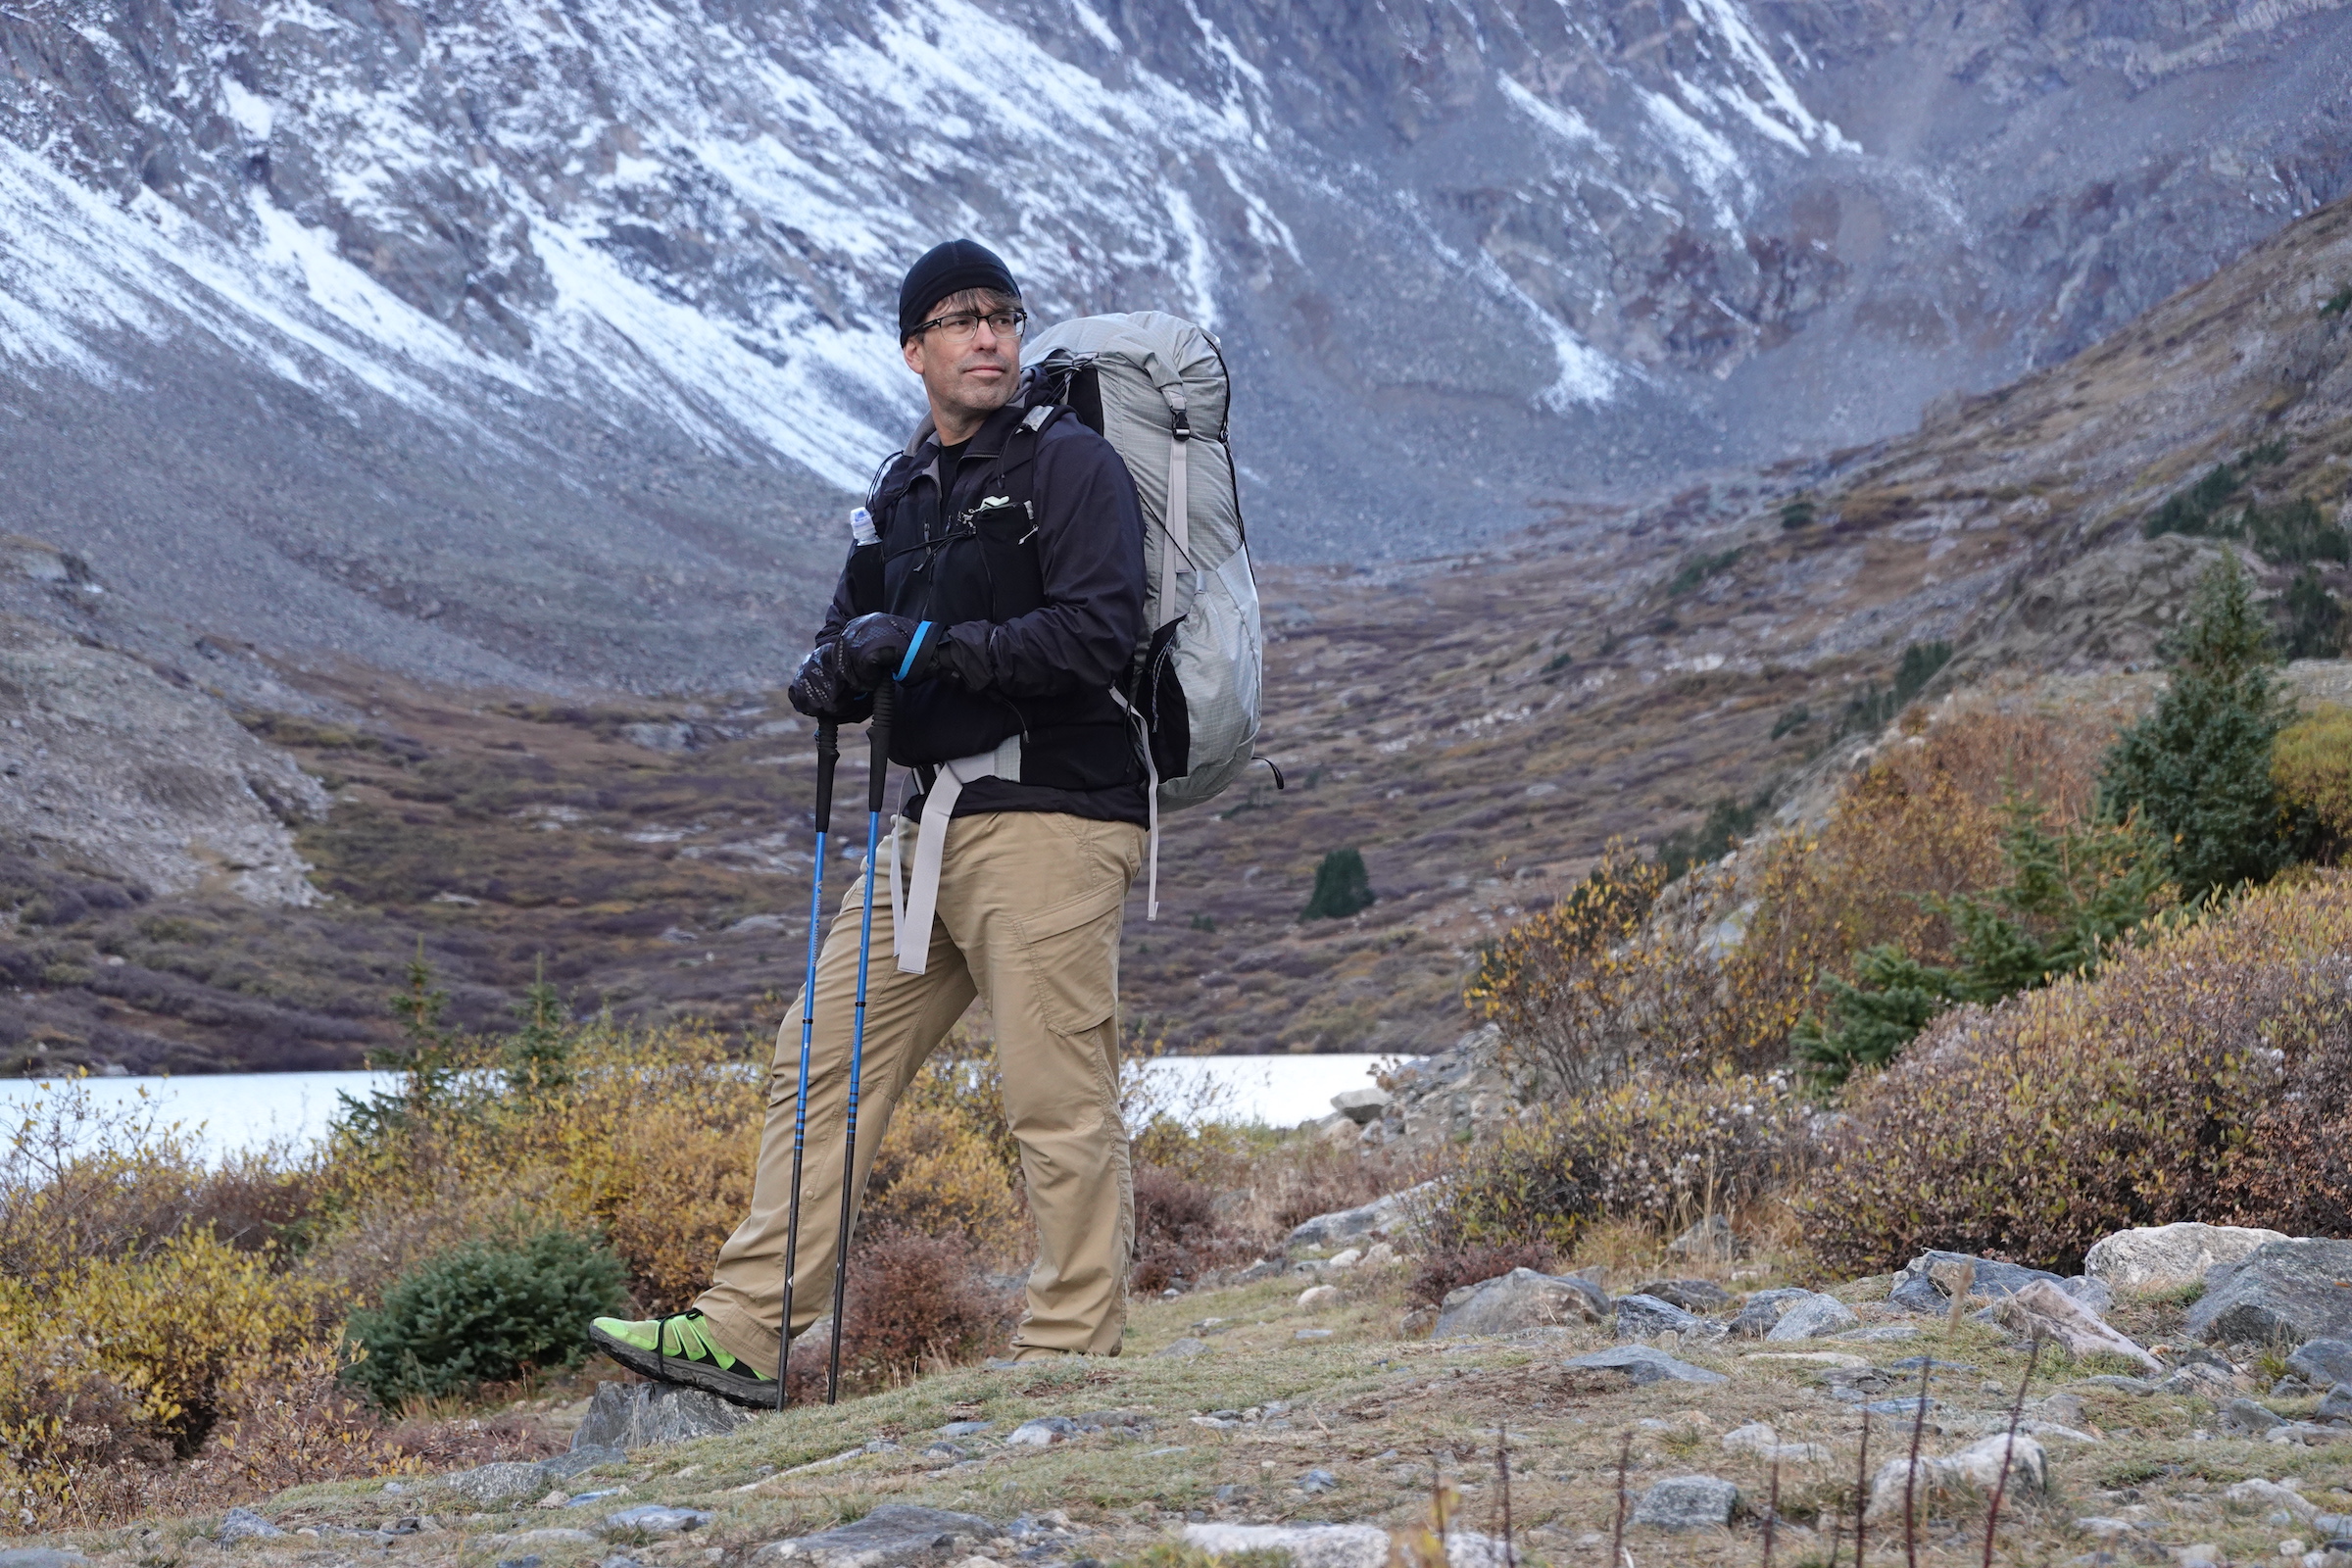
The author hiking at Maple Pass in WA, living his life to the fullest.
I thought about that conversation the next Monday while I sat at my desk at work.
I still think about it to this day.
Perhaps a better question might be, What is the value of happiness? And in my mind, the answer is simply that there is no “dollar amount” that can be put on the value of happiness. Being outdoors makes me happy, and so I’ve learned to care less about the napkin math of what a few extra dollars in my retirement account might look like, and more about the joy that I find in experiencing nature with my wife and my friends.
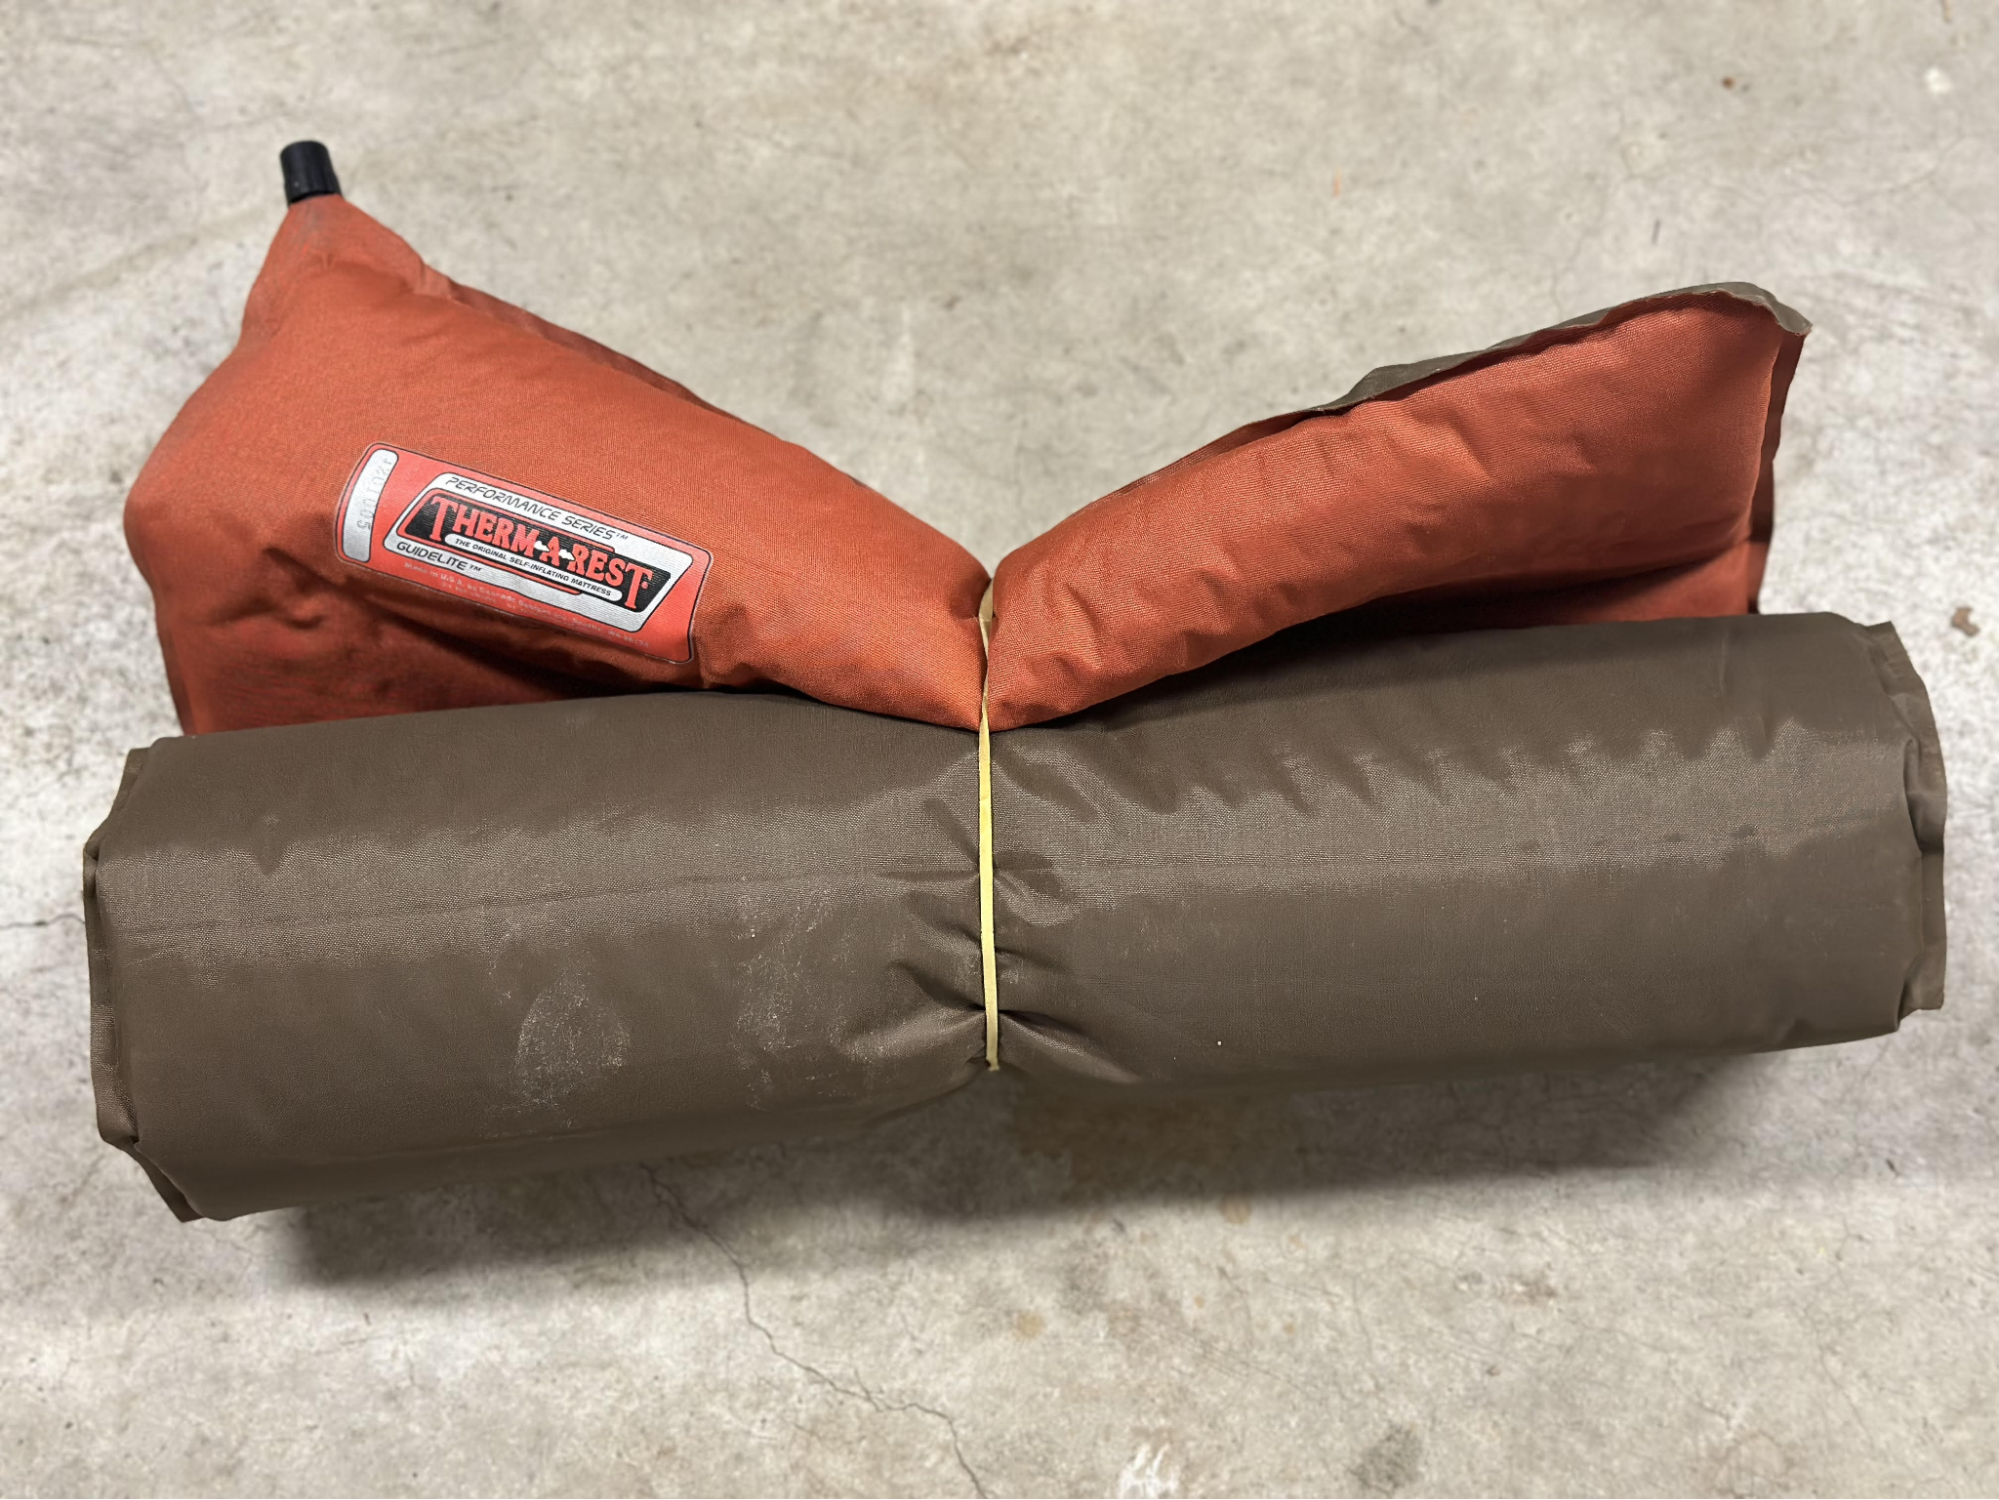
The author’s now-ancient Therm-a-Rest – purchased many years ago at a used-gear shop in Seattle, WA. Still going strong!
One final comment – I love the generosity of the backpacking community, and the ability to share gear with friends. Another way to pursue frugality in backpacking is to check for used gear, which can sometimes be easy to find (example: BPL’s Gear Swap page).
Isaac Simons humorously describes the effects of overtraining for trail running adventures including discussions with Jeff Garmire.
Introduction
Following a winter season spent exhausting what hiking was on offer, I had taken up the wildly masochistic yet universally accepted pastime known as trail running. By this I do not mean casual jogging or the odd sprint from the angered black bear, but a methodically scheduled practice of daily miles in which prescribed distances and heart rates were adhered to with the inflexible zeal of most religions. Certainly there is a parallel between religion and daily running in that the service must be regular. There are also, of course, clear differences—rarely must one lubricate their nipples before attending church on Sunday.
The Experience of Overtraining
After three months of daily practice, I had attained what I considered a respectable weekly mileage. I’d rise each Saturday at some ungodly hour to tackle a half-marathon in the nearby mountains and then return home dusty and battered, gulping for breath, in some state of cardiac distress or other, just in time to join my family for brunch and promptly pass out in my omelet. Weekdays I’d run another three or so mornings to total a marathon per week. I mention the specific mileage not to brag—as compared to even the off-season training schedules of most mountain athletes, a 26-mile week is far from impressive. It is roughly equivalent to playing air guitar to a Jimi Hendrix solo; an endearing act of admiration, but far from the real thing. Ultrarunner Anton Krupicka famously tackled upwards of 200 miles a week while training for his races. Novelist Haruki Murakami casually mentions in his memoirs that he ran 50 miles weekly. (This is a novelist, mind you, a vocation which calls for all of the athleticism of a concrete speed bump.) Even my good friend, whose life now tucks neatly into the confines of the prosaic suburbanite—replete with two kids, a dog, modest real estate holdings, and a predictably unfulfilled desire to trim down—tells me he used to log 100-mile weeks when running track in college. In light of such seemingly commonplace achievements, I had no illusions about being a gifted runner. Still, what I lacked in talent I made up for in recklessness. Sleep became a triviality unworthy of my attention. Recovery is an extravagance on par with the Roman orgy. I adhered to a rigid discipline of running, running, running, in which it was unclear whether the purpose was to train or traumatize.
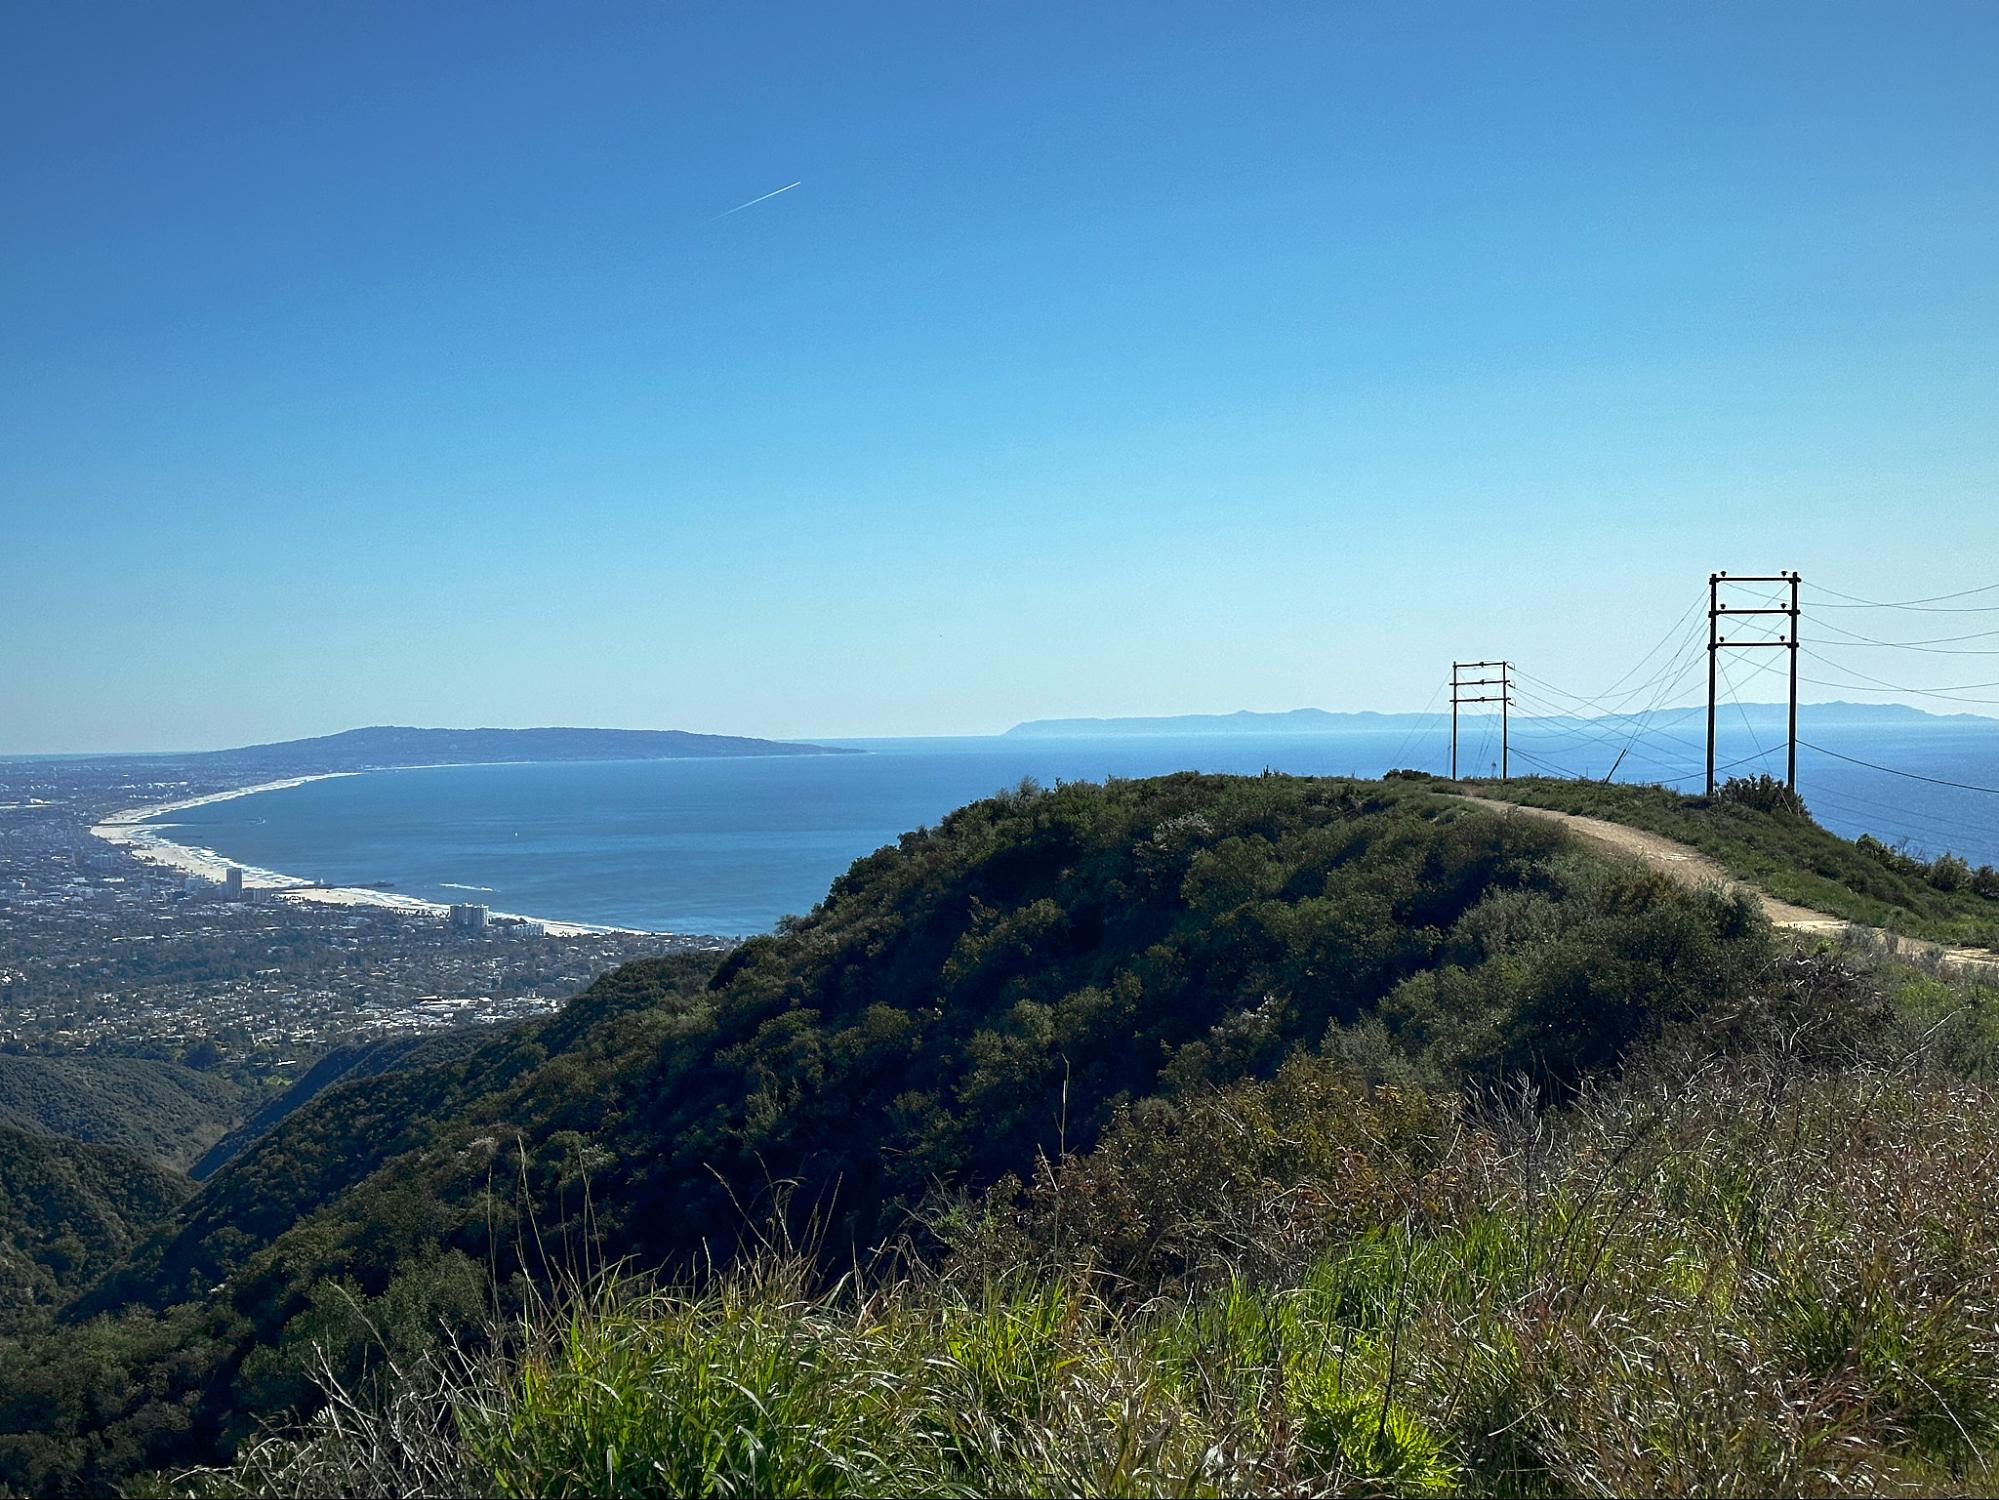
My bi-weekly trail in the Santa Monica Mountains.
As my mileage increased I found myself indulging in an abundance of accessories, purpose-built for the novice runner’s unaccountable fixations. Among them, a neat little device which I wore to sleep each night so that I could awake to a host of charts and graphs detailing with appalling accuracy precisely how overworked I had become. Not to say this slowed me down any. And why should it? My trail running had until then been uncomplicated by injury. Talk of overtraining syndrome was purely hypothetical. The uninviting prospect of months spent sidelined, tending to a mishandled body while woefully depleted, did not loom quite as large as perhaps it should have, considering I was heir to a proud lineage of heart disease and varied cancers, with not a single athletic accomplishment to speak of.
So in the face of deepening soreness, increasing lethargy, and a generalized grousing discomfort, I persisted with my training. If Haruki Murakami could occupy an office chair for however many hours it took to crank out thirteen doorstopper novels, all while running fifty miles weekly, surely I could manage my little essays while keeping up a training regimen. It was a creditable if misguided attempt at “gutting it out,” an approach that most often succeeds only in ruining one’s guts.
In short order the inevitable occurred, as it must always: the crash and burn, the unyielding fact of fatigue, the resting heart rate which imitated a flamenco dancer’s castanets. Accompanying this, a sudden incapacity for any meaningful exertion. And so an abrupt end to my training. I found myself sleeping at first nine hours a night, then ten, and finally augmenting this with a two-hour nap each afternoon. For all intents and purposes I was a man in hibernation. My training schedule had dwindled to that of an overstuffed sectional sofa. Morning runs which once felt boundless now consisted of a miserable lurch from car to trailhead, a sort of scoliotic shuffle, followed by a complete and irreversible collapse within a mile.
This left me in a dreary state of mind indeed, if not a bloody one. I needed guidance. I needed sympathy. I needed a bilateral-leg-heart-and-lung transplant.
Talking with Jeff Garmire
Into this pit of wallowing immobility stepped Jeff “Legend” Garmire, a man who, as his moniker implies, has carried off some truly legendary feats. These include not only the Pacific Crest Trail, the Continental Divide Trail, and the Pacific Northwest Trail, but all three all bundled together into one continuous and downright incomprehensible loop of 6,875 miles. Not to mention the equally commendable achievement of completing a footrace in plastic clogs and another dressed in a bathrobe while pushing a child’s stroller. Add to this the race in which he finished third while running in two left shoes (he attributed this to honest oversight) and you begin to sense the strange breed of irreverence which first drew me to Garmire. That’s not to say he should be mistaken for a novelty or farce; Garmire’s sporting achievements rank him as among our premiere endurance athletes.
Garmire on the John Muir Trail, with customary tiger-tee.
I called Garmire for guidance amid my third week of lingering fatigue and was pleased to hear that he’d encountered the same on numerous occasions. As it turns out, the myth of Icarus deceives us—the danger lies not in how close we fly to the sun, but how quickly.
“Overtraining’s not a myth,” he told me. “When you’re walking that fine line, trying to balance the exact amount of recovery with the amount of training needed, there’s a mental, physical, and emotional crash that occurs.”
And he should know. I spoke to Garmire only a week before he was to run the Cocodona 250, a two-hundred and fifty mile footrace through the heart of Arizona.
“It feels like every little injury hits you at once. Everything stiffens up and that’s the end of it, you’re beat up in every way.”
Most of his overtraining injuries were on account of running, rather than hiking. It seems that trail running’s chief hazard is the speed at which damage accrues. Whereas with hiking fatigue approaches steadily, from a distance, as a silhouetted figure on the horizon, when trail running it leaps from nearby cover to ambush you completely.
Garmire regales me with stories of being unable to get out of bed following a race, of lying still for a half hour while weighing the agony of movement with the humiliation of wetting his mattress. In all, he drives home in his offhanded and amicable way the trifling nature of my suffering. (By way of illustration: during a record-setting jaunt of the 800-mile Arizona Trail, Garmire purchased superglue from a convenience store in order to mend a sizable laceration he’d sustained along the bottom of his heel.)
“I don’t do great,” says Garmire, speaking of his time injured and overtrained. “I crawl around and play a lot of online chess and eat too much. You feel like there’s a void because the outdoors has become a staple of your daily life. There’s nothing logical about it: when you’re injured you feel like you’ll never be healthy again, and when you’re healthy you think you’ll never be injured.”
It occurs to me that while we love the tale of the man possessed, or the woman who commits herself entirely to her passions, we overlook the staggering cost of such a singular life-purpose. When you live cleanly and plainly for one thing, with unfailing commitment, you are on a shaky precipice indeed.
I left Garmire to the final preparations for his upcoming race and set myself to the strange work of recovery. At his lowest, Garmire described hobbling to a local park at night to watch the stars, that this had to serve in place of his usual hiking and running. Imagining his anguish—surely many orders of magnitude deeper than mine—I returned to the trail, humbled, this time content to simply walk it. I took in the scent of pine resin, the low mantle of clover, the runners who frolicked past me in their smooth staccato cadence, and I found it wasn’t fitness I had lost so much as hope.
Stopping to smell the proverbial flowers.
The following week, Garmire completed the Cocodona 250 successfully, rallying from a lackluster opening rife with nausea and overheating to finish in sixth place amid a field of 137 entrants. I reached out to him five days following the race to inquire as to his recovery. I received only four words in return.
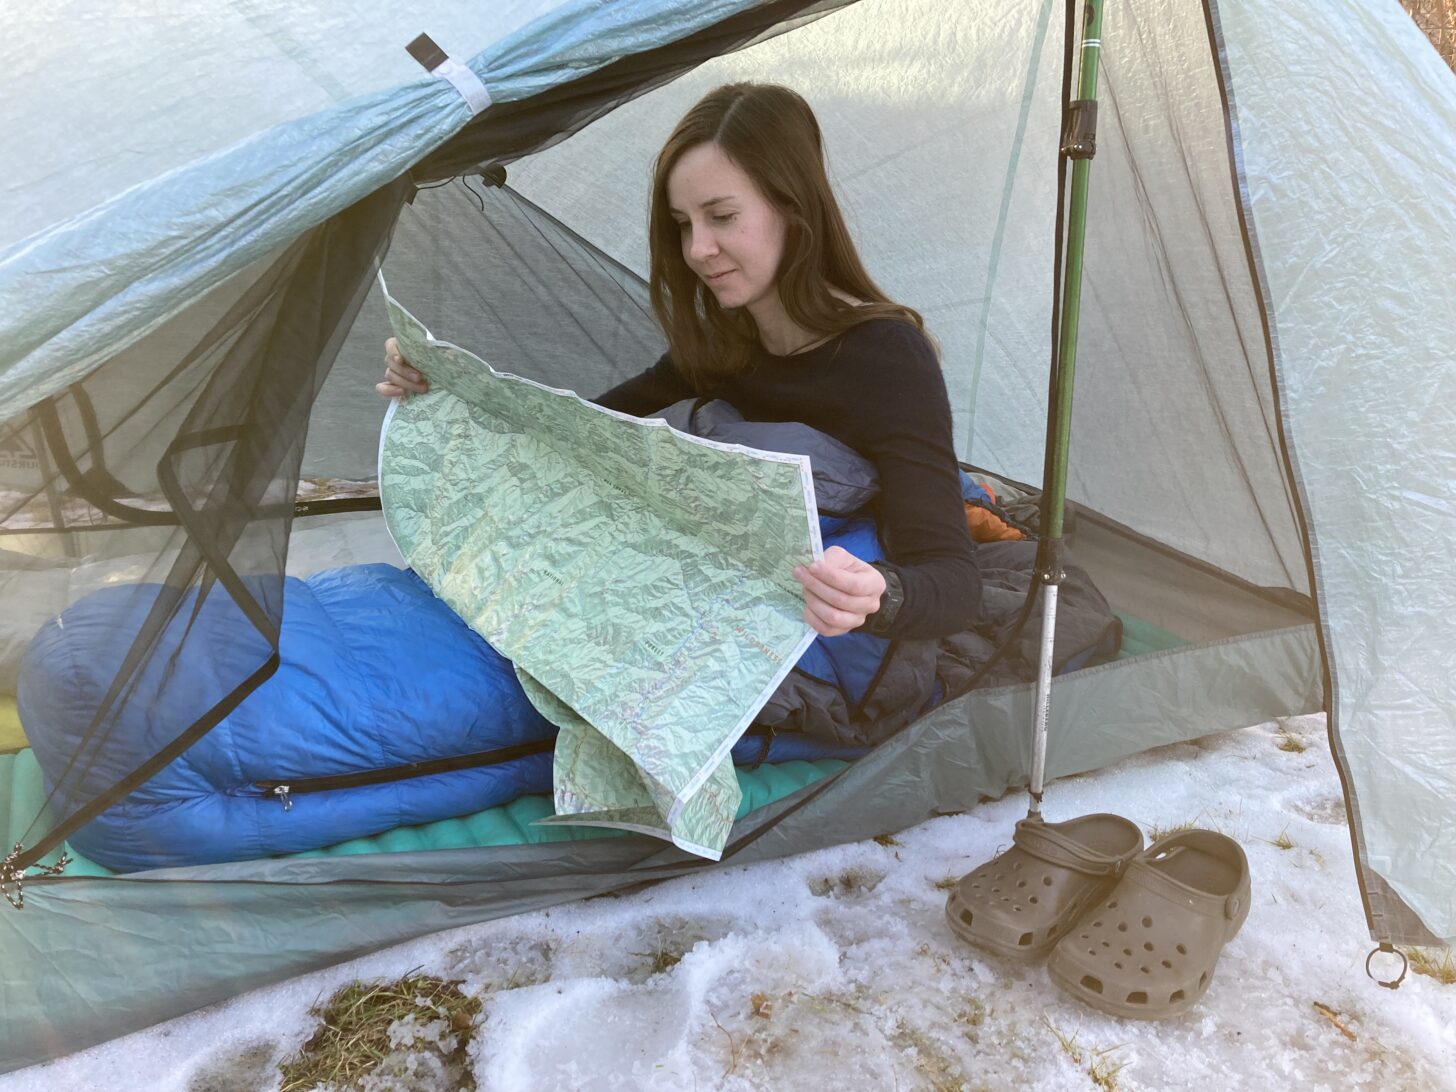
UPDATED! (Long-term performance) – The Durston X-Mid Pro 2 tent is an ultralight (20.4 oz / 578 g) two-person, side-entry, double-door, double-vestibule single-wall Dyneema Composite Fabrics (DCF) trekking pole-supported shelter.
Introduction
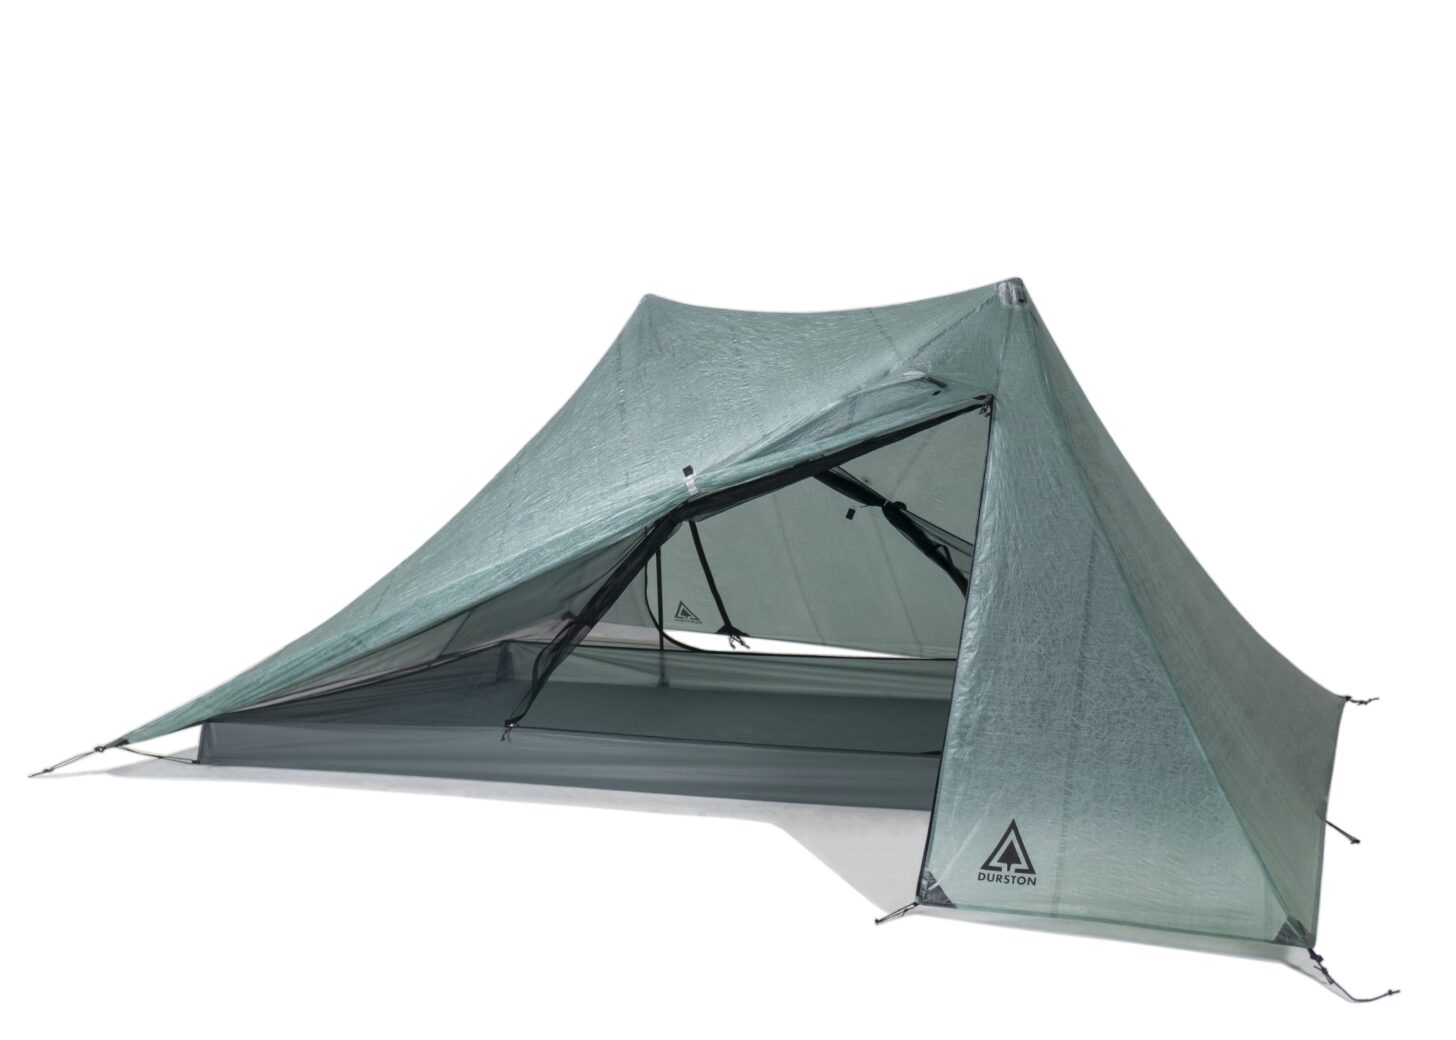
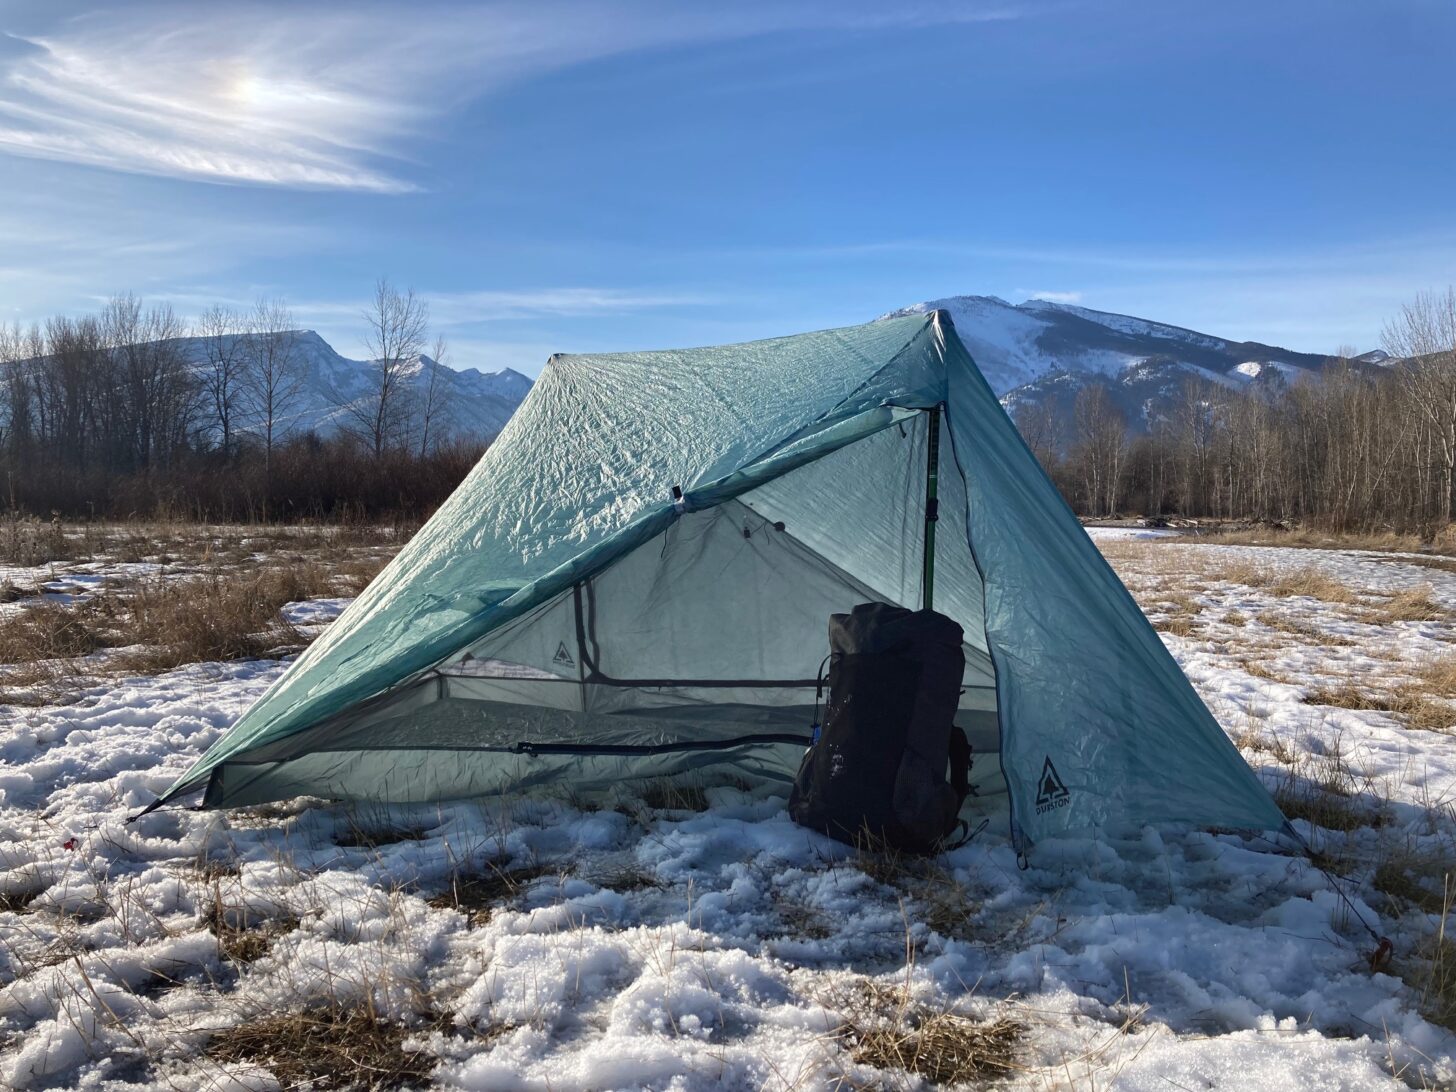
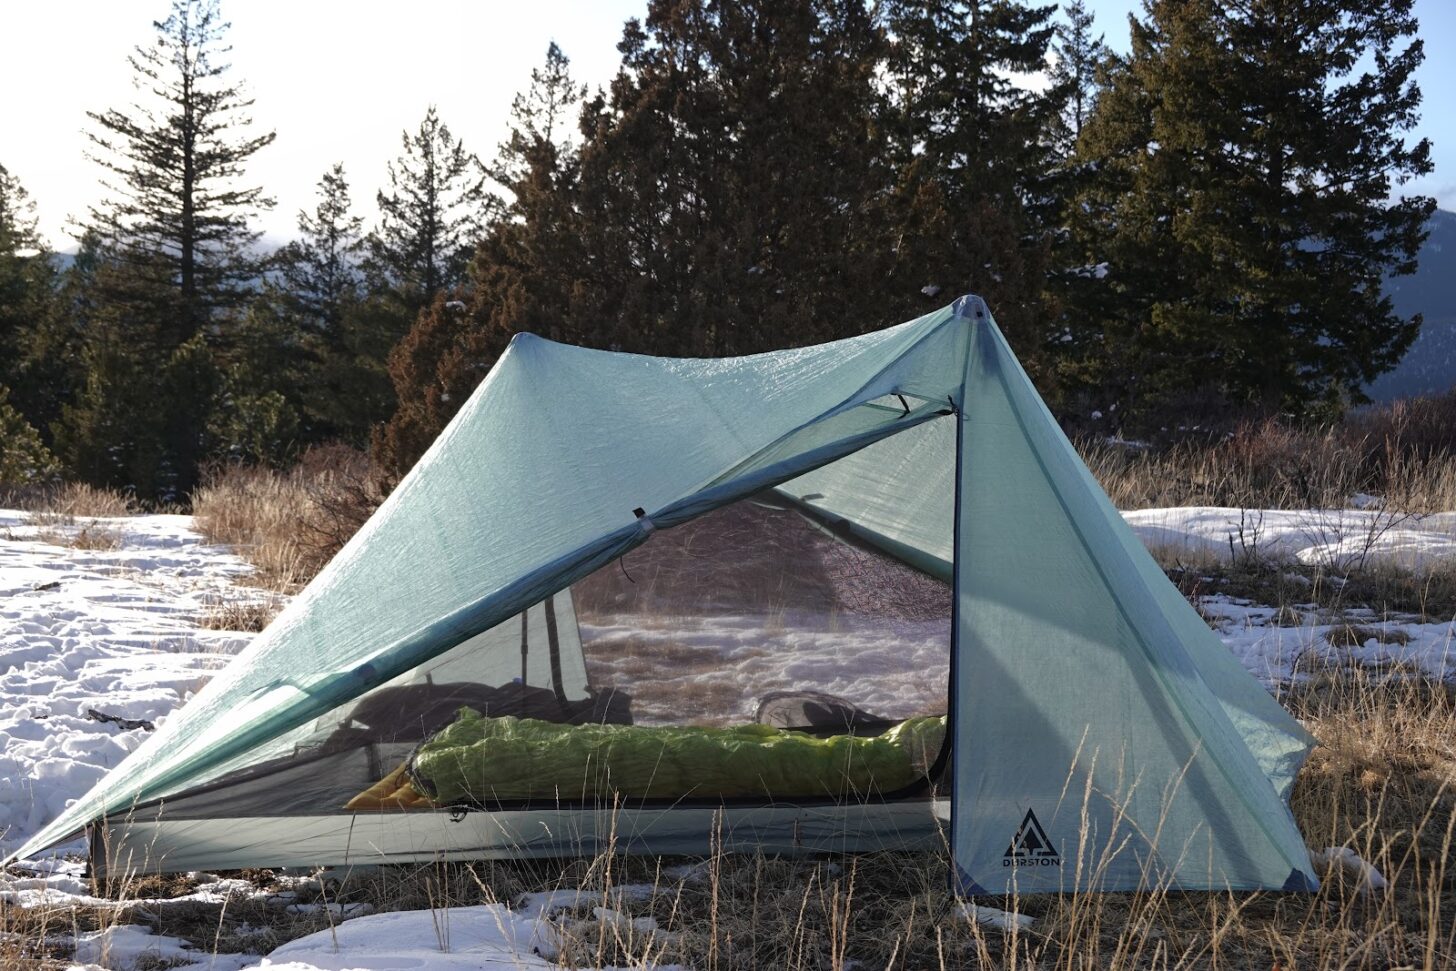
The X-Mid Pro 2 is an ultralight, two-person, dual-door, dual-vestibule, side-entry Dyneema Composite Fabrics shelter supported by two trekking poles and requiring a minimum of four stakes to pitch. Photo: Durston Gear.
The Durston X-Mid Pro 2 tent (20.4 oz / 578 g, MSRP: $639) is an ultralight, single-wall, two-person, double-door, double-vestibule, side-entry, trekking pole-supported shelter made of Dyneema Composite Fabrics (DCF). It requires two trekking poles and a minimum of four stakes to pitch. The design combines the headroom and spaciousness of a classic double-pole single-wall shelter with the stormworthiness and simple set-up of a pyramid-style shelter.
The Durston X-Mid Pro 2 is a compelling product in the somewhat narrow category of ultralight, two-person DCF shelters. The silpoly Durston X-Mid 2 is already a popular tent and is Highly Recommended by Backpacking Light. That makes the lighter, updated DCF version particularly intriguing.
The Durston X-Mid series of tents has become a favorite among ultralight backpackers, and demand for these shelters is very high. A recent sale of the Durston X-Mid 1 sold out in three minutes. Company founder Dan Durston notes there that there will be a better supply of the X-Mid Pro 2, but it seems unlikely that they will remain in stock very long following their initial launch.
This First Looks review is based on our initial hands-on evaluation of a pre-production sample of the Durston X-Mid Pro 2 Tent.
Review Update Log:
June 13, 2023: This review was updated with long-term performance results.
March 25th, 2022: Backpacking Light founder Ryan Jordan and Backpacking Light canine-in-chief Sierra recently had a chance to spend some time with the Durston X-Mid Pro 2 in the field. The new photos are at the end of the review, in the Photo Essay section. Click to jump straight there.
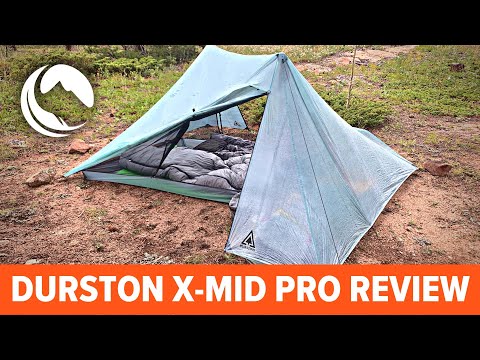
August 22nd, 2022: We shot a video exploring the features of the Durston X-Mid Pro 2. You can find it below.
Table of Contents • Note: if this is a members-only article, some sections may only be available to Premium or Unlimited Members.
shelter: 20.4 oz (578 g), plus 4 stakes and two trekking poles
height: 46 inches (117 cm)
floor width: 48 inches (122 cm)
floor length: 90 inches (229 cm)
floor area: 30 sq ft (2.78 sq m)
vestibule area: 21.5 sq ft (2 sq m)
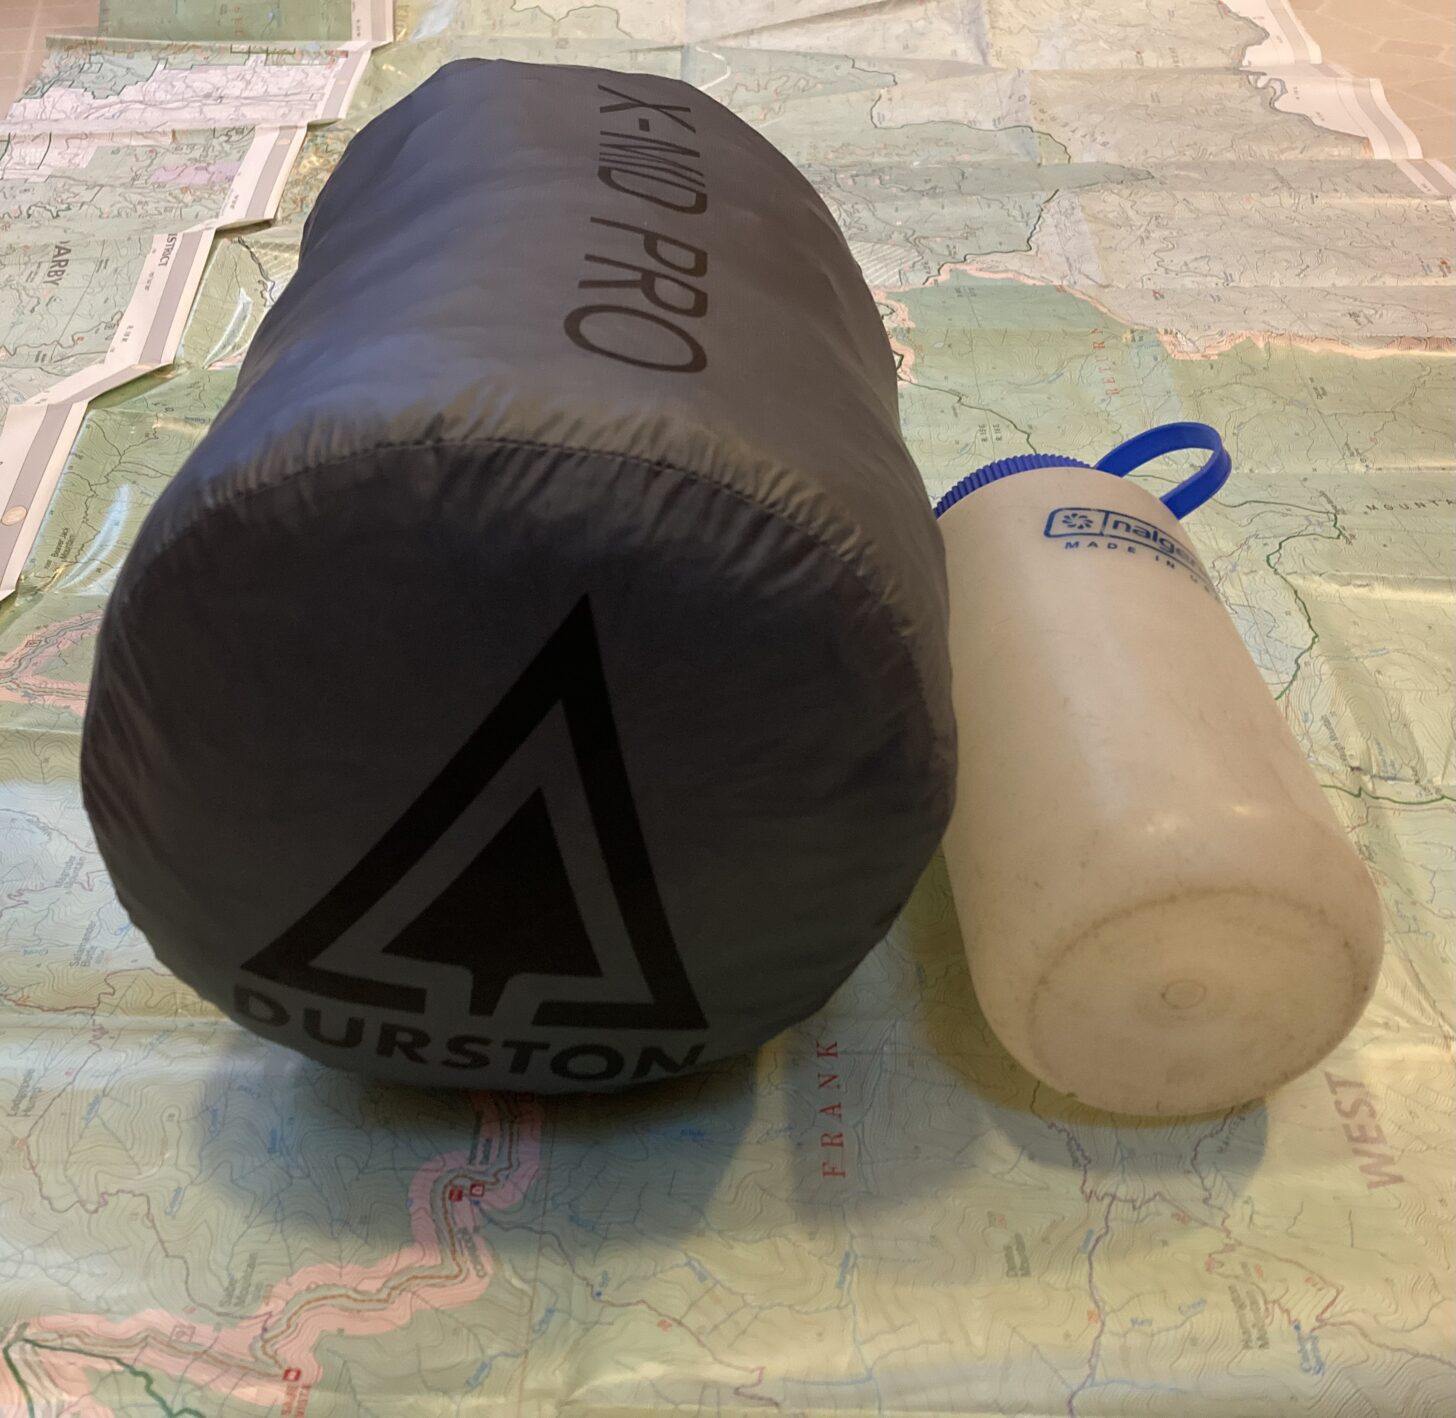
packed size: 12 x 6 inches (30 x 15 cm)
rectangular design allows the tent to be pitched with four stakes
dual peak vents help manage condensation
bonded construction instead of sewn construction
offset pole design allows for easier entry and increased interior volume
two doors with dual vestibules, waterproof zippers on vestibule doors
15 denier nylon floor doesn’t require a footprint in most conditions
floor lays taut when pitched and tensioned properly, instead of simply hanging
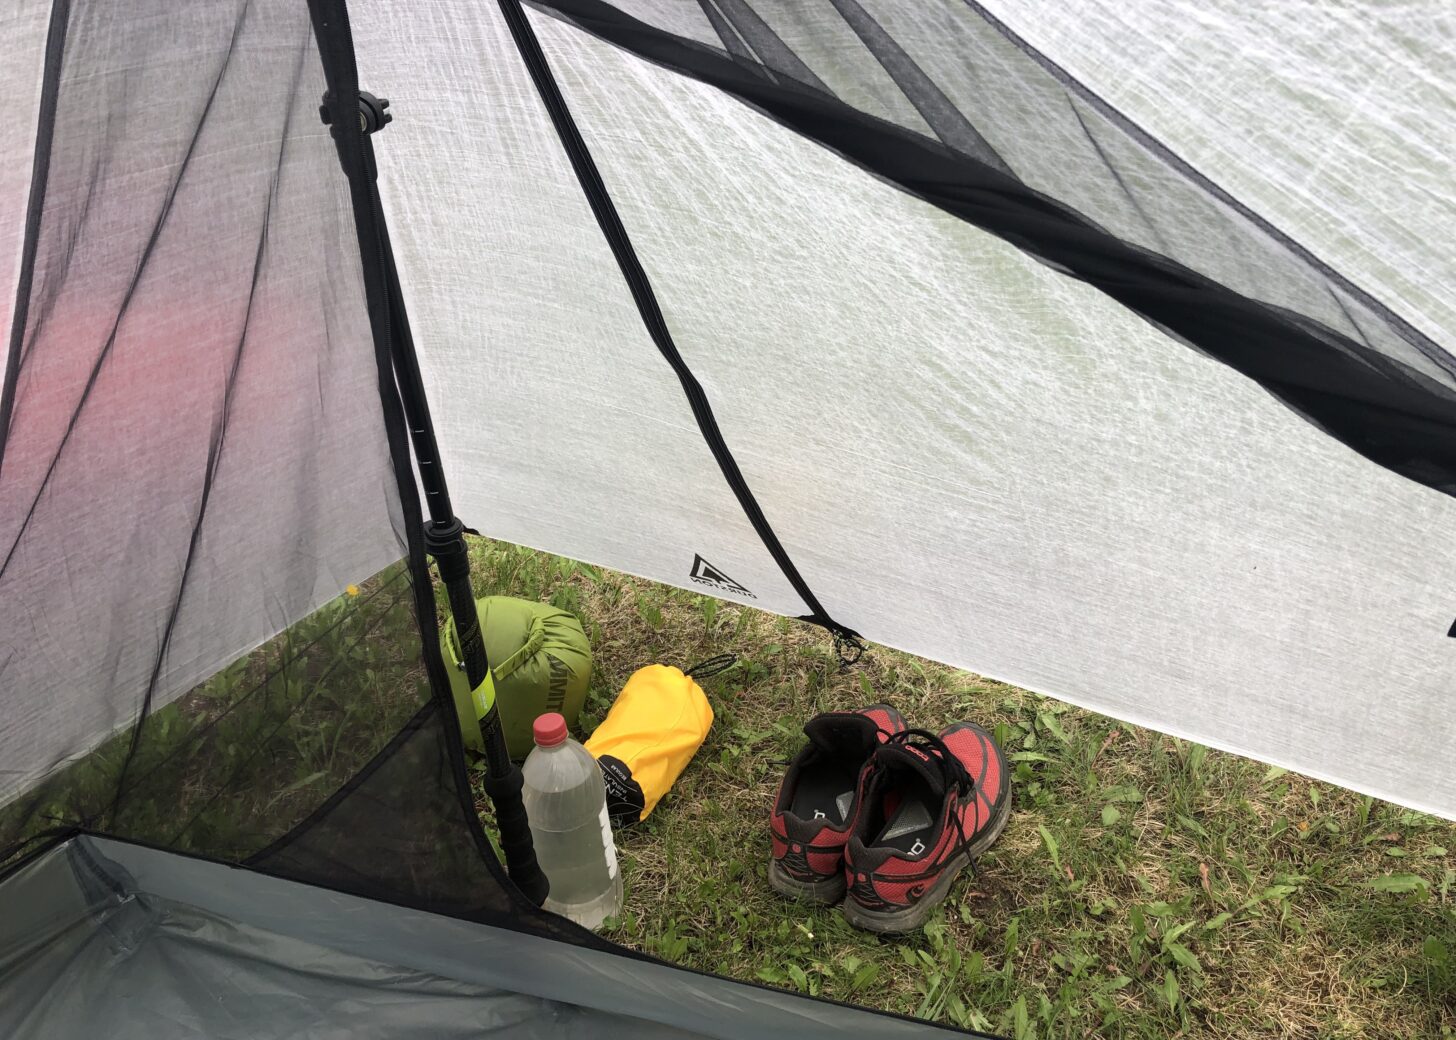
vestibules provide ample room for storing packs and other items not brought into the shelter
door zippers are easy to operate one-handed
magnets allow for the vestibule and/or the mesh tent door to be easily rolled up
The packed size of the X-Mid Pro 2 in the included stuff sack should allow it to fit in most low-volume (40L or less) packs without issue.
Testing Context
This review was conducted using both pre-production prototypes and production models of the X-Mid Pro 2.
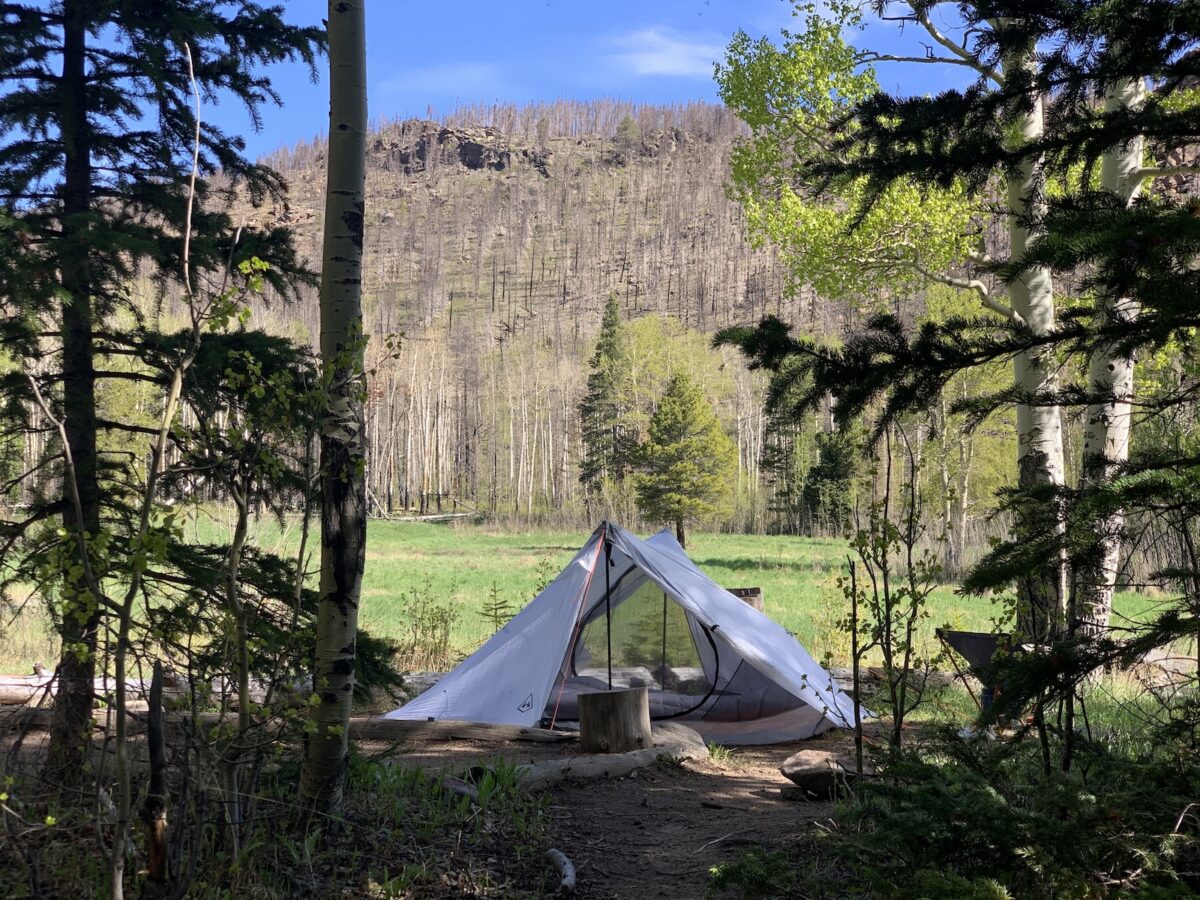
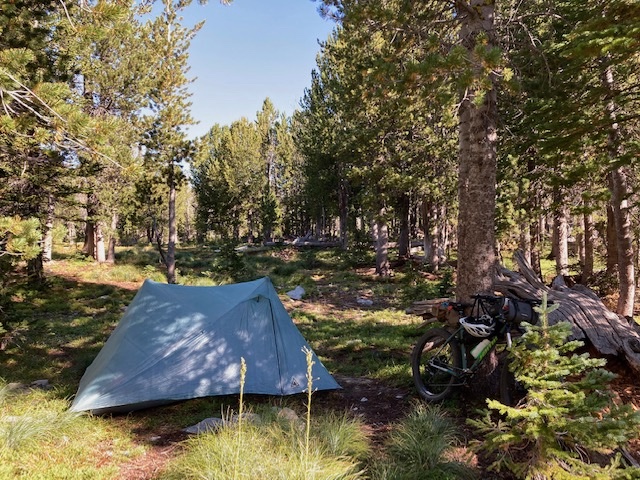
The Durston X-Mid Pro was tested for 27 cumulative nights in Montana and Idaho – a mix of solo trips, trips with a partner, overnight trips and weeklong trips, fair weather, and rough storms.
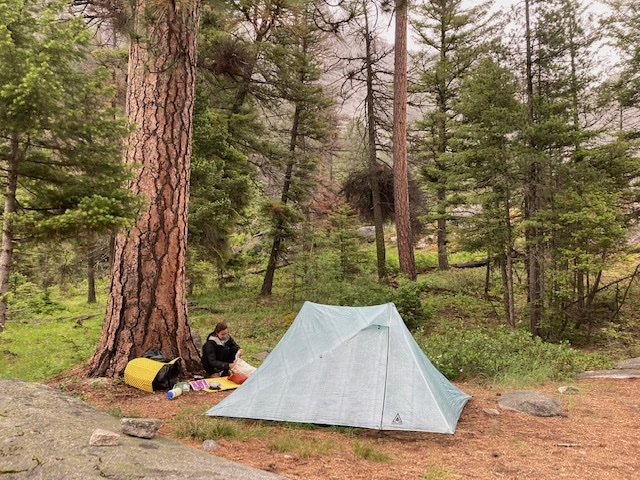
I used the Durston X-Mid Pro solely on summer and fall backpacking trips in the Northern Rockies. It was used for 27 nights. For 22 of these nights, I was the only occupant (the remaining nights were shared with a partner). This tent was tested in national forests and designated wilderness areas that did not require camping in designated sites; therefore I was able to choose locations at my discretion. Whenever possible, I chose sites that had ample room for the tent to ensure a proper pitch, soil that was easy to place stakes into, and natural features (boulders, trees, slopes) which provided additional shelter from the elements. I did not use a footprint while testing this tent and instead tried to practice good site selection and remove small rocks, pine cones, sticks, and other debris before pitching the tent.
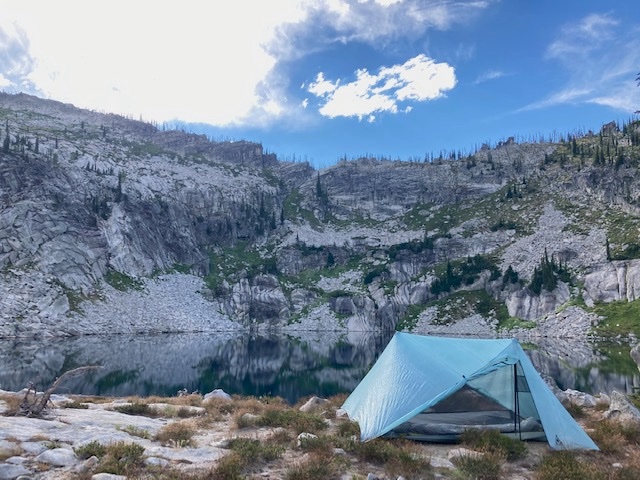
When bringing packrafts to a mountain lake, I was grateful for the light weight of the X-Mid Pro.
I experienced several mild rain events while using this tent, two consecutive days of near-constant rain or drizzle while at a basecamp, three mild-to-moderate thunderstorms, and one severe thunderstorm with approximately 10-minutes of marble-sized hail and gusty winds of around 15-20 mph. I did not use this tent in snowy conditions or excessively windy conditions. Mosquitoes were present, and often in abundance, on roughly half of the nights while using this tent.
First Impressions
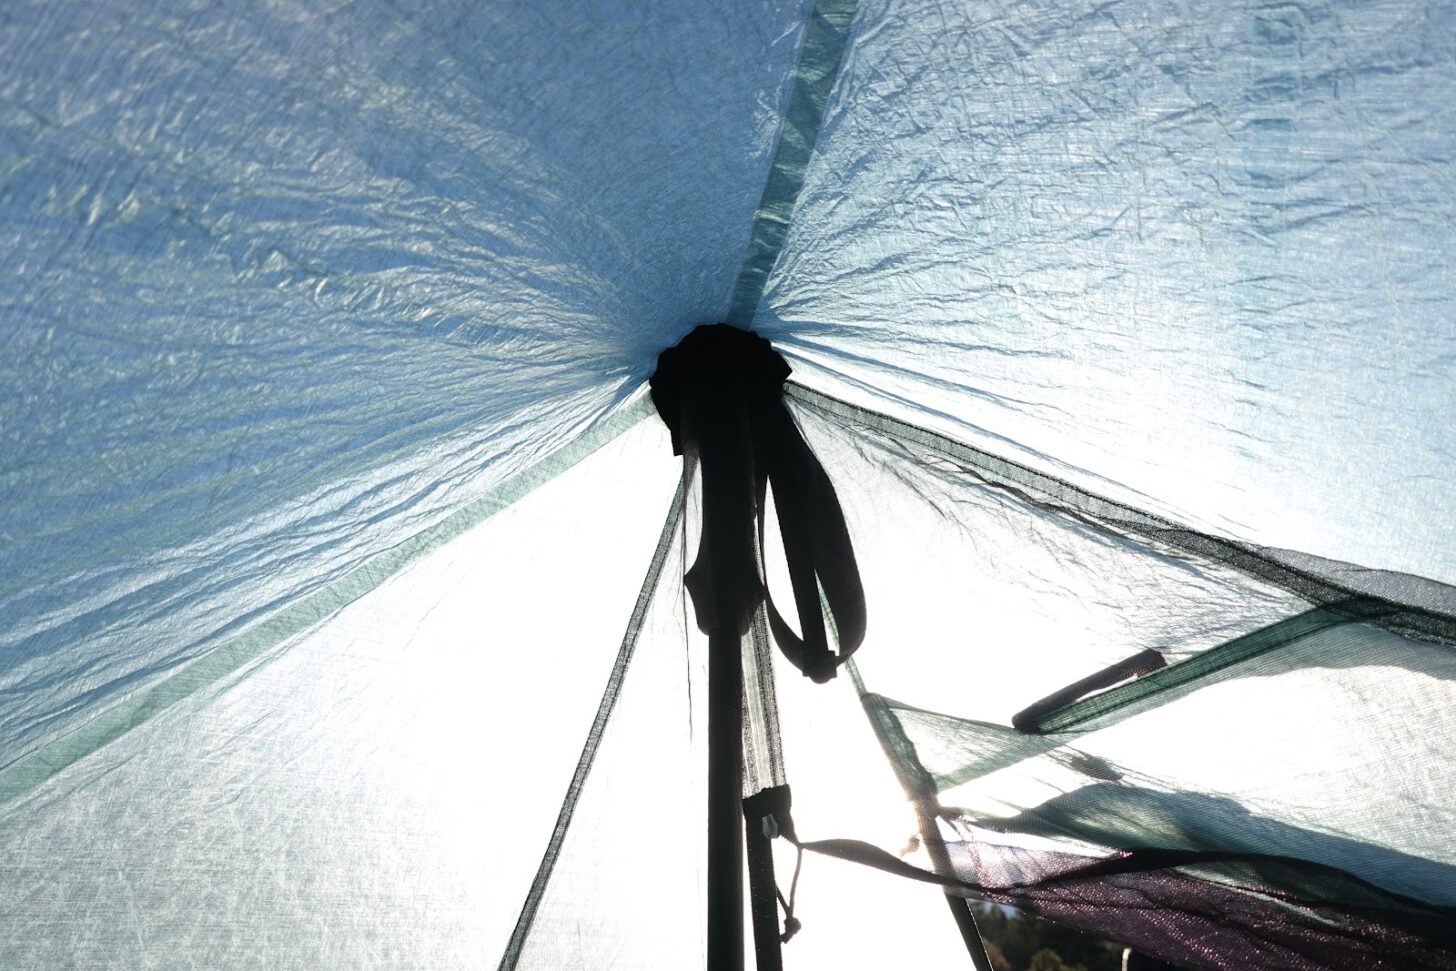
As with the popular X-Mid 1 and X-Mid 2, one of the most impressive attributes of the Durston X-Mid Pro 2 is its unique geometric design that incorporates offset trekking pole placements. (Compare this to most shelters that incorporate two trekking poles, which use a direct-opposite placement of the poles.) In addition, the details that caught my attention include its ease of use, livability, and potential performance in inclement weather.
We recommend you read our Durston X-Mid 2 Review to familiarize yourself with some of the design features of X-Mid tents. That review will aid in your understanding of the X-Mid Pro 2 design.
The vestibule of the X-Mid Pro 2 provides plenty of room for gear including a backpack.
The most obvious unique design features of the X-Mid Pro 2 include:
an intuitive (rectangular) pitch that requires a minimum of only four stakes;
a spacious interior (a function of the offset poles and overall geometry);
integrated fly that extends further to ostensibly provide better coverage in storms than similar tents. The area covered by the fly of the X-Mid Pro 2 is 55.5 sq ft (5.1 sq m), compared to the Zpacks Duplex whose area covered by the fly is 48.6 sq ft (4.5 sq m).
The Durston X-Mid Pro 2 Tent is designed to be pitched using two trekking poles. For hikers who don’t use trekking poles, or for bikepackers and packrafters, Durston Gear has a lightweight, folding pole kit that is compatible with the X-Mid Pro 2 (and other shelters).
The vestibule of the X-Mid Pro 2 provides plenty of room for gear including a backpack.
“The X-mid Pro 2 can offer more space and function for the weight because it uses genuinely more efficient geometry (e.g. fewer seams, less fabric for the volume, etc.) so we can put more weight into things that matter,” said Dan Durston.
What’s the difference between the Durston X-Mid 2 and the Durston X-Mid Pro 2?
Compared to the X-Mid 2, the X-Mid Pro 2’s footprint is smaller:
X-Mid Pro 2: 80 x 100 inches (203 x 254 cm)
X-Mid: 90 x 102 inches (229 x 259 cm)
This allows the X-Mid Pro 2 to more easily fit into tighter campsites. The headroom is almost identical between the two shelters. The floor width of the X-Mid Pro 2 is only 2 inches (5 cm) smaller than in the X-Mid 2. The most obvious difference between the two shelters is that the X-Mid 2 is a double-wall shelter and the X-Mid Pro 2 is a single-wall shelter.
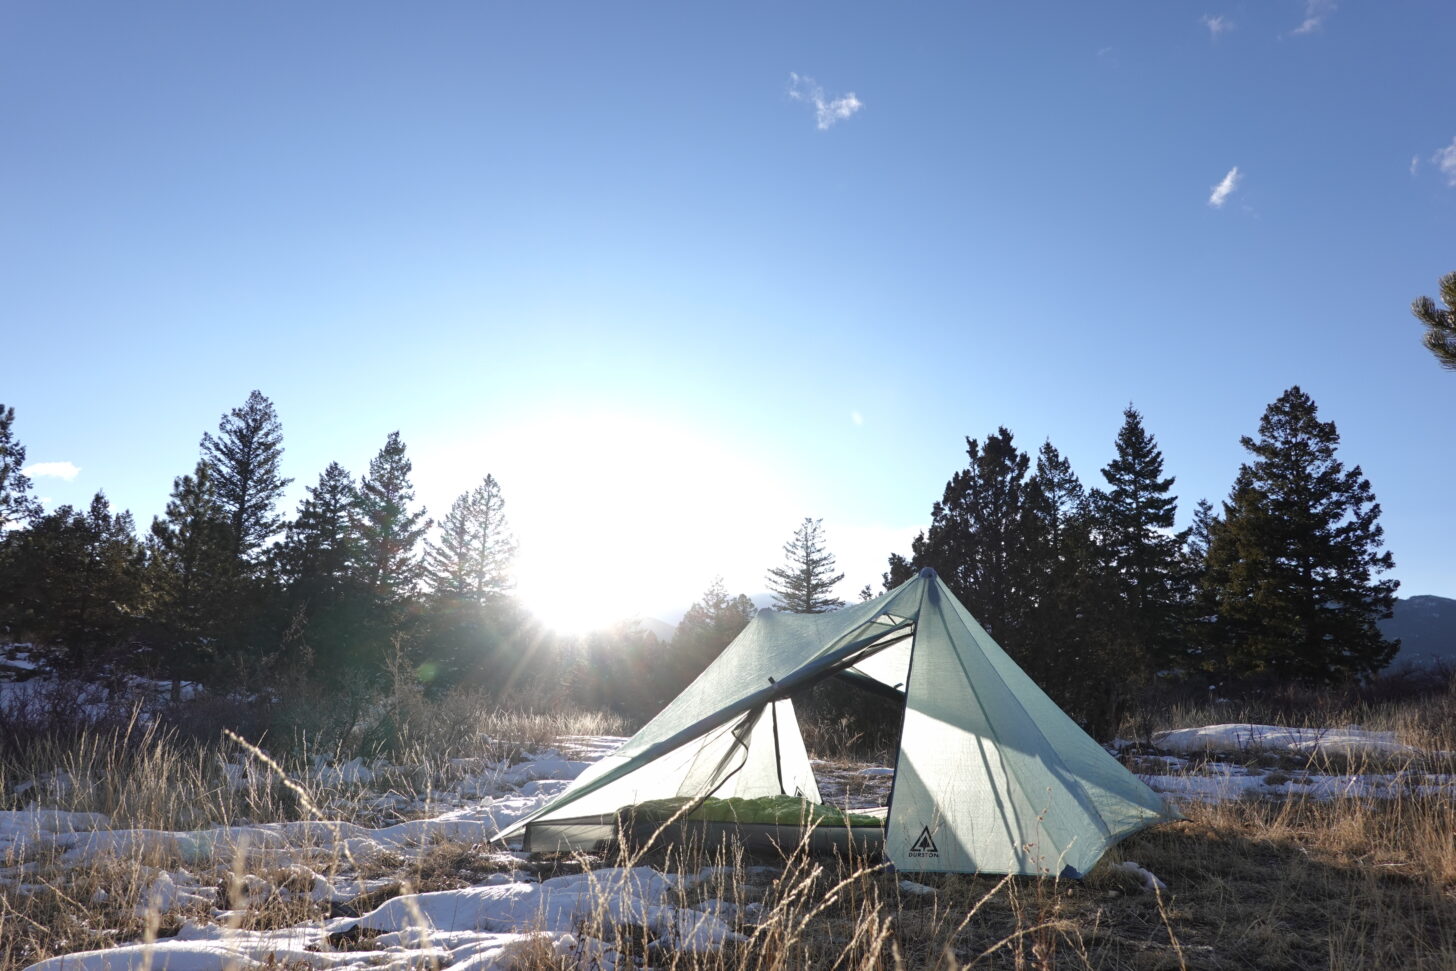
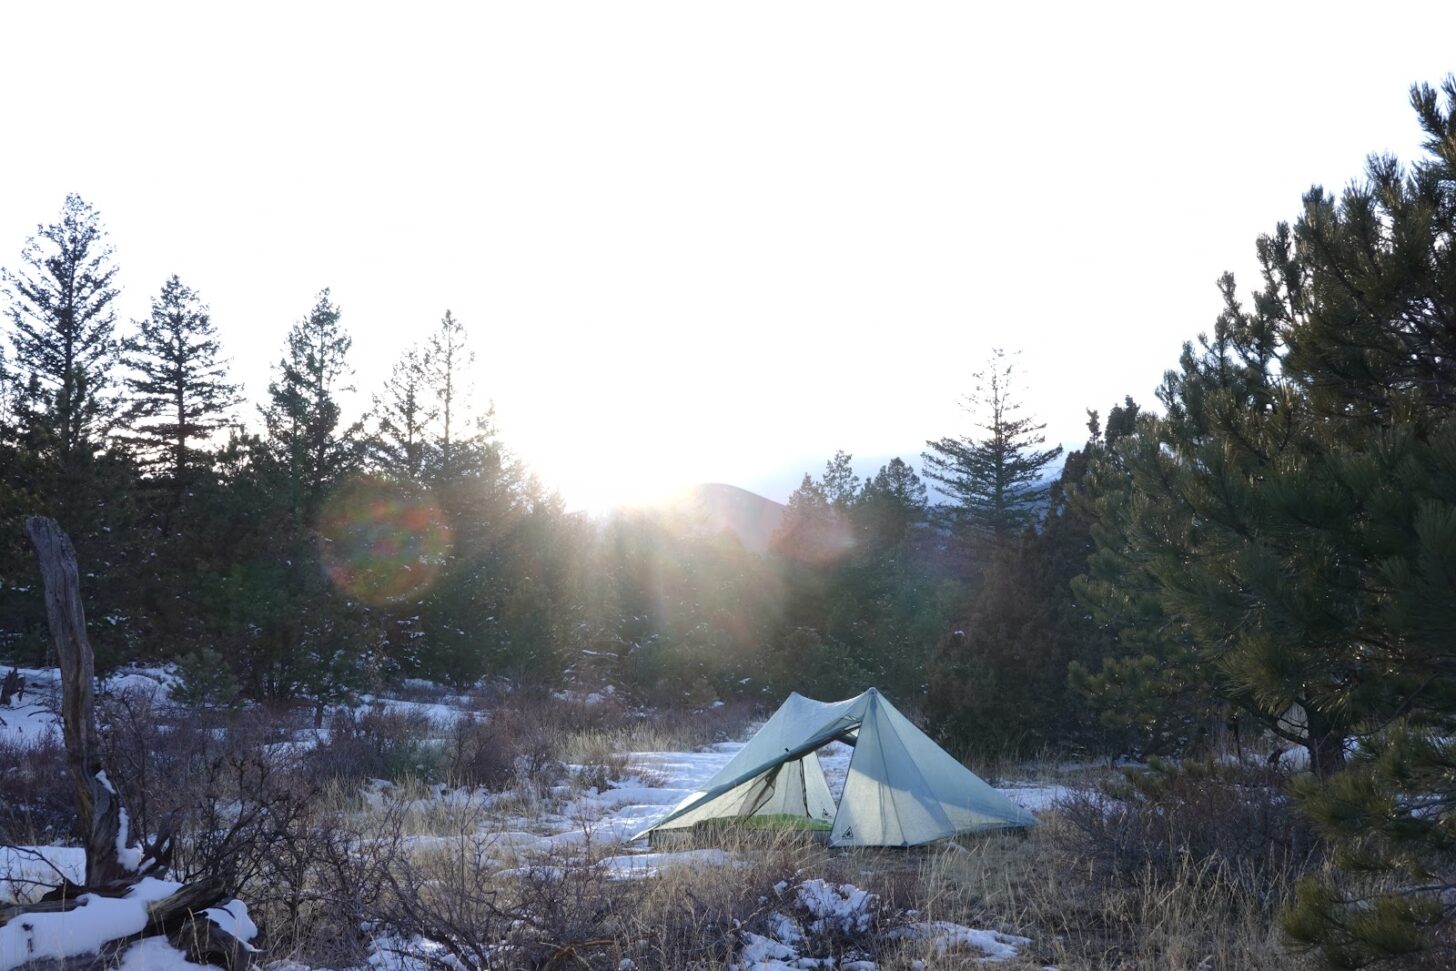
The X-Mid Pro 2 sets up quickly, has a small footprint, and doesn’t take up a tremendous amount of room in your pack. I can easily pack it into a low-volume pack like my Pa’lante V2.
Is the Durston X-Mid 2 Pro easy to pitch?
Using only four stakes and two trekking poles, I was able to have this tent pitched in just a few minutes without having to readjust anything. It almost seemed too good to be true. There was no fiddling with pole height, moving stakes around, or tensioning (and re-tensioning) guylines. These iterative steps are often required when pitching trekking pole tents. The zippers – both the waterproof fly zippers and the zippers for the body of the tent – operated smoothly.
With ample headroom and a spacious design, there’s plenty of elbow room in the X-Mid Pro 2. The mesh door and the fly door can be rolled up and stored out of the way.
In soils where staking is more difficult than in my yard and in campsites with varying topography, pitching will obviously be a bit more challenging and perhaps require longer guylines or other adjustments to the pitch. However, given how straightforward the mechanics of erecting this tent are, it’s an easier pitch than most trekking pole shelters.
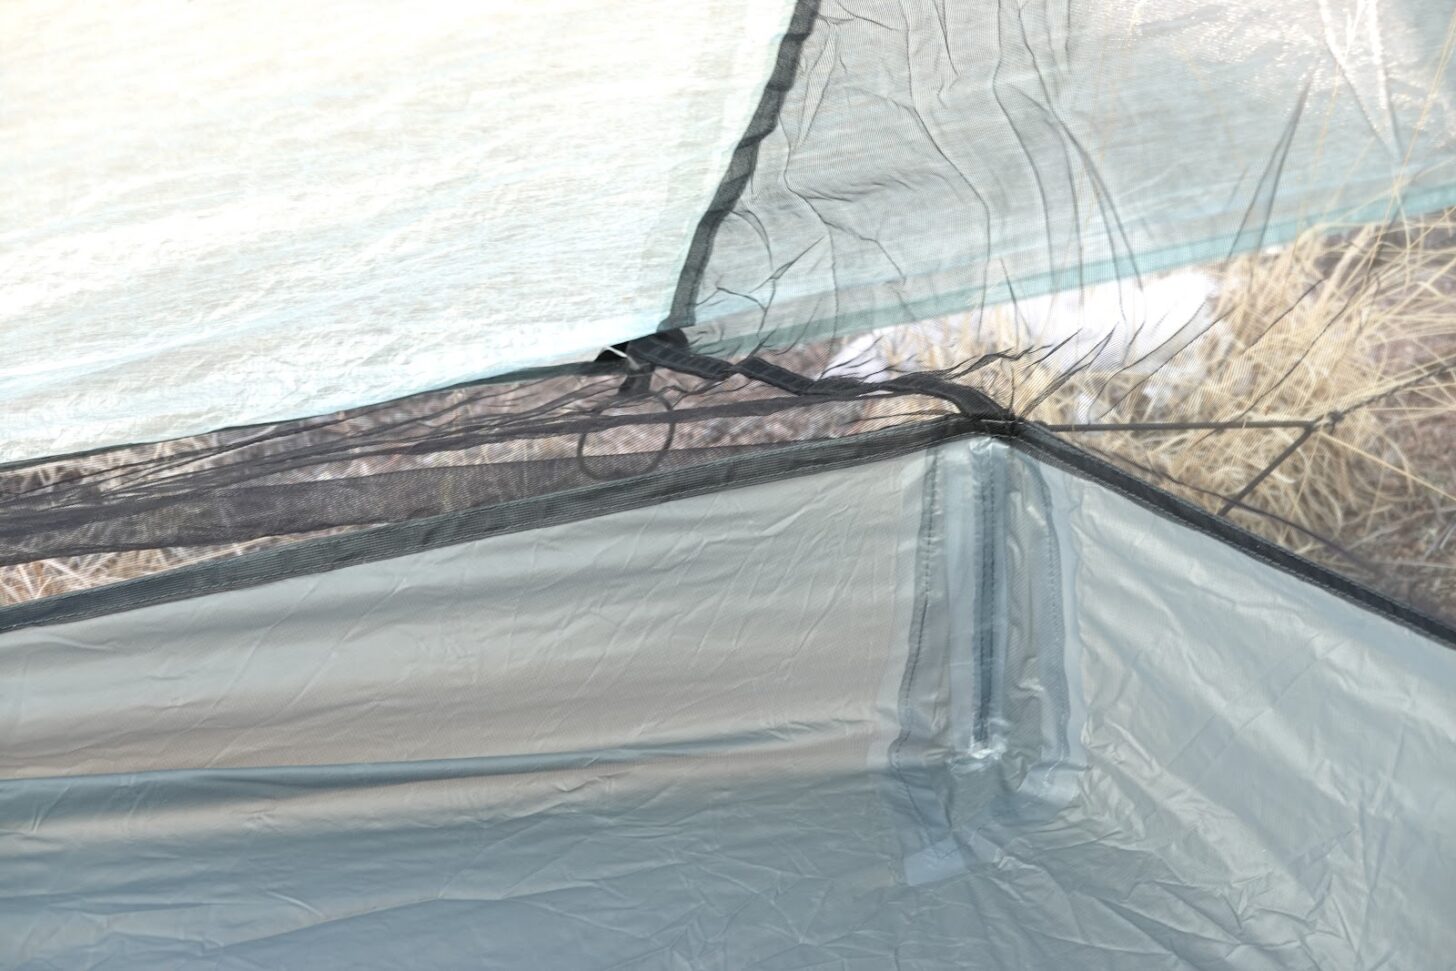
The design of the guylines stabilizes the height of the bathtub floor. The mesh and fly are designed with downward sloping angles to allow condensation to drain to the bottom of the mesh and not land inside the tent.
The DCF used for the body of the tent has been used extensively in many other tents by other manufacturers and will last a while for users who care for their gear with intention. One of the most common failure points of DCF shelters is sewn seams; the seams on Durston X-mid Pro 2 are entirely bonded with no sewing. (You can learn more about the advantages and disadvantages of bonded vs. sewn seams in the Dyneema Composite Fabrics episode of the Backpacking Light Podcast and the Dyneema Composite Fabrics Webinar.
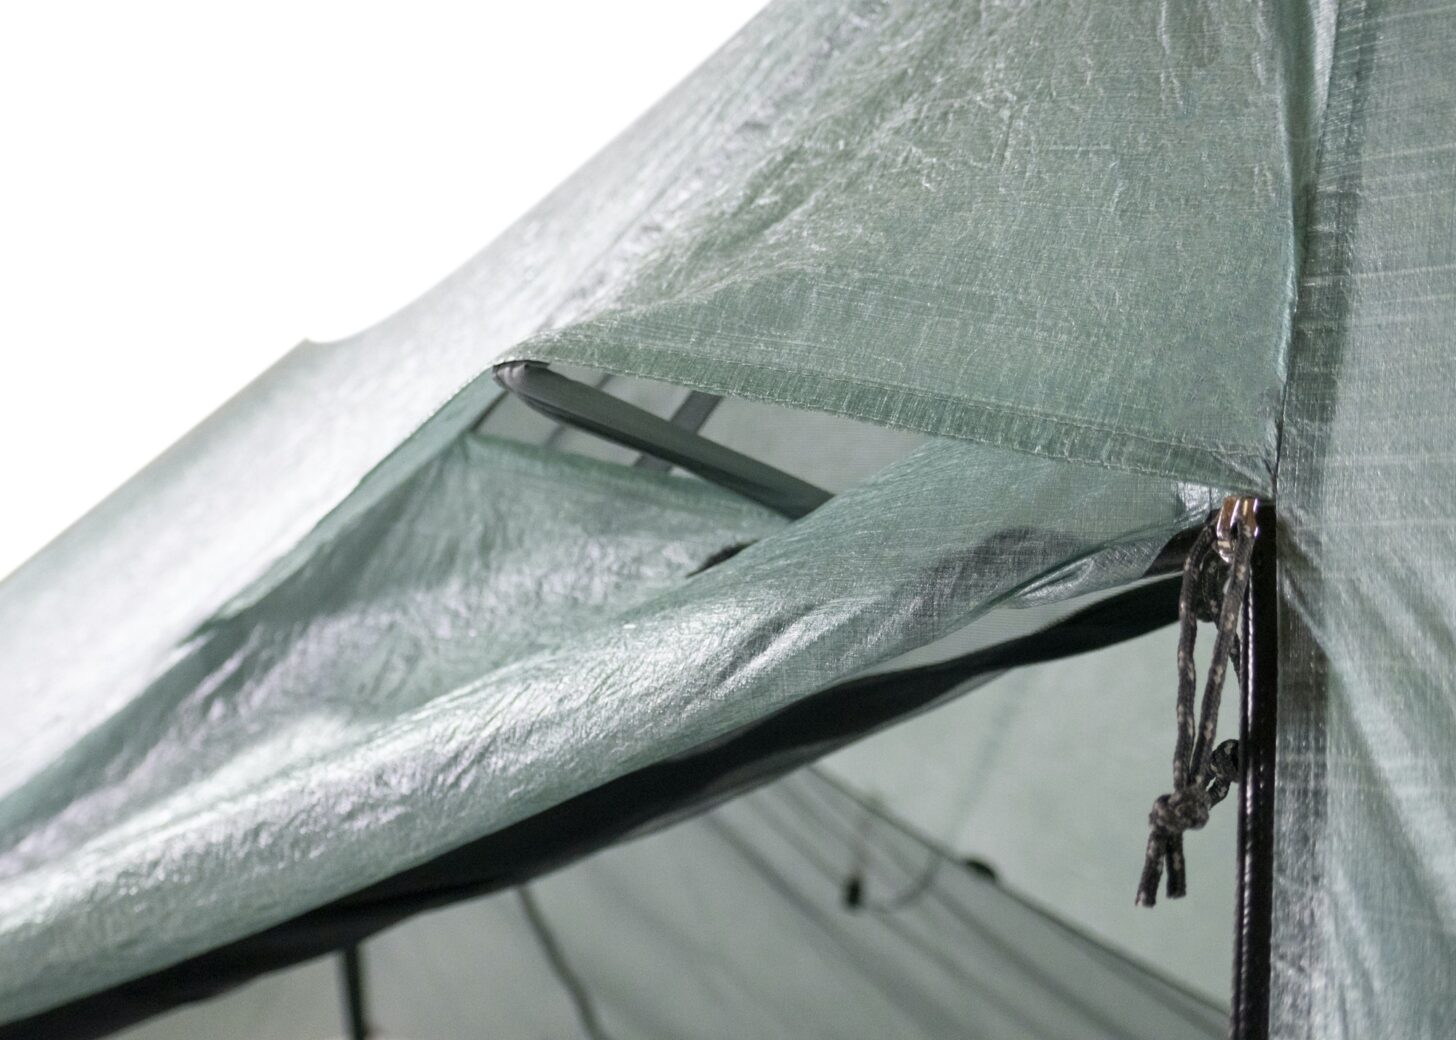
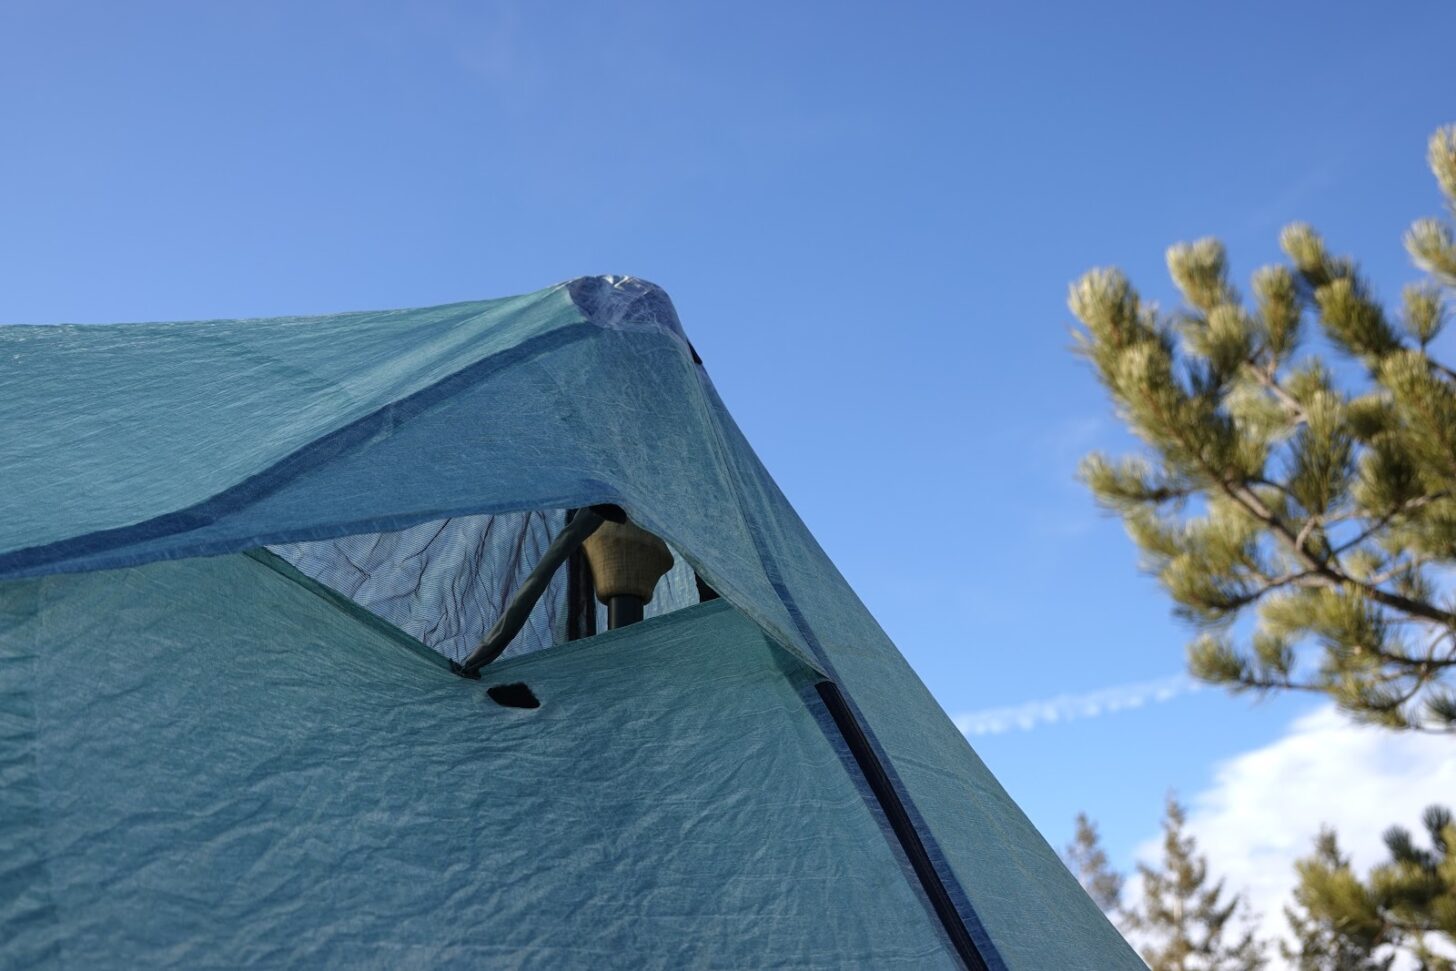
Dual peak vents allow for condensation management and are designed to function in all but the most horrendous weather, such as sideways-driven rain (where drops could bounce up into the vent) or blowing spindrift (snow). In those cases, they can be closed.
Why does the Durston X-Mid Pro 2 have a nylon floor?
A 15-denier nylon fabric was chosen for the floor with the idea that a footprint wouldn’t be necessary for most situations if reasonable precautions are taken with campsite selection. However, hikers using it in conditions where punctures would be more likely (such as rocky terrain or desert environments, with their plethora of spiky things) might want to bring a ground cloth in those specific conditions. The 15-denier floor is similar to the fabrics used in other lightweight tents, including many of those made by MSR and Big Agnes. Many hikers forego using footprints with those tents without experiencing any issues in normal use cases. When asked why the X-Mid Pro 2 uses a 15-denier floor instead of DCF, Dan cited the advantage in packability as one reason.
“We think a 15 denier woven floor is a better choice because it is a similar weight but far less bulk and debatably more abrasion resistant and waterproof in the long term,” said Dan. Using the 15 denier nylon fabric is also less costly than DCF. “Cost is another advantage, although the cost savings are largely offset by our more expensive hot bonding construction process,” said Dan. “We would have used 1.0 osy DCF if we genuinely thought it was better.” Using 15 denier nylon over 1.0 osy DCF results in a less expensive shelter that packs smaller.
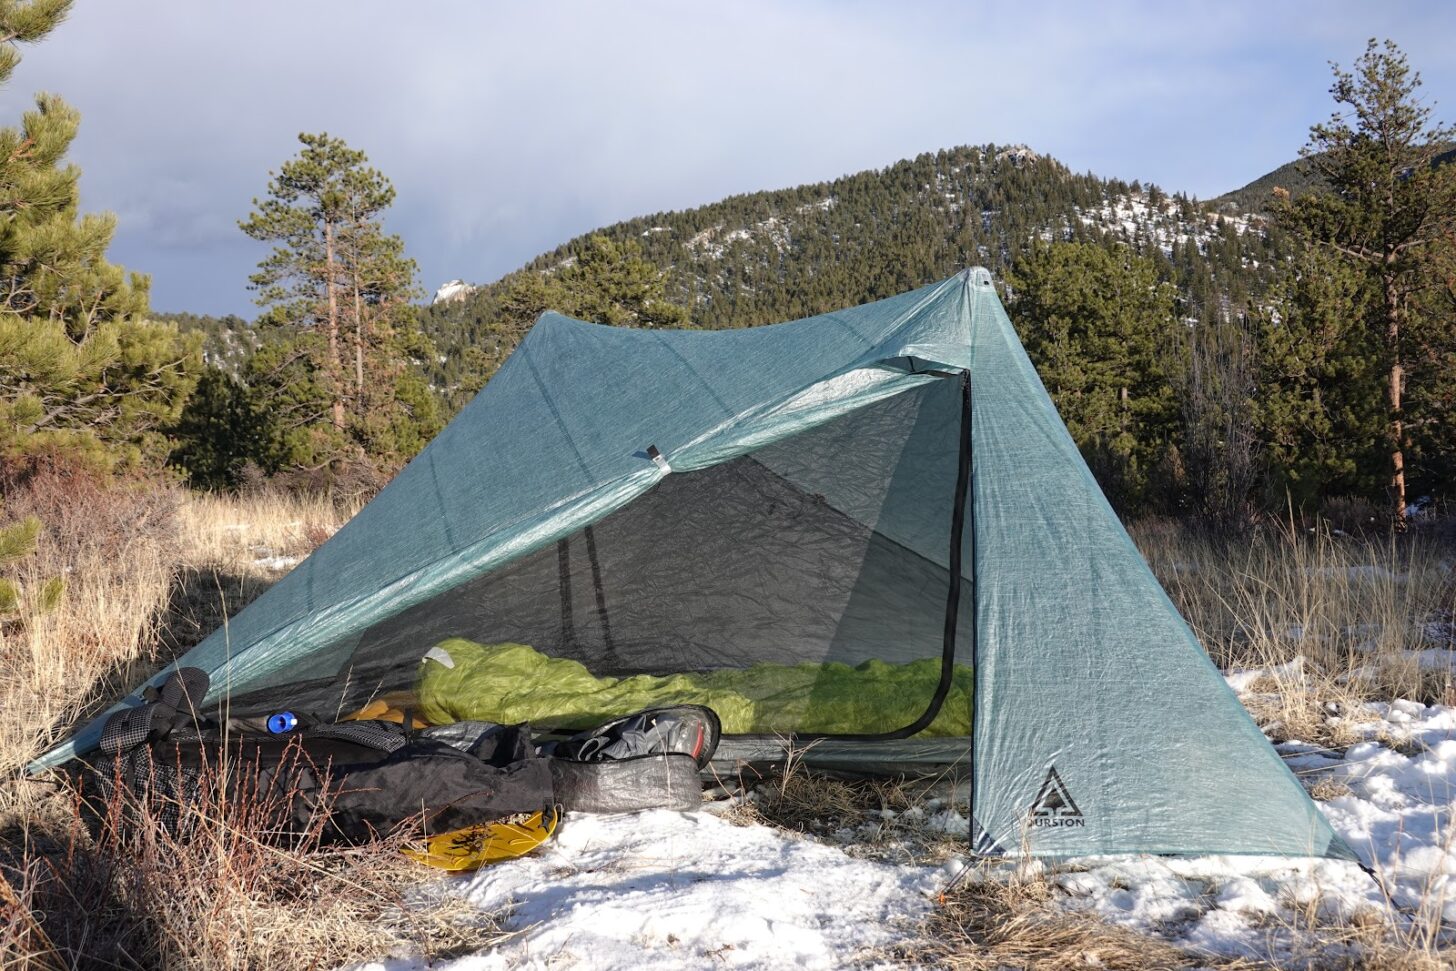
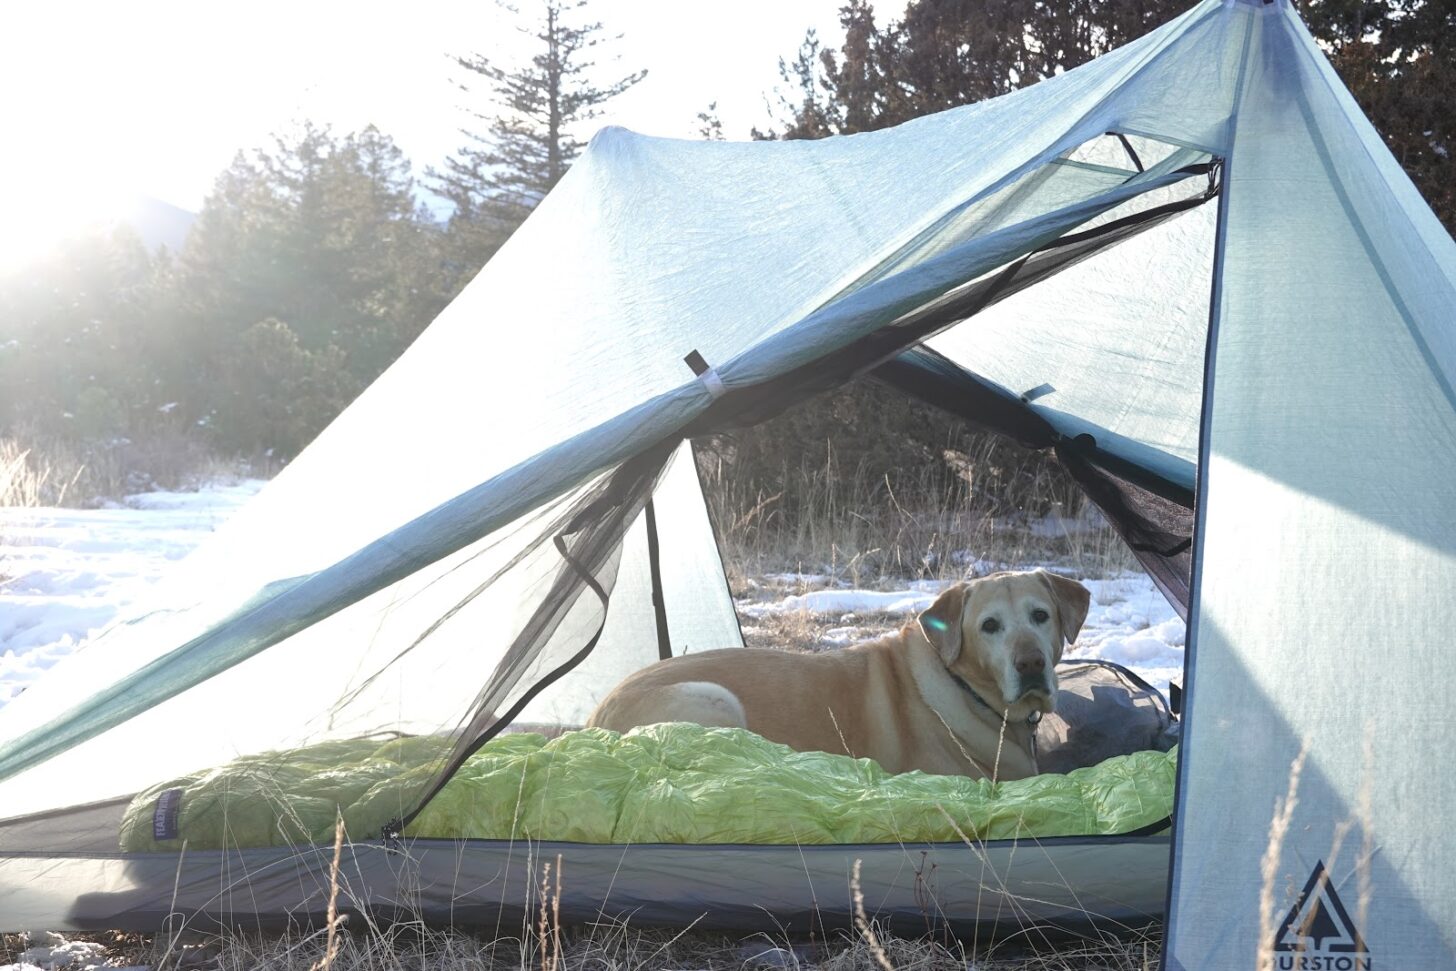
When set up for solo use, the X-Mid Pro 2 provides luxurious livability.
Other similar shelters, such as the Tarptent Stratospire Li, use an offset pole design. One of the advantages of the X-Mid Pro 2 is that it has such a simple pitch in addition to the benefits of having an offset pole design.
When asked how this was achieved without resulting in other trade-offs in performance, Dan said “The X-Mid uses a rectangular base to simplify the pitch (compared to a hexagonal tent) and combines that with two trekking poles (to improve headroom compared to a single pole pyramid). The classic challenge faced by other tents attempting this is locating the poles. Prior tents have positioned them around the perimeter which results in flat walls that catch the wind and mandatory guylines, or they have positioned them along the centerline where they interfere in the sleeping area and/or doorways. The X-Mid uses a new floorplan, where the poles are placed on a diagonal and then the sleeping area passes between them on the opposite diagonal. From the overhead view, these crossing diagonals form the “X” in the X-Mid name. From a functional perspective, they provide a good [larger] living space while avoiding all the common pitfalls (e.g., poles in the doorways, poles in the living area, mandatory guylines, flat walls).”
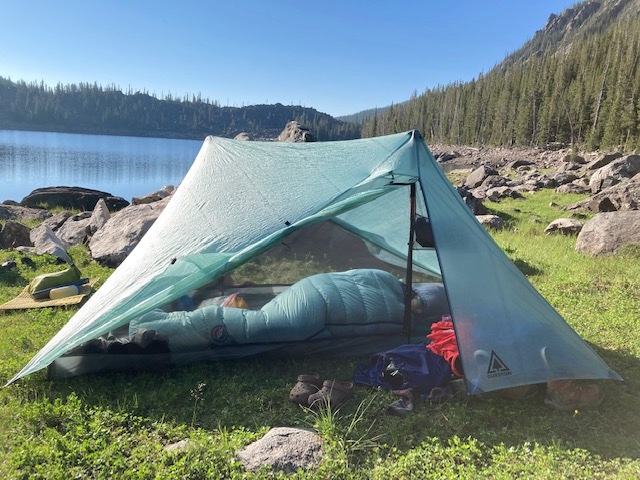
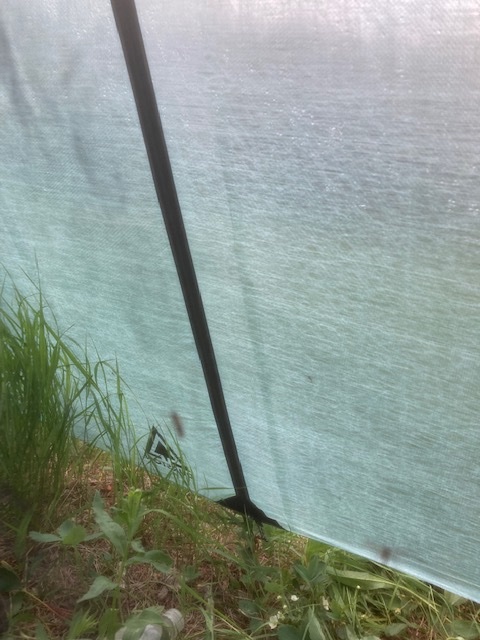
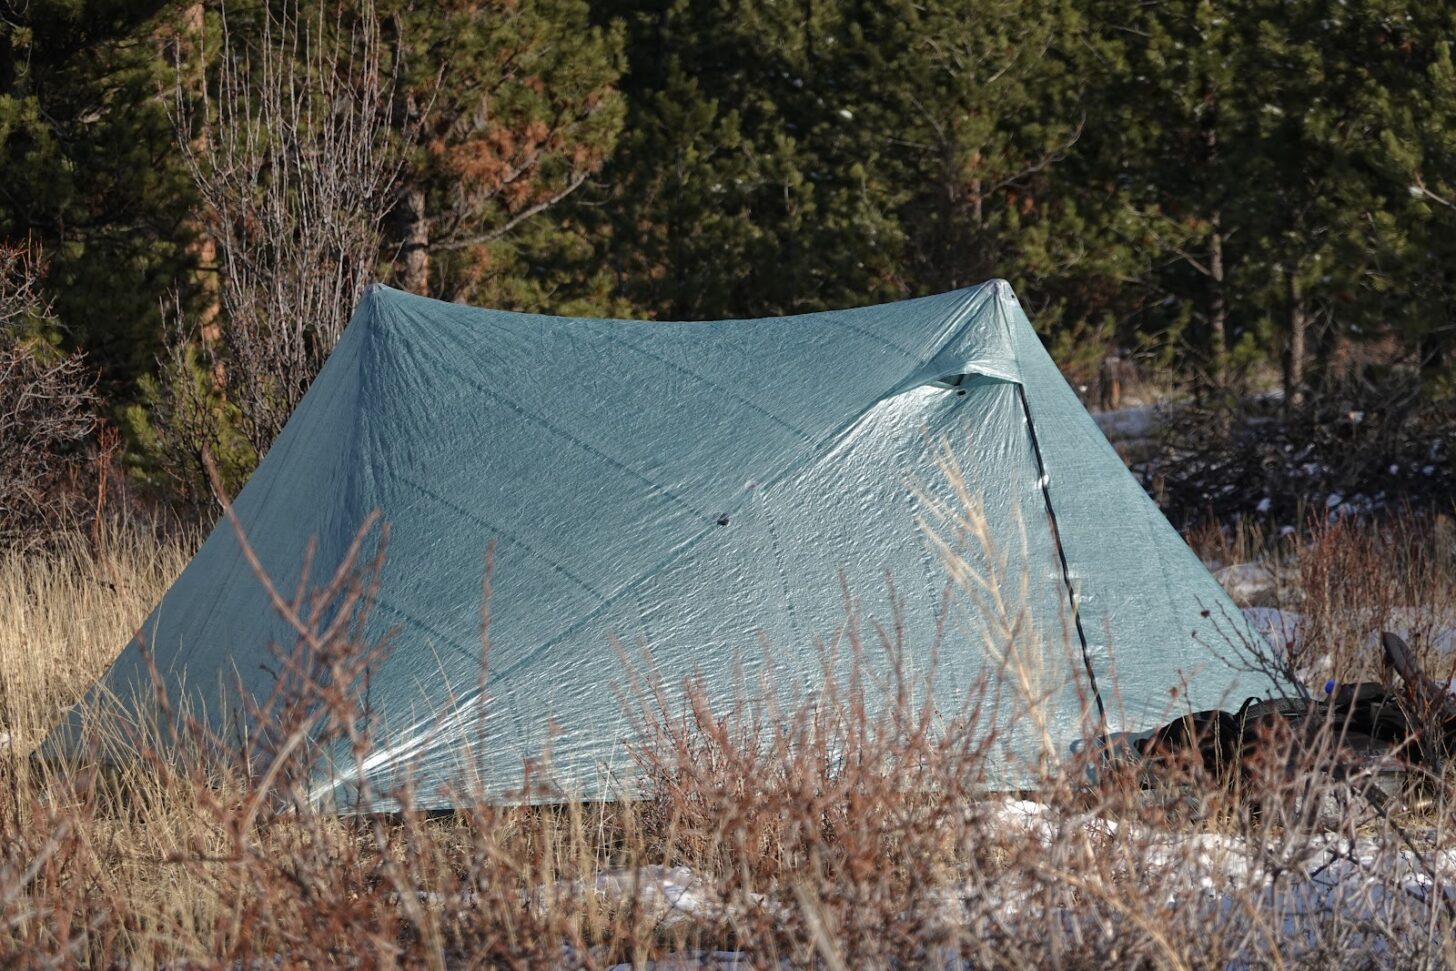
It’s easy to achieve a tight pitch, even when only using four stakes. In the dozen or so times I set it up, I only ended up having to re-adjust about half those times, and those adjustments were very minor (i.e., tightening up one or two guidelines to the stakes a bit, or adjusting pole height, or both). Photo credit: Mark Wetherington
The Durston X-Mid Pro 2 Compared To…
weight
MSRP
wall design (single-wall vs. double-wall)
floor dimensions
maximum peak height
floor material
canopy material
Durston X-Mid Pro 2
20.4 ounces / 578 g
$639
single
48 x 90 inches (122 x 229 cm)
46 inches (117 cm)
15 denier nylon
0.5 osy Dyneema Composite Fabric
Zpacks Duplex
19.0 ounces / 539 g
$699
single
45 x 90 inches (122 x 229 cm)
48 inches (122 cm)
1 osy Dyneema Composite Fabric
0.55 osy Dyneema Composite Fabric
Tarptent Stratospire Li
27.5 ounces / 780 g
$699
double
45 x 86 inches (114 x 218 cm)
45 inches (115 cm)
1 osy Dyneema Composite Fabric
0.51 osy Dyneema Composite Fabric
Gossamer Gear The Two
23.5 ounces / 666 g
$375
single
42/48 x 84 inches (107/122 x 213)
43 inches (109 cm)
10 denier nylon ripstop
10 denier nylon ripstop
On paper, the Durston X-Mid Pro 2 bests many tents in its category (two-person, two-door, side-entry, dual-vestibule trekking-pole shelters) on a number of metrics. It is either lighter, roomier, less expensive, and in certain cases, all of those things. But how a shelter looks in a table is only part of the equation – one which we are increasingly less inclined to emphasize as shelter builders shave ounces at the expense of other important factors. Craftsmanship, quality control, user-friendliness (ease of pitching), livability, stormworthiness, and aesthetics all come into play. These are the performance metrics consider in this review.
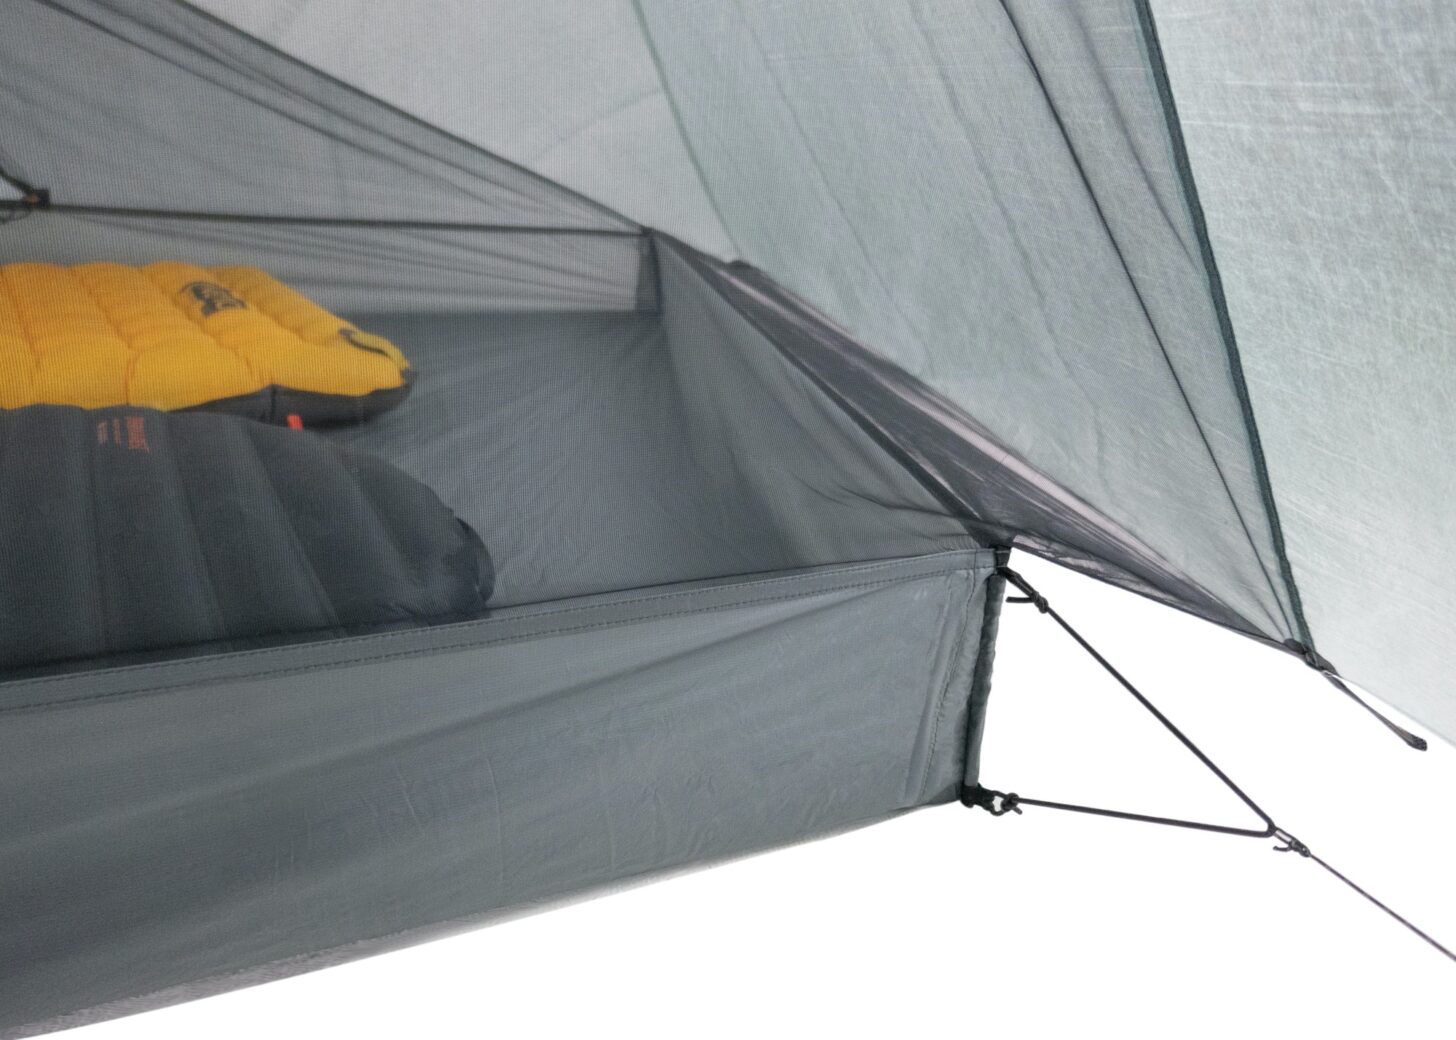
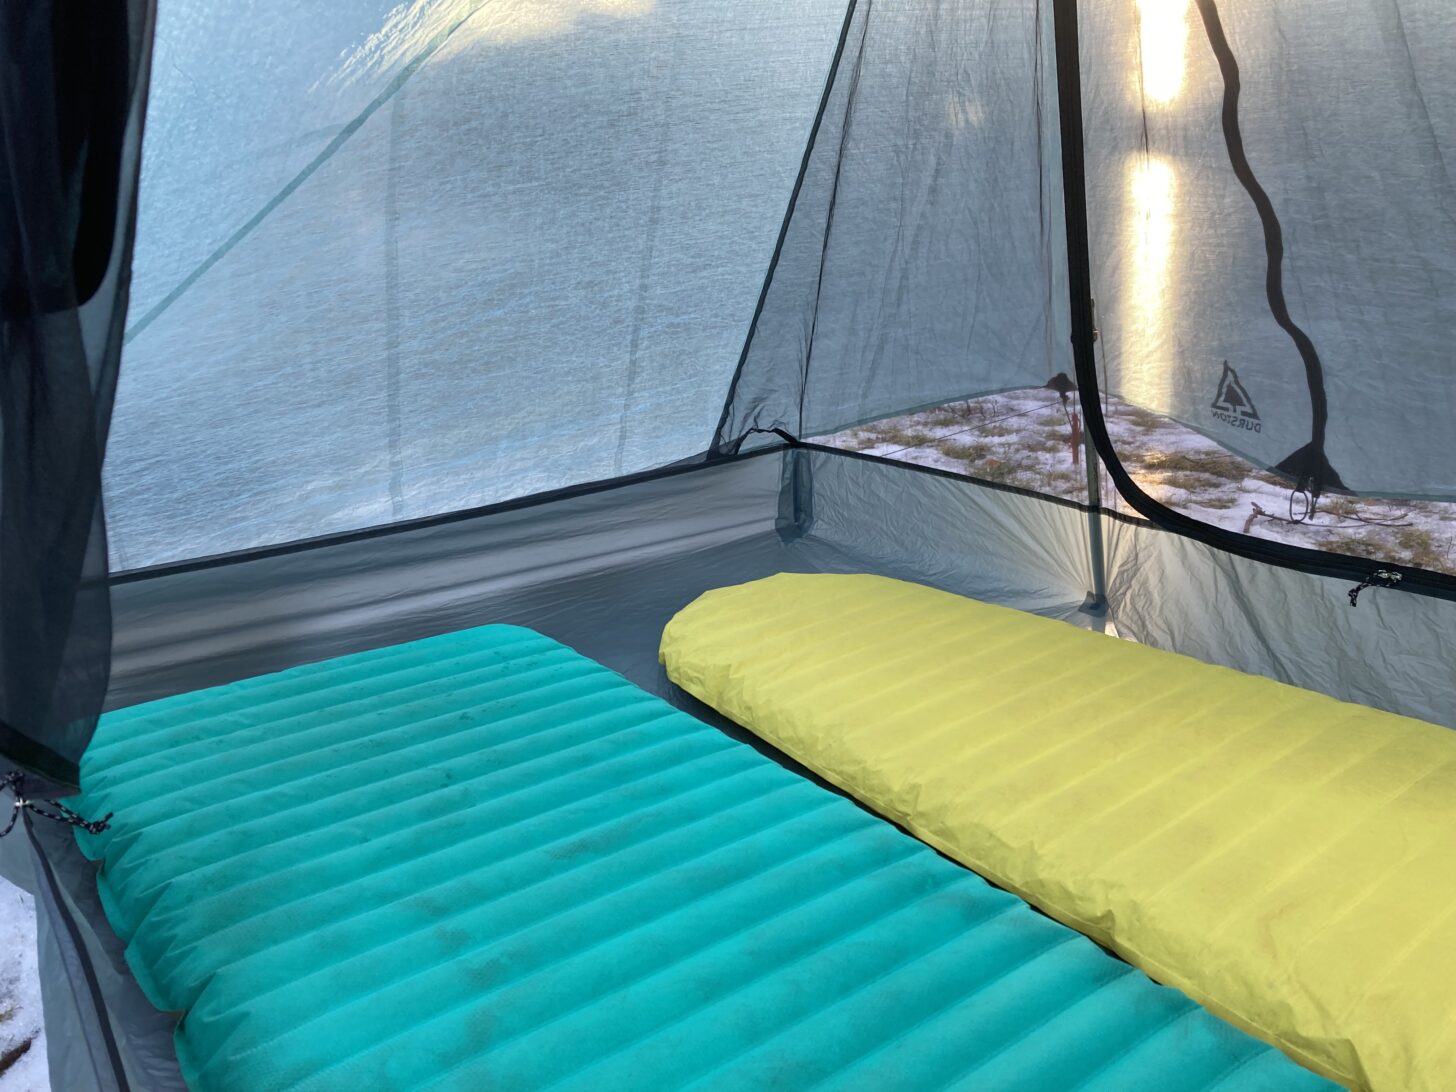
Two long (78 inches / 198 cm) sleeping pads fit well in the X-Mid Pro 2, although the fit will be tight if both of them are wide (25 inches / 64 cm), rectangular pads. There is plenty of room at the ends of the pads for extra layers, stuff sacks, or other items.
Long-Term Performance
In this section, we evaluate:
Pitching
Livability
Stormworthiness
Fabric
Durability
Weight
Finish quality/aesthetics
Price
Pitching
Owing to its rectangular shape, as discussed in detail in our review of the Durston X-Mid 2P, this tent is one of the easiest to pitch that I’ve used. For many years, I was a bit leery of tarp-style shelters and trekking pole tents because of the attention to detail required to pitch them and the variability that could occur in different terrains. I tended to prefer more traditional tents, like the MSR Hubba, that I could easily erect with the same result every time and not have to worry about spending 20 minutes moving stakes around and re-tensioning guidelines when I could be fishing, hiking up a nearby peak, or soaking in a hot spring.
The ease of pitching the X Mid Pro allows for more time swimming in mountain lakes and focusing mental and physical energy on the landscape, not on the gear you hauled in.
The sometimes frustrating, but overall adequate, Six Moon Designs Lunar Solo, was my introduction to trekking pole tents but it was the REI Co-op Flash Air 2 and its ease of set-up which solidified my decision to switch to trekking poles shelters for the majority of my backpacking trips. The Durston X-Mid Pro is even easier to set up than the REI Co-op Flash Air 2 and can be pitched with only four stakes. I typically used six stakes to allow myself to more easily rolly up the doors for ventilation and would use eight stakes in windier conditions or when storms appeared imminent. I did not utilize any additional guylines when using this tent.
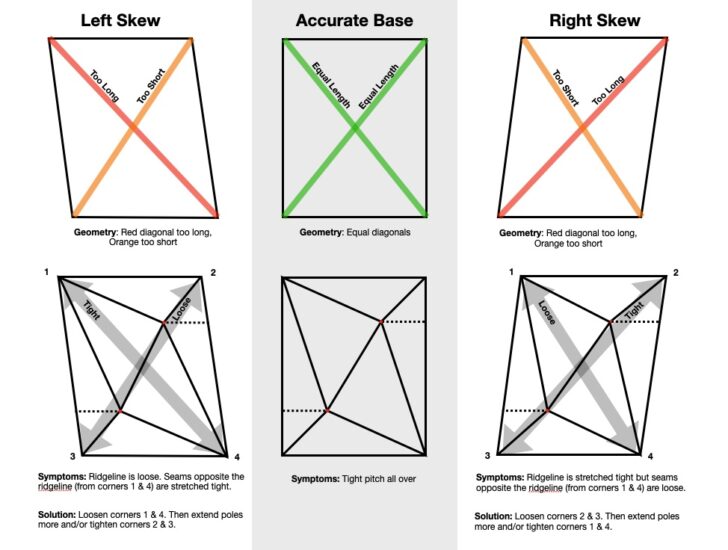
Image: Durston Gear.
Dan Durston has provided detailed instructions on pitching the tent and troubleshooting issues that arise. As mentioned previously, pitching it is more easy and intuitive and with less of a learning curve than other trekking pole shelters I’ve used – but when I have encountered issues due to undulating terrain or cramped spots to pitch it, I’ve been able to rectify them quickly without having to start from scratch or tediously readjust every stake and tension point.
The space required to pitch this tent does limit site selection somewhat (although the footprint is smaller than the X-Mid 2), as there needs to be adequate space to insert the stakes and ensure a taut pitch. However, I did find it to be significantly more difficult to find a spot for this two-person tent than for others I’ve used. When space was cramped, it was intuitive to simply orient the rectangular interior and spot where I would be sleeping to the flattest part of the ground and solve the issue that way.
Livability
This tent is one of the most comfortable and accommodating two-person shelters I’ve used with a partner.
The X-Mid feels spacious when shared with a hiking partner and feels enormous when going solo.
The amount of room at the head and/or foot and the pockets (for the 2023 version, which was tested during part of this review) allow for easy storage and organization with minimal elbow-bumping. The dual doors make it easy to enter/exit without creating an unreasonable disruption for your partner. The headroom is more than sufficient unless you’re exceptionally tall.
The tall, spacious vestibules were some of the most useful I’ve experienced with a tent.
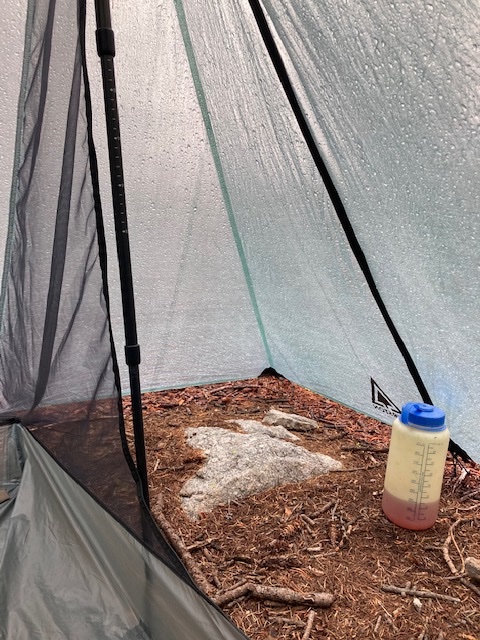
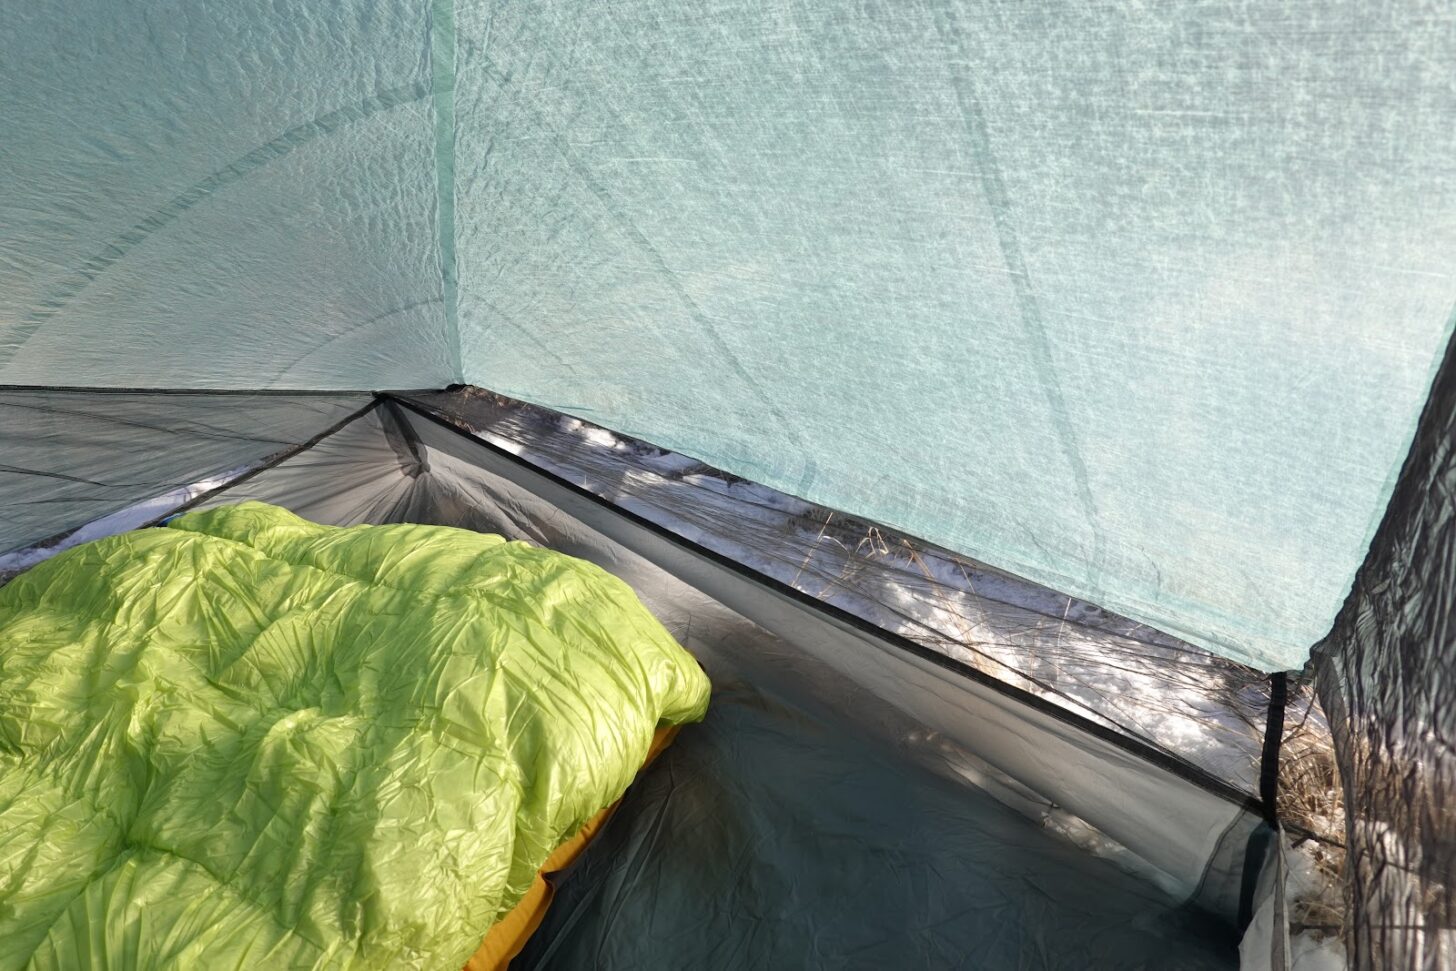
Since this tent was only tested in the Northern Rockies, a fairly arid environment aside from during precipitation events and/or more moist microclimates that can often be mitigated by choosing another spot to camp, my experience with condensation is not comparable to what it would be like to use this tent in the Appalachian Mountains or other high-humidity areas. Condensation will always be an issue with single-wall shelters unless you want to use a solar-powered dehumidifier and venting fan system. The condensation I experienced in this tent was minor overall and less than in a previous single-wall tent I tested, the REI Co-Op Flash Air 2. The morning after an all-night, early October rain in the Selway-Bitterroot Wilderness while camped next to a subalpine lake there was considerable condensation, even though all vents had been left open (I took the risk and left them open since I was in a decently sheltered location and the rain wasn’t accompanied by significant winds). Thanks to the tent’s design, it was easy to avoid (as the sole occupant) brushing up against the damp walls while I got dressed.
Magnetic closures made it easy to open and close the tent doors with one hand.
Perhaps one of the niftiest features of this tent are the magnetic closures which allow the doors to be rolled up. I kept the doors open on clear nights and the condensation was negligible to non-existent, even if camped in less-than-ideal locations (i.e. near bodies of water, cold sinks, etc.). When seeking refuge from biting insects in this tent, having the doors open allowed me to have reasonably panoramic views from inside and not feel so walled-off from the places I’d hiked so far to spend time in.
Stormworthiness
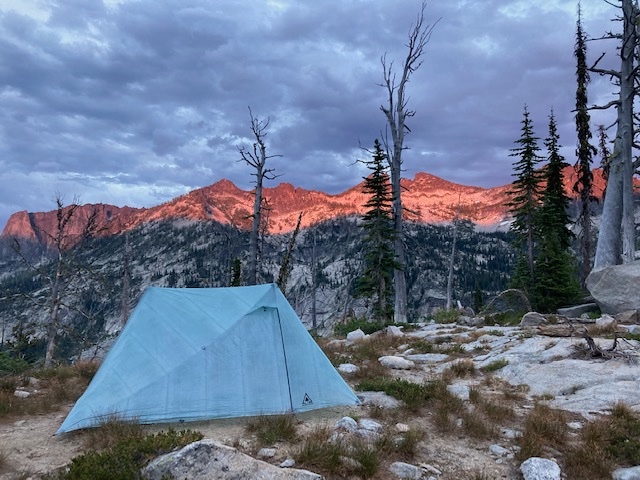
The most significant test of this tent’s storm worthiness was during an early July thunderstorm in the Selway-Bitterroot Wilderness of Montana. I was racing a storm to a small campsite I knew about from previous trips to a high mountain lake – a charming respite tucked into a grove of spruce trees on the edge of a meadow, and positioned just before a grueling climb up to a pass that I would tackle the next morning. A storm was forecast for that afternoon and I could tell during the last two miles of my hike that it was on its way; the clouds thickened, the wind picked up, and the feeling of moisture in the air increased.
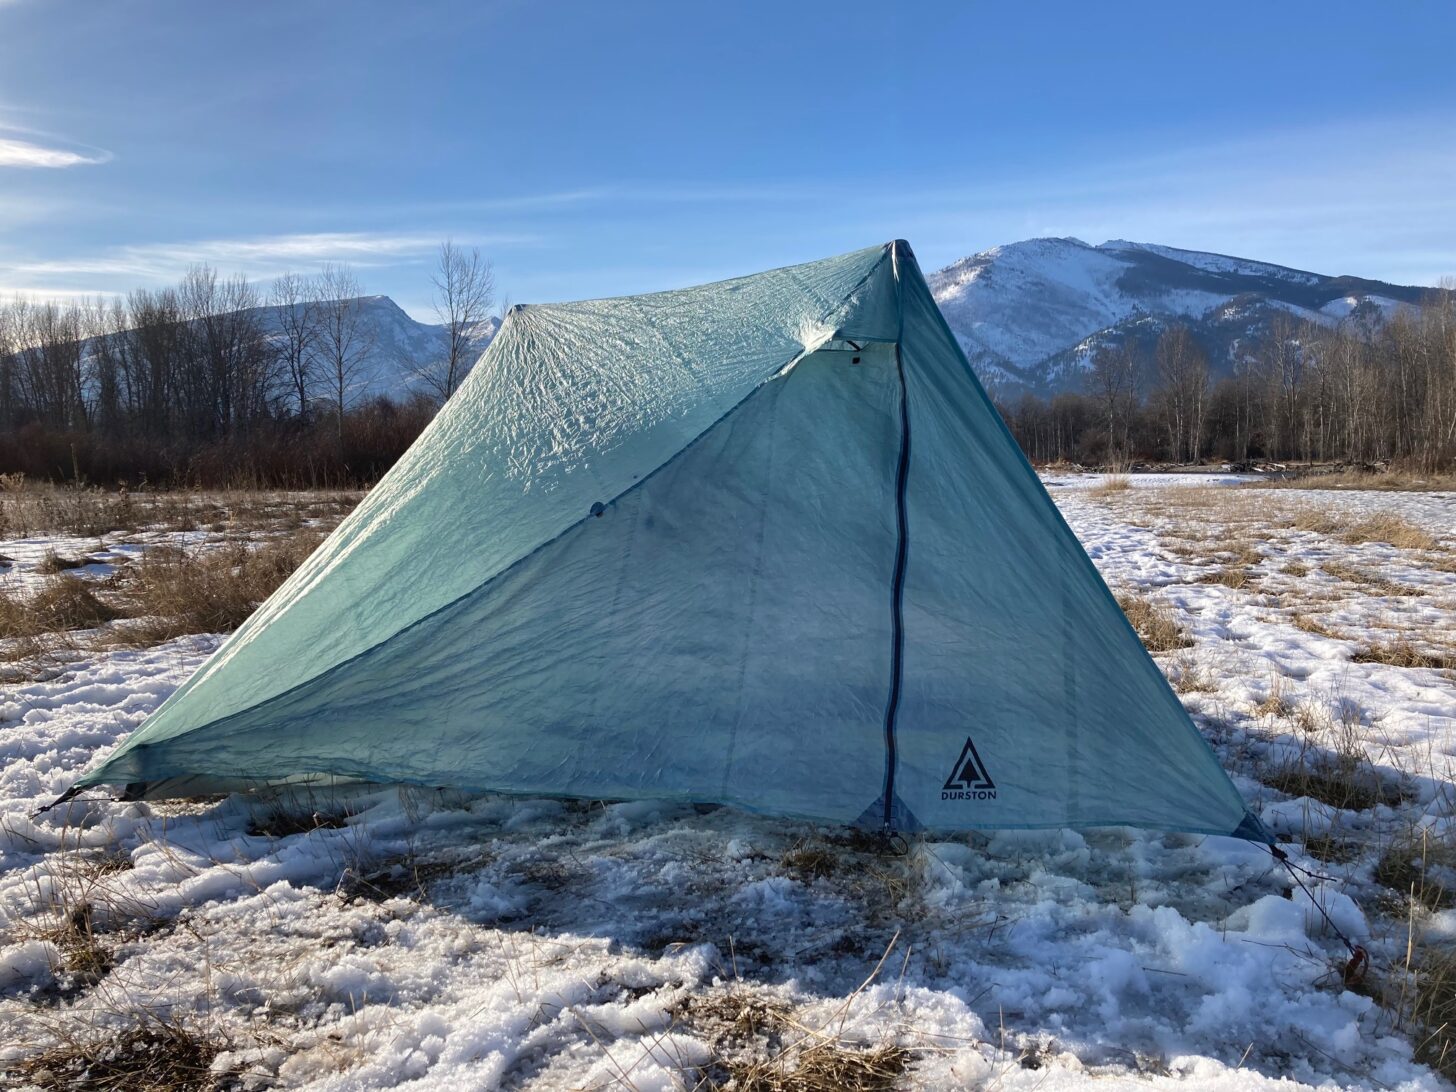
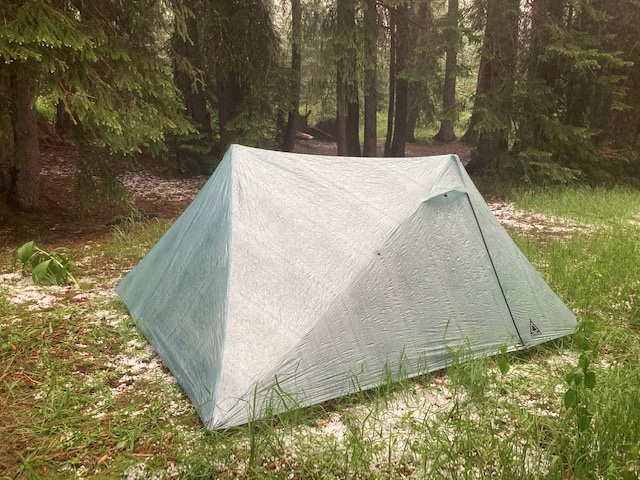
The X-Mid Pro after a thunderstorm with intense hail in the Selway-Bitterroot Wilderness. The tent was pitched with the minimum four stakes required and made it through no worse for the wear.
I’d barely made it to camp when a steady drizzle started. I did a cursory removal of debris from the spot where I planned to pitch the tent and barely got the minimum four stakes into the ground before a gust of wind blew in heavier rain, thunder rumbled, and it was way darker than it should’ve been at early evening in the summer. Not wishing to get soaked trying to put in additional stakes, and embracing the idea of testing the tent with only four stakes, I endured a roughly 45-minute storm that included 10 minutes of marble-sized hail pounding the tent and gusty winds. I’ve been in dozens of mountain storms over the years, and this one was definitely in the top ten. Fortunately, the X-Mid Pro handled it with aplomb. No stakes popped out, the tension needed was maintained, and no rain was blown in the tent as a result of the full-coverage canopy design of the vestibules and head and foot.
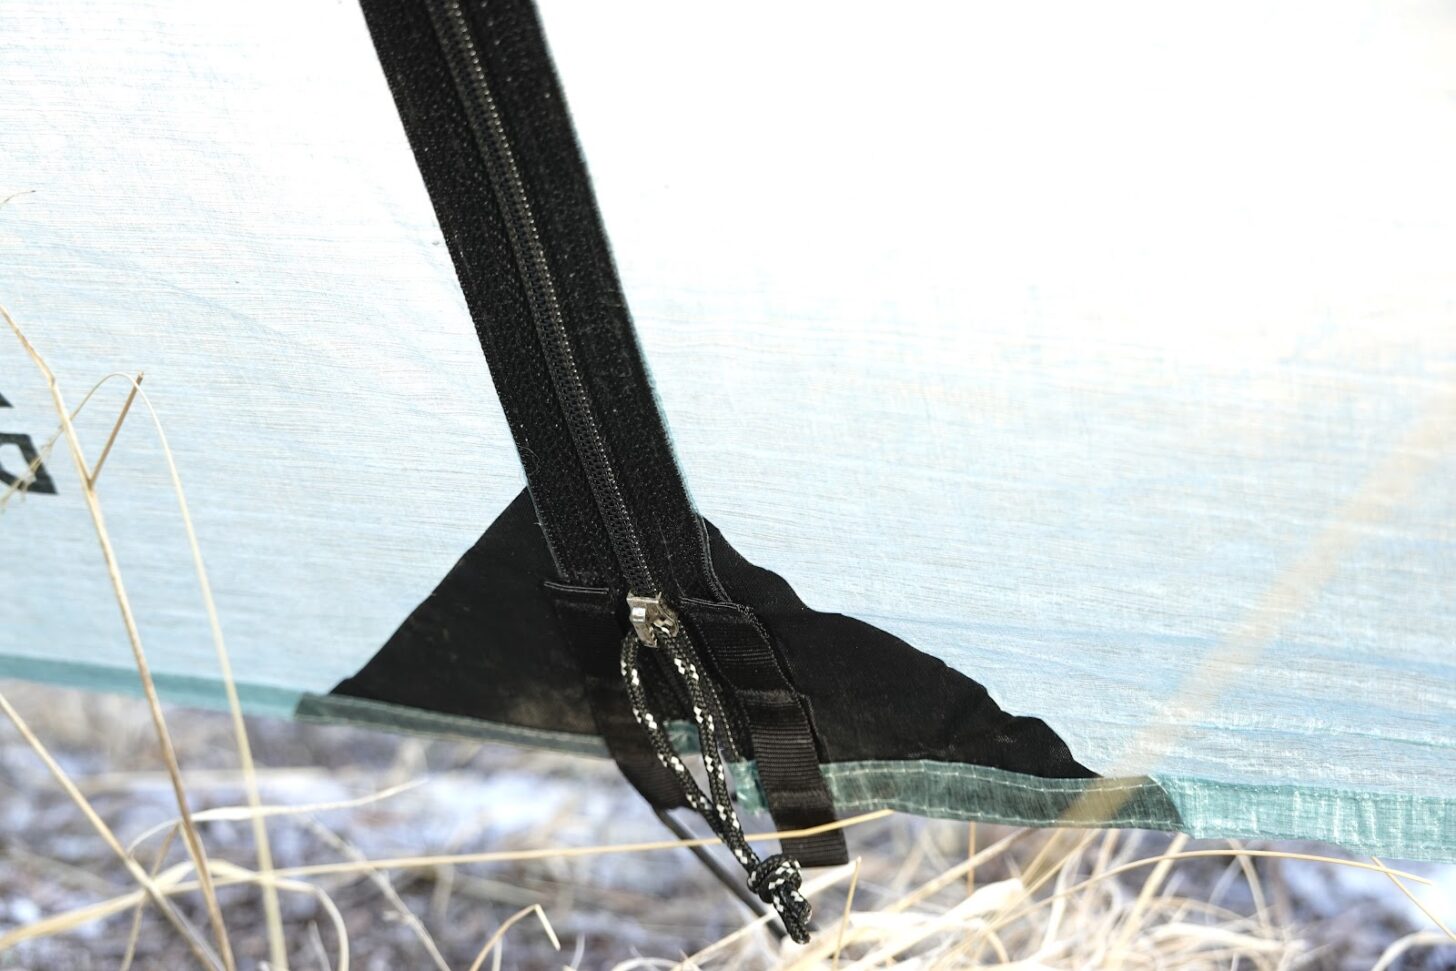
The waterproof zippers didn’t leak during extended downpours and operated smoothly throughout the testing period.
I experienced other minor storms in this tent and did not find its performance to be anything other than excellent. Closing the vents is easy to do and they remained secure throughout all weather events and didn’t leak any water or flap around annoyingly.
Fabric
The 0.55 oz DCF used for this tent strives, as all ultralight shelters do, to balance weight with strength. This is fairly standard throughout the ultralight industry as a material for ultralight shelters. The X-Mid Pro differs from some other tents in this category by using a 15D nylon floor. Although not as light as DCF, choosing this fabric for the floor eliminates the need to use a footprint in most conditions as it is more durable than DCF in that context.
Durability
At the end of the testing period, I noticed no areas of wear on the tent or issues with seams, netting, zippers, discoloration or distortion of fabric, or anything else that would indicate issues with durability. While issues related to the longevity of DCF are becoming more known and documented, it does not appear to me that any of those issues would be made worse by any inherent features of the X-Mid Pro. I noticed no wear on the zippers, magnet closures, or bug netting.
With weight and space at a premium on a five-night bikepacking trip in Montana’s Beaverhead Mountains, I was grateful to not have to bring a footprint along.
The 15D nylon floor has been proven to be a reliable choice for shelters and will likely not be a weak link in the construction of this shelter. I did not use a footprint with this tent, but I did practice due diligence in site selection and removing small rocks and other debris from the ground before pitching. After 27 nights, I did not notice any punctures, tears, or other abrasion of the floor from normal use. For persons backpacking in the Northern Rockies or other areas with similarly forgiving or easily mitigated conditions on the forest floor for pitching tents, it seems like a footprint is largely unnecessary. For backpackers in desert environments or other landscapes with more poky, prickly, and hostile flora that seems to end up on the flattest parts of the ground and in the perfect spot to pitch a tent, a footprint would be a wise investment to extend the life of this shelter.
For backpackers using this tent for multi-day, or multi-month, trips where it is almost always packed up each morning and then re-pitched each night, durability should be a non-issue for most users in most circumstances. The tent should last for several years of frequent recreational use. Care will want to be taken to roll the tent, rather than stuff it as stuffing increases the chance of areas of wear occurring.
If you’re looking for a tent to use as a high-altitude basecamp tent and leave it pitched all day under the blazing sun while exploring various lakes in search of trout or bagging peaks, and you average 100+ days out each summer then you will probably want to look for another tent as several years of that type of use will create issues.
Weight
This tent is incredibly lightweight for the performance and space it delivers. Even with eight, full-length aluminum stakes the total weight of this shelter (assuming you’re pitching with trekking poles and are thus already carrying that weight) is significantly less than a liter of water.
Finish quality/aesthetics
This tent suffered from no obvious visual defects – everything seemed meticulously bonded, sewn, designed, and assembled. The tensioning devices worked smoothly, as did the zippers and the magnetic closures for rolling up the tent doors. The muted color of this tent blended in well with the landscape of the Northern Rockies and allowed for a low-key profile at campsites. At the risk of sounding superficial, this tent does just simply look good. As someone who has no love for the craven consumerism that can sometimes afflict backpackers, I’m a bit embarrassed to admit just how much I liked looking at this tent when returning to it after fishing or day hiking to a peak from camp.
Price
This tent is expensive. There’s no way to sugarcoat that. The Durston X-Mid Pro 2P costs $679 USD; for another $10 USD eight aluminum stakes are included. DCF is a niche fabric that will never be as cheap as a yard of cotton fabric, or of nylon for that matter. Given its performance and weight, a compelling argument can be made that even at this price the tent is a value.
Summary
Like its sibling, the Durston X-Mid 2P, this tent is highly recommended for backpackers looking for an ultralight two-person shelter for three-season recreational backpacking. The combination of weight, performance, and durability is generally equal to or greater than other similar shelters on the market. Given where ultralight tent design and fabrics are at the present time, it is hard to imagine a new shelter coming along and out-competing this tent. If you want one of the highest-quality and best-performing ultralight shelters on the market, the Durston X-Mid Pro should be at the top of your list.
For ultralight backpackers who want room for a hiking partner, or just plenty of elbow room on solo trips, the X-Mid Pro is an excellent option.
Appendix: More Photos
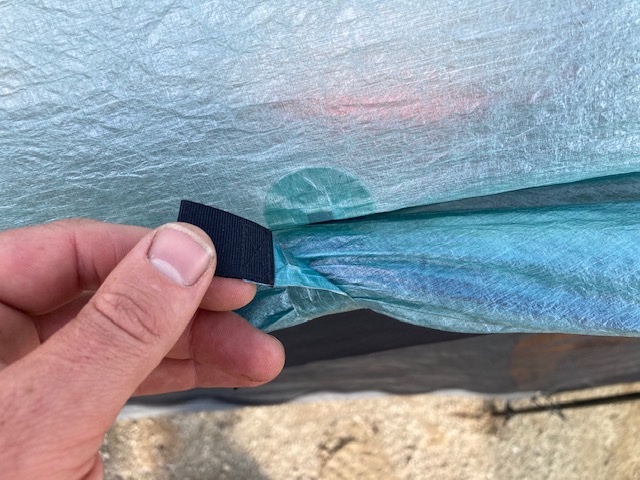
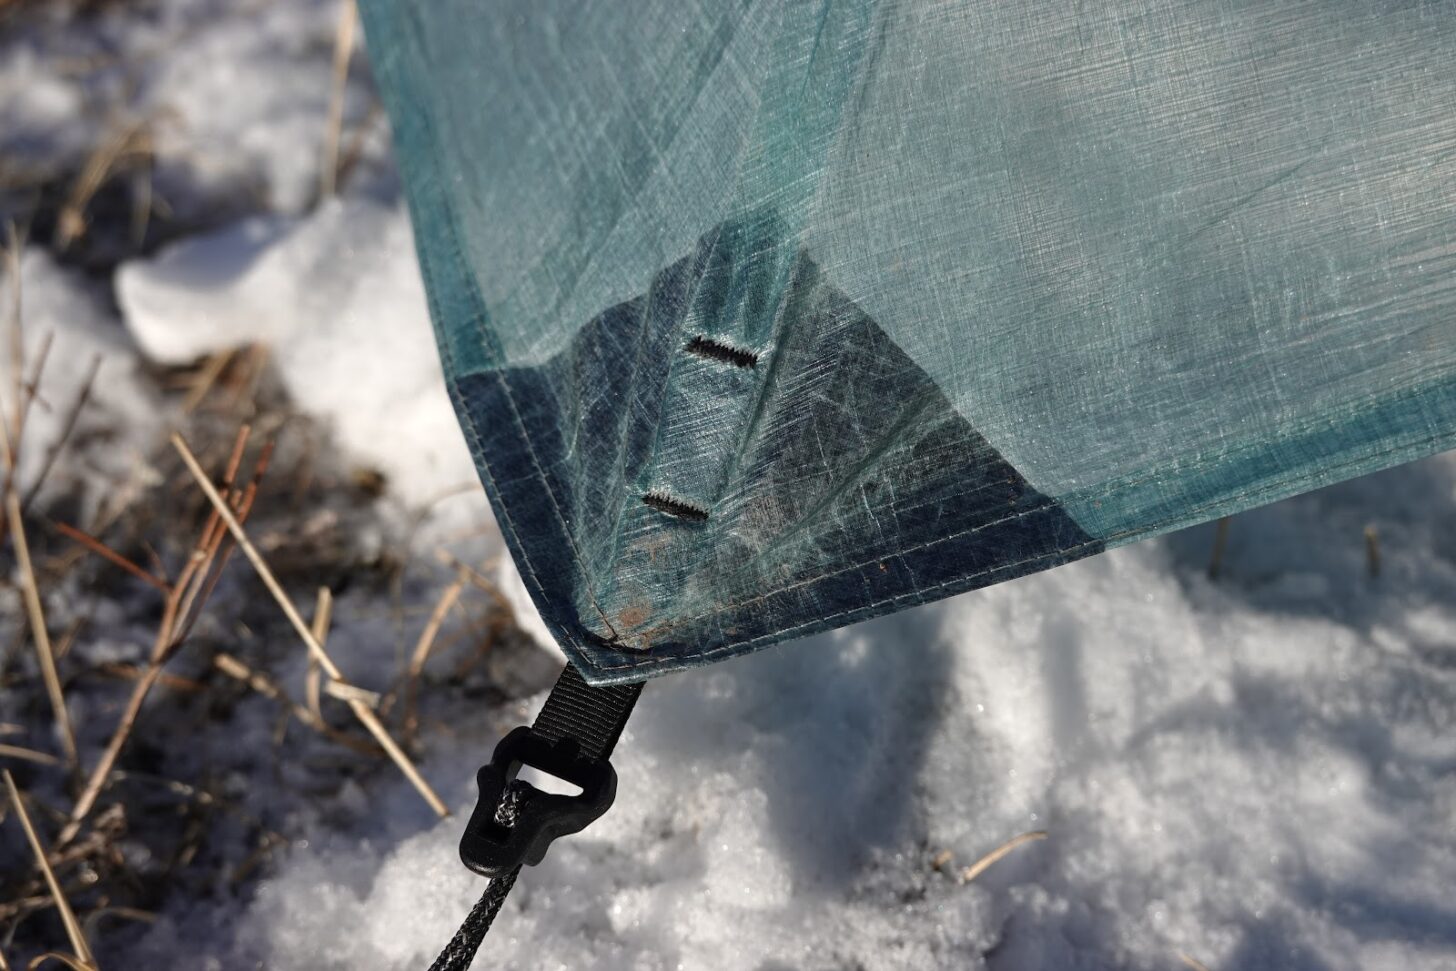
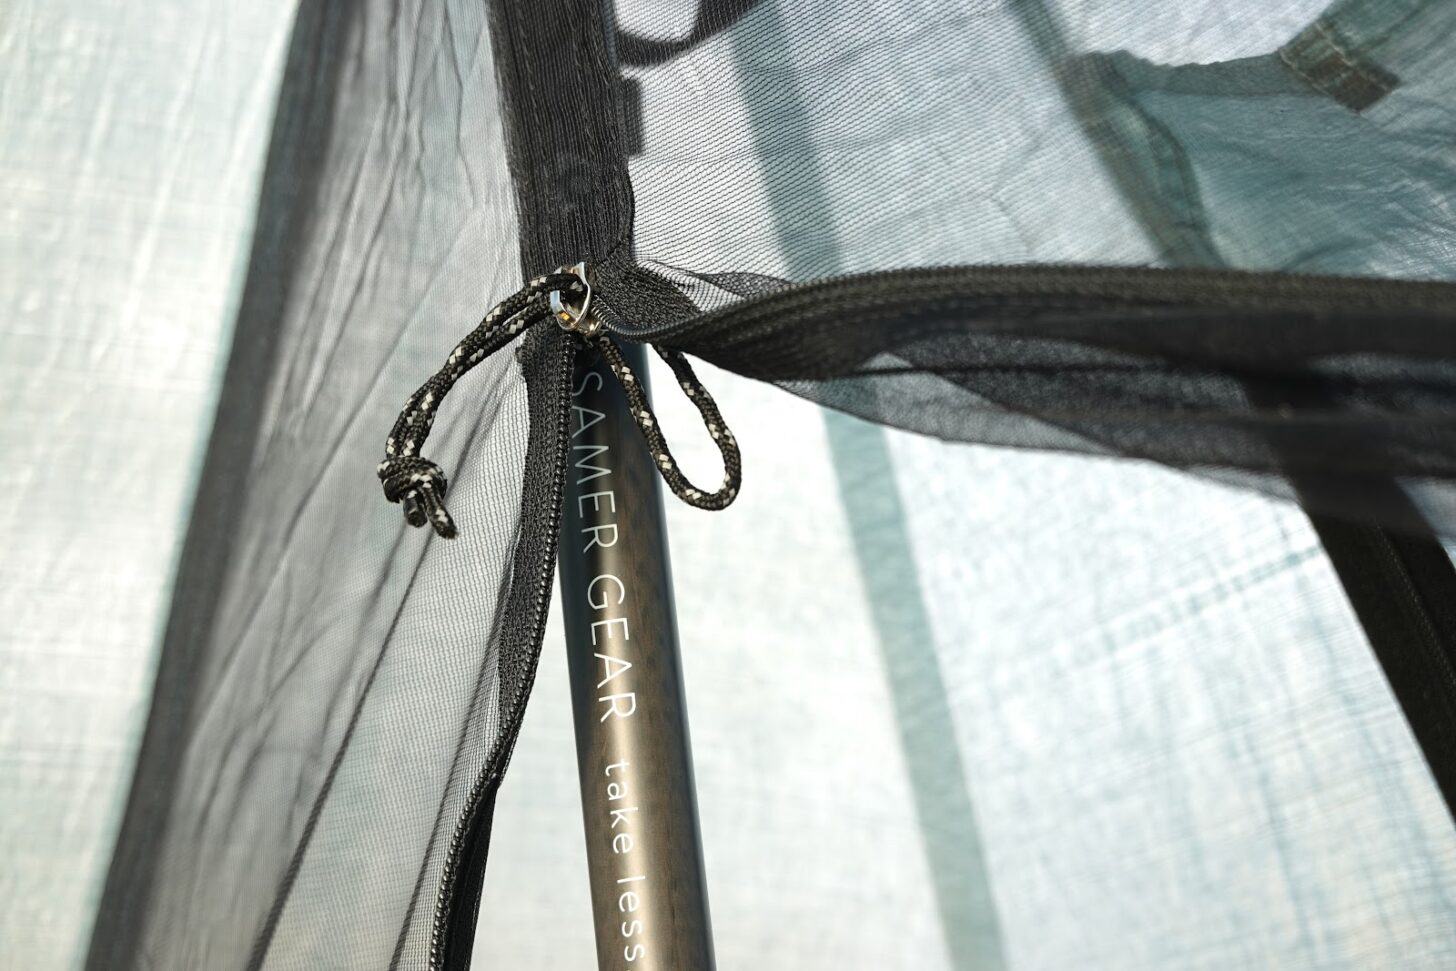
A taut, elegant pitch is one of the most noteworthy features of the Durston X-Mid Pro 2.To maximize living space, the parallelogram bathtub floor is set at an angle from the fly footprint. The fly is 80 x 100 inches (203 x 254 cm) and has an area of 44.4 square feet (5.15 sq m). The packed size of the shelter is roughly 12 x 6 inches (30 x 15 cm).Magnetic door toggles allow for quick and intuitive storage of the door material when not in use. Tarptent is the only other major shelter-maker using this design.DCF is difficult to work with. One reason is the fabric doesn’t close up around needle holes as more stretchy fabrics like silpolyester or silnylon do. Durston Gear compensates for this by hot bonding, instead of sewing, fabric panels together.Corner guyouts have an extra layer of fabric and are double bar-tacked into place.Sierra supervises pitching.An advantage to dual-trekking-pole supported shelters is an opportunity for dual peak vents. The peak height of the Durston X-Mid Pro 2 is 46 inches (117 cm).The Durston X-Mid Pro 2 features two doors and two vestibules. Individual vestibules are 11.6 square feet (2 sq m). That works out to 23 square feet (7 sq m) of total vestibule space.Utilizing a tip-down design on the supporting trekking poles has the advantage of keeping the pole handles clean and dry when conditions are wet and muddy.The inner mesh features a YKK #3 zipper.The outer fly utilizes a YKK #3 AquaGuard water-resistant zipper.
Durston Gear paired the 055 oz Dyneema Composite Fabric fly with a 15D silnylon floor. The reason for this design choice, according to Dan Durston, is packability and longevity. Make sure you read the “Why does the Durston X-Mid Pro 2 have a nylon floor?” section of our review.The Durston X-Mid Pro 2 has a floor width of 48 inches (122 cm) and a floor-length of 90 inches (230 cm), giving it a total area of 30 square feet (2.8 sq m). It can handle two wide tapered pads.Or it can handle one wide pad and one wide dog.The Durston X-Mid Pro 2 has three obvious unique design features. 1) An intuitive rectangular pitch that only requires four stakes. 2) a spacious interior (a function of the offset poles and overall geometry). 3) An integrated fly that extends further from the bathtub floor than similar competing shelters. Read our full First Looks review (above) for more details.
Browse our curated recommendations in the Backpacking Light Gear Shop – a product research & discovery tool where you can find Member gear reviews, Gear Swap (used gear) listings, and more info about specific products recommended by our staff and members.
our community discussed the X-Mid Pro 2 with designer Dan Durston on this forum thread
DISCLOSURE (Updated April 9, 2024)
Product mentions in this article are made by the author with no compensation in return. In addition, Backpacking Light does not accept compensation or donated/discounted products in exchange for product mentions or placements in editorial coverage.
Some (but not all) of the links in this review may be affiliate links. If you click on one of these links and visit one of our affiliate partners (usually a retailer site), and subsequently place an order with that retailer, we receive a commission on your entire order, which varies between 3% and 15% of the purchase price. Affiliate commissions represent less than 15% of Backpacking Light's gross revenue. More than 70% of our revenue comes from Membership Fees. So if you'd really like to support our work, don't buy gear you don't need - support our consumer advocacy work and become a Member instead.
Learn more about affiliate commissions, influencer marketing, and our consumer advocacy work by reading our article Stop wasting money on gear.
Executive Producer - Backpacking Light; Show Director and Host - Ryan Jordan; Producer - Chase Jordan; Theme music: Look for Me in the Mountains written by Chris Cunningham and Ryan Jordan, performed by Chris Cunningham (acoustic guitar, lead and harmony vocals, harmonica), Chad Langford (upright bass), and Tom Murphy (mandolin), produced by Basecamp Studios in Bozeman, Montana.
Sponsorship Policy: Backpacking Light does not accept compensation or donated/discounted products in exchange for product mentions or placements in editorial coverage, including any podcast episode content not excplicitly identified as sponsored content. Some (but not all) of the links in these show notes may be affiliate links. Learn more about affiliate commissions, influencer marketing, and our consumer advocacy work by reading our article Stop wasting money on gear.
A curated guide to Backpacking Light resources about minimalist footwear (e.g., trail running shoes for hiking and backpacking) – gear, skills, podcasts, forums, research, education, product recommendations, and more.
Welcome to the Minimalist Footwear Trailhead
Making sense of Minimalist Backcountry Footwear
Trail running shoes are the most common style of minimalist footwear for hiking, backpacking, and other ultralight backcountry activities. These activities include ultralight backpacking, thru-hiking, long-distance hiking, fastpacking, FKT attempts, packrafting, ultrarunning, and more.
About this Trailhead
This article is one of Backpacking Light’s curated gateway pages (a trailhead, so to speak). Here, you’ll find information and resources about minimalist footwear for hiking and backpacking. We’ve got resources for what is minimalist footwear, when is it useful, how does minimalist footwear affect foot health, and what are examples of minimalist footwear for hiking and backpacking.
About this Trailhead: Curated and maintained by our staff, this Trailhead page includes an overview of the topic as well as links to information and resources about the topic at the Backpacking Light website. Those resources may include gear reviews, technology and testing, research, skills articles, online education (webinars, masterclasses, or other types of online courses), podcast episodes, forum threads, product recommendations, and other discovery tools including our Gear Finder, Gear Shop, and Site Search engine.
Navigating this Trailhead
Table of Contents • Note: if this is a members-only article, some sections may only be available to Premium or Unlimited Members.
Traditional footwear for backpacking (most commonly regarded to be hiking boots):
is heavy and stiff, causing excess fatigue on high-mileage days or multi-day trips
absorbs a lot of water and is slow to dry
is waterproof and thus, not very breathable
But if you can successfully reduce your pack weight, you can get away with lighter footwear. Trail running shoes are overwhelmingly the choice du jour in the ultralight backpacking community. They mitigate some of the problems that heavy boots create:
Trail running shoes are lighter (6 to 14 ounces / 170 to 370 g per pair) than conventional boots (32 to 64 ounces / 910 to 1810 g per pair)
Lighter shoes made with lighter materials drain water and dry faster (2-4 hours vs. 24-72 hours in warm, dry conditions)
Minimalist shoes keep your feet cooler in warm temperatures (reducing the risk of blisters and maceration)
Trail running shoes and other lightweight footwear options are often considered to fall into the category of minimalist footwear for hiking and backpacking.
Are there other types of minimalist footwear besides trail running shoes for hiking and backpacking?
Yes!
Huaraches, sandals, moccasins, toe shoes – even barefoot hiking. There are lots of variations here. We call some of these styles ultra-minimalist footwear. They are available from several brands includingVivo Barefoot,Vibram, andXero Shoes.
However, trail running shoes are the most popular type of minimalist footwear for hiking and backpacking, so we generally focus on that product category.
If minimalist footwear works miracles for runners, how about backpackers?
There’s a lot of research that proposes lofty benefits of minimalist footwear for running. That means it’s applicable for backpacking, too, right?
Wrong.
You can’t transfer the research.
(Most) backpackers don’t run (!), so our stride is shorter and our foot plant is different.
Backpackers carry larger and heavier packs than runners, which completely changes our gait, stride, and plant.
Some backpackers travel over rougher terrain than runners. Talus, scree, tundra, bogs, scrambles. That changes everything.
So be careful – the benefits of minimalist footwear for trail running are going to be dramatically different than the benefits of minimalist footwear for backpacking.
What are the key attributes of minimalist footwear?
Some attributes that can be used to characterize and differentiate minimalist footwear include:
Drop – The differential height between the bottom of a person’s heel and the bottom of the ball of their feet. Shoes with higher drop have a higher heel. Low drop shoes are flatter across the length of the shoe relative to the ground surface. A lower drop provides a more natural, barefoot-style walking motion, but at the expense of transferring more strain to muscles in your calves and knees.
Stack height – The height of the combination of the outsole, midsole, and insole. High stack height shoes can be more comfortable but come at the cost of some stability on uneven terrain.
Longitudinal stiffness – The resistance of a shoe’s sole stack to bending. More stiffness provides resistance to fatigue on long days. Less stiffness provides a more natural walking motion.
Upper material – Synthetic mesh uppers are often lighter, breathe better, drain water better, and dry faster. However, they are less warm in rainy, colder weather. In addition, mesh uppers are often less durable than solid fabric uppers.
Toe box width – A wider toe box allows the forefoot to splay, which helps distribute body and pack weight more evenly when walking. Narrower toe boxes provide more precision, which is particularly useful when scrambling in steep and rocky terrain.
What’s the best trail running shoe for hiking and backpacking?
The best minimalist footwear, or the best trail running shoe, does not exist.
Our position is simple: the best trail running shoe for hiking and backpacking is the trail running shoe that:
Fits you and is comfortable; and
Is designed for the specific application or use case for your style of hiking and backpacking.
Consumer Advocacy Warning: Be wary of listicles written by bloggers or media outlets with titles like “Best Trail Running Shoes for Hiking and Backpacking” because they are often little more than canned, formulaic articles (often written by AI-bots or outsourced to SEO contract writers) filled with affiliate marketing links and seldom offer performance analyses based on extensive experience in the field. We’re not going to recommend any trail running shoe that we think is best for you. Instead, we want to give you the knowledge and skills that empower you to make the best possible decision on your own. Backpacking Light is in the business of sharing information between its members, educating consumers, and consumer advocacy, not in pushing you to buy gear that may not work for you. When we make a product recommendation – always consider that the product may not work for you.
What does a minimalist footwear expert say about using trail running shoes for hiking and backpacking?
Watch Ryan Jordan (founder of Backpacking Light) and Damien Tougas (founder of Toesalad) – a minimalist footwear expert – chat about minimalist footwear philosophy, ideas, and practices:
Is minimalist footwear for everyone?
No, of course not. There are some circumstances where a hiker should elect more robust, supportive footwear. Here are a few contexts:
However, if you care for your feet and judiciously select footwear that won’t cause you injury, we believe minimalist footwear and trail running shoes can be used well into your golden years. See:
You bet, but it requires that you pay more careful attention to gear and skills. Check out the following skills articles to learn more about using trail running shoes and other footwear accessories for winter, snow, and cold:
Skills and Gear: Lightweight Footwear Systems for Snow Travel: Part 1 | Part 2 | Part 3
In addition – we created an entire online course specifically dedicated to helping you understand how to use minimalist footwear and various traction accessories in this online webinar:
Can trail running shoes and other minimalist footwear be used for hiking and backpacking in cold and wet weather?
Sure – with caveats. Keeping your feet warm when it’s cold and wet can be extremely challenging. It requires careful selection of not only the hiking shoe, but also socks, gaiters, and a few other strategic footwear accessories. This guide will help:
Can you provide examples of brands and products that make minimalist footwear and trail running shoes for hiking and backpacking?
As you embark on your search for the best trail running shoe for you, here are some minimalist footwear and trail running shoe brands that may work well for you.
Link Disclosure: The brand links below go to our own brand gateway pages, which provide an index to articles, gear swap listings, and member reviews related to that brand. Likewise, all links on this page will direct to other pages on our site to original content created by Backpacking Light. You may find affiliate links elsewhere on our site (read our disclosure letterhere), but they will not be used on this page.
Browse our curated recommendations for minimalist footwear in the Backpacking Light Gear Shop – a product research & discovery tool where you can find Member gear reviews, Gear Swap (used gear) listings, and more info about specific products recommended by our staff and members.
What do Backpacking Light Members say about minimalist footwear?
Browseour curated recommendations for minimalist footwear in the Backpacking Light Gear Shop – a product research & discovery tool where you can find Member gear reviews, Gear Swap (used gear) listings, and more info about specific products recommended by our staff and members.
Wearing minimalist footwear (trail running shoes) during October at 12,000 feet in the Colorado Rocky Mountains.
Help us Maintain this Page
If you found value in other related resources at Backpacking Light (no external links or resources, please – there are other places in our forums appropriate for that) that you’d like to share with our community, please post them in the comments below.
Got a question about backpacking gear as you assemble your ’23 kits and gear lists? Now’s the time to ask it – this live event will be all about gear. In addition, Backpacking Light Publisher Ryan Jordan will discuss some of the gear he’s using in ’23, with updated recommendations in the categories of minimalist, high-performance, comfortable, and budget-friendly gear across several categories.
Description
Got a question about backpacking gear as you assemble your ’23 kits and gear lists? Now’s the time to ask it – this live event will be all about gear.
In addition, Backpacking Light Publisher Ryan Jordan will discuss some of the gear he’s using in ’23, with updated recommendations in the categories of minimalist, high-performance, comfortable, and budget-friendly gear across the following categories:
Backpacks
Shelters
Sleeping Bags & Quilts
Sleeping Pads
Cooking & Stoves
Hydration & Water Treatment
Rain Jackets
Insulating Clothing
Footwear
Trekking Poles
We’ll close the event with a live Q&A. Submit your questions in the live chat below.
About the Event & Access Info
Event Description: The Gear Show (Q&A)
Livestream Date and Time: Tuesday, May 23, 2023, 4 PM US Mountain Time
Access Info
The live version of this event will be available to the public. The recorded version of the event will be available to the public the week following the event. After that, Unlimited Members will have access to the event as part of their membership.
Watch the Recording of the Live Event:
Product Mentions:
Shelters
Durston X-Mid Pro 2 – space:weight ratio for the dog or companion, ease of pitching
Backpacking Light does not accept compensation or donated/discounted products in exchange for product mentions or placements in editorial coverage.
Some (but not all) of the links in this review may be affiliate links. If you click on one of these links and visit one of our affiliate partners (usually a retailer site), and subsequently place an order with that retailer, we receive a commission on your entire order, which varies between 3% and 15% of the purchase price. Affiliate commissions represent less than 15% of Backpacking Light's gross revenue. More than 70% of our revenue comes from Membership Fees. So if you'd really like to support our work, don't buy gear you don't need - support our consumer advocacy work and become a Member instead.
Learn more about affiliate commissions, influencer marketing, and our consumer advocacy work by reading our article Stop wasting money on gear.
In this episode, Ryan walks through fabric repair kits for hiking and backpacking, including various fabric repair scenarios, strategies, and supplies.
Listen
Summary
This episode features fabric repair kits for hiking and backpacking, including various fabric repair scenarios, strategies, and supplies.
Ryan’s fabric repair kit. Total weight is 2.4 oz (68 g), and is reduced on shorter solo trips to less than an ounce (28 g) when taking fewer supplies, skipping the duct tape, and packaging the items with first aid supplies (thus leaving the Loksak behind). The scissors double up for first aid tape and bandage cutting. Fabric patches, seam tapes, and glue are matched appropriately to the fabrics used in shelters, sleeping pads, backpacks, and clothing.
Executive Producer - Backpacking Light; Show Director and Host - Ryan Jordan; Producer - Chase Jordan; Theme music: Look for Me in the Mountains written by Chris Cunningham and Ryan Jordan, performed by Chris Cunningham (acoustic guitar, lead and harmony vocals, harmonica), Chad Langford (upright bass), and Tom Murphy (mandolin), produced by Basecamp Studios in Bozeman, Montana.
Sponsorship Policy: Backpacking Light does not accept compensation or donated/discounted products in exchange for product mentions or placements in editorial coverage, including any podcast episode content not excplicitly identified as sponsored content. Some (but not all) of the links in these show notes may be affiliate links. Learn more about affiliate commissions, influencer marketing, and our consumer advocacy work by reading our article Stop wasting money on gear.
Membership Required
This feature requires an active Backpacking Light Membership.
Premium Articles
You're currently viewing a free preview of a member exclusive premium article. Our premium articles include in depth journalism and insights from the Backpacking Light editorial team.
Get full article access by subscribing to a Premium or Unlimited Backpacking Light membership!