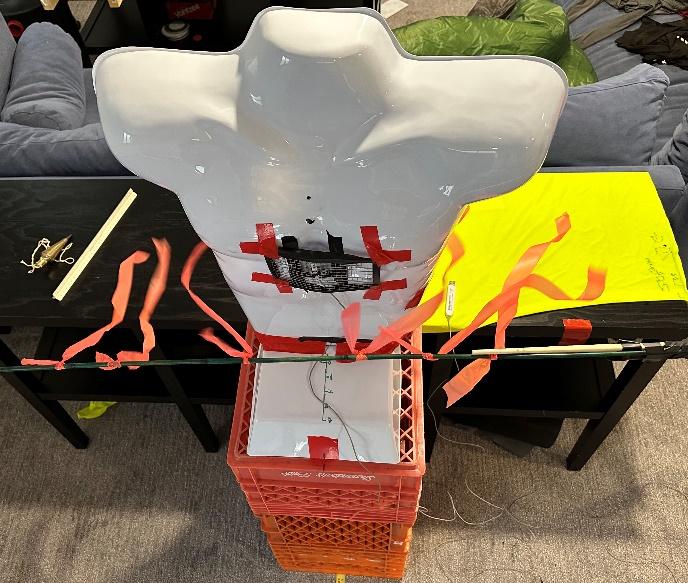
The purpose of this report is to investigate the relationship between air permeability, fabric porosity, weave type, and yarn structure via photomicrography and image analysis. This is not an exhaustive research study, but rather, an exploration of some of the fabric design attributes that have an impact on air permeability rates.
In episode 101 of the Backpacking Light podcast we’re going to talk to Glen Van Peski about the life lessons we can learn from ultralight backpacking.
Listen
Summary
In today’s episode of the Backpacking Light podcast we’re going to talk to Glen Van Peski about the life lessons we can learn from ultralight backpacking.
Interview with Glen Van Peski about Take Less, Do More
Our guest today is Glen Van Peski, founder of Gossamer Gear and author of the new book Take Less, Do More, which will be available on April 16. Glen and I have a wide ranging discussion about ultralight backpacking gear, gossamer gear’s new backpack suspension, minimalism, curiosity, and more. Enjoy the interview.
Executive Producer - Backpacking Light; Show Director and Host - Ryan Jordan; Producer - Chase Jordan; Theme music: Look for Me in the Mountains written by Chris Cunningham and Ryan Jordan, performed by Chris Cunningham (acoustic guitar, lead and harmony vocals, harmonica), Chad Langford (upright bass), and Tom Murphy (mandolin), produced by Basecamp Studios in Bozeman, Montana.
Sponsorship Policy: Backpacking Light does not accept compensation or donated/discounted products in exchange for product mentions or placements in editorial coverage, including any podcast episode content not excplicitly identified as sponsored content. Some (but not all) of the links in these show notes may be affiliate links. Learn more about affiliate commissions, influencer marketing, and our consumer advocacy work by reading our article Stop wasting money on gear.
We hope this guide will help you understand bear canisters a little bit better. You’ll learn about various testing agencies, bear canister design, materials, usability, and user experiences. Lastly, we’ll make some recommendations for bear canisters that reflect unique combinations of value, weight, and capacity.
Introduction
We’ve written before about how bear canisters are a necessary evil (because of their weight and bulk) when backpacking in bear country. Bear encounters increase when bears get a taste of human food, endangering both humans and bears. In our online course about Ursacks, we present important research that correlates human-bear conflict with food-conditioned bears. Effective food storage devices and techniques are critical to minimizing conflicts, attacks, and fatalities – for both humans and bears.
Lightweight, compact, and portable food storage canisters were invented about 50 years ago as a way to reliably prevent bears from accessing food in the backcountry. Today they are required in many wilderness areas.
We hope this guide will help you understand bear canisters a little bit better. You’ll learn about various testing agencies, bear canister design, materials, usability, and user experiences. Lastly, we’ll make some recommendations for bear canisters that reflect unique combinations of value, weight, and capacity.
Table of Contents
Table of Contents • Note: if this is a members-only article, some sections may only be available to Premium or Unlimited Members.
If you’ve seen a close-up video of a grizzly beating the ever-living heck out of a canister, it was probably done during product testing with one of these three agencies. They test all manner of bear-resistant products: bear lockers, coolers, garbage bins, and of course backpacking canisters. Each has their own requirements and histories, and they each test products with a focus on either grizzly or black bears.
SIBBG formed in 2000 in California with a focus on black bears, and many national parks created their canister policies around their approvals.This agency disbanded less than ten years later after fighting a lawsuit from a bear-resistant product manufacturer. (The manufacturer’s product had failed their field test.) Despite winning the lawsuit, many agencies in that group felt too discouraged to continue their work, and the SIBBG dissolved. Many wilderness areas still rely on their original list of approved canisters, and without alternate black bear certification groups it has been unclear whether these wilderness areas will change their list of approved products. That list can be found here.
IGBC is an active and robust tester (and re-tester) of products with a focus on grizzly bears. They have a clear testing protocol for all the products their bears review: Unless the grizzly loses interest, the product must be able to sustain 60 minutes of bear contact time. They have tested almost 1,000 products. A list of approved ones can be found here.
WMI is the third organization to offer a certification program, and theirs is only a year old. It was built in partnership with the South Eastern Association of Fish and Wildlife Agencies who developed the program’s testing protocols – WMI oversees all the mechanics of the testing, which they began in 2023. Their focus is black bears, filling the gap that the SIBBG once held. (Black bears have different temperaments and paws than grizzlies do, so it’ll be very interesting to see what WMI discovers in their new testing program.) They only have one approved bear canister thus far: the Grub Can 6.6L, but they plan to slowly ramp up testing in 2024 as manufacturers submit products for certification.
No bear canisters have been certified by all three agencies, but five brands have been approved by both SIBBG and IGBC: Bare Boxer, BearVault, Garcia Machine, Lighter1 and UDAP.
Model
SIBBG
IGBC
WMI
Bare Boxer Contender 101
✓
✓
BearVault BV425
✓
✓
BearVault BV450
✓
✓
BearVault BV475
✓
✓
BearVault BV500
✓
✓
Counter Assault Bear Keg
✓
Garcia Machine Backpacker's Cache
✓
✓
Grubcan 6.6L Kevlar/Carbon
✓
✓
Grubcan 10L
✓
Lighter1 Lil' Sammy
✓
✓
Lighter1 Big Daddy
✓
✓
Sabre Frontiersman
✓
UDAP No Fed Bear
✓
✓
Wild Ideas Bearikade Scout
Wild Ideas Bearikade Weekender
✓
Wild Ideas Bearikade Blazer
Wild Ideas Bearikade Expedition
✓
If a canister has a certification, they are more likely to be accepted in the places you want to backpack. However, it’s up to the manufacturers to submit their products for testing, and not all of them do so. A bear canister having – or not having – a certification doesn’t guarantee that they will succeed or fail at keeping your food away from a tenacious bear.
Design considerations
It’s easy to get lost in gear specs when deciding which bear canister you want to use. Price, weight, size and certifications all play a significant factor in what bear canister you may want to buy. Someone who backpacks a ton in the Adirondacks won’t want to purchase a BearVault because Yellow Yellow learned to rob them in that neck of the woods. Likewise, a retiree might care more about weight than price, but a recent college grad might just want the cheapest model that will get the job done.
Before we dive into specific specs, let’s talk about a few broader design considerations that could impact your experience with a bear canister.
Table 2. Bear Canister Features
Weight matters – but so does user experience. Manufacturers have approached their bear canister designs in different ways, and several have developed loyal followings as a result. Bear canisters vary with respect to secondary functionality (chair, table), material clarity and color, and their lid closure mechanism.
Model
Flat Top?
Sittable?
Smooth?
Material
Closure
Clarity
Color
Bare Boxer Contender 101
✓
✓
partial
polymer blend
built-in lock
opaque
black
BearVault BV425
✓
polycarbonate
twist
see-through
blue
BearVault BV450
✓
✓
polycarbonate
twist
see-through
blue
BearVault BV475
✓
✓
polycarbonate
twist
see-through
blue
BearVault BV500
✓
✓
polycarbonate
twist
see-through
blue
Counter Assault Bear Keg
✓
✓
polymer blend
built-in lock
opaque
yellow
Garcia Machine Backpacker's Cache
✓
✓
partial
polymer blend
built-in lock
opaque
black
Grubcan 6.6L Kevlar/Carbon
✓
carbon fiber / kevlar
twist
opaque
many
Grubcan 10L
polycarbonate
lever
see-through
blue
Lighter1 Lil' Sammy
✓
✓
polycarbonate
screws
see-through
blue
Lighter1 Big Daddy
✓
✓
polycarbonate
screws
see-through
blue
Sabre Frontiersman
✓
✓
polymer blend
built-in lock
opaque
orange
UDAP No Fed Bear
✓
✓
partial
polymer blend
built-in lock
opaque
black / red
Wild Ideas Bearikade Scout
✓
✓
✓
carbon fiber
built-in lock
opaque
black / silver
Wild Ideas Bearikade Weekender
✓
✓
✓
carbon fiber
built-in lock
opaque
black / silver
Wild Ideas Bearikade Blazer
✓
✓
✓
carbon fiber
built-in lock
opaque
black / silver
Wild Ideas Bearikade Expedition
✓
✓
✓
carbon fiber
built-in lock
opaque
black / silver
Shape
The first consideration is shape. Some bear canisters, like the Counter Assault Bear Keg, have rounded tops and bottoms, while others are flat. The flat tops are easier to sit on and use as a table while at camp, but they may be easier for a bear like Yellow Yellow to leverage in their jaws or against a rock.
Some canisters have ribbed sides, while others are smooth. The ribbed sides are easier for humans to pick up – but they also make it easier on the bears. Canisters also come in varying circumferences and heights. A squat canister might not be very nice to sit on, nor would an exceedingly tall one; some people might find a thin canister to be easier to pack, but if it’s too thin a bear might find it equally easy to carry in its mouth.
Materials
Bear canisters come in different materials. BearVault, Lighter1, and the Grub Can 10L canisters are all made of polycarbonate, a clear and light, but potentially brittle and breakable material. I hike in the Sierra Nevada and Rocky Mountains, so I tend to use canisters made of polycarbonate – the clear siding lets me keep my food bank organized – but many hikers in the Adirondacks rightly avoid canisters made of this material.
Wild Ideas Bearikade and the Grub Can 6.6L employ carbon fiber (the Grub Can is a blend of carbon fiber and kevlar). Carbon fiber is strong and light, but it’s not see-through and it’s an expensive material.
Garcia Machine, Bare Boxer, UDAP, Counter Assault, and Sabre canisters all use a polymer blend. This was the first material used for a bear canister and is a classic for a reason. It’s strong and inexpensive, but it’s opaque and typically comes in black color. Canisters made of polymer are typically heavier per in³ than carbon fiber or polycarbonate canisters.
Lid Closure Mechanisms
Bear canisters come with different lid closure mechanisms. The most common mechanism is some form of built-in lock that requires a small tool like a coin, washer, or multi-tool to open. Garcia Machine, Bare Boxer, UDAP, Bearikade, Counter Assault, and Sabre canisters are all built using this technique. These canisters tend to do very well when it comes to bear-proofing. (Bears still haven’t learned to use screwdrivers.)
Two canisters require twisting the lid with some sort of added difficulty. BearVault canisters have two small nubs of plastic that stop the lid from twisting unless they are pushed out of the way. The Grub Can 6.6L has a combination lock design, requiring users to line up several marked rims in order to open the can.
And then there are a couple of unconventional methods that reviewers seem to either love or hate: Lighter1 canisters use a set of screws and a crossbeam to hold its lid in place, and the Grub Can 10L uses an internal latch that locks the can when it’s lying on its side, and unlocks the can (via gravity causing the latch to “fall”) when it’s in its upright position.
Capacity
The length of your trips will determine how much space you need in your bear canister. Experienced backpackers typically use 125 in³ of capacity per full day for their food, so that’s the calculation we use when recommending how many days of use a canister provides. However, if you are a 6’5” weightlifter who prefers to carry apples and mountain house meals, you may want to assume a larger capacity, and if you are a 4’ runner that trims the top of your ziplock bags and sprinkles couscous into every nook and cranny, you might be able to assume smaller.
Note that although you don’t need to include your first day of hiking in your calculations because that food will be in your stomach before the first night, you will need to save some additional space in your canister for toiletries, medications, and other smellables.
However much space you need, there is probably a canister for you. Canisters come in sizes starting at 275 in³ up to 900 in³, and Bearikade additionally offers custom sizes from 508 in³ to 906 in³.
Bear Canister Failures
Although it’s rare, there have been some instances of bears breaking into bear canisters. A few years ago, Andrew Skurka did an analysis of the 199 food-related bear incidents with backpackers in Yosemite National Park between July 2012 and July 2017. Bearikade, BearVault, Garcia, and Lighter1, and early Ursack models, were all broken into. Typically, these break-ins happened because of user error. Backpackers make a handful of the same mistakes:
Not actually putting everything inside of a bear-resistant container. People fail to properly plan for how much space they will need and are forced to leave smellables outside of their canister on their first night. Bears steal this food (but the food inside the canister remains intact).
Not properly locking their bear canisters. Perhaps they want to make it easier on themselves in the morning, so they only turn one of the locks on their Bearikade instead of all three or don’t twist their BearVault until it clicks twice. Bears were then able to rip the lids off the canisters and access the food.
Being too far from the canister when it’s open. Bears in high-traffic areas have learned to be bold and steal food, even when people are present. Keeping bear canisters within arm’s reach helps prevent this from happening, as does closing them whenever they’re not in use – even if it’s a hassle. People think they will hear or see a bear coming, but the reality is that these animals are exceptionally quiet and able to sneak up on a group of campers.
Storing canisters in the wrong spot at night. Bears usually can’t pick canisters up, but they can easily roll them. Consider if there are any creeks, cliffs, or hills where you’re camped, and store the canister in such a way that it would be difficult to roll away. Some people like to keep their pots on top of their canisters so that they can hear if a bear messes with their canister.
Although the vast majority of break-ins have been due to user error, there have been some structural failures. Lighter1’s hardware (most likely its screws) got broken off and a bear got access to its can. And many canisters have cracked open when dropped or smashed – most famously by the Snow Creek bear in Yosemite. (This bear moved away from Snow Creek as of 2024.) Skurka concludes:
“From what I can gather, when used properly there were no reported cases of broken Bearikades or the Ursack Major (formerly S.29 AllWhite), and only one BearVault. The Garcia canister failed most often, but you’d expect that since they are the most common rental canister. Per updated maintenance guidelines from Backpackers Cache, NPS was able to reduce the frequency of failures of their rental fleet.”
Outside of this analysis, it’s rare to see reports of a canister that was outsmarted (or out-strengthed) by a bear. We mentioned Yellow Yellow, a bear in the Adirondacks that figured out how to open BearVaults (this bear has since been euthanized), but there was also a Lighter1 incident near Marcy Dam in the Adirondacks. Both of these canisters are made of polyurethane, and they both have flat tops and bottoms. We’re speculating here, but it’s possible that the bear had an easier time opening them because of one of those design choices – a corner is easier to wedge into a rock, and polyurethane seems easier to crack open than other bear canister materials.
It’s because of these exceptions that bear canisters typically market themselves as bear-resistant, not bear-proof. However, when used correctly, they do a darn good job of keeping human food away from bears.
Bear Canister Gear Guide
So, now that we know what goes into a bear canister design, Let’s discuss the canisters currently on the market, their specs/strengths/limitations, and their user feedback. There are nine brands currently selling bear canisters today:
Bare Boxer
BearVault
Counter Assault
Garcia Machine
Grub Can
Lighter1
Sabre
UDAP
Wild Ideas (Bearikade)
In addition to these canisters, we will present a handful of alternative food storage strategies for use cases where hard-sided canisters aren’t required or necessary.
Please note that this guide doesn’t cover whether a bear canister is permitted in the location you want to go to. (Although if you want to know about food storage policy in National Parks, we’ve got you covered.) Recreational areas all have differing requirements around bear canisters, so check with the local agency in the area you plan to travel to.
Refer to the following comparison table for specifications.
Table 3. Bear Canister Specifications and Performance Grades
Bear canisters vary in weight, capacity, and dimensions, but some are more efficient (e.g., volume-to-weight ratio) or more cost-effective (e.g., price-to-volume ratio).
Table notes:
[1] Diameter can be a useful metric for determining the extent to which a bear canister exceeds the virtual thickness of your pack and disrupts the shape of its packbag. Height is useful for determining whether or not a canister can fit sideways into a backpack. In addition, height may provide data about the canister’s utility as a stool or table.
[2] Capacity is defined as the number of days based on one day of food being equivalent to about 125 cubic inches of volume (e.g., equivalent to a spherical bag of food that is a little more than 6 inches in diameter).
[3] The Volume/Weight Score defines the % of the average of all canisters’ volume:weight ratio. Higher numbers = more capacity at less weight. “Heavy” canisters are noted as < 90% (i.e., 10% heavier than average), “Average” canisters are noted as 90% to 110%, and “Light” canisters are noted as > 110% (e.g., 10% lighter than average). “Very heavy” and “Very Light” canisters are noted as being more than 20% outside of the average values.
[4] The Price / Volume Score defines the % of the average of all canisters’ cost:volume ratio. Higher numbers = more expensive capacity.
The smallest volume and lightest option on the market
Works great as a stool
Limitations:
Opaque
Rain leaks in from the top
Needs a tool to open
Has the worst volume-to-weight ratio on the market
Additional Notes (click arrow to expand): [expand title=”” trigclass=”awesomearrows”]
User Review Notes:
Users loved the size and shape of this bear canister in comparison to other market leaders, stating that its outside dimensions fit better in their packs: “Packs better than the bearikade.” – Blazer; “This can fit perfectly inside my kumo 36 horizontally.” – Tom C Chen; “It easily fits in my REI Flash 45 pack and gets lost in my Osprey Kestrel 58.” – Mark Messick; “Fits in my 35 liter.” – Christopher S.; “Fit in my ULA circuit pack perfectly!” – Megan C.
Coins won’t unlock the latches. The most common user suggestions were to use a Swiss Army Knife or key, but one user suggested slipping a piece of cordage through a washer, which we thought was pretty genius.
Several users commented on the heavy latches, stating that they were more complicated and heavier than the Garcia Machine canister.
One user stated that the canister weighed more than advertised: “It is not 1 lb 6 oz as stated, but 1 lb 10 oz.” – Eliza B.
Staff Notes:
Cute size, light weight, agency approvals, and packable in smaller packs, but a ridiculous amount of weight to carry for only two days of capacity. That said, it’s still the lightest available if you don’t need the capacity and you absolutely need agency certifications. Otherwise, you’ll get a little more bang for your buck with the BearVault BV425 and a lot more capacity for this weight with the Bearikade Scout. – Ryan Jordan
Good size for short outings, but be aware that locks require some sort of tool that cannot be easily improvised if you forget it (in my case I use a Swiss Army Knife). Even with the SAK, I have at times struggled to open it, especially in cold conditions where the metal locks can freeze. Being opaque and with only a partial mouth opening, it’s hard to locate small items quickly.
BV500 is the largest volume canister that is both SIBBG and IGBC-approved
Wide opening at the top makes getting objects in and out of the can easier
Lid extends over the rim, keeping rain out when set upright
Widely available for rent or purchase across retailers and even in some National Parks
Works great as a stool
Ribbed sides make it easier to pick up
The BV475 and BV500 have an above-average volume-to-weight ratio.
Limitations:
The BV500 won’t fit sideways in most ultralight packs
Opening the can requires some hand dexterity and strength, and the “tab” opening mechanism stiffens when it’s cold, making it even more difficult to open
Nubs get worn down over time and can’t be repaired, making the bear proofing ineffective
There have been incidences of bears breaking into this canister
Additional Notes (click arrow to expand): [expand title=”” trigclass=”awesomearrows”]
User Notes:
Users loved the clear exterior, stating that it made finding things inside the can much easier.
Reviews were mixed about how difficult the can was to open in the cold. Several users offered advice on improvised tools such as sticks that people can use if their hands aren’t strong enough. One user recommended the credit card method: “I went to REI where one of the sales associates showed me how to open it with an ID or credit card. See video.” – Micki; “[My] kids can open the Keg without help but they cannot open this one.” – outdoorsfreak
No users could fit the BV500 sideways inside their pack – most opted to latch it underneath their pack’s brain, or stuff their items around it inside their pack: “I would prefer if they made this canister *slightly* smaller so that I have more carrying options, but I’m able to fit the canister in the very top of my bag. I have the Osprey Aether 85 and the canister fits at the top of my pack, above the shoulder straps but below that detachable compartment that tops the entire pack.” – Richard
Users didn’t have trouble fitting the BV450 into their packs: “It fits perfectly in my 75L backpack with the rest of my gear.” – Isabella Talbott; “It does fit inside my Gossamer Gear Mariposa pack as well as my Kriega OS-32 motorcycle saddle bags no problem.” – Jordan I Smith
Staff Notes:
The opening mechanism does stiffen in 30-40 degree weather, but with healthy fingers and a bit of practice, it can be opened in any weather. BV500 can fit sideways in large backpacks such as the Deuter Expedition 90+10, but must be packed vertically in smaller packs or emptied and held under the brain. This is the brand of bear canister I use when guiding and on personal backpacking trips. I own the BV500 and BV450. – Sarah Bennett (Author)
I use the BearVault BV475 where a hard-sided canister is required. I can fit five days’ worth of meals in the canister with careful packing, including repackaging some freeze-dried packets to reduce volume. The canister packs horizontally inside my Zpacks ArcZip 62-liter pack. The only drawback is unlatching the lid in cold weather when the plastic is less flexible. I use a small metal object to press the catch mechanism when needed. – Stephen Seeber
BV425 Sprint is my favorite bear can ever. I love that it holds 5 liters and that it sits with the flat side against my back in a low-volume pack like my 40 liter Atom+. It is so nice to not have the bear can barreling my pack out into an awkward round shape. If I try hard I can get my food volume below 1.25 liters/day so I’m good with four days of food in the can. I also appreciate the rounded corners on the can which keep it from stressing the fabric of the pack. Bearvaults are a minor pain to open (particularly after a cold rainy night) but this one is worth the hassle. The BV450 and BV500 are too heavy for my taste and necessitate a vertical carry in my pack. I don’t like these canisters. These are the canisters I loan to other people. – Matthew King
The transparent nature of the BearVault makes it easier to find contents, and I like that no tools are required for opening and that it has a full mouth opening. When sand has gotten in the threads, it has made opening more challenging though. – Iago Vazquez
These canisters have been great for trips in the Northern Rockies where I’ll be spending some of my nights above treeline. I like the translucent plastic, which makes it easier to reach in and grab whatever food I’m after, and the fact that I can open them without having to use a coin. They’re reasonably light and fit fine in my larger volume packs. I’ve also found creative uses for them over the years — washing clothes in them during an extended backpacking/car camping road trip (worked surprisingly well!); packing them with small bags of ice to create an impromptu (but heavy) cooler to pack in perishable food for a short overnight trip; and of course as a stool for around camp. – Mark Wetherington
The BearVaults have become a tried and true touchstone of my Sierra backpacking experience, whether bulging in the body of a backpack, strapped atop its lid, or serving as a stool at camp. My BV450, at 7.2 liter capacity, is a perfect weekend bear can. With some strategic packing, it allows for a food-soak jar to be stored alongside dry goods, which is always good practice when bunking down with black bears. For trips in excess of 5 days, the BV500 and its 11.5 liter capacity will spare you the stress of extreme space-management, and its translucent sidewalls aid in locating that final pack of Oreos among the heaped wrappers and refuse. I own both the BV450 and the BV500 and between the two have never felt the need for another bearcan. – Isaac Simons
This is my last resort bear canister that I use only if Ursacks with the aluminum liner or my Wild Ideas Bearikade are not allowed. Their capacity-to-weight ratio is low, and during cold mornings the lid is hard to open. – Chase Jordan
Clear canisters like BearVaults heat faster than opaque canisters – the effect of solar radiation passing through to the interior. Don’t leave them in direct sun, or you’ll end up with extreme condensation inside your food packaging. And I know the Bare Boxer is a tiny bit lighter than the smallest BearVaults, but for overnight trips in areas where bear canisters are required, I prefer the clear-sided BearVault BV425. It’s more packable, easy to find stuff, and makes a better table. – Ryan Jordan
I have been using BearVault products for 10 years, starting with the BV450-Jaunt for shorter trips and then using the BV500-Journey for my longer trips in the backcountry. I like them for their durability, wide mouth, clear body, and ease of use. Certainly it gives me a peace of mind when entering bear country to have this necessary piece of equipment! – Dan Hu
Yellow exterior and reflective strip make it easy to find from far away
Limitations:
Not certified by the SIBBG
Opaque
Rain leaks in from the top
Needs a tool to open
Doesn’t work well as a stool
Despite being one of the larger volume canisters, the Bear Keg has a below-average volume-to-weight ratio
Additional Notes (click arrow to expand): [expand title=”” trigclass=”awesomearrows”]
User Notes:
Users appreciated the durability of the canister: “My son booted it off a 25ft cliff because he wanted to see what would happen (I was not happy at that moment watching a 70$ plastic bucket at the mercy of gravity) but it came out with nary a scratch.” – Bufftester; “One night, “Yellow Yellow,” the bear in the high peaks that knows how to open the clear brand, came to our campsite and decided to play soccer with my container. She took the container down the hill and dumped it in a creek, great. Wet inside and ruined some food, forgot to line it with a garbage bag. But at least we still had food. This container works and mine has the battle scars to proove it.” – XC Cycler
The wide opening at the top made it easy for users to reach their gear: “I checked both the CA and BV models out in the store and checked the opening size and both are almost exactly the same (I mean we are talking mm differences)” – Pgunnz
Some users had mild difficulty getting the lid’s locks to work correctly. They recommended using a keys, coin, or multi-tool to open the canister. “I found that the Garcia lid was easier to handle overall.” – MCL
Users commented that the canister works as a stool, but that it’s not very comfortable. It doesn’t work as a table because of its rounded lid.
Users described the volume as spacious, but reviews were mixed on whether the canister fit well into their packs: “It fit in my gossamer gear mariposa but was a little awkward. Fits fine in my osprey rook. Enough room for 4-5 days/two people if you pack it correctly. Last trip we (2) had 3.5 days and 1.5ltr of vodka in here no problem.” – Mdricks; “I have the Osprey Exos 58 liter pack and this canister is almost too big.” – Angelique Perez; “The interior volume is similar as the BV475 but the shape of this one makes packing and fitting especially freeze dried food packets much easier… It fits vertically in my smaller 48L backpack with enough space around it to fit a tent and shove everything else I need.” – dtw237; “I have the 70L Osprey Aether. It takes up 90% of the room.” – Adrian
Staff Notes:
I have used Counter Assault bear canisters on llama-packing trips where canister weight was less of a concern. They held the perfect volume of llama cookies and easily fit vertically into our panniers. The canisters themselves definitely cannot be opened with one’s fingers, but even something like a dinner knife could work. We would cover them with saddle blankets at night to prevent any water from leaking in. – Sarah Bennett (author).
[/expand]
Garcia Machine
Highlights:
Model
Backpacker's Cache
MSRP
$80
Weight
54 oz (1542 g)
Volume
615 in3
Volume / Weight Score
76%
Volume / Weight Rating
Very Heavy
Where to Buy: This product is discontinued.
Strengths:
Certified by the SIBBG and IGBC
Lightest and cheapest option of agency-approved canisters
Most common bear can to be loaned out to backpackers by the National Parks
Works great as a stool
One of the most inexpensive bear canisters on the market
Limitations:
Opaque
Needs a tool to open
Rain leaks in from the top
Has a below-average volume-to-weight ratio
Additional Notes (click arrow to expand): [expand title=”” trigclass=”awesomearrows”]
User Notes:
One Amazon reviewer cautioned that using a stove on the lid can heat the plastic up and make the can unopenable until it has cooled off – but that the bottom of the can works just as well as a cooking table.
Users resoundingly complained about the dark exterior, stating that it made the can difficult to locate in the dark, and that it made it difficult to locate items inside the can. They recommended putting reflective tape on the can to help backpackers find it in the dark.
A user complained about the narrow opening at the top.
Several users noted that the Backpacker’s Cache fit sideways into their packs: “It fits perfectly in the bottom of an Osprey Atmos 65. It’s tall enough to comfortably sit on, and low enough to reach the ground when you’re on it. Perfect.” – M. S.; “For backpacks, I personally packed it sideways (barely fits) and pushed it down so that it rested around my lumbar area.” – Mr. StevenStaff Notes:
The bear canister is ot transparent, making it harder to find items inside the canister, particularly small ones (for example condiments). I have found myself often requiring emptying the whole container to find what I am looking for. A tool is required to open, but one can easily use coins, utensils or other items commonly carried or improvised to open. It is heavier than similarly sized BearVault. – Iago Vazquez
Both canisters have an average weight-to-volume ratio
Limitations:
Not certified by the SIBBG
The 10L has an unconventionally tall and narrow shape
The 6.6L is opaque
Neither canister functions well as a stool
The 6.6L is the most expensive canister per volume on the market
Additional Notes (click arrow to expand): [expand title=”” trigclass=”awesomearrows”]
User Notes:
This canister is a lesser-known product and reviews of it are scarce
6.6L: A user liked how the ridges helped the canister stay in place when strapped under the brain of their pack, and that the diameter of the canister was smaller than that of the Bearikade – letting them fit it into their Sassafras 3.2 and Durston Kakwa. See their discussion of the product here.
10L: Users appreciated the volume and packability of the canister. (One user noted that it fit into their 60L pack.); One user appreciated how easy the canister was to open: “I can open it easily and I have severe arthritis.” – Mikhail; One user received a faulty canister which locked them out of the can entirely on day 2 of a backpacking trip: “Without that little internal cone thing on the underside of the lid, the contents of the can pressed up on the latches rendering it shut forever.” – Jeffrey A Brown
Lid extends over the rim, keeping rain out when set upright
Its lid can double as a cooking pan
The canisters are middle-of-the-road when it comes to price and weight
Limitations:
Cross-beam makes packing the canister awkward
Outer screws can be abrasive to other gear
A bible verse is imprinted on the bottom
People camping in the Adirondacks may want to avoid using polycarbonate containers
Additional Notes (click arrow to expand): [expand title=”” trigclass=”awesomearrows”]
User Notes:
Users loved the clear exterior, stating that it made finding things inside the can much easier
Users complained that the screws were difficult to keep track of and that losing one would render the can ineffective. Users suggested painting them bright colors, bringing extras, or keeping them in a specialized ditty bag (including while hiking so that they don’t rub against softer materials inside the pack)
Users commented that the screws can be manipulated without tools, but one user found them uncomfortable: “My fingers are raw after a few days of using [the screws].” – Bungzy’s Ultralight
Users had difficulties using the lid for cooking: Users complained that food badly sticks so badly to the lid when cooking that they only used it to boil water or as a plate; One user complained that the handle becomes flimsy when trying to pour contents into another container; “Two cups [of water] is about the limit of what you can fill in this pot.” – Follow Bigfoot; The product comes with a 2.8 oz lid for the lid-turned-pot which doesn’t fit flush with the pot when the handle is attached. “[The lid] is built like a tank and I just didn’t think they needed something so heavy duty.” – Follow Bigfoot
Some users complained about the narrow opening of the can, while others appreciated how the narrow can fit in their packs: “Normal-sized tortillas fit perfectly inside this lid… With its narrow 7 inch diameter and 9 ” height, it fits inside a small UL pack better than any other canister.” – Bungzy’s Ultralight
Staff Notes:
I really wanted to like the idea of having a bear canister lid that serves double-duty as cookware, but this causes both the canister and lid-cum-cookpan to suffer. The canister is hard to pack, the screw-closure mechanism is finicky, and the canister has too small of a diameter to pack efficiently with bulkier foods. – Ryan Jordan
Tall and lean shape may be more convenient for packing
Orange exterior is easy to spot
Available at very accessible retailers
The cheapest bear canister money can buy, whether or not you factor in volume
Limitations:
Not certified by the SIBBG
Unconventional shape
Opaque
Rain leaks in from the top
Needs a tool to open
Heavier than other canisters of comparative size (similar to Counter Assault’s Bear Keg)
Additional Notes (click arrow to expand): [expand title=”” trigclass=”awesomearrows”]
User Notes:
Reviews were mixed on whether the canister was easy or difficult to open. All users recommended bringing some form of tool to help open the canister: “USE A NICKEL! It fits perfectly and stays in the grove so you just spin it! You’ll be surprised how easy it is, you’re welcome. Spin each one a little (10ish turns or so) and switch screws so it’s even pressure. It’s not hard at all.” – Beck; “Screw clamp mechanism is incredibly inconvenient! Screws are very difficult to turn. Lock washers do not stay in place. There are more efficient options out there.” – K2Peng
Some users liked the tall and slim design – others found it difficult to pack around: “I have the 60L REI Flash pack… At first I thought it was a bit tight [but] then it was just fine with the room to spare for my extra clothes and everything else needed on top or in the outer compartments. VERY COMFORTABLE in the pack!” – Beck; “Fits great (inverted) in a Frost River Isle Royale pack along with my gear for a 6 day trip.” – WoodsWalker; “It fits inside my 55 hiking backpack perfectly and rests easily against by back while inside.” – Dynamo (incentivized review); “What’s with the wonky shape? It makes it hard to fit everything else into your backpack.” – Texas Customer; “It is actually less shapely and packable than the standard competitors.” – Andrew
Staff Notes:
The Sabre Frontiersman is cheap, but the weird shape makes for inefficient use of space, and for very little extra money, you can get a canister now that’s quite a bit lighter. – Ryan Jordan
Its cost is below average, but is still more expensive than Garcia Machine’s Backpacker’s Cache (which it is often compared to)
Average in overall weight and weight-to-volume ratio, but performs better than the Backpacker’s Cache
Limitations:
Opaque
Rain leaks in from the top
Needs a tool to open
Opening at the top is smaller than the Backpacker’s Cache
Additional Notes (click arrow to expand): [expand title=”” trigclass=”awesomearrows”]
User Notes:
This canister is a lesser-known product and reviews of it are scarce
The canister is built similarly to the Backpacker’s Cache and tends to get mentioned alongside it
Similar to all other canister designs where rain leaks from the top – a user complained that the canister took on two inches of water when set upright during a rainstorm, ending their trip early
A user had difficulties with the locking mechanism, but said that UDAP customer service was excellent
A user stated that the canister fit sideways in their pack (but did not specify what type of pack)
Staff Notes:
The tiny lid is a deal-breaker. Prepare to scrape your knuckles getting food in and out of the canister. The Garcia Machine Backpacker’s Cache, although a much older design, is surprisingly more usable. – Ryan Jordan
Bearikade Weekender and Expeditions models are SIBBG certified.
Custom sizes also available
Works great as a stool
All four canisters (even the small ones) have the best volume-to-weight ratio of any bear canister
Limitations:
Bearikade Scout, Blazer, and custom models do not have SIBBG certification, and no models have IGBC certification, which is confusing given the relatively low cost and ease associated with having products certified. (One of our sources for this article, a testing administrator, told us that Wild Ideas did work with IGBC on testing at some point, but the IGBC maintains that they don’t have a record of this occurring and would need Wild Ideas to re-submit the Bearikade in order to earn a certification.)
Opaque
Rain leaks in from the top
Needs a tool to open
The lid is attached to the can with a cable
Some of the most expensive bear canisters money can buy
Additional Notes (click arrow to expand): [expand title=”” trigclass=”awesomearrows”]
User Notes:
Users uniformly complain about the price tags, which are about triple the cost of bear canisters of similar sizes
“You can open and close it with anything thin and fairly sturdy like a coin, knife blade, etc.” – JRinGeorgia
One user complained about the corners slowly rubbing at delicate UL fabrics
The canister’s slim design makes it more packable than the Backpacker’s Cache because less volume is spent on the container itself: “The Weekender fits inside of my 52L Zpacks backpack and should fit inside of most/all backpacks of about 45L and larger.” – JRinGeorgia
Staff Notes:
My first choice for a hard-sided canister in areas where land management agencies aren’t beholden to SIBBG and IGBC certifications and every ounce counts. Volume-to-weight ratio is off the charts thanks to carbon fiber construction. Very easy to pack, secure and easy-to-use latching lid mechanisms, and no plastics. Makes a great stool/table as well. – Ryan Jordan
The Bearikade Expedition is my go to bear canister in every locale it is allowed. The large size is great for carrying 7+ day’s worth of good food AND can store my cookware at night, while doubling as a super comfortable camp stool allowing me to save weight and leave my camp chair at home. It necessitates a vertical carry in my HMG Porter 70, but fits well, packed with my sleeping bag and other equipment surrounding it to provide some padding with clothing for comfortable carry. The wide variety of agencies in California and Alaska that use these bear cans during their field operations give me plenty of mental comfort that these bear canisters do their job, despite their limited approval. – Chase Jordan
[/expand]
Alternative Food Storage Methods
Before we conclude, there are a few more products worth mentioning.
First – a number of canisters have previously been on the market (and could perhaps be found at a garage sale or on eBay), but are not currently being sold new. We excluded these models:
Craftsman Tech Composites Wise Backpack (IGBC-approved, unable to find online)
Lastly, an unconventional idea: electric fences. These are commonly used in the pack animal industry, but they could also be a sensible food storage solution for groups that don’t mind an awkward pole sticking out of their pack. The lightest one currently on the market weighs 59.2 oz (1678 g) – a smidge more than the Counter Assault Bear Keg or the Sabre Frontiersman, and significantly less than any two large bear canisters. We can’t include it in our graph comparing weight ratios because the fence covers a 27 × 27 ft. (8.2 × 8.2 m) area, meaning it could hold almost limitless food – and thus – could be a very compelling option for groups or longer trips where multiple bear canisters are weight-prohibitive. Regulations vary, so please check with backcountry offices before using this approach.
UDAP Industries, Inc. Bear Shock Electric Fence (IGBC-approved)
Recommendations
So, after all that discussion, which is the best bear canister for you? It depends on your use case, but here are some suggestions to consider if you’re purchasing one in the near future.
Below, we recommend bear canisters based on your highest priorities among the following:
Value
Weight
Design
Compliance
Small Volume
Large Volume
The following three charts can be used to help inform your recommendations. The charts visualize key metrics and ratios that are useful for evaluating value, weight, and volume:
Price vs. Capacity
Weight
Weight vs. Volume
Value can be defined as the ratio of price vs. capacity. The canisters with the highest value will be those that plot towards the upper-left quadrant of this chart. They are denoted with green circles and include the Sabre Frontiersman ($7.87 / day of capacity), the Garcia Machine Backpacker’s Cache ($6.12 / day of capacity), the Counter Assault Bear Keg ($6.00 / day of capacity), and the BearVault BV500 ($5.60 / day of capacity).
Value: Garcia Machine Backpackers’ Cache
Price is not exclusively representative of value. Value includes usability, durability, and capacity as well. Interestingly, the canisters that have the highest capacity-to-price ratios are made with injection-molded polymer blends (commonly, acrylonitrile butadiene styrene, i.e., “ABS”), which are cheap and durable but heavy.
The Sabre Frontiersman is the cheapest bear canister on the market, but its value is questionable, as reflected by mixed user experiences.
Instead, we recommend the Garcia Machine Backpackers’ Cache as the best value canister in this gear guide. Someone looking to buy an inexpensive bear canister probably wants their canister to last a long time and be usable on every trip they go on, and the Backpacker’s Cache delivers on those two points with flying colors. It’s built like a tank, it will hold about five days of food – plenty for most backpacking trips – and it’s accepted in any location that requires hard-sided food storage. Its downside is its weight and availability (there is only a limited amount remaining in distribution).
Where to Buy: Discontinued (search online at discount retailers and auction sites)
Weight: Wild Ideas Bearikade
An argument could be made for smaller volume canisters (e.g., Bare Boxer) being lighter than the lightest Bearikade models, but when you take the volume of the canisters into account, every Bearikade model (including the smallest one, the Scout) is lighter than the other canisters on the market. Their carbon fiber exterior is their competitive advantage here, and because of their custom sizing offering, the Bearikade could be whittled down even further if someone so desired.
Everyone has their own preferences, and we could probably debate the merits of various canisters into the night. However, the BearVault’s clear container is a surprisingly useful design feature.
It makes it easy to locate items within the can – you can fill any small air holes with food and pack it to the brim, or easily figure out which canister your toiletries are in on a group trip. The flat tops and bottoms work perfectly as stools and tables; the canisters fit reasonably well inside of packs; and they don’t have any widespread issues with rain leakage. The ribbed sides make it so we can pick a full canister up with one hand, and a bit of reflection tape on the lid makes them a cinch to find in day or night. Opening and closing the canister requires some dexterity, but it also doesn’t depend on anything external, so there’s no need to worry about having the right tools to access your food. We do hope that BearVault will look into the bear break-ins and update the canister’s durability, but until then – as long as Yellow Yellow isn’t around – it’s a highly refined canister design.
The Garcia Machine Backpacker’s Cache was the first bear canister to be invented, so it was probably the first to be adopted by many wilderness areas. It has kept that honor with an impressive reputation as a durable canister. Today it’s accepted everywhere. It’s the most prevalent canister to be rented out by many of our National Parks, especially the ones notorious for bears: Yosemite, Denali, and Glacier Bay don’t offer any rental canisters other than the Backpacker’s Cache.
Where to Buy: Discontinued (search online at discount retailers and auction sites)
Small Volume: BearVault BV450
The BearVault strikes a balance between weight, design, and price, and is a popular choice for most people on shorter weekend trips. Although the BV425 could shave some weight (and space), the BV450 will give users a smidge of extra space for extra toiletries and snacks, and some added flexibility when backpacking with friends. And although it’s subject to some localized (and rare) land management agency restrictions, it is certified by both the SIBBG and IGBC so you can take it almost anywhere.
Large Volume: Wild Ideas Bearikade Blazer or Expedition
Every ounce counts on long-haul trips, so for this category, if regulations permit you to do so, we recommend sacrificing the clear exterior of a BearVault for the ultralight design of a Bearikade. Your wallet will hurt, but your body may thank you for shaving the 5+ oz (142+ g) off of your pack weight compared to its closest competitors. Its thin-walled design makes for a smaller-sized canister with more usable volume. The Bearikade Expedition is SIBBG certified, but the Blazer is not. We hope Wild Ideas will consider working toward obtaining more certifications from multiple agencies for all of their bear canisters, so that long-distance backpackers in places can use these sleek, ultralight canisters without violating their permits.
Product mentions in this article are made by the author with no compensation in return. In addition, Backpacking Light does not accept compensation or donated/discounted products in exchange for product mentions or placements in editorial coverage.
Some (but not all) of the links in this review may be affiliate links. If you click on one of these links and visit one of our affiliate partners (usually a retailer site), and subsequently place an order with that retailer, we receive a commission on your entire order, which varies between 3% and 15% of the purchase price. Affiliate commissions represent less than 15% of Backpacking Light's gross revenue. More than 70% of our revenue comes from Membership Fees. So if you'd really like to support our work, don't buy gear you don't need - support our consumer advocacy work and become a Member instead.
Learn more about affiliate commissions, influencer marketing, and our consumer advocacy work by reading our article Stop wasting money on gear.
In episode 100 of the Backpacking Light Podcast we’re going to celebrate sunshine and the one hundredth episode of the backpacking light podcast featuring stories from our listeners and more.
Listen
Summary
In Episode 100 of the Backpacking Light Podcast we’re going to celebrate sunshine and the one hundredth episode of the backpacking light podcast featuring stories from our listeners and more.
Explore the essentials of sun safety in this comprehensive webinar, which delves into the scientific underpinnings of UV exposure, dispels prevalent myths, and offers expert guidance on selecting appropriate sunscreens, protective clothing, and eyewear for enhanced outdoor protection.
Executive Producer - Backpacking Light; Show Director and Host - Ryan Jordan; Producer - Chase Jordan; Theme music: Look for Me in the Mountains written by Chris Cunningham and Ryan Jordan, performed by Chris Cunningham (acoustic guitar, lead and harmony vocals, harmonica), Chad Langford (upright bass), and Tom Murphy (mandolin), produced by Basecamp Studios in Bozeman, Montana.
Sponsorship Policy: Backpacking Light does not accept compensation or donated/discounted products in exchange for product mentions or placements in editorial coverage, including any podcast episode content not excplicitly identified as sponsored content. Some (but not all) of the links in these show notes may be affiliate links. Learn more about affiliate commissions, influencer marketing, and our consumer advocacy work by reading our article Stop wasting money on gear.
In this video, we walk through a framework for making decisions about how to select gear based on benefits, features, and design attributes, with a focus on shelter systems.
In episode 99 of the Backpacking Light podcast we’re going to learn about how bears smell, and what you can do to hide your food from the nose of a bear.
Listen
Summary
In today’s episode of the Backpacking Light podcast we’re going to learn about how bears smell, and what you can do to hide your food from the nose of a bear.
Submit your testimonials for the 100th episode of the Backpacking Light Podcast by March 16, 2024 for a chance to win an Unlimited Lifetime Membership!
Main Topic: How Bears Smell and What Can You Do About It?
The differences between bears being food-motivated vs. food-conditioned vs. habituated to humans.
The science behind food conditioning.
Comparing the nose of a human, dog, and bear – more olfactory receptors means more odor sensitivity; size of olfactory receptors means more range of smell.
By storing foods in a system using plastic ziploc bags, mylar bags, and Nylofume liners, and an Ursack or bear canister, you can reduce the range bears can smell the food down to 0.01% of what it would be originally.
Executive Producer - Backpacking Light; Show Director and Host - Ryan Jordan; Producer - Chase Jordan; Theme music: Look for Me in the Mountains written by Chris Cunningham and Ryan Jordan, performed by Chris Cunningham (acoustic guitar, lead and harmony vocals, harmonica), Chad Langford (upright bass), and Tom Murphy (mandolin), produced by Basecamp Studios in Bozeman, Montana.
Sponsorship Policy: Backpacking Light does not accept compensation or donated/discounted products in exchange for product mentions or placements in editorial coverage, including any podcast episode content not excplicitly identified as sponsored content. Some (but not all) of the links in these show notes may be affiliate links. Learn more about affiliate commissions, influencer marketing, and our consumer advocacy work by reading our article Stop wasting money on gear.
Mark Wetherington reviews the Trail of the Lost by Andrea Lankford and reacts to the implications it unveils for backpackers.
The Pacific Crest Trail (PCT) looms as large as an old-growth redwood in backpacking culture. Even for those with no intention of hiking it, this footpath is intriguing and contemplating the physical and mental toil – and the accompanying gratification – of a thru-hike results in a mixture of aspiration, awe, and enchantment. Statistically, thru-hiking is a relatively safe endeavor compared to other outdoor activities (like backcountry skiing or mountaineering) and even seems fairly low-risk when put against more mundane activities like driving. Indeed, a reasonable argument could be made that doing yard work is more dangerous than hiking or backpacking. But every activity has its outliers and thru-hiking is no exception, with injuries, fatal accidents, and even homicides unfortunately being part of the history of long-distance trails in North America.
“Trail of the Lost: The Relentless Search to Bring Home the Missing Hikers of the Pacific Crest Trail” by Andrea Lankford
“Trail of the Lost: The Relentless Search to Bring Home the Missing Hikers of the Pacific Crest Trail” by Andrea Lankford focuses specifically on three hikers who disappeared while hiking the PCT between 2015 and 2017. Two of the hikers were last seen in southern California and the third disappeared in Washington late in the season as he embarked on the final stretch to Canada. While their last known location – somewhere along the PCT – is the common thread amongst the vanished men, there are few other notable commonalities among them aside from their gender and their all being relatively young (the youngest was 25 and the oldest was 34 when they went missing). In some form or another, they all embarked on the PCT seeking the solace, challenge, and perspective that a long-distance hike can bring. And tragically, they all met the same fate.
Like “The Cold Vanish” , this book describes situations which can rattle even the most experienced backpackers and serve as reminders to avoid complacency. Like with some of the incidents and disappearances covered in that book, what was most distressing when reading about the hikers featured in “Trail of the Lost” was that since there was so little known about the fate of the missing, there was no opportunity to learn from the mistakes. It’s one thing to hear about an injury or fatality that happens to a backpacker due to a mistake in judgment – like allowing summit fever to justify continuing towards a peak when a storm is rolling in, or crossing a swollen creek – and it seems entirely another to read about those who just disappeared. The macabre speculation that results when considering the “into thin air” disappearance of the three hikers provides limited insight into what mistakes to avoid and instead seems to highlight the utter unpredictability that is truly part of life in general, but seems particularly eerie when set in the backcountry.
The author’s research into the responses of law enforcement and land management agencies and the affiliated search and rescue teams to the disappearances was one of the more interesting aspects of the book (this is also covered in-depth in “The Cold Vanish”). Her own experience as a former national park ranger allowed for a degree of insight into this important component of the story and for the emotional impact on the families and the searchers to be explored. While it can be assumed that all those involved – from the sheriffs to the rangers to the volunteers – are doing their best to find missing persons once they are reported, the limitations and challenges of conducting exhaustive searches for missing hikers are rather sobering.
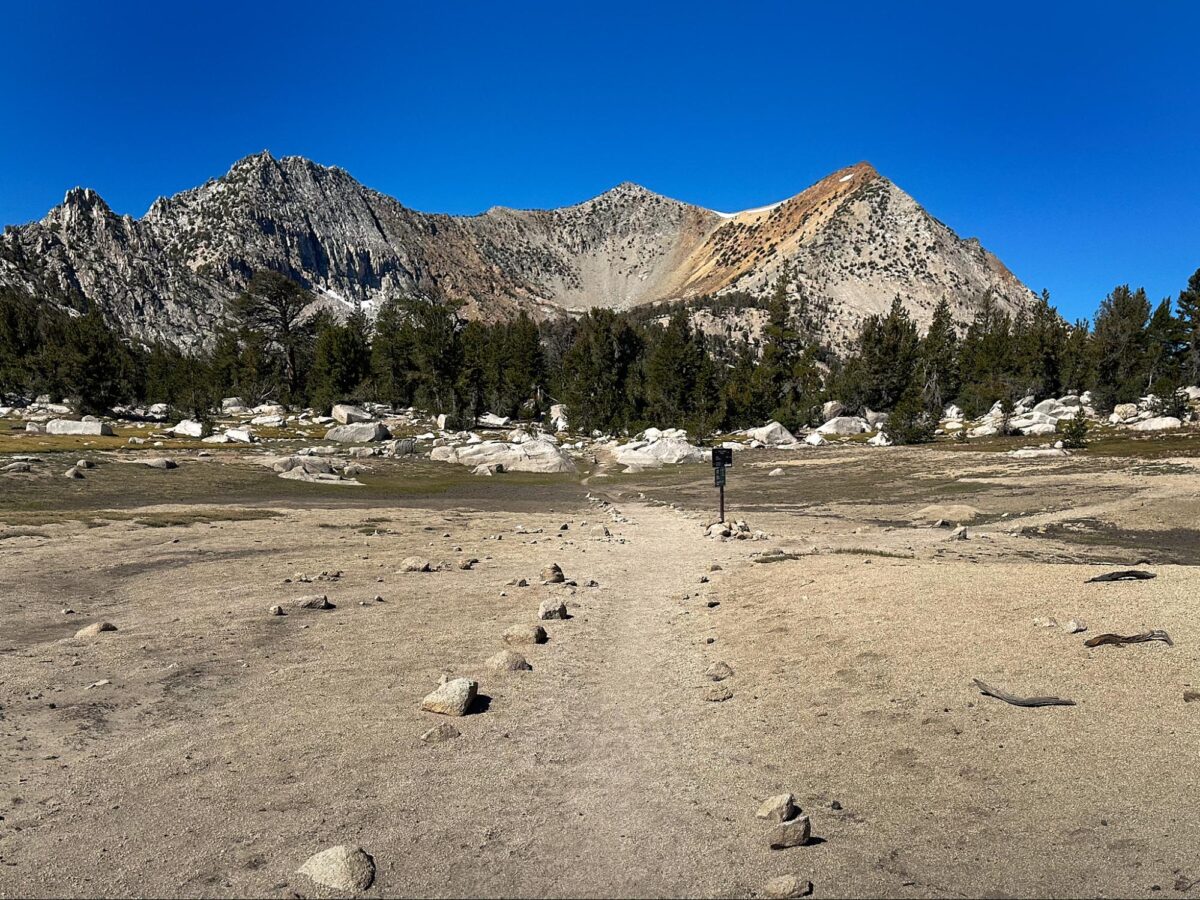
A high camp along the Pacific Crest Trail in the Sierra Nevada. Photo Credit: Ryan Jordan.
From uncooperative and hostile weather, to terrain that can be rugged at best and inaccessible at worst, to false leads and conflicting information, there are nearly infinite permutations of factors that can hamper or postpone a search operation. Lankford did an admirable job of balancing explaining these factors and providing proper context for the way search and rescue missions are conducted while also acknowledging that mistakes can be made by those in charge of the operations, which can in turn compound the frustration and helplessness felt by the families of the missing. Detailing the structure, methods, and timelines of search and rescue operations was a useful part of this book, but what was most enthralling was the personal relationships and involvement that Lankford cultivated with the families of the missing and her role in actively participating in searches for clues related to the missing hikers.
A rugged camp above the PCT. Photo Credit: Ryan Jordan.
The author corresponded with family members and friends of the missing hikers and dedicated an incredible amount of time researching the case – on social media, on the trails, and in the towns the hikers would’ve passed through in the days leading up to their disappearances. Lankford went so far as to hike into extremely rugged terrain near the PCT in southern California to follow up on a lead that had been generated by a “grave-detection machine” developed by an anthropologist that relied on what could most politely be described as pseudoscience. Lankford severely injured her ankle on this hike, which served as a compelling reminder that those involved in search and rescue operations often subject themselves to hazardous situations in their mission to locate missing hikers.
The willingness to consider using dubious and unproven methods to assist with the location of missing hikers is indicative of the need of those who are seeking missing family members or friends to pursue any and all options available to them, no matter how far-fetched. This can often lead to false hope, wasted search efforts, and other frustrations as a mix of psychics, charlatans, and various other hangers-on seem to be drawn to the cases of the missing. Lankford provides a sober assessment of their contributions and her reservations about their utility.
Although the disappearances remain unsolved, this book covers in-depth the most plausible explanations and is worth reading for its engaging prose and insight into the search process. Its structure and detail provide a fairly authoritative account of these cases and allow the reader to gain a useful framework for the topic in general. While some might find the author’s personal involvement with the families and the search efforts blurs the line between reporter and participant to a degree that disrupts the objectivity of the narrative, I found that Lankford was forthcoming in her biases and opinions and that this aspect added rather than detracted from the story. For readers who liked “The Cold Vanish” or are interested in learning more about what happens when backpackers go missing on public lands, this book is unlikely to disappoint.
In this video, I will cover various types of navigation and communications devices, their benefits and limitations, and use case scenarios where you might use one or a combination of multiple devices.
In episode 98 of the Backpacking Light podcast we’re going to learn how to get the most out of your ultralight canister stove for winter backpacking.
Episode Sponsor
Today’s episode of the Backpacking Light Podcast is sponsored by Garage Grown Gear, your hub for all things ultralight. Garage Grown Gear is dedicated to supporting the growth of small and cottage brands, selling the outdoor gear we love, telling the stories we find thought provoking, and striving to cultivate an inclusive, approachable, and curious outdoor community. Great gear helps people get outside, and getting outside matters.
Listen
Summary
In episode 98 of the Backpacking Light podcast we’re going to learn how to get the most out of your ultralight canister stove for winter backpacking.
Backpacking Light presents TRAIL DAYS ONLINE! – a live, online user conference featuring backcountry experts and enthusiasts presenting on the topics of outdoor gear materials, design, and engineering; backcountry skills trends and experiments; make your own gear techniques and projects; backcountry routes, trips, and trails; outdoor industry trends related to hiking, backpacking, and other backcountry activities; and more.
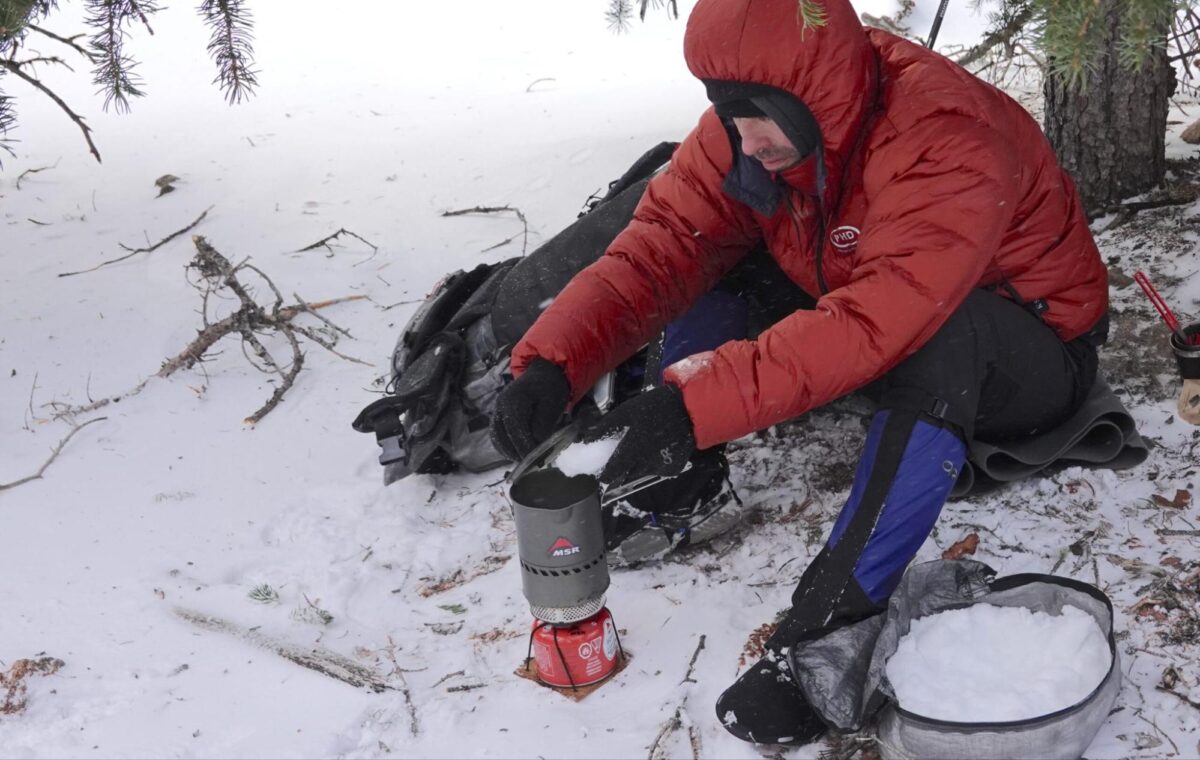
3 unique challenges for backcountry cooking in the winter – (1) water is frozen, (2) cold and windy weather places demands on your stove system, and (3) the consequences of cooking system failure are more severe
Higher capacity stove pots make snow melting more efficient
Pros and cons of liquid gas and liquid petrol stoves
How to keep your fuel canister warm in winter conditions – warming prior to use, warm water baths, using hand warmers under the canister, infrared reflection screens, using copper wire and Moulder strips to transfer heat from the flame to the canister
Advantages and disadvantages from integrated canister stove systems, remote canister stove systems, and inverted canister stove systems
Executive Producer - Backpacking Light; Show Director and Host - Ryan Jordan; Producer - Chase Jordan; Theme music: Look for Me in the Mountains written by Chris Cunningham and Ryan Jordan, performed by Chris Cunningham (acoustic guitar, lead and harmony vocals, harmonica), Chad Langford (upright bass), and Tom Murphy (mandolin), produced by Basecamp Studios in Bozeman, Montana.
Sponsorship Policy: Backpacking Light does not accept compensation or donated/discounted products in exchange for product mentions or placements in editorial coverage, including any podcast episode content not excplicitly identified as sponsored content. Some (but not all) of the links in these show notes may be affiliate links. Learn more about affiliate commissions, influencer marketing, and our consumer advocacy work by reading our article Stop wasting money on gear.
Using an Ursack: Techniques and Supplies for Packing and Using an Ursack – February 8, 2024
Trail Days Online 2024 – February 22-24, 2024
Check out all of our upcoming events on the Backpacking Light Events Calendar!
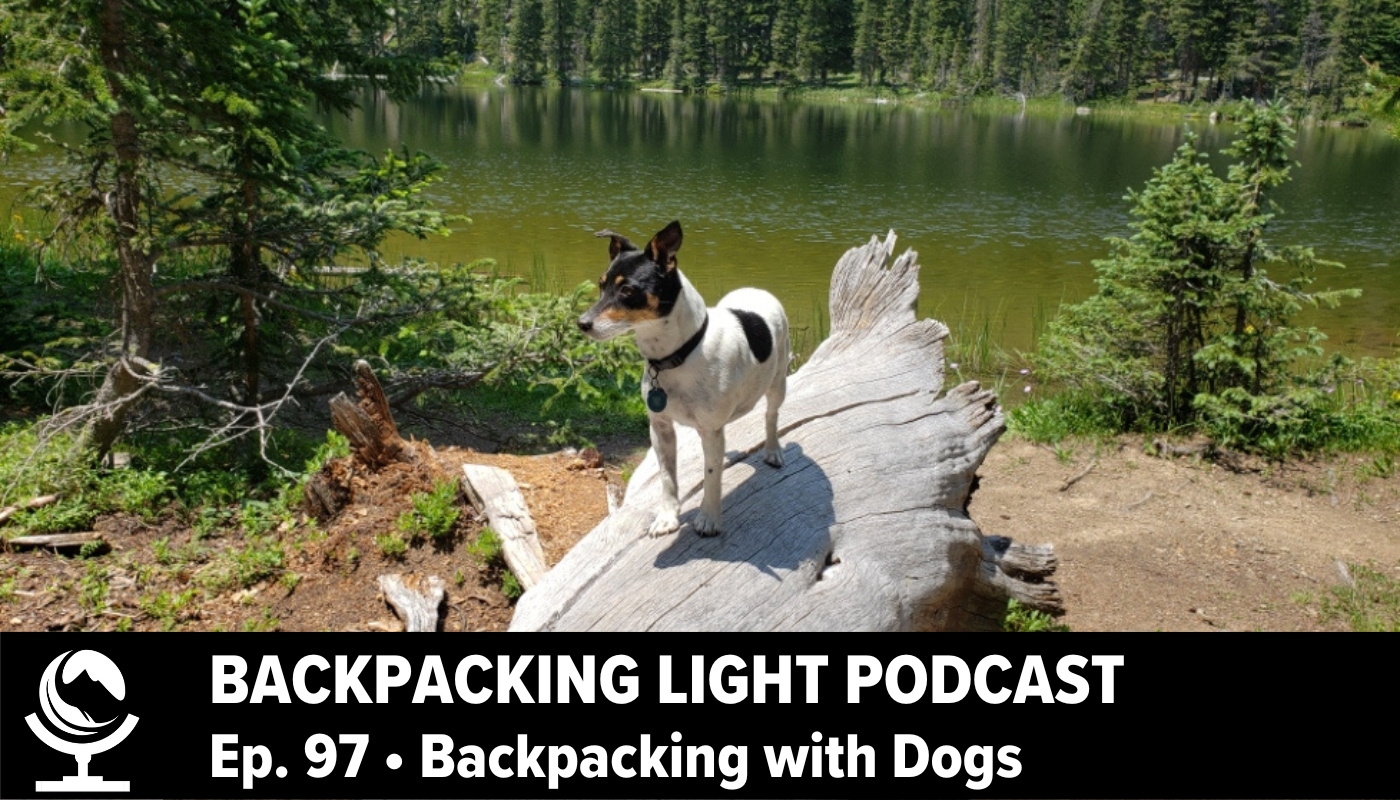
Main Topic: Hiking with Dogs
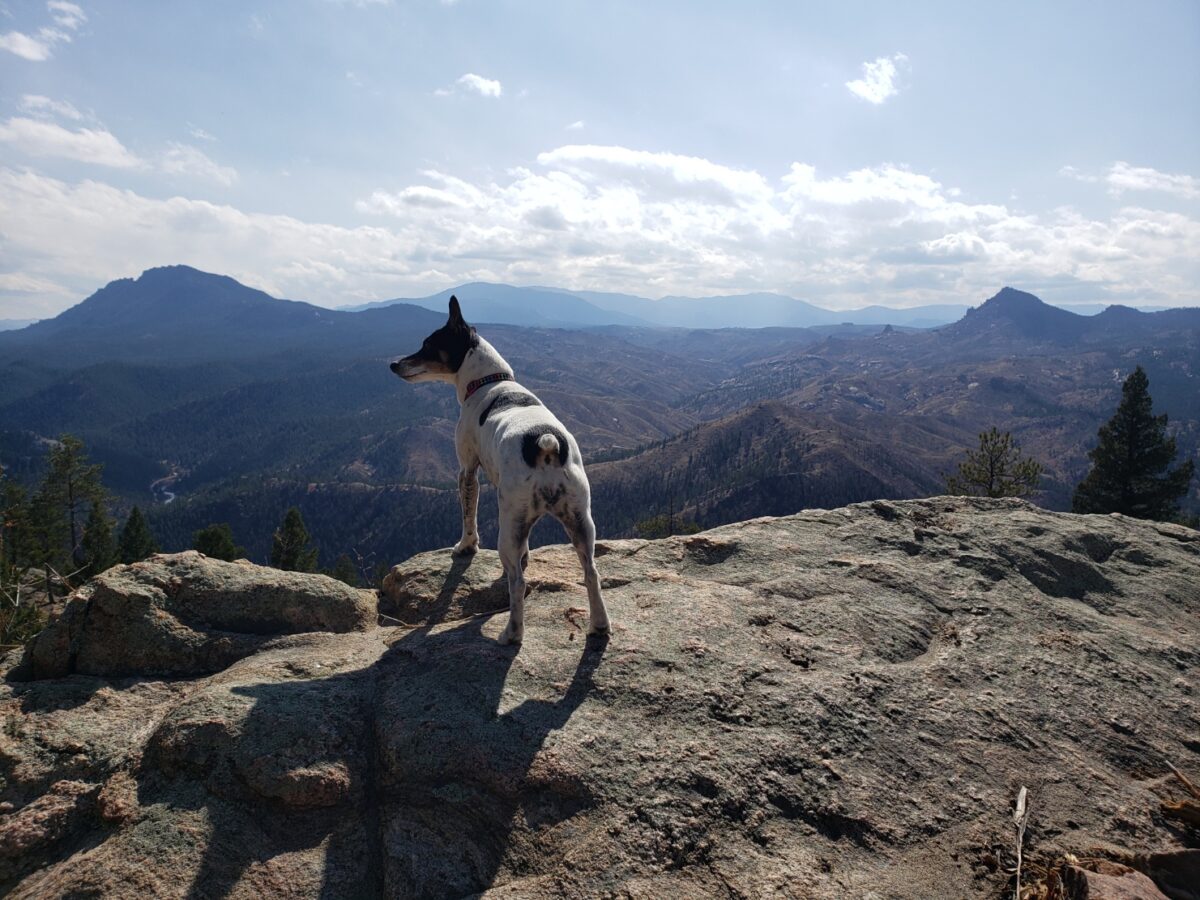
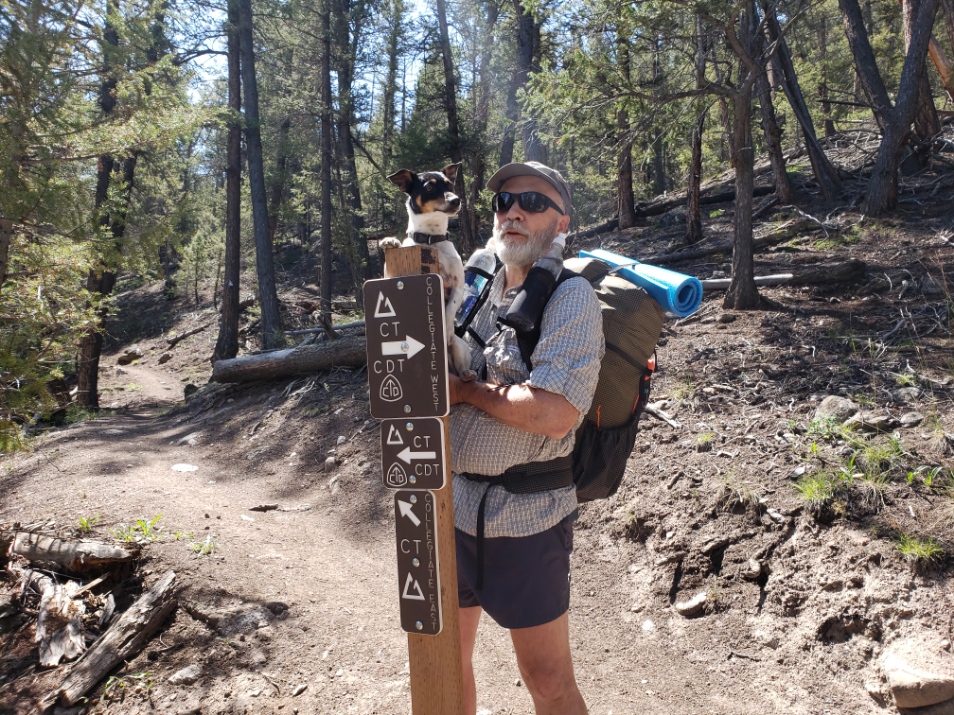
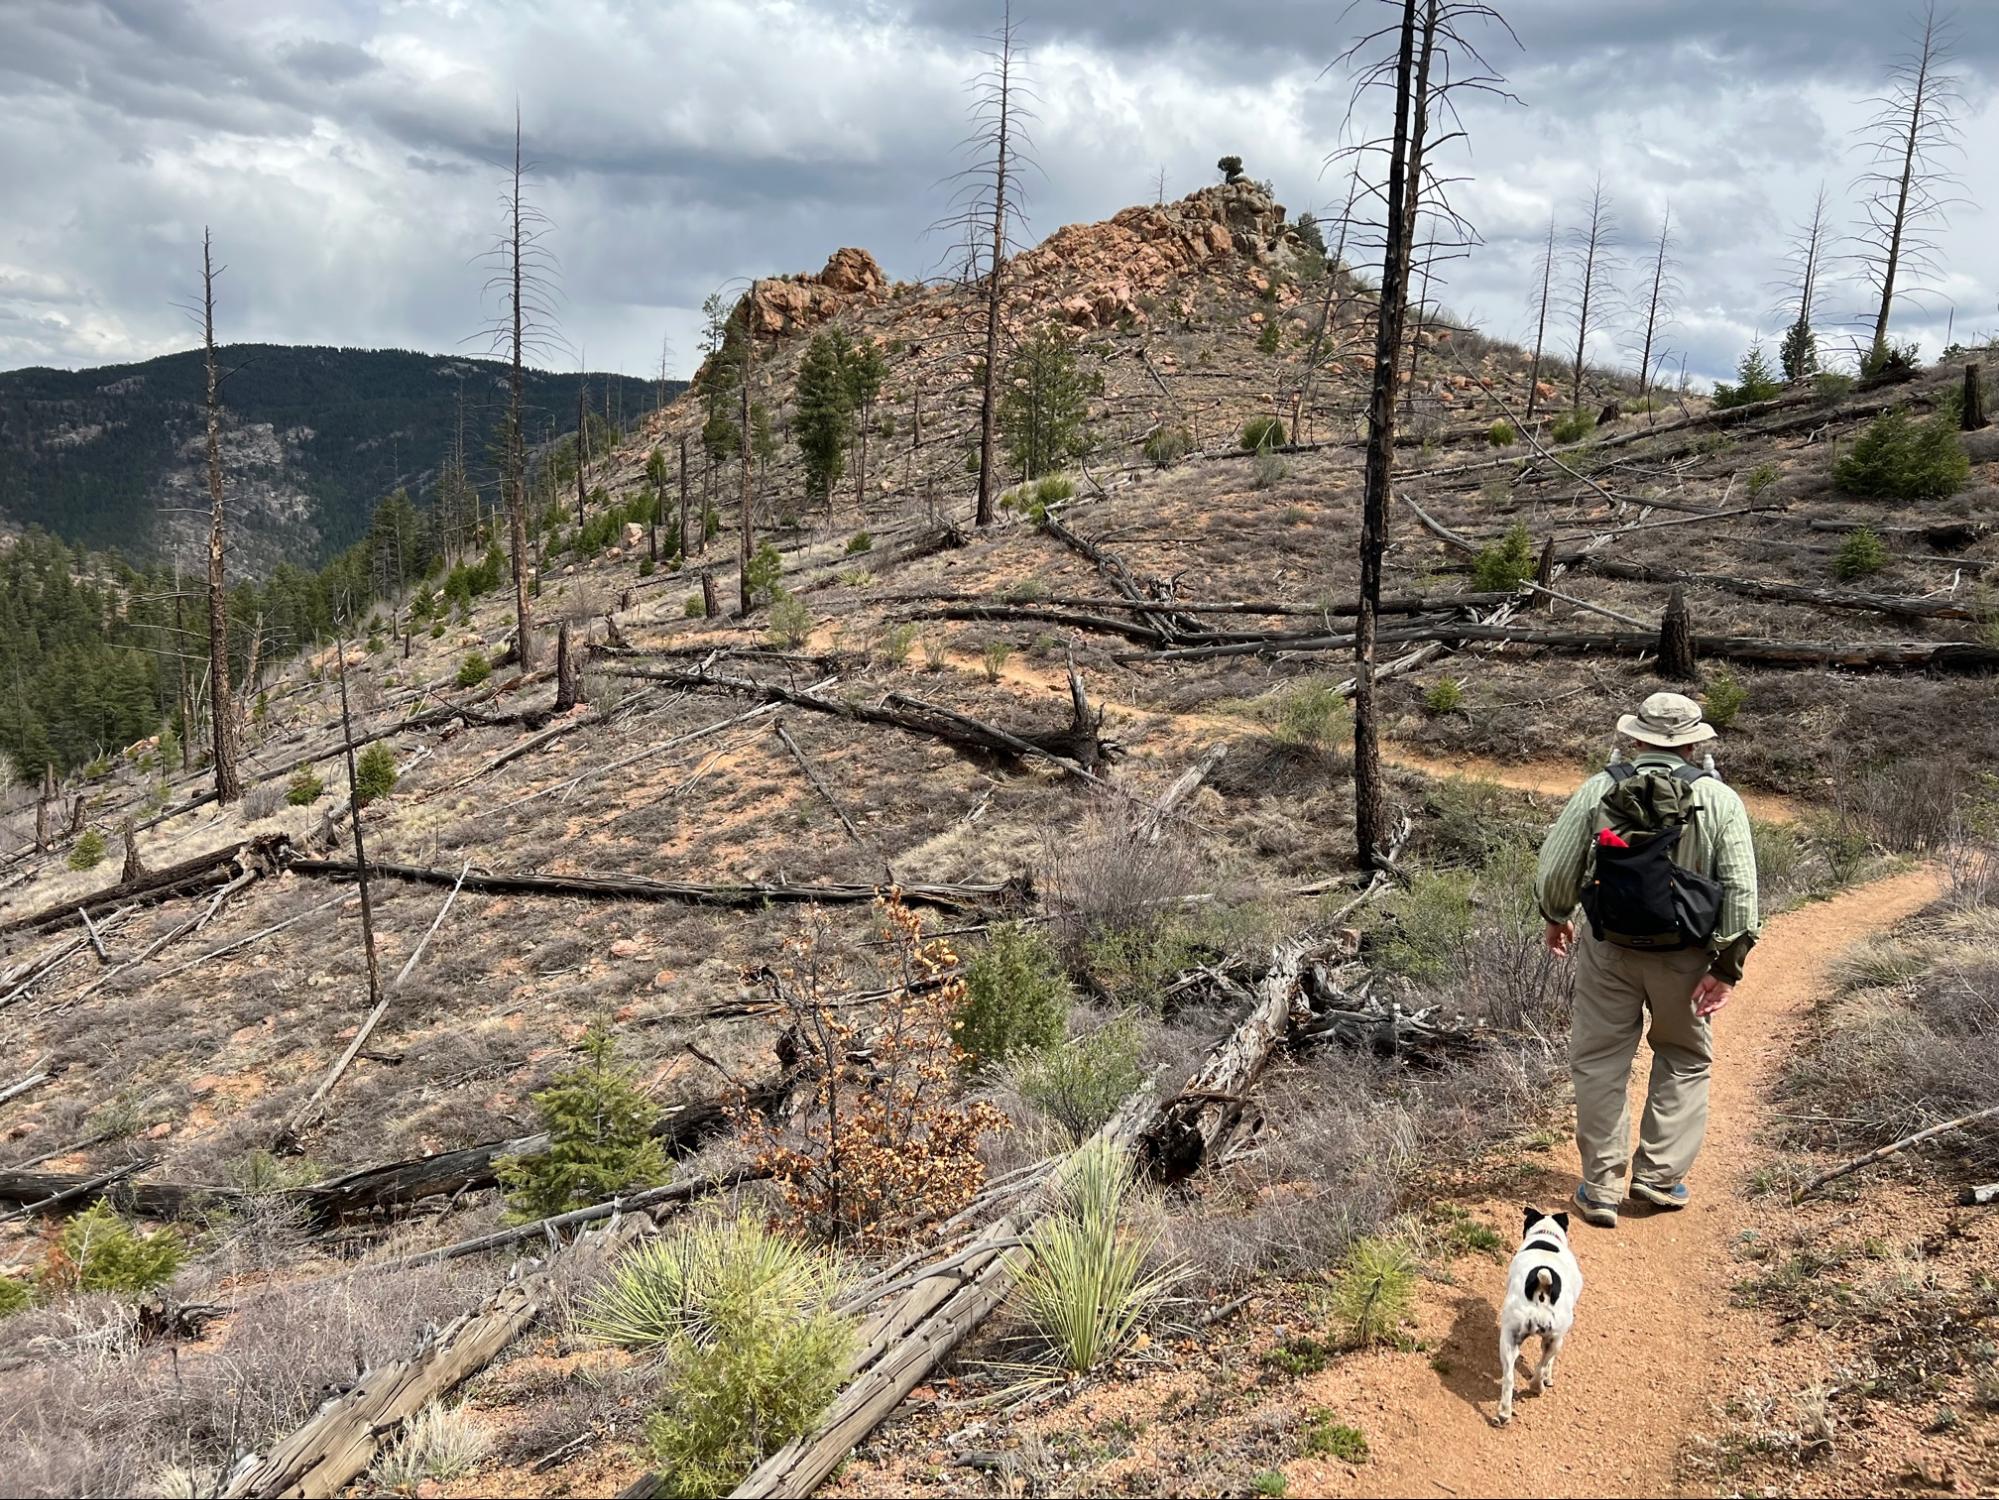
Our guest today is Dave Swink. Dave is a long-time member of the Backpacking Light Community, he is also a guide and instructor in Backpacking Light’s Wilderness Adventures Program. Dave is an accomplished long-distance hiker, and resides with his wife and canine friend in Boulder, Colorado. He joins me today in a discussion about what it’s like to hike with your dog. Enjoy the interview.
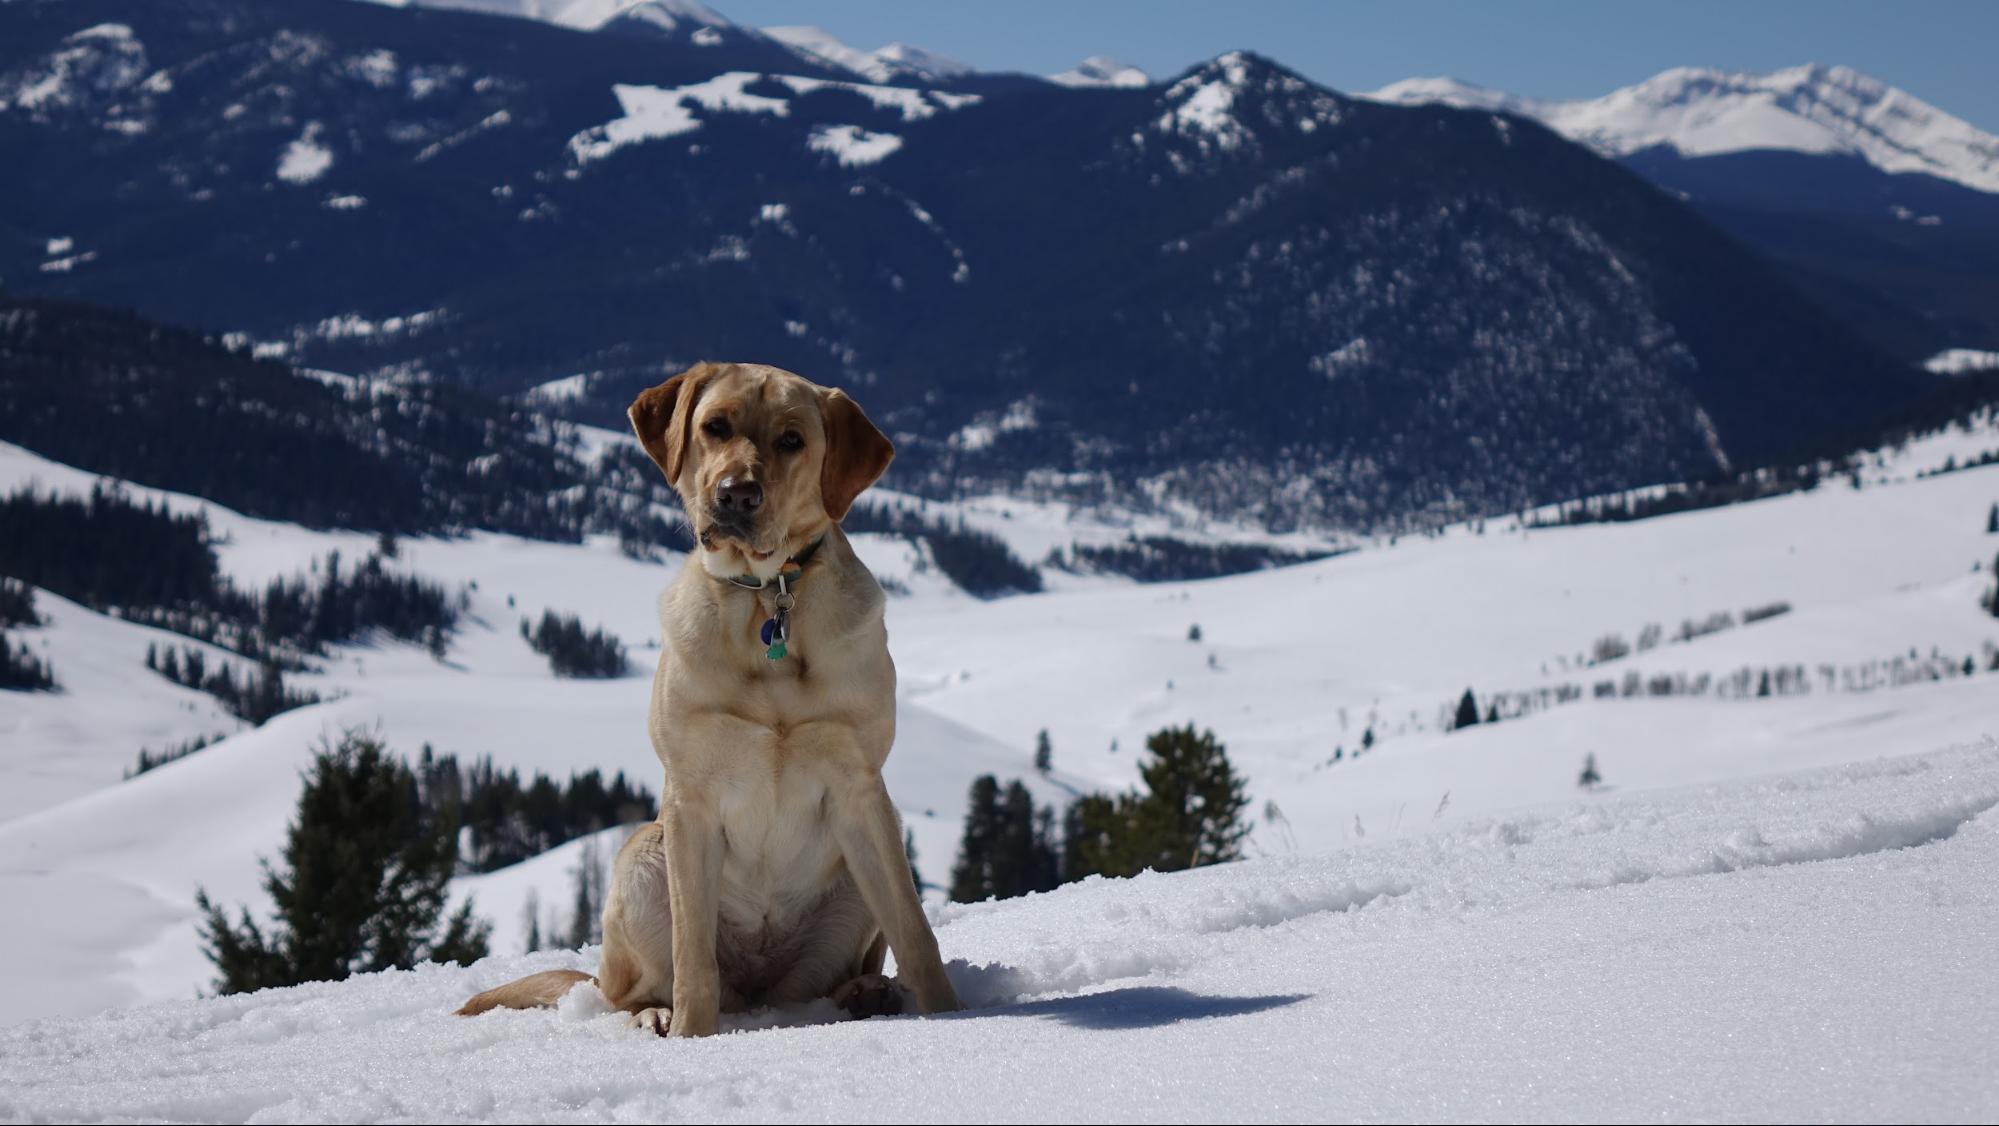
Dave Swink and Kokopelli on the CDT.
Kokopelli on the Colorado Trail.
Kokopelli and Dave hiking through a burn area along the Colorado Trail.
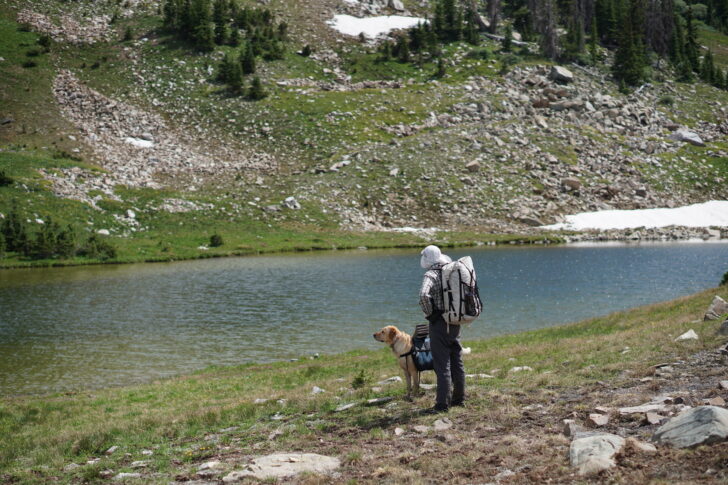
Sierra and Chase Jordan at the shore of an off-trail lake in the Medicine Bow Mountains.Sierra sitting in the snow on a winter backpacking trip.
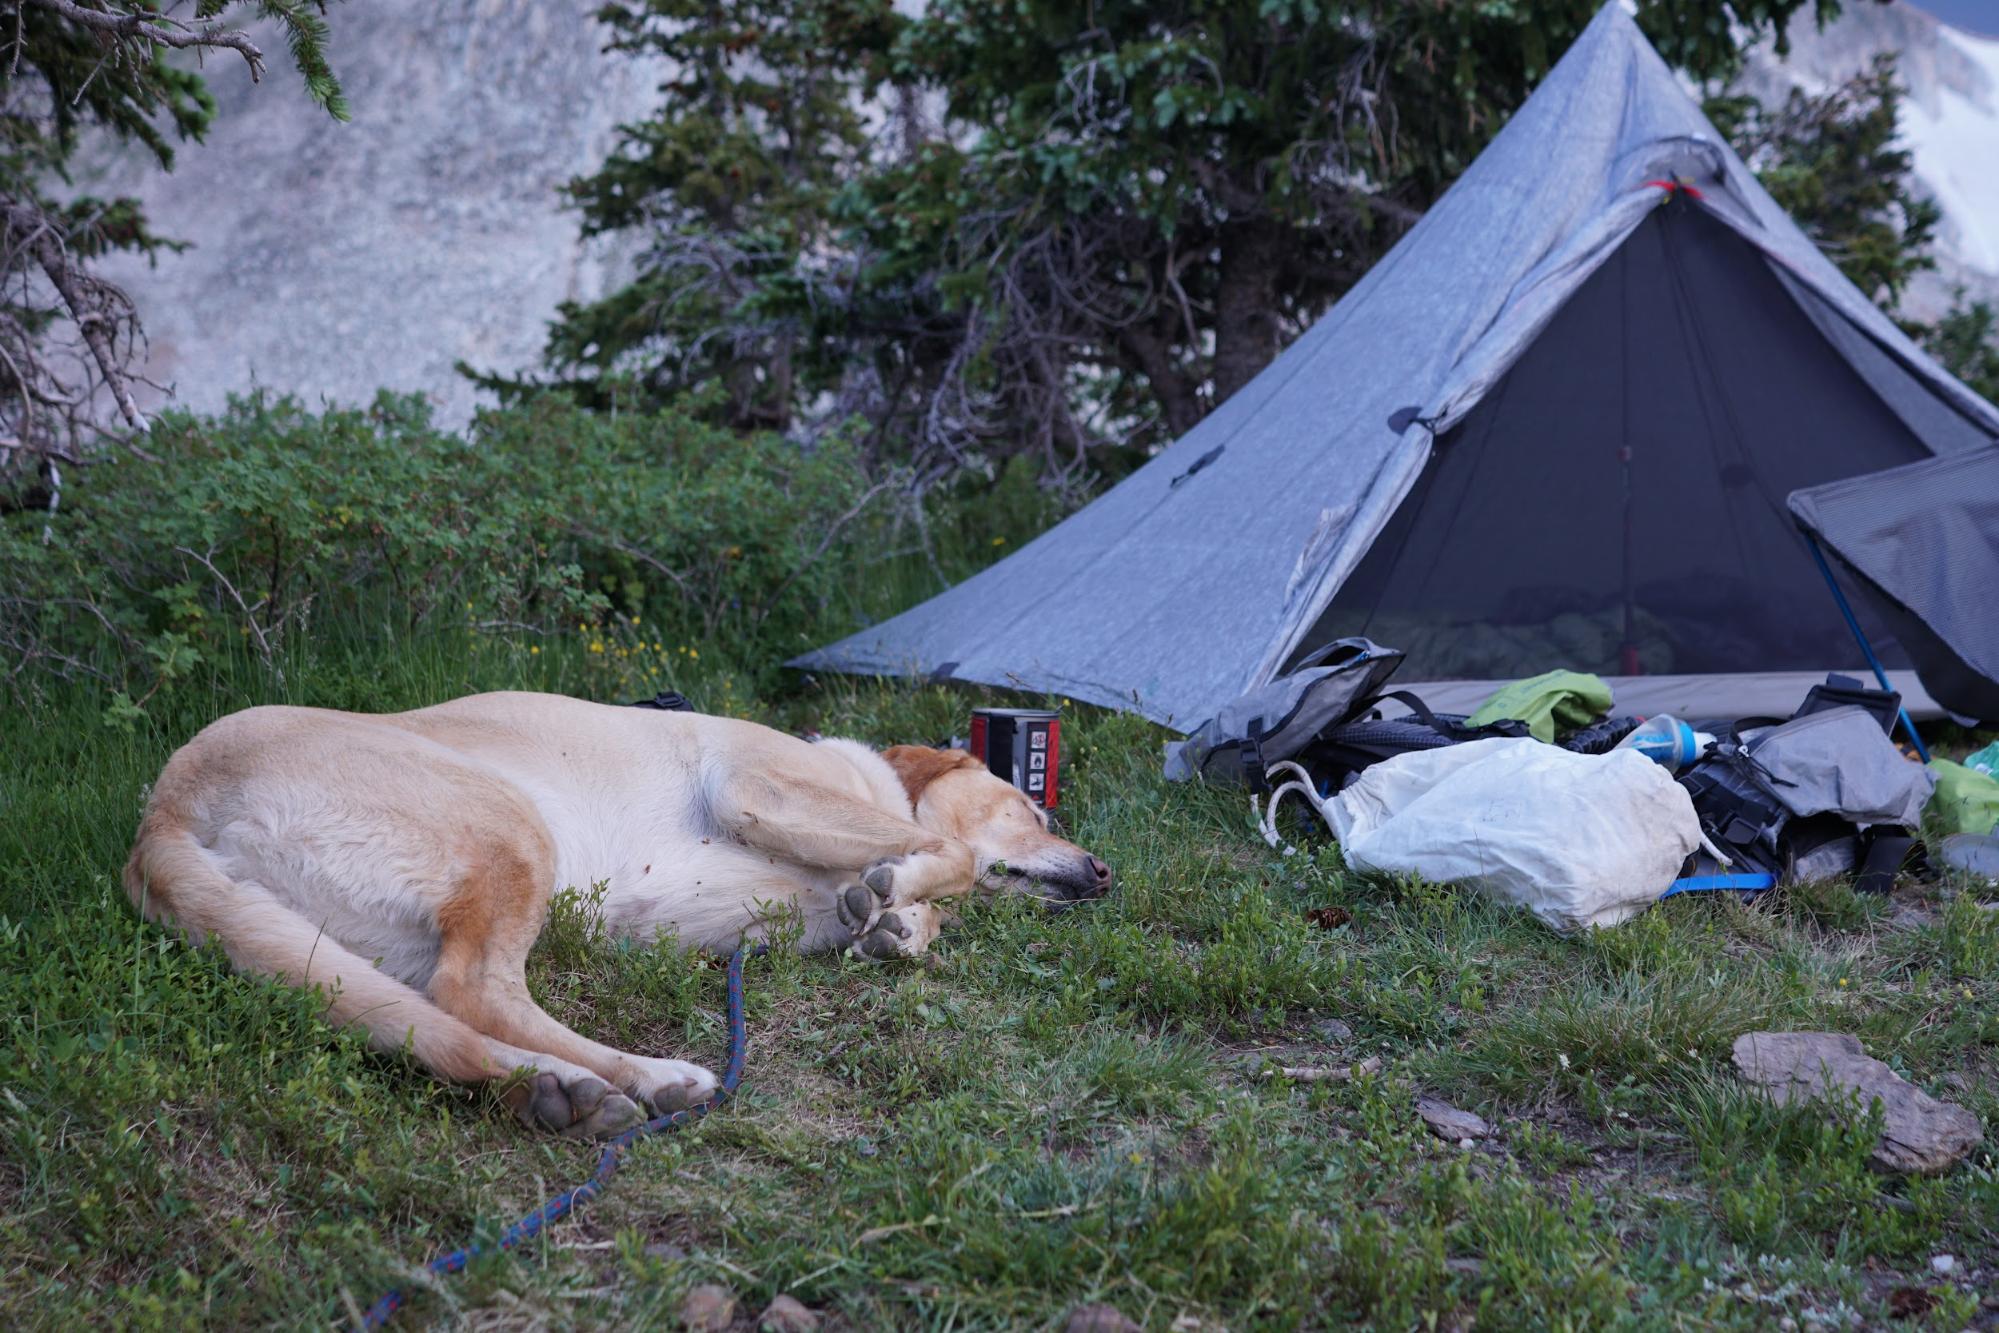
Sierra sacked out after a long day of sniffing and exploring in the mountains.
Executive Producer - Backpacking Light; Show Director and Host - Ryan Jordan; Producer - Chase Jordan; Theme music: Look for Me in the Mountains written by Chris Cunningham and Ryan Jordan, performed by Chris Cunningham (acoustic guitar, lead and harmony vocals, harmonica), Chad Langford (upright bass), and Tom Murphy (mandolin), produced by Basecamp Studios in Bozeman, Montana.
Sponsorship Policy: Backpacking Light does not accept compensation or donated/discounted products in exchange for product mentions or placements in editorial coverage, including any podcast episode content not excplicitly identified as sponsored content. Some (but not all) of the links in these show notes may be affiliate links. Learn more about affiliate commissions, influencer marketing, and our consumer advocacy work by reading our article Stop wasting money on gear.
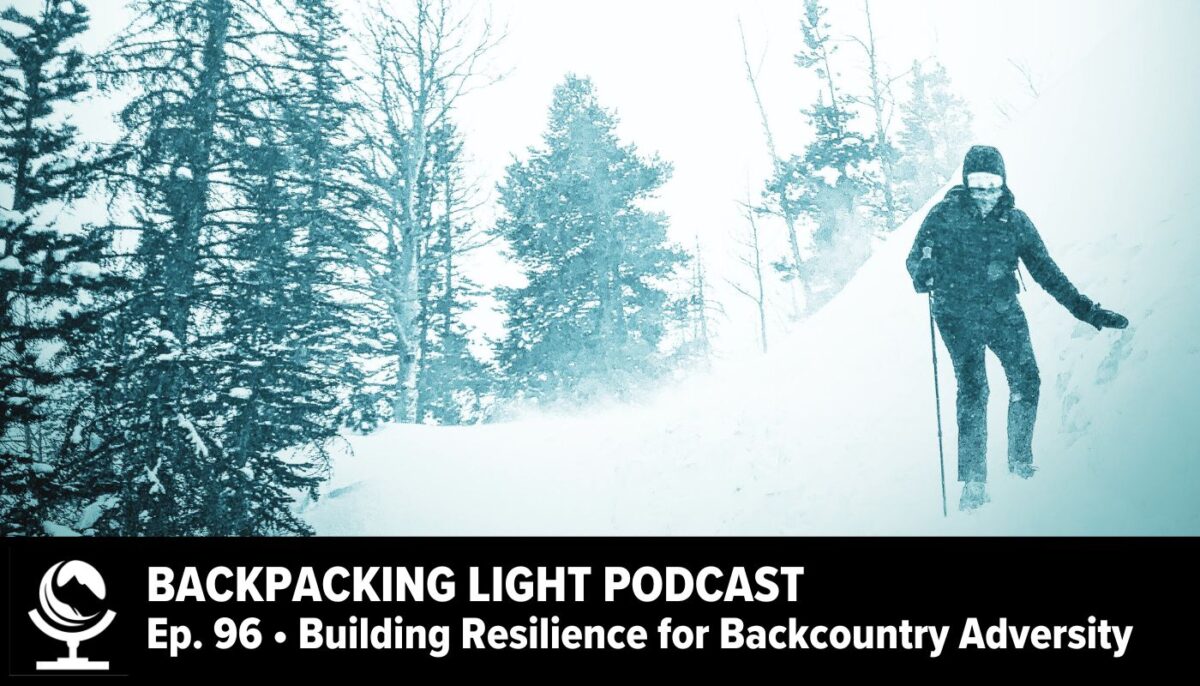
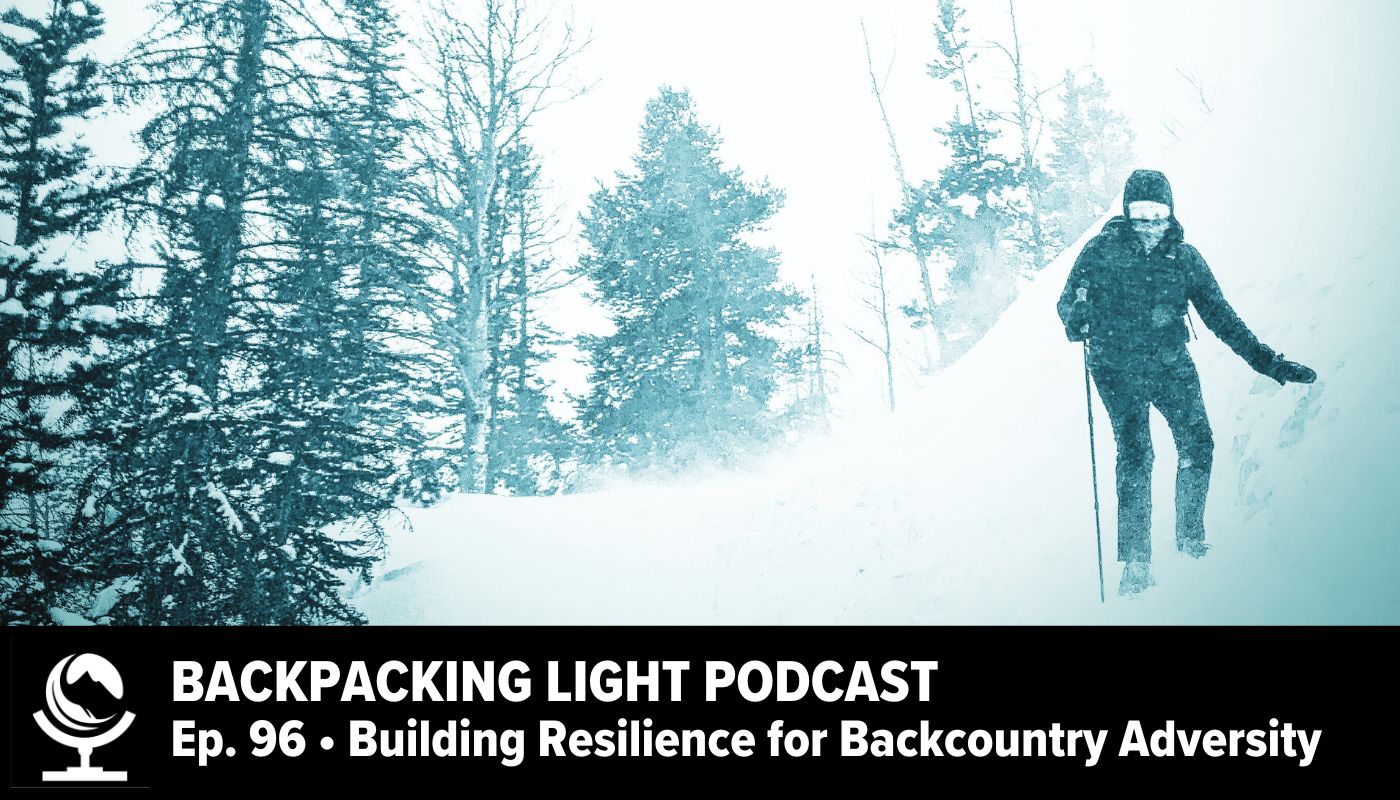
Main Topic: Building Resilience for Backcountry Adversity
Defining resilience – responding to adversity in a constructive manner; the physical, mental, and emotional components of resilience; contrasting urban and wilderness resilience
Characteristics of resilience:
Adaptability – flexibility, problem-solving skills, having a learning mindset, resourcefulness, emotional regulation
Burst strength – maintain mental, physical, and emotional stamina, solve complex problems rapidly, channel intense and positive emotions, maintain high levels of focused energy
Stamina – physical endurance, patience
Developing resilience for backcountry adversity – build physical fitness, develop wilderness skills, develop mental conditioning, detailed route and trip planning, nurturing a positive mindset, develop a sense of self-sufficiency
Listener Q&A
Can I reuse Cook-In-Bags from Packit Gourmet? They are listed as single-use, and I don’t see the point of buying a bag that isn’t reusable! – Luke Russel, via Email
How do you get over-packing your fears? I still get the one question that pops in my head – “what if?” – @goodrows_adventures, via Instagram
I’m new to backpacking fitness training and am pretty sedentary! How do I get started – @seasonal_crafter, via Instagram
Is the best way to train for backpacking, hiking with your pack or equivalent weight? – @jpbalisteri, via Instagram
Executive Producer - Backpacking Light; Show Director and Host - Ryan Jordan; Producer - Chase Jordan; Theme music: Look for Me in the Mountains written by Chris Cunningham and Ryan Jordan, performed by Chris Cunningham (acoustic guitar, lead and harmony vocals, harmonica), Chad Langford (upright bass), and Tom Murphy (mandolin), produced by Basecamp Studios in Bozeman, Montana.
Sponsorship Policy: Backpacking Light does not accept compensation or donated/discounted products in exchange for product mentions or placements in editorial coverage, including any podcast episode content not excplicitly identified as sponsored content. Some (but not all) of the links in these show notes may be affiliate links. Learn more about affiliate commissions, influencer marketing, and our consumer advocacy work by reading our article Stop wasting money on gear.
The Outdoor Research Flurry Sensor Glove (2.5 oz / 71 g, $40) is the warmest glove I’ve found that I can use effectively with a smartphone.
Update: Long Term Review (January 13, 2024)
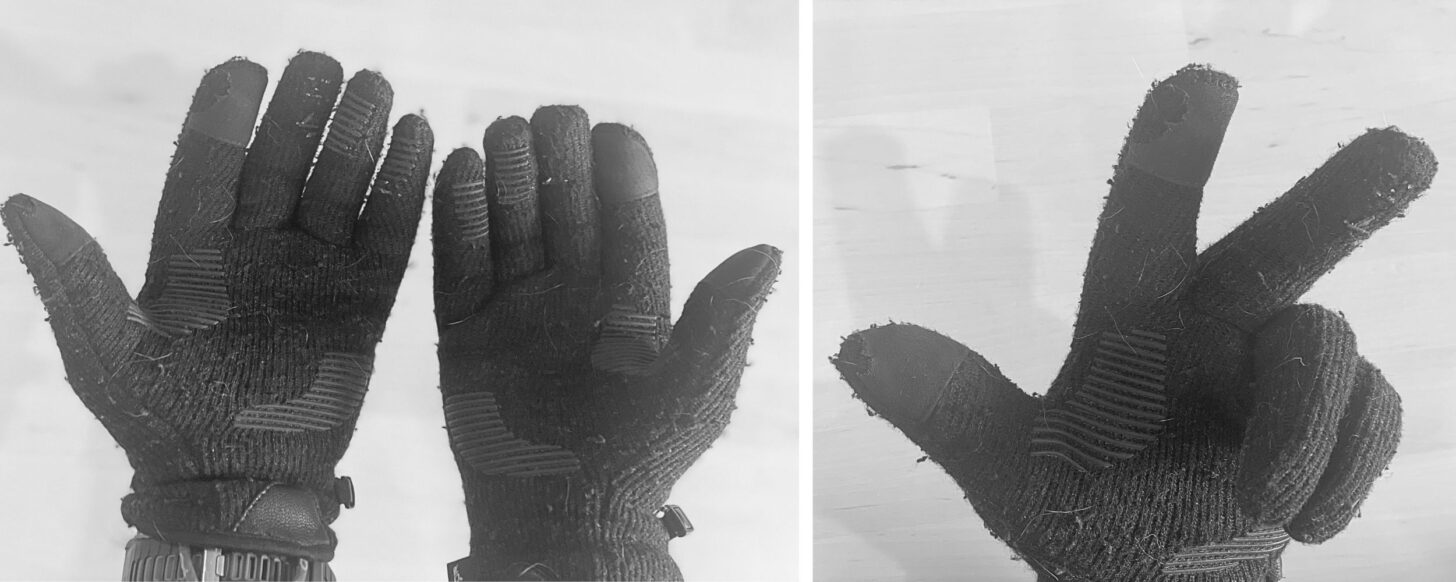
I’ve used Outdoor Research Flurry Sensor Gloves since Fall of 2020. I’m on my second pair, and combined, my two pair have endured more than 200 days in the backcountry, including about 50 days as my primary work-glove (constant-wear) for winter backpacking when temperatures are below freezing.
Left: overall wear on a pair of Outdoor Research Flurry Sensor Gloves after about 100 days of heavy use. Right: specific high-wear areas include the index finger e-tip sensor fabric, PU grip lines (especially on the middle finger), and general pilling of the outer wool fabric face. All in all, these gloves have held up extremely well over heavy use.
Notes:
The e-tip finger sensor pads used to operate touchscreens have a relatively long lifespan (as far as these sensor fabrics go), but after using these gloves extensively for the past 3+ years, I’ve discovered less utility out of having a glove with touchscreen capabilities. For very cold winter conditions, I find myself using cameras and GPS units with buttons instead of touchscreens (for a variety of reasons that I’ve outlined in the recent Member Q&A event about nav & com devices). That said, the e-tip sensor fabrics on the Flurry gloves have worn out faster than the fabric or seams.
Having a fabric glove with “grippy” dots or patterns on it is a nice-to-have feature for handling trekking poles and other tools that I use in the winter (including a stake hammer and ice axe). On the Flurry Sensor Gloves, this was the first area to wear out, and the grip pattern began flaking off after about 30 days of heavy use. For me, not a deal-breaker – I would buy the gloves again (and I did), but it’s disappointing nonetheless.
The outstanding feature of the Outdoor Research Flurry Sensor Gloves is still its bicomponent fabric construction that includes a soft inside fleece lining and an outer high-loft knit wool. They are warm, comfortable, and fire-resistant (great for fires and stove use). And it’s for this reason that the Outdoor Research Flurry Sensor Gloves remain in my winter kit and won’t be replaced anytime soon!
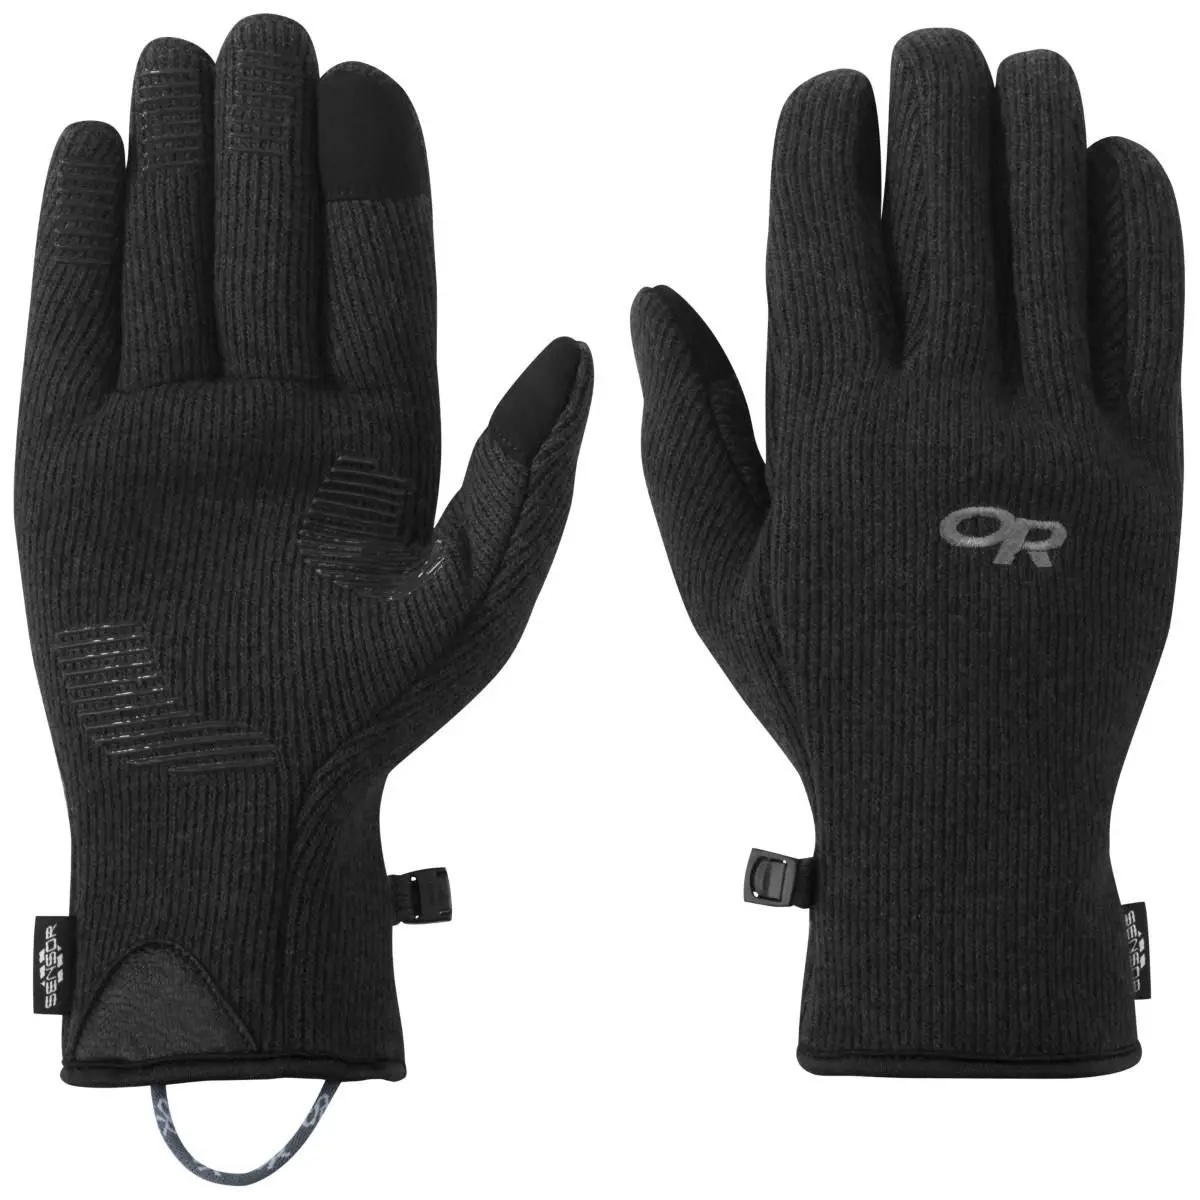
Outdoor Research Flurry Sensor Gloves (photo: Outdoor Research).
The unique feature of the OR Flurry Sensor gloves is their warm fabric construction. The gloves are made with a two-layer fabric branded as Alpin-Wool Plus 2L. The outer layer is a woven blend of wool and nylon, which provides durability and weather-resistance due to the hydrophobicity of those fibers. The inner layer is a thin nylon fleece with a soft polyester inside surface, which provides next-to-skin comfort.
About This Review
In this review, I summarize the highlights of the Outdoor Research Flurry Sensor Glove, after using it for approximately 30 days over the 2020-2021 winter season in Northern Colorado and Southeast Wyoming.
Other Features: pull-on cord loops, side-release buckle clips to keep the pair together in storage, anti-slip silicone palm print, tapered wrist gauntlet, touchscreen-compatible suede thumb and index fingertips
Weight: 2.5 oz (71 g) – size small (actual measured weight of my gloves)
MSRP: $40
Performance Analysis
Since this is a Limited Review, a detailed analysis of durability based on long-term use will not be presented. Otherwise, performance observations and issues are noted below.
Warmth
The Outdoor Research Flurry Sensor Gloves are the warmest gloves I’ve ever worn that weigh less than 3 oz (85 g) in real-world conditions where you experience wind, rain, and snow. They don’t block high winds, but they are more wind-resistant than pile fleece. They don’t prevent the penetration of moisture but they are more precipitation-resistant than polyester fleece (because of the wool/nylon outer layer) and absorb less water than 100% wool (because of the blend of wool with nylon and polyester) for the weight. This all contributes to their warmth and should be considered as much as their pure insulation (e.g., “clo”) value.
On several occasions, I’ve worn them in cold (well below freezing) and snowy conditions to the point where an icy crust formed on the outside of the glove fabric – and my hands stayed warm. My only cold spots were my thumbs while using trekking poles. This area of weakness isn’t unique to these gloves.
Wind and Snow Resistance
I’ve worn the Outdoor Research Flurry Sensor Glove while trekking and performing camp chores in several winter storms. They are not an all-conditions glove. They lack a membrane or outer shell layer for blocking wind and precipitation.
However, their loft makes them comfortably warm for trekking down to temperatures near or below freezing with little wind, and for performing camp chores at colder temperatures.
For temperatures below freezing with moderate wind, I prefer a shelled mitten for warmth, especially when carrying trekking poles, which makes hands colder (poorer circulation resulting from gripping the pole).
In heavy wet snow or cold rain falling at temperatures near freezing, the Flurry Sensor Gloves will wet out. However, for drier snow falling at colder temperatures, I found them to be unexpectedly resistant to moisture reaching the skin of my hands. The more I use these gloves in the winter, the less anxiety I have about them getting wet in snowy, cold conditions.
The Flurry Sensor Gloves are warmer than the gloves I am replacing them with – the Outdoor Research Vigor Sensor Gloves. The Vigor lacks a water-resistant outer layer, and their hydrophilic polyester construction absorbs precipitation that results in cold hands.
Operating my stove while in my bivy sack, wearing the Outdoor Research Flurry Sensor Glove during a winter storm.
Water Absorption & Dry Time
Keeping your hands dry in cold, wet conditions is a big deal.
The amount of water a fabric absorbs depends on several factors, including fiber material, yarn construction, fabric knit or weave structure, and thickness. The dry time of fabric also depends on several factors, including environmental conditions (temperature, wind, humidity, solar heating), the amount of body heat being generated (if the garment is worn), and of course, the amount of water absorbed into the garment.
This latter factor – the amount of water absorbed into the garment – is generally the dominant factor controlling the dry time of a garment, which is often limited by the physics of heat transfer driving the evaporation of water from a garment (which is related to heat loss from your hands over the course of several hours). So when a garment manufacturer claims that their garments dry fast – be wary. They may not understand these concepts, or they may be trying to tell you that they just absorb less water.
And we all know, generally, that lighter garments absorb less water than heavier garments!
Fiber structure and hydrophobicity play a role in dry time as well, but under most conditions, it’s relatively minor. Because wool fibers are porous and can absorb water into the fiber, they release water more slowly than either nylon or polyester. However, polyester is more hydrophilic relative to nylon or wool, and polyester fabrics are capable of absorbing enormous quantities of water.
I compared the water absorption of the Outdoor Research Flurry Sensor Glove with two other models of lightweight gloves in my stash:
The following table compares their fiber composition:
Nylon
Polyester
Wool
Spandex
Other
OR Flurry
11%
63%
26%
-
synthetic suede fingertips on thumb and index finger (80% polyester, 20% polyurethane)
Columbia Fast Trek
-
100%
-
-
synthetic suide palm patch, composition unknown
OR Vigor
-
93%
-
7%
synthetic suede fingertips on thumb and index finger (76% polyester, 17% nylon, 7% spandex)
Water absorption capacity was measured by soaking the gloves in water, wringing them out as much as possible, and measuring their wet weight. The following table compares water absorption capacity for the three gloves:
Dry Weight
Wet Weight
Water Weight
% of Dry Wt as Water
OR Flurry
1.2 oz (34 g)
2.8 oz (79 g)
1.6 oz (45 g)
133%
Columbia Fleece
0.9 oz (26 g)
2.5 oz (71 g)
1.6 oz (45 g)
178%
OR Vigor
1.3 oz (37 g)
3.1 oz (88 g)
1.8 oz (51 g)
138%
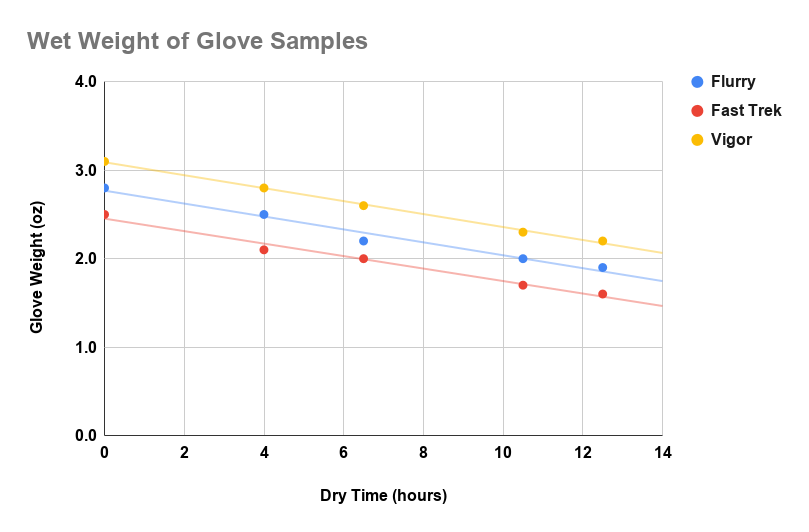
To test the drying rate, I soaked the gloves in room-temperature water, wrung out as much water as possible, laid them on a flat table indoors, and monitored the weight over time. The following chart compares their drying rate:
Drying rate of gloves compared, after initially saturating them and wringing them out as much as possible.
In addition, the gloves were weighed after 24 hours. Here’s the remaining water weight for each glove:
Outdoor Research Flurry Sensor Glove: 0.1 oz (3 g)
Columbia Fast Trek Fleece Glove: 0.0 oz (0 g) – i.e., completely dry
Outdoor Research Vigor Sensor Glove: 0.3 oz (9 g)
The graph above, along with other data I’ve collected through the years, confirms some important information:
The rate of dry time of waterlogged fabrics in the same environment doesn’t really vary much with respect to fiber type, fabric structure (knit/weave type), or thickness. It’s relatively constant. If you dry a garment when you lay it on a rock in the sun, hang it from a tree, put it in a mesh storage pocket in your tent, wear it while hiking, or tuck it inside your base layer next to your belly while you sleep, the drying rate (the rate at which water leaves the garment) won’t change much from garment to garment (even though the method of drying may affect the drying rate).
Because of this (#1 above), it’s really important to be able to wring as much moisture out of your garment as possible if it does get wet.
Dexterity
There’s a notable difference between typical cold-weather glove liners like the OR Vigor and the Outdoor Research Flurry Sensor Glove in terms of loft and bulk. The latter is more like a double-faced pile fleece glove, but with better dexterity.
I was easily able to perform the following tasks while wearing the Flurry Sensor Gloves:
Typing text with my thumbs on a smartphone while using the Outdoor Research Flurry Sensor Gloves requires that autocorrect be shifted into overdrive! However, it wasn’t a terrible experience. The suede sensor tips on the thumbs and index fingers allow for precise tapping that far exceeded my expectations for a glove this thick.
Thumb-and-finger gestures were a piece of cake. Swiping and pinching gestures were reliably precise, and I was able to use all features of my smartphone GPS app (Gaia) with no issues.
Durability
Wool gloves (especially those made with merino wool) are generally not as durable as nylon fleece. However, the nylon-wool fiber blend of the Outdoor Research Flurry Sensor Gloves is plenty durable enough for routine use as a trekking and camping glove. I certainly don’t use them to gather firewood, scramble up a talus slope, or pull a Spectra cord bear bag line – I wouldn’t do these things with any glove knit with soft fibers.
Without having more than 40 days of experience with these gloves, I’m hesitant to comment on their long-term durability. I’m expecting at some point, the knit will begin to unravel or the fingertips will develop holes. This is how the rest of my soft-fiber gloves fail (especially those made with polyester fabrics). However, there doesn’t seem to be any unusual wear so far, and I’ve worn out other soft-fiber gloves in far less time.
What Makes the Outdoor Research Flurry Sensor Gloves Unique?
Traditional polyester fleece gloves like the Columbia Fast Trek Gloves are generally poorly wind- and water-resistant, and lack durability and dexterity.
So-called high-performance wind-resistant polyester fleece gloves like the Outdoor Research Vigor offer better wind-resistance and dexterity but still absorb enormous amounts of water.
The Outdoor Research Flurry Sensor Glove solves many of these issues:
Nylon-wool blend used in the face fabric is durable, water-resistant, and provides good loft for warmth.
A sophisticated pattern allows for a close fit without being restrictive, which improves dexterity, smartphone use, and overall comfort.
Compared To…
The following table compares the performance characteristics of the Outdoor Research Flurry Sensor to two other glove models that I have used extensively for several years:
The Vigor’s hydrophilic fibers hold on to water for a long time.
Polyester fibers of the Fast Trek and Vigor readily absorb rain and snow.
The Fast Trek’s soft fleece weave is very porous.
The Fast Trek is a cheap and simple glove without an ergonomic fit.
The Flurry is the highest loft glove.
The Flurry has the dryest feel next to the skin when wet.
Polyester gloves wear out more quickly than nylon and nylon-wool blends.
Handwear System Integration
Used on its own, the Outdoor Research Flurry Sensor Glove is light enough for summer backpacking.
In wet environments, for fringe-season use, or multi-day winter trips when I absolutely need to keep them as dry as possible in winter storms, I’ll pair it with a lightweight shell mitt like the REI Minimalist GTX Mitten Shells.
And for the deep cold of winter, adding a plush hand parka over the Flurry Sensor Gloves would provide insurance in the coldest temperatures – at least while in camp. For cold-temperature trekking, I prefer the additional insurance of an insulated vapor barrier mitten – worn over very thin merino wool liners.
Strengths and Limitations
Strengths
High warmth-(loft)-to-weight ratio
Durable outer face fabric (wool-nylon blend)
Hydrophobic outer face fabric is weather-resistant
Good dexterity for smartphone use and other fine motor tasks
Limitations
Slightly heavier and much more expensive than cheap polyester fleece gloves
Review Rating: Highly Recommended
Based on my experience with the Outdoor Research Flurry Sensor Glove, it will now replace my Outdoor Research Vigor Sensor Gloves in all seasons. The latter design (wind-resistant 400-weight polyester fleece) has been my go-to type of glove for a long time. However, its fingertips wear out quickly, it offers nearly zero resistance to rain and snow because of its hydrophilicity, and it lacks the warmth (loft) needed for wintry temperatures.
I’m most impressed by the Flurry Sensor’s fit and dexterity, use with a smartphone, weather resistance, and warmth. This makes it my primary glove for all four seasons, and it’s earned a well-deserved spot on my winter gear list.
Product mentions in this article are made by the author with no compensation in return. In addition, Backpacking Light does not accept compensation or donated/discounted products in exchange for product mentions or placements in editorial coverage.
Some (but not all) of the links in this review may be affiliate links. If you click on one of these links and visit one of our affiliate partners (usually a retailer site), and subsequently place an order with that retailer, we receive a commission on your entire order, which varies between 3% and 15% of the purchase price. Affiliate commissions represent less than 15% of Backpacking Light's gross revenue. More than 70% of our revenue comes from Membership Fees. So if you'd really like to support our work, don't buy gear you don't need - support our consumer advocacy work and become a Member instead.
Learn more about affiliate commissions, influencer marketing, and our consumer advocacy work by reading our article Stop wasting money on gear.
Stephen Seeber helps us answer the question, “do air-permeable garments allow a noticeable amount of ventilation while hiking or running?”
You don’t have access to view this content.
Membership Required
This feature requires an active Backpacking Light Membership.
Premium Articles
You're currently viewing a free preview of a member exclusive premium article. Our premium articles include in depth journalism and insights from the Backpacking Light editorial team.
Get full article access by subscribing to a Premium or Unlimited Backpacking Light membership!
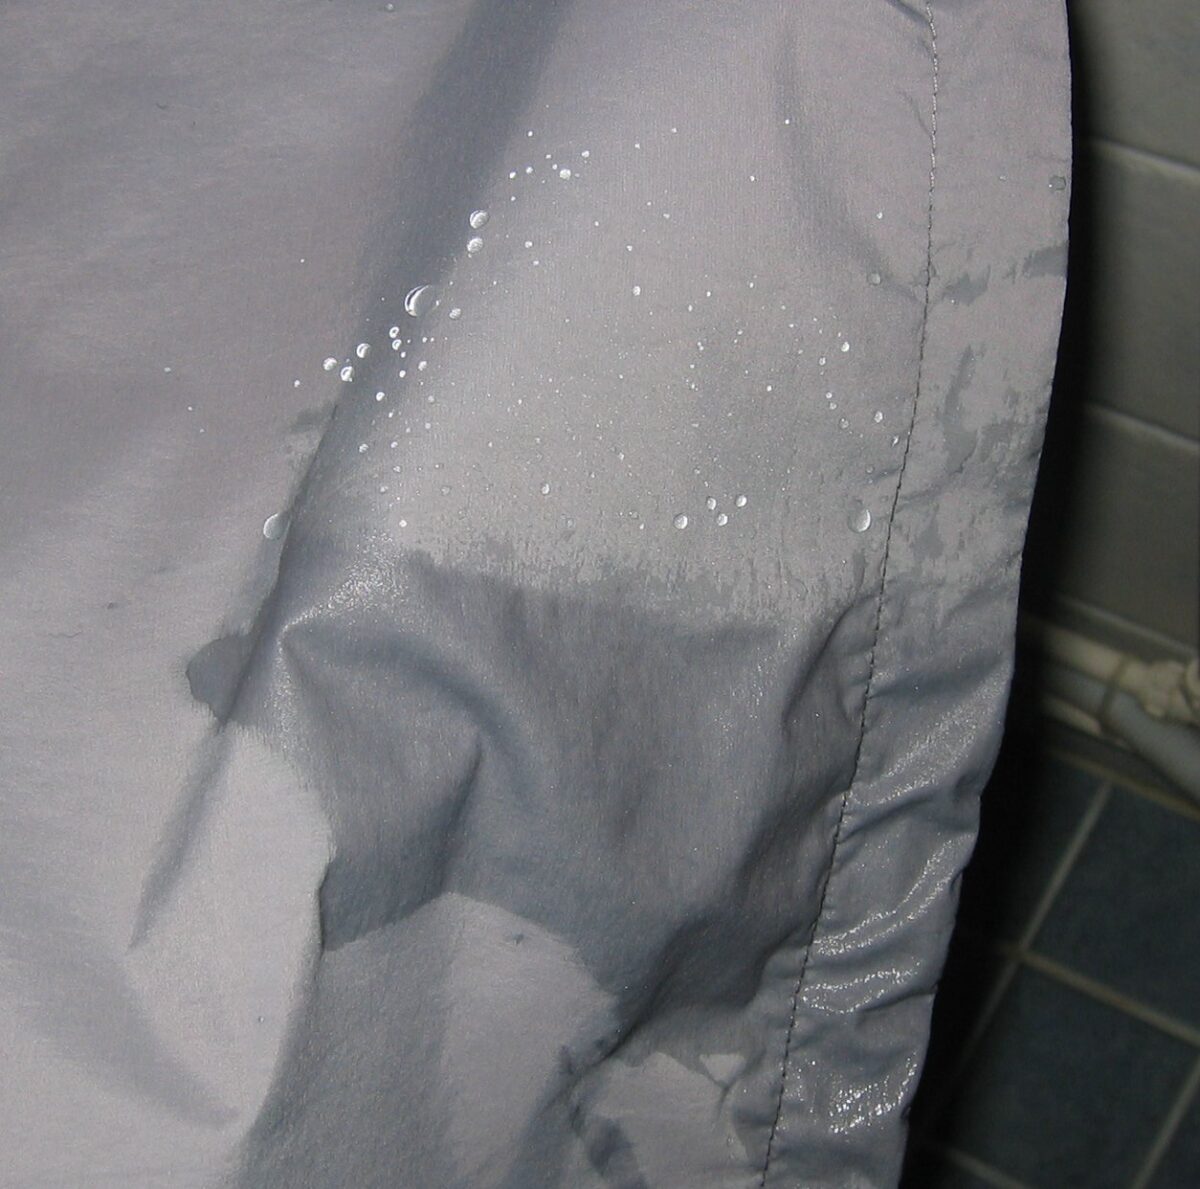

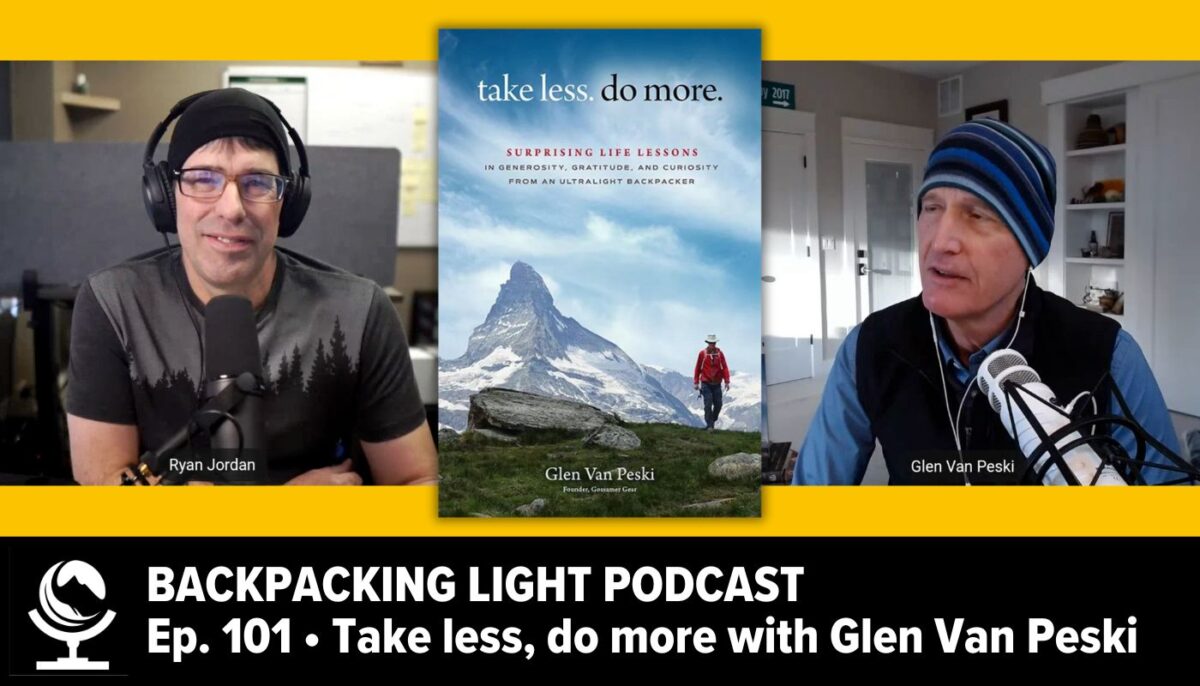

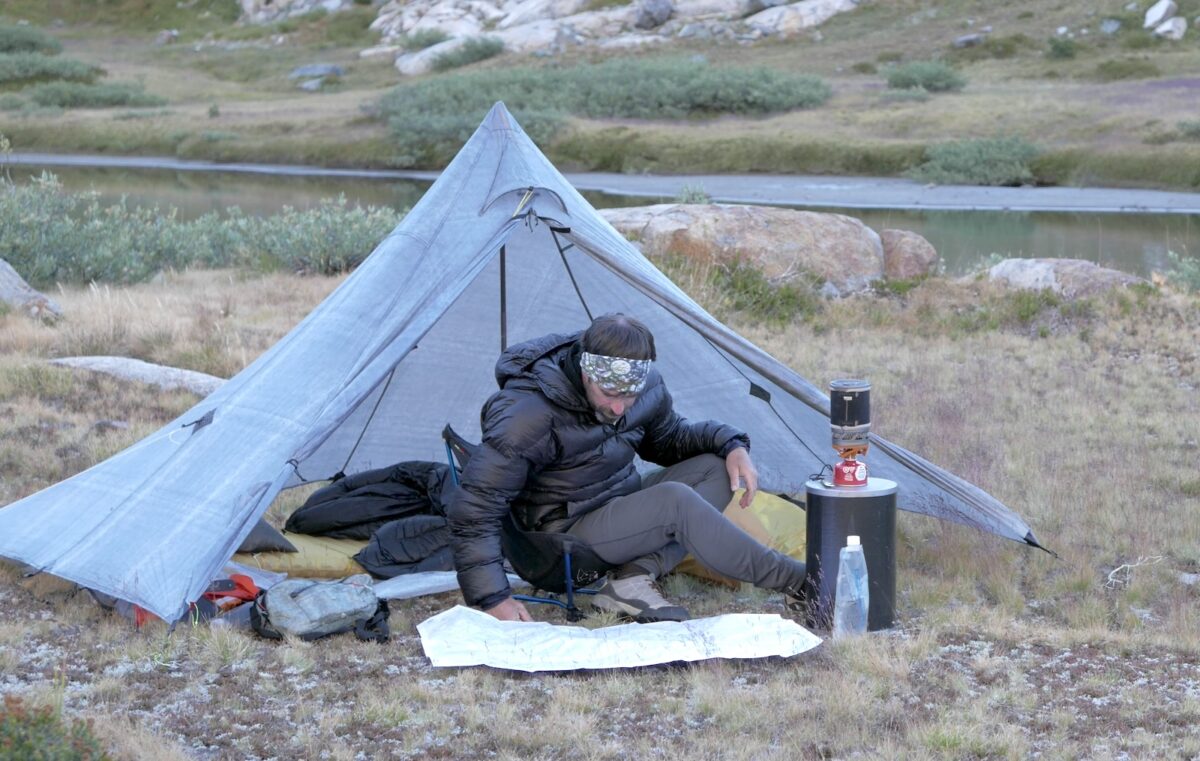
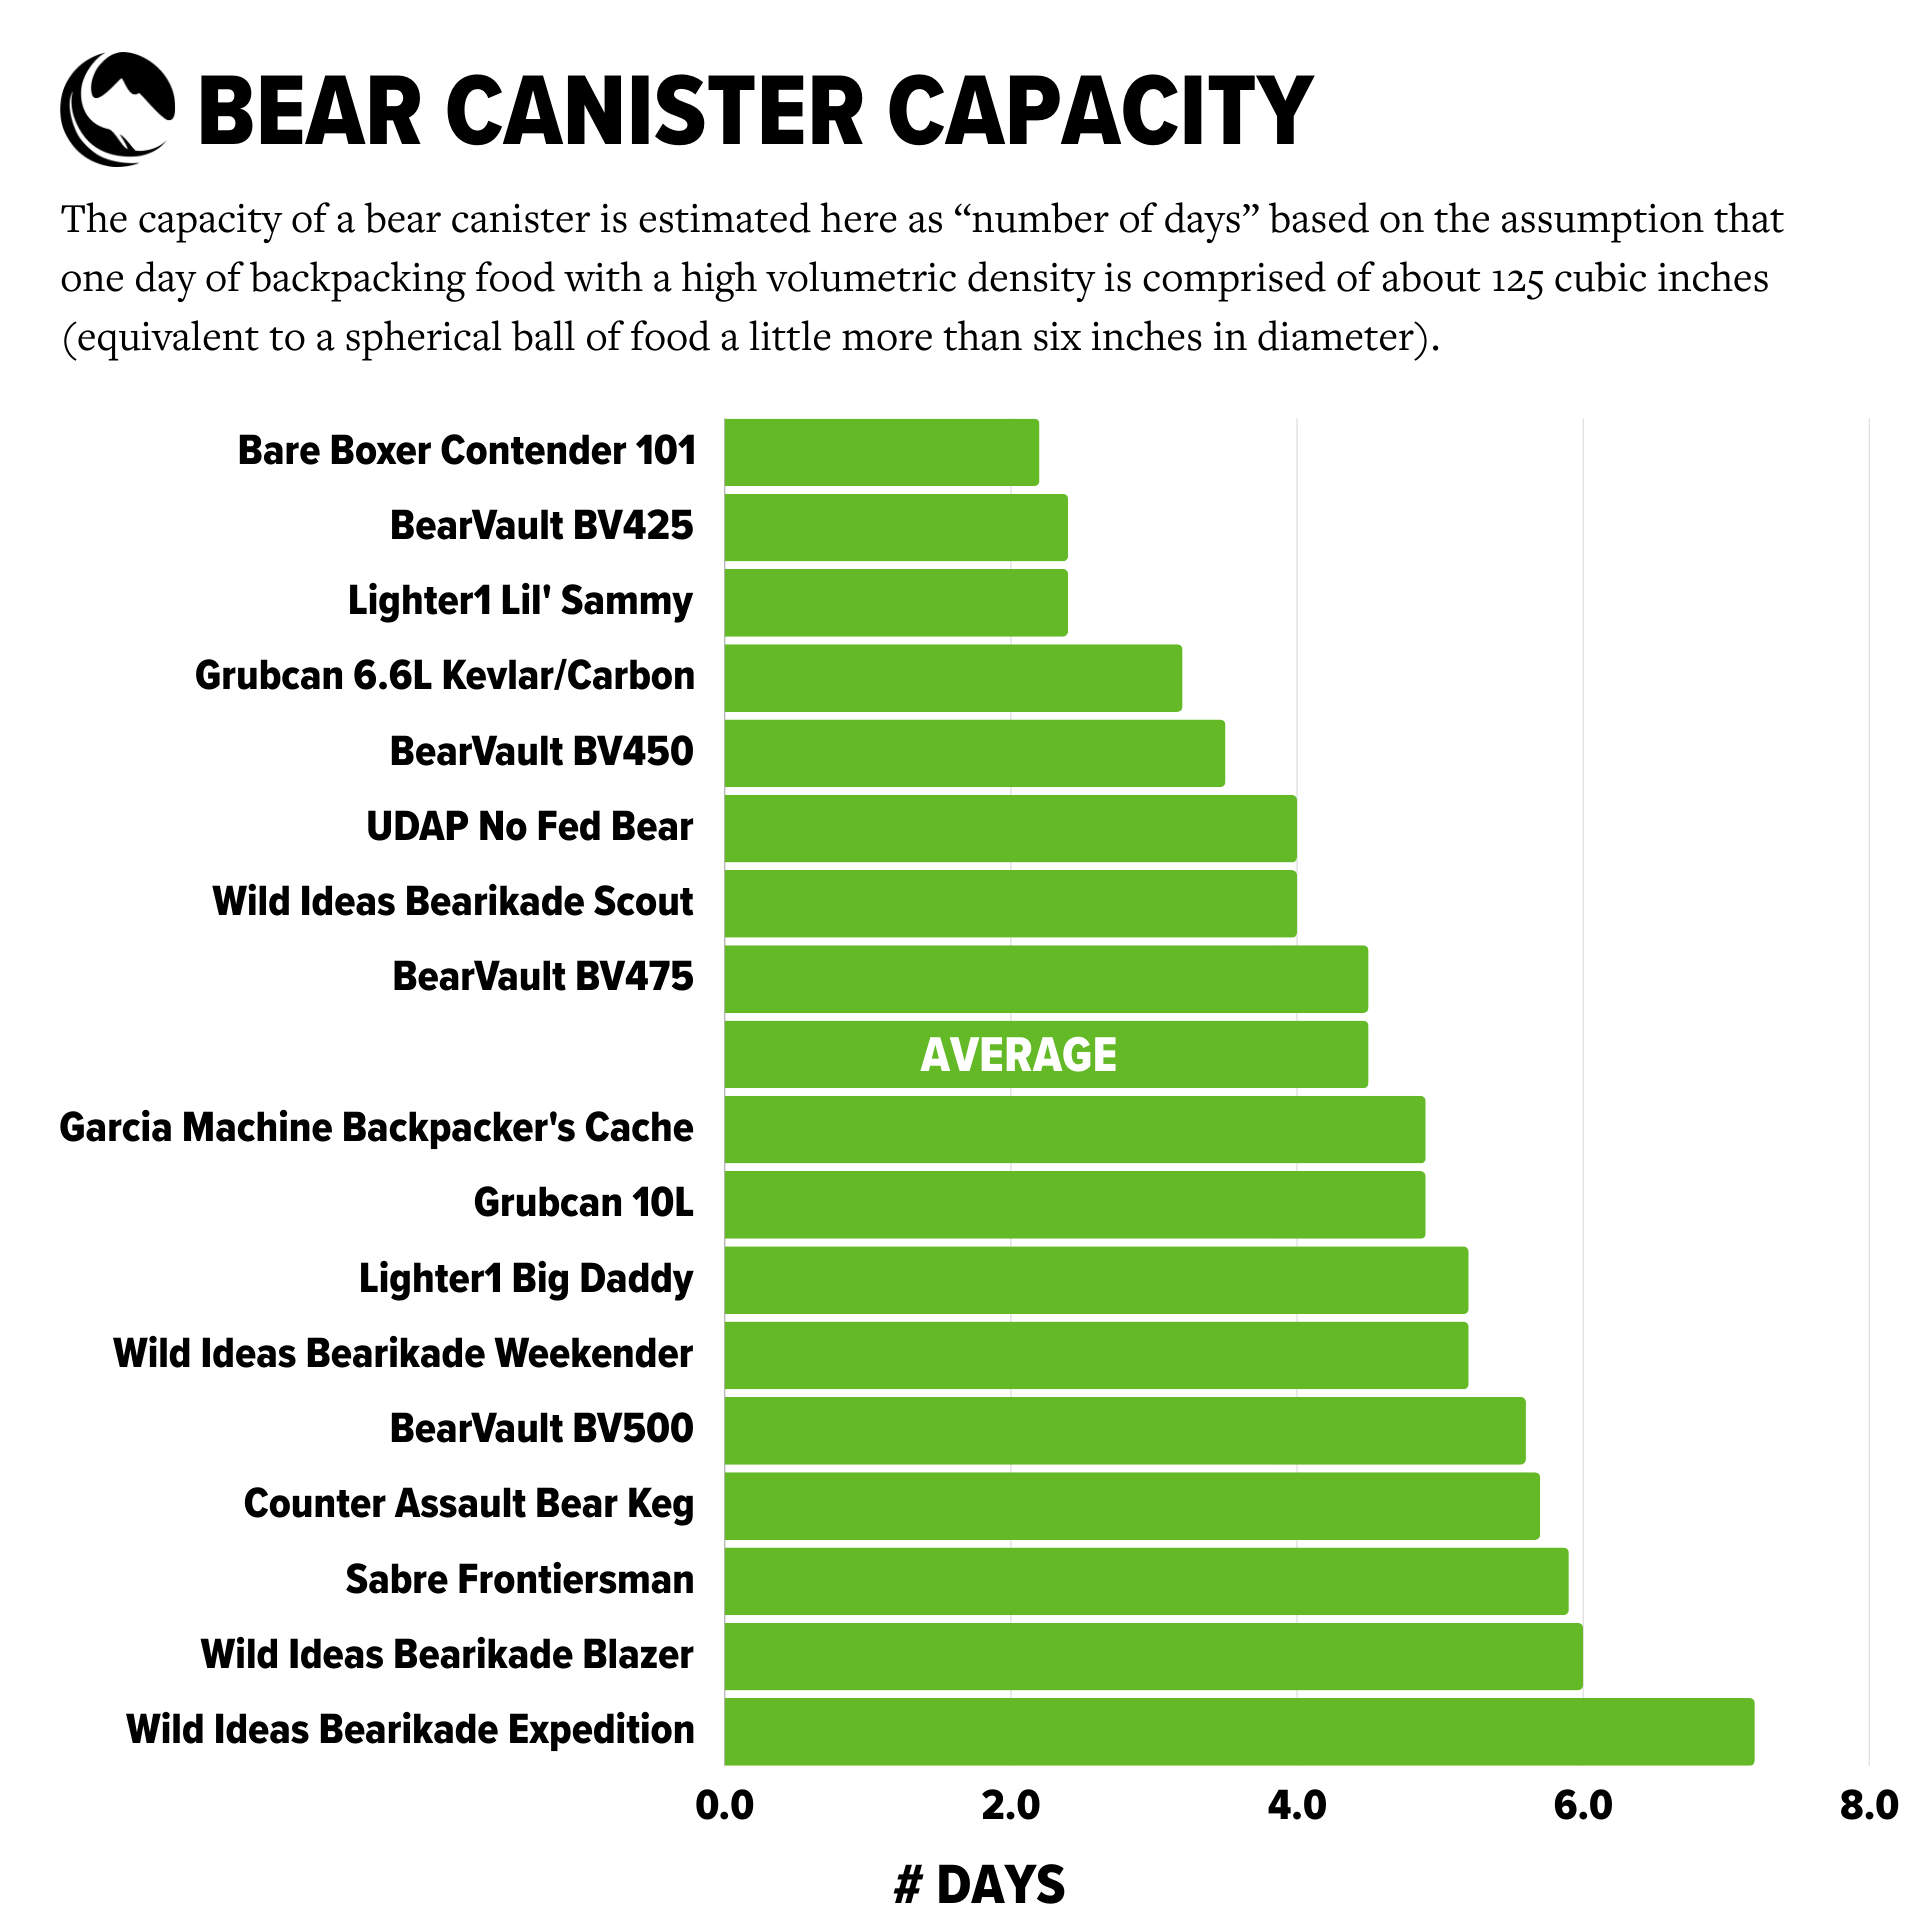
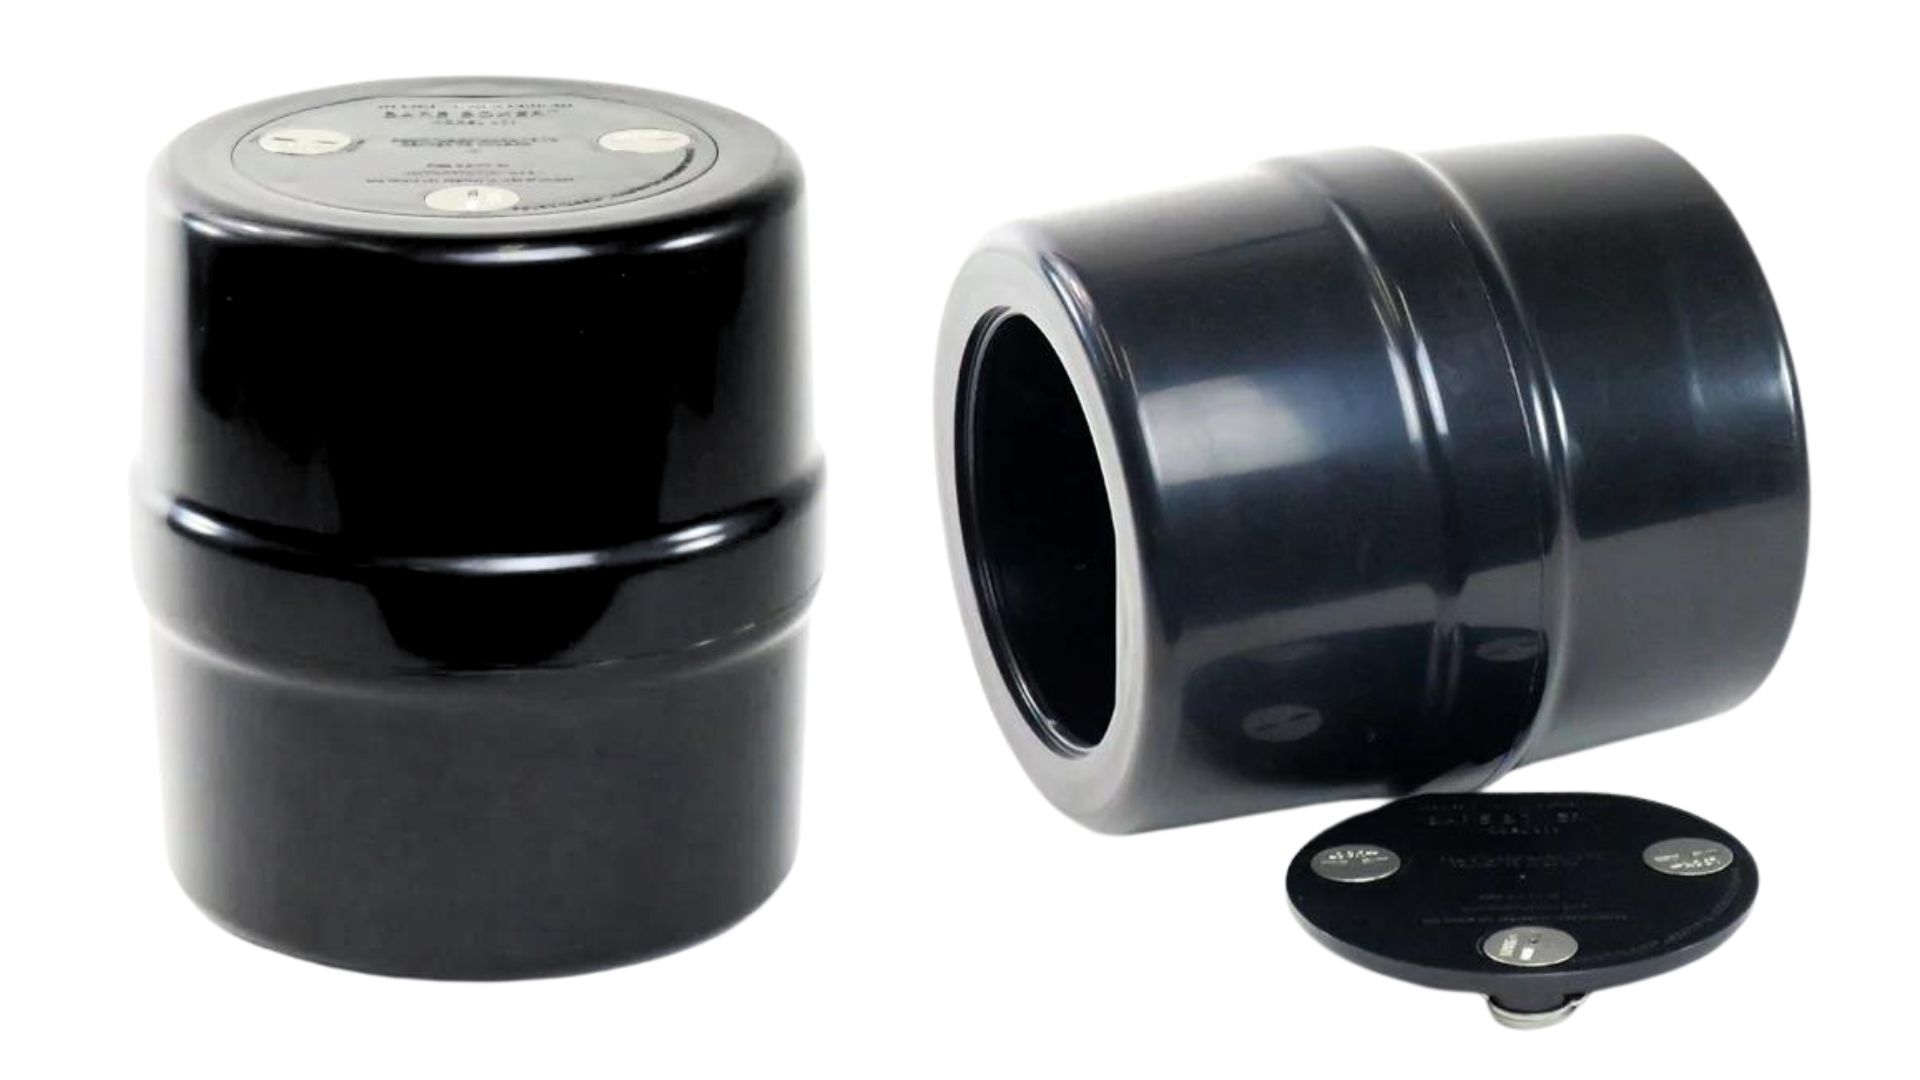 Highlights:
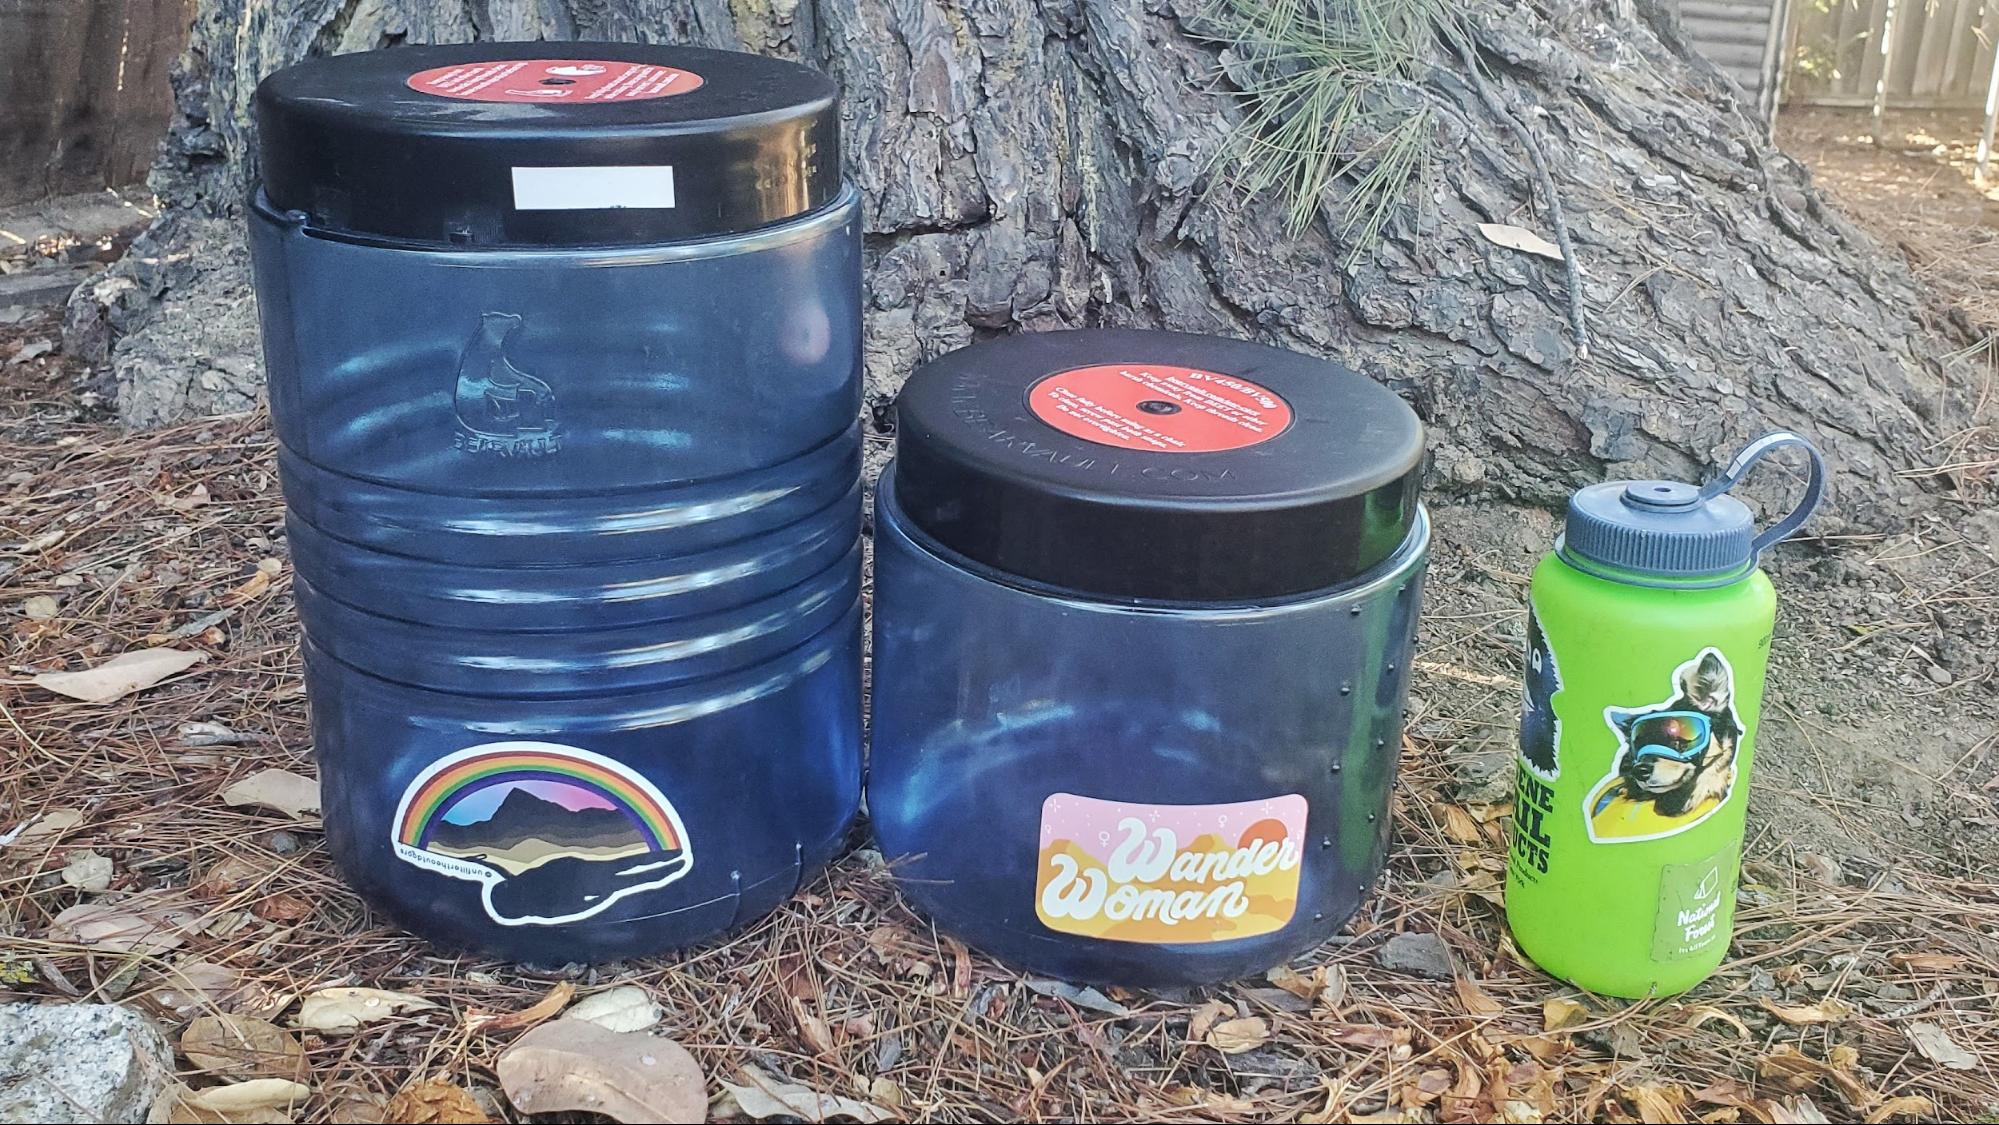 Highlights:
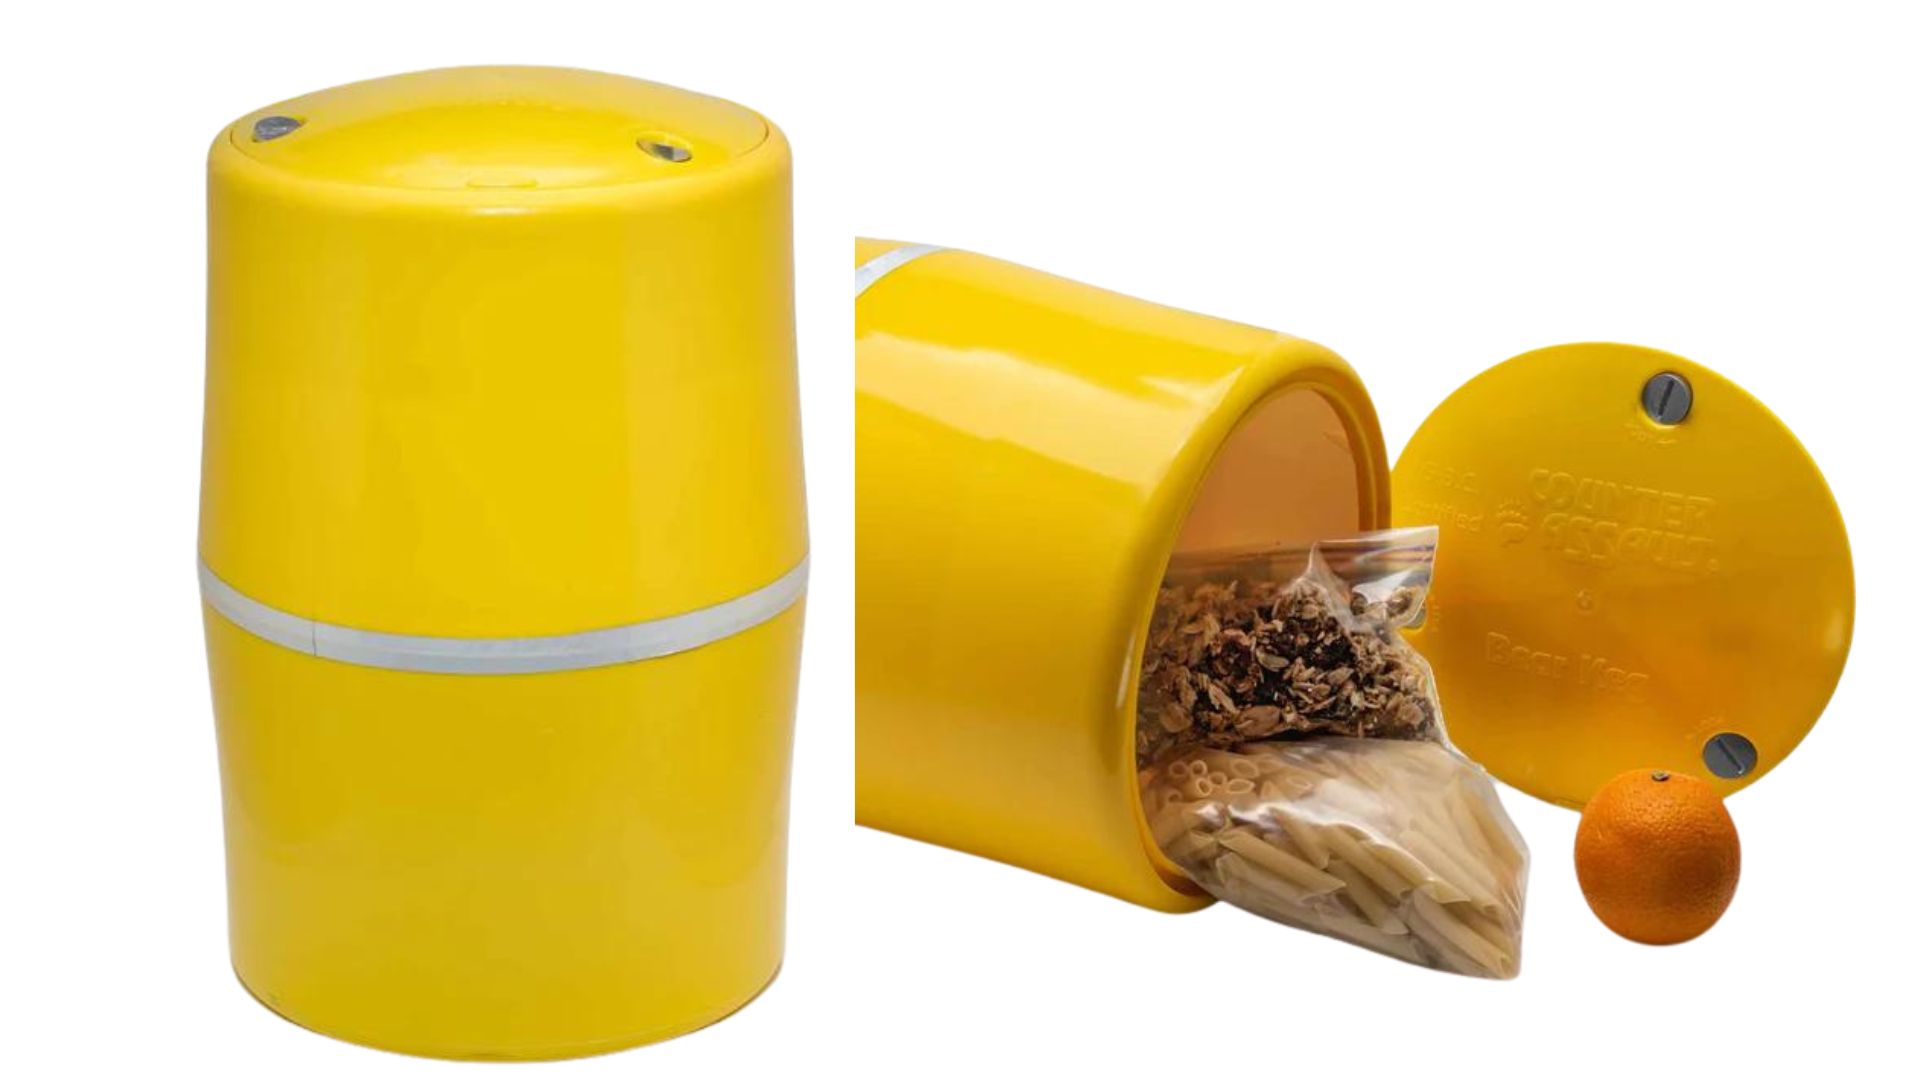 Highlights:
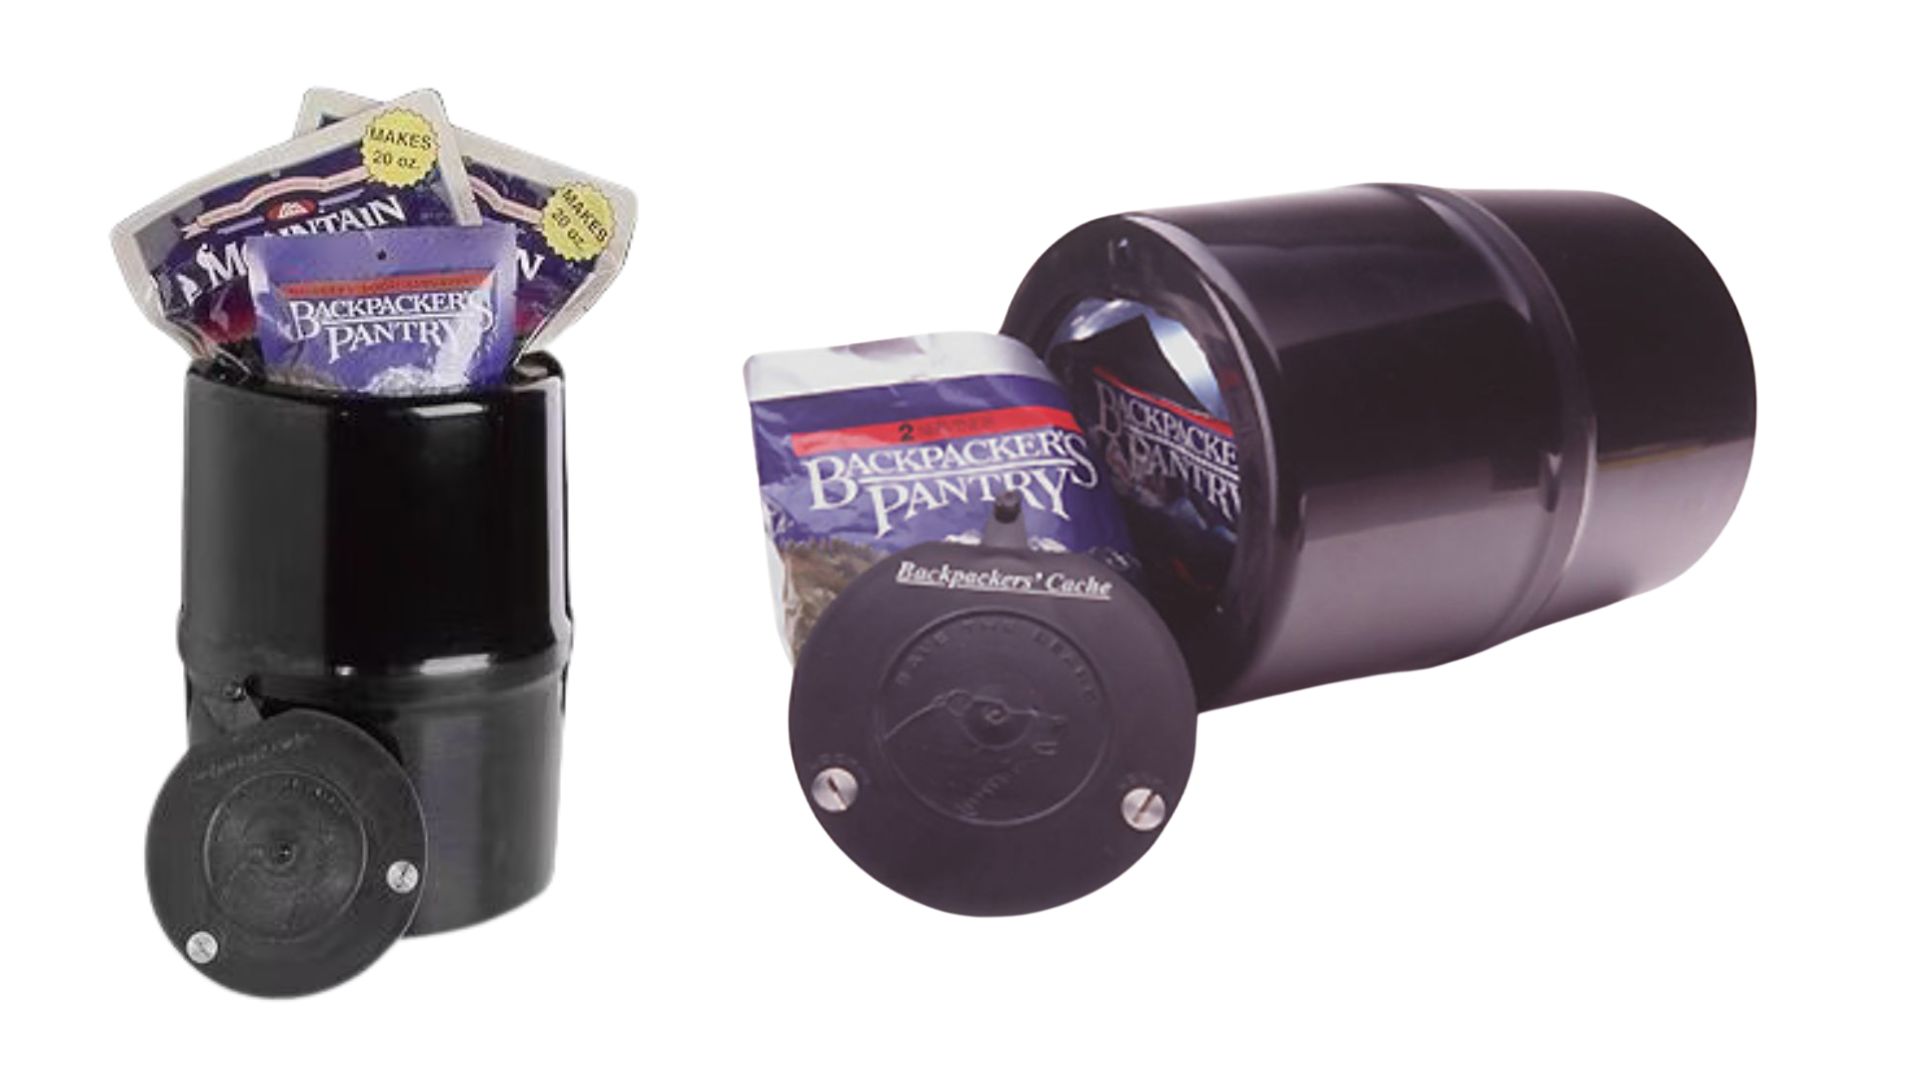 Highlights:
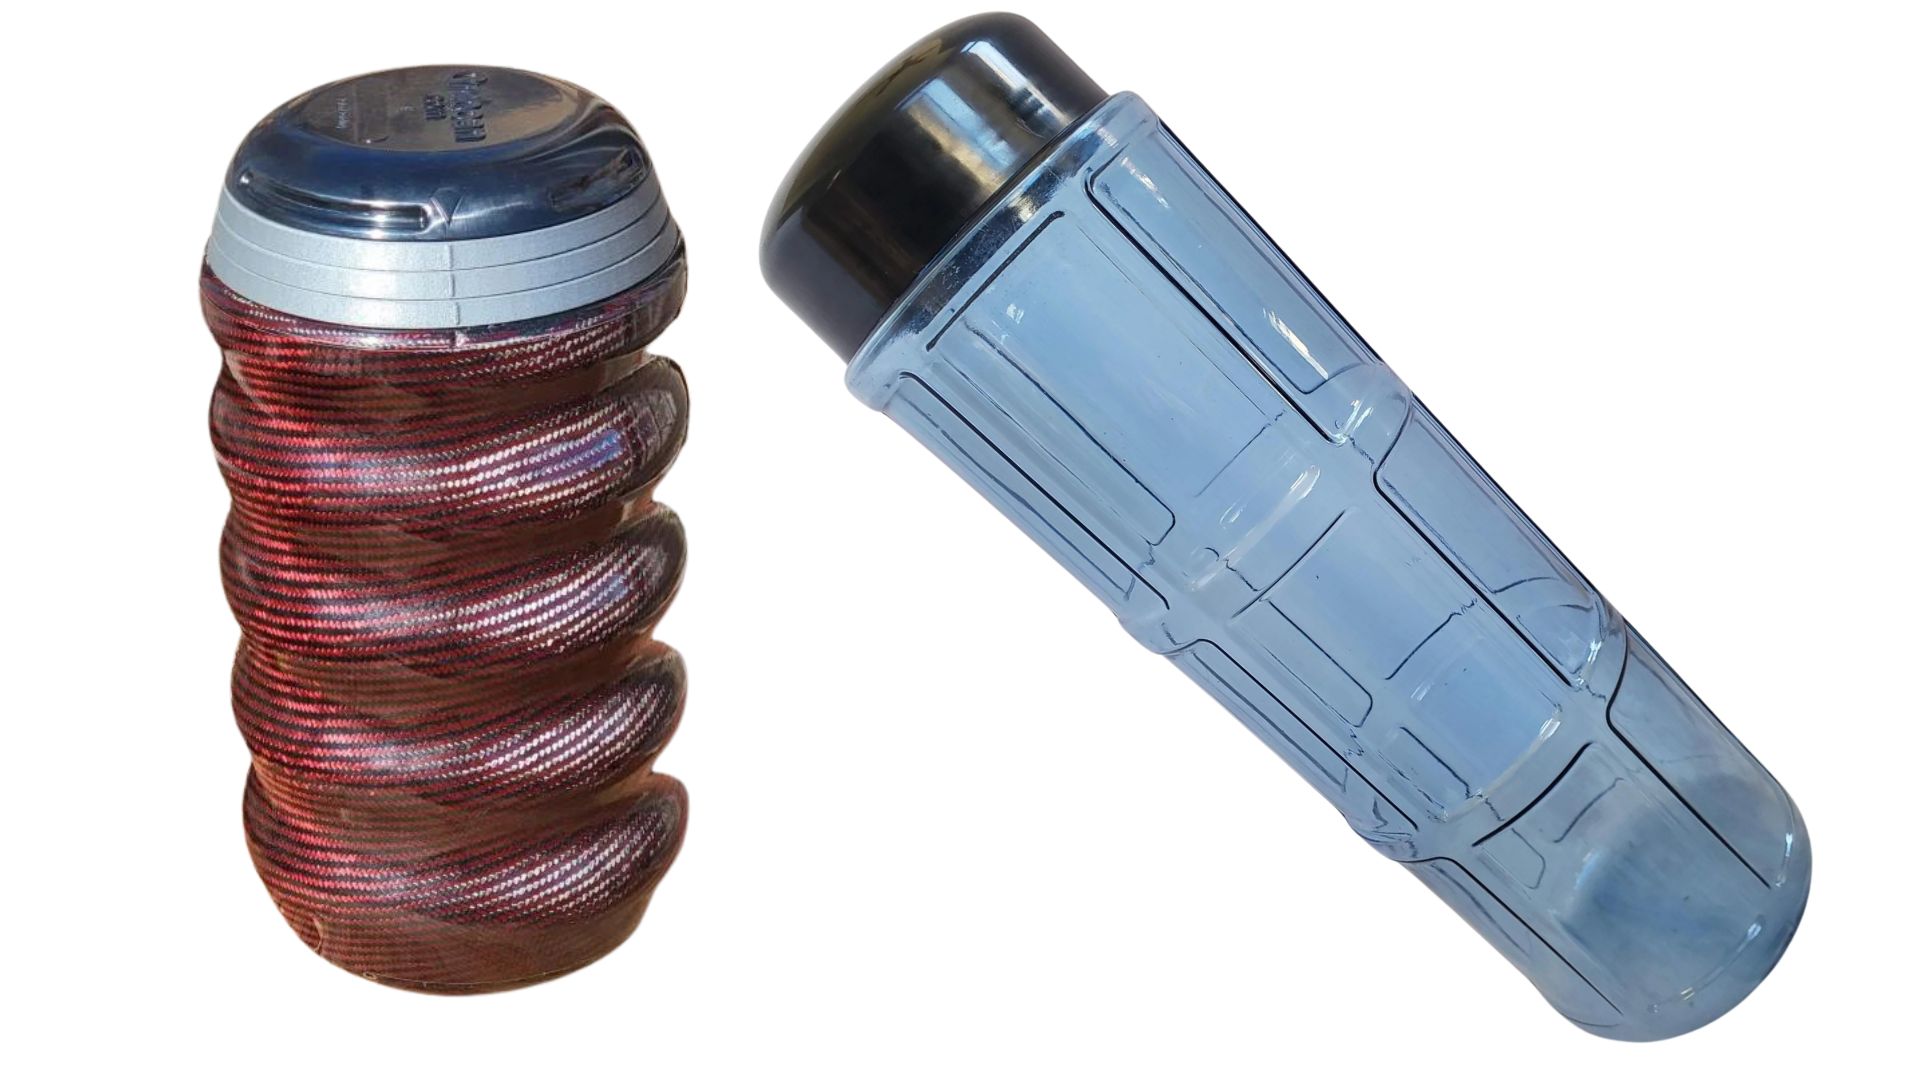 Highlights:
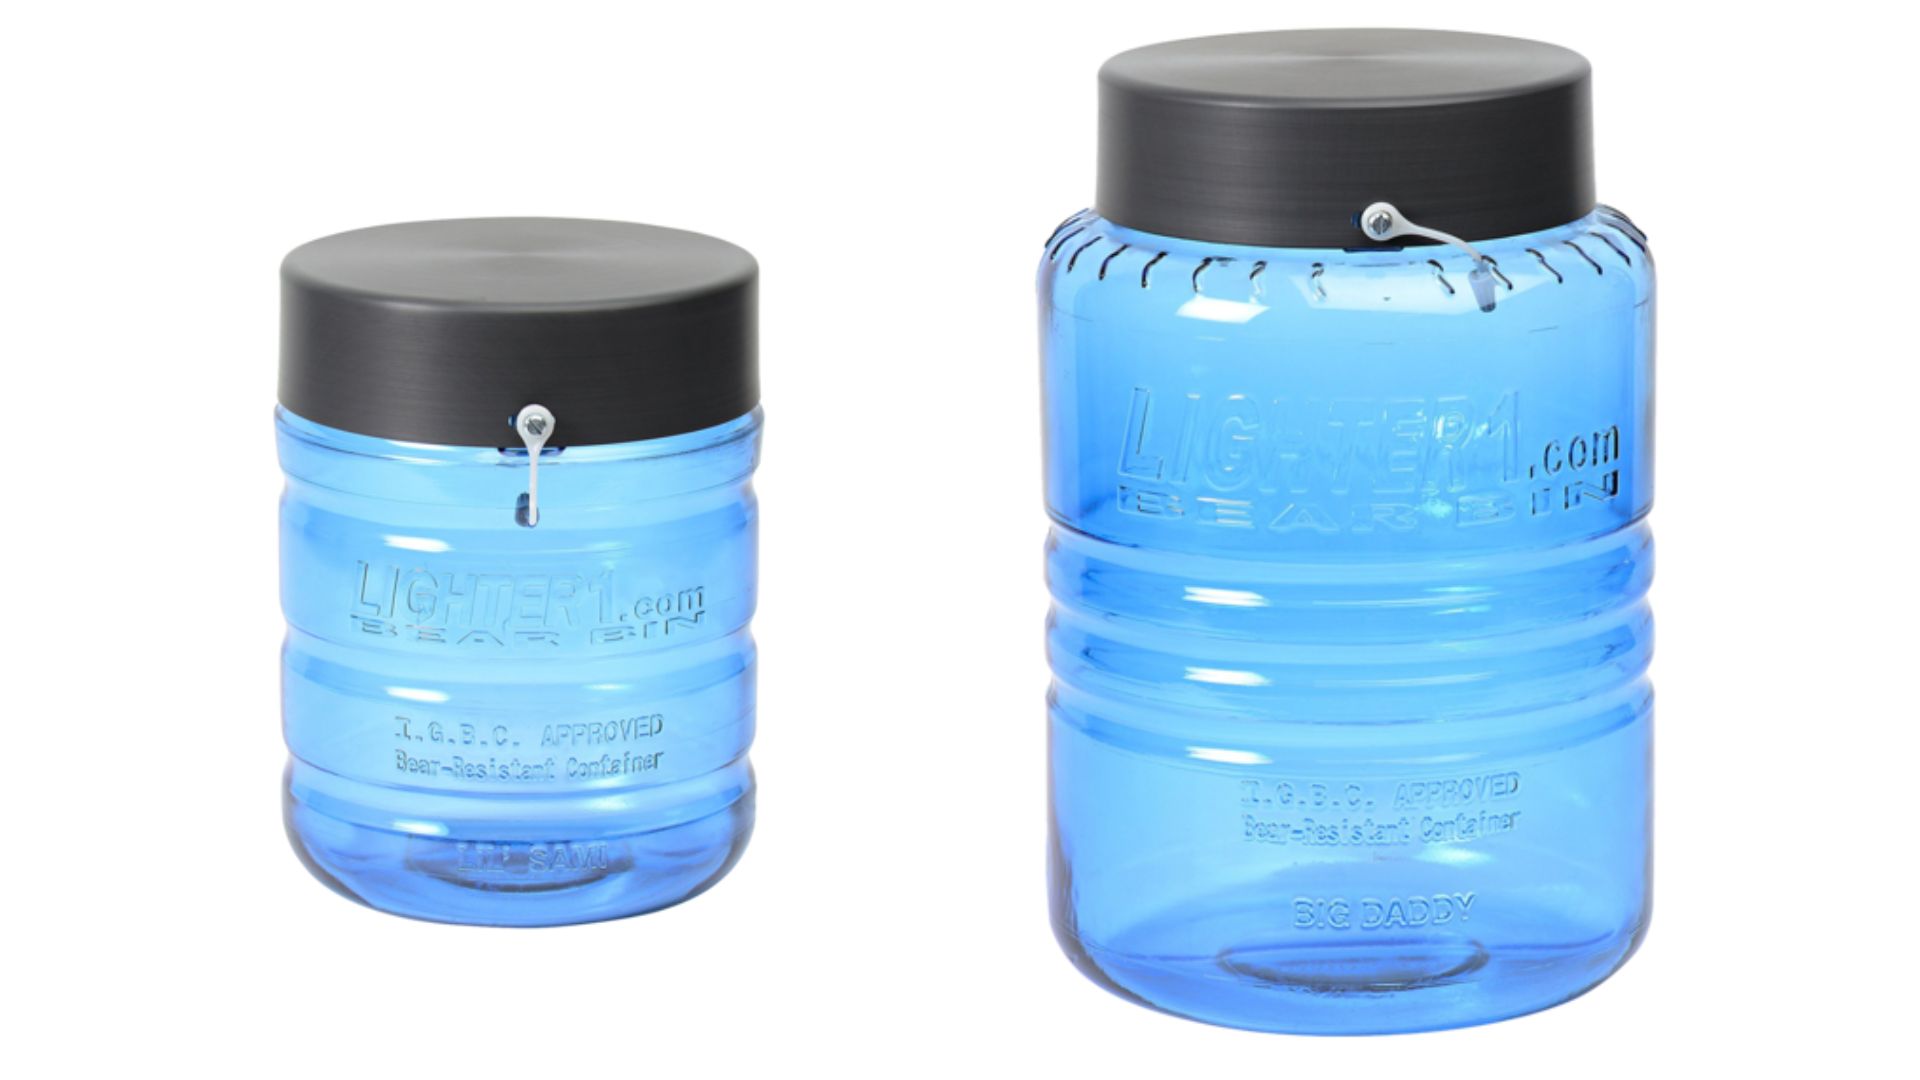 Highlights:
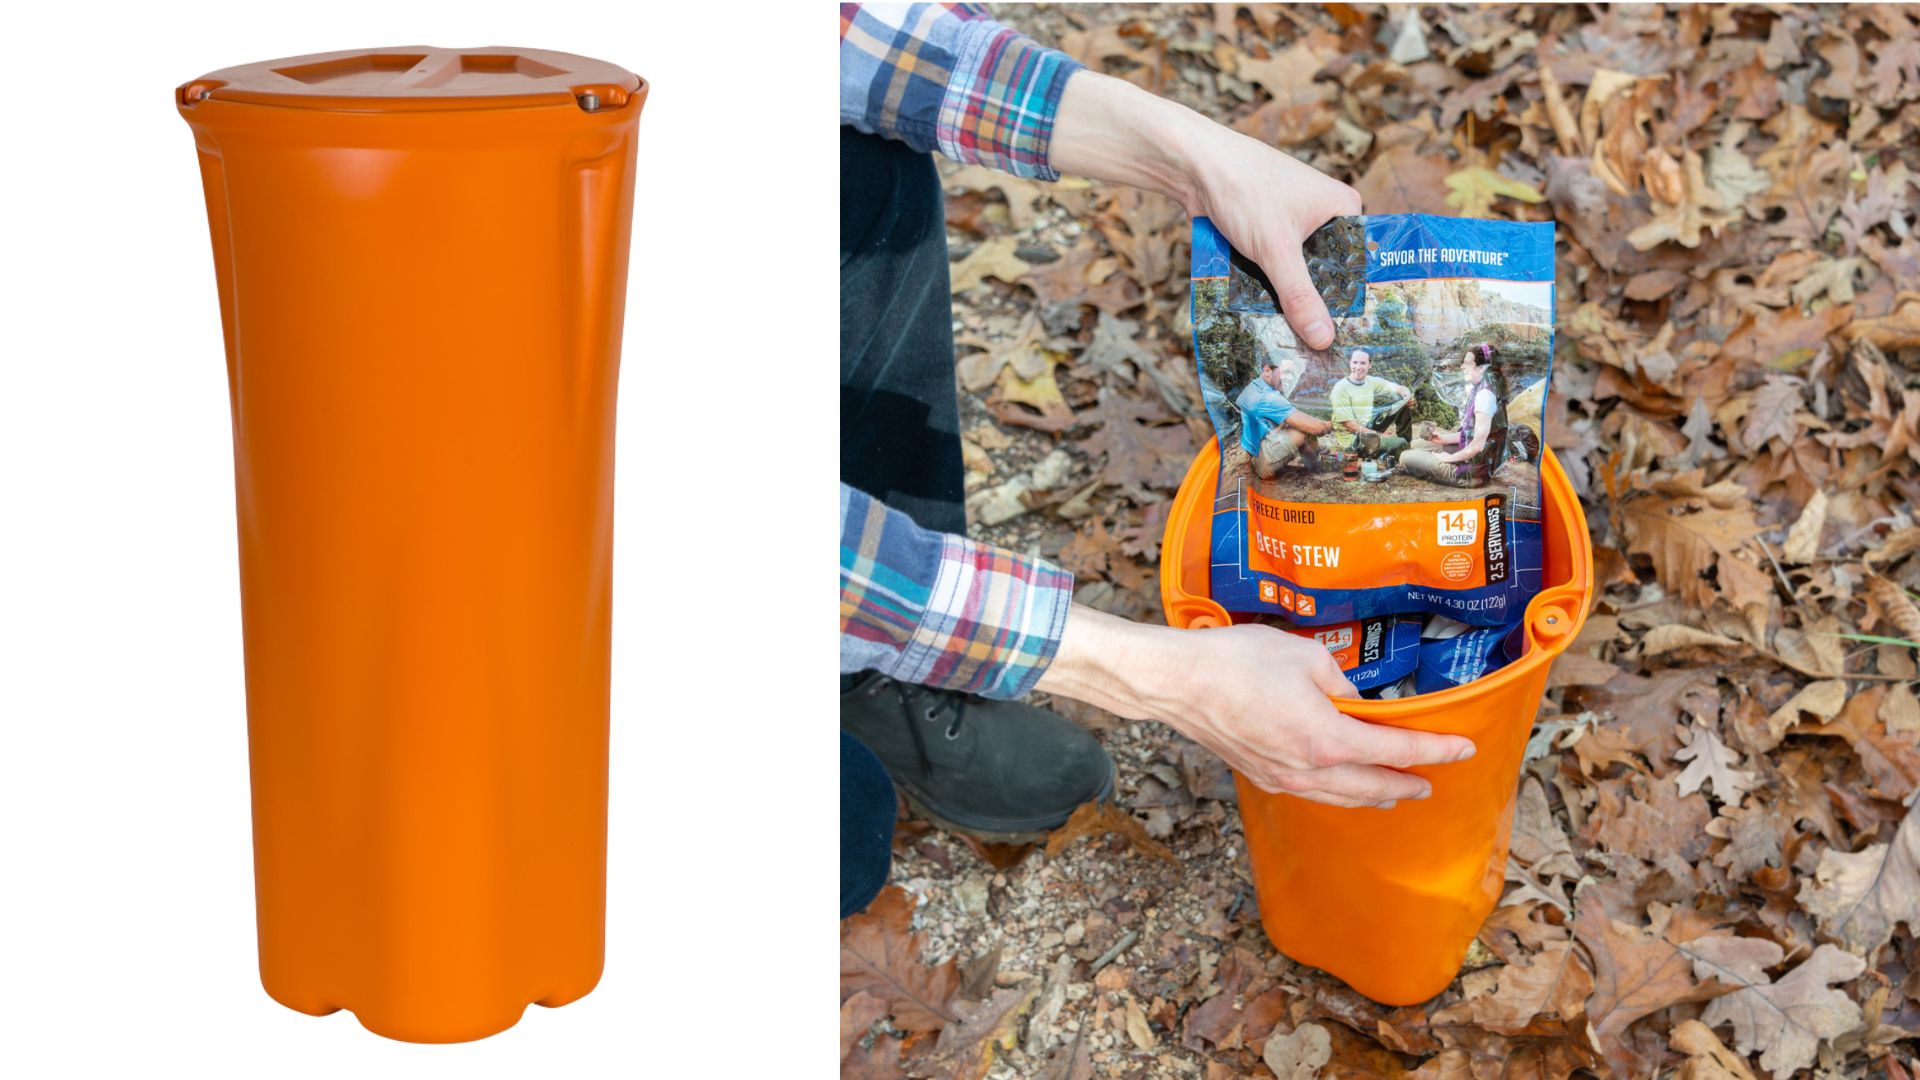 Highlights:
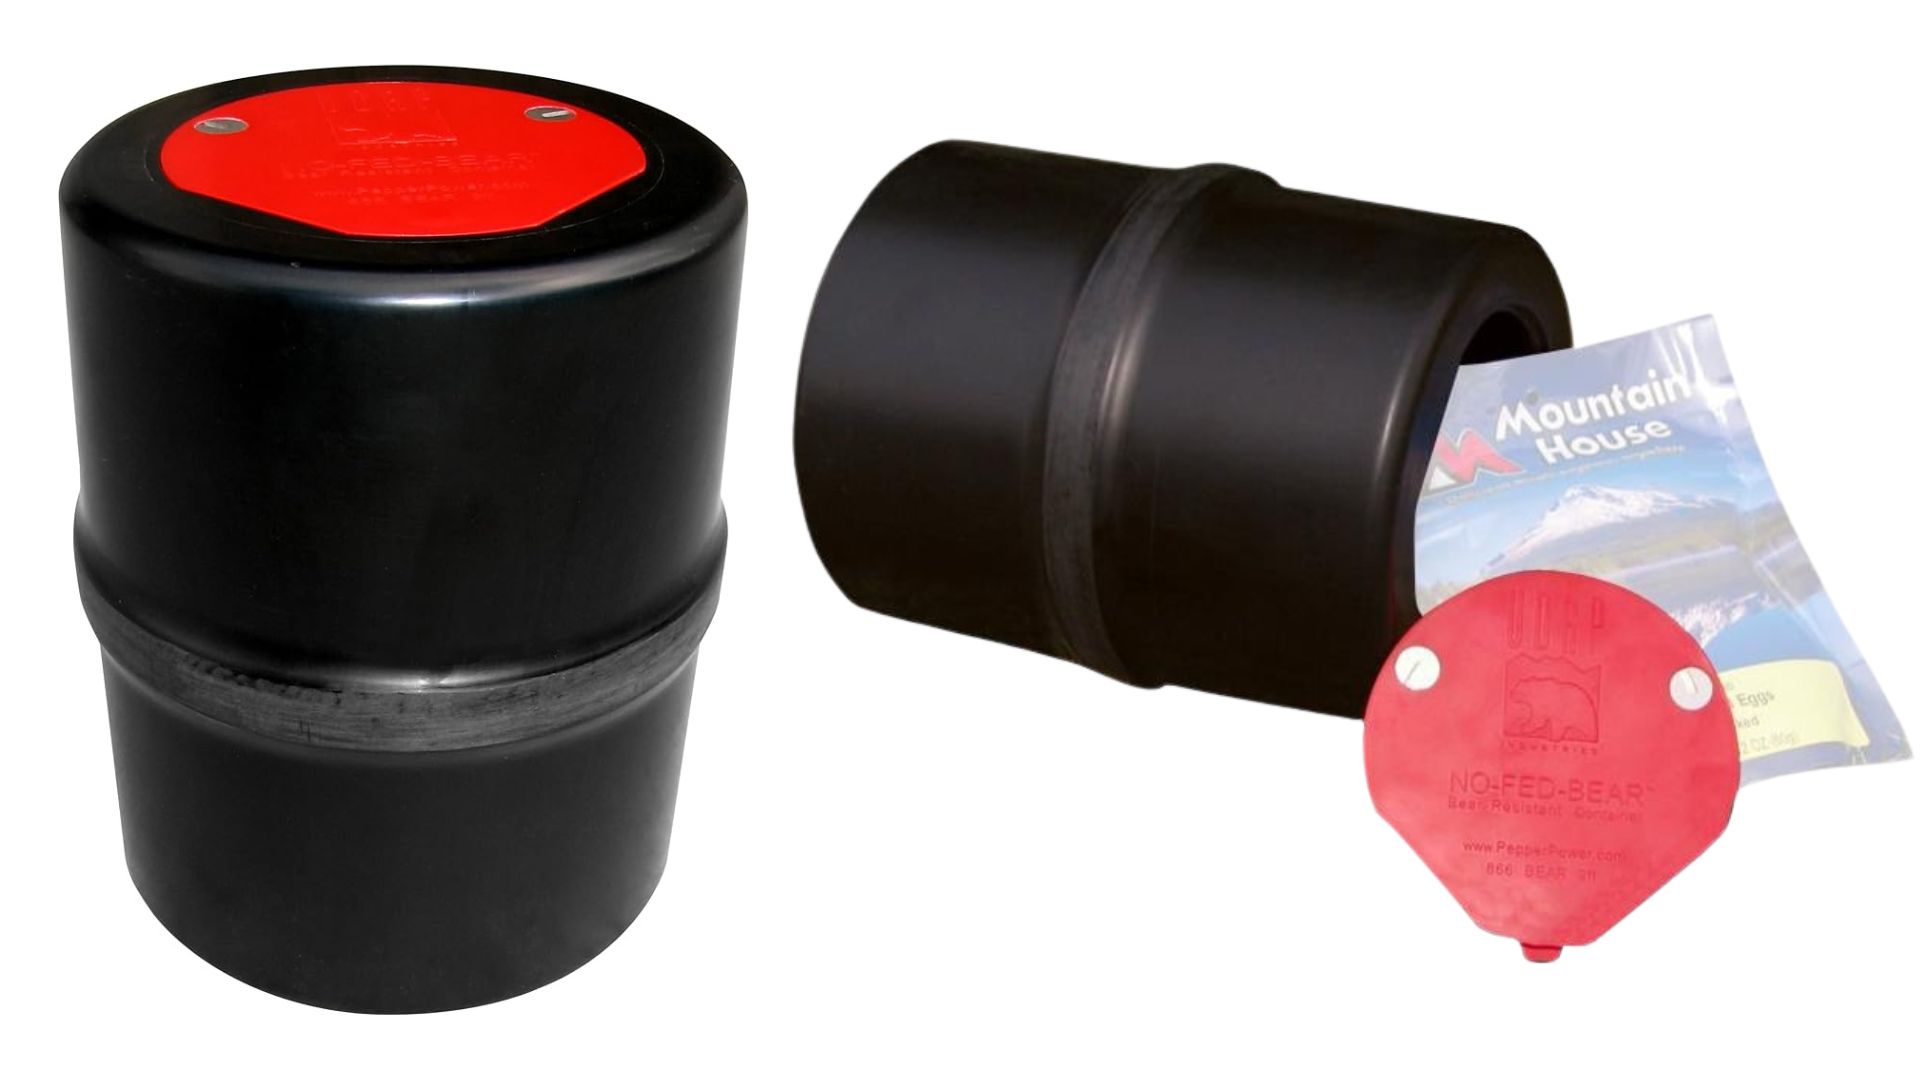 Highlights:
 Highlights:
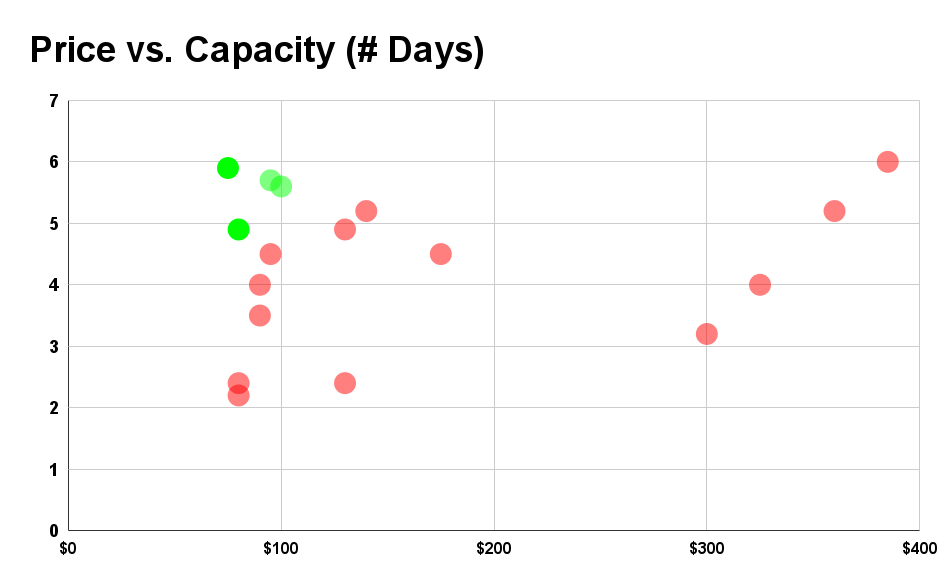
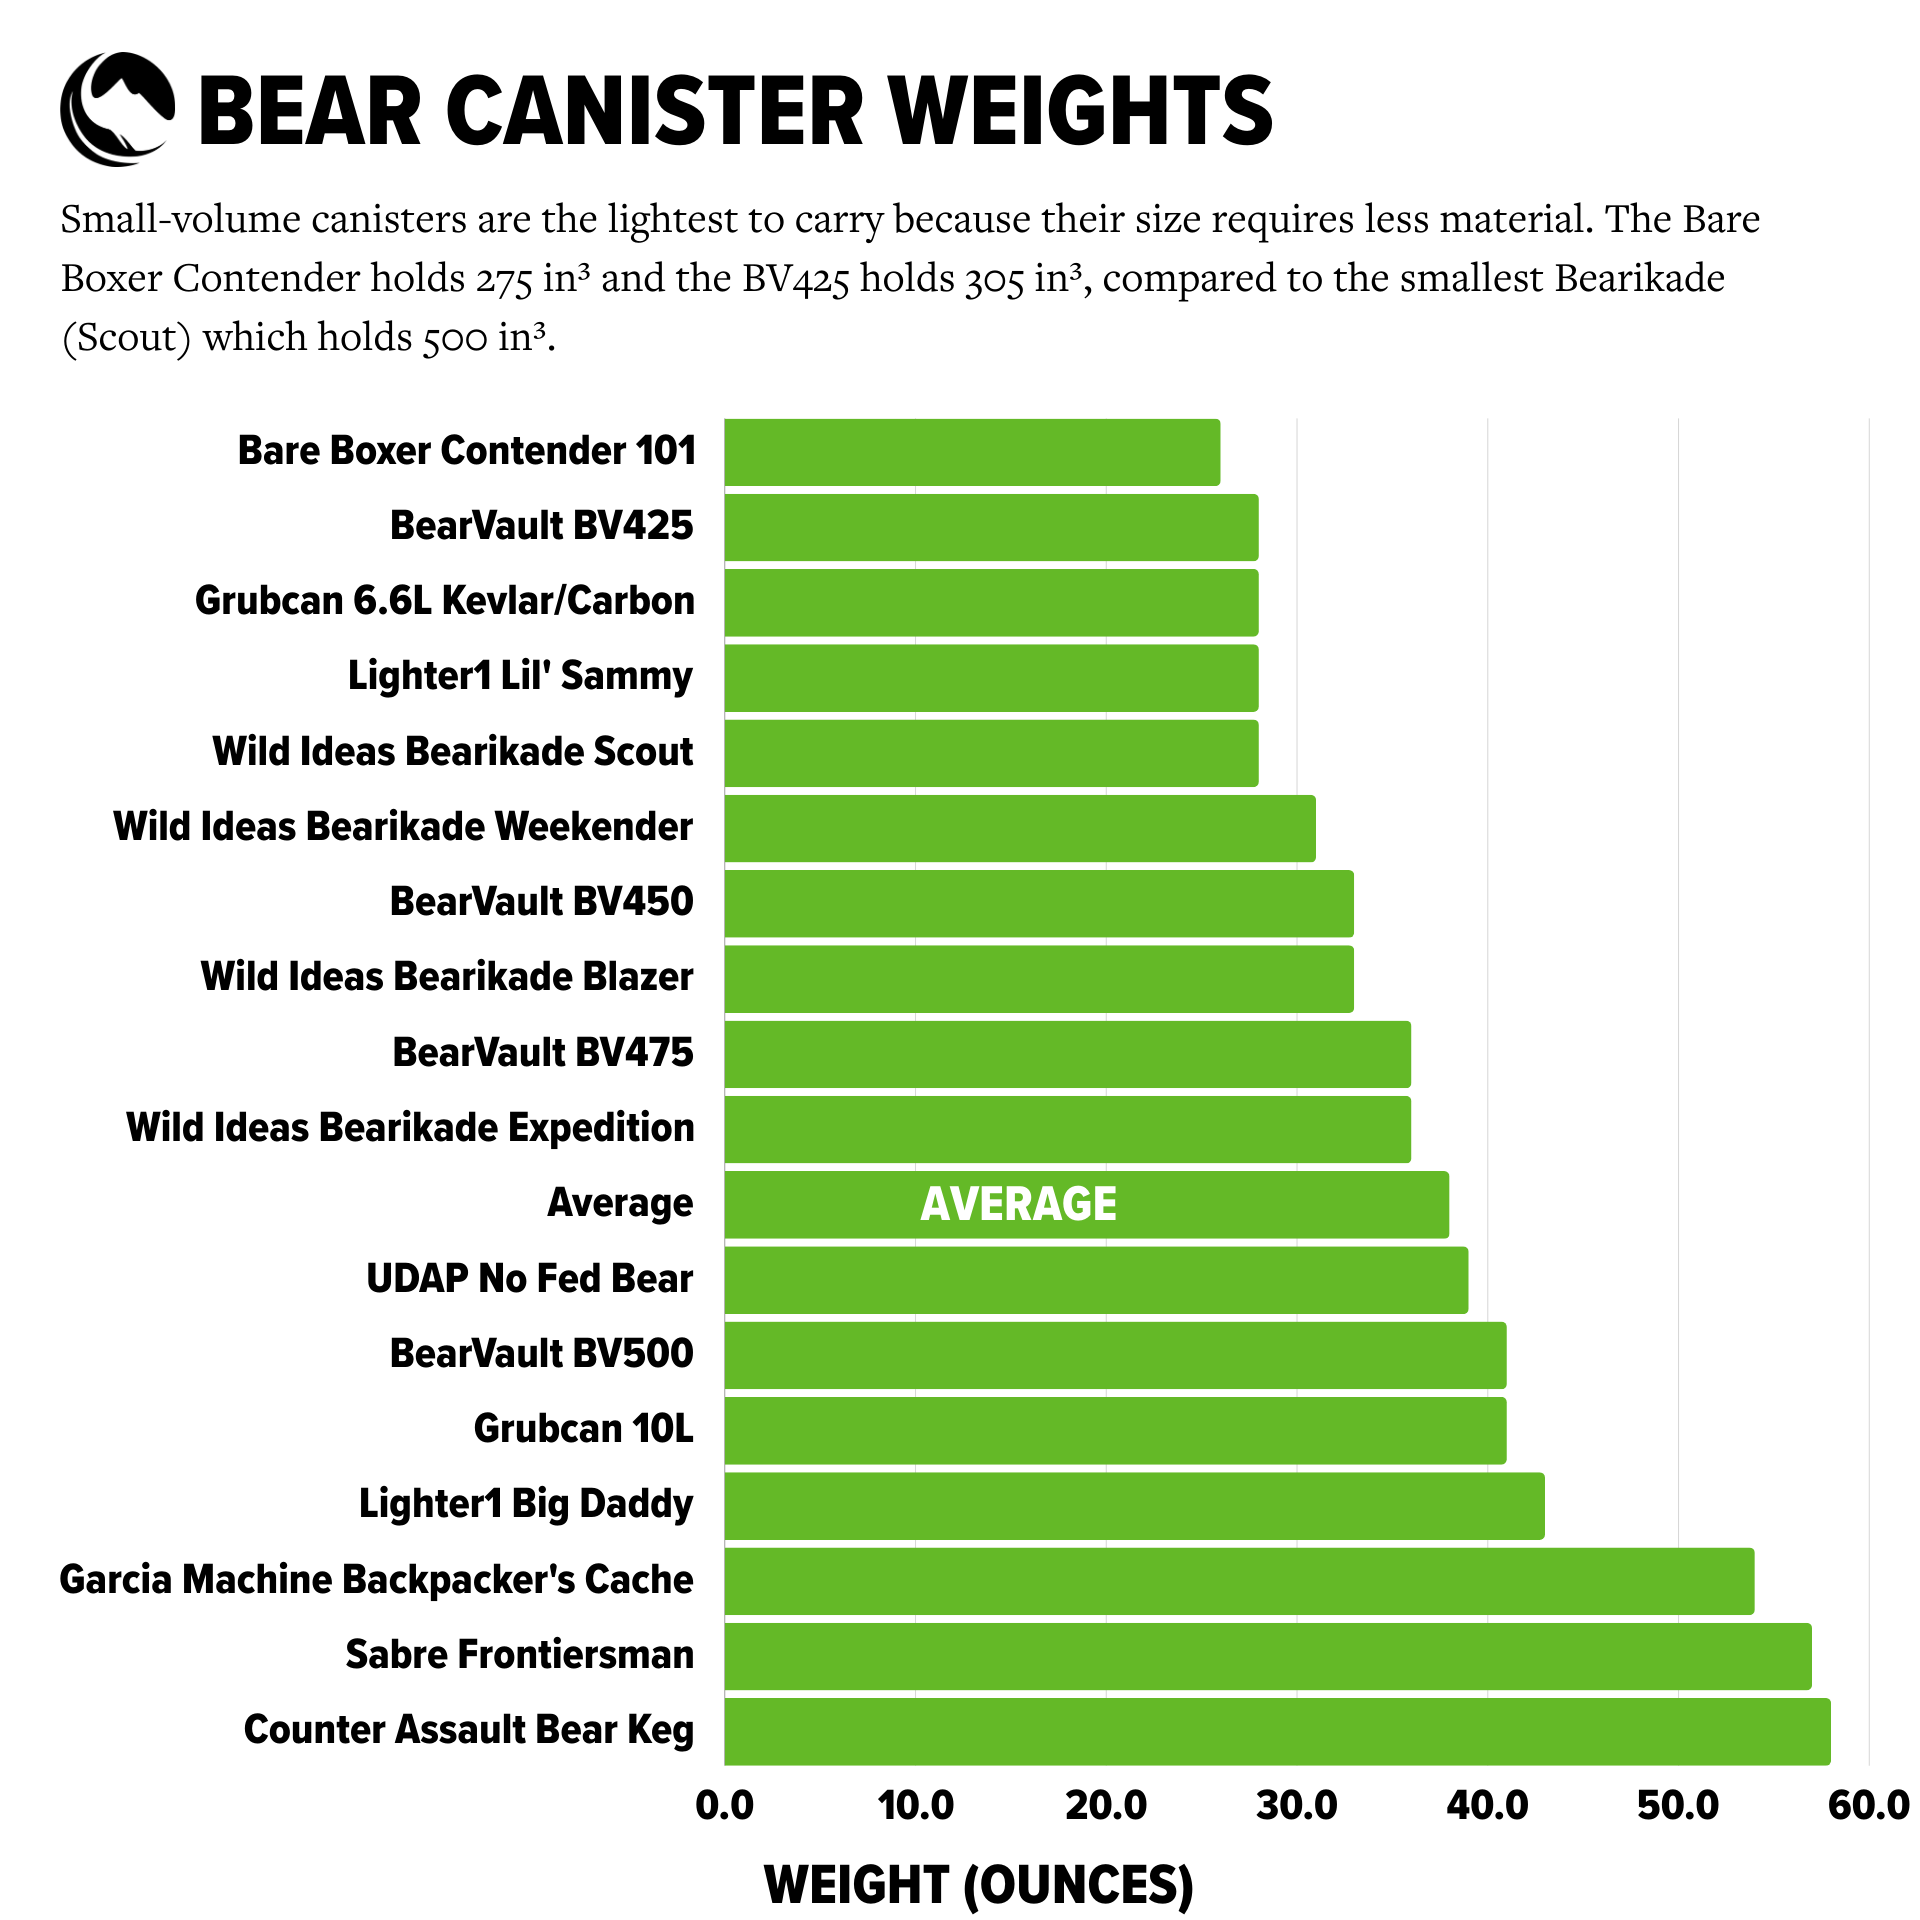
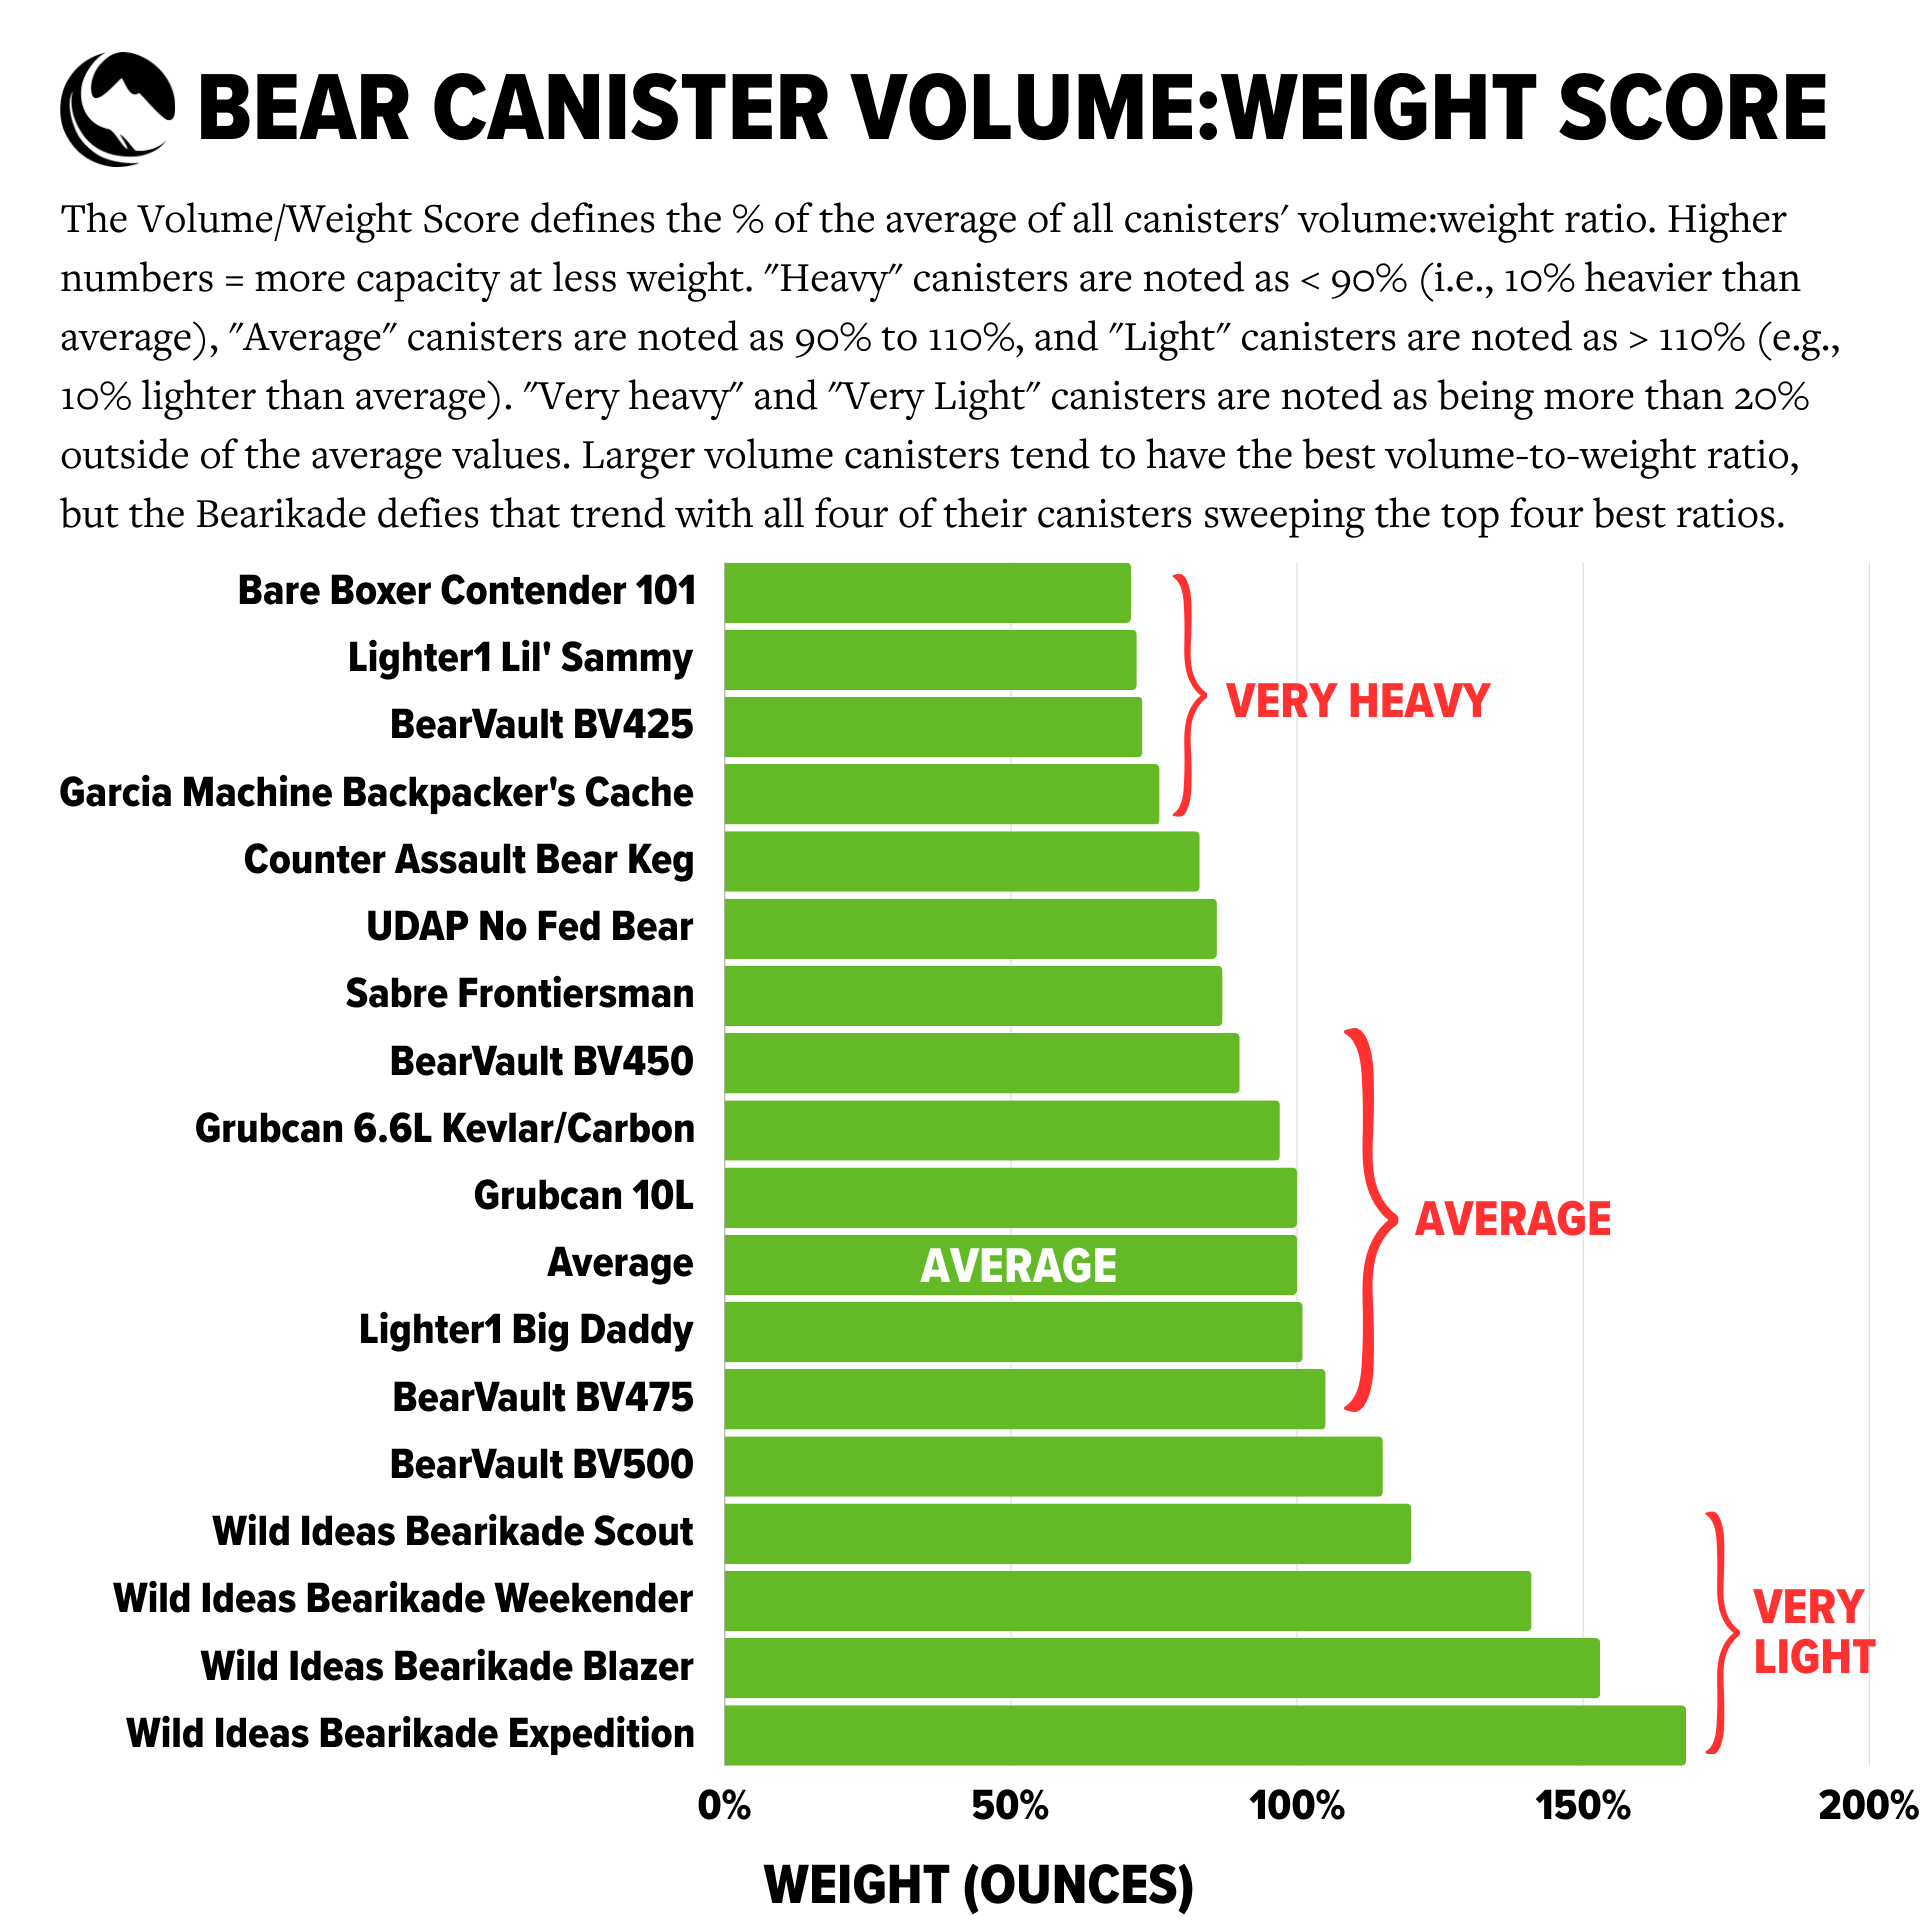


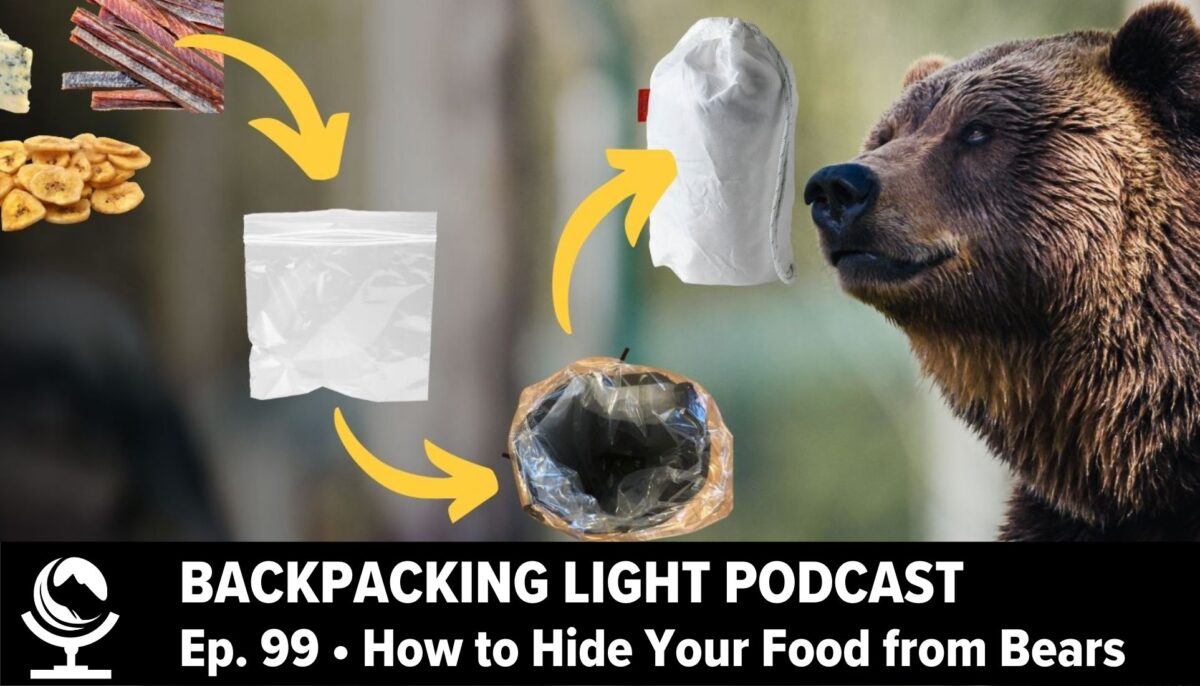

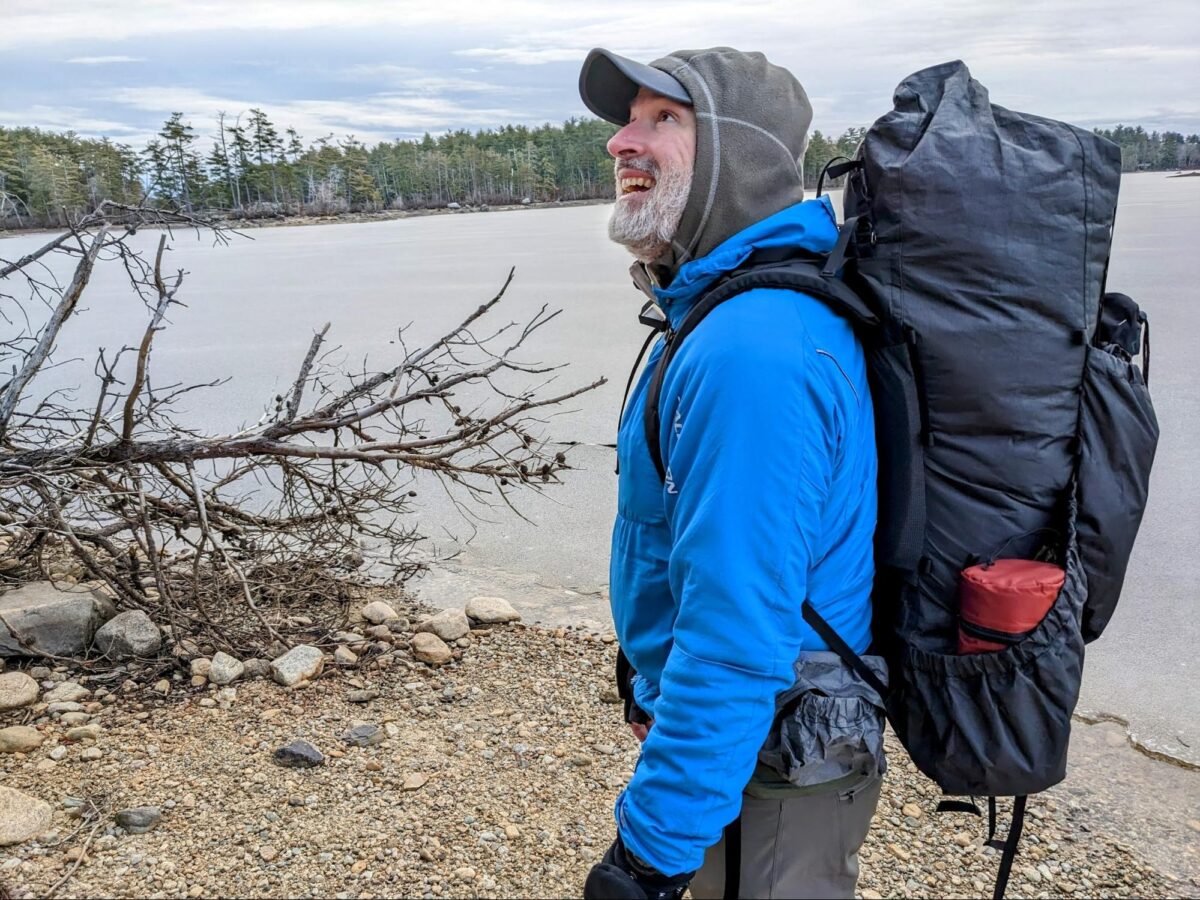

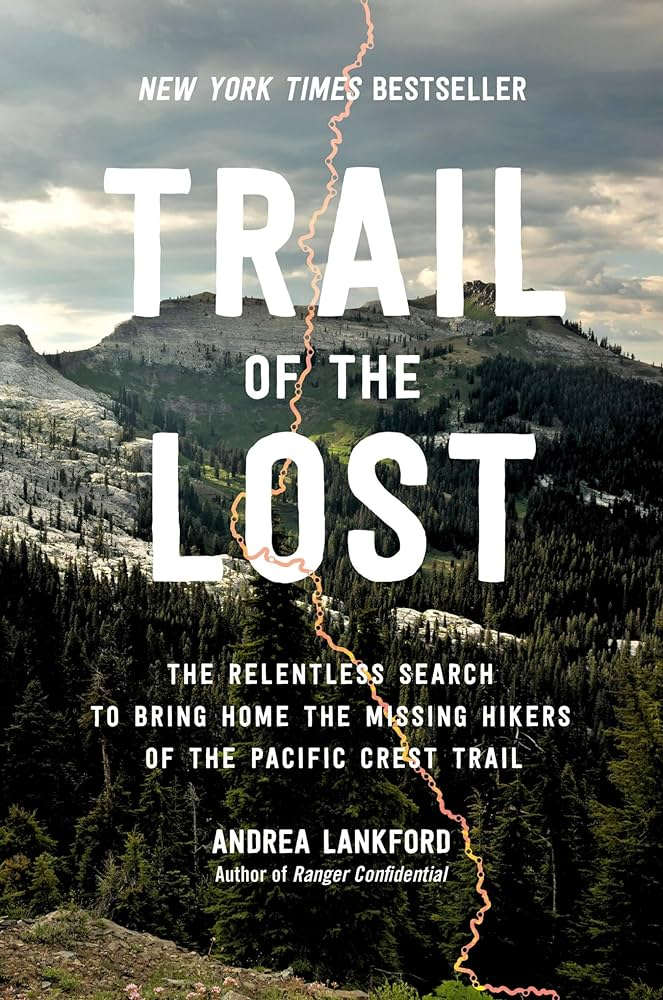
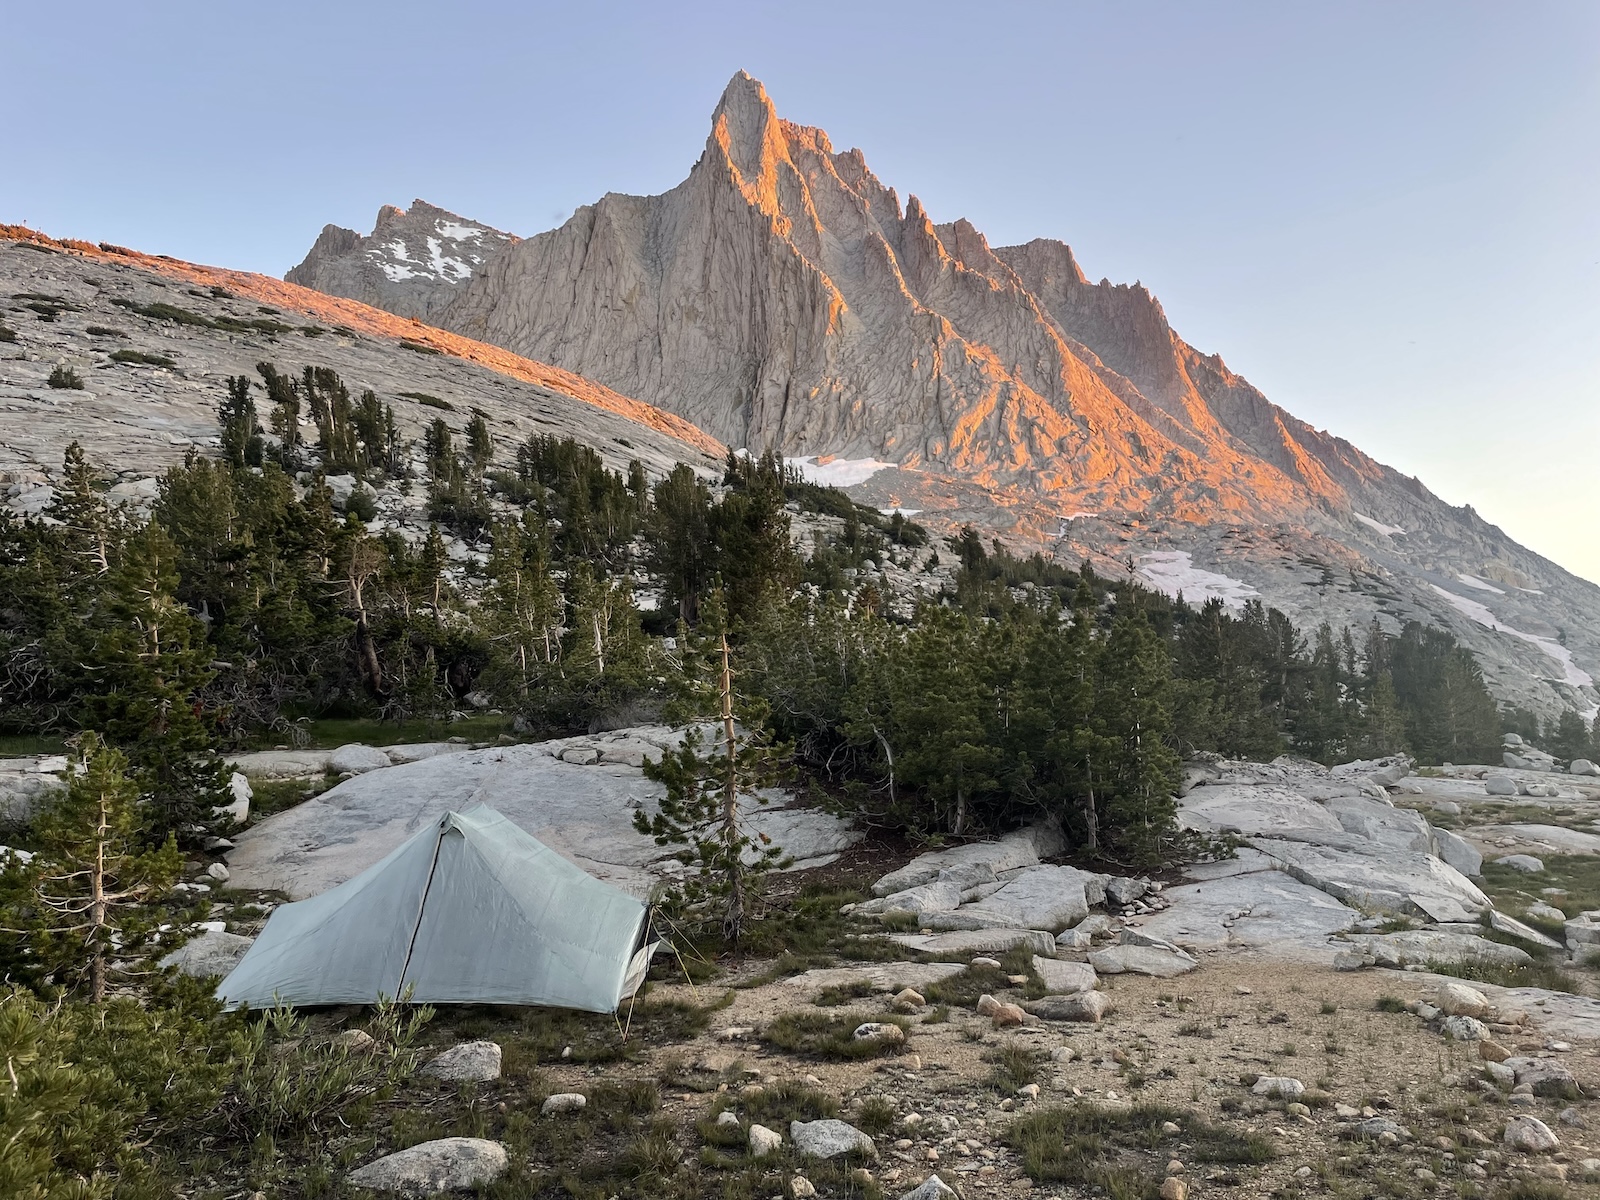
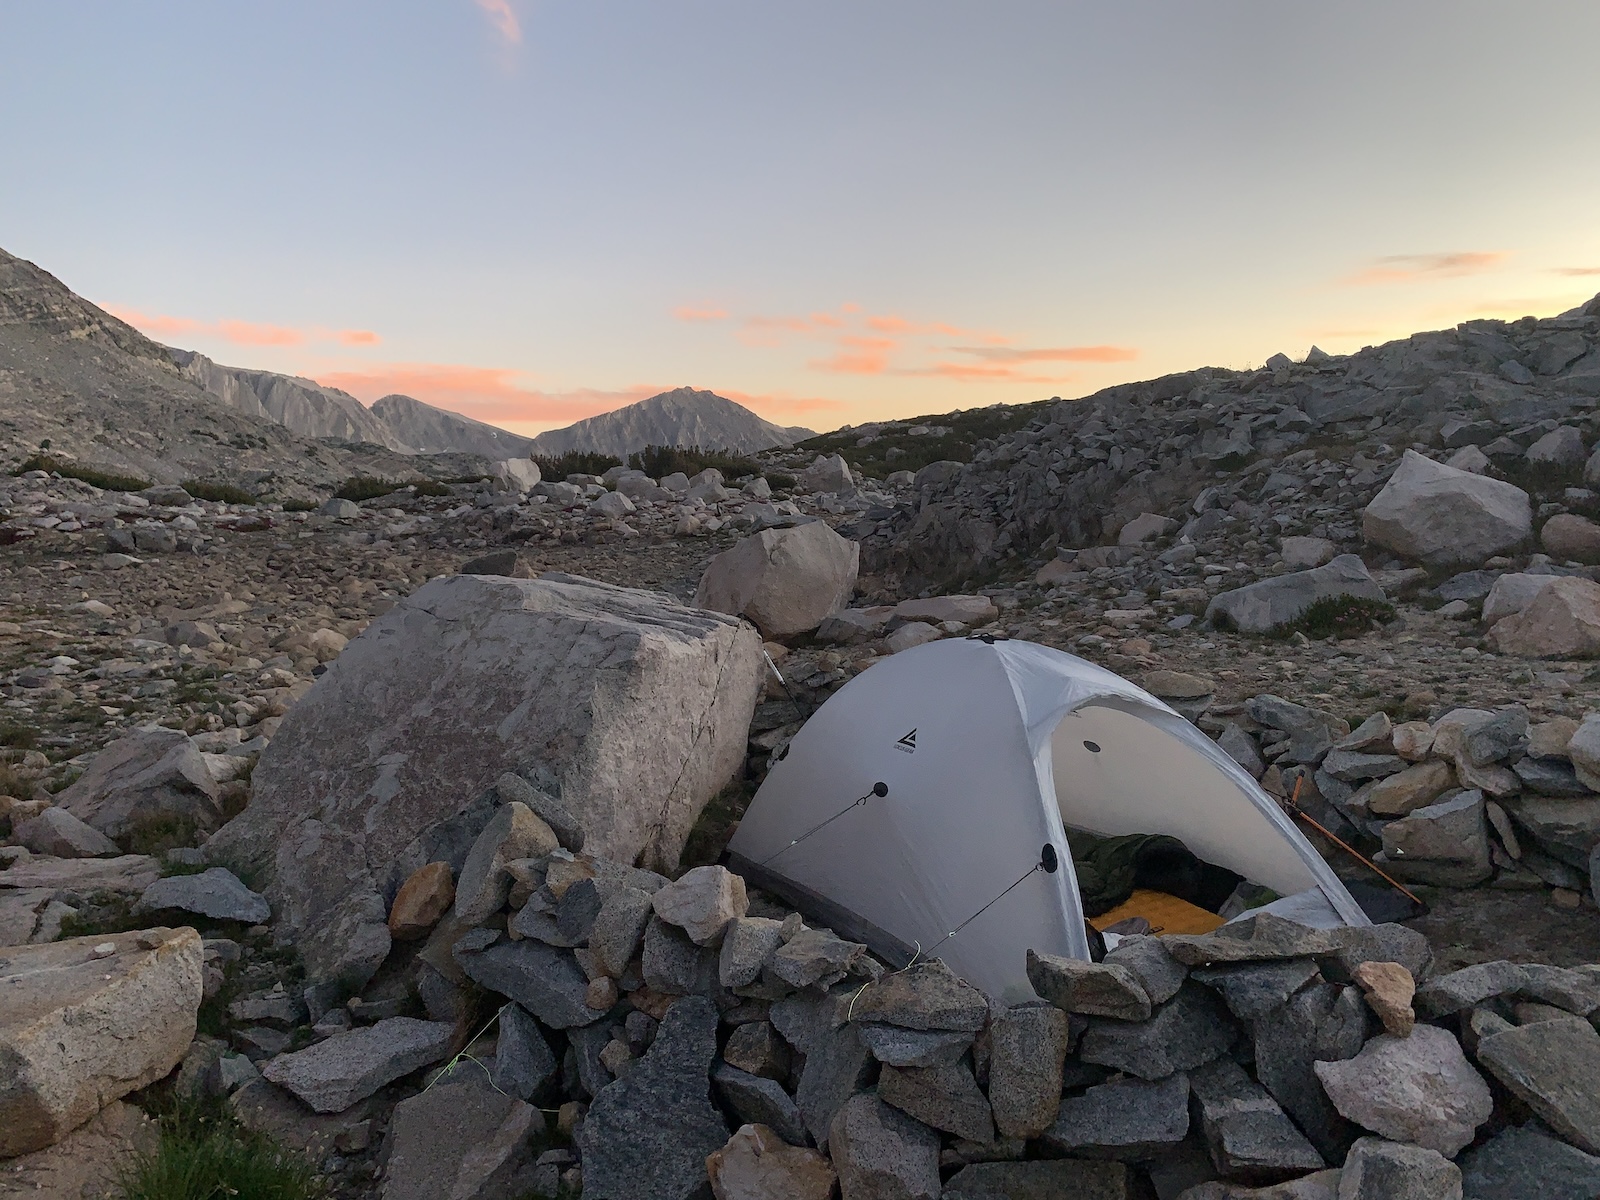


 In this Episode: