Satellite communication devices have become essential tools for backcountry travelers who prioritize safety and connectivity during their adventures. The newly released Garmin inReach Messenger Plus aims to challenge established products with its ability to send photo and audio messages. The inReach Messenger Plus weighs 4.1 ounces and has an MSRP of $500.
The Garmin inReach Messenger Plus is currently the only satellite messaging device on the market that can transmit photos and audio messages (voice memos) via satellite.
WEIGHT:
4.1 ounces (116 g)
WHAT'S UNIQUE:
can transmit photos and voice memos
reverse-charging capability
integrates with both Garmin Messenger (messaging) and Garmin Explore (navigation) smartphone apps
The Garmin inReach Messenger Plus is the first satellite communications device capable of transmitting both photos and voice memos via the Iridium Satellite Network using the Iridium Messaging Transport (IMT) protocol. Photo: Garmin.
Editor’s Note: This is a product preview of a device we haven’t thoroughly tested in the field yet. We will update this article in response to new developments.
Watch the Overview Video
Ryan Jordan and Emylene Vandervelden discuss the market context, impacts, and technical features of the Garmin inReach Messenger Plus in this video:
Overview
The Garmin inReach Messenger Plus is a compact satellite communicator designed for backpackers, hikers, and outdoor enthusiasts. It addresses the need for reliable communication when off the grid using the Iridium Message Transport Protocol (IMTP) for audio and photo messaging and navigation via GPS/Galileo/QZSS/Beidou networks. It offers features backcountry users have come to expect, with durable construction, long battery life (a reported twenty-five days on a single charge), two-way messaging, SOS functionality, and basic navigation capabilities via the Iridium satellite network, promising connectivity in remote environments where cellular signals are nonexistent. The device competes directly with other well-known communicators like the Garmin inReach Mini 2 and Zoleo, but with a few unique upgrades from the Garmin inReach Messenger that aim to set it apart.
The Garmin inReach Messenger Plus transmits photos via satellite messaging using the Garmin Messenger smartphone app. Photo: Garmin.
The inReach Messenger Plus has the same features that sets the Garmin inReach Messenger apart from products like Zoleo or the Spot Gen4:
On-Device Display: View incoming messages to send both preset and custom messages (via on screen keyboard).
Group Messaging: Allows users to send group messages via the Garmin Messenger app.
Weather Forecasts: Provides weather updates to help users make informed decisions about their travel plans.
TracBack: A geographical ‘breadcrumb’ feature is usable without smartphone pairing.
Reverse Charging: Connect a smartphone to the device via USB-C to operate a low-battery phone.
In addition to those features, it can communicate using voice and photo messages.
Tech Brief: The Iridium Messaging Transport Protocol
The Iridium Messaging Transport (IMT) protocol brings a modern, cloud-native solution to small- and moderate-sized Internet-of-Things messaging needs. The IMT leverages the Iridium Certus satellite modules, offers seamless integration with cloud platforms like Amazon Web Services (AWS), and uses industry-standard protocols, such as Python and JSON, for data transmission.
The unique feature of IMT that allows the Garmin inReach Messenger Plus to send photos and voice memos is its publish/subscribe (Pub/Sub) messaging model. Pub/Sub simplifies the communication between devices and applications without requiring a constant connection. This means that IMT can handle data packet sizes ranging from 1 to 100,000 bytes, providing flexibility for various applications, from machine-to-machine (M2M) communications to more detailed weather forecasts to photo and voice memo transmission.
Compared to Iridium’s existing Short Burst Data (SBD) protocol, which has been widely used for transmitting smaller packets of data, IMT offers significant enhancements. While SBD is ideal for low-bandwidth, short messages, IMT’s capability for larger packet sizes and integration with modern IoT frameworks makes it more suitable for complex applications. Additionally, IMT’s use of AWS’s cloud infrastructure ensures better scalability, security, and private queue management, providing a robust framework for modern satellite communication solutions, which is a key advantage for backcountry users and IoT devices operating in remote locations.
Market Context
The inReach Messenger Plus is priced at $500, positioning it competitively but at the upper end of the market. The inReach Messenger Plus appears appropriately placed in the market for its feature set. On the more expensive side for many users, it may be highly desirable for users who have a high need (or desire) for more nuanced communication. Staying in touch with loved ones and being able to see pictures and hear their voices can be particularly compelling for long distance hikers, wilderness guides and other backcountry users who spend extensive time away from home.
The Garmin inReach Messenger Plus (front and side views shown) weighs 4.1 ounces (116 g). Photo: Garmin.
Garmin inReach subscription plans start at $15 per month, with options for higher messaging limits and additional features such as premium weather forecasts, at additional cost. (Garmin does not list pricing for voice and photo messages yet, but it seems likely there will be a premium.) The pricing structure can be annual or flexible, allowing users to pause their subscription during off-seasons (or upgrade their subscription for 30 days at a time for big adventures) which is a welcome feature for seasonal adventurers.
Garmin inReach Messenger Plus (Compared to...)
The Garmin inReach Messenger Plus is the only satellite messaging device capable of transmitting both photos and voice memos. See how it compares to other devices.
Garmin InReach Messenger Plus
Garmin inReach Mini 2
Garmin inReach Messenger
Zoleo Satellite Communicator
SPOT Gen4
battery life (active tracking at 10-15 minute intervals, 8 hr/day)
25 days
10-14 days
20-30 days
6-8 days
20-40 days
battery type
rechargeable lithium
rechargeable lithium
rechargeable lithium
rechargeable lithium
4xAAA
interface
USB-C
USB-C
USB-C
Micro USB
Micro USB
reverse charging
yes
no
yes
no
no
photo messaging
yes
no
no
no
no
audio messaging
yes
no
no
no
no
messaging
2-way
2-way
2-way
2-way
1-way
group message conversations
yes
yes
yes
no
no
send check-in messages from device*
yes
yes
yes
yes
yes
send custom messages from device*
yes
yes
yes
no
no
send custom messages from app*
yes
yes
yes
yes
no
activate SOS from device
yes
yes
yes
yes
yes
seamless messaging (network-independent)**
yes
yes
yes
yes
n/a
tracking
yes
yes
yes
limited (Location Share+)
yes
local storage of track data
no
yes
no
no
no
start/stop from device
yes
yes
yes
yes
yes
track retrace
yes (TracBack)
yes (TracBack)
yes (TracBack)
no
no
satellite network
Iridium (communications) and GPS/Galileo/Beidou (other)
Iridium
Iridium
Iridium
Globalstar
SOS monitoring
Garmin Connect (formerly IERCC)
IERCC
IERCC
IERCC
IERCC
plan costs
$15 - $65
$15 - $65
$15 - $65
$20 - $56
$12 - $15
weather forecasting (integrated)***
yes
yes
yes
yes
no
view forecast on device***
yes
yes
yes
no
no
mapping/navigation on device
no
yes
no
no
no
mapping/navigation in app
yes
yes
no
no
limited
visual display
yes
yes
yes
no
no
show incoming messages?
yes
yes
yes
no
no
smart watch integration
yes
yes
yes
limited
no
waterproofing****
IPX7
IPX7
IPX7
IPX8
IPX8
user rating @ REI
n/a
4.2 / 5.0
4.0 / 5.0
4.2 / 5.0
2.9 / 5.0
companion app
Garmin Explore & Garmin Messenger
Garmin Explore & Garmin Messenger
Garmin Messenger
Zoleo
The Spot App
App Store rating
3.6 / 4.4
3.9 / 5.0
4.4
4.1 / 5.0
2.1 / 5.0
dimensions
3.1 x 2.5 x 0.9 inches
3.9 x 2.0 x 1.0 inches
3.1 x 2.5 x 0.9 inches
3.6 x 2.6 x 1.1 inches
3.5 x 2.7 x 0.9 inches
weight
4.1 ounces
3.5 ounces
4.0 ounces
5.3 ounces
5.0 ounces
msrp
$500
$400
$300
$200
$150
Features
Some unique features that set the inReach Messenger Plus apart from everything on the market today (including other Garmin products) include its photo and voice message sharing.
Photo: Garmin.
The features that set it apart from other brands in the marketplace include its on-device display, group messaging features, TracBack, and reverse charging (all of which are also found on the inReach Messenger.)
Photo Sharing
Unique among satellite communicators, the inReach Messenger Plus supports photo sharing, allowing users to send images along with their messages.
This feature adds a level of richness to communications, whether it’s capturing a stunning landscape or sending visual information during an emergency.
Photo sharing makes the inReach Messenger Plus stand out, offering a more engaging way to keep in touch. The inReach Messenger Plus connects to the Garmin Messenger smartphone app and connects to the Iridium Messaging Transport (IMT) to send photo and audio messages. Older inReach devices use Short Burst Data (SBD) packets when sending messages and cannot send photos.
Photo Quality with the Garmin inReach Messenger Plus
The Iridium Messaging Transport (IMT) protocol allows for data packets of up to 100,000 bytes to be transmitted at a time. This is what allows large files like photos and audio to be transmitted via the Iridium Satellite Network.
Photos that are transmitted from a user’s smartphone via their Garmin inReach Messenger Plus are about 0.9 MP (e.g., 1080 x 810 for a typical landscape-oriented iPhone photo) and about 200 KB to 300 KB in size (this depends on the photo complexity).
When the user activates the Garmin Messenger smartphone app with a non-satellite data connection (i.e., WiFi or cellular), the app syncs with a higher-quality version of the photo via the Amazon AWS Virtual Private Cloud environment. This version of the photo is about the same pixel density but with less compression, and is about 50% larger (in terms of file size) than the photo that was originally transmitted.
Left: A photo of Ryan Jordan hiking in Wyoming’s Snowy Range, as originally transmitted by the Garmin inReach Messenger Plus via satellite using the Iridium Message Transport protocol (download this image here). Right: The same photo synced from the Amazon AWS Virtual Private Cloud environment after the Garmin inReach Messenger Plus returned to a high-bandwidth (WiFi / Cellular) connection (download this image here). Photo: Ryan Jordan.
Voice Messaging
In addition to text and photo messaging, the inReach Messenger Plus offers the ability to send voice messages. This feature adds a personal touch to communications and can be particularly useful when typing is inconvenient (e.g., when injured or in very cold temperatures) or when conveying nuanced information. Voice messaging provides a versatile way to stay connected, blending the immediacy of talking with the reliability of satellite communication.
The Garmin inReach Messenger Plus can transmit voice memos of up to 30 seconds in length. This also uses the Iridium Messaging Transport Protocol. Photo: Garmin.
Reverse Charging
Additionally, the inReach Messenger Plus includes a safety reverse charging feature that allows it to charge a connected smartphone, providing enough power to send custom text messages via the Garmin Messenger app. This capability adds an extra layer of security, ensuring you can maintain communication even when your phone’s battery is running low, making it a reliable companion for prolonged expeditions in remote areas.
The ability to charge an almost-dead smartphone can be exceptionally valuable in situations where a rescue could be hours (or days) away.
On-Device Display
The inReach Messenger Plus features a simple monochrome display that shows essential information such as message status, battery life, and satellite connectivity. While the screen is minimalistic compared to color displays, it’s designed to conserve battery life and provide all necessary information at a glance. The interface on the device itself is straightforward, but still offers essential feedback without the need to engage with the companion apps.
Group Messaging
One of the nice features of the inReach Messenger Plus is its group messaging capability. This feature allows users to communicate with multiple contacts simultaneously via the Garmin Messenger app, making it easy to coordinate with a group during backcountry trips. Whether planning a meetup spot or sharing updates on changing conditions, group messaging ensures everyone stays informed without the hassle of managing separate conversations.
It’s also important to note the functionality this feature provides Garmin to Garmin communication for groups with multiple Garmin devices. In remote areas where cellphone service is rare, this useful feature can be invaluable.
Off-Grid Navigation
The inReach Messenger Plus includes off-grid navigation capabilities, such as tracking your route and marking waypoints. These navigation tools are sufficient for basic route planning and keeping track of your progress in unfamiliar terrain. The inReach Messenger Plus also allows users to send their waypoint coordinates to their contacts from the device, without pairing to the Garmin Explore app from a smartphone.
The inReach Messenger Plus allows users to share their planned routes with friends and family directly from the Garmin Explore app. This feature not only keeps loved ones updated on your location and progress but also adds a layer of safety by providing others with detailed information about your planned path. Route sharing can be valuable in remote areas where conditions change rapidly and rerouting may be necessary.
The Garmin inReach Messenger Plus pairs with the Garmin Explore smartphone app to provide a full suite of navigation functionality. Photo: Garmin.
This feature can also be used in urban areas where you want to track your route, and collect information about topography, or record other route details while training for a trek or ultrarun.
Garmin TracBack function using the smartphone interface. No smartphone required, however, to use it effectively. Photo: Garmin.
What is interesting about Garmin’s TracBack tool is that it does not need to be connected to a smartphone. TracBack allows a wanderer to venture on unmarked trails and be guided back to their starting point once a trek with no destination is over. This can be helpful for the hunter and gatherer hobbyist, the photographer looking for the perfect angle, or anyone else who likes to take a road less traveled. None of these features is particularly surprising from Garmin but the amount you can do without smartphone connection is an intuitive and welcome touch.
Checking the Weather
Access to weather forecasts is critical when venturing into remote areas, and the inReach Messenger Plus delivers by providing weather updates through its app. Users can check the latest forecasts for their current location or planned route, helping to make informed decisions about travel plans. The ability to receive weather data off the grid is a valuable feature that enhances safety and preparedness. What sets the inReach Messenger Plus apart from most competitors is that this can be accessed from the device, no smartphone needed.
Weather report as shown on the Garmin inReach Messenger Plus device display. Photo: Garmin.
Conclusion
The satellite communication device marketplace includes devices with three distinct use cases. First are users who will prefer a device which is a network-independent messaging device which needs smartphone capabilities (like the Zoleo). Second, are users who want adequate messaging and fuss-free tracking and navigation, (for example inReach Mini 2 users). Finally there are users who primarily want communication and tracking during emergencies (Spot Gen4 type). A fourth use case developed when Garmin released the inReach Messenger, which focused on communication with loved ones with some peace of mind features to let friends and family vicariously experience the route traveled, and know where to send help in case of emergency.
The inReach Messenger Plus represents a significant advancement for the fourth use case, offering reliable connectivity, robust design, and user-friendly navigation and safety features with a more personal touch to communication. It stands as a strong contender against established models, providing a valuable tool for those who venture into the backcountry but want or need more connection with home. As always, thorough testing and real-world use will be essential to fully validate its capabilities, but initial impressions are promising.
The Garmin inReach Messenger Plus is currently the only satellite messaging device on the market that can transmit photos and audio messages (voice memos) via satellite.
WEIGHT:
4.1 ounces (116 g)
WHAT'S UNIQUE:
can transmit photos and voice memos
reverse-charging capability
integrates with both Garmin Messenger (messaging) and Garmin Explore (navigation) smartphone apps
Product mentions in this article are made by the author with no compensation in return. In addition, Backpacking Light does not accept compensation or donated/discounted products in exchange for product mentions or placements in editorial coverage.
Some (but not all) of the links in this review may be affiliate links. If you click on one of these links and visit one of our affiliate partners (usually a retailer site), and subsequently place an order with that retailer, we receive a commission on your entire order, which varies between 3% and 15% of the purchase price. Affiliate commissions represent less than 15% of Backpacking Light's gross revenue. More than 70% of our revenue comes from Membership Fees. So if you'd really like to support our work, don't buy gear you don't need - support our consumer advocacy work and become a Member instead.
Learn more about affiliate commissions, influencer marketing, and our consumer advocacy work by reading our article Stop wasting money on gear.
Ronni Wilde writes about her adventures lightening her pack to allow her to do more backpacking at an older age.
Introduction
As an older backpacker, what has become apparent to me over the past few years is that my needs on trail are changing. As we age, we may encounter various new challenges, including muscle loss, joint and muscle pain, a slower metabolism, reduced energy levels, hormonal shifts, changes in mental sharpness, balance, vision, and hearing, as well as increased concerns from family members about our safety while hiking in the wilderness.
Elderly hikers are more likely to suffer from balance-related falls, cardiopulmonary-related events (including strokes and heart attacks), and slower recovery times in response to the type of exertion demanded by hiking several hours a day with a heavy backpack.
Without addressing these emerging issues, aging backpackers can risk discomfort, disorientation, injury or worse. The good news is that as gear improves and technology allows for increasingly lighter equipment, there are ways to improve gear choices, even on a fixed income.
During the past four hiking seasons, I have continued my quest to keep my pack weight as low as possible, but I have also added some items to my arsenal that I believe will help keep me out there longer and with less discomfort and risk. Although the cost of new gear can be a challenge, I found ways to accomplish my goals: I didn’t have the money to replace all my gear with ultralight alternatives right away, so I decided to chip away at it as I could. I scoured online gear sites, budgeted for purchases and waited for sales. I started asking my family for gift cards to REI and Amazon for holidays and birthdays, and created wish lists on those sites so that they would buy me what I really wanted for special occasions. I also shopped used gear websites and stores, where I found some great deals on slightly used gear at a fraction of the price of the new versions. Slowly but surely, I made positive changes.
The author hopes that by adding a few creature comforts while keeping pack weight low, she can keep visiting places like this (Goat Rocks Wilderness, Washington).
The other challenge posed during this process of creating more comfort on trail was doing so without increasing my pack weight. At this point, I’m quite happy with my new items, but in adding them, I have had to figure out how to compensate for the extra weight by finding ways to scale back. Thus the great conundrum of the aging backpacker: skimp too much and be miserable and hurting in the backwoods; add weight and increase the possibility of pain and injury. Here are a few ways I have tackled this problem.
Three summers ago, while hiking the Timberline Trail around Mt. Hood in Oregon, I met a Pacific Crest Trail thru-hiker. During our chat, he told me about an unfortunate event that had happened to him at a town stop in California: He left his pack outside a little store while doing a quick resupply, and when he came out, his pack was gone. When locals in this trail town heard of the young man’s plight, they rallied together and replaced all his gear. Some of the replacements were second-hand, and most were not of the same brand he’d had before, but he was grateful that his hike didn’t have to end abruptly in that little town. When I met him, he had been using his new-to-him gear for a month, and he told me about a pleasant surprise he’d experienced: The Exped Ultra sleep pad he’d been given was now his favorite piece of gear. The used pad donated to him had a puncture in it that was duct-taped over, and it was much heavier than his previous pad, but even so, he said it was the most comfortable pad he’d ever slept on and that he planned to purchase a new one.
1. A more comfortable sleeping pad
That conversation launched what would become a four-year pack reprioritization for me. I wondered if there were tradeoffs I could and should make as an older hiker to help me stay stronger, last longer and feel better while on trail. I had been using a Therm-a-Rest NeoAir Uberlight pad, gloriously tiny and weighing just 8.8 ounces (249 grams), but I had been waking up multiple times a night with sore hips while using that pad. It was also noisy, narrow and a bit slippery, too, so I slid off the pad numerous times each night. Could I justify switching to the Exped Ultra 5R MW, weighing in at 1.6 pounds (0.74 kg)? And if I did make the change, could I find a way to shave off that added pound elsewhere in my pack? I decided it would be worth a try.
I ordered the Exped, and have now slept on it multiple times. The added cushion and comfort — and better sleep — are worth every extra ounce, so the next step for me was to find a way to shed a pound from my pack to keep the scales balanced. I began with the most obvious place: my pack itself.
R-4.8, 3 inches thick, longitudinal baffling, 20D polyester fabrics, internal baffle welding increases stability and reduces air movement, insulated with polyester microfibers, oversized outer chambers create a cradle, Schnozzel bag included for inflation. Availalbe in medium, medium-wide, and long-wide sizes.
I had been carrying an Osprey Aura AG 65 (3.8 lbs / 1.7 kg) and started researching ultralight packs. Though the Osprey’s frame was comfortable and provided nice support for me, I decided I was ready to graduate to an ultralight pack.
I chose the Gossamer Gear Mariposa 60 (2.1 lbs / 1 kg), which instantly shaved off the extra pound of weight and then some. Perfect! The pack went on sale during a Memorial Day weekend special the following spring, so I snatched it up. With this, I pondered other changes I might make that would create more on-trail comfort while simultaneously shaving off weight.
By switching to the Gossamer Gear Mariposa 60, the author shaved off a pound of pack weight, allowing for the addition of a comfier sleep pad.
Now with a new pivot hip belt system, customizable belt options, and more functional load lifters. 60L capacity, S-curve harness, large external stretch mesh pocket, trekking pole attachments, Robic fabrics (100D and 210D). 30 lb comfortable load carrying capacity.
A year later, the summer after my Timberline hike, I took a four-night backpacking trip in the Goat Rocks Wilderness of Washington, and three of my hiking partners were carrying ultralight camp chairs. This seemed an unnecessary indulgence to me, but at the end of the long and tiring hiking days, I looked longingly at those chairs, and snuck in a few sits on them. Blessed relief! Sitting on the ground was uncomfortable and at times even a bit painful for me — particularly with no support for my back — so I came home and did my research. I purchased the Helinox Chair Zero (1 lbs / 0.5 kg) during a sale at REI. Though I wouldn’t carry my chair on a thru-hike, for shorter trips and section hikes, that extra pound brings much comfort. The problem? Now I had to find a way to cut my pack weight down by another pound.
Envying her buddies relaxing in their chairs after a hard day, the author added a Helinox Zero chair to her pack and compensated for the extra pound by scaling back in several other areas. The chair will mostly be used during shorter trips.
The most popular ultralight camp chair in the world, and one of the lighter pole-framed sling chairs available. 7000-series aluminum shock-corded frame, Aramid ripstop nylon support fabric. 14" x 4" x 4" packed size. 25" seat height, 20" width, 18" depth. 265 lb seating capacity. See our review.
On a trip in the Strawberry Mountains of Eastern Oregon last summer, one of my backpacking partners questioned why I was carrying a Kevlar Ursack food bag (5 oz / 28 g). I loved the security of knowing that my food bag was incredibly critter-proof, but I had to admit it was a bit heavy for my purposes, and its large capacity made it tempting to pack more food than I needed. Upon returning home, I purchased an REI Lightweight Stuff Sack (1 ounce) and shaved off several ounces. While I might opt to use my Ursack on a thru-hike, for shorter trips and when I know I’ll do a bear hang, the REI sack is just fine. This gear swap, however, still left me 12 ounces over my previous pack weight because of the chair, so I had to find more ways to tip the scales back in the right direction.
Simple, durable, affordable, light, and well-made. A very good choice for a stuff sack when you don't need to spend the money on DCF or silnylon and need more durability. Available in 15L and 20L sizes for sleeping bags, shelters, food bags, etc.
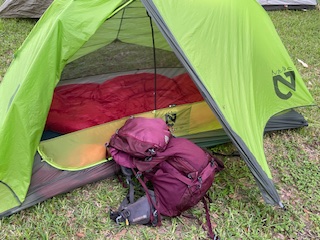
In preparation for this year’s backpacking season, I found a significant way to reduce my pack weight. After several years of sleeping in my beloved Big Agnes Fly Creek 2 (classic version) tent (3.5 lbs / 1.6 kg), I took a big leap and purchased a Durston X-Mid Pro 2 with DCF (Dyneema) flooring (17.9 oz / 507 g). By investing in the new Durston tent, I cut my base weight back by another 2.6 pounds (1.2 kg). My new tent was expensive, but after budgeting for it all winter, I was able to order it in the spring. I did a couple of practice pitches in my backyard, and took the tent out recently for its maiden journey. I love it! The reduction in pack weight by switching to this tent is notable and provided welcome relief during my recent outing.
The Durston X-Mid Pro 1 is a single-person hybrid single-wall DCF trekking-pole tent with patented X-Mid geometry, twin offset poles, dual doors and vestibules, a tensioned bathtub floor, 0.55 DCF canopy, optional floor fabrics, and a listed tent weight from 15.5 oz / 440 g.
My quest to add comfort while concurrently reducing pack weight won’t stop with my new tent: I have figured out that there are other ways I can safely trim back.
An old Coast headlamp was traded out for a Nitecore NU25 UL headlamp, and the Coleman mini lantern is no longer part of the gear list. These changes save the author 9.6 ounces.
A few of those include:
First Aid Kit – My previous kit contained an abundance of supplies, from multiple sizes of Band-Aids to gauze and scissors, tweezers, a sewing kit, a variety of medicines, two emergency foil blankets and more. Now, my kit has the basics of what I might need, but not as much or as many of each item. I no longer pack my fears in my first aid kit; I include just enough to get by until help arrives if I have an emergency. My kit went from 18 ounces (510 g) to 9 ounces (255 g).
Lighting – Up until now, I used a Coast headlamp I purchased at Costco, (3.8 oz / 108 g) and packed a Coleman mini lantern (7.4 oz / 210 g) as a backup light. I recently upgraded to a Nitecore NU25 UL headlamp (1.6 oz / 45 g), and, knowing my phone has a built-in flashlight I can use as a backup, I will no longer carry the mini lantern. These simple modifications will save me 9.6 ounces.
Food – I will still carry one extra day’s worth of food as prescribed by the 10 essentials, but I won’t carry extras beyond that. Knowing that it takes weeks for hiker hunger to set in, I don’t worry about packing extra food and snacks. It’s extra weight that I’ll likely bring home with me.
Water – This is a tough one for me: I have an irrational fear of running out of water on trail. While doing a 100-mile section hike on the PCT from Willamette Pass to Santiam Pass in Central Oregon a few years ago, there was a long waterless stretch over hot, steep, exposed lava rocks that involved an overnight dry camp. I had to carry about 24 hours’ worth of water, and in my fear, I carried 7 liters (!) of water (15.43 pounds). My trail buddies dubbed me “Water Girl” after that irrational carry, and I wound up dumping 2 liters at the next water source. My back complained about my bad judgment for weeks, and I learned the hard way to not go overboard with water.
Hiking in the barren, volcanic terrain of the Cascade Mountains in Central Oregon prompted the author to act upon her fear of running out of water. She carried 7 liters of water for a long waterless stretch with an overnight dry camp, and learned the hard way not to carry more water than she needs. Two liters were dumped at the next water source, and her back was unhappy for weeks.
Enjoying the process
A four-day backpacking trip on the Timberline Trail three years ago is when the author’s quest to add comfort while reducing pack weight began.
I’m still learning how to balance the scales with my pack weight, and I know I’m not finished yet. Likely, I will never be finished, as gear evolves and my needs continue to change. But to date — even with my added creature comforts — I’ve managed to reduce my pack weight by more than 4 pounds (2 kg), and it’s made a big difference in my comfort and energy levels on trail. By replacing my gear one item and one sale at a time, I have lightened my load without emptying my bank account, and I’ve had a lot of fun in the process.
In this updated gear guide, I’ll provide some insight into the backcountry electronics I use, discuss their use cases, and explain why I chose those brands and models.
Introduction
I spend a fair amount of time as an outdoor educator studying backcountry electronics. It’s an area of outdoor skills education that we cover extensively in our courses, including Basecamp and Trek Planning.
One important trend over the past few years is the move toward rechargeable devices. Now that we have high-performance rechargeable headlamps, cameras, smartphones, inflation pad pumps, satellite communicators, and GPS watches, we can now consolidate our charging using portable battery chargers (PBCs). We’ve covered PBC performance is covered extensively in BatteryBench.
In this updated gear guide, I’ll provide some insight into the backcountry electronics I use, discuss their use cases, and explain why I chose those brands and models.
I will focus on lighting, photography, satellite messaging, GPS watches, and portable battery chargers.
Revision Info:
This article was first published here in July, 2018. It has since been revised and updated to reflect the author’s changing practices, preferences, and gear recommendations. Last update: September 3, 2024.
Lighting
The use of electronic devices in the backcountry is a relatively new phenomenon. Of course, disposable battery-operated flashlights have been around for decades, so those don’t really count. But with the increasing prevalence of rechargeable electronics found in hiker kits, the relatively new genre of USB-rechargeable lights can’t be ignored.
I use five lights depending on the use case.
When this article was initially written in 2018, I was using the Petzl Bindi Headlamp. Since then, its weight, form factor, and performance haven’t changed, and its price has decreased by ten bucks.I still use the Bindi when I want a tiny-form-factor (pocketable) headlamp for task lighting around camp. It’s not really powerful enough for extensive nighttime trail hiking. It lacks a bright flood pattern and suffers from poor battery life when powering it in high beam mode (200 lumens). It makes a great addition to my day hiking kit, when I occasionally need a light-duty headlamp to get me back to the car during a late-in-the-day romp in the woods.
One of the lightest rechargeable headlamps available. On its highest setting, it throws a 200 lumen beam up to 36 m for 2 hours. On its low setting, battery life extends to 50 hours with a 6 m, 6 lumen beam. Includes both white and red LED lighting.
If I know I need a headlamp for more extensive trail hiking, I use the Nitecore NU25UL. It will throw 400 lumens at 70 yards for more than two and a half hours. Its flood pattern doesn’t illuminate long distances (which limits depth perception), and the battery is relatively small (650 mAh), so it’s not my first choice for early morning alpine starts, snow-covered landscapes, or bushwhacking. In looking back at my gear lists from the past year, however, the Nitecore NU25UL accompanied me on more than 50% of my nights in the backcountry.
For most of my “casual” multisport adventures (including mountaineering and packrafting), I opt for an IP68-certified housing to prevent water ingress in heavy rain or submersion. In particular, while packrafting, I’m often on the water just before dawn, and may be using a headlight for the first hour (and often wearing it for a few hours). In addition, in cases where I’m paddling long days and can’t find a camp, I’ve been known to paddle for a bit after dark, if I know I’m not having to paddle Class 3 or higher whitewater. The Fenix HL50M is my headlamp of choice in these scenarios. Its 700-lumen burst mode and outstanding flood pattern give me the depth of field for off-trail, snow, and on-the-water navigation. I don’t use it in the winter or for long alpine climbs – its battery is just too small for extensive, hours-long navigation exercises in the dark.
The new v2 model features a Cree XP-G3 S4 white LED that outputs up to 700 lumens with a 377-foot beam throw. Includes a red LED for night-vision-saving task lighting. IP68 water-resistance (submersible) and a machined aluminum housing make this a reliable, durable performer for rough conditions. It has a relatively small battery (700 mAh), so pay attention to recharge needs if you plan to use high-output modes often.
The heavy end of my headlight range focuses on two features: battery life and flood illumination. Most headlights designed for long hours of use where a lot of light is required usually have the battery located in the back. However, advances in battery regulation, LEDs, and lenses in the past 12 months have now allowed for lights that weigh less than 4 ounces (113 g) with their battery integrated into the front housing for better comfort. I’ve tried a half dozen of these designs from Fenix, Petzl, and Biolite, and I landed on the Black Diamond Distance LT 1100. It’s the most stable headlamp I’ve used in this weight range because the battery stays fixed next to the headband (it’s separated from the pivoting lamp housing). A 2200-mAh battery gives it more than 4 hours of run time at its highest setting (600 lumens with a beam throw distance of 350+ feet), and the user depth perception is among the best I’ve experienced. This is my winter and alpine mountaineering headlamp when I know I’m going to spend a lot of time navigating early in the morning or at night among snow, bush, and glaciers.
An extreme-conditions headlamp with some unique features, including a 2200 mAh battery that remains stable against the headband because the lamp housing is a separately-pivoting unit. Burst mode provides 1100 lumens for 10 seconds, then turns off automatically. More than 4 hours of light in high (600 lumens) mode. Waterproof and submersible (IP67). 3.8 oz (108 g).
Finally, I do carry a keychain light. It’s always in my emergency kit. I rarely use it – unless the battery in my main light full discharges and I need something to tide me over until I can charge it again. Since this is a backup (emergency) light, I don’t spend a lot of time worrying about performance specifications. I just carry something as small and as light as possible, usually a Photon II Microlight.
The camera I use the most for capturing vlog-style and documentary trip video is the GoPro Hero 12 Black. It’s easy to use, captures high quality images and video, and I can rig it with my Rode lav mic systems for narration.
Out of the box, the GoPro Hero 12 Black is simple to use, provides very good image and audio quality, and is weatherproof. For documentary filmmaking, the GoPro Hero Black series captures files that hold up well in post, with options for professional audio integration. Still the gold standard for action cameras.
If you’ve followed my photography journey for more than a few years, you’ll know that I’ve been making images and movies with the Sony RX100 series was released in the summer of 2012. Since then, it’s gone through several iterations, and the newest Sony RX100 Mark VII version is a very significant upgrade:
Long Lens: 24-200mm (equivalent) lens. An incredible achievement for a camera that’s pocketable, has a mid-sized sensor, and only weighs 10.6 oz (I verified the weight – that includes the battery and SD card).
This is a game-changer for me, and it means I can (finally) leave my heavy, bulky Sony RX10 or 70-200mm lens for my Sony a6500 at home for trips where I really want to save weight – and I don’t have to give up telephoto capability! This adds a lot for me creatively, because I really enjoy long shots of hikers and campsites with dramatic scenic backdrops!
The little Sony RX100 has been my go-to camera for longer trips where I want to save as much weight as possible without giving up a powerful imaging device. Photo: Absaroka-Beartooth Wilderness, Montana.
And yes, I think there’s still a place for a durable, waterproof point and shoot camera, especially when I want more flexibility (lens range) than what the GoPro offers. I own and use an Olympus TG-7 for mountaineering, packrafting, and winter backpacking – I especially appreciate it when the weather is foul because it’s easy to use while wearing gloves and I never have to worry about getting it wet, submerged, or snow-covered.
A smartphone has mostly replaced point and shoot cameras for many applications. However, for extreme weather, mountaineering, watersports (like packrafting), or snow/winter use, a waterproof, shock-proof camera is still the most reliable option. The Olympus TG series has left the rest of the pack in the past few years, and their latest iteration (TG-7) is a gem. For less than 9 ounces, you get terrific photo quality, ease of use, and one of the most durable camera bodies ever made.
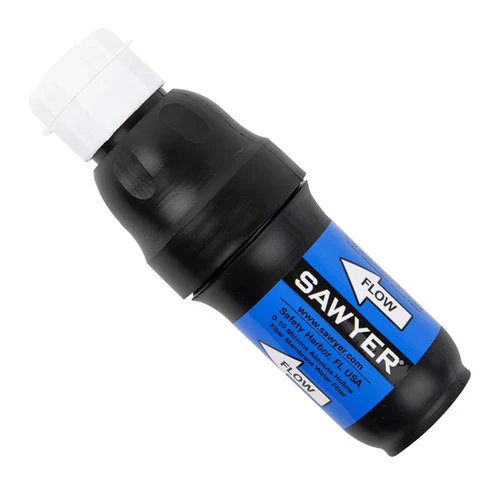
The Garmin inReach Mini 2 offers the most performance (tracking, navigation, and messaging) in the smallest size of any satellite messenger on the market. It's our recommendation when you want to have the insurance of a standalone device if you don't want to use your smartphone or your smartphone fails in the backcountry.
The inReach Mini keeps me in communication via text messaging with my wife back home, and it serves as a powerful mapping GPS when paired with my smartphone.
In addition, I have used a Garmin inReach Messenger more often in the past few years because it’s more pocketable, has better battery life, and is a more straightforward device when I don’t need navigation functionality.
Lighter and smaller than a Zoleo and a more pocketable form factor than a inReach Mini 2, the Garmin inReach Messenger boasts a very long battery life, reverse charging, and a display that doesn't require a smartphone for monitoring weather, incoming messages, and more.
I’ve been using training watches for a long time, and years ago I migrated from a Polar V800 to the Garmin Epix Pro and Fenix AMOLED lines. here’s what I look for in a GPS watch:
GPS navigation that includes both GLONASS and Galileo sat systems for accuracy and speed; integrated color base maps that show trails; powerful route-following features that include a unique climb analyzer that allows you to manage your climbing output on long days.
Activity recording that includes the usual suite of location, speed and altitude data in addition to key health metrics that use wrist-top LED sensors for heart rate and pulse oximetry monitoring.
Tight integration with Training Peaks, which I use to monitor my training and recovery.
Bluetooth integration with smartphone notifications, the Garmin Connect App, and Garmin inReach satellite messengers for message notifications and route-finding.
I’ve owned three Garmin Fenix/Epix models: the Fenix 5X Plus, the Epix Pro 2, and the new Fenix 8 AMOLED. The Garmin Fenix 8 AMOLED is supposed to represent the current state of the art in GPS watches (it’s the most recent model). It offers a beautiful screen, decent battery life, and an updated (simpler) user interface and menu system than previous Fenix and Epix models. However, because it’s such a new model, it suffers from immature firmware. If I had to buy a watch today, I’d stick with the much more refined Epix Pro 2. Garmin continues to release Fenix 8 firmware updates, but we’re likely not going to see this new model optimized until mid- to late-2025.
The Garmin Epix Pro 2 is currently our recommended premium watch for GPS, ABC (alti-baro-compass), and fitness (e.g., HRM, HRV, PulseOx) monitoring. With a bright AMOLED screen, mature firmware, and high level of customization, the Epix Pro 2 represents the current state of the art (and science, with its new sensor set) for outdoor smart watches.
The Fenix 8 AMOLED is the current standard-bearer of ABC/GPS fitness watches. It offers similar guts and sensor technology as the Garmin Epix Pro 2 (including multiband/L5), but with a modified (simpler) user interface and a new codebase. Recent firmware updates in late 2024 have improved responsiveness, battery life, customization features, and usability.
As an outdoor industry professional, I’ve enjoyed the privilege of testing a variety of watches from Garmin, Suunto, Polar, Apple, and Coros – and I always come back to the Fenix series for its professional features and solid integrations with Garmin Connect, Training Peaks, and the inReach ecosystem.
The watch is a very important part of my ongoing (years-long) effort to maintain and optimize my backpacking and mountaineering fitness. It sends the data I need to Training Peaks, which I then use to pretend I’m an unstoppable mountain machine:
I’m a total data junkie when it comes to tracking and training. The Garmin Fenix 5X Plus feeds this addiction and works seamlessly with my Training Peaks account, which is where this screenshot was taken.
Charging Batteries
When I think about backcountry electronics, I get excited about watches and satellite messengers and headlights and the apps I can put on my iPhone to enhance my experience in the backcountry.
For years, portable battery banks and charging cables were always an afterthought – what boring pieces of gear!
Until I started learning about the electrical engineering and design that went into making these things. That excited me because now I could make more intelligent decisions about which batteries and cables were good or bad for backcountry use.
As I learned more, and studied the design and production of batteries and cables, I discovered that there were indeed solutions to my years-long frustrations with underpowered batteries that never lived up to their capacity claims, and to cables that failed in the field.
Today, I’ve landed on two specific products that have given me new levels of confidence on long backcountry trips, because I know (from experience now) that they aren’t going to fail.
My battery of choice is the Nitecore NB10000 Gen 2. Not just because it has an extraordinarily high capacity to weight ratio (7.3 Wh/oz) or because it’s encased in carbon fiber. But because of what’s inside – electronic circuitry that powers some of the most efficient (lossless) PD circuits available. With the right cables (more on that below), it powers my devices quickly, reliably, and efficiently.
Nitecore NB10000 is a 10,000 mAh (39 Wh) power bank with dual USB-C ports, carbon fiber sheets, reinforced flame-retardant composite frame, IPX7 rating, Knock to Wake indicators, RGB port lights, pass-through charging, and 5 oz (143 g) weight.
PD USB-C cables are essential today if you want to get the most out of your battery (less energy wasted) with minimal charging time.
For iPhone and AirPods users, a modern USB-C to lightning cable is a must, but there’s a lot of garbage out there. I’ve purchased cables from the Big Online Retailer that were counterfeit (sold as name brands), slow (sold as PD but weren’t), and poorly durable (failed to charge after just a few uses).
But in September 2023, Anker quietly released a brand-new compact charging cable (available in USB-C to Lightning) that comes in a 12-inch length, offers 25k bend cycles (verified by independent testing labs), and true PD charging. This is a rare combination in a short cable.
My point is this – don’t overlook the little things when it comes to building your backcountry kit. I’ve spent years obsessing over things like miniature dropper bottles, mosquito repellent, toothbrushing comfort, pillows, batteries, and cables. This type of gear isn’t as sexy as a Dyneema tent or a 1000-fp down quilt or a titanium cookpot, but not dialing in the little things can create its own brand of misery.
My approach to calculating battery recharging needs is simple.
Determine the battery capacity of each device.
Estimate the number of times during a trip you need to recharge it.
Add it all up and select an external (recharging) battery (the power station) that has some more capacity than your total needs (usually 20% to 40%, as a factor of safety, to account for the charging efficiency of the external battery – which you’ll find in the manufacturer’s specs).
The following case study shows what I’ll need for a typical 8-day summer alpine trek:
Headlamp: 650 mAh battery x 1 recharge = 650 mAh
Satellite Messenger: 1,250 mAh battery x 1 recharge = 1,250 mAh
GPS Watch: 550 mAh battery x 2 recharges = 1,100 mAh
Sony RX100 VII: 1,240 mAh x 3 recharges = 3,720 mAh
Smartphone: 2,815 mAh x 3 recharges = 8,445 mAh
So the total battery capacity that I’m estimating is the sum of these totals or about 15,590 mAh. Lithium-ion power banks have a density in the range of about 1,200 to 1,800 mAh per ounce in terms of charging capacity-to-weight ratio. So the portable battery charger(s) that I’ll need to cover my charging needs will be around 10 to 16 oz. Going through this process is useful so you can compare the weights of an external power bank vs. taking spare device batteries (if your device supports them, like a camera), or using some type of solar charging system.
Backpacking Light does not accept compensation or donated/discounted products in exchange for product mentions or placements in editorial coverage.
Some (but not all) of the links in this review may be affiliate links. If you click on one of these links and visit one of our affiliate partners (usually a retailer site), and subsequently place an order with that retailer, we receive a commission on your entire order, which varies between 3% and 15% of the purchase price. Affiliate commissions represent less than 15% of Backpacking Light's gross revenue. More than 70% of our revenue comes from Membership Fees. So if you'd really like to support our work, don't buy gear you don't need - support our consumer advocacy work and become a Member instead.
Learn more about affiliate commissions, influencer marketing, and our consumer advocacy work by reading our article Stop wasting money on gear.
In episode 106 of the Backpacking Light podcast we’re going to learn about tent stake holding power and have a chat about tent stake design with Suluk 46 founder Steve Evans.
Sponsor
Today’s episode of the Backpacking Light Podcast is sponsored by Garage Grown Gear, your hub for all things ultralight. Garage Grown Gear is dedicated to supporting the growth of small, startup, and cottage brands.
Listen
Summary
In episode 106 of the Backpacking Light podcast we’re going to learn about tent stake holding power and have a chat about tent stake design with Suluk 46 founder Steve Evans.
Find information about all of our upcoming Member Q&A’s, Webinars, Live Courses, other live events, and more on our Events Calendar Page.
Tent Stake Holding Power
Holding power – a stake’s ability to resist pulling out of the ground as a result of tension forces transferred to the stake via a guyline or stake out loop on your shelter.
Holding power relates to 4 core principles – cross-sectional shape, length, soil interaction, and insertion angle.
Holding power is influenced by – surface area & friction, soil compaction & displacement, load distribution, anchoring & soil interaction, and soil type
More about Tent Stake Holding Power at Backpacking Light:
Today’s interview is with founder of Suluk 46, Steve Evans, and encompasses a discussion about tent stake design principles, what’s new at Suluk, and the adventures of running an outdoor gear business.
The Suluk46 Atani Titanium Tent Stakes are ultralight, flat-profile stakes available in 6-inch (5 grams) and 8-inch (9 grams) lengths, designed for optimal strength-to-weight performance.The wide upper section withstands significant guy-line forces, while the sharp, thin lower section facilitates penetration into hard ground.An upper indentation secures the guy-line loop, and the flat design prevents rotation.The 8-inch stakes include reflective tie loops for enhanced low-light visibility.
Executive Producer - Backpacking Light; Show Director and Host - Ryan Jordan; Producer - Chase Jordan; Theme music: Look for Me in the Mountains written by Chris Cunningham and Ryan Jordan, performed by Chris Cunningham (acoustic guitar, lead and harmony vocals, harmonica), Chad Langford (upright bass), and Tom Murphy (mandolin), produced by Basecamp Studios in Bozeman, Montana.
Sponsorship Policy: Backpacking Light does not accept compensation or donated/discounted products in exchange for product mentions or placements in editorial coverage, including any podcast episode content not excplicitly identified as sponsored content. Some (but not all) of the links in these show notes may be affiliate links. Learn more about affiliate commissions, influencer marketing, and our consumer advocacy work by reading our article Stop wasting money on gear.
This REI Magma Trail Quilt 30 review features a high quality, well-insulated quilt that uses water-resistant down and includes an insulated draft collar.
Updates: REI Magma Trail Quilt 30 (August 2024)
The REI Magma Trail Quilt 30 received notable updates in the 2024 model, including revised sizing and a much more versatile footbox. These updates are summarized here:
model year
2019
2024
availability
discontinued
See it at REI
shell fabric
15d ripstop nylon
15d ripstop nylon
lining fabric
15d ripstop nylon
15d ripstop nylon
down fill type
850 fp water-resistant down
850 fp water-resistant down
down fill amount (size M)
10.5 oz (298 g)
11.6 oz (329 g)
dimensions (size M) - fits up to x shoulder girth x hip girth
71.0 x 58.5 x 52 in
72.0 x 56.0 x 53.0
insulated draft collar
yes
yes
footbox
sewn
zipper / drawstring
weight
19.0 oz (539 g)
20.3 oz (576 g)
sizing options
short, medium, long
medium, medium wide, long, long wide
MSRP
$300
$330
REI Anniversary Sale Price
$210
$230
Fabrics, down fill quality, loft, pad attachment system, and soft goods notions didn’t receive any notable updates, so the remainder of this review continues to remain relevant (specs have been updated to reflect the 2024 model).
The 2024 model of the REI Magma Trail Quilt 30 retains our Recommended Rating:
Latest Updates: The REI Magma Trail Quilt 30 is now offered in wide girth sizing options in both medium and large lengths, more down fill, more generous girth, and a more versatile footbox with a combination zipper-drawcord closure system.
In addition, we’ve updated the comparison table below to reflect 2024 specifications from new models of quilts (including the Magma) from REI, Therm-a-Rest, Sea to Summit, Katabatic Gear, Western Mountaineering, Nunatak, Enlightened Equipment, and ZPacks, and have added the new Burrow UL from Hammock Gear to the table.
Introduction
The REI Magma Trail Quilt 30 is made with 15d Pertex Quantum fabrics, 850 fill power water-resistant down, includes an insulated draft collar, an effective pad attachment system, and is generously cut for a wide girth.
At $330, the 2024 REI Magma Trail Quilt 30 represents one of the best values in premium down quilts available today. If you purchase it during one of REI’s major annual sales (usually around Memorial Day, Labor Day, and the Holidays), you can get the Magma Trail Quilt for 30% off (~$230) which makes it nearly 40% cheaper than the average of the rest of the quilts shown in the comparison table at the end of this review. At about 20 oz (including the pad straps), when you consider its loft (2+ inches) and its wide girth, it offers a compelling performance-to-weight ratio.
The following video provides a summary of this REI Magma Trail Quilt review:
Features and Specifications
Features
Adjustable, insulated draft tube at collar
Pertex Quantum (nylon) DWR finished shell and lining
Trapezoidal foot box (permanently enclosed)
Hybrid vertical/horizontal baffle orientation
Sewn-through baffles
Pad fastening cords
Water-resistant down
Imported
Unisex
Specifications (size regular*)
Claimed weight: 20.3 oz (575 g) – 2024 model
Measured weight of quilt + pad attachment straps: 20.1 oz (570 g) – 2024 model
Temperature rating: 30 F (-1 C)
Fill type: 850-fill-power grey goose down
Fill weight: 11.6 oz (329 g) – 2024 model
Dimensions: 71 x 58.5 in (180 x 149 cm) – 2024 model Medium/Medium
My first quilt was purchased 18 years ago from Nunatak Gear – a generation one Arc Alpinist. Since then, I’ve used quilts for the vast majority of my 3-season camping. I’ve owned and used several models of quilts from Nunatak, ZPacks, Katabatic Gear, Enlightened Equipment, Therm-a-Rest, as well as some lesser-known cottage manufacturers who have come and gone.
My lightest quilt system is a two-layer system (50 deg F down inner quilt + 50 deg F synthetic outer quilt) that (combined) weighs less than a pound and a half. This is the system I use for expeditions in extremely wet environments and while mountaineering and packrafting in temperate environments during the spring, summer, and fall.
The coldest night I’ve ever spent in a quilt was nearly 30 degrees F below zero (-35 deg C), during a winter ski trip in Montana’s Madison Range. It was in a down quilt rated to 10 deg F, but I was also wearing vapor barrier clothing, expedition weight base layers, a down winter-weight parka and pants, an extra down hood, and down booties. I managed to sleep well enough until about 6 am, when I started to get a little chilly.
The quilt that I’ve used the most over the past few years of summertime (July and August) backpacking in Montana, Wyoming, Idaho, and California has been a Katabatic Gear Chisos. It’s rated to 40 deg F and weighs 14 oz. My primary 3-season backpacking quilt is an Enlightened Equipment Revelation (20 deg F rating), and it weighs about 20 oz.
It’s from this foundation of experience with quilts that I can put the REI Magma Trail Quilt 30 into some sort of meaningful context in this review.
Description of Field Testing
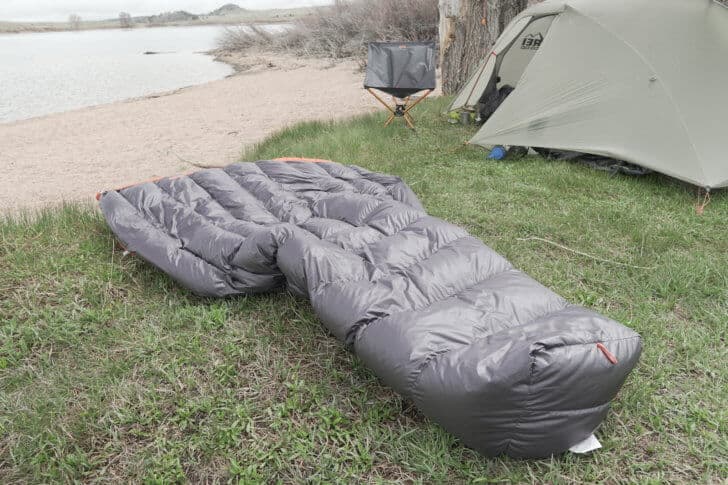
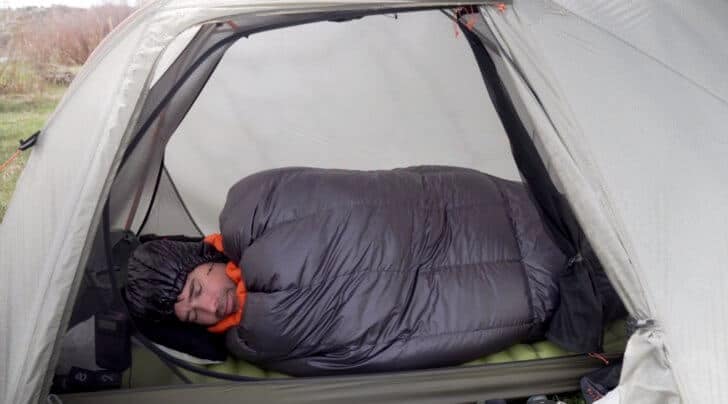
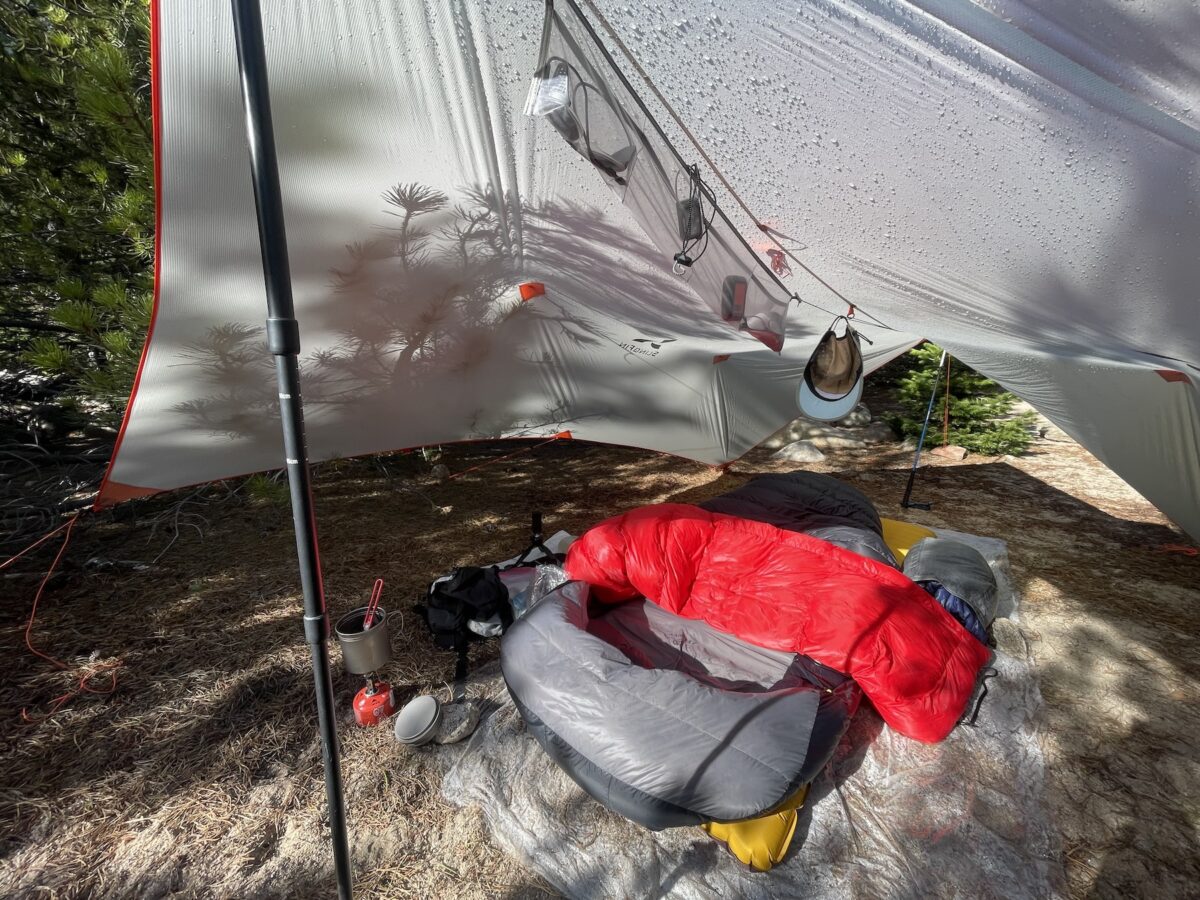
I’ve been using the REI Magma Trail Quilt 30 since early February 2019, and it’s been my quilt of choice for almost every night spent outside since then. The most challenging test of the quilt was on a wintry trip into Wyoming’s Snowy Range (watch the trip video or read the story). Temperatures were in the 20s, winds were gusting to more than 60 mph, and I was sleeping in this shelter, which has a lot of air conditioning.
Otherwise, most of the nights spent in the REI Magma Trail Quilt 30 were in the temperature range of 28 to 42 deg F (0 to 4 deg C) in the relatively dry climate of Wyoming’s winter and spring seasons.
Performance Assessment
The most unique features of the REI Magma Trail Quilt 30, when compared to other quilts at this weight, include:
Generous girth – the REI Magma Trail Quilt 30 offers more girth than any quilt I’ve ever used. I think this offers a few key advantages when it comes to comfort:
More girth is better for side-sleeping (I’m a side sleeper), and with the Magma I never experienced the cold spots (caused by a shoulder or hip compressing the insulation) that I commonly experience on almost all of my (narrower quilts).
More flexibility in adjusting girth for very warm to very cold conditions. On one extremely cold night, I was even able to criss-cross the pad attachment loops so the bottom edges of the quilt overlapped each other, for a very tight (essentially, baffled) seal from the outside elements.
Insulated draft collar – My other quilts don’t have insulated draft collars. This one does. It feels so cozy when it’s all cinched up. I don’t know how much this actually affects warmth, but the effectiveness of the neck seal is undeniable and I won’t likely skimp on this feature for any quilt I acquire in the future, regardless of temperature rating.
Pad attachment system – A pad attachment system affixes the quilt to a sleeping pad, accomplishing two things:
It seals the edge of the quilt to the pad to minimize unwanted drafts of cold air, and to mitigate heat loss; and
It should be adjustable such that the girth of the pad-quilt system can be altered in response to ambient temperature (larger girth at warmer temperatures, smaller girth at cooler temperatures) and the user’s desire for comfort (larger girth provides more mobility and better side-sleeping comfort).
I wasn’t initially very enamored by the “shoelace” rig that REI calls a pad attachment system, but the loop-and-toggle setup is secure and very easy to manipulate and adjust while inside the quilt. It has now become my favorite pad attachment system over the Katabatic Gear cord-and-claw system and the Enlightened Equipment buckle-and-strap system.
Hybrid vertical / horizontal baffle construction – More and more sleeping bag manufacturers are moving to vertical baffles because they (reportedly) offer better down control. I’m not quite sold on this philosophy, because if a baffle is properly (and adequately) filled with enough down, it’s not likely going to shift and create cold spots. However, one distinct advantage of vertical baffling is that when a sleeping bag or quilt is cinched around your body, baffle thickness remains more consistent in vertical baffles, and you have a warmer quilt. This is most important in the torso section, where the girth is large. Some manufacturers try to combat this with a differential cut (where the inside girth is narrower than the outside girth), but few of them execute it successfully with an aggressive enough differential.
Otherwise, here are my notes on other materials and performance features:
Fabrics – Fabrics that are lighter than the 15D Pertex Quantum nylon used in the REI Magma Trail Quilt 30 tend to be more water-resistant, less-breathable, and less comfortable (more clammy) next to skin. This is because fabrics woven from finer denier threads require more calendaring in order to stabilize the weave for strength. Heavily-calendared fabrics don’t feel great next to skin on warm nights. Although there’s a weight cost at using heavier fabrics like 15D Pertex, using this quilt was a good reminder that next-to-skin comfort of the fabric isn’t something you should ignore if you plan on sleeping lightly-clothed part of the time.
Manufacturing quality – The quality of the materials (Pertex fabrics and 850-fill power RDS-certified water-resistant down) and construction (stitching, design, notions) are excellent, and what you’d expect from any high-end outdoor gear manufacturer.
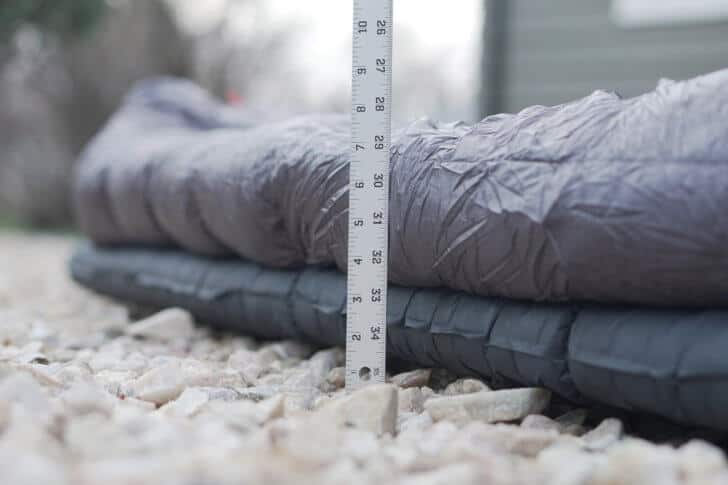
Baffles – all baffles are sewn-through without interior baffle walls. In addition, some of the baffles are quite wide. The torso vertical baffles are about 6 in (15 cm) wide, and the leg horizontal baffles are 7 to 8 in (18 to 20 cm) wide. This made me a little bit nervous given the quilt’s 30 deg F temperature rating. I suppose I’m used to the stuffed 5 in (13 cm) wide baffles that are so common on Western Mountaineering and Feathered Friends bags. However, I found the temperature rating to be accurate, and the baffles to be generously filled to a loft of at least 2 in (5.1 cm) in the torso, and 3 in (7.6 cm) in the footbox. I also couldn’t help but wonder that perhaps larger baffles result in a better drape and conformity to the shape of the human body during its nighttime contortions.
Product Strengths and Limitations
Strengths
High quality materials, thoughtful design, quality construction
Generous girth
Insulated draft collar
Effective pad attachment system
Limitations
Girth will be overkill for those who count ounces and want a skinny quilt for weight savings.
Pad attachment straps absorb water and are slow to dry if they do get wet (unlike the cord system used on Katabatic Gear quilts).
The included stuff sack is absurdly small, is aggravating for arthritic hands, and causes the stuffer to swear unnecessarily.
Compared To…
Caution is advised when comparing quilts on paper based on down fill and weight specs alone. The REI Magma Trail Quilt 30 offers something of value the other quilts don’t – a very generous girth. In fact, this is its most hidden, but perhaps its most valuable feature.
Down Quilts: 26 to 32 °F (-3 to 0 °C)
The following table compares key specifications for quilts in the 30 °F (-1 °C) range. Where options were available, we chose quilts that are "regular length, regular width" and specified with the lightest possible materials (when materials were offered as customizable options), including down fill and fabrics.
REI has been steadily producing quality gear from their own gear and apparel design team for the past several years. Quietly, they’ve introduced a number of lightweight items, most notably, in the Flash and Magma product lines (packs, clothing, sleeping bags). In 2019, however, REI has introduced a number of products that should grab the attention of lightweight hikers looking for solid performance at very compelling weights, including the new REI Magma Trail Quilt 30.
The REI Magma Trail Quilt 30 is not the lightest quilt for its temperature rating. It doesn’t use the absolute lightest fabrics, or the absolute highest fill power down. Nor is it customizable like some products offered by smaller cottage industry manufacturers.
However, it does offer very light (15D) fabrics, high fill down (850 FP), a thoughtful baffle design, a very effective insulated draft collar, and an outstanding pad attachment system. In addition, it offers a generous girth that makes this quilt a far more versatile option across a wider range of temperatures than narrower quilts in this weight class.
And finally, it does all of this for a reasonable amount of money – $300 for a high-quality quilt that performs very well.
I’d be compelled to upgrade this to a Highly Recommended rating with the following improvements:
Replacing the pad attachment shoelace-style cord with something that absorbs less water and is lighter, but maintaining the sliding toggle design.
Replacing 15d fabrics with lighter fabrics without sacrificing durability.
Adding one more inch of width and a little bit of fill to the draft collar.
Including a stuff sack that isn’t so small, and is more durable. A waterproof stuff sack that isn’t made from quilt remnants would be great!
Product mentions in this article are made by the author with no compensation in return. In addition, Backpacking Light does not accept compensation or donated/discounted products in exchange for product mentions or placements in editorial coverage.
Some (but not all) of the links in this review may be affiliate links. If you click on one of these links and visit one of our affiliate partners (usually a retailer site), and subsequently place an order with that retailer, we receive a commission on your entire order, which varies between 3% and 15% of the purchase price. Affiliate commissions represent less than 15% of Backpacking Light's gross revenue. More than 70% of our revenue comes from Membership Fees. So if you'd really like to support our work, don't buy gear you don't need - support our consumer advocacy work and become a Member instead.
Learn more about affiliate commissions, influencer marketing, and our consumer advocacy work by reading our article Stop wasting money on gear.
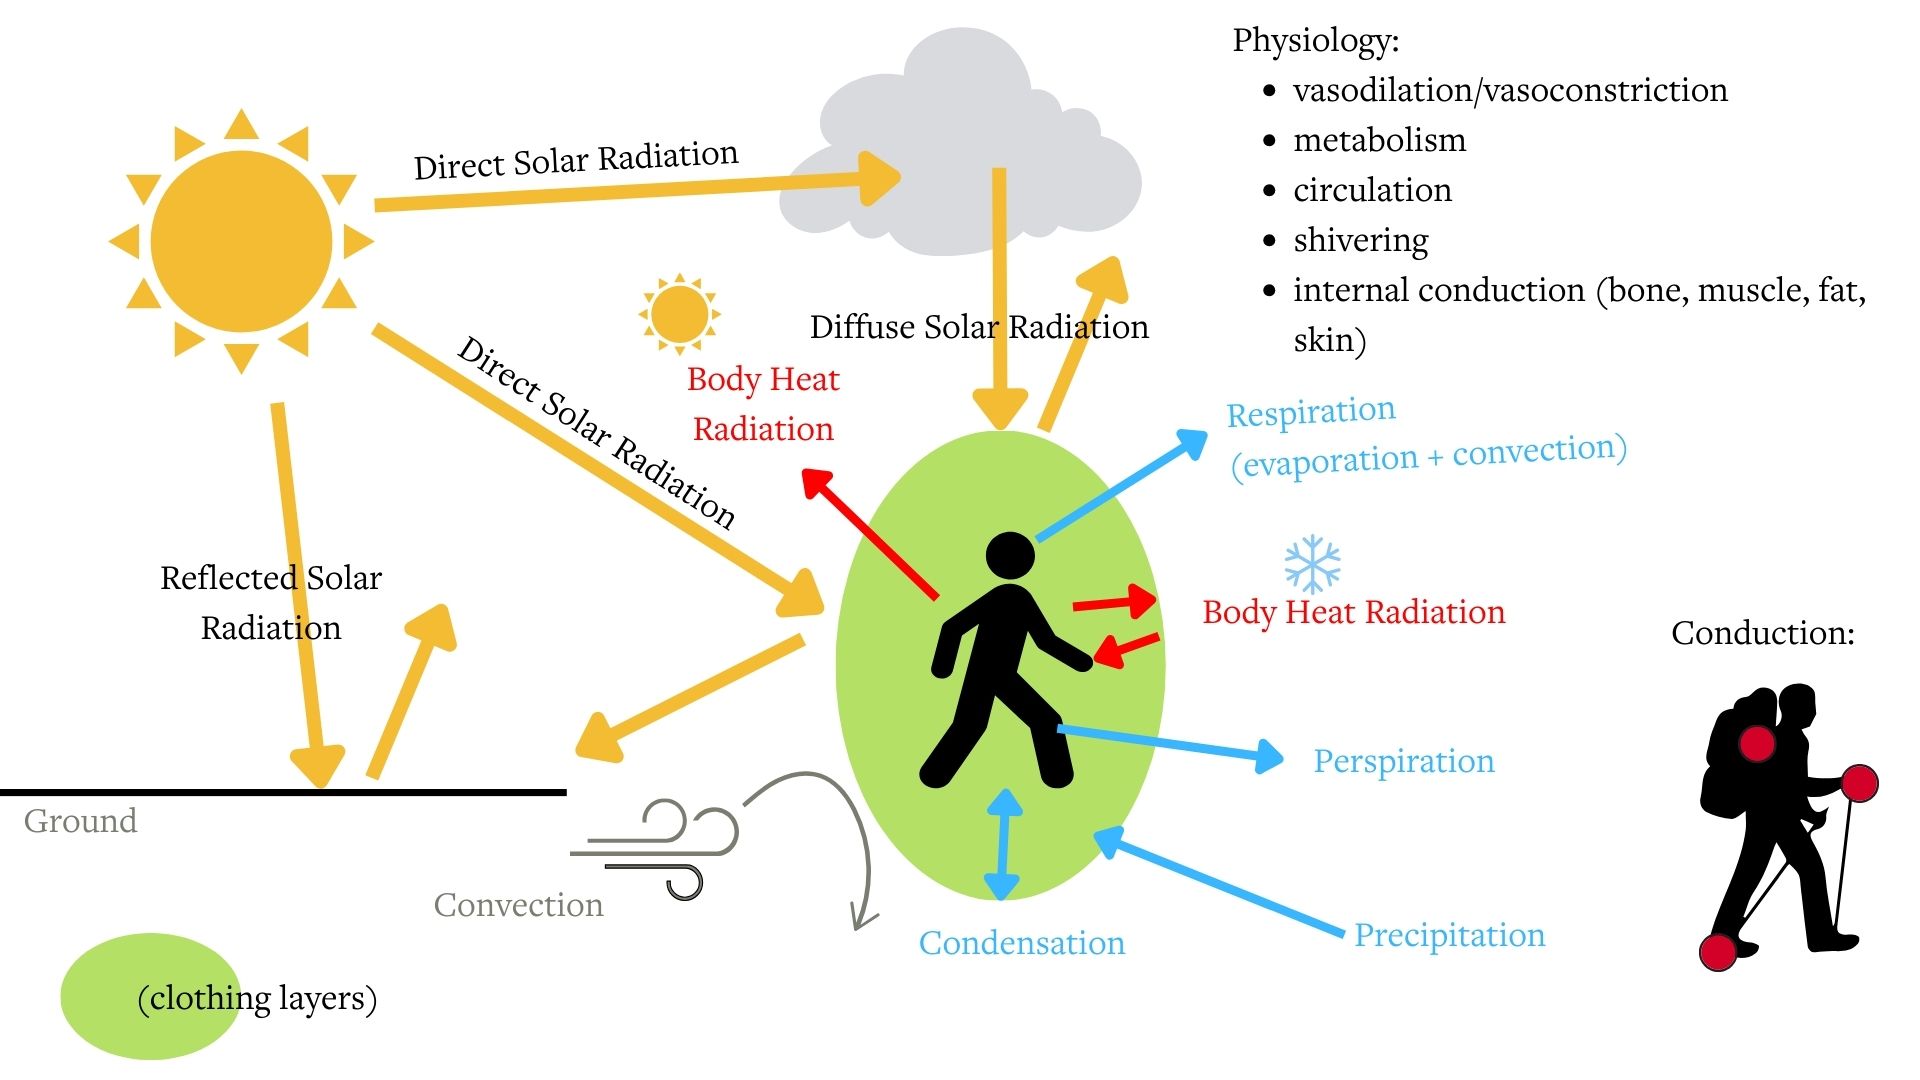
An overview of the complex heat exchange mechanisms between the tent occupant and the outside environment – and how to test tent construction’s impact on comfort.
Tent stake holding power, especially in adverse wind conditions, relies on principles of engineering and physics, including cross-sectional shape, length, soil interaction, and insertion angle.
Introduction
The effectiveness of a tent stake is critical to the security of a shelter in a backcountry storm. Tent stake holding power, especially in adverse wind conditions, relies on principles of engineering and physics. These principles are governed by stake properties (including cross-sectional shape and length), soil properties (type and density of soil), and the interaction of the stake with the soil (e.g., insertion angle).
This article examines the principles that govern tent stake holding power, analyzing how different designs and lengths interact with various soil types to ensure stability. It explores key elements such as surface area, friction, soil compaction, and load distribution, which are integral to a stake’s performance. Additionally, the impact of insertion angles and soil composition on holding power is discussed.
I close with a series of recommendations for building a stake kit based on my personal experience and preferences.
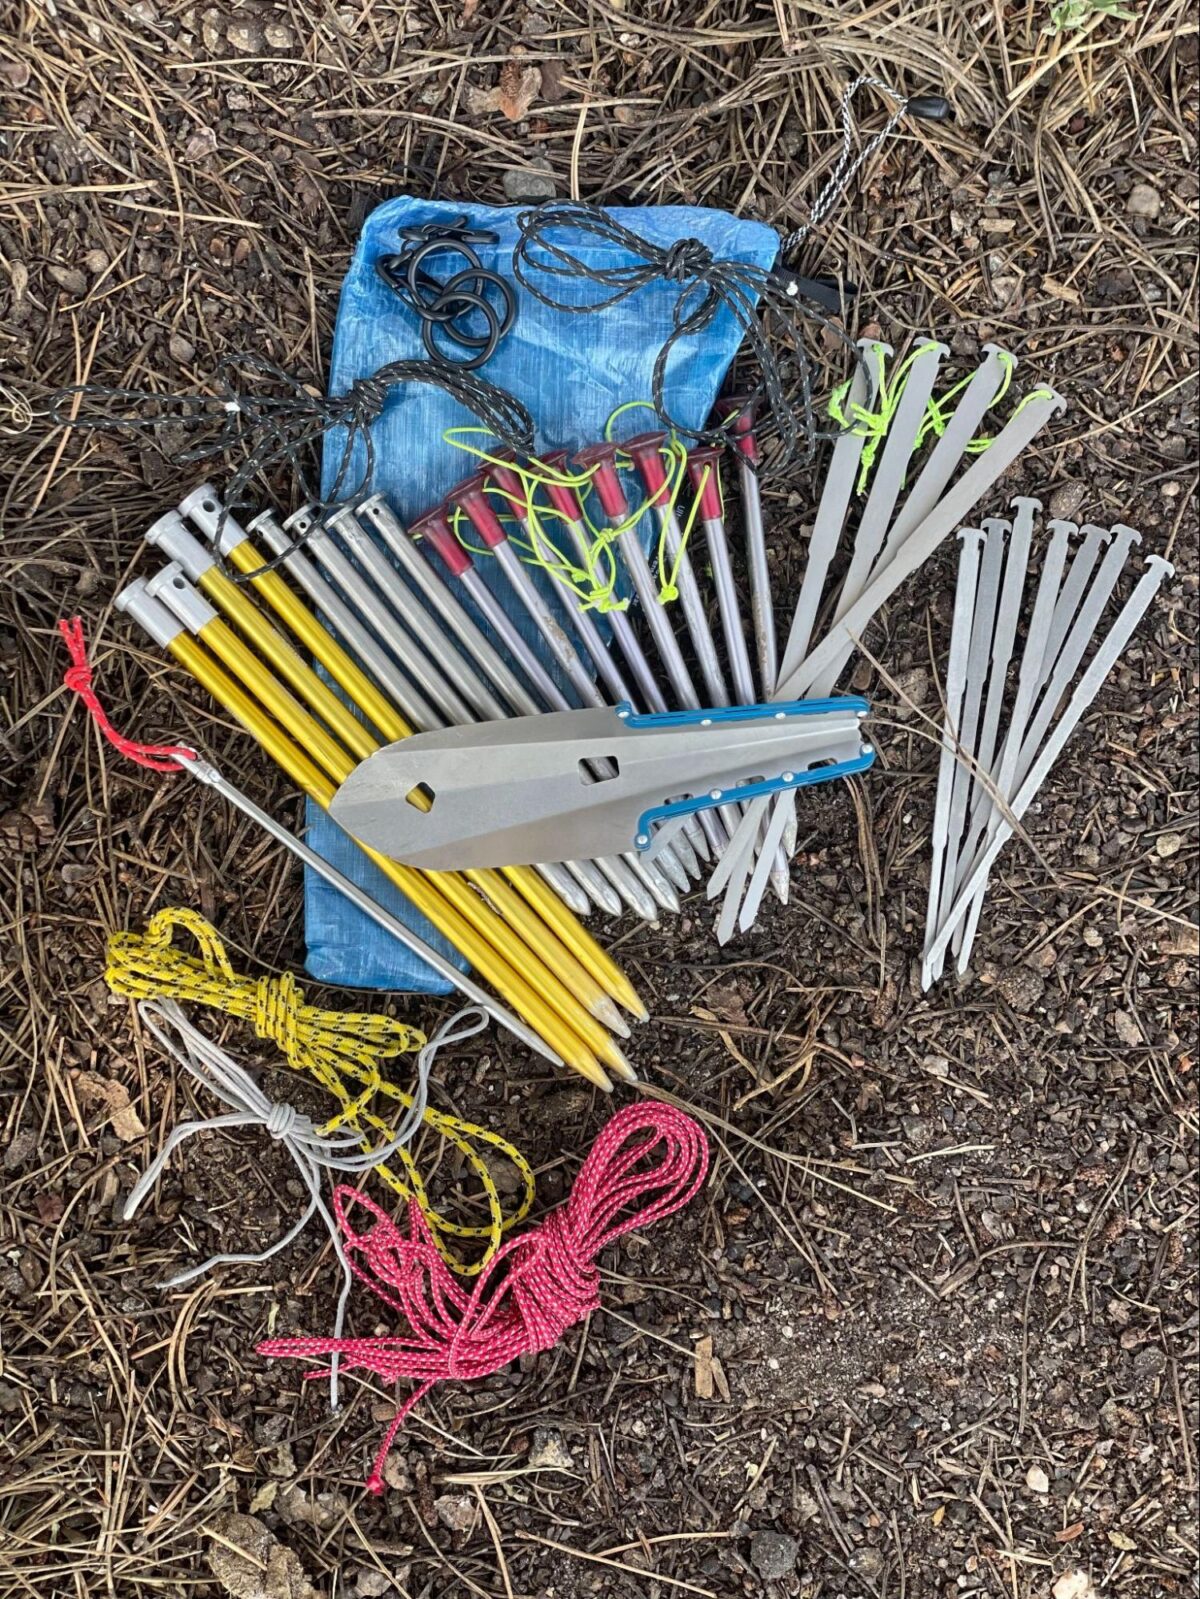
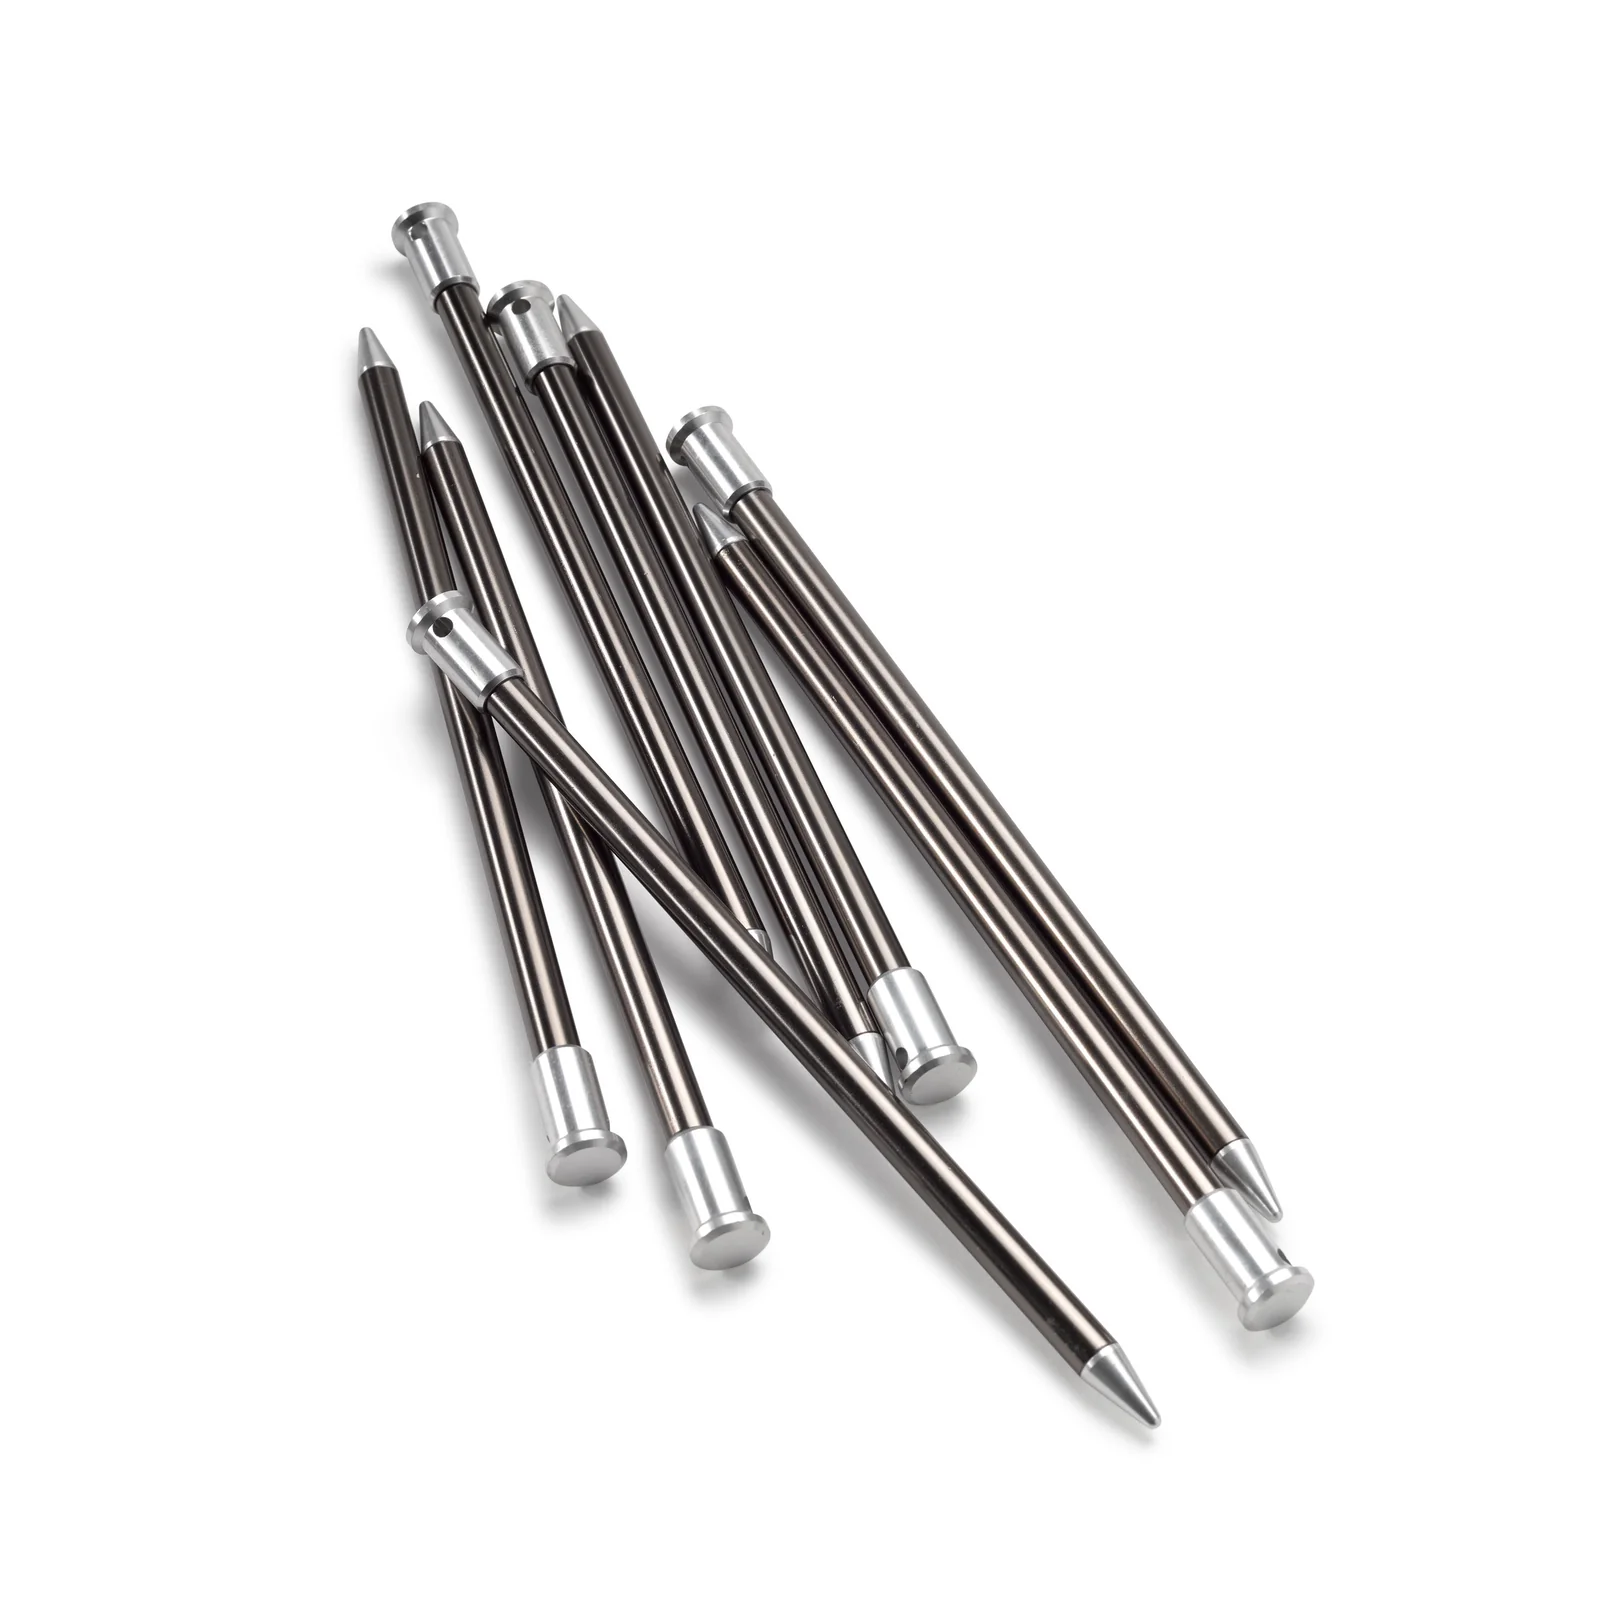
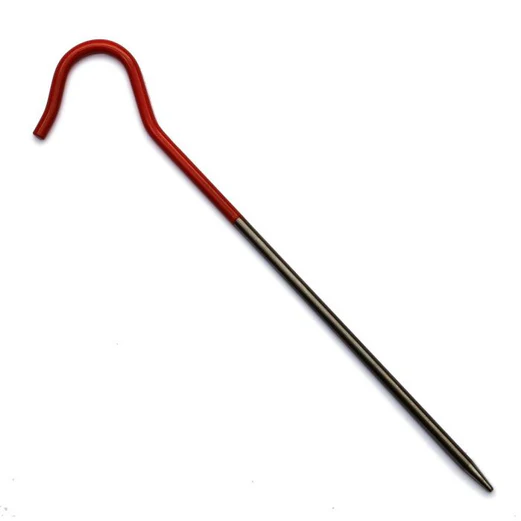
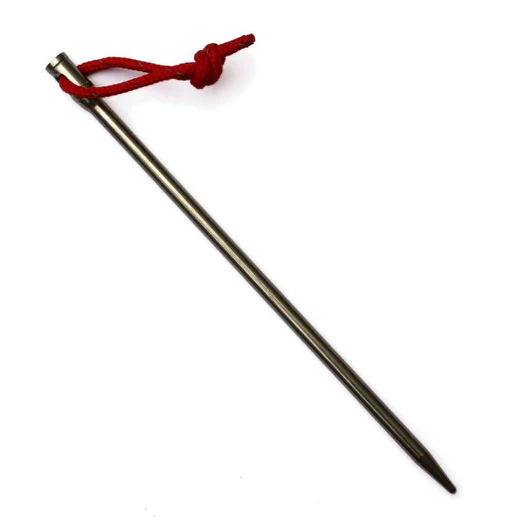
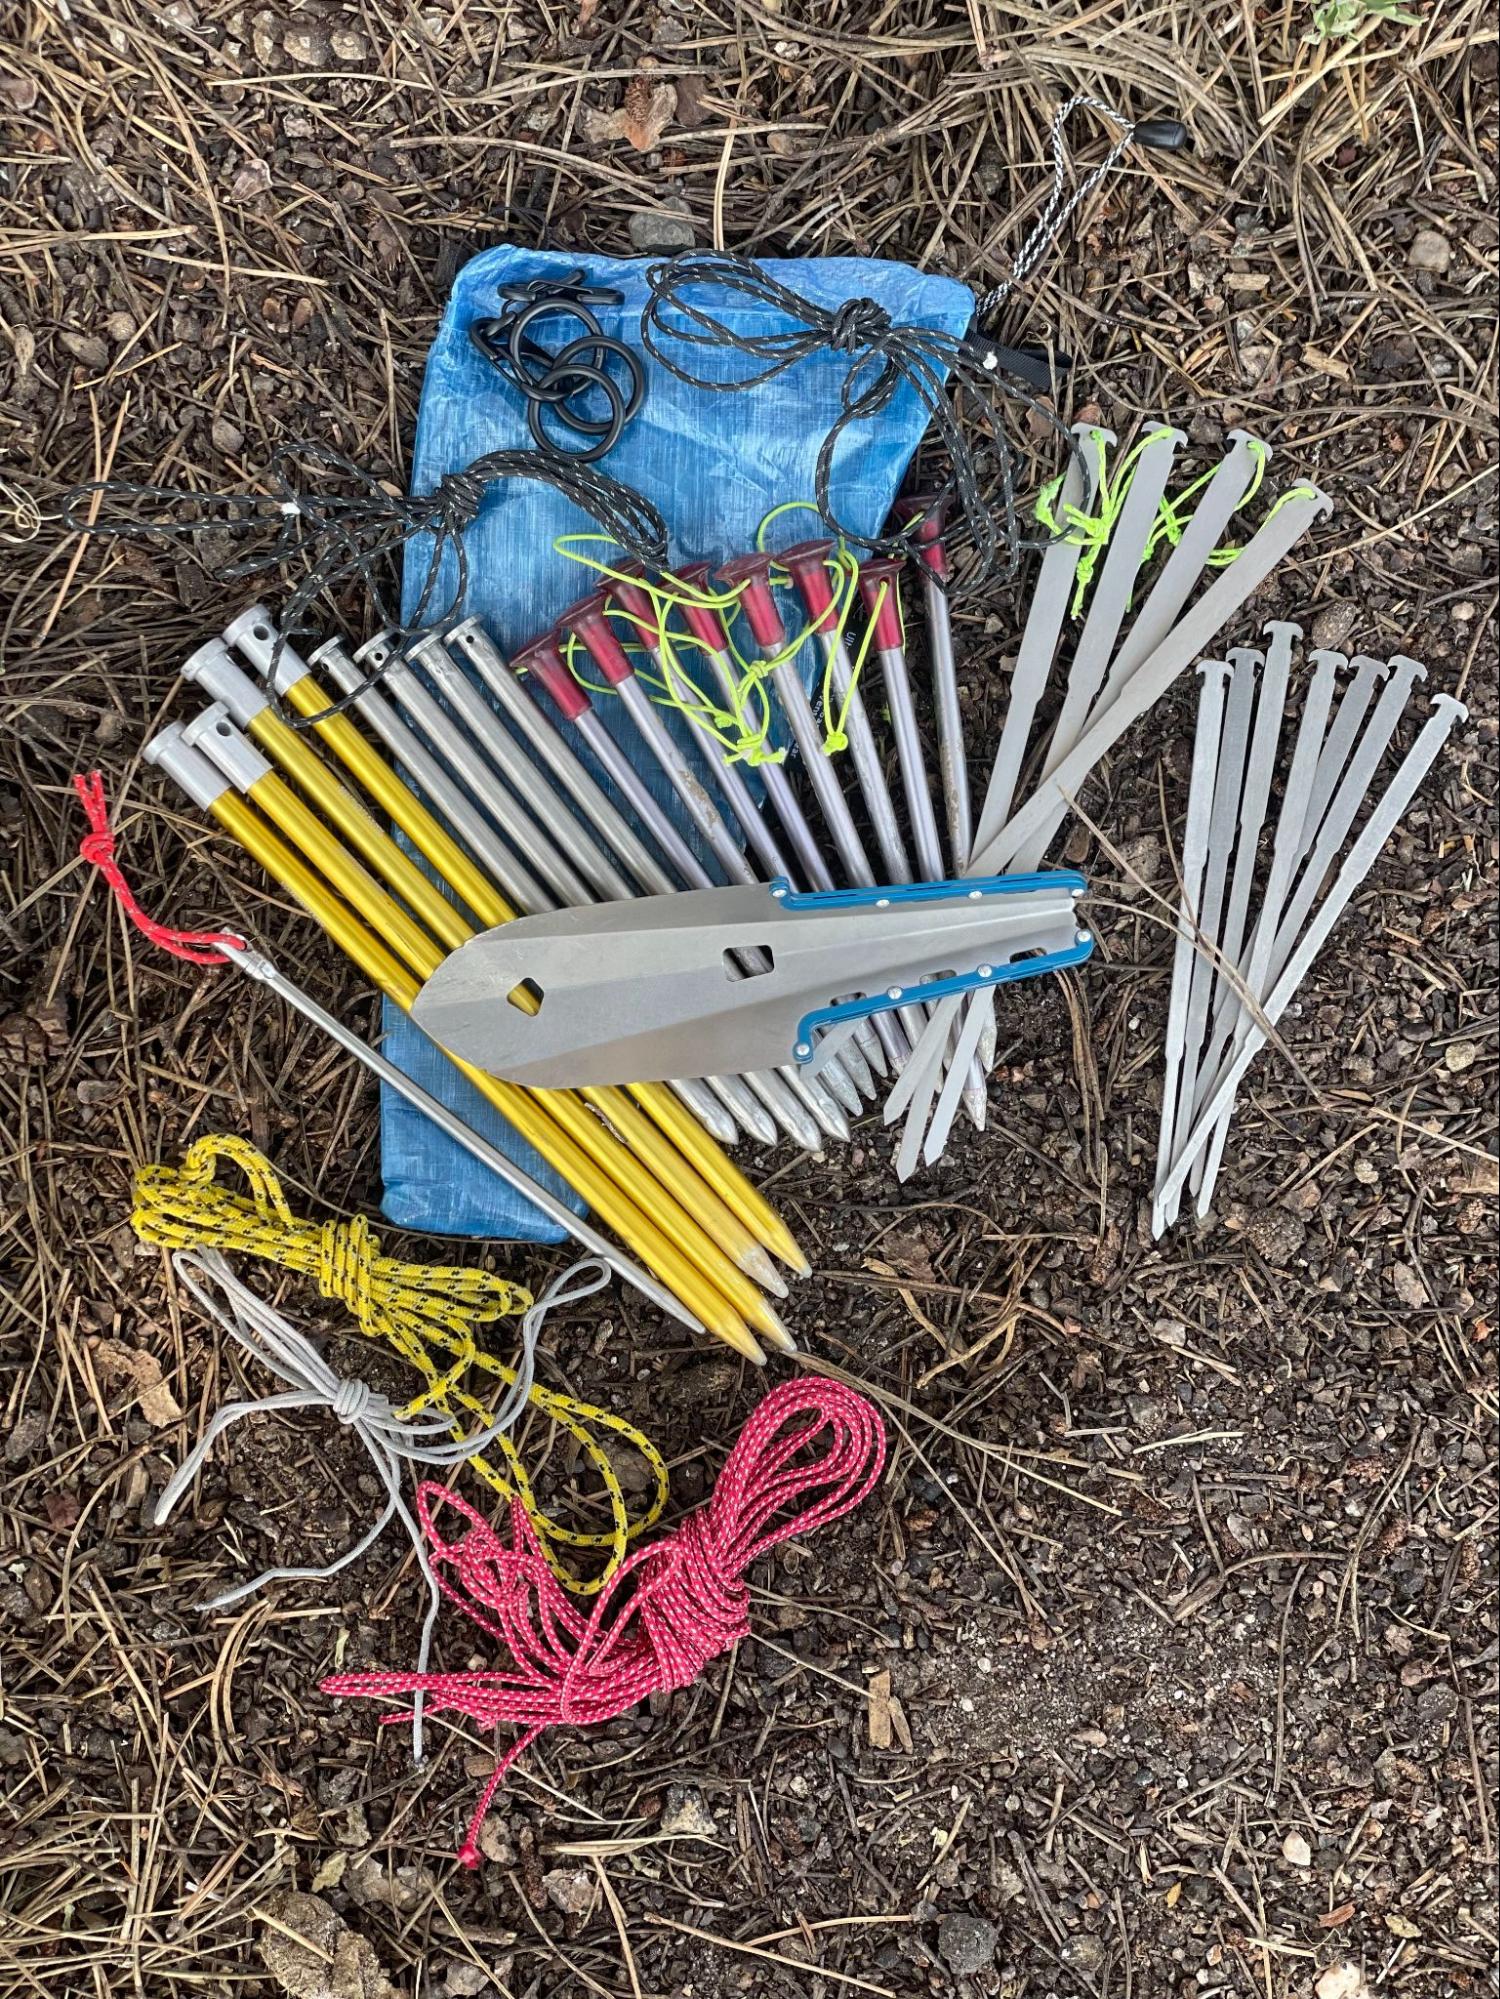
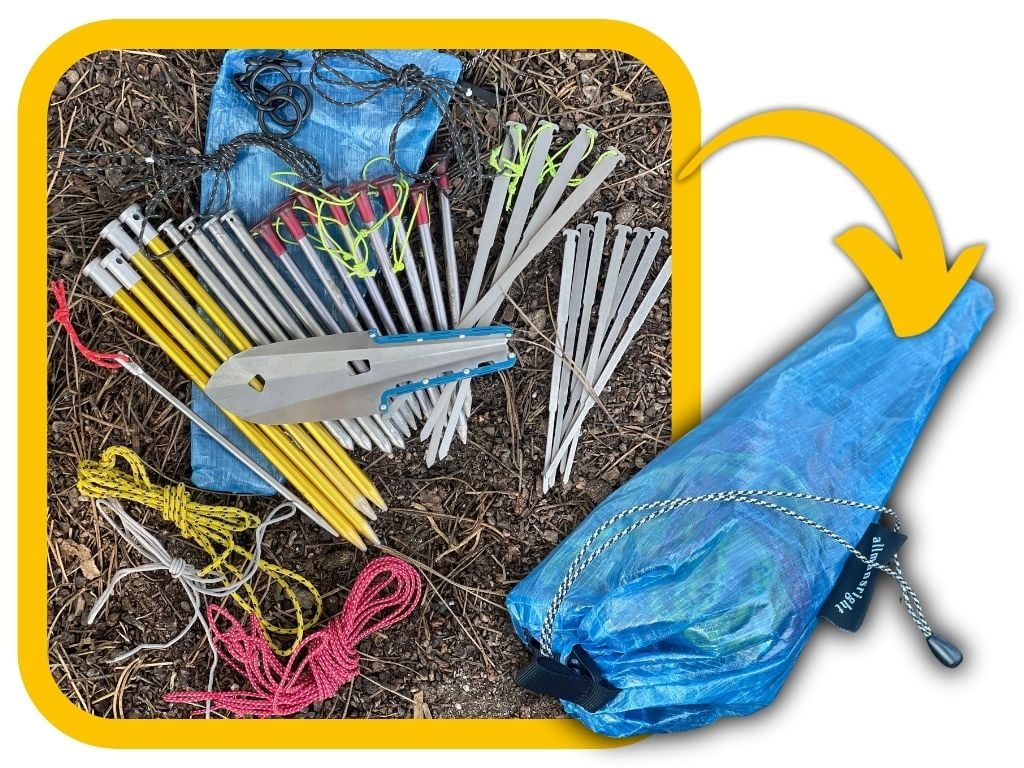
Figure 1. I choose shelter stakes based on a variety of factors: shelter type, expected range of soil conditions, exposure to storms, and weight. On this alpine trip in the High Sierra, we packed a stake kit that weighed three quarters of a pound and included extra guylines, a dozen high-holding power stakes – long tubular aluminum and long Y-channel stakes – and another dozen ancillary stakes for low-load stakout points.
Table of Contents • Note: if this is a members-only article, some sections may only be available to Premium or Unlimited Members.
This article builds on a previous study we performed by providing additional insight into the reasons why tent stakes hold and fail in response to the forces transferred to them by shelters buffeting in windy conditions.
The holding power of tent stakes can be described using core principles of engineering and physics. Holding power is related primarily to a stake’s cross-sectional shape, length, interaction with the soil, and insertion angle.
Surface area and friction
Cross-sectional shape: Stakes with cross sections that have a large perimeter have more contact with the soil. This increased contact area results in greater frictional resistance, which enhances holding power. Conversely, stakes with smaller coss-sectional perimeters have less surface area and, therefore, lower friction, leading to reduced holding power.
Length: Longer stakes penetrate deeper into the ground, increasing the surface area in contact with the soil. This also increases overall frictional resistance and holding power. Deeper penetration can reach more compact soil layers, which may offer better resistance than layers of soil near the surface.
Soil compaction and displacement
Cross-sectional shape: The shape of a stake determines how it displaces soil as it is driven into the ground. Stakes with sharp edges (e.g., Y-shaped) tend to cut through the soil, causing less displacement. However, the displacement occurs between the stake fins, resulting in compaction of soil coming from both fins. This compaction increases the soil’s density around the stake, enhancing holding power. Thin stakes with rounded profiles (e.g., skewers and needles) displace small amounts of soil without significant compaction, reducing their holding power. Large-diameter tubular stakes displace a lot of soil (due to their high cross-sectional area) and offer good holding power.
Length: Longer stakes compact soil over a greater depth, which can increase the density and resistance of the surrounding soil. This is particularly beneficial in loose or sandy soils, where deeper penetration is necessary for good holding power.
Load distribution
Cross-sectional shape: Stakes with a broad or angular cross-section (like large-diameter tubular stock or Y-shaped stakes) distribute applied loads over a larger area. This reduces the stress on the soil at any single point, which helps prevent the stake from being easily pulled out. Stakes with small, circular cross-sections (like skewer stakes made with small-diameter rod stock) focus the load on a smaller area, increasing the risk of the stake rotating or being pulled out under tension.
Length: The longer the stake, the more evenly it can distribute the load through a greater depth (and thus, volume) of soil. This makes the stake less likely to be dislodged when subjected to strong forces.
Anchoring and soil interaction
Cross-sectional shape: Some stake designs, like corkscrew or twisted shapes, are specifically engineered to “anchor” themselves into the ground. These designs twist into the soil as they are driven in, creating a mechanical grip that significantly increases holding power. Straight, smooth stakes lack this anchoring ability and rely solely on friction and load distribution.
Length: With increased length, stakes can interact with different soil strata, some of which may have different mechanical properties (e.g., clay vs. sand). A longer stake is more likely to encounter soil layers that provide better anchoring or resistance to pullout.
Soil type considerations
The interactions between stake shape, length, and soil type contribute to holding power. For example:
Wider and longer stakes are generally better in soft or sandy soils, as they increase surface area and friction.
In hard or rocky soils, shorter, more rigid stakes with a narrow profile may be more effective because they can penetrate without bending or being deflected.
Insertion angles
There is some controversy (and plenty of backyard test results) about tent stake insertion angles. Claims that a particular insertion angle is more optimum than another are generally based on data sets that are too small to draw any meaningful conclusions. The holding power of a tent stake as a function of its insertion angle is highly dependent on both the length of the stake and soil properties.
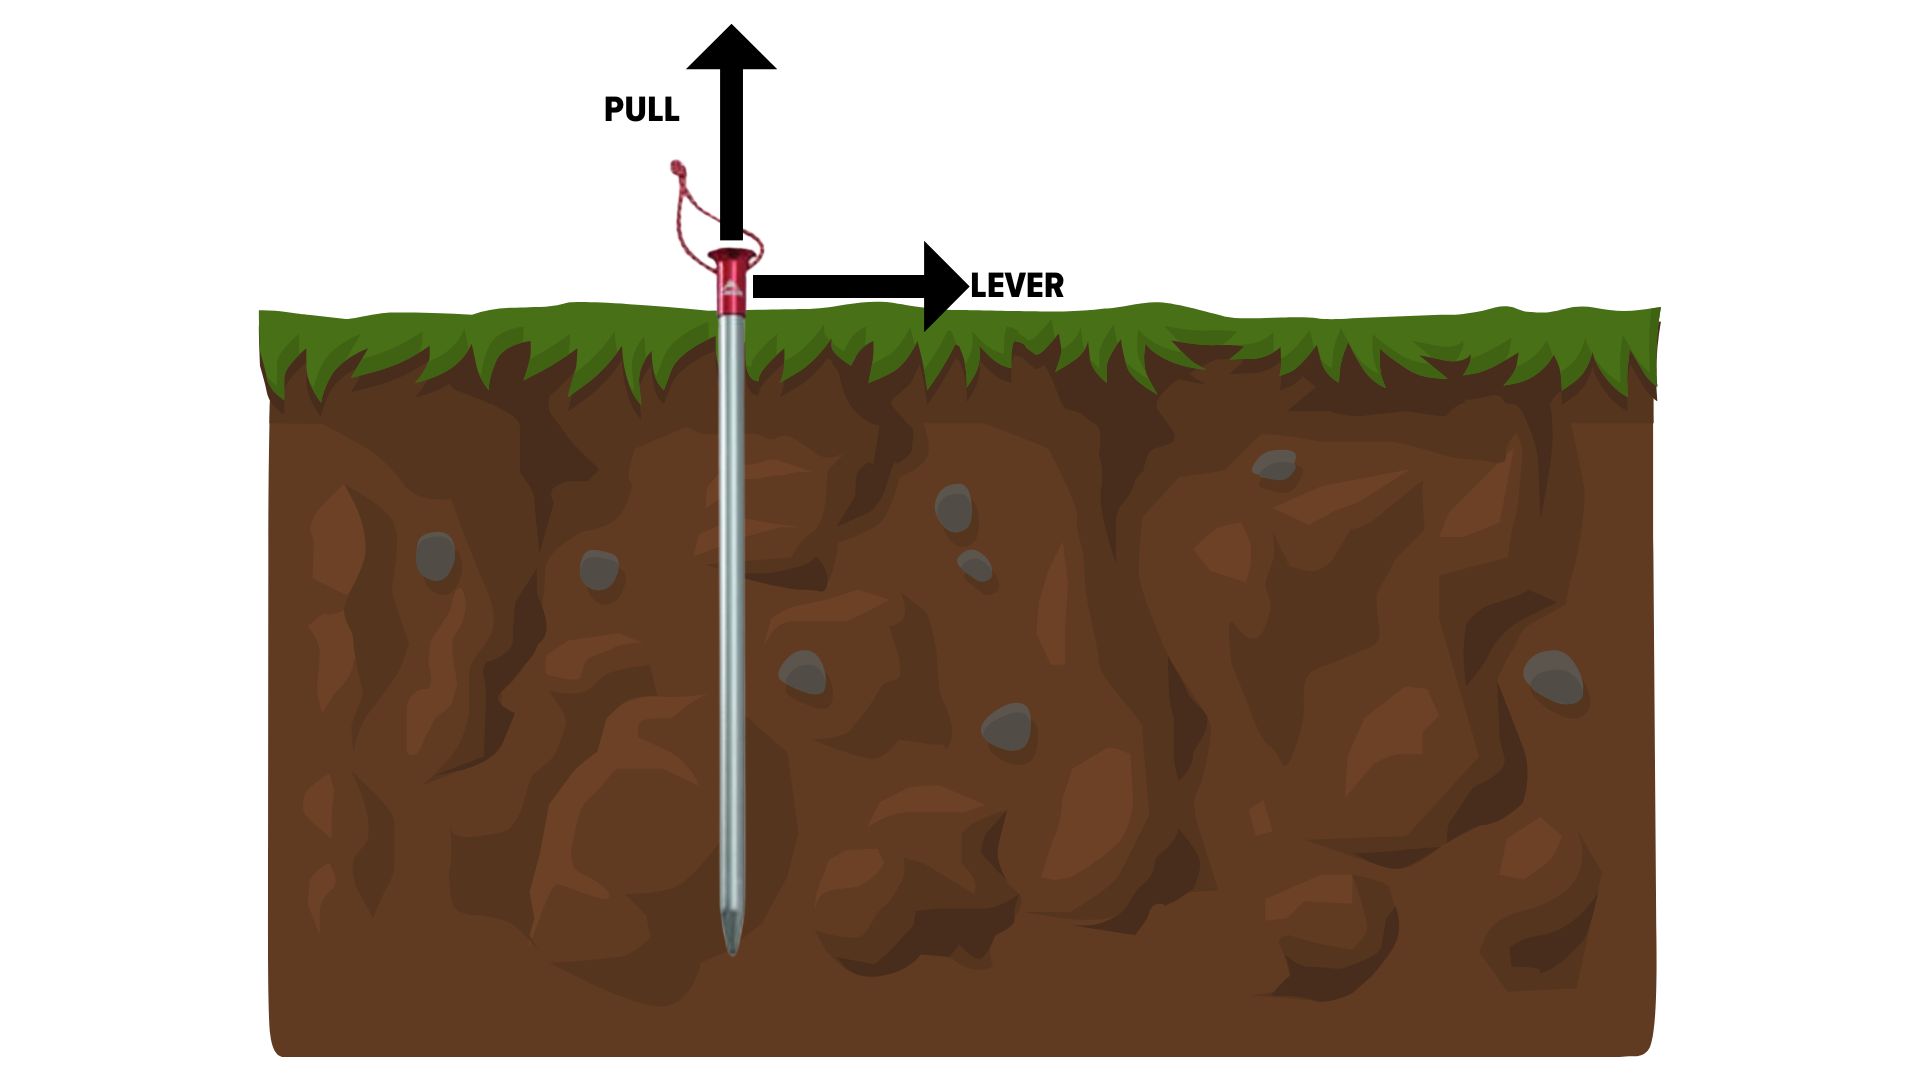
The tension force applied to the head of a tent stake (via its guyline or shelter stake-out point) can be split into two components:
The pulling force, which is parallel to the length of the stake; and
The levering force, which is perpendicular to the length of the stake.
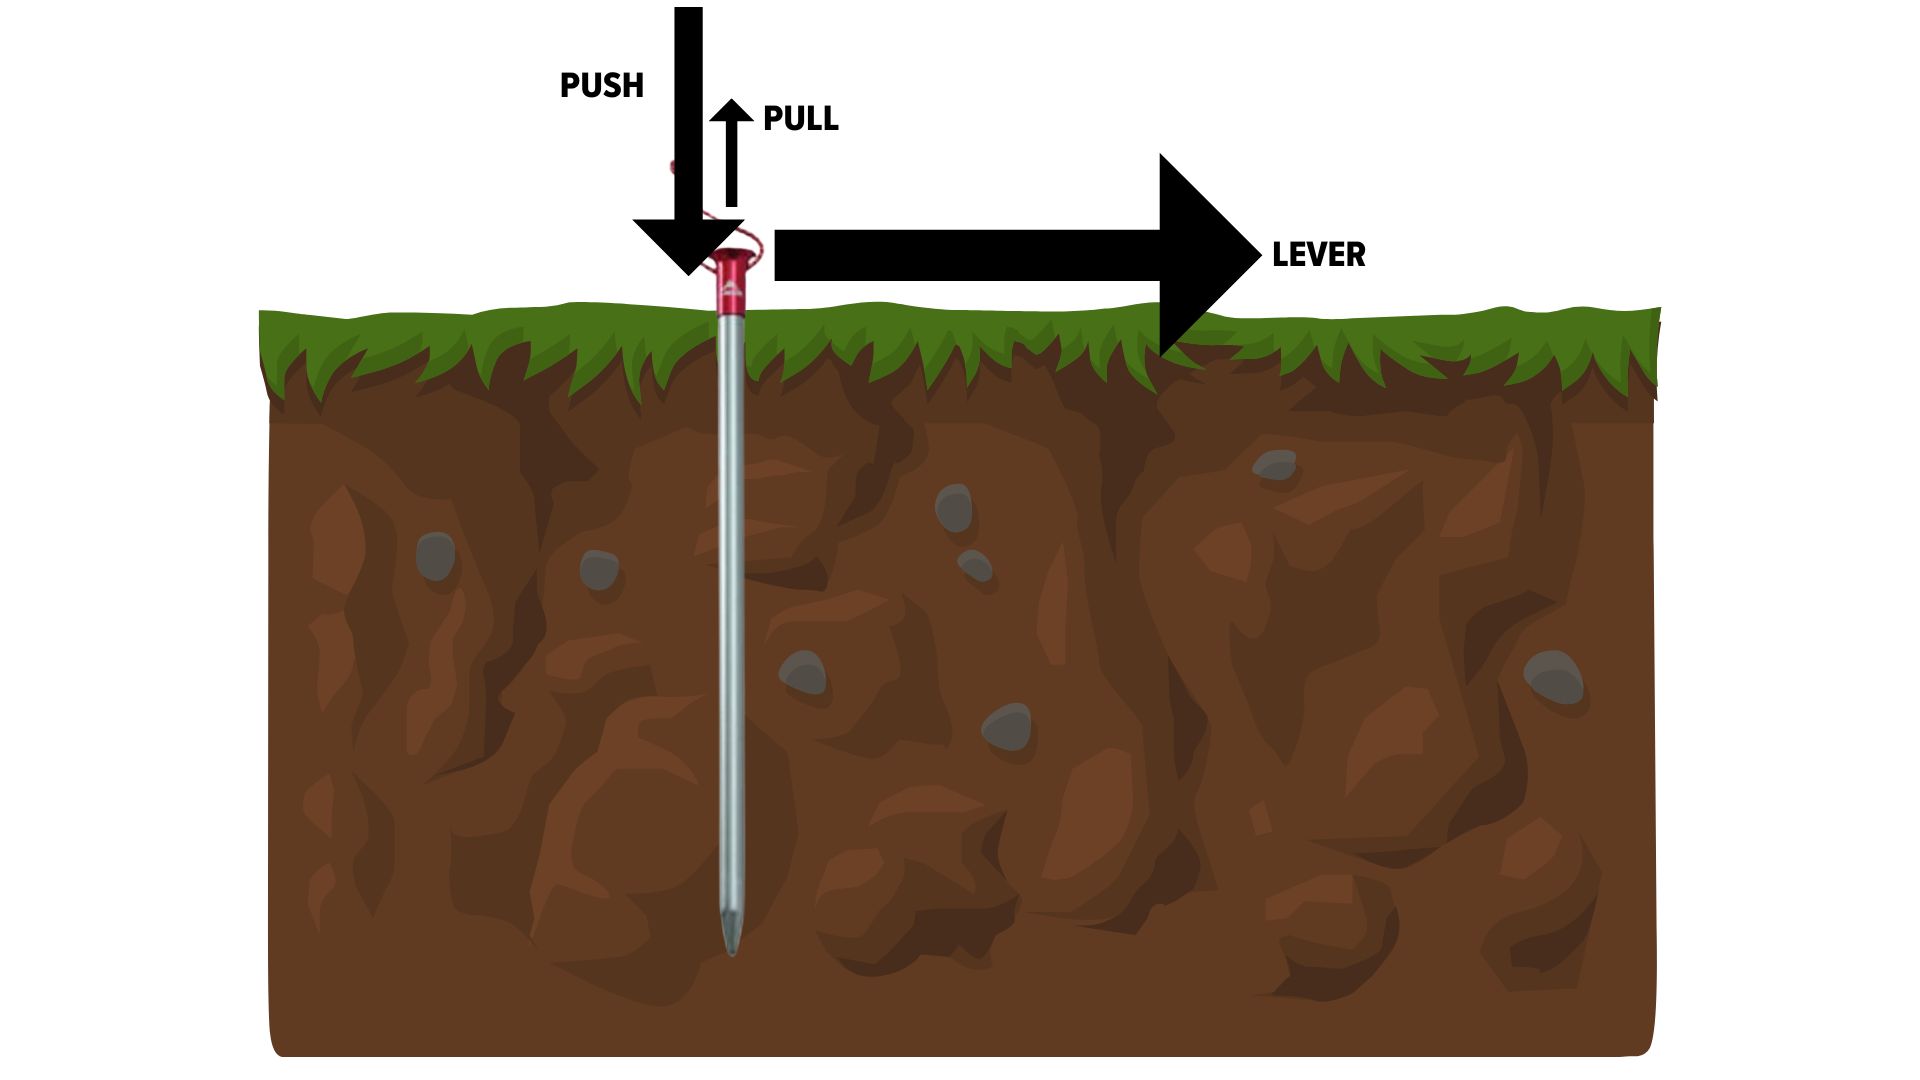
Figure 2. A stake inserted into the soil can be dislodged either by pulling or levering.
When any stake is inserted into soil, it displaces soil along its length, which results in a much lower pulling force required to remove the stake than the pushing force required to insert it. This pulling force is always less than the levering force required to dislodge a stake. The size of the arrows in the following image shows the relative magnitude of each of these forces.
Figure 3. The black arrows show the relative amount of force required to move the stake – larger arrows = higher forces. A higher force is required to push the stake into the ground than pull it out, because once a stake is pushed in, it displaces the soil outward, creating a conduit that requires much less force to pull out the stake. Levering forces are resisted by the compacted soil in the region surrounding the length of the stake.
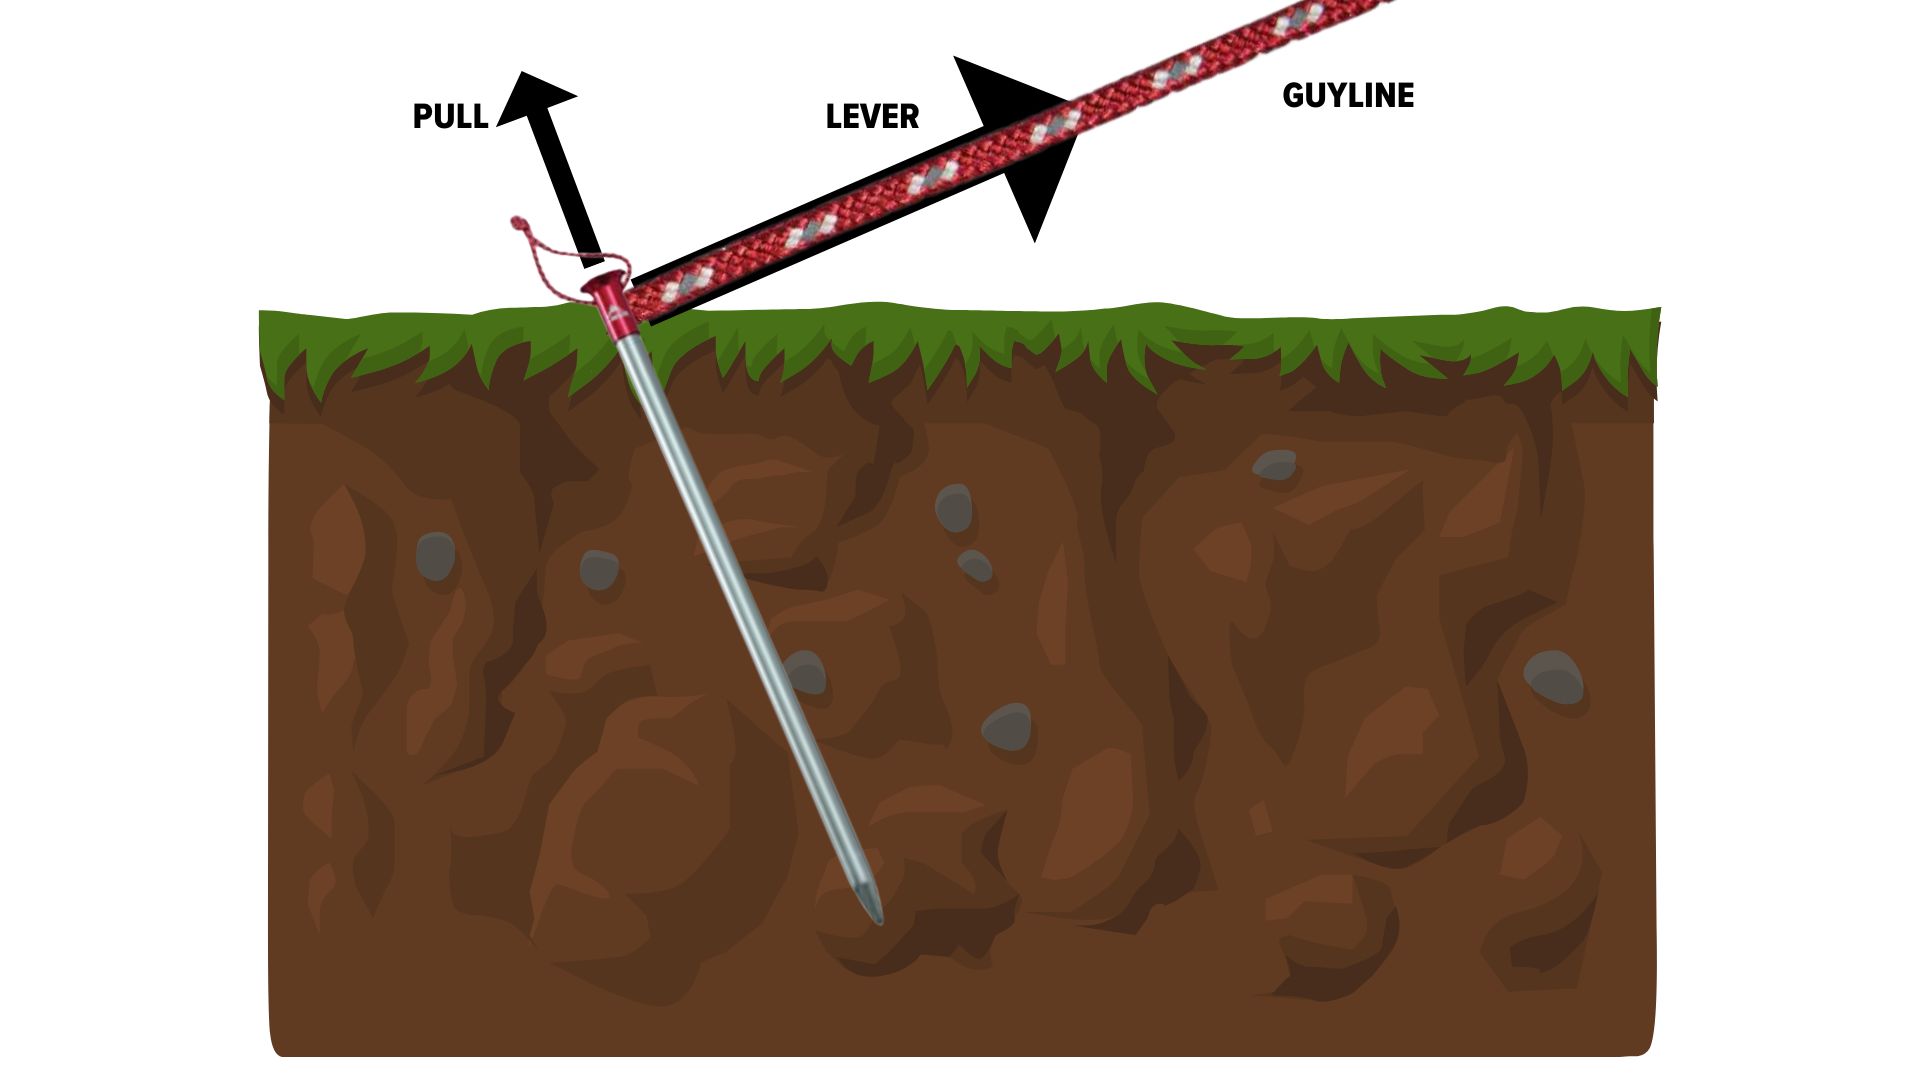
Because nonuniform soils are usually more compact at deeper depths, the maximum resistance to levering of a tent stake will occur when that stake is inserted vertically relative to the ground surface. In this case, the strongest holding power will occur when the tension pulling on the stake is parallel to the ground surface. However, except in the case of ground sheets under tension, this orientation is rarely optimal – guylines and most shelter stakeout points will exert forces at an angle that is not parallel to the ground surface. Consequently, the user may place the tent stake into the ground at an angle that is offset from vertical, to maintain perpendicularity between the length of the stake and the levering force of the guyline. The following image shows this:
Figure 4. A stake may be placed into the ground at an angle (instead of vertically) in cases where the tension force is not parallel to the ground surface.
However, with stakes that are too short, or in soils that lack good compaction in its upper layers, placing the stake an an angle offset from vertical can be problematic. In this case, the stake may be poorly anchored, and the benefit of perpindicularity between the levering force and the stake length may be offset by weaker anchoring, which creates less resistance to levering. This makes a compelling argument for long guylines and shallower guyline angles (which allow the stake to be placed in an orientation closer to vertical).
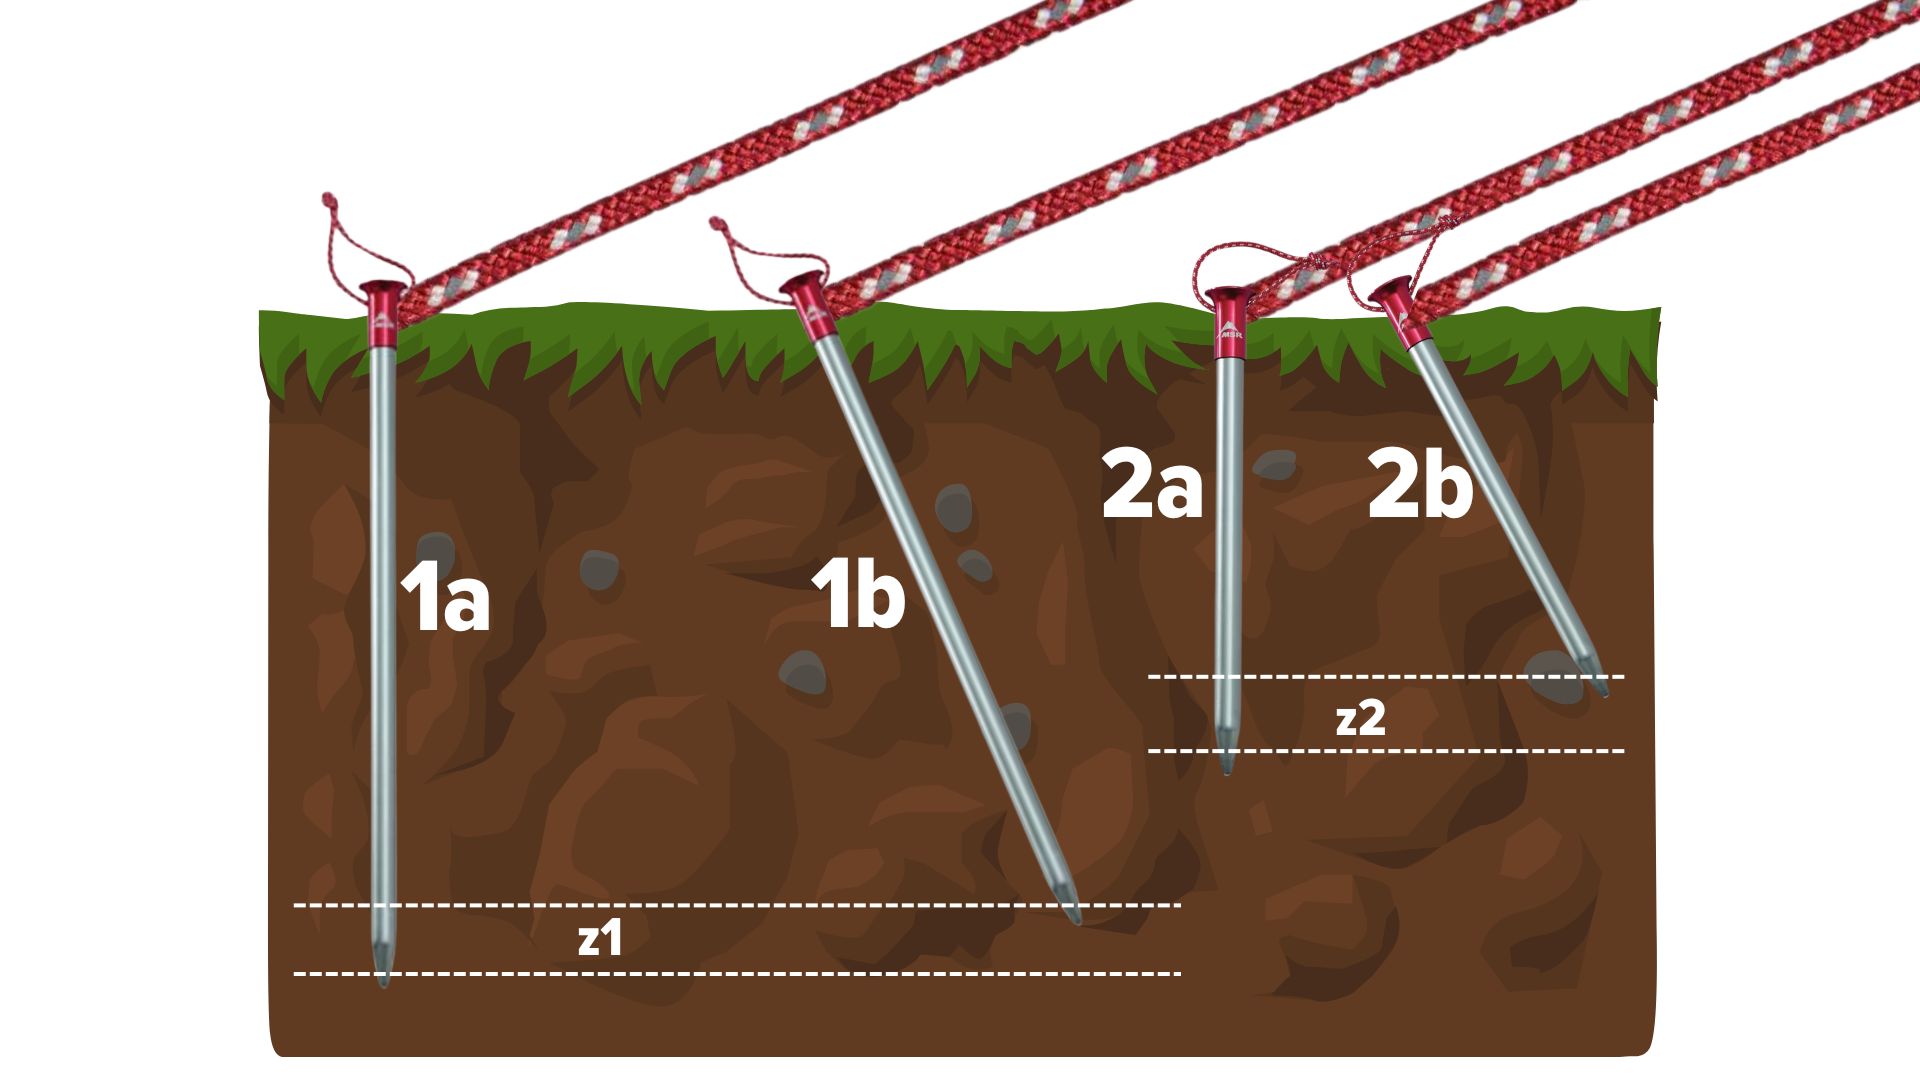
Figure 5. A long stake placed vertically (1a) provides the best possible anchor in nonuniform soils with density increasing with depth. To accommodate tension forces that are not parallel to the ground surface, a user may place the stake at an angle (1b) so the tension force is perpendicular to the length of the stake. This results in a loss of anchoring depth (z1), which increases with the angle of the stake. Shorter stakes (2a vs. 2b) result in a similar loss of anchoring depth (z2).
By now, it should be clear why there’s no one “optimum angle” for placing a tent stake in the ground. Because of the wide variability in soil compaction as a function of depth, a little bit of engineering intuition that acknowledges these competitive factors, combined with experience in different soils and a dose of quick and dirty tests performed at your shelter pitch site go much further than dogmatic recommendations about what angle to insert your stake in the ground.
Let’s explore this further with a brief case study,
Case study
In this case study, I performed a series of tests using short and long stakes (6″ and 9″ MSR Core stakes), in loamy vs. sandy soil plots. All stakes were placed vertically. A load tester was used to measure the pulling and levering forces to failure. Each test was repeated 6 times in different locations. The results represent the average of each test. Standard error percentages were 15 to 25%.
In a typical loamy soil near the ecological edge of a forest and meadow, soil compaction is not uniform across its depth. It may be a less compacted, low-density mixture of sand and organic litter in the upper few inches, and a compacted, dense mixture of sand, silt, and clay in the lower layer.
In this type of soil, the pulling force required to dislodge a 9-inch Easton tubular tent stake is generally around 12 to 15 pounds, while the levering force required to dislodge the same stake is 50 to 60 pounds.
It follows that the force required to dislodge the same stake from the same soil when the force is applied at a 45 degree angle is around 15 to 22 pounds, and that the primary mode of failure will be pulling (not levering).
What happens if we repeat the same test in a more uniformly-compacted (sandy) soil or with a shorter stake with lower holding power?
Table 1. Case study data showing the forces required to dislodge short and long stakes in loamy vs. sandy soils.
pulling failure
lever failure
45-degree failure
type of failure
9-inch stake, loamy soil
12.2 pounds
54.7 pounds
16.3 pounds
pulling
6-inch stake, loamy soil
5.5 pounds
18.7 pounds
8.5 pounds
pulling
9-inch stake, sandy soil
8.4 pounds
24.2 pounds
13.0 pounds
pulling
6-inch stake, sandy soil
3.0 pounds
7.1 pounds
4.0 pounds
pulling
These tests emphasize the importance of encouraging a lever vs. a pulling failure because there is so much more resistance to levering than to pulling. The reason for this is that as a stake is pushed into the ground, it displaces the soil that’s replaced by the stake body. Where does that soil go? It gets pushed outward – thus compacting the soil immediately adjacent to the outer walls of the stake. Two things are happening here – the displaced soil creates a conduit through which the stake can pull out (low resistance), and the newly compacted soil adjacent to the outer wall of the stake creates additional resistance against levering.
Therefore, choose and secure your tent stakes accordingly:
Set your stake as close to vertical as possible, to maximize the probability that you’ll reach more compacted soils deeper down (Figure 5).
Align (angle) your stake to minimize the angle between the tension (guyline) force and the ground surface, to minimize the probability that pulling forces will pull the stake upward (Figure 4).
Stake length may be more important than cross-sectional area in loamy soils than in sandy soils (Figure 5, Table 1).
Recommendations
Stakes for holding power
MSR, Hyperlite Mountain Gear, Tarptent, Mountain Laurel Designs, Outdoor Vitals, Big Sky, and others all distribute their own styles of tubular aluminum stakes. I’ve had several heads and tips break off of Big Sky Tube Steaks, and can’t recommend them. The Mountain Laurel Designs stakes offer a more robust machined head that keeps guylines in place at the top of the stake head, but I never found that feature particularly useful.
I recommend the MSR Core – it’s the most durable and resistant to bending and breakage in hard, rocky soils (it’s also a little heavier than the others). Otherwise, the Hyperlite, Tarptent or Outdoor Vitals versions offer a good balance between affordability and quality.
With a machined aluminum head, long tubular aluminum shaft, and outstanding holding power, the MSR Core represents one of the most durable and strongest stakes on the market.
A very high-quality tubular aluminum stake with high holding power for large shelters, softer soils, and critical stake-out points (e.g., ridgelines) on ultralight shelters. 7075-T9 aluminum, length 8.0 inches (20.3 cm), diameter 0.35 inches (0.9 cm).
Tarptent and Outdoor Vitals both stock the most modern versions of Easton-branded 8.75-inch tubular stakes, which offer good holding power for the weight, reasonable durability, and are more affordable than tubular stakes from Hyperlite or MSR.
Some readers will wonder why the ubiquitous V-channel and Y-channel style of tent stakes are not on my list of recommendations. Longer, larger-diameter Y-channel stakes made with 7000-series aluminum, like the MSR Groundhog, have some of the highest holding power of any stake on the market.
A Y-channel 7000-series aluminum stake that is long, strong, and light, with extremely high holding power. Sharp edges make inserting the stake into the ground without a hammer or rock somewhat problematic.
However, I’ve generally stopped using Y-channel stakes because they are painful to insert into hard ground with the palm of my hand, and they tear up the soles of some of my running shoes when I try to use my foot. Some users rave about the MSR Groundhog Mini, which is shorter, lighter, has less holding power, and still hurts your hands.
As for V-channel stakes, I have set of size L DAC J-Stakes that were shipped with my Slingfin Crossbow, which have about triple the holding power vs. the size S J-Stakes that are shipped with many lightweight tents from mass-market brands such as NEMO, Big Agnes, and others. I’ve swapped some of the J-Stakes in my Crossbow kit out for lighter stakes to save a few ounces, but have kept the J-stakes in my kit instead of tubular stakes to save some bulk (8 to 12 tubular stakes take up a lot of space).
Ultralight stakes
I used to use skewer-style shepherd-hook stakes made with 1/8-inch (3 mm) titanium rod stock. They are light, compact, and very easy to insert and remove in hard soils. However, they are prone to rotation under high tension loads (causing guylines to slacken) and provide low holding power in softer soils.
I’ve used a variety of carbon fiber shaft stake options, but find them to be more fragile and more expensive than they’re worth. Another way to save weight on stakes is by using very short stakes (3 to 4 inches / 8 to 10 cm) but their holding power is limited to soils that offer a firm upper crust, and stake-out points that don’t get a lot of tension.
I use the Suluk46 Atani for low-load stakeout points and the more versatile MSR Carbon Core for general usage. The latter has better holding power, but are bulkier.
A high-quality, all-purpose ultralight stake that takes advantage of the weight savings of a carbon core and molded head, with a 7000-series aluminum sheath and a sharp, machined tip. Some user reviews report "breakage in rocky soils" - just keep stake hammers and rocks away from them and recognize that if you can insert them into the ground with your hand, these stakes will serve you for many years.
The Suluk46 Atani Titanium Tent Stakes are ultralight, flat-profile stakes available in 6-inch (5 grams) and 8-inch (9 grams) lengths, designed for optimal strength-to-weight performance.The wide upper section withstands significant guy-line forces, while the sharp, thin lower section facilitates penetration into hard ground.An upper indentation secures the guy-line loop, and the flat design prevents rotation.The 8-inch stakes include reflective tie loops for enhanced low-light visibility.
I generally consider the MSR Core to be the strongest practical stake available. By practical, I refer to its holding power-to-weight ratio. And by strength, I’m referring to durability. It’s more resistant to breaking and bending than other aluminum tubular stakes on the market. I use it for high-load anchor points for most of my shelters when I need reliable storm protection in most soil types.
However, it’s not durable enough for the toughest situations I face. For example, when I’m using a rock or stake hammer to pound the stake into extremely hard or frozen ground. In these situations, I care less about holding power (because the ground is firm) and more about durability. Titanium rod stock (5 mm, not the 3 to 4 mm rod stock used in ultralight titanium stakes) is about the only material strong enough to withstand abuse while being thin enough to penetrate extremely hard or frozen ground.
My stake of choice here is the Vargo Titanium Nail Peg (note: don’t confuse this with the 4 mm diameter “ultralight” version of this product). I use these in the early winter, when the ground is frozen but the snow isn’t deep enough to use deadmen or snow stakes. When doing so, I also carry the MSR Stake Hammer, which is easier to use in cold temperatures than my hand, boot, or a rock, and prevents me from having to pry frozen rocks out of the ground.
Important: this is not the "ultralight" version - which we do not recommend (lack of durability). This version is made with 5 mm bar stock titanium and is much stronger. We recommend it for extremely hard and rocky or frozen ground.
This is the most practical (usable) stake hammer available that's light enough for backcountry use. With a stainless steel head and light aluminum shaft, it is more effective (more power) than plastic hammers on the market and much lighter than hammers marketed for front-country camping.
I spend a lot of time camping in the snow with tarps, pyramids, and alpine tents. My goal with pitching a shelter in the snow is to reduce effort and get the shelter up as fast as possible with a minimum of fuss.
Below the treeline, I’ll happily use buried sticks for deadmen anchors, tied to the shelter with a self-releasing tension hitch (e.g., trucker’s or McCarthy). Then, when it’s time to break camp, I can release the hitch, leave the anchor, and pack quickly.
Above the treeline, I like to use skis, snowshoes, ice axes, or poles (assuming I don’t need them for activities away from the shelter). However, I also carry a handful (four to eight, depending on the shelter) of purpose-built snow stakes. I used MSR Blizzards for years, but a set of eight weighs half a pound (I do like that they double as a trowel if necessary).
In 2012, I purchased my first set of Suluk46 titanium stakes, upgrading to their most modern design, the Suluk46 Olik Titanium Snow Stake, most recently.
I’ve also used fabric anchors, 24″ carbon fiber arrow shafts, stow bags, bollards, and other strategies for anchoring shelters in the snow, but I keep returning to the ultralight Oliks. (I use them for sand camping as well.)
With an engineered beam design that resists bending and cutouts + thin-walled titanium to reduce weight, the Suluk46 Olik stakes have the highest holding power-to-weight ratio of any snow stake available. Easy to set, easy to retrieve, and the cutouts improve snow sintering and holding power in low-density snow.
Designer ultralight guylines? I understand the appeal. Being able to claim exorbitant breaking strength-to-weight ratios, miniscule diameters, and UHMWPE ingredients should drive up margins pretty good for guyline marketers! However, I look at other features as well: knottability, water absorption, tensioner slippage, and whether or not the guylines can be purchased in bulk quantities.
First things first – I buy a LOT of guyline cord. I rig custom sets of guylines for every shelter I own and use. This keeps things easy for me. I don’t want to have to dig around a guyline bin and rig whatever shelter I want to use on a trip from a limited supply of guylines prior to a trip, remove the guylines from the shelter and return them to the bin after the trip, and repeat the process. For me, each shelter gets its own guyline set. So, considering that I use several different tarps, pyramids, trekking pole tents, and conventional tents every year (it comes with the job), I build and maintain several hundred feet of guyline cordage.
That’s why I stopped buying 50-foot hocks of designer guylines several years ago, and shifted to a guyline that I could purchase in bulk quantities.
I went through a 100% Spectra phase in the 1990s and 2000s, but grew tired of poor knottability and the cord slicing through stakeout loops and fingers.
I used to use the same 1.5 mm polyester with a UHMWPE core that’s now sold by Ripstop by the Roll. It’s cheap (about 20 cents a yard from wholesalers, 50 cents a yard at retail) and light (about one ounce / 28 g per 50 feet), but not very durable. Same goes with 1.4 UHMWPE Core from Hyperlite Mountain Gear. Unfortunately, both of these cords suffer from a low-density polyester sheath that is poorly durable, highly water absorbent, stretches when wet, and stingy when it comes to releasing tightly-bighted knots.
In my hunt for a UHMWPE-core guyline with a high-tenacity, tightly-woven, less absorbent sheath that still didn’t slip when knotted or strung through a tensioner, I discovered Lawson Guywire (non-reflective), Glowire (reflective) and Ironwire (higher strength, stiffer hand). With a slightly larger (2 mm) diameter and a high-density polyester sheath, it tangled less and was easier to unknot than any other guyline material I tried. It absorbed a bit less water, which I appreciated in the winter (my guylines didn’t freeze water inside them to the point where they became unusable). In retail quantities (50 foot hocks), Lawson cordage runs about 60 to 90 cents a yard.
The Lawson Equipment Reflective Glowire Cord addresses nighttime guyline visibility and low-stretch tent/tarp anchoring by providing a highly reflective cord purpose-built for guying tents, tarps, and shelters. Its kernmantle build combines an UltraFuzion polyester/UHMWPE jacket, ultra-high-tenacity parallel-plied polyester core, 3M Scotchlite tracers, 2–5 mm diameters, and 225–550 lb break strengths.
Most of my tent stakes are rigged with pull cords, to make extraction easier and to give a bit of a visual color cue to my stakes to prevent them from getting lost. I use Atwood 1.18 mm Reflective Micro Cord, which is also available in bulk spools. It’s lighter, thinner, and cheaper than most guyline cordage, and may serve users who have more knot patience than I for ultralight guyline usage. I’m also still working through a supply of ZPacks 1.3 mm Z-Line, which has a stiffer hand (which is nice for tent stake pull loops) that makes for less-tangly ultralight guylines than the Atwood cord but is a little more expensive and a little more difficult to knot.
Ultralight stake bags are a funny thing, and I have an unhealthy obsession with their design. Few pieces of gear have irritated me as much through the years as a stake bag. They’re either too small, made with fabrics that are too fragile, poorly sewn, use tiny toggles designed for tiny fingers on tiny people that do not exist, or shaped in such a way that makes the process of stowing and retrieving the stakes more effort than necessary.
I became very fond of that bag, but I found myself transitioning to longer pegs for stormier weather, and they didn’t fit. So I returned to Livio, confessed my dilemma, and went through a few prototypes with him. We finally landed on a design we’re calling the Hölster PRO (i.e., a larger and more durable version of the Hölster). I ordered a batch of stake bags for some marketing giveaways and new membership bundles (I also kept one for myself).
They have a tapered opening for easy retrieval and stowage of stakes. They are long and wide enough for a BIG stake kit full of stakes, many of which can be long and tubular. The drawcord has a reverse-pull mechanism that makes the stake bag easy to open and close with cold fingers. And it’s made with heavier fabrics to protect the rest of your gear, and ensure that the stake bag lasts a long time.
It holds up to two dozen stakes + guylines, including MSR Blizzards, Suluk46 Oliks, and Easton 9″ tubes; it’s made of 1.5 osy DCF, and weighs less than half an ounce (14 g).
In my new Hölster PRO stake bag (shown in blue in this photo), I can fit 16 tubular stakes, a dozen ultralight stakes, several guylines and guyline hardware bits, and even a trowel. This is the kit I take for the double-peaked, 8-person pyramid shown in the first photo of this article. I also use the Hölster PRO to pack my stake kit for alpine climbing tents, when I’m taking two shelters (e.g., a pyramid and a cooking tarp), or when I’m testing gear side-by-side and want to carry multiple shelters.
What I use
My stake kit most commonly includes the following selection:
8x Suluk46 Atani stakes for side panels and edge mid-points
For camping below the treeline, I may replace the MSR Core stakes with additional short tubular or size M DAC J-stakes.
For extremely stormy conditions above the treeline, I may replace the MSR Carbon Core stakes with longer tubular stakes, and half of the Atani stakes with size M DAC J-stakes.
I don’t skimp on guylines. In addition to rigging all of the guyline tie-out points on a shelter, I’ll take 4 to 6 additional guylines (6 to 8 feet long) to extend existing guylines to trees, etc.
Use the coupon code HOLSTERPRO at checkout to become an Unlimited Member today ($20 off your first year) and claim your free allmansright × Backpacking Light Hölster PRO Stake Sack.
Backpacking Light does not accept compensation or donated/discounted products in exchange for product mentions or placements in editorial coverage.
Some (but not all) of the links in this review may be affiliate links. If you click on one of these links and visit one of our affiliate partners (usually a retailer site), and subsequently place an order with that retailer, we receive a commission on your entire order, which varies between 3% and 15% of the purchase price. Affiliate commissions represent less than 15% of Backpacking Light's gross revenue. More than 70% of our revenue comes from Membership Fees. So if you'd really like to support our work, don't buy gear you don't need - support our consumer advocacy work and become a Member instead.
Learn more about affiliate commissions, influencer marketing, and our consumer advocacy work by reading our article Stop wasting money on gear.
In today’s episode of the Backpacking Light podcast we’re going to learn about traveling off-trail responsibly, a rain jacket that defines new standards for durability and performance, and a kite skiing expedition across greenland with Jesse Crocker.
Sponsor
This episode of the backpacking light podcast is sponsored by ARMS OF ANDES, manufacturer of premium base layer apparel made with alpaca wool. Backpacking Light podcast listeners can enjoy 15% off with the coupon code ALPACALIGHT at armsofandes.com.
Listen
Summary
In today’s episode of the Backpacking Light podcast we’re going to learn about {traveling off-trail responsibly, a rain jacket that defines new standards for durability and performance, and a kite skiing expedition across greenland with Jesse Crocker}.
The Arc'teryx Beta SL is the lightest rain jacket on the market that combines a full feature set (generous fit, extensive ventilation, high breathability) AND durable (40D+) fabrics.
Our guest on this episode of the Backpacking Light Podcast is Jesse Crocker, a co-founder of Gaia GPS, and today we’re going to chat with Jesse about his recent kite skiing expedition across Greenland and his newest venture, GOAT Maps. In the interview we discuss:
a summary of Jesse’s life and professional journey that led him to want to kite ski across Greenland
how the team was built and what the group dynamic was
the journey and its challenges, including terrain, weather conditions, and ice conditions
the gear – kites, skis, sleds, food, cold weather gear, etc – did you use for the expedition?
the skills needed for a kite skiing traverse of this magnitude
what is the next big project for Jesse – Goatmaps!
Executive Producer - Backpacking Light; Show Director and Host - Ryan Jordan; Producer - Chase Jordan; Theme music: Look for Me in the Mountains written by Chris Cunningham and Ryan Jordan, performed by Chris Cunningham (acoustic guitar, lead and harmony vocals, harmonica), Chad Langford (upright bass), and Tom Murphy (mandolin), produced by Basecamp Studios in Bozeman, Montana.
Sponsorship Policy: Backpacking Light does not accept compensation or donated/discounted products in exchange for product mentions or placements in editorial coverage, including any podcast episode content not excplicitly identified as sponsored content. Some (but not all) of the links in these show notes may be affiliate links. Learn more about affiliate commissions, influencer marketing, and our consumer advocacy work by reading our article Stop wasting money on gear.
Small Business Outdoors: About this Episode Series
This episode is part of our ongoing series Small Business Outdoors, a once-a-month series featuring Ryan Jordan (founder, Backpacking Light) and Lloyd Vogel (founder, Garage Grown Gear). Small Business Outdoors provides an insider view into small, cottage, and startup brands, and outdoor industry business ownership, featuring interviews with cottage gear founders.
Episode Summary
In this episode of the Backpacking Light Podcast, Ryan and Lloyd interview Jolly Gear founder Bennett Fisher, chat about what is in their day packs, and share their perspectives on recruiting and hiring employees for their companies.
In this Episode:
What’s New at Backpacking Light?
Find information about all of our upcoming Member Q&A’s, Webinars, Live Courses, other live events, and more on our Events Calendar Page.
The Jolly Gear Triple Crown Button-Down is the only sun shirt integrating a full button-down front with a hood, offering adjustable ventilation rarely found in sun protective hiking apparel. Made from an 86% polyester, 14% spandex blend with antimicrobial and quick-drying properties, it includes zippered chest pockets, thumbholes, and a uniquely designed hood with a vent/hair hole and cinch cord. The body fabric is one of the highest air-permeable fabrics we've tested. Men's medium: 7.5 ounces (213 g) and up, depending on fabric choices.
Executive Producer - Backpacking Light; Show Director and Host - Ryan Jordan; Producer - Chase Jordan; Theme music: Look for Me in the Mountains written by Chris Cunningham and Ryan Jordan, performed by Chris Cunningham (acoustic guitar, lead and harmony vocals, harmonica), Chad Langford (upright bass), and Tom Murphy (mandolin), produced by Basecamp Studios in Bozeman, Montana.
Sponsorship Policy: Backpacking Light does not accept compensation or donated/discounted products in exchange for product mentions or placements in editorial coverage, including any podcast episode content not excplicitly identified as sponsored content. Some (but not all) of the links in these show notes may be affiliate links. Learn more about affiliate commissions, influencer marketing, and our consumer advocacy work by reading our article Stop wasting money on gear.
In this video presentation, we dive into a critical topic to raise awareness about the increasing problem of cyanobacteria, or blue-green algae, in backcountry water sources.
In this video presentation, we dive into a critical topic to raise awareness about the increasing problem of cyanobacteria, or blue-green algae, in backcountry water sources. Cyanobacteria (also known as blue-green algae) cause toxic algae blooms (a.k.a. hazardous algae blooms, HAB) because of the presence of cyanotoxins. Cyanotoxins are harmful to humans and mammals (especially dogs) and can cause various symptoms, including skin rashes, eye/ear/nose/throat damage, liver damage, and neurological damage. As these harmful organisms become more common, outdoor enthusiasts need to understand their risks, how to identify contaminated water, and the most effective treatment methods to ensure safe hydration in the wilderness. This presentation provides valuable insights and practical advice to help you stay informed and safe on your adventures.
This module is part of our comprehensive online course, Water Treatment and Backpacking Hygiene. Explore the full course to deepen your understanding of water safety, effective treatment methods, and best practices for maintaining hygiene in the wild.
Learn state of the art best practices for water treatment safety and backcountry hygiene in this comprehensive online course. In Water Treatment and Backpacking Hygiene, you’ll learn the science behind various water treatment methods, how and when to use them, water treatment best practices, and information about health and hygiene on the trail and in camp. Targeted primarily to multi-day backpackers, expedition runners, long-distance hikers, institutional education students, working field professionals, and thru-hikers to ensure your safety and success in the wilderness. In this course, we also offer expert guidance on selecting appropriate water treatment systems, hygiene supplies, and more.
In this video module, we discussed the use of two-stage filtration (hollow fiber membrane, followed by activated carbon) as a promising method for removing cyanobacteria and cyanotoxins from backcountry water sources. Currently, we recommend Hydroblu two-stage filtration systems for this purpose:
Inline hollow-fiber water filter with 0.1 micron pore size and 99.9999% bacteria removal, dual 28 mm threaded ends for bottle, inline, gravity, or straw use, rated up to 100,000 gallons and weighing about 2 oz (57 g).
The Activated Carbon module is made up of mixture of activated carbon and ion-exchange microbeads. Activated carbon adsorbs chemicals and heavy metals, and improves the taste and color of the contaminated water. The ion-exchange microbeads are an organic polymer substrate. These beads are porous, providing a large surface area for removing pollution, poisonous, and heavy metal iron from the water. The ion-exchange replaces these negative ions with innocuous ions, such as sodium and potassium. Additionally, this combination will remove unhealthy organic compounds such as chlorine, pesticides, herbicides, petroleum products, and cyanotoxins.
Resources for water treatment and hygiene supplies for ultralight backpacking.
This guide provides a list of resources for gear and supplies related to water treatment and backpacking hygiene. This serves as our companion resources guide for our online course Water Treatment and Backpacking Hygiene, a 6-hour online course.
Learn state of the art best practices for water treatment safety and backcountry hygiene in this comprehensive online course. In Water Treatment and Backpacking Hygiene, you’ll learn the science behind various water treatment methods, how and when to use them, water treatment best practices, and information about health and hygiene on the trail and in camp. Targeted primarily to multi-day backpackers, expedition runners, long-distance hikers, institutional education students, working field professionals, and thru-hikers to ensure your safety and success in the wilderness. In this course, we also offer expert guidance on selecting appropriate water treatment systems, hygiene supplies, and more.
A cult favorite in the ultralight community for its ease of use, pre-mix stability, efficacy against viruses, bacteria, and protozoan cysts, and its ability to impart better flavor and odor to bad water sources. Can be repackaged if using opaque PE dropper bottles.
Lightest possible treatment method: effective against bacteria, protozoa (such as giardia and cryptosporidia), viruses; 1 tablet per liter of water, treatment time 30 min to 4 hours; meets USEPA purification guidelines; active ingredient is chlorine dioxide; each tablet individually wrapped and sealed; shelf life: 5 yrs. from date of manufacture.
Inline hollow-fiber water filter with 0.1 micron pore size and 99.9999% bacteria removal, dual 28 mm threaded ends for bottle, inline, gravity, or straw use, rated up to 100,000 gallons and weighing about 2 oz (57 g).
The Activated Carbon module is made up of mixture of activated carbon and ion-exchange microbeads. Activated carbon adsorbs chemicals and heavy metals, and improves the taste and color of the contaminated water. The ion-exchange microbeads are an organic polymer substrate. These beads are porous, providing a large surface area for removing pollution, poisonous, and heavy metal iron from the water. The ion-exchange replaces these negative ions with innocuous ions, such as sodium and potassium. Additionally, this combination will remove unhealthy organic compounds such as chlorine, pesticides, herbicides, petroleum products, and cyanotoxins.
The most common squeeze filter used by the long-distance hiking community. Good longevity, relatively fast flow rate, can be backflushed, attaches to a smartwater bottle.
Rapid filtration rate - up to 1.75 liters a minute with no pumping; one of the easiest and fastest ways to get filtered water in the backcountry. Two different sizes - 6 L & 4 L. Ideal for couples, groups, basecamp, and lazy solo hikers!
Purified water in 60 to 90 seconds: Internal 2200 mAh li-ion polymer battery can be recharged from any USB power source (cable included); Ultraviolet (UV-C) light rays safely purify clear water by destroying 99.99% of protozoa (including Giardia and Cryptosporidia), bacteria and viruses. To purify your water, click a button and gently agitate the water; purifies 16 fl.oz. (0.5L) of water (cold or warm) in less than a minute or treat 32 fl. oz. (1L) in 90 seconds. Watertight seals keep water away from the electronics.
Thin-walled Tritan plastic than what you'll find in Nalgenes and other (heavier) water bottles. At 35mm, the opening is still small enough for easy glugging, but much easier to fill in lakes and stillwaters than narrow-mouthed 28mm bottles. Light - 3.2 oz. The 20-ounce capacity is perfect for shoulder strap or hip belt use or easy retrieval from backpack side pockets.
There are a lot of water bottle sleeves on the market, but this one has a clean, simple aesthetic. Bottles are easy to retrieve and put away. Shock cord keeps them in place if you're scrambling. Clips fit most shoulder straps and daisy chains.
Finally - the ultralight towel perfected. A hand/face-sized towel that absorbs 2.3X its weight in water. Weighs only 0.5 oz. Remarkable function for a durable, sustainable towel option.
No mess, no fuss, virtually no weight. Take only what you need for any trip. The perfect solution for the gram-counting ultralighter. Multiple flavors. Good taste!
One of the most popular trowels on the market, now with an updated design with more aggressive sawing edges for side-to-side digging. Very effective root-cutting notches. Reversible, so you can use the narrow end for particularly stubborn soils.
The pStyle is a lightweight personal urination device (PUD). Its rigid plastic design makes it easy to use while fully clothed and has the added benefit of working as a wipe, reducing the need for t.p. It's reusable and a snap to clean. It's BPA and phthalate-free.
The Kula Cloth (0.5 ounces / 14 g) is an antimicrobial, reusable pee cloth featuring a highly absorbent, silver-infused fabric on one side and a waterproof, non-permeable layer on the other to prevent leaks. It includes a snap closure for easy attachment to your pack and a stealth-mode fold for discreet storage.
Ryan Jordan and Lloyd Vogel discuss trends within the Cottage industry in episode 103 of the backpacking light podcast.
Episode Sponsor
Today’s episode of the Backpacking Light Podcast is sponsored by Garage Grown Gear, your hub for all things ultralight. Garage Grown Gear is dedicated to supporting the growth of small, startup, and cottage brands.
Listen
Summary
Episode 103 of the Backpacking Light Podcast is a collaboration between Backpacking Light and Garage Grown Gear, home to more than 200 small, startup, and cottage gear brands, and your hub for all things ultralight. Visit them online at garagegrowngear.com.
In this Episode:
What’s New at Backpacking Light?
Find information about all of our upcoming Member Q&A’s, Webinars, Live Courses, other live events, and more on our Events Calendar Page.
Executive Producer - Backpacking Light; Show Director and Host - Ryan Jordan; Producer - Chase Jordan; Theme music: Look for Me in the Mountains written by Chris Cunningham and Ryan Jordan, performed by Chris Cunningham (acoustic guitar, lead and harmony vocals, harmonica), Chad Langford (upright bass), and Tom Murphy (mandolin), produced by Basecamp Studios in Bozeman, Montana.
Sponsorship Policy: Backpacking Light does not accept compensation or donated/discounted products in exchange for product mentions or placements in editorial coverage, including any podcast episode content not excplicitly identified as sponsored content. Some (but not all) of the links in these show notes may be affiliate links. Learn more about affiliate commissions, influencer marketing, and our consumer advocacy work by reading our article Stop wasting money on gear.
In episode 102 of the Backpacking Light podcast you’re going to learn about the origin, evolution, and use of Polartec Alpha Direct in modern ultralight layering systems.
Episode Sponsor
Today’s episode of the Backpacking Light Podcast is sponsored by Garage Grown Gear, your hub for all things ultralight. Garage Grown Gear is dedicated to supporting the growth of small, startup, and cottage brands. Today, we are featuring innovative products from those brands made with Polartec Alpha Direct, the lightest, most breathable, and most air-permeable fleece insulation available.
In today’s episode of the Backpacking Light podcast you’re going to learn about the origin, evolution, and use of Polartec Alpha Direct in modern ultralight layering systems.
Polartec Alpha Direct fleece hooded midlayer with fitted hood and paracord drawcord, constructed from open-knit synthetic fleece in 60, 90, and combination fabric weights, with manufacturer-listed medium weights from 3.8 to 5.3 oz (108–150 g) depending on selected fabric configuration.
Note: Alpha Direct is commonly available in 60 gsm (grams per square meter), 90 gsm, and 120 gsm weights. Lighter weights are suitable for 3-season active insulating layers for hiking in cool conditions, or as pajama layers. Heavier weights are best used for inactive insulation (e.g., in camp) or during the winter. Alpha Direct is used in torso and pant layers, caps, and socks. Because of durability limitations, Alpha Direct socks should be relegated for sleeping and in-camp use only.
US Military’s PCU (protective combat uniform) and how it relates to outdoor clothing layering systems – lightweight undergarments, midweight undergarment, fleece, wind jacket, soft shell jacket and pants, wet weather jacket and pants, extreme cold weather parka and pants
Comparing Polartec Alpha fabric (required to be stitched to unbreathable shell fabrics) with Polartec Alpha Direct (does not require to be stitched to unbreathable shell fabrics)
The Polartec Alpha Direct as a multifunctional layering piece – as a warm insulated outer layer, as a base layer, as a warm insulated layer within a storm system, insulated layer within a breathable windshirt system
Executive Producer - Backpacking Light; Show Director and Host - Ryan Jordan; Producer - Chase Jordan; Theme music: Look for Me in the Mountains written by Chris Cunningham and Ryan Jordan, performed by Chris Cunningham (acoustic guitar, lead and harmony vocals, harmonica), Chad Langford (upright bass), and Tom Murphy (mandolin), produced by Basecamp Studios in Bozeman, Montana.
Sponsorship Policy: Backpacking Light does not accept compensation or donated/discounted products in exchange for product mentions or placements in editorial coverage, including any podcast episode content not excplicitly identified as sponsored content. Some (but not all) of the links in these show notes may be affiliate links. Learn more about affiliate commissions, influencer marketing, and our consumer advocacy work by reading our article Stop wasting money on gear.
In this article, I discuss some of the challenges that an effective layering system needs to address. In addition, I highlight a handful of the layers that I use the most and how I combine them into various ensembles for different use cases.
Introduction
My backcountry layering system has evolved through the years. I’ve replaced wicking garments with hydrophobic garments, I place a high value on air-permeable fabrics, and I prefer to spend a little extra weight on ventilation. My goal with these choices is to assemble layering systems for inclement conditions that allow me to stay comfortable. For me, comfort is most challenging in the blustery conditions I experience where I hike the most – the Rocky Mountains of Colorado and Wyoming.
In this article, I discuss some of the challenges that an effective layering system needs to address. I also highlight a handful of the layers that I use the most and how I combine them into various ensembles for different use cases.
The Issues
The primary objective of an apparel layering system is to provide enough versatility in layering combinations that allow you to remain comfortable in a wide variety of inclement conditions: precipitation, wind, sunshine, immersion in water, hot and cold temperature, scrambling and bushwhacking, and biting and stinging insects. Image source: Basecamp Live.
Thermal comfort
During physical activity, your body generates heat. In addition, heat is absorbed by your clothing when you are exposed to warm temperatures and direct sunlight. That heat must leave your clothing system in order for you to remain comfortable.
Likewise, during periods of inactivity in cold temperatures, heat loss can make you uncomfortable. Heat loss to the environment is exacerbated in wet conditions (evaporative heat loss), windy conditions (convective heat loss), and when exposed to a clear night sky (radiative heat loss).
The movement of heat from inside your clothing system to the outside environment is critical for maintaining thermal comfort. Heat moves through a clothing system in response to convection (air movement in the system), conduction (the transfer of heat along fabric surfaces from warmer to cooler temperatures), and radiation (e.g., heat loss to an open night sky or heat absorbed from an open sunny sky).
Moisture accumulation
During activity, your body generates moisture in both vapor and liquid (sweat) phases. The movement of sweat from your skin surface to the environment occurs in response to complex processes that involve evaporation, condensation, and capillary movement along fiber surfaces (wicking). Likewise, the movement of moisture vapor through your clothing occurs in response to convection, diffusion, and vapor pressure differentials.
The extent to which moisture accumulates in your clothing will depend on the hydrophobicity (or hydrophilicity) of fiber surfaces, capillary forces within the fabric structure, fabric porosity, air permeability, diffusion (breathability) resistance, and mechanical ventilation features.
Storm protection
Protection from wind and precipitation requires tightly-woven fabrics (for wind resistance) and waterproof coatings, membranes, or laminates (for waterproofing). The fabric physical characteristics that are required for keeping Mother Nature’s elements out also keep your elements (the heat and moisture generated during activity) in.
Managing comfort in a system of layered clothing is easy when there’s no wind or rain, skies are partly cloudy, you’re walking slowly without a backpack, and the outside air temperature is 65 °F (18 °C). Outside that very narrow range of conditions, the processes that impact comfort become quite complex. Image source: Basecamp Live.
Sun exposure
In Managing Sun Exposure in the Backcountry, we study how fabric materials and engineering influence clothing’s resistance to the penetration of ultraviolet radiation from the sun. Because I live at and spend most of my trail time at altitudes in excess of 8,000 feet (2,440 m), I’m attentive to the amount of cumulative sun exposure I get. My normal summer hiking uniform includes a long-sleeved shirt, brimmed hat, neck gaiter, sun gloves, and long pants.
There’s an inverse relationship between sun protection and thermal comfort. The tightly woven fabrics that prevent the penetration of ultraviolet rays also inhibit the movement of heat and moisture.
Biting insects
High-thread-count (tight weave) woven fabrics are more resistant to puncture from a mosquito’s proboscis than knitted fabrics. However, knitted fabrics are generally more air-permeable and more comfortable to wear in warm conditions.
As with sun protection, there’s an inverse relationship between biting insect protection and thermal comfort.
Scrambling & Bushwhacking
Most thru-hikers and other trail followers don’t often have to consider the impacts of traipsing through brush or scrambling on rocks. Both of these activities can abrade, puncture, and tear clothing. Clothing that is most resistant to damage (more durable) will be made with higher-denier fibers and tightly woven. Of course, those factors interfere with the clothing’s ability to facilitate the exchange of heat and moisture and your ability to remain comfortable during activity and warmer temperatures.
My Strategy
I tend to gravitate towards layers that are more hydrophobic, dry faster, are more air permeable, better ventilated, and have high insulation-to-weight ratios.
“The most critical element of a wicking fabric is how well it allows sweat to be drawn away from the skin, converted to moisture vapor, and then transferred out of any clothing layers. This element is different from how well the fabric itself wicks. How well the fabric wicks does not determine whether you will be comfortable. The disposition of sweat to the environment depends on much more than whether a wicking fabric can absorb lots of moisture in a laboratory test.” – Stephen Seeber [source]
The data from these studies suggest that wicking per se (the capillary movement of liquid moisture along a fabric surface) may actually increase moisture accumulation and hinder moisture transfer out of your apparel system. Of course, it will depend on the breathability, air permeability, and ventilation features of other garments in your clothing system as well.
However, this work suggests that more hydrophobic base layer fabrics may not only absorb less moisture and dry faster, but their notable lack of wicking may also contribute to more comfort and more rapid expulsion of moisture from your clothing system.
My preferred base layers are made with polypropylene, a hydrophobic fiber, rather than polyester, which is more hydrophilic. Because most insulating mid-layers are made with polyester, I look for open-weave fleeces (e.g., Polartec Alpha), which don’t promote wicking to the extent that more tightly woven or knitted fabrics do.
Rapid dry time
Garments that are thin, light, and made with hydrophobic fibers will absorb less moisture and dry faster than garments made with fabrics that are thicker, heavier, and made with hydrophilic fibers. Rapid dry time is an attribute that can be correlated to moisture transfer out of a clothing system. In addition, rapid dry time may be valuable for users who risk water immersion (e.g., packrafting, river crossing).
My fastest-drying garments are fishnet, open-weave fleece, and shell fabrics made with 7 to 15 denier fibers.
Air permeability
Air permeability contributes to the evacuation of moisture vapor from a clothing system by allowing the vapor pressure gradient on either side of the fabric to create convective (moisture-laden) air movement across the fabric surface. I prefer wind shirts and rain jackets that are at the higher end of the air permeability spectrum in those product categories.
Likewise, the three base and insulating layers I own and use regularly (Brynje fishnet, Finetrack polyester mesh, and Polartec Alpha) are highly air-permeable and facilitate convective moisture vapor movement through clothing without having to rely on wicking.
Ventilation
Mechanical ventilation has been discussed in depth previously and is a critical feature of outer shell layers. Ventilation promotes the exchange of large volumes of warm, moist air inside a clothing system with the cooler, drier air of the outside environment. Ventilation, air permeability, and breathability (the diffusion of moisture vapor through a fabric) are all important processes involved in evacuating heat and moisture from a clothing system. However, ventilation has the ability to move the most amounts of warm, moist air in the least amount of time. I’m a big fan of mechanical ventilation features – pit zips, full-length zippers, and adjustable cuffs/hem/hoods – on shell layers.
Insulation
When it comes to insulation for active use (while I’m hiking), I want insulation that has a high warmth-to-weight ratio but is highly air permeable so it’s capable of allowing heat and moisture to escape rapidly when I open vents on an outer shell layer. For insulation while inactive (at rest or in camp), I look for insulations and garments that maximize loft-to-weight ratio and that use shell and lining fabrics that are as light as possible.
Brynje Super-Thermo C-Shirt – minimalist polypropylene base layer for cool and cold conditions or warmer temperatures under an air-permeable shirt or shell, very light, rapid dry time, maximum air permeability.
Feathered Friends EOS Down Hooded Jacket – inactive use in cool / dry weather, high fill power down insulation, not air permeable, higher warmth-to-weight ratio than synthetic high loft insulation.
Shell Layers
REI Flash Jacket – full zip, hooded, pockets, air permeable, adjustable hem and hood.
Gorewear R7 Shakedry Jacket – two-way front zipper, very high breathability, exposed waterproof membrane = no DWR required but subject to abrasion damage.
Here are some examples of how I combine various layers for different use cases in three-season conditions.
1. Sunshine, warm temperatures, biting insects
Left: Brynje Super-Thermo C-Shirt under a Jolly Gear Triple Crown Button Down Hoody. The fishnet provides a touch of warmth for cooler weather and adds additional protection against mosquitoes. The button-down hooded design is highly air-permeable, stretchy, and versatile. Right: The Patagonia Sun Stretch Shirt is lighter, made with fabric that has a tighter weave for better insect protection, absorbs less water, and dries faster.
2. Cooler temperatures, no wind or precipitation, no biting insects
Multiple base layer strategies: Brynje Super-Thermo C-Shirt worn under Helly Hansen LIFA (100% polypropylene) provides a very hydrophobic base layer system (left). Finetrack Elemental L1 (100% polyester) worn over Brynje Super-Thermo fishnet provides more air permeability and is more comfortable at higher exertion levels.
3. Warmer temperatures with wind or precipitation
Brynje Super-Thermo Fishnet worn under a highly air-permeable wind shirt like the REI Flash Jacket (left) makes a comfortable ensemble at high exertion levels in cool, dry conditions. Fishnet worn under a highly breathable waterproof jacket like the Gorewear R7 Shakedry (right) is my choice for high exertion levels in the rain to prevent overheating.
4. Heavy rain, strong winds, warmer temperatures
As conditions get stormier and colder, I opt for a 2-shell system (wind shirt + rain jacket). This adds a touch of warmth in the air layer trapped between the two shells, and much better storm protection in very heavy rain and high winds (upper left). In less stormy but still rainy weather, I prefer one, well-ventilated shell. The Gorewear R7 Shakedry Jacket (lower left) has a two-way zipper that can be zipped from the bottom up and the Montbell Versalite Jacket (right) has 18-inch pit zips. In each of these cases, I’m layering the jackets over fishnet.
5. Cooler temperatures (no wind/rain, wind only, wind + rain)
For cold weather and no rain, I like highly breathable, air-permeable layers, like the Senchi Designs Alpha 60 Hoody (left). I’ll add a highly air-permeable windshirt (REI Flash Jacket, center) for cold, windy conditions, and a hardshell (Gorewear R7 Shakedry, upper right) for cold and wet weather. For cold temperatures at rest breaks and in camp, I use synthetic insulation in wet weather (Enlightened Equipment Torrid Apex Pullover, lower right) and a down jacket in dry weather.
Recommendations: Essential Layers
I’m in the fortunate position as an outdoor industry professional to have a steady influx of “gear to try” without having to shell out thousands of dollars trying to figure it all out. Over the past few years, I’ve made some changes to my layering systems, and the following represents my recommendations for what I think are essential layering pieces that represent a good balance of price, performance, form, function, versatility, and durability. Everyone will gravitate towards garments that appeal to their own aesthetic preferences and performance criteria – consider these as personal recommendations based on my experience, and don’t necessarily assume they will be optimal for your environment or use cases. Share with us in the forums below other layering options and ensembles that you find to be optimal for the use cases you experience.
Brynje of Norway makes both synthetic and merino wool fiber fishnet base layer apparel for outdoor adventures. Fishnet construction is more breathable, lighter, and faster-drying than conventional knits.
The Jolly Gear Triple Crown Button-Down is the only sun shirt integrating a full button-down front with a hood, offering adjustable ventilation rarely found in sun protective hiking apparel. Made from an 86% polyester, 14% spandex blend with antimicrobial and quick-drying properties, it includes zippered chest pockets, thumbholes, and a uniquely designed hood with a vent/hair hole and cinch cord. The body fabric is one of the highest air-permeable fabrics we've tested. Men's medium: 7.5 ounces (213 g) and up, depending on fabric choices.
Polartec Alpha Direct fleece hooded midlayer with fitted hood and paracord drawcord, constructed from open-knit synthetic fleece in 60, 90, and combination fabric weights, with manufacturer-listed medium weights from 3.8 to 5.3 oz (108–150 g) depending on selected fabric configuration.
We recommend a synthetic insulated jacket for most conditions where weather is unpredictable, and the Torrid Apex is one of the best in terms of its warmth-to-weight ratio.
WEIGHT:
7.4 to 8.4 oz (210 to 238 g)
WHAT'S UNIQUE:
available in 7d or 10d fabrics
very high warmth-to-weight ratio for synthetic insulation
MAIN ISSUES:
synthetic insulation requires care, not as durable as down
Product mentions in this article are made by the author with no compensation in return. In addition, Backpacking Light does not accept compensation or donated/discounted products in exchange for product mentions or placements in editorial coverage.
Some (but not all) of the links in this review may be affiliate links. If you click on one of these links and visit one of our affiliate partners (usually a retailer site), and subsequently place an order with that retailer, we receive a commission on your entire order, which varies between 3% and 15% of the purchase price. Affiliate commissions represent less than 15% of Backpacking Light's gross revenue. More than 70% of our revenue comes from Membership Fees. So if you'd really like to support our work, don't buy gear you don't need - support our consumer advocacy work and become a Member instead.
Learn more about affiliate commissions, influencer marketing, and our consumer advocacy work by reading our article Stop wasting money on gear.
Editor’s Note: This story contains descriptions of animal abuse and trauma related to a rescue dog.
Introduction: Tripod’s Story
Can anyone own a 4-legged canine rescue? Three-legged? Toothless? Hacked off tail? Tongue hanging? Old? Damaged?
I’ve never owned an old rescue dog before; opting for pedigreed puppies. Slated for euthanasia, prospects for her “forever home” were grim. She was old, crippled, had her tail reduced to a stump, and over-bred. She spent most of her life confined to a crate. She was even set on fire to “cure” scabies and never benefited from veterinary attention. She was a 9-pound, scrap of a mutt, with two front legs and one in the back. Wormy, starved and limping.
Tripod’s “Before” image.
She was discovered on a Houston freeway by Red Collar Rescue, eating garbage, blinded by overgrown hair, with dull eyes, limping, diseased ears, and rotten teeth; barely alive. She was rushed to their rescue veterinarian.
She had three bullet wounds that shattered her back leg bones, leading to her hind leg being amputated at the hip. A bullet was removed from her front knee. She had heartworms, parasites, and a hole in her gums. While anesthetized, she also had her rotten teeth pulled and was spayed. Later, she was dewormed, bathed, vaccinated; ears medicated and shaved.
Tripod’s adoption photo.
She had to recover at her Red Collar foster home, which provided food, medications, wound care, and limited her mobility. I offered to adopt this dog and have her in my home – I submitted all the paperwork and waited.
“Ok,” I thought when the Red Collar agreed, their folks dropped her off after a brief recovery, and she staggered shyly into a corner. “I can do this.”
I took her for medical care: an anti-parasite regimen, blood tests, bathing, grooming, and of course, a healthy dog diet. I renamed her Tripod. She was a noun, verb, and biological mess. But, she loved to eat and squeaked when I prepared her meals.
Due to total tooth extraction, her tongue hung out, and she drooled. She limped and had large tumors along her spine. Sutures from amputation and jaw surgery were tender; she was skinny, ugly, shy, twisted, and slurped her food. I gave her a little bed with clean blankets by a patio door and hoped for the best. She spent hours asleep – waking only to potty or eat.
I bought her a little Henley shirt for warmth and used her Red Collar leash and collar when walking. After several months, she blossomed into a sleek, bright, loyal companion. Her stump of a tail wagged, and she relaxed. She put on a few pounds, and her tumors shrank. Her eyes brightened; fur glossy, balanced well on three legs, and looked good.
Tripod’s Henley shirt.
Recently retired and widowed, with both sons married and gone, I had the time to dedicate to a damaged dog. I also loved to hike, camp, cycle, and kayak – to get dirty, and always a sucker for down-and-out animals. Few women did those things. Even fewer who were my age, and they rarely did these activities solo.
I was rehabilitating Tripod when the Covid-19 pandemic hit, limiting our ability to participate in society. I’m an aged 71 retired science teacher who has been camping, biking, and hiking all her life. Luckily, I had great teachers in outdoor and survival skills and grew up climbing, hiking, and ranching. I knew the joy, heartbreak, rigor of expeditions, and importance of careful planning. I could hike, read a compass, maps, and endure discomfort.
Planning and Preparing for the Trek with Tripod
During winter, I researched a state “long trail,” got the topographic map, planned my route, and trained on a StairMaster. I spent the next several months training, “climbing” on a Stair Master with a progressively heavy pack, and buying the latest and greatest lightweight gear. I also tested out my tent and calculated the R-values of my sleeping pad and quilt. Over the years, I have slowly obtained high-quality hiking gear. The lighter the gear weighs, the more it seems to cost.
I decided on the Colorado Trail (CT) as most National Trails were closed due to Covid. It was also an area I was intimate with – I grew up in Denver, worked in Evergreen (which was then a small village in the “foothills” of Denver), and had a summer place in Bayfield – a small town near Durango, CO.
The Colorado Trail was convenient for a summer thru-hike. It was popular, and I had the time to hike the entire 560-odd miles, starting from Durango on the west side and ending near Denver on the east.
At my tender age, I really did not have any years to wait for things to return to “normal.” Now was as good a time as any. Much within society was shut down, people were laid off and lost their jobs. Quarantines, “closed” signs, and face masks were everywhere. But with many State and National parks closed, the Colorado Trail was still open.
The Colorado Trail is 567 miles routed over the Continental Divide. Construction began in 1974 and was “finished” in 1989, connecting Durango, CO, a small town west of the Continental Divide, and runs to Littleton, CO, another town near Denver, east of the Continental Divide and runs through the Rocky Mountains of Colorado.
The Colorado Trail passes through 8 mountain ranges and 6 wilderness areas while averaging 10,300 feet (3,140 m) in elevation. It is high, wild, and dangerous. I had been on it before, 40 years ago with younger knees and better eyes. I didn’t know if Tripod could finish the trail, let alone if I now could! I consoled myself with the idea that if the Colorado Trail was too hard, I could descend to a nearby mountain town and hop onto a bus. Besides, I was bullet-proof, right?
Not wanting to board the dog for an extended period, Tripod, now healthy, would join me. I began the complicated business of trail logistics for herself and me – clothing, poles, packs, shelter, food, water, cookware, clothing, raingear, dog-gear, navigation, medications, vaccinations, and the financial means to make it.
A healthier Tripod, several weeks before we embarked on the Colorado Trail.
We needed endurance, careful planning, compliance with forest and wilderness regulations, knowledge of how to cope with local animals, and physical, mental, and emotional strength. During our training, I evaluated Tripod’s trail worthiness, health, and ability.
Having only three good legs and her body size were concerns. She was willing, but making her carry any weight seemed cruel. It had me thinking about doing simpler day trips with her – out-and-back hikes if she proved unfit or unwilling.
I took her to my veterinarian, also an animal rescue owner, and he supported my goal of hiking 567 wild miles with this dog on the Colorado Trail. His usually grumpy attitude evaporated, smiled, and became upbeat. He thought it a terrific idea and bent over to scratch her ears. He carefully examined her; checked her vitals, took x-rays, updated her vaccinations, and advised me on Tripod’s caloric needs. He also cautioned that not all dogs liked hiking and told me to watch her attitude carefully.
Tripod waiting at the vet.
Among other things, he said to not let her run free, or drink any unfiltered water source. He provided a few medical items for emergencies and announced, to my utter amazement, she was physically fit enough for the trek. Then he left, grumpily trying to explain the Colorado Trail to his bewildered vet techs.
A few days later, I went to my doctor, sharing with her my plan, asking for antibiotics, antifungal medications, and antiviral medications as well as medicated creams and altitude medications. I also had blood tests and lower back X-rays. She kindly provided the prescriptions, and her entire office wished us well. I had good test results, and we were both approved for our hike.
I was anxious; it all seemed too easy. I still had to carry 35 pounds, stay highly organized, and endure a long trail. I shrugged. Tripod was lifted into my high clearance, four-wheel drive Subaru, rigged with an orthopedic canine bed, and she immediately settled into sleep.
We spent the night in a dog-friendly but run-down, dump of a hotel, about halfway on our journey where I fed and walked Tripod. The hotel housed fierce-looking Hispanic male utility workers, cooking their meals on smokey, charcoal stoves outside their rooms. They looked up and politely grinned at Tripod and me then waved us over. All perceived fierceness gone. Their smiles twinkled from stainless steel implants while they petted Tripod, politely called me Professora, and offered a place to sit. Then, the cook pushed a plate into my hand, loaded with steamy barbecue, rice, pinto beans, and fluffy tortillas; they handed me a huge cup of iced sweet tea, then sat back, politely waiting for me to begin the meal while they petted Tripod.
I used my limited junior-high level Spanish to converse, and between them not speaking English and my poor grammar, we had a great time. Tripod nuzzled her hosts, received many pets, and then wandered over to me, quietly laid down, arranged her tongue, sighed, and slept.
In the morning, as I walked the dog, they smilingly offered foil-wrapped, scrambled egg tortillas with salsa and freshly brewed coffee. Each helped load gear, shook my hand, and wished us a safe journey; then climbed into their utility trucks. Each man wearing a yellow safety helmet, orange vest, and assumed fierce looks.
Later, filling the car with gas and checking oil and tire pressures, I thought about prejudice, gratefully considering the kind men we met, and wished them well. Tripod and I were headed to Durango, Colorado.
I made arrangements for my car to be safely garaged not too far from the Trail. Although pricey to store, the CT disallowed parked vehicles. On our way to the CT, I rationalized it was better for a dog to be pampered on a Trail than confined to a crate, neglected, then abandoned.
Food and Gear
Keeping us well-fed on the Trail was a daily challenge. I carried dehydrated dog food and vitamins, portioned into sealed baggies, mixing with clean water to make a calorie-rich gruel twice a day for Tripod. I picked up her waste with special Leave No Trace (LNT) bags and carefully sanitized our water and food. I protected her three good paws with booties worn by Alaskan sled dogs and walked her using an UL dog leash. If it was chilly or rainy, she wore a fleecy, hooded waterproof dog jacket. I consumed miserable dehydrated food, wore thrift store clothes, and trash bags as “rain gear”.
However, I invested in everything else – it was a necessity after previously fracturing my back – carried an ultralight tent, carbon fiber poles, ultralight cookware, an umbrella, an insulated sleep pad, a quilt, and a robust water sanitation unit. Giardia, a microscopic intestinal parasite affecting humans, and only treated by a medical doctor, took me off a long Trail a few years ago. Having learned the painful lesson, food and water preparation became a scrupulous, almost religious endeavor.
Tripod and I would sleep in my one-person tent together.
Tripod wore tiny panniers with a little battery-powered light. I worried any extra weight may stress her “good” back leg and deliberately kept her pack light. Her pack pockets were balanced with empty potty bags, her doggy raincoat, an extra leash, a red dog sweater her groomer gave her, bandages, snake bite antivenom, medicated paw cream, extra booties, and batteries for her light. I carried everything else.
I had a 70-liter Gregory “Diva” XS pack; internal frame, load lifters, torso length adjustment, “brain” zippers, waist belts with pockets, and a shoulder pocket. I also wore a Hyperlite Mountain Gear fanny pack and carried a high lumen headlamp on my head for doing camp activities and hiking in the dark. Altogether the pack was 35 lbs, which was good – I could not carry anything heavier.
Grinding her commercial dog chow fine in a Vitamix was the basis for Tripod’s meals. For each meal, I added 1/4 teaspoon each of calcium, probiotics, and salmon oil, as well as about 1/2 teaspoon raw turkey before dehydrating everything and portioning her meals into sealed dehydration bags. I would feed her about 1/2 cup twice a day, rehydrating her food with boiled water mixed with cool water.
Grinding Tripod’s food in the Vitamix.
Tripod and I would sleep in my one-person tent on or in my quilt. I used a tent stake tied to her leash to keep her close while pitching my tent and fly. As we hiked the dog looked glossy, fat, gaining weight while I lost. I kept her leashed and walked at her pace.
Hiking the Colorado Trail.
Along the Trail
About two weeks into our hike, we met two retired elementary school teachers sitting at an empty campground picnic table taking a break. Both were from Minnesota, and both were named Kathy. One Kathy had her small dog, and the other Kathy owned a larger breed. As we had the campground to ourselves we allowed our dogs to play. All the dogs relaxed, sniffed tails, and ran. One Kathy fostered dogs in her home; tending dogs recovering from emergency surgeries. I admired her, sharing Tripod’s story. One of the Kathy’s small mutts wore a doggie pack. Seeing it, I made a note of the vendor in the hope to obtain one similar.
One of the Kathy’s recent rescue dog, Thad, models his dog packs.
We visited, comparing gear, dogs, and remedies for ailments before exchanging contact information. It was still light, and they wanted to hike further that day, so the two Kathys packed up and continued their trek, dogs in tow. The larger dog with packs bulging; the smaller dog, tail wagging madly.
Glancing at my map, Lake City was not too far away. However, I had to locate a dog-friendly store, as I needed to restock food. Tripod and I descended into Lake City near Highway 149, then hitched a ride in a beat-up Toyota minivan occupied by three young men on their way to one of Colorado’s small colleges. Tripod sat in my lap. They dropped us off on a side street and wished us well.
I hefted my pack onto my shoulders, lifted the dog down, arranged my poles, and got the dog’s leash around my wrist. I was worried about Tripod and I being so grimy as we walked down Lake City’s main street. It was about noon, but everything seemed vacant. The town was about three streets with each building boasting clapboard siding.
Trying to look as nice as possible and removing my sunglasses, I asked for the manager. A tatted, multi-pierced, blue dreadlocked spectacle of a young woman politely asked how she may help us. I said we were hiking the CT, her store was mentioned as a resupply spot, and may I please bring my companion dog into her shop.
Tripod and I near Lake City, Colorado.
“Of course, you may! You remind me of my Grandmother! I’d do anything for her. How may I help!” That comment about her Grandmother stung. After all, I was a real grandmother to my older son’s two children, but I was still feeling smarted. However, she allowed Tripod inside.
I asked if there were dog-friendly hostels close by. I anxiously noted that the sun was dropping behind the mountains, one of Colorado’s monsoons was brewing, and it was getting cold. Getting a shelter and hot meal seemed great, but I was also worried about the dog. One of the store clerks had a spare room and was getting off soon. She would be happy to help us. As I had learned before on this trek, I again felt guilty for judging these nice people by their appearances.
Tripod, always a celebrity, had people bent over stroking her fur. Her tongue hung wildly out, and her stumpy tail wagged.
“Great,” I thought wryly. “Now I’m a groupie to a mutt.” Our sales clerk completed our transaction and gave Tripod a small commercial dog treat. I mentioned she had no teeth and would probably choke pulling it from her maw. He profusely apologized and came from his register in tears to pet the dog.
We spent the night at the clerk’s house. Her name, we found out, was Jean, from Cincinnati. Jean provided clean sheets, new soap, shampoo, and her hair dryer. Her spotless bathroom was shared between my room and hers. Was this a gift from the Universe?
Her hot shower was divine. I reapplied some LeukoTape to my feet while Tripod slept on the bath mat. Later, taking Tripod for her night potty, I stared at the clear stars, and although not religious, thanked The Creator for incredible nights and loving people.
In the morning, we shared a great meal with real, non-instant coffee. Her family was curious about us – where we lived, our ages, and if I had guns. I offered to pay for our lodging and meal, but they refused, sharing: “God was with in.” They nodded at Tripod, hugged their Down Syndrome family member. I insisted we stop for a photo.
Then, they took us to the Trail. Seemingly unaffected by altitude, solitude, rain, and close lightning, Tripod pranced easily up root-filled trails, across alpine meadows, and down snowy slopes. She kept her bright eyes on me, ears cocked, and nose up. We frequently marveled and smelled wildflowers. Tripod gleefully rolled in exotic animal droppings, slept in my tent, ate well, and hissed away “bad guys” at night. She did not comment on my unbathed odor, ignored iffy weather, weaved around my hiking poles, and waited patiently, as I parsed map and compass.
I carried everything for us both in my heavy and awkward backpack, while wearing a fanny pack, chest pack, compass, and whistle on strings around my neck, topo map and reading glasses in my fanny pack.
“Gosh,” I grumbled, shifting my pack weight off sore shoulders. I leaned heavily on my poles and said out loud while trying to ignore a throbbing altitude headache and vague nausea: “Tripod has three legs, and I could barely make it with two ‘good’ ones.”
A meadow on the Colorado Trail.
She hiked it all to my astonishment, never unwilling, tired, or lame. I could not say the same. Heel blisters ruptured. Gums bled. Knees sore. Toenails died.
Nearing completion! Near Littleton, Colorado, east of the Continental Divide.
I hurt everywhere and wanted to quit a thousand times. This “damaged” dog was my best trail companion – ever. She was cheerful, non-judgmental, and never complained. She was always in the moment, wanting only me. Her oversight encouraged completion by distracting me from my aching body.
At the trail’s end, we took a west-bound bus back to Durango. We were both odious, which aided our separation from the more clean-conscious riders who left us alone. Lifting her onto the empty seat by me, I reflected: A “damaged” rescued, old mutt just walked 567 miles on 3 legs, and we met wonderful people. She transcended obstacles, overcame limitations, and time vanished. We were both whole and drifted into sleep.
This feature requires an active Backpacking Light Membership.
Premium Articles
You're currently viewing a free preview of a member exclusive premium article. Our premium articles include in depth journalism and insights from the Backpacking Light editorial team.
Get full article access by subscribing to a Premium or Unlimited Backpacking Light membership!
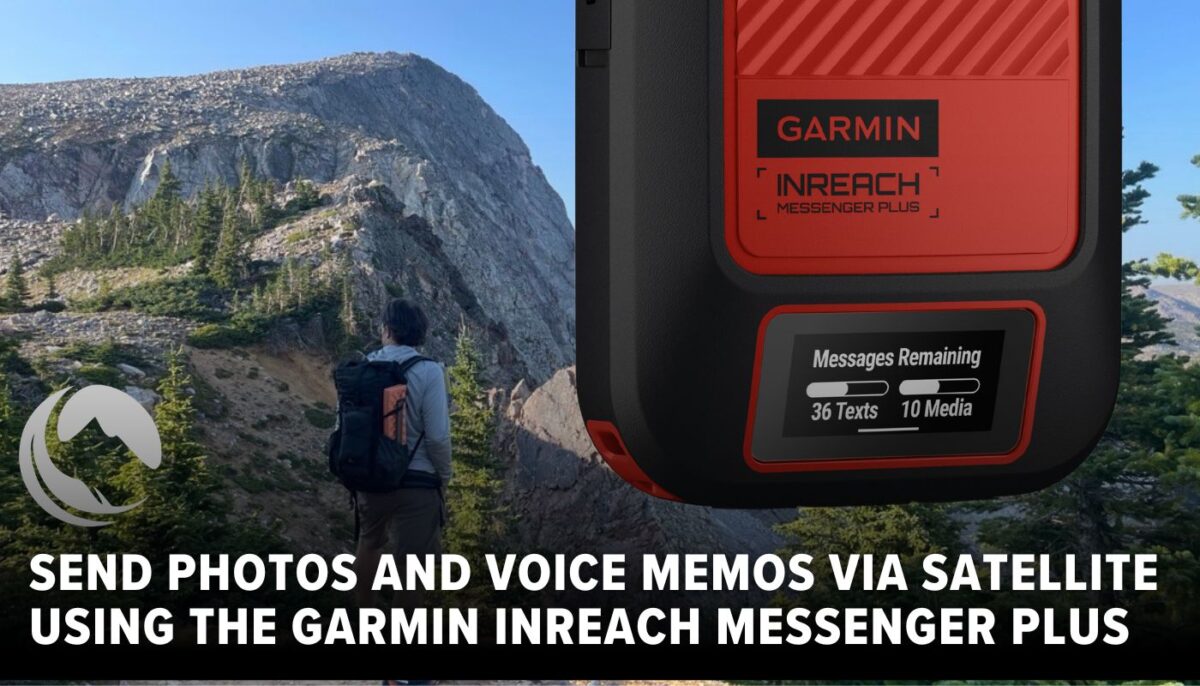
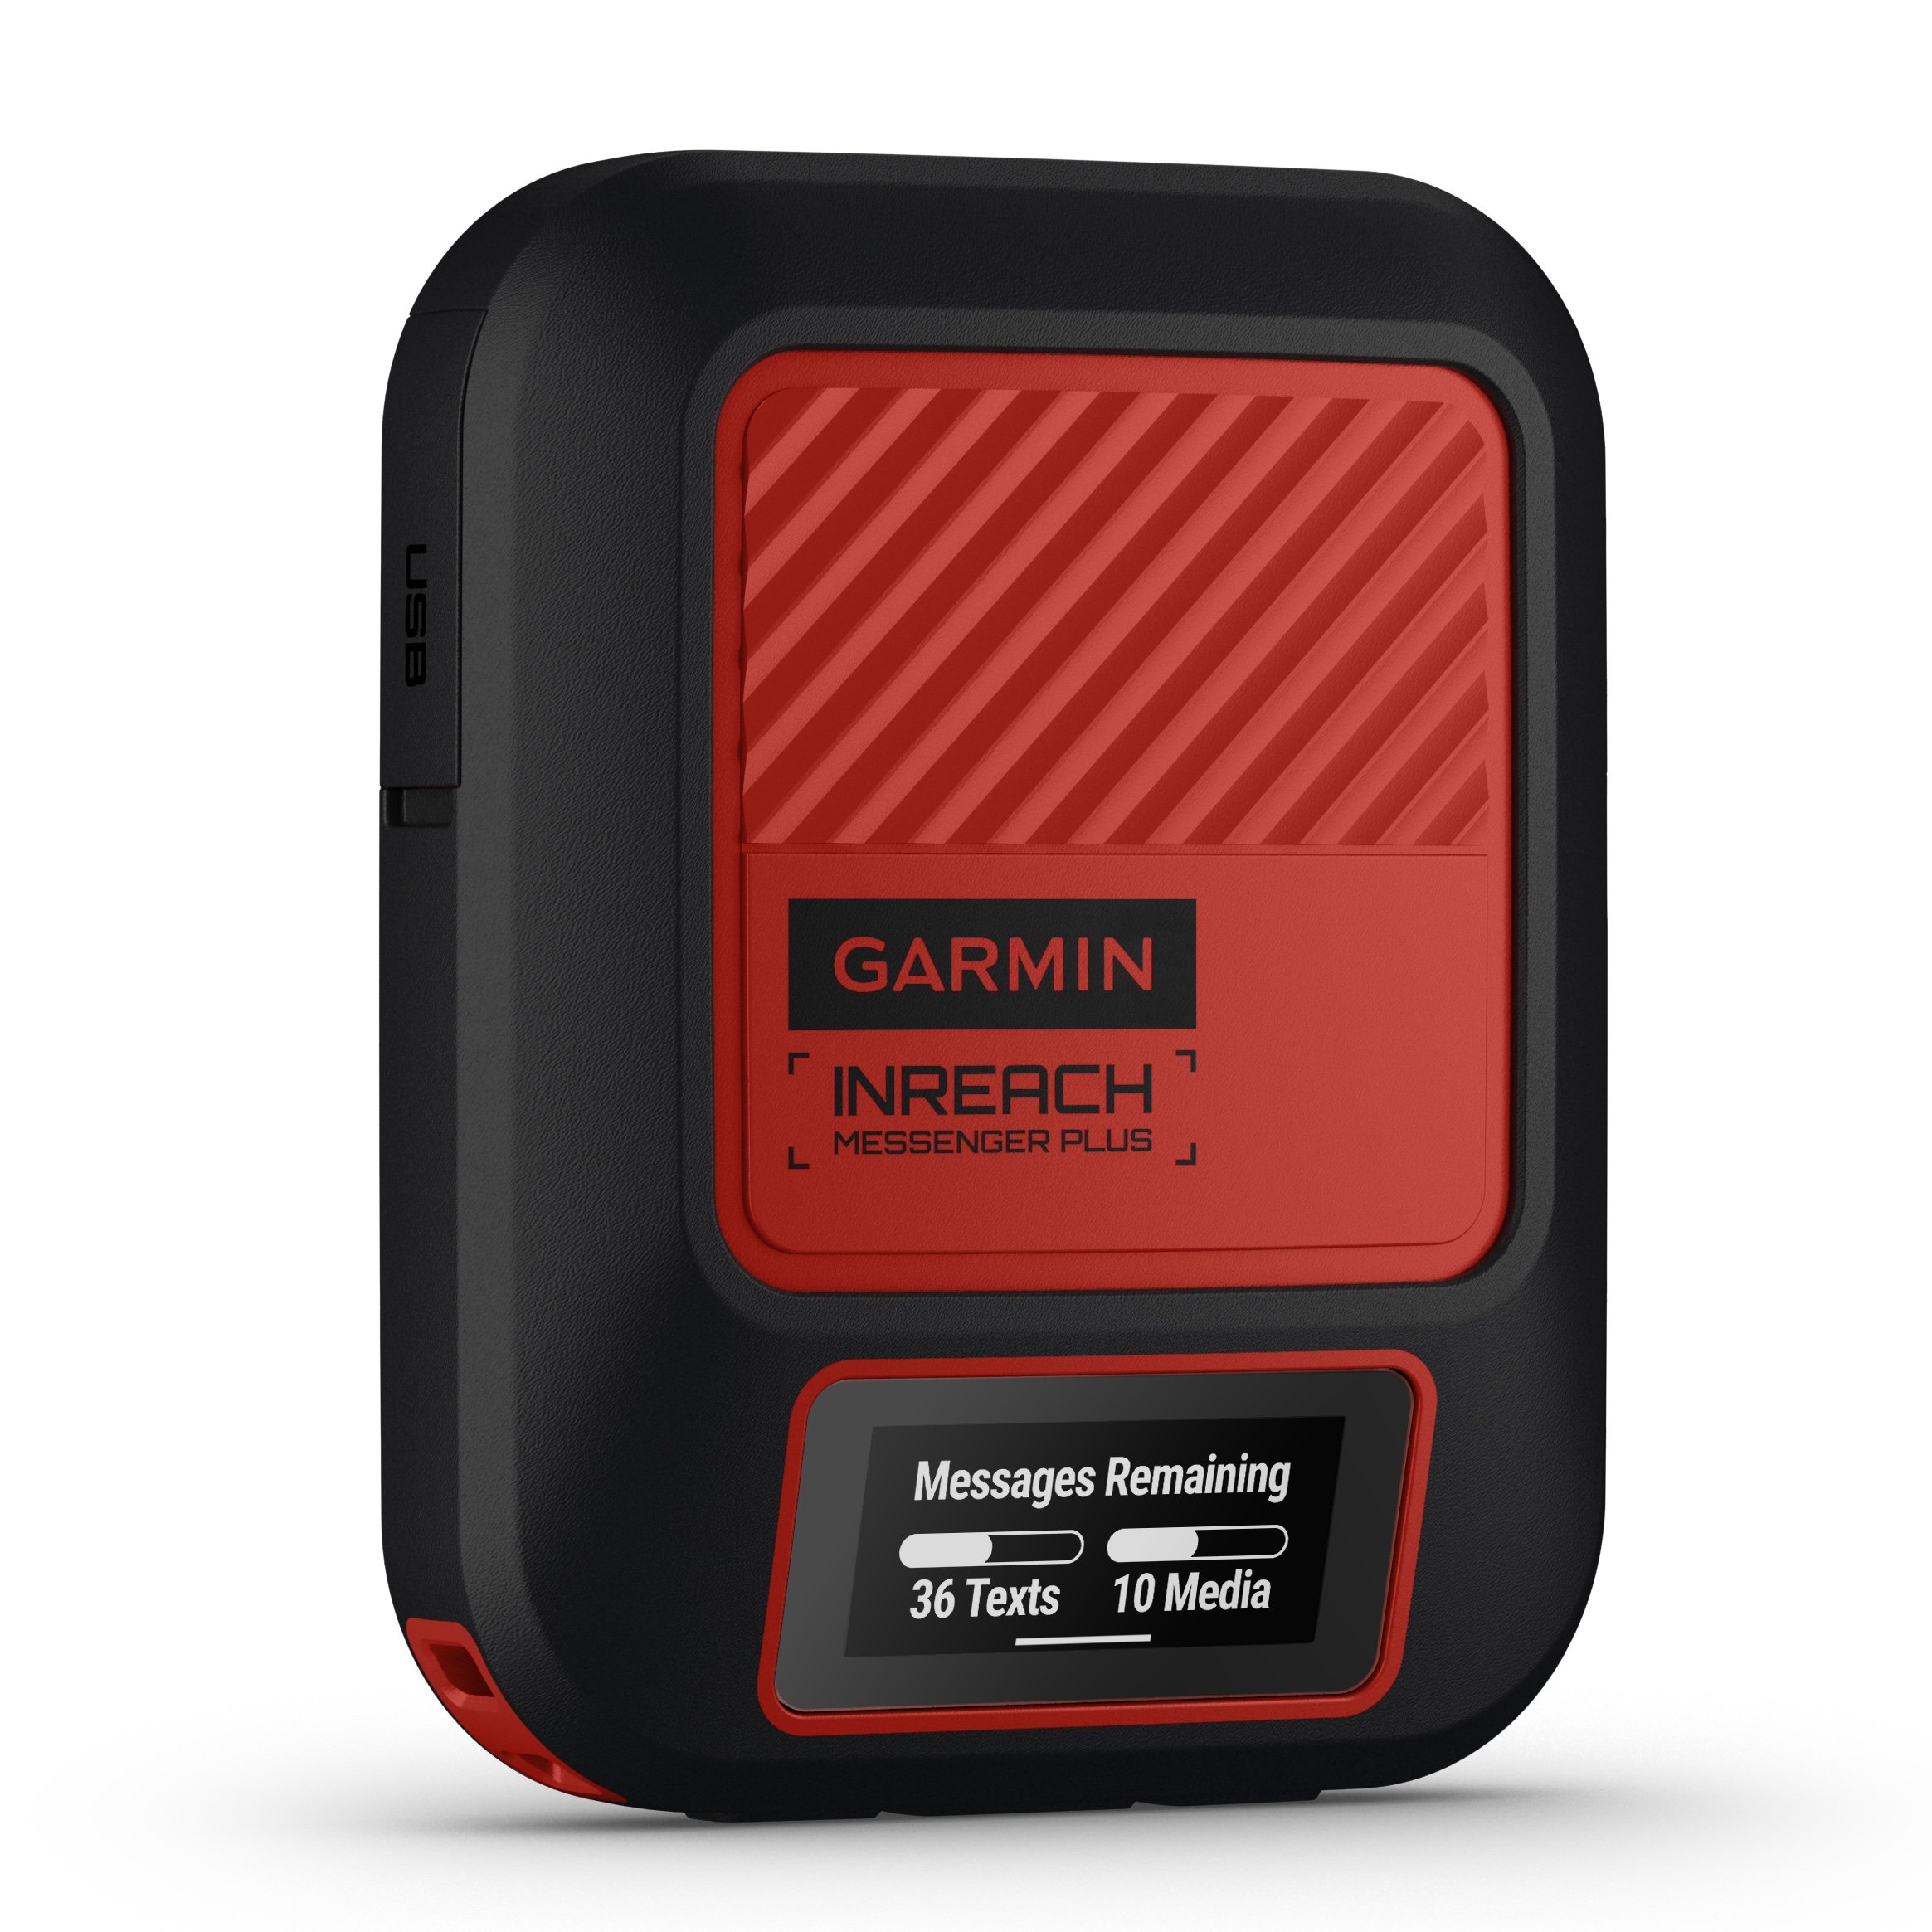
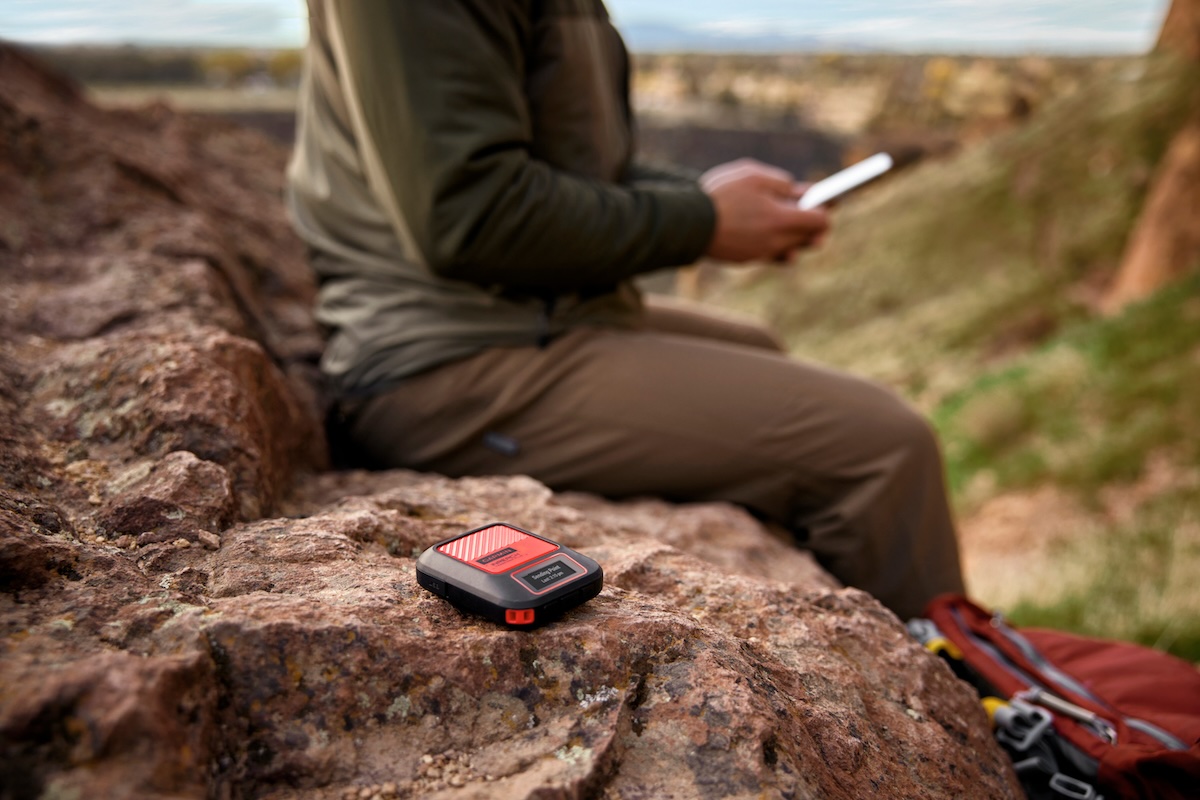

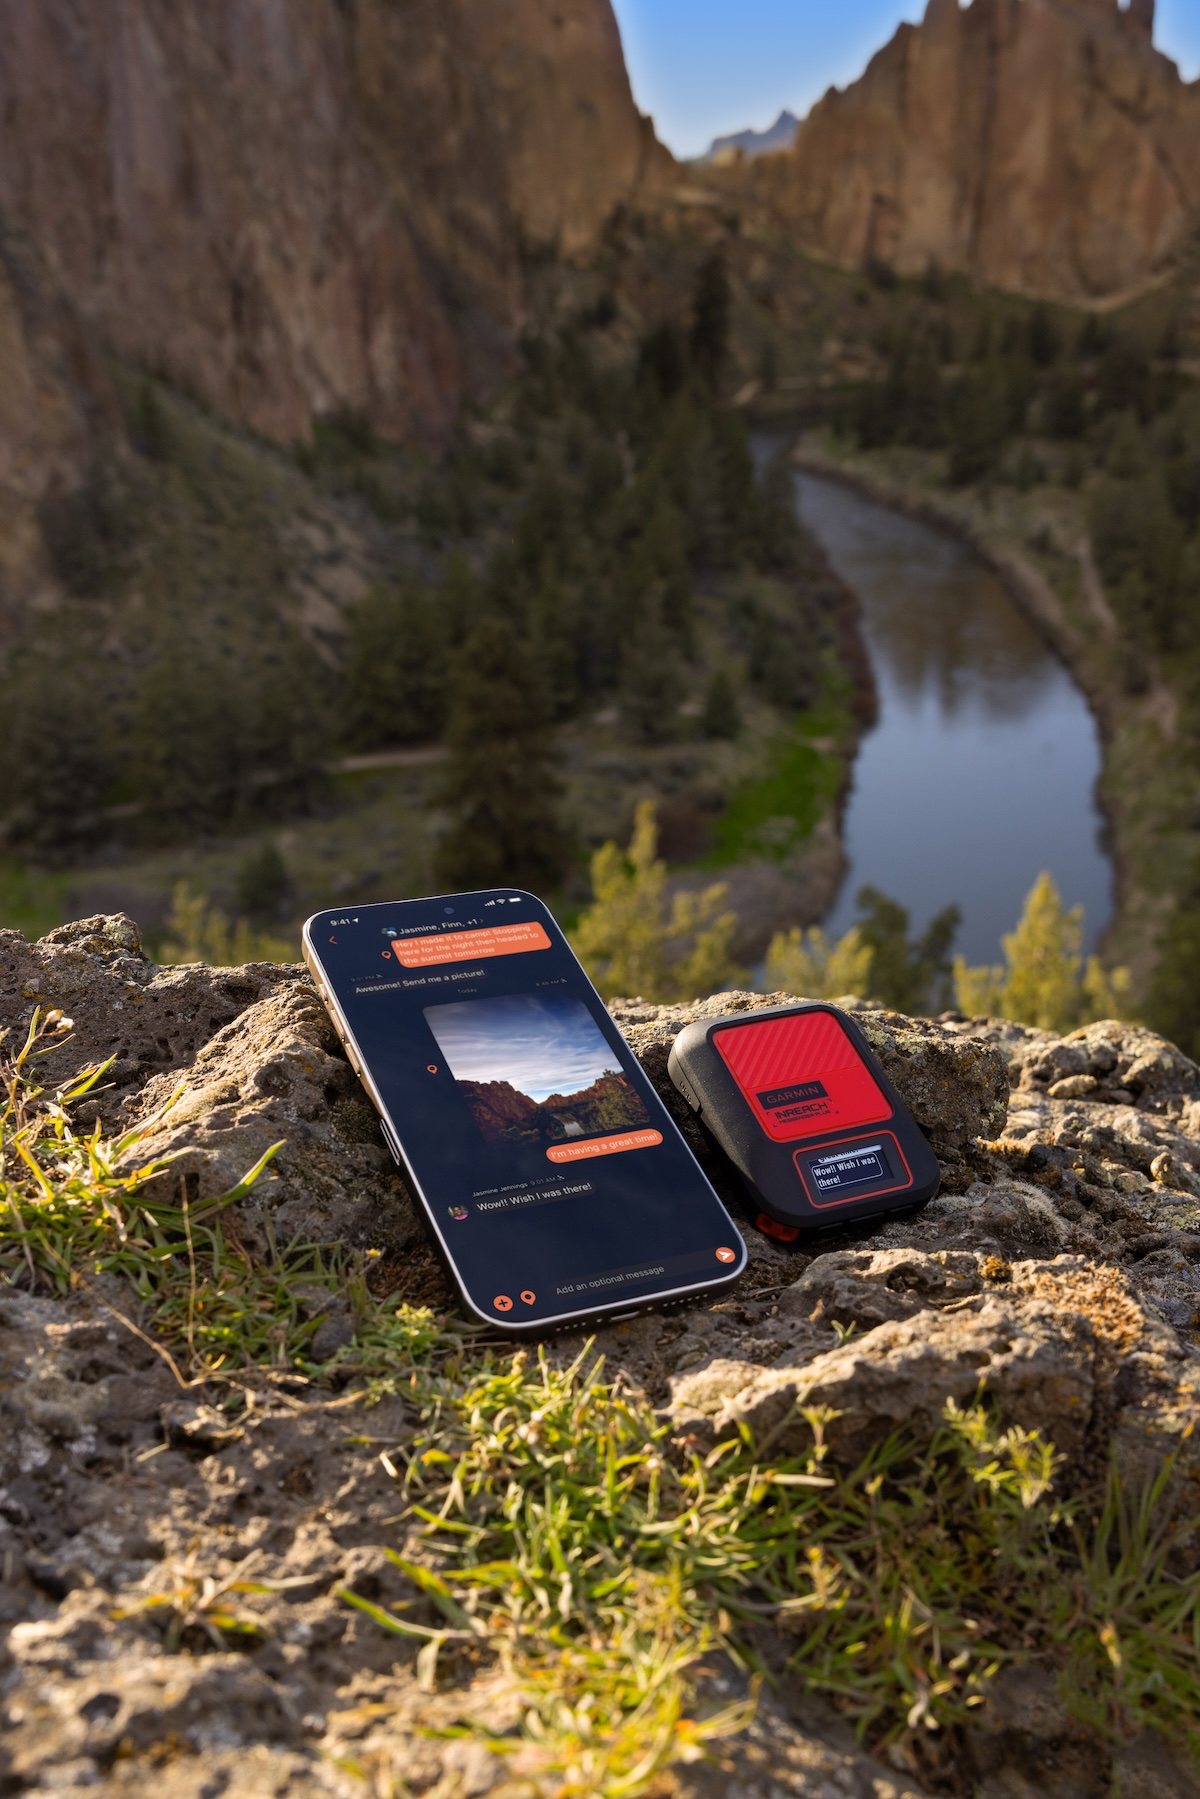
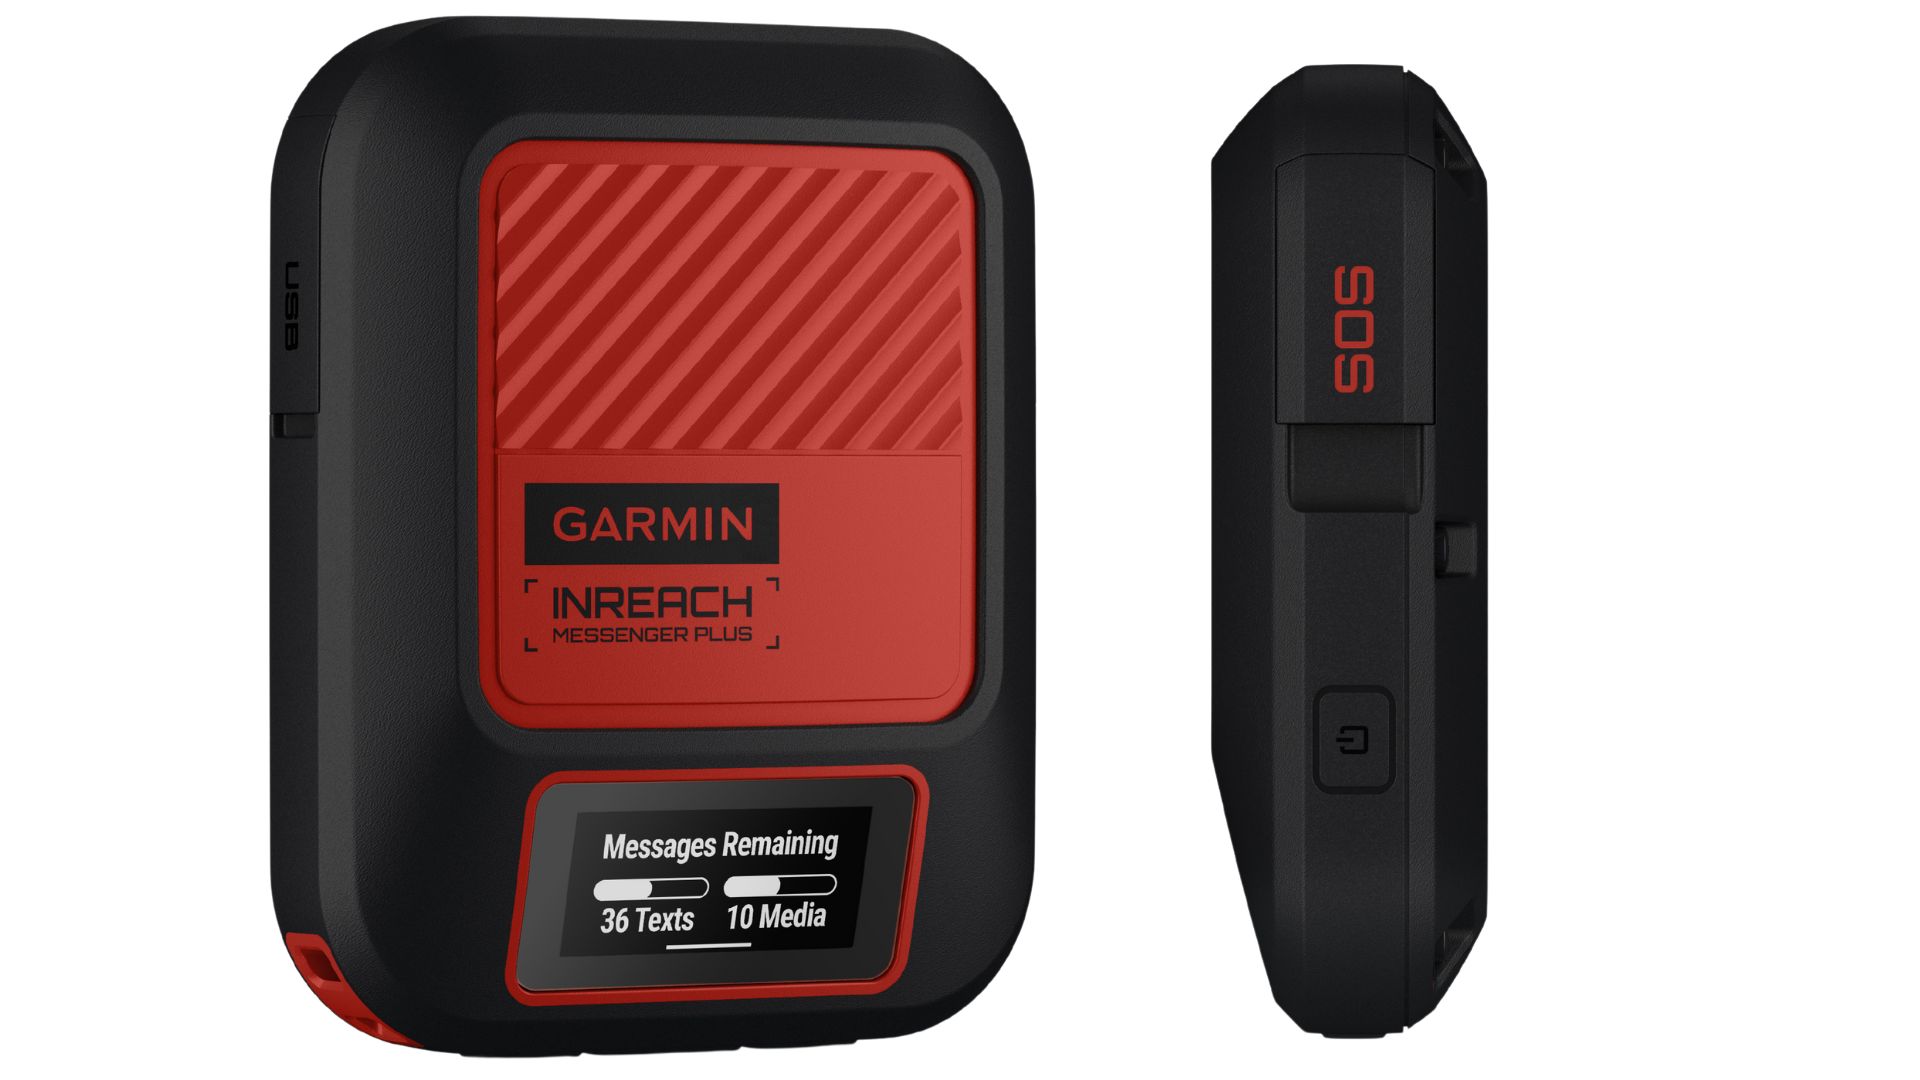
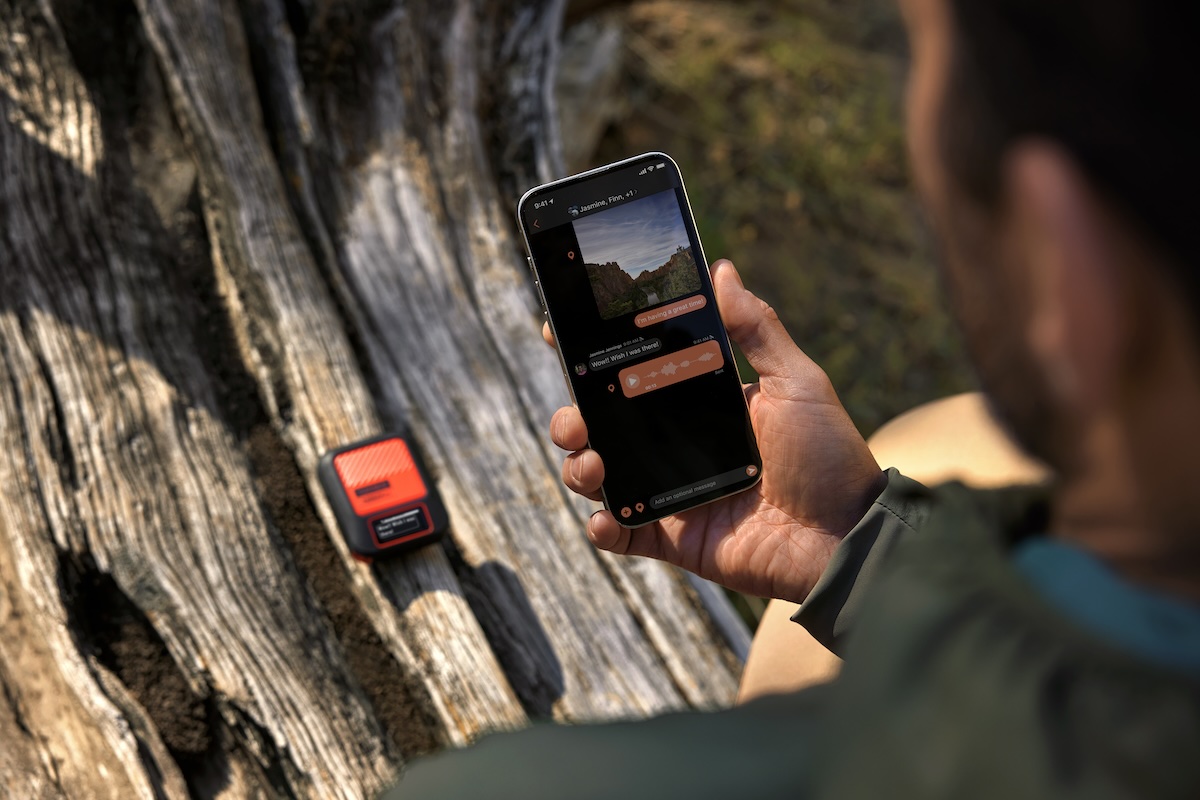
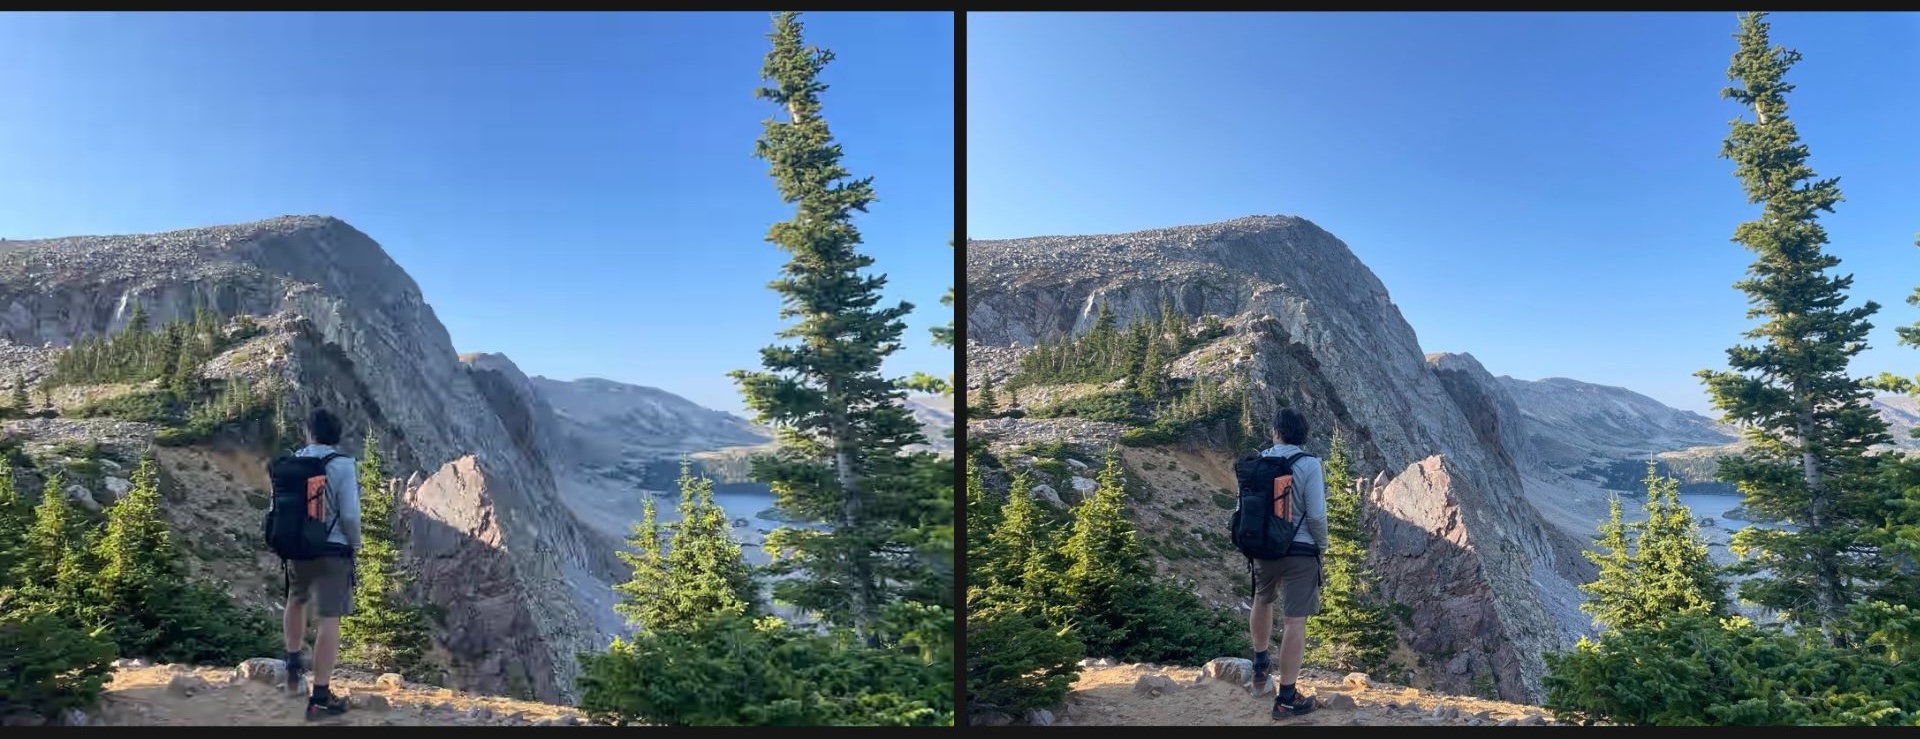
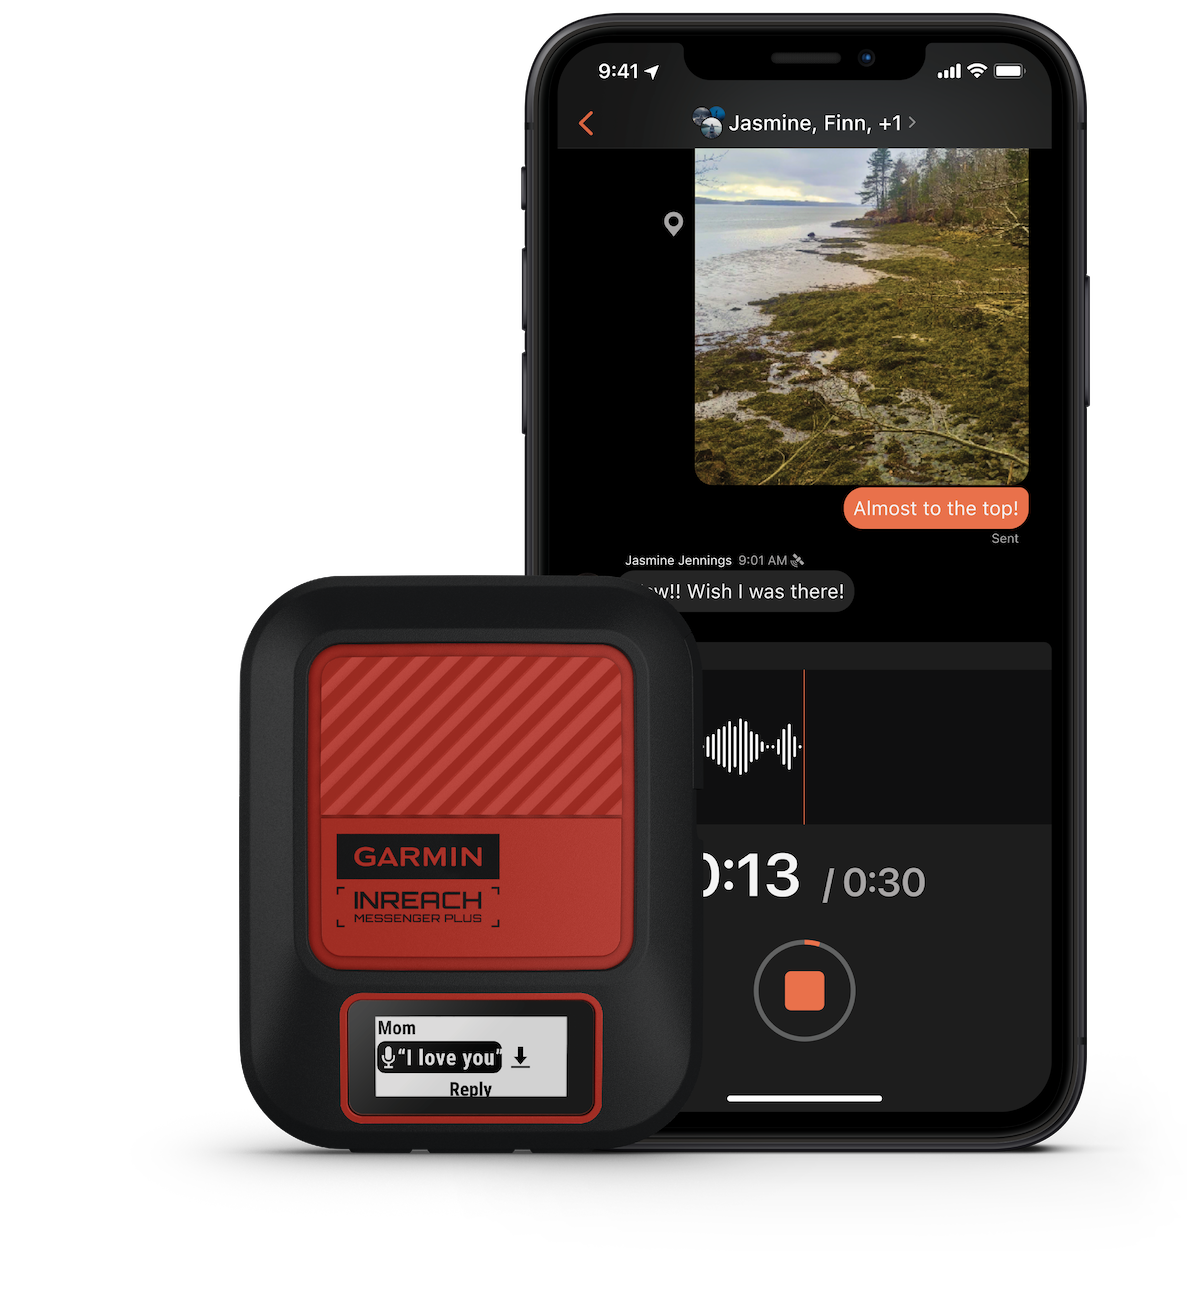
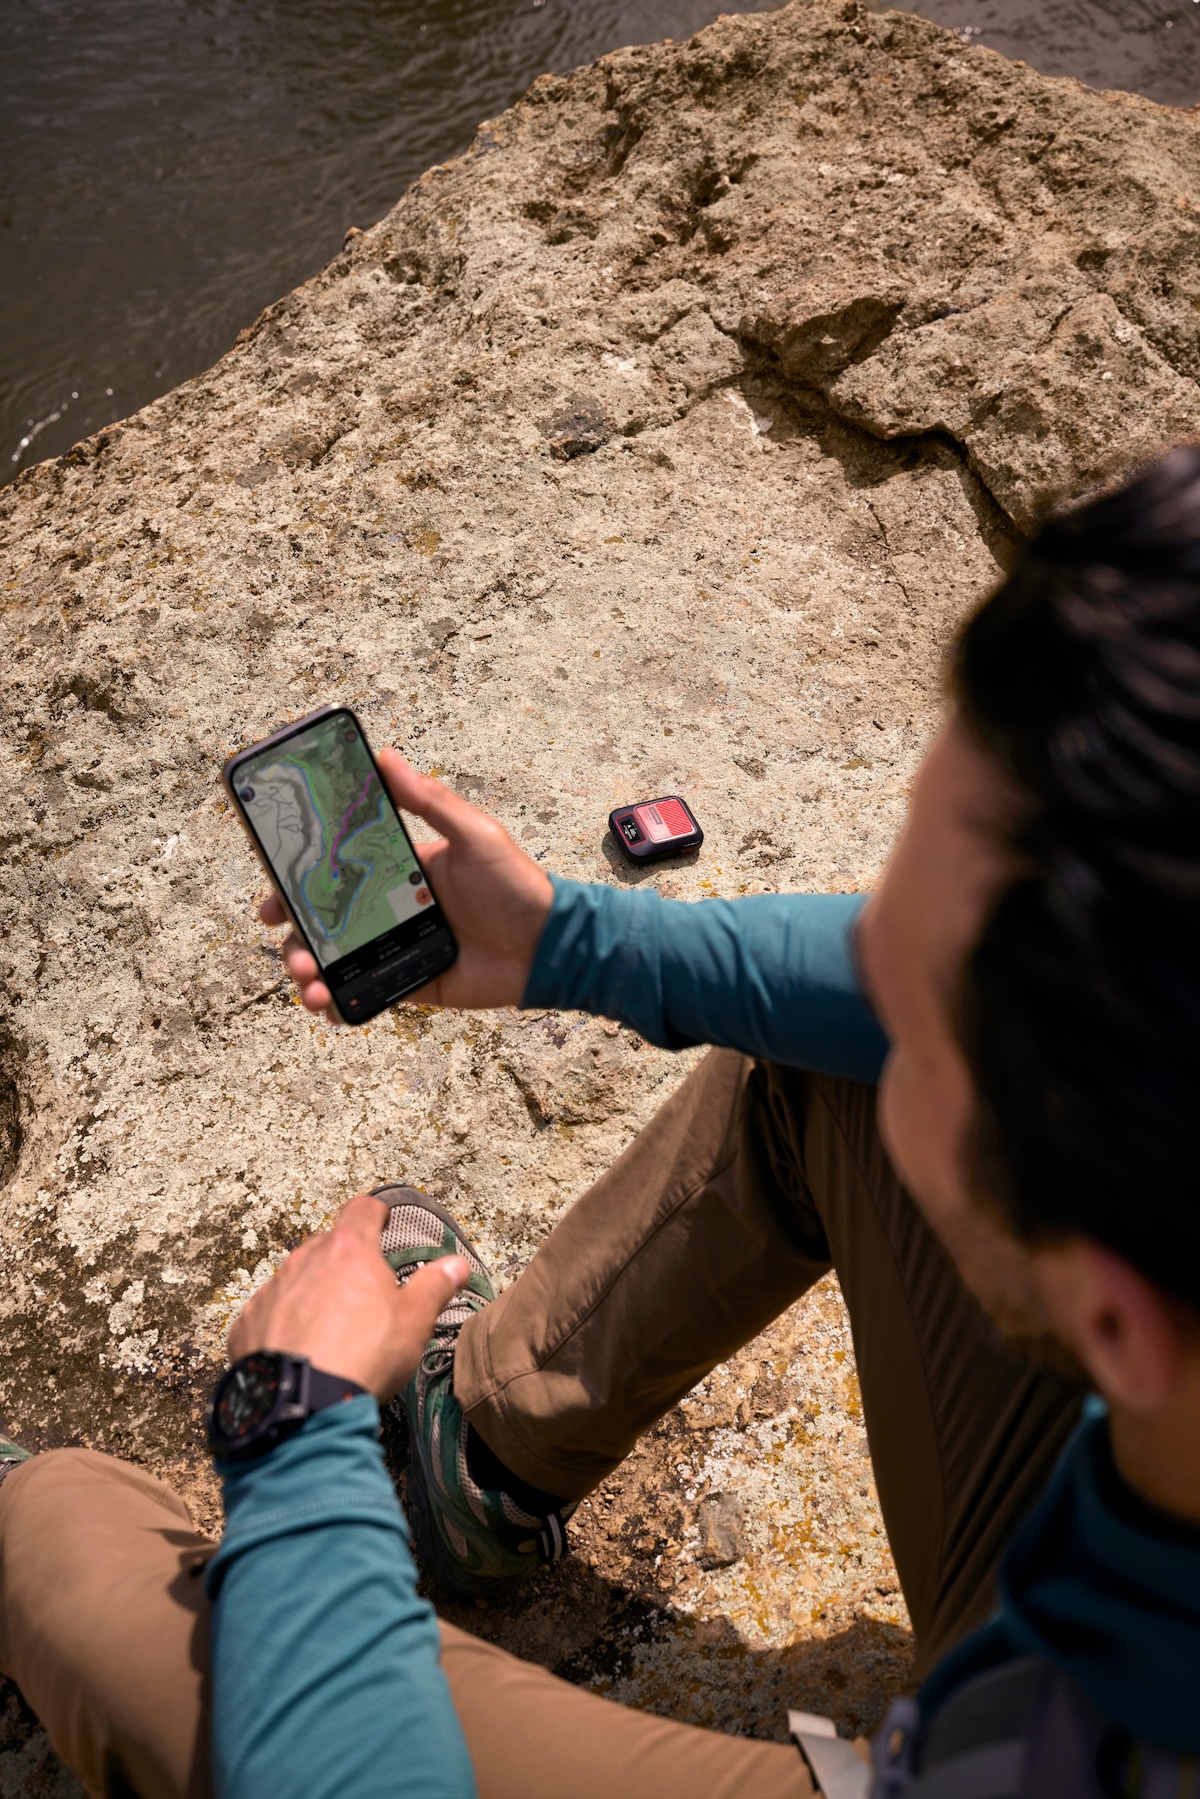
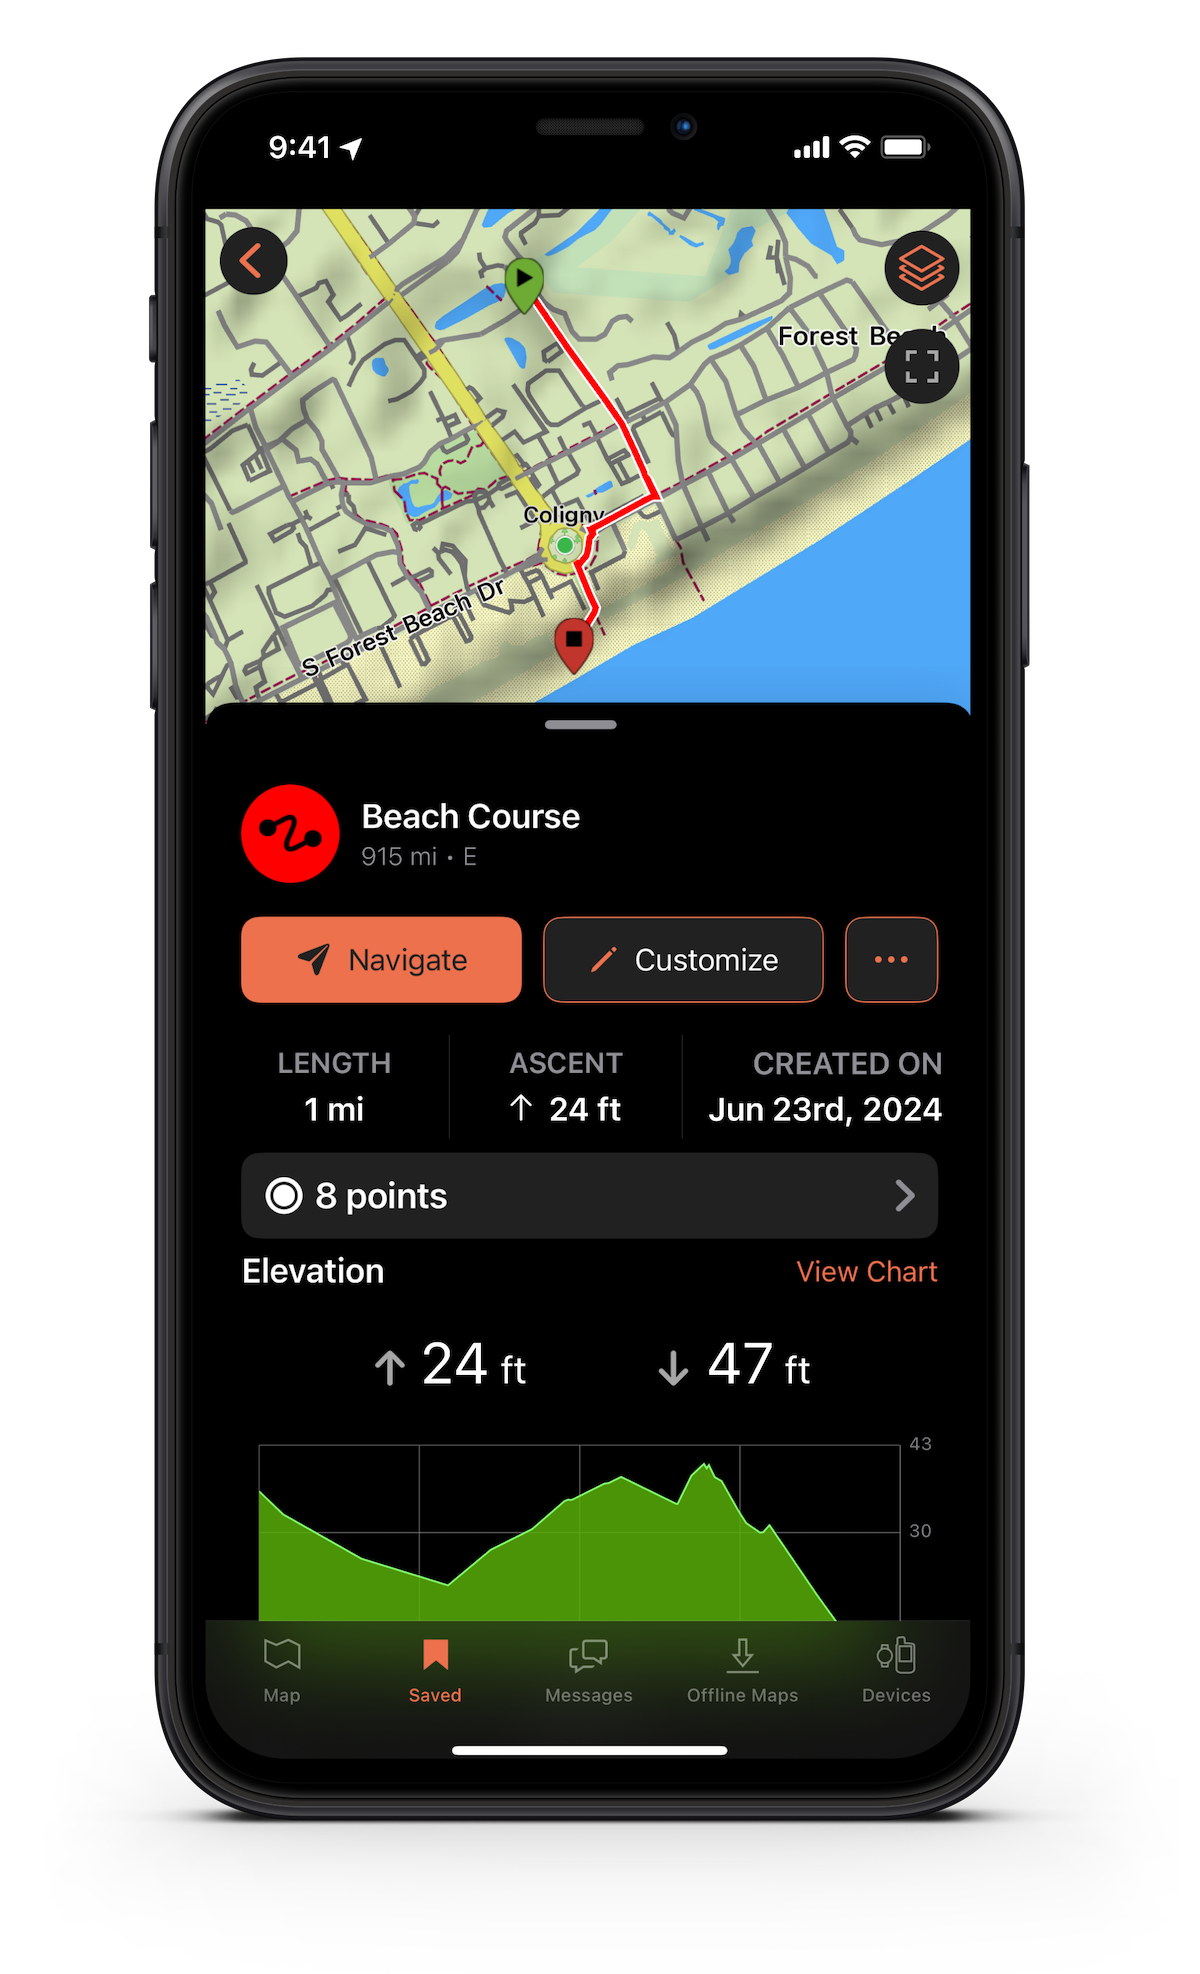
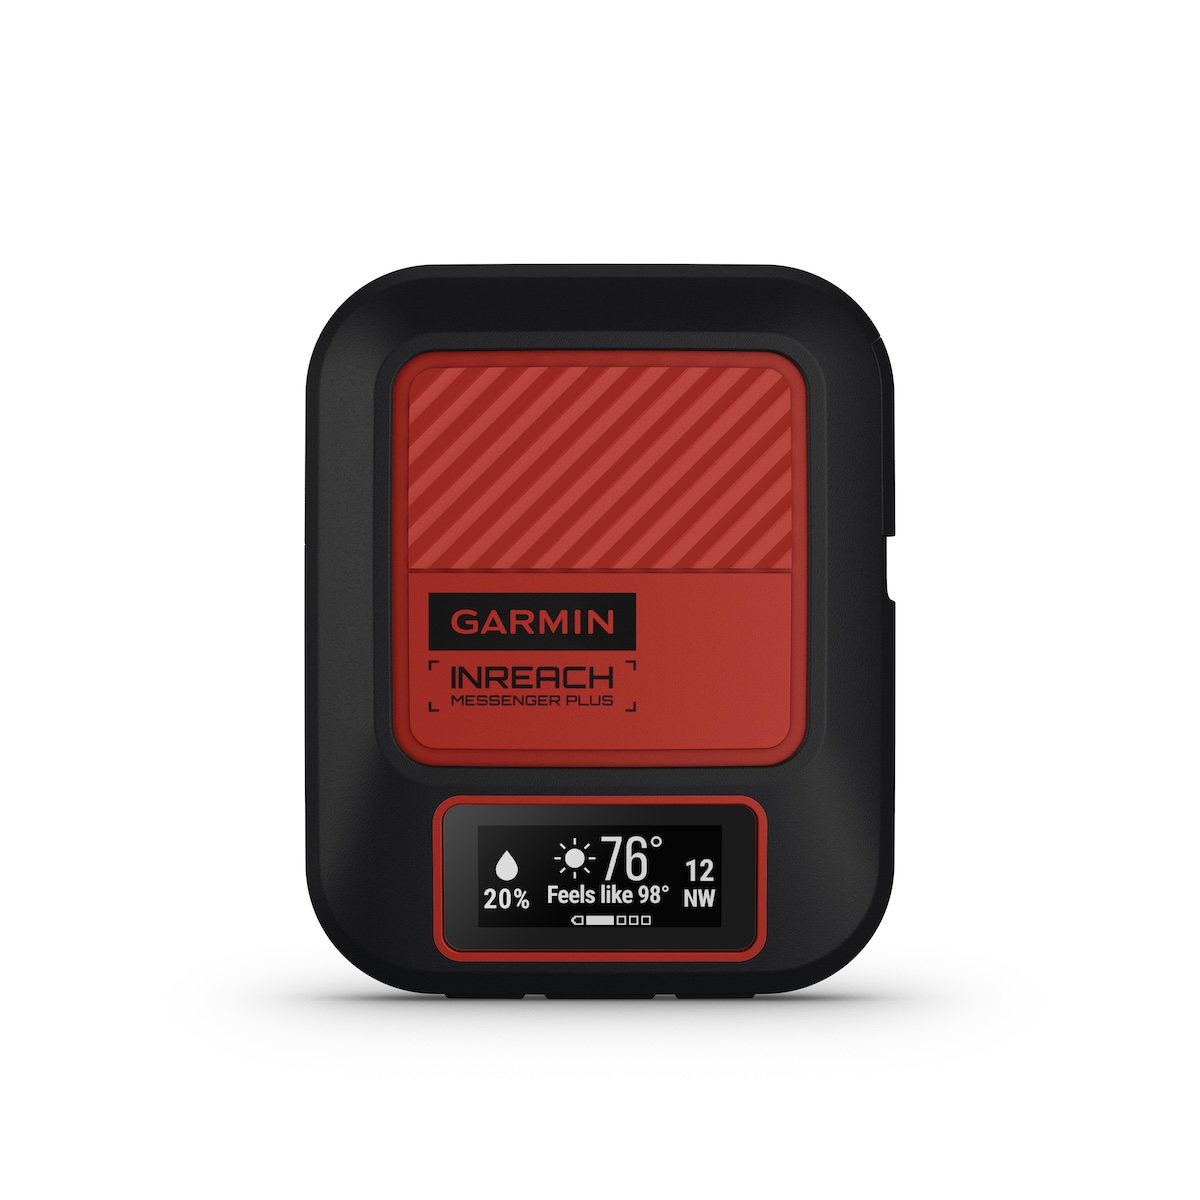

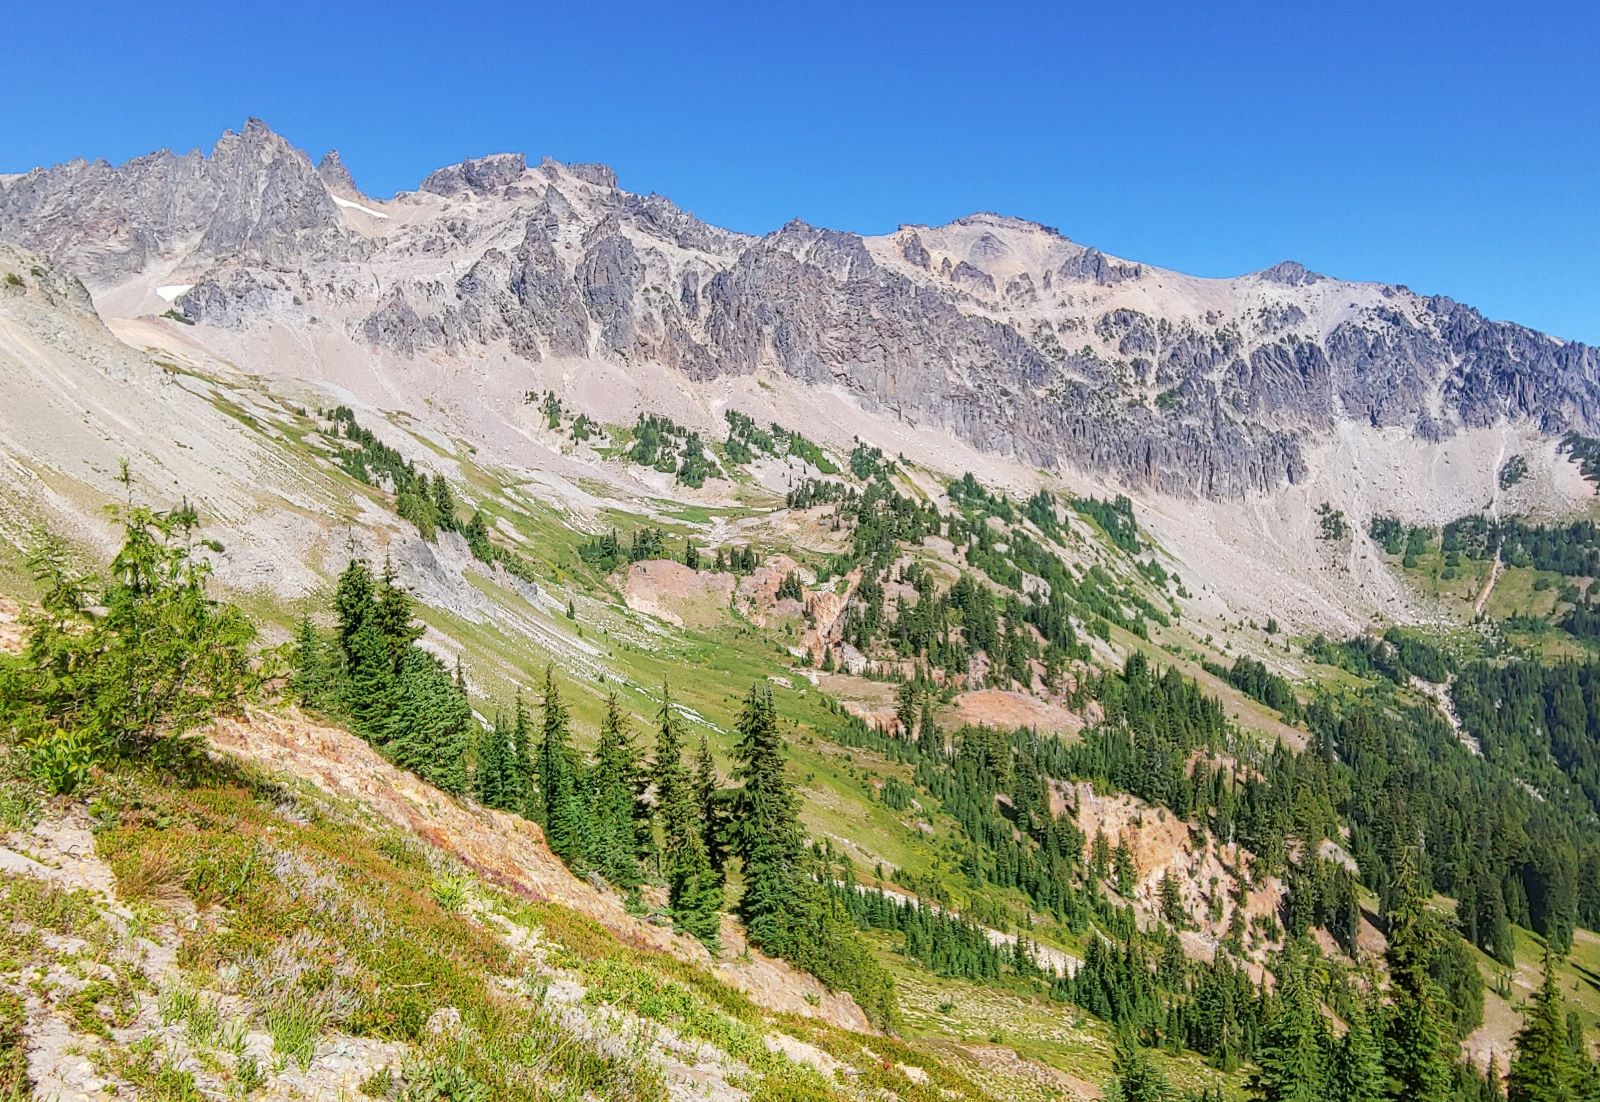
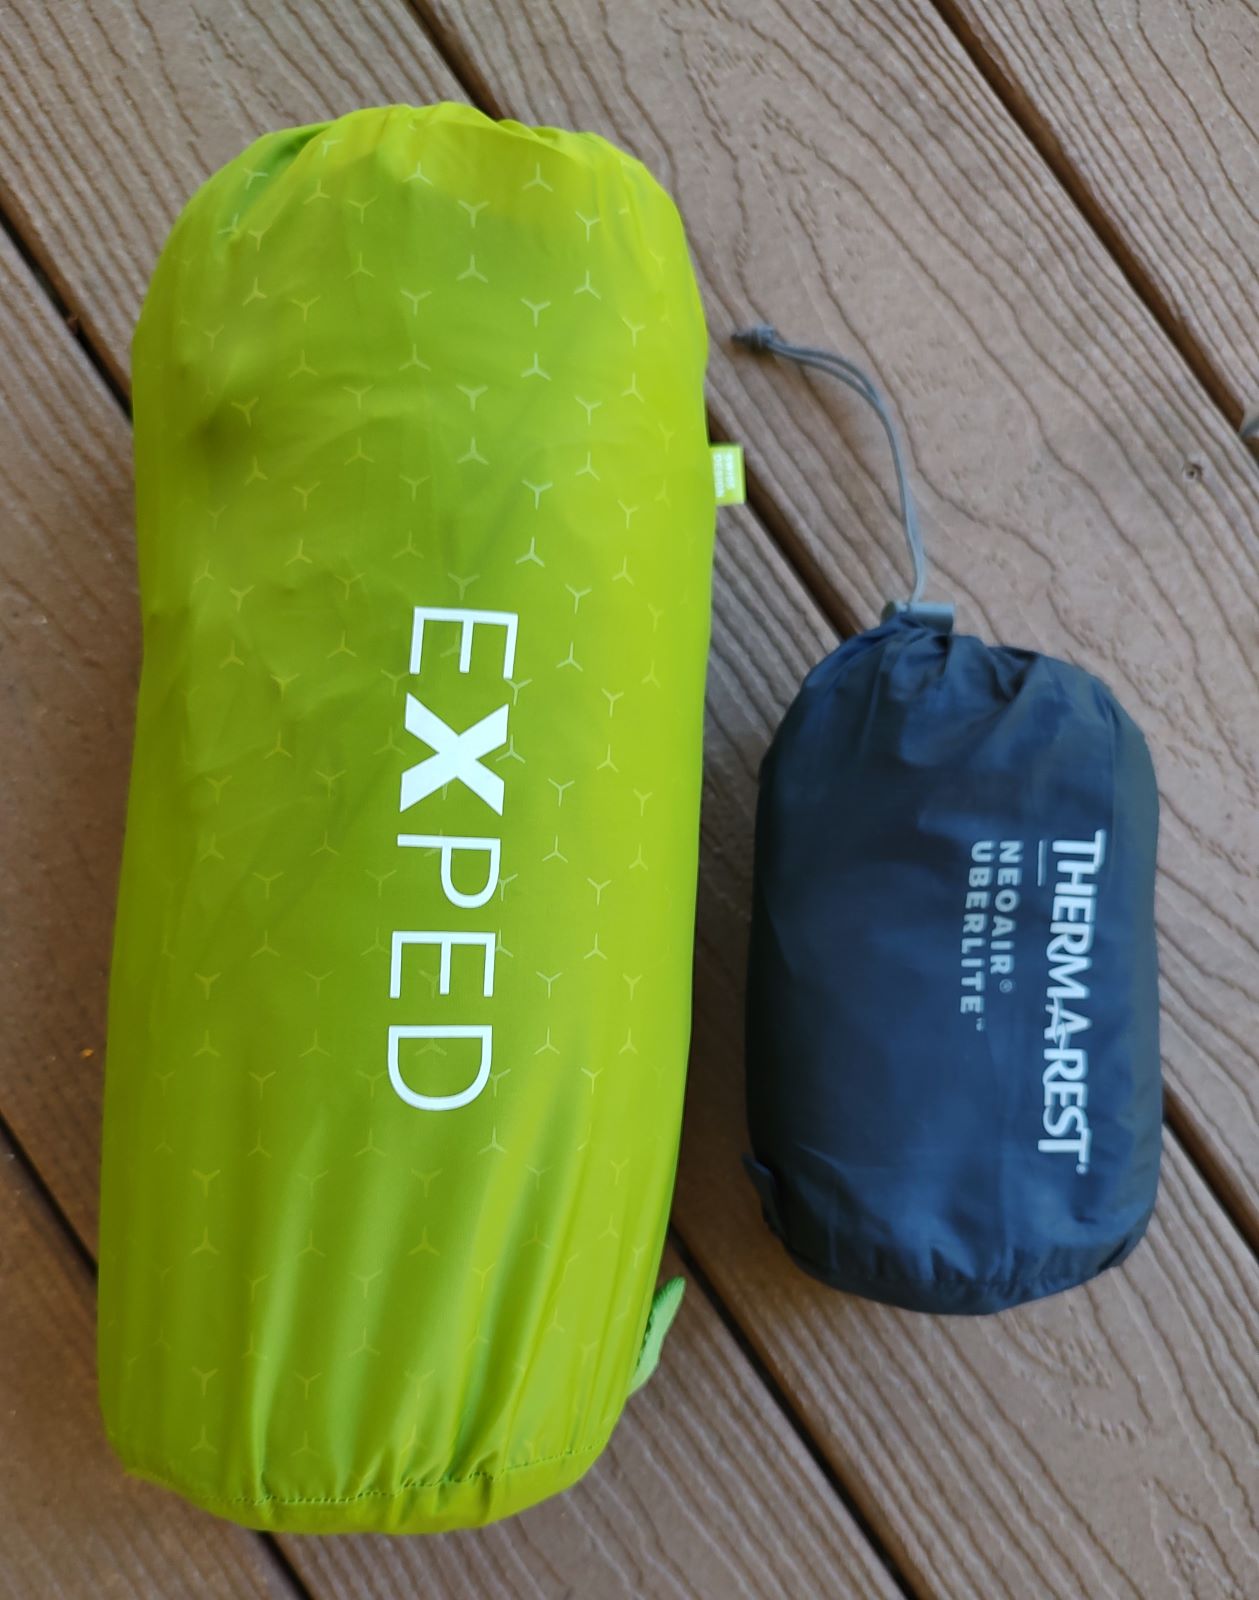
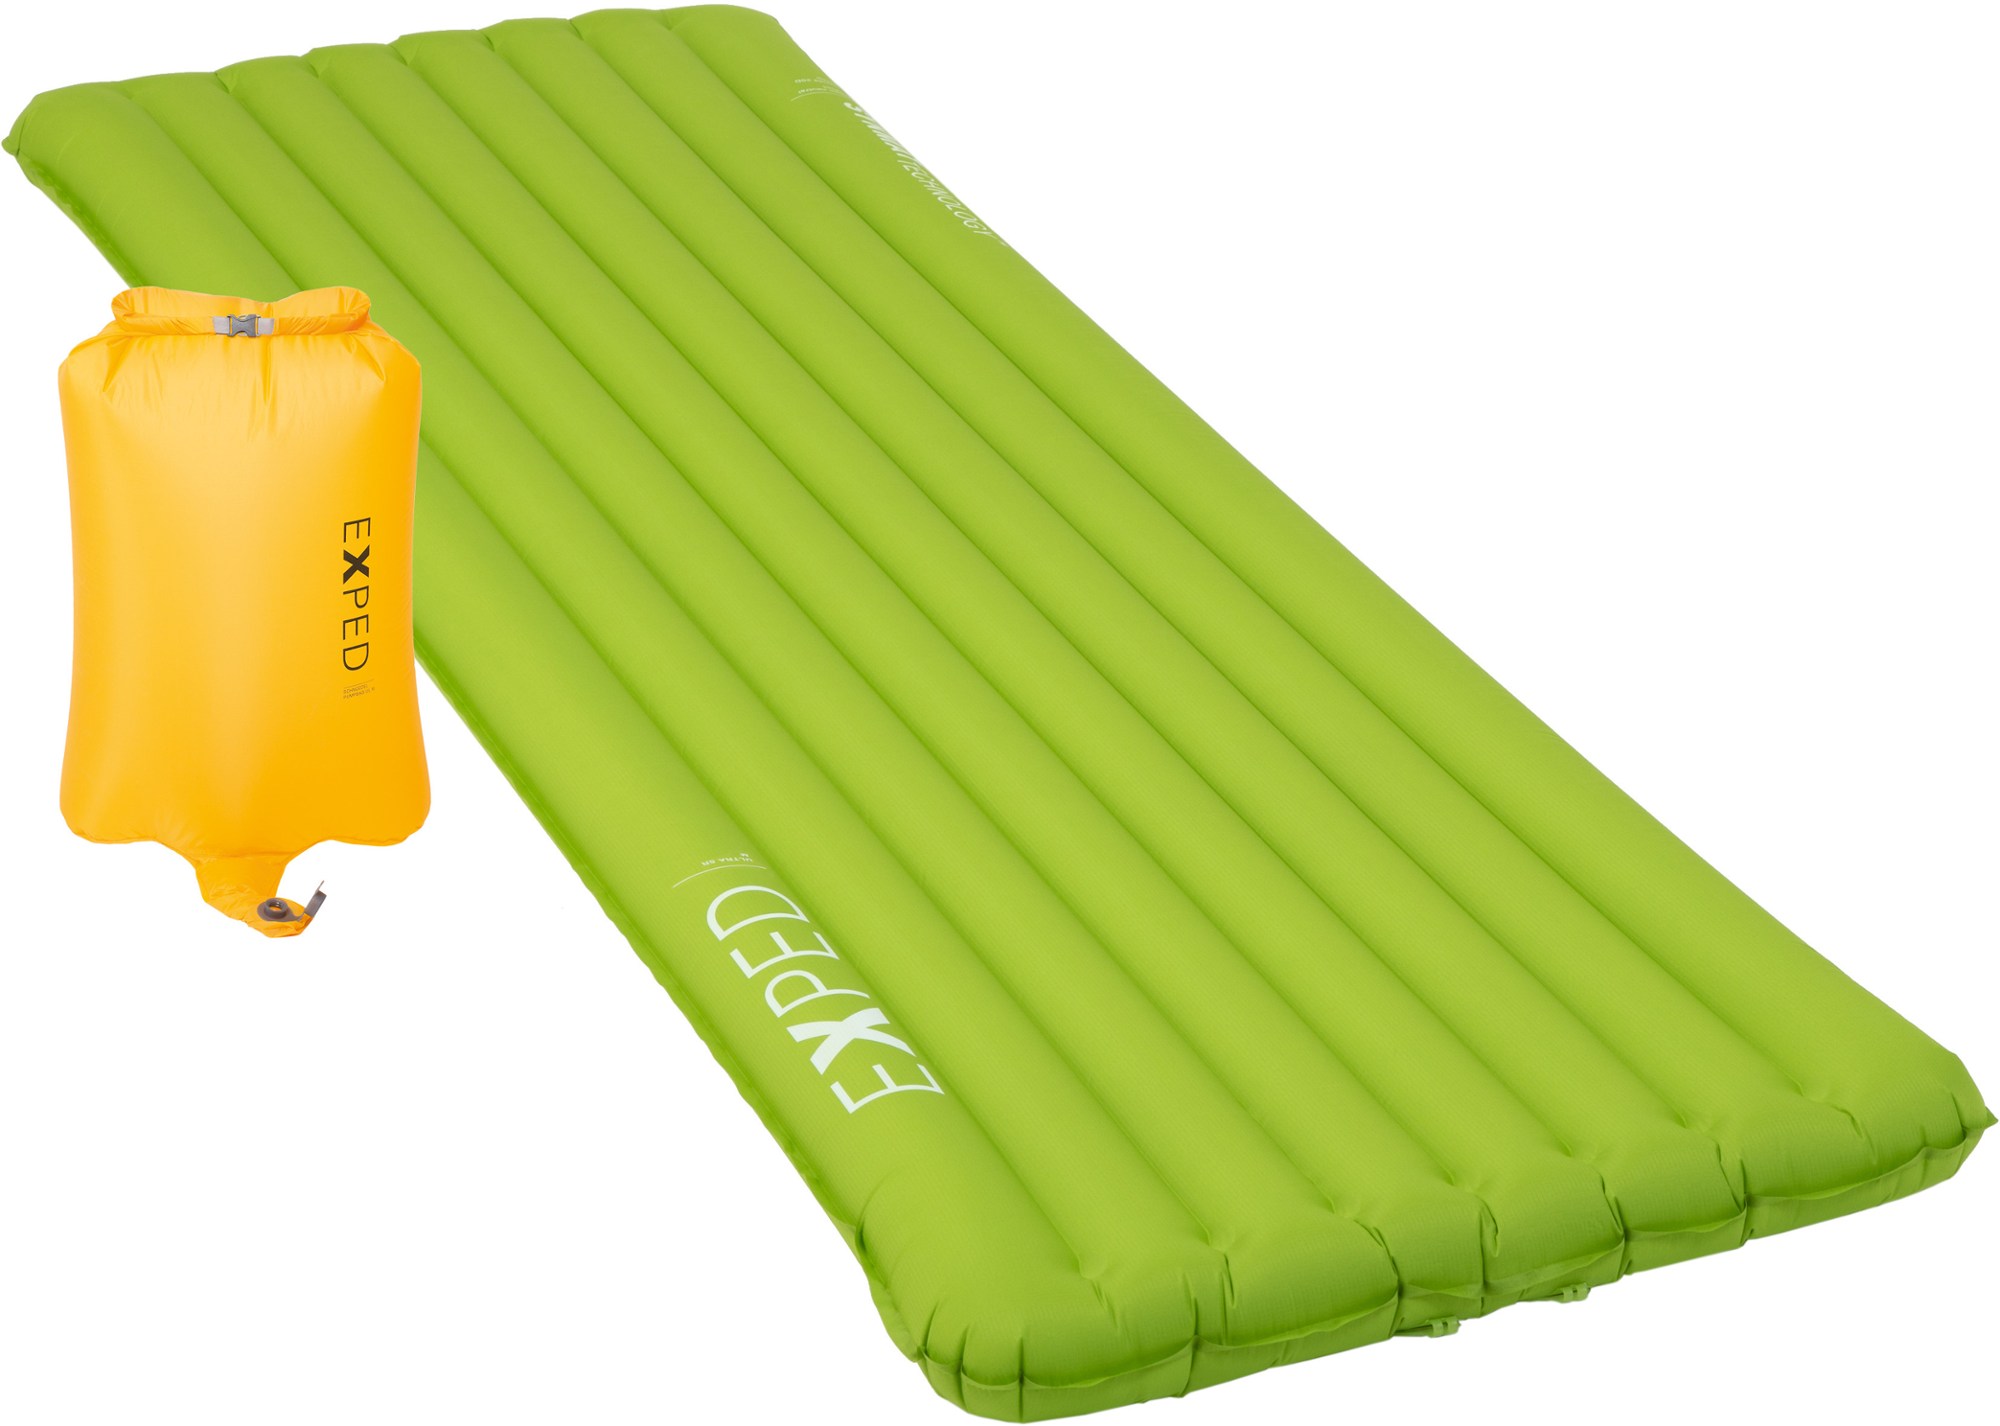
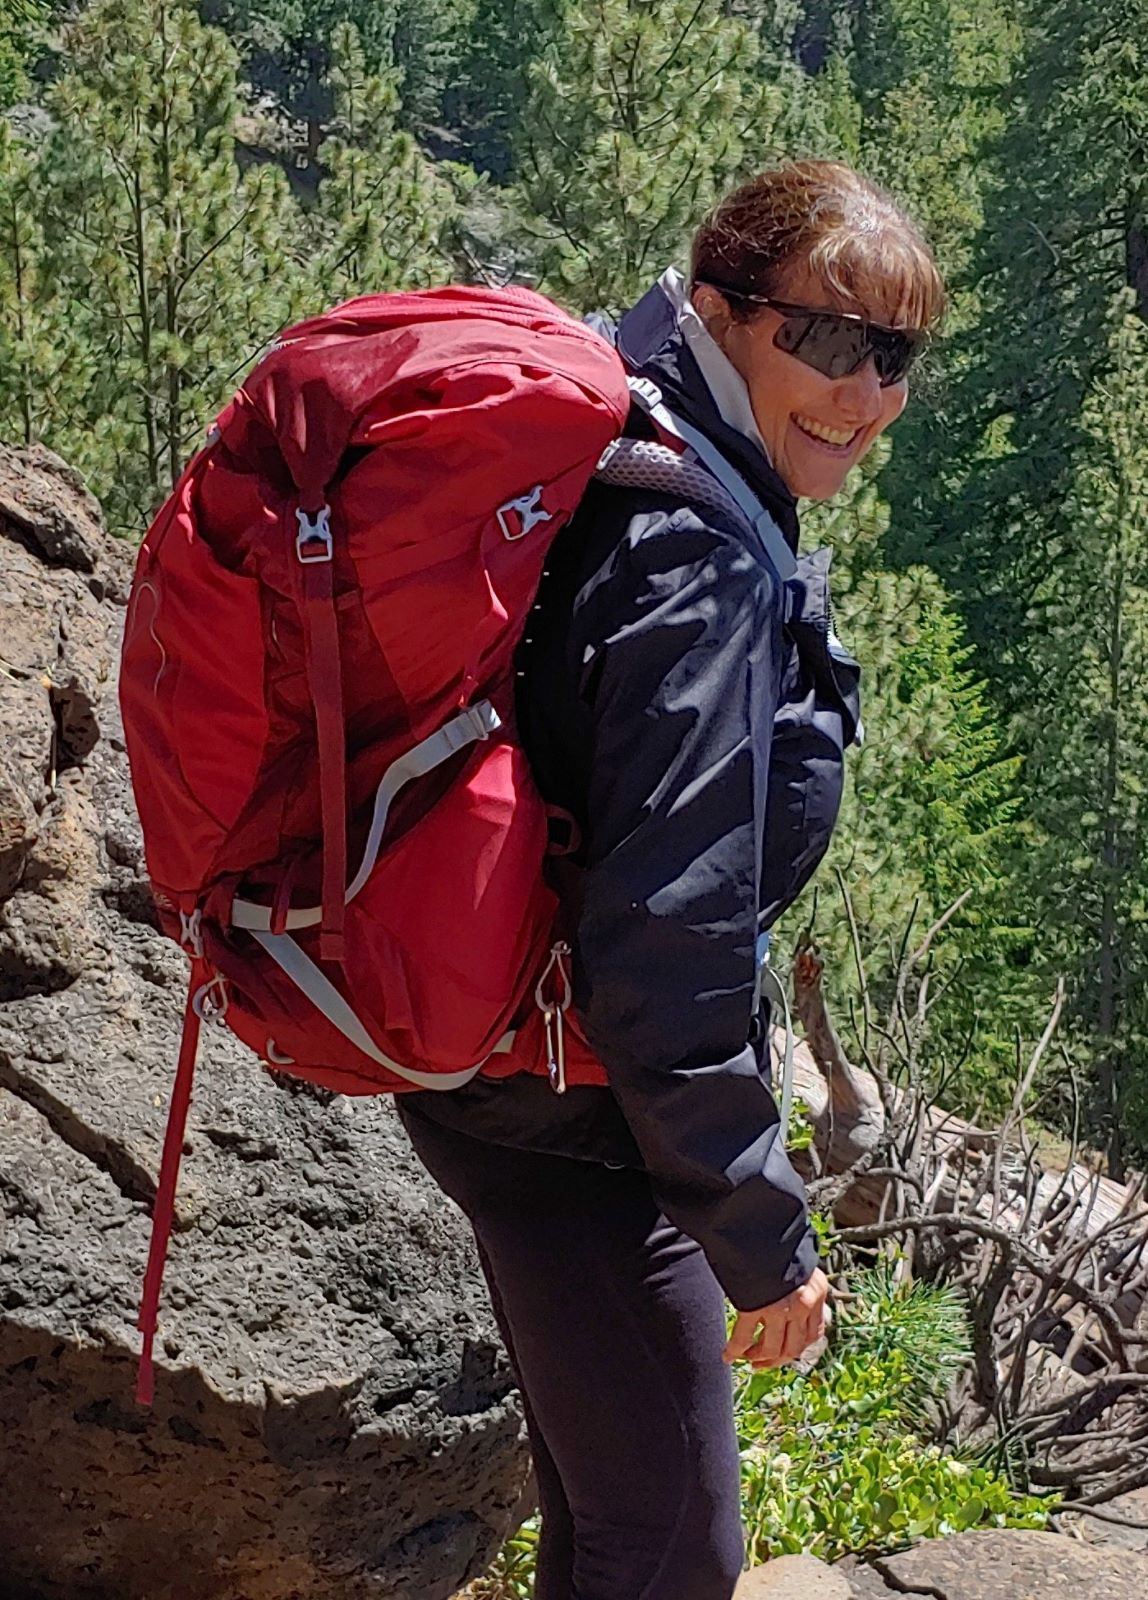
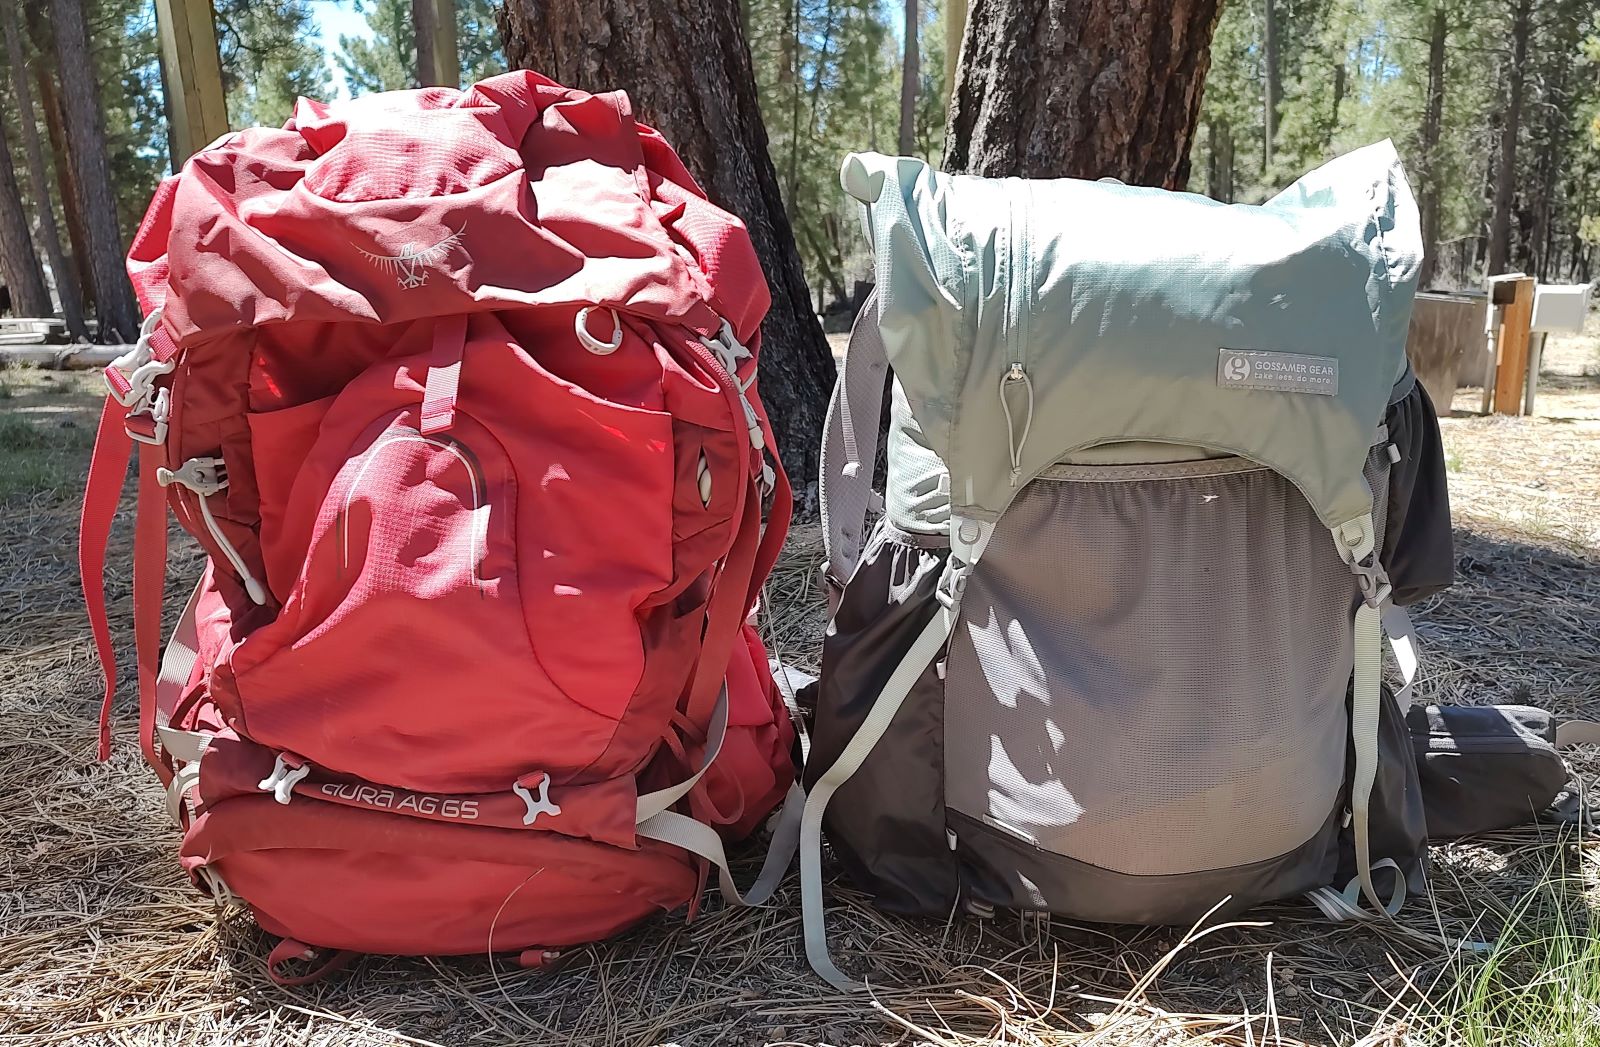
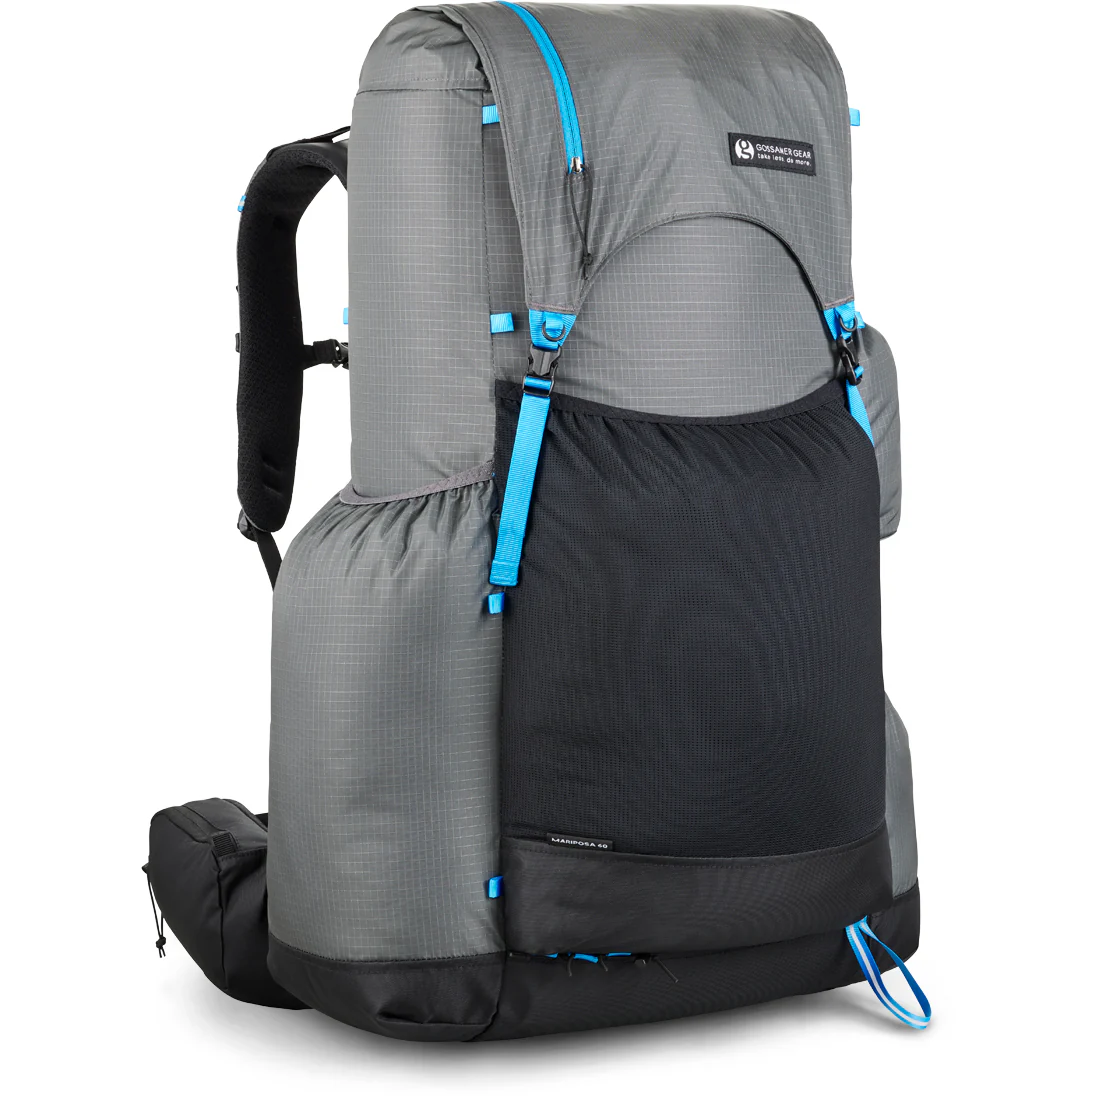


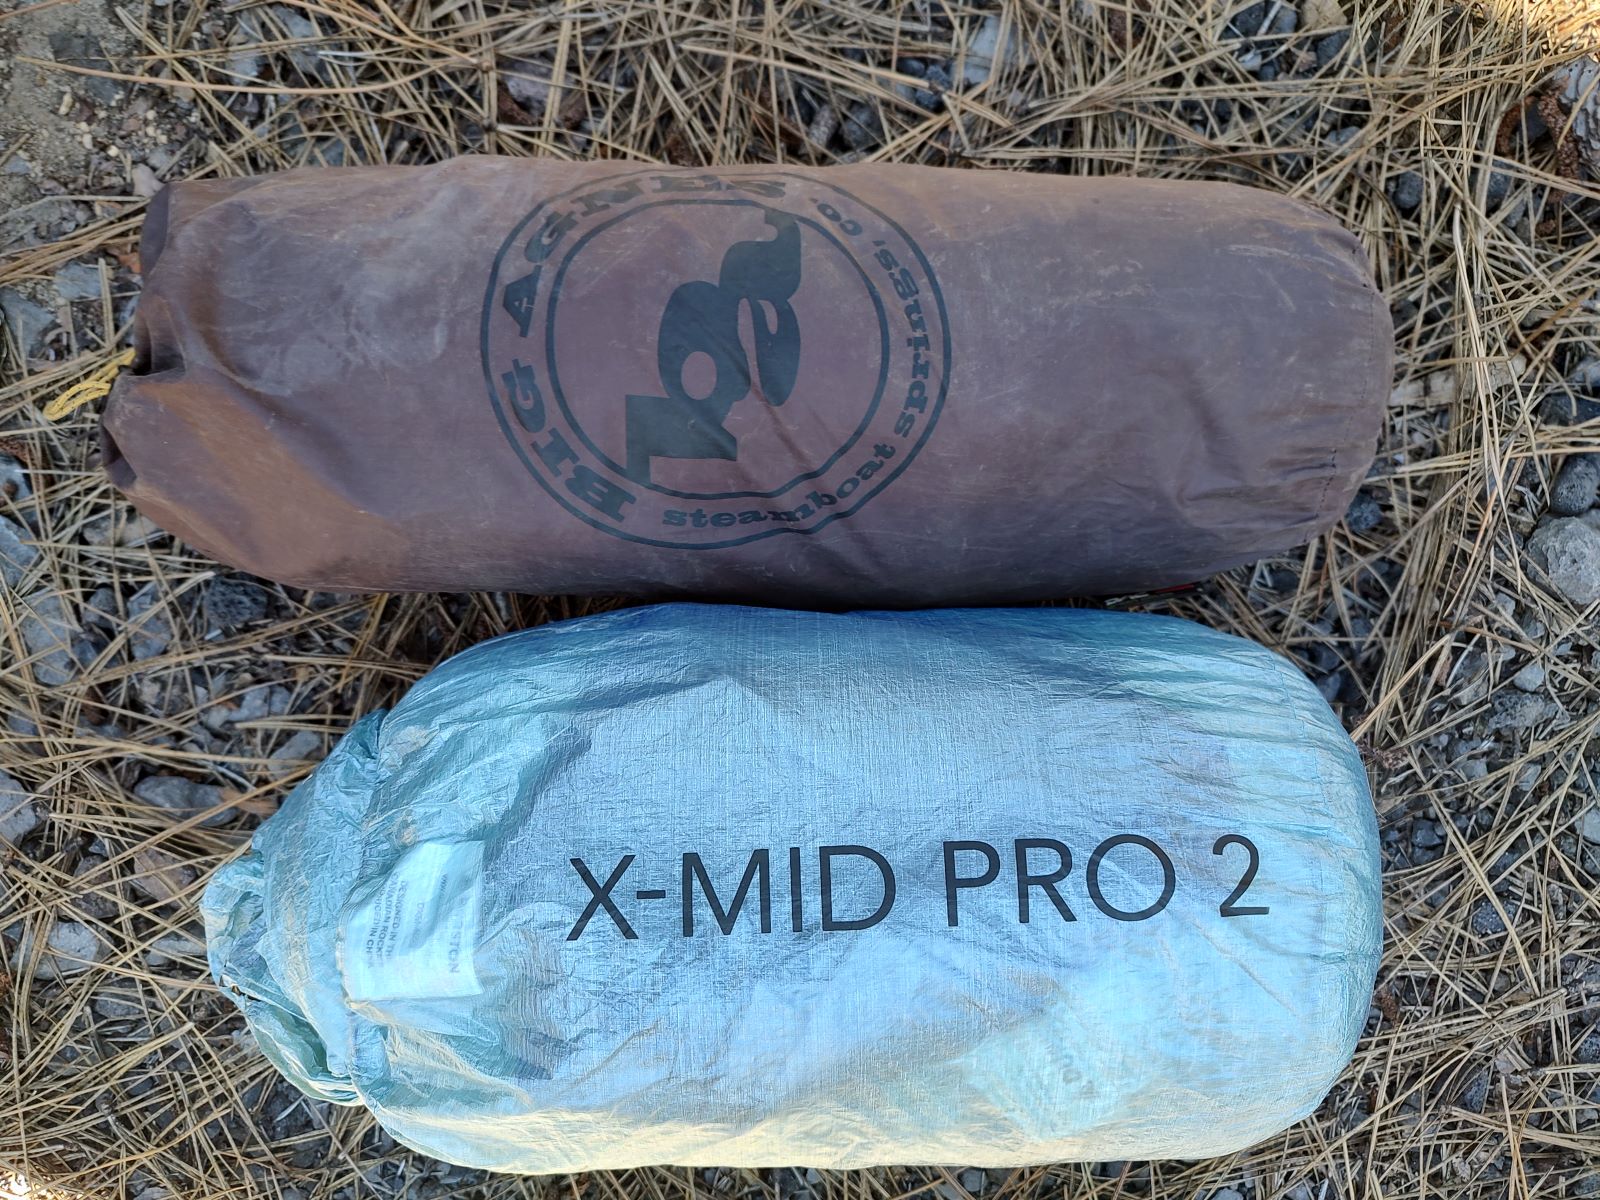
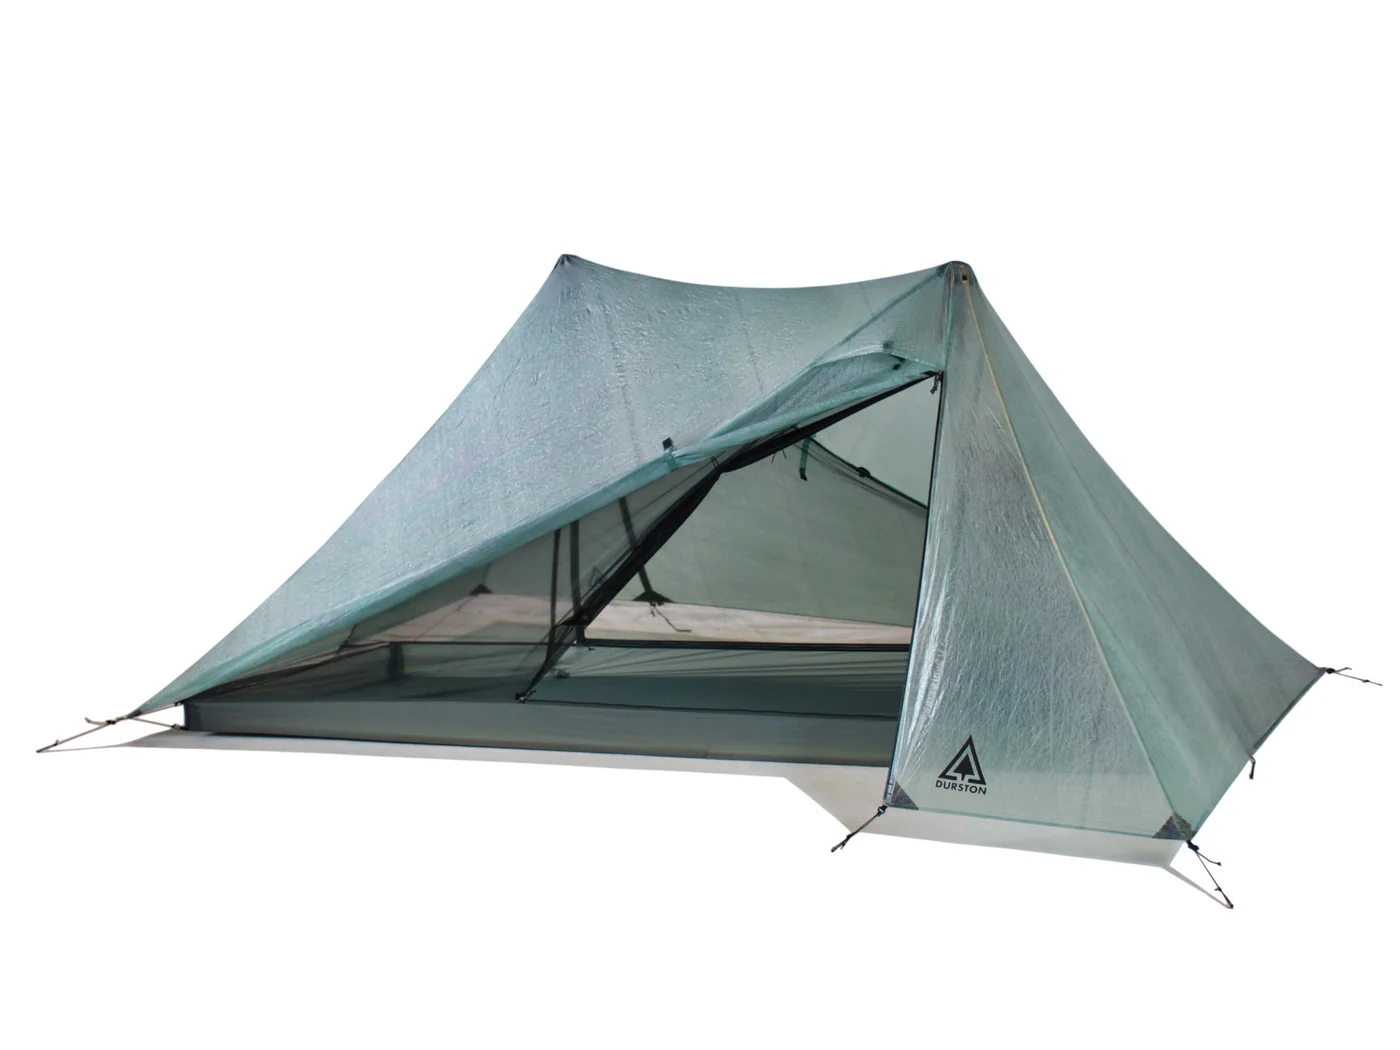
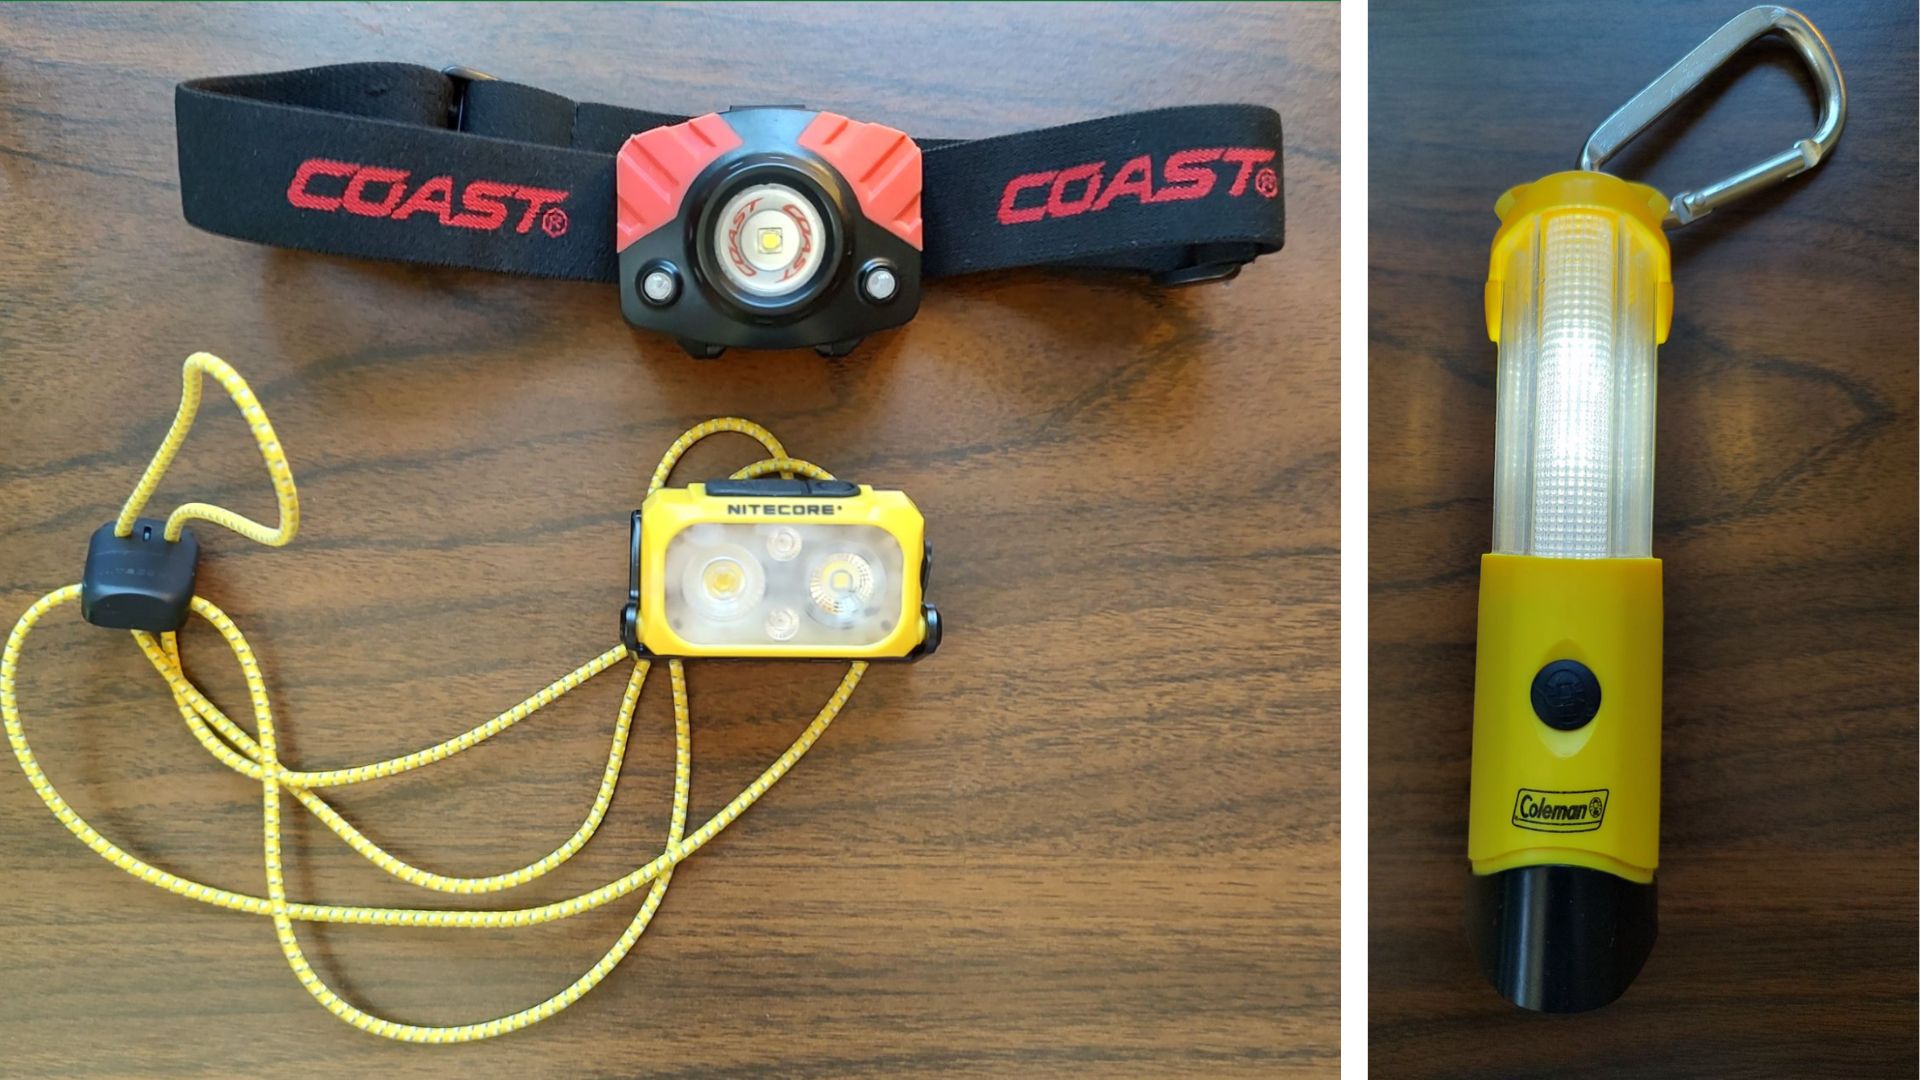
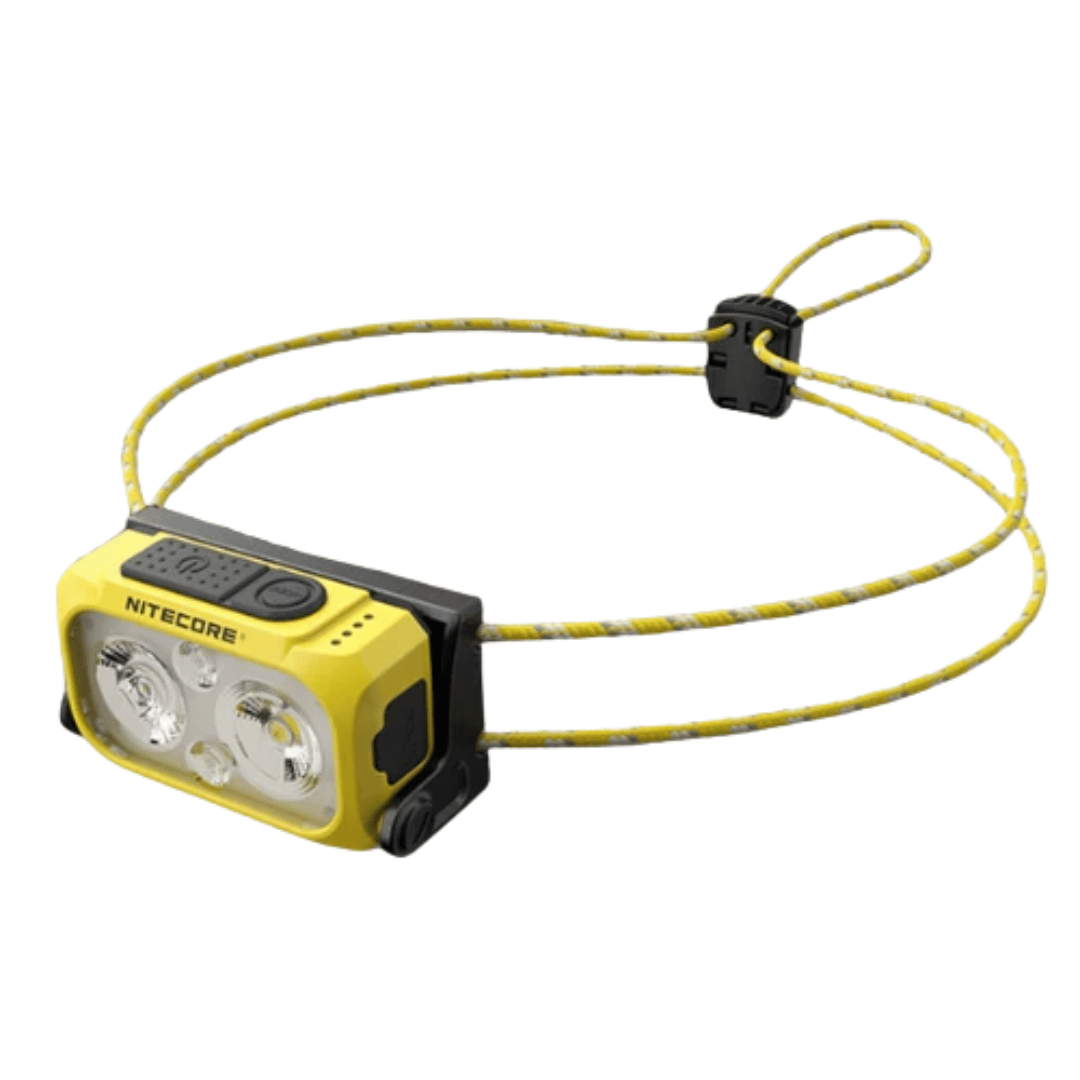
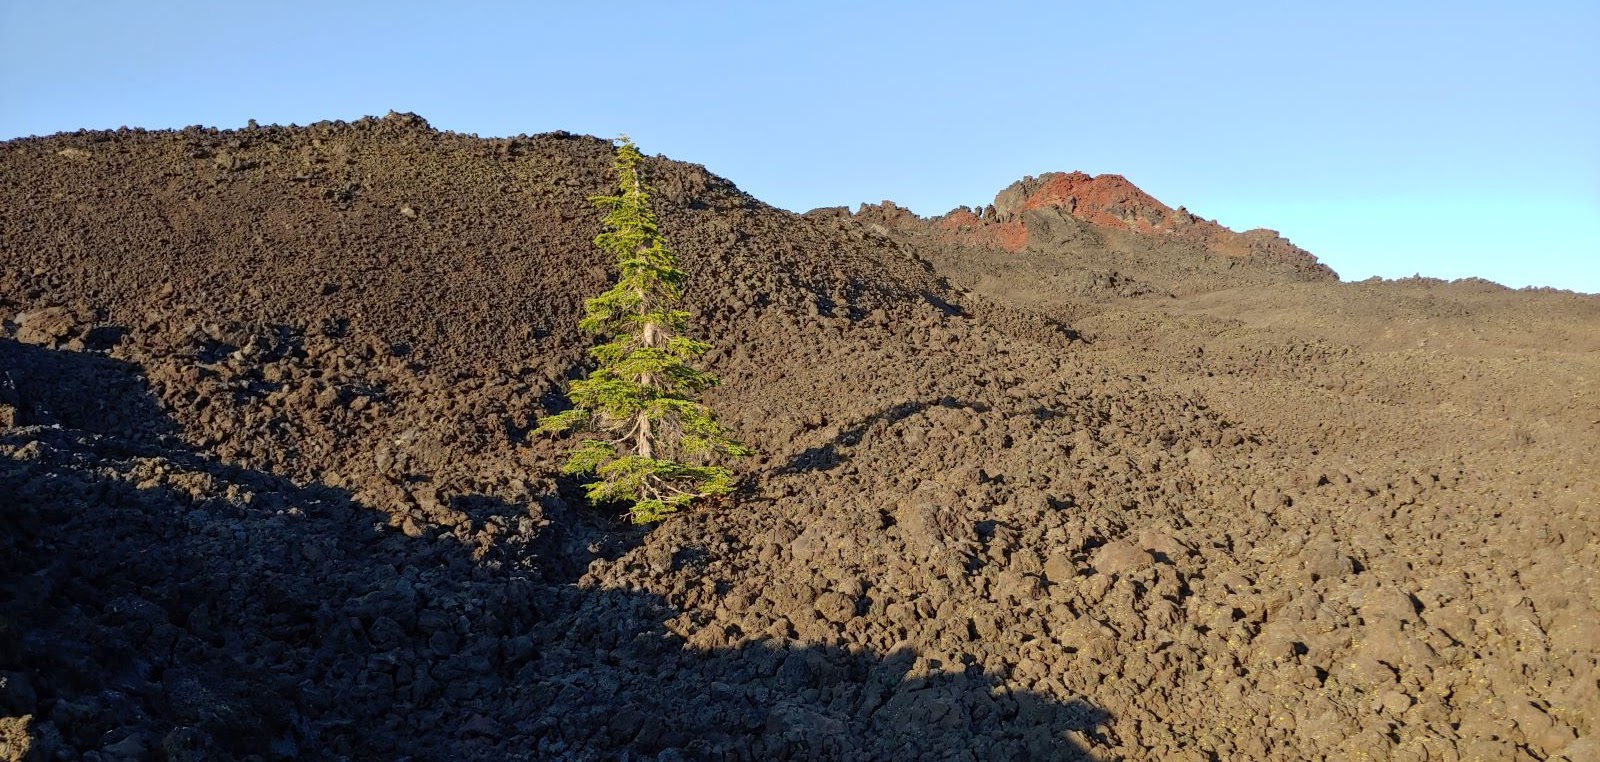


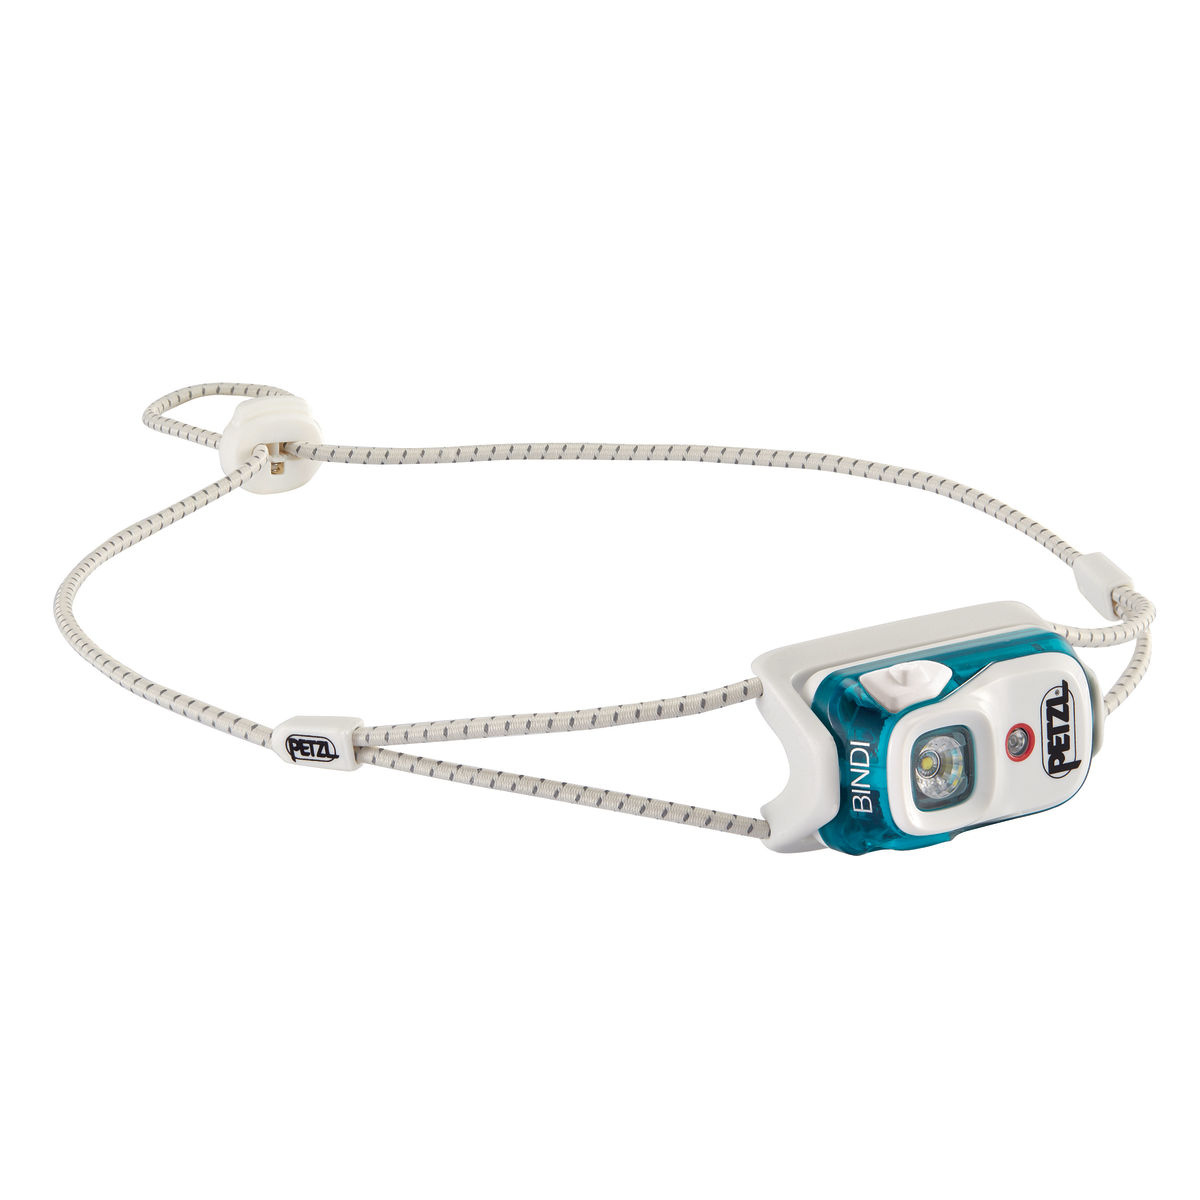
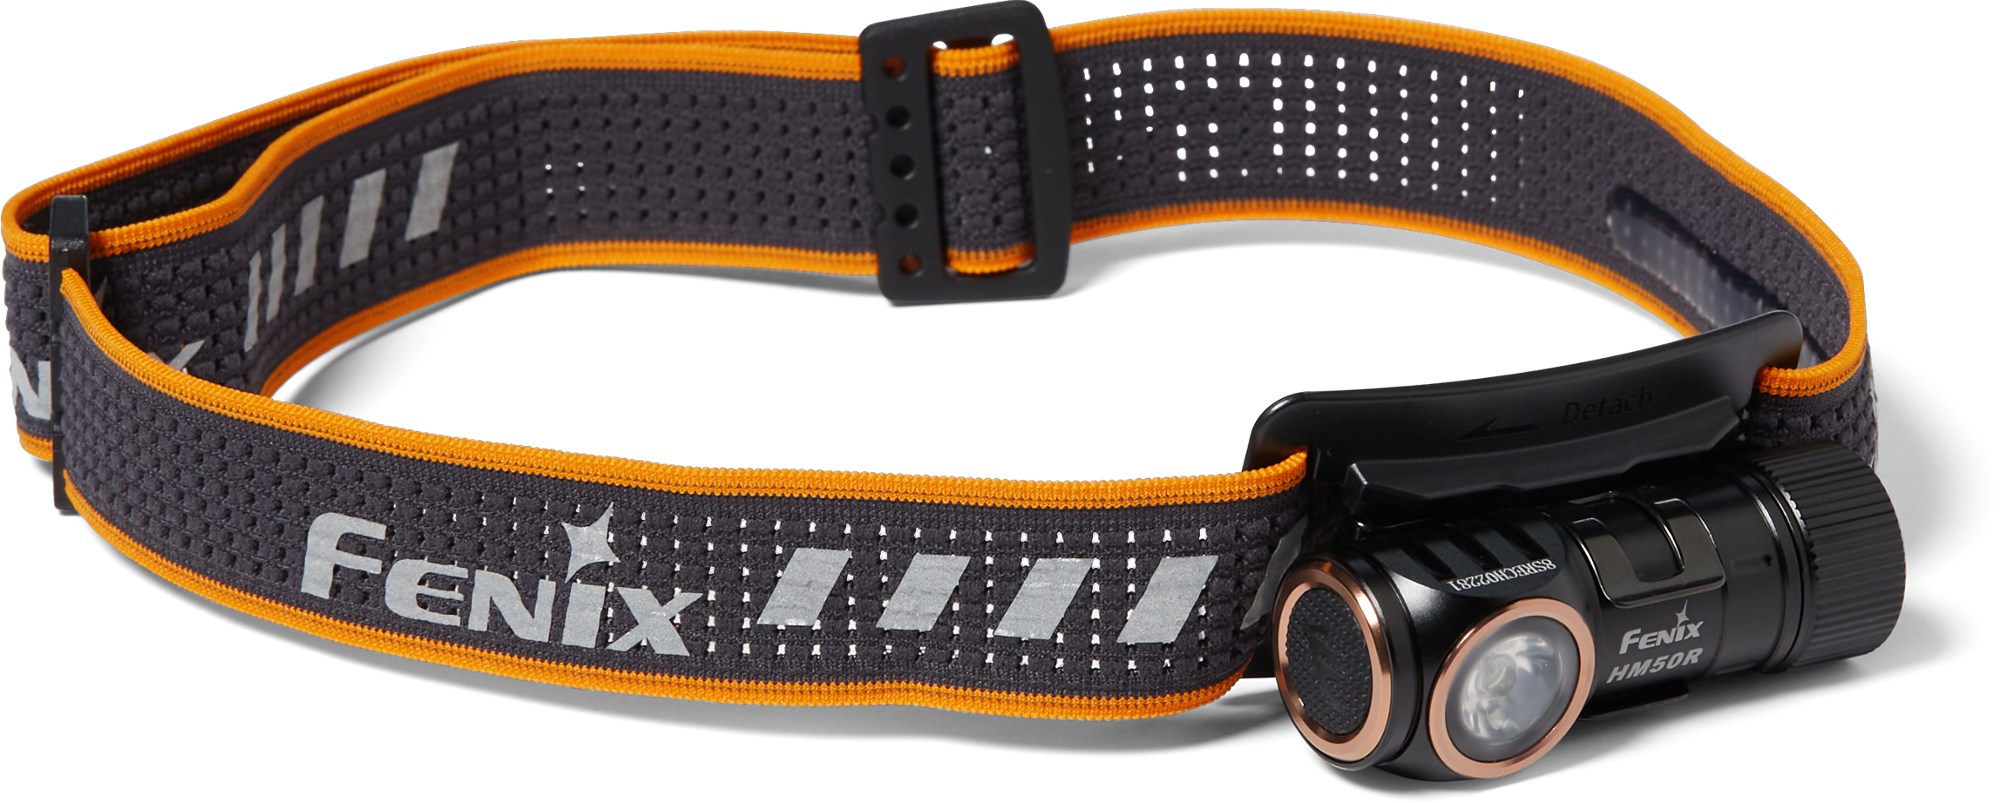
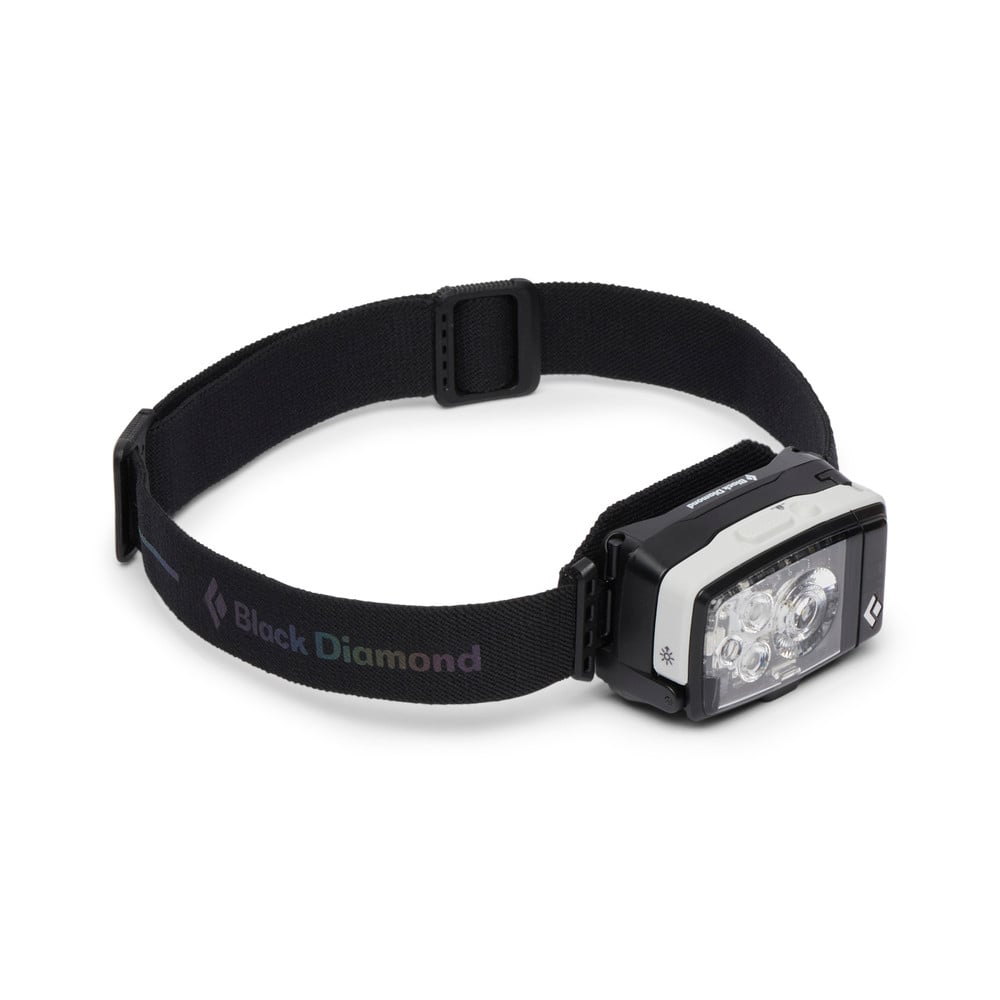


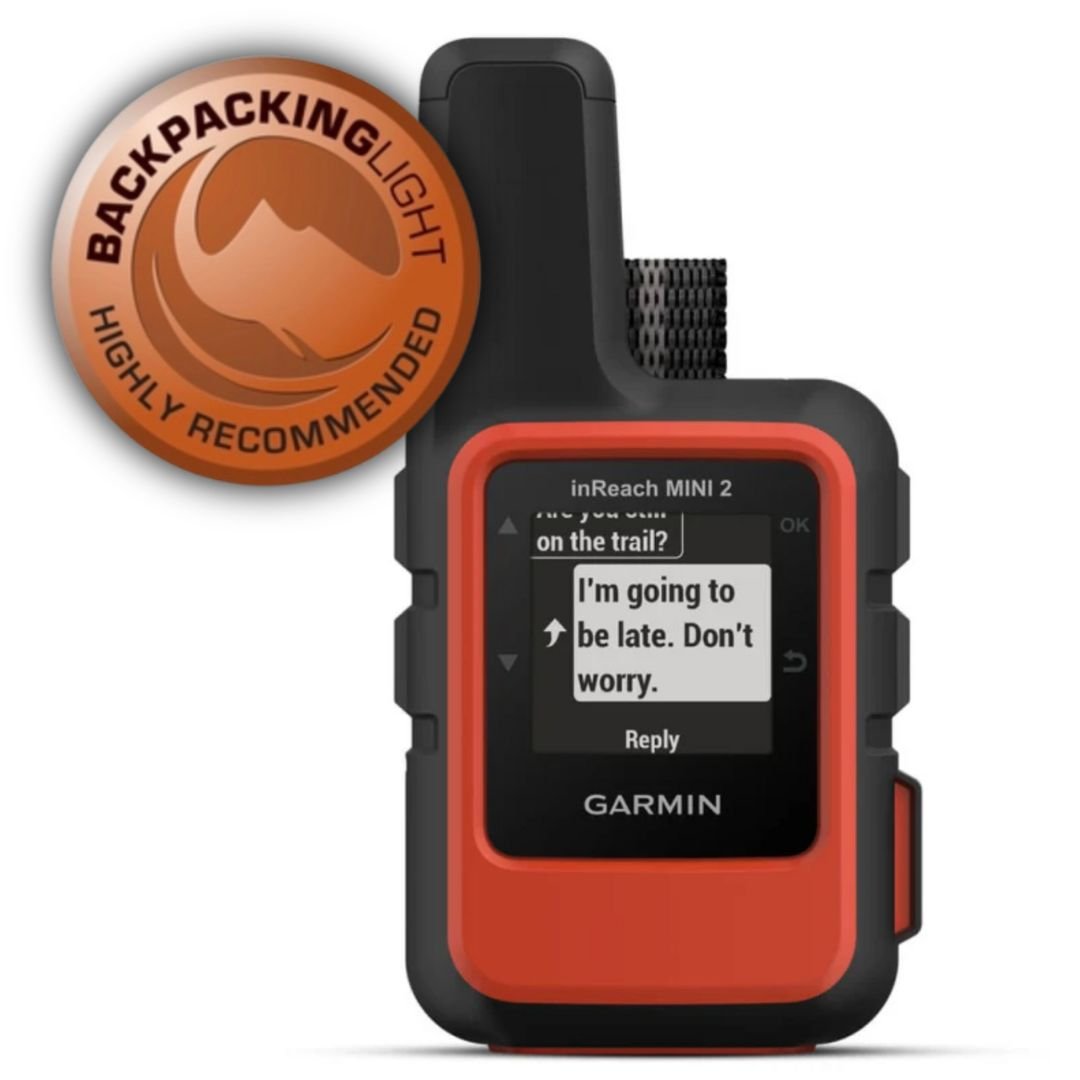
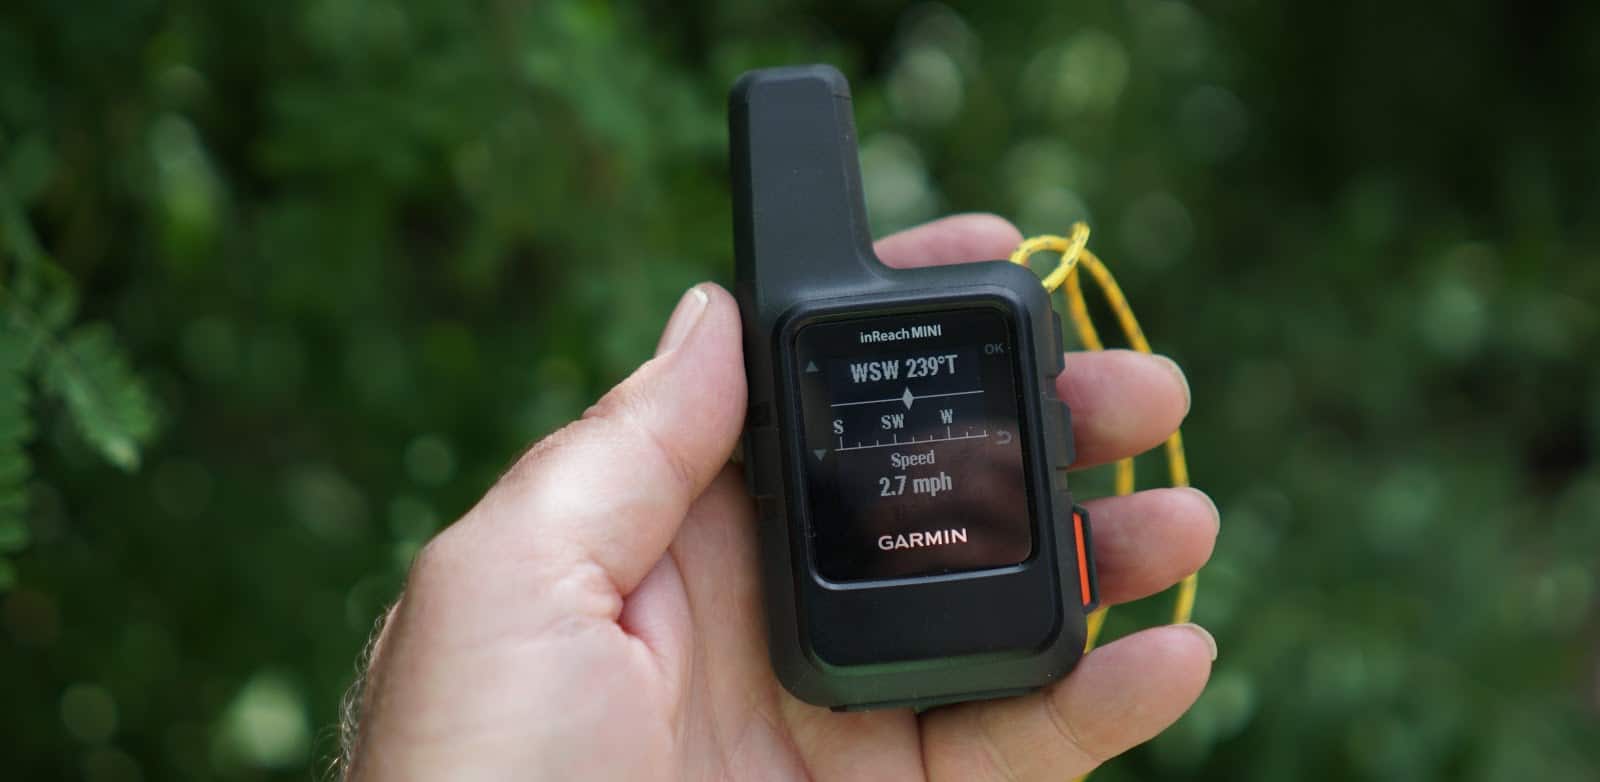

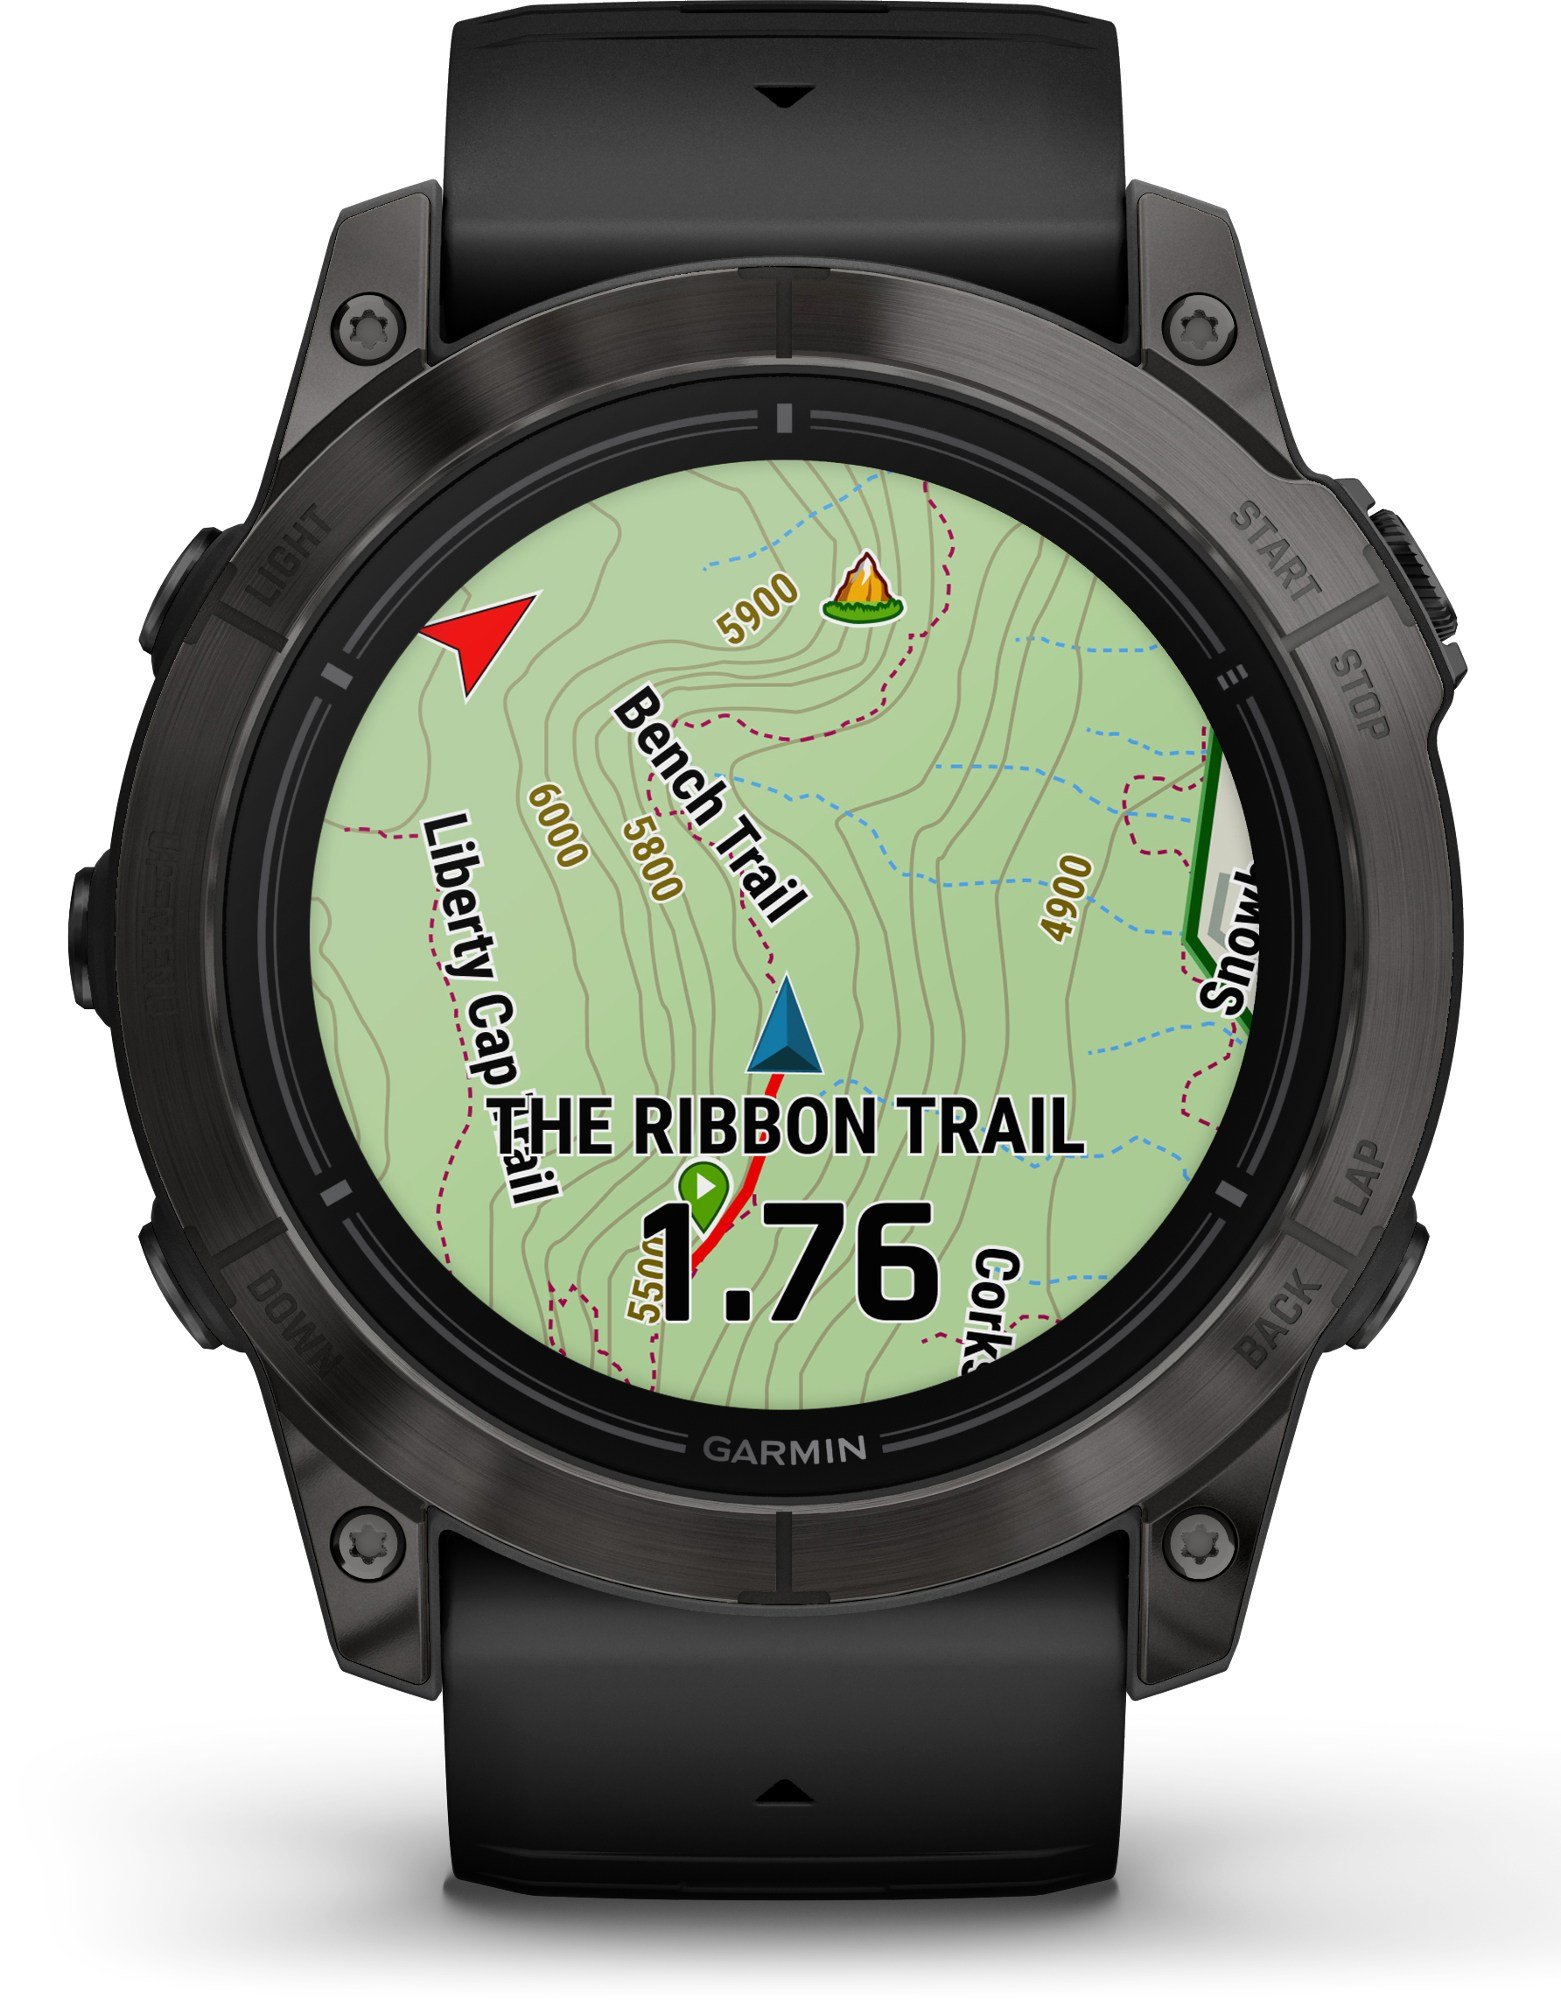
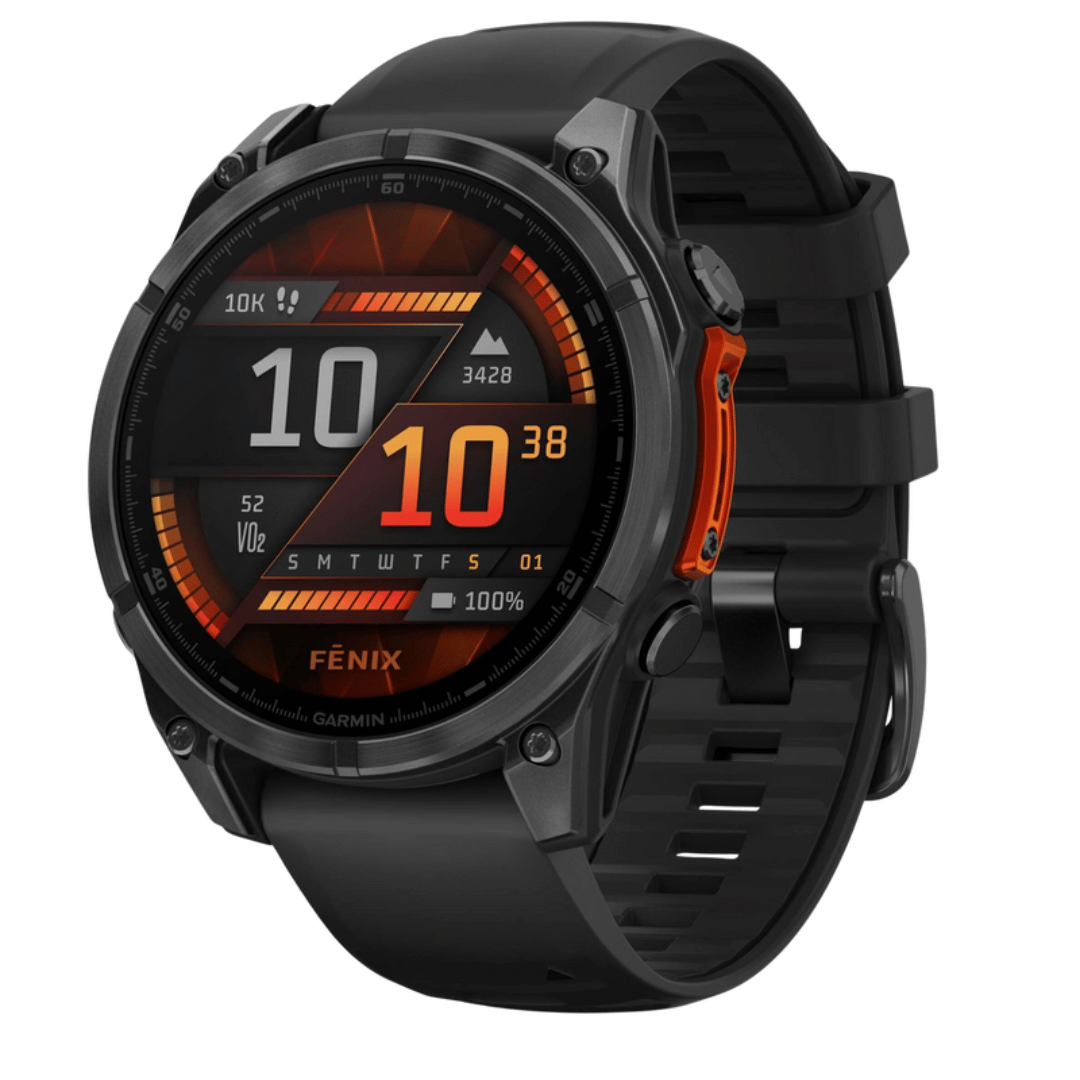
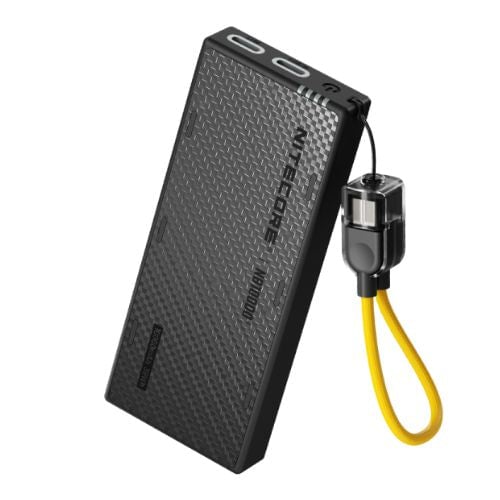


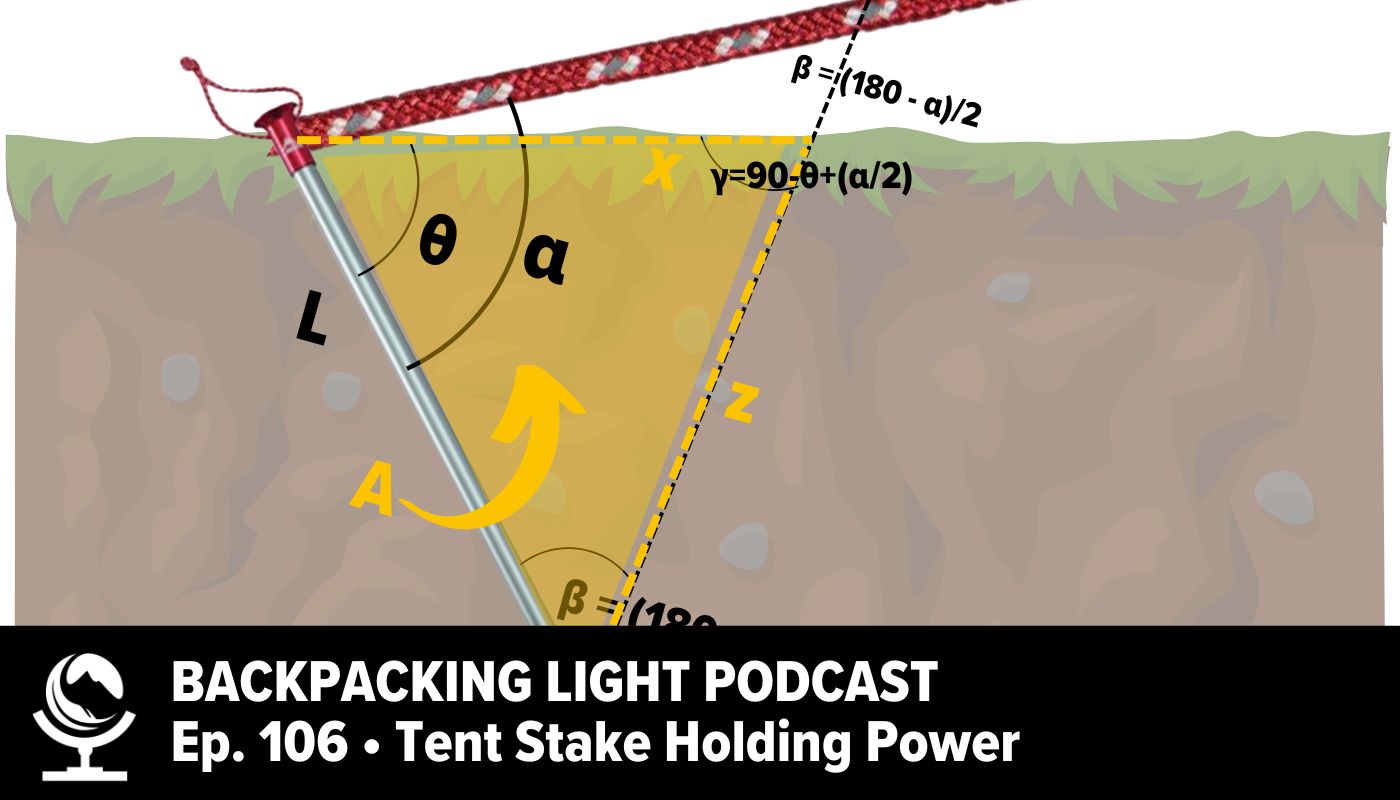
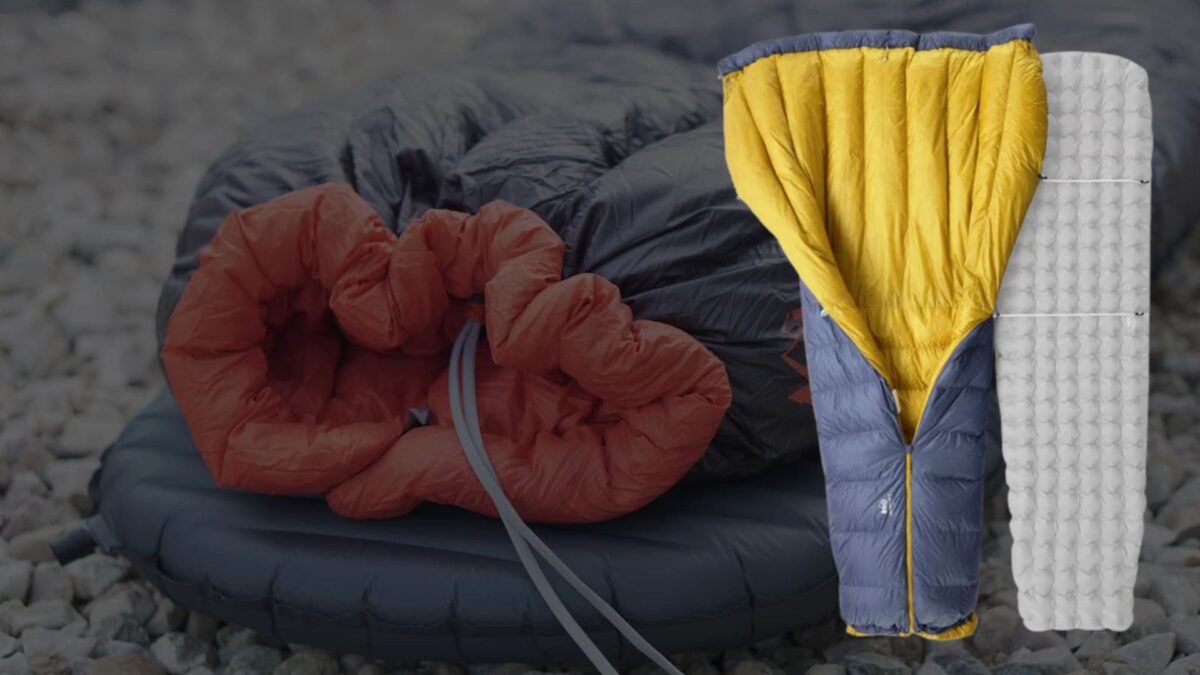
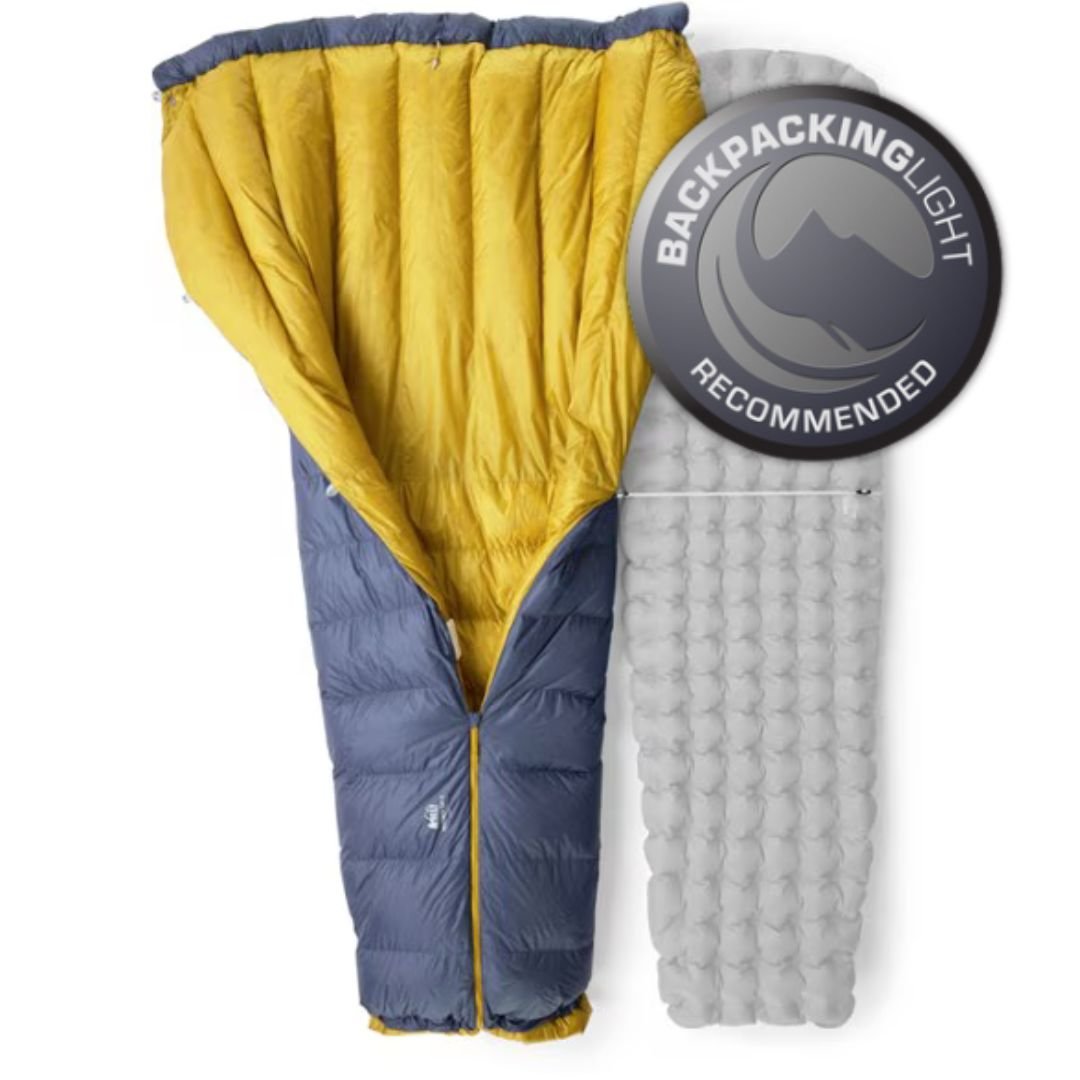
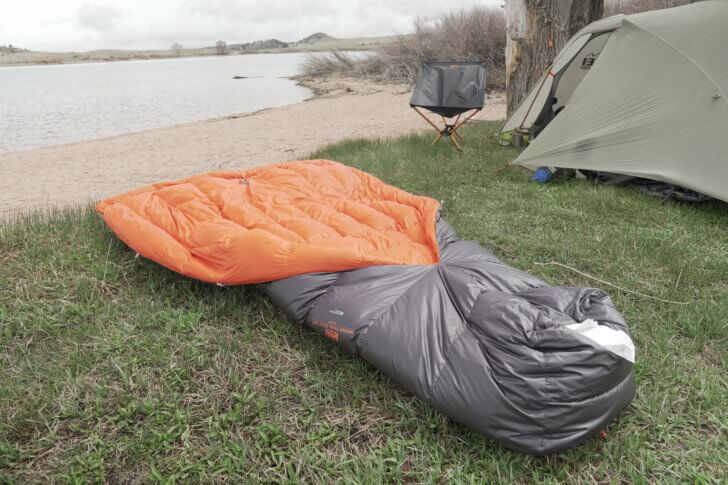 At $330, the 2024 REI Magma Trail Quilt 30 represents one of the best values in premium down quilts available today. If you purchase it during one of REI’s major annual sales (usually around Memorial Day, Labor Day, and the Holidays), you can get the Magma Trail Quilt for 30% off (~$230) which makes it nearly 40% cheaper than the average of the rest of the quilts shown in the comparison table at the end of this review. At about 20 oz (including the pad straps), when you consider its loft (2+ inches) and its wide girth, it offers a compelling performance-to-weight ratio.
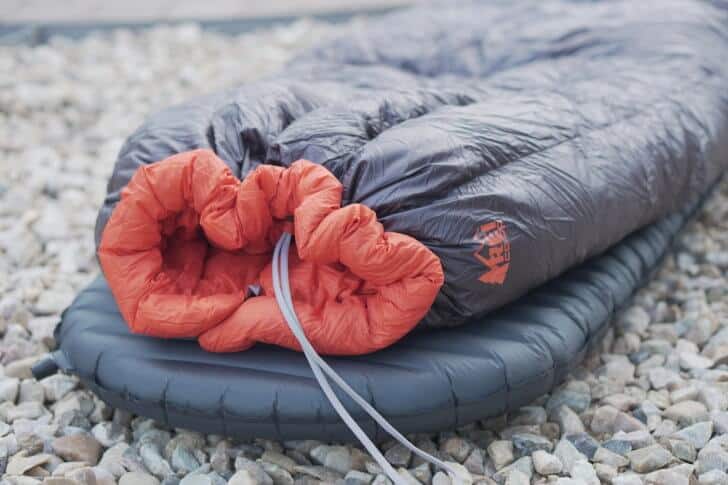 Pad attachment system – A pad attachment system affixes the quilt to a sleeping pad, accomplishing two things:
 Hybrid vertical / horizontal baffle construction – More and more sleeping bag manufacturers are moving to vertical baffles because they (reportedly) offer better down control. I’m not quite sold on this philosophy, because if a baffle is properly (and adequately) filled with enough down, it’s not likely going to shift and create cold spots. However, one distinct advantage of vertical baffling is that when a sleeping bag or quilt is cinched around your body, baffle thickness remains more consistent in vertical baffles, and you have a warmer quilt. This is most important in the torso section, where the girth is large. Some manufacturers try to combat this with a differential cut (where the inside girth is narrower than the outside girth), but few of them execute it successfully with an aggressive enough differential.