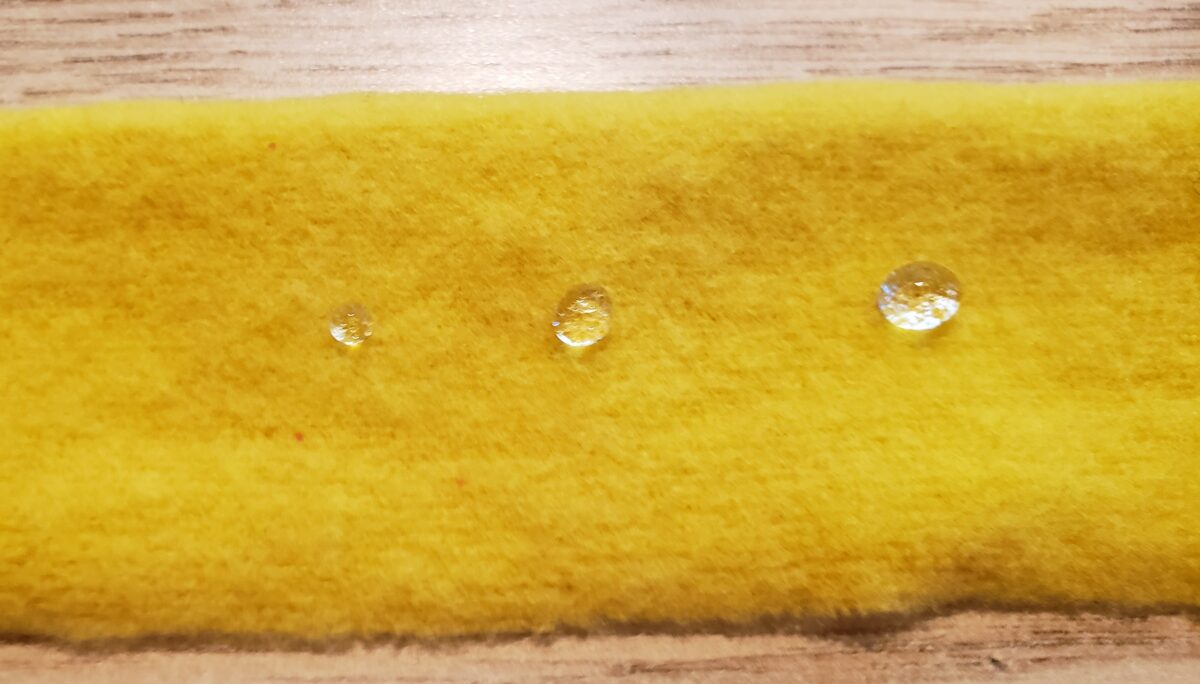
Moisture-wicking fabrics (base layers and underwear) are designed to move sweat away from the skin. In this study, we test if Polartec and other base layer fabrics meet manufacturer claims.
Executive Producer - Backpacking Light; Show Director and Host - Ryan Jordan; Producer - Chase Jordan; Theme music: Look for Me in the Mountains written by Chris Cunningham and Ryan Jordan, performed by Chris Cunningham (acoustic guitar, lead and harmony vocals, harmonica), Chad Langford (upright bass), and Tom Murphy (mandolin), produced by Basecamp Studios in Bozeman, Montana.
Sponsorship Policy: Backpacking Light does not accept compensation or donated/discounted products in exchange for product mentions or placements in editorial coverage, including any podcast episode content not excplicitly identified as sponsored content. Some (but not all) of the links in these show notes may be affiliate links. Learn more about affiliate commissions, influencer marketing, and our consumer advocacy work by reading our article Stop wasting money on gear.
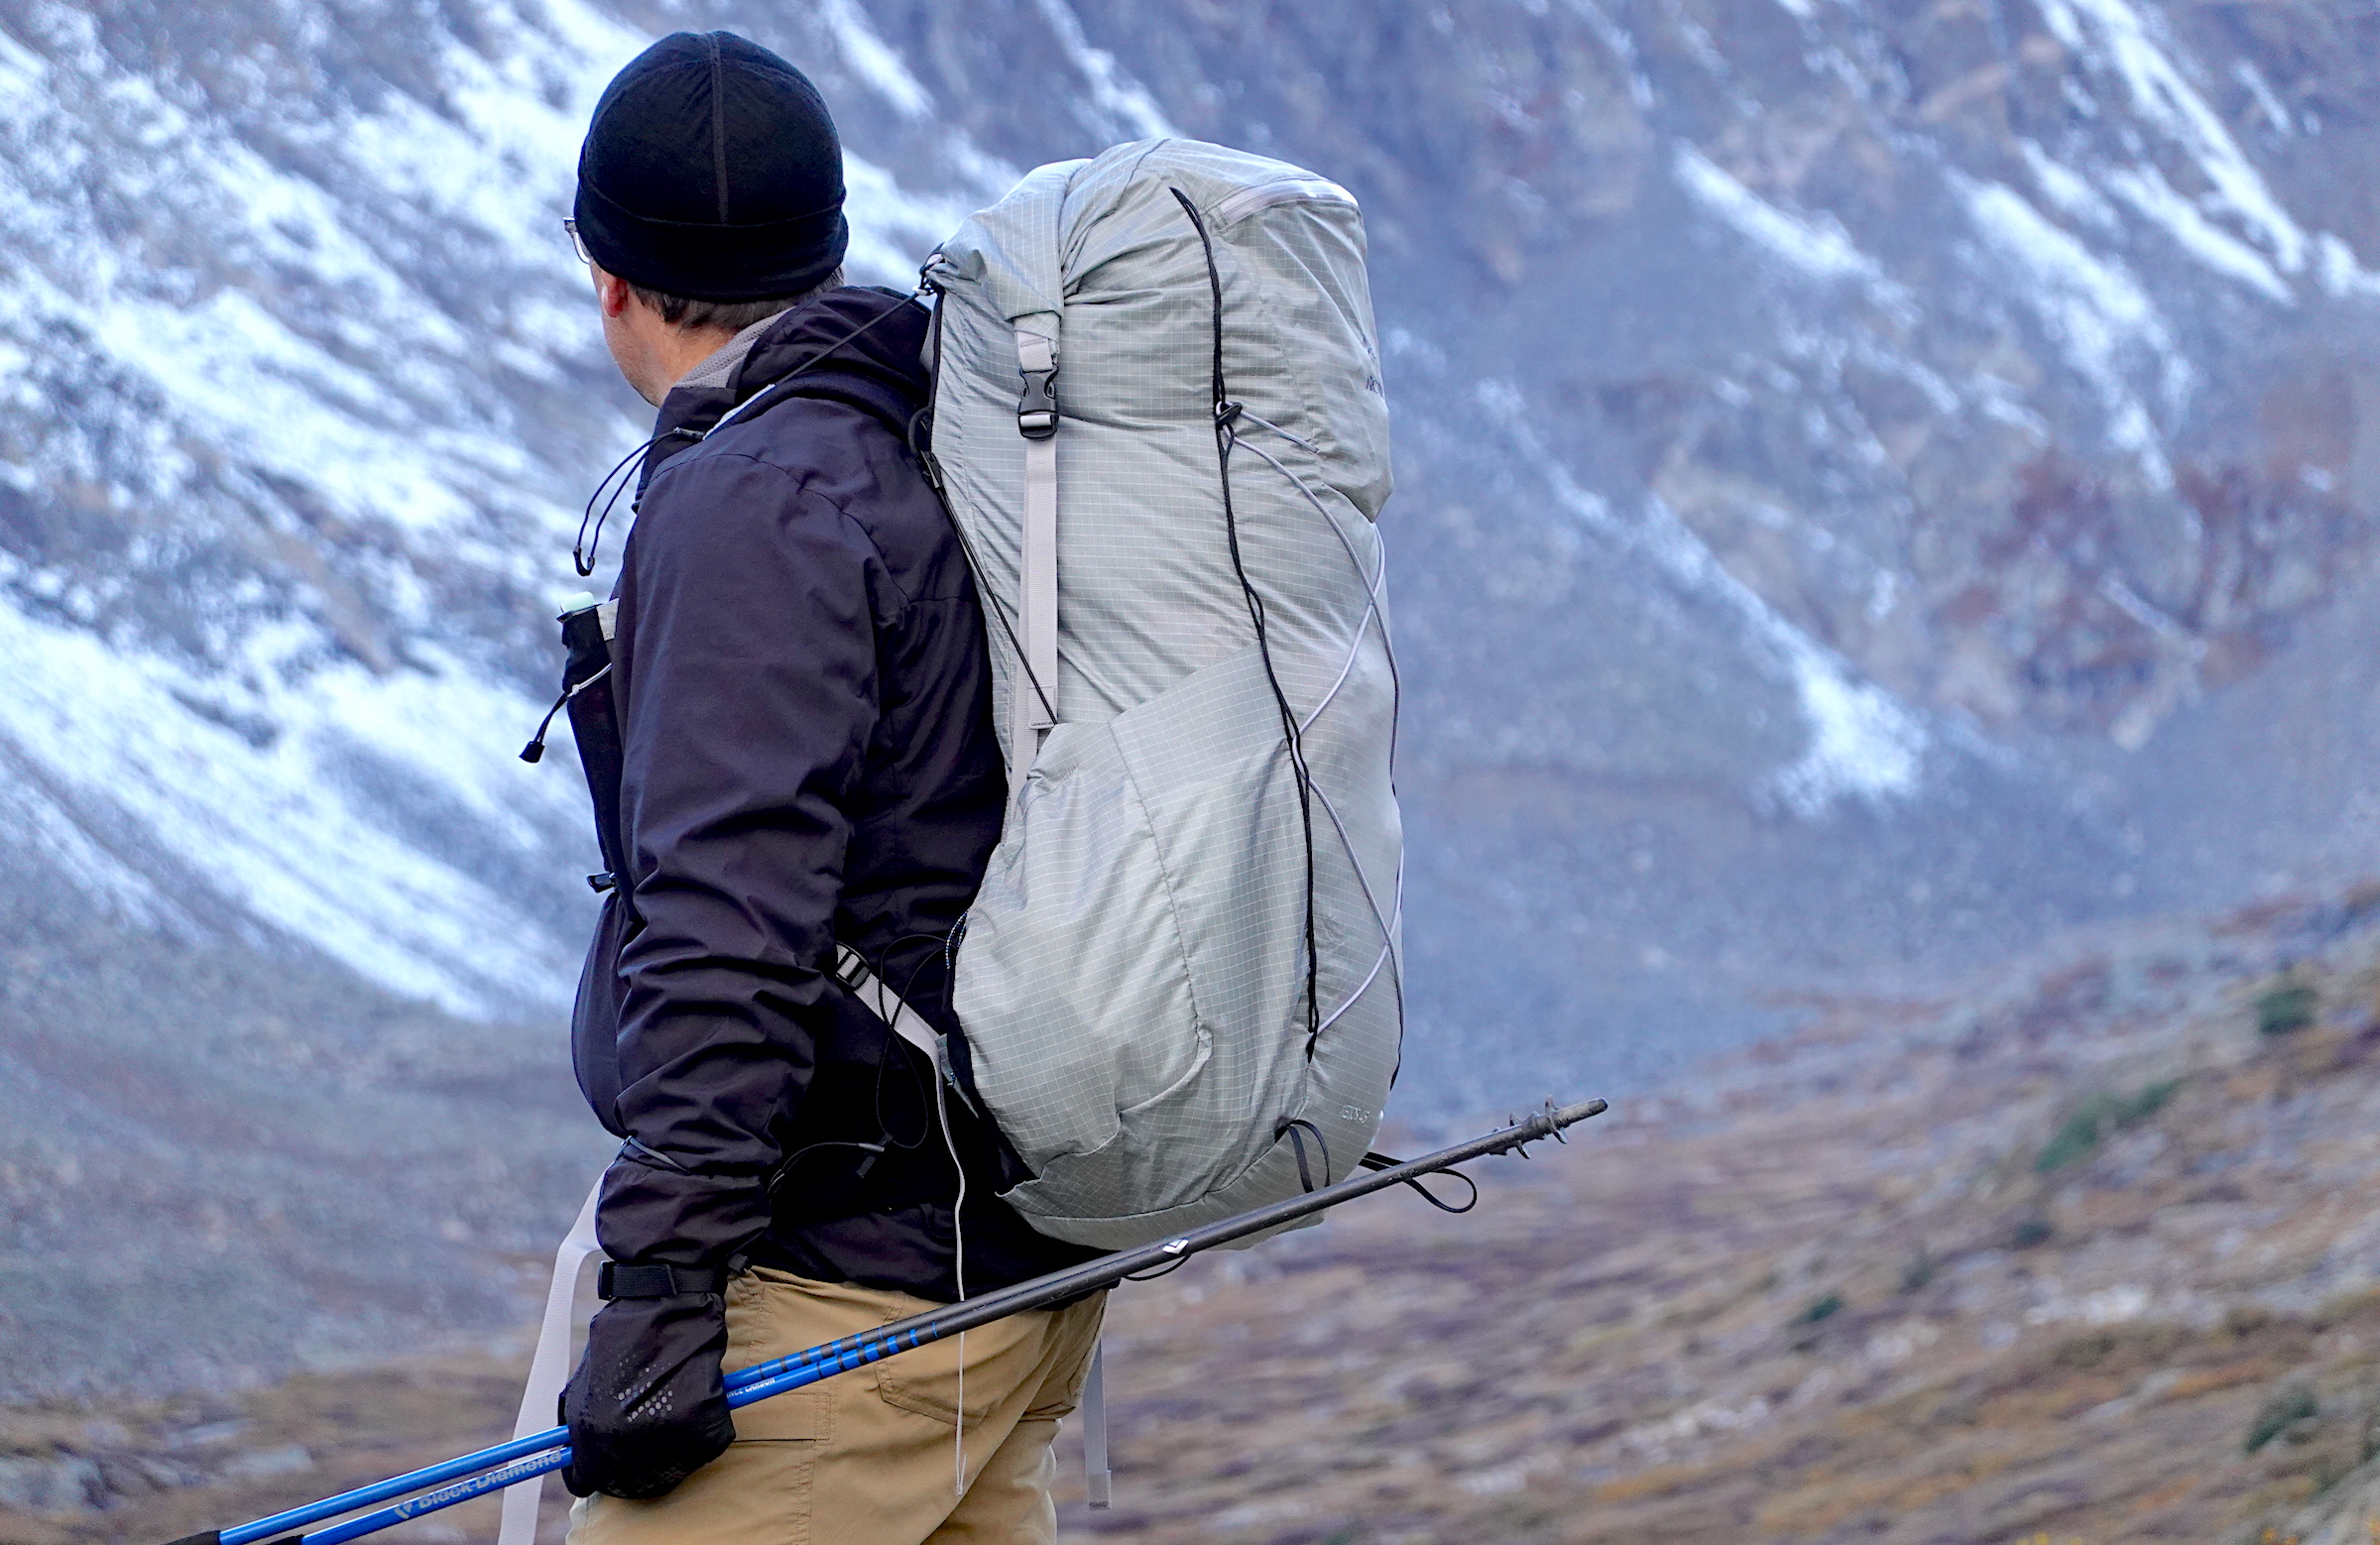
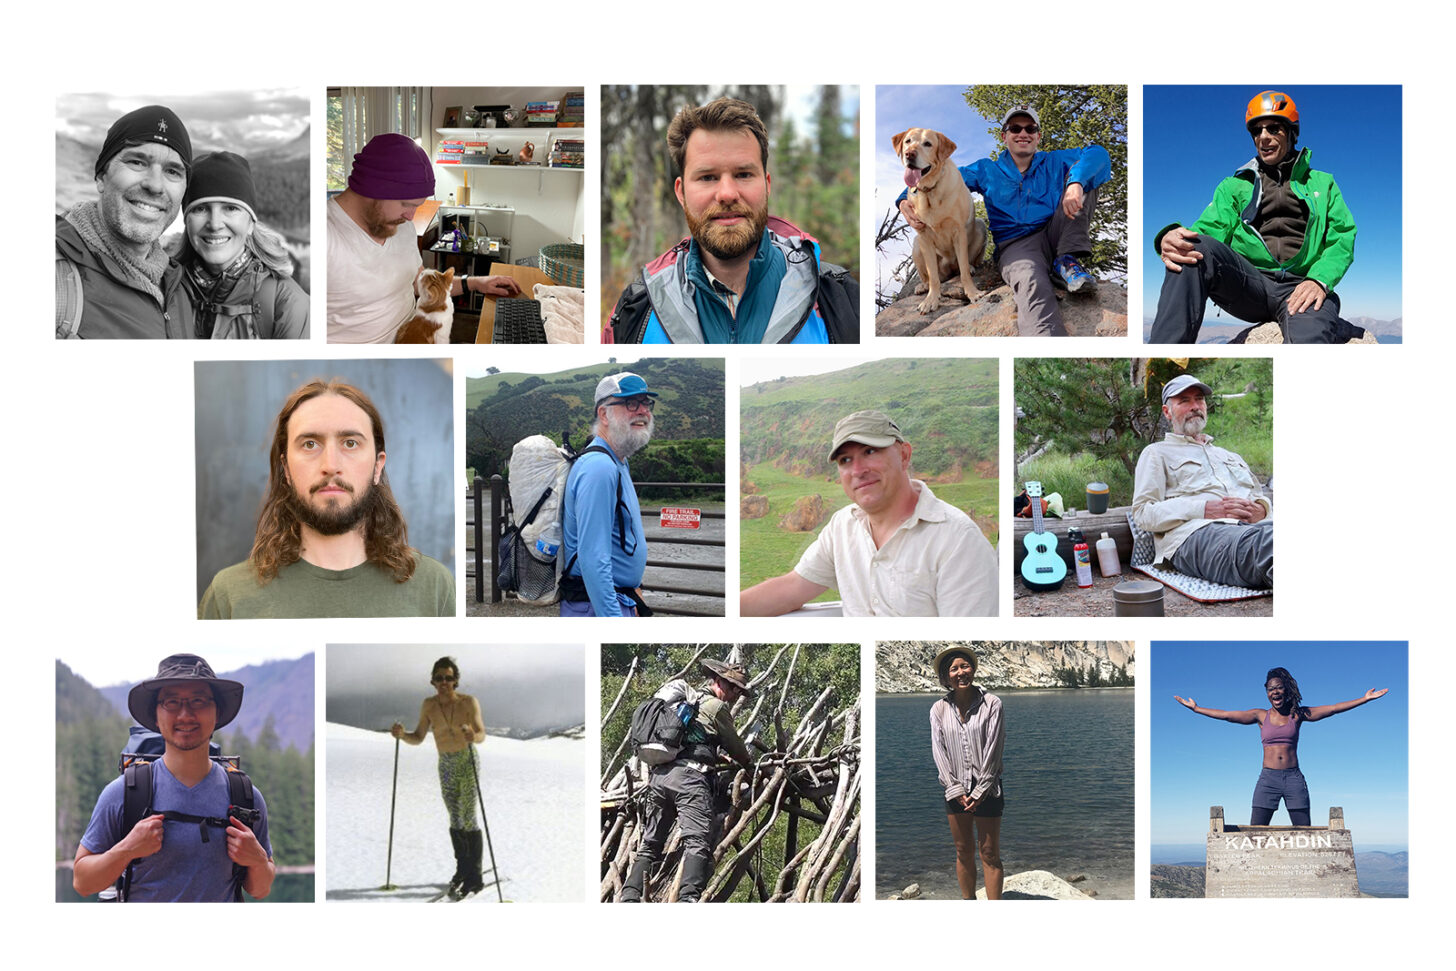
Andrew, Ryan, and the Backpacking Light team chat about their favorite gear they used in 2021.
Stream
We’re gonna wrap up the year with a survey of gear we loved using in 2021. We polled the Backpacking Light staff and contributors and asked them to talk about the gear they couldn’t live without in 2021 – and why. Make sure and check out the related Staff Picks 2021 article for more. Enjoy, and we’ll see you next year!
Outline
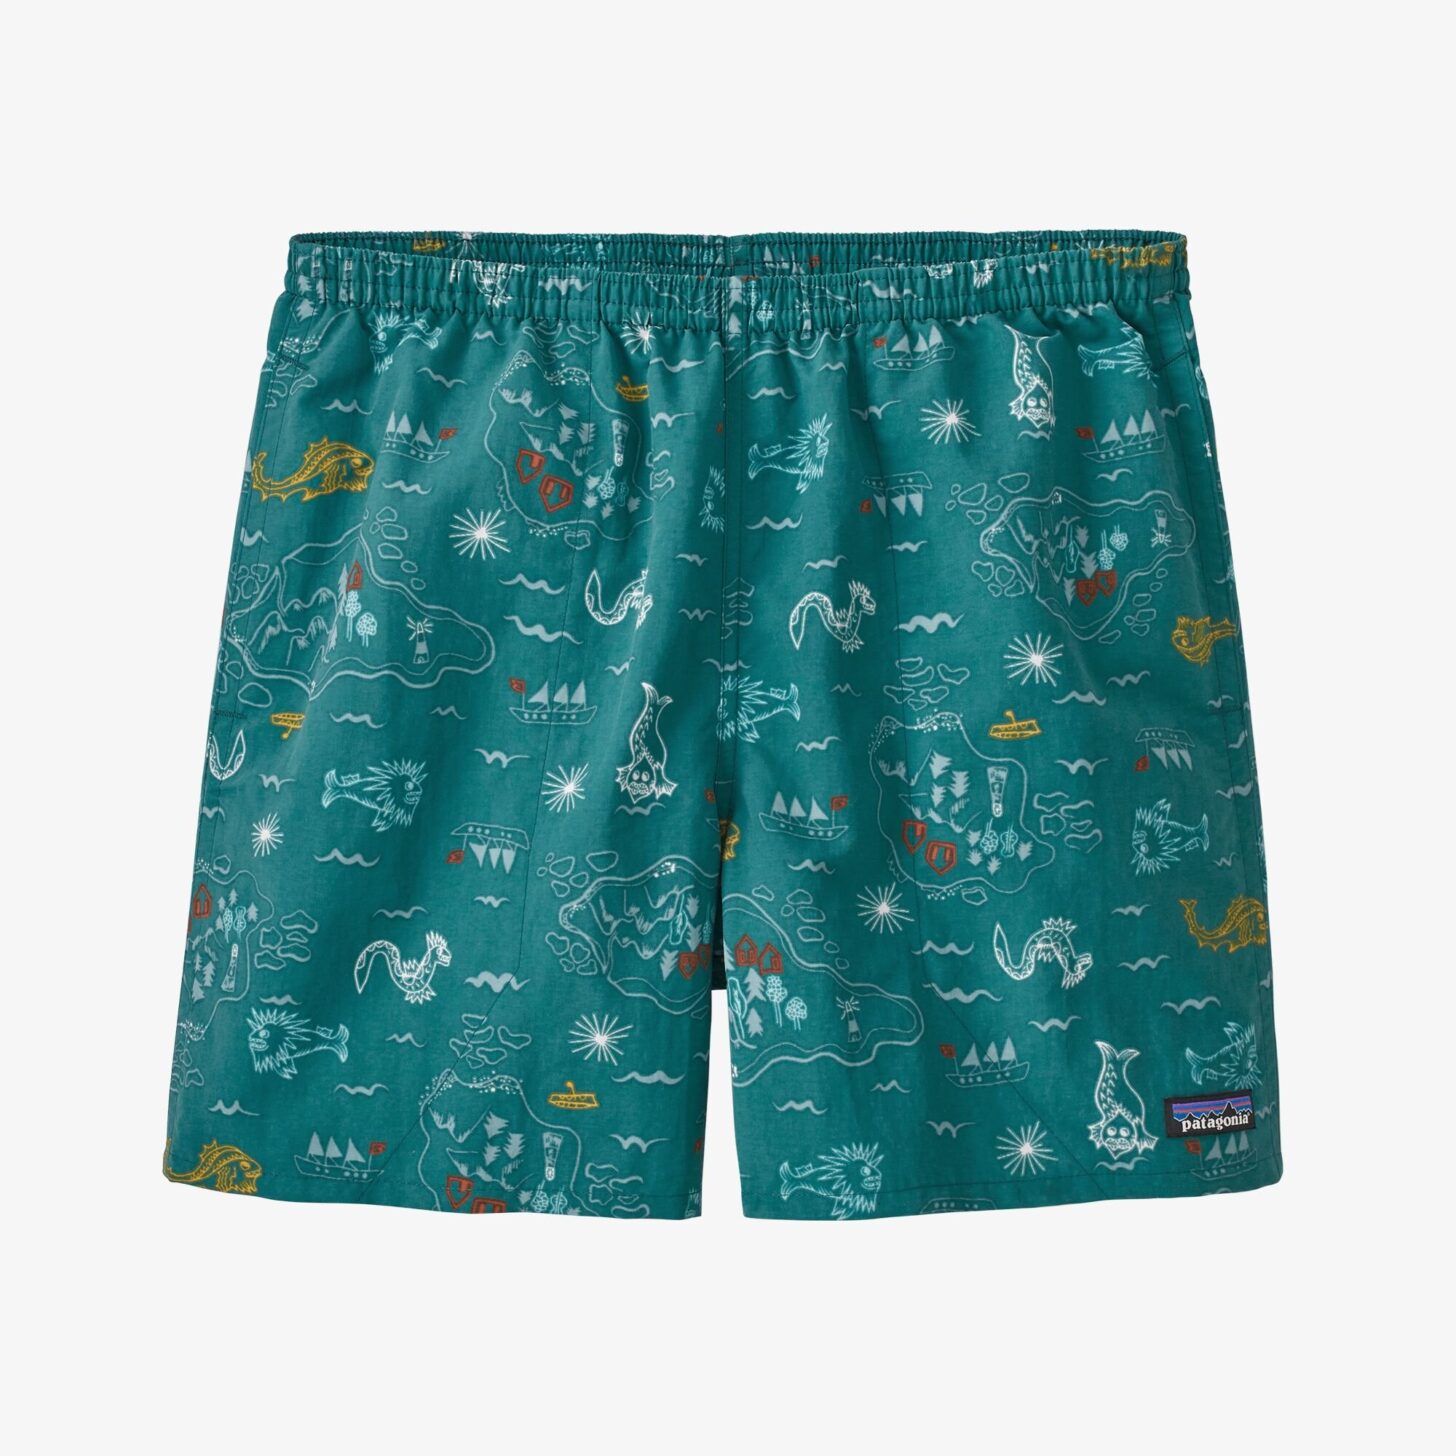
Why use 5-inch inseam shorts?
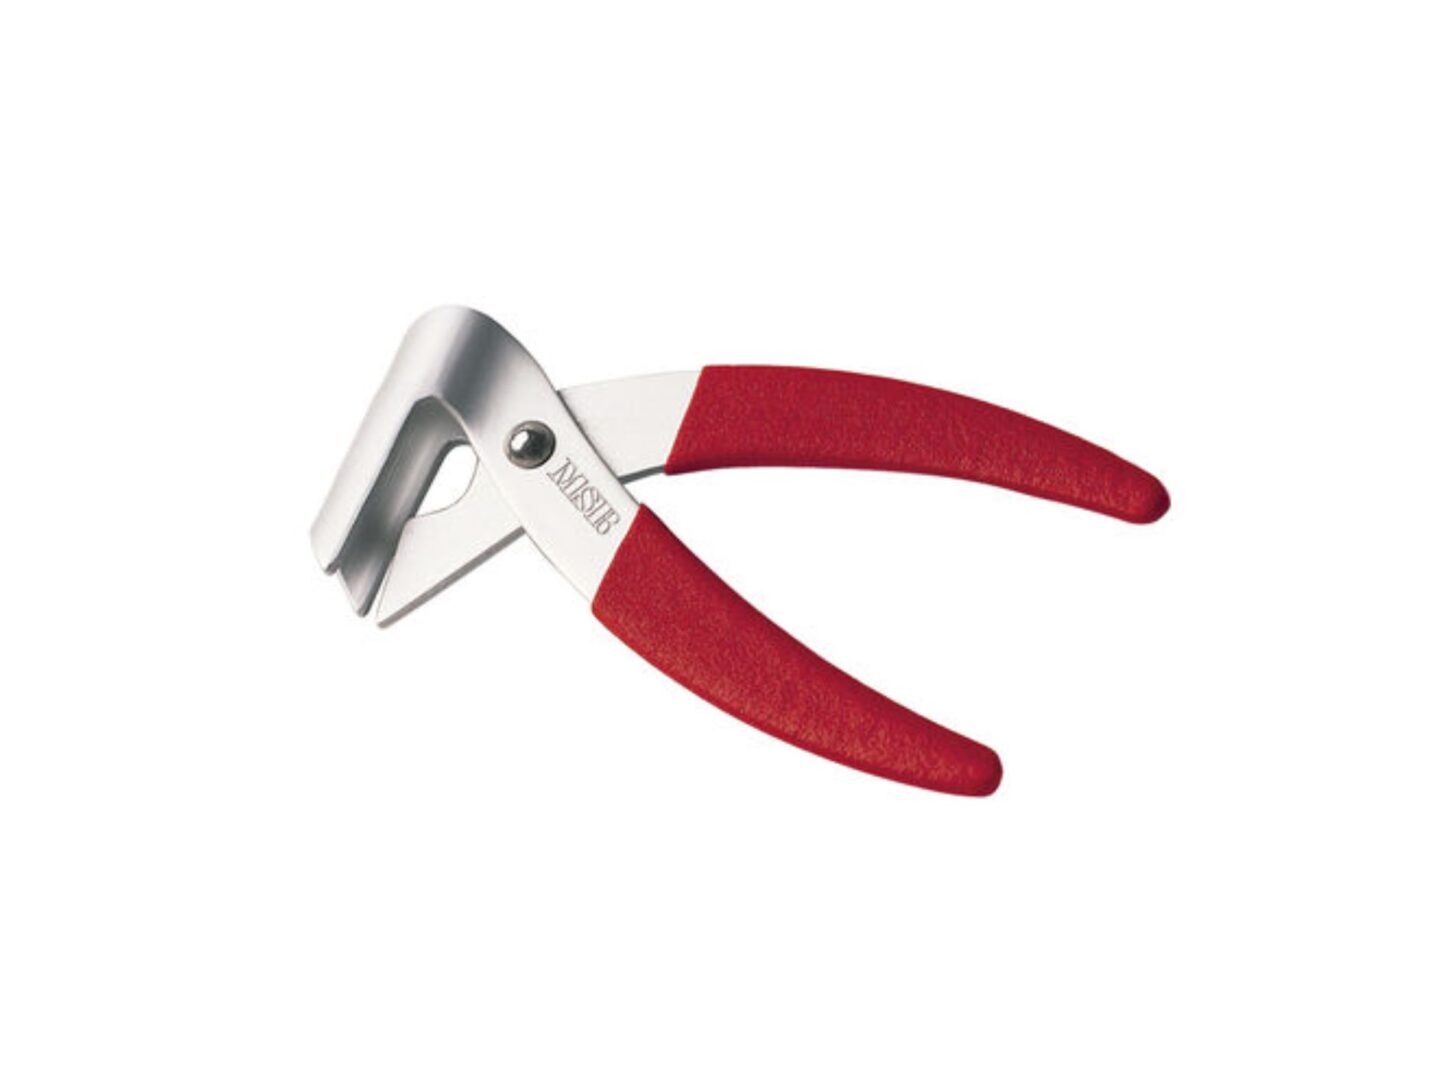
When are pot grippers useful while backpacking?
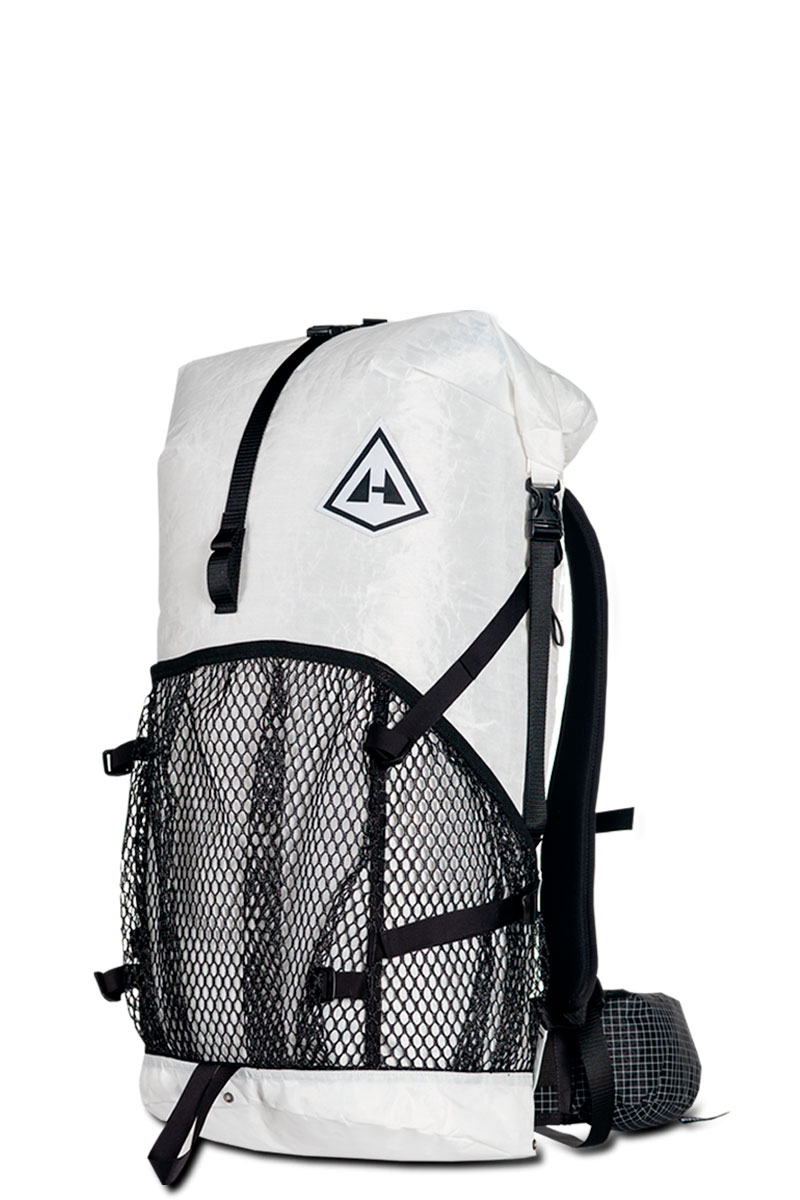
Why do people love Hyperlight Mountain Gear Packs?
Why is a Steripen better than a squeeze filter?
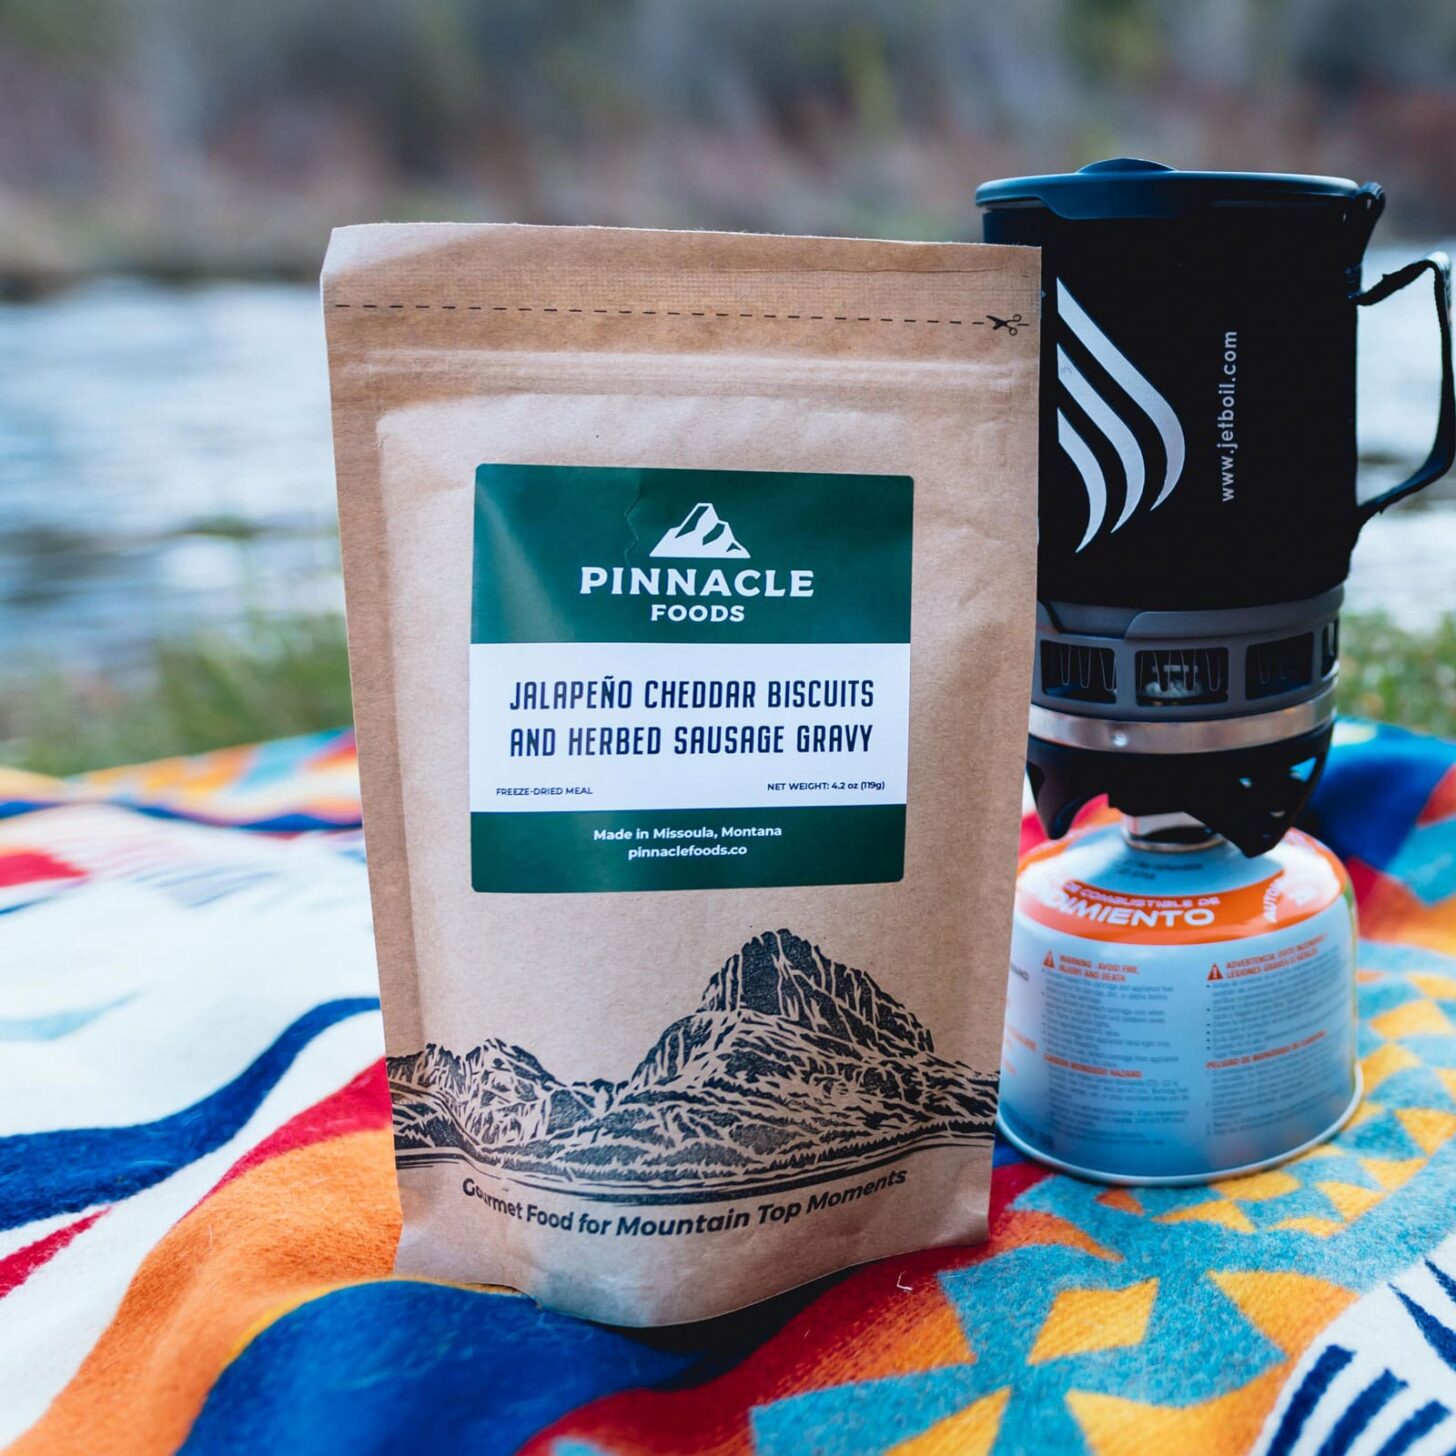
Is Pinnacle backpacking food any good?
What are Senchi Designs Lark Hoodies made of?
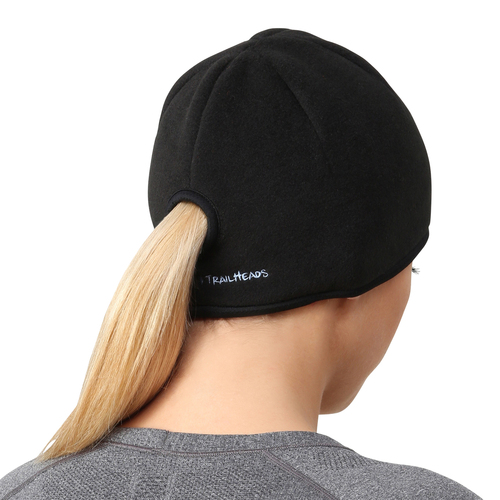
How can I wear a ponytail with a hat?
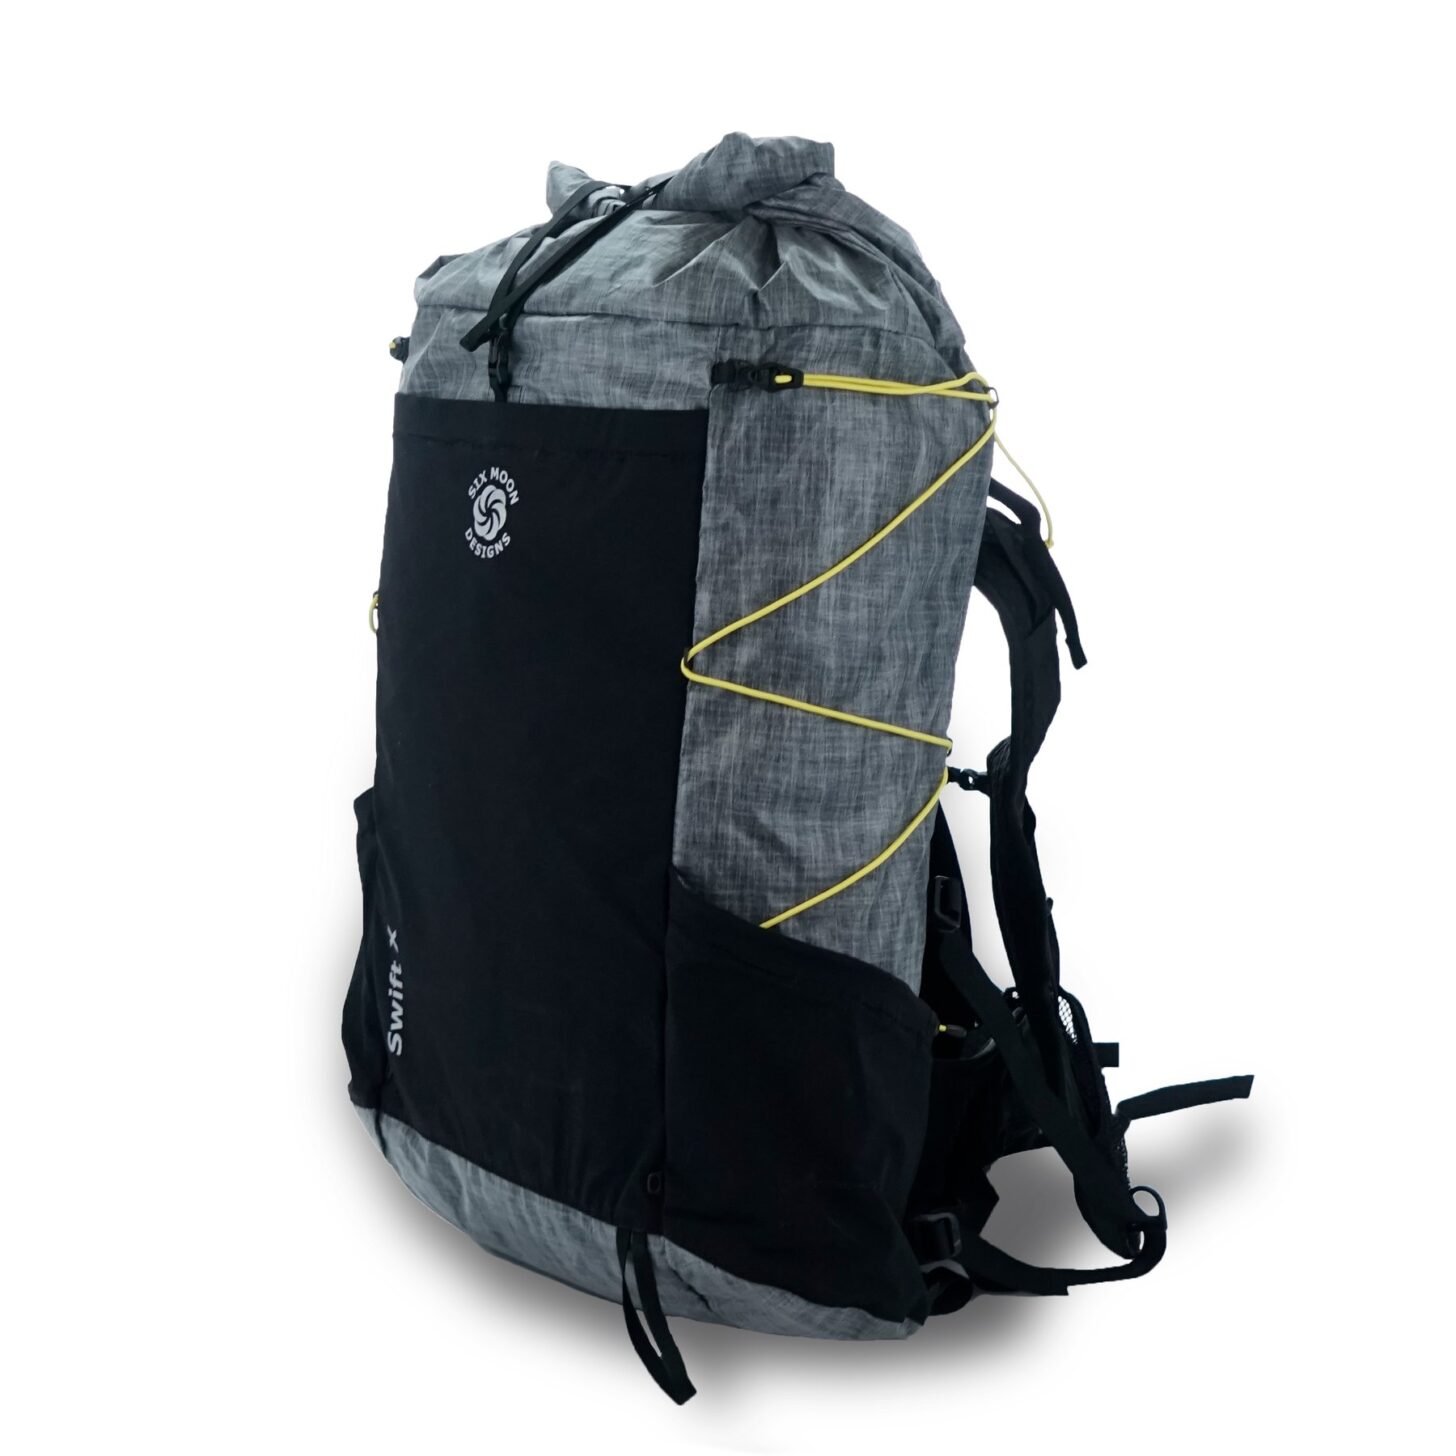
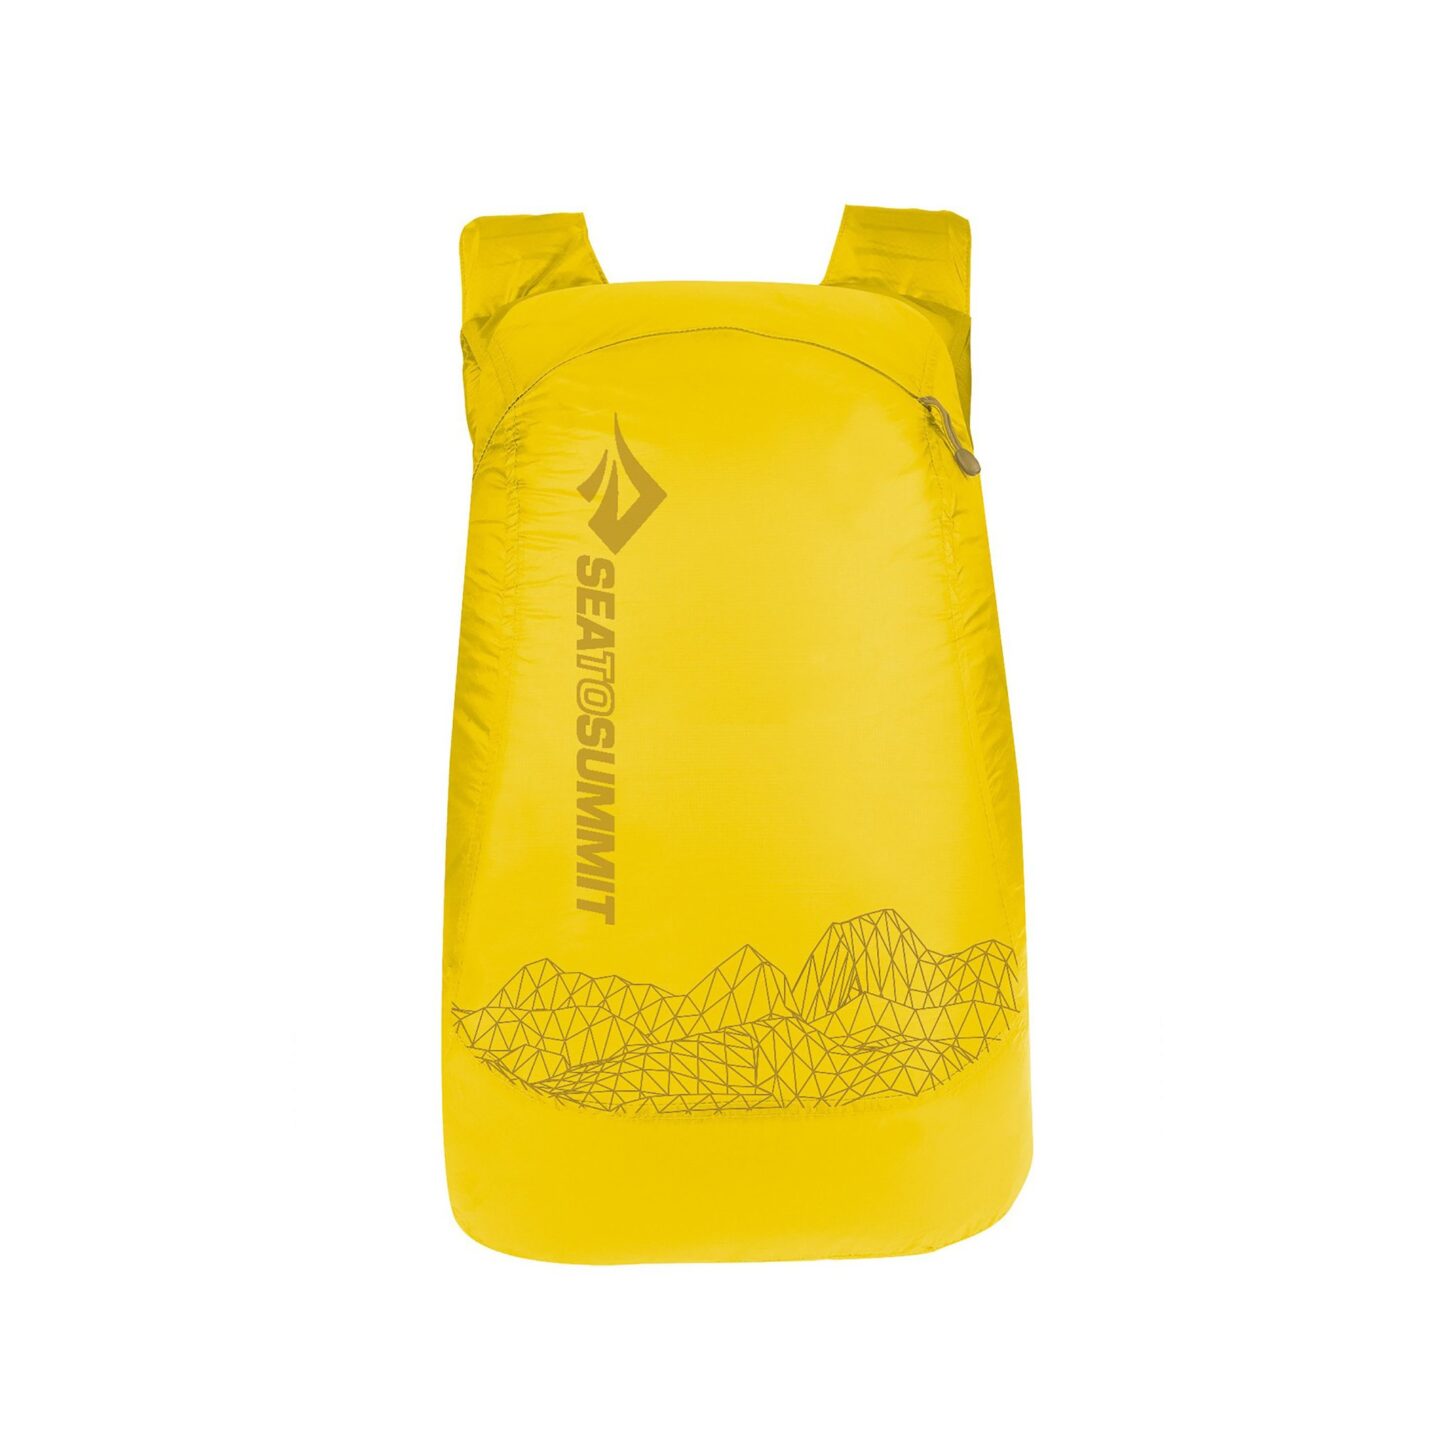
What’s the best daypack to include in my backpacking kit?
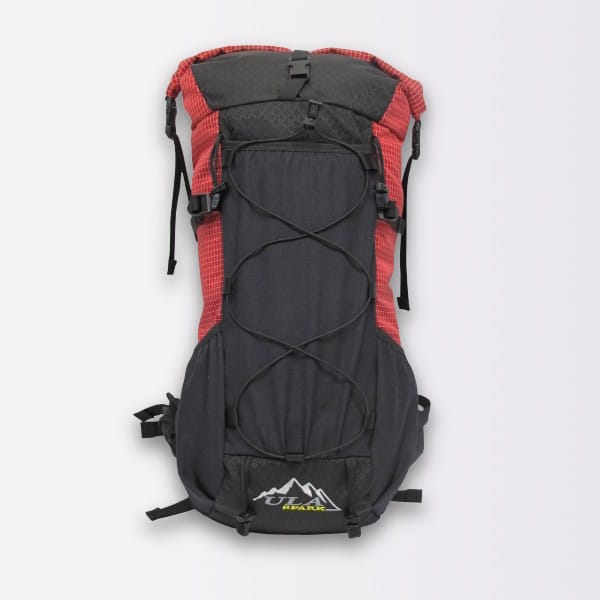
What’s the best backpacking pack for kids?
Where can I order packaged backpacking food for fast delivery?
Executive Producer - Backpacking Light; Show Director and Host - Ryan Jordan; Producer - Chase Jordan; Theme music: Look for Me in the Mountains written by Chris Cunningham and Ryan Jordan, performed by Chris Cunningham (acoustic guitar, lead and harmony vocals, harmonica), Chad Langford (upright bass), and Tom Murphy (mandolin), produced by Basecamp Studios in Bozeman, Montana.
Sponsorship Policy: Backpacking Light does not accept compensation or donated/discounted products in exchange for product mentions or placements in editorial coverage, including any podcast episode content not excplicitly identified as sponsored content. Some (but not all) of the links in these show notes may be affiliate links. Learn more about affiliate commissions, influencer marketing, and our consumer advocacy work by reading our article Stop wasting money on gear.
The transitions from the simple discomfort of the trail to the chaotic comfort of life at home happen by degrees. What can I learn from the trail that will allow me to experience home life in a new way?
Considerations for managing backcountry electronics including portable battery packs, batteries in cold temperatures, headlamps, cameras, satellite communicators, fitness watches, smartphones, and more.
A conversation with Livio Melo, founder of Allmansright, an up-and-coming gear maker based in the Bronx, New York.
Stream
Summary
This is the first installment of the Backpacking Light Podcast’s new series of cottage industry interviews – where Andrew and Ryan chat with some of the small business owners who make up the ultralight cottage industry world.
In this episode, the guys interview Livio Melo, the founder of allmansright.
Outline
introduction to Livio Melo, founder of allmansright, a cottage ultralight gear company
how Livio decided to make his first pack
the allmansright Hölster Stake Sack typifies the allmansright ethos – gear design guided by user experience
what drives allmansright design?
Livio talks real sustainability
why do people fall in love with objects?
how coming from two worlds informs Livio’s thinking and design
Executive Producer - Backpacking Light; Show Director and Host - Ryan Jordan; Producer - Chase Jordan; Theme music: Look for Me in the Mountains written by Chris Cunningham and Ryan Jordan, performed by Chris Cunningham (acoustic guitar, lead and harmony vocals, harmonica), Chad Langford (upright bass), and Tom Murphy (mandolin), produced by Basecamp Studios in Bozeman, Montana.
Sponsorship Policy: Backpacking Light does not accept compensation or donated/discounted products in exchange for product mentions or placements in editorial coverage, including any podcast episode content not excplicitly identified as sponsored content. Some (but not all) of the links in these show notes may be affiliate links. Learn more about affiliate commissions, influencer marketing, and our consumer advocacy work by reading our article Stop wasting money on gear.
Mark Wetherington confronts the novelty of bailing on a trip after things don’t go as planned in Idaho’s Lost River Range.
Seeking New Vistas
With 1.3 million acres of wilderness conveniently located a few miles from my house, I don’t have to look far when I want to hike to subalpine lakes, meadows, peaks, or amble beside a mountain stream through coniferous forest.
I’m able to plan many trips on short notice since there’s a bare minimum of logistics involved, and as someone who is not averse to visiting the same places, I never feel like I’ve seen all there is to see in my local mountain range.
But during the shoulder-season months when backpacking in much of the Northern Rockies tends to be an exercise in frustration, I often travel a bit further afield to reach more accommodating environments for multi-night trips. And sometimes, like almost all backpackers, I want to experience hiking through a landscape with different geology, flora, and fauna than I’m accustomed to.
The Lost River Range is a beautiful mix of sagebrush meadows, coniferous forests, and high peaks. Photo: Mark Wetherington
The Lost River Range in Idaho had piqued my interest over the years. It wasn’t until this past summer that I was able to carve out the time to drive 200-plus miles south for a backpacking trip there. I’d read, and re-read, a compelling description of a 40-mile traverse of the range in Backpacking Idaho by Doug Lorain and had done some day hiking and rock climbing in the area the previous September. A trip to Craters of the Moon National Monument in April took me directly past the Lost River Range. Its snow-covered peaks stretched skyward past 12,000 feet and a coniferous forest striped the middle elevations before fading into the high desert of the valley floor. After seeing the Lost Rivers then, I became determined to do a proper backpacking trip there over the summer.
Since the most practical way of doing the trip would involve a shuttle, I got in touch with my friend Jim, who’d previously expressed interest in exploring the area. We’d done several trips together, from long day hikes to a four-day trip along the Selway River, and fortunately, our schedules aligned and we were able to tentatively commit to a week in late June for this trip. I can imagine some incredulity that we would set aside an entire week for a mere 40-mile trip, a distance which many lightweight backpackers would easily tackle in a weekend, so I’d like to take this opportunity to provide some clarification before I get too deep into this narrative.
A full day would be consumed just by driving down and setting up the shuttle, with distance and the range’s notoriously bad roads working against us, and we would camp at the trailhead the night before our trip. We also wanted to give ourselves plenty of time for side trips and to enjoy our time in such an impressive landscape. And, perhaps most importantly, we didn’t want to overestimate the progress we would make as there were significant portions of our route which lacked any trail whatsoever, and other sections where the trails we would be hiking on were unmaintained. After my firsthand experience with the trip, I can wholeheartedly attest that this paragraph from the trip description in Backpacking Idaho was not an exaggeration; if anything it was a slight understatement:
Though gloriously scenic, significant parts of this trail are so sketchy that much of the walking is effectively cross-country. In addition, junctions are almost never signed and many trails shown on the U.S. Forest Service maps either do not exist or are literally miles from where they are indicated . . . this trip is recommended only for experienced hikers who don’t mind doing some bushwhacking to follow a poorly signed and rarely traveled route.
Rather than finding that a discouraging caveat, both myself and Jim thought it seemed like the perfect trip to kick off the summer backpacking season. And having done several backpacking trips with Doug, the author of the guidebook, and working with him as a co-author on a guidebook for backpacking in Washington, I felt confident that our metrics for difficulty were similarly calibrated.
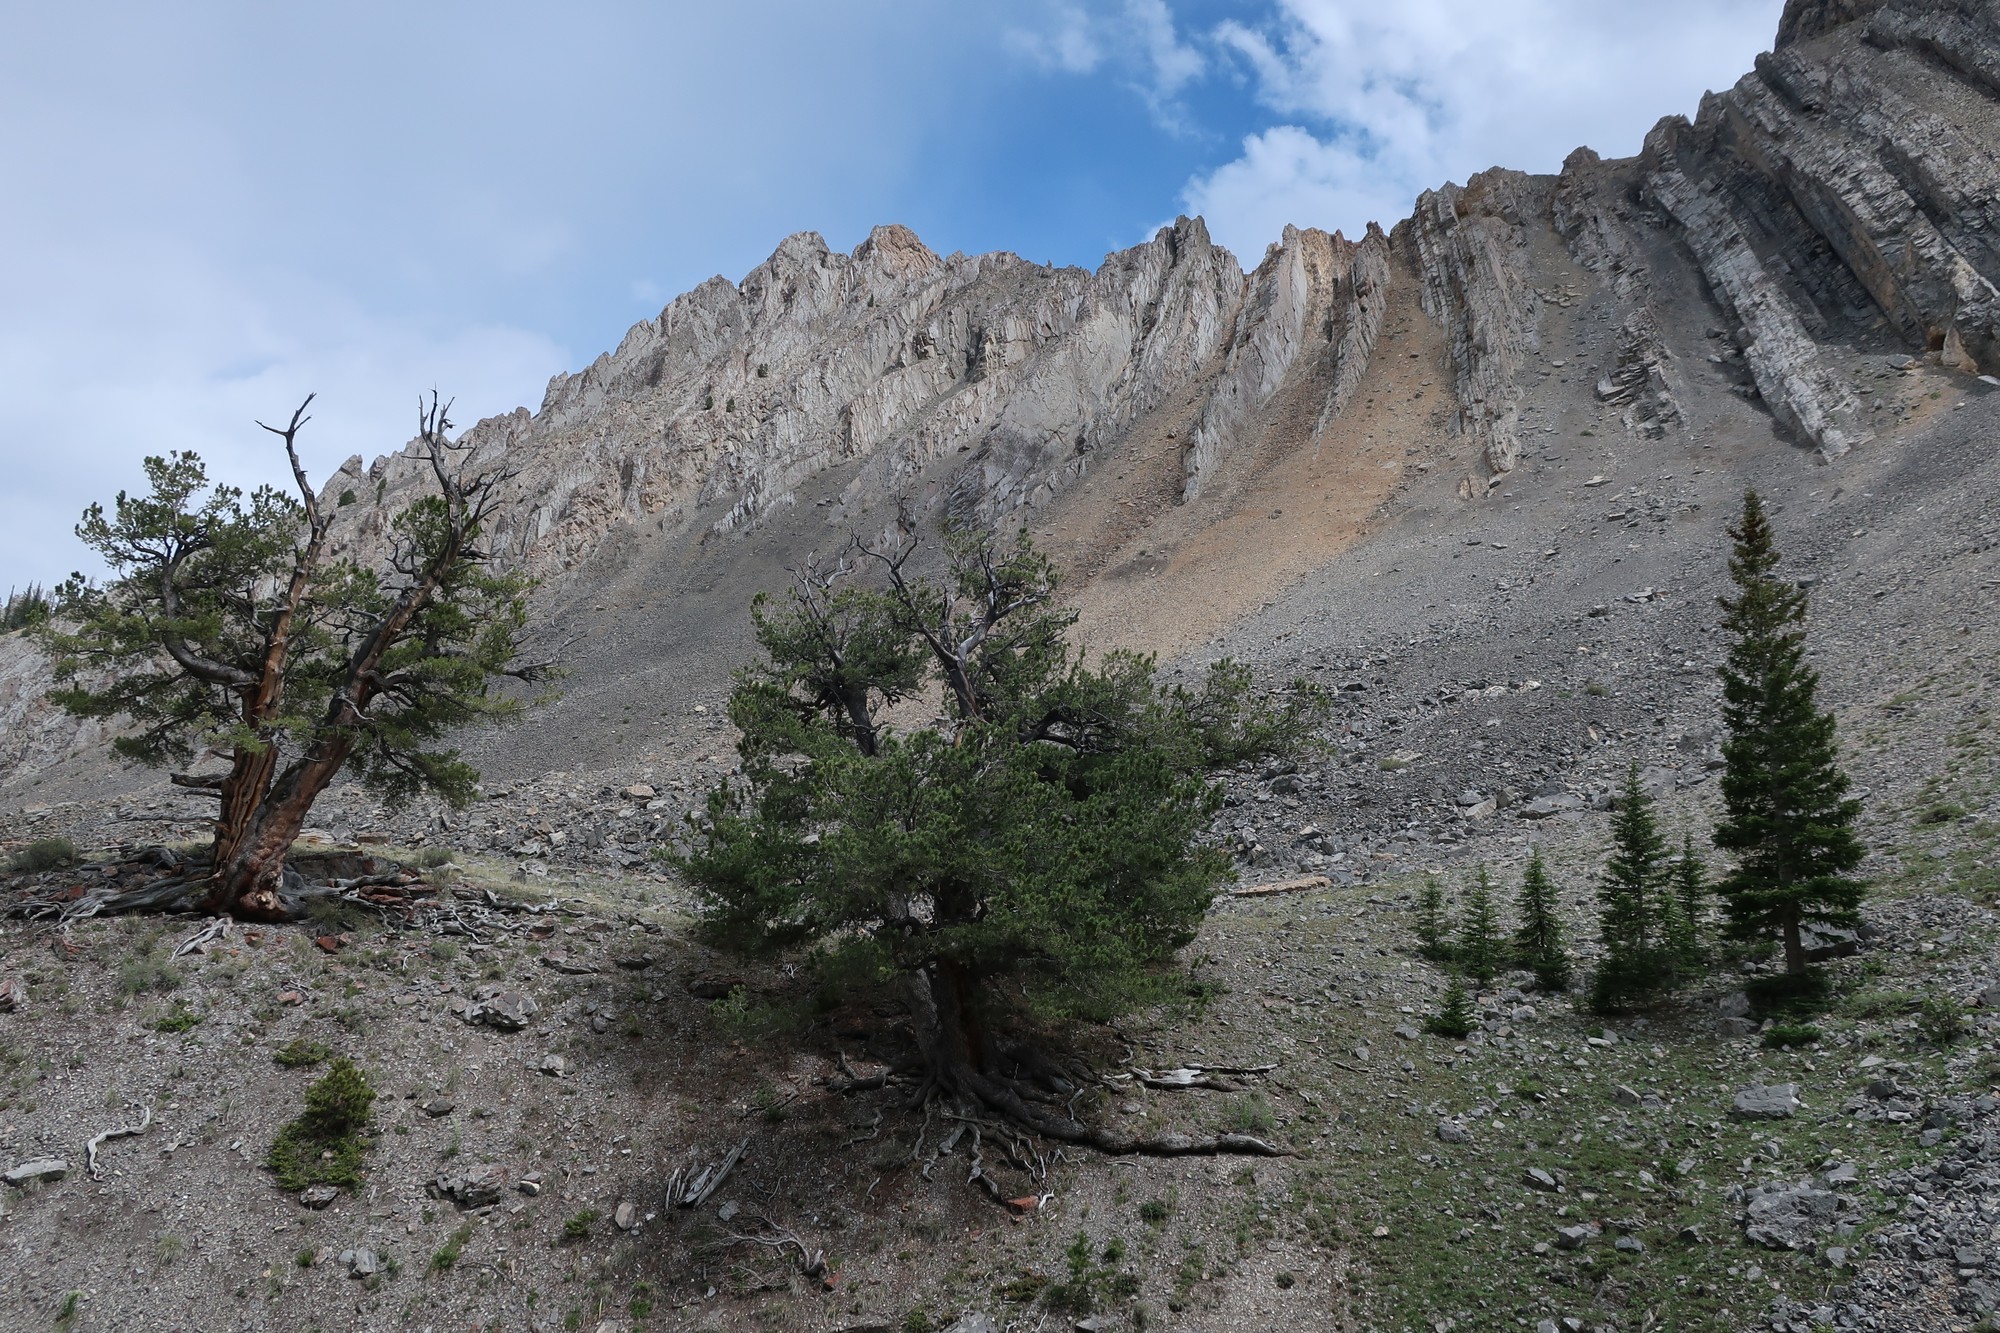
The geology of the Lost River Range is fascinating and results in many intriguing rock formations, cliffs, and mountains. Photo: Mark Wetherington
An Expectation of Solitude
The Lost River Range is remote, at least as far as Lower 48 mountain ranges go, and is the definition of high, dry, and lonesome. Its presence on AllTrails, social media, and other hiking apps and online outlets is sparse to the point of being amusing – if not a bit concerning should you find yourself in a backcountry predicament. There isn’t a NatGeo Trails Illustrated map for this range or guidebooks detailing its nooks and crannies. For such incredible scenery, not to mention such alluring peaks (including Mt. Borah, the Idaho high point), it sees a fraction of the attention of other ranges in Idaho, like the Sawtooths. As someone who places a premium on solitude and scenery, the Lost River Range seemed like a perfect destination.
Our expectations of solitude were met after driving down a horrible excuse for a dirt road off of Highway 93 a few dozen miles north of the tiny town of Mackay, Idaho. We left my car surrounded by sagebrush and not much else. From there we headed south to the starting point, where we saw exactly one other car at the wide spot in the road that was the trailhead. We drove on a little further and car camped at a dispersed site.
From our campsite, we were able to identify one of the landmarks we were supposed to be looking for – a “reddish rock outcrop” that would let us know we were on the right course into the core of the range. Glad to have some of the initial route-finding out of the way, we set up our luxurious car camping gear and enjoyed an elaborate dinner before heading to bed.
Into the Lost River Range
After a delicious and leisurely breakfast the next morning, we drove back to the trailhead, shouldered our packs, and headed down the trail. To our surprise, the trail was clearly marked by a sign, contrary to the guidebook description (which was written nearly a decade earlier). I’d called the USFS in an attempt to get more current information about trail conditions and what they provided me could most politely and generously be described as being close to useless.
Disarmed by this apparently auspicious start to our journey, we trekked along at a good pace. We reveled in the crisp mountain air as we sauntered along at roughly 8,000 feet, gazing up at peaks topping out more than half a mile above us. Soon, however, we found ourselves pausing in a meadow to gaze up at the peaks in an attempt to orient ourselves.
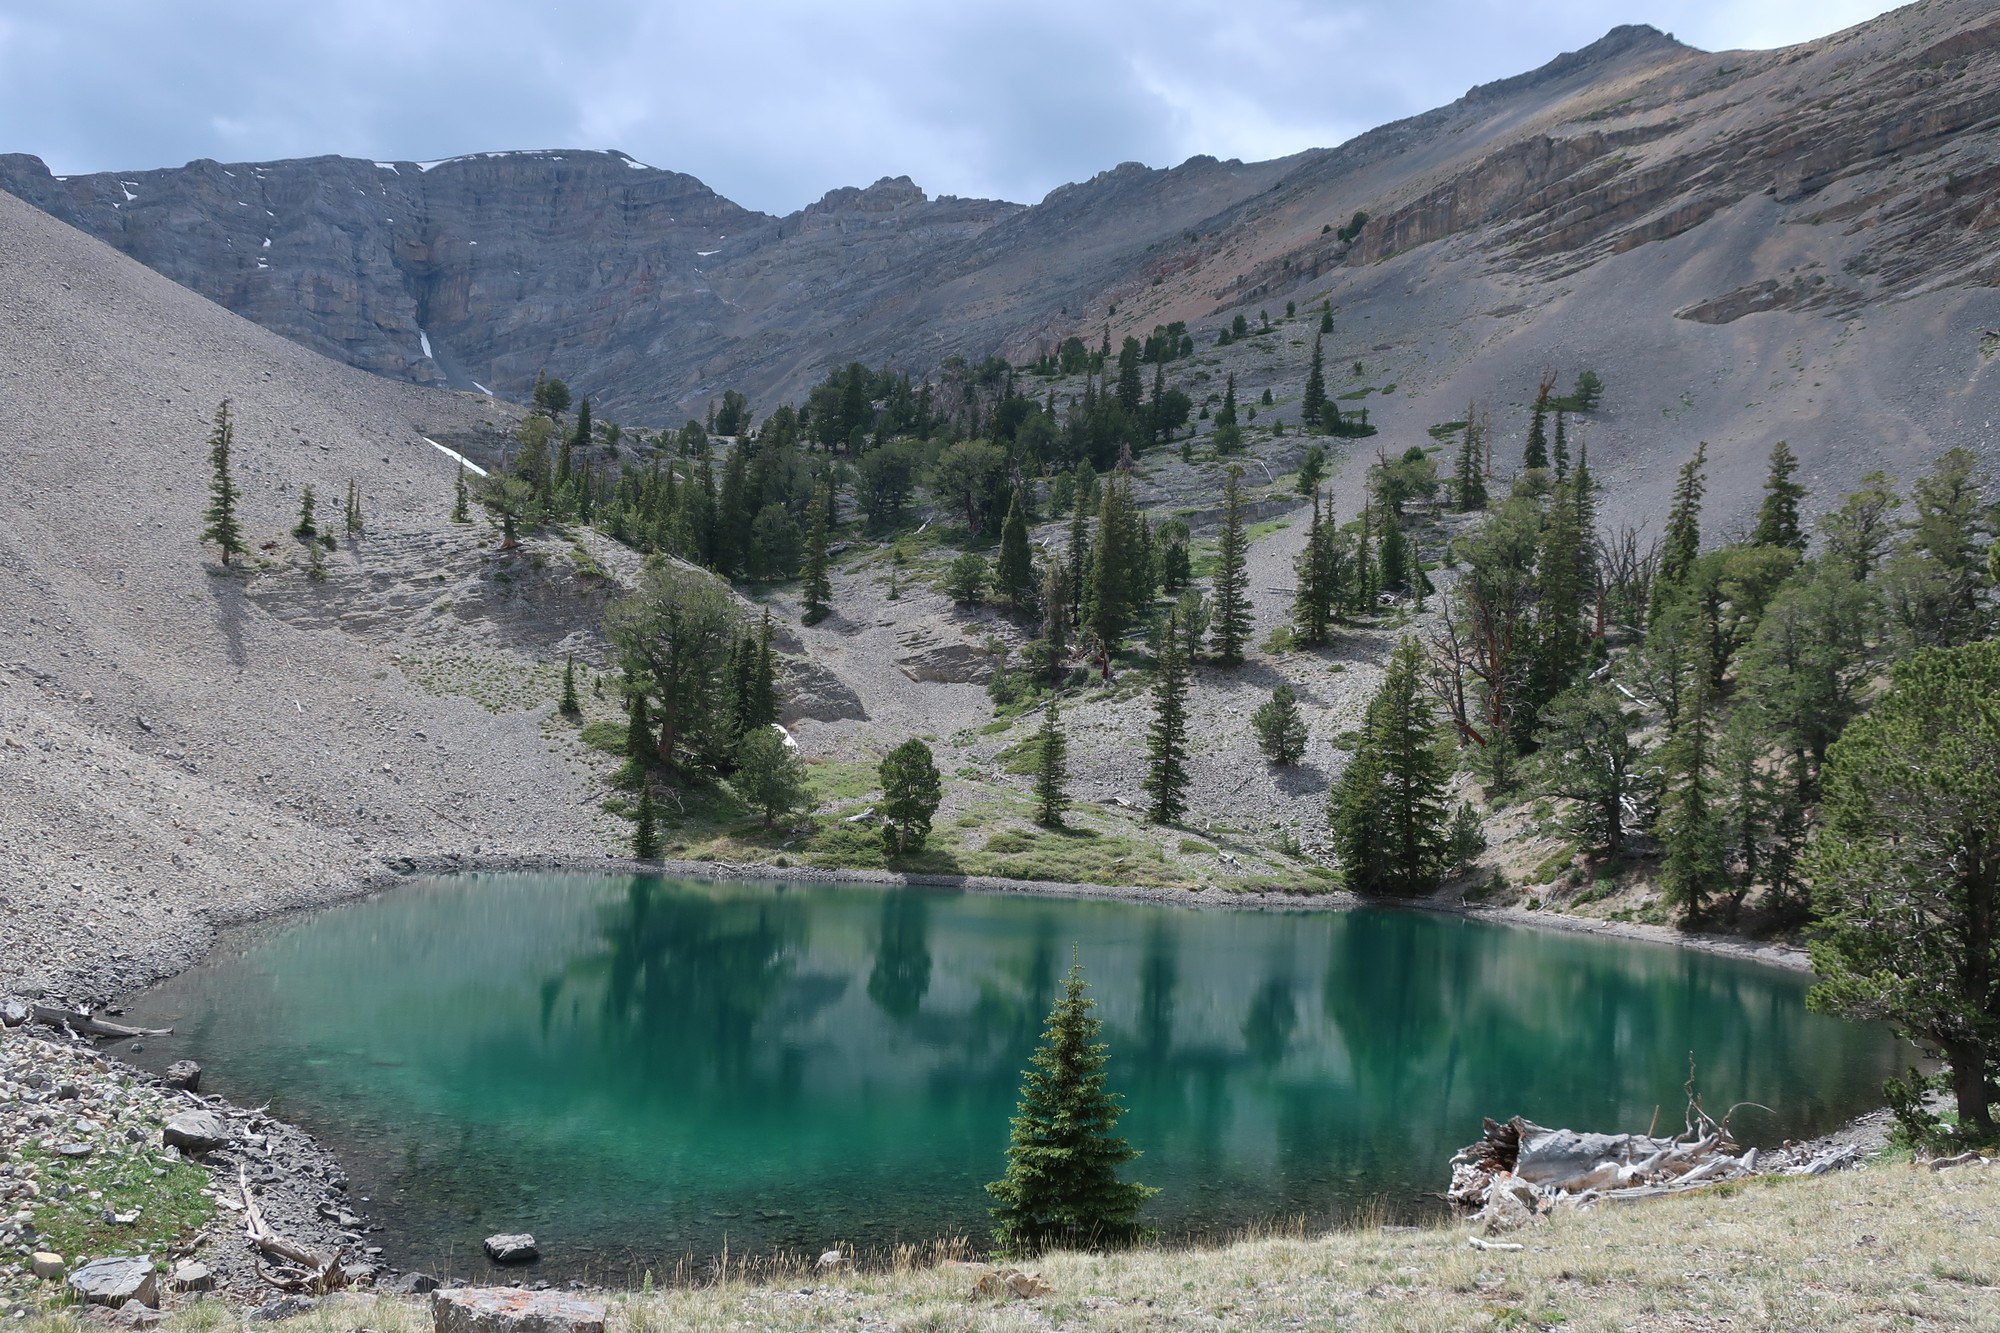
This lake is typical of the high country in the Lost River Range. Sparse forest, beautiful blue water, and lots of rock. Photo: Mark Wetherington
Less than two miles into our hike, we’d missed a split in the trail and allowed ourselves to understandably, but erroneously, follow a blaze along an older trail that overlapped with a game trail and led us about a half-mile off course. Thanks to Jim’s astute navigational skills – and his ability to convince me that my interpretation of where we needed to go was incorrect – we soon found ourselves back on track and headed in the right direction. As we debated which way to ascend to the saddle, I was able to regain some of my confidence by identifying the correct landmark to aim for after Jim suggested a slight deviation from the main route. Although we were only about 5% into our route, we’d already made two minor navigational blunders on one of the more straightforward sections of the trail.
Slightly humbled, we had a refreshing break in the saddle with terrific views of the Lemhi Mountains to the east and the Lost River Range around us. We reviewed the guidebook description, looked over our maps, and then headed downhill and wound our way toward a crossing of Big Creek, where we would filter water and then head to our first night’s camp.
Everything went smooth on the short hike to Big Creek, but when we arrived we realized we would not be filtering water since there was none available.
Despite it being early in the season, and the stream being referenced as a reliable water source, it was completely dry. On the bright side, we still had some water in our bottles and it was only another mile and a half or so to where we planned to camp. On the more dim side, that mile climbed a total of 1000 feet and was nearly entirely off-trail. Being both our preferred plan and the only reasonable option, we started the steep climb to the lake. On the way, we were able to see the pass we would ascend the next day as we continued our route. While beautiful in the austere way that defines much of the Lost River Range, it looked a bit more ominous than either of us would’ve liked.
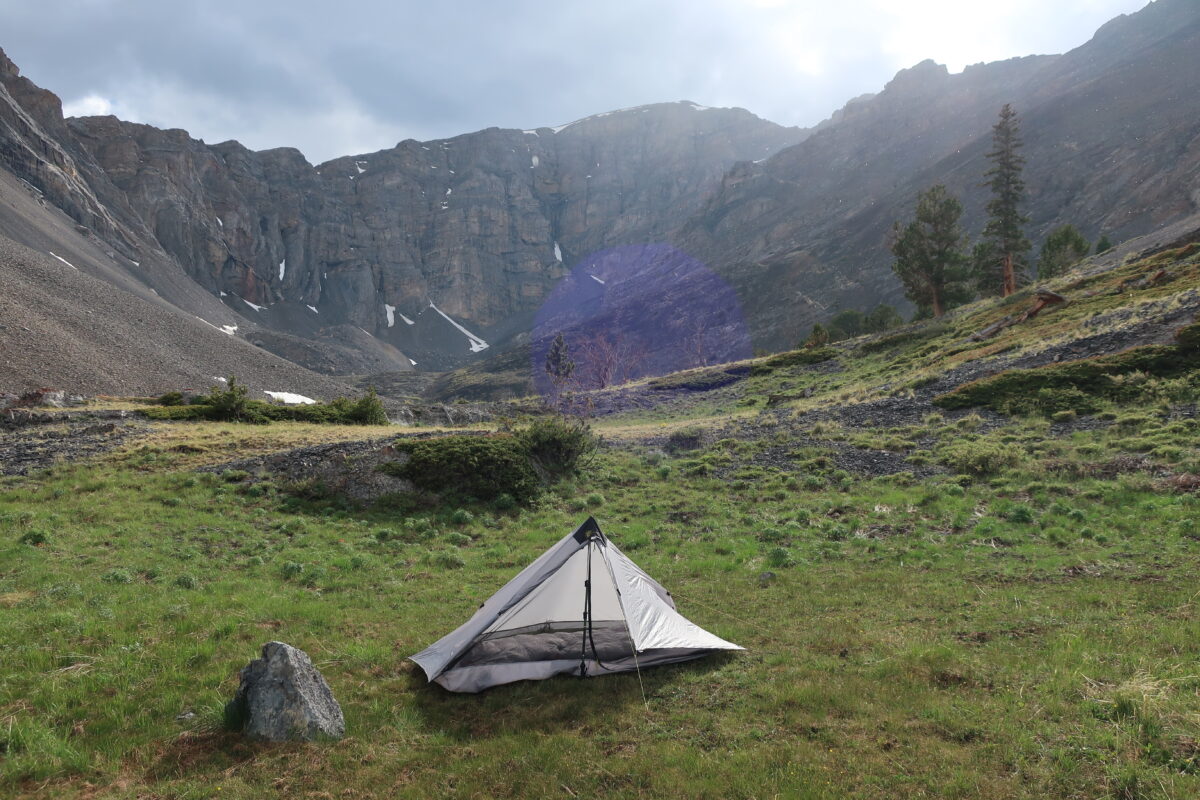
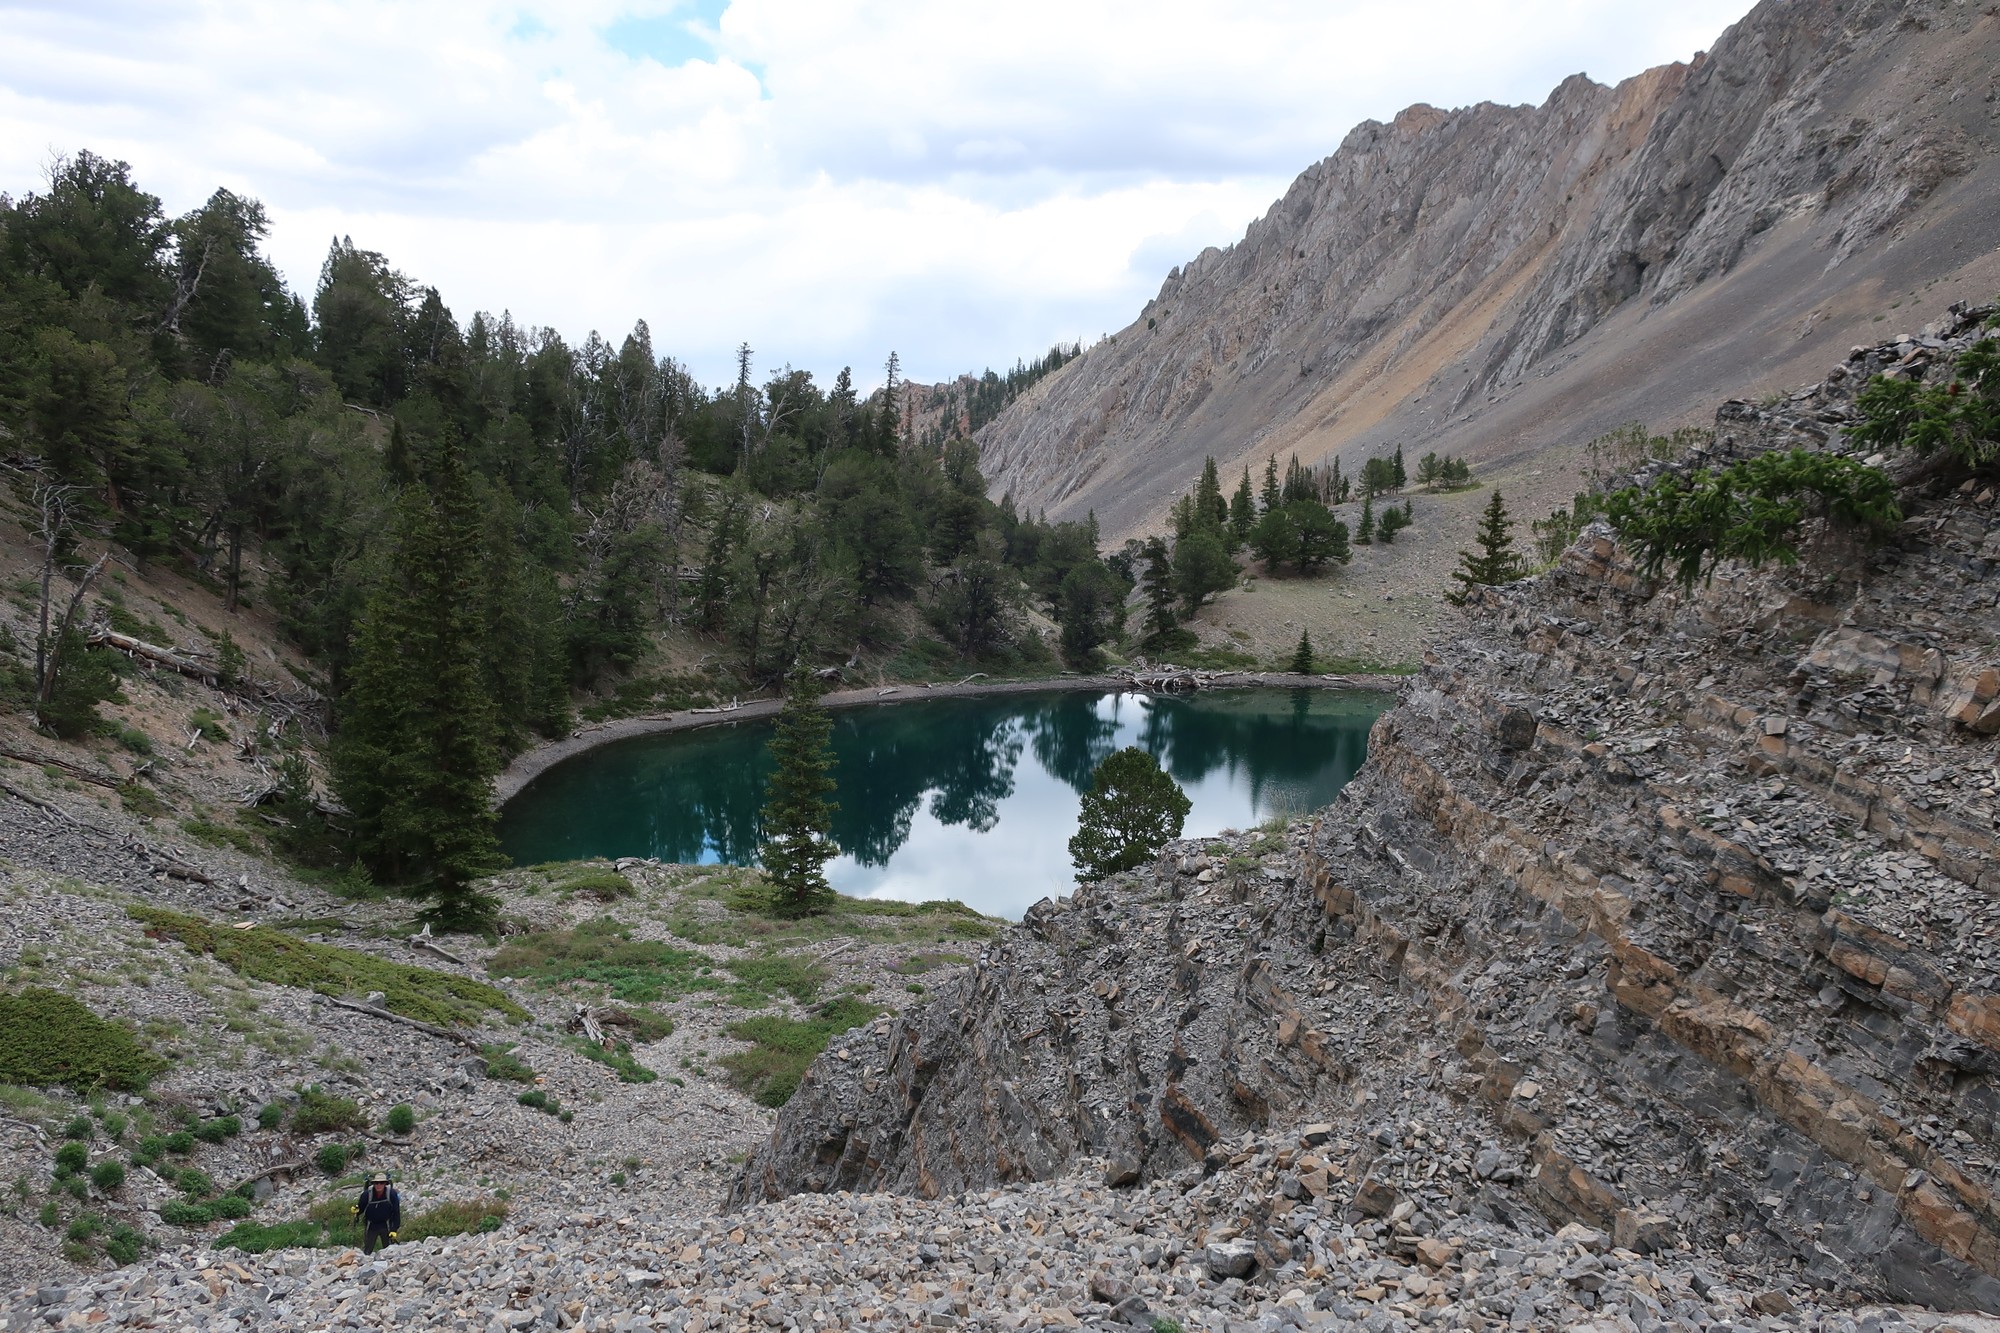
Looking back on the lake from the basin where we would camp. There weren’t any suitable campsites at the lake, but the fish weren’t biting (if there were even any in the lake) so it wasn’t a huge sacrifice to not camp there. Photo: Mark Wetherington
After reaching the striking cerulean waters of a small unnamed lake at the head of Big Creek, we were finally able to relax. We had water, we were only about 500 vertical feet from the basin we were planning to camp in, and we were surrounded by some absolutely sublime scenery. Like pretty much any other information about the Lost Rivers – from roads, to trails, to campgrounds – there wasn’t a whole lot of conclusive reports about the fishing prospects in the few mountain lakes scattered throughout the higher parts of the range. Since it seemed like at least two of the lakes we’d pass would contain fish, I thought it would be worth it to bring my Tenkara fishing gear since it only added a few ounces to my pack. I’d found records online of the lake being stocked in the distant past, but I was unable to get anything to rise to the various flies I tossed onto the water before we headed to the basin above the lake to set up camp.
A steady drizzle developed as we ascended and we took shelter under a stately whitebark pine for the half-hour it lingered. Once the skies cleared up, we strolled through the meadow and scouted out our campsites. There was an abundance of flat ground and there was really no bad place to camp, just sites with different perspectives on the same outstanding landscape, so we each picked the choicest spots we could find and pitched our tents quickly in case the rain returned.
A stunning campsite in a basin above an unnamed lake. This was supposed to be the first of four camps on the trip, but turned out to be our only backcountry camp. Photo: Mark Wetherington
When we regrouped for dinner, each of us feeling surprisingly worn down after having only hiked no more than 7 miles, Jim opened the conversation with an amusing observation.
“When I was sitting at home back in February with a glass of wine and reading the description that described this hike as ‘challenging’, I remember thinking ‘Doug doesn’t know who I am,'” Jim said. He then acknowledged that Doug’s description was indeed eerily accurate. I also admitted that I was a bit surprised by the difficulty of the route, both in regard to navigation and the terrain itself. It wasn’t a route that allowed for one to easily drift into a state of flow or go on auto-pilot. After we’d finished dinner the rain picked back up and we headed to our separate shelters for some much-needed rest; I was almost as tired physically and mentally at that point as I had been on any previous backpacking trip.
Outmatched
The next morning dawned bright and sunny, with just a slight breeze pulsing through the basin that made the warmth of a cup of coffee a more distinct pleasure than usual. Sipping it in such a spectacular location and trying to contemplate how various fossils embedded in the rocks had ended up at almost 10,000 feet above sea level made it a particularly memorable morning. As we began to stride out of the basin and backtrack to the main part of the route, Jim broke the news that he would not be continuing on for the remaining 34 miles. Physically, he just felt outmatched for the terrain that we had come through and that lay ahead. We had several trailless passes to navigate at nearly 10,000 feet, which had seemed intimidating but doable previously, and now just sounded like a recipe for overdosing on Type 2 Fun.
Hiking towards the saddle on the route back to the trailhead. For reference, we are “on trail” here despite there being nothing resembling a distinct path from the meadow at the base of the slope to the saddle at the top. Photo: Mark Wetherington
Jim was happy to hand over the shared gear (water filter, SPOT, bourbon) since he’d head back to the trailhead and his truck and I could keep hiking to my car. This was a trip I was enthralled with completing, the best scenery was yet to come, and the shuttle logistics were taken care of, but for some reason, I just wasn’t excited about hiking solo for the next four days. This was rather out of character for me, as I am comfortable hiking solo and love the time spent in solitude in beautiful places. And in a trip in Arizona’s Superstition Wilderness where a partner bailed unexpectedly and I was solo in an unfamiliar landscape, I was happy to continue alone and it turned out to be one of my most memorable trips. But I was still a bit shaken up by the difficulty of the route and especially the navigational challenges. And to be quite honest, the range itself just felt more hostile than I’d expected. The sense of remoteness was palpable and the lack of predictable water nagged at me as I contemplated pushing onward. Reluctantly, but yielding to my inner sense of responsibility and intuition, I joined Jim as we headed back to the trailhead.
We split a consolatory, rather than a celebratory, beer and then made our way back to my car, where we split up and headed our separate ways. We made plans to meet up at an alpine lake in the Bitterroots in a few days to try and re-establish ourselves as successful backpackers. I had four hours of driving to mull over what bailing on the trip meant and took the opportunity to break the travel up with an hourlong soak in a roadside hot spring next to the Salmon River. This was the only trip I could recall actually ending prematurely and not just making some alterations to the route. I’d never hiked off a trail with more than a days worth of leftover food – on this trip, I hiked out with four days worth of food in my pack.
That food sat heavily in my pack as I hiked out and my thoughts sat heavily with me as I reflected upon whether I’d made the right call. Although I backpack solo out of necessity most often, I also truly cherish the time I spend by myself on backpacking trips. But for some reason, things just didn’t feel right this time around. I’m familiar with the notion that “the mountains will always be there”, but mostly to justify postponing trips rather than ending them early as a means of risk management. And continuing solo in the Lost River Range certainly could’ve been risky. Getting turned around up there, or injured, or both, would’ve turned into an epic of, well, epic proportions. I have no doubt that I made the right decision to hike out with Jim, but I also have no doubt that I’ll return to the Lost River Range for more backpacking. And I’ll be better prepared this time around.
A Lesson Learned…Maybe?
Although I exercised what I think most would view as sound judgment by not continuing solo, just a few days later – on a trip in the Bitterroots where I met back up with Jim – I would exercise rather questionable judgment by hiking to a difficult-to-reach lake from my basecamp. It seemed like whatever hesitation I had about hiking cross-country in an unfamiliar mountain range, I tossed it out the window when I returned to more familiar terrain.
Check out more Places for tales of human-powered adventure from all over the globe.
Have you bailed on a trip recently? Share your story in the comments.
DISCLOSURE (Updated April 9, 2024)
Backpacking Light does not accept compensation or donated/discounted products in exchange for product mentions or placements in editorial coverage.
Some (but not all) of the links in this review may be affiliate links. If you click on one of these links and visit one of our affiliate partners (usually a retailer site), and subsequently place an order with that retailer, we receive a commission on your entire order, which varies between 3% and 15% of the purchase price. Affiliate commissions represent less than 15% of Backpacking Light's gross revenue. More than 70% of our revenue comes from Membership Fees. So if you'd really like to support our work, don't buy gear you don't need - support our consumer advocacy work and become a Member instead.
Learn more about affiliate commissions, influencer marketing, and our consumer advocacy work by reading our article Stop wasting money on gear.
Some things actually suck. We can still learn from them.
The first core question I want to ask in this essay is: what constitutes a backpacking trip failure? I can think of several examples but I have reservations about identifying most of them as outright failures, prompting the second core question of this essay: are backpacking trip failures really failures?
I also feel reservations about painting everything with too zen a brush; some things actually do suck. We can learn from these things, but to deny their terribleness would probably be a mistake. I will look at these potential backpacking trip failures and then discuss whether or not they are failures and what has at times allowed me to view them not only as not failures, but actually as successes.
Injury Cuts Trip Short
Poorly Planned Trip Results in Long Term Injury
Unmet Expectations
Gear-Related Failure
Failure from Not Planning Well Enough
Adapting Correctly to Any Circumstances
Injury Cuts Trip Short
Most of my backpacking injuries have been minor: scrapes and bruises or a strained IT band that I just tried to ignore. My poor planning has caused trip-ending injuries to others, though. And for this, Michelle, I am eternally sorry.
Michelle probably cursing me inside for planning such an absurd trip.
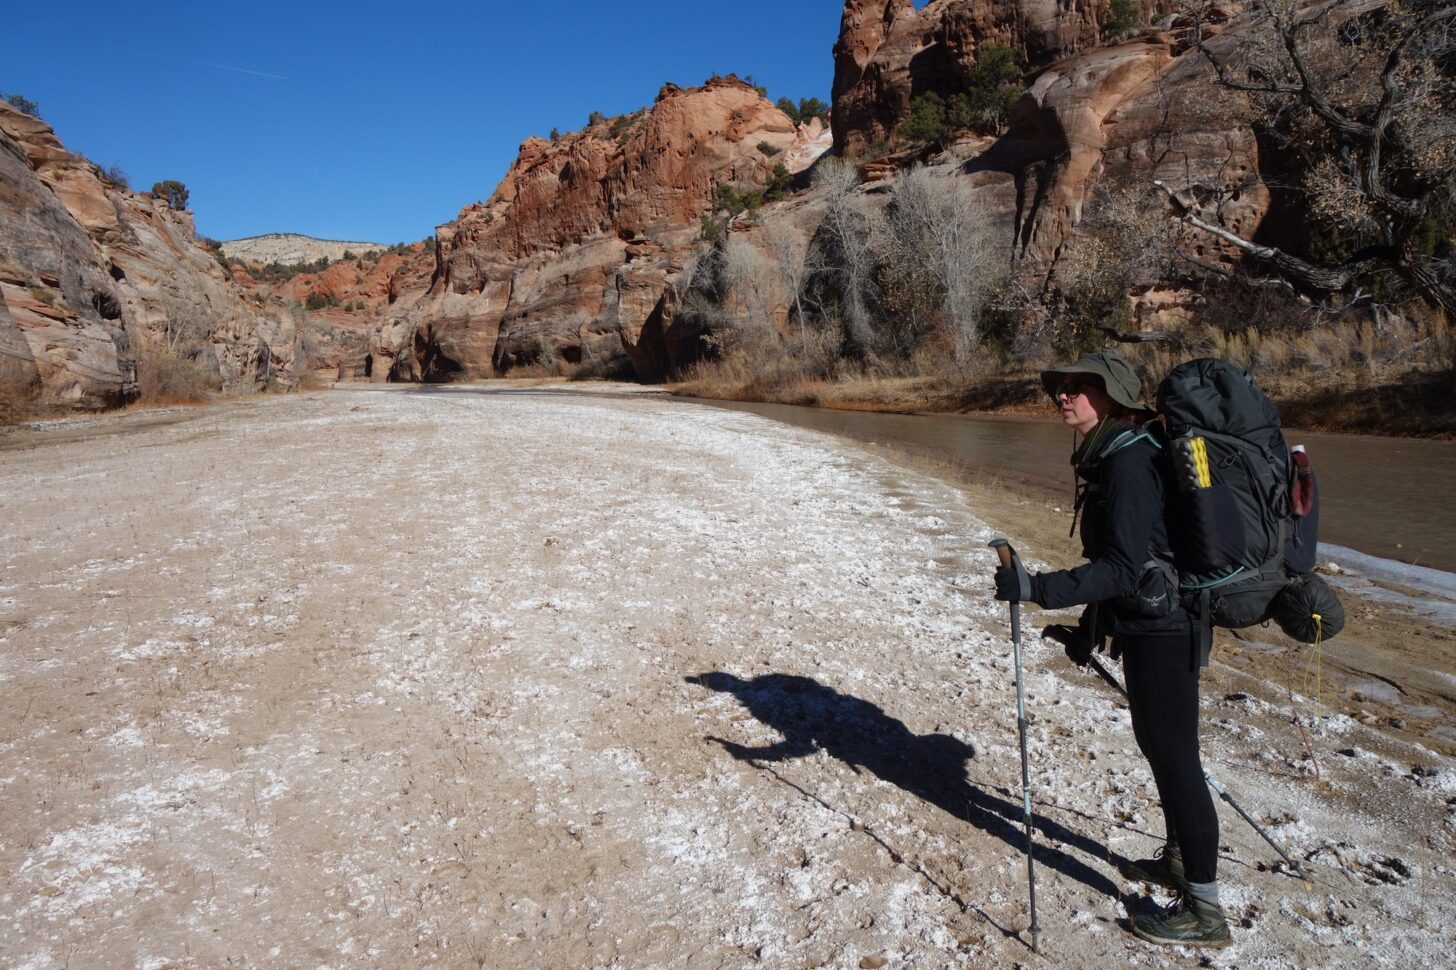
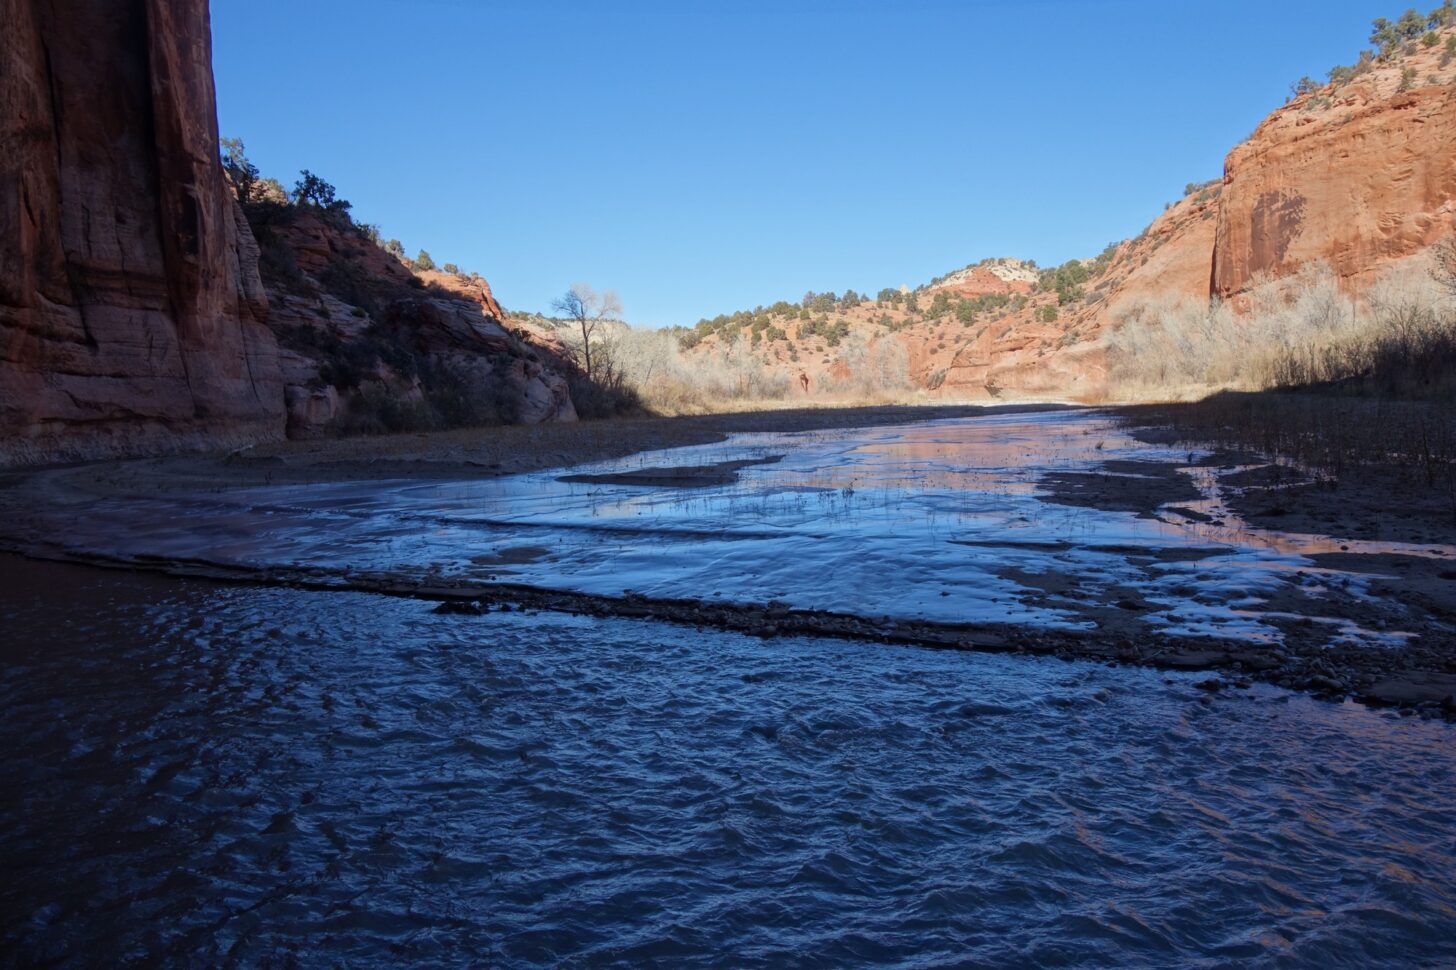
I thought it might be a good idea to hike along the upper Paria River in December because the weather looked decent (60 F° days and 10° degree nights). I didn’t, however, foresee the challenges posed by the freezing and thawing river. I assumed the river would be so low that we could step over it, or frozen enough that we could walk across it, but neither of these things turned out to be true. The river was very frozen indeed, but every morning as the sun hit a section of it, that section began to thaw and release a minor flash flood of 7-11 Slurpee consistency. This meant that while some shadowed sections were completely frozen and other sections were low enough to step over, other sections were raging ice-flows, and we had to walk through them.
I didn’t know that this particular desert river worked this way, and backpacking through it was both not the best way to find out, and also probably the only way to find out.
It was worse than it looks, I promise.
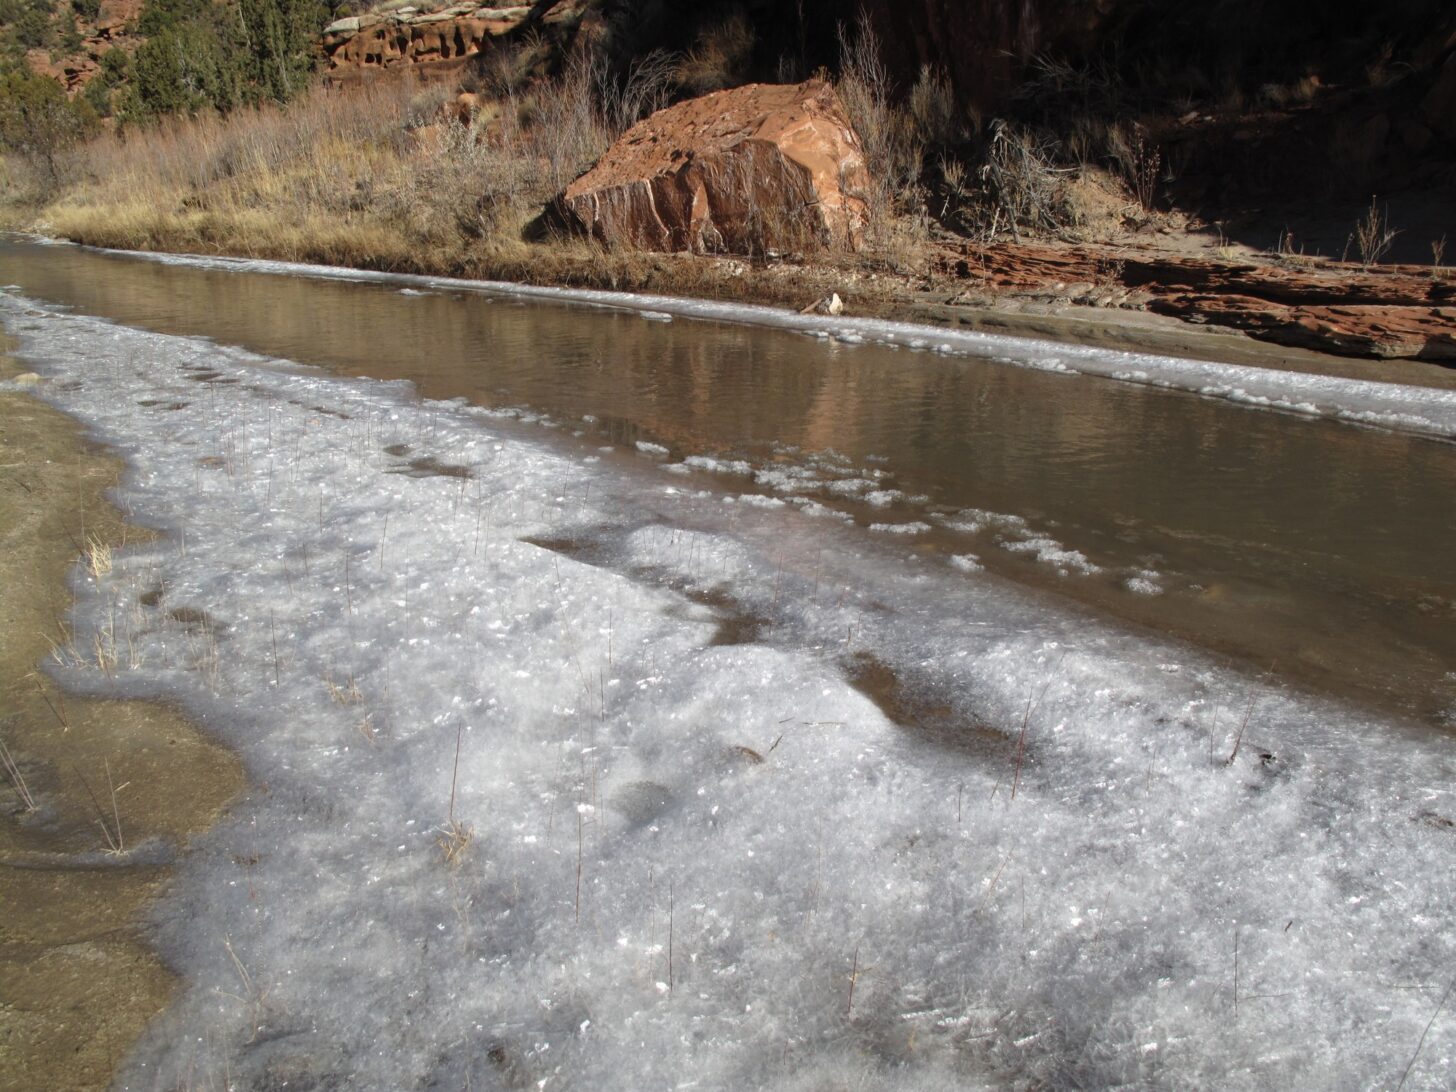
We crossed the river countless times. The feeling that our feet were hunks of cold rubber glued to our ankles never abated all day long. The second day was even worse. We crossed sections of the river that had frozen in thin sheets that reminded me of croissant crust. Our feet punched through these layered crusts descending several feet with each step into the cold, wet mud below. After about 10 miles of this torture, Michelle said her feet were beginning to hurt. We exited the river corridor, road-walked through piñon and juniper woodlands, and then failed to find the route into the next canyon. Admitting defeat, we bailed to the main road and hitchhiked to a state park so we could arrange a ride back to our car at the trailhead.
On the one hand, not finding this route into the next canyon was a failure because we needed to find it to close the loop, but on the other hand, it ensured that we would not be walking anymore, something Michelle’s feet were very happy about. This brings us to the next type of trip failure: Poorly planned trip results in long-term injury.
Poorly Planned Trip Results in Long-term Injury
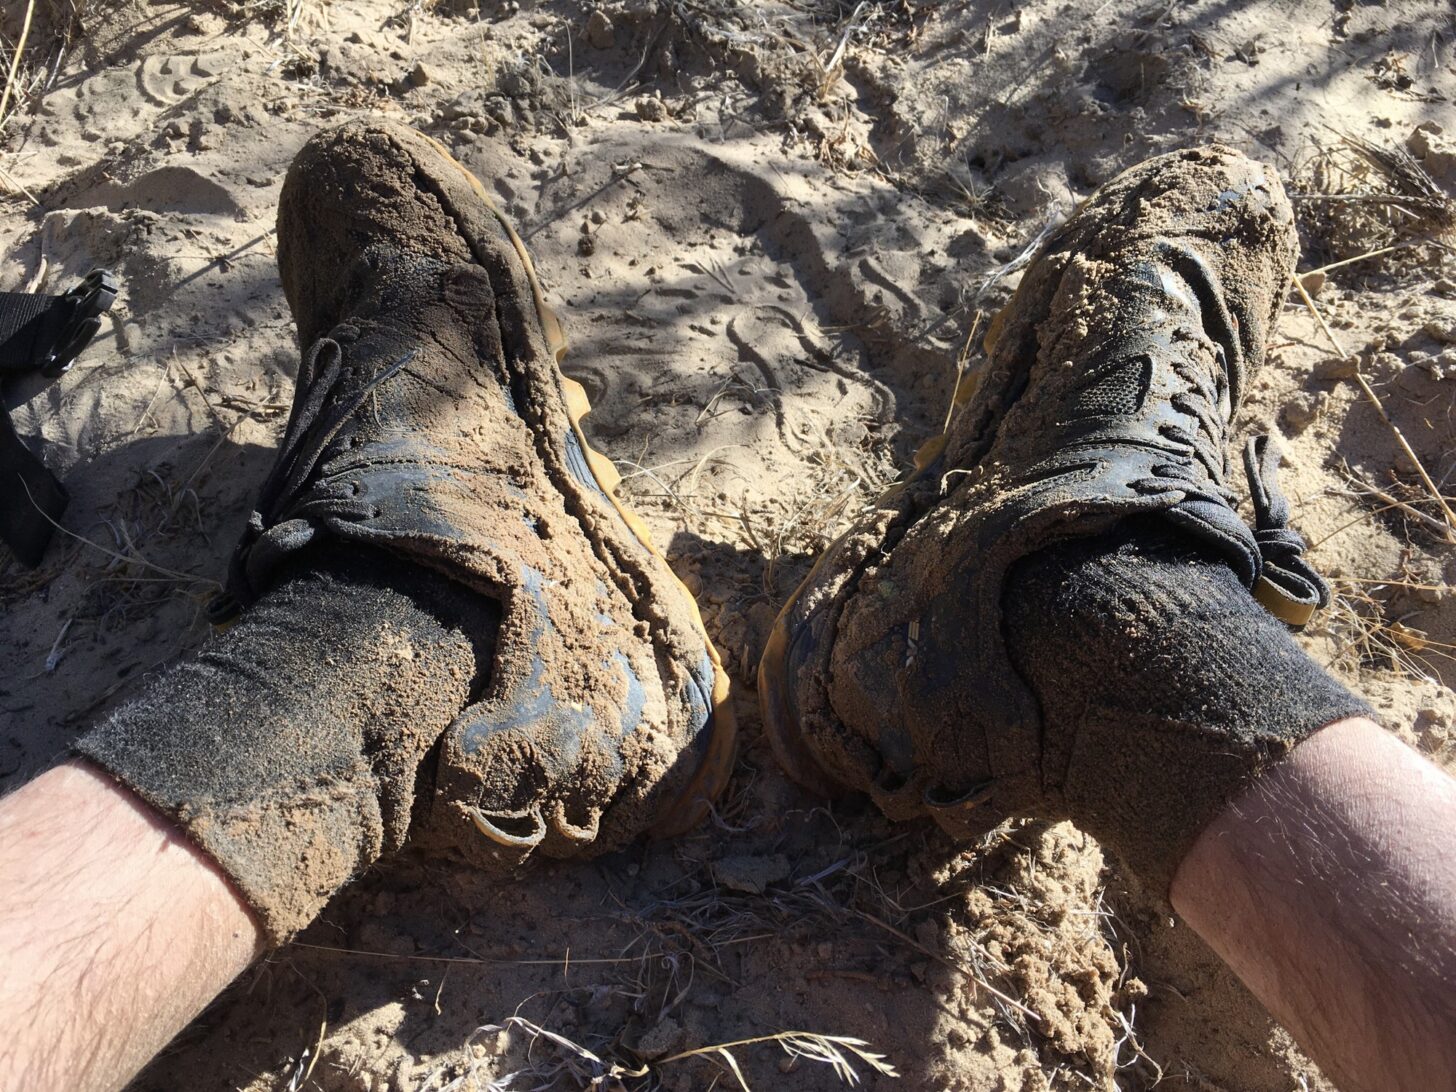
Michelle developed peroneal tendonitis from carrying a heavy load over many miles on frozen feet. It took nearly two months for her feet to heal. I injured my feet too. When we returned home, I took a few days off of running, opting instead for yoga. When I folded towards the ground, placed my palms on the floor, stepped to the back of the mat, and then pressed into downward-facing dog I felt electricity zing from my heel to my calf. I had pulled my Achilles. The prolonged cold strained and weakened it, leaving it vulnerable to a dramatic movement such as down-dog. This injury put me out of commission for a month. I know this series of events sounds like a run of failures, but the truth is more nuanced.
My cold, wet, and ultimately injured feet. I wonder if waterproof socks would have helped.
So… Was This Trip a Success?
I could view the Paria river trip as a failure because we both got injured. I could also view it as a failure because we did not complete the loop that we set out to do. But if I classify the trip as a total failure I would be missing several important things. First, we observed the winter desert in a unique and intimate way which I recounted in my essay Frozen Tracks. Of course, it is true that we could have investigated this canyon in a safer way in April or October.
More relevant to this essay, I believe this harrowing ice-slog along the Paria River was actually a complete success because we adapted correctly to the circumstances at hand. As Michelle later reminded me, “Sticking with the original plan despite many issues for the sake of completing the mission would have been absolutely stupid.” I have to agree. Things could have been much worse for both our feet had we attempted to find a roundabout way to walk all the way back to the car (something we fleetingly considered). In this light, I consider this trip to be a total success. Odd how that works.
The frozen Paria River.
Unmet Expectations
A Trip Was Much Harder than Expected (Type II or III Fun)
Some people might consider harder-than-expected trips to be failures, and I understand that. But these trips sometimes fall into the success category for me. They almost have to because such a large percentage of my trips end up being harder than expected.
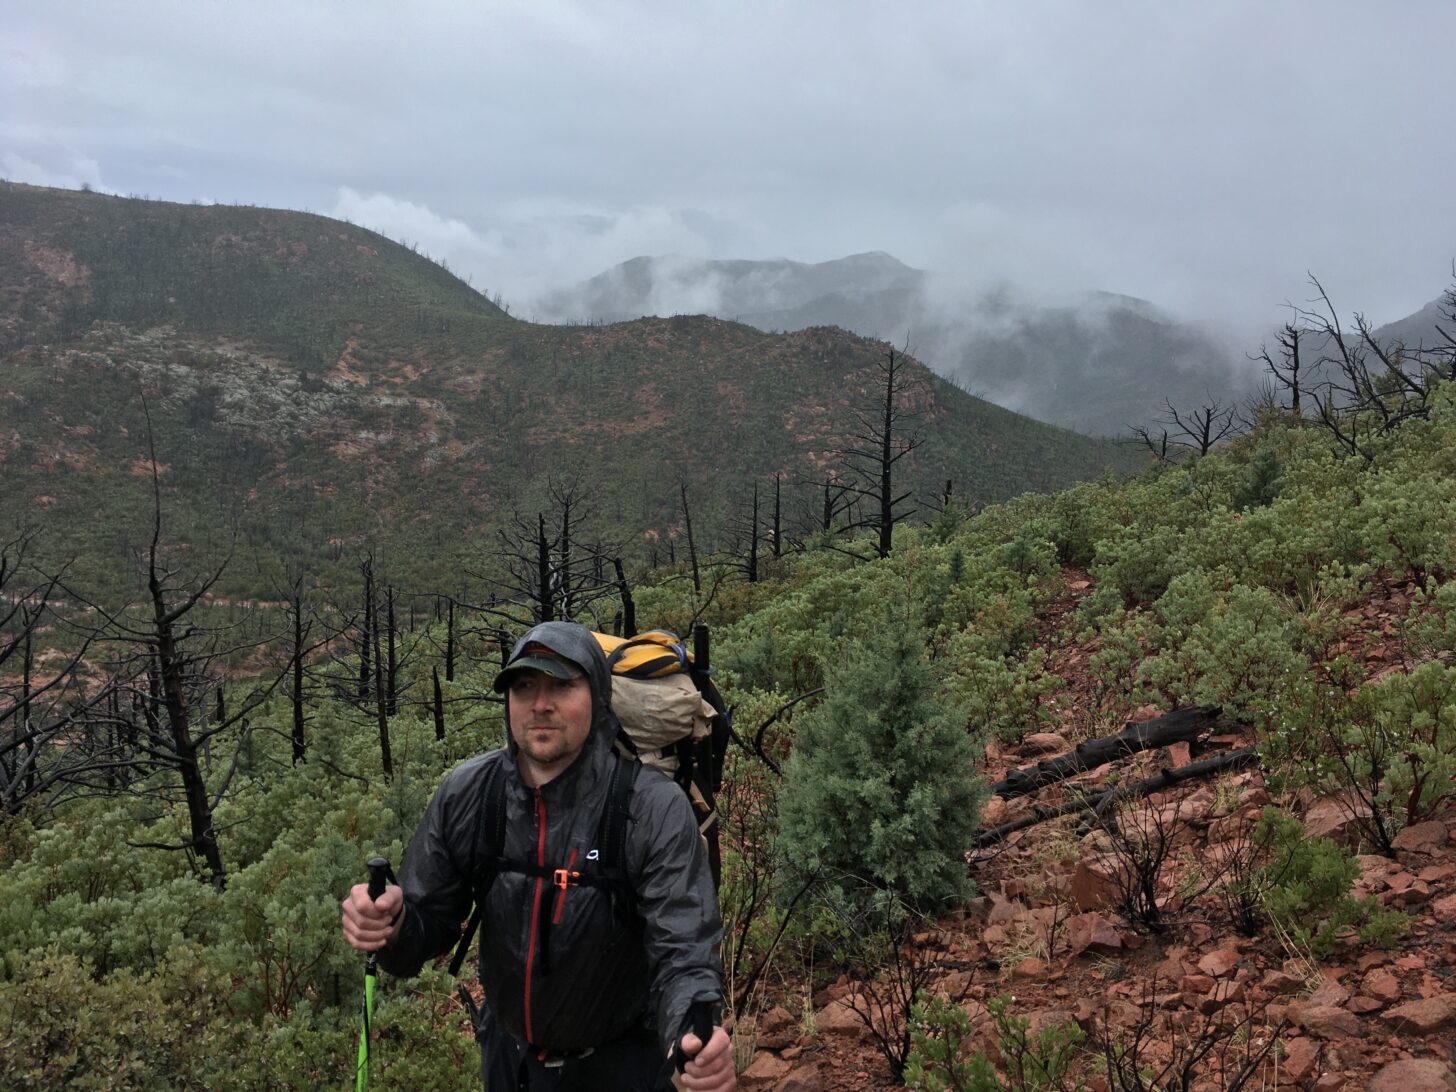
In March of 2020, my friend Jesse and I trudged through the Mazatzal Mountains of Central Arizona for several days in flash flood conditions. Our rain gear failed almost instantly; I often had to keep moving just to keep from becoming hypothermic. When we finally reached the trailhead our ride was not waiting for us because the road had flooded. Additionally, my truck was stranded out in the desert because unpassable rivers had risen all around it. This trip was characteristic of Type II fun, with moments of Type III sprinkled in. I wouldn’t choose any of these things again if I could, but at the same time, I’m glad I had the experience and enjoy telling the story. If, on the other hand, experiencing the uncomfortable and unexpected and then carrying the resulting story wasn’t my cup of tea, I might have viewed this trip as a failure.
Total bewilderment after bushwhacking all day while completely soaked.
Other Unmet Expectations
For most people, the windows of time in which a backpacking trip can take place are small and precious, resulting in the sometimes desperate hope that everything will go according to plan. Often we are disappointed.
We pick the wrong crew, for example; they are too ambitious or not skilled enough. Maybe our worldviews don’t align. Several times I have invited too many people on a trip which slows the overall pace of the trip because no one’s morning schedules match up.
There are also landscape expectations. In this era of unprecedented climatic change, landscapes are changing swiftly and dramatically, squashing backpacking expectations at every turn. Familiar springs dry up, green forests burn, and birds we listen for are eerily absent.
There are countless other examples of unmet backpacking expectations, some of which I hope to read in the comments below. On the one hand, I want to plan for every possible scenario in order to keep a trip out of the failure category, and on the other, I should know that I can’t plan for everything, and that knowledge could allow me to view unmet backpacking expectations as just the way things are.
Gear-related Failures
Gear can affect trips in a few ways, some of which result in outright trip failures, while other outcomes are more nuanced. A gear failure such as a popped pad or torn tent fly could end a trip. An uncomfortable backpack could make every step uncomfortable. The brain of the gearhead could remain fixated on the minutia of gear-tweaking instead of on the sandstone minarets, buttes, and domes silhouetted against the lilac dawn sky.
Gear Failure or User Error
Let’s start with complete gear failure. One of my most dangerous gear failures was my raingear failure in the Mazatzal Mountains. My 2.5-layer rainpants failed almost instantly and my 3-layer, highly breathable jacket failed within a couple of hours of heavy rain. Jesse’s 2.5-layer pants and jacket failed just as quickly. This put us in an extremely dangerous situation; we had nearly 25 miles to hike in nonstop rain and temperatures ranging between about 40 and 55 °F. The situation did not deteriorate, however, because we stayed moving in the rain and had dry sleeping clothes and sleeping bags to crawl into when we stopped. We hiked to the trailhead shivering and blue-lipped and (possibly misguidedly) swore off waterproof-breathable fabrics from then on out. Maybe this Type II fun trip wasn’t a failure, but it came close because of sub-par gear, user error, or outstanding conditions, it’s hard to say which.
Jesse was soaked and cold but somehow not too miserable to enjoy the beauty around him.
Poorly Performing Gear
For about three years I used a very uncomfortable backpack. It didn’t totally ruin any trips, but it stole my attention. When I should have been focused on the land around me I was thinking about how my neck hurt, how I couldn’t turn my head to the side. The pain left me one step removed from the experience of being in the wilderness, and then the problem-solving that ensued thereafter left me yet another step removed. Choosing gear that performs well for me is one way to simply enjoy a trip, remaining attentive to the landscape through which I walk.
Fixation on Gear
Fixating on the minutia of gear-tweaking is a potentially neverending process. I, for one, have created and solved gear-related problems simply to feel a sense of control when the rest of my life is crumbling around me. After doing this enough, it starts to enter addiction territory, and becomes a sort of crutch. And at that point, the habit is hard to kick, so when I’m backpacking and all is well in my home life, I’m still wondering if there’s something better out there or if I could shave 4 ounces from my shelter by cutting things off of it. Fixating on gear in this way may not turn a trip into a failure for some folks, but for me it does. If I cannot remain present while walking through the mountains, I’m doing something wrong.
Failure From Not Planning Well Enough
A few weeks back, I half-heartedly tried to go on a trip. I did not pack. Instead, I took the pile of backpacking gear that I had deposited on my living room floor after my previous trip and shoved it all into the back of my truck again without even sorting through it to see if everything was there. I bought food but I did not pack it. Instead, I just loaded a bunch of paper bags into the truck in hopes of piecing meals together at the trailhead. I finally started planning the route at about 1 AM the night before leaving. These things were signs that I did not really feel like going on a trip, and I probably shouldn’t have tried.
I drove the six hours to the trailhead anyway, and then just sat there staring at the pink sandstone. My life at home had been fundamentally defined by doing things, and I suddenly realized I didn’t want to do anything. I didn’t want to problem-solve or route-find. I didn’t want to have any goals. So I read for a while, went for a pretty goal-less eight-mile run, and drove home. It was a waste of gas, for sure, and arguably a waste of time too. I attempted to embark on a trip I didn’t want to do, and this has the appearance of being a failure to me. But is it?
Adapting Correctly to Any Circumstances
Backpacking is partly defined by expecting the unexpected and being prepared enough to adapt to changing scenarios. In most cases, adapting with humility will result in successes even if trips are cut short, routes are altered, or discomfort is tolerated for days on end. To revisit Michelle’s commentary on our painful Paria trip: “Sticking with the original plan despite many issues for the sake of completing the mission would have been absolutely stupid,” she said. In my opinion (and Michelle’s too), adapting correctly to the circumstances at hand will keep most backpacking trips out of the failure category, and firmly planted in the success category.
Got a backpacking failure (success)? Share it with us in the comments!
Explore all of Backpacking Light’s Culture articles
One of Ben’s trip failures revolved around cold and uncomfortable feet. Check out our Minimalist Footwear Trailhead for a curated list of Backpacking Light content that can help you mitigate those kinds of issues
DISCLOSURE (Updated April 9, 2024)
Backpacking Light does not accept compensation or donated/discounted products in exchange for product mentions or placements in editorial coverage.
Some (but not all) of the links in this review may be affiliate links. If you click on one of these links and visit one of our affiliate partners (usually a retailer site), and subsequently place an order with that retailer, we receive a commission on your entire order, which varies between 3% and 15% of the purchase price. Affiliate commissions represent less than 15% of Backpacking Light's gross revenue. More than 70% of our revenue comes from Membership Fees. So if you'd really like to support our work, don't buy gear you don't need - support our consumer advocacy work and become a Member instead.
Learn more about affiliate commissions, influencer marketing, and our consumer advocacy work by reading our article Stop wasting money on gear.
How bad does high-loft synthetic insulation (Climashield Apex and Primaloft Gold) degrade when subjected to repeated compression cycles? What’s the impact on backpacking gear and apparel?
Ursacks are lighter alternatives to bear canisters for food storage but require the right knots and tying locations to protect your food.
Introduction
Lighter than canisters and less prone to user error or landscape limitations than relying on a traditional food bag hang, Ursacks have become a popular way to keep food safe among lightweight backpackers. Although certainly not the only option for food storage in the backcountry, their relative ease of use and effectiveness against bears, rodents, and other wildlife make them one of the more appealing ones. Effective Ursack use, however, isn’t common knowledge among most backpackers, especially those who don’t read instructions. The purpose of this article is to help the reader learn how to use an Ursack properly.
Ursacks are approved as bear-resistant containers in many national parks. This allows backpackers to meet park requirements without having to use heavy and bulky bear canisters. In areas where there are minimal food storage regulations, but the landscape makes the traditional food bag hang a challenging proposition (deserts, areas above treeline, and subalpine areas with thick conifers that make finding a stout and extended limb difficult) an Ursack is often one of the best options.
I had hoped that with a more abundant layer of blubber around my midsection as I approached the beginning of middle age, maybe any bears that saw me waddling down the trail would feel required to secure their food, rather than the other way around. Unfortunately, a wildlife biologist friend of mine assured me that this was delusional so I found myself sticking to more traditional methods of protecting my food from bears.
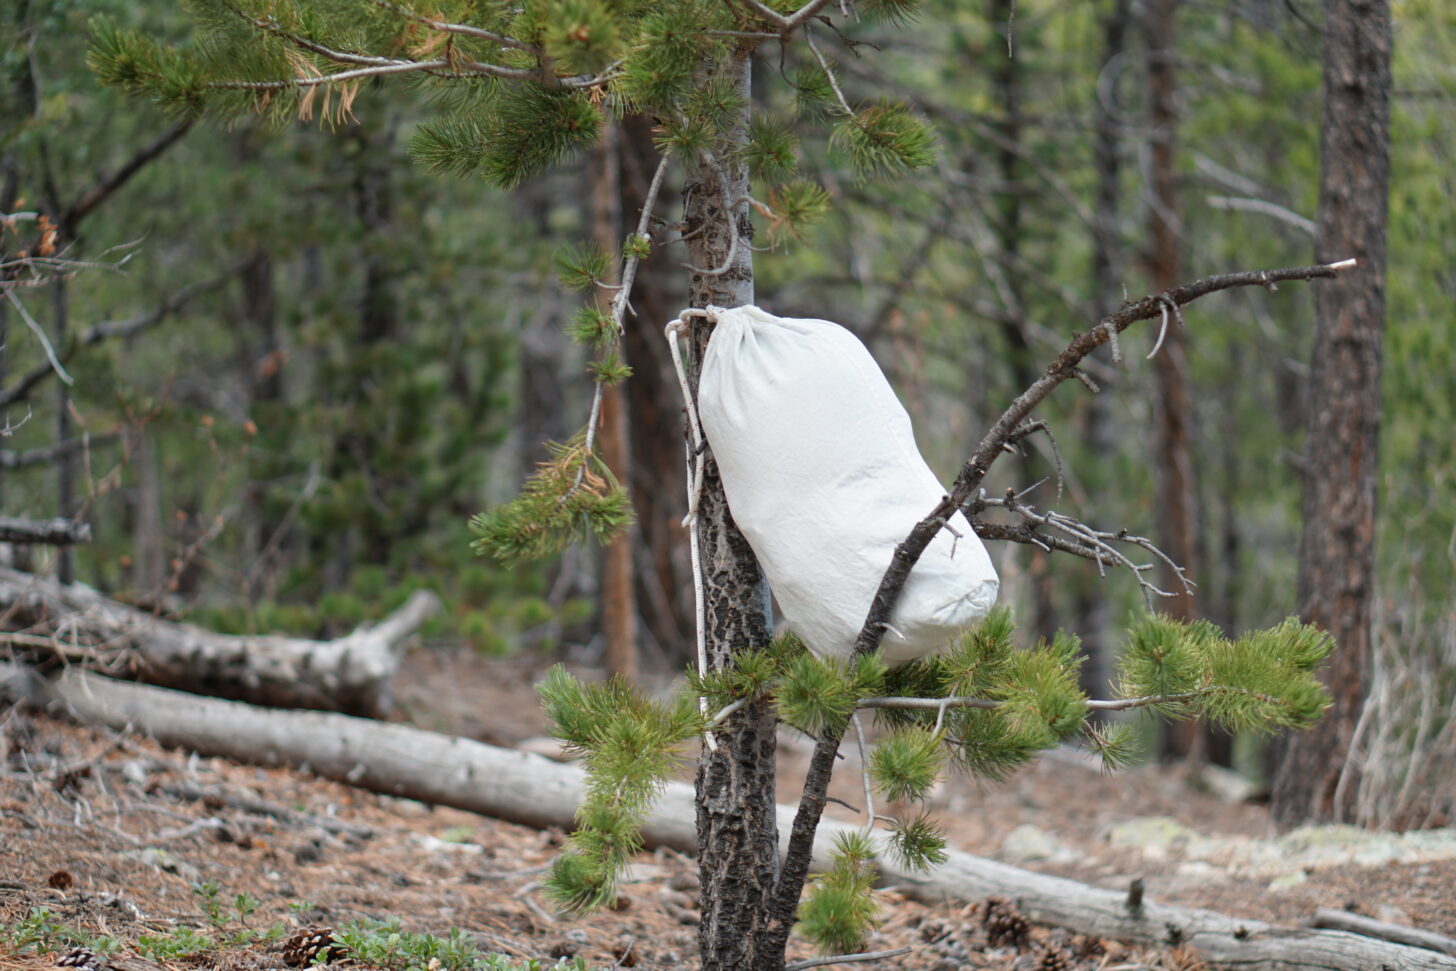
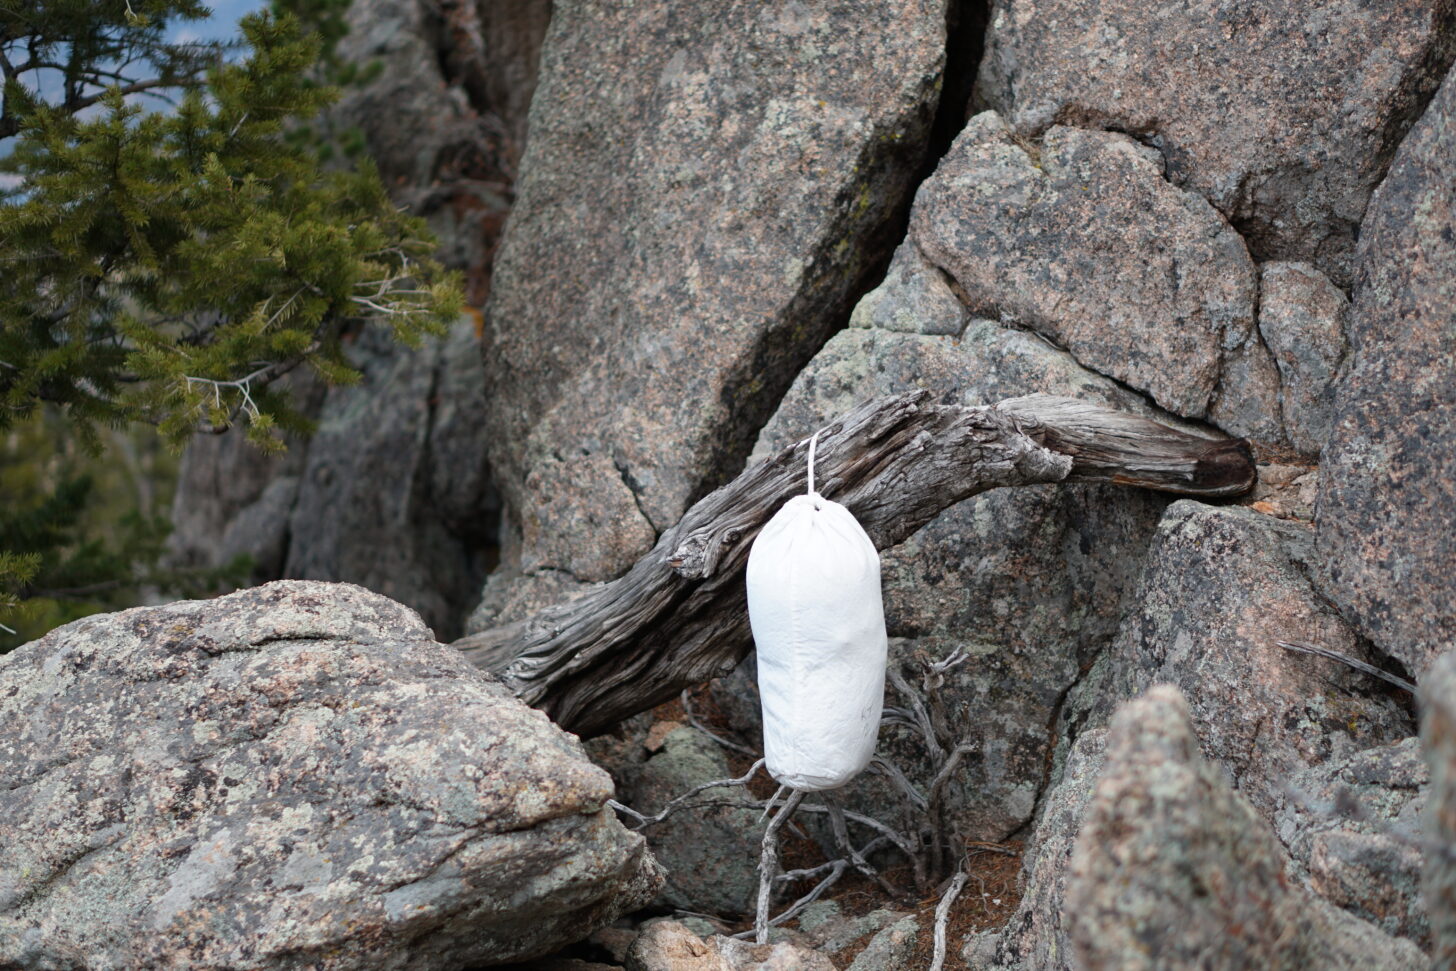
Ursack secured to an 8-inch diameter lodgepole pine in northern Colorado. Photo: Ryan Jordan.
Why Store Food in a Wildlife-Resistant Container
This article is focused on how to use an Ursack, but the why is of paramount importance. Properly storing food keeps wildlife safe, keeps other humans who camp in the same site after you’re gone safe, and can keep you from having to hike out on an empty stomach after your food gets acquired and eaten by wildlife. And wildlife aren’t picky – you won’t find that they simply high-graded your trail mix and picked out the M&Ms, or only went for the Banana Nut Bread Clif Bars. They will eat, or attempt to eat, as much as they can. Hard-sided canisters, Ursacks, or food storage lockers provided by land managers are the most effective options for protecting your food in the backcountry. Ursacks are lighter than bear canisters, which makes them a compelling option for backpackers. Making sure your food is stored securely isn’t exactly the most glamorous part of backpacking, but it is of utmost importance as the use of public lands increases.
A landscape where using an Ursack is an ideal food storage option. Near the whitebark-pine treeline of a mountainous alpine area in Wyoming, where limbs for hanging a bear bag are limited, but small-diameter trees are plentiful. Photo: Ryan Jordan.
Why You Should Learn to Use an Ursack Properly
As with many things in the lightweight backpacking realm, acquiring the appropriate gear is just one piece of the puzzle. Learning how to effectively use the gear – or skill acquisition if you want to use a spiffy-sounding name – is just as important. The snazziest Dyneema Composite Fabrics tarp won’t do you much good if you have poor site selection skills and end up pitching it on a windy spot that pools water right before a thunderstorm rolls through. Likewise, tying an Ursack to a scrawny tree using a jumble of random knots won’t allow it to function properly and protect your food if a hungry bear stumbles upon it.
Unlike climbing or mountaineering, where your life literally depends on tying a proper knot, you almost certainly won’t die if you mess up tying a knot on your Ursack. However, improperly tying a knot greatly increases the chances of a bear (or smaller critter) being able to access and eat your food. At this point, the animal may progress down the dark path of habituating its behavior with a predisposition to easily-accessible food provided by humans. That has unfortunate consequences for a bear especially, including but not limited to relocation or euthanization. And it increases the risk of harm to campers exposed to that bear before management measures are taken. There are consequences to yourself and others if improperly using an Ursack, so take the time to practice the basic knots and make sure you can properly use it before heading out to the backcountry. Or just use a canister if you find an Ursack to be too technically burdensome.
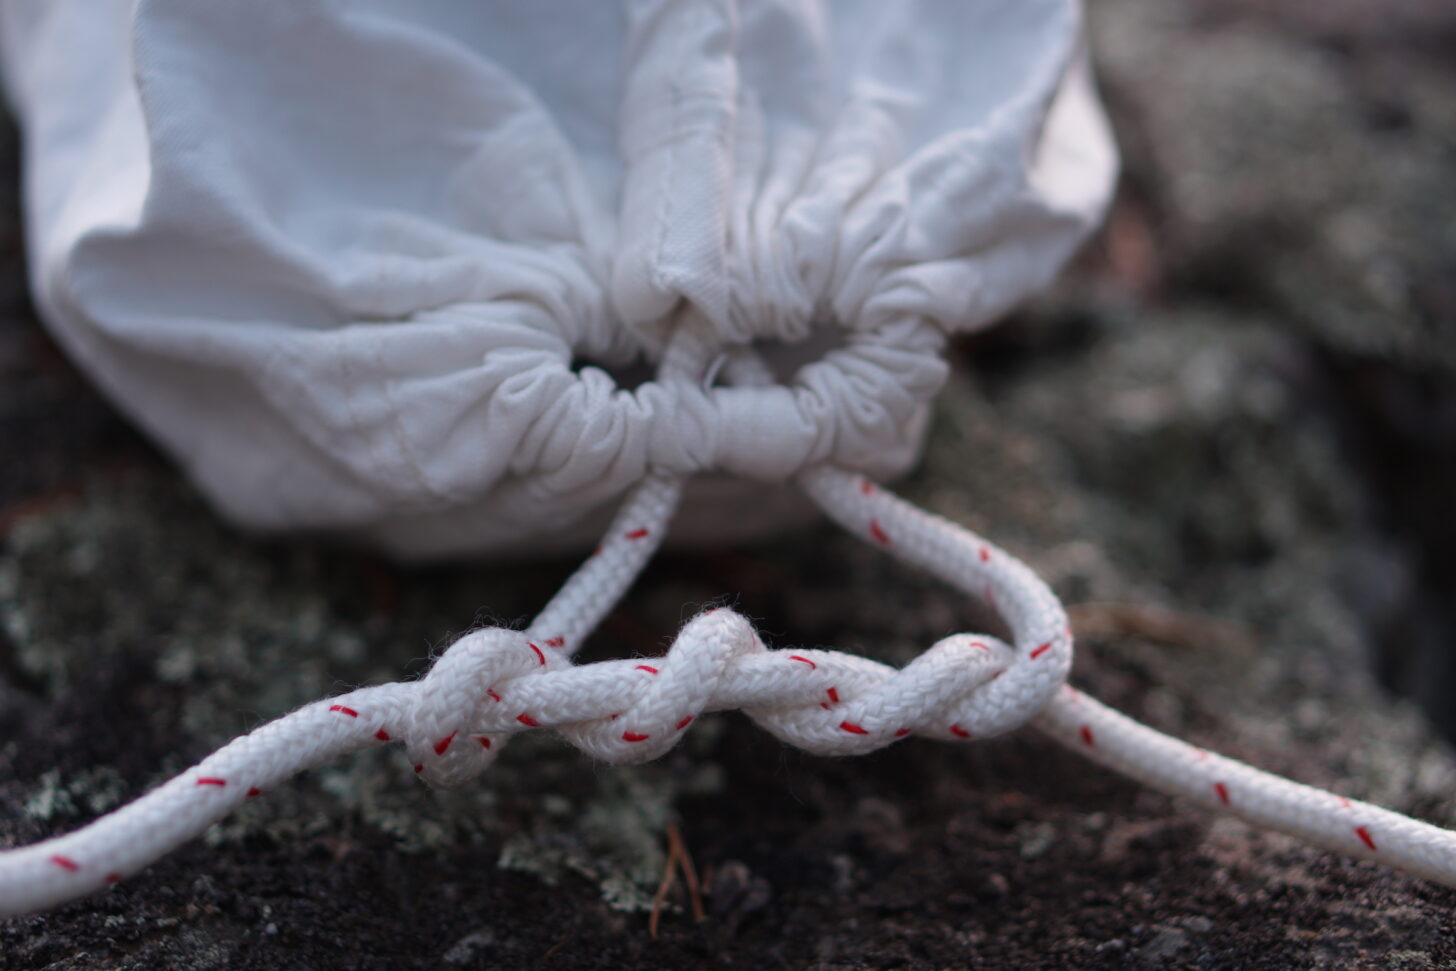
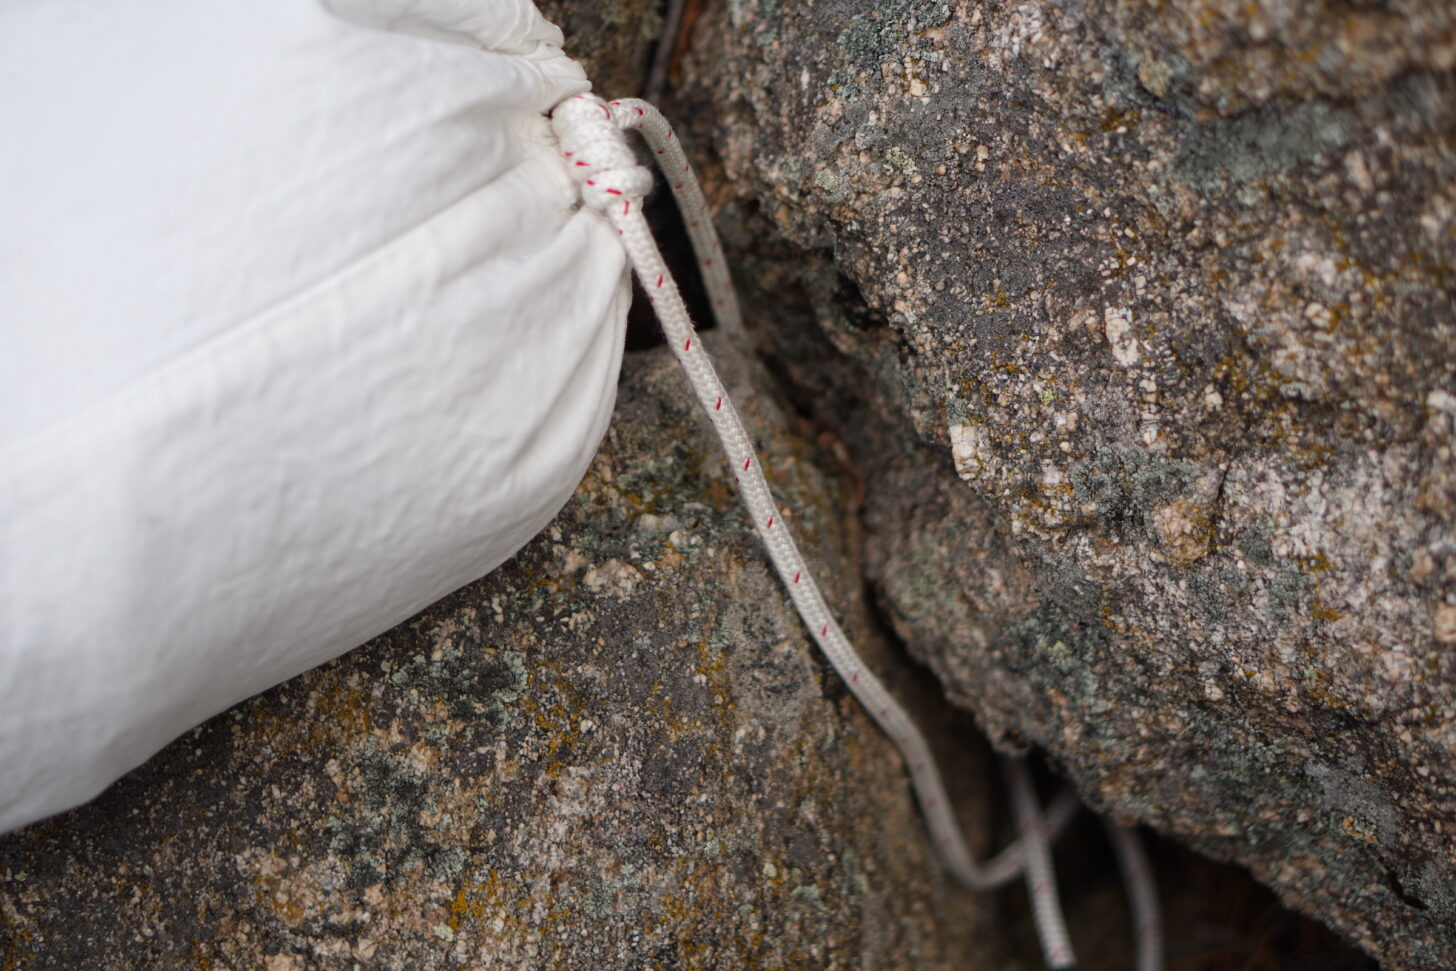
The Ursack drawcords exit their drawcord tunnel and then cross over each other in an “X” configuration before being threaded through the holes on the opposite side. Photo: Ryan Jordan.
Once your food has been stored inside the Ursack, you need to close the bag to prevent bears or other animals from getting inside, make sure to not be sloppy here as providing the space for a claw-hold can compromise the effectiveness of the bag.
Use as much strength as possible to ensure that the Ursack drawcord is securely tightened, so as not to leave a hole in the opening where a bear can insert a claw and further loosen the opening. Photo: Ryan Jordan.
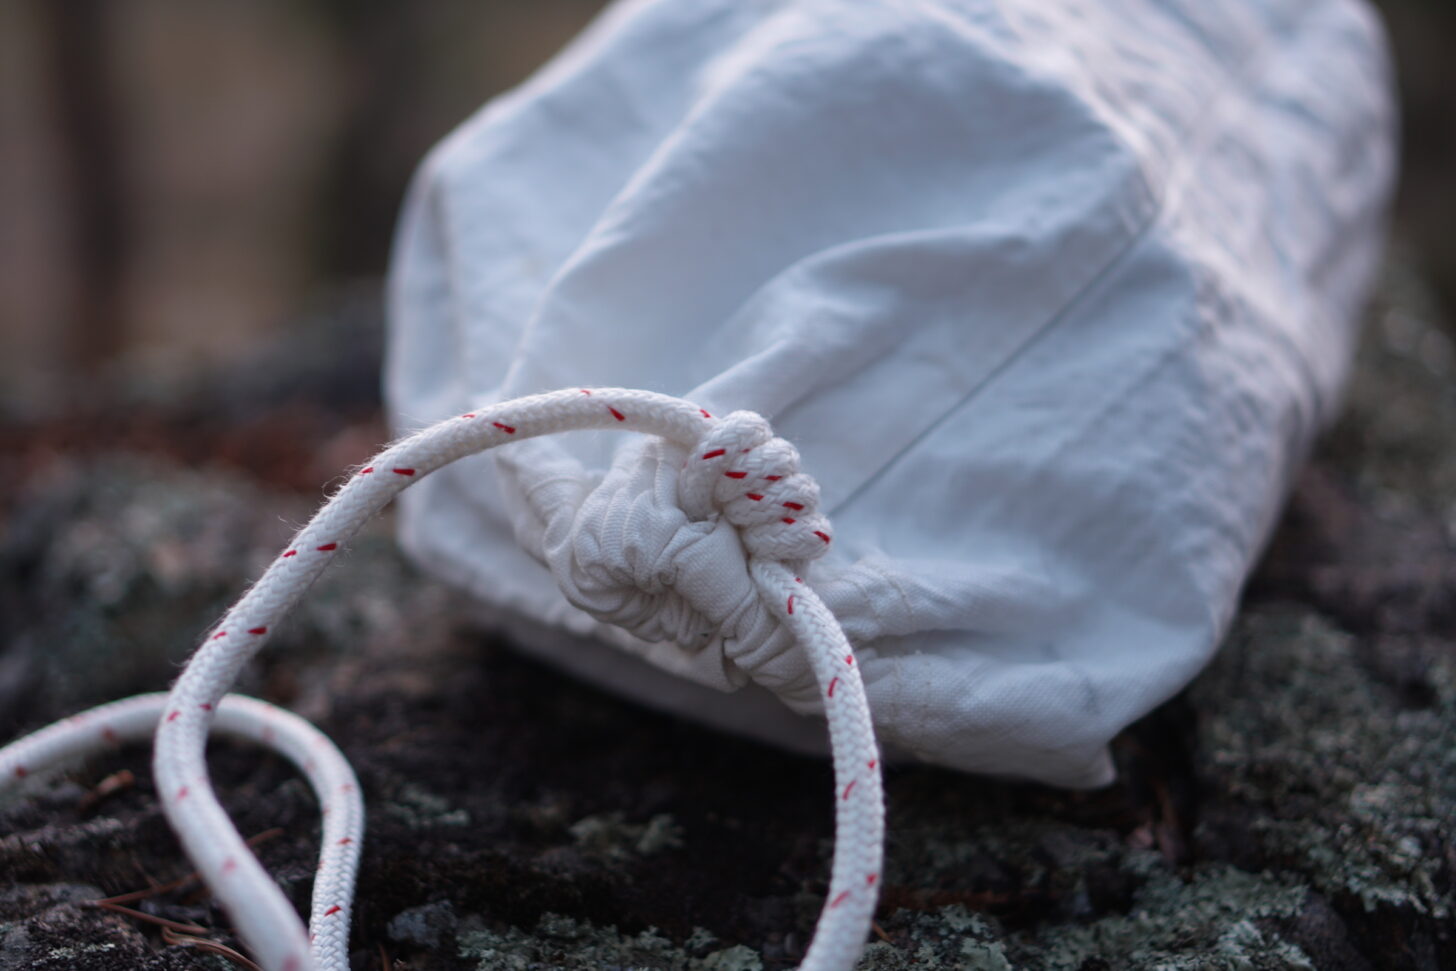
The double (or triple) overhand knot is recommended to secure the cinched opening of the Ursack. Photo: Ryan Jordan.The finished knot to secure the closure of the Ursack is neat – the bights shouldn’t cross over each other, and instead, lie next to each other. Photo: Ryan Jordan.
But first, make sure the strands of the rope in the drawstring cross and form an X. This video does a great job of showing the steps to do this. Practicing the knots at home a few times before going out for the first time with your Ursack is a good use of time. Don’t be lazy and rely on the facetious aphorism of “Don’t know the knot? Just tie a lot!” and think that a random rat’s nest of loops will somehow be easier than learning the correct way to close your Ursack and secure it to a tree.
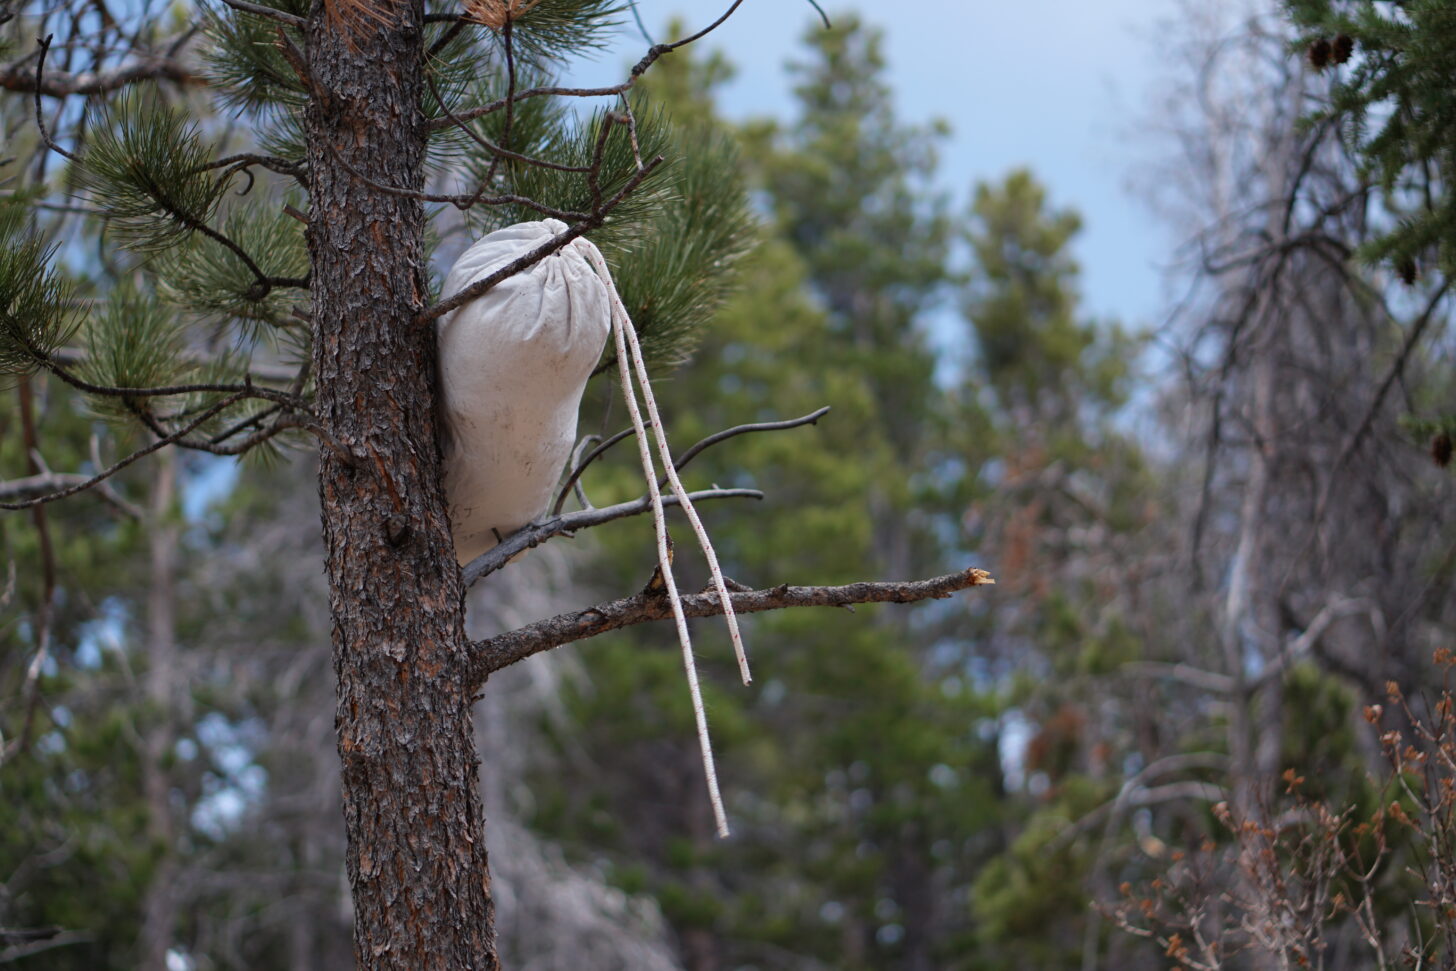
After you’ve closed the Ursack as tight as possible using the proper knots, you should secure it to something substantial to prevent it from getting dragged away by a hungry animal. The best option is a sturdy tree limb or trunk. Don’t underestimate what “sturdy” means, as bears have chewed through limbs to get food. Here are some guidelines:
Aim for something five inches or thicker.
Pick a location away from your camp to store the Ursack. The further the better, but aim for at least 200 feet.
If using multiple Ursacks, split them up and keep at least 75 feet between them.
You can also use a counter-balance method to hang your Ursacks, but since the security of the Ursack lies in its fabric and not any particular distance from the ground or tree trunks that could be scaled by bears this is generally going to be overkill.
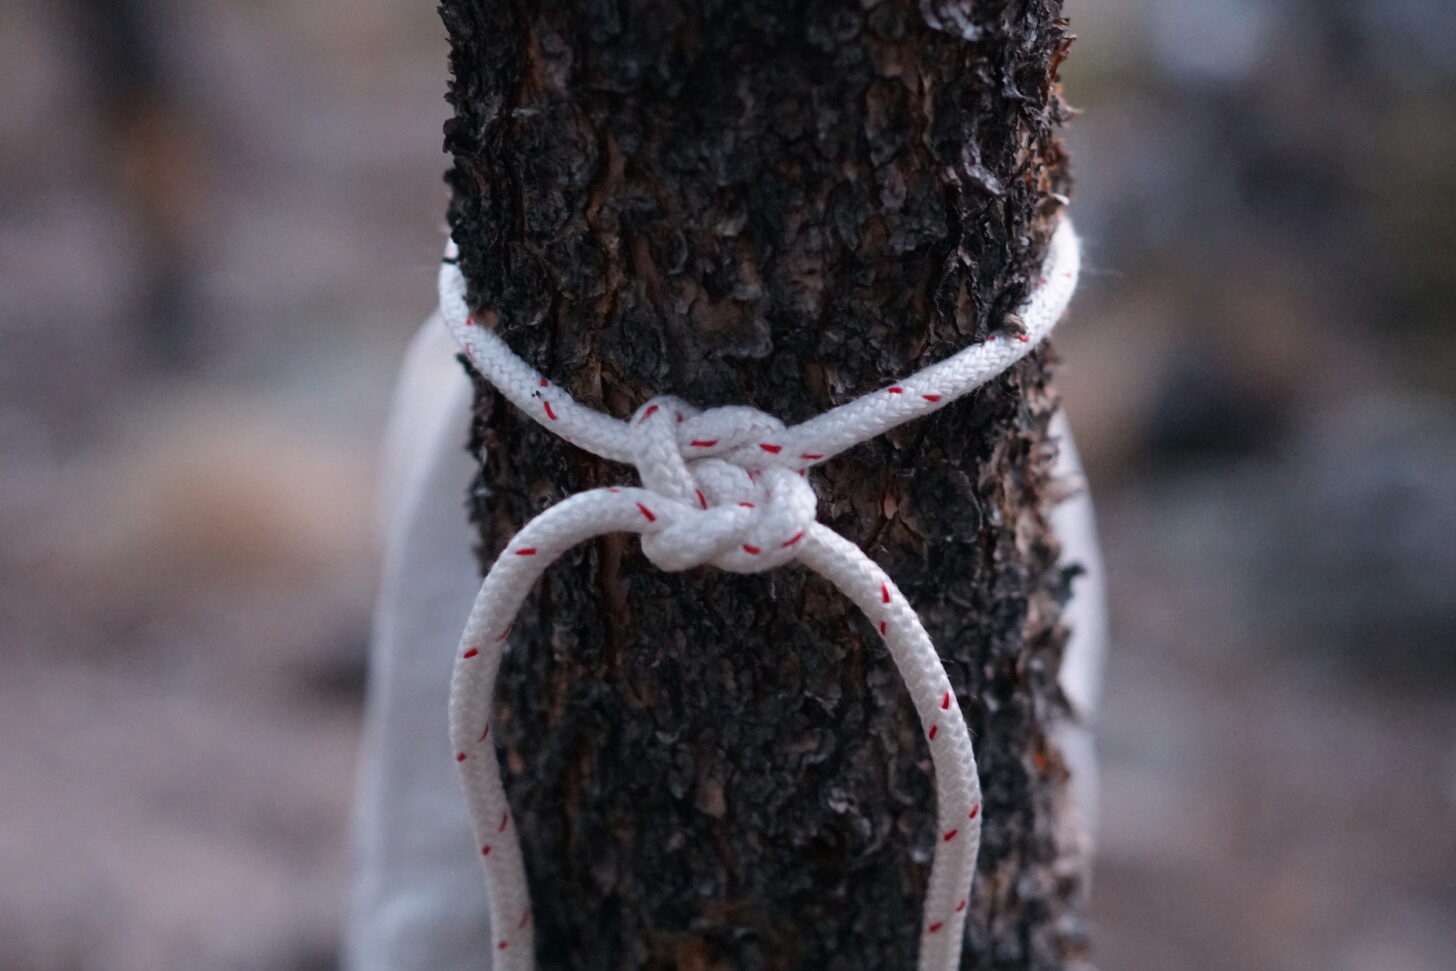
When attaching your Ursack to a tree, use a figure-8 knot, at least three half-square knots (e.g., one full square knot plus one additional half-square knot), or another knot that resists clinching so that it won’t be a struggle to untie it the next day. Ursack has a video of their recommended knot on their website, and in my experience, this truly is the best knot for tying an Ursack, in terms of both ease of untying and security (caveat: it requires a carabiner or other secure chock).
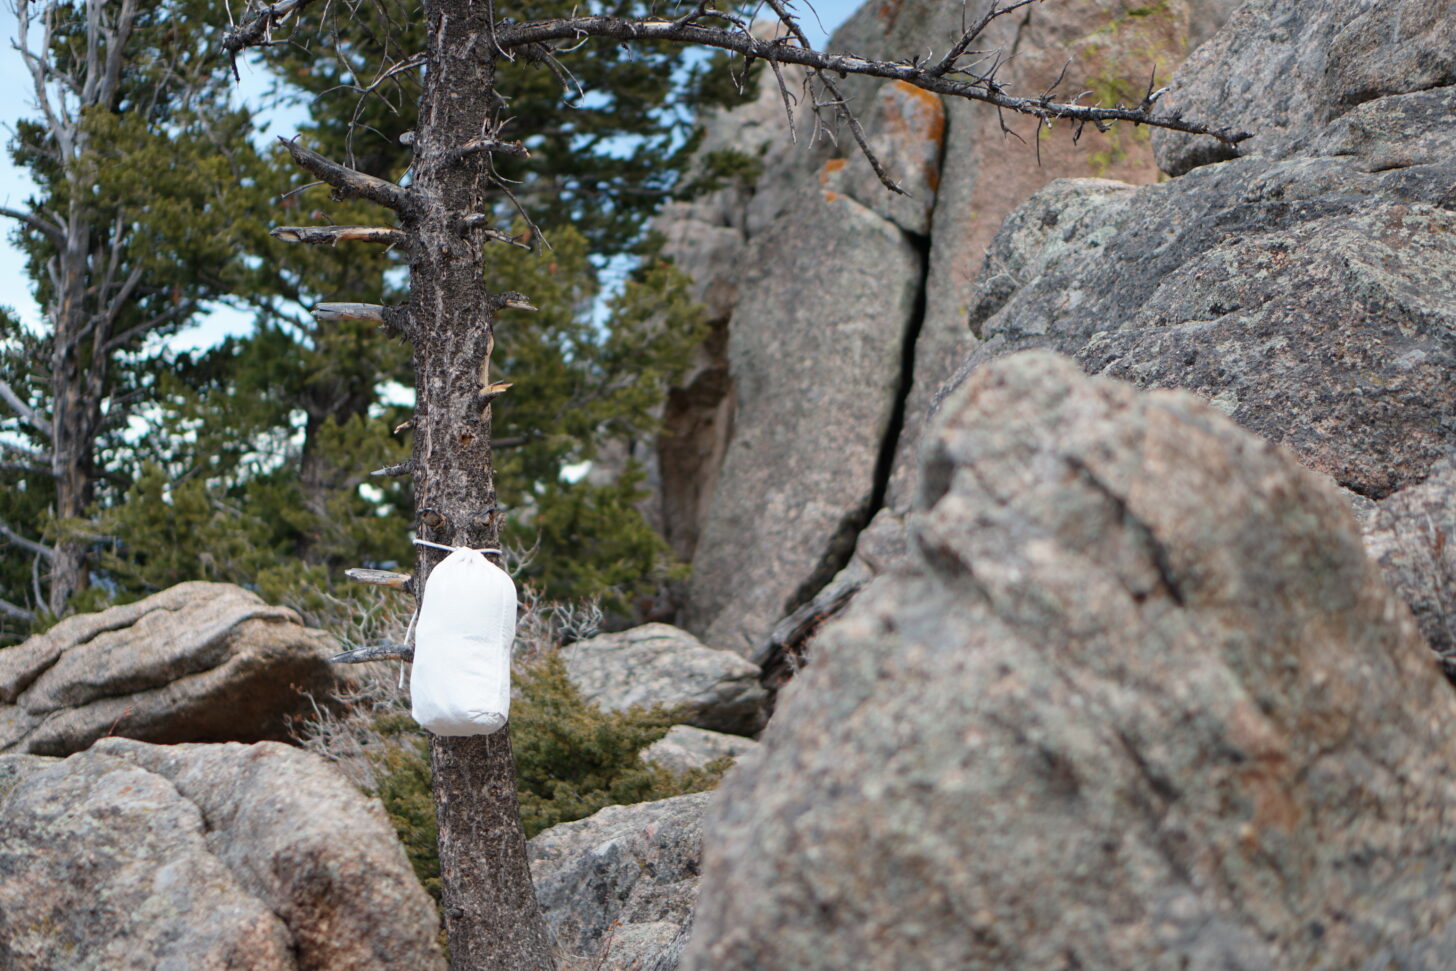
An Ursack affixed to a lodgepole pine using three stacked half-square knots. Photo: Ryan Jordan.
What if you’re using an Ursack in an area where there are no trees?
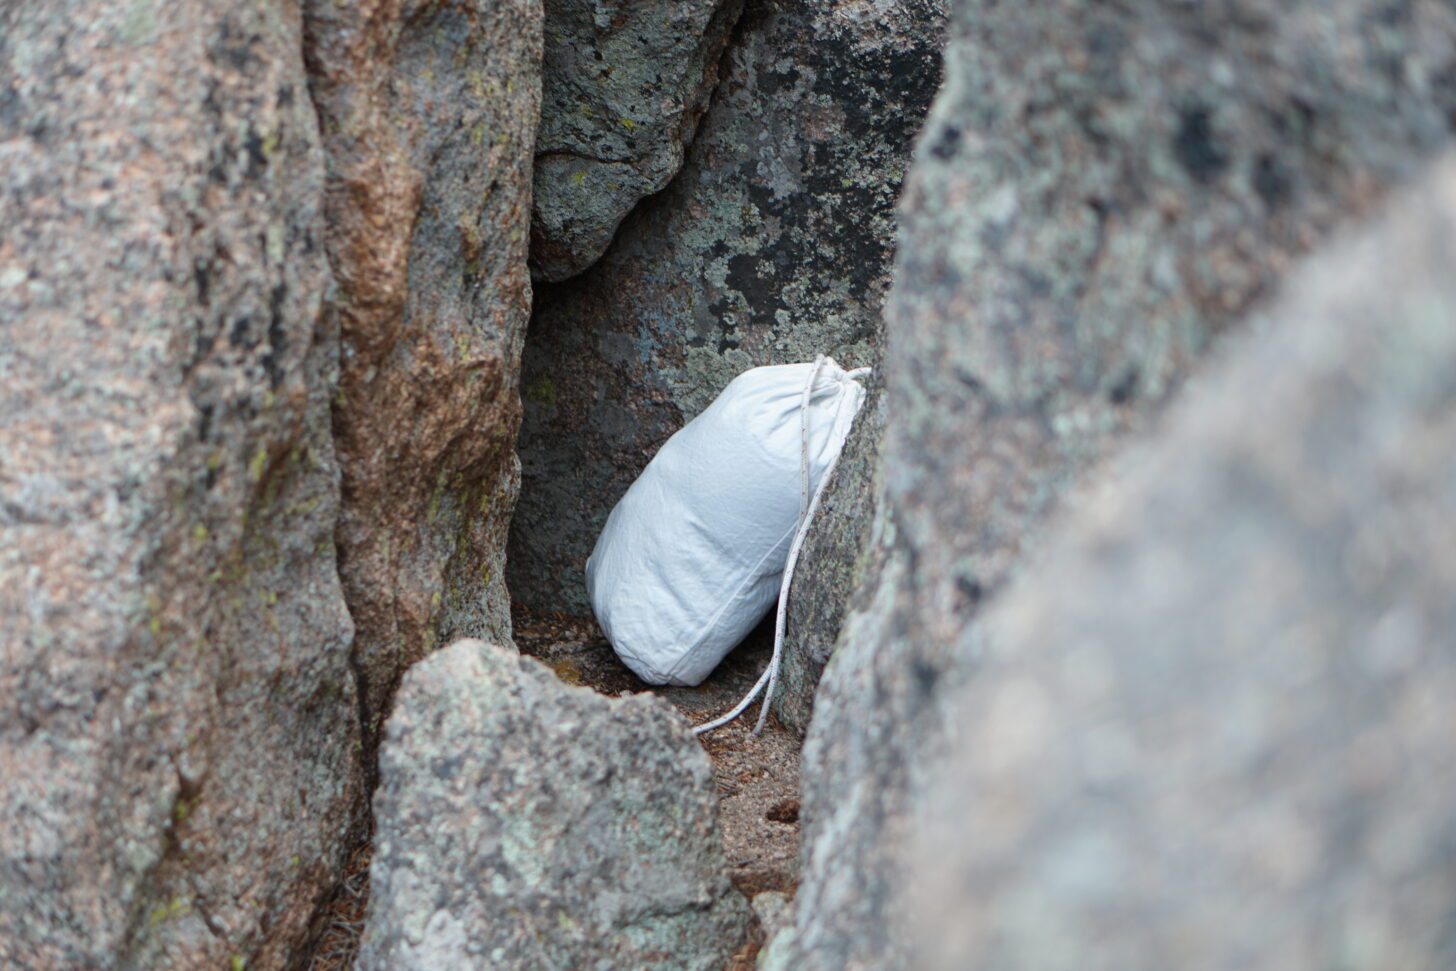
If no trees are available to attach your Ursack to, like in a desert or alpine tundra environment, you can bury the Ursack under rocks to discourage animals from investigating it. In alpine environments where bears are present, tying the Ursack into the crevice formed by two immovable pieces of talus lying against each other may be a viable option. Just be aware that a grizzly bear can easily move a rock that weighs a few hundred pounds, even if you can’t.
Tying an Ursack around two pieces of heavy talus in contact with each other is one way to secure an Ursack above the treeline. Ideally, the same knots should be used to secure the Ursack, and the opening should be tightly bound against the rocks.
One trick Ryan Jordan has used when hiking in a large group above the treeline and no talus is available is to tie everyone’s Ursacks together (they often carry a dozen or more on long trips) in a big Circle of Ursacks. This is not ideal. Food odors are concentrated into a single area, and loose Ursacks that aren’t tightly secured to an immovable object may be more prone to failure since animals can gain better access to the drawcord opening. However, it may be one option for expeditions to save time. In addition, large groups concentrate human smells that are not attractive to bears, so there may be some benefit to keeping your Circle of Ursacks inside your camping area in some situations where regulations allow it.
Caveat: this technique (the Circle of Ursacks) won’t be endorsed by Ursack or most land management agencies. We don’t endorse it where regulations prohibit it.
What about using an odor barrier bag with an Ursack?
In addition, if you find yourself frequently in areas where the ideal Ursack tie-up isn’t available, or areas frequented by habituated bears, you may want to protect your food with an odor barrier. Storing your food in OPSaks or zip-closure 5-mil mylar bags (we recommend the Shield Pro brand) will reduce the chances of a bear or other animals smelling your food to begin with.
How Not To Secure an Ursack
1. Don’t just prop an Ursack up in a tree. Secure it to trees using the methods described above. Black bears, raccoons, and other animals can climb trees and can easily access your food.
2. Don’t tie it to a tree with slack drawcord. This exposes the opening to animals and increases the chance for an Ursack failure.
3. Don’t tie an Ursack to a thin-diameter tree (less than four inches in diameter). Bears can chew through, or push over and break, thin trees.
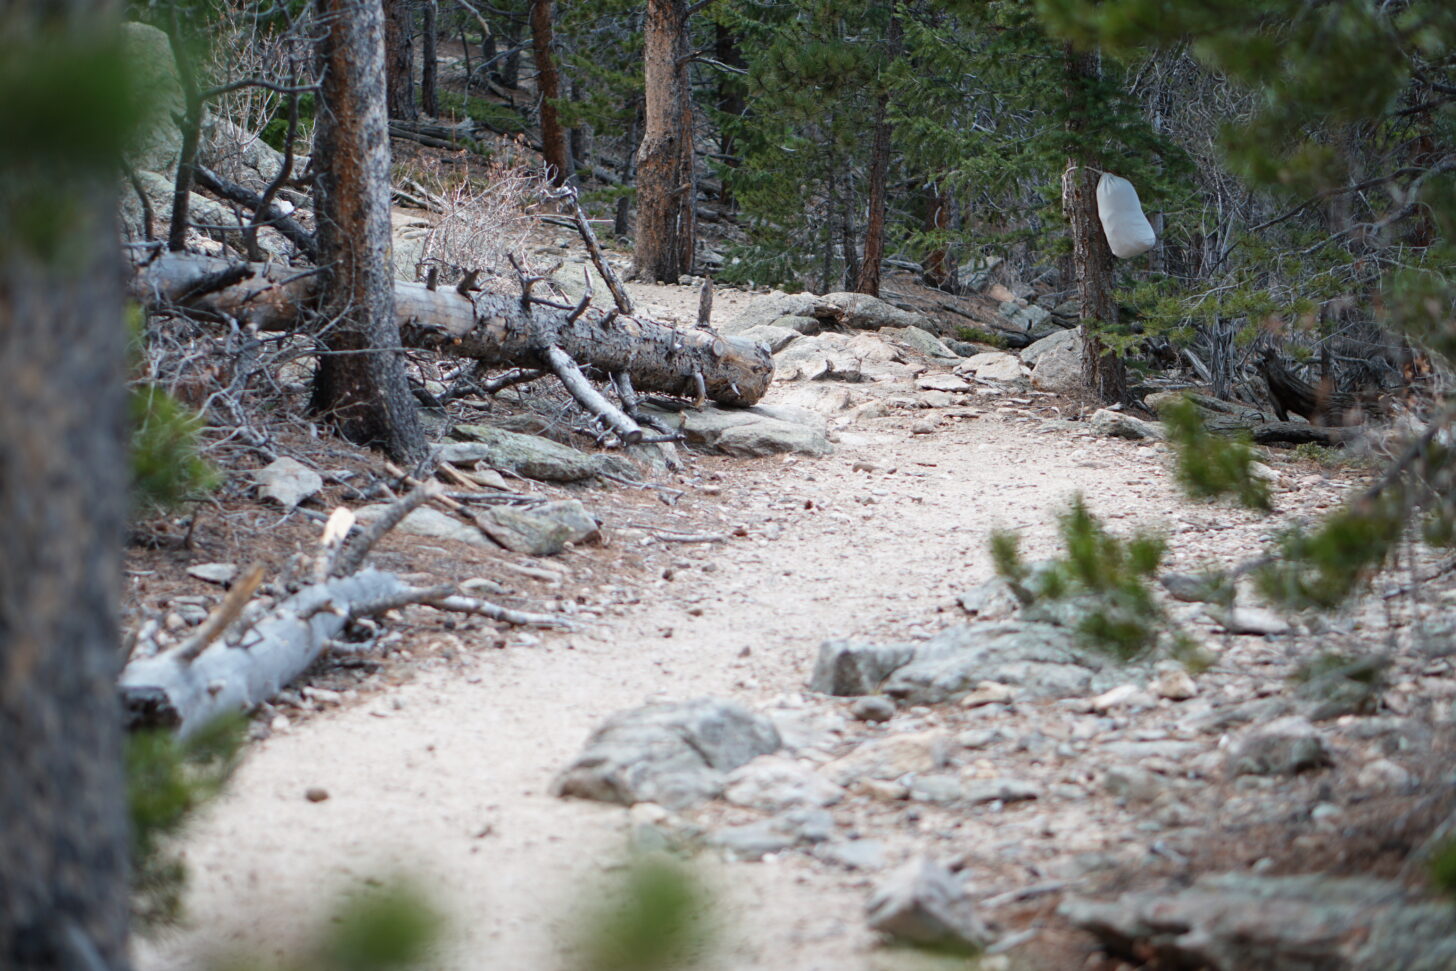
4. Don’t tie your Ursack to a tree near a trail corridor, keep your camp discreet from other users – consider LNT Principle Number 7: Be Considerate to Other Visitors. In addition, don’t tie your Ursack along trails, game trails, rivers, or other obvious big game corridors.
5. Don’t just “hide” your Ursack. Just because it’s hidden from view doesn’t mean animals like bears can’t follow the scent of food emanating from your Ursack and find it.
6. Don’t tie your Ursack to a deadfall. A bear can easily move it, chew through it, and steal your food bag.
7. Don’t tie your Ursack to a standing dead tree. Dead trees are weak and can easily be toppled by a bear.
Learn More
Browse our curated recommendations in the Backpacking Light Gear Shop – a product research & discovery tool where you can find Member gear reviews, Gear Swap (used gear) listings, and more info about specific products recommended by our staff and members.
Backpacking Light does not accept compensation or donated/discounted products in exchange for product mentions or placements in editorial coverage.
Some (but not all) of the links in this review may be affiliate links. If you click on one of these links and visit one of our affiliate partners (usually a retailer site), and subsequently place an order with that retailer, we receive a commission on your entire order, which varies between 3% and 15% of the purchase price. Affiliate commissions represent less than 15% of Backpacking Light's gross revenue. More than 70% of our revenue comes from Membership Fees. So if you'd really like to support our work, don't buy gear you don't need - support our consumer advocacy work and become a Member instead.
Learn more about affiliate commissions, influencer marketing, and our consumer advocacy work by reading our article Stop wasting money on gear.
It’s our 50th episode! To celebrate, we reached out to listeners and asked them to submit their big backpacking questions – our answers of which provide the meat for this episode.
Stream
Summary
It’s our 50th episode! To celebrate, we reached out to listeners and asked them to submit their big backpacking questions. We received fantastic questions about gear, philosophy, and skills and enjoyed chatting about the answers.
Also in this episode, an interview with Backpacking Light grant recipient Narinda Heng and some upcoming educational opportunities at Backpacking Light. Enjoy!
Adapting gear to tropical environments? Hiking sandals like the Bedrock Sandals Cairn Pro II. Try a big, airy mesh tent with a tarp with lots of coverage, or a hammock. Go for a silk liner and/or a tropical-specific sleeping pad with 3D compression-resistant mesh. And uh, you might need a machete.
Keeping a full 3-season kit packed at all times – pros and cons? Duplicate items, don’t switch stuff out. Don’t compress your insulation!
Aluminum vs. titanium pots – especially when it comes to fuel use!
What’s a seriously waterproof bivy sack? Check out the Mountain Laurel Designs eVENT Soul Bivy for moderately rowdy conditions. If things get more wild than that, look for something with more of a structure.
Thoughts on Southern Lite packs? We like the customization that makes them good for winter gear storage!
Are there any negative environmental impacts when using a backcountry bidet system? Not really, just do LNT!
Going backpacking with two adults and two kids – should you have one giant shelter or two smaller shelters? Try the Nemo Dagger 3P.
Why are large pads and bags so common but shelters that can accommodate a tall person so rare? In short? Market pressures and gram-shaving wars. If you want a great shelter for tall users, take a look at the Durston X-Mid series or the Tarptent Stratospire series (Stratospire 1, Stratospire 2, and Stratospire Li).
Do you talk to yourself when you hike?
Applying ultralight philosophy to canoeing?
Going ultralight by switching to tarps and quilts? You don’t necessarily have to…
What can you gain by going ultralight early? Mostly health, and you’ll save some money to boot.
To set up camp in rainy weather – site selection, shelter selection, and bring a tarp to provide a dry space to stage your gear while you set up.
How to build skills and transition from hiking in groups to solo backpacking (safely)?
Interview with Backpacking Light grant recipient – Narinda Heng.
Narinda’s goals and challenges.
The craziest adventure Narinda has been on.
Narinda’s art and how it intersects with the outdoors.
Her pottery and how it reflects the input of Narinda’s adventures.
Executive Producer - Backpacking Light; Show Director and Host - Ryan Jordan; Producer - Chase Jordan; Theme music: Look for Me in the Mountains written by Chris Cunningham and Ryan Jordan, performed by Chris Cunningham (acoustic guitar, lead and harmony vocals, harmonica), Chad Langford (upright bass), and Tom Murphy (mandolin), produced by Basecamp Studios in Bozeman, Montana.
Sponsorship Policy: Backpacking Light does not accept compensation or donated/discounted products in exchange for product mentions or placements in editorial coverage, including any podcast episode content not excplicitly identified as sponsored content. Some (but not all) of the links in these show notes may be affiliate links. Learn more about affiliate commissions, influencer marketing, and our consumer advocacy work by reading our article Stop wasting money on gear.
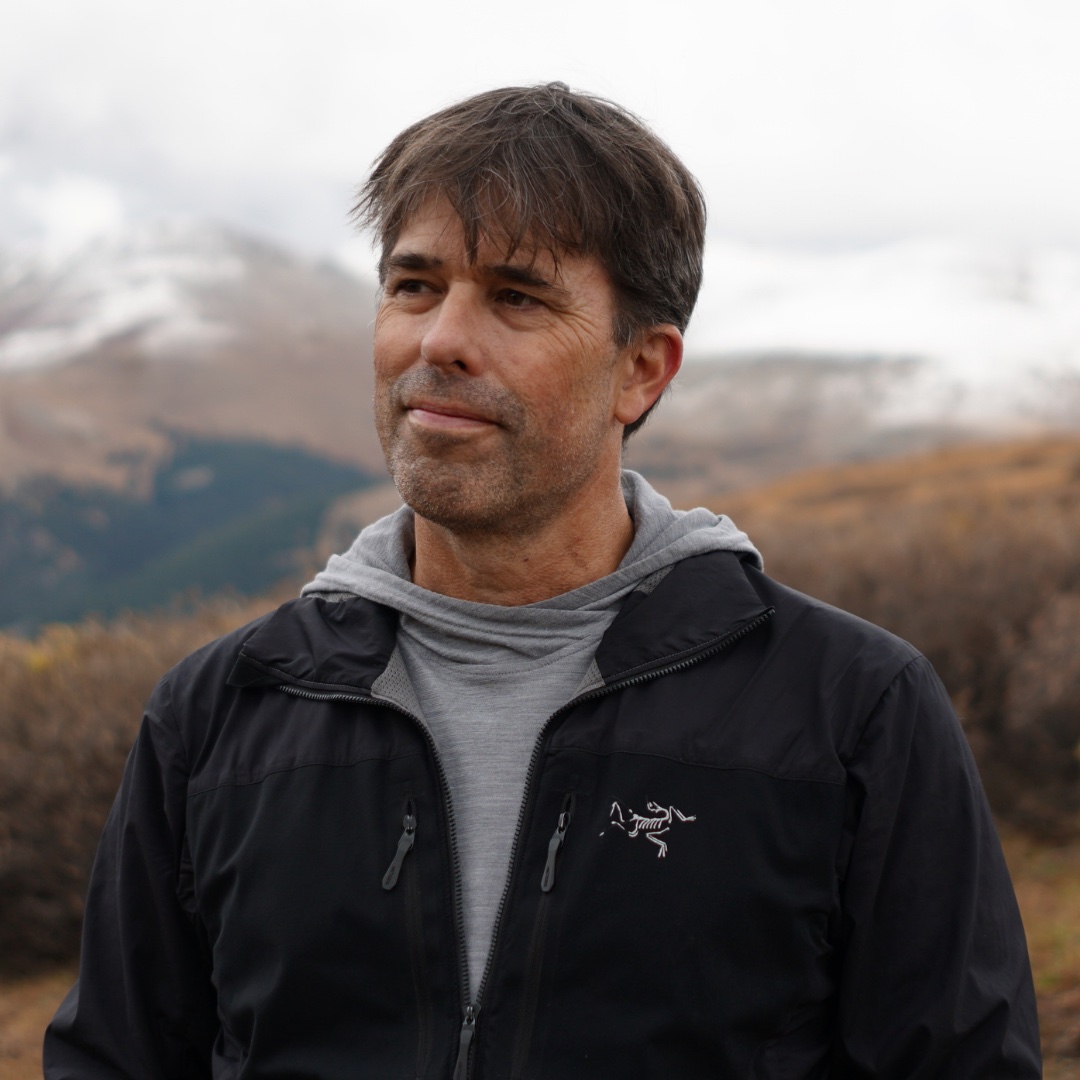
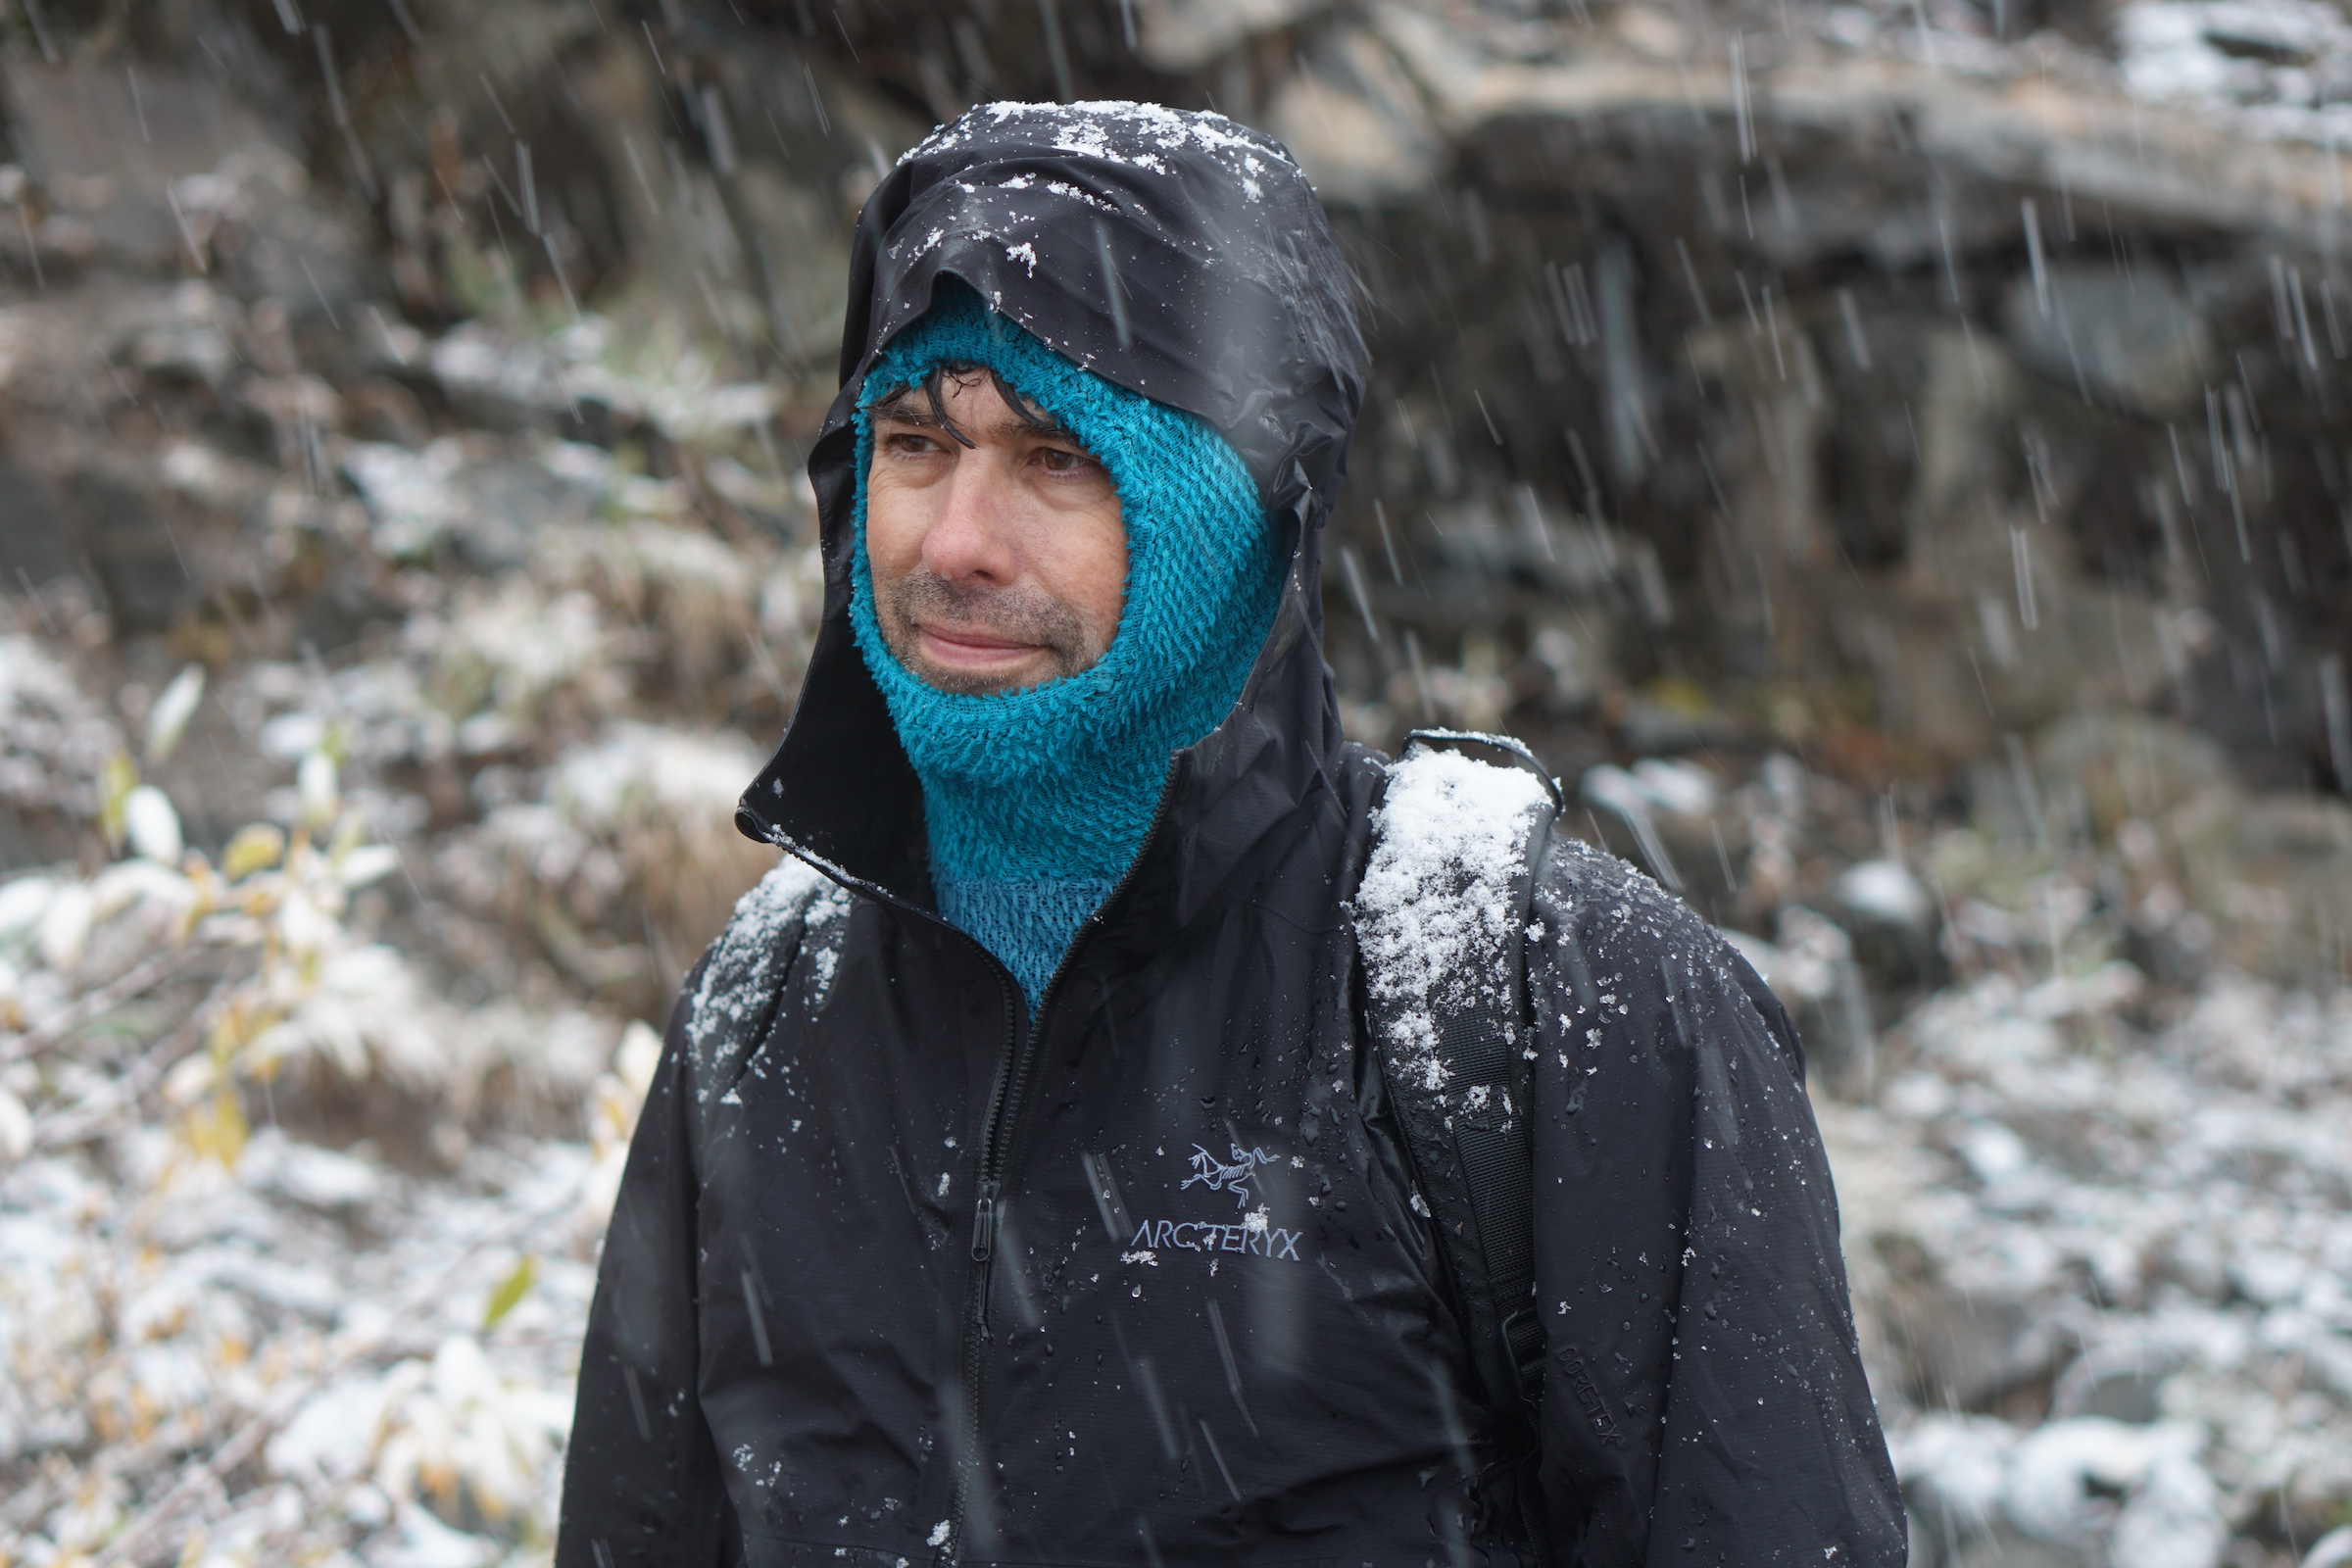
Backpacking Light owner, founder, and publisher Ryan Jordan’s commentary on the hiking, camping, and backpacking gear he’s been using this year.
Introduction
My purpose with this gear guide is to share about the gear that I’m currently using on my own backpacking trips and other outdoor adventures. Some of the products I discuss are those that have been in my kit for several years. Others are new to my kit this season.
Because this gear is the gear I choose myself (and often, represents the gear that I’ve actually purchased with my own money), the selections here represent my personal recommendations of sorts.
I live and primarily hike in the northern US Rocky Mountains and intermountain and high desert regions of Idaho, Montana, Wyoming, Utah, and Northern Colorado. This year, my focus has been on the Bighorn, Snowy, and Laramie Ranges in Wyoming, and in the Rocky Mountains of northern Colorado. In addition, the majority of my trail miles are hiked in the fall, winter, and spring. These environments, compared to other locations in the US, are characterized as dryer, windier, snowier, and colder. Keep that context in mind, it may provide some insight and value into why I prefer certain types of gear over others.
Consumer Disclaimer: This gear guide is intended to expand your awareness of what’s available in the backpacking gear marketplace. More importantly, I hope you’ll learn from my experience in a way that motivates you to be a more disciplined consumer. There is no single piece of gear that can transform your backcountry experience. Transformation comes from spending time in nature. Don’t replace time in the backcountry with compulsory consumption. Here are some of the basic consumption guidelines I strive to live by: use what I have; don’t buy what I don’t need; don’t go into debt to buy gear; buy used gear when I can; donate or repurpose gear I’m not using to others who need it; try to allocate more money on backcountry experiences and learning new skills, and less money on gear. That said, some of the items in this gear guide require an initial (and sometimes expensive) investment. I’m very cautious about recommending any item that costs a lot of money, and only include those expensive items here if – and only if – they have stood the test of time with respect to both versatility (being able to use them in a variety of environments) and durability (longevity). Expensive and durable items are denoted with a target symbol (🎯). In addition, some of the items here are fragile and require very intentional care. I’ve marked these items with a lightning symbol (⚡) – use at your own risk.
Packing Systems
McHale Backpacks
I’ve used McHale backpacks since the early 2000s and I currently own and use two different models. One is a durable, high-volume SARC (🎯) (with a Bypass harness) that I use for winter backpacking and expeditions. The other is a small-volume (45 L) Windsauk and has been the backpack I’ve used the most on trips of up to 8 days or so over the past three years. McHale backpacks are built to custom-fit measurements, have simple but effective suspensions, and terrific hip belts. Mine are modular in nature; both of them can be stripped down to a single packbag or kitted out with any configuration of top, side, rear, shoulder strap, and hip belt pockets for more organization options.
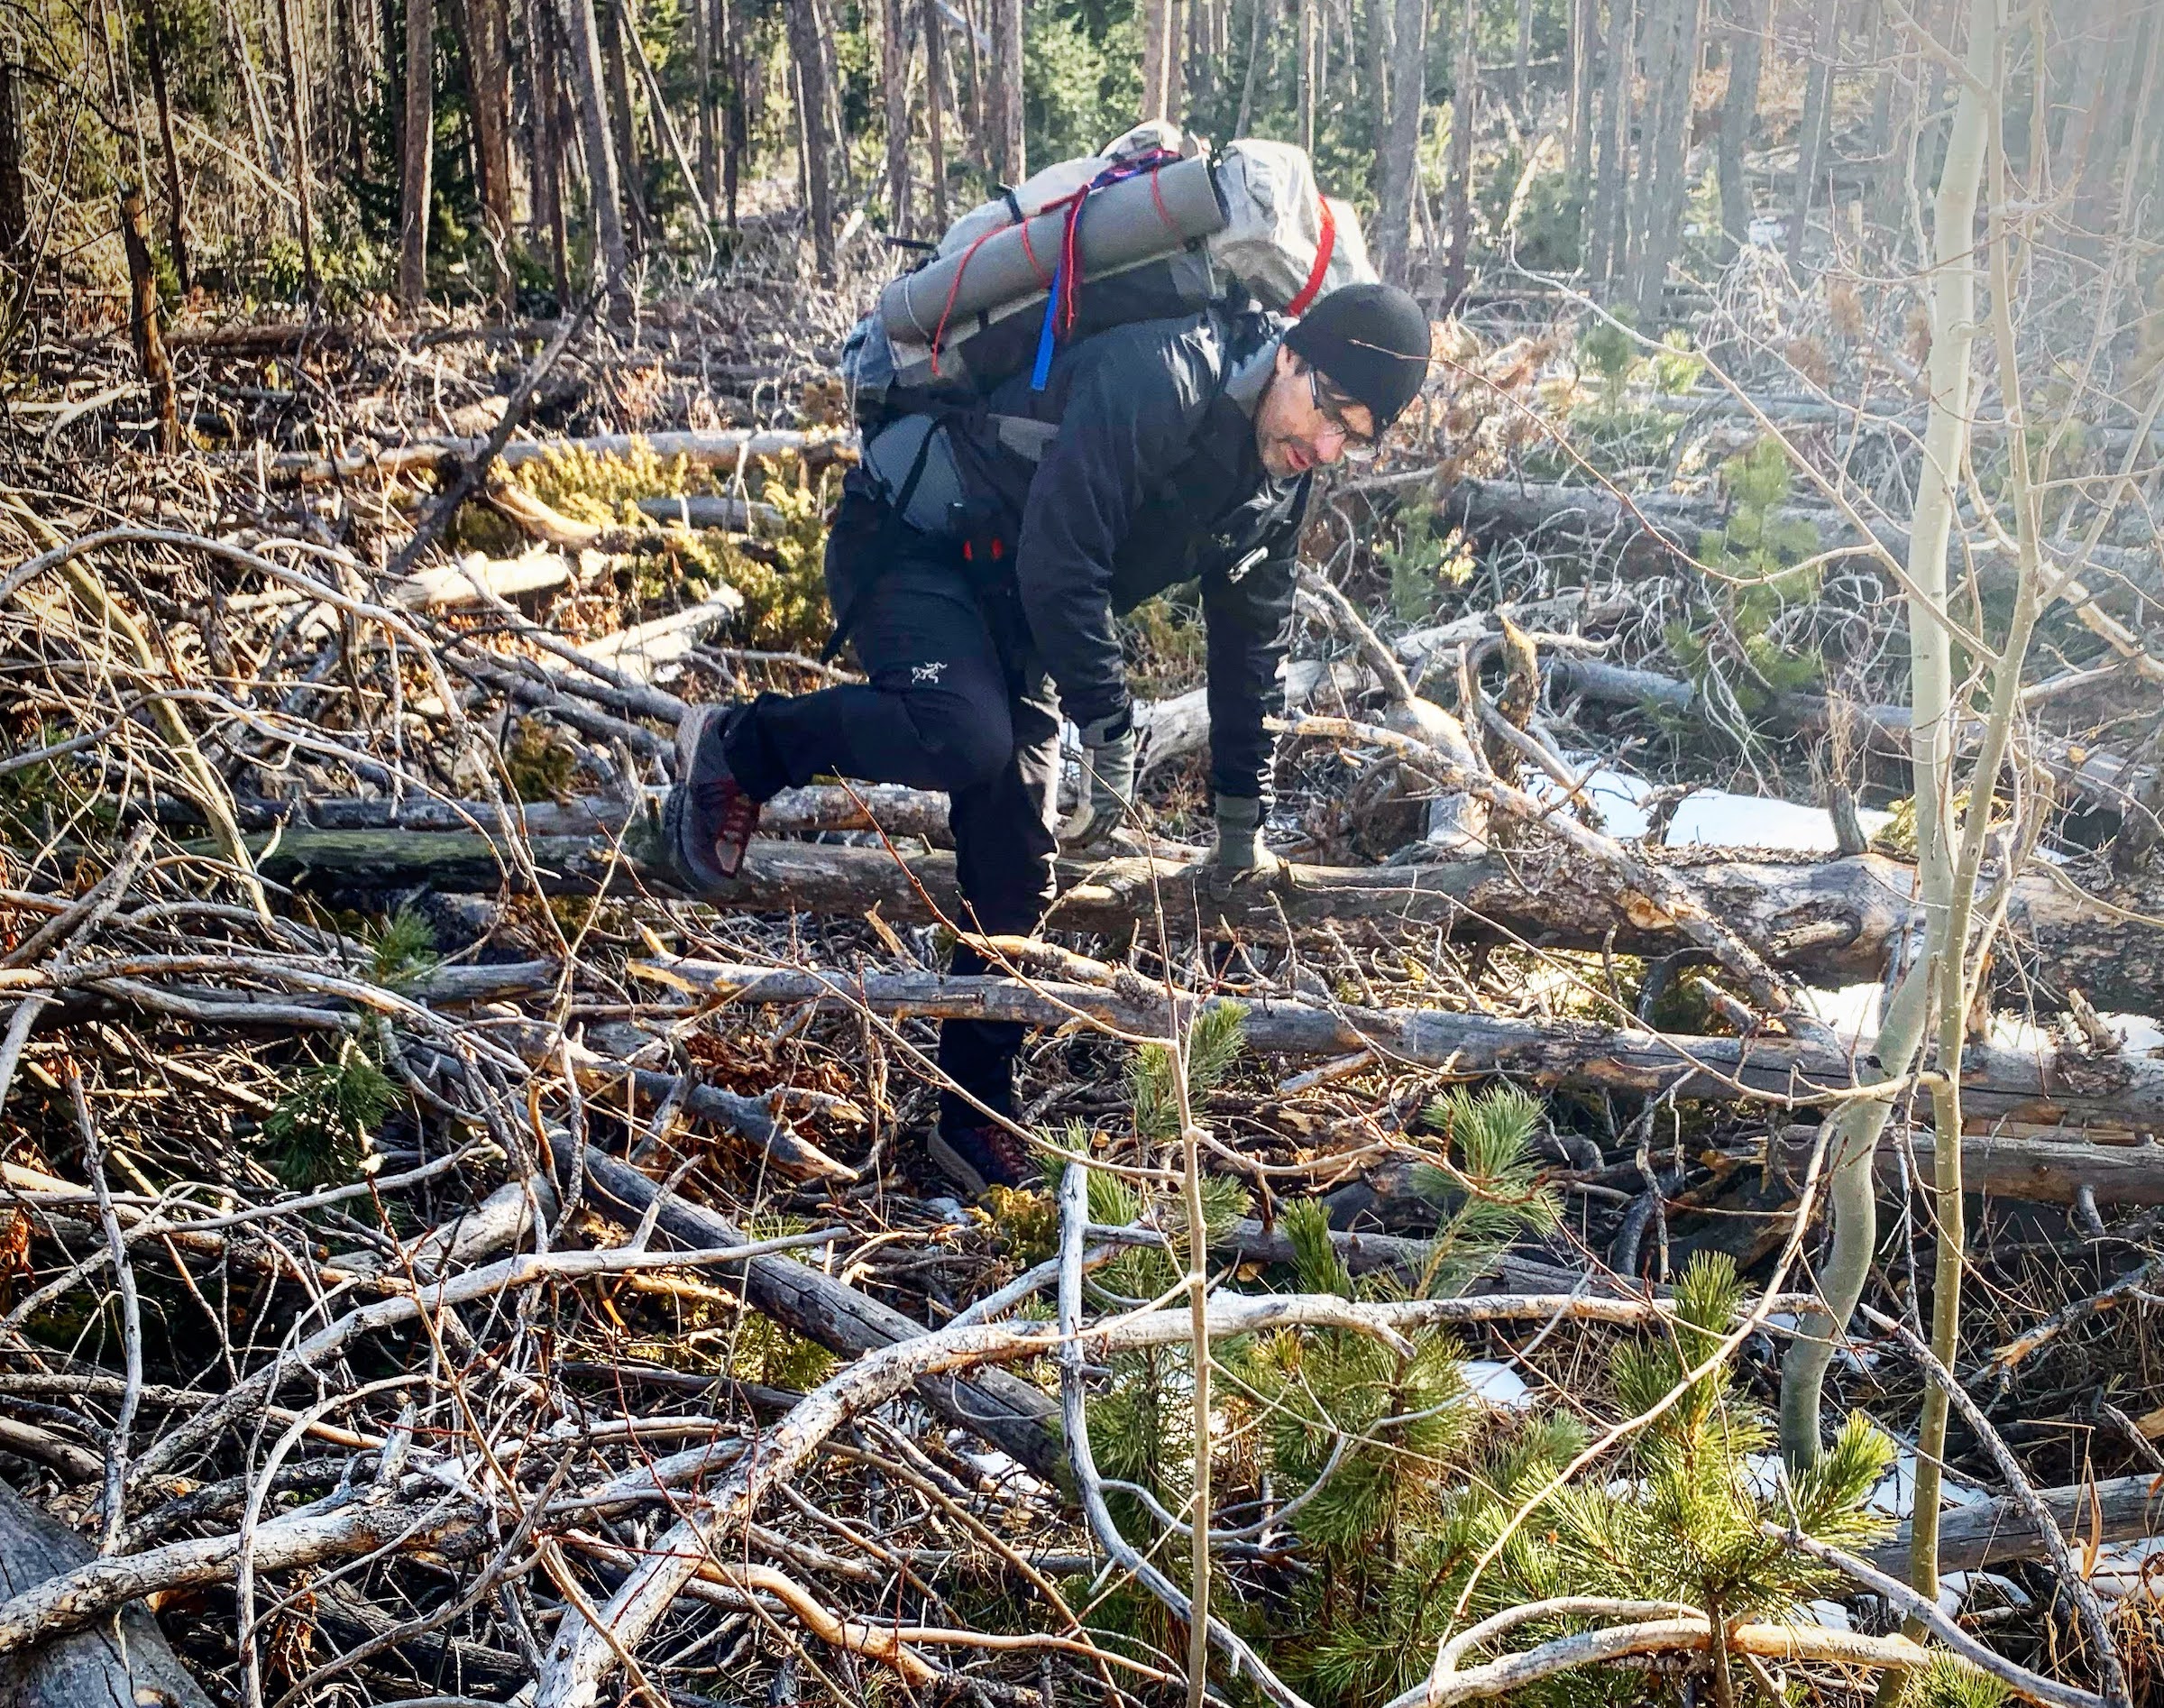
Type 2 fun with my small-volume McHale Pack – bushwhacking through devastating beetle-killed pine in the Medicine Bow National Forest, Wyoming.
One of the most unique features of my SARC is the unique Bypass Harness system. It solves the basic problem faced by packs with traditional load-lifters: the need to decouple shoulder strap positioning from weight transfer distribution (between shoulders and hips) for optimizing load-carrying comfort. Brilliant, simple, and patented: you’ll find this feature only on a McHale pack.
Hyperlite Mountain Gear North Rim Backpack
The Hyperlite Mountain Gear North Rim Backpack (🎯) is one backpack model I recommend for the specific use case where you need a backpack that’s durable enough for alpine or desert rock scrambling and heavy bushwhacking, and waterproof enough for extremely wet environments, swimming and wading through river corridors, or packrafting.
Chase Jordan with the Hyperlite Mountain Gear North Rim Backpack in the Wyoming Bighorn range.
It has sealed seams, a secure roll-top closure, and highly abrasion-resistant (woven Dyneema) outer fabrics. Normally, I’d prefer a woven Dyneema pack with no outside pockets for these conditions. However, the woven Dyneema outside pockets of the North Rim add immense functionality to the pack without adding the problematic mesh or stretch fabrics that are prone to long-term failure when bushwhacking and scrambling.
Osprey Straightjacket Compression Sack
I’ve had a 20-liter Osprey Straightjacket Compression Sack (🎯) in my kit for more than five years, and it goes with me on almost every backcountry trip. Unlike a traditional compression sack, which compresses gear from the ends of the sack, creating a short cylinder, the Straightjacket compresses the sack in the transverse direction, which makes it thinner without affecting its length. That way it fills out the bottom of my pack nicely without having to pack gear around the ends of it. In my typically 3-season kit, the Straightjacket houses a 20-degree down sleeping bag, an inflatable insulated sleeping pad, pillow, down jacket, extra socks, and long underwear – my entire camp bedroom in one spot.
Hyperlite Mountain Gear Pods
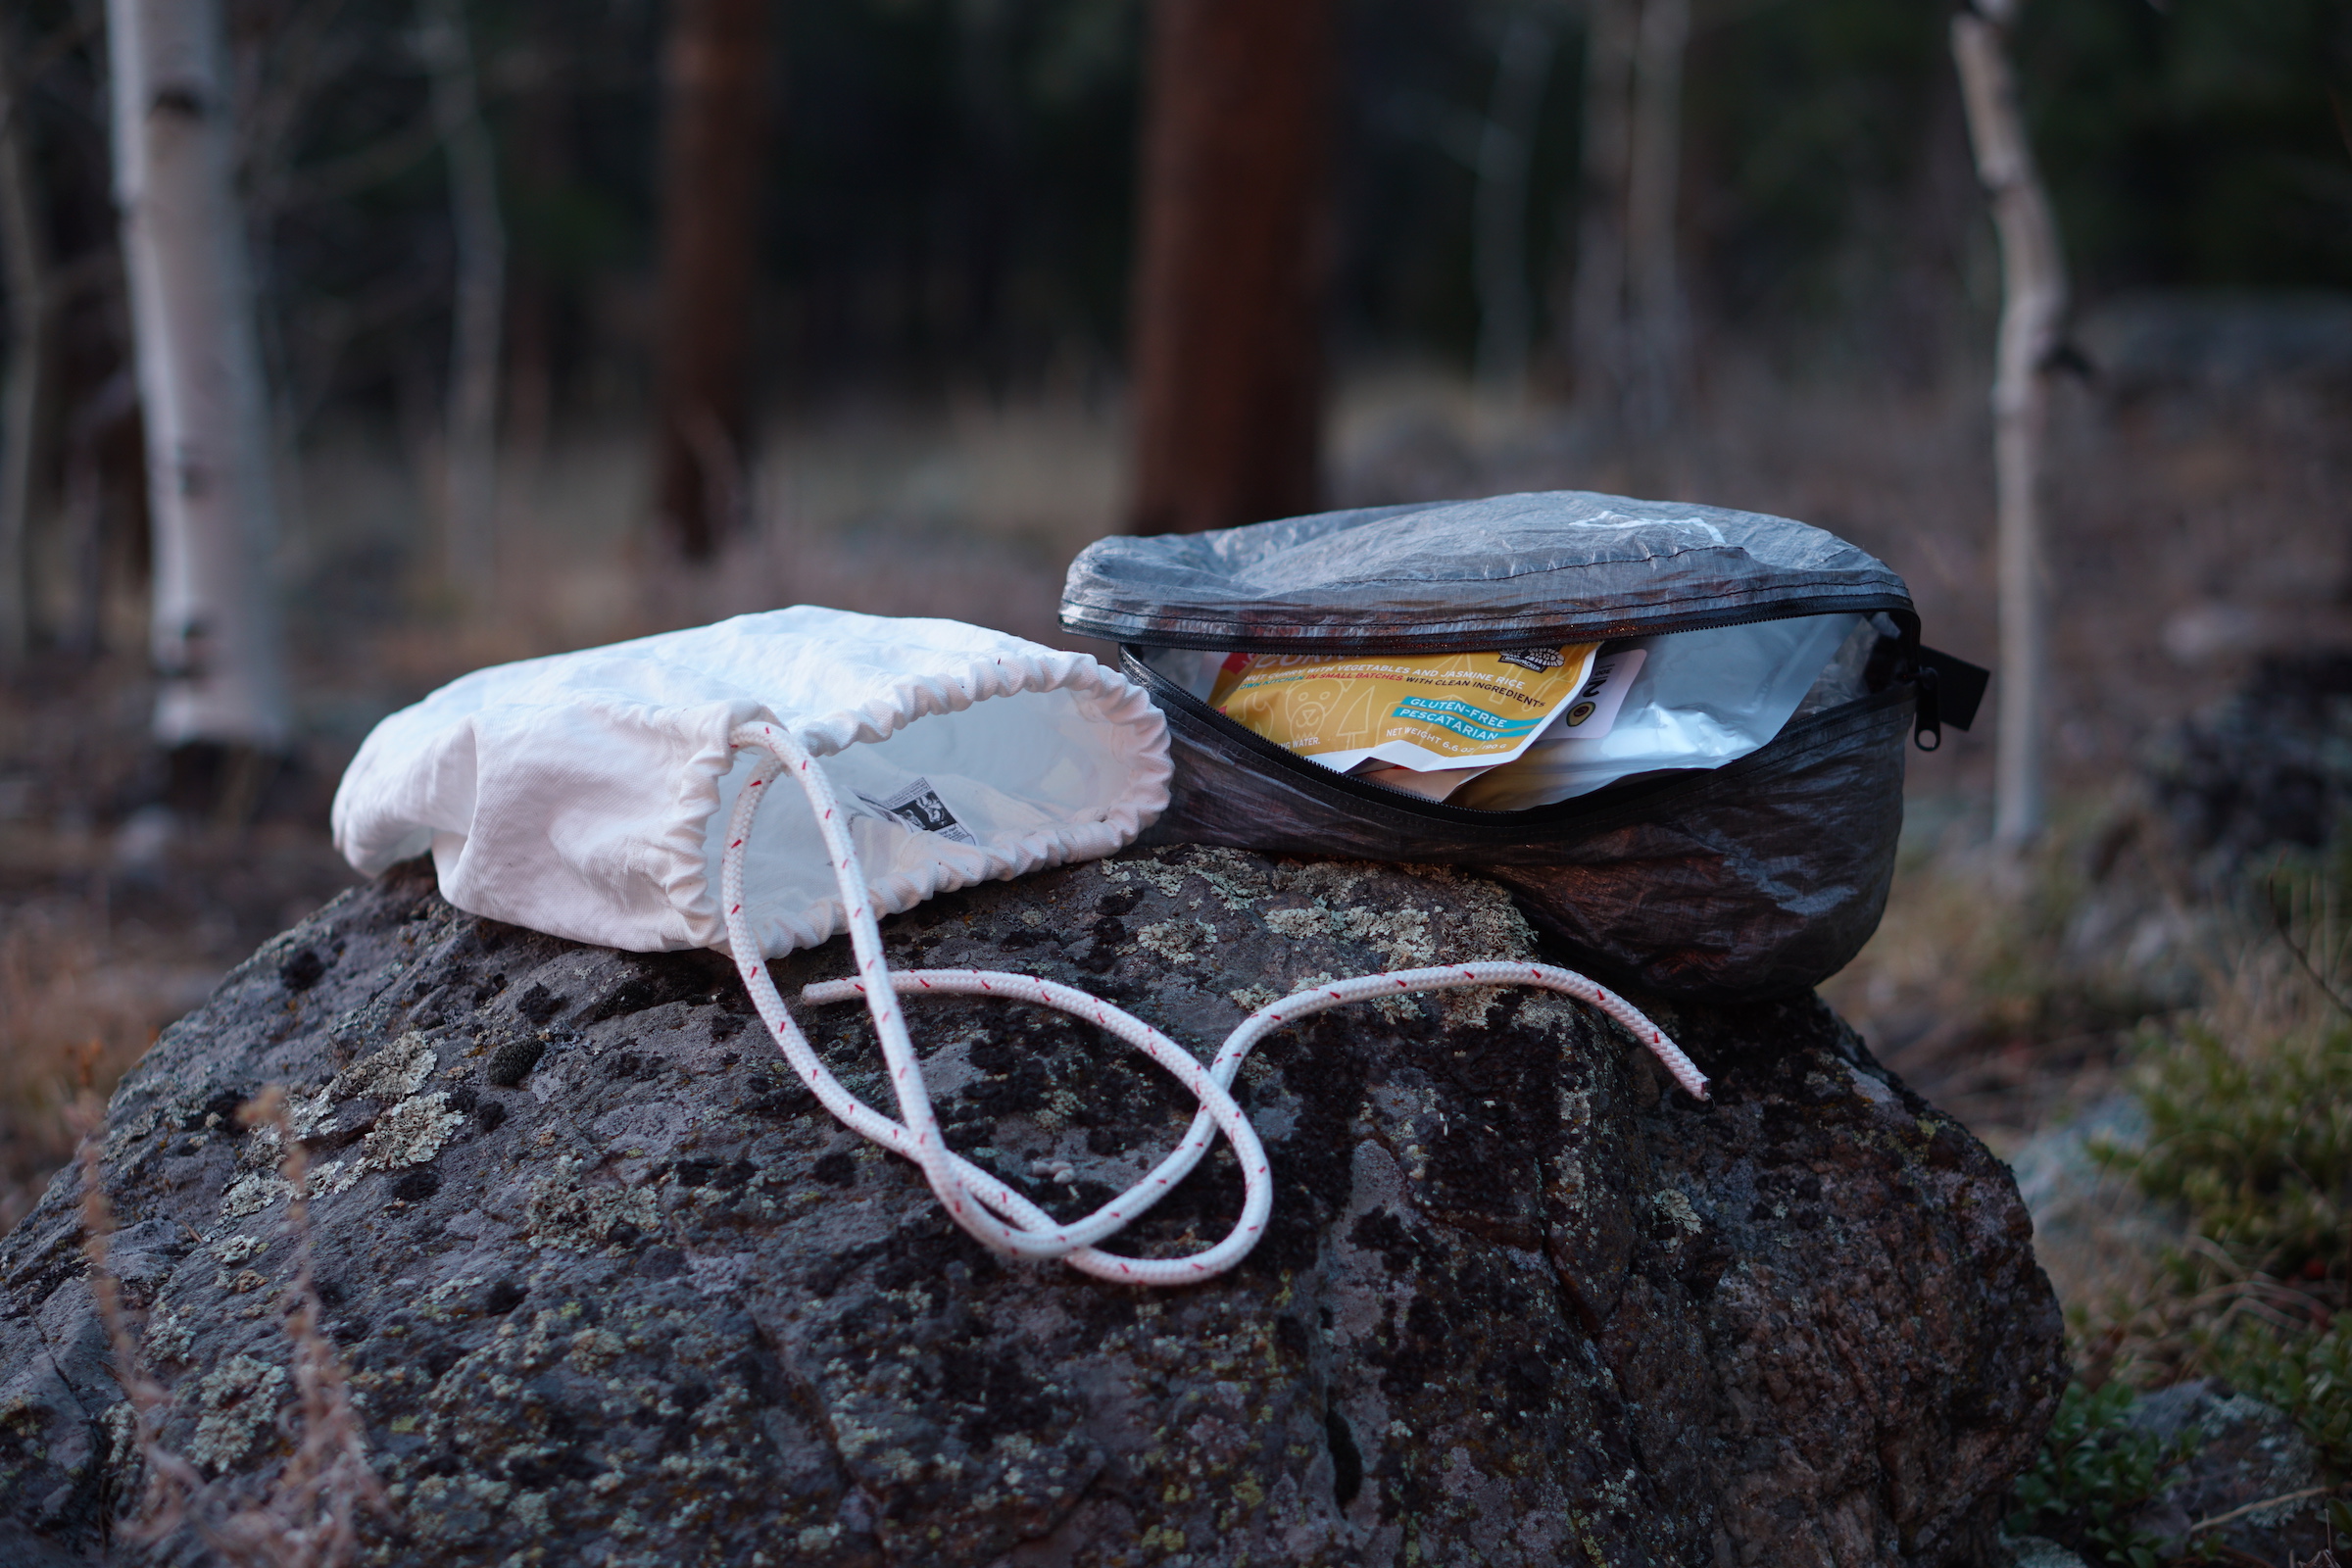
I was a bit resistant to the idea of Hyperlite Mountain Gear Pods (🎯) initially. Why would I add more tenths of ounces to my stuff sack kit, which was already perfectly functional (so I thought)? And stuff sacks with failure-prone zippers? No thanks. I’m singing a different song today. I’ve used these for the past three years and now can’t live without them. The ability to organize my pack using Pods has simply made my life easier. A zippered-access stow bag means I can access anything in a Pod without unpacking or digging around for it. Because they are shaped like the cross-section of a backpack, they nest neatly inside and allow me to more easily pack my pack without the dead air spaces caused by cylindrical stuff sacks. I use one for storm clothing, one for my cooking gear, and one to three for packing food (I leave my Ursacks unpacked and stuff those loosely to fill dead air spaces in my pack). I own five Pods and all of them are regularly used. I’ve yet to experience a seam or zipper failure.
I use Hyperlite Mountain Gear Pods to store my food inside my pack – and don’t store food in my Ursacks until I get to camp.
Hyperlite Mountain Gear Versa Pouch
I spent most of the last decade studying the art of keeping gear accessible while on the trail, and tested so many varieties of pack-attached and standalone accessory pockets and pouches that my 40-liter storage bin containing these accessories was at one point overflowing. I finally settled on a Hyperlite Mountain Gear Versa Pouch (🎯). For me, it’s just the right size, has just the right amount of internal partitioning and organization options, is waterproof enough for my needs, and is light enough. I use mine to house the supplies I need regularly on the trail, as well as enough emergency gear to allow me to survive if I get separated from my backpack on a river crossing. I wrote extensively about how I use this in my recent article on the subject of accessory pouches.
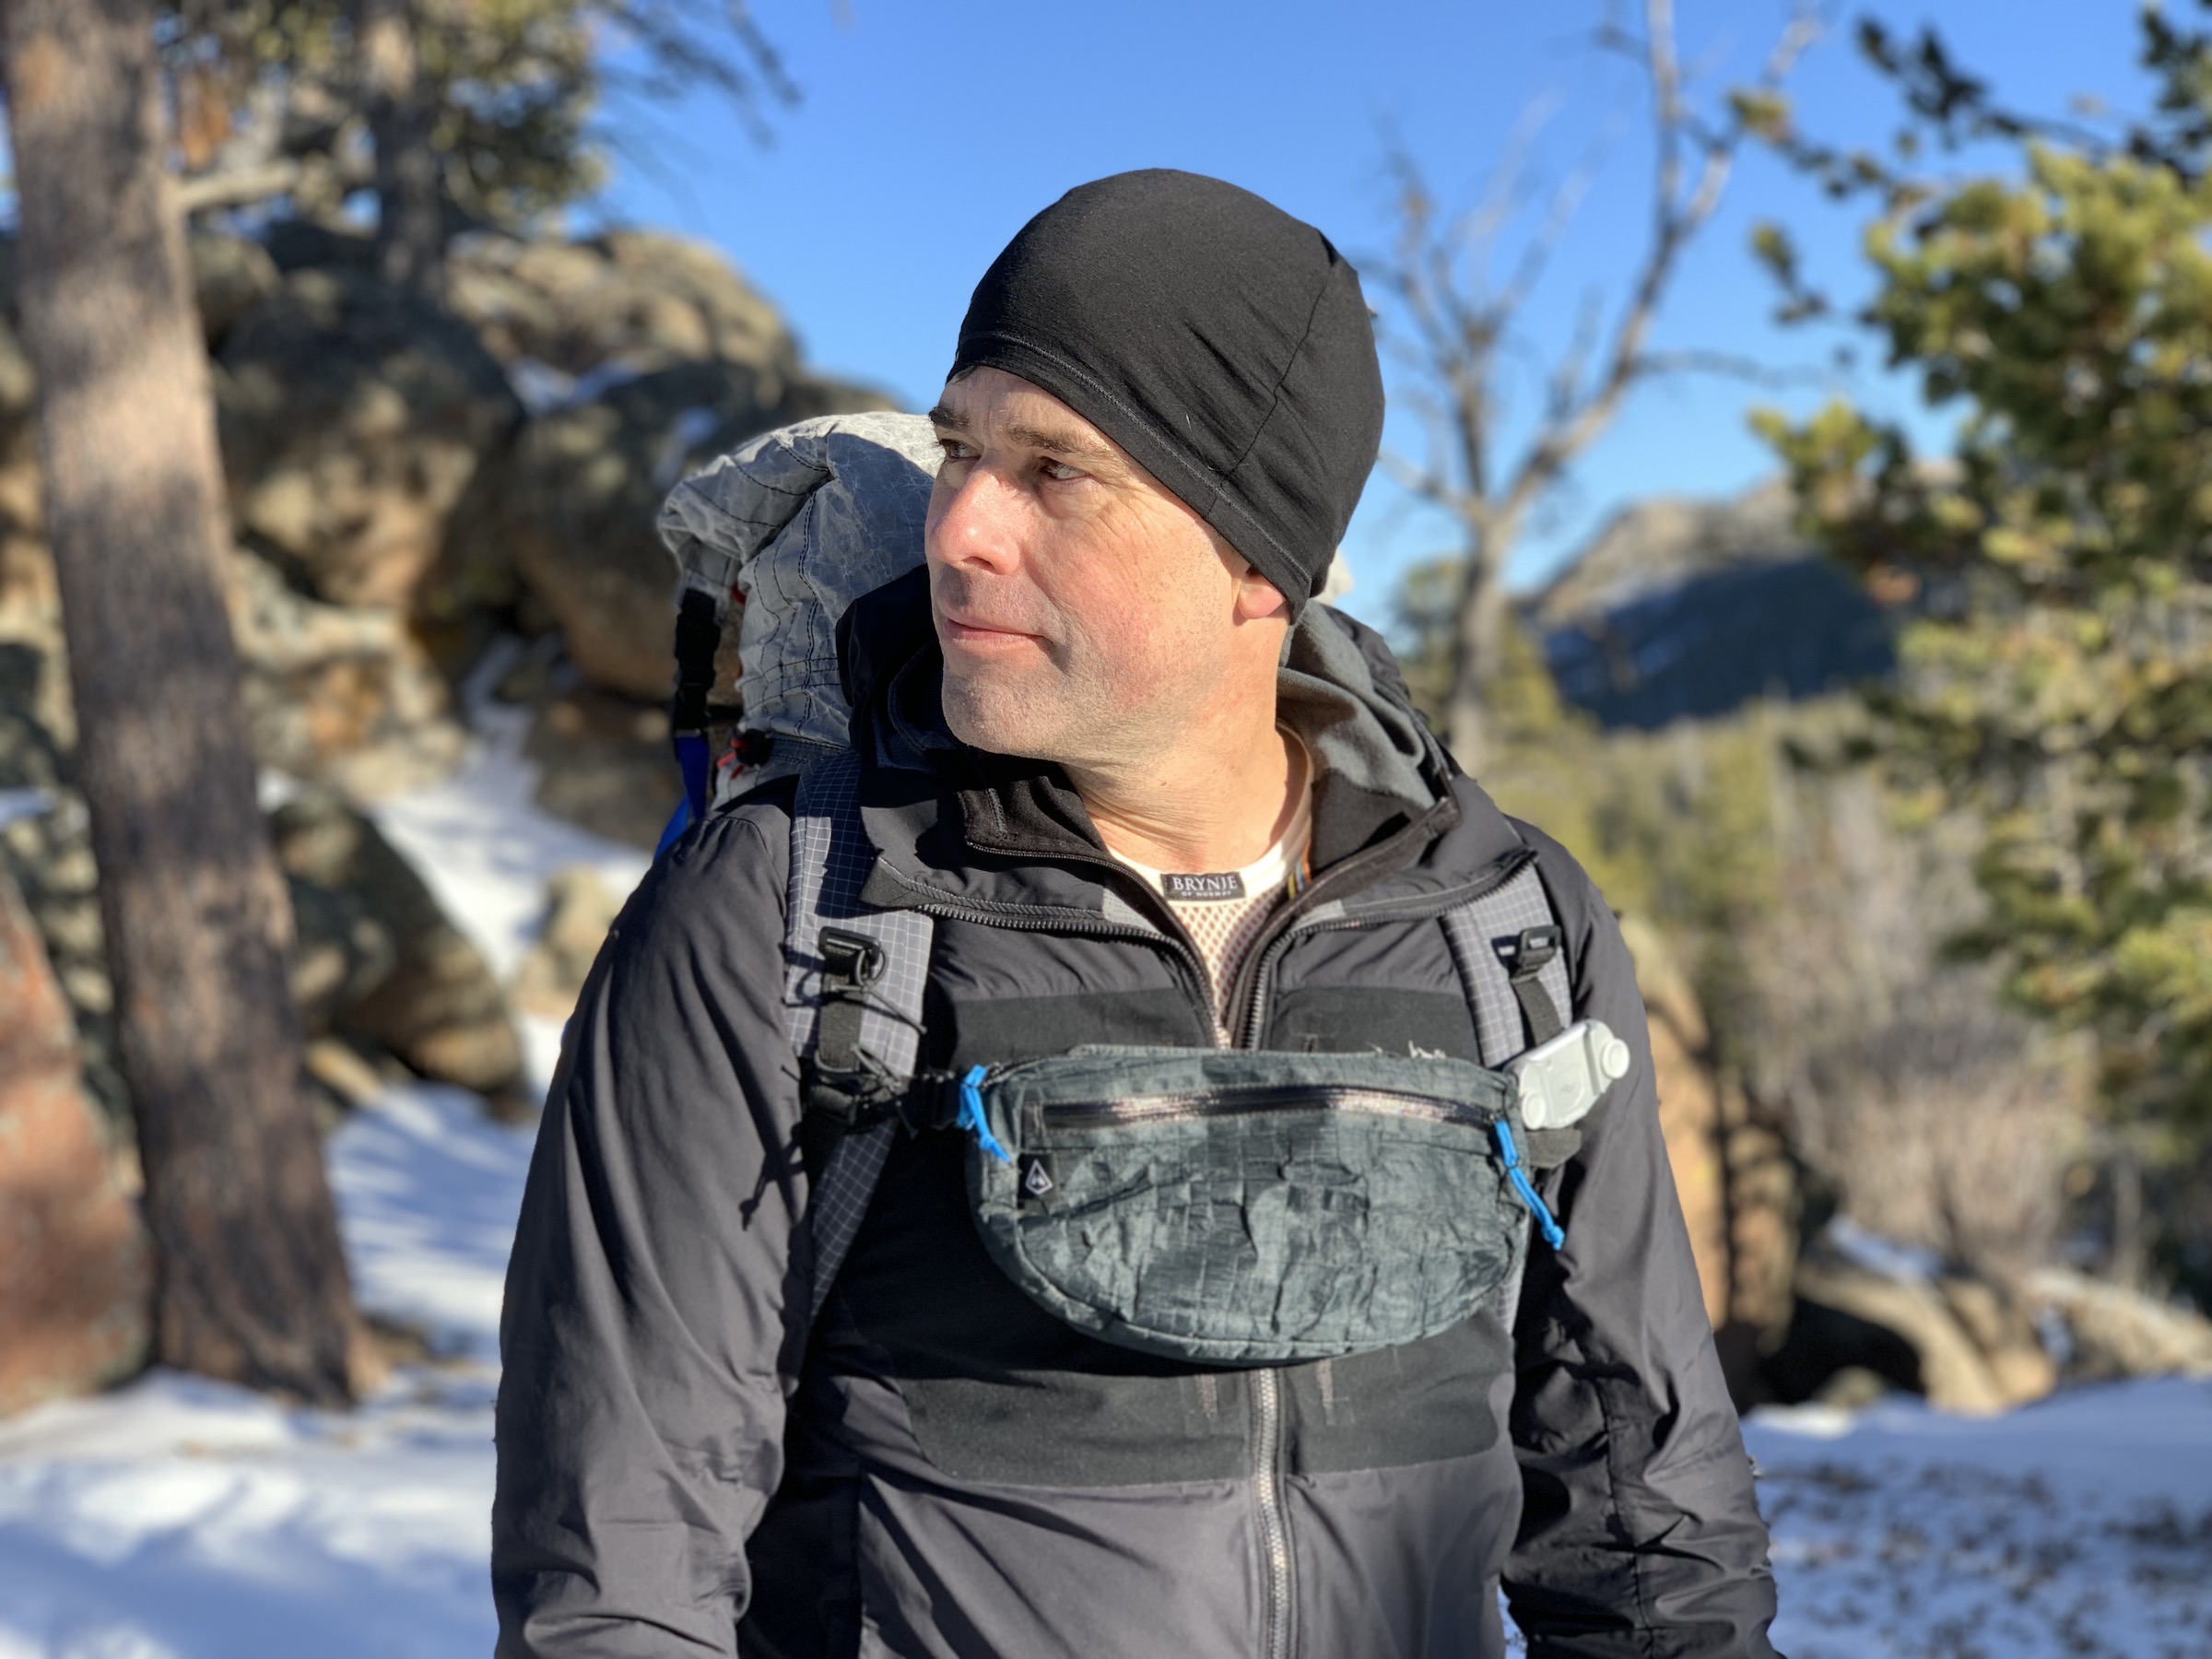
The Hyperlite Mountain Gear Versa Pouch, with hip belt removed and my chest strap threaded through a sleeve on the back of the pouch. Laramie Range, Wyoming.
ZPacks Water Bottle Holder
I’m not a fan of hydration bladders, drinking through a squeeze filter, dislocating a shoulder to access a water bottle pocket on the side of my pack, or stopping just to take a drink of water from my bottle. Shoulder-strap attached water bottle pockets that hold a smartwater bottle are perfect for me. I usually only use one (the other shoulder strap is usually reserved for my bear spray). I prefer a pocket with cylindrical structure (rather than a stretch pocket) to make access easier. The ZPacks Water Bottle Holder is light and perfectly sized for my favorite on-trail bottle – a 20-ounce smartwater bottle.
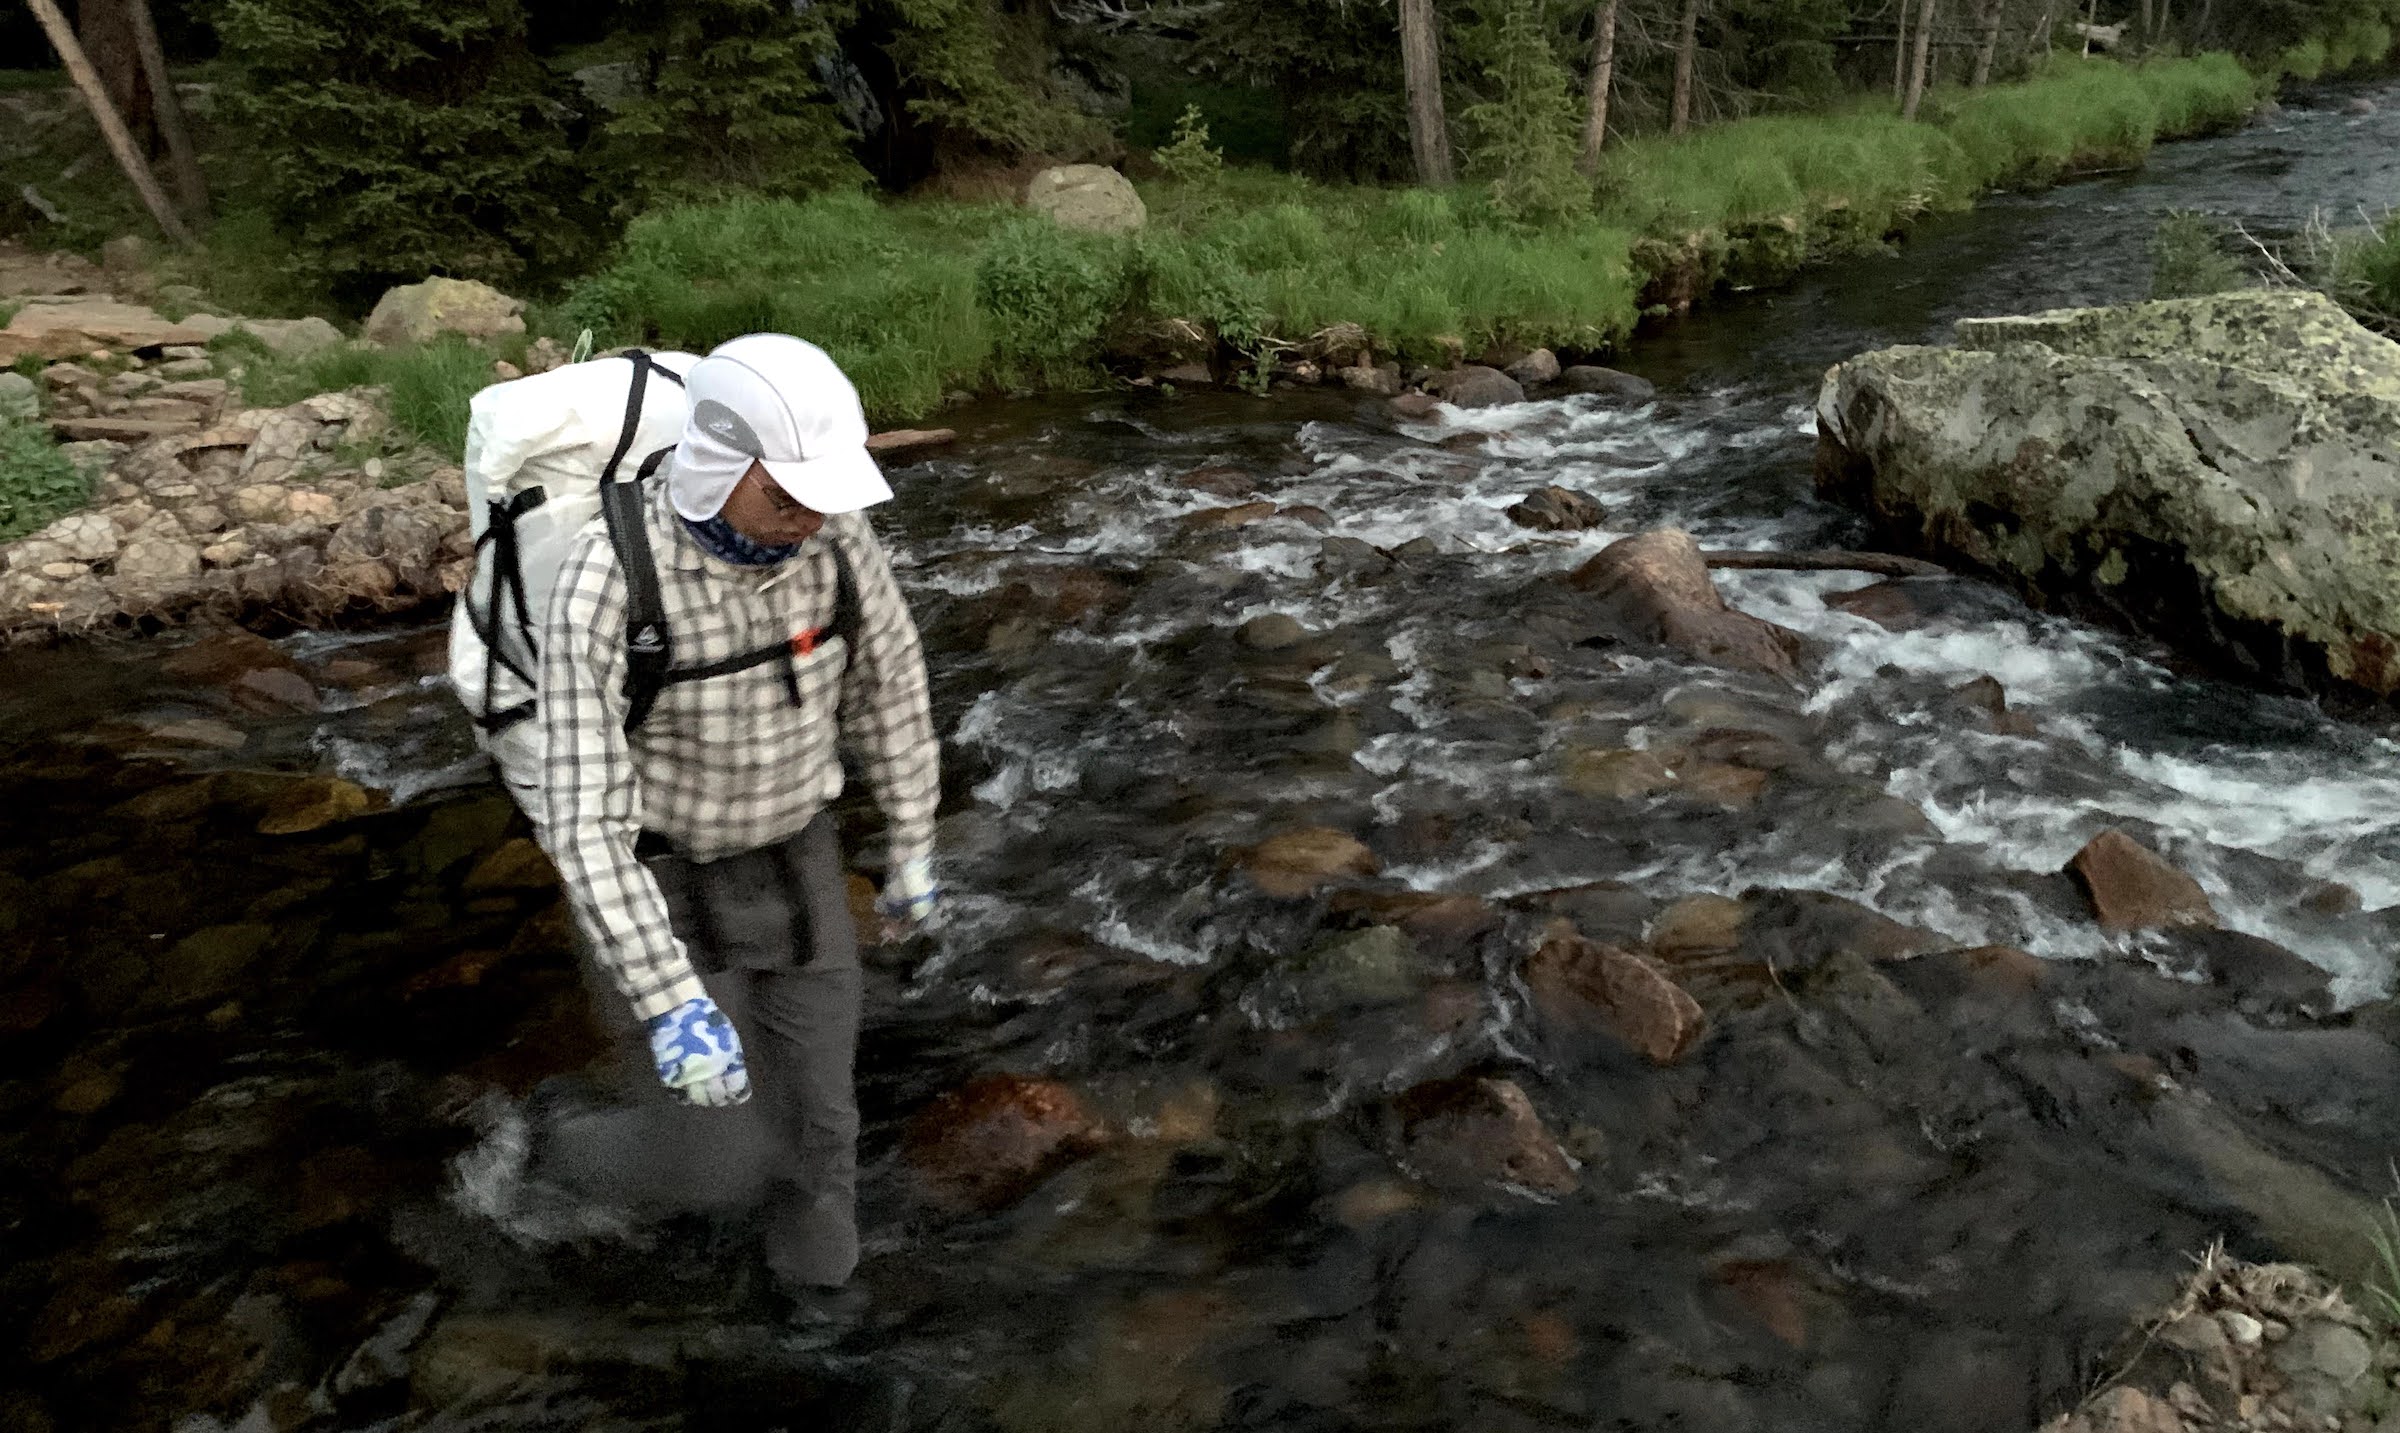
Kitted out for an 8-day trek in the Wyoming Bighorn Range this summer. My ZPacks Water Bottle Pocket contains a 20-ounce smartwater bottle and is affixed to my left shoulder strap.
Other Packing Systems
I’ve also been testing an Arc’teryx Aerios 45 Backpack this year. I’m intrigued, but I’m not a fan of the shape – it’s a little bulbous when packed to the hilt. That may be something that just comes out when someone takes a photo of me wearing the pack. I don’t actually notice it when the load is less than 30 pounds or so. I love the body access zipper, thin daisy chains, roll-top closure, cord storage on the rear panel, shoulder strap config (running-style harness with great stretch pockets), and sort-of-easily-accessible side pockets. Not a fan of the hip belt buckle (it slips), but that’s solvable with a third-party upgrade.
Arc’teryx Aerios 45 Backpack in the Tenmile Range, Colorado.
Shelter Systems
Locus Gear Khufu DCF-B
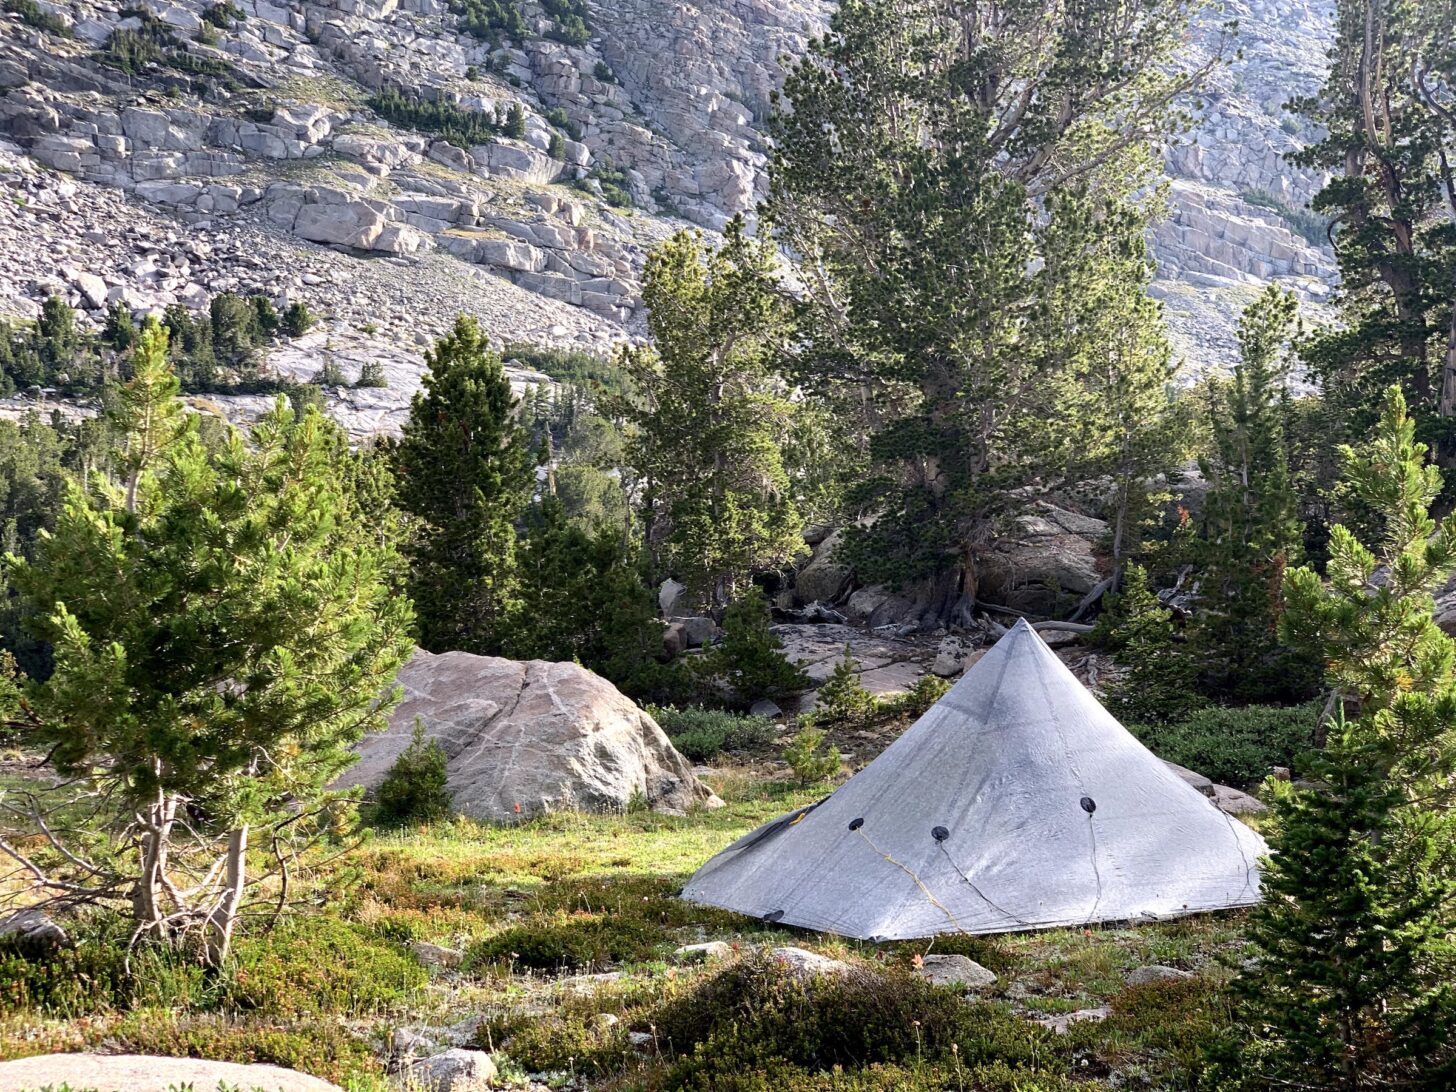
I’ve used Locus Gear shelters for more than twelve years, and this is my second. The Locus Gear Khufu DCF-B (🎯) has impeccable cut-and-(seam bonding) quality. Mine has no wrinkles whatsoever and is the most precisely-cut DCF shelter I own. For me, this is both a four-season shelter and an above-the-treeline shelter in all but winter blizzard conditions.
Locus Gear Khufu DCF-B above the treeline in September in the Absaroka-Beartooth Wilderness, Montana.
Tarptent Notch Li
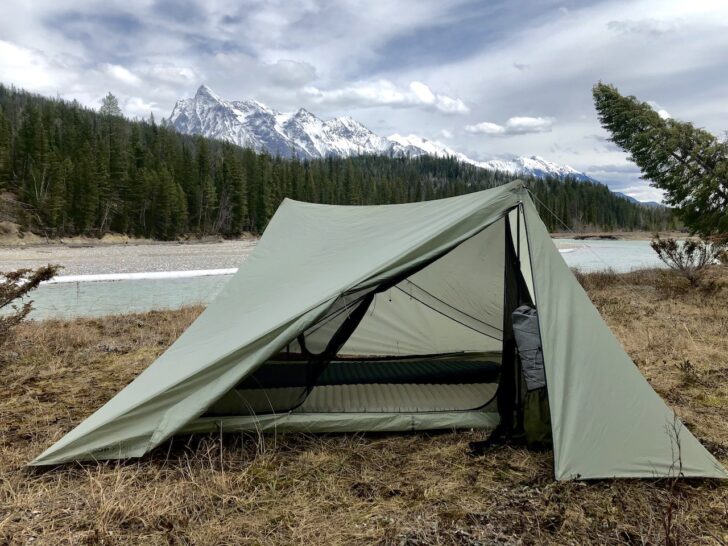
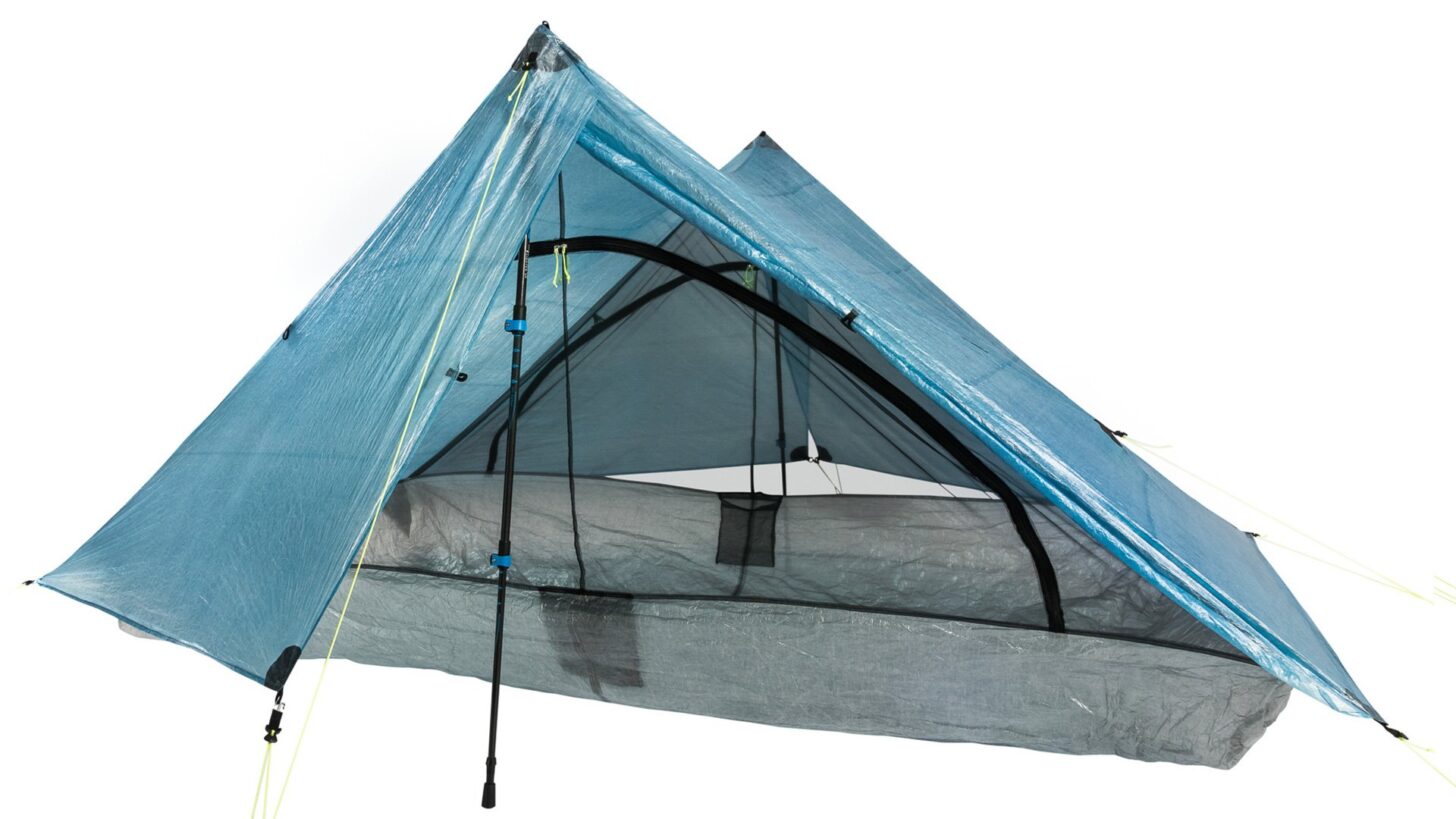
When I’m willing to accept a small weight penalty and need protection from bugs or better livability in rainy weather, I’ll opt for the Tarptent Notch Li (🎯). Dual vestibules and a mesh inner tent, a very easy pitch, and enough storm resistance for most 3-season conditions make this an extremely versatile shelter.
Tarptent Notch Li in the Cloud Peak Wilderness, Wyoming.
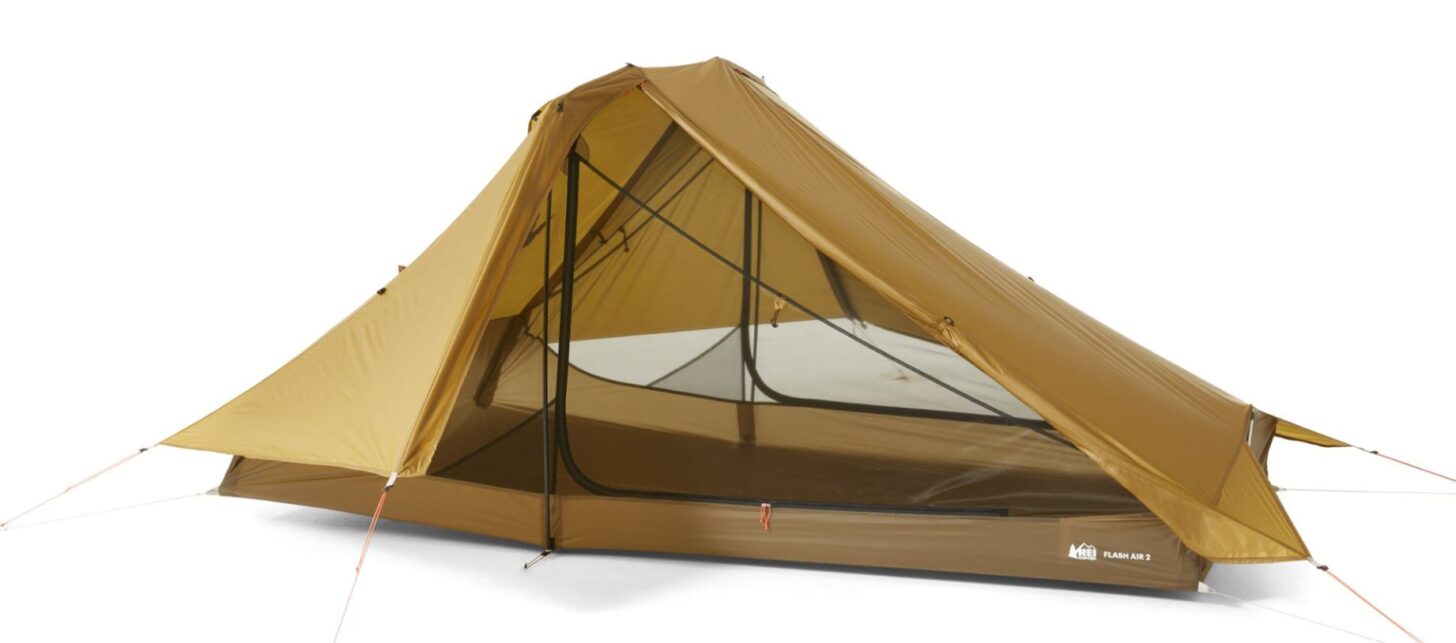
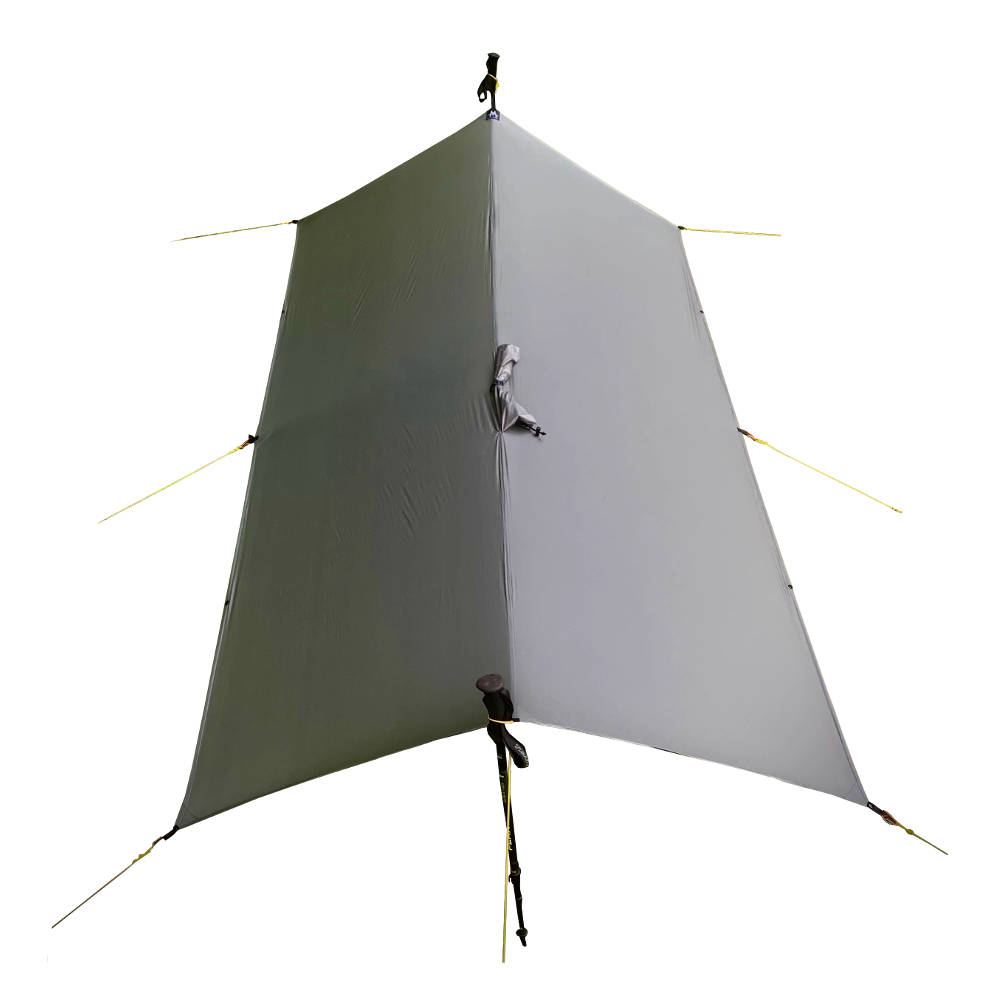
Hyperlight Mountain Gear Flat Tarp
I’m an avid tarp user. Using a tarp provides me with a creative outlet for seeking a more primal connection with nature. Pitching a tarp requires more time, skill, and energy than pitching either my Locus Khufu or Tarptent Notch. However, having open air around me with some overhead protection completely changes my wilderness experience. My tarp of choice is the Hyperlite Mountain Gear DCF Flat Tarp. I prefer flat tarps over shaped (e.g., catenary curve) tarps because they can be pitched in different configurations. I usually pitch my flat tarp in an A-frame, a hybrid A/lean-to, or prow configuration.
Subzero (F) winter camping with the Hyperlite Mountain Gear Flat Tarp in Southeast Wyoming.
Other Shelter System Gear
On fastpacking trips when I’m trying to go as light as possible but still need an overhead shelter, I use a ZPacks Hexamid Pocket Tarp (⚡) for its lightweight and ease of pitch.
Brewing tea on an alcohol stove under the ZPacks Hexamid Pocket Tarp with Doors. This is a specialty shelter for saving as much weight as possible when you’re not expecting high winds. Sherman Range, Wyoming.
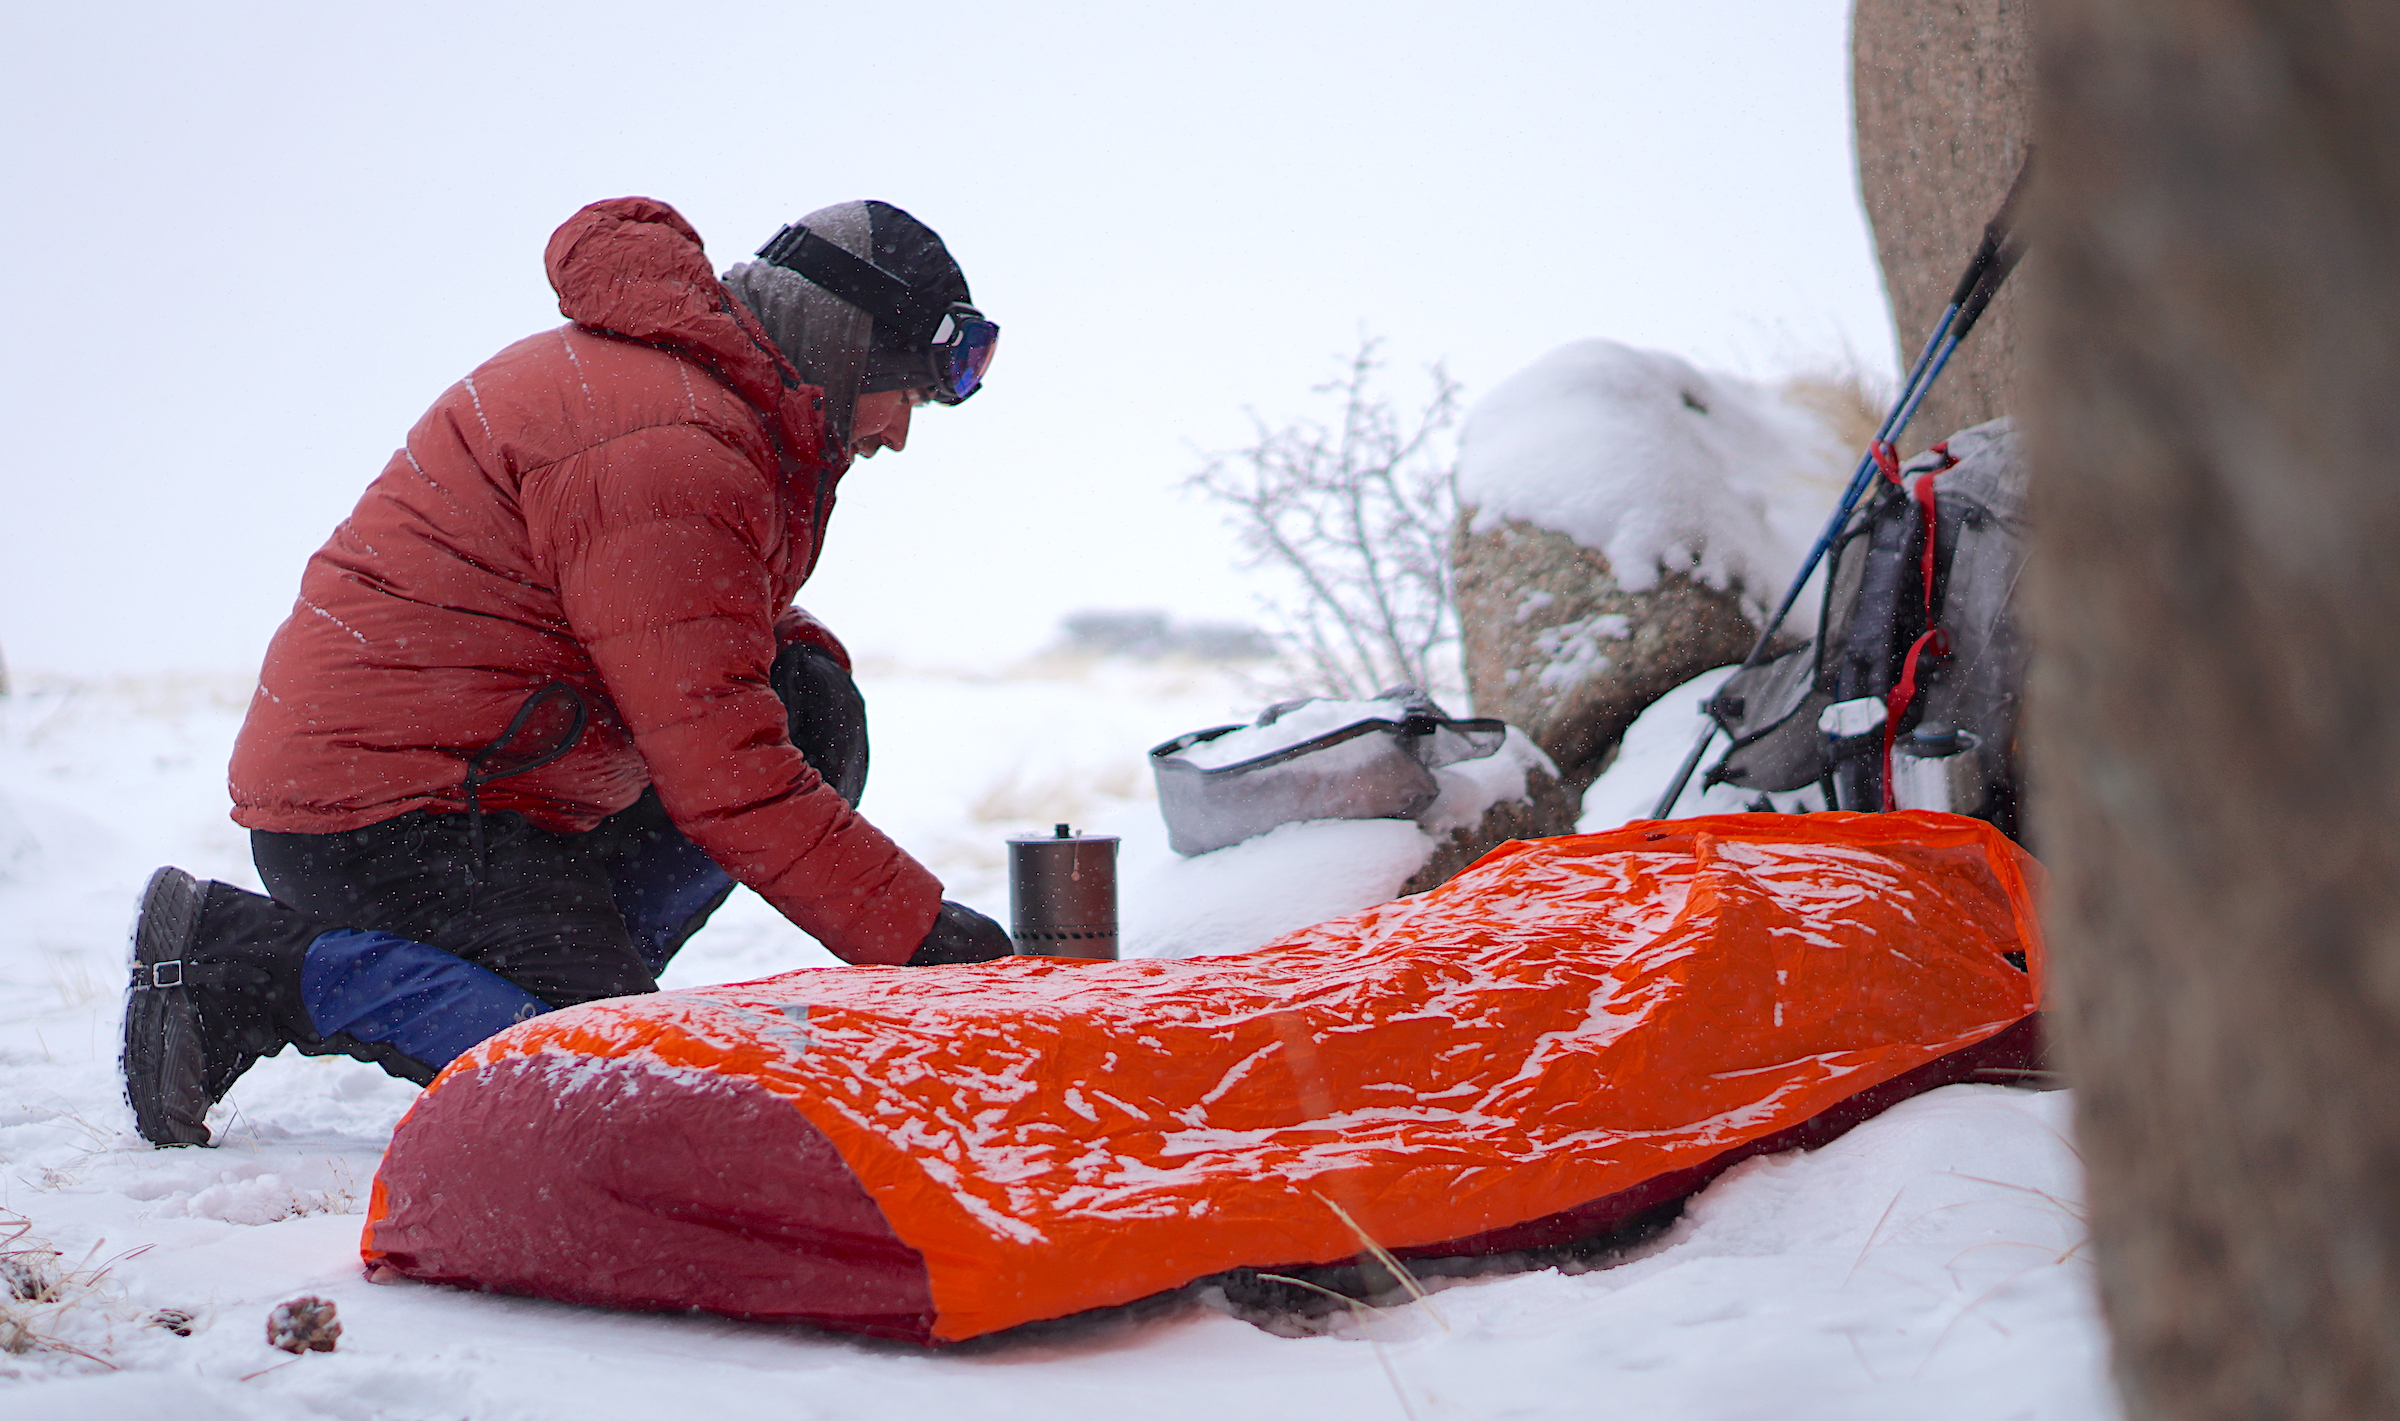
For other shelters, I use a Hyperlite Mountain Gear Ultamid 4 when I need to share a shelter with a fellow hiking pal; a Nemo Dagger 3P with my wife and dog; a Locus Gear Djedi (⚡) for alpine (above the treeline) mountaineering, or when I need a roomy shelter to hole up in during extended rain; and an MSR Advance Pro Bivy Sack when minimalism is on the menu.
Sleeping Systems
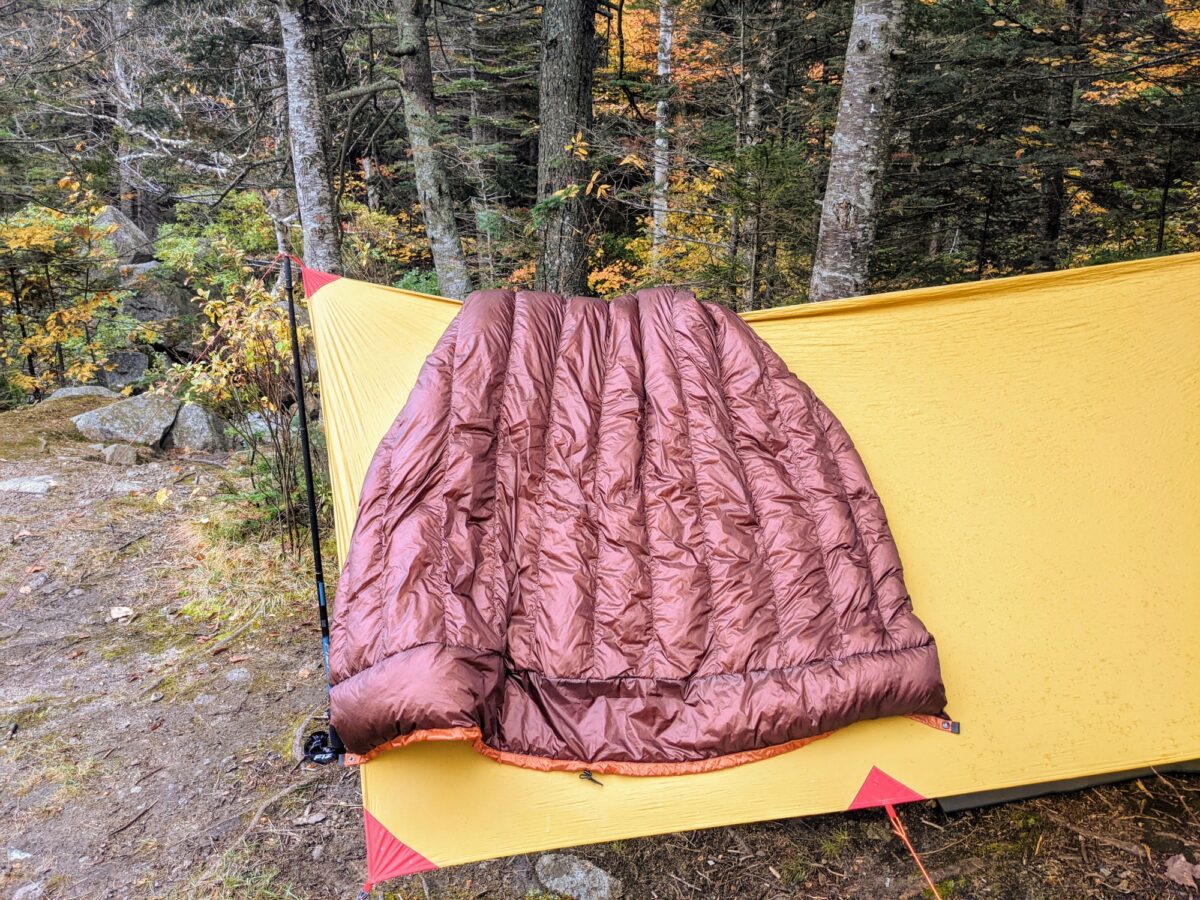
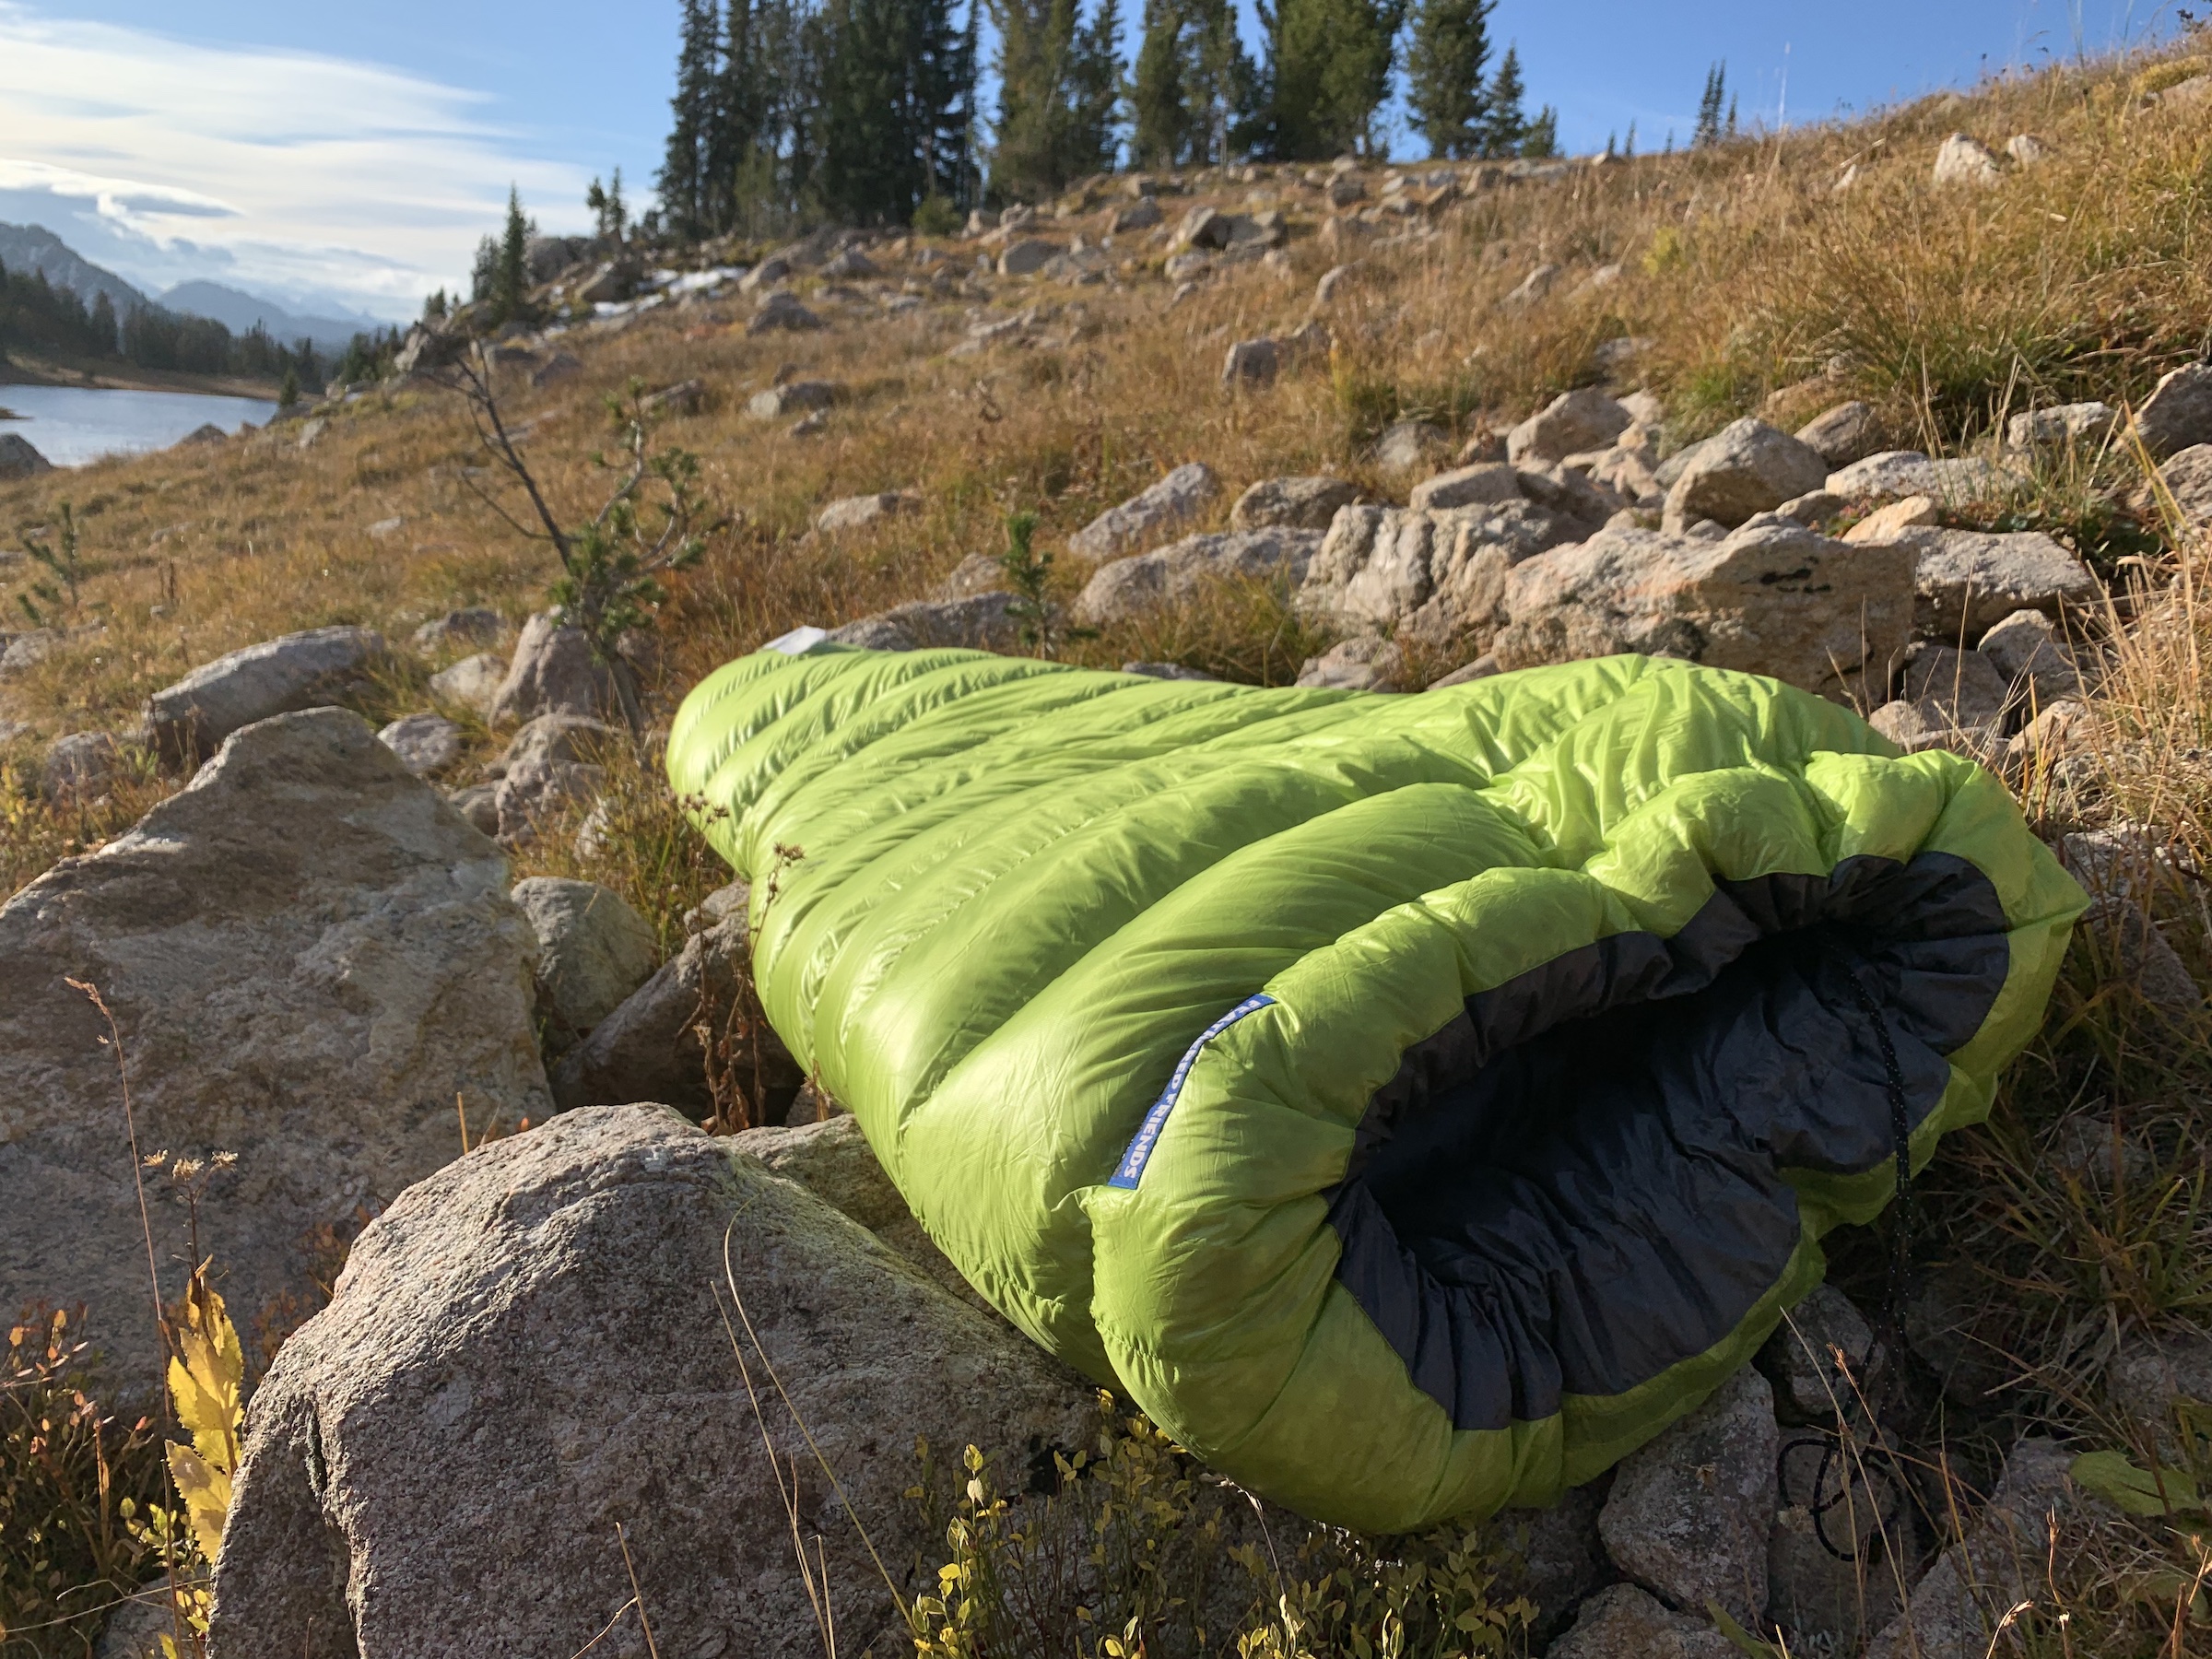
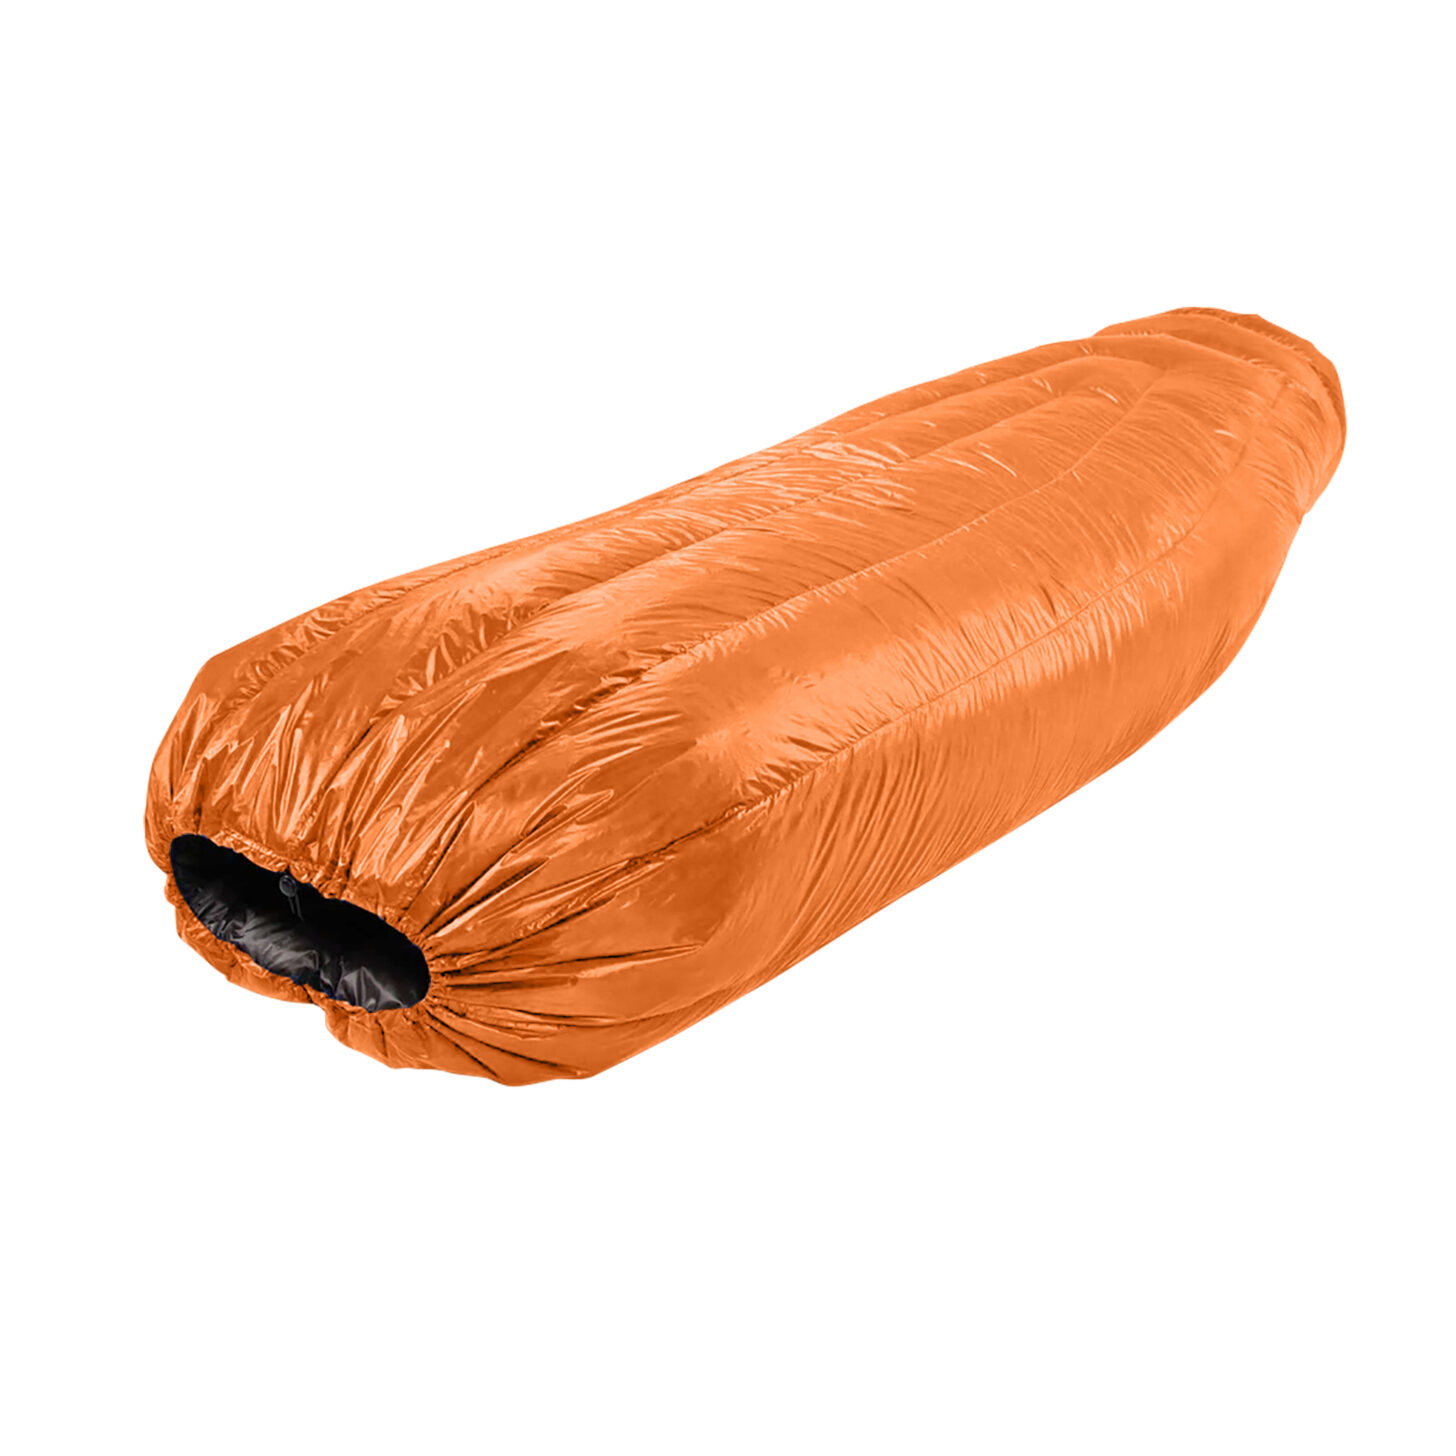
The Feathered Friends Tanager 20 CFL is my favorite 3-season sleeping bag. It’s a simple hoodless, zipperless tube with an even distribution of down throughout its horizontal baffling. I can cinch up the collar, roll around, and not have to worry about cold spots. I’ll combine it with an Enlightened Equipment Enigma Apex Quilt (⚡). Otherwise, my summer bag is the now-discontinued Katabatic Gear Chisos 40 Quilt. I’ve owned this for several years and appreciate the quality of construction and attention to detail. My son Chase uses the slightly more insulated Palisade 30, which is probably a better choice for the mountains during the summer.
The Feathered Friends Tanager CFL 20 weighs only 20 ounces but is a very efficient design – no hood, no zipper, tapered mummy shape. It’s outrageously cozy. Absaroka-Beartooth Wilderness, Montana.
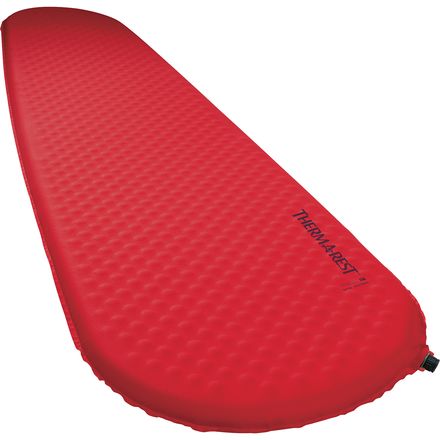
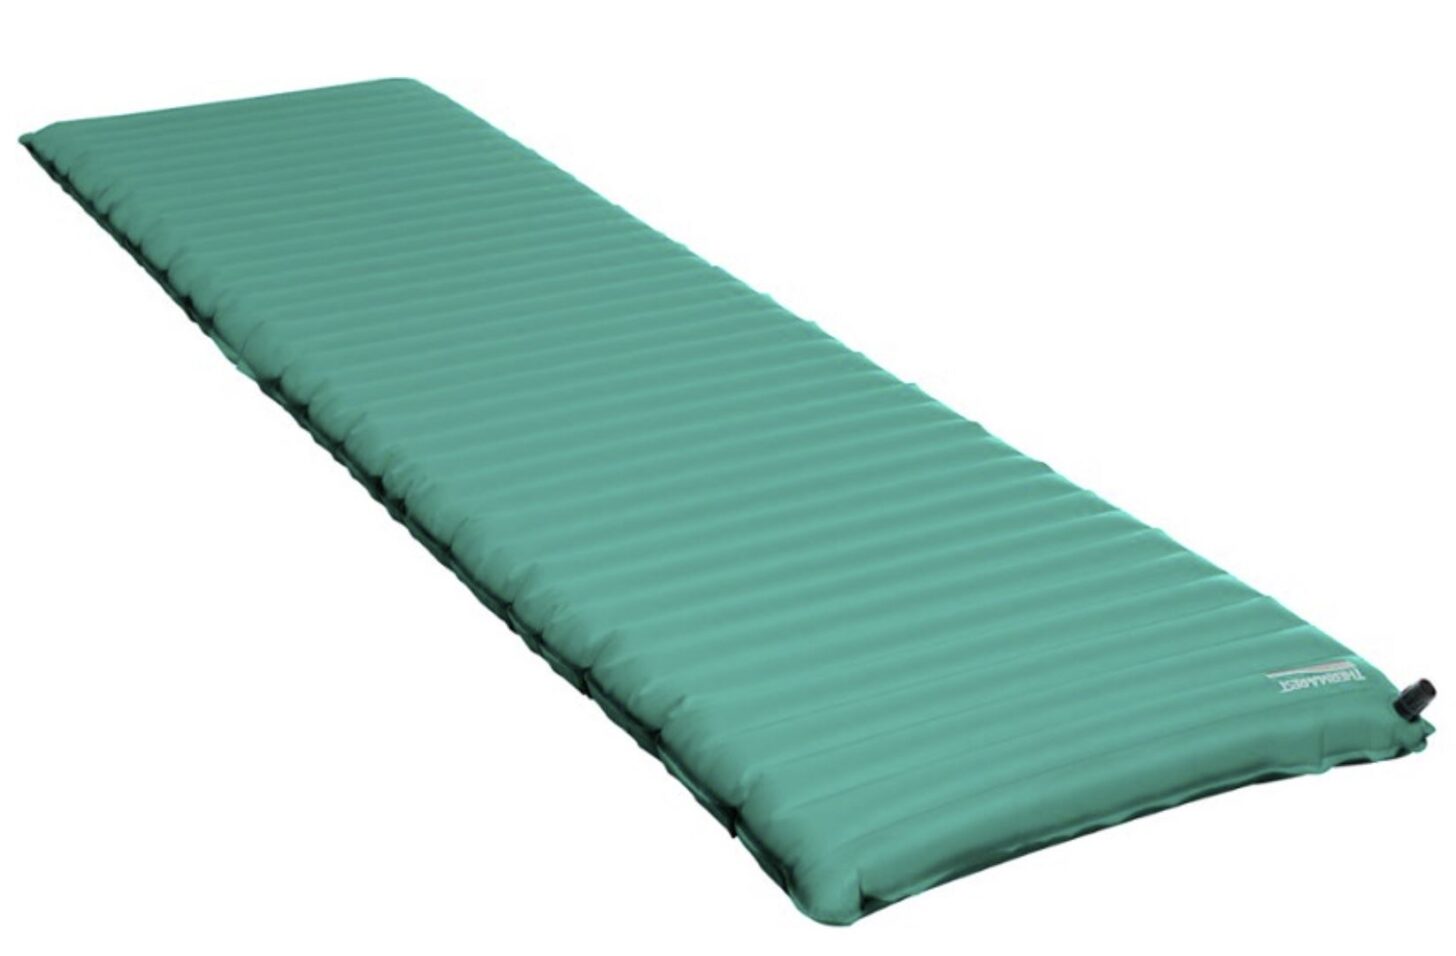
For comfort, I use a Nemo Equipment Tensor Insulated Pad. I’m not a big guy, but I opt for the wide version of the pad so I can lie on my back and keep my arms on the pad, or lie on my side and scissor my legs without having them hang off the pad. The wide pad adds so much to my comfort! My favorite feature of this pad is its stability, a result of a high density of welded baffles arranged in a grid – much better than either horizontal or vertical tubes.
I’ll add a Gossamer Gear Thinlight pad underneath the Tensor for sleeping on snow. For alpine mountaineering when I need a failsafe (non-puncturable) solution, I still opt for a 1.5-cm thick Zotefoams Evazote pad (🎯), which for several years, has maintained its thickness, easily outlasting a Therm-a-Rest Z-Rest.
Rainwear
I recently wrote about rain jackets here, where I advocated for replacing ultralight, minimally-featured jackets with options that have better ventilation when you are expecting sustained rain. In that context, the jacket I’ve used the most is the Enlightened Equipment Visp (⚡). For mountaineering, heavy bushwhacking, or routes with lots of Class 3+ scrambling, I’ll opt for a more durable jacket (Arc’teryx Beta LT 🎯), the latter of which I’ve used for more than five years with heavy abuse in the mountains. Caveat: I take very good care of my rainwear, laundering them and restoring their DWR regularly.
If I don’t need either ventilation or durability, and the jacket is a just-in-case item that spends most of its time in my pack, my favorite option is the now-discontinued Montane Minimus 777 Pull-On but the Rab Phantom Pull-On Jacket (⚡) has served just fine for intermittent use.
For sub-freezing temperatures where the precipitation isn’t as wet, the Paramo Velez Smock is hard to beat for all-around comfort, because of its cozy lining and terrific ventilation.
I own two sets of rain pants: a pull-on model (ZPacks Vertice Pants) and a 3/4-length-side-zip model (Arc’teryx Zeta SL Pants). I pack and rarely wear the ultralight Vertice for most conditions that offer good weather forecasts, and the Zeta SL the rest of the time.
In deep winter, I rarely wear rain pants, and instead opt for a highly-breathable softshell pant (Arc’teryx Sigma FL Pants).
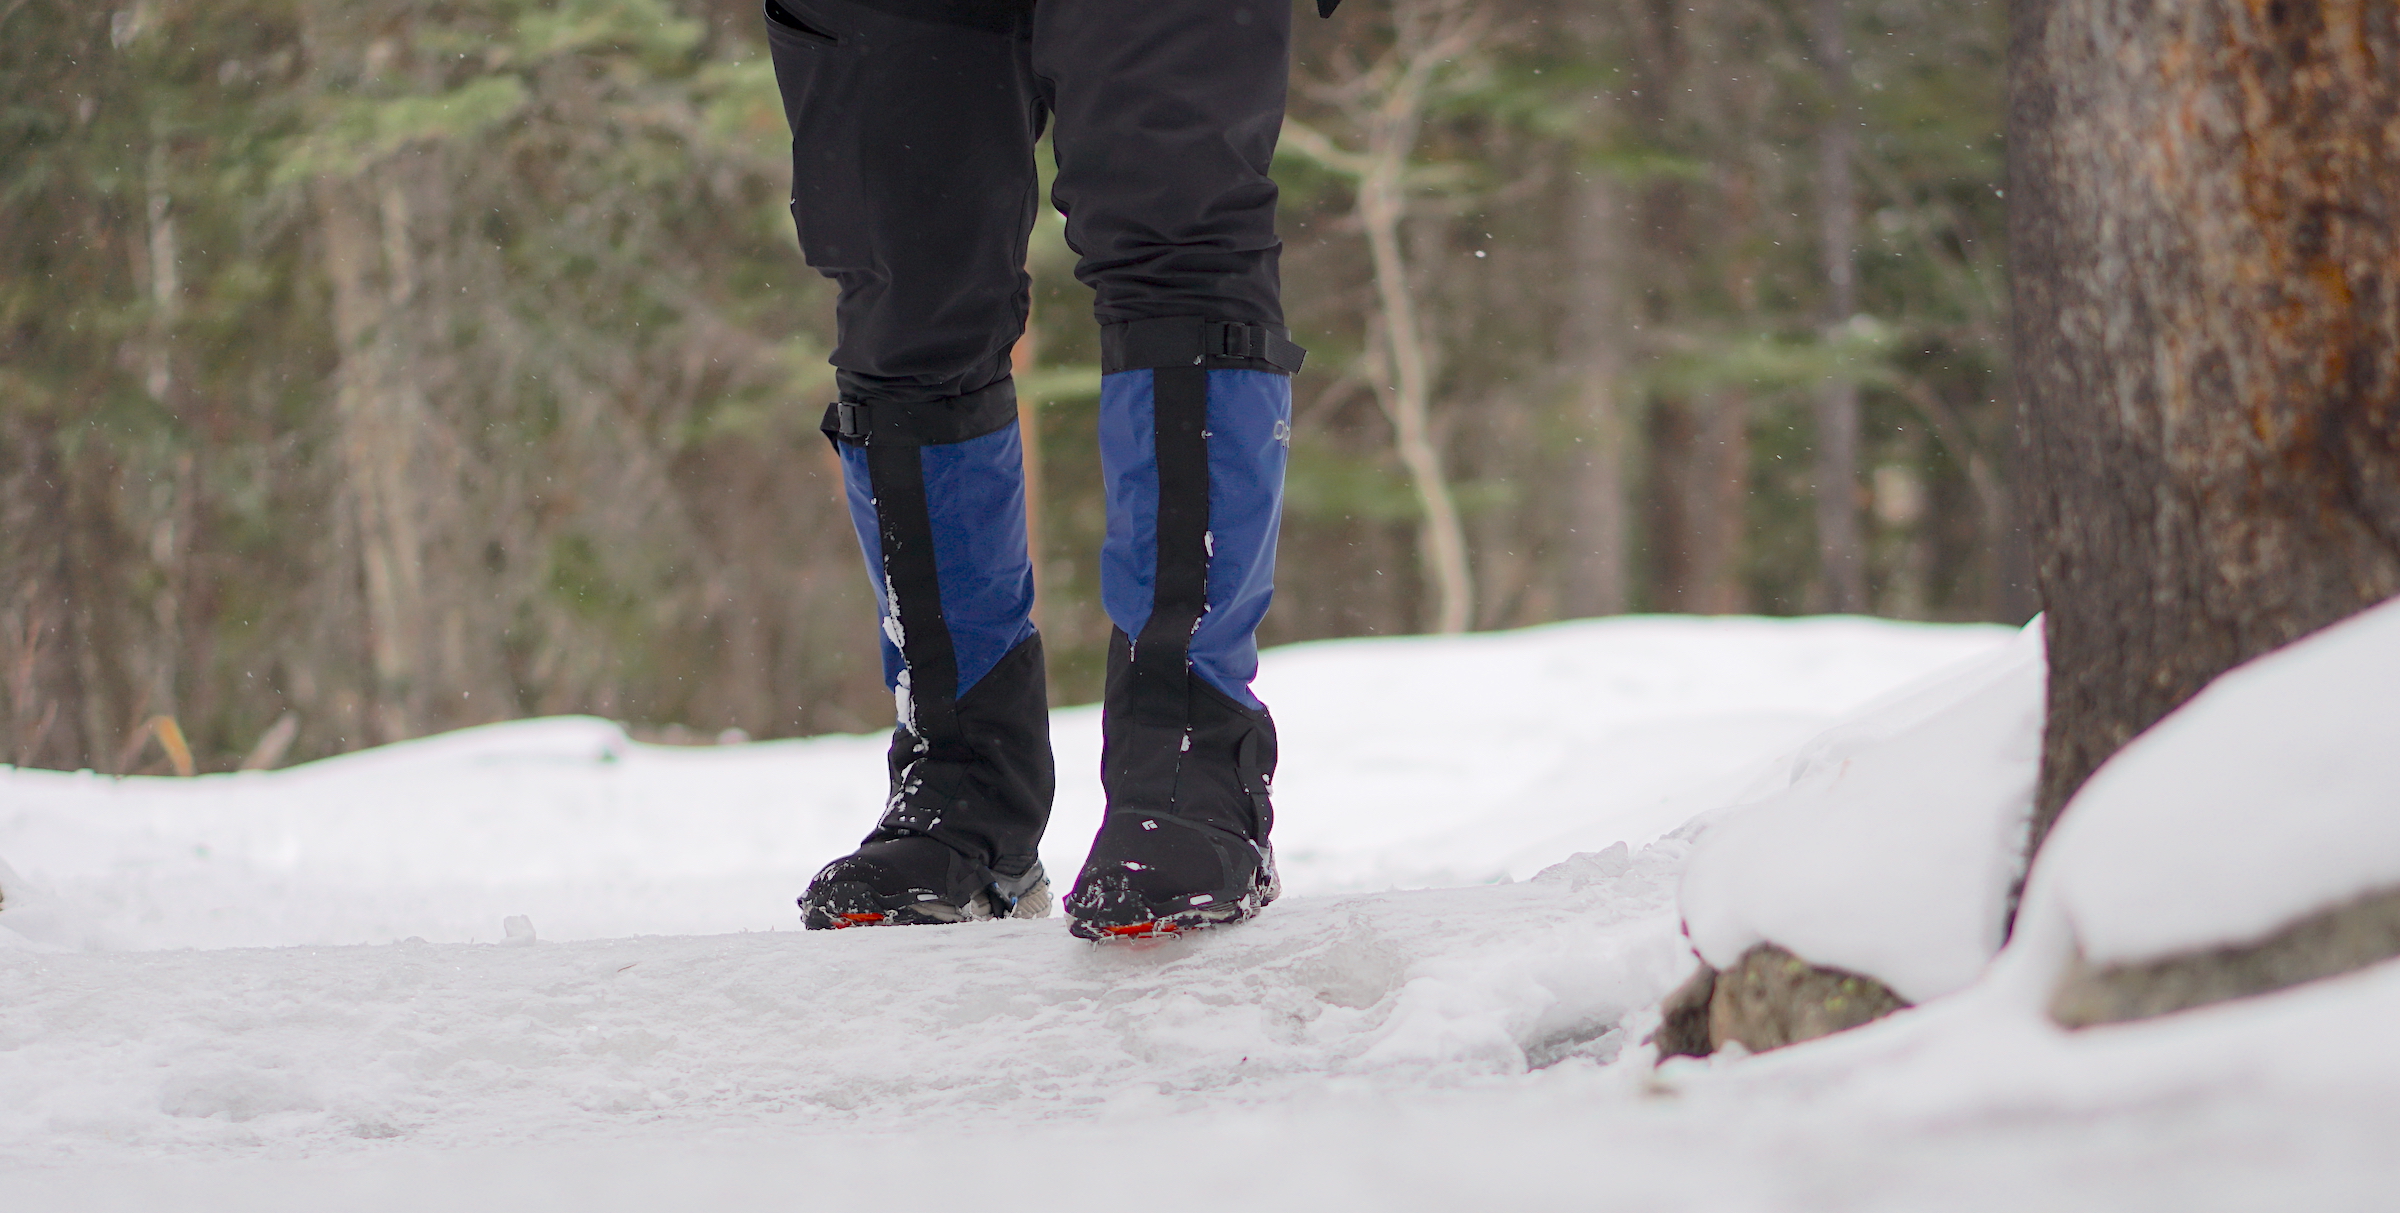
I’ve shredded more gaiters than I care to admit. I rarely wear gaiters in the summer and find them unnecessary outside of the desert. The only gaiters I own and use regularly anymore are the Outdoor Research Rocky Mountain High Gaiters, which I find to be the lightest high gaiter that’s durable enough for light mountaineering and bushwhacking. Combined with a mid-height waterproof-breathable trail running boot, they are indispensable for cold, wet conditions. Learn more in my Lightweight Footwear and Traction Systems for Snow Travel Webinar.
Outdoor Research Rocky Mountain High Gaiters – durable for long-term use, light enough for use with trail running shoes. Wild Basin, Rocky Mountain National Park, Colorado.
Insulated Clothing
My winter parka is still a Feathered Friends Helios Down Jacket. My ultralight down jacket is a Goosefeet Gear Custom Down Pullover (⚡) and is the jacket I pack for fastpacking trips when I know I’m not going to be spending much time hanging around camp outside of my sleeping bag at night.
My warm-weather down jacket is a Goosefeet Gear custom pullover that weighs less than six ounces. Laramie Range, WY.
I’ve been so impressed with the Enlightened Equipment Torrid Apex Pullover (there’s a full-zip jacket version as well). It’s warm, has a boxy enough fit to layer well over other clothing, and has a cozy hood and kangaroo pocket. This is the jacket I would design if I were a designer of ultralight gear. I’ve worn this jacket more than any other insulating piece this year, and the insulation has held up well – it’s retained more than 90% of its loft after more than 80 days of use this year.
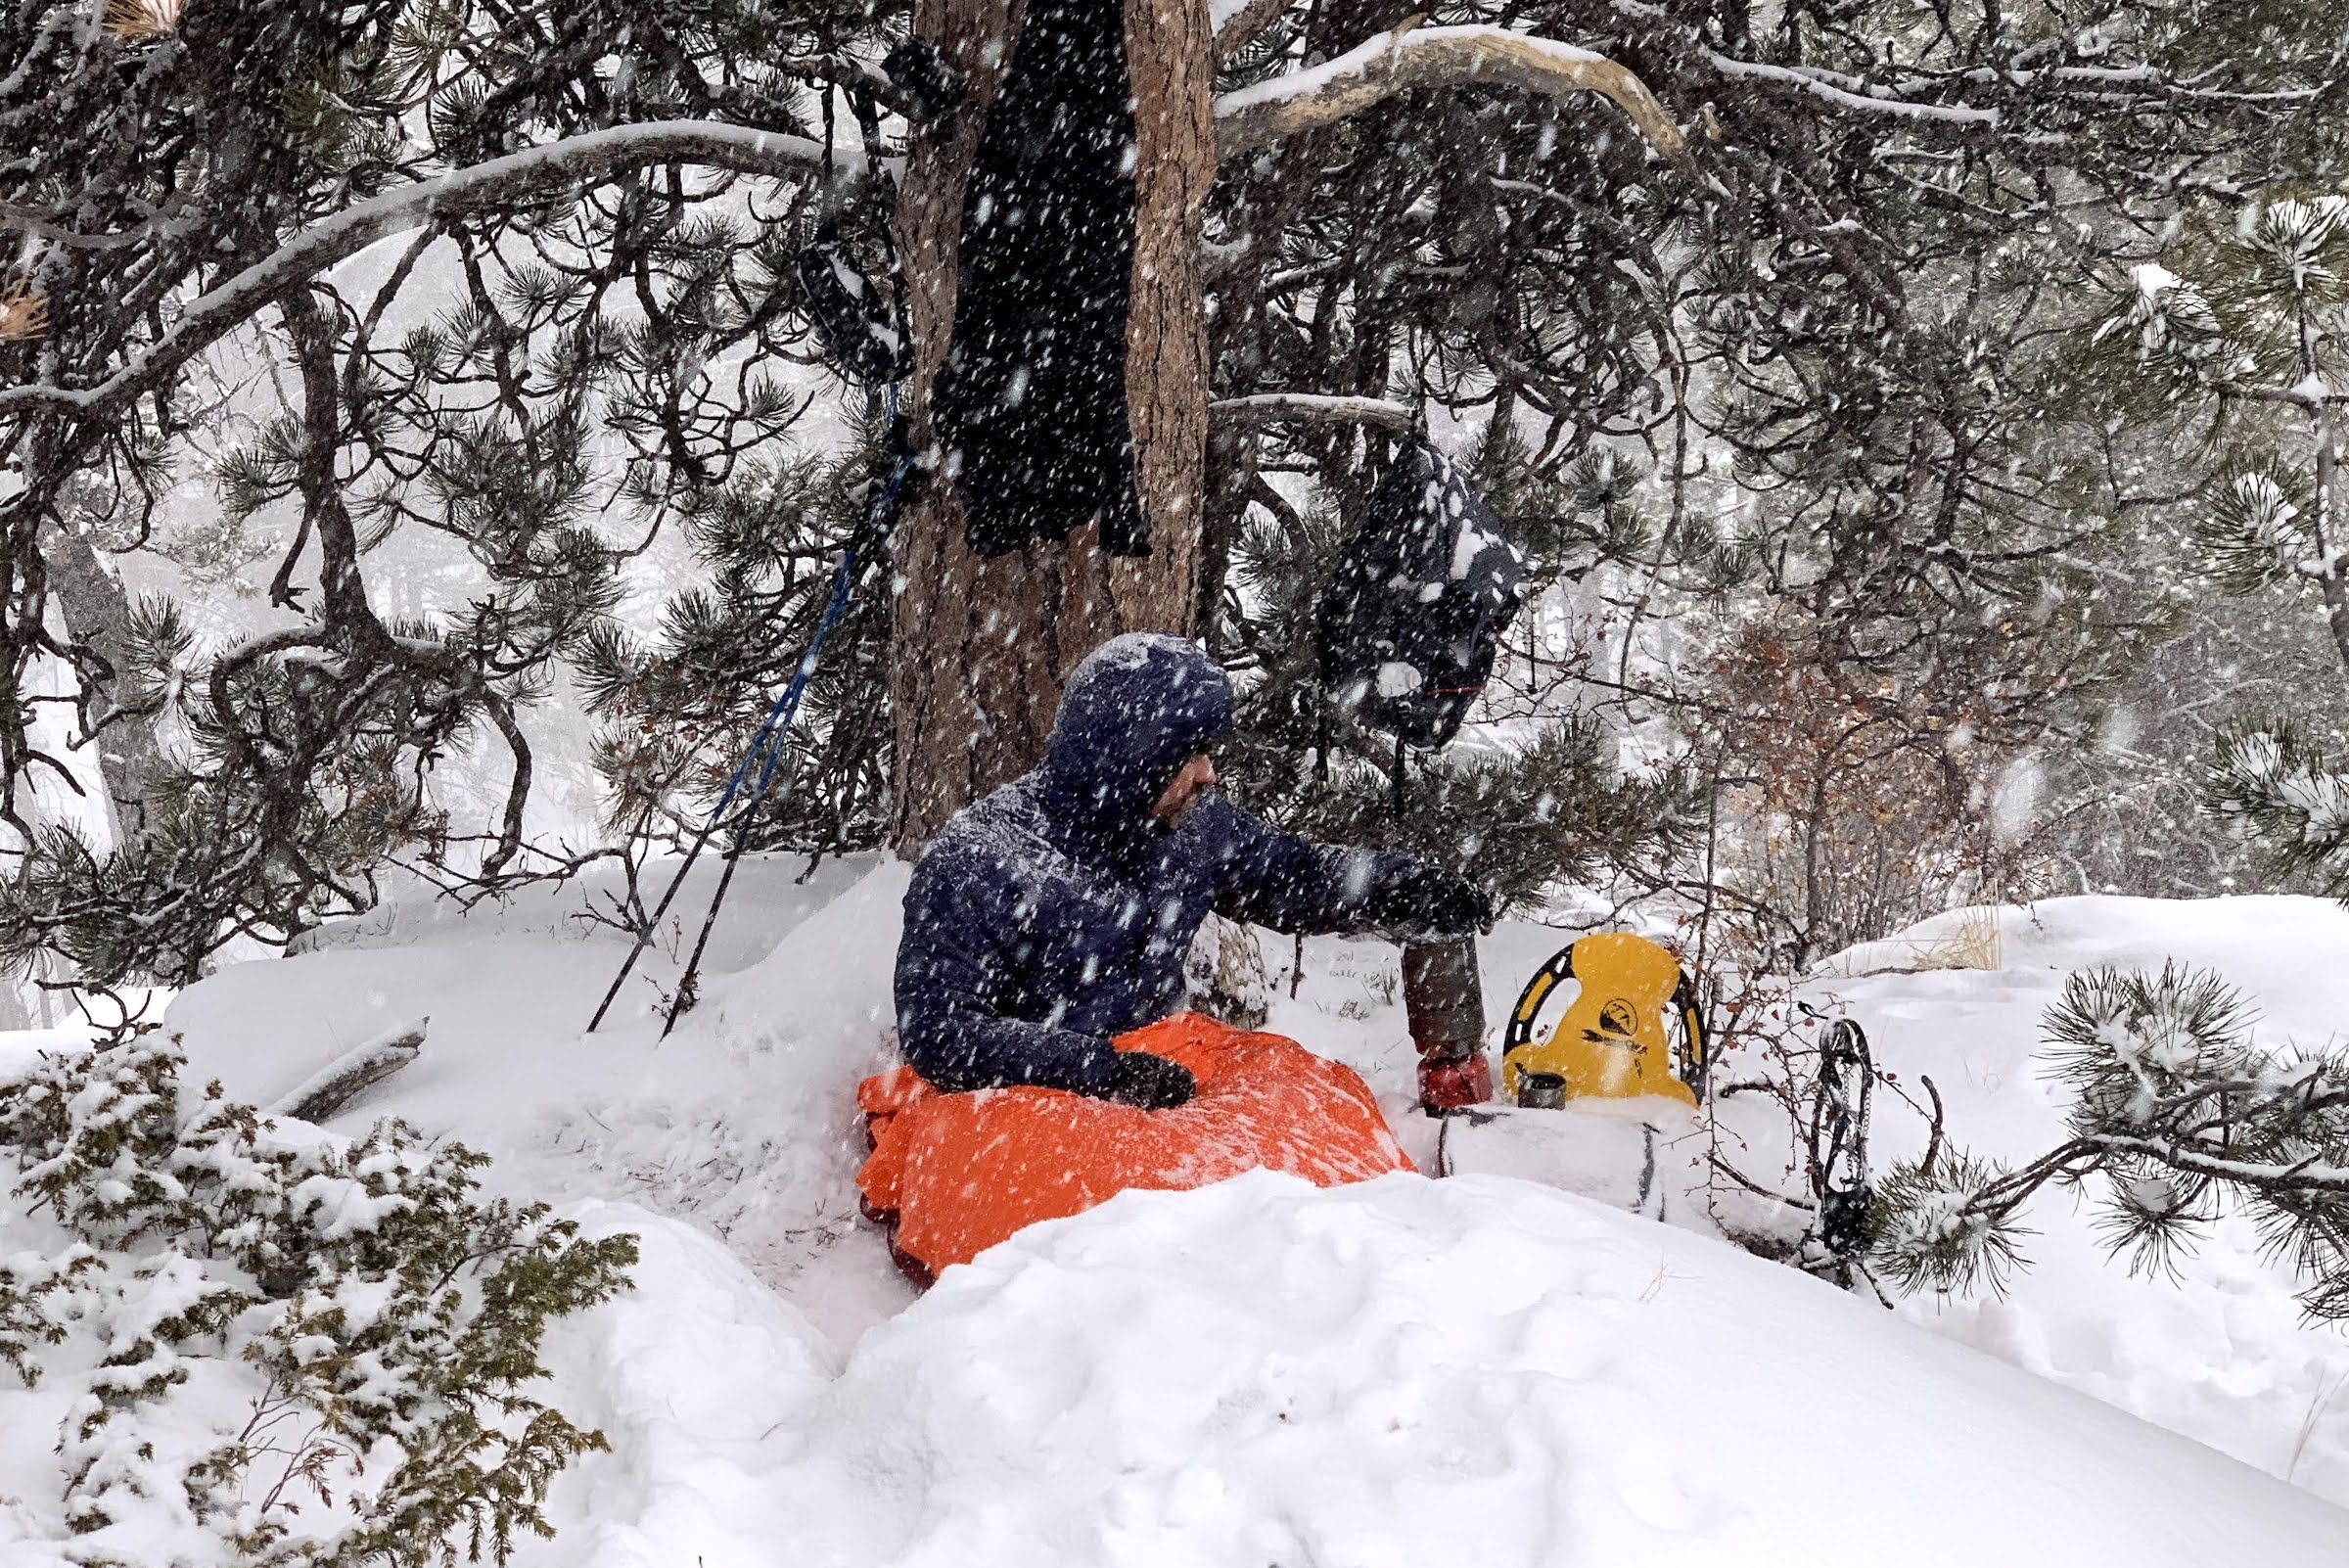
Bivy-sackin’ during a winter blizzard with a synthetic insulation kit that includes the Enlightened Equipment Torrid Apex Pullover. Sherman Range, SE Wyoming.
The PHD Yukon K Hoody is my preferred insulation when I’m trying to save as much weight as possible and I’m expecting temperatures below freezing. The warmth-to-weight ratio of the Yukon K is astounding, and I’ve never found a jacket as warm as the Yukon K at this weight. In many cases, it has replaced my Helios, which is getting dustier in my gear closet.
Staying warm in the PHD Yukon K Hoody during a subzero (F) traverse of the Sherman Range in SE Wyoming.
The Smartwool 150 Hoody is my primary base layer outside of bug season when it’s too warm to wear the Brynje shirt – which means I’ve worn the Smartwool 150 Hoody more than any other base layer this year. I was worried about the lack of zipper and loose hoody, but I’ve become quite fond of this simple design. This was one of my Staff Picks this year.
Smartwool 150 Hoody – no zip, roomy hood, and very comfortable. I’d wear this shirt every day of the year!
A new layer for me this year is the Senchi Designs Wren Hoodie (⚡). It’s made of the lightest version of Polartec Alpha Direct. Combined with a rain shell, this two-layer system is my favorite for hiking in cold rain, and is more comfortable than any other wet-weather system I’ve tried.
The Senchi Wren – Polartec Alpha Direct. This one caught me by surprise this year, and I’m finding myself wearing it more often than I expected in foul weather. Tenmile Range, Colorado.
My now-discontinued Patagonia Lightweight Capilene long john bottoms finally blew the crotch early this year, so I dug out a pair of Montbell Super Merino LW Tights from the closet. These are my primary bottom base layer, and are a good reminder why I love wool. Even if Patagonia brings back their old design, I probably won’t find the one-ounce weight savings worth the loss in comfort.
As for wind shirts, in spite of all that we’ve published suggesting that there’s not a lot of difference between the MVTR of wind shirts and rain jackets, I’m still a fan. My favorite wind shirt is the Patagonia Houdini Air (full-zip, hooded), and it goes with me on most trips. The primary benefit for me is purely tactile – it just feels less restrictive than a rain jacket, and worn over a soft base layer like my Smartwool 150 Merino Hoody or the Senchi Designs Wren, makes for an astoundingly comfortable 2-layer system for the cold, dry, windy weather that’s the dominant theme where I hike.
Last year I reviewed the Outdoor Research Flurry Sensor Glove and the same pair has accompanied me on most of my mountain trips this year as well. They are showing very little signs of wear outside of a few fingertips, but this hasn’t impacted their function at all (yet). Their hallmark features are warmth-to-weight ratio, hydrophobicity (resistance to wetting out from precipitation), and bicomponent construction that makes them soft and comfortable against the skin – and wind-resistant.
I outlined the rain mitt market in a recent gear guide, and the ones I found myself grabbing the most often this year include the Outdoor Research Revel Shell Mitts (for most 3-season trips in very wet weather), the REI Minimalist GTX 2.0 (my just-in-case mitten shell), and the Black Diamond Waterproof Overmitts (for backcountry skiing and snowshoeing in the winter).
The Outdoor Research Revel Shell Mitts are my favorite all-around rain mitt for the mountains. They are durable enough for bushwhacking and light scrambling, have a long gauntlet, and offer a great fit. Combined with my Outdoor Research Flurry Sensor Gloves, they are very close to what I consider a perfect 3+ season mountain handwear system. Tenmile Range, Colorado.
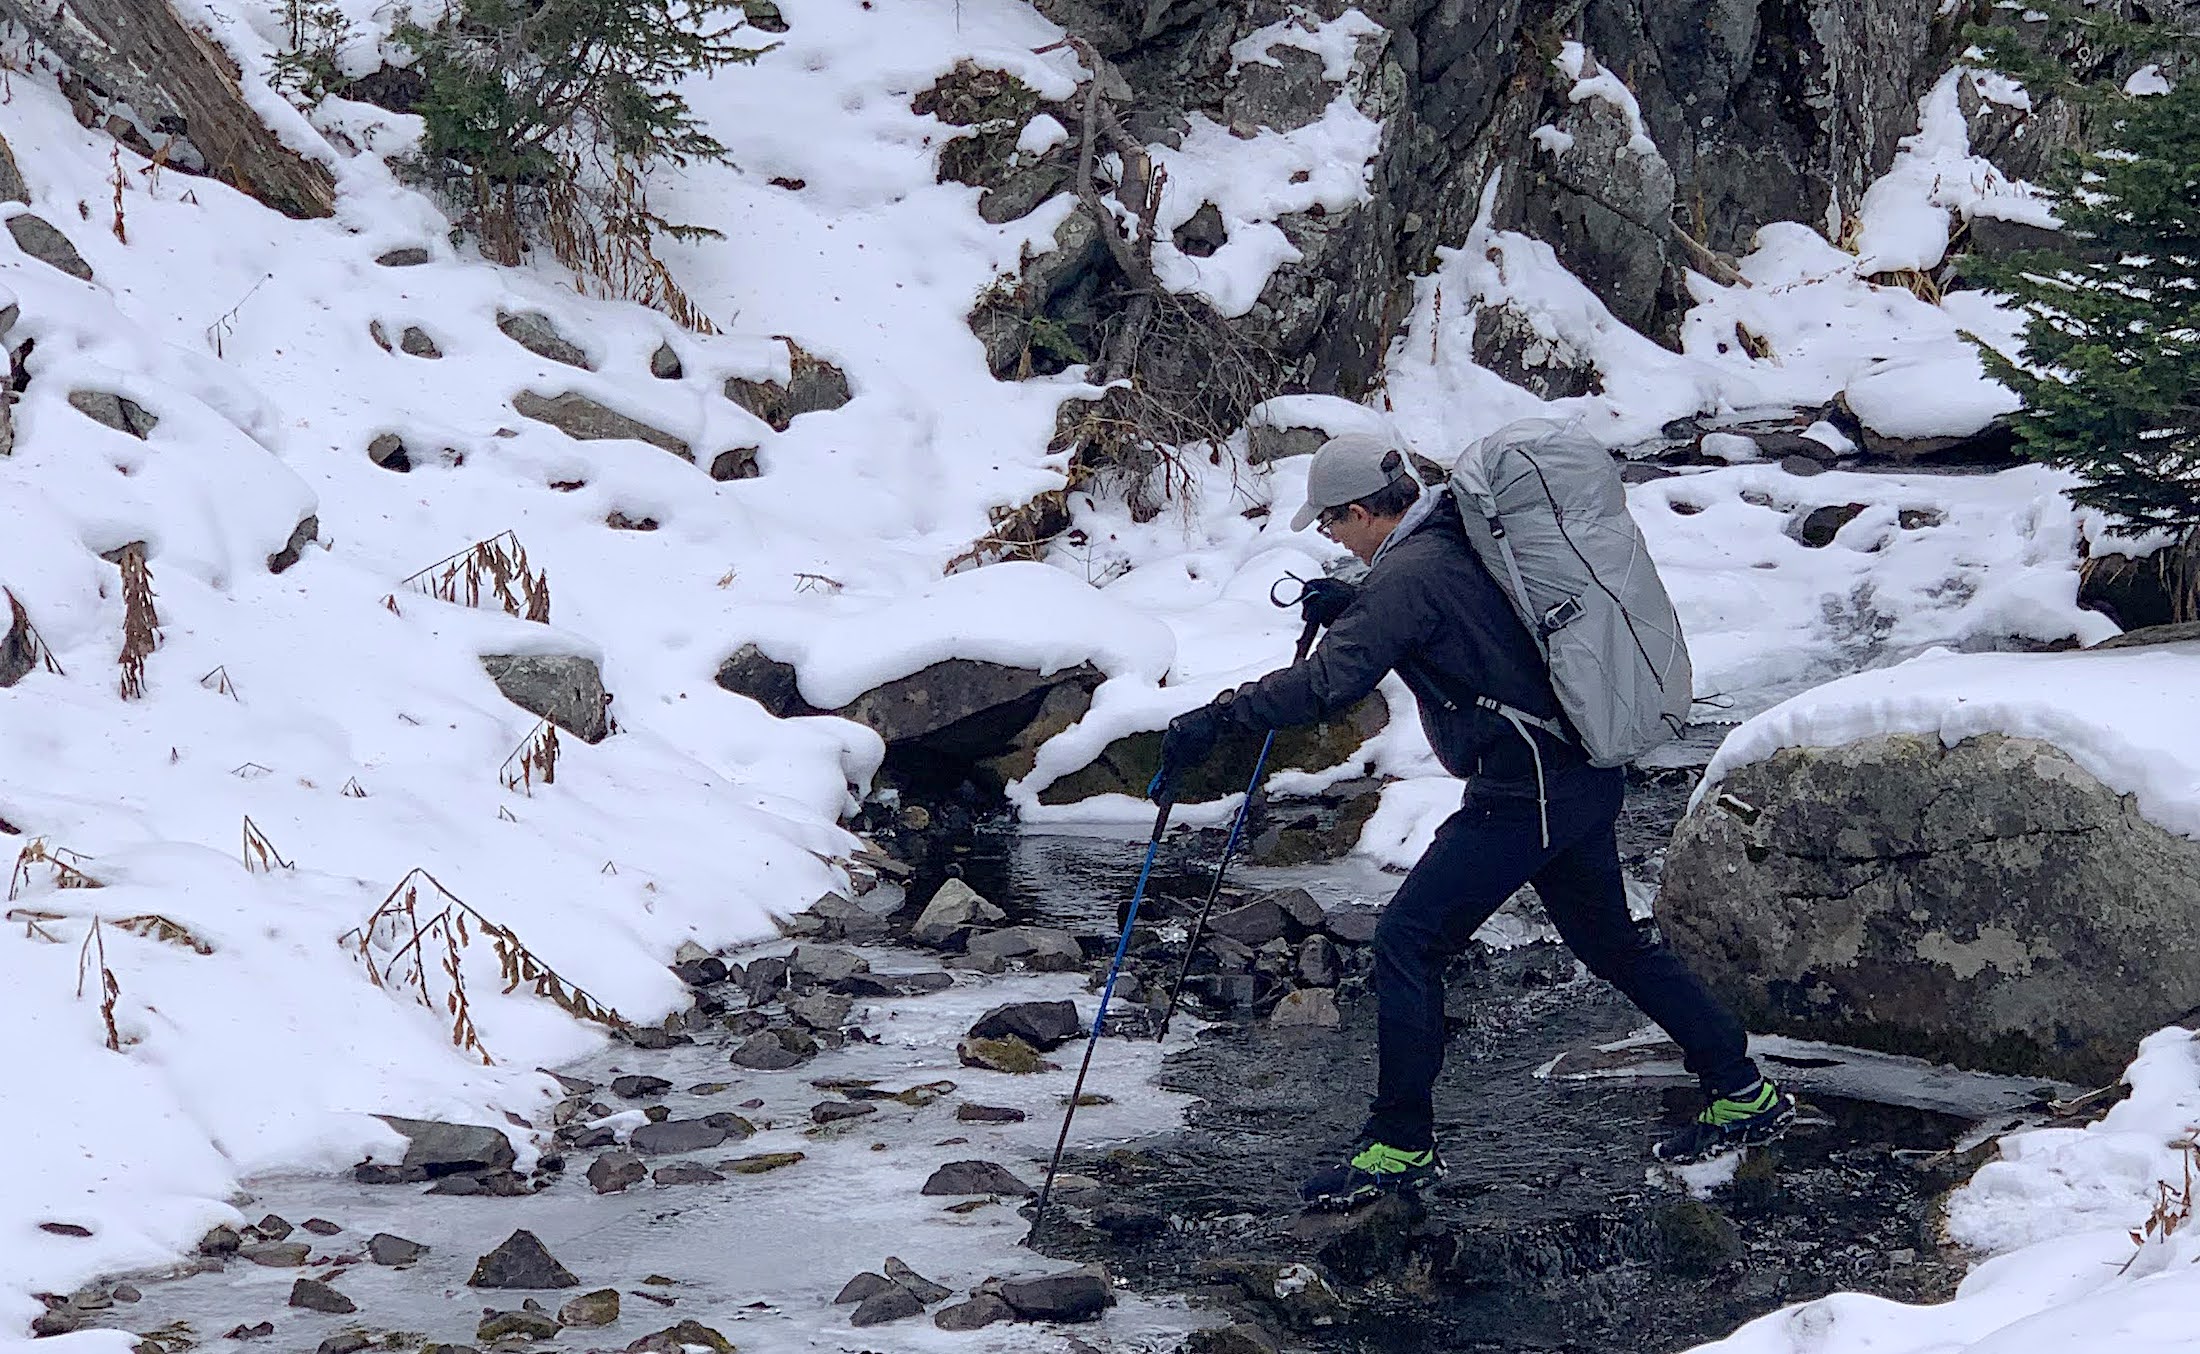
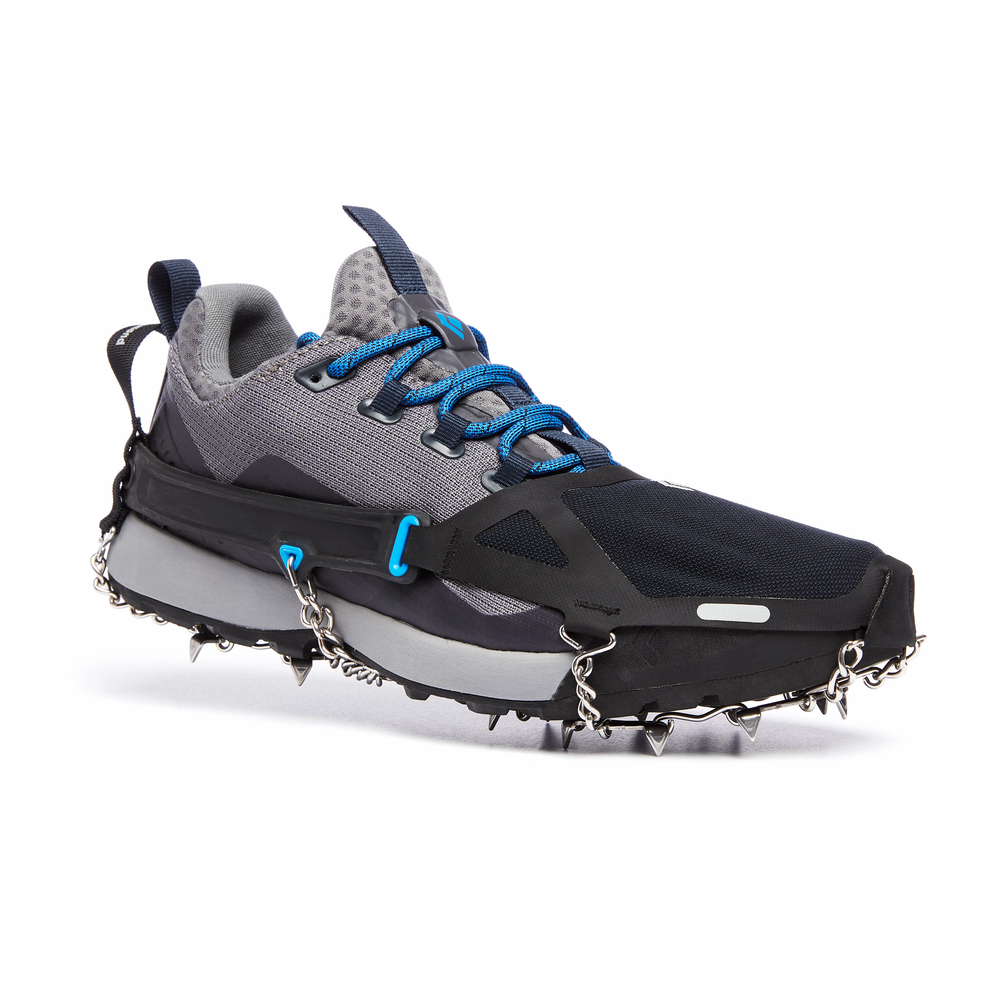
The biggest change I made to my footwear system this year was in my choice of trail spikes. After testing both Kahtoola Microspikes and Hillsound Trail Crampon Pro traction devices side-by-side with the Black Diamond Distance Spikes last year, I made the switch full-time to the BD’s this year. They are lighter, have shorter spikes that don’t interfere with walking on bare ground, and a terrific soft-shell toe cover that keeps my shoelaces from icing up in very cold temperatures.
Wearing Black Diamond Distance Traction Spikes in “mixed (up)” terrain in Colorado’s Tenmile Range.
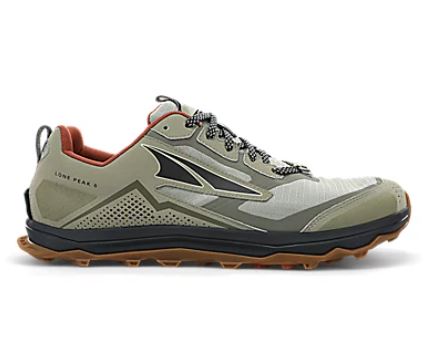
Otherwise, the La Sportiva Akyra continues to be my go-to shoe for most off-trail trekking, and the Scarpa Zen Pro (🎯)stays in my quiver for mountain travel requiring substantial amounts of Class 3-4 terrain.
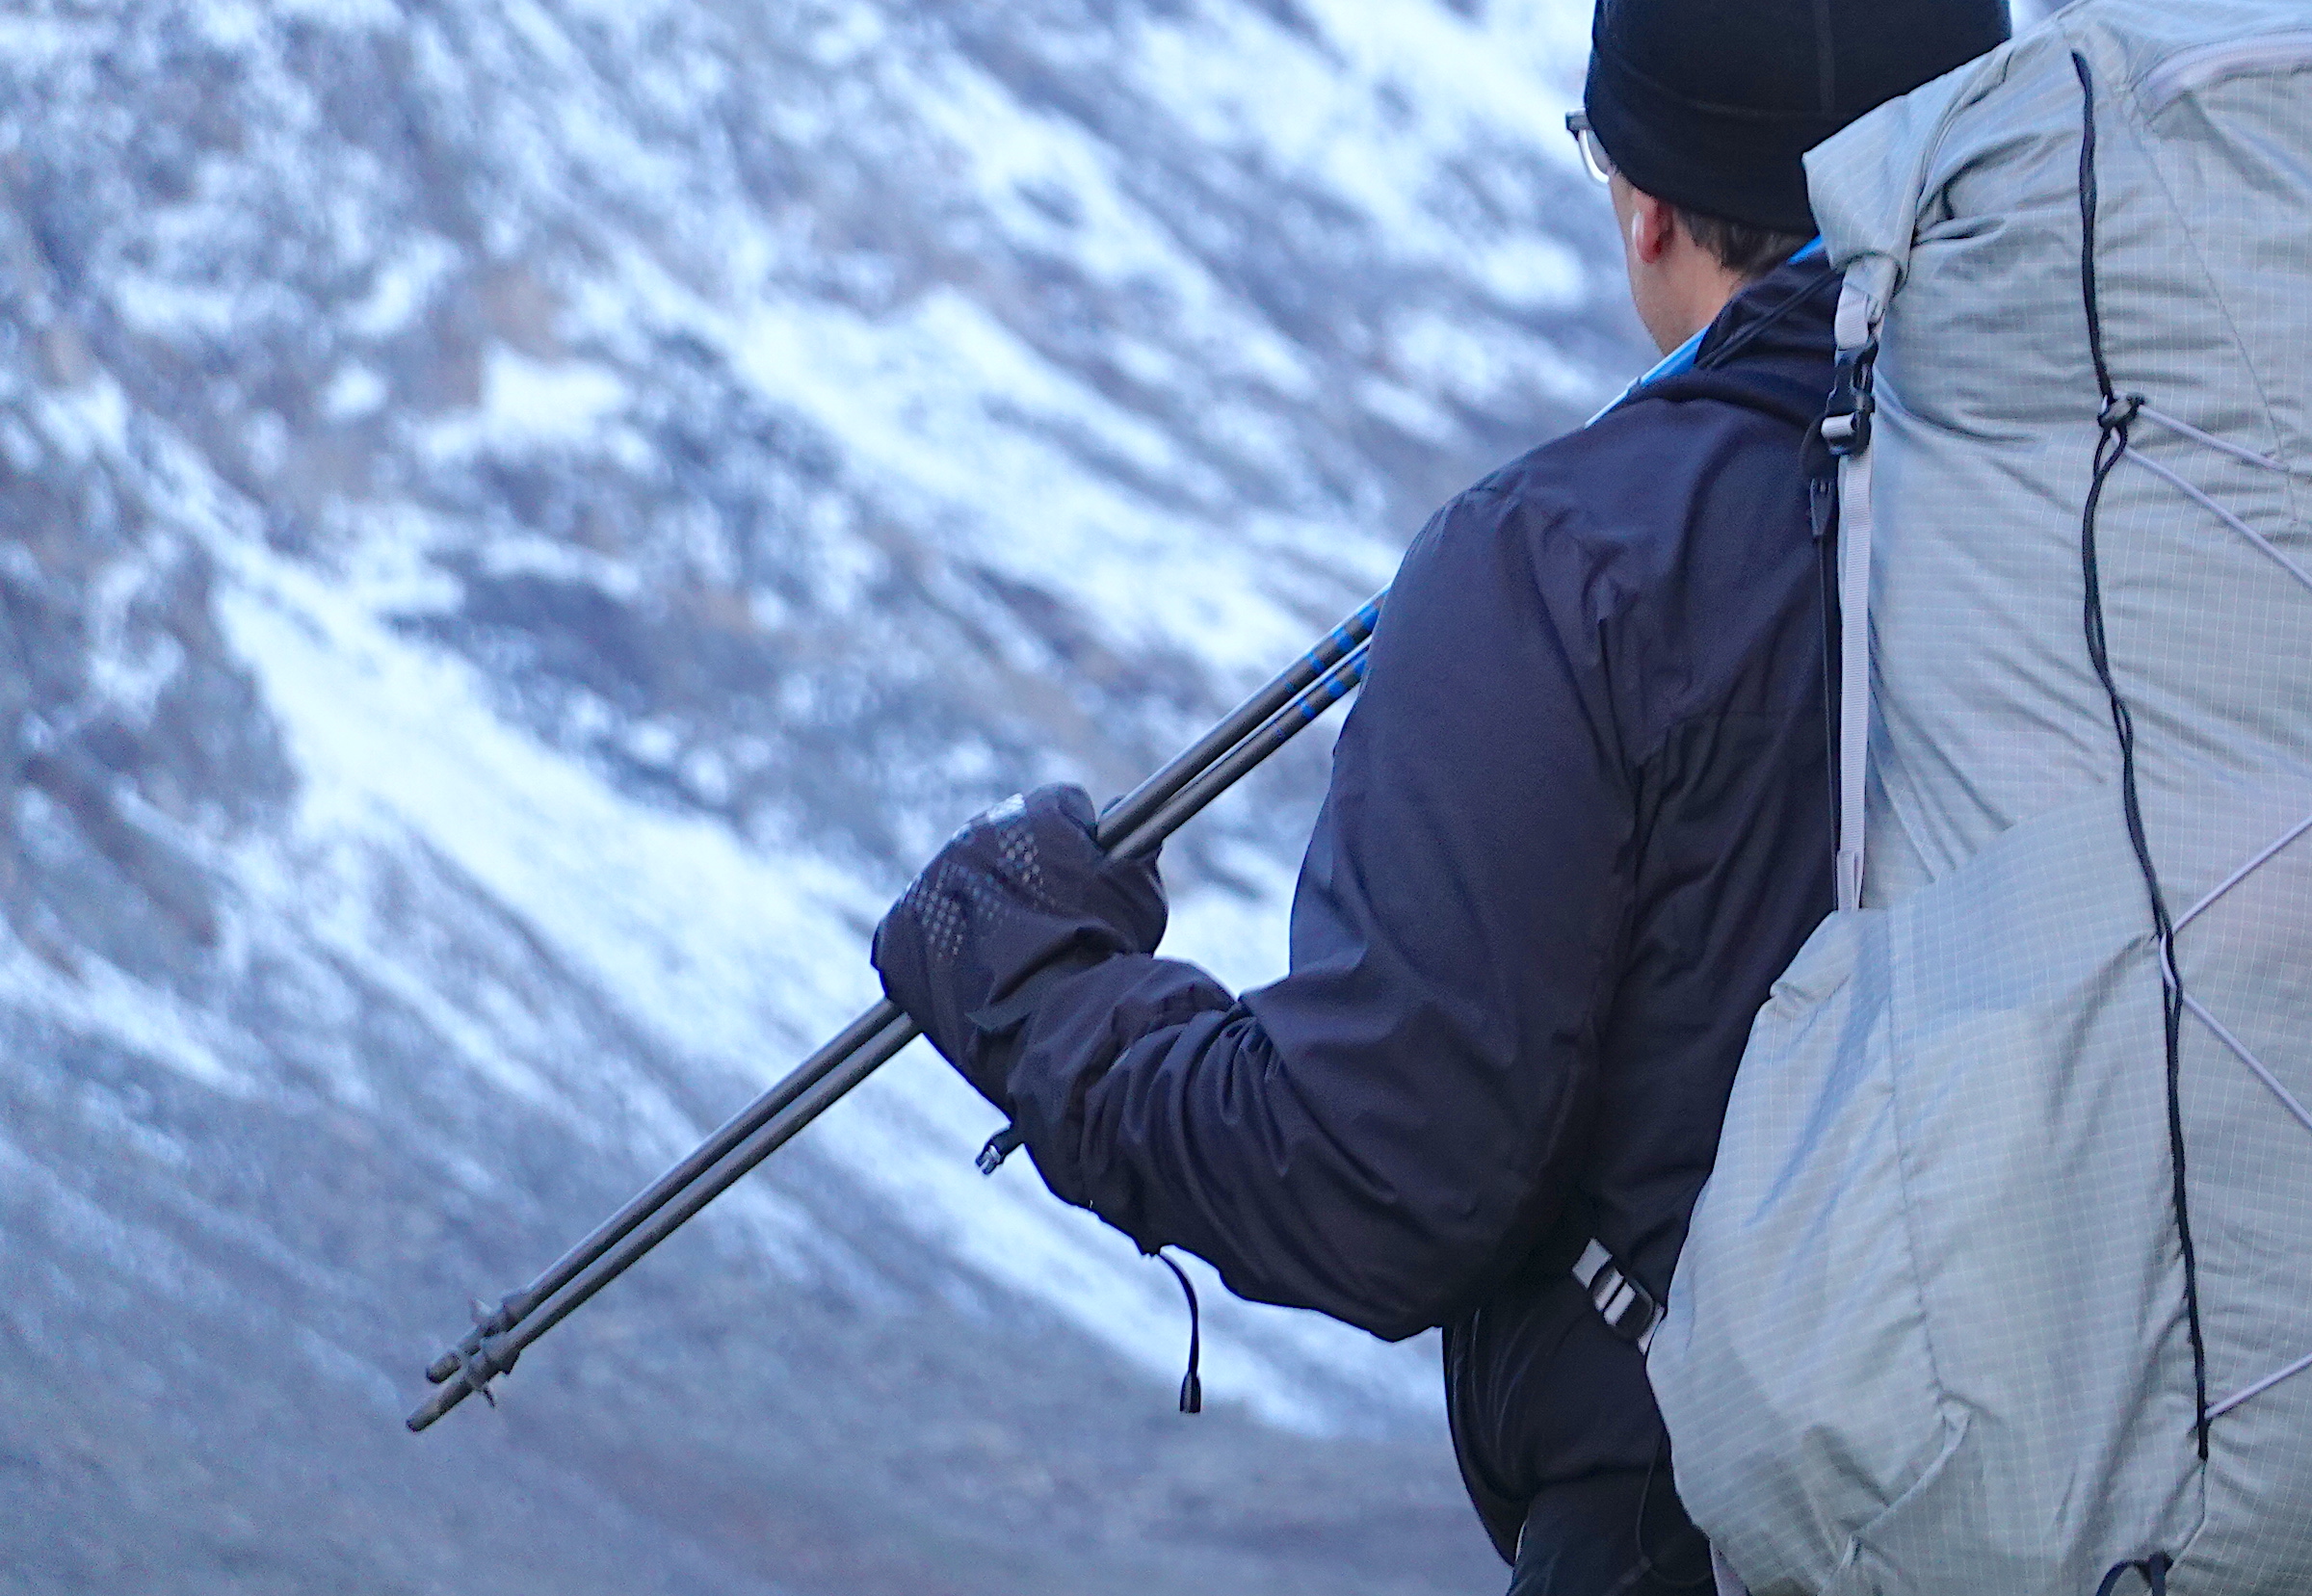
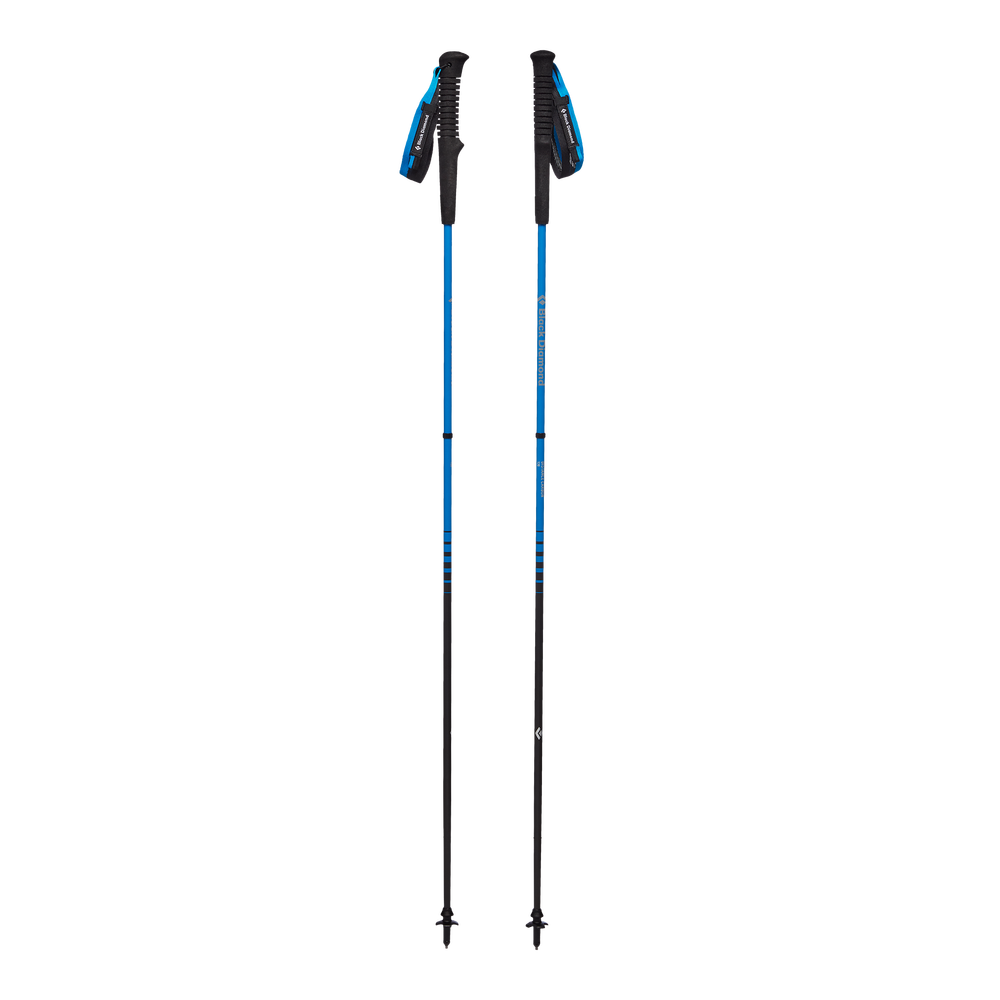
The most notable change to my traction systems this year is in the area of trekking poles. After having broken so many pairs of ultralight carbon fiber poles through the years, I got fed up and switched to Black Diamond Alpine Carbon Cork poles, which have served me well for several years without damage. This year, I stumbled across the Black Diamond Distance Trail Running Poles (🎯), which are thin, stiff, and strong. I’ve abused them on nearly every non-winter trip this year, and they’ve held up great. They are light and balanced and swing better than any trekking pole I’ve ever used. Another Staff Pick for me this year.
Using the Black Diamond Distance Carbon Trail Running Poles in Colorado’s Tenmile Range this year.
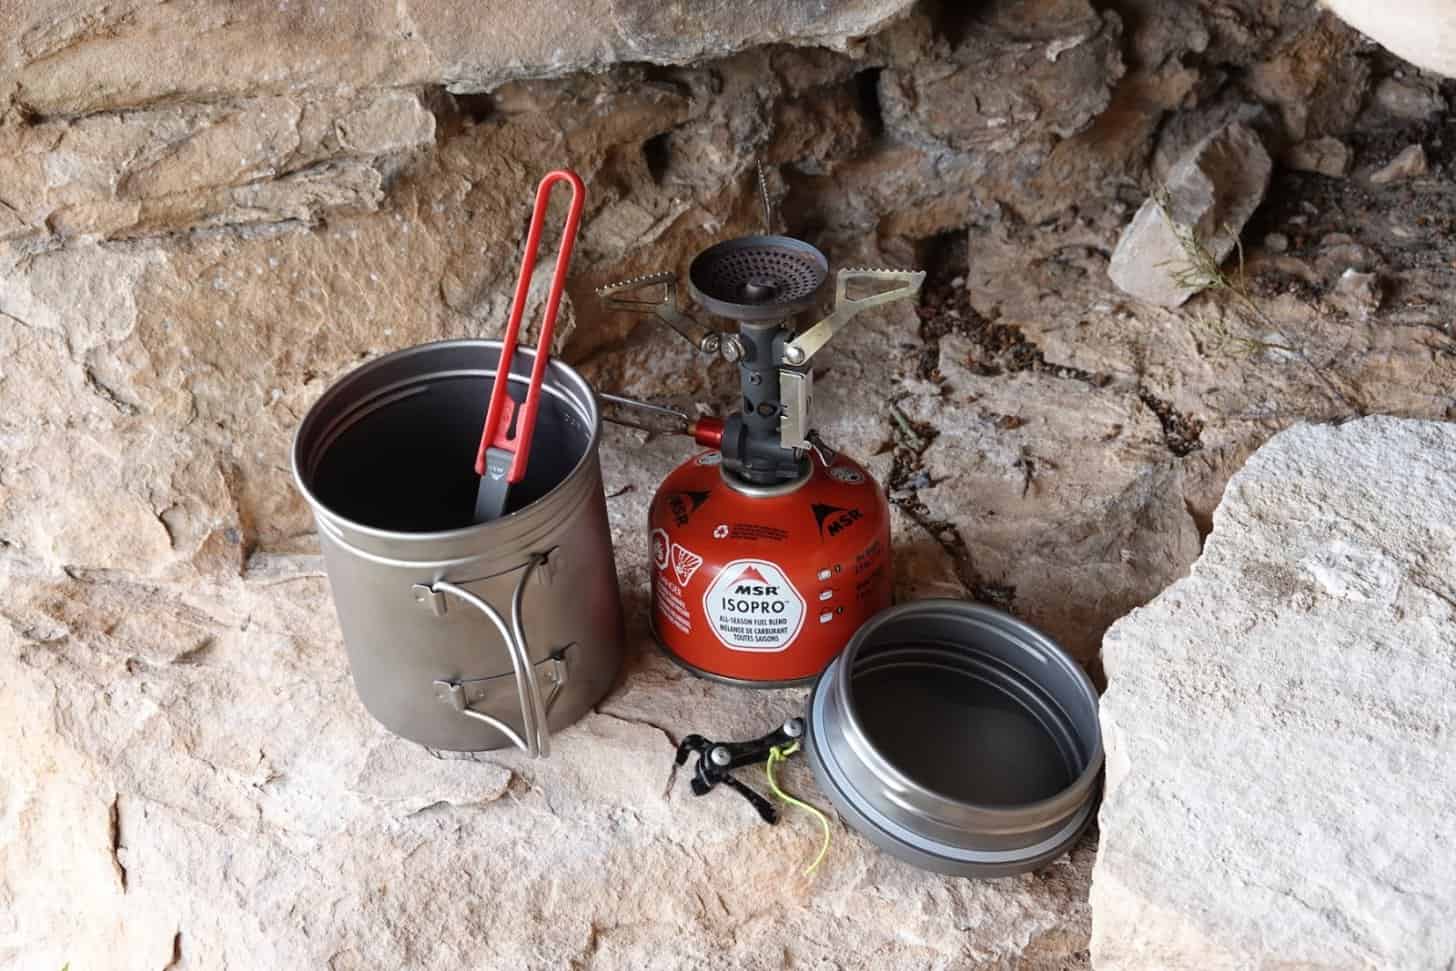
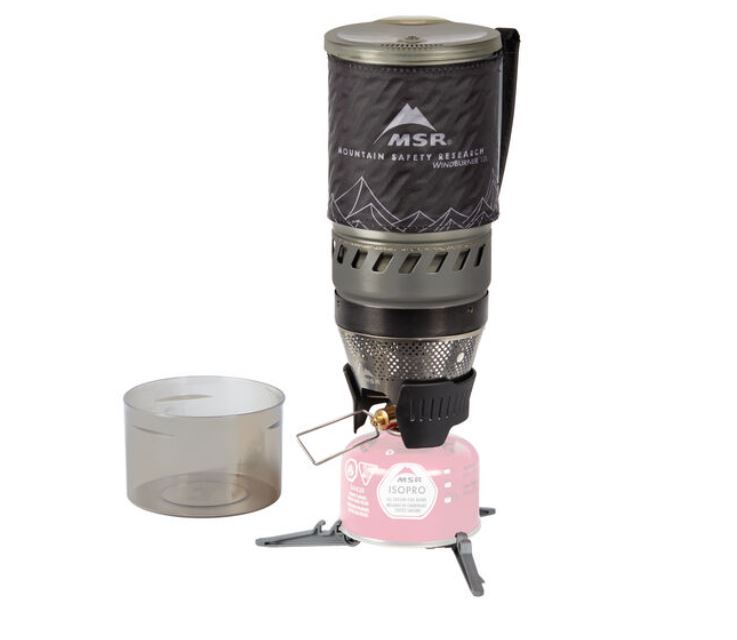
The MSR Reactor Stove (🎯) is my primary winter stove and has been for several years. Its hallmark features are its reliability, fast boil times, and ease of use while wearing mittens.
Melting snow for tea time on a day hike near 11,000 feet in Rocky Mountain National Park. Temperatures in the single digits (F).
New in my stove quiver this year is the Bushbuddy Mini (⚡). Due to wildfire restrictions, I found myself cooking with wood less frequently this year, but the Bushbuddy Mini Kit has been a joy to use when the opportunity has presented itself.
Hydration Systems
I spent quite a lot of time over the past two years performing side-by-side testing with hollow-fiber membrane squeeze filters, including the Katadyn Befree Filter, the Platypus Quickdraw Filter (new this year), the Sawyer Squeeze, the Lifestraw Flex, and the Hydroblu Versa. Some of what I learned about their performance was published recently in this test report about backflushing and storage practices for squeeze filters. Long-time readers here know that I’ve had good success with the Befree. The Platypus Quickdraw has also earned my respect, mainly for its ergonomics. It hasn’t yet unseated the Befree in the quest to become my main squeeze, so I plan to continue using both next year until something bad happens with one of them.
As for gravity filters with groups, I started using Lifestraw, Platypus, and Befree gravity systems last year to see if they’d trump my long-time favorite – the Rapidpure Trailblazer Gravity System (🎯). I’m still collecting data, but my observations are that the Rapidpure remains the best gravity system available with respect to maintaining flow rate in response to poor quality water and sub-freezing temperatures.
Otherwise, Aquamira (🎯) is still my first choice when I’m trying to save weight and bulk, and Aquatabs (🎯) are always in my emergency kit for supplemental treatment when I’m hiking in areas where stock grazing is allowed. This includes the sheepy areas of the Uintas, Wind Rivers, and Sawtooths.
I still own and use a Steripen Ultra, and it goes with me when I’m bringing a pot, but not a water bottle. Yep, that’s still a thing for me for trips where minimalism and simplicity, and flowing with nature, are the main goals.
When I take an Ursack (most trips), I pack my food in Hyperlite Mountain Gear Pods and stuff the empty Ursacks into the dead air space in my backpack to fill it out a bit. Then, when I get to camp, the food (inside the pods) goes into the Ursacks, which of course, get tied to trees or chocked in talus.
Navigation, Electronics, and Software
I’ve made no major changes to my navigation, electronics, or software systems this year. To be honest, this was one of the most boring years on record when it came to innovation in these areas.
My iPhone remains my primary camera for the purpose of journaling, and the Sony RX100 still produces the most beautiful photographs of landscapes of any camera I’ve ever used in this weight class. I did upgrade to a GoPro Hero 10 Black (from v9) this year (for improved battery life), and that’s the camera I use when I’m shooting some types of educational videos or vlogging.
I keep close tabs on the satellite communicator market, and in spite of the introduction of Zoleo, the bizarre trajectory of the Bivy Stick, and the promise of an Apple phone with satellite capabilities, I still can’t make an argument for recommending any device other than the Garmin inReach Mini (🎯). In spite of its faults (which include complex software and systems integration that we try to help you with), it remains the most reliable and capable satellite communicator on the market. This year, it helped me keep tabs on the Seattle Mariners’ unexpected playoff run with family back home. Read my Garmin inReach Mini Review or learn how to become a power user in my Garmin inReach Masterclass.
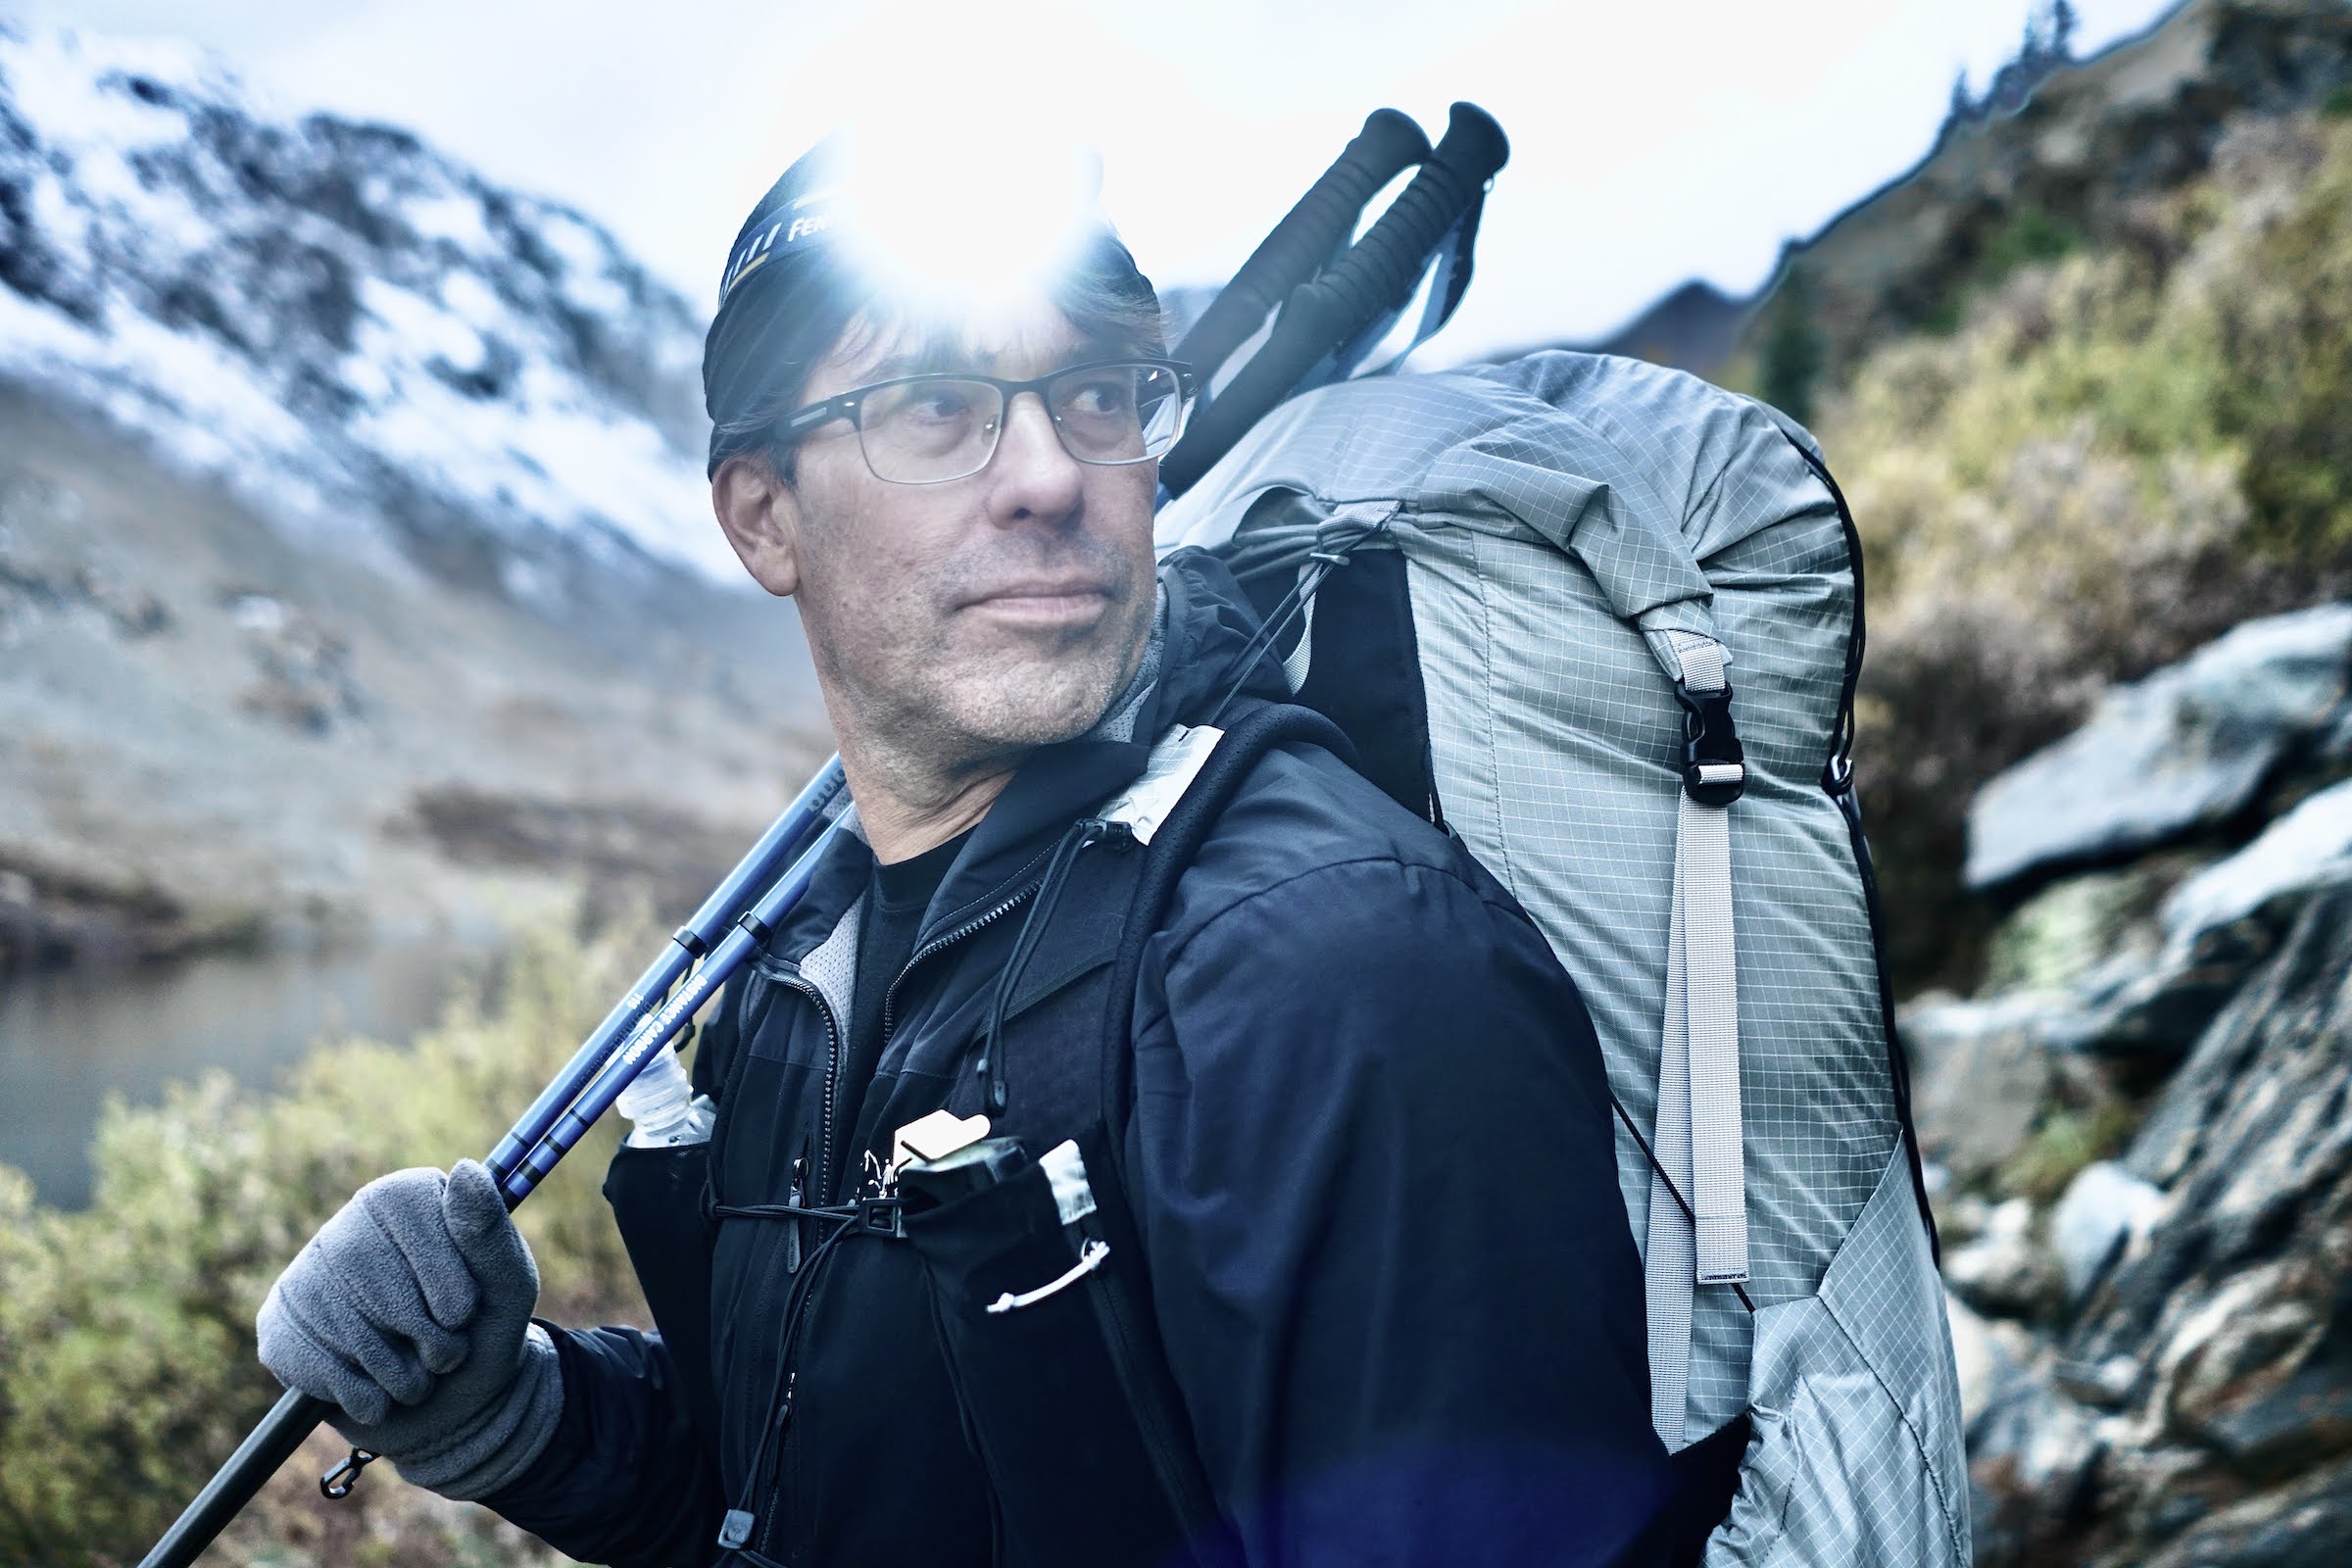
No changes to my headlamps. My favorites are the Fenix HM50 Headlamp (🎯) (most trips) and the Petzl Actik Core Headlamp (trips where I need a lot of bright light for nighttime navigation). I’ve experimented with other new headlamps introduced this year and have remained unimpressed by the (lack of) innovation in this category.
I’m a training data junkie, so the Garmin Fenix Watch, the Garmin Run Pro HRM, and Training Peaks Software are critical components of monitoring my training. I’m currently using a Garmin Fenix 5X Plus, which has since seen upgrades to versions costing nearly a thousand dollars (e.g., the Garmin Fenix 6X Pro Solar). I picked one up at REI, tested it, and returned it. The upgrades are minor and made little difference to the quality of the data I collected, battery life, or field usability. Maybe next year.
New to my training quiver is Whoop. Adding sleep quality tracking and additional recovery metrics has been fascinating, insightful, and helpful to me. Continuous tracking of HRV has transformed my training this year and helped me focus on the practices that improve my recovery after hard workouts, including more and better sleep, meditation, drinking less alcohol, and eating better. I can measure the impacts of all of these things quite predictably with Whoop, and it blows my mind.
Accessories
I don’t pack a camp chair on every trip, but I almost always wish I did. When I do pack a chair, it’s the REI Flexlite Air Chair (🎯), which I wrote about extensively in this review and was featured in this gear guide. I broke my back in 2005, and the chair is absolutely critical to my rest and recovery if I have to spend any length of time in camp in the evenings or mornings.
One of the raison d’être for backpacking for me is fishing, and the tenkara style is my modus operandi. I have a long history of using rods from Tenkara USA, Tenkara Rod Company, Tenryu, Daiwa, and others. I’ve caught panfish, bass, trout, steelhead, and salmon with tenkara rods. In the mountains, of course, my focus is trout, and the primary rods I use are from Tenryu and Tenkara USA. This year, I focused more on rods with a longer reach for alpine lake fishing, including the Tenryu Furaibo TF39TA (⚡) and the Tenkara USA Ito. I can’t recommend the former for general use – it’s a wonderfully responsive fly rod, but is too expensive and difficult to repair for the casual fisher. The Tenkara USA Ito, on the other hand, may be the most understated rod on the market for the backcountry angler. I still prefer the Tenkara USA Hane (🎯) for general backpacking use including small stream fishing, but the Ito is a more capable performer when it comes to delicately casting tiny flies like midges to wary trout using long leaders on calm alpine lakes.
What dreams are made of: tenkara fishing at an alpine lake in the Absaroka-Beartooth Wilderness, Montana.
I’m a journaler, note-taker, and sketcher in the backcountry. I used to use Moleskine and Rite in the Rain Notebooks but became a little frustrated by the weight of Moleskine pads and the poor tactile feel of writing on Rite in the Rain paper. Early this year, I discovered Traveler’s Notebooks, which are light and have terrific paper quality. Combined with my favorite writing instrument – Staedler Pencils – they’ve brought joy back to my backcountry notetaking.
Conclusion
My gear kit is in a constant state of flux. I yearn to downsize it and just keep those items that are durable and versatile across a wide range of conditions. I’m not always successful. I have too many shelters, jackets, stoves, water filters, shoes, sleeping bags, and backpacks.
When I started this article and offered my guidelines for consumption, I meant it. They are ideals that I’m working towards, not standards that define where I’m at today. Being an outdoor industry professional, a lot of new gear passes over my desk each week. I do my best to stay on top of current trends, and I certainly enjoy testing new gear in the field. But I don’t like owning it, storing it, cleaning it, repairing it, or figuring out how to sell it or donate it when I no longer want it.
If I have one piece of advice to leave you with today, it’s this:
Study this gear guide in the context of adding gear to your kit only if it’s capable of dramatically improving your outdoor experience, and resist the temptation to buy gear for the quick fix of dopamine that comes with getting new stuff. It will wear off, and then you’ll be left paying the bill.
Pack less, be more, and happy trails. – RJ
DISCLOSURE (Updated April 9, 2024)
Backpacking Light does not accept compensation or donated/discounted products in exchange for product mentions or placements in editorial coverage.
Some (but not all) of the links in this review may be affiliate links. If you click on one of these links and visit one of our affiliate partners (usually a retailer site), and subsequently place an order with that retailer, we receive a commission on your entire order, which varies between 3% and 15% of the purchase price. Affiliate commissions represent less than 15% of Backpacking Light's gross revenue. More than 70% of our revenue comes from Membership Fees. So if you'd really like to support our work, don't buy gear you don't need - support our consumer advocacy work and become a Member instead.
Learn more about affiliate commissions, influencer marketing, and our consumer advocacy work by reading our article Stop wasting money on gear.
Each year, our staff selects their favorite hiking, backpacking, and other backcountry gear that they’ve used this year – our infamous Staff Picks!
Introduction
Each year, our staff selects their favorite backcountry gear from the past 12 months, and we look forward to you sharing your favorite gear of the year as well in the forum comments below!
Some of the gear chosen by staff, contributors, and grant recipients. Scroll through the article to learn more!
Our Staff
This year’s Staff Picks contributors are:
Row 1 L to R: Ryan and Stephanie Jordan (owner/founders), Andrew and Meriwether Lewis Marshall (Managing Editors/Podcast Producers), Mark Wetherington (Staff Writer), Chase and Sierra Jordan (Production Editors), Stephen Seeber (Contributor); Row 2 L to R: Ben Kilbourne (Contributor), Rex Sanders (Contributor), Iago Vazquez (Contributor), Drew Smith (Contributor); Row 3 L to R: Dan Hu (Contributor), Roger Caffin (Professor Emeritus), Jeff de Graffenried (Contributor), Narinda Heng (Grant Recipient), Shilletha Curtis (Contributor/Grant Recipient)
If you read my review of the Durston X-Mid 2P tent, you know that I am very impressed by it. The X-Mid 2P is a large, dual pole, two-person, double-wall, non-freestanding tent made of 20D silicone-coated polyester and weighing 2.5 lbs. The main reason I chose it for one of my staff picks this year is because of its rectangular shape – which solves the stability and ease of use problems of many other two-pole shelters. I have always been a big fan of rectangular footprint pyramid tents because they are extremely easy to pitch. If all four corners are pitched at right angles to each other (or close to right angles), the pitch will be taut. A rectangular shape tensions the perimeter, stabilizing the entire structure and allowing it to perform well in wind. The Durston X-Mid 2P takes this concept and makes it more livable by turning the traditional pyramid into a two-pole rather than one-pole shelter. It has been a joy to use the Durston X-Mid 2P tent in 2021 and I will continue to use it as my primary two-person, three-season tent. – Ben Kilbourne
The Therm-A-Rest Pro-Lite Plus. Photo: Therm-A-Rest
I’ve had my Therm-a-Rest ProLite Plus sleeping pad since 2015 and it’s been on pretty much every camping trip with me, including when sleeping in my car (I ditched memory foam because gets odd and stiff when cold). I love that the ProLite Plus is quiet when I shift around at night, and that even if deflated, it still offers a little cushion and insulation. Mine has a couple of patches in it and is still going strong. – Narinda Heng
I recently reviewed this tent and have kept using it on trips with my girlfriend this year (when solo I usually opt for the Six Moon Designs Lunar Solo or a bivy and tarp combo). The REI Co-op Flash Air 2 is a lightweight shelter that provides protection from the elements and, while certainly cozy, isn’t cramped with two people in it. Setting it up is a breeze, which leaves me with more time on trips to fish, scramble up a peak, or just enjoy relaxing in the backcountry. – Mark Wetherington
Multiple-use is the essence of lightweight backpacking. Using your shelter as your rain protection returns big savings in weight. The Mountain Laurel Designs Poncho Tarp is my usual home on 3-season trips when I don’t expect to spend a lot of time in camp or to encounter more bugs than a head-net can handle. As raingear, this silnylon poncho will actually keep you dry and well-ventilated, unlike the legions of waterproof-breathable jackets that are neither of those things. The Poncho Tarp kept me dry in a thru-hike of the Colorado Trail in which it rained 22 of the 28 days I was on trail. It performed in hours-long storms on the trail and in all-night downpours in camp. Paired with a lightweight bivy and groundsheet, you get effective shelter and raingear for about a pound. – Drew Smith
I love my Zpacks Duplex because it’s so spacious. I can literally tumble inside of my tent. Not only that but this tent holds up in the wind. I’ve never had any leaks in the rain and it’s easy to stake out. I found the learning curve to be the easiest out of the three tents that I used on the Appalachian Trail in 2021. – Shilletha Curtis
The Therm-A-Rest Neo Air All Season. Photo: Therm-A-Rest
The Therm-A-Rest NeoAir All Season sleeping pad is no longer available but I wanted to mention it because it is my oldest piece of gear that I still use on most trips. I bought it around 2011, so I have been using it for at least ten years. It just recently sprung its very first leak, a tiny pinhole in the top fabric from a piece of a tumbleweed. Ten years with no holes is pretty amazing, in my opinion. This pad has a 70 D bottom fabric and 75 D polyester top fabric, has an R-value of 4.9, and weighs 19 oz (539 g) in size regular. It’s not the lightest thing out there, but holy cow, it is reliable and warm. When I replace it, I will probably take a look at the Therm-A-Rest NeoAir X-Therm, hoping it will last at least ten years, as well. – Ben Kilbourne
My 10 Degree Enlightened Equipment Revelation Down Quilt is the love of my hiking life. There’s nothing like setting up camp after a long day and being snuggled in my warm and comfortable quilt. At 24 ounces (680 g), how could I ever say no? What I love about the Revelation is how versatile it is. I can close the footbox on cold nights and when it’s warm, I can stick a leg out. If I want to sit around camp and chat with others, I can take my quilt with me and wrap it around me. – Shilletha Curtis
The Nunatak Equipment Bears Ears 50. Photo: Nunatak Equipment
It’s rare enough to find a pack that solves one problem brilliantly. The Nunatak Bears Ears 50 solves two – how to store a bear canister effectively (low and externally) and how to get to your water bottles easily (via optional hipbelt mounted holders). The shoulder straps are thick and comfortable, and the rear pocket wraps all the way around the pack body for extra storage. Put it all together and you have an extraordinarily comfortable and stable frameless pack with lots of storage options. Bonus points – you can use the bear canister storage system for Ursacks, packrafts, or any other heavy/bulky items. – Andrew Marshall
The Nashville Packs Cutaway. Photo: Nashville Packs
I have found a small pack that can fit a lot of stuff when pushed to the limits of its extension collar and exterior pockets – the Nashville Packs Cutaway. But unlike most frameless packs, this one has been comfortable for me to 29 pounds (13 kg) using the hybrid vest straps and a closed-cell foam pad attached to the back panel. – Iago Vazquez
Six Moon Designs Swift X Hiking Backpack. Photo: Six Moon Designs
The Six Moon Designs Swift X is my favorite backpack. My pack is purple and I love that there are so many colors to choose from. These packs are fully adjustable when it comes to torso length, hip belt, and harness. Speaking of the harness, what a godsend for folks like me with back issues. The pack carries well and the support I get with the harness is critical. There are pockets in both the hip belt and harness, making snack and water consumption that much easier. Overall, this pack is lightweight, durable, and very well designed. – Shilletha Curtis
The Pa’lante V2 is my first frameless pack and it has been outstanding. Great design features, but not overengineered. Comfortable, durable, and just an all-around great pack for ultralight backpacking. – Mark Wetherington
The Mountain Laurel Designs DCF Exodus 55 L was my favorite frameless backpack in 2021. It’s light at 18 ounces (510 g), water-resistant, and extremely comfortable. It makes my staff picks list this year primarily because it would be impossible for me to overstate its comfort. When sized correctly (I have a 19.5 inch / 50 cm torso and use a size large), the shoulder straps attach near the top of my shoulders effectively negating the need for load-lifters or load-shifters with light to moderate loads. Moreover, the straps are thick, wide, widely spaced, and have no binding on the edges, so they don’t dig into my neck like some other straps. While Mountain Laurel Designs advertises the DCF Exodus 55 L pack as maxing out at a carrying capacity of 25 pounds (11 kg), I believe it can carry more than that comfortably, especially when using a foam pad as a frame sheet. I use four sections of a Therm-A-Rest Z-Lite which increases the load-carrying ability of the Exodus to at least 30lbs (for me). – Ben Kilbourne
Sea to Summit Ultra-Sil Nano Day Pack. Photo: Sea to Summit
The Sea to Summit Ultra-Sil Nano Day Pack has undergone a few revisions since I bought mine about 12 years ago (see our latest review here). But the fact that I still have the original version is a testament to its durability despite its evanescent weight. At about 2 oz (57 g), it functions as a clothes bag in my backpack, and then as a capable day pack for summit or fishing side trips. At town stops it is a laundry bag and a grocery bag. On non-hiking trips, I throw it in my luggage (it packs down to about 2 x 1 inch / 5 x 2.5 cm) to enable day hikes should the opportunity arise. – Drew Smith
I’m always on the lookout for lightweight gear that fits and can be used easily by small children. This year, I decided to recommend the ULA Equipment Kid’s Spark Backpack to my hiking partner for three of his young girls, ages 8 through 10. They used them during our 8-day trek in the Wyoming Bighorns this summer, and I was very impressed by how comfortable they were for the girls when loaded with up to about 15 pounds (7 kg) or so of gear. – Ryan Jordan
Slowly, I have dialed in my backpack needs and have settled into the Hyperlight Mountain Gear 2400 Windrider. This nearly waterproof DCH pack has a super-efficient design that can be expanded for a week-long trek or tightened down for a weekend getaway. At less than 2 pounds (1 kg), the pack gives me the freedom to do what I want and with the various accessory pouches and the external pouches, there is enough room to pack what I need. – Jeff de Graffenried
The fit and feel of the REI Co-op Take Your Time 7/8 Leggings (they are the softest leggings I’ve ever owned) make these my main go-to for hiking in the shoulder seasons. They have a mid-rise waist that stays secure – I love that I’m not hiking them up on the trail constantly. Most yoga pants aren’t long enough in the legs for me, and these cover my ankles and prevent those pesky black fly bites. These have thigh pockets that are easily accessible and deep – they can comfortably carry a phone, or any other small item you like to keep handy, but I love them most for keeping my hands warm when I don’t want to get out my gloves. I can see me keeping some hand warmers in here in the coming winter months. They are moisture-wicking and quick-drying. – Stephanie Jordan
In more than six decades of wearing clothes (and counting), I’ve rarely gotten a compliment on my togs, much to the chagrin of my fashion-designer wife. But my Patagonia Duckbill Cap has triggered more than 100 unsolicited plaudits from total strangers. Keeps the sun out of my eyes, is easy to stuff into a pocket, covers my one-size-fits-none melon, and has plenty of ventilation. Almost useless in the rain, but that’s what poncho hoods are for. Patagonia might have discontinued all 1.9 ounces (54 g). No, you can’t have mine, it is a key component of my retirement plan. – Rex Sanders
I have evaluated bamboo viscose clothes this summer in hot weather as a way to reduce my use of synthetic clothing. My two favorite pieces for extreme sun exposure have been the Tasc Carrollton Hoody and the FreeFly Bamboo Lightweight Hoody. The two main characteristics that stood out for me were comfort and odor control. After days of use and sweat, they do not accumulate much funk. I have found that the Tasc Carrollton (UPF 50+) protected me from sunburn in all-day exposure. But the fabric felt a bit thicker than I would like (160 gsm), so I also tried the FreeFly Bamboo Lightweight Hoody (UPF 20+, 140 gsm). I have yet to have an extended outing wearing the FreeFly to find out whether it provides sufficient sun protection, but so far it has worked well for a couple of hours of exposure. The lighter fabric does feel a bit airier. My previous lightweight synthetic hoody, the OR Echo Hoody from a couple of years ago, resulted in sunburn despite its UPF 15 rating.
One word of warning, bamboo viscose is often marketed as quick-drying, wicking, or other similar claims. I have found that, like most plant-based fabrics, when overwhelmed with moisture, they are neither quick-drying nor wicking. – Iago Vazquez
I’m sensitive to textures and tend to lean towards natural fibers whenever possible. When it comes to mid-layers, that means merino – until the last few years, that is. Appalachian Gear Company makes a lot of bold claims about how alpaca wool is superior to merino – claims I’ve yet to verify via testing with Backpacking Light fabric-testing wizard Stephen Seeber. But I’ll say this – the Appalachian Gear Company All-Paca Crew mid-layer is the most stink-proof material I’ve ever worn in the backcountry. The fabric is a little more scratchy than merino, but seems way more hydrophobic (according to my unscientific, but extensive, observation). The hooded version is popular, but I prefer the crew-neck because two or three hoods from my various other layers are more than enough! Seriously, not every layer needs a hood. – Andrew Marshall
The Patagonia Baggies 5-inch Inseam Shorts. Photo: Patagonia
I’ve been wearing Patagonia Baggies shorts with 5-inch (13 cm) inseams for longer than I can remember. Incredibly tough, incredibly cool, dry fast enough, stuff rarely falls out of the pockets, almost un-noticed under pack hip belts, PFDs, and wetsuits, despite weighing 7 oz (202 grams). Yes, I’m one of those old dudes with skinny legs wearing unfashionably short shorts. Deal. – Rex Sanders
The Senchi Designs Lark Hoodie. Photo: Senchi Designs
The Senchi Designs Lark Hoodie is an ultralight mid-layer or extra-warm baselayer, depending on what size you buy. I am 5 feet 11 inches (180 cm), 160 pounds (73 kg), and I purchased the Lark in size large (4.8 ounces / 136 g total weight). It fits comfortably over a baselayer, making it a perfect mid-layer to wear under a shell when winter hiking, backpacking in the rain, or packrafting in cool weather. The Polartec Alpha 90 Direct Insulation is super breathable, so it seems to work best under a wind-shedding layer such as a rain jacket. It’s also pretty stretchy, making it comfortable to sleep in. Because the material is basically little tufts of fleece held together by a thin, web-like lattice, it is not super durable and should be handled with care. In my experience, wearing a rainjacket over it sufficiently protects it from snagging on velcro, junipers, or sandstone. – Ben Kilbourne
The TrailHeads Ponytail Hat is my most loved piece of gear. I have been using this for 17+ years and it has held up through all of the Rocky Mountain seasons. I’ve used it for backpacking, hiking, skiing, snowshoeing, and it has even fit under my bike helmet for fatbiking. It is soft and warm and fits a ponytail or low bun comfortably. It stays in place even while running. Keeps ears and head warm in cold temperatures. Even comfortable to sleep in during those cold high alpine summer nights while sleeping in a quilt. This is a great piece for anyone with long hair. It’s a signature piece for me and has been so easy to care for. – Stephanie Jordan
Smartwool Merino Sport 150 Hoodie. Photo: Smartwool
I wasn’t sure if I was going to be very happy with a shoulder season baselayer that didn’t offer any ventilation features like a zipper, or a non-balaclava style hood. The Smartwool Merino Sport 150 Hoodie surprised me in both aspects. I love the simplicity of not fiddling with a zipper or having it get in the way, and when paired with a lightweight hooded wind shirt (I really like to pair this with the Patagonia Houdini Air), the looser hood is comfortable and warm. Surprisingly, the hoodie has also made it into my summer pack, and when bugs aren’t biting, it provides sun protection and is still light enough to wear alone for warm days in the mountains. – Ryan Jordan
Spent too many nights with cold feet, trying in vain to warm up and dry out damp hiking socks. Decided to splurge on 3.1 ounces (88 g) of Zpacks Possumdown Socks dedicated to camp. I love slipping these on after a long day on the trail, both to pad around camp in cushioned comfort (with shoes, of course), and to keep my toes toasty during those long hours of darkness. – Rex Sanders
Whether I am hiking during a New England Nor’Easter, or snowshoeing and spiking during the coldest parts of the Rocky Mountain winter, the Endura Humvee Waterproof Socks have become a core part of my winter weather gear. Winter treks have always been extra miserable for me as I’ve struggled to keep my feet warm regardless of the gear I have. These socks have allowed me to be out in the wilderness longer, safer, and with a heightened degree of enjoyment in winter conditions. Combine with gaiters and waterproof shoes for even more winter warmth and to keep the knit outer fabric of the Humvee Socks from getting saturated. – Chase Jordan
Billy grips, pot lifters, or spondonicals – there is no doubt that these are a marvelous invention, and (unlike so many trivial accessories) a pair should be in your pack. They completely solve the problem of handling a full hot pot or a frying pan. They work like a bent pair of pliers, with the rim of your pot fitting into a notch at the end of the pliers. Drop the grips over the edge of the pot and close the handles. The notch and the long handles mean you don’t have to squeeze very hard to maintain a secure hold. Other than the MSR LiteLifters, there are several brands on the market with minor variations in design, with a reasonable price ($8) including postage from eBay. Some are rather expensive (up to $70 from one American retailer). They are wonderful tools, but don’t leave them attached to the pot while cooking: they will get very hot in the updraft from the stove. The best place to leave them is on top of the lid on the pot. That way they hold the lid down, keeping steam in, and you will know exactly where they are when you need them.
For the curious, the (Australian) term spondonical comes from a Three Stooges movie, where Larry is performing some surgery.
Larry: “anesthetic”
Helper passes large rubber mallet, Larry dongs patient on head.
Larry: “scalpel”
Helper (passes scalpel): “scalpel”
Larry: “scissors”
Helper (passes scissors): “scissors”
Larry: “spondonical”
Helper: “spondonical?!” (rummage frantically through piles of instruments)
Pinnacle Foods makes the best freeze-dried meals I have ever had! These meals are absolutely delicious and the fact that the company is local to me – western Montana – makes it even better. Great choices of entrees. I’ve usually resigned myself to just having oatmeal or a bar for breakfast, but the Jalapeno Cheddar Biscuits and Herbed Sausage Gravy meal is a treat I found myself packing more often. – Mark Wetherington
I have long been an ambassador for integrated canister stoves for their ease of use. This year, I swapped my old Jetboil Flash out for the MSR Windburner, and won’t be going back. The simplicity and sleekness of the integrated-canister design, coupled with excellent wind protection built into the pot makes this an excellent cooking system for backpacking in exposed mountain environments at high elevations. – Chase Jordan
I spent a year over 2020/2021 researching and testing vegetarian and vegan packaged backpacking meals. Outdoor Herbivore and Pack-it Gourmet were both standouts. In particular, Outdoor Herbivore’s cinnamon-sugar dusted, baked plantains won me over for life. These things come in 6 oz (170 g) packages and pack an impressive 860 calories per serving – that’s 143 calories per ounce. I eat them on the go-between lunch and dinner, sub them out for breakfast if I want to get out of camp quickly, or have them for dessert. As a final perk, Outdoor Herbivore ships orders within one or two business days, making them a great choice if a last-minute trip comes up and you just can’t stomach a Backpacker’s Pantry dessert from your local big box store. Yes, you could probably make these yourself, but sometimes it’s worth spending a few extra bucks for convenience. – Andrew Marshall
This year’s iteration of the Altra Lone Peak shoes keeps the comfort of the wide toe box, zero-drop sole, and excellent breathability that has kept me coming back to these shoes year after year. This year’s shoe, in addition, reduces some seams that were common failure points in the last model, making for one of Altra’s more durable trail running shoes yet. – Chase Jordan
Black Diamond Distance Spike Traction Devices. Photo: Black Diamond
Winter is my favorite hiking season and the Black Diamond Distance Spike Traction Devices have quickly become my favorite traction device while hiking snowy and icy mountain trails. They are the first pair of spikes that have stayed in place and not shifted on my narrow feet, especially on steeper, icier terrain. The soft-shell toe cover is comfortable and keeps the snow from entering through my laces, helping keep my feet warm. The large heel loop makes them easy to take on and off. They are light (6.7 ounces / 190 g a pair) and small to pack. I appreciated the little storage bag that came with them, so I could toss them in my pack without getting other gear wet or snagging something fragile. I’ve worn these mostly over Hoka, Altra, and Topo Trail Runners. – Stephanie Jordan
I bring the Peak Designs Capture Clip with me on every single hike and backpacking trip. I was an early adopter and have the original model! As a photographer out in the forests and on the trails, I like to keep my camera at the ready, and the Peak Design Capture Clip helps me have it in my hand at a moment’s notice. You never know when a fox or a marmot will scamper out in front of your feet! – Dan Hu
I used to employ both a filter and a Steripen. My wife just slept better when we went through both processes. After years of filters failing unexpectedly, I came to the conclusion that my one reliable source of water purification has been my Steripens. I bought my first one, the Adventure Opti in March 2011. After a couple of years, I got fed up with the type of batteries it required, which made it expensive to run, and I got a Classic 3. The Opti was relegated to supplemental use with larger groups. Now it is my son’s means of purification as a Scout after his first filter failed him on a three-day backpacking trip last year. We pack extra batteries and the devices have never failed. Will they one day? Probably. But the longest run I ever got out of a filter was the Sawyer Squeeze, which lasted about five years. This past October, on our three-day backpacking trip with the Scouts, a number of parents wondered about the Steripen, and my wife made the comment that she does not quite trust the blue light and would be more comfortable if we did both filter and UV again. As always, I reminded her that we have not gotten sick in the past couple of years using only the Steripens! – Iago Vazquez
Black Diamond Distance Carbon Running Poles. Photo: Black Diamond
Over the years, I’ve seen so many sets of so-called ultralight carbon fiber poles break and be discarded that I can’t in good conscience recommend these somewhat disposable poles for most hikers anymore. Still, I like my trekking poles simple: foam grips, fixed-length, as stiff as possible, and of course, lightweight. That’s where the Black Diamond Distance Carbon Running Poles come in. They’ve been in my kit for the entirety of 2021 and have become my favorite pole for all conditions except backcountry winter skiing and snowshoeing in deep snow (the baskets are too small and I prefer adjustable-length poles for traveling through deep snow). Best of all, they are stiff, strong, and less than 7 ounces (200 g) per pair. –Ryan Jordan
I am all for LNT, but am not at all excited to pack out used TP. Eliminating and reducing TP use is a win all the way around. There are many materials one may use as a substitute, but one of the most effective, available, and plentiful is the humble cone of the Englemann Spruce. These beautiful trees are common throughout the montane and subalpine zones of the Rockies and Cascades. The scales of the cone are not exactly soft, but they are papery and flexible. At about 3 inches long by an inch wide, they are big enough to give your fingers some separation from the business end, and small enough to get in where they need to go. Give them a try. – Drew Smith
Share your favorite gear of 2021 with us!
What are your favorite pieces of outdoor gear from 2021?
Tell us what you loved and why in the forum comments below!
Backpacking Light does not accept compensation or donated/discounted products in exchange for product mentions or placements in editorial coverage.
Some (but not all) of the links in this review may be affiliate links. If you click on one of these links and visit one of our affiliate partners (usually a retailer site), and subsequently place an order with that retailer, we receive a commission on your entire order, which varies between 3% and 15% of the purchase price. Affiliate commissions represent less than 15% of Backpacking Light's gross revenue. More than 70% of our revenue comes from Membership Fees. So if you'd really like to support our work, don't buy gear you don't need - support our consumer advocacy work and become a Member instead.
Learn more about affiliate commissions, influencer marketing, and our consumer advocacy work by reading our article Stop wasting money on gear.
We provide data that evaluates backflushing and storage in maintaining flow rates of the Platypus Quickdraw, Sawyer Squeeze, and Katadyn Befree hollow-fiber membrane squeeze filters.
You don’t have access to view this content.
Membership Required
This feature requires an active Backpacking Light Membership.
Premium Articles
You're currently viewing a free preview of a member exclusive premium article. Our premium articles include in depth journalism and insights from the Backpacking Light editorial team.
Get full article access by subscribing to a Premium or Unlimited Backpacking Light membership!