The Harvest Right Home Freeze Dryer is a fantastic – and fantastically expensive – way to prepare backpacking meals.
Introduction
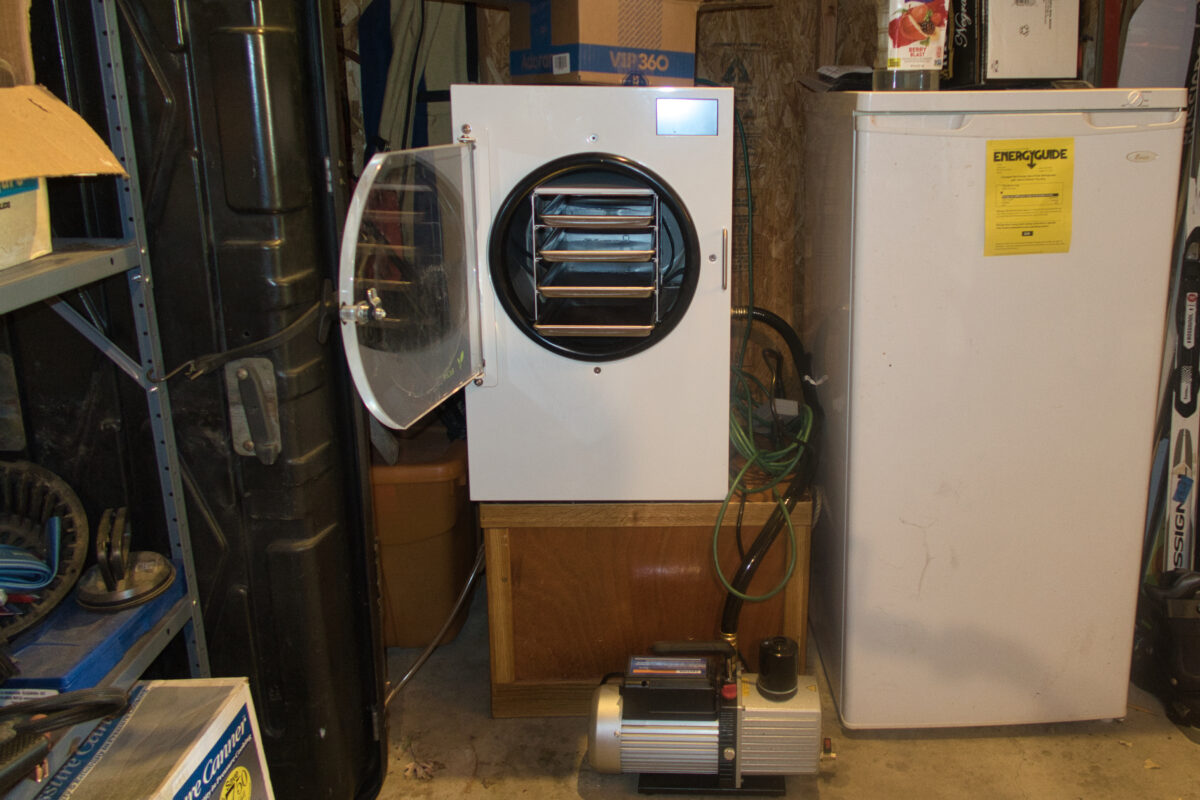
The Harvest Right Home Freeze Dryer (MSRP: from $2,695) is a freeze dryer designed for at-home, personal use by backpackers and anyone else with a need to preserve food in a lightweight fashion for long periods of time. It uses a 110-volt outlet, ships with four trays, weighs 112 pounds (51 kg), and can freeze dry 7-10 pounds (3-5 kg) of food at a time. The vacuum pump weighs an additional 35 pounds (16 kg).
Photo: Harvest Right
Freeze-drying addresses two problems for backpackers: weight and spoilage. Heat-assisted dehydration does this too but is not as effective. Freeze-drying also does a better job than dehydration of preserving flavor and nutrition and renders food easier to rehydrate. There are good reasons why freeze-dried meals are so popular among backpackers.
However, freeze-drying requires specialized equipment that is quite expensive. For most of us, the only way to get freeze-dried meals is to buy them already prepared.
The Harvest Right Home Freeze Dryer is targeted at consumers (not necessarily just backpackers) who want to preserve substantial amounts of food for personal use. Backpacking Light owns one of these units. I have been putting it through its paces so that you can judge whether to consider getting one yourself.
In this First Looks review, I’ll give a top-line summary of operation and performance. In later articles, I’ll explore the science and technology of freeze-drying, and share some recipes that work particularly well.
Highlights
consumer-friendly home freeze-dryer system
run capacity (medium model) is 7 – 10 pounds (3 – 5 kg) of fresh food
programmable for solid or liquid foods
24 – 36 hour batch run time
touch-screen interface, walkaway operation
unit size: 18 x 21 x 29 inches (46 x 54 x 72 cm), 112 pounds (51 kg)
complete system list price $2,695
Testing Context
I got this unit about a month before continuing my MYTH (multi-year thru-hike) of the Pacific Crest Trail, set it up in my garage, and prepped a number of freeze-dried meals for resupply.
I returned in September at peak harvest time in Colorado and was able to freeze-dry a number of fresh foods (tomatoes, peppers, corn, apples, garlic, etc) for home use as well as for future backpacking trips.
This is a first look at new gear that recently entered our review pipeline, and hasn't yet been subjected to rigorous field use. Learn more about the types of product reviews we publish.
First Impressions
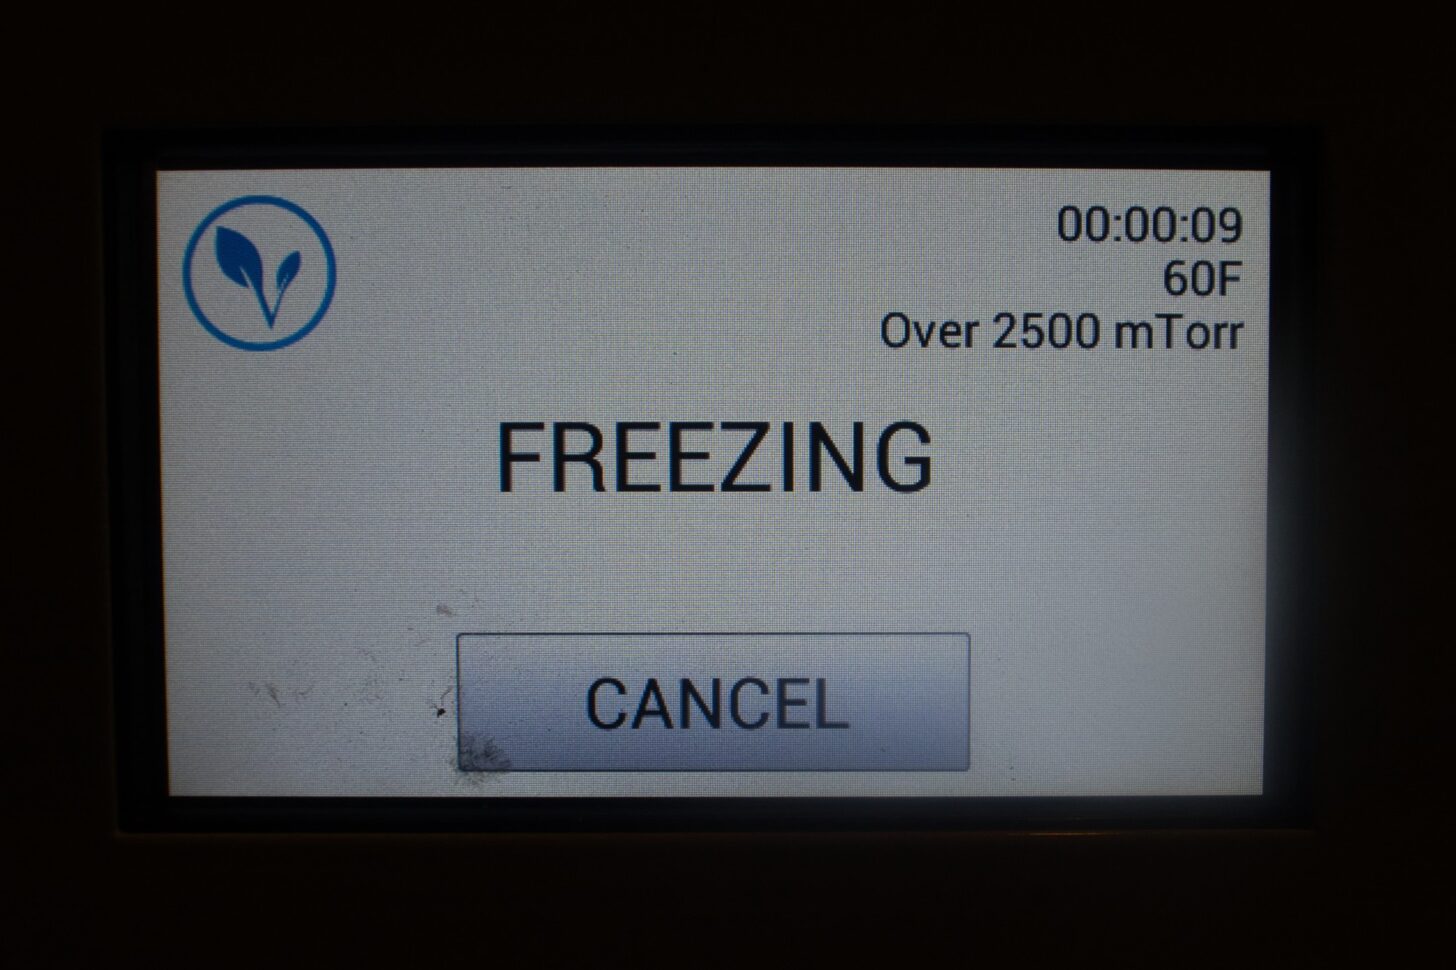
The operation of the Harvest Right Home Freeze Dryer is simple and straightforward. Using the touchscreen interface, you choose liquid vs. non-liquid food type and then pre-frozen vs. not-frozen. After that, you can walk away and come back the next day or evening to collect your freeze-dried food.
The unit appears to be very solidly built, befitting its hefty weight. Components appear to be of high quality. This is important because durability is a key factor in determining whether the unit delivers adequate value for the substantial investment required.
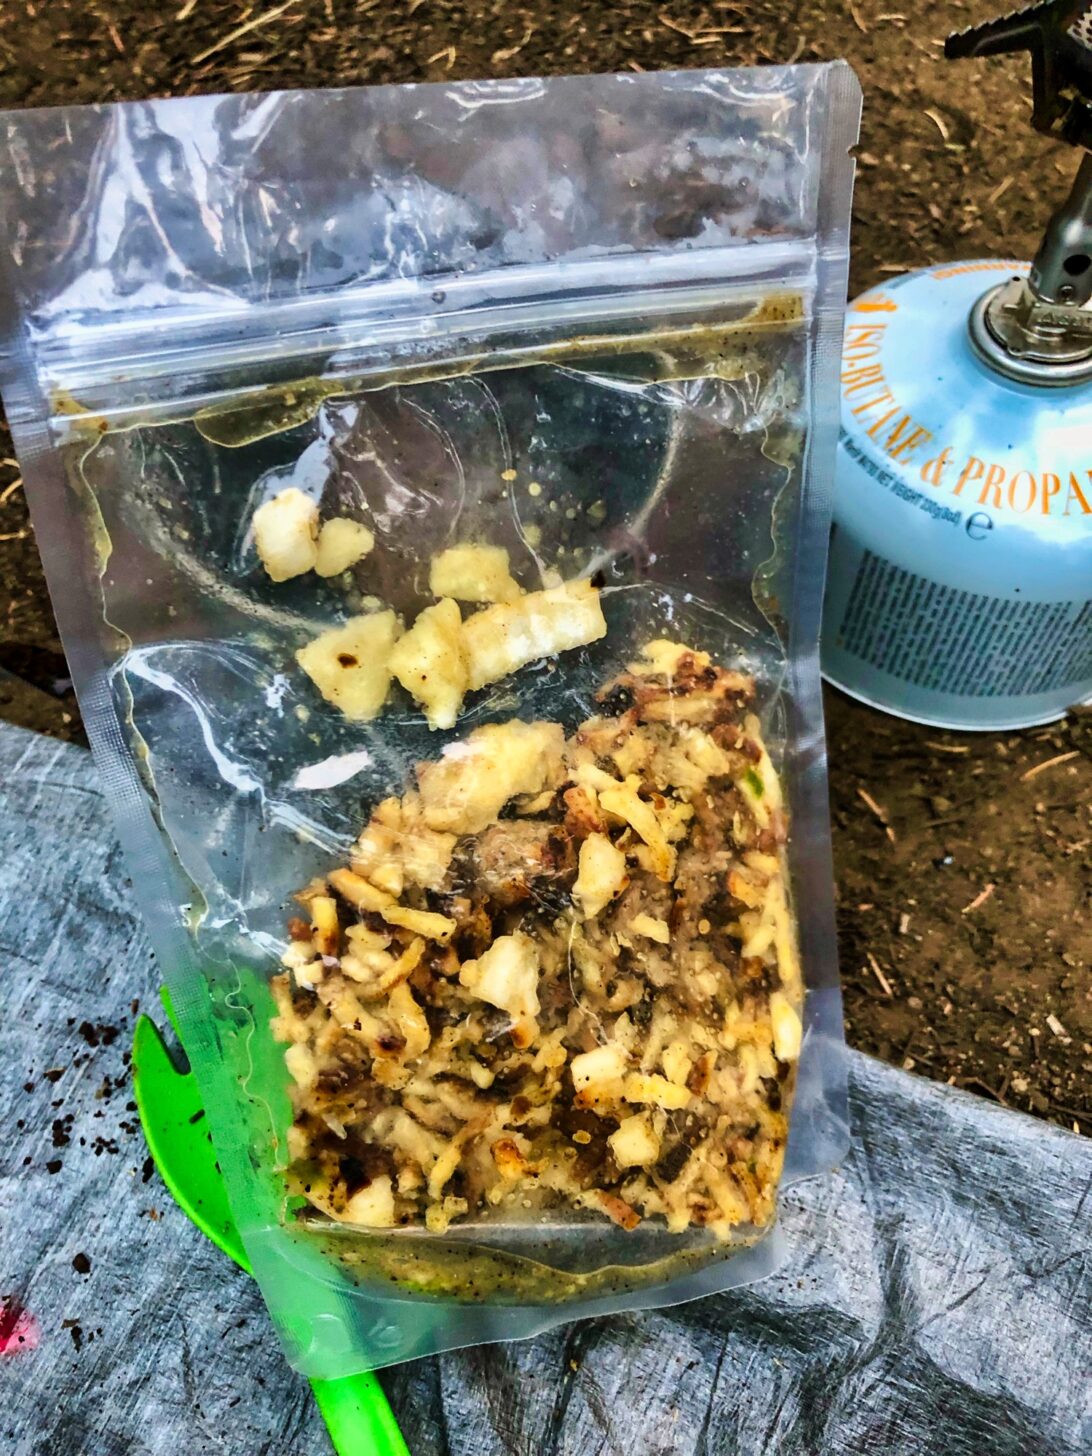
I was able to successfully dry a range of foods – not only fruits, grains, veggies, and meats, but yogurt, smoothies, and ice cream sandwiches. I learned a few best practices along the way, which will be incorporated into future articles.
Entire meals can be prepared in the freeze dryer (as opposed to using dehydration, which requires ingredients to be dehydrated individually). In addition to standards like chili, take-out meals such as sesame tofu and spaghetti Pomodoro from local eateries worked well. In fact, more than well – those meals were downright awesome. The possibilities here are pretty much endless.
Rehydration of foods was comparable to that of commercially prepared meals: add an appropriate amount of hot water and wait a few minutes. I also found (because I ran low on fuel) that cold-soaking home freeze-dried foods works great. Rather than the hours required to reconstitute most dehydrated foods by cold-soaking, my freeze-dried meals rehydrated in 5-20 minutes in cold water.
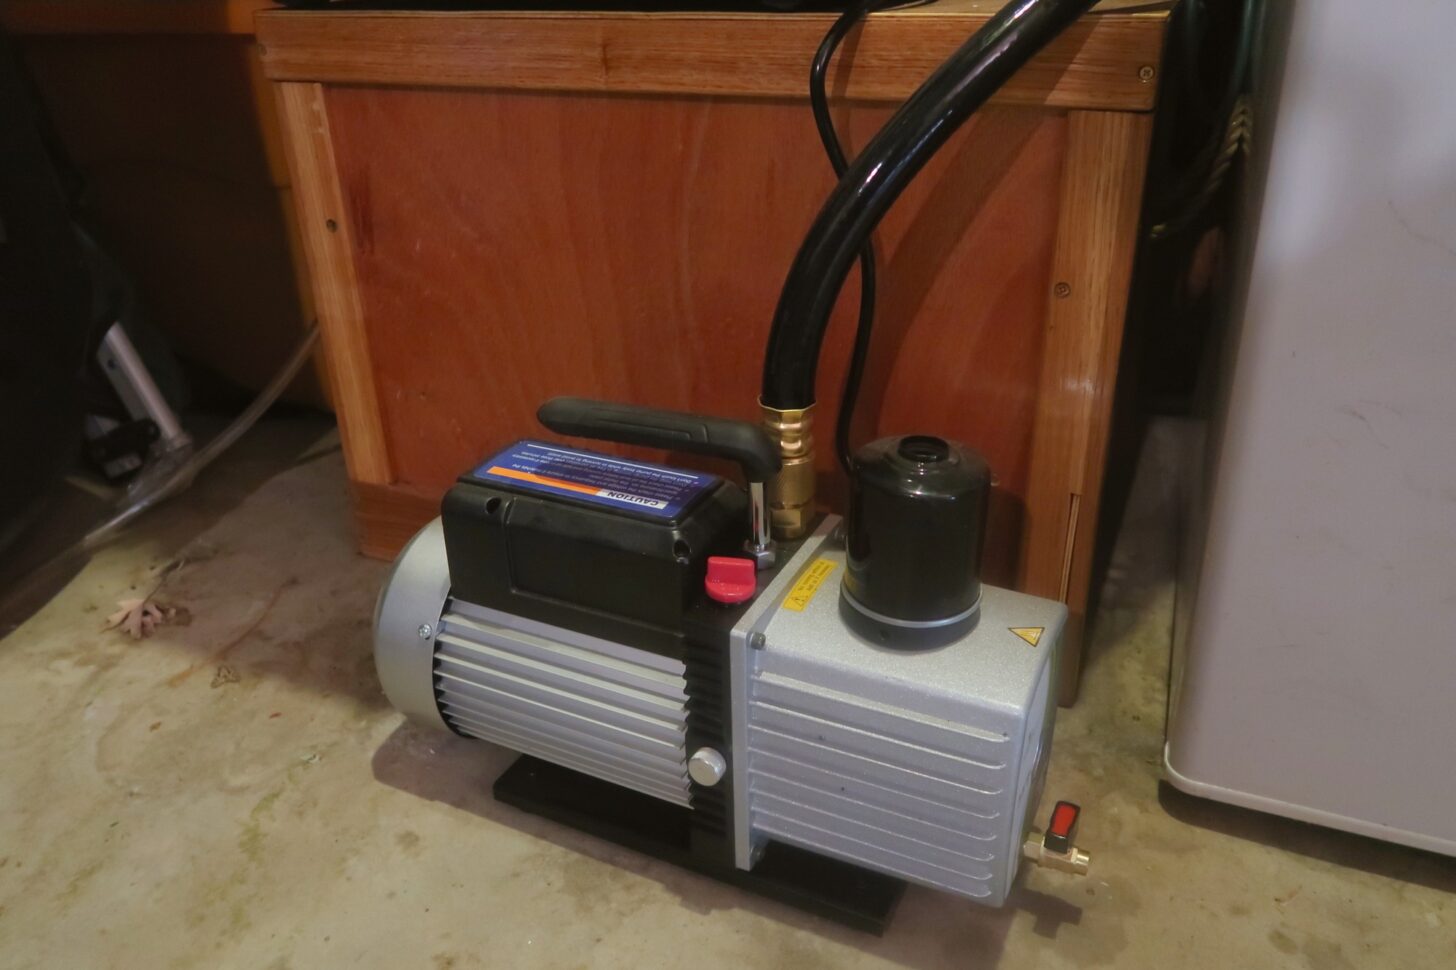
Some maintenance of the unit is required, chiefly draining condensed water from the vacuum pump and topping off with fresh oil after every run. Other than that, keeping the door gasket wiped clean is all that is required.
The unit – specifically, the vacuum pump – is noisy. You want to place it in a garage or shed, not in your house. Those who wear earplugs or use a noise machine in the bedroom may not mind.
The capital costs for freeze-drying are 5 – 50X that of heat-assisted dehydration, but the operational costs are similar. You’ll need to process a lot of food to justify the initial outlay.
Photos
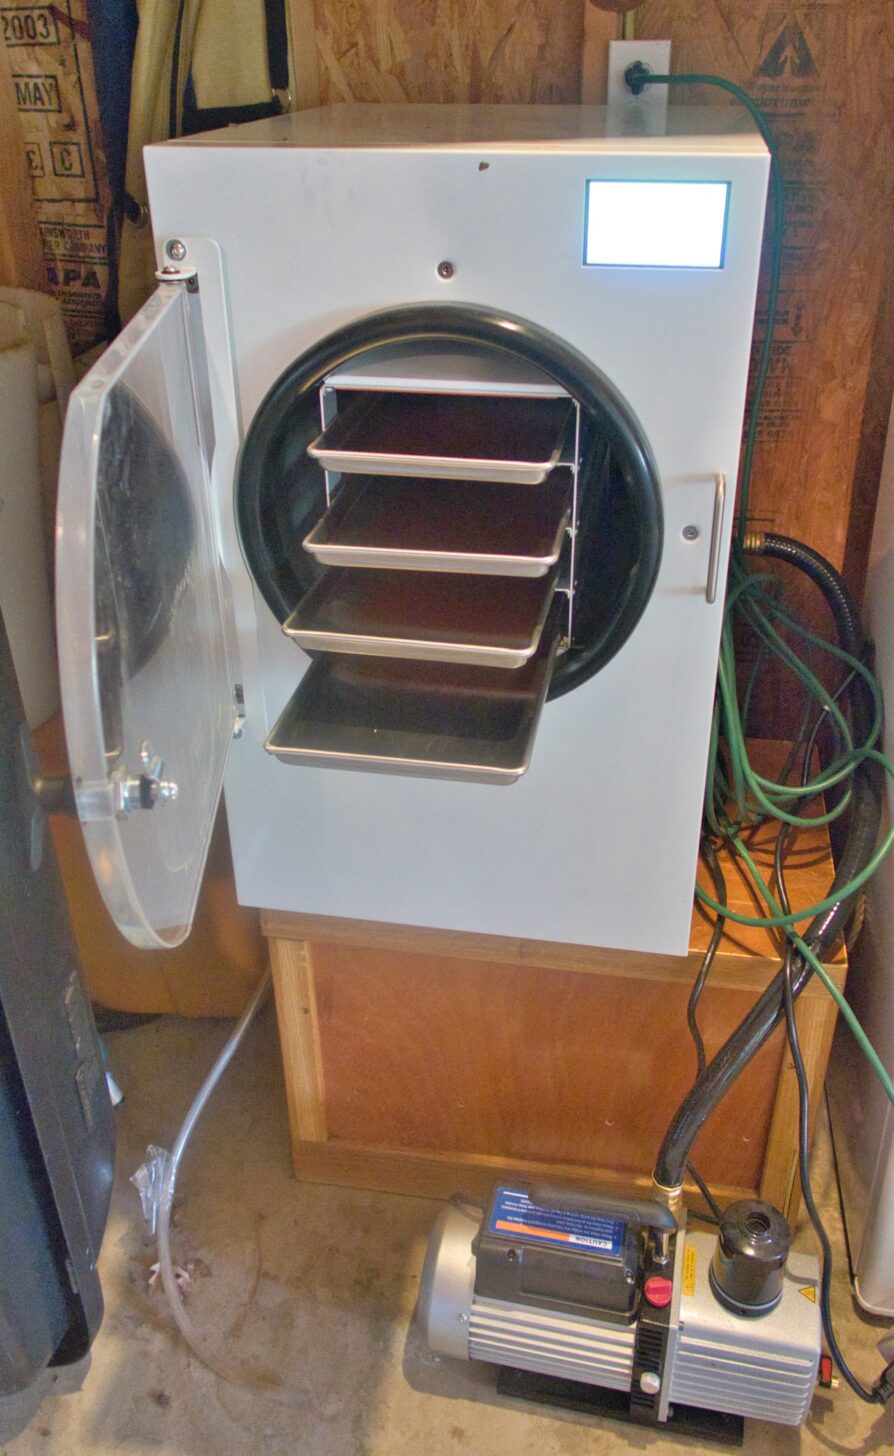
The Harvest Right Home Freeze Dryer set up in my garage, complete with its vacuum pump.Vacuum pump and hose connected to the Harvest Right home freeze-dryer.Hash browns going into the freeze-dryer.The liquid vs. non-liquid menu.The frozen vs. not frozen menu.Once the machine is running, you can simply walk away.The close the drain valve screen.The HarvestRight freeze-dryer.Hash browns about to go down.
The Takeaway
The Harvest Right Home Freeze Dryer unit delivers on food quality, versatility, and ease of use. If you can afford the up-front investment, it will change your life. OK, maybe not your whole life, but it will change how well you eat on the trail. Stay tuned in 2022 for a series of articles that discusses freeze-drying science, best practices, and recipes.
Product mentions in this article are made by the author with no compensation in return. In addition, Backpacking Light does not accept compensation or donated/discounted products in exchange for product mentions or placements in editorial coverage.
Some (but not all) of the links in this review may be affiliate links. If you click on one of these links and visit one of our affiliate partners (usually a retailer site), and subsequently place an order with that retailer, we receive a commission on your entire order, which varies between 3% and 15% of the purchase price. Affiliate commissions represent less than 15% of Backpacking Light's gross revenue. More than 70% of our revenue comes from Membership Fees. So if you'd really like to support our work, don't buy gear you don't need - support our consumer advocacy work and become a Member instead.
Learn more about affiliate commissions, influencer marketing, and our consumer advocacy work by reading our article Stop wasting money on gear.
Executive Producer - Backpacking Light; Show Director and Host - Ryan Jordan; Producer - Chase Jordan; Theme music: Look for Me in the Mountains written by Chris Cunningham and Ryan Jordan, performed by Chris Cunningham (acoustic guitar, lead and harmony vocals, harmonica), Chad Langford (upright bass), and Tom Murphy (mandolin), produced by Basecamp Studios in Bozeman, Montana.
Sponsorship Policy: Backpacking Light does not accept compensation or donated/discounted products in exchange for product mentions or placements in editorial coverage, including any podcast episode content not excplicitly identified as sponsored content. Some (but not all) of the links in these show notes may be affiliate links. Learn more about affiliate commissions, influencer marketing, and our consumer advocacy work by reading our article Stop wasting money on gear.
An overview of how Leave No Trace techniques can be applied to winter backpacking.
Introduction
This article provides an overview of the best practices for minimal impact winter backpacking through the framework of the current Seven Principles of Leave No Trace (LNT). These principles are not necessarily intended to be strict, inviolable rules – aside from perhaps not leaving a pile of human waste on the trail. Instead, they provide guidance for making sound decisions related to outdoor impacts. The exact applications sometimes require exercising judgment informed by the science behind the principles.
Winter backpacking has a steeper learning curve than three-season backpacking, but is incredibly rewarding. Photo and caption: Mark Wetherington.
The Expanding Popularity of Winter Backpacking
Winter backpacking is much more intimidating than its three-season counterpart, although a mid-summer trek in Death Valley would rightfully scare the trail runners off most hikers. Even relatively fair-weather outdoor recreation in the colder months comes with challenges that are largely absent the rest of the year. Low temperatures, limited daylight, and terrain often covered in snow or ice all add complexity to a trip.
While many backpackers sit out the winter season and pick backpacking up again in the spring, the popularity of winter outdoor recreation is increasing. And rightfully so, as the joys and rewards of winter backpacking are so numerous they’d warrant a separate article or an entire book. Following wildlife tracks across the snow, enjoying incredible stargazing, not having to worry about annoying insects, packing tasty and fresh food that doesn’t spoil, and creating elaborate snow shelters and snow furniture are just a few.
Lighter and more comfortable equipment and clothing, flexible schedules as a result of work-from-home arrangements, and an overall increase in outdoor recreation in general during the last few years all contribute to more people getting out in winter. With more people getting out and exploring their public lands in winter, it means that it’s important for folks – even those who’ve been winter backpacking for decades – to brush up on the current best LNT practices for minimal impact backpacking in winter.
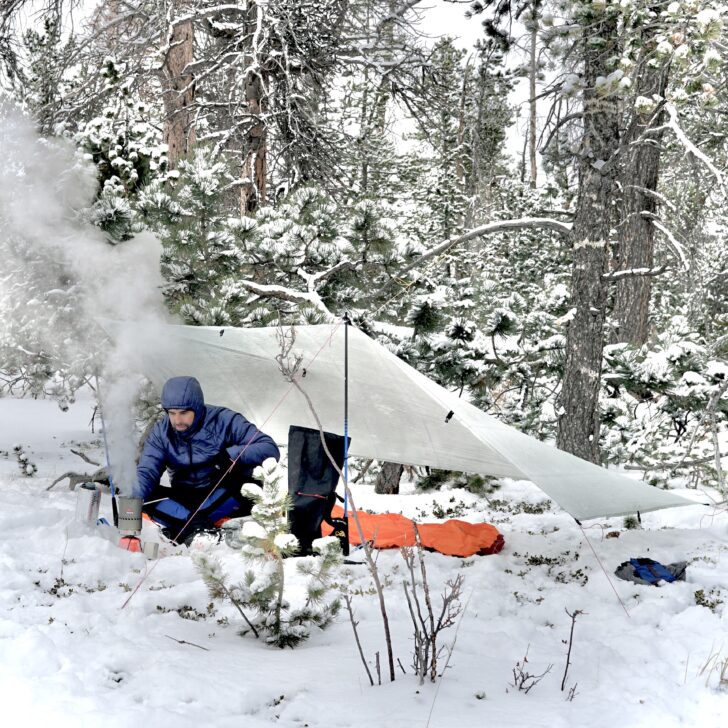
Winter tarp camping in Medicine Bow National Forest, Wyoming. Photo and caption: Ryan Jordan.
The conditions one might find when backpacking in winter can vary greatly from region to region and within the same region based on elevation. For some landscapes, like the lowland areas of the Southeast and Southwest, there usually isn’t much practical difference between backpacking in winter and backpacking the rest of the year other than being prepared for colder temperatures and increased rain. In other areas, particularly those where snow is measured in feet, backpacking in winter is different in such fundamental ways that it requires specialized skills and equipment – including Leave No Trace skills.
The seven principles of Leave No Trace are:
Plan Ahead and Prepare
Travel and Camp on Durable Surfaces
Dispose of Waste Properly
Leave What You Find
Minimize Campfire Impacts
Respect Wildlife
Be Considerate of Other Visitors
Winter-specific considerations to keep in mind when applying these techniques on backpacking trips will be covered in the body of this article. In addition to reviewing the published information from the Leave No Trace Center for Outdoor Ethics, I conducted an interview with Ben Lawhon, Senior Director of Research and Consulting at Leave No Trace, for additional insight into the best ways to travel lightly on public lands in the winter months. I also used my personal experience with practicing Leave No Trace skills during winter backpacking trips to illustrate certain approaches and provide first-hand observations.
Plan Ahead and Prepare
Of paramount importance in any season, planning ahead for a trip and being properly prepared for conditions is absolutely crucial for safety, comfort, and minimum impacts in winter. The consequences of not doing so tend to be greater and manifest themselves more quickly in winter. Although many things in winter take significantly longer than in summer – setting up a shelter, procuring water, dressing, undressing, etc. – it seems that when bad things happen they tend to happen fairly quickly and have multiple compounding effects. Lawhon says that not properly planning and preparing for a winter trip is likely the most common Leave No Trace skill that backpackers transitioning into winter are lacking.
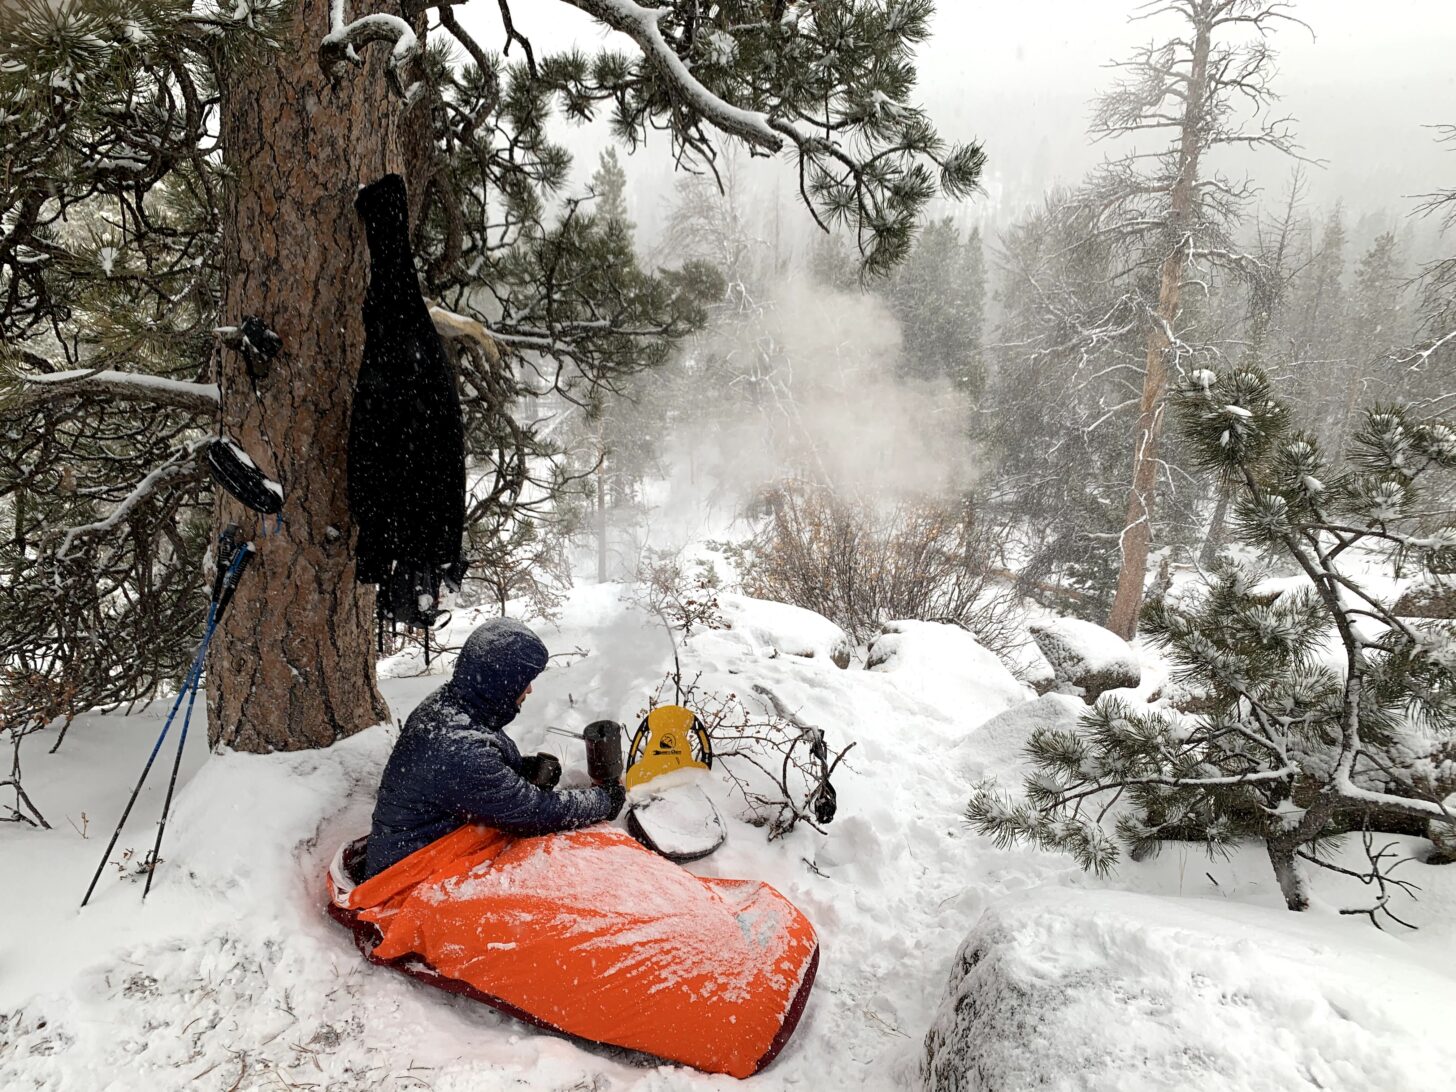
When planning a winter bivy without a shelter, consider making gear decisions that make life safer and easier. On this trip, a synthetic insulated jacket (instead of down) and a very fast-boiling stove contributed to the overall enjoyment of this camp when faced with snowy weather. Photo and caption: Ryan Jordan
For example, a fuel bottle gets left at camp or falls off a pack during a scramble over a snow-laden deadfall and this isn’t realized until you get to the next campsite. In summer, this might simply mean no hot meal for dinner or cold coffee the next morning. In winter, it would likely mean an incredibly difficult time melting snow for water and having to build a fire to do so, if firewood is available (or putting handfuls of snow in a Nalgene and trying to melt minuscule amounts of snow with body heat).
If adequate water can’t be acquired, then it might limit your ability to cook dehydrated meals as well as keep yourself hydrated. The consequences of being underfed and dehydrated on a person’s physical performance are considerable. Add in subfreezing temperatures and performance deteriorates further. I’ll end the winter backpacking catastrophizing here, but the profound impacts simple oversights or mistakes can have on comfort and safety should not be taken lightly. More than any other season, winter is not the time to experiment with fringe techniques.
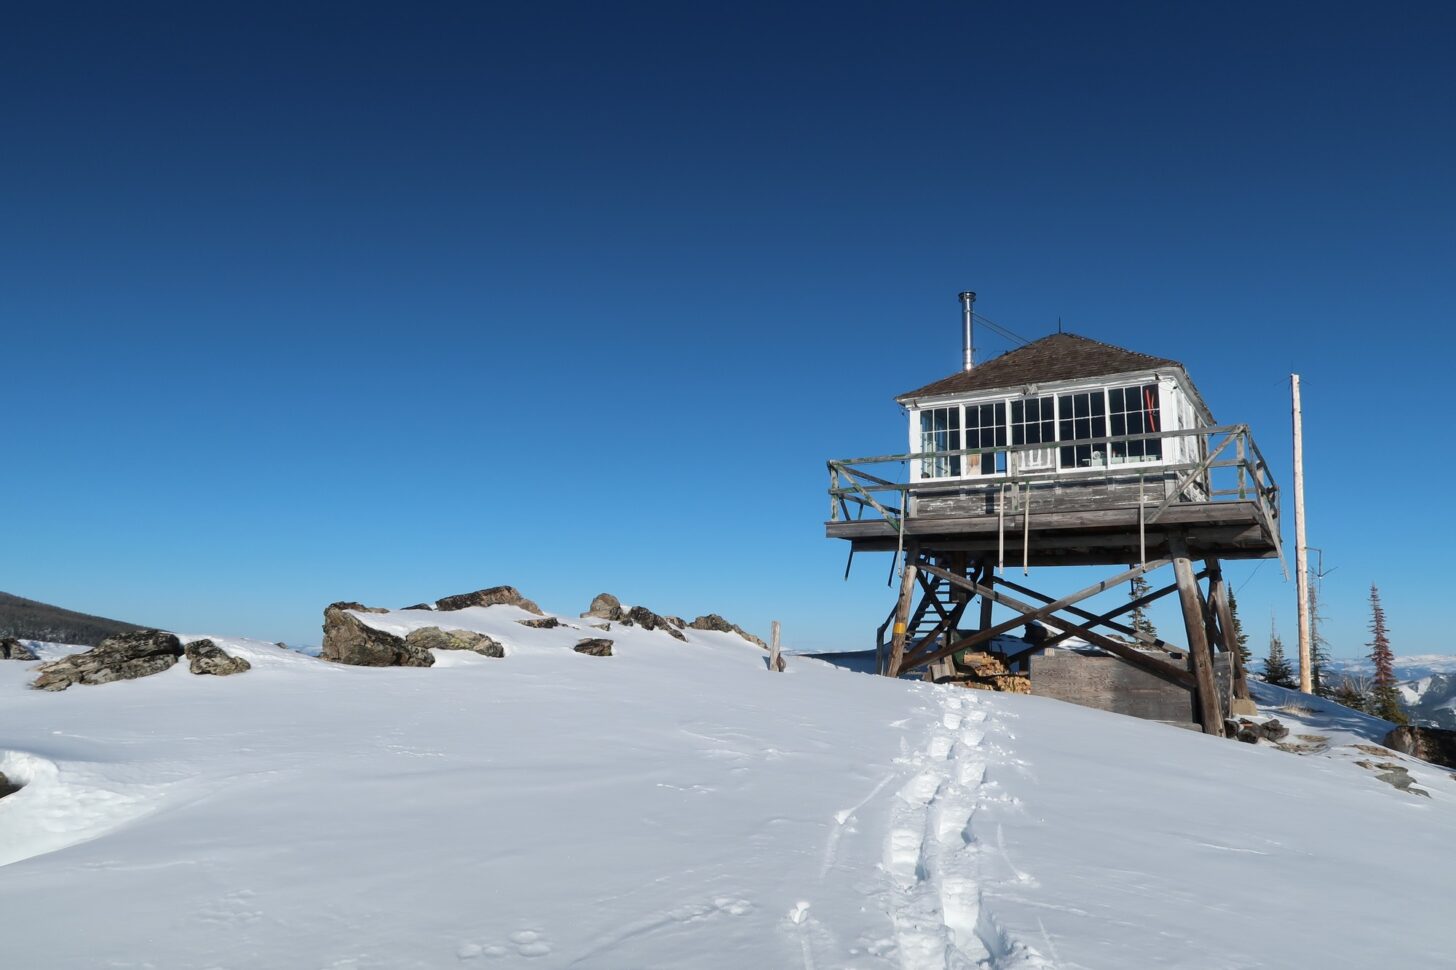
Although I’d planned to make it to this lookout to spend the night, I took a bivy sack in case I ran into trouble along the way. I got off-route and benighted, and ended up needing to use it. It was worth every ounce. Photo and caption: Mark Wetherington.
In addition to the usual planning involved in backpacking trips (permit requirements, trail conditions, and restrictions in place to protect the resource) planning ahead in winter involves knowing the potential hazards of your route (specifically avalanche danger), the possibility of limited access to trailheads, hazardous water crossings, and planning on how to handle contingencies due to weather, terrain, or other unforeseen circumstances.
One of the benefits of winter camping in a snowy climate is that durable surfaces are abundant. Deep snow cover allows for you to snowshoe or ski off-trail without having to worry about impacting ground cover. And by using snowshoes or skis to stamp out a spot for your tent, you can create a campsite pretty much anywhere.
Camping on durable surfaces is easy in winter, as long as there is enough snow. Photo and caption: Mark Wetherington.
There is no precise metric at which snow cover becomes a durable surface due to variations in the type of snow, but “If you’ve got light, powdery snow, that’s not going to provide the same level of protection as more dense, set-up snow,” Lawhon explained.
Avoiding areas with thin snow cover – of any type – is of primary importance. The general guideline from Leave No Trace is that 6 to 8 inches (15 to 20 cm) of snow can usually be considered as a durable surface and is when travel impacts to vegetation would be limited. However, what type of footwear you have on – crampons, microspikes, or other traction devices – might need to be taken into consideration when making a judgment call on what option is best. “It’s less of a set number and more about what are the clues on the ground,” said Lawhon.
Being able to choose from a wide selection of campsites in snow-covered terrain also makes it somewhat easier to be more deliberate about campsite selection and to choose places that are not only low-impact, but which are also in locations sheltered from prevailing winds, above cold sinks (areas where cooler air settles overnight – typically near bodies of water or in small valleys), and are oriented to maximize the limited daylight of winter. The ability to select more ideal campsites and to further customize them by digging trenches in the snow and/or snow caves to get out of the wind and make yourself more comfortable by creating benches and tables is a novel and downright fun part of winter camping. When moving on from a campsite where you’ve been particularly industrious and built furniture or shelters using the snow, these should be destroyed and the area naturalized as much as possible. This is actually pretty fun, as getting to go berserk with a snow shovel on a snow cave is more enjoyable than the tedious and sweat-inducing labor of building one. And it allows the next visitors the opportunity to experience a landscape that is in a more natural state.
Staying in rental cabins, huts or yurts can be a great way to mix up your usual backpacking trips and create an opportunity to introduce others to the charms of winter backpacking. And these surfaces are about as durable as it gets. Many of these are available through the United States Forest Service (USFS) and can be reserved on recreation.gov. In my opinion, these provide the best of both worlds in regard to winter recreation. You get the experience of being out in a natural environment and free of distractions (other than those you may have brought along, either physically or mentally), but without so much of the work of winter backpacking. You can lay out and stargaze until you get chilly, then walk into a cabin warmed by a wood stove and have plenty of elbow room to cook up a tasty and elaborate meal. Not having to pack a winter shelter, subzero sleeping bag, and other items associated with camping in winter make this a much more beginner-friendly option for those who are curious about winter backpacking and wishing to develop their skills.
Dispose of Waste Properly
Unless you’re staying in an area with facilities built to handle human waste (i.e. an outhouse at a campsite, cabin, or trailhead, for example), packing out solid human waste is the simplest, and sometimes only, option. Digging down to the ground through three feet of snow only to encounter frozen ground that renders a trowel moot is not a good way to start your day. So be prepared with WAG bags or similar products to pack out all solid human waste. Although packing it out is the gold standard, the Leave No Trace Center for Outdoor Ethics notes another option: “in lieu of packing it out, cover and disguise human waste deep in snow away from travel routes and at least 200 feet (70 adult steps) from water sources.” Toilet paper should absolutely be packed out if using this method.
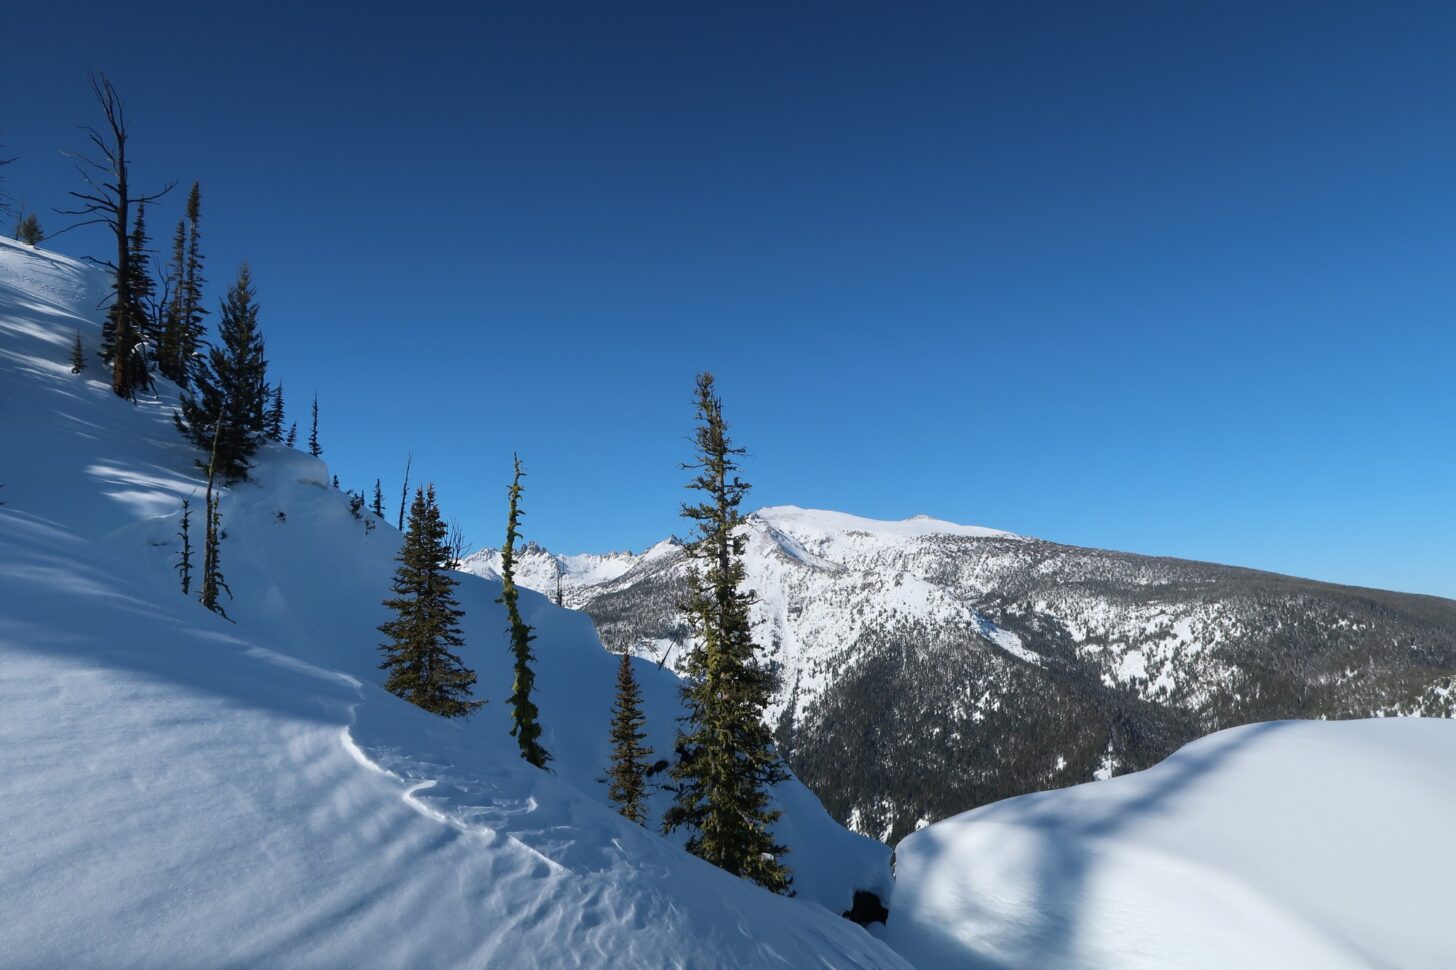
Planning ahead and preparing for variable snow conditions and being aware of terrain hazards that don’t exist in summer is extremely important in winter. Photo and caption: Mark Wetherington. Photo credit: Mark Wetherington
Liquid waste also needs to be given a bit more consideration in snow-covered terrain. Since most backpackers will be using snow to melt water, that means the water source is everywhere. No one wants to toss a clump of yellow snow into their pot. Fortunately, this rarely seems to happen – the abundance of snow, the relatively small numbers of winter backpackers, and the tendency to disperse rather than concentrate at campsites all help in avoiding this unpleasant situation. It seems most common in areas near cabins, huts, or yurts where those staying there don’t want to leave the comfort of the abode any more than they have to. Unfortunately, this means they (and also their dogs) risk urinating in the same places where others might be tempted to gather snow for water, since they also don’t want to leave the comfort of a shelter.
In addition to not urinating in obvious places where folks might gather water, another way to be considerate of other users regarding human waste is to cover the area with snow so people don’t have to see your marking, or to urinate close to the base of a tree where it is extremely unlikely anyone would be gathering water, since those places tend to have more debris (leaves, twigs, etc.) in the snow. Ben Lawhon of the Leave No Trace Center for Outdoor Ethics suggested that folks camping in small groups might consider designating a specific area for liquid waste to avoid any issues.
Leave What You Find
Adhering to this LNT principle is perhaps the only one that is actually made easier during winter. Snow typically covers up the rocks, artifacts, and other small items that are most tempting for hikers to take with them. And it seems that even the most ardent proponent of LNT wouldn’t begrudge you for taking home a snowball if you were so inclined. When snow cover isn’t thick enough to hide cool rocks, or fossils, or an artifact that intrigues you, remember that removing such items from public lands is not only against the LNT best practices but is also a crime in many contexts (particularly for artifacts). Instead of taking it with you, take a picture, spend some time admiring the object of your desire, then move on.
For folks who find themselves spending time in USFS rental cabins or other shared spaces in winter, this principle would also apply to leaving those structures in the same condition, or better, than when you found them. This includes the inverse of this principle – take with you what you bring. No matter how tempting it is to leave food for the next visitor or something you think might be appreciated or useful, it is almost always better to resist this urge (especially with food) as it can create problems with rodents. And visiting cabins that are crowded with the cast-off pots, utensils, and items from previous guests is rarely charming – it usually just creates needless clutter in spaces that are already often rather cramped.
Backpacking into a United States Forest Service Cabin in Montana on New Year’s Eve. Nighttime low temperatures reached -27 °F (-33 °C). Forgoing heavy tents, sleeping bags, cooking gear, and clothing allowed our group to ski rapidly with light packs on winter-closed roads to reach the cabin quickly and safely. In addition, it provided a safe refuge for experimenting with winter gear in extreme cold. Photo and caption: Ryan Jordan.
Minimize Campfire Impacts
Campfires in any season have become a contentious topic in the backpacking community over the past few years. The topic has been discussed here at Backpacking Light and in numerous other places. While many would argue – and quite compellingly – that the best place for a fire in winter is in a wood stove in a cabin, there are ways to have responsible campfires within the framework of minimal impact camping during winter backpacking trips. Leaving the debate about the appropriateness of campfires for another time and place, if you do decide to have a campfire in the winter months there are important things to keep in mind.
First and foremost is whether or not campfires are even allowed by the land management agency which controls the public lands where you are backpacking. If fires are allowed and you’re staying at a campsite with an existing fire ring, you should use the infrastructure that is already there. If not, consider a fire pan if appropriate for the terrain you are in. Digging through the snow down to the ground, then scattering the ashes and filling the hole back in with snow is also a good option. As tempting as it might be to break off dead branches from trees, do not do this as the wood is not dead and down.
If you plan on relying on a fire for any part of a subzero expedition, reading the Jack London short story “To Build A Fire” should be mandatory (spoiler alert: it is not a how-to guide).
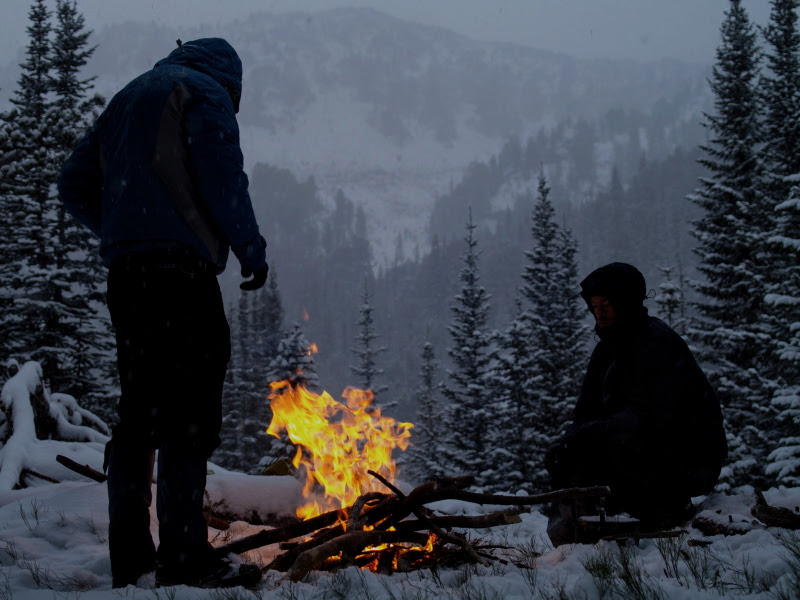
A campfire provides welcome warmth during a wintry traverse of the Montana Beartooth Range. When practicing winter LNT for building campfires: use dead and down wood and build them on durable surfaces. In this case, we weren’t able to find a durable surface on this ridgetop forest, so we laid a foundation of stones on top of the vegetation to create insulation that would protect the vegetation, without having to dig it up and destroy it. Photo and caption: Ryan Jordan.
Respect Wildlife
As tough as it might seem to backpack in winter, it’s unimaginably tougher to be an animal that must survive through the winter. Wildlife is especially vulnerable in winter, making it even more important to avoid causing them additional stress or impacting their habitat. Seeing animal tracks across the snow is especially magical. One of my favorite memories is of seeing rodent tracks and then them disappearing when an owl or hawk swooped down and grabbed them, with some of the snow disturbed from the flapping of the wings. However, actively following animals that you can see is something that must be avoided in winter. Observe from a distance and make doubly sure that you aren’t causing them any stress.
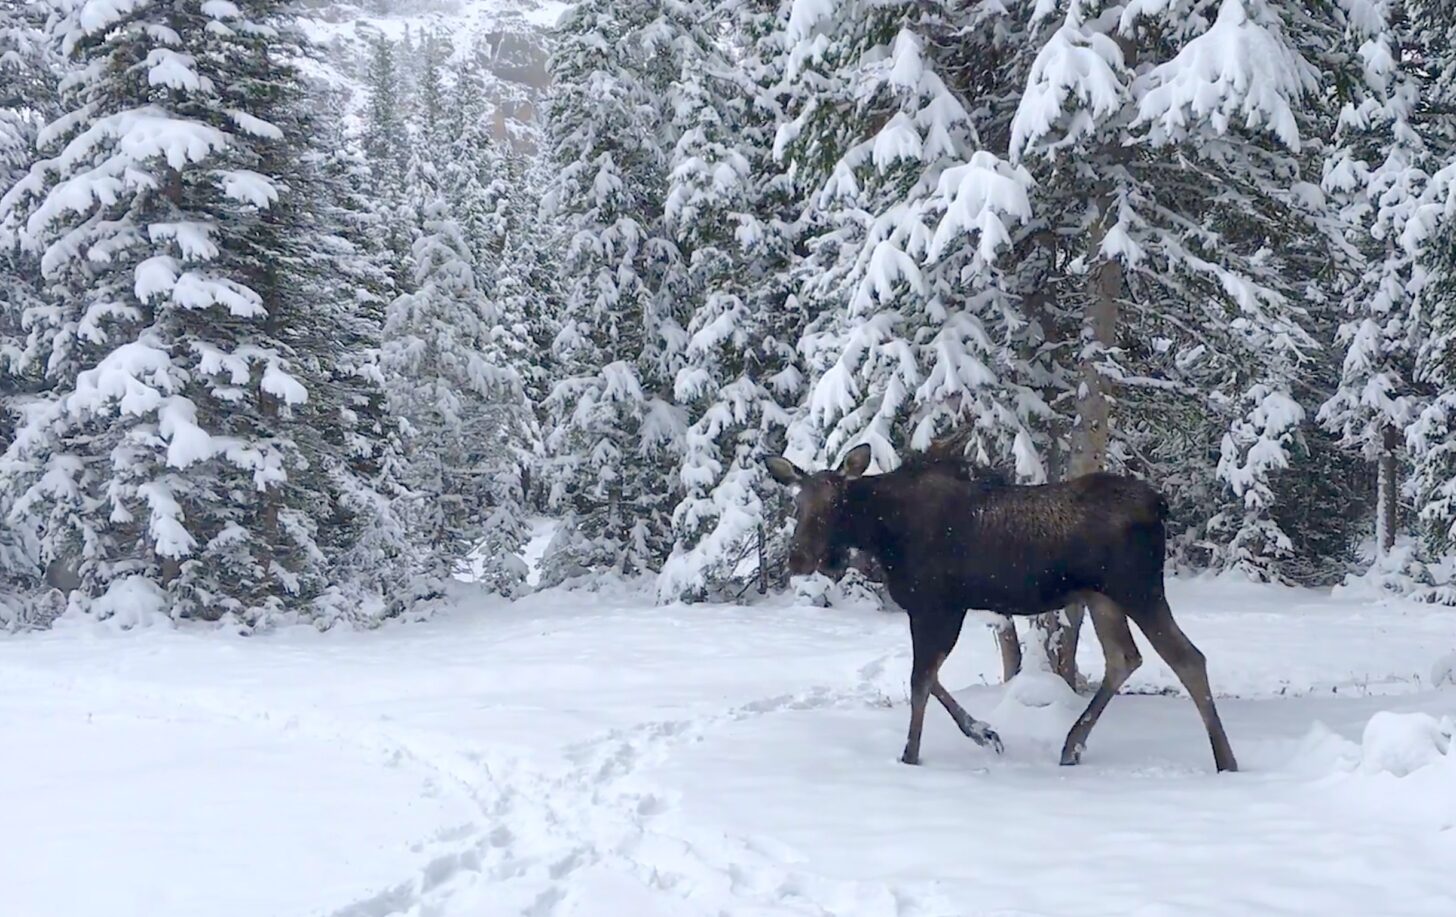
Winter creates stress on wildlife. They are in a constant search for food and warmth, and can be more susceptible to predators. Give wildlife a wide berth and let them be. This moose wandered through our camp in the Montana Beartooth Range, and we all just stayed as still as possible and let her pass without event. Photo and caption: Ryan Jordan.
Winter is also not a time to let your guard down in regard to food storage. Although bears in most northern latitudes are generally hibernating (bears in warmer climates typically don’t hibernate to the degree most expect) and aren’t as much of a threat to food, life, or limb, there are numerous other critters who could wreck your trip by gnawing into your food stash. Make sure all food is properly secured either with a canister, Ursack, or hung an appropriate distance from where an animal could get to it.
Be Considerate of Other Visitors
Consideration for other visitors is important in all seasons and, with more people recreating on our public lands each year, this is an LNT skill we should all be practicing plenty. Basic courtesy and respect cost nothing to extend to fellow visitors and allow everyone to enjoy their time outdoors with a spirit of shared fellowship and contemplation rather than competition.
Hot springs are popular locations in winter and for good reason. Soaking in hot water when the ambient temperature is below freezing is a sublime experience. Unfortunately, such prime geothermal destinations can get crowded in the winter and contribute to overuse impacts. Try to visit such places on weekdays instead of on weekends if possible. Photo and caption: Mark Wetherington.
With snow closing many of the forest roads that lead to trailheads, there can be an increased concentration of visitors to the most popular, accessible, or attractive locations. If you’re seeking solitude, then it’s probably best to avoid those locations so as to not inadvertently project your potential grumpiness towards others that are out there enjoying themselves (bonus points if you don’t project your grumpiness towards those you encounter and you don’t complain about all the crowds on the internet later). By avoiding popular places at popular times you also help to reduce the impacts that can result from concentrated use at specific locations (i.e., social trails around hot springs as folks seek privacy to change, use the bathroom, camp, cook, etc.) or on specific trails. When using trails that have multiple uses and might be groomed specifically for a certain type of recreation – skate skiing, classic cross-country skiing, and snowshoeing, for example – take care to not posthole into the ski tracks or otherwise disturb the surface. When in backcountry areas, similar etiquette applies and if at all possible (and I can think of very few situations where it isn’t possible) do not hike or snowshoe on the tracks of skiers skinning uphill.
The silence and hush of winter is profound and a magical feature of the season. Keep this in mind when around other groups and avoid loud conversations, music, or other disruptive noises. While snow has a muffling effect and can deaden sound, sound does travel further in chilly weather.
As noted in a previous section, dismantling snow structures made when camping allows other visitors to experience a minimally impacted landscape rather than having to look at your attempts at engineering. While there is certainly some nuance and discretion to be used, and the structures will melt or be covered up by snow, it generally is best to err on the side of not leaving things you built once you’ve moved on from an area.
Summary
Winter backpacking can be a rewarding experience filled with magical highlights. Although other seasons are easier to backpack in, there is a magnificence and wonder present in winter that is worth putting in the effort and learning the skills to be able to safely enjoy the backcountry during the colder months of the year. Backpacking in winter also provides you with a different perspective on the landscape. Visiting areas in winter that I backpack in during the summer allows me to view them in a completely different way and adds depth to my experience in each season.
Becoming familiar with the gear, skills, and knowledge needed for winter backpacking – including proper application of Leave No Trace principles – takes a bit more time and energy than three-season backpacking. Easing into winter backpacking by going with experienced partners, taking skills courses focused on safe travel and minimum impact camping, and planning your first trips to be easier ones can allow you to become comfortable with the unique challenges of winter backpacking. One way to ease the transition into winter backpacking is to plan your first trip to an area that is close to your vehicle and has pit toilets available. This can help to make certain tasks easier, ease fears about things going wrong since you have a quick exit available, and allow you to “pack your fears” for your first trip so that you can better evaluate what you need and what you don’t.
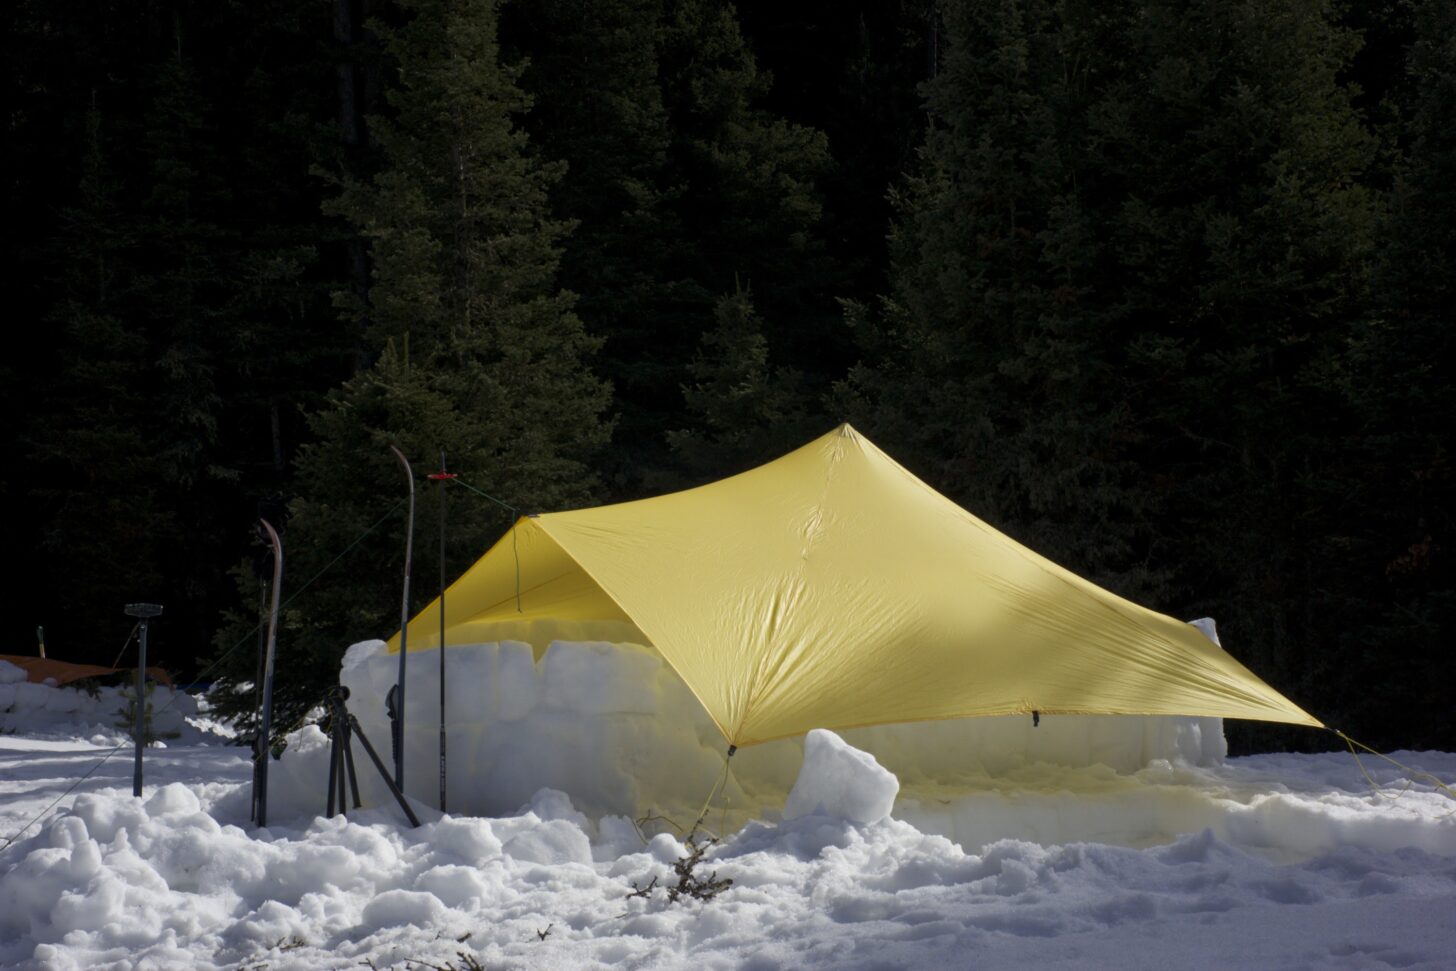
Winter camping is fulfilling on so many levels. The quiet solitude of winter, combined with long and peaceful nights, make it a very alluring activity for many hikers. Being intentional about your backcountry footprint and minimizing your impact is essential so we can share the winter backcountry and provide a meaningful collective experience for all of us. Here, a deep snowpit is rimmed with an upper wall of snow bricks, and covered with a pyramid tarp for a palatial shelter. Photo and caption: Ryan Jordan.
Browse our curated recommendations for winter gear in the Backpacking Light Gear Shop – a product research & discovery tool where you can find Member gear reviews, Gear Swap (used gear) listings, and more.
Backpacking Light does not accept compensation or donated/discounted products in exchange for product mentions or placements in editorial coverage.
Some (but not all) of the links in this review may be affiliate links. If you click on one of these links and visit one of our affiliate partners (usually a retailer site), and subsequently place an order with that retailer, we receive a commission on your entire order, which varies between 3% and 15% of the purchase price. Affiliate commissions represent less than 15% of Backpacking Light's gross revenue. More than 70% of our revenue comes from Membership Fees. So if you'd really like to support our work, don't buy gear you don't need - support our consumer advocacy work and become a Member instead.
Learn more about affiliate commissions, influencer marketing, and our consumer advocacy work by reading our article Stop wasting money on gear.
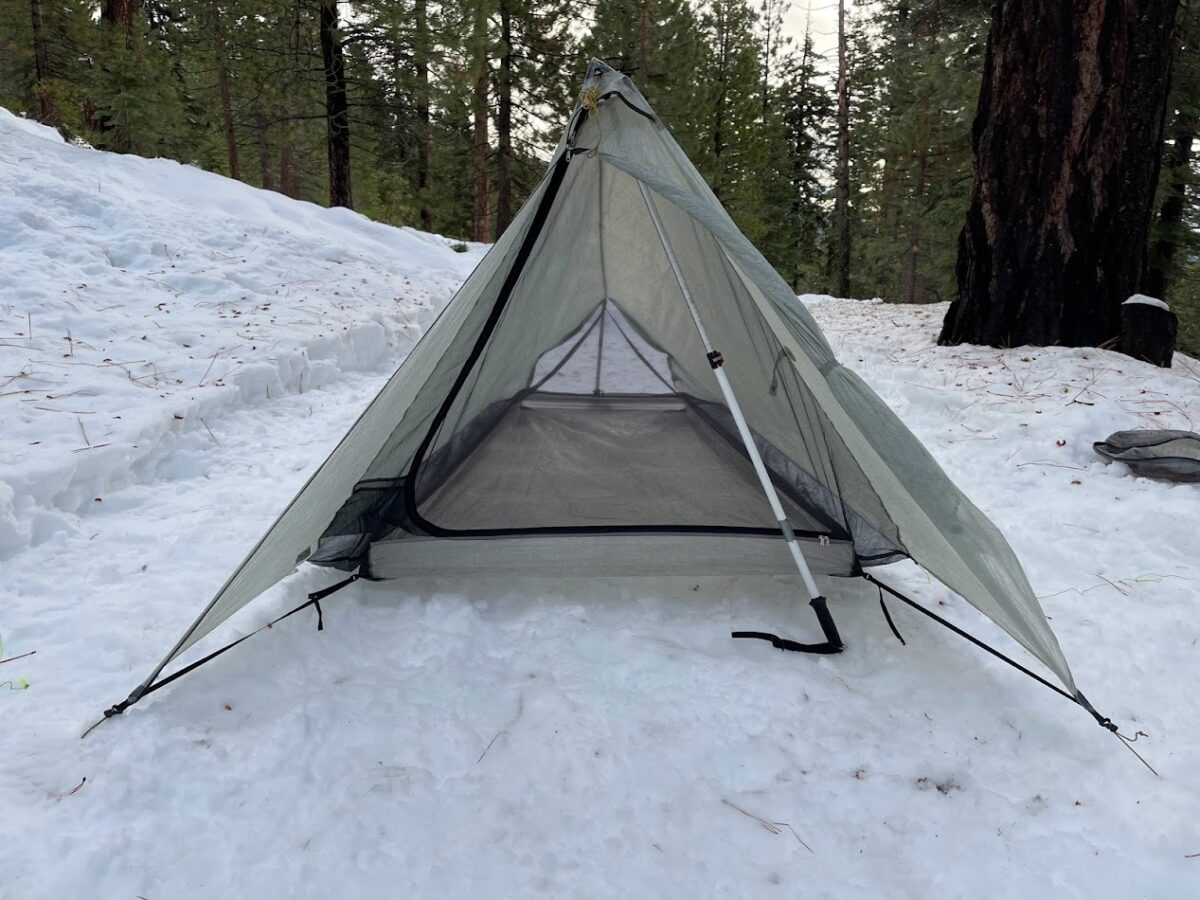
The Tarptent ProTrail Li (17.7 ounces / 502 g, from $529) is a single-wall, double trekking-pole, single-vestibule, front-entry Dyneema Composite Fabric (DCF) 1-person shelter.
A high MVTR waterproof-breathable shell jacket may be the holy grail that can replace both a wind shirt and a rain jacket. Do they exist, and where do we find them?
Andrew and Ryan chat with Backpacking Light contributor Stephen Seeber about layering and waterproof-breathable fabrics.
Stream
Summary
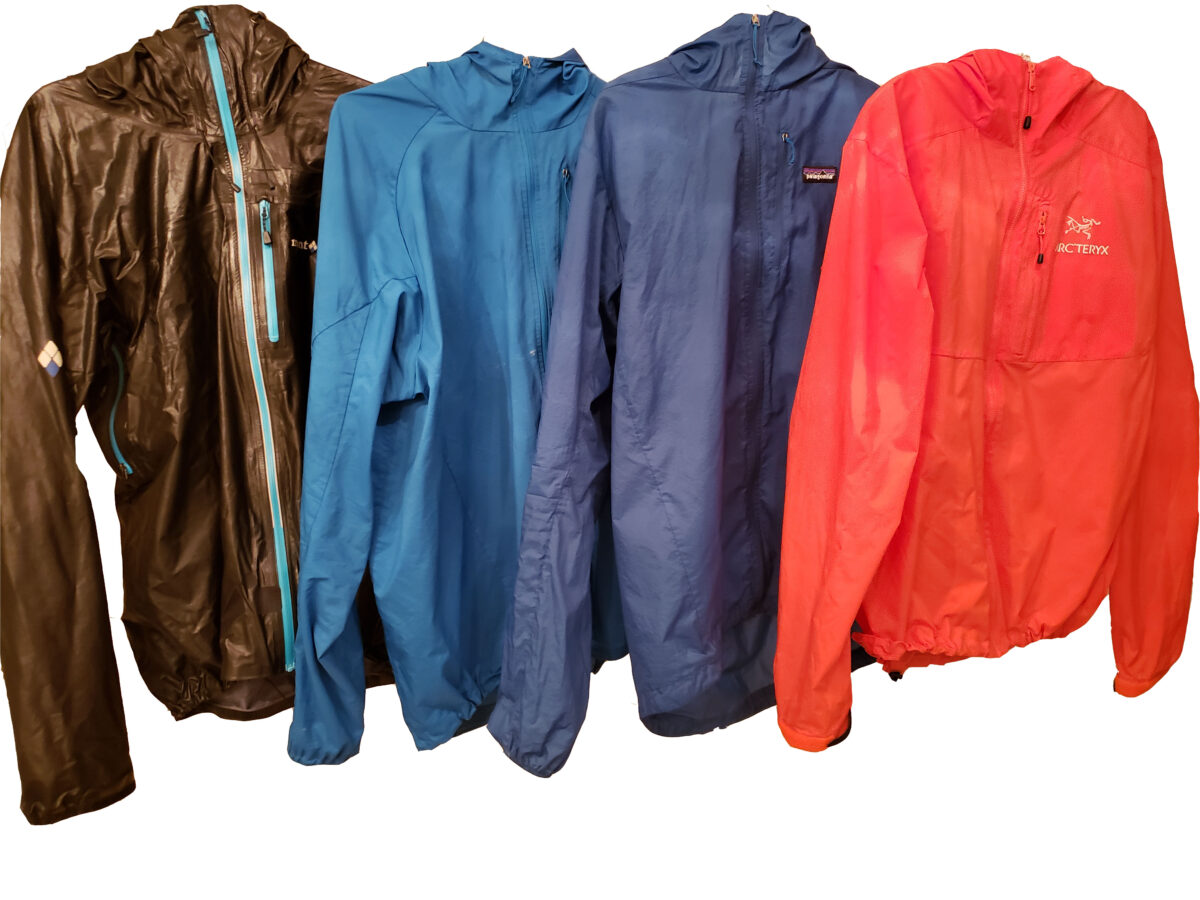
In this episode of the Backpacking Light Podcast, Ryan and Andrew chat with Backpacking Light author and materials tester Stephen Seeber about layering, waterproof-breathable fabrics, and new GORE-TEX technology. Also in this episode, we discuss a new pack from Arc’teryx, updates to the popular NEMO Tensor line of sleeping pads, and a follow-up conversation about water-resistant down.
A few of the jackets Stephen Seeber has tested recently. Photo: Stephen Seeber.
Executive Producer - Backpacking Light; Show Director and Host - Ryan Jordan; Producer - Chase Jordan; Theme music: Look for Me in the Mountains written by Chris Cunningham and Ryan Jordan, performed by Chris Cunningham (acoustic guitar, lead and harmony vocals, harmonica), Chad Langford (upright bass), and Tom Murphy (mandolin), produced by Basecamp Studios in Bozeman, Montana.
Sponsorship Policy: Backpacking Light does not accept compensation or donated/discounted products in exchange for product mentions or placements in editorial coverage, including any podcast episode content not excplicitly identified as sponsored content. Some (but not all) of the links in these show notes may be affiliate links. Learn more about affiliate commissions, influencer marketing, and our consumer advocacy work by reading our article Stop wasting money on gear.
In this gear guide, we review 16 models of waterproof mitten shells (“rain mitts”) weighing less than 4 ounces (113 g) within the primary context of 3-season backpacking.
Mark spends ten percent of every year backpacking – he just doesn’t do it all at once.
Stream
Summary
In this episode of the Backpacking Light Podcast, longtime Backpacking Light contributor Mark Wetherington reads his essay The Backpacking Tithe Project. In it, he considers the implications of intentionally focusing on frequent, short trips over long thru-hikes.
Backpacking Light author Mark Wetherington would rather explore hidden nooks and crannies than pound away at a thru-hike.
Would you like to read a written version of this podcast? Check it out here!
Executive Producer - Backpacking Light; Show Director and Host - Ryan Jordan; Producer - Chase Jordan; Theme music: Look for Me in the Mountains written by Chris Cunningham and Ryan Jordan, performed by Chris Cunningham (acoustic guitar, lead and harmony vocals, harmonica), Chad Langford (upright bass), and Tom Murphy (mandolin), produced by Basecamp Studios in Bozeman, Montana.
Sponsorship Policy: Backpacking Light does not accept compensation or donated/discounted products in exchange for product mentions or placements in editorial coverage, including any podcast episode content not excplicitly identified as sponsored content. Some (but not all) of the links in these show notes may be affiliate links. Learn more about affiliate commissions, influencer marketing, and our consumer advocacy work by reading our article Stop wasting money on gear.
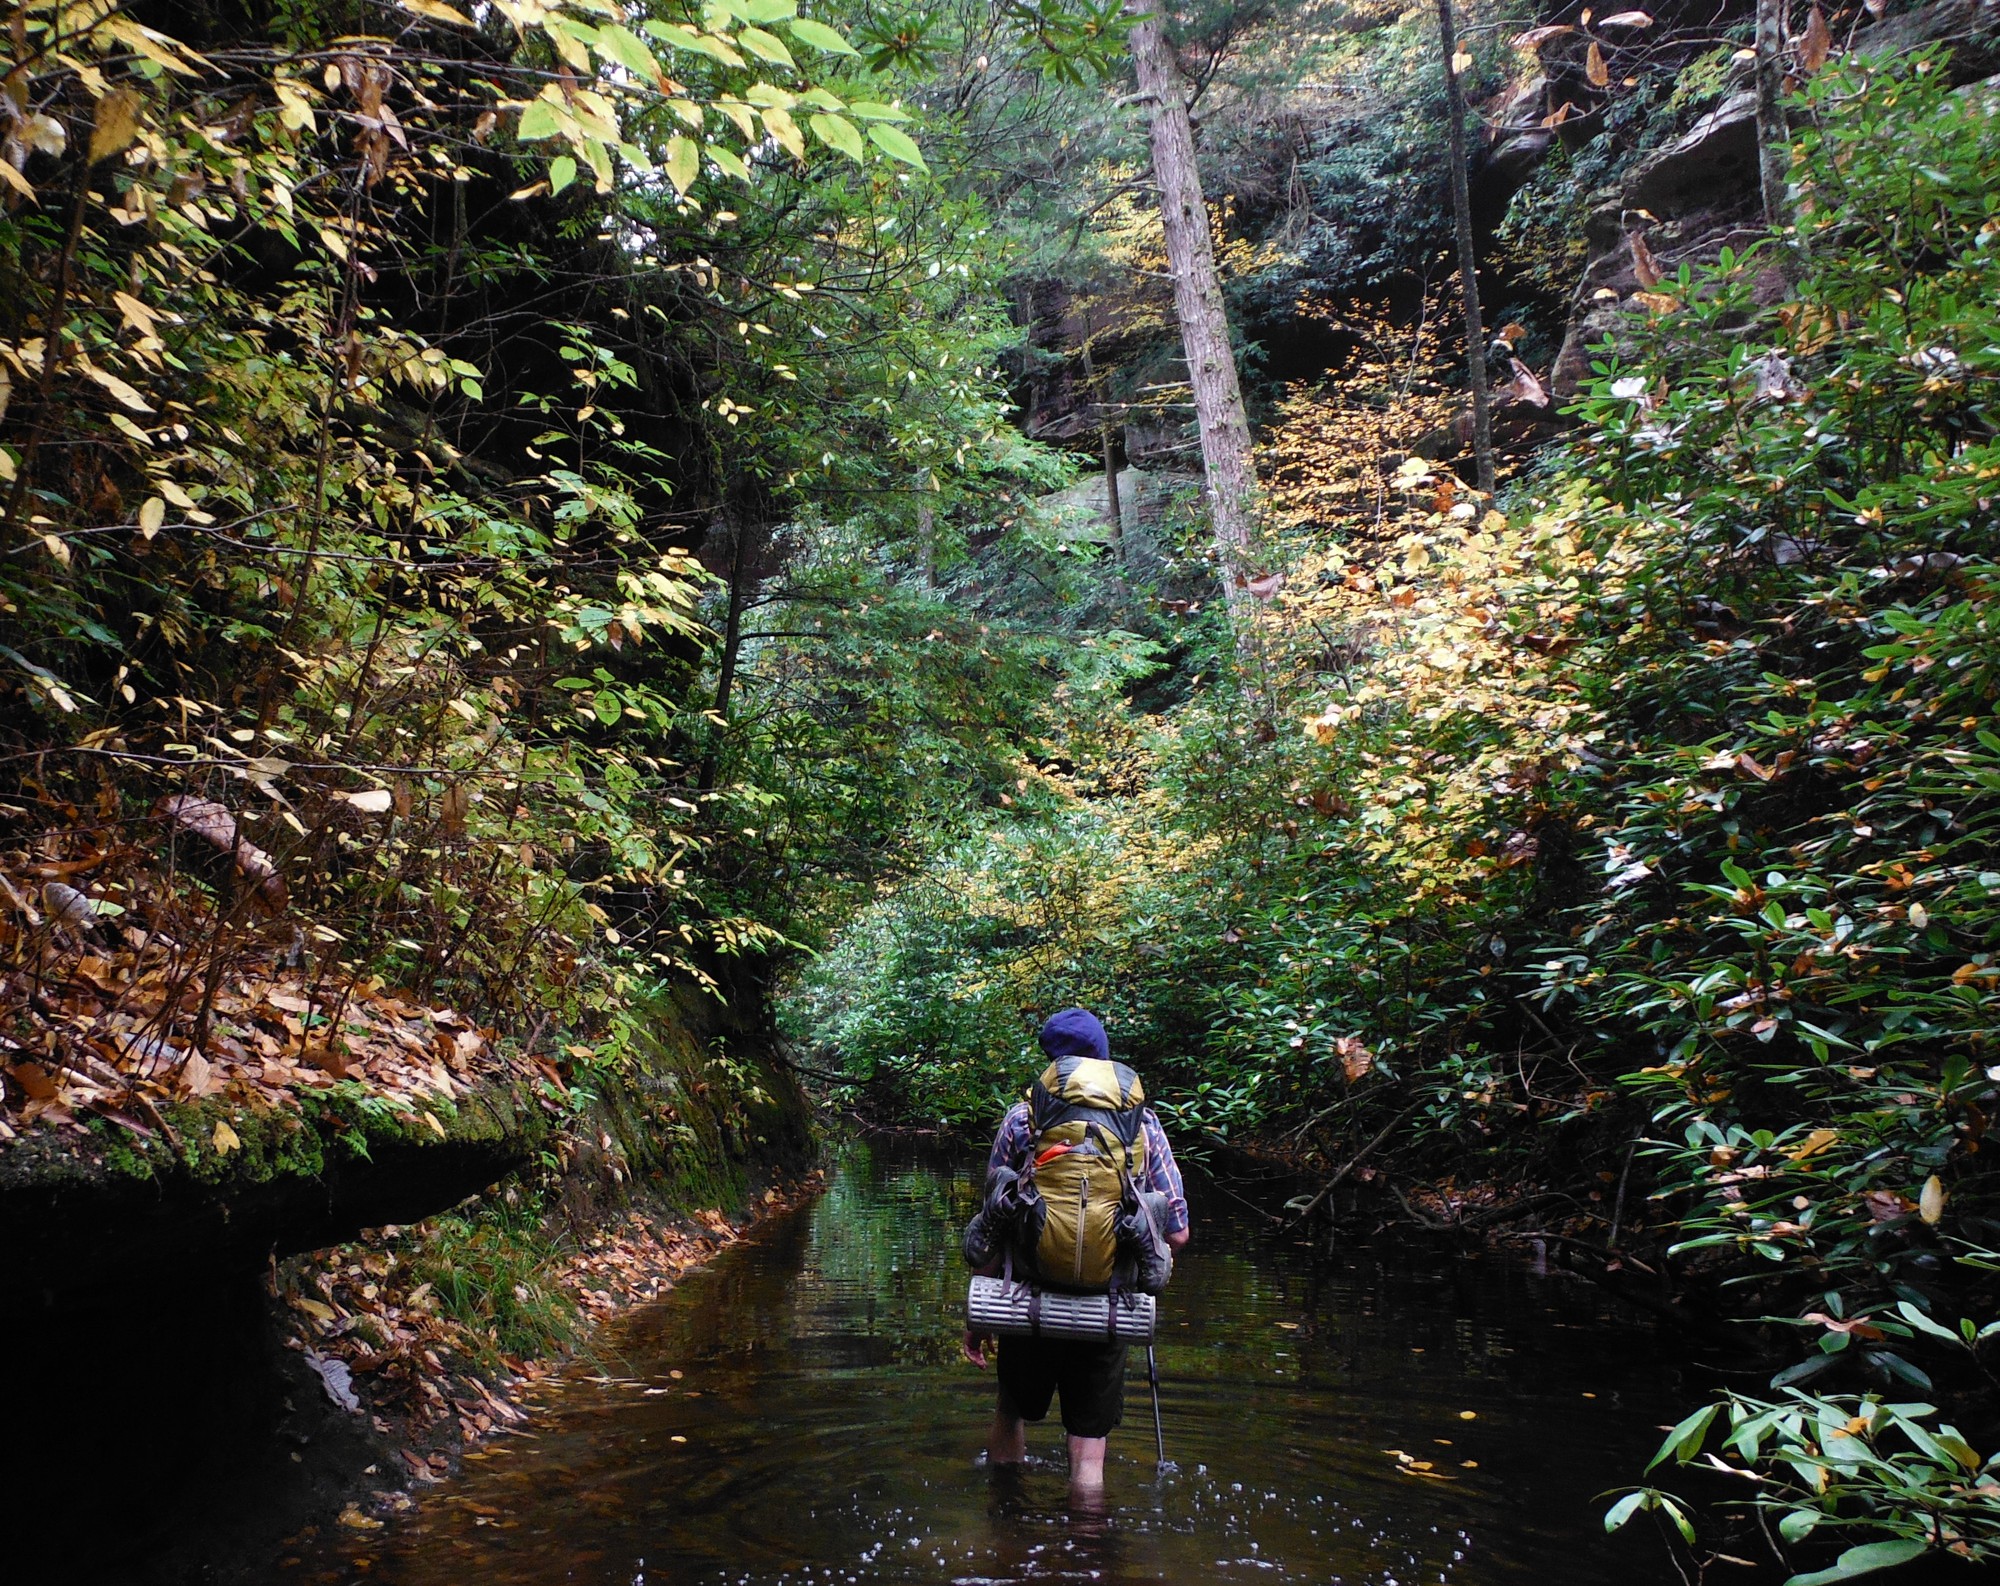
Mark Wetherington explores how trading auto for bicycle for home-to-trailhead transportation impacts the hiking and backpacking experience.
Getting to a trailhead might involve better scenery than commuting to work and could require some deliberate maneuvering around obstacles or the use of a four-wheel-drive vehicle, but for most of us, it just involves the mundane operation of a car.
As I started my career in public libraries after finishing graduate school in Kentucky, I chose to look for jobs in places that had prime proximity to public lands. I derive little joy from driving, preferring pretty much any physical activity – hiking, biking, paddling, skiing, or even snowshoeing – to sitting in a car. But it is often the most practical form of transportation.
I figured the closer I lived to trailheads the better. Aside from eastern Kentucky, eastern Tennessee, and western North Carolina, the bulk of my applications went to libraries out West. Most counties have public libraries (and if they don’t, I would strongly question the wisdom of living in them) and most counties out West have access to public lands (the previous caveat is also applicable here). Seeking a life that combined two of the most wonderful things in America – public lands and public libraries – seemed like a good option for a young backpacker who oddly didn’t have the youthful zeal (or, in hindsight, perhaps the wisdom and courage) to go hike the PCT (Pacific Crest Trail a.k.a. the Post-College Trail) and then figure out a career afterward.
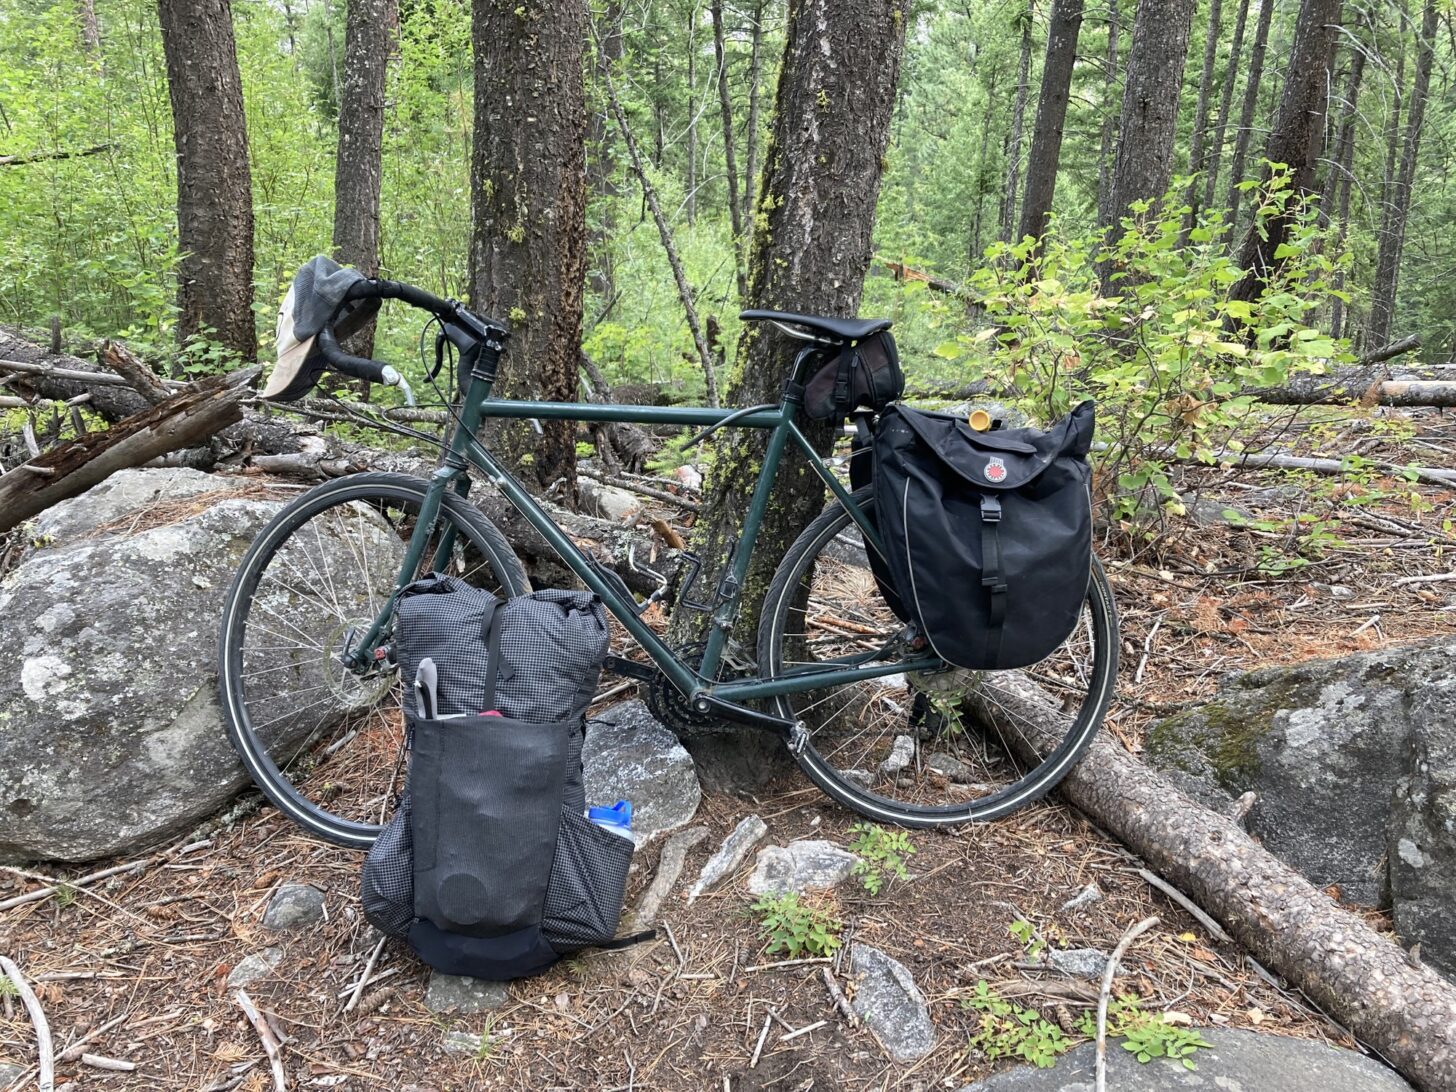
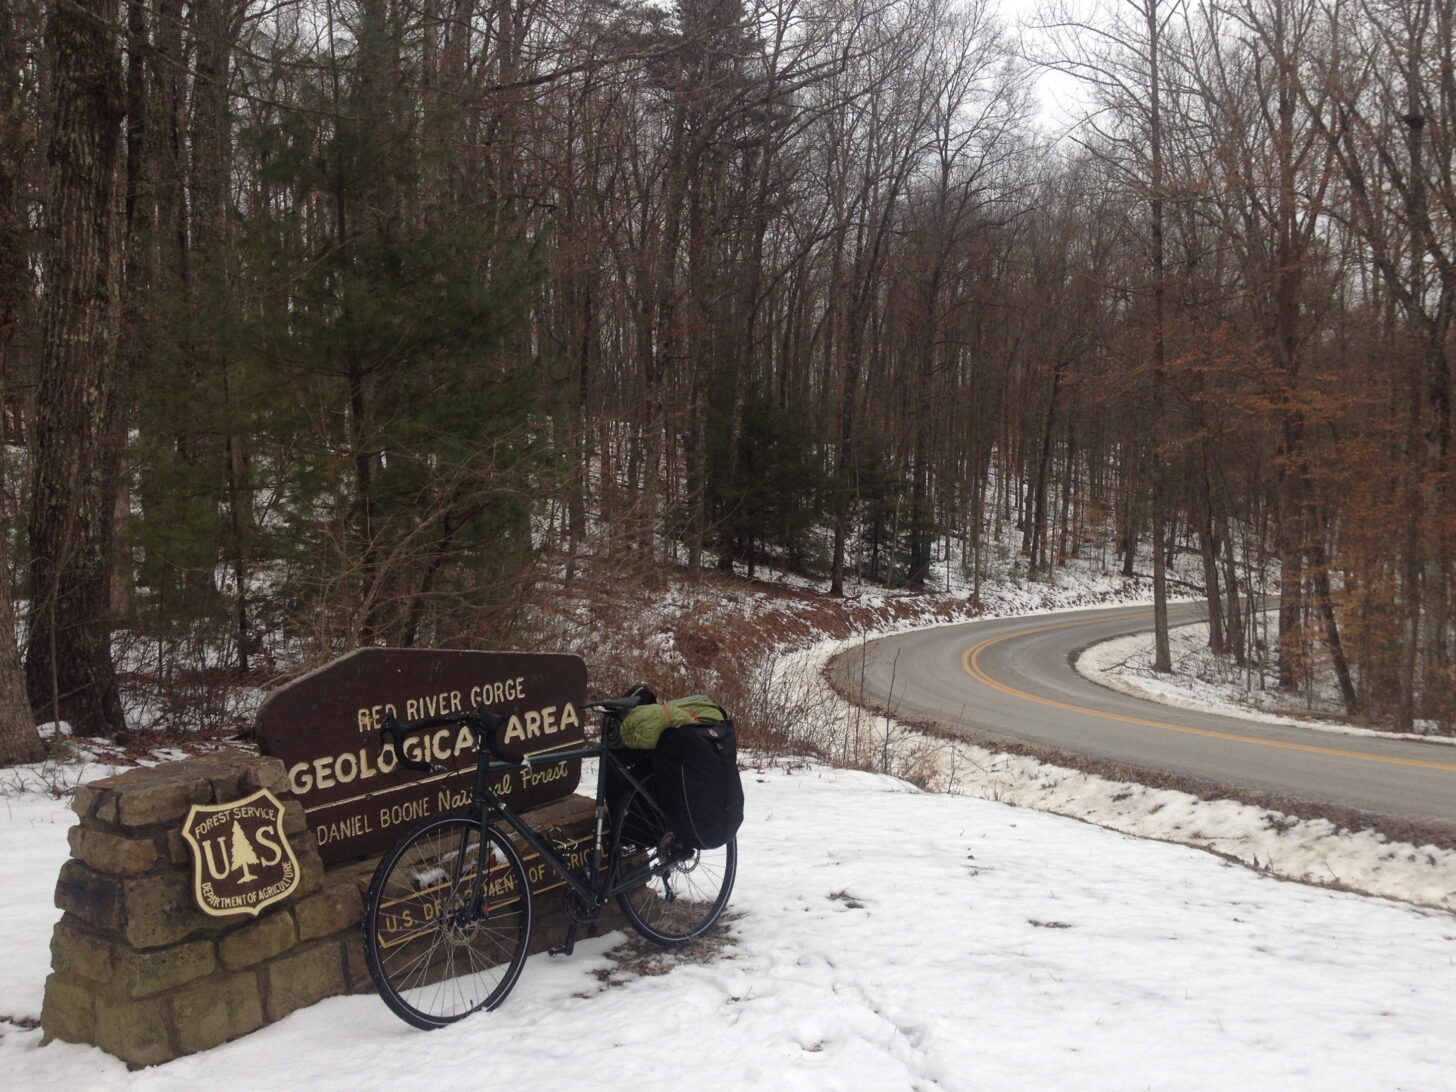
On the road to a trailhead in Montana. All gear is stored in the panniers, bicycle touring style, including a frameless pack to allow for an easy transition to backpacking.
Through a combination of good luck and good timing, both my current and previous residences have afforded me the ability to bike to trailheads in less than an hour of moderately-paced bicycling. Riding a bike to a trailhead that accesses a wilderness area is one of the most sublime pleasures I experience. Rather than being in a weird purgatory between when I leave my house and when the trip really seems to begin (i.e. my car is parked, locked, and I’m hiking), I get an instant immersion in the experience. With each turn of the pedals, I get closer to a different part of the journey, but the journey itself has already begun.
I’m using my own power, albeit with a slight mechanical advantage, to transport myself to the trailhead. And along the way, I’m seeing things at a more human pace and in a richer way. I notice the houses getting fewer and farther between. Things become more quiet and clear – not the least of which is usually my mind. Birds flit between trees and creeks ramble alongside the road. Without barriers of glass and steel surrounding me, I become more attuned to the landscape as I make my way to the trailhead. There’s no rumbling of an engine in front of me interrupting the natural reverie as I cruise down a mellow forest road, but sometimes the panting from my two lungs on steep climbs rivals the noise made by the humble four-cylinder in my Honda.
Once I reach the trailhead, it’s a rather simple matter of unpacking my saddlebags and loading up my backpack (I will note that frameless packs are particularly well-suited for biking to trailheads as they can more easily be stowed when in transit than an internal frame pack). I’m already warmed up from the ride, but rarely overtired. I’ve found that I’m able to slip much more easily into the flow state that I sometimes achieve when hiking on trails after biking to the trailhead when compared to having driven there.
Loaded up and ready to hike. All the gear that was previously in the panniers was transferred to to a Pa’lante V2 pack for a twelve-mile hike to a lake after a five-mile bike ride to the trailhead.
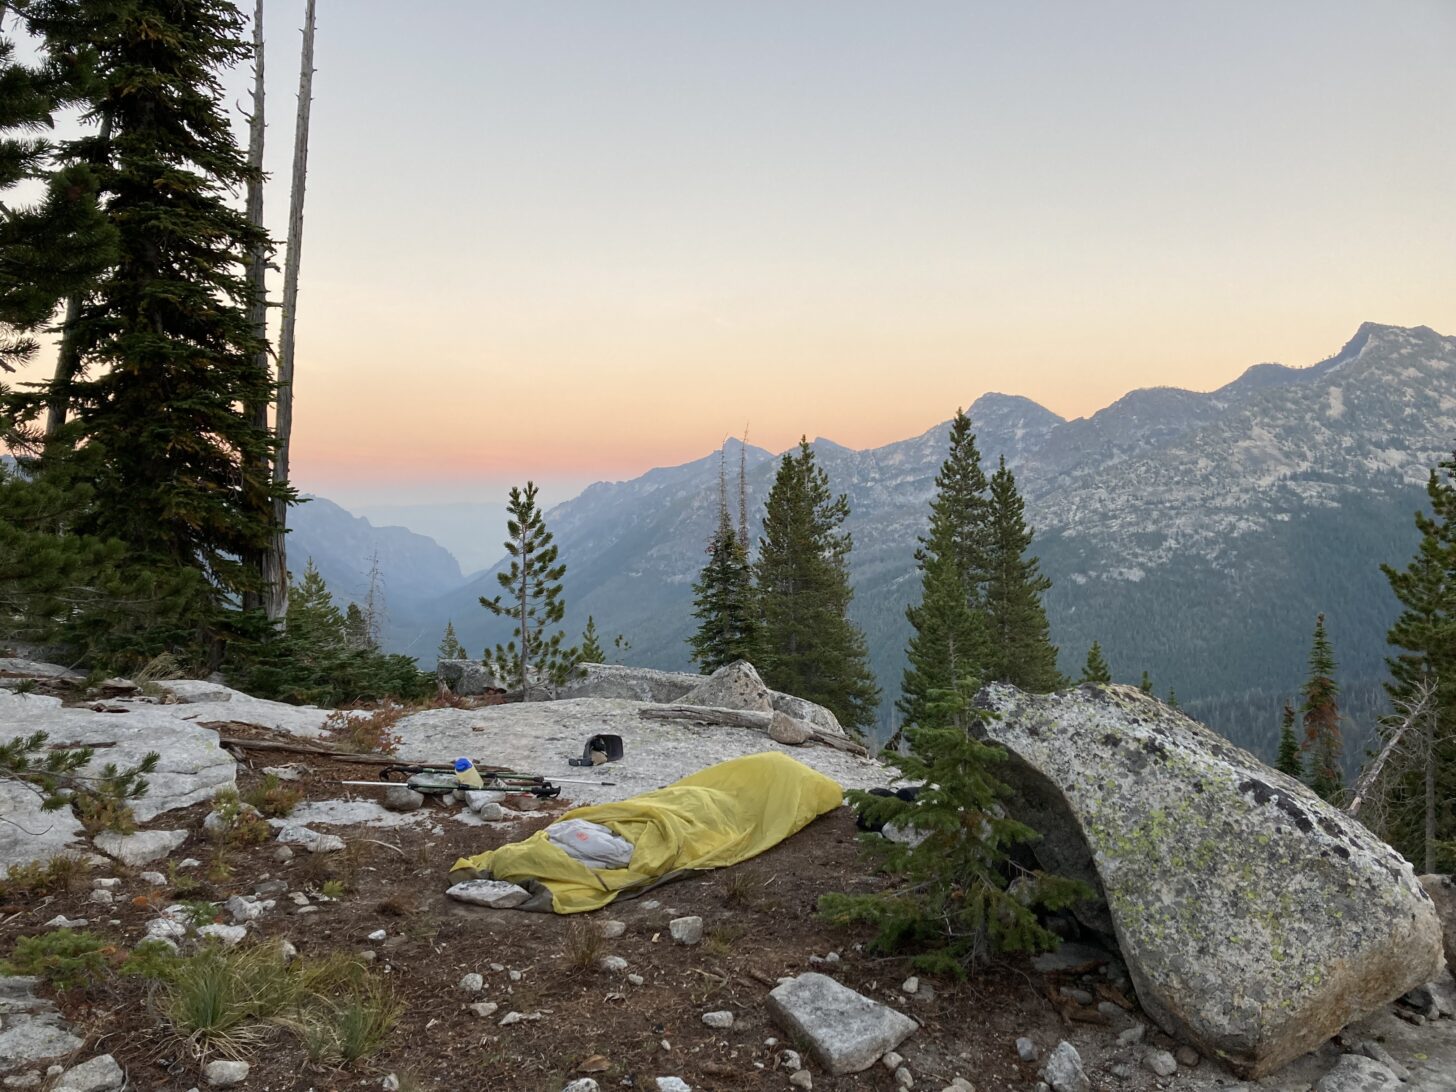
While spending time in nature is rewarding however I get there, I found that on my most recent trip – a four-day trek in the Selway-Bitterroot Wilderness – that having biked the seven miles to the trailhead from home rather than having driven it added a depth to the trip that was palpable but hard to parse out. It provided me with a connection to and interaction with the landscape and made it feel, in a certain sense, more real. Whereas however magical my trips to far-flung places like Aravaipa Canyon Wilderness and Capitol Reef National Park have been, they feel otherworldly in a more layered way than simply by virtue of their scenery. And I suppose they feel that way, in large part, because I don’t live in that world. I’m reliant upon almost incomprehensible amounts of fossil fuels and heavy machinery (planes and cars) to get there. Although I’m still walking in those places, the fact that I live somewhere far, far away seems to separate me on some level.
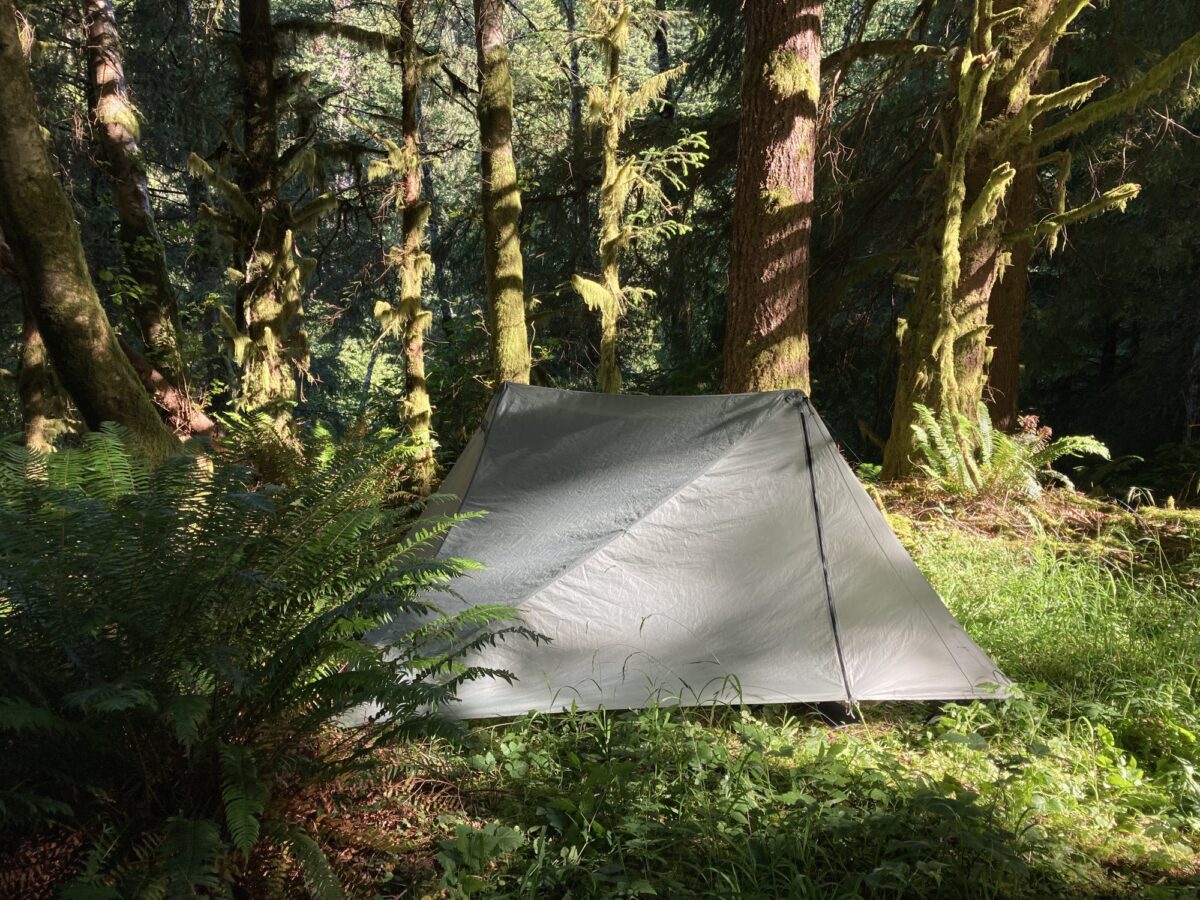
My campsite on the last night of a recent trip. The next day I would hike out, hop on my bike, and enjoy a (mostly) downhill ride home.
I’m certainly not the first to notice this phenomenon, as Wendell Berry eloquently and accurately described it in The Unforeseen Wilderness over 50 years ago. Although specifically about Kentucky’s Red River Gorge, many themes and insights are universal.
“We seem to grant to our high-speed roads and our airlines the rather thoughtless assumption that people can change places as rapidly as their bodies can be transported,” Berry wrote. He then described his experience of arriving at a campsite after leaving work, driving on the interstate, taking roads to the trailhead, then finally hiking a few miles and feeling somewhat unsettled upon settling into camp, ” …my mind is still keyed to seventy miles an hour. And having come here so fast, [my mind] is still busy with the work I am usually doing. Having come here by the freeway, my mind is not so fully here as it would have been if I had come by the crookeder, slower state roads; it is incalculably farther away than it would have been if I had came all the way on foot.”
The Red River Gorge has been a formative landscape in my growth as a person and was also where I first experienced the joy of biking to a trailhead.
I can wholeheartedly attest to the veracity of this observation – during the trips where I’ve pedaled to a trailhead for a backpacking trip I feel no metaphysical jet lag when I get to the trailhead and start my hike. Coincidentally, I made many trips to the Red River Gorge via bicycle to backpack as I once lived 15 miles away in Stanton, Kentucky, and Berry’s words were often in the back of my mind.
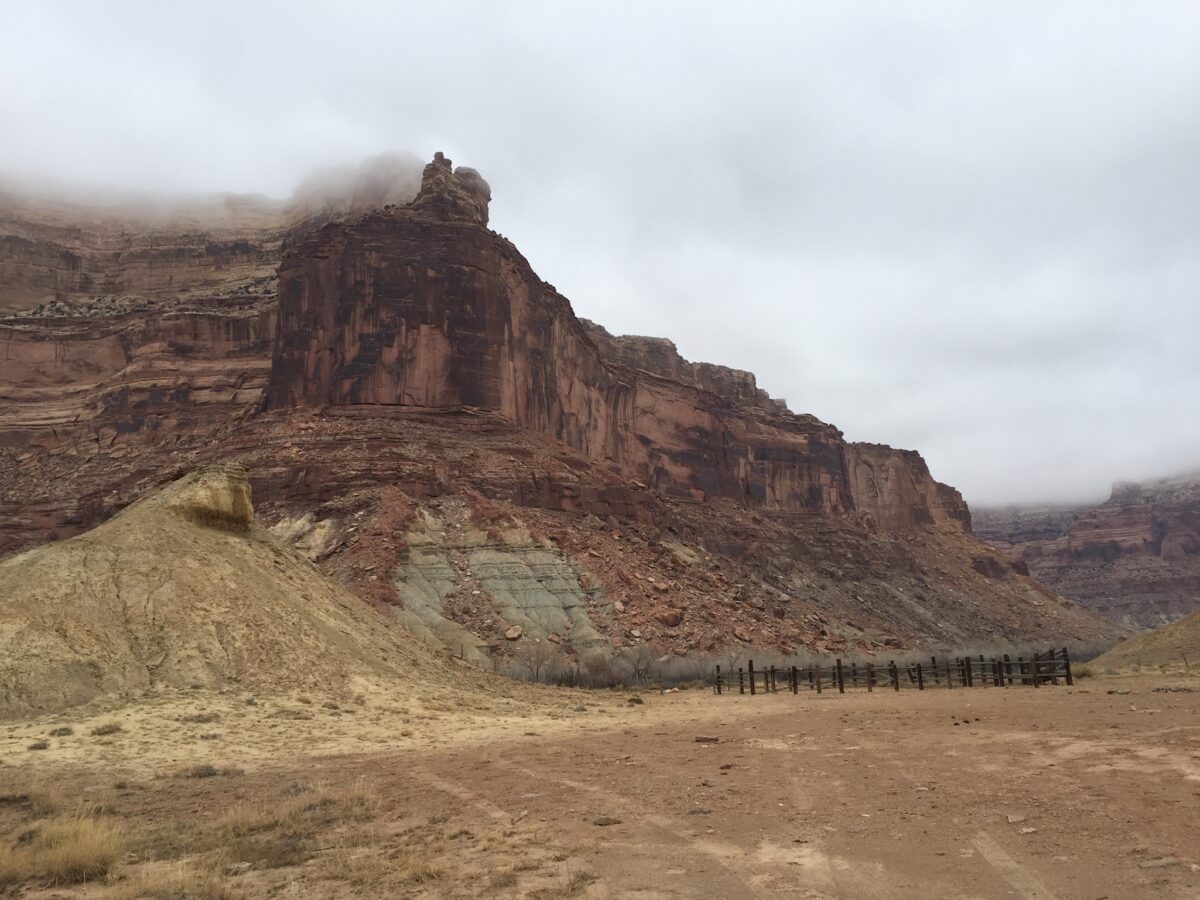
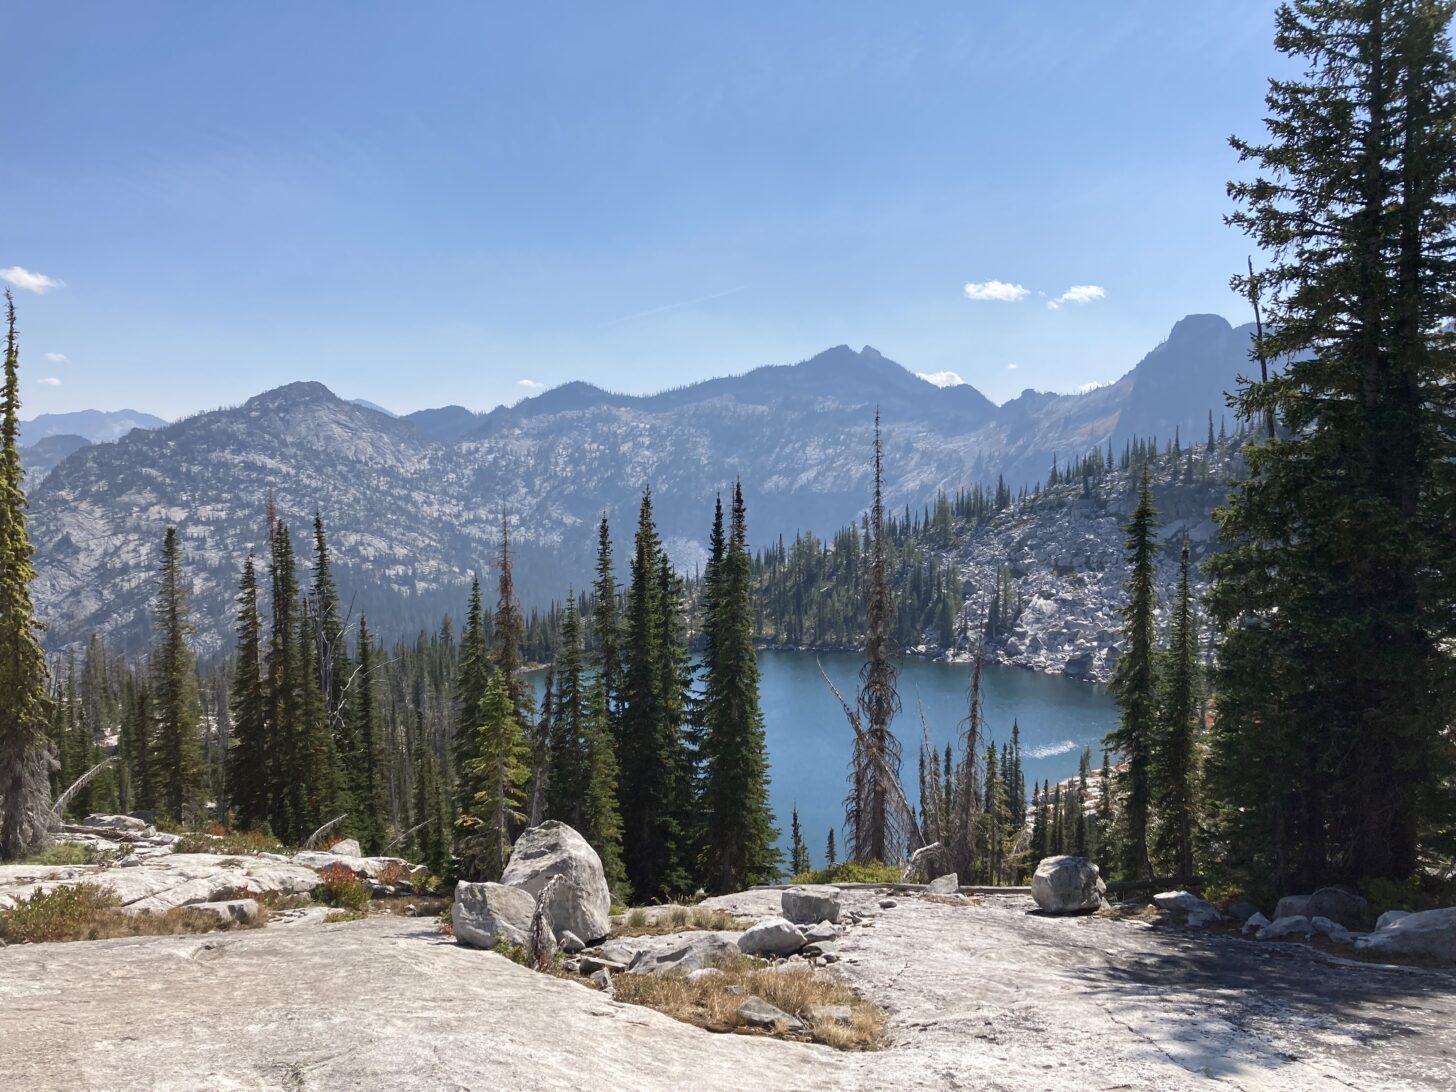
At the risk of speaking in eye-roll-inducing truisms, when I get to the trailhead to start my hike after biking, I’m there. And the spectacular compounding effect of this is that when I get to where I’m going on my backpacking jaunt – a lake, peak, or meadow, for example – I’m very much more there. Looking up at the incredible walls of a sandstone canyon in Utah this past spring was amazing, but standing on top of a summit on the crest of the Bitterroot Mountains on the third day of a recent trip and looking out over the crags and valleys of the 1.3 million-acre Selway-Bitterroot Wilderness whilst on an entirely unmotorized vacation was a more profound experience. Not only was getting there half the fun – bicycling, hiking, scrambling – but how I got there made an incalculable improvement in the totality of the experience.
It’s hard to improve on the view of a mountain lake, but for some reason having biked to the trailhead made this scene so much sweeter.
I realize that most backpackers don’t live in a place where biking to a trailhead is realistic. Our transportation system was designed to favor the automobile and excludes, if not outright antagonizes, more pedestrian modes of travel. And our centers of population are usually too far from public lands to allow for biking to a trailhead to be practical for a weekend trip. Being able to take the time to bike to a trailhead for backpacking, like backpacking in general, requires varying degrees of privilege and prioritization.
But it is most definitely something that if you can do, you should do – at least once.
Learn how Ryan Jordan plans a home-to-trailhead trek via foot and pedal (hike and bike) in the Trek Planning Masterclass.
DISCLOSURE (Updated April 9, 2024)
Backpacking Light does not accept compensation or donated/discounted products in exchange for product mentions or placements in editorial coverage.
Some (but not all) of the links in this review may be affiliate links. If you click on one of these links and visit one of our affiliate partners (usually a retailer site), and subsequently place an order with that retailer, we receive a commission on your entire order, which varies between 3% and 15% of the purchase price. Affiliate commissions represent less than 15% of Backpacking Light's gross revenue. More than 70% of our revenue comes from Membership Fees. So if you'd really like to support our work, don't buy gear you don't need - support our consumer advocacy work and become a Member instead.
Learn more about affiliate commissions, influencer marketing, and our consumer advocacy work by reading our article Stop wasting money on gear.
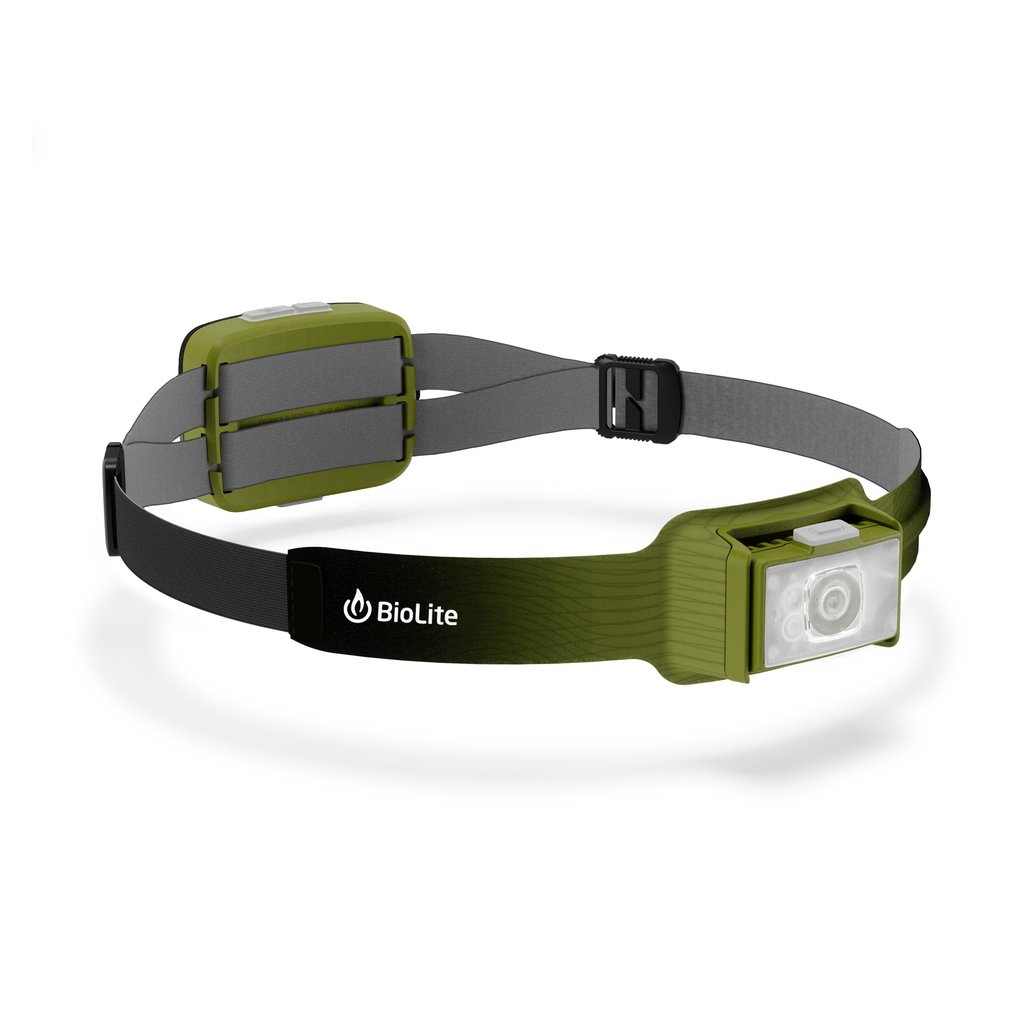
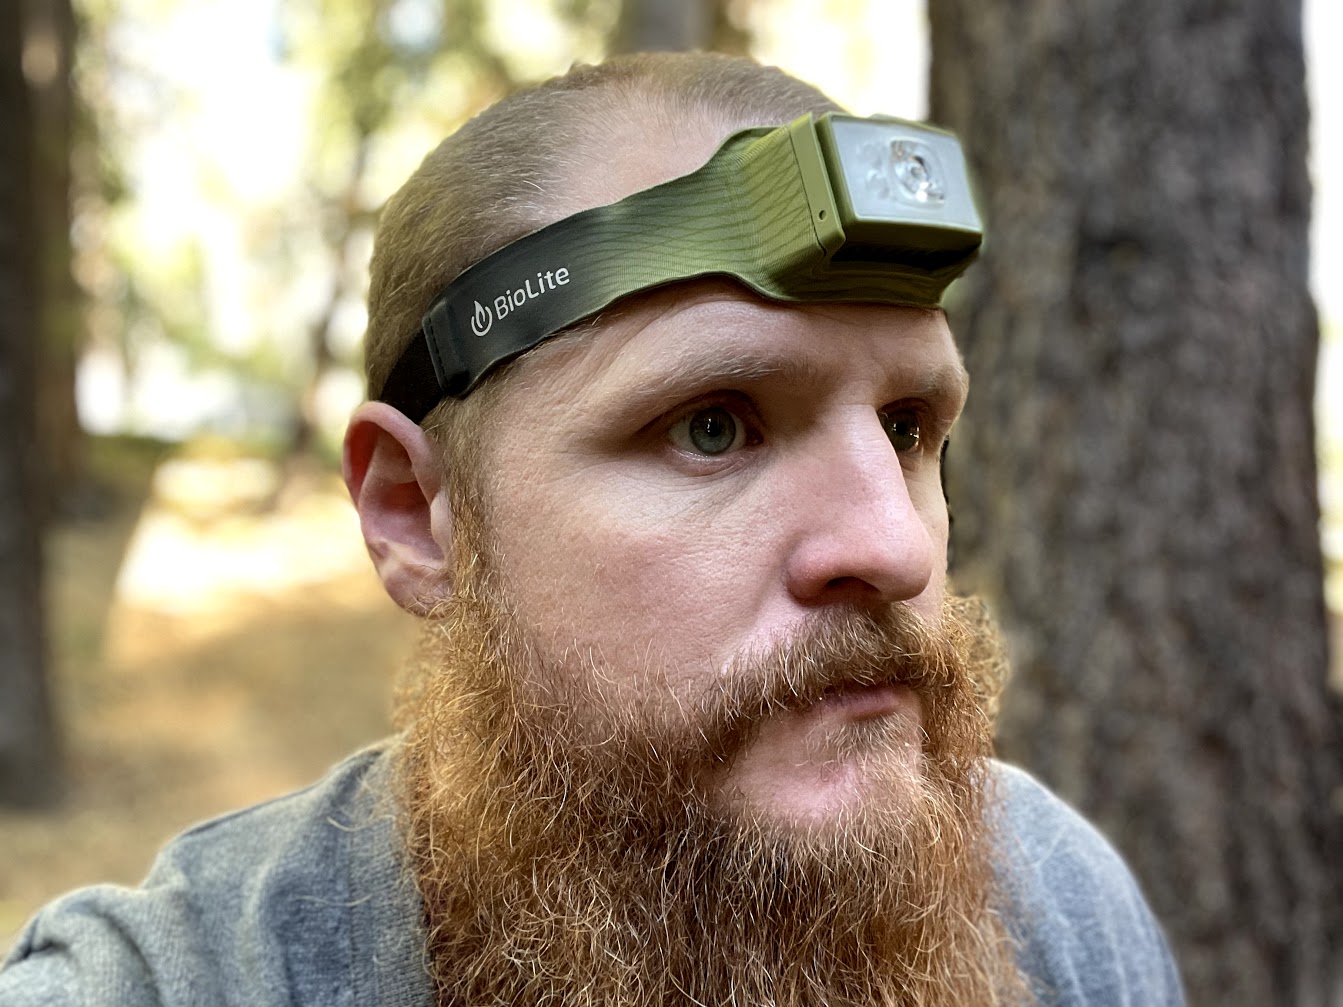
The BioLite Headlamp 750 (MSRP $99.95, 5.3 ounces / 150 g) is a performance-oriented USB-rechargeable headlamp with several unique features but crippling reliability issues.
Introduction
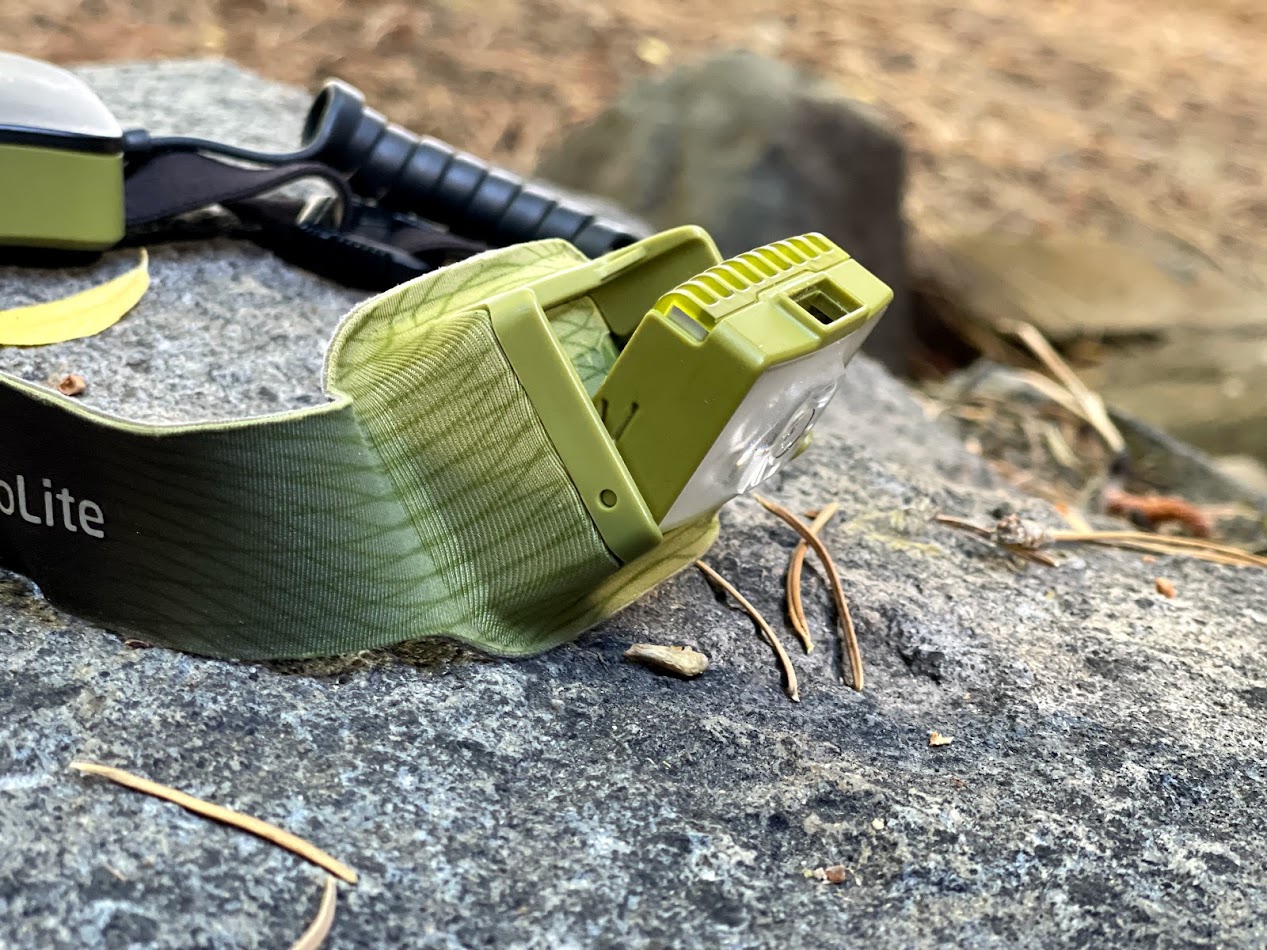
The BioLite Headlamp 750 (MSRP $99.95, 5.3 ounces / 150 g) is a performance-oriented USB-rechargeable headlamp with a few features that attempt to set it apart from the crowded rechargeable headlamp field. Its long battery life, 750-lumen max output, constant brightness mode, and pass-through charging feature might make it interesting to some. It’s a bright headlamp, but is more expensive than most headlamps targeted to ultralight backpackers, and certainly heavier. However, its brightness and battery life may be attractive to guides, winter backpackers, or bikepackers. Notably, it has a known flaw in the primary button which many users, including myself, have run into.
Photo: BioLite.
Highlights
MSRP: $99.95
weight: 5.3 ounces (150 g)
beam distance: 142 yards (130 m)
burn time: 7 hours high / 150 hours low
battery size / type: 3000 mAh li-ion micro-USB rechargeable
water resistance rating: IPX4
tiltable front panel
dimmable red, white, strobe, and burst modes
dimmable rear red light with solid and strobe modes
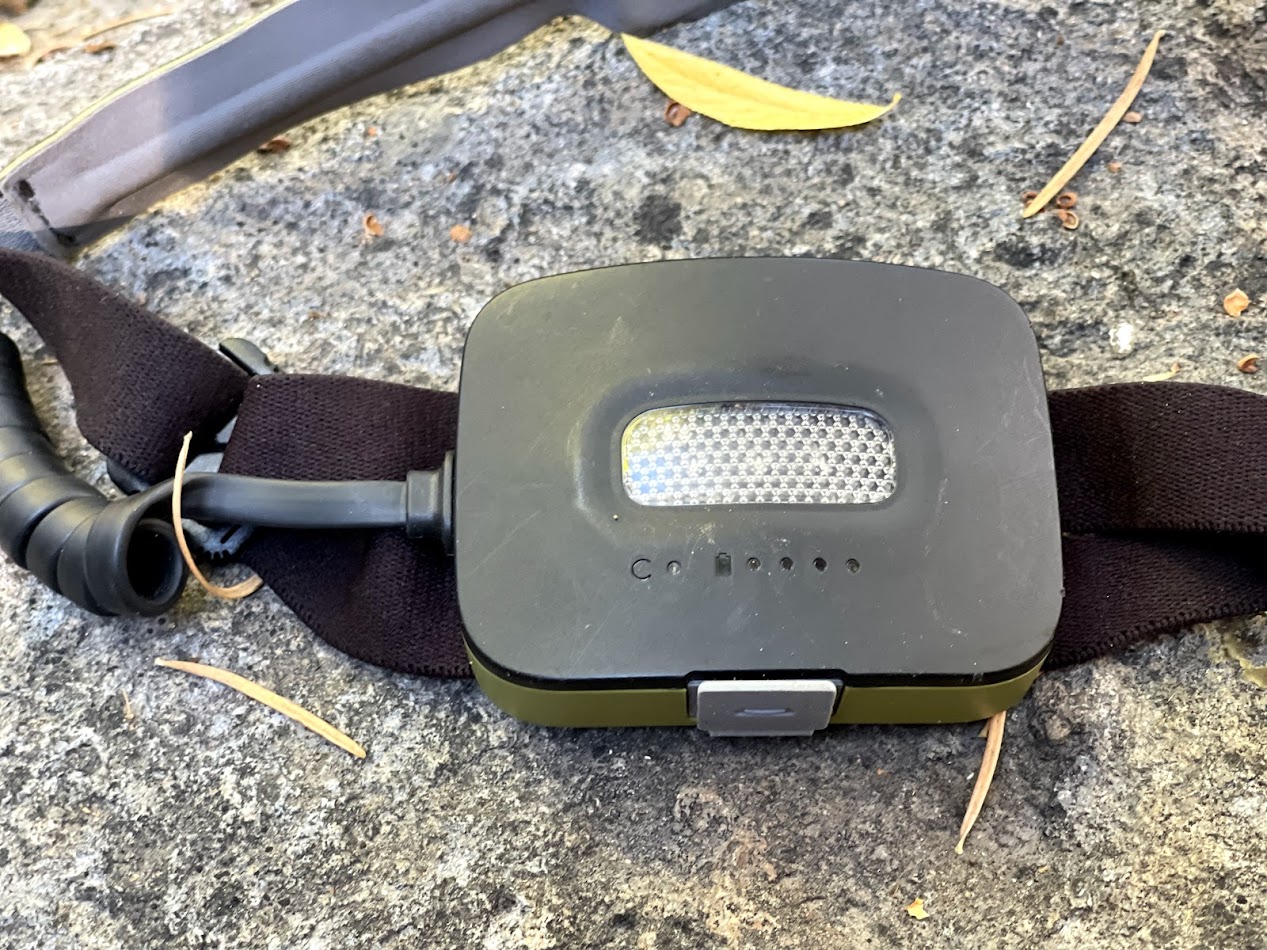
4 LED battery indicator lights
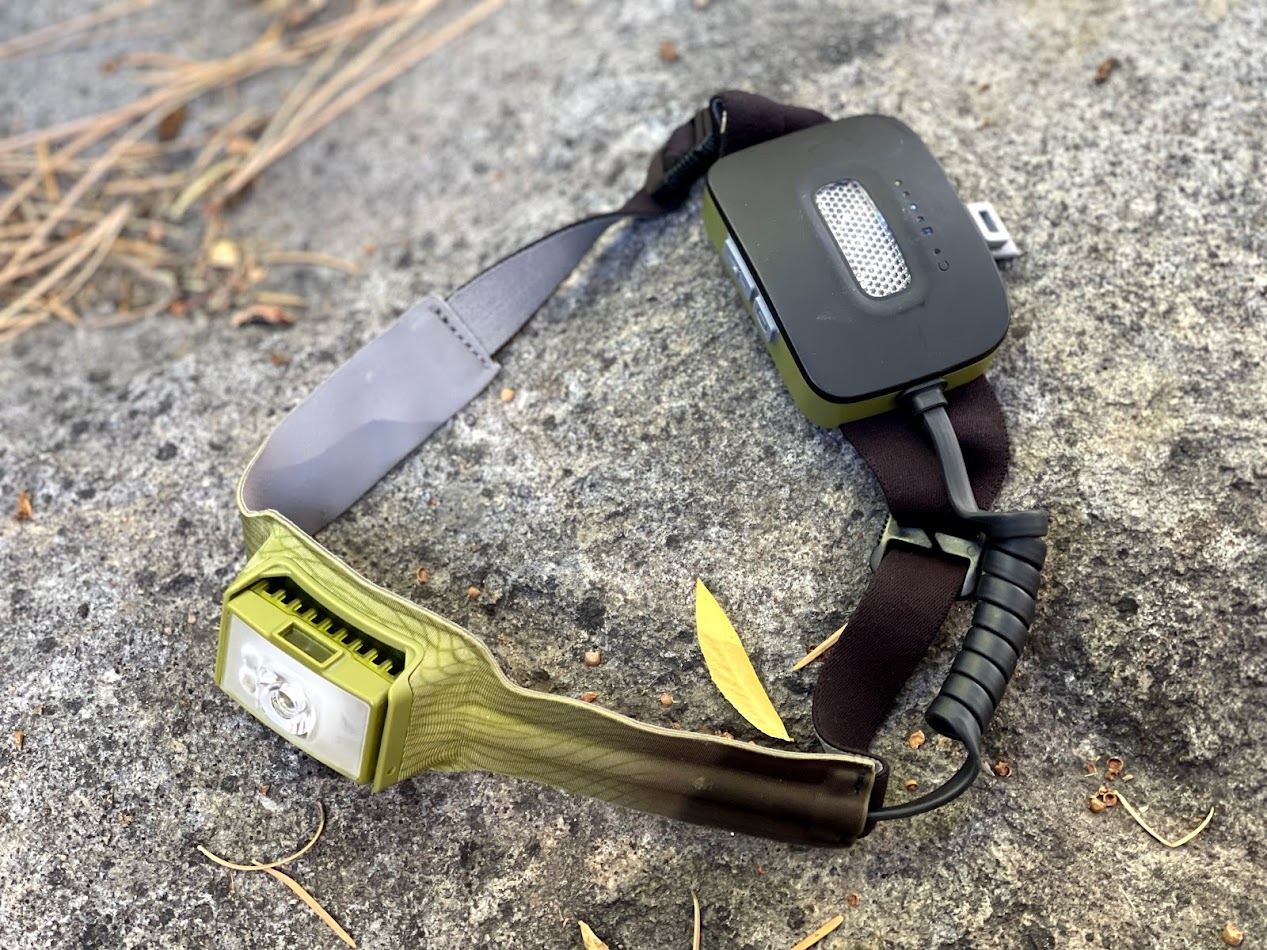
pass-through charging capability with included micro-USB cord
constant mode – no auto-brightness regulation
digital lock
Testing Context
I occasionally guide during the shoulder seasons on off-trail, expedition-style trips. The circumstances that crop up on those trips – short days combined with the delays associated with moving a varied group of people over difficult terrain – had me searching for a more richly-featured, brighter, longer-lasting rechargeable headlamp than my current go-to for personal trips. I wanted a headlamp I could trust to handle all the unexpected situations that sometimes crop up when guiding. Because my guiding kit is, by necessity, slightly more heavy and bulky than my personal trip kit, weight and bulk were secondary considerations behind utility, comfort, and reliability.
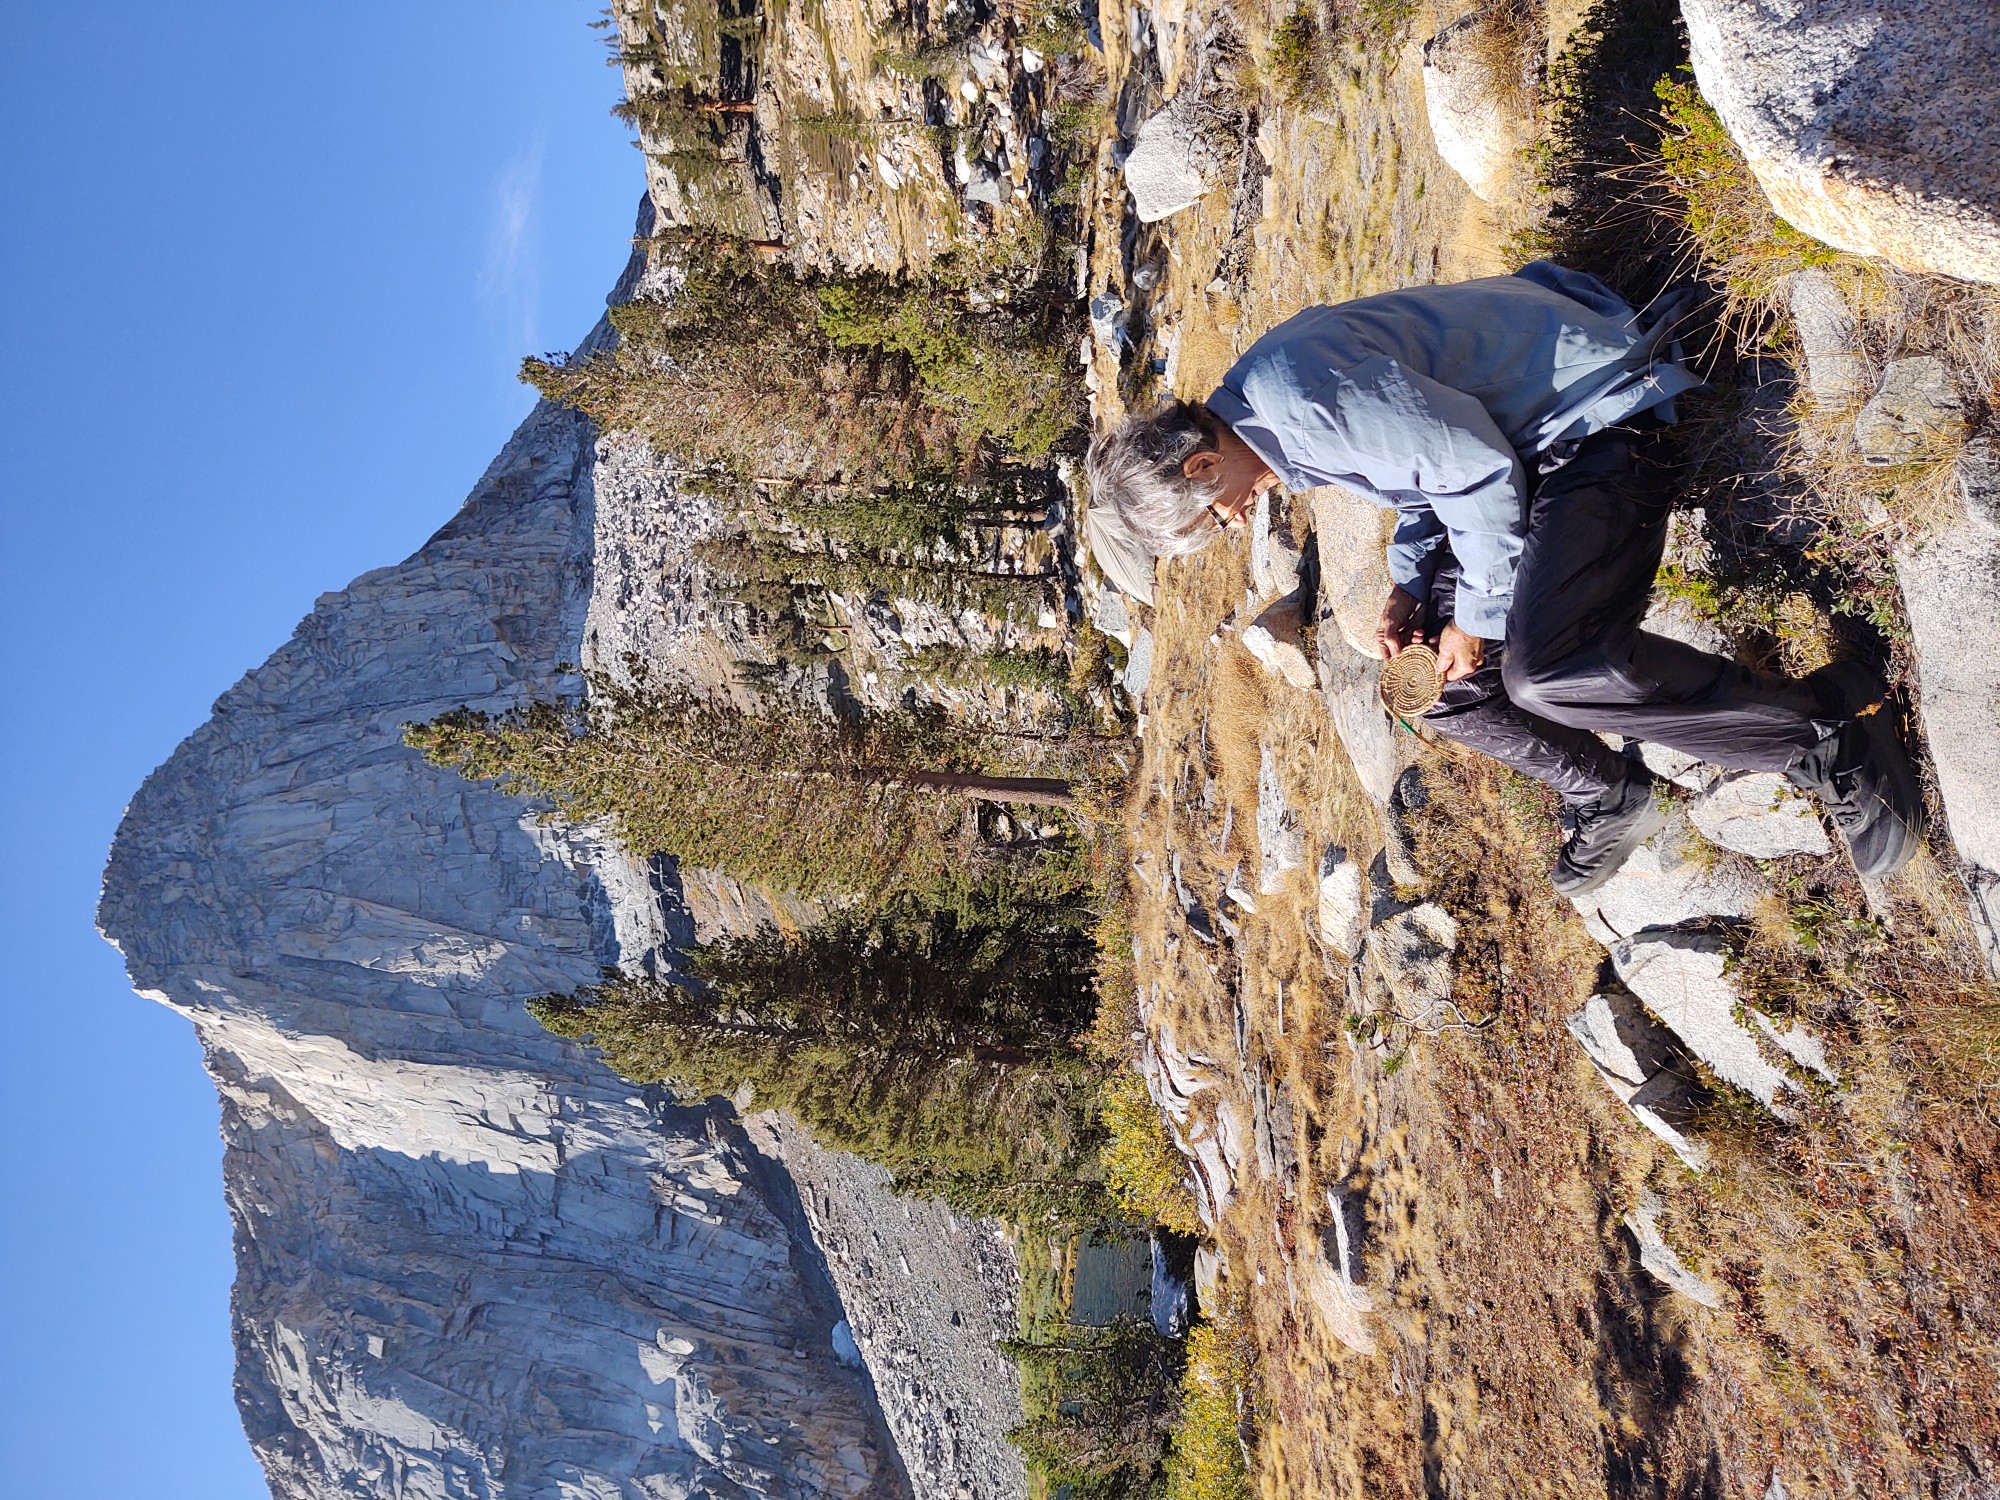
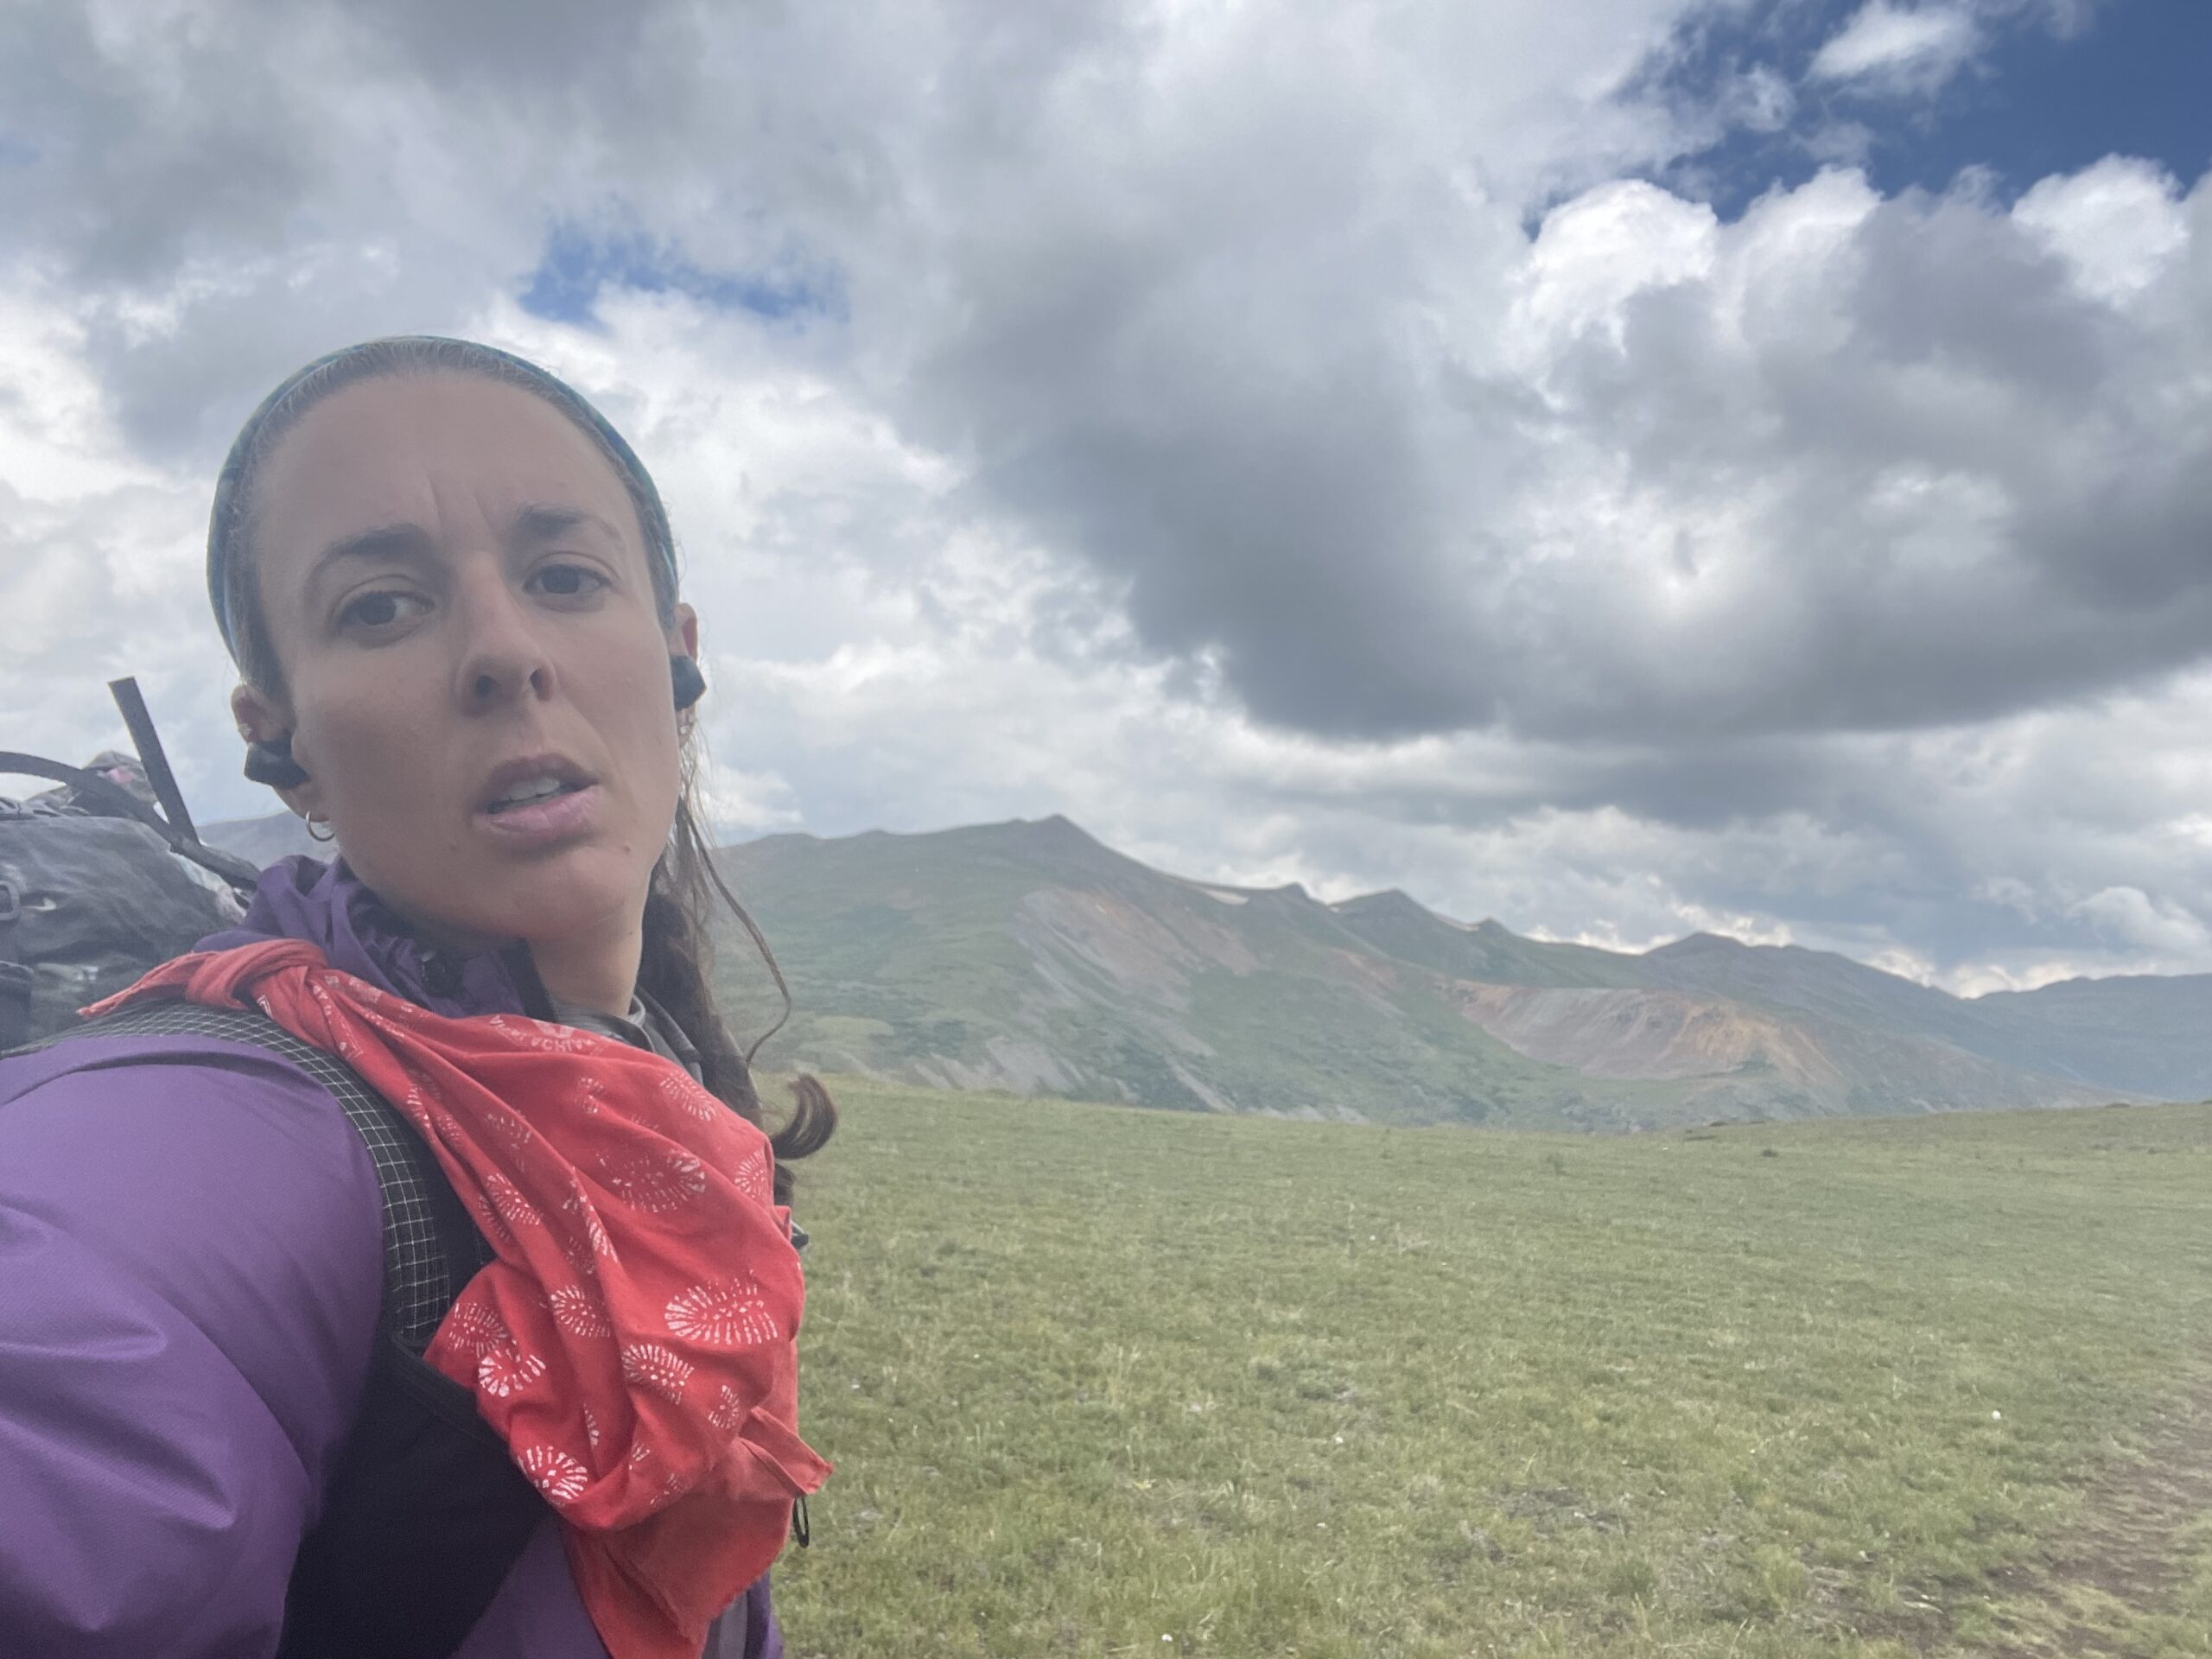
I knew the BioLite HeadLamp series was comfortable – the hallmarks of the series are sculpted, intentional blends of soft and hard components, molded fits, and battery/bulb separation for front/back balance – so I gave the BioLite HeadLamp 750 a try on a recent 12-day backpacking trip in central Colorado. Although it was a late-summer trip with plenty of light, I still pushed past sunset, venturing up and down some steep terrain on uneven footing after dark, and so was able to give the BioLite Headlamp 750 enough of a test to warrant this First Looks review. Unfortunately, my testing was somewhat limited by a serious flaw in the headlamp’s design – one I’ll get into in the Durability section of this review below.
This is a first look at new gear that recently entered our review pipeline, and hasn't yet been subjected to rigorous field use. Learn more about the types of product reviews we publish.
First Impressions
Utility
The BioLite HeadLamp 750 has all the features you’d expect from a headlamp in this size/brightness category – multiple light modes, standard (for headlamps) waterproof rating, and a digital lock so the battery doesn’t drain in your backpack. The backing stays flush against the forehead while tilting the bulb up and down within the housing, though this feature doesn’t operate as smoothly or with as much range as I’d like (the BioLite HeadLamp 200, by contrast, excels here).
The battery is huge and long-lasting, and the spot/flood hybrid mode is a joy to walk in the dark with. Four LED lights indicate battery levels, which is a major improvement over the flashing-bulb system found in some other headlamps, including the other two headlamps in this series. Rear visibility features are somewhat unique and might be especially attractive to bikepackers, mountain bikers, or the kinds of trail runners/adventure racers who routinely find themselves operating at night.
But the primary draws to the BioLite HeadLamp 750 are its so-called pro features: a thirty-second brightness burst feature, a constant-brightness feature, and a pass-through charging feature.
Brightness Burst Feature
The brightness burst feature is probably the least useful of the three (for me). Pushing a rear button gives the user a blast of maximum lumens for thirty seconds even if the brightness is set at a dim setting. After the thirty seconds is over, the brightness returns to the previous setting. I suppose the point here is to give a user just enough light to navigate something tricky (a scrambling move, perhaps) or perform a minor camp chore, but I don’t really see the need for routine backpacking. Adjusting an adjustable headlamp isn’t much of a hassle, and how many complicated tasks that require maximum lumens only take thirty seconds?
Constant Brightness Feature
The constant brightness feature exists in a middle ground between useful and possible gimmick. Many (most?) headlamps slowly dim their output over time for efficiency and maximum battery life. That’s why as a headlamp battery drains from use it gets fainter and fainter until it winks out.
The BioLite HeadLamp 750 is no different on its regular setting, but it does give users the option to engage Constant Mode, which delivers maximum brightness until the battery is totally dead. This takes battery life from a claimed 8.5 hours to a claimed 4 hours on medium brightness and from a claimed 7 hours to a claimed 2 hours on maximum brightness. I could see this being useful on final, technically complicated pushes to camp, or perhaps in wilderness first-aid situations. Testing the accuracy of battery life claims and lumen claims is beyond the scope of this review, but I can vouch for the fact that the Constant Mode works as advertised and got me into camp over an after-dark talus scramble with a feeling of bright security that I appreciated.
Pass-Through Charging Feature
Pass-through charging is the feature on the BioLite HeadLamp 750 I think is most likely to be useful to outdoor professionals, winter backpackers, or other users who need the security of long-battery life. The BioLite Headlamp 750 has 100% functionality while charging from a battery pack. It comes with a 4-foot micro-USB cable designed to run from the headlamp to a pack or pocket – wherever a user might keep their external battery pack.
This feature has all kinds of utility. It’s easy enough to become tired or distracted and forget to charge a headlamp, only to find it dying at the moment of greatest annoyance. Pass-through charging eliminates that problem entirely. Likewise, situations that crop up unexpectedly – like straggling clients or wilderness first-aid scenarios – will have less stress with the assurance that a steady stream of light is available even if the scenario drags on into the small hours of the morning.
I tested the feature briefly and it works as advertised. I had larger plans in mind that were cut short by a hardware malfunction, which I’ll discuss in the Durability section.
Interestingly enough, I’ve confirmed that many headlamp brands, including Fenix and Petzl, have similar pass-through charging features that aren’t marketed as heavily as the feature on the BioLite HeadLamp 750 is.
Comfort
A headlamp of this size and weight is only going to be so comfortable. BioLite carries over design features from its other headlamps – lycra backing, ergonomic elements, balanced weight, and an intuitive tension adjustment system – to max out the comfort rating for a headlamp of this mass. But that being said, the BioLite HeadLamp 750 isn’t the headlamp you want for long reading sessions in a sleeping bag – especially because of the battery placement. And as handy as pass-through charging and long battery life is for lengthy excursions, I wouldn’t necessarily want it banging around on my head if I was running, either.
Durability
Three-quarters of the way into my testing trip, I fished my headlamp out of my fanny pack where I keep it for quick access and discovered that it wouldn’t turn on (I’d just charged it fully). After fiddling with it for a bit, I realized that the front button wasn’t clicking on and off – it seemed to be stuck in place. With nothing to lose, I poked at the button mechanism through the rubber cap for a few minutes with the edge of my Swiss Army Knife bottle opener and managed to get it to turn on and off once. After that, the headlamp got stuck on strobe mode.
3,000 mAh worth of strobing headlamp wasn’t something I wanted to deal with for the back half of my backpacking trip, so I pried the rubber button off the top to see what I could see. The button mechanism was indeed stuck, and nothing I could do short of prying it loose from the electronics would turn my light off. I did so, and my test came to an end.
Luckily I was with a partner who had a functioning headlamp, and I was hiking a well-marked trail in a season with plenty of light to get my miles in. What could have been a bad situation was merely annoying. But this was an extremely disappointing situation given that I was searching for a headlamp that would be reliable in possibly stressful scenarios.
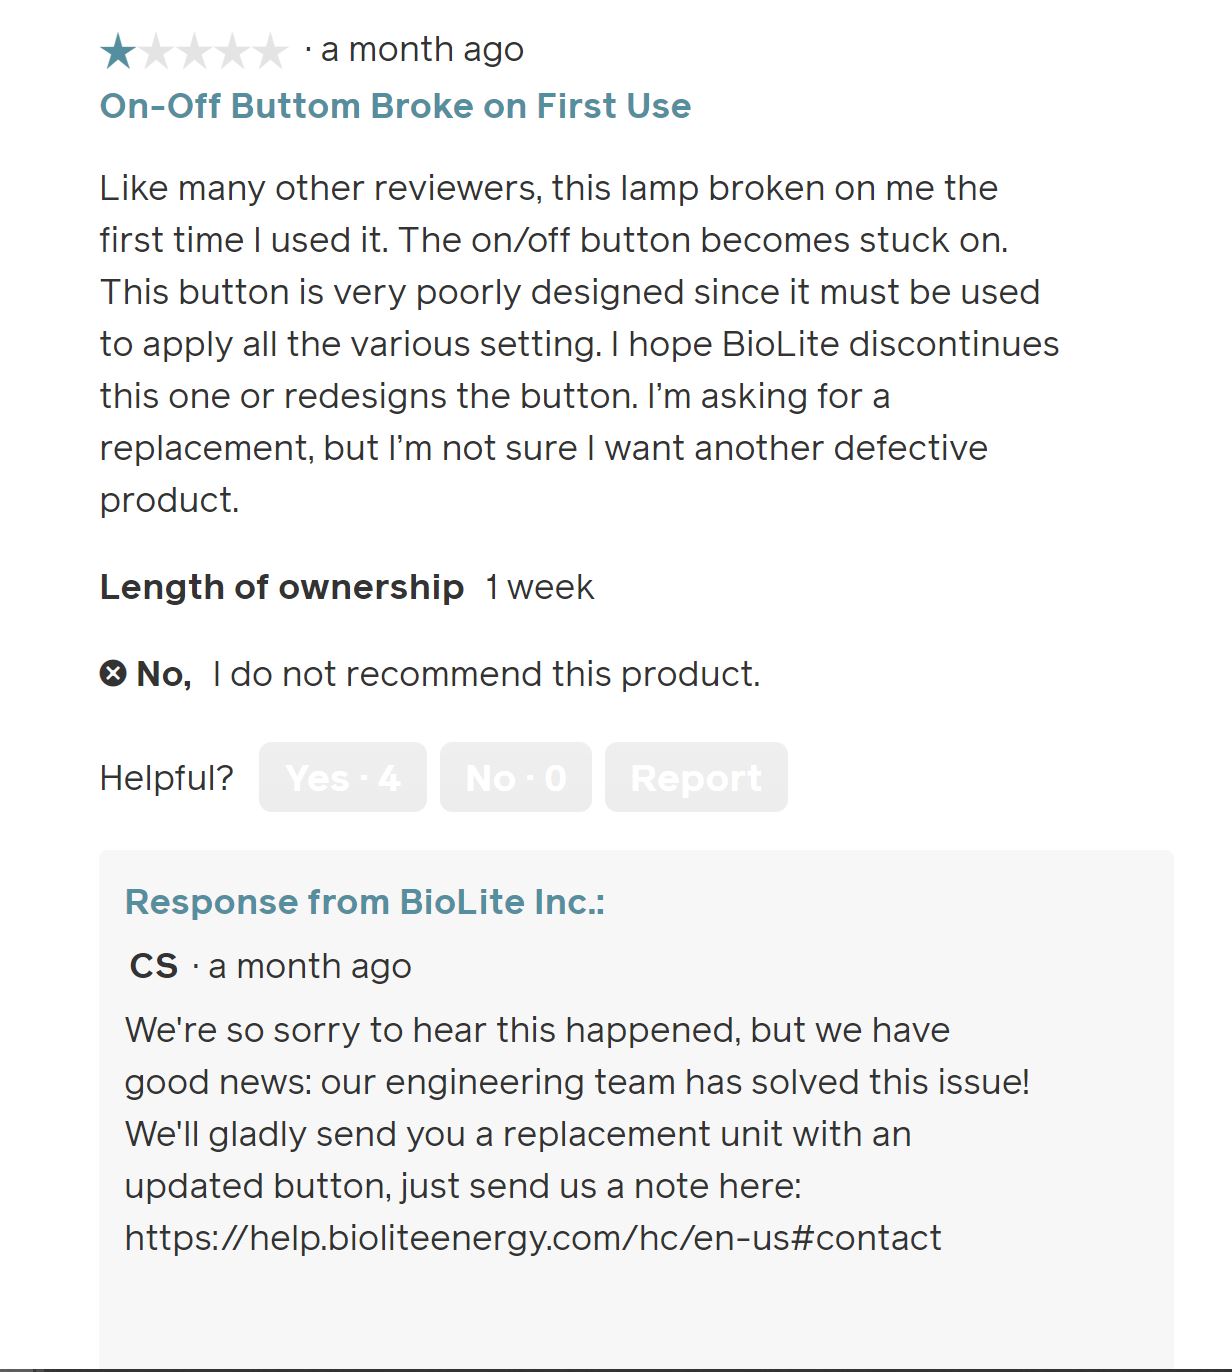
Upon returning home and doing some research, I discovered I wasn’t the only person to have this issue. Here’s one of several comments and responses I found on the BioLite website.
I was ready to write my experience off as a freak accident – maybe I crammed the headlamp a little too tightly into my pack – but a pattern like this is not a good sign: especially for a product designed with so-called pro features and technical terrain navigation in mind.
To BioLite’s credit (as shown in their response above), this known issue appears to have been resolved. What is not known (buyer beware) is how many models on retail shelves right now have the old button design, or what the incidence (%) of failure might be.
Photos
Note: readers will notice that in these photos, the front button is missing. The photos were taken after I’d attempted and failed a field repair on the BioLite HeadLamp 750.
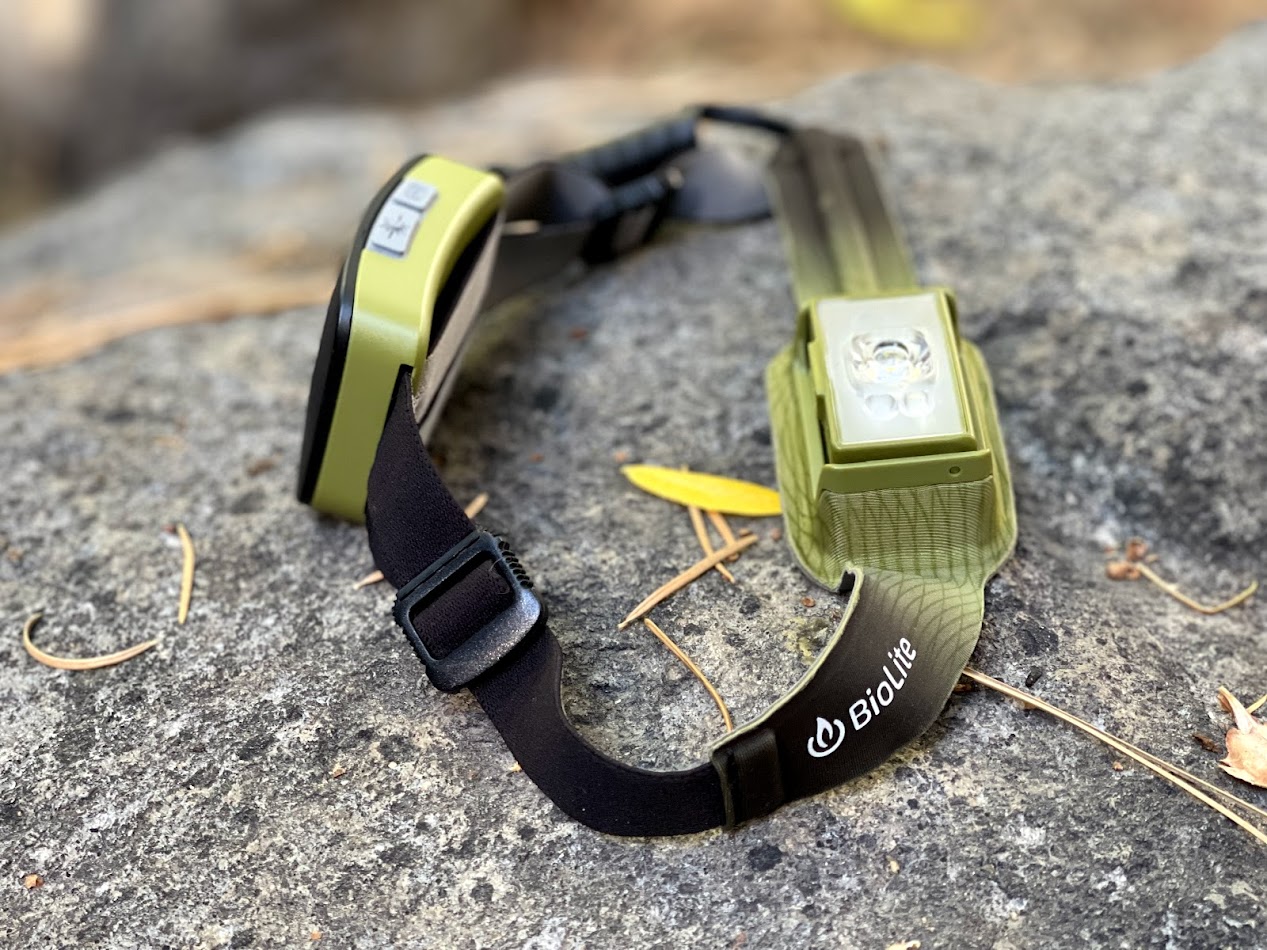
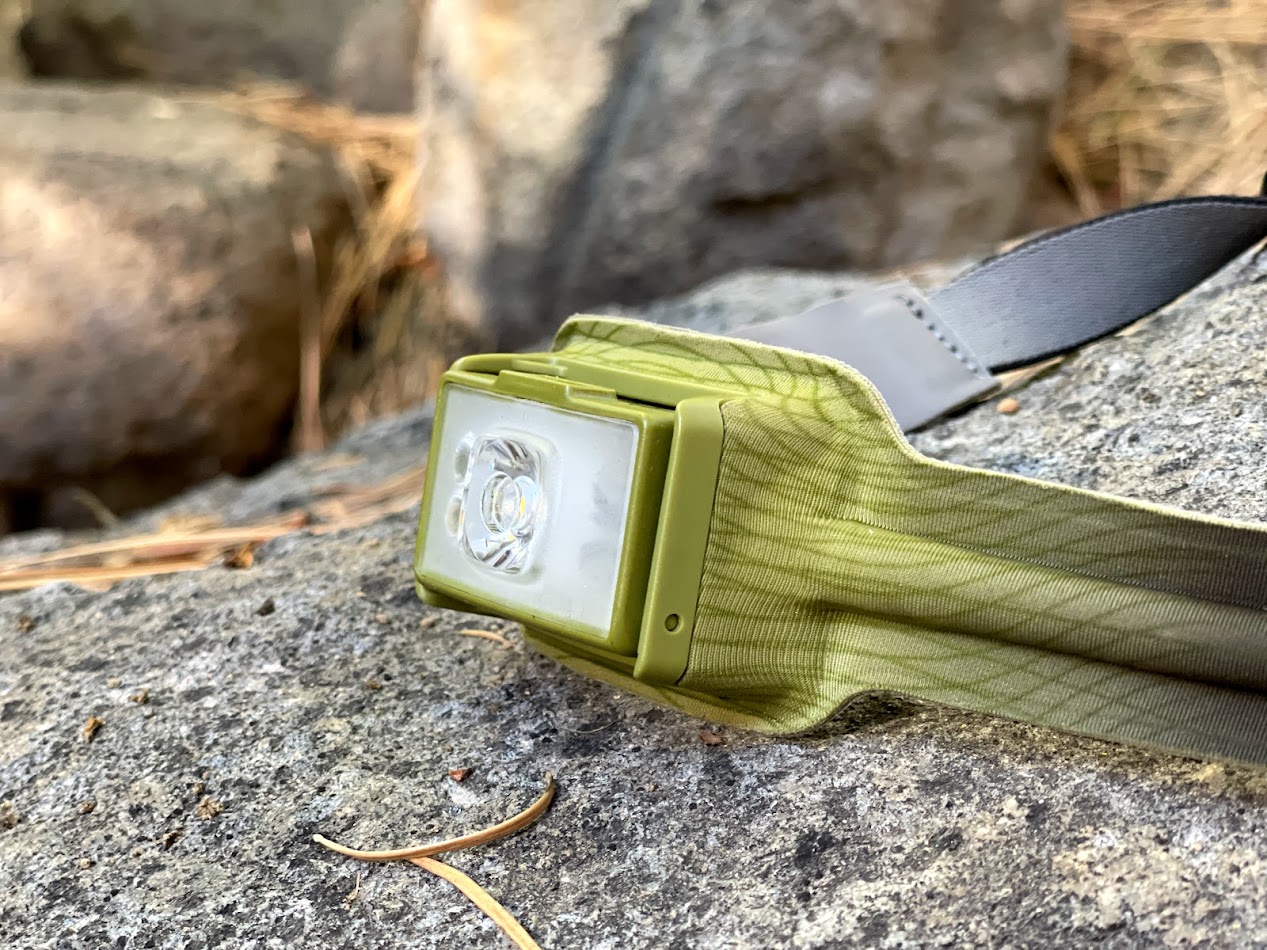
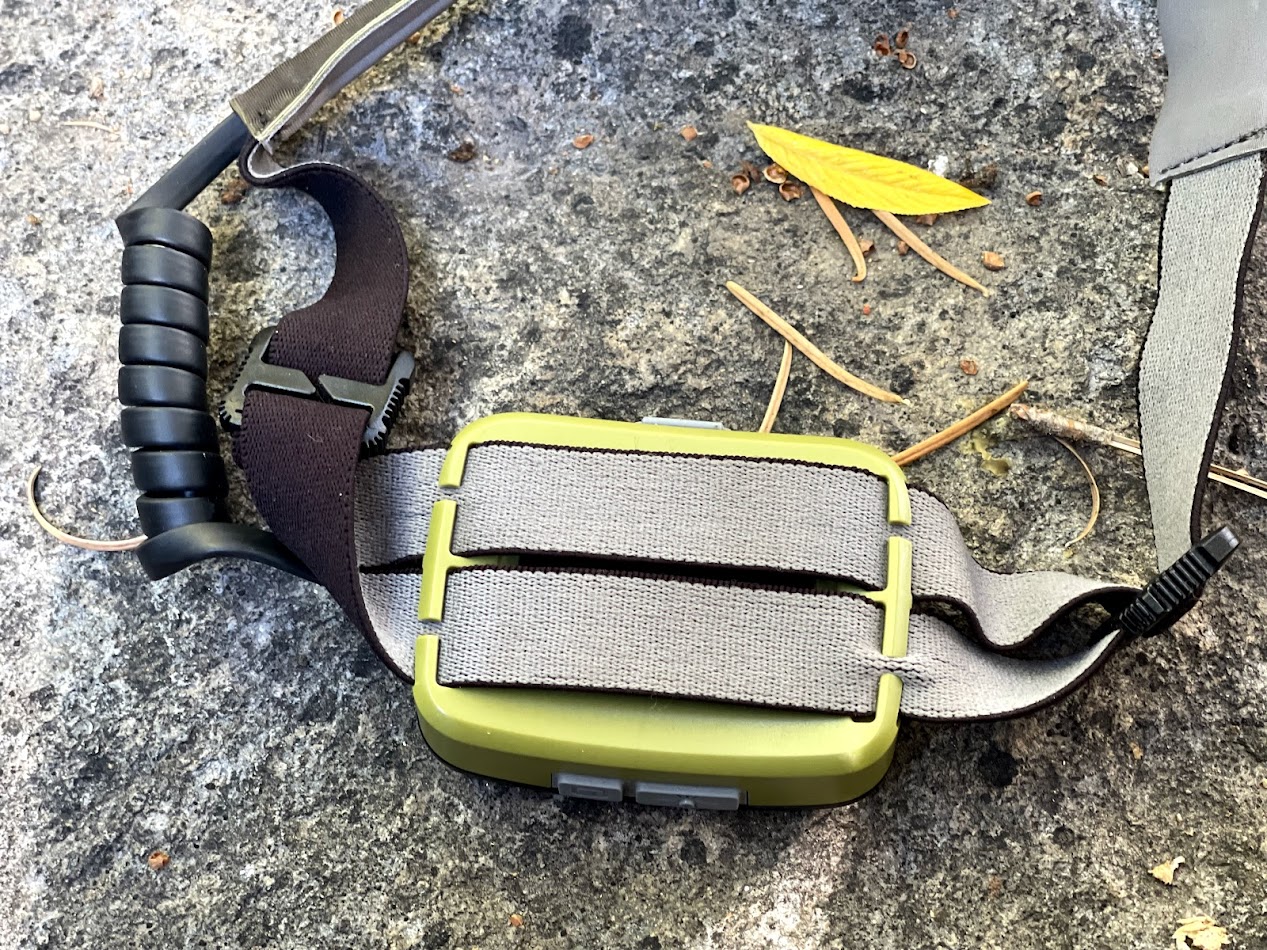
Wearing the BioLite Headlamp 750.The BioLite Headlamp 750.The BioLite HeadLamp 750 has a max brightness of 750 lumens and the standard slate of light types and colors – including a spot/flood mix that’s great for hiking.The BioLite HeadLamp 750 has a strap tensioning system that is intuitive and comfortable.The lighting element of the BioLight HeadLamp 750 tilts down independently from the molded, ergonomic housing.The seamless Lycra backing on the BioLite HeadLamp 750 makes the headlamp as comfortable as a headlamp this big and bulky can be.The huge battery is located on the rear strap and features a rear visibility lighting element and 4 LED battery indicator lights.The BioLite Headlamp 750 has a pass-through charging function and includes a 4-foot micro-USB cord.The BioLite HeadLamp 750 has a lot of unique features but is flawed by a common failure in the front on/off/dim button.
The Takeaway
It’s hard to talk about any of the BioLite HeadLamp 750’s positive features – and there are many – when it has a fatal flaw that could endanger safety.
I’m not sure what the BioLite team has done to fix the button issue, and I’m not sure if the products currently sitting on shelves or in distribution warehouses have been replaced. As of this writing, most of the responses from BioLite on their website are about a month old. While the BioLite HeadLamp 750 has several interesting features that would be useful to users in extreme conditions – and the other two products in this line are excellent – the 750’s proven unreliability would make me hesitant to bring it into the field in situations where I’d be counting on it. At least until I knew that all the defective models currently floating around had been replaced – and that the new models didn’t suffer from the same issue.
The Competition
The BioLite Headlamp 750 doesn’t differentiate itself very much from its competition. If we look at rechargeable headlamps offering 750+ lumens of brightness, consider the following:
The Petzl Swift RL is brighter (900 lumens) and lighter (3.5 oz / 99 g), but a little more expensive ($119.95), and has a smaller battery (2350 mAh).
The Petzl Nao is incredibly comfortable while climbing and running, but its harness weight comes at a cost, because the Nao is heavier (6.5 oz / 184 g), has a smaller battery (2650 mAh), and is much more expensive ($199.95).
The Fenix HM61R is cheaper ($84.95), brighter (1200 lumens), has a larger battery (3400 mAh), more water-resistant (IPX8), and slightly lighter (5.0 oz / 142 g). Editor’s note: this is a very compelling headlamp spec – if you need a bright, powerful, long-lasting, stable light – consider this one.
The LEDLenser MH11 is brighter (1000 lumens), has a much longer max beam distance (320 m), but is more expensive ($159.95) and a little heavier (6.3 oz / 179 g).
Product mentions in this article are made by the author with no compensation in return. In addition, Backpacking Light does not accept compensation or donated/discounted products in exchange for product mentions or placements in editorial coverage.
Some (but not all) of the links in this review may be affiliate links. If you click on one of these links and visit one of our affiliate partners (usually a retailer site), and subsequently place an order with that retailer, we receive a commission on your entire order, which varies between 3% and 15% of the purchase price. Affiliate commissions represent less than 15% of Backpacking Light's gross revenue. More than 70% of our revenue comes from Membership Fees. So if you'd really like to support our work, don't buy gear you don't need - support our consumer advocacy work and become a Member instead.
Learn more about affiliate commissions, influencer marketing, and our consumer advocacy work by reading our article Stop wasting money on gear.
Andrew chats with the down experts at the IDFL Laboratory and Institute about water-resistant down.
Stream
Summary
In today’s podcast, Andrew chats with some of the folks from IDFL Laboratory and Institute (originally known as the International Down and Feather Testing Laboratory) about water-resistant down. Also in this episode, Andrew shares some of the creative things listeners are doing in the backcountry and gives his final thoughts on the Nunatak Gear Bears Ears 50 pack.
water-resistant down’s performance at full saturation
the regulation (or lack of regulation) around water-resistant down
does the DWR (durable water repellent) treatment add any noticeable weight to the down?
does treated down loft as well as untreated down
care of treated down (washing best-practices)
would Stewart buy a garment based entirely on a DWR treatment?
RDS (Responsible Down Standard)
the ubiquitous nature of RDS
how consumers drive RDS and other certifications
the nuts and bolts of the actual certification process
chain of custody and supply chain
be on the lookout for our next long episode (coming in a month, not two weeks like Andrew said in the pod! ) where Ryan and Andrew will follow up on this conversation
Photo: Joanna StanberryPhoto: Alice HengstPhoto: Jen T
50th episode is coming up – email us “ask us anything” type questions about gear, techniques, skills, philosophy, past guests, why cats are clearly superior to dogs, or anything else at podcast@backpackinglight.com
Executive Producer - Backpacking Light; Show Director and Host - Ryan Jordan; Producer - Chase Jordan; Theme music: Look for Me in the Mountains written by Chris Cunningham and Ryan Jordan, performed by Chris Cunningham (acoustic guitar, lead and harmony vocals, harmonica), Chad Langford (upright bass), and Tom Murphy (mandolin), produced by Basecamp Studios in Bozeman, Montana.
Sponsorship Policy: Backpacking Light does not accept compensation or donated/discounted products in exchange for product mentions or placements in editorial coverage, including any podcast episode content not excplicitly identified as sponsored content. Some (but not all) of the links in these show notes may be affiliate links. Learn more about affiliate commissions, influencer marketing, and our consumer advocacy work by reading our article Stop wasting money on gear.
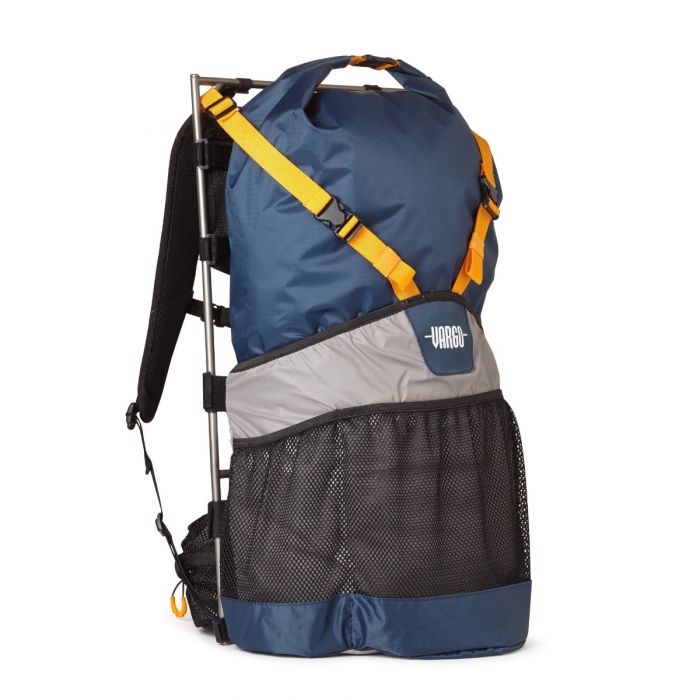
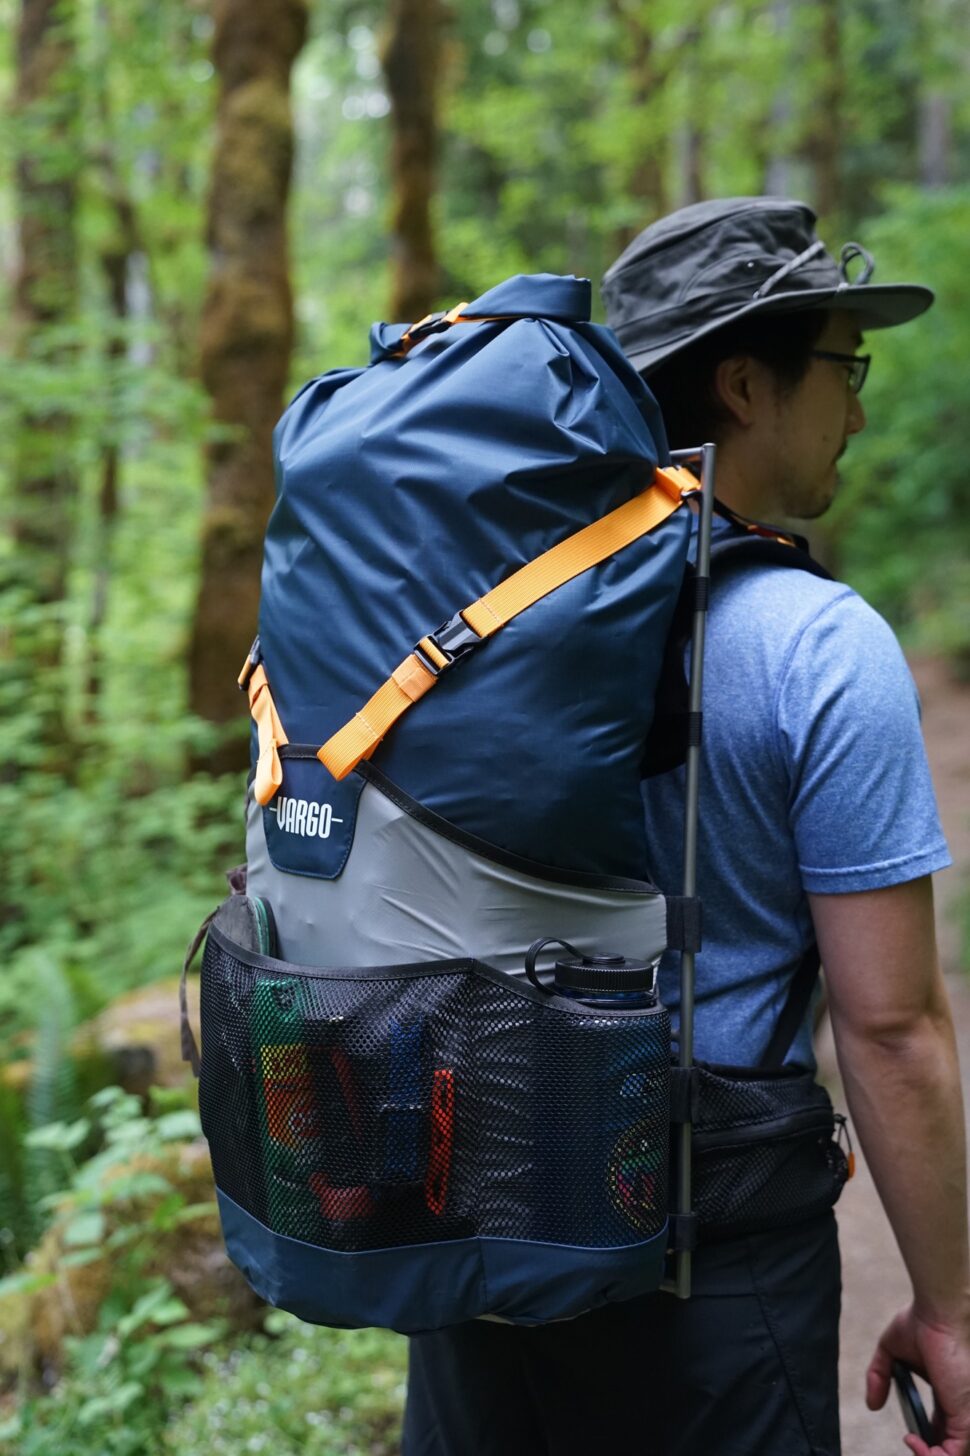
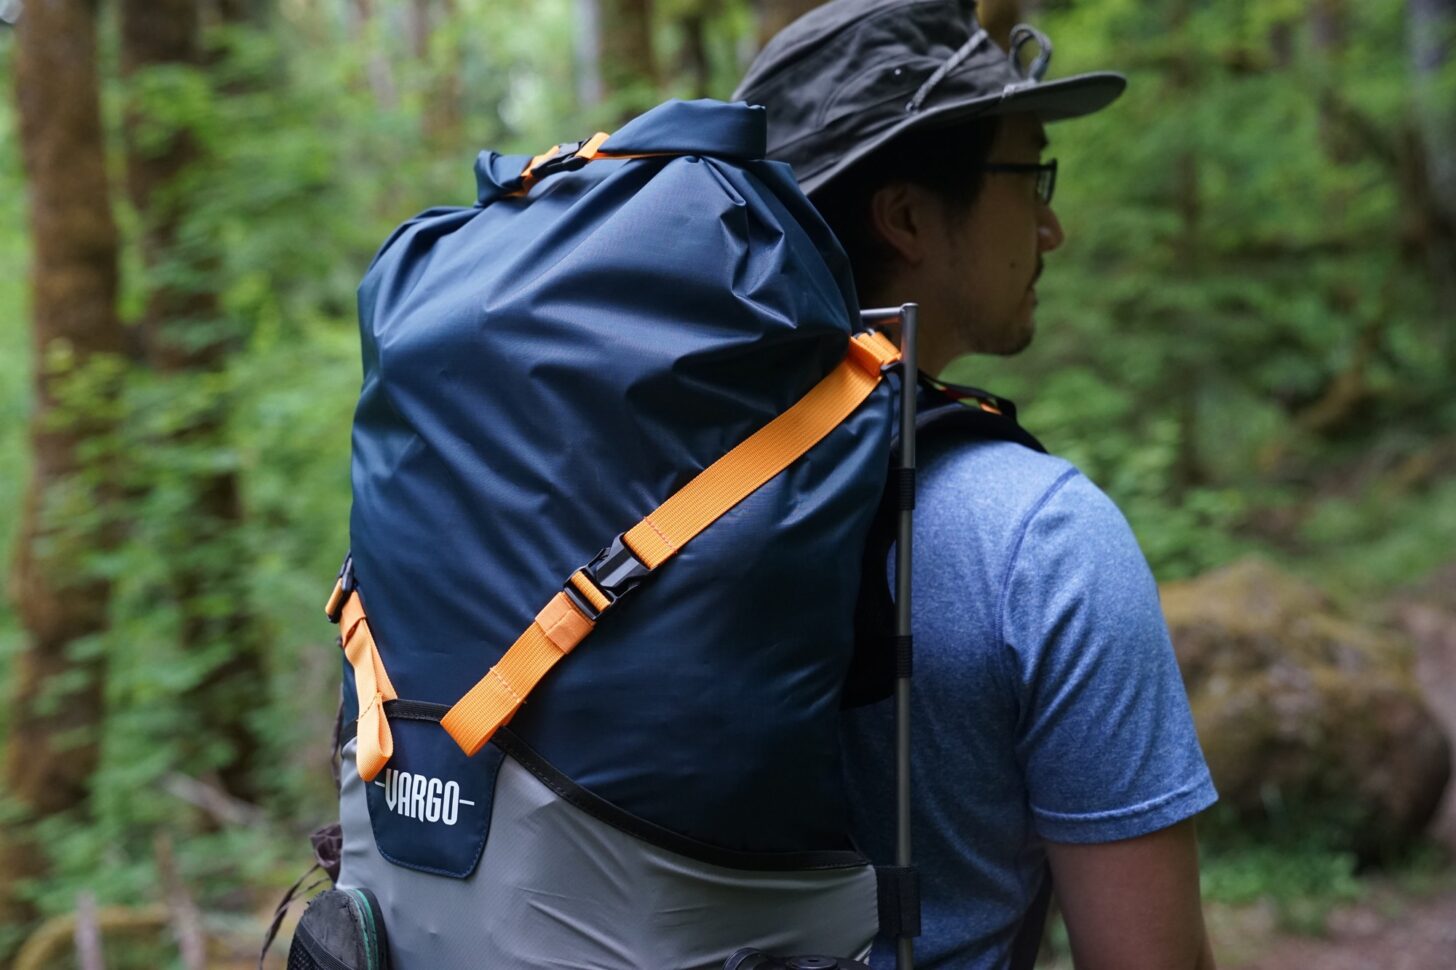
The Vargo ExoTi BOG backpack (2 pounds 9 ounces / 1.16 kg, MSRP $299.95) is a roll-top, external, titanium framed backpack with a removable 40-liter 70 denier primary compartment.
Introduction
The Vargo ExoTi BOG backpack (2 pounds 9 ounces / 1.16 kg, MSRP $299.95) is a roll-top, external, titanium-framed backpack with a removable 40-liter 70 denier primary compartment. This article provides a review of the pack as well as an in-depth interview with the designer (Brian Vargo) about the design philosophy behind the pack.
The Vargo ExoTi series is an interesting take on the ultralight external-frame concept. The Vargo ExoTi BOG backpack was born of minimalist concepts and design and includes no unnecessary bells or whistles. It accomplishes the most basic function of all packs: carrying your gear on your back as you adventure towards your destination.
Photo: Vargo Outdoors.
About this Review
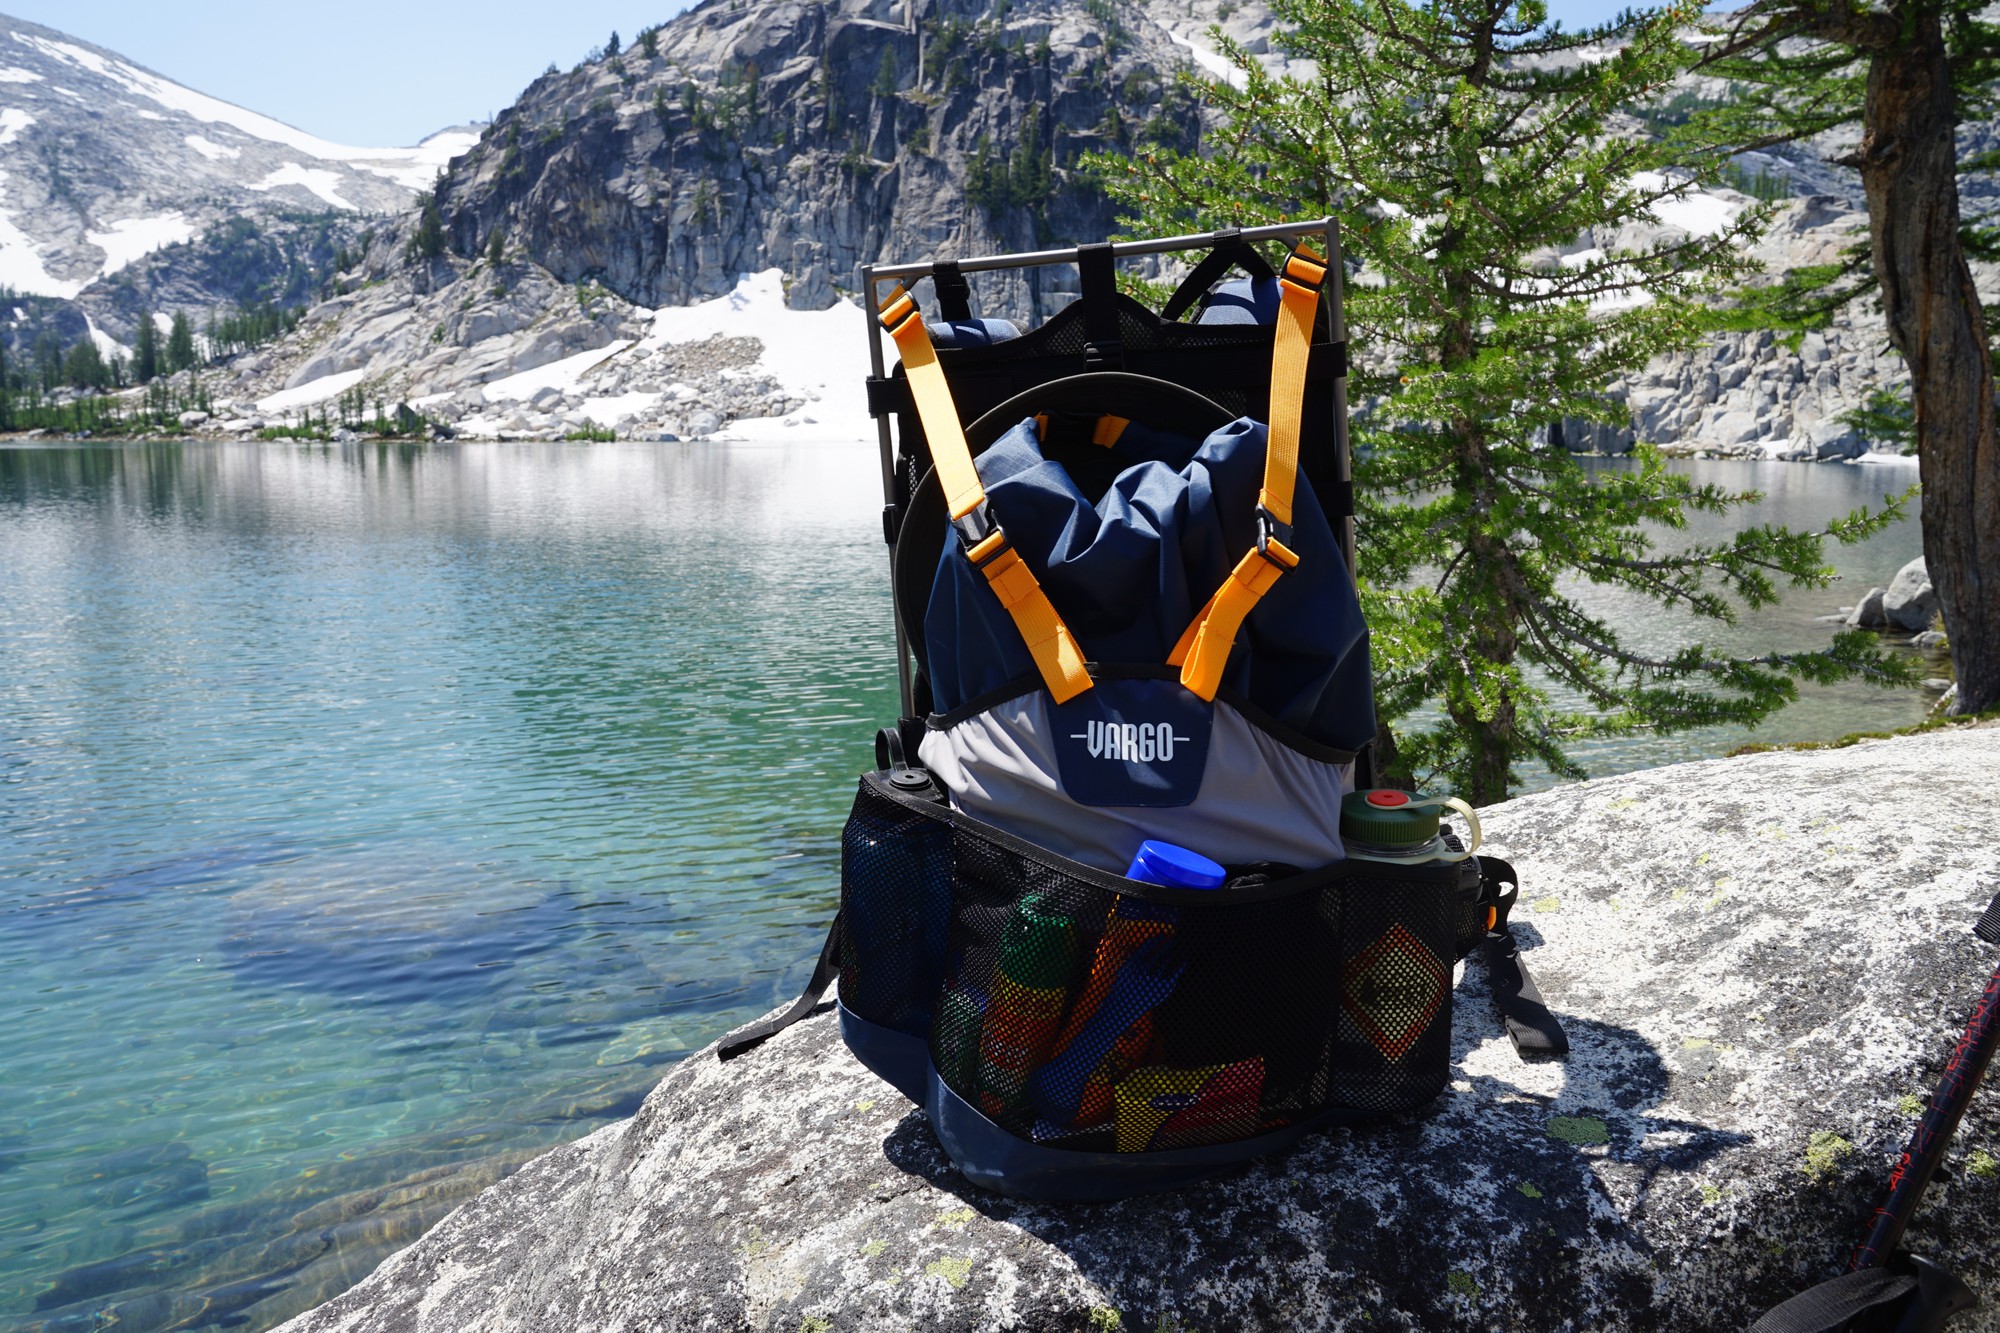
This is a Limited Review of the Vargo ExoTi BOG backpack. The testing was done in a subalpine location in the Olympic Mountains and the Alpine Lakes Wilderness area of Washington State’s Cascade Mountain Range over a combined total of five days during the summer season. Approximately 30 miles were covered during this timeframe with several thousands of feet of elevation changes.
Taken in the Enchantments in Washington State. Little Annapurna in the background.
Features and Specifications
titanium alloy external frame design
removable, compressible 40 L water-resistant roll-top bag with fully taped seams
ventilated, adjustable shoulder harness
two zippered hip belt pockets
large front mesh pocket for quick access to larger items
dual water bottle pockets
fabric weight: 70 denier
torso lengths: 16-22 inches (40-55 cm)
hip belt sizes: 24-60 inches (61-152 cm)
volume (main bag only): 2,440 cubic inches (40 L)
pack length: 24.375 inches (61.9 cm)
pack width: 13.875 inches (35.2 cm)
weight: 2 pounds 9 ounces (1.16 kg)
recommended maximum pack load: 30 pounds
Description of Field Experience
My first overnighter with the Vargo ExoTi BOG backpack was in the Washington Olympics on a 7.2-mile trail with 1,300 feet (396 meters) of elevation gain. Temperatures ranged from 49 °F to 59 °F (9.4 °C to 15 °C) in June with no precipitation.
The second trip was over two nights in the Alpine Lakes Wilderness (Enchantments) in the Washington Cascades in September, over approximately 25 miles with 4,500 feet (1,372 meters) of elevation gain. Temperatures ranged from 56 °F to 94 °F (13.3 °C to 34.4 °C) in July with no precipitation.
Performance Analysis
Since this is a Limited Review, a detailed performance analysis based on long-term use will not be presented. Instead, performance observations and issues are noted below.
Criteria/Observations:
Design and Function: The design of the Vargo ExoTi BOG backpack is unique (titanium external frame) and bare-bones (roll-top bag, minimal pockets). With roll-top packs, one sacrifices accessibility to gear at the bottom for clean aesthetics and durable zipper-free design. The Vargo ExoTi BOG has a few pockets which unfortunately are not easily accessible (this will be discussed further in the Commentary).
Construction and Durability: The titanium frame will be around long after I am long gone – it is clearly designed to withstand whatever can be thrown at it. The main bag is made of 70 denier nylon. The mesh used for the pockets may be vulnerable to snags and tears, and would be more difficult to repair than a tightly woven fabric. Depending on where you’re hiking, this could be problematic. I frequently hike in the Washington Olympics and Cascades, where brush can occasionally become thick at times on and off the trail (e.g., devil’s club, slide alder, dense spruce/fir forests). A user in an area with less dense forests would have no concerns at all. The plastic fasteners, while lightweight, also seemed a bit vulnerable to stress and breakage, as they appeared relatively thin. The straps and suspension system are strong and appear sturdy enough to keep up with any other pack.
Fit and Comfort: This is one area where my review will likely differ from other user experiences with Vargo packs (based on my research of others’ experiences). Initially, the Vargo ExoTi BOG seemed quite comfortable. But over a period of several hours (and multiple days) it became uncomfortable. I suspect the individual user’s mileage may vary in this regard, and I may be an outlier. I’ll go into this more below.
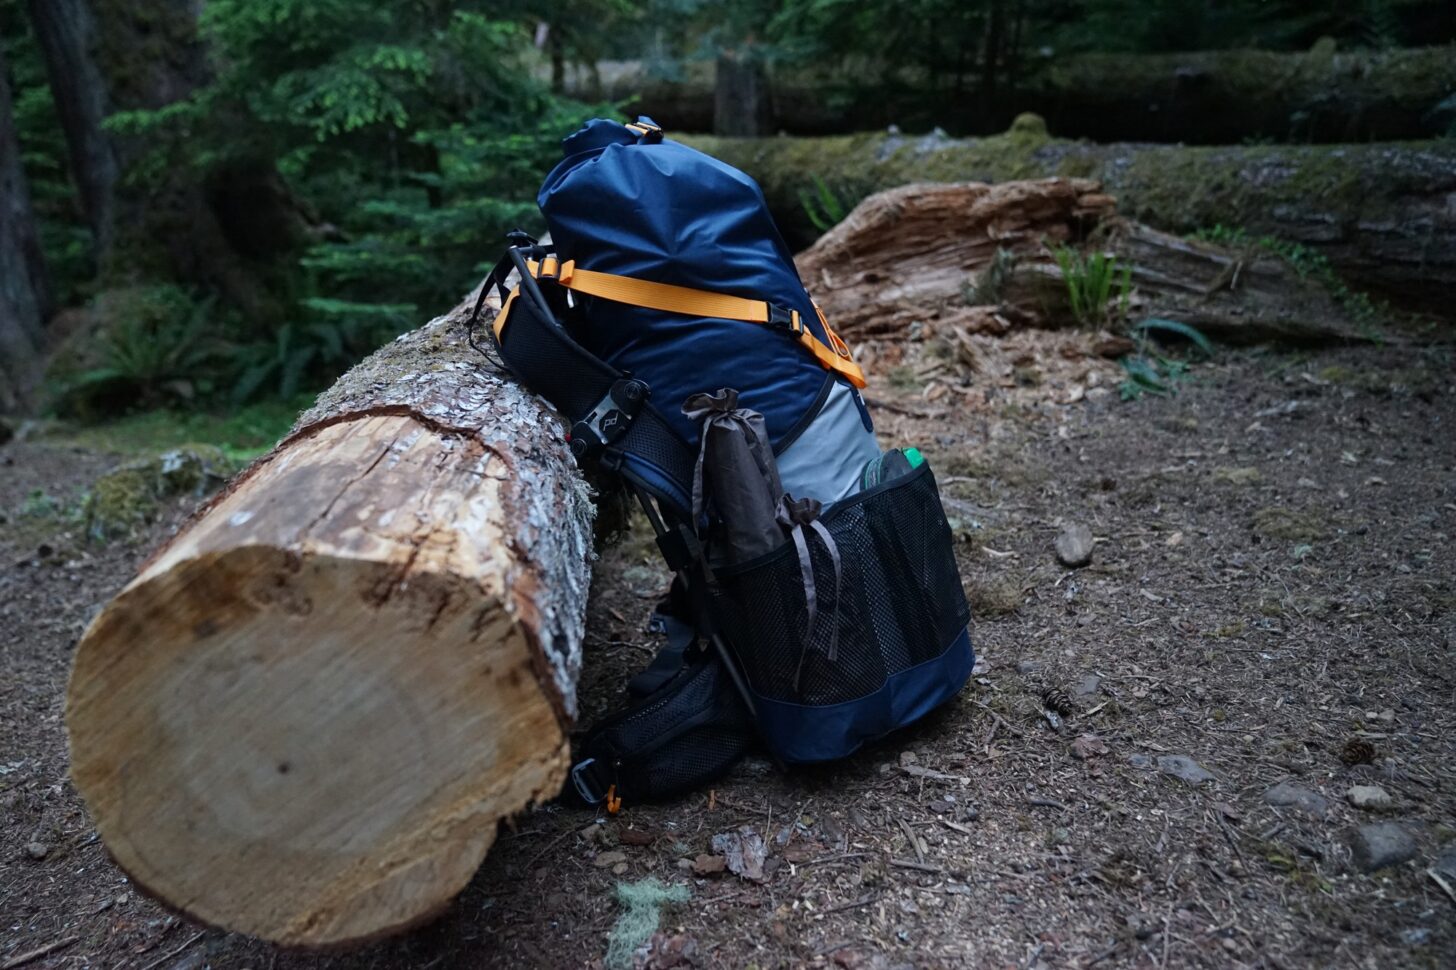
The Vargo ExoTi BOG has a large mesh pocket in the back, flanked by two pockets for water bottles.
Commentary
What makes the Vargo ExoTi BOG backpack stand out? It’s a combination of minimalist design, a unique external titanium frame, and the modular nature of the harness. I interviewed Brian Vargo regarding the Vargo ExoTi BOG, which provided valuable insights into his design process and helped me wrap my head around how to judge the pack’s performance. The full interview is available at the end of this review.
Minimalist Design
Brian Vargo set out to realize a minimalist pack design and in the case of the Vargo ExoTi BOG (note: pronounced EX-oh-TIE) he has achieved that mission. The BOG is essentially just three pieces: frame, suspension, and removable roll-top, three-pocket main bag. There’s beauty (and durability) in the simplicity of the design.
Frame
The frame is a rectangular outline made of titanium rods with a convex lumbar support plate. This frame is a successor to the previous Vargo Ti-Arc lineup. In our interview, Brian noted that the ExoTi frame eliminates some angles in the Ti-Arc frame’s vertical rods, which were necessary to keep the pack from touching the hiker’s head.
“In external frames, there’s traditionally that top bar. I found that [removing that top bar] didn’t make a big difference in the way [the pack] felt when you carry it. [Removing the traditional top bar] has a different feel but not significant enough [to warrant keeping it]. I wanted to improve the strength of the system overall and that was what part of led to the ExoTi series.” – Brian Vargo
He also noted that there are angle brackets in the corners of the ExoTi frame to add additional strength.
While Vargo officially recommends a maximum of 30 pounds (14 kg), the frame seems rugged and in my opinion, could carry far more weight. Indeed, during my second testing period, I pushed it beyond that limit and was carrying 35-40 pounds (16-18 kg) with no perceivable compromise to the frame’s ability to carry the load. As far as comfort goes, well, I’ll get to that.
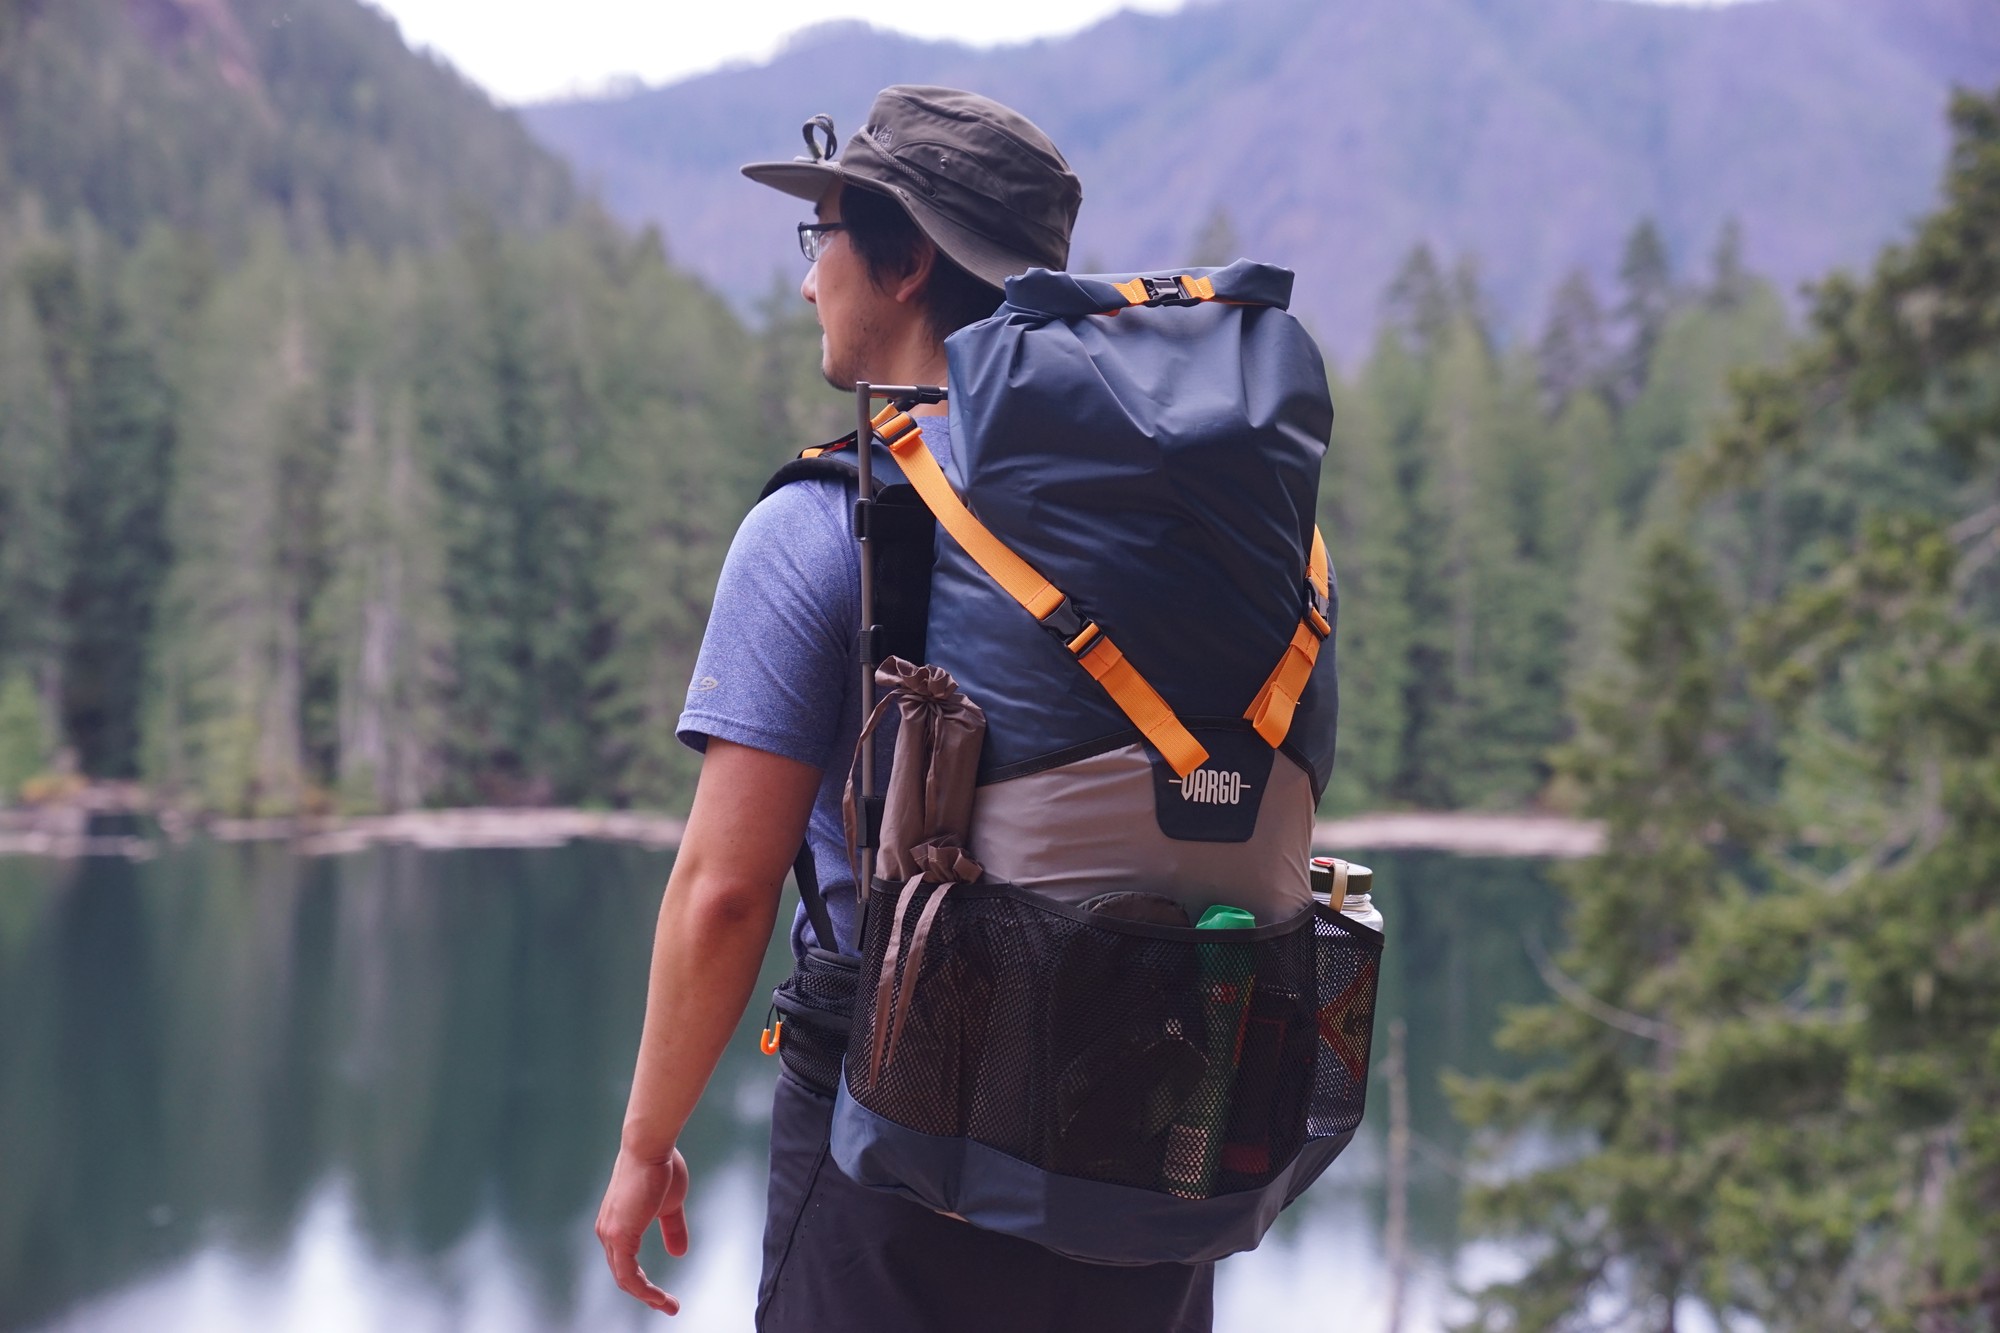
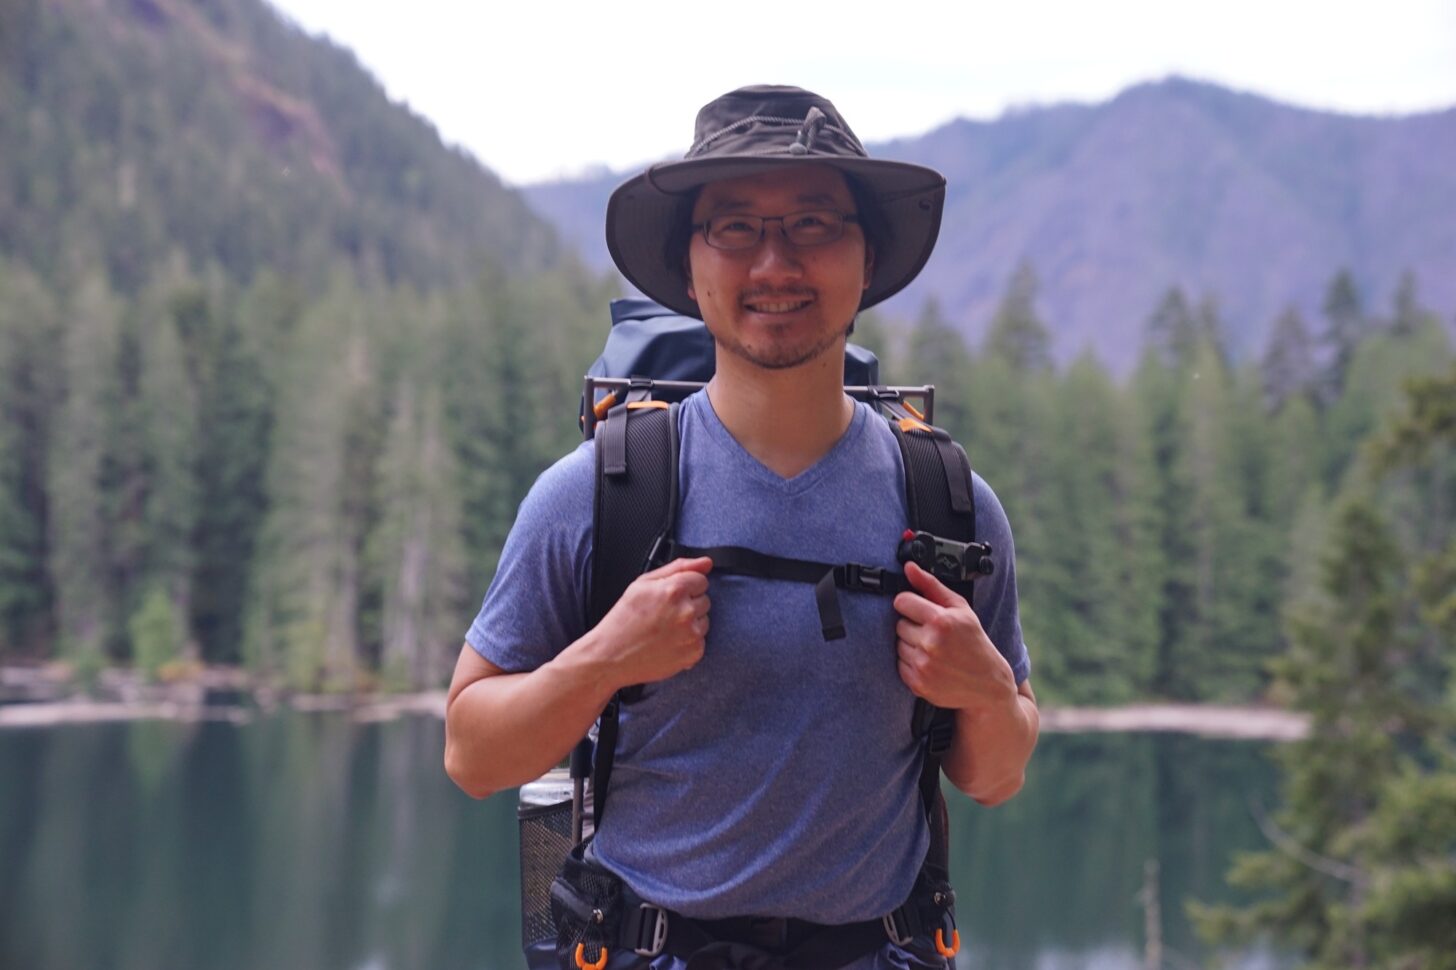
At Lena Lake in the Olympics. Note that Vargo designs their bags to better facilitate an upright posture while hiking.
Suspension
The suspension is comprised of a pad covering the frame’s lumbar support, sturdy straps, and a load-lifting compression strap system. The suspension attaches to the frame using several small but strong hook-and-loop straps.
The hip belt straps and shoulder straps are strong but lack the amount of padding seen in many other packs. I also found that the hip pads were substantially shorter than other packs I’ve used in the past, meaning that the end of the pad ended right at my hip bones. More to come on comfort.
One thing I think would have been handy here is an extra strap at the top to better secure the top of the main bag to the top of the frame. Vargo’s blog indicates that they prefer to keep the center of gravity higher, then transfer the weight to the lumbar area in order to maintain an upright position while hiking. The two load-lifting compression straps went around the bag but seemed to leave a V-shaped notch in the middle, thus when stuffed full, the bag seemed to sag back and down through the notch at times. This was most noticeable when needing to shift my weight as we clambered upwards over steep alpine trails. In general, it wasn’t a huge problem, but at times the bag seemed to want for extra stability that I think one more strap could have provided. I will note here that I consider it entirely possible that I simply overloaded the pack beyond its recommended weight/load – you can see from the photographs that I had enough gear that I could barely close the roll-top buckle! Perhaps someone with a more compact kit would not struggle here.
Hiking up to Lena Lake in the Olympics. Note that I had this pack weighing in around the 35 pound (16 kg) mark and have stuffed it full of gear! Compare to the stock image to see just how much I had put in the bag – I could barely clasp it shut. You can see here the V-shaped notch created by the load-lifting straps.
Roll-top Bag
The roll-top bag is much like any other single-compartment, three-pocket bag of its kind. A couple of noteworthy comments come to mind, though.
While Vargo stops short of calling the Vargo ExoTi BOG waterproof on its website (the pack is noted as water-resistant), Brian Vargo frequently referred to it as waterproof in our interview. I suspect based on my own use that waterproof is probably an appropriate term. The bag clearly is not meant for prolonged submersion, but given its taped seams and 70 denier construction, I think that it could be considered functionally waterproof. Vargo does offer a rain cover on its website, but in the case of the BOG I think that it would be superfluous given material and design.
The material choice is probably one of the areas where Vargo could have shaved some weight. When I asked Brian Vargo about his choice of 70 denier nylon over lighter materials (like Dyneema Composite Fabric), he stated that the choice was mainly guided by cost, as using something lighter would have increased the price-point for users.
“Dyneema [Composite Fabric] is waterproof, but you need to be careful with the seams; they have to be sealed. Mostly it was a cost consideration more so than anything else. If we had used Dyneema [Composite Fabric] it would’ve increased the cost significantly and I didn’t know if those few ounces were justifiable to the consumer.” – Brian Vargo
My own perspective after using the BOG backpack is that Brian’s explanation is perfectly reasonable. The nylon bag is sturdy and functions exactly as it should while keeping the price quite competitive. If the few extra ounces are a make-it-or-break-it issue for a hardcore consumer, then the great thing about the BOG is that it gives that person the option of using a different bag – provided the user can figure out how to attach it to the frame.
The roll-top bag is made of a durable 70 denier nylon fabric and has fully taped seams for maximum protection against water penetration.
Functionality and Modularity
As mentioned repeatedly in thisreview, the Vargo ExoTi BOG’s functionality is centered around minimalism. Vargo offers two other systems in the ExoTi lineup, and if you want additional features and functions, those systems have them. The BOG accomplishes its mission of being a minimalist bag focused on carrying gear (as opposed to convenient access to various parts of your kit). However, this does obviously limit some functionality in other departments. I will not call it a weakness (see Brian’s comments in our interview) but I will identify certain functions that are limited as a result of this design.
One easily identifiable feature of roll-top bags is simply that you have to be strategic about your packing: place an item at the bottom, and you’ll have to take everything else out in order to access it. You also cannot use a water reservoir with a tube and bite valve (e.g., Platypus or Camelbak) as there is no interior sleeve or hydration port.
With regards to water storage, the BOG does have two mesh pockets for water bottles. These are well out of arm’s reach while wearing the pack.
I often hike in areas with bears, necessitating the use of a bear canister for food storage. The BOG’s roll-top bag easily fits my BearVault BV450 inside the main compartment. The BOG’s 40L interior capacity meant I had to be strategic with the rest of my gear when packing my bear canister. Due to space limitations, I found myself attaching my sleeping pad to the bottom of the pack using an extra strap I had lying around. You could maybe do this with a bear canister (or similar heavy item), but that isn’t how the BOG is designed and could impact the center of gravity to some degree (note that the Vargo ExoTi AR2, being a 3/4 length pack, isdesigned for this).
The way that the bag is easily removed from the frame and suspension means that it can be taken into the tent while leaving the bulky frame outside. I often hike with an internal frame pack, and when I need to keep it inside the tent it takes up quite a bit of space. But with the BOG, I could keep the packbag in the tent and leave the rest of the backpack outside.
“You can use any bag [with the titanium frame], and I recommend a dry bag. You could use just about anything else as well. [The suspension system is] just a pouch, and how you use it is completely up to you.” – Brian Vargo
The ExoTi lineup is essentially comprised of three main components: frame, suspension, and bag. This modularity is beneficial if the suspension or roll-top bag is subjected to any catastrophic damage, since they can be easily replaced individually without having to replace the entire system all at once (again, I consider it a near-impossibility for the titanium frame to suffer such damage). The “BYOB” (bring your own bag”) option can be found on Vargo’s website here, with links to the individual bags at the bottom of the page, thereby allowing the user to choose whichever bag would best suit a particular adventure.
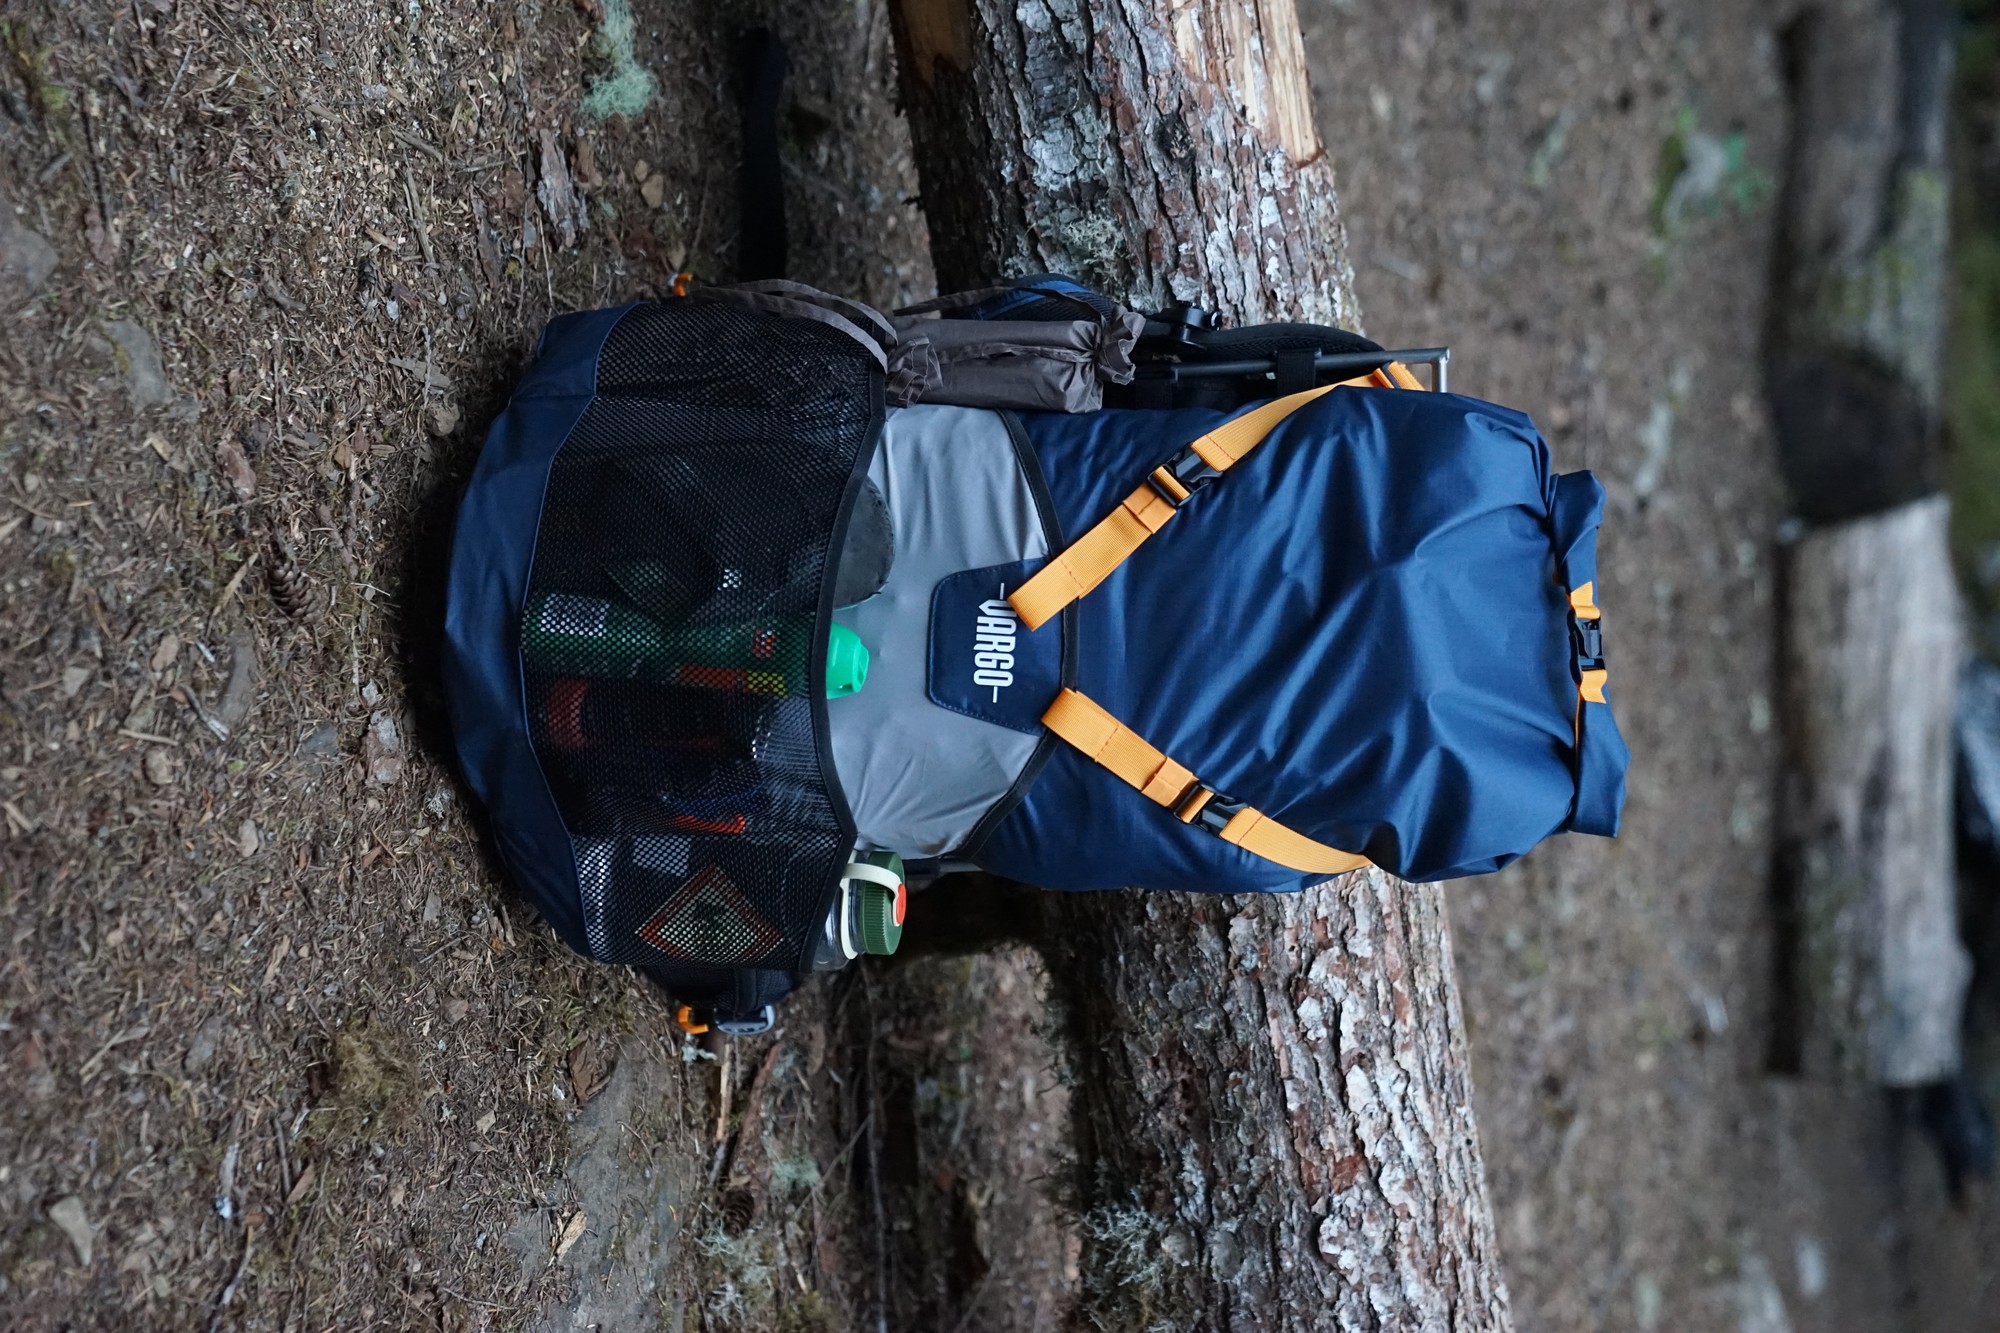
Side view of the Vargo ExoTi BOG. I used one of the water bottle pockets for my tent poles.
Comfort
The hip pads are short. When the hip straps were tightened, it felt like the tips of the hip pads were digging into my iliac crest. Initially, this was unnoticeable, but over the course of several hours became uncomfortable. I could see how adding a little more padding (at the shoulders, hips, and lumbar support) could have improved the comfort of the Vargo ExoTi BOG backpack.
The lumbar support issue was interesting as initially, I felt that it did a great job of transferring the weight off my shoulders – and the placement of the lumbar support plate was perfect. There’s an informative post by Vargo on its website about its approach to the ExoTi frame weight distribution (e.g., maximizing weight transfer to the lumbar region). Perhaps Vargo did too good of a job in this department, because after several hours I began to experience pain in the spot where the lumbar support met my back. The material used to cover the support plate is mesh and fairly rough, and at times if my shirt rode up my back, would rasp my skin raw.
Unfortunately at the end of each day, I felt pain in my hips where the pads dug into my iliac crest, and pain in my back where the lumbar support plate transferred the pressure of the load.
I will note that the user feedback I have seen online and in social media has met the ExoTi frame system with near-universal acclaim for its comfort and load distribution qualities. I am an outlier in my experience with the discomfort I felt. I’ll also note that when I took the pack up into the Enchantments, I was certainly pushing it beyond its recommended maximum load of 30 pounds (14 kg), as I had approximately 35 to 40 pounds (16 to 18 kg) on my back. Whether due to my anatomy or the way in which I used the pack, it seems that my experience was not the norm, as almost every comment I have seen on the comfort of the ExoTi system has been one of praise.
Backpacking at Lena Lake in the Olympics. If you look closely at the hip pads, you can see that they are relatively short and do not wrap far around the body.
Compared To…
The Vargo ExoTi BOG backpack has few direct competitors. It’s an external frame backpack with a modular bag system. Its closest competitors in terms of modular function would be the ULA Epic and the Seek Outside Unaweep, but both of these are internal frame designs. If one prefers the load-carrying style of an external frame pack, the experience will be matched more closely to backpacks with external frames or external-frame-like exoskeletons like the ZPacks Arc Air. Thus, the latter was used for this comparison.
The Vargo ExoTi BOG backpack weighs 41 ounces (1160 g) while the ZPacks Arc Air 50 L weighs 19 ounces (544 g).
Edge: ZPacks Arc Air 50 L is the clear winner here at just under half the weight of the Vargo ExoTi BOG. Much of the weight savings comes via the use of Dyneema Composite Fabrics and a carbon fiber frame.
Price
The Vargo ExoTi BOG costs $299.95, the ZPacks Arc Air 50 L costs $325.00. Note this is where Brian Vargo’s material choice comes into play. However, the price premium for Dyneema Composite Fabrics is not substantial in this case.
Edge: Vargo ExoTi BOG
Function
The Vargo ExoTi BOG’s roll-top bag is removable, while the ZPacks Arc Air 50 L is fixed to its exoskeleton suspension similar to an internal frame pack. The ZPacks Arc Air 50 L has options for accessories, interchangeable belts, and overall seems to be more customizable.
Edge: In terms of function, they’ll both carry your gear! It comes down to whether you prefer the modularity of the Vargo ExoTi series or the customization available with the ZPacks Arc Air 50 L. There’s no clear edge here – I feel this will come down to the individual hiker’s preferences. I am not aware of any direct competition to the ExoTi BOG’s removable roll-top bag feature in an external frame design.
Material
The Vargo ExoTi BOG’s main bag is made of a relatively thick, durable 70 denier nylon (likely in the range of 2.7 to 3.2 oz/yd2). Its frame is titanium. The ZPacks Arc Air 50 L is made of 3.1 oz/yd2 Dyneema Composite Fabric Hybrid with a frame using carbon fiber stays.
Edge: I feel the Vargo ExoTi BOG wins the frame contest with its rugged titanium construction, but the Zpacks Arc Air 50 L’s lighter DCF/carbon fiber wins in the weight department. However, given the fact that the BOG’s nylon bag can be swapped out for a DCF bag, the edge (in my mind at least) goes to the BOG.
Strengths and Limitations
Strengths
minimalist, with a clean and durable roll-top design
modular design with removable/replaceable main compartment is unique among external frame packs
durable materials (titanium, 70 denier nylon)
functionally waterproof
Limitations
difficult to reach water if hiking alone
comfort issues due to (in my opinion) insufficient padding
short hip pads may not work for some individuals’ anatomy
You can purchase the Vargo ExoTi BOG backpack from Vargo here.
Full Interview with Brian Vargo and Daniel Hu – September 10th, 2021
Dan: I like the simplicity of the BOG and the ability to remove the main bag. Can you describe your process in designing and then manufacturing the BOG? Were there any other designs that inspired you?
Brian: With our whole backpack series, the ExoTi, there’s Part A and Part B.
Part A is made up of the frame, shoulder straps, and belt. And so that’s the commonality between all three ExoTi packs. Part B is “What do we attach to the frame?” One of our packs (the ExoTi 50) is more of a standard pack, and it sort of resembles an internal frame pack. The next is a 3/4 pack – typically with a traditional external frame pack, there’s a space underneath to attach stuff like your bedroll.
The BOG was the last option as the series goes progressively. It was created with what you said in mind: people who want the ability to come into camp and instead of pulling this and that out of the bag, you can literally grab everything out of the backpack with the dry waterproof bag and take it into the tent, while leaving the frame and suspension out in the vestibule or even outside if you wanted. That was the main idea, for people who want to keep all of their essential gear in the tent at night.
Dan: I think any user would intuitively figure out how to take the bag out, to minimize the bulk inside the tent. This was my own experience! I got to my campsite, set up the tent, and when it came time, it was easy to look at the BOG and go, “Okay, I can just lift the whole bag out and keep it in my tent.” I often hike with an internal frame pack, and when I need to keep it inside the tent it takes up quite a bit of space. But with the BOG, I did exactly what you described and left the frame outside of the tent overnight with no problems.
Brian: Obviously we only offer one size of bag, but you can use any bag (and I recommend a dry bag). You could use just about anything else as well. [The suspension system is] just a pouch, and how you use it is completely up to you.
Dan: Were there any features that didn’t make the cut when you were designing the BOG?
Brian: We have three options with the ExoTi series, so with each one there are different design elements. With the BOG I wouldn’t say I took anything away, it’s a really minimalist design. There was never anything I ever thought, “Oh I should add to it”. It was the third bag in the series and so I was trying to make it even more minimalistic than the first two.
Dan: I know that there was an update a few years ago when the ExoTi series was released as a successor to the Ti-Arc line. Were there any significant changes made for the ExoTi frame used with the BOG?
Brian: So the Ti-Arc was even more like a traditional external frame backpack. Different, but more similar [than the ExoTi series]. The biggest difference is that in the Ti-Arc, similar to traditional [external frame] backpacks, there’s a frame that goes around the top that the bag hangs from. And it’s a nice feature in the way that it’s suspended from a higher point so it has a different center of gravity. I liked it, but there were things I didn’t like about it, but we needed them in order to have that arc that went around the top. With the ExoTi it goes straight up like a big rectangle, but with the Ti-Arc we had to bend the rod, the vertical rods on the sides, to avoid you hitting your head on the pack. It was inherently the way the bag would lay there. I wasn’t happy with that and I wanted to change it, and I felt the ExoTi was a stronger design. We added angle brackets in the corners to increase the strength. In external frames, there’s traditionally that top bar, I found that experimentally and playing with new ideas it didn’t make a big difference in the way it felt when you carry it; it has a different feel but not significant enough, I wanted to improve the strength of the system overall and that was what part of led to the ExoTi series.
Dan: Aside from the obvious titanium external frame, could you talk a little bit about the other materials used in the construction of the BOG? For example, the main bag. Were there other materials you considered?
Brian: The bag that some people are using, a former employee did the same and is using a Dyneema bag. Dyneema would probably be the most common swap out that I’ve seen. They’re very expensive and to get a bag that big it would increase the cost. So it was a cost issue, and I wanted the bag to be as waterproof as possible. Dyneema is waterproof, but you need to be careful with the seams; they have to be sealed. Mostly it was a cost consideration more so than anything else. If we had used Dyneema it would’ve increased the cost significantly and I didn’t know if those few ounces were justifiable to the consumer. If people who want to do it, great, but at the end of the day the bag we offer, it’s a good bag, it’s waterproof, and it’s at a pretty good price and it’s fairly durable. Everyone has their wants and likes. It’s a nylon bag. Very highly water-resistant nylon bag.
Dan: I’ll share that while I personally love ultralight products, I’m not necessarily obsessed with shaving off every possible gram. I know some folks say to themselves, “Okay, where can we truly minimize weight and cut off a strap here or there,” but I figure that back a generation ago, say in the 90s, ultralight didn’t exist (to the extent it does now) – and people still went hiking! I’ve never been on a hike that was so strenuous that I went back and said, “Okay, that extra 100 grams was what stopped me from completing the hike.” So in some ways, I just tell myself to be strong enough to handle the extra ounce or two.
Brian: [Laughing] That’s my generation! I did most of my hiking in the 90s. There was no “ultralight.” I remember a guy who did the Appalachian Trail who had a pack that was 35 lb and I thought, “How in the world do you have that?” It seemed unattainable to me. But everyone wanted to have a lighter backpack, but the gear in those days, it just wasn’t designed that way. I’d say arguably some of the materials may have existed, but the designs weren’t around. Like the minimalist design, you had to have things that were durable and were going to last, and that’s important. In my mind, you have to have a balancing act. You can take it too far. You don’t need gear like I had in the early/mid 90s. This is what obviously sparked my imagination as well – “It’s too heavy; what can I do to get the weight down?” That was the inspiration behind a lot of our products.
Dan: Do you have any updates coming down the pipeline for the BOG? How do you envision the BOG backpack evolving in the future?
Brian: Everything always evolves, and as I do this longer, I get more feedback, I have my personal experience. I do have some things I’m working on, I’m not ready to share it yet, but I’ll say in general, I’m always trying to think of how can I do it better, that’s half the fun and what keeps me doing this.
DISCLOSURE (Updated April 9, 2024)
Product mentions in this article are made by the author with no compensation in return. In addition, Backpacking Light does not accept compensation or donated/discounted products in exchange for product mentions or placements in editorial coverage.
Some (but not all) of the links in this review may be affiliate links. If you click on one of these links and visit one of our affiliate partners (usually a retailer site), and subsequently place an order with that retailer, we receive a commission on your entire order, which varies between 3% and 15% of the purchase price. Affiliate commissions represent less than 15% of Backpacking Light's gross revenue. More than 70% of our revenue comes from Membership Fees. So if you'd really like to support our work, don't buy gear you don't need - support our consumer advocacy work and become a Member instead.
Learn more about affiliate commissions, influencer marketing, and our consumer advocacy work by reading our article Stop wasting money on gear.
Maggie Slepian uses past experiences on trail to push through rough days on Colorado’s challenging Collegiate West.
My dad has an old ultrarunning adage that he’d impart when I was having a tough time in school, social life, athletics, or some combination of general life: it doesn’t always keep getting worse. At first, this might seem like a downer statement – the word worse doesn’t exactly sing of empowerment – but to me, it’s the opposite. This is a statement I return to time and time again when things have been challenging. I can hope that at some point, circumstances will turn around and it gives me something to look forward to.
My dad would repeat this saying to himself around mile 60 of his 100-mile races when he was deep in the pain cave but still had well over a full marathon distance until the finish line.
I’ve returned to this sentiment over and over, and somewhere along the way, it became more than just words. It’s something I truly believe thanks to plenty of experiences coming out of low points.
Welcome to Collegiate West range.
I just returned from a 486-mile solo thru-hike of the Colorado Trail. While the trail was challenging, with manageable miles, the terrain was within my physical abilities.
Mentally? That was another story.
My mental lows on this trail were like nothing I’d ever experienced in the backcountry. I fought through waves of anxiety so bad I couldn’t eat, drink, or get a full breath of air. I would pack up my gear while crying in my tent and have to pause to cry multiple times during the day, doubled over on my trekking poles in the middle of the trail.
I felt helplessly trapped in my own head, and it impacted my physical strength as well. I wasn’t intimidated by the hike, I wasn’t afraid of being alone in the mountains, and I wasn’t overly tired. Day after day, I just couldn’t get a handle on my emotions. I felt like I was battling my brain while trying to cover more than 20 miles per day with thousands of feet of vertical gain.
I had been dealing with some very challenging personal issues, and nature had always been an escape. When the problems became too big for my normal dose of nature, I thought an epic thru-hike would provide healing and take my mind off of it. Believe me when I say I was stunned when that was not the case. Bouts of crying and inertia were for breaking down in your room at home, not in the middle of a 486-mile solo hike. Yet here I was, fighting through regrets and doubts and choices I had made in the middle of some of the most incredible terrain I’d ever hiked through.
Four passes in a day, bad anxiety. A fun cocktail of trail joy. Photo credit: Maggie Slepian
The Collegiate West section was the worst. This alternate is 80 miles of rugged, remote trail, and is some of the most dramatic, astounding backpacking I’ve ever done. But as I reached this point, my anxiety spun out of control. My headspace was so bad I felt I was in the bottom of a well, staring up at a pinprick of light. It was all I could do to drag myself one step at a time up the trail, my mind a swirling vortex of worst-case scenarios, imagined pitfalls, and run-of-the-mill black holes.
But here’s the thing: I’d been there before. Maybe not quite as bad as those days in Collegiate West, but I’ve had my fair share of bad headspaces on the trail and in life.
It was around 11 AM on one of these Bad Days. I was sitting on a log at the base of a 3,000-foot climb to the Continental Divide, and I was a wreck. Once I crossed the footbridge over a creek, I had five miles of steep ascent to 12,500 feet. By the time I’d reach treeline, the thunderstorms would likely be rolling in. I was exhausted, demoralized, and spiraling in anxiety.
This was a hard section. It was also some of the most amazing backpacking I’ve ever done. Photo credit: Maggie Slepian
I dropped my pack and cried on the log for as long as I wanted to. When I was ready, I started the climb. The beginning of the climb dragged, and then the middle flattened out. Then it climbed steeply, then more steeply. Then the trail circled a lake and dropped 200 feet of hard-earned elevation.
I gradually stopped obsessing over where I was in the ascent, my breathing regulated, and the top of the ridge eventually appeared. Before I knew it, I was on the final shale-covered switchbacks. Suddenly I was on top of the Divide before hiking a glorious section of ridge, seeing the Collegiates unspooling in front of me and behind. My meltdown at the base was miles behind me, and I had another small victory to add to my arsenal.
That climb to the Divide marked the conclusion (thank God) of four days of anxiety and mental lows. I still don’t know exactly where my mindset came from, but I do know that I got through it. It didn’t always keep getting worse. That climb ended, as they all do. Now I’m sitting on my couch writing about it, and the Colorado Trail is in my rearview mirror – the good days and the hard ones.
Another day, another pass. This time smiling!
Gaining experience in the backcountry doesn’t just mean honing your technical skills or learning advanced techniques. Sometimes experience can mean gaining a deeper understanding of yourself through the miles, especially the ones that have challenged you to your core.
For me, that’s as good a reason as any to keep putting one foot in front of the other.
Editor’s Note: mental health is a complex and nuanced issue – and many people need more than leveraging past experiences to get through hard days. If you are struggling, call the National Suicide Prevention Lifeline, available 24 hours, at 800-273-8255.
Backpacking Light does not accept compensation or donated/discounted products in exchange for product mentions or placements in editorial coverage.
Some (but not all) of the links in this review may be affiliate links. If you click on one of these links and visit one of our affiliate partners (usually a retailer site), and subsequently place an order with that retailer, we receive a commission on your entire order, which varies between 3% and 15% of the purchase price. Affiliate commissions represent less than 15% of Backpacking Light's gross revenue. More than 70% of our revenue comes from Membership Fees. So if you'd really like to support our work, don't buy gear you don't need - support our consumer advocacy work and become a Member instead.
Learn more about affiliate commissions, influencer marketing, and our consumer advocacy work by reading our article Stop wasting money on gear.
The Durston X-Mid 2P is a 2-person, double-wall, dual side-entry, silpoly shelter with two vestibules that weighs 40 oz (1134 g).
You don’t have access to view this content.
Membership Required
This feature requires an active Backpacking Light Membership.
Premium Articles
You're currently viewing a free preview of a member exclusive premium article. Our premium articles include in depth journalism and insights from the Backpacking Light editorial team.
Get full article access by subscribing to a Premium or Unlimited Backpacking Light membership!