You don’t have access to view this content.
Where Do I Put My Waterbottles When Backpacking?
What’s the best way to store water bottles while backpacking? You’ve got some options, but the answer depends on what you want to achieve.
What’s the best way to store water bottles while backpacking? You’ve got some options, but the answer depends on what you want to achieve.
You don’t have access to view this content.
If you are struggling to find a shelter that fits, you aren’t alone. We provide some (mostly useful) advice in the context of a pop culture tour.
You don’t have access to view this content.
In this episode, we chat with longtime Backpacking Light contributor Rex Sanders about his ongoing tests of portable battery chargers. Also, Ryan and Andrew chat about vandalism on public lands, electronic device management, new gear from Atom Packs, and the benefits of freeze-drying.
In this episode, we chat with longtime Backpacking Light contributor Rex Sanders about his ongoing tests of portable battery chargers. Also, Ryan and Andrew chat about vandalism on public lands, electronic device management, new gear from Atom Packs, and the benefits of freeze-drying.

How to Subscribe
Apple Podcasts | Spotify | RSS
More Episodes
Backpacking Light Podcast Index
Credits
Executive Producer - Backpacking Light; Show Director and Host - Ryan Jordan; Producer - Chase Jordan; Theme music: Look for Me in the Mountains written by Chris Cunningham and Ryan Jordan, performed by Chris Cunningham (acoustic guitar, lead and harmony vocals, harmonica), Chad Langford (upright bass), and Tom Murphy (mandolin), produced by Basecamp Studios in Bozeman, Montana.
Feedback / Tips / Questions
podcast@backpackinglight.com
More Backpacking Light
Sign up for the Newsletter. Become a Backpacking Light Member.
Disclosure
Sponsorship Policy: Backpacking Light does not accept compensation or donated/discounted products in exchange for product mentions or placements in editorial coverage, including any podcast episode content not excplicitly identified as sponsored content. Some (but not all) of the links in these show notes may be affiliate links. Learn more about affiliate commissions, influencer marketing, and our consumer advocacy work by reading our article Stop wasting money on gear.
Andrew Marshall explores an ancient life skill that is surprisingly applicable to backpacking – meditation.
You don’t have access to view this content.
Learn how to choose and use trekking poles for backpacking, trekking pole design, and how trekking poles influence physiological energy costs and biomechanics as related to mitigating overuse injuries.
You don’t have access to view this content.
Why and how does freeze-drying work? The physics and science of freeze-drying your own backpacking food, plus a killer freeze-dried hash browns recipe.
Preserving food is another attempt by humans to stop time. Or at least slow it down a bit.
Time is defined by decay. Water and oxygen cause food to decay. Liquid water provides a medium for microbes to degrade complex food molecules. The bacteria break food down into the building blocks needed to grow more microbes, pursuing the dream of every cell (i.e., to become two cells). Oxygen steals electrons to become carbon dioxide and water. Together or separately, water and oxygen turn delicious food into useless mush and ash. Worthless to us anyway.
Heat-assisted dehydration removes water, resulting in a product (especially if kept away from oxygen) that lasts for months or even years. But heating food in the presence of oxygen for 6 to 18 hours inevitably results in some loss of taste and nutrition. Furthermore, as liquid water is removed from plant and animal tissues, those tissues collapse. The result is a product that can be leathery and hard to rehydrate. Several hacks, such as adding polenta to scrambled eggs, or breadcrumbs to ground beef, have been developed to aid rehydration. However, they add time and complexity to the food preparation process and are only partly successful.
That’s where freeze-drying comes in. Freeze-drying preserves taste, nutrition, and texture – welcome attributes for backpacking food. This article explores the physics of freeze-drying and closes with a hash brown recipe.
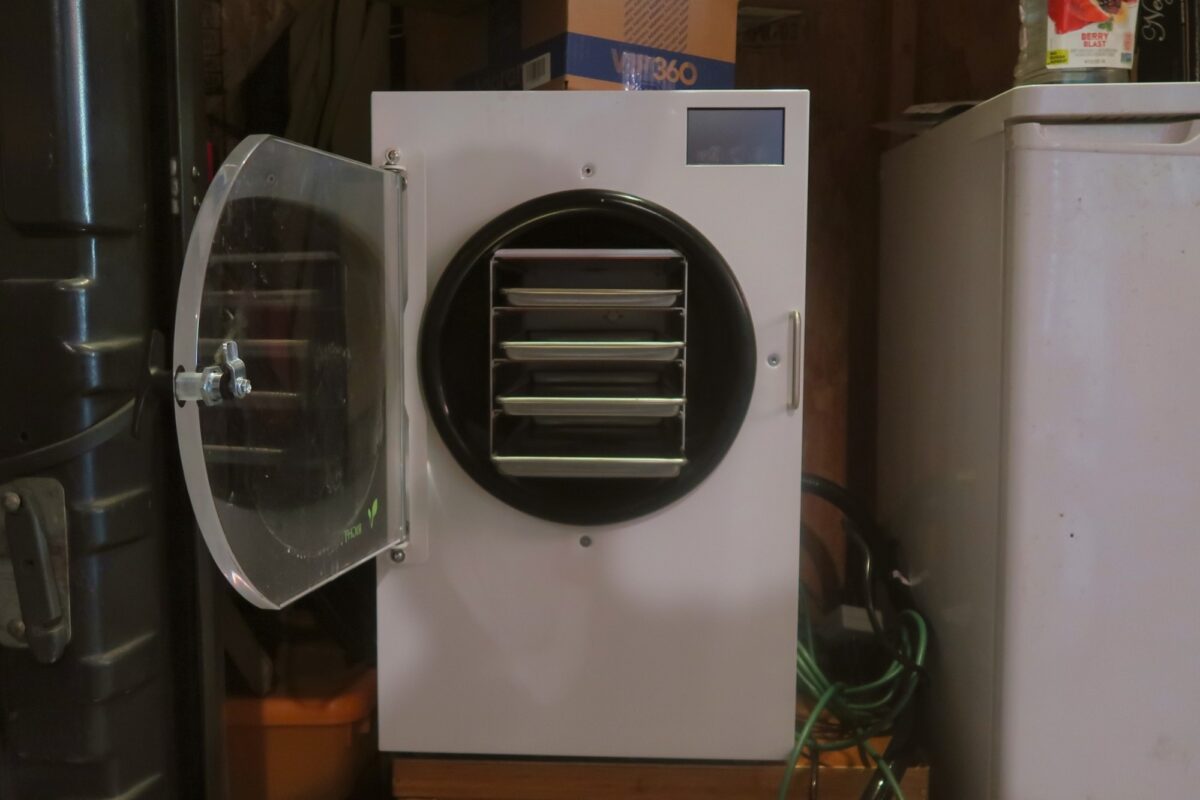
A Harvest Right Freeze-Dryer was used in all recipes and experiments in this article series.
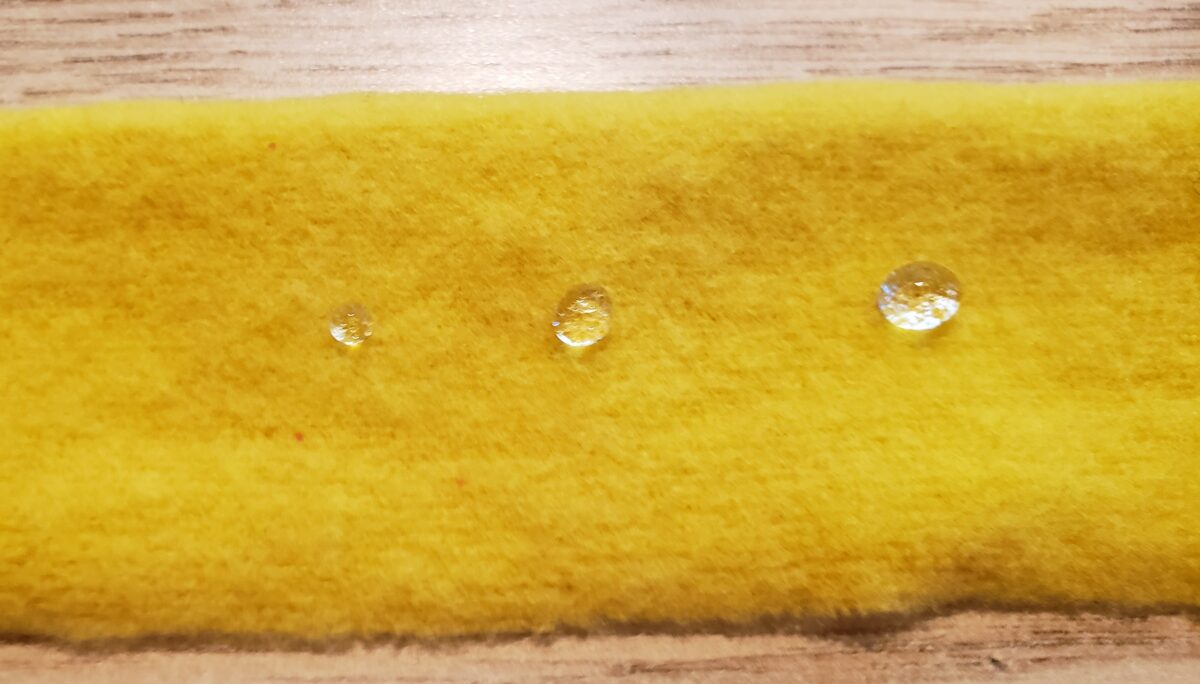
Freeze-drying preserves nutrients and taste by removing oxygen from food as it dehydrates. Moreover, it solves the collapse problem by cooling foods below their collapse temperature (which is just what it sounds like, the temperature above which foods collapse) as they dehydrate. However, cold temperature is not enough. Foods kept in the freezer will dehydrate (this is where the frost on the inside of containers comes from), but it takes weeks and months, and even then, it doesn’t remove much of the water.
The critical component of the freeze-drying process is low pressure. Or, if you prefer, high vacuum. Water will evaporate directly from its solid form (ice) at sufficiently low pressure without melting into its liquid form. The diagram below illustrates the thermodynamics of this process and compares the paths that water takes during a freeze-dry run to the path taken during heat-assisted dehydration.
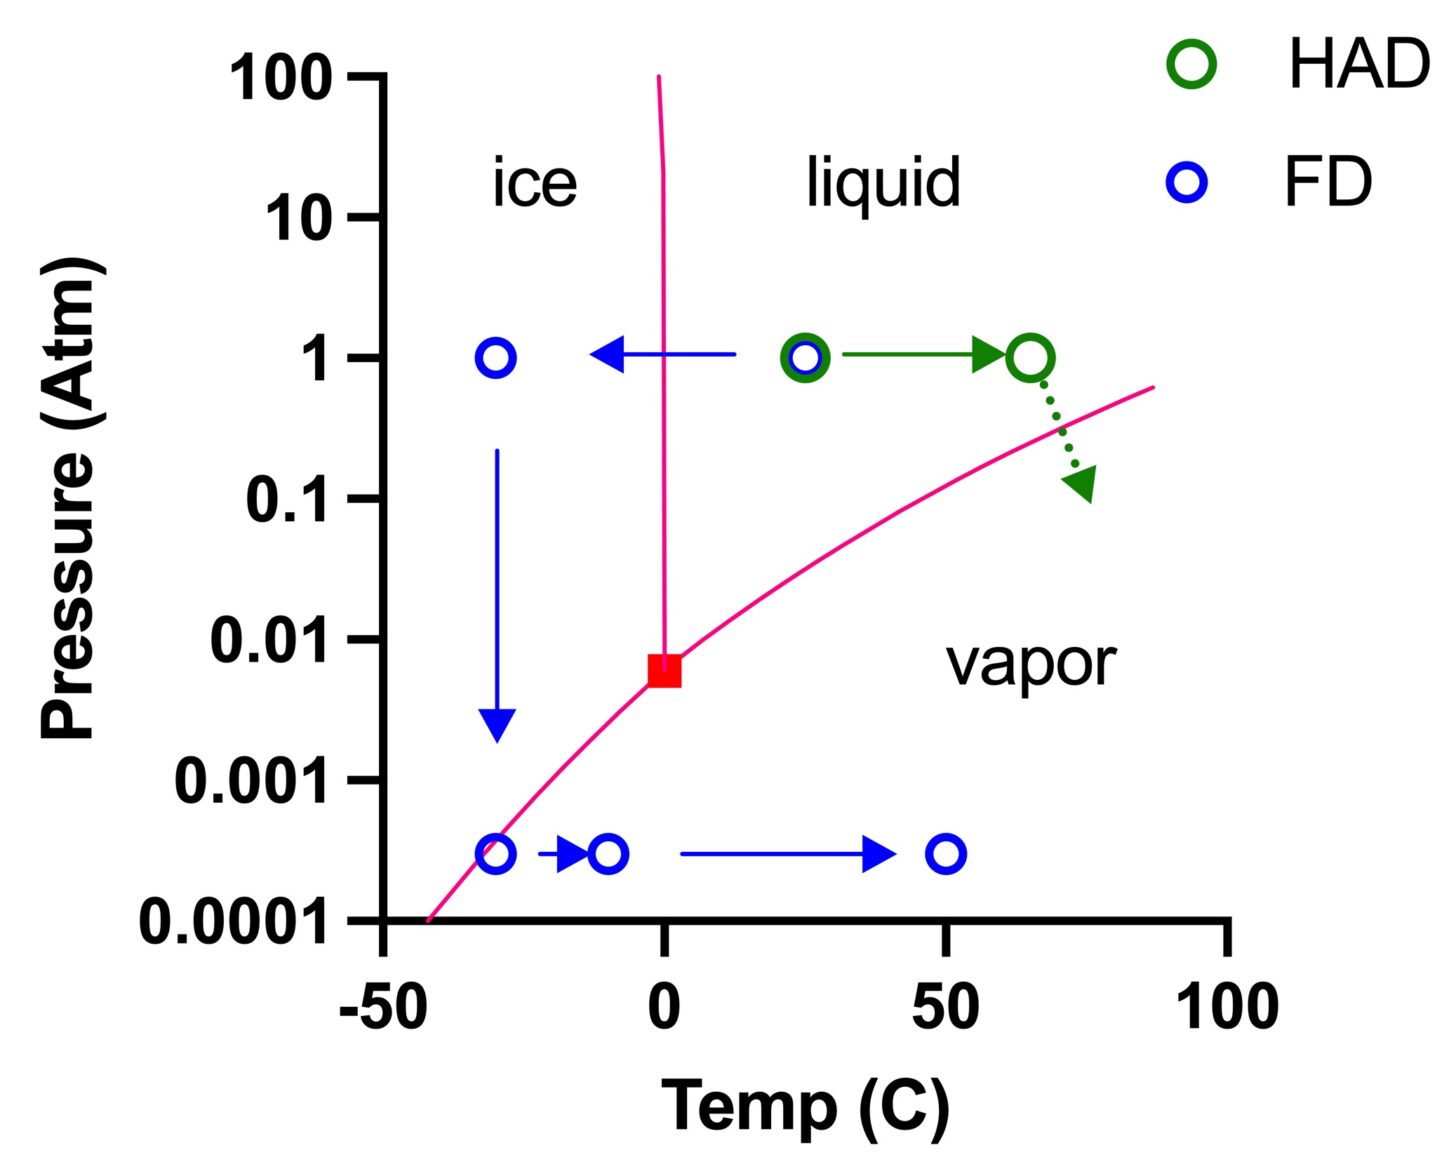
The red lines are the phase boundaries that describe the status of water under different combinations of temperature and pressure. Reducing pressure lowers the boiling point of water. Even water near freezing (0 °C) will boil if pressure is less than 0.01x normal atmospheric pressure. In heat-assisted dehydration (HAD, right-ward path, green), water in food at 1 atmosphere (atm) of pressure is heated from room temperature (20 to 25 °C / 68 to 77 °F) to 50 to 65 °C (120 to 160 °F), moving it closer to the liquid-vapor phase boundary. Because water molecules are in a distribution of energetic states, a certain fraction per unit of time will evaporate from the liquid and enter the surrounding gaseous environment. As water is removed, the food collapses. Most foods are above their collapse temperature during the process of HAD.
A typical freeze-drying (FD) process follows the leftward path (blue). First, food is frozen to a temperature well below its collapse temperature (leftward arrow), and then a vacuum is applied (downward arrow). When pressure drops, water in food approaches the phase transition boundary between ice and vapor, beginning the dehydration process. Water in the form of ice evaporates directly, without first melting into water. This process is called sublimation.1
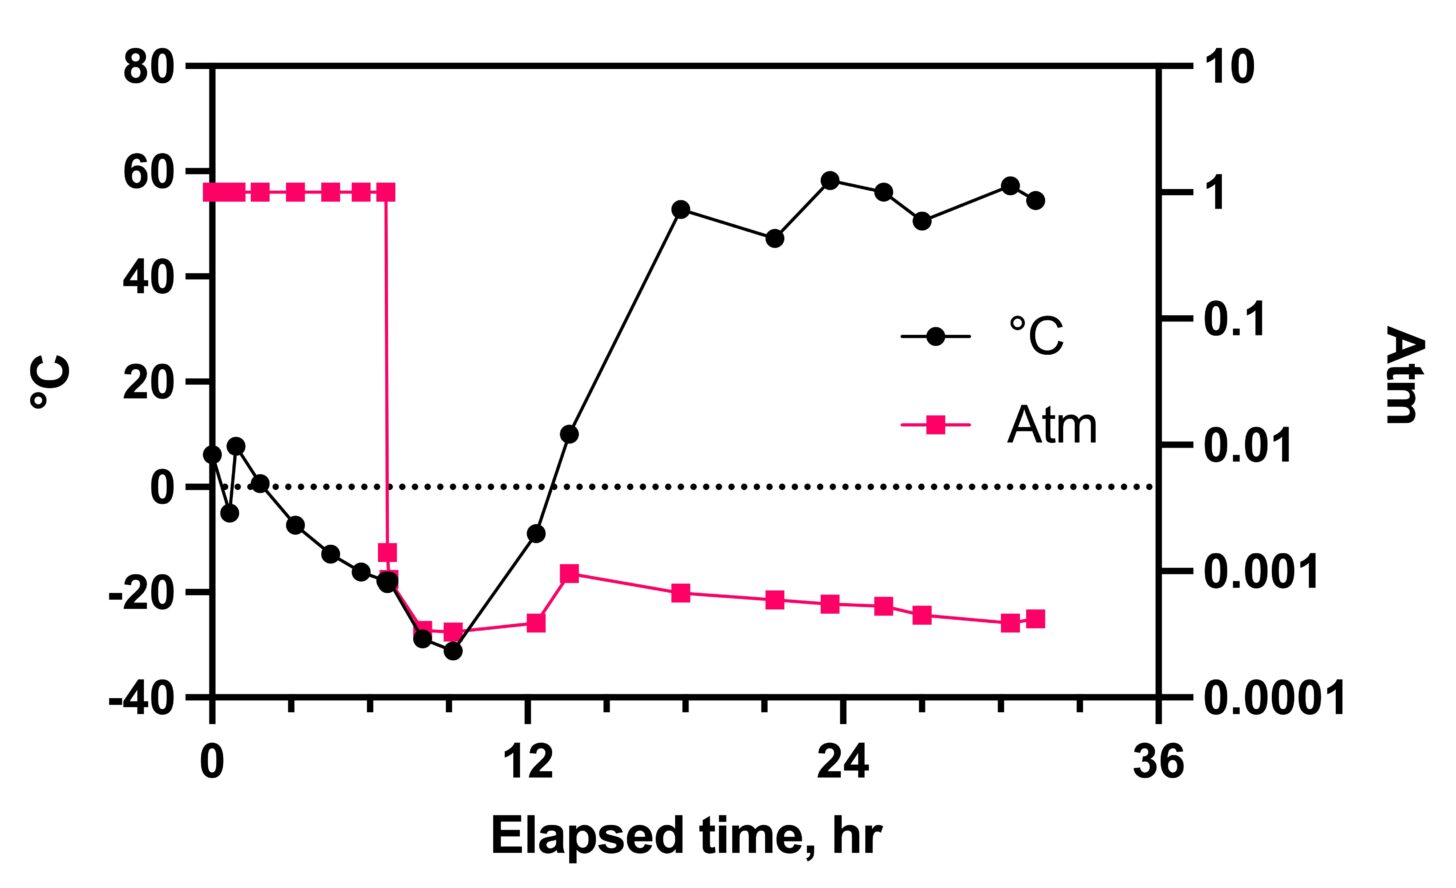
Although water is removed from the food by sublimation at low pressure, the process is painfully slow. First, food is slowly warmed to speed evaporation, although kept below freezing (bottom-left rightward arrow). This portion of the process continues until nearly all the bulk water (water molecules bound to other water molecules) evaporates. At this point, food is unlikely to collapse when warmed. Then, an additional warming cycle at low pressure but much higher temperature (bottom-middle rightward arrow) evaporates water molecules bound to food molecules. Sugars and carbohydrates bind water especially tightly (this is why cakes form in sugar that is stored in the pantry in humid weather). The time course of temperature and pressure in the freeze-drying process is charted out below.
Freeze-drying removes 90 to 95% of total water in food compared to 60 to 80% in heat-assisted dehydration. It does so in a near-vacuum, thus minimizing oxidative damage and thereby preserving taste and nutrition. In addition, freeze-drying dehydrates food below its collapse temperature, making it bulkier. However, it’s also less leathery and easier to rehydrate. This is usually a good trade-off in exchange for the added bulk.
As always, there are a few subtleties and complications with freeze-drying. Rapid freezing results in larger ice crystals. Large ice crystals expand the structure of the food, causing ice to sublimate rapidly, reducing the time and energy needed for dehydration2. However, large ice crystals destroy cellular and sub-cellular structures. This destruction causes a loss of some food texture and releases degradative enzymes that impair food quality. So slow freeze-down cycles are generally preferred. The Harvest Right Freeze-Dryer usually takes 6 to 8 hours to cool down to its target temperature before applying a vacuum.
Not all foods work well with a generalized freeze-dry cycle. For example, blueberries, with their waxy outer coating, are notorious for drying slowly and unevenly. During the commercial preparation of freeze-dried blueberries, CO2 lasers are even used to create micro-perforations in the berry skin before freeze-drying.
High-sugar foods, such as syrup, are even more problematic. Because sugars bind water so tightly, they form amorphous solids during dehydration. Amorphous solids are also known by the term “glasses.” As you can imagine, glasses, though technically a liquid, do not rehydrate readily. This issue will be explored in more depth in a subsequent article in this series.
That’s enough thermodynamics for today. Let’s talk about trail food!
I enjoy a good plate of hash browns and always order it for town-stop breakfasts. I would love to eat them on the trail, but my experiments with dehydrated hash browns haven’t turned out so well; they are hard to rehydrate and get mushy when they do. So, giving hash browns a try with the freeze-dryer was high on my priority list.
You can make hash browns with russet potatoes, but I prefer red potatoes. They are more fun, and they grow a bit better here on the Front Range than the big blocky commercial varieties coming from Idaho. However, I could not swear to you that homegrown red potatoes taste any better than store-bought white ones.
Flavor-wise, potatoes are pretty much a blank canvas. Add onions (vitamins B, C, and minerals), carrots (vitamins A, B, C, K, fiber, and minerals), and jalapeño peppers (vitamins B, C, and E) to improve taste and nutrition.
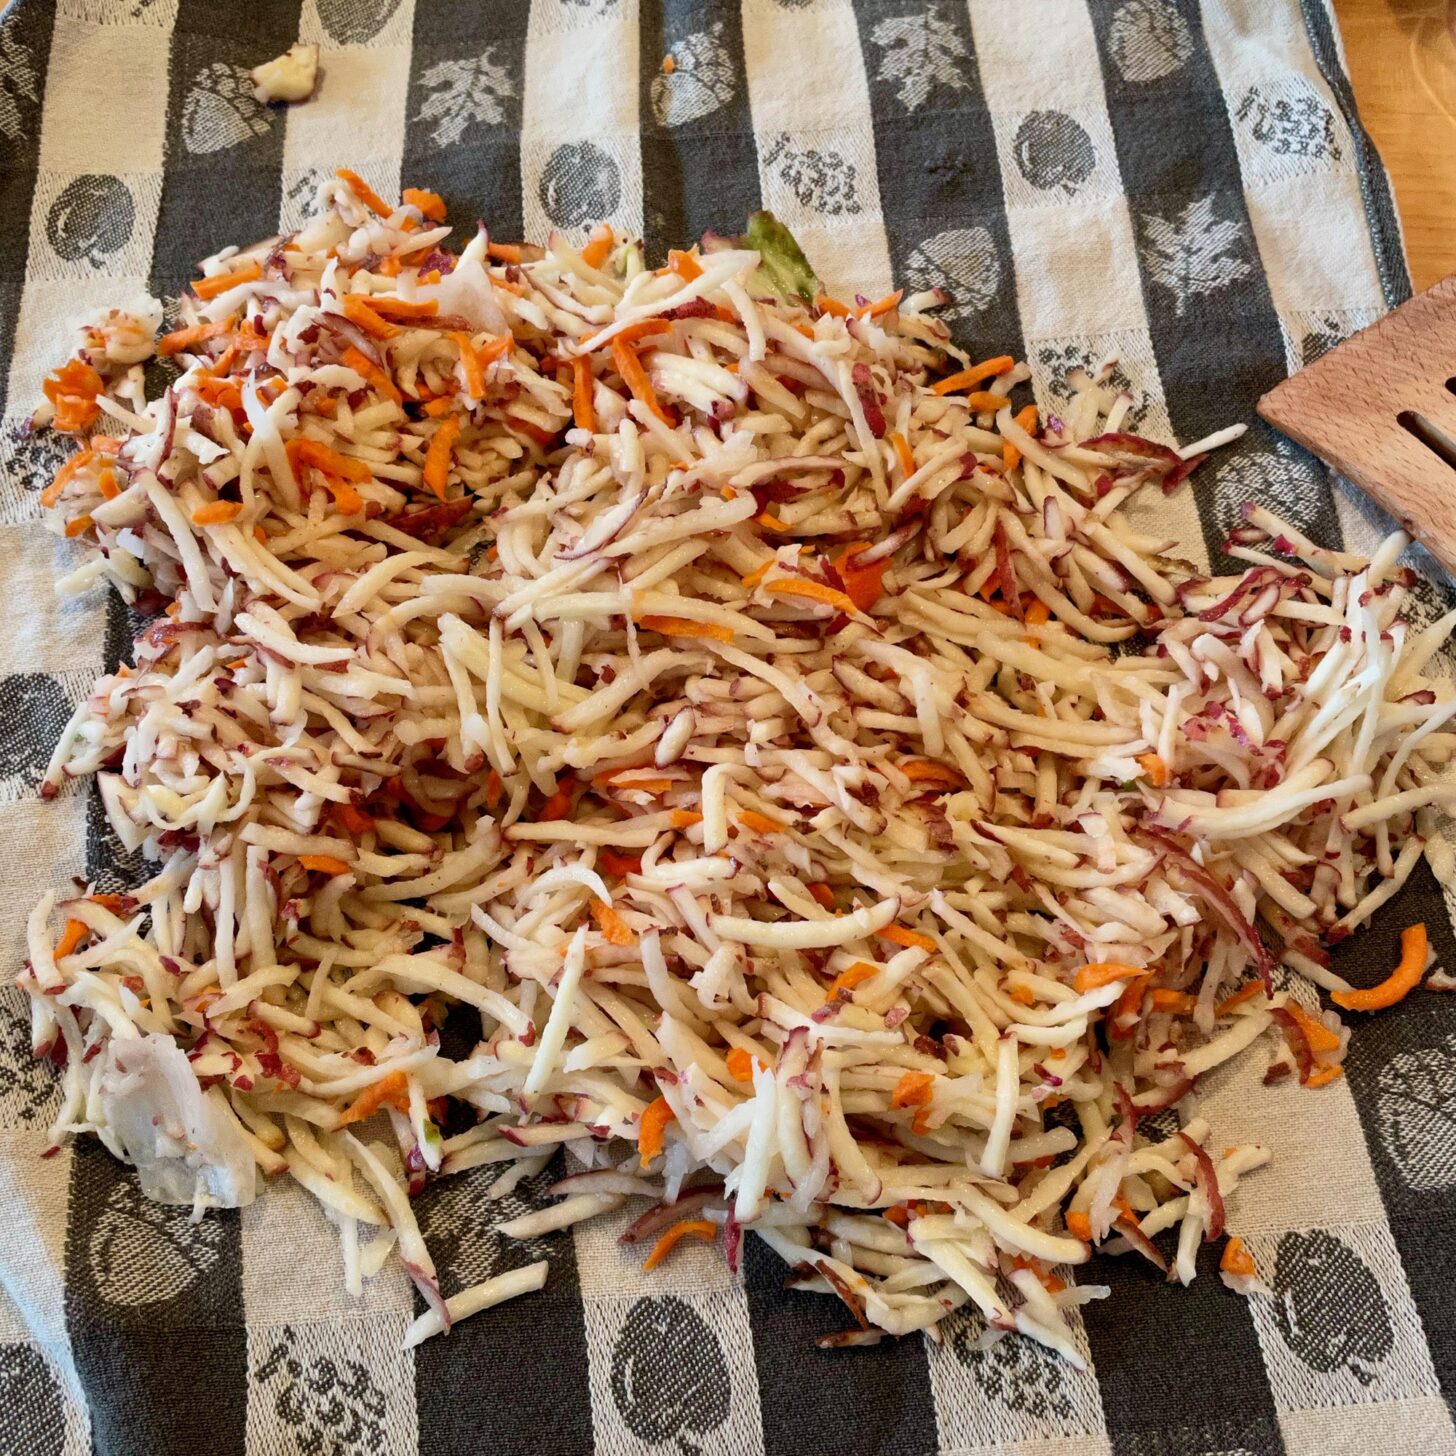

If you like, add sausage. I did this with cut-up link sausages, but it wasn’t a good idea. The sausages rehydrated poorly. Next time I will crumble up bulk sausage.
Rehydrating hash browns was a bit challenging as I wanted them crispy. Also, I thought it would not be easy to cook them in a pot and have them turn out perfect. So, I used cook-in bags instead, adding just a bit of hot water and letting them soak. After five minutes, I had a very palatable meal.
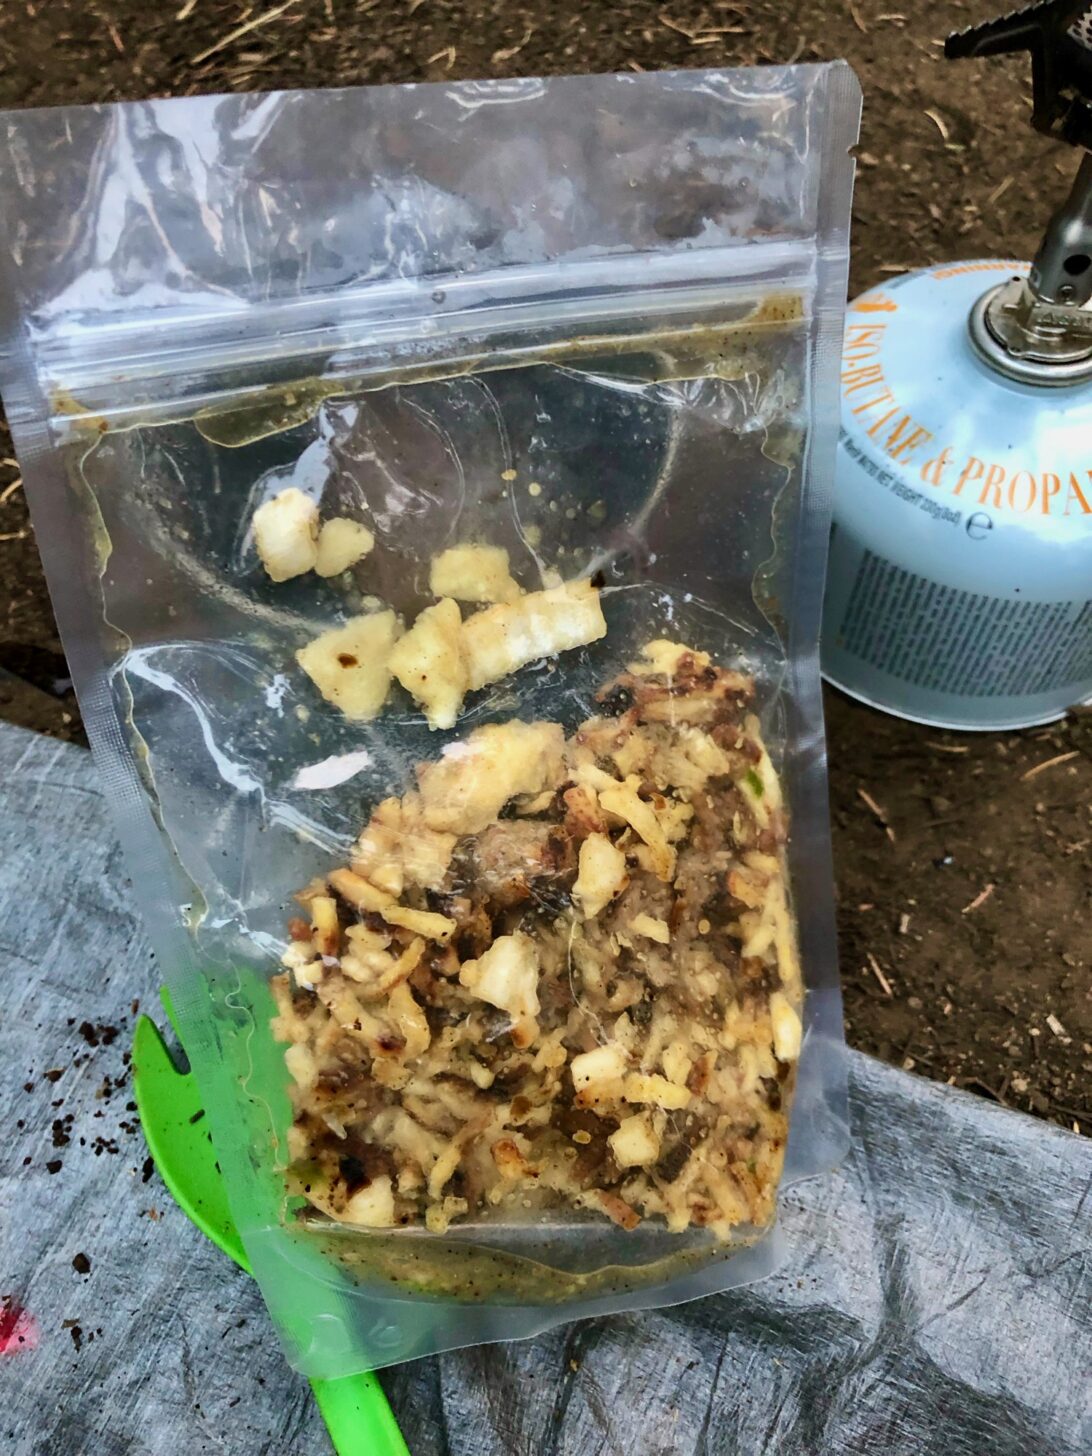
I can’t claim the hash browns were truly crispy, but they were not mushy either, and they were delicious. A great breakfast that takes no longer than oatmeal to prepare and tastes way better. I will be eating this a lot in the future.
The next article in this series will discuss the chemistry of flavor and nutrition and share some ideas on preparing tomato sauce and pasta. See you then.
This article is part of a multi-part series featuring the principles of freeze-drying, experiments with freeze-drying food for backpacking, and operation and reviews of the Harvest Right Freeze-Dryer, which is the gold standard for home-based freeze-drying equipment.
Browse our curated recommendations in the Backpacking Light Gear Shop – a product research & discovery tool where you can find Member gear reviews, Gear Swap (used gear) listings, and more info about specific products recommended by our staff and members.
Gear Shop » Food Preparation and Packaging
1. Nowak, Dorota, and Ewa Jakubczyk. 2020. “The Freeze-Drying of Foods—The Characteristic of the Process Course and the Effect of Its Parameters on the Physical Properties of Food Materials” Foods 9, no. 10: 1488. https://doi.org/10.3390/foods9101488
2. Fellows, P., (2017). “Freeze drying and freeze concentration”. Food processing technology: principles and practice (4th ed.). Kent: Woodhead Publishing/Elsevier Science. pp. 929–940. ISBN 0081005237. OCLC 960758611
DISCLOSURE (Updated April 9, 2024)
The horizon is our reminder that the way things are now is not the way things have to be. Exploring, even just backpacking into the hills at the edge of town, expands the known and opens us up to the possibility of more.
You don’t have access to view this content.
“I was suddenly seized by an inability to breathe: the world went black and I was bent over gasping for air, then passed out and collapsed, falling into the marsh.”
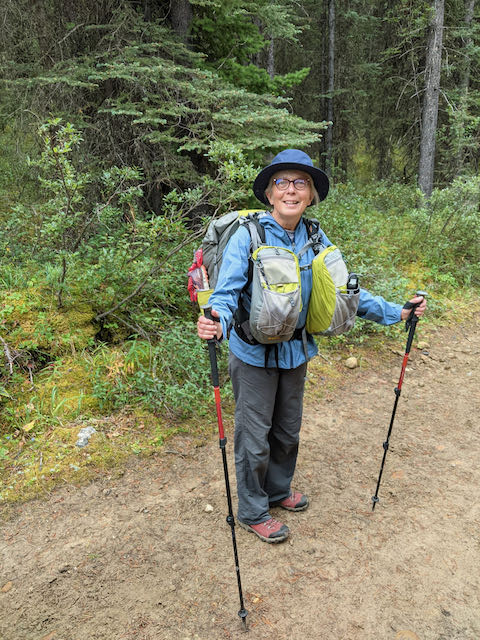
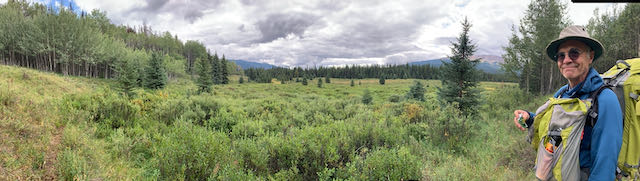
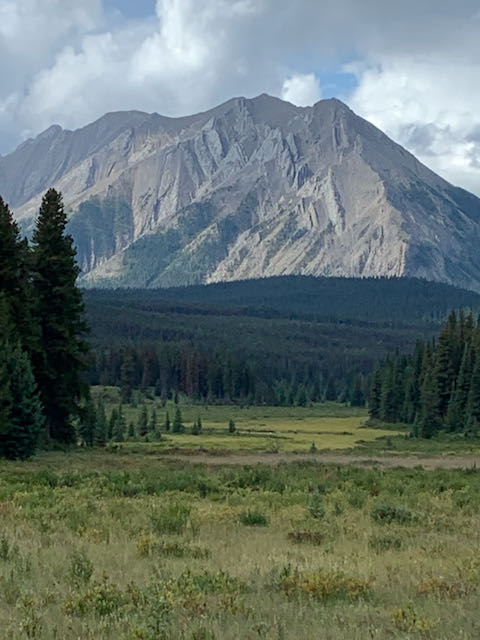
Editor’s Note: This account comes from Pat Dunn, a Backpacking Light Member who encountered a medical emergency in Jasper National Park. Pat and her husband Sam were carrying a Garmin inReach Mini and activated the SOS button. I invited Pat to share her experience for the rest of us, so we had some understanding of what happens when GEOS (a.k.a. the International Emergency Response Coordination Center, or IERCC) springs into action following an SOS activation of a satellite communications device. – Ryan Jordan
My long-time partner Sam and I were married in July and in August we undertook a honeymoon backpacking trip in northern Jasper National Park. We are seniors and are both experienced backpackers. We have backpacked in this area before but this time we had prepared for a longer trip than we’ve previously done.
Day 4 was wet with rain that turned to snow. When we pulled into camp we ate a quick light meal and then ducked into the tent for the night. The next morning dawned cold and wet and still snowing and raining. We decided to get up and get moving and had only a couple of granola bars as we packed up the tent.
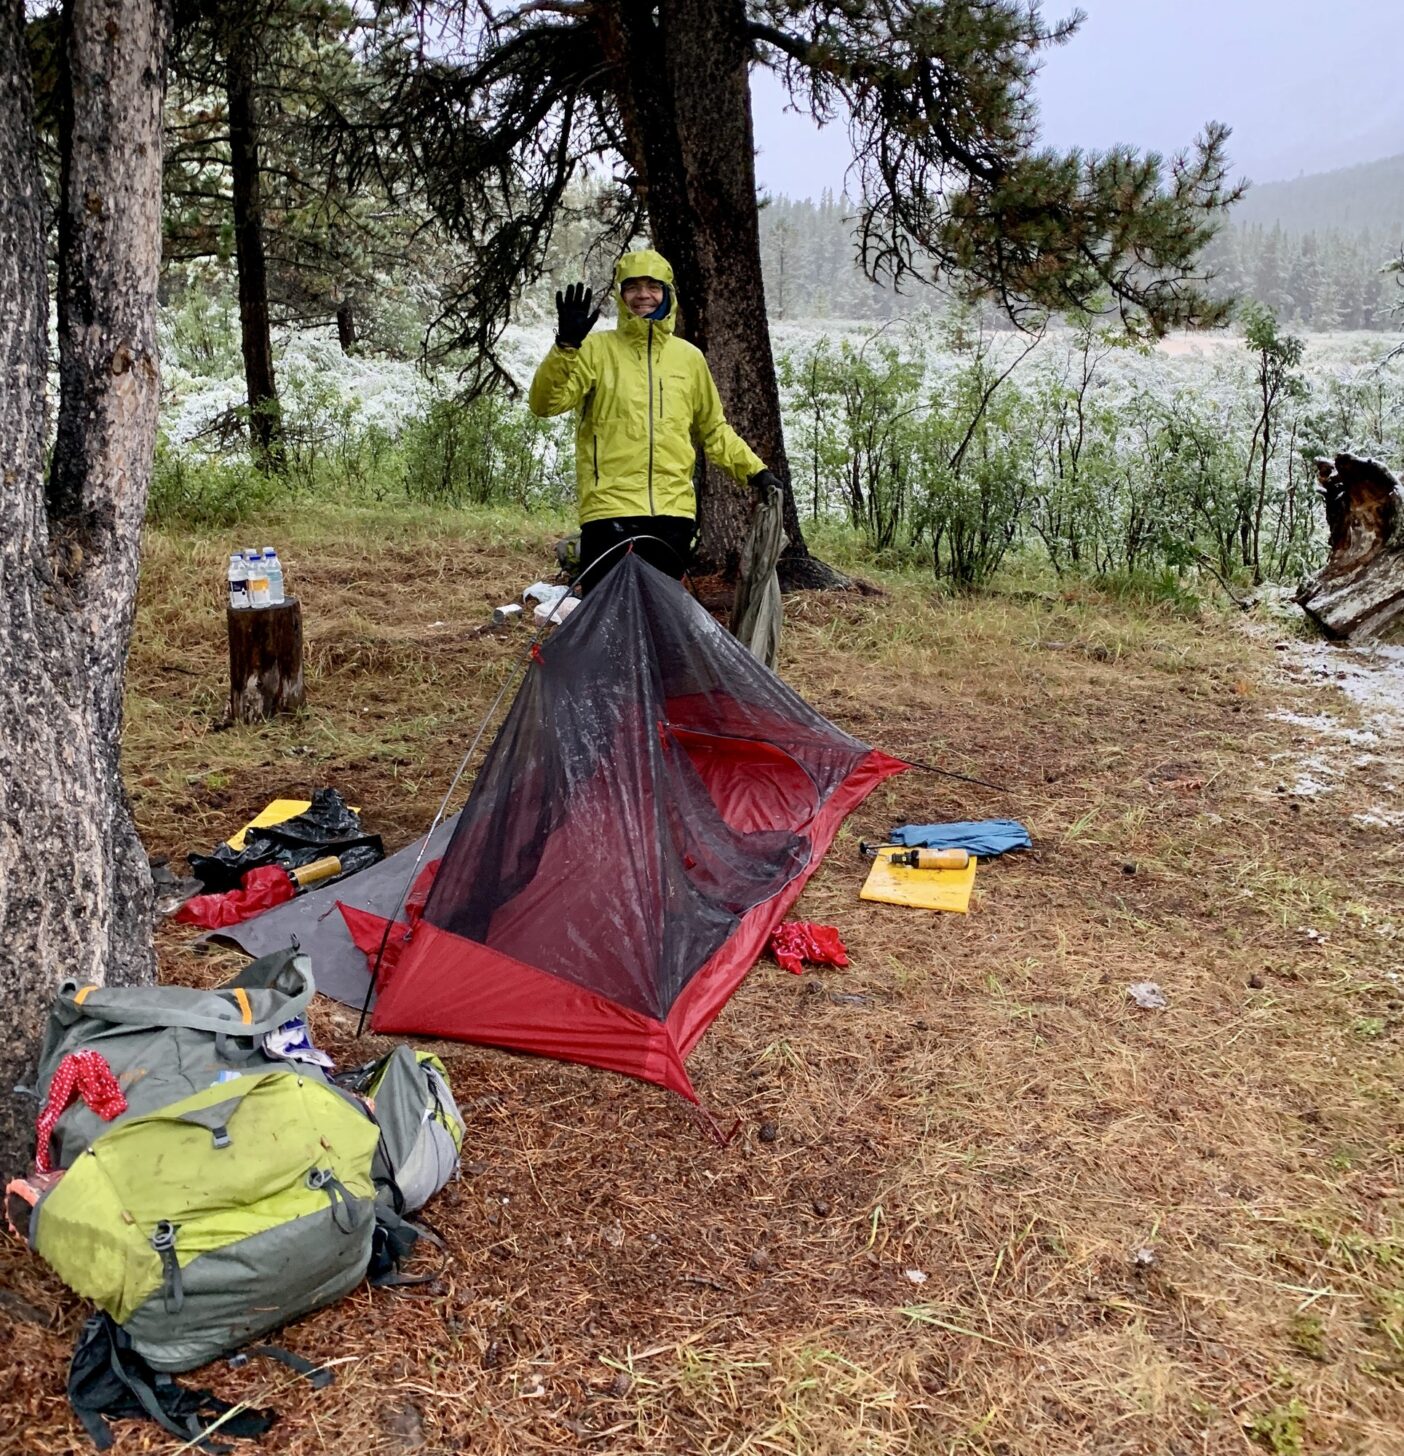
The first couple of hundred metres of the hike were in a knee-deep marsh, where we were hopping from tussock to tussock to cross to drier ground. Practically mid-hop I was suddenly seized by an inability to breathe: the world went black and I was bent over gasping for air, then passed out and collapsed, falling into the marsh.
I was out for a short moment, then Sam pulled me to my feet, and then I collapsed again. Sam got me on my feet again and helped me get to solid ground. He got out the stove and made a hot drink, and retrieved my pack. We waited to see how I would recover and how I was feeling. Although I began to get my breath back, I didn’t feel well. We were both in shock at the suddenness and violence of this collapse. We realized that I needed medical attention. We had been carrying the Garmin inReach Mini for years on trips primarily as a communications tool. We never thought we would use the SOS button and in fact, were not entirely clear what would happen once we pressed it. We had an idea of what we hoped would happen based on our experience in taking the Backpacking Light online course How to Use the Garmin inReach.

So we pressed the SOS button and a well-oiled process leapt into action. Very quickly we received a text back from GEOS (a.k.a. the International Emergency Response Coordination Center, or IERCC) asking about the nature of the emergency and what had happened.
This was where we realized that the one cell phone we shared between us had run out of battery life, and that phone – paired with the inReach Mini – would make it much easier to communicate with GEOS. So Sam dug in his pack for the portable battery charger, and plugged in the phone to charge it enough to boot it up. This delayed our response to GEOS by a few minutes.
We replied with more information. They responded with the contact name and number of the public safety specialist in Jasper who they had alerted. GEOS asked to be advised when we knew that help was on its way. We were then in touch with Jasper, who requested information on the location and asked about a landing place for a helicopter. There was a large open meadow at this location.
Sam set up the tent for me. I waited under the warmth of a sleeping bag. The helicopter took about an hour to arrive. Flying conditions were not great as it continued to rain and snow. Meanwhile, both GEOS and Parks Canada alerted our two emergency contacts and kept them informed throughout the morning. We were all very grateful for this and very impressed with their communications. When the helicopter arrived I was able to walk to it and Sam quickly broke camp, packed up, and we flew out.
We felt that the decision to push the SOS button was the right one: we were four days from our vehicle and didn’t know if this was a life-threatening event. We didn’t know if it would happen again, or even what had happened. But I felt embarrassed at having to call for help because we value the feeling of self-reliance in the backcountry. In addition, rescue operations are expensive and they expose public safety staff to risk.
Editor’s Note: Wilderness medicine protocols as taught by the Wilderness Medicine Institute define instances where an evacuation is necessary, or whether the evacuation should be slow (self-assisted) or fast (emergency airlift). Difficulty breathing, fainting, Pat’s age, and no obvious pre-existing circumstances that could predict her behavior (i.e., heat exhaustion, sickness, or an allergic reaction) point to the high probability that this could have been a serious medical emergency (e.g., heart episode), and that activating the SOS signal on a satellite communications device was the right choice.
After the trip, I underwent a barrage of heart tests and was finally advised by the cardiologist that my heart is healthy. He suspected a vasovagal episode caused by what he called “a perfect storm” of metabolic conditions possibly including dehydration, hypoglycemia, and significant physical effort. We may never know what exactly triggered it and I should be able to ensure it is never repeated.

Things we learned/observations:

DISCLOSURE (Updated April 9, 2024)
The Pa’lante V2 Backpack (16.8 to 17.5 ounces / 476 to 495 g, MSRP $240) is a lightweight, frameless backpack for low to moderate weight loads and compact equipment.
The Pa’lante V2 is a lightweight, frameless backpack (16.8 to 17.5 ounces / 476 to 495 g, MSRP $240) for low to moderate weight loads and compact equipment. It is a minimalist backpack, but several novel design elements add to its functionality and set it apart from other packs in this category. Those design elements include pockets that are accessible while hiking, a funnel-shaped main packbag for easier packing, durable fabrics, comfortable shoulder straps, and a clean design.
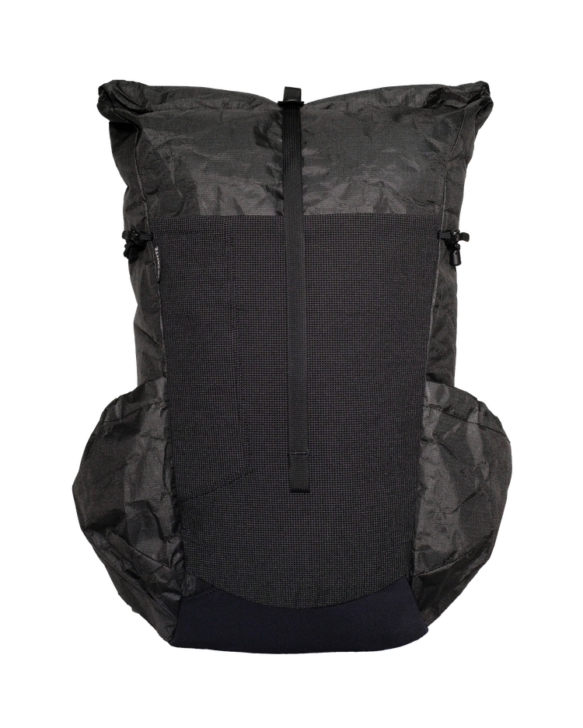
Table of Contents • Note: if this is a members-only article, some sections may only be available to Premium or Unlimited Members.
Review Rating: Highly Recommended
The Pa’lante V2 earns a Highly Recommended rating from Backpacking Light. This rating is conferred because of a collection of standout features that, by themselves, are benefits that aren’t unique to this pack, but as a collective whole, make this backpack a uniquely positioned product in the otherwise crowded market of frameless backpacks. Those features include a clean, aesthetically-beautiful design; shoulder, side, and bottom pockets that are accessible while wearing the pack; durable fabrics; robust and comfortable shoulder straps; stash-away hip belt; and a funnel-shaped top opening.
Pa’lante backpacks are sold in small batches and not continuously stocked. Those batches go on sale intermittently and sell out quickly. Monitor the company’s Instagram feed for information about new batch inventory.
I’ve been using a Gregory Z55 for most 3-season trips up to about a week in length. I use a larger pack (Gregory Z75) for winter trips and a smaller, frameless pack (Arc’teryx Cierzo 35) for fast-and-light trips and biking to trailheads. But as the wear and tear of a decade of trips finally began to catch up with the Z55, I realized that perhaps part of loving a pack is letting it go.
Testing the Pa’lante V2 allowed me to move on from grieving the end of my relationship with the Gregory Z55. I was genuinely looking forward to using a more streamlined, minimalist pack that would require me to make more deliberate choices about what to bring and what to leave at home. I had an abundant selection of lightweight, low-volume gear in my gear room, but I often passed over the tarps and torso-length sleeping pads for the bulkier and more familiar pieces that fit easily in my Gregory pack. The V2 would be a catalyst for embracing a different backpacking style, and I was looking forward to the change.
The Pa’lante V2 pack is part of the increasingly crowded field of frameless, minimalist backpacks. Popular amongst thru-hikers and catered to by numerous cottage industry manufacturers, these packs are often scarcely more than a pound (454 g) in weight. They appeal to thru-hikers cranking out long days and using lightweight, low-volume gear. These are not packs to use if you’re bringing a camp chair, a hammock, a book, a two-person tent, bulky fleece and winter parkas, or large hydration bladders and gravity filters. These packs efficiently help you get from Point A to Point B carrying a minimalist equipment kit. They are designed to be as comfortable as possible when loaded at or below their load-carrying capacity (usually around 20 pounds / 9 kg).
Given the popularity of this style, several packs in this category have been the focus of reviews at Backpacking Light. Recently, Ben Kilbourne reviewed the Yar.gear Mountain Drifter and Andrew Marshall reviewed the Mountainsmith Zerk 40. In his review, Ben mentioned several related packs, including the Nashville Packs Cutaway, the Mountain Laurel Designs Hell 27L, the Six Moon Designs Flight 40 FKT, the Ultimate Direction Fastpack 40, the Superior Wilderness Designs Superior 35, and the Nunatak Liten 35. The LiteAF Curve is another pack that fits into this category.
Most mass-market backpack manufacturers don’t make ultralight frameless backpacks for actual backpacking. (There are summit bags and day packs that loosely fit in this category but aren’t well-suited for multi-day trips.) The reason almost certainly includes not wanting to deal with the inevitable avalanche of customer complaints of poor load-carrying performance rooted in unrealistic customer expectations. Thus, cottage manufacturers are left to fill the category.
This Performance Review reflects my experience with the Pa’lante V2 backpack during multiple backcountry trips. Read more about our types of reviews here.
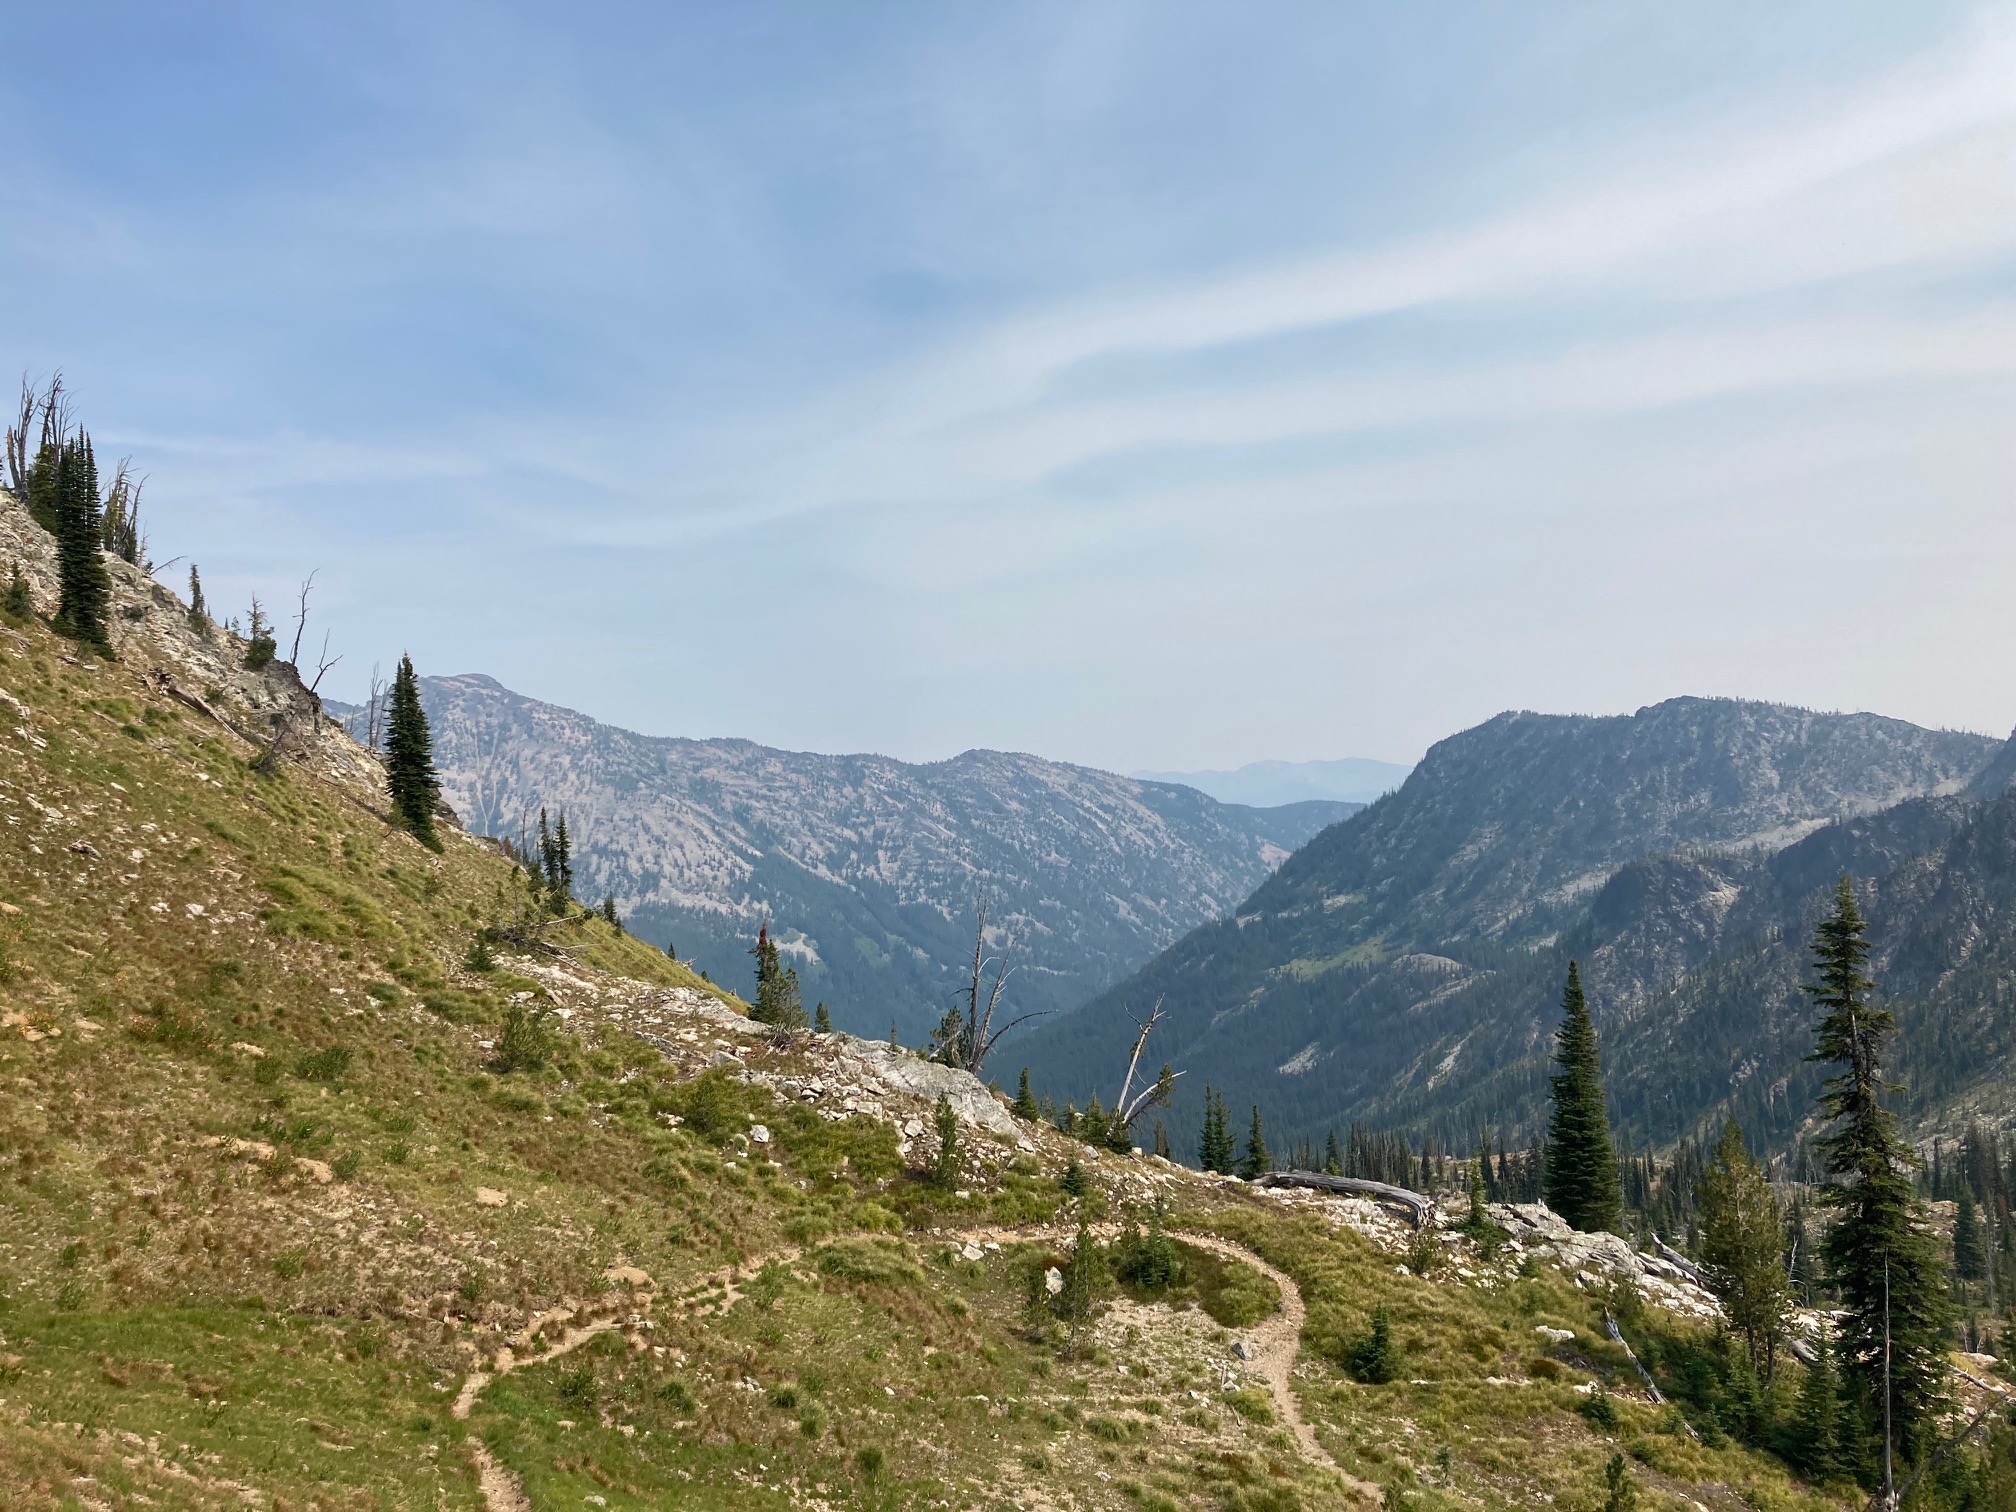
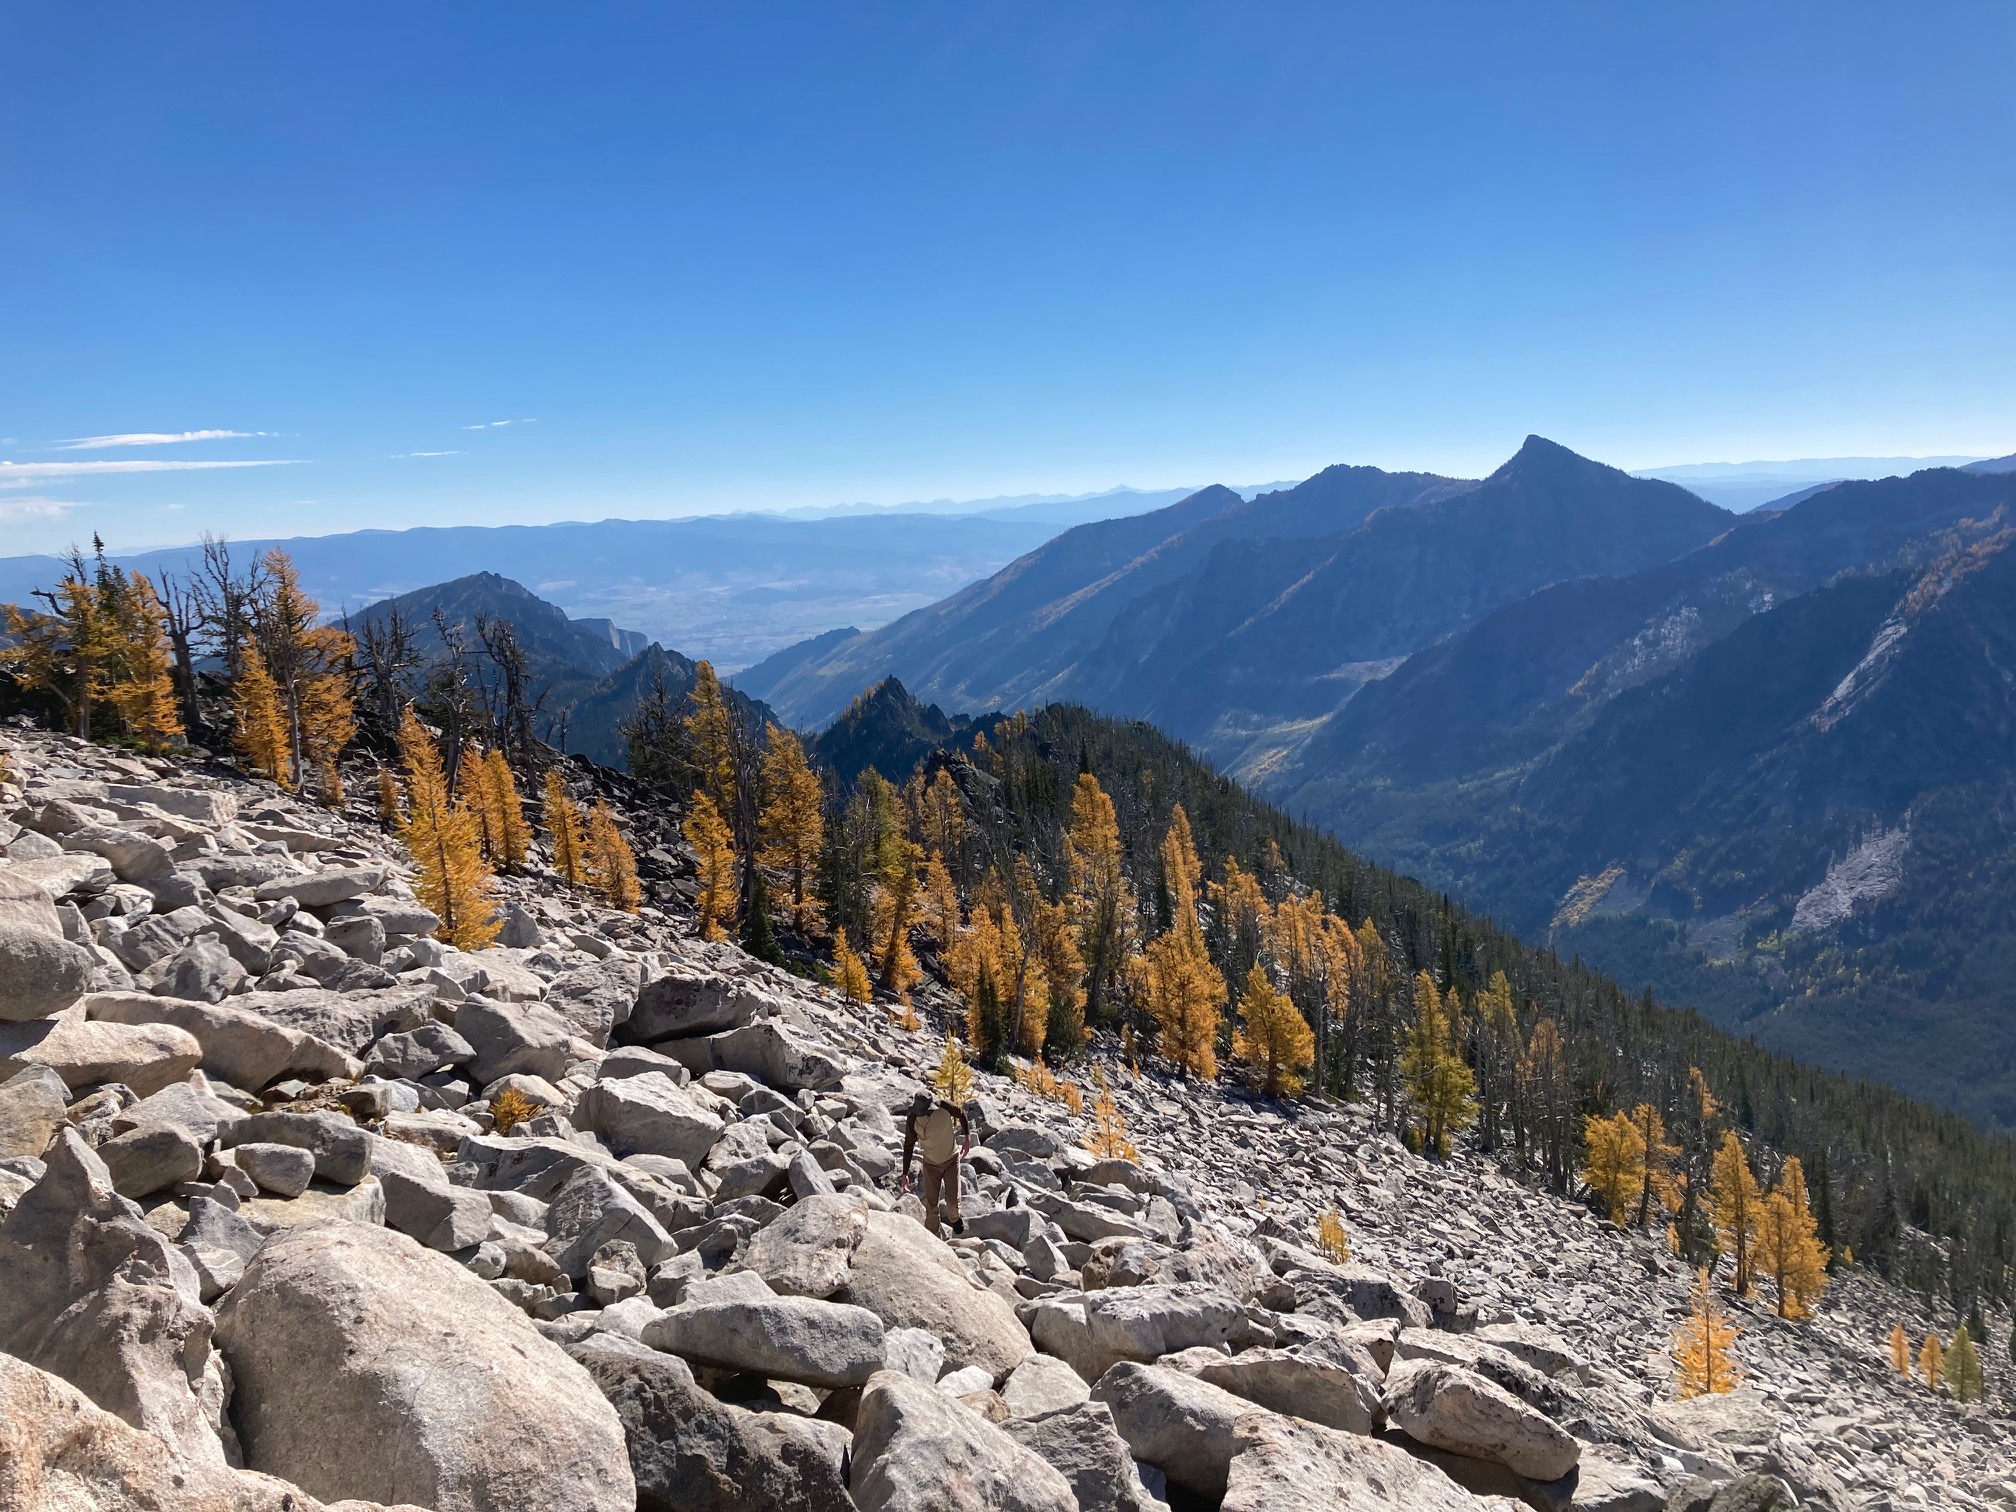
I tested the Pa’lante V2 during eight backpacking trips that included a mix of overnight trips and four-day trips. Aside from one four-day trip in the Big South Fork National River and Recreation Area in Tennessee in late October, all trips were in the Selway-Bitterroot Wilderness of Montana and Idaho between July and September in typical summer conditions for the Northern Rockies.
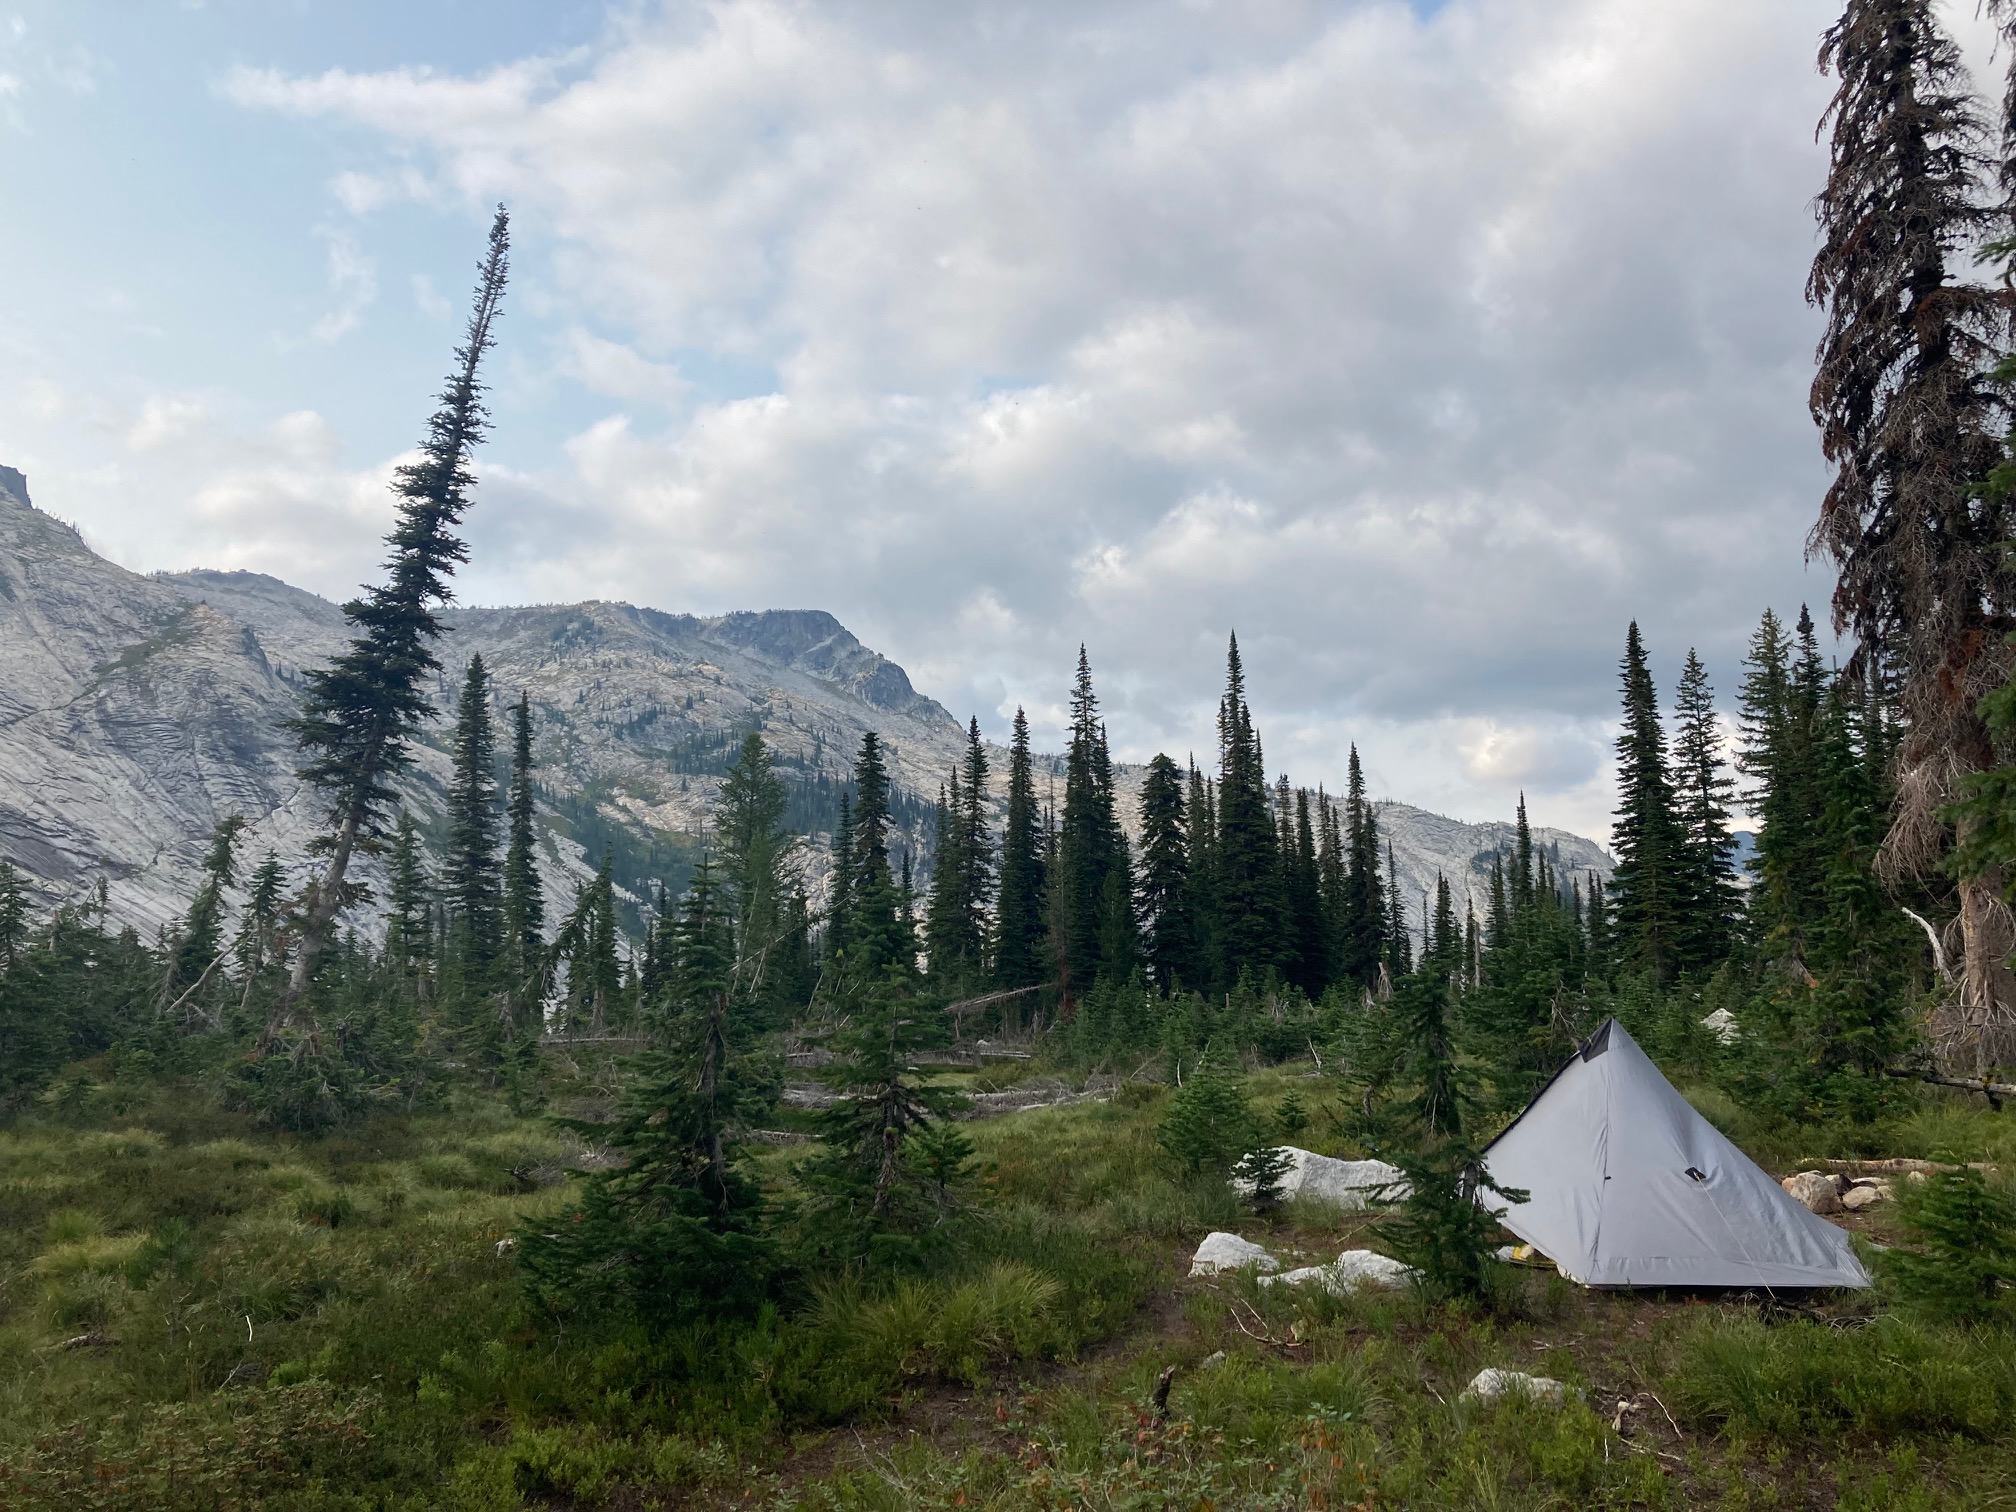
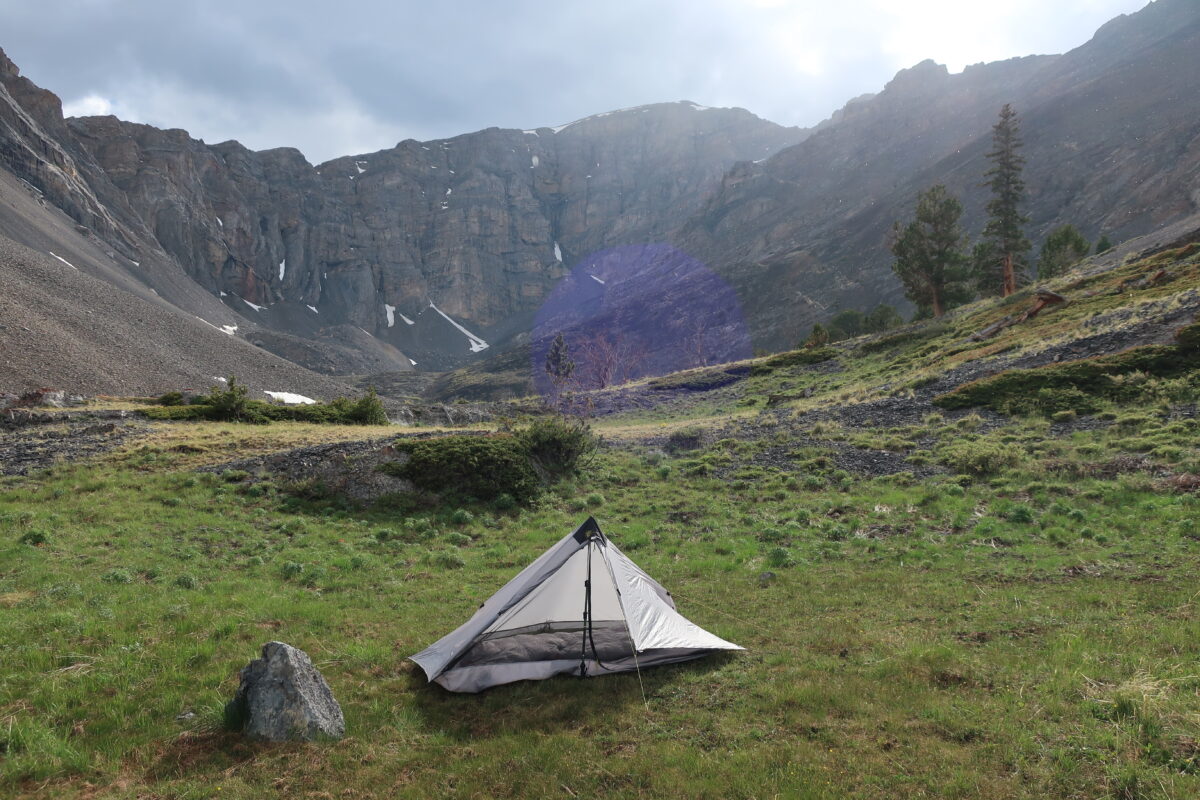
Though most testing occurred in the same general area, the conditions encountered and miles per day varied considerably between the various trips. My longest day with the pack was approximately 15 miles (24 km) on a well-maintained trail in Tennessee’s Big South Fork National River and Recreation Area with modest elevation changes. My shortest day was less than 4 miles (6.4 km) on a faint trail in the Selway-Bitterroot Wilderness. That day included a short but steep detour to a minor highpoint on a nearby ridge for a stunning view. This was a day where I focused more on meditating in meadows, swimming in alpine lakes, and fishing than hiking long miles. Most of the time, the distance walked fell between these two extremes, with 7 to 12 miles (11.2 to 19.3 km) per day being the general range. I was usually on a well-maintained trail and cruising along on longer days. On shorter days, I was often hiking cross-country for a significant portion of the total distance or hiking on faint trails that had limited maintenance and were more difficult to follow or had more obstacles (washouts, deadfalls, etc.).
I did not have any significant water carries when using this pack. I kept the weight between 12 to 22 lbs (5.4 to 10 kg). My pack weight varied, depending on the length of the trip, the weather forecast, and whether or not I packed extra gear (reading material or fishing gear). I feel confident that I tested this pack in the way most backpackers would use it. My experience and observations provide a reasonable assessment of the performance that hikers could expect with extended use.
I used the Pa’lante V2 backpack for a total of 19 days of backpacking and an additional 7 days of day-hiking.
I also used it for a short packraft day trip on the Bitterroot River near my home in Hamilton, Montana. I loaded it up with my packrafting gear, walked a half-mile (0.8 km) to the river, floated for a mile (1.6 km) or so, then exited the river and walked a mile (1.6 km) home. The ability to easily compress and stow the pack on that impromptu outing was very convenient. However, due to its limited capacity, this pack is unsuitable for more extended packrafting adventures where the raft, backpacking gear, and food all must be loaded simultaneously and carried for any appreciable distance.
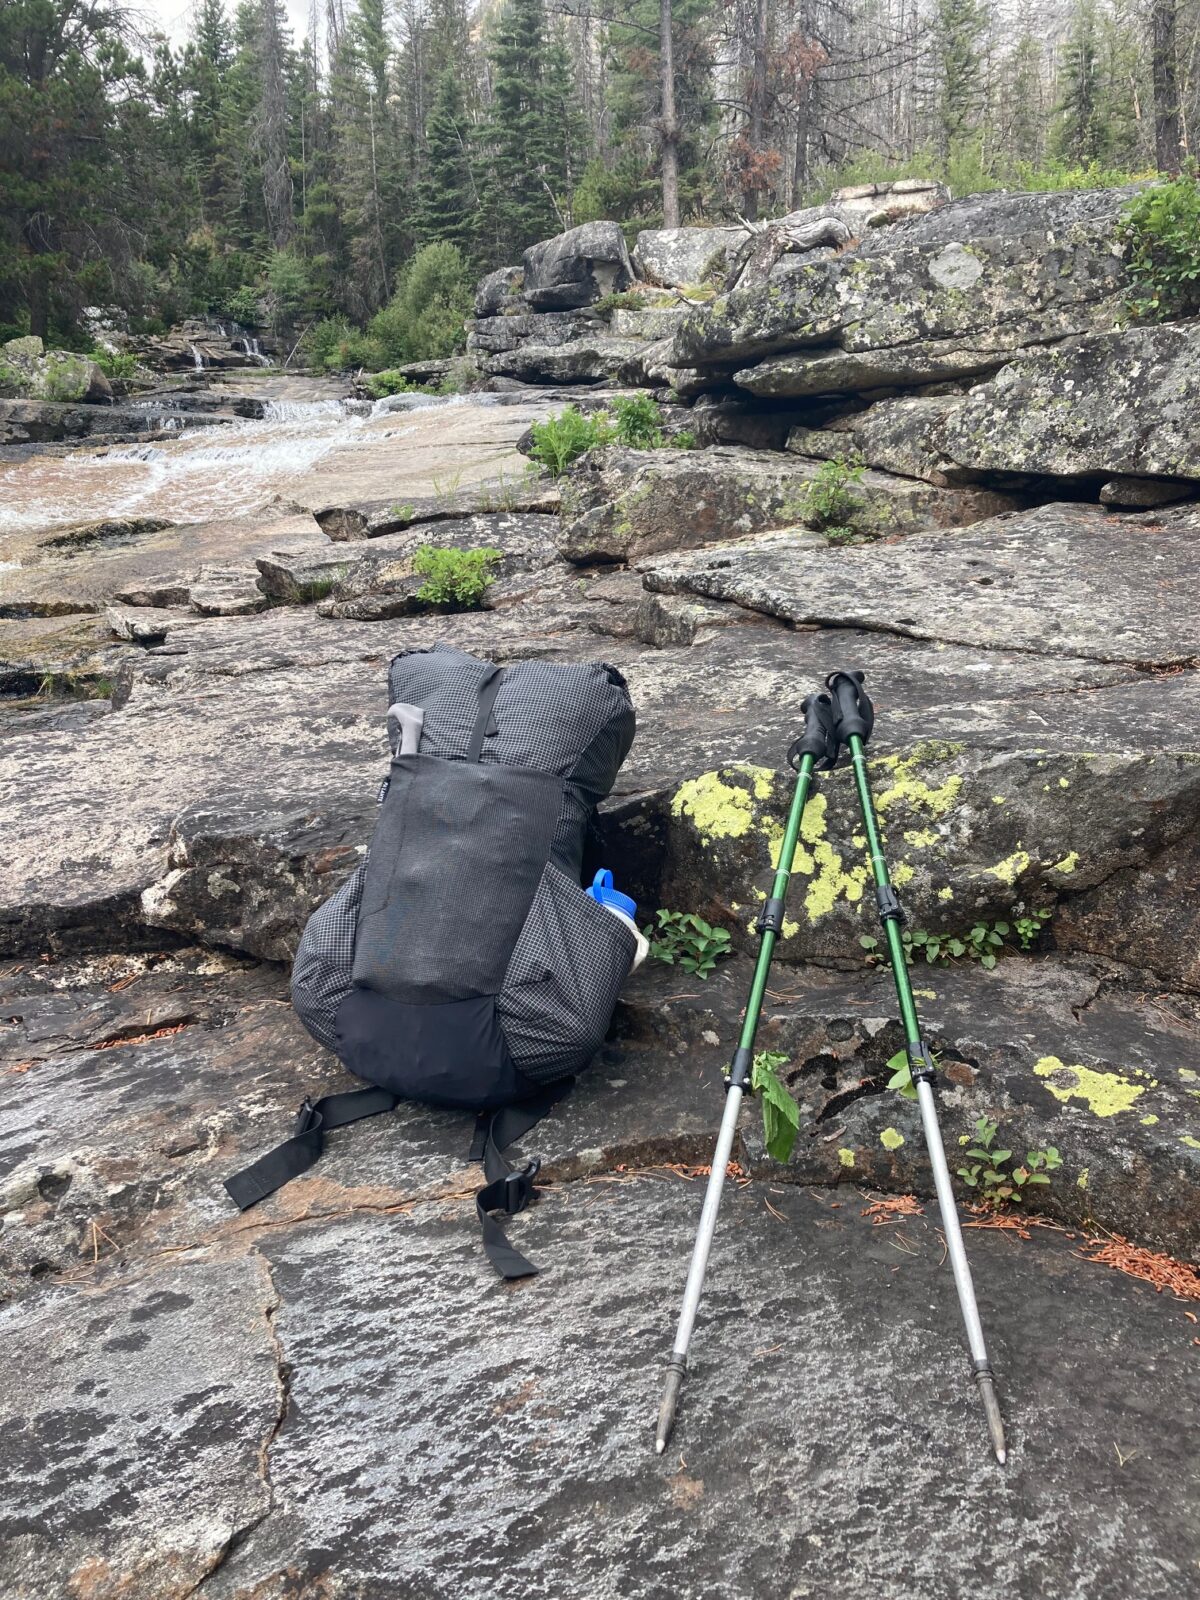
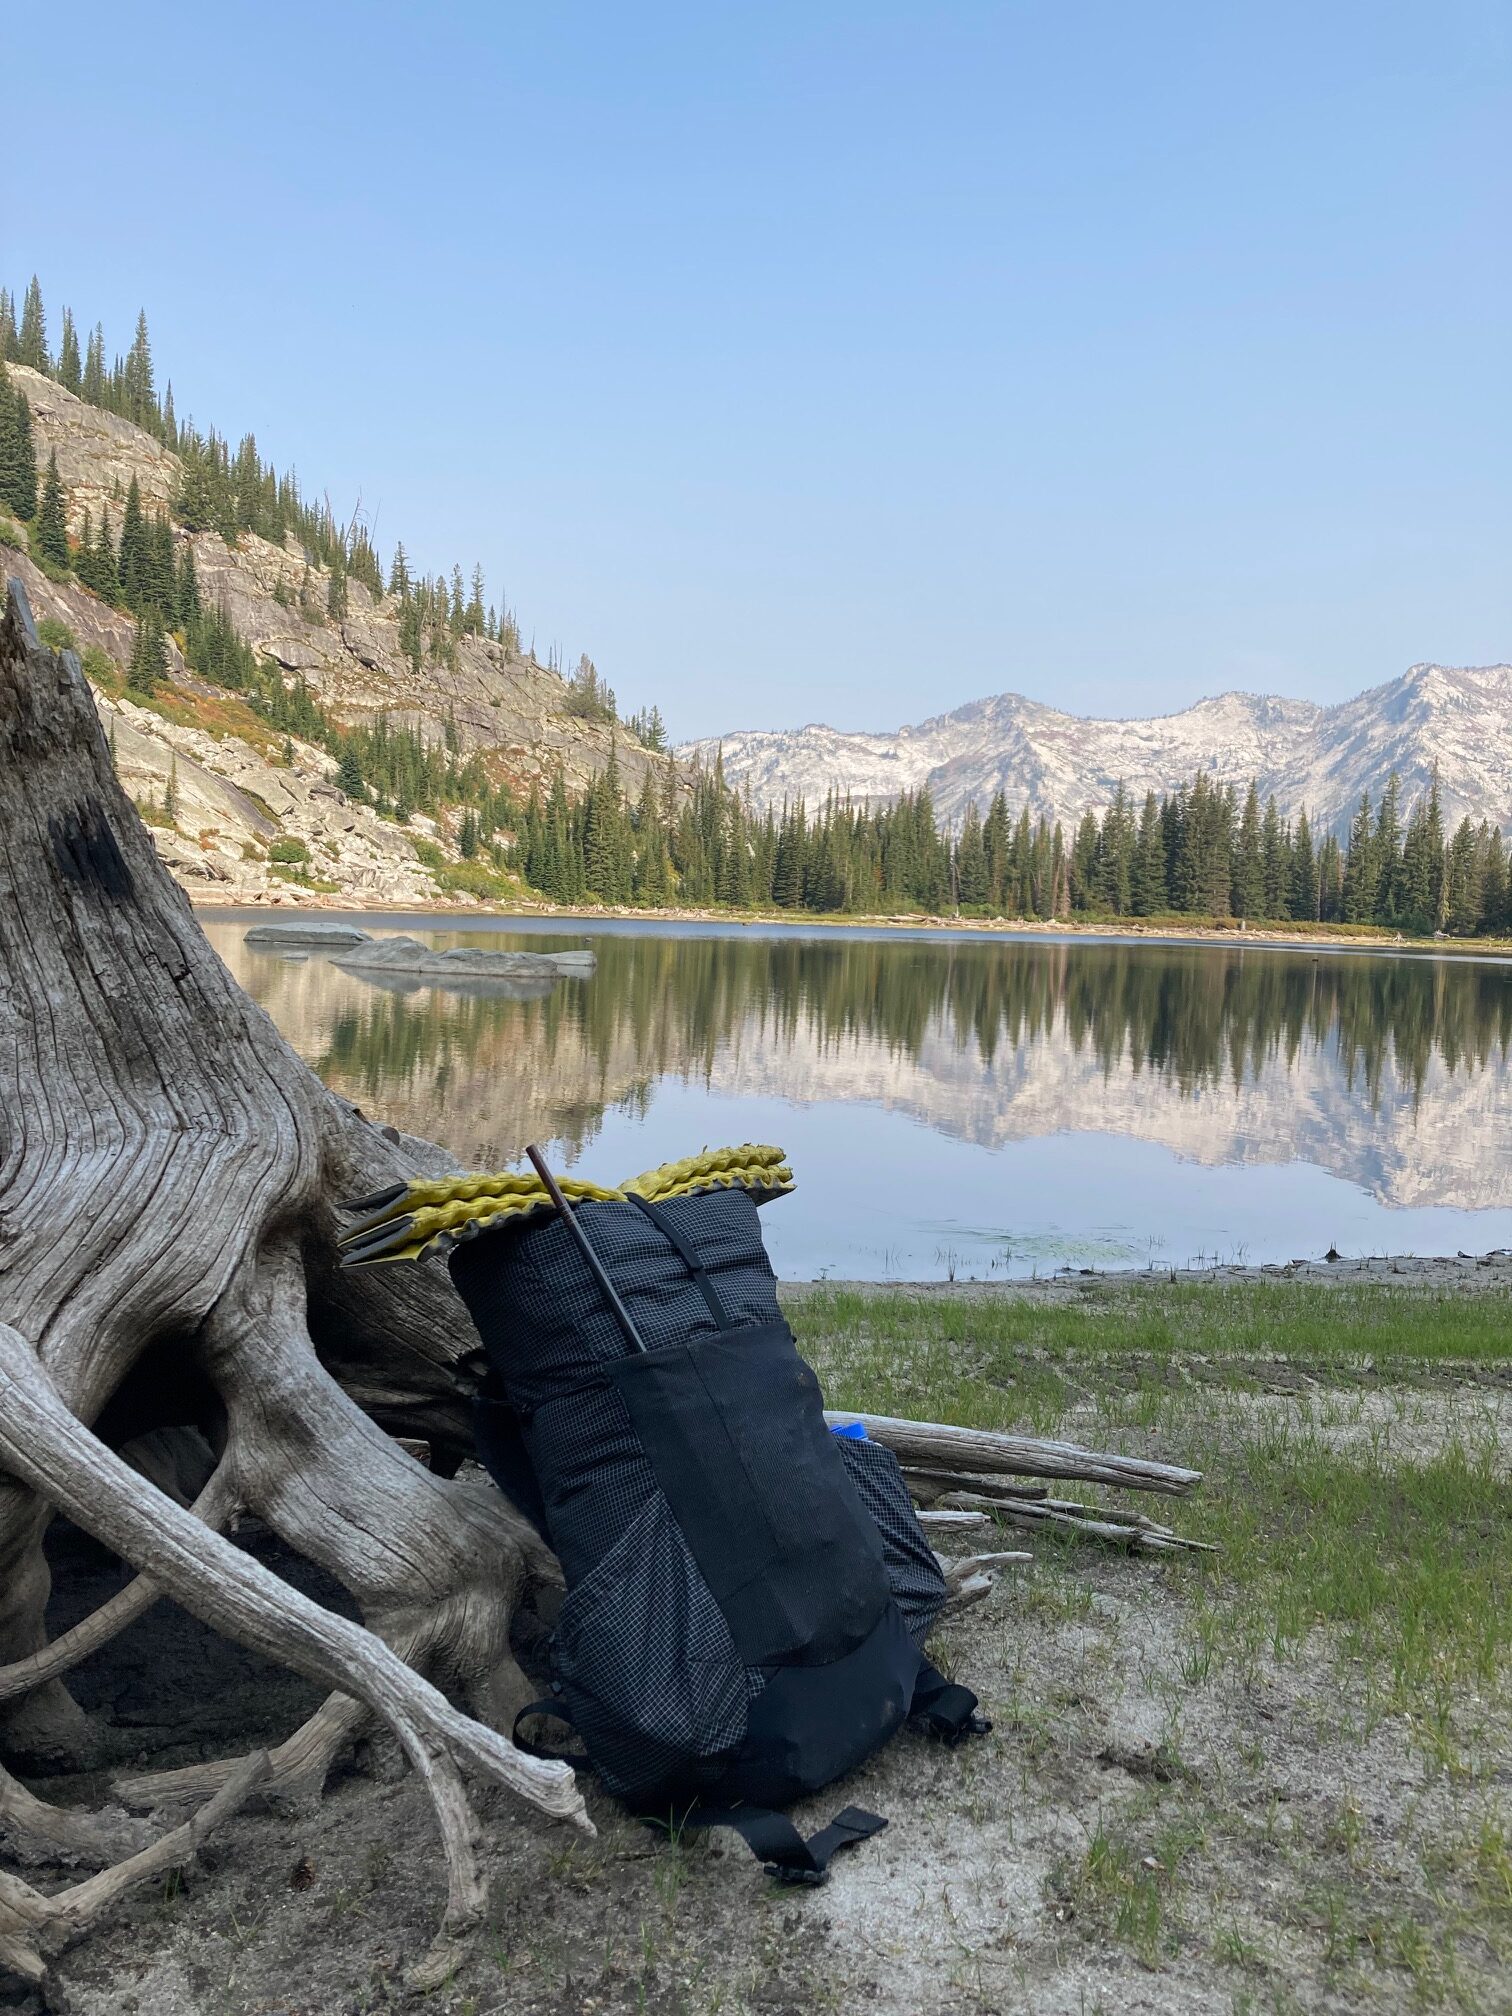
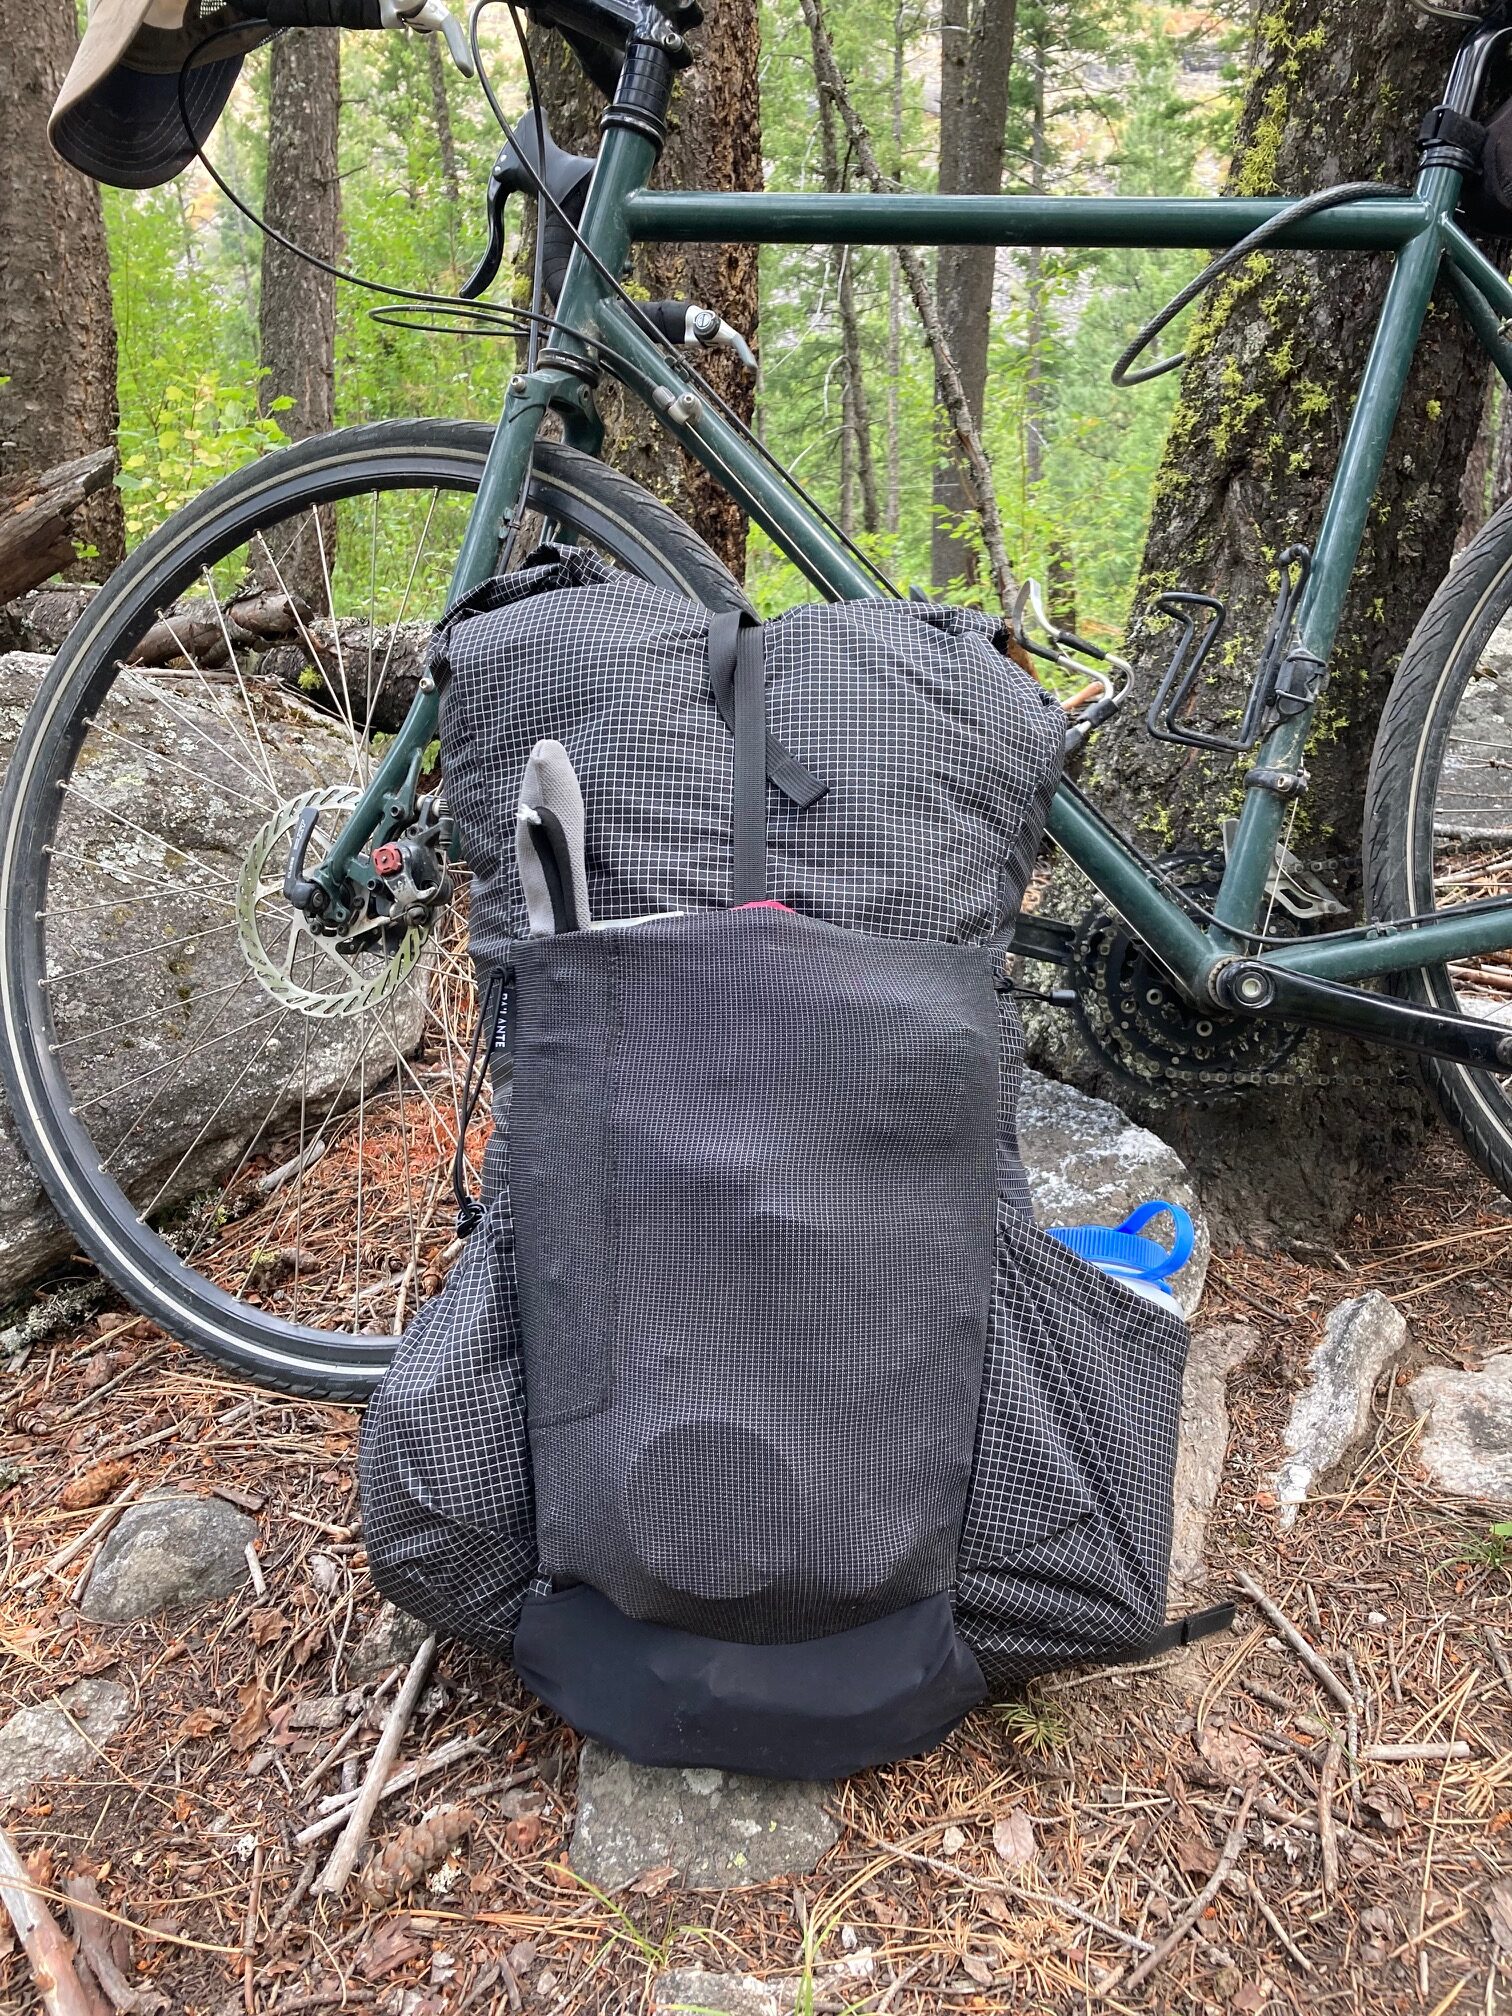
The current version of the Pa’lante V2 backpack comes in two fabric options. One uses a 200D ultra weave (UHMWPE/polyester blend laminated to a 0.5 mL film), and the other uses 210D HDPE nylon gridstop. These fabrics, common among frameless ultralight backpacks, are lightweight and durable. What makes them even more appealing is that they’re waterproof (note that water can still penetrate through seams unless they are seam taped, which the V2 is not). As far as ultralight backpacks go, these are pretty much miracle fabrics. Pa’lante describes the gridstop, which I tested, as the more durable option.
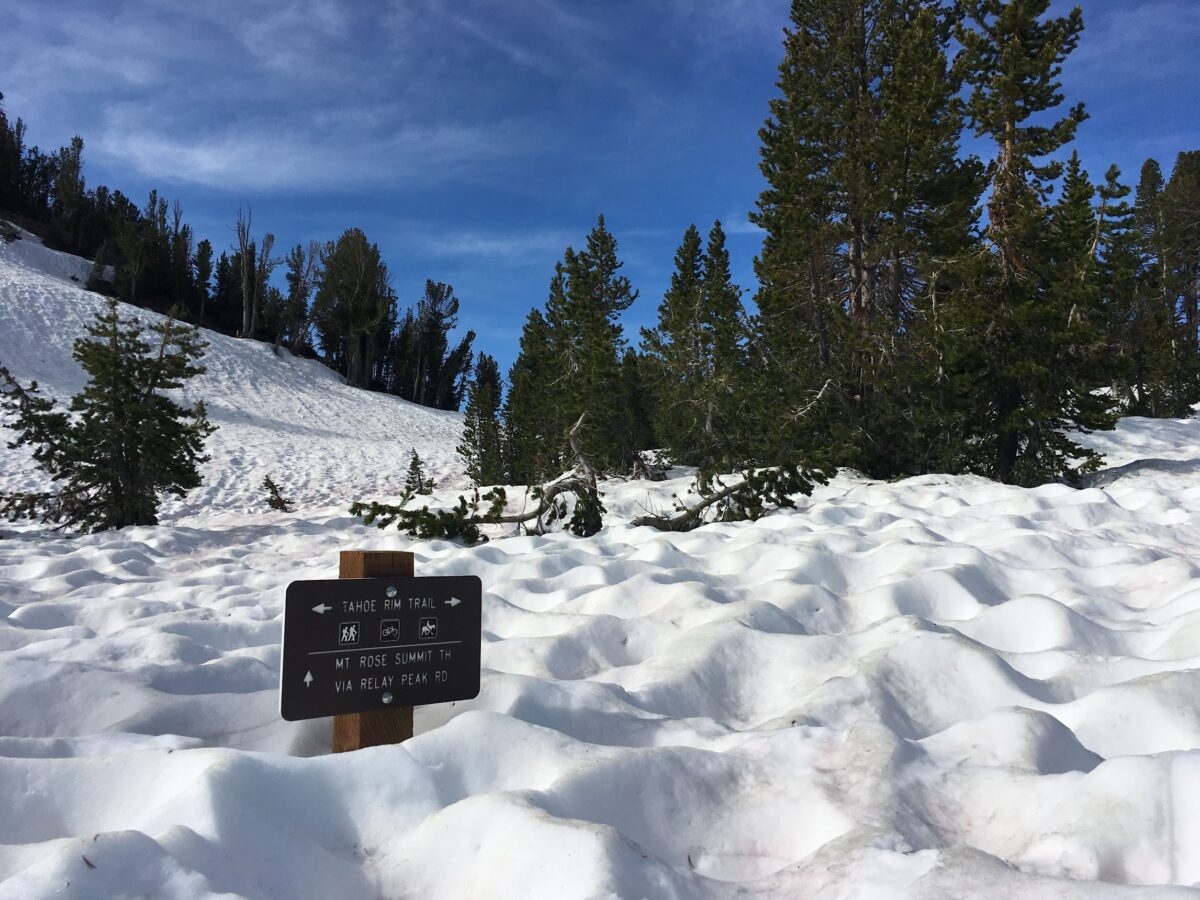
I tested the Pa’lante V2 mostly on trails or cross-country in the Selway-Bitterroot Wilderness. Most sections aren’t exactly the idyllic national park scenic trail where you’ll see people hiking along in short shorts and tank tops and cranking out 25-mile (40-km) days. The designated trails in the Selway-Bitterroot Wilderness are often rugged and overgrown. They’re a bit rougher around the edges and provide plenty of opportunities to scrape your pack (not to mention your legs, elbows, etc.) on trees, shrubs, and boulders. Cross-country hiking in the Selway-Bitterroot Wilderness can include a delightful stroll on granite slabs, a meander across an alpine meadow, or a leisurely walk through an open subalpine forest.
Conversely, at lower elevations, it can be a brutal slog through thick shrubs, boulder fields, and doghair-thick stands of conifers that can send nature-loving hikers back to the fluorescent lights of their cubicles. I did a fair mix of each type of trail and terrain during the testing of this pack. No unusual wear (significant abrasion, rips, tears, or punctures) occurred in the fabrics.
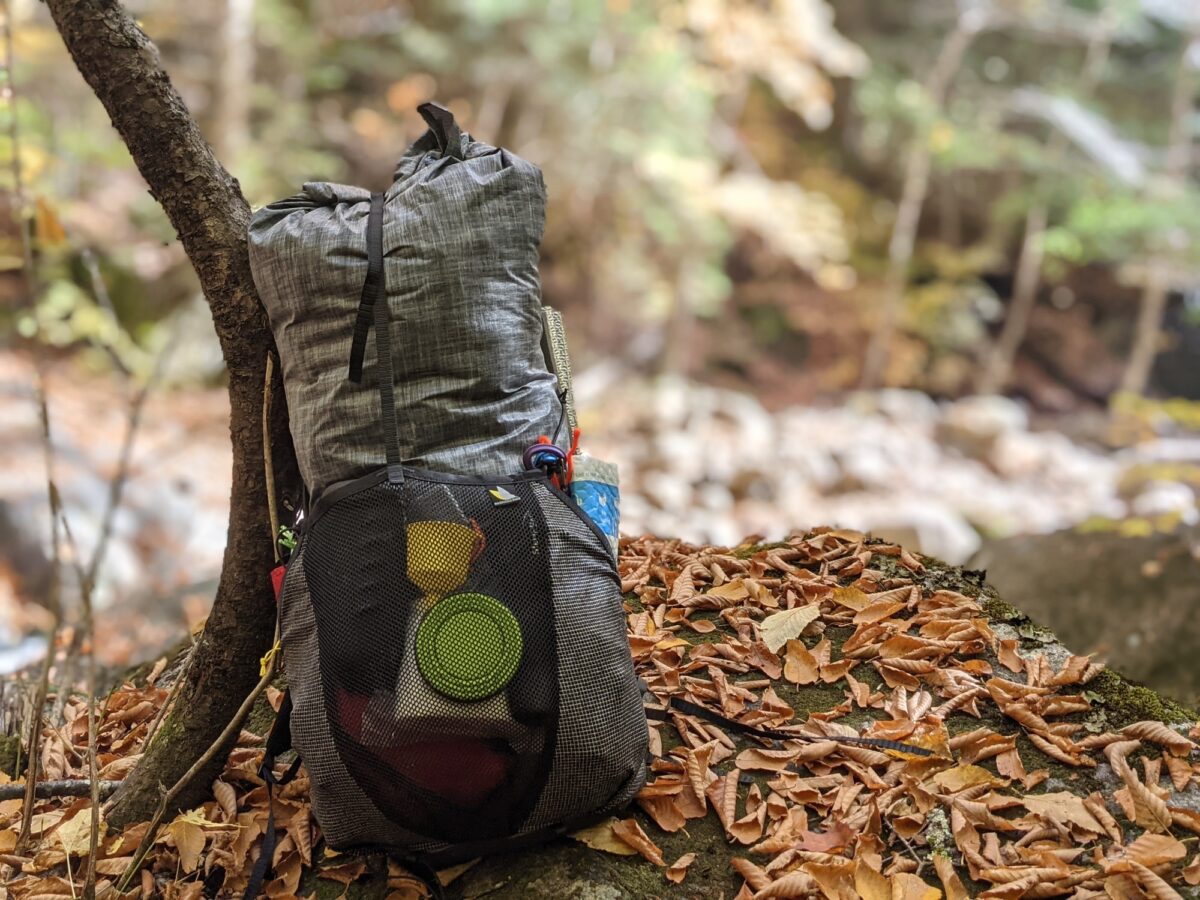
For the stretchy mesh pockets on the back and bottom, the pack uses UHMWPE (ultra-high-molecular-weight polyethylene) grid mesh and nylon-spandex meshes. The bottom pouch, typically used for snacks to allow easy access while hiking, provided plenty of stretch. However, I did wish for a bit more give when trying to cram various items in the kangaroo-style pouch on the back.
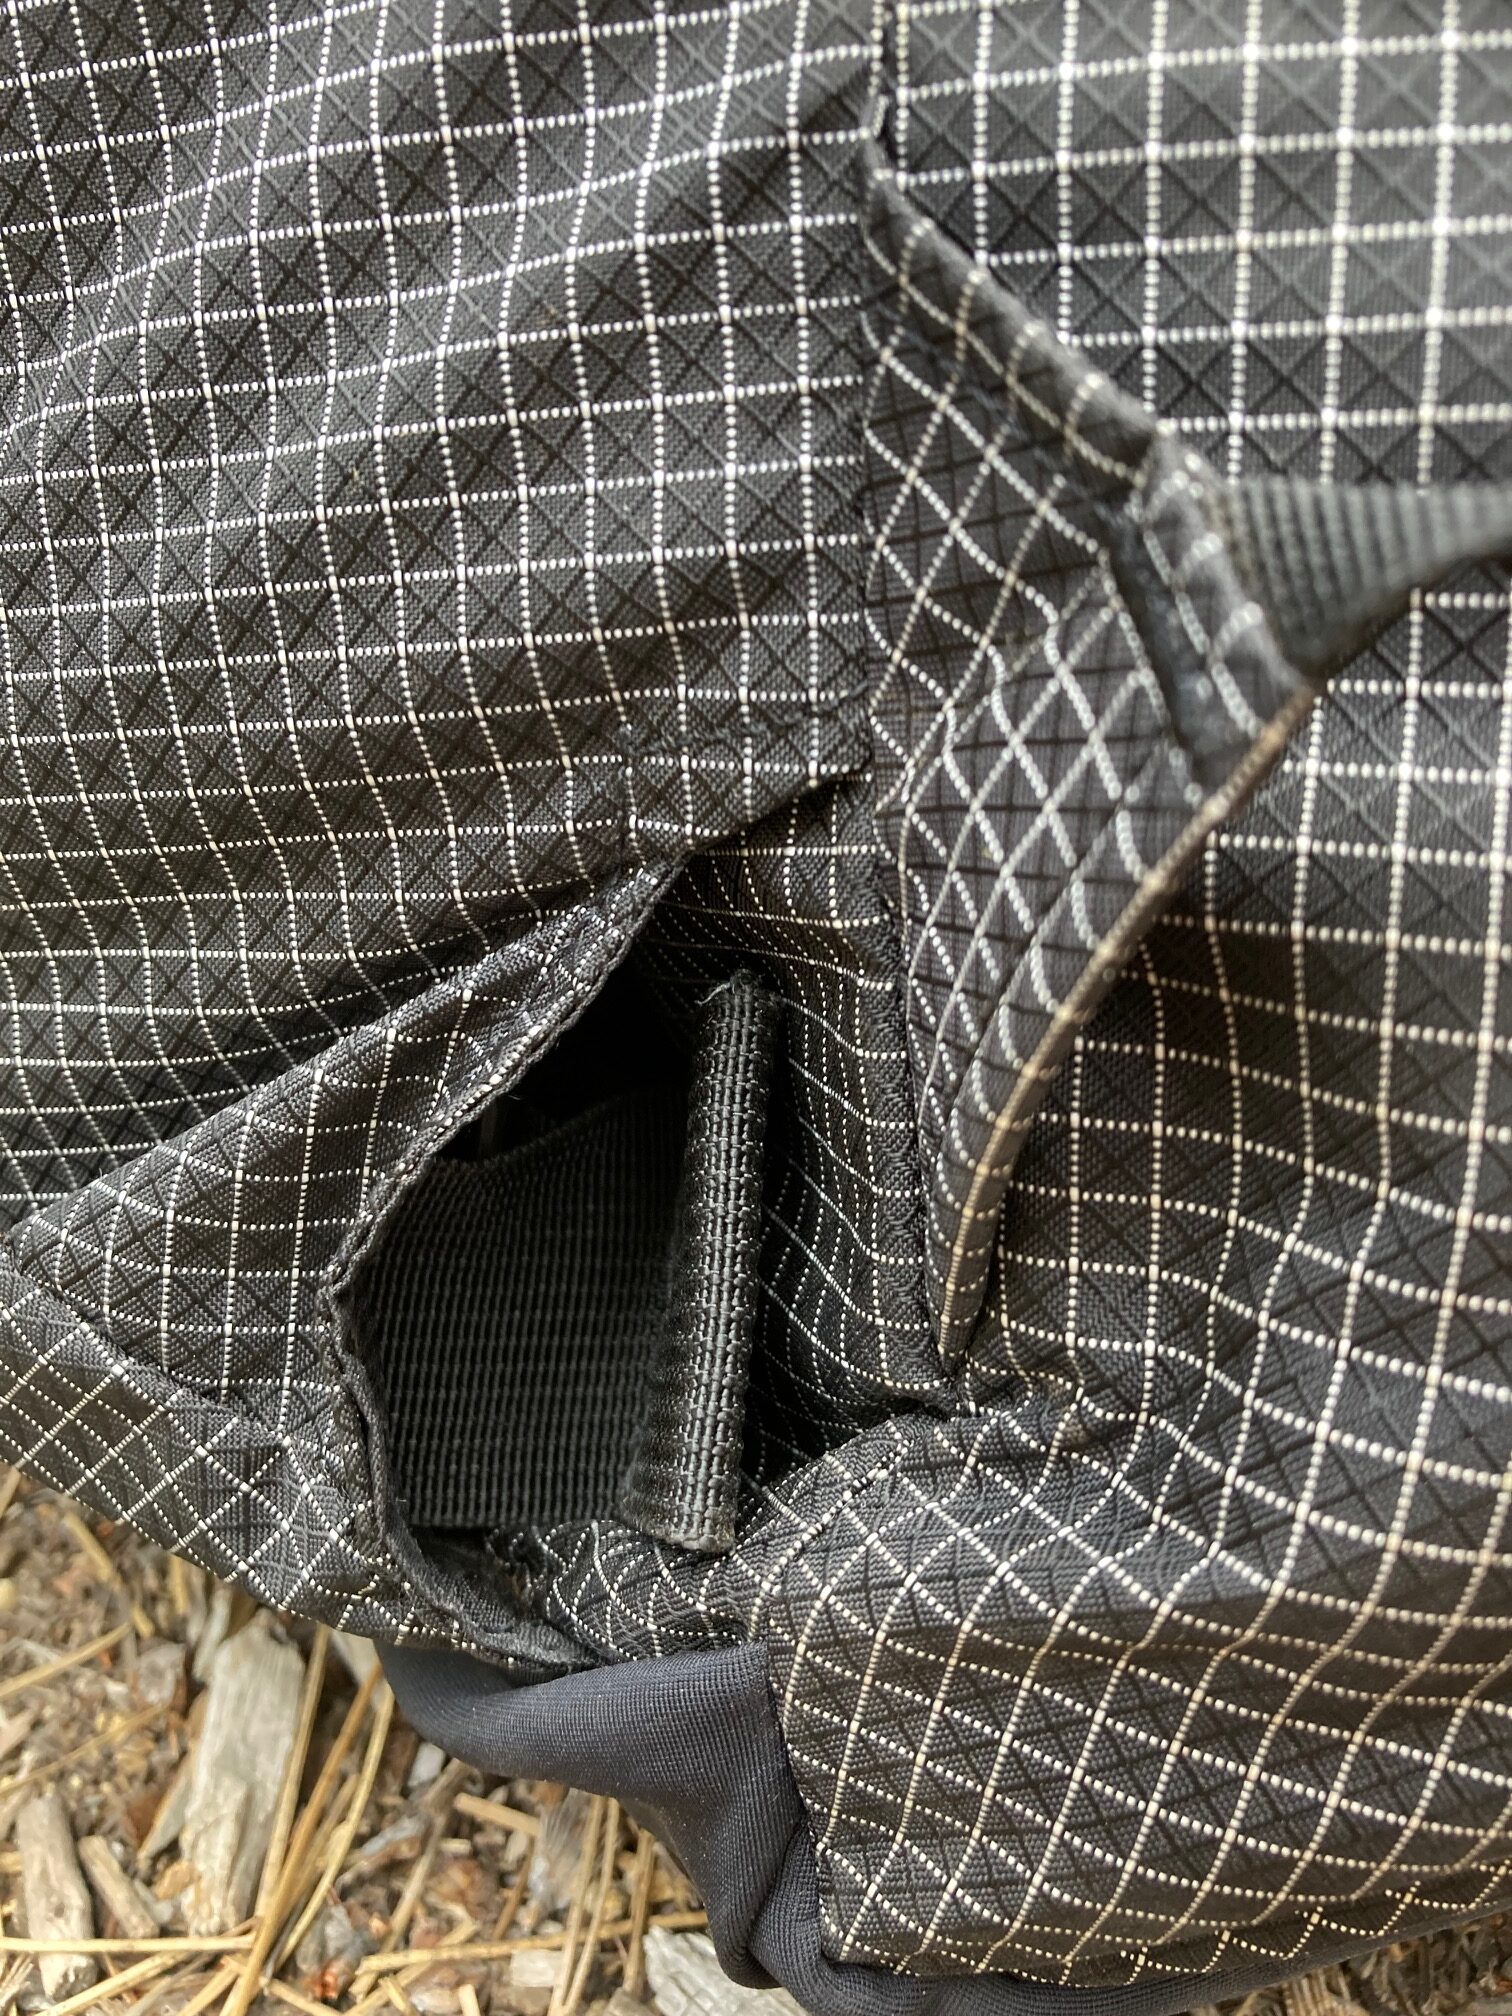
The stretchy bottom pocket is one of this pack’s most unique, practical, and innovative features. The bottom stash pocket allows you to easily access a variety of snacks while hiking without having to remove your pack. In addition, the inclusion of a small opening at the other end of this pouch allows you to insert your trash without having to worry about it cluttering up the rest of the pocket (and then falling out later when you reach into it). While this option isn’t unique to Pa’lante, bottom stash pockets aren’t standard features on most backpacks.
However, a bit of caution is warranted when using this feature.
First, don’t put Cheez-Its or crackers in the bottom stretchy snack pocket, or they’ll get crushed quicker than a box of light bulbs by a 50 lb (23 kg) bag of dog food. Second, you should be wary of inadvertently leaving food or trash in this pouch if you’re in bear country. I made this mistake myself and lived to tell the tale, but it wasn’t fun to be packing up in the morning and realize I’d slept with a Clif bar and a wrapper from a stick of jerky at my feet while in an area that grizzly bears are beginning to expand into.
In my experience, innovations in backpacking gear add value to the experience, whether through reduced weight, increased performance, or convenience. And purchasing gear that genuinely improves the experience is worthwhile. The problem, at least in my opinion, is that a lot of equipment purports to do this, and too many people buy into it or are just chasing meaningless weight reductions. The amount of convenience the Pa’lante V2 pack adds by making food access and trash deposition a one-handed affair without having to take it off my back is noteworthy. It’s one of my favorite features.
I’ve got an irrational attachment to hipbelts for some reason. They’re like a ritual for me. Once I shoulder my pack and snap the buckle, I feel that I’m locked and loaded, and ready to hike. So going from my usual wide-padded hipbelts to the webbing belt on the Pa’lante V2 was a bit of a change. But part of growth is letting go. So I accepted this change and, within the first few miles, realized that I didn’t miss having a padded foam hipbelt cradling my bony hips. This pack was lighter and carried differently than my internal frame packs. Since that didn’t impact my comfort in the slightest, I was okay with that. And in fact, I liked it.
I was ready to shed my traditional backpacking habits and embrace this brave new minimalist world; I did what would’ve been unthinkable to me a few years ago.
I unbuckled my hipbelt and stashed it in the cleverly designed pockets crafted just for that purpose.
And then I hiked out six miles on a rugged trail. I didn’t miss having a hipbelt around my waist in the least. The pack carried comfortably with the light load, and I realized that perhaps I had been trading a feeling of security for an unnecessary encumbrance all along. Or maybe I was using a hipbelt I didn’t need, and now I’m just waxing poetic because it’s the middle of winter, and I’m sitting in front of a computer writing about a pack I used this past summer. Regardless, the hipbelt is functional when needed, like having a 2-liter water carry in the middle of the first day of a four-day trip when the pack is loaded to its capacity at the limit of its load-carrying comfort.
The hipbelt doesn’t transfer weight in any meaningful sense, but to expect it to would be a bit like thinking that getting a new titanium pot will somehow make your pasta and tuna taste better. It’s just not realistic, no matter how much you pay or how hyped the product is.
As far as hipbelts go, short of hiding the 15 lbs (6.8 kg) of body weight I mysteriously put on since I hit my mid-30s, there isn’t much more I could ask for.
The hipbelt can easily be tucked out of the way when it’s not needed.
My expectations for comfort and fit were low when I began testing this pack. My previous experiences with frameless packs were limited, but they weren’t overly pleasant. Things poked into my back at odd angles. Straps pulled on my shoulders with what felt like an unfair mechanical advantage despite the modest load. I went at the same pace but was less comfortable while doing so. It was more of an exercise in endurance than a nifty way to go fast and light.
I expected the Pa’lante V2 backpack to improve over my previous dalliances with frameless packs, but I was astounded at just how much an improvement it was. When I first began testing this pack, I used a few panels of a Therm-a-Rest Z Lite to provide something resembling a frame. While it offered a solid structure, it ate up valuable interior storage space. About midway through the testing period (yes, I’m stubborn), I decided to put the Z Lite on top (secured under the strap) and just try and arrange the gear inside the pack in such a way that it didn’t (literally) rub me the wrong way while hiking.
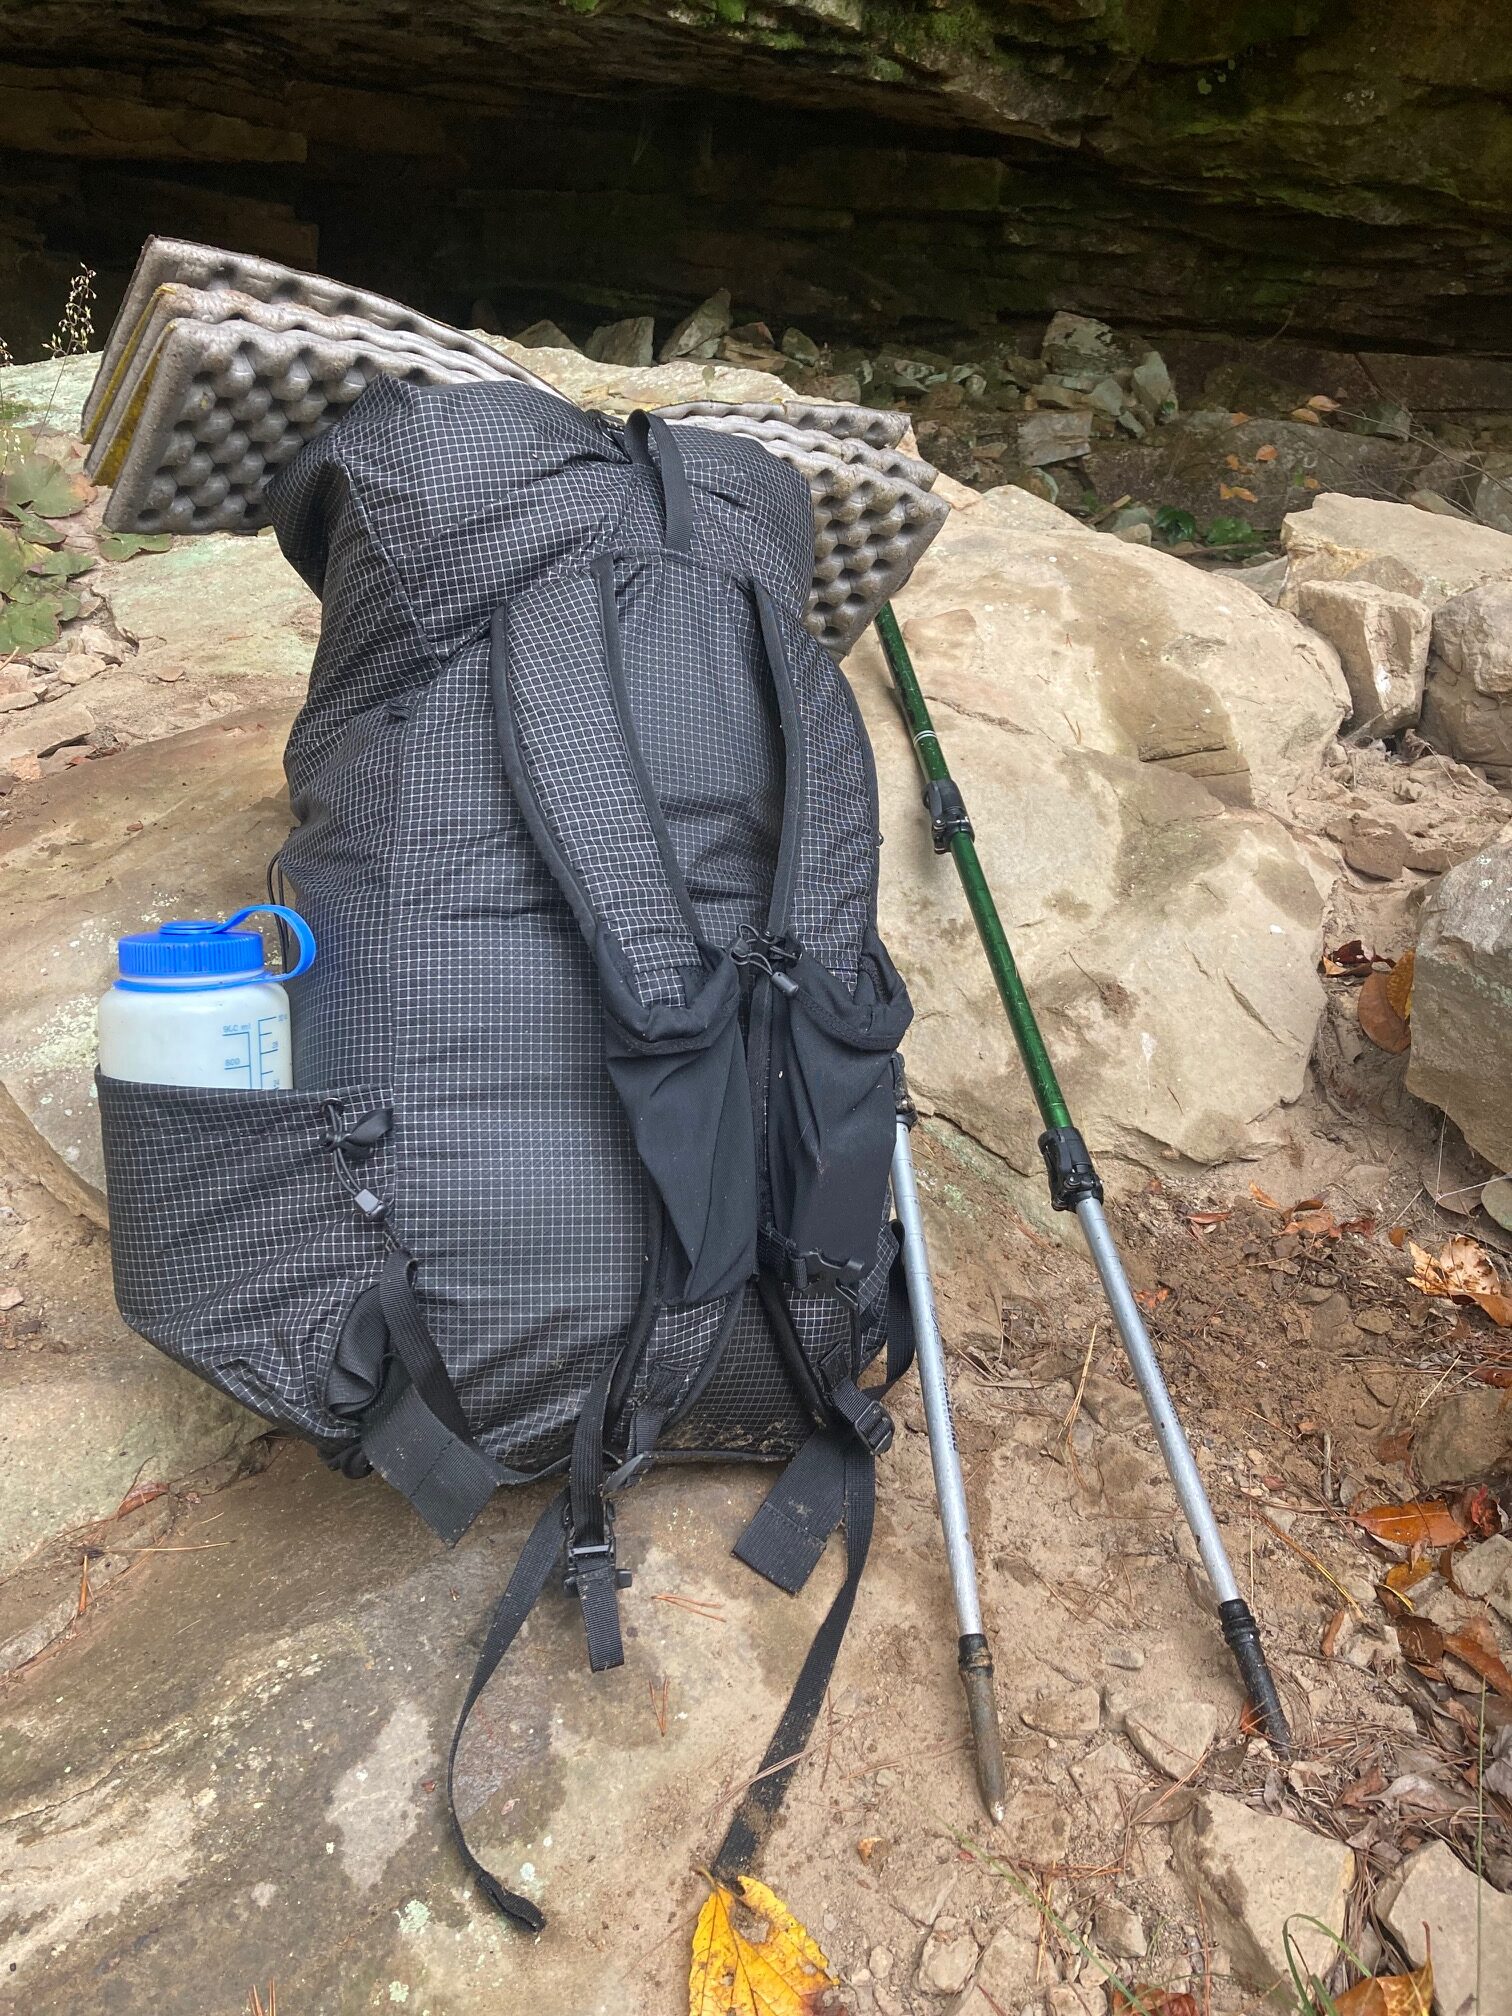
It didn’t take a Ph.D. in engineering to figure out packing to ensure this pack carried well. Depending on what gear you have, it will be a bit different for everyone, but I arrived at a system that worked for me with minimal trial and error. I also liked having the Z Lite on top of the pack, where it was more easily accessible as a sit pad for longer lunch breaks.
How to Pack a Frameless Backpack
Packing a frameless backpack poorly can result in discomfort. If you learn how to create structure in the pack, pack it for maximum comfort and efficiency, and understand how an inefficient packing job can sap your energy over long distances, you’ll vastly improve your comfort and enjoyment on the trail.
Backpacking Light founder Ryan Jordan teaches a module in our Ultralight Backpacking Boot Camp online course about packing a frameless backpack that provides valuable education to hikers new to using a frameless backpack. Learn more about the course here or access the module directly at this link.
The shoulder straps are padded with 3/8 inch Evazote foam and are comfortable. The padding felt almost luxurious on the last days of a trip when I didn’t have much weight in the pack.
Even during long days of hiking, I never felt like the straps were pulling too hard, not padded enough, or shaped in a way that impacted basic ergonomics. Similar to comfortable shoes when hiking, the pack was something I was looking forward to taking off when winding down the day, but not something that was actively causing me discomfort at any point. I wasn’t cursing the pack the last few miles of each day and fantasizing about taking it off.
The 19-inch (48-cm) torso-length version of this pack fits me perfectly. I’m just under 6 feet tall (1.8 m) and have used a size medium for all the framed packs I’ve used (I’m also a medium in most clothes), so I wasn’t exactly surprised to have a Cinderella-slipper type of match with this pack.
Overall, I found the amount and location of pockets on the Pa’lante V2 backpack abundant yet not overwhelming. I’ve already articulated the benefits of the bottom pocket for snacks – I won’t belabor that point here. Having one pocket on each shoulder strap was convenient for storing my iPhone (which I use for a camera) and a Garmin inReach Mini, as well as a few energy gels or Clif Shot Bloks. I could also fit a Clif bar or jerky bar into these pockets. In combination with the snacks accessed via the bottom pocket, this allowed me to snack all day without ever opening up the main packbag.
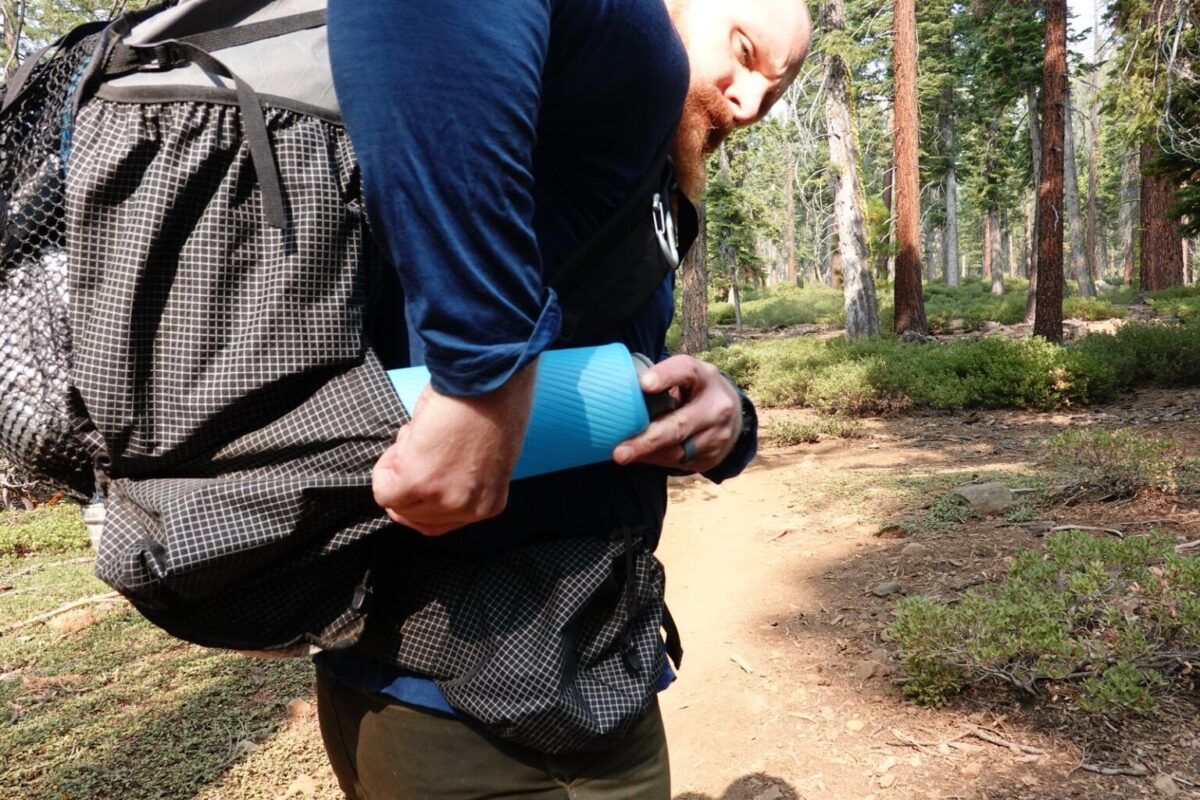
Being able to stay hydrated and fueled with calories while hiking without having to stop and remove the pack is one of the Pa’lante V2 backpack’s key benefits. The dual side pockets on this pack were perfect for stowing water. Each of them can fit a full two-liter Platypus for longer water carries. I used a standard one-liter Nalgene for most of my trips, occasionally sizing down to a half-liter bottle for trips where water was particularly abundant. I could easily access my water bottle one-handed, which was ideal as I didn’t have to remove the pack to hydrate. Having to do so would defeat the purpose of the snack-friendly bottom pocket.
Being able to stay hydrated and fueled with calories while hiking without having to stop and remove the pack is one of the Pa’lante V2 backpack’s significant benefits.
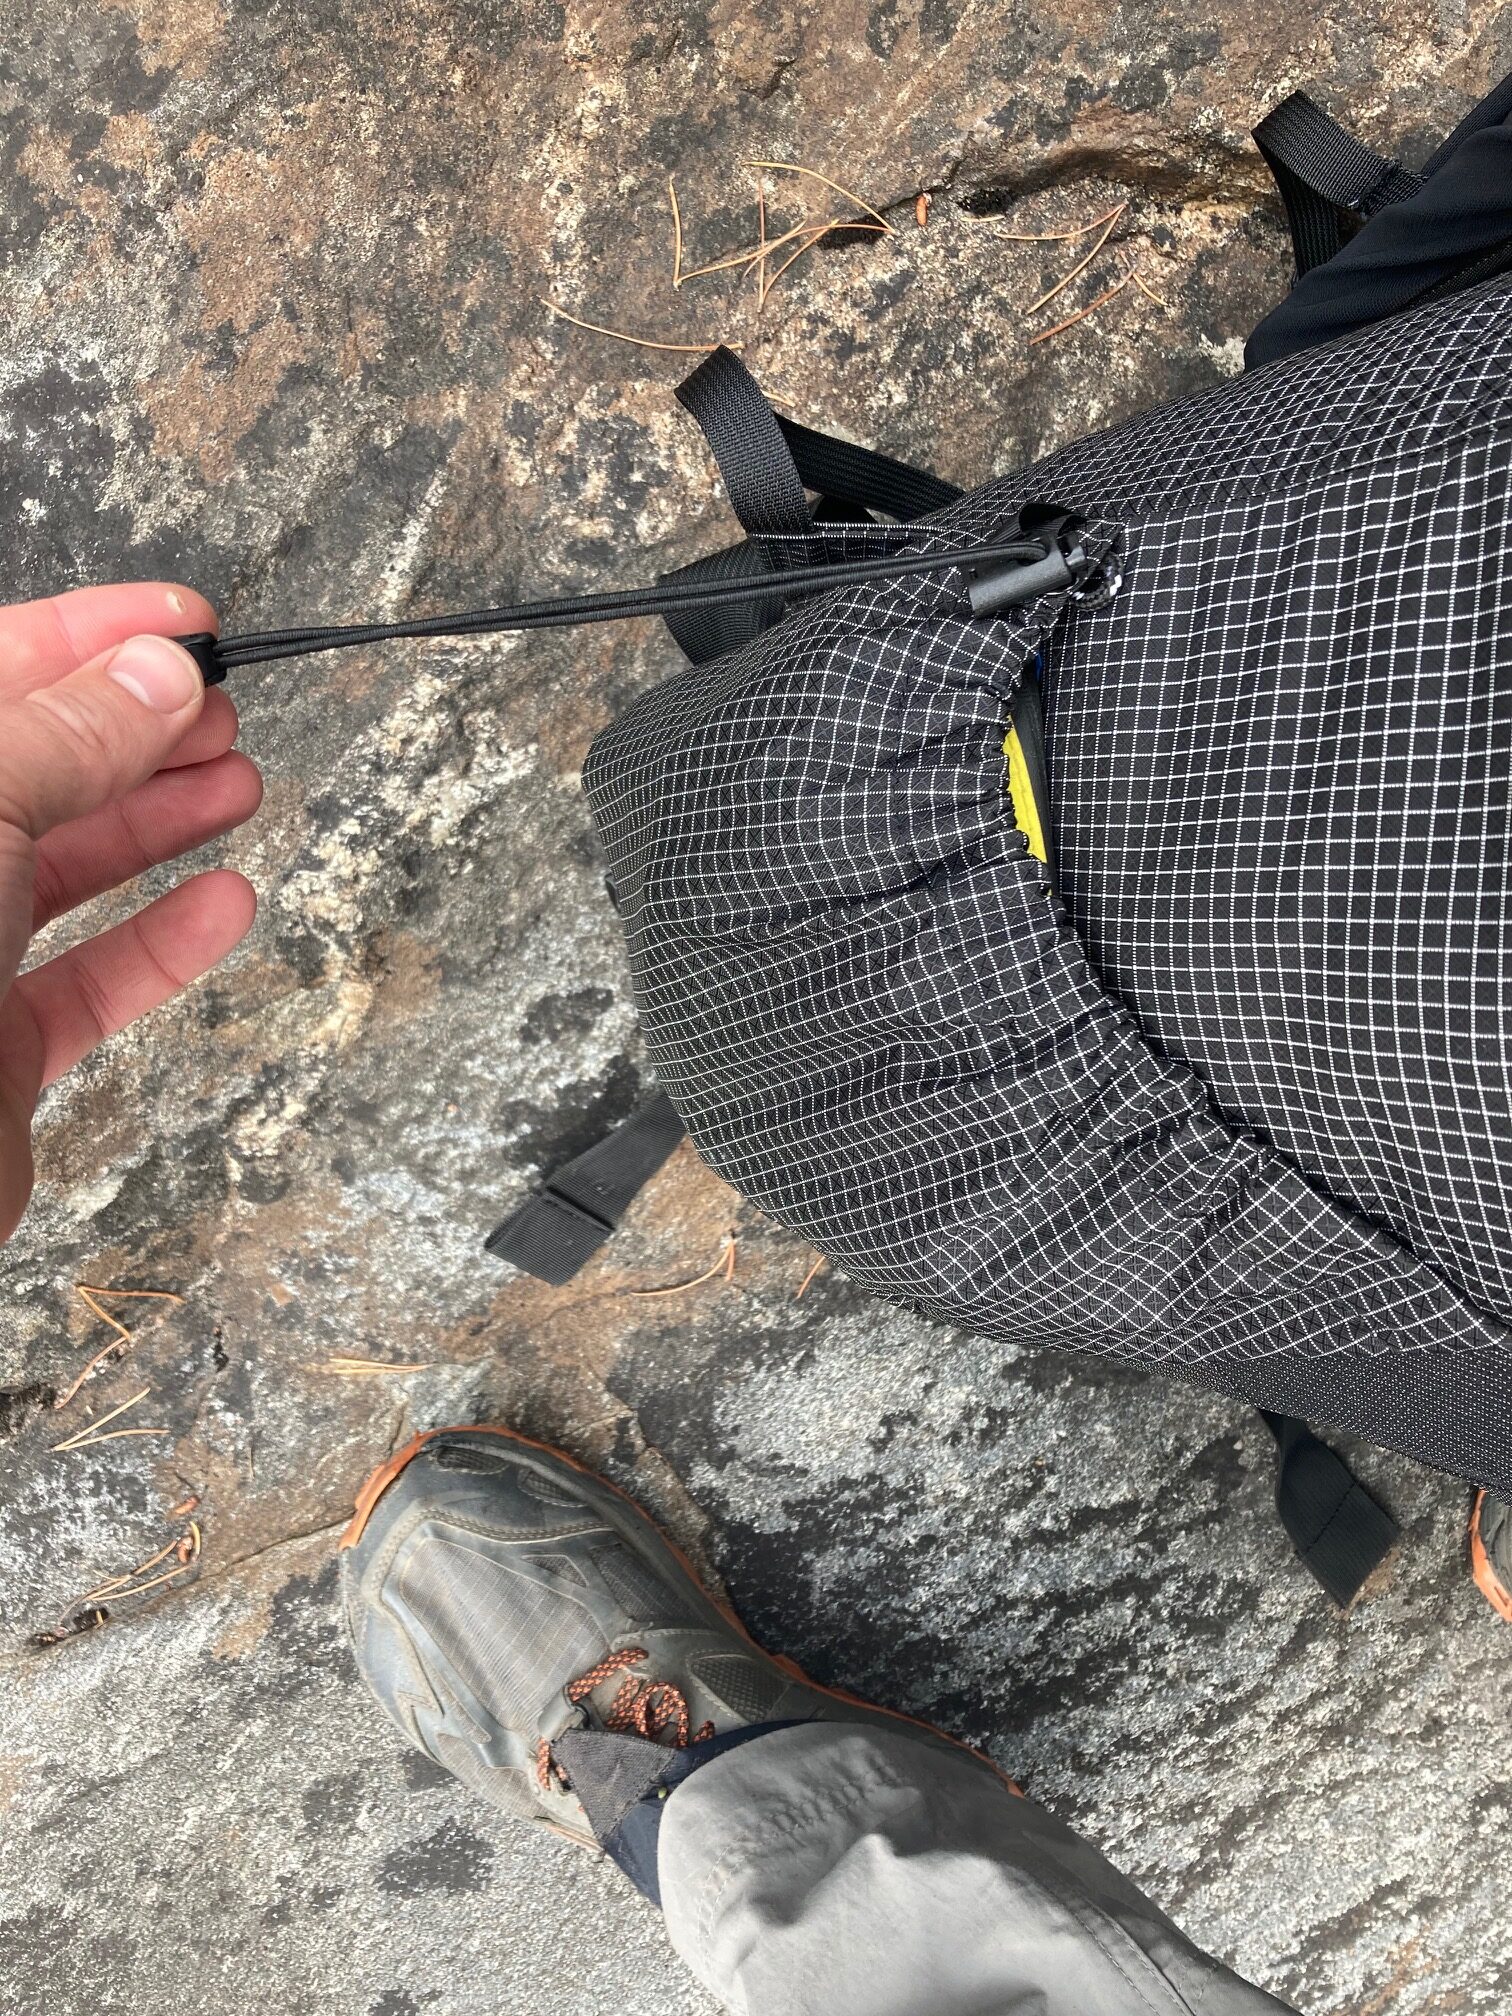
With my water bottle stored in one pocket, I used the other pocket for my first-aid kit (which includes my water purification tablets) and a small bag of miscellaneous items. The side pockets have an effective cinch cord that allows them to be pulled tight to keep smaller items from falling out, which gave me peace of mind when scrambling around cross-country or climbing over deadfall.
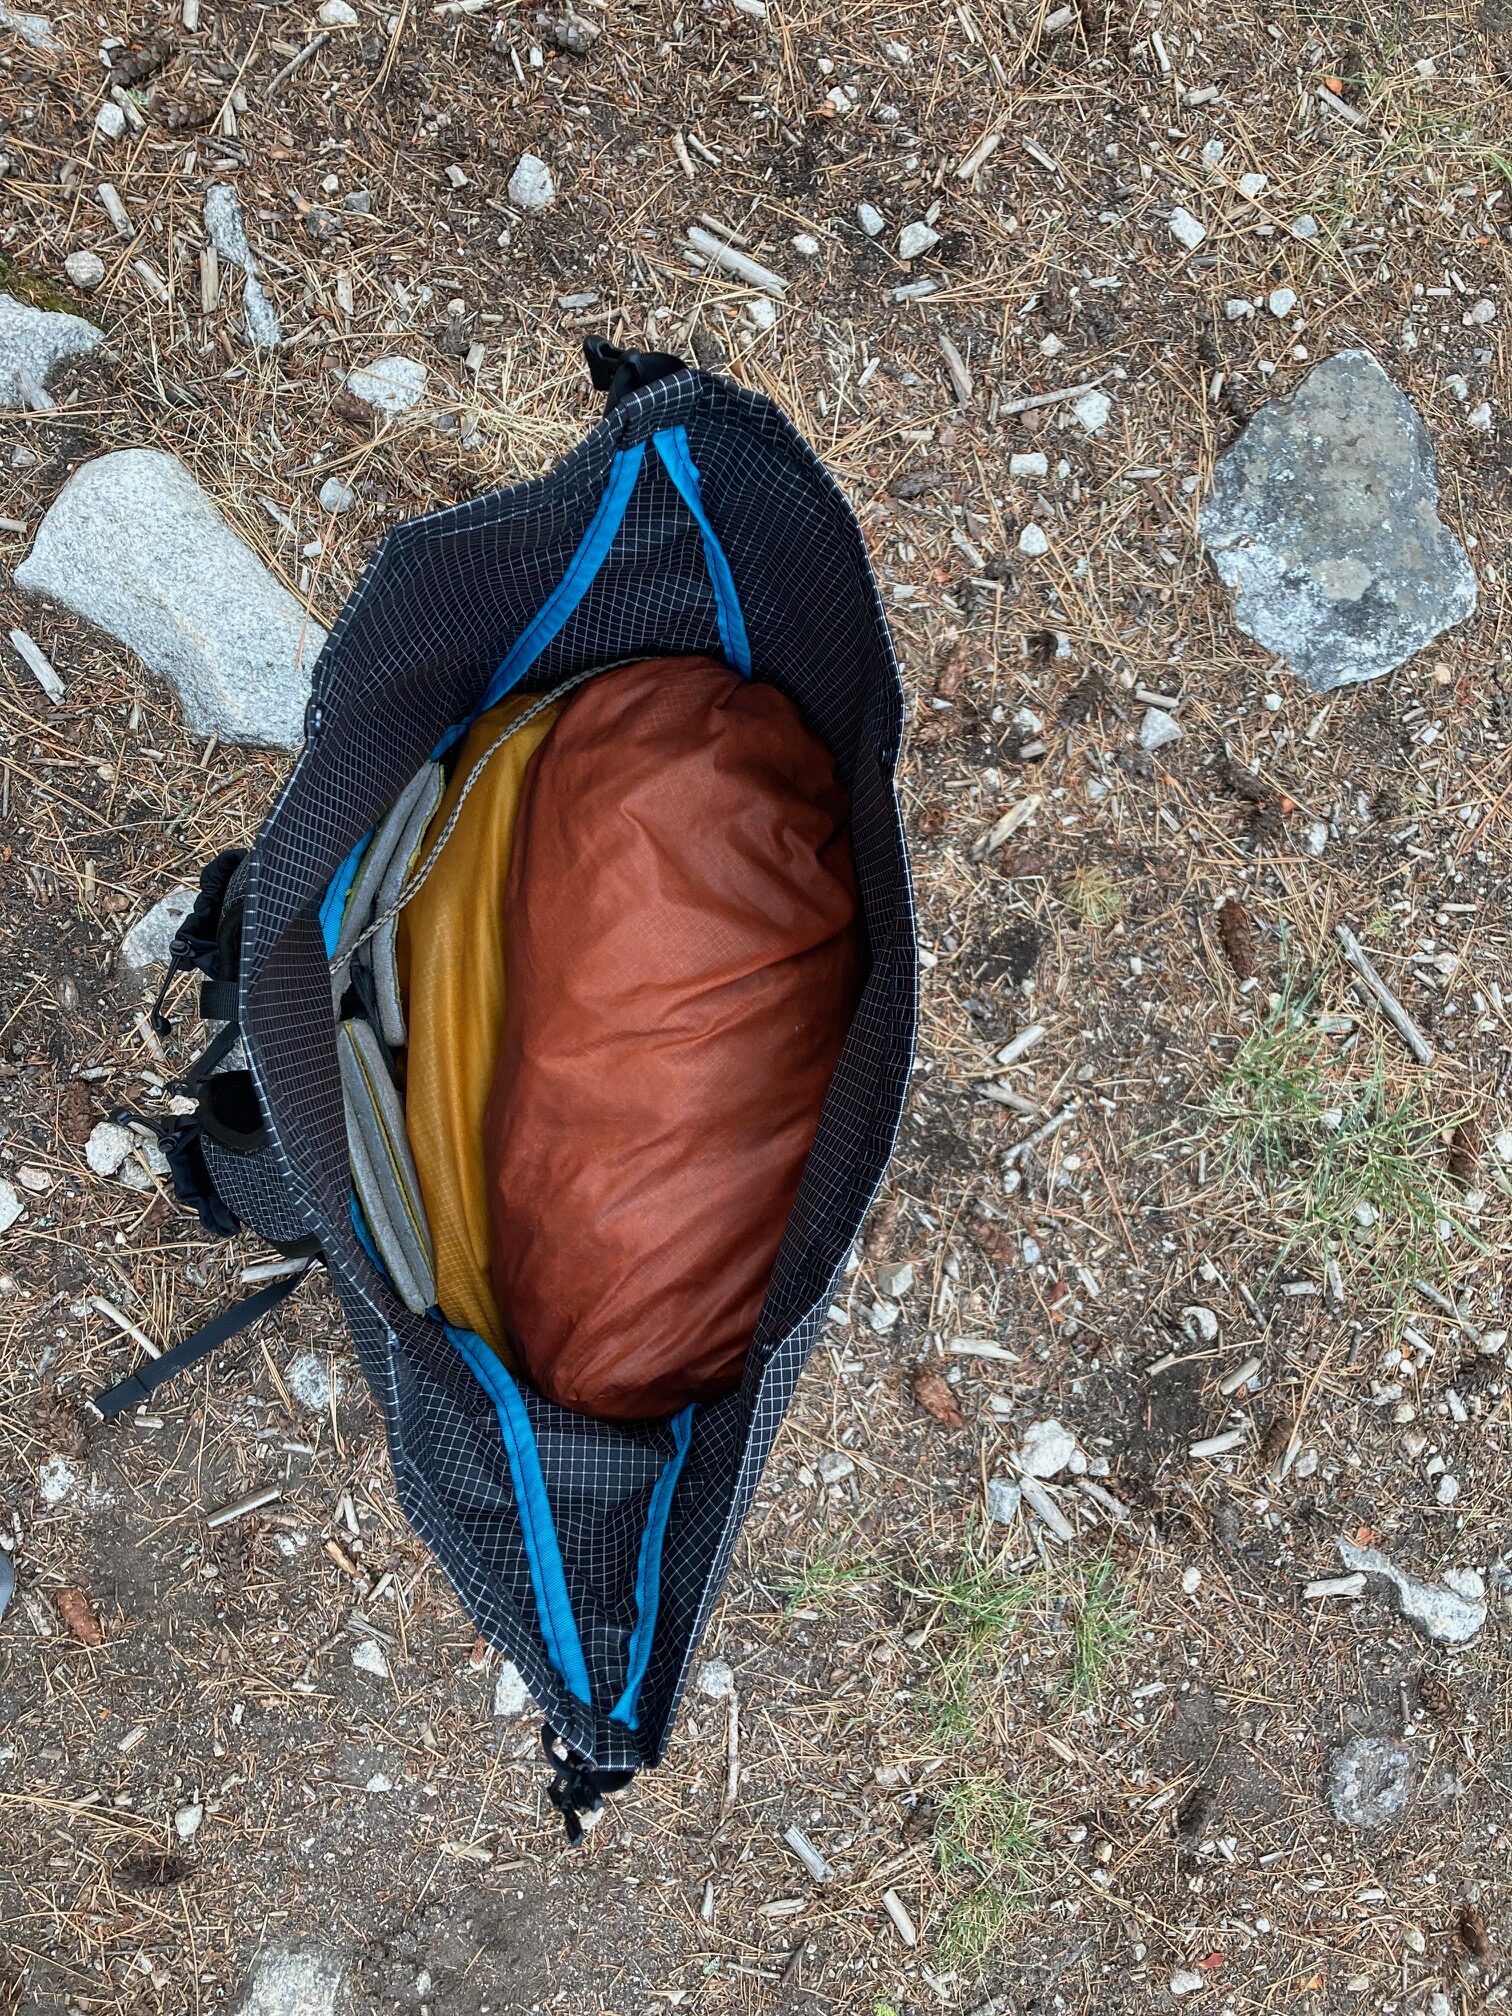
The main compartment was large enough for my gear on four-day trips and could easily have accommodated enough additional food for me to have done a five- or six-day trip in three-season conditions. The wide, funnel-shaped opening at the top of this pack made it a breeze to load and unload. It wasn’t a chore to pack up or to reach in and rummage around for a specific item. It impressed me that not only did this pack make my time spent hiking more efficient, but it also made arriving and departing camp a bit smoother.
The wide, funnel-shaped opening at the top of this pack made it a breeze to load and unload.
With many packs I’ve used, packing up in the morning always caused a higher degree of frustration than it should when I was trying to cram in the last few items. With some packs, I’ve felt that reaching down and pulling out a down jacket, cook kit, or spare socks was like yanking a molar out with a pair of pliers. Because of the funnel-shaped top, the Pa’lante V2 backpack gets easier to pack as you fill it up.
The Pa’lante V2 pack is similar to other backpacks in the frameless ultralight category. Depending on features, most packs in this category weigh 16 to 20 ounces (455 to 567 g). At 17.5 oz (495 g), the Pa’lante V2 pack I tested was in the middle of this range, with the shorter torso version of the pack weighing a bit less. Given its weight class, I was thoroughly satisfied with how the pack carried over 20 times its weight in surprising comfort. Similar to how ants can carry amounts of weight many times their own, I’m always a bit impressed by how comfortable well-designed ultralight backpacks can be when loaded up with significant amounts of weight.
The Pa’lante V2 is most comparable in weight to the YAR.gear Mountain Drifter 38L, the Allmansright Liten 35, and the Nashville Packs Cutaway.
While I haven’t used any other packs in this weight class, it is important to note that with packs, perhaps more so than any other piece of gear, shaving off weight at the expense of comfort or functionality is a fool’s game. A pack that weighs a few ounces more but works better with your hiking style will be a much better value than one that is slightly lighter but lacks features that are important to you. For me, the Pa’lante V2 was an ideal combination of both being lighter than the internal frame packs I was using and providing a significant improvement to my actual on-trail hiking experience. Using a lighter pack that had more limited features or durability would have been at best a lateral move rather than a real upgrade, despite reducing my base weight.
The clean design of the Pa’lante V2 just might make you feel like popping the collar on your hiking shirt, putting on your sunglasses, and rocking out to Sharp Dressed Man as you’re hiking down the trail (please use earbuds if you do this). I know this sounds like cringe-worthy hyperbole, but this is a nice-looking pack that doesn’t sacrifice function for form.
The clean design of the Pa’lante V2 just might make you feel like popping the collar on your hiking shirt, putting on your sunglasses, and rocking out to Sharp Dressed Man.
As noted in an engaging interview by Mekenna Malin with Andrew Bentz, founder of Pa’lante, aesthetics were part of the foundational vision of Pa’lante and not an afterthought. “I wanted to make something with high-end materials and truly minimal aesthetics. Something that actually looked nice on a person,” Bentz said in the interview. When using the pack, and even when admiring it while it’s, sadly, sitting at home and not loaded up, this attention to detail is apparent. I have my V2 hanging from a hook in my gear room when it’s not in use. Hanging next to my internal frame packs, the improvement in aesthetics is obvious, even in my peripheral vision when I’m sitting on the couch and looking at a guidebook planning my next trip. Looking at it next to those more traditional packs, I’m impressed with several things: how much more admirable its streamlined design looks, how much less pack there is, and how such a minimalist backpack can accomplish the task of carrying my gear just as well as backpacks with more structure and features.

The Pa’lante V2 is a small volume frameless backpack designed for carrying loads of less than 20 pounds. That load-carrying criterion is strict. If your kit is small and light enough, we can optimize the use case further.
This pack is best suited for hikers who value performance, durability, and efficient packing systems and are willing to spend a few extra ounces on them. This pack is most suitable for trips of less than a week (due to space limitations for gear and food – but your mileage may vary). Hikers making trips that include long sections without resupply might need a pack with more volume and support to accommodate heavier loads.
I found the Pa’lante V2 to be equally well-suited for both on-trail and cross-country travel. This isn’t always the case for less durable or more bulbously-shaped ultralight backpacks. Its streamlined design and durable fabrics allowed me to feel comfortable taking it through places where it was subjected to significant abrasion against rocks and scratching by tree limbs. The minimalist hipbelt made the pack feel secure on uneven terrain and when scrambling and didn’t throw my balance off. When hiking on a trail, this pack performed precisely as a pack should – it kept all of my gear secure and organized, with items I frequently needed to be easily accessible. It was especially comfortable even on higher-mileage days.
The YAR.gear Mountain Drifter 38L recently reviewed by Ben Kilbourne is perhaps the closest competitor to the Pa’lante V2. They are similar in capacity and materials; the most significant difference is the ability to add or subtract various features from the Mountain Drifter 38L, whereas the options for the V2 are currently limited to fabric and color. The hybrid fastpacking harness of the Mountain Drifter 38L is also a notable difference between the two packs. While I’ve found that traditional S-shaped harnesses work well for me, if you know you have a preference for the fastpacking style, that might be enough to nudge you in the direction of the Mountain Drifter 38L. The Mountain Drifter 38L is also $40 less expensive than the V2.
Reviewed by Andrew Marshall, the Mountainsmith Zerk 40 has a similar capacity to the Pa’lante V2 but is almost a half-pound (8 ounces / 227 g) heavier. Like the Mountain Drifter 38L, and in contrast to the V2, the Zerk 40 utilizes a nontraditional harness, featuring an ultra-running-style harness. As noted in Andrew’s review, the Zerk 40 puts a premium on organization and has nine external pockets. The Zerk 40 also has compression straps, which the V2 lacks (at least in a meaningful sense – there are small cords that can be used to keep trekking poles out of the way or a Tenkara fly fishing rod secured, but these don’t serve to compress the volume of the pack). Notably, the Zerk 40 has a more bulbous shape than the V2, which may get in the way of navigating tight spaces for cross-country travelers who are rock scrambling or bushwhacking through dense vegetation. The Zerk 40 costs $20 less than the V2 but is significantly heavier. Those choosing between the two would need to determine their priorities and preferences as that will make a big difference in which pack they would ultimately be happier to have on their back for hours on end.
There isn’t a configuration of the LiteAF Curve pack that is identical to the V2, given the multiple options for packs in the LiteAF Curve series and their customization options. The LiteAF pack most comparable to the V2 may be the 40L Curve. It’s priced higher than the Pa’lante (by $35) but allows more customization options. Another key difference between the two packs is load lifters on specific packs in the Curve series (although not all packs can accommodate load lifters due to their size). LiteAF Curve packs also come fully seam sealed. See our review of a pack from the LiteAF Curve series.
The Pa’lante V2 is on the more expensive end of packs in this category (aside from the LiteAF offerings). In addition, it’s generally not the lightest option in the bunch. And with limited choices regarding fabrics and features, the Pa’lante V2 pack doesn’t necessarily stand out when relying solely on the cold data comparisons that seem to permeate most online gear discussions. If you’re trying to spend the least amount of money for the lightest pack in this category, then the Pa’lante V2 isn’t the pack for you.
Users who prefer the Pa’lante V2 will do so based on their prioritization of aesthetics vs. organization vs. weight vs. cost. As with any piece of gear, there are trade-offs, and what works for one person might not be ideal for another.
With so many different features and combinations possible with backpacks, your choices should primarily be guided by fit – both literal and figurative:
The Pa’lante V2 fits my hiking style and body perfectly, so it is an easy choice (for me). Based on the reviews of the packs I’ve compared the Pa’lante V2 to, I am somewhat confident that most of those packs would work reasonably well for me (assuming no fit issues). But given my satisfaction with the V2, I’m in no mood to try out a new pack just for the sake of change. The Pa’lante V2 pack works great for me. The duration and difficulty of my trips represent the style of trips taken by most non-thru-hiking backpackers, which leads me to believe that the V2 would be a functional pack for most hikers who:
If you’ve got a low-volume, lightweight backpacking kit for three-season trips that’s around 10 to 12 lbs (4.5 to 5.4 kg) before you add food and water, the Pa’lante V2 should be considered if you’re interested in a frameless backpack.
If you’re coming from a framed backpack, there will be a bit of a transition and a learning curve as you dial in your packing system to ensure that it feels comfortable against your back. So, if you need an upgrade, are curious about frameless packs, and are okay with a bit of trial-and-error along the way, then the Pa’lante V2 would be a reasonable choice.
If:
then you’d probably be better off passing on the Pa’lante V2 pack.
It’s also not an ideal backpack if you frequently do longer water carries. However, it’s certainly strong enough and durable enough to carry loads well above its comfortable load-carrying capacity. It can undoubtedly accomplish heavy-load duties if you reshuffle your gear to free up the pockets and don’t mind the discomfort created by a pack being pushed towards its limits (and the dual side pockets allow the added water weight to be nicely balanced).
This pack is also not well-suited for folks looking for a pack for weeklong loads or those who like the bells, whistles, and ease-of-adjustment found on more traditional backpacks.
Browse our curated recommendations in the Backpacking Light Gear Shop – a product research & discovery tool where you can find Member gear reviews, Gear Swap (used gear) listings, and more info about specific products recommended by our staff and members.
Gear Shop » Frameless Backpacks
DISCLOSURE (Updated April 9, 2024)
Dan Hu reviews current research regarding the safety and efficacy of sunscreen for hiking and backpacking, including ingredient efficacy, safety, and best practices for outdoor adventuring.
You don’t have access to view this content.
In this video interview, Ryan Jordan and Chip Noble (Senior Product Manager at Garmin) discuss the new features of the Garmin inReach Mini 2, including its improved battery life.
Garmin released the inReach Mini 2 Satellite Communicator this week. This video presents my interview about the new inReach Mini 2 with Garmin’s Chip Noble, the Senior Product Manager responsible for the Outdoor Traditional and inReach device product lines.
Chip and I discuss several new features of the Garmin inReach Mini 2, including:
In the following sections, I will discuss the primary differences between the 1st generation Garmin inReach Mini and the inReach Mini 2 and how important they are to me. The commentary that follows is my own and is not influenced by my conversation with Chip or Garmin. Instead, it relies on my extensive experience with radio and satellite communications devices during my expeditions and 34 years of outdoor guiding experience. In addition, I have spent hundreds of hours of study and testing into how the Garmin inReach works, which led to the development of our How to Use the Garmin inReach Mini Masterclass.
Here are what I perceive to be the significant new features of the Garmin inReach Mini 2:
The processor upgrade is the most significant change from the 1st generation Garmin inReach Mini and the inReach Mini 2. The practical impact for the user is that the device will run more powerful (feature-rich) software, run it faster, and save battery life.
Expect at least three times more battery life than the 1st generation inReach Mini (for similar tracking settings, messaging, and navigation use. It is important to note that the improved battery life is primarily the result of a silicon upgrade (the processor chip). Therefore, you will see improved battery life across the board and not just while tracking.
The Garmin inReach Mini 2 satellite communicator says goodbye to Garmin Earthmate and joins the Garmin Explore software family. Earthmate, the legacy inReach software, never entirely made it to the modern age of UI/UX design. In contrast, Explore is more capable, powerful, and easier to use for trip planning, navigation, and analysis on mobile and desktop devices. Both pieces of software are addressed in our inReach Masterclass.
In our How to Use the Garmin inReach Mini Masterclass, I recommended turning the TracBack feature off to save battery life. However, this is a valuable feature for beginners or off-trail travelers exploring dense vegetation. Hikers who like to wander (hunting comes to mind) in timber may appreciate it. I have used TracBack when camped in forested areas when I have had to hang my bear bag (or find an eco-friendly spot to poop) at night, far away from camp. TracBack allows me to quickly find my way back to my tent without wandering.
On the Garmin inReach Mini 2, TracBack is always on and running in the background. The new battery optimization of the inReach Mini 2 will be a welcome safety feature for some users. Knowing that they will not have to remember to start the TracBack program when they begin their trip will come as welcome relief.
The inReach Mini 2 also received some minor updates worth noting:

The Garmin inReach Mini 2 satellite communicator gets a user interface (UI) facelift familiar to Garmin Instinct and Fenix outdoor watch users. Photo: Garmin.
In addition, there are some other changes that most users will not perceive to impact their user experience, including:
Every hiker has to answer this question for themself. For me, the ability to use a device on a long trip without recharging is an improvement. In addition, the upgrade from Earthmate to Explore makes for a more enjoyable pre-trip and post-trip experience on my desktop. Explore is also more user-friendly to use than Earthmate on a mobile device. The other features do not play into my decision to upgrade. I use a digital compass primarily on my watch. I use the TracBack feature sparingly (e.g., perhaps one or two times during a 10-day expedition). More satellite support is not a significant need for me because most of my hiking is in the mountains of the North American west. Improved battery life and Explore integration are enough to justify the upgrade for me.
While the 1st generation inReach Mini will still be supported by Garmin with firmware updates as needed, forward compatibility with Garmin Explore will not be possible. The 1st generation inReach Mini uses a different Bluetooth protocol that is not compatible with the Explore app. In theory, it’s possible, but because the Mini 1 has so little unallocated memory, it doesn’t have enough memory margin to support the new protocol.
I will not say that it is the best because “best” will always depend on users’ needs. However, the inReach Mini 2 is undoubtedly the most powerful and capable standalone satellite communicator available. That is a critical designation because it gives me duplicity of function in case of a smartphone failure. Plus, the opportunity to leave the smartphone at home is always welcome. That said, there are other capable satellite communicators on the market, and you will find our current recommendations in the Gear Shop.
With the introduction of the Garmin inReach Mini 2, the 1st generation inReach Mini’s will start flooding the used gear market. They will (likely) be closed out by retailers at sale prices. At a price of less than $200, the 1st generation inReach Mini would be a very good deal. However, suppose you are interested in pre-trip planning or post-trip analysis or want the most positive user experience possible with desktop and mobile apps. In that case, Garmin Explore (Mini 2) is more capable and user-friendly than Garmin Earthmate (Mini 1st generation). In addition, Earthmate is now a legacy package. It will receive minimal maintenance and support from Garmin, having reached the end of its development cycle. Look for continuous development and improvement of Explore.
I would only recommend the Zoleo if you need seamless message threading across satellite, WiFi, and cellular networks. I would recommend the inReach Mini 2 if you want a smaller, lighter package more capable as a standalone device. In addition, the inReach may be a better option if you want to integrate your satellite communicator into a Garmin ecosystem that includes Instinct or Fenix watches and Explore software. Other differences between the two communicators are otherwise relatively insignificant.
DISCLOSURE (Updated April 9, 2024)
PrimaLoft Gold outperforms Climashield Apex as the more resilient (durable) insulation, capable of retaining more of its original warmth and loft in response to repeated compression.
You don’t have access to view this content.
Ryan and Andrew discuss strategies and gear for managing perspiration in layering systems, including the processes of wicking, evaporation, and ventilation.
In this SKILLS SHORT, Andrew and Ryan discuss strategies and gear for managing perspiration in layering systems, including the processes of wicking, evaporation, and ventilation.
How to Subscribe
Apple Podcasts | Spotify | RSS
More Episodes
Backpacking Light Podcast Index
Credits
Executive Producer - Backpacking Light; Show Director and Host - Ryan Jordan; Producer - Chase Jordan; Theme music: Look for Me in the Mountains written by Chris Cunningham and Ryan Jordan, performed by Chris Cunningham (acoustic guitar, lead and harmony vocals, harmonica), Chad Langford (upright bass), and Tom Murphy (mandolin), produced by Basecamp Studios in Bozeman, Montana.
Feedback / Tips / Questions
podcast@backpackinglight.com
More Backpacking Light
Sign up for the Newsletter. Become a Backpacking Light Member.
Disclosure
Sponsorship Policy: Backpacking Light does not accept compensation or donated/discounted products in exchange for product mentions or placements in editorial coverage, including any podcast episode content not excplicitly identified as sponsored content. Some (but not all) of the links in these show notes may be affiliate links. Learn more about affiliate commissions, influencer marketing, and our consumer advocacy work by reading our article Stop wasting money on gear.
The Nashville Pack Cutaway backpack is a roll-top 30 L frameless pack with a modular shoulder strap attachment system. Also discussed: The Nashville Pack Tiempo.
You don’t have access to view this content.
Learn how to choose a base layer for backpacking, base layer material performance differences, and how base layers impact moisture transfer in the broader context of a clothing system.
You don’t have access to view this content.
Enriching friendship through fishing and adventure in Colorado’s Middle Park.
You don’t have access to view this content.
Physical therapist and athletic performance coach John Zombro chats with Ryan and Andrew about foot injuries, training strategies, and rehabilitation in the context of hiking and long-distance backpacking.
In this episode of the backpacking Light Podcast, we interview physical therapist and athletic performance coach John Zombro about foot health, footwear, injuries, rehabilitation, training, and more.
Also in this episode: shoes we are looking at in 2022, updates on the Backpacking Light Member Q and A series, and our favorite things we’ve published lately!
How to Subscribe
Apple Podcasts | Spotify | RSS
More Episodes
Backpacking Light Podcast Index
Credits
Executive Producer - Backpacking Light; Show Director and Host - Ryan Jordan; Producer - Chase Jordan; Theme music: Look for Me in the Mountains written by Chris Cunningham and Ryan Jordan, performed by Chris Cunningham (acoustic guitar, lead and harmony vocals, harmonica), Chad Langford (upright bass), and Tom Murphy (mandolin), produced by Basecamp Studios in Bozeman, Montana.
Feedback / Tips / Questions
podcast@backpackinglight.com
More Backpacking Light
Sign up for the Newsletter. Become a Backpacking Light Member.
Disclosure
Sponsorship Policy: Backpacking Light does not accept compensation or donated/discounted products in exchange for product mentions or placements in editorial coverage, including any podcast episode content not excplicitly identified as sponsored content. Some (but not all) of the links in these show notes may be affiliate links. Learn more about affiliate commissions, influencer marketing, and our consumer advocacy work by reading our article Stop wasting money on gear.
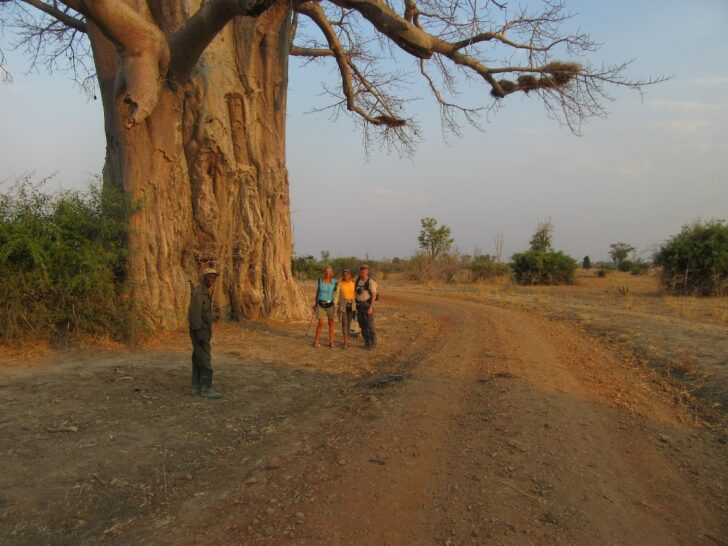
Heat, army ants, and stupendous views await Jeff de Graffenried as he treks through South Luangwa National Park, Zambia.
When Lari Merritt, operator of Mutinondo Wilderness, asked me to join her and three friends on a 78-mile backpacking trip across the Great Rift Valley (GRV) in Zambia, how could I say no?
The timing was perfect at winter’s end with cool nights and pleasant days. The route started from the remote, 25K acre Mutinondo conservation area on the Machinga Escarpment and descended nearly 3,281 feet to the Luangwa River Valley and across South Luangwa National Park (SLNP).
Western Zambia’s Luangwa Valley is an ancient landscape formed by violent geologic events that ripped the earth apart to form a great chasm. The GRV is a series of faults and tears that extend from the Red Sea across East and Southern Africa forming some of the most dramatic landscapes and unique ecosystems on the continent.
Mutinondo is located on the edge of the GRV’s northwestern escarpment, the Muchinga Mountains. This extraordinary landscape is formed by exposed ancient granite “whalebacks” or inselbergs that continue northeast towards the Tanzanian border, spanning approximately 540 miles.

The Mulungushi River forms the northwestern boundary of the SLNP and is fed by rivers from the Muchingas. As these streams slow, they deposit massive amounts of sediment across a valley floor filled with flat-topped acacia trees, elephants, big cats, and herds of antelope.
A granite plateau, rolling hills, old river banks, and oxbow lakes bounded by Miombo and Mopane woodlands, thick grasslands, and lush riverine forests form unique, world-renowned ecosystems.
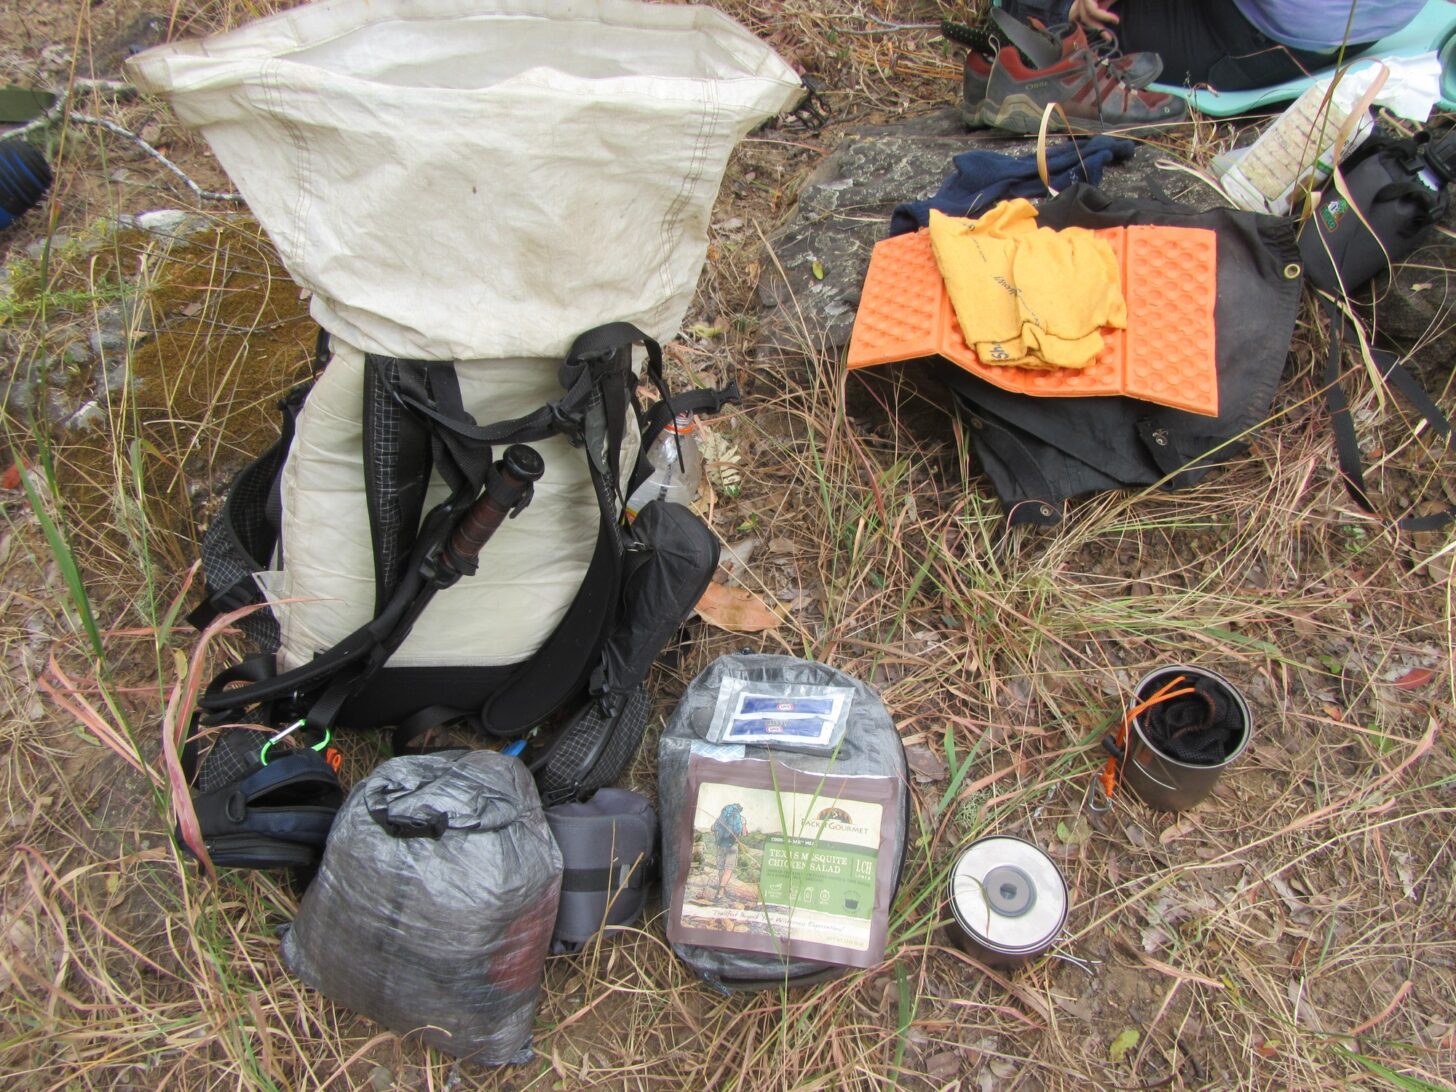
For this six-day trip, I carried my gear in a Hyperlite Mountain Gear Windrider 2400 pack. My 6 lbs of food weight included Mountain House dehydrated meals, muesli, trail mix, power bars, instant coffee, and tea bags. The total non-food weight was almost 11 lbs., including a 1 lb. utility K-bar 7 inch open blade knife that I attached to my pack for easy access and phone, camera, 20,000 mah power-bank and batteries. A pair of zip-off long pants, one long-sleeve shirt and Outdoor Research sleeves for sun and tsetse fly protection, two quick dry short-sleeve shirts, two pair of Darn Tough socks and liners, calf-high OR gaiters, and Oboz trail runners were my clothes. The gaiters kept the grass and grit out of my shoes, protected my legs, and reduced shoelace snags. Plus, they came in handy to sit on during lunch breaks and to place under my Thermarest Neoair Xlite sleeping pad to reduce the chance of puncture from nasty thorns. The total weight carried and worn was just under 21 lbs.
This was freedom – a true escape from the routine of everyday life. My senses opened to what was happening around me and my mind had time and space to notice the details – signs, sounds, and creatures – that are easily missed. Focusing on the flora, fauna, and the sights and sounds of the animals, I started to better understand what makes these complex ecosystems so special and to experience the Zambian wilderness in a natural way – to feel it and be part of it.
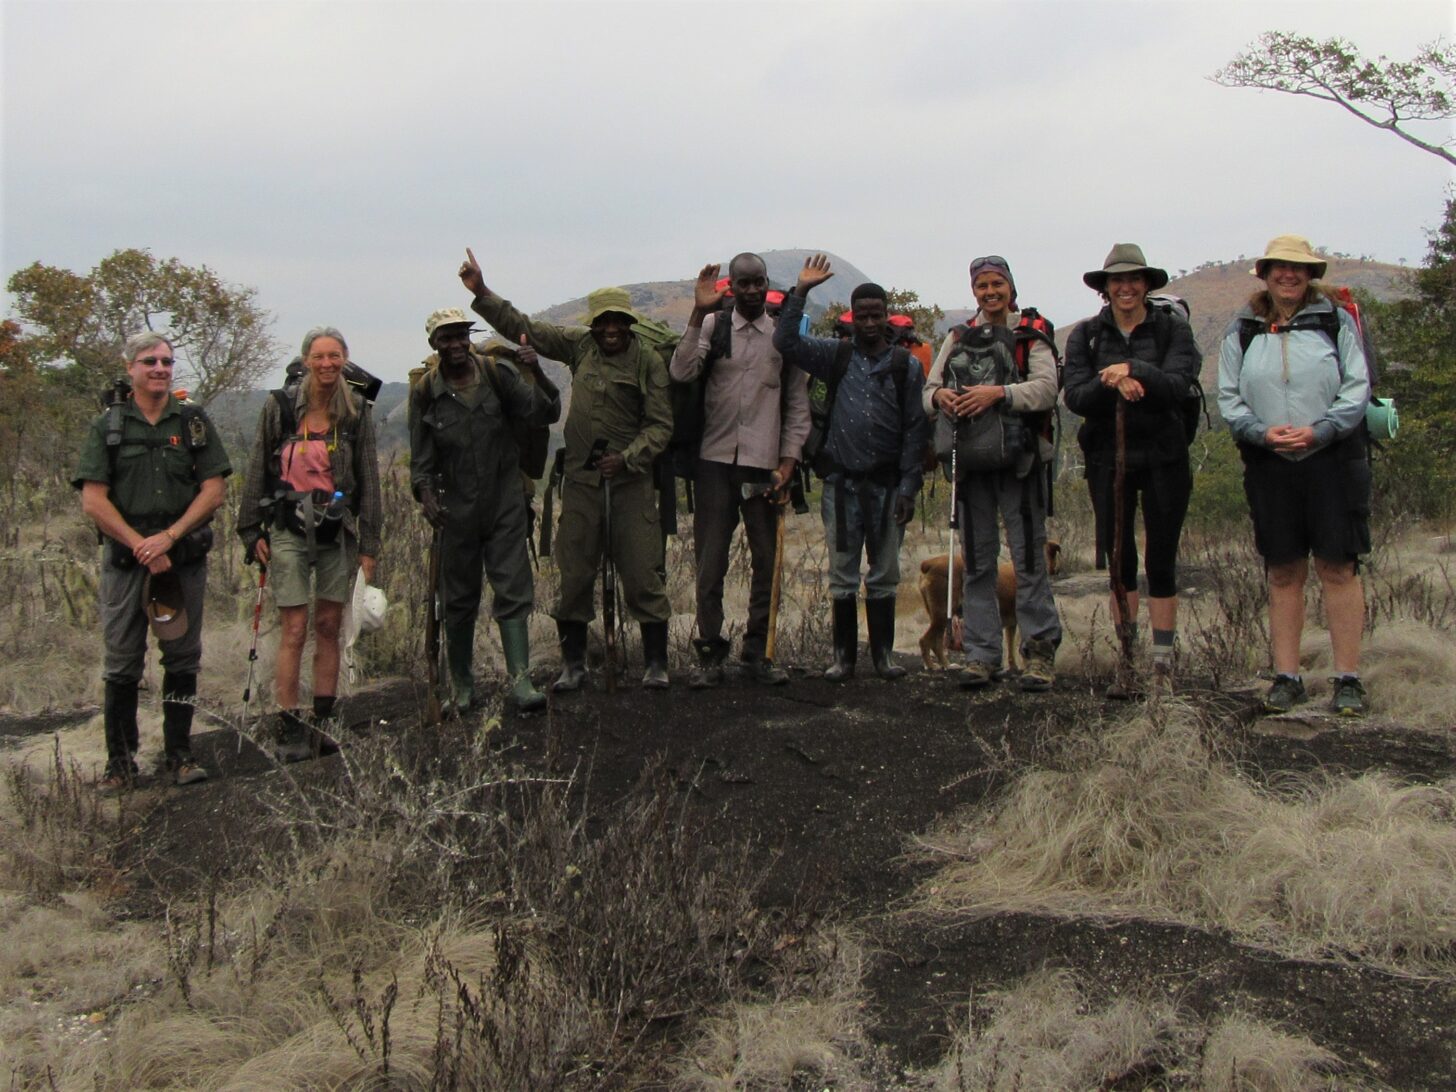
After obligatory beginning-of-the-adventure group photos, we set off. Following well-established trails, the rangers led us through the granite whalebacks and, within an hour, we were at the eastern Mutinondo boundary. There, we abandoned the known and stepped single file into the bush.
Navigating through the waist-high grass and shrubs, we were slowly swallowed by the Central Zambezi Miombo Forest. Along the escarpment, rock-capped overhangs provided 180-degree views of endless uninterrupted forests that provoked silent contemplation of the earth’s beauty and vastness.
Though we caught only fleeting glimpses of a klipspringer and a few roan antelope, there were abundant signs bushbuck, bushpig, warthog, and porcupines. Relentless poaching has made the animals skittish and they quickly disappear.
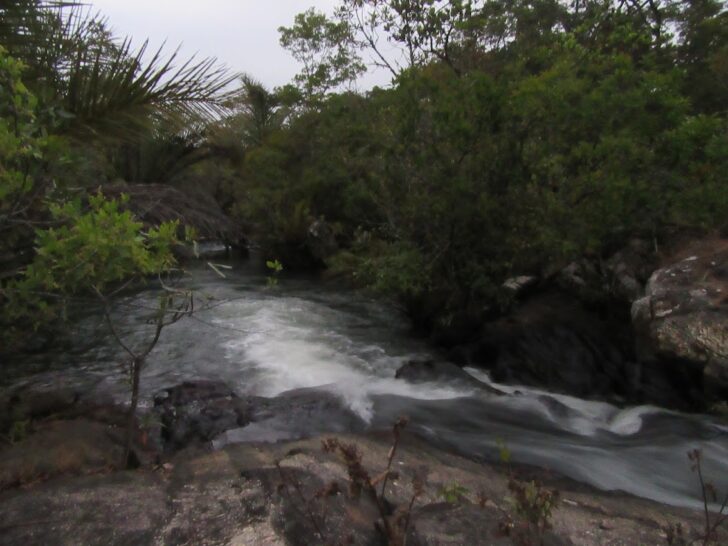
At around 12.5 miles in, we dropped our packs next to a series of rapids and pools on the Wateshi River, soaked our feet, had a drink of cool water, and set up our first camp.
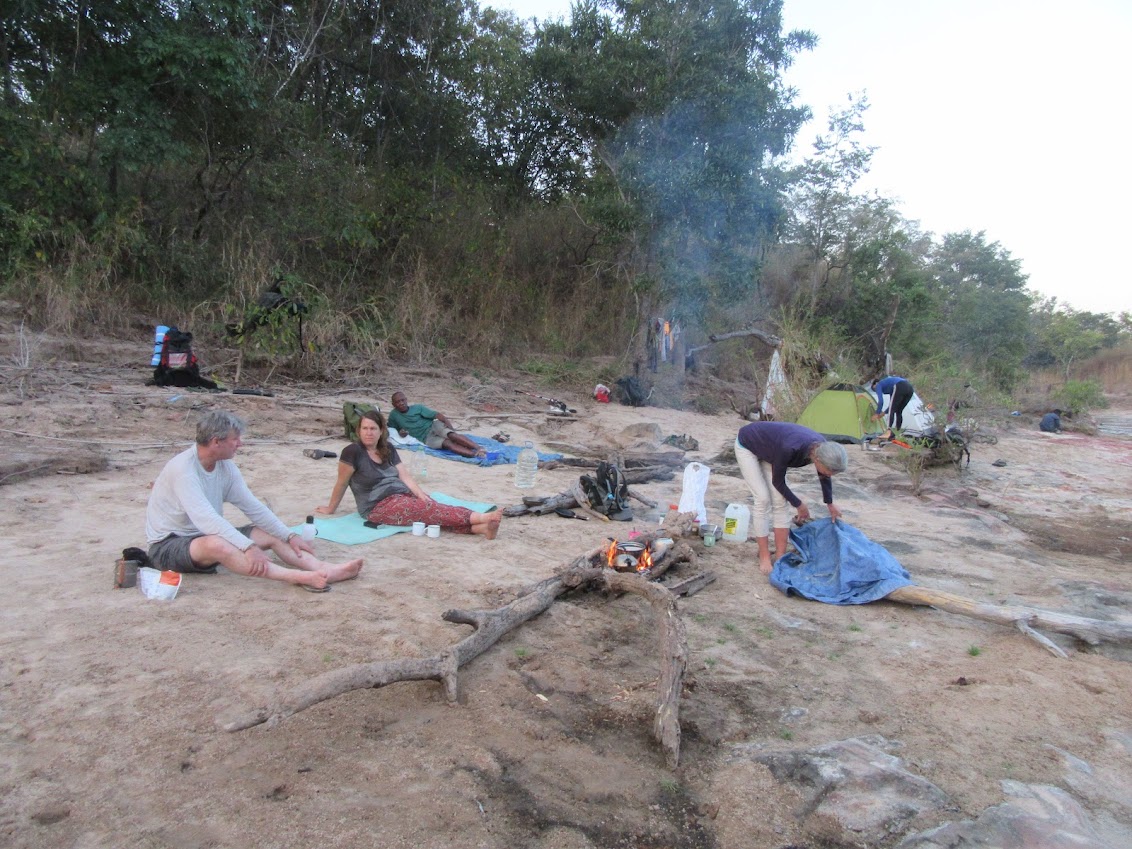
After checking for crocodiles, we quickly bathed in the river. We admired our first sunset as we sat by the crackling fire, sipping tea and reflecting on the day’s adventures. With a full belly, I crawled into my sleeping bag and fell asleep listening to soothing sounds of the rapids, mesmerized by the vast night sky. This is malaria territory, so I tented a mosquito net to keep from getting that nasty illness. Again.
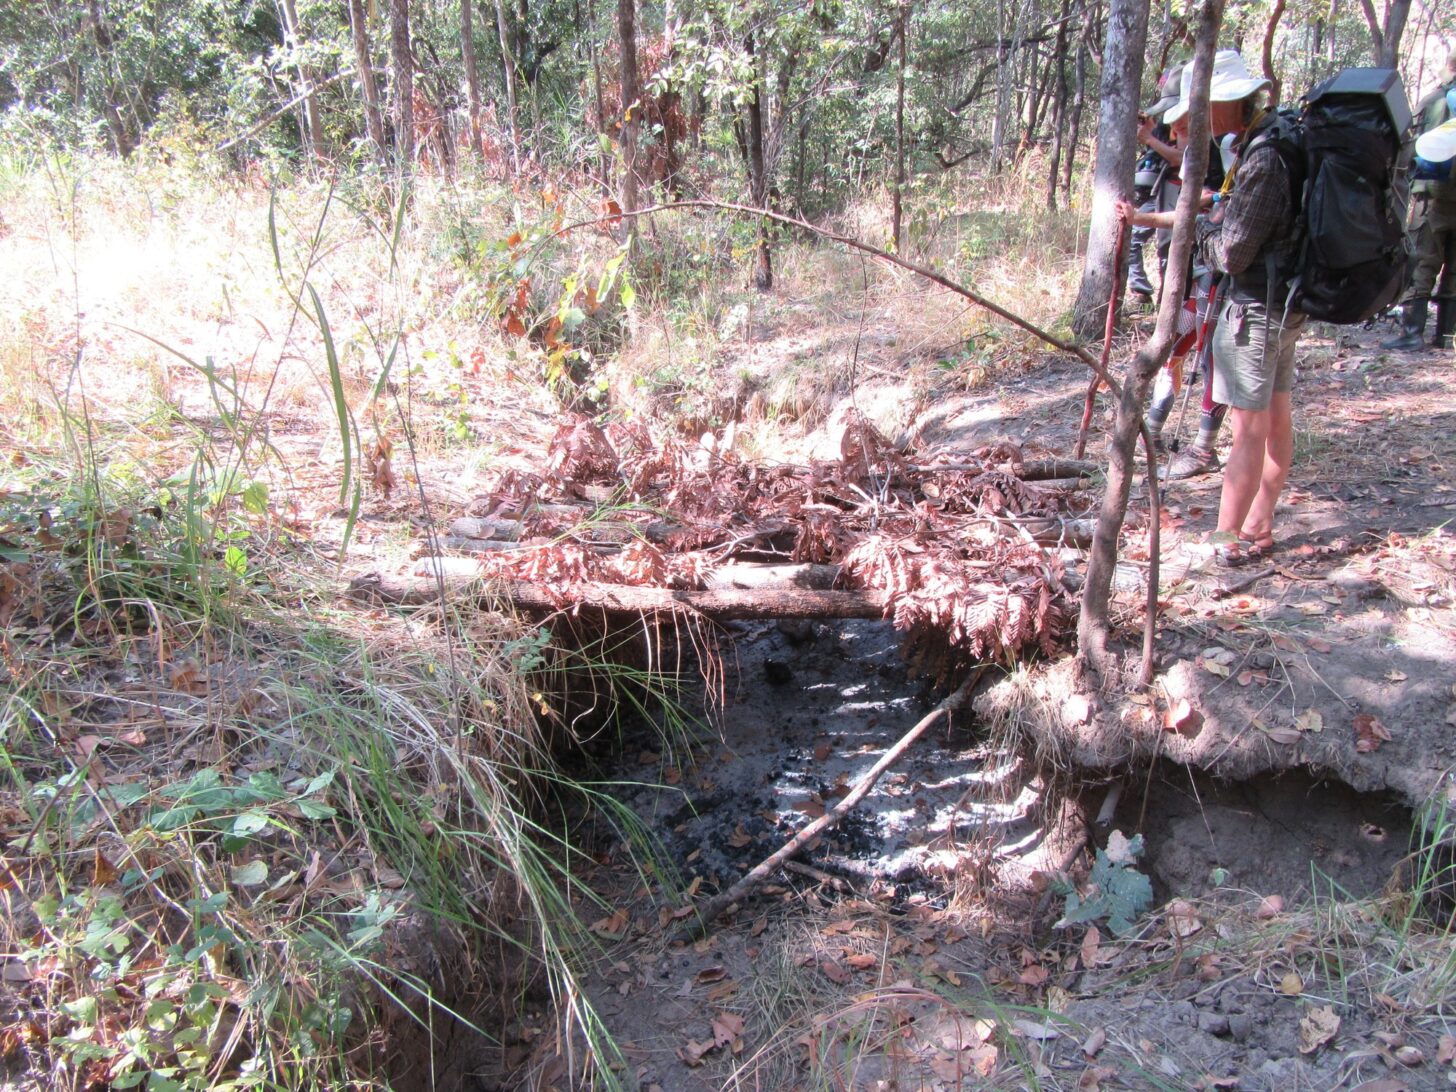
On day two, we set off before dawn after breaking camp and making coffee. Following the Wateshi downstream, we crossed at a shallow ford. We spotted the first evidence of illegal wildlife poaching at the top of the ridge on the other side. It was a wooden bushmeat drying rack made from trees cut nearby.
Again, we covered more than 12.5 miles before setting up our second camp inside a bend of an oxbow lake of the Mupamadzi River. Since it was dusk and prime time for hunting predators, we wasted no time settling in and adjusting our attitudes with tea and a meal. The crickets and fiery-necked nightjars sang us to sleep at night.
Day three started with crossing the Mupamadzi River only a quarter-mile east from where we camped. Before crossing any river, it is imperative to check for elephants, African buffalo, and crocs, otherwise it could be your last day trekking.
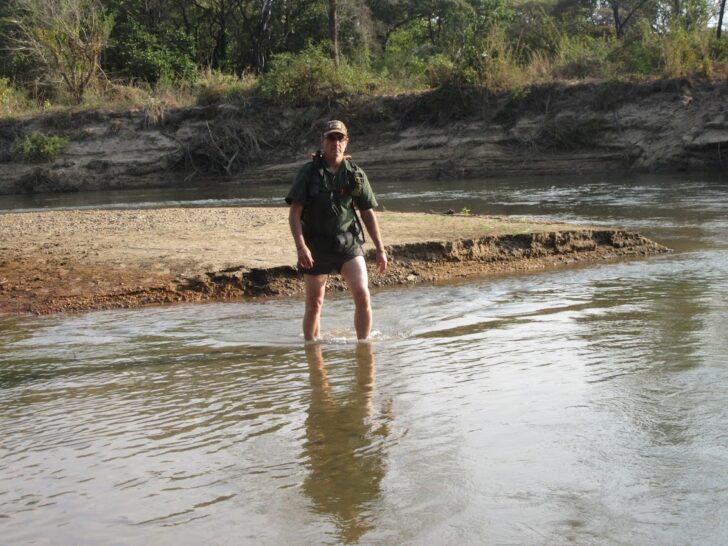
In the shallow, clear water on the other side and under the cover of tall grass, we took turns bathing in our own private spa! Afterward, we made breakfast and relaxed while our freshly washed clothes dried in the sun.
Clean, refreshed, and fed, we cheerfully turned south. But after several hours of steady walking in the intense sun, the cheer factor was decreasing, so we rested along a shady bank of a small, dry stream. There, we refilled bottles with filtered water from holes we dug in the sand.

Late that afternoon, we arrived at the Department of National Parks and Wildlife’s remote Bush Baby Ranger Camp and checked in with park authorities, then set up camp at a nearby stream.
Donning my headlamp, clearing a sleeping spot, and hanging my mosquito net, I picked my way through the brush to the small, narrow stream to bathe. Returning to camp clean, I ate and fell asleep under the stars, listening to the sounds of the evening and thinking of the day’s trek.
After an hour of deep sleep, I was awakened by a small sharp bite on my foot, then another on my leg, and another on my waist. Suddenly I was being bitten all over. I turned on my headlamp and jumped up. To my horror, army ants were everywhere! All my gear and sleeping area were being raided. I was covered in ants from head to toe and could even feel them crawling in my hair. Doing the “ant dance,” I jumped out from under the mosquito net and tore off my clothes. To hell with modesty, I had to get them off fast.
Seeing me dance around half-naked and yell in a staccato of shrieks and swears, the rangers came to my rescue. Working from experience, they quickly cleaned my gear and then spread campfire coals and ash around the campsite to prevent the ants from marching through the entire camp. Apparently, when foraging, army ants don’t like ash and won’t pass through it. As quickly as they arrived, the ants turned and marched on in a different direction. The rangers later told me that if I had not gotten up, the whole troop of ants would have covered me and tried to eat me alive like they do a caterpillar or anything else living that gets in their way. It took a long time for the sensation of ants crawling over my body to go away.
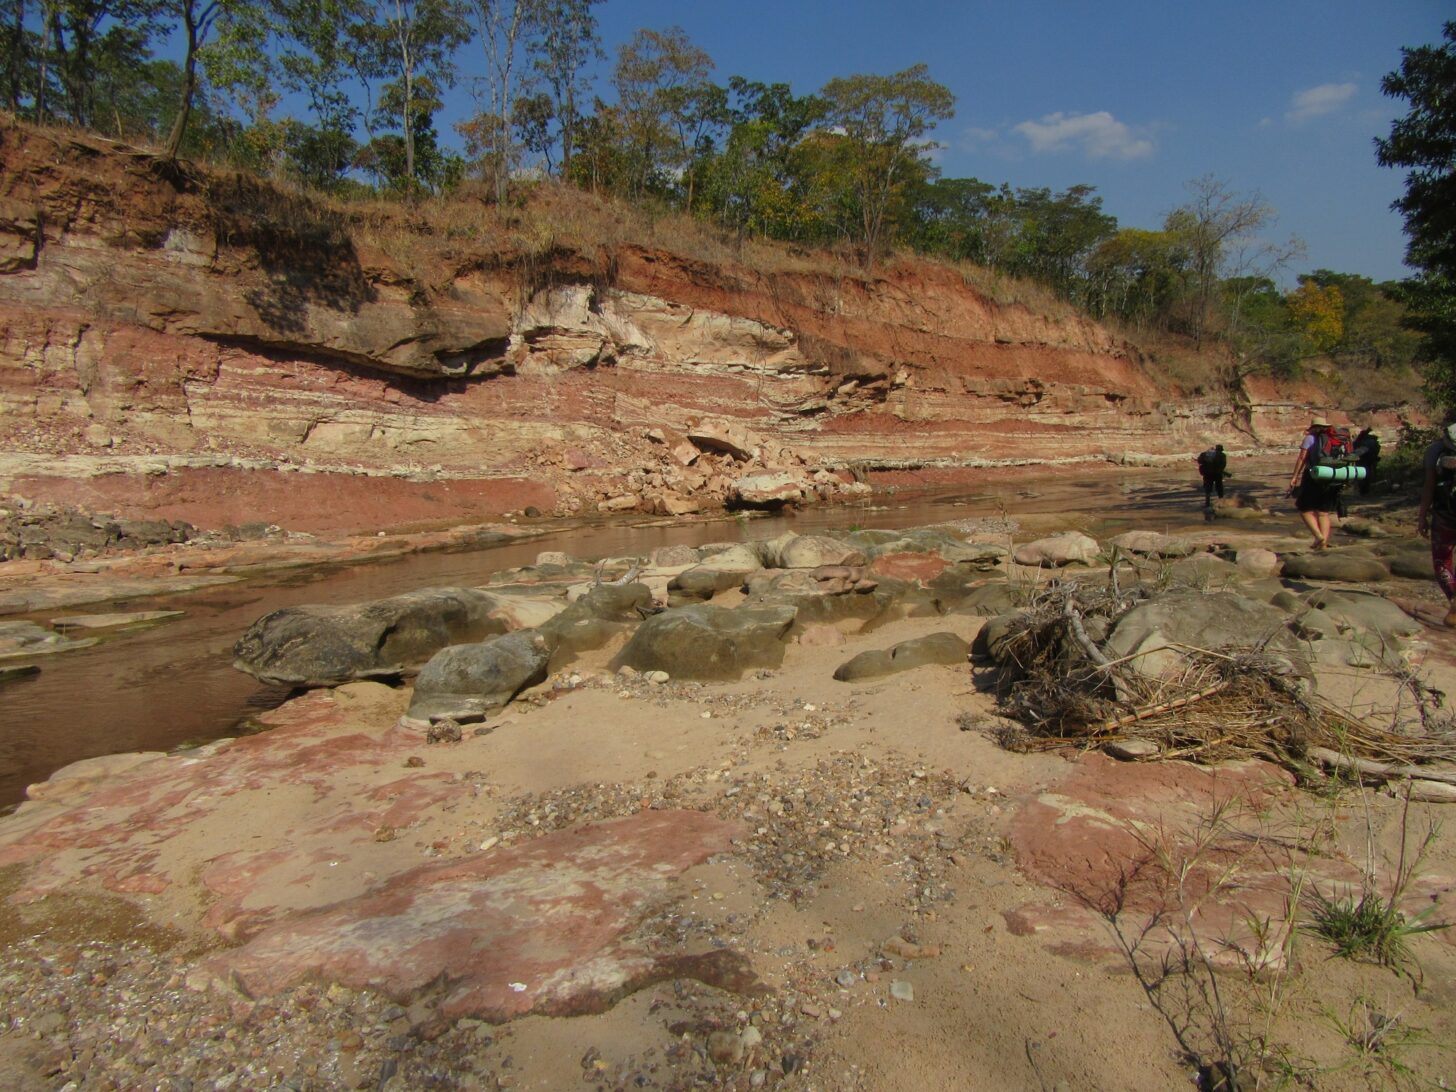
During the first half of Day 4, we walked 16 miles south toward the Luwi River, following a slight rise that divides it from a tributary. The midday break found us resting in the shade of large fig trees overlooking the river and enjoying the wild fruit with our lunch. From there we decided to take off our shoes and give our battered feet a revival, walking barefoot in the riverbed for the rest of the day, walled by angled and undulating orange sandstone.

Camping that night near a three-way confluence on a narrow sugar-white sand bar, we had a front-row seat to the Southern Cross constellation and shooting stars, which diverted my thoughts from the lion, leopard, and elephant tracks that crisscrossed the river bottom around us.
Late in the dry season, it gets hot and water becomes scarce, increasing chances of encountering wildlife around water sources. In the privacy and shade of the tall grass along the rivers, we stayed alert as we walked, preferring to avoid startling a resting animal. We didn’t want to be charged at close range (or any range).
At one point on day five, we emerged onto an exposed river bank to the surprise of a family of six elephants across the river. Within seconds, the elephants trumpeted, flared their ears, and rushed away to the protection of the forest. Even though we were more than 50 yards away and on the other side of a river, they weren’t waiting around to determine our intentions. Similarly, other animals (hartebeest, buffalo, impala, puku) noticed us and disappeared quickly. Humans are dangerous.
We camped on a tree-lined high point with a good view across the braided river. A spectacular burnt-orange sunset silhouetted elephants crossing far upstream and impala casually munching away on the opposite bank. The deep roar of lions calling into the night reminded us that this is their territory and we are just visitors.

The last day was arduous. It was hot (105 °F) in the Luangwa Valley and we had a long way to go. Shade was sparse so we walked fast. Each hour we took a break to rest and get out of the intense tropical sun. The gnats and tsetse flies were swarming so bad that I had to cover my head and face with my bandana to get a break, and leaned back on my pack to “rest my eyes.”

As we passed the 1,500-year-old Big Baobab tree, a well-known park landmark, we knew we were close to our destination. Baobab trees are respected throughout Africa for their many uses, age, shape, and nutritious fruit. The Vitamin C-loaded fruit fueled us forward.
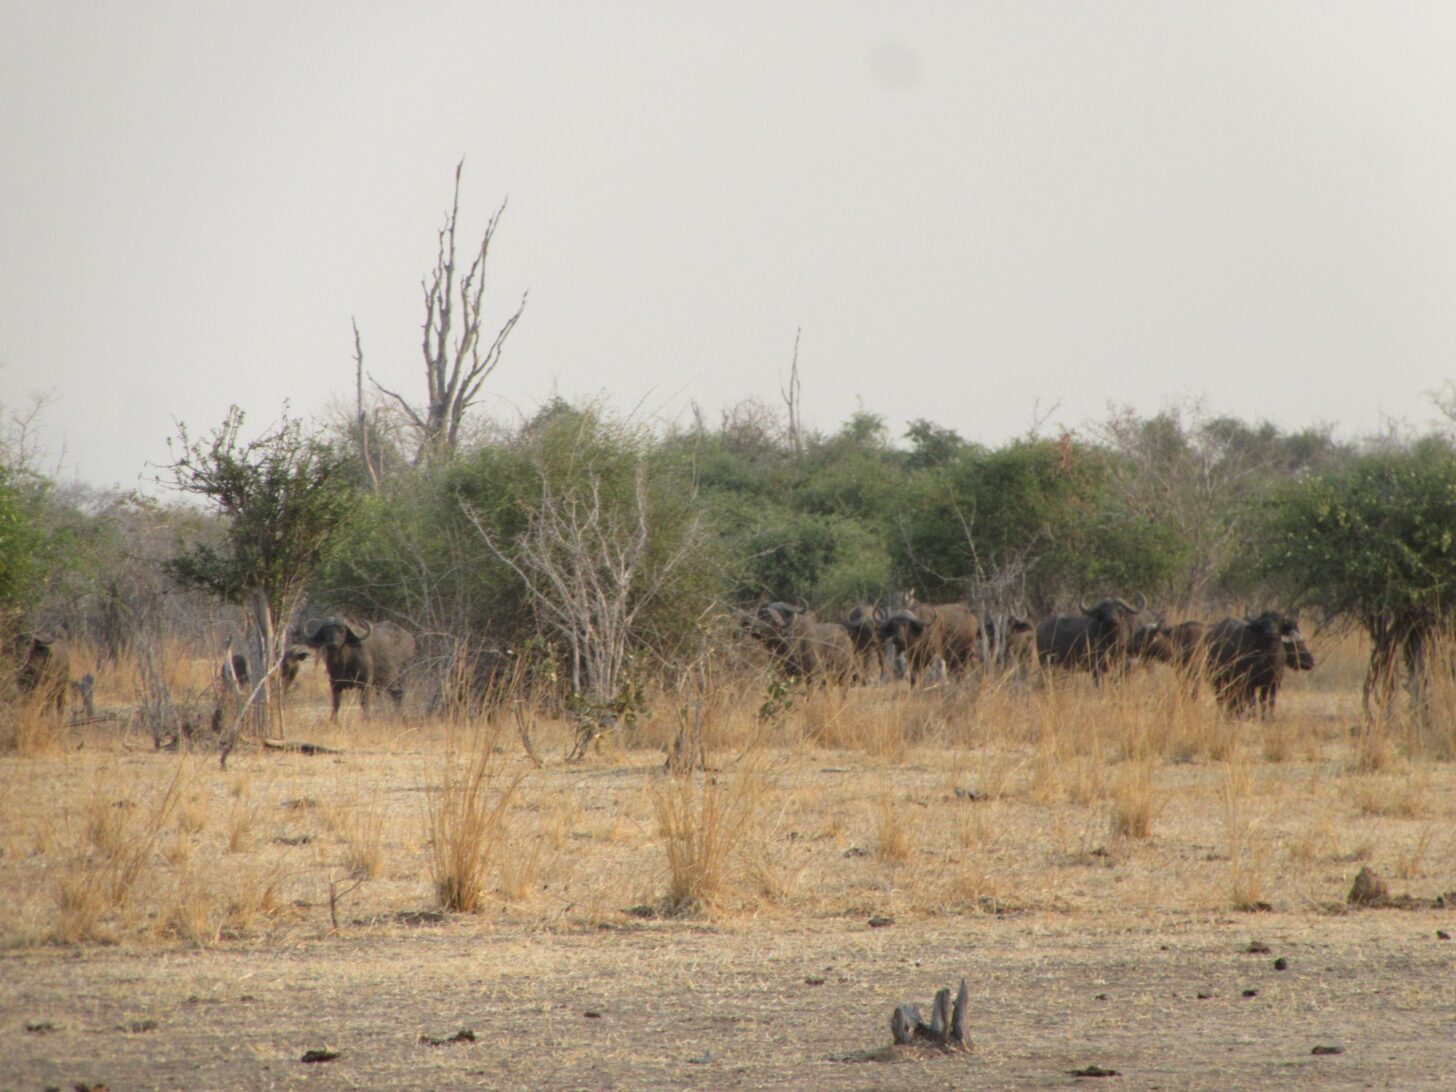
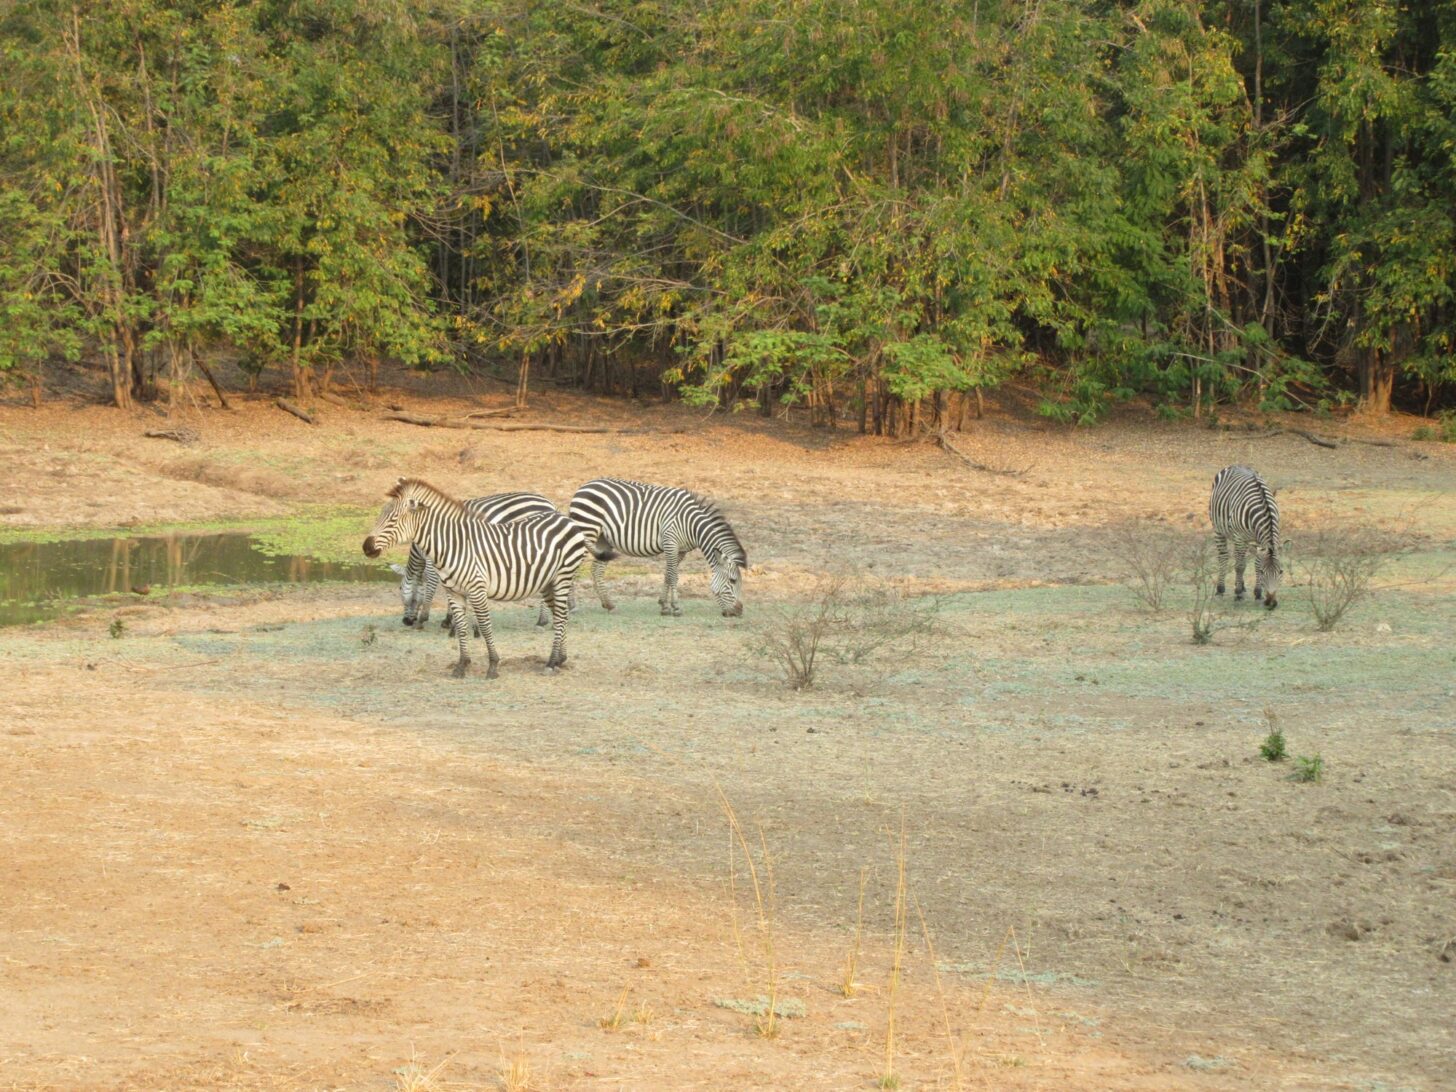
With two coolers of cold drinks waiting, our friend and long-time park guide, Jason Alphonse, was an oasis. Dropping our packs, we leaned against his Landcruiser and cooled down with a cold beverage before the last few miles. We were in the heart of the park and surrounded by abundant wildlife, including at least two prides of lions, leopards, wild dogs, hyena, elephants, buffalo, giraffe, zebra, and various antelope. We hurried thought the last few kilometers (1-2 mi.) to the Luangwa River and the SLNP main gate. A massive herd of buffalo, highlighted by zebra, impala, hippos, and elephants, bid us farewell.

This rare opportunity to walk across one of the best national parks in Africa tops my list of life highlights. Whether navigating our way through the Machinga Escarpment, pushing our way through elephant grass twice as high as a person, or digging for fresh water, I felt a sense of achievement that only comes from completing a long, hard trek.
The vast landscapes and roaring lions at sundown were fantastic, but the shared memories and friends I made during the trip way will stay with me forever.
DISCLOSURE (Updated April 9, 2024)
In this freeze-drying installment, we discuss the history of freeze-drying and experiment with using a freeze dryer to prepare our favorite take-out town meal for enjoyment in the backcountry.
People have been drying food for tens, perhaps hundreds of thousands of years. The reasons are straightforward and well-known – dried food is lighter and keeps longer.
Drying food to sustain us on long journeys is an ancient tradition. When you load your pack with dried food and hit the trail, you are just the latest link in a long chain of humans: nomads who are coming into the country, going down the road feeling bad, heading for that Big Rock Candy Mountain.
The earliest food drying technology – cutting food into small pieces and laying it out in the sun – costs almost nothing. It also works pretty well if you don’t mind entertaining the local fly population.
Simple dehydrators, consisting of racks, a fan, and a heating element (and a cover to keep the flies off) are a step up. They deserve a place in every hiker’s gear depot. You can and should use these effective tools to dry a wide variety of foods. I’ve written about why to dehydrate your own food and how to dehydrate food for backpacking previously.

Heat-assisted dehydration has its limitations though. Many foods – meats, eggs, various sauces – simply don’t rehydrate well. Even for those that do, some loss of flavor and nutrition is unavoidable during the drying process.
That’s why nearly all of us have used freeze-dried meals at some point during our hiking careers. Freeze-dried foods rehydrate readily, preserve taste and nutrition, weigh little, and store well for very long periods. However, freeze-dried backpacking meals are also somewhat expensive and available only as ready-made products through retailers. The quality and variety of retail freeze-dried foods have improved dramatically in the last decade or two. But you are still stuck with the choices that others have made for you. These choices are aimed at pleasing a mass or niche market in order to make a profit, they are not choices aimed at pleasing you.
Backpacking Light owns a Harvest Right Home Freeze-Dryer unit. Ryan Jordan asked if I would be willing to use it and write a series of articles for Backpacking Light. (The fact that they were moving into a smaller space and no longer had a place for it may have had something to do with this assignment!)
In this first installment, I’ll tell you a bit about the history and general principles of freeze-drying foods. Each article will finish with a recipe and review of something I’ve freeze-dried. I am definitely up for challenges and testing new ideas. So if you’ve got an idea for something you’d like to see tested, hit me up in the comments section and I will see what I can do and report back.
Drying food is the process of reducing its water content. The fundamental difference between freeze-drying and dehydration is that during freeze-drying, water is removed by sublimating ice in a vacuum, and during dehydration, water is removed by evaporation of liquid water via heat.
This process has a surprisingly ancient history. Inca peoples, who invented the potato, also invented a low-tech method of freeze-drying. Potatoes were left out on freezing nights; ice and water would be squeezed out of them during the day. After a few cycles, they had freeze-dried potatoes (a dish called chuño) that stored very well.
Modern technology only began to improve on this process in the 1890s with the use of vacuum pumps and mechanical refrigeration. However, freeze-drying remained a fairly obscure niche technology until the 1950s and 1960s, when it began to be applied to pharmaceuticals and food preservation. Military contracts to Rich-Moor and Mountain House gave these companies a start in using freeze-drying for food preservation. Soon they began marketing freeze-dried meals to a peculiar subset of civilians who thought that carrying a heavy pack all day and sleeping on the ground at night was good fun.
Although the meals are much better now than in the 60s (trust me on this), the fundamentals of freeze-drying have not changed. The basics are:
Those are the basics. I’ll expand on them a bit more in future articles.
This first recipe isn’t really a recipe. After I had done a couple of runs in the Harvest Right freeze-dryer with good results, it occurred to me to simply order some favorite take-out food and dry it.
Chez Thuy is a nearby Vietnamese diner that has been in business here (Boulder, Colorado) for over 30 years. Although my family members aren’t really tofu-eaters, we love the sesame tofu at Chez Thuy and always get it when ordering from them. I thought it would be pretty great to eat one of my favorite take-out dishes while hiking the PCT this summer.
The dish consists of broccoli stir-fried in sesame sauce, along with fried breaded tofu and crispy noodles. I cut the larger veggie and tofu chunks into half-inch pieces to facilitate drying and rehydration and popped the dish into the freeze-dryer. It looked like this going in:

And a month later like this, about to go down:
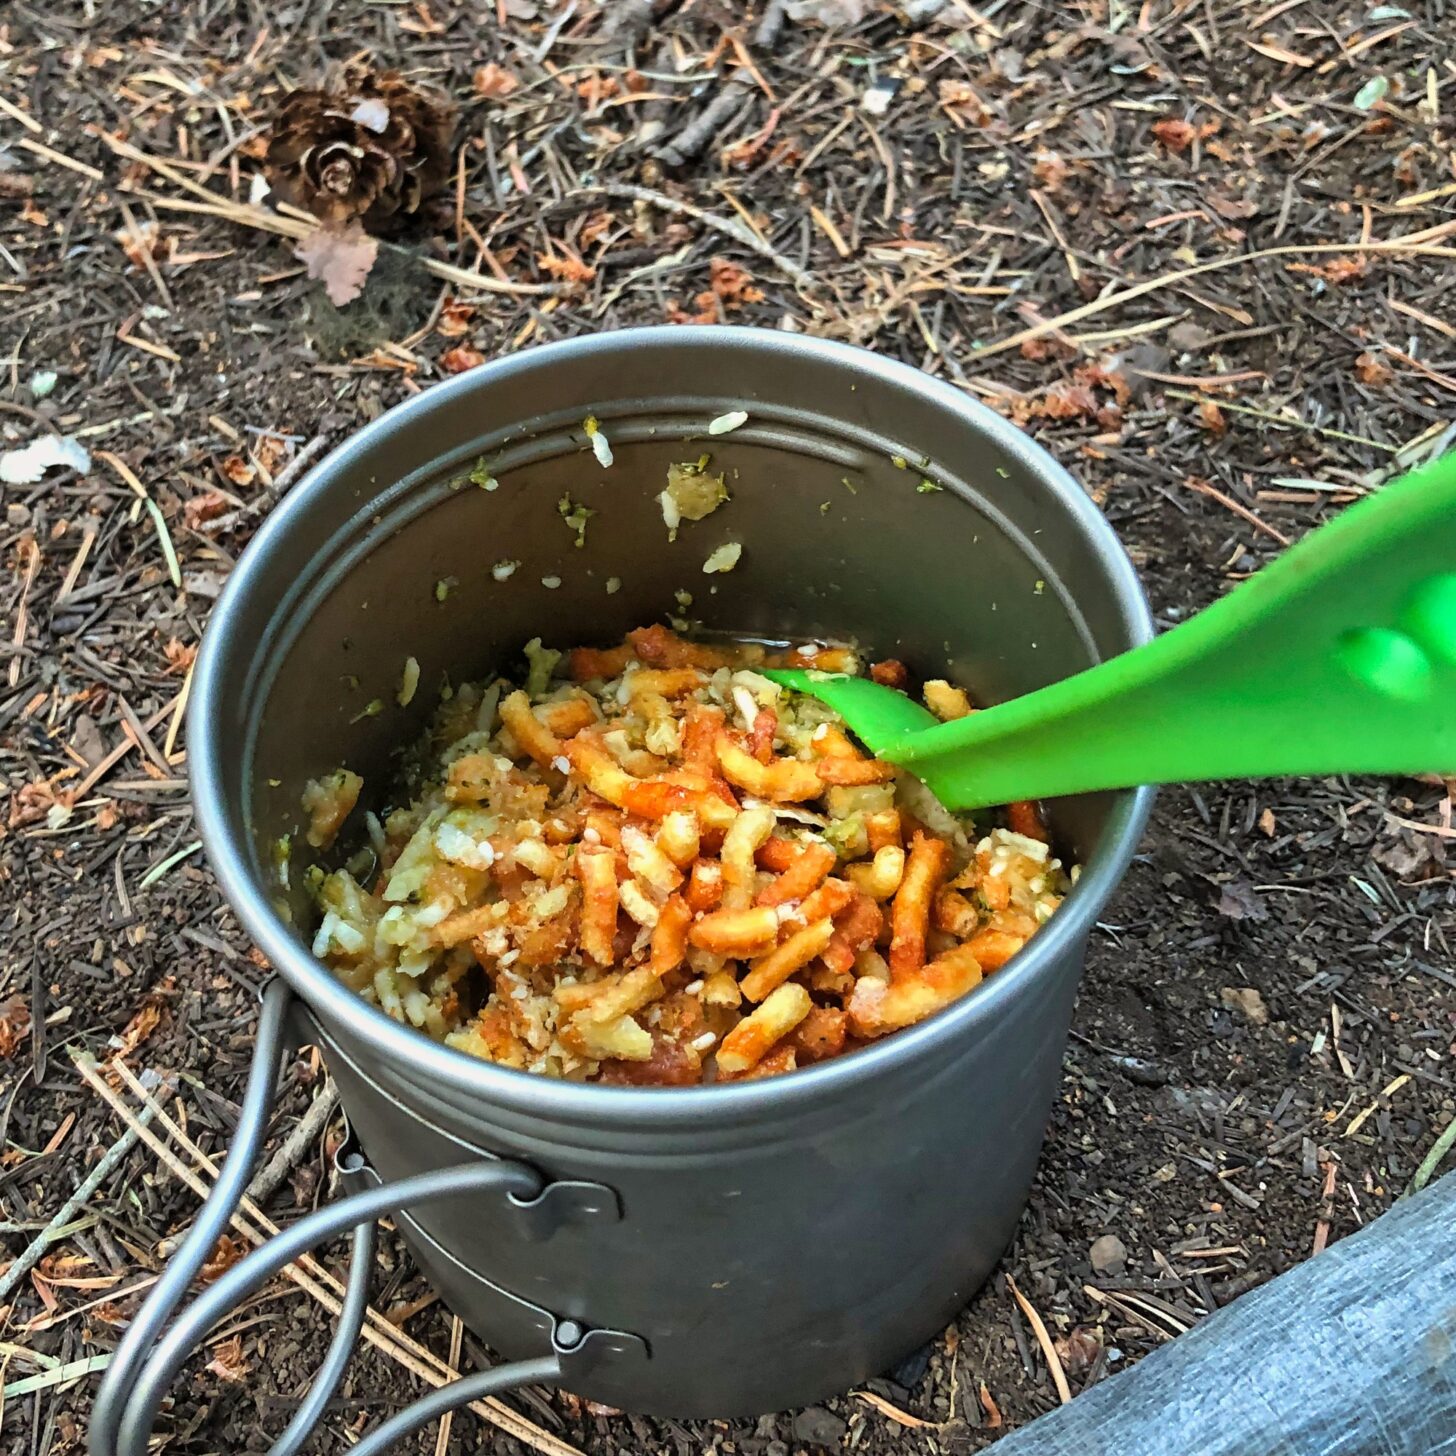
It did not disappoint, and this was a good thing. I was not in a good mental space to be handling disappointment. Hiking the NorCal – Oregon PCT this summer was mostly awful. There were far too many days of brutal heat, long water carries, and choking smoke. Being able to chow down on a first-class meal did not make everything all better, but it put a good end to a couple of really miserable days.
The flavors were there in all their glory. I held the crispy noodles back while rehydrating so that they retained their crunch. The biggest and most pleasant surprise was that the tofu was actually improved by the freeze-drying process – it was much less slimy, and the breading even retained its texture fairly well. This experiment was a total success, a 10 out of 10, and I will freeze-dry this again.
The possibilities here are nearly unlimited. Every long-distance hiker who gags down a pot of instant mashed potatoes begins to dream of town food. Freeze-drying take-out food lets you eat like a town stop glutton while you are still on the trail. That’s what I call winning.
In the next installment, I’ll go into more detail regarding the principles and practice of freeze-drying, and share the results of other culinary experiments. Talk to you then.
Here’s a link to the Harvest Right Freeze Dryer model used in this series.
Browse our curated recommendations in the Backpacking Light Gear Shop – a product research & discovery tool where you can find Member gear reviews, Gear Swap (used gear) listings, and more info about specific products recommended by our staff and members.
Gear Shop » Food Preparation and Packaging
DISCLOSURE (Updated April 9, 2024)
Moisture-wicking fabrics (base layers and underwear) are designed to move sweat away from the skin. In this study, we test if Polartec and other base layer fabrics meet manufacturer claims.
You don’t have access to view this content.
 Loading...