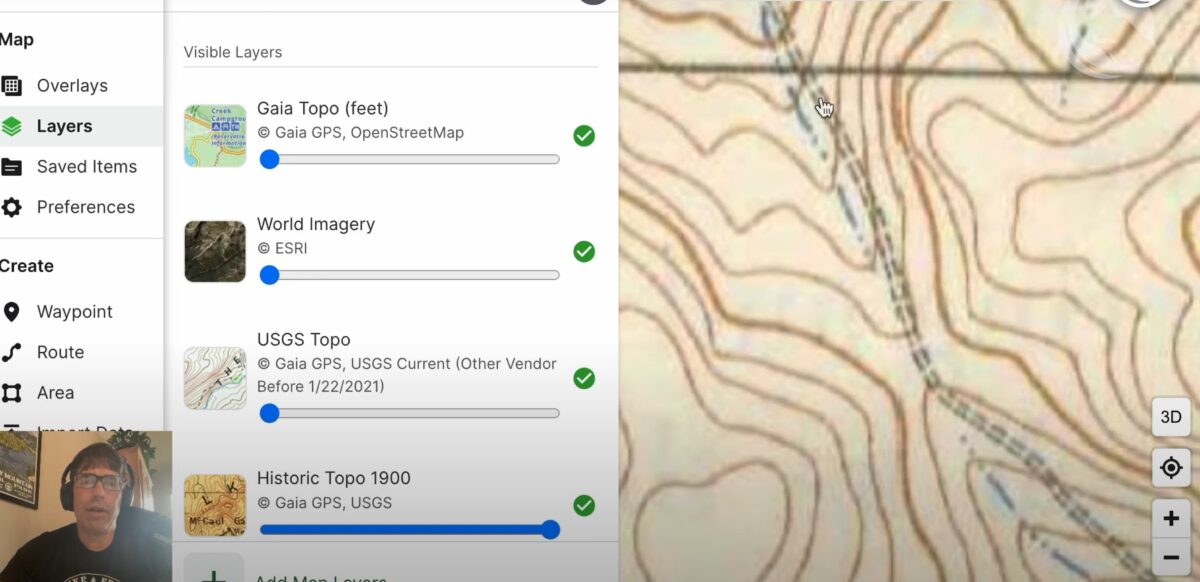
Learn Ryan Jordan’s process for discovering hidden backcountry routes by integrating current base maps, satellite imagery layers, and historical USGS maps.
There’s nothing more serendipitous than stumbling across an old road bed while bushwhacking. But you don’t just have to rely on blind luck. With a combination of modern satellite imagery and historical USGA topo maps, you can incorporate such features into your route planning.
In the following video, Ryan Jordan demonstrates:
how to find and use historical USGS topo maps in Gaia GPS
how to identify person-made features in satellite imagery
how to use Gaia GPS layers to confirm your suspicions about possible routes of least resistance
Editor’s Note: This video was shot before we released our First Look review of the Tarptent Dipole Li 1 and 2, so that’s why you’ll notice it blurred out in the video. If you missed that review, check it out here!
Browse our curated recommendations in the Backpacking Light Gear Shop – a product research & discovery tool where you can find Member gear reviews, Gear Swap (used gear) listings, and more info about specific products recommended by our staff and members.
Backpacking Light does not accept compensation or donated/discounted products in exchange for product mentions or placements in editorial coverage.
Some (but not all) of the links in this review may be affiliate links. If you click on one of these links and visit one of our affiliate partners (usually a retailer site), and subsequently place an order with that retailer, we receive a commission on your entire order, which varies between 3% and 15% of the purchase price. Affiliate commissions represent less than 15% of Backpacking Light's gross revenue. More than 70% of our revenue comes from Membership Fees. So if you'd really like to support our work, don't buy gear you don't need - support our consumer advocacy work and become a Member instead.
Learn more about affiliate commissions, influencer marketing, and our consumer advocacy work by reading our article Stop wasting money on gear.
Searching for grace and gratitude through the smoke.
MYTH: a multi-year thru-hike
A goal deferred
Hiking the PCT has turned into something of a life project for me.
My brother and I started north from Walker Pass in 1976, headed for Lake Tahoe, 500 miles to the north. A torn cartilage in my right knee forced a bailout after a hundred miles.
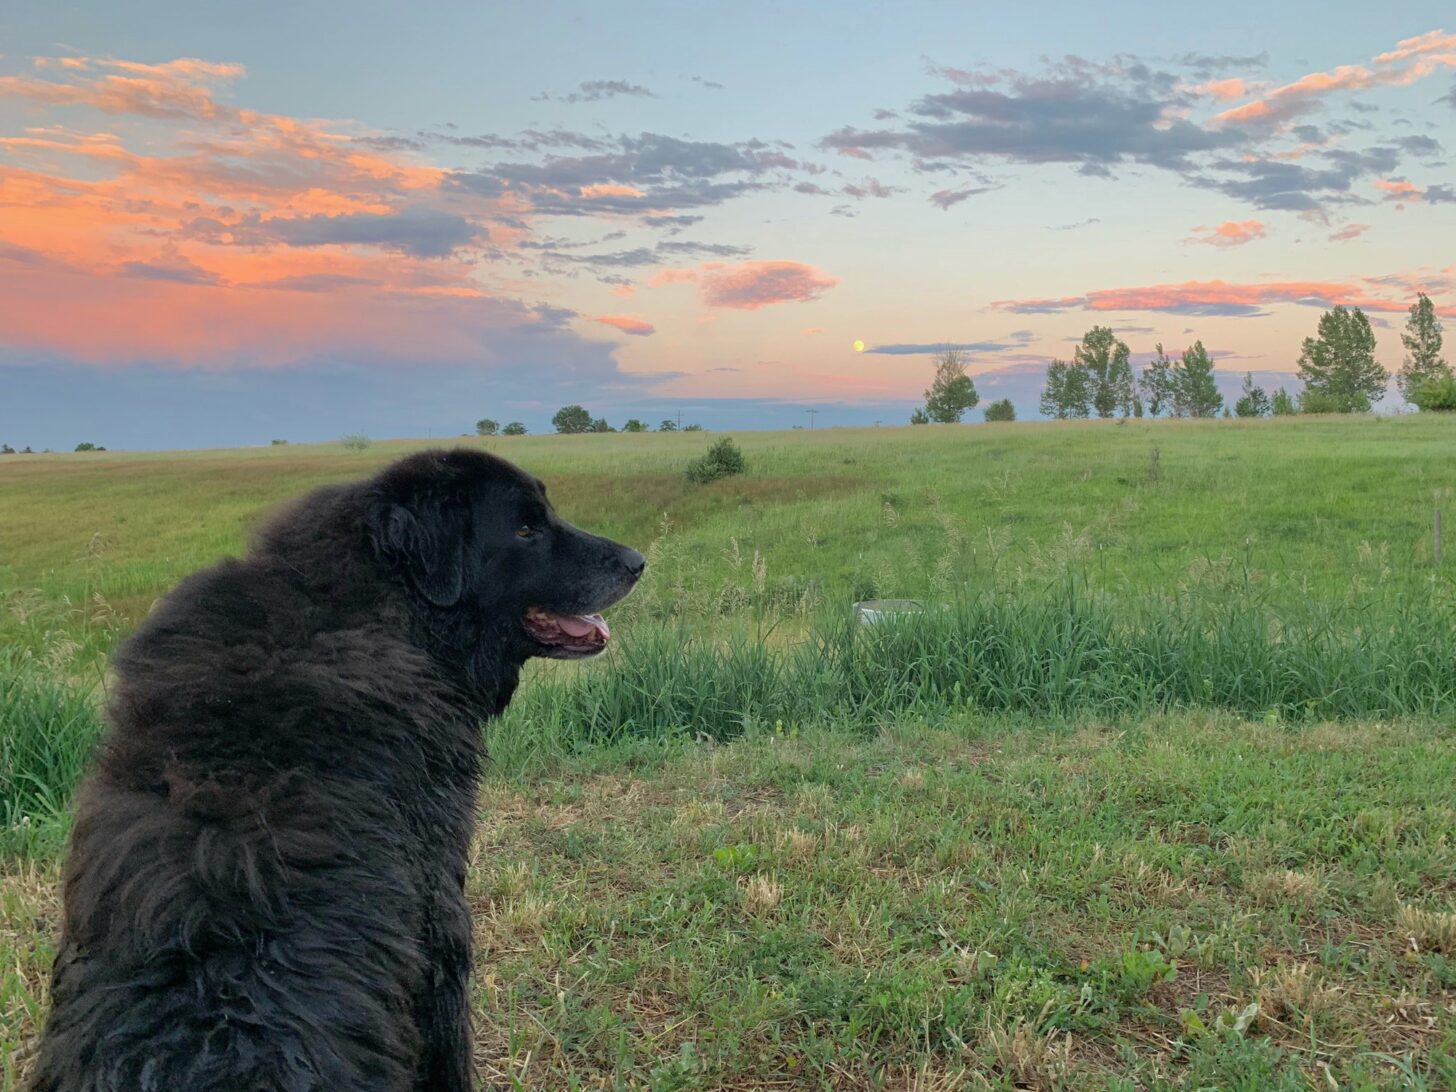
I didn’t resume the trail until 2013, having acquired an education, a family, and a career in the meantime. Also a dog. When I returned to the PCT, Bonny, a 125-lb Newfoundland-sled dog mix was my companion. She had joined our family a few months before, an adult rescue dog who had apparently led a pretty rough life.
Or maybe her incorrigible food stealing, fear of tall teenage boys, and separation anxiety were just who she was. But her need for affection was matched by her ability to give it. We became friends.
She accompanied me north from Lake Morena in 2013. She had no trouble keeping up and would dash around meadows and up and down hills when we camped, delighted to be free and wild.
That went well enough until the winds shifted from cool Pacific westerlies to hot desert easterlies. She was a snow dog, and it was clear that bringing her on a desert hike was a mistake, even in March.
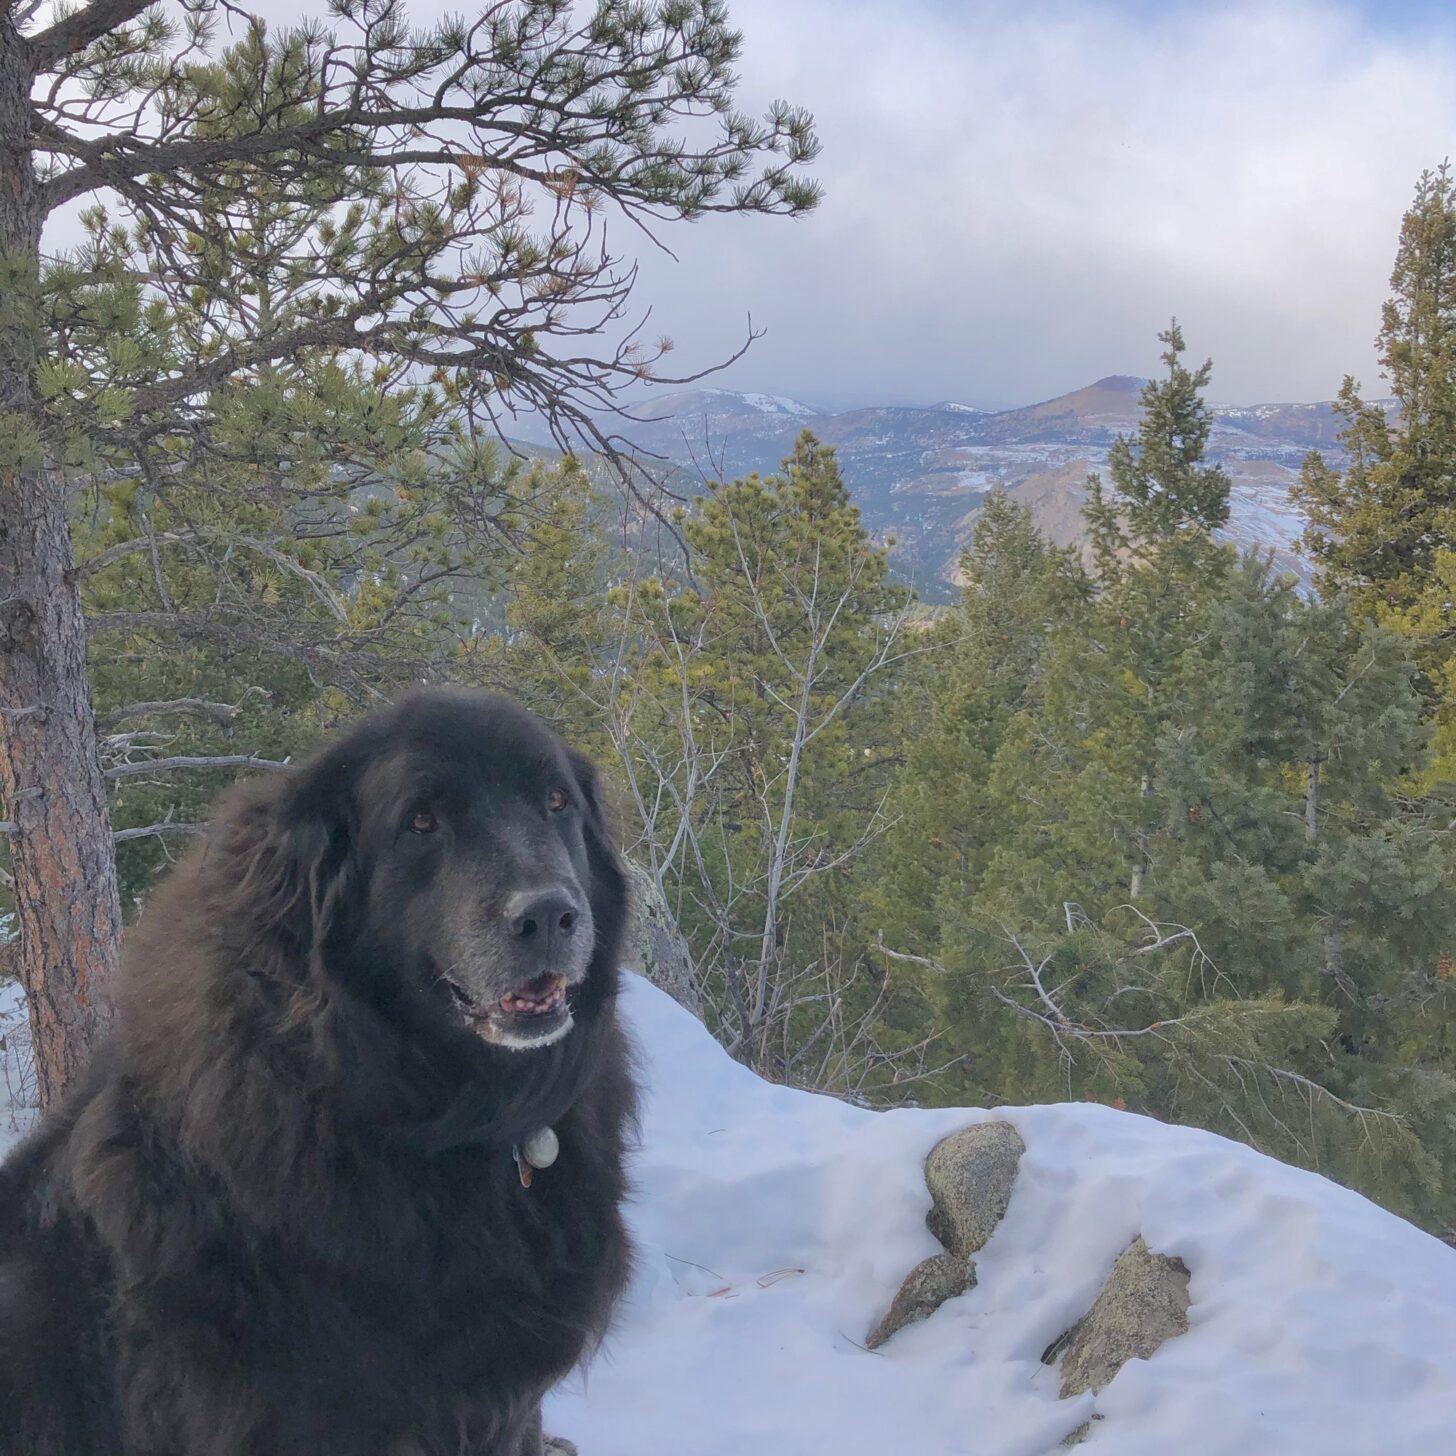
Bonny in her preferred environment.
That ended Bonny’s long-distance hiking career, but she went on plenty of shorter trips in cool mountains. She especially loved going on trips that I lead for the Sierra Club’s ICO program: short hikes, kids to fawn over her and give belly rubs, and plenty of leftovers to clean up after dinner time.
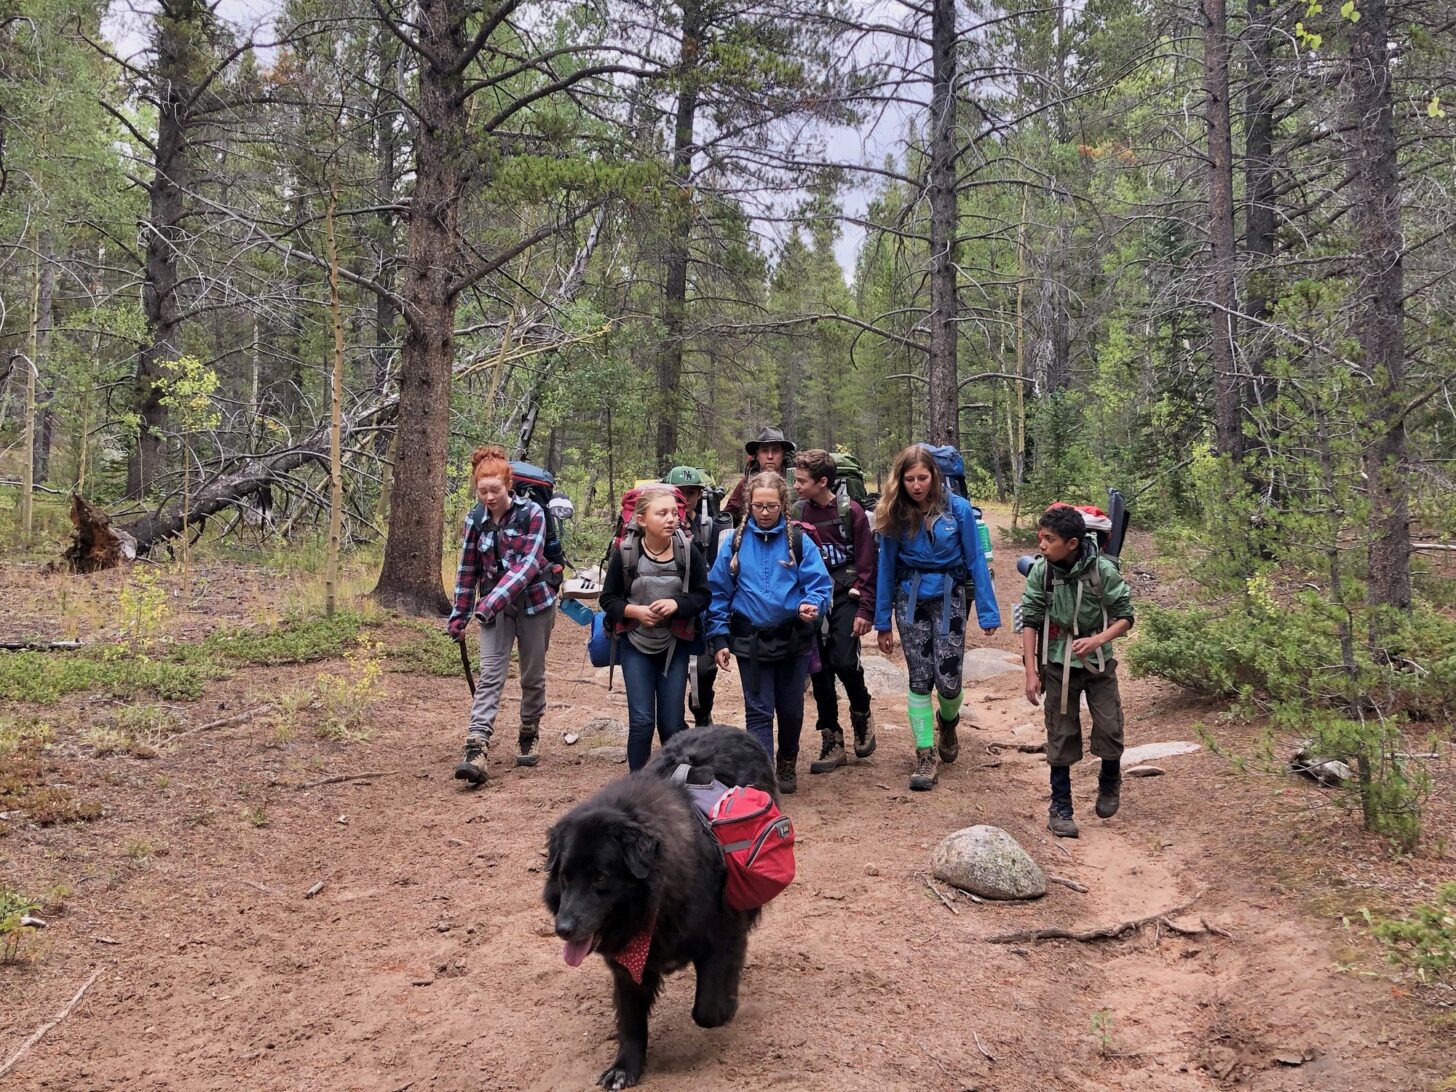
Leading the children through the Mt Evans Wilderness.
Big dogs have big hearts but short lives. Bonny was nine or 10 when she began to weaken. Backpack trips became shorter and then I had to start leaving her behind. Day hikes and ski tours dwindled from five miles to two, and then from one to zero.
Neighborhood walks got shorter and shorter as progressive paralysis set in, weakening not only her legs but closing her windpipe until a walk of half a block left her gasping and needing multiple rest stops.
I put off the inevitable as long as I could but it was time. Bonny departed this life as she lived it, with grace and affection.
Bonny.
On the trail again (Castle Crags to Etna)
I arrived at the Redding Airport and received a text from my ride wondering just where exactly at Castle Crags Campground I was. She had gotten the directions reversed. A phone call set the matter straight and we headed from the airport to the nearest sporting goods store to pick up a butane canister.
A turn around the store revealed no canisters. I asked a clerk and she unlocked a cabinet, pulled one out, and asked for my driver’s license to document the sale. Butane is useful in methamphetamine synthesis. Apparently, there are enough tweakers in Redding, CA to necessitate control of a simple 4-carbon alkane.
Steering clear of degenerates would be an issue for another day, though. My immediate concern was the heat. Even at 5 PM, the temperature at Castle Crags was near 100 F°. I compounded the issue by making an immediate wrong turn that took me over a superfluous ridge before joining the PCT.
It was near dark by the time I made it to a pleasant camp spot along Indian Creek, located in a deep leafy gorge that offered some relief from the heat. It was already occupied by two hikers. Fomo and Princess not only welcomed me but offered to paint my nails as well. I was back on the trail, back with the goofy, welcoming community that populates it.
Last light on my first day back on the PCT.
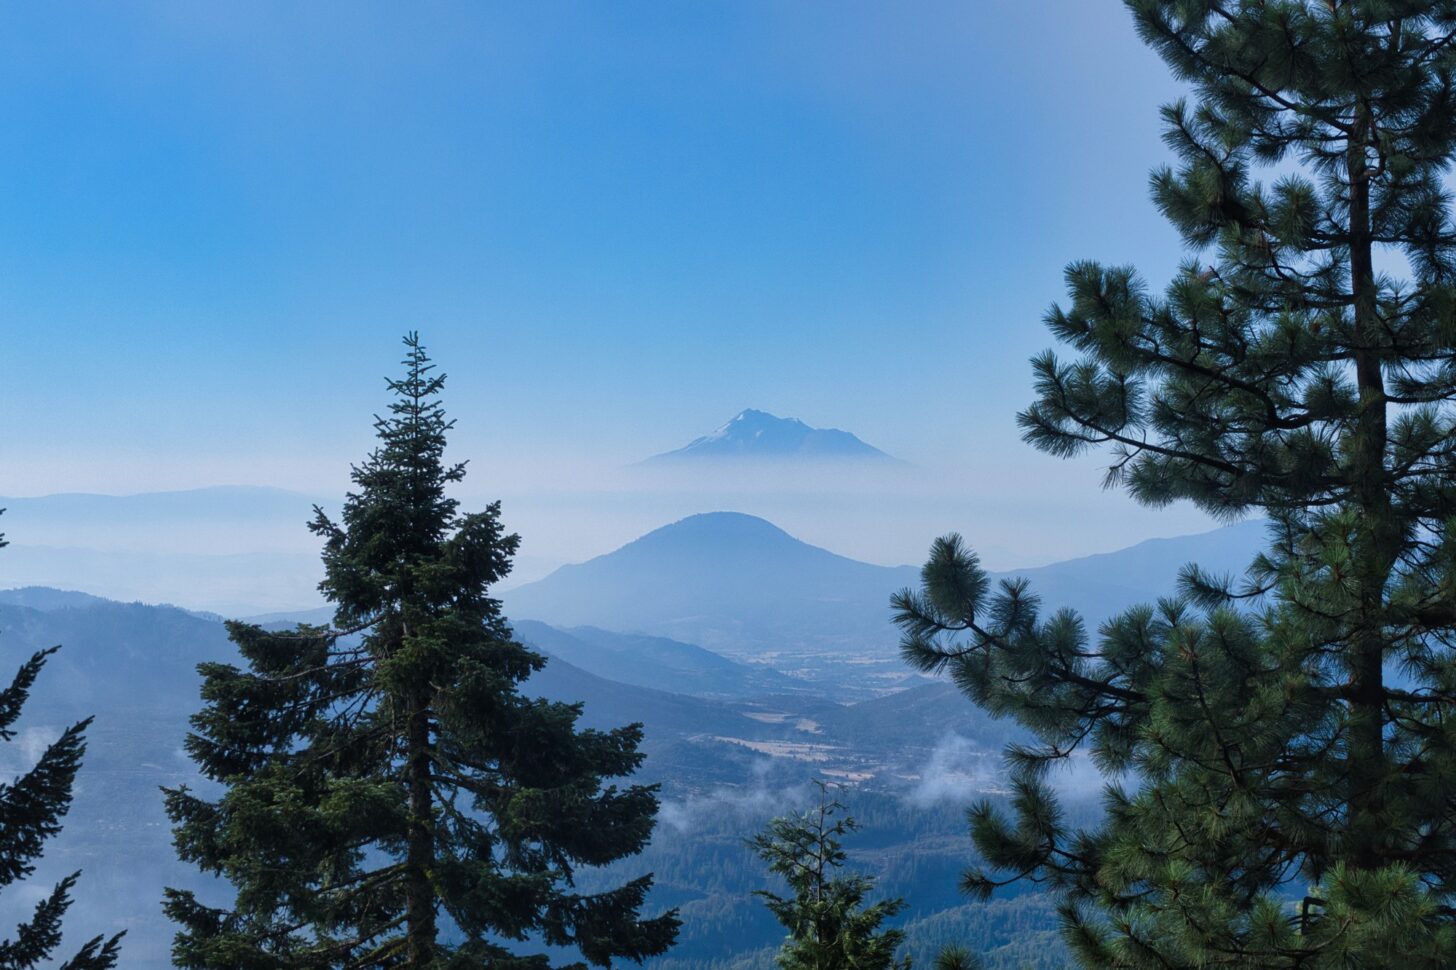
The night was warm and I started the 4000-foot climb well below dawn, hoping to get high before it got hot. Although that hope was not realized, I did get my first PCT views of Mt. Shasta. In 2018 I hiked from Lake Tahoe to Castle Crags without a glimpse of the iconic peak, visibility limited to a few miles at best by smoke from the terrible fires that year. Although the mountain was snowless in this drought year, I hoped at least to be spared a smoky hike.
Mt Shasta at lasta.
The trail leveled off at Gully Spring, where I lunched in the company of carnivorous pitcher plants and one-striped bumblebees attracted to the swirling patterns of my gaiters. Both are probably endemic to these mountains, well-known to be a hotspot for biological diversity: more than 3500 plant species are found here; some 280 are found nowhere else. I intended to enjoy and appreciate this region of the PCT, a region that is often overlooked by hikers hurrying toward Canada.
Cobra Lillies at Gully Spring.
One of the advantages of MYTHing a long trail is that you get to start each section with the same anticipation and eagerness that most single-year PCT thru-hikers feel only in the desert ranges of Southern California. Read or watch any account of a single-year thru-hike and you’ll notice that half the story covers the desert sections, another quarter covers the Sierra, and the rest of the trail – NorCal, Oregon, and Washington, about 60% of the total mileage – gets only a quarter of the narrative.
By the time PCT hikers get to Lake Tahoe, they have walked 1100 of the trail’s 2650 miles. Hiking has become a job. You get up at dawn, put in your 25 miles, eat some crappy food, make your camp, and lay down to sleep. And then do it again. And again. And again.
Your choice is either to quit (as many do) or to become a hiking automaton obsessed with grinding out the miles before fall snowstorms close the passes. The trail – which started out as a road to freedom and adventure – begins to look more and more like the Land of Toys. I may bear a pack, but I will not become a donkey.
Porcupine Lake, a fine swimming hole.
So I laze in the shade another hour; stop for a swim at Porcupine Lake the next day; stop at Deadfall Lake intending another swim. But clouds have rolled in and a light intermittent drizzle commences. A helicopter appears, dips its bucket in the lake, flies up to an adjoining ridge, and dumps the water. It repeats this sequence three times. I can see no sign of smoke on the ridge. Surely the copter was not practicing; there are plenty of real fires in California.
I hike on through increasingly heavy rain, which is now accompanied by loud thunder overhead. The rain should fireproof this parched area for a few days, but the thunder, soon distant, might well spark fires elsewhere.
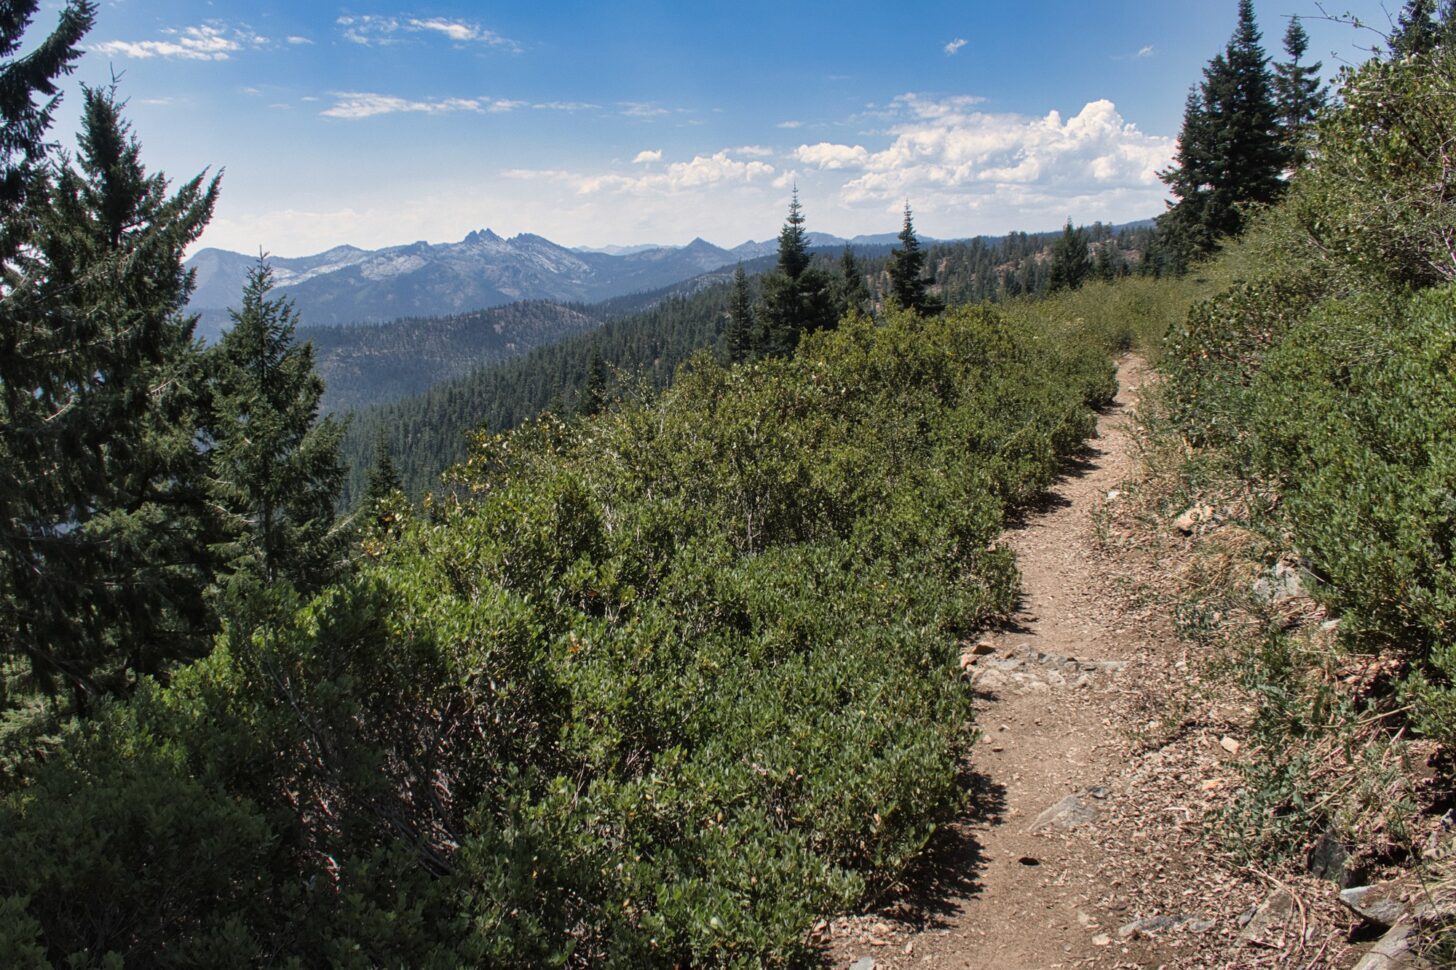
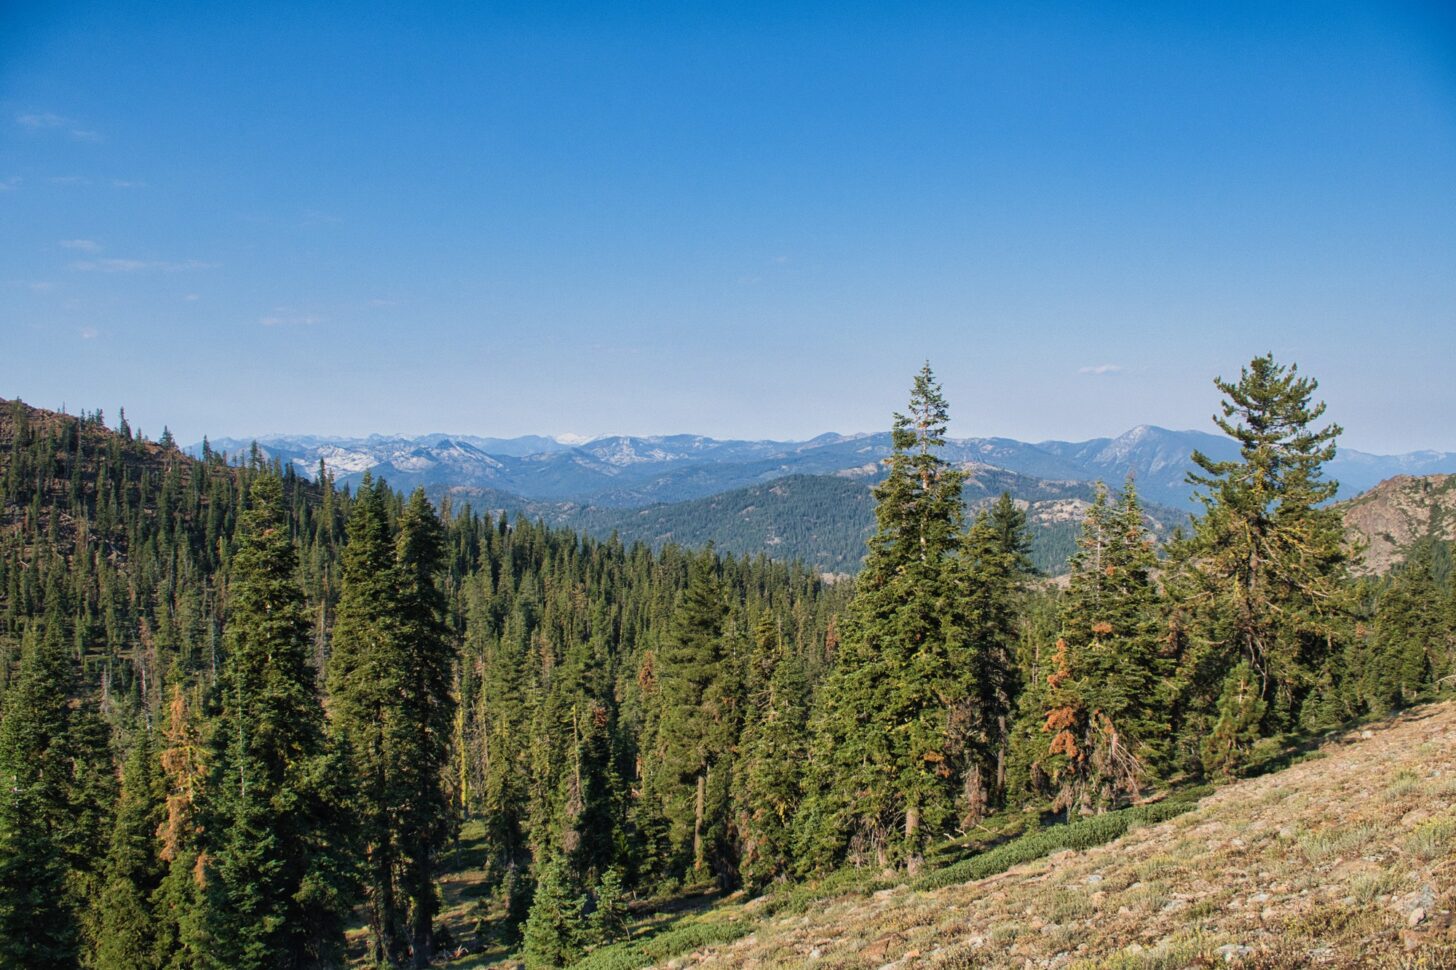
After a soggy night, the heat returns, but the hiking is mostly easy. Though the mountains are rugged the trail contours around them, staying between 6,000 and 7,000 feet.
Heading toward the Marbles.
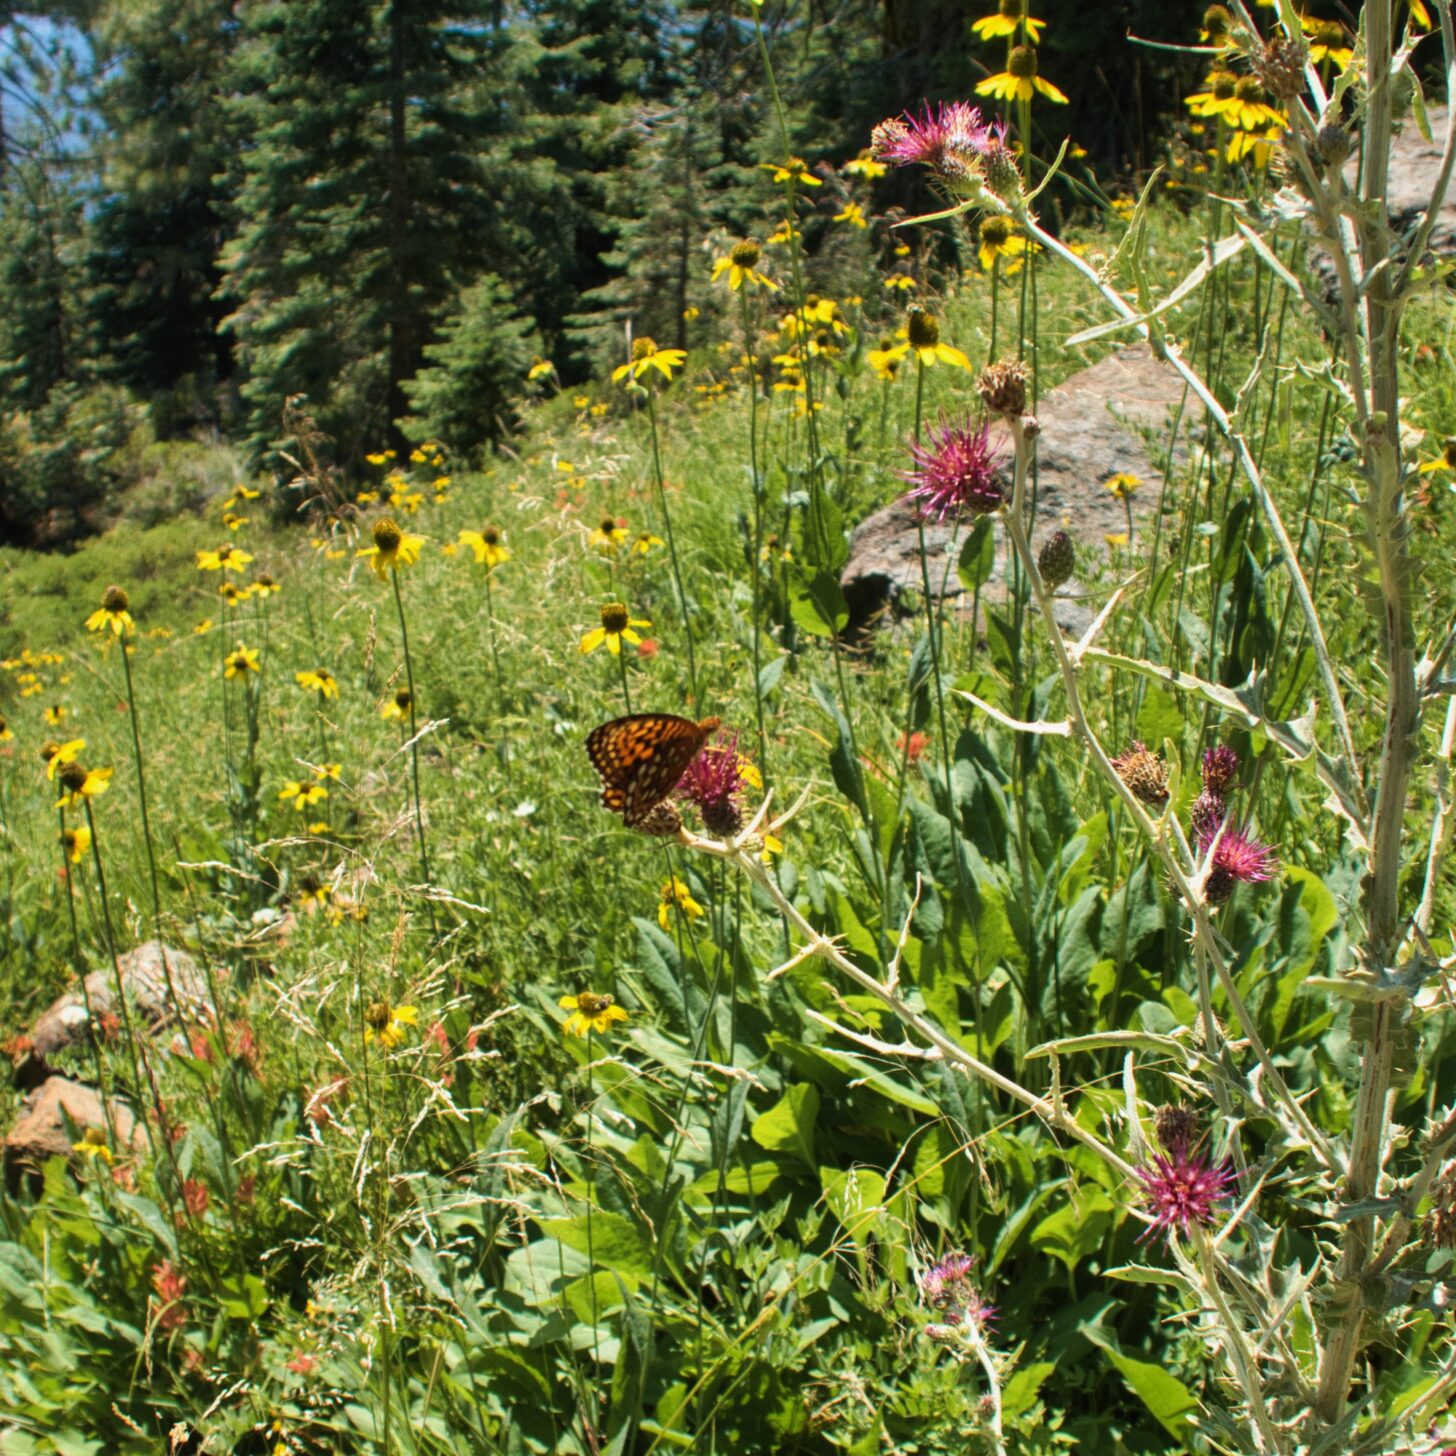
There are cold springs to drink from, fringed with flowers and attended by butterflies.
Butterflies adorn the trail.
The Marble Mountains appear, gleaming white rock mimicking long-melted snow.
The Marble Mountains.
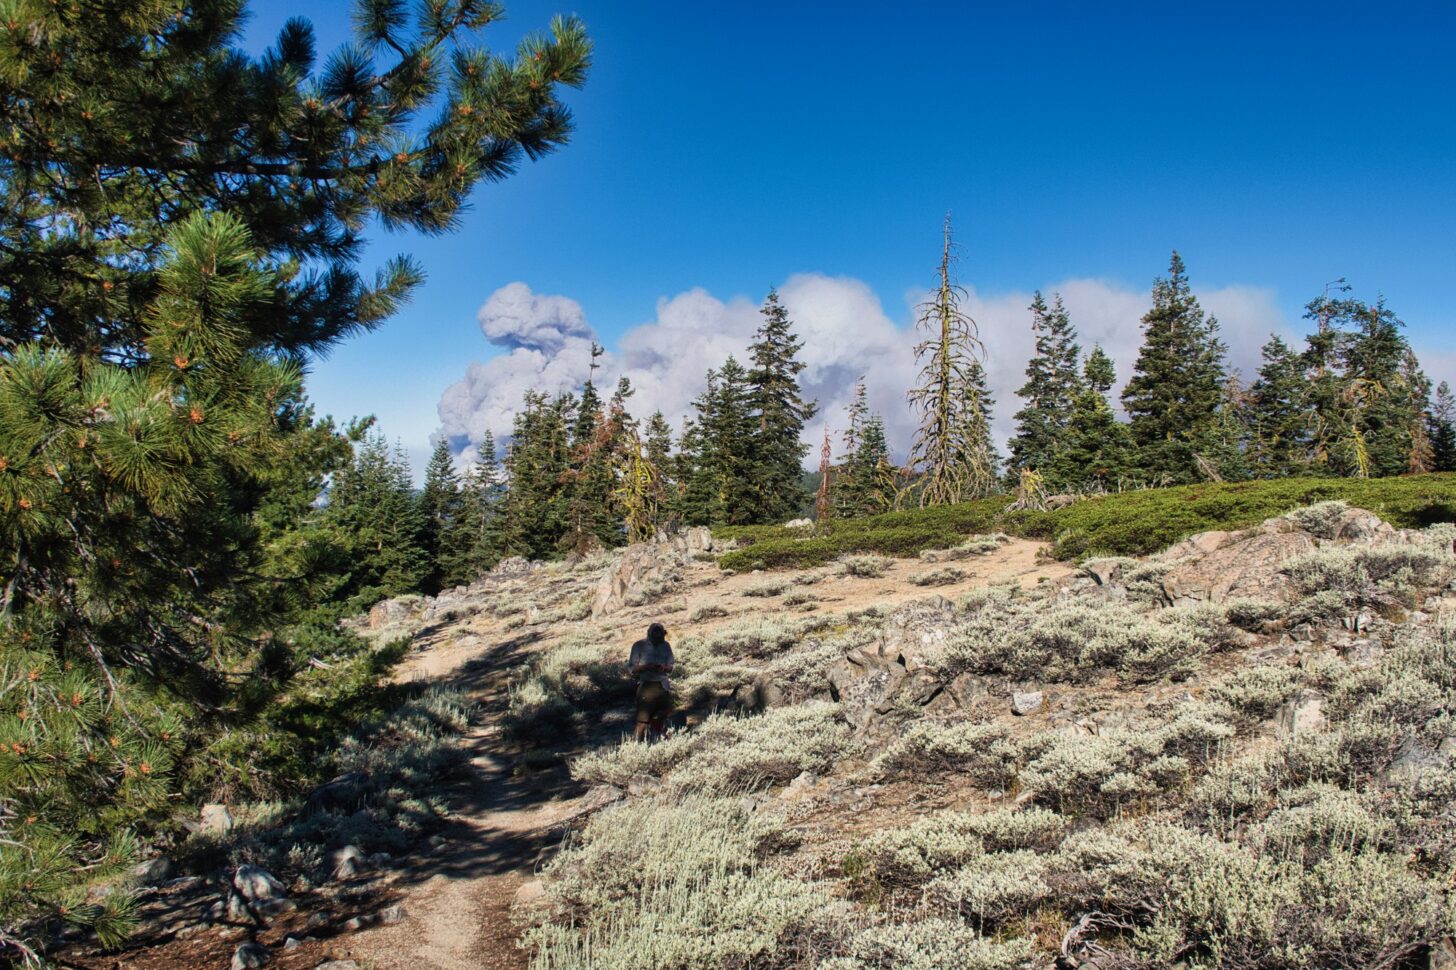
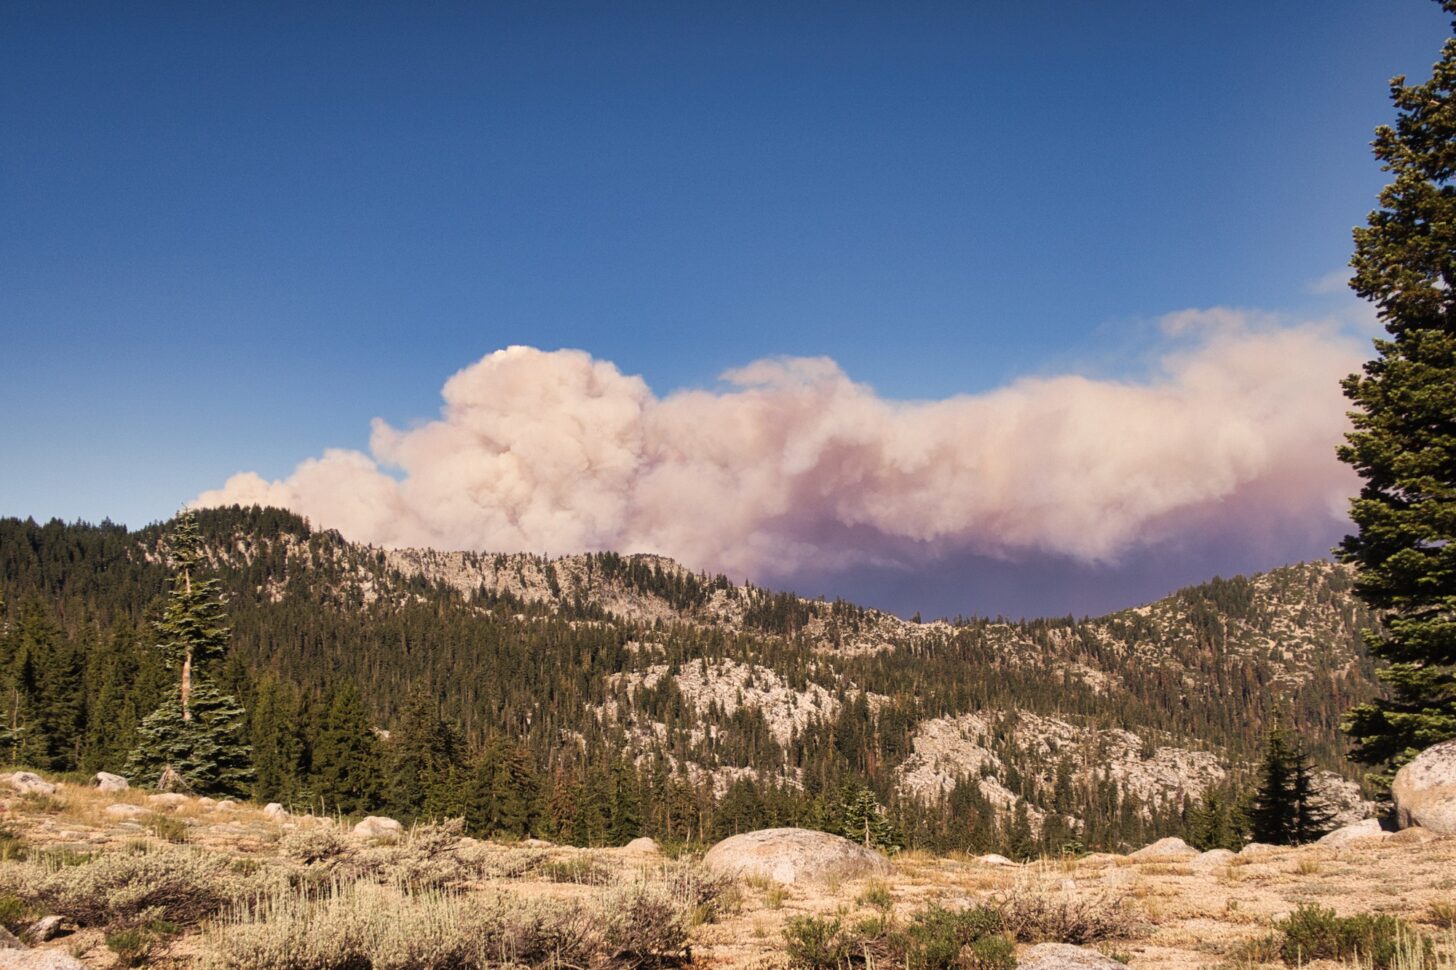
A cool morning breeze makes for delightful hiking weather. But rounding a ridge, a column of smoke appears, rising fat and thick above the ridge. Another hiker – trail name TimeWarp – comes up and we confer. Is this a small fire nearby or a large fire far away? The fractal nature of smoke clouds defeats any sense of scale. We decide to proceed, even though the column is directly on our course toward Etna Summit. The wind is blowing left to right, not into our faces, and we can retreat back to highway 3, some 15 miles back, if the fire blocks our path.
Uh oh.
TimeWarp finds a spot with reception and calls the Forest Service. They tell him the fire is 10 miles west of the PCT, we are in no danger. But that column of smoke gets bigger and darker and redder on the underside. We catch up to yet another hiker – Tumbles – confer again, and agree that we will stop at the Callahan Road crossing a couple of miles ahead and consider bailing.
Looks like trouble.
As soon as we get to the road four volunteer fire trucks whiz by, not a good sign. One pickup comes back and we flag it down. It is driven by Bill, a retired firefighter who says the fire has blown up in the last few hours and nobody knows what is going on, especially not the Forest Service. He offers us a ride into Etna and we accept. It would probably be ok to keep hiking but “probably ok” is not the standard we want to apply to this situation.
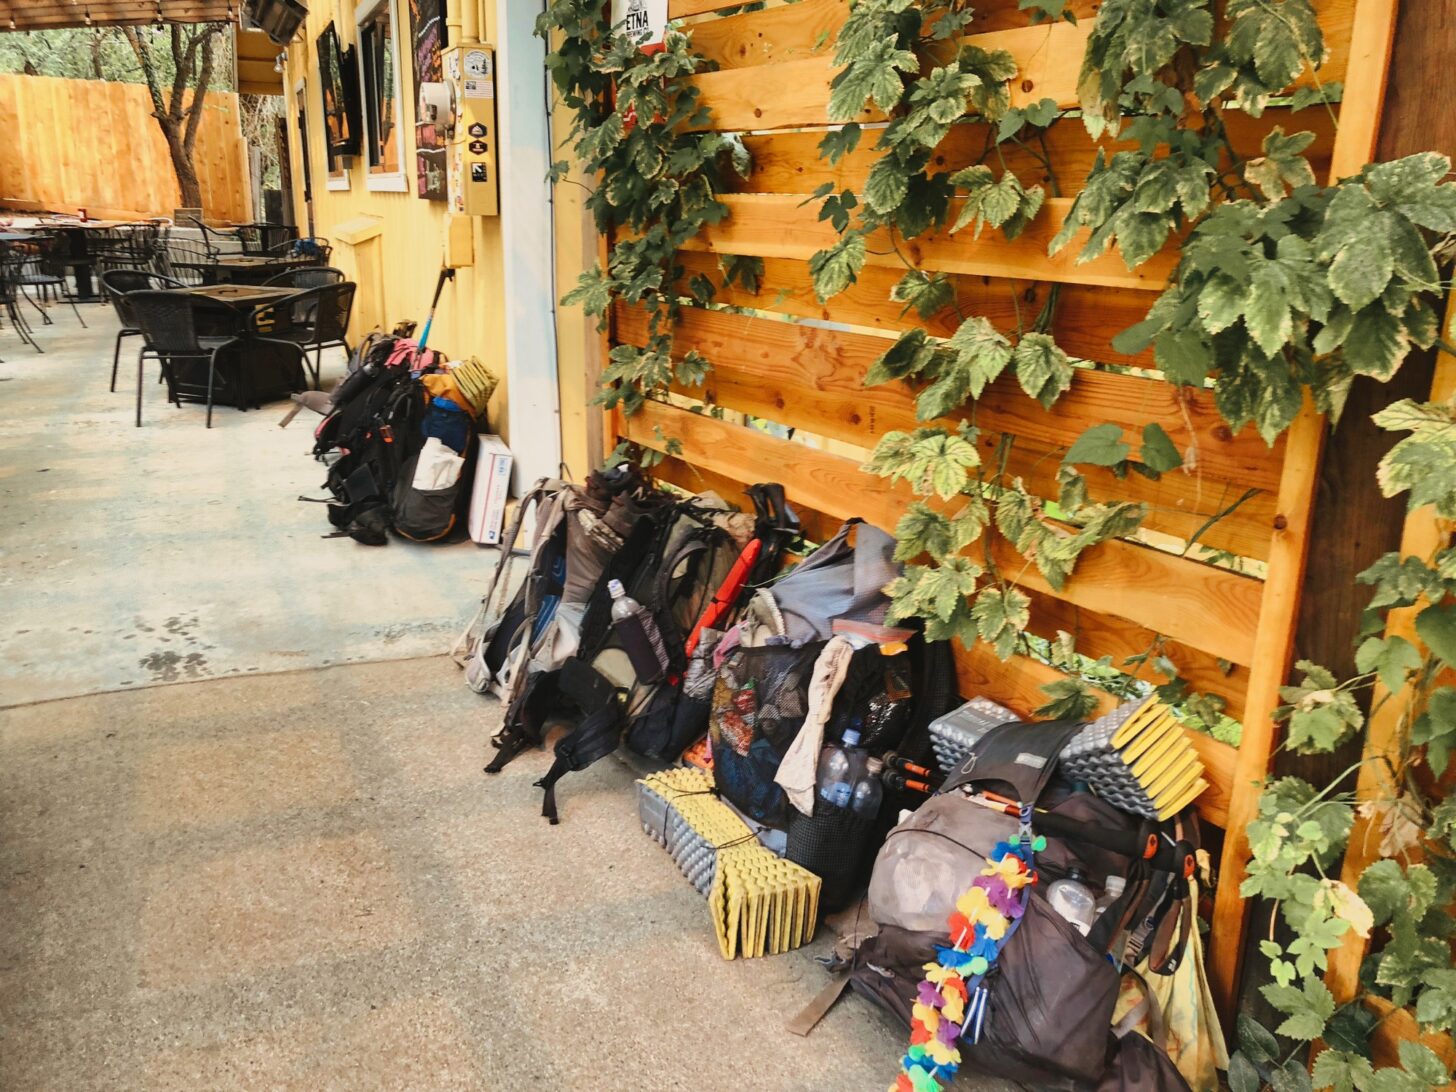
The town of Etna (population 750) is amazing. It sports two brewpubs and a couple of good coffee shops. For a minimal fee, it lets hikers sleep in a park that features not only restrooms and water but a shower (cleaned daily by volunteers), wifi, tables, a shelter, and outlets to recharge phones. The townspeople are friendly and welcoming. An easy place to hang out, as attested to by nearly a hundred hikers milling about the town. Not just easy, amazing.
Taking refuge inside a brewpub.
Through the state of Jefferson, Seiad to Ashland
All of us were hoping for some more information. But word is that hikers who attempt to resume the trail are being turned back by thick smoke or by rangers at the trailhead.
My plan (and that of many others) was to skip ahead to Seiad Valley to bypass the fires and smoke. It’s about 60 miles by trail but twice that by sparsely traveled roads and reputedly a very hard hitch.
A ride was arranged with a hiker named SoleSaver, who was to ferry me and six other refugees northward. All went well until the car overheated on the remote road connecting Ft Jones with Seiad Valley.
I hopped out and while everyone was milling around, saw some blackberry bushes lining the road and walked toward them, thinking to score some fresh berries.
An angry man with no shirt but a beard down to his belly ran out of his house and yelled up at me.
“What the FUCK do you think you are doing!”
“Just curious as to what’s here,” I replied. Wrong answer.
“Take your curious ass and get the hell away from my property and keep going.”
One of the women tried engaging him with reason: we can’t go anywhere, we are broken down, etc. Studio, a public defender in St. Louis and thus a man familiar with criminal psychology, walked her away, hoping to de-escalate the situation before any weapons were involved. There was no phone service, no law nearby, and no one was going to protect us if things got ugly. We were deep in the State of Jefferson, home to secessionists and outlaws, a refuge no doubt for illicit grow operations and cook labs. Hikers were most certainly not wanted here and we would not be missed.
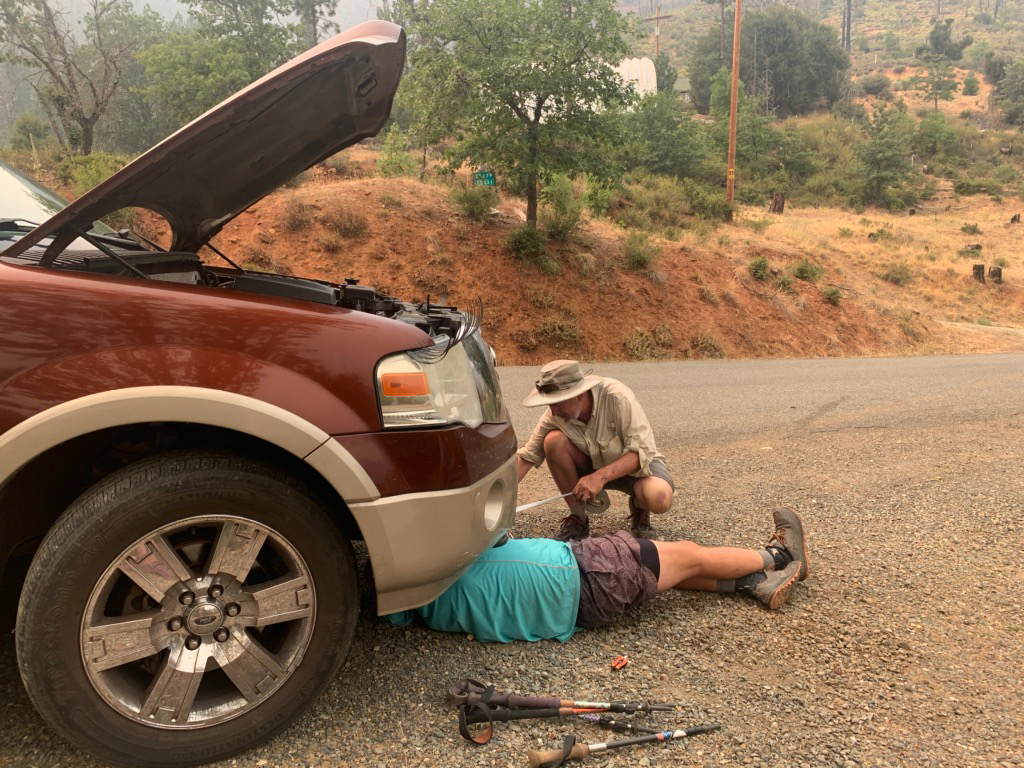
SoleSaver was flummoxed by the breakdown. I went back to the car, took a look under the hood and saw the lower radiator hose had popped off. All I had to do was reconnect it, fill it with water and we would be off.
An elderly gentleman was walking up his driveway toward us and I prepared to be cussed out again. Instead, he offered help. His name was Carl, he was 90 years old, a retired gold miner, and he volunteered to go back down to his well and get some water and haul it up.
I got under the car and tried reconnecting the hose but the hose clamp was stripped and would not tighten down. I asked Carl if he had any duct tape and he slowly walked down to his shed and returned with a roll.
Fortunately, there was another hiker (Cocacola) willing to get his hands dirty and we took turns tearing off strips of tape and wrapping them around the hose. We poured water into the radiator. Despite high hopes for our handiwork, the water ran right out again. The hose had been repaired in another spot and was leaking where the plumber’s putty had failed.
Fixing a hole.
By this time another Jeffersonian from across the road was shouting at us to move on and to not even think about coming on to his property. He returned to his porch and sat there with a rifle on his lap, glaring down at us.
The other hikers decided that maybe it was time to hitch onward to a place where there were no angry armed hillbillies yelling at us. It was getting late and this was not a good spot to be when the sun went down. They promised to call SoleSaver’s husband from Seiad so he could come get her. SoleSaver was in the car, sobbing into the steering wheel.
Cocacola and I got back under the car, scraped off the putty with our knives, wrapped the connector with tape, then wrapped the whole assembly over and over (its hose clamp was also stripped), and poured in the water.
This time it held. We made the remaining 15 miles to Seiad just a few minutes after the hitchhikers, who insisted on buying us beers at the store.
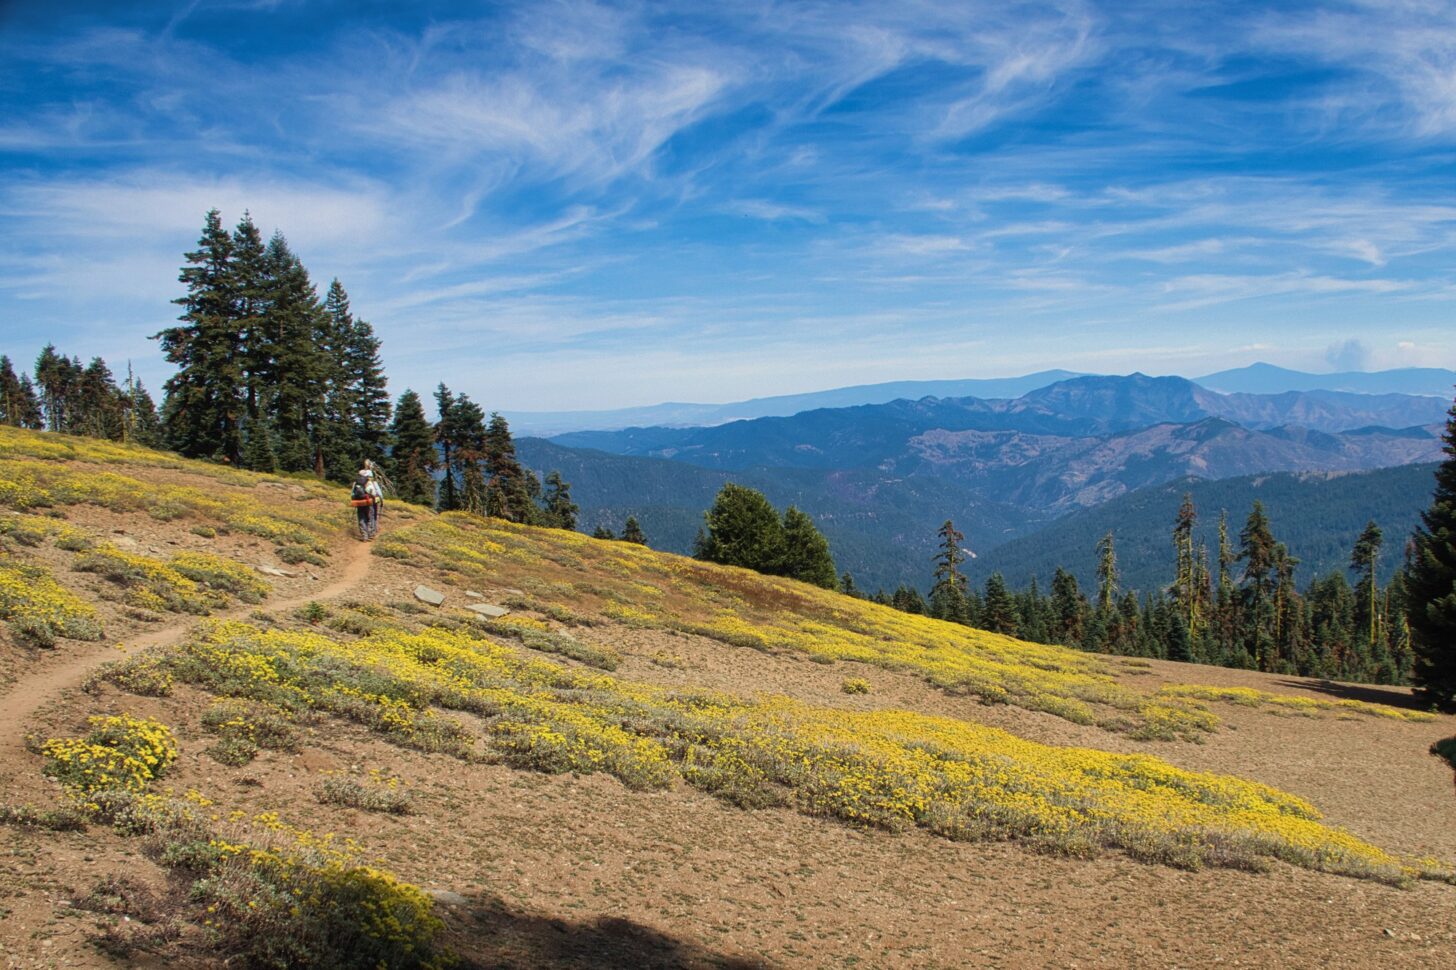
It was a hot and heinous climb out of Seiad the next morning. The smoke had thinned a bit, but some of the ridges were dead zones, places of orange metallic soil where little grew. The effect was ghastly and unnerving, but eventually, the forests returned and a few springs popped up. We were in the last bits of California. With a clearing west breeze, we could see Oregon from the high points.
The last of California.
It looked just like California of course, the 42nd parallel having no particular biological or geological significance. But it felt like progress. I had started this MYTH in 2013, walking from Lake Morena to the San Jacintos; continued in 2014 to Walker Pass; to Lake Tahoe in 2016, and then to Castle Crags in 2018.
Hike the trail over a stretch of years like this, and you notice changes. I started in the pre-Wild era when only a few hundred people attempted the PCT each year. Now there are thousands. Permits are required to regulate the traffic, and several iconic trail angel stops have had to close up, unable to cope with the crowds. Although the megadrought was already well underway in 2013, the new normal of wildfires and smoke had not yet taken hold. It was easy then to believe that it was just a dry year. Next year would be normal.
The sociology of the trail has also changed. There are far more women hiking now, and a far larger proportion are hiking without male companions. In 2013 and 2014 there were plenty of Iraq and Afghanistan vets walking off the traumas of war; in the plague year of 2021, they have been replaced by nurses.
Nurses with a wicked sense of humor. When TimeWarp asked Tumbles for some free medical advice regarding a bothersome ankle, she shot back that “I can’t help you unless your pants are off and you have a vagina,” (she is a labor and delivery nurse).
The trail has changed and it will continue to change. It is a living thing, and change is the essence of life. All we can do is keep moving and appreciate what good remains and work for more good to come. The west wind continued to blow the smoke away as I walked the ridges toward Ashland, the north slopes of Mt Shasta receding but revealing that a bit of snow remained there, holding on through the heat and the drought.
Farewell to Mt Shasta.
Feeling the heat – Ashland to Crater Lake
After a zero in Ashland, spent mostly at a brewery where I managed to hold the cornhole court until closing, I hitched back to Callahan’s. The free hiker campground there, I learned to my displeasure, is a grassy island in a parking lot that boasts many bright security lights. So I was up and out early, making the climb south and east from Siskiyou Pass back into the higher mountains. Smoke built through the day, as did the heat. Much of the hike was through arid oak and pine forests separated by meadows dried to a crisp by the drought.
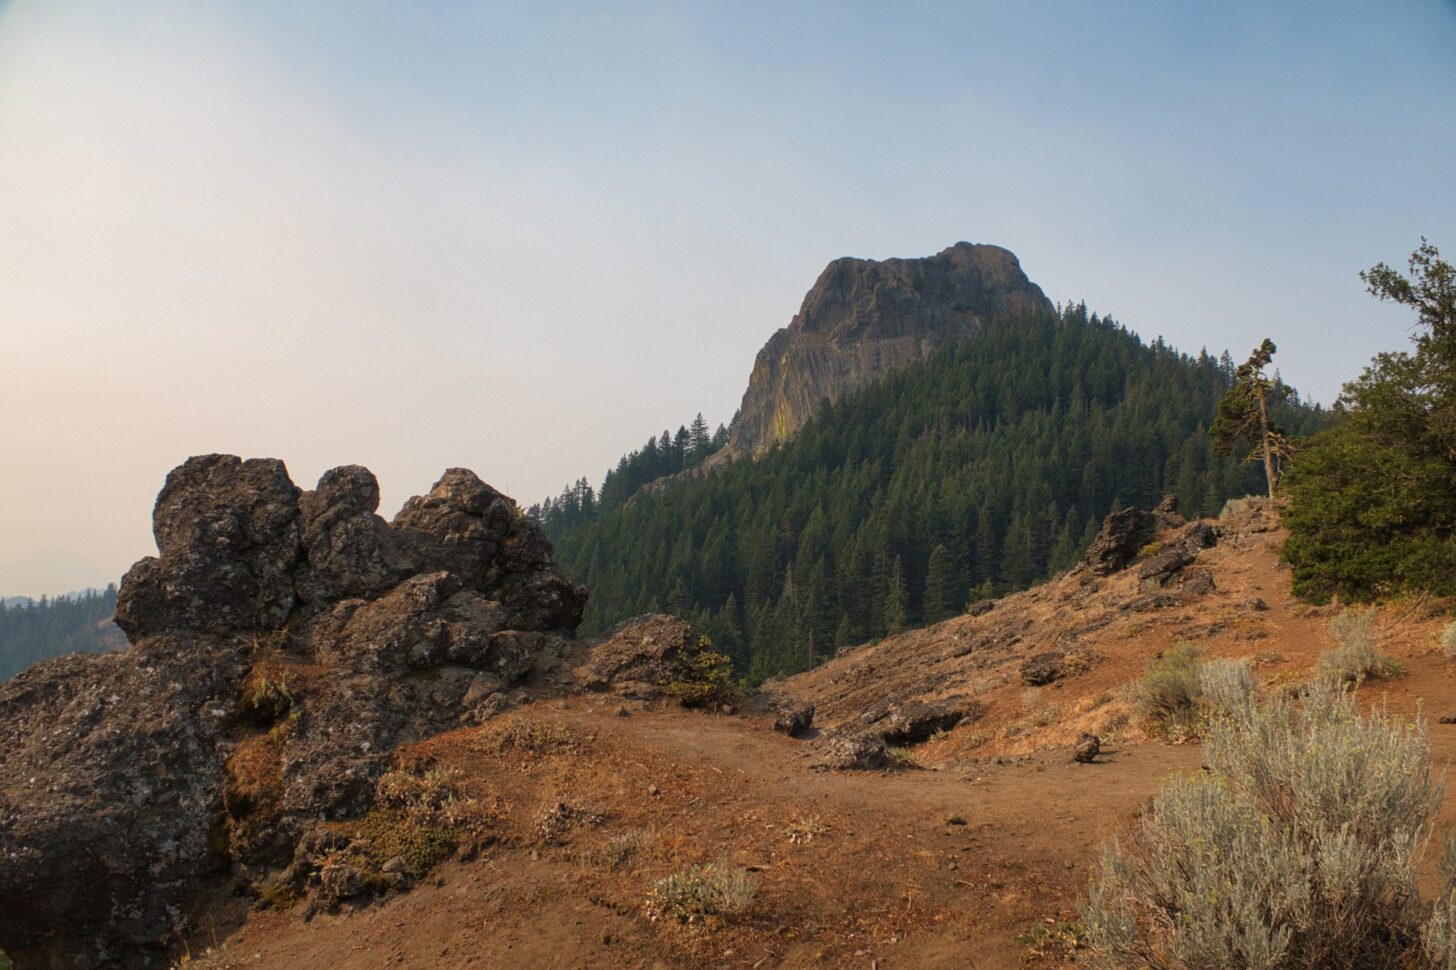
Pilot Rock presides over desiccated forests in southern Oregon.
I holed up for the night near one of the few sources of water, the outflow from Little Hyatt Reservoir. The water was low and distinctly skanky, but there was no other water on offer, so I treated it with chlorine dioxide drops and made the best of it.
The evening’s entertainment was provided by a frisky yearling blacktail deer. It dashed by through the creek meadows and so I was on the lookout for a lion stalking it. But then it dashed back the way it had come. And then diagonally across the creek. And then back again. In all, it made six or seven passes through the forests and meadows, all by itself, delighted to be wild and free, in love with its home.
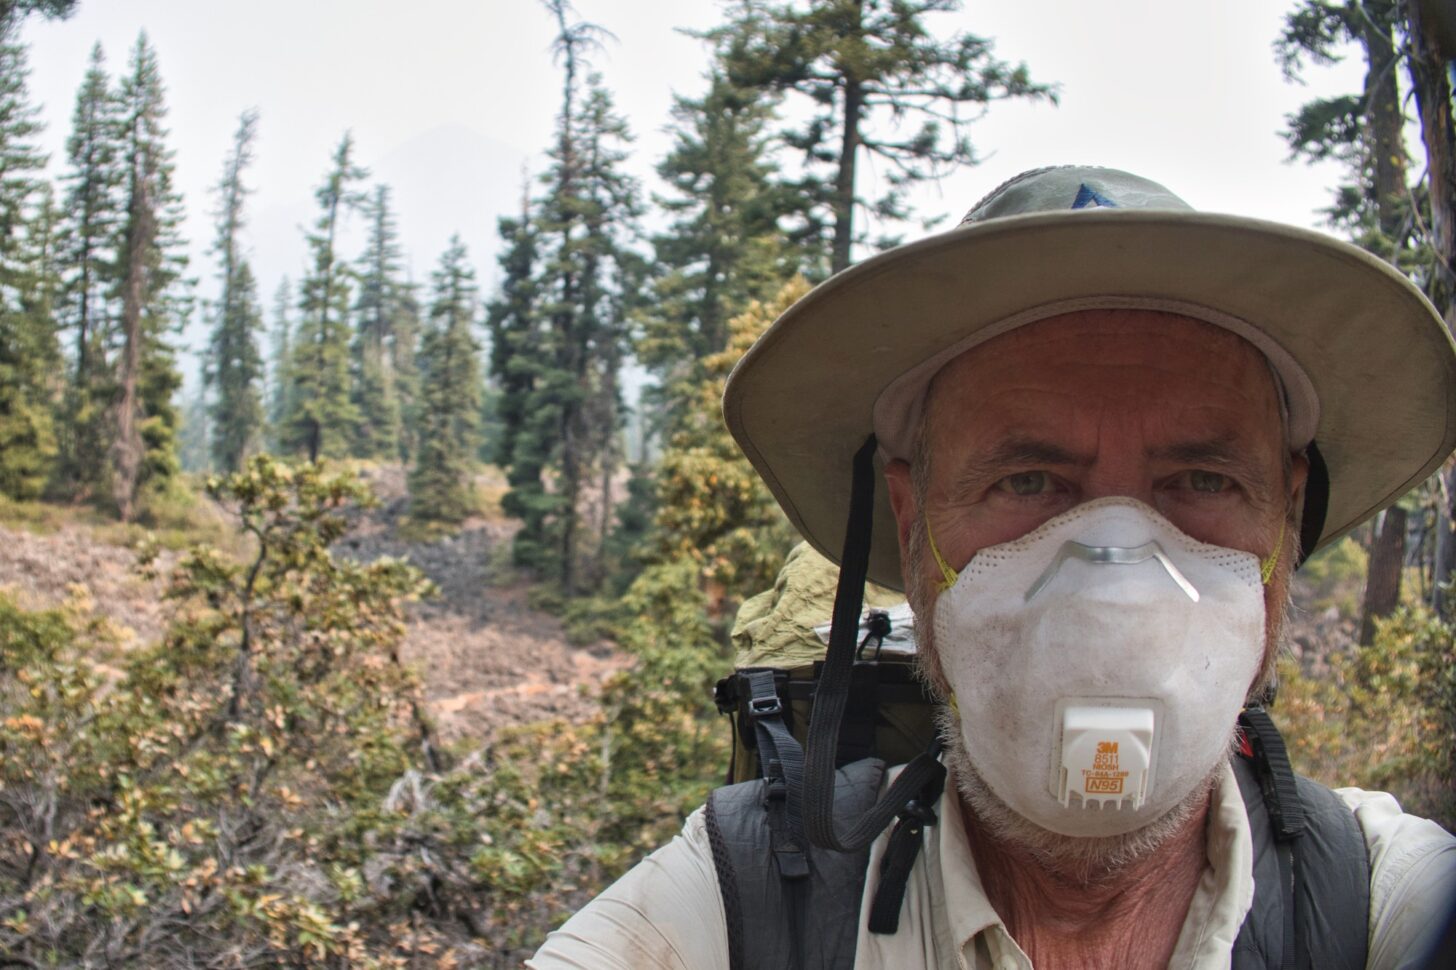
I am every bit as unhappy as I look.
Another heat dome set itself up in Oregon, making it way too hot and way too smoky. Fearing damage to my lungs, I wore an N95 mask despite the heat. The dust was fine and thick on the trail, combining with my copious sweat to create a kind of tar on my feet and legs. The springs and creeks were dried up and 15-mile water carries became the norm, not what I was expecting from Oregon. When I came to the trail junction above Fish Lake it was an easy call to cut down to the resort where showers and cold drinks awaited.
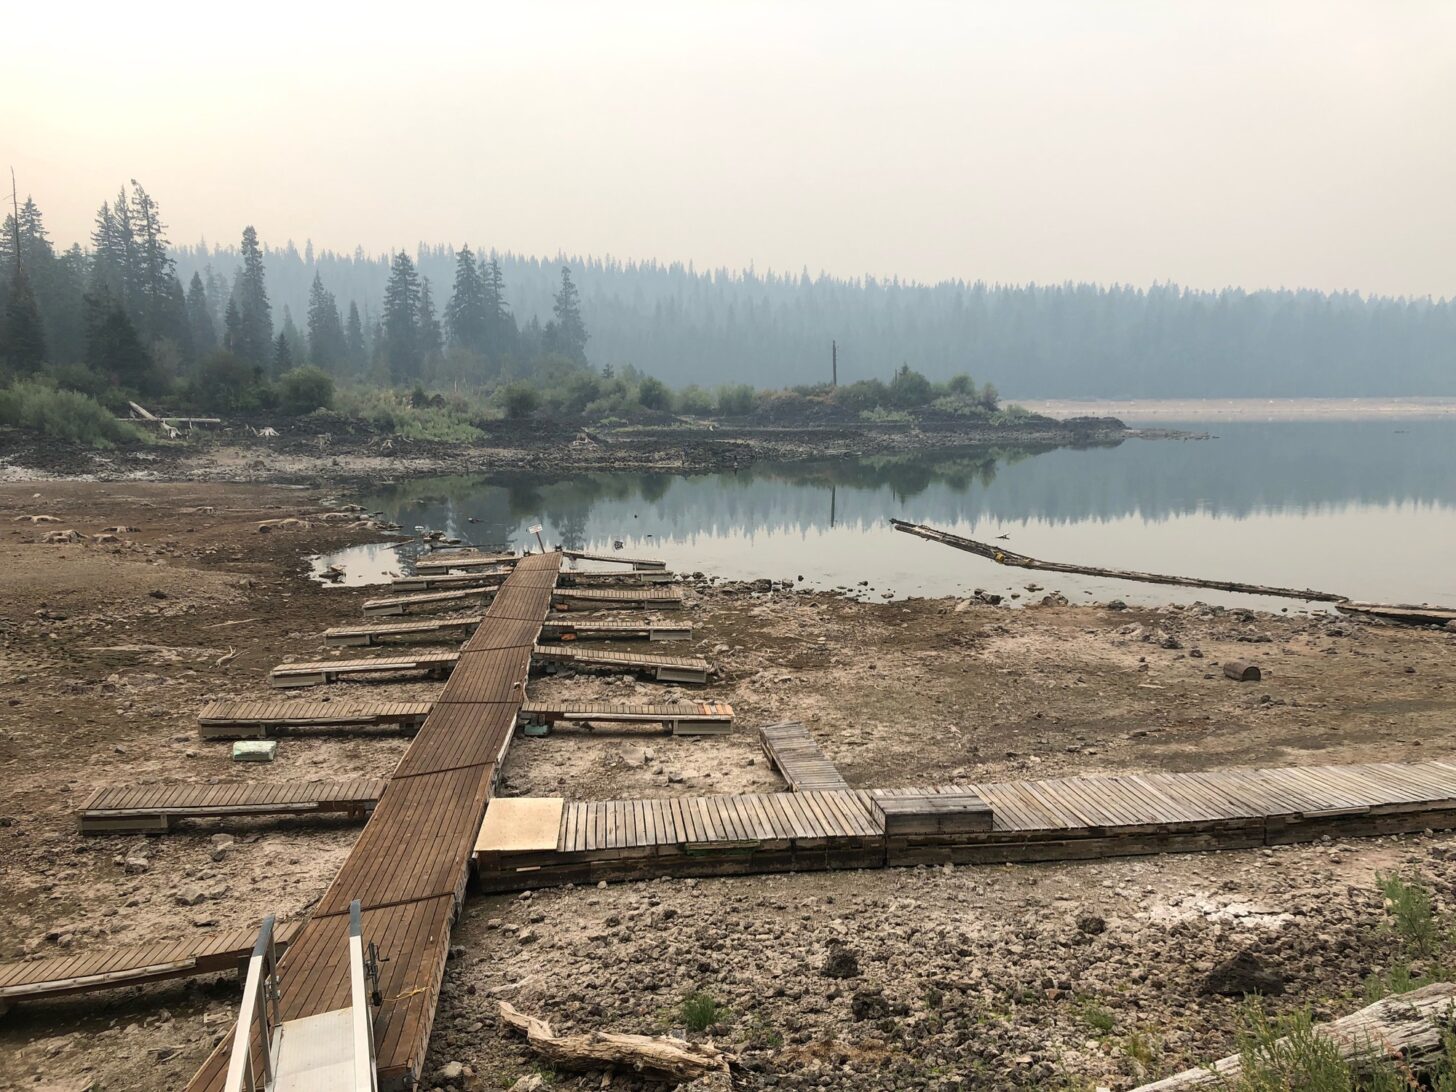
Swimming and boating were not among the amenities available at Fish Lake.
But hanging out in a resort was only a temporary respite. The heat and smoke continued to oppress. The PCT is mostly a ridgeline trail in southern Oregon. It overlooks any number of lakes (this was the Sky Lakes Wilderness), but they were only faintly visible. Mt McLoughlin loomed through the smoke but quickly disappeared again. The skies cleared a bit one night and a number of Perseid meteors appeared, a good omen. However, the relatively clear skies of morning did not last. Ten miles of hiking through a shadeless burn area on the south side of Crater Lake National Park depleted my water and forced me off-trail to dip from a warm tannic pond.
Another hot and smoky morning.
The mood at the Crater Lake hiker campground was subdued bordering on sullen. There was little sign of the usual hiker lightheartedness. No one here signed up for this kind of punishment. Hikers who walked 1800 miles to get here from Mexico – obviously not wimps or quitters – were ready to quit. Or take a week or two off. Or just hitch up to Washington where surely the skies would be clear, the air would be cool and the springs would be flowing. Where a hiker could hike, not just slog through smoke and heat. Washington would be better. It had to be.
Reprieve – Crater Lake to Elk Lake
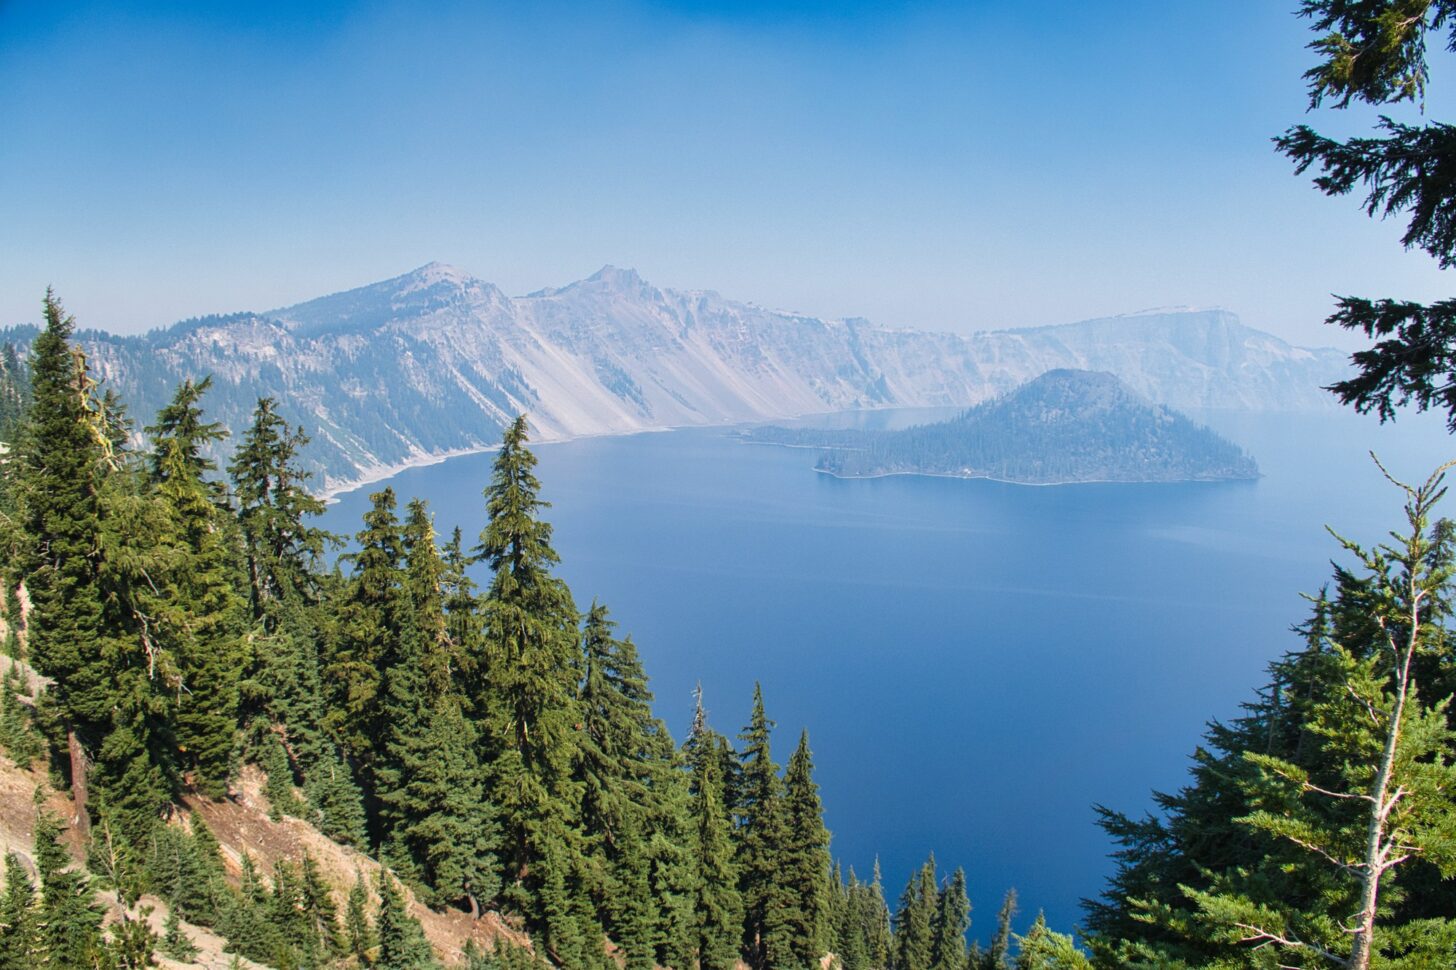
Like everyone else not hitching out, I took the Rim Trail around Crater Lake, rather than the official PCT which runs in parallel a few miles to the west. Because why would you not want to walk around the rim of one of the most spectacularly beautiful lakes in the world?
Crater Lake in the morning.
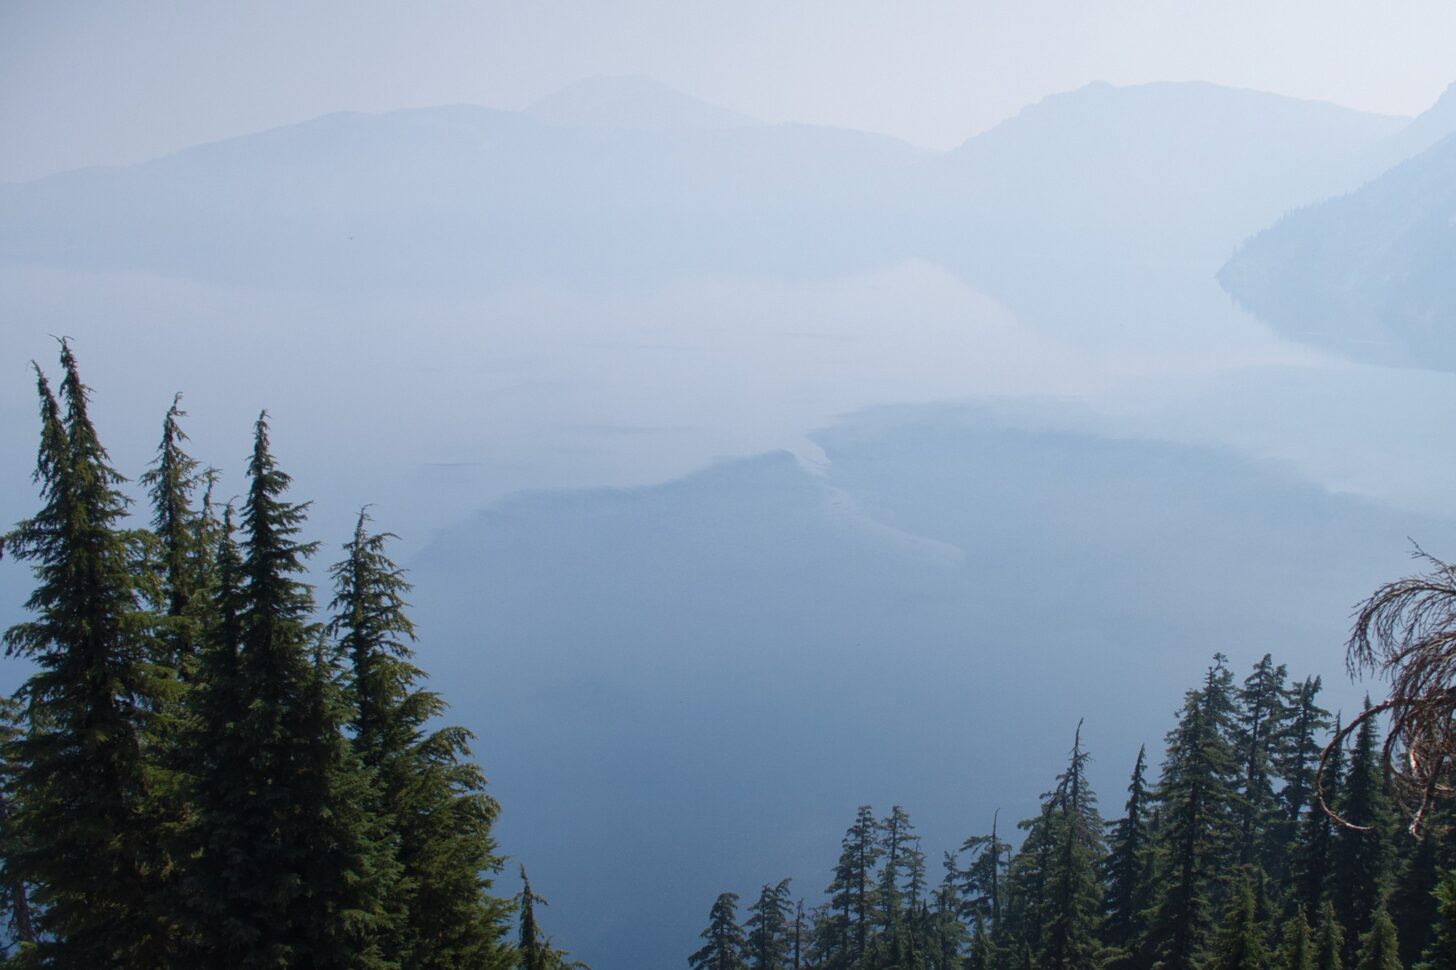
The smoke was not bad in the morning and in fact imparted a bit of hazy mystery to the scene, not unlike a Japanese watercolor. But it got smokier through the day, and by the time I got to the north end of the lake, I had my N95 mask on again.
Crater Lake at noon.
The next morning was cold and windy, with wet clouds whipping up the mountainside. I was thrilled to put on my down sweater and wind shirt, and even fantasized about having to hike in the rain.
Although it didn’t rain, fog dripped from the trees. The trail was transformed from a hot, dusty, smoky slog to something cool, dark, and somewhat mysterious. After days of misery, I was hiking in clean cool air. It made hiking fun again and I took advantage of the opportunity to stretch my legs and cruise through the forest.
The fog and cold wind were a welcome change.Southbounders water up at Thielsen Creek.
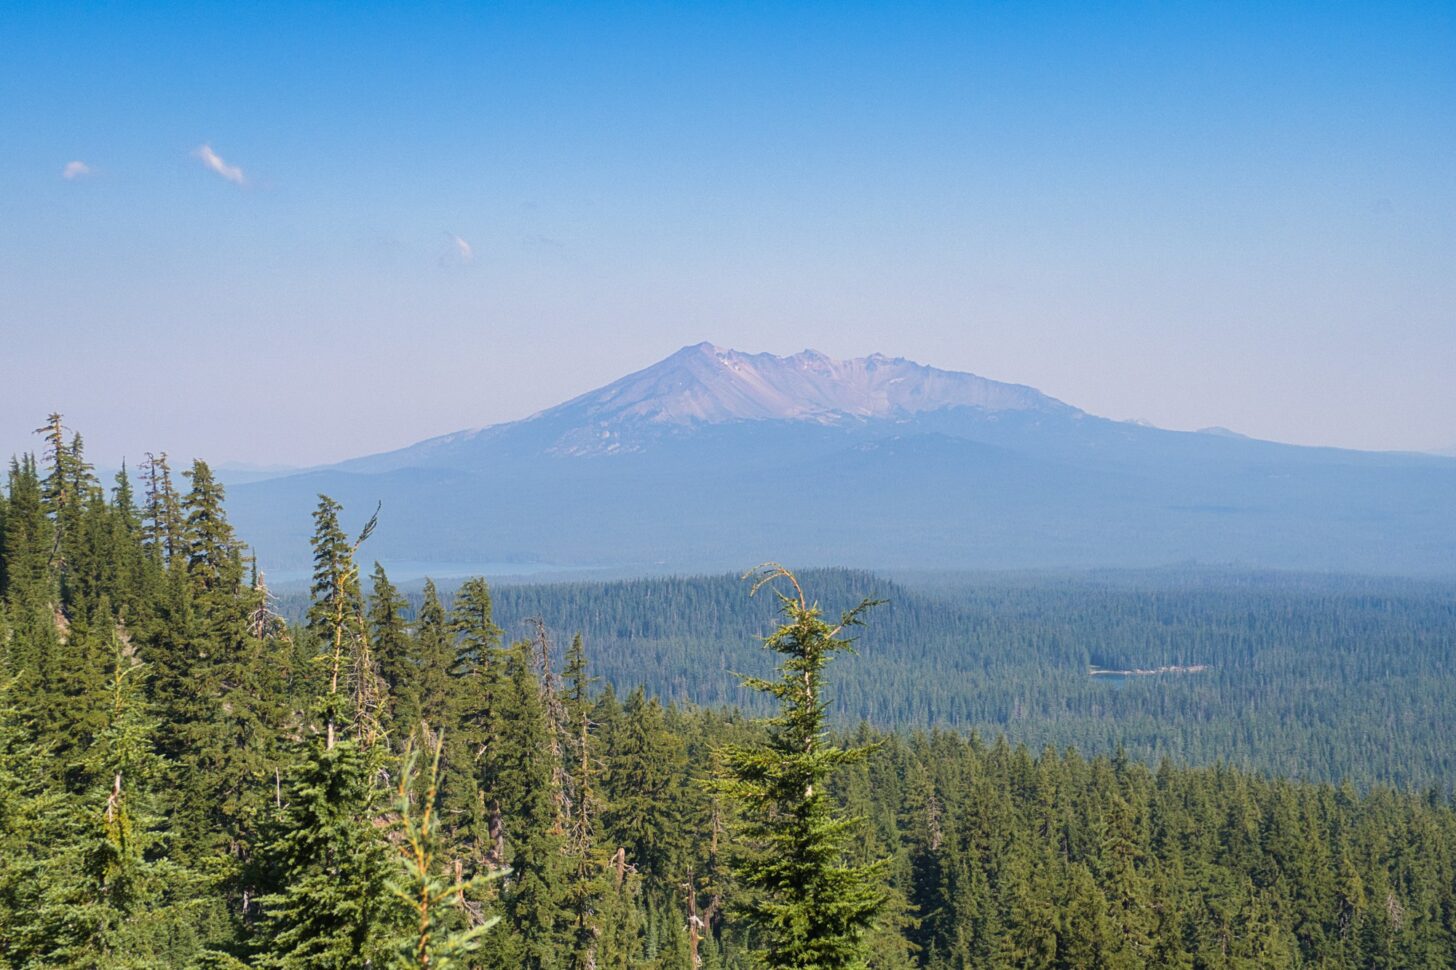
The clear air brought views of the isolated conical peaks of the Oregon Cascades. These mountains are very different from the ranges I know best – the Rockies, the Sierra, the Transverse Ranges of California, and the Sky Islands of southern Arizona. Sharp volcanic peaks rise out of a skirt of rolling forested hills. They seem scattered about more or less at random within a north-south corridor that must be a tectonic plate boundary.
A peak in the Oregon Cascades.
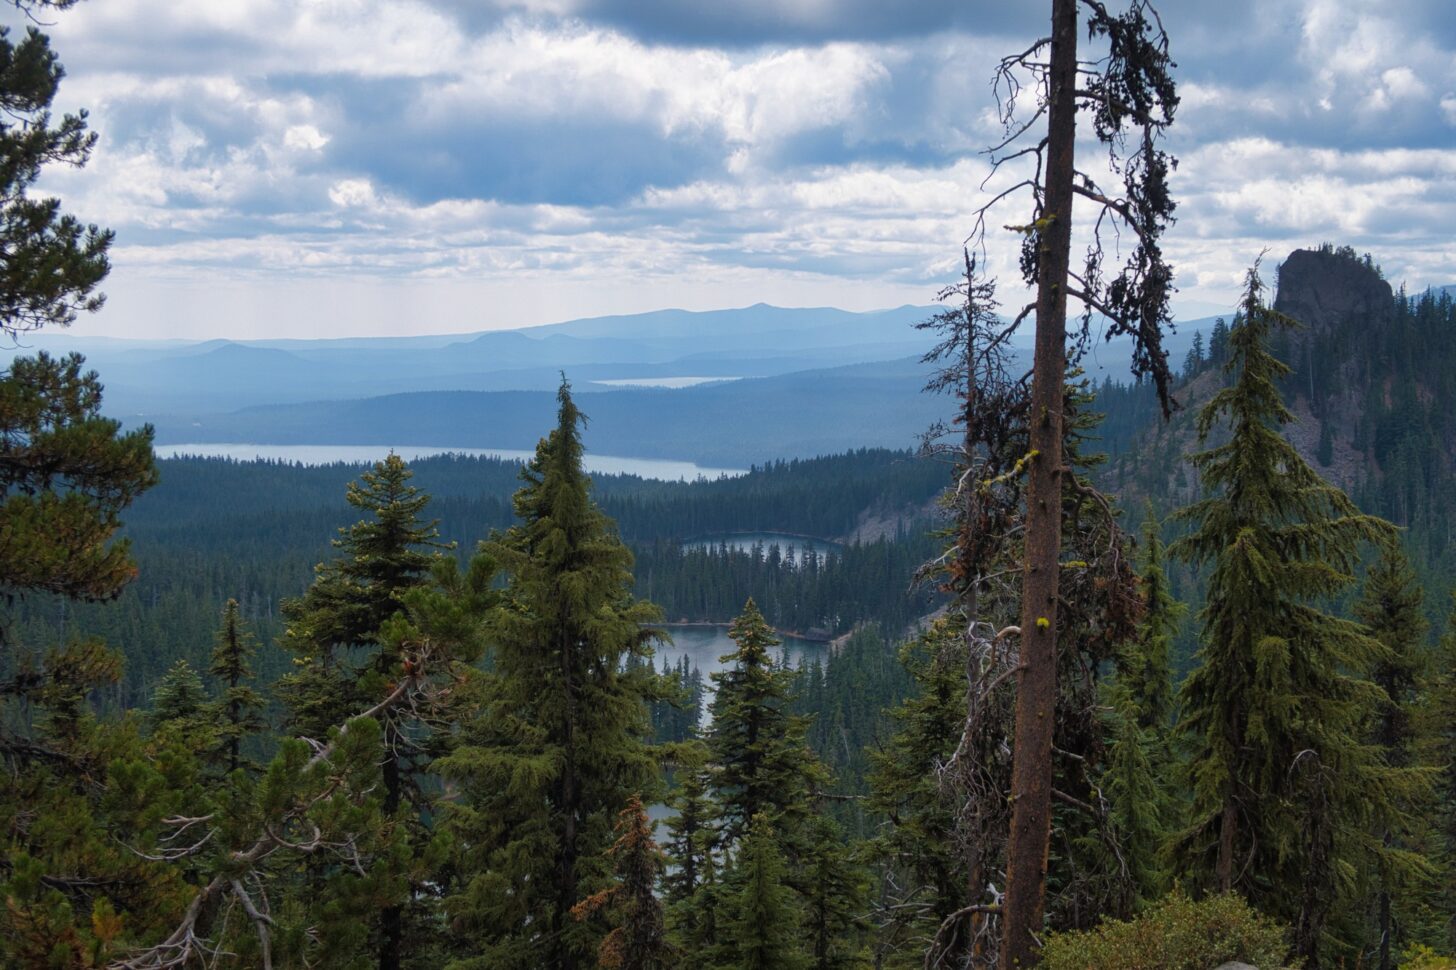
There are plenty of lakes here but little running water.
Oregon lake country.
The miles beyond my last resupply at Shelter Cove rolled on, pleasant but unremarkable. The smoke was never wholly absent, but in the deep forest, it was easy to ignore, to avoid thinking about what was happening in distant forests. Lakes appeared, beautiful and sparkling in the summer sun. They were low, but not obviously low. Patches of blueberries crowded the trail at times, and maybe if you didn’t know better you wouldn’t realize that delicious as the berries are, they are also sparse and a bit desiccated.
The blueberries were hanging on.
I will be exiting the trail soon, but it feels like the trail is making its own exit. A walk through another burn area festooned with fireweed makes the point. Change is coming, change is already here.
I walk knowing I will never see this place again. Not just because I am old, but because this world is old. We’ve lived for the last 10,000 years in a world of mild and stable climate, an anomaly in climate history. That anomaly gave us the chance to invent agriculture, and thus invent cities and, eventually, the notions of progress and freedom and wilderness.
A stable climate regime also let plants and animals engage in exuberant rounds of diversification and specialization, each new species a bit better at exploiting a niche environment, each one a bet that the niche would persist and not leave it stranded. With our specialized dependence on agriculture, we have made the same bet: that we would know what crops to plant and when and where. Now we are losing that bet, victims of our own success.
I come to the place where I will turn right and leave the trail. I stop, unwilling to make my exit just yet. I drop my pack, lean back against a fir. Regard the scene. The forests, the meadows, the lakes, the birds, the bugs, the pitcher plants, the yearling deer skittering through the woods: all beautiful, all on their way out. They too have lived lives of grace and affection. I say a few words of gratitude for this and depart.
Backpacking Light does not accept compensation or donated/discounted products in exchange for product mentions or placements in editorial coverage.
Some (but not all) of the links in this review may be affiliate links. If you click on one of these links and visit one of our affiliate partners (usually a retailer site), and subsequently place an order with that retailer, we receive a commission on your entire order, which varies between 3% and 15% of the purchase price. Affiliate commissions represent less than 15% of Backpacking Light's gross revenue. More than 70% of our revenue comes from Membership Fees. So if you'd really like to support our work, don't buy gear you don't need - support our consumer advocacy work and become a Member instead.
Learn more about affiliate commissions, influencer marketing, and our consumer advocacy work by reading our article Stop wasting money on gear.
Learn how to identify and use lines of position to help fix your location on a map while traveling in the backcountry.
Introduction
Knowing where you are in the backcountry and identifying that location on a map (“fixing your position”) is an essential skill. Doing so with analog tools (e.g., map and compass) seems to be a lost art, having been replaced by the digital position fix marker found in GPS smartphone apps.
“You are here…” Has the GPS position fix icon become the golden calf of backcountry navigation?
In this skills article, you’ll learn a fundamental map use technique – what lines of position are and how to use them to fix your position on a map in the backcountry.
What is a line of position?
If you look at your map and say, “Hmmm…I’m somewhere on this map.” that’s not going to inspire a lot of navigational confidence.
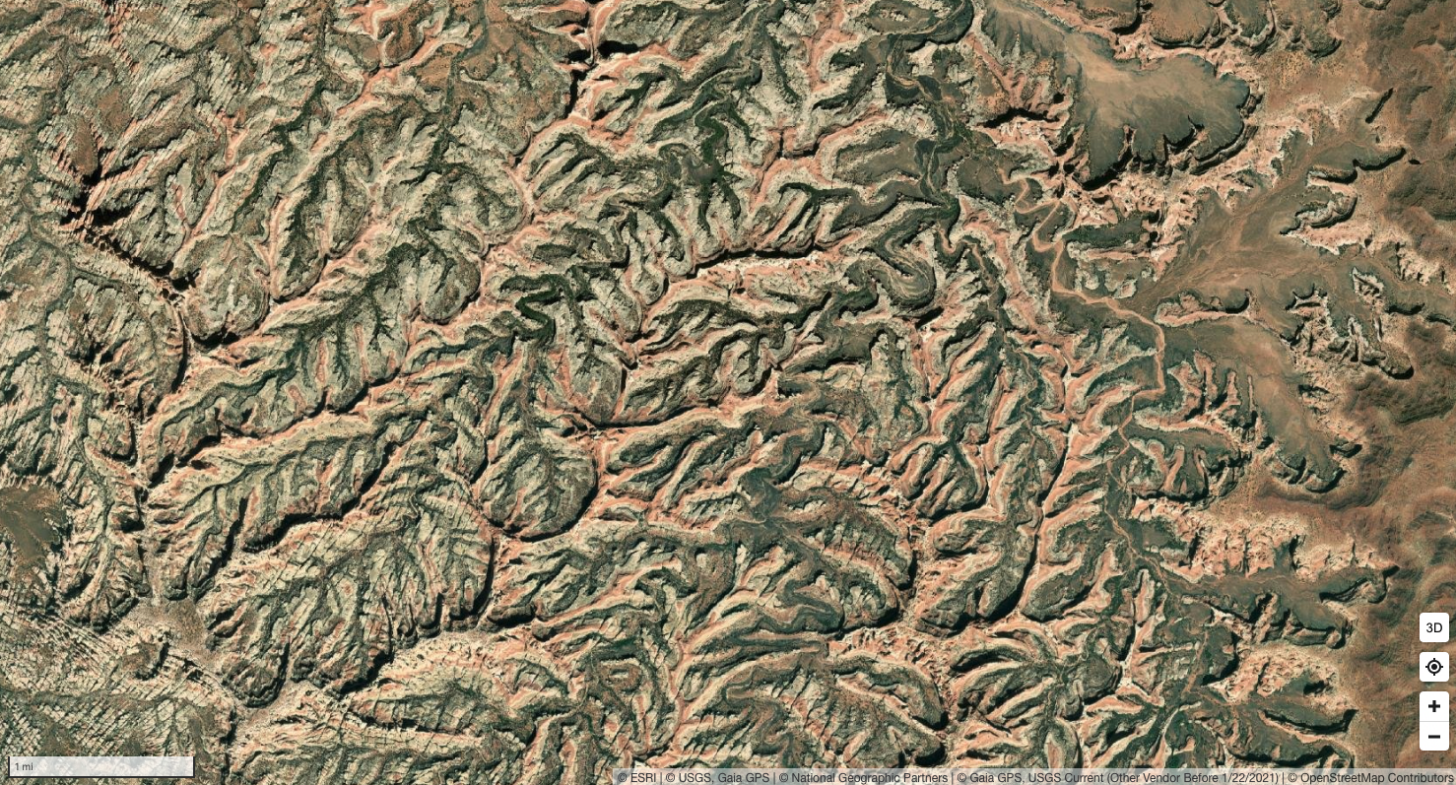
In my last trip into the Maze in Canyonlands National Park, I used the analog techniques of dead reckoning (movement time tracking) and lines of position to navigate more than any other technique. This is not a great environment to be asking the question, “Hmmm…I wonder where I am on this map?”
However, if you knew with certainty that you were somewhere along a line on the map, that may make you feel quite a lot better about where you’ve come from and where you’re going.
A line of position, or LOP (sometimes called a “position line”) is a line on the map where you know with 100% certainty that you are somewhere along that line.
Lines of position may be straight (e.g., a boundary fence) or they may be nonlinear (e.g., a trail).
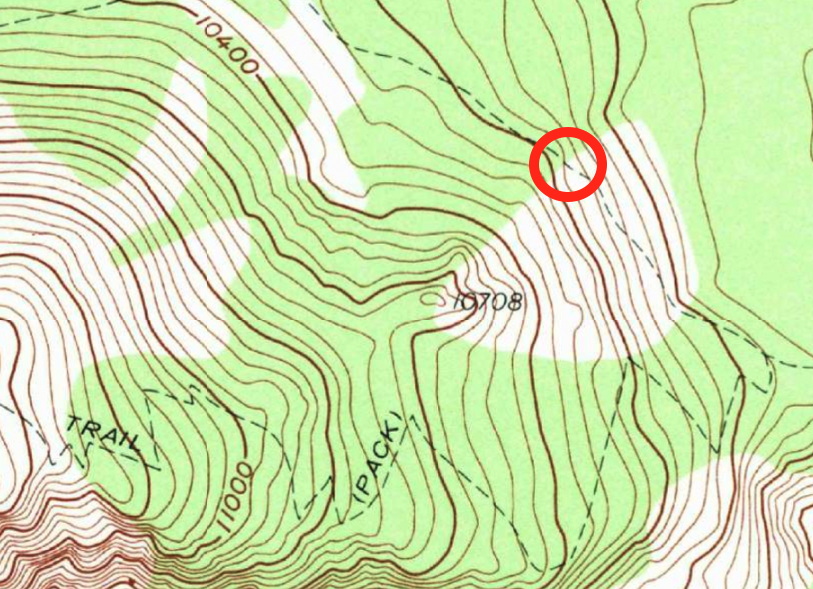
I knew with 100% certainty that we were on this hiking trail. That trail was our known line of position. But it’s not clear or obvious what our exact position is. For that, we need one more line of position.
What are examples of lines of position?
The most important thing about a line of position is that it must always be identifiable on a map. A stream you discover in real life that isn’t on the map cannot be a line of position.
Lines of position can be manmade features, topographical features, terrain features, or sighted bearing lines.
Manmade lines of position:
trails
roads
fences
powerlines
Topographical features that can serve as lines of position:
ridges (where peaks and passes live)
valleys (drainages)
steep slopes or cliffs adjacent to significantly less-steep terrain
benches
plateau boundaries (i.e., topographic perimeter)
Terrain features that can serve as lines of position:
streams
lake shorelines
changes in vegetation
Sighted bearing lines can also serve as lines of position. These are the imaginary lines drawn between a known landmark and your current position. In most cases, they require the use of a compass.
The exception to this is when you, and two other (known) landmarks lie along a straight line. This type of LOP is called a transit line. A compass isn’t needed to draw a transit line.
Two or more lines of position = a position fix
The magic happens when you arrive at a point where two lines of position intersect. At that point, you can fix your precise location on the map.
One of the most obvious intersections of two lines of position for hikers is where a trail crosses a stream. As long as you’re paying attention as you hike, and make a mental note of major stream crossings that correspond to mapped streams, this is a reliable method for fixing your position. However, it can become confusing if you are hiking in particularly wet areas, or during the early summer, when you may cross several streams that are too small to appear on the map.
Any two lines of position mentioned in the previous section can be used to fix your location – the combinations seem limitless. The next section outlines some common examples.
Examples of intersecting lines of position used to fix your position on a map
1. Trail LOP intersects another trail LOP at a trail junction
In most National Parks and other popular hiking destinations, we can enjoy the informative benefit of signed trail junctions. In the absence of signs, we can still use the information reliably – assuming our maps are up to date!
Position fix: trail junction. LOPs: two trails.
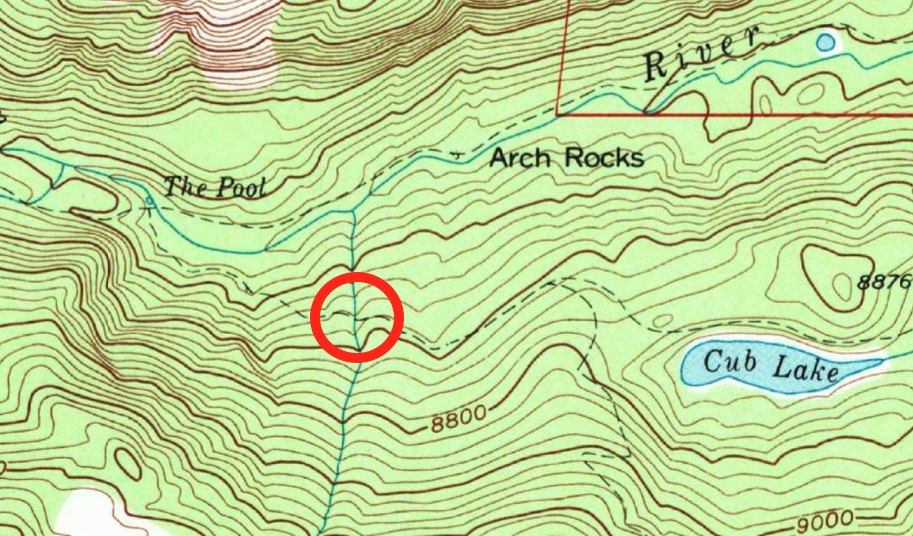
2. Trail LOP intersects a stream LOP at a bridge
This method is most reliable for significant streams that flow year-round, are mapped, and travel through topographically-obvious valleys that we can visually identify in real life.
Position fix: stream crossing or bridge. LOPs: trail and stream.
3. Trail LOP intersects a vegetation boundary LOP when it enters a meadow
This method requires updated maps. Be cautious of wildfire-burned areas that have appeared before the printing date of your map – vegetation cover can change significantly with wildfire.
Position fix: forest-meadow vegetation edge. LOPs: trail, meadow perimeter.
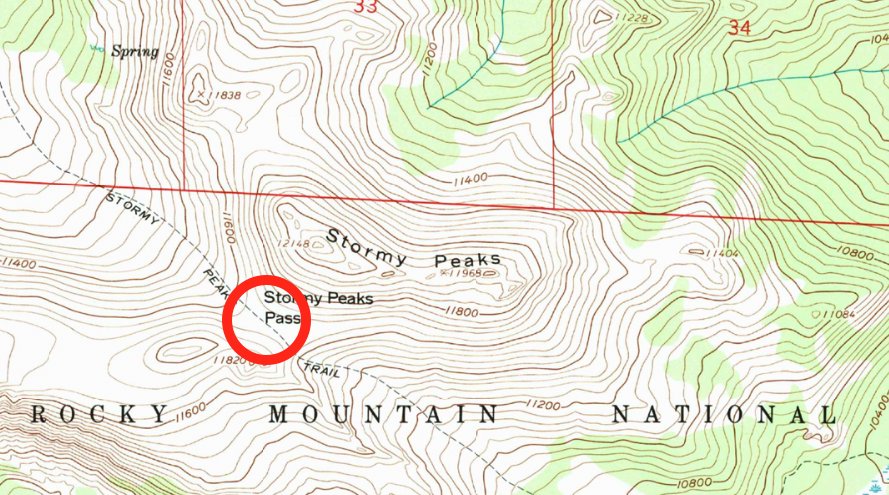
4. Trail LOP intersects a ridge LOP at a pass
Recognizing passes, ridges, and other topographic features requires practice. Make it a routine to take your map with you everywhere and correlate the terrain you see in real life with the shapes of the topographic lines on the map.
Position fix: a pass. LOPs: trail and a ridge.
5. Sight line LOPs (compass required) to known landmarks that intersect with topographic LOP
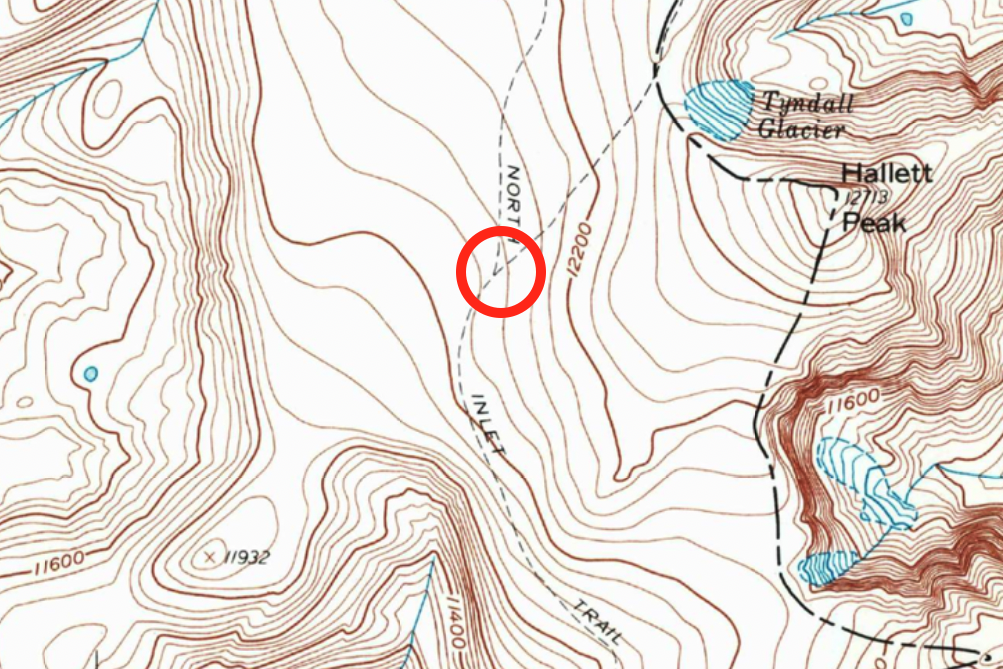
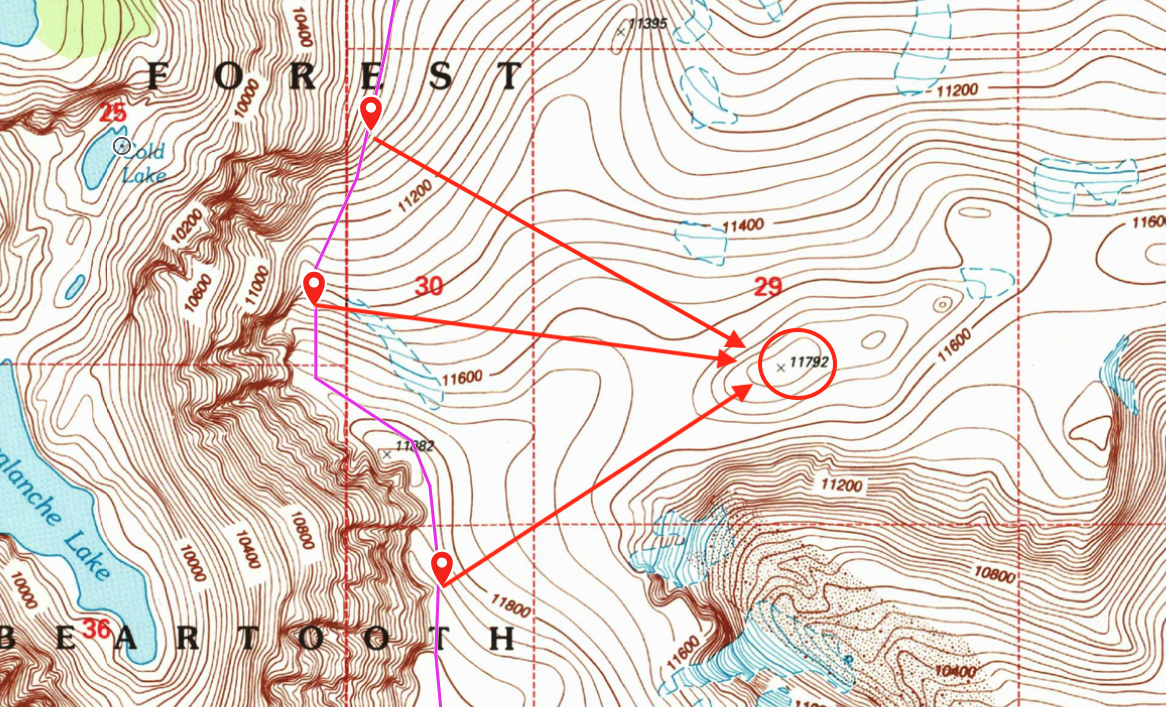
In the absence of trails, you’ll need to get more creative. Here’s an example of a mountaineering route I attempted up the north ridge of a prominent peak in Montana. Most of the climb was performed in low-visibility conditions (cloud cover). I was handrailing (a technique where you follow a natural terrain feature) along the western edge of the summit plateau, which fell off steeply to cliffed terrain. So when the clouds cleared enough, I was able to sight a bearing line to Peak 11792 (compass required), and then draw that bearing line onto my map. My approximate position fix was where the bearing line LOP intersected my route LOP at the western edge of the plateau.
Position fix: the intersection of a bearing line sighted to Peak 11792 (LOP #1) and a topographic feature (slope change boundary at the plateau perimeter – LOP #2).
6. Trail LOP intersects a transit line LOP (no compass required)
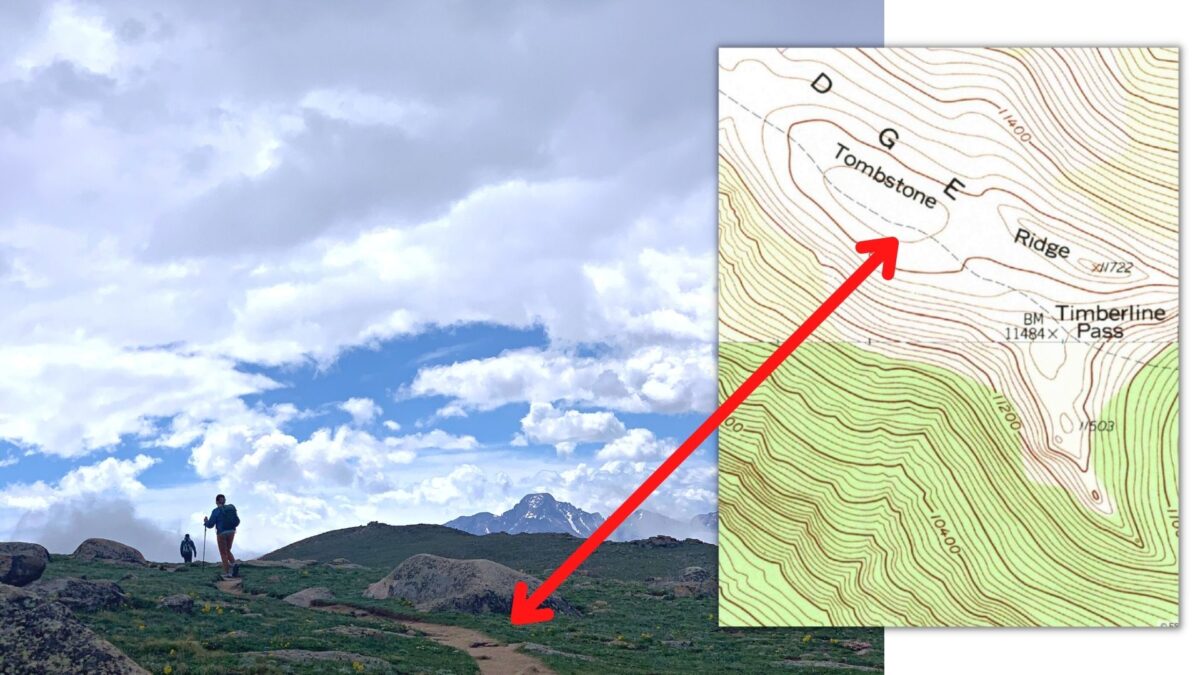
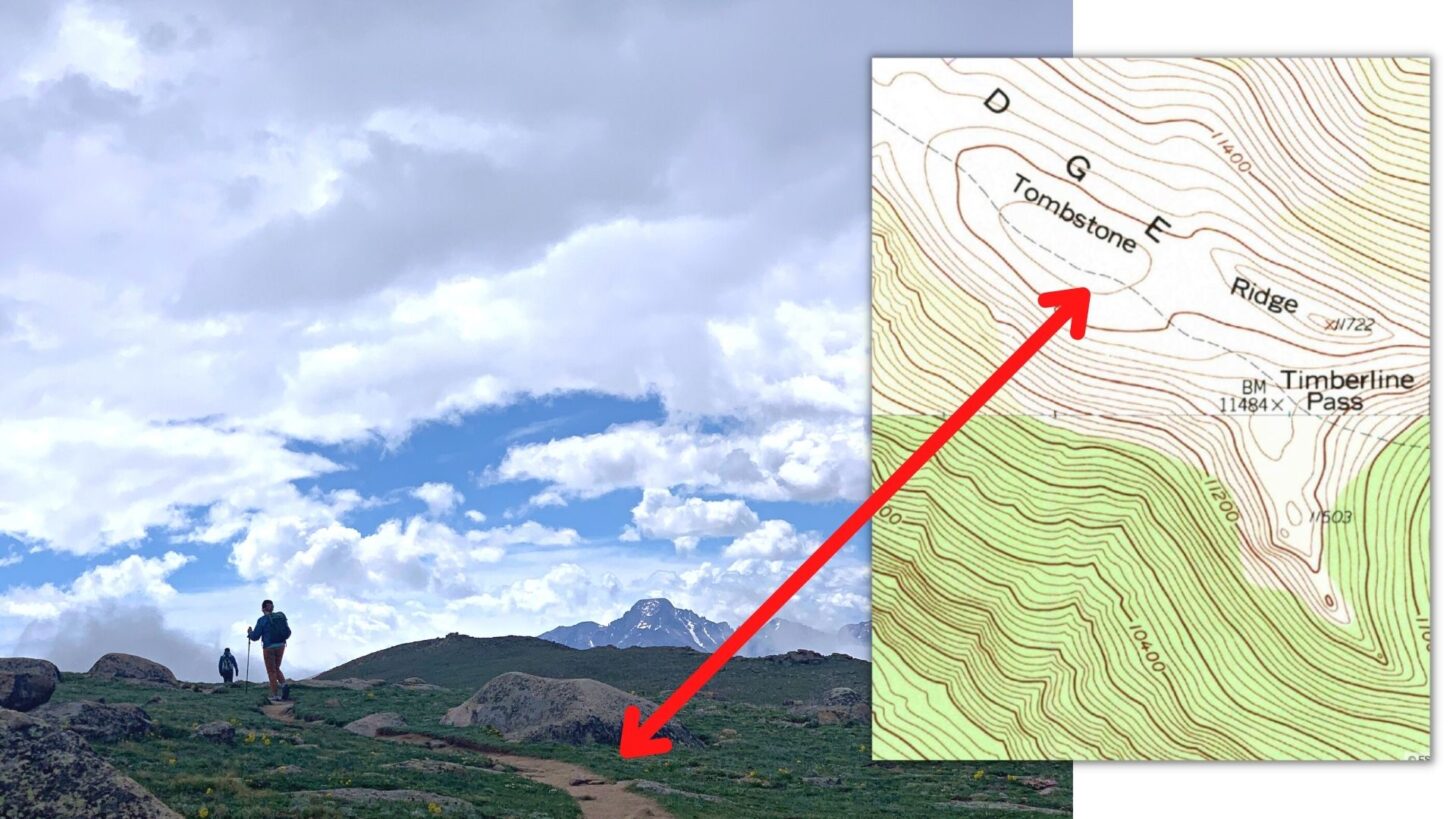
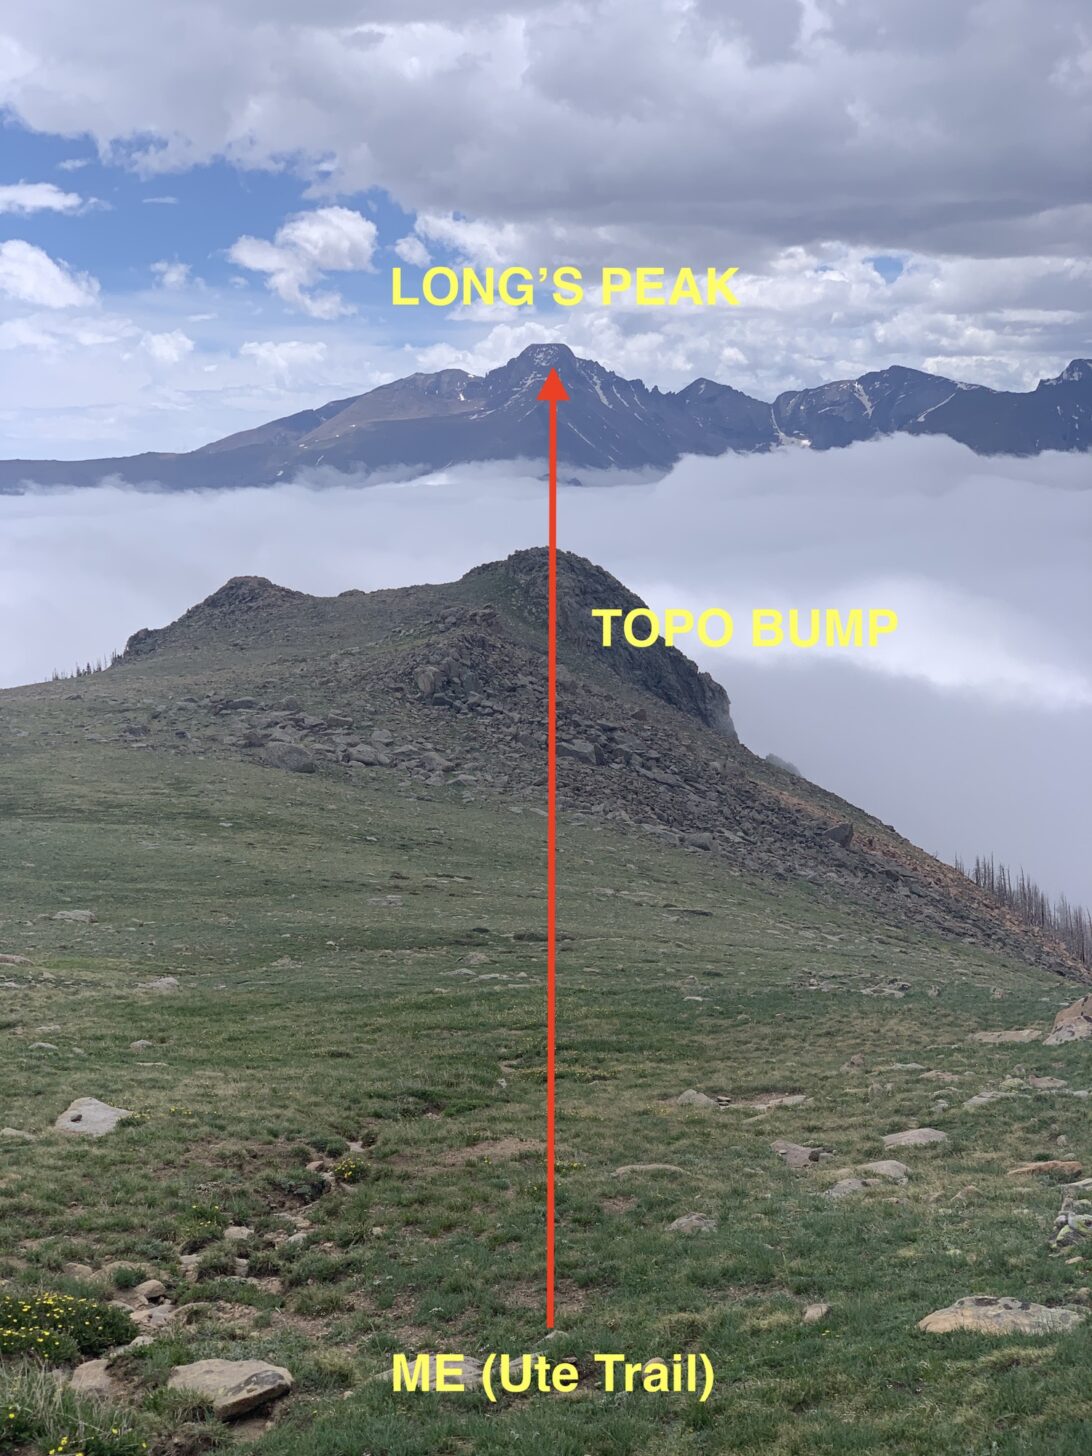
We recently hiked the Ute Trail in Rocky Mountain National Park, and encountered a classic example of a transit line LOP. A transit line is a straight line that intersects your current position and two visible landmarks. Transit line LOPs can be used to orient a map, or sight a bearing without using a compass.
The two landmarks I observed were a small unnamed topographical bump (foreground) and the very prominent north face of Long’s Peak (background):
Position fix: at the intersection of the Ute Trail (LOP #1) and a sight line (LOP #2) intersecting me, a topo bump, and Long’s Peak.
Now, simply drawing a line on the map from Long’s Peak, through the topo bump, and intersecting the Ute Trail, I can fix my position on the trail. In addition, by laying the map on the ground, and rotating it so the transit line drawn on my map is parallel to my line of sight to Long’s Peak, it’s now oriented. All this without using a compass – such is the power of a transit line.
Conclusion
Understanding how to identify and use multiple lines of position (LOPs) to fix your position on a map is one of the most valuable navigation skills you can learn. This technique does not require a compass most of the time, so it’s very fast and simple to learn. Practice it!
In this episode, Andrew chats with BPL staff writer Mark Wetherington about his favorite articles, backpacking in the south, and more.
Listen
Listen to the public version of this podcast episode on Itunes, Spotify, or wherever you get your podcasts.
Summary
In this episode, Andrew chats with Backpacking Light Staff writer Mark Wetherington. Mark began backpacking in 2007 as a student at the University of Kentucky, and since then he’s been exploring the southeast and the west on foot, bicycle, and skis. Mark’s writing has appeared in Backpacker Magazine and Trail Groove Magazine in addition to Backpacking Light.
Andrew and Mark chat about backpacking in the southeast, Mark’s love of exploring the same place over and over again, Mark’s favorite pieces he’s written for Backpacking Light, and more.
Make sure you are logged in as a member to listen to or watch the full version of this podcast. Not a member? Click here!
Outline
0:01:16 – podcast opening and introduction
0:01:43 – Mark’s early days of backpacking
0:05:31 – the relationship between place, Mark, and writing
0:14:09 – developing the ideas behind Backpacking Tithe
— Members Only Begins here —
00:26:31 – the psychology behind bailing on trips & risk management
00:37:23 – using bikes to begin backpacking trips
00:48:55 – Why do you write for BPL?
00:54:22 – What is something you would like to write about?; Podcast Wrap-up
Resources
Check out the full catalog of articles from Mark Wetherington at his author page at Backpacking Light.
Executive Producer - Backpacking Light; Show Director and Host - Ryan Jordan; Producer - Chase Jordan; Theme music: Look for Me in the Mountains written by Chris Cunningham and Ryan Jordan, performed by Chris Cunningham (acoustic guitar, lead and harmony vocals, harmonica), Chad Langford (upright bass), and Tom Murphy (mandolin), produced by Basecamp Studios in Bozeman, Montana.
Sponsorship Policy: Backpacking Light does not accept compensation or donated/discounted products in exchange for product mentions or placements in editorial coverage, including any podcast episode content not excplicitly identified as sponsored content. Some (but not all) of the links in these show notes may be affiliate links. Learn more about affiliate commissions, influencer marketing, and our consumer advocacy work by reading our article Stop wasting money on gear.
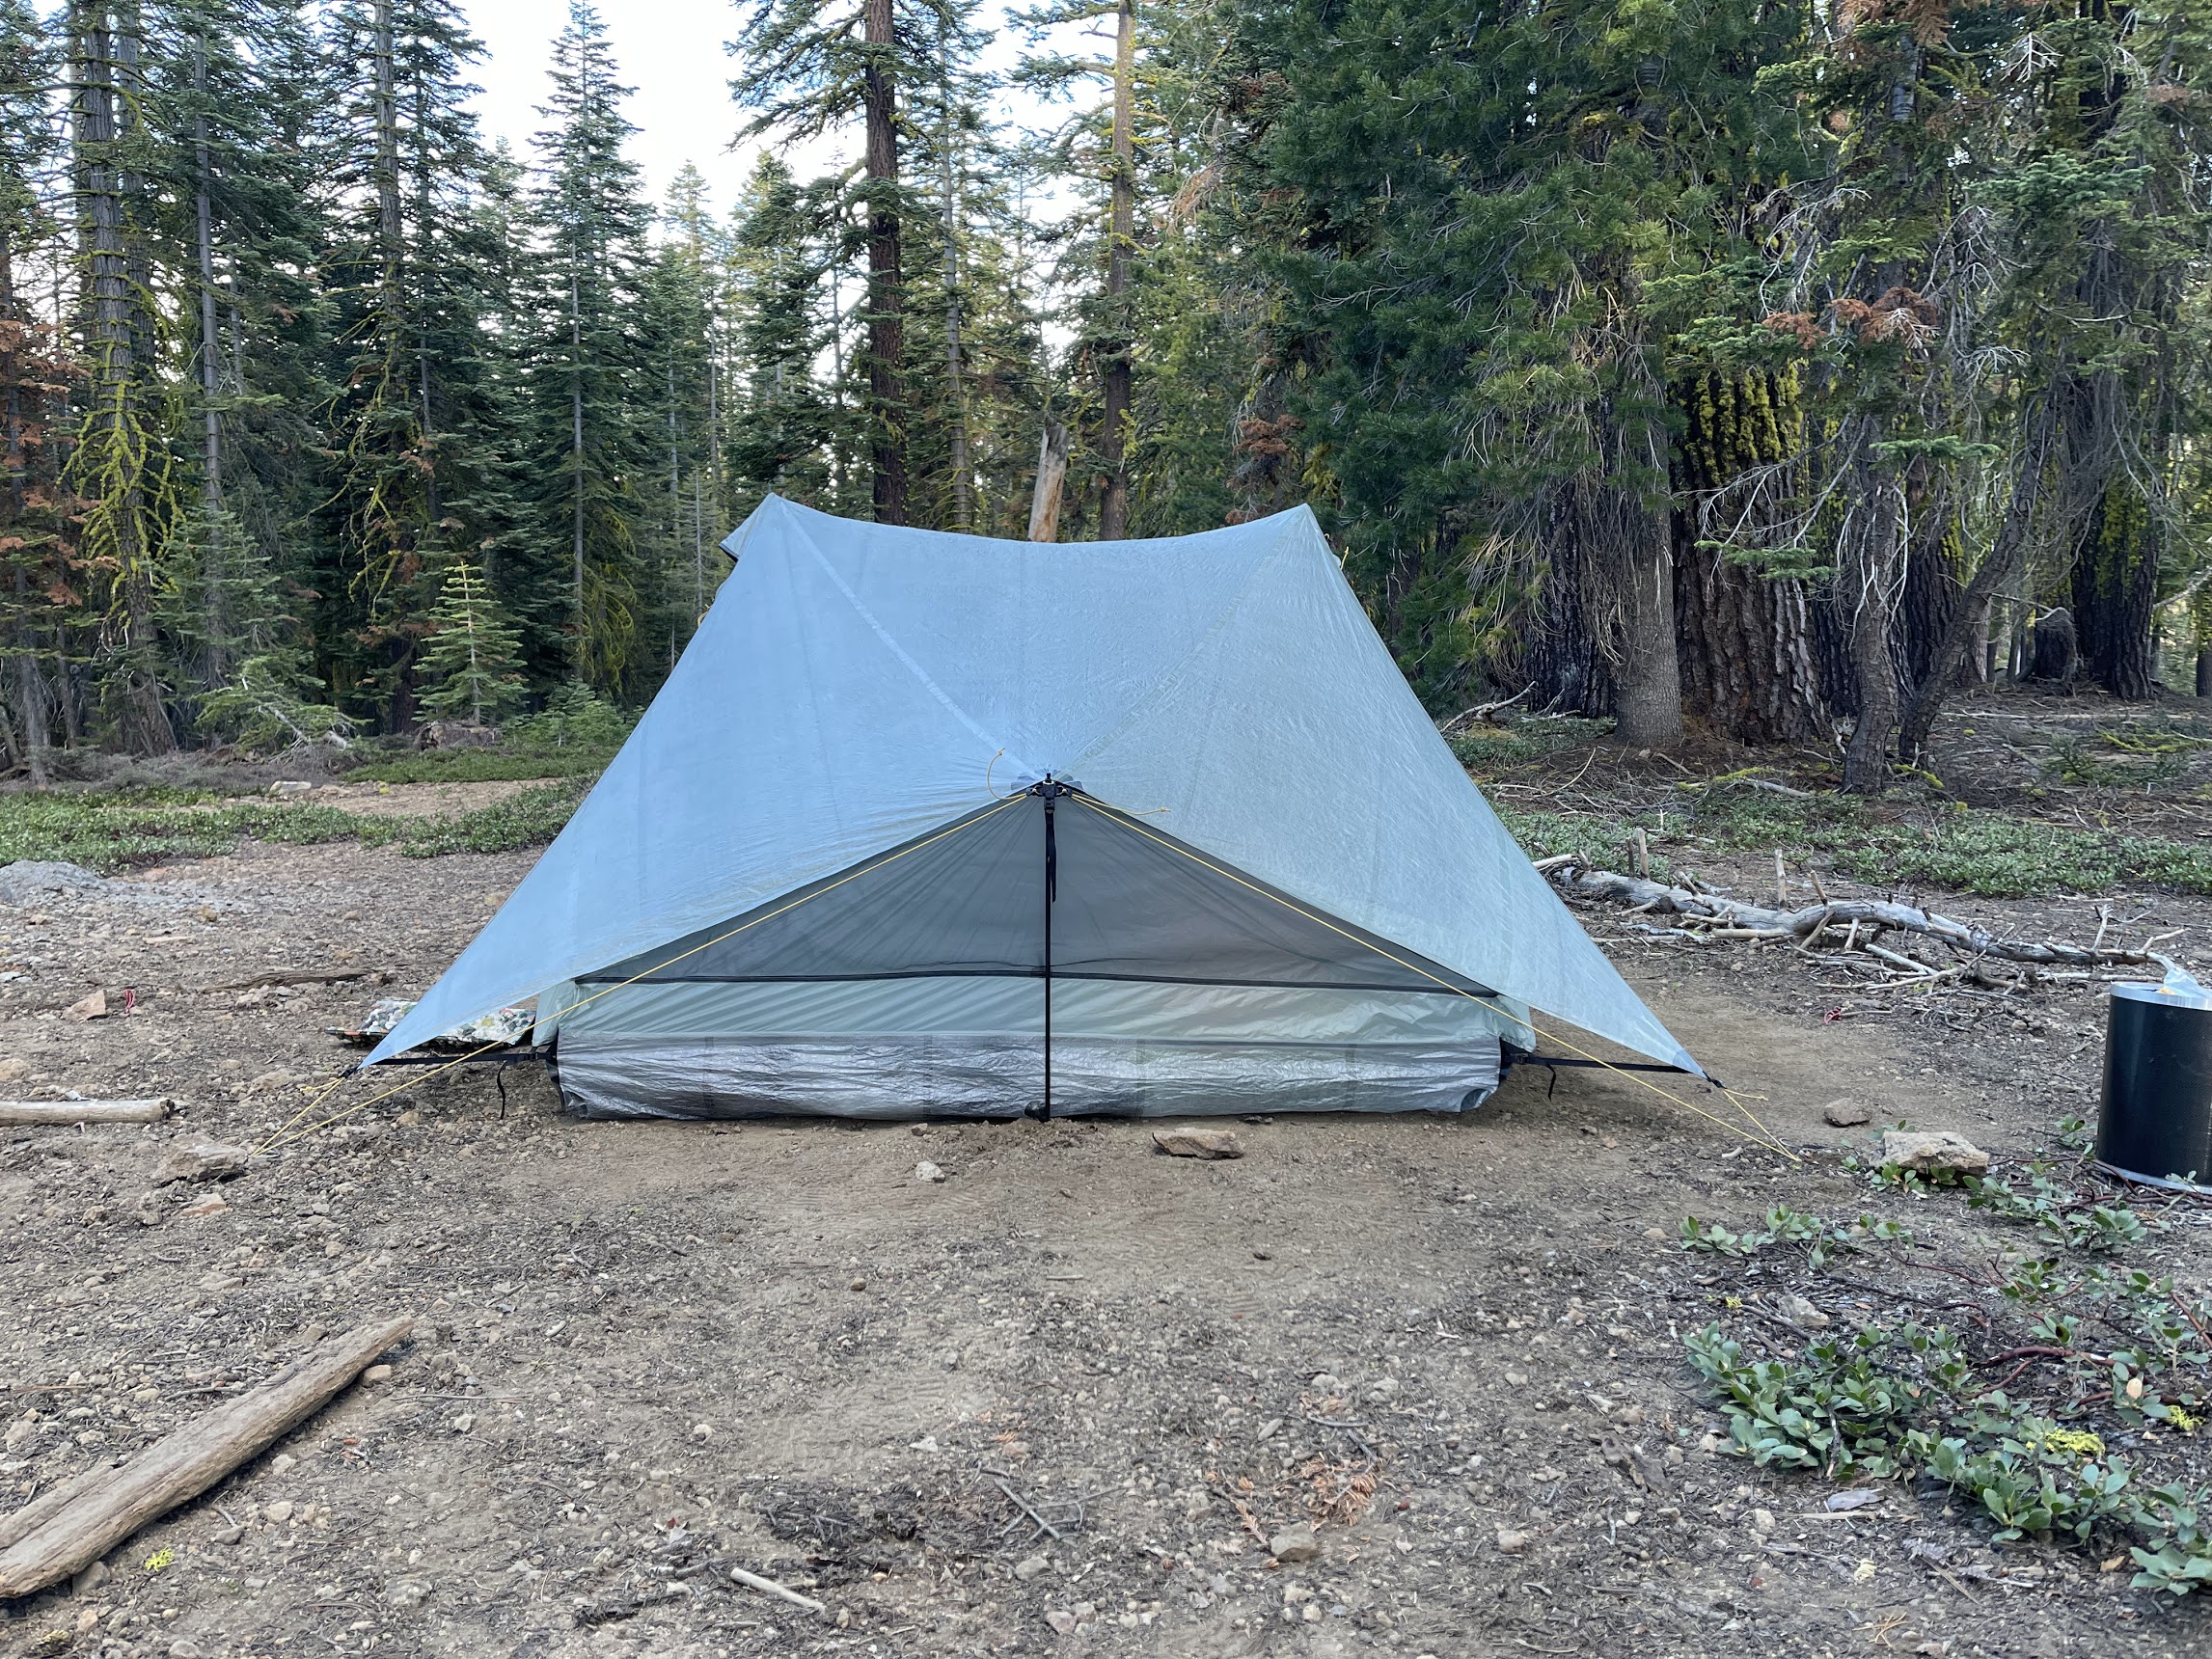
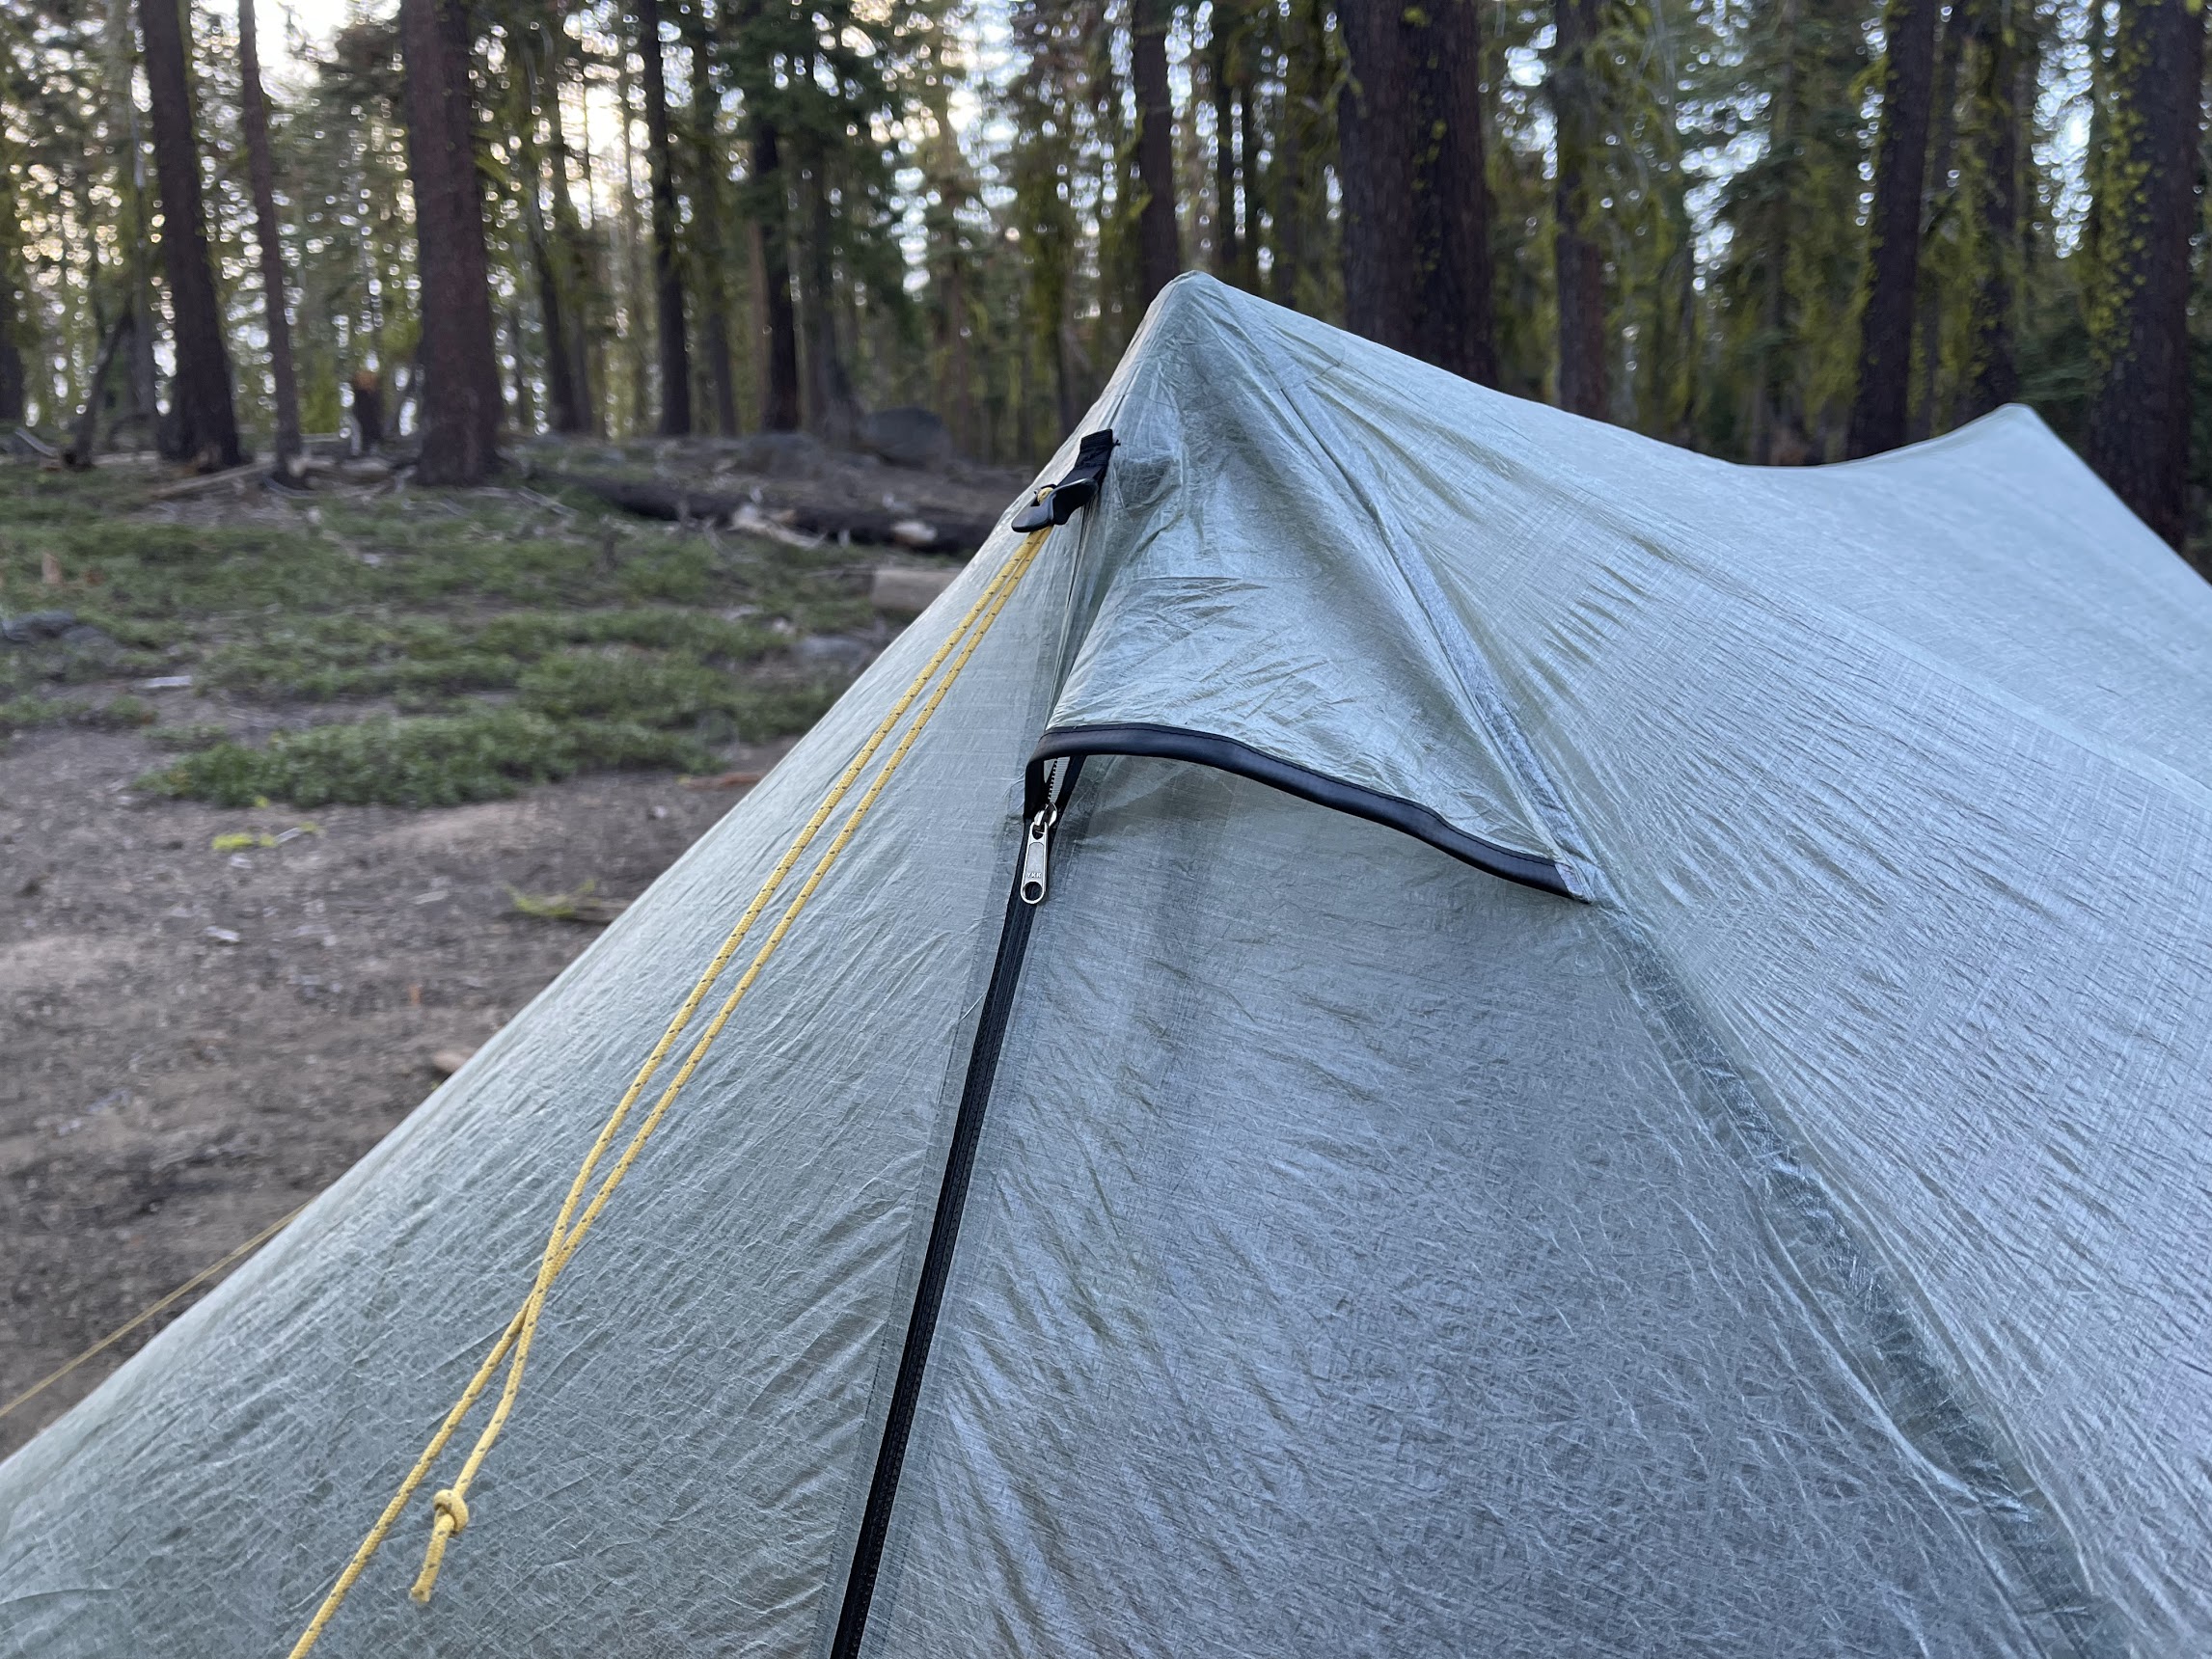
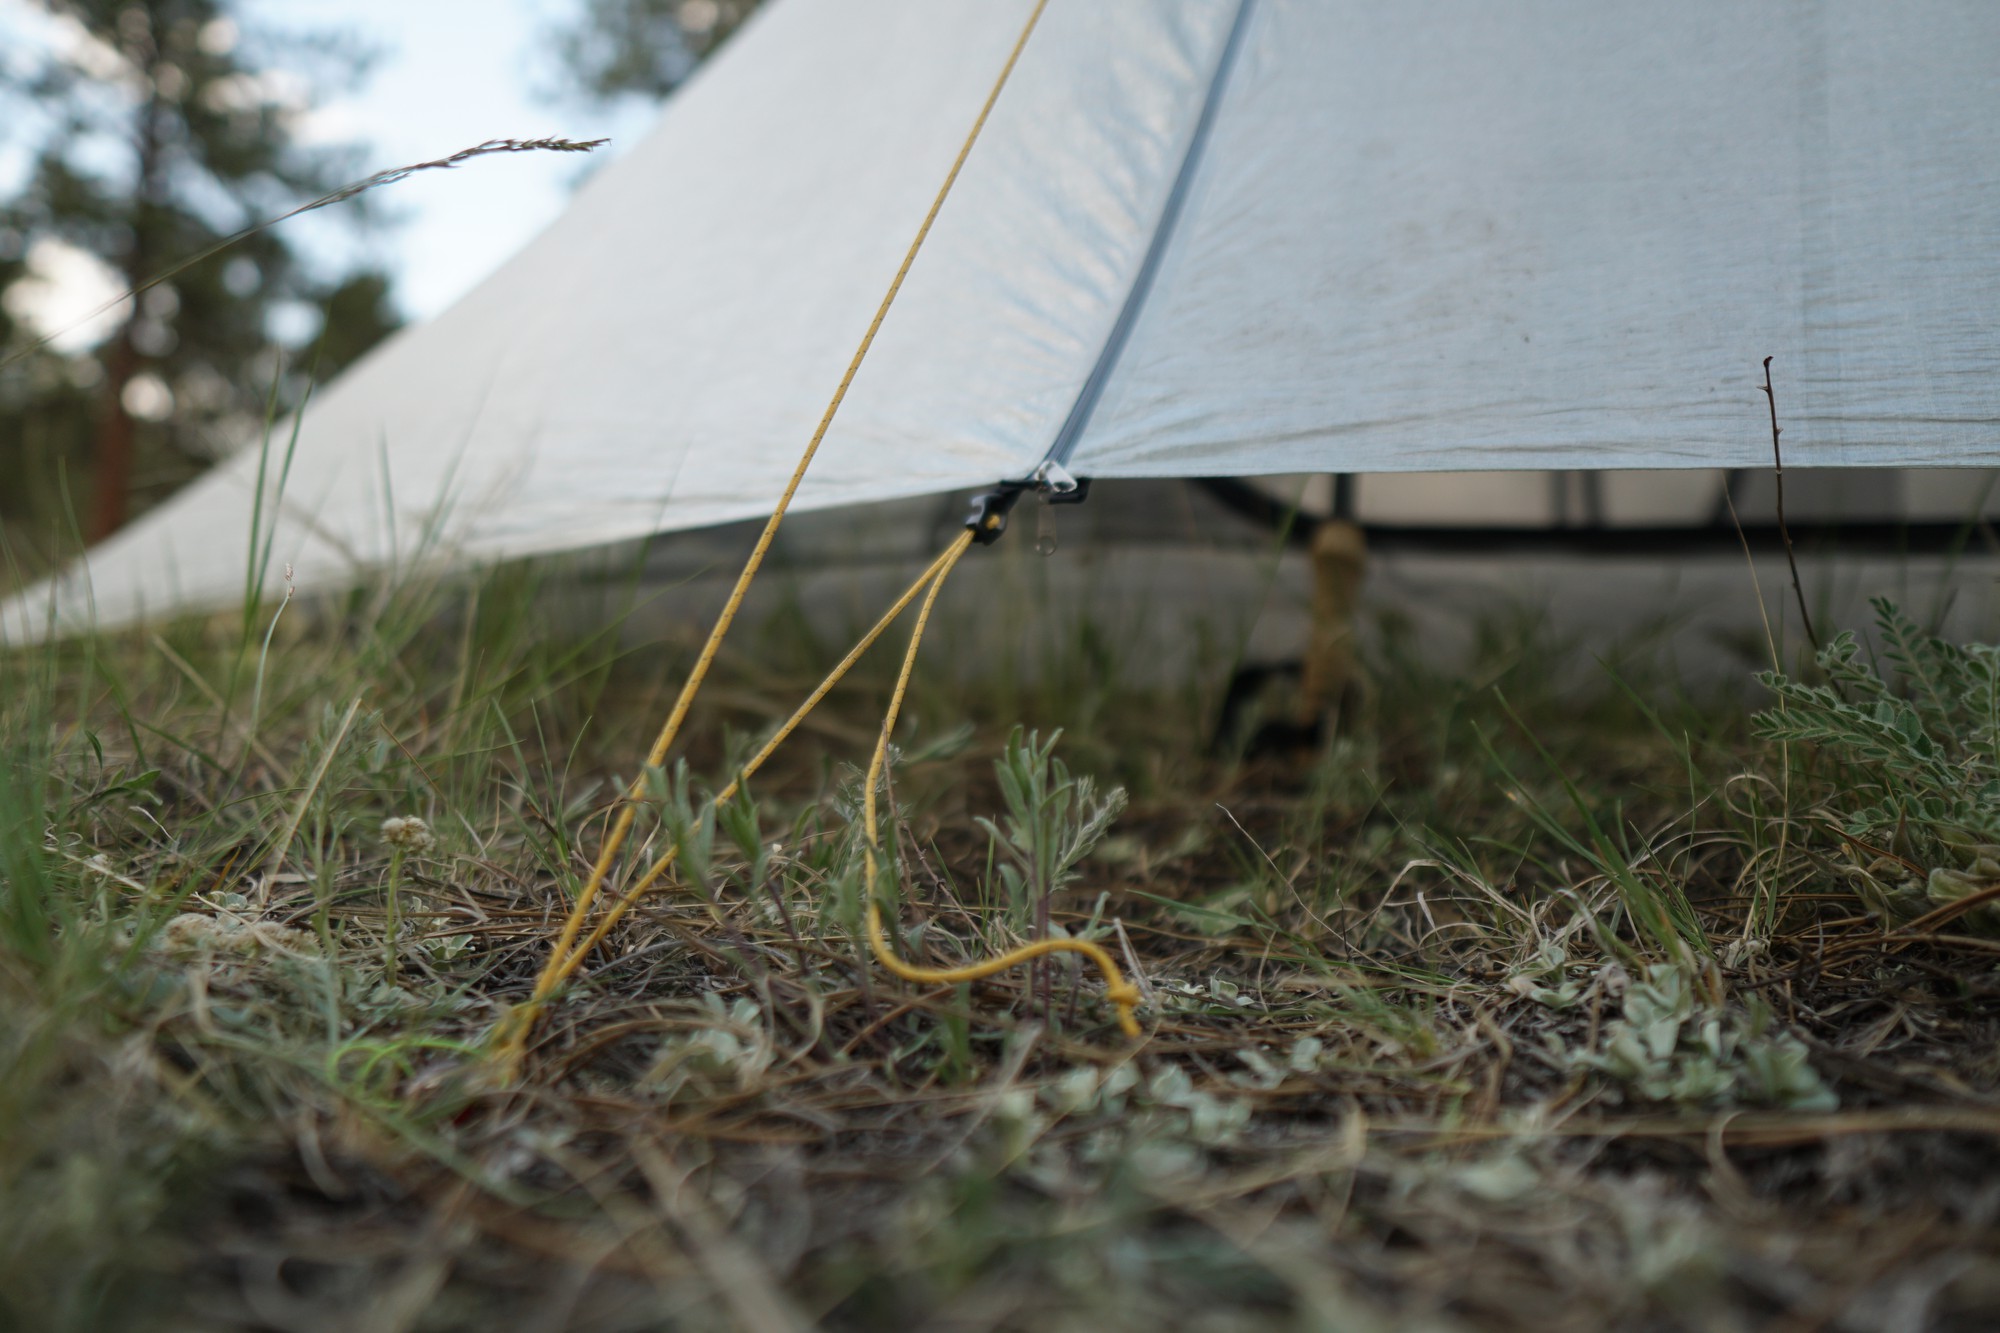
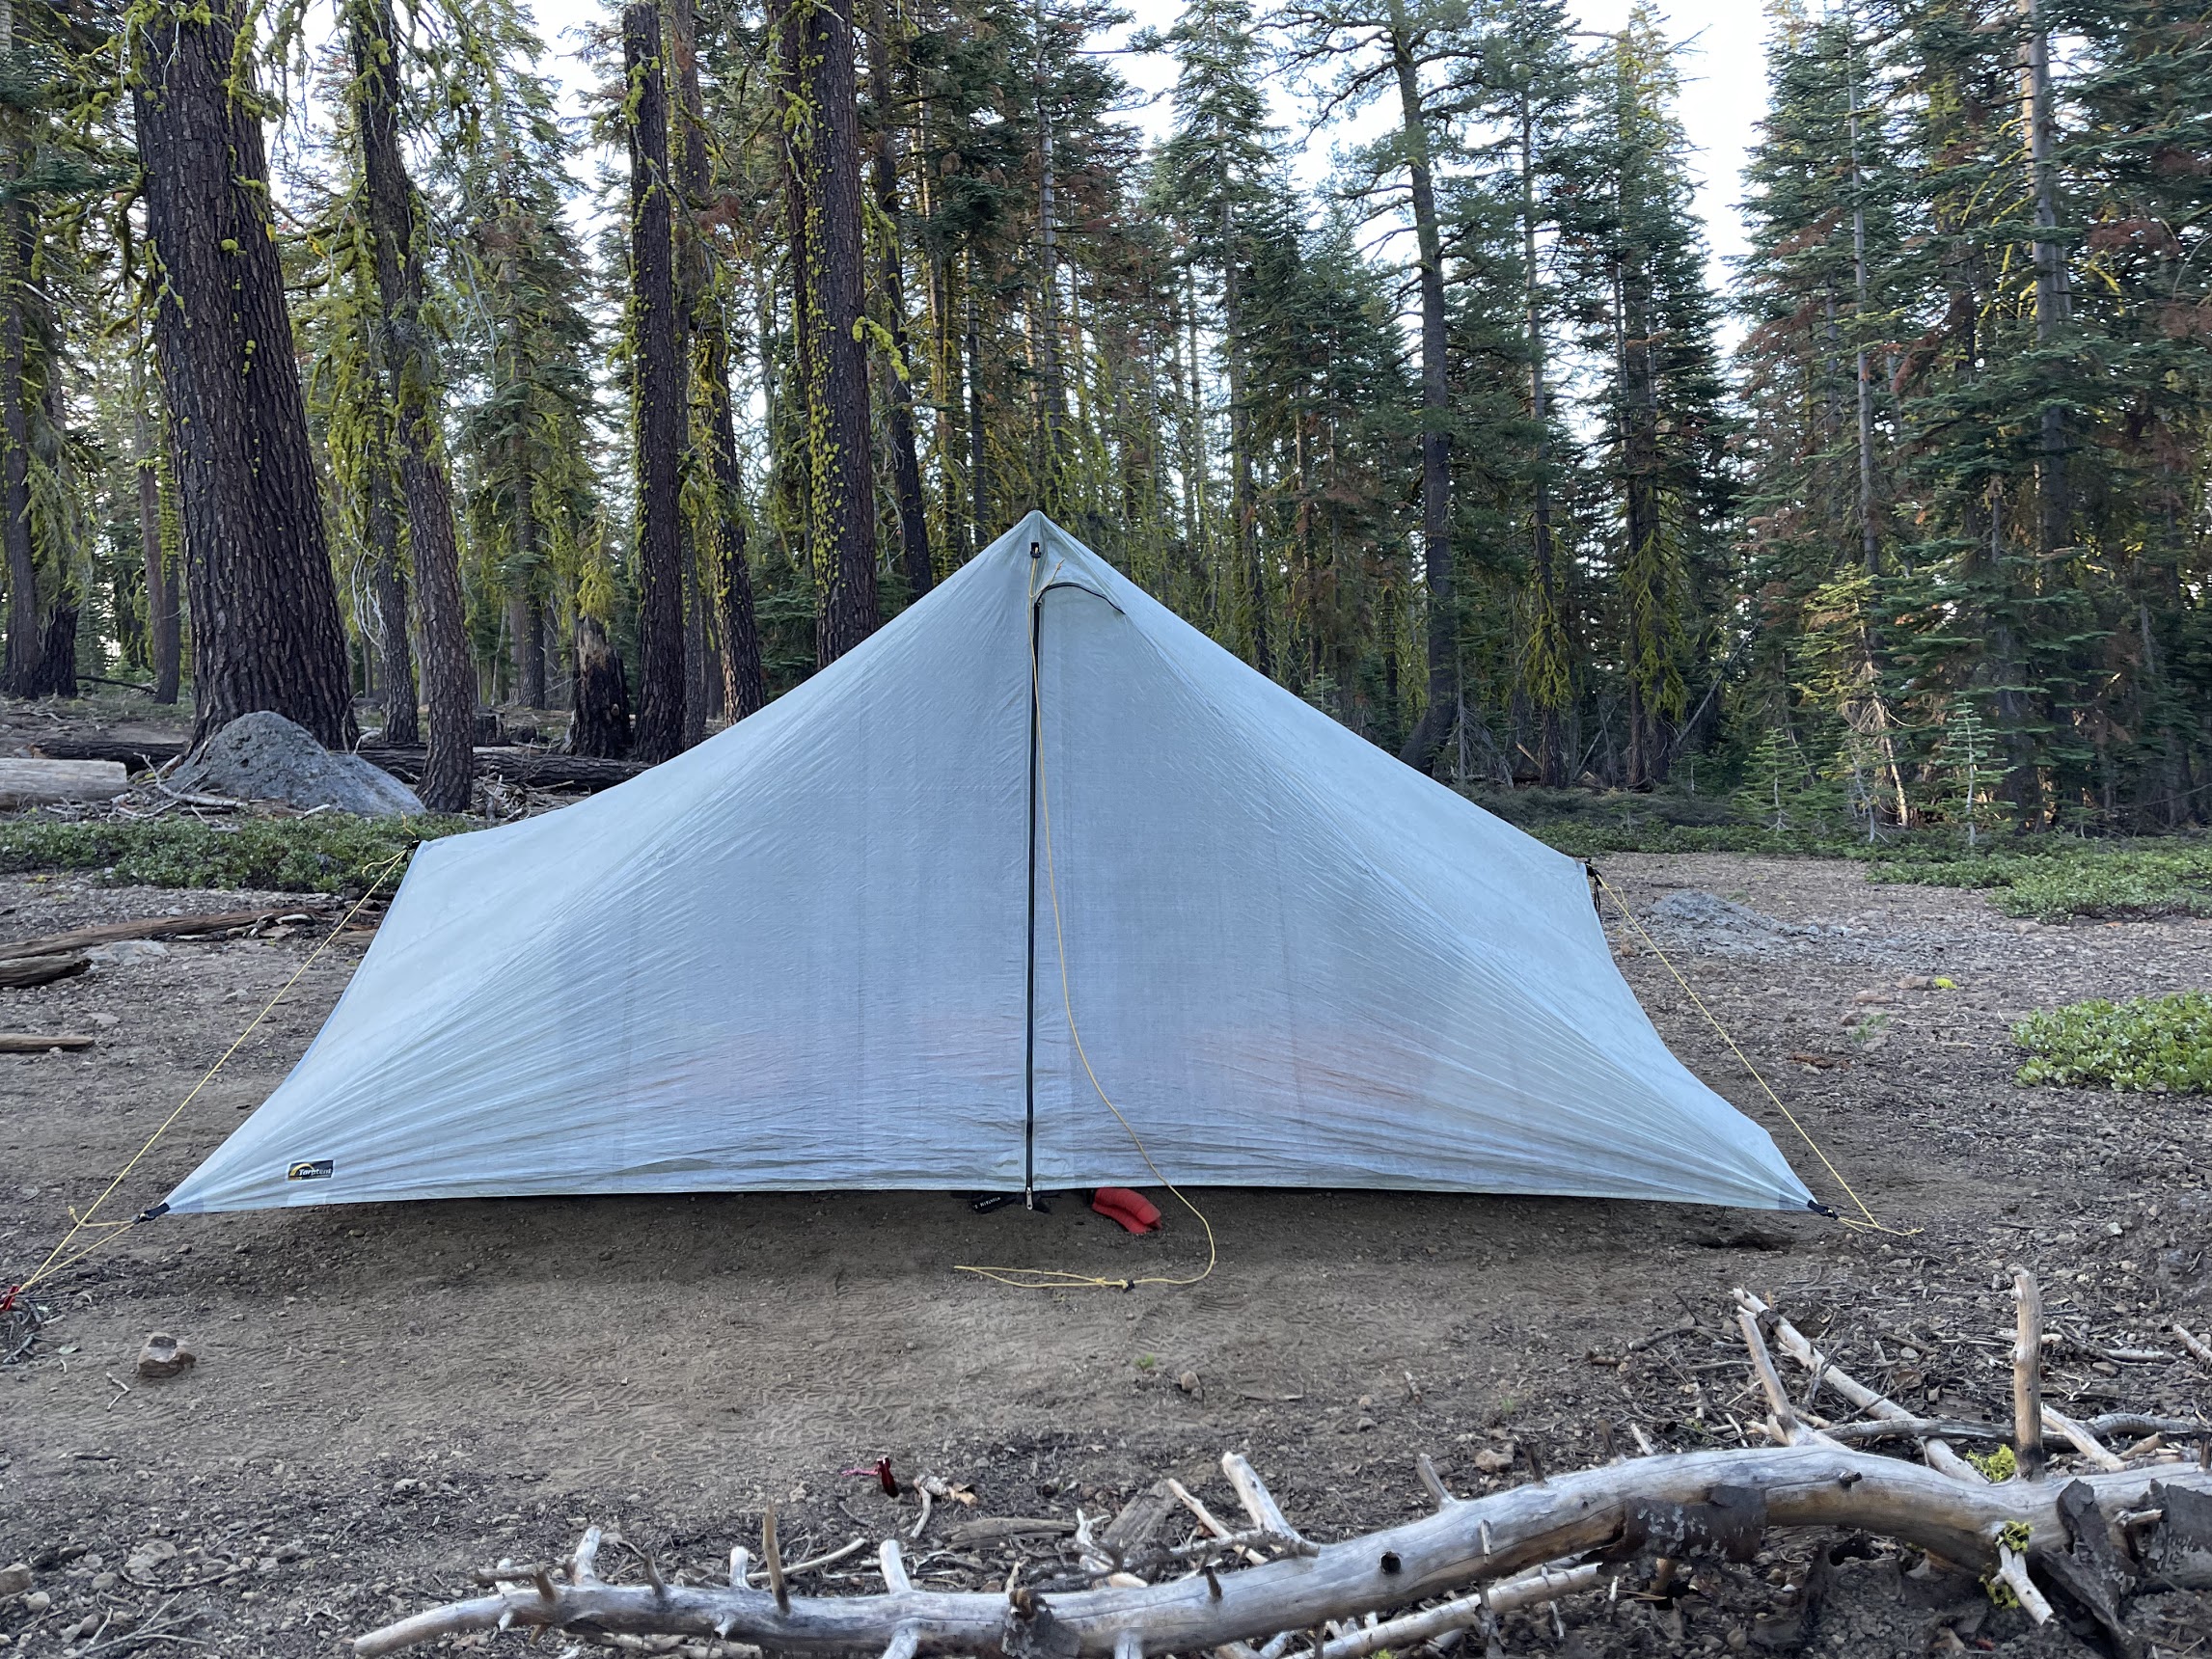
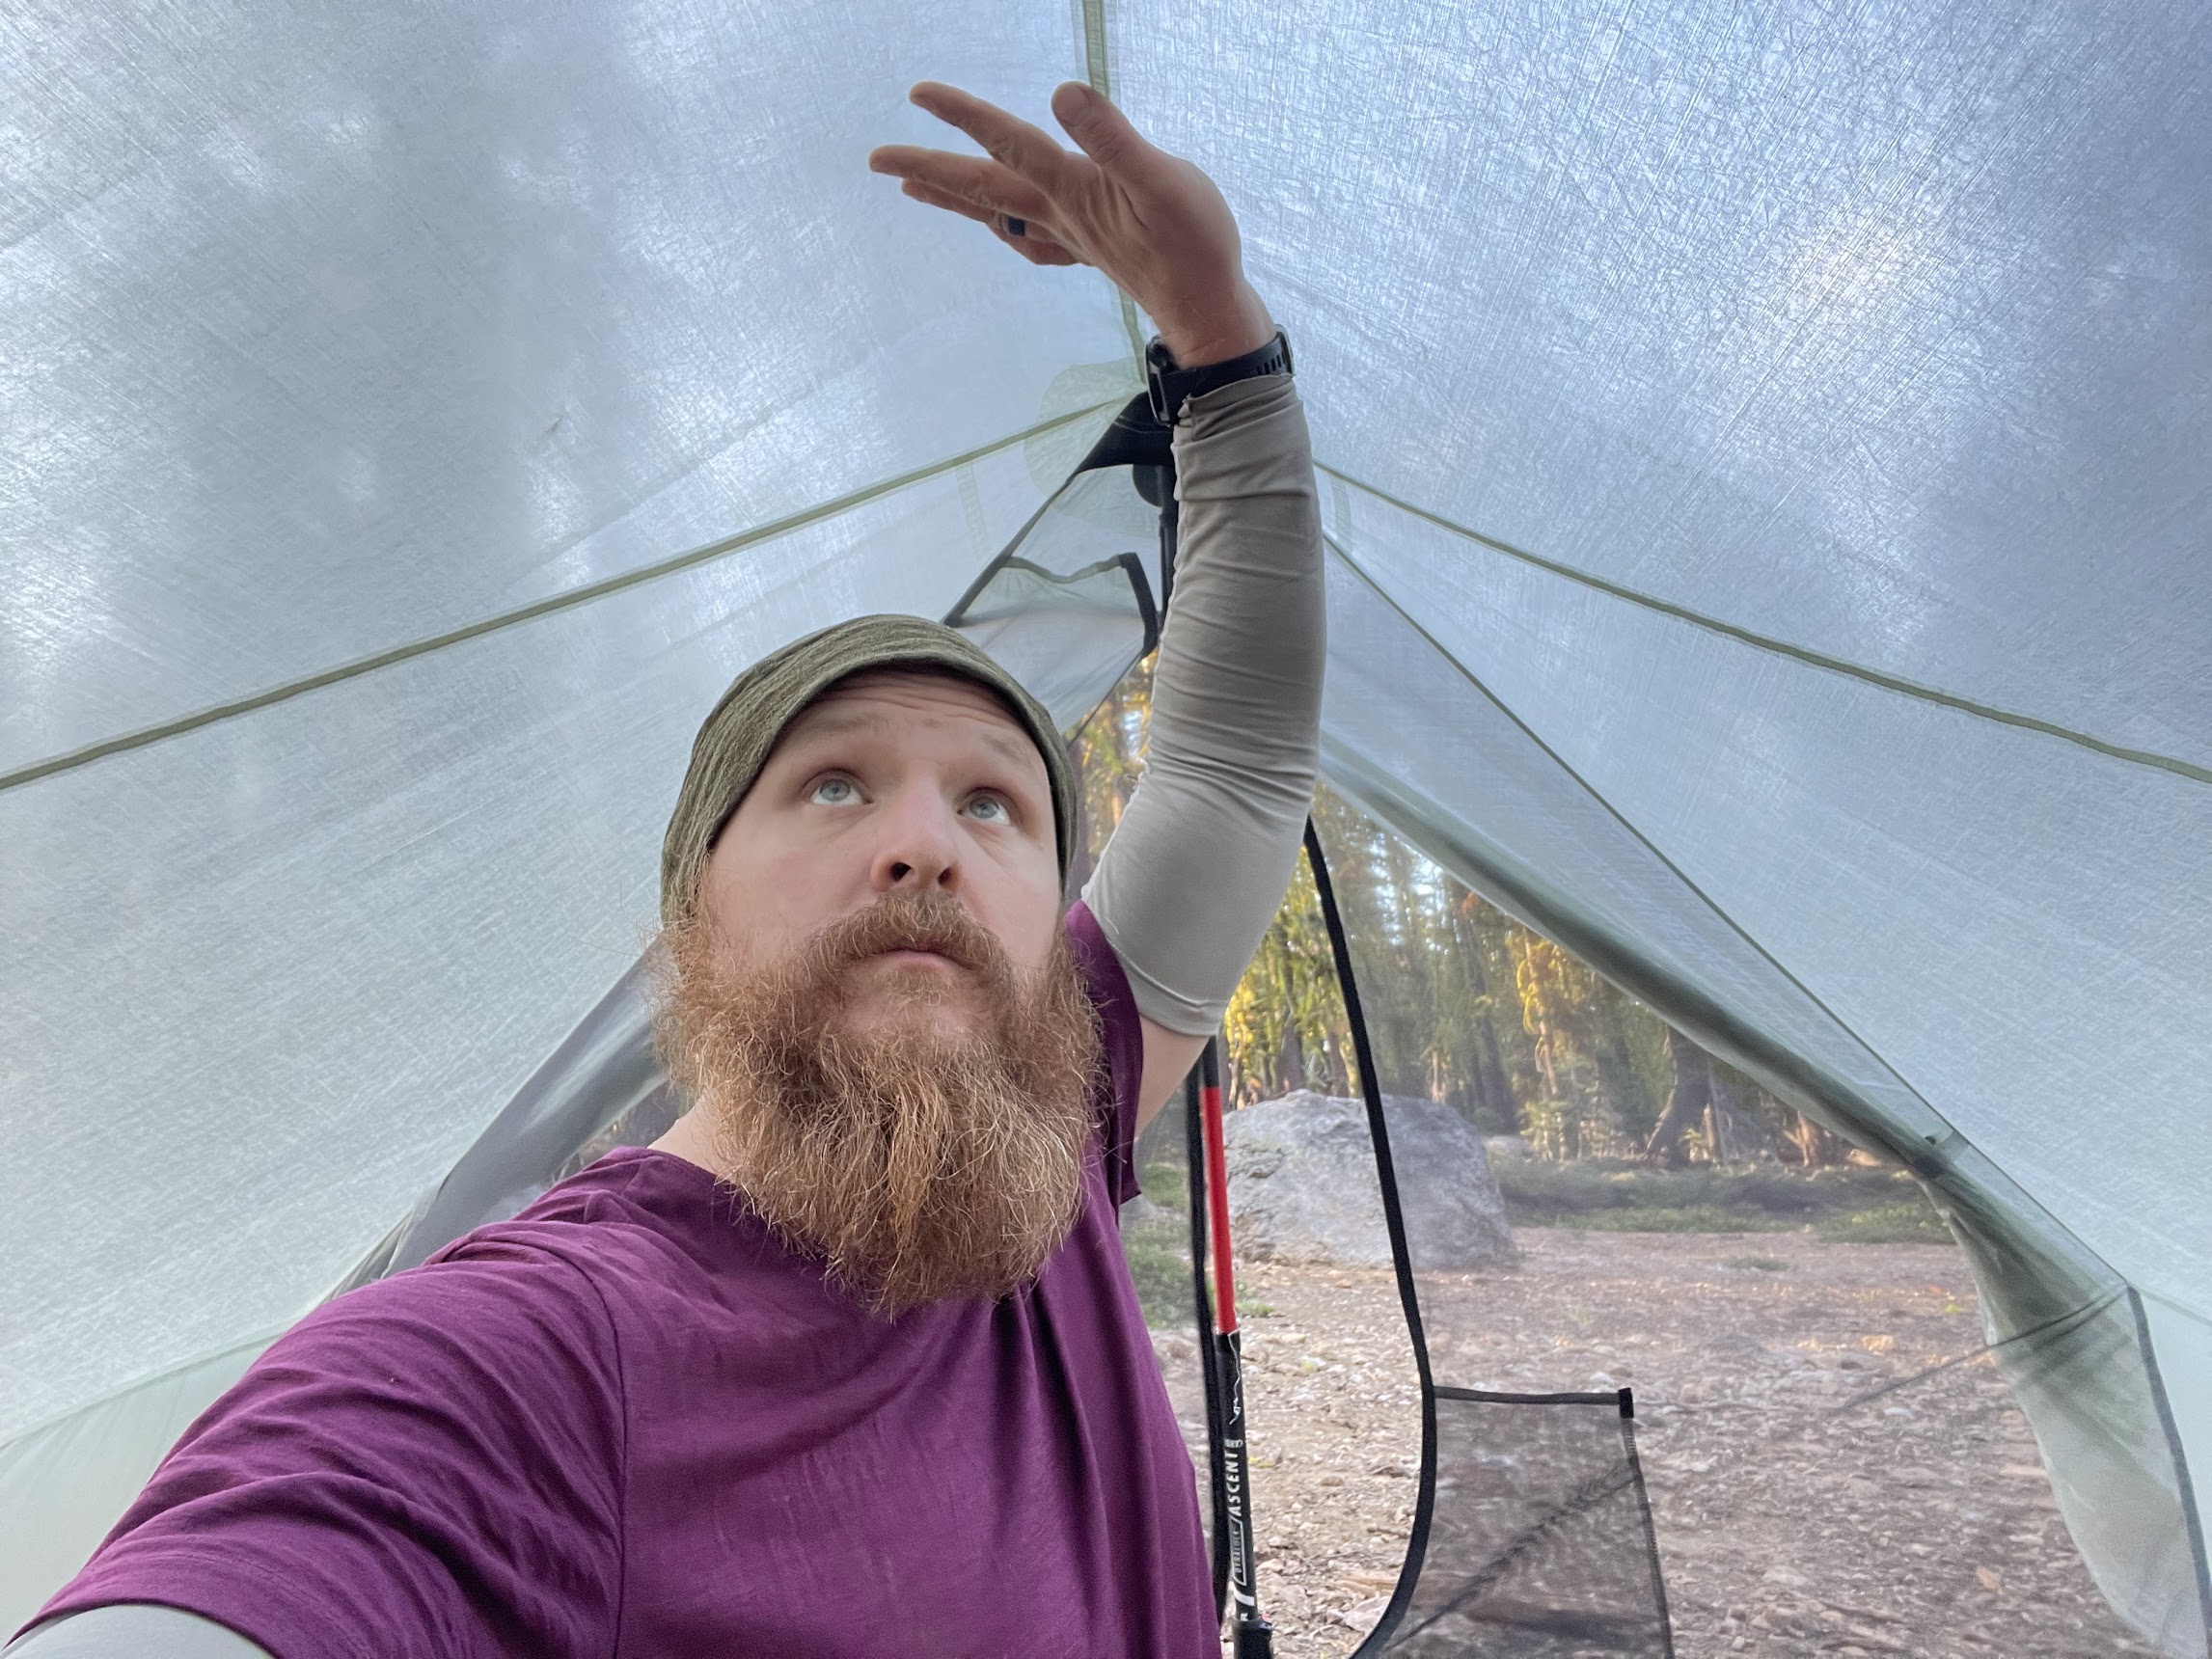
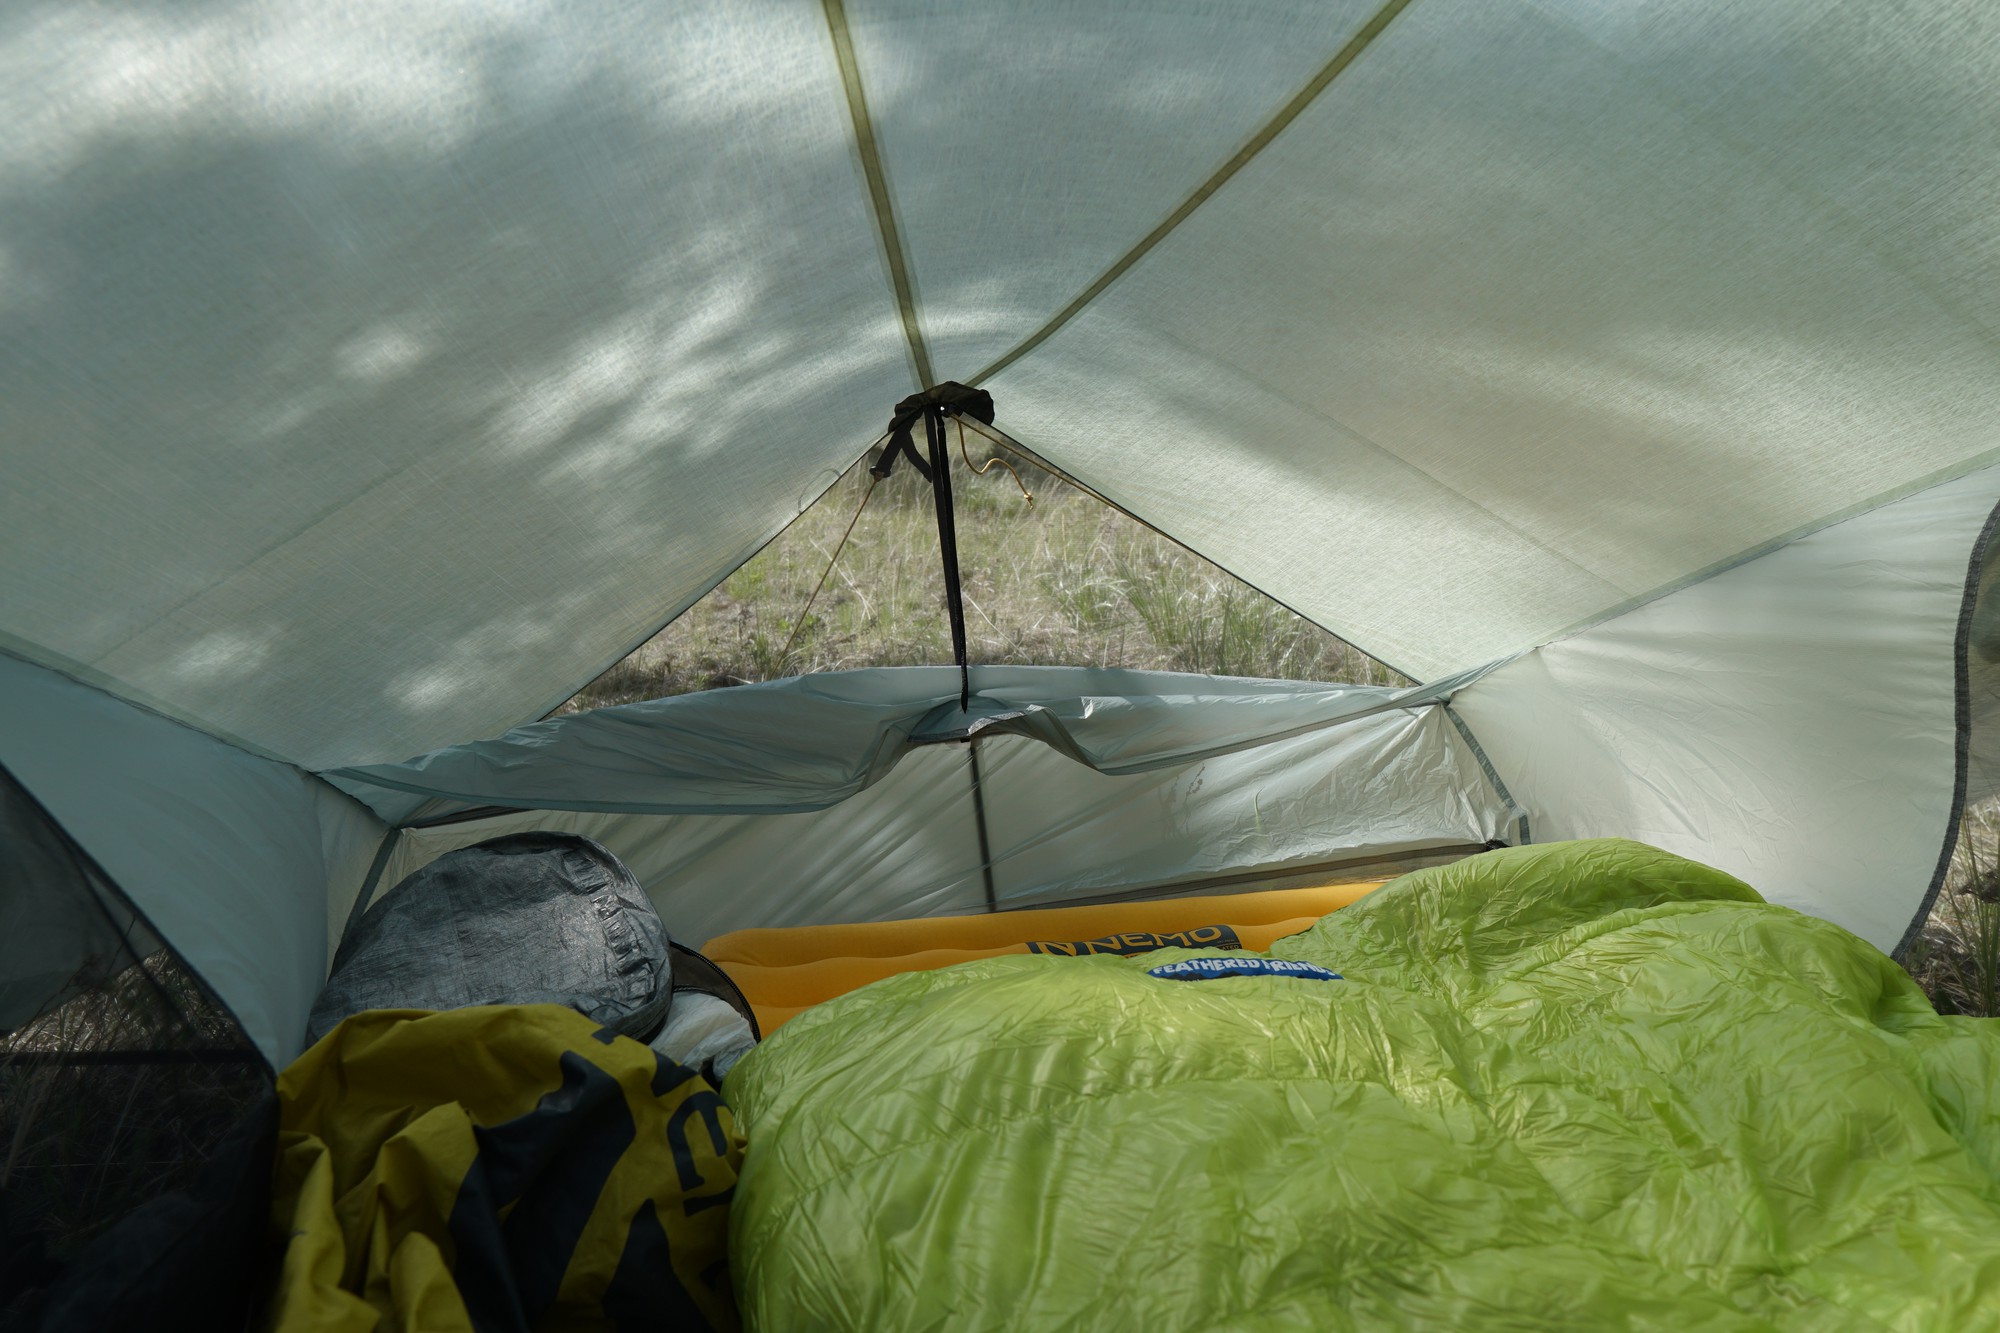
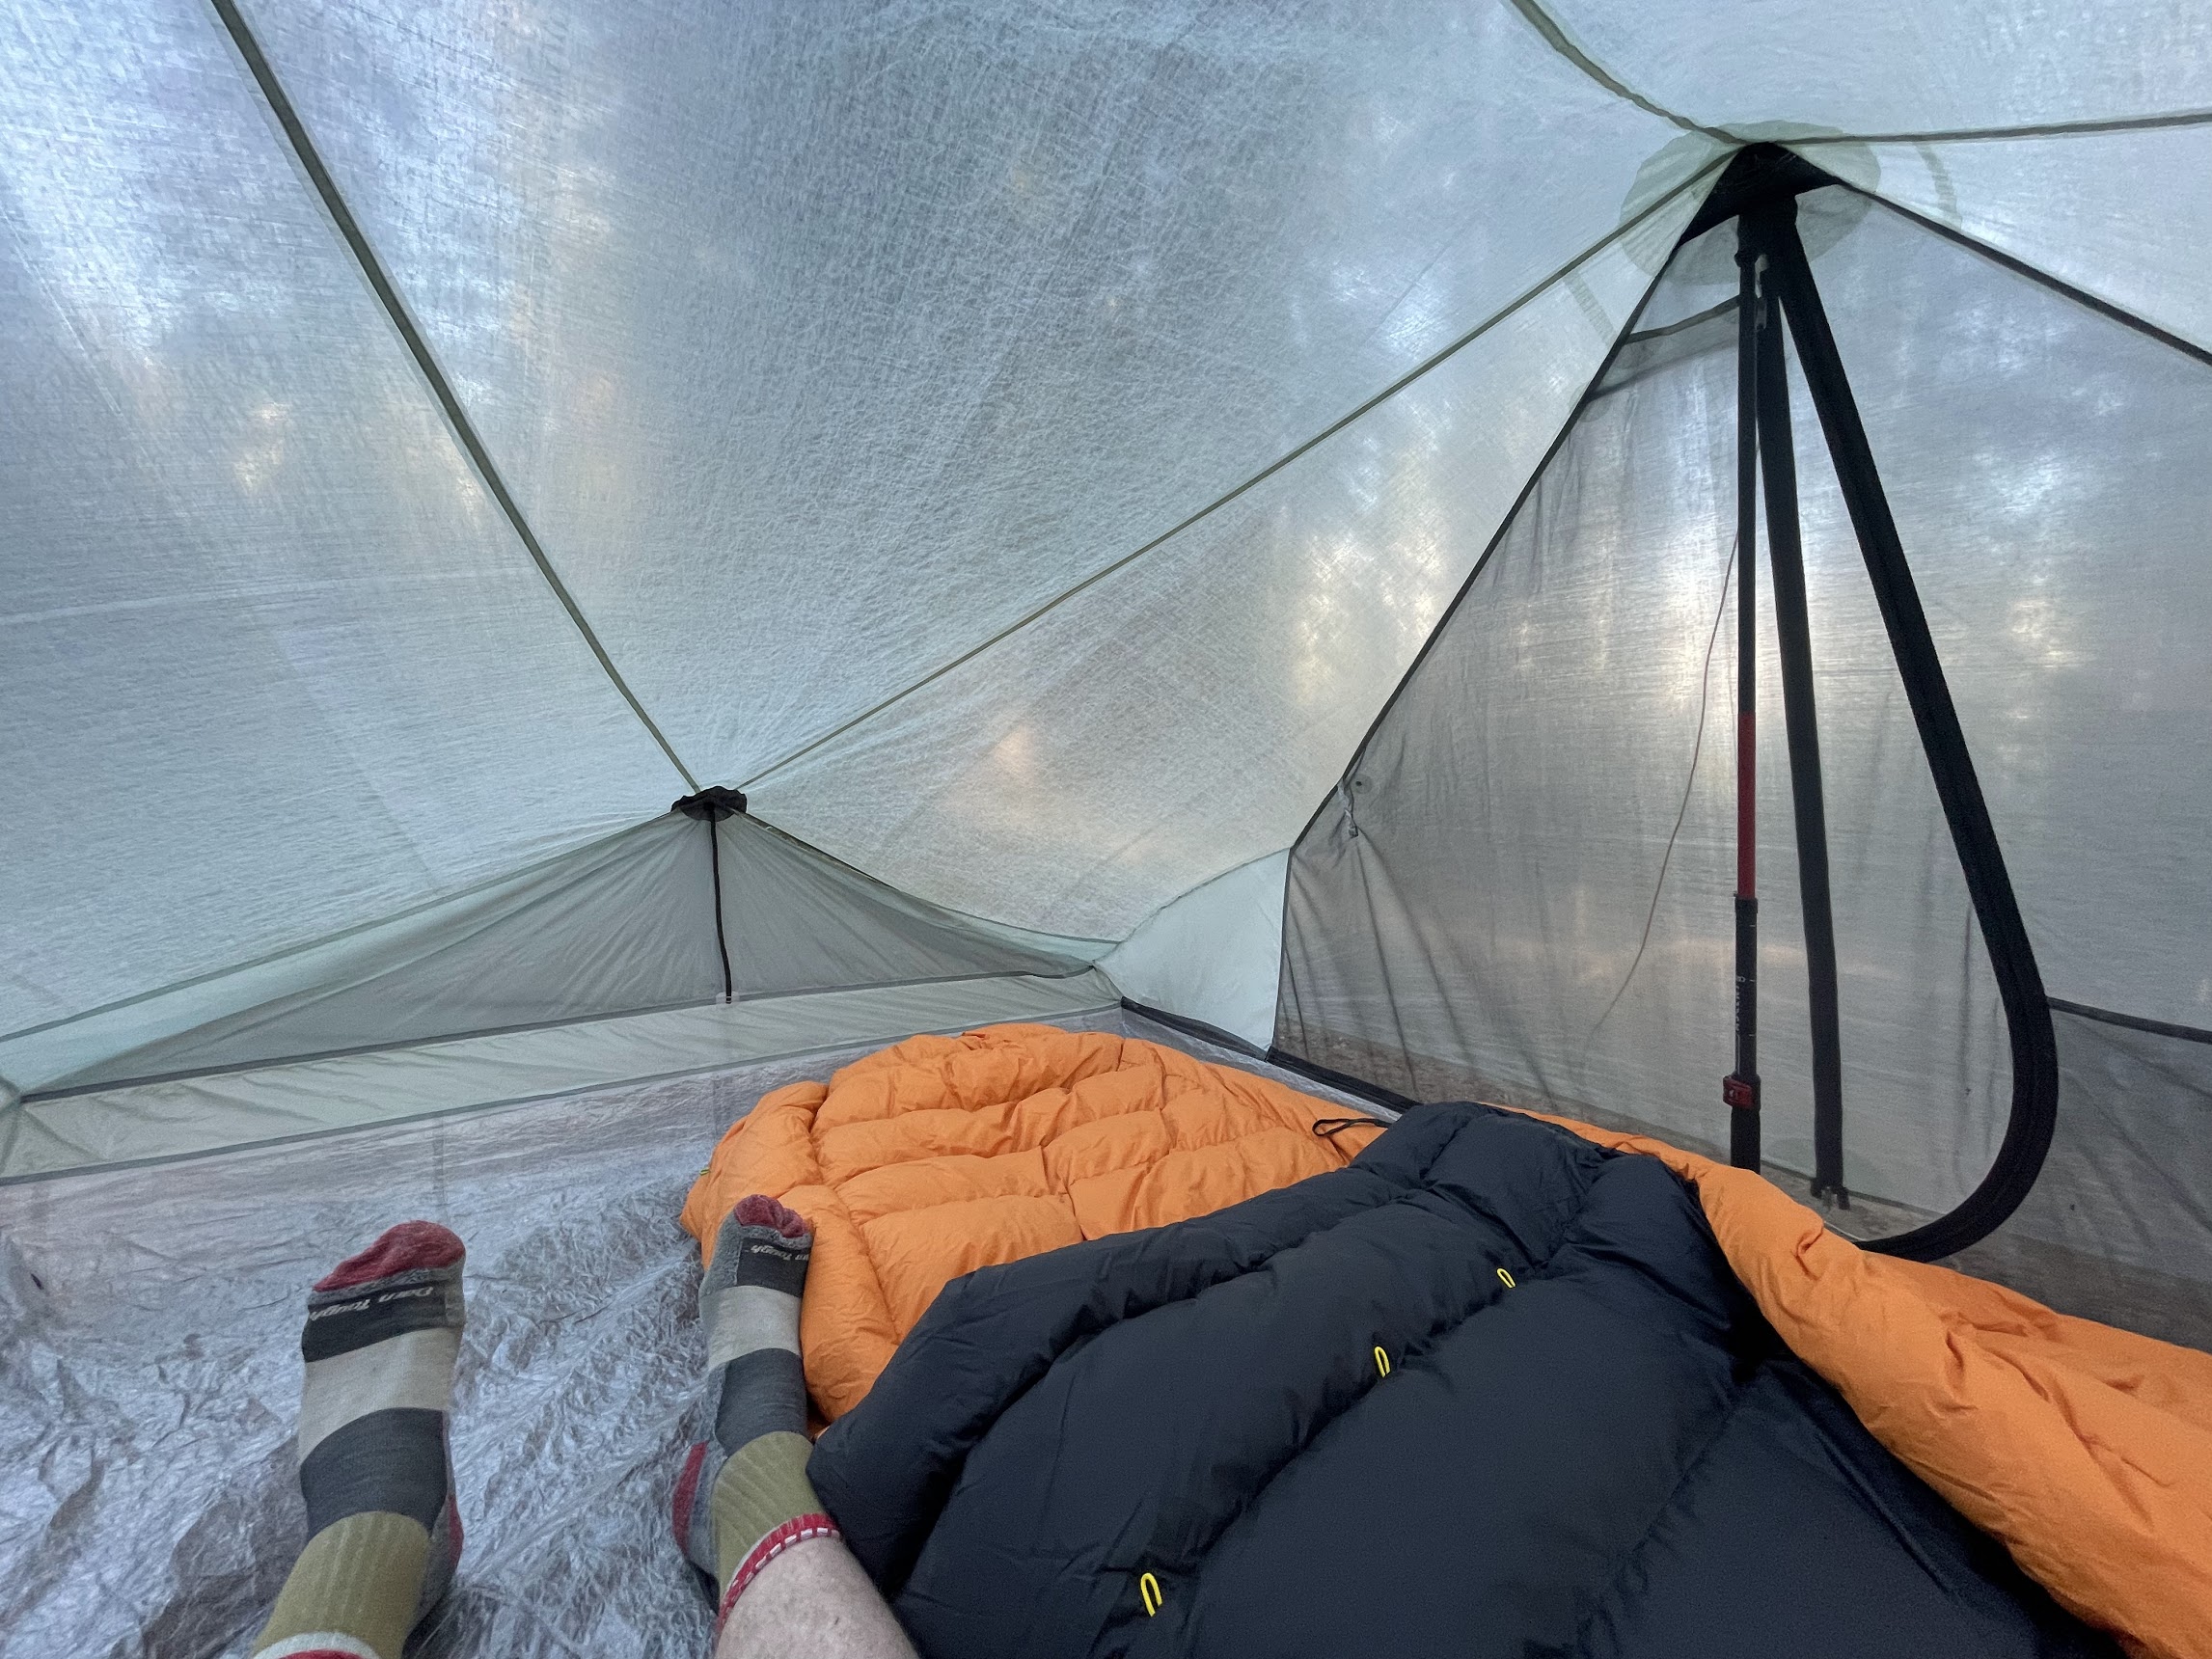
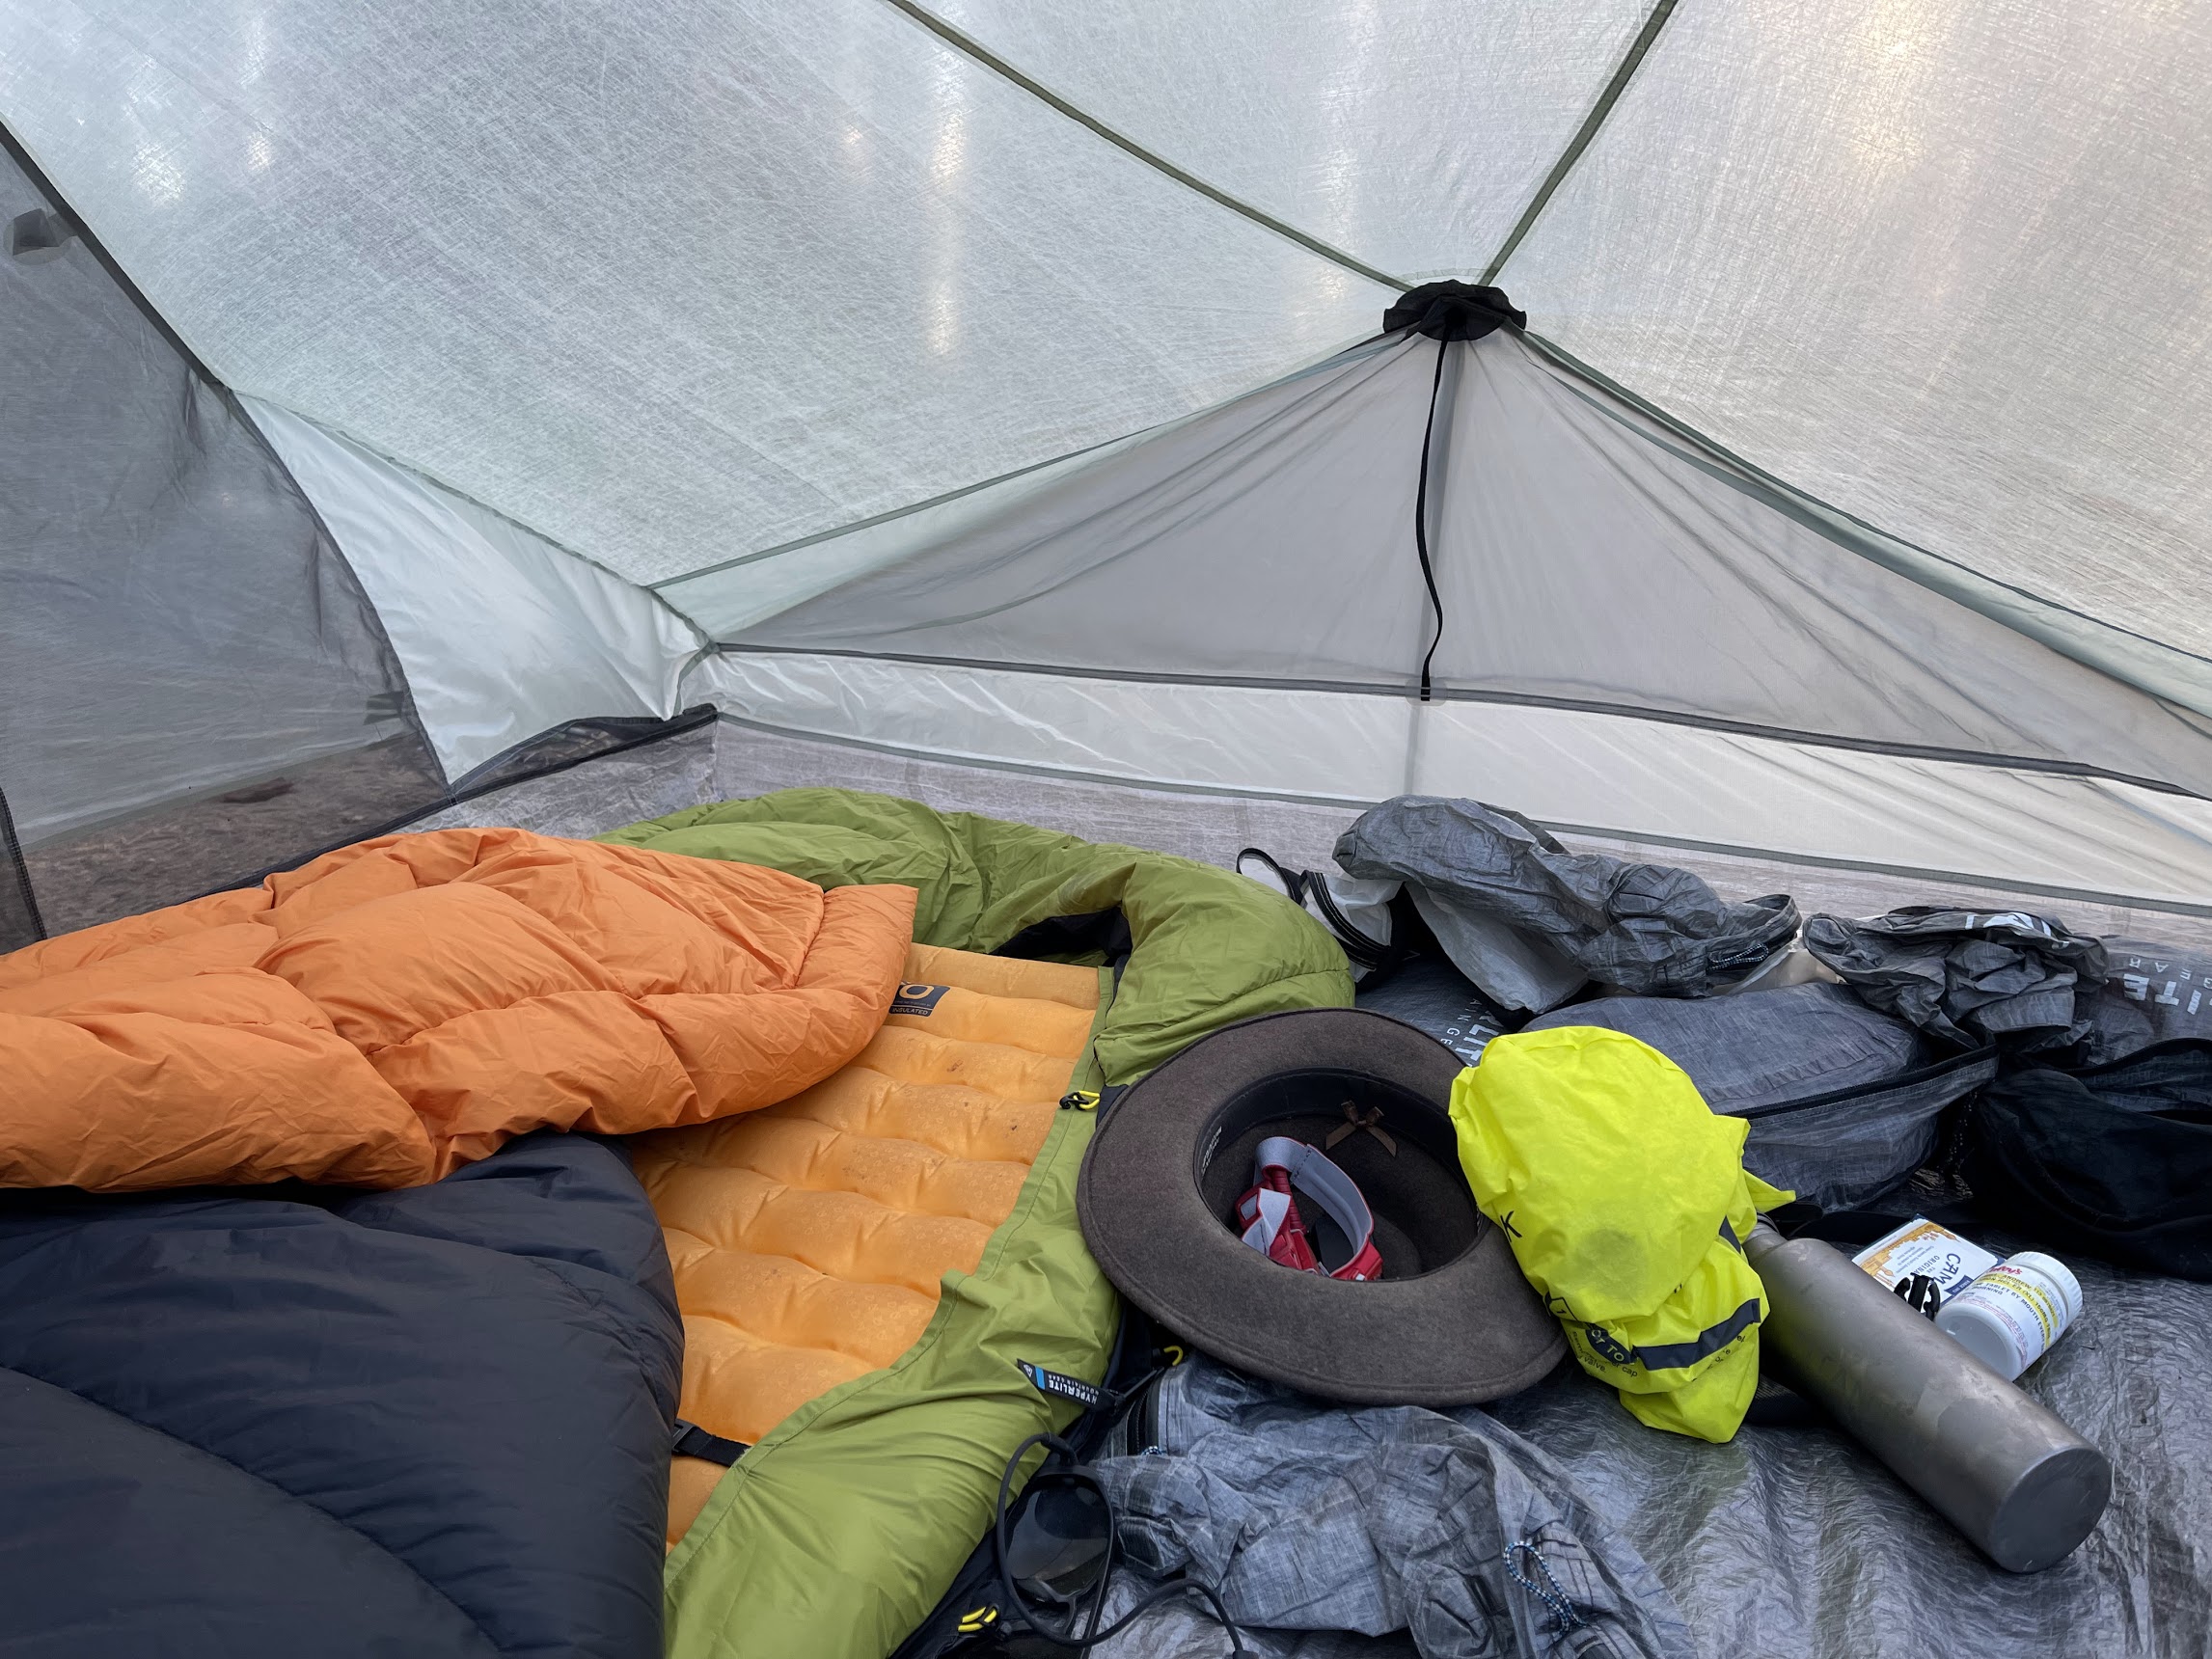
The Tarptent Dipole 1 Li and 2 Li are rectangular DCF trekking pole tents with carbon end struts to boost interior volume and stability, and a four-stake footprint that eliminates the need for apex guyline tie-outs in mild weather.
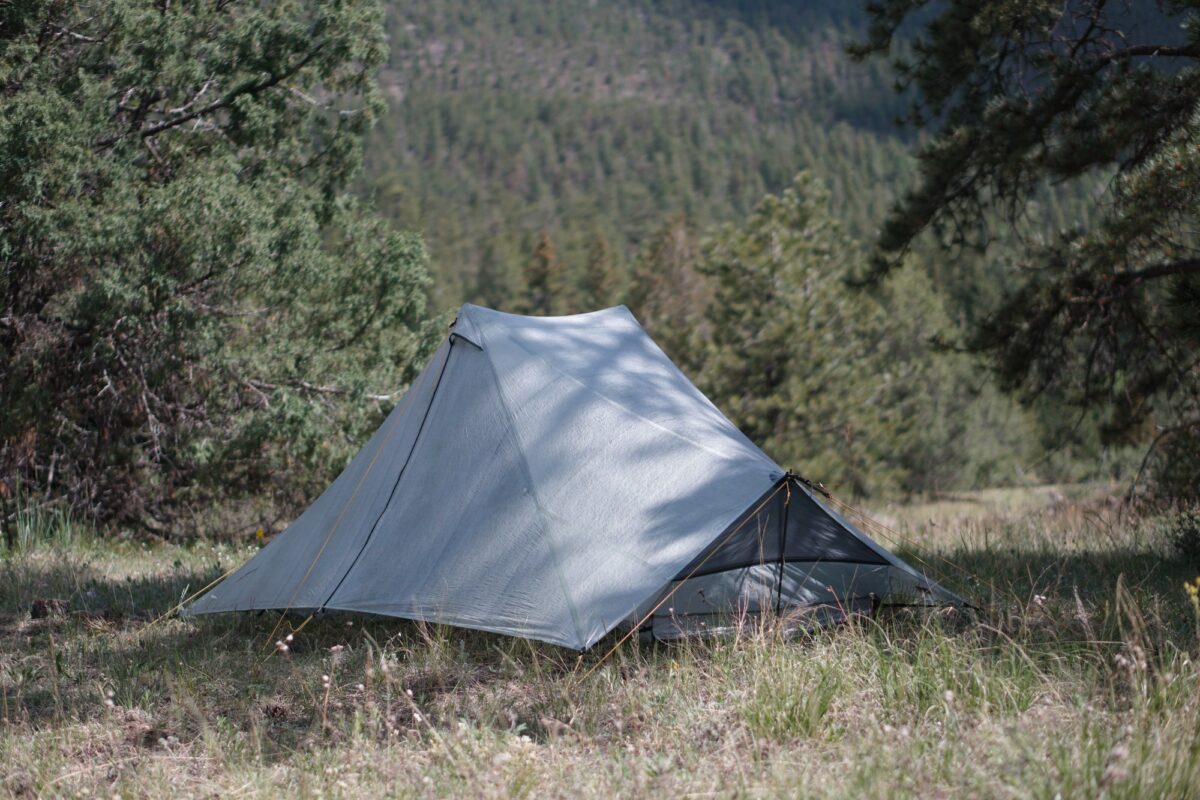
The Tarptent Dipole 1 Li (22 to 23 ounces / 0.62 to 0.65 kg, MSRP: ~$699) and Tarptent Dipole 2 Li (26 to 27 ounces 0.74 to 0.77 kg, MSRP: ~$799) are both modified A-frame, double-trekking-pole, double-vestibule, double-door, side-entry, single-wall, Dyneema Composite Fabric (DCF) shelters.
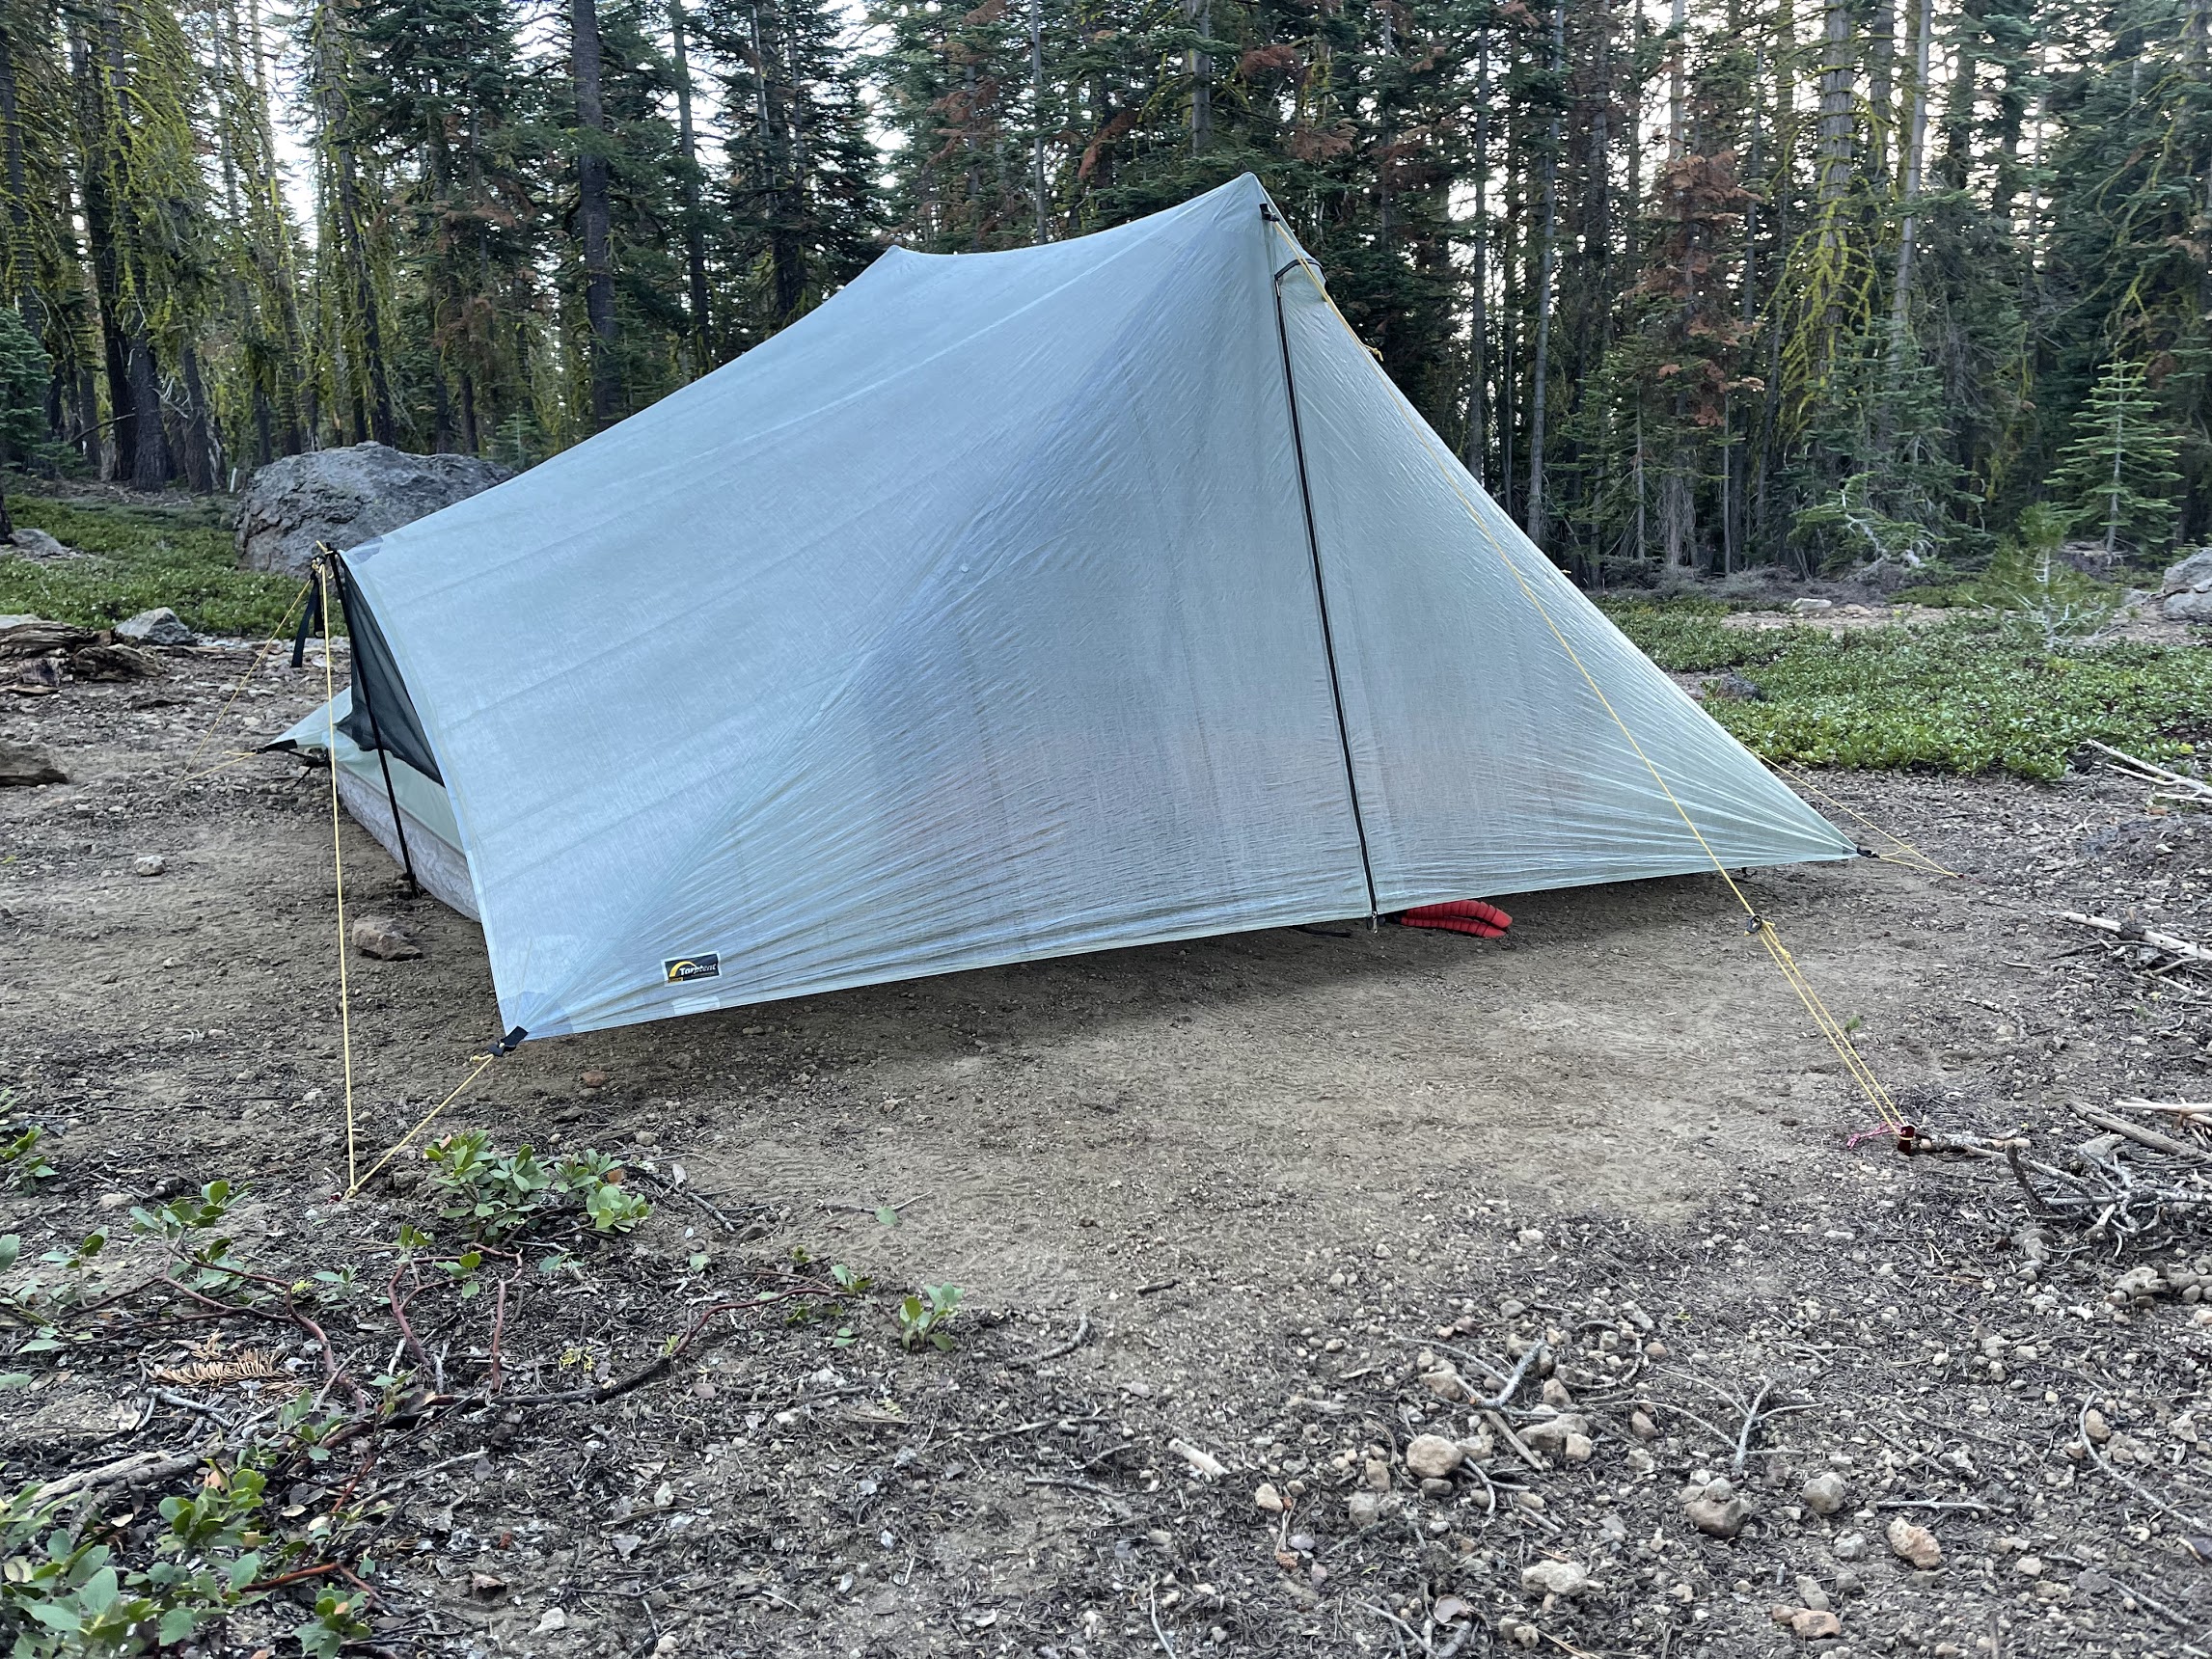
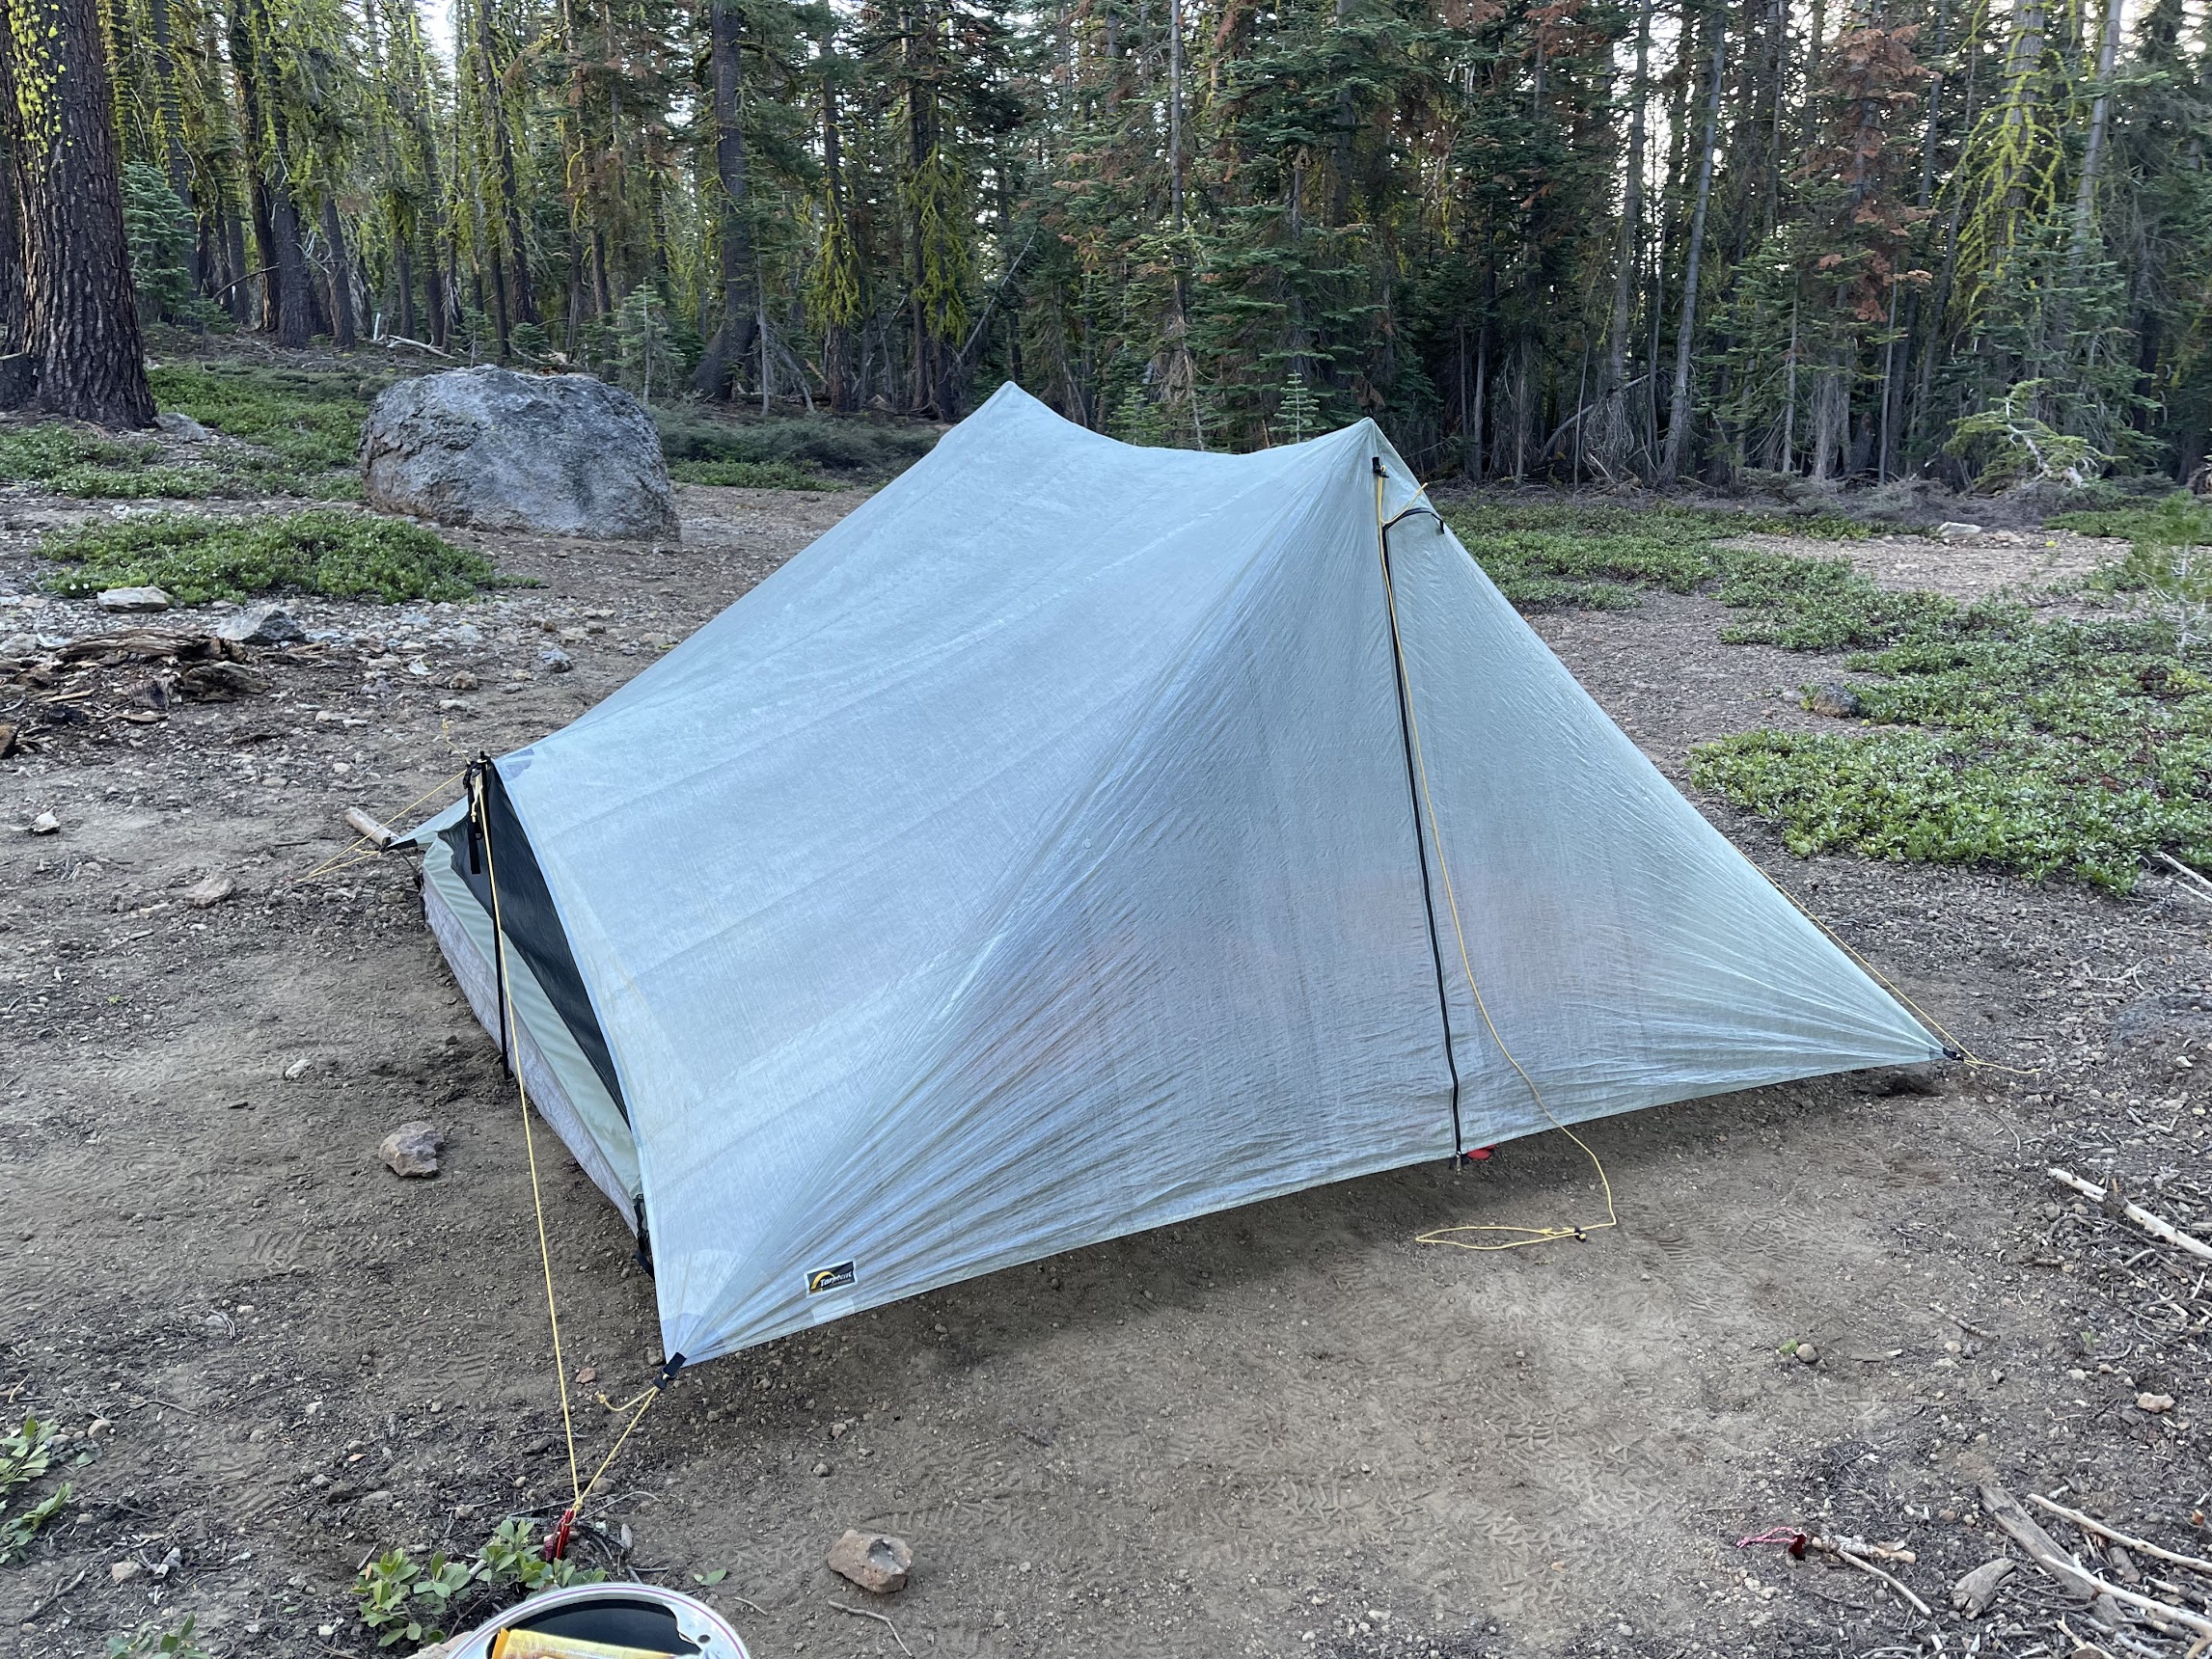
The Tarptent Dipole 2 Li in the Tahoe Basin, CA. Photo: Andrew Marshall.
The Dipole line represents a continuation of Tarptent’s use of supplemental poles (i.e., extra poles in addition to the trekking poles) to add volume and support to trekking-pole shelters. Dipole tents have several features that make them unique among two-pole, double-door shelters:
they can maintain a stable structure with four stakes
they can maintain a stable structure while both vestibule doors are open and the shelter is in a four-stake configuration
they feature collapsible, removable, 21-inch (53 cm) carbon fiber struts at the head and foot that add a noticeable amount of interior livable volume while supporting the tent structure (and allowing the first two points above to be a reality)
Watch the Video
Watch Ryan Jordan’s video review and tour of the Tarptent Dipole 1 Li and Dipole 2 Li:
This is a first look at new gear that recently entered our review pipeline, and hasn't yet been subjected to rigorous field use. Learn more about the types of product reviews we publish.
Highlights
weight*: Tarptent Dipole 1 Li – 22.6 ounces / 0.64 kg (*pre-production prototype)
weight*: Tarptent Dipole 2 Li – 26.3 ounces / 0.75 kg (*pre-production prototype)
can maintain a stable structure in mild weather with four stakes
vestibule doors are not part of the structure (both doors can be open at the same time without losing tension/stability)
21-inch volumizing end struts (Easton 3.9 carbon fiber) create large amounts of interior livable volume
end struts are removable and collapsible to 13 inches (two-section, shock-cord connected)
vestibules are 17 inches (43 cm) deep, expandable with an optional line from lower zipper pull tab to apex guyline stake (Tarptent includes hardware and guyline to accomplish this)
Dipole 1 Li apex height: 43 inches (109 cm)
Dipole 2 Li apex height: 45 inches (114 cm)
Dipole 1 Li width x length: 36 x 84 inches (91 x 213 cm)
Dipole 2 Li width x length: 58 x 88 inches (147 x 224 cm)
mesh panel on either end, backed by a sil-poly panel that can be opened and closed from inside the tent for ventilation/weather protection
Dipole 1 Li fits one long/wide pads and users up to 6 feet 8 inches (203 cm)
Dipole 2 Li fits two long/wide pads and users up to 6 feet 10 inches (208 cm)
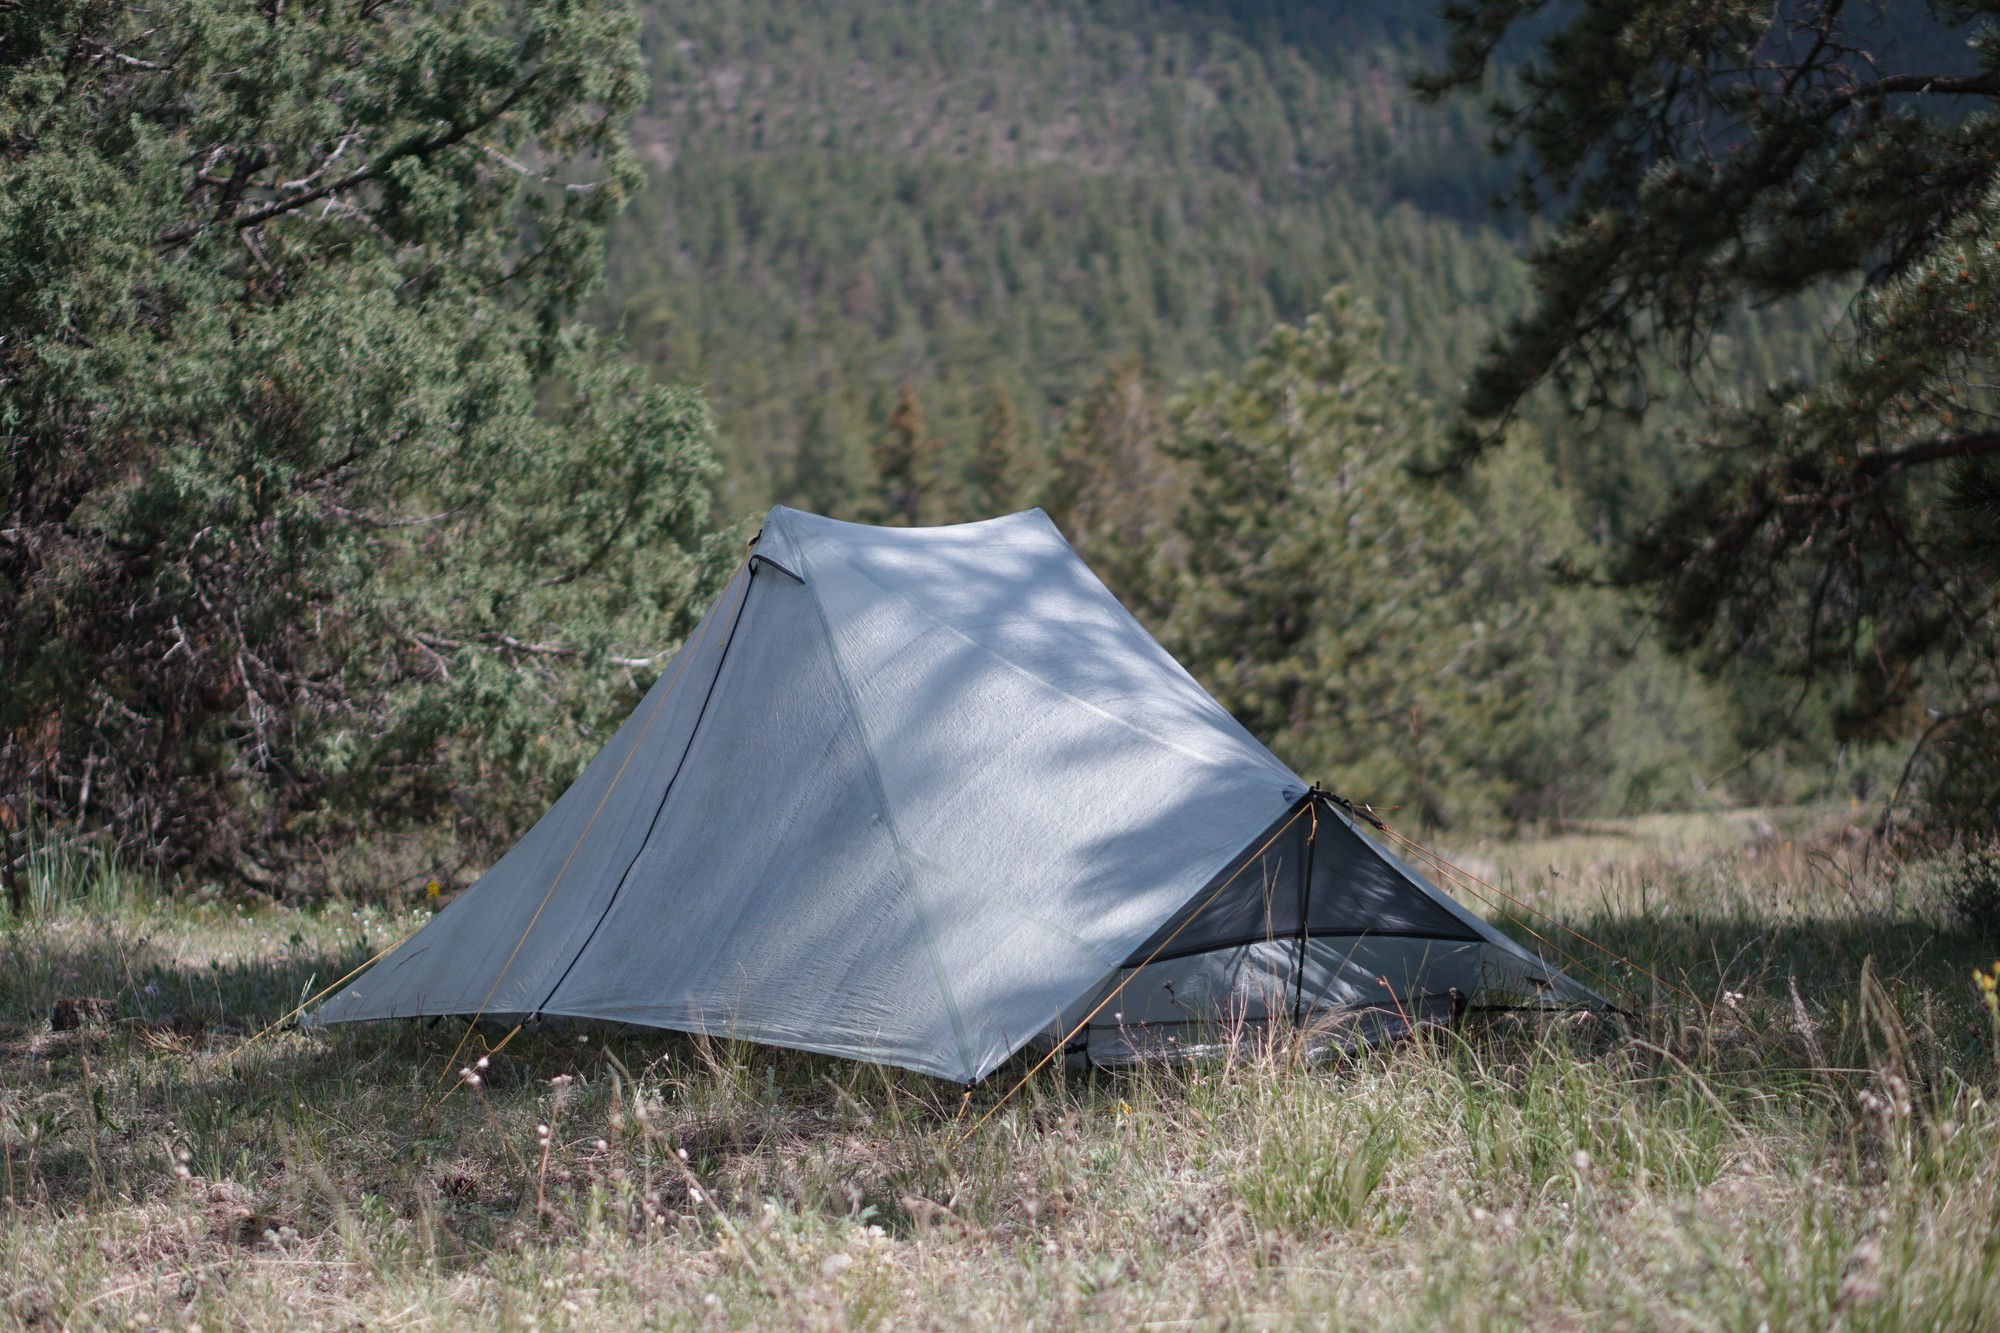
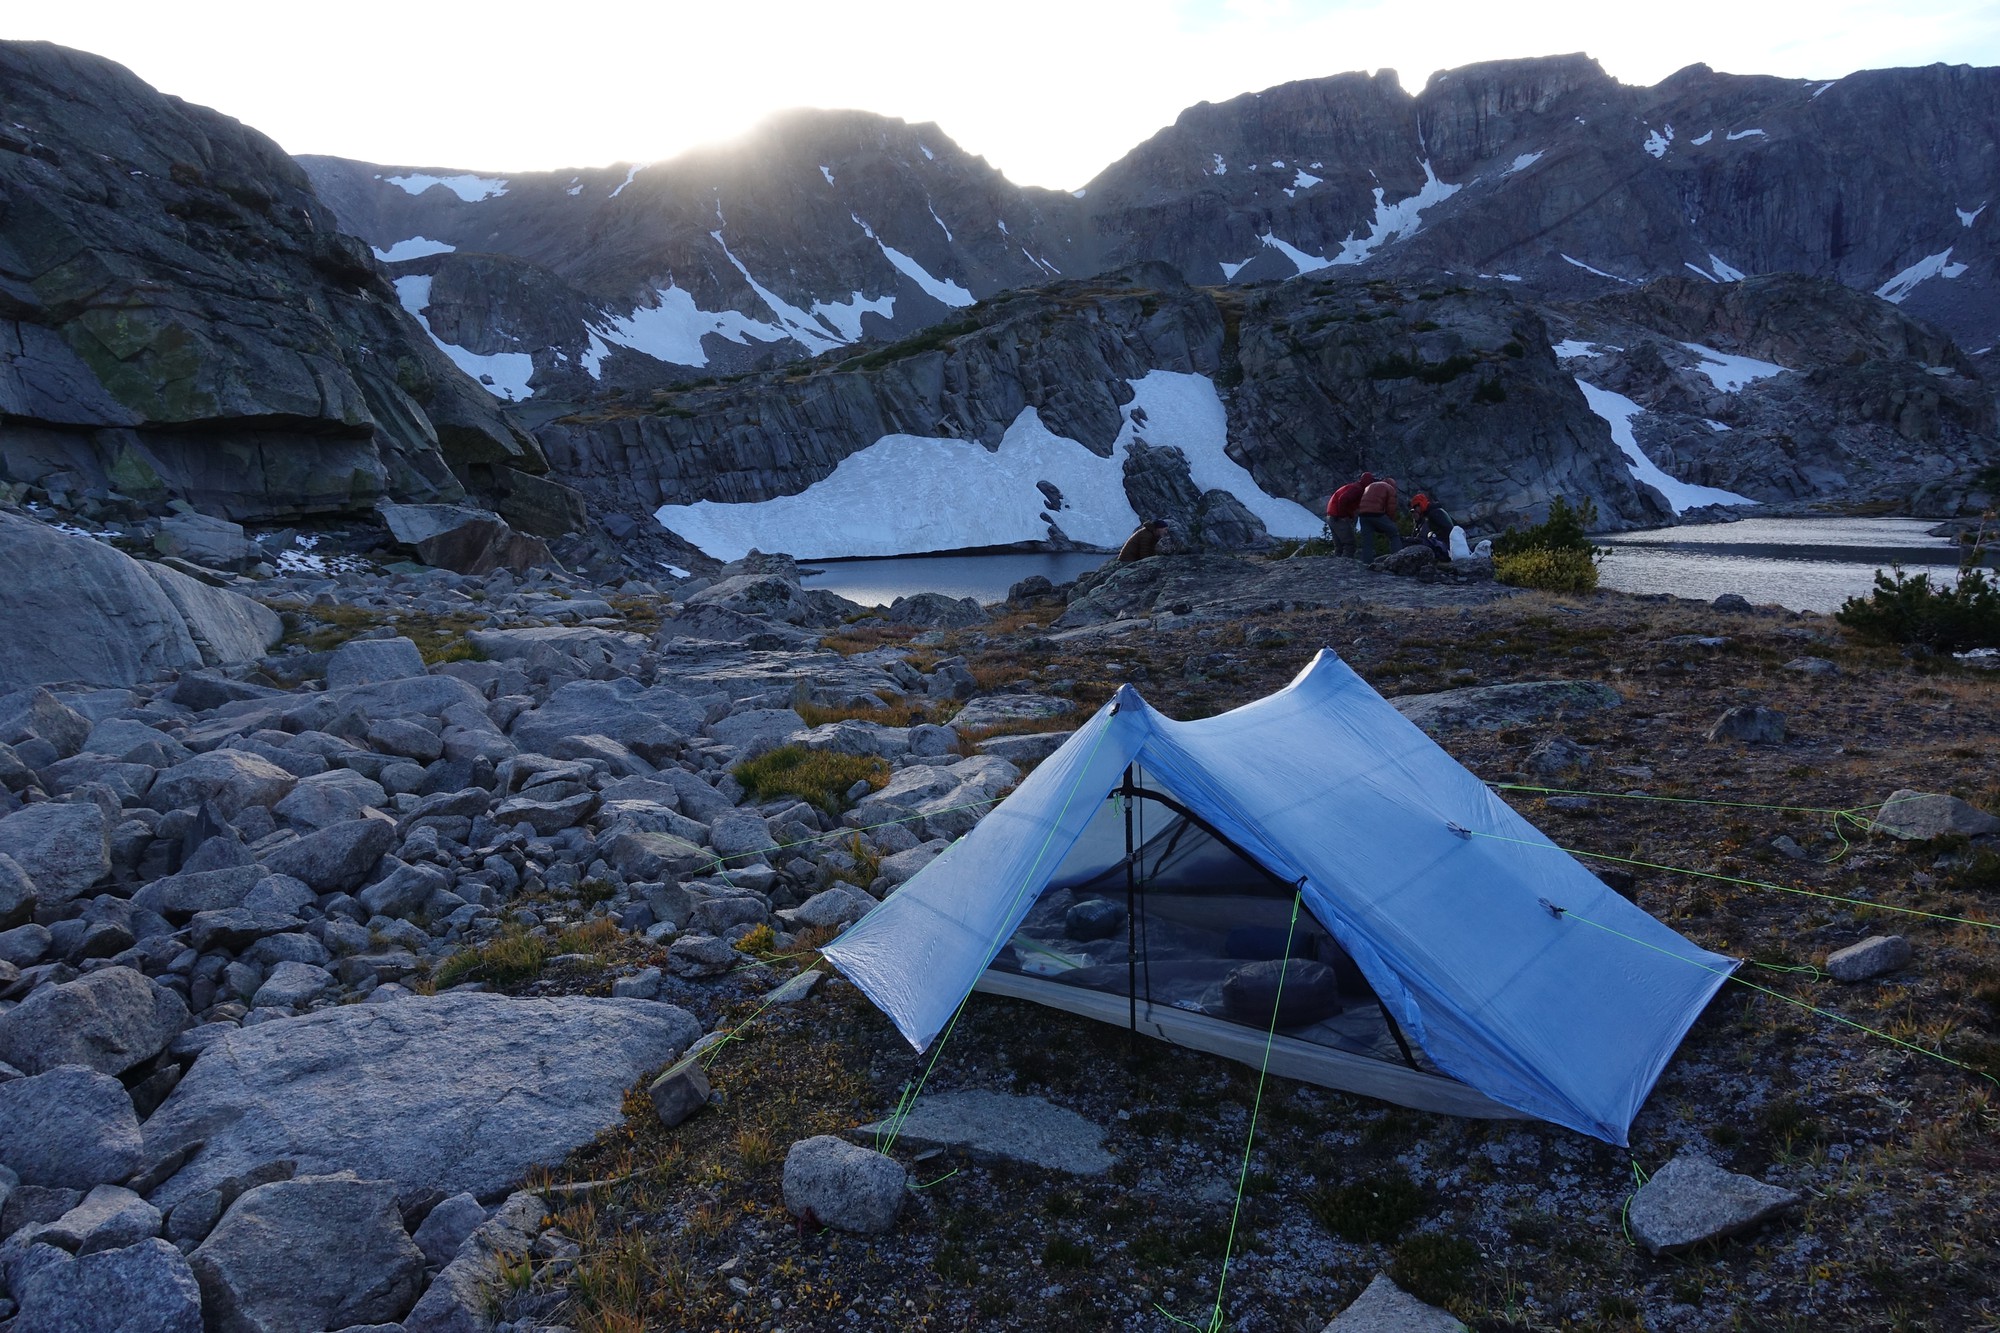
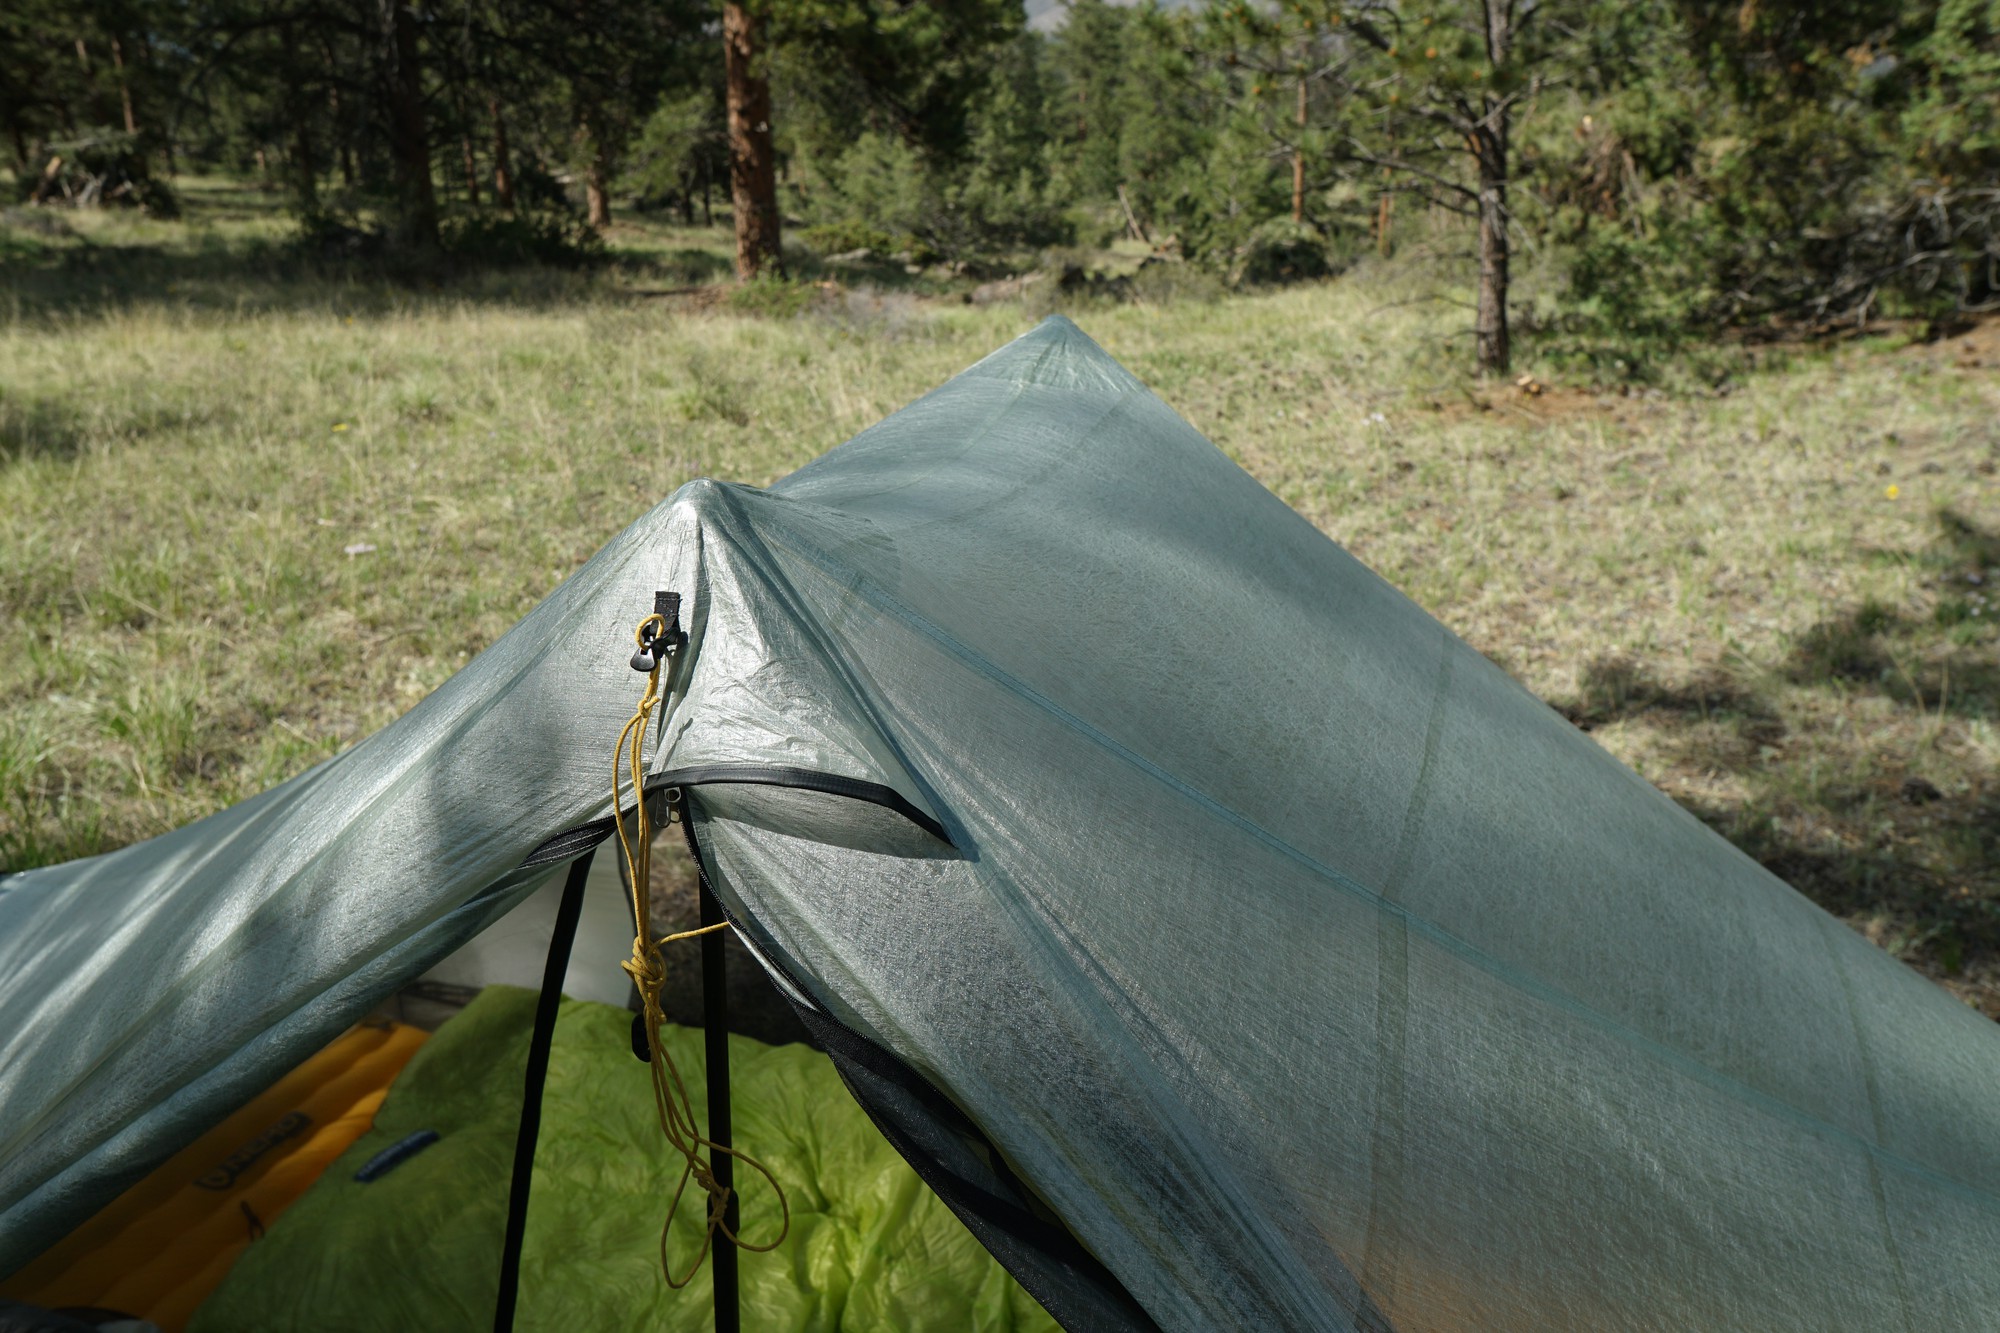
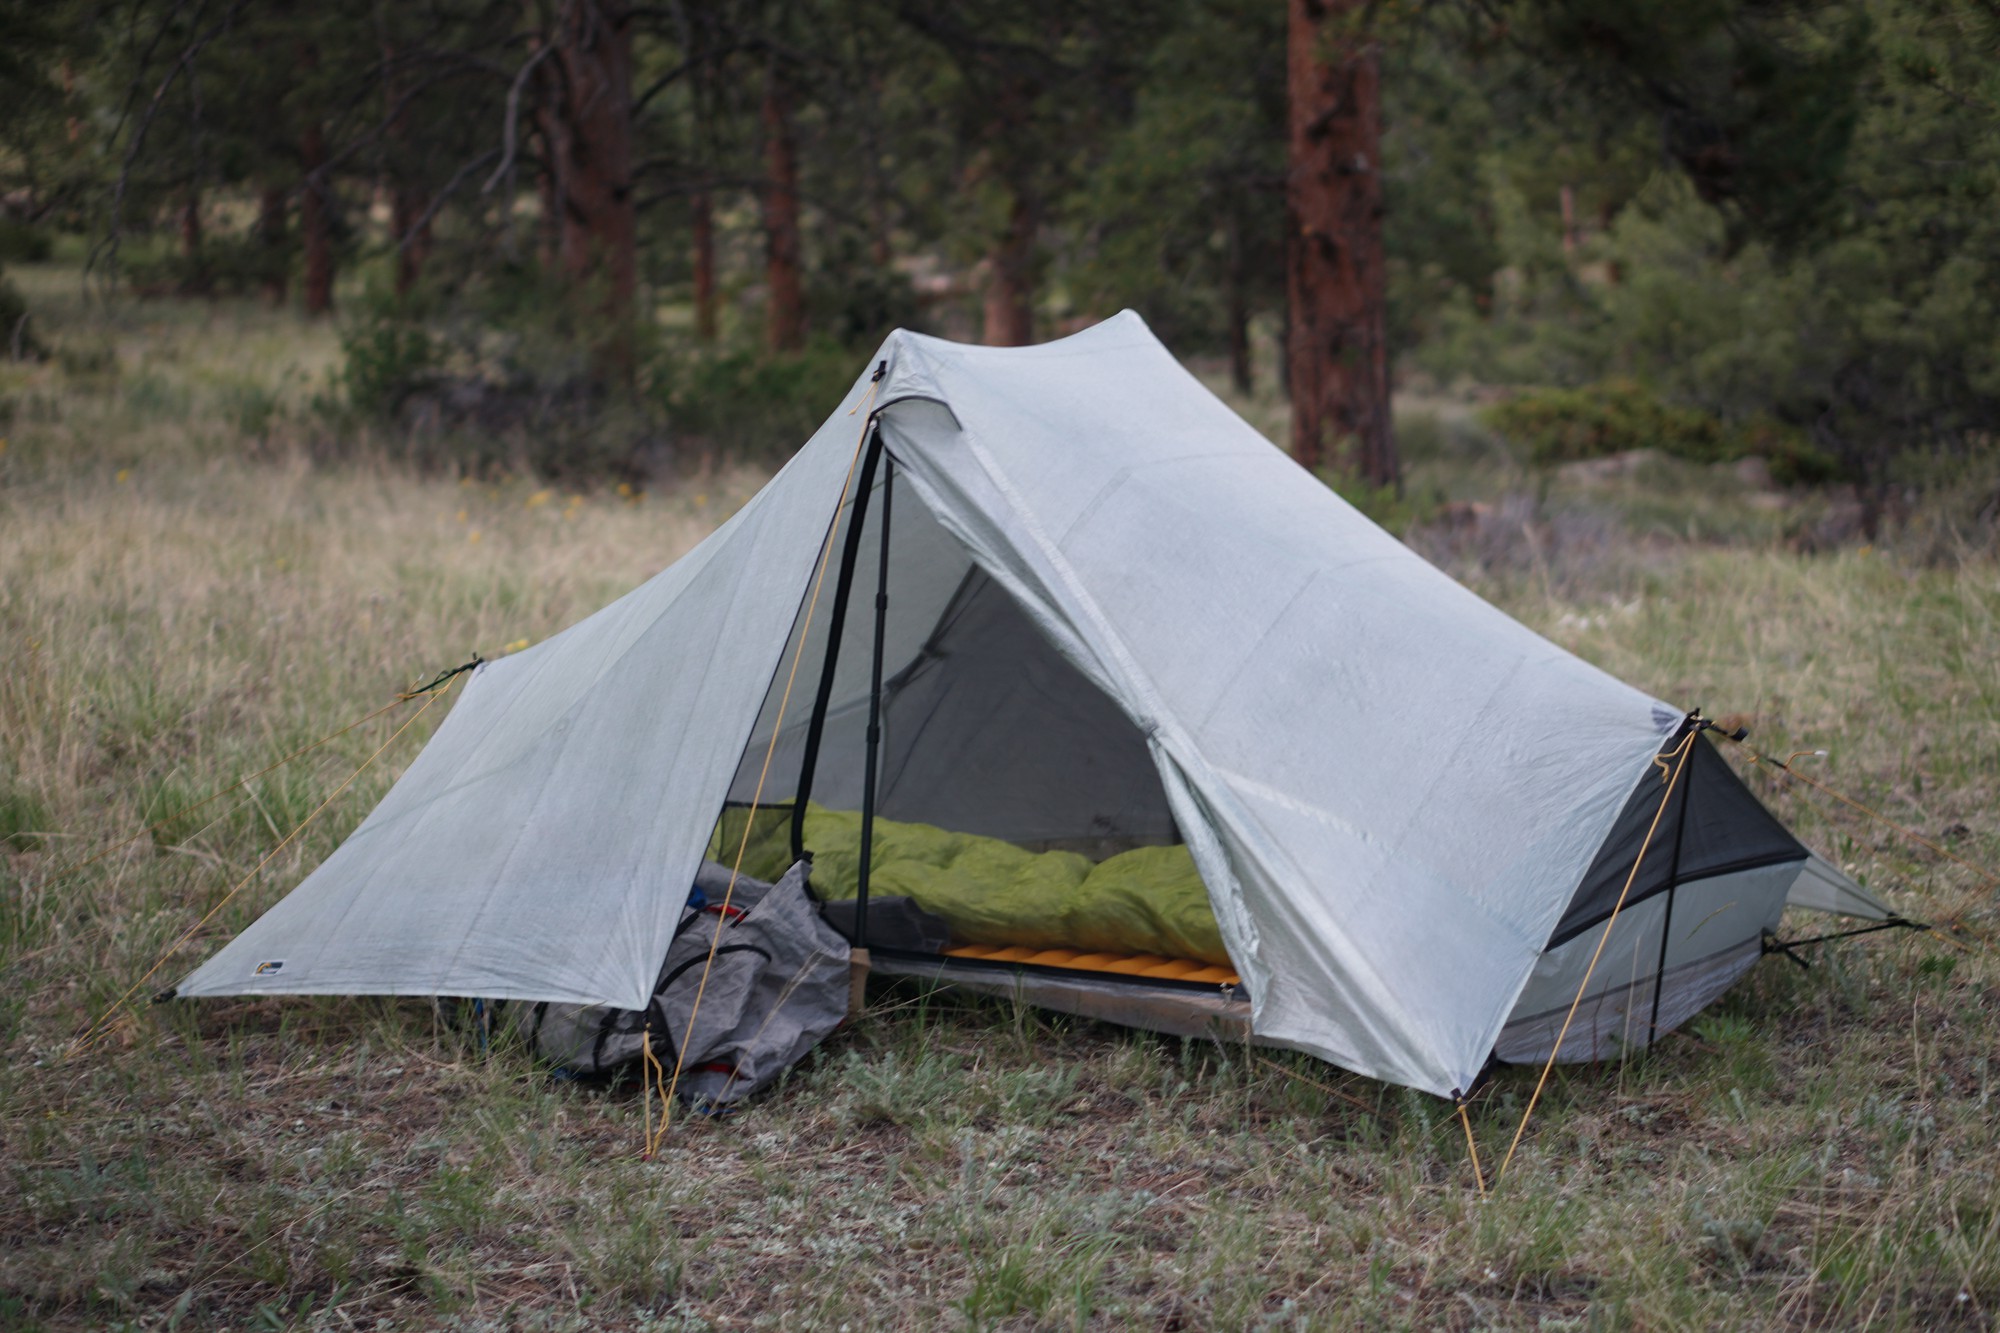
A Tarptent Dipole 1 Li in the Colorado Rockies. Photo: Ryan Jordan.
Testing context
We tested the Tarptent Dipole 1 Li and Dipole 2 Li on three below-the-treeline overnight treks in June of 2022 in the Sierra Nevada and Colorado Rockies. Both shelters were subjected to light wind (with gusts up to 10 to 20 mph) and moderate-to-heavy rain. We were interested in getting initial impressions on ease of setup, livability, structural integrity, condensation resistance, and weather protection.
Testing the Tarptent Dipole 1 Li in Colorado. Photo: Ryan Jordan.
Test samples vs. final product
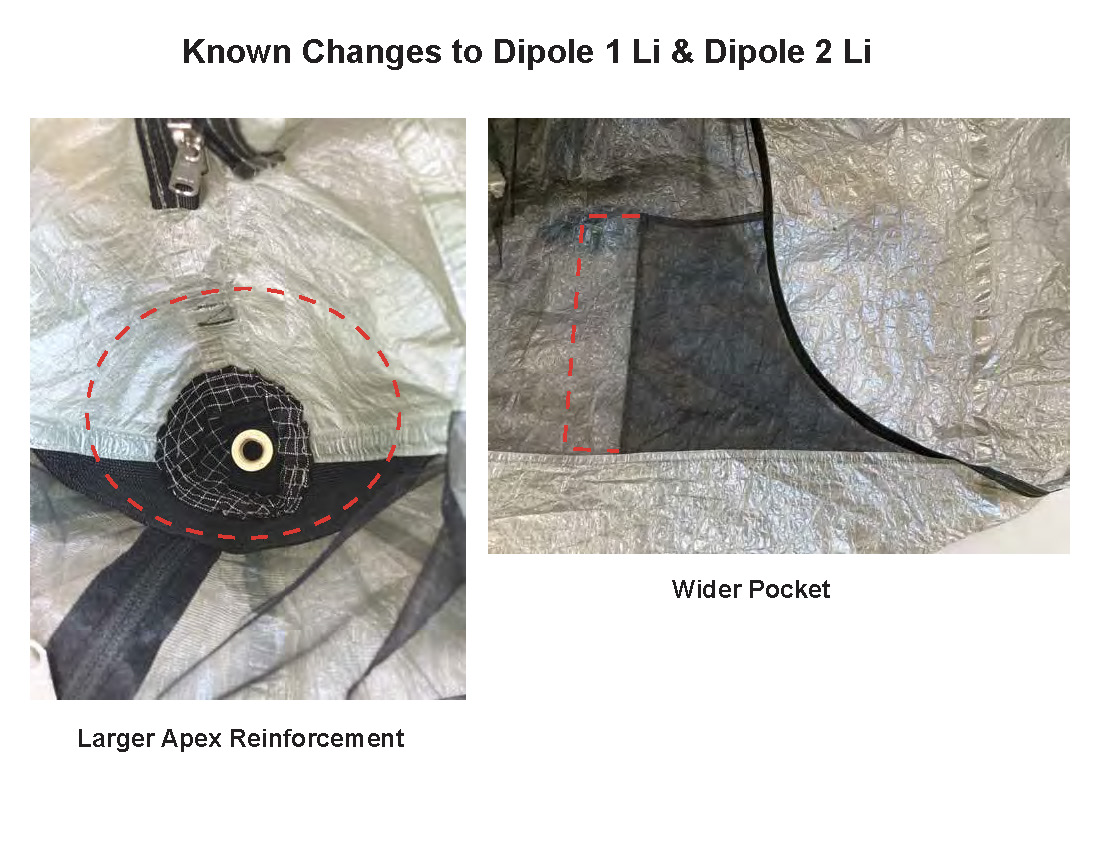
The samples that we tested are late-stage prototypes. Tarptent is still making adjustments to the Tarptent Dipole 1 Li and Dipole 2 Li, and some of the features visible in the photos in this article will be changed by the time the product gets into consumers’ hands. Currently, changes will include:
very small pattern edits on the vestibules to tighten them up at the hem, especially on the Dipole 2 Li
larger apex pole cap reinforcements
top of the mesh reinforcement that is currently black ballistic nylon will also be changed to the lighter 210D w/Dyneema grid
wider interior stow pockets
the MSRPs listed above are estimates
Changes to the Tarptent Dipole 1 Li and Dipole 2 Li that will be incorporated into production models include a larger pole cap and wider interior pocket. Photo: Tarptent.
First impressions
Setup and structure
The Tarptent Dipole 1 Li and Dipole 2 Li have a rectangular footprint, which makes site selection easy – certainly easier than site selection is for the Stratospire Li or ProTrail Li (non-rectangular shelters).
Setup is simple (for a trekking-pole supported shelter) but the order of operations is important – watch the video above for a setup demonstration.
Setup instructions:
Insert the end struts.
Stake the two corners of one end of the tent to bring tension to the fly edges between the top of the strut and the stakeout point.
Repeat for the other end, ensuring a rectangular configuration that brings tension to the vestibule door bottom edges.
Unzip one vestibule zipper from the top, insert a trekking pole (tip up) – 43 inches (109 cm) for the Tarptent Dipole 1 Li and 45 inches (114 cm) for the Tarptent Dipole 2 Li. Zip up the zipper.
Repeat – insert the second trekking pole into the opposite vestibule.
Reset corner tent stakes as needed so they are parallel with the corner seams (i.e., 45-degree angle off the parallel lines of the tent bottom edges).*
Make sure the bottoms of the end struts are inset slightly relative to the tops, to ensure that downward falling rain doesn’t enter the end vents.
Tighten the corner guylines.
Tighten the guylines at the tops of the struts – this step brings the entire tent into a final state of tension. At this point, minor adjustments to pole height and position, corner tension, and corner stake location may be necessary to bring the tent into a taut stake if camping on uneven ground with minor irregularities.
*Tarptent recommends a 45-degree angle for the corner stakes (i.e., the guylines should be parallel to the corner seams). We found that a slightly wider than 45-degree angle works best for creating tension along the edges at the ends of the shelter. The photo below illustrates a pitch on uneven ground that hews very closely to the 45-degree guyline recommendation.
Note just a slight amount of slack on one of the end edges – so slight that I (Andrew) didn’t notice it until I was reviewing my photos. Adjusting the angle of the corner stakes to be slightly wider solved this issue in Ryan’s pitches (as noted in the video above).
A slightly floppy end fly top edge (back left) was the result of experimenting with different setup techniques/processes. Like all trekking-pole-supported shelters, it takes a few setups to get the Tarptent Dipole 2 Li totally dialed in. See the text for our recommended setup step order. Photo: Andrew Marshall.
The tension created by the end struts and their triangular guyline system allows the Tarptent Dipole 1 Li and Dipole 2 Li to maintain a stable four-stake pitch that does not incorporate the doors as a load-bearing element. The upshot is that both vestibule doors can be open and rolled back without losing tension.
We experienced moderate rain and light wind below treeline in our testing, and are confident that the Tarptent Dipole 1 Li and Dipole 2 Li can handle those conditions without collapsing or letting in water. In heavy weather, four additional stakes and guylines can be deployed – two along the axis of the ridgeline and two running from the end struts. The symmetrical nature of the tension forces in the Dipole shelters is a real strength of the design (see our email interview with Henry Shires at the bottom of this article for more on this).
Livability and interior volume
There are several other features that we’ll explore more fully as we continue to review the Tarptent Dipole 1 Li and Dipole 2 Li:
vestibule size and depth
vent placement and design
condensation drain placement and design
end vent/window design and stormworthiness
packed size and packability
trekking-pole placement in terms of livability
performance and stability in high winds/heavy rain/under snow load
inner mesh door size and placement
Ryan touches on these performance issues in the video above.
But in this First Looks review, we are concentrating on the two features that stood out the most in our initial handling of the Tarptent Dipole 1 Li and Dipole 2 Li. The first was the four-stake design that allows both vestibule doors to be open without losing tension.
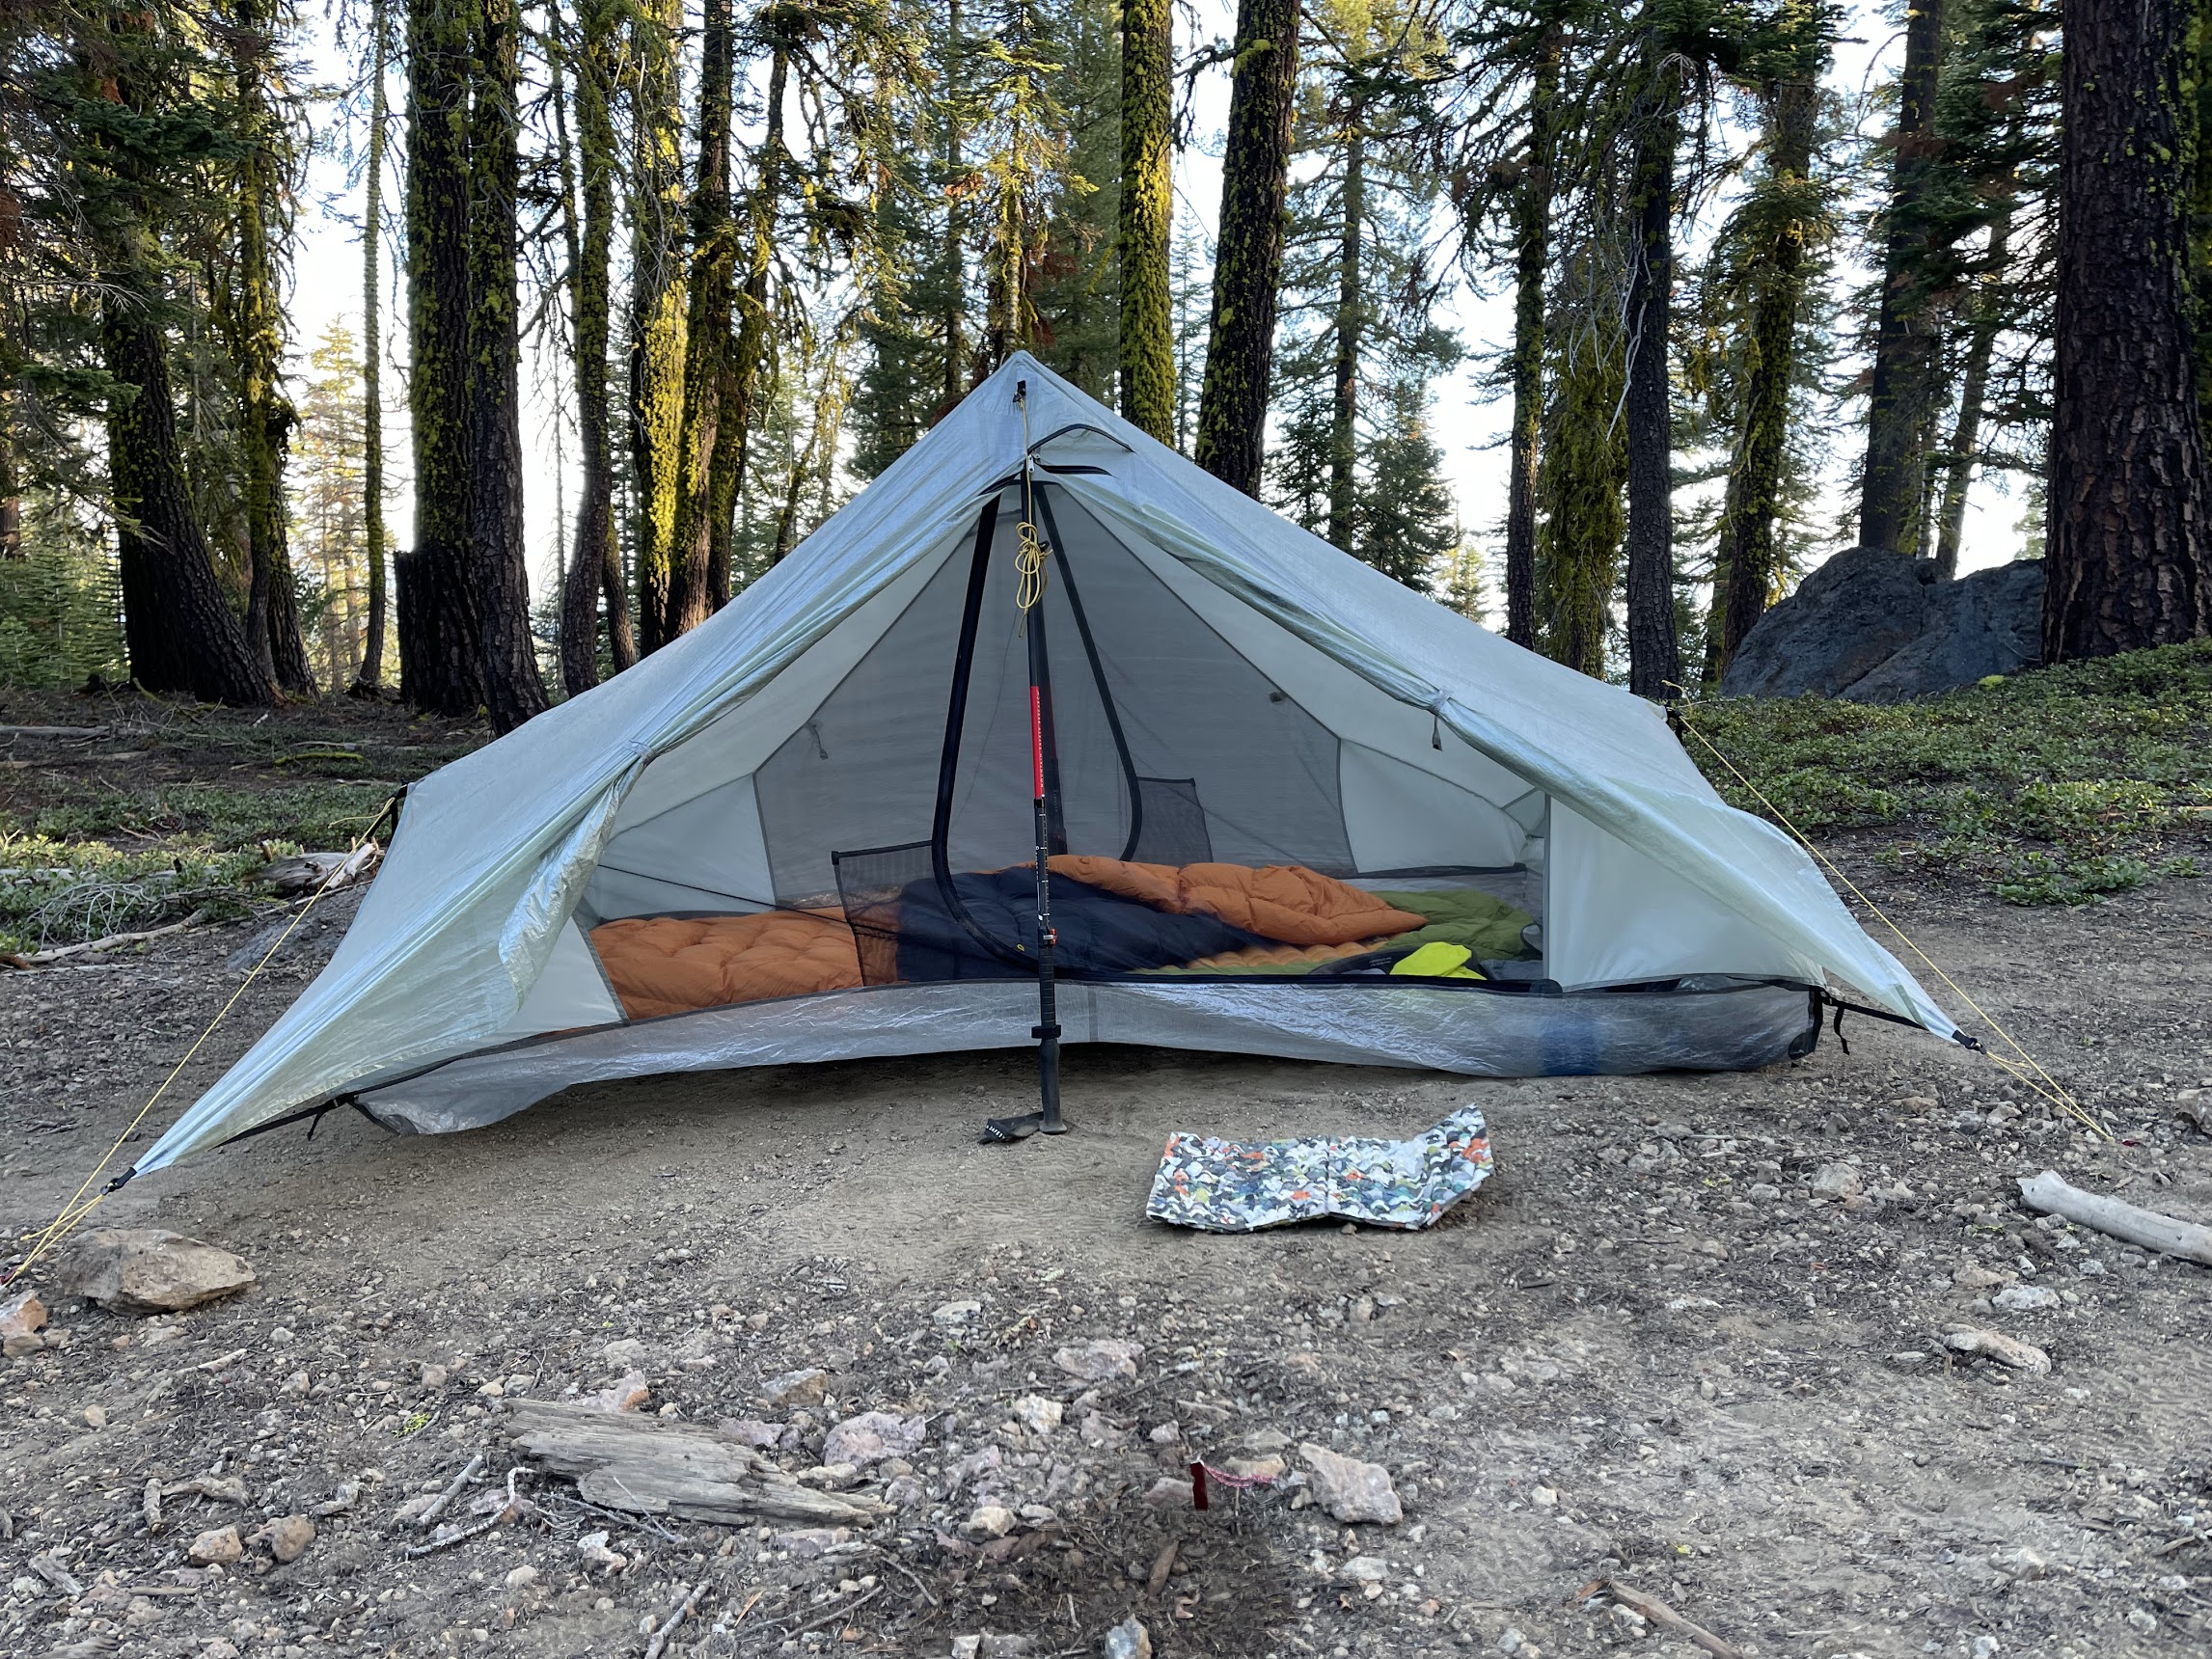
The second standout feature is the livable interior volume present in both shelters. The ends of the shelter are 21 inches (53 cm) tall – tall enough that feet will not rub against the shelter ceiling when sleeping pads inevitably slide down towards the end of the tent. The width and length are both designed to accommodate larger hikers. We are not tall (Andrew is five feet six inches and Ryan is five feet seven inches) but we are confident that Tarptent’s claim of comfort for backpackers six feet eight inches and over is not an exaggeration.
We believe that the Tarptent Dipole 1 Li and Dipole 2 Li are the roomiest trekking-pole-supported shelters for their weight that we’ve ever tested.
Comparisons
This is not a comprehensive comparison – that will have to wait until we can put the Tarptent Dipole series through long-term field testing. The purpose of this comparison is to help place the Tarptent Dipole 1 Li and Dipole 2 Li (specifically the Dipole 2 Li) within the category of two-pole, two-door, single-wall, Dyneema Composite Fabric shelters. No shelter in this comparison has the end struts and correspondingly totally vertical end panels of the Tarptent Dipole 2 Li, so we won’t waste time repeating that in every comparison.
Another noteworthy thing about the Tarptent Dipole 1 and 2 is that both shelters feature a slightly hourglass-shaped bathtub floor. In the specs above, we list the bathtub floor dimensions as follows:
Dipole 1 Li width x length: 36 x 84 inches (91 x 213 cm)
Dipole 2 Li width x length: 58 x 88 inches (147 x 224 cm)
But in fact, the Dipole 2 Li narrows slightly in the center to 50 inches (127 cm) and the Dipole 1 Li narrows in the center to 28 inches (71 cm).
Readers are encouraged to elaborate further on the differences and similarities between all four shelters in this comparison – and the pros and cons of each – in the comments section.
Tarptent Dipole 2 Li vs. Durston Gear X-Mid Pro 2
The Durston Gear X-Mid Pro 2 is the only other two-person, two-pole, double-pole, double-door, single-wall shelter currently on the market that is claimed to be pitched with a minimum of four stakes. (Another one is the Sierra Designs High Route 1 but that’s a one-person shelter.)
The Durston Gear X-Mid Pro 2’s floor footprint is slightly longer than the Tarptent Dipole 2 Li – 90 inches (229 cm) for the X-Mid Pro 2 vs. 88 inches (224 cm) for the Dipole 2 Li. But the Tarptent Dipole 2 Li is significantly wider at 58 inches (147 cm) at the ends and 50 inches (127 cm) at the middle vs. the X-Mid Pro 2’s 48 inches (122 cm). The final weight of the Dipole 2 Li is still pending, but the Durston X-Mid Pro 2 is likely to be ~5 ounces (142 g) lighter than the Dipole 2 Li. The Dipole 2 Li easily fits two long/wide (25 inches / 64 cm) sleeping pads – this is not possible in the X-Mid Pro 2 without deforming the shape of the inner tent.
The Durston Gear X-Mid Pro 2 is ~$100 cheaper than the Tarptent Dipole 2 Li. There are differences in overall design between the two shelters. The biggest difference is that the X-Mid Pro 2 is based on an asymmetrical design (offset poles and an inner tent that is diagonally oriented relative to the canopy). The Tarptent Dipole 2 Li is symmetrical – poles are oriented opposite of each other and the inner tent is parallel to the canopy. These design characteristics have implications for pole placement, stability, and the wind and rain performance of both shelters in their four-stake configuration.
For more on this, see our interview with Henry Shires, below.
Tarptent Dipole 2 Li vs. Zpacks Duplex
The Zpacks Duplex is still one of the most ubiquitous double-pole, double-door, single-wall DCF shelters. A noteworthy difference between the Duplex and the Tarptent Dipole 2 is that the Duplex needs eight stakes minimum to be considered ready for mild wind and rain. The resulting forest of guylines can be a little overwhelming at a small campsite.
It is assumed in our community that the Zpacks Duplex does not fare well in high winds. However, we think it’s mostly attributable to user error – the Duplex is a difficult shelter to pitch properly and securely in stormy weather, but with up to 14 stake-out points, it can be done. We think the Tarptent Dipole 1 Li and Dipole 2 Li will fare better than the Duplex in this regard – it takes much less effort to achieve an extremely taut pitch with the Dipole than with the Duplex.
A properly-pitched ZPacks Duplex above treeline in the Absaroka-Beartooth Wilderness in Montana. Up to 14 stakes can be used to secure the Duplex. The Tarptent Dipole 1 Li and Dipole 2 Li can achieve a stormworthy pitch with only 8 stakes. Photo: Ryan Jordan.
The Duplex has large doors with the support poles taking up space right in the center of the doors. The Tarptent Dipole 2 Li also has centrally located poles, but smaller, offset doors so the pole is not in the way, particularly if the user angles the poles to one side. The Duplex is more than a foot (30 cm) narrower than the Dipole 2 and weighs ~8 ounces (227 g) less than the Dipole 2.
Gossamer Gear The DCF Two
The Gossamer Gear The DCF Two weighs ~6 ounces (170 g) less than the Tarptent Dipole 2 Li. The DCF Two requires a minimum of six stakes for setup. Steeply sloping walls and a relatively small footprint make the DCF Two suitable only for hikers shorter than about 6 feet 1 inch (185 cm).
Like the Dipole 2 Li, the DCF Two has smaller doors to one side of the support pole (they are across from each other as opposed to offset from each other as with the Dipole 2 Li).
The DCF Two also stands out on this list for being tapered, with a head-end width of 48 inches (122 cm) and a foot-end width of 42 inches (107 cm) – so no room for two wide pads. It also has an apex height of 43 inches (109 cm) as compared to the Dipole 2 Li apex height of 45 inches (114 cm).
Final Thoughts
The Tarptent Dipole 1 Li and Dipole 2 Li are not the lightest double-door, double-pole, single-wall Dyneema Composite Fabric shelters available. From conversations with Henry Shires (owner/founder) and Rob Dunne (design engineer) at Tarptent, that was clearly not the design goal. Tarptent’s primary goals were to create usable interior volume and a stable minimum four-stake setup, and at this, it succeeded.
The Tarptent Dipole 1 Li and Dipole 2 Li are the roomiest shelters in their class – that class being single-wall, double-pole, double-door trekking pole-supported shelters in the 18 to 26 ounce (510 to 727 g) range. This liveable interior volume is a combination of apex height, floor width and length, and the unique end-strut design.
Four-stake setup is stable in rain and light winds and allows vestibule doors to be open without losing tension. Tarptent’s secondary goal was to maximize ventilation and minimize condensation buildup. We like the design features they’ve implemented with this in mind, but we will need further field days with these shelters to accurately judge condensation management.
Camped under an old-growth fir at a grassy and remote off-trail pass east of Rocky Mountain National Park in Colorado. Tarptent Dipole 2 Li. Photo: Ryan Jordan
Photos
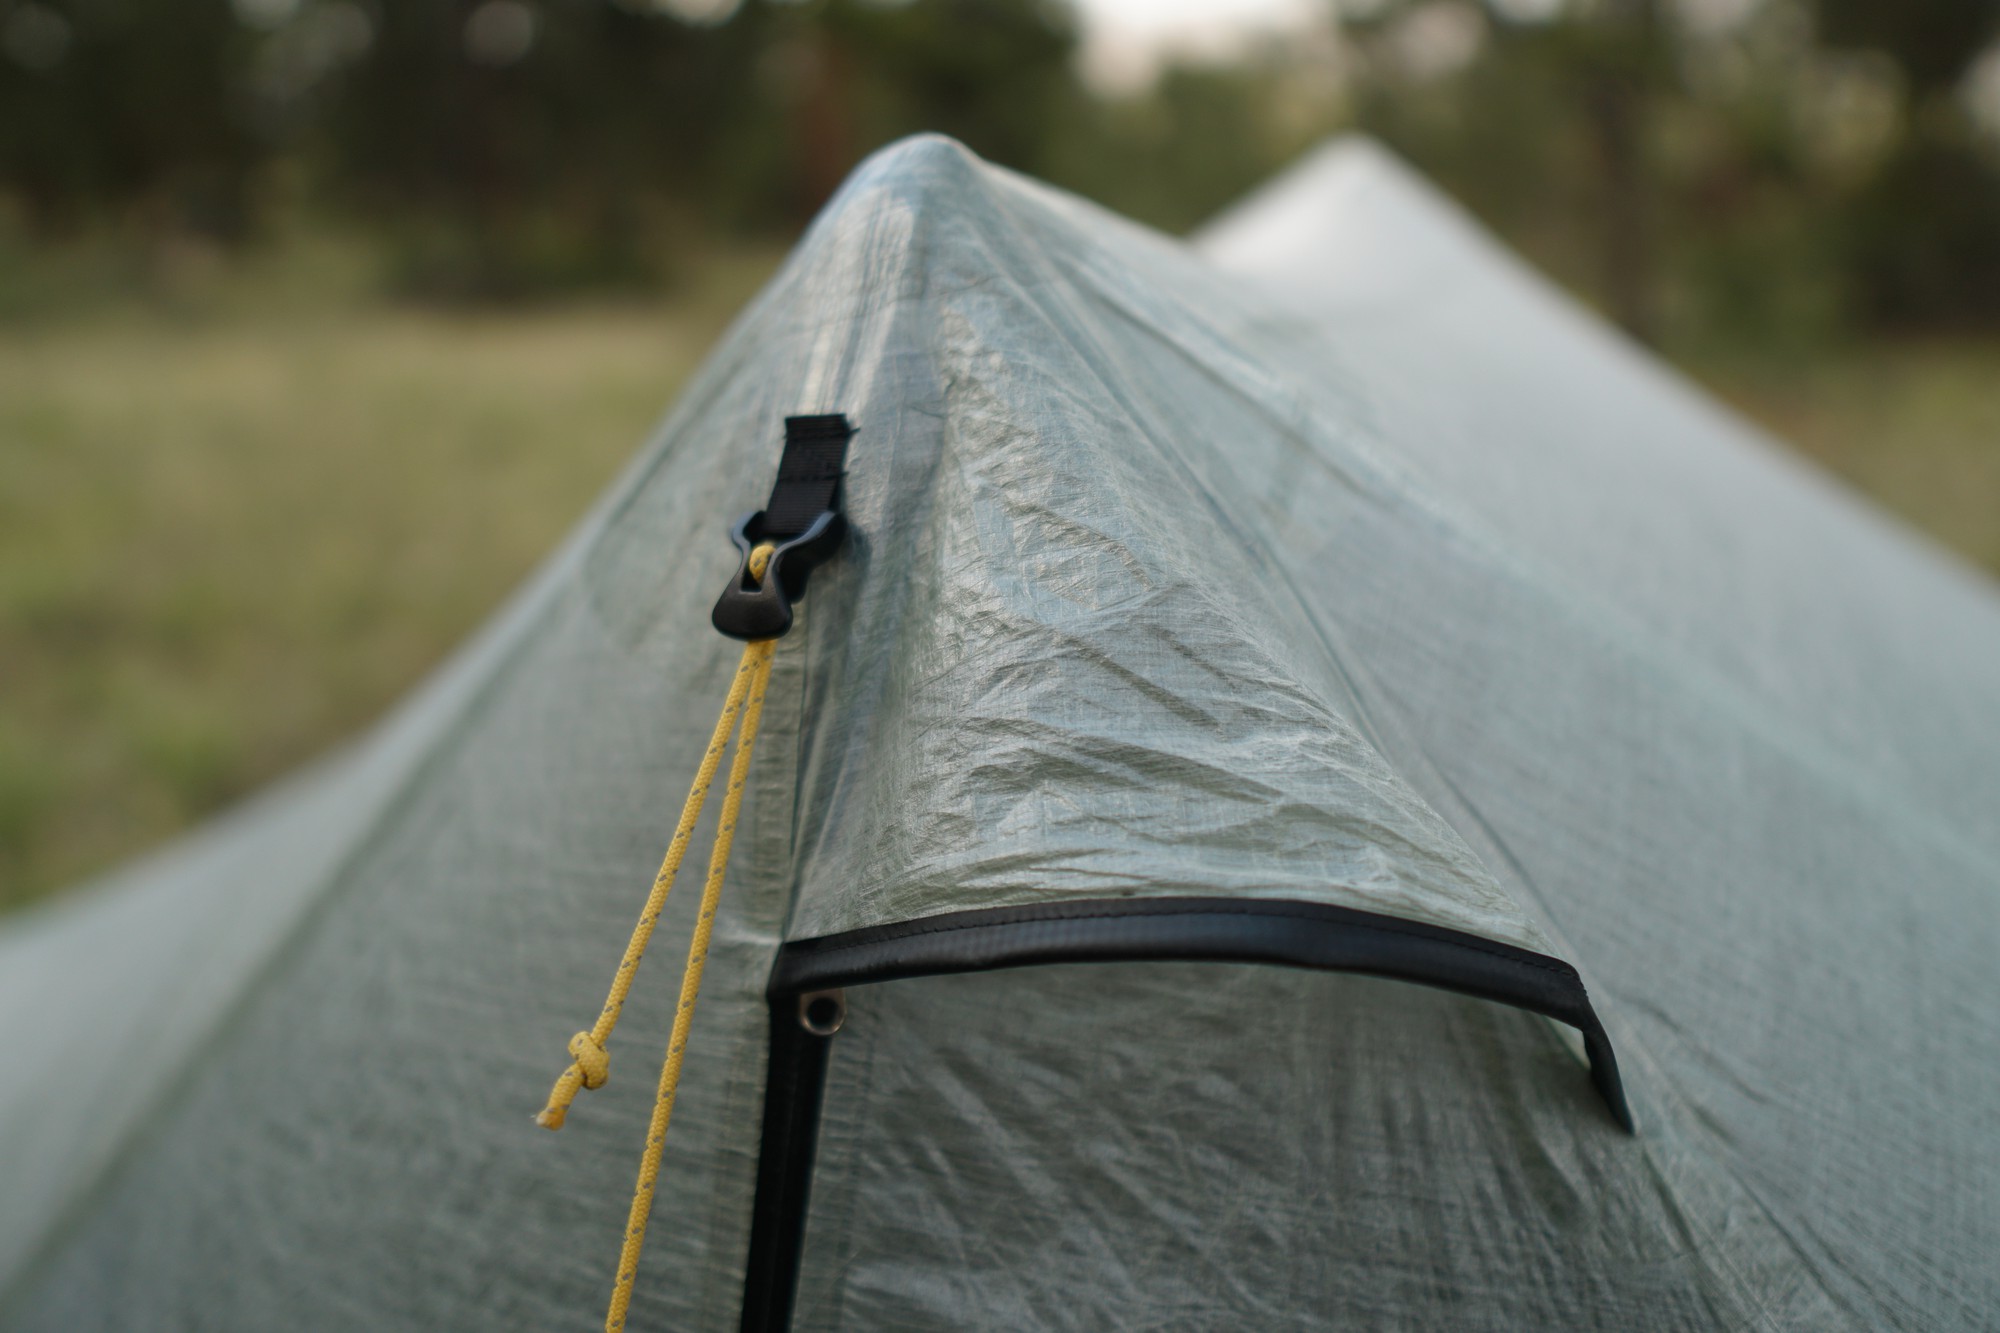
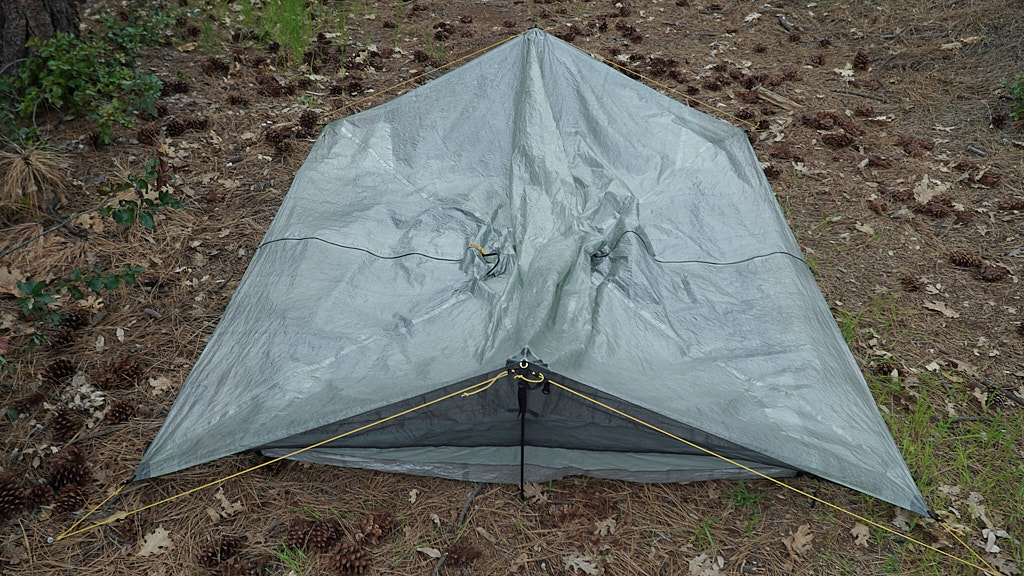
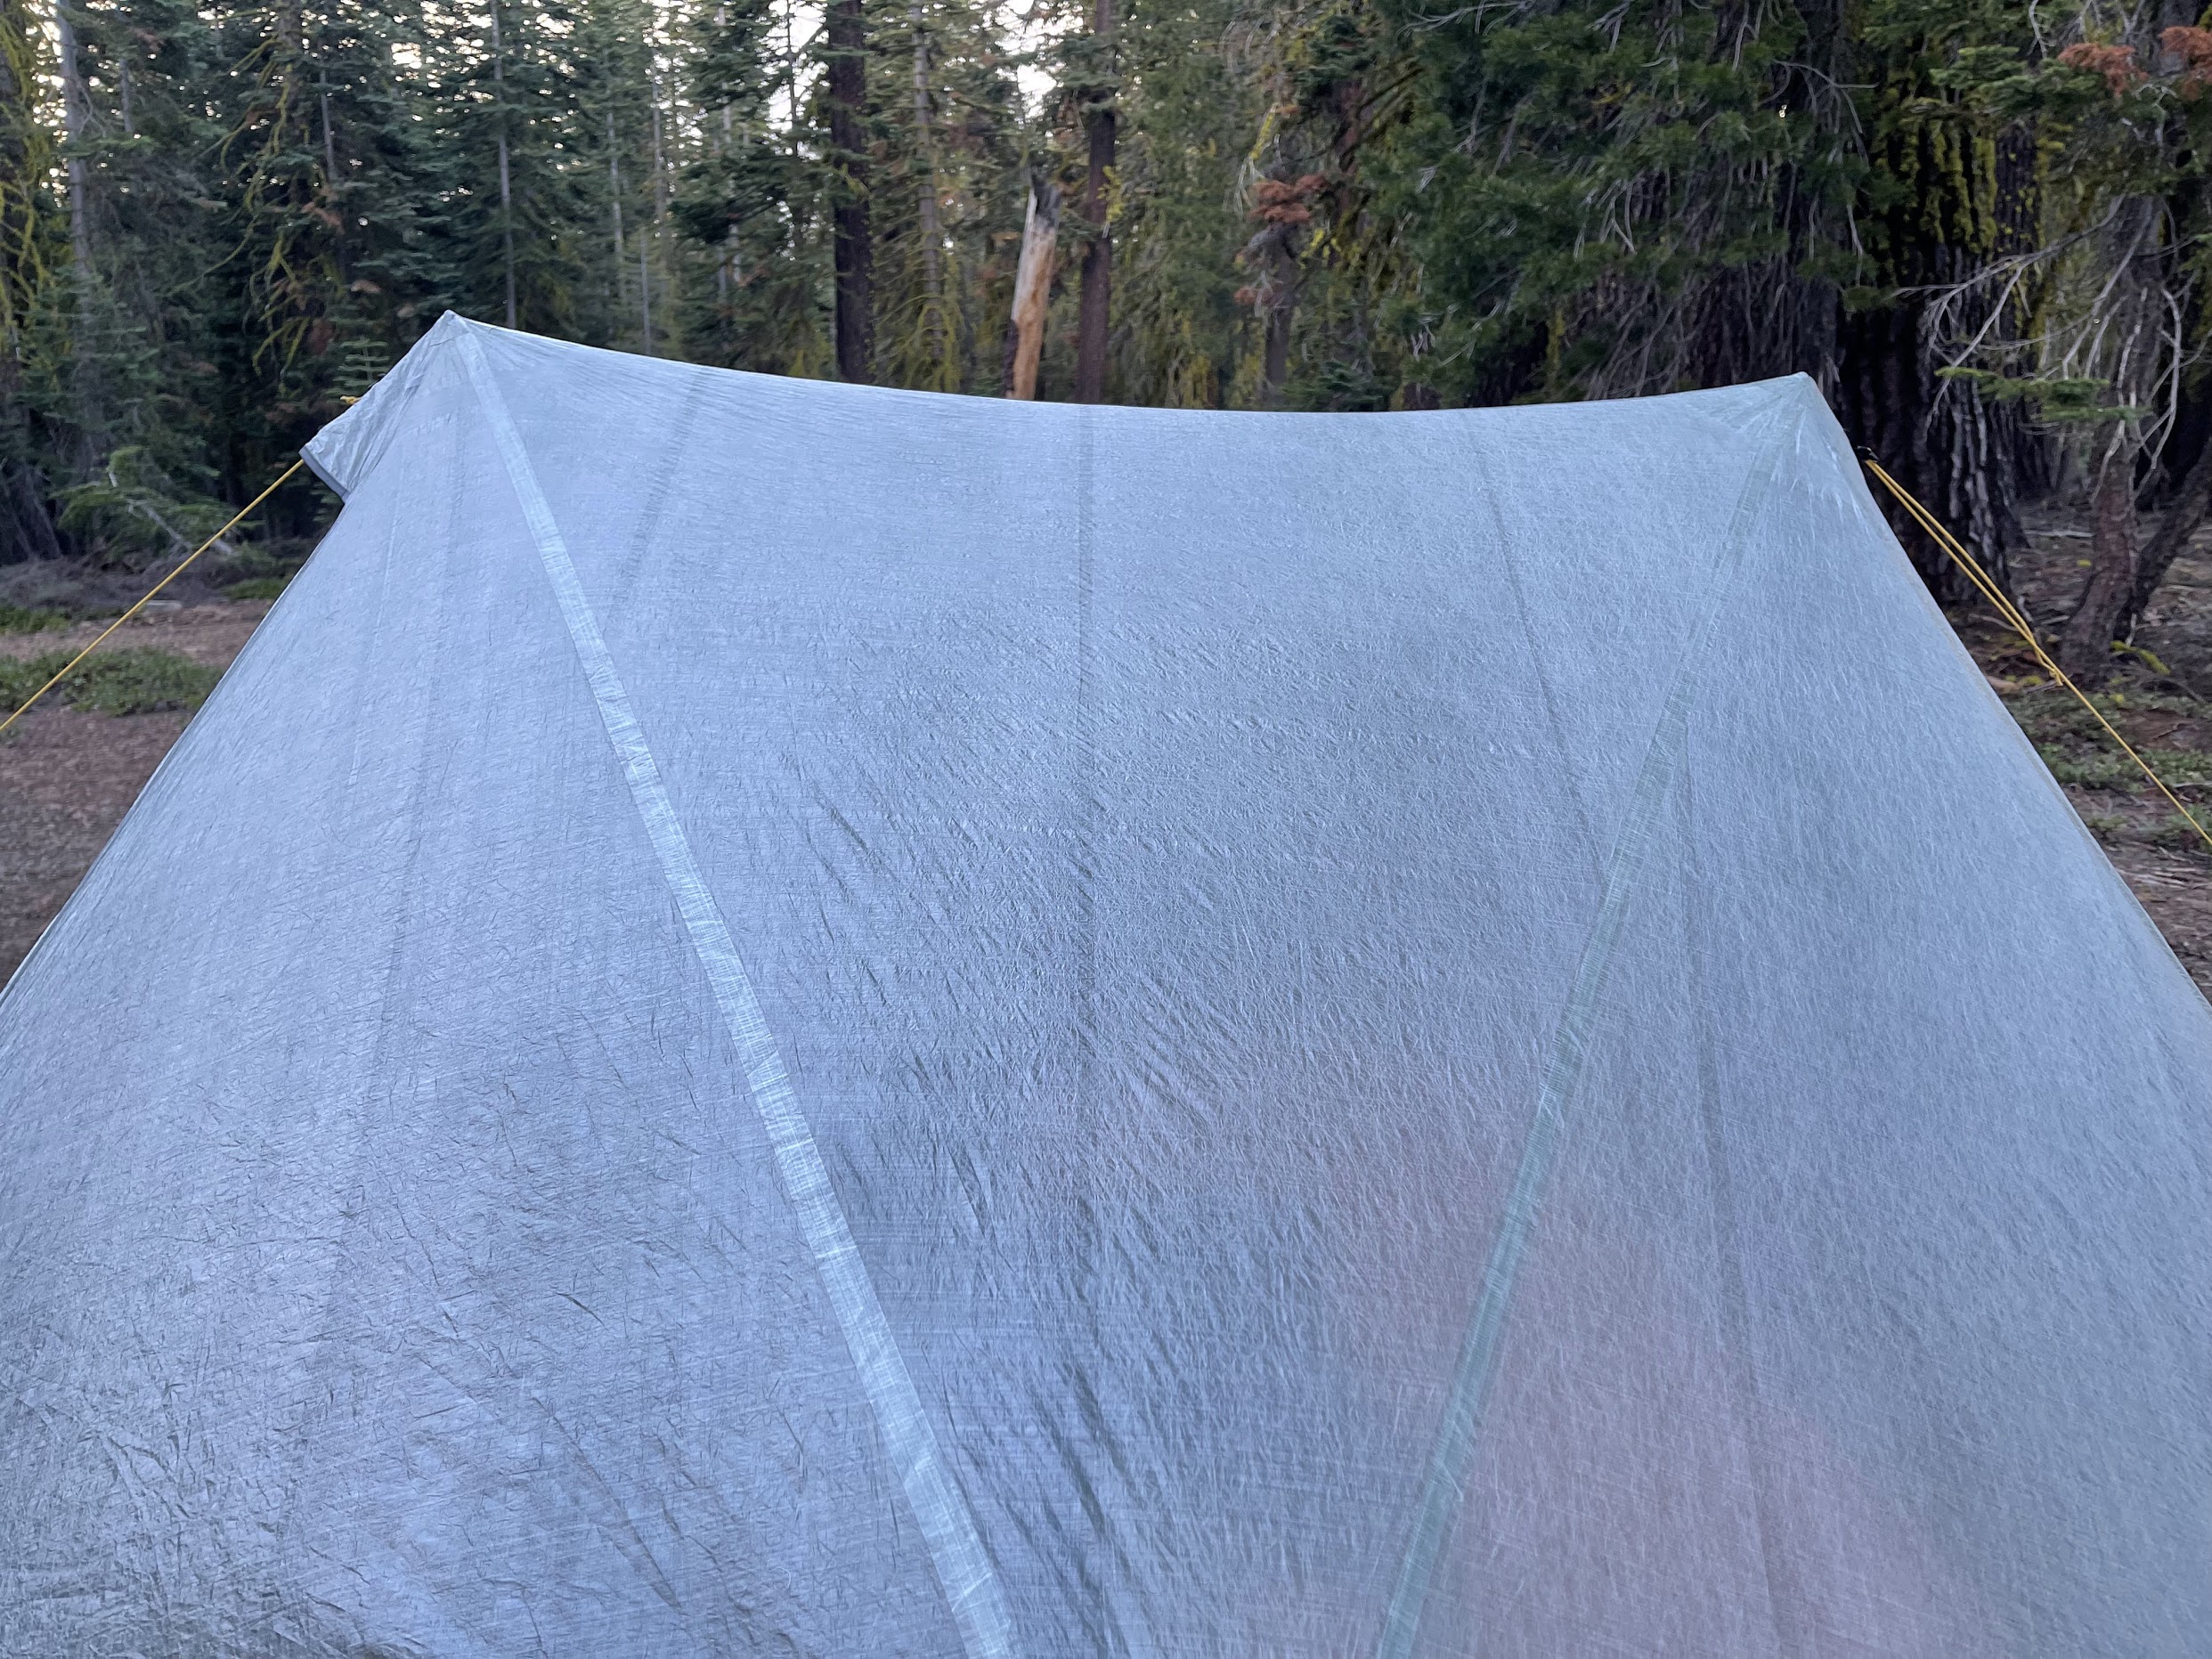
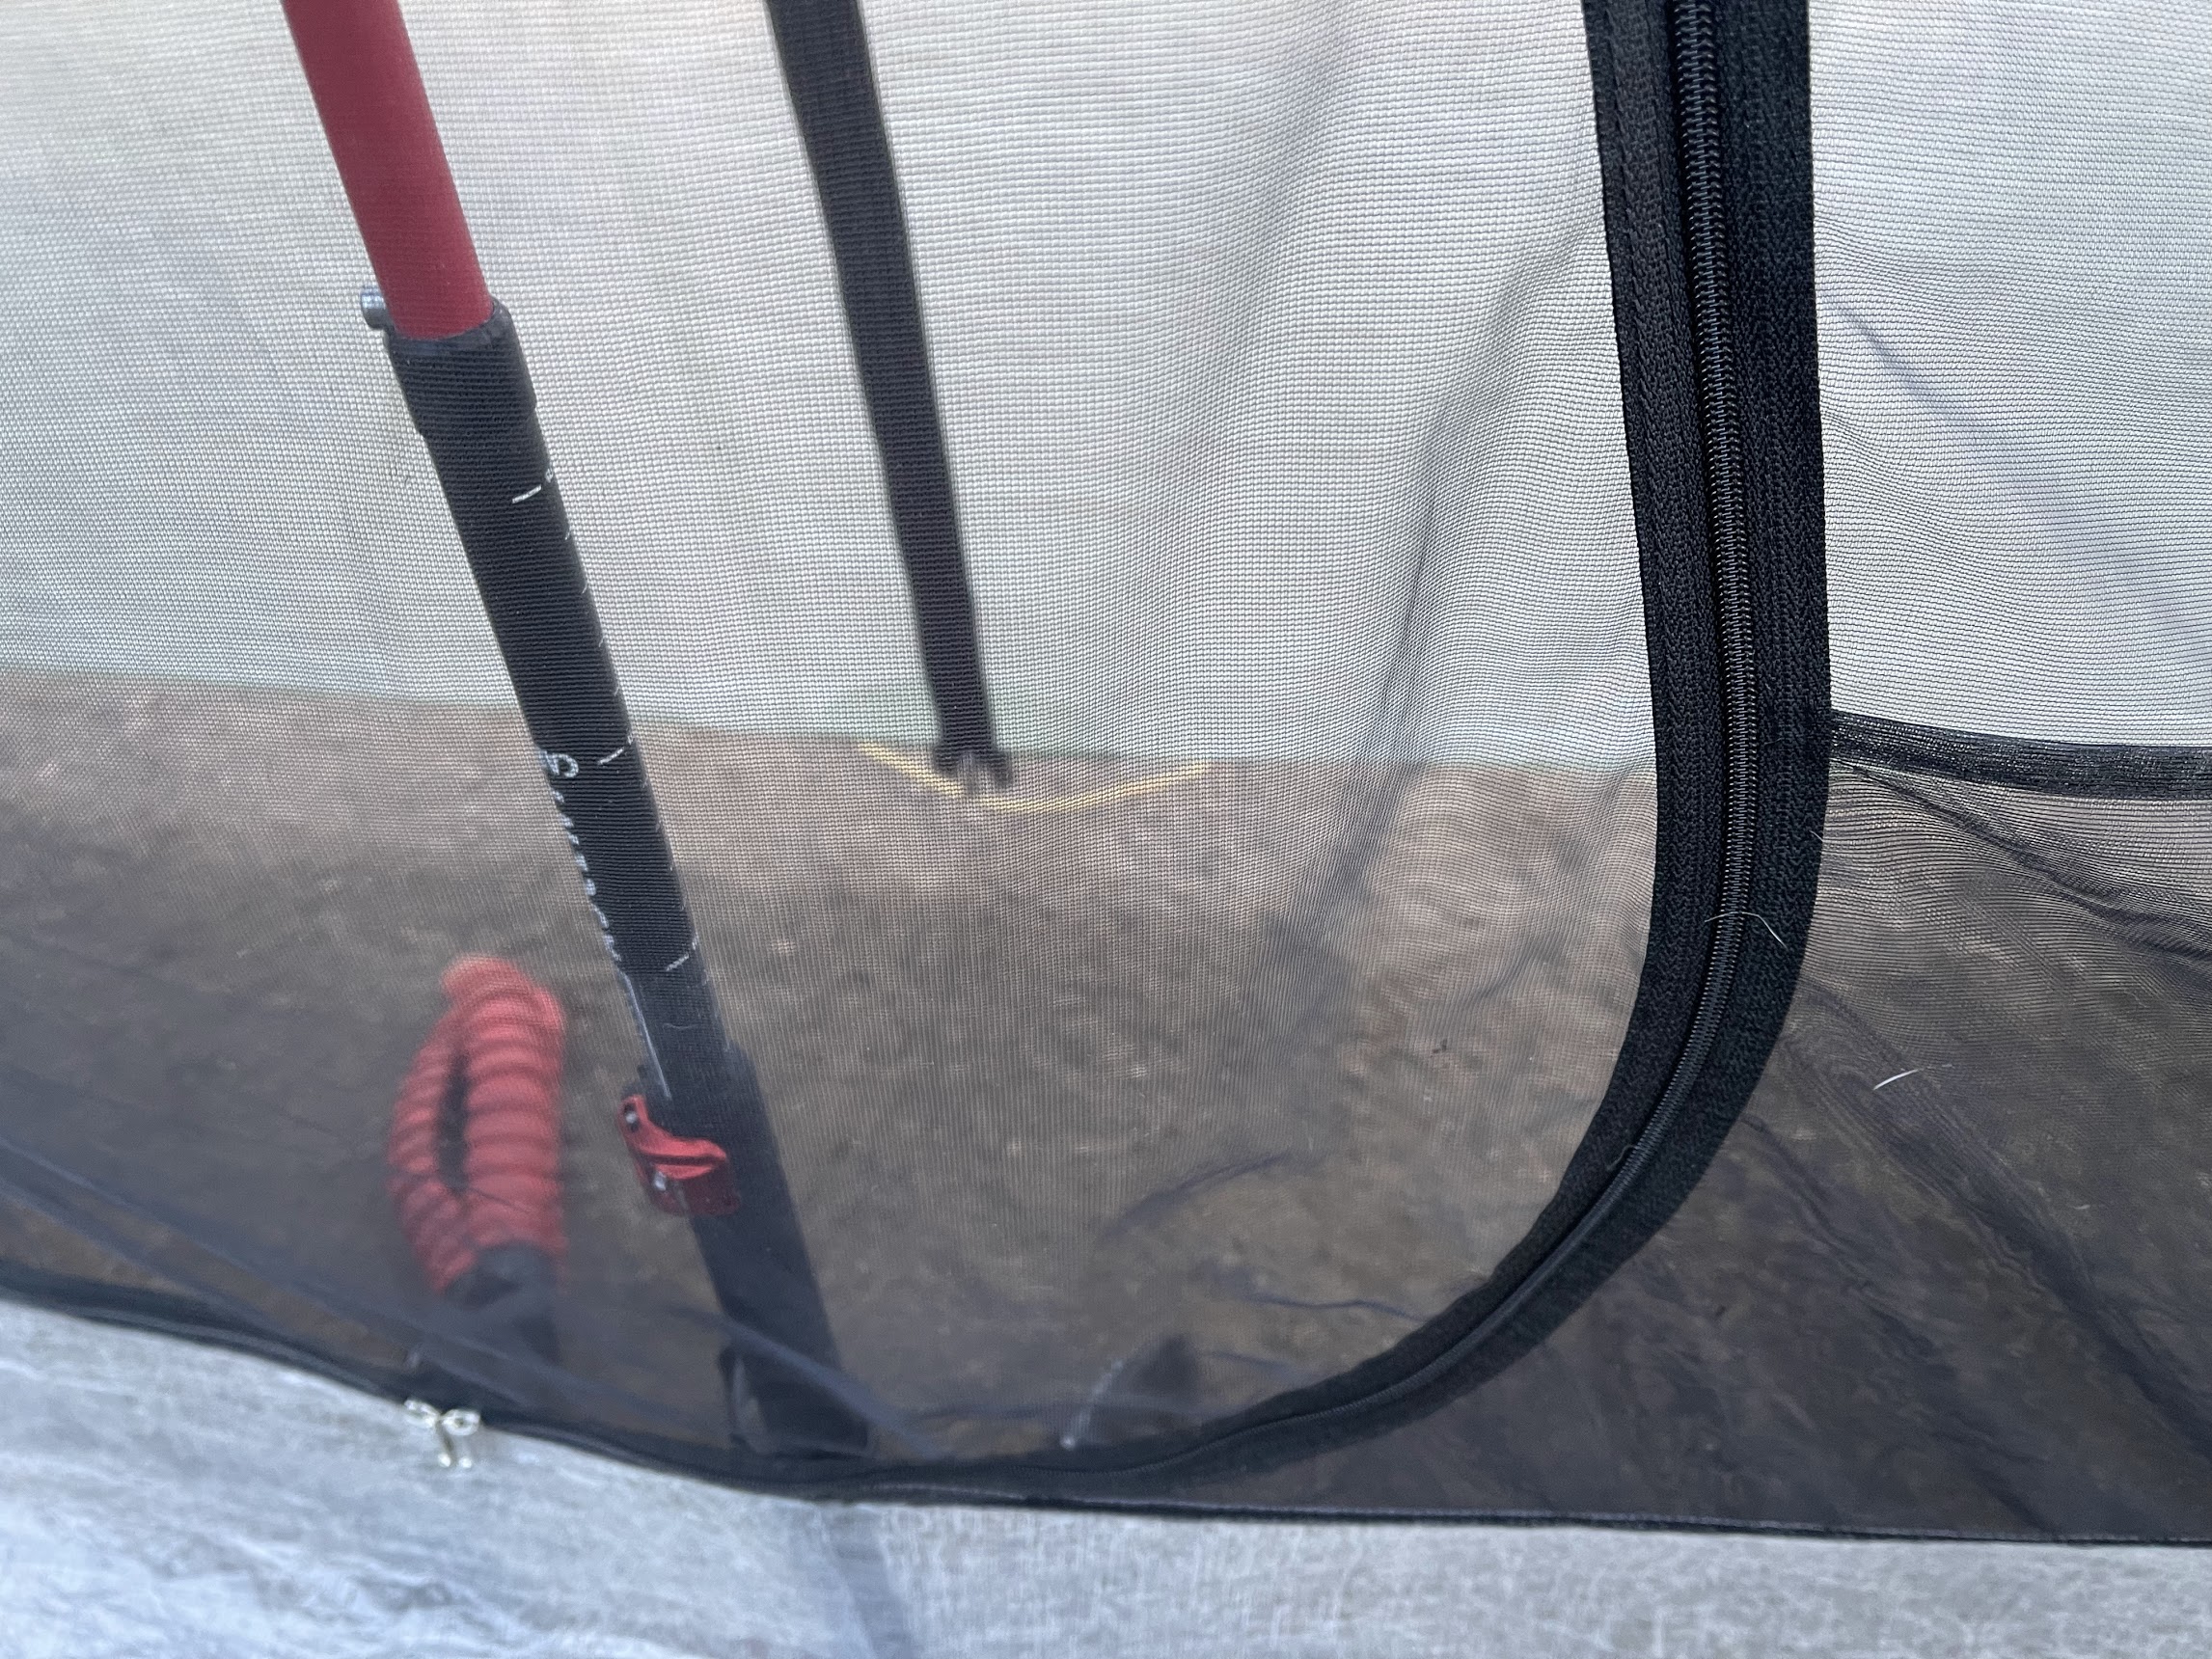
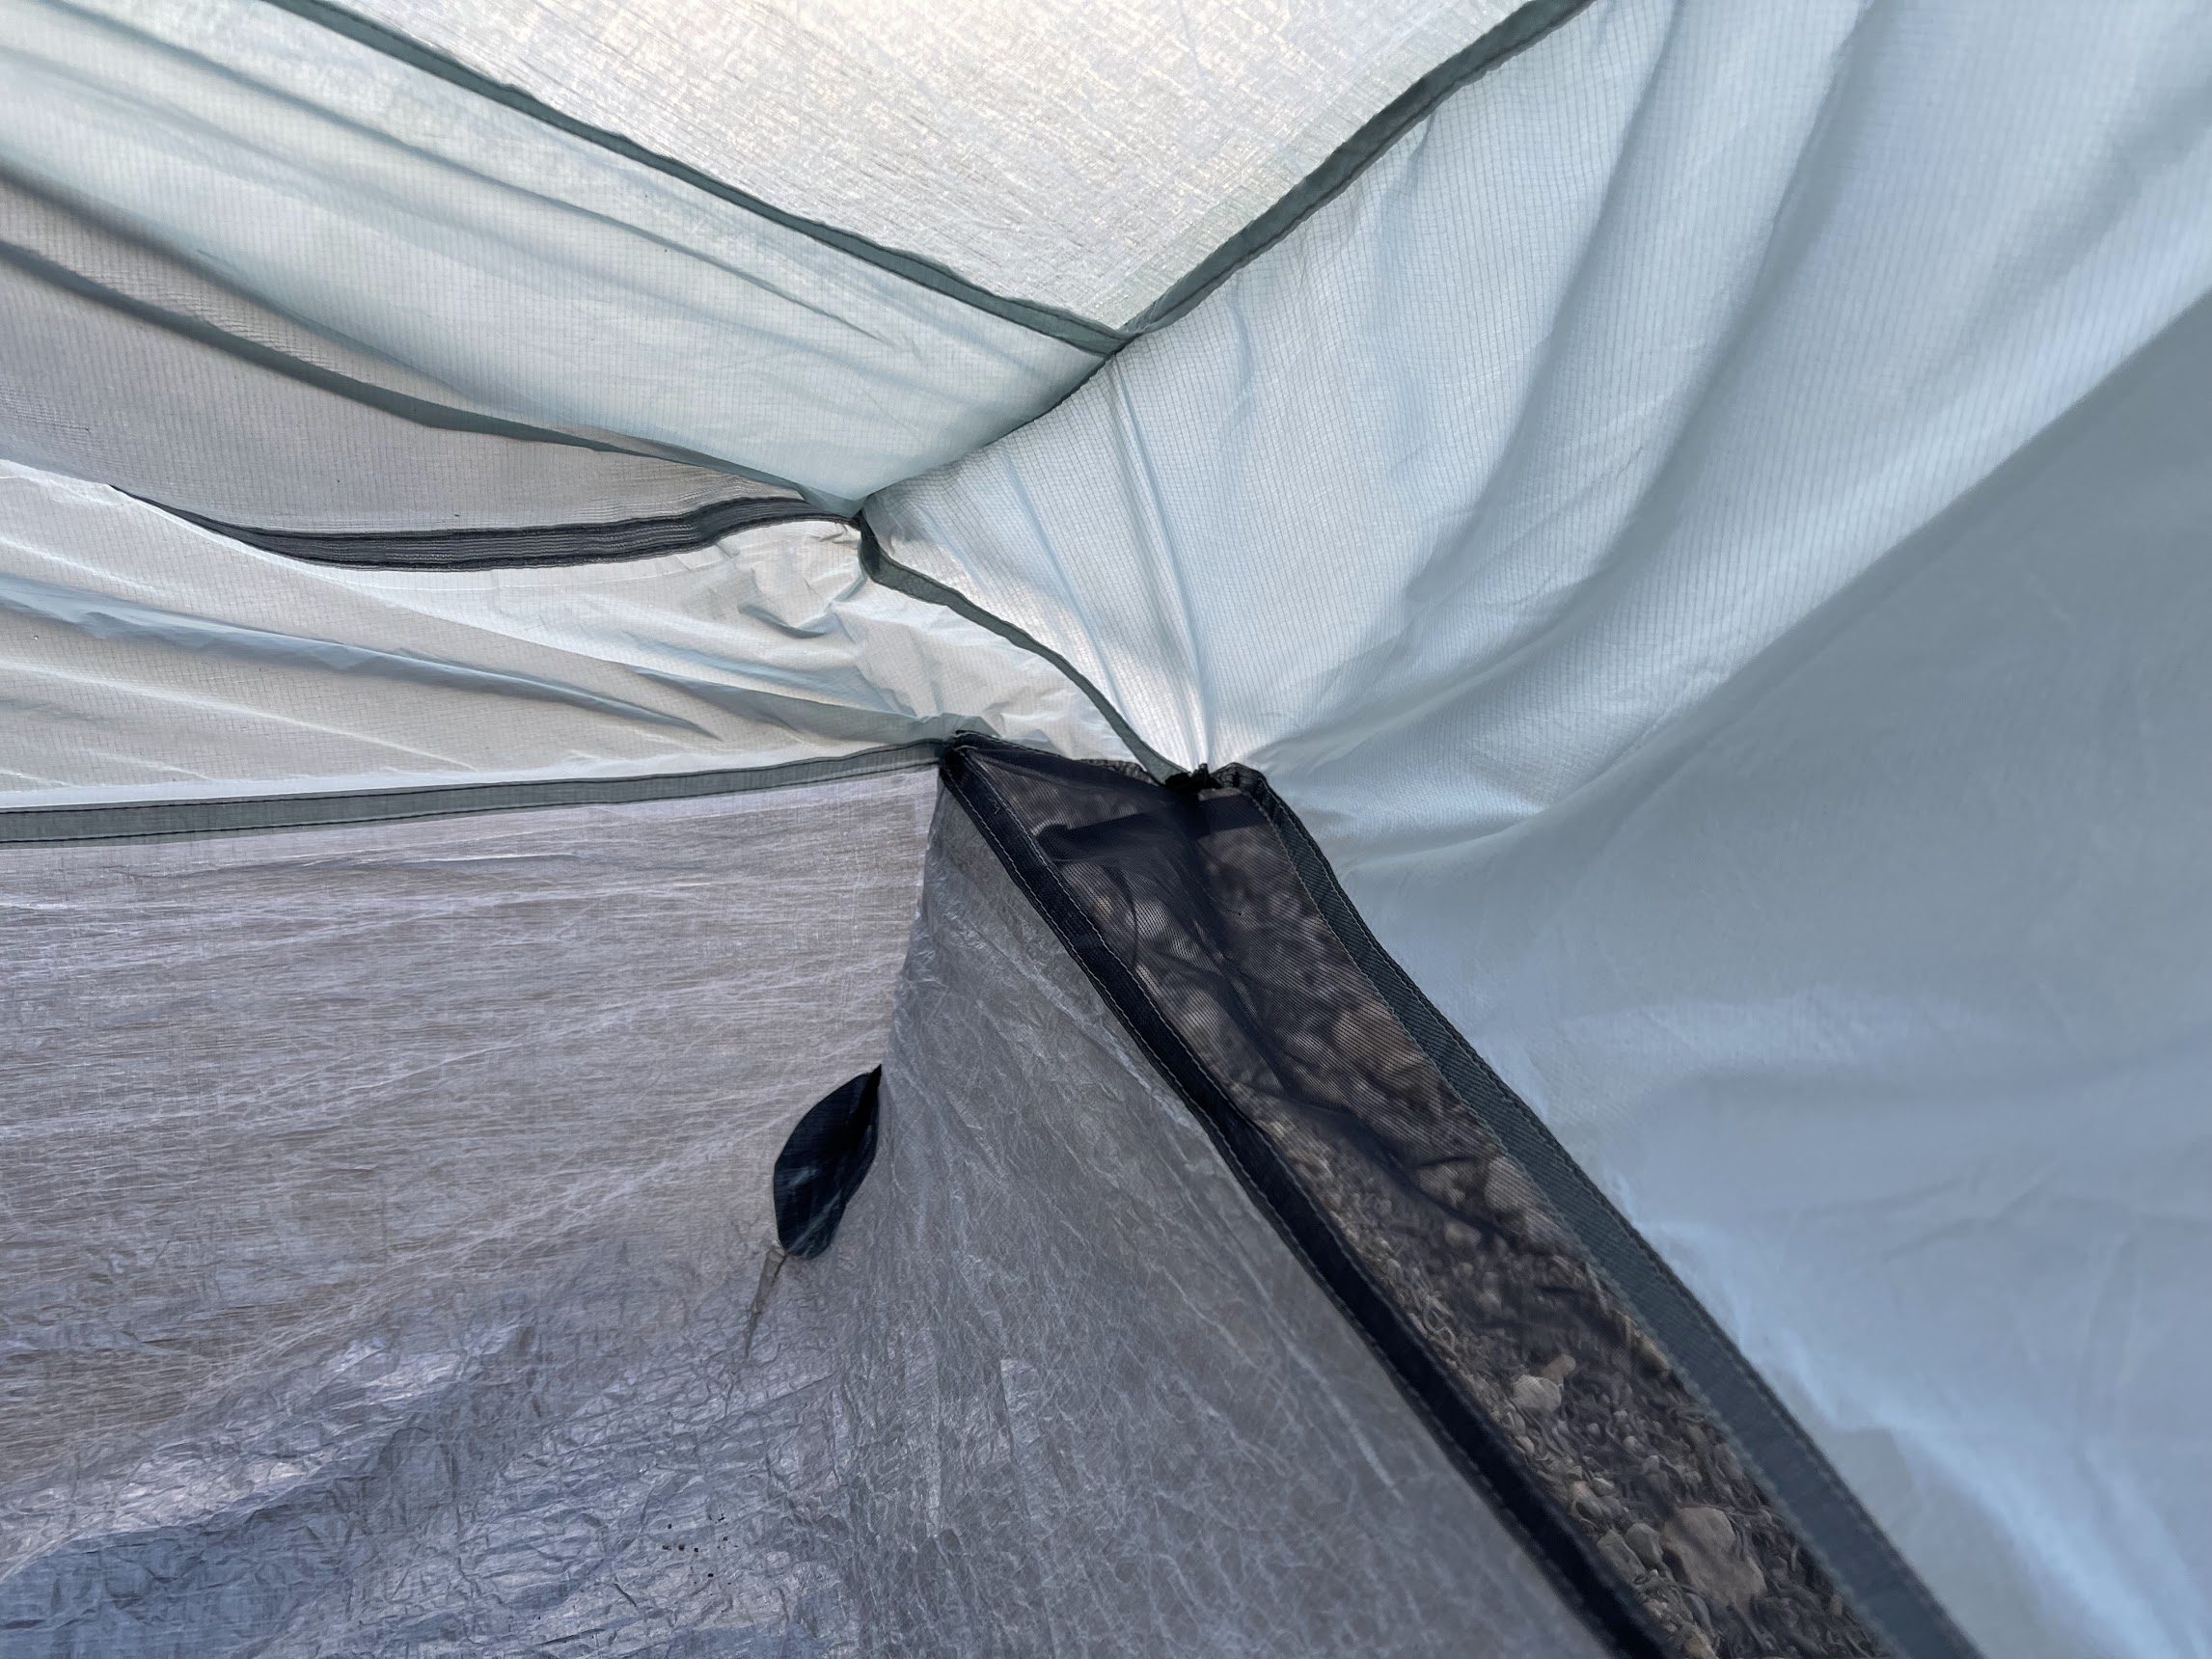
The Tarptent Dipole 2 being tested in the Sierra Nevada. Photo: Andrew MarshallApex guyline linelocs and peak vent at the ridgeline of a Tarptent Dipole Li. Photo: Ryan JordanEnd view of a Tarptent Dipole 2 Li showing the carbon fiber strut and vented window. Photo: Andrew MarshallApex guyline deployed on the Tarptent Dipole 2 Li. Photo: Andrew MarshallUsing the apex guyline and vestibule clip to extend the vestibule on the Tarptent Dipole 1 Li. Photo: Ryan JordanFour-stake setup of the Tarptent Dipole 2 Li – no apex guylines needed in mild weather. Photo: Andrew MarshallThe Tarptent Dipole 1 Li with no apex guylines deployed, and all doors rolled back. You need the ventilation when camping with a dog! Photo: Ryan JordanYKK #3 AquaGuard zippers on the canopy/fly. Photo: Andrew MarshallA Tarptent Dipole 2 Li shelter with the ends set up, prior to inserting the trekking poles. Photo: Tarptent.The end strut and guyline system adds volume and creates tension. Also shown here are the ladderloc buckle-and-strap end strut guyline attachment. Photo: Ryan JordanMagnetic door retainers are a common feature on all Tarptent Li shelters. Photo: Andrew MarshallWithout the apex guylines deployed, and following the setup instructions published in this article, a taut ridgeline is achievable with only four stakes. Shown here: the Tarptent Dipole 1 Li. Photo: Ryan Jordan.Deploying the apex guylines creates additional ridgeline tension and panel stability, shown here on the Tarptent Dipole 2 Li. Photo: Andrew MarshallSunset in the Tahoe Basin, Tarptent Dipole 2 Li. The apex guylines are not deployed. Note the slight sag in the ridgeline. This was my first pitch, and it was simply a result of not yet understanding how to perfect an effective 4-stake Dipole pitch – which didn’t take long. Photo: Andrew MarshallTarptent Dipole 1 Li in the mountains northwest of Rocky Mountain National Park. Apex and end guylines are deployed here for a storm pitch. Photo: Ryan JordanI (Andrew) am five feet six inches, so I almost always have headroom in tents. But the Tarptent Dipole 2 is roomy even by my short-man standards.The sil-poly panel on the inside of one of the end vents. Photo: Andrew MarshallOpening the end vent on one end of the Tarptent Dipole 2 Li. In the production model, the cord that the vent cover slides up and down on will be made of Dyneema Composite Fabric so as not to absorb water. Photo: Andrew Marshall.End vent on a Tarptent Dipole 1 Li. Even with a wide pad, there’s room to the sides of the pad at the head and foot ends of the tent to stash gear inside. Photo: Ryan JordanThe spacious interior of the Tarptent Dipole 2 Li. This space in this photo is slightly exaggerated due to the use of a wide-angle lens, but only slightly. Photo: Andrew Marshall.The Tarptent Dipole 2 Li is spacious for two persons. For one person, it’s a palace that can easily hold all of one’s gear for a long expedition AND a large dog, if necessary! Photo: Andrew MarshallThe vestibules are 17 inches (43 cm) deep and can be expanded with included guyline and hardware if needed – plenty of space to hold a large pack plus plenty of other wet gear. Photo: Andrew MarshallThis wide-angle lens view from the interior of the Tarptent Dipole 2 Li shows the house-shaped mesh door flanked by two triangular silpoly end panels. Photo: Andrew MarshallThere’s a condensation drain at each of the four corners of the bathtub floor. Photo: Andrew Marshall
Tarptent Dipole 1 Li and Dipole 2 Li design notes: an interview with Henry Shires
Ryan Jordan:Using the four-stake setup without apex guylines, I’m able to achieve pretty good stability the tighter the guylines are tightened. In our forest soils here, the six-inch stakes are not holding this level of tension on the Dipole 2 Li, so I’ve been using eight-inch stakes.
That said, I’m pulling [up to] 15-20 pounds of tension on each stake – that’s a lot. I can pull significantly less by using apex guylines, which is to be expected. But I wanted to get a feel for your expectation of stability with and without apex guylines in terms of use cases for wind speeds.
Henry Shires: Yes, agreed that six-inch stakes are marginal in loose soil, especially for the Dipole 2 Li and that eight-inch [stakes] are the way to go. In my/our testing the 4-stake setup (assuming the stakes hold) is fine for low to moderate winds but, yes, the apex/vestibule lines are needed in higher winds if only to take some of the stress directed at the low corners by broadside winds.
As with most/all tents, more stakes are better than fewer stakes, and, yes, for real weather in exposed places the Dipole will want six of them. However, for many/most cases, at least in sheltered areas, four will be fine and I personally really like not having to work around guylines getting in and out.
RJ: Can you give us some info on what is exactly being patented?
HS: We are moving to patent the combination of the ability to stand with four stakes – provided by the dual inset pole structure and relatively large (17-inch) displacement between the ground level corners and apex points – and the mid-end foldable struts which provide the large increase in both interior volume and structural support.
As you know we’ve done plenty of trekking pole tents with end strut designs including the long discontinued Saddle 2 but all had vestibules that required staking (or, if rolled back, apex guylines in lieu of) for lateral support.
The Aeon Li was the first one [that] allowed for full front rollback with no apex line needed (and we have a patent for that one) but to the best of our knowledge, the Dipole has never been done before. I know you’ve played around with the [Durston Gear] X-Mid and [Sierra Designs] High Route designs which, at first glance, appear to be a four-stake setup but the asymmetry proves otherwise and my goal with this one is a true 4-stake setup and practical use (in most cases).
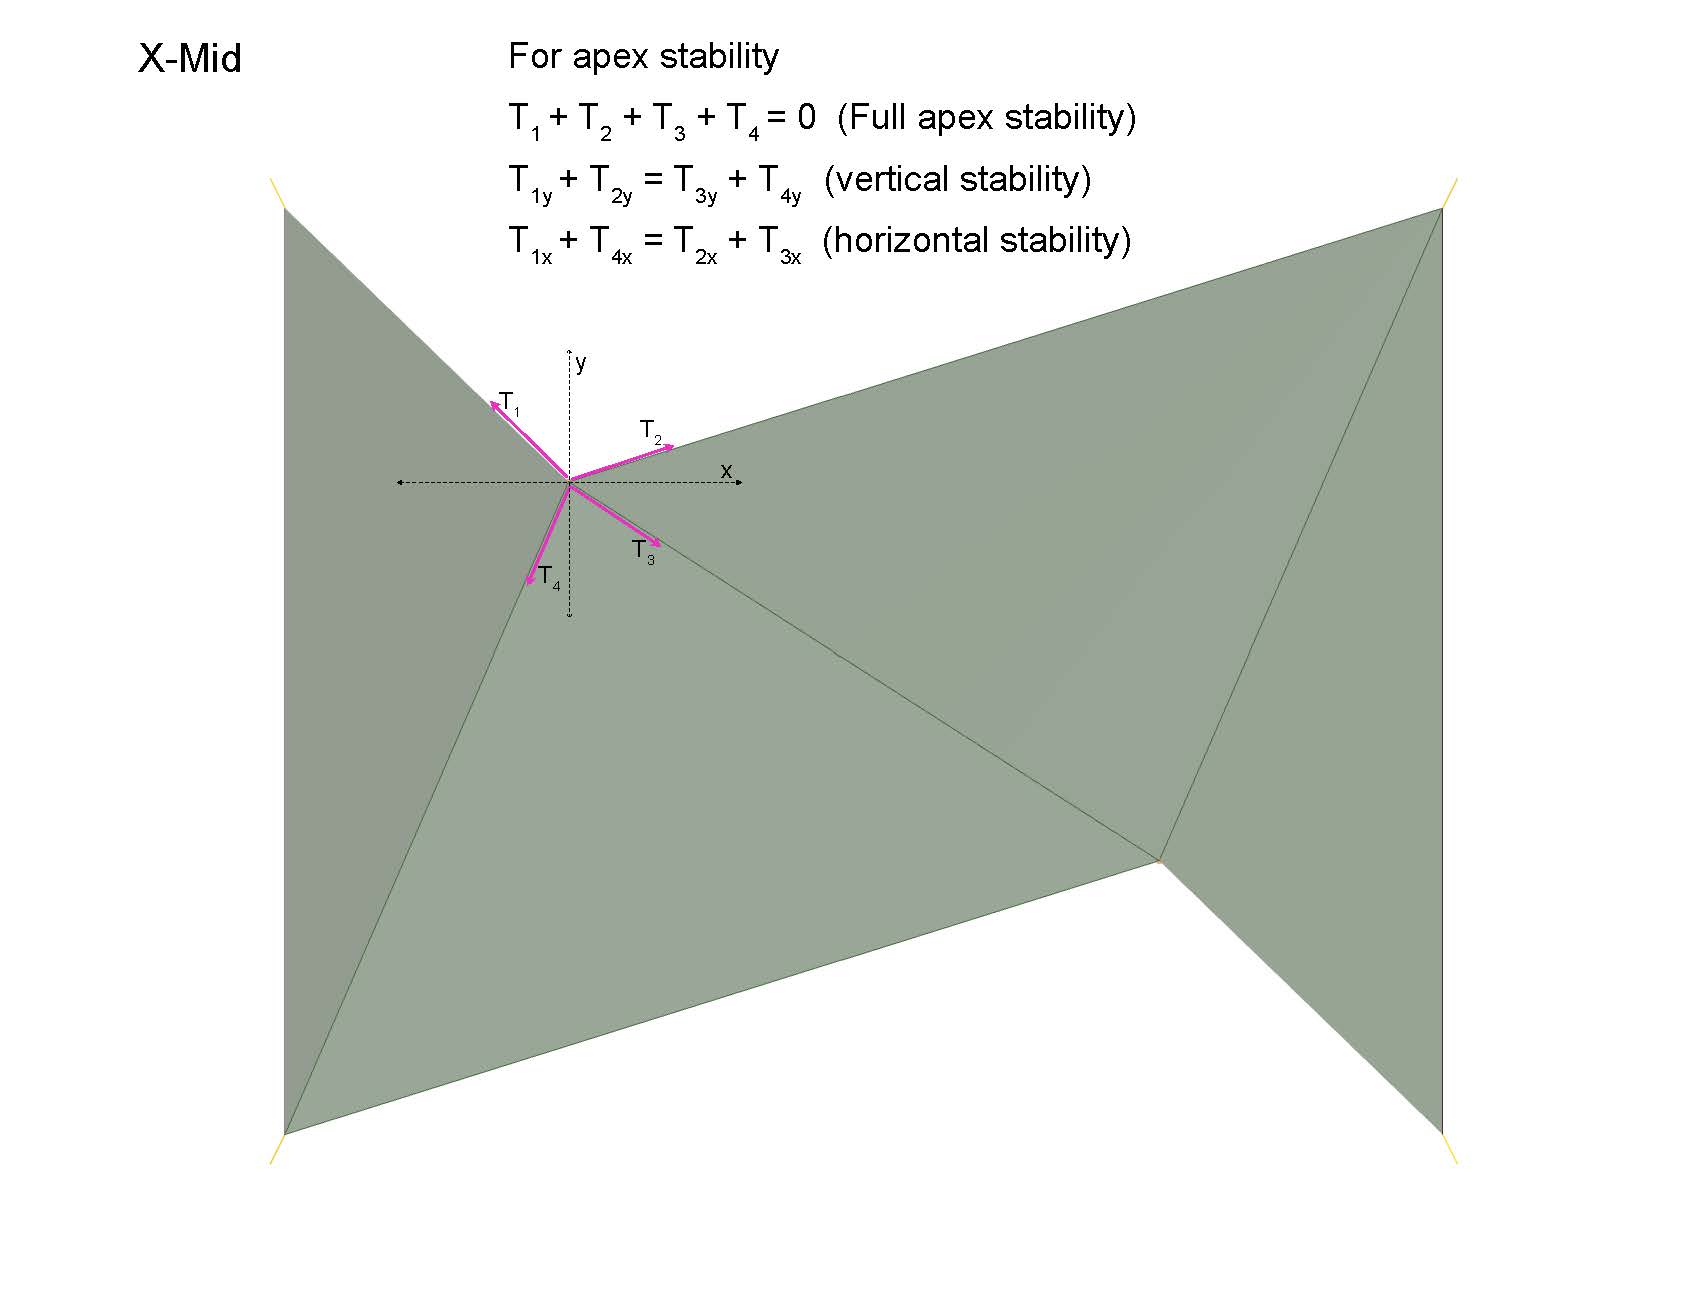
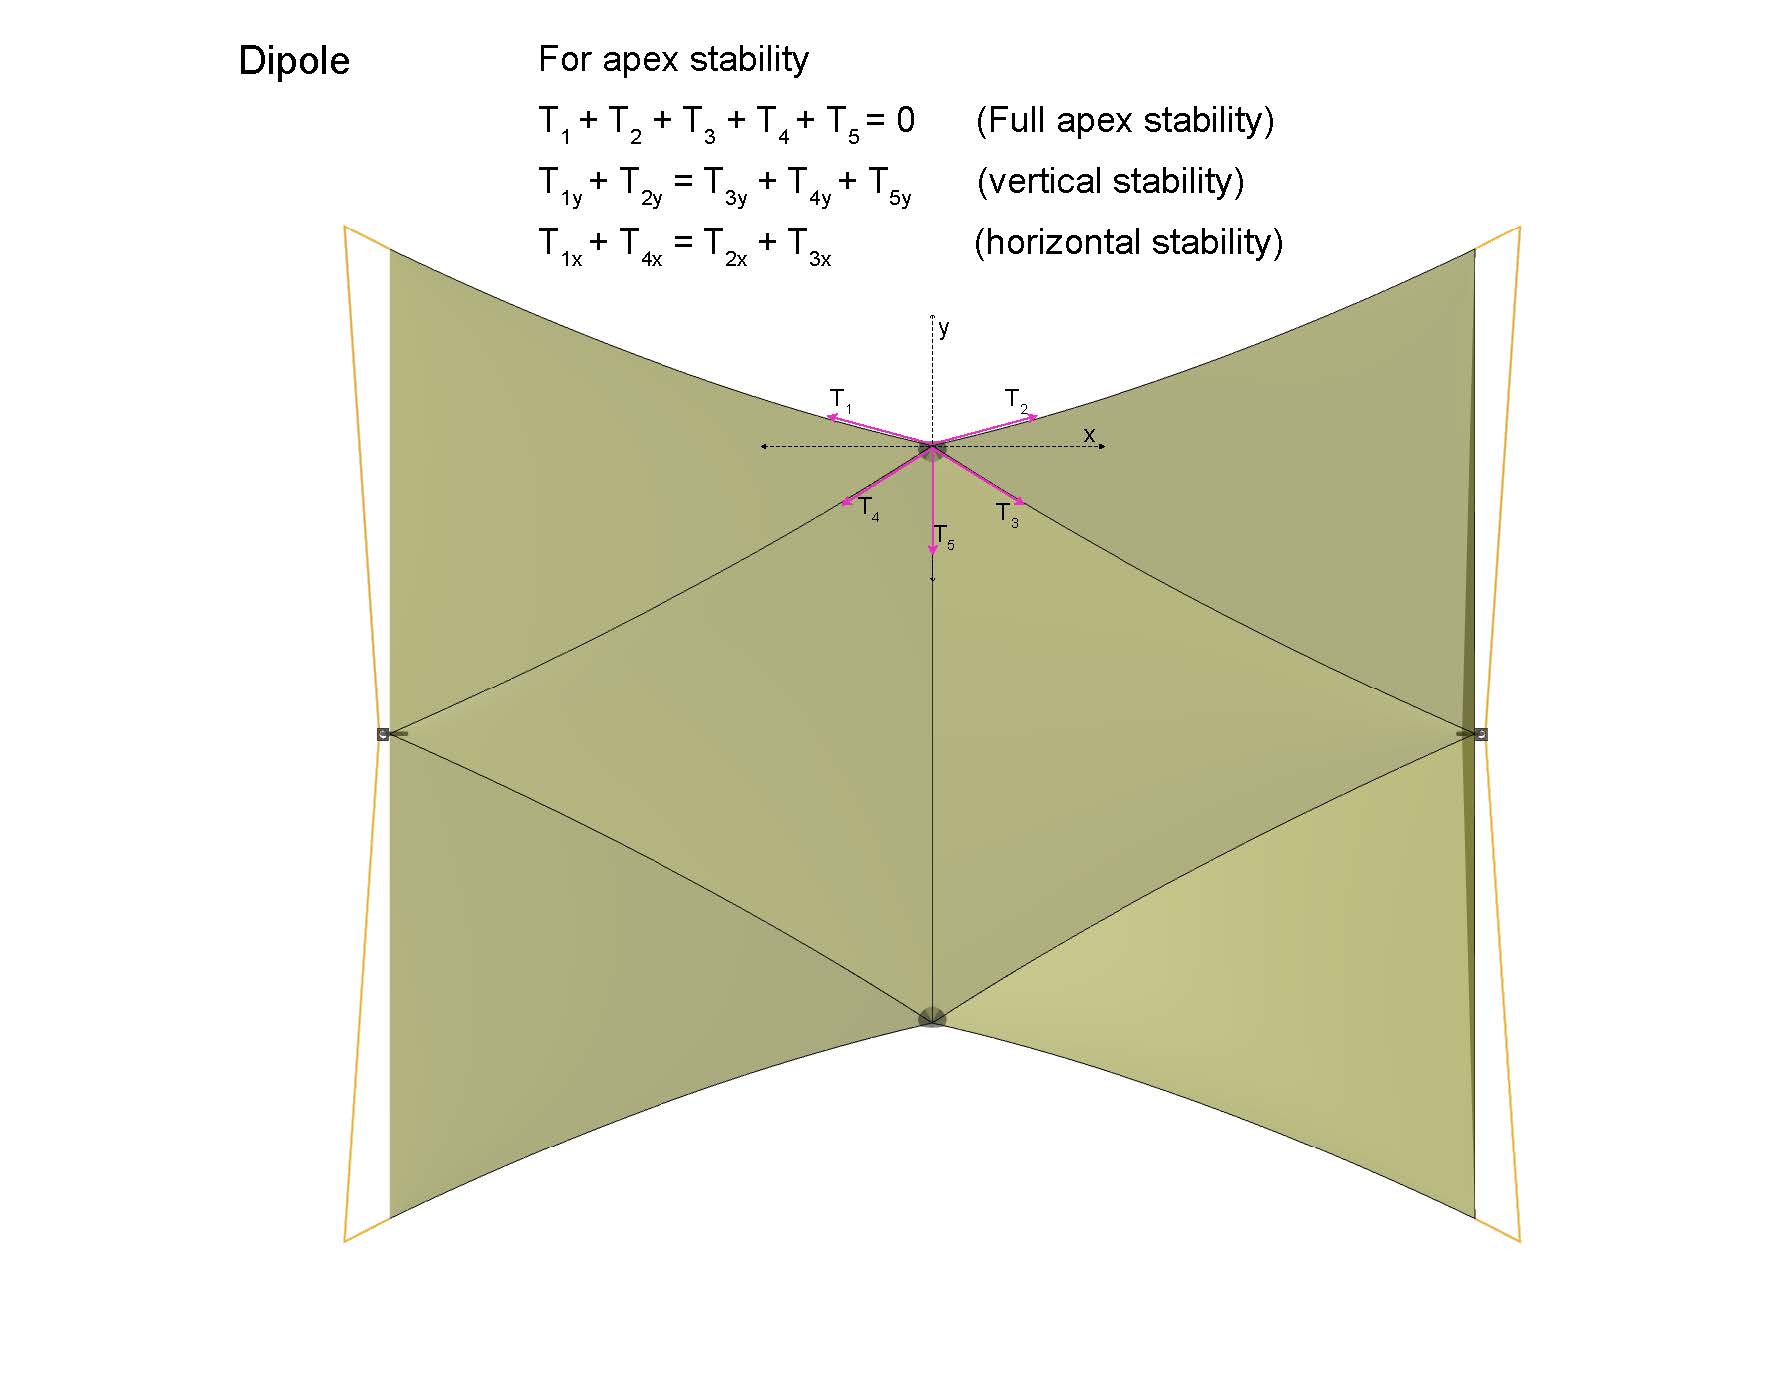
[Here are a] couple of graphics (below) showing the tension lines on the Dipole and X-Mid/High Route designs, both with full rolled back doors. Note that for stability what matters are the relative forces applied to apex points where the underlying vertical poles meet the canopy.
Unequal forces will cause some form of pole rotation and corresponding loss of fabric tension. I did not include a graphic of a simple four-sided square pyramid but that one would have four tension lines coming off the center apex pole and each would be at 90 degrees. For two pole tents, each pole has tension lines and at least one connecting tension line between them.
A graphic of the tension line and forces on the Durston Gear X-Mid Pro 2. Graphic: Henry Shires, Tarptent.A graphic of the tension line and forces on the Tarptent Dipole 1 or 2. Graphic: Henry Shires, Tarptent.
The inherent asymmetry of the offset poles in the X-Mid/High Route means there is no way to adjust the four corner tension points such that the sum of all the tension lines equals zero with the doors open in any sort of stable equilibrium. Inthe X-Mid graphic, note that all tension lines are at different angles and that the T3 tension line that runs between the two apex points is not independently addressable.
RJ: T3 is not independently controllable without apex guylines – and that makes the X-Mid a six-stake tent in all but a mild breeze.
HS: It is also the case that the long seam line carrying the T2 tension is a shallow angle and any deviations in the pole apex position aren’t resisted by corresponding changes in tension because that edge doesn’t need to stretch to accommodate the change.
RJ: There is notably different behavior in apex stability between the X-Mid and Dipole. On the X-Mid, T2y is indeed a very shallow angle. So it would seem intuitive to crank that T2 corner stake down hard, to bring more tension to T2y. However, the asymmetry causes an additional imbalance in all of the other tension lines because there are no directly opposite forces to T2y. It’s tricky and time-consuming in the field to sort this all out. Of course, the problem is sort of solved by just adding the apex guylines to the X-Mid.
HS: Adding an additional tension line (in the direction of the Y-axis as shown in the diagram) does inhibit an inward rotation and is the reason why the X-Mid is always shown that way.
In the Dipole, there is an additional inward tension line (T5). That line is resisted by the corner tension lines (T1 and T2) but is also addressable through the tensioning system at each mid-end strut which creates T3 and T4. The inherent symmetry of the Dipole – tension lines are equalized and at comparable angles – means that no additional apex tension lines are needed for low to moderate winds and doors can be fully rolled back.
RJ: I had the tent in a heavy thunderstorm yesterday and it otherwise stayed remarkably dry – the end vent construction is unique and effective. I like it. I was admittedly a bit nervous about not having an awning over these vents, but the inward-sloping struts kept rain from entering the tent.
HS: Yes, I too was nervous about that. Earlier versions of that system weren’t reliable but [Tarptent Design Engineer] Rob [Dunne] – thanks Rob – made that work well.
RJ: What’s at the heart of your design process for the Dipole series? What did you set out to accomplish?
HS: The pack and pad market [has] evolved over the years and we acknowledge the trend toward wider, thicker pads and narrower packs. The way we achieve [usable interior volume] on many of our tents is to deploy the PitchLoc structure. They are strong and effective but only foldable/packable down to 16 inches on the Notch and StratoSpire series and that length makes it hard to fit horizontally into many ultralight (i.e., skinny) packs.
To retain/enhance usable volume on the Dipole we moved to a foldable single strut structure that folds to 13 inches (and [is] easily detachable), a length much more viable for horizontal packing. The other goal for these was to enhance usable length and width such that both models would easily fit long wide, and thick pads – one in the Dipole 1 and two in the Dipole 2 – while still sleeping people at six feet eight inches or even taller. The completely vertical and relatively tall (21-inch) ends walls make that possible.
The other goals were a true four-stake setup and greatly enhanced venting – ends, sides, and apex venting.
Check this space for more notes and observations on the Tarptent Dipole 1 and 2 as we continue to field test these shelters over the coming months.
Learn More
Browse our curated recommendations in the Backpacking Light Gear Shop – a product research & discovery tool where you can find Member gear reviews, Gear Swap (used gear) listings, and more info about specific products recommended by our staff and members.
check out what our community thinks of the Zpacks Duplex
see what our community has to say about tent shopping in forum threads here and here
DISCLOSURE (Updated April 9, 2024)
Product mentions in this article are made by the author with no compensation in return. In addition, Backpacking Light does not accept compensation or donated/discounted products in exchange for product mentions or placements in editorial coverage.
Some (but not all) of the links in this review may be affiliate links. If you click on one of these links and visit one of our affiliate partners (usually a retailer site), and subsequently place an order with that retailer, we receive a commission on your entire order, which varies between 3% and 15% of the purchase price. Affiliate commissions represent less than 15% of Backpacking Light's gross revenue. More than 70% of our revenue comes from Membership Fees. So if you'd really like to support our work, don't buy gear you don't need - support our consumer advocacy work and become a Member instead.
Learn more about affiliate commissions, influencer marketing, and our consumer advocacy work by reading our article Stop wasting money on gear.
The Waymark Gear Lite 50L backpack features a unique shoulder-strap attachment system and several fit-related features that might appeal to larger users.
Andrew has a wide-ranging interview with gear designer Dan Durston about X-mids, shelter and pack design, and more.
Listen
Listen to the public version of this podcast episode on Itunes, Spotify, or wherever you get your podcasts.
Summary
In this episode, Andrew chats with gear designer and biologist Dan Durston. Dan is an accomplished backpacker and longtime Backpacking Light member. He went from gear enthusiast to gear tester to successful gear designer and small-business owner in a remarkably short time. His most recent shelter, the X-Mid Pro 2 (see our Durston X-Mid Pro 2 Review), is one of the buzziest ultralight shelters to hit the market in quite a while. All this despite the fact that Dan doesn’t have a background in engineering or design.
In this wide-ranging interview, Andrew and Dan talk about design philosophy, the difference between designing for shelters and packs, his journey from tester to designer, upcoming projects from Durston Gear, and more.
Outline
0:00:34 – new public vs. members only podcast format
0:01:38 – introduction; Who is Dan Durston?
0:02:44 – the story behind Durston Gear, hiking the Pacific Crest Trail, and a minimalist philosophy to tent design
0:06:54 – the process of bringing the first X-mid from design to production
0:11:47 – What makes an X-mid an X-mid?
0:12:56 – first principles design philosophy
0:14:56 – using polyester in a shelter design
0:16:56 – Dan’s shelter hierarchy of needs
0:21:00 – weight savings vs. usability
0:22:42 – talking backpacks with Dan
0:27:38 – Ultra fabric
— Members Only Begins here —
0:30:18 – the X-Mid Pro Series
0:35:42 – What is coming soon for Dan and his designs?
0:41:42 – How do your personal philosophies inform your design philosophy?
0:44:44 – company values and vision
0:50:01 – wearing multiple hats in the field
0:51:50 – podcast wrap up
Resources
Check out the articles Dan Durston has written at BPL here.
Johnathan Davis interviews Dan Durston as part of the Faces series in 2015.
Mark Wetherington recently wrote an article analyzing the Supply Chain economics of being a cottage manufacturer which includes discussion with Dan.
Curious to learn more about Dan’s thoughts on design, standards, and testing? Check out Rex Sander’s Standards Watch article written after a chat with Dan!
To peruse Durston Gear’s tents, backpack’s and more, check out their website!
Executive Producer - Backpacking Light; Show Director and Host - Ryan Jordan; Producer - Chase Jordan; Theme music: Look for Me in the Mountains written by Chris Cunningham and Ryan Jordan, performed by Chris Cunningham (acoustic guitar, lead and harmony vocals, harmonica), Chad Langford (upright bass), and Tom Murphy (mandolin), produced by Basecamp Studios in Bozeman, Montana.
Sponsorship Policy: Backpacking Light does not accept compensation or donated/discounted products in exchange for product mentions or placements in editorial coverage, including any podcast episode content not excplicitly identified as sponsored content. Some (but not all) of the links in these show notes may be affiliate links. Learn more about affiliate commissions, influencer marketing, and our consumer advocacy work by reading our article Stop wasting money on gear.
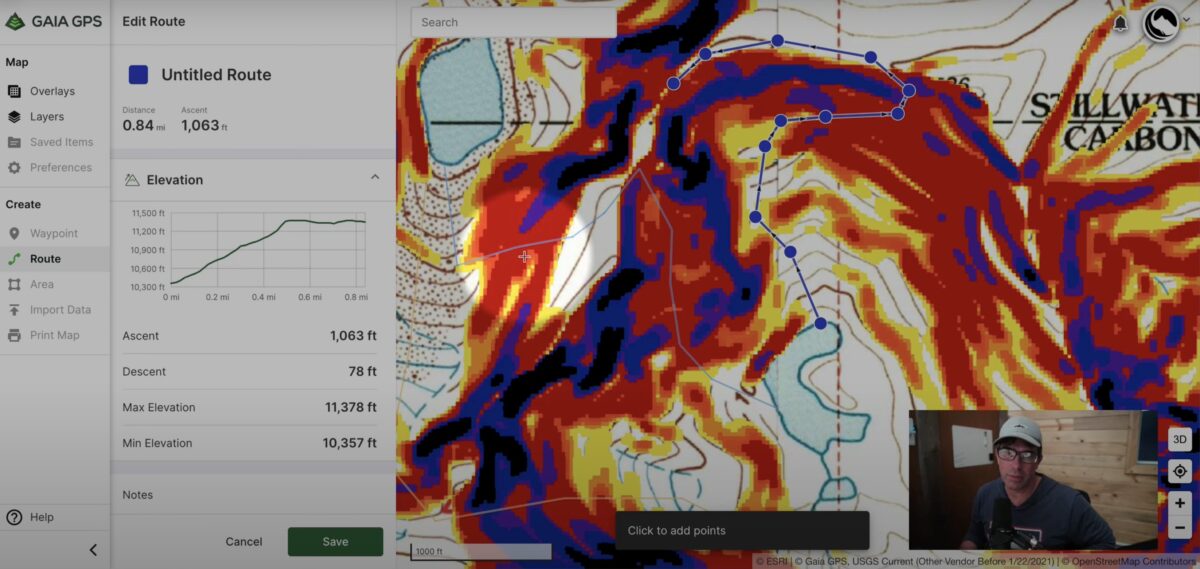
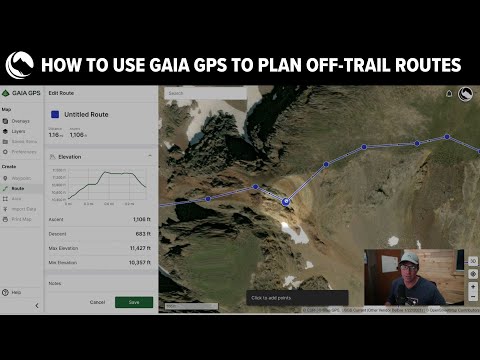
In this video, I walk through how I use slope angle overlays and satellite imagery to plan off-trail mountaineering routes, focusing on Gaia GPS as the digital mapping software.
Introduction
In this video, I walk through how I use slope angle overlays and satellite imagery to plan off-trail mountaineering routes. For the purpose of this demonstration, I’m using Gaia GPS, but the technique can be used with any mapping software that includes both slope angle overlays and aerial imagery map layers.
This is a summary of my process for using slope angle overlays and satellite imagery to plan off-trail mountaineering routes:
Draw possible routes between Point A and Point B using “paths of least resistance” using slope angle layers. Pay attention to routes less than 25 degrees in steepness to minimize scrambling and excessive exposure.
Turn on the satellite map layer and change the route points you created in Step 1 to avoid cliff bands, rock scrambles, steep snow, and other terrain that you may not be comfortable with.
Compare your route options in terms of distance and elevation gain (use the elevation profile feature). Evaluate the crux (most difficult) sections of each route. Evaluate the terrain of each route (e.g., tundra, talus, scree, bushwhacking). Pick the route that best meets your objectives – scenery, path of least resistance, etc.
Or see our entire online course offering and learn more about trek planning, satellite communications, backcountry food planning, and more.
What’s Your Process?
I’m always curious about how other backcountry adventurers plan off-trail routes with digital mapping software. Please share your process with me in the forums below!
DISCLOSURE (Updated April 9, 2024)
Backpacking Light does not accept compensation or donated/discounted products in exchange for product mentions or placements in editorial coverage.
Some (but not all) of the links in this review may be affiliate links. If you click on one of these links and visit one of our affiliate partners (usually a retailer site), and subsequently place an order with that retailer, we receive a commission on your entire order, which varies between 3% and 15% of the purchase price. Affiliate commissions represent less than 15% of Backpacking Light's gross revenue. More than 70% of our revenue comes from Membership Fees. So if you'd really like to support our work, don't buy gear you don't need - support our consumer advocacy work and become a Member instead.
Learn more about affiliate commissions, influencer marketing, and our consumer advocacy work by reading our article Stop wasting money on gear.
The Nitecore NB10000 is a simple portable battery charger built around a carbon-fiber platform for maximum weight savings.
Introduction
This Nitecore NB10000 review (5.3 oz / 150 g, MSRP $59.95) covers a lightweight entry into a crowded portable battery charger market. The Nitecore NB10000 features 10,000 mAh of nominal capacity at full charge, carbon fiber frame and panels, USB-A and USB-C outputs, a single multi-functional button, blue and white LED indicators, and pass-through charging capability.
The outstanding feature of this power bank is its high capacity-to-weight ratio. For a weight that is little more than that of a typical 5,000 mAh battery pack, you get twice the power. That’s an attractive proposition for any backpacker who carries electronics on multiday trips. I put the NB10000 through its paces at home and in the field to see if it delivers on its promise.
The Nitecore NB10000. Photo: Nitecore
This is a first look at new gear that recently entered our review pipeline, and hasn't yet been subjected to rigorous field use. Learn more about the types of product reviews we publish.
• 10,000 mAh at 3.85 V (38.5 Wh) nominal capacity
• 5.3 oz / 150 g
• 4.8 x 2.3 x 0.4 inches (12 x 5.8 x 1.0 cm)
• input: USB-C – 5 V @ 2.4 A (12 W) / 9 V @ 2 A (18W)
• output 1: USB-C – 5V @ 3 A (15 W) / 9 V @ 2 A (18 W) / 12 V @ 1.5 A (18 W)
• output 2: USB-A – 5 V @ 3 A (15 W ) / 9 V @ 2 A (18 W) / 12 V @ 1.5 A (18 W)
• carbon fiber frame and panels
• 3-level LED indicator for remaining power and charging status
• one-touch low current mode
• USB-A to USB-C cable included
• IPX5 rated (water resistant against sustained, low pressure water spray, dust protection not rated)
• operating temperature: 14 to 104 °F (-10 to 40 °C)
• storage temperature: -4 to 140 °F (-20 to 60 °C)
Testing context
I ordered the Nitecore NB10000 from Nitecore through Garage Grown Gear in February 2022. I performed quantitative testing at my home under typical indoor ambient conditions unless otherwise specified. I mostly followed the testing rubric described by Rex Sanders in BatteryBench: A Protocol for Testing Portable Battery Chargers and Electronic Devices for Backpacking. Rex’s fine article defines all the terms used here; if any are unfamiliar, please follow the link above.
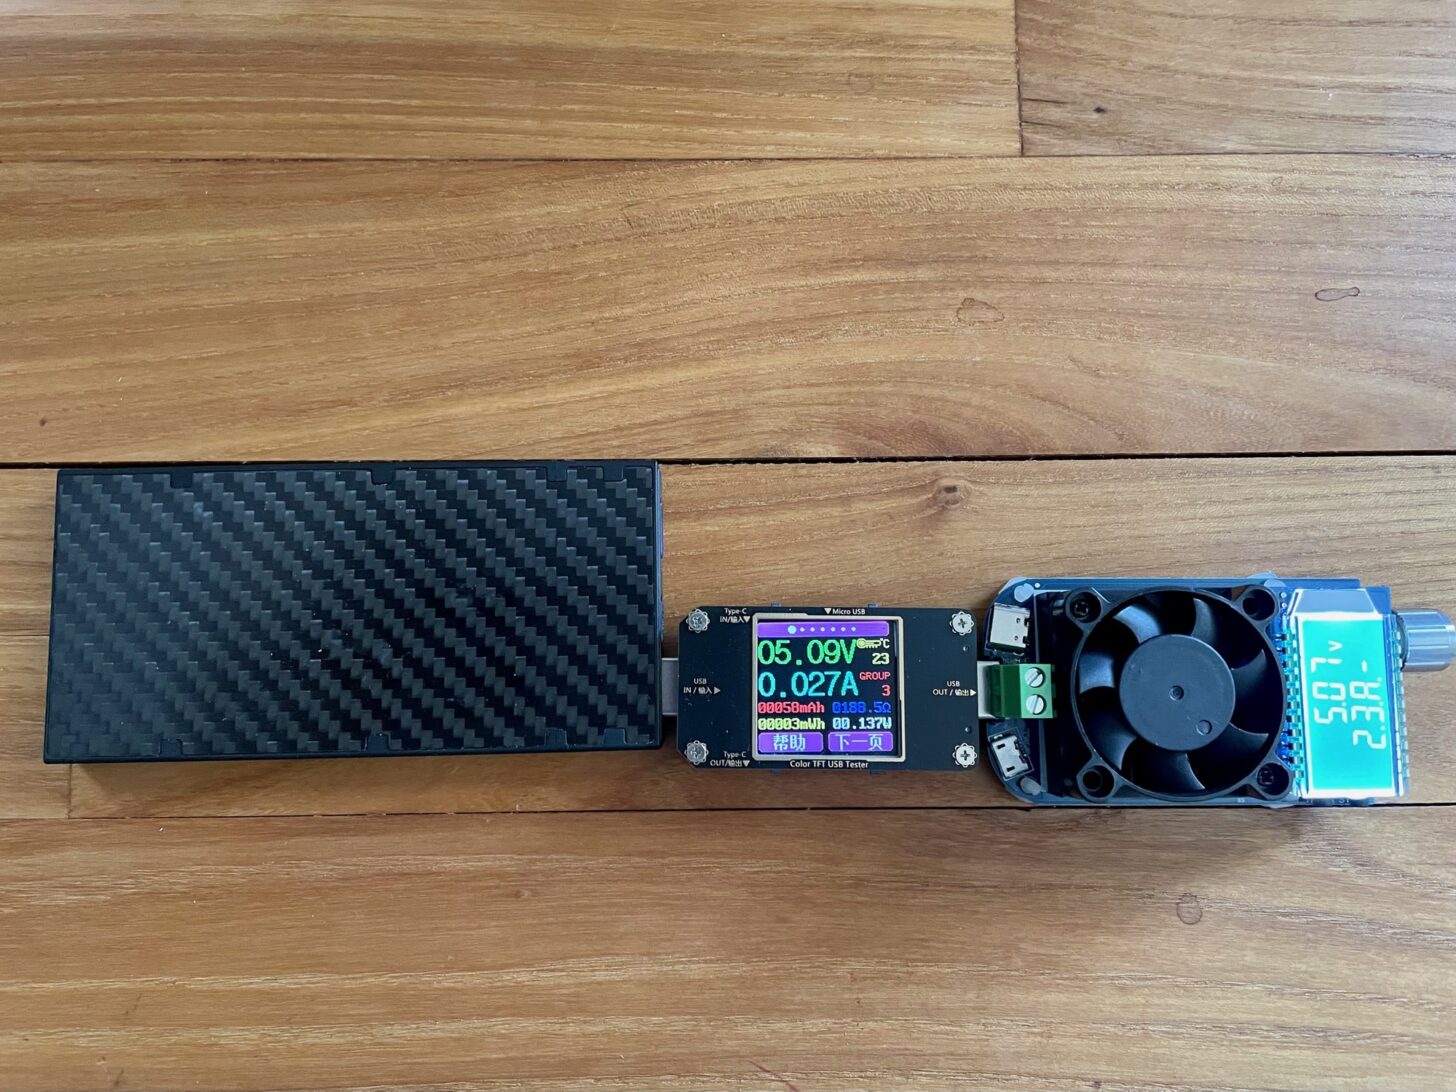
I ran tests using the MakerHawk model QC2.0/3.0/4.0 MTK USB multimeter. For a load tester, I used the UCTRONICS Electronic USB Load Tester. The multimeter looks much the same as the one Rex used, but I found that I could not power the meter independently of the current being tested. My measurements, therefore, include some loss due to the power needed to operate the meter. The LED screen shuts off after 30 seconds, so I expect the power loss at the meter is only a few percent. The result is that my measurements of power delivered are low by a few percent.
I drew heavily on the work of Rex Sanders to test the Nitecore NB10000.
For the energy loss measurements, I measured the power needed to fully recharge the phone, rather than the power remaining in the phone, as Rex did. My rationale is that when little power is lost, comparing small differences between large numbers is unreliable.
I also skipped the drop test, as I bought this item with my own money and didn’t want to risk breaking it, even in the name of science.
Editor’s Note: It’s worth mentioning that in yet-to-be-published research conducted by Rex Sanders, this product performed poorly in the drop test. Rex’s thoughts – “Good battery. Just don’t drop it.”
Field testing was performed on a week-long section hike of the Desert Trail between Halloran Summit on I-15 and Badwater in Death Valley, in March and April, 2022. Conditions were generally dry and windy, with temperatures of 35 to 100 °F (2 to 38 °C).
First impressions
Physical attributes and feature set
The Nitecore NB10000 is light. And small. Smaller than a typical phone. The measured size and weight agree with the manufacturer’s specs.
The Nitecore NB10000 is pretty much a small brick. Or maybe more a tile.
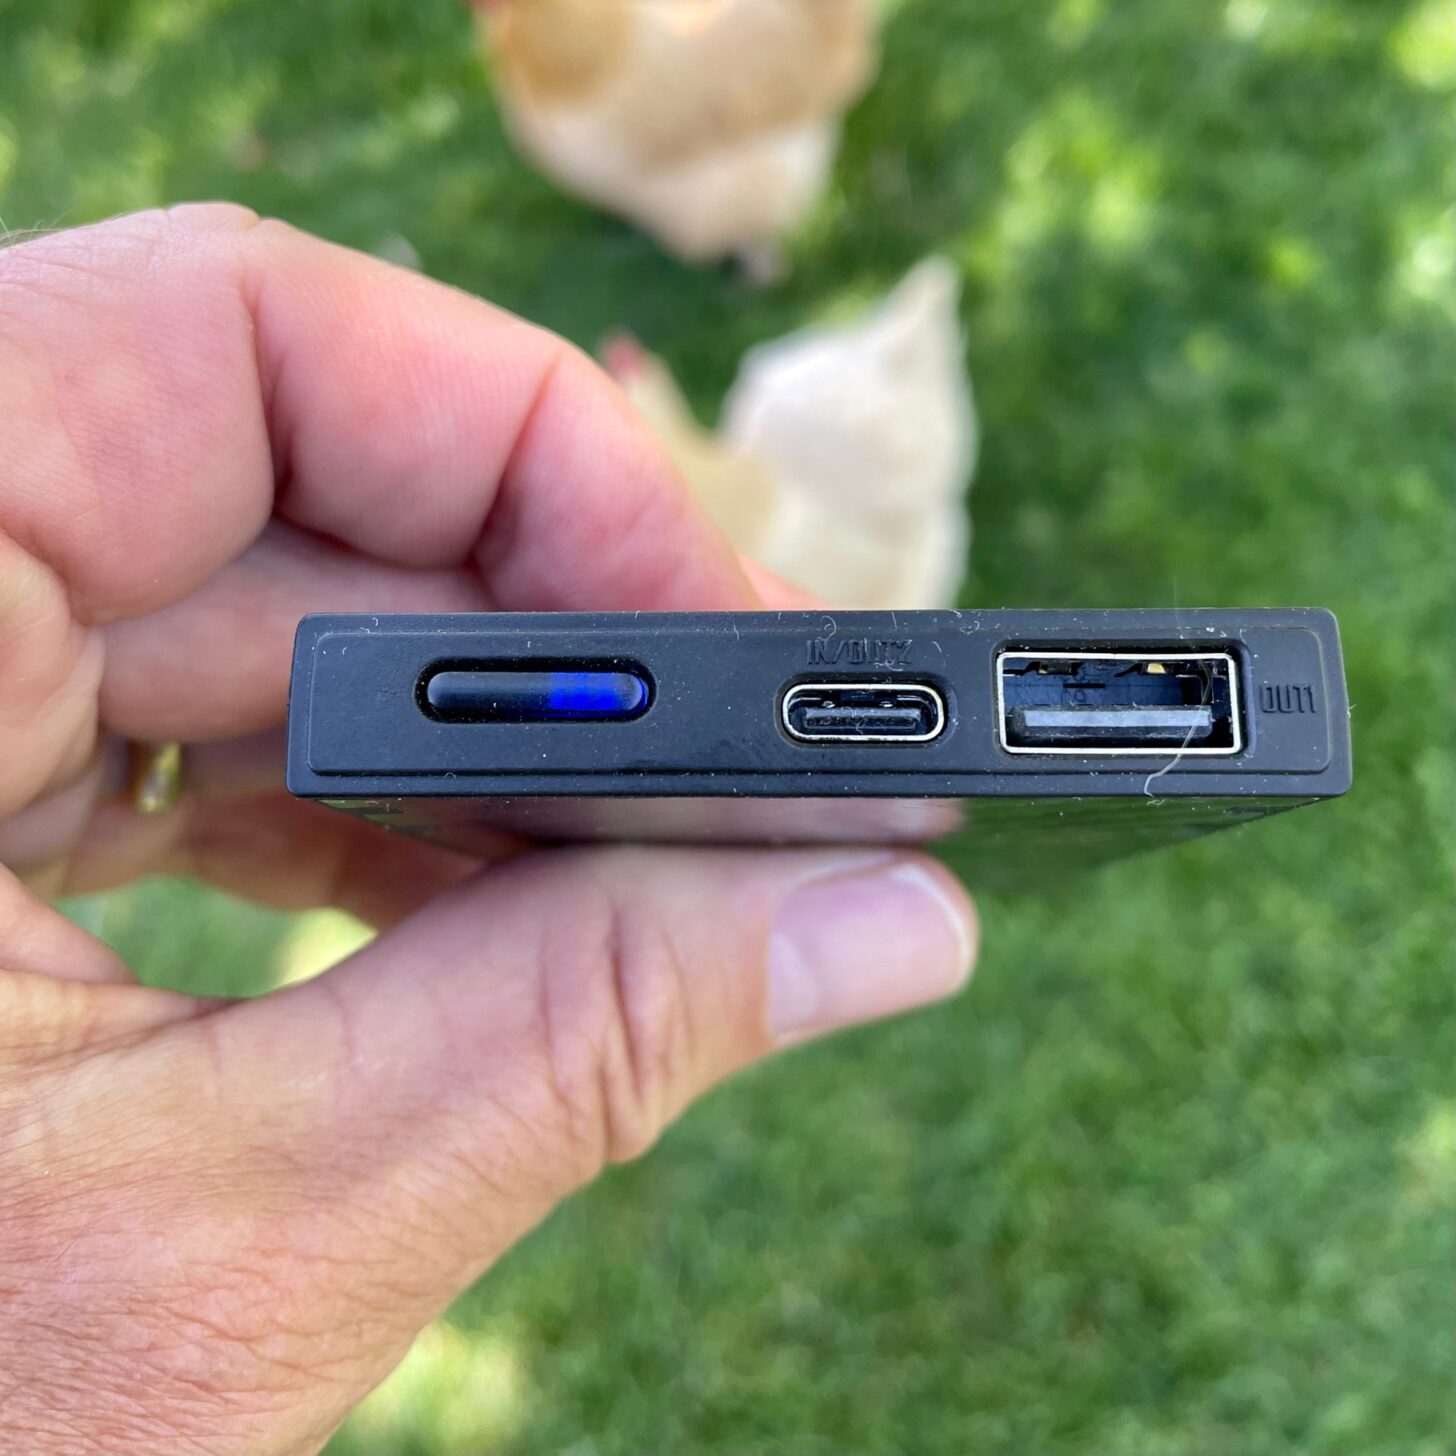
The design is minimalist. There are just the two ports and a level indicator panel that also serves as an on-off/change-mode switch. There is no flashlight or any other functionality. All corners are squared, not rounded or otherwise streamlined.
The power switch with 3 LEDs, and the USB-C and -A ports are all on one end of the Nitecore NB10000.
Construction and quality
The carbon-fiber panels are pressed onto the carbon-fiber frame, aligned and held in place by four tabs on each edge. The fit of the panels is tight and even, but not invisible. The ports feel stable and solid when plugging and unplugging cables. The power button feels solid when pressing it. I own one other Nitecore product, a USB-rechargeable headlamp, and it has functioned flawlessly for several years now. This battery pack appears to be made to the same level of quality.
In the Forums: See what the Backpacking Light community has to say about batteries and electronics.
getting the most delivered energy for the least weight,
and recharge time.
Delivered Energy– This is the amount of power that a battery pack can actually deliver to your small devices. I measured the output of the Nitecore at 29.6 Wh (@ 5 V x 3 A) or 5920 mAh. You’ll note that this is about 60% of the capacity specification. Capacity is how much energy is in the battery. Delivered energy is how much energy actually is available to the device being charged.
The difference between capacity and delivered energy is the amount of energy lost as heat due to resistance in the battery pack, the charging cables, and the battery of the small device being charged.
As with all thermodynamic processes, speed is the enemy of efficiency. When I turned down the load to 2A, the delivered energy increased to 32.9 Wh, or 6600 mAh, an 11% increase.
So how many phone charges will the Nitecore deliver? Most modern phones have battery capacities of 10 – 15 Wh. You can therefore expect 2 – 3 phone charges from the Nitecore NB10000.
Between navigation, photos, journaling, and reading, I typically use 30-40% of a charge on my iPhone 12 (11 Wh capacity, so 3-4 Wh/day) per trail day. Starting with a fully-charged phone, I should be able to go 12 days with the Nitecore NB10000. Throw in charging of other electronics (headlamp, earphones, camera, Garmin inReach Mini, portable vaporizer), and 9 to 10 days between charges is a reasonable expectation. Your mileage will vary.
Recharge Time – The other key battery pack metric for hikers is how long it takes for a recharge. Nobody wants to hang around a campground bathroom for hours while charging a battery. Starting with the Nitecore completely depleted, I found it took 3 hours to fully recharge via USB-C (using a USB-C to USB-C cord) and 4 hours, 10 minutes to recharge via the supplied USB-A to USB-C cord (the Nitecore can only recharge via its USB-C port). Given that charging slows down as the battery nears capacity, you can expect an 80-90% charge in 2+ hours. That’s a reasonable time for a midday nap or for nursing a beer at a trail town bar.
The peripherals
Other factors beyond delivered energy and recharge time are worth considering.
Cold Delivered Energy – Electrons are harder to knock loose at cold temperatures, thus increasing resistance and reducing battery efficiency. I let the Nitecore cool down in my beer cooler (48 °F / 7 °C, don’t judge me) for an hour, then discharged it at 5 V x 3 A. The battery delivered 28.2 Wh in the cold, about 95% of the power delivered at room temperature.
Cold Storage Loss – I charged the battery and held it in the beer cooler for 4 days. I then measured the power needed to bring it back to a full charge. The power needed was 0.28 Wh, about 1% of total capacity.
Low-power Overnight – This test measures how much energy you waste leaving your low-capacity device (Bluetooth earbuds in this case) plugged in and charging overnight. I fully charged the battery and the earbuds, connected the earbuds to the charger via USB-A and left them connected for about 9 hours. In the morning, I measured how much power was needed to recharge the battery fully. The amount was nominal, 0.16 Wh, about 0.5% of the battery’s charge. Very little energy was lost by leaving the earbuds connected overnight.
Smartphone Overnight – Same thing as the low-power overnight, except with my iPhone 12 connected via the USB-C port, rather than USB-A as with the earbuds.
To my great surprise, I needed 6.6 Wh to recharge the battery, about 22% of the total deliverable energy. I was pretty sure I had done something wrong and repeated the test. This time I needed 7.0 Wh to recharge.
I repeated the test again, now connecting the NB10000 to the phone via the USB-A port. I got the same result: 7 Wh were needed to recharge. I conclude that the vampire energy loss is not a port issue.
It could be an iPhone issue. I don’t have any non-Apple phones around the house, so I repeated the overnight test with the Nitecore connected to a fully-charged Anker E1 5200 battery. The result was somewhat intermediate: 1.5Wh (about 5% of total deliverable energy) was lost.
The conclusion here is that you cannot count on the Nitecore to shut itself off when the device it is charging is fully charged. Plugging in your phone at bedtime and leaving it charging all night could end up wasting considerable battery power.
The vampire energy loss described here matches Rex Sanders’ results in his work studying portable battery chargers. Rex and the Backpacking Light team discuss this at length in this podcast episode.
USB-A Power – Maximum power was 18.1 W (5.10 V x 3.55A) when the load tester was connected directly to the battery. When connected through USB-A, it yielded 17.3 W (4.75 V x 3.64 A). The minimum power level was 0.13W @ 5V. This value was the same in both normal-power and low-power modes.
USB-C Power – Maximum power was 21 W (8.5 V x 2.5 A). The minimum power level was 0.13W @ 5V. This value was the same in both normal-power and low-power modes.
Low-power mode – The NB10000 has a low-power mode for charging small items like smartwatches and earbuds. This mode is activated by pressing and holding the power/indicator button for 5 seconds. When I connected it to my earbuds, it charged them at 5 V x 0.6 A (3 W). But when I returned the battery to normal power mode, it charged at exactly the same voltage and current. It is not clear to me what low-power mode actually does, if anything.
Capacity – This is the amount of energy needed to fully charge the battery: 44.5 Wh (@ 5 V x 2.65 A).
Field Testing
I took the Nitecore NB10000 on an 8-day, roughly 100-mile cross-country hike through the Mojave Desert. There were the usual extremes of cold and heat and of course, lots of wind. I had to slide my pack (Seek Outside Divide 4500, reviewed here) down several canyon dryfalls, and it took a few lumps doing so.
But I keep my electronics, including the Nitecore NB10000 (but excluding my phone, camera, and InReach Mini), in a Dyneema Composite Fabric zip bag. The bag is in my pack while I am walking and only comes out while I’m in camp. So while the environmental conditions of this hike were pretty harsh on me, they were fairly gentle on the NB10000.
I recharged my phone every night to 80-90% capacity, and the InReach Mini and my camera once. I zeroed in Shoshone on day 5, where I recharged everything at the RV park (which I highly recommend if you are hiking the Desert Trail), so I didn’t really put the battery’s capacity to the test.
In short, the NB10000 performed as expected in the field. I didn’t test it in environmental extremes involving extreme cold or moisture.
Final thoughts
The Nitecore NB10000 is a step ahead of the competition when it comes to providing maximum power for minimum weight: 30 Wh/5.3 oz = 5.8 Wh/oz (0.2 Wh/g). It replaces an Anker E1 5200 in my kit. The Anker (now about 7 years old) provides 15.2 Wh of delivered energy and weighs 4.3 oz (122 g). That works out to 3.5 Wh/oz (0.12 Wh/g), about 60% of power per unit weight. A current comparison would be the Anker PowerCore 10000, which has the same nominal capacity specs and weighs 6.3 oz (180 g). It costs half of what the Nitecore does.
In addition to being lightweight, the Nitecore NB10000 seems solidly built with a simple design for operation. In my field tests, it stood up perfectly well to higher-than-average jostling within my pack, but did not perform well in a drop test Rex Sanders conducted on an identical unit.
When left plugged in after it has finished charging a device, it will continue to bleed power, and the amount of power loss can be substantial. This is an issue with all the portable battery chargers we’ve tested at Backpacking Light, particularly when charging phones.
In summary, the Nitecore NB10000 is a solid choice for powering your small devices in the backcountry at a minimum weight penalty – even if that minimum weight penalty comes at an increased cost.
Learn More
Browse our curated recommendations in the Backpacking Light Gear Shop – a product research & discovery tool where you can find Member gear reviews, Gear Swap (used gear) listings, and more info about specific products recommended by our staff and members.
Product mentions in this article are made by the author with no compensation in return. In addition, Backpacking Light does not accept compensation or donated/discounted products in exchange for product mentions or placements in editorial coverage.
Some (but not all) of the links in this review may be affiliate links. If you click on one of these links and visit one of our affiliate partners (usually a retailer site), and subsequently place an order with that retailer, we receive a commission on your entire order, which varies between 3% and 15% of the purchase price. Affiliate commissions represent less than 15% of Backpacking Light's gross revenue. More than 70% of our revenue comes from Membership Fees. So if you'd really like to support our work, don't buy gear you don't need - support our consumer advocacy work and become a Member instead.
Learn more about affiliate commissions, influencer marketing, and our consumer advocacy work by reading our article Stop wasting money on gear.
Further reflections on short trips vs. thru-hiking.
I spend a lot of time thinking about my relationship with the outdoors. And a significant chunk of that thinking is about backpacking as it relates to, well, time. Setting aside the time to backpack, recognizing that there is a finite lifetime in which to backpack and that obligations and unforeseen circumstances will inevitably limit that time even further.
National Scenic Trails are outstanding ways to traverse public lands and experience breathtaking landscapes. But they can also contribute to tunnel vision and a more linear and less exploratory hiking experience.
As I described in my essay The Backpacking Tithe Project, I’ve spent well over a year of my life on backpacking trips. But the time has all come piecemeal. I’ve yet to undertake any trips longer than six days. I have never intentionally done any section hiking on long-distance trails. Yes, I’ve been on parts of the Pacific Crest Trail, the Pacific Northwest Trail, the Continental Divide Trail, and the Appalachian Trail. But only because they were overlaid on other routes I was exploring.
I stepped on these famous paths without any intentionality applied to the experience of being on a long-distance trail.
I took pride in knowing that I was traveling near and deep, rather than far and wide. I was piecing together an understanding of how best to travel in and experience the public lands whose peaks I could see from my yard. I felt a bit of insider satisfaction at knowing where the best campsites were, which lakes had the best fishing, and which couloirs weren’t as sketchy as they looked. Intimate knowledge of my immediate landscape allowed me to piece together safe trips that looked unreasonably difficult on paper. This focus on exploration over mile-making has served me well and enriched my experience immeasurably.
Article Library Resources – Read more Backpacking Light articles by Mark Wetherington:
For instance, I timed my trips for peak wildflowers, foliage, or other conditions. I became intimately acquainted with the landscape near my home. Once a year, I also tried to get to some bigger-name destinations – like Glacier or Yellowstone National Parks. And I had some absolutely exceptional trips with friends that we could only pull off because of the location scouting I’d done on prior solo trips.
There is so much to see just a half-mile or so off any trail. I know I’d have difficulty staying focused on a long-distance trail when I’ve seen how many amazing places are just a few steps from the dotted line.
This incredible waterfall is barely more than a mile or so from the Pacific Northwest Trail, but unless you were detouring to stay at the nearby campsite, it probably wouldn’t make it on any PNT thru-hikers itinerary.
But I did have a bit of anxiety about whether I was missing out by not prioritizing a multi-week thru-hike. There is a level of immersion that comes with long periods in the woods.
On the other hand, I noticed that some of my friends who’d completed long-distance trails were less-than-excited about overnights or short multi-night trips.
This lovely basin isn’t on a National Scenic Trail, or any trail at all for that matter, but being able to visit it at its aesthetic peak is something I’ve made a priority the last few years. And discovering other off-trail places of exquisite beauty has been an exciting way to spend the off-season.
Some of my thru-hiking friends hadn’t undertaken an overnight trip in years. It seems like long-distance hiking had merely been a post-college phase. For others, it was an all-or-nothing attitude where if it wasn’t some big adventure, they had little interest in pursuing it.
These anecdotes seemed to indicate that some people have chosen an all-encompassing, identity-heavy, short-term approach to backpacking. In contrast, I seemed to have gone with the small-scale but consistent option.
A short, steep trail climbs to the Columbia Mountain Lookout from the Pacific Northwest Trail in eastern Washington’s Kettle Mountains. This historic lookout was a unique place to spend the night, but I doubt I would’ve gone out of my way to hike up to it if I was hiking the PNT. Photo credit: Mark WetheringtonAccessed by a short spur trail from the Appalachian Trail, the Mt. Cammerer Lookout provides a terrific vista of the southern Appalachian Mountains and Great Smoky Mountains National Park. If set on making miles for the day, it would be easy to convince yourself to skip this delightful detour.
In the Forums: browse these Backpacking Light forum posts about thru-hiking
I certainly don’t intend to advocate one option as better or worse. Still, there are differences and distinctions between the two approaches worth considering. The reasons for choosing one or the other – if it is even a choice, as financial and familial pressure can narrow options to nearly nothing – vary greatly from hiker to hiker. But reconsidering one’s patterns and habits, whether regarding gear, diet, route planning, or anything else, can be useful even if you come full circle.
While I don’t think I’ll be quitting my job and becoming full-on hiker trash any time soon, I had an interesting conversation last summer with a Backpacking Light member who’d read my backpacking tithe essay. He stopped by my house while on a road trip, and we enjoyed wide-ranging conversations about backpacking, Gary Snyder, fly fishing, Honda Elements, and life in general. He’d hiked the John Muir Trail through the Sierra decades ago. While he appreciated my perspective regarding the backpacking tithe, he urged me to try and prioritize experiencing a weeks-long trek for myself.
He described the experience in a way that really clicked for me as being a different experience than my usual backpacking. Not just a longer experience, but a fundamentally unique one that isn’t comparable to the pattern I’d adopted. I found the idea of getting all 37 nights of my backpacking tithe accomplished in one fell swoop to be more compelling than I’d anticipated.
After some self-reflection and conversations with other hikers, I’m exploring the idea of committing to a Colorado Trail thru-hike next year. Or the year after. Or maybe the year after that.
I keep thinking about his advice – to embark on a weeks-long hike at least once in my life – and am seriously considering making it happen sooner rather than later. There’s a Colorado Trail guidebook within arm’s reach as I type this. In terms of length and logistics – not to mention scenery – it seems like a good fit for me. I’m thinking about committing to planning and perhaps even hiking it next summer.
In the meantime, I’ll keep making the most of the public lands in my backyard, secure in the knowledge that however one enjoys the outdoors, the rewards are always worth it.
Do you prefer fewer – but longer and more immerseive – wilderness expereinces? Or do you lean in the direction of frequency over distance? Share your experiences in the comments!
Backpacking Light does not accept compensation or donated/discounted products in exchange for product mentions or placements in editorial coverage.
Some (but not all) of the links in this review may be affiliate links. If you click on one of these links and visit one of our affiliate partners (usually a retailer site), and subsequently place an order with that retailer, we receive a commission on your entire order, which varies between 3% and 15% of the purchase price. Affiliate commissions represent less than 15% of Backpacking Light's gross revenue. More than 70% of our revenue comes from Membership Fees. So if you'd really like to support our work, don't buy gear you don't need - support our consumer advocacy work and become a Member instead.
Learn more about affiliate commissions, influencer marketing, and our consumer advocacy work by reading our article Stop wasting money on gear.
Learning how to use the Garmin inReach Mini (or Mini 2) satellite communicator without a smartphone opens up opportunities for overall battery management and more efficient messaging, navigation, and tracking.
Learning how to use the Garmin inReach Mini without a smartphone is an essential skill to learn for device owners.
A smartphone paired to a Garmin inReach Mini satellite communicator certainly enhances the experience of using the device. It’s easier to type a message on a smartphone keyboard than on the Mini “keyboard” (sic). In addition, using a smartphone paired to the inReach Mini provides a more robust mapping-navigation experience, since the inReach Mini is not a mapping GPS unit.
However, as I wrote in this week’s Founder’s Journal:
“My phone generally stays off throughout the day unless I need to send a message (which I rarely do while hiking) or I need to consult digital maps on the Gaia GPS app on off-trail routes. I still like a small paper map and a real camera. There’s tactile satisfaction at using a paper map and a camera for photography rather than using a smartphone.
And this brings me to the main point of today’s letter – why I choose to use a Garmin inReach Mini 2 vs. a sat-connected brick like the Zoleo or BivyStick.”
from the May 19, 2022 issue of the Founder’s Journal, an email newsletter written by Backpacking Light owner/founder Ryan Jordan sent 1-2x per month to Backpacking Light email newsletter subscribers.
In the video below, I highlight some of the ways I use the Garmin inReach Mini 2 as a standalone device during the day if and when I’m not using my smartphone (e.g., while hiking on trails where I don’t need to refer to my mapping app very often).
These are the features I regularly use when my smartphone is off and packed away and not paired with my Garmin inReach Mini 2:
marking waypoints
sending preset messages
monitoring and reading incoming messages
using the digital compass
requesting and reviewing incoming weather updates
determining location coordinates (I pair this info with my paper map)
Do you keep your smartphone on during the day while hiking? Why or why not?
For Garmin inReach Mini or Mini 2 users: are there other functions you use in addition to the ones outlined above that you use regularly when your inReach is not paired to your smartphone?
Executive Producer - Backpacking Light; Show Director and Host - Ryan Jordan; Producer - Chase Jordan; Theme music: Look for Me in the Mountains written by Chris Cunningham and Ryan Jordan, performed by Chris Cunningham (acoustic guitar, lead and harmony vocals, harmonica), Chad Langford (upright bass), and Tom Murphy (mandolin), produced by Basecamp Studios in Bozeman, Montana.
Sponsorship Policy: Backpacking Light does not accept compensation or donated/discounted products in exchange for product mentions or placements in editorial coverage, including any podcast episode content not excplicitly identified as sponsored content. Some (but not all) of the links in these show notes may be affiliate links. Learn more about affiliate commissions, influencer marketing, and our consumer advocacy work by reading our article Stop wasting money on gear.
Cottage backpacking gear makers face supply chain and logistical challenges but find fulfillment in other aspects of their operations.
Introduction
The ripple effects of the pandemic made everything from toilet paper to bicycles hard to find. Consumers quickly gained a cursory understanding of the entangled and interdependent factors that get materials from Point A to Point B. After two years, many of the day-to-day inconveniences connected with the pandemic disruption related to the supply chain have faded or reduced in frequency, at least on a superficial level. But smaller manufacturers in the backpacking industry are still feeling the disruptions in ways both subtle and severe, and more challenges are on the horizon.
Ultralight backpackers have long accepted a delay of several weeks to months between ordering and shipping as standard practice in the cottage industry. But the price of Dyneema Composite Fabric (DCF) tents and shelters rose sharply as the fabric itself became more expensive and difficult for cottage manufacturers to obtain. Even backpackers who didn’t need to purchase any new gear encountered issues with purchasing some consumables, like the typical gas canisters used with lightweight backpacking stoves. Some stores – even major chains like REI Co-op – were out entirely or only offered limited options.
Stove fuel is one of the items that became hard to find during the height of the pandemic – even at large stores like REI Co-op. Photo: Ryan Jordan
The pandemic also impacted warranty services, as replacement parts were subject to supply chain issues. On top of that, some warranty shops faced staffing issues as people were either sick or had decamped for greener pastures. Items I sent to Arc’teryx and Cascade Designs for warranty claims in 2020 and 2021 took several weeks longer to be processed than I had previously experienced. I had casual phone conversations with two warranty employees during the return process. Both described challenging conditions at their respective facilities regarding having staff on hand to open, evaluate, and ultimately resolve the warranty claims.
Posts across social media over the last two years, including the BPL forums, frequently discussed longer lead times for custom or limited-run pieces of gear. Posters also noted backorder and out-of-stock notices becoming increasingly common even among mainstream brands and at stores with significant market share and purchasing power.
These complaints come on top of concerns and discussions that predated the pandemic but have increased considerably since March 2020. Most of these discussions revolve around the increasing popularity of backpacking and hiking. Our sport’s pandemic-driven newfound popularity has resulted in new challenges. There are overuse impacts on trails and dispersed camping areas, permit and quota implementation difficulties in wilderness areas, and higher trail-use densities on public lands. All these issues can result in a degraded user experience.
But the ability to adapt to changing conditions is a crucial skill for backpacking. In many ways, it has proven crucial to the success of the smaller companies that are making backpacking gear.
This article is based on interviews with makers from several corners of the backpacking world. It will examine the highs, lows, current concerns, and unique challenges of the ultralight gear cottage industry.
From Our Archives: Listen to our ongoing podcast series where we interview cottage industry makers.
Most backpackers have a practical appreciation for the quality of the high-tech fabrics used in ultralight backpacks and shelters. Such fabrics protect us from the elements and haul our gear around. And they do so for hundreds of days and thousands of miles without meaningful decreases in their performance. But most of us fail to fully consider the international production and distribution process, with many literal moving parts and production timelines involved. The changes to Dyneema Composite Fabric (DCF) pricing and production have been the most noticeable.
The price of this DCF shelter, the Zpacks Free Duo, rose by about $100 in the months between field testing and when we published our review. Photo: Ben Kilbourne
DSM, the company that makes Dyneema Composite Fabric, is still only one of a few companies working with ultra-high-molecular-weight polyethylene (UHMWPE). The way DCF is constructed – by arranging fibers between two laminate sheets of polyester rather than weaving – necessitates large batches and specialized equipment.
DCF production is limited – the fiber is made in Greenville, NC, and the fabric comes out of a single factory in Mesa, AZ. Ordering from these factories isn’t something that happens on short notice with a few emails. Production is scheduled months in advance. But delays with sourcing the appropriate fabrics, shipping logistics, or other issues can impact production schedules. Customers ordering larger volumes have priority. That affects scheduling and the quantity of material available for smaller companies. Outfits without an existing business relationship might be unable to get taken on as customers.
“Let’s not sit here and pretend like DSM will even acknowledge our existence. If you’re smaller than Zpacks or Hyperlight Mountain Gear, they won’t even return an email, let alone take our order,” said Chris Millard of Light AF, a cottage company specializing in ultralight backpacks.
A custom LiteAF DCF dye-sublimated pack being worn by Jeff Garmire. Photo: Maggie Slepian.
“[Even] prior to Covid, it was difficult to compete with the larger brands for materials and production sourcing if you want[ed] great suppliers. All the top suppliers don’t want to bother with you if you don’t have sufficient volume and reputation, so you can be left working with tier two suppliers that are often cheaper but don’t have the same quality, nor opportunities for innovation (e.g., new materials, new methods),” explained Dan Durston of Durston Gear.
Light AF was, until recently, one of few cottage companies using a dye-sublimation process on DCF. The result was unique and colorful packs that went beyond the neutral blues, greens, grays, and whites for which the fabric is known. Now Millard has announced the company will be moving exclusively to Challenge Sailcloth’s Ultra fabric. Other brands, such as Nashville Pack and Equipment Company and Pa’lante Packs are also switching.
Like DCF, Ultra is an UHMWPE. But it features a woven face fabric with a laminate backing instead of the “arranged and sandwiched” approach taken by DSM for Dyneema Composite Fabric. Like DCF, it has a high strength-to-weight ratio and is waterproof. But the best part – from a maker standpoint – is its availability.
As Dan Durston said, “everything about it is way easier, from smaller quantities to way better lead times. You can get it in weeks or a few months, whereas DCF is about a year right now.”
Ultra is a woven UHWMD fabric with a laminate backing. It is much more readily available than Dyneema Composite Fabric. Photo: Ripstop by the Roll
The advent of Ultra could go a long way towards solving the premium technical fabric supply issues that cottage manufacturers are currently facing. That could make for cheaper – but still high-performing – gear on shorter turnaround times, though the long-term durability of Ultra in ultralight gear applications is still unknown.
But there’s still the issue of factories.
“For tents, there are really only two factories in the world that build almost all of the premium tents, and we were fortunate to start with one of them…but if we were trying to start smaller, it probably would have been a no,” said Durston. “For many companies, making that jump from small-scale production to…top factories would be a hard one because you can’t get there gradually – you have to commit to a large production run.”
Finding factories that match the exacting standards of cottage gear makers while remaining in their price range is tough. Many cottage companies start with one person, a sewing machine, and a basement, and makers are able to ensure every piece matches their quality control standards. Once scaling begins, things get more complicated.
Dan Durston of Durston Gear considers himself lucky to be working with high-end factories to produce his shelters – like this Durston X-Mid Pro 2 – but still faces issues related to material sourcing, capital, and scaling. Photo: Ryan Jordan
Matt Evans of Red Paw Packs has been a solo operation until just recently. Expansion has been rocky for him.
“The first factory I worked with a few months ago [created a batch of 50 fanny packs] and most of them were unacceptable for sale (and [are] now wasting space in my studio),” said Evans. “I want any item sold through my shop to match or exceed the quality that I produce myself.”
Even medium-sized (by market share) companies struggle with it.
“When you’re a small and growing business, you must be creative in your solutions to almost everything. Scaling means you might be working out of a renovated basement turned into a drying room. Direct-to-consumer can be challenging for many cottage businesses, because while you’re busy making your product, you also have the added duties of marketing, accounting, shipping, etc. There are only so many hours in the day,” said Jennifer Scism, chef and co-founder at Good To-Go.
The ability to be involved in every aspect of the company and envision the use of a product comes more easily at smaller outdoor companies. Many of those interviewed focused on their appreciation of the creativity that they can exercise. Direct-to-consumer business models mean they get to genuinely engage with customers and backpacking communities online.
Good To-Go has successfully scaled its small operation to the point where its products appear in major outdoor stores. Photo: Andrew Marshall
“The thought of a bunch of people eating meals we cooked ourselves all over the country, especially in some awesome areas is super cool,” said John Ritner of Pinnacle Foods, which he founded with his brother Ben. “It’s been a rewarding process to be covering every aspect of the process, from sourcing ingredients and packaging, to prepping, cooking, freeze-drying, packaging, shipping, marketing, sales, social media, etc.; our small team of three literally does everything, so it’s been fun getting our hands in everything, and being able to control the quality at every step.”
“A business model that I’m passionate about is direct to the customer,” said Dan Durston. “I think a gear company can better educate people about their gear than a retail store since we can develop in-depth product videos, be available online, provide detailed product pages, etc., whereas a retailer is handling numerous product lines and can’t provide the same depth.”
“Of course, a retailer can allow customers to touch and try the gear, so having both would be nice, but selling direct saves substantial retailer markup, which we can put to better use. Instead of an 80-100% retailer markup, we can put more money into making an even better product and still sell it for substantially less…overall, I think our direct-to-customer model is better for backpackers because it’s more efficient, allows us to build a higher-end product, and to innovate faster, so we think this strategy makes the most sense. With that said, maybe there [are] some benefits to being in a few retailers, so people have somewhere to touch and try the gear.”
Henry Shires of Tarptent had similar feelings about the benefits of the direct-to-consumer business model.
“I/we decided long ago to stay direct-to-consumer and not go retail. In the retail model, your customer is the store, not the end-user,” said Shires. “I much prefer selling direct to the person using the product. It leads to direct feedback and ultimately better products.”
Henry Shires of Tarptent long-ago decided that his products – like this Tarptent Notch Li – would always be direct-to-consumer. Photo: Ryan Jordan
Offering custom-made pieces of gear for a user’s specific preferences or dimensions is a crucial part of the business of many cottage industry manufacturers. However, long wait times for custom gear – a factor even before the pandemic – do impact the overall business. Customization can be hard to sustain, and some small companies that start out offering it don’t do so for long.
“Our business model centers around quick fulfillment. This is so that people who want to be outfitted for a last-minute weekend getaway can make it happen while also experiencing the freedom of ultralight gear,” said Sarah del Puerto at Gossamer Gear. “For this reason, we do not make custom gear as that usually entails a multi-month waiting period.”
Finding capital
Access to the capital needed to start a business and expand it once it begins to grow is a challenge in any industry. It is one that several cottage manufacturers noted.
“My thinking about the biggest difference between cottage and larger/retail brands is that it all comes down to capital investment. We have been forced into a heavy capital investment model due to our growing line of Dyneema [Composite Fabric] tents,” said Henry Shires of Tarptent. “All product businesses go through managing supply and demand, and it’s really just a matter of scaling to meet your expected demand while managing risk with available capital.”
John Ritner of Pinnacle Foods noted that managing capital resources and preparing for demand was a challenge and required careful strategizing.
“Since the beginning, we have been trying to scale up as we grow, which is hard because we didn’t want to get ahead of ourselves with a ton of debt before the demand was there. When we launched, we were doing everything in a shared-use commercial kitchen in the early mornings before we headed off to our day jobs. We produced 40 meals per week and got things going with just some of our savings,” he said. “Without access to a ton of capital, we have been trying to grow as demand grows, which is a hard guessing game. We recently moved into an awesome 3,200 square foot kitchen…and are feeling really ready for our next big push.”
This meal was made in a shared-use commercial kitchen early in the morning before Ben and John Ritner of Pinnacle Foods headed off to their day jobs. Photo: Andrew Marshall
Sometimes a product might sell out even before an unforeseeable increase in interest due to internet hype. That can be rough for smaller companies with less capital on hand.
Dan Durston noted that when supply chain issues occur, “That’s hard for everyone, but especially hard for us newer and fast-growing companies because now we can’t respond as quickly to rising interest. We wind up out of stock on popular tents and with long waits to get more. The only solution is to estimate demand much further out (e.g., two years instead of six months) and act on that, which is harder/risky, and it ties up a lot more money in order deposits and materials.”
The unique challenges of packaged food
Makers of cottage industry packaged meals are also affected by the recent world events and economy.
Pinnacle Foods launched only a few months before the pandemic began, so they don’t have a baseline to compare with what business was like in the pre-pandemic years. Despite that lack of comparison, they have noticed issues directly related to the supply chain.
“We did have some issues with packaging because the company making our bags was working at 50% due to Covid precautions, so we did have to use some really large bags for a few months, which was a bummer,” said John Ritner of Pinnacle Foods. “We have also seen food costs go up pretty significantly over the past year, which is always tough to manage.”
Good To-Go saw a sharp increase in demand – with an over 300% increase in revenue in March 2020 – at the pandemic’s beginning. They aren’t the only ones – many of the food brands we reached out to for testing samples in 2020 and 2021 were completely overwhelmed by the demand of panic buying. The situation has generally leveled out since then, with a few occasional spikes in demand.
“As far as ingredients, yes, there have been struggles, but our in-house purchasing manager is a rock star. Over the past two years, we’ve only had to cancel one day of production due to ingredients,” said Jennifer Scism. “Throughout this unprecedented time, we feel very fortunate to have had great relationships with our suppliers – that has helped us stay on track and overcome obstacles as they arise.”
Because the internet
According to our interviewees, social media is “a wild rollercoaster” or “very much a bull in a china shop.” But they also identified it as a way to foster authentic connections with the folks who use their gear and monitor trends that could help prioritize product development or scheduling.
When asked about the challenges of being a smaller company in the outdoor market, Jennifer Scism at Good To-Go notes marketing as her second-most pressing challenge behind scaling.
“We don’t have the budgets the larger brands do. We’re a small brand that does everything in-house, from production of the meals to communicating with our customers,” she said.
While marketing and managing social media can be time-consuming, it also has benefits.
“Being a smaller brand allows us to connect more intimately with our customers. They can reach out with questions and ideas and know someone on our team is going to respond. We’re also more nimble than the larger brands. For example, we can see in real-time if a particular meal seems to be increasing in popularity and can switch production to address demand more quickly.”
Dan Durston agrees.
“The two most enjoyable parts for me are being able to design exactly what I want and being able to engage with the community along the way for ideas, stories, and shared enthusiasm. As a small company, it’s really neat to undertake the full process of having an idea (which typically occurs while I’m out hiking), putting it down on paper, prototyping it to perfection, and then getting it out to customers,” said Durston when asked about the rewards of running a cottage industry backpacking business.
Many cottage industry makers find internet marketing a double-edged sword. It is fulfilling to interact directly with customers but also requires time and energy. Screenshot: Durston Gear Instagram page.
“In a larger company, you’d be part of a larger team designing something where any one person’s ideas are likely a much smaller piece of that process, and they wouldn’t have the same personal investment in the finished product. Seeing ideas come to life is incredibly rewarding, and so is seeing people loving the gear and using it on their adventures,” he continued. “Through the Durston Gearheads group on Facebook and other outlets like Instagram, it’s a joy to people out using the gear. Neatest of all is hiking into a campground here in the Rockies and actually meeting someone in the wild that is using my gear.”
Looking forward
The supply chain has stabilized somewhat, but it seems likely that cottage industry manufacturers will continue facing inflation, staffing challenges, increased transportation costs, material backlogs, and logistical issues. If you’re planning on purchasing from a cottage industry manufacturer, it seems prudent to submit your order as soon as you’ve decided on a product – wait too long, and the product could be out of stock for weeks or months, see a price increase, or see its production indefinitely postponed.
When this happens, it seems best to remember that the person on the other end of the internet is a real human, and forces beyond their control might be impacting your order.
Conclusion
Despite the sheen of romance that surrounds it, there’s nothing particularly fascinating or intriguing about the cottage industry in a purely economic sense. Makers face all the same difficulties – albeit on a different scale – as any business endeavor does.
But the dedication, innovative designs, and often superior quality of many products made by cottage industry manufacturers are remarkable. Cottage makers engage in customer correspondence about customization options, design choices, or deep dives into material selection. The result is a business relationship that both the consumer and producer seem to find deeply rewarding – a feedback loop of innovation and design ethos with a purpose firmly rooted in enjoying the natural world.
The people behind the sewing machines – their goals and dreams, their challenges and triumphs, their philosophies and ideas – are well worth reflecting on as you pack up for your next trip.
Andrew Marshall also contributed reporting to this piece.
Backpacking Light does not accept compensation or donated/discounted products in exchange for product mentions or placements in editorial coverage.
Some (but not all) of the links in this review may be affiliate links. If you click on one of these links and visit one of our affiliate partners (usually a retailer site), and subsequently place an order with that retailer, we receive a commission on your entire order, which varies between 3% and 15% of the purchase price. Affiliate commissions represent less than 15% of Backpacking Light's gross revenue. More than 70% of our revenue comes from Membership Fees. So if you'd really like to support our work, don't buy gear you don't need - support our consumer advocacy work and become a Member instead.
Learn more about affiliate commissions, influencer marketing, and our consumer advocacy work by reading our article Stop wasting money on gear.
This First Looks review of the Atom Packs Nanu X25 examines the standout features and multi-use potential of a durable and aesthetically-pleasing daypack.
Introduction
This review of the Atom Packs Nanu X25 (21 oz / 600 g, MSRP: $269) examines a multi-use daypack with the potential to function as a one-night overnighter. The Nanu X25 is constructed with X10 Cotton Duck Fabric, 500 denier nylon, Dyneema Composite Fabric-reinforced stretch material, and triple stitched and bound seams.
Ryan Jordan talks about minimalist backpacking concepts and Atom Packs Nanu X25 features and specifications in the following video:
The X25 won’t replace anybody’s multi-night pack, and I don’t see it excelling in fastpacking applications (the relatively heavy material choice and shoulder-strap designs preclude it from that). But with a blend of bike, commuting, and backpacking specific features, it could replace two or three packs on the low-volume end of a backpack quiver.
This is a first look at new gear that recently entered our review pipeline, and hasn't yet been subjected to rigorous field use. Learn more about the types of product reviews we publish.
Atom Packs Nanu X25. Photo: Atom Packs
Highlights
clean, minimal aesthetics
body fabric: X10 Cotton Duck
back panel and shoulder strap fabric: 500d nylon
pocket fabric – Dyneema Composite Fabric stretch
classic overnight pack design – roll-top closure, three pockets
shoulder-strap pocket
padded laptop sleeve
removable sternum strap
triple stitched and bound seams
zip upper pocket with internal key clip
shock cord compression tensioners
shock cord trekking pole attachments
bike light loop
Testing Context
I tested the Atom Packs Nanu X25 on a couple of day hikes in the Tahoe Basin Land Management Unit (the traditional land of the Wašišiw people). Leaning into the Nanu X25’s intended use, I also ran some bike errands with it – to the grocery store, to the coffee shop to do some work, and to the post office. I didn’t push the Nanu X25 to its limits as a one-night overnight pack, but Backpacking Light founder/owner Ryan Jordan did, and I tap into his experience in this review as well.
Testing the Atom Packs Nanu X25 on a day hike in the Tahoe Basin. Photo: Andrew Marshall
This is a first look at new gear that recently entered our review pipeline, and hasn't yet been subjected to rigorous field use. Learn more about the types of product reviews we publish.
First Impressions
Fabric and Aesthetics
Atom Packs deviated from typical ultralight fabrics with the Atom Packs Nanu X25, choosing the relatively heavy X10 Cotton Duck by Dimension Polyant (DM) for the main body and 500 denier nylon for the back panel and shoulder straps.
DM’s X10 Cotton Duck is interesting. It’s a 100% cotton fabric with polyester X-PLY yarn reinforcements at 22 degrees off the warp and a polyester film laminated to one side. The upshot is a fabric that looks and feels traditional (think Carhartt jackets) but performs at a high technical level (extremely durable and waterproof, if not the lightest thing around).
The Atom Packs Nanu X25 is made of durable materials. Photo: Andrew Marshall
X10 Cotton Duck started showing up in bikepacking bags because – I imagine – it’s not going to tear the first time it rubs up against a thorn bush at 20 MPH. So it makes sense that Atom Packs would choose it for a pack they assume you’ll be biking around with (more on that later). Based on my experience with and knowledge of fabrics, I have to assume the Atom Pack Nanu X25 is going to age beautifully in a way that synthetic fabrics don’t. And from a purely aesthetic standpoint, the pack succeeds right out of the box. X10 Cotton Duck seems to come in the kind of pleasing, toned-down natural colors I’d prefer to see more of in technical gear (please spare me more neon shades of green, blue, and pink).
I should note that DM has discontinued X10 Cotton Duck. I reached out to Atom Packs to see what they’d make the next run of Nanus out of (currently slated for sometime this summer). The answer is – they aren’t sure. It will be interesting to see if they stick with a natural fiber + laminate model (X-Pac has a variation called X11) or move towards something a little more traditional. The fabric choice adds a lot of character to the Nanu, so personally speaking, I’d think of it as a loss if Atom Packs went with something purely synthetic like ECOPAK.
The Atom Packs Nanu X25 is essentially a miniature version of a classic three-pocket ultralight backpacking pack. Photo: Andrew Marshall
As a final nod towards durability, Atom Packs opts for a Dyneema Composite Fabric-reinforced stretch material that is likely to hold up well against rips and tears. This fabric choice seems a good compromise between the utility of traditional nylon stretch pockets and the durability of open-weave mesh.
Multi-use feature set
The Atom Packs Nanu X25 is essentially a miniaturized version of a three-pocket ultralight pack. It has a roll-top closure with a g-hook tensioner and a single over-the-top webbing strap. There’s a stretchy shoulder-strap pocket on the left-hand shoulder strap that’s big enough to accommodate my iPhone 12 Pro Max or my 650 ml water bottle.
The Nanu X25 also has a shock-cord trekking pole attachment system and two shock-cord compression tensioners on either side of the upper pack. This classic ultralight backpacking feature set gives the Nanu X25 the chops for all-day excursions and quick one-night overnights – provided you have a low-volume kit. A stiff foam back panel lends just a touch of structure, while a line of daisy chain webbing running down each shoulder strap provides attachment points for other incidental gear.
The Atom Pack Nanu X25 on a day hike in Colorado. Photo: Ryan Jordan
The side pockets are cut at an angle. Usually, this design choice denotes a nod towards on-the-go accessibly. I almost never find such pockets practically accessible, and the pockets on the Nanu X25 are no different. It’s possible to fish a water bottle out of them with some contorting, but why bother when you’ve got a shoulder strap pocket right there?
Additional features expand the Nanu 25 capabilities beyond backpacking and hiking. There’s a zip pouch right above the shoulder straps that includes an integrated key clip, a laptop sleeve padded out by the foam back panel, and an internal pocket with a snap closure. A webbing loop sewn into the fabric below the rear pocket provides a handy bike light attachment point. These features make the Atom Packs Nanu X25 an attractive option for the user wanting a day pack that performs at a technical level while also doubling as a commuter or travel pack.
Construction and finish quality
The Atom Pack Nanu X25 features seams that are triple stitched and bound. The hardware and webbing loops are bar-tacked into place. Between these construction choices and the material choices discussed above, I’d classify the Nanu X25 as overbuilt, and I mean that in a good way.
In his Performance Review of the Atom, Dan Durston gave Atom Packs high marks on some, but not all, of his finish quality metrics. Looking over his observations and comparing them to this pack, I’d say Atom Packs has upped its game. There’s one line of stitching with a little wiggle – nothing the average user would be likely to notice.
Final Thoughts
There’s a lot to love about the Atom Packs Nanu X25. It’s a technical pack that doesn’t look or feel like a technical pack. It’s got just enough volume to make a low-volume overnight trip possible but maintains a sleek design that rides comfortably while hiking or biking. The aesthetics are enhanced by attractive material choices that also happen to be durable and waterproof. The overall construction is well-realized.
If you are wondering where the hair that covers the pack in the rest of the photos came from, your answer is in this picture. Photo: Stephanie Jordan.
It is, unfortunately, pretty expensive for a day pack, coming in at ~$269 at the exchange rate as of this writing. That kind of price tag is likely to be offputting to anyone with a daypack that is still doing the trick. But if you happen to be in the market for a new daypack and you’d like it to be one that can replace a few of your other bags as well, you could do worse than considering the Atom Packs Nanu X25.
Atom Packs is out of stock at the moment, so you’ll have to look around on the second-hand market to purchase one. Atom Packs tells me they’ll be tackling another run of this pack sometime in the summer of 2022.
Photos
Dyneema Composite Fabric reinforced stretch pockets are a good middle ground between the stretchy functionality of normal nylon mesh pockets and the durability of open-weave net-style pockets. Photo: Andrew MarshallA line of daisy chain webbing runs down the center of both shoulder straps. Photo: Andrew MarshallX10 Cotton Duck is a hard-wearing, waterproof fabric with a very traditional look and hand-feel. It is certainly heavier than the sorts of ultralight fabrics commonly used in packs at the moment. Photo: Andrew Marshall.The Atom Pack Nanu X25 features a zippered pocket directly above the shoulder straps with an integrated key clip. Photo: Andrew MarshallFeatures include: roll-top closure, adjustable shock cord compression on either side of the pack, and a trekking pole attachment system. Photo: Andrew MarshallThis webbing loop, which is more on the side of the pack than the bottom when the pack is full, is designed to clip a bike light to. Photo: Andrew MarshallThe side pockets are pretty small but large enough to accommodate water bottles of the tall and skinny variety. Photo: Andrew MarshallThe shoulder strap pocket is a much better location for water bottles than the side pocket.
Learn More
Browse our curated recommendations in the Backpacking Light Gear Shop – a product research & discovery tool where you can find Member gear reviews, Gear Swap (used gear) listings, and more info about specific products recommended by our staff and members.
Product mentions in this article are made by the author with no compensation in return. In addition, Backpacking Light does not accept compensation or donated/discounted products in exchange for product mentions or placements in editorial coverage.
Some (but not all) of the links in this review may be affiliate links. If you click on one of these links and visit one of our affiliate partners (usually a retailer site), and subsequently place an order with that retailer, we receive a commission on your entire order, which varies between 3% and 15% of the purchase price. Affiliate commissions represent less than 15% of Backpacking Light's gross revenue. More than 70% of our revenue comes from Membership Fees. So if you'd really like to support our work, don't buy gear you don't need - support our consumer advocacy work and become a Member instead.
Learn more about affiliate commissions, influencer marketing, and our consumer advocacy work by reading our article Stop wasting money on gear.
Ryan chats with Willow Belden from Out There. Also in this episode: updates on some new packs and the How to Use Gaia GPS masterclass.
Stream
Summary
In this episode, Ryan chats with Willow Belden of Out There. Out There is a podcast that tackles big questions through intimate storytelling and is committed to elevating the voices of those traditionally left out of the conversation when it comes to the outdoors.
Also in this episode: a conversation about a new outdoor fabric, updates on some packs we’ve been testing, and the launch of a new Backpacking Light online course – the How to Use Gaia GPS masterclass.
Outline
00:00:30 – introduction
00:01:20 – Ultra – a pack material that is showing up in cottage brands
Executive Producer - Backpacking Light; Show Director and Host - Ryan Jordan; Producer - Chase Jordan; Theme music: Look for Me in the Mountains written by Chris Cunningham and Ryan Jordan, performed by Chris Cunningham (acoustic guitar, lead and harmony vocals, harmonica), Chad Langford (upright bass), and Tom Murphy (mandolin), produced by Basecamp Studios in Bozeman, Montana.
Sponsorship Policy: Backpacking Light does not accept compensation or donated/discounted products in exchange for product mentions or placements in editorial coverage, including any podcast episode content not excplicitly identified as sponsored content. Some (but not all) of the links in these show notes may be affiliate links. Learn more about affiliate commissions, influencer marketing, and our consumer advocacy work by reading our article Stop wasting money on gear.
Membership Required
This feature requires an active Backpacking Light Membership.
Premium Articles
You're currently viewing a free preview of a member exclusive premium article. Our premium articles include in depth journalism and insights from the Backpacking Light editorial team.
Get full article access by subscribing to a Premium or Unlimited Backpacking Light membership!