The Outdoor Research Stargazer AscentShell Bivy (18.9 oz / 536 g, $259) is one of the few waterproof-breathable bivy sacks on the market that weigh just over a pound and also includes mosquito netting and a headroom-extending pole.
I fell into a rut, like many of us when an activity is familiar and comfortable. It took connecting with a more experienced backpacker to show me I had the knowledge and skills to push myself into new territory.
Learning Curve is a monthly column by outdoor journalist Maggie Slepian which will examine human-powered outdoor adventure through the lens of beginners. How do beginners learn our sports? What pitfalls do they face? How does mentality shift through time? And how should experts treat beginners? The Learning Curve will cover all this, and more. Got suggestions? Drop Maggie a line in the comments.
I’ve spent the past decade gaining backcountry skills, gear knowledge, and putting mileage on my trail runners. I have long been comfortable taking friends out for overnights, and confident within my own distinct parameters of backcountry exploration.
But I fell into a rut, like many of us when an activity is familiar and comfortable. After a while, it stopped occurring to me to step outside the bounds of what I’d already explored. I think this is common for a lot of people with a primary activity. For backpackers, it might be a different trail each week, but maybe that trail never exceeds a certain length or spending two nights outside instead of one feels like a big step.
Maybe it’s always an out-and-back, or the term “route-finding” in the trail description is intimidating enough that you click out of the trail page and find a familiar trail. It’s not anxiety, fear, or a deliberate dismissal of trying something new. It’s a comfortable pattern we can all fall into where good enough is the standard, and the unknown of anything beyond that standard somehow becomes an unbreachable wall.
Getting stoked on the high-elevation Gallatin Crest Trail.
Every summer, I hiked the same trails over and over. Day hikes became repetitive. I had a five-mile (5 km) hike, a five-mile hike with a lot of elevation gain, a trail I could run if I felt like it, and a ten-miler (16 km) that involved a peak and made me feel accomplished. My overnight trips were similar. I had my favorite alpine lakes and one particular overnight that involved climbing a pass and dropping into a picturesque lake that became my show-off trip to impress visitors.
But it was always the same rotation. I forgave myself for this so-called rut because at least I’m still getting out there, but there is a certain stasis and the lack of accomplishment that comes with making the same trips for literal years in a state with more wilderness, national forest, alpine lakes, and peaks that I could hope to explore in a lifetime.
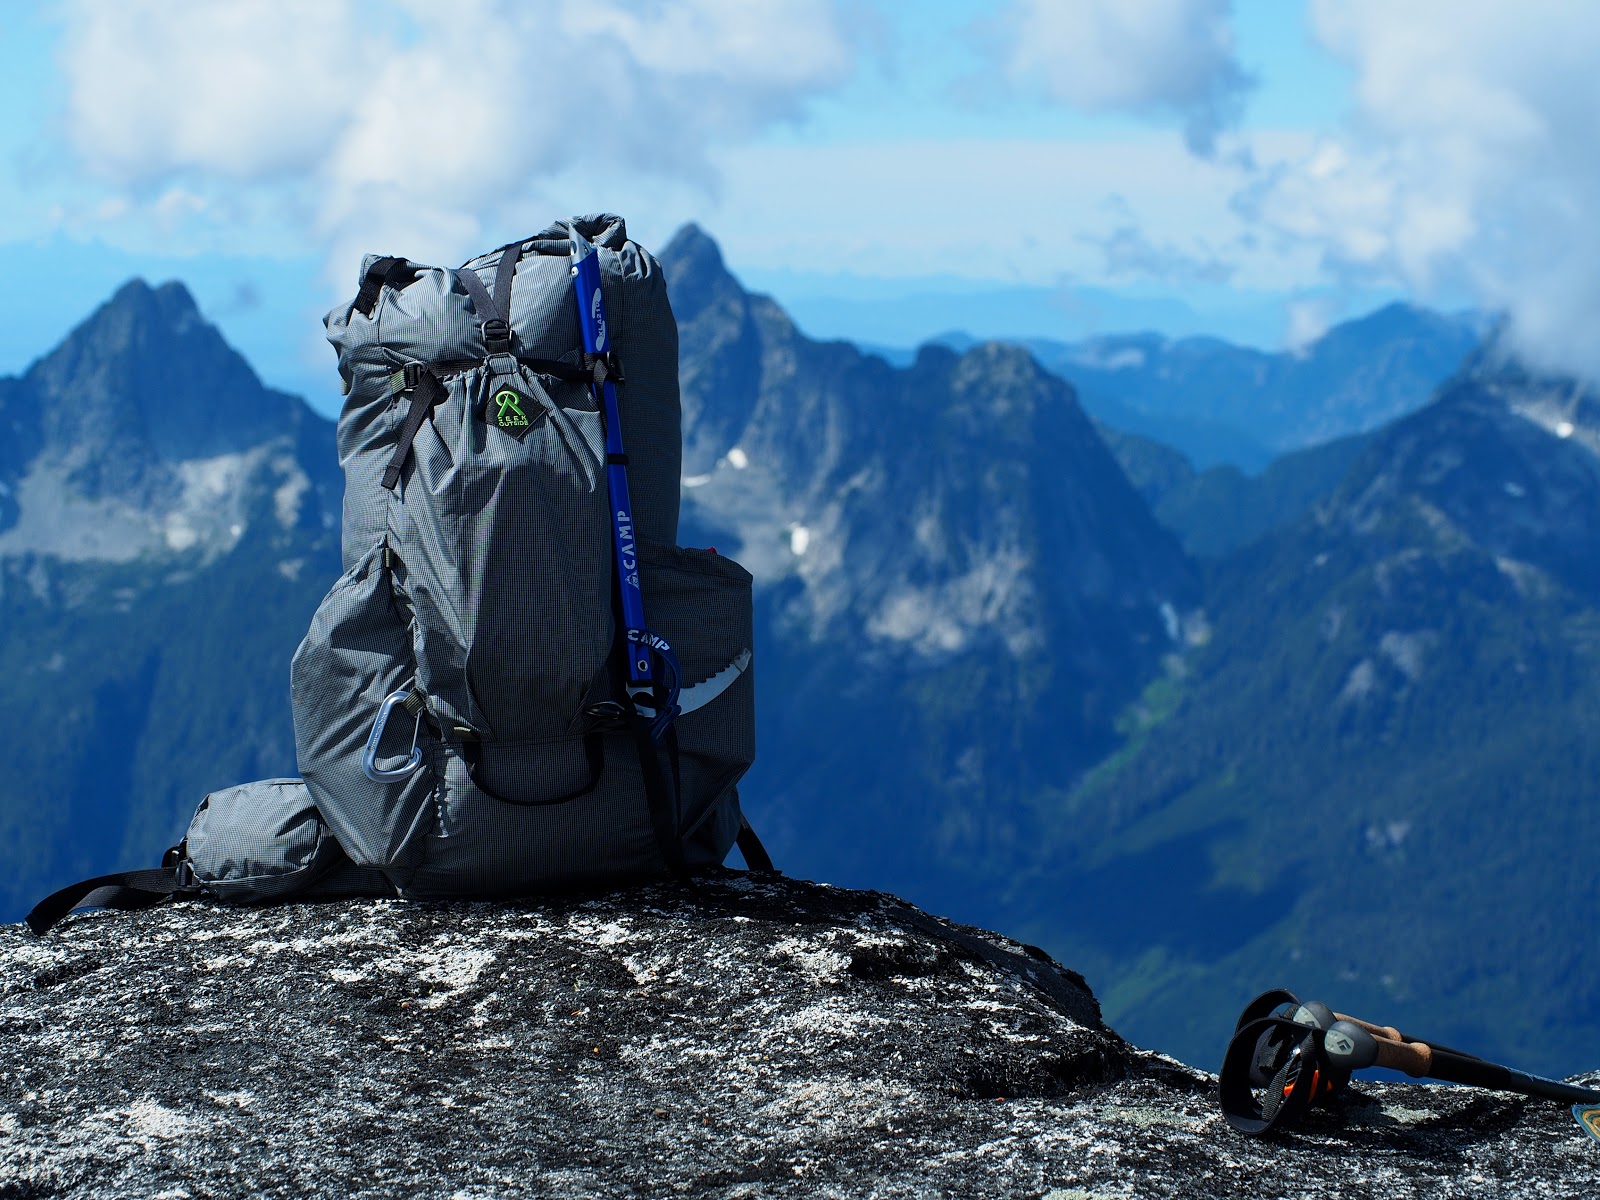
When I met my boyfriend Jeff (known in the hiking community as “Legend”), he had almost ten times the trail mileage as myself, a dozen trail records under his belt, and was the second person to have ever hiked the 7,000-mile (11,265 km) Great Western Loop. He had hiked the Calendar Year Triple Crown, and thousands of miles of trail that saw little foot traffic and were more choose-your-own-adventure than established routes. Jeff had no self-imposed limits, no patterns he’d felt stuck in. With this as my in-person example, I started toeing the line of my preconceived boundaries.
The things that unnerved me—bears, route-finding, cowboy camping, losing the trail—were nonissues for Jeff. It didn’t occur to him to be worried if the trail vanished and turned into a navigational challenge. If we lost the trail under snow, he could gauge from the landscape where our route likely turned next. “It’s going to take the path of least resistance,” he told me, scanning the looming walls of a snow-covered pass on one early-season outing. He stepped behind me and let me take the lead. “Your turn to figure it out.”
The final push up Pintler Pass was through deep snow in clothes that seemed increasingly ridiculous with each step.
If we lost the trail entirely, his instincts from 25,000 trail miles (40,200 km) were so finetuned that he could accurately guess what drainage we had to drop into, where the lower switchbacks would likely cross, and the best way we could reconnect.
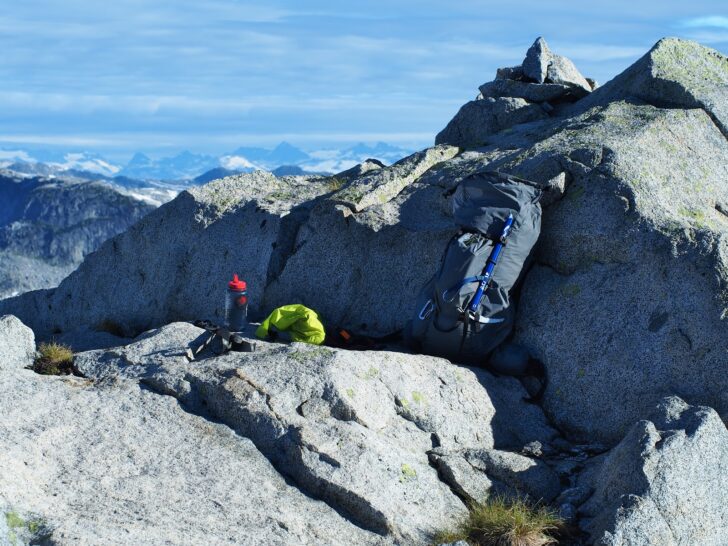
On one trip, we linked together two popular trails that looked like they had some semblance of an established path between them. My map showed each trail being fairly straightforward, but the ten miles (16 km) of connector trails wound up being quite ambiguous. Heading up one steep climb, we mistakenly followed a game trail across to the wrong ridgeline. When I realized we were not on our planned route anymore, I felt my chest tighten and my anxiety spike. I tried to bring it up casually, that maybe we should climb back up to the top and figure out where we went wrong. He seemed unconcerned, scanning the forested hills and layered peaks of the Gallatin Range. He casually agreed that we were indeed wrong, but we definitely didn’t have to backtrack.
Most definitely, 100%, absolutely on the wrong ridgeline.
It’s not that I was being shrugged off, or my anxieties were ignored. He had simply lost the trail enough times and reconnected with it to confidently know how our trip would end up. Either we found the trail and finished our loop at the car, or we knew we were pointed in (mostly) the right direction, and we’d drop down to Highway 191 and orient ourselves from there. Both scenarios wound up with us back at the car, not lost for weeks in the woods or dismembered by a grizzly bear.
We studied the map together, and he pointed out what ridgeline we were supposed to be on, and to reconnect with the trail, we should have just turned south and started dropping in elevation. Once again, he put me in the front and told me to take my best guess.
“What if I’m wrong?” I asked, feeling at once helpless and like I was overreacting. He shrugged again. “Then we’ll figure it out later.” This wasn’t an act, either. Enough backcountry experience had proven to him which situations would resolve easily and which ones were a legitimate cause for concern, with the worst outcome being a road walk.
And we were wrong. The worst happened, and it was a one-mile (1.6 km) road walk. We dropped down one drainage from where we wanted to be, and had a scenic stroll along Highway 191 back to the trailhead. It was proof to me that it was possible to lose the trail enough that we wound up in the wrong drainage, and the world didn’t end. In this case, it was simple. We wanted to be lower down, so we dropped down. Obviously, the general idea is to stay on the trail, but if you don’t, that is okay too. This past season of backpacking has shown me that combining common sense and practicing stepping outside of boundaries go hand in hand, and there’s less to fear from the unknown than I thought.
Probably close to losing the trail. And then finding it again.
With new experience and confidence, I’ve now begun to push my boundaries a little. I’ve lost the trail and either found it by pausing and using my brain, or continued on my path and reconnected with it based on the topography of the area.
I am not promoting going out and getting yourself lost in the woods. That’s a good recipe for the SOS button on your GPS unit and an overly involved backcountry rescue. Don’t be like that. Be smart and stay within your moderate limitations, but don’t let those perceived limitations govern everything you do. Try a new trail. Make a loop between two lakes instead of an out-and-back to that one you always hike to. Spend two nights in the woods instead of one. Set out prepared with a map, a trail description, and a navigational tool (that you know how to use), but it’s okay if you’ve never been in this mountain range or you explore the national forest from a different trailhead.
Once you have enough experience in your back pocket, or you’re lucky enough to have an experienced partner who wants to help impart upon you backcountry common sense, the world seems to open up in incredible ways.
Backpacking Light does not accept compensation or donated/discounted products in exchange for product mentions or placements in editorial coverage.
Some (but not all) of the links in this review may be affiliate links. If you click on one of these links and visit one of our affiliate partners (usually a retailer site), and subsequently place an order with that retailer, we receive a commission on your entire order, which varies between 3% and 15% of the purchase price. Affiliate commissions represent less than 15% of Backpacking Light's gross revenue. More than 70% of our revenue comes from Membership Fees. So if you'd really like to support our work, don't buy gear you don't need - support our consumer advocacy work and become a Member instead.
Learn more about affiliate commissions, influencer marketing, and our consumer advocacy work by reading our article Stop wasting money on gear.
BPL columnist Ben Kilbourne was on a trail run when he suddenly found himself in a mask-related confrontation. What happened next got him thinking.
The Overlook is Backpacking Light’s new monthly column where hiker, writer, and thinker Ben Kilbourne will explore backpacking from many different vantages. He will try to climb up to a high place with a view, an overlook, where the myriad issues intertwined with backpacking can be seen. This column will challenge the reader to embrace complexity and engage in thoughtful dialogue with other readers. Join us at The Overlook!
An Encounter
To some, this is what the “other” looks like.
After a long workday, I closed the computer, switched from jeans to running clothes, drove up Big Cottonwood Canyon just outside of Salt Lake City, and parked on the side of the road behind a long string of cars. On a Friday afternoon, hordes of people had the same idea as me: get some exercise in the woods. It’s a common pastime for Salt Lakers of all kinds, an activity with no apparent common denominator. The Wasatch Range is a place where different people are brought together through a shared love of the outdoors.
Huge family groups speaking a variety of languages were headed up the trail that forked to the left to Lake Blanche and Sundial Peak. Dads and moms with towering overnight backpacks toted along kids with small packs, toys, water bottles, or nothing at all. While I felt happy to be sharing with them the experience of getting outside at the end of the week, I didn’t want to compete for the trail, so I went right on the Broad’s Fork Trail. The sharp daytime call of the northern flicker issued through the woods as I joined my neighbors in the comradery of leaving the workweek behind. We all needed it and deserved it.
Hiking these days, I carry a mask with me but it often stays on my wrist. Knowing that the coronavirus passes as tiny particles through the air and that the danger is greatest when people are in close proximity, I only pull it over my mouth and nose and secure the straps behind my ears if I find myself on a narrow trail where an oncoming hiker and I will be forced to pass each other within only a foot or so. This closeness is oftentimes inevitable, so I come prepared.
Only ten minutes on the trail and I found myself headed towards a hiker on a trail bounded on either side by thick, impenetrable brush. It was one of those times where we’d have to essentially brush shoulders. I took the mask off my wrist and put it on. I casually said, “Hi” to the man and stepped past him and was about to continue on up the trail when he stopped and said loudly, “You’ve got to be kidding me.”
I stopped and turned. “What’s that?” I asked.
“F*** you, you f***ing piece of s***!” he roared.
I paused and looked at him. He looked like other hikers I would typically pass on the trail—unnoteworthy. He wore hiking boots, cargo shorts, and carried a daypack. Nothing about him distinguished him from anyone else with whom I shared the trail that day, save for the face below the brim of his baseball cap, which was strained, red, and utterly livid.
“You’re angry,” I said, and I pulled the mask down around my chin and removed my sunglasses so I could see him better. At that moment, I only felt capable of stating the obvious.
“F*** you, you f***ing liberal, hippie!” He shrieked at me.
I stood staring. I knew I was experiencing something special, something unique to 2020 America. My senses became heightened. I didn’t want to miss anything.
The man continued to shout at me about how he could never have the coronavirus because he was in such good shape for a 55-year-old. How I shouldn’t be scared of him because he just climbed a mountain; all the obvious rebuttals flashed through my brain, but I stayed silent. I knew that if I said the mask was to protect him more than me he wouldn’t hear me. If I said I wasn’t harming him by wearing a mask he wouldn’t hear me. If I said that while I didn’t really even know how much I was protecting either of us, but that I chose the better-safe-than-sorry option, and that it was no skin off my back to do so, he wouldn’t hear me.
I felt like I was trapped with a troll on a Facebook or Twitter post. But this social media interaction was somehow playing out below a canopy of spruce and fir instead of inside a screen. It felt sacrilegious. Having ample experience with Facebook, I knew he expected me to sling judgments right back at him and how it would go if I did so. I would be confirming his judgments. The threat my existence apparently posed to him would be validated. “I knew it!” he would exclaim, gleefully vindicated in his rage. Instead, I listened as he continued to yell at me.
Then things escalated without any provocation at all; I was still just staring and listening when he took a few steps towards me, balled his hands into fists, and shrieked, “If I hit you, maybe you’ll get the virus!” I reached for my phone, wishing at that moment I had been filming the whole thing. He stopped within five feet of me and took a few steps back.
The author right after the encounter.
“You seem to know a lot about me. What else can you tell me about myself?” I asked.
“You’re a f***ing Mormon!” he barked with certainty.
That response was totally unexpected. I had given him no information about myself at all, and he created a complete narrative regardless. He turned and started down the trail, and the repeated accusations that I was “a f***ing Mormon, f***ing liberal, or f***ing hippie” echoed through the forest even after he was out of sight.
Othering
When he was gone, I looked down at my feet, scanning my body, trying to see what he saw. I was wearing navy blue running shoes, turquoise shorts, a blue, quarter-zip running jersey, and a black running vest. I wore a short beard, my long hair was tied up in a bun, and I had on a tattered, salt-stained, short-brimmed hat. The entire narrative he built was founded on this image. I guess this is what a liberal, hippie, Mormon looks like, I thought. I had no idea.
What I did know was that what he saw in me was otherness. The person he saw standing before him embodied ideas that ran counter to his ideas about the reality of the world. The act of wearing a mask is objectively nonthreatening, but it signified something that was threatening to him. It represented an otherness that prevented us from being united by the mountains and the joy of exercising in the woods on a Friday afternoon.
Sundial Peak, where many backpackers go to enjoy the mountains at the end of the workweek.
The act of othering places division where there really is none. It’s an arbitrary and fundamentally dishonest attempt to divide the common destinies of humanity. I might go so far as to say it’s a form of gaslighting when he tells me I am different from him. I just don’t buy it. I can’t buy it. In fact, it’s my duty as a member of humanity, a citizen of the Earth, not to buy it. Martin Luther King Jr. once said, “We are caught in an inescapable network of mutuality, tied in a single garment of destiny. Whatever affects one directly, affects all indirectly.”
Somehow, we managed to forget this despite being surrounded by the great outdoors, the Earth which is home to all of us. The trees towering over us and the flicker’s call which echoed between them so clearly displayed that inescapable network of mutuality, our shared belonging to nature, but we didn’t notice.
Moving slowly up the trail, I wondered what we should do to remember our shared belonging during this strange time. I know the United States appears more divided than ever, but if you take a moment to look, we really are united by our shared dreams and desires. The man and I, and those parents at the trailhead, all want the freedom to drive from our homes, throw a pack on our backs, and head out into the woods. Surely, we want our children and their children to have this experience as well. In retrospect, all I wish is that I could have shared this sentiment with him before we parted ways.
A few minutes later, I crested a false summit, and could see the great metamorphic mass of Dromedary Peak through the trees. The sky above it was perfectly blue and cloudless. Two men—one with a mask and one without—were headed my way, so I stepped off the trail to let them go by. As we passed each other, we exchanged cordial, brief salutations, and went our own ways in the same forest.
Backpacking Light does not accept compensation or donated/discounted products in exchange for product mentions or placements in editorial coverage.
Some (but not all) of the links in this review may be affiliate links. If you click on one of these links and visit one of our affiliate partners (usually a retailer site), and subsequently place an order with that retailer, we receive a commission on your entire order, which varies between 3% and 15% of the purchase price. Affiliate commissions represent less than 15% of Backpacking Light's gross revenue. More than 70% of our revenue comes from Membership Fees. So if you'd really like to support our work, don't buy gear you don't need - support our consumer advocacy work and become a Member instead.
Learn more about affiliate commissions, influencer marketing, and our consumer advocacy work by reading our article Stop wasting money on gear.
In this episode of the Backpacking Light Podcast, Andrew and Ryan interview some of the folks who came together to make friend’o-the-podcast Jeff Garmire’s recent FKT of the Colorado Trail a success: Maggie Slepian, Dylan Harris, Nik Tizekker, and, of course, the Fastest Known Tiger himself.
Stream
Summary
In this episode of the Backpacking Light Podcast, Andrew and Ryan interview some of the folks who came together to make friend’o-the-podcast Jeff Garmire’s recent FKT of the Colorado Trail a success. First, Ryan talks with the Fastest Known Tiger himself to get an insight into the physical and mental stresses Jeff underwent while achieving the record.
Jeff Garmire on his FKT attempt of the Colorado Trail. Photo: Elisabeth Tizekker
In the second interview, Andrew chats with filmmakers Nik Tizekker and Dylan Harris about the logistics (and adventure) of shooting a film about Jeff’s FKT.
Finally, Ryan takes the mic again for a brief chat with BPL Columnist (and Jeff’s partner) Maggie Slepian about the highs and lows of watching a loved one complete such a challenge.
Outline
Jeff Garmire Interview
General check-in
Starting pace and strategy
Tackling the San Juans at the start vs. the end
Struggling with altitude
Weather
The climb up Elk Creek
Dealing with touch sections of the trail
Finding a tempo
Sleep deprivation and hallucinations
Going FKT style means he had to sacrifice on some things like electrolytes
Food
Ate his last bit of food 24 hours before he finished
Executive Producer - Backpacking Light; Show Director and Host - Ryan Jordan; Producer - Chase Jordan; Theme music: Look for Me in the Mountains written by Chris Cunningham and Ryan Jordan, performed by Chris Cunningham (acoustic guitar, lead and harmony vocals, harmonica), Chad Langford (upright bass), and Tom Murphy (mandolin), produced by Basecamp Studios in Bozeman, Montana.
Sponsorship Policy: Backpacking Light does not accept compensation or donated/discounted products in exchange for product mentions or placements in editorial coverage, including any podcast episode content not excplicitly identified as sponsored content. Some (but not all) of the links in these show notes may be affiliate links. Learn more about affiliate commissions, influencer marketing, and our consumer advocacy work by reading our article Stop wasting money on gear.
In part three of his series on modern wildfires, Rex Sanders uses video and animation to help you visualize just how crazy this wildfire season has been.
Editor’s Note: This is part three of a three-part series. Make sure you read part one and part two of this series first!
This past summer and fall, wildfires in the Western U.S. seemed to set new records daily. News reports featured endless streams of scary images, incomprehensible statistics, and mysterious maps. But all of this told only part of the story.
NASA satellites with special infrared sensors capture images of fires every day. By animating those images, we can get a different look at how fast and how far wildfires grew in 2020. We’ll look at outbreaks in Northern California, Oregon, Colorado, and Wyoming. And we’ll zoom in on particularly aggressive blazes, like the Creek Fire near the John Muir Trail, which resulted in heroic night-time helicopter evacuations. In one night, the East Troublesome Fire leaped across the Continental Divide in Colorado’s Rocky Mountain National Park, torching an area 31 miles long and 17 miles wide (50 km x 27 km).
By helping backpackers visualize the rapid growth and monstrous size of these blazes, we can be better prepared for the changing risks in our new wildfire era. For more about adjusting to this altered environment, see the recently published stories “Adapting to Changing Wildfires: Part One” and “Part Two.”
Be safe out there. And thank the firefighters and EMS staff that worked hard to defend your friends, communities, and favorite outdoor destinations.
Backpacking Light does not accept compensation or donated/discounted products in exchange for product mentions or placements in editorial coverage.
Some (but not all) of the links in this review may be affiliate links. If you click on one of these links and visit one of our affiliate partners (usually a retailer site), and subsequently place an order with that retailer, we receive a commission on your entire order, which varies between 3% and 15% of the purchase price. Affiliate commissions represent less than 15% of Backpacking Light's gross revenue. More than 70% of our revenue comes from Membership Fees. So if you'd really like to support our work, don't buy gear you don't need - support our consumer advocacy work and become a Member instead.
Learn more about affiliate commissions, influencer marketing, and our consumer advocacy work by reading our article Stop wasting money on gear.
Wildfires in western North America have changed for the worse and will continue changing. Fire tornadoes ripped living trees out of the ground, set them alight, and dropped them miles away. Blazes consumed 400 mi² (1,000 km²) in one day. Researchers compared the worst wildfires to the firebombing of Dresden in World War II or Hiroshima’s destruction by an atomic bomb.
False-color satellite image of Colorado and Wyoming on October 22, 2020, showing bright red active fires and dull red burn scars. The East Troublesome Fire exploded the previous night, burning more than 230 mi² (600 km²) in 24 hours and crossing the Continental Divide. Just northeast, the Cameron Peak Fire was the largest recorded in Colorado history as of that date. The scar from Wyoming’s Mullen Fire is visible about 40 miles (64 km) north. Image roughly 125 miles (200 km) across. Credit: NASA, public domain.
Existing fire forecasting software has proven useless, while scientists struggle to develop new models. Some researchers predict that, on average, next year will be worse than the year before – indefinitely. As Daniel Duane wrote in WIRED, “It is as if we’ve crossed some threshold of climate and fire fuel into an era of uncontrollable conflagrations.”
While reasonably cautious backpackers are unlikely to perish in wildfires, we must learn to live with altered fire behavior, landscapes, and rules. This essay is an exploration of what some of those changes might look like.
Closures
Screenshot of the announcement temporarily closing all National Forests in California. Credit: U.S. Forest Service, public domain.
During active wildfires or even high-fire-danger weather, land managers will close parks and forests for many good reasons. Don’t try to sneak in, thinking you know better. You are probably interfering with firefighting just driving to the trailhead, and you could put others at grave risk if you need rescue.
For several weeks in 2020, every National Forest and BLM area, most National Parks, and many state and local parks in California closed to backpackers and all other recreational users.
Even after authorities declare a fire contained – with fire lines surrounding the blaze – trees and brush could continue burning until the first heavy rains or snowfalls. Wildfires sometimes jump artificial boundaries. Remnant fires can produce a lot of smoke; many trails are trashed; falling rocks, limbs, and trees could trap or injure you; and long-smoldering ash pits that look like solid ground could severely injure you.
Some parks and forests might stay closed for months or years after the immediate dangers subside. Land managers must fix problems like blocked or collapsed roads and trails, damaged or destroyed buildings, and broken or polluted water sources.
Short-term Landscape Changes
Species Adaptation (Or Not)
Wildfires do not create uniform destruction. Within a blaze’s boundary, we often see a mosaic of unburned, lightly burned, heavily burned, and nothing-but-ashes areas. This variety is fortunate because plants and animals in the less-affected parts can repopulate the heavily-damaged zones, sometimes quickly. And we often witness an explosion of rarely seen species that thrive in post-wildfire conditions, including open spaces, abundant sunlight, and mineralized soil.
But it doesn’t always work that way. Rare and endangered species populations can plummet or vanish. Wildlife may disappear temporarily or permanently. Trees and brush will be damaged or killed. Formerly postcard-worthy vistas often look like moonscapes.
Water Problems
Fires can expose rivers, lakes, and watersheds to more sun, dramatically reducing water levels in the short run. Many blazes leave behind blackened ponds and streams filled with ash, burned debris, or landslides. Developed water sources might suffer from destroyed spring boxes, burnt piping, damaged tanks, and melted spigots.
Toxic or cancer-causing chemicals from fires and smoke can make water in wildfire areas and downstream unusable, even for washing. One rural system found benzene levels 40,000 times higher than EPA standards after a fire. You could experience serious challenges finding drinkable water, even from previously-reliable sources.
Trail Damage
Trails can suffer severe damage during wildfires, caused by erosion from firefighting work, collapsed retaining walls, rockslides and landslides, fallen trees, and even stealthy 2,000 F (1,000 C) ash pits. Trail signs may be down and pointing the wrong way or reduced to slag and ashes.
With trail maintenance funds often redirected to wildfire suppression, don’t expect government employees or contractors to repair problems quickly. Typically, issues will persist until teams of volunteers fix them. The PCTA is still repairing trails and signs damaged by wildfires in 2018.
Long-term Landscape Changes
For years after a wildfire, you might hike through blackened scrub and forests, over burnt deadfall, with trails difficult to follow or gone, while skirting newly-sprouted noxious species like poodle-dog bush and thistles. Expect on and off closures of trails, trailheads, forests, and parks.
In some burned areas, you’ll encounter restoration activities: dead tree removal, trail repairs, campground rebuilding, tree planting, and controlled burns. And you might see drones in the sky, dropping seeds, herbicides, pesticides, and fertilizers, or just surveying the area. Workers may move some trails, outhouses, campgrounds, and ranger stations, leading to map errors. Land managers may choose to close or abandon certain features forever.
It’s Just Not the Same Here Anymore
And sometimes nature takes other paths. Post-fire erosion can quickly strip hillsides, leading to poor plant growth. Fires can burn so hot it sterilizes the soil and kills seeds and roots, delaying repopulation by decades. So-called “invasive species” may live up to their name, filling ecological niches before native plants and animals have a chance – and forever changing the biological landscape. Plus, the local climate might have changed so much that certain trees can’t grow there anymore. These new landscapes also might be much more fire-prone than the old ones, adapted to warmer and drier conditions.
For many years burnt-over areas could have streams and lakes filled with ash and debris, undrinkable water, and experience more massive and more frequent landslides. Since fewer trees and bushes will suck water from the ground and cast shade on snowpacks, rivers and streams can carry earlier and much higher spring runoff, making for more challenging crossings. Higher lakes and reservoirs could temporarily drown trails and campsites. And research shows that some burned areas get significantly hotter, while others cool a few degrees.
Finally, resupply towns and resorts often sustain severe wildfire damage. Some could close forever. Many will suffer from polluted tap water and frequent power outages for years, making bottle refills and battery charging even harder.
Land Management Changes
This year, federal, state, and local land managers issued many emergency orders, including total closures and stove bans. And some of them might get more enthusiastic about using more prescribed or cultural fires or letting burn fires that don’t directly threaten civilization. But others will rely on old practices like logging disguised as thinning or forest management.
Here are some of the potential impacts on backpackers.
Stoves and Shovels
Expect significant, possibly permanent changes in stove and campfire policies for many western U.S. parks and forests. Authorities could prohibit everything but off-the-shelf stoves with a valve, as they have from time-to-time in the past. Stoves burning gasoline, kerosene, alcohol, wood, and hexamine might be banned due to their perceived fire-starting potential. For a short time, National Forests and BLM lands in California prohibited all “ignition devices,” including stoves, lighters, and fire steels – meaning no-cook meals only. Dreaming next to a campfire in the western backcountry seems doomed.
Yet banning stoves and campfires increases other risks. You’ll have nothing but body heat and possibly wet insulation to prevent hypothermia. You won’t be able to start rescue signal fires. And no more purifying water by boiling it.
Don’t be surprised if some land managers require backpackers to carry a shovel. They’ve forced whitewater rafters to carry those tools for decades, to put out “escaped campfires.” While camped next to a river on rocks and sand. During campfire bans.
Feller Bunchers and Herbicides
Many parks and forests might ramp up so-called mechanical thinning operations using powered equipment ranging from chainsaws to feller bunchers. You’ll definitely wake up when noisy machines in the same canyon roar to life. I love the smell of engine exhaust in the morning – that’s why I went backpacking!
And the U.S. Forest Service often applies herbicides like glyphosate (aka Roundup) and dicamba after wildfires to knock down unwanted plants and allow commercially-valuable trees to grow.
Cultural Fires and More Park Closures
If we’re lucky, government agencies will allow more areas to burn using prescribed fires or cultural fires overseen by Indigenous peoples, who learned to manage fire-adapted landscapes over many millennia. Before European colonization, Native Americans in California often burned over 18,000 mi² (47,000 km² ) every year. The Karuk Tribe in Northern California is just starting to work with the U.S. Forest Service to expand these culturally and environmentally vital fires.
Since 1970, Yosemite National Park has used prescribed burning and allowed selected backcountry fires to blaze without interference for weeks or months. Land managers might follow the example of Florida, which for the last 100 years has practiced widespread controlled burns. A fire big enough to make headlines in California is barely noticed in the Sunshine State. And ranchers in Kansas set fire to more than 3,000 mi² (8,000 km²) annually to improve grazing. Yet it took Sequoia National Park more than a decade to gain approval and the right conditions for a 1.6 mi² (4 km²) prescribed fire.
We might see an expansion of forest and park closures during all or part of a fire season. I wouldn’t be surprised if some areas close to recreation for many years due to high fire risk and lobbying from surrounding suburbs.
Emotional Impacts
Imagine hiking for days through blackened forests, with occasional unburned patches, or passing the remains of animals that perished in the fire. It’s okay to cry. It’s okay to be angry. It’s okay to feel whatever you feel.
And don’t be surprised if fear comes up. Fear that the fire could return, or fear that your favorite area that hasn’t burned yet could go through something like this. Those are all normal reactions.
Your favorite stream crossing or your favorite view may be unrecognizable. That post-trip ice cream bar that you always enjoyed at the mom and pop resort? Gone. The rustic buildings replaced by piles of ash and broken foundations. Beautiful forests, shrublands, and grasslands may change dramatically as new trees, bushes, and herbs move in.
But life on earth is always changing. We can learn to appreciate a new landscape with the right knowledge and attitude. Often by the time a burned-over area re-opens, the first signs of life are appearing. Healthy green sprouts carpet the hillsides. Birds return quickly to take advantage of new shoots and open skies and fill the air with song. You can rejoice in the renewal of life.
Be prepared for a wide range of emotions as you backpack through an area that’s been through a devastating wildfire.
Advocacy
Smokey Bear says, “Only YOU Can Encourage GOOD Forest Fires.” Image: USDA, public domain. Illustration by Rex Sanders.
Experiencing vast tracts of devastation and altered landscapes might motivate you to advocate for healthy wildlands and reduce future destruction. Fires are a critical part of the ecosystem and native culture in the Western U.S. and many parts of the world.
Maybe you can do something to prevent enormous landscape-changing wildfires. Let land managers know that you support prescribed fires, cultural blazes, and letting backcountry wildfires burn. If you live near wildlands proposed for these fires, don’t automatically oppose them. This year’s mild wildfire could prevent next year’s catastrophic blaze – which won’t even pause at your property line. And support non-profit groups that advocate for better forest management, far beyond raking and logging.
Adapting to Changes
How can backpackers adapt to a future with more and bigger wildfires, over an extended season, plus forests and parks with new rules?
Skills and Tools
It might be time to learn a new skill – backpacking without cooking. Except that going stoveless might mean eating differently and (gasp) carrying more weight.
In areas with bad water quality, consider using activated charcoal filters to remove more known and unknown nasty compounds. Simple membrane filters, chemicals, boiling, and UV won’t work. One California lake hasn’t returned to pre-burn pollution levels after more than 13 years.
Switching Times and Locations
Rethink trip timing, perhaps backpacking less during lengthening wildfire seasons and periodic closures, and more in the formerly colder and wetter months. In much of Southern California and other parts of the world where wildfires are nearly a year-round problem, that might mean going elsewhere.
Many people want to reduce their exposure to herbicides and pesticides. If you discover that land managers are using those chemicals to promote wildland “health” in an area – maybe you should consider a different hike.
And some trails will stay off-limits until they get rebuilt. Consider volunteering on trail crews to help pay back and pay forward enjoyment of the backcountry.
Supporting Each Other
Take a friend along for your first hike through a recently-burned area that you love. Share your feelings to help both of you deal. You can support each other as you work through intense emotions – and maybe deepen your friendship.
Be careful in helping someone else experiencing strong emotions. Reserve your judgments. Be supportive. Don’t tell them how they should feel or how they should react. Helping another person with their emotions can help you process your own. And you’ll both end up more content.
It’s easy to feel overwhelmed before, during, and after trips through scorched wild areas. Stay in the here and now. One foot in front of the other, one sip of water after another, one deep breath leading to the next. Enjoy each moment of nature’s renewal.
Setting Good Examples
There are few documented cases of backpackers starting wildfires. But that’s not the public perception. We should lead by example, going beyond the legal requirements, and doing much more to avoid setting blazes. I’m not recommending that everyone switch to uncooked food forever – that’s not even wise for trips in frigid weather. But the safer you can make your meal preparation, the better.
Respecting closures and new rules while practicing Leave No Trace, especially when people are watching or when you post to social media, can encourage other trekkers to make this new way of life part of everyday practice.
As backpackers, we have special responsibilities to leave natural settings “unimpaired for the enjoyment of future generations.” That includes changing where, when, and how we pursue our passion, further minimizing our chances of starting wildfires, and modeling responsible behavior. These changes could include switching from the absolute lightest equipment to safer-for-the-wildlands gear. Think of it as owing the Earth some ounces (grams).
Conclusion
False-color satellite image showing reddish burn scars from California’s August Complex Fire, the largest in recorded state history at the time. Taken October 22, 2020, image about 125 miles (200 km) across. Credit: NASA, public domain.
As I researched and wrote this story, new backcountry blazes started, and too many existing ones kept growing. Alarming scientific studies and shocking tales appeared daily. It honestly seems like we’ve entered a new wildfire era.
Backpackers must adapt to larger, faster, more frequent, and more catastrophic wildfires and their aftermaths. Some of these changes will be easy – others will be tough. And we should set good examples for other backcountry visitors as we trek into this brave new world.
Life is full of risks. Take reasonable precautions and learn to enjoy a changed and changing landscape when backpacking after a fire.
More Information
Creek Fire forces hikers into ‘Mordor’ smoke and across Sierra, including a boy and dog, Fresno Bee
Six astounding stories from backcountry visitors trapped by wildfire, including one first time backpacker forced into an off-trail, cross-Sierra death march – by headlamp. Many good decisions, some less good. Highly recommended.
2020 Western United States wildfire season, Wikipedia
A chilling account of how wildfire behavior has dramatically changed for the worse, the scientists trying to understand why, and how we might adapt. Highly recommended.
Unsafe to drink: Wildfires threaten rural towns with tainted water, CalMatters
Backpacking Light does not accept compensation or donated/discounted products in exchange for product mentions or placements in editorial coverage.
Some (but not all) of the links in this review may be affiliate links. If you click on one of these links and visit one of our affiliate partners (usually a retailer site), and subsequently place an order with that retailer, we receive a commission on your entire order, which varies between 3% and 15% of the purchase price. Affiliate commissions represent less than 15% of Backpacking Light's gross revenue. More than 70% of our revenue comes from Membership Fees. So if you'd really like to support our work, don't buy gear you don't need - support our consumer advocacy work and become a Member instead.
Learn more about affiliate commissions, influencer marketing, and our consumer advocacy work by reading our article Stop wasting money on gear.
In the first part of his series on modern wildfires, Rex Sanders runs through the most common dangers associated with wildfires – and what you can do about them.
What is the future of backpacking in an era of frequent massive wildfires? This year’s giant blazes in the Western U.S. closed many thousands of square miles (tens of thousands of square kilometers) in forests and parks for weeks and months. While the backcountry burned, land managers couldn’t take any chances that trekkers might start new fires or need rescue. This year, helicopters plucked dozens of backpackers from the Sierra Nevada when rapidly spreading blazes broke out. And in Colorado, choppers rescued two dogs and 23 hikers when a relatively small fire blocked a trailhead.
Smoke from western U.S. wildfires shrouds the Pacific Coast in this satellite image from September 9, 2020. Credit: NASA, public domain.
Most experts expect wildfires to get larger and more frequent, which will significantly impact backpackers in ways that you might not have considered. Learning to work around massive wildfires will become yet another non-traditional backpacking skill in the western U.S. and other countries. This essay gives you some background on wildfires in the U.S., describes the potential health and safety risks, and suggests how to stay safer and healthier. The next essay in this series (to be published on Friday, October 3oth) will cover landscape changes, potential new rules for enjoying the backcountry, and adapting to a flame-filled future.
It’s important to keep things in perspective when we’re talking about the health and safety of millions of people affected by wildfires and smoke. The recreational longings of backpackers are low priority compared to the lives and health of people and landscapes.
Background
U.S. firefighters call wildfires “massive” or “megafires” when they reach more than 100,000 acres (156 mi², 404 km2). In 2020 alone, California suffered from ten massive wildfires, including its first modern “gigafire” over 1 million acres (1,560 mi², 4,040 km2) – the August Complex.
And the Creek Fire in the central Sierra Nevada virtually exploded one night, torching another 100 mi² (260 km2) and triggering heroic military helicopter evacuations of trapped campers and backpackers. A few of this year’s fires burned for weeks in the so-called “asbestos forests” on California’s foggy, damp north coast. For months, tens of millions of Golden State residents suffered from unhealthy levels of wildfire smoke.
Megafires also broke out in Colorado, Wyoming, and Oregon. The Cameron Peak Fire has grown to the largest in Colorado’s modern history, eclipsing a record set by a different wildfire just seven weeks earlier. In the past year, Australia burned an astronomical area, more than five times the U.S. total in 2020. And record-breaking swaths of Russian Siberia burned this year after smashing records less than 12 months earlier.
Wildfires don’t just ravage iconic forests. I grew up watching Southern California’s chaparral-covered hillsides burn with regularity. In college, I learned that some of those bushes and trees depend on frequent fires for reproduction. Many of the same mountains and canyons burned again this year. Fires also raced through sagebrush in eastern Washington state, wiping out one of three small populations of a very endangered pygmy rabbit.
In too many cases this year, firefighters ran out of resources and defended carefully chosen towns and homes while letting large areas burn. The U.S. could expand wildland firefighting capabilities by a factor of 10 and still not have enough for years like this.
You Ain’t Seen Nothing Yet
This year we’re experiencing fire activity that some forecasts claimed might happen 30 years in the future – yet we could see a rerun every couple of years. But in the U.S., we haven’t even reached the fire totals of the early 20th century.
From 1926 to 1945, U.S. wildfires burned, on average, five times more area than 2000 to 2019. And the earlier years didn’t include Alaska. Source: National Interagency Fire Center, graphic by Rex Sanders.
Scientific studies project longer fire seasons, more fires, and bigger fires worldwide. Our new wildfire era has many causes and many potential solutions. But for this article, I’ll focus on backpacking safety and health risks and what you might do to reduce them.
Immediate Dangers
Nighttime flames and smoke on a ridge in the Santa Cruz mountains of California. Credit: Wikimedia CC BY-SA 4.0.
If you are backpacking far from civilization when a wildfire breaks out nearby, you don’t have many options. Even finding out that a large blaze is headed your way might be impossible. Consider these suggestions to reduce your risk.
Before your trip, check on wildfire and weather forecasts. Even if red flag warnings aren’t posted, any predictions of hot, dry, windy conditions dramatically increase fire likelihood. Look over your planned path and work out possible escape routes. If you have cell coverage or a satellite communicator, check on conditions daily, with the assistance of trusted home contacts if needed. Consider modifying your trip to make fleeing easier. Or change the dates or location of your trip.
If evacuation looks likely, pack quickly and leave immediately. Don’t delay hoping the fire might change direction at the last minute – that’s probably too late. Take the shortest route to safety, even if that means you exit hundreds of miles from your car – you’ll figure it out. Let emergency contacts at home know of your changed plans as soon as possible.
Finally, despite your best efforts, a wildfire might trap you. Pushing the SOS button on your PLB or satellite communicator is totally appropriate – but don’t expect a quick, miraculous rescue. You must fend for yourself until help arrives or you escape under your own power.
A backpacking shelter won’t protect you from choking smoke, falling trees, and raging flames. If threatened by fire, head for an open area with as little vegetation as possible, ideally next to a lake or river where you could submerge. This year’s fires yielded several stories of trapped people surviving in the water, with their nose and lips barely exposed to falling embers and thick smoke. Find a stable spot where the river won’t sweep you downstream if you lose grip on the rocks or vegetation.
Short-term Smoke Impacts
Scientists have found more than 100 chemical compounds in wildfire smoke and suspect many more. Its composition changes depending on fire intensity, time of day, and fuels like trees, brush, or buildings. Modern structures and furniture contain various potentially toxic and carcinogenic burnable materials, including plastics, furniture, cleaners, and pesticides.
And smoke can still be hazardous hundreds or thousands of miles (kilometers) downwind. You might be backpacking several states away from a blaze and still suffer.
Wildfire smoke can cause a lot of problems quickly. Visibility might drop so low that navigation or even trail walking becomes almost impossible. Plus, your eyes are likely to burn, itch, and make tears.
You will probably cough a lot – that’s normal and good for you. Smoke could also trigger asthma or other lung conditions. Even a short exposure to wildfire smoke can temporarily increase your risk of stroke and heart attack. Studies show that emergency room visits jump 10% or more after smoky air arrives. And if you are close enough to flames or smoldering stumps, carbon monoxide poisoning can make you woozy or kill you.
Wildfire smoke can be a severe problem for people with asthma, bronchitis, COPD, diabetes, and chronic heart disease. Children, pregnant adults, and elders are especially sensitive.
The U.S. Centers for Disease Control and Prevention (CDC) says:
“Wildfire smoke is a mix of gases and fine particles from burning vegetation, building materials, and other materials. Wildfire smoke can make anyone sick. Even a healthy person can get sick if there is enough smoke in the air. Breathing in smoke can have immediate health effects, including:
Coughing
Trouble breathing normally
Stinging eyes
A scratchy throat
Runny nose
Irritated sinuses
Wheezing and shortness of breath
Chest pain
Headaches”
Long-term Smoke Impacts
Experts just don’t know much about the long-term health effects of breathing wildfire smoke, particularly after weeks or months of constant exposure. Post-fire studies show that lung capacity can be well below normal for at least two years, and death rates jump in large populations.
When you inhale microscopic smoke particles, your lungs absorb some of them. Then your body attacks them like viruses or bacteria. Except that these foreign specks don’t break down as quickly, so your immune system stays highly inflamed longer – which affects everything else in your body.
Researchers suspect links to lower birth weights, damage to organs including the lungs, heart, liver, kidneys, and brain; and more susceptibility to diseases like COVID-19. In one study, summer exposure to wildfire smoke caused flu cases to jump three to five times higher the next winter. A news story described wildfire smoke as “like tobacco, without the nicotine.”
Is it Safe?
This summer, many of us constantly refreshed web sites like PurpleAir.com and fire.airnow.gov, watching as PM2.5 values moved up and down with smoke levels. These pages even displayed color-coded dots indicating health risks based on short-term studies. As we just learned, the long-term effects are mostly unknown.
Researchers can’t definitively answer the question, “Is it safe to go backpacking when it’s smoky?”
They do know this: more smoke is worse, prolonged exposure is worse, and vigorous exercise makes everything worse. One scientist’s rule of thumb: stay inside if you smell smoke or the sky is orange.
Changes for Health and Safety
Here are some suggestions on how backpackers can stay safer and healthier in this new era of wildfires. Also, the Pacific Crest Trail Association (PCTA) posted excellent advice on burn area safety for all hikers.
Escape route planning should become part of your pre-trip process. Spending a few minutes at home considering your options will be much better than scrutinizing maps in a semi-panicked state under orange, smoke-filled skies, with flames cresting over the ridge.
If wildfire smoke is thick, but flames don’t threaten, your best option might be to stay put until the haze clears. If you have asthma or other lung problems, use your inhaler and medications as directed. Move to cleaner backcountry air when and where you can.
We’ve become all too familiar with face masks in 2020. You might want to take a lightweight, vented N95 mask to filter wildfire smoke – simple coronavirus masks won’t help much.
If you are already deep in the backcountry when the smoke blows in, you could reduce your activities and stay put until it blows out again. That might not be practical, depending on your location and supplies. Do your best to reduce smoke exposure.
Hats, glasses, and sunglasses might keep ashes out of your eyes – a little. Stay well-hydrated to assist coughing when the smoke is thick. Wear a wet bandana or neck gaiter over your mouth and nose – it might help.
You could rethink trip timing, backpacking less during wildfire season, and more in the formerly colder and wetter months. In much of Southern California and similar regions where wildfires are a year-round problem, that might mean going elsewhere.
If you are in a sensitive health group – pregnant, older, or with pre-existing health conditions – reconsider plans to trek in the backcountry when fire and smoke risks are high.
Conclusion
More frequent massive wildfires producing choking smoke seem to be the new normal. These blazes present increasing health and safety concerns for backpackers. But you can take steps to reduce your risks.
Were you trapped by a wildfire while backpacking? Have you suffered from too much forest fire smoke in the backcountry? What did you do to stay safe and healthy? Share your experiences below so we can all learn.
More Information
2020 Western United States wildfire season, Wikipedia
Backpacking Light does not accept compensation or donated/discounted products in exchange for product mentions or placements in editorial coverage.
Some (but not all) of the links in this review may be affiliate links. If you click on one of these links and visit one of our affiliate partners (usually a retailer site), and subsequently place an order with that retailer, we receive a commission on your entire order, which varies between 3% and 15% of the purchase price. Affiliate commissions represent less than 15% of Backpacking Light's gross revenue. More than 70% of our revenue comes from Membership Fees. So if you'd really like to support our work, don't buy gear you don't need - support our consumer advocacy work and become a Member instead.
Learn more about affiliate commissions, influencer marketing, and our consumer advocacy work by reading our article Stop wasting money on gear.
The Arc’teryx Norvan VT 2 shoe provides above-average foot protection and traction performance when hiking or running on rocky, uneven ground, but suffers from abysmal durability.
Introduction
The Arc’teryx Norvan VT 2 shoe (11.3 oz / 320 g per shoe, $170) is specifically built for trail running and includes several features making it ideal for lightweight backpacking across different landscapes.
With a sleeker and more refined design than most other trail running shoes, the Norvan VT 2 is an aesthetically appealing shoe that is thoughtfully built around the human foot. It provides above-average protection and performance when hiking or running on rocky, uneven ground and doesn’t sacrifice comfort or breathability in doing so. Unfortunately, the shoe suffers from what can most charitably be described as abysmal durability.
Arc’teryx Norvan VT 2 shoe. Photo: Arc’teryx.
About this Review
This will be a Limited Reviewof the Arc’teryx Norvan VT 2. I put 211 miles (340 km) on these shoes between April and July of 2020 before their condition deteriorated to a point where they were no longer suitable for backpacking, trail running, or hiking. Approximately half of those miles were put on the shoes during backpacking trips, with the other half being split more or less equally between trail running and hiking.
The backpacking trips were overnight trips with a pack weight between 17 and 31 lbs (8 to 14 kg), depending on how luxurious my hiking partner and I were eating. The high weight was achieved when salad, macaroni and cheese, filet mignon, and wine were on the dinner menu.
Trail runs during the testing period were between 3 and 8 miles (5 and 13 km), and I did not carry a pack during those runs. Hikes during the testing period ranged from 2 to 11 miles (3 to 18 km), and I often carried a daypack under 10 lbs (4.5 kg) on these hikes.
My testing occurred in western Montana and nearby parts of Idaho at altitudes between 2,500 feet and 8,500 feet (762 to 2590 m).
Trail and off-trail conditions ranged between faint footpaths in dusty sagebrush country with loose soil, cruiser trail with solid tread, rocky and rooty trails, sections of packed spring snow, mud, talus slopes, granite slab, thick forest, and wide running paths in a city park.
A friendly section of trail encountered during the testing. Frank Church-River of No Return Wilderness, Salmon-Challis National Forest, Idaho.An average section of trail encountered during testing. Selway-Bitterroot Wilderness, Bitterroot National Forest, Montana.Cross-country terrain traversed during testing. Selway-Bitterroot Wilderness, Bitterroot National Forest, Montana.
Features and Specifications
Weight (per shoe, men’s size 9): 11.3 oz (320 g)
MSRP: $170
Fit: The fit is on the snug side but not so much as to warrant sizing up as adjusting the lacing allows for a reasonable fit to be dialed in. That said, this is not an ideal shoe for persons with wide feet or whose feet swell more than average when hiking.
Narrow toe-box
Mesh upper
Welded lower
Toe cap
TPU rock plate
8 mm heel drop
8 mm stack height
4 mm Vibram Megagrip lugs
4 mm sole insert
Forward eyelet placing
Tongue pocket for stashing laces
The Arc’teryx Norvan VT 2 shoes taking a break on a backpacking trip in the Frank Church-River of No Return Wilderness, Idaho.
Performance Analysis
As a Limited Review, and therefore not typically covering long-term use, this article focuses on my experience with the Arc’teryx Norvan VT 2 shoes during a shorter testing period. However, since these shoes experienced a review-ending failure after about 200 miles (322 km), it seems unlikely that they would’ve made it through a full Performance Review.
The Arc’Teryx Norvan VT 2 shoes provided remarkable grip and stability on slab granite, rivaling the performance of climbing approach shoes.
Criteria
Observations and Issues
Fit
As someone who owns numerous Arc’teryx products which fit me perfectly, and who has quintessentially normal feet, I was a bit surprised at the effort required to get the Arc’teryx Norvan VT 2 shoes to fit comfortably. The stiff sole and fairly rigid body provide great stability and protection but make it a bit laborious to dial in a comfortable fit. After a bit of trial and error, and after ending up with a few small blisters after a short trail run, I was able to figure out a system that worked for me. And once it did, I was incredibly happy with the fit of these shoes while hiking.
The toe box, as is the shoe in general, is on the narrower side. This results in a snug and secure fit. Despite being snug, I never found these shoes to get uncomfortable on long downhill stretches or during long days of hiking. The only area where I found the fit to deviate from snug and narrow was in the heel. The heel was more roomy than I’m used to, and it took some additional fiddling with the lacing process to adequately secure the shoe in this area and not cause blisters.
It’s worth noting that I was unable to easily slip these shoes on and off the way I can with most other trail runners. I had to untie and retie these shoes every time I took them off. This isn’t a big deal when day hiking or trail running, but for backpacking I found it to be mildly inconvenient - especially when getting up in the middle of the night to go to the bathroom or after taking breaks with the shoes off. So if you’re someone that enjoys being able to easily slip in and out of your shoes when backpacking, this might be a considerable downside.
Traction & Stability
The stability and traction of this shoe approaches perfection. Once I figured out the lacing tightness and eyelet pattern that worked best for me, these shoes felt like they had been built around my feet. I can’t recall more than a handful of times where I stumbled or had a misstep while testing these shoes. While I’m not a clumsy hiker or runner by any means, I usually have some all-thumbs moment when walking for a long time where I’m less than precise in my steps. This seemed to occur much less frequently with these shoes. On a variety of terrain, from low-angle granite slabs, to undulating trails wrinkled by roots, to steep, loose soil; I felt totally confident in the stability of these shoes to not roll or shift as I ran or hiked.
The traction provided by the Arc’teryx Norvan VT 2 shoes is excellent. The deep lugs made muddy or slushy snowy sections less cartoonish as I was able to firmly plant my feet, and with the aid of trekking poles, easily cross them without looking like I’d stepped on a banana peel. As advertised, the deep lugs and aggressive pattern were extremely effective at providing traction in challenging conditions.
The traction of these shoes also stood out when traversing on rock. Many cross-country routes in the area where I tested these shoes (western Montana) feature sections of talus, boulder fields, or granite slab. The Norvan VT 2 was the best shoe I’ve ever used in each of these conditions. I’ve never felt as comfortable walking up granite, other than when wearing technical rock climbing shoes, than I have when wearing these shoes. They stick to the rock in a way comparable to approach shoes for rock climbing, but are vastly more comfortable in a less demanding terrain.
Durability
It sounds harsh, but the durability is almost non-existent in these shoes. After only 100 miles of hiking, trail running, and backpacking I noticed the first hints of wear on the mesh where it met the welded lower portion of the shoe near the toe box. I figured maybe I’d just snagged it on some particularly sharp talus or branches when I was travelling off trail but that it shouldn’t deteriorate too quickly. I was wrong. The shoes barely lasted another 100 miles before the mesh on the outside of the shoe on the instep of both shoes completely separated. This exposed the thin inner liner of the shoe and impacted the fit, as the shoe was no longer holding its shape in a crucial area. The mesh on the outstep of the shoes was also significantly worn by this time.
Frustratingly, the entirety of the rest of the shoes remained functional. The soles in particular looked as if they had barely been worn. The welded lower was holding up admirably and the toe caps showed only slight wear. Minimal to negligible wear was present in other places. Overall, the shoes had a lot of life left in them but due to the failure of the mesh they were virtually unwearable for any active pursuits.
Curious about whether or not I had just put these shoes through uniquely tortuous conditions that resulted in their premature demise, I looked online for reviews to see if others had similar experiences. As it turned out, several others had nearly identical failures after similar lengths of use. One reviewer on the Arc’teryx website noted that “the mesh dissolves when it even looks at rocks,” while another commented that, “After three trail runs the mesh had already pulled apart from rubber toe box over the 1st metatarsal. Maybe it's my feet, but both shoes are the same. It's a shame cause the rest of the shoe is in perfect shape.” At least three other reviewers expressed similar concerns about the durability.
Breathability & Drying Time
The mesh upper provided adequate but not excellent breathability. The microfiber heel collar, while comfortable, likely limits the breathability for the rear-third of the shoe.
Drying time was average once the shoe was drained of any water, but the welded lower portion prevented the quick draining that occurs after a brief step in water. While this wasn’t a major issue, it did lead to delayed drying time while hiking. Once the shoes were off and wiped out with a bandana they dried reasonably quickly.
Long-term Comfort
These shoes were very comfortable on trail runs, day hikes, and shorter mileage days when backpacking with a lightweight pack. On shorter backpacking trips, I was in no hurry to loosen up the laces on the shoes or switch to camp shoes once I had reached my destination.
After about 12 miles (19 km) of hiking with a backpack, the comfort began to fade and I was glad to be out of the shoes at the end of the day. This can likely be contributed to their rigidity, which provides great stability and excellent protection on rocky terrain, but results in diminishing comfort over time.
Overall, the comfort was reasonable when compared to any trail runner but was especially impressive when considering the stability and traction.
Commentary
What went wrong with the Arc’teryx Norvan VT 2 shoes?
Based on my experience and other reviews, it’s pretty clear that there is a major failure of design, materials, or both, that results in the mesh separating or prematurely wearing out where it meets the welded lower near the metatarsal area.
After reading several reviews and reflecting upon some of the conditions I put the Arc’teryx Norvan VT 2 shoes in, I’m surprised mine lasted as long as they did. Some people noted considerable issues in less than 100 miles. None of the reviews seem to be from persons who used the shoes above and beyond their intended purpose.
When Arc’teryx markets this as “trail running footwear providing grip, performance and durability on varied terrain,” one could reasonably expect it to last more than 100 miles. The failure I experienced when testing these wasn’t as if I took a Honda Civic up a rutted 4WD forest road and was complaining about its performance. It was more akin to taking a Honda Civic on a flat gravel road with a few small potholes and having the axle break.
The end of the line for the VT 2s.
Based on my previous experience with Arc’teryx products, I was astounded to see a product fail so spectacularly after such moderate use.
To Arc’teryx’s credit, they did provide me with a replacement (in the form of a credit for the purchase price of the shoe to be used on their website) for the defective shoe when I initiated a warranty claim. However, based on my experience and that of others, I have no confidence in using this shoe again for trail running or backpacking in the landscape where I most often travel.
While the VT 2s do have their redeeming points, which I’ll discuss below, the current issues with durability make it impossible to recommend this shoe to anyone. I hope Arc’teryx can keep the parts of this shoe that work and redesign a mesh upper that is more compatible with the demands of trail running and backpacking. Unfortunately, that means they’ll pretty much have to scrap the current stock of these shoes or be prepared to warranty nearly every pair.
What went right with the Arc’teryx Norvan VT 2 shoes?
Despite my disappointment in the overall performance of the Arc’teryx Norvan VT 2 shoes, they did get several important things right. Comfort and grip being foremost among them. For the type of hiking I do most often in the summer – decently maintained trails combined with cross-country jaunts to peaks, lakes, and passes – these shoes would have been perfect if not for the lack of durability.
I rarely hike more than 12 to 15 miles per day (19 to 24 km), which was the upper limit of the comfort range for this shoe when backpacking. For hikers who regularly do longer days, this shoe would likely not be as comfortable, but most people doing longer days typically stick to trails and so wouldn’t benefit as much from the excellent traction provided by the VT 2s.
Traction
Speaking of traction, the grip on rock was unparalleled by other trail runners I’ve used and was a major strength of these shoes during the testing period. When these wore out, and I switched back to Altra Lone Peak 4s, I immediately and desperately missed the grip of the Arc’teryx Norvan VT 2s when scrambling around on boulders to access the best lakeside spots to cast my fly rod.
The Little Things
Arc’teryx got many little details right with these shoes. The pull straps on the heels are large enough to easily pull them on and to thread them through pack straps and secure them when taking them off to cross a stream (assuming you don’t just wade through with them, which is somewhat less than ideal given that the welded lower retains a bit of water).
For quick stomps across small creeks, they’re fine, but for longer fords, I preferred to take them off and wear my camp shoes. The tongue pocket for storing the laces is brilliant and totally functional. Even on long runs or in thick brush, the laces stayed tucked away.
Toe Cap and Rock Plate
The toe cap actually lived up to the marketing hype. It looks barely used despite having taken heavy abuse when climbing up Class 4 scramble routes and hiking across talus slopes. It dulled many toe stubbings and could last for many more miles before wearing thin. The rock plate was also high-functioning.
I never had to worry about stepping on talus with these shoes. They felt like impenetrable forcefields around my feet in terrain that otherwise would have required me to delicately choose each step to prevent myself from ending up with stone bruises.
The Arc’teryx Norvan VT 2 shoes in the early days of testing. They provided superb traction when hiking uphill through the consolidated spring snow.
Compared To…
The Arc’teryx Norvan VT 2 is a difficult shoe to compare with other trail runners. Perennial favorites like the Altra Lone Peak series or Brooks Cascadia series lack the rugged sole and attempts at durability that put the VT 2s in a class of their own and are of a substantially different design.
The VT 2’s construction and layout make its closest competitors other shoes in the Arc’teryx Norvan Series. However, neither the Arc’teryx Norvan LD or the Arc’teryx Norvan SL have comparable grip or reinforcement around the lower area, which, in theory, makes the VT 2 more appropriate for rugged treks.
The Arc’teryx Norvan SL is twenty dollars cheaper than the Arc’teryx Norvan VT 2.
Arc’teryx Norvan SL
Weight
The Arc’teryx Norvan SL is significantly lighter (4.8 oz / 136 g) per shoe than the Arc’teryx Norvan VT 2.
Arc’teryx Norvan SL
Durability
This is an area where the Arc’teryx Norvan VT 2 should win handily because of its welded lower and durable toe-cap. But the mesh uppers failed after 100 miles, prompting me to award it a tie with the lighter Arc’teryx Norvan SL.
Tie
Breathability/Drainage
Full mesh construction gives the Arc’teryx Norvan SL the edge here.
Arc’teryx Norvan SL
Grip/Traction
Aggressive 4mm lugs provide superb traction on the Arc’teryx Norvan VT 2. It’s the shoe’s best feature.
Arc’teryx Norvan VT 2
Comfort
The Arc’teryx Norvan VT 2 provides protection on scrambles and talus, but is somewhat stiff compared to traditional trail runners, and requires some thought and experimentation to dial in the fit.
Tie
Strengths and Limitations
Strengths
Exceptional traction and grip on technical terrain
Small details superbly realized
Toe cap and rock plate are sturdy and hard-wearing
Limitations
Mesh uppers wore out after 100 miles
Likely too stiff to be comfortable for long days on trail
Wide feet beware
Related Content
More by Mark Wetherington
Mark is one of BPL’s new columnists! Check out the first installment in his column “Unpacked.”
Product mentions in this article are made by the author with no compensation in return. In addition, Backpacking Light does not accept compensation or donated/discounted products in exchange for product mentions or placements in editorial coverage.
Some (but not all) of the links in this review may be affiliate links. If you click on one of these links and visit one of our affiliate partners (usually a retailer site), and subsequently place an order with that retailer, we receive a commission on your entire order, which varies between 3% and 15% of the purchase price. Affiliate commissions represent less than 15% of Backpacking Light's gross revenue. More than 70% of our revenue comes from Membership Fees. So if you'd really like to support our work, don't buy gear you don't need - support our consumer advocacy work and become a Member instead.
Learn more about affiliate commissions, influencer marketing, and our consumer advocacy work by reading our article Stop wasting money on gear.
Backpacking Light columnist Mark Wetherington is no stranger to risk assessment. But this non-fiction account of search-and-rescue operations in North America gave him chills.
Unpacked is a new column from Backpacking Light by outdoor writer, gear tester, and librarian Mark Wetherington. It ranges from book reviews to essays on outdoor ethics and culture. There’s a richness in backpacking that’s rarely reflected in gear reviews and trip reports – this column aims to explore the deeper essence of our hobby with an insightful (and sometimes humorous) approach.
As someone who has enjoyed over two hundred nights in the North American backcountry on solo trips, and another two hundred or so with companions, I’ve often pondered the risks associated with wilderness travel. I reassure myself – or those in my group – that there’s a statistically minuscule chance of being mauled by a bear in the middle of the night, murdered at the trailhead by cult members, or becoming hopelessly lost. Nevertheless, such thoughts pop up from time to time.
The conventional wisdom is that understanding our fears helps us overcome them and rationally approach them. We can safely enjoy our hobbies by acquiring knowledge and skills that allow us to recognize real threats, handle them with confidence, and ignore the boogeyman types of fears. Most backpackers, rock climbers, backcountry skiers, and other outdoor adventurers become masters at this, and it’s an approach that I’ve become rather adept at myself.
The Cold Vanish: Seeking the Missing in North America’s Wildlands, by Jon Billman
The Complexities of the Missing
In the book, Jon Billman explores various missing person cases that have taken place on North America’s public lands. The central narrative is the case of Jacob Gray, a bicyclist who vanished from the side of the road in Olympic National Park in 2017. In addition to chronicling the search for Gray, the author explores several other disappearances on public lands. Billman analyzes common themes in the responses and their efficacy, or lack thereof, and often interviews those involved. From park rangers to bloodhound search-dog handlers to psychics, Billman tries to provide a holistic view of the complexity of the efforts and the atmosphere around missing person cases.
The first-hand accounts – from the families of missing persons and those who helped in the search and rescue efforts – give the book an intensity that is both compelling and unsettling. As you read this book, you become fully aware of just how much we don’t know about the people who go missing on public lands in the United States. Even simple facts like just how many people are reported missing in national parks and forests each year are almost impossible to arrive at because of jurisdictional complexities. The book doesn’t shy away from unscientific explanations either; advocates of extraterrestrials, Bigfoots, and other phenomena are respectfully included in the explanations for the unexplainable.
With the author at times joining Jacob’s father in his quest to find his son – whether that’s in the bottom of streams in the Olympic Mountains or communes in the Pacific Northwest – you’re provided with a glimpse into the nuts-and-bolts of searching for a missing person as well as the intense desperation of the loved ones left behind who are seeking closure and peace while hanging onto hope.
The Takeaway
The stories covered by the author are so intriguing, and the scope of the book so varied despite focusing on a single topic, that it is easy to overlook the quality of the writing itself – which is excellent. This book is not likely to remain unfinished on your nightstand, although it might be one that you should avoid giving to friends or family who’ve expressed concern about your safety while backpacking.
If you don’t currently use a personal locator beacon, inReach, or a similar device, this book provides plenty of tragic inspiration to get one. And by doing that, it just might be one of the few books that could save your life.
Backpacking Light does not accept compensation or donated/discounted products in exchange for product mentions or placements in editorial coverage.
Some (but not all) of the links in this review may be affiliate links. If you click on one of these links and visit one of our affiliate partners (usually a retailer site), and subsequently place an order with that retailer, we receive a commission on your entire order, which varies between 3% and 15% of the purchase price. Affiliate commissions represent less than 15% of Backpacking Light's gross revenue. More than 70% of our revenue comes from Membership Fees. So if you'd really like to support our work, don't buy gear you don't need - support our consumer advocacy work and become a Member instead.
Learn more about affiliate commissions, influencer marketing, and our consumer advocacy work by reading our article Stop wasting money on gear.
Shilletha Curtis was awarded a Backpacking Light Diversity Grant in 2020 to help her prepare, acquire gear, and train for her next dream: hiking the Triple Crown. We caught up with Shilletha for a quick interview.
Introduction
Shilletha Curtis was awarded a Backpacking Light Diversity Grant in 2020 to help her prepare, acquire gear, and train for her next dream: hiking the Triple Crown. She will start with an attempt to thru-hike the Appalachian Trail in spring of 2021.
We caught up with Shilletha for a quick interview.
What’s your background – what notable parts of your childhood / life-to-date led you to who you are today?
Orlando, Florida, became my symbol and my icon of what dreams lay ahead of me.
Disney World gave me hope and opened my mind to worlds I couldn’t even fathom as a sheltered eight-year-old girl. I visited Epcot, Magic Kingdom, and my favorite park of all – Animal Kingdom.
The day my aunt and great uncle took me to Animal Kingdom, the sun kissed my brown cheeks and welcomed my presence. The temperature was tropical, to say the least. Hot to others, but just perfect for a little thin girl with anemia. The sky was a canvas painted with hues of baby blue and calm, white cirrus clouds. I walked around with my uncle as my aunt stayed back at the resort as she wasn’t feeling too well.
Everywhere we walked, there were habitats for creatures of every kind – amphibians, birds, and primates just to name a few; however, I found my niche among the arthropods. As I walked through the enchanting forest that was Animal Kingdom, I found myself extremely drawn to a ranger in the park that was holding an insect in her hand. My curiosity got the best of me and I picked up my pace and headed over to the ranger.
I looked in her hand and saw a brilliant three-inch insect which boasted a royal blue exoskeleton, four translucent wings, and two huge black eyes which nearly took up all the space on its head. I later found out through research that the dragonfly was blessed with being the symbol of maturity (both mental and emotional) and depth of character, in addition to power and poise!
What are your wilderness ambitions, and why?
Years later, I emerged from the water with mighty wings and some sense of direction.
Nature captivated my path and swooped me up like an autumn leaf rustling in the wind. Since I was a child, I dreamt of working in the sciences as a marine biologist or a veterinarian. The winds changed course and I ended up graduating from Rutgers University in 2014 with a Bachelor’s in Social Work. I had always helped people behind the walls but then coronavirus hit me like a roaring wave.
Furloughed and eventually terminated, I set sail for the woods and found the Appalachian Trail in New Jersey. Since then, it has been my goal to prepare for the AT and aim to accomplish the Triple Crown.
Favorite place to hike right now and why?
From Dunnified Creek to High Point, I have visited various parts of the AT but have fallen in love with Worthington State Forest. There is something so tranquil and mysterious about Worthington and all its wonders. Although it is less strenuous than other parts of the AT, it provides versatile terrain and surprises around every turn. Racoon Ridge is mind-blowing and provides spectacular views and a comfort that I cannot explain.
What do you like to do when you aren’t hiking?
When I am not below treeline or above the clouds, I spend my time writing, drawing, and hanging out with my girlfriend. I like to stay busy as idle hands are the devil’s playground. Tactile activities suit me best as they provide visual and mental stimulation.
Most days off-trail, I pitch my tent or hang my hammock in my yard and enjoy the beauty that life brings. Life is an adventure and I am ready to ride it, no matter where I am. But of course, ninety-five percent of the time you will find me in the depths of the forest.
How has your background in social work influenced your relationship with nature? To what extent do you see our connection to nature as critical for our personal or social mental health?
My background in social work has influenced my relationship with nature in the sense that I can truly appreciate nature for its healing power. I have learned the true meaning of empathy and to look at situations and nature as a whole. Everything from the slimy grotesque slugs to the glimmering green leaves that sway in the crisp wind has a part in the forest.
As someone who is a strong advocate for mental health and lives with depression, anxiety, and ADHD on a daily basis, I can tell you that nature is medicine for our souls. Nature has a tranquil way about it and creates an atmosphere where we can be us in our most vulnerable forms. Trees, mountains, and wildlife do not judge the human who seeks peace.
Feeling connected to the Earth, I believe creates a sort of grounding and rejuvenation within one’s soul. Many seek the forest for its silence and answers that only the trail can provide. And trust me, the trail will provide.
The trail gives an unspeakable peace and escape from the distractions of our daily life and other humans. Working, dealing with racism, and immeasurable pain and suffering without self-care can be detrimental to our physical and mental well-being.
What are the biggest challenges you face as you plan for your AT hike?
I would have to say gearing myself up mentally as well as understanding base layers.
As I have heard before, the Appalachian Trail is a mental game. Our bodies adapt over time but the mind, now that’s a different story. Mentally, I am a strong woman and I have been working on learning more about myself through solitary 10-11 mile hikes about twice a week. I know that nothing can ever fully prepare to walk 2,186 miles but at least I can learn by practicing now, how to embrace the bad days and revel in the good.
A friend that I met from the Appalachian Trail group online told me I have three options when I am having a bad day: Cry, Quit, or Continue. He said “You will cry, I cried, but you can’t quit-you have to continue” and that is what I plan to do.
Base layers are a whole ‘nother story!
I will start my thru-hike as winter is ending and I have been warned of the cold temperatures. Knowledge is power and so, I decided to do copious research on base layers and as I collect clothing it becomes increasingly more confusing. Nearly everyone recommended Merino Wool so I went and brought a midweight baby blue long-sleeved shirt. Bad idea! Every inch of my arms felt like chiggers were burying their fiery red bodies into my flesh! It was so frustrating! Luckily, I got the Patagonia Nano Puff on sale and have accomplished that part of my clothing journey (an insulating layer) with ease. It’s a work in progress, but one day I will have it down perfectly.
What are you working on right now in terms of backpacking skills? What areas do you feel like you need to work on more?
Right now, I am working on lowering my base weight and figuring out how to shave weight where I can.
When I started this journey in March, I immediately knew that I wanted to go ultralight. Now, when I say that don’t get me wrong, I will carry weight that is necessary. Winter gear, for instance, is usually heavier but currently, my cold weather setup is weighing in at a measly 10.1 pounds!
I am willing to sacrifice more weight for items like warmer clothing because I am anemic and sleep cold. At the same time, I want to keep my base weight under 12 pounds because I had a back injury three years ago. It’s not for everyone but I do find that my ultralight setup is working well for me thus far.
Every day, I go out with my gear and do shakedowns and I am learning that it is crucial to listen to your body. Going up steep inclines, I am realizing that every 3-5 minutes that I need to take a rest and that’s okay. Drinking sufficient amounts of water and snacking along the way are things I need to be more cognizant of as I have gotten severe headaches and fatigue on long treks.
Being okay with my pace and trying not to be superwoman is a constant lesson that I am figuring out.
What’s your favorite piece of ultralight gear you are using right now and why?
There is nothing I adore more than my ULA Circuit backpack.
Best piece of gear, hands down! I received my pack as a donation from a kind soul who supports my journey for diversity and inclusion on the Appalachian Trail. That in itself is one of the reasons I hold my pack so dear to me. Weighing in at only 2.9 pounds with all the attachments, this beauty has changed the way I backpack.
At first, I was a little reluctant about having a 68 Liter pack but I have no regrets. After, learning how to adjust the straps, I love the way this pack adheres to my body and how supportive the aluminum stay is for my fragile back.
The hip belt and pockets are convenient and the pack sits comfortably on my hips. The side pockets are perfect for my Big Agnes tent stakes and poles as well as Smartwater bottles. One disadvantage though, is that I have to take the pack off to reach the water bottle, but I may MacGyver some type of holder in the front.
Internally the small purple pocket makes a great space to stash my headlamp and water filter and I am a huge organizer. Knowing where my gear is in my pack makes me a happier hiker, and having two removable internal pockets plus the front mesh pocket gives me bliss.
The ULA Circuit is extremely comfortable all around and I really dig the cushioning of the shoulder straps. All my gear compresses nicely in the pack and I even have extra room (that I am not tempted to stuff!). I really cannot complain and I will note that I removed the hand loops as I saw no need for them and inner hydration sleeve as I am not using a bladder. Being highly customizable and having the ability to add and subtract gear pieces is necessary for me as it lets me control what works for me. Overall, I love the ULA Circuit and I plan to carry it not only on the AT but also the PCT!
Summary
We’ll keep you posted on Shilletha’s quest for the Triple Crown, and look forward to having her join our authors’ corps as she documents and shares her experiences along the way!
Backpacking Light does not accept compensation or donated/discounted products in exchange for product mentions or placements in editorial coverage.
Some (but not all) of the links in this review may be affiliate links. If you click on one of these links and visit one of our affiliate partners (usually a retailer site), and subsequently place an order with that retailer, we receive a commission on your entire order, which varies between 3% and 15% of the purchase price. Affiliate commissions represent less than 15% of Backpacking Light's gross revenue. More than 70% of our revenue comes from Membership Fees. So if you'd really like to support our work, don't buy gear you don't need - support our consumer advocacy work and become a Member instead.
Learn more about affiliate commissions, influencer marketing, and our consumer advocacy work by reading our article Stop wasting money on gear.
The purpose of this article is to present three ultralight water treatment options for backpacking. We chose these three for their diversity and efficacy, and they include a chemical method, a physical method, and an electro-ultraviolet method. We included a video to demonstrate each technology in the field.
Introduction
The purpose of this article is to present three ultralight water treatment options for backpacking. We chose these three for their diversity and efficacy, and they include a chemical method, a physical method, and an electro-ultraviolet method. We included a video to show each of the three technologies used in the field.
Based on the results of my most recent analysis of internet keyword searches, paid advertising buys from manufacturers, and interviews with industry contacts who work for outdoor gear distributors, the most popular water treatment option among backpackers is still the pump-style water filter. Two of the lightest examples include the Katadyn Hiker (11 oz) and the MSR Hyperflow (8 oz).
The problem with pump style water filters is that they’re relatively heavy, they’re sort of difficult to clean, and they clog easily. And of course, it requires a bit of work to pump the water and prepare it for drinking.
So I’m going to talk about three methods of what we might consider ultralight water treatment: Aquamira, squeeze filters (Sawyer and BeFree), and the Steripen Ultralight.
Aquamira
The one that’s probably the most popular among the hardcore ultralight crowd is a chemical treatment known as Aquamira.
Aquamira ($15 and 3 oz / 85 g) is a chlorine dioxide-based water treatment chemical that is very effective against viruses, bacteria, and Giardia. It is moderately effective against Cryptosporidium.
Aquamira is a chlorine dioxide-based water treatment chemical kit. It consists of a 2% chlorine dioxide solution (part A) that is activated by phosphoric acid (part B). The resulting activated solution acts as a water disinfectant by interrupting nutrient transport across cell walls and membranes.
How it works:
Mix a few drops of part A with a few drops of part B (typically seven drops of each per liter of water you want to treat) in a small mixing cup.
Wait five minutes for the solution to activate – it turns bright yellow. It may take a little longer in cold temperatures.
Once it’s active, then you can pour that solution into your water bottle, and then wait 15 to 30 minutes before the water is ready to drink. Longer times are required for cold water, turbid water, or to inactivate cryptosporidium cysts.
The key advantage of Aquamira is that it’s compact, lightweight, and has a long shelf life (typically about four years).
The key disadvantage of Aquamira is that it does take up to 30 minutes to get clean water. And for some types of protozoan cysts like Cryptosporidium, the treatment time is around four hours.
Aquamira Notes and Tips:
Chlorine dioxide is highly effective against Giardia and less effective against Cryptosporidium. If you suspect that your water source is contaminated with the latter, consider combining Aquamira with a filtration method (below) or use a Steripen.
Aquamira dosing can be halved (3-4 drops per liter each of parts A and B) if you double the treatment time to 30-60 minutes. Likewise, dosing can be doubled (14 drops per liter each of parts A and B) if you need water fast (8-15 minutes). This principle is known as Chick’s Law and is a bedrock principle in water disinfection.
The newest (since summer 2020) 1-oz Aquamira kits now ship with a closeable cap – this is useful for backpacking! If I know I’m going to walk over a creek soon, I can create my premix, stow the cup in my pocket, and then it’s activated and ready to pour in my bottle by the time I reach the creek.
For shorter trips, repackage Aquamira parts A and B into smaller dropper bottles, but be aware that drop size in your new bottles may be different than drop size in the stock bottles, which could affect dosing.
For short trips, I repackage Aquamira into smaller dropper bottles ($7 and 0.3 oz / 10 g). My “mini”-kit (right) weighs about 1 oz (28 g) compared to the stock kit (left), which weighs about 3 oz (85 g).
The Squeeze Filter (Sawyer, BeFree)
The second ultralight treatment method is a lighter version of a pump-style water filter – the squeeze filter. Instead of a pump, you attach a squeeze filter to a soft or otherwise semi-flexible water bottle and squeeze the bottle to push the water through the filter. Or, you can suck water through the filter, but that requires more effort.
The Katadyn Befree ($40 and 2.1 oz / 60 g) water filter is compatible with Hydrapak bottles and has one of the fastest flow rates of any filter we’ve used.
There are two popular types of squeeze filters: the Sawyer Squeeze and the Katadyn BeFree. You can attach a Sawyer Squeeze directly to a Smartwater bottle. This option is popular among thru-hikers. The Katadyn BeFree filter is compatible with HydraPak bottles (like the new HydraPak Flux), making it adaptable to a variety of bottle shapes and sizes.
The flow rate of squeeze filters is relatively fast when compared to pump filters and straw filters. So unlike some of the earlier straw filters and other bottle filters, you don’t get cheek fatigue caused by sucking through a slow-flow filter.
Squeeze filters are one of my favorite water treatment solutions because I get drinkable water right away. If I know I’m going to be in an area where there’s a lot of water, I don’t have to pack any water at all in my backpack. I can just take my squeeze bottle, dip it whenever I reach a stream or lake, and hydrate at those locations.
If you need to carry more water in your pack and you’re using a squeeze filter system, then you can just take a dirty water bottle as extra water storage. When it comes time to drink, and you’re away from a water source, you can pour the dirty water into the squeeze filter bottle and then drink through the filter.
Alternatively, if you want to keep a water bottle as a clean water bottle and don’t want to drink through the filter, you can filter the water through the filter into your clean water bottle and then drink straight from the clean water bottle when convenient.
Squeeze Filter Notes and Tips:
Flush a solution containing a few drops of chlorine bleach in a liter of water through the filter before storage. This minimizes bacterial growth in the filter, which can cause pore clogging. If you’re on a long trip, do this every couple of days.
Make sure water is expelled from the filter before you go to bed at night, and store the filter in your sleeping bag if you expect freezing temperatures. Water turning into ice in the filter could cause damage to the filter membrane.
Steripen
The third option I want to discuss is an ultraviolet (UV) light pen, specifically the Katadyn Steripen Ultralight.
The Katadyn Steripen Ultralight ($90 and 2.6 oz / 74 g) uses ultraviolet light (UV-C) to disinfect water and is effective against all types of pathogens, including Cryptosporidium.
Ultraviolet light disinfects bacteria, viruses, and protozoa. And it’s very effective against all three, and it works fast. Water only needs to be exposed to this lamp for about 60 seconds to be purified. UV light works by damaging DNA inside a cell, which prevents it from replicating. So even if you ingest live pathogens, they won’t be able to reproduce in your body to a level that causes a gastrointestinal infection.
Of course, the disadvantage is that it’s a battery-operated electronic device and is subject to all the failures of such devices when you’re in the backcountry. The Steripen Ultralight is USB rechargeable. I carry a battery pack on longer trips so I can recharge the Steripen (as well as my headlamp, smartphone, and inReach Mini). But generally, the internal battery of the Steripen Ultralight remains charged for 3-7 days, depending on how often I’m using it.
When I use a Steripen, I have an old Platypus bottle that I repurposed as a dipping and treatment cup. It’s very light (< 0.5 oz!) and folds flat, so I can keep both the Steripen and the old Platy cup handy in my accessory pouch without taking off my pack.
One of my favorite features of the Steripen Ultralight is its automatic switch. It turns on automatically as soon as you dip the Steripen’s lamp below the waterline of your treatment container. There are two metal contacts there. As soon as water touches both of those contacts, the lamp turns on. Treat the water for 60 seconds (a built-in time shuts off the light automatically), and it’s ready to drink.
The other thing I like about the Steripen Ultralight is that because this is such a compact device with a short lamp, it works great in solo-size cooking mugs. I use it regularly with my Vargo Ti Bot 700 and MSR Titan Kettle.
Steripen Notes and Tips:
In cold temperatures, keep the Steripen inside your jacket and sleeping bag to prolong battery life.
Make sure the USB port battery door is secure to prevent water entry into the port.
If you regularly use store-bought water bottles like Smartwater, use the Steripen Ultra instead of the Steripen Ultralight. The Ultra is designed specifically to be compatible with narrow-mouth water bottles.
Summary
The following table summarizes each of these three treatment methods.
New PDF Download: Get our water treatment recommendations.
DISCLOSURE (Updated April 9, 2024)
Product mentions in this article are made by the author with no compensation in return. In addition, Backpacking Light does not accept compensation or donated/discounted products in exchange for product mentions or placements in editorial coverage.
Some (but not all) of the links in this review may be affiliate links. If you click on one of these links and visit one of our affiliate partners (usually a retailer site), and subsequently place an order with that retailer, we receive a commission on your entire order, which varies between 3% and 15% of the purchase price. Affiliate commissions represent less than 15% of Backpacking Light's gross revenue. More than 70% of our revenue comes from Membership Fees. So if you'd really like to support our work, don't buy gear you don't need - support our consumer advocacy work and become a Member instead.
Learn more about affiliate commissions, influencer marketing, and our consumer advocacy work by reading our article Stop wasting money on gear.
In this Unlimited video podcast, Rex Sanders and Ryan Jordan discuss sleeping bag temperature ratings, the ISO 23537 temperature rating standard, and how consumers can interpret the standard to make better buying decisions.
Unlimited Member Exclusive
This video podcast is available only to Unlimited Members (learn more).
This private podcast for Unlimited Members will explore deeper investigations into gear, skills, and technology. Our public podcast will continue to focus on a long-form variety show featuring stories about people and places through interviews, with short segments about gear, skills, and what’s happening at Backpacking Light.
Summary
In this video podcast, Rex Sanders and Ryan Jordan discuss sleeping bag temperature ratings, the ISO 23537 temperature rating standard, and how consumers can interpret the standard to make better buying decisions.
BPL author Rex Sanders tackles the pros and cons of navigating by GPS in a short blog post that includes links for further info.
Credit: Illustration by U.S. Air Force, public domain. Design by Rex Sanders.
Introduction
We trust the U.S. Global Positioning System (GPS) for accurate locations to help guide us through the wilderness – either through smartphones and similar devices or via paper maps with reasonably correct feature positions. Global Navigation Satellite Systems (GNSS), like GPS, have revolutionized position, navigation, and timing. Yet, they have a variety of physical limitations and human-caused problems that can lead hikers astray.
Backpackers can work around many GPS issues by maintaining spatial awareness. One shouldn’t just keep hiking until an expensive smartwatch tells you to turn. Instead, periodically match electronic or paper maps with real-life features like creeks, ponds, peaks, and passes. Then you might recognize when GPS is misleading you.
The Good
The recently-created U.S. Space Force now runs GPS, including 31 satellites in orbit. With a clear view of the sky, smartphones, GPS mappers, satellite communicators, and even smartwatches can often determine your position to less than 6 feet (2 meters). Just a few decades ago, the best global radio-navigation system (Omega) was accurate to about 4 miles (6.4 kilometers), using a receiver bigger than a suitcase – plus a large antenna and a power supply. Many backpackers got much better positions using a good map and a cheap compass.
GPS satellites are also equipped to detect nuclear bomb detonations and relay Personal Locator Beacon (PLB) rescue messages.
The U.S. Federal Aviation Administration (FAA) operates the Wide Area Augmentation System (WAAS) using three geostationary satellites that cover North America. WAAS provides real-time corrections to GPS signals distorted by the atmosphere, and can more than double the position accuracy. The FAA designed the system to support aircraft, but most GPS devices used by backpackers include WAAS receivers. The European Union runs the comparable EGNOS system for Europe. Similar schemes improve GNSS accuracy in some other areas of the world.
Yet the U.S. Government continues to improve GPS technology. They’ve started launching the next generation of satellites, that by the late 2020s, using new receivers could give positions with three times more precision. Are you standing on the left side of the trail, or the right? And do you need a smartphone to tell you? The new satellites also include stronger signals and other technologies that will make getting an accurate position in dense forests even easier.
There are three other GNSS networks operating today. The European Union supports Galileo, providing 3.3-foot (1-meter) location accuracy from 22 satellites. The Russian Federation runs GLONASS, including 24 spacecraft supporting 9.2-foot (2.8-meter) positions. And finally, BeiDou, launched and operated by the People’s Republic of China, using 35 satellites to yield locations as good as 7.7 feet (2.3 meters). All three networks are planning or implementing upgrades to accuracy.
These systems work very similar to GPS. In fact, many devices can receive and process signals from multiple networks. Access to more satellites results in faster positions and better coverage in cities, forests, and canyons. However, devices in the U.S. may legally use only GPS and Galileo at this time.
The Bad
GPS and the other GNSS networks have their problems. Despite launching ever more powerful satellites, trees, buildings, and mountains can block the signals due to simple physics. Solar flares can scramble satellite messages. And GPS radio waves can bounce off buildings and mountains creating multipath errors, potentially offsetting your reported location by hundreds of yards (meters). Smartphones and similar consumer devices are especially vulnerable.
Your GPS position might not match what’s on your map for many reasons. Every map uses a datum or simplified mathematical model of the Earth’s shape, and there are several available. But if your smartphone reports your latitude and longitude, or UTM coordinates, using a different datum, your plotted position can be off by many yards (meters).
Plus, maps can have errors. Even USGS Topo maps have varying standards for accuracy. That peak you are standing on might look like it’s still many yards (meters) away on your GPS device; yet another reason to trust your lying eyes instead of a smartwatch.
Of course, all GPS devices require batteries and electronics that can fail in many ways. You don’t want to be staring in disbelief at a blank screen deep in the backcountry if that’s your only means of navigation.
The Ugly
Even worse, human activities can jam or spoof GPS – intentionally or unintentionally. Jamming happens when another radio signal on the same frequency overpowers the message you are trying to receive – and GPS signals are notoriously weak. Spoofing is when someone sends fake GPS signals that lead you astray. But spoofed and jammed radio waves don’t stop at one receiver.
Jamming
Jamming is much more common than you might think. Drivers use cheap but illegal GPS jammers to prevent the tracking of trucks and cars. One truck with a jammer, parked next to Newark Liberty International Airport in New Jersey, interfered with aircraft landings until authorities tracked it down. Even cars and trucks with jammers traveling on nearby highways cause problems. An illegal jammer left running in a car parked at a trailhead with good views could block GPS signals for a large area.
Three poorly designed amplified TV antennas made GPS useless for ships, boats, and researchers at Moss Landing harbor in California, triggering a lengthy investigation. A rural TV antenna could have the same impact on hikers, especially if mounted high enough to pick up distant stations.
Military jamming exercises in the U.S. have caused many problems for civilian airplanes, including leading some of them off course. BPL community members occasionally report GPS issues at the same time they see military aircraft overhead.
What’s even scarier is that when we get self-driving cars, GPS jamming could cause nightmares on the way to and from the trailhead.
Spoofing
For many years, experts considered GPS spoofing too hard to pull off effectively. But now step-by-step instructions using inexpensive parts and open-source software are on YouTube. There are multiple reports of spoofed boats, ships, planes, drones, trucks, and cars going off course.
An accidental spoofing attack at a GPS conference in Portland, Oregon scrambled many smartphones in unexpected ways, some for several hours even after the transmissions stopped. Most phones reported a position in France until experts took extraordinary measures to reset the device. Even the U.S. military is looking for non-satellite navigation systems as backups to GPS.
Hackers could potentially install a GPS spoofing app on your smartphone or smartwatch without your knowledge. These apps trick your device into showing an alternate location, without sending radio waves. Some people deliberately install one to fool a workplace-installed tracking app or gain advantages for delivery drivers. These apps are also favorites of some Pokémon Go players. A long-forgotten or well-hidden app could cause serious problems in the backcountry.
Conclusion
GPS and similar systems are remarkable technologies that have transformed many hidden and visible parts of modern life. I wouldn’t want to go back to pre-GPS position, navigation, and timing for many reasons.
However, GPS problems can be much more than an inconvenience for backpackers mindlessly following smartwatch directions. If you ever activate a PLB or press the SOS button on a satellite communicator, these devices also send your GPS position. While that’s normally a huge help for search and rescue teams, there are many reports of inaccurate GPS locations leading them astray – or even forcing them to give up the search entirely.
It’s important for trekkers to stay found almost in spite of multi-billion-dollar navigation systems, $1,500 smartphones, and matching $900 smartwatches. We need to use GPS networks and GPS-dependent devices wisely, recognizing when they mislead us, and staying safe when they fail. A simple paper map, an inexpensive compass, and a few easy-to-learn skills can turn a potential disaster into an inconvenience.
The U.S. government usually warns of planned GPS disruptions. Some other countries (including the UK) provide similar notifications. Worth checking just before you head into the wild.
Backpacking Light does not accept compensation or donated/discounted products in exchange for product mentions or placements in editorial coverage.
Some (but not all) of the links in this review may be affiliate links. If you click on one of these links and visit one of our affiliate partners (usually a retailer site), and subsequently place an order with that retailer, we receive a commission on your entire order, which varies between 3% and 15% of the purchase price. Affiliate commissions represent less than 15% of Backpacking Light's gross revenue. More than 70% of our revenue comes from Membership Fees. So if you'd really like to support our work, don't buy gear you don't need - support our consumer advocacy work and become a Member instead.
Learn more about affiliate commissions, influencer marketing, and our consumer advocacy work by reading our article Stop wasting money on gear.
The Seek Outside Flight One (36 oz/1.02 kg, $299 – $319) is a lightweight, minimalist pack designed with comfort and durability in mind.
Introduction
The Seek Outside Flight One (36 oz/1.02 kg, $319 or $299 for an X-Pac version) is a lightweight, minimalist pack designed with comfort and durability in mind. Seek Outside markets the Flight One not only as a thru-hiking pack but also for more burly and technical adventures. It combines water and abrasion-resistant materials with a streamlined and user-friendly design to create a pack that is worthy of both serious miles and serious loads.
Approximately ten days of gear and supplies packed into the Flight One with a cinch strap to keep everything tight during a ridge traverse.
About This Review
This review is based primarily on a five-night alpine trip, including scrambling and glacial travel in the Pacific Northwest. I also used it for multiple-day hikes, overnights, and gear hauls, and all those experiences are reflected in the review.
Features & Specifications
The pack used for this review was made from solid Spectra Grid HT and had a Belt One and 22 in (56 cm) frame. The following specifications are from Seek Outside’s website.
weight
22 in (56 cm) frame – 36 oz | 2 lbs 4 oz (1.02 kg)
volume
main pack bag: 3200 cubic inches (52 L)
front pocket: 534 cubic inches (9 L)
bottle pockets: fits one 1 L Nalgene or two 1 L Smartwater bottles
While weight may seem more like a specification than a performance component, it stands out when using the Flight One. The pack is remarkably light when empty, and this makes for really convenient packing and high functionality. This of course also decreases the carry weight of the loaded pack and seems to improve the weight distribution when the pack is filled to different degrees.
Durability
The light weight and relatively thin fabrics of the Flight One made me cautious at first. However, this caution gradually dissipated as the pack took unavoidable scraping and bushwacking in stride. After some fairly technical scrambling on rock and ice/snow, the Flight One's materials showed a little abrasion but didn't seem to thin or wear through at all. The simplicity of the pack's structure also makes me hopeful that there will be few points of possible failure, making for a pack with a lot of longevity. NOTE: Seek Outside says that the water-resistance of the full Spectra model will diminish over time but this may be able to be addressed with waterproofing treatments or simply sidestepped with a liner or cover.
Padding
Both the hip-belt and the shoulder straps feel well padded. At higher weights, comfort declines as should be expected but the Flight One is capable of a wide variety of loads without undue pain.
Adjustability
The Flight One seems to be a fairly fixed pack at first encounter. There are, however, a couple of aspects that let it adapt to different users and different loading. The hip-belt can be adjusted by securing it with some overlap at its fixture point, making for a simple but effective size adjustment that can easily be amended on the fly. Adjustments to the shoulder straps are only made through the standard cinches and load lifters but with the right frame sizing, this doesn't seem to be too limiting.
An assortment of straps and attachment points make for some great flexibility with external storage and compression. Water Bottles fit easily and snuggly in the side pockets.
Commentary
How does the Seek Outside Flight One stand out?
Backpacks may be tempting to dismiss as a basic piece of equipment with little difference between one and the next. After all, it is just a bag for all of your stuff. As with any piece of equipment though, there are some key advantages to be had by getting the right pack for the job. Different backpacks carry weight differently and organize their contents in different ways.
The Seek Outside Flight One is marketed as a jack-of-all-trades. In essence, the idea of a light pack that is durable and carries weight well presents a lot of possibilities for any given activity but also a slew of different activities.
I had a quick chat with Dennis Poirier at Seek Outside to get a sense of what has gone into making this pack a reality. Seek Outside already had an established line of backpacks before the Flight One was released, so I was curious what inspired them to develop this new pack and what it added to their collection. Dennis highlighted the importance of weight for them in designing and prototyping the Flight One, saying that they were chasing the 2 lbs (0.9 kg) mark throughout the process. He also gave me the interesting tidbit that the name actually was inspired by the desire to have the pack be functional as a carry on for flights. This wasn’t their sole mission, but my impression is that it is just one way to shoot for an adventurous pack that was unobtrusive while also being highly functional.For Dennis, the Flight One stands out by combining Seek Outside’s trademark rugged frames with a lightweight design, making for a very versatile pack. Through using the pack, I have come to the same conclusion and am impressed with their execution.
We should also note that this pack has an extensive Backpacking Light forum thread, complete with a diverse range of reactions and notes. We encourage you to check it out!
The Flight One is a pack that does a number of things very well. It certainly shares some of these characteristics with other available packs, but it executes them very well and stands out on a few fronts:
Materials
Space and Weight Carry
Features
Materials
While other companies use materials that perform similarly to those used in the Flight One, Seek Outside’s implementation, design, and options are noteworthy. The pack used for this review was the full Spectra Grid HT model geared more towards abrasion-resistance than their X-Pac/Spectra model, which claims more permanent water-resistance.
The material used in this pack is a Spectra Grid HT fabric, not unlike Dyneema grid fabrics used by some other manufacturers. This is aimed at abrasion resistance and wear centered on the stronger Spectra fibers woven through a somewhat weaker nylon body. Seek Outside also offers an X-pac/SpectraGridHT option of the Flight One which has greater water resistance but uses the Spectra Grid fabric in high wear areas to improve durability and abrasion resistance.
This being said, the pack was impressively waterproof, holding out moisture during rain showers in the field.
The pack showed minimal wear despite rocky terrain, and the water-resistance of the fabrics was impressive for such a robust but light material.
The pack also impressed during a more dramatic pour-over test. I filled the pack with a sleeping quilt and doused it at home. After a few rounds of pouring multiple liters over the pack and giving it some time to sit, the only moisture inside was at the base where it had been sitting in the pooled water. For a proper rainstorm or an extended wet bushwack, the Flight One may not keep its contents bone dry (with the full Spectra Grid HT). Still, users in some environments may well be able to avoid a liner or cover altogether.
The use of a water-resistant material simplifies the pack’s use and provides extra comfort and versatility without requiring the use of either a pack-liner or a cover. Some features of the pack (discussed below) also assure this simplicity by limiting exterior (unprotected) storage and avoiding potential weak points such as zippers or a cinch style opening.
The Seek Outside Flight One shines in combining the water-resistance of its materials with durability. The materials of the pack proved to hold up well to some abuse. Often, waterproof fabrics require some tenderness to hold up to continued use. In assuring that their pack will hold up to heavy use while having functional waterproofing, Seek Outside has made a workhorse of a pack for a variety of occasions.
Space and Weight Carry
A particular strength of the Seek Outside Flight One is that it is light and compressible enough to adapt to a variety of packing styles, from ultralight overnights to longer trips requiring more weight and space. The weight of my particular pack (I chose one without extra straps) is 36.5oz (1.03kg).
Due to the closure, the 60-liter volume of the Flight One may feel smaller than some other 60-liter packs that expand more and include brain storage. This volume, however, still proves to be enough for a broad range of trips. The longest trip done for this review was planned for ten days, and although it was cut short by weather, the Flight One proved to be capable enough for ten days of equipment and supplies (~30 lbs/13.5 kg), including an ice ax and crampons. Through a handful of other shorter trips and gear hauls, the Flight One proved to handle loads up to about 50 lbs (22.5 kg) with relative ease. It is fully possible that this pack could handle bigger loads but at 60-liters, users would likely fill the pack before reaching much larger weights.
I found the hipbelt to be very comfortable. Because I had the pack for a limited time my main use was around 30lbs (23.6kg). I found this weight to ride really nicely on my hips and tighten down onto my shoulders and back well for more technical terrain. Also, it’s important to note that the hip belt is adjustable in length. My iliac crest is about 30 in (76 cm) and I was able to get a snug fit. The more the hip belt is shortened the less velcro overlap there is though, so there could be more risk of sliding or walking on the velcro fixture. That being said, with shorter hikes and load tests I was able to load the pack to about 60lbs (27.2kg) and still carry all of the weight with my hips.
Note that for me the arch of the back panel (providing better airflow) makes a close body fit tricky when heavily loaded while still transferring the majority of the weight to the hips. This may differ for different torso lengths, and the transfer of some weight to the shoulders is still comfortable with the suspension provided. The hipbelt is also fairly soft, allowing it to pivot (as another user pointed out in the comments), this does, however, make heavier loads slightly less stable if transferred to the hips. The hipbelt does twist and sag somewhat with 50lbs+ (22.7kg+) on it. I am personally known to suffer through heavy packs but would say that particularly around the 30lbs (23.6kg) mark this pack is truly comfortable.
Other packs may carry heavy loads better than the Seek Outside Flight One but many of those packs are significantly heavier. The Flight One has a great variety of comfortable carry-weights while not adding much weight itself to your back. It is also fully capable of stretching to higher weight limits if needed, with sacrifices in comfort that generally comes with that. It is designed as simultaneously a minimalist pack and a weight hauler, and I found it to suit this double-duty quite well.
Features
There are a couple of approaches to improving a backpack’s features. Features can either be added in an attempt to increase convenience (more pockets, side access, integrated pack cover, etc.) or they can be stripped down and streamlined to reduce weight and simplify (rolltop, fewer pockets, no zippers, etc.). The Flight One leans more towards the second with a simplistic design. However, I was impressed with the specific features implemented by Seek Outside to make this a very functional pack at an impressively low weight.
The Flight One’s most obvious features are three external pockets: two side pockets that easily fit a 1-liter water bottle fully inside, and one pocket on the rear that can be used for various things from crampons to fuel to wet equipment. The frame and hip-belt come with the standard adjustments and cinches, including load lifters and a sternum strap. The roll-top closure works well, though it requires enough rolls to be completely sealed, and pairs well with the water-resistant materials to seal the contents.
Access to the main pocket is pleasantly quick, although only the rolltop and fairweather pit stops were fuss-free.
The hip-belt also has two zippered pockets which are a good size to store a number of items for easy access but are not overly cumbersome whether full or empty. These pockets are the only zippers on the pack. The zippers proved to be easy to use and are well made.
Overall, the Seek Outside Flight One’s design makes for a sleek, user-friendly experience as long as you aren’t looking for too many frills. I was impressed with how it performed and liked its simplicity for an efficient packing experience that encourages further minimalism without sacrificing comfort.
Compared To…
Below is a brief comparison of the Seek Outside Flight One to the CiloGear 60 L WorkSack. These packs are both designed with light weight and quality materials in mind. The WorkSack markets itself more towards the alpinist or technical backcountry user but these packs could both be used for similar applications and come from companies with similar intentions in quality, durable, and high-performance packs.
The factory specs are much lower on the Flight One at 2 lbs 4 oz (1.02 kg) compared to the WorkSack at 4.2 lbs (1.98 kg). The WorkSack does strip down some weight, but the Flight One provides more function per weight.
Seek Outside Flight One
Weather Resistance
The Flight One uses more water-resistant materials, meaning that for a lot of applications, a pack liner or pack cover could be avoided altogether. The WorkSack materials are rugged but absorb water much more quickly.
Seek Outside Flight One
Adaptability
With a detachable lid and a more involved strap system the WorkSack can adapt slightly more to different situations and uses. That being said the Flight One does have better water bottle storage and hip-belt pockets making this a close one depending on what kind of use the pack is going to see.
CiloGear WorkSack
Price
The Flight One ranges from $299 to $319 while the WorkSack is listed at $309 making these packs hit essentially the same price point.
Tie: The pricing for both of these packs is similar
Strengths
Comfort
Light and carries a variety of load weights with comfort.
Ease of Use
External pockets are all convenient and simplistic.
Rolltop closure requires little fuss and can compress the pack somewhat.
Easy to use straps and attachment points make for quick adjustment, compression, and external storage.
Hipbelt adapts in length with fairly straightforward adjustment.
Durability
Material has proven so far to be resilient to abrasion and other stresses.
Fairly streamlined design limits catching and other possible wear when moving through brush or rubbing against rock.
Limitations
No brain or pocket which can be detached as a day/peak pack.
Frame size does not adjust, i.e., the fit must be considered when buying and cannot be hugely adapted (there will still be a range of fit for each frame size).
The only access is through the top.
A fairly large frame (i.e., 60 liter-sized) may be unnecessary or even uncomfortable for some with smaller loads.
The strap system allows for customization but may require some finagling at first.
Open bivvies, even with frost in the morning, were easy with everything miscellaneous stuffed into the Flight One before bed.
Our community had fun discussing the Seek Outside Flight One before it came out. Check out the convo!
DISCLOSURE (Updated April 9, 2024)
Product mentions in this article are made by the author with no compensation in return. In addition, Backpacking Light does not accept compensation or donated/discounted products in exchange for product mentions or placements in editorial coverage.
Some (but not all) of the links in this review may be affiliate links. If you click on one of these links and visit one of our affiliate partners (usually a retailer site), and subsequently place an order with that retailer, we receive a commission on your entire order, which varies between 3% and 15% of the purchase price. Affiliate commissions represent less than 15% of Backpacking Light's gross revenue. More than 70% of our revenue comes from Membership Fees. So if you'd really like to support our work, don't buy gear you don't need - support our consumer advocacy work and become a Member instead.
Learn more about affiliate commissions, influencer marketing, and our consumer advocacy work by reading our article Stop wasting money on gear.
The Learning Curve is a new column by outdoor journalist Maggie Slepian. In this installment, she talks about how easy it is to find yourself in over your head in the outdoors.
Prior to moving to Montana from my sanitized life on the East coast, the majority of my outdoor recreation involved out-and-back day hikes with plenty of signage and an ice cream cone on the way home. I was fit and enthusiastic but had yet to experience the range of activities that existed from access points my sports car couldn’t reach.
At 23, I was new to the West and eager to shed my sheltered northeast persona. I’d never carried a fully loaded overnight pack, crammed my foot into a climbing shoe, or ridden a bike in a place where suspension mattered. Within this dazzling array of backcountry sports, nothing piqued my interest quite like climbing. Or, rock climbing as I called it when I proudly announced my newest hobby to my gaggle of coffee shop coworkers.
With this lack of experience came a lack of inhibitions. I’ve always been the type of person to dive headfirst into a new activity. It’s a combination of a desire to prove myself, a lower-than-average risk perception, and a heaping dose of overconfidence. By the time I decided to try “rock climbing,” I had already tackled my first overnight backpacking trip with minimal research and minimal resulting issues. I had tried mountain biking and found I could walk a section when the terrain seemed above my paygrade. To me, climbing was simply the next step.
Climbing seemed like the next step in my outdoor adventuring life. But the first community I found didn’t take the the time to train me correctly.
But there was a difference in learning to climb compared to my first attempts at backpacking and mountain biking. Falls weren’t from bike height, and I couldn’t stab a trekking pole into the ground or put a foot down to save myself. Taking a high-consequence fall was more likely than I could comprehend. The technical skills weren’t just to aid efficiency: the knots, belay strategy, rappelling technique, and rope management could be the difference between a moderate whip and a ground fall.
None of this registered as I flailed on the rainbow plastic holds and felt sparks of joy as my muscles moved in a flow I’d never before experienced. I relished the soreness in my forearms, the feeling of increasing strength, the pride that accompanied tackling higher-rated routes.
I climbed in the gym every day for a month, mostly alone, but occasionally top-roping with other solo climbers. I was friendly and ready to meet people but didn’t have a climbing community.
On one of these afternoons in late summer, I sat sifting my hands in the chalk bag, scanning the beginner problems scattered across the wall. A heavily muscled guy around my age strolled in, shoulder-length hair, a cut-off t-shirt, and the type of swagger that immediately draws you in. Following him were two other guys around the same age. They had guest passes, but their shoes were soft and worn, their chalk bags dusty from use.I immediately walked over and introduced myself.
They were coworkers from Yellowstone National Park, spending their summer working hospitality jobs with the goal of escaping work on their days off to climb in Montana and Wyoming. Bozeman was their base camp for a trip to Wyoming to climb single-pitch sport routes around the Tetons. Within an hour of chatting and bouldering, I somehow portrayed enough confidence to warrant an invitation on the trip.
I dashed out of the gym and across town to REI, clutching a sticky note scrawled with quick draws (12), ATC, slings. I swiped my credit card, gathered my armful of new swag, and met the group of guys back at my apartment, where we assembled climbing gear and camping items for the next three days.
The things I didn’t know on this trip so vastly outnumbered the things I did know that it’s almost hard to remember them. I want to deny that I cleaned a route 40 feet in the air while someone yelled instructions from the ground. Or that I asked them how to clip as I was well past the second draw on my first lead. Or that I belayed a man who outweighed me by 50 pounds while standing ten feet away from the wall. I smashed face-first into the granite when he fell.
I told myself that I couldn’t show hesitation or tell them no, because I would never be invited back. I gritted my teeth and fought through any potentially overwhelming nerves. Focus on the rock, pull the rope up, clip it into the draw. Move your feet. Move your hands. Worry about the top when you get there. I carefully maneuvered up the blocky 5.9, reveling in the thrill of my first lead. They shouted instructions at the top, and I clipped the anchors, flushed with pride.
I lead routes, belayed, and cleaned anchors without ever having practiced, and without any understanding of technique and consequences. The way they explained it made sense: I was top-roping their climbs, so of course, I was going to clean them. Everyone has to do their part. I gamely agreed, even though it makes me cringe to know that I didn’t understand anchors, rappelling, prusiks, going indirect. My understanding of the consequences of tying in incorrectly, or dropping the ATC or my end of the rope was none. I was so thrilled to be outside climbing with this group of handsome men, indoctrinated into their group and beaming as they praised my level head and bravery, that it surpassed every alarm bell I should have been heeding.
It’s easy to adventure past your skill set and not even realize it.
The thing about this egregious display of bad judgement is that there were no accidents. Nothing bad really happened. I wound up bruised and somewhat unnerved, but I didn’t know enough to be scared and certainly not enough to understand the consequences of what I was doing.
Because there were no consequences, I didn’t learn any immediate lessons—not for years. I returned from the trip feeling successful. Like I’d cut the switchbacks of the learning curve and accelerated an entire season. To me, I’d gone from a person who had been flopping around a gym for a few weeks to an outdoor lead climber in just one weekend. I didn’t understand how close to catastrophe I’d been. If I’d tied the wrong end at the top of a route, or fallen on a backwards clip, or dropped the rope as my climber fell, the consequences could have been severe, tragic.
Climbing did become a core part of my social life, athletic outlet, and backcountry identity. After that trip, I slowly relearned outdoor climbing skills and wound up with an incredible, badass community of climbers. Safety and protocol were paramount in our endeavors while preparing for a trip, at the crag, and during all downtime. We knew to communicate with each other and how to verbalize if something unnerved us. It was such a far cry from the way I learned that it took literal years to look back on my first experiences climbing outside and understand there had been something wrong. My desire to be included and to prove my own worth swept easily over what I inherently understood to be unsafe, and it was too easy for me to ignore it.
It took some time, but I finally found an adventuring community that prioritized safety and communication over ego. That should be the goal of every beginner in outdoor sports.
I can say it was mostly dumb luck that let me get away with leading routes, lead belaying, and cleaning anchors with no understanding of how to do it. Looking back, years later, it still sends a shiver through me and a quick thanks to the backcountry recreation gods that somehow, all the correct pieces fell into place. It would have been easy not to have been so lucky.
There’s no shame in not knowing what the hell is going on, and there’s no wrong time to stand up and let your group know you’re in over your head. Whether you’re just mapping out the plan for a backpacking trip across technical terrain, loading the climbing gear into the car, or already deep in the backcountry, when you feel uncomfortable, speak up. If the people you’re recreating with are worth your time, they won’t judge. The people I went climbing with were good-natured, goofy, and out to have a good time. I can pretty much guarantee they would have been totally fine if I’d said I wasn’t comfortable with leading, lead belaying, or cleaning routes, but that’s neither here nor there. As the person who now takes new people out, I’m on the other end of the rope, and the first thing we do is make sure the new person feels comfortable and confident in their skills and the task at hand. It’s the best kind of communication to pass down the line.
The Learning Curve is a monthly column by outdoor journalist Maggie Slepian which will examine human-powered outdoor adventure through the lens of beginners. How do beginners learn our sports? What pitfalls do they face? How does mentality shift through time? And how should experts treat beginners? The Learning Curve will cover all this, and more. Got suggestions? Drop Maggie a line in the comments.
Product mentions in this article are made by the author with no compensation in return. In addition, Backpacking Light does not accept compensation or donated/discounted products in exchange for product mentions or placements in editorial coverage.
Some (but not all) of the links in this review may be affiliate links. If you click on one of these links and visit one of our affiliate partners (usually a retailer site), and subsequently place an order with that retailer, we receive a commission on your entire order, which varies between 3% and 15% of the purchase price. Affiliate commissions represent less than 15% of Backpacking Light's gross revenue. More than 70% of our revenue comes from Membership Fees. So if you'd really like to support our work, don't buy gear you don't need - support our consumer advocacy work and become a Member instead.
Learn more about affiliate commissions, influencer marketing, and our consumer advocacy work by reading our article Stop wasting money on gear.
CS Instant Coffee is a small instant coffee product designed to compete with Starbucks Via and other popular backcountry coffee solutions.
CS Instant Coffee is a small instant coffee product designed to compete with Starbucks Via and other popular backcountry coffee solutions. It comes in packs of six for $19, and each pack makes two cups of coffee. That equates to about $1.59/cup.
In Defense of Instant
I’m somewhat of an anomaly amongst the Backpacking Light authors and staff. Although I appreciate and can identify quality coffee—and tend to drink middle-range, fair trade, course-ground coffee prepared in a French press when I’m at home—I also don’t need a gourmet coffee experience. I can and have imbibed caffeine through tea, electrolyte tabs, and bottom-of-the-pot swill at run-down gas stations, burger joints, Waffle Houses, and beautiful sweeping vistas all across the country.
Ryan Jordan, Chase Jordan, and Emelyene VanderVelden have all weighed in extensively on their go-to backcountry coffee preferences. They uniformly prefer pour-over, French-press, or Aero-press backcountry coffee when those options are available.
I, on the other hand, tend to gravitate towards instant coffee when backpacking.
I know. I know. When I was pre-interviewing a coffee roaster for our Backcountry Coffee podcast, he almost refused to talk to me after I mentioned I drank instant while backpacking. I believe he called it “a sin against all that is good and right in the world.”
But if your palette is sufficiently dull (working a night shift job, being poor in your twenties and early thirties, or making a living as a writer are all great ways to lower your coffee expectations), instant is the way to go. It packs smaller, weighs less, and is more convenient than any other option – bar none.
And not all instant is the same. Starbucks Via is ubiquitous amongst the instant-carrying ultralight crowd because of its wide availability, but I think most of us agree that there’s room for improvement. Even to Philistines like myself, Via can taste like the coffee equivalent of the tea Arther Dent tries to get the Heart of Gold to brew in Hitchhiker’s Guide to the Galaxy.
So I was excited to try CS Coffee when they mailed me a sample a few months ago.
The Test
I drank CS Coffee on backcountry expeditions in the Lake Tahoe region of the Sierra Nevada, as well as in Great Smoky Mountain National Park and my house while writing this article.
I compared the product to Starbucks Via in a direct taste test because Via is available in almost any grocery store in the country, and it is easy to get your hands on if you have to re-supply in a hurry. It is (by my anecdotal reckoning) still the most common instant coffee to be found in backpacks.
CS Coffee comes in two-serving-per-packet portions. Whether you find this convenient and waste-saving or annoying will depend on your coffee-drinking habits and priorities.
I also compared CS coffee to Alpine Start, a very decent instant product you can find at REI or online in individual servings. It also has the advantage of being available in bulk. The downside to Alpine Start is that it can be hard to find (I’m not sure if they have supply issues or something, but it’s been out of stock at REI in multiple locations at various times I’ve searched for it). If you are a last-minute packer like me, beware.
I tested a dark roast from CS because it is currently their only product. I tested a dark roast from Via because I wanted to match the roast as closely as possible to the product from CS. Alpine Start only has a medium roast available, so I didn’t do a direct taste test. But I will mention it in comparison below when it seems appropriate.
Finally, in an effort at total transparency, I will disclose that I wrote a compensated article for CS Coffee’s blog a few months ago in my capacity as a freelance outdoor journalist. The article wasn’t coffee related.
The Taste
I think CS Coffee is significantly better tasting than Starbucks Via, and about on par with Alpine Start. Here’s why.
Aroma
Upon the initial pour, CS froths up with a beautiful and appealing crema, while Via just kind of sits there, glimmering darkly. Via’s aroma has a top note of toasted marshmallow—this is what they say on their packaging, and after trying and failing to come up with a different explanation for the aroma, I think they nailed it. There is an underlying soapy finish to the smell, though, one that replicates itself in Via’s taste.
CS Coffee develops a pleasing crema upon the initial pour.
CS Coffee’s top note is citrusy and a little sharp, with an earthy finish. It lacks the unpleasant tang of Via’s finish and is, therefore, a more pleasing aroma.
Tasting Notes
I enjoyed CS Coffee’s initial hit of flavor—on the mild side for a dark roast, fairly nutty, and with a nice bright finish. Via’s tasting notes are, on the whole, much sharper. Via seems to walk a line between “dark roast” and “turn the beans into charcoal.”
Both products get a little bitter and acidic as they cool (this seems to be the hallmark of instant coffee), though my experience revealed CS Coffee is less acidic on the tongue (and stomach) than Via. It’s about on par with Alpine Start.
The Rest
I went into this mini-review with one question—is CS Coffee a better-tasting instant coffee than Starbucks Via? The answer is an unequivocal yes. Is it better than Alpine Start? That’s where things get a little more thorny. The roasts aren’t really the same, so it’s hard to make a direct comparison. For the purposes of this review, I will call them equally good tasting, or close enough.
Since I’m calling CS Coffee and Alpine Start roughly equal in terms of quality, it’s worth examining things like cost, packaging, and other factors for a moment. CS Coffee’s paper packaging is 100% biodegradable and burnable if you happen to live in an area where campfires are okay. Alpine Start uses the ubiquitous plastic and mylar packaging you’ve seen (and thrown away) a thousand times. So that’s a point in CS Coffee’s favor.
Getting ready to enjoy a hot beverage halfway through a long day on the trail.
CS Coffee is about $1.59/cup and comes in boxes of six packets, with each packet containing enough powder for two servings. Alpine Start comes in boxes of eight packets, with each packet being a single serving. It’s $8.99/box, or $1.12/serving. As I mentioned before, you can also get Alpine Start in bulk containers. When you buy it that way, it’s $0.83/serving.
A final point in Alpine Start’s favor is that it also comes in dairy-free creamer or dirty-chia varieties if you don’t like your coffee black.
I’d be remiss if I didn’t point out that Starbucks Via is the most affordable of the three products. I just bought a pack of eight at my local Safeway for $5.99, or $0.74/serving.
In Conclusion
If you’ve been looking for a Starbucks Via alternative and you like supporting small companies that put good into the world (CS donates 1% of its profits to environmental non-profits), CS Coffee is a good alternative. It is head and shoulders above most instant coffees in terms of taste and is about on par with my other favorite option, Alpine Start.
While Alpine Start is cheaper, CS Coffee’s packaging is a little more earth-friendly. Whether or not you like CS Coffee’s two-cup-per-packet strategy will depend on your coffee drinking habits. I like it because I always have two cups, and the double-serving strategy is less wasteful.
The final takeaway comes down to use cases. If I’m supplying for an extended trip with high food costs or difficult, rural re-supply, I’ll go with Via for cost and convenience. If I have a slightly better budget or my trip is shorter, but I’m still re-supplying in a hurry, I’ll go with Alpine Start because of its taste, relative budget-friendliness, and moderately convenient availability. If I happen to be supplying myself within the internet ordering window and I have a little extra cash, I’ll go with CS Coffee because of the combination of taste, double-serving packaging, and environmental friendliness.
Product mentions in this article are made by the author with no compensation in return. In addition, Backpacking Light does not accept compensation or donated/discounted products in exchange for product mentions or placements in editorial coverage.
Some (but not all) of the links in this review may be affiliate links. If you click on one of these links and visit one of our affiliate partners (usually a retailer site), and subsequently place an order with that retailer, we receive a commission on your entire order, which varies between 3% and 15% of the purchase price. Affiliate commissions represent less than 15% of Backpacking Light's gross revenue. More than 70% of our revenue comes from Membership Fees. So if you'd really like to support our work, don't buy gear you don't need - support our consumer advocacy work and become a Member instead.
Learn more about affiliate commissions, influencer marketing, and our consumer advocacy work by reading our article Stop wasting money on gear.
In this episode of the Backpacking Light podcast: National Public Lands Day, transitioning from summer to fall gear, UV light as a water treatment technology, an interview with adventurer Tully Henke about his epic trek through the wilderness of eastern Russia, and attempting to answer the question: “why do I walk?”
Stream
Summary
In this episode of the Backpacking Light podcast: National Public Lands Day, transitioning from summer to fall gear, UV light as a water treatment technology, an interview with adventurer Tully Henke about his epic trek through the wilderness of eastern Russia, and attempting to answer the question: “why do I walk?”
Executive Producer - Backpacking Light; Show Director and Host - Ryan Jordan; Producer - Chase Jordan; Theme music: Look for Me in the Mountains written by Chris Cunningham and Ryan Jordan, performed by Chris Cunningham (acoustic guitar, lead and harmony vocals, harmonica), Chad Langford (upright bass), and Tom Murphy (mandolin), produced by Basecamp Studios in Bozeman, Montana.
Sponsorship Policy: Backpacking Light does not accept compensation or donated/discounted products in exchange for product mentions or placements in editorial coverage, including any podcast episode content not excplicitly identified as sponsored content. Some (but not all) of the links in these show notes may be affiliate links. Learn more about affiliate commissions, influencer marketing, and our consumer advocacy work by reading our article Stop wasting money on gear.
The HydraPak Flux 1 L (2.7 oz / 77 g, MSRP $20) is a soft-sided, collapsible, 42 mm threaded, reusable water-bottle aimed at the single-use Smartwater or sports-drink bottle crowd.
The HydraPak Flux (2.7 oz / 77 g, MSRP $20 for the 1L version) is a soft-sided, collapsible, 42 mm threaded, reusable water-bottle aimed at the single-use Smartwater or sports-drink bottle crowd.
The HydraPak Flux 1 L. Photo: HydraPak
The Problem
When I first took up the sport of long-distance backpacking in a serious way, my first instinct was to use Platypus-style soft-sided bottles. I appreciated their compressibility and weight, and I liked that they were not single-use. At the time, I was proud of myself for not using a big, heavy Nalgene bottle (we all start somewhere, right?).
But soon enough, the realities of trail life took their toll on my good intentions. I found this style of bottle challenging to fill from shallow pools or lakes when running water wasn’t available. They don’t dry out easily, don’t stand up well, and their softness and floppiness can make them hard to get in and out of pack pockets while on the go. On top of all that, they can’t take much abuse—at least they didn’t as of a few years ago (the last time I seriously put a Platypus bottle through its paces).
And so I did what a lot of thru-hikers do: I gravitated towards single-use plastic bottles, namely 1 L Smartwater bottles. As most of us know, Smartwater bottles hold up well (I usually use them for a month or so at a time) and have a long, skinny shape that slots nicely into most pack pockets. Some packs are even designing pockets with Smartwater bottles in mind, which I find to be a fascinating development. 750 ml (25.3 oz) sports-drink bottles are also popular for many of the same reasons.
But since becoming a full-time outdoor journalist, I find myself increasingly facing the realities of our community’s impact on the environment. I’m starting to do some thinking about my carbon impact with regards to traveling to a trail-head. I’m self-conscious about all the single-use plastic baggies in my food-packing strategy. And finally—and this is a big one—I’ve finally decided that it’s time to give up my beloved Smartwater bottles.
Enter HydraPak
The HydraPak Flux 1 L is the newest product from HydraPak, a company that’s taken a noticeably different approach to soft-sided bottles than Platypus and similar competitors. Readers may be familiar with the Stash – HydraPak’s original 1 L bottle. The Stash has a screw-off lid, a bail handle, weighs 3.7 oz (107 g), and is made with durable TPU and PP materials.
This design is notable because although it’s soft-sided, it stands up on its own when empty. This function comes with several benefits – notably that filling from difficult water sources is easier, and your drinking nozzle doesn’t get dirty from laying on the ground. Thanks to the material selection, these bottles are far more durable than either Platypus soft-sided bottles or single-use plastic bottles.
The 1 L Stash has a 63 mm threaded lid, and so it is nice if you want a wide opening and/or use a filtration device that matches that thread size (most of the pump-style ones do). But until recently, you had to go down to the 750 ml (25.3 oz) size to get a 42 ml (read Katadyn BeFree compatible) lid.
I prefer 1 L bottles, and the 3.7 oz (105 g) weight was just a little too much for me to pull the trigger on. And like most ultra-lighters, I don’t use pump-style filters.
The Flux Pros
And now we get to the Hydrapak Flux. This product retains all the great things about the Stash and tweaks the design to appeal to a broader range of ultralight needs.
The HydraPak Flux 1L retains the useful features of the HydraPak Stash but incorporates them into a lighter product.
The Flux retains the bail handle, my favorite feature for keeping my hands out of cold water and filling from ponds with ease. The Flux also keeps the strong yet flexible construction, welded seams, and compressibility; although it doesn’t compress quite as neatly as the Stash. And of course, you get HydraPak’s signature feature–that standing-up-when-empty ability.
The bail handle is one of my favorite features of the HydraPak Flux 1 L. I hate getting my hands into cold water first thing in the morning.
The Flux’s first difference is that you get a 42 mm thread with 1 L of storage, meaning that 1 L bottle fans can pair it with a Katadyn BeFree no problem.
The lid is still screw-off (for easy lemonade/chia seed/electrolyte additions) but now has a squeeze nozzle.
The 42 mm thread is compatible with Katadyn BeFree filters—a major plus.
The final point, of course, is the weight. The 1 L Flux weighs 2.7 oz (77 g). That’s still 1.3 oz (36 g) heavier than a Smartwater bottle, but 1 oz (28 g) lighter than the Stash. For some reason, that one ounce was just enough of a mental nudge for me to make the switch.
Indicator marks for milliliters are another little benefit over using a single-use plastic bottle.
The Hydrapak Flux Bottle: Cons
There’s a lot to like about the Hydrapak Flux Bottle, but it isn’t all roses and sunshine. My load-hauling Rogue Panda Zoro has water bottle pockets designed with long, skinny, hard-sided Smartwater bottles in mind, and my Flux bottles are nearly impossible to get in there (go check out the pack to see what I mean).
Trying to get the HydraPak Flux 1 L into the specially designed (for Smartwater bottles) pocket of my Rogue Panda Zoro. It didn’t go so well.
I had slightly better luck when pairing Hydrapak Flux bottles with my Mountainsmith Zerk 40 L Fastpack. That pack utilizes a much more traditional side-pocket system. So, if that’s how your pack is designed, you might be better off. But it still wasn’t as easy as when using a Smartwater bottle. So I’ve come to accept this drawback as a necessary evil of switching away from single-use bottles. I’d rather re-think my bottle storage system entirely (and possibly commission a backpack with soft-sided bottles in mind) than continue to use single-use plastics.
Having a little more luck getting the bottle in and out of traditional side-pockets, but it still isn’t great – and I should note that the Zerk 40 L pictured here is one of the easier packs I’ve ever used for water-bottle retrieval.
A final thought: It’d be nice if the Hydrapak Flux could handle boiling water for use as a hot-water bottle in extreme conditions, but it maxes out at 140 F (60 C). You could maybe get away with attempting to heat up water to just below that point, but that seems foolish, dangerous, and easy to get wrong.
Conversation
I can tell you that HydraPak has a hard-sized reusable bottle coming out this October. This bottle is Smartwater-shaped and made of 50% post-consumer plastic. Called the Hydrapak Recon, it might be a good middle-ground between Nalgene bottles and Smartwater bottles. I’ll post a blog about it later this fall once I’ve had a chance to test one out.
What’s your current water-bottle setup? Are you thinking about ditching single-use plastics for more reusable (but heavier) options? Drop me a line in the comments and let me know where your head is!
Andrew mentioned his Zerk 40 L Fastpack. It’s still his all-time favorite backpack. Read his review here.
Forums:
This thread explains our community’s long-standing love affair with Smartwater bottles.
DISCLOSURE (Updated April 9, 2024)
Product mentions in this article are made by the author with no compensation in return. In addition, Backpacking Light does not accept compensation or donated/discounted products in exchange for product mentions or placements in editorial coverage.
Some (but not all) of the links in this review may be affiliate links. If you click on one of these links and visit one of our affiliate partners (usually a retailer site), and subsequently place an order with that retailer, we receive a commission on your entire order, which varies between 3% and 15% of the purchase price. Affiliate commissions represent less than 15% of Backpacking Light's gross revenue. More than 70% of our revenue comes from Membership Fees. So if you'd really like to support our work, don't buy gear you don't need - support our consumer advocacy work and become a Member instead.
Learn more about affiliate commissions, influencer marketing, and our consumer advocacy work by reading our article Stop wasting money on gear.
In this installment of Standards Watch, Rex Sanders tackles sleeping bag ratings: the standard, the pros, and the cons.
Standards Watch is a monthly column by Rex Sanders that examines important backpacking product standards, interviews key people, and describes how the industry uses, abuses, or ignores tests and standards. It also critiques existing standards and marketing, points out missing standards and tests, and proposes other ideas to improve life for backpacking consumers.
Introduction
Credit: The Noun Project, for all illustrations in this article
You’ve probably seen sleeping bags advertised as good to “32 degrees” (Fahrenheit) or “0 degrees” (Celsius) and wondered how they came up with that number. Thanks to measurements using the ISO 23537 standard, commonly known as the EN rating, we have a consistent but imperfect way to measure and report those values.
In this column, I’ll review the standard in detail and cover its pros and cons. In a future installment of Standards Watch, we’ll hear from some sleeping bag and quilt designers, and look at how companies use, abuse, or ignore standard temperature ratings.
You should keep in mind a few facts barely discussed in the standard. Sleeping bags or quilts are just one part of a system to keep you warm at night. Other gear includes a warm enough sleeping pad, sleeping clothes, and a shelter. Essential skills include going to bed warm, well-fed, and hydrated in a location protected from the wind. Your sleeping system doesn’t generate warmth – it just traps the heat your body gives off, like a thermos keeping coffee warm. And just because your younger, fitter, and trimmer hiking buddy slept warm in a particular sleeping bag doesn’t mean that you will too.
Part of the cover of the ISO-23537 standard. (c) ISO, 2016.
Overview of the Standard
You will see sleeping bag “EN” ratings or “EN 13537” ratings far more often than “ISO 23537” ratings. “European Norm” 13537 was the first widely used international standard for measuring sleeping bag temperature ratings. In 2016, the International Standards Organization published ISO 23537 to replace that standard and make it more consistent. For consumers, the difference between EN and ISO ratings isn’t relevant. Most backpackers and retailers still refer to the EN rating of a bag, whether it’s measured under ISO or EN.
The standard defines a test procedure, using a calibrated manikin in a climate-controlled room on a well-insulated sleeping pad, for measuring a sleeping bag’s Maximum temperature, Comfort temperature, Limit temperature, and Extreme or Survival temperature. Most bag makers publish just the Limit temperature, or the Comfort temperature, or sometimes both.
ISO 23537 bases the Comfort rating on a “standard woman” who isn’t shivering “in a relaxed posture.” The lower Limit rating is based on a “standard man” who’s “curled up inside the sleeping bag” and not shivering. Regardless of your gender identity, I’ll go into more detail below, and in a later article, help you decide which rating might fit best.
There are a few other ways to measure insulation. R-values in U.S. traditional units come from construction, and are now widely used (for better or worse) to measure sleeping pad insulation. RSI or m2*K/w is the metric equivalent and used throughout ISO 23537. You can measure clothing insulation in international tog units or U.S. clo units, but sleeping bags rarely feature them.
Testing Process
Before testing begins, a climate-controlled room is set up to meet the standard. The sleeping bag and manikin lie on an R 4.8 (RSI 0.85) pad, placed on a large-enough, about 3/4 inch (20 mm) thick wooden board. The whole apparatus is at least 3.9 inches (100 mm) above the floor, with air circulation underneath.
Sleeping bag preparations typically start the day before the test, with the bag tumbled for 15 minutes without heat in a large, laundromat-sized dryer. Then the bag goes into the climate-controlled room for at least 12 hours. Yes, even sleeping bags need to acclimate!
The real action starts on the day of the test. The tester lays the sleeping bag on top of the pad and board. If the bag’s hood closes small enough, a cold-weather mask goes onto the manikin’s face. Then the tester places the manikin inside the sleeping bag and completely closes the zippers and hood, if appropriate.
The manikin has both electric heaters and an array of thermometers connected to test equipment. While monitoring the temperatures, the tester slowly increases and measures the electric power heating the manikin. The rarely-seen Maximum temperature test uses a manikin with arms out, no face mask, a flat hood, and an open zipper.
Five pages of mathematical formulas in ISO 23537 can compute sleeping bag insulation in RSI and the four rated temperatures. The equations reflect human heat production; dry, evaporative, and respiratory heat loss; body temperature changes; and sleeping bag breathability. In practice, shortcut formulas and tables in the standard make the job much simpler.
Example of an ISO 23537 standard compliant sleeping bag graphic label. The temperatures left to right are Maximum, Comfort, Limit, and Extreme. Credit: Rex Sanders
ISO 23537 also requires specific consumer labeling on each sleeping bag, including a graphic based on the four calculated temperatures. Bag makers may be creative if they include all the required elements.
Good Stuff
Testing most sleeping bags to the same standard makes for easier and more trustworthy consumer comparisons. Before standardized testing, you had to rely on the inconsistent temperature or “season” ratings of bag makers. Moreover, some manufacturers had a much better reputation than others.
Despite using a motionless manikin lying on its back, standard developers used extensive human research to calibrate their mathematical models. Also, the standard explicitly allows for testing of hoodless sleeping bags, and by extension, quilts. However, the manikin would lose a lot of heat through its uncovered head, resulting in a more flawed temperature rating.
Oddities
ISO 23537 has a few quirks. One part of the standard requires testing in a room with a temperature that could range from 41 F to 59 F (5 C to 15 C). A later section specifies calibration using 58.8 F to 59.2 F (14.9 C to 15.1 C). Yet, Amendment 1 requires testing in the same conditions as calibration.
The standard has specific but confusing language describing when tests should include a military-grade extreme cold weather mask. In brief, the tester must put that mask on the manikin for sleeping bags with hoods that can close to less than 4.7 inches (120 mm) across the face. That would barely expose the eyes, nose, and lips. For sleeping bags with larger openings or no hoods, or for quilts, tests must not include a mask. That seems like the opposite of what most people would do.
The standard says it works like this: in cold air, most sleepers turn their face into the cinched-up hood of their sleeping bag. But the available instrumented manikin’s neck can’t rotate. So to simulate a turned head in a closed hood, the standard requires a mask but prohibits it when there’s no suitable head covering.
Test Issues
The standard has many limitations that can reduce its accuracy when compared to the real world. For example, all tests use just one manikin that must stand in for humans with a range of heights, widths, weights, and total heat production. This can be a real testing problem for bags much smaller or larger than the manikin. And during testing, the manikin wears a relatively warm long-sleeved top, long underwear, knee socks, and usually a cold weather mask.
The standard developers calibrated the test using numbers from a so-called “standard man,” who was 25 years old, 154 lbs (70 kgs), and 5 ft 8 in (1.73 m). And the so-called “standard woman” was also 25 years but with a height of 5 ft 3 in (1.6 m), 132 lb (60 kg) weight, and 25 years old. The standard also warns that it might not work for children, temperatures below -4 F (-20 C), or sleeping bags with “local extra insulation.”
Sleeping bags and quilts featured in recent Backpacking Light stories. Credit from top left: Ryan Jordan, Max Neale, and Max Neale.
Sleeping Bag Design Issues
Note that the ISO 23537 test does not cover other features that can affect your warmth. A dummy that never stirs won’t thoroughly test draft-prevention features that can move a little or a lot, like hoods, neck collars, and zipper draft tubes. Real-world tests of bags with identical ratings but different draft-prevention features often discover these differences.
Other design issues can make a sleeping bag feel warmer or colder, including: insulation movement and clumping, especially with down; overstuffing that doesn’t add significant insulation, but can stop shifting and delay decay; compressing insulation, especially down, as you move and extend feet, knees, hips, shoulders, and elbows; and balancing between enough room inside for comfort versus heating more air that escapes when you gyrate. Designs that create cold spots, particularly for hands and feet, can make an otherwise warm sleeping bag feel miserable.
Environmental Issues
A variety of environmental issues can turn any sleeping bag colder or warmer than the controlled environment specified in ISO 23537. Wind through your shelter is very efficient at removing warmth. Low humidity can make a cold night feel colder through skin evaporation. Excess condensation can reduce the insulating power of down. You’re unlikely to stay warm if rain or snow falls on your unprotected sleeping bag. High altitude can lead to more heat loss. But clouds overhead act like another blanket, keeping you warmer.
Unexpected temperature drops through the night, like a cold front moving in or camping at the bottom of a drainage, can refrigerate you. A sloping campsite can make you slip out of your bag, or make you and the bag slide into damp shelter walls. And going to bed early on long winter nights allows more heat loss before the warming rays of dawn.
Individual Issues
Everyone’s different, and everyone changes. Sleeping bag tests based on a theoretical average human can mismatch your camping experience in many ways; to hijack a common BPL acronym, YMWAV – Your Mileage Will Always Vary. Here are some examples.
Cold, Wet, Tired, Hungry, or Thirsty
If you are suffering from the usual suspects, don’t be surprised if you have trouble sleeping warm enough.
Traditional Gender Differences
In general, women tend to sleep colder than men, often due to smaller bodies and different circulation patterns. And hormone changes can have a significant effect on perceived warmth. And if your gender identity is non-traditional, some of these factors might not apply.
Age
Most people lose some heat-generating muscle mass as they age, so older people often sleep colder than younger people.
Circulation
Some people have better circulation in their feet and hands than others. You won’t be happy if your feet are ice cold, but the rest of your body is warm.
Acclimation
When you fly from your home in coastal Hawaii straight to a winter trek in central Alaska – watch out!
Attitude
If you are convinced that you’ll sleep cold, you will.
Tossing and Turning
Some people rotate and rearrange their bodies throughout the night, pushing out a lot of warm air and pulling in too much cold air.
Health Issues and Medications
If you’re sick, or have chronic health issues, or take traditional or non-traditional medicines, your body can run much colder or warmer than usual.
Personal Thermostat
Some people just run hotter or colder than others.
Gear Issues
Your gear and its condition can assist or obstruct a comfortable night’s sleep. Some people cuddle with hot water bottles for added warmth. Others keep cold water bottles, electronics, gas canisters, and other stuff in their sleeping bag to prevent freezing. Those items are also heat sinks with only one source of warmth – you!
Your sleep system may have been a faithful companion on many adventures over the last 20 years. But now the insulation has broken down, the foam in your sleeping pad is noticeably thinner, and your long johns have holes with names. Or maybe you’ve borrowed a bag that’s too big or too small. Don’t be surprised if you wake up colder than expected.
Many sleeping bag makers assign the lower Limit temperature to “men’s” and “unisex” bags, and the higher Comfort temperature to “women’s” bags.” If you buy a bag based on the headline number, you could be in for an unpleasant surprise.
Pushing Test Limits for Better Ratings
Sleeping bag testers could push certain parameters to the boundaries allowed in the standard to get better temperature ratings. I’ve seen no evidence that this is happening. Yet, pushing limits might be in the best short-term interest of well-funded sleeping bag and quilt makers with their own test equipment.
ISO 23537 calls for a small range of sleeping pad insulation values. The standard also allows for slight variations in the manikin’s clothing insulation, electric heating power measurement, wooden board thickness, air speed in the test room, and other parameters. Pushed in the right direction, small changes like these can add up to measurable differences in ratings – and price.
Conclusion
ISO 23537 isn’t perfect, but all similar standards are flawed, since they substitute laboratory measurements for individual real-world experience. Still, widespread use of the standard was a big leap forward for consumers. Now we can compare sleeping bags between most manufacturers more reliably.
However, we must keep in mind all the other variables that go into sleeping warm in the backcountry. And high-quality gear reviews will continue to play an important role in sleeping bag and quilt selection.
“A temperature rating is not a guarantee of warmth for any bag.”
About Standards Watch
Standards Watch is a monthly column by Rex Sanders that examines important backpacking product standards, interviews key people, and describes how the industry uses, abuses, or ignores tests and standards. It also critiques existing standards and marketing, points out missing standards and tests, and proposes other ideas to improve life for backpacking consumers. Got an idea for Standards Watch? Submit it in the comments below!
More Information on Sleeping Bag Standards
“ISO 23537-1:2016” International Standards Organization
Backpacking Light does not accept compensation or donated/discounted products in exchange for product mentions or placements in editorial coverage.
Some (but not all) of the links in this review may be affiliate links. If you click on one of these links and visit one of our affiliate partners (usually a retailer site), and subsequently place an order with that retailer, we receive a commission on your entire order, which varies between 3% and 15% of the purchase price. Affiliate commissions represent less than 15% of Backpacking Light's gross revenue. More than 70% of our revenue comes from Membership Fees. So if you'd really like to support our work, don't buy gear you don't need - support our consumer advocacy work and become a Member instead.
Learn more about affiliate commissions, influencer marketing, and our consumer advocacy work by reading our article Stop wasting money on gear.
Membership Required
This feature requires an active Backpacking Light Membership.
Premium Articles
You're currently viewing a free preview of a member exclusive premium article. Our premium articles include in depth journalism and insights from the Backpacking Light editorial team.
Get full article access by subscribing to a Premium or Unlimited Backpacking Light membership!
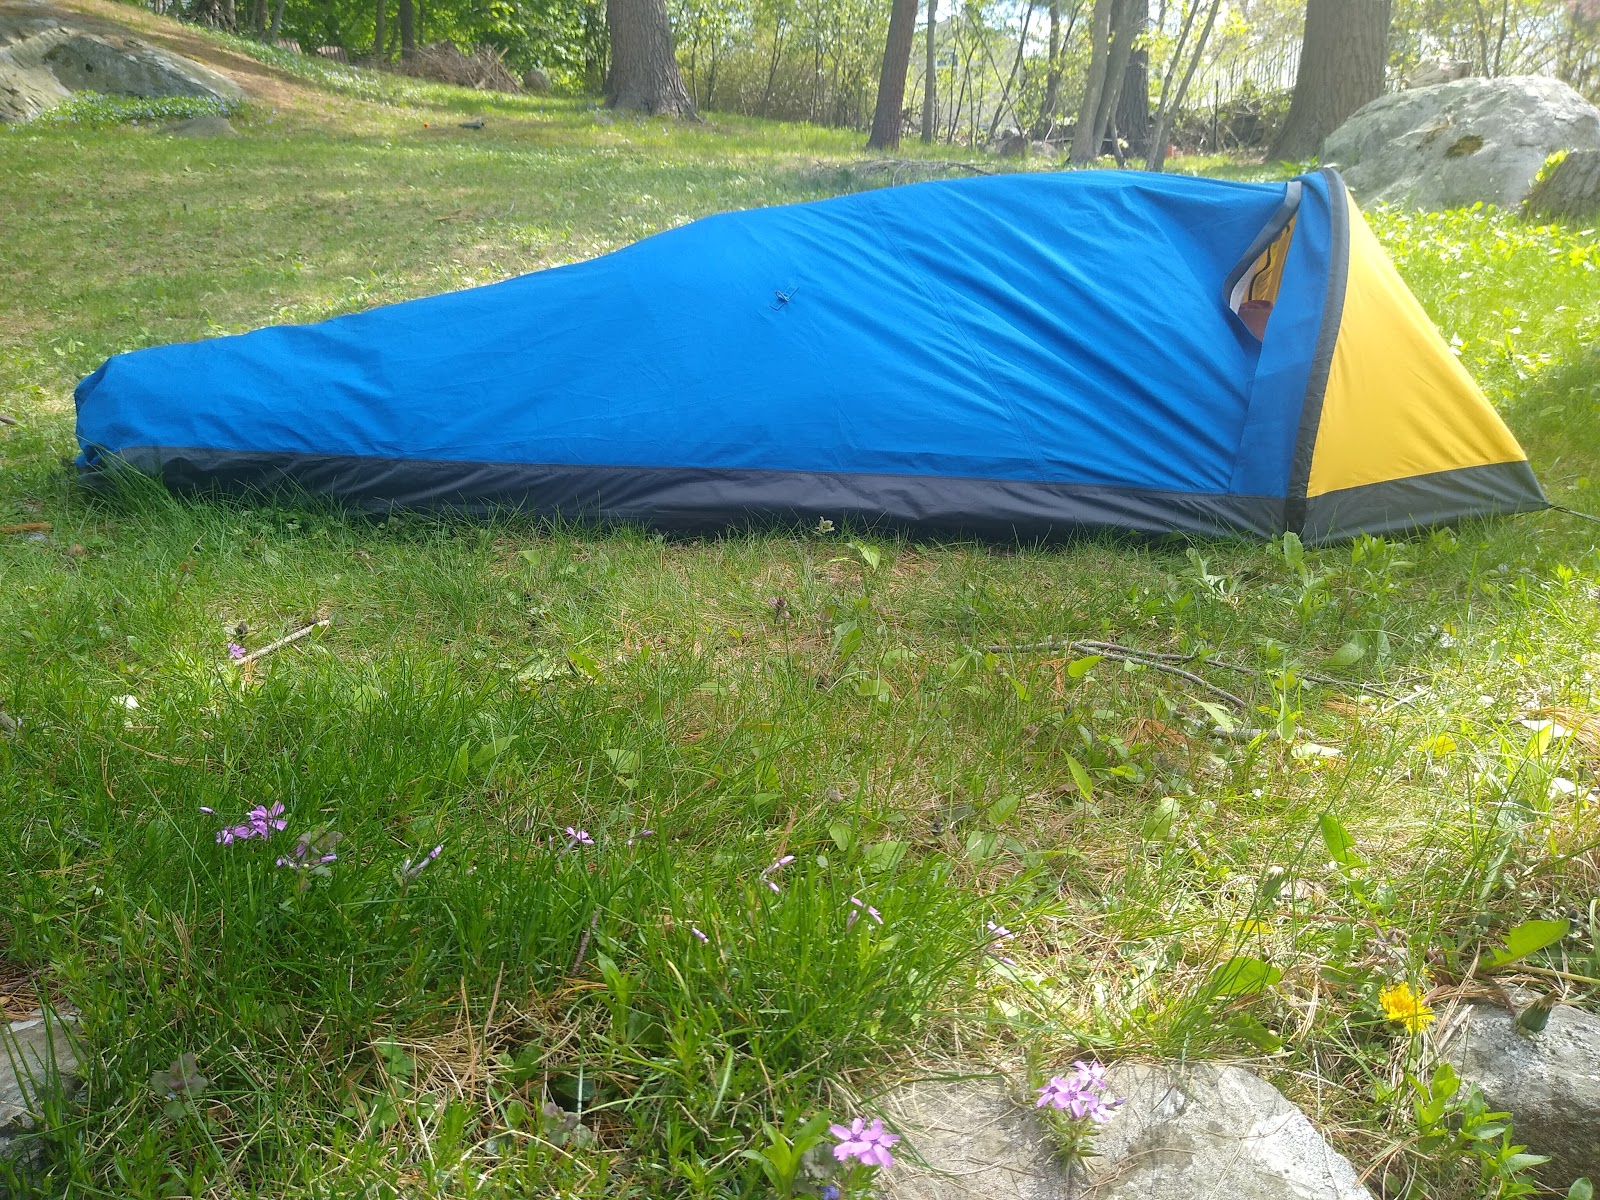


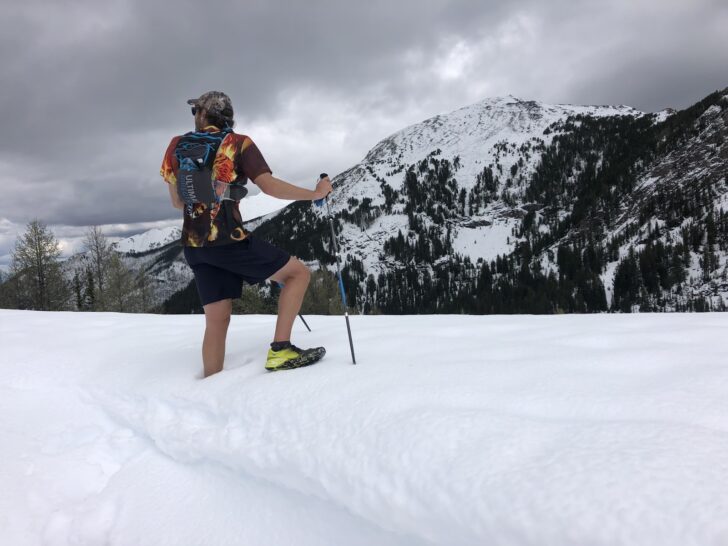
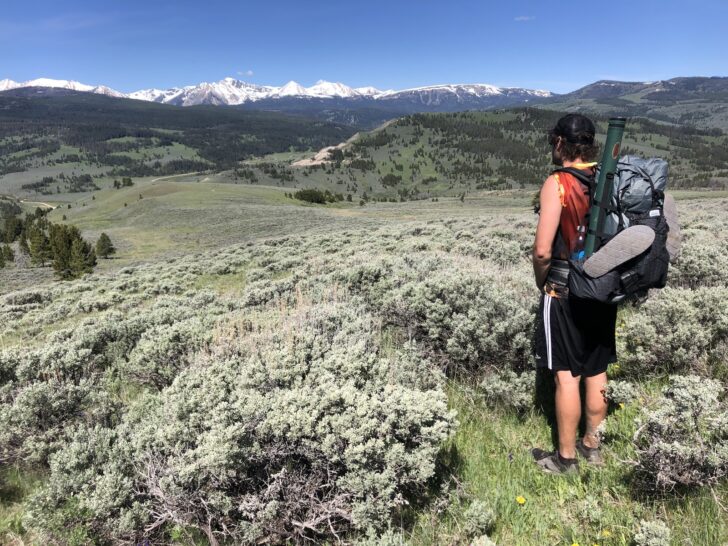
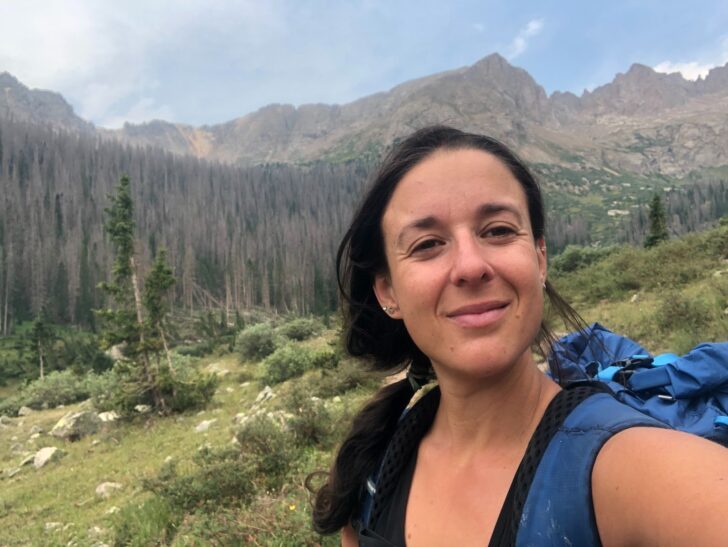
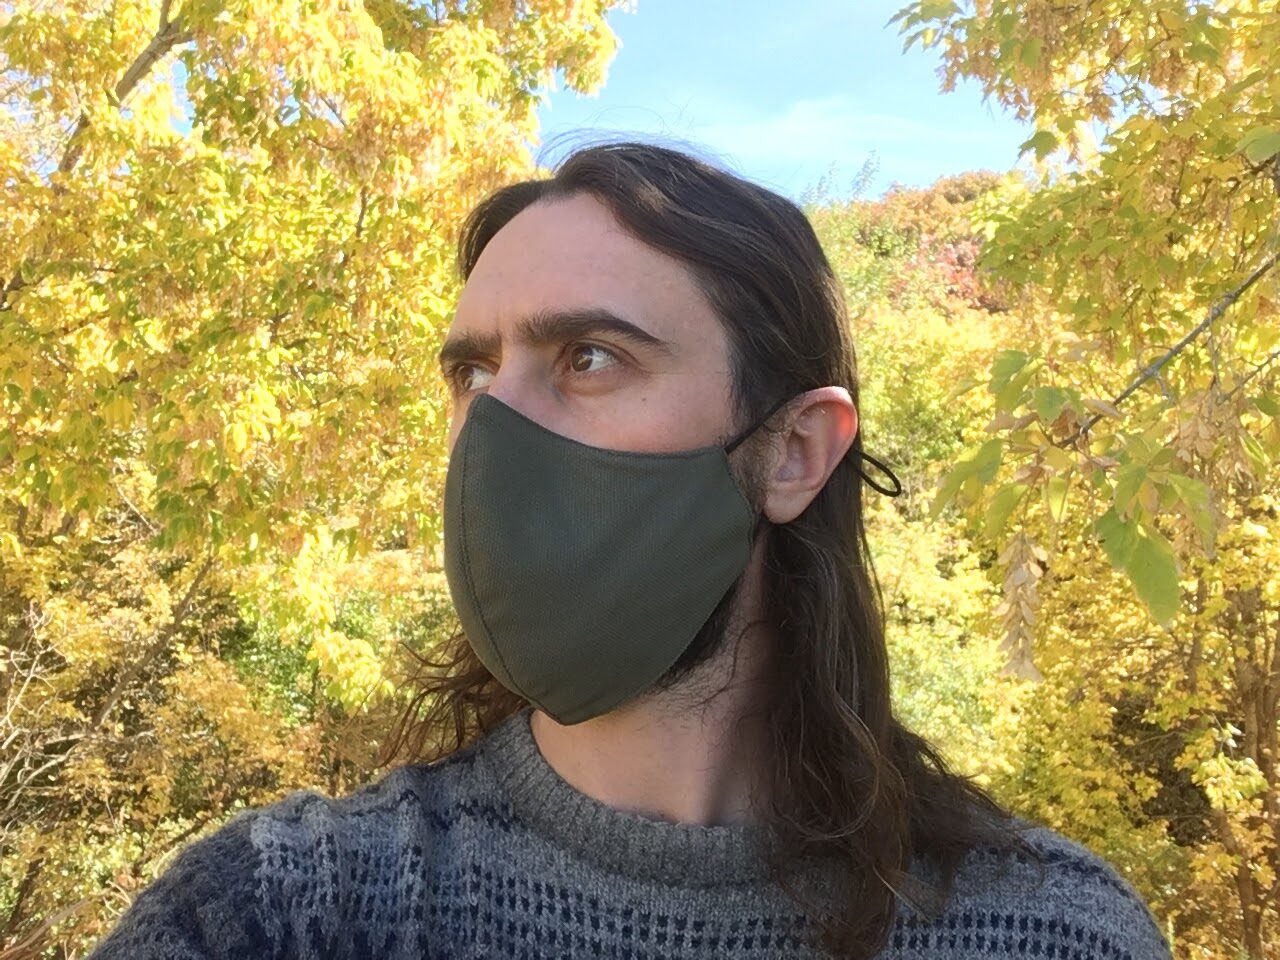

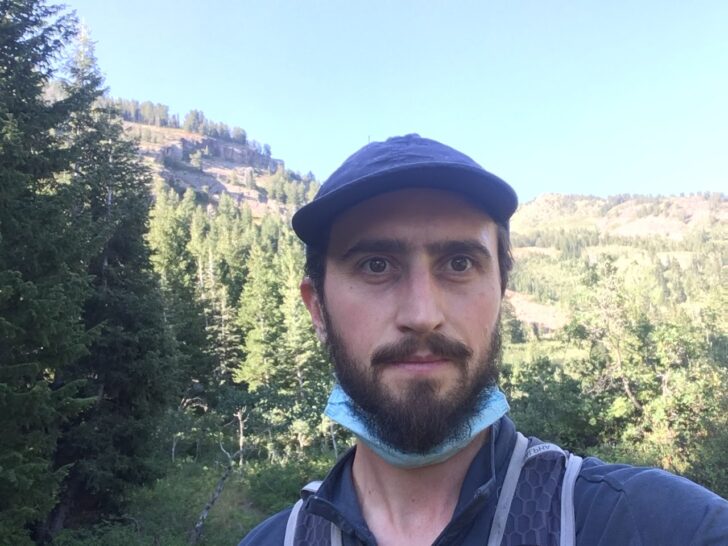
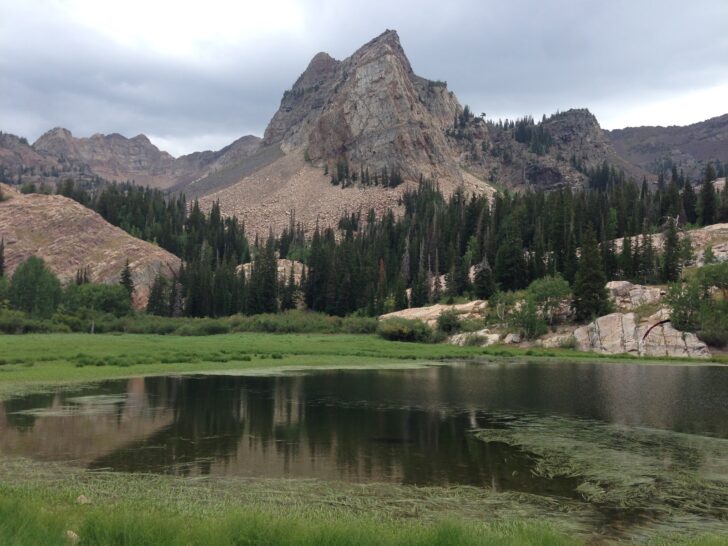
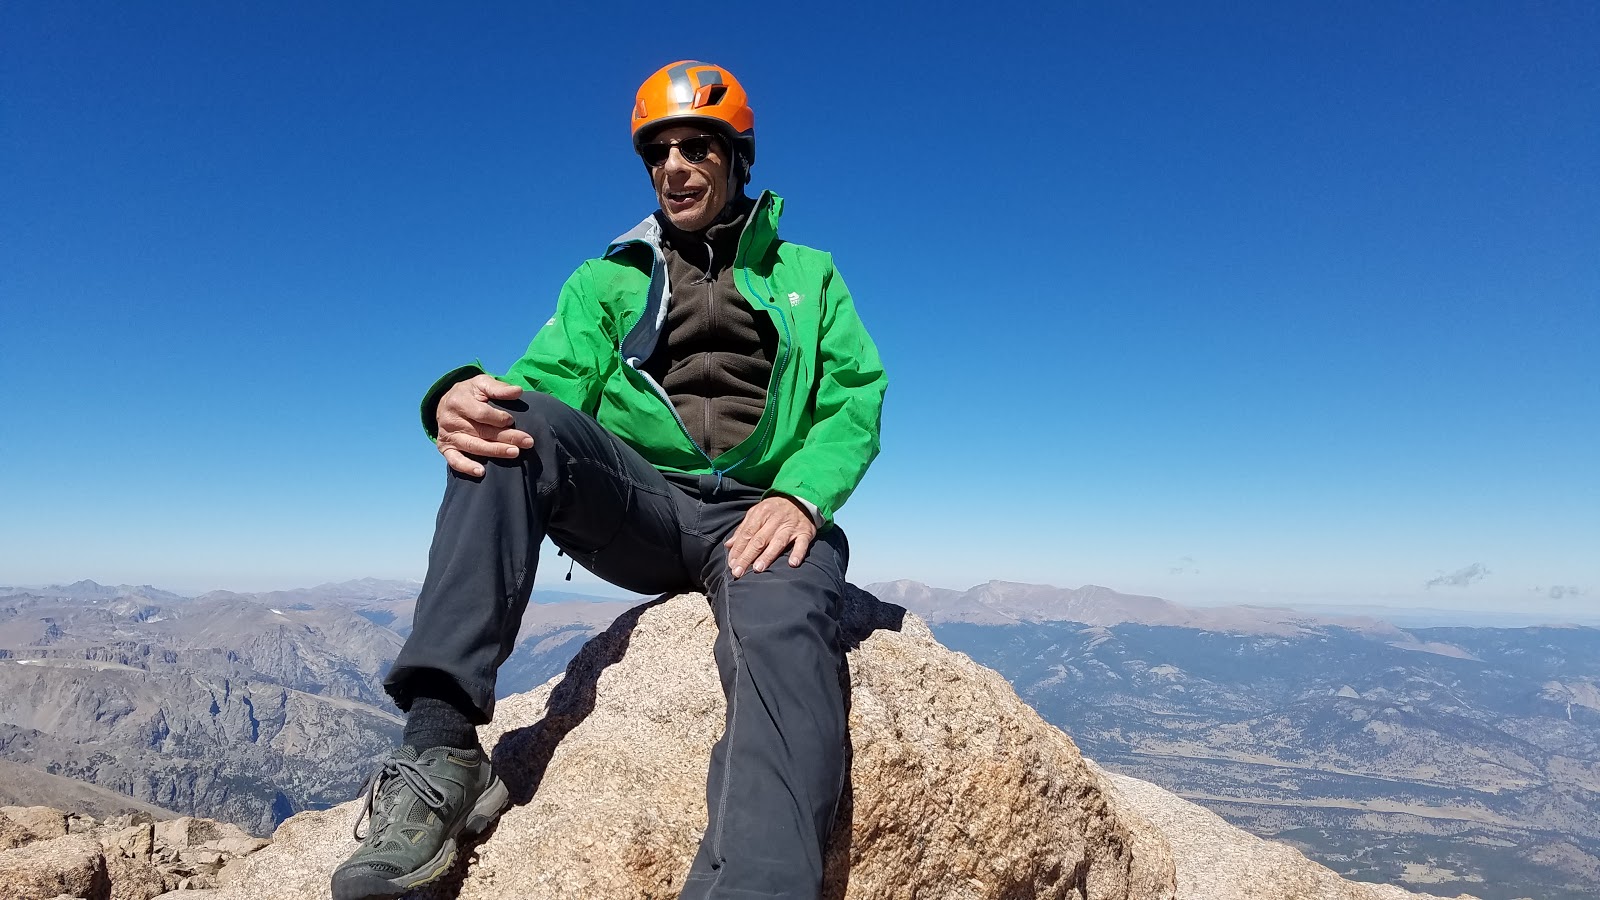
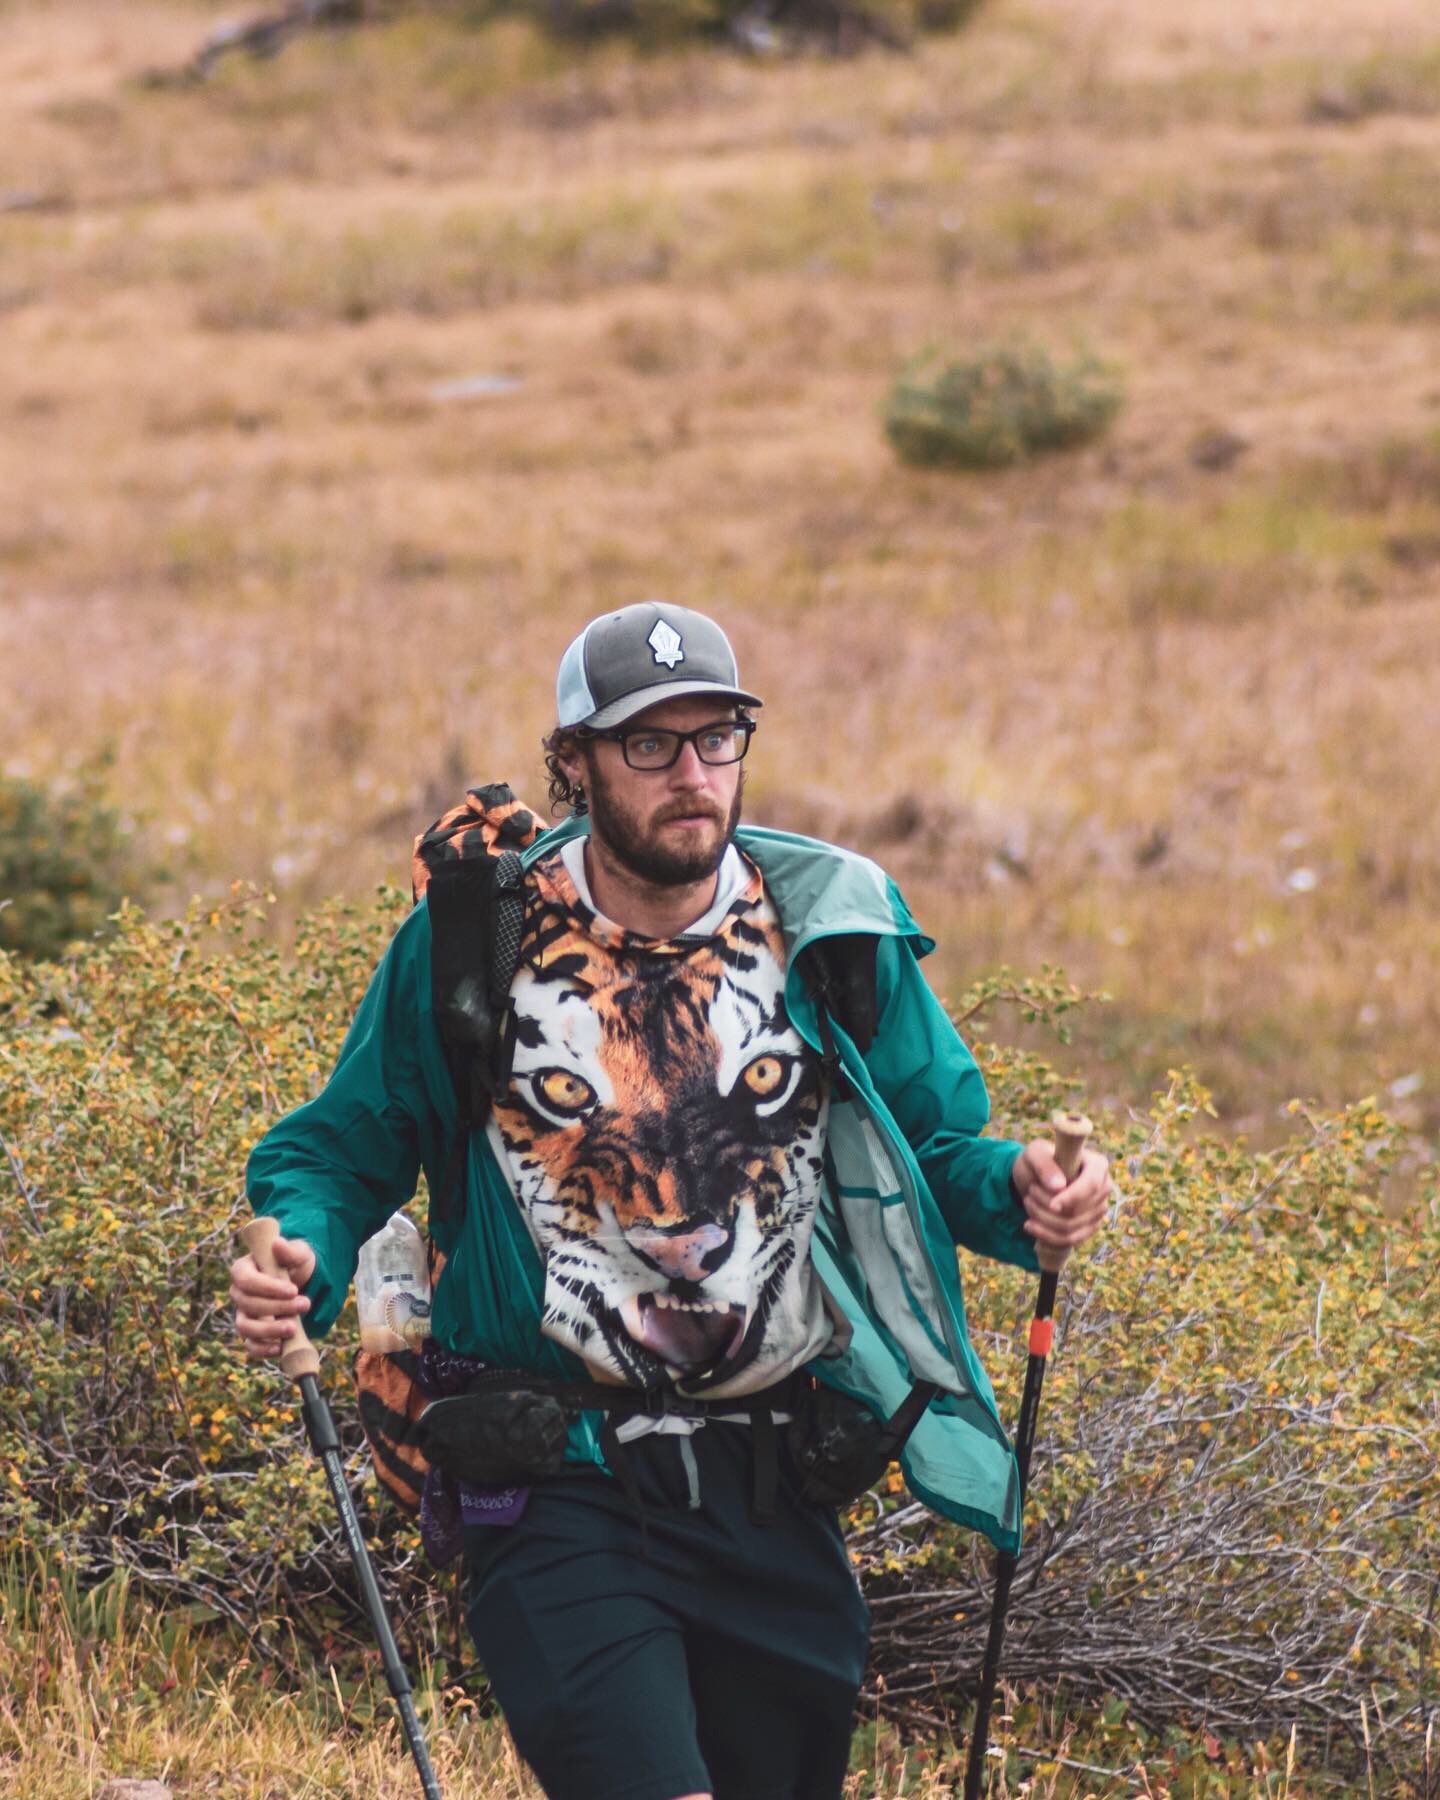
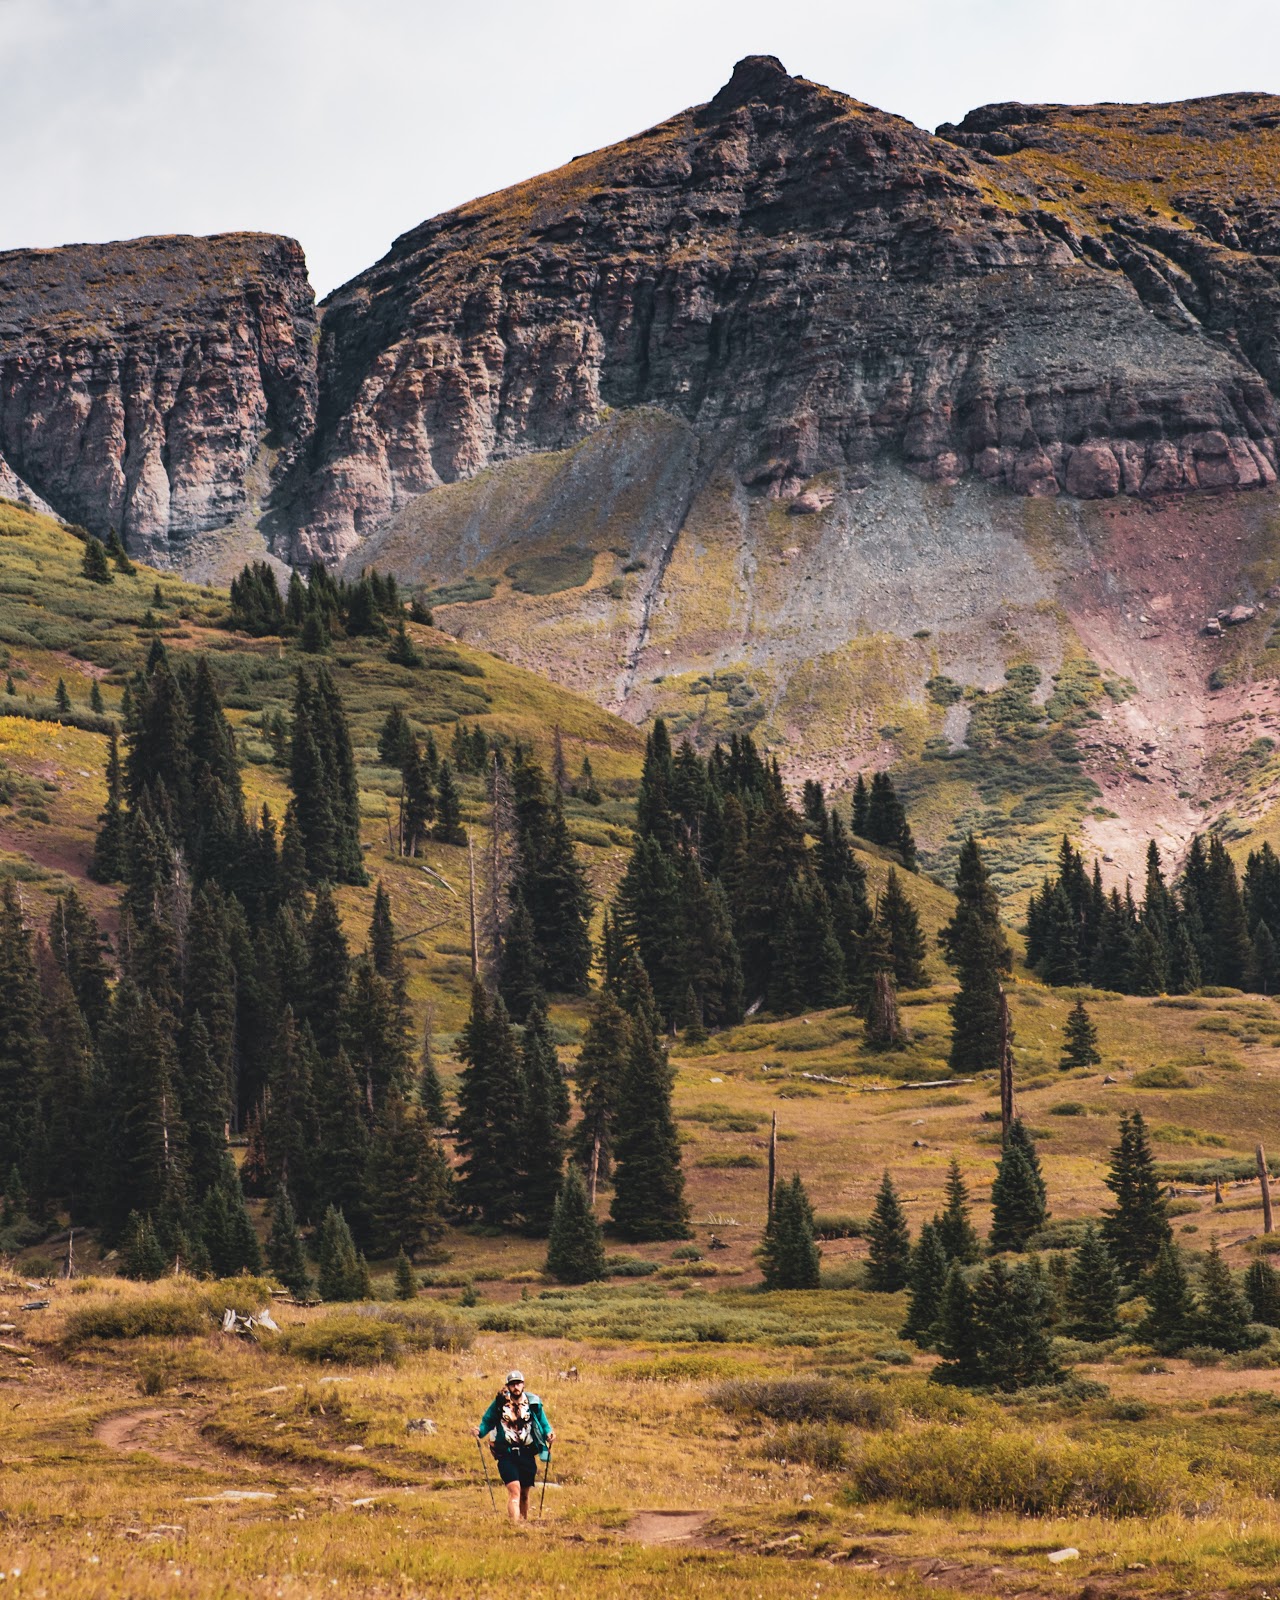

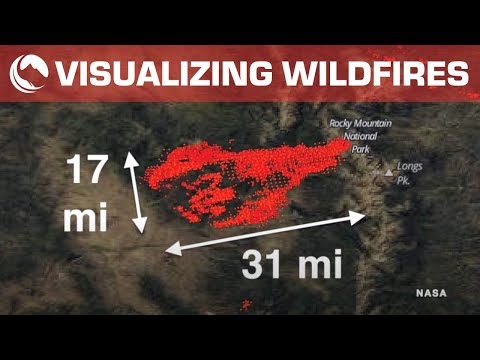
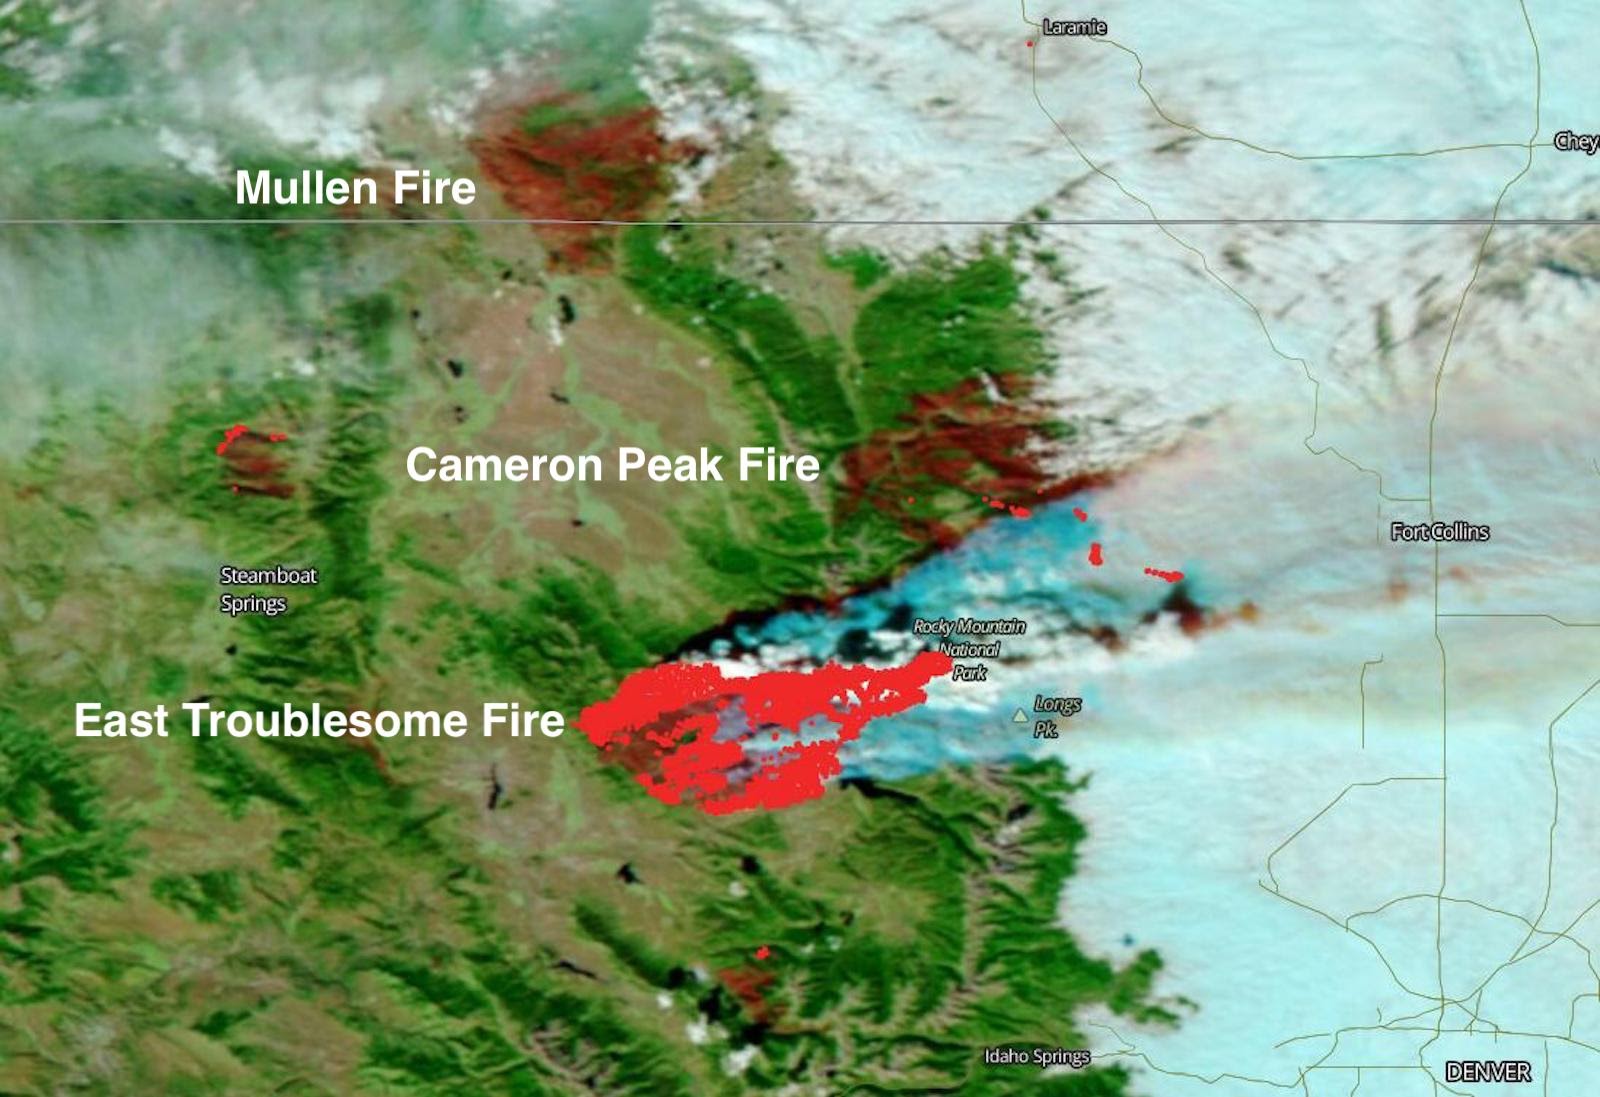
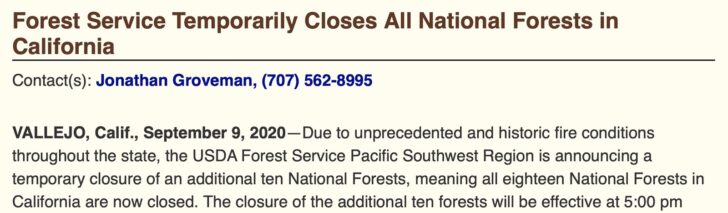


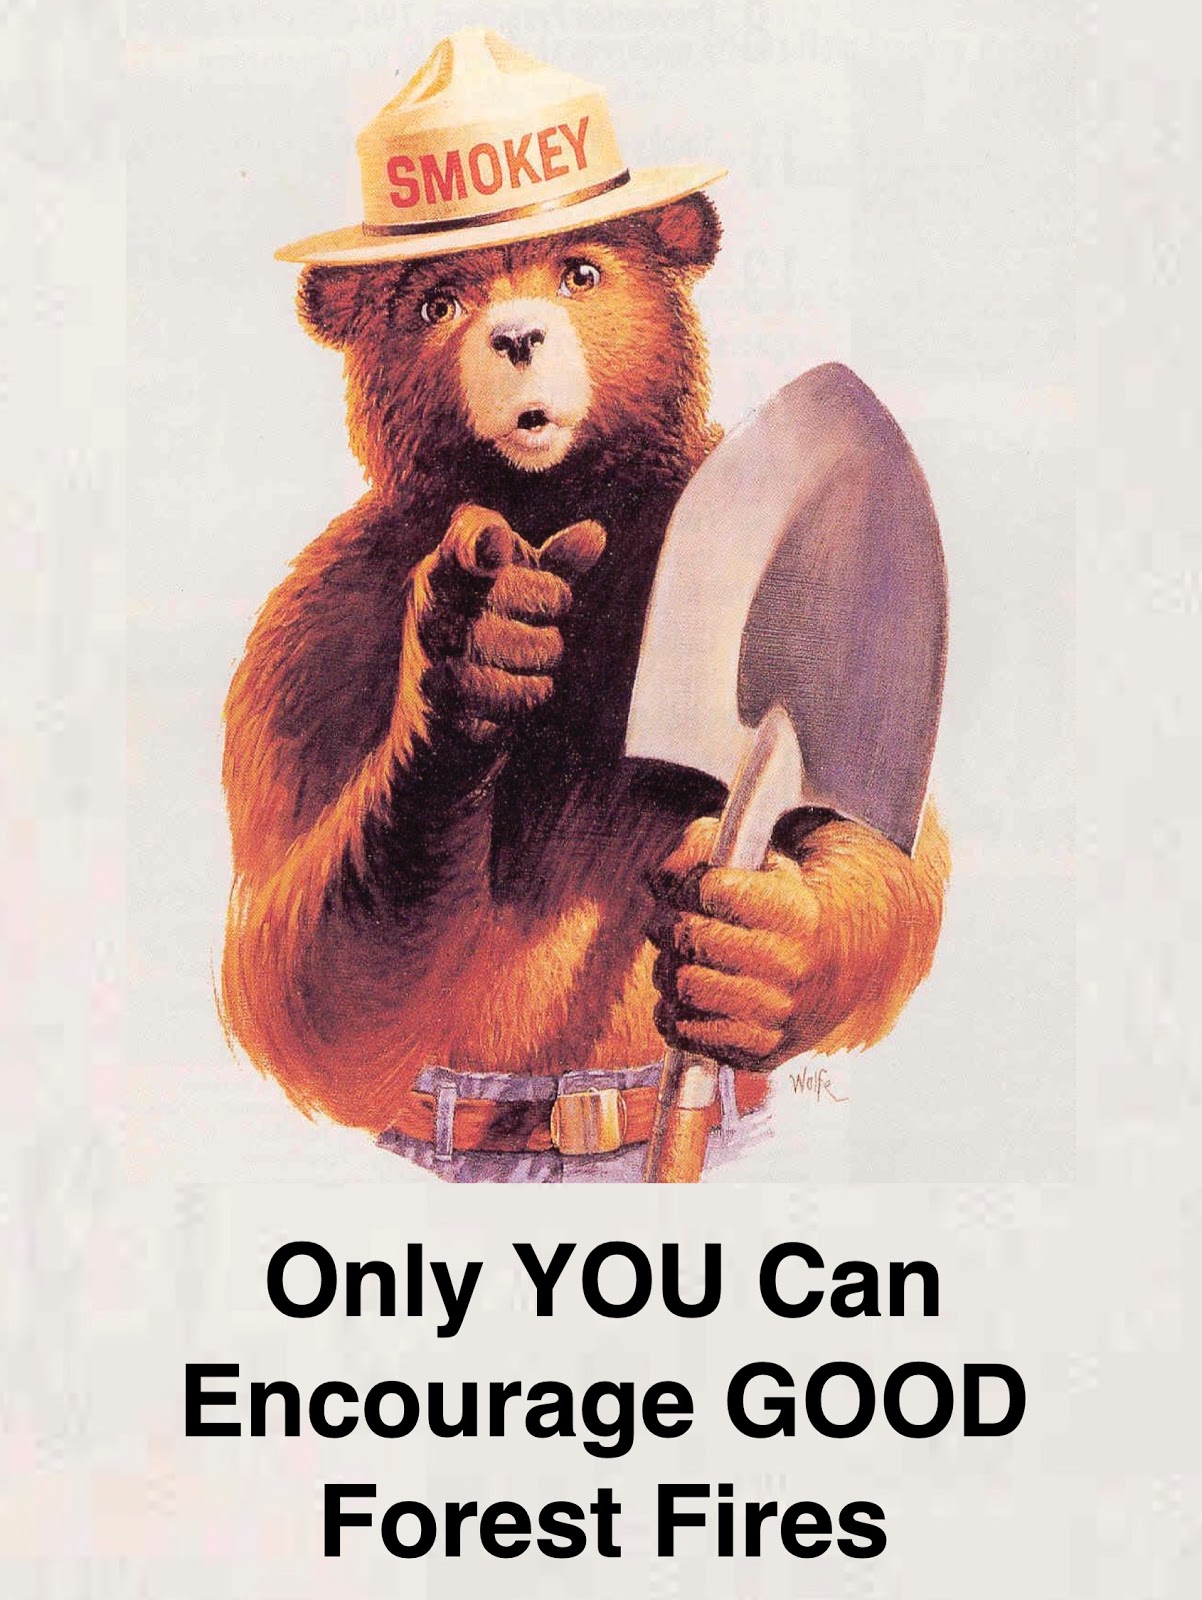

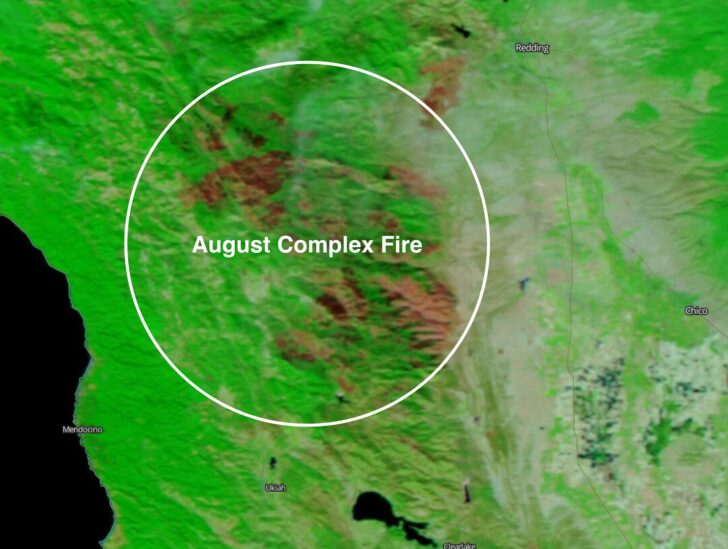
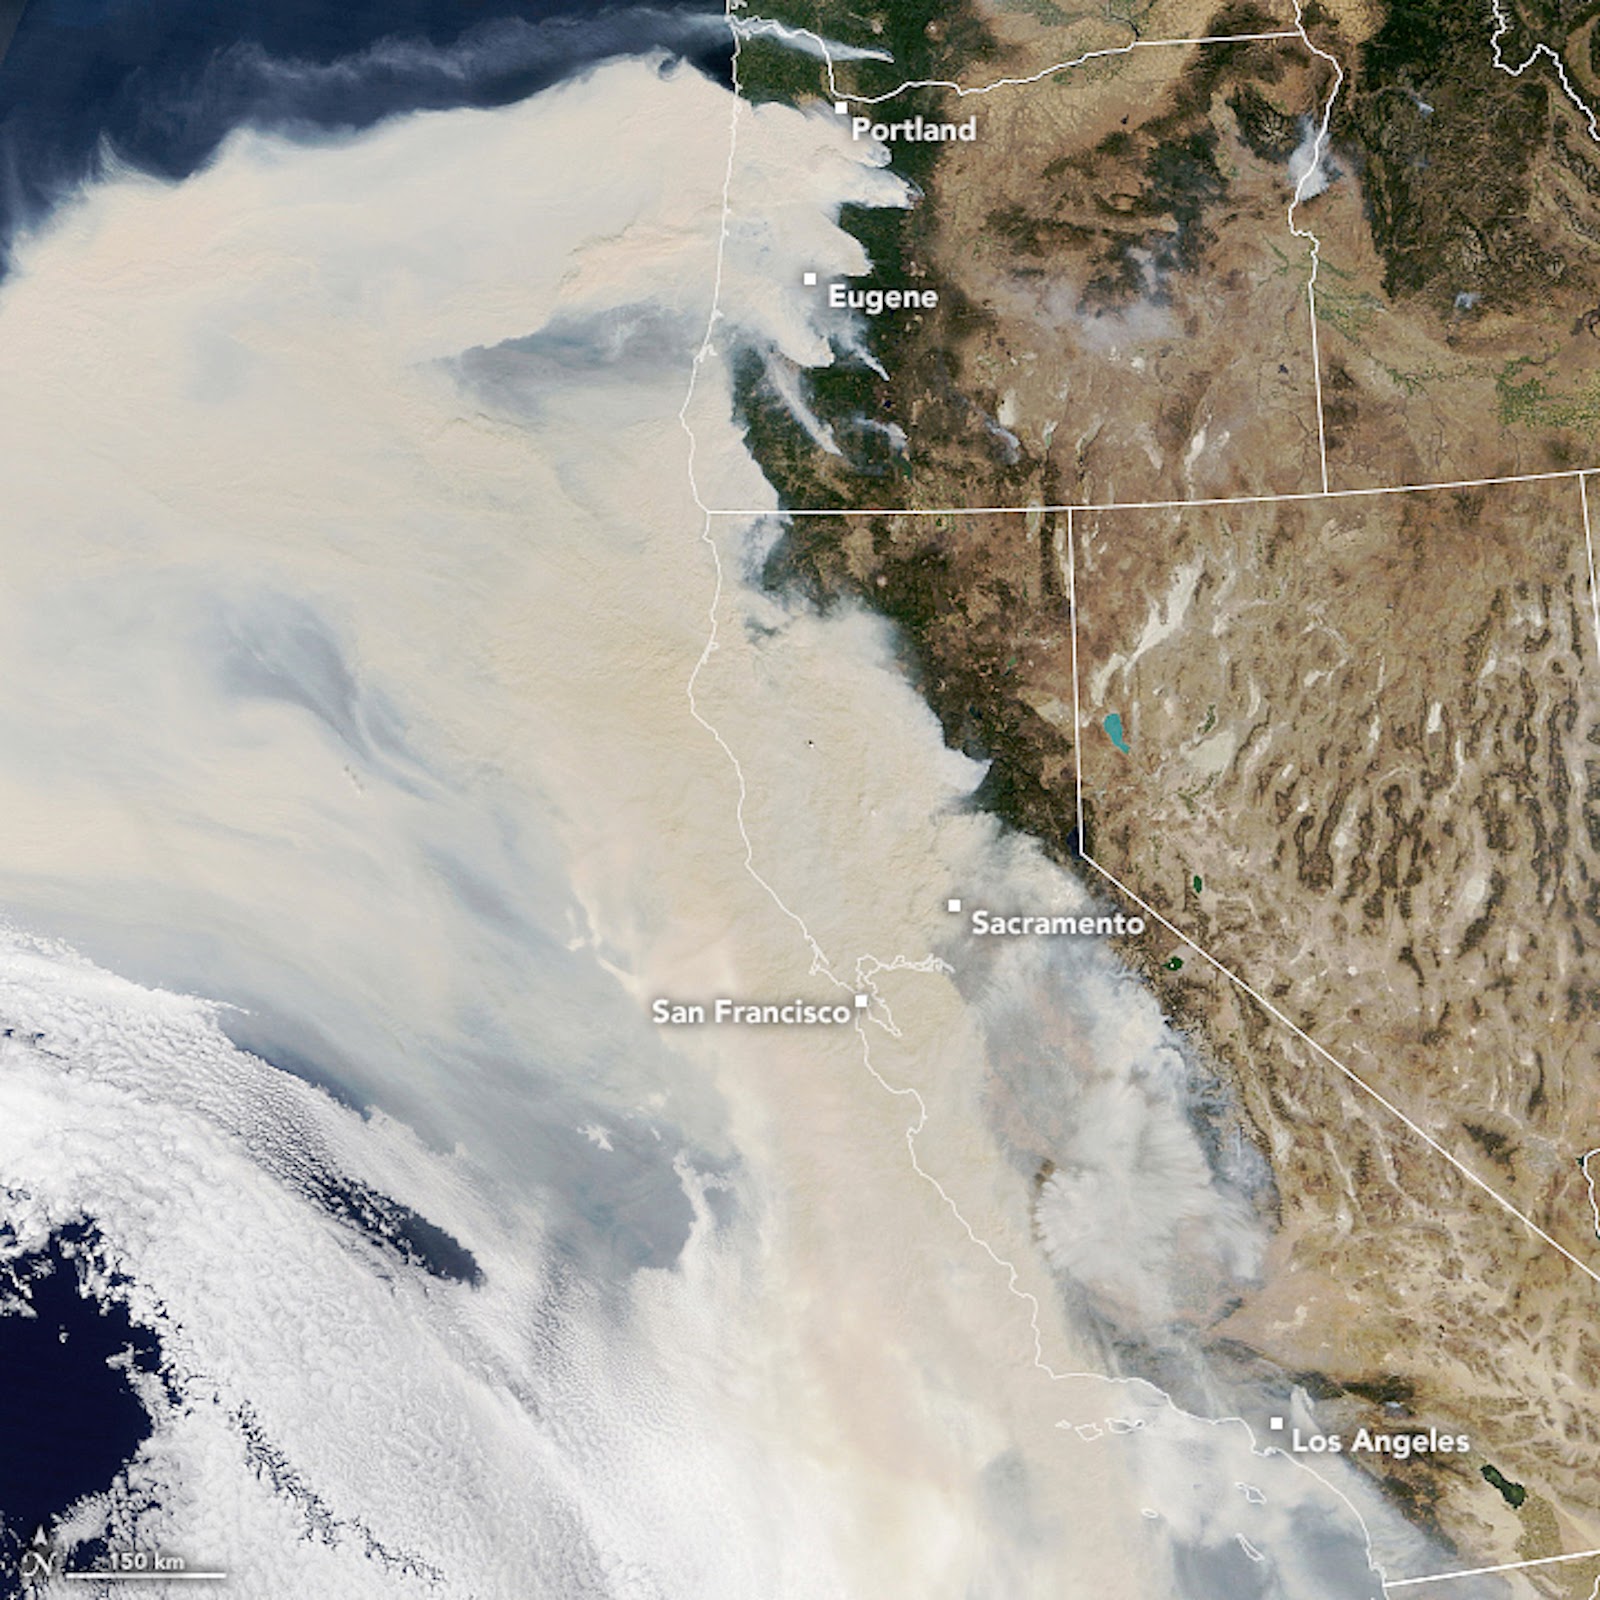

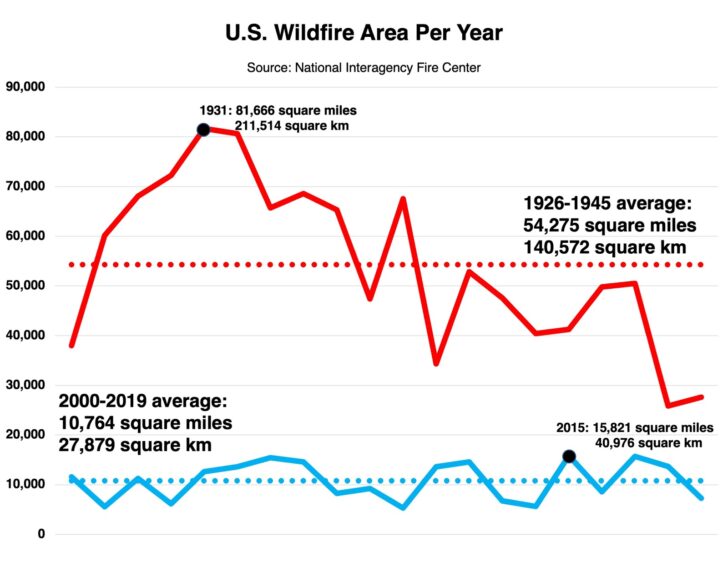
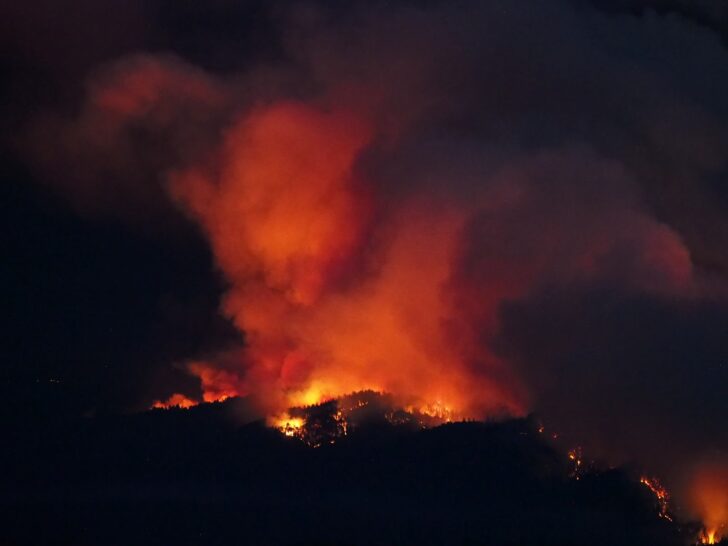


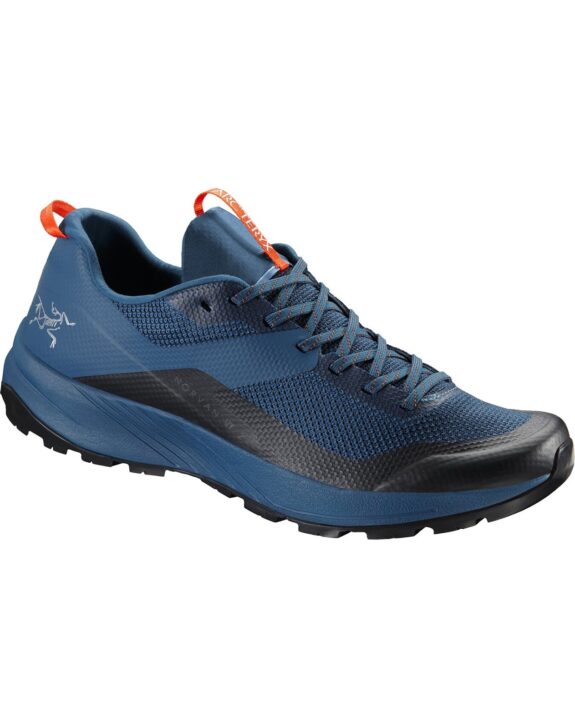
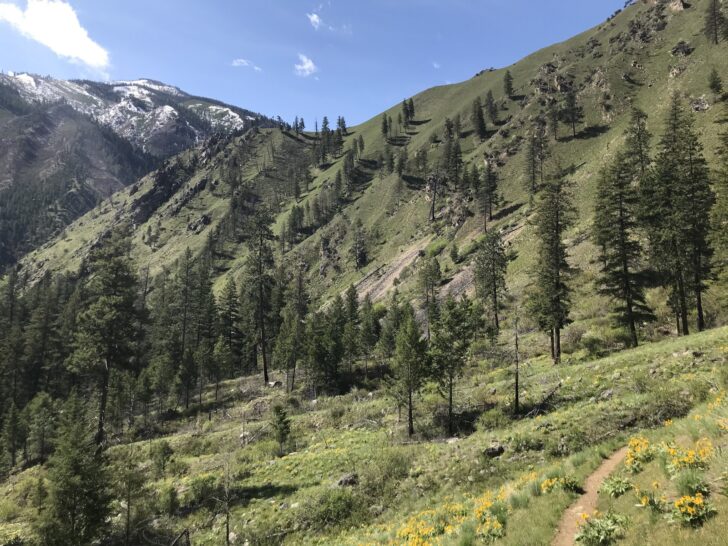
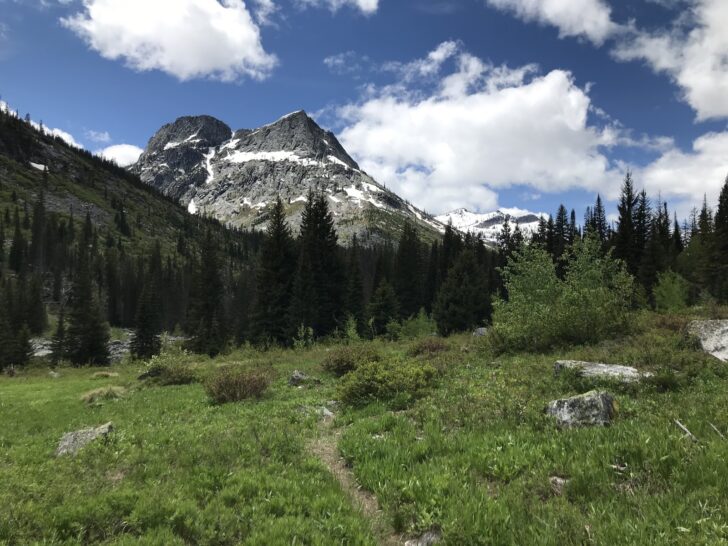
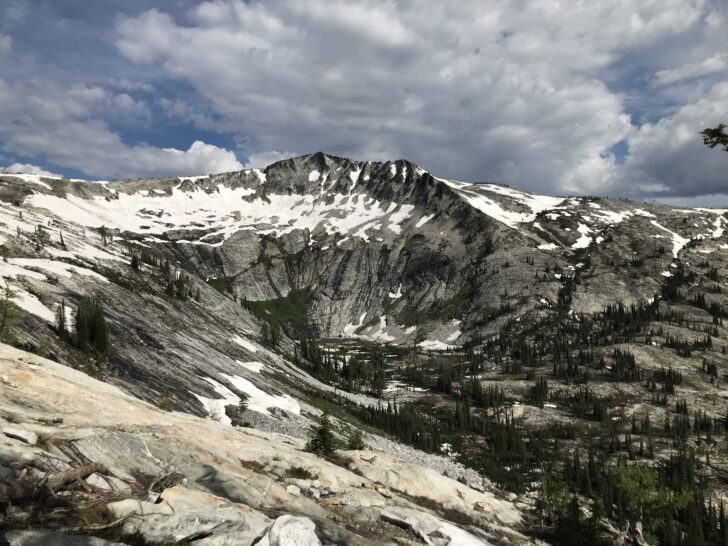
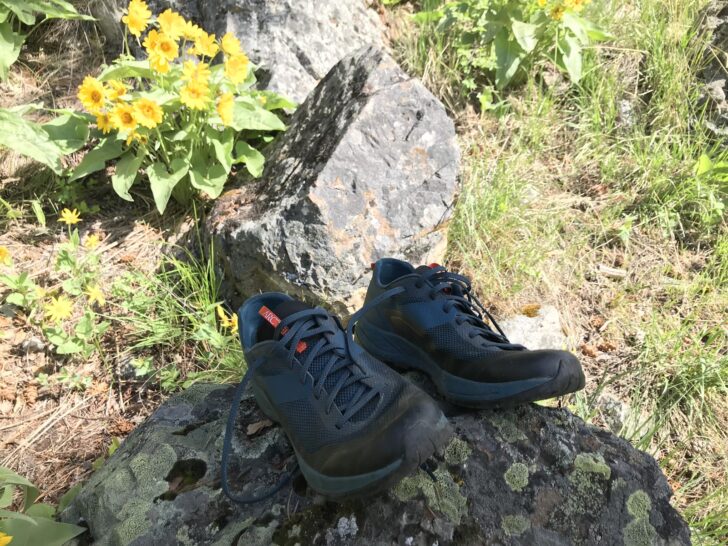
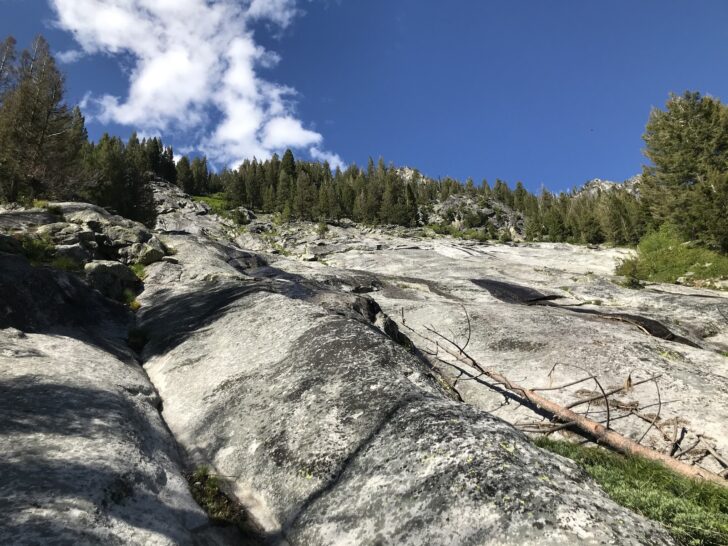
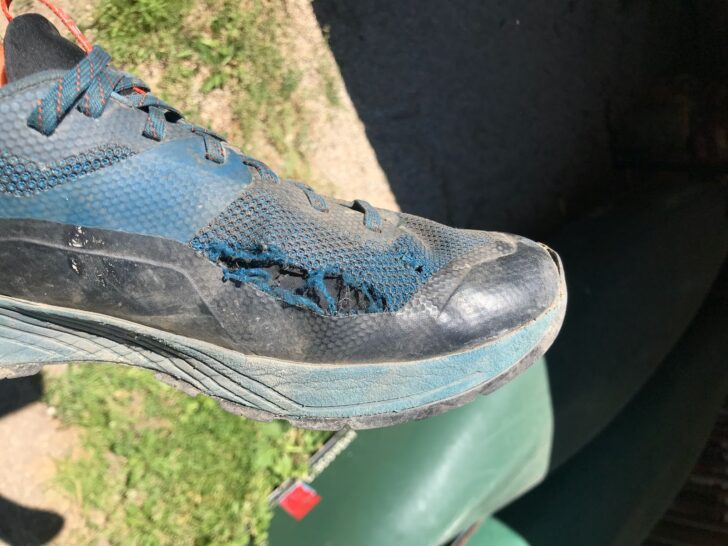
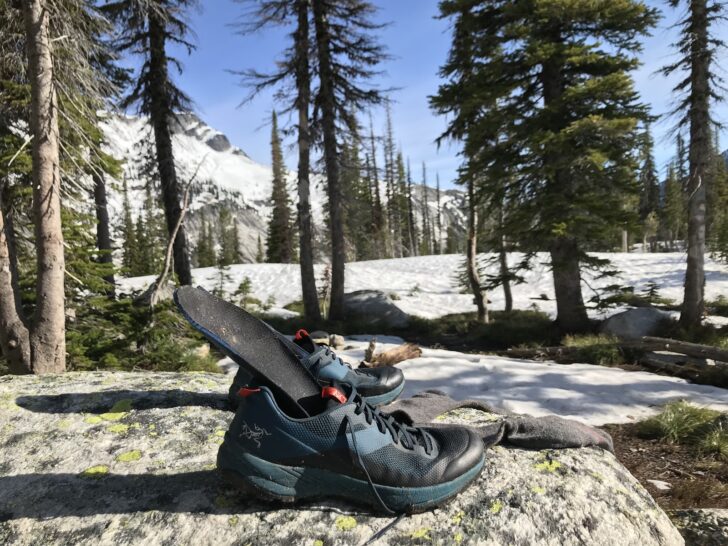
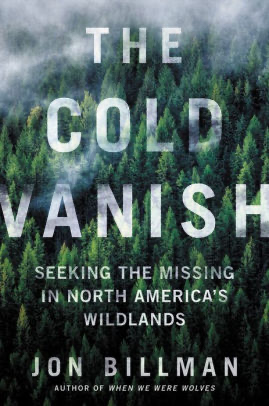

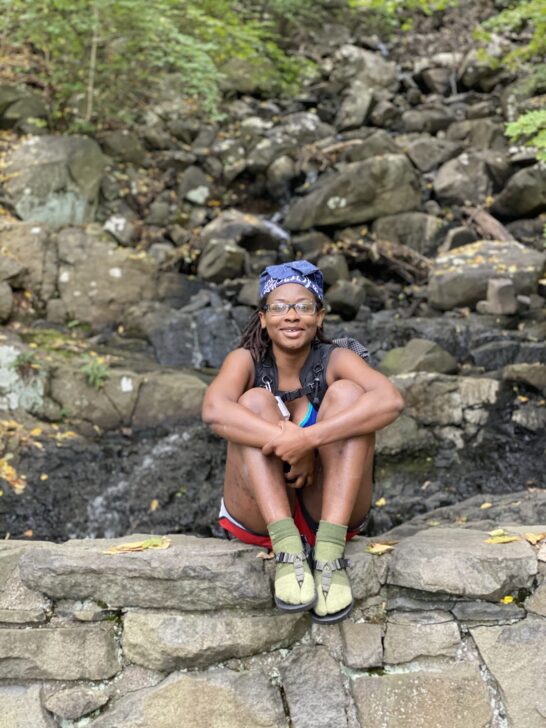
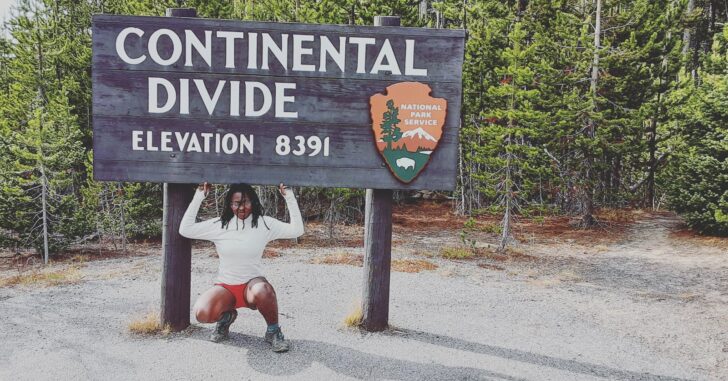
 Favorite place to hike right now and why?