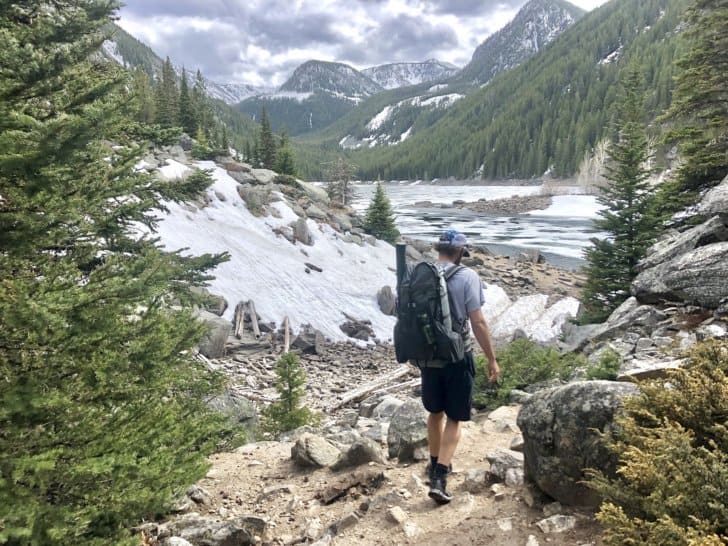
Having accessible “pockets” on your pack is useful for keeping little bits of gear handy without taking off your pack. But consider a multi-use pouch that can also be worn as a standalone fanny-style pack.
Editor’s Note: This article was originally published on November 17, 2019, and was updated on September 19, 2020.
Having accessible “pockets” on your pack is useful for keeping little bits of gear handy without taking off your pack.
Fastpackers and FKTers know this well – it makes them incredibly efficient on the trail, allowing them to log long miles in short periods. Not just because they’re moving particularly fast, but because they just keep moving. We talked about this with Jeff Garmire on the last episode of the podcast (Jeff just set the unsupported speed record on the Long Trail).
My expedition backpack – a McHale Windsauk – includes pretty big hip belt pockets that I use to store snacks, hydration kit, and inReach. I’ve been experimenting more with multi-use pouches, which give me the flexibility to have a dedicated (fanny-style) pack I can use while hiking away from camp when I bag a peak or go fishing.
But fastpacking and ultrarunning packs with lots of easily-accessible pockets on the shoulders and hips are specialty items – they tend to have smaller volumes, and don’t carry much weight well.
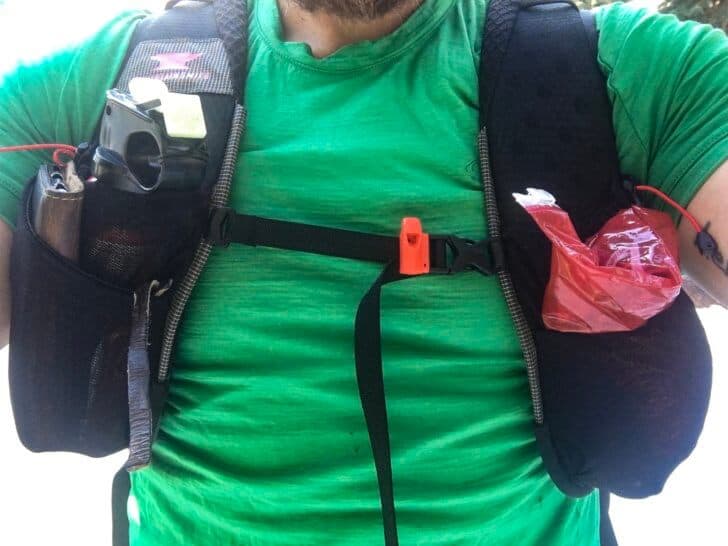
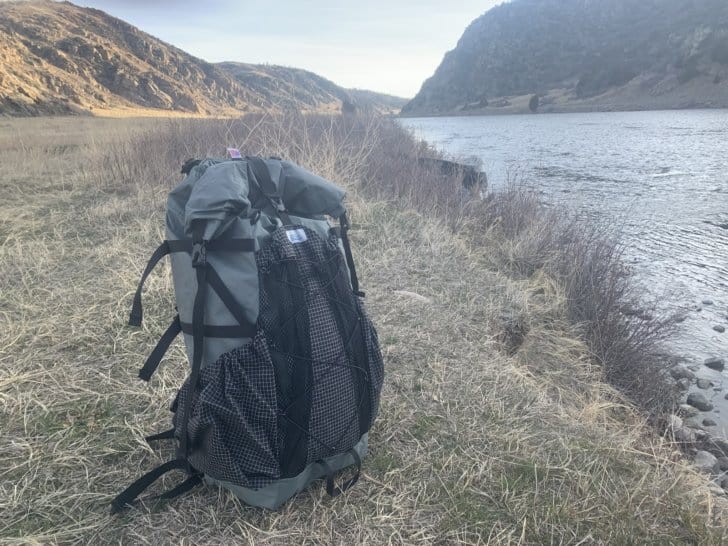
One exception is the new Mountainsmith Zerk 40L, which we reviewed recently. It may have the best stock pocket configuration of any pack we’ve ever used. That’s why it’s gaining popularity in the thru-hiking community.
Wide shoulder straps on the Mountainsmith Zerk 40L give plenty of space for deep, stretchy pockets. In this photo, mine are holding a camera, extra batteries, 800 calories of food, bear spray, my phone and wallet, extra batteries, a pocket knife, headphones, and chapstick.
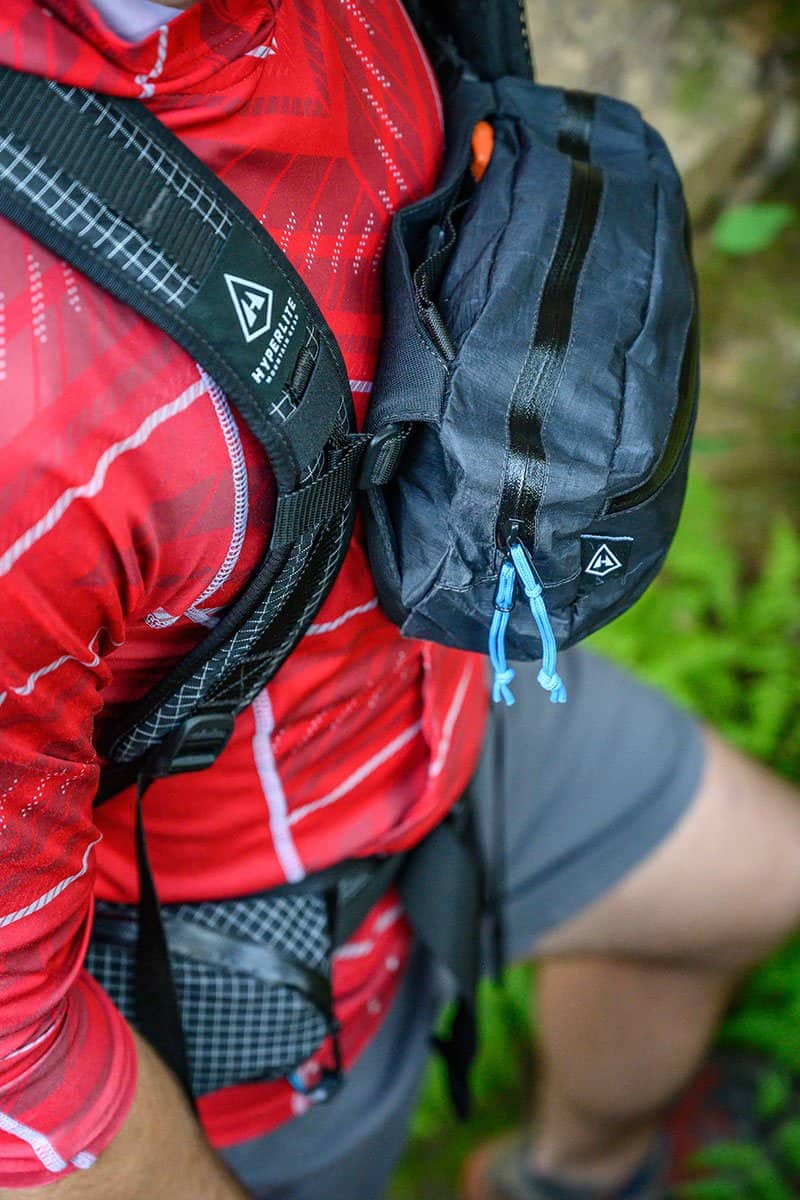
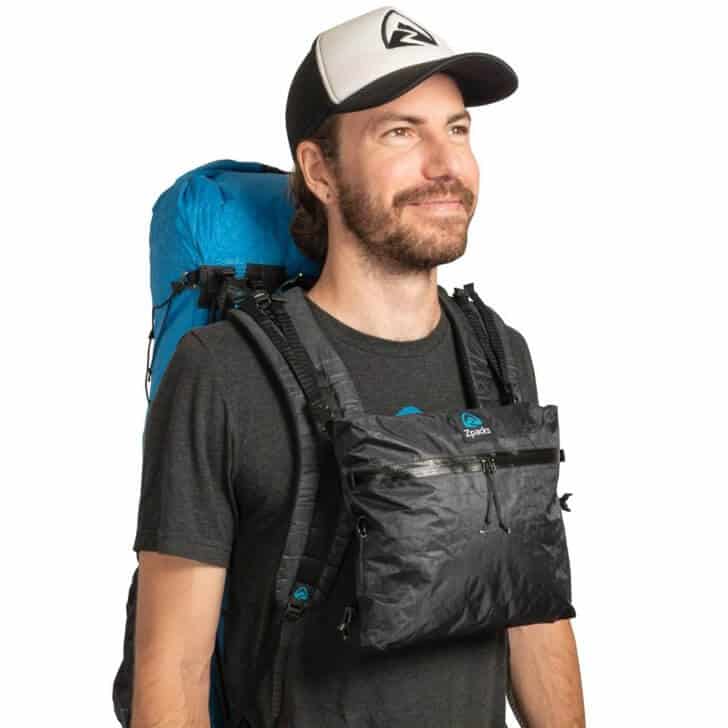
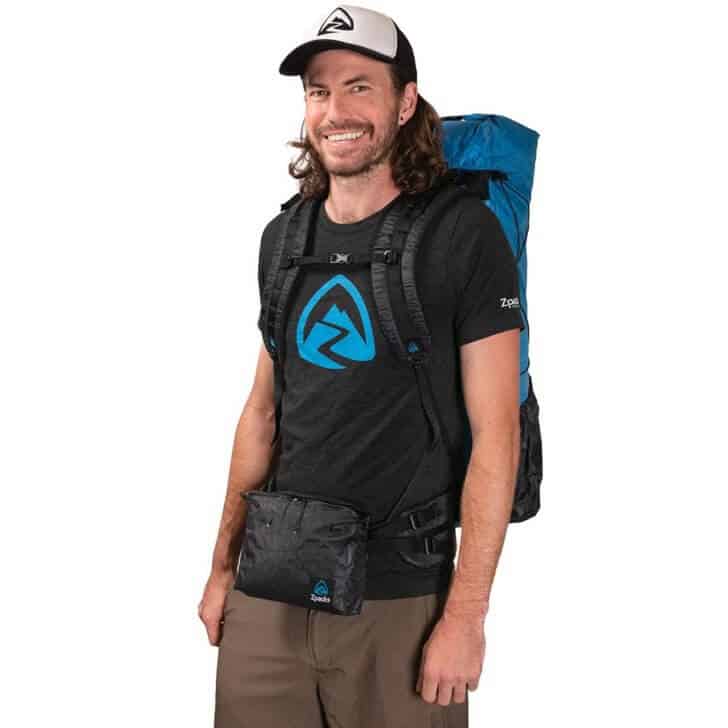
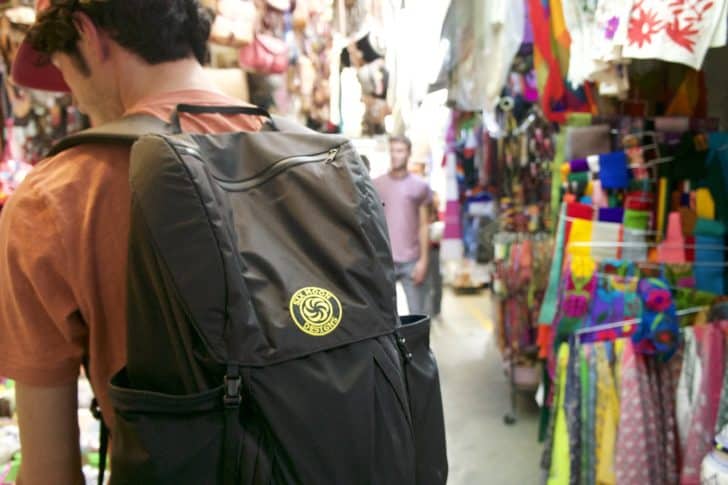
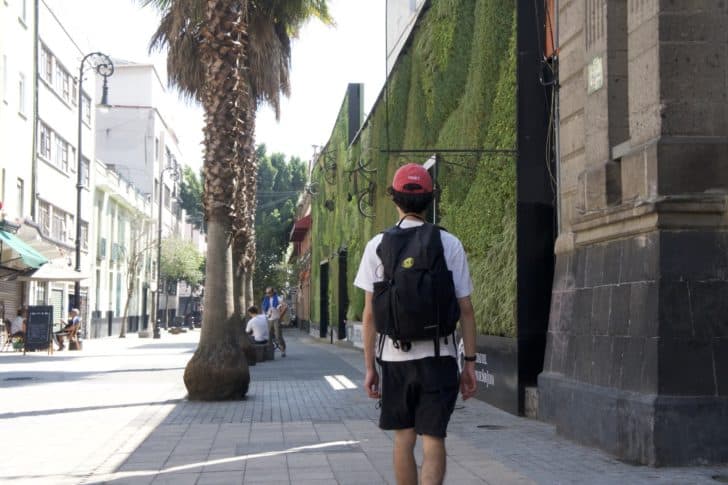
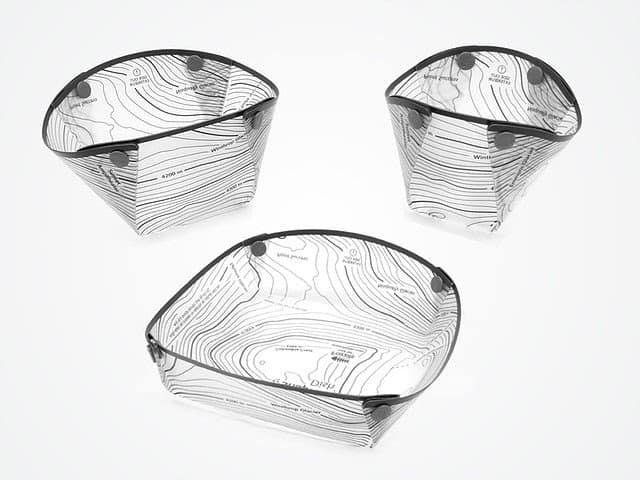
Another approach is to use add-on pouches. Three of my favorites are the ZPacks Multi-Pack, ZPacks FUPA, and Hyperlite Mountain Gear Versa because all of them can work as either standalone pouches/packs or integrate with a backpack’s shoulder straps, chest strap, or hip belt. The main reason I want this separability is so I can also use the pouch for traveling away from my campsite – when I go try to bag a peak or go fishing.
The ZPacks Multi-Pack is one of the larger options available, and is popular among photographers for stowing mirrorless cameras and small DSLRs. It’s most commonly rigged as a chest pouch (shown here) or as an outside accessory pocket on the back of a backpack (e.g., attached to a pack’s daisy chains). Related: Read our review of the ZPacks Multi-Pack here. Photo: ZPacks.The ZPacks FUPA (“Front Utility Pack Accessory”) is smaller than the multi-pack but instead of one large compartment, offers a divider, zipper compartment, and thus, additional organization ability. Photo: ZPacks.The Hyperlite Mountain Gear Versa is a fanny-style pack with removable straps and a slotted area behind the main pack that can be used with a chest strap, hip belt, etc. Photo: Hyperlite Mountain Gear.
The following table compares the specs of these three packs, plus a few others from cottage brands Gossamer Gear, Thrupack, and LiteAF.
This summer I used a LiteAF Fanny Pack on a 9-day backpacking trip in the Sierras and stowed some minor essentials in it while on trail runs out of my campsites. Its small size made it great for running, but limited the amount of gear I could take in it. My preference today is the Versa, for its reasonable capacity, organization capabilities, integration with my backpack’s chest strap, and stable shape that keeps it from bouncing around when worn as a bum pack, or in front.
Here’s the gear I typically store in my pouch while it’s attached to my pack:
Miniature sunscreen/lip balm stick
Insect repellent in a tiny dropper bottle (+ a headnet if it’s the peak of bug season)
That portion of a paper map for the section I’m currently hiking
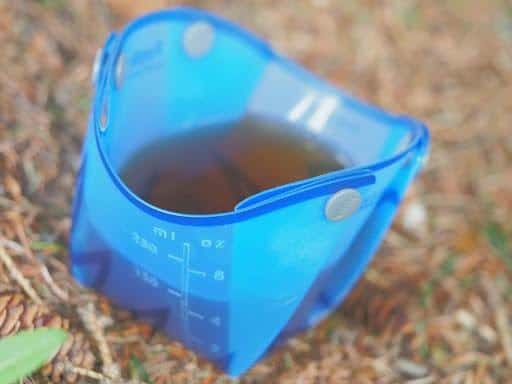
Electrolyte/hydration kit – a 16 oz water bottle, bottle filter, and some electrolyte tablets
A few hours of Calories in easy-to-eat packaged snacks.
When I go on a short day hike away from camp, I’m typically packing the same stuff, but I’ll add a wind shirt as well. When I take it fishing, I’ll add a few flies and an extra tenkara line.
So as you plan your strategy for maximum efficiency on the trail, consider this:
Be as efficient as possible by keeping the gear you use on the trail accessible without taking your pack off.
Consider adding an accessory pouch that serves as a multi-use item like the Multi-Pack, FUPA, and Versa that can also be worn independently of the pack, for wearing around camp and for excursions away from camp.
What other types of “multi-pack” and “accessory-pouch” strategies do you use to increase your on-trail and in-camp efficiency?
Sleeping pad R-values are not useful for many consumers, and the guidance from pad makers, retailers, and gear reviewers is inconsistent and prone to misinterpretation. This is a proposal for improved labeling and marketing of R-values.
Introduction
Sleeping pad R-values are not that useful for many consumers, and the guidance from pad makers, retailers, and gear reviewers is inconsistent and prone to misinterpretation. This is a proposal for improved labeling and marketing that requires further development.
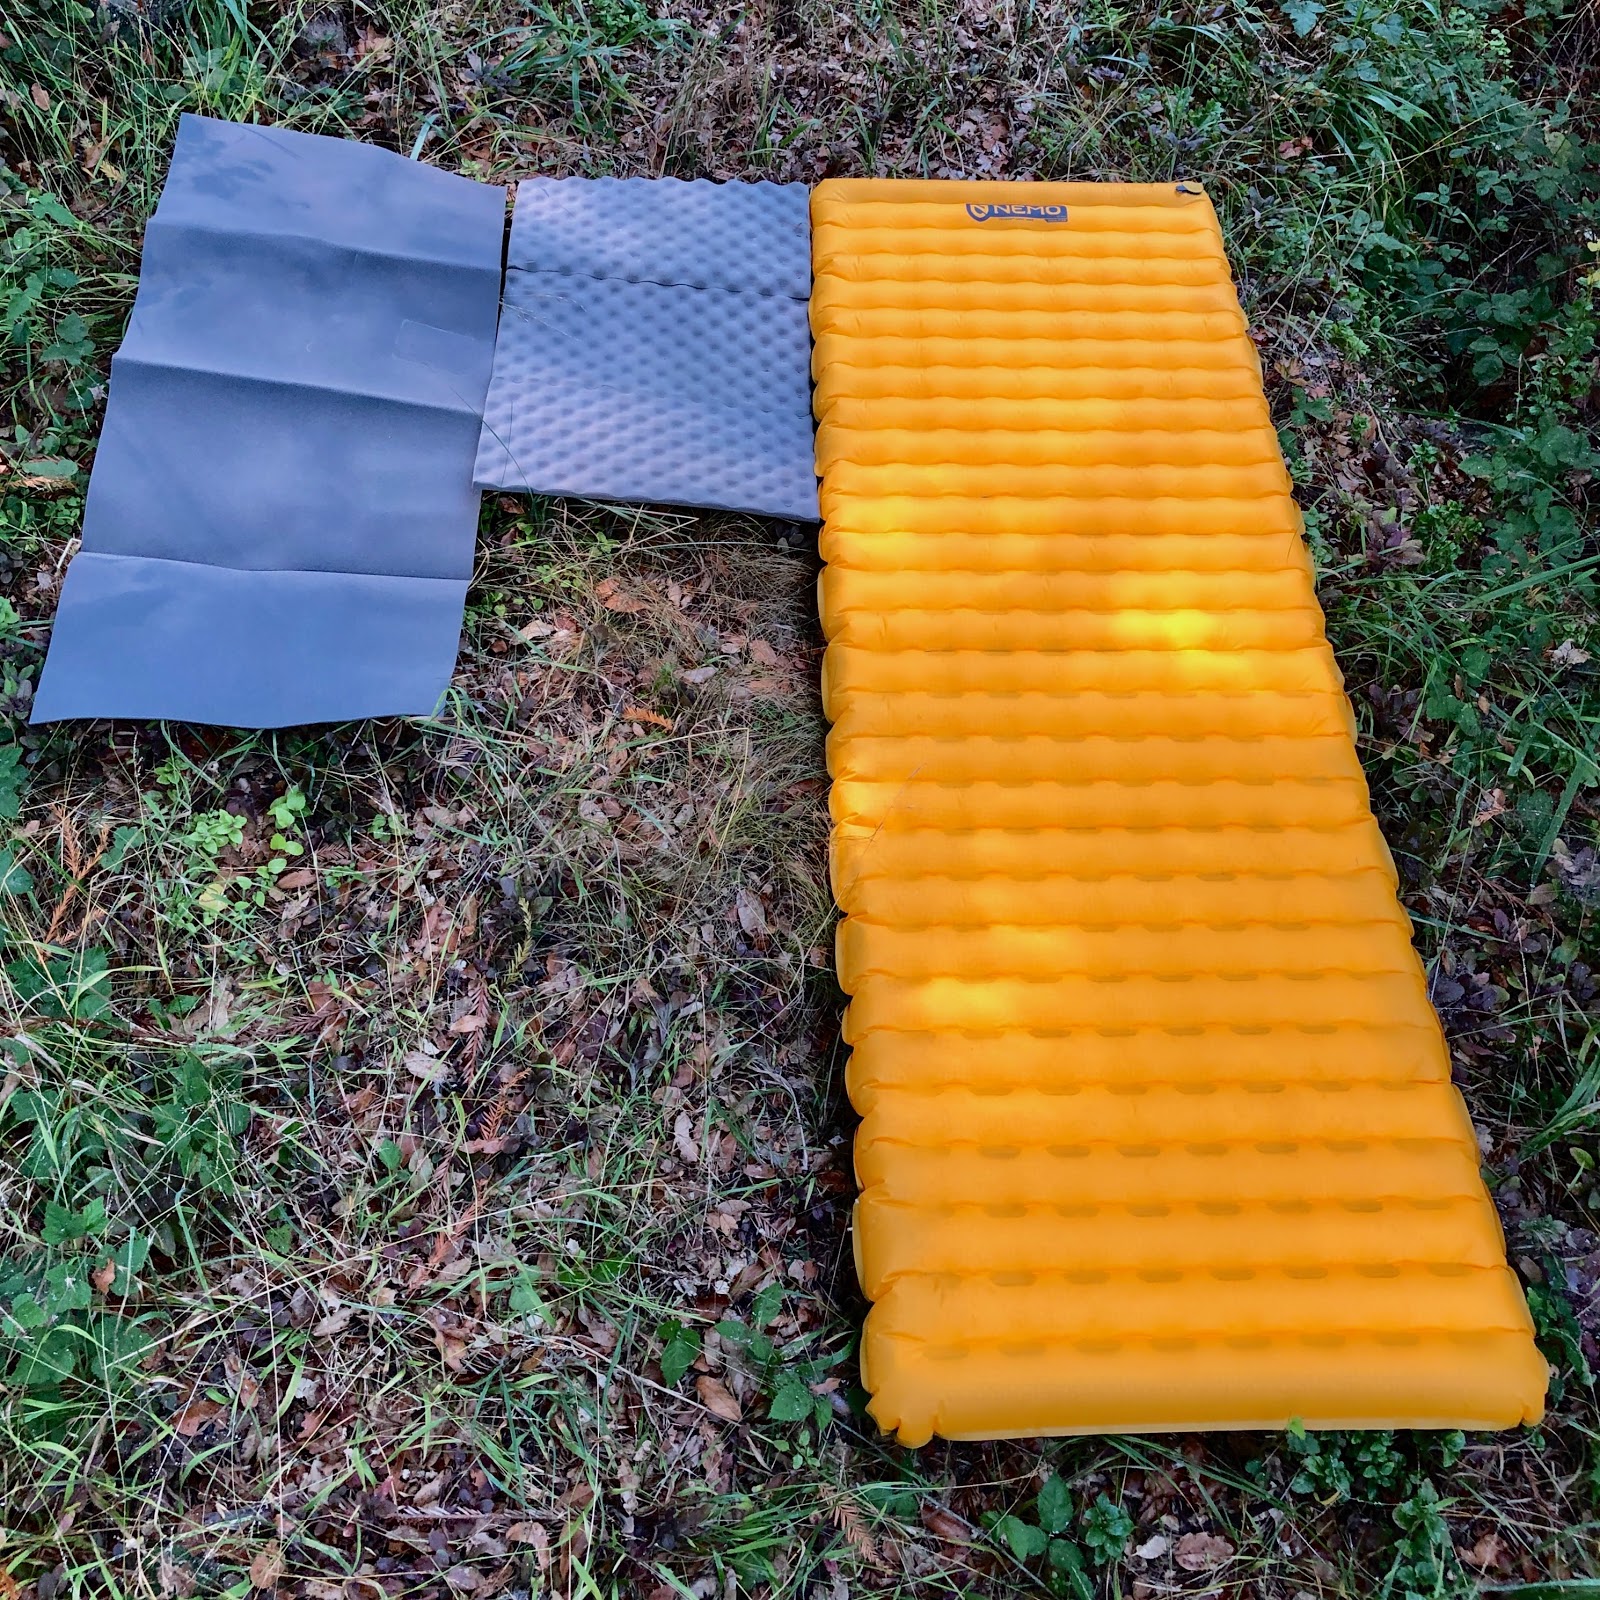
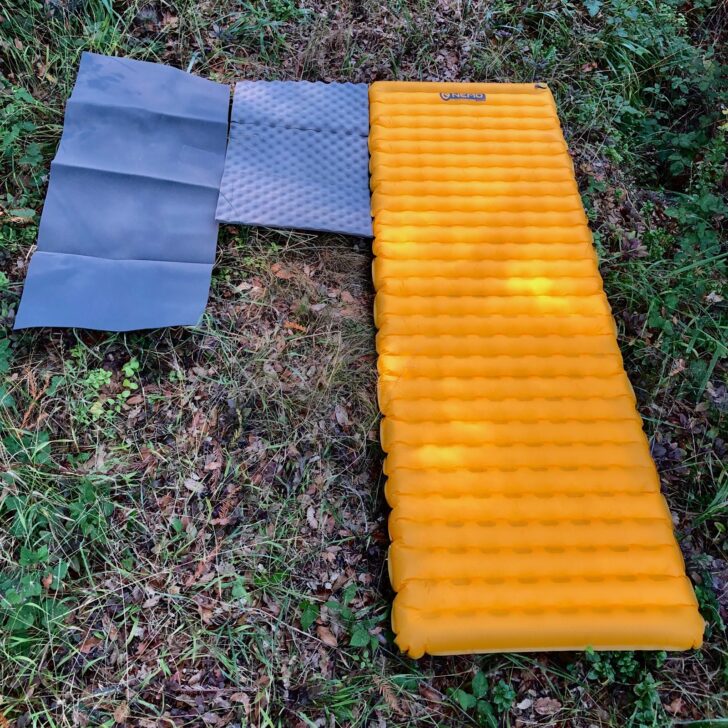
Sleeping pads in a range of R-values and sizes.
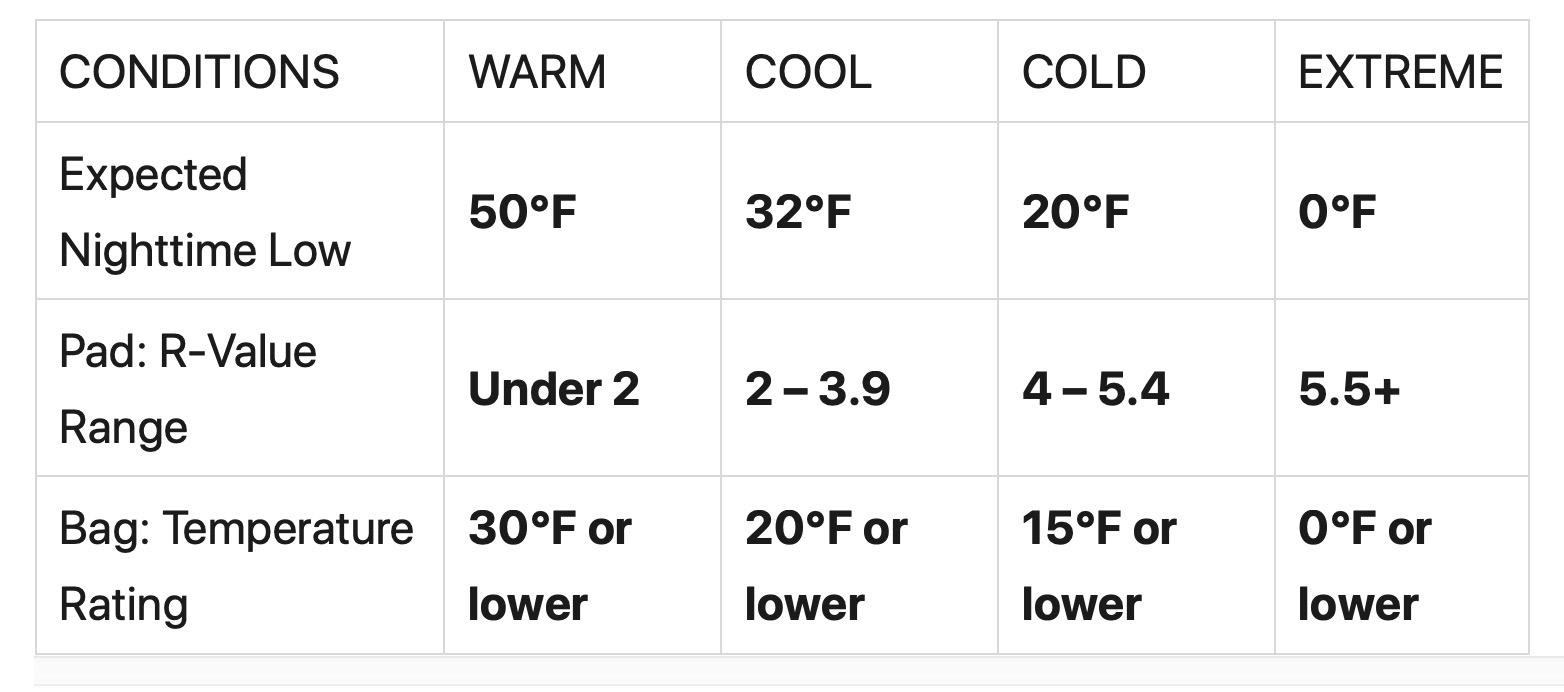
REI published a chart this year comparing expected low temperatures, R-values, and sleeping bag temperature ratings.
Chart from a recent REI blog post, based on internal research.
One curious thing about this table: the ISO 23537 standard for measuring sleeping bag temperature ratings specifies an R 4.8 sleeping pad. However, that R-value doesn’t seem sufficient in REI’s testing.
Initial Idea
Using the above chart, and making lots of assumptions, I created a first draft alternative labeling and recommendation system for sleeping pads:
First draft sleeping pad consumer guidance.
Retailers and reviewers could group sleeping pads this way to help consumers make better choices. For example, all the pads in the “Add 20°F” (11 C) category can be grouped into one area or a store or online review.
Further Development
One-time independent testing, perhaps through a standards body like ASTM or ISO, could improve this system. The tester would gather a selection of sleeping bags at different ISO 23537 temperature ratings plus sleeping pads at several ASTM F3340 standard R-values. Afterward, they would use ISO 23537 tests to measure sleeping bag temperature ratings using different sleeping pads.
For example, if a 20 F (-6 C) comfort rated sleeping bag tested on an R 3 pad returns a 35 F (+2 C) comfort rating, then the 15 F (8 C) difference applies to that R-value. In other words, “Add 15°F” (8 C). In the end, testers would calculate an average “Add” number for each pad, and perhaps derive a more general formula connecting R-values to temperature differences. They could also test the REI chart’s curious part, which might be due to temperature-dependent R-values.
Revised Chart
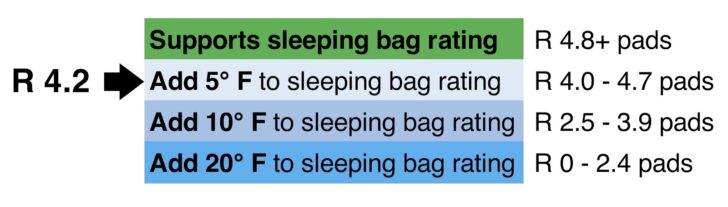
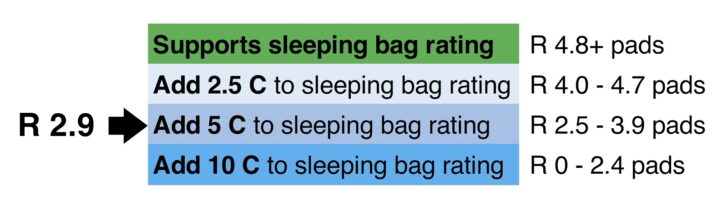
To communicate more clearly with consumers, I grouped R-values into “Supports,” “Add 5° F,” “Add 10° F,” and “Add 20° F” chunks. For the metric world, perhaps group into “Supports,” “Add 2.5 C,” “Add 5 C,” and “Add 10 C” chunks. I chose the word “Add” rather than a plus sign to reduce confusion. I also assigned new colors to make it easy for consumers to distinguish between different pads, group similar pads together, and better understand the consequences of choosing a pad with a lower R-value.
An example of my revised consumer guidance chart. The left side R-value and arrow refer to the current product.An example revised consumer guidance chart with metric temperatures. Many international retailers use U.S. R-values for sleeping mats.
Consumers who want a warmer or colder pad than the one they are looking at can use these charts to find products in the right range. People with more backcountry experience might still choose a pad in a higher “Add” category (i.e. lower R-value) for use during warmer weather in order to save money, or weight, or to gain comfort. Many seasoned backpackers layer two pads: an air pad for comfort plus a foam pad to add sufficient insulation, since R-values are roughly additive. But I hope new backpackers would choose an R 4.8 or higher pad if they can afford one, and sleep warmer.
I am not a color or design expert. In the draft proposal, consumers might interpret the red color as warning or warmer, causing more confusion. By changing the colors and including the “Add” numbers, R-value ranges, and product R-value with an arrow, I hoped to reduce that uncertainty.
Industry Support
Why should the backpacking industry support a scheme that obviously makes some pads less desirable? According to an Enlightened Equipment video, 50 percent of their customer complaints about cold sleeping bags, and quilts were traced to using a sleeping pad that’s not warm enough.
Many pad makers also produce sleeping bags, including Alps Mountaineering, Big Agnes, Exped, Nemo, REI, Sea-to-Summit, Sierra Designs, and Therm-a-Rest. It would be in their self-interest to use a system like this to improve customer ratings and reduce complaints and returns. Also, warmer pads usually sell at higher prices than colder pads. Gear makers would still measure and publish sleeping pad R-values, but manufacturers and retailers could communicate more effectively with their customers by using this scheme.
Conclusion
I’m not holding my breath. Running a bunch of ISO 23537 tests at $600 each plus analysis and standards development would be a costly one-time investment that no single manufacturer or retailer could justify. And the switch to ASTM F3340 standardized R-values this year was too recent, too confusing, and too expensive. But we can hope – and suggest that the industry improves.
Please post your suggestions below to enhance this proposal.
Backpacking Light does not accept compensation or donated/discounted products in exchange for product mentions or placements in editorial coverage.
Some (but not all) of the links in this review may be affiliate links. If you click on one of these links and visit one of our affiliate partners (usually a retailer site), and subsequently place an order with that retailer, we receive a commission on your entire order, which varies between 3% and 15% of the purchase price. Affiliate commissions represent less than 15% of Backpacking Light's gross revenue. More than 70% of our revenue comes from Membership Fees. So if you'd really like to support our work, don't buy gear you don't need - support our consumer advocacy work and become a Member instead.
Learn more about affiliate commissions, influencer marketing, and our consumer advocacy work by reading our article Stop wasting money on gear.
It’s four-thirty in the afternoon and I’m feeling a sleepiness only caffeine, napping, or walking can fix. English tea time. Spanish siesta. Utah amble.
I pull my truck into a packed trailhead across the street from the Hogle Zoo in Salt Lake City, park, and again look at my phone. I check my messages, scroll briefly through Instagram again, and then turn it off and tuck it under the seat. It’s four-thirty in the afternoon and I’m feeling a sleepiness only caffeine, napping, or walking can fix. English tea time. Spanish siesta. Utah amble.
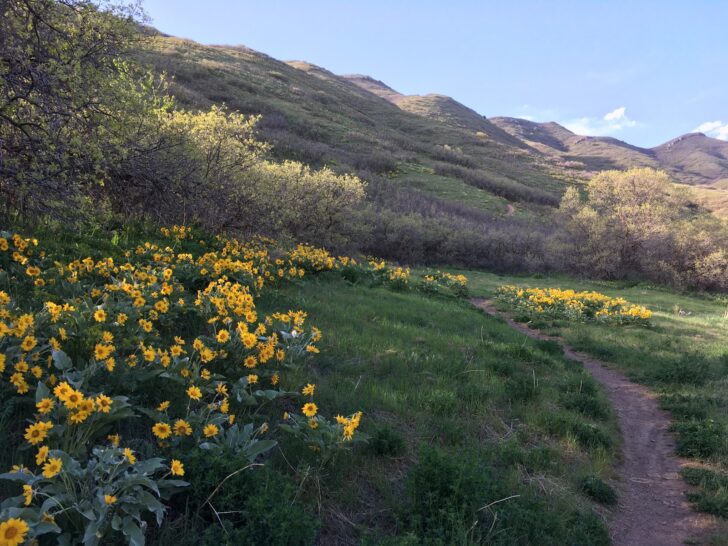
On a daily walk along the Bonneville Shoreline Trail in Salt Lake City.
Phoneless, I exit the vehicle, check the doors, pocket the keys, and step slowly up a dry, rocky trail between scrub oak. I do this, or something like it almost every day—a ceremony of leaving everything behind except for my body and mind. But a part of me always protests. A part of me could keep working, checking messages and email perpetually, but it’s the slipperiness of this inclination that I don’t trust and which I have to make an effort to resist. So, I walk.
As my heart starts pumping and my breath becomes more labored, all the things I’ve been avoiding rush through me along with my quickened blood. The problem I’ve been unable to solve. The interpersonal interactions that could have been better. What I could have said, what I still can say, what I should have done, what I still can do. Planning, anger, rumination, grief. Those first thirty minutes are allocated for feeling these things. And then things (usually) quiet down. This is why I walk.
One foot falls in front of the other, falls in front of the other, falls in front of the other. The warm May sunlight and cool breeze together land on my skin, replacing some rumination over which I have no control. The burning in my calves as the trail steepens replaces the desire to finish a project that will be on hold for at least as long as I commit to walking through the hills. Buds are starting to emerge from the gamble oak, and the big yellow flowers of the arrowleaf balsamroot spring from the nothing of winter and carpet the round hills. The rhythm of my lungs filling and emptying, my heart beating, and the cadence of my feet produce what Rebecca Solnit in her book Wanderlust calls “a delicate balance between working and idling, being and doing. It is a bodily experience that produces nothing but thoughts, experiences, arrivals.”
But, while idling seems to replace working, and being seems to replace doing, I’m inadvertently becoming more productive as an internal sorting occurs. And not arbitrarily productive. Thoughts rinse through the rain of walking, sorting in the sieve of walking, and when the dust runs from them as mud and the gravel refuse falls on that tailing pile of ruminations, and the water falls away, I look down to find gems sitting there clear, shining, obvious. I’m giving myself the space to find what really matters.
Why is walking so effective in this regard, and for how long has it had this function?
Arrowleaf balsamroot along the Bonneville Shoreline Trail in the foothills of Salt Lake City.
There doesn’t seem to be much consensus on when or why early hominids started walking upright. The Savannah-based Theory points to a shift from forest to grasslands in Africa, a result of climate change, and the need for apes to stand up and see over the tall grass. Others say standing upright kept us cooler, with the sun striking less of our body as we scurried between trees. The (possibly sexist) provisioning model says that bipedalism was a result of the male being sent out to get food and bringing it back in his arms, becoming the sole provider for an essentially immobile female. Other theories suggest that walking upright is simply more efficient than moving on all fours, a theory that finds some favor in Prescott, Arizona’s Man Against Horse Race, where Nick Coury outran a horse over the course of 50 miles (80 kilometers) in 2019. The idea is that when we started hunting big game, one of the first methods was to simply run after them until they wore out. When we caught up to them, we used our newly-freed hands to bash them to death with some sort of club. Brutal. But also sensible.
In any case, biomechanical changes took place. The pelvis became more like a bowl. The out-turned legs shifted inwards and under the pelvis. The legs became longer. The spine obtained a curve to support the upright structure. The butt developed, allowing us to run. And of course, the hands were freed up to manipulate things. Tools could be made, carried, brandished. And then humans set out from Africa on foot, traveling out of curiosity, necessity, or maybe just because we could. Maybe just to see what’s around the next bend, over the next horizon, eventually spreading out to populate every corner of the Earth.
At some point, walking became more than its origins, developing into a cultural activity of simultaneous walking and thinking. Looking specifically at Europe, the Greek philosophers famously walked as they thought and thought as they walked. Rousseau, in the mid-1700s, was one of the first to promote walking as the ideal state of being. Man, he believed, reached his fullest potential “wandering in the forests, without industry… with no need of his fellow-men, likewise with no desire to harm them.” The walker was outside of society, in nature, relying on their own strength.
William Wordsworth supposedly walked about 180,000 miles (290,000 kilometers) in his life on his nobbly legs. According to Solnit, he “made walking central to his life and art to a degree almost unparalleled before or since.” His walking seems pretty similar to the type of walking I and people reading this article also engage with, a sort of backpacking, so it seems. In his early twenties, he set off on a 2,000-mile (~3,200 km) walk. Of course, I wonder if he used some sort of canvas rucksack, what he carried in it, where he slept, how he dealt with weather.
The pace of life today, the perpetual notifications popping up on ever-present screens threaten to hide experience from us. Memories and needs remain trapped in that unmined ore of unexamined life. Rousseau and Wordsworth would agree that backpacking pushes back against this fast-moving world. It urges us to slow down. As Solnit says, the mind probably works at the same pace as the feet, three miles per hour. Backpacking puts us back in that rhythm for extended periods of time. That’s probably why so many of us feel like every trip is a reset. Some of us need to hit that button more often than others. I need short daily resets, phoneless, and typically alone. But I need longer ones too, at least once a month—some quick overnighters in the mountains or deserts within a few hours’ drive of my home. And I know some people need even longer ones and so embark on the PCT, the AT, the AZT, the CDT. Some of us would prefer to linger in that place where the mind’s pace matches that of the feet, and nothing threatens to break that linked cadence.
There are other reasons for walking, too. Cheryl Strayed is interviewed on an episode of the Design Matters Podcast, saying “what happens on the outside, one foot in front of the other in front of the other, also happens on the inside.” She says that the body becomes the teacher, and the rest of us learns from it. When she hiked the PCT, she revisited every single moment of her life. The pain, the joy, all of it. It allowed her to emerge at the end as a person willing and capable and confident to reenter the world, something she would have had a hard time accessing otherwise. Walking allowed this.
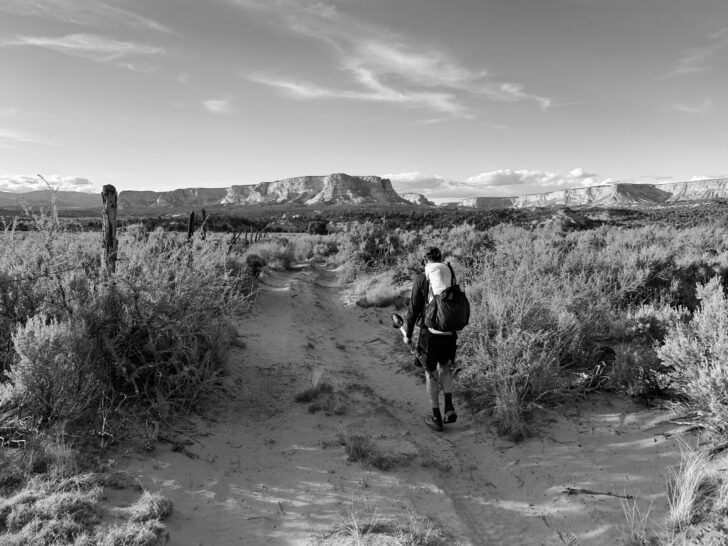
Nearing the end of a 17-mile (27 km) day of walking.
Walking is exploratory, walking is an escape, walking is exercise. We also walk to offer respect for timeframes we can’t perceive. We follow geological divisions like the Continental Divide Trail which splits the continent between water that drains into the Pacific Ocean from water that drains into the Gulf of Mexico. Or for comradery. To be one of many on national scenic trails like the AT and PCT. To proudly say “I did it too!” We also walk to trace old paths so that the act itself functions as a sort of ambulatory memory. Robert MacFarlane, for example, in his book The Old Ways, follows the Icknield Way, one of the oldest paths in the UK, possibly up to 6,000 years old. And Craig Childs, in his book House of Rain follows ghosts of the Ancestral Puebloans across the southwest.
Some also walk to imagine potential. John Davis’s Trek West expedition endeavored to imagine landscape connectivity from Mexico to the Yukon where animals once freely roamed, and could do so again. In 2019, I followed an individual mule deer from winter to summer ranges to see what I could learn from intelligences other than my own. It wasn’t a premier wilderness experience as I crossed highways and climbed over barbed wire fences, but it was a walk full of meaning, and it made me want to do more like it.
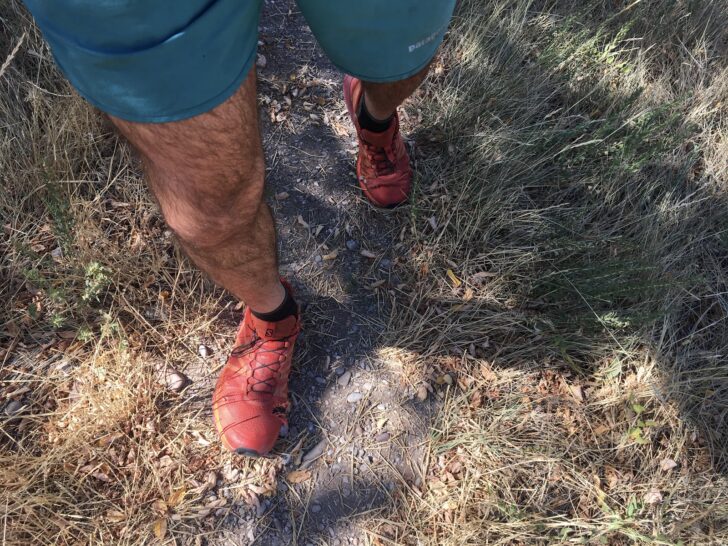
Wearing out shoes on my daily walks/runs.
After nearly an hour ambling through the foothills above Salt Lake City, I start to make my descent to the car. The densest thoughts crack and break apart and fall away like dried mud from a shoe, leaving me with new clarity. In fact, I need to take some notes before I forget everything I just learned without trying to learn anything at all. So I pick up my pace. The rhythm of the body, the lungs, heart, become the teacher and teach me something I wouldn’t have known had I not gone on my daily walk.
Backpacking Light does not accept compensation or donated/discounted products in exchange for product mentions or placements in editorial coverage.
Some (but not all) of the links in this review may be affiliate links. If you click on one of these links and visit one of our affiliate partners (usually a retailer site), and subsequently place an order with that retailer, we receive a commission on your entire order, which varies between 3% and 15% of the purchase price. Affiliate commissions represent less than 15% of Backpacking Light's gross revenue. More than 70% of our revenue comes from Membership Fees. So if you'd really like to support our work, don't buy gear you don't need - support our consumer advocacy work and become a Member instead.
Learn more about affiliate commissions, influencer marketing, and our consumer advocacy work by reading our article Stop wasting money on gear.
The NEMO Equipment Hornet Elite 2P (33 oz / 935 g, $499.95) is a semi-freestanding, double-walled, ultralight tent. It features design touches meant to increase the volume of the tent while not adding additional weight.
Introduction
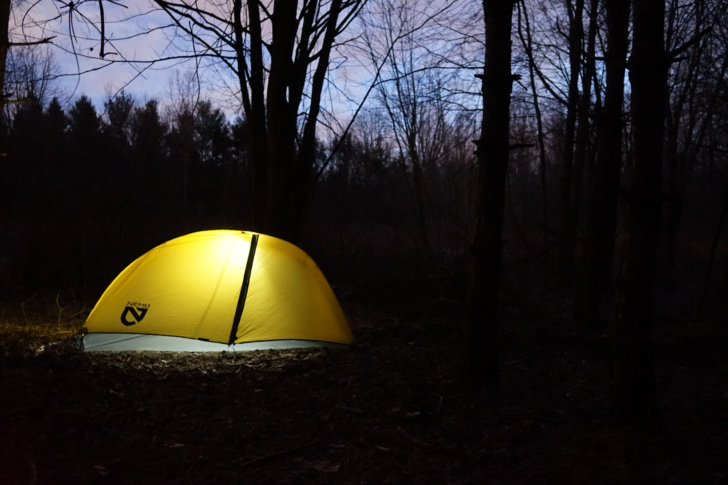
The NEMO Equipment Hornet Elite 2P (33 oz / 935 g, $499.95) is a semi-freestanding, double-walled, ultralight tent. It is designed to be, according to the NEMO website, “… the ultralight tent of choice for extreme minimalists wanting the best in technical materials and design.” Intended as a three-season, two-person shelter, the Hornet Elite features design touches meant to increase the tent’s volume while not adding any extra weight.
Photo: NEMO Equipment
About this Review
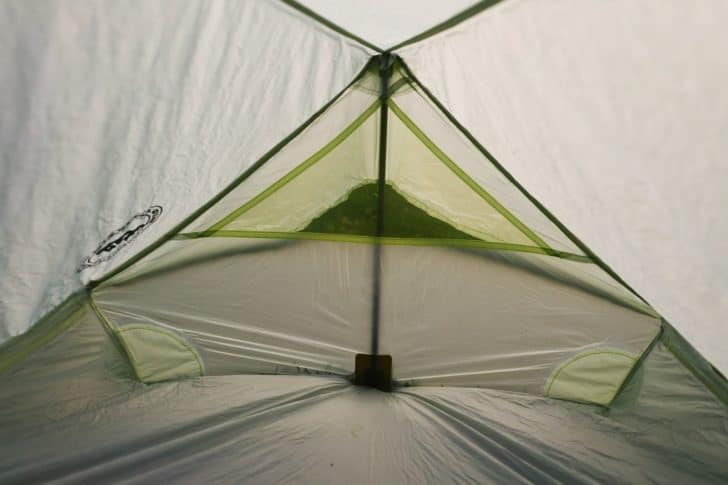
The NEMO Equipment Hornet Elite 2P lit from within as night falls in Southeast Michigan.
This Limited Review is based on my initial testing of the NEMO Equipment Hornet Elite 2P over five weekend trips in Southeast Michigan during January, February, and March of 2020.
Features and Specifications
Ultra-fine 7D nylon ripstop fly
Two doors and vestibules
Dual-stage stuff sack
Volumizing guy-outs
Light Pocket
Capacity: two persons
Seasons: three
Minimum weight: 1 lb 11 oz (779 g)
Packed weight: 2 lb 1 oz (935 g)
Packed size: 19.0 x 4.5 in (48 x 12 cm)
Peak height: 37 in (94 cm)
Floor area: 7.3 sq ft (2.5 sq m)
Floor dimensions: 85 x 50/42 in (216 x 128/107 cm)
Vestibule area: 2 vestibules with 6.2 sq ft (0.6 sq m) each
Doors: two
Materials
Frame: aluminum
Canopy: no-see-um mesh
Fly: 7D PeU nylon ripstop (1200 mm)
Floor: 10D Sil/PeU nylon ripstop (1200 mm)
NEMO Equipment Hornet 2P Elite floor plan and elevation. Illustration: NEMO Equipment
Performance Analysis
Since this is a Limited Review, I will not present a detailed performance analysis based on long-term use. Instead, I’ve noted performance observations and issues below.
Criteria
Observations and Issues
Weather Resistance
Overnight weather conditions ranged from lows of 25 F (-4 C) to 40 F (4 C). Conditions were generally wet and muddy, with a maximum snowfall of 2 in (5 cm). We did not experience any rain. However, I found the waterproofing of the NEMO Hornet Elite 2P to be very good. There was no serious leakage from the fly. Condensation build-up was slight, but the steep walls and sharp peak of the tent did not allow it to collect or drip down during the night.
The tent’s floor did not leak, though I did use a lightweight Polypro ground cloth to keep the tent body clean. One night we pitched the tent too quickly and got some snow between the ground cloth and the tent bottom. The snow melted, but the small puddle of water did not seep through to the tent’s interior.
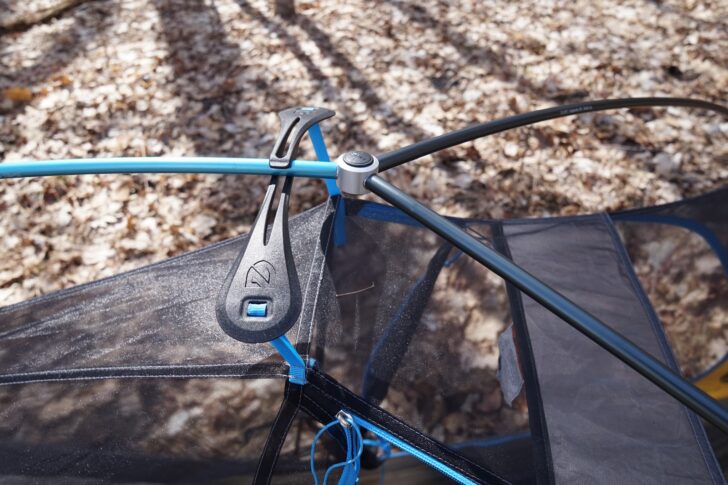
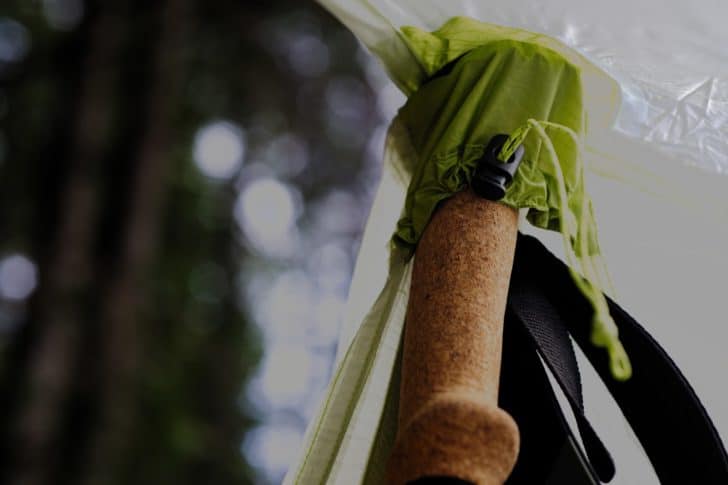
Other reviewers have reported issues with the volumizing Flybar coming undone during high wind events. It is unidirectional, so it doesn’t surprise me that it could come undone under heavy load. I did not have any issues with it, but I did select sites that were slightly protected from the wind and pitched the tent perpendicular to the prevailing wind. Backpackers that spend a lot of time in high wind areas will want to keep that in mind.
Ease of Setup/Takedown
Setup of the NEMO Hornet 2P Elite is straightforward. The instructions published by NEMO have the user set up the tri-pole first, attaching to the corners then snapping the body into the pole. I found it pitched more easily when I staked out the tent body first. The saddle between winter and spring in Michigan can be very windy; staking the corners first made the Hornet Elite 2P much easier to set up.
I ended up timing each of my two dozen or so setups and takedowns of the Hornet. Setup times including the rain-fly averaged just under five minutes. Without the fly, I was able to set up in about five minutes and 15 seconds. For the life of me, I could never get the fly facing the correct direction on the first go, adding a good 30 seconds to the setup time. I ended up tying a bit of red cord to the right corner in an effort to speed things along, but I still rarely got it right. Andrew Marshall (BPL Gear Editor) tested this shelter before I got my hands on it, and he had the same problem with the fly.
My rainfly confusion aside, the Hornet Elite 2P is straightforward to pitch. The tri-section pole is color coded, making it easy to align the poles on the first try. The delicate nature of the materials meant I needed to put some careful thought into site selection. It’s also important to note that the tent is not free standing.
It would have been nice to be able to pitch the NEMO Hornet Elite 2P in a “fly only’”configuration, but that is not possible. Certainly a small complaint, but one worth noting.
Livability (Two person and one person)
The NEMO Hornet Elite 2P is a livable two person shelter. My wife and I are both 5’8” (173 cm) tall and of average build. The fit with early spring sleep systems [35 F (2 C) to 45 F (7 C)] was snug, but passable. Anyone over 6’2” (188 cm) may have issues with the length of the tent.
It is a great setup for backpacking with a plan of spending as little time in camp as possible while putting in big milage days. For an extended trip with prolonged time in camp, it’s way too much proximity for us. Two doors and two vestibules increase the livability for two people, enabling entrance and egress without having to climb all over one another.
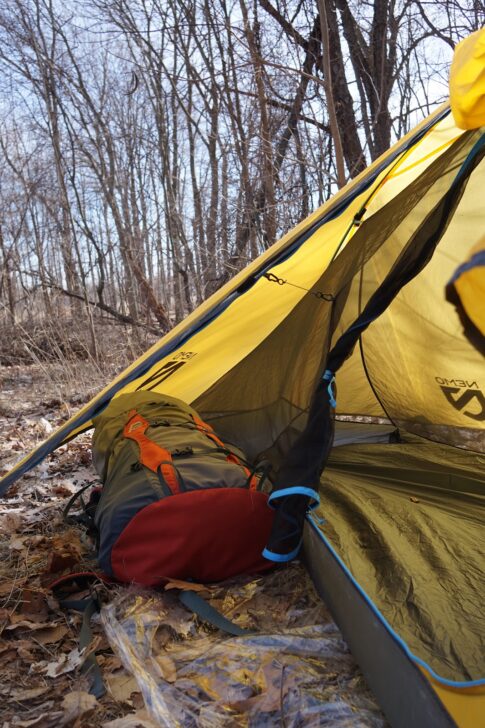
For one person, the NEMO is very comfortable. The Hornet 2P is roomy enough to drag my backpack inside on a stormy night, while the two vestibules provide ample room for cooking, hiking shoes, and stashing any gear that may be too dirty or wet for comfortable cohabitation.
There are two gear pockets, one per each side of the tent. They are quite ample, easily keeping my cell phone, lens cloth, and other pocket items at hand.
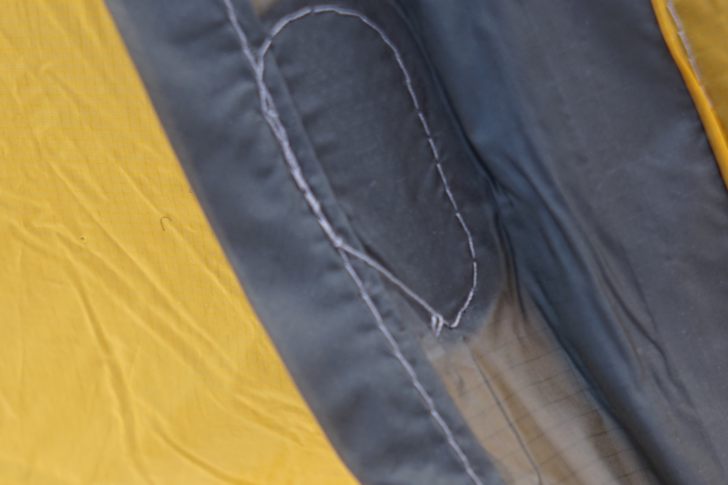
The Light Pocket is an interesting idea. It is a pocket located at the apex of the tent that is designed to hold a head lamp. The pocket itself is made from a white, light diffusing fabric. I’m not convinced that the fabric makes that much of a difference from a simple mesh enclosure, but it doesn’t hurt and the pocket does make for a nice headlamp stash. There is also room in the pocket for a couple of pairs of glasses.
There are three tie-down points on the interior that, in theory, a hiker could use to fashion a gear loft. I was not able to find a gear loft specific to the Hornet, and with the ample side pockets, I wouldn’t bother carrying one if I could. This tent is designed for sleeping between long days of hiking. On days like that I keep the vast majority of my gear in my backpack overnight.
Packability
The NEMO Hornet 2P Elite is the most packable two-person double-wall shelter I have ever used. Compared to the Eureka! and Marmot tents I’ve used with backpacking partners in the past, the NEMO Hornet 2P Elite packs into an incredibly small package.
The tent, fly, stakes, ground cloth, and pole all stuffed in the dual-stage stuff sack for a total size of 20 in x 18 in dia. (51 cm x 46 cm dia.) The NEMO Hornet 2P Elite easily slips into the side and front pockets of my small Granite Gear Virga2.
Durability
With a shelter this light, I was worried about the durability of the NEMO Hornet Elite 2P. Generally, those fears were unfounded. My biggest concern was that the 10-denier floor wouldn’t hold up. The floor even feels thin in the hand. The no-see-um netting is also incredibly delicate to the touch and I thought that it would be prone to tears. Neither the floor nor the tent body showed significant wear after my testing.
I used a Polypro ground cloth for the entire length of the review. This was winter in Michigan and I didn’t want to have to deal with a dirty tent bottom in my pack all day. The ground cloth got shoved into a pack pocket along with the fly, keeping the interior of my pack relatively clean. While the ground cloth may have helped preserve the tent floor, I was careful with my site selection. In less muddy conditions, I would not hesitate to leave the ground cloth at home.
I did have an issue with the rain-fly. During my second pitch of the tent, the stitching on the rainfly failed at one of the velcro closures. While it was an easy enough task to repair it myself, I don’t think I should have to take on a repair task my second time out with a shelter this expensive.
Weight
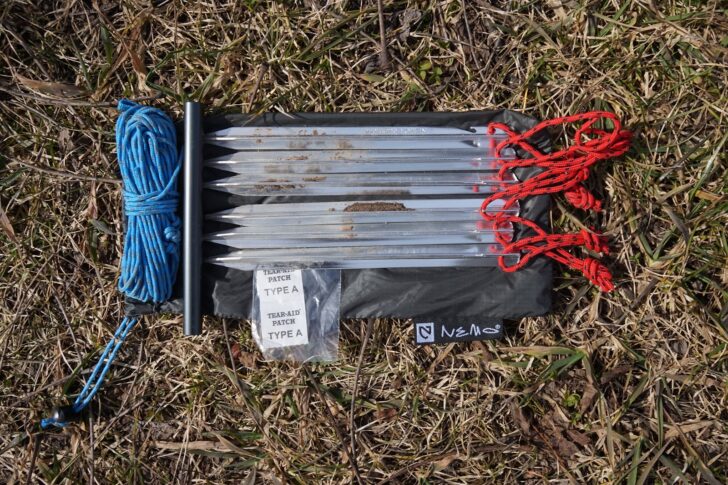
My carrying weight for a fully loaded setup of the NEMO Hornet 2P Elite was 2 lbs (906 g). This consisted of the tri-pole, tent body, rain-fly, six stakes and their bag, two additional guylines, and a Polypro ground cloth. I had no need to bother with the stuff sack for either the poles or the tent and fly. The ground cloth was in an effort to keep the inside of my pack clean and dry. The ground in Michigan is wet and muddy over the winter. For a dry summer hike, I would not bother carrying one. It would be simple to shave two ounces (57 g) off of this kit; simply remove the ground cloth and replace four of the stakes with titanium shepherd’s hooks.
Commentary
The Unidirectional Flybar attachment (for volumizing) on the NEMO Equipment Hornet Elite 2P
What Makes the NEMO Equipment Hornet Elite 2P Unique?
There is no getting around it, the NEMO Hornet Elite 2P is an excellent tent. It checks a number of boxes; it’s super light, highly livable, and incredibly packable, with very good weather resistance to boot. If I were to own one shelter for two people going hiking in the midwest in three seasons, the Hornet Elite 2P would be my pick. Here’s a weight breakdown of each component.
Tent
oz
grams
Tri-pole
7.7
219
Tent body
10.4
296
Rain-fly
8.9
253
Stakes
3
85
Additional guylines
0.6
18
Tent stuff sack
0.6
19
Tri-pole bag
0.2
7
Stake bag
0.2
6
Repair kit
0.4
10
Ground cloth (just a piece of thin Polypro)
1.6
44
Ground cloth (Official NEMO)
6.6
187
A snug, comfortable winter pitch
I don’t think the NEMO Hornet Elite 2P is the best choice for everyone. People in high wind areas, those who camp regularly above treeline, or folk that spend a lot of time in rough terrain would be better served by a more robust shelter. If time in camp is valued as much as time on the trail, then the Hornet Elite 2P is too small for two people.
Fast and Light Use Case
Use as a Solo Shelter
Fast and Light Use Case
Fast, long days are where this tent shines. For two people with a daily mission of maximum distance, I do not know of a better traditional double-walled semi-freestanding shelter. It also performs admirably as a spacious one-person shelter. That being said, I’m not giving up my solo shelter system. The Hornet Elite 2P weighs six ounces (162 g) more than my tarp and bivy setup. While the Hornet Elite 2P is an easier pitch, I just can’t justify the tradeoff in weight or adaptability.
Stakes, guylines, and repair kit.
There is a lot to love about the NEMO Hornet Elite 2P. It is a well thought out ultralight tent with nice design touches throughout that enhance its usability. There are ample storage pockets which are easily accessible by one or two people, the tent is easy to pitch, and though the interior space is limited, the design maximizes it. I have no qualms about the durability of the materials and found the tent to be comfortable and dry.
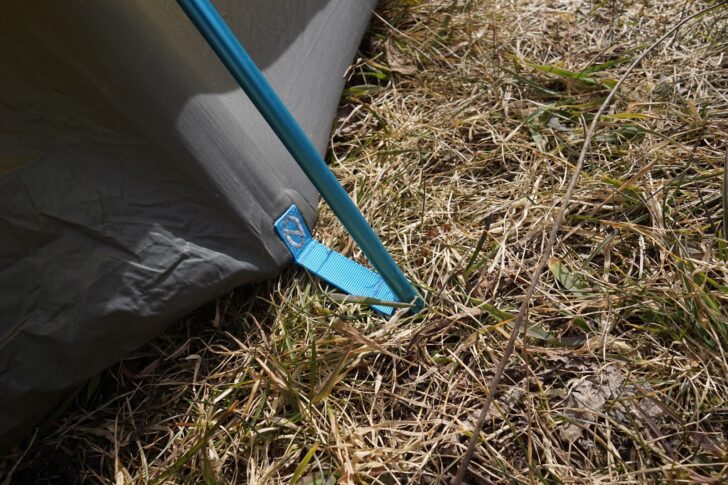
Blue end of the tri-pole goes with the blue anchor, a nice touch.
If you and your hiking partner’s goals are putting in lots of miles and spending as little time in a tent as possible then you should definitely consider the Hornet Elite 2P. The tent packs up fast and small. It is tailor-made for big days covering a lot of ground. If you both are the sort of hiking duo that likes spending time in camp and wants some elbow room, you will be better served looking elsewhere.
Use as a Solo Shelter
The NEMO Hornet Elite 2P is a fantastic one-person shelter. For the cost of a few extra ounces (few hundred grams) of pack weight, you get a lot of space for a solo hiker. Those that hike with four legged friends would find the space ample as well, though if your pup is over 100 lbs (45 kg) the space might get tight fast.
Solo camping, the Hornet Elite 2P has interior room for my sleep system and pack.
My experience with the stitching tearing on the rain-fly velcro is all that precludes me from highly recommending the NEMO Hornet Elite 2P. It is a fantastic tent.
Stitching on the rainfly velcro closure failed on the second pitch.
Compared To…
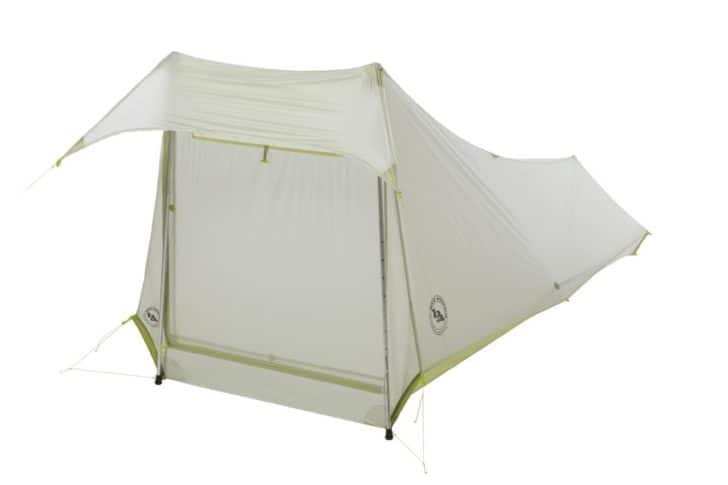
I compared the NEMO Equipment Hornet Elite 2P to the Big Agnes Tiger Wall Platinum 2.
The price point is similar, with the Tiger Wall 2 Platinum costing $50 more. The designs are similar as well. Both tents are semi-free standing with nearly indistinguishable interior dimensions. They both have two doors and two vestibules.
Ample vestibule space at both doors of NEMO Hornet Elite 2P. Note the clip between the fly and the tent body, adding more volume to the interior. In comparison, the Tiger Wall 2 Platinum (see table below) has even more vestibule space.
The differences lie in the weight and in the pitching options. The Tiger Wall 2 Platinum weighs 5 oz (142 g) more than the Hornet Elite 2P (at total packaged weight). The Tiger Wall 2 Platinum can also be pitched in a fly-only configuration, whereas the design of the Hornet makes a fly-only pitch impossible. If the ability to pitch fly-only is important to you, you should consider the Big Agnes Tiger Wall 2 Platinum over the NEMO Hornet Elite 2P.
The NEMO Hornet Elite 2P costs $499.99 while the Big Agnes Tiger Wall Platinum 2 costs $549.95.
Hornet Elite 2P
Weight
The NEMO Hornet Elite 2P is about 5 oz (142 g) lighter than the Big Agnes Tiger Wall Platinum 2.
Hornet Elite 2P
Packed Size
The packed size of both shelters is virtually identical, with the NEMO Hornet Elite being an inch longer but the Tiger Wall Platinum being an inch wider in diameter.
Tie
Floor Area
The two shelters have virtually identical floor areas - with a slight advantage of 0.7 square feet to the Tiger Wall Platinum.
Tiger Wall 2 Platinum - barely
Vestibule Area
The Big Agnes Tiger Wall Platinum has just under 2 square feet more vestibule space on each side than the NEMO Hornet Elite 2P
Tiger Wall 2 Platinum
Peak Height
The peak height of the Tiger Wall 2 Platinum is two inches higher than that of the NEMO Hornet Elite 2
Tiger Wall 2 Platinum
Number of Doors
Both shelters have the same number of doors.
Tie
Set-up style
The Tiger Wall 2 Platinum can be set up in fly-only mode.
Tiger Wall 2 Platinum
It’s essential to compare the NEMO Hornet Elite 2P to its heavier, less expensive kin, the NEMO Hornet 2P. For $130 less, the Hornet 2P delivers more vestibule area, more interior height, and more floor space. It does weigh more (5 oz / 131 g). Also, there is less netting in the non-elite version’s tent body. Reviews of the non-elite version of the Hornet 2P mentioned condensation as an issue. I hypothesize that the difference in netting is the cause; while I had minor condensation on the fly of the Elite version, I had no issues with it in the tent itself.
There are hardware differences as well. The anchors for the ridge pole on the Elite version feel better designed than those on the non-Elite. The non-Elite is pitched using two Flybars, which increases the headroom a bit. If cost is a consideration, the non-Elite Hornet is worth a look.
Are differences between the non-Elite and Elite versions of the Hornet worth the $130 price? To me they are. Better airflow with the increased netting, slightly more fly coverage, and more durable anchoring add up to the price difference. Take that along with the weight savings, so for me it’s a no-brainer. Your financial situation may well be different than mine. If $130 is the difference between being able to take an extra night out on the trail and an incremental gear upgrade, save the money, get the non-Elite, and have a great time outdoors.
Product Strengths and Limitations
Strengths
Ease of setup/takedown – The single pole setup was quick and easy.
Packability – The Hornet Elite 2P is the most compact two-person, semi-freestanding, double-wall tent I have ever used.
Weight – One of the lightest options in a widely available, double-walled, two-person shelter market
Limitations
Durability – Poor stitching on one of the rain-fly velcro closures is tough to swallow in a $499 shelter
Curious about double-wall vs. single-wall shelters? Our community has some advice.
DISCLOSURE (Updated April 9, 2024)
Product mentions in this article are made by the author with no compensation in return. In addition, Backpacking Light does not accept compensation or donated/discounted products in exchange for product mentions or placements in editorial coverage.
Some (but not all) of the links in this review may be affiliate links. If you click on one of these links and visit one of our affiliate partners (usually a retailer site), and subsequently place an order with that retailer, we receive a commission on your entire order, which varies between 3% and 15% of the purchase price. Affiliate commissions represent less than 15% of Backpacking Light's gross revenue. More than 70% of our revenue comes from Membership Fees. So if you'd really like to support our work, don't buy gear you don't need - support our consumer advocacy work and become a Member instead.
Learn more about affiliate commissions, influencer marketing, and our consumer advocacy work by reading our article Stop wasting money on gear.
Standards Watch will be a monthly column that explains important backpacking product standards, interviews key people, and describes how the industry uses, abuses, or ignores tests and standards.
Overview
We’re all frustrated by inconsistent measurements and descriptions of backpacking products. Too often, you can’t reliably compare weights, volumes, temperature ratings, seasons, and other key quantities between different manufacturers. Yet a wide variety of standards and tests apply to backpacking gear that should make selection much easier.
Standards Watch will be a monthly column that explains important backpacking product standards, interviews key people, and describes how the industry uses, abuses, or ignores tests and standards. I’ll also critique existing standards and marketing, point out missing standards and tests, and propose other ideas to improve life for backpacking consumers.
Like most human endeavors, making standards is far messier than it appears from the outside. Many contain significant but hidden compromises. And some standards and tests are more rigidly defined than others – allowing room for misinterpretation or even fudging.
Yet slavish devotion to standards sometimes causes other problems – inhibiting innovation, misleading consumers, imposing high testing costs, and more. I plan to highlight those issues as well.
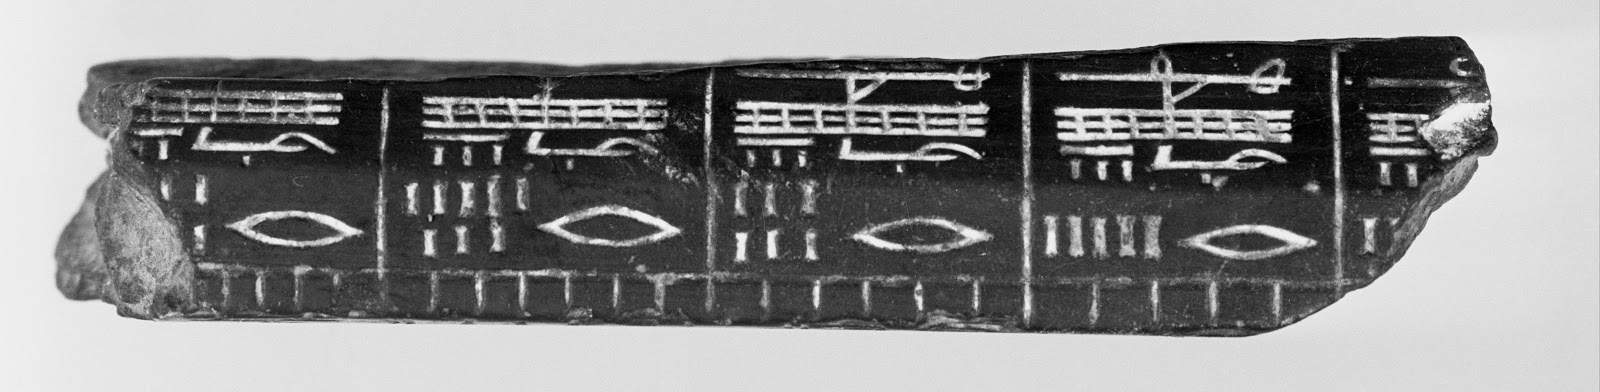
Fragment of an ancient Egyptian cubit rod carved in granite. Credit: U.S. National Institute of Standards and Technology, public domain.
Importance of Standards
Historically, measurement standards varied over time and place. Lengths were based on a king’s arm, barleycorns laid end-to-end, and scratches on granite rods. Bushels were units of volume or weight based on what you measured. A pound varied by as much as 30 percent depending on where and when you weighed something – and if the scales were honest.
All this inconsistency made buying and selling goods tricky enough that in 1789 the U.S. Constitution gave Congress the power to fix the “Standard of Weights and Measures.” Today, we take for granted that a pound or a meter or a second is the same everywhere. But how we use those basic measurements for a wide variety of tasks is still a work in progress.
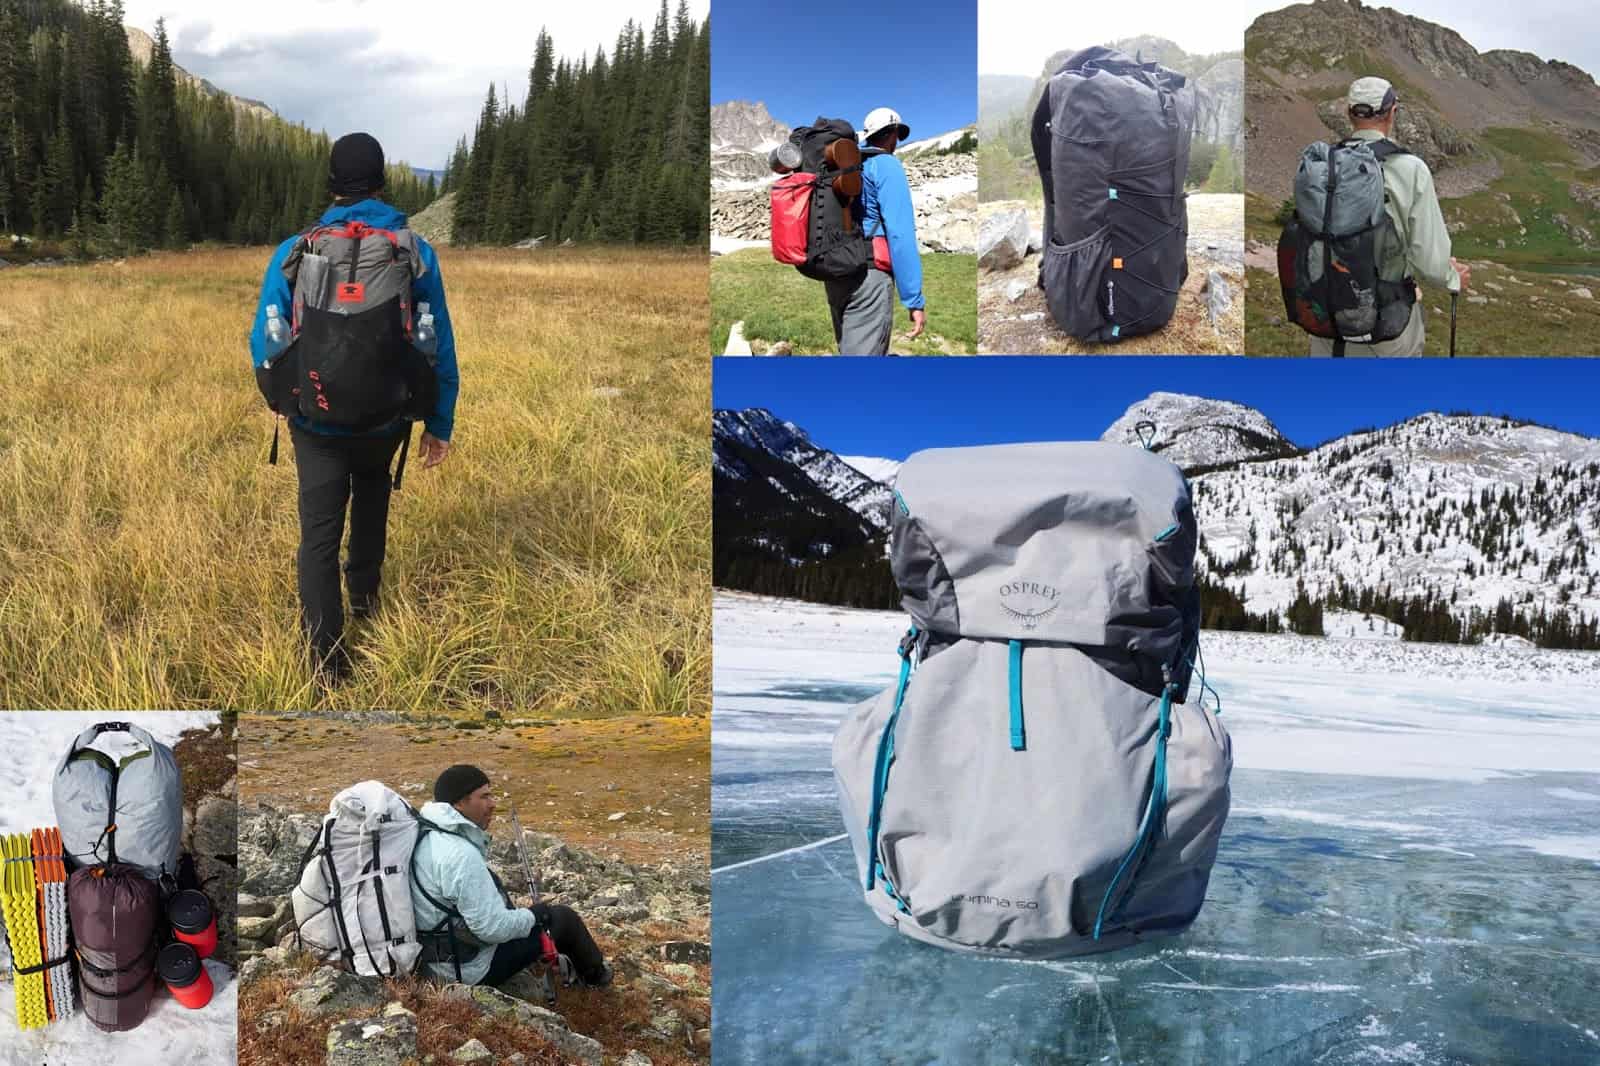
Montage of backpack photos from Backpacking Light reviews.
Example: Backpack Volumes
Have you ever wondered why a 50-liter (3,000 cubic inch) backpack from one company seems much larger than a 50-liter backpack from another? If you have a certain volume of gear, food, and water to carry, you want to know if all of it will fit inside. Simply multiplying the height by width by depth doesn’t work when measuring the volume of an amorphous bag of fabric, especially with extension collars and pockets that change shape depending on how much you stuff inside the main compartment.
Roger Caffin found disturbingly wide differences between claimed and measured volumes in his 2010 Lightweight Internal Frame Packs market survey. A couple of BPL forum threads (here and here) even wandered down the rabbit hole of backpack volume measurements.
And yes, there’s been a standard for that since 2001: ASTM F2153 “Standard Test Method for Measurement of Backpack Capacity.” However, too many pack makers, mostly in the United States, ignore or take liberties with that standard. It’s so widely abused and misunderstood that Philip Werner at Section Hiker proposed measuring pack capacity in beer cans. It was an April Fool’s Day joke, but not without its merits.
I’ll dig into the ASTM standard and why it’s not meeting consumer needs in a future column.
Planned Columns
Over the next year, I plan to write about these topics and others.
Sleeping Bag Temperature Ratings
You’ve probably seen sleeping bags advertised as good to “32 degrees” (Fahrenheit) or “0 degrees” (Celsius) and wondered how they came up with that number. Thanks to ISO 23537, commonly known as the EN rating, we have a consistent way to measure and report those numbers. But how realistic is it? Which gear makers test according to that standard? What do the others use instead? I’ll explain what’s in the standard, how different manufacturers assign temperature ratings to bags and quilts, and why marketing makes a confusing standard even more muddled.
Interviews with Product Testers
If you’ve weighed every piece of gear you own to the nearest gram, you’ve taken the first step down the path of independent product testing. Some backpackers have gone much further down that trail, buying commercial test equipment, or designing and building their own measurement rigs. I’ll interview these independent investigators to find out what drives them to make these investments, what they’ve learned, and what other backpackers should know.
Tent Flammability Standards
In the mid-20th century, deadly tent fires spurred the development of the Canvas Products Association International “Specification for Flame-Resistant Materials Used in Camping Tentage.” Compliance with CPAI-84 became a legal requirement for tent sales in several states, including California. But the materials used to comply with those laws created new and serious problems.
Plus, tent fabrics and designs have changed a lot over nearly four decades. I’ll investigate what’s in that standard, why it went wrong, and how the industry is slowly fixing the problems or working around them.
Product Designer Interviews
In theory, the people who design backpacking gear for sale should follow all the applicable standards. In practice, those standards conflict with other design decisions, and sometimes the standards lose. I plan to interview product designers for a peek inside the process and how standards affect what you can buy.
Headlamp and Flashlight Performance Standards
More than a decade ago, the flashlight industry developed ANSI FL 1, a standard for consistently measuring brightness, beam distance, run-time, and other parameters. Yet some headlamp and flashlight makers grossly exaggerate those numbers, while most retailers simply regurgitate the values, knowing they are wrong. I’ll discuss what’s in the standard, how it was developed, and why it failed.
Send Your Ideas
As far as I know, no other publication consistently covers backpacking standards and testing. Yet, we see standards abused or ignored by companies in ways that often confuse and misinform customers. My primary focus will always be on helping backpackers choose and use products wisely. I hope to be a vox clamantis in deserto, to quote Edward Abbey, a voice crying in the wilderness to make life easier for gear purchasers.
Got ideas for the Standards Watch column? Drop them in the comments section or send me via a BPL private message.
I’ve already found about 140 standards that could apply to backpacking equipment and more than a dozen standards development groups. At one or two columns per standard or group, I better get to work!
You can help. Let me know which backpacking standards have problems or which ones are missing. Send questions like, “I’ve always wondered why…?”
If you’ve designed or tested products using standards or participated in backpacking standards development, let’s talk!
Post your comments below or drop me a BPL private message. I want these columns to help you make better gear choices.
Backpacking Light does not accept compensation or donated/discounted products in exchange for product mentions or placements in editorial coverage.
Some (but not all) of the links in this review may be affiliate links. If you click on one of these links and visit one of our affiliate partners (usually a retailer site), and subsequently place an order with that retailer, we receive a commission on your entire order, which varies between 3% and 15% of the purchase price. Affiliate commissions represent less than 15% of Backpacking Light's gross revenue. More than 70% of our revenue comes from Membership Fees. So if you'd really like to support our work, don't buy gear you don't need - support our consumer advocacy work and become a Member instead.
Learn more about affiliate commissions, influencer marketing, and our consumer advocacy work by reading our article Stop wasting money on gear.
In this episode of the Backpacking Light Podcast, Andrew follows up with journalist Adam Federman about the Arctic National Wildlife Refuge.
Stream
Summary
In this episode of the Backpacking Light Podcast, Andrew follows up with Type Investigations journalist Adam Federman to find out what’s new with the Arctic National Wildlife Refuge.
Then, Ryan reads his essay “What is Ultralight Backpacking: How We Talk About Ultralight.”
Executive Producer - Backpacking Light; Show Director and Host - Ryan Jordan; Producer - Chase Jordan; Theme music: Look for Me in the Mountains written by Chris Cunningham and Ryan Jordan, performed by Chris Cunningham (acoustic guitar, lead and harmony vocals, harmonica), Chad Langford (upright bass), and Tom Murphy (mandolin), produced by Basecamp Studios in Bozeman, Montana.
Sponsorship Policy: Backpacking Light does not accept compensation or donated/discounted products in exchange for product mentions or placements in editorial coverage, including any podcast episode content not excplicitly identified as sponsored content. Some (but not all) of the links in these show notes may be affiliate links. Learn more about affiliate commissions, influencer marketing, and our consumer advocacy work by reading our article Stop wasting money on gear.
Jeff Garmire is attempting a Colorado Trail FKT (fastest known time). Here’s his approach, gear, tracking info, and more. He started today.
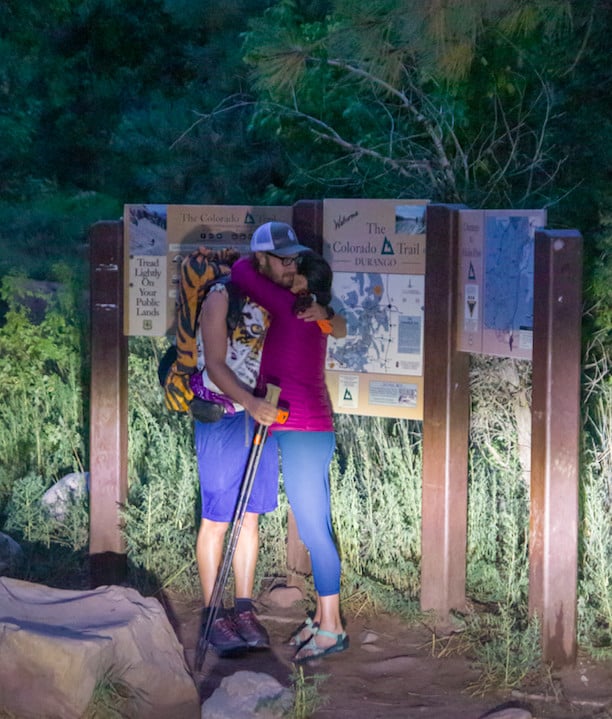
UPDATED (6-Sep-2020) – Jeff set a new FKT (unsupported) on the Colorado Trail today with a time of 9d 8h 18m. Watch my post-trek interview with him here:
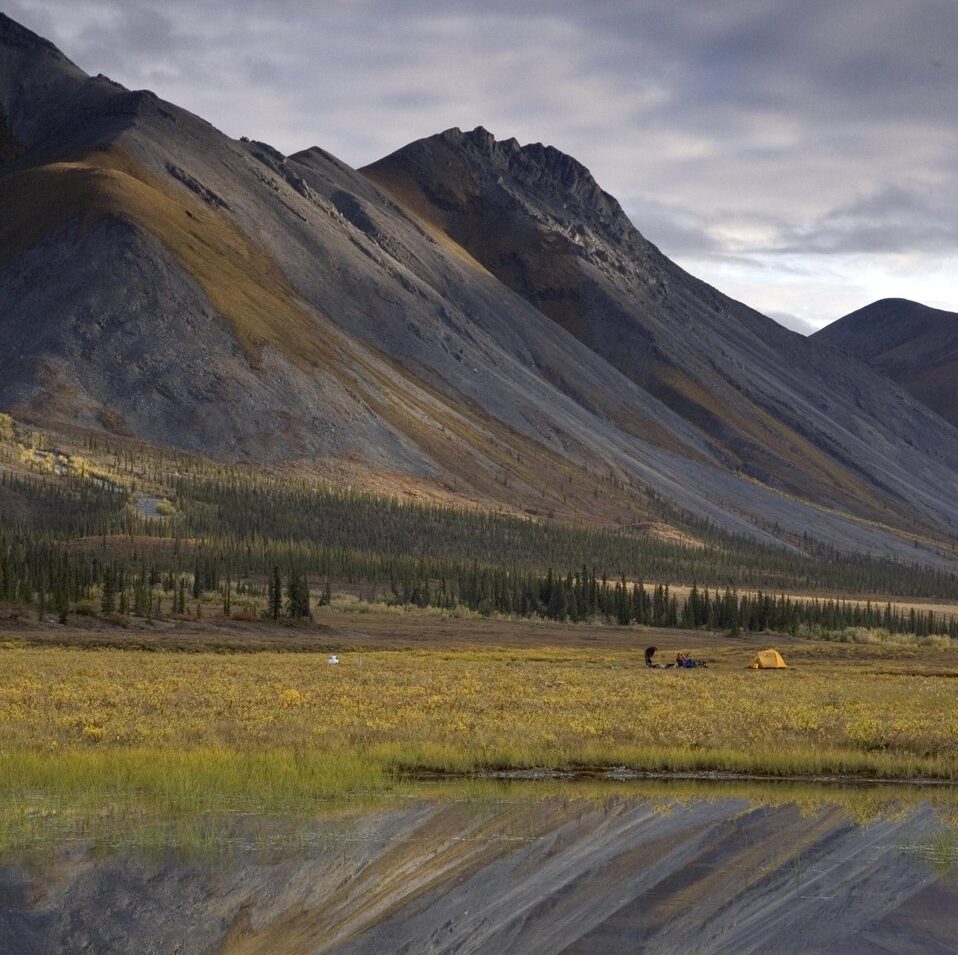
Jeff and Maggie this morning at the southern terminus of the Colorado Trail. Thanks to Maggie Slepian for providing details about Jeff’s attempt for this article! Photo provided by Maggie Slepian.
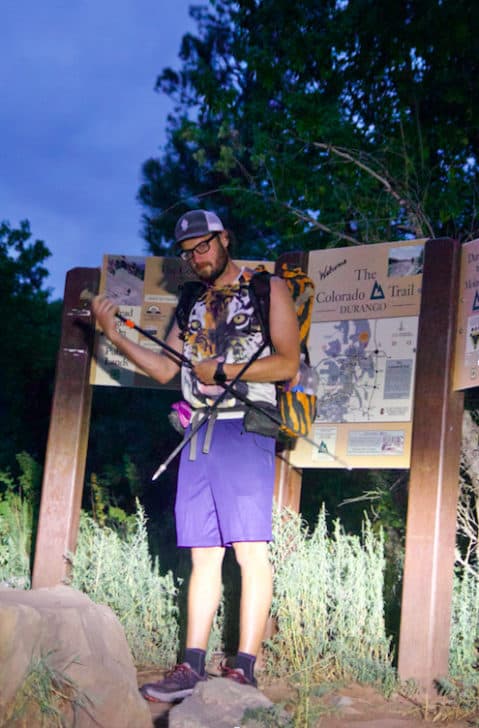
Jeff elected a W-to-E strategy in order to get the more challenging San Juan section out of the way on fresh legs (albeit with a heavier pack).
This is particularly notable because it’s an unsupported attempt – Jeff is carrying all of his food and gear for the 485-mile trail on his back. There will be no resupply or other outside support.
In 2004, Demetri “Coup” Couponas became the first (known) person to have completed an unsupported attempt of the Colorado Trail. He completed it in about 20 days, which wasn’t exactly a race pace, but it set the bar.
The current unsupported record is held by John Zahorian, founder of Pa’lante Packs. John’s record, established in 2016, is 9d 12h 32m. He traveled east to west. A claim on John’s record was made by Bronson Hargreaves in 2016 for 8d 18h 17m but is not recognized by the FKT community due to incomplete tracking information.
More: FKT source data, and the history of FKT on the Colorado Trail here.
Why the CT?
From Maggie:
Jeff chose the Colorado Trail because there were so many things that didn’t happen this year. He had big goals (PCT FKT, AT FKT, Barkley Marathons) that were crushed by COVID, so he recalibrated and started training again a few months ago without a real goal in mind other than he wanted to go after a prestigious trail record. The Colorado Trail made sense in the amount of challenge it presented with elevation gain and distance, as well as adding the challenge of doing it entirely unsupported as both an extra challenge and pandemic precautions.
The Challenge
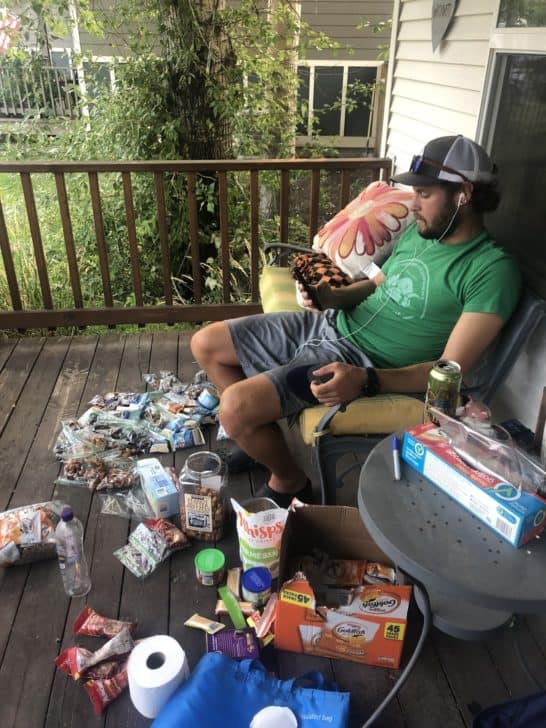
In addition to the obviously physical and mental challenge associated with a hike like this, energy management and figuring out how much food to take is critical.
At 485 miles with 75,000 feet of elevation gain, the Colorado Trail has an energy-mile equivalent of about 605 miles. If a hiker expends about 200 Calories per energy-mile, you’d be looking at more than 120,000 Calories required to complete the CT (not including basal metabolic needs at around 1,500 to 2,000 Calories per day).
Highly-trained athletes undergo extensive training in order to minimize the “number of Calories per mile”. So getting this number down to 150 would be entirely reasonable – for a long-distance hiker. But this is an FKT attempt, so additional fitness is going to be invested into additional speed.
Jeff’s starting pack weight is about 30 pounds, of which 18 pounds or so is food (his average Caloric density came out to around 150 Cal/oz). He budgeted about 5,200 Calories per day for 8 days and 4,000 for a ninth day. That’s 45,600 Calories, or 75 Calories per energy-mile. That’s a razor-thin margin that will require a careful balance of minimal sleep with maximum time on the trail. Such is the nature of modern-day FKT attempts on major trails like this.
So with Jeff carrying 45,600 Calories, that means he may need to make up 70k or more with body fat reserves. That could be up to 20+ pounds of body weight (less if he moderates his pace), depending on how efficiently he can burn fat vs. muscle. Jeff is highly trained, and lean, so he won’t have access to much more than that. If he moves too fast (too many Calories per mile), he’ll run out of body fat. If he moves too slow (higher basal metabolic load), he’s going to run out of food. This topic is addressed in more depth in Roman Dial’s How Far, How Fast, How Heavy: Calculating the Range for Unsupported Long-Distance Hiking.
The Colorado Trail climbs more than 75,000 feet of elevation as it traverses eight distinct mountain ranges. Its average elevation is more than 10,000 feet. Modern FKT attempts are enormously challenging and debilitating. Coup lost 25 pounds on his 20-day unsupported CT hike in 2004. Paul Pomeroy – a highly-trained athlete – lost 16 pounds on his 9+ day unsupported FKT in 2006.
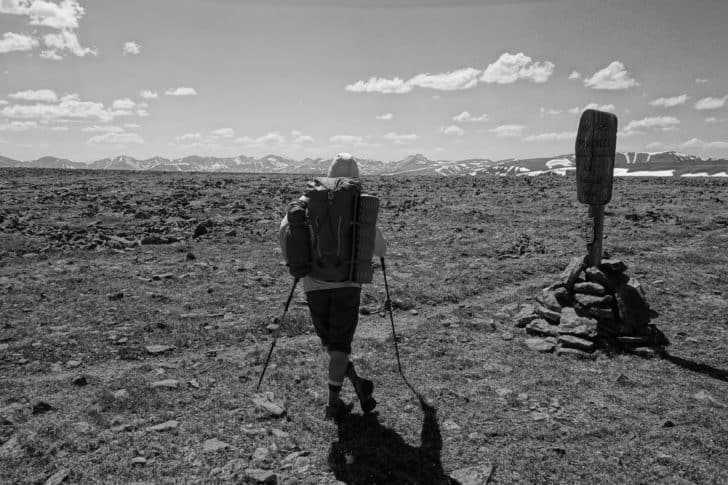
Am I willing to temper my desire for the pristine with an awareness that the pristine is a cultural construct?
The Wilderness Boundary at North Pole Pass, looking west.
A Catechism
After passing Flaming Gorge Reservoir, that strange blue mirror pooling unnaturally around red hills and cliffs, and turning off the 191 onto a dirt road, we drove past the eastern terminus of the Uinta Highline Trail because there was no sign. We flipped around in the deeply rutted road and let the GPS guide us to where the trailhead was supposed to be. There were a toilet and one white sedan in an otherwise empty and very dusty parking lot. The clouds were patchy, the sky behind them rich blue, and it was hot when we stepped outside the car and pulled the COVID masks from our faces.
We packed hurriedly, and I made a last-second decision to carry a grapefruit. Then we started down the two-track past the post where the sign should be, or once had been. Walking through the forest, we noted its relative health compared to other parts of the Uintas. We started at 3:15 in the afternoon and hiked until we realized we hadn’t seen water in a long time. I checked the map and found a blue squiggle labeled Big Brush Creek, meandering through a meadow called Manilla Park. When we reached it, we ambled down the meadow until it transitioned from dry to wet, and there on the edge of the marsh, we dropped our packs and made camp.
The next day we walked on dusty logging roads and through forests consisting of equal parts stumps and new trees. We passed trucks parked on the edges of lakes, jarringly shiny in all that matte landscape. We heard heavy machinery roaring and beeping somewhere in the woods. It wasn’t until late afternoon on the third day that we actually found the Wilderness boundary at the top of North Pole Pass and looked down into the Uinta Basin. The Wilderness sign stood propped up by a pile of rocks on the subtle apex of rounded, bleak tundra. It divided the land of humans, roads, and motor sounds behind us from the land described in the Wilderness Act of 1964 as “untrammeled by man, where man himself is a visitor who does not remain.”
We were headed into a land that would provide us with a sort of religious experience. The Catechism of Observing Otherness. A view of the world without the humans. A world which hints at the ancient times from which we sprang. It hints at The Before.
Before there was anything at all – Before we were able to meddle. It reminds us of our source within the earth, the universe. We went there to be humbled by this vision, while on our backs, we carried everything we needed in order not to be killed by it. We had rain jackets and tents and sleeping bags and food procured from grocery stores. And we experienced that very tension, skirting the edge of death intentionally, looking off the edge into its void while remaining firmly tethered to life by our gear, skills, physical strength, willpower, and luck.
As we climbed to the top of another pass, seven elk dashed across the trail in front of us and ran down the hill to the green treeless meadow below. A mother stopped and turned and called to her babies, the last to descend. And then they all ran to where ribbons of water from the snowmelt subtly pleated the green velvet, following gravity and geology to a shallow blue lake.
Not ten seconds later, a mountain goat ascended the trail in front of us. It moved strong and fast and didn’t even look in our direction. This was the world we came to see: that place where the human is a visitor but doesn’t remain. It felt like a pristine – ahistorical – Eden, and it filled me with awe. It was the world separate from the human world, rolling on intentionless and insulated from the influence of ideas. This separate world couldn’t be infiltrated by concepts like religion or physics with all their limits. It just is what it is.
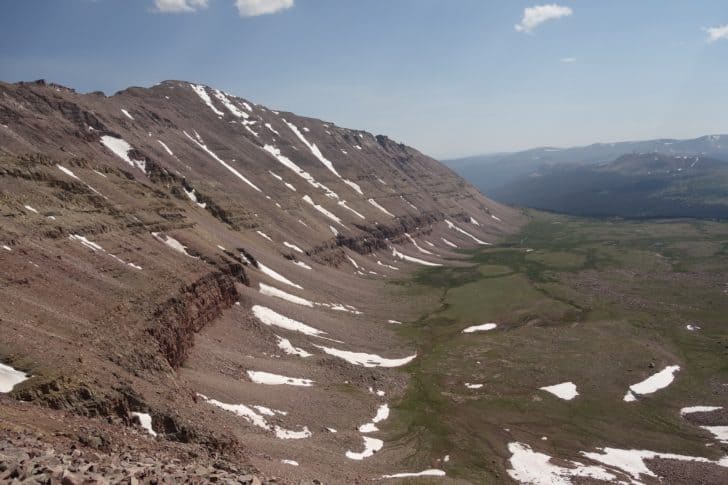
Oweep Basin from Porcupine Pass.
This Ground is Not Prepared For You
Wilderness didn’t always elicit such feelings of wonder and awe; it used to be viewed as the outer margins of civilization. It’s described in the Bible as a fearful place one went only against one’s will. For years, Europeans thought it was the darkness on the edge of town, which was empty, deserted, barren, savage, and ultimately useless besides the fact that it contained the raw materials of civilization. In short, it was an undesirable place.
And then its meaning started to shift. Henry David Thoreau viewed it as something simultaneously awe-inspiring and frightening. He described Mt. Katahdin in Maine as “vast, Titanic, and such as man never inhabits… She seems to say sternly, why came ye here before your time? This ground is not prepared for you.” Of course, while Thoreau was climbing Katahdin in 1846, Black people all across the country knew wilderness as the place where they might be lynched. Wilderness has, at times, meant very different things to different people.
Later yet, John Muir recounted a trip to the Sierra. “Perched like a fly on this Yosemite dome, I gaze and sketch and bask, oftentimes settling down into dumb admiration without definite hope of ever learning much, yet with the longing, unresting effort that lies at the door of hope, humbly prostrate before the vast display of God’s power, and eager to offer self-denial and renunciation with eternal toil to learn any lesson in the divine manuscript.”
This version of the wilderness experience seemed closest to what I was seeking when I set foot on the Uinta Highline Trail. I found myself humbly prostrate before the seven elk crossing the meadow.
This romantic sublime view of wilderness described by Muir is foundational to conservation in the United States, but was only possible in places that were untouched by humans, places that were pristine Edens, places where no one had set foot since the day God stopped creating. The only problem with this was that these Edens didn’t actually exist! People had been walking every square inch of America for at least 15,000 years before Muir. So, when forest preserves and national parks began to be created, Native people were removed from them so the parks could be advertised to the wealthy white tourists as safe, uninhabited, and most importantly, unchanged since the dawn of creation.
In the late 1800s, Americans began to lament the disappearance of the frontier. Moreover, wealthy white men wanted something empty to be able to push into, to conquer. If wild places were so important in the construction of the United States, then the future of the country must lie in their preservation.
In his famous essay “The Trouble with Wilderness,” the environmental historian William Cronon says, “It is no accident that the movement to set aside national parks and wilderness areas began to gain real momentum at precisely the time that laments about the passing frontier reached their peak. To protect wilderness was in a very real sense to protect the nation’s most sacred myth of origin.”
Recreating in the wilderness became an elite activity. And ironically, the construction of national parks closely followed the final Indian Wars, and Native people were removed and placed on reservations. It’s ironic as well, that while these places had a façade of wildness, their boundaries were policed to keep violence out. Real wildness, frontier wildness, was full of conflict. The wildness we experience today, like the wildness I saw in the High Uintas, is lacking a human element that could be even wilder. As an elite, white, male, I don’t have to watch my back the way I would have in the mid-1800s. Lightning and hypothermia are separated from other real (and objectively wild) threats, such as human conflict.
The Beguiling Mask
According to Cronon, all these things describe the problem with wilderness. “Wilderness,” he says, “hides its unnaturalness behind a mask that is all the more beguiling because it seems so natural.” This idea was appalling to me when I first came across it, and if it gets your hackles up, you’re not alone.
“But it is natural!” I’ve wanted to scream. It’s nature, isn’t it? It’s true enough that we’re going to have transcendental encounters with the more-than-human world in the wilderness, and these are real. But the islands of land in which we have these experiences are a cultural construction. The elk I watched run across the talus, tundra, and meadow, and disappear into the mysterious distance felt wild. The whole encounter was indelibly wild. It caused in me a feeling of awe, joy, melancholy, elation, and wonder. These were feelings I couldn’t articulate or define, but the combination of which continues to drive me to walk through these wild places.
So, there I was, following in the footsteps of Muir except in the High Uintas instead of the Sierra, in search of the romantic sublime, something at once frightening and beautiful, a religious experience impossible to have in my suburban neighborhood. And I pushed into this imagined frontier, almost squinting to blur it into something it isn’t, to see myself as the first to descend a rocky pass and rest against a glacial boulder placed there on the day of creation and which no one has seen since. To be the first to fill a bottle from clear snowmelt running through squat willows and Indian paintbrush.
The problem with this experience, according to Cronon, is that it dishonestly leaves humans out of the equation. Even worse, it creates an intractable nature/human. So, in the context of “The Trouble with Wilderness,” the big question becomes: What would it mean to backpack (or engage in other forms of recreation) while being fully aware of historical contexts? What would it mean to consider humans as part of nature instead of separate from it? Am I willing to temper my desire for the pristine with an awareness that the pristine is a cultural construct? Can I try and reinstate the past in my imagination?
As I walked huffing and puffing over Porcupine Pass, I tried to see Paleo-humans with tools chipped from quartz-sandstone following big game to the edges of the glaciers. The glaciers disappear and I see horse herds in Oweep Basin. We pass their bones, whiter than snow with lupine and columbine protruding from hip-sockets and eye-sockets. Wall tents are staked to glacial moraines, and smoke pours from them as the sound of clanking pots and pans comes from within, and distant voices echo through the healthy lodgepole forests. The sounds mingle with the hermit thrush’s pentatonic call that still echoes through dying forests today. I hear rocks crashing together as CCC crews construct a dam along the outlet of a lake.
We stopped for lunch where Oweep Creek left the long meadow to enter pines, spruce, and fir. I pulled out my map and noticed a clumsy line running along the entire spine of the Uintas labeled “Old Indian Treaty Boundary.” When Utes were rounded up out of the Wasatch Front and other areas, and then dumped in the Uinta Basin, their promised territory extended all the way up past the very place where I sat. The Uintah Valley Reservation was designated in 1861, the Ouray in 1882, and in 1886 they were combined to encompass 4 million acres of land. But as was always the case, Native territory got whittled down to nothing like a boy scout trying to make a spoon out of soft aspen wood. Pretty soon there’s nothing left.
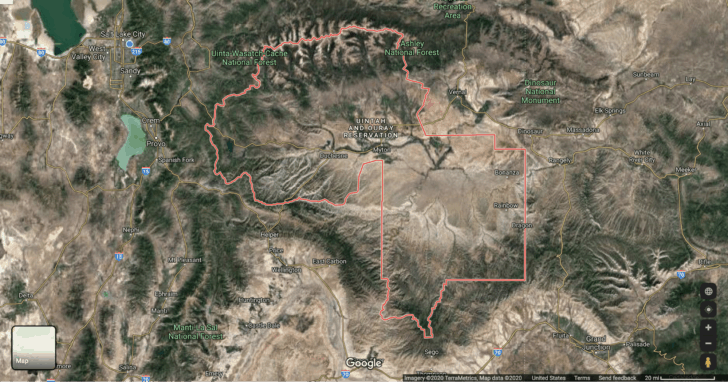
While this was obviously Native land before the treaty, I found it all the more upsetting that it was also promised to remain so under a treaty that was no longer being honored. Indeed, if you type “Uintah Ouray Reservation” into Google Maps, the original swath of 4 million acres is still shown, including the entire southern slope of the Uintas, the whole Uinta Basin, much of Desolation Canyon, and a gigantic portion of the Tavaputs Plateau.
Today, tribal land includes only 1.2 million acres of this original area, patchy and disjointed. Presidential proclamations created townsites within it. On July 15, 1905, President Theodore Roosevelt absorbed almost all of the southern slope of the Uintas, the Native land, into the Uinta Forest Reserve. Three years later, by executive order, he renamed this area Ashley National Forest, the very forest where I was sitting looking at my map. Soon thereafter, dam construction began, an effort to standardize water availability for a growing population of white settlers within the reservation boundaries at the base of the mountains.
The original Uintah and Ouray Reservation includes about half of the Uinta Mountains and most of the Highline Trail (Screenshot of Google Maps search result).
Does this remembrance diminish the sublime experience? If it does, I don’t care.
Not only does it improve my overall backpacking experience, but it’s also an absolute necessity to know a place’s history. I prefer to backpack while aware of my own privilege, aware of the human histories embedded in a place that is only pristine if you actively ignore its history. Cronon reminds us that “Wilderness always displays an escape from history, an erasure, running from something to a past that never actually existed.” I don’t want to experience wilderness in this way; I want to be fully aware that my 104-mile Highline trip took place in what is supposed to be native land.
But let me acknowledge the merits of Wilderness, National Parks, and other protected areas. While there is nothing natural about the idea of wilderness, it doesn’t mean there isn’t any value in it. We’ve ended up with islands of relatively intact ecosystems, and this is a good thing! We protected them often for the wrong reasons (beauty, the feeling of the sublime associated with such grandeur, etc.), but we protected them nonetheless, and it feels important to remember both of these things at once. National Parks and Wilderness areas are better off this way than they would be if we left them open to exploitation.
That said, I may have to rethink the way backpacking, my preferred method of recreation, influences which landscapes I choose to care about, and which I choose to ignore. This could mean paying more attention to pastoral or suburban areas between core protected areas.
Considering conservation in these places could start to undo that human/nature division that is so seductive, which props up the concept of wilderness. It would suggest that we have to consider ourselves as a part of nature, part of everything. It would start to break down the fantasy Cronon laments.
This fantasy is what worries Cronon the most. He’s concerned that wilderness causes us to dismiss the nature all around us, and forget that conservation should happen in the places we are, not just the places we visit. He doesn’t want us to forget about that liminal space that people have inhabited for all of human history: working with nature, using it, making a living. Cronon’s final plea is for us “to discover a common middle ground in which all of these things, from the city to the wilderness, can somehow be encompassed in the word “home.” So how do we do this?
For me, it’s two-fold.
1. Fully acknowledge the histories of places where we backpack.
2. Acknowledge wilderness not associated with backpacking at all: in the city, in our own neighborhoods.
Remembering that the High Uintas Wilderness has been occupied, used for subsistence, altered, stolen, and renamed should begin to illuminate a kinship between it and the sycamores that line the street in front of my house, and the squirrel that runs across the powerline between them. All of these things are the more-than-human world affected in some way by humans. We should endeavor to care for all these things as much as we can, regardless of their connection to backpacking or other forms of recreation.
Backpacking Light does not accept compensation or donated/discounted products in exchange for product mentions or placements in editorial coverage.
Some (but not all) of the links in this review may be affiliate links. If you click on one of these links and visit one of our affiliate partners (usually a retailer site), and subsequently place an order with that retailer, we receive a commission on your entire order, which varies between 3% and 15% of the purchase price. Affiliate commissions represent less than 15% of Backpacking Light's gross revenue. More than 70% of our revenue comes from Membership Fees. So if you'd really like to support our work, don't buy gear you don't need - support our consumer advocacy work and become a Member instead.
Learn more about affiliate commissions, influencer marketing, and our consumer advocacy work by reading our article Stop wasting money on gear.
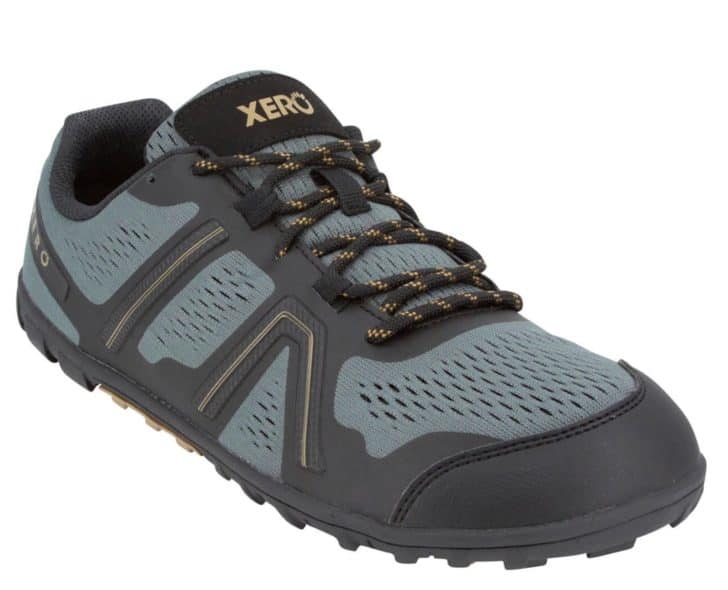
The Xero Shoes Mesa Trail (8.5 oz / 241 g, $119.99) is a minimalist trail runner best used for fastpacking. Huarache-inspired straps on the midfoot and instep allow for precisely dialed fit without causing compression.
Introduction
The Xero Shoes Mesa Trail (8.5 oz / 241 g, $119.99) is a lightweight, minimalist trail runner best used for fastpacking and other fast and light pursuits.
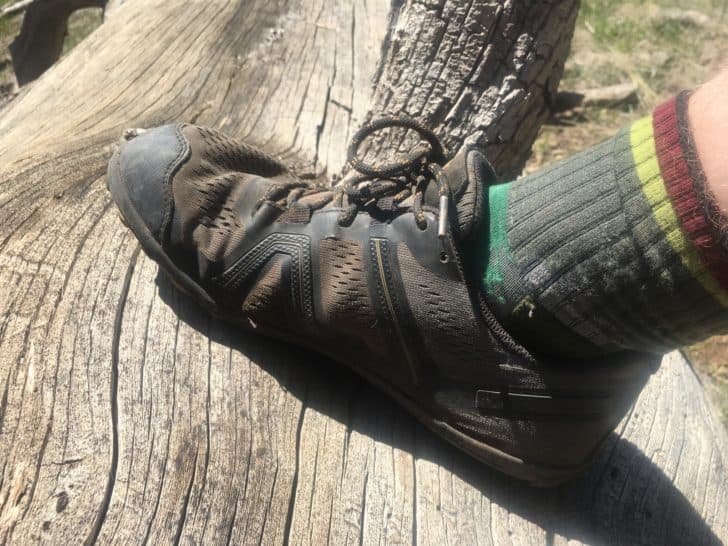
A low stack height, mesh uppers, and moderate tread keeps the shoe light, while welded components and smart design make it surprisingly durable. Huarache-inspired straps on the midfoot and instep allow for precisely dialed fit without causing compression across the top of the foot.
The Xero Shoes Mesa Trail.
About this Review
This review of the Xero Shoes Mesa Trail will be a Limited Review. I put 500 miles (805 km) on these shoes between January and May of 2020 and another 300 miles (483 km) on a second pair between June and August. Roughly one-fifth of this distance was covered while backpacking under load. Initially, my testing plan called for more backpacking, but Covid-19 interfered with my plans, and I had to cancel several overnight testing trips.
During those backpacking trips I was able to take, my pack weighed between 15 and 45 lb (7 to 20 kgs), depending on the type of trip and season.
I achieved the rest of my miles while trail running. On these runs, I often carried 10 lb (5 kgs) of water and food.
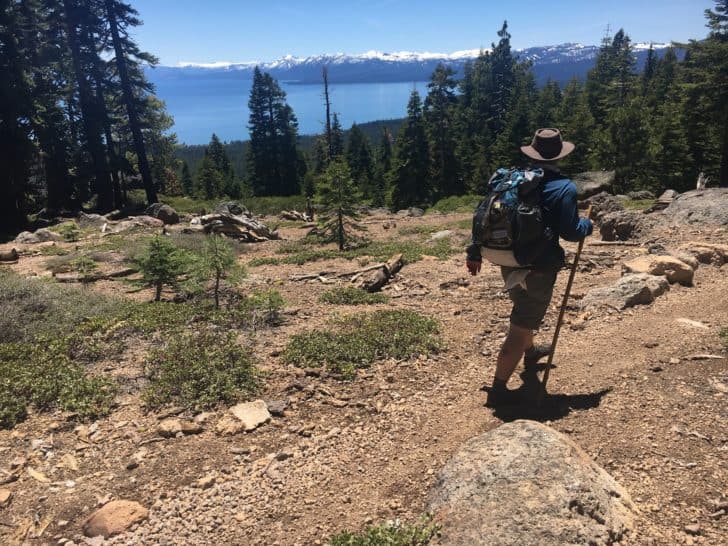
My testing occurred in the Lake Tahoe area of the Sierra Nevada, at altitudes ranging from 6,500 ft to 10,000 ft (1,981 m to 3,048 m).
During my testing, the tread conditions included a few inches of late winter powder, consolidated early spring snowpack, mud, and dry singletrack. In my area, the singletrack is well-packed, but dusty, dirt with periodic loose gravel, boulders, and slab.
Typical trail conditions while testing the Xero Shoes Mesa Trails: Packed dirt, loose gravel, and occasional boulders and slab.
Tested: Size up one-half size if your feet run slightly long for your normal size. Use standard sizing-up procedures to account for foot swellings on long hikes.
Wide toe-box
Mesh upper
Welded lower
Stitched and bonded rubber toe-box covering (no toe-cap)
No rock plate or heel cup
Zero-drop heel
10 mm stack height:
5 mm outer sole
3 mm midsole
2 mm insole
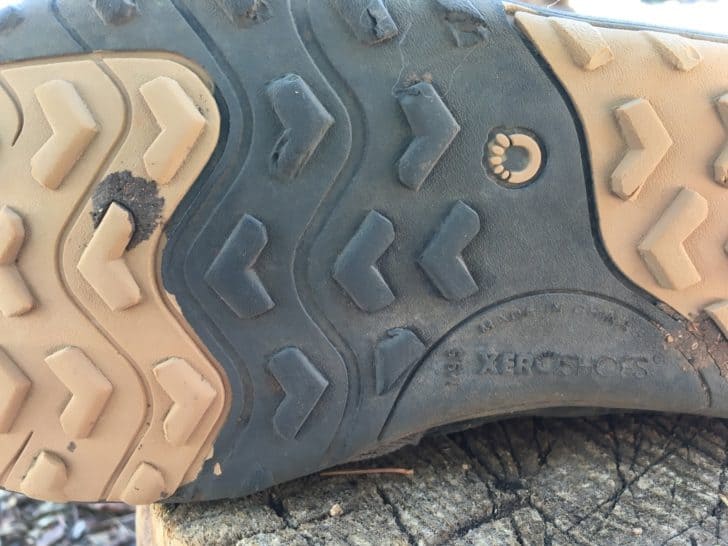
3.5 mm dual-chevron patterned lugs
Adjustable instep and midfoot straps
Vegan friendly
The Xero Shoes Mesa Trail is a minimalist shoe with a secure lacing system and the chops to last for 500+ miles (805+ km).
Performance Analysis
Since this is a Limited Review, a detailed performance analysis based on long-term use will not be presented. Instead, performance observations and issues are noted below.
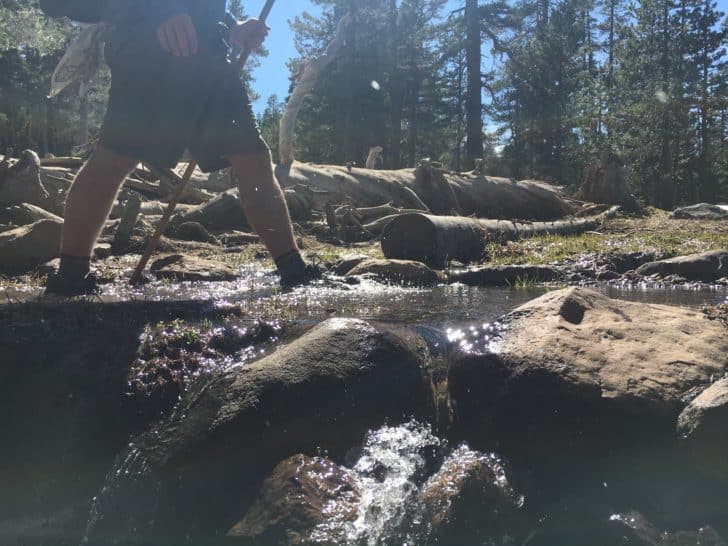
Minimalist material choices and breathable mesh uppers mean you don’t have to be afraid of getting your feet wet while wearing the Xero Shoes Mesa Trail. The shoes drain rapidly and dry quickly.
Criteria
Observations and Issues
Fit
A narrow heel combines with minimalist-minded uppers to create a close, stable fit on the shoe’s back end. There’s no heel cup here, so if you are used to one, you might find the heel fit a bit strange at first.
Straps run from the bottom of the shoe up to the laces, meaning you can dial in a secure fit without causing undue compression on the top of the foot (this is a feature of many products in the Xero Shoes lineup - they call it huarache-inspired).
The toe-box is moderately wide (measuring 4 in / 10 cm in my men’s size 9.5). The Mesa Trails’ toe-box is not as wide as, say, that found on the Altra Lone Peak line, but it is wide enough to do the trick if you like extra toe-space. Consider sizing up if you wear these shoes in shoulder seasons with waterproof socks on top of your normal socks.
While Xero Shoes claims these shoes fit true to size, I found them to be slightly short on the downhils. This seems to be the gripe amongst the (very few) negative reviews I could find on third-party websites. And of course, you should follow the general wisdom of sizing up for long hikes to accommodate foot swelling. Once I went to a size ten from my normal nine-and-a-half, I had no issues.
Stability and Traction
The low stack height, zero-drop heels, dialed-in fit in the midfoot, and general flexibility of the Mesa Trail inspired a lot of confidence while moving over a variety of terrains.
One frequent criticism of wide-toe-box trail runners is a sloppy feel, particularly on off-camber terrain. The Mesa Trail doesn’t have this problem - it felt stable and glove-like while traversing slopes. I believe this performance is a result of two factors: the aforementioned midfoot / instep straps, and the fact that the toe-box, while wide enough to allow for toe spread, is not overly wide.
At 3.5 mm, the duel-chevron lugs are moderately aggressive. The shoes handled snowmelt-slick rock like a charm, struggled slightly in thick mud, and floundered on slush and ice.
Durability
The durability in these minimalist trail runners is quite impressive - especially for their weight.
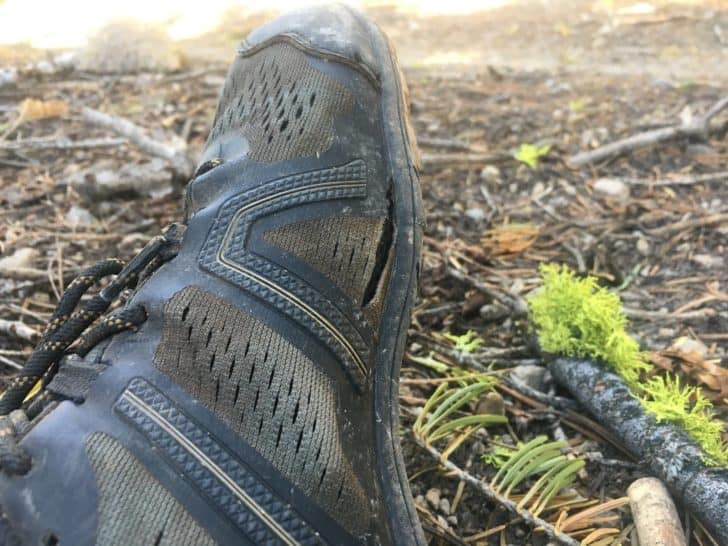
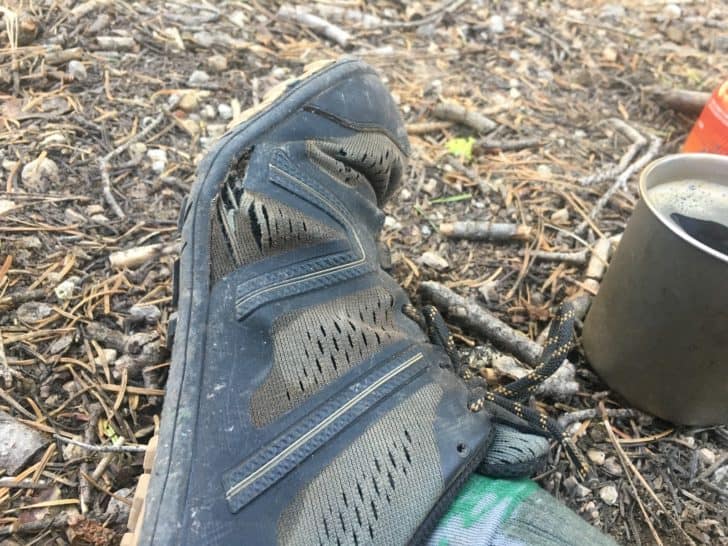
My original pair of Mesa Trails weathered 500+ miles (805+ km) with minimal compression in the insole, no noticeable compression of the midsole, and minor fraying on the mesh at the instep on both sides of the shoe (both shoes). See pictures in the Commentary section for more info on this fraying.
No bonded toe-cap over the front of the toe-box means there’s nothing to peel away immediately as in most trail runners.
On top of all this, I found the outsole to be hard-wearing. After 500 miles (805 km) of mixed terrain, the lugs have not measurably worn down.
Breathability and Drying Time
Full mesh uppers and minimal padding in the lining around the ankle and heel lead to a shoe that breathes well and dries out quickly.
Long-term Comfort
Make no mistake - these are minimalist shoes with only a 10 mm stack height (not counting the 3.5 mm lugs). And as much as this confers other advantages - low weight, stability, confidence, superior ground feel - it does not make for a shoe that is going to baby your feet on high mileage days with a heavy pack over punishing terrain. There’s also no rock plate to pamper you.
I pushed the comfort capabilities of these shoes with some 20+ mile days under a 40 lb (18 kg) load. My feet were understandably achy at the end of each day under these conditions - but not more so than when I wore trail runners with thicker midsoles in similar circumstances.
Under lighter loads or shorter miles, I experienced no achy feet. My weekly mileage while trail running was about 50 miles (80 km), on average. I should note that I’ve spent the last ten years slowly transitioning to zero-drop minimalist shoes as both a runner and a backpacker.
Commentary
What makes the Xero Shoes Mesa Trail Unique?
It’s relatively easy to find a trail runner with a zero-drop heel. The same goes for a low stack height, a wide toe-box, a minimalist sole (no rock plate or similar features), a moderate tread, a low weight, or a well-designed lacing system. But to find all of these features in the same shoe is rare.
In my research, I’ve found veryfew negative reviews of the Mesa Trails – and most of those are related to sizing issues (Xero Shoes has a free return policy around sizing). But it’s worth noting that this is a relatively new product, and the long-term durability(600+ miles / 965+ km) of this shoe is yet to be determined.
The 3.5 mm dual-chevron lugs are moderately aggressive. They do the job, and they keep the Xero Shoes Mesa Trails nice and light, but I’d prefer something a little more aggressive. The sole rubber is well-chosen – these soles are hard-wearing, and the lugs haven’t lost any depth after 500 miles (805 km).
The combination of these features, breathable mesh uppers, and sparing use of fabric and cushioning around the ankles and in the tongue make for a capable backpacking shoe that excels for fast-packing ultralight pursuits in spring, summer, and fall. I’ve paired the Mesa Trails with waterproof socks for running and backpacking in the winter and early spring, and although they are functional for these kinds of trips, there are perhaps better options available.
Note the inverted V shape to the welded components on the midfoot. There are straps underneath the welding that connect to the laces, making for a secure fit that doesn’t cause compression across the top of the foot. There’s a similar strap running from the upper welded component (and corresponding laces) to the back of the shoe.
Of course, minimalist shoes aren’t everyone’s cup of tea – and that’s okay. There’s no need to rehash the minimalist vs. maximalist debate here. But suffice it to say that if you are already a fan of low-drop, wide foot-box shoes with minimal features (and you are okay with a low stack height and a lack of rock plate), the Mesa Trail is worth a hard look.
This recommendation is particularly true for people on a budget. The Mesa Trail is competitively priced at $119.99. On top of that, the shoes will last you longer than anything I can name with a similar feature set, which brings me to my final point, durability of the shoe for its weight.
Durability for Weight
Like many ultralight backpackers, I made the transition from classic leather boots to trail runners with no regrets – save one. I loathethe lifespan of average trail runners, a mileage that seems to be ticking ever downwards as materials get lighter. My last pair of trail runners (Altra Lone Peak 4s) started to fall apart after 200 miles (322 km) – same deal for my last pair of Merrell Trail Glove 4s.
Wear and tear on Altra Lone Peak 4s after 300 miles (483 km). Note the peeling toe-cap and disintegrating fabric around the ankle in addition to the obvious failure.
Enter the Xero Shoes Mesa Trail. These sturdy little shoes have lasted 500 miles (805 km), and I expect to get at least 200 more out of them before complete failure. Is that ideal? No. I long for the day I can get 1000 miles out of a lightweight, minimalist shoe. But the Mesa Trail is getting close to that milestone.
No Toe-Cap
First of all, there’s no toe-cap glued to the front of the shoe. In my experience, this is the first failure point on any trail runner. The Mesa Trail has a broad rubber toe-box covering welded to the sole and stitched to the upper. After 500 miles (805 km), this aspect of the shoe shows no signs of failure.
A stitched toe bumper shows no signs of failing after 500 miles (805 km).
Midsole Durability and Conservation of Materials
The second common failure point in trail runners is compression and breakdown of the midsole. I interviewed Steven Sashen, CEO and developer of Xero Shoes, in preparation for this review. I asked him how he made such a durable shoe for such a small weight penalty. He answered that much of the heft in otherwise lightweight shoes comes from midsole material. Because the midsole of the Mesa Trail is a dense 3 mm EVA foam, it holds up well to repeated compression but adds very little weight to the shoe.
While a low stack height might be a dealbreaker for some, it does mean there is less foam to break down in the midsole.
This wiggle room freed the Mesa Trail designers to focus on burly design choices (like the broad rubber toe-box covering and welded protective components, see below) while still maintaining a light shoe.
Mesh Uppers and Welded Components
A third failure point in trail runners is an abrasion-induced failure in the mesh material. Here I finally saw some failure in the Mesa Trail, at around the 450-mile (723 km) mark. The mesh just behind the instep on both feet failed (on either side of the foot). This failure occurred at the only spot on the front three-quarters of the shoe that doesn’t have a welded covering marrying the sole and the mesh upper.
Mesh failure between welded components just behind the instep. You can see where the tear has started to creep into the welded component. There is a similar tear on each side of each shoe. This started at mile 450 (724 km).
It’s worth noting a few things here. Firstly, this mesh failure on this exact spot occurs in many of my trail runners (prompting Steven Sashen to point out, rightly, that the problem couldbemy feet, my mechanics, my general terrain, or all of the above.) But it’s also worth noting that this failure occurred at mile 200 (322 km) on my Altra Lone Peaks and went all the way through the shoe (see my photo above). On my Mesa Trail shoes, the failure has stopped at the outer layer of mesh.
A final point – I sent photos of this mesh failure to Xero Shoes and they sent me a new pair, with assurances that this kind of damage is covered under the manufacturer warranty. Steven Sashen in particular was surprised – he said none of their testers had managed to make the shoe wear like this. I’ve put 300 miles (483 km) on the new pair and they are holding up even better than the first pair – which makes me think that the late-winter running conditions (with occasional punching through sharp snow crust) contributed to the failure of the original pair at the 450 mile (724 km) mark.
Here’s a shot of the mesh failure and welded component tear on the other shoe.
Compared To…
I considered comparing the Xero Shoes Mesa Trail to trail runners from Altra, Topo Athletics, and Inov-8. At the end of the day, none of the comparisons I considered making matched the Mesa Trail’s mixture of stack height, weight, and minimalist design. While I could have compared the Mesa Trail to products from Lems or Vivobarefoot, in the end, I made a comparison to another Xero Shoes product, the TerraFlex.
The TerraFlex is a more heavy-duty shoe and is designed as a true running/hiking hybrid, while Xero Shoes designed the Mesa Trail for speed and as a dedicated trail runner (with the understanding that some consumers would use it as a minimalist backpacking shoe). I tested the TerraFlex concurrently to the Mesa Trail, so I could get an accurate idea of how each shoe stood against the other.
Welded components and more mesh make the Mesa Trail a lighter shoe.
Mesa Trail
MSRP
The TerraFlex is twenty dollars cheaper. The Mesa Trail is a new product, while the TerraFlex was updated in the last two years.
TerraFlex
Durability
The TerraFlex is a heavier, more solidly constructed shoe, with heavier mesh and a higher content of non-mesh components. One would assume this would make for a more durable shoe - but to be fair, I haven’t subjected the TerraFlex to the same amount of miles as the Mesa Trails.
TerraFlex - theoretically
Stack Height
Both shoes utilize a 5 mm outsole, a 3 mm foam midsole, and a removable 2 mm insole.
Tie
Traction
The TerraFlex has 4 mm lugs, while the Mesa Trail has 3.5 mm lugs. I consider 0.5 mm to be a negligible difference in terms of traction. Honestly, I’d prefer if both shoes had larger, more aggressive lugs.
Tie
Fit
Both shoes use the Huarache-inspired design.
Tie
Breathability / Drying Time
The Mesa Trail utilizes thinner, more breathable mesh than does the TerraFlex.
Mesa Trail
Strengths
Lightweight
Extremely durable for weight
Breathable
Comfortable
Unique and well designed lace-tensioning system
Stable and grippy on mixed terrain
Affordably priced
Limitations
The minimalist design could limit the trip type and use cases (best for fastpacking, low-mileage days if loads are heavy, or traditional trail running).
Mesh upper failing just behind instep on both sides of each shoe (after 450 miles / 723 km). Xero Shoes says this failure is covered by warranty and sent me a new pair. Original damage was probably caused by late-season winter running and punching through sharp snow crust. My new pair has not worn in the same way during late-spring and summer backpacking and running.
I’d personally prefer slightly more aggressive lugs.
Related Content
Reviews:
New to minimalist footwear? Be aware of the pitfalls. Check out Ryan’s explainer video.
Product mentions in this article are made by the author with no compensation in return. In addition, Backpacking Light does not accept compensation or donated/discounted products in exchange for product mentions or placements in editorial coverage.
Some (but not all) of the links in this review may be affiliate links. If you click on one of these links and visit one of our affiliate partners (usually a retailer site), and subsequently place an order with that retailer, we receive a commission on your entire order, which varies between 3% and 15% of the purchase price. Affiliate commissions represent less than 15% of Backpacking Light's gross revenue. More than 70% of our revenue comes from Membership Fees. So if you'd really like to support our work, don't buy gear you don't need - support our consumer advocacy work and become a Member instead.
Learn more about affiliate commissions, influencer marketing, and our consumer advocacy work by reading our article Stop wasting money on gear.
The Big Agnes Scout 1 Platinum (13 oz / 369 g, $349.95) is a single wall, single-entrance, trekking pole-supported, silnylon, one-person tent from Big Agnes. It is one of the lightest shelters in its class.
Introduction
The Big Agnes Scout 1 Platinum Tent (13 oz / 369 g, $349.95) is a single wall, single-entrance, trekking pole-supported, silnylon, one-person tent by Big Agnes. It is one of the lightest shelters in its class.
This shelter features steep sidewalls, a minimal eave-style vestibule, and a front entry.
Photo: Big Agnes
About this Review
This Limited Review is based on five days of overnight backpacking experience in the Pacific Northwest during the fall, winter, and early spring of 2019-2020.
Moist conditions cause some sagging in the silnylon panels, but the Scout 1 Platinum is easy to re-tension.
Specifications and Features
Weight
Claimed: 13 oz (369 g)
Measured w/o Stakes: 13.2 oz (375 g)
Measured with Stakes: 16.9 oz (479 g)
Packed Size: 16 in x 4.5 in (41 x 11 cm)
Floor Area: 16 ft² (1.49 m²)
Head Height: 41 in (105 cm)
Footprint Weight (sold separately): 3 oz (85 g)
Material: silicone treated nylon rip-stop with 1200 mm waterproof polyurethane coating
Number of Seasons: 3
Number of Doors: 1
Single wall
Supported by two trekking poles
Pole sleeves allow for tip down setup
Taped seams
Mesh vents
Pre-cut guylines
Vertical side and end-walls
Interior loops for gear lofts and accessories (sold separately).
Trekking pole sleeves allow the support poles to be pitched with the sharp end down, minimizing accidental punctures.
Performance Analysis
Since this is a Limited Review, a detailed performance analysis based on long-term use will not be presented. Instead, performance observations and issues are noted below.
Criteria
Observations and Issues
Livability
Despite the Scout 1 having tiny dimensions, it is pleasantly spacious for the minimalist style it employs. The peak height is somewhat low, but its placement at the door makes it very usable for moving in and out and sitting up inside the tent. The floor stretches seamlessly into the walls before transitioning into the fly via mesh venting.
What this means is that the width of the floor conforms to the weight inside the tent, making usable floor space quite large and relatively flexible. This design does sometimes add tension to the sides of the tent that may change the tautness of the pitch. However, when you get used to this it becomes quite natural.
Stormworthyness
The Scout 1 sheds water well, and in vertical rain, all of the venting is well protected. In situations where precipitation is combined with wind or if significant splashing is likely, it wouldn’t surprise me to see some water striking the mesh vents and possibly passing through.
The side venting is predominantly protected by an interior flap but air flow is significant, cooling the tent and introducing some moisture in inclement weather. The foot and headwalls being vertical can cause wind striking them to travel upwards. In some situations, this may bring rain in contact with the mesh panels.
Note that this movement of air is a positive in warm weather when high ventilation is desirable. A taut pitch helps to alleviate any of these problems and they may not become noticeable except in exposed, stormy conditions. Something noteworthy in this area is that the design of the tent requires consideration of wind direction when pitching, meaning that if the wind direction changes, the tent can become both less stable and less resistant to any precipitation.
Ease of Use
The Scout 1 requires nine stakes for a basic pitch. With some shelters, this can be laborious. However, when pitching the Scout 1, the stakes are used in stages that allow for easy adjustment and it remains an easy pitch for a single person.
Trekking poles fit easily and securely into the sleeves provided and tension down nicely. The tent packs with incredible ease, simply rolling the body up with the carbon foot stay. The silnylon material lends itself to easy compression into its stuff sack. The tent also has a quite small footprint and can be pitched in a confined area, particularly if guy lines are used carefully.
Condensation Management
Condensation is something that comes up a lot regarding ultralight sleeping. A big reason for this is that one of the most common choices in ultralight shelters is a single wall versus a double wall. The former can come with significant weight savings but often at the expense of ventilation.
With the Scout 1, Big Agnes has addressed the condensation issues of a single wall tent with relatively large mesh areas that increase air flow. There are mesh panels at both the head and foot of the tent. These panels cannot be closed but are protected by awnings of the fly. Additionally, the floor is connected to the fly via mesh on both sides, and the air flow through this side mesh can be adjusted somewhat with the height and tension of the pitch as well as the side guy outs.
Materials
The Scout 1 is made of a silnylon fabric with a polyurethane coating. One of the main drawbacks of silnylon is that it stretches with temperature fluctuation and precipitation. This sort of sagging can be troublesome, particularly in adverse conditions. Through some basic tests with temperature drops and moisture, the Scout 1 sagged slightly, loosening the pitch and causing the body to flap more. The Scout 1 is easy to tension, however, and can be adjusted quickly when needed.
A number of other companies opt for silpoly in some of their tents as this avoids the issue of sag without increasing weight. One of the drawbacks of this material is that it does not have as much strength per weight as nylon fabrics do.
As an ultralight shelter for three seasons, the Scout 1’s use of silnylon seems to fall within its directive. The particular silnylon used is thin (read: very thin), and while it held up well with my experience with the tent, long term durability and resilience remain to be seen. While Big Agnes hasn't necessarily pushed boundaries of innovation with their materials in the Platinum line of tents, their application in the Scout 1 is impressively sleek and remarkably light.
Commentary
What makes the Big Agnes Scout 1 Platinum Unique?
Big Agnes is a longstanding company in the outdoor world. They are mostly known for their shelters and sleep systems (i.e. sleeping bags and sleeping pads). They have recently broken into the ultralight scene with their platinum and carbon series tents.
Tents like the Fly Creek have been popular for backpackers and bikepackers for over a decade. The new lines, however, have employed new technologies and designs to make what the Big Agnes is calling “crazylight” shelters.
Weight
The Scout 1’s weight is perhaps the most striking and unique aspect of this shelter. At 13 oz (369 g), the Scout 1 is the lightest one-person tent on the market. The only other tent I’ve found with lighter claimed weight is the Scout 2 Carbon. There are certainly a number of other tents very near to the Scout 1 in weight, but for a silnylon shelter this is clearly a huge point of interest.
The Scout 1 hits this weight with thin materials and small dimensions. That being said, it does manage to perform as a tent and not just a bivy. Additionally, the paper-thin materials have reports of being effective in the Scout 2 Platinum and shouldn’t be a deal-breaker if you are in love with the other features of this shelter.
Design
The Scout 1 is a non-freestanding, trekking pole supported tent; some users may be more familiar with freestanding styles (relying on poles) or semi-freestanding tents (e.g., Fly Creek). A freestanding tent often offers a more versatile pitch, however, the trekking pole approach of the Scout 1 and other similar tents offers significant weight savings (and sometimes more livable space). In the case of the Scout 1, it doesn’t seem to sacrifice significant stability or ease of setup. For those more accustomed to freestanding tents, a trekking pole pitch can be an adjustment, but one you get used to quickly, particularly in combination with the 13 ounce weight.
An interior view of the foot vent.
The Scout 1 has a unique shape compared to most other shelters on the market (see the comparison to the Flylite below). The two-pole setup at the head of the tent creates a sort of tunnel that differs from the more dome or pyramid styles in many shelters. Big Agnes has done a great job executing this style, and it proves to be easy to set up, take down, and use.
When taut, the body of the Scout 1 sheds water and wind fairly well.
The biggest benefit to this steep-walled design is a large amount of livable space – especially for an enclosed shelter of this weight class.
Compared To…
The Scout 1 has a fairly unique appearance but does share some key features with the MSR Flylite 2 (discontinued). The visual similarities illustrate some of the functional components of the Scout 1. The Flylite received mixed performance reviews and I wanted to use some of its shortcomings to highlight features of the Scout 1.
The Big Agnes Scout 1 Platinum (below) vs. the MSR Flylite 2 (above). You can see similarities in both the design and pitch. Photos: Big Agnes and MSR
The main complaint from users of the Flylite was that it was prone to precipitation collecting on the top of the fly. The Scout 1 seems to avoid this issue with both a sharper and narrower peak that sheds precipitation from its sides more readily. Users of the Flylite also had issues with its zipper. The Scout 1 seems to have quite durable zippers which are sealed by storm flaps, rather than the waterproof zippers that in my experience fail more readily. The dual zipper system is also very convenient for opening the door and sliding gear in and out.
The dual zippers slide and adjust easily and are convenient for access. A Trekking pole sometimes has to be adjusted to avoid impeding access, which can be done easily.
Tarptent currently offers a relatively similar single wall tent called the Protrail. The Protrail is also a one person, two trekking pole, silnylon tent and is also marketed towards fast and light style users. The design and specs differ somewhat but these shelters may well be considered as closely competing alternatives.
Big Agnes Scout 1 Platinum vs. Tarptent Protrail
Criteria
Comments
Edge
Weight
The Scout 1 comes in at half of the weight of the Protrail. That being said, both remain very lightweight shelters and much of the weight comes down to denier of the fabrics.
Big Agnes Scout 1 Platinum
Price
Both shelters come in at good price points compared to their specifications and intended uses. The lower price of the Protrail ($229) may be a significant benefit for some over the Scout ($349.95).
Tarptent Protrail
Storage/space
The Scout 1 is particularly minimal when it comes to space. The Protrail is wider, has more headroom, and has a vestibule for gear storage. The Scout 1’s lack of vestibule will be particularly concerning for backpackers in rainy environments that like to vestibule cook.
Tarptent Protrail
Materials
The Scout 1 uses thin (7d) materials while the Protrail uses thicker (30d), more conventional silnylon. While certainly more durable, experiences seem to be mixed as to whether the thicker material is required for weather protection. One separate benefit of the Scout’s thin materials is that they make it a very bright and airy tent.
Tie: Material use in the Protrail makes it more durable, material use in the Scout 1 makes it lighter (and airy feeling).
Setup/Ease of Use
The Protrail benefits in setup by requiring fewer stakes. The Scout has a broader, more square door and both trekking poles on the side, making entry and exit a little easier than the Protrail - an important consideration for a front-entry shelter.
Tie: Tarptent Protrail is easier to set up, Big Agnes Scout 1 Platinum is easier to get in and out of.
Condensation Management and Visibility
The mesh paneling of the Scout is simple, fuss free, and effective. It is however, inflexible and doesn’t offer the same amount of venting, adjustment, or outward visibility as the Protrail.
Tarptent Protrail
Strengths
A remarkably light shelter at a reasonable price point with a small footprint and easy setup (worth practicing for optimal pitch).
Good condensation management for a single wall tent.
Despite somewhat small dimensions, liveable space is pleasantly surprising.
Based on my experience with the tent, it seems best suited for fast and light style trips with relatively mild weather conditions below treeline.
Limitations
Keep in mind the lack of vestibule type storage.
Durability of the thin materials remains to be seen – but they seem to be sturdy and hold up to all use thus far.
Not ideal for high wind and exposure during weather.
Product mentions in this article are made by the author with no compensation in return. In addition, Backpacking Light does not accept compensation or donated/discounted products in exchange for product mentions or placements in editorial coverage.
Some (but not all) of the links in this review may be affiliate links. If you click on one of these links and visit one of our affiliate partners (usually a retailer site), and subsequently place an order with that retailer, we receive a commission on your entire order, which varies between 3% and 15% of the purchase price. Affiliate commissions represent less than 15% of Backpacking Light's gross revenue. More than 70% of our revenue comes from Membership Fees. So if you'd really like to support our work, don't buy gear you don't need - support our consumer advocacy work and become a Member instead.
Learn more about affiliate commissions, influencer marketing, and our consumer advocacy work by reading our article Stop wasting money on gear.
We don’t explore urban landscapes like we explore the wild. But maybe we can apply ultralight backpacking techniques to urban exploration.
Time to Get Lost.
When we venture into the wilderness, it’s never our goal to get lost. As soon as we step into our self-appointed naturescape, be it rugged mountains or vast deserts, the goal becomes finding our way out. But that doesn’t stop us from telling ourselves otherwise.
“This is a detox, man.”
“No cell service.”
“Work will be a distant memory once we get lost out here.”
We lace up our hiking shoes and begin (almost subconsciously) to change our mindsets. We move from being goal-motivated to exploration-motivated. What’s next on our list ceases to matter. The possibility of getting lost in the wild, away from society and cell reception, helps our minds reach that point.
We don’t think of cities in the same terms. We vacation in urban centers to stimulate, not detox. You can get lost in a city, but odds are your accommodation is an Uber ride away. There are so many things to do in a city that it becomes hard to choose. So we’ve created an array of apps to help us save time.
Uh huh…
What do we lose by scrolling Google for the best pan-Latin dive with a killer happy hour and outdoor seating? My challenge to you (and to myself) is to think of your next city adventure the same way you would a trip into the backcountry. Don’t worry about crossing goals off lists. Lace up your Converse and choose an exploration mindset. One that flows from cool looking bird to gnarled tree, or rather, from stretching mural to an eccentric street vendor.
Two friends and I put this into practice on a recent week-long trip to Mexico City.
One of countless CDMX street murals.
A Moment of Hesitation
We found the cheapest flight from PDX to Mexico City; no seat selection, no checked bag, not even a carry-on. Only one personal item: 18 x 14 x 8 in (45 x 35 x 20 cm). “This is crazy, that’s tiny.” Silence from Robin and Nathan on the other end of the FaceTime call. Then, “Let’s do it.”
We were headed to Mexico’s capital to visit Ryo, our Japanese friend whom we hadn’t seen since freshman year of college, eight years ago. As usual with this group, we didn’t plan a thing. Before arriving in CDMX though, there were two things we needed to figure out. Both things will sound familiar to outdoor adventurers.
1. The Right Pack
To fit a week of urban adventuring gear into a bag that’s supposed to slide under an airplane seat, you’ve gotta give up some luxury and implement the same ultralight backpacking skills you’d use in the woods. You also need a versatile bag.
Our ideal pack would be as follows:
Be frameless, so as to be expandable and compressible as needed
Have waist/chest straps for long days of exploring
Include a mix of pockets for things like a rain jacket, passport, and tequila a water bottle
Be discreet
Oh, and could it be comfortable too?
This one was easy. The guys at Six Moon Designs thought they had a pack that would do the trick: the newly released Daybreaker. This pack killed it. You’ll see photos of it throughout the read.
The new Six Moon Designs Daybreaker pack in action.
2. Decision Making
We would have tacos and tequila, but without any sort of itinerary. None of us had been to Mexico City before. We didn’t want to get trapped relying on Google, or worse, arguing in our three-bed hostel room. We only had six days. We didn’t know how to do it, but we vowed not to get bogged down, crossing things off a Tripadvisor-inspired bucket list. We vowed to get lost in the city, just as we would get lost in the effortless joy of an itinerary-free backpacking trip.
Here’s how we did it.
Ditch Google for a Guide
It was Nathan who set us up for success. Unlike Rob and I, Nate actually did a small amount of reading prior to arrival and scheduled us a free walking tour for our first full day in Ciudad de Mexico. Belen, our guide with Mexico Walking Tour, and Oskar, our guide two days later with Mexico City Greeters, helped jumpstart our exploration. Most importantly, they provided local context with which to understand and appreciate the city.
Belen, our guide with Mexico Walking Tour.
Like knowing your basic wildflowers, learning the history of the streets we walked enriched our wanderings and inspired more questions. The internet’s list of top ten al pastor taco joints could wait.
We Walked Our Legs Off
I can’t recommend walking highly enough. Or let’s call it hiking – urban hiking. That sounds better. It is a sublime way to explore a city. It’s slow, but so is hiking in the wild. That’s sort of the point. Hiking around a city helps encourage an exploration-mindset. Cities can be hectic. The sheer number of people getting stuff done, running to catch subways, honking, speeding, and yelling makes us feel like we need to do the same. Walk around a city with no goal other than vague destinations, and you start to get lost – that same state of mind we strive for on a backcountry trek.
We happened upon more than one climbing opportunity.
I had blisters on day three. And of course, I hadn’t thought to bring blister-care – this wasn’t one of my guided backcountry trips. Walking brought Rob, Nate, and I to places that were not on any list. It’s how Rob and I ended up as the two goofy gringos in a street performer’s crowded comedy routine at Bosque de Chapultepec. We played the roles well. It’s also how Nathan and I happened upon a massive outdoor music festival promoting “Amor Sin Violencia” in Zócalo, Latin America’s largest square, and returned late to our hostel soaked by a sudden and incessant deluge. It’s how the three of us, on our last night, found ourselves in a speak-easy style nightclub with a heck of a view.
The Ciudad at night.
We Asked Questions
This one proved harder for Nathan and I, given our sorely lacking Spanish, but from day one, we sought answers from people, not phones. It reminded us of the time-honored trail tradition – two hikers traveling in opposite directions stopping to swap important (and sometimes dubious) trail info.
Our Uber driver from the airport, with help from his tipsy English-speaking brother, recommended a taco place that would become our go-to dig. That first night, the waiters giggled at the quantity of tacos we ordered and laughed harder when we tried to order water but ended up with horchata. We smiled, flushed red, and stuck to Modelo after that.
Leave no food cart behind.
Talking to locals introduced us to Mexico’s most traditional alcohol: pulque. For me, especially, pulque gave purpose to wherever we found ourselves in the city. I dragged the others along to off-the-beaten-path watering holes where ancient men filled our plastic mugs with the translucent liquid. When we met back up with our guides-turned-friends Belen and Oskar before returning to Oregon, it was pulque that closed the night.
Pulque, an excuse to explore.
We Learned to be Okay With Downtime
Even on a hard-charging backcountry excursion, it’s nice to throw up a hammock and spend a few hours taking your leisure. As worried as we were about making the most of our week in Mexico, Rob, Nate, and I each hit a point where we needed to spend an afternoon on a park bench. While laidback vacationing is second nature for some, we had to arrive at an awareness that free time is okay. We didn’t go to see Goldlink and Erykah Badu three hours south of the City, because we didn’t want a rushed trip. We didn’t spend the entire week glued to each others’ hips either. Taking a solitude break gives you time to think, recharge, and synthesize your experience.
Taking time to relax was vital.
Let Wanderlust Take You
As in the wild, the urban landscape is chock-full of alternate routes and waypoints. Serendipity is right around the corner. You just have to let it find you. Be distracted, ask questions, chase feelings, and see what happens. Our week in the capital could have been spent (waiting in lines) at Mexico City’s most popular destinations and restaurants. We could have spent more money, slept in luxury, and come back with nice gifts. We might have avoided some gastrointestinal distress by eating more conservatively. We could have spent half the trip with our heads buried in our phones, double-checking, making sure we spent our money wisely.
Instead, we hiked. We laughed. We saw a Mexico City that only we could have seen. The paths our feet walked are not to be found again.
The friends.
DISCLOSURE (Updated April 9, 2024)
Backpacking Light does not accept compensation or donated/discounted products in exchange for product mentions or placements in editorial coverage.
Some (but not all) of the links in this review may be affiliate links. If you click on one of these links and visit one of our affiliate partners (usually a retailer site), and subsequently place an order with that retailer, we receive a commission on your entire order, which varies between 3% and 15% of the purchase price. Affiliate commissions represent less than 15% of Backpacking Light's gross revenue. More than 70% of our revenue comes from Membership Fees. So if you'd really like to support our work, don't buy gear you don't need - support our consumer advocacy work and become a Member instead.
Learn more about affiliate commissions, influencer marketing, and our consumer advocacy work by reading our article Stop wasting money on gear.
Misti is one of the three volcanoes you can see from Arequipa, Peru, which is the second-largest city in the country. Part of the Andes mountain range, Misti is located between Chachani and Pichu Pichu. In this article, I’ll tell the story of my Misti summit attempt and share some lessons I learned along the way.
What to Expect When Hiking Above 19,000 Feet on Top of a Volcano
Misti is one of the three volcanoes you can see from Arequipa, Peru, which is the second-largest city in the country. Part of the Andes mountain range, Misti is located between Chachani and Pichu Pichu. In this article, I’ll tell the story of my Misti summit attempt and share some lessons I learned along the way.
The three mountains are a part of the town and the history of Arequipa. On a clear day, Misti appears to be so large and close to the city that you can stick out your hand and touch it. It’s a beautiful mountain that lures people to try and climb it every year.
Misti is not the tallest of the three, but it is not small by any means. At 19,101 feet, Misti will challenge anyone who has never hiked above 15,000 feet. Why do I say 15,000 feet? Because there are no mountains taller than 15,000 feet in the lower 48 States. That extra 4,000 feet might not seem much, but you will feel it.
Highlights of Gear You’ll Need:
Hiking jacket and warm clothes – Summit Day is a cold day, and most of your hiking will be in the dark.
Sleeping bag that is designed for single digit weather. It never got that cold but keeping warm at night goes a long way.
Wool leggings – You can wear them while you sleep and put your hiking pants over them
Headlamp – This is extremely important because your second day starts in the dark.
Trekking poles
Thermos – Warm beverage while hiking will help pick up your spirits.
Neck Gaiter – This was my favorite possession because it helped protect me against the sun on the first day, kept me warm on the second day, and also helped block dust from the high winds on the mountain.
Don’t Get Overconfident
I wouldn’t say that I have an abundant amount of confidence, but I am a very optimistic person. When I looked at climbing a 19,101-foot mountain, I shrugged it off and said I’ll be fine. It can’t be that hard. Well, I was wrong. A lot of my confidence and optimism is based on what I remember my physical condition to be when I used to run marathons and triathlons. Now older, I do not do those activities as much as I used to.
Hiking Misti was tough, and it was probably one of the hardest things I have ever done. I had several moments while hiking the mountain when I asked myself, “Why the heck am I doing this? I wish I was drinking a cold beer in the plaza.” Even worse, your mind starts looking for the easiest excuse to give up and return to basecamp.
Tip: Commit to training for the hike like you would for a marathon or triathlon. You need months of preparation. The more work you can put in, the better.
Acclimating at High Altitude
I arrived in Arequipa two nights before I would start my ascent of Misti. I knew deep down that it was not enough time. Unfortunately, based on my travel schedule, that was the best I could do. Arequipa sits at 7,760 feet. As soon as I got out of the plane, I could feel the high altitude. Coming from a place of pretty much zero feet above sea level, I expected to feel some discomfort in my chest. It doesn’t hit you until you have to walk up a flight of stairs. That is when you realize that you are way out of your element.
Tip: Altitude affects everyone differently, so the more time you have to acclimate, the better.
The road to Misti.
First Day
From our hotel in Arequipa, our guide picked us up at 9:30 AM to start the journey. The drive would take about 3 hours and go through the Salinas y Aguada Blanca National Reserve. While driving through the park, we were lucky enough to see wild alpacas, lamas, and vicunas. The SUV dropped us off at the end of the road; elevation 14,107 feet.
At this point, our guides started to prepare us lunch by making us soup and serving empanadas. From my own experience of hiking at high altitude, I knew that I needed to eat and drink while I could.
Between waking up and starting the hike I drank three liters of water. I drank two more liters of water on our hike to our basecamp. And all through this time, I only urinated a couple of times.
Tip: High altitude dehydrates you, so drink plenty of water.
We started our hike to basecamp after lunch. After acclimating two days in Arequipa I felt better. I still had my appetite, and I was in good spirits. As soon as we started hiking at 14,107 feet, I could feel my heart race. I was breathing heavily only minutes into the hike, but as we walked, my breathing improved, and I felt more relaxed.
The route was a steady hike up the base of the mountain. The hardest part of the path was dealing with the volcanic ash and loose gravel that layered Misti. It felt like running on loose sand on a beach, but instead of being flat, it was uphill and at 14,000+ feet of elevation. I made the mistake of asking the guide if the path would be like this for the following day. He simply answered “yes.”
The volcanic sand around Misti made hiking difficult.
Since we started after lunch, the hike was hot, and our route was protected from the intense cold winds that blew on the mountain.
Tip: Wear sun protection. Peru is closer to the equator than North America, so the effects of the sun are much stronger. I covered my face with a hoodie, neck and faceguard, and a hat.
Basecamp was at 15,748 feet. Everyone in my group was feeling pretty good at the time, but we knew how hard the next day would be. The porter hiked ahead of us and prepared our tents. It felt weird because no one has set up my tent since I was in second grade, but at the moment, I wasn’t complaining. All we had to do was set up our belongings in our tent and change into warmer clothes.
The basecamp is located in the open with no protection from the winds. Over the years, guides made walls out of rocks to protect the campground.
The wall of rocks helped a lot, but once you were inside, you could hear how strong the winds were. Trying to sleep at almost 16,000 feet was nearly impossible. For those thinking or planning on camping at high altitude, I wouldn’t plan on getting much sleep. I was in my tent by 7:00 PM, and the next day was going to start at midnight.
Rock walls around basecamp sheltered us somewhat from the constant wind.
Tip: I had a zero degree bag and a pair of wool long johns. I kept warm throughout the night. Even though I couldn’t sleep, at least I was comfortable.
At this point, doubt started to creep in. I tried climbing a mountain like this ten years ago that did not result in reaching the summit, and fear of altitude sickness started to creep in my thoughts. I did my best to ignore the fear and tell myself that I was a lot more experienced and prepared this time around.
Summit Day
Summit Day arrived quickly, and it was time to get out of the comfort of my warm tent. It was cold, but the winds stopped during the night. I ate what I could since my appetite wasn’t there, and it was harder for me to drink water because of the altitude. I had my backpack and everything else ready to go. Our guide led the way into the darkness. I for one could not see any trail; however, our guide has done this hike so many times he could do it blindfolded. Like the first day, my heart started to race for the first five minutes of the journey.
We hiked for twenty minutes before stopping for a minute to catch our breath. It felt like we were going for an hour. Again, more doubt started to creep in. I had to keep reminding myself that I wasn’t hurting that bad. I had a small headache but nothing unmanageable. My breathing was hard, but nothing more than what I would feel training for a marathon. One of the members in our group was a swimmer and hated walking for twenty minutes for a break. He asked the guide to take twenty steps, stop for three breaths, then resume another twenty steps.
Tip: Your guides will always be in better shape than you. Don’t be afraid to ask them to change to more of an interval series or frequency/length of breaks.
This method worked great for our group. The guide was excellent and would do anything (besides carry us) to get us to the top. We did take a couple of longer breaks along the way. As we continued our “twenty steps-three giant breaths strategy,” the mountain got more and more steep. I tried my best to take deep breaths to gather every last bit of oxygen that my body desperately needed.
The temperature was in the mid-thirties but felt colder with the increasing wind. Even my Minnesota blood was not keeping my body warm. My toes and fingers were freezing at different points in the hike. I was wearing medium wool socks and thin cotton gloves. My feet did not bother me as much as my hands did. During our breaks, I would try and blow hot air into my gloves to warm up my hands. At one point, I took my hands and placed them in the inside of my jacket to keep them warm. I survived the hike with the full functionality of my fingers, but it was not the smartest thing I have done.
Tip: Don’t underestimate how cold it can be on top of a mountain. Bring warm clothing, including gloves and a jacket that are designed for the winter. Cotton gloves do not work well.
I remember taking a five minute break and feeling like the mountain was winning. As we were sitting, trying to regain any bit of energy, I was falling in and out of sleep. I could have fallen asleep for hours if they didn’t wake me up. I knew from previous experiences that feeling sleepy while hiking was a sign of altitude sickness for me. At this moment, I wanted to give up and head back to the comforts of a warm bed. Everything seemed so hard in the darkness of the early morning. I kept wishing for some solid ground to walk on, anything but volcanic ash. I kept pushing and told myself that at least I wouldn’t quit until someone else did in my group. Luckily no one did, and the sun started to rise, which gave me new life. We began to see how close we were getting to the summit and how far we’d already come..
Tip: Think of anything that can motivate you to keep moving forward and not give up. Never quit before sunrise.
Our guide gave us extra motivation when he told us we were getting close. Soon we could see the final stretch and the summit. I remember asking the guide several times if it was indeed the top and not a false summit. He assured me that it was real, and at that point, I knew I was not going to turn around. The last stretch of the mountain was difficult because we were nearly at 19,000 feet. I was breathing incredibly hard. We were all going at our own pace at this point, and I pulled ahead of the group. The last piece of the hike included several small switchbacks.
Nearing the summit of Misti.
Here, I would hike about twenty steps and take at least ten big breaths before I would continue. Each set of twenty steps felt like I was hiking for days without rest. However, the summit started to get closer and now nothing was going to stop me from reaching the top. I reached the summit just before 7:00 AM; seven hours of being challenged by Misti. It was a big relief as soon as I made it to the summit. It was hard to imagine how high we were and how far we came, but we made it.
Final Thoughts
It was hard to feel excited or happy once I reached the top because I was worn out from the ordeal. However, it is something that I will never forget. It was an experience that challenged me physically and mentally. If you are thinking of climbing Misti or another mountain around the same elevation, then plan accordingly. Give yourself plenty of time to acclimate, drink lots of water, wear hiking gear that will keep you warm, train months in advance, and keep a positive attitude when you are hiking.
DISCLOSURE (Updated April 9, 2024)
Backpacking Light does not accept compensation or donated/discounted products in exchange for product mentions or placements in editorial coverage.
Some (but not all) of the links in this review may be affiliate links. If you click on one of these links and visit one of our affiliate partners (usually a retailer site), and subsequently place an order with that retailer, we receive a commission on your entire order, which varies between 3% and 15% of the purchase price. Affiliate commissions represent less than 15% of Backpacking Light's gross revenue. More than 70% of our revenue comes from Membership Fees. So if you'd really like to support our work, don't buy gear you don't need - support our consumer advocacy work and become a Member instead.
Learn more about affiliate commissions, influencer marketing, and our consumer advocacy work by reading our article Stop wasting money on gear.
The CrazyCap 2 ($59, 1.9 oz/56 g) is an ultraviolet water treatment device that takes the form of a bottle cap. At first glance, this little multi-use item seems like the perfect invention for ultralight backpackers on the fly. But how does it perform in the field with its bottle compatibility issues?
Introduction
The CrazyCap 2 ($59, 1.9 oz/56 g) is an ultraviolet water treatment device that takes the form of a bottle cap. At first glance, this little multi-use item seems like the perfect invention for ultralight backpackers on the go. But how does it perform in the field with its bottle compatibility issues?
The CrazyCap 2
The Test
Inside the box, I found directions, a warning about not looking directly into the UV light, an alcohol swab, a USB charger, and The CrazyCap 2. Aside from being double the weight (0.85 oz/24 g vs 2 oz/56 g) than a standard S’well water bottle, the cap is pretty similar to a standard S’well lid.
CrazyCap 2 compared to a Manna bottle standard lid.
The CrazyCap 2 lid requires a specific bottle format and you will require either a CrazyCap bottle, S’well bottle, or another similarly configured bottle. I used a Manna water bottle. I did find a cola style water bottle in plastic (2.8 oz/80 g) (also made by Manna), but because plastic has a different screw style than the stainless steel bottles, the CrazyCap 2 didn’t fit.
Touch once and the CrazyCap 2 lights up and give the battery status, touch twice and it does a normal sterilization mode (one minute), touch five times and it gives the crazy sterilization mode (2.5 minutes). Indicator colors red for less than 25% battery, orange for 25-50% battery, green for a full charge, and blue for sterilizing in progress.
The charge mounts overtop the cap and plugs into any USB port, including one on a laptop or battery pack.
The CrazyCap 2 charging.The CrazyCap 2 with a full charge.The CrazyCap 2 purifying water.
The Limitations
The Crazy Cap 2 is a neat product but is a limited use item for most ultralight or lightweight backpackers. The first obvious issue is that The CrazyCap 2 uses a stainless steel bottle which is heavier than most of us would be comfortable packing around if only to protect our “ultralight cred.” I’m all for finding little luxuries on the trail and if a stainless water bottle is yours, this is a fantastic product. For me, a fancy water bottle is definitely not one of my luxuries.
Second, the battery life on The CrazyCap 2 lasts about a week doing 5 batches of 17 ounces (0.5 L) or 85 oz (2.5 L) of water per day or 595 ounces (17.6 L) per week. This is great on a short trip with low hydration needs. However, on a longer trip, charging may be required, which therefore requires the addition of a charging pack (or two.) Obviously this is a limitation but not a real strike against The CrazyCap 2. If you are bound to using UV technology, battery life will be a constant factor. A Steripen Ultra has about 1,700 ounces (50 L) of water per charge or 170 ounces (5 L) per day for 10 days. The Steripen Ultra weighs about 4.9 ounces (138 g) vs CrazyCap 2’s 1.9 oz (56 g), but the Steripen Ultra also processes twice as much water per week and lasts an additional three days.
This brings me to my third point. After I started using hydration packs because I like them more than bottles, I didn’t use my Steripen Ultra very often. When I finally dug it out to sell it about 5 years after it had last been charged and put away, the battery was still at ¾ charge. The LCD screen still had its idiot-proof interface. I could use the Steripen Ultra instantly and explain how it works to the guy who bought it. The CrazyCap 2 was less intuitive, in that the button is glitchy with a 3-second delay between touching the button and it responding. The delay makes you second guess if you are using the CrazyCap 2 correctly. I found myself asking, “Is this thing even on? Or does it need to be charged again?” The CrazyCap 2 indicator colors (red, orange, green, and blue) all make sense, however, what it does not do (unlike the Steripen Ultra) is give a reading if the water is too contaminated or if the sterilization failed. The Steripen Ultra has a happy face, a sad face, an error, and a battery life indicator on its LCD screen, and its neoprene carry case has a definition for each icon.) A sterilization failure indicator seems crucial for any device you plan on using to keep you safe from giardia.
The CrazyCap 2 can be used multi-functionally for sterilizing other items, and this is good in theory. It’s true, a UV light can be used for sterilization, however, it is important to note that UV Sterilization only works if the light is not impeded. By not impeded I mean the surface has to be clean, with no particulates covering the surface. The requirement of surfaces to be clean is why hospitals don’t extensively use UV sterilization technology. This is also why cloudy water doesn’t work with a UV light, as the particulates block the light and the sterilization fails. In short, this is a great device if you know you have crystal clear water. UV sterilization is a recipe for disaster with cloudy water. With the CrazyCap 2 providing no notification it failed sterilization in cloudy water, it makes me wary of using it on long trips where I have questionable water sources.
Another potential issue is that CrazyCap 2 is relatively expensive. The cap itself is $59.00 plus a compatible bottle at $25.00 – $45.00. A Steripen Ultra is $110.00 and a Steripen Ultralight is $90.00. Having used both types of products, I would pick the Steripen Ultra. The Steripen Ultra can pretty much be used in any water bottle, and overall I found it more reliable than the CrazyCap 2.
My final issue with the CrazyCap 2 is this – every time you fill the bottle in a water source, you have to sterilize the mouth of the bottle. The mouth of the bottle must either be sterilized before you screw the cap on so you don’t cross-contaminate the cap’s threads, or you must sterilize the mouth of the bottle every time you take a sip. CrazyCap provides one alcohol swab for this purpose. On a long backpacking trip, a single alcohol swab would be insufficient. Carrying one alcohol swab for every water bottle refill or every sip is impractical, to say the least. Therefore, you could use the CrazyCap’s UV rays to sterilize the mouth of the bottle but at a battery cost of 1 use per every 17 oz (0.5 L) of water sterilized, which cuts the battery life down to 3.5 days. The other possibility, of course, is to take a weight penalty and carry a small bottle of alcohol or bleach with a small cloth to wipe down the mouth of the bottle. Obviously, this is an issue with other UV systems as well, but the Steripen markets a bottle mouth cover for filling the bottle. This could be a solution for the CrazyCap as well but to my knowledge, no one is making a bottle mouth cover for cola style bottles.
Conclusion
I love the idea of the Crazy Cap 2, but its limitations concerning the bottle size and type mean that its functional use in my pack is limited. From an ultralight perspective, the best use of CrazyCap 2 is for a short duration trip with excellent water sources. I would gladly use the product for a mountain marathon where water sources are frequent and clean, gear is minimal, and the duration is short. At this time, however, the use of the CrazyCap 2 is primarily for people who have a sentimental attachment to a specific S’well style bottle regardless of its weight. If CrazyCap produces an ultralight bottle, or comes up with more universal designs, and addresses the mouth sterilization issues, then I can see greater use for this product in the future.
DISCLOSURE (Updated April 9, 2024)
Product mentions in this article are made by the author with no compensation in return. In addition, Backpacking Light does not accept compensation or donated/discounted products in exchange for product mentions or placements in editorial coverage.
Some (but not all) of the links in this review may be affiliate links. If you click on one of these links and visit one of our affiliate partners (usually a retailer site), and subsequently place an order with that retailer, we receive a commission on your entire order, which varies between 3% and 15% of the purchase price. Affiliate commissions represent less than 15% of Backpacking Light's gross revenue. More than 70% of our revenue comes from Membership Fees. So if you'd really like to support our work, don't buy gear you don't need - support our consumer advocacy work and become a Member instead.
Learn more about affiliate commissions, influencer marketing, and our consumer advocacy work by reading our article Stop wasting money on gear.
Executive Producer - Backpacking Light; Show Director and Host - Ryan Jordan; Producer - Chase Jordan; Theme music: Look for Me in the Mountains written by Chris Cunningham and Ryan Jordan, performed by Chris Cunningham (acoustic guitar, lead and harmony vocals, harmonica), Chad Langford (upright bass), and Tom Murphy (mandolin), produced by Basecamp Studios in Bozeman, Montana.
Sponsorship Policy: Backpacking Light does not accept compensation or donated/discounted products in exchange for product mentions or placements in editorial coverage, including any podcast episode content not excplicitly identified as sponsored content. Some (but not all) of the links in these show notes may be affiliate links. Learn more about affiliate commissions, influencer marketing, and our consumer advocacy work by reading our article Stop wasting money on gear.
The Vargo Titanium Bot 700 is a 0.7-liter cooking pot made of titanium with a watertight, screw-top lid with a silicone gasket.
Introduction
The Vargo Titanium Bot 700 is a 0.7-liter (24 fl. oz) cooking pot with a watertight, screw-top lid. The Bot 700 is made of titanium and the lid contains a silicone gasket. I measured the weight of the pot (including the lid) to be 4.83 oz (137 g).
This is a first look at new gear that recently entered our review pipeline, and hasn't yet been subjected to rigorous field use. Learn more about the types of product reviews we publish.
The Vargo Bot 700 has a reputation for being useful for cold-soaking dehydrated (or freeze-dried) food but is a very expensive option compared to an empty peanut butter jar, which is an excellent cold-soaking pot. The Bot 700, however, can be used for stove-top cooking as well – a plastic jar cannot.
There are some other metal cold-soak options from DIYers that have been made commercially-available by cottage manufacturers like Stormin’s, which are both lighter and cheaper. I picked one up off the used gear market last year and found that pot to be too fragile – it deformed easily when stored in my pack and accordingly lost its leak-proof seal in short order. Also, I never felt good about using an enameled aluminum jar designed for dry food storage for cooking.
Highlights
weight of pot: 3.27 oz (93 g)
weight of lid: 1.56 oz (44 g)
capacity: 700 ml (24 fl. oz.)
size: 4.1 in (105 mm) dia x 4.8 in (122 mm) height
foldaway titanium wire grab handles
screw-top lid with silicone gasket for a watertight seal
the lid is deep enough to be used for cooking or drinking/eating small volumes of food or beverages
MSRP $99.95
First Impressions
The lid has a capacity for 8.5 fl. oz. (250 ml), and can be used for other purposes in addition to being a lid for the pot. First, you could use it to warm soup or tea when it’s in its inverted position during cooking. Second, you could use it as a mug/bowl for drinking. Third, with a small pot grabber, it could even be used as a miniature fry pan. Its practical capacity is closer to 6 fl. oz. (175 ml), which is obviously pretty small.
The gasketed, screw-top lid works to contain any liquid I tried in it, including oily liquids, liquids with alcohol (it might make a great margarita shaker), and hot or cold foods. I had an older version of the Bot that wasn’t gasketed and it leaked like a sieve. This one (so far) seems much better, but only time will tell, I suppose.
I’ve been using it for pre-soaking dehydrated and freeze-dried meals. My normal routine has been to cold soak my food for an hour or two, add a little more water, then heat it up when I get to camp and am ready for dinner. Unlike the screw-top plastic containers revered by most cold-soakers, the Bot 700 gives me the flexibility to cook and use with a stove as well.
Titanium gets hot, especially the lid. Use a bandana or pot grabber to lift the inverted lid off the pot when cooking. And watch your mouth when sipping hot tea, it takes a few minutes for the rim of the lid (or pot) to cool down enough to drink.
Don’t cook with the lid screwed on – only use the lid in its inverted position while cooking so as not to pressurize the pot contents and create an explosion hazard.
It’s a $100 jar, and the price tag makes it a specialty item. If you’re cold soaking and not cooking and need cheap, stick with your peanut butter jar. It does everything you need without being able to use it with a stove.
Product mentions in this article are made by the author with no compensation in return. In addition, Backpacking Light does not accept compensation or donated/discounted products in exchange for product mentions or placements in editorial coverage.
Some (but not all) of the links in this review may be affiliate links. If you click on one of these links and visit one of our affiliate partners (usually a retailer site), and subsequently place an order with that retailer, we receive a commission on your entire order, which varies between 3% and 15% of the purchase price. Affiliate commissions represent less than 15% of Backpacking Light's gross revenue. More than 70% of our revenue comes from Membership Fees. So if you'd really like to support our work, don't buy gear you don't need - support our consumer advocacy work and become a Member instead.
Learn more about affiliate commissions, influencer marketing, and our consumer advocacy work by reading our article Stop wasting money on gear.
Fozzils Solo Pack dishware is a unique, folding, ultralight, compact set of dishes which at first blush are a luxury-seeking, ultralight backpackers dream. But we ran into problems when testing them with hot liquids.
Introduction
Fozzils Solo Pack Ultralight dishware is a unique, folding, compact set of dishes which at first blush are a luxury-seeking, ultralight backpackers dream. But we ran into problems when testing them with hot liquids.
At a paltry 4 oz (115 g) and $14.95 for a cup, bowl, and plate, which pack flat, the Fozzils Solo Pack is a full set of dishes unlike any other on the market. The dishes snap together in origami style and unsnap to flat sheets of food-grade, heat-safe polypropylene and silicon.
Fozzils
The Test
The Fozzils Solo Pack has rattled around my backpack for about three years (usually only one part of it at a time, though.) Fozzils are the lightest, most compact and innovative dishware I have ever seen.
What I like is the fact that they are light and pack completely flat. I thought the snaps would give out after a few months but so far have held out. Also, the bowl and cup have measurement marks, making them perfectly multifunctional. The propylene also makes a decent cutting board with gentle use. I also love how easy Fozzils are to wash once they are unsnapped and flat.
Fozzils
The Issues
They are flimsy and even flimsier with hot liquids inside. The irregular lip-height on the dishware and tendency to squish and overflow (sometimes overflowing boiling liquids on my hands) relegates all but the Fozzils bowl and plate to my pile of inconclusive experiments.
The Fozzils plate with about 200 g of mac and cheese.
I still use the plate on occasion if I need a cutting board and a small plate. It holds about half-to-three-quarters of what I want to eat when I’ve had a hard trek day (I’m on the small side of female backpackers. The plate holds about a quarter of what most gentlemen would like to eat at the end of a hard trek day). The plate has the best stability of all the pieces in the set, with its wide base.
With the Fozzils cup half full, the slightest move can spill hot liquid all over my hands.Here, you can see how high the fluid comes to the low side of the Fozzils cup when half full.
The cup is too small and is the worst offender for overflowing simply by holding it gently. It can hold 4 ounces (150 ml), which is slightly more than its 10 ounces (275 ml) of capacity without overflowing by gentle pressure. The cup is the lightest dish, with the smallest base, the most likely to contain a hot liquid, and therefore the most likely to overflow boiling liquid. I have completely abandoned the cup and it could be thrown out as far as I am concerned.
Though slightly unwieldy for my hand, the Fozzils bowl does make a decent two-handed cup at about half full.
Because of its wider base and larger capacity, the bowl is more forgiving than the cup and less likely to overflow when held, but again it holds only about 8 ounces (250 ml) of its 18 oz (525 ml) capacity. I rarely opt to pack the bowl, but when I do, I use it as a cup and only fill it up to the 8 ounces (250 ml) mark.
Conclusion
In short, I love the idea of Fozzils dishware, but the implementation is somewhat lacking. For the money, Fozzils might be worth playing with. They are especially worth playing with if you don’t put hot hot liquids in them. However, I suspect, due to their flimsy nature with hot liquids, they won’t appeal to a large section of the backpacking community.
DISCLOSURE (Updated April 9, 2024)
Product mentions in this article are made by the author with no compensation in return. In addition, Backpacking Light does not accept compensation or donated/discounted products in exchange for product mentions or placements in editorial coverage.
Some (but not all) of the links in this review may be affiliate links. If you click on one of these links and visit one of our affiliate partners (usually a retailer site), and subsequently place an order with that retailer, we receive a commission on your entire order, which varies between 3% and 15% of the purchase price. Affiliate commissions represent less than 15% of Backpacking Light's gross revenue. More than 70% of our revenue comes from Membership Fees. So if you'd really like to support our work, don't buy gear you don't need - support our consumer advocacy work and become a Member instead.
Learn more about affiliate commissions, influencer marketing, and our consumer advocacy work by reading our article Stop wasting money on gear.
Lightweight wood saws for backpacking can be used for preparing firewood and more. Here’s what affects saw performance and how that’s revealed in four models from Bahco, Suluk46, Coghlan’s, and Sven Saw.
Introduction
Lightweight wood saws for backpacking can be useful tools. I’ve used them for:
Cutting firewood.
Preparing limbs for snow trench shelter roofs.
Building a pyramid for hanging a pot over a fire.
This article includes a video where I show the process by which a saw can be used for preparing wood for further hatchet-splitting (or batoning with a knife) to create dry kindling from wet wood.
Backpacking wood saws are not considered essential items by most of us, but they offer enough utility that it’s worth exploring the market to see what’s available across the weight spectrum.
Limitations
Backpacking wood saws suffer from three primary limitations:
They are bulky.
They are heavy.
They don’t have enough cutting power to be useful.
So-called survival saws are the least bulky of all of them. They have no frame to hold the saw blade, which is typically just a short “chain”. Folding saws are less bulky than non-folding saws, but require more time to deploy.
In terms of weight, saws with longer blades require more framing to keep the blades stable, and will necessarily be heavier.
Cutting power and quality is defined by these three factors:
Teeth per inch (TPI) – the number of teeth per inch of saw blade. The fewer teeth per inch (and the deeper the teeth), the faster you can saw through a given thickness of wood (generally), but the rougher the cut and more likely the teeth will get hung up on knots in the wood.
Opposing teeth – saw blades with teeth that are perfectly in line (parallel to) with the saw blade cut more aggressively – i.e., faster with less effort, because cutting is performed on both push and pull strokes. This feature is a hallmark of pruning saws, which are designed with opposing teeth for cutting through live, wet wood. Dry wood blades do not have aggressively opposing teeth, and can get stuck in soft, wet woods that can swell during sawing (e.g., fir, pine).
Blade length, thickness, and saw frame – the more robust a frame is (which provides blade stiffness), the thicker a blade is, and the longer a blade is, the more power you can transfer to the saw with your body. This makes cutting faster and more efficient. All of these features also add weight to the saw.
An Overview of Selected Wood Saw Models
One of the more popular compact camping saws is the veritable Sven Saw, a folding model with an aluminum frame and 15-inch blade that weighs about 11 oz (310 g).
Sven Saw
The Sven Saw is a powerful, functional saw that folds away to a relatively compact package, but is generally considered to be a bit heavy for the backpacker who needs a saw only for incidental use.
At the other end of the spectrum, one of the lightest and most compact wood saws is the Coghlan’s Pocket Saw, which weighs a little under 3 oz (86 g) and rolls to the size of a small spool of fishing line.
Coghlan’s Pocket Saw
Although very compact and light, the Coghlan’s Pocket Saw has very little cutting power and is generally considered to be more useful in a survival kit than as a backcountry tool requiring frequent use.
The Pocket Saw is a lighter weight version of the well-known Nordic Pocket Saw, which typically uses nylon webbing handles connected to a very light chainsaw-style blade. Nordic Pocket Saws are much more powerful than the Coghlan’s Pocket Saw and would be well worth the added weight of 2 oz (56 g) or so if you needed something that could actually cut wood.
Nordic Pocket Saw
I’ve used both the Sven Saw and the Coghlan’s Pocket Saw and neither of them is found in my backcountry kit today. For the past few years, I’ve been using two products that I find to be “high performance” (good cutting power) while still being light and compact enough that it doesn’t provide me undue hardship to include them on short backpacking trips.
It’s not quite as powerful as the Sven Saw, and has a much shorter blade length (7 in vs. 15 in). It’s a folding saw as well but requires only a push button to engage and it deploys quickly. It’s also more compact and lighter (6.8 oz / 193 g) than a Sven Saw. It cuts both wet and dry wood well.
The most popular alternatives to the Bahco Laplander are folding saws from Fiskars and Silky, especially the Silky Pocketboy 130. My experience with Fiskars folding saw blades is that they don’t hold their sharpness in response to heavy use. I find that Silky Saws are a little less ergonomic when it comes to discomfort in my hand during sustained sawing – the handle isn’t quite as comfortable for me as with the Bahco Laplander.
View of the teeth in-plane with the blade of the Bahco Laplander wood saw. This is a pruning saw designed for cutting wet wood, and you can see the opposing teeth (red arrows). Blade thickness is about 1.4 mm and TPI is 7. With the thick blade and additional 0.3 mm of tooth offset on each side, the cut thickness is about 2.0 mm.Side view of the Bahco Laplander saw blade. You can see the (shiny) chiseled edges of every other tooth. Opposing chiseled tooth edges is a feature critical to any useful saw (as opposed to uniformly-chiseled edges on both sides of every tooth) in order to create the cutting power required for sawing wood.
The Uki has a custom-designed aluminium frame built for stiffness and light weight (4.9 oz / 139 g), and uses standard 12-inch buck saw blades. Heat-shrink tubing is used to create a comfortable handle. It doesn’t fold, so it’s the bulkiest of the wood saws mentioned here. The blade can be tensioned to a very high level so it’s an efficient cutter. It cuts dry wood well, but suffers and gets stuck on wet softwoods like pine.
The Suluk46 Uki buck saw has opposing chiseled edges. However, its teeth are all inline with the saw blade, so it doesn’t provide much cut thickness beyond its 0.7-mm blade thickness, more than twice as thin as the Bahco Laplander cut thickness. The Uki suffers accordingly with soft, wet wood. At only about 4 TPI, it cuts dry, soft wood aggressively and well. However, the low TPI and deep teeth make it limited for hardwood cutting.
In Use (Videos)
The first two videos show the Bahco Laplander and the Suluk46 Uki in use on dry, soft wood (beetle-killed pine).
The second two videos show the same two saws on wet, harder wood (dead aspen).
Final Thoughts
Suluk46 accomplished something special: a beautifully-designed 12-inch buck saw that weighs less than 5 oz (142 g). It has potential, but its utility is limited by thin, aftermarket saw blades that shine when sawing through dry, soft wood but suffer for wet hardwoods. The Suluk 46 Uki buck saw will be fine for most users cutting dead fir and pine.
The Bahco Laplander is about 2 oz (56 g) heavier than the Uki. However, it’s more compact and more versatile, and represents the best of what a lightweight folding saw can offer.
The Sven Saw has the most power of all of these saws, due to its blade length. Like the Uki, it suffers when trying to saw through wet hardwoods.
The Pocket Saw is nearly useless beyond its ability to be included in a survival tool that you might give away as a gift, but otherwise is unable to efficiently cut wood that you can manage to break yourself with a swift kick.
DISCLOSURE (Updated April 9, 2024)
Product mentions in this article are made by the author with no compensation in return. In addition, Backpacking Light does not accept compensation or donated/discounted products in exchange for product mentions or placements in editorial coverage.
Some (but not all) of the links in this review may be affiliate links. If you click on one of these links and visit one of our affiliate partners (usually a retailer site), and subsequently place an order with that retailer, we receive a commission on your entire order, which varies between 3% and 15% of the purchase price. Affiliate commissions represent less than 15% of Backpacking Light's gross revenue. More than 70% of our revenue comes from Membership Fees. So if you'd really like to support our work, don't buy gear you don't need - support our consumer advocacy work and become a Member instead.
Learn more about affiliate commissions, influencer marketing, and our consumer advocacy work by reading our article Stop wasting money on gear.
The Elemental Horizons Kalais XT backpack (42.8 oz / 1213 g, $336) is a 60.4-liter pack meant to handle the harshest and most rugged conditions.
Introduction
The Elemental Horizons Kalais XT Pack (42.8 oz / 1213 g, $360) is a 60.4-liter pack (total capacity) meant to handle the harshest and most rugged conditions. The quality of the build and the durability of the construction make it conducive for backpacking with a heavy load and in variable environments. The hip belt and back padding along with the sturdy internal frame allow the pack to comfortably carry substantial weight.
Elemental Horizons Kalais XT photo by Elemental Horizons
About This Review
This Limited Review is based on my initial testing of this pack on a wide range of trails in Montana in April of 2020. I carried a variety of weights on this backpack at faster hiking speeds as well as a more casual pace to assess the stability of the components and efficacy of the suspension.
Testing the Kalais XT on the Continental Divide in Montana spring weather.
Features and Specifications
MSRP: $360
Capacity: Total: 60.4 liters (3685 cu in).
Main compartment: 46.1 L (2816 cu in)
Front Pocket: 5.4 L (331 cu in)
Bottle Pocket: 7.2 L (442 cu in)
Hip Belt Pockets: 1.6 L (96 cu in)
Weight: 42.8 ounces (1213 grams)
Materials
X-Pac VX21
Dyneema X
Stays are directly connected to hip-belt and shoulder-strap
Dual-density hip belt
Adjustable torso length
Bear canister compatible
Five pockets
Made in the USA
Testing the Kalais XT pack at a Montana alpine lake
Performance Assessment
Criteria
Observations and Issues
Adjustability
The dual independent straps on the hip belt allow easy adjustments while hiking. They squarely rest on the hips and don’t move even with large amounts of weight. The multiple connection points, roll-top, and dual cinch point can compress the bag when carrying less gear.
Load-bearing/comfort
The load lifters, wide hip belt, and three compression straps per side hold the weight close to the body. The dual strap adjustability on the hip belt limits excess movement and keeps the pack resting comfortably.
Organizational capacity
The breadth of external storage sets this pack apart. The back contains a stuff pocket, elastic cordage, and three compression straps. Gear and accessories can be strapped to the outside of the pack for drying or additional capacity.
Durability
The X-Pac material holds up well, and shows little sign of wearing out after the testing period. The backpack frame maintains its integrity and even the bathtub bottom is unscathed after multiple drops on the ground.
Commentary
What makes the Elemental Horizons Kalais XT Pack Unique?
The Elemental Horizons Kalais XT Pack is unique in terms of durability, storage options, adjustability, and versatility. The numerous straps, buckles, elastic, clasps, and loops allow both large amounts of gear and weight to be carried, both inside and outside the pack. The roll-top and multiple compression straps allow it to be snugly cinched to the body and constricted when carrying a smaller load. The Kalais XT is rated for up to 45 pounds (20.5 kg).
The Kalais XT has multiple straps, back mesh pocket, and cordage to aid in external storage of gear such as a fishing rod.
This pack uses several durable fabrics and comes with different adjustment options and organization features. Here are a few that stand out:
X-Pac fabric construction
Multiple external storage options
Compression and adjustability
Versatility with multiple weights
X-Pac Fabric Construction
X-Pac is a composite fabric. Multiple sheets are laminated to form a single sturdy layer. X-Pac is heavier but more durable than Dyneema composite fabrics and aids in the heartiness of the Kalais XT. The fabric showed few signs of wear despite many hours and miles of testing.
Multiple External Storage Options
The stuff pocket, elastic-topped water bottle pockets, elastic webbing, and multiple compression straps give the ability to carry gear externally. Outside of the waterproof compartment, wet items and soiled articles can easily be separated from the more protected interior. The ease of use and independence of each buckle and strap offers multiple creative alternatives to separate gear and stow it inside or outside of the pack. The dual water bottle pockets on each side are large and can fit multiple bottles. The pockets are secured with elastic cordage.
Compression and Adjustability
The adjustability of the hip belt and the variable and customizable length of the torso section aid in the perfect fit and carry for loads both big and small. The compression and roll-top style allow the main pocket to be compressed for any size carry.
The roll-top, large side pockets, and compression straps aid in carrying large loads.
Versatility with Multiple Weights
The removable hip belt, numerous loops, and options to fasten gear to the pack, and the adjustable torso length lend this pack to a variety of uses. A bear canister fits within the main compartment along with all the necessities for trips into bear territory. The rigid frame and pack construction are designed to carry heavy loads. The versatility means the Kalais XT can be used for long distances with heavy carries, as well as shorter sections once the pack is compressed. It could seemingly be used for both long-distance hiking and day hikes while maintaining integrity as a versatile backpack.
Mariposa is 10 ounces lighter when both hip belts are included.
Mariposa
Price
Mariposa is $90 less expensive with the hip belt included
Mariposa
Load Limit
Kalais XT is rated for 45 pounds and the Mariposa sits at 35
Kalais XT
Adjustability
Kalais has 4 torso size options, five hip belt sizes and mens and women’s harness styles
Kalais XT
Customizability
Each Kalais XT Pack is custom made with a modular approach of adding or omitting accessories based on each order
Kalais XT
Durability
Kalais XT Pack containing the X-Pac material holds up better
Kalais XT
Strengths
The adjustability of the torso length along with the compression options.
Multiple compression straps help customize the pack for each individual and also specific trips. For shorter trips with less gear, the internal compartment can be cinched tighter and hold the smaller amount of gear closer to the body, while on longer expeditions the compression straps can either be neglected or loosened.
The durability of the pack is aided by the numerous points of contact, a sturdy harness system, and X-Pac fabric. Despite long trips and the rugged Montana terrain, my Kalais XT looks nearly new.
The load-carrying ability makes the pack unique. The pack is rated for up to 45 pounds (20.5 kg) and the hip belt is designed to distribute this much weight throughout the body. The width and dual strap style of the belt spread the weight over a larger surface area than comparable packs with a narrower hip belt.
The dual strap padded hip belt is fully adjustable to find the perfect fit.
Limitations
Price: The durability, adjustability, and the multitude of features come at a price. At $360, this pack is priced moderately higher than other comparable packs.
Weight: In conjunction with the heavier frame and adjustability of the backpack, it could exceed the weight range for hikers on shorter sections.
Excess cordage and straps: While the adjustability and the ability to hang gear and clothing on the outside of the pack can aid in specific situations such as rapidly changing weather, there are enough loops and cords that I cannot see myself using all of them at any one time. While not necessarily a limitation, I do not see a use for some of the straps and cordage.
The Kalais XT pack sitting on the edge of the Madison River in Montana
Product mentions in this article are made by the author with no compensation in return. In addition, Backpacking Light does not accept compensation or donated/discounted products in exchange for product mentions or placements in editorial coverage.
Some (but not all) of the links in this review may be affiliate links. If you click on one of these links and visit one of our affiliate partners (usually a retailer site), and subsequently place an order with that retailer, we receive a commission on your entire order, which varies between 3% and 15% of the purchase price. Affiliate commissions represent less than 15% of Backpacking Light's gross revenue. More than 70% of our revenue comes from Membership Fees. So if you'd really like to support our work, don't buy gear you don't need - support our consumer advocacy work and become a Member instead.
Learn more about affiliate commissions, influencer marketing, and our consumer advocacy work by reading our article Stop wasting money on gear.
Membership Required
This feature requires an active Backpacking Light Membership.
Premium Articles
You're currently viewing a free preview of a member exclusive premium article. Our premium articles include in depth journalism and insights from the Backpacking Light editorial team.
Get full article access by subscribing to a Premium or Unlimited Backpacking Light membership!