In this post, we share about Backpacking Light’s plans for its next phase of website development. Over the past several months, we have been vetting enterprise website development agencies. We have made our final decision and are excited to announce that we are building a new site and plan to launch it in 2021.
Updates
8/25/2020 – Phase 1 (moving the production site to a dedicated physical server) is now complete
9/28/2020 – Phase 2 is now complete
12/31/2020 – Phase 3 is now complete
Currently in Phase 4 (development) – on schedule
Intro
In this post, we share Backpacking Light’s plans for its next phase of website development. Over the past several months, we have been vetting enterprise website development agencies. We have made our final decision and are excited to announce that we are building a new site and plan to launch it in 2021.
First, let’s talk about what’s around the corner, and then what’s on the longer-term radar.
New Site Search Engine
In 2018, we solicited feedback from our membership about site search, and the difficulty members had in finding content in our article library and forums. This remains our users’ #1 pain point.
In 2019, we designed the specs for our new site search and started building the new search engine in the fall. Earlier this spring, we distributed a beta version to Unlimited Members who gave us invaluable feedback about it. We’ve incorporated nearly every suggestion submitted by several hundred Unlimited Members, and we’re now getting ready to roll it out to everyone! We will be replacing the old site search with this new search engine before the end of the month.
Here’s a preview of what’s coming:
What’s Next?
We invested in a custom-built platform and server architecture in 2007 and ran on that platform until 2015. In mid-2015, our hosting and development company abruptly announced that they were ceasing operations, and we only had a few months to build a new site. That site was developed rapidly and launched in November of 2015. The primary goal of the 2015 transition was to maintain continuity of our website and content – it was not to be a long-term solution. But at the time, we didn’t have the resources to manage a new ground-up development effort, so we have had to make do with that site until now.
The primary challenges with that site were related to security and speed. It became clear that we would need to invest substantial resources to lay the foundation of a highly secure, fast, and scalable server architecture. So 2016-2017 became a period of saving money to pay for the transition to our first enterprise server environment. The focus of our web development efforts in 2018-2019 has been primarily on developing and optimizing that server architecture, so we could begin website redevelopment/redesign efforts in 2020.
BPL has close to two million forum posts, articles, member profiles, and other content records stored in 175+ different databases. These databases are interdependent and accessed by several hundred users online at a time with complex queries. Maintaining stability and speed is an enormously challenging problem that’s a balancing act between server resources, database optimization via regular maintenance, and continued new development to maintain state-of-the-art data access and delivery code. As our current site ages, it becomes more difficult to maintain because we didn’t have the time or resources to develop scalable architecture in 2015.
And so, here’s what’s next.
1. We have increased our budget for website support and maintenance and have hired a new website support agency.
Maintaining the website effectively, including fixing bugs that pop up when code updates are installed, is a complicated and expensive process due to the complexity of the website and the extent of its customization. On an enterprise site like ours, bug fixes require validation and source analysis, a fix proposal, code writing, code review, testing on a staging server, migration to the production server, and testing on the production server. We have to maintain very strict standards for change control to maintain the security, speed, and stability of the site.
We retained a new website support services agency that will be providing site monitoring, security, and maintenance services for us. Because of the complexity and size of the BPL website, there is a substantial onboarding/training/transition period, and they won’t be up to full speed until later this summer. This is the agency that will be handling our site maintenance including routine code updates and bug fixes. Moving to an outside support agency comes with a substantial cost (consider that at least 10-15 hours per month of developer hours are required to maintain BPL at rates of $150 to $200 an hour and you get an idea of what sort of commitment this is).
2. We are adding an additional community moderator who will focus on website issues.
We are seeking an additional moderator from our community who will help us manage bug reports and communications between the BPL community and the website support and development team. This moderator’s responsibilities would include:
Acknowledging new bug reports, logging them in BPLTrac, and communicating them to the website support and development staff (here’s how we process bug reports).
Two-way communications with our staff in our company’s internal Slack channel, so the moderator can participate in real-time internal communications about website issues.
Communicating progress back to the community with updates about bug reports and other website issues.
If you’re interested in this role, have a reasonable understanding of how web development and web technologies work, have a diplomatic disposition, and are able to communicate technical information to a lay audience, please drop me a note at publisher@backpackinglight.com.
3. We are about to finish our 2-year transition to enterprise server architecture.
Site security, speed, and stability comprise the most important foundational pillars of a healthy site, and we knew we had to get these things right before embarking on any major development projects. Since 2015, we’ve experienced issues with speed and stability. And in the past 18 months, attempts at breaching our site security have grown more than tenfold. We now block 30% of attempted traffic to the BPL site. This traffic is the direct result of malicious bots and known hacking networks attempting to steal passwords and other user data, overwhelm server resources, and inject malware into the site. Such is the nature of the new internet. It’s normal, but serious and requires money and infrastructure to combat it and protect our user data. Security will always be our #1 priority.
Last month, we took another step in what has been a 2-year transition period to new server architecture. We now host BPL on a custom-configured enterprise-class server with enterprise-grade security systems in place to protect user data and site functionality. This was a critical step to achieve the security, speed, and stability required for scale, and to proceed with further development.
We have one more phase in building out our enterprise server architecture:
Decoupling database operations from the rest of the site (where database ops are processed on a different server than the rest of our ops) In early August after tests on a dedicated vs. decoupled server, we made the decision instead to upgrade our server architecture to a dedicated server with a local database. While more expensive, it will result in substantially better performance. This upgrade is schedule for August 7-10, 2020
Finishing installation of state-of-the-art security protocols to take advantage of the security policy compliance opportunities afforded by the most modern browsers.
This is the focus of 3Q2020.
Once this foundation of security, stability, and speed is established, we can then proceed to the next era of backpackinglight.com.
4. We have started building the next Backpackinglight.com website.
The site we launched in 2015 was an attempt to re-create the functionality of the pre-2015 site with minimal UI (user interface) disruption to our community. We knew we couldn’t create a modern user experience with the resources and time constraints that we had. As such, the BPL site as it exists today is inelegant, with an aging user interface. In particular, forums have limited functionality, ad injection clutters the site in unpredictable ways, the article reading experience is clunky, managing member accounts and profiles is difficult, online course delivery is antiquated, and styling is inconsistent across site sections.
Our mission for the next site is:
Completely update the user interface, site design, and functionality so the user experience is enjoyable – refreshing, easy, fast, intuitive, immersive with our content, and able to connect members of our community in more meaningful ways.
We have retained the services of a website development agency that specializes in custom-built sites for media publishers with large memberships and forum communities, online courses, and robust content publishing/content management platforms. We’ve reviewed their work, worked with them on preliminary scoping, and conducted due diligence with several of their previous clients. They are among the very best UI/UX designers of membership communities in the world.
Our plan is to launch the new site in May 2021.
Here’s our development timeline. We will update our membership as we progress, and let you know which items have been completed so you can see exactly where we’re at on our schedule.
Combined with our existing enterprise server architecture, the next website will usher in a new era for BPL. It will give us the opportunity to:
Implement modern website design and user interface standards to vastly improve the user experience at the site – allowing us to maintain modernity into the future without major redesigns of underlying architecture;
Create a platform with scalable maintenance and speed in response to continued growth;
Offer features and functionality that will enhance member experiences at the site, including community, content discovery/curation, site search, and online course delivery.
It became clear in 2015 that we needed to put a plan in place to create a state-of-the-art website that served the needs of our community. We’re excited to enter this next phase of our transition because this is the phase that results in dramatic improvements in user experience for our community.
The reasons for the lengthy time frame to get to this point are simple:
This final piece of development – the new site design – carries a substantial price tag. It will require 300 to 400 hours of high-level engineering by outside developers at rates of $120 to $180 an hour. That’s on top of annual server and tech maintenance costs that are also very expensive. I’m debt-averse and am committed to paying cash for a new website. That means money has to be saved. It takes time to save that much money, and time to ensure that we have enough operating cash flow reserves to properly commit to ongoing maintenance when we take on these new recurring expenses.
It takes time to research, study options, and make decisions that have the potential to impact our operations for several years into the future.
It’s easy to burn money on development efforts that have short-term impacts, but doing so can result in dramatic losses of long-term opportunities that require substantial cash reserves. This is the universal challenge of all entrepreneurial endeavors. It didn’t take long before we realized that the 2015 site was not going to be a long-term solution, so I prioritized saving cash for tomorrow’s build rather than trying to continue hacking together a disjointed site and missing out on this current opportunity. The downside of this unpopular business management strategy, however, is that it frustrates our users when we make the decision not to make their requests for site features and functionality a higher priority during periods where we are saving cash for large projects. I understand that frustration.
Your Feedback is Essential: Take the Survey
We will be soliciting feedback from our community throughout this process.
Today, we’d like to invite you to participate in this very short survey so we can gather feedback that will help us during the design phase. This information goes straight to the development agency, so it’s critical that if you want your feedback to be heard and processed by the folks that are actually building the new site, that you do so in this survey!
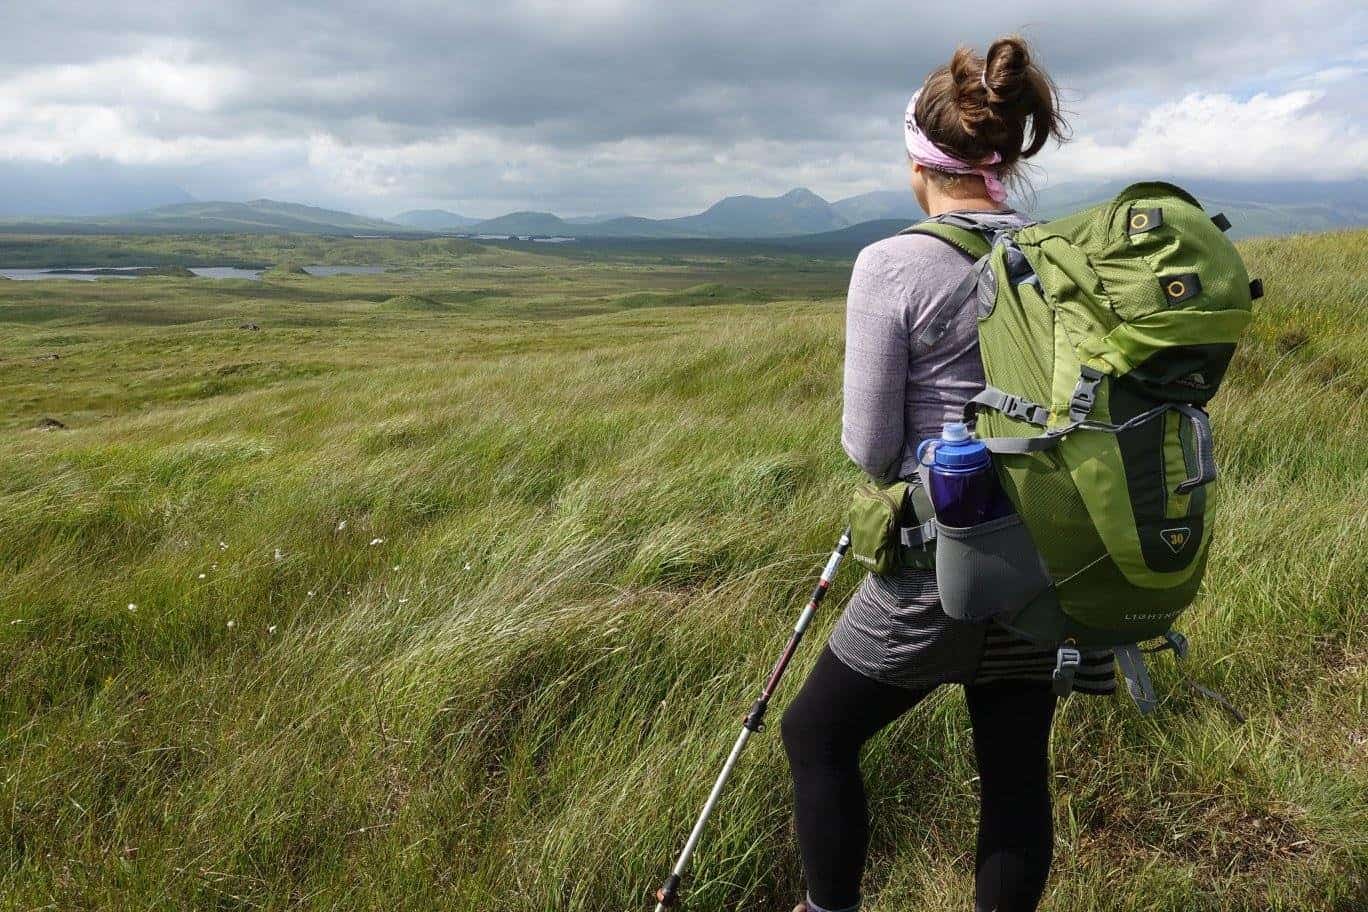
How is it possible to spend three-to-six months walking through the woods and still have a relationship left to come home to? In this article, I chat with a mental health expert and share some tips to help you maintain a strong relationship while backpacking.
Introduction
How is it possible to spend three-to-six months walking through the woods and still have a relationship left to come home to? In this article, I chat with a mental health expert and share some tips to help you keep your relationship strong while backpacking.
Let’s go back in time. Six days after I completed my southbound thru-hike of the Appalachian Trail, I looked up from a plate of chimichangas and asked my fiance how she’d feel if I tackled the Pacific Crest Trail the next summer.
Every committed relationship has its own secret dialect: a subtle combination of spoken words and body language. But I’d just spent the last four-and-a-half months walking through the woods and mostly speaking to the same four or five dudes. And so I missed the obvious clues that I was treading on, shall we say, off-camber ground with the woman I was about to marry. The resulting conversation – fueled by too many watery margaritas – lives on in my memory as the longest consecutive string of regrettable things I’ve said in under an hour.
Naturally enough, my soon-to-be-wife was not enthused at the prospect of her new husband shouldering a pack and vanishing into the California desert mere months after doffing his wedding suit. Less forgivably (but perhaps still understandably) I was chafing at the thought of my lifestyle being curtailed by domestic restrictions. Things got so bad that the mariachi band didn’t even bother approaching our table. They were better at reading my fiance’s body language than I was.
Let me just stop here and say that seven years later we are still enjoying a deeply rewarding marriage. We’ve even come to a gentle compromise regarding my tendency to strike out for the territories. We’ve cobbled it together over the better part of a decade through trial-and-error, wise advice, increasing maturity, and a certain amount of luck.
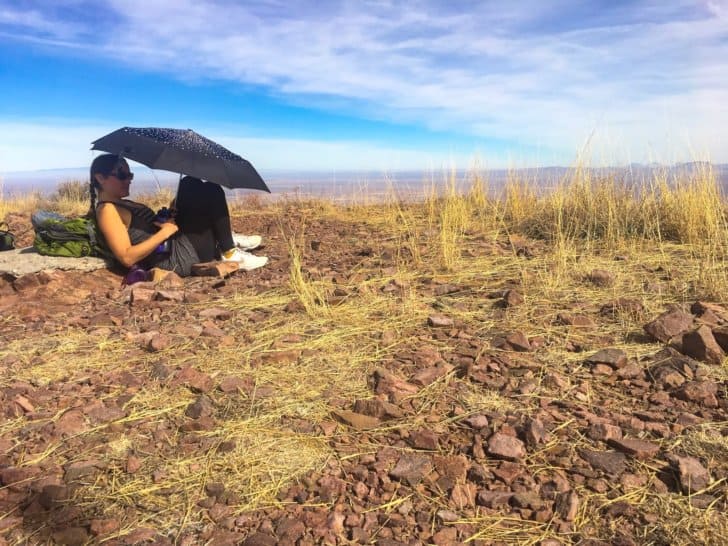
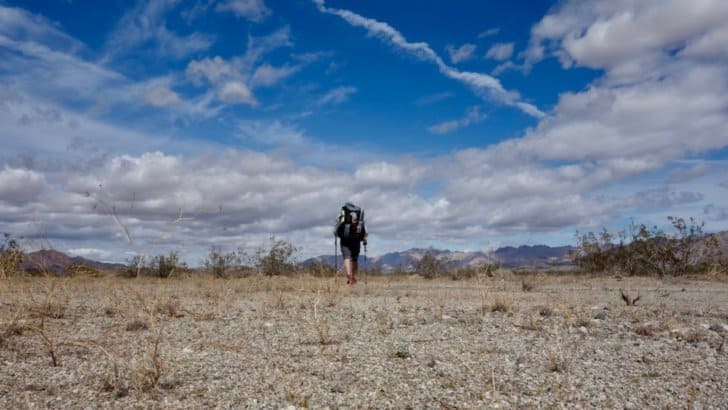
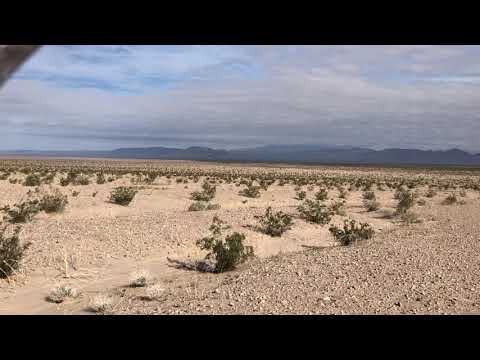
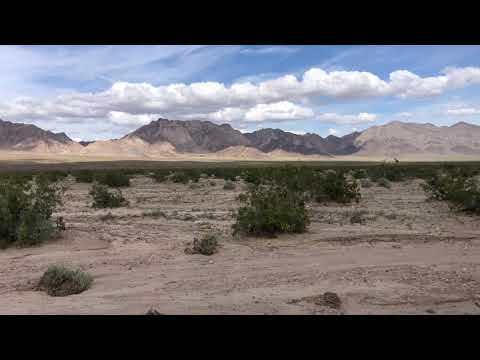
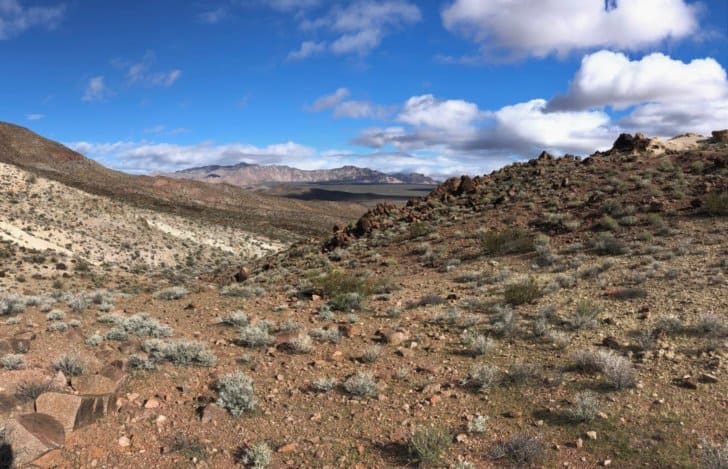
The author and his wife find a shady spot during a hike in southern New Mexico.
I set out to write this article to pass along what I’ve learned. But at the end of the day, I’m just a writer who likes to hang out by myself in the mountains, and it struck me that just about every descriptor in that previous sentence disqualifies me from giving relationship advice. So I’ve enlisted the help of an expert, Mary-Catherine Riner, Ph.D., Ed.S, M.S., and all-around relationship expert.
If you’ve already figured out how to keep your relationship strong while engaging in solo long-distance human-powered adventures, the following article might be useful to you for note comparison. If you are just dipping a toe into this world, maybe this article can shorten your learning curve, thereby reducing the frequency of placing your trail-runner clad foot directly into your mouth.
The Emotional Bank Account
Let’s start with the big question. How the heck is it possible to spend three-to-six months walking through the woods and still have a relationship left to come home to?
A big part of it is a concept called “the emotional bank account.”
“Relationships are never 50/50.” says Riner as we settle into our interview. “If you find a relationship that is 50/50 I would be shocked. Some seasons it’s going to be 70/30, some seasons it’s going to be 40/60, and some seasons it’s going to be 90/10. So you’re in it for the long haul. So if you are looking at six months for example, then how do you look at the other half of the calendar and really buffer that? How do we create a strong emotional bank account?”
What she’s getting at is that if you know you are leaving for Springer Mountain in early March, you need to be spending at least September through February going way above and beyond the normal effort you spend on your relationship. And then you need to do the same when you get home. You just took a long, long time doing something that was all about you. So take an equal amount of time and make life about your partner. You have to put in more than you take out, preferably before you take it out.
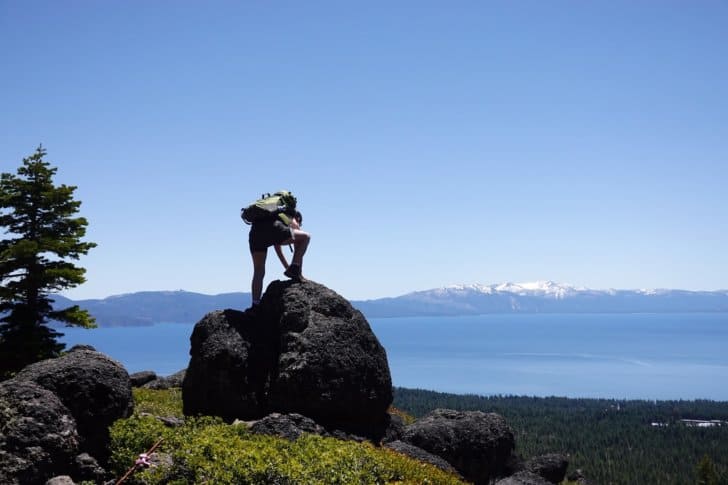
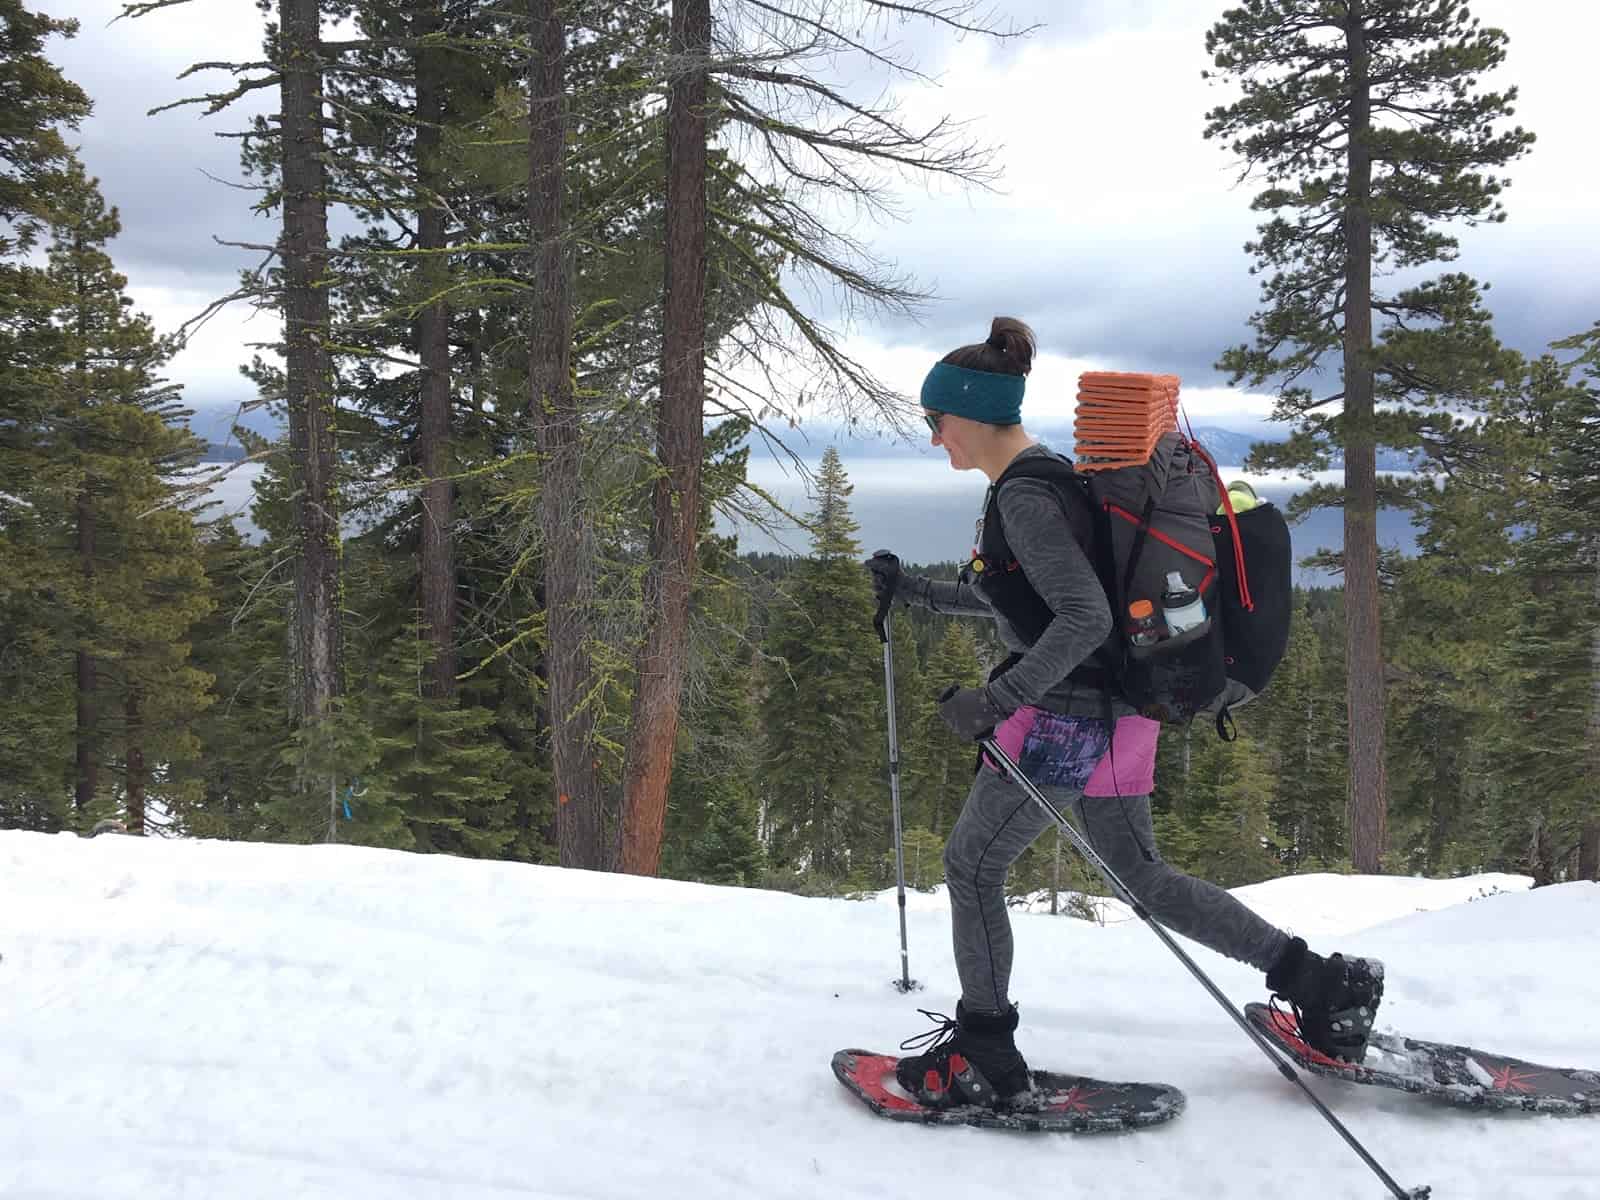
The author’s wife scrambling up a boulder above Lake Tahoe. Plenty of day hikes together is a good way to spend quality time before going off on solo adventures.
To a certain extent, this seems obvious (or at least it seems obvious to anyone with more emotional intelligence than I possessed at 26). But there’s a widely known phenomenon common amongst long-distance adventurers. In the weeks before and after finishing a long trek, it’s hard not to think about what’s next. Adventuring life is so radically different from first-world culture, and our bodies are so well-calibrated to moving every day in the outdoors, that ending an adventure can be like withdrawing from a powerfully addictive substance. It’s a complex set of feelings to wrestle with, and it can blind you to the needs of those around you.
And that’s totally understandable. I daresay a committed and emotionally mature partner will find thoughts (and eventually vocalizations) of the next adventure totally acceptable – if their emotional bank account is being replenished. Otherwise, as Riner says, “…fights will happen more frequently, and become more and more resentment based.”
Meeting Needs
Communication is super important. Not the headline of the year, I know, but how many couples do you know who seem a little oblivious to this concept?
Ideally, you should be communicating your lifestyle and needs to a partner very early in the relationship, so they know that doing quasi-risky things in remote locations is how your brain makes feel-good juice for you. As Riner puts it, “most people who like sensation-seeking don’t just develop it overnight.” Being communicative upfront (and not confrontational) about your lifestyle is a great way to still be adventuring if and when your twenty-year anniversary rolls around.
It’s important to meet your partner’s needs as well (maybe the title of this article should be “It’s Not All About You!”). In order to meet their needs you have to, you know, ask them what their needs are (don’t wait around for them to volunteer the information. Be proactive).
Ask, “while I’m gone, what will make you feel close to me?” These are not easy conversations to have. As Riner says, “Setting those intentions and mutual communication without…being vague or broad is difficult. There’s a lot of grey area…people have to stretch themselves to uncomfortable places to talk about that.”
Riner recommends approaching these conversations within the context of the “love languages” concept. You’ve probably heard of this: it’s the idea that you can roughly group everyone’s relational needs into five categories – words of affirmation, quality time, receiving gifts, acts of service, or physical touch. Figure out which ones matter most to your partner, then go out of your way to make it happen before, during, and after your adventure.
For words of affirmation and gifts, Riner suggests writing letters, leaving gifts and notes around the house while you are gone, and staying in contact as much as possible during your trip. Yep. Get over your Luddism. Get a satellite communicator and stay in touch with your partner. It’s an investment in your future.
Quality time, acts of service, and physical touch can be a little harder to accomplish while on a trek. That’s why you have to make deposits into your partner’s emotional bank account using these love languages before and after your trip. If possible, try to arrange things so your partner can see you at the halfway mark or at some other point in your adventure. If you can drop a few hundred dollars on a shelter, you can do the same for an airline ticket if getting to see you meets your partner’s needs.
Once you’ve committed to meeting your partner’s needs in a certain way, follow-through is crucial. Setting reasonable, clear expectations is important. Meeting those expectations is doubly-so.
Changing Seasons
So what about if you find Wild in a used bookstore and decide to hike the PCT fifteen-years into a relationship – and you’ve never once mentioned a desire to backpack? It happens. Riner points out, “Things change – what you like at twenty and what you like at thirty might be different things. There’s an ebb and flow to life.”
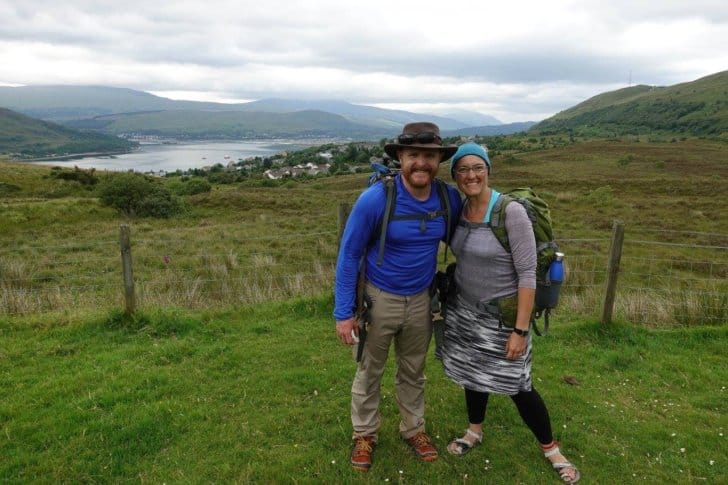
The author and his wife at the finish of their trek across Scotland.
The key, Riner says, is embracing the changeable nature of life. It’s harder than it sounds. We all know a couple who called it quits because someone in the relationship “just wasn’t the same anymore.” In these situations, Reiner says, “It’s both people’s responsibility to be honest and vulnerable and authentic and not to hide the parts of themselves that are the most true.”
So if you find yourself trying to break it to your partner that you are considering leaving their soft bed for a questionably comfortable sleeping pad for months at a time, the best policy is to not put it off. Be as open and descriptive of your need as possible, and trust that your partner is willing to do the needed work on their end.
Dealing with Worry and Fear
Speaking of which, let’s talk about something your partner is going to have cope with: worry and fear. Riner told me that there are all kinds of fears that can crop up for your loved one while you are out in the woods: fear of being alone, fear of abandonment, fear of missing out, fear of not being a part of something, fear of not belonging. Some of these fears you can assuage with intentional thought and action (everything we just talked about above, for starters), but some of them are up to your partner to deal with.
In the early days of our relationship, my wife was often pretty fearful of my outdoor adventures. Buying tools to stay in communication (like a satellite messenger) and including her in my adventures are two ways we mitigated that fear.
Riner says your partner needs to think about it this way: “How do we hold thoughts but not let them dictate our behaviors? There’s risk everywhere but you have to ask yourself what makes you[r partner] come alive. If your partner has to say no to the things that make him come alive, then how strong is the relationship going to be anyway, because if you don’t honor and recognize that part of them, then you are probably going to brew more resentment and depression.”
She goes on to say that your partner’s worry and fear is natural and that it’s okay for them to hold a space for that fear, but they should also be, “holding a bigger space for why [they] fell in love with [you] in the first place. [Your partner should ask themselves], do I really want to change that person or can I lean into this fear and also be excited that this person is pursuing their passion? It doesn’t have to be…a dichotomous thought.”
Maintaining Training, Maintaining Love
Recently I trained for and completed a marathon as part of my larger backpacking training cycle. I was astonished to realize the sheer time-suck training for such an undertaking involves. Luckily I’d just completed research on this article, and was able to apply an actionable tip that Riner gave me to avoid draining my wife’s emotional bank account right before I left for an extended time in the woods.
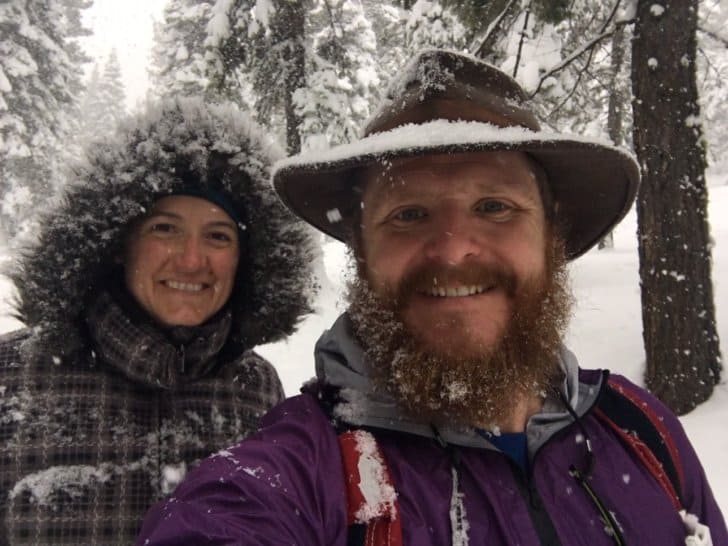
My wife loves to snowshoe. I prefer to ski. It’s okay that we develop and maintain different interests around the outdoors.
Riner’s suggestion is this: that every person in the relationship needs eight hours a week just for themselves. This time can come spread out or in one or two large blocks, but the point is neither person in the relationship needs to ask permission or forgiveness for how the time is used.
At the same time, the relationship also needs eight hours of guaranteed, locked-in time per-week. If possible, sit down and schedule your week, or your month, out. This isn’t always realistic, of course, but the more you make your relationship a priority, the easier it is for each person to take the (much needed) time for themselves. I used my eight hours for extra training time, and my wife used hers to read. Both of us came away from our dedicated time more able to build into each other during our relationship time, and the net result is each of our emotional bank accounts was full before I walked into the mountains.
Adventuring Together
Of course, one way to approach this whole issue is to simply adventure together. This outcome is quite common, either because your mutual interests are what attracted you to your partner in the first place, or because it’s in the nature of relationships to grow to love the things your partner loves. But be careful not to think that a long or intense adventure will save a failing relationship. While intense adventures can build powerful relationships, they also put existing relationships under stress. Your relationship needs to be firing on all cylinders before you take it into the mountains.
I often invite my wife on short trips while I’m testing gear. Ultralight backpacking isn’t really her thing though – and that’s okay.
Riner also cautions against loss of identity in these situations. “…if you do everything together, all the time, same situation, same person, you may kind of lose your sense of self through it. Or you may sacrifice in some ways, your values, or your roles around it,” she says.
Just because both people in the relationship like backpacking doesn’t mean you have to backpack together. You may have different goals, different speeds, and different styles. You may, in other words, want entirely different things out of the sport. So it’s best to make no assumptions. Be open to changing emotional circumstances, and re-assess each person’s needs before every adventure.
Going the Distance
The best adventure my wife and I ever undertook was our coast-to-coast trek across Scotland. We hiked fifteen-to-twenty miles a day, stayed in bed-and-breakfasts every night, and started each morning with a full Scottish breakfast. It’s the only adventure that I returned home heavier than I left.
Is this an ultralight kit? Nope. That wasn’t the point of this trip.
It was a beautiful and powerful moment in our relationship because it combined something I love (walking in the mountains) with something she loves (European travel) and created something new for each of us. My type-A reservations about trekking from BnB to BnB vanished the first time I ended a trekking day with a cold beer, a plate of fish and chips, and a soft bed. For my wife, it was just enough of a new experience for her to feel accomplished and connected to one corner of what I love to do, and she got a shower every night. Hard to beat.
My takeaway from our Scotland trip is that the best way to make my wife feel included in my adventuring life is not to force her to enjoy the things that I enjoy, but to figure out a way to combine our mutual interests into things that are fun for both of us. And so I do a lot more car camping than I used to. And she sleeps on the ground more often than she ever did. And we are having a blast.
We wouldn’t be if we (and, in particular, me) had shied away from the hard conversations that led us towards new understanding. I shudder to imagine our relationship if I’d ended our backpacking related spat with a dismissive “you knew who I was when you agreed to marry me, and now you have to deal with it.”
No relationship is perfect and no one is going to stay the same,” Riner says as we wrap up our conversation. To me, our chat felt less like an interview and more like a free marriage counseling session, and I couldn’t be more pleased.
“Life is always changing, life is always evolving. So if you lean in to ‘this may be uncertain and I can handle hard things, I can do hard things, I can be uncomfortable’, then you are setting yourself up for a lot more success.”
Her final point resonates powerfully with me. What is adventuring if not learning to be uncomfortable for the sake of an emotional, physical, or spiritual payoff? If we can learn to be uncomfortable in the woods, then we can learn to be uncomfortable in our relationships – honest, communicative, vulnerable, and, as a result of our discomfort, happy – and with relationships that can weather any mountain gale.
DISCLOSURE (Updated April 9, 2024)
Backpacking Light does not accept compensation or donated/discounted products in exchange for product mentions or placements in editorial coverage.
Some (but not all) of the links in this review may be affiliate links. If you click on one of these links and visit one of our affiliate partners (usually a retailer site), and subsequently place an order with that retailer, we receive a commission on your entire order, which varies between 3% and 15% of the purchase price. Affiliate commissions represent less than 15% of Backpacking Light's gross revenue. More than 70% of our revenue comes from Membership Fees. So if you'd really like to support our work, don't buy gear you don't need - support our consumer advocacy work and become a Member instead.
Learn more about affiliate commissions, influencer marketing, and our consumer advocacy work by reading our article Stop wasting money on gear.
Part 1 of a detailed account of our expedition down the Nahanni River by canoe, including our pre-trek preparation and training.
Series Notes
This is Part 1 of 2 of the series Traversing the Elusive Nahanni River.Read Part 2 here.
Introduction
“What are you doing in August?” Michael texts me in January 2019.
Though I usually have my life arranged in advance, I’m never organized more than six months prior.
“Nothing I know of yet,” I text back.
“Good, do you think you can get a few weeks off?” Michael asks.
“I can try,” I reply, still not knowing what he had in mind. Michael wanted to paddle the Nahanni River in the Northwest Territories (NT). I wasn’t going to pass this opportunity up for anything. Within a month, I arrange my schedule to accommodate being gone for most of August of 2019.
My Attachment to the North
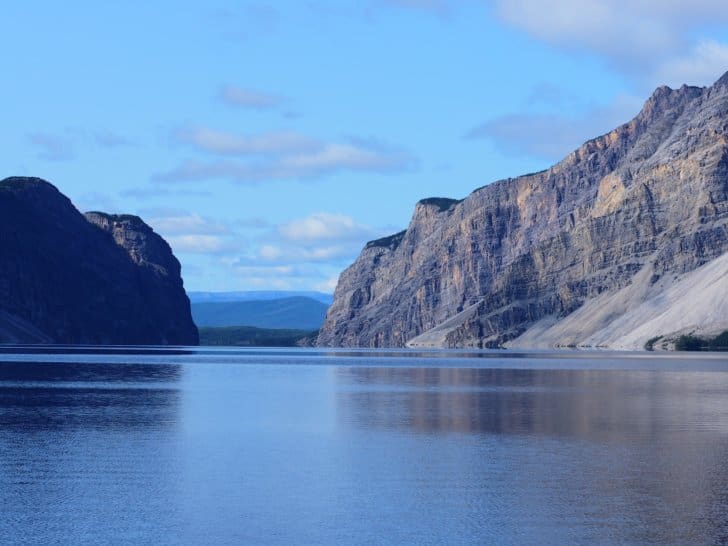
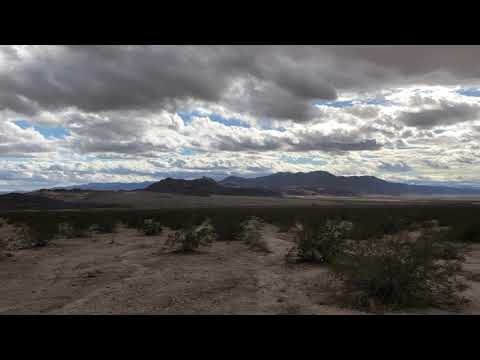
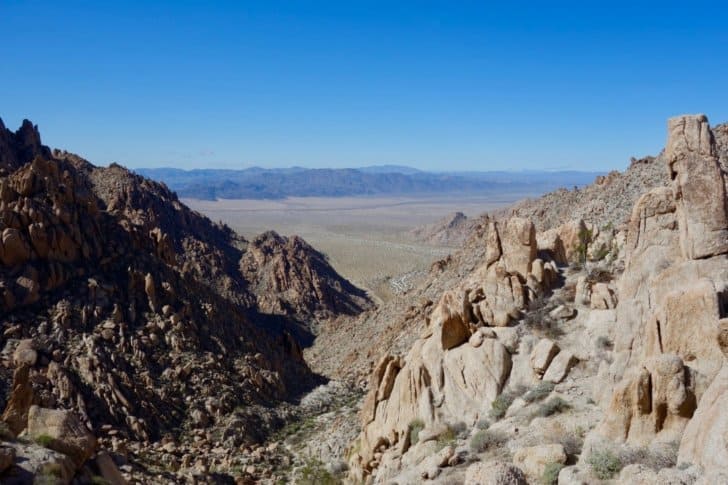
The Nahanni has a half-romantic and half-haunting allure. The area is probably one of the few truly wild places left in the world. In summer, it’s unpredictable, harsh, unforgiving, and remote. In winter, it’s only inhabitable by the fiercest and hardiest of any species.
I have been inching my way towards the far North for much of my life. Perhaps the first time I knew I would see the North was as a small child. As I sat on my Grandpa’s knee, he recited the Cremation of Sam McGee by Robert W. Service:
There are strange things done in the midnight sun
By the men who moil for gold;
The Arctic trails have their secret tales
That would make your blood run cold;
The Northern Lights have seen queer sights,
But the queerest they ever did see
Was that night on the marge of Lake Lebarge
I cremated Sam McGee.
Wonder, macabre curiosity, and an unquenchable wanderlust for the North filled my heart. I can still recite the entirety of a haunting poem that I memorized two decades ago.
My love of the North did not stop with Grandpa and Robert Service, though. It continued through reading every story Jack London wrote (a dozen times or more), and finally to the mystic Nahanni. Nahanni National Park Reserve holds the same kind of unearthly curiosity for me as an adult, as Sam McGee held for me as a child.
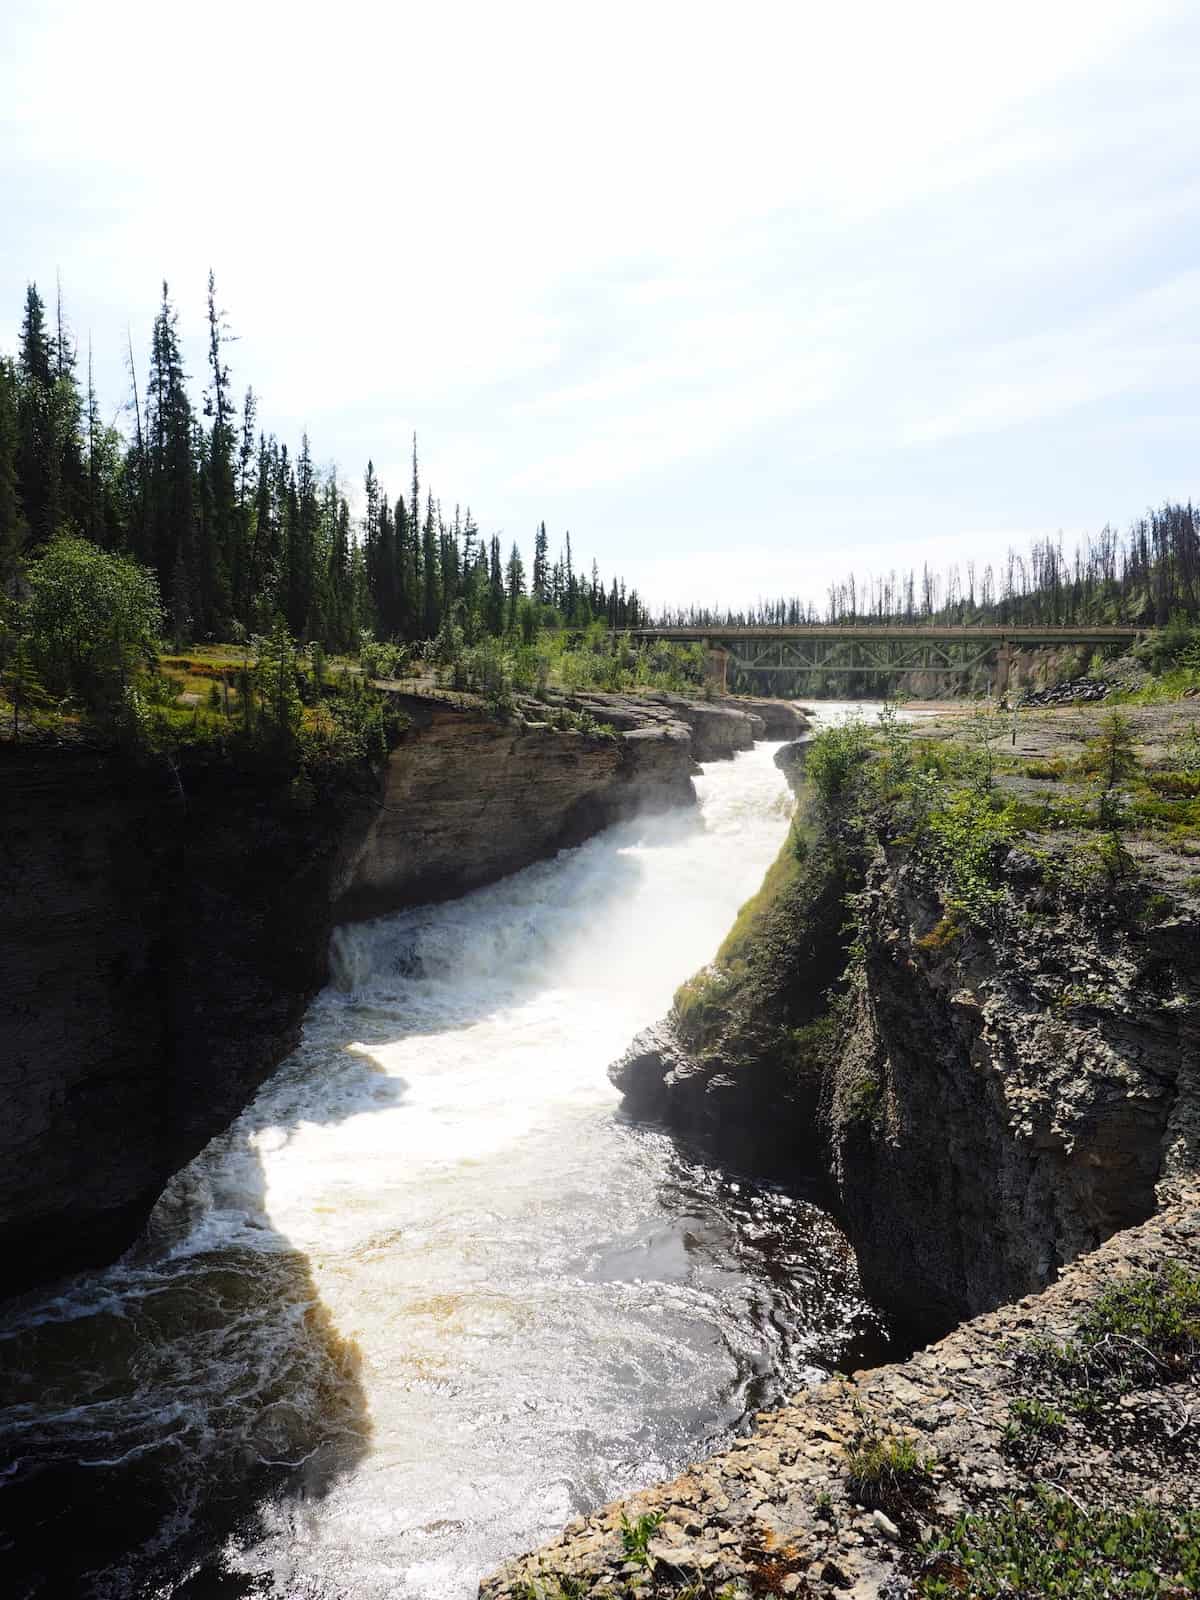
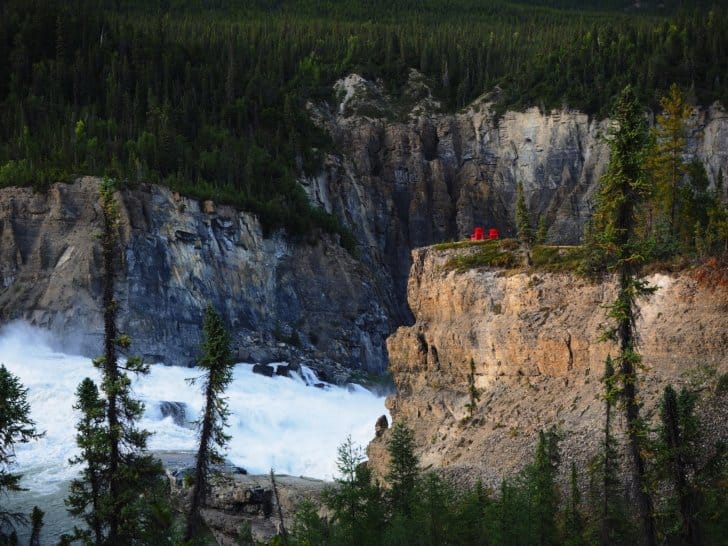
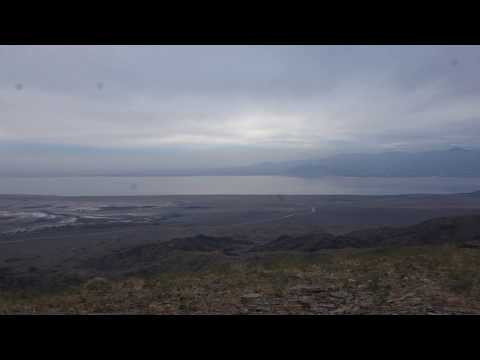
“The Cirque of the Unclimbables granite spires rise out of the lush alpine meadow, at Náįlįcho (Virginia Falls) the South Nahanni River surges over a drop twice the height of Niagara Falls.Nahanni National Park Reserve, encompassing 30,000 square kilometers, is a designated UNESCO world heritage site. The Dehcho First Nations welcome adventurers to Nahʔą Dehé, land of peaks, plateaus, and wild rivers.” Parks Canada boasted. I highly doubted it was an idle boast, either.
Developing Skills
In the back of my mind, my nerves frayed. I’m a backpacker who has paddled. I paddle well enough, but this was the outside edge of my skill. I am reaching, but I’m always reaching for the edge of possibility. This trip is the challenge I’ve been craving.
I know I need to adapt and adjust the lightweight backpacking theory to a different application. Canoeing is a different game; I know enough about it to realize I need to be flexible while still leveraging my skills. For leverage, I primarily require my ability to learn and adapt.
Risk Assessment
Nahanni is a massive river and by far the most prominent and fastest-moving river I have ever challenged. I could disappear into it without a trace. I’m not fond of the idea of becoming a statistic. Moreover, my biggest fear (after falling) is drowning.
Whitewater canoeing, unlike backpacking, isn’t always better to be ultralight. A canoe needs a ballast against rapids, waves, and wind, but lighter is easier to maneuver quickly. The ballast needs to fit into heavy dry bags and barrels and be lashed in with rope and carabiners. My skills in packing smaller and lighter will help, but almost two weeks of gear, food, backpacking, and camera equipment are dense and space consuming. If I have to swim or walk myself to help or safety, my ultralight backpacking will be an advantage. However, on the Nahanni, ultralighting will do next to nothing to mitigate rapids, strong currents, driving rains, or buffeting winds.
The remote and difficult to access area drastically restricts margin of error, I could be in trouble for over a week before anyone notices I’m missing. On many trips, it’s a day’s walk to the nearest highway or contact for help. In the Northwest Territories, it could be days or even weeks before aid reaches me and longer if I have to reach support myself.
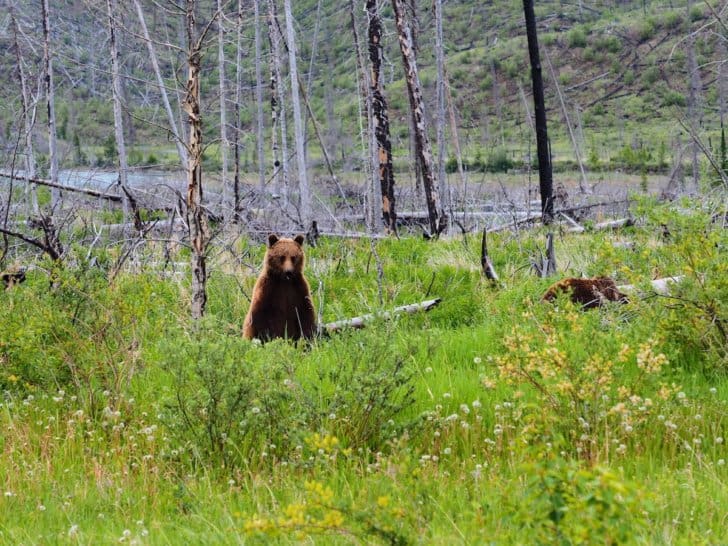
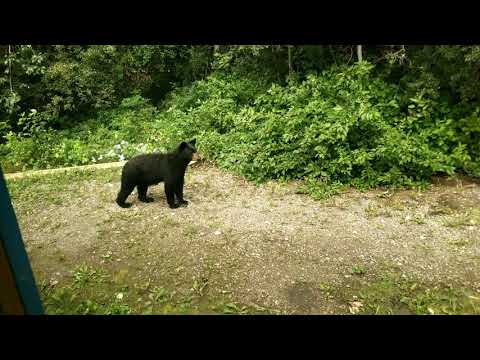
No discussion of potential risks is complete without mentioning the potential of sharing space with various bears, ungulates, and birds. I recently obtained a telephoto lens, and I’m interested in close-ups of anything the Northwest Territories offers, but from a healthy and respectful distance of course.
Practicing with my new telephoto lens, I had the opportunity of seeing a pair of grizzlies, up close and personal, without being in harm’s way. Nordegg, Alberta.
At least, I had considered a worst-case scenario and knew what I was getting myself into…. Well, mostly.
Logistics
A trip of this magnitude has logistics. To complete the Nahanni, we need the following:
Two proficient paddlers
An appropriate canoe
Gear of sufficient quality and quantity
Massive amounts of food
Extensive transportation
Planning
Training
Paddlers
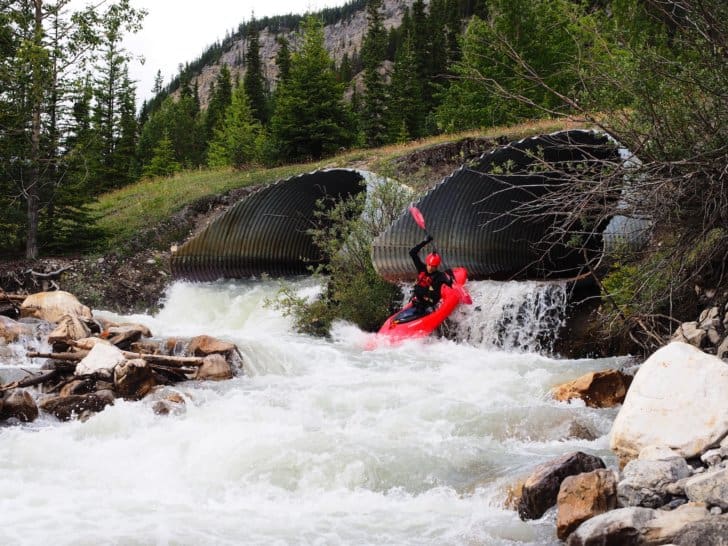
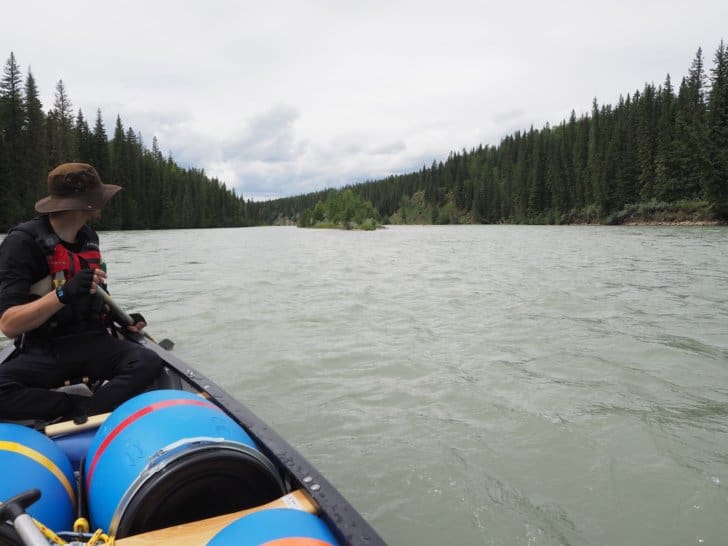
Michael, a swift-water rescue technician and a paramedic, has spent more time in a kayak or canoe on whitewater than the average river rat.
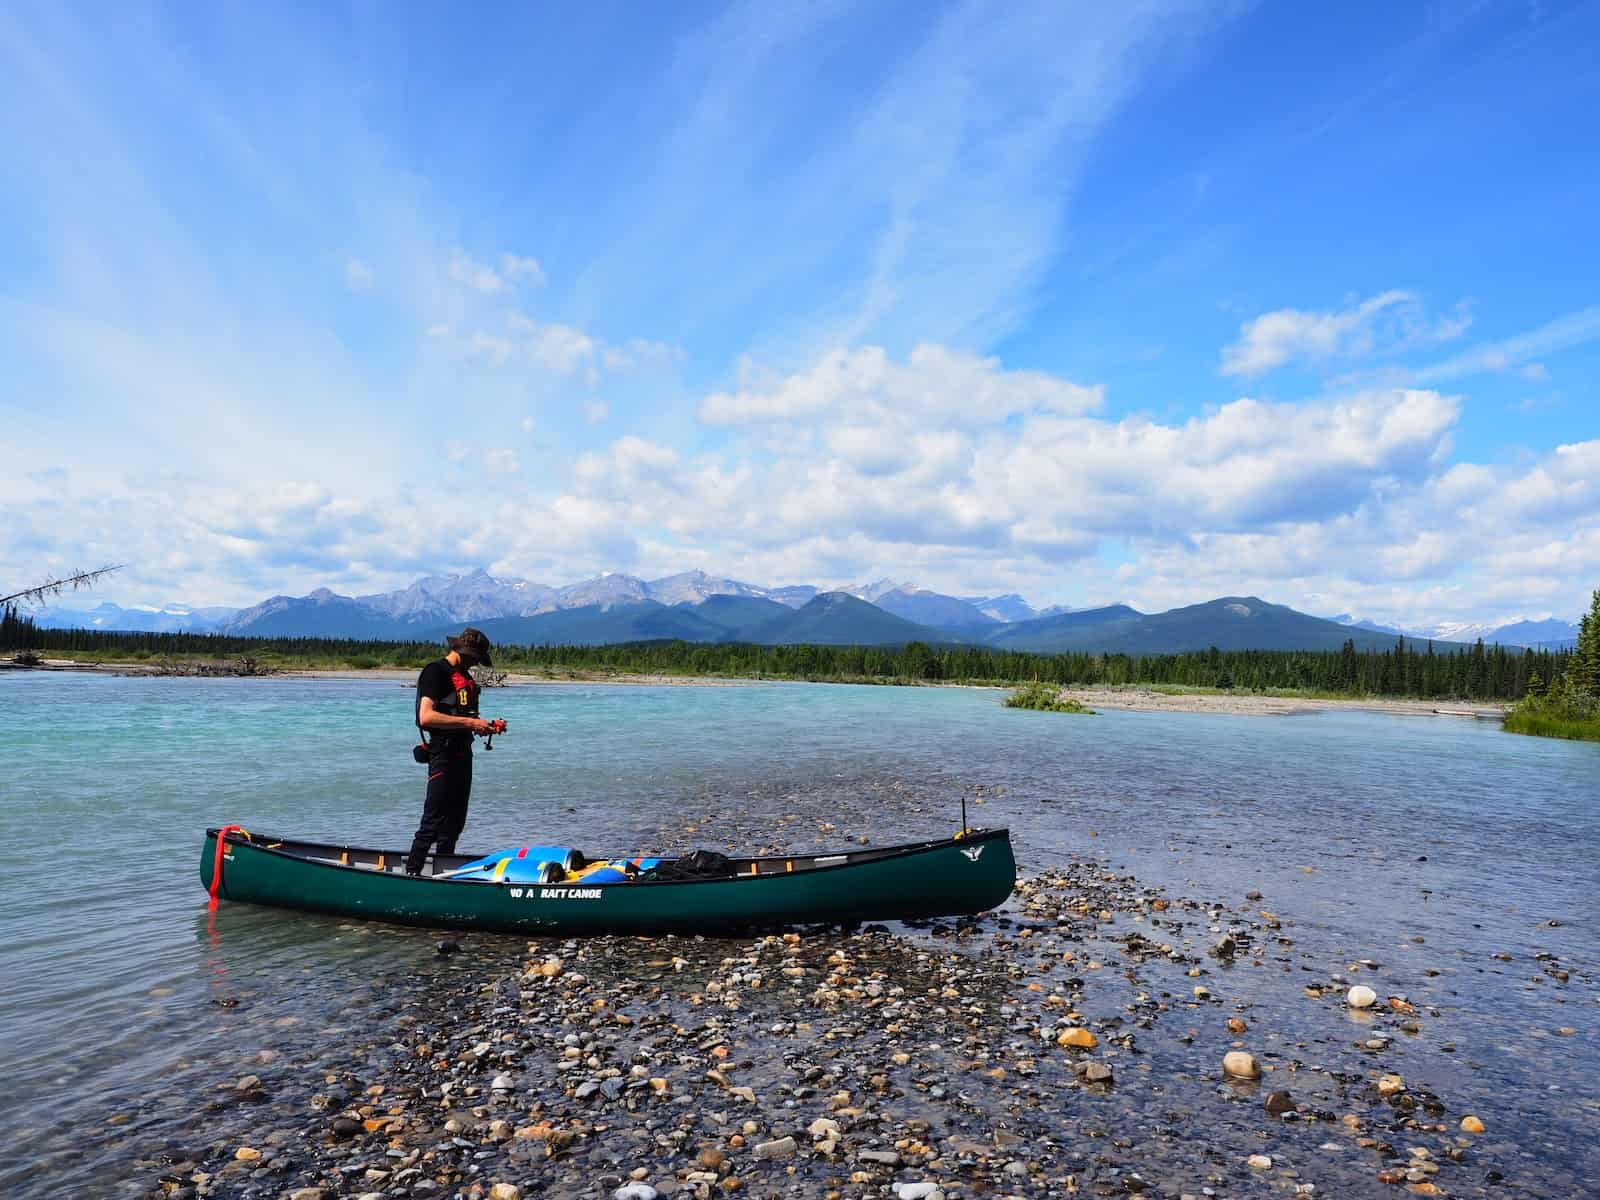
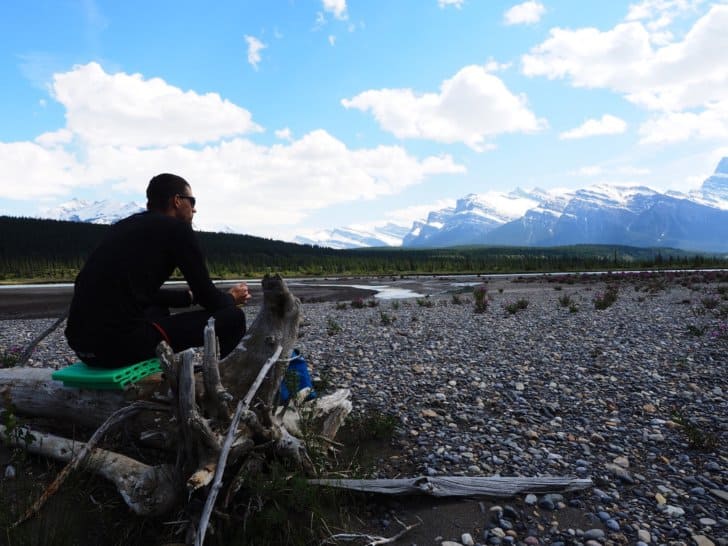
Michael paddling Rampart Creek, near Jasper, Alberta, Canada.
I know how to paddle and I am a proficient swimmer. I’ve spent a good deal of time paddling, surfing, and swimming, but have barely touched a paddle since anaccident back in 2015. My upper body suffered significant trauma. My recovery, though remarkable, has been slow. According to my physical therapy team, I owe much of my recovery to my fitness level, dogged determination, positive attitude towards a new normal, and continuously challenging limitations.
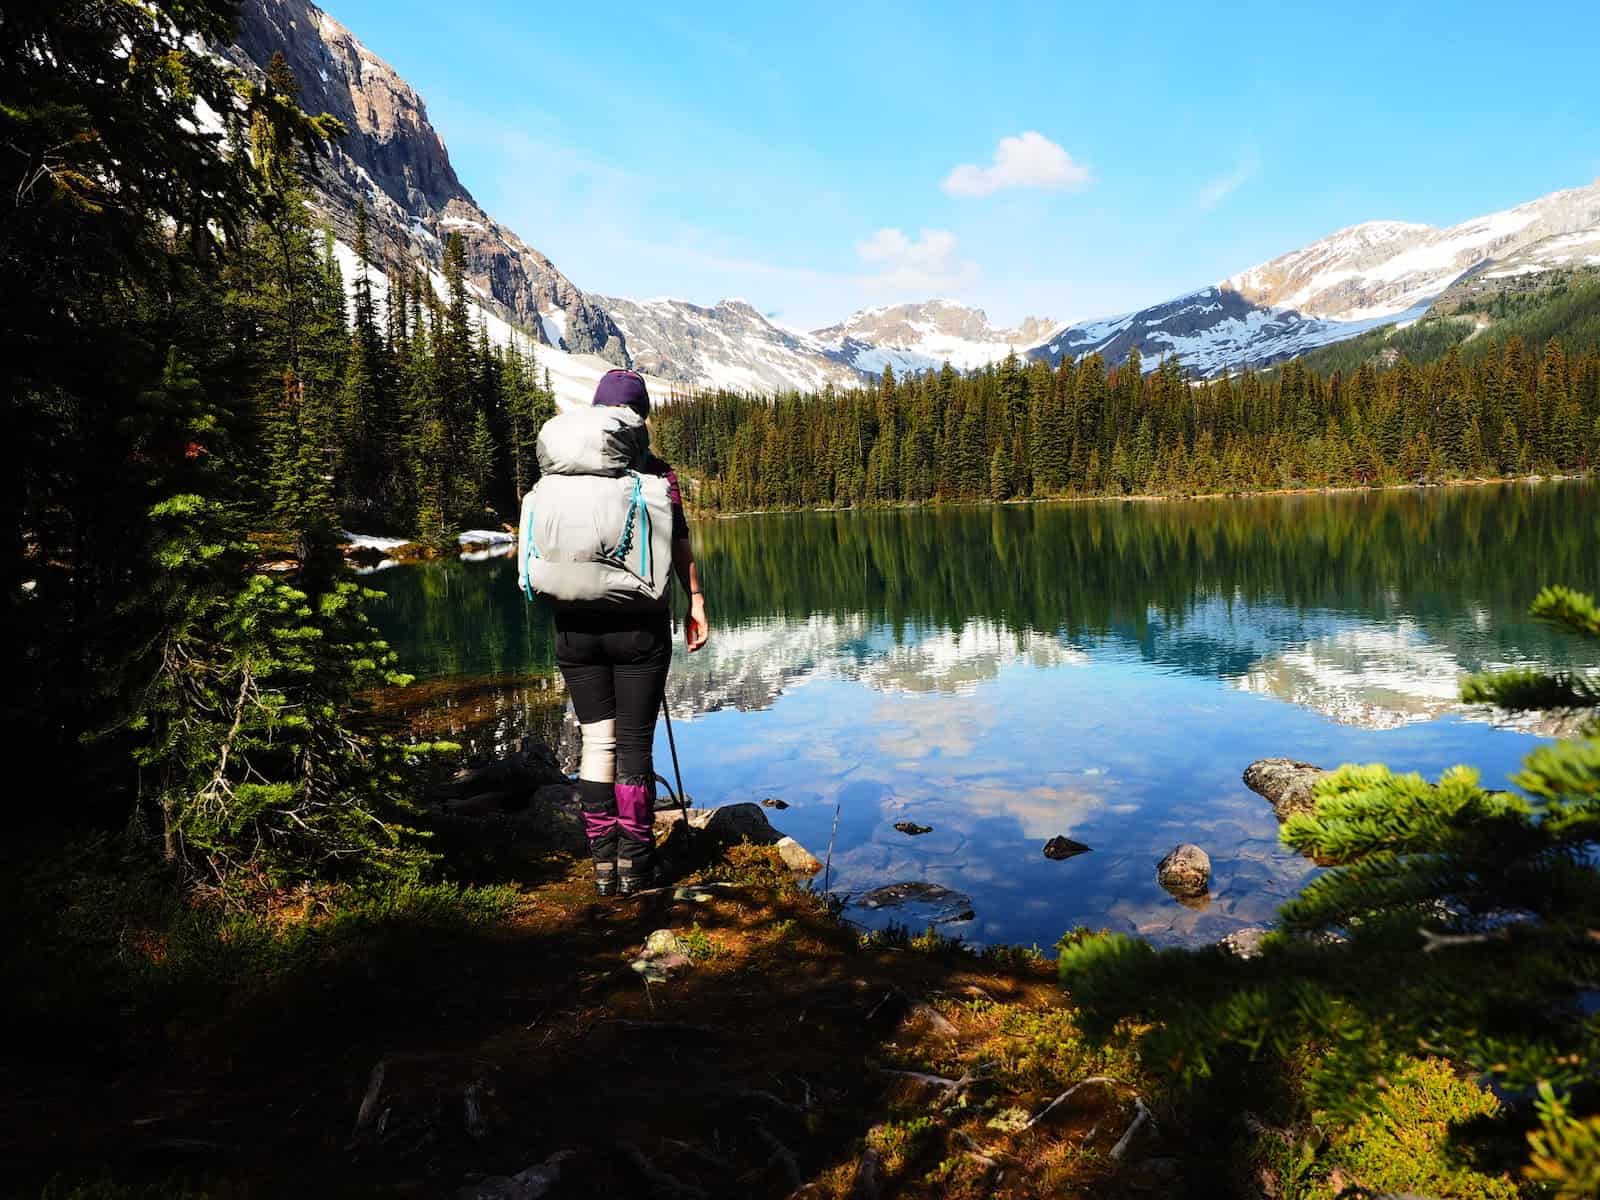
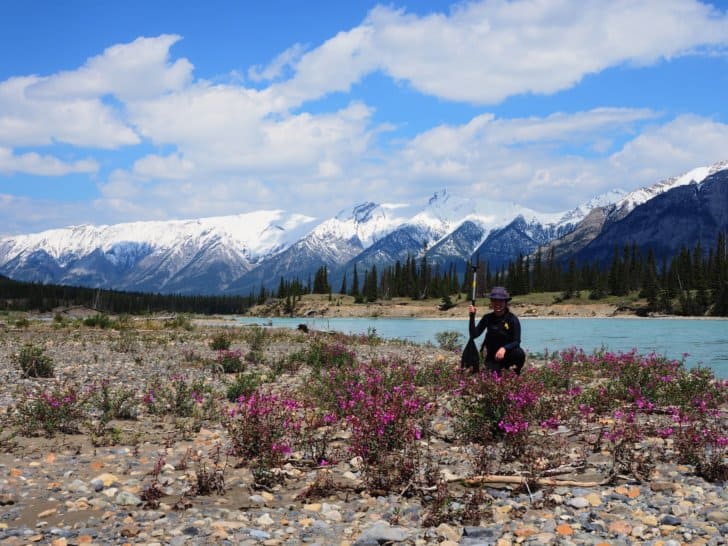
Emylene VanderVelden out in her native Canadian stomping grounds near Linda Lake, BC.
The same hyper-mobility, which saved my life in 2015, became mymechanism of injury in 2016. I had the displeasure of dislocating a knee that further slowed my recovery. Having since recovered to about 85% – 90%, I continue to push boundaries.
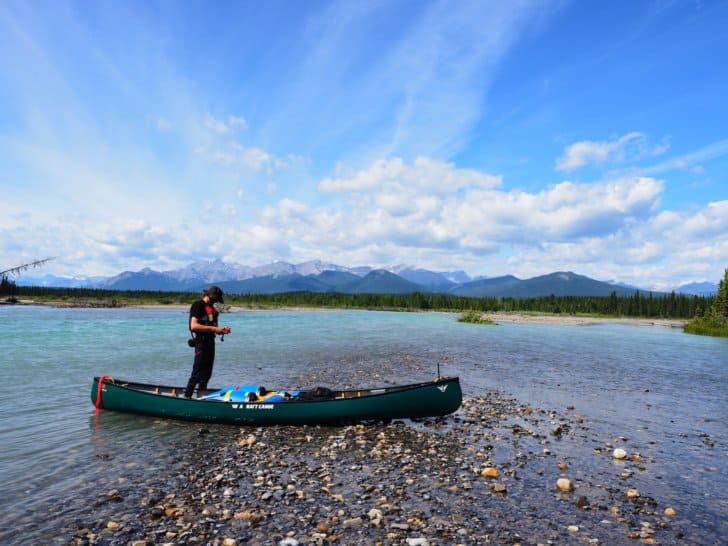
If nothing else, I know how to pick a gifted teammate. On a river, though, the team is only as strong as its weakest link. I (at 5’2 and 110 lb / 50 kg) am the weak link and have no illusions otherwise.
Canoe
The Nahanni is a big whitewater river. From Virginia Falls to just past Nahanni Butte, we’ll paddle about 150 miles (240 km), which drops a staggering 1300 feet (400 meters) over the course; not just any canoe is right for this type of endeavor.
I left the expert canoe selection up to Michael; he’s been researching the whitewater expedition member of his fleet for some time. He selects theNova Craft Canoe Prospector 17 and orders a new one through the local retailer. He chose this canoe for its excellent primary and secondary stability and load capacity for long trips.
Nova Craft Canoes, especially their Prospector line, is a gold standard for arctic expeditions, designed for Nahanni-like paddling conditions.
Specifications
Material: SP3: 99 lb (44.9 kg)
Length: 17′ (518 cm)
Width: 36″ (91.4 cm)
Center Depth: 15″ (38.1 cm)
End Depth: 23″ (58.4 cm)
Rocker: 2.5″ (6.4 cm)
Capacity: 1200 lb (545 kg)
Features
Symmetrical Hull
Shallow Arch Bottom
Moderate Rocker
Available with or without shoe keel in some materials. Weights listed above are for no-keel versions.
There are lighter but less durable and more expensive options out there. As this canoe will also be used on shallower whitewater, the more durable and substantial option is better. Nothing would be worse than being up the Nahanni without a canoe.
Gear
For Nahanni, my standard backpacking gear still applies. Additional equipment also needs to be added. Considerations include barrels, Pelican boxes, dry bags, wet suits, dry suits, paddles, neoprene socks, spray decks, neoprene booties, paddling gloves, neoprene gloves, PFDs, river knives, rescue gear, water safety kits and other equipment native to water travel. Fortunately, I have much of the gear tucked away in a box in the back of my closet. If I don’t have it, Michael still does. We both upgrade some equipment, but our inventories remain mostly unchanged.
Food
As we plan and pack food for the trip, I am not behind the eight-ball.Planning meals and making food tasty, compact, quick, and lightweight is one of my specialties. I’m also a master of collecting backpacking food from a grocery store when it’s on sale to keep costs down.
Michael rolls with my Excel spreadsheets and grocery lists. He is not inclined to complain about meals like Hawaiian pizza, tacos, chili cheese mac, garlic cheese biscuits and gravy, vanilla cake with icing, and banana cream pie.
He also doesn’t seem to mind my versions of backpacking meals that are tailored to taste and cost significantly less than commercial backpacking meals. On average, homemade meals weigh the same (sometimes a bit more, give or take) as commercial ones. They also have significantly less sodium and preservatives. Packing meals as a team reduces space and packaging requirements. With the inevitability of spending hours or days in the rain (or swimming), we opt for more warm meals than cold. Fuel reduction is natural as Nahanni permits campfires.
Transportation
Though I am in Canada, getting to Nahanni National Park Reserve is more complicated, dangerous, and time-consuming than flying to New Zealand. With about 1060 miles (1700 km), over 24 hours of driving time (one-way), and a chartered bush plane, planning Nahanni is not for the faint of heart.
The Reserve itself requires travelers to obtain a permit and register atFort Simpson before continuing toLindberg’s Landing. At Lindberg’s, we meet thebush plane pilot before flying intoVirginia Falls and starting the adventure in earnest. Once returning to Lindberg’s Landing, by paddle or foot, over a week later, travelers must return to Fort Simpson and unregister the permit. Fortunately, in actual practice, the Parks Canada office allows phone registration and deregistration if we have a phone service (which is unlikely.)
To fly intoYellowknife, NT from Edmonton, AB (a two hour, one-way flight) is $250 – $900 CAD per person, in economy seats, without any equipment besides what could fit in a carryon. From Yellowknife, a traveler has to make it to Fort Simpson or Lindberg’s Landing. It is possible to charter a guided tour to save some logistics, but it also comes at a high cost ($5,000 – $10,000 CAD.)
Michael volunteers to handle the permits and bush plane bookings (I will not argue), and we split the driving time and cram (us and gear) into the truck for well over 24 hours.
Training
If nothing else, I have confidence in my swimming ability; though I am not confident about how I feel about rivers. Lakes, oceans, and rivers are distinctly different beasts. I’m confident on the lake, competent on the ocean, but nervous on a river. I’ve been on rivers before and found them pushy and unforgiving. Somehow though, I am compelled to go to rivers every few years. I never have the heart to let go of all my river gear.
In spite of my fear, I’ve always had an affinity for water. When I went to Mexico to snorkel, dive, surf, and paddle, locals kept calling me “la Serena,” or “the mermaid.”
On the other hand, drowning is one of the highest causes of death for outdoor people (after falls.) Nothing is so firmly fixed in my mind as the thought of me drowning. After falling, drowning is my greatest fear.
That said, here I am, up a river with a paddle, a PFD, and questioning my sanity. The only way to mitigate my risk, gain competence and confidence is to paddle. Michael’s big plan is to let me paddle every river between Alberta and NT as soon as they melt and until August. Fortunately, I have almost everything I need already:
Wetsuits
Helmet
PFD
Kayaking odds and ends
North Saskatchewan River
Finally, one early morning in June, it’s time to test my mettle, and get my first whitewater canoeing lesson. The paddle feels like a shoe on the wrong foot. It’s too short compared to sea kayak-paddle. Everything feels awkward and clumsy; mostly, I am a bundle of nerves.
This first trip out is an acid test. After my accident a few years ago, I scaled back my activities. I found ultralight backpacking and all but abandoned kayaking. I don’t know if my shoulders and spine can withstand paddling again. Compounding my concern, when I get nervous, my joints ache from my previous injuries. I tense them and hold my rib cage like it’s still broken.
Shuttling
On the drive out to the canoe launch point, I blast my stereo and try not to think about it. I am meeting Michael at Preacher’s Point in Kootenay Plains, Alberta. I’ll leave my vehicle at the canoe take out on the North Saskatchewan River.
I park my car, and Michael pulls in behind me. I hop into his truck, and we continue down the mountain highway to the canoe launch near Saskatchewan River Crossing, Alberta.
Michael notices I am nervous. “I can paddle this one solo; you don’t have to paddle at all if you don’t want to,” he says. Which in my mind, voids the point of the activity.
I grin and laugh, and say “If nothing else, I’ll make almost useless ballast in the bow.”
Route
He covers the route details on the drive. The river runs about 56 km and is a braided channel most of the way. There is a risk of log jams along the entire route.
As Micheal ties in our gear, he covers basic safety:
Don’t risk yourself for saving your equipment. You’ll probably find it quickly downstream. Otherwise, it’s tied in and will stay with the canoe even if it’s upside down.
Stay with the canoe unless you need to swim to avoid a hazard.
Hold onto your paddle if you can. A paddle makes safety equipment to help you catch an eddy, get to shore, or avoid a hazard. Let go of the paddle if it becomes a hazard.
If you swim, always keep your feet pointed downstream with toes and nose facing sky side.
Swim diagonal to the current, avoiding hazards. Try to reach an eddy or shore as safely and quickly as possible, but don’t exhaust yourself doing it.
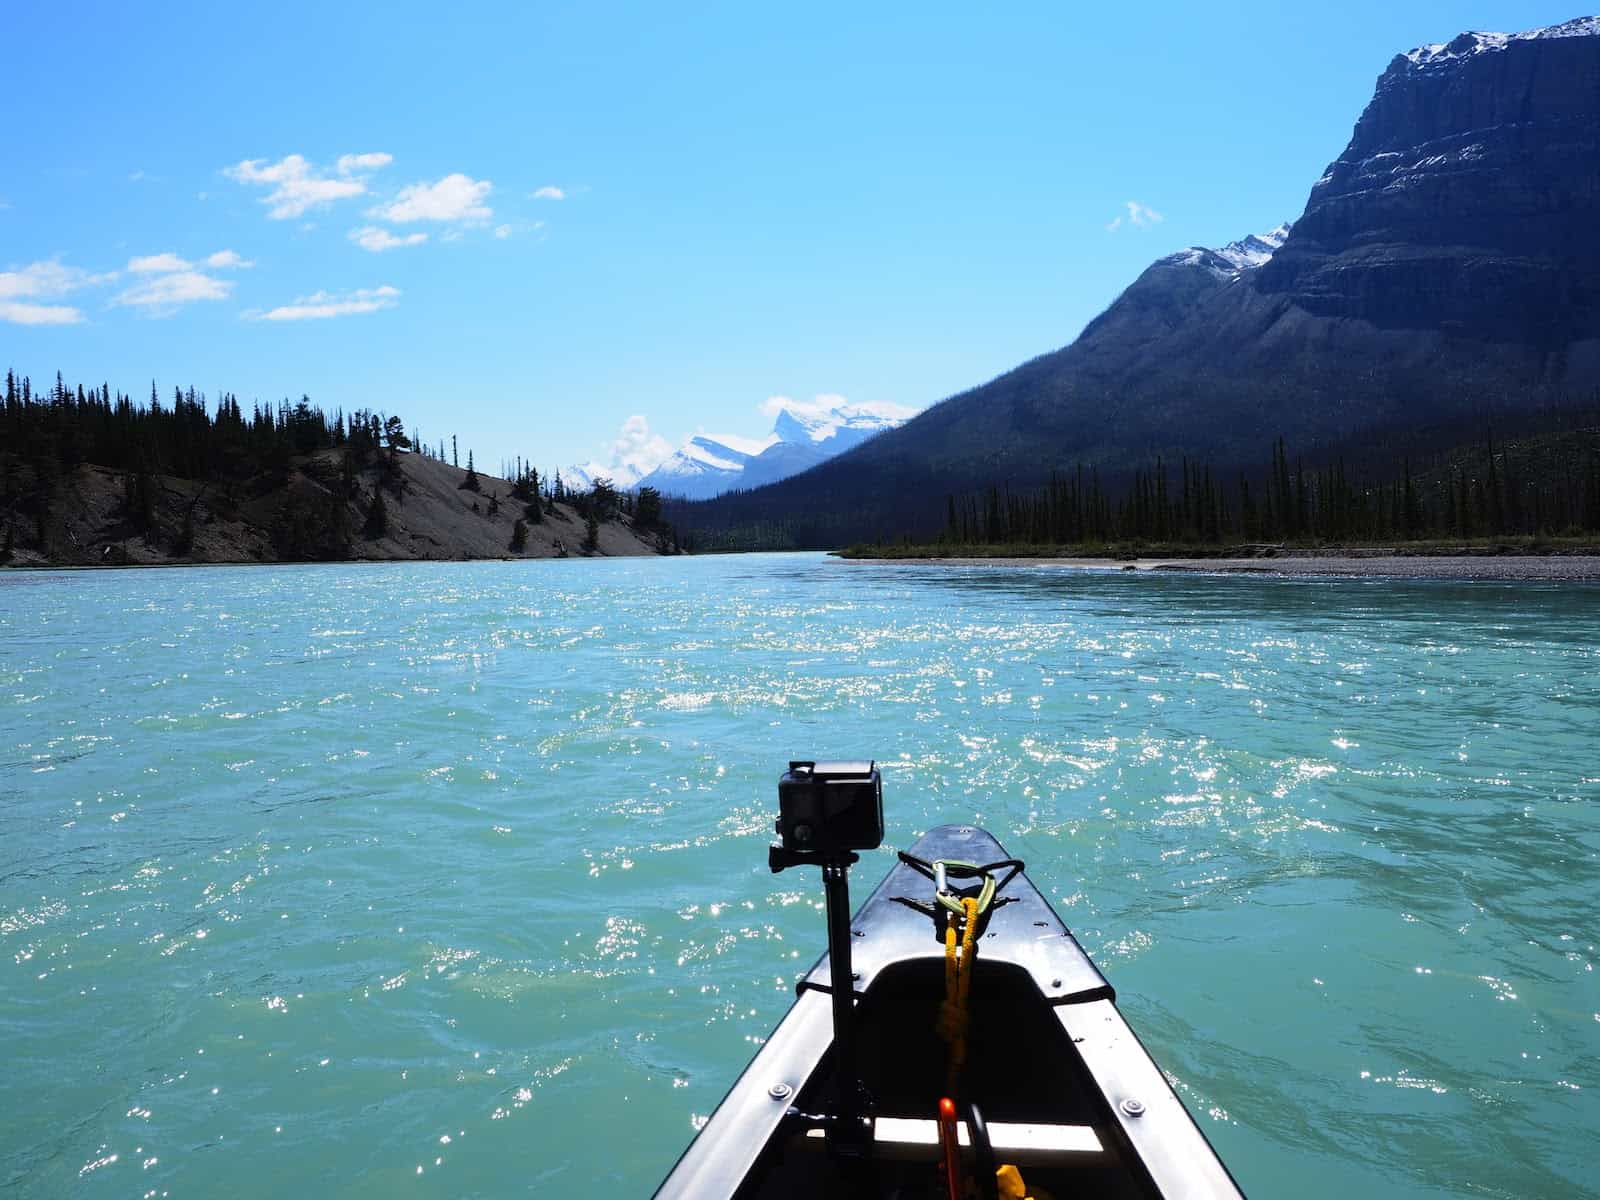
Finally, Michael pops a GoPro in front of my seat and tells me that my job is to get the footage. I internally grimace, as any nervousness on my face will have a front center view. I hide behind lenses to avoid being in front of them.
My least favorite companion, a GoPro.
The North Sask is not a beginner route without someone who could paddle it alone. Although it has good examples of river features, hence it’s a perfect training ground for a rookie with a coach. This section is much smaller than Nahanni, and as we push off from shore, I further question my sanity.
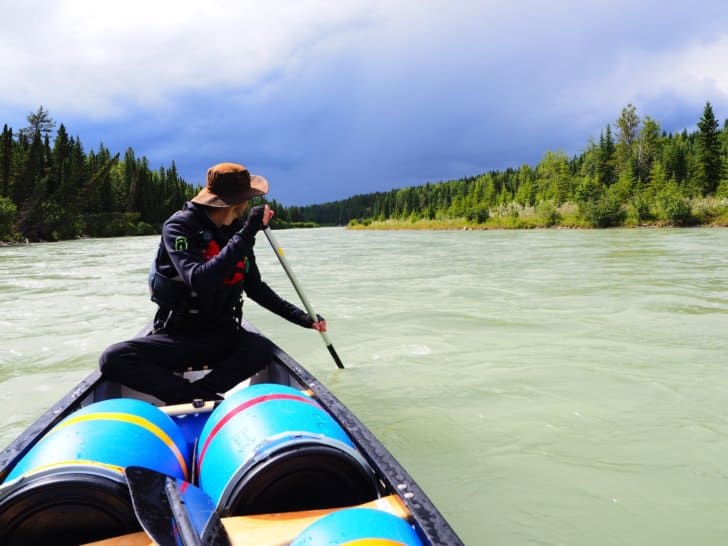
Paddle
I clench my jaw and my paddle. No one has talked me out of whitewater in years. I’ve known people who have drowned or almost drowned. I’ve thought about drowning once or twice myself. Near drowning, in my experience, involves panic, cold chills, agonizing cramps, and an abiding fear of drowning.
Sitting in the bow on the North Sask, I know I’m a figurehead. A wind-torn siren, decorative but without purpose. Nahanni, though, will take teamwork and both paddlers’ strength to navigate. Without a glance backward, I test my paddle while Michael starts coaching on my technique.
He talks me through maneuvers, and the current repeatedly rips at my paddle while I follow instructions. The river splashes and howls past rocks and logs, forcing us down its course.
As I ease back into whitewater, I slowly recall how to catch current lines properly. As I relax, I glance at the scenery all around us.
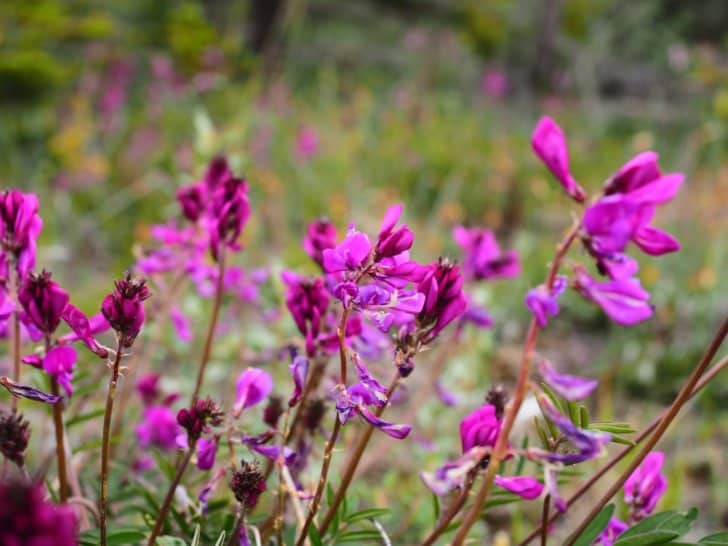
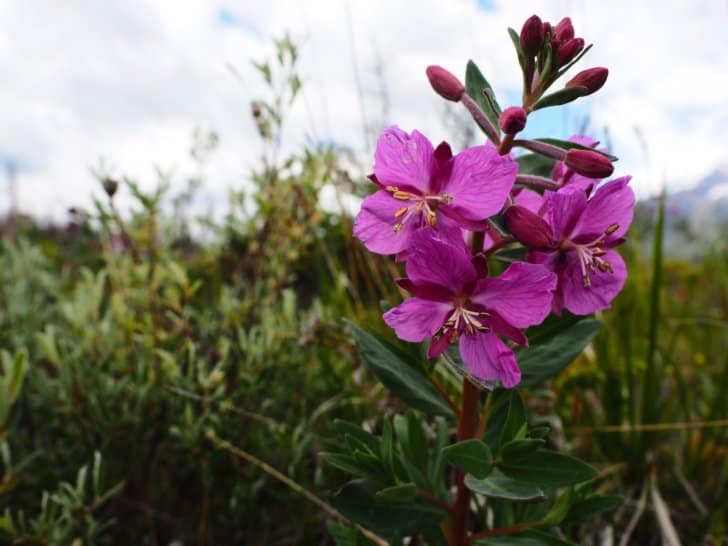
Vetch
Everywhere around the river, the vetch, fireweed, primroses, and prairie fire are in full bloom. The mountain air pours into my lungs and infuses my hair with subtle aromas.
Fireweed
I can hear the river singing all around me; sometimes its voice so loud, I can’t hear Michael’s instructions, so I paddle by instinct.
For practice, we pull off the river onto floral islands, separated by braided channels.We occasionally stop, pulling out snacks, making hot drinks, or searching for artistic driftwood, lost gear, or pretty rocks.
It’s breathtaking. While sitting in the warm sunlight, I remember why the rivers call me back year after year.
Several hours of paddling later, we pull into Preacher’s Point. By Michael’s estimation, I’m a rusty, but easygoing and natural paddler. By my estimation, my shoulders and abs ache from the current ripping at my paddle.
One river down; as many as possible to go between then and August.
Our Trial Run
After months of prep, two weeks before Nahanni, Michael and I decided to make one last multi-day test run. To my chagrin, I am negotiating contracts and barely ever available for packing (aside from dropping my gear and lists off and occasionally providing input.) Between my lists, Excel spreadsheets, and his expertise, Michael packs almost everything without me.
For readers who have read mytrip planning article, you will recognize the extraordinary amount of trust and self-control it takes to allow someone else to plan and pack for me. Though I have pre-planned for Nahanni, this trip is impromptu, and it’s testing my adaptability.
The fact that I am handing Michael the reins indicates to me that my trip mate is reliable. I’ve said before, trusting and liking your trip mates is critical.
If you catastrophically disagree with a backpacking partner, then likely the worst which happens is you walk home alone (possibly with hypothermia or a minor injury.) Though you can end up dead backpacking, there is usually a wide margin of error and opportunities to correct course. In paddling or climbing, though, a disagreement between trip mates could lead to a significant fall, a swim, an injury, and, at worst, death. Nahanni has critical elements for things to go badly wrong: remote access, open fast-flowing water, and high cliffs.
North Sask, Round Two
The smell of bacon and coffee woke me up around 6 AM on a Saturday morning. Without knowing exactly what was packed, I follow Michael back out to another section of the North Saskatchewan River. This time it would be three days out on the river, and there would be hazards, training, rapids, and gear trials.
My last practice run down the North Sask started at Highway 93 Crossing in Jasper, Alberta, and ended west of Lake Abraham (colloquially known as Lake Abe.) This trip begins downstream and east of the Lake Abe Dam.
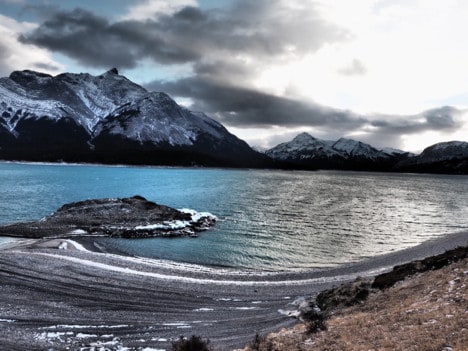
Lake Abraham, November 2018
After all the practice sessions, I’m not nervous. Instead, I’m anticipating fun and a much-needed escape. Once most of the gear is organized, packed, and loaded, it’s almost midnight, and I tumble into bed.
Day 1 – 22 Miles (35 km)
Launch
Early Saturday morning, I drag myself out of bed for a quick coffee before driving to the Lake Abe Dam. We arrange for someone to shuttle the truck to the takeout after we drop off our gear at the launch point.
Once we arrive downstream of the Lake Abraham Dam, we start organizing logistics; loading gear, tying in and finally climbing into our neoprene suits.
Lake-like conditions on this section of the North Saskatchewan River are deceptive.
Paddle
The first section of the North Saskatchewan River we are heading into is generally not recommended for novice or nervous intermediate-paddlers. At first, though, the river seems safe with a slow-moving, almost lake-like surface. Not far in though, it takes a turn for the worse with dangerous strainers and log jams which have ambushed more than a fewunwary paddlers.
Fortunately, Michael is neither unwary nor cocky about this section of the river. From being part of rescue teams, he knows this section of the river well.
On the River
In a short while, what appears as simple lake-paddling becomes a braided group of channels with log jams, sweepers, and strainers around each bend.
My heart is pounding most of the day as we scan around for hazards, and frequently encounter them. I barely remember to take photos as we dodge massive log jams. We pull off on scouting missions and quick breaks throughout the day. As Michael promised, we bypass the hazards with ease.
Quick scouting mission before carrying on downstream.
Now, through the riskiest section of the river, and with what looks like a soaking rain coming in, we decide to camp for the night at about 3:30 PM.
In Camp
We set camp and get a fire started and a tarp up just in time for a heavy afternoon shower. From my perch on top of a barrel, I watch as my little campfire valiantly resists the rain, and with a bit of help, stays just hot enough to survive almost 40 minutes of soaking rain.
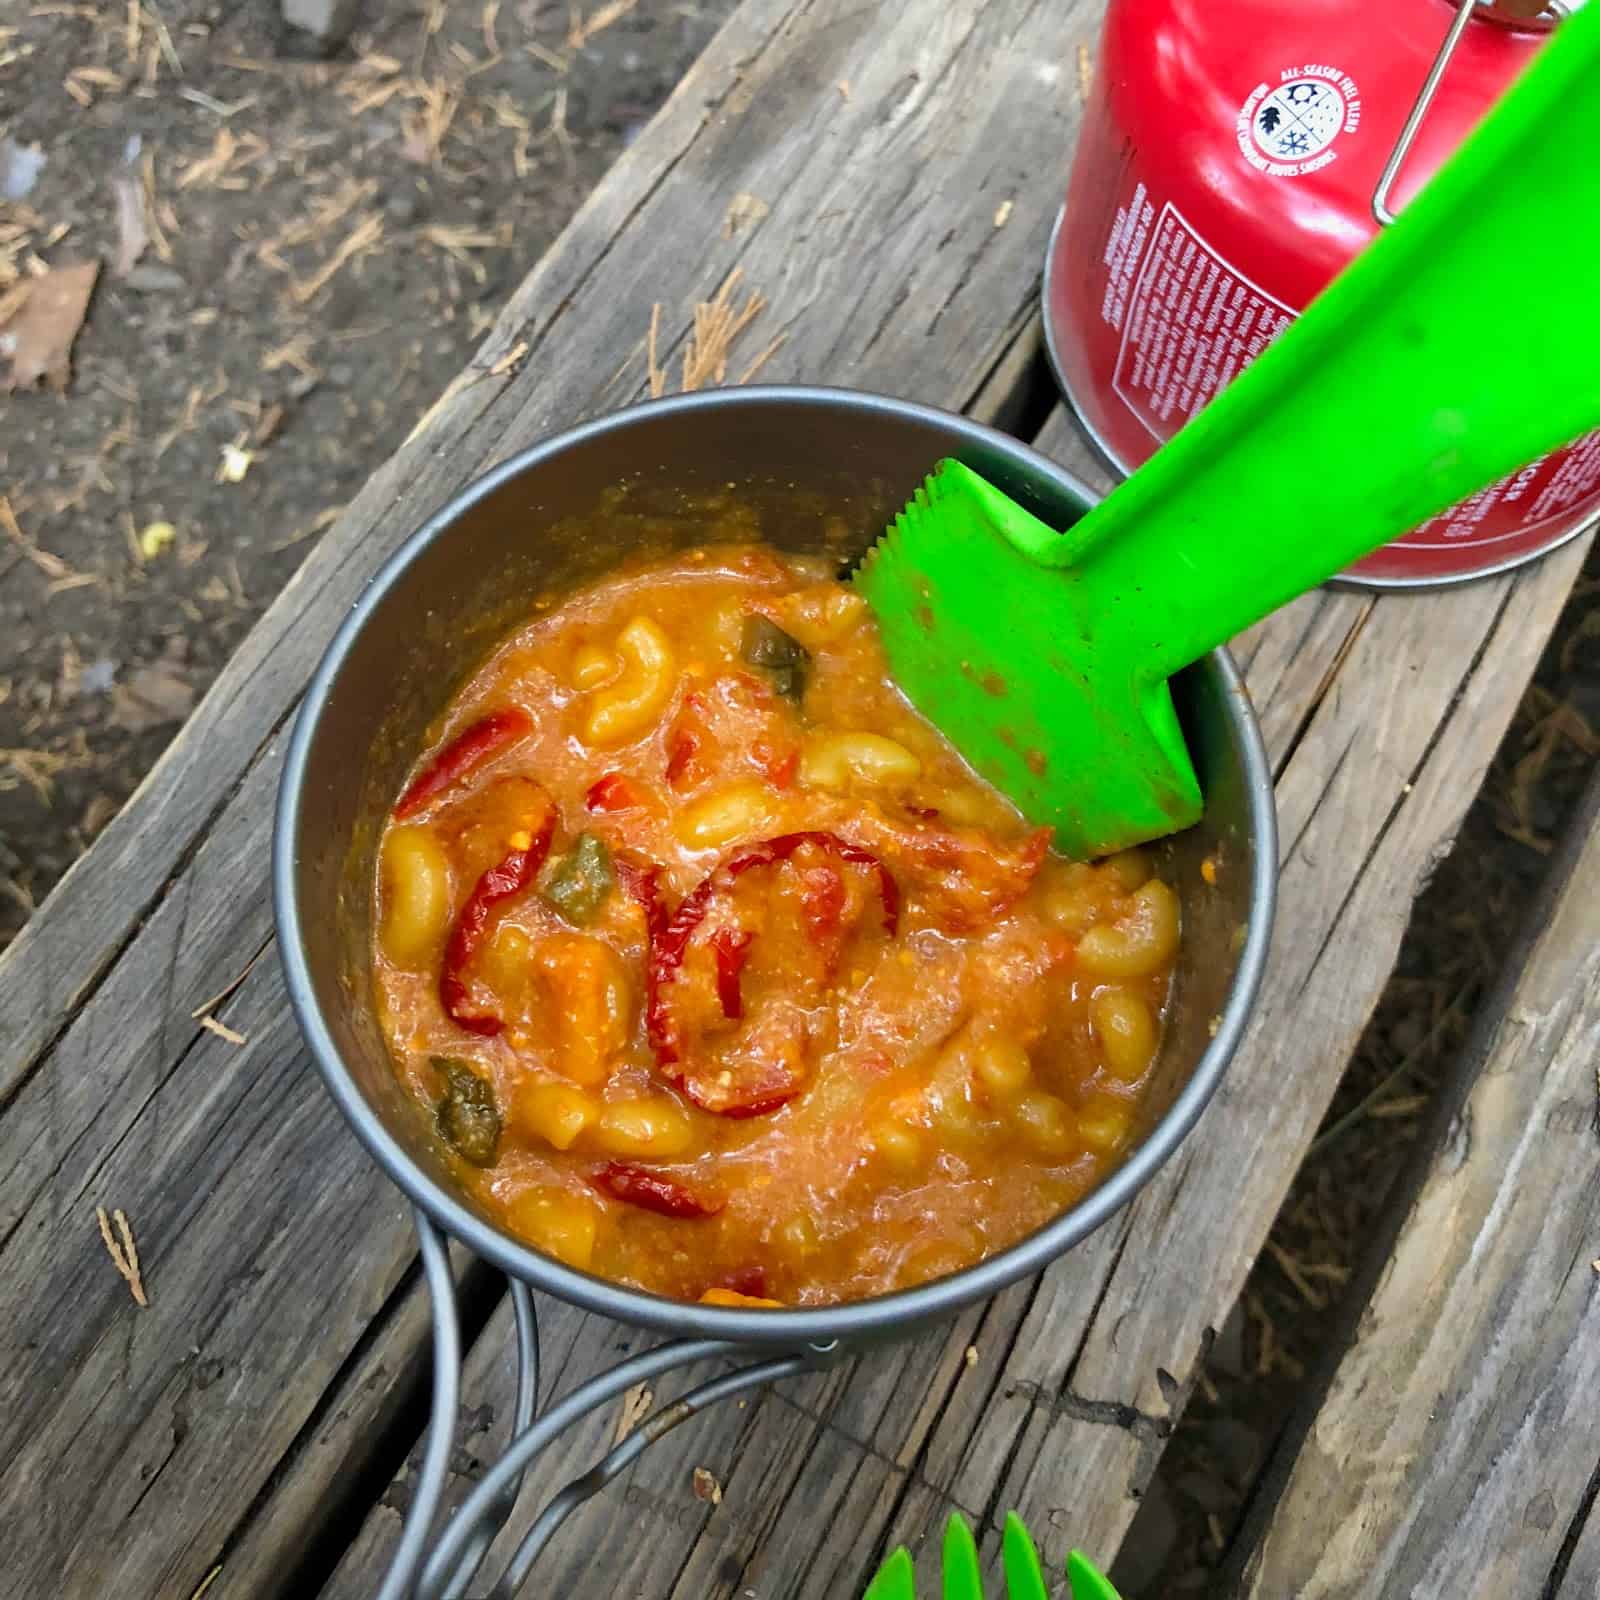
Dinner consists of Tunagetti, a meal test for Nahanni. It’s good with its sundried tomatoes, garlic, salt, pepper, olive oil, Parmesan cheese, tuna, and stir fry noodles. It’s also, thankfully, warm. Though we didn’t go for a swim today, the rain certainly adds a chill.
Day 2 – 39 Miles (63 km)
On the River
Michael and I slowly develop a morning system. He is tall and more of a morning person than I am. Packing up the sleeping gear in a tent during the rain is more or less the bane of his existence. I am not a morning person (without caffeine.) At 5’2, I can easily pack up equipment inside a tent.
Michael opts to be in charge of starting the coffee and the morning fire. I pack up the sleeping gear and join him for coffee shortly after that. The rain slowly dissipates. We finish packing everything into barrels and loading the canoe before donning neoprene.
Back on the river, it’s desolate. We have only seen one other group. Usually, this river is relatively busy, but we theorize the current flood conditions scare most paddlers off.
After a long leisurely breakfast, we start paddling like mad to try to outrun what looks like a soaker of a storm.
I realize that I find paddling relatively untechnical, especially after yesterday. As Michael points out, flood conditions don’t necessarily equate to a more dangerous river. Flood conditions can erase rapids and safely bury obstacles in the depths. Some of the most technical water in the world isn’t deep but in fact shallow, and the river bed has more impact on the course.
What flood conditions do dictate is a faster river. A faster river means if there are obstacles, you have to respond faster and have less margin for error. Nahanni is a quicker, bigger river. Not only will we have to respond faster, but we also have more distance to cover when we respond.
The Chase
As we paddle the river, it becomes increasingly apparent that a thunderstorm is chasing us. Yesterday we stopped to avoid the storms, but today we need to make miles. We have to make up for lost time or risk not making it back to Rocky Mountain House in time for looming responsibilities.
Though we have sunshine, behind us, a cloudburst is waiting to happen.
For hours we face the sun with our backs to a storm. We manage to stay just on its border and miss the worst of the rain before about 7:30 PM in the evening and pull into shore to camp.
In Camp
Our teamwork system further develops as Michael learns we forgot the fire-starting paper. He realizes I have better fire-starting skills than a troop of Boy Scouts and don’t need paper. After my valiant little fire stayed ablaze in a torrential downpour yesterday, Michael is happy to make me fire goddess for the duration.
We fall into another routine where I start the fire and start unpacking the kitchen, while Michael sets up shelters. We then switch. I begin assembling sleeping gear inside tents, and he finishes unpacking the kitchen and starts supper over my roaring fire.
I have a penchant for fire craft. I like building fire pits in all-terrain. On my native prairies (in any season), or in the boreal forest and near coastal waters, I can start a fire in a matter of minutes, sometimes even in spite of driving precipitation.
Though time is not on our side, daylight this far North of the equator is. We spend the remainder of the evening testing out Beef Stroganoff and drinking hot chocolate, while intermittently avoiding short mountain squalls and rain under a tarp.
The morning will come early. The last section of the river features a series of rapids, which includes the Devil’s Elbow and the Three Bears.
Day 3 – 19 Miles (31 km)
In the morning, we prepare for rapids and strap on the spray deck. Michael has decided I am sufficiently seaworthy to attempt rapids. We’ll catch the Devil’s Elbow, and a few others before we reach the truck in the afternoon. In a worst-case scenario, it’s a safe swim, and we should find the canoe washed up not too far downstream.
What Michael did not tell me is he intends upon repeatedly half drowning me while laughing the entire time. I need a snorkel for Nahanni.
Fortunately, in spite of repeat attempts (on Michael’s part) to see if I know how to swim, we make it to Rocky Mountain House. Throughout the trip, we kept a log of things we forgot or didn’t think of, and in the remaining week will finish packing for Nahanni.
Packing Strategies
12 days of equipment and over 3000 km worth of supplies for driving and camping is not a small load or a short list. Every spare moment of July 2019 is dedicated to packing or testing equipment for Nahanni.
A Nahanni River trip is like planning the most remote possible 13-day thru-hike. A shoulder-season thru-hike, with no resupply, and the added requirements of whitewater canoe equipment.
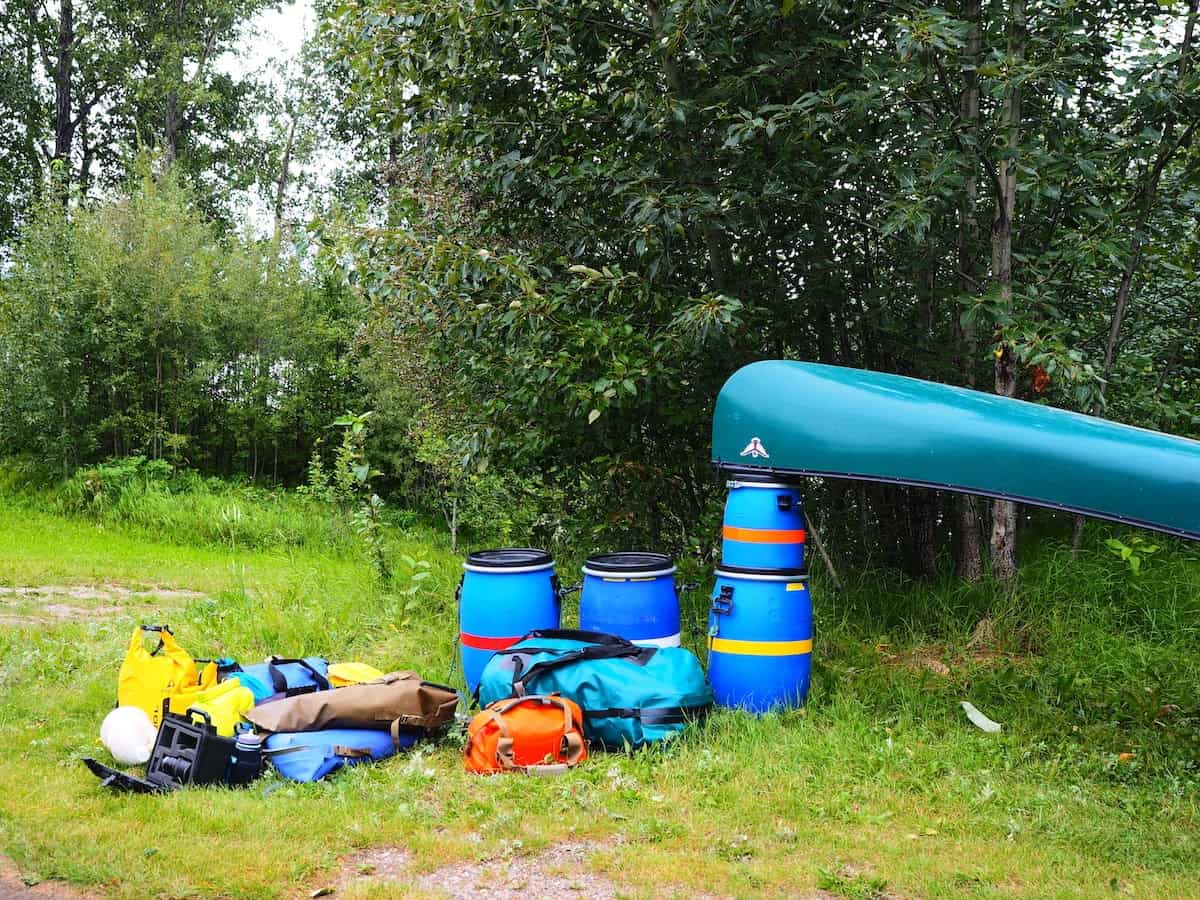
Canoe Equipment
Whitewater canoe equipment includes: three 60 liter river barrels, one 30 liter river barrel, a 115-liter portage pack, two Ocoee Watershed dry bags, two Watershed stern bags, and one 20 liter Sealine drybag empty weigh more than all my backpacking equipment (in use and not) combined. A canoe (which we christened Kermit), a Northwater sprayskirt, four paddles, a pin kit, four throw bags, a bailing bucket, and a bailing sponge weigh more than Michael, and I do by far.
Additional canoe specific gear includes wetsuits, neoprene socks, neoprene gloves, paddling gloves, river shoes, PFD (personal floatation device), river hat, bathing suit, and quick dry tube scarf. An extra set of dry layers is required in case of a swim. Firestarter and stove are also not-optional.
Seeing the massive pile of equipment makes the ultralight backpacker in me want to break out in hives. However, trying to make a list shorter and shrink the collection proves to be almost impossible. Whitewater canoeing is different; it requires more and a different sort of equipment.
Camera Equipment
I am almost certain I will not return to Nahanni again. With that in mind, I pack my camera equipment in Pelican boxes. Ultralight backpacking has allowed me to pursue my passion for photography, and I’m not about to let whitewater prevent my pursuits.
Backpacking Equipment
Backpacking equipment is easy. I won’t ever need an overnight pack, but I will need a day pack for layers, food, hydration, safety equipment, and camera equipment on unmarked treks up the river canyons. A tiny 9-liter day pack with a hydration system will meet my needs adequately.
However, at no point, except portaging, will I carry these items.
Food
Food on this trip challenges my creativity. The journey ahead is long and expensive. In total, I need about 16 days of supplies (including road days.) I am half famous for not eating my food if I’m tired and the food is boring, which is not ideal on a long duration trip. I rarely get to plan a menu with many options, especially not on one trip.
Fortunately, canoeing allows me liberty I rarely have. So, I’m bringing my Banks Fry-Bake Oven 12 oz (340 g.) I am also bringing a pot, a kettle, and my coffee press. This type of kitchen allows me to bake, boil, fry, and backcountry chef, to my heart’s content.
For a backpacking trip, I would have to pick one or two of these items at most; canoeing lets me have a full outdoor kitchen. This is only limited by space, and I have to creatively fit a large kitchen and an almost expedition amount of food in barrels. The food here sounds gourmet, and to be sure it is, especially since it is virtually all dry or powdered shelf-stable goods.
The dinner menu includes:
2 Tunagetti meals
1 Chili Cheese Mac meal
2 Garlic Cheese Biscuits and Gravy meals
2 Beef Stroganoff meals
2 Teriyaki Stir Fry meals
1 Hawaiian Pizza meal
2 Beef Burrito meals
Dessert includes:
1 Cake with icing
1 Apple Crisp
1 Chocolate Mousse
1 Vanilla Pudding
1 Lemon Pudding with whipping cream
1 Banana Cream Pie
Hot chocolate
Tea
Lemonade
Ice Tea
Lunches and snacks are a free-for-all with:
4 or 5 flavors of Protein/Granola bars
4 or 5 flavors of Chocolate bars
Mixed unsalted nuts
Chocolate covered coffee beans
Dried fruit
Swiss chocolate squares
Wasabi peas
Beef jerky
Breakfast includes:
Bacon
Eggs
Hash Browns
Pancakes
Granola
Coffee
The kitchen is the only place I severely depart from ultralight backpacking on this trip. However, If not for how light and compact the food is, I wouldn’t be able to pack half the cheffing equipment I’ve managed to fit in. Half of this trip is the freedom to depart from ultralight backpacking in the kitchen and test what I can accomplish with backcountry gourmet. Canoeing an extremely remote mountain river is the only time my kitchen supplies might be of value in a rescue scenario as well.
For the drive, I tuck in powdered soups, tortillas, fresh fruit, and a selection of other bits and bites which can’t survive packing into barrels.
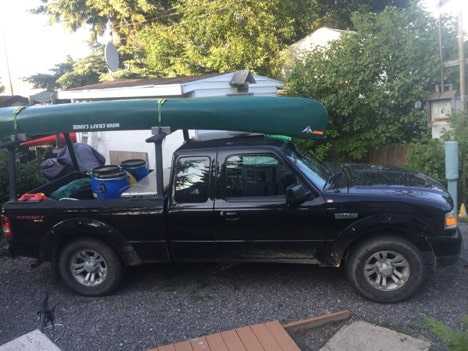
Culmination
After eight months of planning and packing, leaving for the trip flows relatively seamlessly. Seeing the pile of gear disappearing into seaworthy containers and into the bed of the truck with a 17’ canoe overhead feels like a feat of engineering. It takes till almost midnight to complete packing. I stash the last item and collapse into bed.
Morning is early, but the truck is ready and waiting for adventure.
On the Road: Big Sky and Seas of Green
As expected, the morning starts close to dawn. I stretch, and my mind starts sorting through all the things I may have forgotten. I grab a few last-minute items as I drink my coffee and eat my breakfast. Michael opts to drive till he is tired, then I will take over. We want to make it from Rocky Mountain House, Alberta, to at least High Level, Alberta, which is about halfway.
Day 1 – 652 Miles (1050 km)
Approximate Fuel Price:
$4.40 CAD / $3.30 USD per gallon, $1.10 CAD / $0.83 USD per liter
The drive starts at 7:45 AM in the seas of green forests, fields, and hills of livestock. Slowly, forestry and grazing lands give way to seas of golden canola, wheat, oats, and barley. Hours pass with conversation and podcasts. Occasionally we stop for fuel or truck snacks before continuing ever North.
At 6:30 PM we arrive at High Level, Alberta, which is about 800 km from Lindberg’s Landing. Neither of us is ready to stop driving, and we want to shorten Tuesday’s driving time. After getting fuel and a bite to eat, we continue Northward, hoping to make it to the Northwest Territories border before nightfall.
Approximate Fuel Price:
$4.00 CAD / $3.00 USD per gallon, $1.00 CAD / $0.75 USD per liter
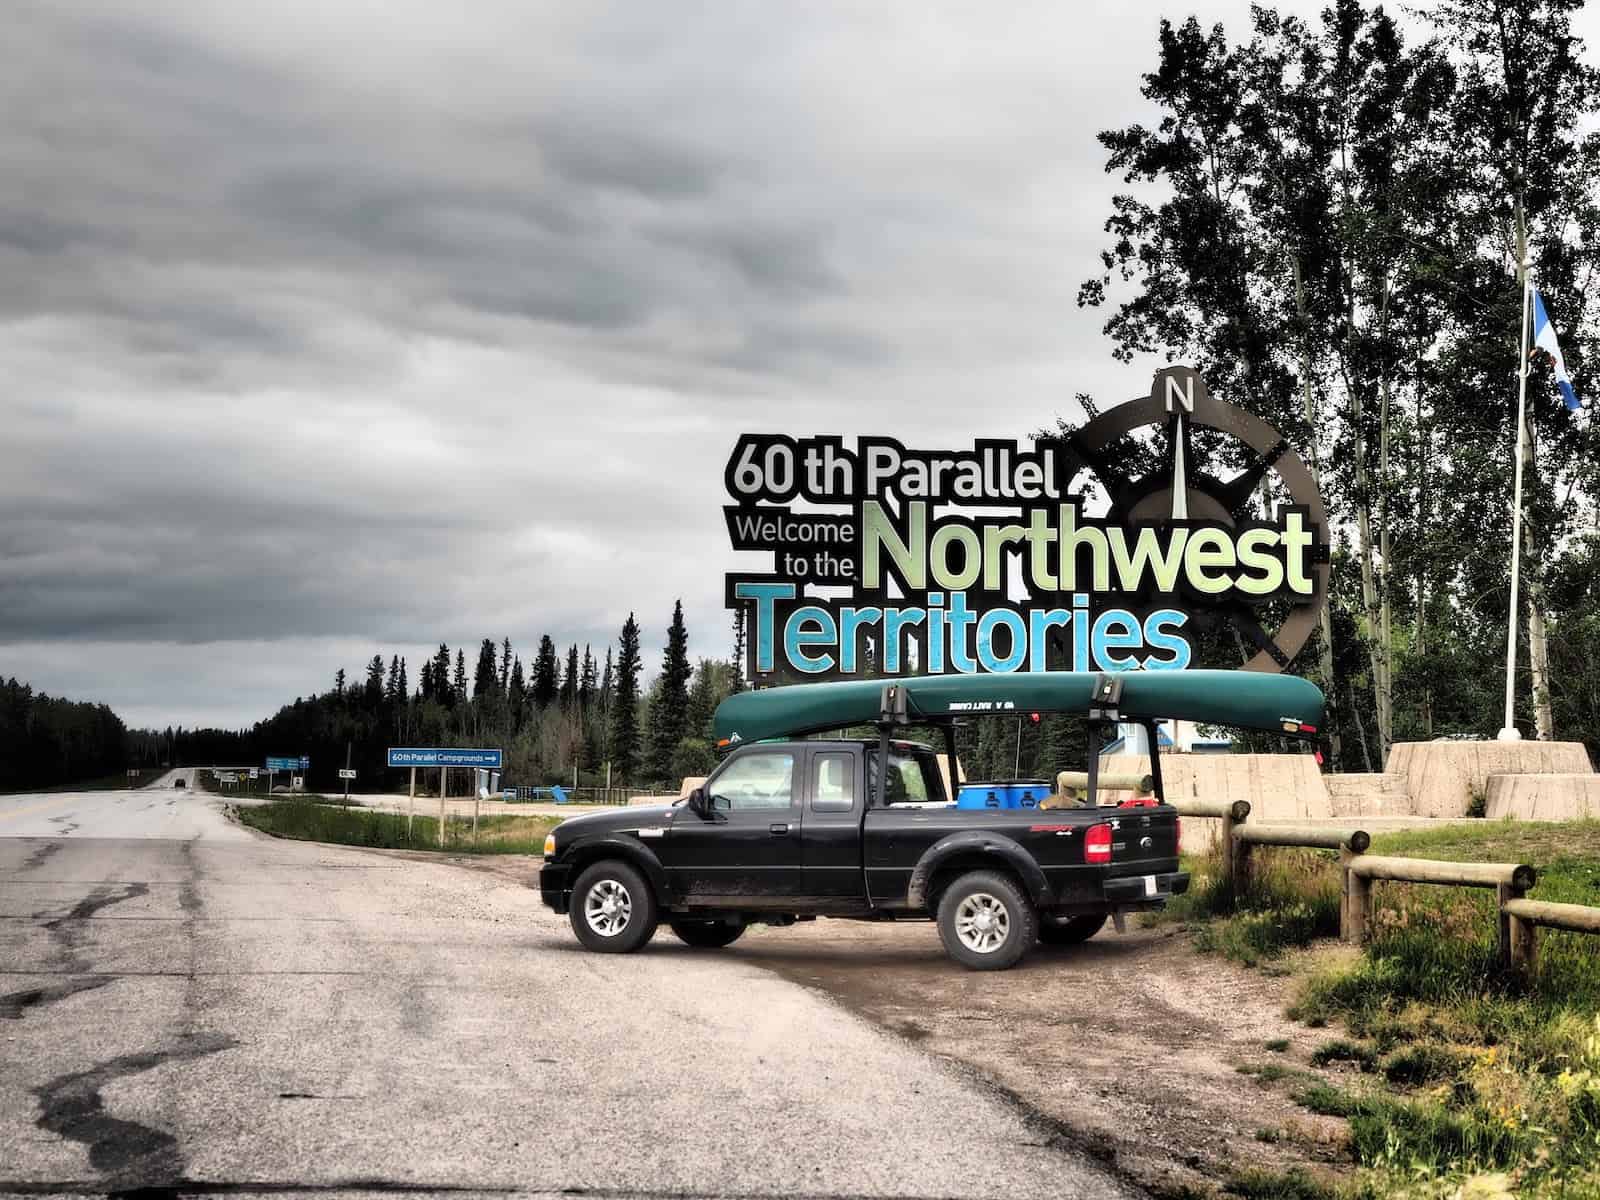
As we drive, crop fields fade into the rearview as thick tangles of trees and undergrowth take their place. At 8:30 PM, we reach the 60th meridian and the Northwest Territories border. We covered 1050 km in a single day, and we both feel it.
The Northwest Territories and Alberta border in Canada.
Sadly, the visitor center is closed, but there are empty campsites. We set up camp and crawl into our beds for the night.
Approximate Park Fees:
Campsite: $25
Day 2 – 365 Miles (588 km)
We allow sleep in till 7:30 AM before packing up and registering at the visitor center when it opens at 8:30 AM. The manager of the campsite is friendly and gives us information about the nearest fuel (Hay River, NT – an hour and a half and a 76 km detour, or Fort Providence, NT – 2.5 hours and a 50 mile (80 km detour) until we get to Lindberg’s Landing.
Hay River
We opt to stop at Hay River for one more fuel up. Aside from almost vacant Enterprise, we won’t see another community, house, or sign of civilization except for the road and the occasional vehicle.
Approximate Fuel Price:
$4.80 CAD / $3.60 USD per gallon, $1.20 CAD / $0.90 USD per liter
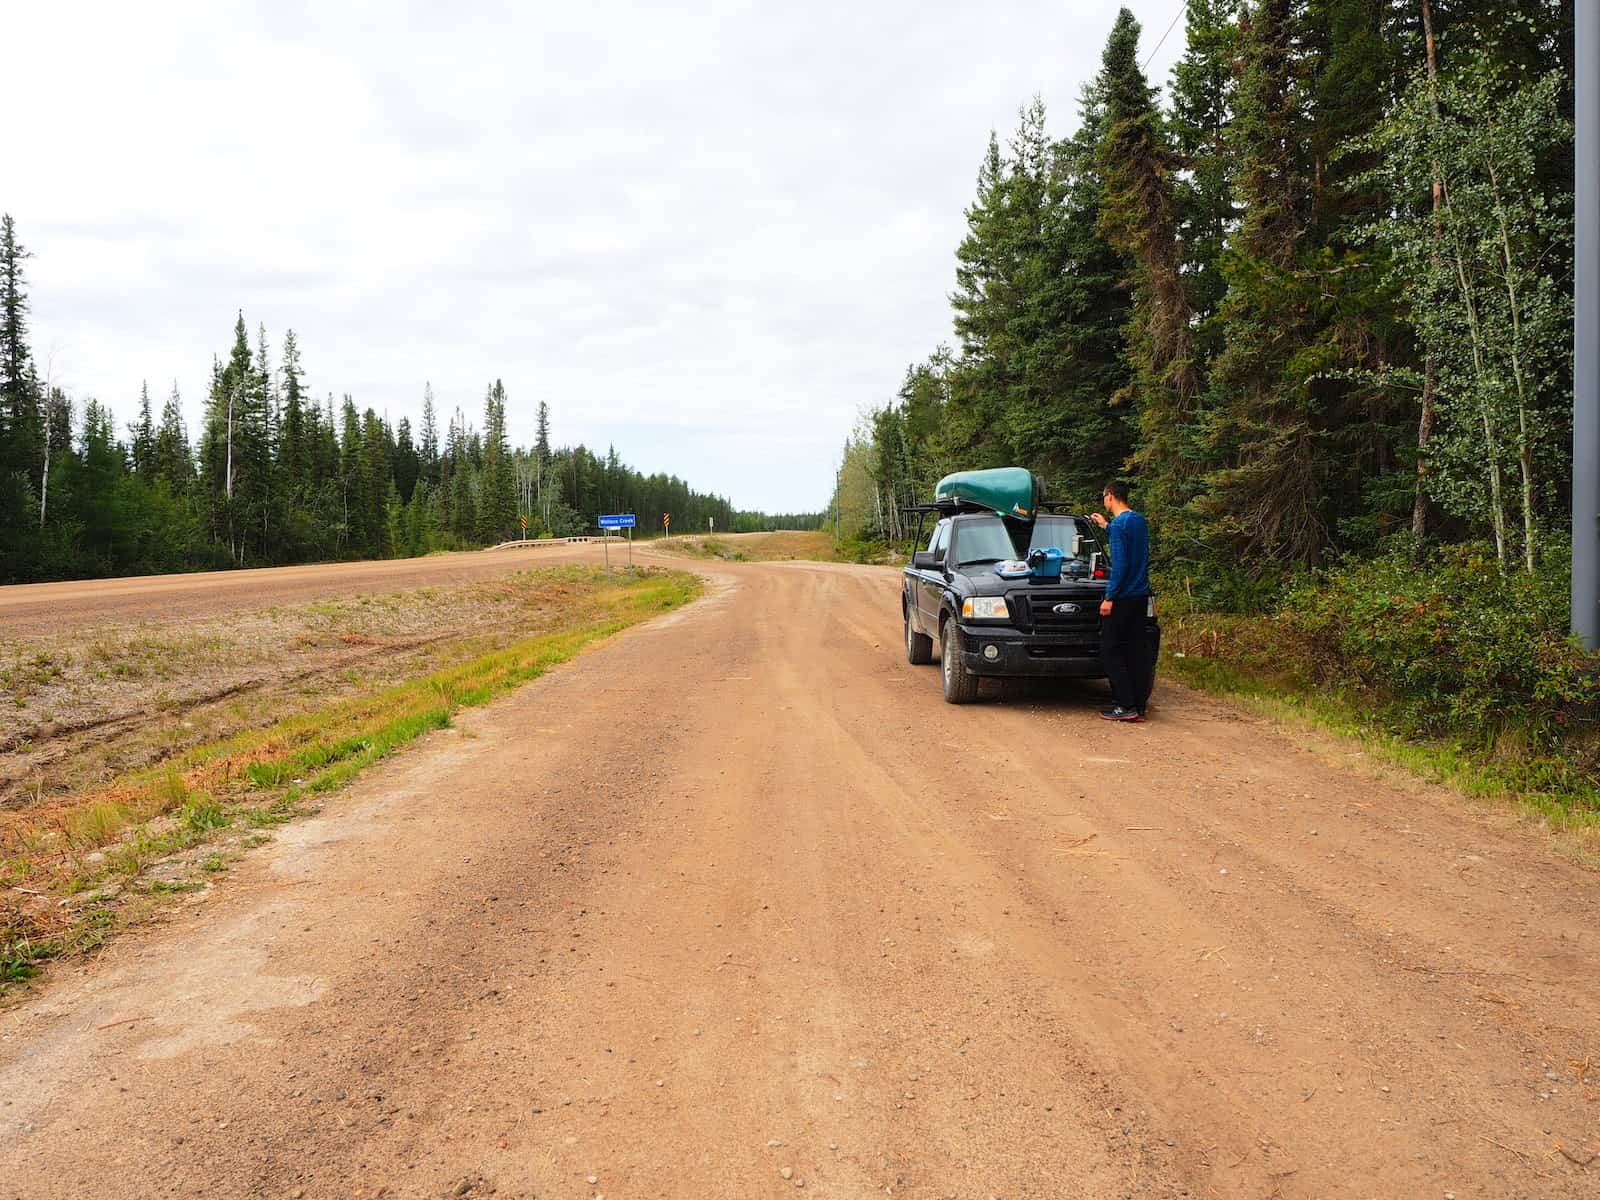
Within hours, we leave the pavement and cell service behind for the next two weeks. As we travel, we notice how the amount of traffic dwindles. As we drive, we see one other vehicle every hour and a half on average.
Numerous pull-outs with trash disposal and the occasional outhouse make the drive North and West towards Fort Simpson and onto Lindberg’s Landing pleasant. As the hours pass, the complete isolation of Northern communities sets in. We are truly alone here, and the Nahanni National Park Reserve, though a focal point in the area, will be no less isolated.
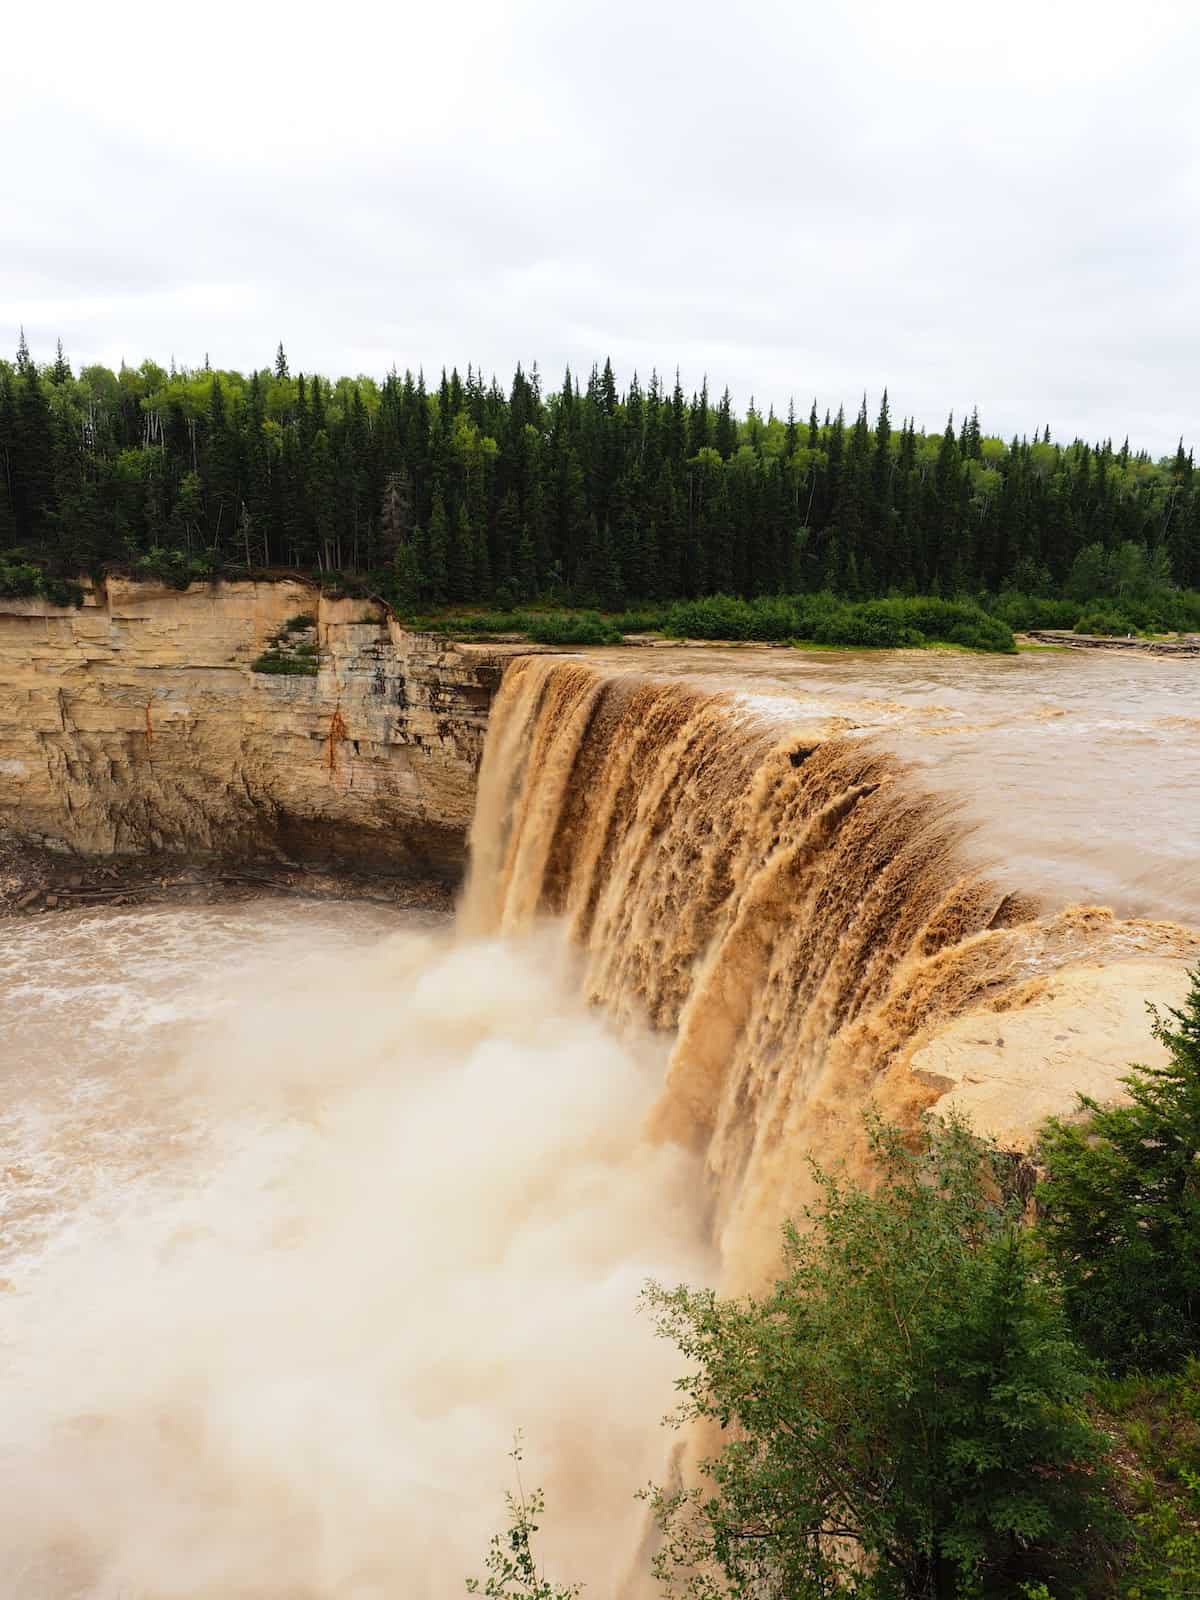
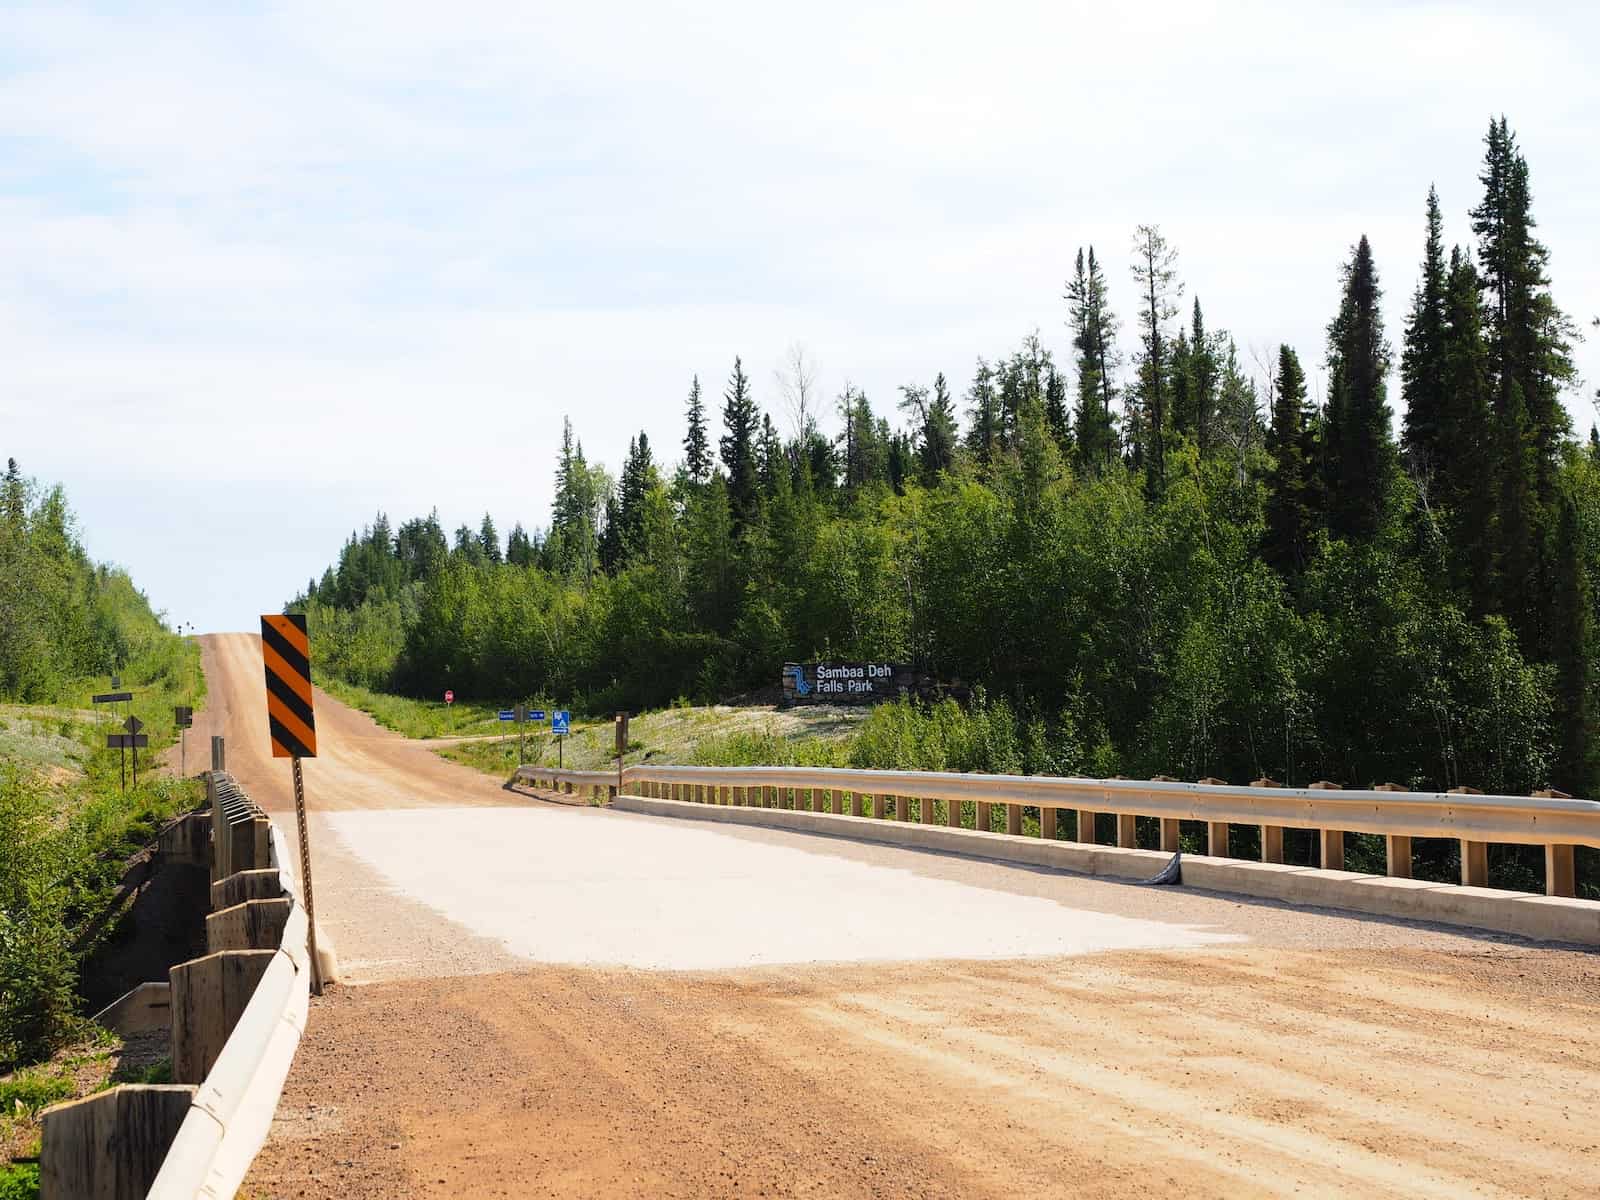
Parks dot the landscape, and we take frequent stretches and picture breaks. Hay River, NWT.Coffee break in one of the beautiful pullouts along the road.Another beautiful Territorial Park, but we still have miles to make.Sambaa Deh Falls
The further we get down this highway, the more I crave the isolation. My life has often taken me far from my natural state of quiet solitude. The Northwest Territories feels like home in its reclusive independence.
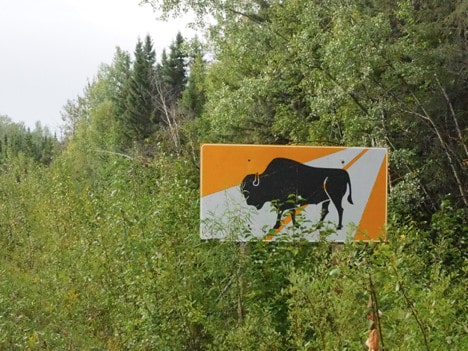
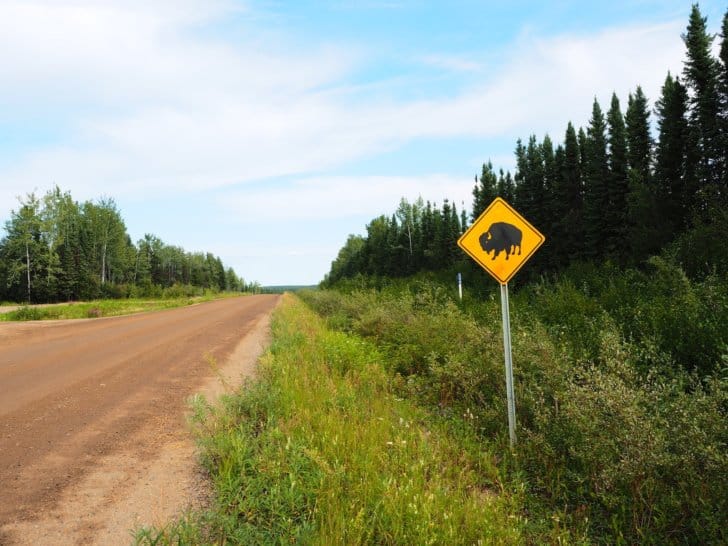
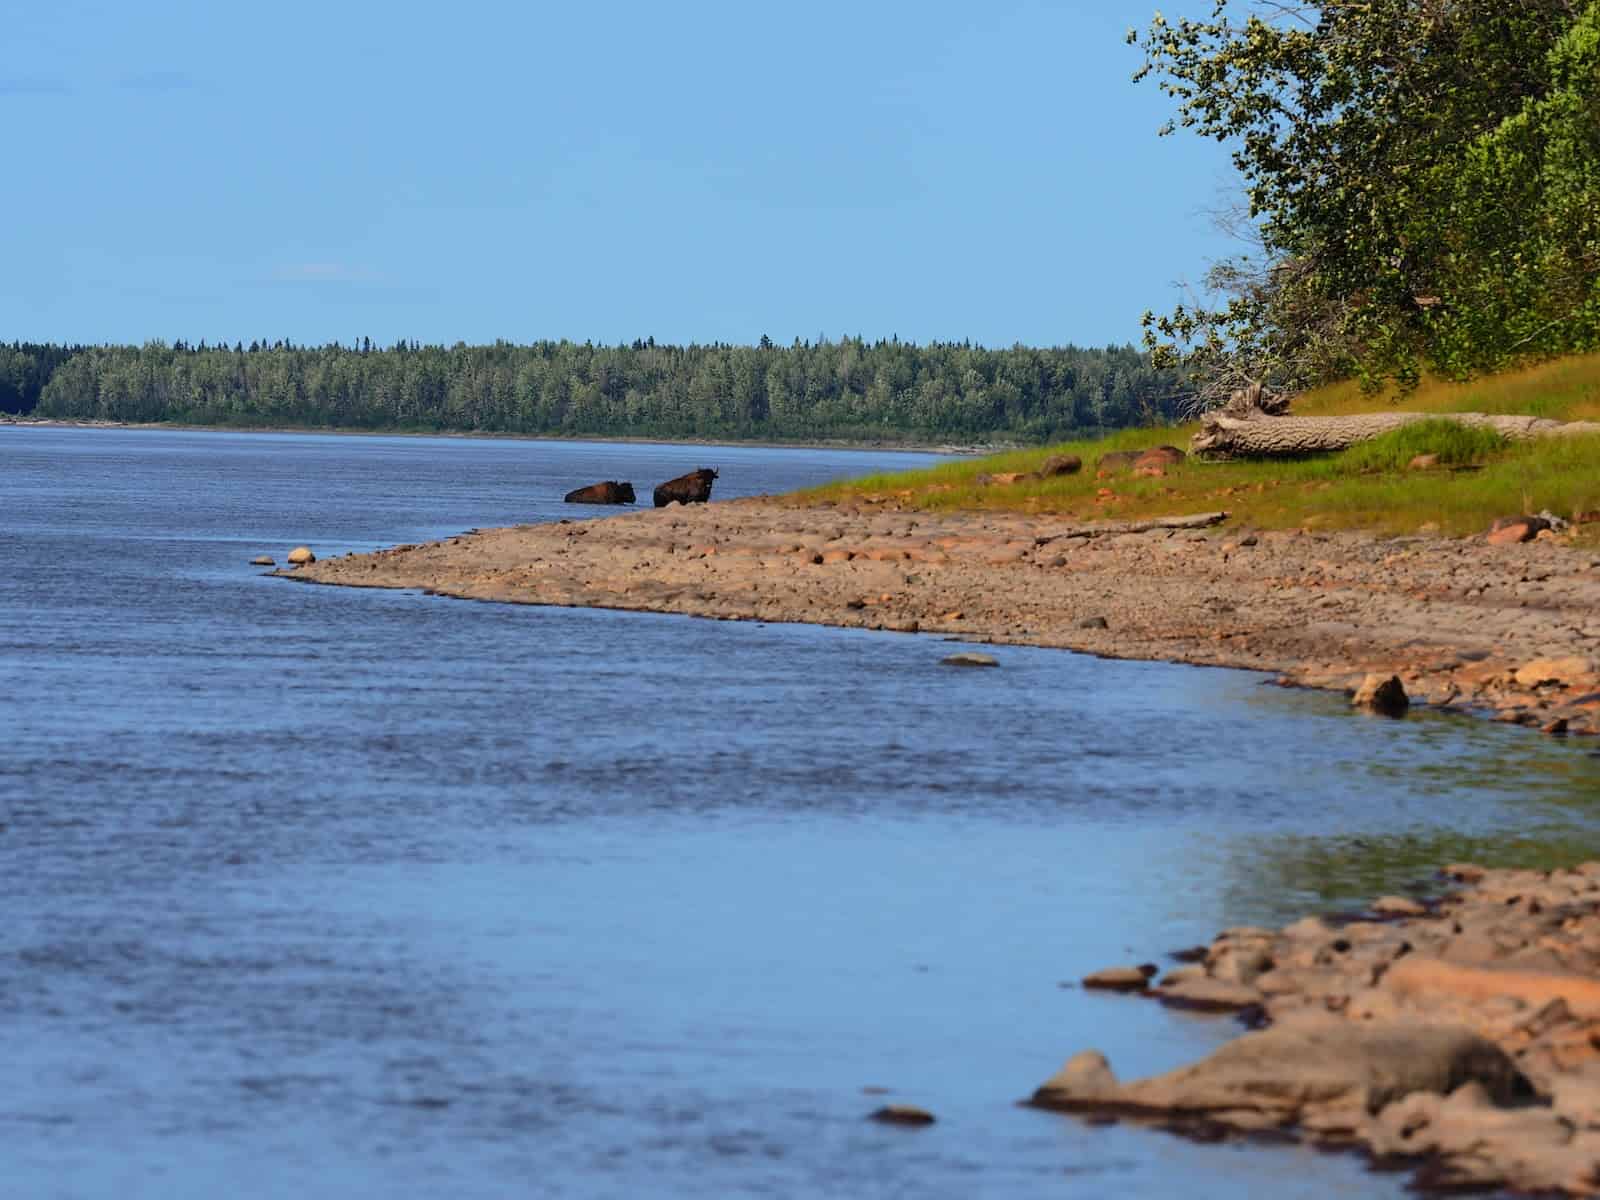
I see a road sign that I have never seen before: Bison Crossing.More bison crossing signs make me anticipate seeing one of the giant beasts.
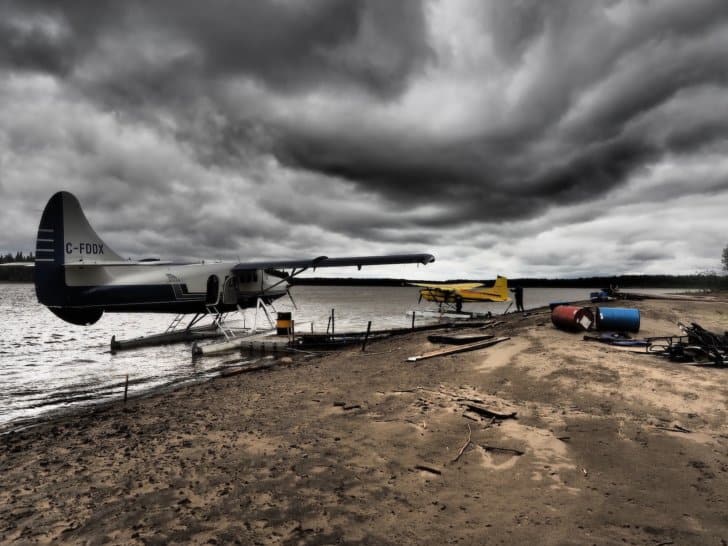
Lindberg’s Landing
When we arrive at Lindberg’s Landing, we find that it’s obviously not ideal for camping or parking. There is a floatplane dock but no cell service to call the airport or the park. Our flight won’t arrive till 10 AM tomorrow (August 7) anyway.
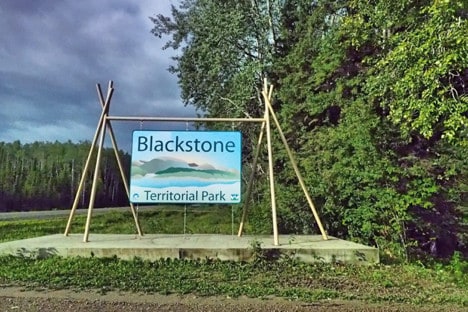
Blackstone Territorial Park
Michael saw a sign for a Territorial Park, and instead of camping on the lawn at Lindberg’s, we opt to check the park. We have been impressed by parks in NT, and Blackstone Territorial Park is a gem. Fully staffed, coffee, and room for us to camp, park a vehicle for two weeks, a shower house, campsites on Liard River, and cell service have us sold on the park just a couple of miles from Lindberg’s.
Blackstone Territorial Park
Blackstone’s manager, Curt, tells us to pick any tent site and come pay him after. We choose a site right next to the river and hatch a plan to pay the parking fee for two weeks and paddle our gear downstream to Lindberg’s Landing in the morning.
Upon arrival at Blackstone Territorial Park, we opt to check out the Liard River and spot two Bison swimming the 2 miles (3 km) wide river.Bison
Approximate Park Fees:
Park access (if not purchasing overnight or facility permits): $5
Shower House access (if not buying overnight or facility permits): $5
Campsite (includes access and showers): $25
Multiple week parking passes: $30
Day 3 – Delay
On August 7th, high winds, cloud cover, and rain convince us (and Simpson Air), flying to Virginia Falls is not an option first thing in the morning. A steady North wind blows, and lazy meandering North-flowing Liard River is white-capped and flowing South. Simpson Airlines has us call back every two hours for flight updates.
The locals keep us entertained as we wait for our flight:
Curt, who seems apologetic for our flight situation, starts a fire and coffee in the visitor center fireplace and makes us feel at home while letting us dry our gear. We watch high winds drive the Liard River’s southward current northwards for eight hours, and Simpson Airlines delays our flight till August 8th. Curt offers to rent us one of Blackstone’s cabins to keep us dry and more packable for the next day. He also offers to shuttle us to Lindberg’s after we drop our gear off by truck to avoid spending time paddling the Liard River in the morning.
A night in a cabin, keeping gear dry was a welcome relief. We knew we would eventually get soaked, but it was nice not to start there. We didn’t sleep well because of the storm and a few “unwelcome guests” (mice), but in the morning, we are dry.
Approximate Park Fees:
Cabin Rental: $60
Day 4 – 101 Miles (162 km)
The weather still looks questionable, and we call Simpson Airlines. Simpson Airlines receives a “weather report” (there are no local weather stations) from a Parks Canada Officer at Virginia Falls at 9 AM. Our flight was delayed until the report came in. When we call at 9 AM, the flight is confirmed, and the pilot will arrive by 10:30 AM.
We drive to Lindberg’s, unload our gear, and Michael drops his truck off.
True to his word, Curt shuttles Michael back to Lindberg’s.
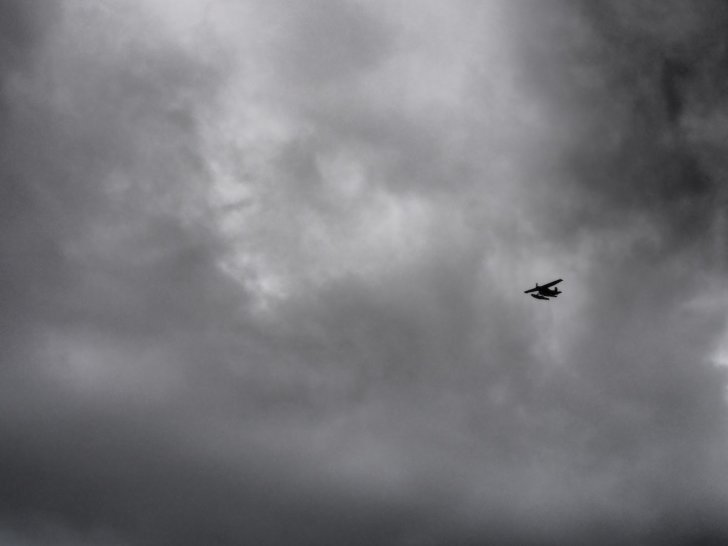
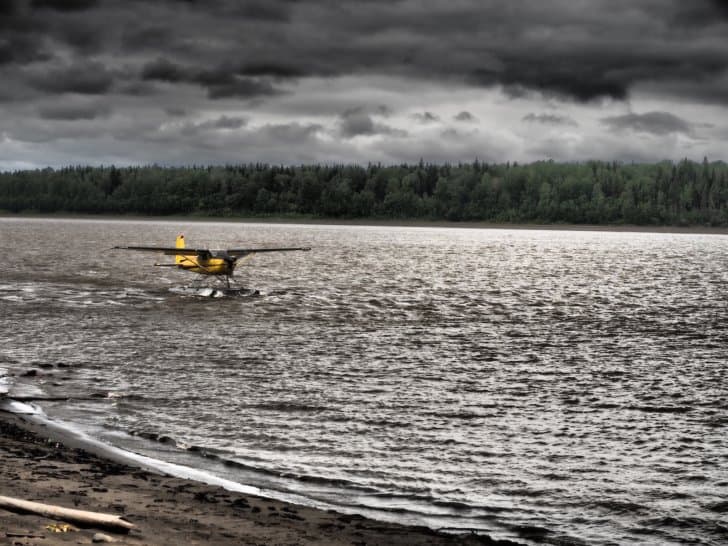
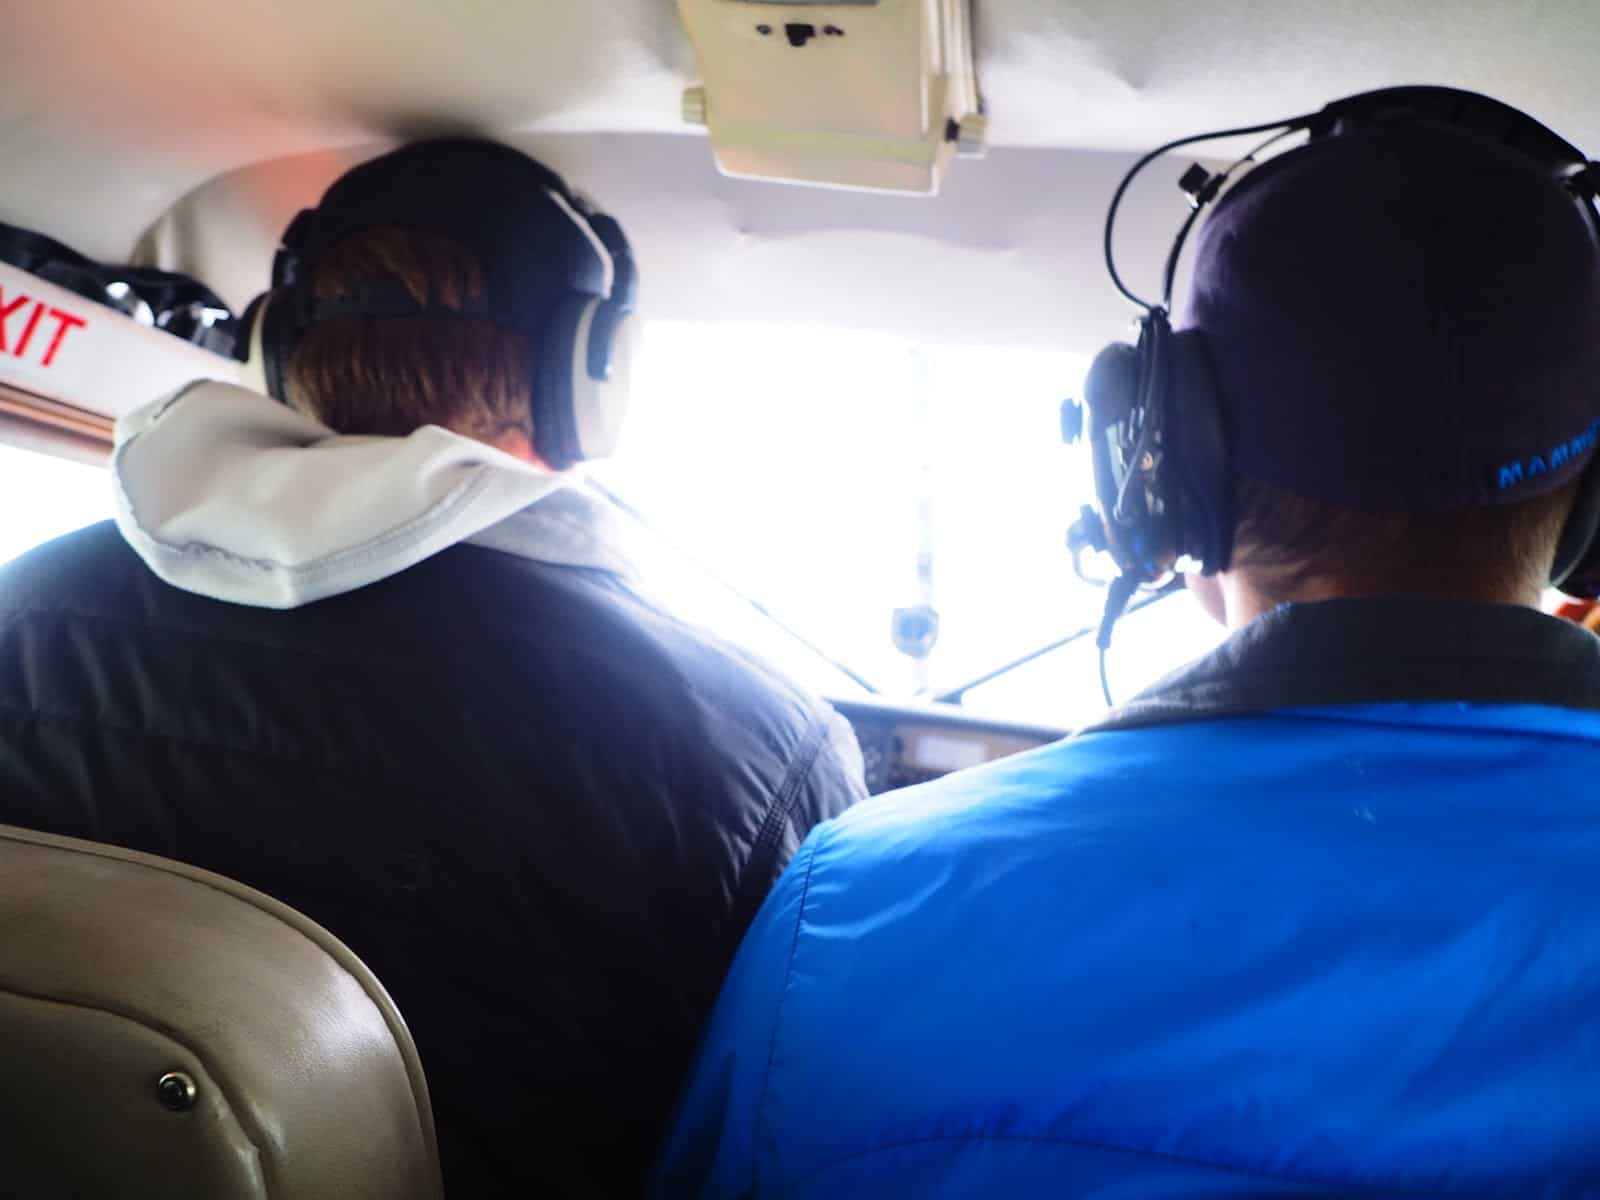
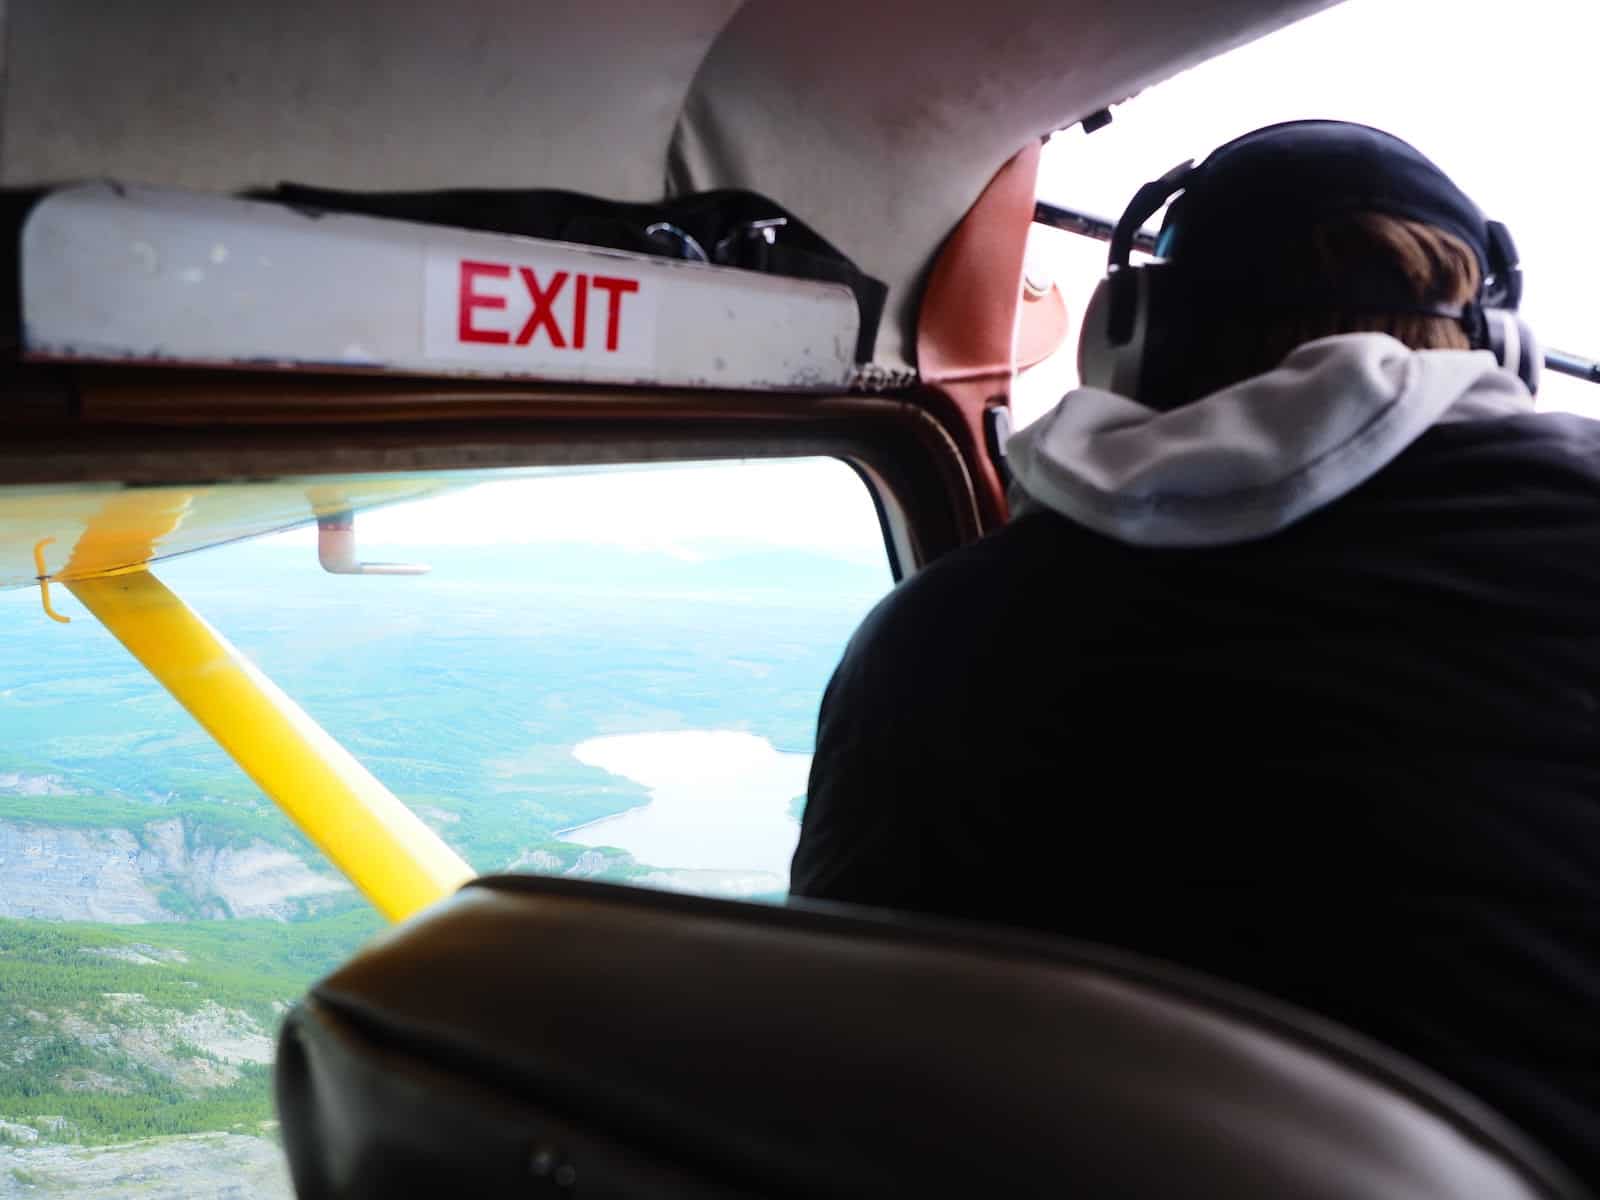
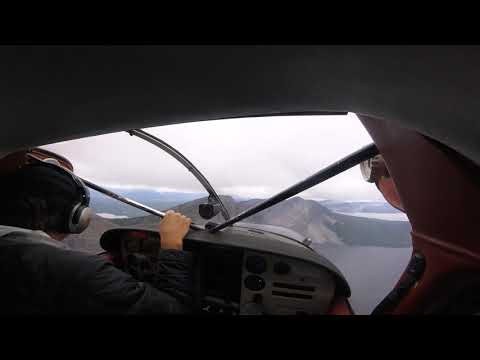
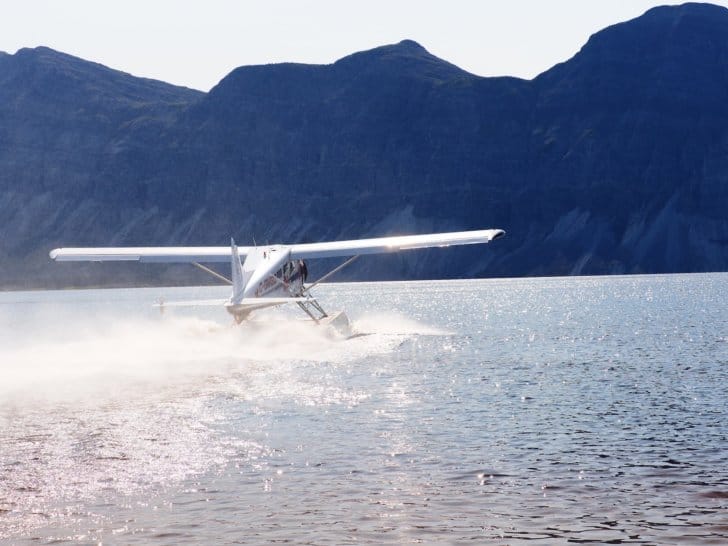
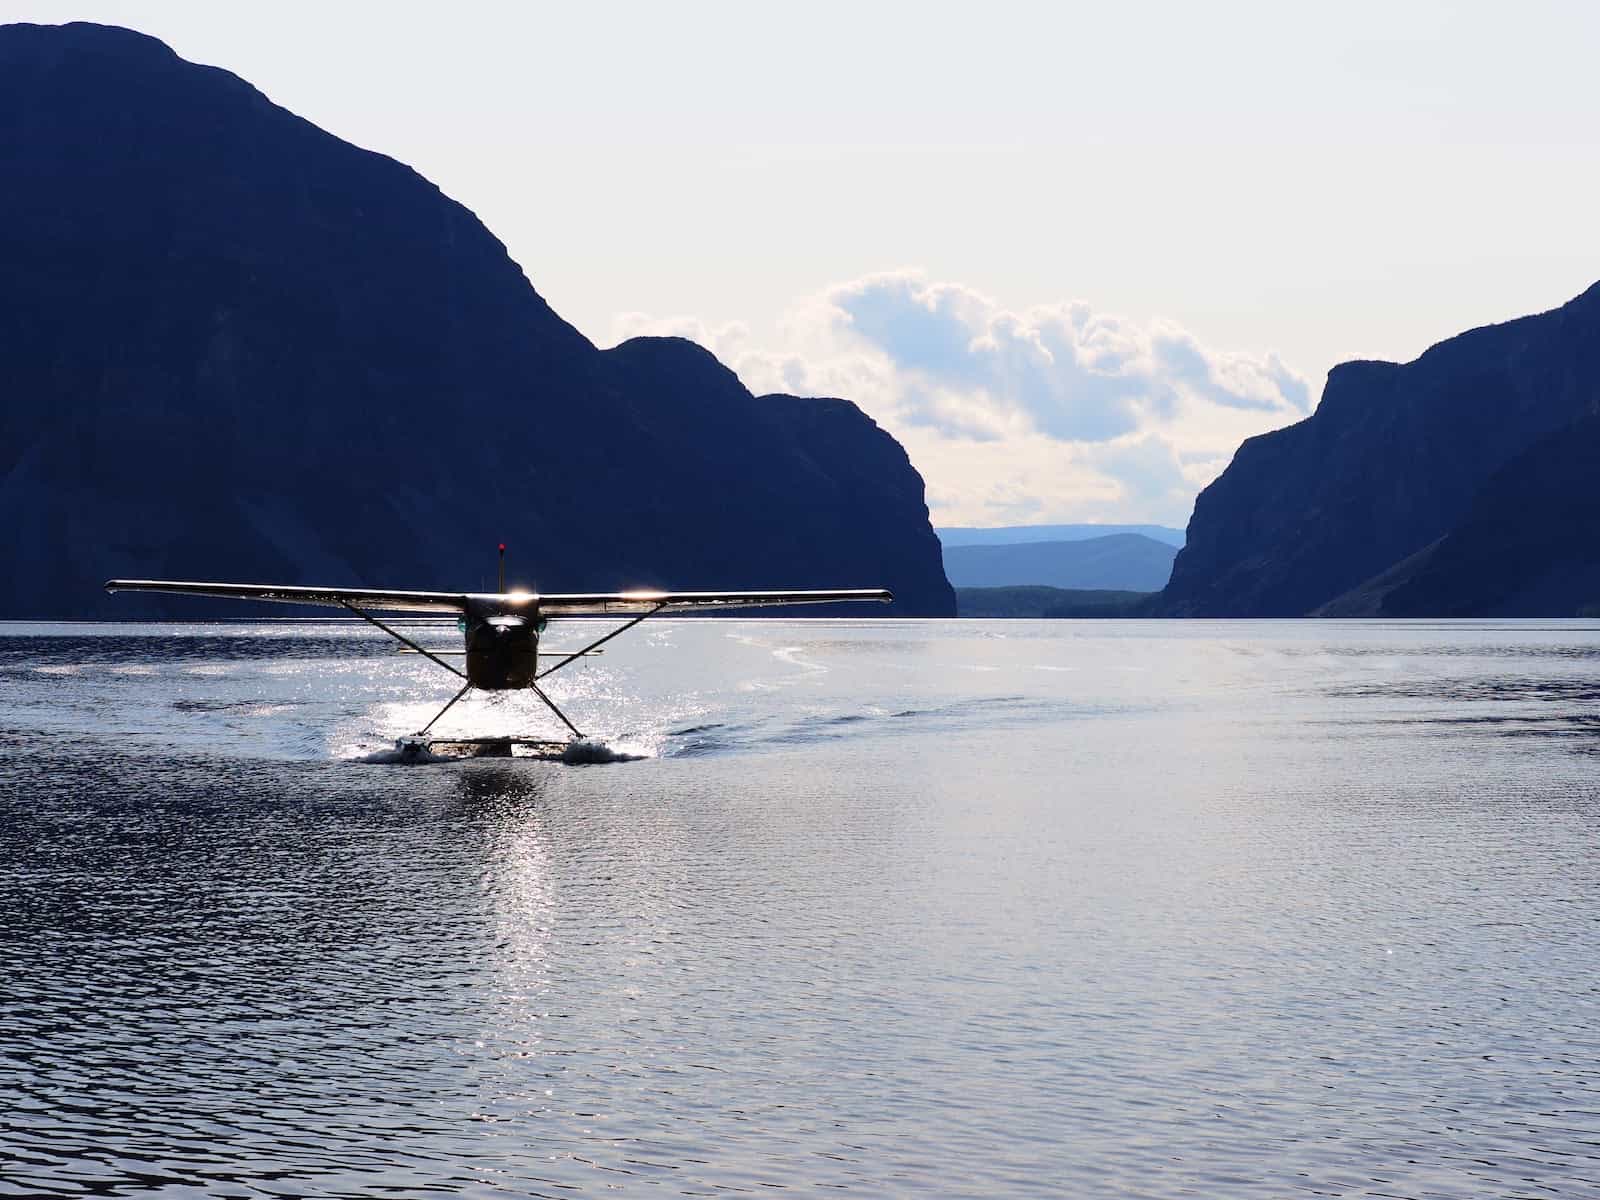
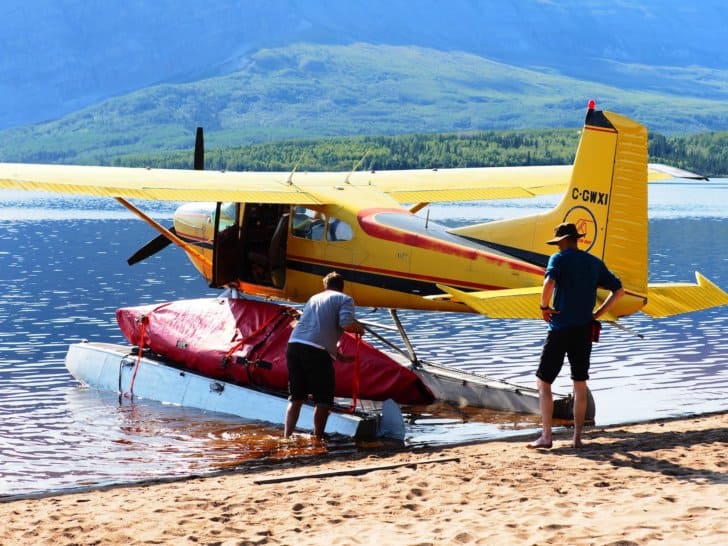
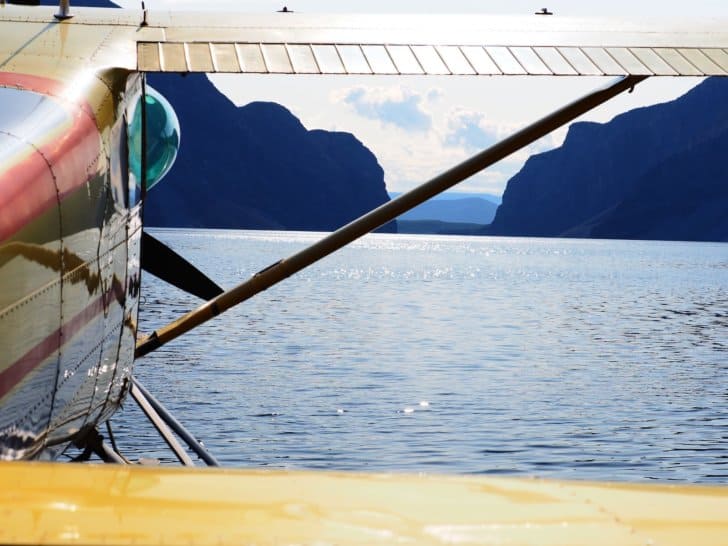
As we portage gear down to the beach, we hear an incoming bush plane.Soon, we spot a bright yellow Simpson Airlines Cessna 185 coming in for a landing.The pilot, Ron, hops out of the plane. At 6’4 or so, Ron makes the Cessna look tiny.The tiny plane makes me worry our gear won’t fit.In a few short minutes, all the gear is in the back of the plane.I climb into the back, and Michael squeezes into the seat beside Ron.
Ron tells us the weather over the Nahanni River is unpredictable and volatile today. Clouds are low over the passes, and Ron isn’t sure we can get through, but he’ll try.
My heart is in my throat as the plane takes off. Bush planes do not have thehighest safety track record, but Ron seems professional and cautious.
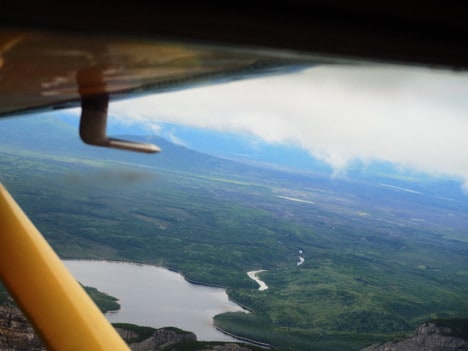
Wild Blue Yonder
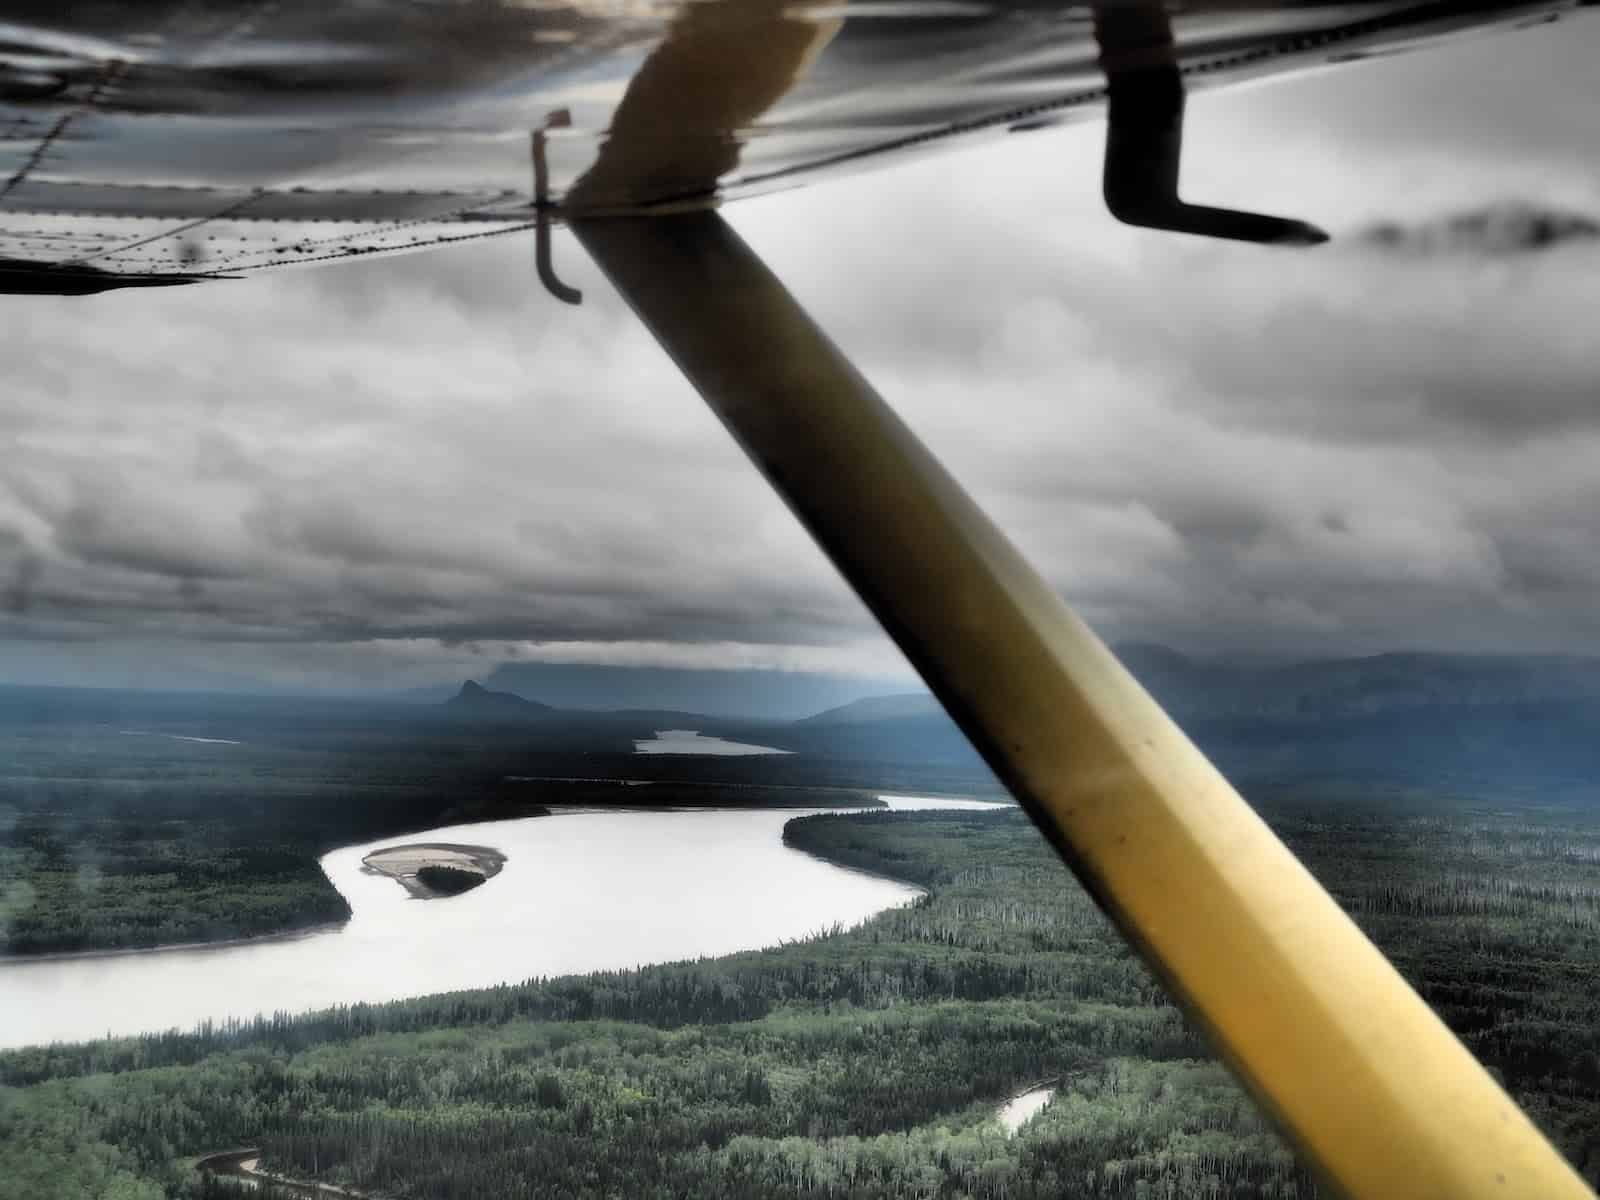
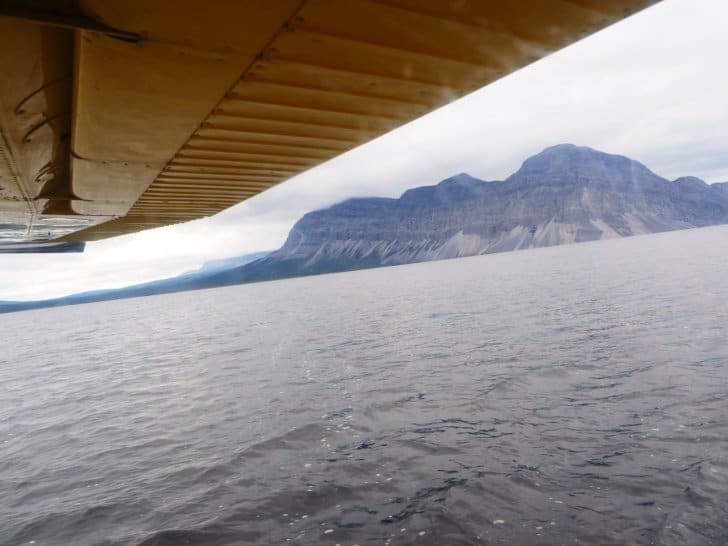
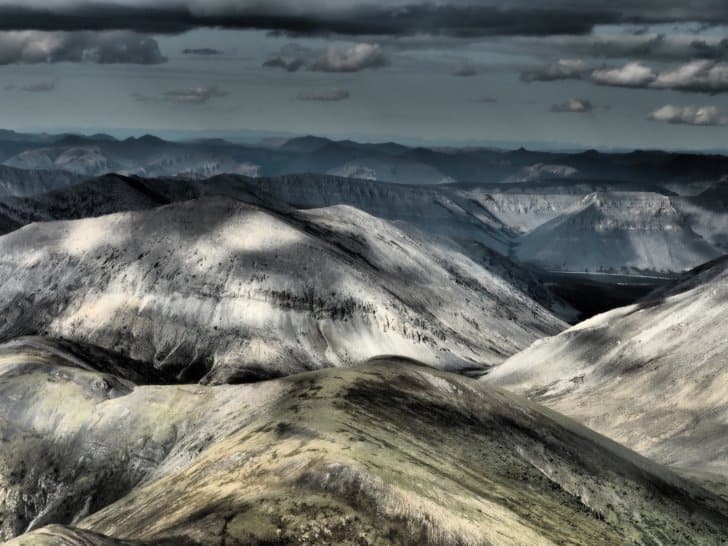
Once in the air, I am almost catatonic as I see the vast expanse of barren muskegs and mountain ranges. Behind each mountain range is another. The expanse does not end. There are no signs of humanity in any direction. It’s a harsh looking environment where only the hardiest of beasts survive and few if any, humans dare to venture.
Liard River from above.
One thing is crystal clear in my mind, I do not want to get lost in this wilderness. I might never be found, nor would I be likely to be able to locate help for hundreds of miles.
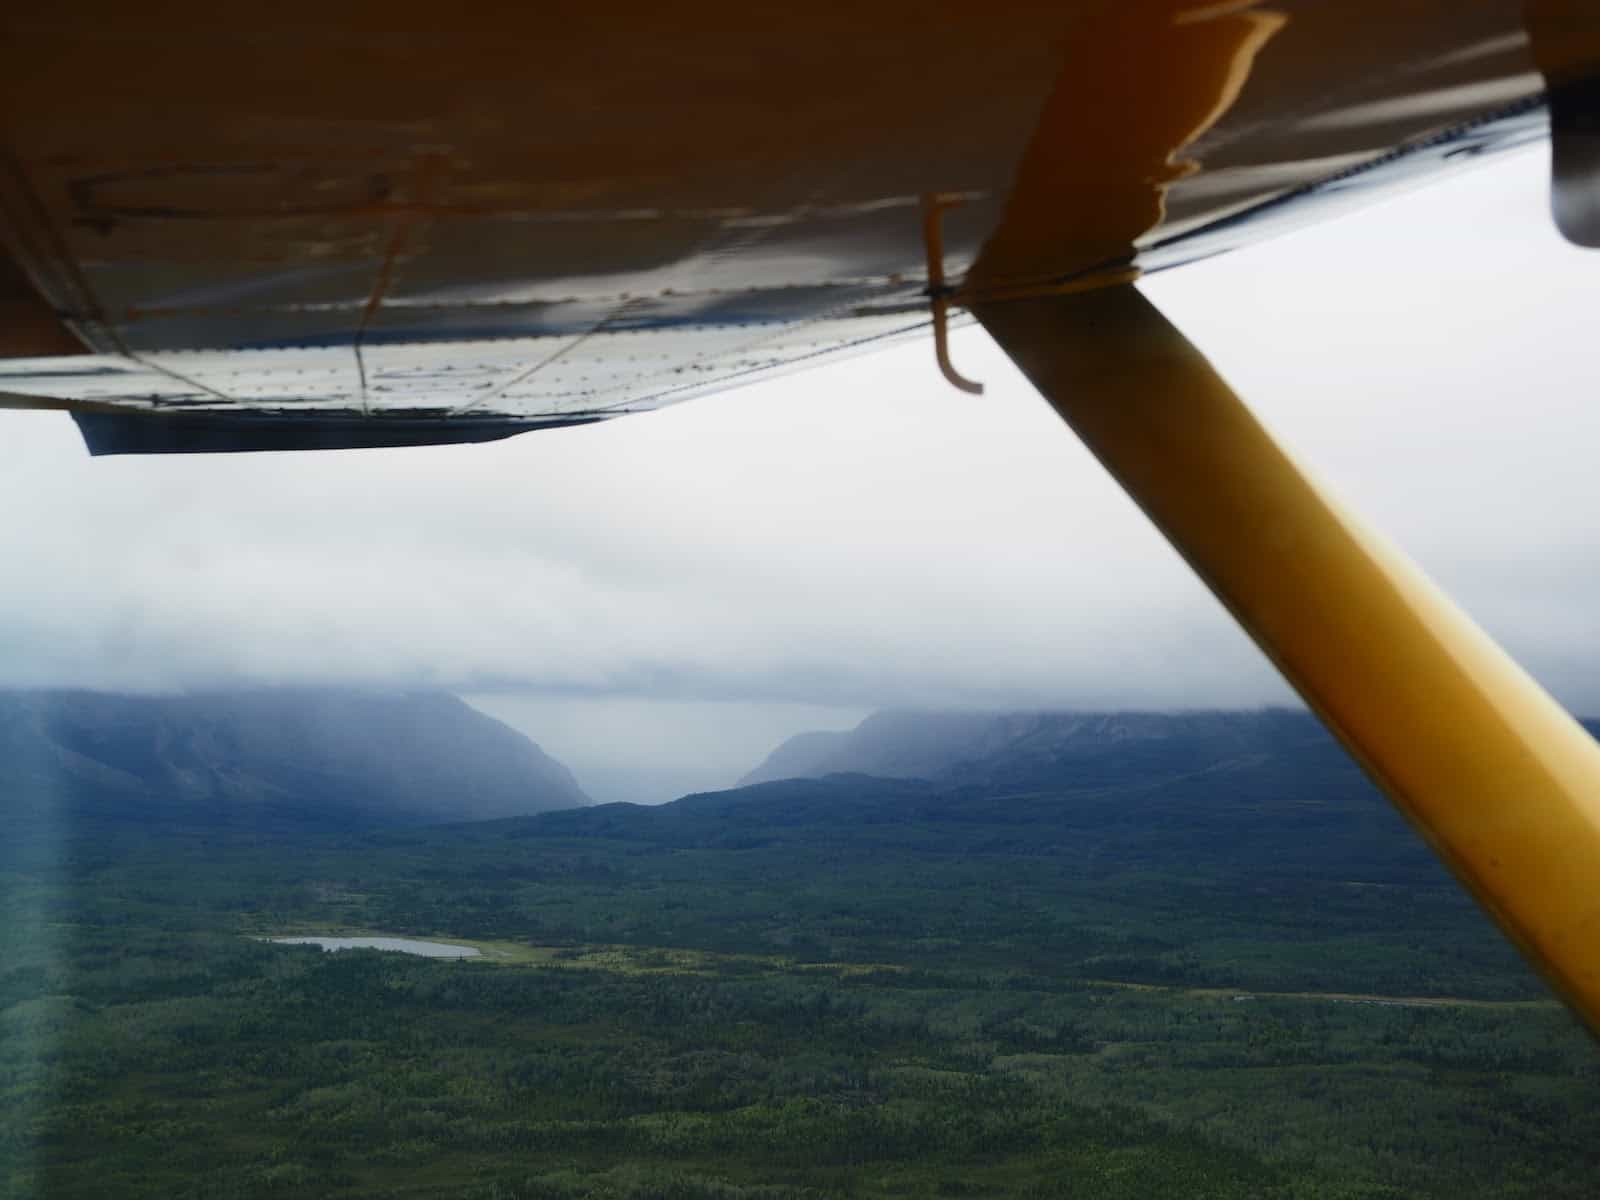
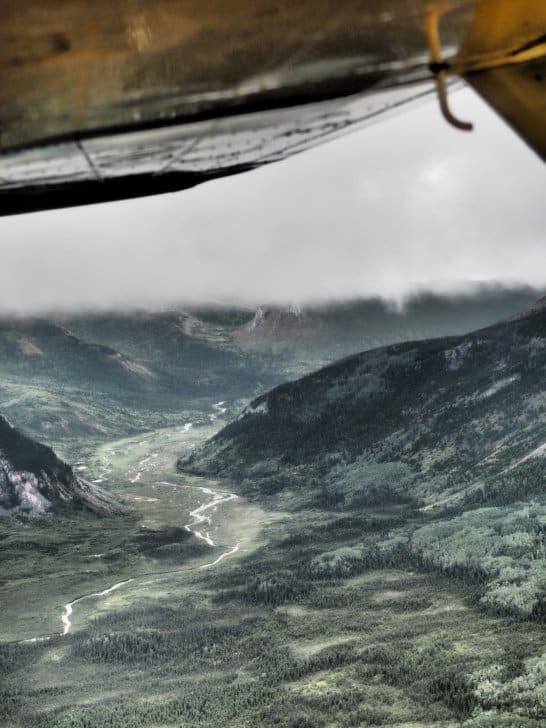
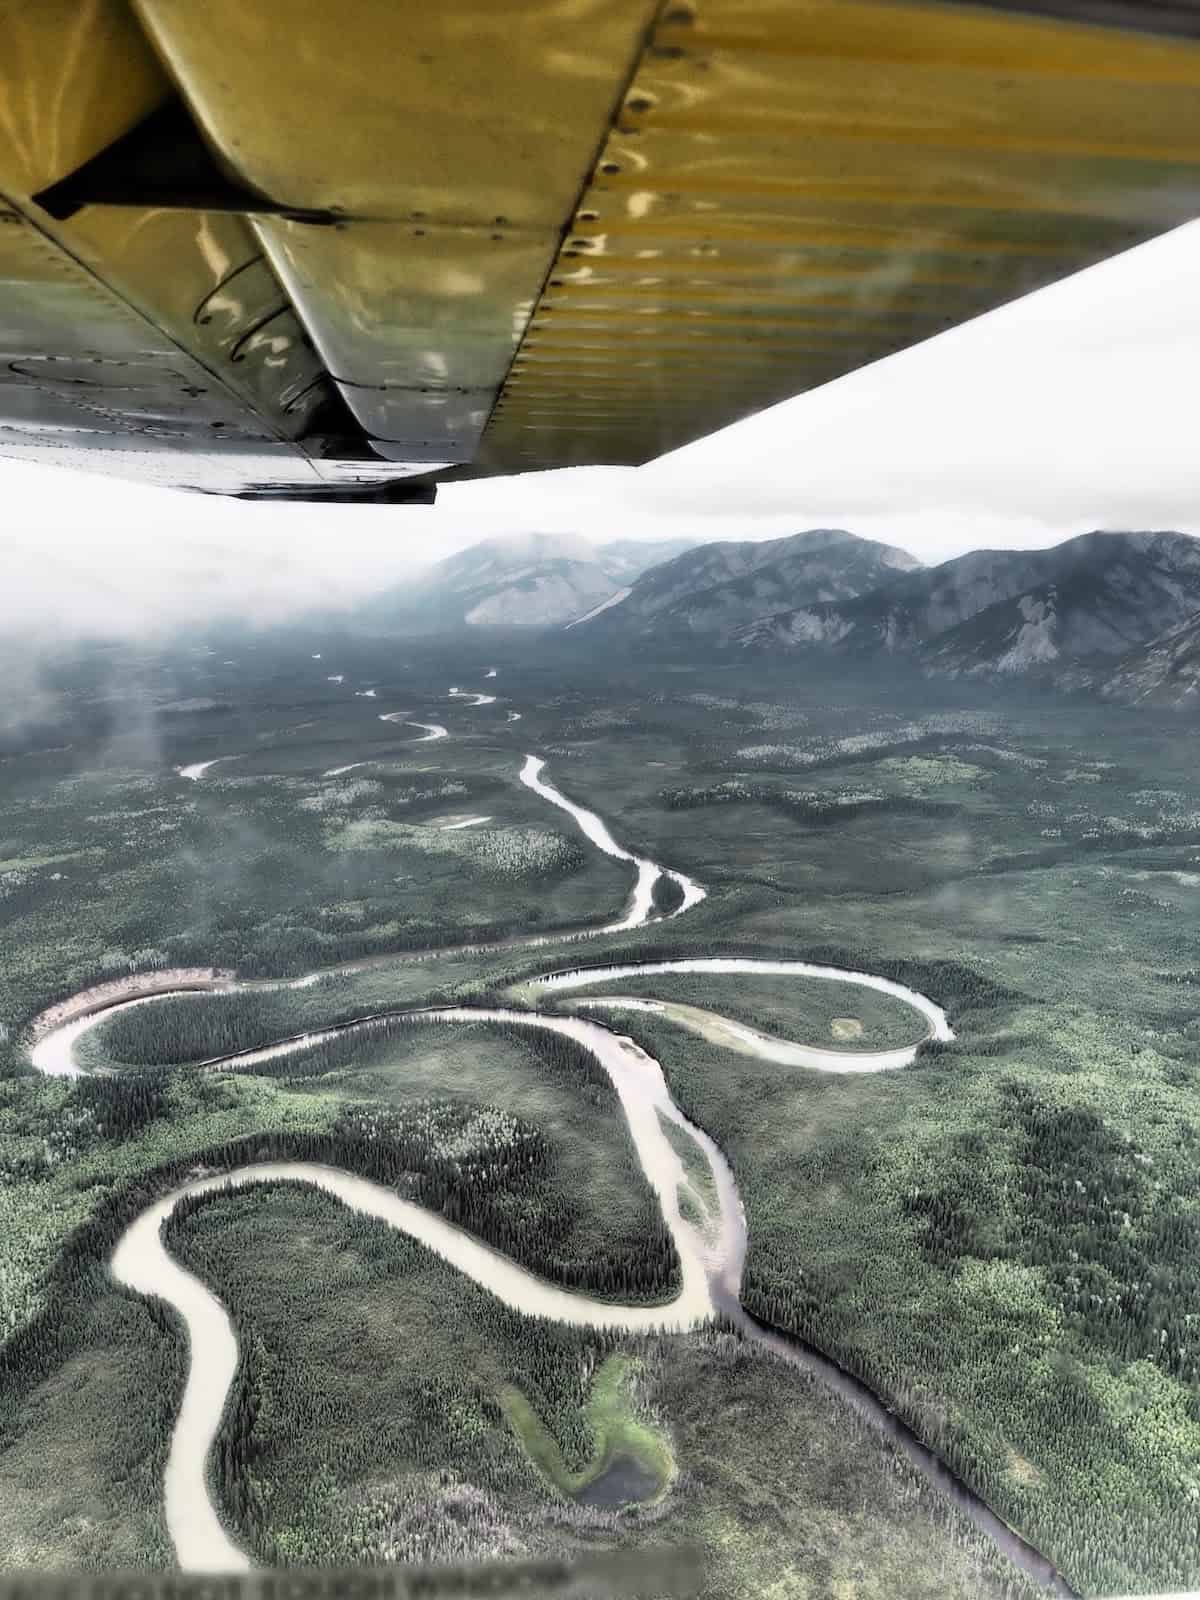
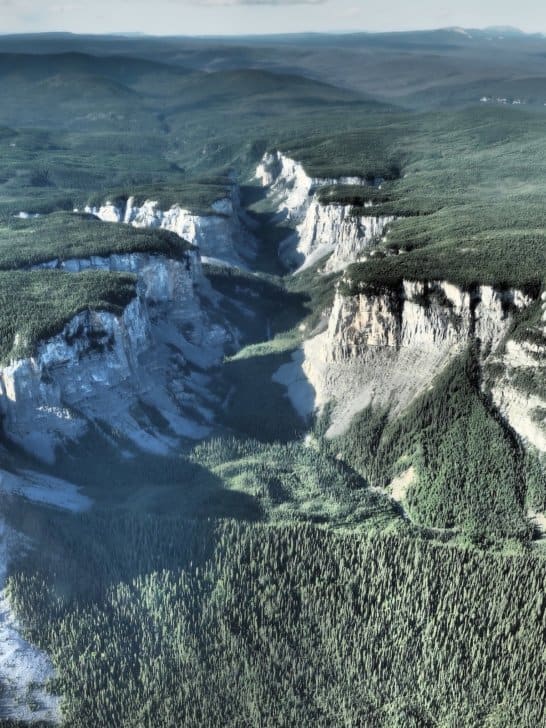
The pass we are supposed to travel is completely occluded.Clouds cover our way in every direction.We have nowhere to turn, and the clouds will not let us through.
After almost two hours of searching for a clear pass, we exhaust the known routes for a Cessna to get into Virginia Falls.
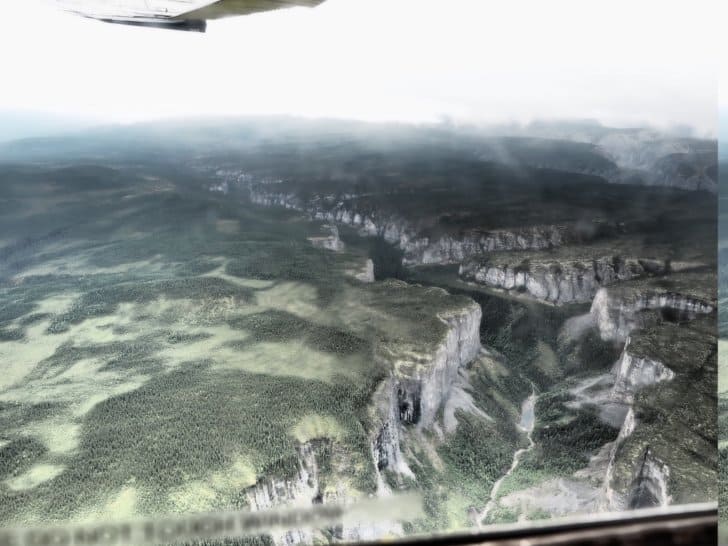
Ron tells us he’s afraid the cloud cover will close behind us, leaving us literally flying blind in a mountain range.The landscape reminds me of some exotic paradise.Jagged cliffs carved out of the landscape.
I can see Ron is increasingly agitated and turns back without hesitation or further explanation. To be fair, I’m more nervous and more than ready to feel the firm ground beneath my feet.
The Gap
Ron decides to set the plane down at a nearby bush refueling station atLittle Doctor Lake. Little Doctor Lake is one of the few places to safely set a plane down nearby. It’s also guarded by a ridge known as “the Gap.”
As Ron flies through the Gap, it looks like we could reach out and touch the sides. High winds blow through the Gap like a wind tunnel and shake the Cessna and its contents (me) like a Magic 8 Ball. It feels suddenly like an elevator floor drops out from under us. My fingernails embed into my seat as I tighten my grip, clench my jaw, and weld my eyes shut.
The turbulence rocks the Cessna, and I vow to give up flying, or chocolate, or whatever it takes to be safe on the ground:
Little “Doc” Lake
As the pontoons touch down on the surface of Little Doctor Lake, and the plane skips along like a stone towards the shore, I breathe a deep sigh of relief.
Pontoon waves ripple behind us, and the shore of Little Doctor Lake is a direct contradiction to the storm we left behind in the Gap. The air feels warm, and there is a hint of sunshine.
Another plane with four passengers on board is also grounded at Little Doc Lake. Both pilots opt to spend the afternoon with us waiting out the storm. Soon all hope of getting through to Virginia Falls is lost, and the pilots unload our gear from the planes and take off for Fort Simpson.
We (and our new friends) are stranded on the lakeshore till morning.
New Friends
As we sit on the beach, we make fast friends with some other Albertans (Bruce, Bruce, Donna, and June) who, like us, are enjoying the view at Little Doc Lake but are anxious to get to the Nahanni. Our new friends have been separated from the other half of their group too (Chris and Ken.)
Michael and I are starting to wonder if we can paddle fast enough to get him home to his job as a Paramedic. It’s unlikely his employer will understand about a flight being delayed for two days.
In this circumstance, we will hike around Virginia Falls tomorrow as soon as we get there. We estimate we should be at Virginia Falls around noon if Ron’s promise to see us “in the morning” pans out. We’ll have to forgo most of the other hikes because if we don’t, we might not make it back in time for Michael’s shift.
With our strategy planned, we get our tent set up and make Hawaiian pizza and white cake with icing. With two full days of delay, we also now have at least two extra days of food.
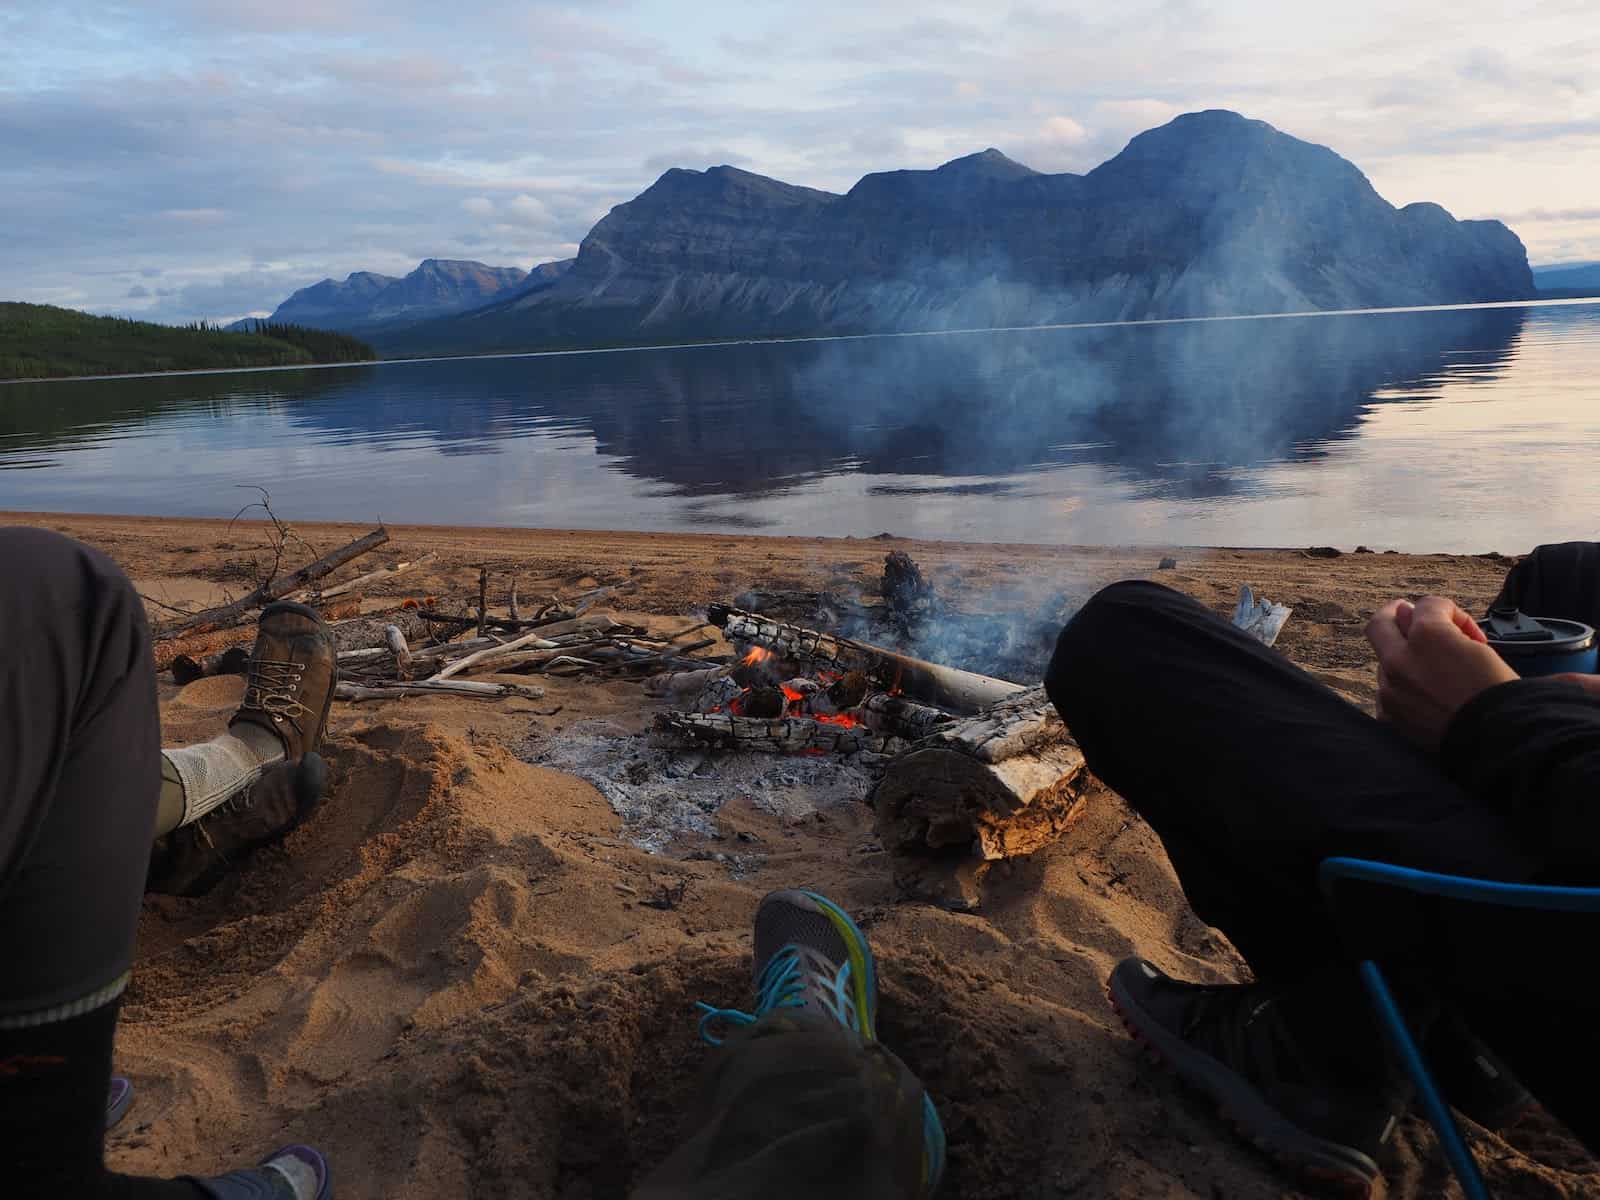
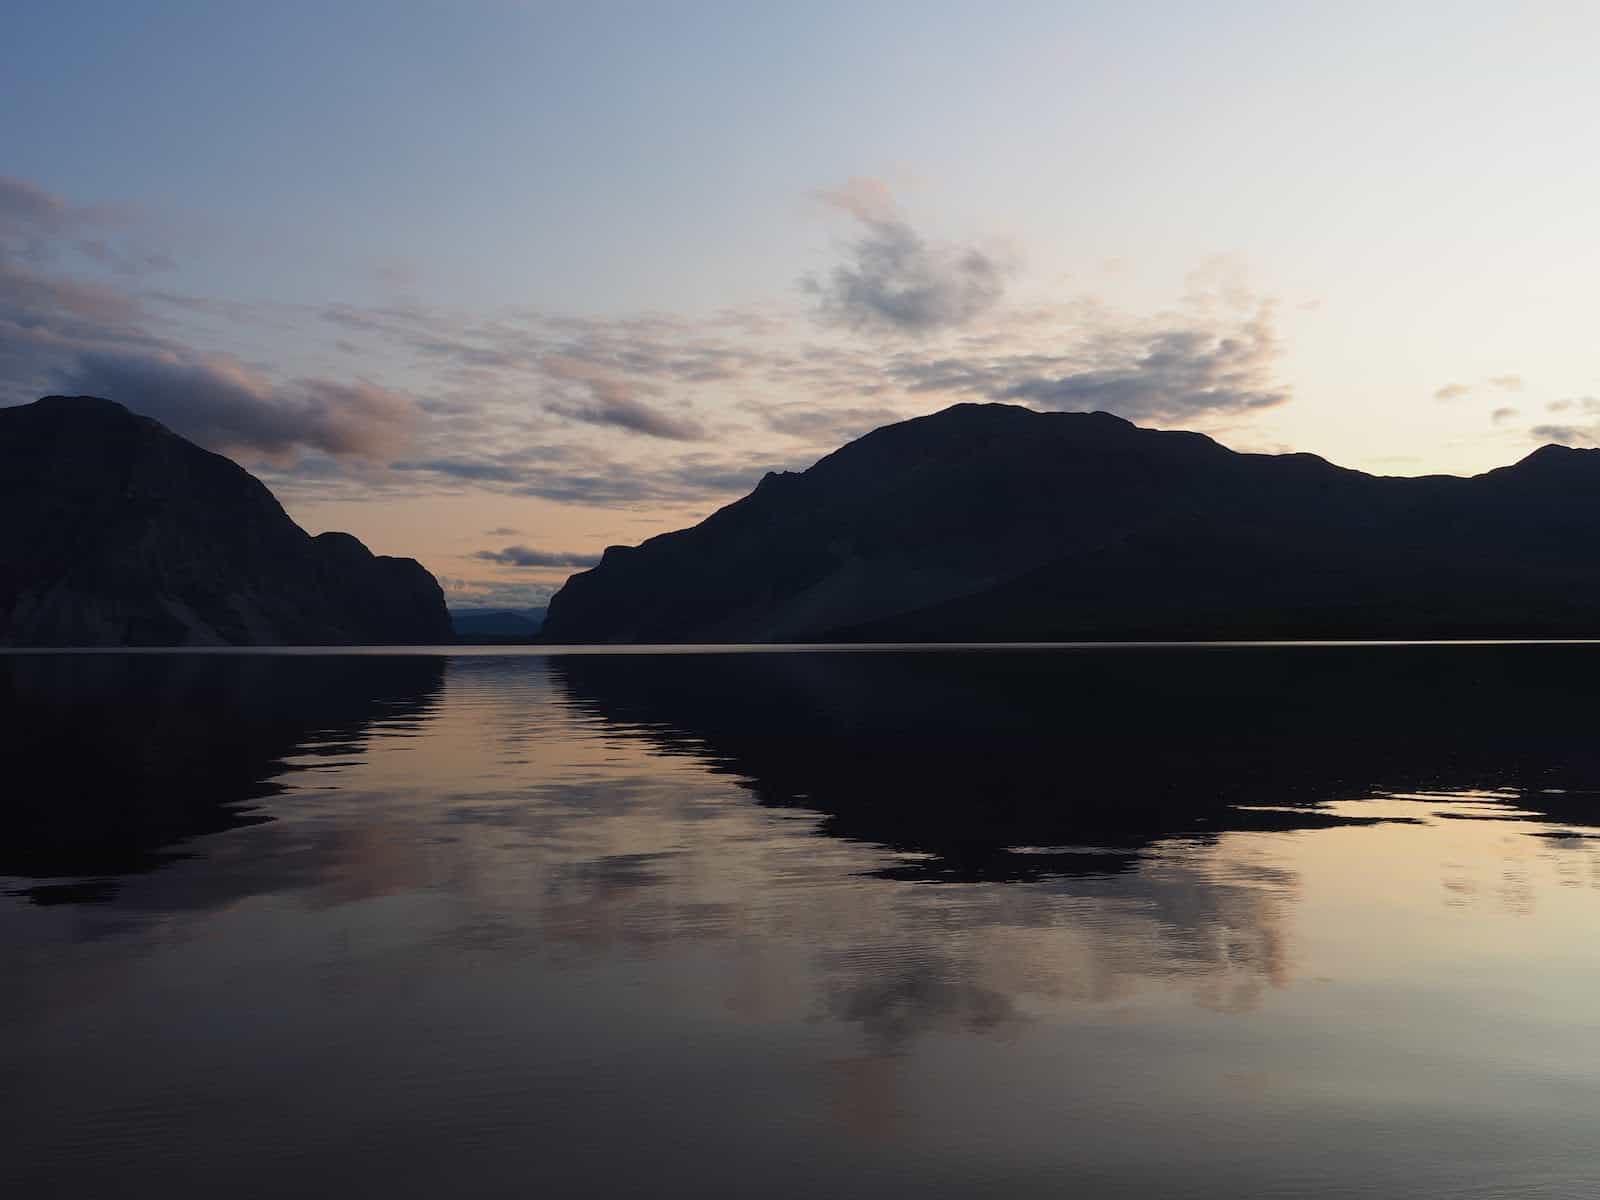
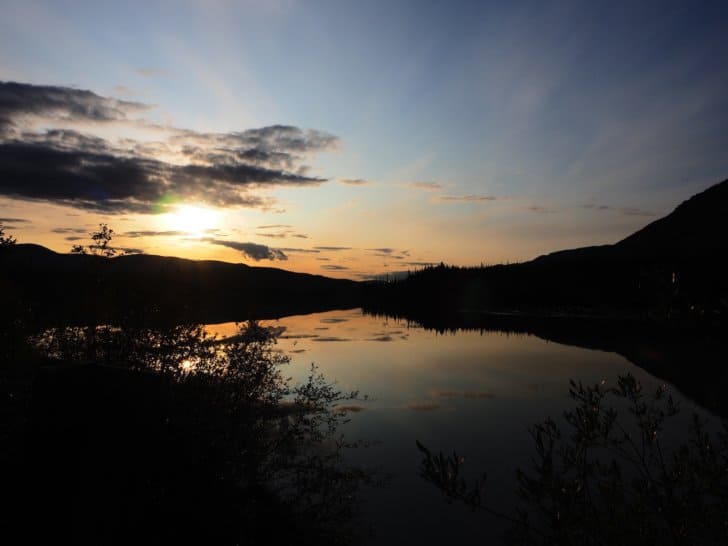
We sit on the beach with the Bruces, June and Donna, and enjoy a campfire and a sunset that lasts for hours longer than any of us are accustomed to.
One of the Bruces has paddled Nahanni before and gives us ideas of where to camp and which hikes we should try to get in.
Soon, though, the events of the day wear on us all. With the sun finally setting on the lake, everyone retreats to tents for the night.
Day 5 – 46 Miles (74 km)
Delay Day
Morning arrives, and for the third day in a row, we eat breakfast, pack and await a plane. To our surprise and delight, the skies are clear, our plane has to arrive soon. 8 AM becomes 10 AM, and 10 AM becomes noon.
We stare out at Little Doc Lake for hours, and no plane arrives.We sit on the beach until noon when finally a plane arrives, but it isn’t our plane. We wave goodbye to our friends, the Bruces, Donna, and June as their plane takes off.
Michael is on edge. Usually, he is the more even-tempered of the two of us, and it’s throwing me off. He is afraid we’ll miss our deadline to get back, and he’ll miss work. For a medic, missing work would likely mean losing his job. We have no way of predicting weather conditions. We make a pact that we cannot stop anywhere on the river, and we have to paddle every day no matter what happens.
The afternoon wears on long enough so I take a dip in the lake. An hour later, I climb out of the lake, and there is still no sign of our plane. Overhead we can hear Twin Otters flying towards Virginia Falls, and we know flights are making it in. Michael and I seriously discuss abandoning the trip and having the pilot fly us back to Lindberg’s Landing instead. At 4:00 PM, we resolve to abandon the trip if we don’t make it to Virginia Falls tonight.
At 4:30 PM we hear a plane, after days of listening to bush planes overhead, we can identify the sound of the Cessna 186 coming into Little Doc Lake.For the second time, we load up the Cessna and hope Ron gets us to Virginia Falls.I take one final glance through the gap while boarding the plane.With a wild roar, the plane lifts off the surface of Little Doctor Lake and into the blue horizon.
Virginia Falls
In the sunlight, the terrain looks more like a lost tropical world, than the Canadian deep north.Yet even with sunlight, the landscape retains its rugged mysteries.I have a wild desire to explore every canyon, where human feet may have never gone before.After every range, I can see, there is another range and no signs of humanity. I am tiny, and this place could swallow me whole.With names like the Ragged Range and the Headless Range, the Northwest Territories warns visitors of its dangerous past and an uncertain future.
Ron feels terrible about how long our flight was delayed. To make up for it, he is giving me a direct flight over the top of the falls. He’s not supposed to fly over the falls, but he knows I am a photographer and is gifting me a photo from above. I have just one shot at this. I won’t have time to take a second one. My hands shake nervously as I screw on my precious telephoto lens and line up for the shot of my lifetime.
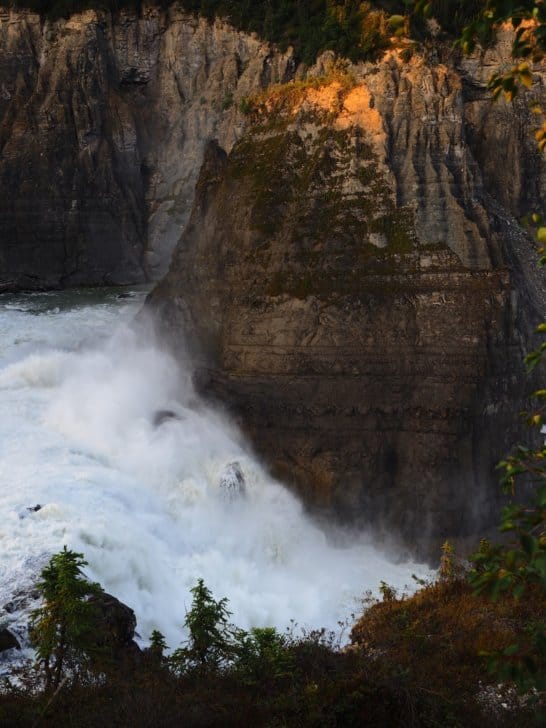
From a plane high above, you can see the scale of the tallest falls in North America, Virginia Falls (315 ft / 96 m).
As I look at the falls, my heart is in my throat, but almost as soon as I glimpse them, they vanish into the calm, lake-like waters of the Nahanni River above the falls.
No Room in the Inn
As we land and start unloading, we are met by Parks Canada staff. We have no reservations, had no way to sign in with the Parks Canada staff, and our two overnight permits for Virginia Falls are expired.
Ron smooths things over, and the Parks Canada staff tell us there are no campsites; they’ll work something out and squeeze us somewhere. Just then, one of the Bruces comes off the dock and starts helping haul our gear up onto the shore. He and his crew have already saved us a tent spot with them. They have been waiting for us all day.
As soon as our gear is unloaded, we wave goodbye to Ron, and he takes off for Fort Simpson and home. We take our equipment into camp and have a reunion with our fellow castaways.
Just above the towering Virginia Falls is a glassy Nahanni River.
A View from the Top
We only have tonight and tomorrow morning to explore Nahanni, but we are also travel-worn. As soon as we have our tent and gear set up, we race to explore the falls before dark.
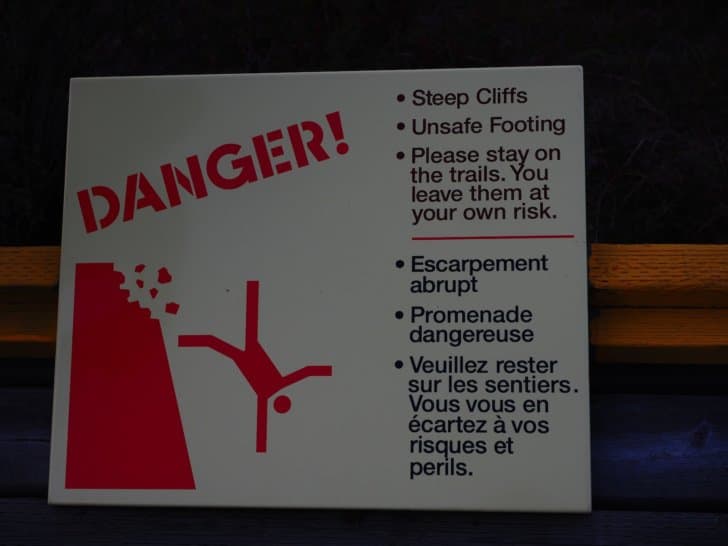
Sun is quickly setting over the Nahanni River.The classic Parks Canada red chairs are part of a Canada wide scavenger hunt, and we have found a pair on the precipice of Virginia Falls.Top of the Falls is devastatingly beautiful, and a reminder that a mistake here could be fatal.The height of the cliffs here is sobering.
S’mores with Great Friends
Darkness comes, despite our wishes for a bit more time. Once it’s completely dark (and past midnight), we return to our tent site. Our new friends are still awake and have a beautiful campfire roaring.
Without the sun, there is a new and vengeful chill to the northern air. We all huddle in close to the fire, and Michael and I share one of our precious few pure luxuries: maple marshmallows and chocolate-covered cookies for s’mores. Our new friends have made all the difference tonight, and we are grateful for their help and company.
The evening becomes bittersweet as we realize, Bruce, Bruce, Donna, June, Chris, and Ken will not be joining us for the remainder of the trip. From here, Michael and I are completely alone.
This episode of the Backpacking Light podcast is chock full of actionable advice to create your own delicious backpacking meals.
Stream
Summary
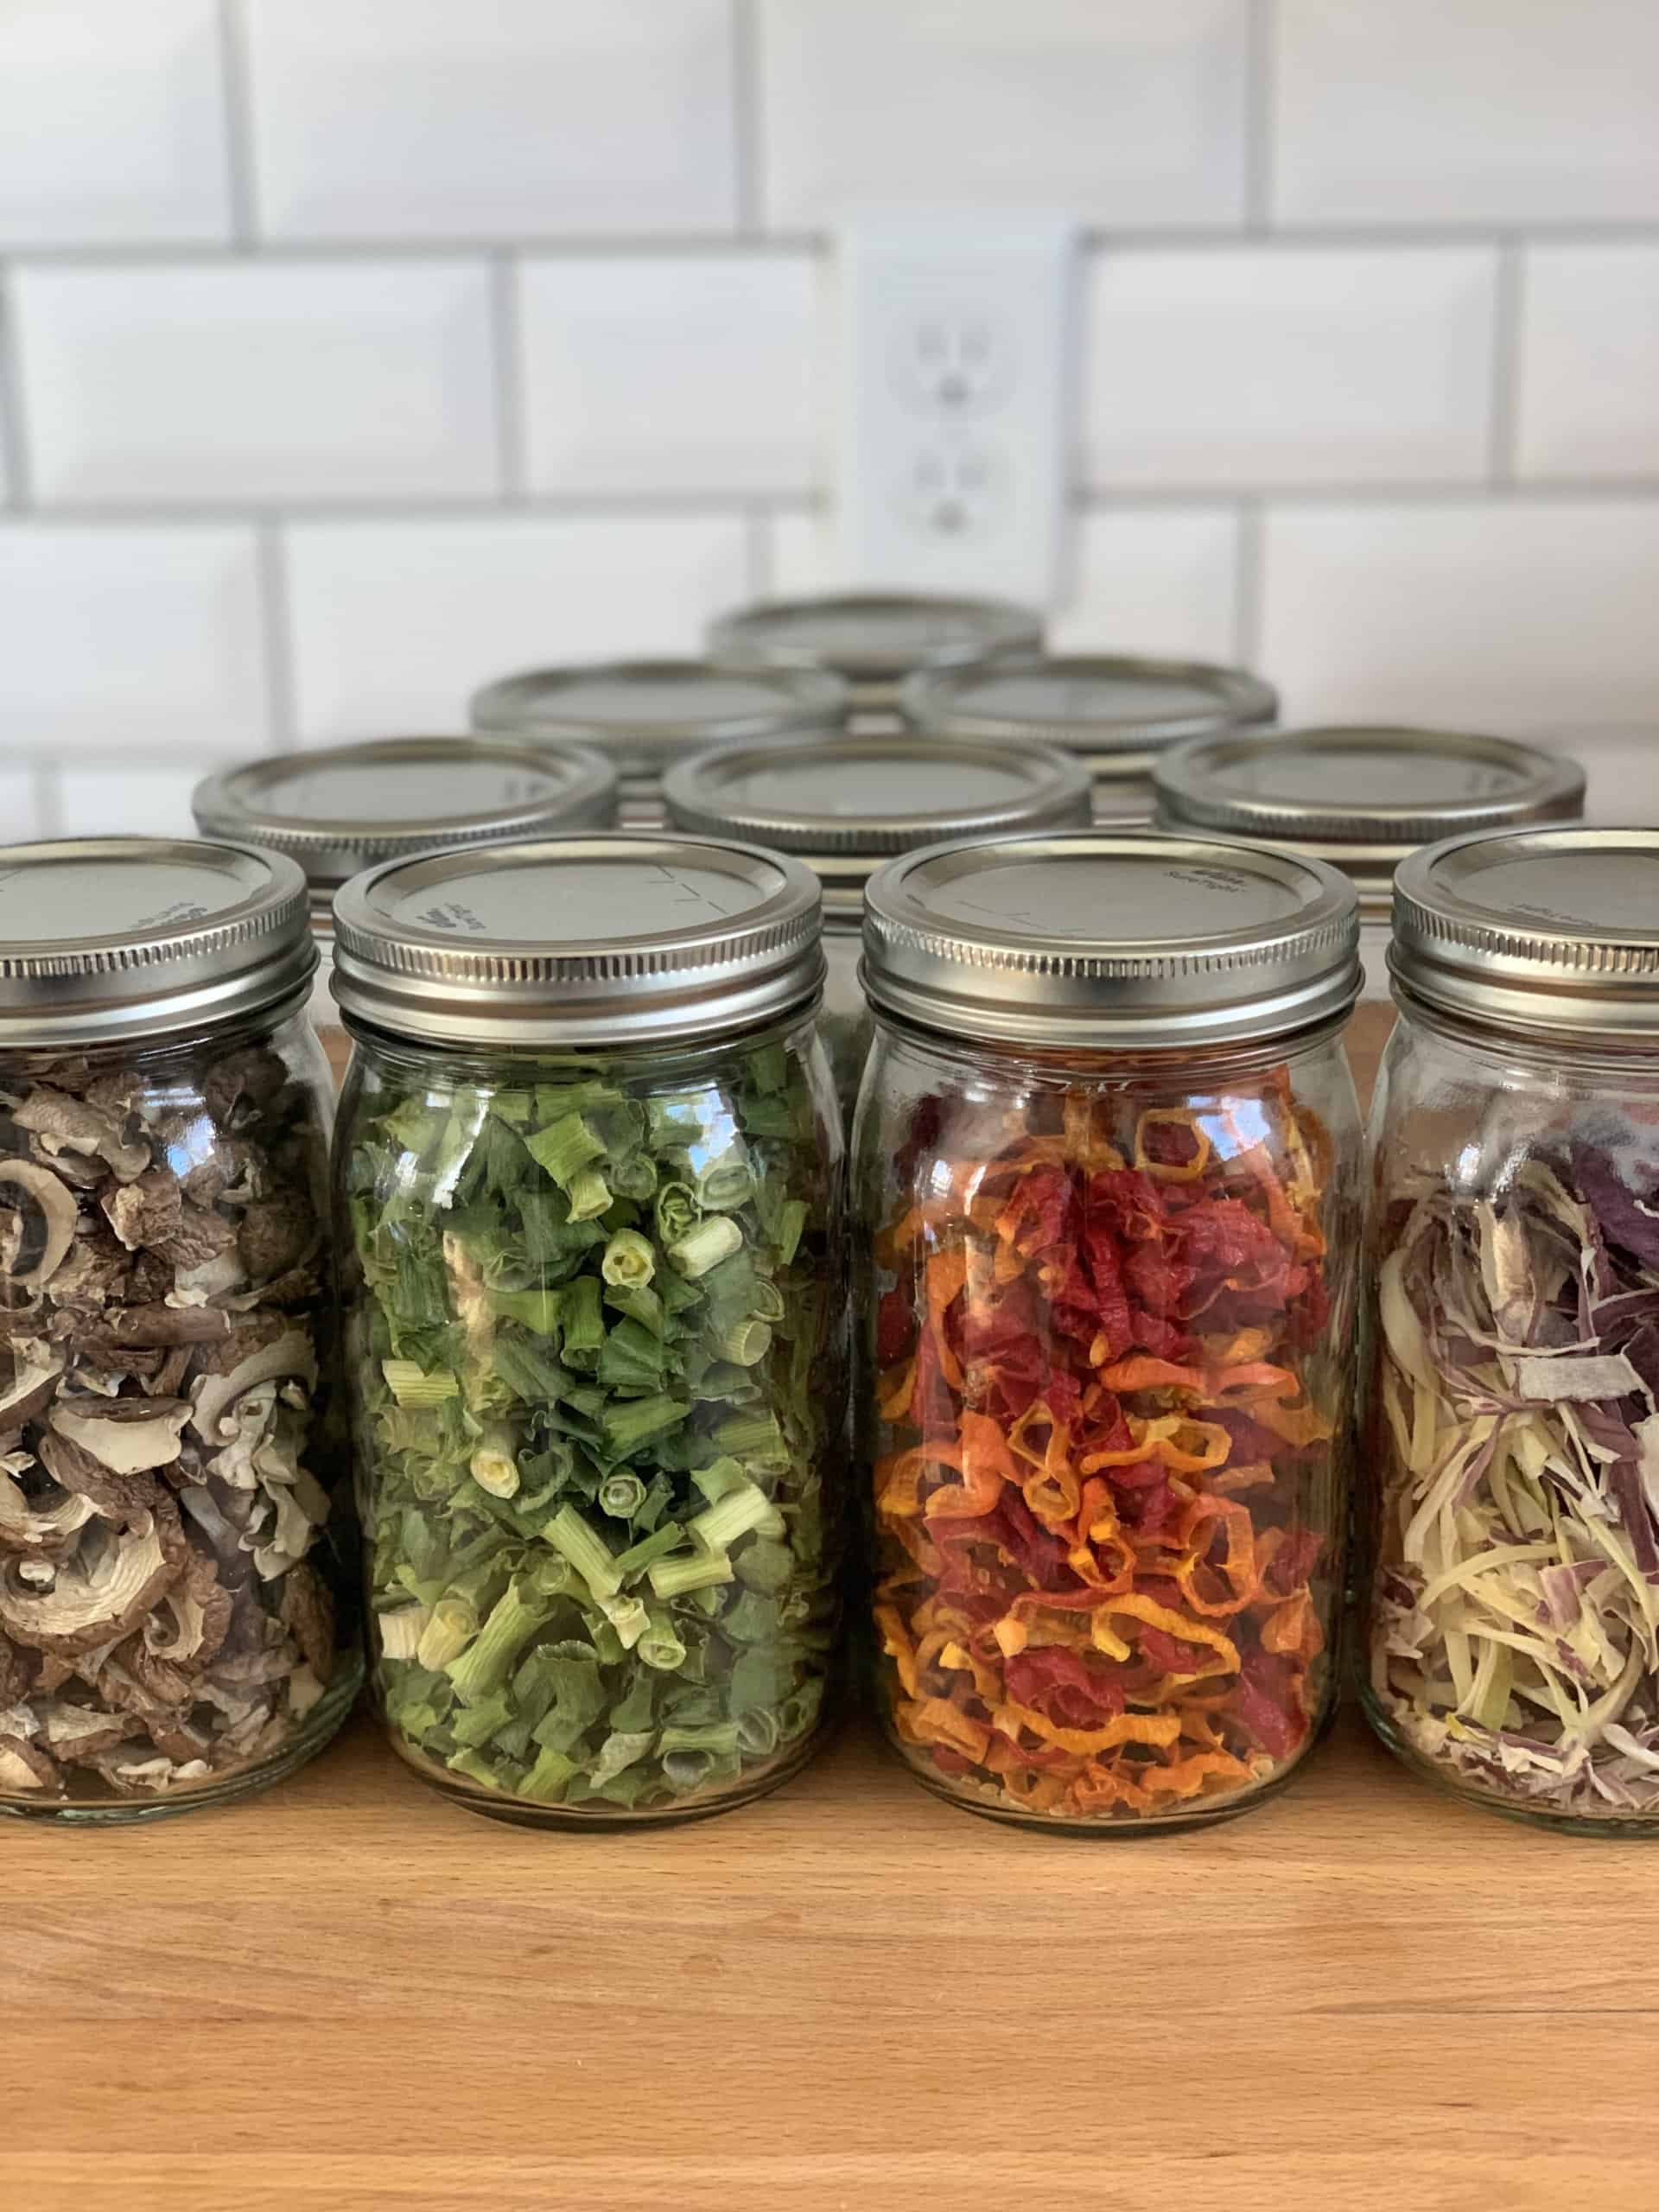
In this episode of the Backpacking Light podcast, Andrew and Ryan discuss the gear, skills, and hacks you need to create your own backpacking meals. This giant two-hour episode is chock full of actionable tips, with input from Backpacking Light’s resident dehydration expert, Dave Swink, and Aaron Owens Mayhew, MS, RDN, CD from the Backcountry Foodie.
Just a few of the things covered:
All the gear you’ll need to get started with at-home dehydration
How to make good backpacking meals using only ingredients from dollar stores
The best tricks to decrease food prep time and increase the taste and texture of your dehydration efforts
Which foods to dehydrate and which foods to stay away from
Executive Producer - Backpacking Light; Show Director and Host - Ryan Jordan; Producer - Chase Jordan; Theme music: Look for Me in the Mountains written by Chris Cunningham and Ryan Jordan, performed by Chris Cunningham (acoustic guitar, lead and harmony vocals, harmonica), Chad Langford (upright bass), and Tom Murphy (mandolin), produced by Basecamp Studios in Bozeman, Montana.
Sponsorship Policy: Backpacking Light does not accept compensation or donated/discounted products in exchange for product mentions or placements in editorial coverage, including any podcast episode content not excplicitly identified as sponsored content. Some (but not all) of the links in these show notes may be affiliate links. Learn more about affiliate commissions, influencer marketing, and our consumer advocacy work by reading our article Stop wasting money on gear.
The Revelation is a perennial favorite among ultralight backpackers – it features an adjustable, zippered foot-box, U-shaped baffles, the ability to open all the way out into a blanket, and solid, long-lasting construction. Now Enlightened Equipment is introducing the Rev-HOLE-ation – the same quilt but with a hook-and-loop neck-hole for use as a poncho in camp on cold mornings and evenings.
This is a first look at new gear that recently entered our review pipeline, and hasn't yet been subjected to rigorous field use. Learn more about the types of product reviews we publish.
Highlights (Regular/Regular 20F / -7C, 850 FP)
Features:
A hook-and-loop neck-hole for use as a poncho!
Flat clips for pad attachment system double to gather the material when using as a poncho
20 in (51 cm) YKK #3 zippered foot box with snap and drawstring
Draft-tube
Snaps and drawstring at collar
U-shaped baffles
Box-baffle construction
Available in short/regular, regular/regular, regular/wide, and long/wide
Weight (measured): 24 oz (686 g)
Fabrics: 10d nylon (0.65 oz per sq yard down fill)
fill type: 850 fill power RDS certified duck down
fill weight: 16.08 oz (456 g)
average loft: 2.5 in (6 cm)
baffle width: 5.75 (15 cm)
type of baffle: box
Measurements:
Length: 78 in (192 cm)
Shoulder width: 54 in (137 cm)
Foot box width: 40 in (102 cm)
First Impressions
The Rev-HOLE-ation Quilt is the same Revelation Quilt template that made Enlightened Equipment’s name in the ultralight world – now with more functionality!
I’m a big fan of this concept, but – I’ve used poncho-style quilts in the past, and a big problem is that the loose material gets in your way, especially while cooking – which is when I most want a nice cozy poncho wrapped around me!
That being said, Enlightened Equipment’s already solid pad-attachment system does double duty here to keep the material locked in close around your body while maintaining loft.
There’s a little extra material around the hook-and-loop closure so that what touches your neck is nylon and not scratchy hook-and-loop – a thoughtful touch.
10 denier fabric, box baffles, a draft collar, a zippered foot box, stellar construction quality, good pad attachment system, and now poncho-style utility – the Rev-HOLE-ation is a highly versatile foundation for a sleep system!
Even the stock products at Enlightened Equipment come in a variety of options. Price and weight may vary depending on custom sizing, materials, and design choices.
Questions? Hit us up in the forum below, and we’ll do our best to answer them based on our brief experience with this product.
DISCLOSURE (Updated April 9, 2024)
Product mentions in this article are made by the author with no compensation in return. In addition, Backpacking Light does not accept compensation or donated/discounted products in exchange for product mentions or placements in editorial coverage.
Some (but not all) of the links in this review may be affiliate links. If you click on one of these links and visit one of our affiliate partners (usually a retailer site), and subsequently place an order with that retailer, we receive a commission on your entire order, which varies between 3% and 15% of the purchase price. Affiliate commissions represent less than 15% of Backpacking Light's gross revenue. More than 70% of our revenue comes from Membership Fees. So if you'd really like to support our work, don't buy gear you don't need - support our consumer advocacy work and become a Member instead.
Learn more about affiliate commissions, influencer marketing, and our consumer advocacy work by reading our article Stop wasting money on gear.
Ben Kilbourne explores the need for backpackers to be amateur naturalists in our effort to steward our natural environment.
Out of my backpack, I pulled the small nylon sack that contained my tarp and began scanning the meadow for a flat place. My pack fell over and my pot and stove spilled out. I walked away from the mess toward a mostly flat, mostly rockless patch of meadow. Perfect. I pulled the tarp out of the sack and draped the rectangle over the grass and the tiny white and purple flowers. Before I pounded in a single stake I noticed a dead lodgepole about 50 feet (15 meters) away and 60 feet (18 meters) tall. Halfway up the tree split into a schoolmarm, one side bare and the other side impossibly supporting a mess of dead branches. The whole thing leaned generally in my direction. This spot will not do. I gathered the tarp and continued the search.
My tent pitched a safe distance from beetle-killed hazard trees.
Rags of snow lay in strips through the scree at the south end of the lake. Great cliffs encircled the basin, their definition subdued by the now-permanent summer smoke. Water cascaded into the lake somewhere on the far side, though I couldn’t quite tell where. Chris, my hiking partner, already had his tent set up, a dead army of trees leaning in every direction on all sides of him. Am I paranoid? Chris has clearly considered the statistics and decided it very unlikely that one of these trees will fall tonight. But aren’t those statistics changing every day as beetles kill more and more trees in the Uintas? The outcome less and less in our favor?
After sighting the fall direction of every tree within a quarter mile I settled on a spot. It was imperfect. There were lodgepole ghosts still in my vicinity but they mostly threatened to find permanent repose on top of other future campers. Not me. Not tonight.
From a good vantage, you can tell the color of the forest is more gray than green because of all the dead trees.
At the trailhead a photo was posted of this very basin, looking nothing like the graveyard I now gazed out upon. The photo showed a lush mountain of green trees with no beetle kill at all. The photo was from the 1980s when this problem was still in its infancy and I was glad they had not updated it. Using a photo of today’s ghost-forest would have the potential to reify disease in these mountains. Dead trees could come to be seen as the way things are. This photo and the death immediately behind it struck me as an image crucial to solving ecological crises in the places we love. The photo, like the memories of people who have been backpacking here for decades, has the potential to imagine the Uintas in its past healthy state, the result of which is the imagination of a future state of forest health as well. As backpackers, our ability to observe changes in the places we love is critical to finding a path to ecosystem intactness in spite of the ravages of climate change.
Those of us who have been walking around for a long time will be able to tell you that the Uintas were not always like this, that one never had to worry about a beetle-killed tree falling on them in the middle of the night. So, what has changed? William deBuys, in his book A Great Aridness, says that the onset of higher temperatures due to anthropogenic climate change favors the beetles. Because summers are getting longer and winters are getting shorter, the beetles begin reproducing earlier and continue later into the season. With extra time for reproduction, greater numbers of beetles will make it to winter. If winter isn’t cold enough to knock them back, an even greater number will begin reproduction again the following summer. If temperatures continue to go up this cycle will continue. In British Columbia alone, the mountain pine beetle has killed over 33 million acres of lodgepole, but it’s not the only culprit; the piñion Ips beetle and Spruce beetle also threaten to decimate our forests. And in Colorado, it is expected that pretty much all of their lodgepole forests—about 5 million acres—will succumb eventually.
Sap oozing from a lodgepole attacked by bark beetles.
This bark beetle predicament struck me first as a purely aesthetic issue—likely a common reaction among recreationists. The mood of the Uintas went from somber to apocalyptic. The trees forced to stand for many years after death become their own tombstones, and the whole range becomes a graveyard. But I walk among them regardless, and enjoy doing so, for my personal needs are not to be stopped by a tree cemetery. I often claim and do so with passion, that I need wild places for my own wellbeing. Sometimes there is a city-born sorrow that accumulates in one’s bones and becomes heavy. Sometimes only walking can break its gout-like crystallization and disperse with it.
The dispersal of this accumulation often drives our desire to protect all the wild that remains, but it should not be the only reason. The possibility of being squashed by a dead lodgepole woke me up to other, more dire reasons for us to care about wild places. A tree falling on me would very literally be the former intact ecosystem retaliating on the human in response to anthropogenic climate change. It becomes symbolic of other, greater revenge that the relative ecological intactness of the Holocene may seek as a result of its disruption.
About half the trees at the end of this meadow appear to be dead.
I think this consideration can urge backpackers to think more critically about what we are trying to protect when we say we want to protect wild places. For while humans could be considered to be natural, we are currently very bad members of the natural community. We are like the band who, after refusing to attend other bands’ shows, wonders why it is so hard to book a gig. If we refuse to be a member of the ecological community should we really be surprised if it retaliates eventually with disease, poverty, and ugliness? As I walk through the beetle kill of the Uintas my trip becomes about more than recreation. I experience sorrow in the manifestation of the ghost of Holocene balance retaliating with disease. I wonder what, if anything, I can do.
The first step, promoted by Wendell Berry, Aldo Leopold, Ellen Meloy, and Robin Wall Kimmerer, is to become amateur naturalists. And who is better suited to this task than we backpackers? Our observations are invaluable to maintaining ecosystem health. We know what places have looked like in the past, and we know how they have changed. We know when the desert bighorns stop frequenting their favorite lookouts, and this observation should fill us with concern. We are reminded that:
To have a place, to live and belong in a place, to live from a place without destroying it, we must imagine it. By imagination we see it illuminated by its own unique character and by our love for it. By imagination, we recognize with sympathy all the fellow members, the neighbors with whom we share the world. As imagination enables sympathy, sympathy enables affection. And it is in affection that we find the possibility of a neighborly, kind, and conserving economy. – Wendell Berry
While it is worthwhile to experience wild places for our own wellbeing, this experience can come to have more depth. We, through deep observation of our backpacking destinations, develop affection for them. And through this affection, we begin to develop the ability to imagine these places in both states of health and states of catastrophe. This imagination has great potential for conservation.
After a rainy dinner, the sun found a tunnel through the gloom and lit the tops of the
mountain. The red looked unreal against the dark sky and red and gold raindrops fell into the lake. When I laid down to sleep I thought briefly of the dead trees around us, but only briefly, and then fell asleep because the issue was officially out of my control. In the night a deer visited me. I awoke to her nose snorting loudly about three inches from my forehead. I twitched violently and she ran off. Since I was awake I used the opportunity to get out of the tarp and pee. I walked to the edge of the meadow and in the blackness, many glowing eyes met the light from my headlamp. I wondered what invisible threads run between the dying lodgepole and these deer. I wondered what the mountain would be without them. It would still be a mountain, but how would it feel without deer? And then I remembered that there is a feeling I have never had in the Uintas and likely never will; that of the presence of the grizzly bear. The complexity of the invisible threads that tethered bear to deer to lodgepole and on and on and on was too much for my drowsy, oxygen-deprived brain. I would have to think about that in the morning. But I laid there for a long time thinking about the absence of the grizzly, how its absence is the ghost whose poltergeist hauntings are likely occurring all around me, but which I am unable to perceive as such due to my ignorance of this place’s character 150 years ago. Come back, grizzly, it might be the only way to know how things have changed.
The last light of day in Four Lakes Basin, Uinta Mountains.
For further reading:
Berry, Wendell E. “It All Turns on Affection.” National Endowment for the Humanities, 2012.
DeBuys, William. A Great Aridness. Oxford University Press, 2011.
Kimmerer, Robin Wall. Braiding Sweetgrass. Milkweed Editions, 2013.
Leopold, Aldo. A Sand County Almanac. 1949. Random House, 1970.
Meloy, Ellen. Eating Stone: Imagination and the Loss of the Wild. Vintage Books. 2005.
This first look at the Goosefeet Gear Custom Down Sweater summarizes features, specifications, and photo details of an ultralight down garment that weighs less than 6 oz (170 g).
Introduction
One of the topics I’m exploring in 2020 is fastpacking, and Goosefeet Gear agreed to take on the challenge of making an insulated top that pushed the limits of warmth while maintaining a weight that was as low as possible. Therein lies the motivation behind this particular down-insulated sweater.
This is a first look at new gear that recently entered our review pipeline, and hasn't yet been subjected to rigorous field use. Learn more about the types of product reviews we publish.
This sweater may be the warmest sub-6 oz (170) insulated garment I’ve ever worn.
I specified a generous back and sleeve length. I’m pleased about that! The generous sizing makes it a more comfortable garment, especially in cold conditions.
I specified a slim profile. So as long as I can keep the “Covid 15” away, I can layer this under my rain shell if needed!
Packed size is tiny, which is perhaps my favorite feature, especially in the context of fastpacking, where I’m using a small (30L) backpack.
I can fit the sweater easily into a 5 in x 8 in (13 cm x 20 cm) stuff sack, and it could almost certainly go into one a little smaller.
Photos
More Info
This is a custom made-to-order product available from Goosefeet Gear. Price and weight may vary depending on custom sizing, materials, and design choices.
Questions? Hit us up in the forum below, and we’ll do our best to answer them based on our brief experience with this product.
DISCLOSURE (Updated April 9, 2024)
Product mentions in this article are made by the author with no compensation in return. In addition, Backpacking Light does not accept compensation or donated/discounted products in exchange for product mentions or placements in editorial coverage.
Some (but not all) of the links in this review may be affiliate links. If you click on one of these links and visit one of our affiliate partners (usually a retailer site), and subsequently place an order with that retailer, we receive a commission on your entire order, which varies between 3% and 15% of the purchase price. Affiliate commissions represent less than 15% of Backpacking Light's gross revenue. More than 70% of our revenue comes from Membership Fees. So if you'd really like to support our work, don't buy gear you don't need - support our consumer advocacy work and become a Member instead.
Learn more about affiliate commissions, influencer marketing, and our consumer advocacy work by reading our article Stop wasting money on gear.
A narrative of my spring hike on the Desert Trail, and what it was like to re-enter American society at the beginning of the coronavirus pandemic.
Introduction
The Desert Trail (DT) runs some 1500 miles from Mexico to Oregon through eastern California and western Nevada. Despite the name, it is not a trail but a route, a passable corridor through public lands. It is composed mostly of cross-country travel with a few jeep trails mixed in.
By early spring I suffer from a hiking deficit that ski and snowshoe trips are unable to satisfy. Deserts are the cure for this malady. In April 2019 I did a 5-day/75-mile section of the DT through the Anza-Borrego desert. I liked it well enough that I went back for a 10-day/150-mile chunk through the Mojave desert in March 2020 – just as the country was being swept by the coronavirus. With little phone service, I was a desert version of Schroedinger’s cat, simultaneously both aware and ignorant of the pandemic. That blissful state of quantum uncertainty collapsed when my brother picked me up at I-40 and brought me back to a changed reality.
My route, campsites, and caches on the Desert Trail from the Mecca Hills to I-40. In addition to the water caches shown, I got water at the Chiriaco Summit coffee shop on I-10 and at the Cottonwood visitor center in Joshua Tree NP. I also cached 8 days of food just north of I-10. Screenshot from my Gaia GPS account.
Narrative
Day 1, Mecca Hills to Hidden Springs Canyon
I am not a trail completist, and so I had no problem skipping a long dreary road walk around the Salton Sea and starting this year’s hike in the Mecca Hills.
It felt like a bad start when I discovered I had packed shorts rather than convertible pants for the hike. I was not worried about my legs getting cold, but I was worried about them getting shredded. Cat’s Claw can be hell on your hide.
This section starts near Ladder Canyon:
Ladder Canyon is comprised of a series of dryfall slots where the BLM thoughtfully placed ladders for the convenience of canyoneers.
Climbing the slots of Ladder Canyon.
I spent an hour on a side trip into Ladder Canyon and then headed up the main canyon. With just a few missed turns, I emerged up on the crest of the hills and enjoyed a fine afternoon of easy walking with spectacular views in all directions.
Mt. San Jacinto from the Mecca Hills.The Salton Sea is vile up close, but from a distance it is magnificent.
The only other hiker I encountered today was wearing a hat and boots and nothing in between save a grin. A disciple of Colin Fletcher, no doubt. I made it to my first cache in Box Canyon and discovered I had drunk only half the water I allotted for this first leg. I cut back the water for the next leg from 7.5 to 6.5 L. I probably could carry less but I hate being out of water. As always, we carry our fears in our packs. But 6.5 L of water weighs about 14 lb, so those are some pretty heavy fears.
And we also carry beers. Or at least one beer, the Coors tallboy I included in the cache.
Celebrating a fine start to my trip.
Day 2 – Hidden Springs Canyon to below Orocopia Mountain.
The route wound over a series of rugged ridges dividing broad washes then followed Orocopia Wash to the base of Orocopia Mountain. This was the launching point for the biggest, steepest climb of the hike: some 2000 feet up in a distance of about 2 miles. It was a hard climb over slopes covered with loose shale and I don’t mind admitting I was pretty whipped by the time I made it to the top.
I pulled out the summit register and it fell open to where my friend Dirtmonger had signed it a couple of years ago. He is one of the few other people twisted enough to think this kind of hiking is good fun.
I took a video of the summit view. As a storm was approaching, I thought it best to head down to find a camp on a bench a few hundred feet below. It began raining soon after I pitched my fly and kept up until morning.
Day 3 – Orocopia Mountain to Lost Palms Canyon Wash
Rain in the morning meant answering the call of nature under challenging conditions. Fortunately, I brought an umbrella to ward off the desert sun, and it turns out that it wards off the desert rain as well. Business concluded, I was able to pack up and start walking without getting too wet.
I was fortunate to stop and camp where I did. The next two miles were a series of downclimbs in a narrow rocky canyon with no possible place to pitch a tent. If I had pushed on I would have been scaling down rockfalls in the dark, and in the wet. That’s not exactly a best practice.
Slick dryfall. Not a big deal in dry weather, a widowmaker when wet.
The storm moved back in as I approached I-10, and I walked up to the coffee shop at Chiriaco Summit draped in my poncho, looking pretty much like a hobo. A wet, smelly hobo.
But they made me feel welcome there. I had a chili burger and a couple of beers, hoping for a break in the rain. One appeared and I hustled up the canyon, dug out my food cache, and made camp further up the wash.
Day 4 – Lost Palms Canyon to Valley North of Eagle Mountains, JTNP
The sun rose after a night of rain and began burning clouds off the Cottonwood Mountains.
The desert unveiled.
The route turned from a broad flat wash to a narrow canyon filled with car-sized boulders. I enjoyed the luxury of palm tree shade at Victory Oasis, and then was forced to climb up and above the canyon for a kilometer or so until Lost Palms Oasis.
Looking back at Victory Oasis.Lost Palms Oasis featured running water and … a trail!
There is a trail – a real trail – to Cottonwood Springs about 3 miles away, and I gladly made use of a route that was free of rocks and Cat’s Claw.
My Tarptent Moment DW in fly-only mode beneath the Eagle Mountains in JTNP.
I arrived at the Cottonwood campground, filled up on water, had a bit of a siesta and headed east through the trailless valleys of eastern Joshua Tree. I walked until my feet tired of carrying 8 days of food and 6 L of water and then stopped and set up camp after a very fine day of hiking.
Day 5 – On to Big Wash, JTNP
I woke again to the sound of raindrops on the tent. Rather than go out and get wet, I dawdled inside for a couple of hours, thinking to wait it out.
Instead, the rain kept increasing. I finally faced up to reality (a hiker has to hike), packed my pack, and took down the tarp in a steady drizzle.
At first, the drizzle was well-contained by my umbrella. A few transient breaks in the clouds allowed me to convince myself that fair weather was just ahead. No need to put on my poncho.
Then the real storm began. Drenching rain accompanied by 20-30 mph winds soon had me soaked. I finally put on my poncho, but at this point it couldn’t keep me dry. It just slowed down the rate at which I got wet. I think a small spot on my back stayed dry, but that was all.
I was fortunate that today’s route was simple. Much of the DT has directions like “follow the wash until it makes a bend to azimuth 40 degrees, then climb the third gully on the right until you get to the ridge where you follow it at azimuth 135 degrees for half a mile then descend down the gully on the left.”
That kind of route-finding would have been impossible today. I had my phone with a GPS route laid out on it, but hadn’t thought to bring a waterproof phone pouch to the desert, and couldn’t use it. I had paper maps, but they would have been destroyed by the wind and rain in about 30 seconds. Fortunately, all I had to do was head slightly north of east for about 8 miles over a low divide and then slightly south of east. Visibility in the rain was about 200 yards.
The only way I could keep on track in the broad valley was to walk with a compass in my hand, constantly looking down at it. I found that if I put it away for a few minutes, I always went off track, always to my right. Even after I noticed this and tried to compensate, I still did it.
Old-school route finding.
My satellite beacon beeped with a message from my brother: flash-flood warning for eastern JTNP. Not a surprise, but not welcome news either.
By late afternoon I could hear thunder ahead. There was a bench up out of the wash to my right. Time to stop and put up my tarp.
It was still raining, but the wind was a bigger problem. It took me nearly half an hour to get the tarp pitched and stabilized so I could crawl inside and be out of the storm. I unpacked and found that my merino hoody was still dry. As was my quilt. And my whiskey was still clean. Life was beginning to look good again. The sky seemed to lighten a bit. I peeked outside, and there it was. I had held on through the rain and gotten my rainbow.
Brutal and magnificent.
Day 6 – Big Wash to the Coxcomb Mountains
I lounged in camp until nearly eight o’clock, luxuriating in a morning with no wind or rain. I hiked the few miles to my water cache, then turned north to cross the immensity of Pinto Basin.
Hiking through big country.
Clouds played across the mountains, shadows stalking the land like ancient formless giants. You can’t really capture the scale and immensity with a picture. A video is only slightly more effective. You have to be there. And you have to be prepared to feel very small and humble and unimportant. Because you are.
Day 7 – Coxcomb Mountains to the Sheephole Valley
The easy striding of yesterday ended immediately as I began climbing up into the Coxcomb Mountains. The high alluvial valley I camped in last night turned into a rocky but passable canyon, and that canyon turned into an even rockier but climbable couloir that slips between the teeth of the comb that comprises the crest.
It was maybe a mile to the top and a 1500 foot climb and it took nearly two hours. Slow going, but nothing too harrowing or strenuous. Just steadily working my way up the couloir, rock by rock. The reward was fine views from the top through the notch in the mountain.
Looking back over the Pinto Basin.Sunset in the Sheephole country.
I took several wrong turns on my way out of the Coxcombs but finally navigated through a quicksand-infested canyon and out to the Sheephole Valley. I recovered my water cache near Highway 62, then walked a few miles further and made a fine scenic campsite in the sand and wind.
You’ll notice my sleeping pad in the picture above. It’s a Nemo Switchback 72-inch foam pad cut in half.
Despite such scanty padding, and my advanced years, I sleep great on it. One trick is that I dig out a circular pit about a foot wide and two inches deep with my trowel. That takes the pressure off my lower back when I’m on my back, and off my hips when I sleep on my side.
But it’s more than that. I prefer not having a big soft inflatable cushion between me and the ground. I like feeling the ground, and thus the Earth, when I lie down. It makes me feel connected with all that’s around me. I can sense (or imagine I do), the world turning on its axis, spinning through space, carrying us all on to a destiny that remains unknown and unknowable. That sense of connection provides me with a more comfortable sleep than a whole pile of mattresses ever will.
Day 8 – Sheephole Valley to Calumet Hills
Despite best efforts, I probably stepped on a hundred tunnels most days.
Classic basin and range country now. The ranges are narrow, just a mile or two across. The basins that separate the ranges are 15-20 miles wide. The upshot is that I mostly walked through open desert. I did go through a 6-mile long fault canyon that separates two halves of the Calumet Range, but everything else was gently rising and falling alluvial outflows. The biggest obstacles were the kangaroo rat tunnels that undermine the basin floor and collapse underfoot.
Day 9 – Calumet Hills to Marble Mountains
Another walk across a wide basin. The views were expansive. I watched a storm front approach, cloud the mountain peaks, but then rotate east and stay north of me before it was chased away by blue sky.
I arrived at my cache just south of Route 66 and dug it up, everything intact. The cool weather means I don’t need all the water I buried, and I decided to use the excess for a little desert laundry.
On mountain hikes, where I expect to encounter water at least daily, I typically wash out my boxers and socks (I carry a spare of each) every other day. This system doesn’t work for a waterless desert. Other than getting my clothes soaked in a rainstorm, they have been steadily accumulating dust and sweat and grime for over a week.
Laundry done, I headed toward my last mountain range, the Marble Mountains. My target is an alluvial re-entrant valley about half-way along the range, five miles distant. But the quickest path is not a straight line. The terrain adjacent to the mountains is broken and fissured, littered with rocks large and small, scarcely a place to set my foot.
I swing out a mile to the west, where the ground is sandier and more walkable. Near sundown I find a small but suitable camp spot. I pitch the tarp to get out of the wind, then open the lee side to enjoy views and the beer from my cache. I cook dinner, play a few tunes on my uke, and lay down to sleep the sleep of the righteous.
Sunset on the Marble Mountains.
Day 10 – Marble Mountains to I-40
I awoke to a still, clear morning, anxious to get up and get hiking. Another 13 miles or so and I would reach the end of my hike at I-40, meet up with my brother, and begin to wallow in the comforts of civilization once again.
Sunrise view of the Bristol Mountains from camp.
The route does not look too challenging: a few miles of climbing up a broad wash, a couple of low summits in the middle of the range, a mile or two of a narrow, steep canyon but then a broad flat wash through some low hills to my destination. Easy peasy. I send Dave a text by satellite saying I should be there by two o’clock and head out.
I-40 and my path back to civilization from the crest of the Marble Mountains.
I arrived at the interstate and Dave soon pulled up. We embraced, I tossed my pack in his car and got in. I savored being enveloped in a cocoon of modern automotive comfort as we drove to Hole-in-the-Rock Campground.
My comfort quickly evaporated. Dave filled me in on the alarming developments about the coronavirus pandemic. His wife Karen, a schoolteacher, was trying to teach first-graders remotely from home. Restaurants were closed. Non-essential businesses were shutting down and sending employees home. Both the basketball and baseball seasons were suspended. Concerts were banned. Movie theaters were closed. Hospitals in Italy and Spain were overwhelmed, and US hospitals expected the same. The stock market was crashing. A recession dwarfing that of 2009 was all but inevitable.
I was shocked and stunned and surprised. When I set out on the trail on March 8, I knew that these events were a distinct possibility. I had spent a career in biotechnology, much of it developing diagnostic tests for infectious diseases. I knew the threat a novel virus posed was grossly underappreciated. I knew that we had underfunded public health agencies and would be unprepared. I had written about how vulnerable we were to epidemics, how quickly our interconnected world would unravel if a highly contagious and lethal disease emerged.
It is one matter to know that such things are possible. It is quite another to witness them happening. I had walked out of one world and into another, as though the desert were a portal between two realities.
I wanted to go back. But there is no going back. Not to the trail, and not to the life of complacency towards infectious disease that once was possible. Just as the desert humbled me, so would this virus humble the world. Humility is the first step on the path to wisdom. That’s why I embrace the humblings that long trails dish out on a regular basis. Perhaps this virus will do the same for humanity. Maybe we will emerge – as we eventually will – on the other side a bit wiser. Slower to anger, quicker to forgive, more mindful of our place in the universe, more aware of how dependent we are on others and on the planet that supports us, more willing to care for both. One can hope.
Field Notes
The Desert Trail will challenge both your gear and your skills. The DT is a route, and there is very little trail or even jeep tracks to follow. You will mostly have to find your way cross-country. Expect extremes of temperature and plenty of wind. Violent rainstorms are also a possibility; snow is not out of the question. There are plenty of rock scrambles and thrashes through thorny brush. Resupply points are few, water is scarce and there will be no trail magic. It is unlikely you will encounter another hiker. This is not the PCT.
A heavy-duty pack is appropriate for the rough conditions and long water and food carries. I took a Seek Outside Divide 4500 in order to review it for BPL. I was taken aback by its weight (54 oz) when packing, but that weight provided good value in the form of comfortable carriage of heavy loads, resistance to abrasion and tears, and waterproofness. Read my Seek Outside Divide 4500 backpack review.
Cachingwater and food (and beer) – and then locating those caches – is essential on the DT. In sandy areas, I completely buried my caches. In rocky areas I built a cairn of rocks over them. The likelihood of a varmint (whether two- or four-legged) disturbing them if left in the open is small but not zero. I used Gaia GPS to drop a waypoint on my caches, and took pictures with my phone. I also put a rock or stick above the buried caches and was glad I did – the rain completely washed away all signs of digging, and GPS only gets you so close to your cache. You really don’t want to be probing a 6-foot radius with a 6-inch trowel, trying to find your cache. Especially in a rainstorm.
Navigation is a constant challenge on the DT. The official Desert Trail Guidebooks, by Steve Tabor (most of CA and NV) and George Huxtable (Death Valley), are essential. I transcribed the route from Steve’s excellent maps into Gaia GPS, and made paper copies of his written directions, as well as of USGS topo maps. I still made numerous wrong turns by virtue of not checking these resources often enough, thinking I understood the route. I always bring paper maps but in this century I have rarely combined them with compass work for precision navigation (GPS is just sooo much easier). As a result I hadn’t noticed that most of the number labeling on my compass dial was worn off. This complicated my efforts to navigate by compass during a heavy rainstorm.
Forrain protection I used a DCF Zpacks Groundsheet Poncho. I’ve been disappointed by many generations of waterproof-breathable jackets. They are fine for short squalls but fail miserably in all-day storms. A poncho made with non-breathable material like DCF is actually waterproof, and the open sides and bottom provide excellent ventilation. The Zpacks poncho is a shorty – although it covers your pack in back, it doesn’t quite reach to your knees in front. I’m OK with that. The big flaw in its design is the use of zippers for side closures. Given that it doubles as a ground cloth, it was no surprise when one of the zippers failed. I’ve since modded it with adhesive hook and loop strips to close the sides.
My footwear was the Altra King MT trail runner. It has the same form factor as the more-popular Altra Lone Peak. It differs in having a grippier sole and better side support which can be cinched down with a hook and loop strap. I find the King MT model preferable to the Lone Peaks for off-trail travel.
My Kala Waterman plastic ukulele now has about 1500 trail miles on it. It survives just fine through rain, sun, rocky scrapes, rough bushwhacks and freezes. No one would mistake it for a fine musical instrument (or me for a fine musician), but it sounds remarkably good for a cheap piece of plastic. Much better than a Martin backpacking guitar in my opinion.
My repair kit consists of needle and thread, superglue, and Tenacious Tape.
My first aid kit consists of antiseptic wipes, gauze pads, butterfly closures, adhesive bandages, leukotape, moleskin, antibiotic ointment, Imodium, ibuprofen, Benadryl and hydrocortisone cream.
Food is what was in my day 3 resupply cache. My breakfasts and dinners were homemade dehydrated meals. Dried fruits and jerky were also homemade.
Breakfasts: oatmeal (plus sugar, milk, dried peaches) x 3; muesli (plus milk, dried peaches) x 3; scrambled eggs w/salmon and sweet potatoes; scrambled eggs w/ham and veggies.
Dinners: beef and bean chili; rice w/peanut sesame sauce and veggies; pasta w/cheesy tomato sauce; pork green chili; posole; navy beans and ham, peas and carrots; mashed carrot and sweet potato w/chicken; Adobo mac and cheese.
Backpacking Light does not accept compensation or donated/discounted products in exchange for product mentions or placements in editorial coverage.
Some (but not all) of the links in this review may be affiliate links. If you click on one of these links and visit one of our affiliate partners (usually a retailer site), and subsequently place an order with that retailer, we receive a commission on your entire order, which varies between 3% and 15% of the purchase price. Affiliate commissions represent less than 15% of Backpacking Light's gross revenue. More than 70% of our revenue comes from Membership Fees. So if you'd really like to support our work, don't buy gear you don't need - support our consumer advocacy work and become a Member instead.
Learn more about affiliate commissions, influencer marketing, and our consumer advocacy work by reading our article Stop wasting money on gear.
If some of humanity is threatened, then our humanity’s collective intimacy with nature is also broken.
On the morning of May 26, 2020, I woke up to Darnella Frazier’s video of George Floyd’s murder the day before by four Minneapolis police officers.
As I watched the 8 minute-46 second ordeal unfold, I felt anger, grief, and sadness – for Mr. Floyd, for his family, for the community of Minneapolis, and for our country. By the time the medics loaded his limp body onto a stretcher, I just felt numb.
In the aftermath, each day brings new pain in our reeling, confused, and deeply hurting society. Often, pain comes with emotion – anger, sadness, grief – symptoms of injustice and unfairness.
Justice and fairness are core human values: cornerstones of community function and collective intimacy. A police officer abusing his power to take the life of an unarmed citizen is a pretty easy thing to use as an example of unfairness. So it’s no surprise that we are questioning what systemic defects are present in the ground that supports those cornerstone values. Many are asking: is justice being served fairly among all peoples in our communities?
The recent deaths of George Floyd, Breonna Taylor, and the many others before suggest that the answer to this question may be a resounding “no”. I have no idea what it feels like to be a Black person in this country. But I know that Mr. Floyd and Ms. Taylor should not have been killed by police that exercised their power to remove their human rights to life and fair treatment. I’ve also learned that their deaths, while difficult to process for all of us, is difficult for Black people in a way that transcends my understanding. All I can do is offer deep empathy. I’m not going to pretend to understand. But it’s not hard to keep my eyes and ears open to see, hear, and feel some of this pain with them.
The civil unrest we are witnessing today in America and across the world cuts deeper than a hashtag or a black square or even a political ideology. What is taking place is foundational to human existence and equality: fighting for the basic human and civil rights that many of us already have. That many of us take for granted. And that many of us would want for our children.
But why is protecting diversity and taking an antiracism stance so critical in the outdoor industry?
The outdoor industry has grown from a tiny niche to a powerhouse capable of facilitating meaningful change on a national, and even a global scale. Many of us participate in movement leadership, business leadership, and platform-building. We bear some responsibility for providing leadership in all aspects of our industry, whether they impact our profitability or followers or likeability or social credit score. If we don’t accept this responsibility, or accept responsibility only within the smallest circles of our influence, then we simply bow to the altar of free-market capitalism and let the chips fall where they may.
Every person exercising their platform in our industry will choose the extent to which they invest in social, environmental, and economic justice. And every one of us will distribute our energy differently. Public lands accessibility, climate activism, fair economic policy for businesses, access to healthcare programs for our employees, the pursuit of fair wage laws, ethical media disclosure, consumer protection, tariff and tax negotiations – and not the least of these – fighting for ethnic diversity and inclusion so marginalized people have a meaningful say in how our industry evolves and serves their communities.
Some people say that they don’t witness or practice racism, or perform other actions that violate and diminish human rights. That doesn’t mean that it doesn’t exist. Nor does it mean that we shouldn’t collectively fight against the practice of racism overtly, or investigate and address how it’s practiced covertly and passed down through generations and across the systems we have built.
We know about the intimate connection between humans and nature – we experience it every moment we spend in the outdoors. And there are so many different ways to enjoy it. Hiking is my personal favorite. Others may enjoy it on a horse or in a kayak, pedaling a bicycle or riding a snowmobile, behind binoculars or a rifle scope, carving a snowboard or climbing on crampons. Further, we can enjoy this intimacy alone, or with a group. In each experience, the outdoor participant realizes value and recognizes their own humanity as a direct result of what spending time in nature brings to the human spirit.
We’re quick to point out that if some of nature is threatened, then our ability to access intimate experiences in nature may also be threatened. That threat keeps us fighting for nature and engaging in movements that include climate activism and public lands policy and endangered species protection and more.
And so we must move forward and also recognize that if some of humanity is threatened, then our humanity’s collective intimacy with nature is also broken. And this threat must keep us fighting for human justice that focuses on equality, representation, and antiracism.
We can’t just fight for environmental justice. We can’t just march in protest for the climate. We can’t just protect public lands. Of course, these are fights that serve the outdoor industry’s interests, because they have a profound impact on our long term sustainability, profits, and growth as an industry. That makes these fights “acceptable” – most people expect us to participate in them. They fit our stereotypes. They fall into our lane.
Maybe one day, a fight for racial justice will become as ingrained into every fabric of our personal and work ethos as our fight for environmental justice because these fights will reflect our desire to protect the whole of humanity. For without humanity and the racial justice that protects its whole being, nature and environmental justice are reduced to something less, unable to fully inspire and soothe the spirit of all humans. I hope that day comes sooner rather than later for each American citizen.
Reconciling our need for individualism with the collectivism required to ensure the existence of intimately connected communities that care for each other seems particularly difficult in today’s polarized political climate. Americans are fiercely individual creatures. Our identity is rooted in our rugged individualism, expression, and freedom. But we are also members of a collective whole – as human beings in the communities of our families, our neighborhoods, our industry collectives, and of humanity overall.
The glue of collective connection is spiritual and difficult to measure, graph, poll, or summarize in a statistical report. But when spiritual connections in our communities are disrupted, we feel pain in the depths of our soul. Part of our humanity is experiencing intense, deep pain right now as a result of unjust treatment. Our empathy and spiritual connectedness allow us to feel that pain too. And that’s why we stand by their sides – so we can grieve together, and help each other do the hard work required to ensure a better future.
Executive Producer - Backpacking Light; Show Director and Host - Ryan Jordan; Producer - Chase Jordan; Theme music: Look for Me in the Mountains written by Chris Cunningham and Ryan Jordan, performed by Chris Cunningham (acoustic guitar, lead and harmony vocals, harmonica), Chad Langford (upright bass), and Tom Murphy (mandolin), produced by Basecamp Studios in Bozeman, Montana.
Sponsorship Policy: Backpacking Light does not accept compensation or donated/discounted products in exchange for product mentions or placements in editorial coverage, including any podcast episode content not excplicitly identified as sponsored content. Some (but not all) of the links in these show notes may be affiliate links. Learn more about affiliate commissions, influencer marketing, and our consumer advocacy work by reading our article Stop wasting money on gear.
The Seek Outside Divide 4500 is an external frame backpack featuring a roll-top closure, two oversized side pockets, and a back pocket.
Introduction
The Seek Outside Divide 4500 (54 oz / 1531 g, $359) is a high-capacity external frame backpack designed to carry heavy loads. Seek Outside introduced this pack in 2016. It features a roll-top closure, multiple compression straps and attachment points, two oversized side pockets, and a back pocket. The bag material is waterproof, and all materials are heavy-duty, intended to give long service in rough conditions.
Photo: Seek Outside
About This Review
This Limited Review of the Seek Outside Divide 4500 is based on my experience with the pack during a 10-day, 150-mile section hike of the Desert Trail in the Mojave Desert of California, March 2020.
Features and Specifications
Base MSRP: $359
External frame
Roll-top closure
Waterproof X-Pac fabric
Dual-adjustment straps on hip belt
Gatekeeper buckles allow compression straps to be easily added or removed
Optional accessories include top lid, frame extensions, hipbelt pockets, lumbar pad, bottle holster
No hydration ports
Minimal weight 2 lb 12 oz (1250 g)
Weight as tested 3 lb 6 oz (1530 g)
3000 – 4500 cu in (50 – 75 L) volume
Carries 50+ lb (23+ kg) loads
Adjustable harness fits torsos 16-20 in (40-50 cm), 18-22 in (45 – 55 cm) with optional frame extension
Five hipbelt sizes fit 26-48 in (66-122 cm) hip range
Performance Assessment
Criteria
Observations and issues
Load Hauling
Rigid U-shaped external frame and well-padded yoked harness enabled me to comfortably carry loads of up to 40 lbs (18 kg). Dual straps on hipbelt provided a comfortable and secure fit.
Load Adaptability
The side, top, and bottom compression straps minimized volume as water carries went from 8 L to 1 L, and my food supply went from 8 days to 1 day. However, the main bag is cavernous, 38 inches (97 cm) tall when unrolled. It's a long reach to grab gear.
Usability and Flexibility
The Divide 4500 comes with an abundance of straps and gatekeeper buckles that are easy to move around between the many attachment loops. The optional hipbelt pocket is positioned too far back, making it difficult to access. The optional lumbar pad increased comfort with heavy loads, increased airflow to back. The pack was easy to balance. A lack of a hydration port meant that I used a side pocket for a hydration bladder, which was easily accommodated by the oversize side pockets.
Agility During Off-trail Travel
Articulated hipbelt maintained my freedom of movement. Curved frame geometry kept the load close to my back. Cordlocked drawstrings on back and side pockets kept items secure when clambering up and down rocks.
Durability
Heavy-duty mesh and solid fabrics resisted abrasion from rocks and thorny vegetation very well. There are a lot of both on the Desert Trail.
Water Resistance
Although I did not seam-seal the pack, only minimal moisture entered the Divide 4500 in an all-day rainstorm.
Weight
Seek Outside bills the Divide 4500 as an ultralight pack, placing it in the 2.5 lb(1 kg) category. This billing is unrealistically low, as most configurations result in a 3+ pound (1.4+ kg) pack weight. Such weight doesn't qualify as ultralight in my book. But it does qualify as light, especially in the context of its load and volume capacity.
Commentary
What makes the Seek Outside Divide 4500 unique?
Wide Load Range
Robust Construction and Materials
Configurability
Suspension
The yoked harness is easy to adjust to a range of torso lengths
Load Range
I tested the Divide 4500 on a 10-day hike of the Desert Trail in California. With long stretches between food and water caches, I carried loads ranging from 20 to 40 lbs (9 to 18 kg). The pack readily accommodated my maximum load of 6 days food and 6 L of water. I can easily imagine the pack accommodating the kind of bulky gear I bring when leading youth groups: a 4L pot, mixing bowls, bear canister, etc. Conversely, compression down to my base load (15 lbs / 6.5 kg) plus a day of food and 2 L of water was no problem.
The Divide 4500 after stocking from a cache outside Joshua Tree NP, with 7 days of food and 3 L of water. There are plenty of attachment points to strap on a ukulele, a solar charger, and some wet socks.
Robust Construction and Materials
A ten-day trip is insufficient to assess long-term durability, but the Desert Trail dishes out plenty of pack (and human) abuse per mile. I routinely subjected the Seek Outside Divide 4500 to thorny vegetation and extensive abrasion from rock scrambles. The pack showed no damage or signs of wear. The side pockets are 500d Cordura. The back pocket is a mesh-solid hybrid, with the mesh a non-stretchy heavy-gauge material. These are the most vulnerable points on a pack when bushwhacking, but they were undamaged.
The laminated X-Pac material forming the main bag is heavy (4.4 to 7 oz/sq yd, 150 to 240 g/sq m) and somewhat stiff. This material is exceptionally waterproof (200 PSI, 140K mm H2O) but must be seam-sealed to achieve full water tightness. I hiked for hours in the rain one day with the pack exposed and noted only minimal water infiltration, despite not having seam-sealed the pack.
Close inspection of the Divide 4500 revealed its workmanship to be top-notch. The seams are straight and even and are double-seamed or zig-zagged for strength where appropriate. Seams are covered with tape to prevent fraying, and no loose ends are left to unravel.
Configurability
A key attribute of the Seek Outside Divide 4500 is its flexibility and how easy it is to configure. I ordered my tester pack with the lighter gray Xpac fabric (the heavier olive material adds 3 oz / 85 g), a lumbar pad (+ 3 oz / 85 g) and a hipbelt pocket (+ 2 oz / 57 g). I opted against ordering the frame extensions, which increase load capacity because I have no intention of ever carrying 60+ lb loads. A top lid is also available.
I adjusted the torso length per the manufacturer’s instructions, a fairly simple operation. I tested the ride of the pack with and without the lumbar pad and opted to keep it mounted as it increased carry comfort with heavier loads and also increased air circulation along my back. I retained the removable horizontal stay (2.5 oz / 71 g) for the same reasons.
Among the distinctive features of this pack are the numerous loops for strap attachment, and the use of gatekeeper buckles for rapid attachment and removal of straps. To minimize weight, I opted to leave off the top “V” strap, the two bottom straps, and used only two, rather than three, side compression straps. The trail weight of this arrangement (size M hipbelt), was 3 lb 6 oz (1.5kg).
Gatekeeper buckles latched for secure attachment and unlatched for removal. You squeeze down on the top bar (on the left in these pictures) to pop open the latch.
The Divide has no hydration ports, which increases its water tightness and suitability for packrafting. It has two very large side pockets. Each pocket can accommodate two 1 L Nalgene or two 1.5 L Smartwater bottles. I prefer to hydrate on-trail with a bladder. It was little trouble to fit a Platypus 2.0 L Hoser bladder in a side pocket, clip its top loop to a compression strap with a mini-biner, cut the drink tube to size and clip it to the shoulder strap.
Load Carry
The Seek Outside Divide 4500 is not an ultralight pack. To justify its weight, it has to carry heavy loads securely and comfortably. A 0.5 inch (1.3 cm) anodized 6061 T6 aluminum external frame is key to load capacity. The frame runs in a U-shape around the perimeter of the pack bag and has a concave curve at the bottom to wrap the pack closer to your body. This geometry keeps the pack’s center of gravity closer to your center of gravity.
The shoulder straps and hipbelt are well-padded. The hipbelt is 5 inches (13 cm) wide and has two independently adjustable 1-inch (2.5 cm) straps. I find the two-strap configuration to provide a superior fit, both on this pack and other packs I own.
Divide 4500 hipbelt and hip pocket.
The Divide carried loads of up to 40 lbs (18 kg) over rough terrain with minimal flexion and no buckling. The load remained well-distributed at all times, and the pack was easy to balance without much fuss. I believe it could easily cope with an additional 20 lbs (9 kg), but I am not anxious to test this assertion.
Equally important on this hike, the Divide moved with me on innumerable scrambles, climbs, and sidehill traverses. At no time did I feel thrown off-balance by the pack. The Divide hipbelt is articulated, which simply means that it is attached along the bottom edge of the frame and can swivel up and down. This feature is very helpful when scrambling over rocks and reaching for handholds.
The hipbelt is attached by loops to the bottom of the frame, allowing it to rotate. Optional lumbar pad is shown.
In short, the pack’s ability to move with me was superb. It made carrying 30 to 40 lb (12 to 18 kg) loads about as comfortable as is possible.
Scrambling up Lost Palms Canyon with a 40 lb load in the Seek Outside Divide 4500.
Compared To…
Last fall, I bought the Andrew Skurka-designed Sierra Designs Flex Capacitor 60-75L. This pack checks many of the same boxes as the Seek Outside Divide 4500 concerning capacity and compressibility and addresses many of the same use cases. I have taken the Flex Capacitor on two trips: a 4-day fall loop through the canyon country of western Colorado, and a winter overnight in the Front Range foothills.
Flex Capacitor 43 oz (1220 g), Divide 4500 54 oz (1530 g)
Flex Capacitor
Max volume
75L both
Tie
Min volume
Flex Capacitor 60L, Divide 4500 50L
Divide 4500
Carry comfort
The Flex Capacitor has a high center of gravity, making it tippy. Single-strap hipbelt constantly loosened and slid down
Divide 4500, big time
Durability
Mesh side pockets of Flex Capacitor were shredded in bushwhack. The Divide 4500 is made of much burlier material.
Divide 4500
Configurability
Few attachment points on Flex Capacitor, the Divide 4500 has many attachment points.
Divide 4500
Organization and accessibility
Flex Capacitor has a zippered top lid and zippered main opening (works better than you think). Divide 4500 has back mesh pocket (good) and long roll-top opening (not great)
Flex Capacitor
Cost
Flex Capacitor $220, Divide 4500 $359 base
Flex Capacitor
Strengths
Rugged and durable
Comfortable carry
High capacity
Waterproof with seam-sealing
Adaptable storage options
Limitations
Heavy. Best use cases are cold-weather trips, guiding, packrafting, hunting, and long water/food carries
Product mentions in this article are made by the author with no compensation in return. In addition, Backpacking Light does not accept compensation or donated/discounted products in exchange for product mentions or placements in editorial coverage.
Some (but not all) of the links in this review may be affiliate links. If you click on one of these links and visit one of our affiliate partners (usually a retailer site), and subsequently place an order with that retailer, we receive a commission on your entire order, which varies between 3% and 15% of the purchase price. Affiliate commissions represent less than 15% of Backpacking Light's gross revenue. More than 70% of our revenue comes from Membership Fees. So if you'd really like to support our work, don't buy gear you don't need - support our consumer advocacy work and become a Member instead.
Learn more about affiliate commissions, influencer marketing, and our consumer advocacy work by reading our article Stop wasting money on gear.
Internet pundits often insist that new lightweight backpackers should buy a pack last, so that it will hold all their new gear and a week’s worth of food. Sometimes the advice is to buy the pack first, a little larger in volume than the backpacker thinks they’ll need. But both approaches can misfire, and I think there’s a better way.
Introduction
Internet pundits often insist that new lightweight backpackers should buy a pack last, so that it will hold all their new gear and a week’s worth of food. Sometimes the advice is to buy the pack first, a little larger in volume than the backpacker thinks they’ll need.
But both approaches can misfire, and I think there’s a better way.
The first purchase for transitioning trekkers should be a backpack that fits well and holds 50 liters (3,000 cubic inches) or less. Then they should buy and carry only as much gear, food, and water as fits inside, because they’ll always fill the space available. It took me three tries to figure this out the hard way.
Stumbling into Lightweight Backpacking
Type 2 fun, all day, every day. My monster pack and stylish clothing on the PCT in 1980. Photo credit: Gordon Masor
From the mid 1960s to the early 1980s, I backpacked with large external frame packs. Books and friends told me to buy the biggest volume hauler that fit, because you never knew what you might need to take. Catalogs and ads convinced consumers to buy a monster pack now in order to climb Mount Everest someday.
Of course, I always crammed those packs full, and frequently strapped more to the outside. I commonly carried 40 pounds (18 kg) for a two-night trip, and 55 pounds (25 kg) or more for Pacific Crest Trail sections. I was young and strong, but still couldn’t wait to dump my pack at all-too-frequent rest stops.
Then in the early 1980s a mainstream lightweight backpacking revolution started. Eventually I bought a low volume 2-pound (0.9 kilogram) internal frame pack for weekend trips. Most of my old equipment wouldn’t fit, which forced me to buy smaller and lighter gear and to carry less crap.
At last I could hike longer distances without suffering nearly as much. I actually enjoyed backpacking for several years, until a good friend introduced me to whitewater rafting.
Big Boat, Small Boat, Bigger boat
Most rafts can haul enormous piles of gear for overnight trips – and I did. But I also had to arrive a day early to inflate the boat, attach the frame, load the gear, and tie it all down with dozens of straps. And at each river camp I spent more hours unloading and reloading.
Then one evening at a live charity auction (with beer), I spontaneously bought a small cataraft that could carry me, my personal gear, and not much more. I could rig that boat in less time than it took to inflate most rafts. The cataraft’s small size and weight made it a joy to row down the river. And I schlepped a lot less stuff in camp.
Then I got married, bought a bigger raft, and hauled even bigger piles of gear. But I secretly longed for backpacking-style river trips, where each person brought just one large dry bag of equipment and food. Backpacking alone started looking better.
Third Time’s the Charm
My copy of “The PCT Hiker’s Handbook” by Ray Jardine, first published in 1992. This book kicked off the current ultralight backpacking movement.
By the time my 1980s lightweight backpacking gear wore out, the outdoor industry had reverted to 5 pound (2.3 kilogram) tents, packs, sleeping bags, and boots. My base pack weight jumped to 25 pounds (11 kilograms) and backpacking became a rarely-repeated sufferfest again.
But in 1993 I stumbled across Ray Jardine’s “The PCT Hiker’s Handbook,” and it blew my mind. Could I really backpack without hurting so much? I dropped weight piece by piece without downsizing my pack. I still carried too much gear “just in case,” and ultralight running shoes resulted in ultra-large blisters. It wasn’t until I bought a much smaller pack, which forced me to ditch unnecessary stuff again, that I got my base weight below 15 pounds. That was about 17 years ago. I think I’ve learned the lesson this time.
The Universe is Expanding?
An old rule of thumb says you’ll always fill the space available. This is true for garages, hard drives, and backpacks. So what happens when an enlightening trekker buys a smaller pack last? Until then, they keep using their old high-volume pack, they haul too much stuff, and they continue suffering. After spending big bucks on new gear, they could easily decide that lightweight backpacking is nonsense and give up.
If a lightweight convert buys a new pack first, “a little larger than needed,” then to be safe they’ll estimate too high, carry too much, and won’t be happy.
The American way is that bigger is better. Yet bigger backpacks are almost always heavier. Bigger means you’ll carry more stuff, which makes your load heavier. Bigger means there’s more fabric, seams, and straps to wear out, snag, leak, etc. And bigger is usually more expensive.
Better Advice
The first purchase for transitioning backpackers should be the smallest backpack that fits well and holds a downsized weekend load. For most trekkers that’s 50 liters (3,000 cubic inches) or smaller.
My 50-liter Hyperlite Mountain Gear Windrider 2400 fits me better than any pack I’ve owned or tried. I’ve used it to comfortably carry up to 33 pounds (15 kilograms) of gear, food, and water at the start of eight-day trips. And I’m not SUL or even UL – my base pack weight is about 13 pounds (6 kilograms).
Pack fit is crucial, and this HMG Windrider 2400 fits me well but doesn’t hold too much gear. Type 1 fun returns! Photo credit: Judith Witt-Sanders
Yet multiple reviewers claim that this pack is just big enough for weekend trips. They insist on recommending packs of 60 liters (3,700 cubic inches) or larger, especially since the 65-liter (4,000 cubic inch) Windrider 3400 weighs “only” 1.8 ounces (51 grams) more.
Start Small
The reality is you don’t need a bigger pack unless you plan to hike and camp in cold, snowy weather for many days, or carry a bunch of specialized gear like packrafts or climbing racks. Even if you do – why not buy a smaller pack first, carry less, and suffer less for most trips? If you need to carry more gear for special trips, you could downsize other equipment to make room, and hike even lighter most of the time. Or you could strap gear on. Or you could buy, borrow, or rent a larger pack.
But start small – 50 liters (3,000 cubic inches) or less. Because you’ll always fill the space available.
Note: Some backpack makers advertise just the main pack bag volume, others include the pockets. I included pockets for this post.
DISCLOSURE (Updated April 9, 2024)
Backpacking Light does not accept compensation or donated/discounted products in exchange for product mentions or placements in editorial coverage.
Some (but not all) of the links in this review may be affiliate links. If you click on one of these links and visit one of our affiliate partners (usually a retailer site), and subsequently place an order with that retailer, we receive a commission on your entire order, which varies between 3% and 15% of the purchase price. Affiliate commissions represent less than 15% of Backpacking Light's gross revenue. More than 70% of our revenue comes from Membership Fees. So if you'd really like to support our work, don't buy gear you don't need - support our consumer advocacy work and become a Member instead.
Learn more about affiliate commissions, influencer marketing, and our consumer advocacy work by reading our article Stop wasting money on gear.
We review the 6-Liter model of the Platypus GravityWorks Water Filter, intended to provide water for groups and for basecamp scenarios.
Introduction
In this article, we review the 6-Liter model of the Platypus GravityWorks Water Filter, intended to provide water for groups and for basecamp scenarios. The potential advantages of this gravity-powered system are the saving of time, effort, and weight in purifying water for groups.
Schematic of parts and assembly. From the owners’ manual.
The GravityWorks system has been around since 2008 and is a mature product. We reviewed the 4.0 L incarnation of this filter in 2016. That review found the GravityWorks system to be robust and easy to use, offering good value for weight. According to the design team at Cascade Designs (parent of Platypus), the current version of the filter is little changed from previous models. The most significant change is that the cartridge walls are now thinner. The team found that they could save a bit of weight there without sacrificing robustness or reliability.
Our previous review focused on qualitative factors: ease of use, quality of build, and design. Our current review expands on those observations with a quantitative analysis of key performance factors. Together these reviews should give you a good sense of what to expect from the GravityWorks filter, and whether it is a good fit for your filtration needs.
About This Review
This Limited Review examines some of the key performance parameters of the system: rate of filtration, how this rate is affected by water quality and hydrostatic head, and how this performance declines with use. I also make a qualitative assessment of ease of use based on my experience with similar previous models and compare the GravityWorks filter with its nearest competitors.
The Platypus GravityWorks 6.0L filter in its basic use configuration: dirty water reservoir hanging from a tree limb, feeding water through the filter to the clean water bladder on the ground. No animals were harmed in the production of this review.
Features and Specifications
Gravity driven
Effective against bacteria and protozoa, but not viruses
Meets EPA and NSF standards for removal of 99.9999% of bacteria and 99.9% of protozoa
Pore size: 0.2 µm
Field-cleanable by backflush
Hollow-fiber filtration media
Wide-mouth collection reservoir
Simple operation controllable by in-line clamp
6.0L capacity
Filtration rate
Claimed: up to 1.75 L/min
Measured: see text
Weight:
Claimed: 12.3 oz (350 g)
Measured: 12.7 oz (360 g)
Packed size: 12 x 6 x 3 inch (30 x 16 x 7 cm)
Replaceable cartridge treats up to 1500 L
Polyethylene reservoir, silicon tubing
The GravityWorks filter, packed.The GravityWorks filter components unpacked
Performance Analysis
I tested the GravityWorks filter for several parameters:
flow rate with both clean and dirty water sources,
dependence of flow rate on hydrostatic head, and
loss of flow rate as a function of cumulative liters filtered.
Those are a fair number of variables to examine, and they are variables that I expected to show some dependence on each other. Rather than examine each in a traditional one-factor-at-a-time experimental design, I used statistical design of experiments methods to minimize the number of runs needed to extract the desired information.
To measure the effects of hydrostatic head, I hung the collecting reservoir 3, 5, and 7 feet (the maximum extension of the tubing) above the receiving reservoir. I used tap water for clean water. Per the manufacturer’s recommendation, I backflushed the filter with 0.5 – 1.0L of clean water before every run. To generate dirty water, I stirred up the algae from a downspout rain barrel in my garden and withdrew water from that barrel.
Testing setup: the dirty water reservoir was hung from a post at 3, 5, or 7 feet (max extension) above the receiving clean reservoir. The rain gauge and bee nesting block were not part of the test protocol.To generate dirty water, I stirred up the algae from a downspout rain barrel in my garden.For comparison, here’s what the filtered (clean) water looked like.
Experimental Results
Here’s my raw data:
hydrostatic head (ft)
water quality
filtration time time (hh:mm:ss)
filtration rate (L/min)
cumulative water filtered (L)
ambient temperature (F)
7
clean
0:03:47
1.59
0
50
7
clean
0:04:02
1.49
12
50
7
clean
0:04:27
1.35
18
50
7
clean
0:03:56
1.53
24
50
7
clean
0:03:50
1.57
30
50
5
dirty
0:05:53
1.02
36
58
7
clean
0:04:39
1.29
42
58
3
clean
0:09:39
0.62
48
58
3
dirty
0:16:49
0.36
54
58
7
dirty
0:06:35
0.91
60
40
3
clean
0:11:14
0.53
66
40
3
dirty
0:21:10
0.28
72
40
5
clean
0:08:15
0.73
78
40
7
clean
0:05:56
1.01
84
47
3
dirty
0:22:54
0.26
90
47
7
dirty
0:16:38
0.36
96
47
5
clean
0:11:58
0.5
102
47
3
clean
0:17:14
0.35
108
47
5
dirty
0:15:39
0.38
114
49
3
clean
0:17:20
0.35
120
49
7
clean
0:06:34
0.91
126
49
5
clean
0:08:30
0.71
132
50
Note: Data from the second run (the 6L run) excluded due to a kink in the tubing.
I used these data to create a multivariate model of test performance using a response surface design. A Bonferroni correction was applied to reduce the false discovery rate of significant factors. Factors that were thus excluded were: temperature, non-linearity of hydrostatic head, and interaction of water quality on hydrostatic head.
Significant factors and their Bonferroni-corrected P values are:
The derived multivariate model fits well to the observed data (R2=0.94, RMSE=0.13 L/min, Pvalue < 0.0001).
Here is a graphical representation of the model, showing the relative effects of each of these factors:
Clicking on the graph will take you to an interactive file that will open in a new browser tab.
Conclusions from this analysis:
Dependence on the hydrostatic head is about 0.2 L/min/ft. Not surprisingly, the higher you hang the filter, the faster filtration rates will be. This dependence is linear over the range tested.
The maximum filtration rate is about 1.5 L/min, not 1.75 L/min as claimed by the manufacturer.
Dirty water is filtered about 17% more slowly than clean water. This is less of an effect than I expected. Obviously this depends on just how dirty the water is. A limitation of this result is that I tested scummy (algal) water, but not silty water, which might behave differently.
Filtration rate drops with use. The initial rate of 1.5 L/min dropped to 0.9 L/min after 100 L. That’s a lot. To be fair, most users won’t be filtering as much dirty water as I did in this testing and should see a lower loss of filtration rate. Unless you are hiking the Arizona Trail, I can easily imagine that the drop in rate would be much slower than what I measured.
The loss of filtration rate is non-linear and appears to slow down after an initial rapid drop. This effect is of borderline statistical significance (p = 0.06) but still more likely than not to be real. My physical interpretation of these results is that there are a finite number of sites on the filter to which scum will stick irreversibly.
Qualitative Observations
My testing plan was to use this filter on a Sierra Club ICO trip with middle-schoolers to Canyonlands National Park in April 2020. The coronavirus outbreak led to the cancellation of all our outings for the time being. However, I have used earlier versions of this filter on previous outings. As the basic design and form factors appear little changed, I think it is valid to apply those experiences to the current product.
The operation of this filter system is very simple. Both elementary and middle-school kids have no trouble in both setting it up and getting water from it. Collecting water from still sources using soft-sided containers is always harder than using rigid containers. However, the wide mouth and stiff zip-seal at the opening make collection from still water relatively easy.
Backpacking Light publisher Ryan Jordan has used large-volume Platypus GravityWorks filters for several years with Scouting groups in mountainous areas of the Northern Rockies, including Glacier National Park, Yellowstone National Park, the Bob Marshall Wilderness, and the Absaroka-Beartooth Wilderness and notes that as long as they aren’t filtering extremely silty water, the efficiency of using a system like this as a group filter far outweighs the filtration rate slowdowns that come with filtering clean water.
Earlier versions of this system featured an adapter that allowed filtration directly into a variety of bottles, rather than the supplied Platypus bladder. Although this was convenient, it was not unusual for kids to fill their bottles and forget to clamp the line shut, draining filtered water out onto the ground. Filtration into a closed reservoir prevents this waste.
The narrow mouth of the clean reservoir also makes it difficult to use for water collection, thus minimizing the risk of cross-contamination.
Performance Summary
criterion
observations and issues
Filtration rate
1.75 L/min claimed, but 1.5 L/min max rate for a full 6 L batch observed. Not surprisingly, this rate decreases with reduced hydrostatic head, and for dirtier water.
Ease of use
Simple to assemble. Wide, rigid mouth facilitates water collection. Walkaway operation. Easy to backflush.
Robust design
No moving parts or power sources required. Sturdy construction. Very few failure modes.
Product lifetime
Significant drop in filtration rate with use.
Backflush setup: hang the clean reservoir above the dirty reservoir for a minute.
Commentary
Gravity filtration technology is mature. The first version of the Platypus filter was launched in 2008. With several well-established competitors in the field, there are no striking innovations that distinguish one product from another. Instead, these products are differentiated on the basis of execution. I reached out to the design team at Cascade Designs (parent of Platypus) for their view of what distinguishes their product from the competition:
Clean side/dirty side complete system. Makes it easy to backflush and purge air bubbles, reduces the risk of contamination, provides storage capacity so that clean water is always available. Comment: These claims are fair. Several competitors do not include a clean water reservoir. Backflushing only requires placing the clean reservoir above the dirty for about a minute.
Internal testing. Platypus does actual microbiological testing rather than relying on dry particles to verify manufacturing quality. Comment: I can’t vouch for competitors’ methods, but microbiological testing is the gold standard. Bacteria (especially Gram-positive cocci, which can be < 0.5 µm) are flexible and can pass through filters whose pore size is smaller than they are. Also, nominal pore sizes are an average over a distribution. The width of that distribution matters greatly to actual filter performance.
Taste-free. The proprietary film of Platypus products has a thermoplastic polyurethane outer layer that provides strength and durability and is lined with an inner-water contact polyethylene layer. This construction keeps water from tasting like polyurethane. Comment: I did not detect any plastic flavor from the clean reservoir. I have had other products, notably an MSR Dromedary bag, that had a strong plastic taste (incubating several hours with a warm, dilute solution of Dr. Bronner’s helped fix this).
The Cascade Designs team also noted that they test 100% of filters inline on their production lines. They also believe that their lifetime claims are more realistic than those of their competitors, and plan to update this spec to best-case/worst-case (i.e., clean vs. dirty) scenarios. Comment: I noted a significant decrease in the filtration rate in less than 100 L use. However, the rate seemed to be stabilizing at about 1 L/min, which is still comparable to rates for mechanical filters.
Compared To
I’ve used the comparable Sawyer product on group outings. In my experience, it is a distinctly inferior product. Flow rates under the best of circumstances were significantly slower than the Gravityworks filter and it clogged readily. Repeated backflushing was required to get it to work at all.
The MSR Trail Base Water Filter System is more expensive, heavier, treats a smaller volume, and has a slower filtration rate. On paper, it loses out to the Gravityworks filter.
Platypus $120, Katadyn $90. Katadyn does not include a clean reservoir.
Katadyn
weight
Platypus 12 oz (350 g), Katadyn 10 oz (283 g). The Platypus clean reservoir weighs 3.2 oz (90 g) and can be left at home, making it lighter in a comparable configuration.
Platypus
packability
Clean reservoir accounts for most of the small difference.
Katadyn
capacity
6 L both
tie
pore size
0.2 µm both
tie
backflushable
Platypus easy to backflush, Katadyn cartridge must be replaced
Requires trees or other support, preferably > 5 feet height
Decreased filtration rate over time, even with backflushing
Closing Comments
The Platypus Gravityworks 6.0L Filter is a mature product that addresses the use cases of high-volume water treatment for groups and basecamp scenarios. It is simple to operate and is robust and reliable. It provides clean water at a higher rate and with less effort than mechanical pumps, and at a comparable weight. Its main limitations are that it will not remove viruses or chemicals and that it is more difficult to use in non-forest environments such as above treeline and deserts. I have used this filter for years on group outings and will continue to do so.
Product mentions in this article are made by the author with no compensation in return. In addition, Backpacking Light does not accept compensation or donated/discounted products in exchange for product mentions or placements in editorial coverage.
Some (but not all) of the links in this review may be affiliate links. If you click on one of these links and visit one of our affiliate partners (usually a retailer site), and subsequently place an order with that retailer, we receive a commission on your entire order, which varies between 3% and 15% of the purchase price. Affiliate commissions represent less than 15% of Backpacking Light's gross revenue. More than 70% of our revenue comes from Membership Fees. So if you'd really like to support our work, don't buy gear you don't need - support our consumer advocacy work and become a Member instead.
Learn more about affiliate commissions, influencer marketing, and our consumer advocacy work by reading our article Stop wasting money on gear.
It all started years ago when I was contemplating the weight of a number of commercial remote canister stoves, and wondering why they had to be so heavy. In many cases, it seemed as though someone with little knowledge of stove engineering had just thrown bits together with no regard for either weight or elegance. Some of the results were clunky, and others were just weird.
At the same time I was looking at some of the massive pre-heat tubes found on commercial remote canister stoves, and wondering why they were needed when butane boils below 0 deg C and propane boils below -40 deg C. It seemed to me that the designers of these stoves were simply copying, rather blindly, the design of current white gas and kero stoves. Kerosene boils somewhere between 150 deg C and 300 deg C, so the comparison seems ridiculous.
Version 1
Actual development work started when I was asked to review the Brunton Stove Stand. It allowed me to put a hose onto my favourite upright canister stove (a Snow Peak GST-100). But it had a solid metal pipe where the hose connected to the body, and I wondered whether I could conduct enough heat in there to vaporise the propane/butane fuel mix as it arrived.
I added a hose and a copper strip to a Snow Peak GST-100 and Version 1 was born. The stove is integrated with the Brunton Stove Stand.
Well, no use wondering: go and do. So I did, as above (see photo), and it worked fine. There was enough heat coming down the metal strip (copper) from the flame to the pipe. After all, the pipe had only to reach something like +5 deg C. Interestingly, while a copper strip (thermal conductivity 400 W/m∙K) worked fine, a brass (61-111 W/m∙K) strip was not so good. For interest, plain aluminium is 236 W/m∙K while Ti is 22 W/m∙K. Obviously, good thermal conductivity would be needed. This metal strip is now called the Heat Shunt.
But the original steel legs on the Brunton stand were heavy, the large base was heavy, and the hose was stiff. If I did some engineering, made some lighter legs, and integrated the needle valve with the base, better was possible. And so the long journey got going.
On one trip in the Pyrenees, the brass thread (where the stove connects to a canister) on my GST-100 had been stripped by the very rough steel thread on the screw-thread canisters. I had to suddenly buy a Campingaz stove (lumpy and heavy) and Campingaz canisters (nice). I wanted to get away from that crude rough steel thread, and I had quite a few nice full Powermax canisters on the shelf. Could I make a universal canister connector?
I redesigned (and made more durable) the hose, a better fuel control system, and universal canister adapter next (the black pieces attached to the canisters).My universal canister connector with fuel-control valve. Photo by Ryan Jordan.
Jumping ahead several years, this is what I envisaged: compatible with screw-thread, Campingaz and Powermax, and having a fast ultra-reliable shut-off facility at the canister, separate from the control valve. It was possible, and it has been described in my previous stove articles. At the same time, I was able to make a thoroughly satisfactory but light-weight armoured hose, as seen in the above and below photos.
But developing the whole system had taken a year or two, and I had become a bit impatient. I decided to use a commercial burner head on my stove body and legs to get things going. I could pick a burner head which was light and effective, and it would save me a lot of work. I used two stoves for this: at first the Fire Maple FMS-116 and later on the Fire Maple FMS-300.
Using these currently available burners (the Fire Maple FMS-300 (left) and Fire Maple FMS-116 (right)) allowed me to focus on other stove design elements, but eventually, it became time to optimize the burner.
The FMS-300 had, to my mind, a better gap between the burner head and the pot, permitting better combustion and lower CO levels. Also, I cheated slightly and reused the needle valves out of the stoves. Purely as a side note, you might like to compare the Fire Maple FMS-300 (on the left) with the BRS-3000t: there is not a lot of difference, and I believe the FMS version was first. A performance comparison between the two can be found in Backpacking Light’s most recent upright canister stove gear guide.
Anyhow, my V1 stove was successful, and I sold well over 100 of them. I was very pleased, and my wife was impressed (which was not easy to do).
Despite the sales, I was not entirely happy with using a commercial burner head. I wanted to make my own burner head. So I started to experiment (and use up a lot of gas in the process).
One of the few constraints I had was that I wanted a wide flame head, not a focused pencil flame like the original Pocket Rocket, the BRS-3000t, or the Fire-Maple FMS-300. Two other constraints were that it had to be manufacturable, and it had to work well. A year or two went past.
The Vortex Diversion
I was well on the way down this path when I suddenly started thinking about Vortex Burners: they are very different from the conventional designs above. I was hooked and spent the next few years happily playing with them – to the point of producing two slightly different models and selling them as well.
This is the V3 model, also covered in articles here at BPL. Yes, I sold a number of both the V2 and the V3 models. There is something very macho about the noise these stoves make when going full bore, they look impressive, and they do work well.This photo was taken up in our Alpine region one morning. It was sub-zero and my wife wanted warm milk on her muesli. Not a problem. So was this the end of the road?
Rediscovery
I was tidying up the workshop after making and selling my V2 and V3 stoves when I opened up one of several boxes of left-over parts. I found all the old burner heads I had been experimenting with after V1, plus about 14 (quite refined) burner heads I had been just about to fit onto stove bodies. I had forgotten all about them.
Revisiting burner heads.
Out of interest, I examined them closely. All very nice in fact. Some were made from titanium tubing I had lying around, and others were made from machined aluminum. They were all very light, and they all made a nice broad flame.
Then I looked at the stove body design that came with these heads in the left-overs box: that’s the bit held in the vise in the photo above. It’s rather long, with a pivoting connection for the hose, and I began to remember that both the length of the stove body and the pivot on the hose had both given me a lot of trouble.
The long stove body presented two problems. The needle valve is perforce directly under the jet. This means a delicate drilling operation for a precisely concentric 1 mm hole at the end of a long thin (4 mm) bore, and I could not find a suitable stock drill bit for this. I had to get some custom-made in China for it. In addition, machining a long thin aluminum needle to fit down the long bore had been difficult: the long thin aluminum rod insisted on flexing in the lathe.
Proving the concept, but at the expense of creating bulk.
I tried using some titanium rod for the needle, and this machined OK, but actual field use revealed a terminal problem when I shut the stove down after use. You see, aluminum has a significantly higher coefficient of thermal expansion than titanium. When the stove cooled down the aluminum body shrank more than the titanium needle, which meant that the needle ended up jammed hard in the orifice. It was very hard to reopen the valve. Long-term reliability? Very poor. Not good enough.
Then I looked at the pivot connection for the hose: the little bit sticking down from the long stove body, near the black O-ring on the spare needle valve. I could buy larger versions of these pivots, but not small ones. My memory was that machining these had been even more complex and slow. The problem lay in how you hold them. There had also been a small problem with the gas flow: going from the pivot connection into the side of the needle valve. There was not a lot of room at the bend for the fuel. I began to remember why I had abandoned the idea and switched to designing Vortex Burners.
But still, I wondered whether I could do better now, with the advantage of many more years of stove design. Ah, the challenge! Further optimisation of the burner head, and a much smaller and simpler stove body at least.
Stove Body
The first decision was that the revised stove body had to be very short, both to keep the weight down and to make the machining easier.
The hose connection was not difficult: I had developed a neat simple connection method for previous stoves which could be further developed.
In the photo of a V1 stove here the end of the hose goes into the stove body, into a bore machined to the right size for an O-ring on the PFA hose itself. The ‘nut’ which holds the hose in place also goes inside the stove body. The version shown here on V1 did not allow rotation of the hose at first, but that was soon fixed. The nut also clamps the Heat Shunt to the stove body for good heat transfer.I changed the screw connection from the V1 style to one which used a loose external nut which lets the hose spin nicely. This had already been done on one of the Vortex Stoves as shown here, so I knew it would work.
Part of the problem with the long stove body had been having the hose connection at the same end of the stove body as the valve, even though it had ‘seemed like a good idea at the time’. If I put the hose at the other end, as in V1 as shown in the previous photo, everything fitted nicely.
This is an engineering cross-section of the stove body on the V3 stove. The needle valve screws into the thread at the right, and the hose connects at the left. The O-ring is inside the end while the nut is on the outside. The jet comes in at the top.
A very technical point should be made here about how the gas flow goes in at the opposite end from the needle valve. Any dirt or wax from the fuel (it happens) which wants to collect somewhere will most likely blow through the needle orifice, leaving it clean, and it will then collect on the needle. It can often be cleared by movement of the needle valve, or if it’s really bad, by removing the needle valve and wiping it. The overall length of this stove body is under 40 mm, so the needle valve is very short and much easier to machine in the lathe. These factors made both the stove body and the needle valve much easier to manufacture – and lighter too.
Another technical point concerns the aluminum used. In this photo above I had used a readily available 6060 alloy for the needle and a hard cast aluminum (scrap from an aeroplane propellor) for the stove body. After a few open/shut cycles, the hard cast aluminum body had damaged the profile of the tip of the 6060 needle right where it seals, at the red arrow. I had not realised just how hard cast aluminum can be. For long-term reliability, I needed to match the needle alloy with the body alloy to maintain the profile and get a good shut-off seal.Obviously I would need some sort of heat shunt to vaporise the incoming liquid gas. This photo shows what I had done for the V1 stoves, but I could not do exactly the same for the new V4 stove as the hose was now to be retained by an external nut. Well, I could with some redesign, but I wanted something simpler.The solution was quite simple: bend the heat shunt and have it held down to the stove body by the burner tube. The heat will easily get to the stove body: it only needs to get it above, say, +5 deg C. Conduction from where the Heat Shunt sits over the short distance to where the hose enters the stove body is very simple. In practice the stove body can sometimes get about the touch-test temperature of 40 deg C: definitely hot enough even in very cold weather!Previous stoves had used a jet hole of 0.3 mm diameter, and that had given plenty of power. As the power available in any canister stove depends mainly on the amount of fuel being used, with very little contribution from the design of the stove, it seemed reasonable to keep it this size. I make my own miniature jets as you can’t buy them. Yes, that is a 0.3 mm dia drill bit held in an expensive Albrecht chuck. Actually, you can’t really see the 0.3 mm part of the drill bit: it’s too small. Those drill bits are expensive and come from Switzerland. Watchmakers. The part holding the Albrecht chuck gives me precision centering of the drill bit on the centre of rotation of the chuck; typical lathe headstocks are not accurate enough for 0.3 mm bits.
Handle and Windscreen
While both the stove body and the needle valve are small, one does have to be able to adjust the valve while the stove is running. I soon found out that there was a fair bit of radiation that close to the stove body (rather warm fingers), so some sort of handle would be needed. The V3 stove used a long Ti wire handle, but the machining was a bit complex. Perhaps a very light bit of tubing could be made to connect somehow with the short but solid handle on the needle valve?
Carbon fibre tube is very strong and quite light, and I had a fair amount of bits and pieces leftover from making tunnel tents. It was a simple matter to make the handles on the needles fit snugly inside the CF tubing. However, the tube had to not only fit, but connect reliably so the valve could be turned reliably. Since the CF tube could be rather long, it was also necessary that it should be removable for packing.
My first idea was a bit complex, although it certainly worked. However, getting the sliding clip exactly right was tricky. Bending the 1 mm wire used into the right shape (Bend1) to fit the holes was not as difficult as getting Bend2 exactly right so the straight bit of the wire went through the handle and engaged both sides of the CF tube when shut but cleared the handle when open so the handle could be removed. Adding the heat shrink tubing to ‘thicken’ the wall of the CF tube helped a bit. After making a few of these (they do work fine) I cast around for something simpler.The basics of this second version are very simple: a simple slot in the handle and a pin through the CF tube. The problem is how to keep the two connected during use: they look as though they could fall apart. A little experiment showed that a practical implementation with real wire would work: the fit onto the handle of the valve was snug, the slot in the handle was not sloppy, and the wire pin through the CF tube was not 100% straight (reused stainless steel wire). There was enough interference due to a slightly curved wire pin and an ever-so-slightly offset alignment of wire and slot that the handle stayed in place during use.
I chamfered the entry into the slot just a little so that I could simply push the CF handle over the end of the valve and spin it a bit to get the wire to drop into the slot. Should the connection ever start to get a bit loose, a tiny bit of a crimp in the wire would restore the grip. In practice, this was very effective.
The CF tube offcut I was first experimenting with was longer than I needed, but I was loath to cut it down too early. Then, looking at the stove and wondering how to fit the windshield around it now that the handle stuck out so far, I suddenly saw the perfect solution. I punched a hole in the light foil at the right height at the midpoint and threaded the windshield onto the CF handle. The hose then came out the gap or opening in the windshield on the opposite side. Perfect, and very fast to set up. (Yes, this is V4, but you are meant to be looking only at the CF tube handle at this stage.)
Summary So Far
This article covers all the easy bits. The next article will go into some detail about the development work needed to get a design that satisfied me: optimising the burner head and coming up with a neat solution for the stove legs and the pot supports.
The LiteAF 35L Curve Backpack (16 oz / 453 g, $255+*) is a frameless ultralight pack constructed partially of Dyneema Composite fabric.
You don’t have access to view this content.
Membership Required
This feature requires an active Backpacking Light Membership.
Premium Articles
You're currently viewing a free preview of a member exclusive premium article. Our premium articles include in depth journalism and insights from the Backpacking Light editorial team.
Get full article access by subscribing to a Premium or Unlimited Backpacking Light membership!