This is a story about a 40-day backpacking trip in the Far East (Russia) where I started with a pack that weighed 95 lb (43 kg).
Introduction
This is a story about a 40-day backpacking trip in the Far East (Russia) where I started with a pack that weighed 95 lb (43 kg).
For some, ultralight backpacking is all about carrying the bare minimum. For others, it’s a mindset or framework.
Not everyone wants to pack ultralight, whether it is for comfort or because of the kind of trip, but I am sure that most people can appreciate lightening their load. Ultralight gear is about shaving weight down for any trip. With good weather you could easily spend a weekend in the mountains with 15 lb (6.8 kg) or less on your back, or you could go out for another week and double that weight. Continuing advances in gear design mean that in 2019 you can get a 2 person tent that weighs less than 1 lb (0.45 kg) and a 0F (-18C) sleeping quilt at only a pound and a half (0.7 kg)
This summer a friend of mine and I decided to make our ultralight gear seem a little ironic and carry 95 lbs (43 kg) on our backs. This wasn’t just as a joke or some bizarre industry commentary though, we had good reason, and we were still light on food and gear by the end of our trip. As much as ultralight gear can make for light packs it can also afford other opportunity. Nearly 100 lbs (45 kg) may seem a bit nonsensical until you look at what we were doing. We were out for 40 days unsupported in Far-Eastern Russia. That means we had 40 days of food on our backs in addition to our gear.
This presents an interesting if perhaps seemingly niche side of ultralight backpacking. Instead of the desire to carry less and go further, the desire to carry more and go longer. Were we actually backpacking ultralight? Perhaps not. Were we cutting every ounce we could from our packs? We certainly made an effort to. This is a bit of a different perspective and approach than what is more conventional. Instead of shaving weight to have the lightest pack possible, you choose the heaviest pack you’re willing to carry and go backwards from there to see how many days you can spend in the wilds. We ended up carrying more than we probably should have (I don’t know if anyone has ever enjoyed a 95 lb (43 kg) pack) but only because of how long we wanted to spend in the backcountry.
Expectations also change for things like distance and rest. Day after day of hiking for 20 miles (32 km) or even to hike every single day become something approaching impossible. Movement is often slow and distances are often grueling.
In a world where trails like the Sunshine Coast Trail – 112 miles (180 km) – in British Columbia are run in under 35 hours and the 310-mile (500 km) Superior Hiking Trail saw four new speed records in 2019 there is an obvious propensity for travelling light and fast and far. So why on earth would someone carry 95 lbs (43 kg) and cover a fraction of the distance? To explain myself I’d like to try to capture what actually happened over those 40 days.
About The Trip
For long sections of trail, self-supported or supported trips are often possible. This helps to alleviate the necessity of carrying consumables like food and fuel for an entire trip. Thru-hikes are well known for this type of travel, often with frequent resupplies (typically every 3 to 7 days) of the day to day necessities. There were a number of reasons we did not employ this approach on our trip this summer. In addition to any desire we might have had to be unsupported, the realities of remote off-trail hiking also made it our only option.
Planning an international expedition without any intention to follow a known route or trail system requires a certain level of self-sufficiency. We prepared ourselves to be absolutely on our own for up to 40 days at a time, and we ended up doing just that.
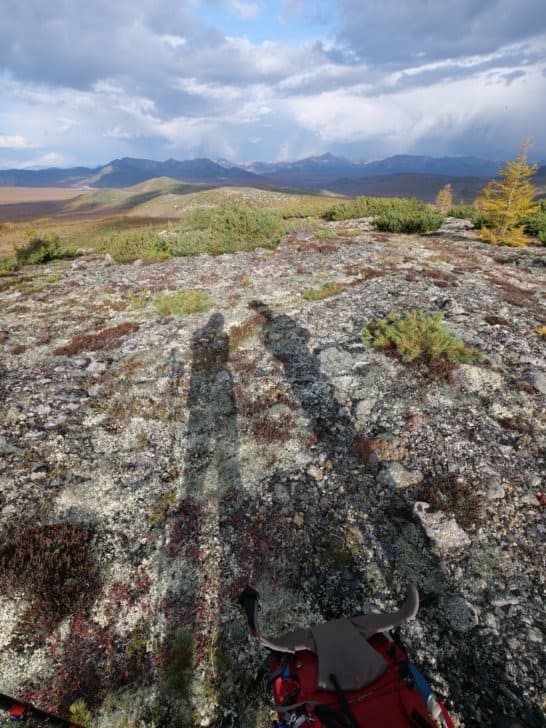
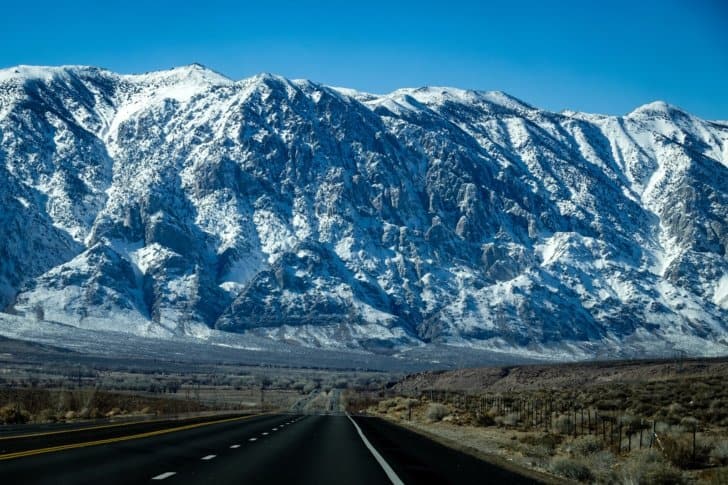
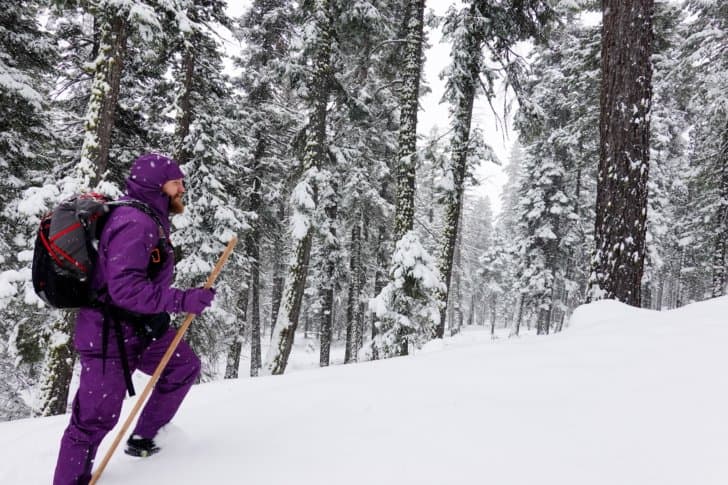
We hiked into the mountains of Magadan Oblast (Магаданская область) at the beginning of August and exited about midway through September. In that time we committed ourselves to an existence that flowed through time and space in synchronicity with our bodies and the landscape. We were lucky enough to see one of the most amazing changes of seasons that I have ever experienced and to revel in sun rain and snow, truly at a pace that followed the mountains around us.
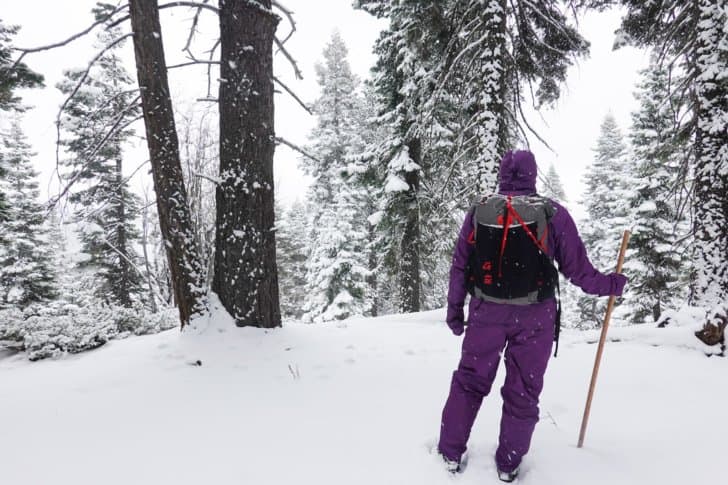
Colors changed everyday, from the glowing greens of summer to vibrant reds, pinks, purples, and the shining gold of the fall subarctic forests and tundra.
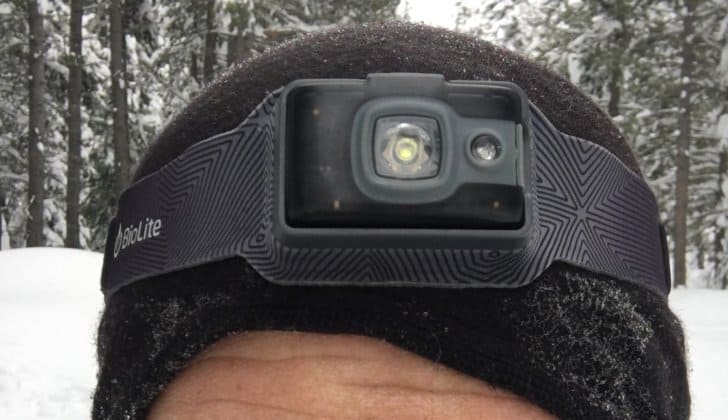
At 63 degrees North days are long in August. We only used headlamps once over the course of 40 days and that was at the end of the day after reaching a summit at 6pm. The larches and the tundra framed microcosms and macrocosms of stunning plants and animals and rocks and water. We saw snow sheep and a brown bear and foxes and loons and countless insects and spiders. It seemed that at each turn there was more magic awaiting us.
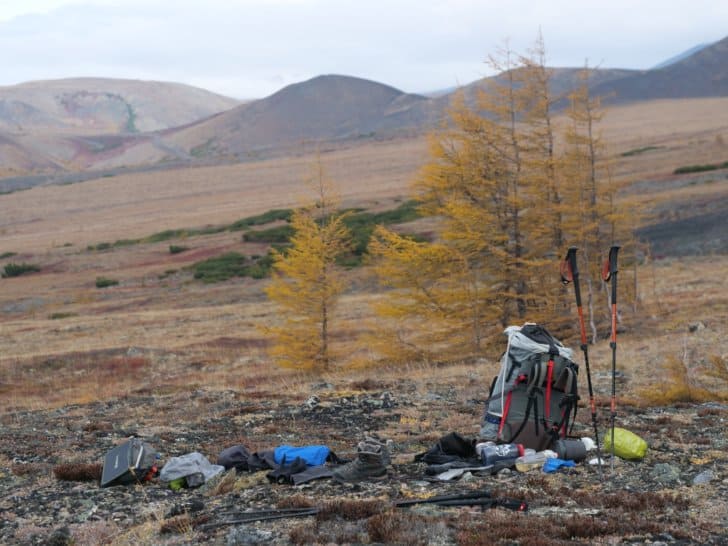
Our day to day wasn’t dissimilar to what you might expect from any other backpacking trip. We found both routine and novelty in each day. Our isolation allowed us to focus, whether that be on our feet across slick talus or in the immersion of a reader absorbed by a well-written book. Things were simplified and this revealed some of the complexities of each tiny piece of the world around us and of ourselves. In lieu of a novel to describe the momentous character of this trip I will let the pictures here reveal what they can to you.
The ground wore many faces. The growing and shrinking of lichens and plants with the rains and the seasons made even what was underfoot a dynamic world.
What’s challenging about an unsupported, 40-day trek?
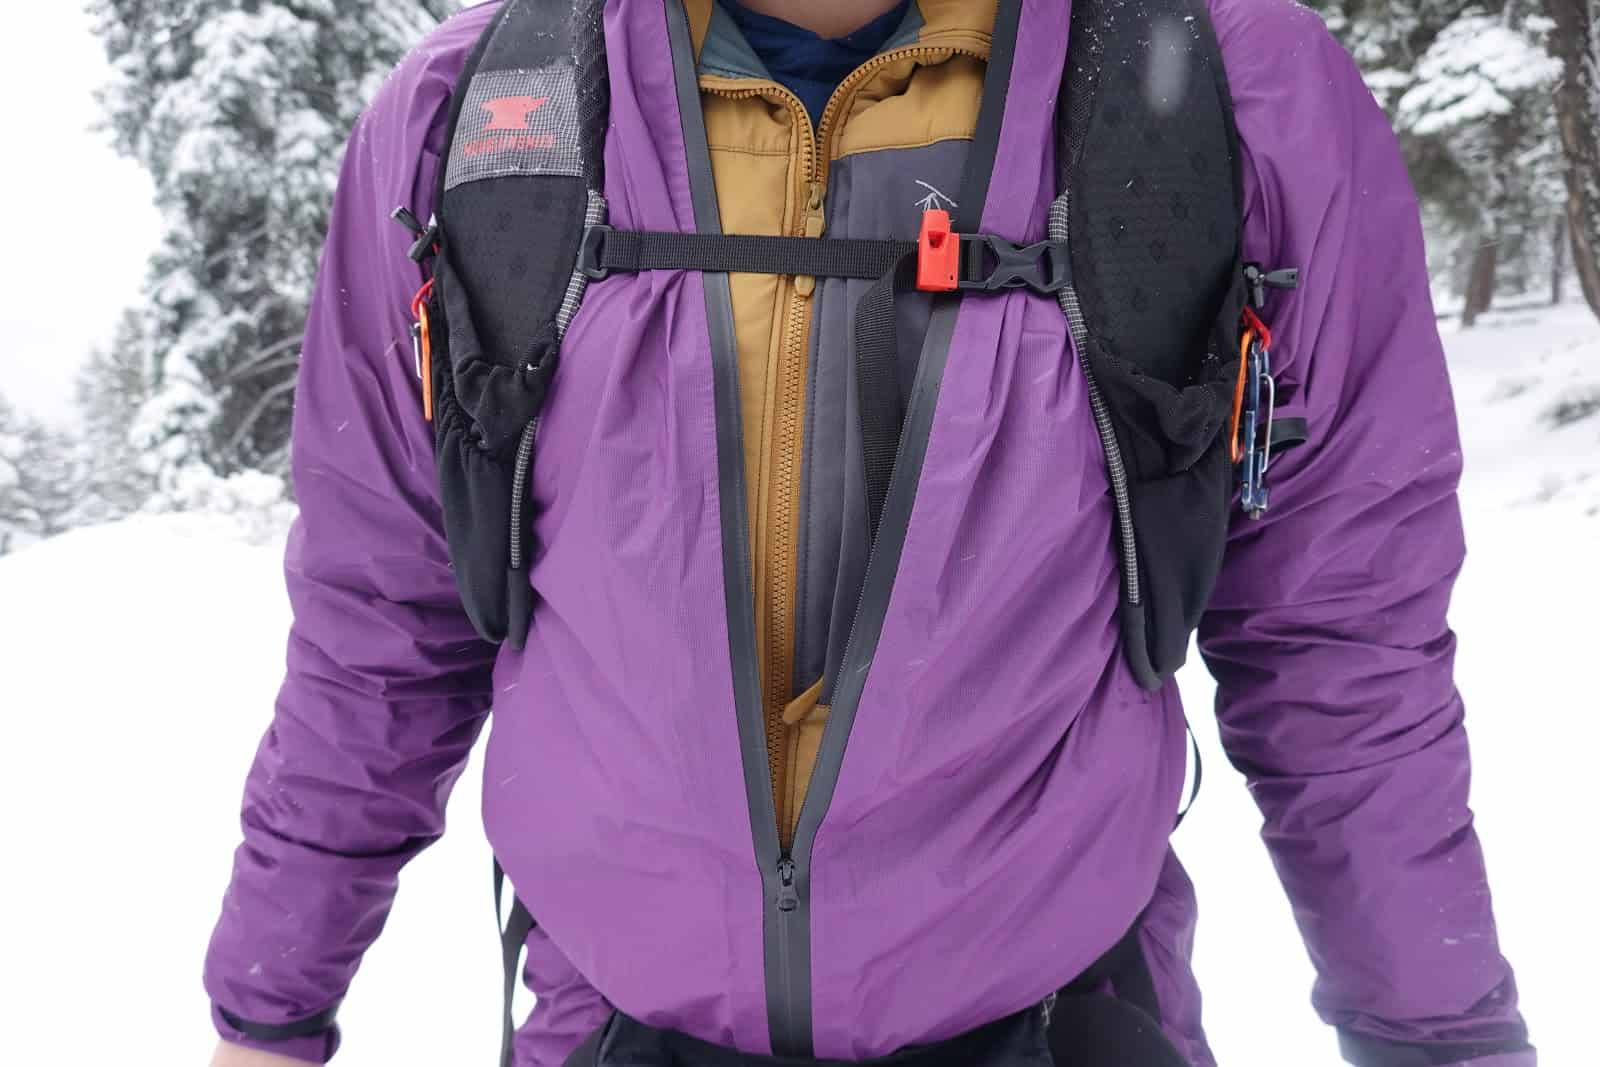
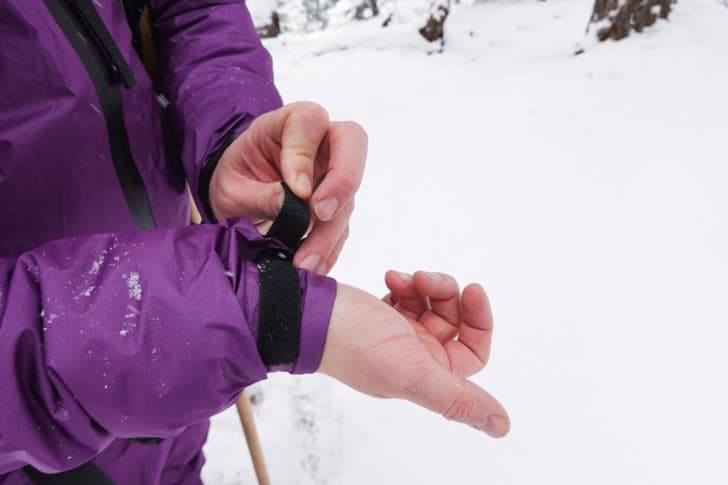
Pain. Carrying 95 lbs (43 kg) hurts – a lot. Every day, the pack gets lighter but a heavy pack takes a toll on the body. Even a light pack can press heavily on the body as the miles and the days build. Over the course of weeks the body fights back, bruises and cramps and stiff joints can be discouraging feedback and morning stretching can only appease so much.
Patience. Moving slowly is surprisingly taxing, not only on the body but on the mind. One of the beautiful things about spending weeks on end in the mountains is the ability to settle into routines but also stay present in response to surprising and changing details. This takes some patience to settle into. If you are focused on a constant sense of movement or of accomplishment, it does nothing but distract from the immersion of calm moments and the breaks that the body needs.
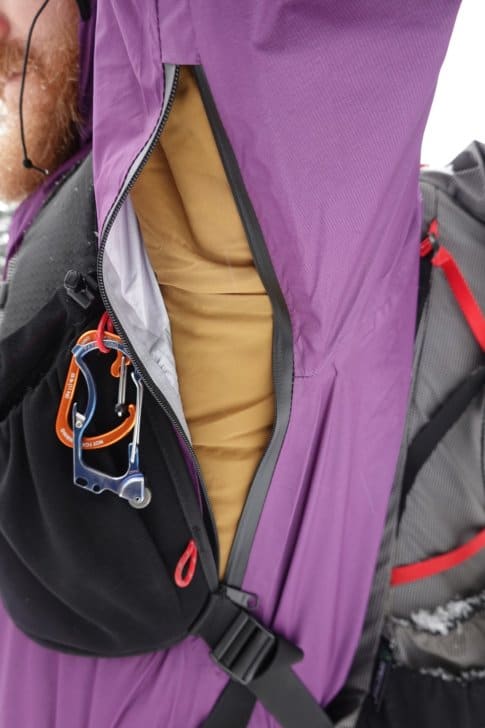
Hunger. I think a lot of backpackers, particularly ultralight hikers, bring less food than they might eat in their kitchens at home. Over the course of a few days or even a week this works well, just enough things missing to make the first meal back extra tantalizing. Skimming ounces off of the top of 40 days of food to save weight makes for a different story. Over the course of almost six weeks hunger can become a real nuisance. With any long unsupported backpacking trip it must be balanced with what can become a back crushing load.
Fresh berries were a welcome mouthful of freshness and a calming pause from the weight of a heavy pack or the stretching of a long day.
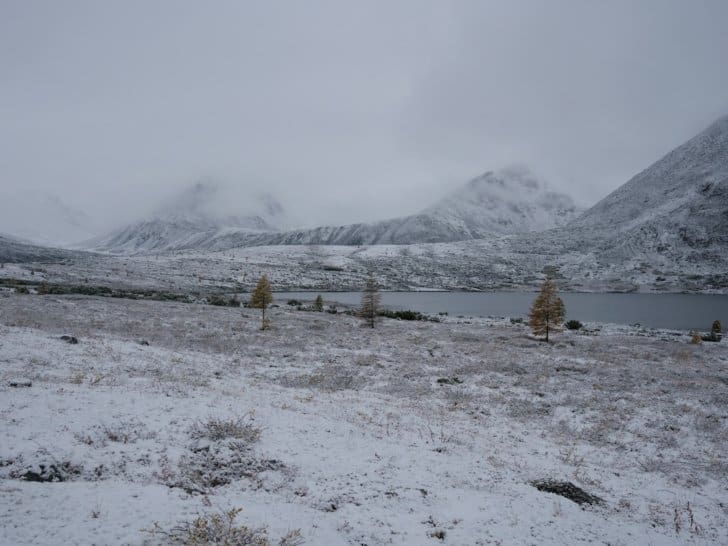
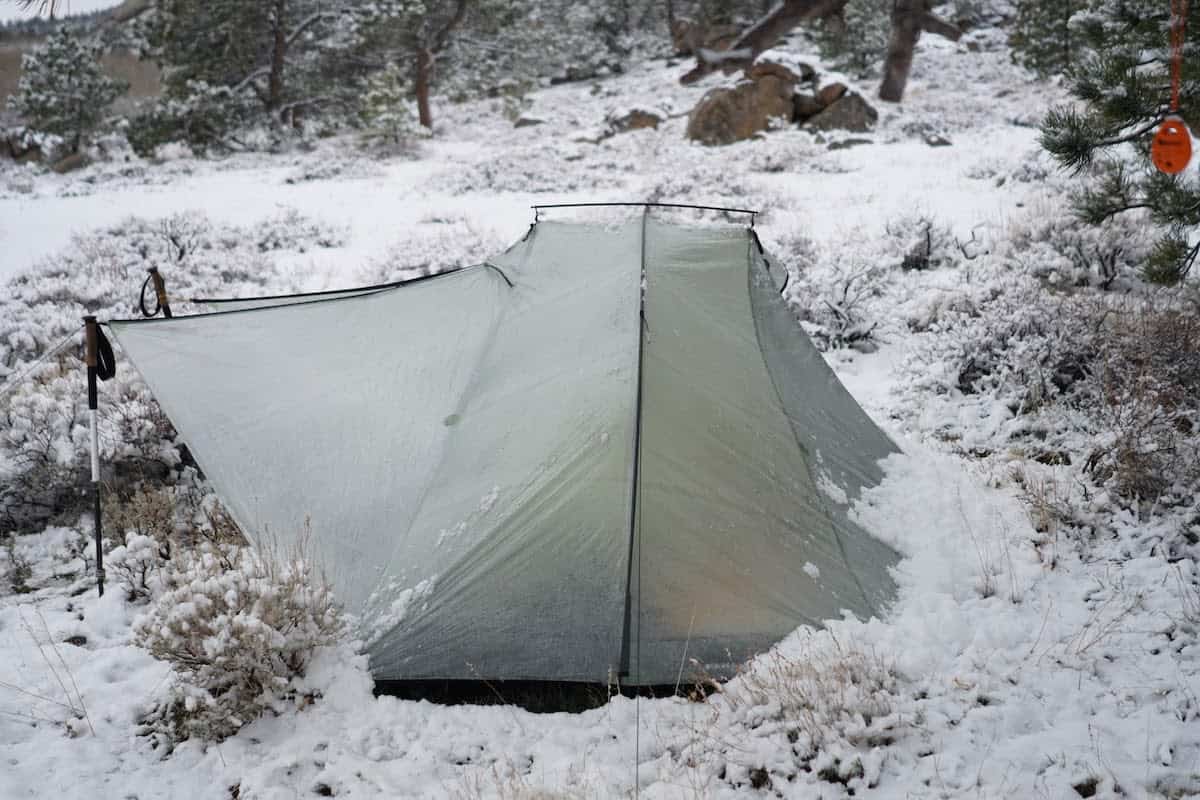
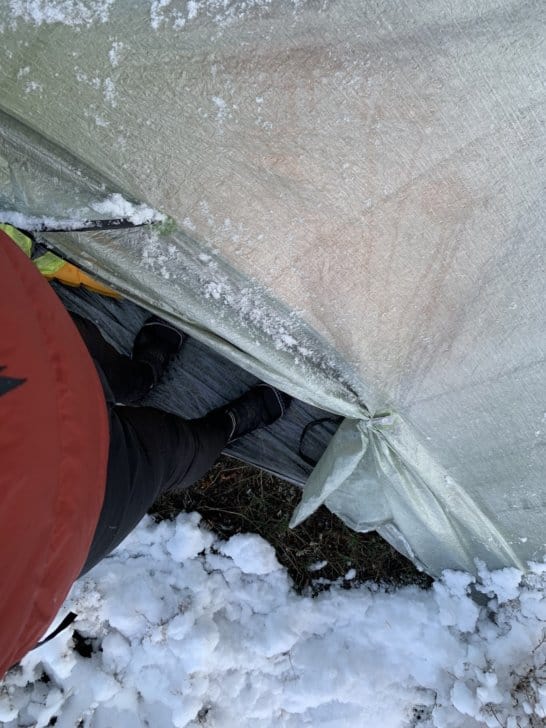
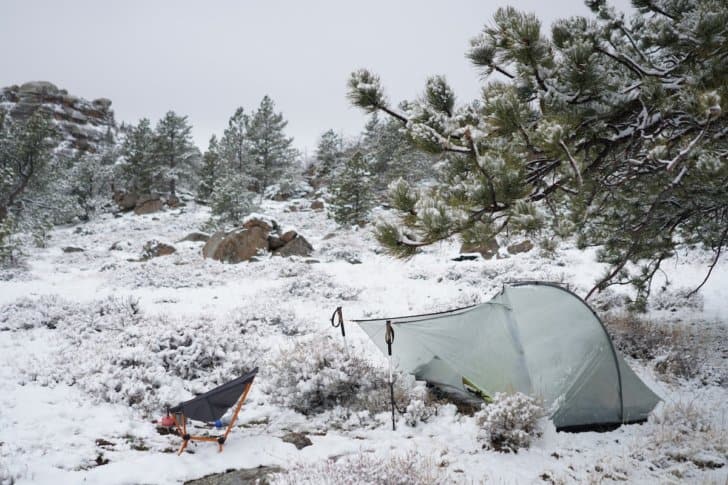
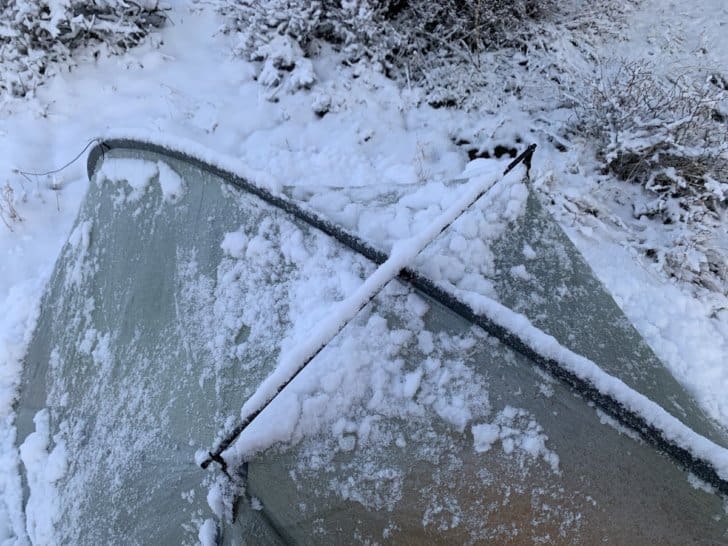
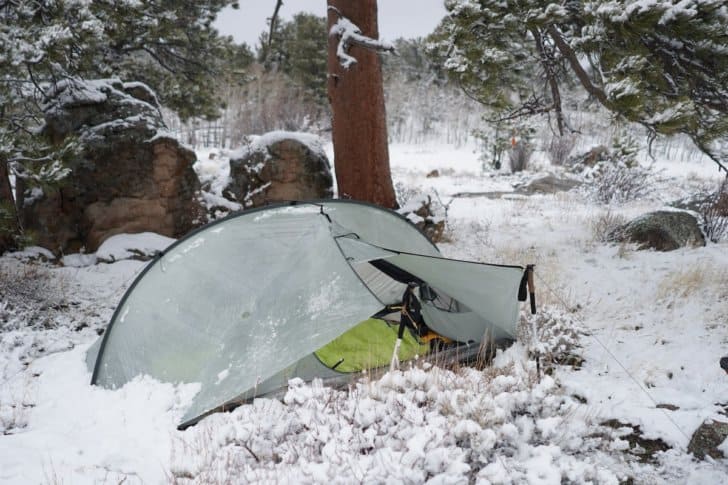
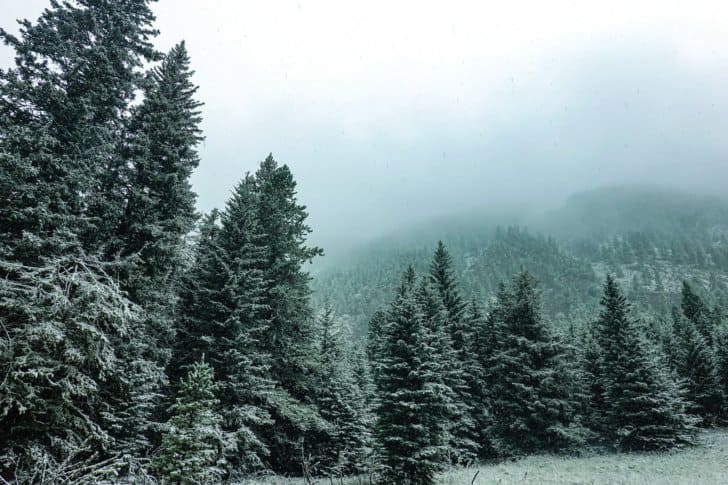
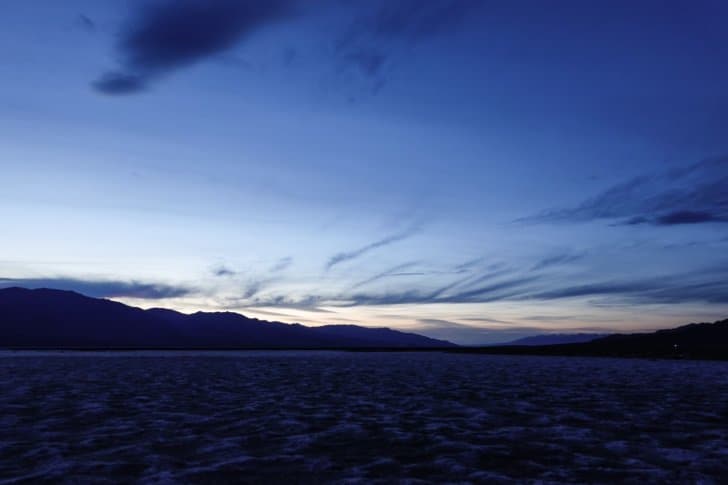
Constant Exposure. You are exposed to it all. When you spend almost a month and a half out in the backcountry you can’t plan for weather. Sometimes you can anticipate it and sometimes even take refuge from it, but you certainly cannot avoid it. On our trip we were rained on for almost a week straight. We ended our trip with four days of snow and our last day we woke to frozen water bottles. Cold and wet happen, and sometimes they stick for a little too long.
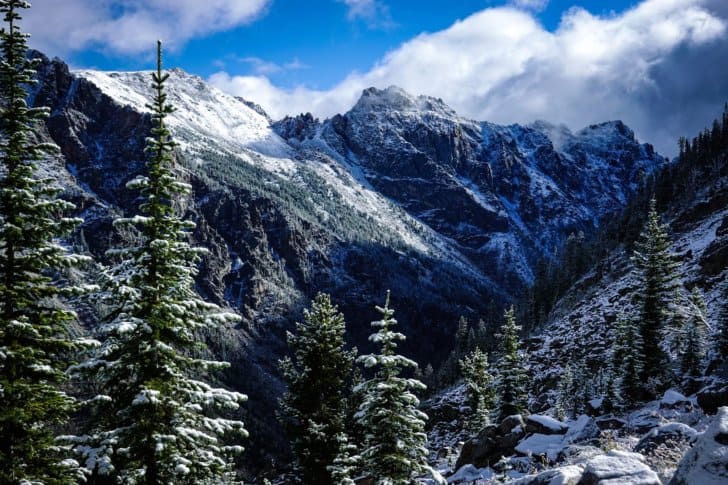
Waking up to so much fresh snow with over a week still ahead of us was at first intimidating. It proved to be both challenging and enchanting in its encompassing of the landscape and in the ice that built on our boots.
Conclusion: Why?
With all that struggle looming over you it should probably take a lot of convincing that this style of backpacking is worthwhile at all. I know there will be some people that will be instantly on board with the idea of spending so long in the backcountry, the love of it came naturally for me. However, I want to leave the more reasonable reader with something meaningful as well.
Maybe you have to be a bit crazy to want to carry almost three quarters of your body weight just to have five and a half weeks in the mountains. However, I think that more people will see the charm of going into the wilderness unsupported for three weeks with under 50 lbs (23 kg) on your back. I hope that this presents another way to look at limits. We all have different goals in our adventures. Some of us want to move fast, some far, some light. I’ve found that one of the things I value most is the time I spend in the mountains and the woods and even a tent. Sometimes that means packing differently and sometimes that means working hard and slow and pausing to let it all soak in.
Appendix: Selected Gear
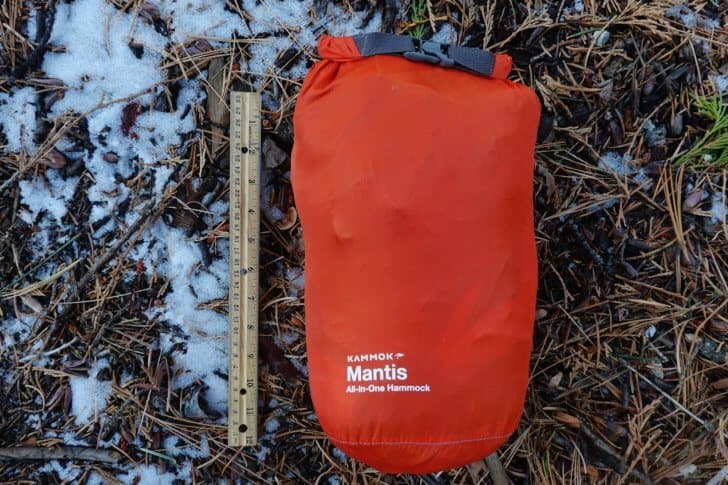
Here’s some of the gear I (very carefully) selected as part of my 95-lb kit for a 40-day trip in Russia.
item
brand/model
weight
backpack
CiloGear 75L WorkSack
4.8 lb (2.24 kg)
quilt
Enlightened Equipment Revelation 0F
27 oz (0.76 kg)
pad
Therm-a-rest NeoAir Xtherm
15 oz (0.43 kg)
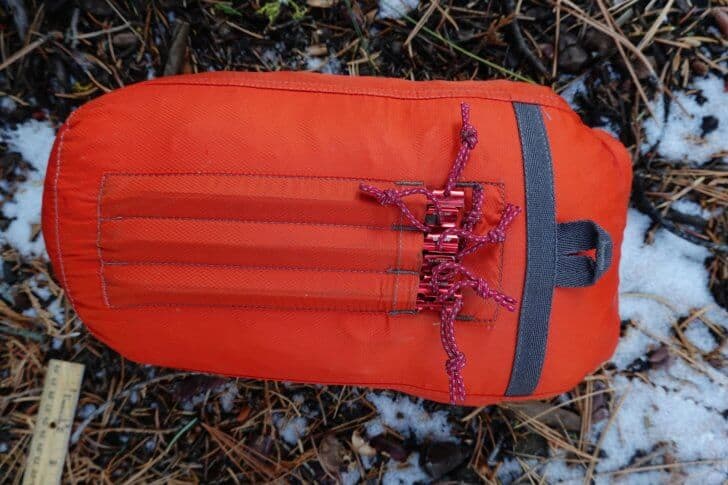
shelter
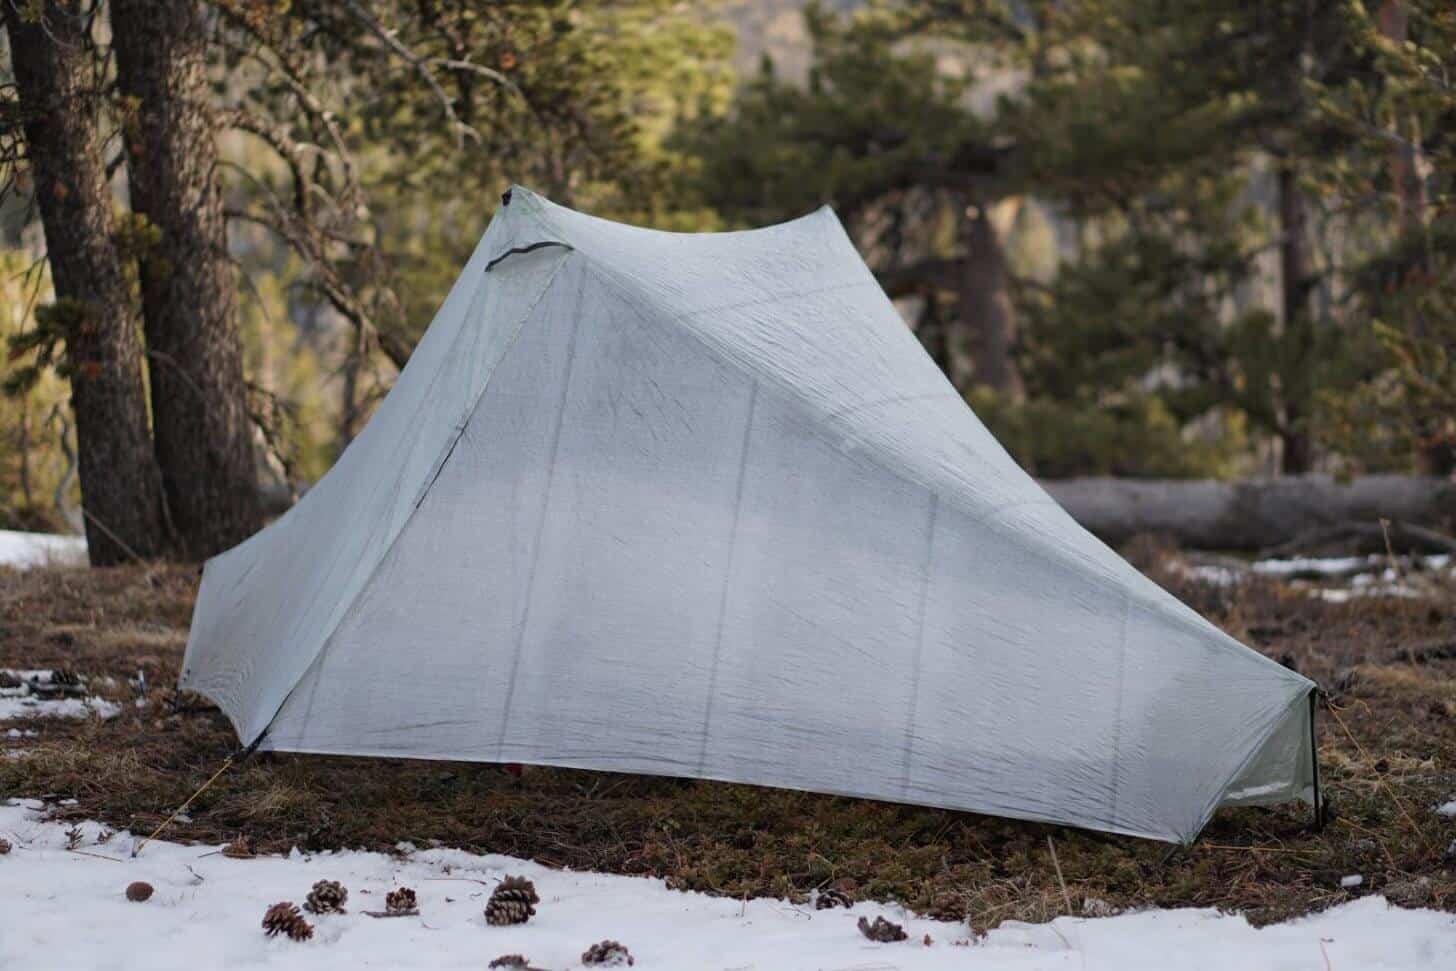
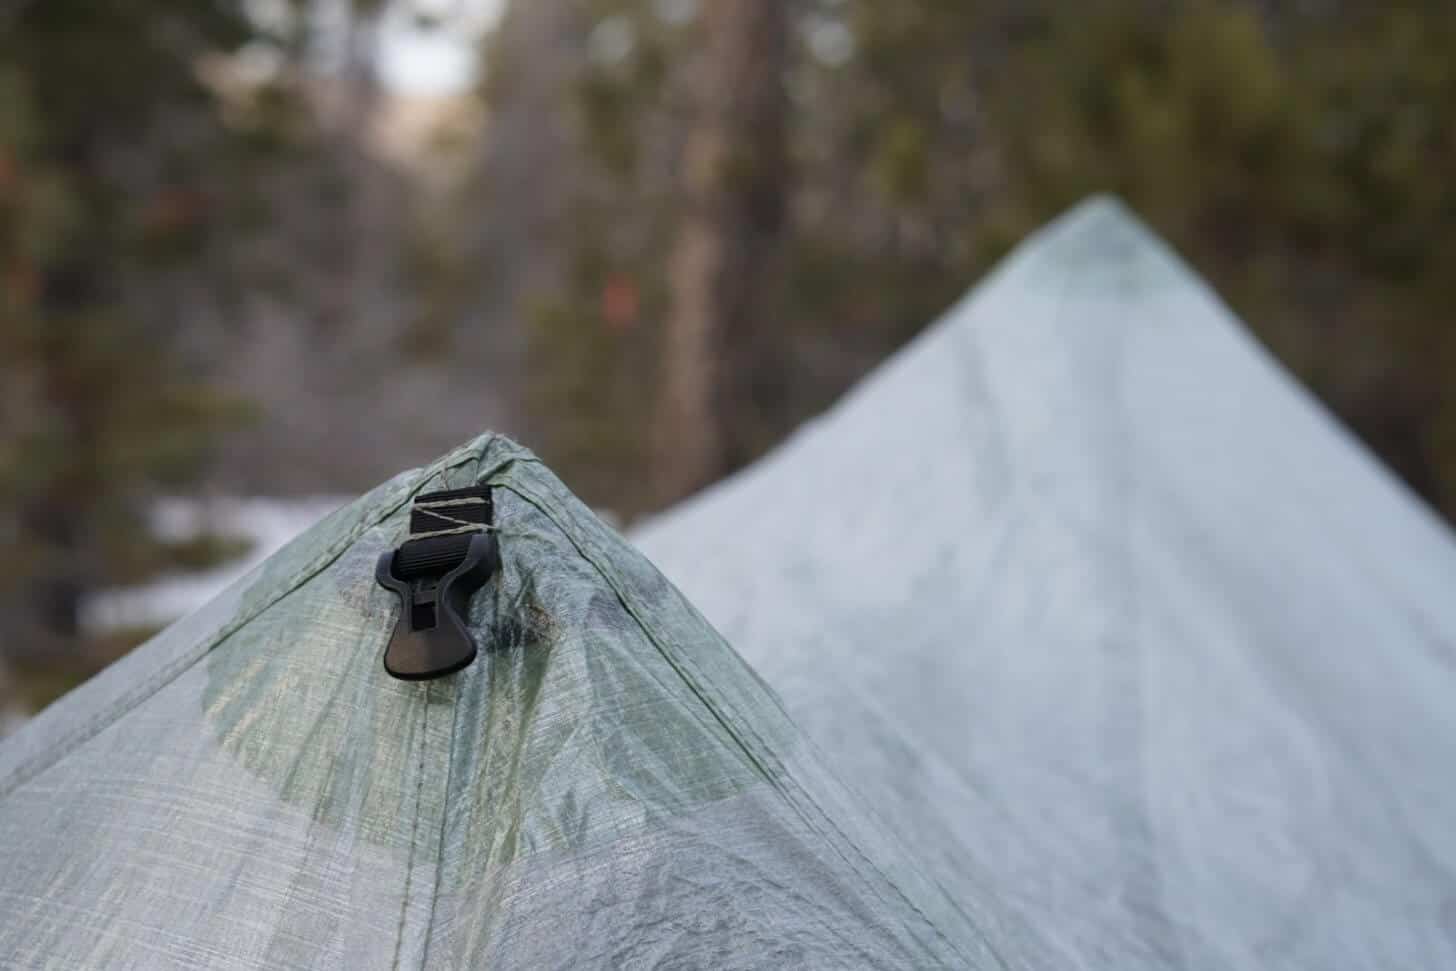
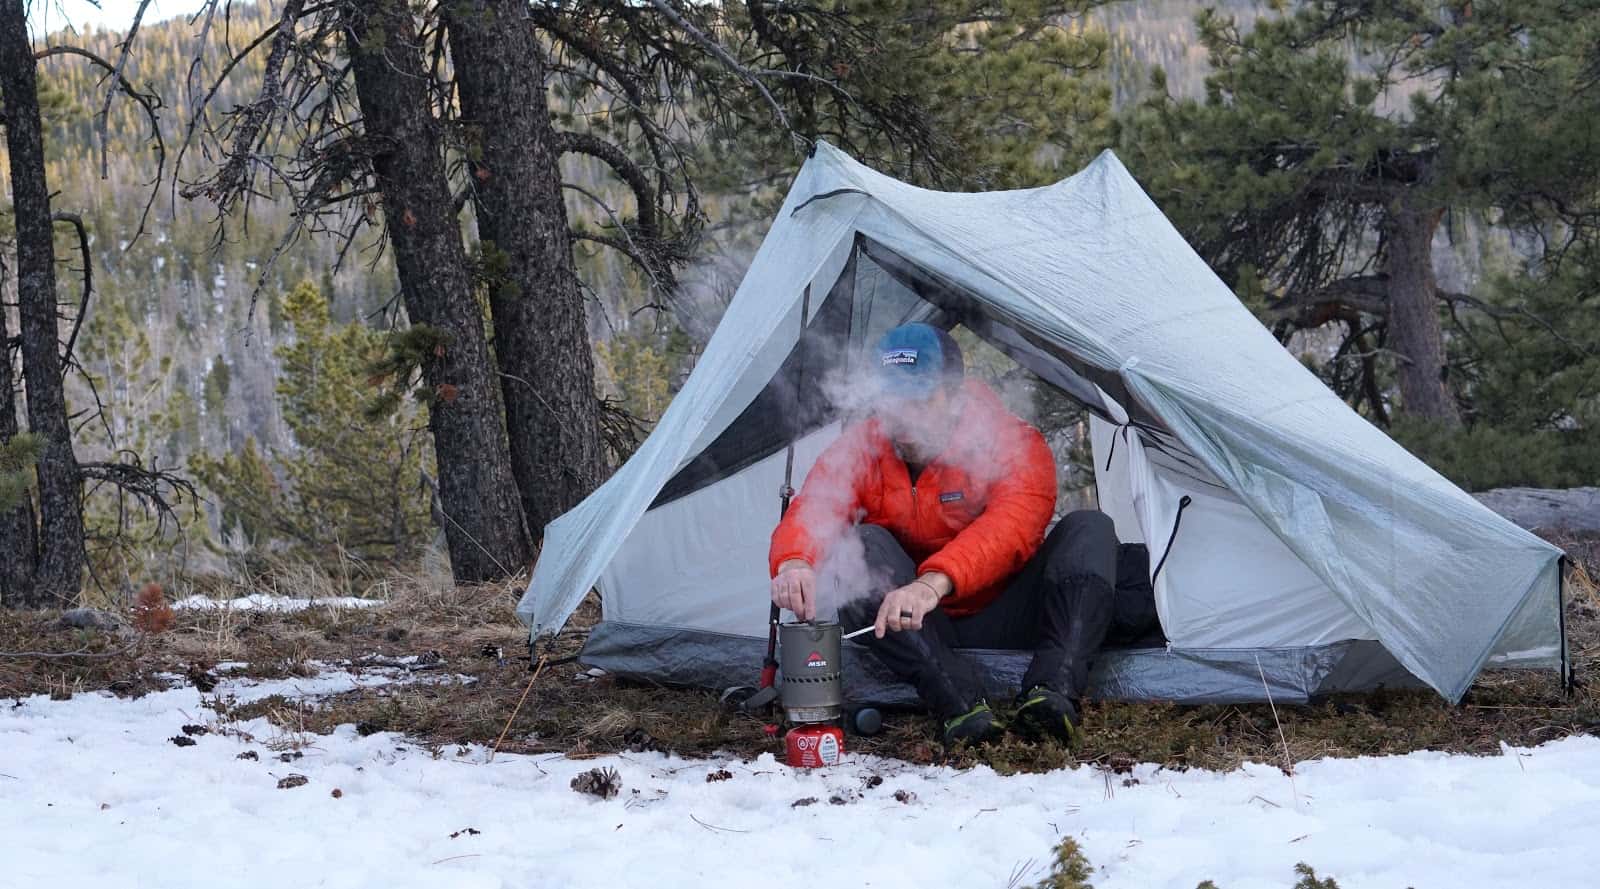
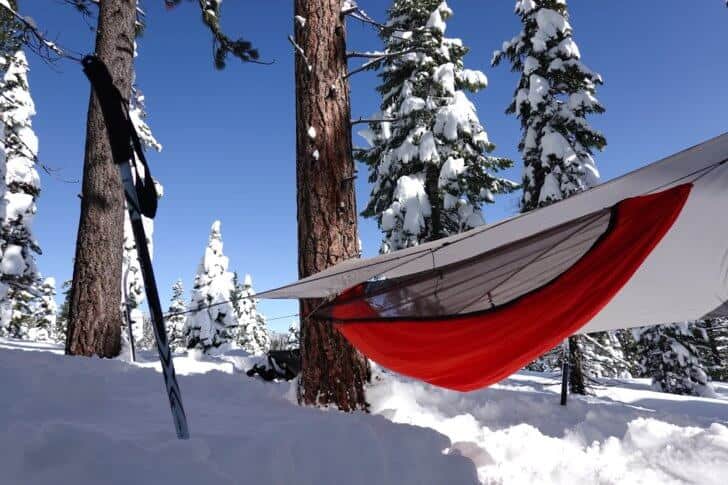
Tarptent Stratospire Li
28 oz (0.79 kg)
cook shelter
Mountain Laurel Designs Supermid
26 oz (0.74 kg)
trekking poles
Black Diamond Trail Trekking Poles
17 oz (0.48 kg)
stove
MSR Pocket Rocket
3.1 oz (0.09 kg) plus fuel canisters
pot
Toaks Titanium 1300 ml Pot with Pan
6 oz (0.17 kg)
bear bags
2 x Ursack Major XL + 4 x odor-proof bags
21.6 oz (0.61 kg)
DISCLOSURE (Updated April 9, 2024)
Backpacking Light does not accept compensation or donated/discounted products in exchange for product mentions or placements in editorial coverage.
Some (but not all) of the links in this review may be affiliate links. If you click on one of these links and visit one of our affiliate partners (usually a retailer site), and subsequently place an order with that retailer, we receive a commission on your entire order, which varies between 3% and 15% of the purchase price. Affiliate commissions represent less than 15% of Backpacking Light's gross revenue. More than 70% of our revenue comes from Membership Fees. So if you'd really like to support our work, don't buy gear you don't need - support our consumer advocacy work and become a Member instead.
Learn more about affiliate commissions, influencer marketing, and our consumer advocacy work by reading our article Stop wasting money on gear.
Recorded version of the livestream of the 2020 Backpacking Light Adventure Film Festival. This content is available only to Premium and Unlimited Members.
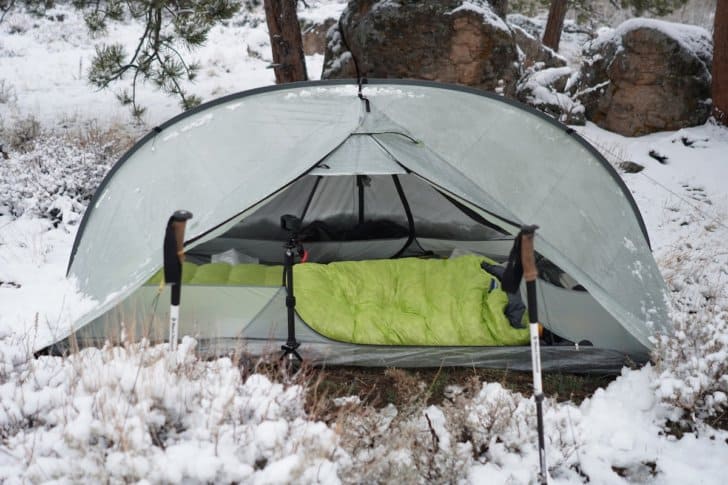
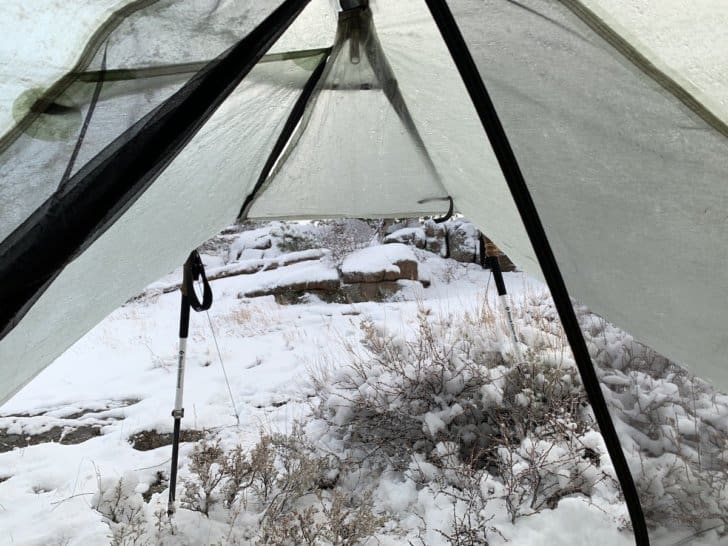
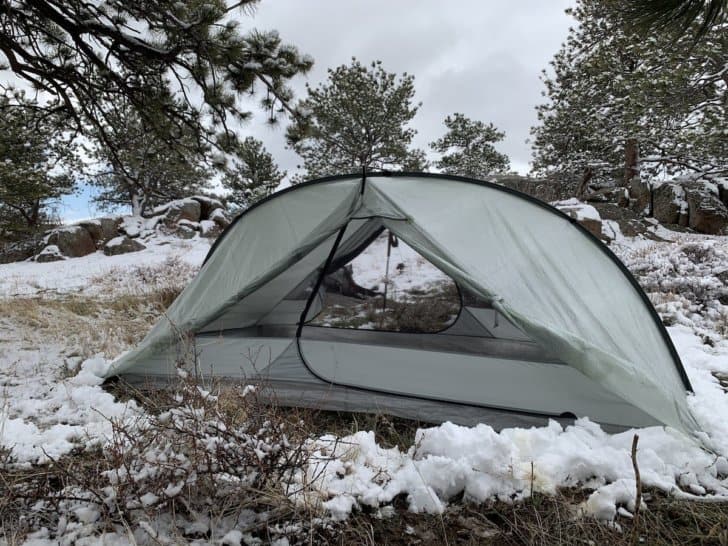
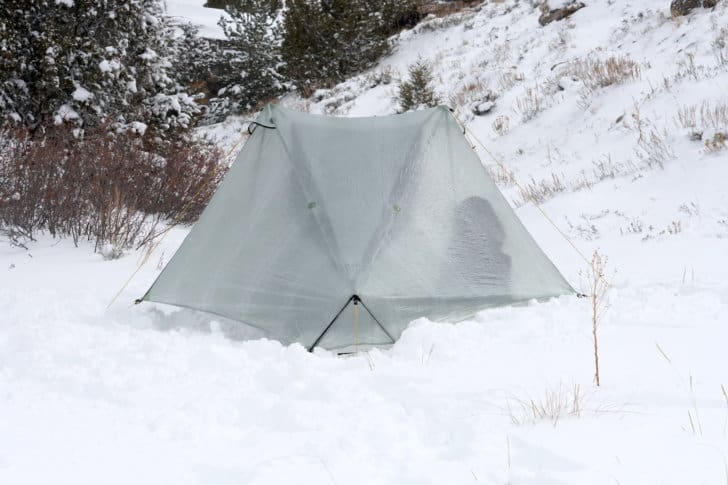
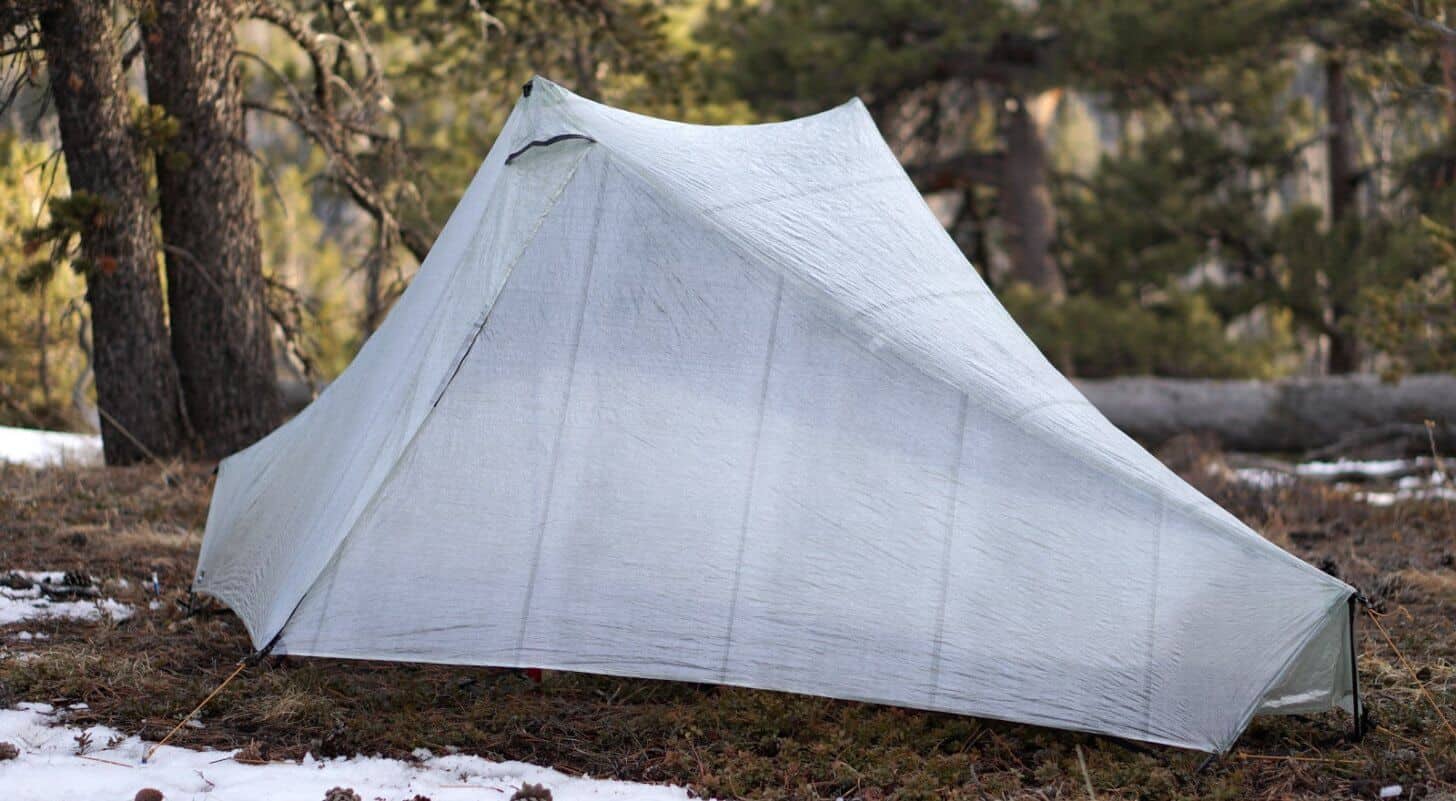
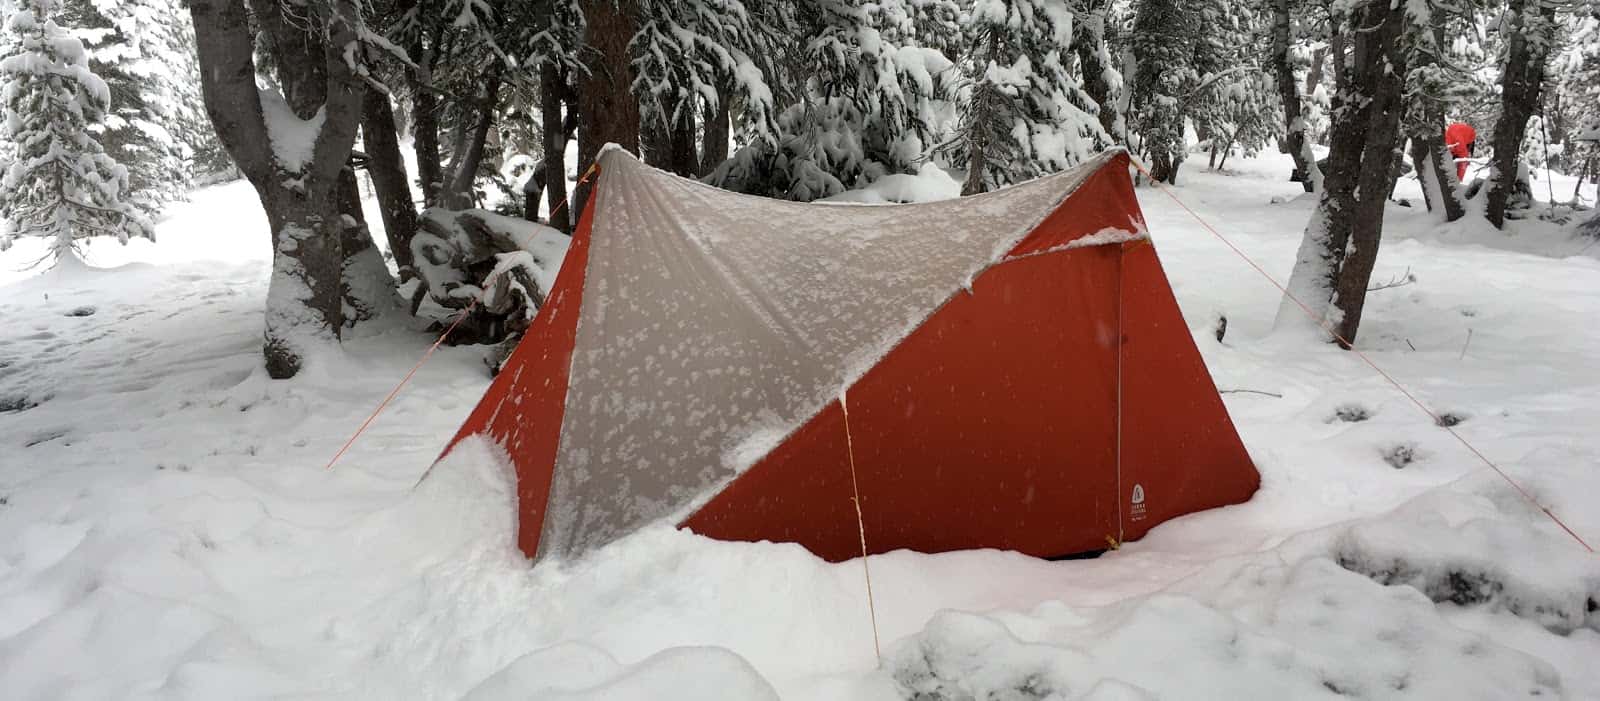
The Tarptent Double Rainbow Li is a 2-person, side-entry, 2-door (and 2-vestibule) hybrid single/double-wall tent made with Dyneema Composite Fabrics that weighs 27 oz (765 g).
The Tarptent Double Rainbow Li is a 2-person, side-entry, 2-door (and 2-vestibule) hybrid single/double-wall tent made with Dyneema Composite Fabrics that weighs 27 oz (765 g).
Tarptent announced the Double Rainbow Li on April 23 and will make it available for sale beginning April 27. The Double Rainbow is Tarptent’s best-selling shelter, and the new DCF version will be one-third lighter.
We’ve had a few days to look over Tarptent’s specs for this product, and took it out for a spin this week to form some first impressions.
Watch the review video:
This article is sort of a hybrid First Look/Limited Review – it represents an initial performance analysis of a new product based on limited use in one type of climate and geographical environment. Herein, we make no claims regarding its long-term durability or performance in other environments. Learn more about the types of product reviews we publish.
Highlights
Weight: 27 oz (765 g)
Floor Dimensions: 50 in wide x 88 in long (127 cm x 224 cm)
Bathtub floor height: 5 in (13 cm)
Vestibule depth: 26 in (66 cm)
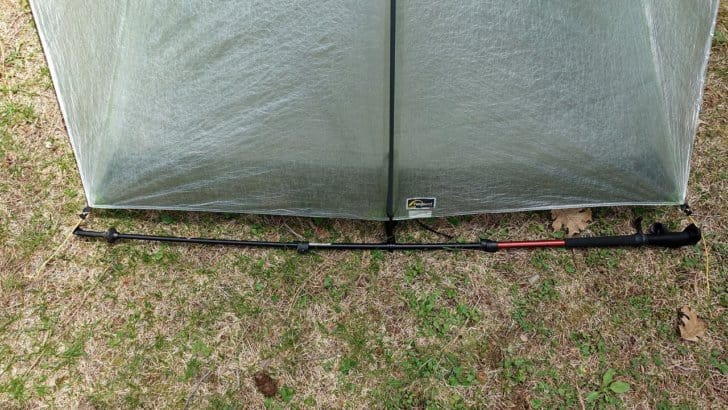
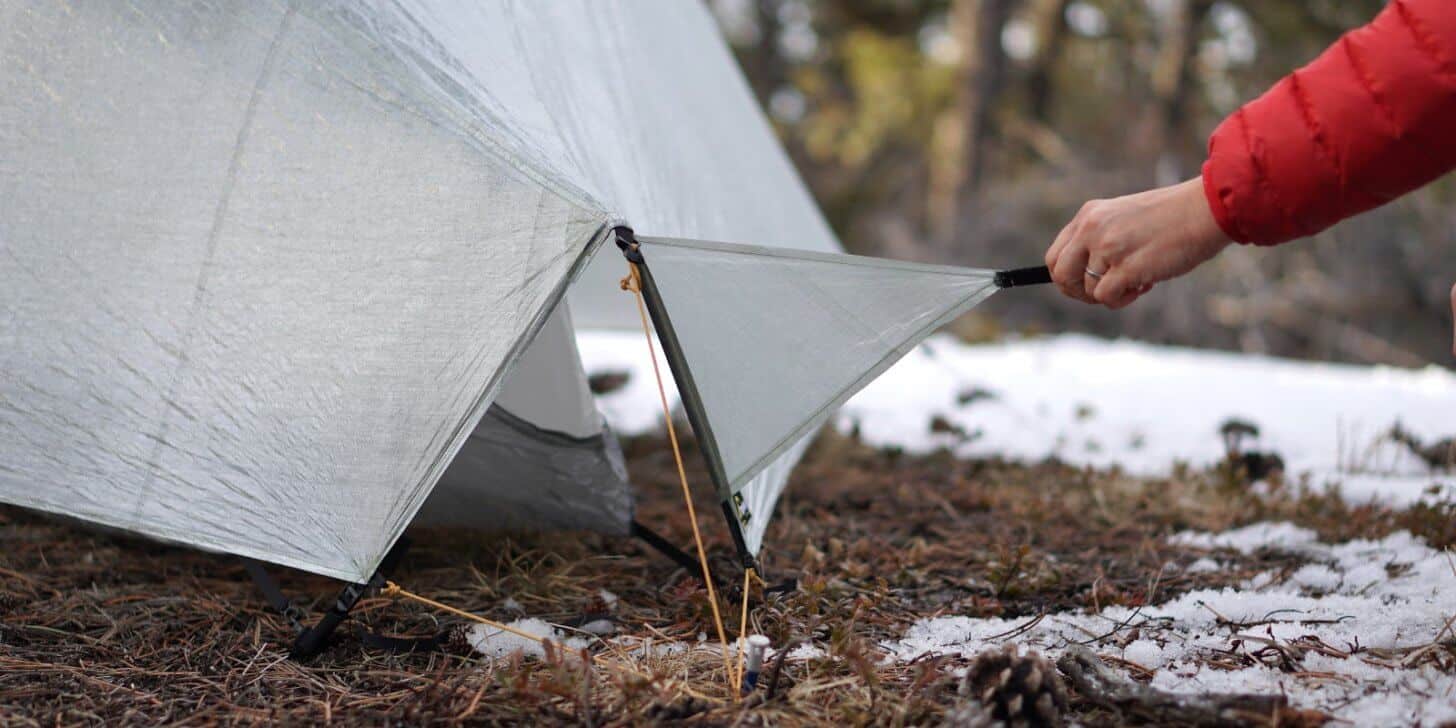
Trekking poles can be used to set up the shelter in freestanding mode or to create a “porch.”
Overview
What is new about this version of the Double Rainbow?
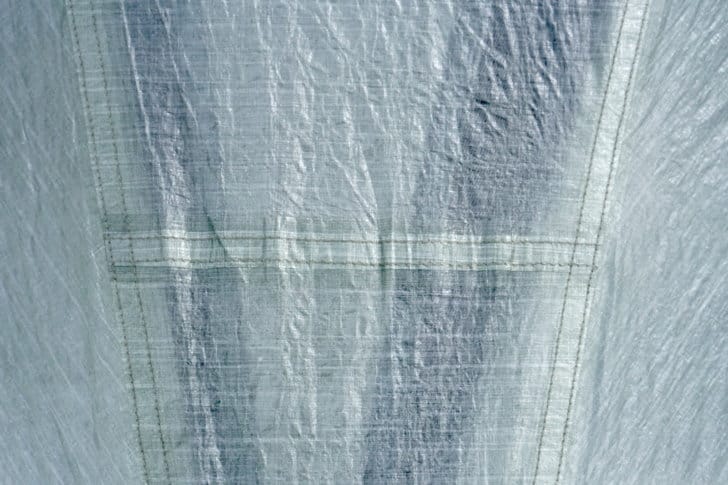
DCF construction
bonded seams – no sealing required
one-third lighter than silnylon version
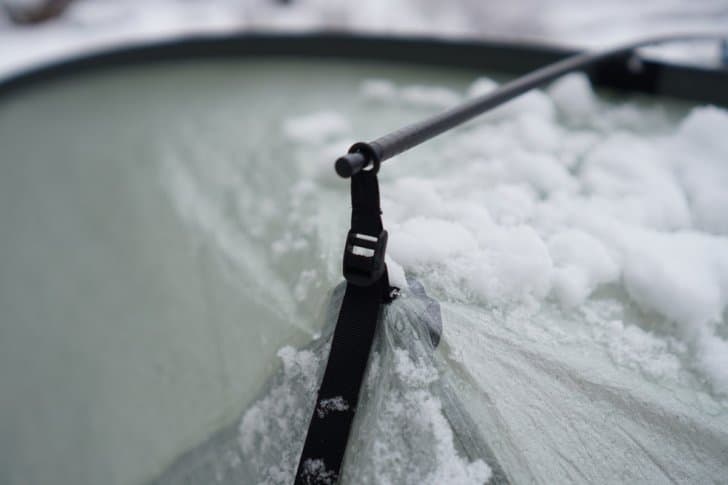
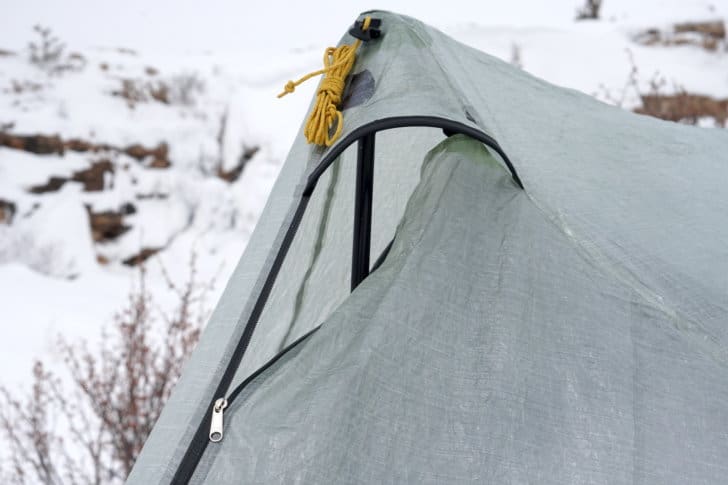
carbon-fiber pole-set:
Easton 3.9 carbon series (7.5 mm dia)
main arch pole: 4.44 oz (126 g)
cross strut: 0.88 oz (25 g)
total carbon-fiber pole-set offers ~4 oz (113 g) weight savings over the aluminum pole-set used in the Double Rainbow
Quote from Henry Shires: “We have been offering and shipping the Easton 3.9 carbon pole for awhile on the Rainbow and Bowfin 1S and so far reports of breaks have been nothing statistically greater than for the aluminum. I still wouldn’t trust the carbon pole to handle more extreme stresses — carbon snaps rather than bends — but for most use we think it will be fine.”
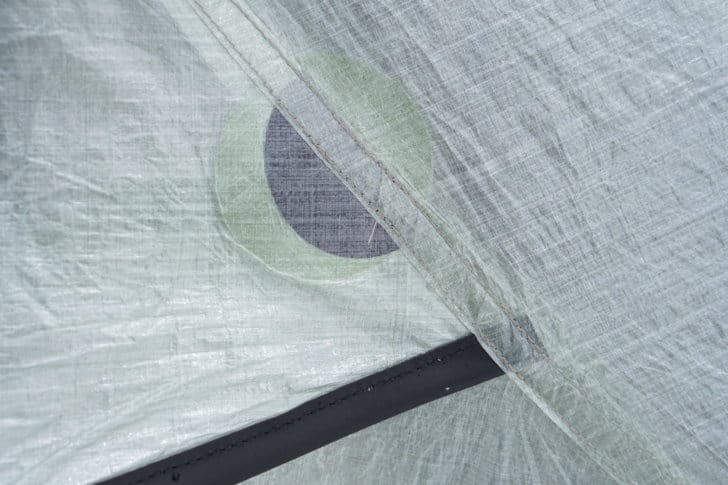
partial solid interior wall (10d uncoated nylon)
improved trekking pole attachment points for freestanding mode
What has carried over from the previous version of the Double Rainbow?
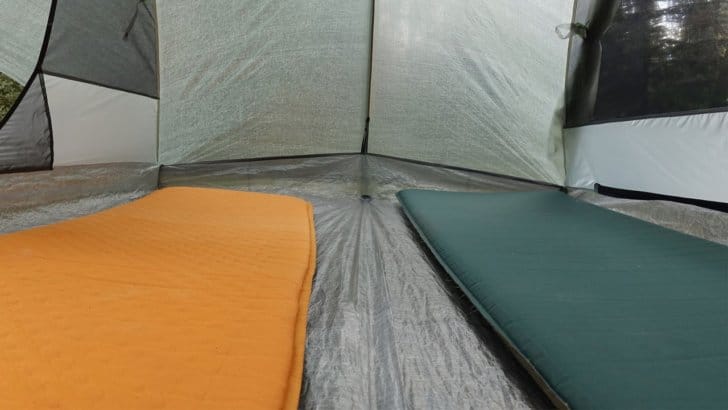
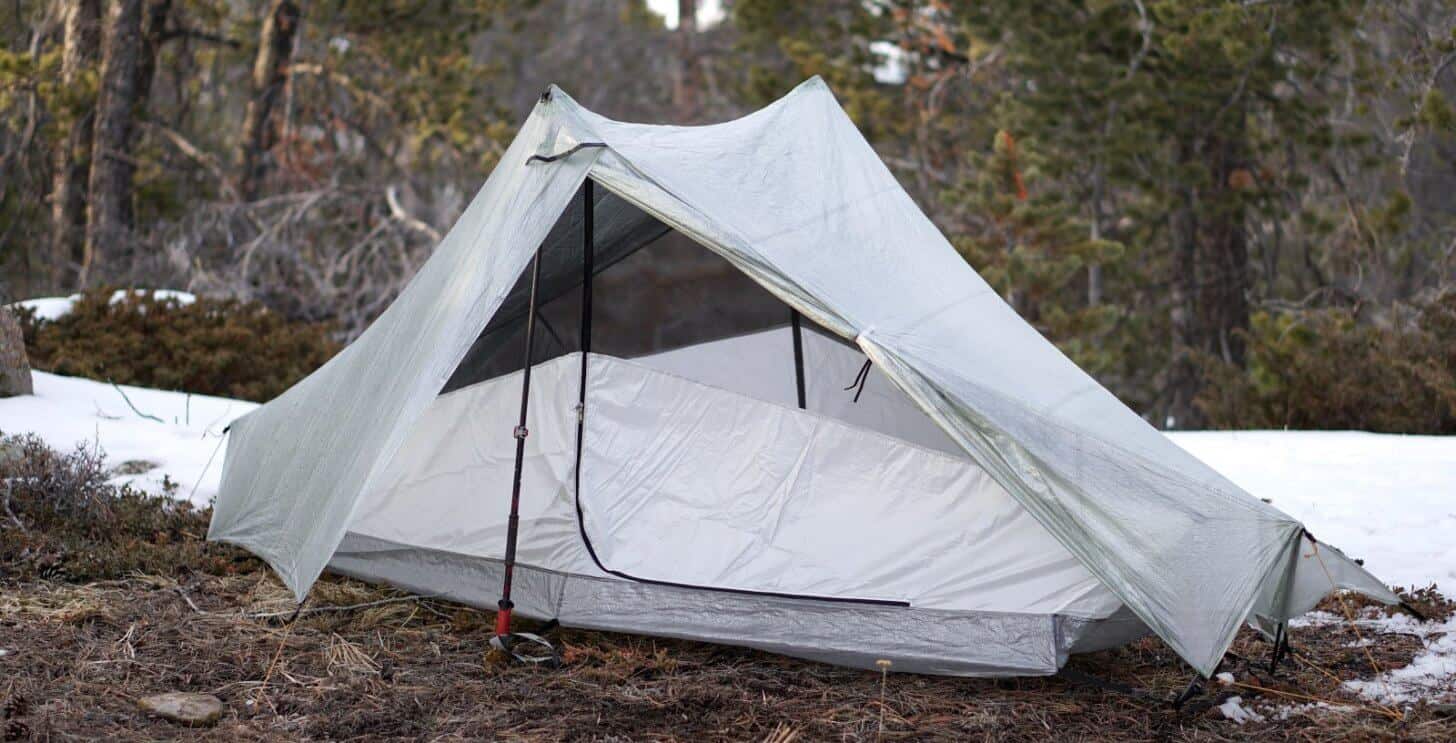
hybrid wall design (lots of living space – a two-person shelter for people who want to save weight but don’t want to spoon overnight
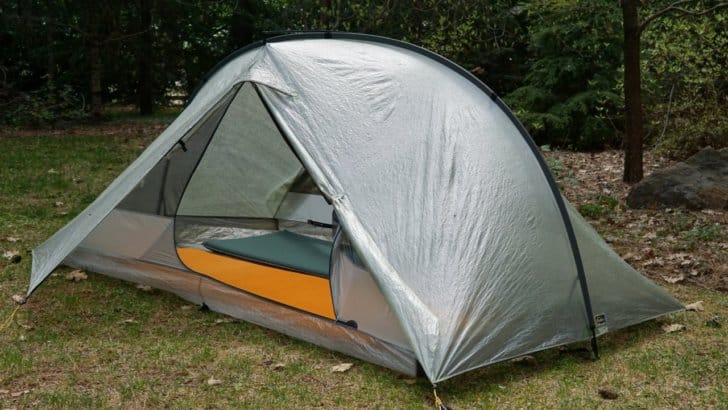
versatile – can set up in freestanding mode using trekking poles if desired
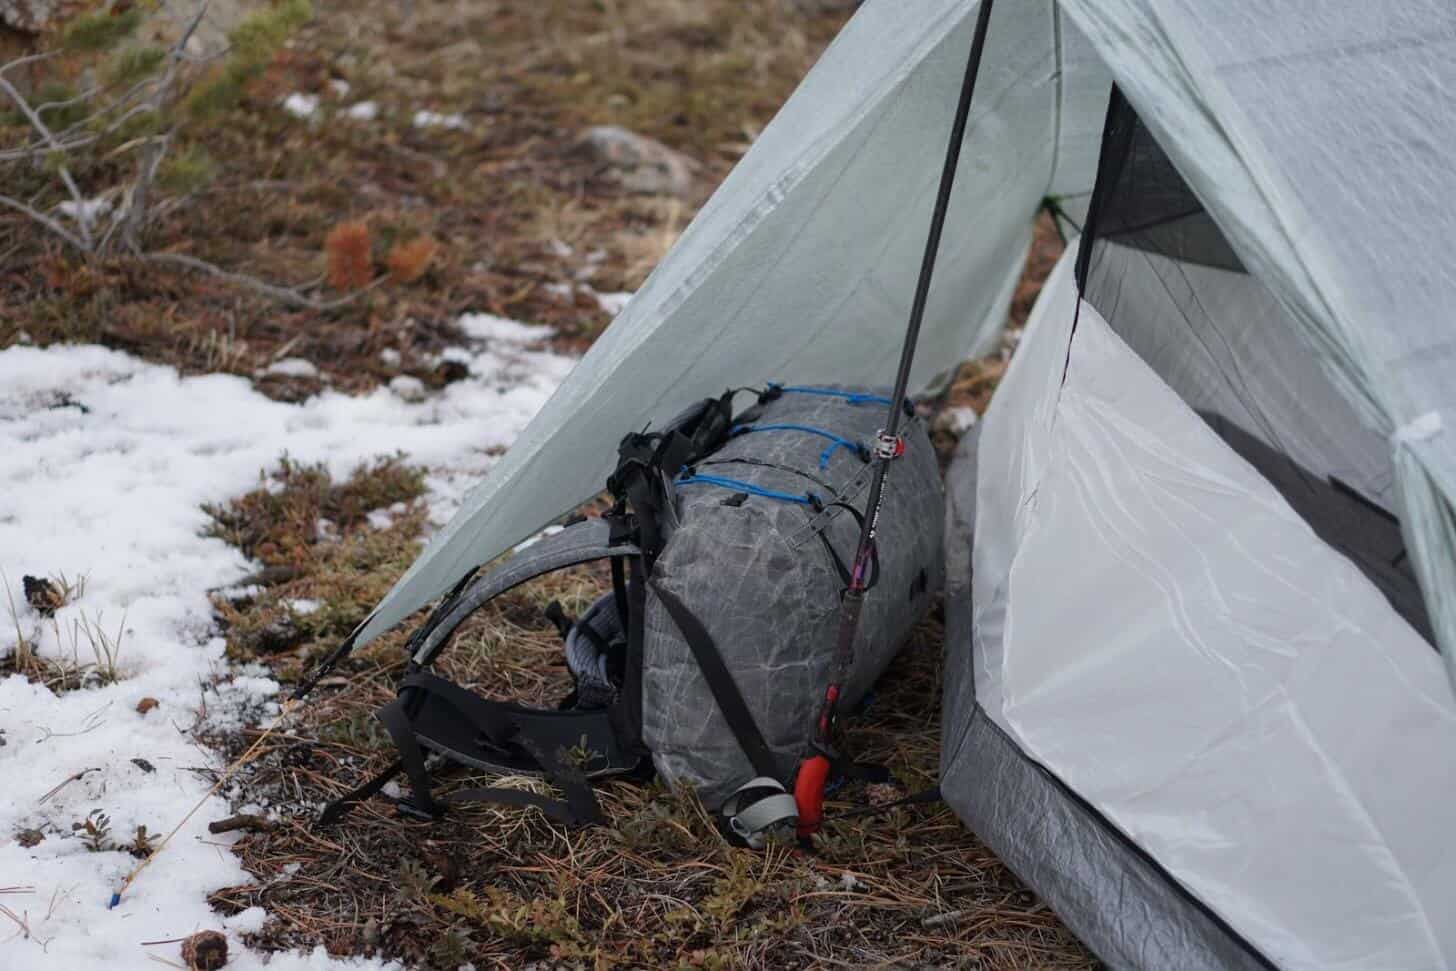
large, spacious vestibules
“Porch mode”
Photo: Tarptent
Photo: TarptentPhoto: Tarptent
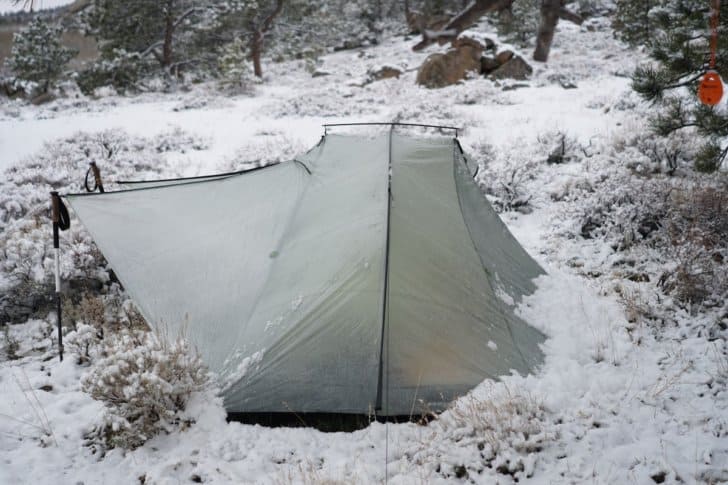
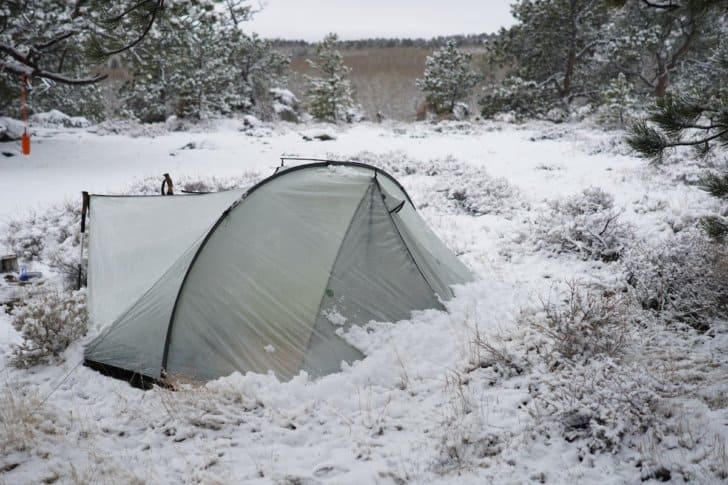
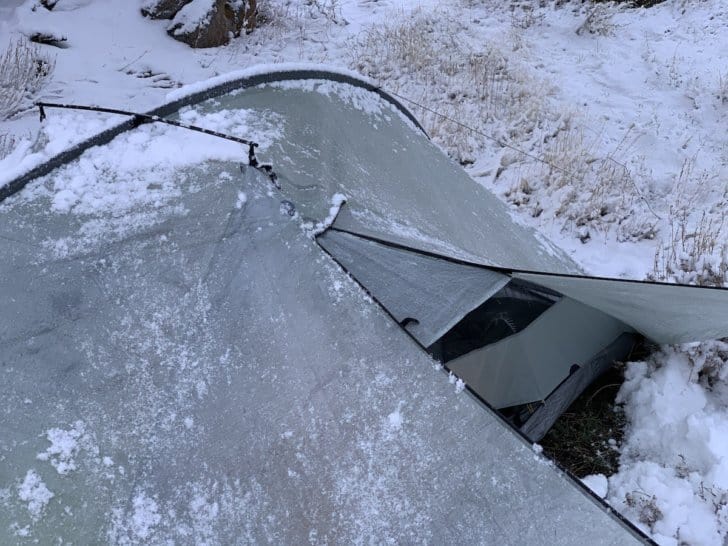
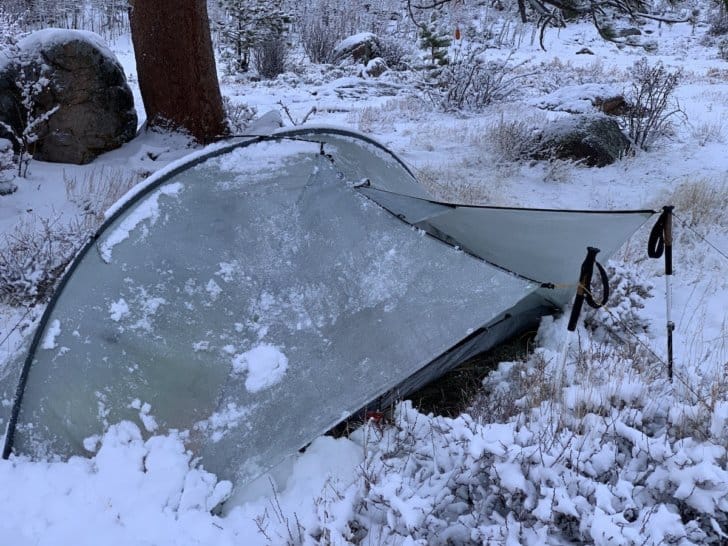
Field Test
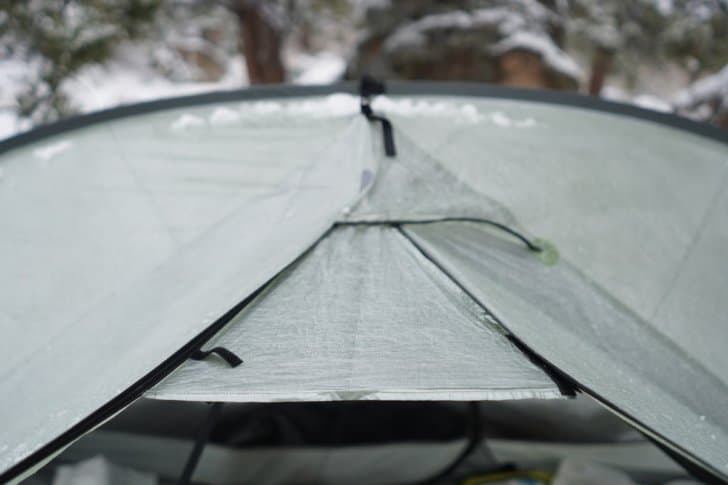
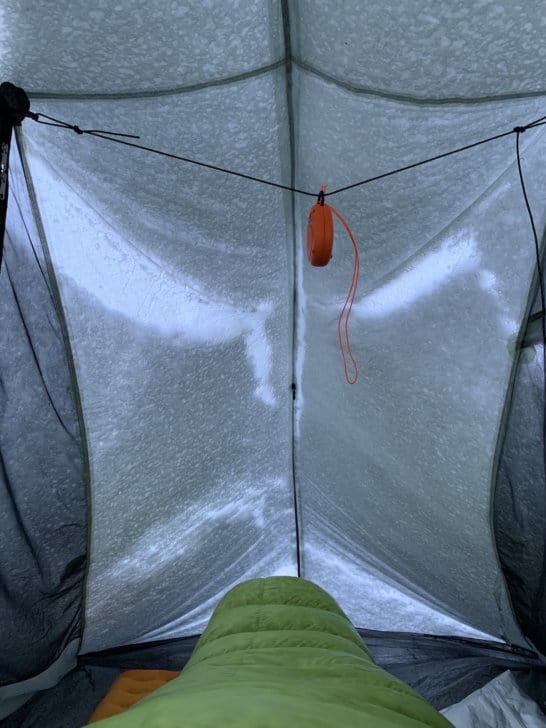
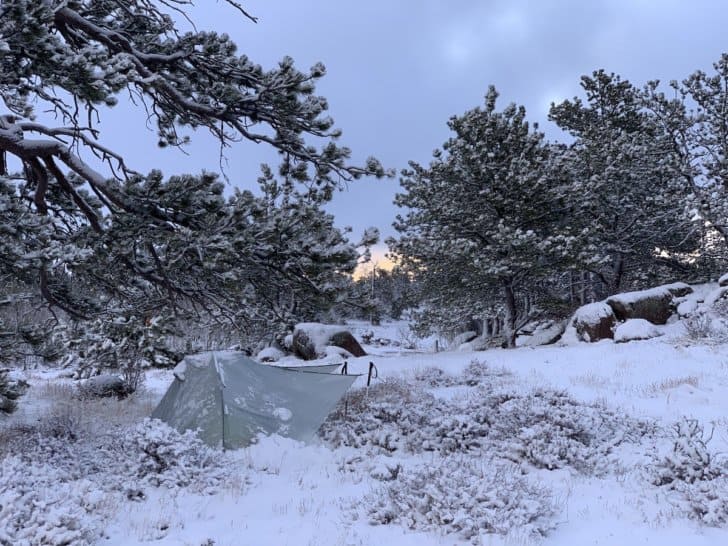
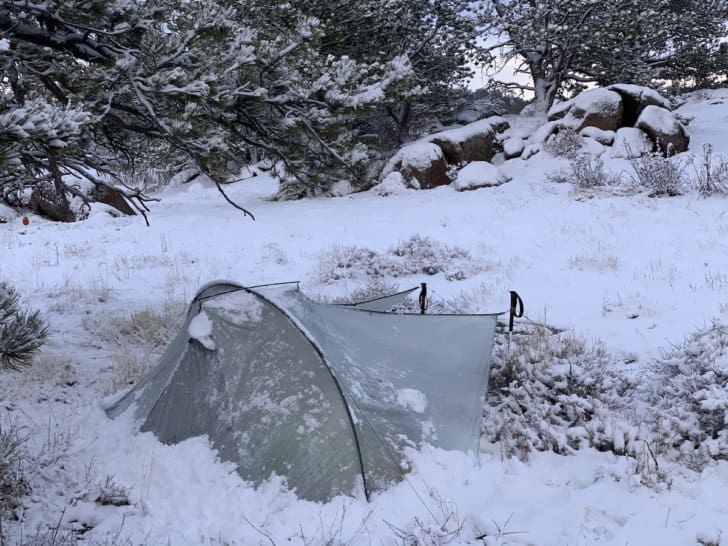
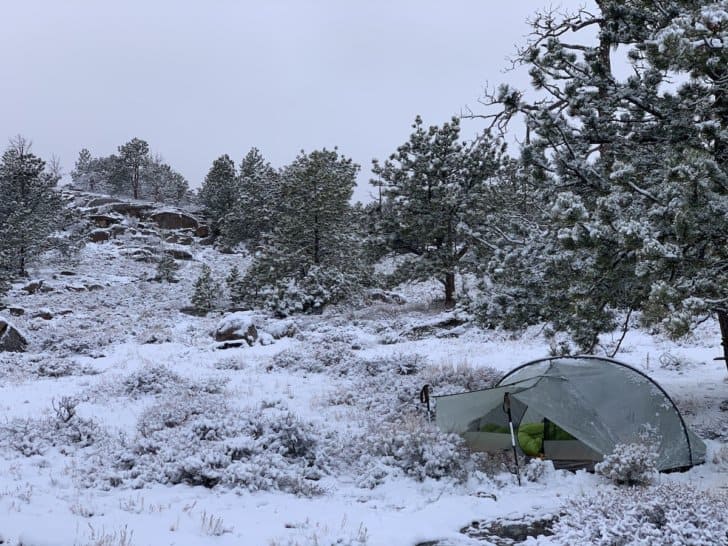
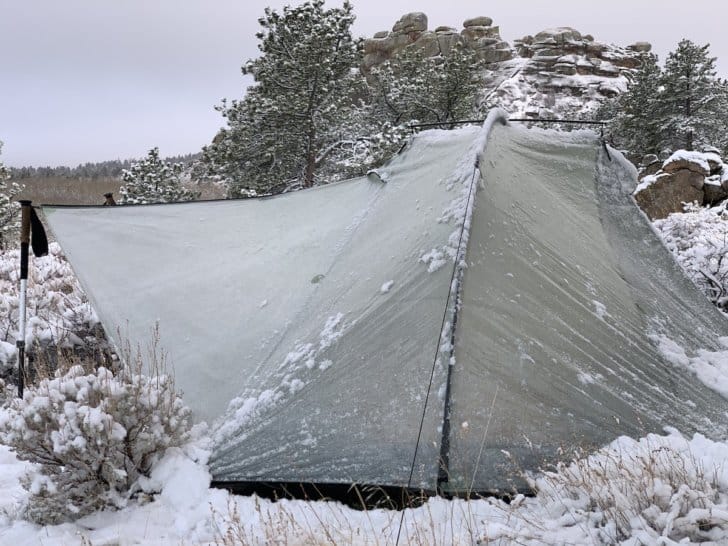
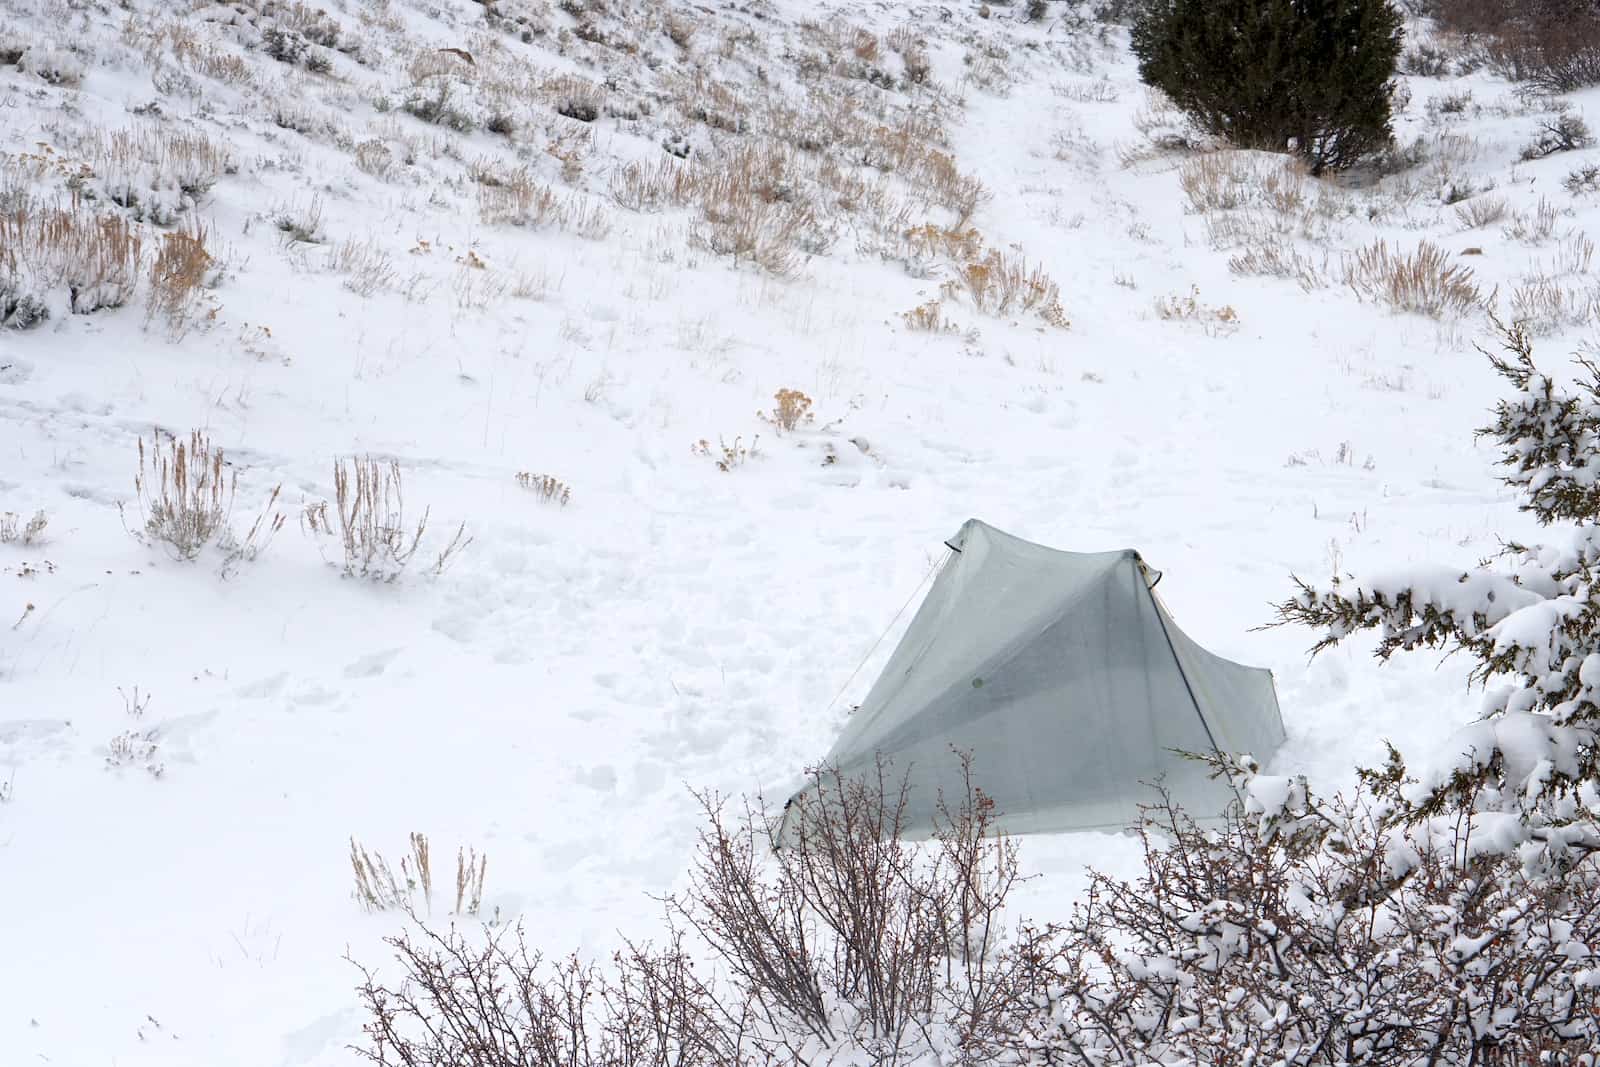
Ryan had the chance to spend a few days with the Tartpent Double Rainbow Li, including one overnight backpacking trip during a winter storm in SE Wyoming.
His first impressions are outlined in this review video, now online at YouTube:
Photos below from Ryan:
More Info
Tarptent will begin taking orders the week of April 27th. You can read more about the shelter here.
Questions? Hit us up in the forum below and we’ll do our best to answer them based on our brief experience with the shelter.
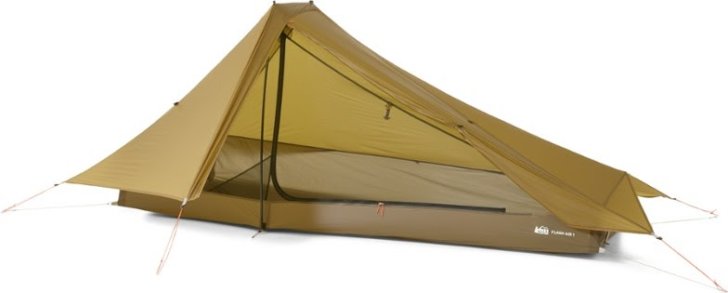
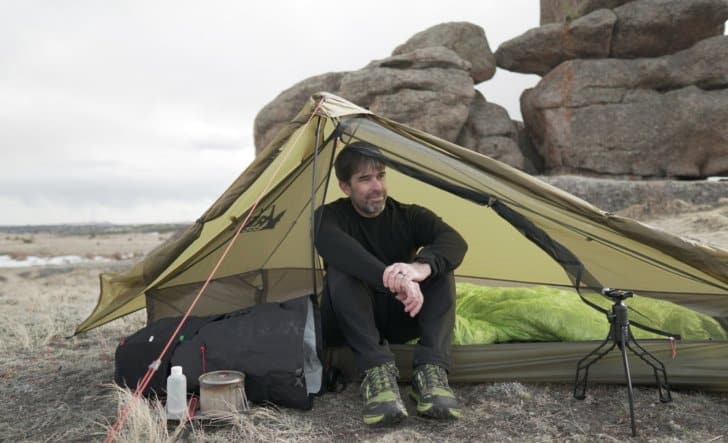
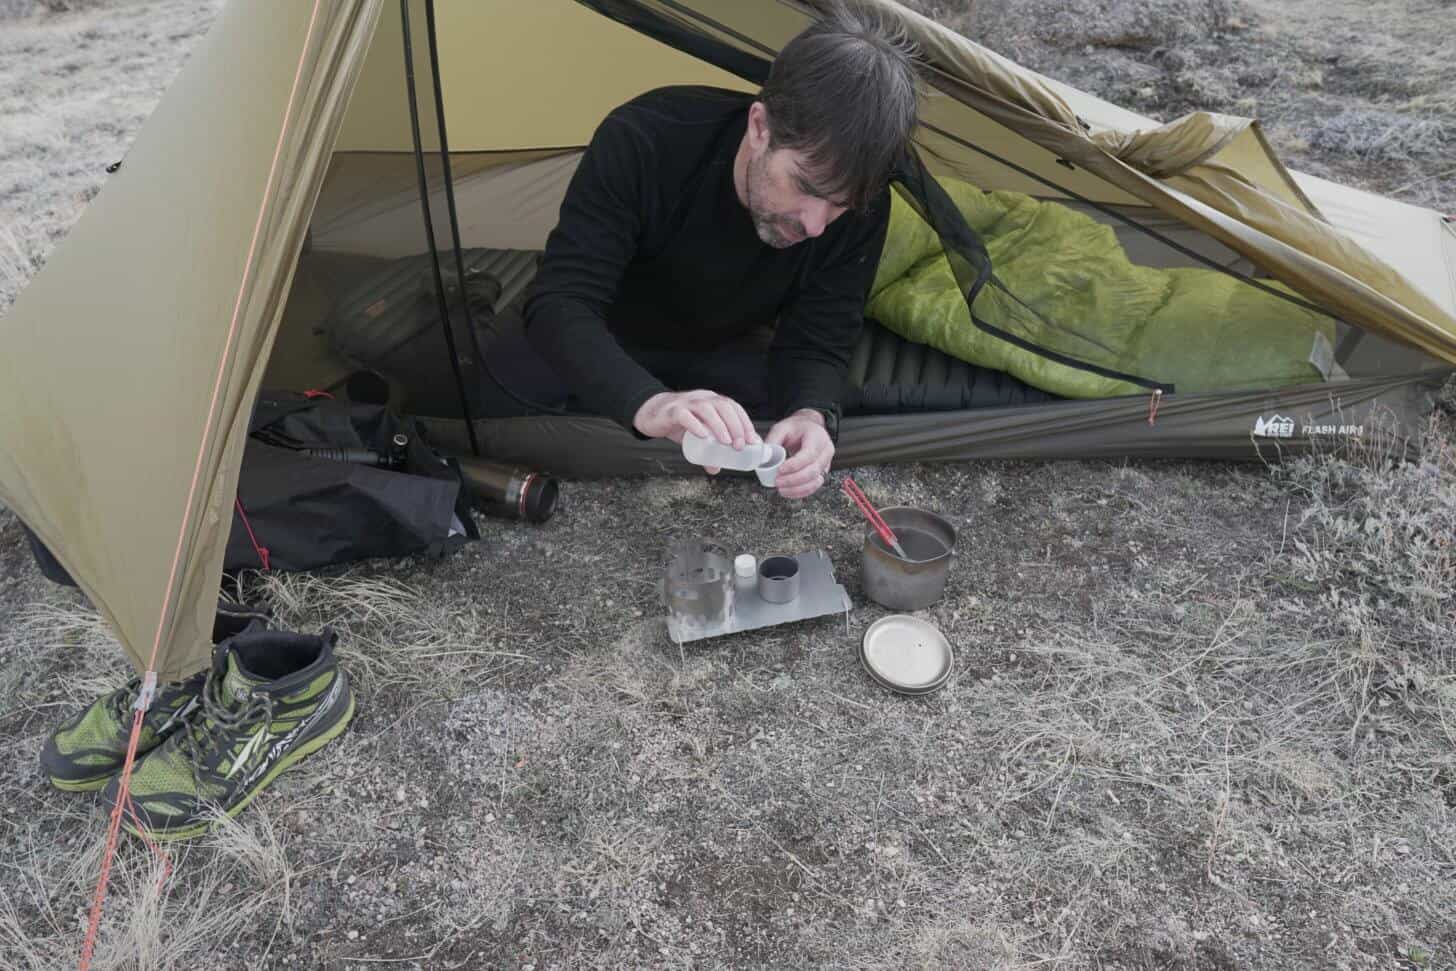
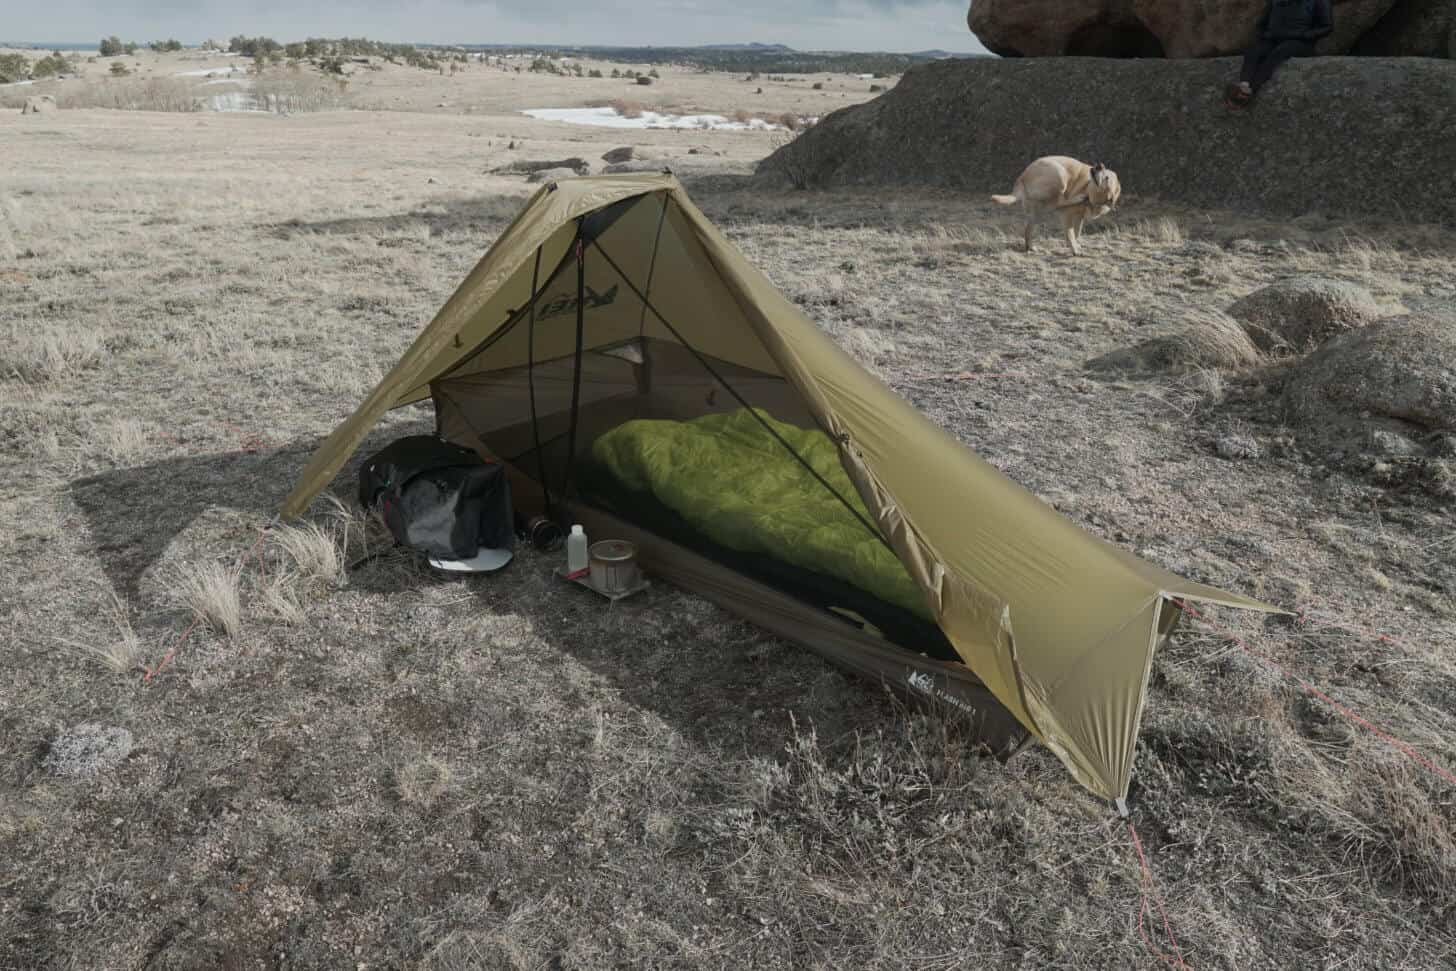
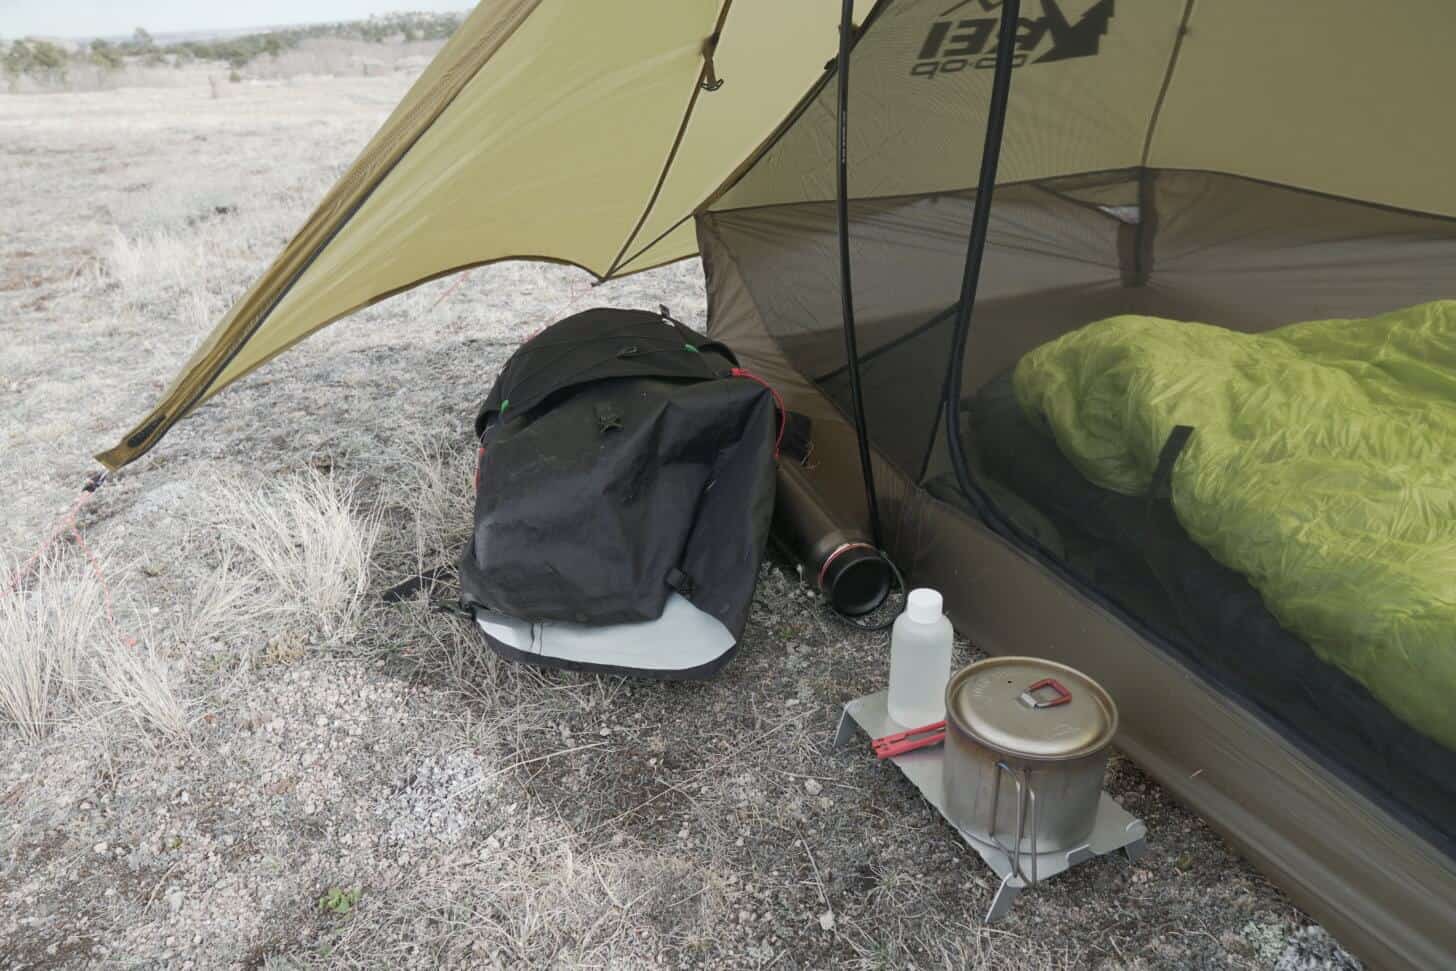
The REI Flash Air 1 Tent (20 oz / 567 g, $249) is a hybrid single/double-wall solo tent with a single entrance and vestibule and can be supported by a single trekking pole.
Introduction
The REI Flash Air 1 Tent (20 oz / 567 g, $249) is a hybrid single/double-wall solo tent with a single entrance and vestibule and can be supported by a single trekking pole. A 2-person model is also available (the REI Flash Air 2 Tent, 31 oz / 879 g, $299).
Photo: REI
About This Review
This Limited Review is based on overnight backcountry use in a single geographic environment (the mountains near southeast Wyoming). The tent has been exposed to light rain and snowfall, mild-to-moderate winds, overnight temperatures near freezing, and moderate humidity levels. In addition, I performed a quantitative condensation study and a direct measurement of the hydrostatic head rating (waterproofness) of the fly fabric using a Suter tester. This review builds on the initial peek at this product as published in our First Looks of the REI Flash Air 1 Tent.
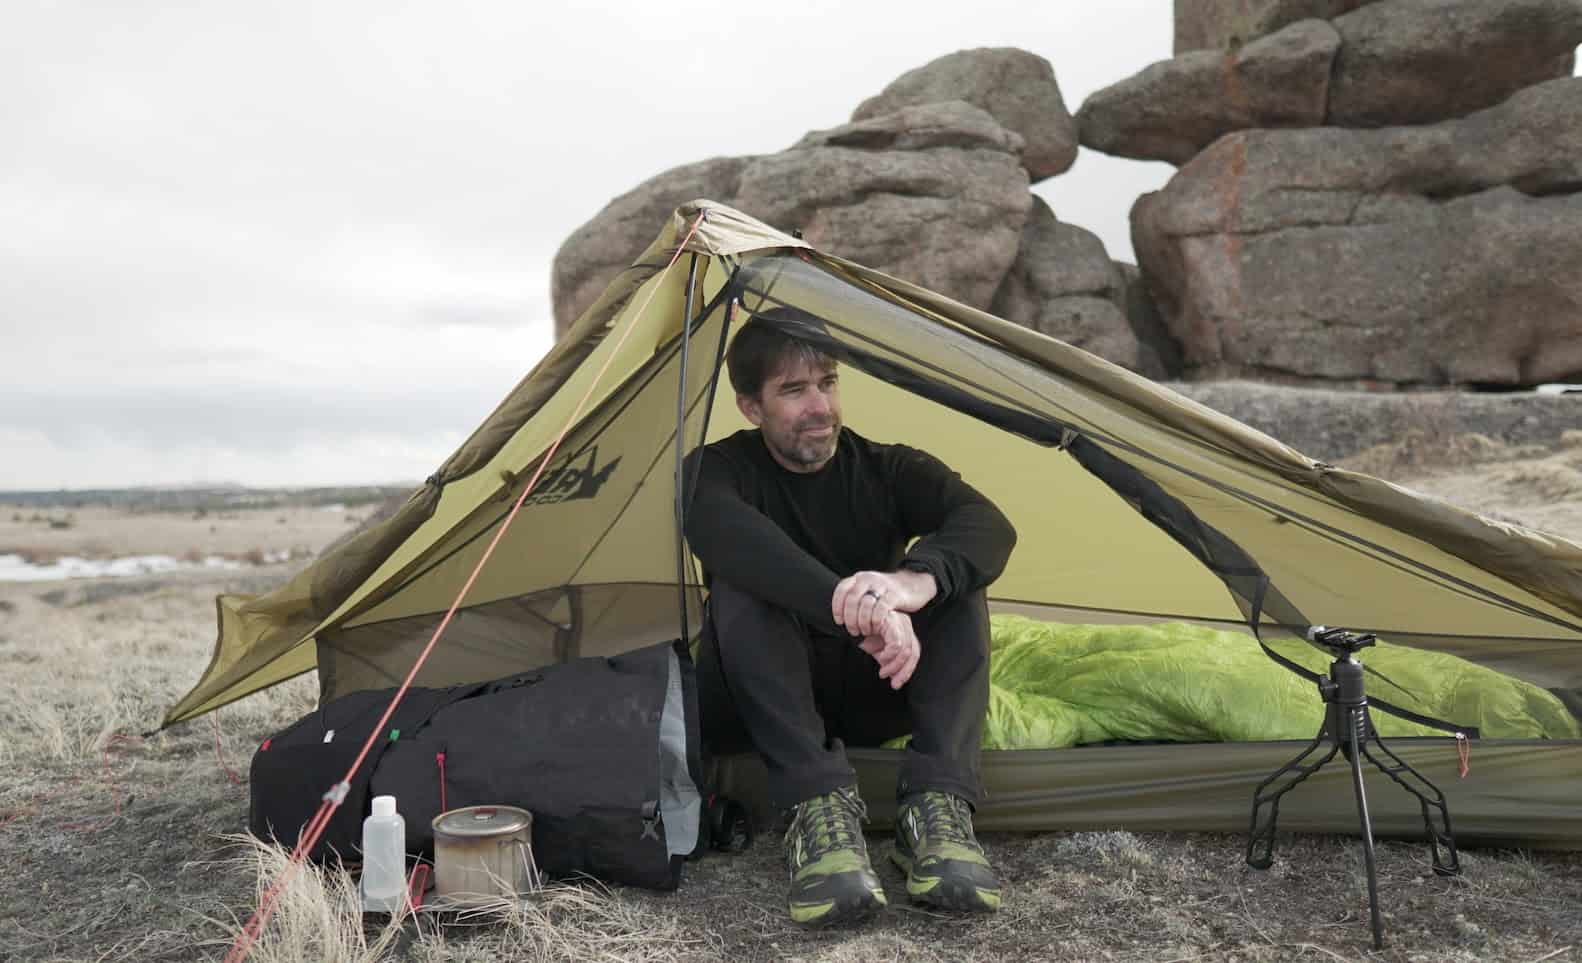
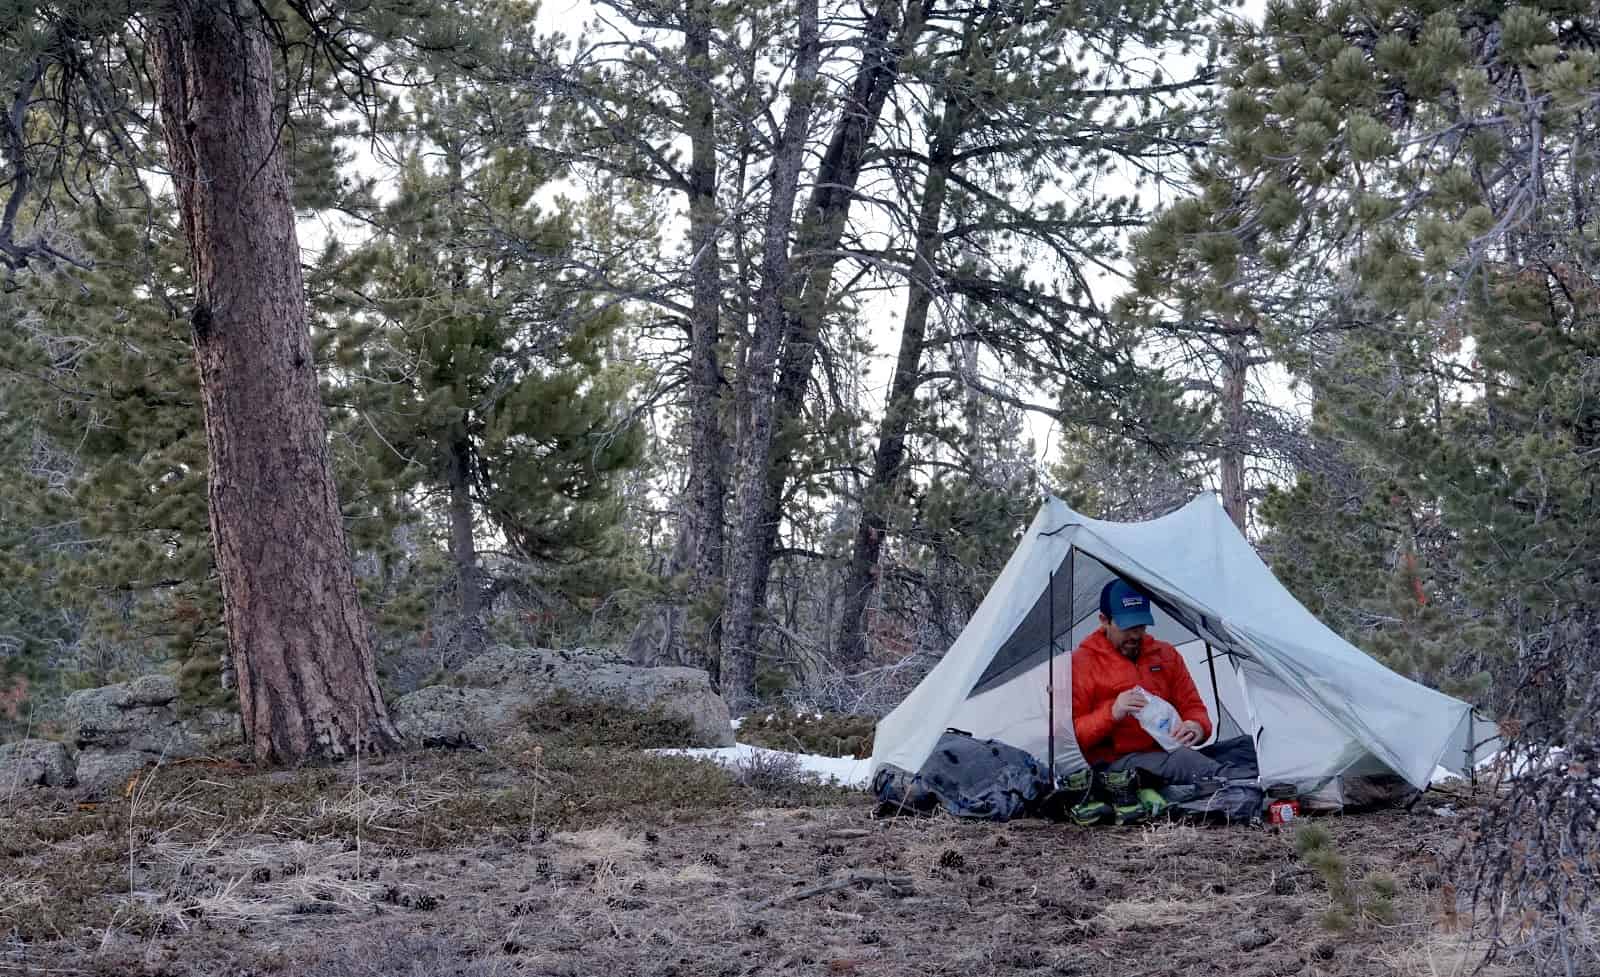
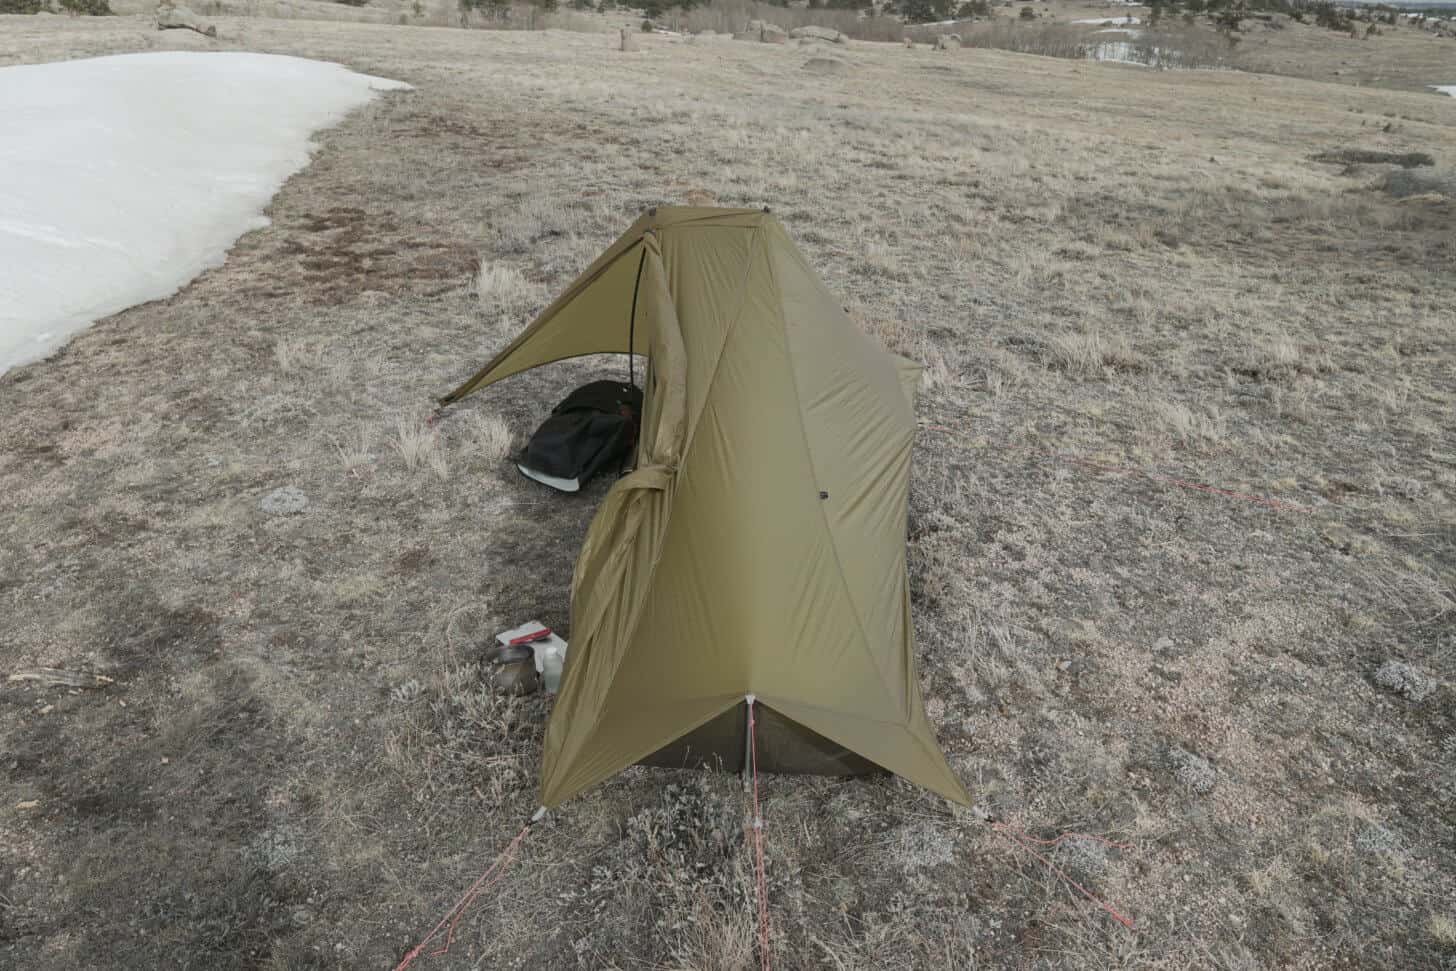
My first trip with the REI Flash Air 1 Tent was in the open, windy flats of the Sherman Range foothills in SE Wyoming.
Features & Specifications
key features
non-freestanding (requires a minimum of 5 stakes)
no. of accessory guyline tie-out points: 8
no. of included extra guylines: 4
weight
claimed (tent body, strut, and roof pole): 20 oz (567 g)
measured (tent body, strut, and roof pole): 20.10 oz (570 g)
measured weight of included vertical pole (required if a trekking pole isn’t used): 1.72 oz (49 g)
dimensions
floor: 88×35/27 in / 224×90/69 cm (LxW head/foot)
surface area
floor: 21.3 sq. ft. (1.98 sq. m.)
vestibule: 8.4 sq. ft. (0.78 sq. m.)
materials
support pole (optional, or use a trekking pole): DAC Featherlite NFL Green, 9.3 mm dia x 38 in (96.5 cm), 3-sections fold to 14 in (35.6 cm)
end strut pole: 8.7 mm dia x 11.875 in (30.2 cm)
roof pole: 8.7 mm dia x 14 in (35.6 cm)
roof pole hub: molded plastic
fly and floor: ripstop nylon
mesh: nylon noseeum mesh
MSRP: $249
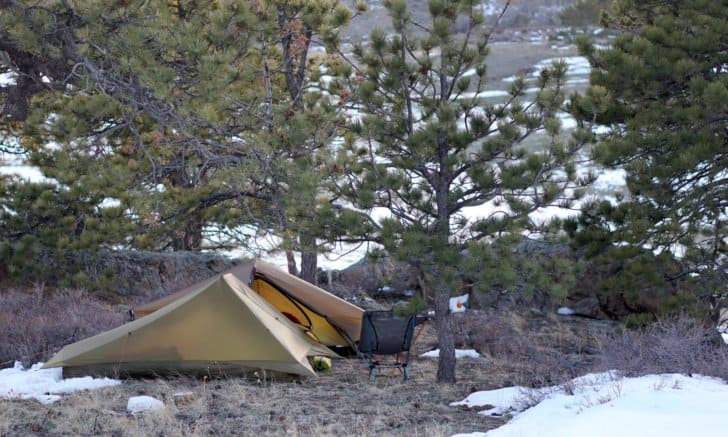
I used the REI Flash Air 1 Tent on a recent tent testing trip with Stephanie (she was in the Hilleberg Enan, behind the Flash Air 1). We camped in a ponderosa copse on a ridge in the Sherman Range in Wyoming.
Performance
Because this is a Limited Review, a detailed performance analysis based on long-term testing will not be presented. In lieu of a detailed analysis, performance observations and issues are noted below.
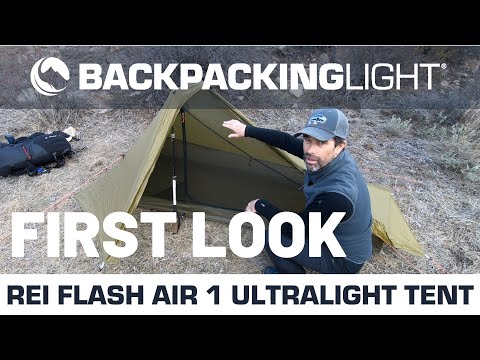
Before reviewing the table below in detail, take a look at my initial First Looks video about the REI Flash Air 1 Tent that I posted in my First Looks Review, which also addresses some questions from our forum community:
Criteria
Observations and Issues
ease of setup
No issues of note - setup is fast, simple, and intuitive; the instructions are worth reading, just to familiarize yourself with how the roof hub pole assembly works with the included vertical pole vs. a trekking pole. Because the shelter depends on the balance of tension around its perimeter, it's easy to overtighten guylines attached to the fly.
quality of materials and construction
Consistent with other tents we've reviewed from REI, and similar to the REI Quarter Dome SL1 and REI Quarter Dome SL2. Seams, cut-and-sew quality, and seam taping are all performed to a consistently high standard, on par with shelters from MSR and Big Agnes.
livability
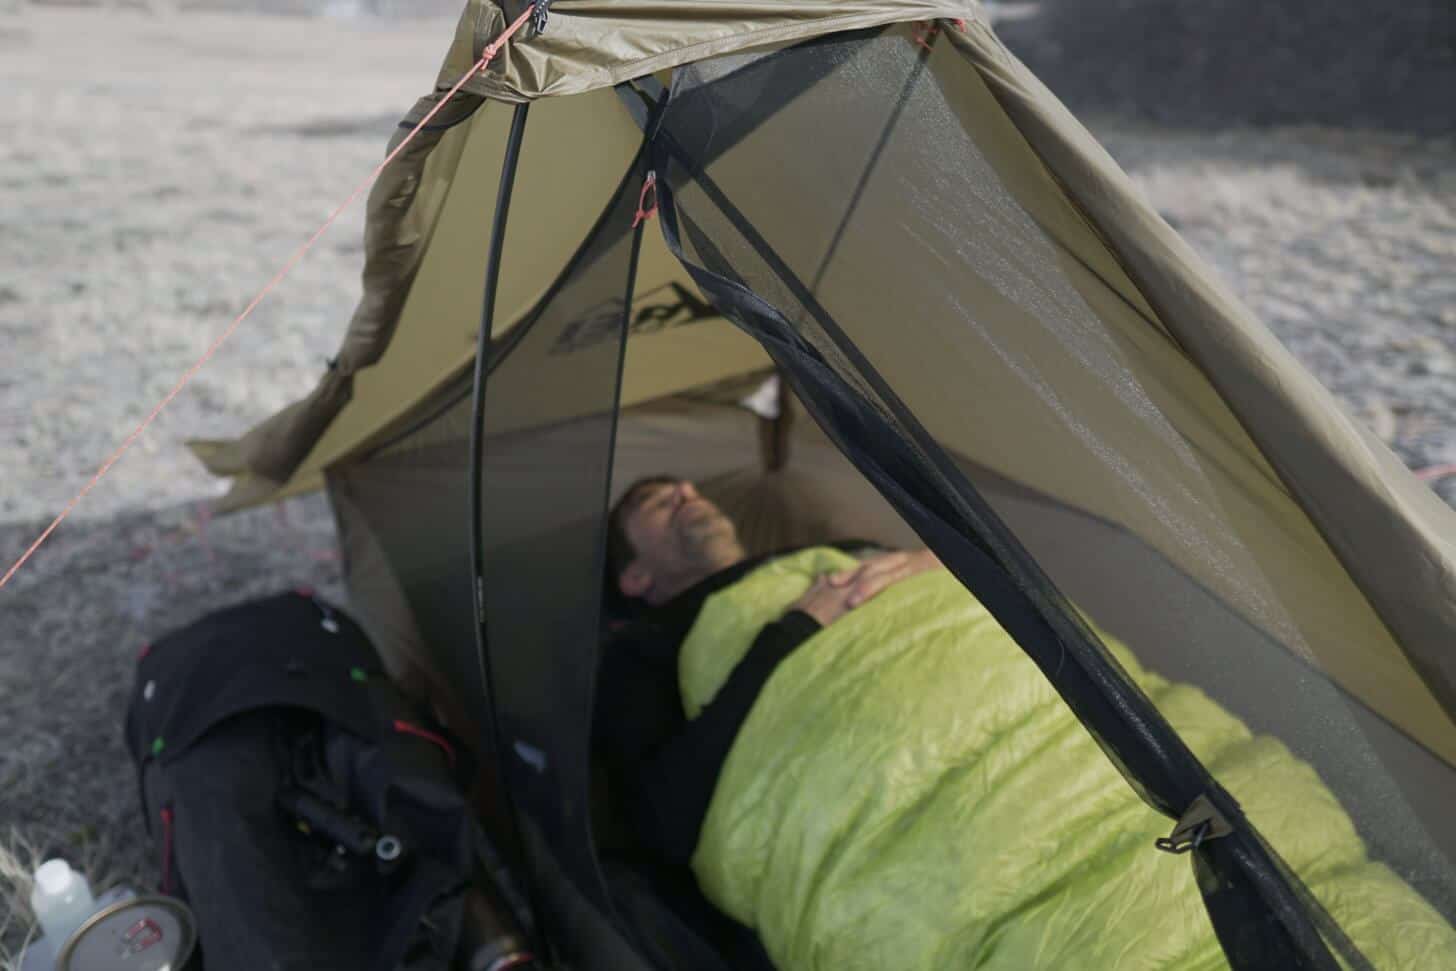
The REI Flash Air 1 Tent is small - more in line with a solo bivy tent than a solo tent you'd want to spend extended time in during an all-day rainstorm. Its Achilles' heel is its interior height at the ends, which limits the overhead volume in the tent that's required for anyone larger than an average-sized man to move around much, change clothes, etc. Design execution using the roof "arch" pole combined with a trekking pole and fabric tension from stake-out points is brilliant - it works and adds meaningful headroom.
rain protection
The vertical mesh inner tent door is protected by the fly during an overhead rain. The fly and floor fabrics tested to about 1,800 mm H2O on my (calibrated) Suter tester. This is sufficient for moderate rain protection, but water may seep through this ultralight floor material if you camp on hard, sopping wet ground, and crawl around on your knees in the tent.
snow loading
This is an ultralight tent that loses volume in response to very light snow loading. Given this limitation, it probably can't be considered a 3-season tent for some users.
ventilation/condensation resistance
Two very small vents at either end and a vestibule door that sits a few inches above the ground provide intake points for dry air, while a full mesh wall and peak vent allow moist air to escape. However, by nature of its hybrid-wall design and small interior volume, this is not a tent for sustained cold, humid conditions. End and back walls are solid and joined to the floor, so provide no place for dripping condensation to escape tent without reaching the floor.
warmth
Hybrid wall design doesn't provide meaningful insulation to allow tent to retain much body heat at night.
compressibility
Ultralight fabrics are very compressible, and pole sections are minimal, short, and easily separable from the body.
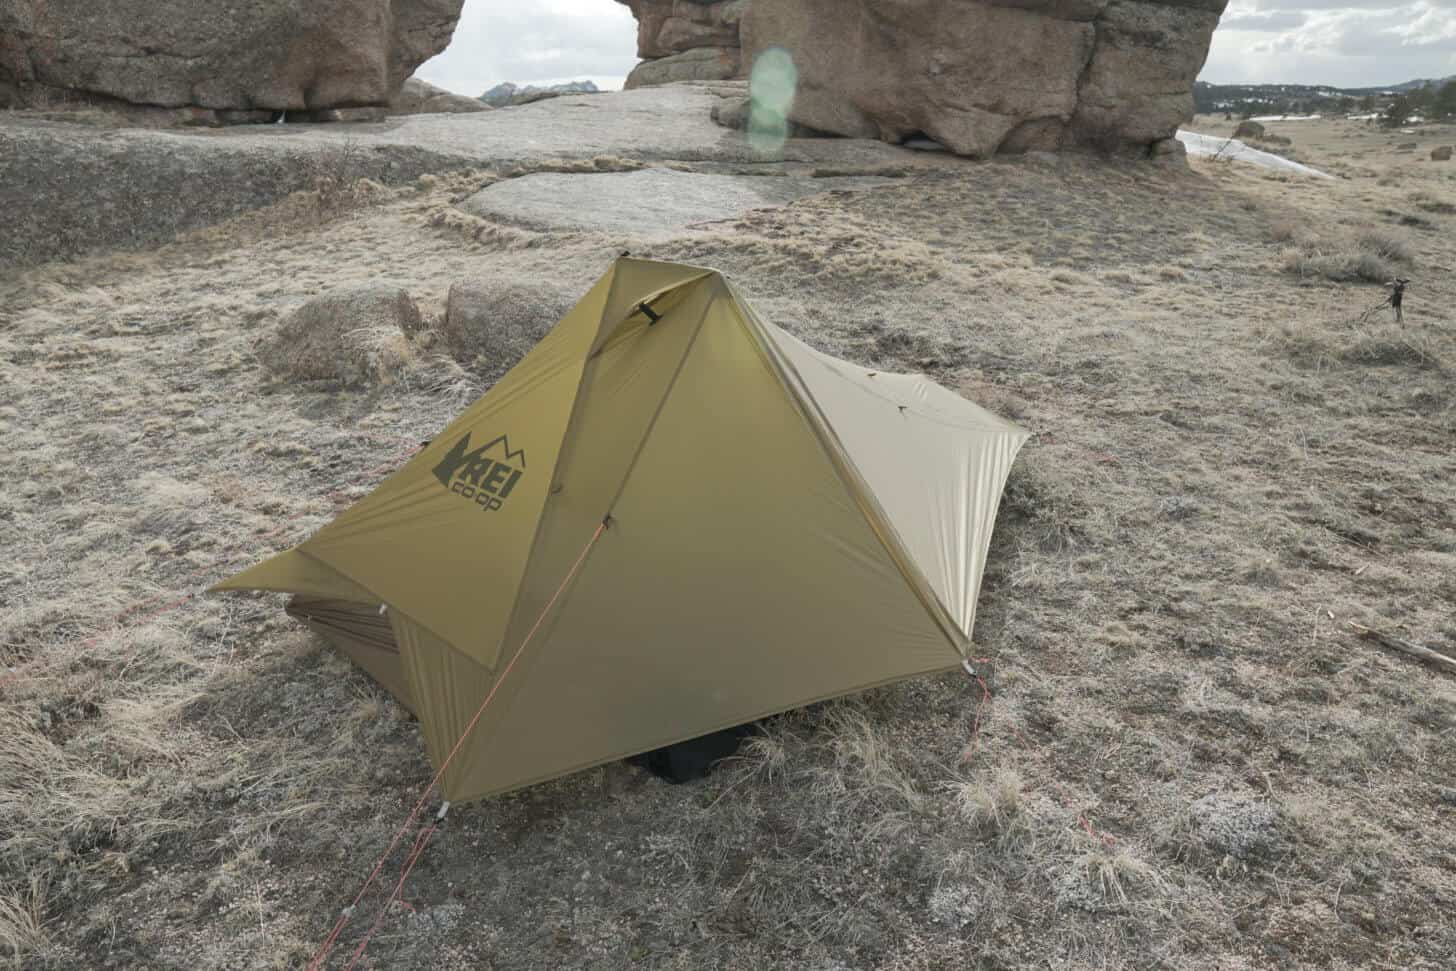
aesthetics
Foremost, I absolutely love the drab olive color. It disappears into the landscape, making it almost as non-intrusive as my favorite tent color, Hilleberg Sand. The profile is low, the lines are clean, and the pattern cuts make it look kind of like a Stealth Bomber. It's a cool design, and it's not ugly!
value
At $249, the REI Flash Air 1 Tent is a quality product that provides a light, minimalist shelter for a range of conditions that doesn't include extended heavy rain or cold, humid environments.
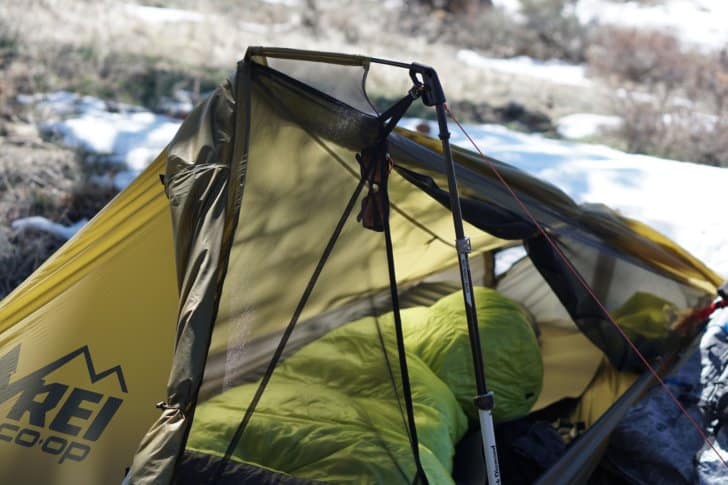
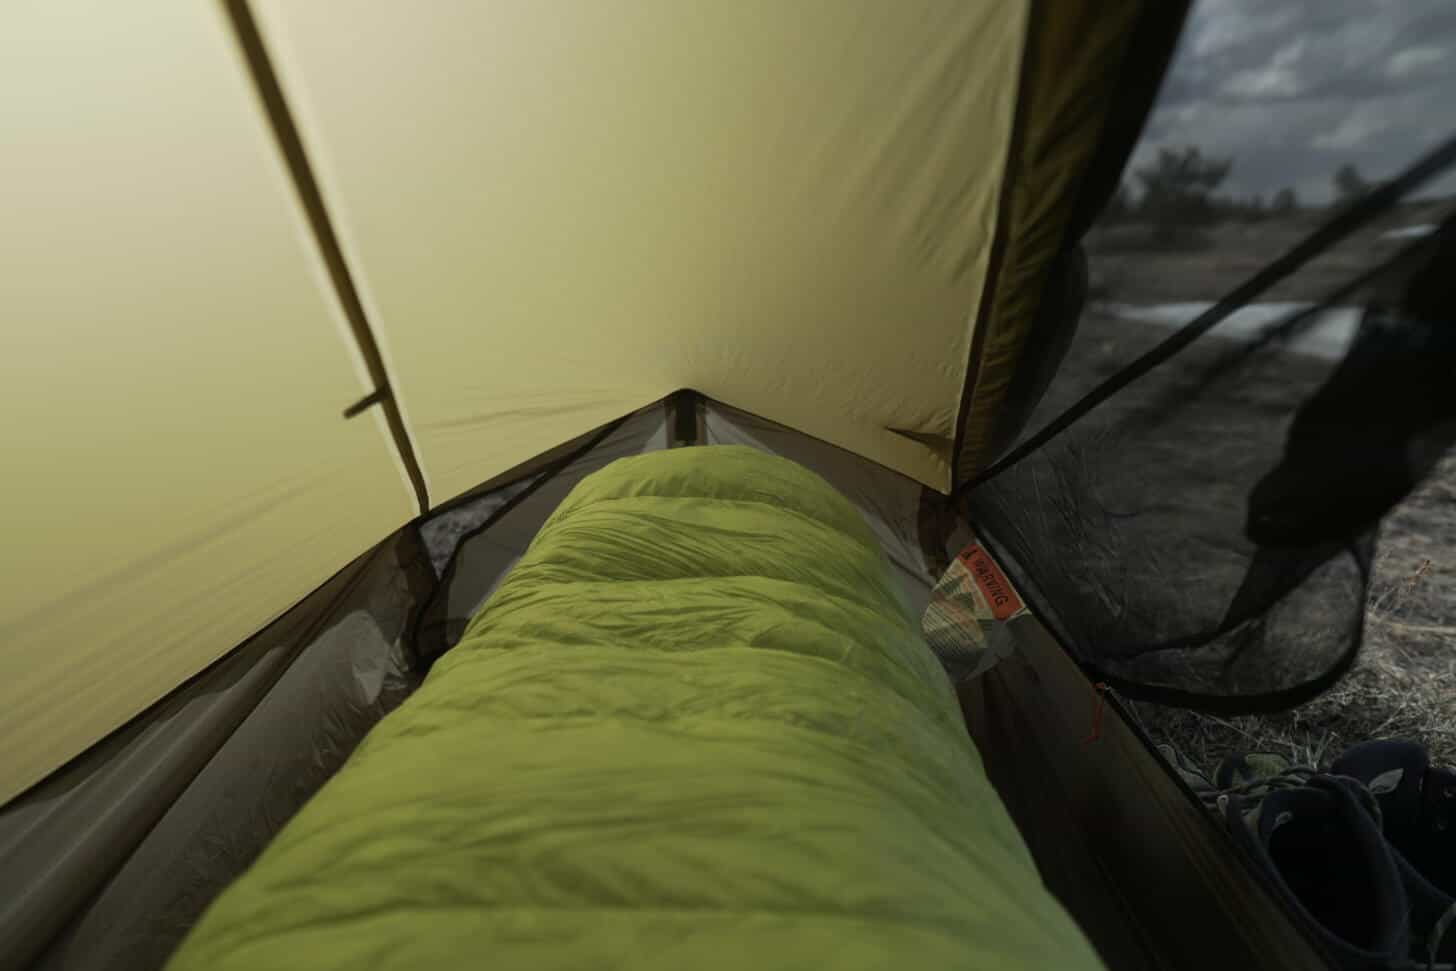
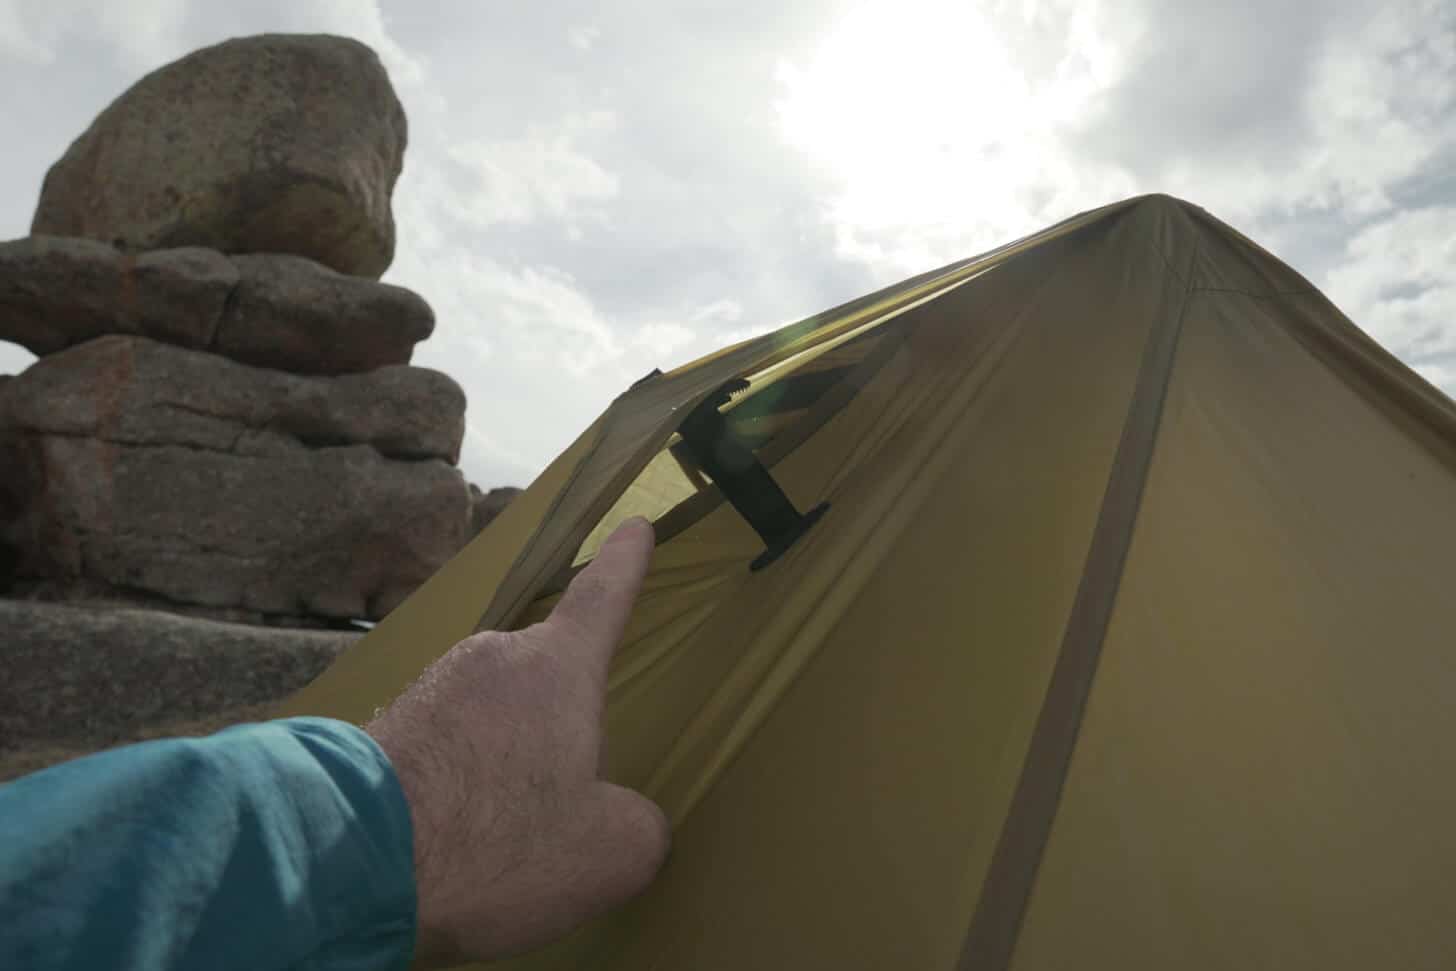
One of my favorite features of the REI Flash Air 1 Tent is its rollaway fly, which exposes roof and sidewall mesh for views, stargazing, and ventilation.
Commentary
What makes the REI Flash Air 1 Tent Unique?
There are lighter shelters that offer more volume than the REI Flash Air 1, but they are usually made from exotic materials like Dyneema Composite Fabrics and cost twice as much or more.
There are more compact fully-enclosed shelters at close to the same weight and cost (e.g., hooped bivy sacks), but they lack livability and wet-entry-and-exit options.
Therefore, the unique aspect of the REI Flash Air 1 Tent is its combination of:
low weight
low packed volume
reasonable price point
Hydrostatic Head Test
I used a Suter tester (calibrated) to measure the hydrostatic head rating of the REI Flash Air 1 Tent fly and floor fabrics. Both measurements were similar – about 1,800 mm H2O of pressure was required for water droplets to begin appearing at the ripstop threads. Read Roger’s account of this particular phenomenon in his article about hydrostatic head testing.
This photo shows widespread leakage by the time the pressure reaches 3,000 mm H2O. The first leaks started showing up at around 1,800 mm H2O.
This compares well with some other ultralight fabrics I’ve tested. For example, the fabric used in The One by Gossamer Gear tests at around 1,300 mm H2O on my test device. For context, Tarptent silnylons (latest generation) test at around 3,500 mm H2O, and Hilleberg Kerlon 1000 tests well over 5,500 mm H2O. Note: all of these numbers represent new fabrics that haven’t yet been exposed to significant amounts of UV radiation from sunlight.
Condensation Resistance and Livability
The REI Flash Air 1 tent’s most notable limitations include its condensation resistance and its livability.
I’ve addressed both in detail in this video:
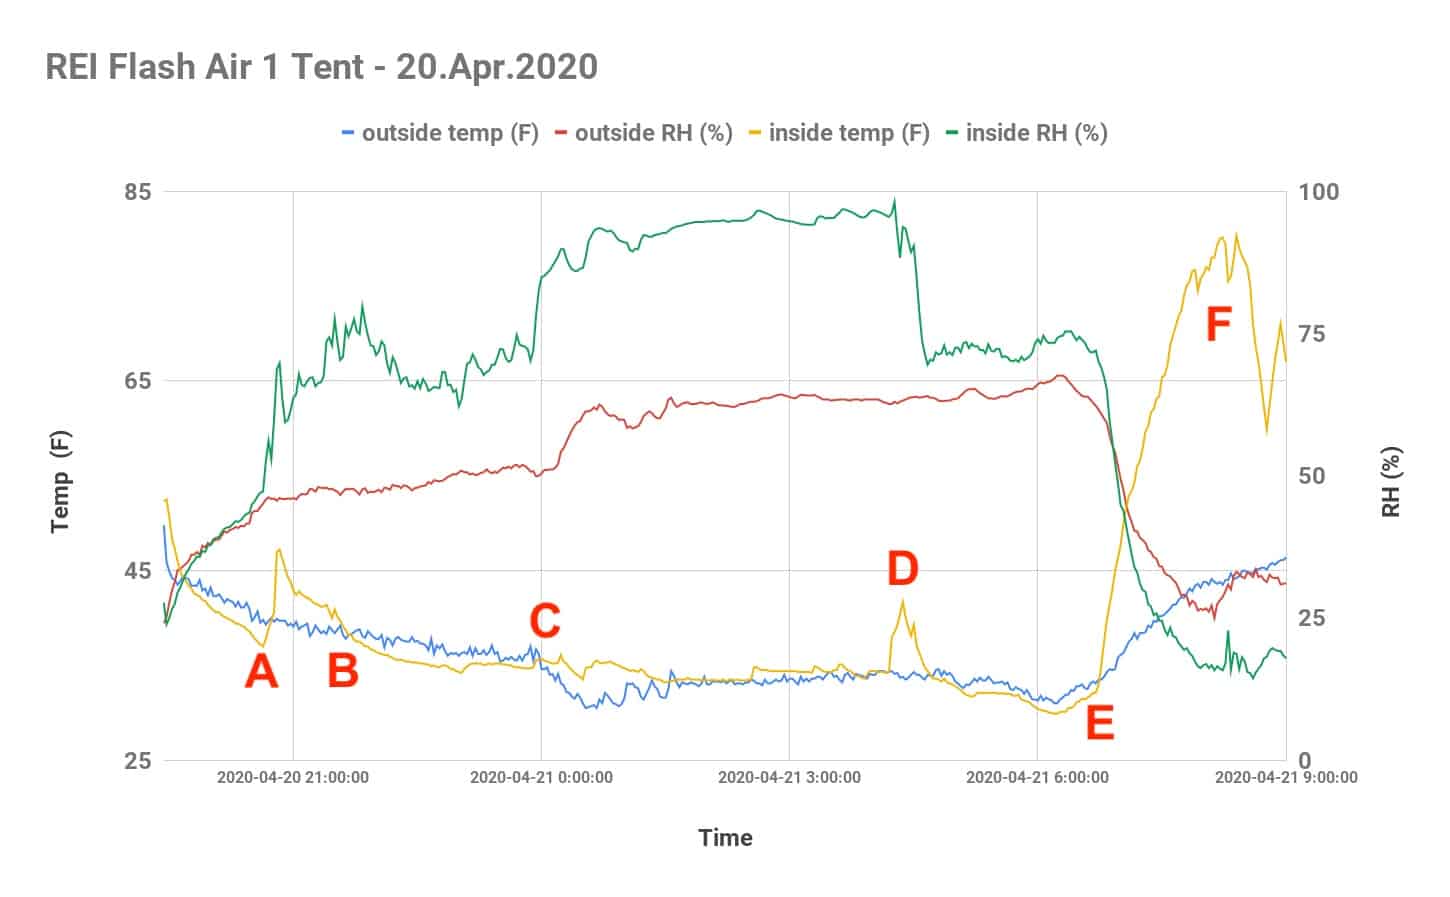
Here’s a graph showing its temperature and condensation performance (as measured with Kestrel Drop meters placed inside and outside the tent) on a cold, clear night at an elevation of 7,800 feet (2,377 m) in southeast Wyoming (click image for larger size):
Points of interest on the graph:
A
Bedtime – I enter the tent, close the roof vent (just for fun), and zip up the doors.
Increase in inside temp and humidity results from me moving around lot as I changed clothes and wriggled into my sleeping bag.
B
I’m in my sleeping bag here and now remain still, so the environment starts to stabilize.
Inside humidity begins to drop to around 65%, where it reaches a pseudo-equilibrium with the outside environment.
Outside air temp is 39 F and outside RH is 53%. Inside air temp is 39 F and inside RH is 65%. Inside vapor pressure differential is 2.88 mb (see the Tarptent Moment DW review for details about this calculation and why it’s important).
Note throughout this test that inside and outside temperatures are nearly the same, reflecting the tent’s lack of insulating ability.
Nothing more than a thin film of very light condensation is observed on the tent walls until about midnight.
C
At midnight, outside temp takes a sharp dive of a few degrees, while outside humidity increases by about 10%.
Inside humidity increases significantly now, approaching 95%+ for the next several hours. Inside vapor pressure differential is now only 0.25 mb.
Condensation begins to accumulate on the tent walls. By 4 am, there are visible drops of condensation.
D
I have to pee at 4:30 am.
Wriggling around raises the inside temperature as I get ready for nature’s call.
When I return to bed, I open to the foot-end vestibule door, and roll it all the way back, exposing half the sidewall and the lower roof mesh to open air.
The humidity inside the tent drops from 97% to 70% and stays steady at 70% until sunrise. Inside vapor pressure differential rises to 1.48 mb by 6:00 am.
Condensation inside the tent gradually disappears over the next few hours.
E
Official sunrise, 6:15 am.
By 6:45 (when the sun’s first direct rays hit my tent), there is virtually no condensation remaining in the tent, except very a very thin, almost imperceptible film on the roof; vapor pressure differential inside tent here is calculated to be 5.79 mb.
F
8:00 am, I’m awake for the day.
The sun is beating down on my tent and the interior temp climbs into the 80s.
Compared To…
The REI Flash Air 1 Tent is a single-entry, single-vestibule, side-entry, solo tent that can be pitched with a single trekking pole and weighs only 20 oz (567 g).
You simply cannot find any shelters that offer this feature set, at this weight, and at this cost.
If we are to compare tents of similar cost, they will be notably heavier, as a result of heavier fabrics, more features, more volume, or more pole structure. For example, the Six Moon Designs Skyscape and the Tarptent Notch offer two entrances, two vestibules, and require two trekking poles, at weights at least 8 oz (227 g) heavier than the REI Flash Air 1 Tent. Likewise, similar weights are available for solo, side-entry, 1-entrance/vestibule tents with their own pole sets, like the REI Quarter Dome SL 1.
And, if you look at single-trekking pole side-entry tents like the Tarptent Aeon Li or the ZPacks Plexamid, you’re now into a weight range that’s more competitive, but they are made with Dyneema Composite Fabrics that drive the price to more than twice the price of the REI Flash Air 1. Now, if you consider something like The One from Gossamer Gear, you have a shelter that is close in design and weight to the REI Flash Air 1 Tent. The key difference is that The One uses two trekking poles. It’s a little bit larger shelter, but also a little more expensive than the REI Flash Air 1 Tent.
Scroll right to view additional table columns.
REI Flash Air 1
Six Moon Designs Skyscape Trekker
Tarptent Notch
REI Quarter Dome SL 1
Tarptent Aeon Li
ZPacks Plexamid
Gossamer Gear The One
weight (minimum)
20 oz
28 oz
27 oz
29 oz
16 oz
15 oz
21 oz
MSRP
$249
$250
$314
$299
$535
$549
$299
wall type
hybrid
hybrid
double
double
hybrid
hybrid
hybrid
# trekking poles required to pitch
1
2
2
0
1
1
2
# entrances/vestibules
1
2
2
1
1
1
1
fly fabric
nylon
silpoly
silnylon
nylon
DCF
DCF
sil/PU nylon
peak height
42 in
45 in
42
38 in
47 in
48 in
46 in
floor area
21.3 sq. ft.
23.0 sq. ft.
15.8 sq. ft.
18.9 sq. ft.
18.3 sq. ft.
20.6 sq. ft.
18.3 sq. ft.
vestibule area
8.4 sq. ft.
16 sq. ft.
16 sq. ft.
9.6 sq. ft.
8.6 sq. ft.
6.4 sq. ft.
16.2 sq. ft.
Strengths
Core function – minimalist, overhead shelter with a side-entry and a reasonably generous vestibule – is very high for a tent at this weight and price point.
Easy to set up, with very little fiddle factor.
Ventilation and views are outstanding in fair weather. It’s a good option for buggy, warm conditions.
REI product that comes with outstanding customer service and a solid warranty.
Limitations
Limited weather resistance – this isn’t a tent for snow or high winds.
Limited condensation resistance – this isn’t a tent for cold, humid environments.
Limited livability – small volume isn’t ideal for larger folks or if you have to spend a few days holed up in a rainstorm.
Our review of the Tarptent Aeon Li features a single-side entry, single-vestibule, 1-trekking pole hybrid-wall tent that may be the performance gold standard for this style of shelter.
DISCLOSURE (Updated April 9, 2024)
Product mentions in this article are made by the author with no compensation in return. In addition, Backpacking Light does not accept compensation or donated/discounted products in exchange for product mentions or placements in editorial coverage.
Some (but not all) of the links in this review may be affiliate links. If you click on one of these links and visit one of our affiliate partners (usually a retailer site), and subsequently place an order with that retailer, we receive a commission on your entire order, which varies between 3% and 15% of the purchase price. Affiliate commissions represent less than 15% of Backpacking Light's gross revenue. More than 70% of our revenue comes from Membership Fees. So if you'd really like to support our work, don't buy gear you don't need - support our consumer advocacy work and become a Member instead.
Learn more about affiliate commissions, influencer marketing, and our consumer advocacy work by reading our article Stop wasting money on gear.
Note: This podcast was recorded in early February 2020 – before Covid-19 social distancing measures went into place.
In this episode of the Backpacking Light Podcast, Ryan and Andrew talk about load hauling – how to go as light as possible when the nature of your trip (packrafting, desert water carries, winter travel, etc.) requires specialized and (often) heavy gear.
After catching up (Ryan is running some cool experiments) the guys talk gear: packs, footwear, and other considerations for when the pack weight starts to creep up. After that they move into a discussion of skills that can lighten up a trip, even when the equipment is heavy.
Ryan updates the listeners on cool new stuff going on at BPL, and Andrew talks about his new favorite thing – a new pair of ultralight running shoes.
The episode wraps with an interview of Kevin Timm, owner and founder of Seek Outside. In a wide-ranging discussion, Kevin and Andrew talk about:
Seek Outside’s story and gear design aesthetic
What Kevin values in a piece of gear
Kevin’s advice to budding outdoorsy industry entrepreneurs
Lessons learned
The overlap between hunters and backpackers
Conservation and public lands use
And more!
Outline
Introduction
Today’s theme – load hauling: going light when you have to bring along a bunch of gear.
Catching Up
Ryan’s been doing experiments
Load testing with tent guylines
Comparison of moisture transfer in different layering systems
This episode of the Backpacking Light Podcast is supported and kept advertising-free by Backpacking Light membership fees. Please consider becoming a member which helps support projects like this podcast, in addition to a whole slew of other benefits!
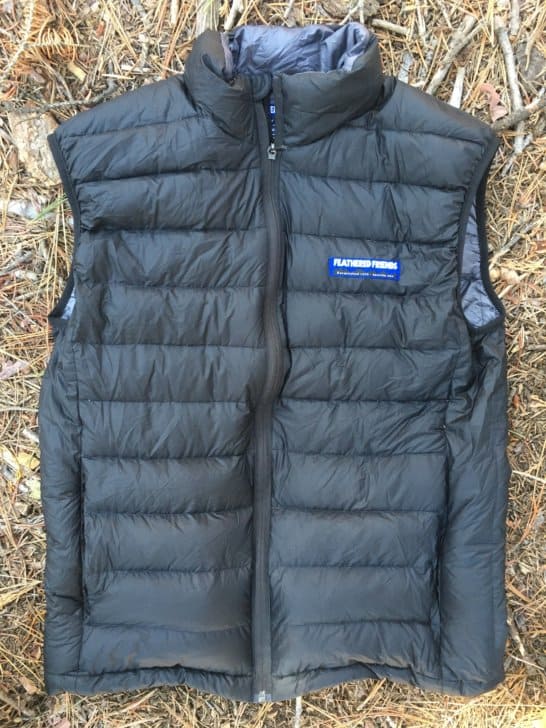
The Feathered Friends Eos Down Vest (7 oz / 200 g, $249.00) is a simple, well-constructed, well-fitting down vest with a high warmth-to-weight ratio.
Introduction
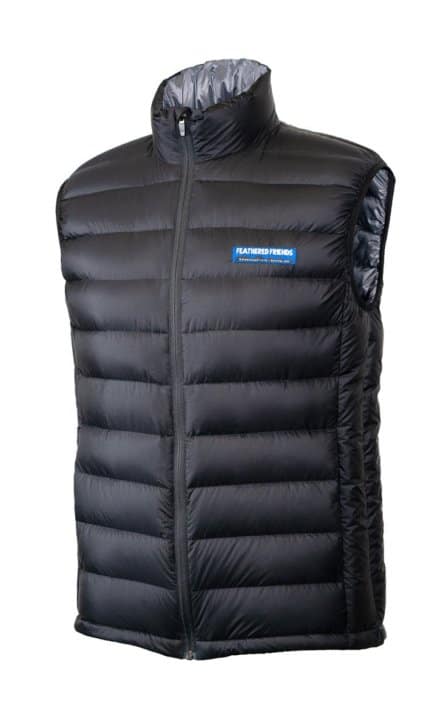
The Feathered Friends Eos Down Vest (7 oz / 200 g, $249.00) is a simple, well-constructed, well-fitting down vest with a high warmth-to-weight ratio. The Eos Down Vest is, as you might suspect, the vest version of the Feathered Friends Eos Down Jacket. That jacket is a popular piece of apparel that BPL jacket-guru Max Neale once referred to as “arguably the best down jacket on the market.” The Eos Down Vest seems primed to follow in the Eos Down Jacket’s footsteps by utilizing the same 900 FP down and lightweight shell fabrics as the jacket.
The Feathered Friends Eos Down Vest. Photo: Feathered Friends
About This Review
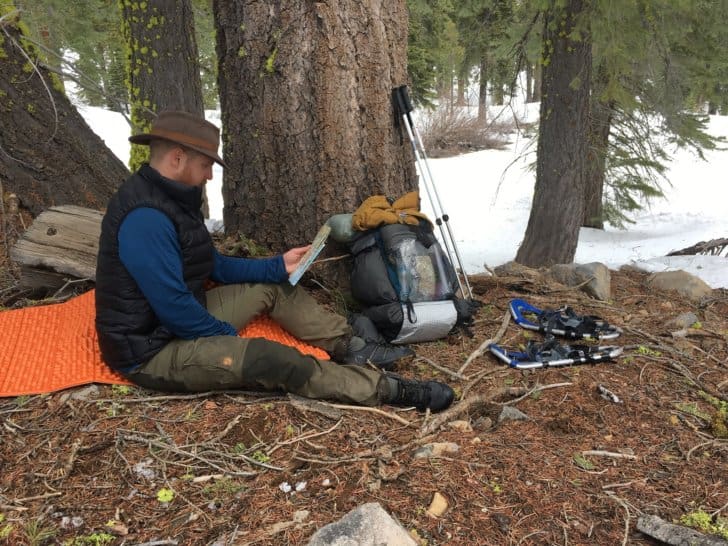
This Limited Review is based on use over three nights of backpacking and 10-15 day hikes and trail runs in the Lake Tahoe area of the Sierra Nevada Mountains in late winter and early spring.
Testing the Feathered Friends Eos Down Vest during late-spring while backpacking in the Lake Tahoe region of California.
The Feathered Friends Eos Down Vest combined streamlined design with premium materials.
Because this is a Limited Review, a detailed performance analysis based on long-term testing will not be presented. In lieu of a detailed analysis, performance observations and issues are noted below.
criteria
observations and issues
warmth
The Eos Down Vest delivers a high degree of warmth for its weight. Partly this is a function of premium materials - 900 fill-power down, and 12 x 20 denier woven nylon. It’s also a feature of choosing a vest over a jacket. In a sense, you could look at a vest over a jacket as minimalism applied to its logical extreme - insulating only where necessary (torso) and trimming everything else.
The zippered hand warming pockets are generously deep, going well beyond my wrists when using them.
fit and comfort
This product features a moderately trim cut. I routinely wore mine on top of a Brynje Wool Thermo T-Shirt Base Layer and Ridge Merino Solstice Lightweight Pullover Hoodie, and still had room to layer one more light fleece-type layer underneath if necessary. Anything more than that will begin to feel constrictive. In other words - it is a refined fit - certainly less baggy than a jacket. This fit makes it a very functional mid-layer.
Lycra around the armholes ensures the vest doesn’t pull or rub in that area. The elastic hem is adjustable on both sides. The nylon fabric is soft and comfortable - what you’d expect from a high-end insulating layer.
packability
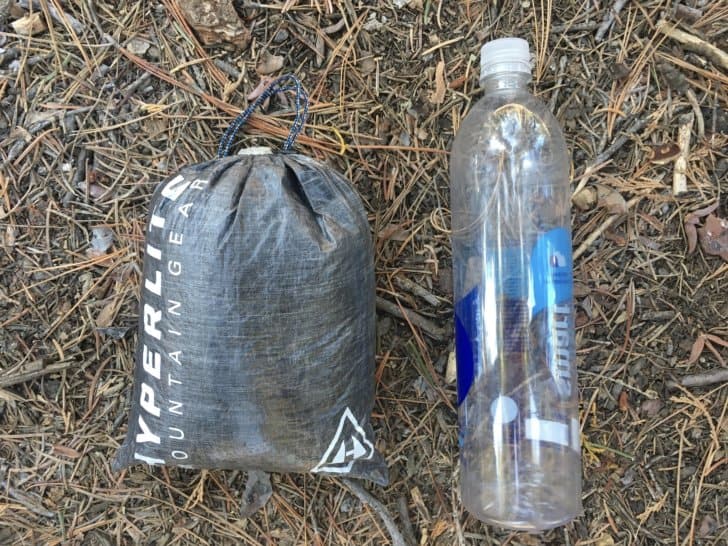
Although I prefer to let my insulating garments remain uncompressed in my pack as much as possible to extend their lifespan, that isn’t always an option - particularly if I’m using a pack that features external storage. In those cases, I need to keep my jacket easy to access but also protected from moisture, so I will sometimes keep an insulating layer in a waterproof stuff sack on the outside of my pack.
The same premium materials and minimal cut that make the Eos Down Vest so warm for its weight also make it highly compressible. During my testing, I mostly kept my Eos Down Vest in an 8 in x 10 in (20 cm x 25 cm) Hyperlight Mountain Gear Drawstring Stuff Sack (size small). It fit easily in there, far from its maximum compression.
weather resistance
The DWR coating and calendered 12 x 20 denier woven nylon fabric shrug off light rain and snow as much as expected. I take great care not to expose my insulation layers to moisture, but if you were caught in an unexpected light shower while wearing this vest, you’d be okay long enough to get it safely stowed away or covered with a rain layer. The Eos Down Vest is wind-proof within reason, but you’d certainly want to toss a wind-shirt over it if you were dealing with moderate-to-high winds in cold conditions.
quality of construction / durability
The Feathered Friends Eos Down Vest is sewn with extremely high quality. There are no errant seams, and the stitching is straight. The zippers glide easily and do not catch in the fabric. In my time testing this vest, one down plumule migrated through the fabric.
The 12 x 20 denier woven nylon fabric is light but not so light as to be overly delicate. I wouldn’t want to expose it to sustained bushwhacking, but I wouldn’t worry about pushing through some brush while visiting the latrine or hanging a bear bag.
After rigorous inspection, I haven’t found anything that would indicate a short lifespan for this vest. If anything, the opposite is true - you would be safe in assuming that an investment in this vest would be paying off for a long while.
Commentary
What Makes The Feathered Friends Eos Vest Unique?
At first glance, the question of “What Makes the Feathered Friends Eos Vest Unique” is somewhat hard to answer. There are no gimmicks or trendy features on this insulating layer – the only way to make it any more minimal (or lighter) would be to remove the pockets and zippers and make it a pull-over, reduce its fill weight, or use even lighter (e.g., 7d/10d) shell fabrics.
After giving it some thought and using this garment broadly (across a wide range of circumstances and temperatures) if not deeply (for an extended period on a long, multi-week backpacking trip), I’ve determined that two factors make the Eos Down Vest unique. These factors are:
Quality of Construction and Materials
Utility While Fastpacking
Quality of Construction and Materials
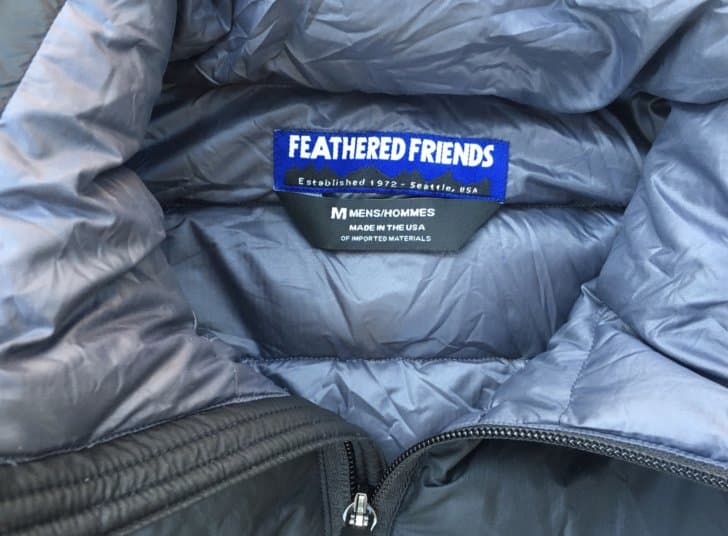
The Feathered Friends Eos Down Vest is sewn in the USA.
Feathered Friends sews its products in Vancouver and Seattle, and if “made in the USA” isn’t quite the byword for quality that we sometimes believe it is, in this case, the old maxim is true – this is an exceptionally well-made garment. In researching this article, I spoke with Juna Gates from Feathered Friends, who shed a little more light on how Feathered Friends maintains such high quality of construction (the brand’s quality is well-known in the outdoor world).
Firstly, Juna told me, Feathered Friends places a lot of emphasis on retaining their Seattle workforce, preferring to keep workers for years. There’s something to be said for practice and experience, particularly behind a sewing machine and while working with ultralight fabrics.
Secondly, Feathered Friends’ small scale (relative to larger brands like Arc’teryx) means they “hand inspect every piece coming out of [the Feathered Friends] factory.”
Neither of those factors makes for a flashy product, but when combined with good customer service and function-centered design, they do make for a very high quality product. The final factor to consider is Feathered Friends’ use of premium materials in the Eos Down Vest. I’ll talk more about that below.
Utility While Fastpacking
When I need fast (but waterproof) access to my Feathered Friend’s Eos Down Vest, I often store it in this size small (8 in x 10 in / 20 cm x 25 cm) drawstring stuff sack. The vest could compress more than this if needed.
As the ongoing Covid-19 pandemic has limited my vagabonding area to my immediate surroundings, I’m experimenting with ways to challenge and progress my backpacking skills and fitness. One of the ways I’m doing this is by fastpacking and trail-running (and blurring the lines between the two). In essence, I’m playing with how quickly I can move over challenging terrain for short distances (thirty miles or less). For this purpose, the Feathered Friends Eos Down Vest has been perfect. Its compressible nature and high warmth-to-weight ratio (both factors of simple, elegant design and premium materials, including 900 FP down) make it perfect for inclusion in fastpacking kits – particularly on trips where you’ll be spending a minimum amount of time lounging around camp. My weekly long trail runs are now edging up towards marathon distance, and I like to take a break at the halfway point to eat and admire the scenery. It’s still somewhat chilly in my area, so the Eos Down Vest is a worthy inclusion in my 18L running vest – well worth the 7 oz (200 g) and the minimal space it takes up.
When longer backpacking trips are back on the table, it will make a stellar insurance garment. While I’d probably lean towards a more substantial down jacket for serious alpine trips, I’d be tempted to bring the Eos Down Vest along instead of a jacket on multi-week trips in milder climates where I just need something small and light to fend off evening and morning chills.
Compared To…
I chose to compare the Feathered Friends Eos Down Vest to the Arc’teryx Cerium LT Vest. Both vests are simple, streamlined designs, at an identical price-point and similar weight, from companies known for quality garments.
The Eos Down Vest uses 900 FP down, while the Cerium LT Vest uses 850 FP down and minimal amounts of synthetic insulation at strategic locations. The Cerium LT Vest weighs in at 6.5 oz (185 g) vs. the Eos Down Vest is 7 oz (200 g).
Eos
price
Both products cost $249.
Tie
insulation type
The Eos Down Vest uses 900 FP down, while the Cerium LT Vest uses 850 FP down and synthetic insulation.
Eos
weather and moisture resistance
Both garments utilize calendared, ultralight nylon fabrics coated with a DWR. What sets the Arc’teryx Cerium LT vest apart is its use of synthetic insulation at strategic points (notably the shoulders). In my opinion, this gives the Arc’teryx Cerium LT vest a slight edge in terms of moisture resistance.
Cerium
durability / quality of construction
Both products are from companies known for high-quality production. That being said, research into the Cerium LT Vest revealed ongoing issues with zipper durability (according to multiple user reviews on Arc’teryx and several third-party websites). The Eos Down Vest is a new product and hasn’t garnered many reviews yet. I certainly didn’t find anything of concern on my sample, so for now, the Eos Down Vest holds the edge.
Eos
packability
The inclusion of synthetic insulation in the Cerium LT Vest makes it slightly less compressible than the Eos Down Vest.
Eos
pockets
The Eos Down Vest has two zippered hand-warmer pockets. The Cerium LT Vest has two zippered hand-warmer pockets but also includes an inner zippered chest pocket. I find this type of pocket especially useful for keeping electronics and batteries warm, so in this case, I give the edge to Arc’teryx.
Cerium
Strengths
Utility
Ideal for peak-bagging, fast-packing, trail-running, or other pursuits where you might be trying to shave ounces but maintain warmth on short rest breaks.
Great utility as an insurance layer or primary insulative layer in milder climates
Precise, refined fit functions well under layers.
Quality of Construction
Lives up to the Feathered Friends reputation for quality.
Limitations
Insufficient warmth for long stays in alpine environments where temperatures can fluctuate dramatically.
Our community discusses the Feathered Friends Eos Down Jacket and several other insulated jackets in this forum thread.
DISCLOSURE (Updated April 9, 2024)
Product mentions in this article are made by the author with no compensation in return. In addition, Backpacking Light does not accept compensation or donated/discounted products in exchange for product mentions or placements in editorial coverage.
Some (but not all) of the links in this review may be affiliate links. If you click on one of these links and visit one of our affiliate partners (usually a retailer site), and subsequently place an order with that retailer, we receive a commission on your entire order, which varies between 3% and 15% of the purchase price. Affiliate commissions represent less than 15% of Backpacking Light's gross revenue. More than 70% of our revenue comes from Membership Fees. So if you'd really like to support our work, don't buy gear you don't need - support our consumer advocacy work and become a Member instead.
Learn more about affiliate commissions, influencer marketing, and our consumer advocacy work by reading our article Stop wasting money on gear.
This Tarptent Notch Li Review presents the benefits of Dyneema Composite Fabrics (DCF) for ultralight backpacking shelters, assesses its design/feature set, and compares the Notch Li to its competitors.
Updated: Notch Li V2 (2020 Version)
Updates:
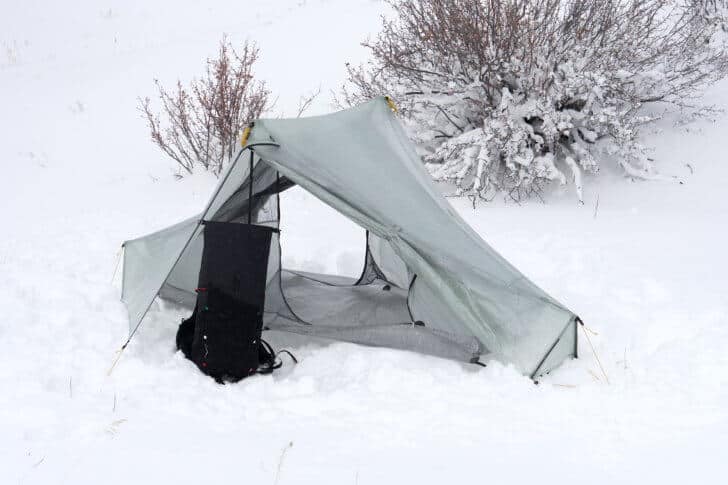
April 18, 2020 – added new field and detail photos of the v2
April 9, 2020 – added stock photos and details about the v2 update
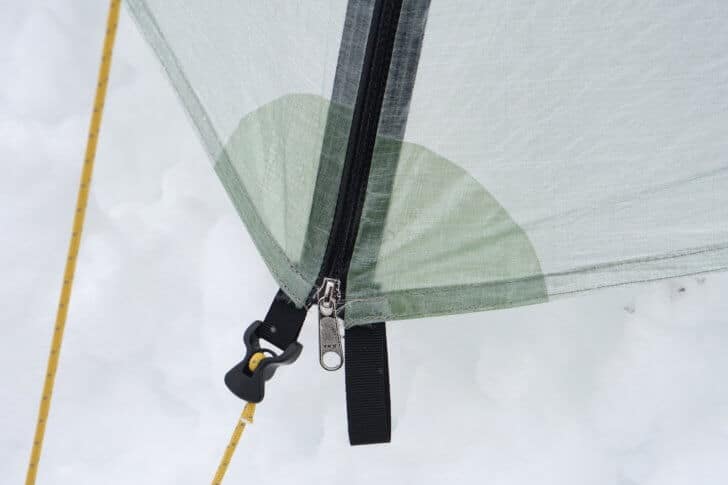
The most meaningful change is replacing the door flaps on the vestibules with waterproof zippers. This will drastically improve weather performance in wind, which was was the notable shortcomings we discovered in our review below. These are two-way waterproof separating zippers, which will help with ventilation at the peak as well.
The Notch Li now includes a waterproof, 2-way separating zipper. Photo: Tarptent.
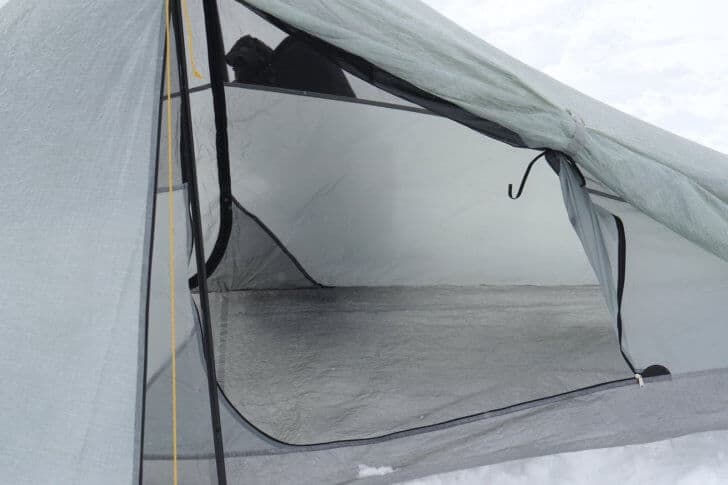
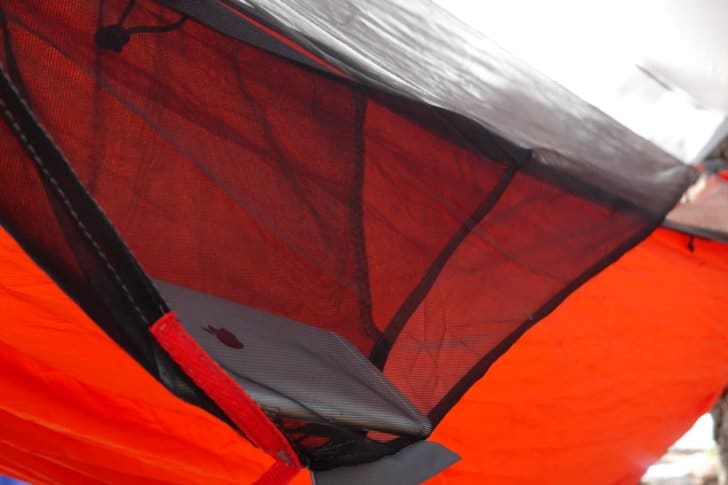
The partial solid fabric interior now has a solid fabric (instead of mesh) roof panel. This type of construction is essential in order to prevent condensation that has accumulated on the inside of the roof from falling down on you through mesh. Best of all, Tarptent changed the fabric to a 10 denier weight – which means the partial solid fabric inner is now lighter than even the mesh inner.
The partial solid fabric inner tent now includes a solid fabric roof panel for protection from dripping condensation. Plenty of mesh in the upper, so this has the potential to be a very functional all-season inner tent except in the warmest environments (then you’d want the mesh for additional airflow). Photo: Tarptent.
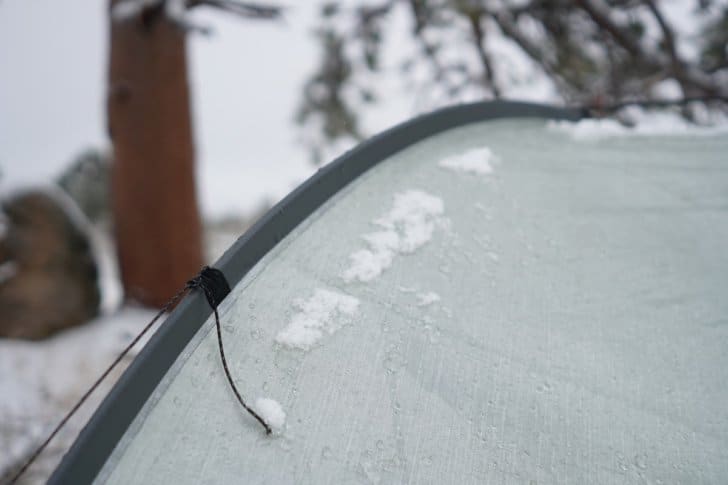
Tarptent notes that they also made “end to end improvements in stitching, cutting, taping and bonding” which we can only assume will result in a better pitch and more strength. There are some obvious additional bonding patches here and there (see photos below for the magnetic door tie).
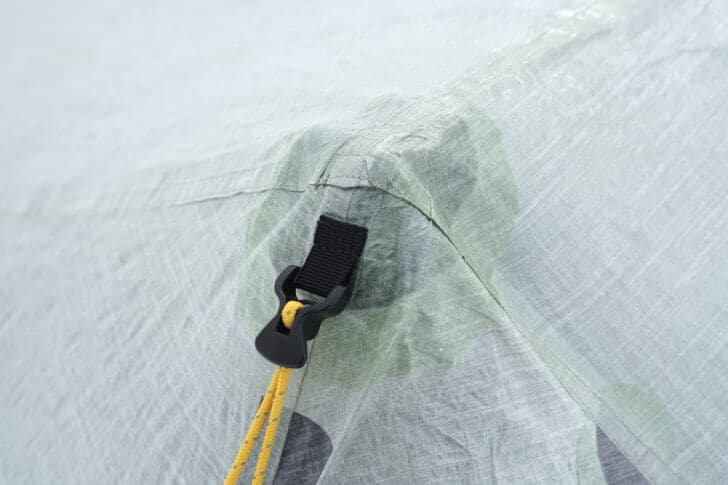
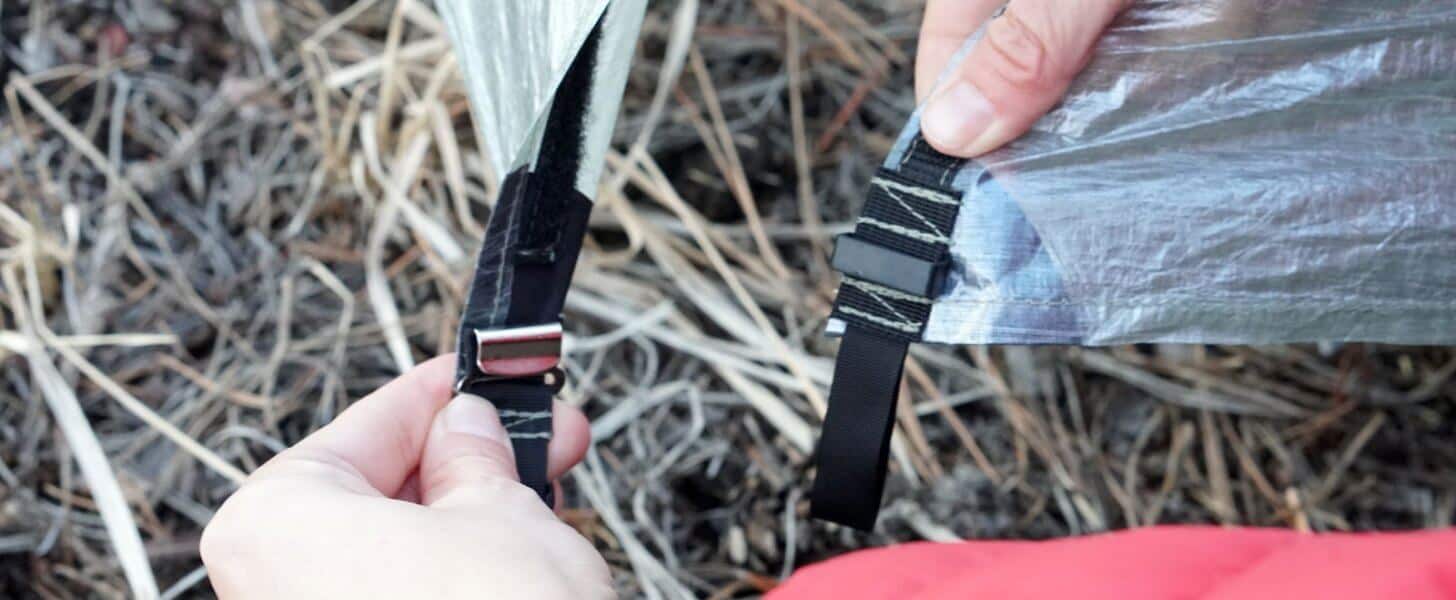
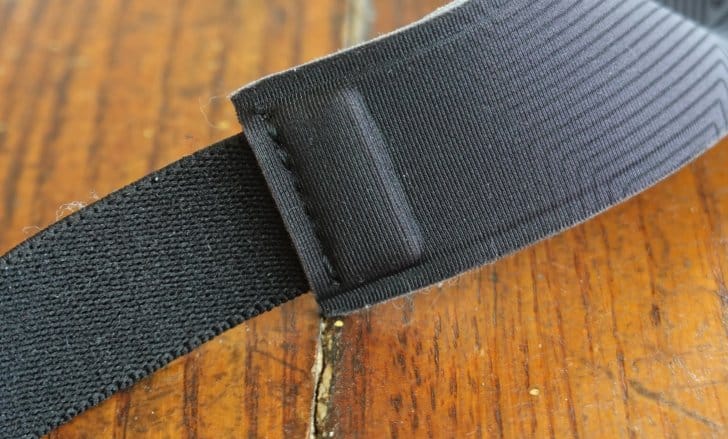
It looks like Tarptent has addressed the magnetic vestibule door tie issue. It tended to pop open under very little pressure (wind, tight staking, etc.). Note in the photos below, the V2 magnetic closure is attached to a thicker strap and the location has changed along the door seam, so less stress will be imparted on the door tie and it should be less likely to pop open under tent stress.
Magnetic closure on the Tarptent Notch Li v2 (2020 version). Photo: Tarptent.Magnetic door tie on the V1 (2018) Tarptent Notch Li. Photo: Ryan Jordan.
Manufacturing has moved from Seattle to China, at least for Lithium series tents. We expect this to improve sew and finish quality of these new tents dramatically.
New Photos
added 4/18/2020
Introduction
This review was originally published on March 4, 2018.
This Flash (“first looks”) Review provides an overview of the new Tarptent Notch Li shelter, representing Tarptent’s first use of Dyneema Composite Fabrics (DCF, formerly, Cuben Fiber) in their shelter line.
In DCF, it is quite a beautiful little tent, yes?!
DCF shelters have a cult following amongst hardcore ultralight hikers for their:
High fabric tear strength-to-weight ratio (and very light weight);
Low stretch (maintains a taut pitch across a wide temperature range);
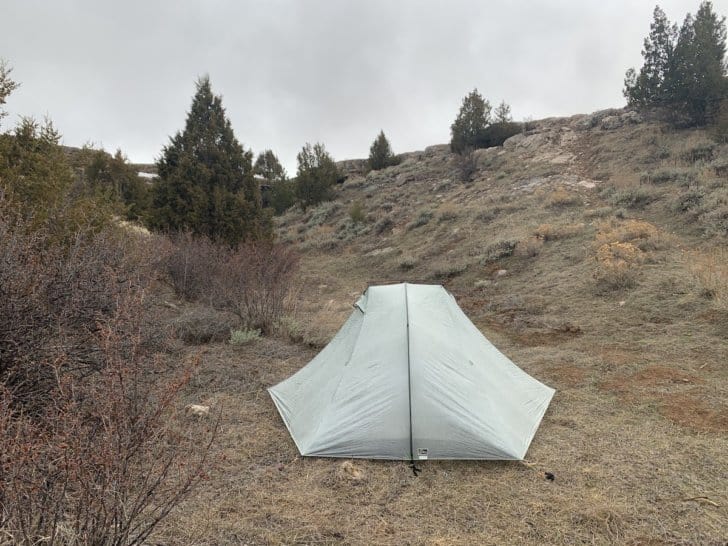
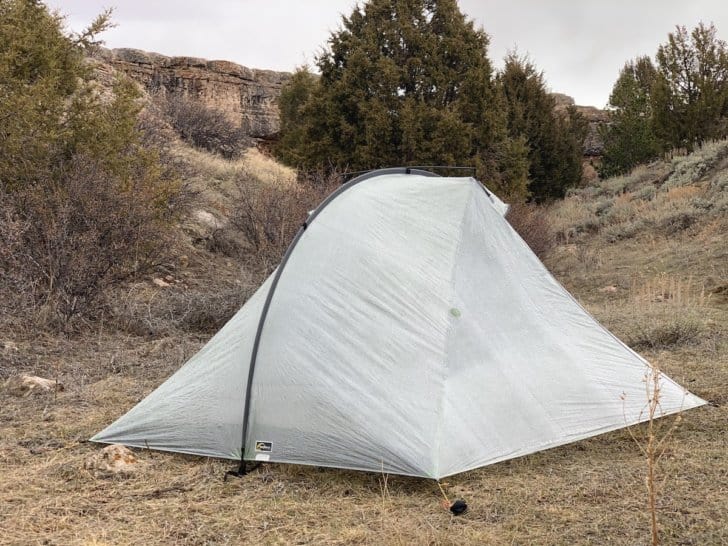
Tarptent is known for shelters that are well-made, stable in foul weather, and usable, roomy designs. We recently reviewed the Tarptent Stratospire 1, which I’ve personally found to be a highly-weather resistant shelter in four-season conditions. Oh how I wish for a DCF Stratospire!
The (silnylon version of the) Tarptent Stratospire 1 on the Colorado Plateau. Constructed of DCF, this tent could weigh as little as 1.5 lb.
We’ve published a number of other Tarptent Reviews here. I find the curved-pole designs sort of ho-hum (others will differ in opinion, and I respect their preferences) due to their unflattering performance (storm-worthiness)-to-weight ratios. However, my personal experience in recent years has focused on their dual-trekking pole solo models, including the Notch and Stratospire.
I appreciate the design simplicity of the Notch – stability afforded by two trekking poles (and a few carbon struts). Its double-side entry/double vestibule design makes it a very usable shelter that offers great advantages for the solo hiker.
However, the use of silnylon fabric for a shelter this small makes it a condensation trap in all but the driest environments. On nights with little or no wind, at temperatures less than about 40 deg F, prepare to mop moisture from the walls – there simply isn’t enough ventilation in this shelter to manage condensation well.
In addition, the Silnylon Notch (and its more robust bigger brother, the Stratospire) suffers from fabric panel sagging as temperatures drop and/or precipitation falls. This isn’t unique to the Notch, it just happens to be one of the disadvantages of silicone-coated nylon fabrics. (Another 2-trekking pole-supported tent that suffers similarly is the Sierra Designs High Route FL1.)
And so it is with some hope that this new DCF version of the Tarptent Notch (the Tarptent Notch Li, or “Lithium”) improves on silnylon versions by increasing pitch tautness during a decreasing temperature / precipitation event, and being more resistant to condensation.
Of course, the weight savings of half a pound is nothing to shake a carbon fiber strut at, either.
Features
Dyneema fabrics for weight savings and improved condensation performance;
Taped seams;
Dual trekking pole support; no poles in your living space (Requires minimum 43 in (110 cm) trekking poles or optional setup poles (extra $);
Double wall, dual entry, and dual vestibules;
Interior is completely removable and can set up independently;
Interior protected from overhead precipitation during entry/exit;
Alternate partial fabric and/or silnylon floor interiors available (extra $);
PitchLoc™ foldable corners and integrated line tighteners for increased pitch tautness;
Pole handle side up possible with optional adapters (extra $);
Reflective spectra cord guylines;
Catenary ridgelines improve pitch tautness and performance in wind/snow loading;
Different interiors available (extra $).
Specifications
Dyneema composite fabric (DCF) spec – 0.52 oz/sq yd on fly, 1.0 oz/sq yd on inner tent floor;
Hydrostatic head rating: 8,000+ mm
Interior surface area: 15.2 sq ft (1.4 sq m);
Floor width (max): 34 in (86 cm) – fits a wide sleeping pad;
Floor length (max): 84 in (213 cm);
Interior height: 43 in (109 cm);
Stakes (included): 4 x 6 in (15 cm);
Packed size: 16 in x 4 in (41 cm x 10 cm);
Weight
Mesh interior with DCF floor (standard model)
19.9 oz (0.57 kg) – includes fly (10.1 oz / 0.29 kg), interior (8.2 oz / 0.23 kg), and stakes/stuff sack (1.6 oz / 0.045 kg).
Mesh interior with silnylon floor
21.8 oz (0.57 kg) – includes fly (10.1 oz / 0.29 kg), interior (10.0 oz / 0.23 kg), and stakes/stuff sack (1.6 oz / 0.045 kg).
Partial DCF/mesh interior with DCF floor
21.5 oz (0.57 kg) – includes fly (10.1 oz / 0.29 kg), interior (9.8 oz / 0.23 kg), and stakes/stuff sack (1.6 oz / 0.045 kg).
Design, Features, and Usability Assessment
Inner Tent Layout
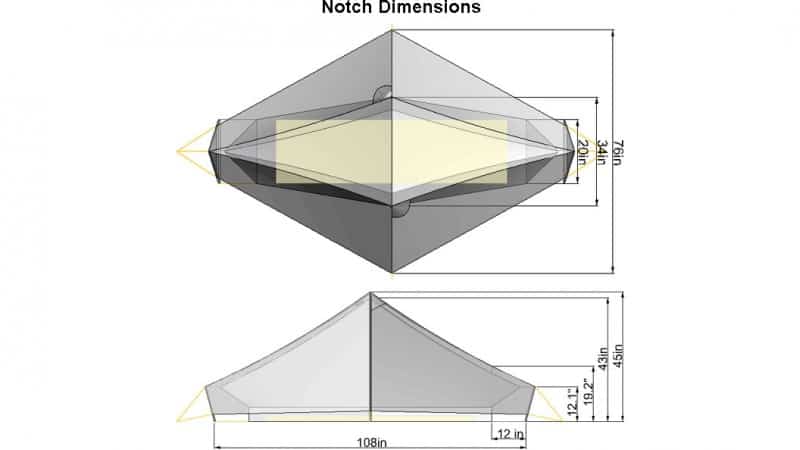
The Tarptent Notch Li includes a relatively small inner tent (34 in x 84 in, only 15.2 sq. ft. of area), but with notable features:
PitchLoc corners integrate with the inner tent to provide more usable space at the ends. Consequently, nearly the entire 84 inch length can be used with a thick foam pad and winter-weight sleeping bag. A tall person using a long-length sleeping bag (e.g., 6′ 6″) should have no problem spreading out without touching any solid-fabric tent walls.
With an inner tent width at its maximum of 34 inches (at the mid-point of the inner tent) and at its minimum of 20 inches (at the ends of the inner tent), the claim that a wide (e.g., 25 inch) sleeping pad will “fit” is a little dubious. That said, it works well enough, even though it all gets a little bit scrunched up at the ends.
An interior peak height of 43 inches, even a tall-ish person (probably up to about 6′ 0″) can sit upright without rubbing their head on the top of the inner tent.
The Notch and Notch Li share the same geometry. Specifically, note the yellow-shaded model of a standard-sized sleeping pad (20 x 72 inches). A wide/long pad (e.g., 25 x 78 inches) will interfere a little bit with the footprint of the inner tent. Image credit: Tarptent
Dual Doors, Dual Vestibules
Dual doors and dual vestibules first appeared on two-person tents for obvious reasons: each person could have their own entrance and gear storage area.
However, and perhaps counterintuitively, I think dual doors and dual vestibules are even more important for a solo tent, and especially for a solo tent that has an inner tent as small as that included with the Tarptent Notch Li.
Here’s why:
Two vestibules allow you to organize gear more efficiently. For example, I often keep my pack, shoes, hiking clothing, and wet gear in one vestibule and my water, cooking gear, and food (if not in bear country) in my other vestibule. That leaves me one vestibule for gear storage and organization, and one vestibule for cooking and/or morning coffee.
Two entrances (on both the fly and inner) allow me to open up all doors, and tie them back for the best views and maximum ventilation on warm nights.
Two entrances allow me to use one or the other, depending on the direction of prevailing winds, when entering or exiting the tent in inclement (especially snowy) weather.
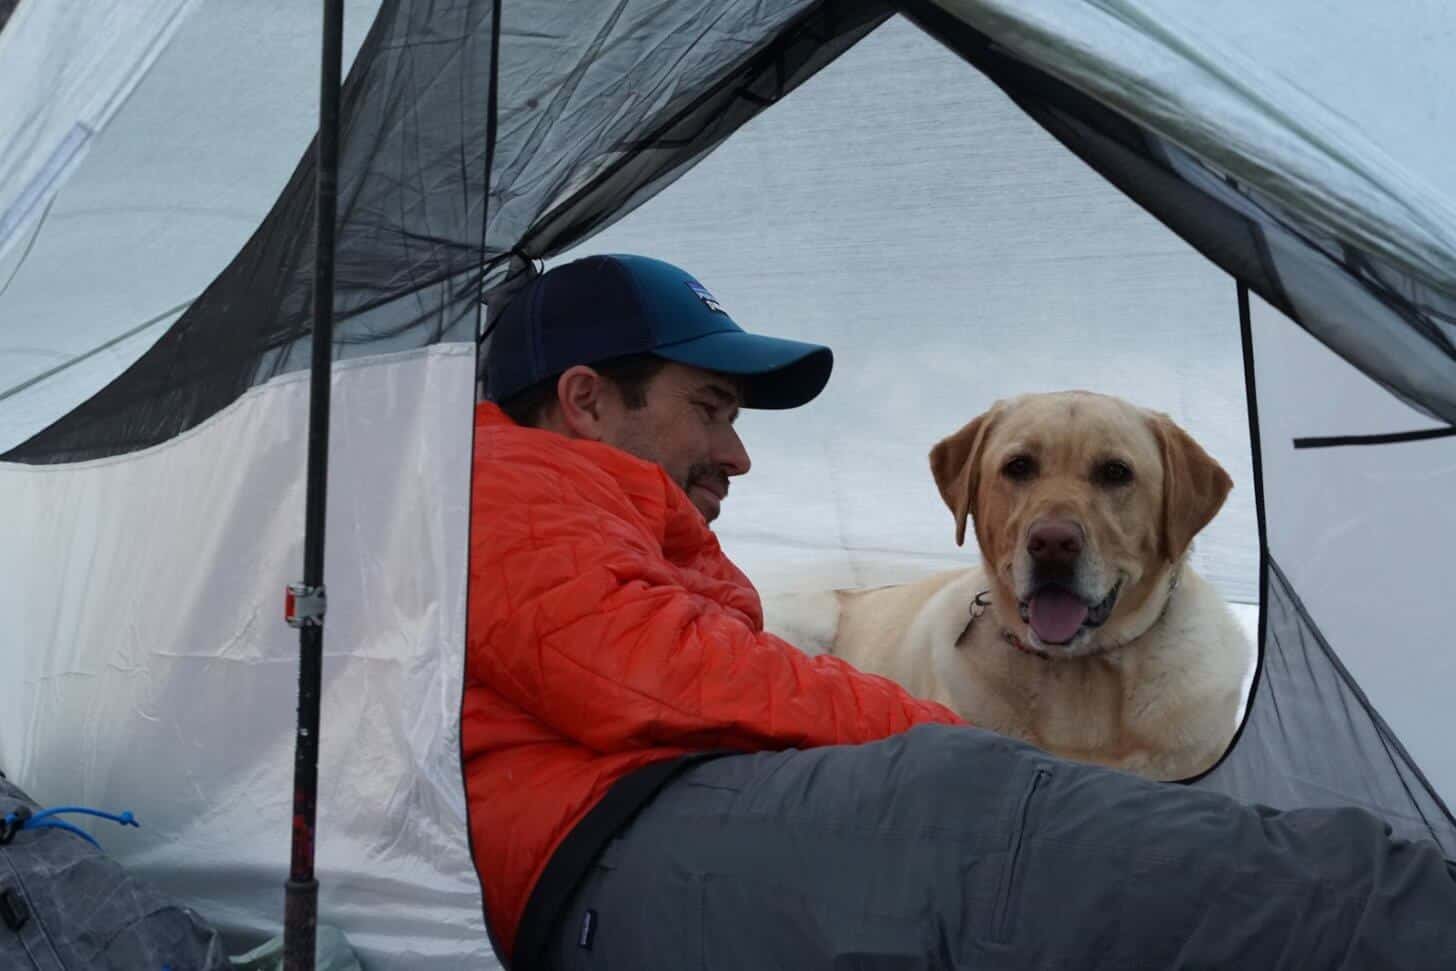
Two vestibules and entrances also allows me to save one side for the dog.
#BigSkySierra is happy enough in the vestibule as long as she can hang with me through an open door but when the weather hits, her backside needs to somehow fit inside, too. The Tarptent Notch Li vestibule isn’t big enough for a 95-pound labrador retriever, so keep that mind if you need this tent to accomodate your furry friend.
Design Geometry and Pitch Tautness
The Tarptent Notch Li features a catenary ridgeline, dual trekking poles for support, two PitchLoc corners, only four required stake-out points, and of course, low-stretch DCF fly fabric.
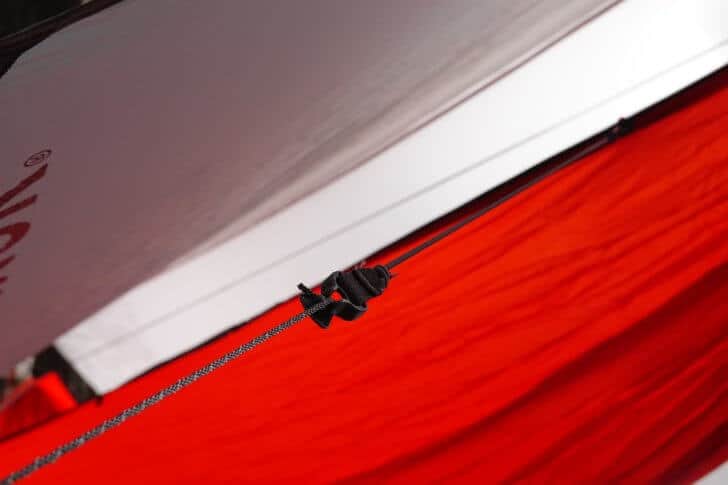
The aggressive catenary ridgeline is a good idea on the Tarptent Notch Li, but don’t expect to take advantage of its stabilizing properties unless you add guylines to the ridgeline Linelocs (shown in foreground), which effectively makes this a “6-stakes-required” shelter for inclement weather involving high winds or snow loading.
These design elements check off all the right boxes to make the Tarptent Notch Li a stable, taut shelter that maximizes wind resistance, and minimizes collapse in response to snow loading.
The result is a shelter that I can confidently rate as a 3+ season shelter. Having used the silnylon version of the Notch in snowy fringe-season conditions, I can’t say that it’s a shelter I’d recommend for any amount of snow. Silnylon simply has too much stretch, and more structure is needed to support it under even a small snow load. For any conditions where snow is expected, and I had to use a silnylon shelter, I’d upgrade to the Tarptent Stratospire 1 model, which offers additional stability afforded by more fabric stability resulting from an increased number of stake-out points.
Construction Quality
My beef with DCF / Cuben Fiber shelter construction quality goes back a long time.
DCF is expensive. Construction quality and attention should match it.
When I first introduced Cuben Fiber tarps as part of the Backpacking Light Gear Shop back in the early-2000s, the first generation tarps were horrific. Back then, we all assumed that we could treat Cuben Fiber like any other fabric and call it good. Boy were we wrong. Ripped seams, ripped fabrics, puckered panels – it became a customer support nightmare and an engineering debacle. My Cuben Tarps were ridiculed for their lack of durability. And deservedly so.
I learned a few hard lessons very quickly:
Recalibrate the CAD software to consider the differences in stretch and bias vs. the fabrics we were used to building shelter flys with (silnylon, nylon, and poly).
Find the balance between needle size (make it smaller) and thread size (make it bigger) to minimize the catastrophic effects of thread cutting that was so prevalent with Cuben Fiber.
Orient the fabric bias (high strength threads which dominate in one direction over another) so that tensile strength resistance is consistent with the actual tensile forces exerted on the shelter in high winds.
Remove raw fabric panels that contained puckering (manufacturing defects) from the production line.
Never, ever – use Cuben in geodesic spherical panels. The math (lack of stretch) doesn’t work. Take note, Sierra Designs: you could have saved yourself a lot of heartache, cost, and embarrassment.
Study seam, edge, and corner bonding as if bonding was the Holy Grail, because it is.
After I pulled all Cuben Fiber production from our inventory and recalled tarps purchased by our customers, I went to work and studied Cuben tarp design in more detail, and we eventually produced the Stealth Zero and Stealth One catenary-ridgeline tarps – the first Cuben tarps available on-demand to a wide audience. They were decent – not awesome – but durable, bonded, unpuckered, and properly bias-oriented. And the 7×9’s were five ounces, man!
Shortly thereafter, other manufacturers started introducing Cuben Fiber shelters, including Locus Gear, Mountain Laurel Designs, and Six Moon Designs. LG and SMD’s early shelters suffered the same durability problems as our early tarps – inadequate bonding (or in one manufacturer’s case, none at all), giant needle holes, poor bias orientation, and puckered fabrics.
But I applaud their guts. They took on an innovative new fabric and went for it.
All the while, Tarptent remained absent from the Cuben Fiber shelter market. Chickens!
OK, maybe not chickens. Maybe Henry Shires (Tarptent owner/founder) was simply … staging.
Meanwhile, we saw Sierra Designs release the Cuben UFO, which seemed more proof of concept than practical execution of anything (floppy and flappy in even light winds). Terra Nova introduced the Laser Ultra 1, seemingly to break a Guinness World Record rather than provide something more usable than a bivy sack. And Brooks Range brought us the Rocket, which was the finest mountaineering tent I’ve ever used – but was pulled off the market for suffering UV damage that sent the manufacturer into “fear and withdrawal” mode.
So that brings us to the present day.
SMD has pulled back from Cuben Fiber / DCF. MLD has modified their bonding at seams and tie-out points over several iterations. Locus Gear has set a totally new standard with the new CTF-B Khufu – one of the most aesthetically beautiful, and strongest DCF pyramid-style shelters ever produced.
And now we have the Tarptent Notch Li.
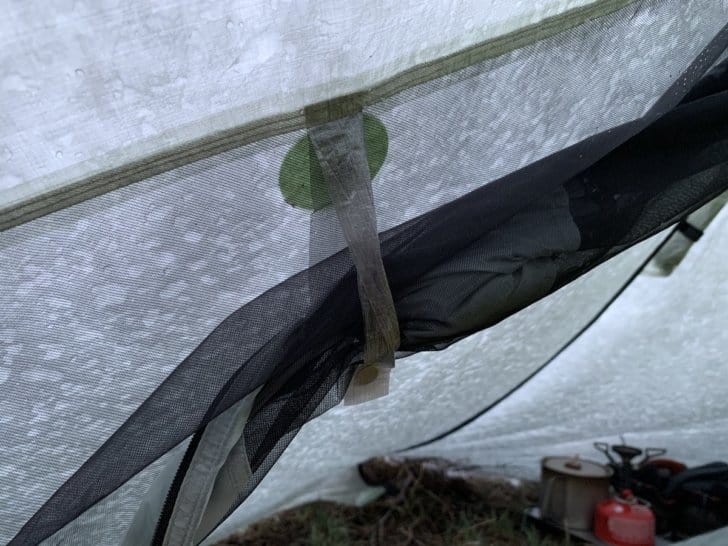
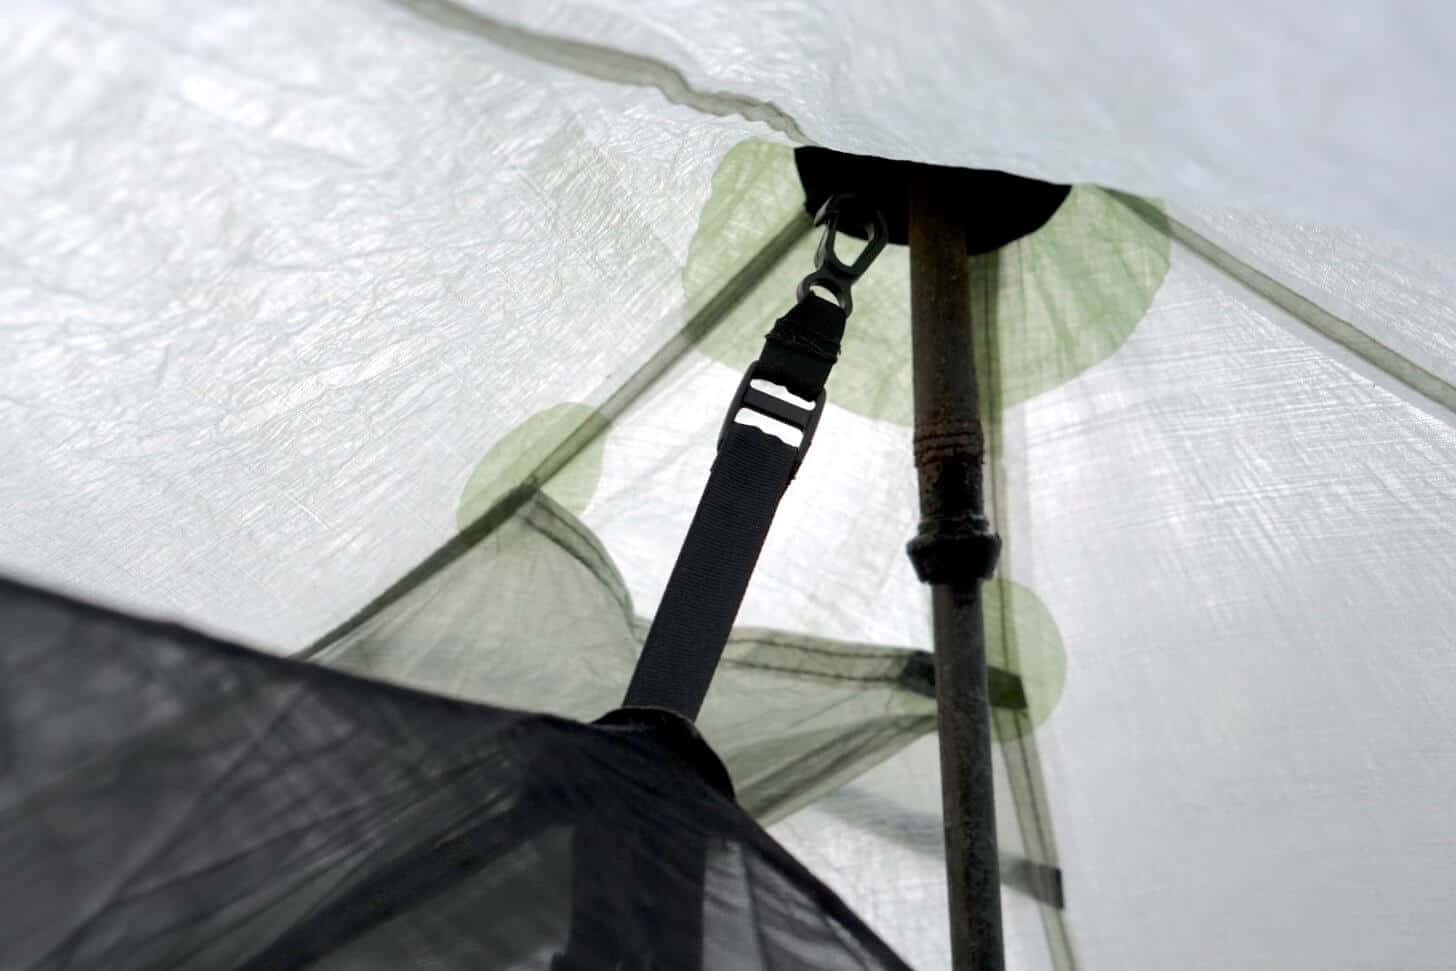
Look for bonded panels at every structural (tensile load-bearing) seam junction when shopping for a DCF shelter. Lack of bonded panels reveals the designer’s ignorance of how to properly design a shelter with DCF fabrics – these junctions are notorious for concentrating high stress as a result of tensile loads placed on the fabrics from tight pitching, high winds, or snow loading. This photo shows one of the ridgeline peaks of the Tarptent Lithium from the inside. The darker green areas indicate bonded reinforcement panels that help distribute stress at seam junctions. Well done.
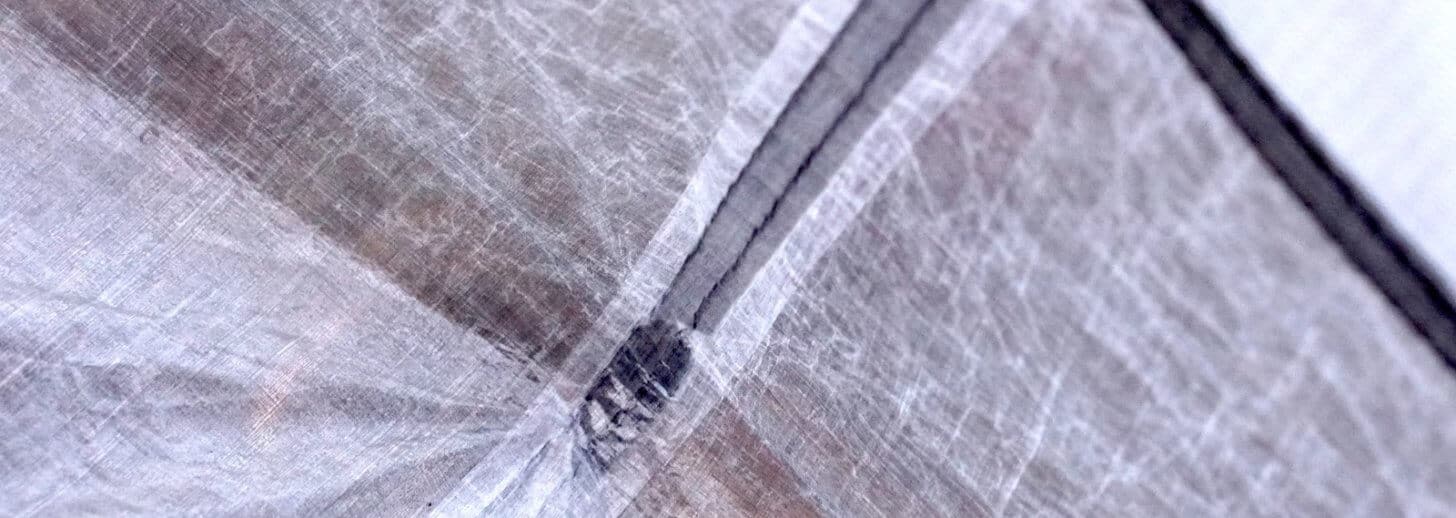
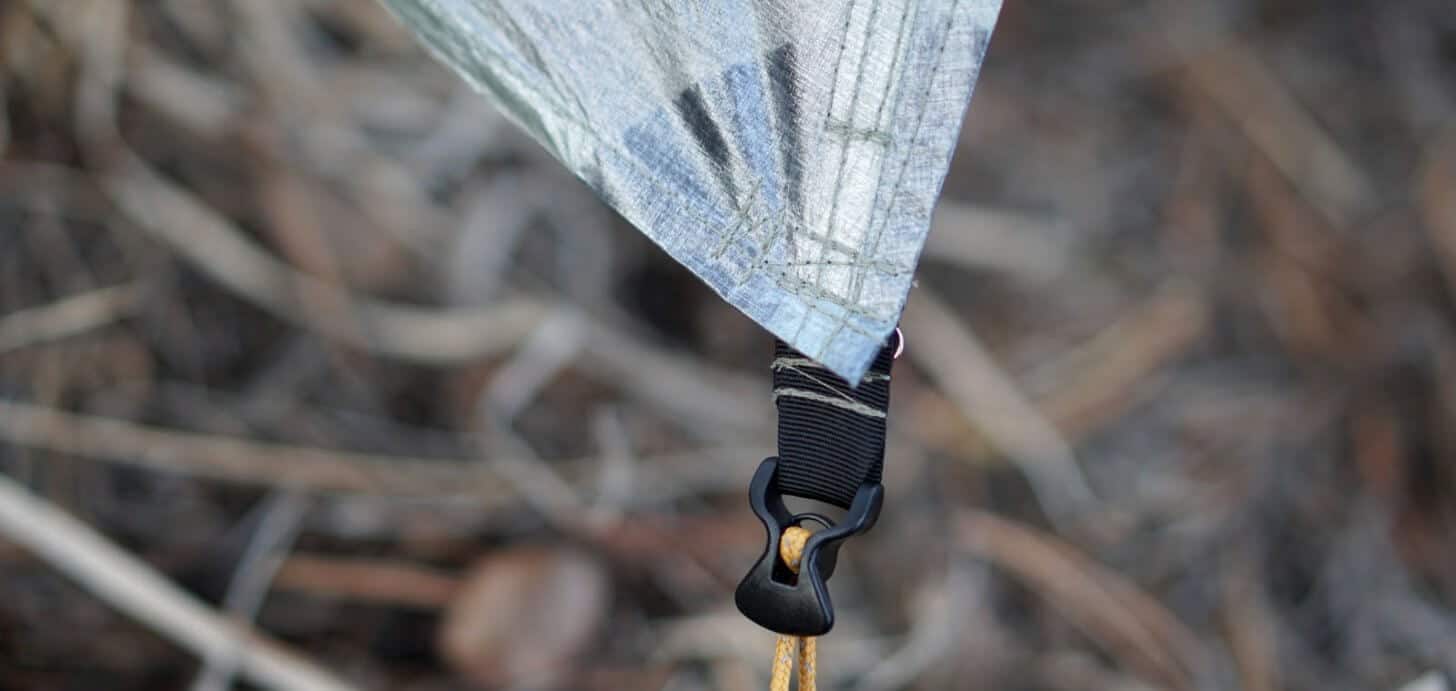
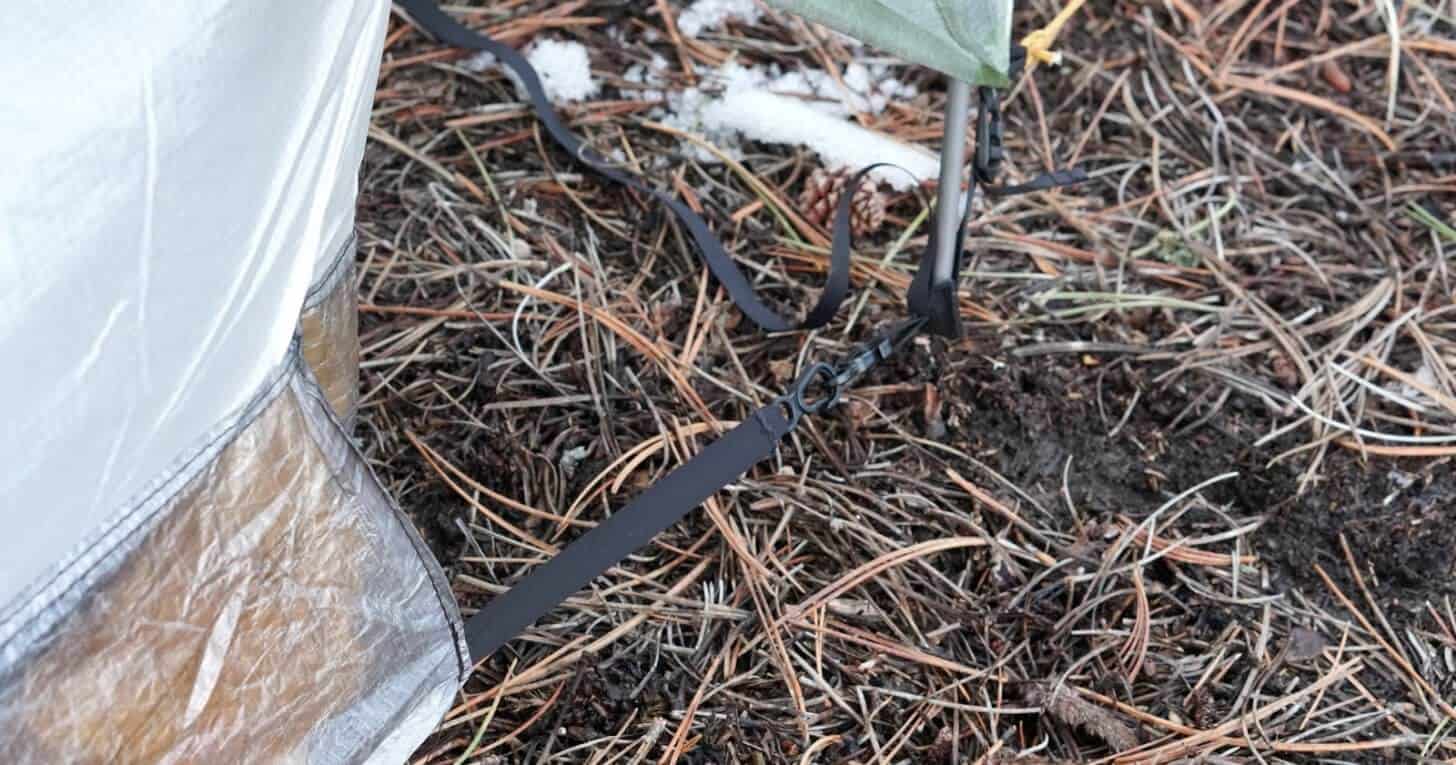
A common area of weakness in DCF tents is found where external tie-outs meet the shelter floor. Here’s a shot from inside the Tarptent Notch Li. The dark gray is a bonded reinforcement that secures the tieout sewing to the floor. As a bonus, the tieout cord is elastic, further reducing stress on the fabric.
The Tarptent Notch Li applies a bonded-then-sewn approach to adjoining DCF seams, which is reasonable. Just recognize that there is some controversy surrounding various DCF adjoining techniques. Sewing after bonding, most notably, introduces undesirable aesthetics, but probably no loss in strength vs. a sewn-then-bonded approach. And, because bonding can delaminate in cold temperatures, there is some legitimacy to the argument that a bonded-then-sewn approach results in a more durable, albeit a little bit uglier, seam.
A fly corner reinforcement is assembled using a bonded-then-sewn approach that reveals the aesthetic limitation of exposed, criss-crossing seams, but may preserve the security of the bonded tape in case of delamination in cold temperatures.
Snow-Loading Considerations
A relatively shallow roof pitch (about 30 degrees) doesn’t bode well for snow-loading. The Tarptent Notch Li will have to rely on the amount of tension that you use to engage those rooflines between the shelter’s peak (ridgeline) and the PitchLoc (carbon fiber strut) ends.
The good news is that the PitchLocs will keep the ends from collapsing, which is the main problem caused by snow loading of shelters where the corners and ends of the shelter go directly to guylines.
The PitchLoc corners and lower stretch of the DCF fly effectively make the Tarptent Notch Li a 3+-season shelter capable of handling a little bit of snow rather than a 3-season shelter.
Six Panel Geometry
The Tarptent Notch Li has four stake-out points (2 side, 2 end), and two ridgeline peaks. This creates a geometric shape comprised of six (generally triangular) panels (2 side panels on each side, and 2 roof panels).
This gives it some advantage over conventional one-pole pyramids (4 triangular-panel shelters), and quite a lot of advantage over shelters comprised of rectangular / trapezoidal panels (e.g., Six Moon Designs Skyscape, or conventional flat tarps – although tarp users can address this).
It is well known among tent designers that tension can be generated to a much higher degree in smaller triangular panels than in larger rectangular panels. Higher tension equals greater wind stability, better resistance to snow loading, and decreased condensation dripping.
Ventilation
Little tiny peak vents. Don’t expect any miracles.
The Tarptent Notch Li offers two tiny peak vents and two lower end vents. Don’t expect any condensation resistance miracles. The best thing going for the Notch Li is the fact that it’s made using DCF fabrics that remain taut in response to decreasing temperatures and/or precipitation during the night, and should accumulate less condensation than silnylon.
Lower vents on each end should provide much needed airflow on warm nights, especially when combined with opening the fly doors. When combined with the tiny peak roof vents, will they help resist condensation on cold nights? Time and testing will tell, I suppose.
Magnetic Fly Closure Thingys
I’m not a fan of gimmicks.
I tend to be pretty conservative when it comes to design: use what works, and stop futzing around with it.
That’s what I was thinking when I discovered the *new and improved* Tarptent Notch Li tent fly retainer thingys (you know, what is usually some type of hook-and-loop or elastic toggle mechanism for retaining a rolled-back fly).
It was magnetic.
My first response was, “Oh, Lord, no.” I think I saw this on purse closures at the Nordstrom Rack the last time I went on a shopping date with Stephanie. I just hate to see her get pickpocketed. I like the sound of Velcro’s RRRRRR-R-R-I-P – it’s a good alarm system.
And my gut feeling was sort of validated when I realized that this little magnetic mechanism doesn’t work that well on the Notch Li.
I’ll get to its limitations in a second, but I have to admit that the idea is worth refining.
I like not having to hear the RRRRRR-R-R-I-P of Velcro when I’m trying to enjoy the peace of natural sounds in the backcountry. And fiddling around with elastic cord and toggles with cold fingers? No thanks.
In that context, the magnetic retainer is sounding pretty good right about now.
It just needs a little better execution:
Longer tabs, so you’re not trying to secure so much rolled up fabric with such a short length of fabric – it’s too tight.
A tab extending beyond the magnet, so you can operate it more easily with gloves or mittens, maybe? I did like the ability to “brute-force” the whole thing and just “tear it down” without fear of ripping out any seams, so maybe that’s OK as is.
A stronger magnet would keep things more secure. I found the magnet popping loose quite a bit, especially when the shelter was pitched very taut.
Not a deal breaker for me. I like the idea. It could be improved.
Inner Tent Options
The Tarptent Notch Li comes with a few different inner tent options:
All mesh body, 1.0 oz/sq. yd. DCF floor. This is the lightest version, best for most temperate-climate hikers who simply want insect protection and the feeling of coziness that comes from sleeping inside an inner tent.
All mesh body with a silnylon floor. A little heavier, this is for the crowd who thinks that silnylon floors are better than DCF floors (they probably aren’t). DCF floors are easier to repair, result in less condensation accumulation, and are less slippery.
Partial solid fabric (breathable nylon, uncoated) interior with a DCF (or silnylon, presumably) floor. Best for hikers who want additional windblown dust / snow protection, or a little extra warmth.
My personal pick is #3 for sand resistance in desert winds, and spindrift (snow) resistance for winter trekking. It also affords a little more privacy if you’re camped in a crowded camp in warm conditions and want to keep your fly doors open.
Vestibule Function and Space
The Tarptent Notch Li features two vestibules, which is great for organization, cooking, or stowing a dog.
The vestibules aren’t small, but they’re not huge. They big enough to stow my 90-L McHale expedition backpack, but too small to comfortably stow my 95-pound labrador retriever without her wanting to encroach on my turf inside the tent.
Fly doors that protect the vestibules are brilliantly designed with overlapping shingles secured by hook-and-loop patches and a neat little plastic loop-and-metal-hook gizmo at the bottom of the door. Like most other door security contraptions, this one is also a pain in the neck to use while laying inside the tent, it’s dark, wind and rain are starting to blow, and your fingers are cold.
The door closure clip. It requires more precision than I’m capable of giving when I’m tired and cold and I’m inside the tent.
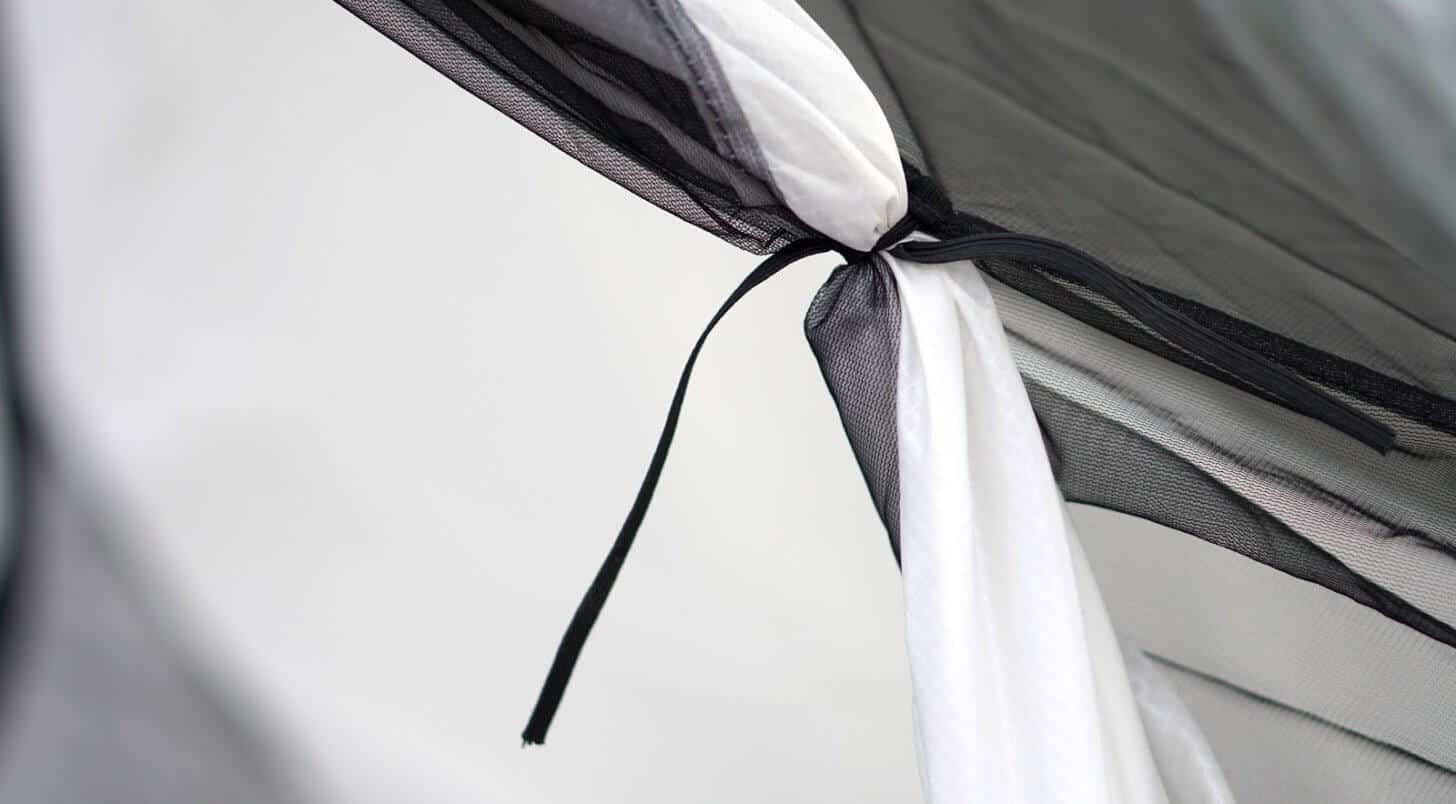
Conventional elastic ties secure the rolled-away inner tent door. That works for me, but they’re hard to untie. There must be an innovation in the making in the dark recesses of some designer’s mind out there: how can we retain rolled-up-tent doors, and release them, with cold fingers in the dark? For now, I’ll try to stick with a quick-release slipknot loop instead of an overhand knot.
Securing the Inner Tent
The Tarptent Notch Li is a European-, and not an American-style tent.
Don’t worry, #maga fans, that’s actually a good thing!
You see, in America we have this view that “whilst” backpacking the sun always shines. Therefore, we can casually pitch our meshy inner tent, go brew a coffee, and then, when the occasion strikes us, we can decide to pitch our fly over it and retire to bed “when convenient” (a phrase we Americans really love).
In Europe, however, and the UK specifically, the situation is often different.
One arrives in camp in a mild gale, signaling an oncoming storm. It is then when tea is brewed and enjoyed.
But by the time the tea is half finished, the gale has given way to sideways driving sleet and graupel. Thus the Brit must erect the tent fly first, and then crawl under it to escape, and finish his tea.
After finding some solace that comes with refuge under the fly, the Brit (or Scot) can then “clip” the inner tent into the fly, and enjoy the dry inner tent accordingly.
Let’s take a look at the American, on the other hand, in a similar scenario.
Upon arrival to camp in a gale, the American is already in tears, claiming “this is the worst storm ever experienced in American history!” Regardless of wind speed, of course.
Then the American will pitch the inner tent of their American-designed shelter, through which its meshy-ness will permeate all precipitation falling from the sky, soaking the inside fully.
Still crying, the American will haphazardly toss the fly over the inner and spend the next forty minutes suffering mightily trying to get the fly tight, the floor mopped, and the ego revitalized, while composing an Instagram selfie to publicize the suffering.
I know this routine, because I’m an American, and I’ve experienced all this hoopla.
And I’ve hiked with Brits, and while I have a little disdain that they actually know more than us about tent design, I get pretty excited about tents that can be pitched “fly-first”.
The Tarptent Notch Li is just such a tent – whew!
In mild weather, you can leave the inner tent attached to the fly. In inclement conditions, however, you might consider leaving the two detached. Then, you can simply pitch the fly first and take refuge.
When you’ve finished your first cup of tea and have enjoyed a change of clothes and some gear organization, you can pitch the inner tent and crawl into it dry, all the while under the protection of the fly.
As shown above, the inner attaches to the fly using mitten hooks and elastic bands. The process of attaching the inner tent to the fly is pretty easy while sheltered under the fly, and requires no major body contortions (assuming you’re under the age of 40). It is easier, however, if you leave both inner tent doors open, so you can reach through the doors to access the various attachment points.
The corners of the inner tent attach to the PitchLoc struts via mitten hooks and grosgrain webbing.
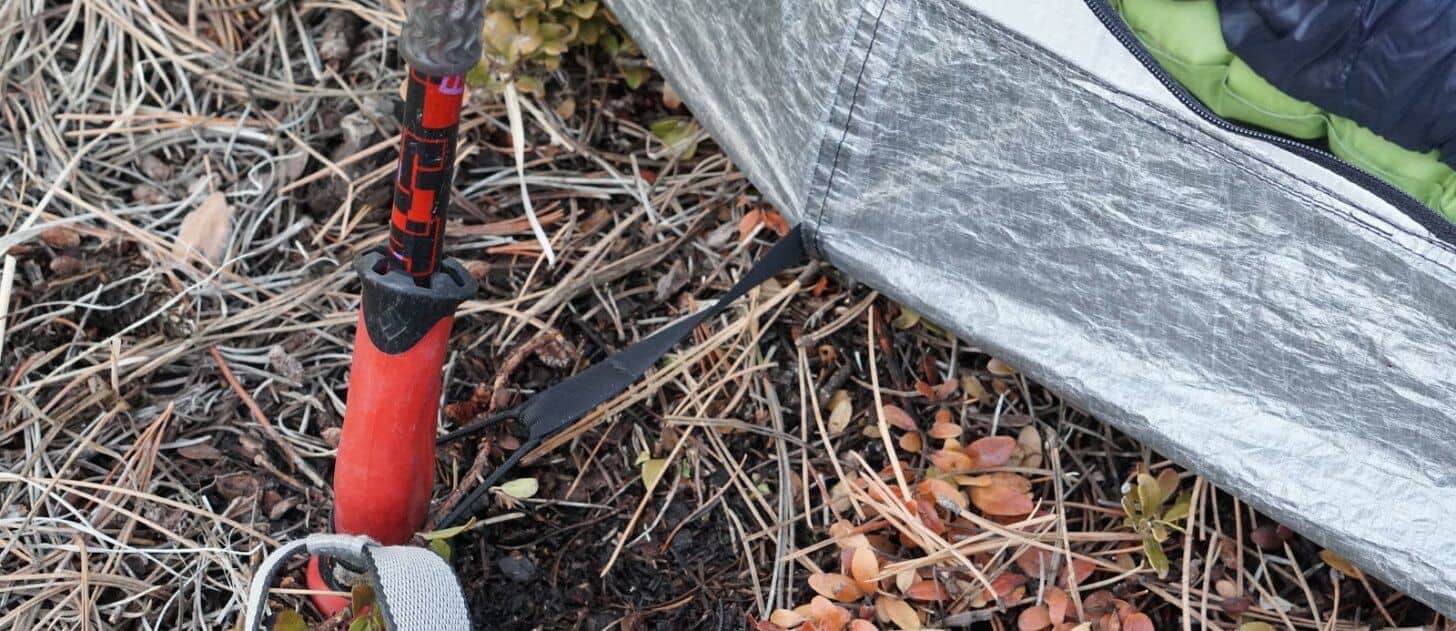
The side edges of the inner tent attach to the trekking pole handle via a grosgrain ribbon tab attached to an elastic shockcord loop.
Headroom
I’m not tall – 67 or 68 inches on a good day. The Tarptent Notch Li offers plenty of headroom for me. A 74 inch human shouldn’t brush his head on the roof (too much), but if you’re any taller than that, you’ll probably need a shelter with an inner tent headroom of at least 45 inches. The Tarptent Notch Li offers 43 inches.
Other Features
Mitten hooks on the inside of the inner tent, at the ridgeline, allow you to connect a cord for clothes drying or hanging a tent light.
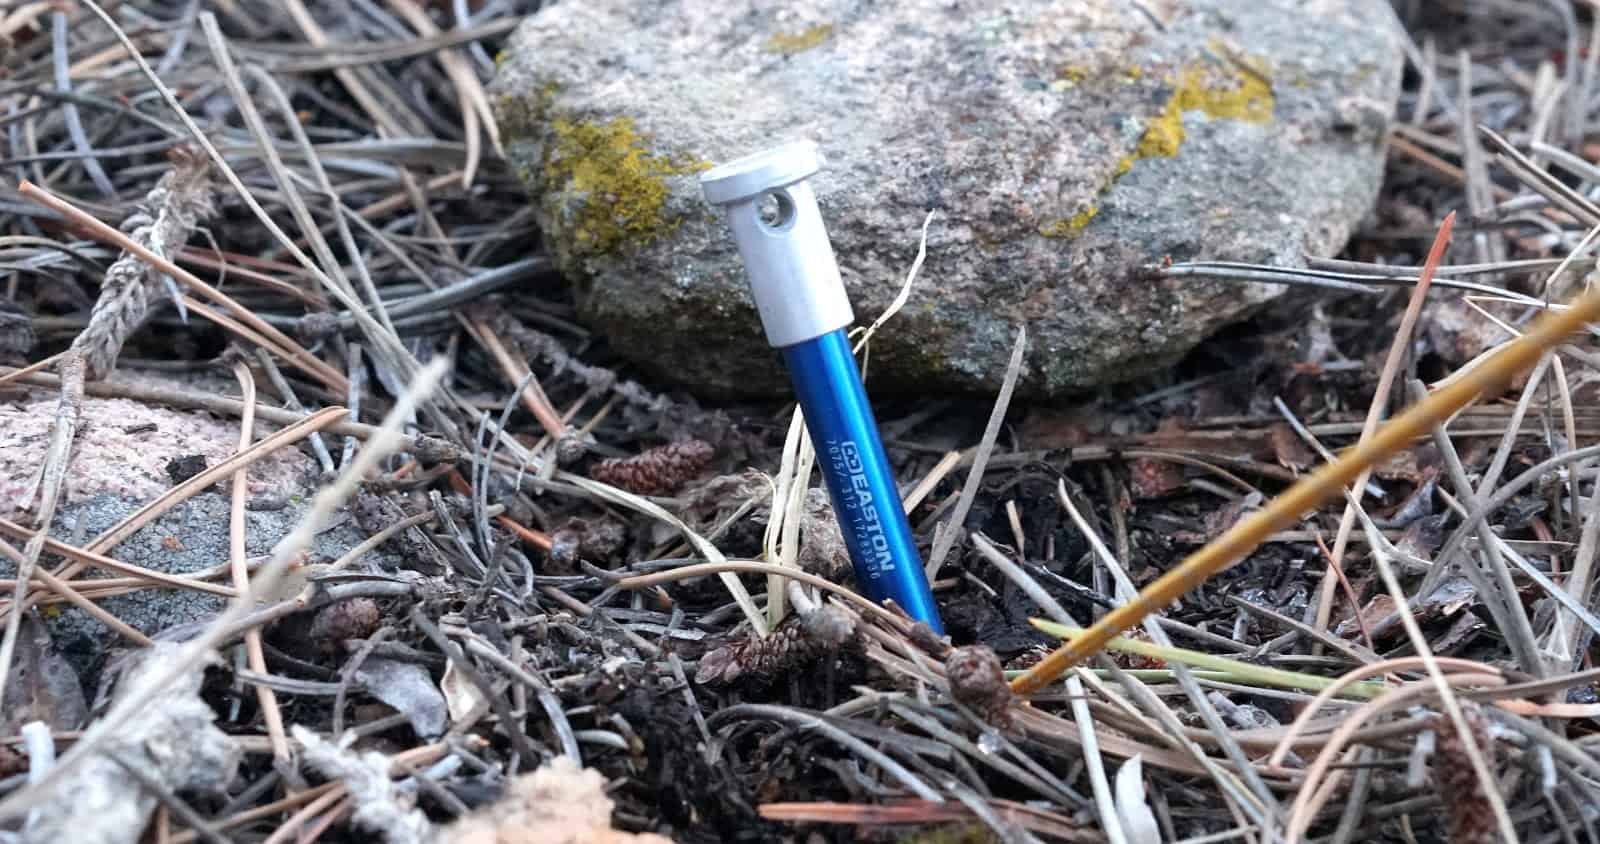
The Tarptent Notch Li ships with four (4) Easton 7075 tubular aluminum stakes. You’ll want to purchase two more, plus accessory guylines, to secure the ridgeline for more inclement weather.
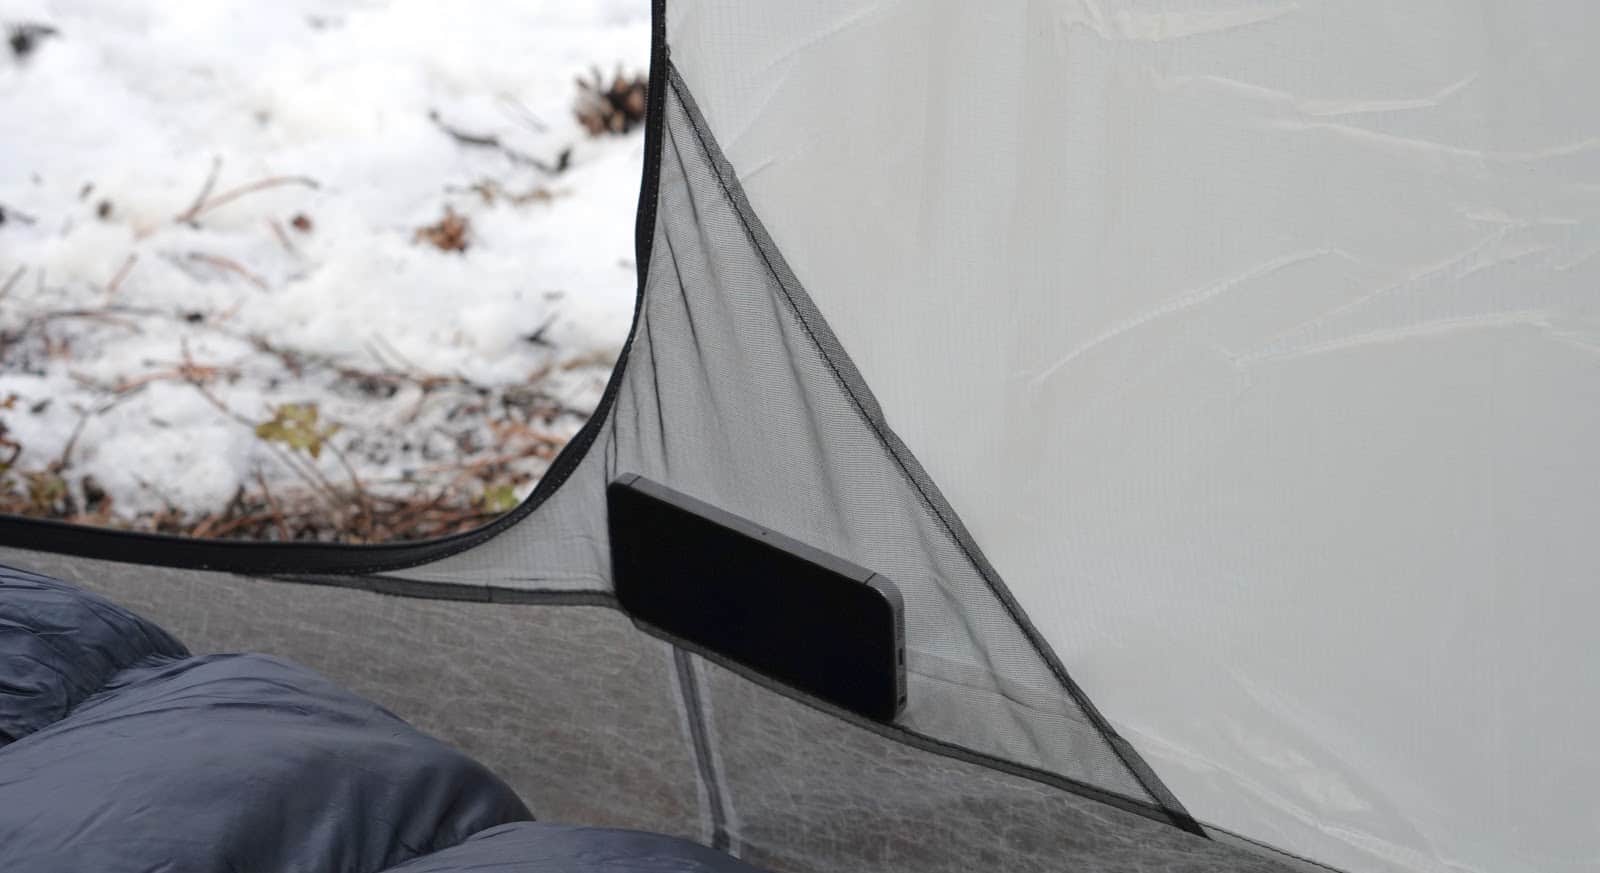
Two interior stash pockets are big enough for accessories. Shown is an iPhone SE for reference.
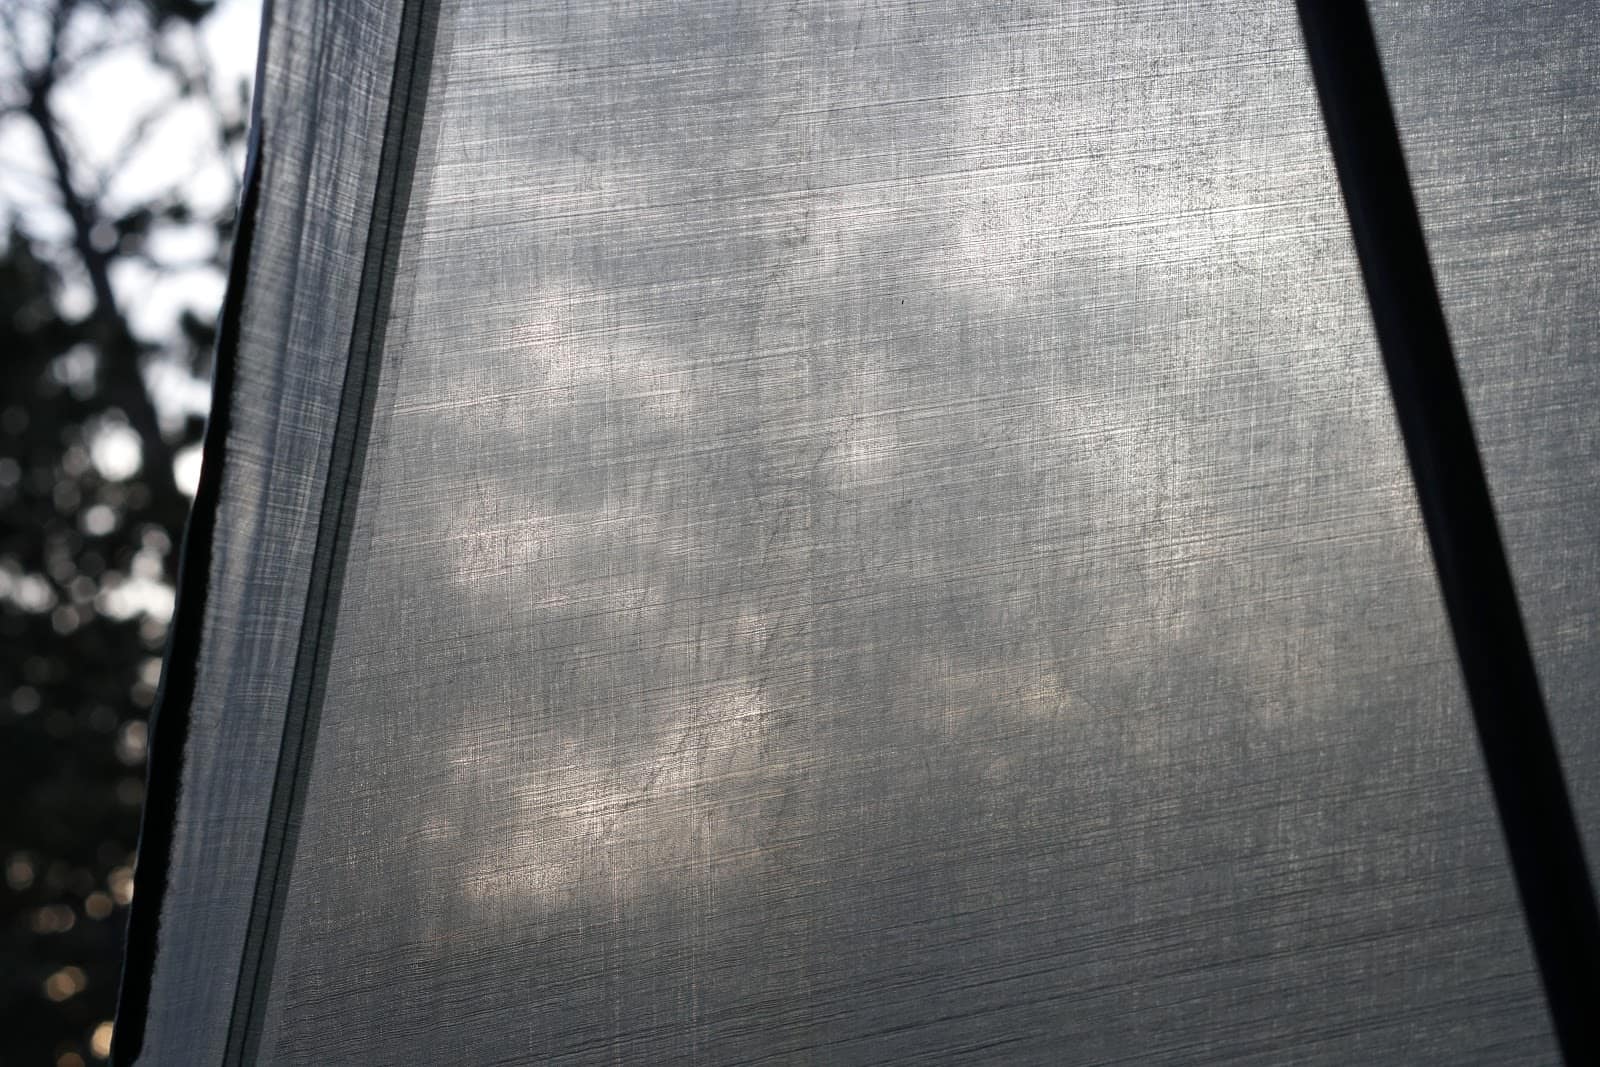
One of my favorite features of DCF fly fabrics is its translucency. It makes me feel closer to nature.
Compared To
If you’re shopping for a solo tent, consider the Tarptent Notch Li in context with these options:
Tarptent Notch Silnylon
Compared to the Tarptent Notch Li, the Tarptent Notch (silnylon version) is:
$285 cheaper;
7 oz heavier;
More condensation-prone;
Less resistant to snow-loading;
More likely to sag during cold rain / temperatures.
Tarptent Stratospire 1
Compared to the Tarptent Notch Li, the Tarptent Stratospire 1 is:
$290 cheaper;
16 oz heavier;
More wind- and snow-resistant;
More condensation-prone;
Larger footprint, but larger inner tent and larger vestibules;
More likely to sag during cold rain / temperatures.
Sierra Designs High Route FL1
Compared to the Tarptent Notch Li, the Sierra Designs High Route FL1 is:
$300 cheaper;
17 oz heavier;
Larger footprint, but larger inner tent and larger vestibules;
More wind- and snow-resistant;
More condensation-prone;
Has a lower level of construction / finish quality;;
More likely to sag during cold rain / temperatures.
Sierra Designs High Route FL1, Absaroka-Beartooth Wilderness, Montana.
ZPacks Solplex
Compared to the Tarptent Notch Li, the ZPacks Solplex is:
$45 cheaper;
Narrower and shorter;
Taller;
4 oz lighter;
Less storm resistant.
Six Moon Designs Skyscape Trekker
Compared to the Tarptent Notch Li, the Six Moon Designs Skyscape Trekker is:
$255 cheaper;
7 oz heavier;
Has smaller vestibules;
Is less stormworthy;
Has a lower level of construction/finish quality;
Less wind/snow resistant;
Less condensation resistant.
Gossamer Gear The One
Compared to the Tarptent Notch Li, the Gossamer Gear The One is:
$300 cheaper;
1 oz lighter;
Has a larger interior floor space;
Has one larger but one much smaller vestibule;
Less wind/snow resistant;
Less condensation resistant.
Summary
My first impressions of the Tarptent Notch Li are positive.
There are few shelters in its weight class that offer the following options:
Dual trekking pole support for stability;
Dual side entrances and vestibules for gear organization, views, and usability;
Fabrics that are more condensation- and stretch (temperature)-resistant than silnylon.
In fact, there are only three. The Tarptent Notch Li, the ZPacks Soloplex, and the Gossamer Gear The One. They all range from about 19 oz to about 21 oz in weight.
However, the Tarptent Notch Li stands out even from both of those, due to a symmetrical design that allows for greater versatility, a six-triangular panel pitch that offers better stability, and of course, Tarptent’s unique PitchLoc carbon fiber strut system which improves both stability and usable space.
Disclosure
Backpacking Light has no financial affiliation with Tarptent. This is an independent review of a product owned by Backpacking Light, and Tarptent did not provide this product with any expectation or contractual obligation for a review.
The REI Flash Air 1 is a 1-person, hybrid-wall (single/double) tent that can be pitched with a single trekking pole and weighs 20 oz.
The REI Flash Air 1 Tent entered our gear review queue last week, so we took it on its maiden voyage Sunday to become familiar with it.
This is a first look at new gear that recently entered our review pipeline, and hasn't yet been subjected to rigorous field use. Learn more about the types of product reviews we publish.
This is a 1-person, hybrid-wall (single/double) tent that can be pitched with a single trekking pole.
Highlights:
Stake-out points: 2 in front, 2 in rear, 1 vestibule
Guyline options: rear peak strut, back side, peaks (2), front top (2), rear top (2).
Weight: 20 oz (minimum)
First Impressions:
I found it to be surprisingly roomy, but I’m not a big guy. The pad in the photo is a 20×72 Uberlite.
With all of the guylines attached, wind resistance is excellent for a 20 oz tent, but not in a conventional way. It buffets a lot in high winds, so the structure moves quite a lot. However, it doesn’t seem to flap excessively, and it remains well-tensioned. In addition, high winds don’t seem to deliver much force back to the tent stakes (I’m guessing here, I’ll try to verify with our guyline force measurement sensors later). Instead, the structure’s resiliency (sort of akin to elasticity) distributes the brunt of the forces. The slightly bendy stock vertical pole hooked into the arch pole probably helps with this. Maybe a trekking pole would make this a “stiffer” structure but that *may* actually cause more flapping. We’ll see!
Lack of structure means you can’t pull a lot of tension force into the guylines without disrupting the shape negatively.
The 100-pound dog won’t fit into the vestibule very comfortably.
Acknowledgments: Thanks for taking the photos, Stephanie (my wife). I’m grateful to be social distancing with you during the Covid-19 pandemic.
Questions? Hit me up in the forum below and I’ll do my best to answer them based on what I know so far about it.
DISCLOSURE (Updated April 9, 2024)
Product mentions in this article are made by the author with no compensation in return. In addition, Backpacking Light does not accept compensation or donated/discounted products in exchange for product mentions or placements in editorial coverage.
Some (but not all) of the links in this review may be affiliate links. If you click on one of these links and visit one of our affiliate partners (usually a retailer site), and subsequently place an order with that retailer, we receive a commission on your entire order, which varies between 3% and 15% of the purchase price. Affiliate commissions represent less than 15% of Backpacking Light's gross revenue. More than 70% of our revenue comes from Membership Fees. So if you'd really like to support our work, don't buy gear you don't need - support our consumer advocacy work and become a Member instead.
Learn more about affiliate commissions, influencer marketing, and our consumer advocacy work by reading our article Stop wasting money on gear.
There are many good motives for altering equipment. Mostly we focus on reducing weight, fixing problems, or adding features. Here are a few more reasons.
Introduction
Decades ago I read Ray Jardine’s The PCT Hikers Handbook. One of my biggest “aha” moments was realizing that it’s OK to modify the gear I own, and often a good idea. Since then, I’ve reworked backpacks, bottle caps, hats, headlamps, jackets, pods, ponchos, pots, recorders, shirts, shoes, shorts, sleeping bags, sleeping pads, spoons, stoves, stuff sacks, tents, thermometers, toothbrushes, umbrellas, and water filters – almost everything I wear and carry. Today, modding your stuff is popular in the lightweight, UL, SUL, and XUL backpacking communities.
There are many good motives for altering equipment. Mostly we focus on reducing weight, fixing problems, or adding features.
Here are a few more reasons.
Simplicity
Photo credit: Andy Cattoir, National Park Service. [Note: All photos in this story are public domain.]
“Everything should be made as simple as possible, but not simpler.” – Albert Einstein
If you don’t need it, remove it. If you can’t remove it, simplify it.
For every doodad you remove or simplify, that’s one fewer thing to snag on brush, or tangle in other gear, or get in the way while you are looking for something else, or chafe in sensitive spots, or whatever.
I’ve removed ice axe loops from new packs for decades and don’t miss them. Same with most compression straps. I’ve trimmed extra-long hip belts to fit me while wearing warm clothing. Less strappage flapping in the wind, getting dirty, etc.
If you aren’t going to add optional poles to your tent, cut off the loops and hooks. Ditch the tiny key ring and toothpick on your Swiss Army knife if you don’t need them. Many people value the simplicity of lightweight backpacking as much as carrying fewer grams.
Reliability
Photo credit: Ed Austin/Herb Jones, National Park Service.
“Simplicity is prerequisite for reliability.” – Edsger Dijkstra.
It can’t break if you didn’t bring it.
Why be disappointed when something fails in the wilderness, when you didn’t need it or want it in the first place? You’ll be especially sad if that useless tchotchke breaks something else as it fails. Remove it now, so it can’t malfunction later.
Cleanliness
Photo credit: Eric A. Hegg.
“Man and other civilized animals are the only creatures that ever become dirty.” – John Muir
If it’s not there, it can’t get dirty.
Some people are proud of their dirty gear. Others see value in clean gear. If you remove that strap, it can’t get dirty, and it can’t get other things dirty.
Ownership
Photo credit: Brendan Collins, U.S. Navy.
“Ownership is the most intimate relationship that one can have to objects.” – Walter Benjamin
If you mod it, it’s yours.
By modifying your gear, you put your mark on it. It looks different from everyone else’s. You’ve spent time and possibly money changing it. You could add a patch for your favorite sports team, national park, or environmental cause. You might add something light and whimsical to the peak of your shelter, so it stands out in a sea of grey and green silnylon. You could add your trail name or avatar to the back of your pack. But after your mod, you can’t hop onto the Internet and order another one just like it in 30 seconds. And now that it’s yours, you’ll take better care of it.
Education
Photo credit: John Linzmeier, U.S. Air Force.
“Anyone who keeps learning stays young.” – Henry Ford
To mod it, you must learn how.
You shouldn’t begin making your own gear by sewing a hooded, baffled down jacket with zippered pockets and elastic closures. It’s much easier to start by removing sewn-on logos, since seam ripping is a critical sewing skill. Simpler tasks build abilities and confidence for more complex projects.
Let’s say a bear ripped an unwanted four-foot opening in your tarp, three days from the nearest trailhead, and the rain hasn’t stopped. You have two feet of repair tape, a needle, and some dental floss. Luckily, you learned some sewing skills while adding a beak to that tarp, so you stay calm and fix the problem.
Photo credit: SpaceX.
Beauty
Photo credit: NASA.
“If pure gold were liquid and could raise a cream, that golden cream might be like the color of the poppies.” – John Steinbeck, The Grapes of Wrath
If it’s ugly, remove it or change it. If it makes you happy, add it.
I don’t want to be a walking billboard, so I remove logos and tags whenever feasible. I’ve even used a permanent marker to blot out branding. The look of diagonal compression straps on one backpack bugged me for years, until I figured out how to replace them with one better looking and slightly more functional binding. You could draw a grinning sun or a bunch of flowers on your pack or shelter – if that makes you or other trail users smile.
Conclusion
This isn’t about making long lists of favorite gear mods, or the wisdom of any particular change. It’s just a reminder that we can alter equipment for many reasons besides adding features, fixing problems, or dropping weight.
What are some of your uncommon motives for modifying gear?
The Biolite Headlamp 200 (1.75 oz /50 g, $44.95) is a USB-rechargeable headlamp with a unique design that makes it very comfortable and stable.
Introduction
The Biolite Headlamp 200 (1.75 oz /50 g, $44.95) is an ergonomically designed, competitively priced, feature-rich, rechargeable headlamp. Minimal stitching, careful-material selection, and an easy-to-use adjustment mechanism pair with the Headlamp 200’s weight to make it attractive to anyone seeking a functional, comfortable, economical option over a more powerful, chunky design.
Photo: Biolite.
About this Review
A wide lycra head strap and curved backing make the Biolite Headlamp 200 comfortable and stable while in motion.
This Limited Review is based on my initial testing of the Biolite Headlamp 200, over about ten days of day hiking, trail running, and overnight backpacking in the Tahoe region of the California Sierra in February and March.
Features & Specifications
weight: 1.75 oz (50 g)
MSRP: $49.95
max output: 200 Lumens
modes: Dimmable white spot, white strobe, dimmable red flood, red strobe
brightness memory
lock mode
battery:
charges with micro-USB
700 mAh lithium-ion
low: 40 hours
high: 3 hours
water resistance: IPX4
adjustable elastic band
die-cut, layered fabric head strap with minimal stitching
tiltable front panel
comes in grey, green, blue, and red
Performance Analysis
The Biolite Headlamp 200’s spot feature is only available in white, while the flood feature is only available in red. Both modes are dimmable to a customizable level of brightness, and the headlamp’s memory feature retains your brightness setting between uses. Illustration: Biolite
Since this is a Limited Review, I will not present a detailed performance analysis based on long-term use. Instead, I’ve noted performance observations and issues below.
Criteria
Observations and Issues
Beam Pattern and Brightness
The Biolite HeadLamp 200 features a spot mode in white and a flood mode in red. At maximum brightness, the spot mode is 200 lumens. The brightness and spread pattern are more than enough for camp chores and night-hiking on trails and moderately technical terrain. I’ve also used it for nighttime trail-running on unevenly compacted, icy snowmobile paths and while cycling at night. The HeadLamp 200 is slightly too dim to be ideal for these purposes.
Comfort and Adjustability
I found the Biolite Headlamp 200 to be the most comfortable headlamp I’ve ever worn. This comfort springs from three sources: the curved, ergonomic backing paired with low profile electronics, a die-cut lycra fabric on the head strap (very minimal stitching), and a tensioning system that distributes pressure evenly around the skull (as opposed to one side or the other).
Weight and Price
At 1.75 oz (50 g) and $44.95, the Biolite Headlamp 200 is one of the lightest rechargeable headlamps available (though products like the Nitecore NU 25 have 160 more lumens at a lower price for only slightly heavier weight). There are a few rechargeable headlamps, like the Petzl BINDI, that are slightly lighter at identical lumens. The BINDI is $15 more expensive than the HeadLamp 200.
Usability
The Biolite HeadLamp 200’s dimming capability sets it apart from other rechargeable headlamps. I found the ability to dial in brightness precisely for a given task (as opposed to having to choose between two or three presets) valuable when moving over different types of terrain and doing different kinds of tasks around camp.
Additionally, while some headlamps are designed to be able to tilt up while wearing them around the neck, the Biolite HeadLamp 200 can only tilt down. According to Biolite engineers, the Biolite Headlamp 200 didn’t need the ability to tilt up because it is expressly designed to be comfortable enough for long-term wear around the head.
The Biolite Headlamp 200 sports a dual-tensioning system, one-button mode cycling, and a locking function - features that are relatively ubiquitous on modern headlamps.
Battery Life
Biolite’s claimed battery life for the HeadLamp 200 is 3 hours on maximum brightness and 40 hours on minimum brightness. The HeadLamp 200’s dimming capabilities mean the average user will likely experience battery life somewhere between these two extremes. I tested battery life claims at max brightness while hiking and trail running, and found the 3-hour claim to be accurate to plus-or-minus ten minutes depending on the ambient temperature.
Recharge Time
I was able to consistently re-charge the Biolite HeadLamp 200 from empty to full within 2-3 hours using a 20,000 mAh portable battery pack (depending on temperature).
Quality of Materials and Construction
The Biolite HeadLamp 200 is well-constructed of quality materials. The backing is particularly impressive and feels sturdy but soft against the skin. The charging cable slides in and out of the charging port easily, but the rubber flap that covers this port often requires a little extra manipulation to get it to lay flush again.
Durability
I subjected the Biolite HeadLamp to the kind of shocks you’d expect during normal operation - namely drops on mixed-terrain surfaces from three-to-six feet and jostling around inside a pack during the day. As expected, it held up perfectly well to these rigors.
The Biolite HeadLamp 200 is rated for IPX4 water resistance - which means it is resistant to splashing water from all directions. This rating is common for headlamps of this type.
Commentary
The Biolite Headlamp 200 weighs 1.75 oz (50 g) and provides 200 Lumens of illumination for 3 hours, but its real strength is its comfort, stability, and dimming function.
What Makes the Biolite Headlamp 200 Unique
The Biolite Headlamp 200 is not the brightest rechargeable headlamp available, nor is it the lightest (though it comes close). While it is competitively priced and bright for its weight, it doesn’t provide the best lumen-per-dollar value. But the Biolite Headlamp 200 does have two features that set it apart from the expanding rechargeable headlamp crowd.
Comfort and Stability
Customizable Brightness Levels
Comfort and Stability
The electronic element of the Biolite Headlamp 200 is recessed inside a plastic and lycra compartment and tilts forward at adjustable angles.
To prepare for this review, I interviewed Mindy Abbruzzi from Biolite’s design and engineering team. From Mindy, I learned that the Biolite team turned to Nike’s high-end cleats for inspiration on the Headlamp 200 project. At first glance, shoes and headlamps may not have much in common. Mindy explained that her team was trying to accomplish a seamless integration between hardware (electronics) and soft-ware (fabrics) akin to how Nike integrates hard metal pieces and soft materials in their sports shoes.
The die-cut lycra head strap is stitched to the elastic band. This connection point (one on each side of the head strap) is the only instance of stitching on the Biolite Headlamp 200 – minimizing threads that could irritate or rub while in motion.
This focus resulted in two choices that make the Headlamp 200 so comfortable:
Material choice: layered die-cut lycra is just thick and stretchy enough to be soft but thin enough to allow some moisture to pass through. Utilizing non-woven fabric here allows there to be minimal stitching and, therefore, minimal rubbing or discomfort.
Low-profile electronic components sit flush inside a compartment with a broad, ergonomically-curved backing for superior stability in motion. This design choice effectively removes the cantilevered effect without having to overtighten the adjustment straps.
Customizable Brightness Levels
The other factor that makes the Biolite Headlamp unique in its category is its dimming function. With typical headlamps, I often find myself wanting to save battery by not using the brightest setting, but struggling to see clearly with the next-lowest brightness level. The Biolite Headlamp 200’s adjustable feature (available with both red flood and white spot modes) allows the user to dial-in a desired lumen level. Even better, a memory function retains that level after turning the light off and back on. One downside to this adjustability is that it might make it hard to guess how much battery life you have left (the Headlamp 200 does have a battery life indicator function, but I found it to be a little imprecise)
Compared To…
I wanted to compare the Biolite Headlamp 200 to another rechargeable headlamp of similar lumens, battery life, and weight. I chose the Petzl BINDI.
The BINDI weighs 1.23 oz (35 g) while the HeadLamp 200 weighs 1.75 oz (50 g).
BINDI
Brightness
Both headlamps have the same maximum brightness of 200 lumens
Tie
Battery Life (max burn time at highest and lowest available lumens)
The HeadLamp 200’s 700 mAh Lithium-ion battery will burn for 3 hours at max brightness while the BINDI’s 680 mAh battery will burn for 2 hours at max brightness. The BINDI has a lower minimum Lumen setting. This means it will burn for 50 hours at lowest output vs. the HeadLamp 200’s 40 hours
Tie
Features
Both headlamps have locking functions, red modes, strobe modes, and tiltable light panels. The BINDI’s light panel can tilt up while wearing the headlamp around the neck, while the HeadLamp 200 can only tilt down. The HeadLamp 200’s red and white modes are both dimmable for customized brightness levels, while the BINDI has four fixed brightness modes (one red and three white).
Tie (depends on your preferences)
Comfort
While both lamps feature ergonomically-curved designs, this curve is more pronounced on the HeadLamp 200. Additionally, the HeadLamp 200 has a more comfortable tensioning system and strap and is more stable on the forehead due to more surface area contact.
HeadLamp 200
Price
The HeadLamp 200 retails for $49.95 while the BINDI retails for $59.95
HeadLamp 200
Usability
Both headlamps have lock functions and similar one-button mode cycling. Both headlamps tighten from the back instead of the side, and both adjustment systems (while different) are equally functional and intuitive. Both lamps have the same level of water-resistance (IPX4)
Tie
Strengths
Comfort and Stability
Ergonomic, low-profile, streamlined design with wide backing for maximum surface area contact
Die-cut lycra fabric with minimal stitching for comfort
Usability
Dimmable red and white modes for dialed in brightness or battery life control
Brightness memory
Low-weight and low-profile design
Value
Competitively-priced
A wide, ergonomically curved backing made of soft fabric and an intuitive tightening system are two of the Biolite Headlamp’s strengths.
Limitations
Battery life
3 hours will not be long enough for anyone needing maximum brightness for night-hiking over difficult terrain
Brightness
200 Lumens will not be bright enough for anyone needing exceptional brightness for night-hiking in highly technical terrain
Issues of Interest for Backpacking Light Community Members
1. Is receiving packages from Gear Swap transactions safe?
As of March 13, the World Health Organization (WHO) and U.S. Centers for Disease Control and Prevention (CDC) have stated that the likelihood of novel Coronavirus contaminating cardboard or other shipping containers is low.
In a March 20 report conducted by researchers at Johns Hopkins University, the coronavirus can survive on hard surfaces for up to 24 hours (cardboard), 48 hours (stainless steel), and 72 hours (plastics). Keep in mind that these are the times required to reach a virus presence that is 0.1% or less of the original inoculate population. Consequently, the likelihood of an infectious concentration of coronavirus surviving after these times is extremely low.
Precautions to take:
If you or a household member are infected with COVID-19, do not sell or exchange goods on Gear Swap until you have completed a 14-day quarantine following the disappearance of symptoms.
If you are a member of a high-risk population for complications resulting from COVID-19 illness and are receiving a shipment, consider the additional precaution of placing the shipment/goods in a dry location for 72 hours prior to handling the goods.
2. What’s the status of Backpacking Light film festival events, live clinics, guided treks, and other event-based programs?
As of February 1, 2020, Backpacking Light canceled all live events during the month of February.
As of March 1, 2020, Backpacking Light canceled all live events until May 31, 2020.
We have tentatively rescheduled the 2020 Backpacking Light Adventure Film Festival in October 2020 in Estes Park, Colorado. We will re-evaluate this decision on June 1, 2020.
As of March 25, 2020, approximately four months prior to the start of our guided trekking season in the State of Montana, we have not yet canceled group treks. We will re-evaluate the progression of the pandemic and make further recommendations about our July 2020 guided treks on April 30, 2020 (approximately two months after the beginning of the logarithmic progression of the pandemic in the US). Our decision to move forward will depend on the following:
The extent of progression of disease transmission in the US, the State of Montana, and the city of Red Lodge, MT.
Recommendations from our land management agency oversight and government health officials.
The extent to which we can ensure the health and safety of our guides and participants, and take measures to minimize disease transmission during travel to and from Montana, and during the trek.
3. Should I go backpacking in 2020?
The answer to this question depends on a number of complex factors. In addition, this situation is changing rapidly, and we (the US) are still early in our disease transmission cycle (“the curve”).
Review this content to help you in your decision-making:
As the Covid-19 pandemic continues to sweep the world, Andrew and Ryan take a hard look at responsible backpacking in 2020. They are joined by Jeff Garmire: repeat guest, elite long-distance athlete, author, and FKT holder – and Maggie Slepian: thru-hiker, climber, freelance writer, and Managing Editor of the Trek.
Also in this episode:
Are group trips possible once the pandemic begins to recede?
Resources for managing your non-backpacking time
Thoughts on how to stay sane in a year of social distancing and too much indoor time
This episode of the Backpacking Light Podcast is supported and kept advertising-free by Backpacking Light membership fees. Please consider becoming a member which helps support projects like this podcast, in addition to a whole slew of other benefits!
We need to take a hard look at what it means to be a long-distance backpacker in 2020 – what types of trips should be off the table, what types of trips are still okay, and how to keep yourself sane if you can’t make a backpacking trip work this year.
This article was updated on March 28th, 2020.
I’d Rather Be Backpacking
A trail sign in the Absaroka-Beartooth Wilderness. Photo: Andrew Marshall
Like you – I should be backpacking right now.
2019 was tough for me, one of the toughest years of my life, and I’ve been planning a 2020 thru-hike of something, anything, for a while now. As I’ve said elsewhere, long hikes are how I do the weeding of my internal landscape. After three years of trying, my wife and I finally reached the medical and emotional end of our attempts to get pregnant. The act of “giving up” was freeing in one sense, but it also sent me spiraling into a depression that was proving hard to escape. I needed some time in the woods – a long time in the woods – to get my head on straight again.
Initially, I was going to tackle the Pacific Crest Trail. As the vagaries of life mounted up and it became apparent I wouldn’t be able to take four-to-six months off from my career and relationships; I shortened my goal to the Arizona Trail. At some point, even that (relatively) shorter hike became impossible to squeeze into my schedule, and I downsized my goal once again to the Benton McKaye Trail – 300 miles up and down over the ridges and hollows of the western Smoky Mountains.
On March 11th, I was tossing my final bits of food onto the scale and updating my spreadsheet with odds and ends. My pack, a new offering from Rogue Panda I was going to test for BPL, was packed.
On March 12th, I was canceling my flights and the reservation at the hostel I’d made just ten hours earlier. Over the weekend of the 14th and 15th, the fabric of American social life changed suddenly and completely for large portions of the country. As well all know, the situation accelerated quickly – like an avocado going from rock hard to rotten in the course of a few hours. Now as I make the final updates to this article (March 28th, 2020) Covid-19 is the one and only thing in the news and in private conversations.
It might seem trite to be talking about backpacking, and examining the implications of the pandemic on this year’s crops of thru-hikers, in light of the severe financial and social impacts of Covid-19. But we backpack because it meets some deep-seated need in all of us, and in times of stress the urge to sling on a pack and escape from the world can become even more pressing. And it just so happens that Covid-19 ramped up just as this year’s batch of northbound thru-hikers are getting ready to hit the trail (some of them already have).
So we need to take a hard look at what it means to be a long-distance backpacker in 2020 – what types of trips should be off the table, what types of trips are still okay, and how to keep yourself sane if you can’t make a backpacking trip work this year.
The last moments of twilight in the Lake Tahoe Basin. Photo: Andrew Marshall
Why Canceling Your Thru-hike is Hard.
“…we have all been asked to make changes, make sacrifices, and/or take precautions to minimize [Covid-19’s] spread.
We at the Appalachian Trail Conservancy (ATC) are now asking you to do the same: please postpone your section or thru-hike. Instead, consider alternate ways of connecting to the Trail and to the outdoors.”
– Sandra Marra, President & CEO, Appalachian Trail Conservancy
When I wrote the first draft of this article (March 18th, 2020) there was still some discussion of whether or not it was okay to continue or begin your thru-hike this year. In the weeks since, it has become more apparent than it already was that the answer is clearly “No, it’s not okay.” But just in case you are one of the holdouts, consider the following.
To put it simply, planning a thru-hike is hard. Really, really hard. It takes careful negotiation with your place of work – or you have to quit your job and hope you can find one again when you return. Many people suspend their car insurance and make other complex life changes in advance of a hike. It takes savings and forethought, and a certain amount of logistical and financial precision. It often takes sacrifices on the part of your loved ones.
So with all that work achieved and with your hike on the horizon, it can be easy to convince yourself that thru-hiking won’t have a negative social consequence at this point. But you’d be wrong.
A storm sweeps into a valley in Montana. Photo: Andrew Marshall
This way of thinking is called “loss aversion bias,” and it’s the reason new employees often have an easier time spotting systems or protocols that need to change in the workplace, and why people tend to stay in bad relationships. If you’ve worked hard for something, or sunk time into something, you don’t want to give it up – even if it is inefficient, ineffective, or ethically questionable. We’re just hardwired to avoid loss.
Jeff Garmire Gives Up on a Dream
Consider Jeff Garmire. Jeff is an elite long-distance athlete. He’s set fastest known times (FKTs) on the Arizona Trail and the Long Trail. For the 2020 hiking season, he was aiming for FKTs on the PCT and the AT. He’d also been invited to run the Barkley Marathons. Only forty people a year are accepted to the Barkley Marathons, so getting a chance to run them is potentially a once-in-a-lifetime opportunity.
A few weeks ago, Jeff made an excellent blog post on his struggle to cancel his 2020 plans. The whole thing is worth a read, but here’s an excerpt:
“I had my plane ticket and was prepared to travel through three airports, crossing the country to try to complete a race with a 1% finish rate. The more news, numbers, and widespread impact of Covid-19 [became apparent] the more I began to wonder about my social responsibility versus my personal goals.
…The concept of attending and running the race resulted in sleepless nights. But, I couldn’t possibly withdraw and risk never getting the chance to run in the only race I had wanted to attempt for years. Every night I sat awake wondering what the future would hold but paralyzed by indecision…
…Finally, a company I have been working with who had taken care of my travel arrangements asked me if I would attend if the race was still held. I thought about the question for hours and eventually replied that I would not. It took the external question to set me straight. I had irrationally held on to the belief that I could responsibly travel across the country. My travel plans were canceled.”
-Jeff Garmire, Social Responsibility and Personal Goals: Barkley Marathons, Coronavirus, and Valuing the Dreams of Others
What I find fascinating about this is that Jeff knew from the start what the most socially responsible course of action would be: cancel his plans. But still, he vacillated, trying to talk himself into something he knew would be wrong. I did the same thing in the days leading up to my change of plans – and I didn’t put nearly the time and effort into training for a 300-mile hike as Jeff did in prepping for the hardest ultra-marathon in the country.
The Depression Trap
Morning on a remote alpine lake. Photo: Andrew Marshall
Of course, it isn’t just logistics and finances and loss-aversion bias that makes resetting your 2020 so difficult. When we interviewed Jeff for our podcast in 2019, Ryan Jordan (BPL owner, editor-in-chief), Jeff, and I realized we had something in common – we used backpacking as a way to treat the depression and anxiety that we all struggled with. I don’t know how many long-distance hikers carry around depression as well as a backpack – but I suspect it’s a lot. (I’d love to see some kind of study on it one day).
And so in times of stress and uncertainty, it’s doubly hard to give up on something that you know will be a salve on your raw psyche.
But here’s why you should.
Why You Should Cancel Your Thru-hike
Death Valley National Park. Canceling your thru-hike is an opportunity to explore more remote, less-trafficked outdoor spaces – as long as they remain open, and as long as you do so responsibly. Photo: Andrew Marshall
The Ethical Considerations of Social Distancing
It’s incredible how quickly the phrases “social distancing” and “flattening the curve” entered our lexicon. And at first glance, both of these concepts are compatible with long-distance backpacking. But dig in a little more, and it becomes evident that thru-hiking (at least in the way it is commonly practiced on the more popular trails) is untenable in the age of Covid-19.
For one thing, thru-hikers often share physical space, food, latrine areas, and water sources – particularly in the more crowded-southern portions of popular trails. When you combine proximity with the poor hygiene that is all-but-inevitable in such situations – well, it seems obvious that Covid-19 will spread on the trails. Given the current lack of test availability and the lag-time associated with this virus, there’s almost certainly at least one person on the AT who has it – and, as we know, one is all it takes.
Covid-19 spreading among a relatively young, relatively fit group of thru-hikers is one problem – but those hikers spreading the virus to isolated, rural, trail-side communities is another problem altogether. These towns generally have an older demographic, and certainly lack the resources to deal effectively with a cluster should one appear.
When I talked to Jeff Garmire about all this a few days ago, he pointed out another factor I hadn’t even considered – trail angels.
“A lot of…trail angels are older. They are part of the age group that is more likely to experience complications from this pandemic…and potentially taking resources away from them and elevating their risk felt like an insult to the people who have selflessly aided hikers and trail users for years,” Jeff said when I interviewed him for this article.
The Logistical Complications
If the ethical conundrum isn’t enough to sway you, consider this – Covid-19 is throwing monkey wrenches into the already complicated logistics of a thru-hike. The closure of small-town grocery stores, gas stations, and other resupply points was one of the first warning signs many potential thru-hikers got that 2020 might be off the table.
“It happened really fast…within three days I went from considering a different resupply strategy to deciding not to go entirely,” said Maggie Slepian, the Managing Editor of The Trek, when I reached out to her for comment about her aborted PCT thru-hike:
“…once I started getting wind of closures along the trail in smaller towns and the potential for a seriously limited resupply, I added three locations for mail drops in the desert alone.” Not long after, Maggie pulled the plug because, as she says, “…it started to seem selfish and indulgent. Once that idea got into my head, I couldn’t shake it, and the next day I got onto a call with my boss…and by the end of the call, I had canceled the hike.”
On top of resupply issues, there’s the problem of transport and other infrastructure conundrums. Major airlines have already cut their available capacity by huge margins. Will buses, shuttles, taxis, and ride-share programs do the same? Hard to say, but one has to think it’s at least on the table. And let’s not forget that it will be harder to hitch a lift to and from trail heads. Trail angels will likely be less willing to share their personal spaces.
At this writing, states are imposing more and more draconian isolation measures as social distancing gives way to shelter-in-place and mandated quarantines. Can you imagine popping into town after a few days in the backcountry only to discover that you are violating a quarantine that went into effect only hours before?
Some Other Considerations
A pine forest receives a dusting of snow. Photo: Andrew Marshall
Some final thoughts.
Maybe now isn’t the best time to spend weeks and months away from your friends and family. The truth of the matter is that thru-hiking is an inherently self-centered endeavor – it’s often as difficult for our loved ones as it is for those of us carrying packs (albeit for different reasons). The trail will be there next year – I’d argue it’s probably more important to devote your time and energy to a sense of community at this moment.
There are also some safety issues to consider. Rescue teams and first responders may be busy with other things should you need some help for non-Covid-19-related reasons – or that you might be taking away resources from someone who needs them more than you.
Finally, there’s a conservation issue at play. In their statements to the public, major trail associations are already indicating that ridge runners, trail crews, and other maintenance and support systems will be limited-to-non-existent this year. The upshot is any given hiker’s impact on the trail and surrounding ecosystems will be much more significant than in years past.
All in all, there are many good reasons to cancel or abort your thru-hike – and not many great reasons to continue forward with it. The reasons to cancel are about other people. The reasons to continue forward regardless of Covid-19 are about you.
So Your Thru-Hike is Canceled – Now What?
I believe you can still backpack responsibly in 2020 – but you’ve got to do it right. Driving short distances to your destination is one way to do so. Photo: Andrew Marshall
Now that you’ve (hopefully) changed your plans, what can you do to get a taste of the long-distance backpacking that you love?
Your best bet is to discover, or re-discover your local outdoor opportunities, and to keep your trips very short – and thus limit the need to travel and resupply. One troubling idea that pops up a lot in outdoor circles is that western mountains and deserts are better than eastern mountains, or that the midwestern and south-eastern states have nothing to offer to backpackers or other recreational outdoor enthusiasts. This simply isn’t true. There’s a lot to explore out there, no matter what corner of the country you call home. We’ve got some ideas on how to backpack responsibly during this time (hint: it involves an extremely specific set of circumstances) – scroll down for more.
You can also change your trip-type entirely. Backyard camping is a fantastic way to learn or hone new skills in a low-stakes environment. Now’s the time to learn how to pitch a tarp, or paint with a small watercolor kit, or take up the harmonica, or learn a new knot. When your time to thru-hike circles back around, maybe you can use your new skills to drop some ounces out of your pack – or make music and art in the backcountry.
On the days you are stuck inside, consider doing some additional daydreaming and trip planning. I know – you’ve been daydreaming and trip planning about thru-hiking for years. But now you’ve got a little extra time. So maybe you can think of something even cooler to do – perhaps a trip that involves multiple modes of human-powered travel? Something in a different country?
Train! Be careful not to fall into the trap of eating or drinking more than usual while stressed out and stuck inside. If anything, you want to go the other way. I’m trying to look at my postponed hike as an opportunity to improve my fitness for the next adventure. That means more squats, more trail runs, more yoga/mobility exercises, and increased awareness of caloric intake and quality of nutrition.
Above all, you should take care of yourself. We seek adventure and trail-life partially to escape the stress and trials of our modern world. It’s important to realize that having to cancel your thru-hike is a loss. And as much as other people have their own pain and losses to deal with, it’s okay to mourn the loss of your adventure. One thing that can help is to reframe your circumstances a bit. Jeff Garmire, freed from the pressures of training for FKTs, is leaving his sports watch at home and running for the joy of it. Maggie Slepian is trying to get her life back on track after nearly suspending it for her hike, but suddenly has six-months of saved income she can put towards other things in her life. Me? Well, I get some more time with my family, and I’m around to help my wife as she tries to figure out how to be a teacher from behind a computer screen.
How to Responsibly Backpack in the Age of Covid-19
It’s essential to strike a balance between social isolation and putting yourself in danger. If you are going to backpack in 2020, do so in a way that absolutely minimizes the chances of a search-and-rescue. Photo: Andrew Marshall
I think it’s possible to backpack responsibly during this time – with strict adherence to a few guiding principles, and as long as you use these principles to err on the side of caution.
Comply with Your Local (Current) Guidelines
As I write this, the state and county governments where I’m located (Placer County, CA) have both instituted strict “stay-at-home” measures to help flatten the curve. Crucially, both of these mandates make exceptions for outdoor activity, so long as that activity takes place in a socially isolated manner. Many states seems to be following suite. Of course, this could change in an instant – the situation is moving quickly. If your local or state government institutes official quarantine measures that include not leaving the house for anything but emergencies and groceries, you have a social duty to abide by those measures.
But for now, the thought seems to be that getting outside and exercising while maintaining social distance is more beneficial to our society than forcing people to stay inside.
Stay Local
Your trip has to take place within a geographical area that you can reach easily, by car, with minimal-to-no social interaction. At this point we are really talking thirty minutes and under by car.
You should avoid point-to-point trips, as they require shuttling or some other type of social interaction; loop or out-and-back trips are best. Day hikes from a base-camp near your car are even better – that way, you can get out easily if you need to. Additionally, you should respect the wishes of small towns that serve as gateways to popular backpacking areas. Many of these towns (such as the close-to-me town of Truckee, CA) have issued appeals to visitors not to come into the area so as not to overwhelm their limited infrastructure. So if you aren’t already a local in one of these gateway communities – stay away.
Stay Short
The Covid-19 situation is changing too rapidly to justify a trip longer than two or three days. Unless you are an absolute hermit, chances are someone will need your love, time, and attention in the weeks and months to come. I understand and support the need to feed your soul by being in the woods – but that has to be balanced by the needs of others.
Keep Your Distance
If you can find a trip that meets the above three guidelines – great! If you get out there and the trailhead is swamped with cars or the backcountry campsites are full – pull the plug on your trip as quickly as possible. Being in the woods isn’t social distancing if there’s a bunch of society out there with you.
Know Your Limits
Don’t travel in unfamiliar areas; don’t push yourself beyond your comfort zone and skillset, and don’t take risks. In an attempt to get away from increasingly crowded trails and public land gateways, you might have the temptation to explore remote areas that increase your risk factors. You might also have the urge to use new or unfamiliar gear during this time of boredom and cabin-fever. Don’t do either of these things. As I said above, now is not the time to risk pulling resources away from those who didn’t intentionally put themselves in harm’s way. You should only get into serious remote areas if you absolutely have the skill-set travel these areas with maximum possible safety – and chances are you are overestimating yourself a little.
Make Contingency Plans
Stay in touch with your household using a satellite phone or GPS communicator (one that you know is effective). Have a plan for: what to do if a member of your household gets sick, what you’ll do if you become symptomatic while on your trip, and how you’ll get out of the backcountry without exposing anyone else to your illness. If you can’t come up with a satisfying answer to any of those questions – or you don’t possess a reliable way to stay in touch – don’t go.
Don’t Go Solo
A solo trip, even in an area you know well, could still be hazardous if you started showing symptoms (particularly the “difficulty breathing” symptom). While you don’t want to travel with a huge party, one solution is to backpack with a spouse or partner (someone with whom you are already sharing personal space). Another option is to travel with a tiny group – but we would recommend this only after the Covid-19 pandemic has reached it’s peak and infection rates are starting to decline.
Will We Return to Normal?
I asked Backpacking Light publisher and founder Ryan Jordan about backpacking with multi-household groups. As a professional guide and director of our Wilderness Adventures program, Ryan suggests that behaviors will change until a Covid-19 vaccine is widely available and/or a substantial fraction of our population has otherwise been exposed enough to develop antibody-based immunity.
Ryan offers these guidelines for backpacking as a group (many of which are also applicable to solo trips or trips with just your household group members) “after the peak”, and I thought I’d share them here.
The main goals of these guidelines are:
Treat each household like an independent entity and respect the space of other households in your group.
Minimize the chance that you’ll transmit an infection to the community you are visiting.
Minimize the chance that you’ll expose yourself to the infection en route between your home and the trail.
Here are the guidelines:
Travel in your own personal automobile to your destination instead of renting a car, flying, or taking public transit.
Persons from different households should not share equipment, food, supplies, etc. Don’t handle equipment from other household groups.
Don’t share pre-trip accommodations with persons from different households.
Before the trip, prepare, cook, and eat your meals as part of household groups only, in your chosen accommodations (e.g., hotel if it’s available), or outside, to minimize your exposure to community restaurants, grocery stores, etc. Consider bringing your pre-trip meals with you, since restaurant services in trail communities may be limited. Do your best to limit the risk of transmitting an infection to the community you are visiting.
All household groups should bring and use their own communications devices (e.g., satellite phones or messaging devices) to stay in touch with their family or other household members back home.
Members of household groups should maintain social distancing of at least 6 feet from members of other household groups at all times. When cooking, household groups should remain upwind of other household groups to minimize respiratory droplet drift.
Household groups should camp well away from each other, since activity is often concentrated around shelters.
No household group should participate in the group trip if any member of the household group has the following health symptoms: shortness of breath, fever, runny nose, cough, sneezing, or eye drainage. All of these factors increase the risk of transmission. Even if you’re an asymptomatic carrier of the infection, let’s say you have environmental allergies. All that sneezing is going is going to let out a whole lot of respiratory droplets contaminated with the virus that could infect others near you.
Don’t use backcountry facilities, including latrines and cabins.
Household groups should not share latrine spaces – create and use your own.
In Conclusion
Our need to go backpacking is understandable, but must be balanced by societal good.
Ultimately, what I’m advocating is caution, unselfish behavior, and prudence – balanced with the realization that “isolation” doesn’t necessarily mean “indoors.” A few days of backpacking will probably replenish and re-balance you in a way that’s particularly important during this time. If you can make that happen in a way that doesn’t endanger others, then go for it!
But if you can’t, then don’t. Please, err on the side of caution. As the collective internet keeps pointing out – we are all in this together. Ultimately we cannot put a leisure activity above the safety and health of our fellow human beings. So if your prospective backpacking trip doesn’t hit the above guidelines precisely, it’s probably best to just stay home and do squats until you can’t feel your face anymore.
You’ll thank me for it when you get back out there and your pack feels three pounds lighter.
In this article, I present a DIY testing device (and test results for 30 fabrics) that allows me to measure the hydrostatic head of “waterproof’ fabrics at home.
The Enlightened Equipment Visp Rain Jacket (4.93 oz/140 g, $190) is minimally-featured, made with 75k MVTR fabric, and is reasonably-priced.
Introduction
The Enlightened Equipment Visp Rain Jacket (4.93 oz/140 g, $190) is targeted to users interested in a minimally-featured design, a fit-and-feature set for backpackers (instead of trail runners or climbers), made with high-performance fabrics at a low weight, and at a reasonable price.
This Limited Review is based on my initial testing of these products, over about 10 days of day hiking, trail running, and overnight backpacking in the Tahoe region of the California Sierra in January and February.
Features & Specifications
overview
weight: 4.93 oz (140 g) – men’s size Medium
MSRP: $190
customization options: pit zips (adds $10 and about 1 oz/28 g)
Testing the Enlightened Equipment Visp Rain Jacket (and pants and mitts) in a light snow-storm.
Since this is a Limited Review, a detailed performance analysis based on long-term use will not be presented. Instead, performance observations and issues are noted below.
criteria
observations and issues
water resistance
Other than a shower test, I haven’t been able to subject these garments to sustained rain in the field. Minimal hood brim limits its ability to provide protection in heavy rain. Zipper is effective at resisting water entry at high pressures.
fabric breathability
Breathability seems on par with other high breathability spec fabrics (e.g., MVTR > 30,000), based on moderate-exertion hiking while carrying a backpack uphill.
ventilation
Pit zips as an option is a very nice feature. Combined with a full-length zipper, these two items are critical for a rain jacket designed to be worn for several hours in an all-day rain. Waist hem and wrist cuffs can be fully relaxed. Hood volume is low, which limits ventilation around the head while wearing the hood.
usability
I used all adjustment mechanisms and zippers with one hand, bare hands, and while wearing both gloves and mittens.
Small zipper pulls, no pull tabs, shock-cord and adjustment mechanisms are small
That, combined with the roomy cut of the jacket, means that it’s difficult to tighten drawcords or engage zippers while using one hand – but it is possible to loosen or disengage zippers with one hand.
Usability with two bare hands is high, with usability dropping as expected while using gloves and mittens respectively.
This is especially true with the side hood drawcords and mechanism, which are the smallest, most fiddly bits of the jacket.
fit and patterning
Designed for layering, plenty of room in the shoulders and across the chest* for light high-loft insulating layers (e.g., less than 14 oz)
Raglan sleeve/shoulder junctions, articulated elbows, drop hem, and long sleeves offer good moisture protection and a full range of motion.
I can bend over, reach across my body, extend my hands over my head, without pinching, bunching, retracting wrist cuffs, or a riding waist hem.
With the hood up and tightened there is slight resistance when turning my head side-to-side, but nothing that prevents the motion from being completed.
*I tested a size medium jacket. I’m 5’6, 170 lbs with a somewhat broad and stocky athletic body-type.
quality of materials and construction
My close inspection didn’t turn up anything unusual with regards to quality.
Fabric has no blemishes or defects.
Stitching is straight and tight, and wouldn’t loosen even after I pulled hard on it while wearing the jacket.
Bound and sewn edges are even.
Seam taping is evenly applied with no edges peeling up or loosening.
Zippers move freely and without binding.
durability
To date, I’ve only used this jacket on well-cleared paths and didn’t subject it to any bushwhacking – and would be extremely cautious before doing so, the fabric is light!
Face fabric is (so far) not showing wear signs in pack strap contact areas.
Seam taping has remained intact.
Zippers have remained smooth.
No apparent short-term durability issues.
Commentary
What makes the Enlightened Equipment Visp Rain Jacket, Rain Pants, and Rain Mitts unique?
In a market crowded with dozens of competitors (i.e., “lightweight rain gear”), the Enlightened Equipment Visp Rain Jacket, Pants, and Mitts are somewhat unique for
a minimalist design,
a backpacker-oriented fit and patterning, and
their use of a high breathability spec fabric.
Minimalist Design
The Enlightened Equipment Visp Rain Jacket includes minimal features in its base model configuration (no pockets, and no pit zips). This design choice makes it squarely targeted to hikers who place simplicity and weight savings above all else, and makes the Visp Rain Jacket a more interesting choice for users who want a lightweight rain jacket “for incidental use” rather than a full-featured garment for sustained wear in heavy rain. Of note, the Visp Rain Jacket can be ordered with pit zips as an option (which is the model I’m reviewing here).
Pit zips are a new feature option in the 2020 Enlightened Equipment Visp Jacket.
In spite of the lack of pockets, which is the Visp’s most obvious nod to minimalism, the rest of the feature set isn’t exactly Spartan. The jacket includes:
dual drawcord (aperture and volume) adjustment for the hood;
waist hem drawcord
full-length zip
hook-and-loop wrist cuff closures
generous sizing
Its generous sizing and articulated fit are welcome in a market category where manufacturers love to save weight by reducing the amount of fabric used (and thus limiting its ability to layer over insulating clothing or provide decent articulation and mobility).
Rain Gear for Backpackers (Fit and Pattern)
Ultralight backpackers are often drawn to the lightest possible gear. Often, minimum weight comes with significant sacrifices in form and function. After looking at a photo of the Enlightened Equipment Visp Jacket, and noting its pocket-less design, you too may be balking at the apparent “over-simplification” of the jacket’s design.
The Visp Rain Jacket worn under a pack and layered with an active insulation layer (Arc’teryx Proton LT Hoody).
However, consider many features that backpackers value that are often sacrificed in ultralight rain jackets:
lack of layering volume underneath
Over-simplified pattern that limits range-of-motion
Short arms and waist hem
No or minimal means of adjusting fit in the hood, or at the wrists and hem
No or minimal means of adjusting ventilation through zips and other closures
The design philosophy behind the Visp Rain Gear is to strike a balance between maximum functionality and minimalist aesthetic. It doesn’t fall prey to the “over-simplification” trap of much ultra-light gear. For example, the wrist cuffs offer full hook-and-loop adjustment closures instead of the non-adjustable bound elastic trim found on some ultralight jackets.
The Enlightened Equipment Visp Rain Jacket doesn’t skimp on any of these important features for backpacking. In particular, when you consider that the jacket is targeted to the long-distance hiking community, it does these things very well:
provides a design that performs very well while wearing it in the rain (highly breathable fabric, good ventilation, well-considered cut)
saves as much weight as possible (light fabric, light zippers, and other notions, no pockets) so it doesn’t impact your pack weight much while it’s stowed
Still retains functionality (adjustable where it needs to be, pit zips optional).
Breathability: MVTR 75,000 Fabrics
High MVTR levels are a nice marketing feature that helps manufacturers sell jackets to users who don’t understand the relationships between breathability and ventilation, or how to manage ventilation effectively when hiking in a sustained rain.
Even at this level of breathability (MVTR of 75,000+), the Enlightened Equipment Visp Rain Jacket still won’t breathe well enough to keep you dry and cool when slogging uphill at a moderate pace (MET 6-8+) while wearing a pack.
At lower metabolic rates (e.g., MET 4-6) in cooler temperatures, the breathability of this fabric is quite sufficient for most users, especially if you compare this to a jacket made of fabrics with MVTR of less than 15,000 (assuming the same test).
And when comparing its breathability performance to jackets made of non-breathable fabrics, like silnylon, the differences are like night and day, even when performing light-duty chores around camp at low MET rates (2-4).
However, don’t expect this to provide a level of breathability that will allow it to replace your wind shirt, and don’t expect it to perform heat-and-moisture-shedding miracles at high MET rates without utilizing its generous ventilation features.
Highly breathable fabric helps keep you dry while exerting yourself, but mechanical ventilation (pit zips) are still a necessity when exerting yourself.
In this episode of the Backpacking Light Podcast, Ryan and Andrew talk about some of the BPL staff’s favorite gear from 2019. From there they transition into a larger discussion of Backpacking Light’s gear philosophy.
Also in this episode:
What’s new at BPL
Andrew and Ryan’s favorite new gear
Public lands news and headlines
Interesting conversations in the forums
And tons more!
Outline
Introduction
Today’s theme – what gear we like right now, why we like it, and how we choose it.
Featured Image Illustration by Mike Clelland, commissioned by Backpacking Light.
Sponsors
This episode of the Backpacking Light Podcast is supported and kept advertising-free by Backpacking Light membership fees. Please consider becoming a member which helps support projects like this podcast, in addition to a whole slew of other benefits!
The Kammok Mantis and Mantis UL are all-in-one hammock shelters that include hanging systems, tarps, bug netting, and more.
Introduction
The Kammok Mantis (44 oz / 1247 g and $229) and Kammok Mantis UL (35 oz / 992 g and $259) are all-in-one hammock shelters. By this, I mean they come with (almost) everything you need for a successful hammock shelter system – hammock, stuff sack, removable bug-net, tarp, stakes, lines, knotless attachment clips, integrated line-locs, and suspension. The systems do not include insulation (top-quilt and under-quilt) or optional storage accessories.
The Kammok Mantis. Photo: KammokThe Kammok Mantis UL. Photo: Kammok
This review is written from the standpoint of an enlightened beginner. I’ve completed multiple thru-hikes (Appalachian Trail, Colorado Trail, Tahoe Rim Trail, among others) but never with a hammock system. I chose to review the Kammok Mantis and Mantis UL because the “all-in-one” nature of the system is likely to appeal to hammock beginners such as myself – people who want to experiment with hammocks but are intimidated by the cost and knowledge barriers of assembling a system from à la carte components.
The Kammok Mantis UL (foreground) and Kammok Mantis (background) hanging in the Cohutta Wilderness on the Georgia/Tennessee Border.
The weight difference in the two Kammok Mantis models is primarily a function of material choice in the hammock body and suspension straps. Otherwise, the designs are (mostly) identical. In this review, I’ll point out differences when applicable; otherwise, you can assume the features I discuss apply to both models.
Features
shaped silnylon tarp with catenary ridgeline
removable zip-out bug net (zip-in winter barrier available separately)
two pockets (in bug net)
knotless set-up
roll-top stuff sack with exterior stake-storage
integrated structural ridgeline
volumizing guy-out points (four on the Mantis, three on the Mantis UL)
15D nylon diamond ripstop nylon (1,500 mm PU/Silicone/DWR)
15D nylon diamond ripstop nylon (1,500 mm PU/Silicone/DWR)
ridgeline length
115 in (292 cm)
115 in (292 cm)
stakes required
6
6
max weight capacity
500 lb (227 kg)
300 lb (136 kg)
packed dimensions
8 x 6 x 6 in (20 x 15 x 15 cm)
6 x 6 x 6 in (15 x 15 x 15 cm)
MSRP
$229
$259
Performance
Description of Field Testing
I experimented with the Kammok Mantis UL and Kammok Mantis in two very different climates – the cold, dry, snowy eastern Sierra Nevada in the early winter, and the chilly, humid, rainy mountain southeast in the late fall.
All-told I spent 10+ nights in the shelters. On some trips I used the system as a “base-camp”, and on others, I assembled and disassembled the shelter in the evenings and mornings. I experienced precipitation in the form of heavy snow, heavy rain, and light rain. Overnight temperatures ranged from 55 F (13 C) to 20 F (-7 C). Wind in all scenarios was minimal.
Disclaimer: Since I’m not an experienced hammock camper, and this review is limited to only 10+ days of backcountry experience, the reader should consider these limitations when evaluating the authority of my review. In addition, for reference, I weigh 170 lb (77 kg) and am 5 ft 6 in (168 cm) tall.
In judging the initial performance of the Kammok Mantis and Mantis UL hammock systems, I looked at:
sleep quality
features and ease of use
pockets and gear storage
weight and packability
Sleep Quality
One of the author’s friends testing the Kammok Mantis UL hammock. The storage pouch clipped above his head is sold separately. Photo: Nick Ramey
I’ll admit – I’m tired of sleeping on the ground. Over the years, I’ve moved from cheap, light, and indestructible closed-cell-foam pads to expensive, not-so-light, and definitely destructible inflatable options. But I’m still struggling. So sleep quality was the big reason I wanted to give the Kammok Mantis and Mantis UL hammock systems a try.
The Kammok Mantis’ cut gave me a slightly curved shape once I was in it and properly (slightly diagonally) positioned. I pulled out my book, flipped my headlamp to its red-mode, and promptly fell asleep. The next thing I knew, it was 2:00 AM, and I’d been sleeping with a paperback on my face for five hours.
I can’t overstate this. I always toss-and-turn for at least forty-five minutes before falling asleep when ground sleeping, even after big-mile days. I always have lower back pain and heel pain when back-sleeping. I always have pain in my hips, shoulders, and ankles when side-sleeping. I always wake up stiff and sore. I’ve learned to judge my ground-sleeping quality in terms of small successes. Did I sleep for more than an hour without waking up to change positions? Success. Am I functional enough in the morning to make coffee? Success.
In the Kammok Mantis and Mantis UL, however, I only woke up once (that inevitable 2:00 AM call of nature). I had no stiffness or pain the next morning, no lower-back pain, and no pressure points. It’s not my practice to set alarms when backpacking because I usually sleep so poorly that my eyes pop open as soon as light hits my shelter. In the Kammok Mantis Hammock systems, I routinely slept for 11, 12, even 13 hours.
The Kammok Mantis UL in use on an overnight cross-country ski trip. From this angle, you might be able to see that the Mantis UL and Mantis do not have asymmetrical cuts, unlike many popular backpacking hammocks.
Of course, any time we talk about sleep quality, we have to remember that it is one of the more subjective standards in the backpacking world. It’s also worth noting that unlike many popular hammock designs, the Mantis and Mantis UL are not cut asymmetrically. The Mantis’ symmetrical design means you can’t lay entirely diagonally for flat sleeping. This style didn’t bother me at all, but it might irritate committed side sleepers or those with lower-back problems. Three nights was the longest I ever slept consecutively in the systems. It has to be considered that for long-term consecutive usage, the extent of cut asymmetry might come into play. At the moment I have loose plans to use the Mantis system on a thru-hike in the late spring – I’ll update this article accordingly if I gather any new data.
But for now, I can say that the Kammok Mantis gave me my best night’s sleep in the backcountry thus-far in my career as a backpacker.
Features and Ease of Use
The fly attaches to the tree with a knotless aluminum hook. Integrated line locks take up the slack.
The fly attaches to trees with a knotless aluminum hook. Integrated line locks then take up the slack for a taut pitch. The tarp has six guy-out points (one at each corner and two in the middle), each with fixed-line and integrated line-locs. Because the included tarp is silnylon, it stretched a bit under snow-loading and during particularly humid evenings. In my testing where snow was likely, I made sure to pitch the tarp at a steep angle to compensate. A catenary ridgeline assisted in taut pitching.
A catenary ridgeline and integrated line-locs make it easy to get a taut pitch.
The copious amount of line needed to guy out a tarp high off the ground is one of the things that initially slowed me down when unpacking, setting up, and repacking the Mantis. Being-accustomed to tarp-based systems, I quickly made a mess of these lines when stowing and unstowing my shelter. Soon enough, I learned to gather the excess line on each guy-out into a neat bundle before storage, and that improved my set-up speed a bit – though it added to my take-down time. The stretchable nature of the silnylon tarp meant I had to do a couple of circumnavigations adjusting tension once I had everything staked out.
Line management was a new exercise for me. My previous shelters-of-choice didn’t need eight long lines, as the Kammok Mantis and Mantis UL do.
Overall, I’d say setting up the tarp is the most time-intensive element of the Mantis system. I wouldn’t mind seeing Kammok add some sort of clever, integrated system for line-management – especially since everything else on the shelter is approached from a thoughtful, time-saving standpoint. Hey, why not?
External stake storage. Such a simple idea, but it helps me keep track of stakes and gives me one less stuff sack to keep track of.
The stuff sack is a DWR treated silnylon roll-top bag with plenty of space to hold all the components (I hate a too-small stuff sack). The stuff sack has slots for external stake storage – a super-cool idea that I haven’t come across elsewhere. Not only does this help you keep track of your stakes (you can see at a glance that you have them all), but it gives you one less sack to lose. I replaced the Kammok stakes with MSR Groundhog Minis, and they fit the stake slots just fine.
The stuff sack is integrated into the hammock so you can’t lose it. Thoughtful touches like this abound in the Mantis systems.
The hammock itself unfurls from the stuff sack, which remains attached to the integrated structural ridgeline. The stuff sack then hangs between the attachment carabiner and the hammock body. I love this touch. Again, one less thing to lose in the dark or the wind. Folks who like to switch out stuff sacks with their preferred brand and style are going to be irritated by this feature, though. The stuff sack is constructed with 15D nylon diamond ripstop nylon with a 1,500mm PU/Silicone/DWR treatment. The material seemed to absorb a lot of moisture during my testing. Based on its performance, I wouldn’t trust it to keep the contents totally dry. This failure of waterproofing was my one gripe with the stuff sack.
Kammok’s Python Straps attach to trees of varying sizes with a girth hitch. The Python 10 UL straps (shown here) are much lighter than the standard Python 10 straps.
The Mantis comes with Kammok’s Python 10 tree strap system (7.7 oz / 218 g), while the Mantis UL comes with the much lighter Python 10 UL straps ( 2.9 oz / 85 g). Each strap offers 20 connection loops, 10 ft (3 m) of length, and secures to trees with a girth hitch. I found this system not-at-all prone to slippage and extremely easy to use.
Each version of the Mantis comes with guy-out points on the hammock body to increase interior volume a bit. The lines clip into the attachment points with aluminum hooks and run to corner stakes (the same ones used by the tarp). These lines have a bit of elastic at the end closest to the hammock – a useful design that allows the hammock to sway as you get in and move around without putting tension on the stakes, but retain volume after you’ve become still. The Mantis has four of these points (two each at the head and foot) while the Mantis UL has three (two at the head, one at the foot). The bug nets on each version also have two attachment points for volumizing.
The lines used to volumize the hammocks are 3/4 (length) regular line and 1/4 (length) shock cord (upper right). This hybrid construction lets the hammock shift as you enter it without putting tension on the stakes.
The bug net zips out easily for reduced weight in the correct season. However, it takes a little more work to zip it back in. You can zip in the Kammok Mantis (solid nylon) Winter Barrier (sold separately) to add some warmth to the system, but it feels a bit like sleeping in a floating coffin and comes with some risk for condensation as you might imagine. One user I interviewed didn’t enjoy the winter barrier for all of the above reasons and will leave it behind on future trips. I didn’t find the winter barrier necessary when utilizing proper sleeping gear and insulation. Overnight lows on my various testing trips ranged from 55 F (13 C) to 20 F (-7 C). There was one night I wish I’d had the weird-looking but useful Timmermade Waterbear Hood to keep the cold off my face.
The zip-in bug net. You can leave this at home to save 5.3 oz (152 g), or zip in a solid winter barrier (sold separately) which weighs 8.5 oz (241 g) – a 3.2 oz (91 g) penalty vs. the bug net.
Pockets and Gear Storage
Each version of the Kammok Mantis comes with only two pockets – and those pockets are on the removable bug netting. I’ll probably end up investing in some optional storage. Here the pockets are hanging down slightly because I don’t have the bug net guyed out.
The Kammok Mantis and Mantis UL only have two included pockets – and those pockets are on the removable bug-netting. Though they are sizable – and I like that because it seems like shelter pockets have been shrinking lately – they are useless if you aren’t using the bug net. Kammok has a range of storage accessories like the Mantis Gear Loft that are both inexpensive and light – but I wish the shelter came with some more built-in storage options.
Weight and Packability
There’s a significant weight difference between the Kammok Mantis (44 oz / 1257 g) and the Mantis UL (35 oz / 992 g). As near as I can tell, this difference comes from the straps (see above) and the hammock material used in each model. The Mantis uses 40D nylon diamond ripstop, while the Mantis UL is made from 20D nylon diamond ripstop. In my testing and interviews, I found both materials to be sturdy enough for their purpose and breathable to boot – though each version of the hammock has a different max weight capacity (see Conclusion, below).
Although the integrated nature of the Kammok Mantis hammock system makes some components unchangeable, there is room for weight savings here and there. The included silnylon tarp is functional but not extraordinary (I do like that catenary ridgeline though, and that it has six guy-out points instead of four). It could easily be switched out for a DCF tarp of the user’s choice. Similarly, hammock aficionados might have aftermarket tree strap systems that they prefer over Kammok’s Python straps.
Both the Kammok Mantis packs down into a tiny package roughly 8 x 6 x 6 in (20 x 15 x 15 cm). The Mantis UL system is about 15% smaller. The package expands beyond those specs a bit when you haven’t carefully packed the tarp and straps (as seen below), but it’s still a small and packable shelter. Don’t forget some extra space in your pack for your underquilt.
I stuffed in a hurry and ended up with a package that was larger than the advertised 8 x 6 x 6 in (20 x 15 x 15 cm). Still, the Kammok Mantis and Mantis UL are pack-friendly shelters.
Commentary
The Kammok Mantis UL, guyed out to cross-country skis on a winter trip.
The lighter fabric and suspension of the Kammok Mantus UL hammock mean that its maximum recommended load is 300 lbs (136 kg) as opposed to the burlier weight rating of 500 lbs (227 kg) for the Mantis. That’s the only apparent difference in functionality, other than one less volumizing guy out on the Mantis UL. So if you and the gear you stow inside your hammock are on the lighter side, you can save 11 oz (312 g) by choosing the Mantis UL over the Mantis for an extra $30.
This choice was such a no brainer that I wasn’t even planning on testing the Mantis (I weigh 170 lbs / 77 kg) – I was going to go straight for the Mantis UL. The only reason I ended up testing both is that the manufacturer sent me the Mantis by mistake, and I didn’t notice until I was out in the field. (Luckily one of my friends was using the Mantis UL, so I was able to test both.)
Given how much some hammock campers enjoy building a system from the ground up, the Mantis systems are unlikely to appeal to everyone. Committed hammock campers may want to spec their own well-dialed system. But for beginners and those wanting to break into hammocking without the barrier of researching and assembling a system, it’s hard to go wrong with the Mantis UL. The knotless set-up, all-in-one-system, and thoughtful features are all winners. Most of the shelter is integrated with itself, but a few of the features are modular – including the tarp, which can easily be swapped out as desired for a lighter, less-stretchy DCF version.
Issues of Note
There are a few issues common to most hammock systems, including the Mantis and Mantis UL:
Beginners are likely to find the set-up and take-down more time-and-energy-intensive than some of the better designed pole-supported shelters.
Line management will be an issue if you aren’t intentional about it at every step.
These problems can be overcome with practice and familiarity.
In addition, I found a few issues unique to the Kammok Mantis system:
The design isn’t an asymmetrical cut, so you can’t lay totally flat. This didn’t bother me at all, but if you have back problems, it could be an issue.
The shelter’s only two pockets are on the removable bug net, and you have to pay extra for additional storage.
The stuff sack is cleverly designed in almost every way – but I’m not a fan of the fabric or the DWR treatment. It seemed to soak up moisture after just a few minutes on wet ground. I’d love to see the same stuff sack in Dyneema Composite Fabric. I know it will probably never happen, but I can dream.
In spite of these issues, the Mantis hammocks are reasonably priced, reasonably light, extremely thoughtfully designed shelters. From my enlightened beginner standpoint, I wouldn’t hesitate to recommend them – particularly the Mantis UL – as an entry-point to the backpacking hammock world. They’ve certainly fulfilled that function for me.
Compared To…
For this comparison, I wanted to include “all-in-one” hammock systems – packages you could buy and get right out into the woods with. This included:
In terms of design and features, the Kammok Mantis and Mantis UL are probably most similar to the ENO SubLink Hammock Shelter System – symmetrical cut, knotless set-up, integrated ridgeline, and an unfortunate shortage of storage. They differ in a few ways – the two Mantis systems suspend with webbing and a carabiner, while the ENO suspends with webbing and whoopie straps.
In the pocket department, the REI Flash Air Hammock seems to take the cake – it has four interior pockets and an included under-sling for shoes and other gear. All the other hammocks in my table have far less storage than this.
Another interesting feature of the REI Flash Air Hammock is the spreader bar at the hammock’s head. Our review for the Flash Air Hammock is forthcoming, but I can tell you that our primary reviewer, David Hosmer, appreciated the spreader bar feature. David also appreciated the Flash Air Hammock’s integrated pad straps, which kept his pad secure through a night of tossing and turning. Like the ENO, the Flash Air Hammock suspends with webbing and whoopie straps. The Flash Air Hammock has the longest tarp ridgeline of any hammock in my table.
The two lightest hammocks in my table are the Kammok Mantis UL (35 oz / 992 g) and the Hennessy Hammock Ultralite Backpacker Asym Zip Hammock (34 oz 964 g). The Hennessy’s relative weight is impressive, given that its fabrics are heavier than what the Mantis UL utilizes. The Hennessy also features an asymmetrical cut and ships with a ridgeline pocket but maxes out at a 200 lb (91 kg) capacity vs. the Mantis UL’s 300 lbs (136 kg).
The Hennessy Hammock Ultralite Backpacker Asym Zip Hammock also has the least amount of tarp coverage (due to size and shape) of any hammock in my table – though, like all my compared hammocks, the tarp could easily be switched out for weight savings or penalties depending on which direction you went (i.e., a smaller or larger tarp). The Hennessy is also $30 cheaper than the Kammok Mantis UL.
The final thing to note about the Hennessy Hammock Ultralite Backpacker Asym Zip is that it seems to require the most experience (or time, or both) to set up. This was my takeaway after watching set-up videos for all the hammocks in my table and researching reviews by others about these hammocks. At the very least, the Hennessy requires the most knots or lashing to set-up. While all the other hammocks in my table set-up with whoopie straps, hooks, or carabiners, the Hennessy requires some knowledge of rope-craft. Whether you consider this a good or bad thing likely depends on your larger outdoor philosophy. Are you the kind of person to sniff at integrated line locks? Then the Hennessy Hammock Ultralite Backpacker Asym Zip might catch your eye over the Kammok Mantis UL.
Product(s) discussed in this article may have been purchased by the author(s) from a retailer or direct from a manufacturer, or by Backpacking Light for the author. The purchase price may have been discounted as a result of our industry professional status with the seller. However, these discounts came with no obligation to provide media coverage or a product review. Backpacking Light does not accept compensation or donated/discounted products in exchange for guaranteed media placement or product review coverage.
Some (but not all) of the links in this article may be “affiliate” links. If you click on one of these links and visit one of our affiliate partners (usually a retailer site), and subsequently place an order with that retailer, we receive a small commission. These commissions help us provide authors with honoraria, fund our editorial projects, podcasts, instructional webinars, and more, and we appreciate it a lot! Thank you for supporting Backpacking Light!
This feature requires an active Backpacking Light Membership.
Premium Articles
You're currently viewing a free preview of a member exclusive premium article. Our premium articles include in depth journalism and insights from the Backpacking Light editorial team.
Get full article access by subscribing to a Premium or Unlimited Backpacking Light membership!