A short, detailed discussion on immersion foot and maceration, how to deal with it in the backcountry and when not to.
Introduction
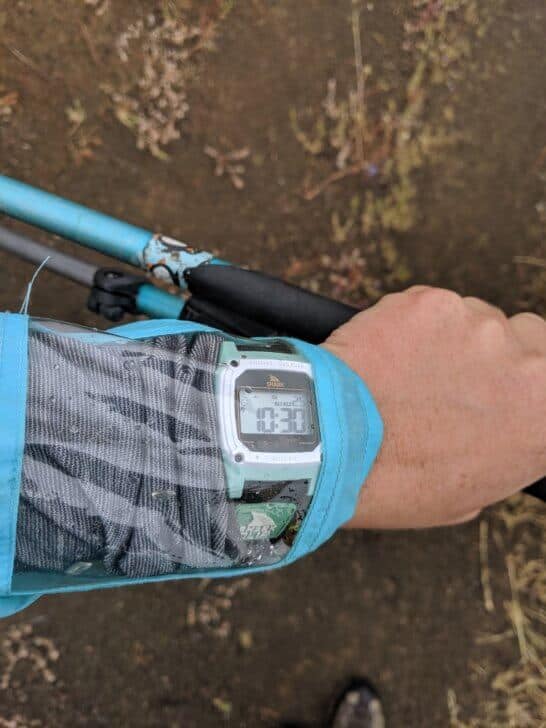
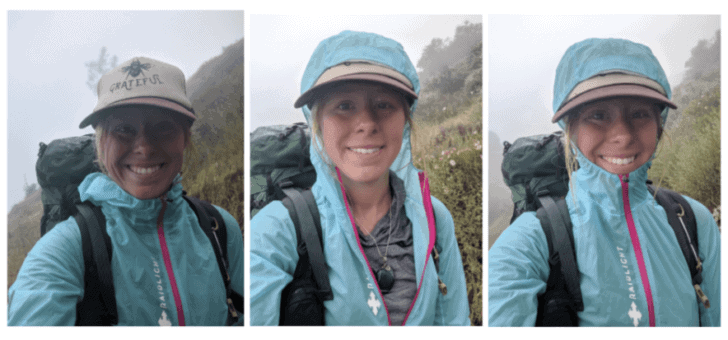
In response to an article I posted recently about crossing streams in your hiking shoes, @impalatrash replied via Twitter to share their experience with trench foot.
Nice article but with wet feet comes the risk of trench foot. Which I didn’t know was possible but after one day of wet feet I was off trail for 9days. If I had hiked on it could have caused permanent damage. I still just cross but now rub vaso in 3 times a day.
The purpose of this article is to clear up some confusion about trench foot, other immersion foot diseases, and maceration, and provide some context for backpackers who are worried about it.
Macerated feet, with separated dermal layers now starting to slough off, during a 100-mile ultramarathon event. Photo: John Vonhof.
What is immersion foot?
Immersion foot refers to a type of diseased condition that results when your feet are continuously wet for extended periods of time.
The most well-known of these conditions is trench foot (TF). Related conditions include tropical immersion foot (TIF) and warm water immersion foot (WWIF).
For a backpacker, understanding the differences between these three distinct diseases aids in diagnosing the right condition. Knowing what disease you are manifesting will allow you to optimize subsequent treatment so you can return to the trail as soon as possible without suffering permanent damage.
It’s often assumed that the three diseases are distinguished by the temperature of the water that causes the immersion foot disease, but that’s not the entire story. It is true that TF usually occurs in cold conditions (temperatures above 32 deg F but less than about 60 deg F) and that TIF and WWIF usually occur in warm conditions (temperatures greater than about 60 deg F).
Other than the temperature of the water that causes the disease, the nature of the disease and the symptoms between cold water immersion disease (TF) and warm water immersion diseases (TIF and WWIF) are notably different.
Trenchfoot occurs primarily when the feet are exposed to cold temperature water for extended periods of time. It occurs far more rapidly when the feet are continuously immersed or otherwise soaking wet (as what might occur if you are walking through an Alaska tundra swamp during snowmelt), instead of intermittently immersed (as what might occur if you are wading cold rivers in the High Sierra several times a day).
Snow, wet tundra, cold rivers – a good recipe for developing immersion foot diseases. Wulik River, Alaska.
Water immersion, whether in cold or warm water, causes maceration (“pruning”) of the foot’s dermal tissues. However, maceration (which is simply the byproduct of supra-hydration of dermal tissues) tends to be more pronounced in TIF and WWIF.
With TF, it’s the combination of water immersion with cold temperatures that creates a different set of problems – vasoconstriction to the foot’s surface tissues (dermal layers). Once the blood supply has been restricted for a significant period of time, tissues start to die, which makes them more prone to bacterial infection. As a result of tissue death and bacterial growth, blisters and open sores occur more easily – which creates even more avenues for infection. Trench foot can be halted in its early stages, but if allowed to progress, can lead to gangrene and permanent nerve damage.
Trench foot occurs when tissues actually die. Dead tissue is seen here (dark areas). Photo: John Vonhof.
Another primary difference between TF and TIF/WWIF is that trench foot can occur more rapidly, and progress to a fairly advanced state within the course of a single day’s march (e.g., 12-14 hours). TIF and WWIF, on the other hand, progress more slowly, and usually requires 48-72 hours or more to manifest themselves.
Although the pathology behind all immersion foot diseases is complex and not well-understood, it is generally accepted that trench foot is caused primarily by cold-induced vasoconstriction, and TIF/WWIF are caused by the maceration-induced separation of dermal layers.
Other than these causative differences, all immersion foot syndromes share similar symptoms:
extreme maceration
dermal layer separation
redness
tenderness
swelling
blisters
sloughing skin
open sores
How to prevent immersion foot disease
Now, how does an understanding of these diseases affect the backpacker?
First and foremost, consider that if your feet are exposed to wet conditions for several hours, the very first thing that you are going to notice is maceration:
Maceration is the softening of the dermal tissues of the foot as a result to these tissues become overhydrated due to sustained water exposure.
Warm, wet, muddy marsh in Montana high country. A recipe for warm water immersion foot and bacterial infections.
The primary symptoms of maceration are white, wrinkly feet. In the early stages of maceration, there should be little or no tenderness, redness, or swelling. As a result of the softening and wrinkling of the tissues, you may begin to notice some cracking or blistering of the skin.
At this point, you don’t have an immersion foot disease but do consider the maceration as a warning sign that needs to be addressed.
Macerated feet during a stage race in Brazil. Photo: John Vonhof.
In my research on this topic, one of the most mind-blowing themes I discovered was that there seems to be no limit to the amount of water your dermis and epidermis can absorb (ref. 3). The implications of this are profound because we can no longer assume that the skin becomes “saturated” at some point, and then all’s good. The bottom line is that the more you expose your feet to saturated conditions without drying them out fully, the more that maceration will develop, and the risk of dermal layers separating from each other increases. Consider early wrinkling, whitening, and softening of your foot skin to be a canary in the coal mine for something down the road that could cause permanent damage and require weeks or even months of healing.
And this brings me to the most important consideration for backpackers: preventing and managing maceration should be your focus, not worrying about full-blown immersion foot diseases. Control maceration and your feet won’t degrade further, regardless of water temperature.
There are a number of things you can do to help prevent maceration, and manage it once it starts:
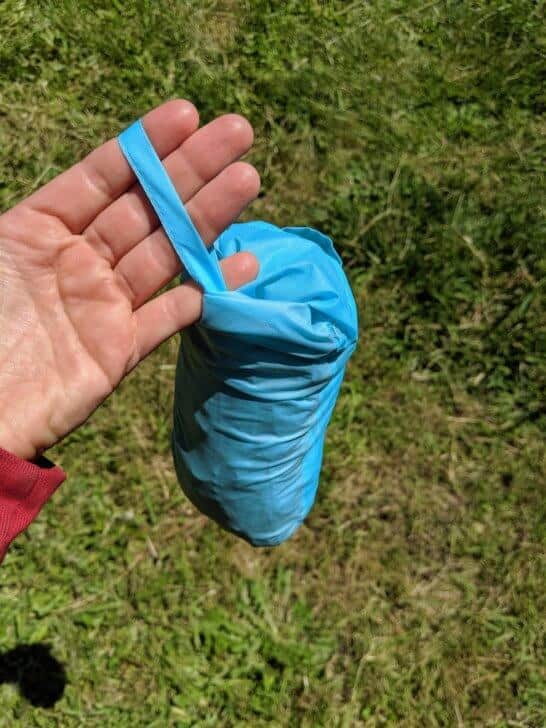
Use a hydrophobic balm as a barrier. Maceration is the softening and wrinkling of dermal tissues as a result of supra-hydration of those tissues. So let’s prevent water absorption into the tissues in the first place – use a hydrophobic balm. @impalatrash noted in the tweet in the introduction to this article using Vaseline, which is very hydrophobic but tends to wash off the skin in just a few hours. Balms containing ozokerite waxes are among the most effective due to the high melting point of the waxes, which helps maintain a water absorption barrier through the dirty and damp activity of long-distance hiking. Apply to the entire surface of the foot, use liberally, and reapply frequently.
Wear merino wool socks rather than synthetic socks. Socks that have a higher content of merino wool fibers are better than socks made with predominantly synthetic fibers. Wool fibers absorb water into the fiber, which keeps it away from the skin surface. Synthetic fibers are non-porous and result in clammier, wetter feet.
Change blister dressings and tapes frequently. Encasing a portion of your foot in tape and blister dressings can create localized areas of macerated skin that can cause problems in the long run. Remove dressings at night, allow your feet to dry out, and reapply them in the morning.
Wear shoes that drain. Hiking shoes with mesh uppers and/or engineered drainage ports allow you to pump water out of your shoes. Maceration progresses rapidly if your feet are submerged in water inside your shoes!
Drain your footwear after a river crossing. When you reach the dry side of a river crossing or otherwise wet area, remove your shoes and socks, drain your shoes, and wring your socks out. This removes most of the water and can put you on a path to drier feet more rapidly. See the Crossing rivers and water shoes article.
Take off your shoes and socks at rest breaks. If it’s the middle of the day and you can afford to stop for a break, take off your shoes and socks and allow your feet to air dry for a bit. It’s going to take more than an hour to reverse the maceration process, but this will help prevent it from getting worse by keeping your feet in wet shoes and socks during your rest breaks.
Change into dry socks during the day. If your water exposure is intermittent and you know that you’re heading into a significant dry stretch, change into dry socks. If you’re able to plan your water immersion/dry stretches at all, consider wearing wet socks in wet stretches of your route and change into dry socks for dry stretches of your route.
Slow down your pace. Your feet are now compromised and the tissue softness and wrinkling are going to make you more susceptible to cracking and blistering. Fast-paced hiking + heavy pack weights may be two of the biggest (controllable) culprits when it comes to exerting the shear stresses on foot skin surfaces that lead to cracking and blistering.
Stop and camp. If you’re on a multi-day trek – the best possible thing you can do is allow your feet to dry at night. If it’s warm, sleep without socks. If it’s cool, sleep only in dry socks that are as thin as possible to maintain foot warmth and comfort. Cold feet at night doesn’t help recovery, due to poor vascular circulation in your feet. You need that warm blood flowing in order to heal at night!
A mildly macerated big toe pad that resulted from hiking in relatively dry conditions. Three days of Leukotape on this toe (to manage the blister in the left of the photo) caused the maceration.
Do I need to get off the trail?
Finally, if you note that your feet have been macerated for several hours or days, and any of the following symptoms manifest, you may be progressing into an immersion foot disease:
redness
tenderness
swelling
open sores/sloughing skin
At this point, the chance that you can reverse conditions while on the trail is extremely slim. It’s time to get off the trail and rest your feet for a week or more. It may take up to several weeks for your foot to grow new dermal layers of skin, depending on the extent of the damage. If your feet are discolored (blue, black) or open wounds appear to be infected, it’s time to see a doctor as well.
Immersion Foot Syndromes (Wikipedia) – not a terrific summary, but I suppose it’s worth starting somewhere if you don’t have the patience to dig into medical writing.
A Microbiological Cause for Trench Foot (Microbiology Society) – discusses the relationship between immersion foot and microbiological activity; it’s interesting to me that we still don’t understand exactly what’s going on here – are immersion foot diseases caused by microbial activity, or does the onset of immersion foot disease simply predispose the foot to an increase in microbial activity?
Maceration (Blister Prevention) – a good discussion about what is happening at the cellular level.
Fixing Your Feet (John Vonhof) – the bible of foot care for runners and hikers. The new 6th edition is expanded, and an essential upgrade.
In this video, I walk through my gear during a 9-day summer trek in the high mountains of the western US. This was a trip with friends and family – 3 other adults and four children ages 7-11. We moved camps every day but one, and spent 70% of our miles off-trail, with camps up to about 11,600 feet. Scroll down for gear notes and trip photos!
In this video, I walk through my gear during a 9-day summer trek in the high mountains of the western US. This was a trip with friends and family – 3 other adults and four children ages 7-11. We moved camps every day but one, and spent 70% of our miles off-trail, with camps up to about 11,600 feet. Scroll down for gear notes and trip photos!
Gear Notes
Shelter
Locus Gear Djedi Dome – terrific livability for one person with fully-contained gear storage and reprieve from insane mosquitoes, great design for in-tent cooking
Katabatic Gear Chisos down quilt – a little chilly for sub-freezing temps but otherwise, this is my go-to mid-summer quilt
Nemo Tensor reg/wide sleeping pad – my choice when comfort is king and I’m not concerned about pack weight too much
HMG pillow – filled with some open-cell foam and other clothes for height adjustment
Commentary: I was surprised at how much I liked the simplicity of the Djedi tent. I’ve had the chance to use it for most of the summer now, and I appreciate its stability in wind, ease of setup, and confidence in knowing that I’m in a real tent while a storm is raging outside. On this trip, having a mosquito-free haven where I could actually make coffee inside the tent and not have to fiddle with a too-small vestibule was wonderful. The Chisos quilt was too cold. I think my metabolism is changing, and I’m not sure how much longer I can suffer through sub-freezing nights using a sub-1-lb quilt. The Tensor pad was a pretty nice luxury, but I still can’t justify the weight (probably) on long expeditions. We’ll see if it makes it into my kit for the September Whitetail Trek, or if I’ll go back to the XTherm for longer, harder trips…
Off-trail, above the treeline at a climber’s camp.
Commentary: I only used the raingear for nights where my quilt was too cold (2 nights below freezing). I suppose for 8 oz, it’s not a bad deal to have real raingear in the pack. For trekking in actual rain off-trail, however, I prefer my Arc’teryx Zeta FL. My rain pants are also too bloomy for off-trail scrambling and am on the lookout for something more tailored. The Sun Stretch shirt has been a go-to for me for years, and I’m a huge fun. The Quandary pants are light, but not so durable or warm when the terrain gets hard or the weather turns south. Nights were chilly, and I would have rather had my down jacket than the synthetic puffy.
Day Hiking/Running Gear
I also brought some gear for day hiking and mountain running. This trip involved kids, and short miles, and I’m in the middle of a training cycle for another expedition, so I used the following for mountain runs and day hikes on this trek:
UL mountain running shorts – I stored mosquito repellent, sunscreen, and snacks in the shorts pockets
2 oz hip pack – I carried my hat, wind shirt, inReach Mini, BeFree bottle, whistle, phone (maps), and light in this on trips away from camp
Commentary: I wish I brought some light gloves for evening runs. After the sun went down, my hands got pretty cold up high where I was scrambling in the evenings.
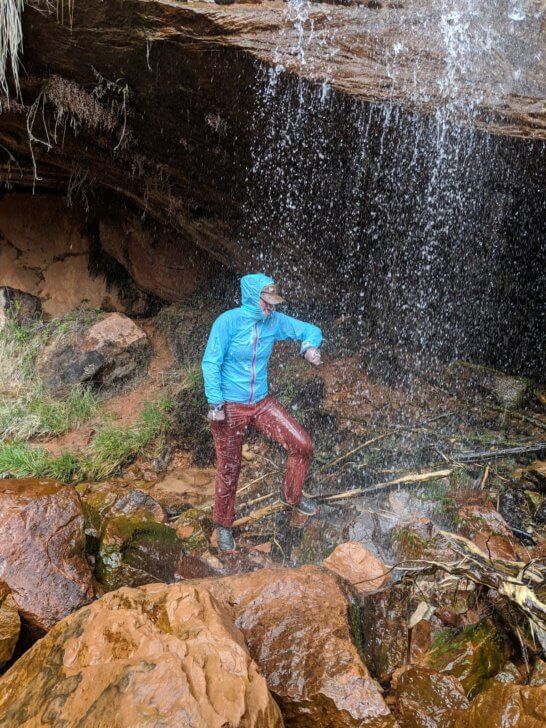
Commentary: Very happy with my footwear choice on this trip. The balm helped ease the skin stress when the temps got warm during the day and my feet were closed up in leather shoes.
DCF zippered pods for gear organization and void-free packing
Commentary: I’ve been experimenting more and more with the HMG pods over the last year and they have become an essential component of efficient, void-space-free packing and organization.
Commentary: The little Fire Maple 300t stove is tiny, reliable, and powerful. But it’s not a great stove for simmering food – its flame/heat distribution is just too tiny. I wish I had my Pocket Rocket Deluxe. The rest of my cook and water kit – no complaints at all.
Morning coffee.
Food
I brought about 18 oz of food per day (2,000+ Cal):
4 oz breakfast – grains, dried fruit, nuts
10 oz snacks – fish (salmon or tuna), nuts, rice cakes, potato chips, chocolate
4 oz dinner – grains, pasta, potatoes, veggies, spices
Meals were supplemented with fresh trout, which I prepared by poaching, de-boning, and then adding back to my one-pot meals.
Trout chowder.
I did experiment with fasting on this trip, and fasted up to 24 hours at a time, with no challenges, energy depletion, or ill effects. I left the trailhead with about 10 pounds of food and came out with about 2.5 pounds leftover. I lost about 3 pounds of body mass over the course of 9 days.
My favorite filling, calorie-packed, quality packaged foods from this trip:
Commentary: I’m very happy with Patagonia Provisions soups, chilis, savory grains, and fish. They are some of the best-tasting foods I’ve ever had on a backpacking trip. The packaged meals are surprisingly filling and compact (dense). Adding trout to my menu was a huge bonus, and I can’t imagine leaving my tenkara rod behind when I know I’m going to be traveling through alpine lake country. My experiments with fasting surprised me, but admittedly, I went into this trip riding the wave of two months of an every-other-day 16-20 hour fasting lifestyle, so there was some conditioning. On trips that don’t involve a lot of exertion, I could save quite a lot of food weight by eating fish, foraging, and fasting.
Choosing a fly.
Electronics
Training/gps/compass watch for recording HR, route, miles
We also brought a sat phone on this trip but reception was terrible (Iridium 9575) and it was difficult to get calls out and maintain connections in this high-mountain environment
Photo/video taken with an iPhone XS and Moment lenses
Commentary: inReach Mini for the win, as usual. Easy to stay in communications with this tiny device. Not so easy with the sat phone. Pleased with the iPhone XS photo and video capabilities, especially with Moment lenses.
Chair
15.6 oz – the most comfortable and lightest full chair
Commentary: Critical item for my back health on trips where I have to spend a bit of time in camp.
How we acquired these products: Product(s) discussed in this review were either acquired by the author from a retailer or otherwise provided by the manufacturer at a discount/donation with no obligation to provide media coverage or a product review to the manufacturer(s).
We do not accept money or in-kind compensation for guaranteed media coverage: Backpacking Light does not accept compensation or donated product in exchange for guaranteed media placement or product review coverage.
Affiliate links: Some (but not all) of the links in this review may be “affiliate” links, which means if you click on a link to one of our affiliate partners (usually a retailer site), and subsequently make a purchase with that retailer, we receive a small commission. This helps us fund our editorial projects, podcasts, instructional webinars, and more, and we appreciate it a lot! Thank you for supporting Backpacking Light!
The goal of this test is to determine the effective age of your backpacking water filter based on comparing its current flowrate to its flowrate when new.
Background
I worked in the 3D printing industry for many years: actual jetting of material (not dispensing molten material through a single nozzle). We were using a 300 dot per inch printhead to generate solid objects and the printhead contained 1200 nozzles. Building a single 8” tall object was equivalent to printing 5000 pages.
Supplying the printhead with clean material was paramount to printing reliability as well as longevity. To assess this issue, a metric was developed to evaluate jetted material for cleanliness. This is called Conductivity Testing. To conduct the test, liquid was placed into the test apparatus and the fluid level was held at a constant level – this would provide a uniform fluid pressure. Downstream from the vessel was a standardized filter material. The liquid was allowed to flow through the filter and the data was collected. To generate a Conductivity Chart, you plot the real-time flowrate of the liquid through the filter material (Y-axis) against the total amount of fluid that had passed through the filter (X-axis). The chart would look like a straight line with a negative slope: high on the left side and diminishing on the right.
The slope of the line would give us the rate at which the filter clogged or in other words, a measure of the material cleanliness. The minimum flowrate is defined by performance requirements needed to jet material correctly. The total volume of material jetted is defined by marketing requirements. From this chart you can determine how many cubic feet (or pounds) of material could be jetted before the flowrate drops below acceptable levels.
The test metric is excellent for verifying material cleanliness, so we can apply this to estimate backcountry water filter performance.
However, we have no control over water quality in the backcountry. Modifying the test methodology to estimate effective filter area does add a lot more value to help characterize the performance state of the water filter.
It would be easy to replicate this type of test for water filters and the results would be highly repeatable. That being said, the system we used for evaluating 3D printing material quality, described above, is bulky and requires additional equipment that would make it difficult for most backpackers to emulate.
Thus, in this article, I am proposing a faster and easier-to-use test that, while not as accurate, the would be easy to replicate and is user friendly enough for most backpackers.
The goal of this test is to determine the effective age of your backpacking water filter based on comparing its current flowrate to its flowrate when new.
Procedure
I developed this test procedure using Sawyer Squeeze and Sawyer Mini filters, since they are probably the two most popular filter models in use by the lightweight backpacking and thru-hiking communities.
You can estimate the life of your Sawyer filter using a pretty simple test setup. The test requires that you measure the flowrate of a new filter in order to establish a baseline.
Darcy’s Law is used to characterize fluid flow through a filter media. However, this assumes that the fluid is free of particulates. By adding the assumption that the filter will become clogged over time, you can estimate the life of the filter by calculating the reduction in the effective filter area. By monitoring the flowrate, you can approximate the amount of useable filter (effective remaining filter area) that is remaining in your filter. Additionally, you can see the effect of backflushing on restoring the life of your filter.
Required Materials
Sawyer filter (or any other filter capable of operating in a gravity filtration mode)
1-liter Smartwater bottle
digital scale
Instructions
Step 1: Drill a hole in the bottom of the Smartwater bottle. The hole should be small enough (~3/16” or 5 mm) that you finger can prevent air from leaking into the bottle. This is required to prevent a vacuum from forming in the water bottle during filtration, which will influence repeatability by altering the flow rate.
Step 2: Make sure that your filter is wetted out: I placed mine in a full glass of water overnight.
Step 3: Fill your sink (or a bucket of water) full of water.
Step 4: Submerge the bottle completely under water and remove all of the trapped air. Do the same with the filter and attach the two while keeping them underwater. In the picture below, the assembly is completely submerged below the surface of the water.
Step 5: Place your finger over the hole on the bottom of the water bottle and raise the bottle/filter assembly out of the water. Water should not flow out of the filter (there may be a few residual drips, and that’s OK).
Step 6: Place a bowl on top of the scale and tare the scale.
Step 7: Suspend the bottle/filter over the bowl. Release your finger from the vent hole, and at the same time, start a stopwatch.
Step 8: When the scale reads 500 grams (16.9 oz), record the time (in seconds) and end the test.
Test Results
For reference, I tested a brand-new (unused) Sawyer Squeeze filter and a used Sawyer Squeeze filter. The used filter has been my go-to filter for the last 5 years or so. I haven’t been judicious about backflushing or performing maintenance on the filter after my trips. I also do not have a clear idea as to how much water has been through the filter.
The test was conducted 3 times. Due to good repeatability, I elected not to include more replicate runs. The same batch of water was used for all tests and the water temperature remained constant. After the test, the filtered water was poured back into the main body of water.
The test was limited to 500 ml (16.9 oz) for 2 reasons. First, I was concerned about the impact of the reduced pressure head over time (h). As the water level dropped so would the flowrate and that could add error into the measurements. Secondly, my digital scale times out after 3 minutes so the change in volume (ΔV) had to be managed.
The following table summarizes my results with the new filter, the used filter, and the same used filter after a backflushing regime:
New Filter
Used Filter
Used, Backflushed
Time
(seconds)
57
103
99
56
105
97
57
100
98
Average
56.7
102.7
98.0
Theory of Operation & Data Analysis
Darcy’s Law was first used to describe fluid motion through permeable media (e.g., water flow through dirt and sand). Darcy’s Law has been used by engineers for decades to characterize filter performance. The basic equation is defined below:
K = ( ΔV * L ) / ( Δ t * A * h )
Where
K = hydraulic conductivity (volume/unit time)/filter surface area
ΔV = change in volume of water
Δt = change in time
L = specimen length
A = surface area of filter media
h = pressure head
Engineered filters are easier to analyze compared to earthen systems as a number of variables are under control.
K (hydraulic conductivity) is usually a design specification. A and L are defined by the physical design of the filter. For the purpose of this test, K, A, and L are all constants since we are comparing the performance of the same filters.
Darcy’s Law was formulated with the assumption that the fluid does not contain any contaminants (particulates). We can adjust the formula by assuming that as the filter clogs, the effective area of the filter is reduced.
Given the test protocol, the initial volume (V) is defined as a full bottle and the final volume occurs at the termination of the test when 500 ml (16.9 oz) has been filtered. Additionally, h (pressure head) is geometrically fixed as a function of the bottle’s dimensions.
Since K is a true constant between two filters having the same design, we can rewrite Darcy’s Law for both the new and used filter tests:
( V * L ) / ( tnew * Anew * h ) = K = ( V * L / tused * Aused * h )
V, K, L & h are basically constant over the course of any replicate tests so they cancel out of the equation.
The formula now reduces to:
1 / ( tnew * Anew ) = 1 / ( tused * Aused )
This can be rearranged into:
Aused / Anew = tnew / tused
Thus, the ratio of the effective surface area of the used filter compared to the surface area of a new filter is proportional to the inverse of the time difference of the flowrates.
Data Analysis
Using my test data in the Darcy’s Law formula above, we can compare the performance of my used to a new filter:
In this case, 56.7/102.7 (tnew / tused) = 55%. Assuming that Anew= 100%; Aused has 55% of the original effective filter area of Anew.
In my particular case, backflushing (3X) had very little impact on the flowrate (102.7 sec compared to 98.0 sec).
A Real World Model of Filter Degradation
Water quality is unknown and filtered volumes will vary. Here is a graph speculating what can happen over the life of a filter.
Each color represents a different backpacking trip. The decreasing slope of lines, e.g., may be a function of particulates clogging the water column (steep lines represent the filtration of water with higher particulate concentrations). The vertical spikes represent attempts to backflush the filter.
Commentary
Test Results
This simple test would provide insight about the effective surface area of your water filter’s media (in a sense, it represents a fuel gauge for the filter’s life).
No meaningful conclusion can be drawn from the backflushing results because the history of the used filter is not well-documented. More field data would be needed in order to clarify the effectiveness of backflushing, de-calcification, or any other mechanism by which filtration could be improved.
In an ideal world, one could measure results on (for example) 10 samples of new Sawyer filters to create a baseline range of flow rates for new filters. Users could then repeat the test protocol to estimate the actual effective filter area or life of their used system. If successful, the database could be expanded to include other gravity/squeeze-based filters.
Filter Type vs. Water Quality
Water quality around the country (world) is highly variable, so you must select the right filter for the right conditions. When camping in and around slot canyons and silty water sources, I usually bring my MSR MiniWorks filter because I can easily clean the filter element even in silt-laden water. Otherwise, I use the Sawyer Squeeze for 90% of my trips.
Sawyer Squeeze vs. Mini
When they first came out, the reported life of a Sawyer Squeeze was 1 million gallons (3.8 M liters) of water!
A million gallons is an absurd amount of water. I knew that the only way that they could claim those numbers were based upon something like continuous-flow (i.e., Conductivity) testing using some type of clean model water. Sawyer was forced to back off on those claims as they could not verify the claim with confidence, and it had almost zero real-world applicability.
The Sawyer Mini claims to have a filter life of up to 100,000 gallons (380,000 liters) of water. That’s great but the Mini has an order of magnitude less filter material that the Squeeze. After more than 5 years of use and abuse, the test results indicate that my original Sawyer Squeeze filter still has 55% of its life remaining. In terms of equivalence, that’s the same as about 5 Sawyer Mini filters!
In my opinion, the Sawyer Squeeze is superior with respect to flowrate, longevity and most importantly robustness (or latitude in its ability to resist clogging by problematic water sources). The biggest downside of the Squeeze for most people is the weight. That being said, the Sawyer Squeeze filter weighs only 1.0 oz (28.3 gm) more than the Sawyer Mini.
This test protocol proved to be very useful for me in making the decision to stick with the Sawyer Squeeze, for its performance-to-weight ratio vs. the Mini, especially with respect to its durability (longevity).
Disclosure: Some (but not all) of the links in this review may be “affiliate” links, which means if you click on a link to one of our affiliate partners (usually a retailer site), and subsequently make a purchase with that retailer, we receive a small commission. This helps us fund our editorial projects, podcasts, instructional webinars, and more, and we appreciate it a lot! Thank you for supporting Backpacking Light!
When Backpacking Light Gear Editor and Podcast Producer Andrew Marshall set out on a fast thru-hike of the Tahoe Rim Trail, he knew he’d be contending with Sierra snow pack that was several hundred percent above average. The story of that trip – trail conditions, lessons learned, and gear tested – is the subject of this BPL TRIP SHORT.
After a brief introduction, Ryan and Andrew spend some time discussing the Tahoe Rim Trail and conditions in the Eastern Sierra. Among other things, the guys talk about Andrew’s route finding, food strategies, training, and how to walk on sun cups (hint – meditate).
In the second half of the pod Ryan and Andrew talk about the gear – what Andrew loved, what he didn’t, and what he wished he’d left behind. They wrap it up with a lament on the state of footwear in the ultra-light world.
Aggressive, durable, and simple – this piece of gear probably saved Andrew’s bacon more than a few times on the Tahoe Rim Trail. Check out BPL’s enthusiastic review.
Sponsors: Help us Keep the Podcast ADVERTISING-FREE!
This episode of the Backpacking Light Podcast is supported and kept advertising-free by Backpacking Light membership fees. Please considerbecoming a member which helps support projects like this podcast, in addition to a whole slew of other benefits!
In addition, some of the links on this page may be affiliate links that refer to our partner merchant retailers. If you follow a link and then make a purchase, we receive a small commission which goes a long way towards helping us pay for podcast production, hosting, and bandwidth fees! Thanks for supporting us in this way!
Contact
You can contact us at podcast@backpackinglight.com, or follow us on social media –
We do not accept money or in-kind compensation for guaranteed media coverage: Backpacking Light does not accept compensation or donated product in exchange for guaranteed media placement or product review coverage.
Affiliate links: Some (but not all) of the links in this review may be “affiliate” links, which means if you click on a link to one of our affiliate partners (usually a retailer site), and subsequently make a purchase with that retailer, we receive a small commission. This helps us fund our editorial projects, podcasts, instructional webinars, and more, and we appreciate it a lot! Thank you for supporting Backpacking Light!
A narrative about Andrew Marshall’s thru-hike of the Tahoe Rim Trail during a big snow year.
The author on the Tahoe Rim Trail in the Mount Rose Wilderness.
The Tahoe Rim Trail passes just above my cabin. Walk out the front door and up three miles of forest roads and singletrack and there you are – at a loop that winds through 170 miles of stunning eastern Sierra scenery.
We moved to Tahoe nine months ago, and I found the TRT a few days after that. You will perhaps remember that A Walk in the Woods, Bill Bryson’s seminal work on the Appalachian Trail, begins in much the same manner. In the opening pages, he stumbles across the AT a few minutes from his backyard in New Hampshire.
Bryson is a literary hero of mine, his book a large part of the reason I eventually set out on my own AT journey. So I rather enjoyed the similarities in our life experience. I made up my mind to thru-hike the TRT the moment I stepped across it, and it’s been an itch on the back of my neck ever since. Just existing up there, maddening, while I pecked away at a keyboard and watched through my window as the wind off Lake Tahoe tossed around the top of the sugar pines.
Maybe you know what I mean. Long trails have a way of getting under your skin. For every person who decides to do a thru-hike spur of the moment, it seems like there are ten folks who’ve been obsessing for years. Reading books and blogs, haunting forums, and boring their friends at cocktail parties. When you do finally pull the trigger on a long hike, it can feel strange, like you aren’t doing the thing you’ve been talking about doing for months, years, or decades. But you are, and it’s glorious and heady and a touch disorienting.
This is the state in which I found myself in early July as I bounced along the TRT at a respectable 3.4 mph. I’d spent the day frantically getting the loose threads of my life tucked away – freelance work put to bed, cat sitter paid, dishes washed, firewood tarped. Now I was getting a late start, but I was afoot and lighthearted in the golden afternoon light. Best of all, I was confident that regardless of what emergencies cropped up over the next week, I wouldn’t know about them and couldn’t solve them even if I did.
The arc of American life is long and bends towards obligation. And so I’ve come to value the disconnection and simplicity of thru-hiking more and more, even as near-daily Instagram updates, vlogs, and satellite communication become the rule rather than the exception. At the risk of breaking the sanctity of the “hike your own hike” mantra, it seems to me that the more thru-hiking comes to mirror “normal life,” with its unceasing connections and updates, the less reason there is to do it.
But why do we do it? It seems like a simple question at first, but I’ve struggled to explain myself over the years – particularly as the tales of hardship and suffering end up being the best stories from any hike. A good thru-hiking yarn doesn’t go, “and then I had several pain-free days of excellent walking in good weather and no bugs, and I wasn’t even all that hungry.”
It’s the sort of thing that becomes hard to explain to relatives at family functions, and the unexplainable nuance of it is why you end up answering with “it just seemed like it would be fun” when asked why you decided to trudge through snowfields from Mexico to Canada. On such occasions, it’s easy to understand why Mallory answered with a flippant “Because it’s there,” when asked why he was making another Everest attempt. That his quote has come to symbolize badassery rather than a frustrating inability to express the in-expressible is no fault of Mallory’s. We generally like our heroes to have good explanations for their actions, and when they don’t, we assign them our own explanations.
So why schlup a pack up and down mountains when for the same money and time you could be drinking margaritas on a beach somewhere? The obvious thoughts – immersion in nature, sitting in awe of beauty, and disconnection from modern society – are only part of the total answer. This story will have its moments of hardship – it wouldn’t be good otherwise. But I’ll also attempt to highlight the small moments of grace and wonder that comprise the answer to the ultimate long-distance backpacking question: why are we doing this?
I made an easy fifteen miles counter-clockwise around the lake by dark and pitched my tent in the lee of some boulders overlooking the water. I watched the sunset as I ate dinner, then fell into the familiar chores: store the food, treat the water, organize the gear, look over the following day’s terrain.
Enjoying a lake sunset on the first night.
Here’s an often-overlooked reason to hike long distances: to meet your needs you must do simple, repetitive work with a small number of tools. The relationship between you and a drink of water is immediate and tangible, not separated into a series of remote capitalistic interactions which start with you going to work and end with you unthinkingly turning on the faucet. Sure, you have to do these simple chores on a three-day hike as well. But the rhythm they form after weeks and months of repetition is lovely.
Everything has a cost. While backpacking, that cost becomes concrete. And the longer you pay that cost concretely, the more concrete the world itself seems to become. To that end, backpacking is grounding.
Day two of my hike took me through Tahoe City and out the other side, into the edge of the Desolation Wilderness. As I gained altitude, I ran across ever-growing mounds of consolidated snow cutting across the trail like the edges of a desert expanding into a forest. These drifts immediately slowed my pace – the easy-to-follow trail became a slippery exercise in aerobic route finding. Nothing gets the blood pumping like gaining and losing a thousand feet of elevation in ten-foot increments.
The Tahoe Rim Trail was buried under three to fifteen feet of consolidated snow drifts for well over a quarter of its 170 mile length. Not as bad as post-holing, but no easy task.
As the TRT joined the PCT at the end of day two, I started coming across northbound PCT thru-hikers. Thru-hikers tend to vacillate between grim fatalism and manic joy, but these gangly individuals were finishing four-hundred miles of conditions that were already wearing me out after ten miles. It’s hard to express their mood. Weary resignation, perhaps?
We had a hell of a winter here in the Sierra, and what is good for wildflowers and the California water table is bad for poor saps trying to make it to Canada. Sunken-eyed, hollow-faced, and thinner than they should be before the halfway point, this crop of PCT NoBos took it on the chin. They were exceedingly happy to be leaving the Sierras, and hopefully, their caloric burn would stabilize once they were in better trail conditions.
Weight loss is a pleasant side effect of thru-hiking but shouldn’t be considered in the “why we do this” category. Particularly as any weight you lose, you are likely to gain back almost immediately following your hike. It’s challenging to transition out of the “eat everything you see” mindset once you rejoin normal life. Most people don’t manage it very well. Another thing people forget about thru-hiking – whatever problems you take with you into the woods are likely to be there when you return.
Upon meeting PCT thru-hikers, I took great pride in being mistaken for one of their own. I took it to mean my pack was well-dialed and my stride locked in (either that or my beard, cultivated all winter against my wife’s clearly articulated wishes, was sufficiently ratty). Either way, I sucked in my winter paunch at every opportunity as I explained that, no, I wasn’t a PCT SoBo, I was on the significantly shorter Tahoe Rim Trail.
I love the traditional exchange of trail conditions as two hikers meet each other from opposing directions. It’s another oft-overlooked pleasantry of life on the trail. Is there anything more basic than two travelers meeting on a path, each doing his or her best to ease the passage for the other? Our ancestors have been doing it since the first proto-humans met each other on proto-elephant trails. No doubt they were leaning on sticks, saber-tooth tiger packs slung over their shoulders, discussing water sources and upcoming elevation changes. Shortly after that, the first forum arguments broke out on cave walls as strangers argued with each other about the pros and cons of giant sloth pelts as overhead shelters (so breathable, but is it worth the weight? They had OPINIONS).
In this case, The Ritual all through the Desolation Wilderness went like this:
“How’s the trail behind you?”
“Snowy. Sketchy traverses. Twenty-foot snowdrifts. Slushy walking and wet feet after ten am. Hard going, you won’t make good miles. Streams are running though. How’s the trail behind you?”
“Same. Exactly the same.”
“Happy Trails.”
“Happy Trails.”
Snowfield and sun cups made for tough going. These are the conditions PCT NoBos have been dealing with for all 400 miles of the Sierras.
As day three progressed, the slow-going started to stress me out. With less than a week available on my calendar to complete the TRT, I had to top 27 miles days every day. My late start on day one had already set me behind, and now I was working twice as hard as I’d been expecting in order to make two or three miles per day less than I needed to. The brutal math of trail miles adds up quickly – this was going to mean 30+ mile days on the east side of the lake.
As I slid down my umpteenth snowbank and searched around for the trail, I reflected on my pre-hike research. My sources had indicated that this particular section of TRT was “mostly clear of snow.” It occurred to me that I must have a different definition of “mostly,” “clear,” or “snow” than the person who wrote the trail conditions on the official Tahoe Rim Trail website. I was starting to think my ambitious timeline might be coming up against the reality of mother nature. I was walking by five-thirty am every morning and setting up camp after eight every night. I’d yet to crack the 10 oz paperback I’d already hauled over eighty miles of tough going, an unconscionable sin if ever there was one.
At the start of this essay, I mentioned that a common reason for long-distance backpacking is a chance to be “in nature” for long periods. What I believe most people mean when they say this is “to be surrounded by the beauty of nature,” and that it is wonderful and soothing to the soul, of course.
But another aspect to being “in nature” is to be at the mercy of nature. All the research, preparation, and expensive gear in the world doesn’t change the fact that if it rains long enough, you will be wet. If the cold is cold enough, you will be cold. If you are hungry, you will be hungry, because you just can’t carry enough food with you to not be. If the going is sufficiently hard, you may not accomplish your goal, no matter how hard you try. If you push yourself too far past your limits in the wrong situation, you die.
Dealing with these realities is one of the hardest things about thru-hiking for type-A first-world humans. We are used to getting our way with the push of a button or the swipe of a finger across a screen. “Hard work and preparation will bring you success,” is so deeply ingrained in our American mythology that it’s disorienting when mountains turn out not to give a damn about your hard work. Even worse, mountains sometimes don’t care how much Dyneema and carbon fiber your high-paying white collar job affords you.
A brief respite from snow-walking.
So long as it isn’t fatal, the occasional kick in the ass is one of the best things that can happen to you, as crusty old grandpas everywhere are fond of reminding you. And so it turns out that being uncomfortable and sometimes failing is an excellent reason to go on a long hike – but this can be hard to remember sometimes.
On the morning of day four, I arrived at the Echo Lake Chalet, a mountain hotel with a well-provisioned general store. I took the opportunity to grab a candy bar and a cup of coffee and settled down to text my wife. After I complained about the conditions and my swiftly compressing timetable, my wife responded with the obvious.
“You know, you don’t have to finish. Maybe conditions are just too hard for the time you have. Just do what you can and take an Uber back to the house at the end of your seven days,” she texted.
I grumpily pondered this wisdom while I dunked my Snickers in my coffee and glared up to the mountains.
A few minutes later, she texted again.
“But you are a bad-ass, and I believe you can get it done,” read text number two.
Clearly, she was unsure which tactic would make me feel better, so she decided to toss both out there and hedge her bets. In truth, both ideas (that I didn’t HAVE to finish, but it was likely I COULD finish, but also just as likely that I COULDN’T finish because the trail is what the trail is) soothed my mounting gloom. I would give it my best shot, knowing that the reality of the mountains might defy me regardless of how hard I tried. Thus buoyed by expert philosophical wifery, I finished my snack and slid back into the slipstream of the trail.
We are lead to this: thru-hiking (or any long-distance backpacking) is a contradictory experience. Clearly, the point is to be in the wild, in the woods, in the mountains, for long periods of time. Clearly, the point is also to get from point A to point B. It isn’t about the journey, it’s about the destination, although it is simultaneously very much about the journey.
Trying to hold both of these ideas in your head at the same time is an exercise in mental gymnastics that is best assisted, in my opinion, with a deep study of the Tao Te Ching and some of the more Zen focused branches of Buddhism. Failing that, you can always go southbound on the Appalachian Trail. The southern terminus of the AT is famously just a plaque bolted to the ground, overlooking a pretty but unremarkable collection of low, soft Georgia ridgelines. The “Oh. Well. I did it, I guess,” feeling this plaque engenders is such a contrast to the Instagram-worthy epicness of the Katahdin northern terminus that it boggles the mind. It will teach you to think correctly about the act of walking long-distances, that’s for sure.
By the afternoon of day four on the TRT, I was enjoying my longest snow-free stretch of trail yet, feeling lean and strong and locked in.
As I rounded the southern tip of Lake Tahoe and started north on the eastern side, trail conditions continued to improve. I made up some lost time, knocking out twenty-nine and thirty miles on days five and six respectively. As day seven dawned, I was thirty miles from finishing the TRT, with an additional three miles after that to walk back to my cabin. At this point, I was determined to finish on day seven because I’d neglected to pack a dinner for that evening, to say nothing of breakfast or lunch for a hypothetical day eight. Philosophy considerations almost always take a backseat to the realities of the stomach.
Covering the ground was going to be no easy task. My route for the day would take me into the Mt. Rose Wilderness and over Relay Peak, the highest point of the TRT. The Wilderness was a section of trail I knew would be completely socked in with snow, which is why I’d saved it for last. I was banking on the somewhat silly hypothesis that an extra six days of sunshine would vaporize the twenty-foot snowbanks.
Feeling like an Everest mountaineer on summit day, I broke camp and drank coffee by headlamp. Five miles later, I was in the snow, and my pace dropped from 3.5 mph to under .5 mph.
I had a few new problems with which to contend. Firstly, the TRT had split from the PCT forty miles earlier, and I no longer had even the hesitant footprints of previous hikers to follow. So I spent even more time route finding than I had in the Desolation Wilderness a few days earlier.
To add to that, the sheer volume of snow at this higher elevation had created a quasi-glacier. The weight of the ice had pushed giant pines over like matchsticks. Soon enough I was engaged in a sort of vertical scrambling bushwhacking with slushy late-morning snowpack underfoot, fighting hard for every scrap of elevation gain. When I finally cleared treeline, I was met with even more challenging tread – sun cups that were two feet deep.
A trail marker near the top of Relay Peak in the Mount Rose Wilderness. At times, the TRT was more of an idea than a trail.
Both the final ascent to Relay Peak and the descent on the other side were replete with the kinds of traverses that make your mother extremely unhappy. Halfway across one particularly exposed traverse, I stopped for water and thought to myself, “I’d better mentally rehearse my self-arrest technique.” On the very next step, my fragile toe-hold gave way and down I went, suddenly subject to the forces of friction and gravity and pants-pissing fear. I managed to halt myself about ten feet into the slide, though it felt more like ten hundred. Terror inducing traverses are the sort of thing I never had to deal with growing up backpacking in North Carolina, Georgia, and Tennessee. In the southeast, snow is (generally) less murderous, and it’s easier to find decent post-hike barbeque.
Sketchy traverses were the norm in the Desolation and Mount Rose Wildernesses on the TRT after a huge winter in the Sierras.
All in all, it took me about eight hours to clear six miles of trail, and I ran into periodic snowbanks for another five miles after that. But finally, blessedly, I was out of the Wilderness and into elevation that snow had given up on weeks beforehand. Digging deep, I cranked up my pace and pushed into the final leg – fueled by my final few almonds, a chunk of parmesan cheese, and some lemonade soaked chia seeds. My reward was truly jaw-dropping ridgeline vistas beneath a bluebird sky. Beyond the ridge, Lake Tahoe was a surreal ultramarine. After a day of unceasing snow-glare, everything seemed over-saturated. Under my feet, the trail was solid and real.
I like off-trail travel – the problem solving, the adventure, the sense of being “out there” – and it always makes for a good story. But what I truly love is the steady, rhythmic, boring walking that a good section of trail provides. It’s my meditation and my prayer, and the thing that’s allowed me to stomp most of the poison out of my soul over the years. In his essay “On Walking,” Henry David Thoreau provides a Latin quote that sums it up nicely.
“Solvitur Ambulando.”
It is solved by walking.
What is solved? Well. Lots.
Herein lies my final thought on the matter of why we participate in this odd pastime of long-distance backpacking – a pursuit that is arguably the least sexy of all outdoor sports.
It’s just about walking. That’s it. Everything else – the beauty, the solitude, the camaraderie, the routine, the life lessons – all of it takes a back seat to what happens to your mind, body, and soul when you spend a good chunk of your day just plodding along.
Thoreau, that keen observer of the human condition, didn’t need modern double-blind studies to tell him the benefits of traveling by foot at two to three miles per hour. He saw the rewards made manifest in his soul, and as such was no fan of how locomotives, with their noise and their speed, shrunk and cluttered his world. We can only imagine what he’d have to say on the state of things now, although, come to think of it, his words would probably be much the same as they always were.
“Simplify, Simplify, Simplify.”
What’s more simple than walking?
In his book “On Trails,” journalist Robert Moore explores the concept of pathways as a kind of collective species memory. All sorts of animals from sheep to elephants follow trails because trails go somewhere. If a trail exists, the logic goes, it must be worth following.
My trail went exactly where it started – an unassuming fire road in the middle of the woods and from there three miles downhill to my home. When I stumbled into my cabin an hour later, it was eight-thirty pm. I’d covered thirty-three miles on the single toughest day of hiking I’d ever foisted upon myself. I’d finished on time, though I like to think I’d have been okay with not doing so.
More than that, I’d walked in a giant loop, a great irony to anyone who’s ever spent time in the woods expressly avoiding that navigational feat.
But to walk in a circle only to arrive home again seemed appropriate (and a touch Tolkien-esque), a final manifestation of my ponderings on the nature of thru-hiking. As the old saying goes, “Wherever you go, there you are.”
Maybe it’s all a little too esoteric, a bit too hippy-dippy. That’s okay. Just go on a long ramble, that’s all I’m trying to say. Follow a trail somewhere, and do it for more than a weekend. There are worse ways to shrug off a burden than to shoulder a pack and go walking for a long time. And few better.
Gear Notes
Here are my notes about some of the more significant pieces of gear I took on the Tahoe Rim Trail. My base weight was around 17 lbs.
Mountainsmith Zerk 40L – 28 oz – My current favorite pack. Foam frame, 30 lb capacity, with a thick, extra-cushy trail running inspired suspension and tons of well-designed exterior storage. I was able to access my camera, phone, bear spray, sunscreen, chapstick, 4 Liters of water and 1,500 calories of food without taking my pack off – and I had room to spare. See my First Look review here, and stay tuned for a full review coming soon.
Big Agnes Fly Creek HV1 Carbon – 21 oz – An interesting double walled Dyneema Composite Fabric / sil-nylon hybrid with carbon poles. Light for this style of tent, but not nearly as roomy as similarly weighted single wall Dyneema trekking pole shelters. Seems to handle condensation well but my climate was very dry for this trip. Full review coming soon.
Therm-a-Rest NeoAir UberLite – 8.8 oz – Still probably the best sleep you can get for the weight. Check out my extensive review here. I managed to avoid sleeping on snow on this hike. If I had to, I’d have needed to use my pack as extra insulation under the UberLite. This pad is not without its limitations.
Therm-a-Rest Vesper 20F Quilt – 19 oz – I’ve cooled slightly on this quilt since my initial review. Love the weight and packability as well as the premium materials (950 fp down!), but the pad connection system leaves something to be desired.
Hillsound Trail Crampon Ultras – 16 oz – I purchased these rugged puppies after reading and editing Emylene VenderVelden’s enthusiastic review. I was not disappointed. I found the aggressive traction and double-weld durability to be just what I needed on this particular hike. I did have some issues with the toe section slipping out of place occasionally. Could be an issue of improper sizing on my part.
Joshua Tree Hiking Salve – 2.4 oz – I’ve been hearing about this stuff for years but never pulled the trigger on it. Now I’ll never go on a long trip without it again. In the future I’ll be applying it for months before a big hike, as per the advice in our recent podcast.
What I Learned
Just because my muscles and cardio system can handle 30 mile days with little build up, doesn’t mean the structure of my feet can. Training in the future will entail less days mountain biking and trail running and more days spent hiking under load and slowly working up mileage. I’m currently dealing with some foot injuries incurred on this hike as a result of going too far too fast.
I’ve increasingly been eating real food (nuts, dried berries, hard cheeses, legumes, brown rice, and soaked chia), over bars, chips, fast-carbs (tortillas, bagels, ramen), candy, and other junk. The performance benefits are worth the extra weight, especially on thru-hikes. Additionally, I space all my lunchtime calories out over a full day as I’m walking. I like the steady flow of energy. This system is made easier with a pack like the Zerk 40L.
As much as I love hiking in shoes like my Altra Lone Peak 4 Trail Runners, I worry about the environmental cost of choosing a footwear strategy that has to be replaced every three to five hundred miles. My Altras only have about three hundred hard miles on them (half hiking, half trail running) and are showing significant wear, especially in the midsole cushioning and outer mesh fabric. Food for thought.
This article features an interview with a Canadian Mountain Rescue Medic, focusing on how to assemble lightweight first aid and trauma kits for backcountry travel.
Introduction
This article features an interview with a Canadian Mountain Rescue Medic, focusing on how to assemble lightweight first aid and trauma kits for backcountry travel.
Invariably, when I release a new trip report with my gear list, the forum has at least one person ask: ‘what is in your first aid kit?’ Though, I am generally savvy with emergencies, (I did spend a fair bit of time with emergency services and have certainly been a patient more than my share of times) I am not a doctor, a nurse or a paramedic. Though I have taken many medical courses, I am long since expired on most of the relevant certifications, except basic first aid. I am perfectly capable of administering basic medical care to myself and packing my own kit. However, I balk at doing either for anyone else if I can possibly avoid it. I am evasive about answering the question to say the least.
Disclaimer
I will start with a relatively generic disclaimer: no one can tell you what to put in your kit. You are the best person to evaluate your needs based on your own skills and medical liabilities. That said, insight from a medical professional is a great place to start. In my case, I built my kit around ideas I got from my family doctor (he’s an outdoor enthusiast), an ER nurse friend of mine and my physiotherapist. I took wilderness first aid and have had a fair amount of experience either managing an emergency as a responder or being a casualty (I’m a pinch accident prone.)
I do, however, believe the question of ‘what goes in your first aid kit’ begs an answer; a very good answer from a current professional (read: not me.) And, if you don’t use your skills, you lose them and the certifications expire.
Candidate Search
To that end, I decided to find a professional to interview. I needed someone not only with medical experience, but also with outdoor experience (and preferably emergency trauma experience). Odd combination, which I put on the back burner for several years.
My search for a perfect interview candidate, accidentally ends one afternoon. As I stand in a line for a desperately needed cup of coffee, a stranger walks into the line behind me. Uncharacteristically, my, typically introverted personage introduces itself.
Turns out, my extroverted alter ego made friends with Michael. Michael is an avid kayaker, canoer, mountaineer and backpacker. On top of all of his outdoor pursuits, Michael is a paramedic and firefighter in the mountain community of Clearwater County, Alberta, Canada. Some time later, Michael and I part ways and I realize he’s going to be my interview subject to help us answer the question, ‘what goes into your first aid kit?’
The Interview
A few months later, I meet with Michael for the interview. He’s tall, athletic with a boyish, unassuming charm and an affable grin. He is an obvious introvert, but with an air of confidence and intention.
Em: So what goes into a mountaineering paramedic’s kit?
Michael: I think experience as a paramedic tells me more about what isn’t important in a kit than anything else. Most life-saving tools and interventions come down to training, quick thinking and thousands of dollars worth of bulky electronic equipment. None of these are possible in a physical first-aid kit.
People shouldn’t fool themselves into thinking that loading up with a lot of dressings, bandages and splints will make a positive outcome more likely than loading up with knowledge of injuries and illnesses and the techniques for managing them.
Em: What is in your head is more important than what you carry.
Michael: It’s funny, now that I’m thinking about it, me being a paramedic probably allows me to weed out a lot of items more than it has me adding a bunch of items. I carry a few different things than a first aider, but a lot less of the common things. Improvising is easier when you understand what is going on and what the objective is.
For instance, people get hung up on items of wound care needing to be sterile. I know better…Clean is preferred but sterile is not a necessity. I always say, a dirty sock stuffed in a wound is still better than hypovolemic shock.
Em: In the backcountry, is there really such a thing as sterile? Most medical personnel I know would debate how ‘sterile’ conditions are in hospitals. There is contaminated, clean and clean enough to do surgery. If you aren’t a surgeon, the last one is irrelevant. Humans are relative germ factories. Is there any case where you would be seriously worried about clean dressings?
Michael: Large area burns, deep or full thickness burns, that is. Infection can happen fast when you lose a large portion of skin. That’s the main reason I add roller gauze to my kit, they come sterile.
Em: What is a common item you would eliminate from every backcountry first aid kit and why?
Michael: Instructions (on how to use first aid supplies). [laughing] Ok, I’ll give a real answer… Probably most of the tensor bandages and triangular bandages because they’re bulky and can be easily substituted with other things. Most kits seem to throw in a lot of them. I keep a couple if I have the luxury of room.
And I also toss the stupid little CPR face shields. They don’t work. Especially for a layman first aider. An actual CPR face mask would be optimal but are larger.
Em: And really how often are you going to be giving yourself CPR or traveling with someone you are afraid to give CPR? If you are giving CPR, it is most likely to be someone you are traveling with. Most people (maybe everyone) I backpack with could bleed all over me and I wouldn’t worry about it.
Michael: Exactly.
Em: What is one thing no kit should be without?
Michael: Duct tape. [laughing] Actually, no first aid kit should be without a user with a prevention mindset. Basically, no kit should be without brains. Always remember the brains!
Em: What’s a weird item in your kit most people wouldn’t think to put in, and what is it for?
Michael: Well, you’ll laugh… Condom, [laughing] its an emergency water container, waterproof bandage (fingers, hands), use it for its elasticity, crude glove, waterproofing for a firestarting kit (they stretch a surprising amount). Never actually used one yet for any of those though. Just seemed logical. They’re tiny and multifunction. Always a good thing to have in first-aid or survival kits.
Em: What do you look for in a first aid kit case?
Michael: Waterproof or water resistant, easily recognizable or marked as first aid, (might be sending someone else for it) and something that allows easy, even one handed access, without having to dump out all the contents. Most commercial options fit the bill but lots of other options too.
Em: I prefer to toss my meds in craft baggies from the dollar store and label them. I usually toss them in an old pill bottle afterward to prevent them from getting crushed. Is there a better method?
Michael: Same, I used to use mini bottles but never had a problem with them getting crushed in baggies. I do keep them organized separate from everything else in a mini nylon sack or designated pouch in the kit.
Em: I just dumped a pile of pink powder out of my kit the other day. Pepto doesn’t do well in baggies apparently. I used to always use a bottle then switched to baggies and switched back to bottles again.
Michael: You can still take the powder form. [laughing] I only have one tablet per bag so it doesn’t matter. The harder tablets I double up. The bags aren’t really robust enough to be opened and closed repeatedly anyway.
Em: Is there anything you think is an absolute no-no to toss out of your kit?
Michael: Never leave behind the meds. They’re basic meds but can still really improve a situation, and you can’t improvise them. Rapid fluid loss is really bad. Symptom control can’t be overstated when presented with diarrhea or vomiting.
Em: Same thing with hard tools like scissors?
Michael: Yeah, tools are the basis for improvising. Or at least, necessary for improvising.
Em: I know a lot of people think, ‘I’ll improvise a tool if I need it’, which can be done. However, it can cost precious time when it counts. Somethings cannot be improvised well either. Also, most people do a terrible job of improvising when they or a loved one are in pain.
What about antibiotics?
Michael: Antimicrobials would be a good idea for a long term trip, for treatment of various bacterial, viral, or protozoal infections, especially when you’re potentially a long time from getting out. Azithromycin (Z-Pak) is not effective against giardia, but a good choice for a wide variety of other bacterial infections.
Having the meds to treat high probability illness is always a plus. However, keep in mind that even quick recognition and treatment of, for instance, a bad case of giardia (with drugs such as Flagyl, tinidazole, etc.), diarrhea and other symptoms will continue for up to a week, for a lot of people. It’s very hard to “knock out” diarrhea fast and very easy to aggravate it. Even after treatment, dehydration will continue to be a serious safety concern, in a lot of wilderness settings where strength and endurance is required. Therefore, certain otherwise fairly benign illnesses, like giardia – in certain settings – would be cause for aborting a trip, if that option is open and depending on severity of symptoms, security of your position and available resources. (I say that having never suffered a case of it myself).
If you have no other choice or are in a good enough position to push through, having the right meds will indeed save you a lot of anguish.
The Kits
Now the brass tacks, what are the contents of Michael’s kits? Michael works on a sliding scale, he starts with a universal consideration kit and combines with items for the next size up kit. This strategy makes it easy to organize as each kit size addition can be stored separately but combined to make a larger kit when needed.
Additionally, meds are kept in a separate list and section of the kit to make using, replacing and ensuring expiration dates are valid easier. The amount of meds in the kit is determined by the length of the trip and the individuals on the trip. Everyone should be aware of what personal meds are needed by their adventure mates and where they are if the meds may be needed in a life-saving intervention (epipens, heart medications and inhalers etc.)
Universal Considerations (Day Trip +)
My universal considerations for every kit (the list may get long but most of these are light and small items):
Editor’s Note: links to specific products are not necessarily links to the exact products in either Michael’s or Em’s kit, but are representative of the types of products that are popular choices by members of our community.
signalling, long term and night vision friendly light source, marking a patient or location in darkness, marking important equipment or rope
2-5
24 g (.9 oz)
Commentary:
Michael: Between that and the gear you would be carrying, that covers a bunch of small annoyances as well as splint building and major bandaging, so you can toss out the splint materials and bulky triangular bandage (substitute with clothing).
Em: I actually don’t carry a blade, I carry nail clippers with a sharp pointed file. It’s one of those tools I cannot replicate on the fly and serves a crucial and practical function in a pinch.
Michael: I hadn’t thought of that one, it makes pretty good sense.
Em: I like the seat belt cutter though, great idea. I also saw Victorinox is making a “blister pack” of tools about the size of a credit card called a SwissCard Lite which pretty much covers everything. It’s light and compact, but it’s also heinously expensive. Neat tool for backpackers on an unlimited budget.
Approximate Total Weight: 7oz (200 g) (with glow sticks)
Approximate Total Size: 1 Quart Ziplock Bag or Smaller
Minimalist Kit (2-3 Days)
Michael: I’d then work up from there to your most minimalist kit which would add some wound care supplies but only enough for isolated trauma (a single deep laceration, a single bad burn, a single broken bone) as any multi trauma in the wilderness environment is going to require improvisation anyway – unless you travel with a trauma jump kit.
As your trip length increases, the kit gets larger to account for higher potential and repeated use.
So in the most minimalist kit (solo, light 2-3 day trip) I would add:
head wound/open skull fracture, open abdominal injury, any large wound dressing. (Especially open skull fracture, important to distribute pressure over large area, not directly over wound site, which is why Abdo pads work well)
1 small 4×6
9 g (.3 oz)
Approximate Total Weight: 7.4oz (210g)
Approximate Total Size: 1 gallon Ziplock bag or smaller
Commentary
Michael: And by the way, the tick removal with a syringe is a ‘Michael field special.’ You don’t want to squeeze a tick when removing and you also want to save it/them for testing.
It’s something that I’m starting to take more seriously as I know a few people now that have contracted Lyme disease from local tick bites. It’s pretty much a North American wide thing now. Just to qualify that it’s not a well known method. There’s special tweezers too.
Em: Any reason you don’t toss your emergency blanket out? Most backpackers who practice ultralight skills want to throw them out because they have sleeping bags etc.
Michael: I don’t bother chucking it because I’m not watching my weight to that extent. If I was watching the grams, I’d only carry it on single day hikes. No reason to keep it if you have a sleeping bag other than redundancy’s sake.
Em: You are also out climbing for longer days where the bigger kit goes, but the sleeping bag doesn’t?
Michael: Yup, when I’m with other people especially. My climbing partner doesn’t carry much in the way of first aid. In that case, I bring the bigger kit which contains the emergency blanket.
Large Kit (Multi-day, Multi-person, Paddling)
In the largest kit I’d carry (multi-day paddling trip), I’d add:
Item
Purpose/Importance
Amount
Approximate Weight
abdo trauma pad
head wound/open skull fracture, open abdominal injury, any large wound dressing
1 large 8×8
18 g (.6 oz)
gauze pad
wound dressing: particularly eye injury dressing, additional days of dressings
dressing attachment, cleaning wound site to ensure adhesion, multiple days of treatment
1
17 g (.6 oz)
Approximate Total Weight: 8.4 oz (239g)
Approximate Total Size: 1 Quart Ziplock bag and 1 Gallon Ziplock bag or smaller
Commentary:
Michael: These aren’t exactly what my kits look like, but would be reasonable, minimalist kits for an intelligent first-aider, in my opinion.
Em: Any reason a backpacker shouldn’t toss the SAM splint?
Michael: The biggest kit is the one that goes on the long term, remote trips where it may be several days or weeks before help gets to you and you may need to have every advantage getting yourself or partners out. You might need typical items used as splint materials as crutches or their intended purposes in the long term.
The SAM is versatile. They make good neck braces and can be incorporated into bulk dressing for rib fractures. You can always cut it in half to save weight and space but still have a small amount of rigid splint to work with.
Em: Yeah, I could see the problem with using a makeshift splint out of existing materials (ice axe, trekking poles, tent poles) you are already carrying, because you may need those items during the course of a long self-rescue.
Baseline Meds
For meds, I always have the following for myself (and are a good baseline for everyone):
Michael: I can’t really give weights or amounts on meds, I can give a basic idea but it depends on who is on the trip and what the individual needs of the users are. I have some more sophisticated administration techniques and tools than a standard first aider as well, but I haven’t included those in the list.
Michael at work in Nordegg, AB, Canada
Summary
From my experience as a first responder, and I’m sure Michael would agree, no one can tell you exactly what to put into a first aid kit. Other paramedics, doctors, nurses and emergency responders will be able to add unique items and items they have found effective in the past.
As someone who practices ultralight backpacking, I can say first aid supplies make up a reasonably small percentage of my base weight (10-20% for me at 10lbs or less) and I would rather cut weight from somewhere else. I’ve been in some tight jams, on and off the trail and its one place I do not like to skimp.
One thing all responders will tell you is “take your brain with you.” Sometimes intelligence means leaving behind things which are unreasonable for the situation you are entering. Sometimes using your brain, means backing down from things which have too high a risk profile, or taking an alternate route and not getting into a first aid situation in the first place.
You cannot always avoid first aid though, and it is important to have it ready for worst case scenarios, even when going ultralight.
To that end, I encourage every backpacker to acquire some meaningful first aid education: e.g., wilderness first-aid, search and rescue, first-aid, and safety courses throughout their journey of traveling light.
Disclosure
Updated September 15, 2018
Affiliate links: Some (but not all) of the links in this review may be “affiliate” links, which means if you click on a link to one of our affiliate partners (usually a retailer site), and subsequently make a purchase with that retailer, we receive a small commission. This helps us fund our editorial projects, podcasts, instructional webinars, and more, and we appreciate it a lot! Thank you for supporting Backpacking Light!
How do trails form? Why do trails form? Come to think of it, what is a trail? These are but a few of the (deceptively simple) questions author Robert Moor attempts to answer in his book On Trails (Simon and Schuster, 2016). Moor – a lifelong backpacker and Appalachian Trail thru-hiker in addition to being a writer – approaches his subject with lyrical language and journalistic due-process. The result is a book as quietly spiritual as it is wildly informative.
Book Review: On Trails by Robert Moor
How do trails form? Why do trails form? Come to think of it, what is a trail?
These are but a few of the (deceptively simple) questions author Robert Moor attempts to answer in his book On Trails (Simon and Schuster, 2016). Moor – a lifelong backpacker and Appalachian Trail thru-hiker in addition to being a writer – approaches his subject with lyrical language and journalistic due-process. The result is a book as quietly spiritual as it is wildly informative.
Moor begins his exploration in the micro (with single-celled organisms and slime molds) and finishes with the macro (the 12,000 mile International Appalachian Trail). In between those extremes, he covers:
How the fossil record has preserved examples of the earliest known trails.
How ants are evenly matched with supercomputers at trail design.
Why elephants understand the “idea” of a trail (as opposed to just following a path of least resistance).
How the trail-following tendency of domesticated herd animals has shaped cultures world-wide.
How hunting has changed (and continues to change) the landscape in which we live.
How the history, language, and culture of the Cherokee shaped their trails – and how those trails shaped the Cherokee in return.
How European and native people differed in their approach to resource management (and how they were similar).
How drastic shifts in technology have created the modern sport of “hiking”.
How the ideas of wilderness and conservation have shifted throughout history.
How modern trail construction is just as much an art as it is a science.
How the Appalachian Trail was born – and how similar trails continue to be cobbled together.
Woven between all these subjects are layman’s studies of history, chemistry, biology, anthropology, botany, geology, entomology, etymology, philosophy, poetry, and a dozen other scattered pursuits.
Moor’s gift as a writer is to make following this maze of interconnected ideas seem effortless and natural, like easy walking over smooth tread. One of the great pleasures of On Trails is how much the subject of pathways informed the book’s linear but ultimately branching (trail-like) structure.
On Trails is far from a dry academic tome, however. Moor is an accomplished backpacker. He gathers the threads of his story while hiking along with everyone from Latifa Asselouf (one of Morocco’s only female mountain guides) to M.J. “Nimblewill Nomad” Eberhart. The immersive style suits Moor’s subject well. The author’s voice is something like a cross between Bill Bryson and Jon Krakauer (with a dash of Steven Ambrose sprinkled in for good measure).
What is a trail? In his closing chapters, Moor sets aside hard science and reaches instead for philosophy and poetry to grapple more theoretically with his central question. Those old standbys – Thoreau and Muir, Abbey and Leopold – all make an appearance. But so too does the thousand-year-old verse of Chinese poet Hanshan and the heartfelt cowboy prayers of Nimblewill Nomad.
In the end, it takes both science and philosophy to fully describe the messy confluence of travel, connection, communication, and time that we call “trails.” Moor’s work is well worth the journey, and if the final page leaves you wanting more, well, isn’t that what all the best trails do?
It’s no secret: the more physically prepared you are for a backpacking trip, the more you are going to enjoy yourself. But what are the most effective ways to reach optimal backpacking condition? That’s the topic of today’s BPL SKILLS SHORT: training.
It’s no secret: the more physically prepared you are for a backpacking trip, the more you are going to enjoy yourself. But what are the most effective ways to reach optimal backpacking condition? That’s the topic of today’s BPL SKILLS SHORT: training.
After a brief introduction, Ryan and Andrew get right to it – covering some basics like living at sea level, training on stable vs. uneven ground, and trail vs. road running. After that, they talk about cycling, stabilizing muscles, core strength, upper body resistance training, nutrition, flexibility, injury and foot care, and body weight maintenance.
At the end of the pod, Ryan gives his suggestions for a very basic backpacking training plan.
If you are interested in a more in-depth training episode of the Backpacking Light podcast, let us know at podcast@backpackinglight.com. There’s so much more to dig in to!
Outline
Living at sea level but training for a hike at say, +6,000?
Skyscraper stair climbing!
Stair climbers or inclined treadmill at the gym.
Ultimately, being in good shape is going to be more important than finding a way to acclimate to altitude.
What about strengthening the muscles in your feet and ankles and calves to deal with uneven ground?
Your foot and ankle muscles will develop just fine so long as you are putting miles in.
Be careful not to get your ankles too flexible!
Is pure cardio like street running or cycling helpful or sufficient for training?
Trail running > road running.
Cycling is good for aerobic training.
Be cautious of repetitive motion and overtraining injuries.
How about stabilizing muscles in the back and core stability? Is there any reason to incorporate upper body resistance training into a regimen?
There are certain practical movements that might be useful.
Simple pulling or pushing motions.
Ryan’s Rambo-style ice-axe cage pull-up device
How important is flexibility? In muscles? In connective tissue?
Posterior chain flexibility is paramount.
Take it easy, take it slow. It takes a long time to develop flexibility.
How about pre-trip nutrition?
The better you are eating before a trip (nutritionally dense, good fiber, whole foods, fruits and veggies) the better your body will handle the nutritional deficits of an extended time spent backpacking.
One of the most common backpacking injuries is a stress fracture. Is there any way to train to avoid getting one?
Be patient in your training!
“There’s no such thing as overtraining, just under-recovery”
How about toughening up the skin of your feet? Is there a way to prep for wet feet?
You might consider having feet that are more malleable instead of less malleable.
How can someone find out what their ideal body weight is, and what are some strategies to achieve that number?
Ways to find BMI
BMI tables
Scans and professional devices at hospitals and gyms
Remember these are general guidelines and there are a TON of factors involved.
The best thing to do might be to think about what your weight is or has been when you’ve received injuries and try to stay under that.
Assuming you have an hour a day, what is the best combination of stuff you can be doing to get yourself towards your goal?
Sponsors: Help us Keep the Podcast ADVERTISING-FREE!
This episode of the Backpacking Light Podcast is supported and kept advertising-free by Backpacking Light membership fees. Please considerbecoming a member which helps support projects like this podcast, in addition to a whole slew of other benefits!
In addition, some of the links on this page may be affiliate links that refer to our partner merchant retailers. If you follow a link and then make a purchase, we receive a small commission which goes a long way towards helping us pay for podcast production, hosting, and bandwidth fees! Thanks for supporting us in this way!
Contact
You can contact us at podcast@backpackinglight.com, or follow us on social media –
We do not accept money or in-kind compensation for guaranteed media coverage: Backpacking Light does not accept compensation or donated product in exchange for guaranteed media placement or product review coverage.
Affiliate links: Some (but not all) of the links in this review may be “affiliate” links, which means if you click on a link to one of our affiliate partners (usually a retailer site), and subsequently make a purchase with that retailer, we receive a small commission. This helps us fund our editorial projects, podcasts, instructional webinars, and more, and we appreciate it a lot! Thank you for supporting Backpacking Light!
I’d like to address what I do in each of these areas at some point in the future, but for now, I want to expand on why I believe a lean body weight – in addition to carrying less weight in your pack – is really important for a backpacking lifestyle.
This post is part of a new blog-style series that summarizes key concepts about backpacking skills, gear, and philosophy in a shorter format than our standard articles. It’s filed under the category blog.
A lot less attention could be paid to that question if we maintained healthier, leaner body weights, and spent more time on fitness development. Over the past 3+ decades of backpacking, I’ve learned something that has almost entered into my own personal gospel: the leaner I am, and the more attention I give to physical training, the less my shoes matter.
Sometimes I carry a big jug of water on an alpine climb, and pour it out on the summit – but only when I’m training.
That spurred a few folks to send me an email requesting that I share what I do to maintain fitness for backpacking.
I believe fitness should be looked at holistically. In addition to physical fitness, you also have to consider your mental, emotional, and spiritual fitness when it comes to living a healthy lifestyle.
When it comes to physical fitness, there’s a lot to consider as well: sleep habits, training, nutrition, rest, etc. All four of these have an impact on maintaining lean body weight. I’d like to address what I do in each of these areas at some point in the future, but for now, I want to expand on why I believe a lean body weight – in addition to carrying less weight in your pack – is really important for a backpacking lifestyle.
Why a lean body weight is important for backpacking.
The “why” behind this objective is simple when it comes to backpacking: less bodyweight (and even more specifically, less body fat) with respect to backpacking means that:
The muscles that you do have can be used more efficiently. If your body has 50 pounds of muscle at your disposal, would you rather use that muscle for moving 140 pounds of body weight or 180 pounds of body weight?
Lower weight = lower stress on joints (especially in the foot) which helps hedge against cartilage damage and decay. This stuff’s been studied so much it should now be pretty common knowledge, and part of our basic education when it comes to long term life planning.
Choose your foods carefully.
Indiscriminate consumption of food has been the most significant impediment to maintaining lean body weight for me.
Maintaining lean body weight depends on managing insulin levels. A high level of insulin does two things:
It triggers metabolic processes that convert calories to body fat. When your insulin levels are high, blood glucose levels drop and glucose enters your cells. Combine this with calorie excess, and the surplus glucose in your cells doesn’t metabolize fully and instead, glucose gets metabolized into fat – body fat.
It halts some of the metabolic processes that burn body fat reserves. Your body’s metabolic pathways for burning fat are optimized when insulin levels are low.
Foods that screw up a healthy insulin balance include sugars (especially when combined with fats in a single meal) and other simple carbohydrates. Of course, copious amounts of those same foods also contribute rapidly to a calorie excess.
Be intentional about every calorie you put in your body, and focus on quality over quantity.
Through the years, I’ve experimented with a variety of keto-style diets but I prefer a few more carbs above the keto baseline, to keep energy reserves high during hard, sustained aerobic training. Keto does help you lose weight, but it’s not a great fit for my lifestyle, and I have some personal reasons for minimizing my meat intake.
Right now, my own diet is mostly plant-based (especially veggies with lots of leafy greens and cruciferous), some fish, mostly whole foods (not processed), nuts, lots of slow carbs like legumes, less than trace amounts of dairy, a minimal amount of refined grains and oils, realistic (not American) portions, and a minimal amount of simple carbohydrates. I also severely restrict those combinations that inhibit fat metabolism – sugars, alcohol, and fast carbs + high fat foods eaten in the same meal. In terms of processed supplements that actually provide some calories, I use a pea protein isolate as a protein supplement and occasional doses of MCT oil.
If I’m backpacking on a longer trip, I break some of these rules (more fat/carb combinations like potato chips and fettucini alfredo) and will increase my salt, carb, and calorie intake.
Schedule, and limit your eating periods.
The first world is used to breakfast, lunch, dinner, desserts, snacks, crumpets, donuts, etc. eaten throughout the day.
If this is you, your insulin is going to think you’re really cool.
And maintaining lean body weight is going to be hard, especially once you exit adolescence-young adulthood.
Once you sort out the details of a quality menu, consider limiting your eating periods during the day a few times a week. Spending 16 to 20 hours in a fasted state, and 4 to 8 hours in a feeding period, helps you maintain low insulin, allows your insulin spikes to come down more quickly when they do happen, and simplifies your life because you’re no longer chained to the three-meal-a-day social structure.
Crossing rivers “ultralight style” – that’s when you simply walk through the water wearing your hiking shoes and keep walking on the trail once you get to the other side.
This post is part of a new blog-style series that summarizes key concepts about backpacking skills, gear, and philosophy in a shorter format than our standard articles. It’s filed under the category blog.
Crossing rivers “ultralight style” – that’s when you simply walk through the water wearing your hiking shoes and keep walking on the trail once you get to the other side.
There’s no stopping to change shoes and socks, and no carrying an extra pair of “water shoes”.
There are two primary barriers that trip up hikers when it comes to crossing a stream in your hiking shoes.
The first is the trauma (sic) caused by (the idea of) wet feet and the second is the fear of blisters caused by added moisture to the footwear.
The trauma caused by the idea of wet feet usually goes away with experience. Other than this perceived trauma (which of course, is not real trauma, but merely some level of minor discomfort), having damp shoes has no real impact on most hiker’s performance.
The added moisture to your footwear that you think might cause blisters may actually be offset by the fact that the water is cold. Blisters are formed by heat, friction, and moisture. Heat and friction are generally more problematic than moisture. Friction can be solved almost entirely if you carry a light pack and wear a lightweight, flexible trail running shoe instead of a hiking boot.
The ideal footwear for hiking in wet areas where there are lots of stream crossings has the following characteristics:
lightweight – so they absorb less water
flexible – so when you start walking on the other side of the stream, each step “plunges” water out of the shoe
breathable mesh uppers – so water drains out of them readily
So embrace those stream crossings – they provide opportunities to cool your feet down and experience some podiatric refreshment!
To me, ultralight backpacking is the idea that one should solve a problem using as little as possible, but that which is used to solve the problem should be as effective as possible. Defined as such, the actual weight of individual pieces of gear, or one’s pack, matters less, and takes a back seat to the performance-to-weight ratio of a piece of gear.
Iconic ultralight – my Cuben Fiber tarp, a 14-oz down quilt, trail running shoes for footwear, 20+ mile days, and a base pack weight of less than 10 pounds during a Uinta High Route traverse, Utah (2014).
What is ultralight backpacking?
If you pose this question to a community of “ultralight hikers” (sic), here are some of the answers you’ll get:
It’s when your base pack weight is less than 10 pounds.
It’s when your tent, backpack, and stuff sacks are made with Dyneema composite fabrics.
It’s when you don’t carry things like a camp chair, camp shoes, or extra underwear.
It’s when you carry a pack that looks like a day pack – it doesn’t have a frame and is really small!
It’s what you have to do to hike the Pacific Crest Trail.
It’s when you sleep in a quilt instead of a sleeping bag.
And on and on.
Ultralight backpacking (the topic in general, the ideological principles, and the community at large) has been maligned by critics in some form or another since the niche was popularized by this “label” back in the 1990s. The reason for the criticism may have more to do with people’s attraction to sound bites than it does with any substantive failings of the ultralight ethos to solve hikers’ problems. We (proponents) of ultralight backpacking must bear some of the blame, as a result of our own desires to compartmentalize what ultralight backpacking is (“…a base pack weight of less than __ pounds”) and is not (“…in ultralight backpacking, we don’t use camp shoes, camp chairs, or double-walled tents.”)
As with any labeled ideology, ultralight backpacking has both its evangelists and its critics. Interestingly, much of the criticism levied against ultralight backpacking seems to be targeted to fringe manifestations as practiced by only a small fraction of the community (or a small fraction of the time by a broader cross-section of the community).
We are fighting against our innate nature to define ideologies based on simplistic criteria that are easy to digest and communicate. The most common (and most egregious) is defining ultralight based on some arbitrary definition of base pack weight, i.e., ultralight backpacking is backpacking with a base pack weight of less than _ pounds. And it decays from there – SUL (“super-ultralight backpacking”) etc.
These definitions lack utility if you are actually a student and practitioner of the ideology. As you immerse yourself in an area of study, defining it becomes more nuanced and complex – and irrelevant.
On this 12-day trek through Wyoming’s Wind River Range (2015), I wore mountain boots, slept in a double-walled tent, packed a camp chair, carried a rope, and my starting pack was about 50 pounds. In spite of the fact that I applied ultralight principles aggressively on this trek, this type of experience doesn’t fit neatly into the ultralight backpacking box defined by many hikers.
In reality, ultralight backpacking as an idea is one that encompasses a set of core principles that can be differentially applied (or entirely rejected) depending on context. Developing a framework based on how ultralight backpacking principles are applied (rather than if they are applicable) can be quite powerful – once we cast off the idea that ultralight backpacking is defined by a certain number of pack weight pounds.
To me, ultralight backpacking is a practice centered around the idea that one should solve a problem using as little as possible, but that which is used to solve the problem should be as effective as possible. Defined as such, the actual weight of individual pieces of gear, or one’s pack weight, matters less and takes a back seat to the performance-to-weight ratio of your gear.
Taking the concept of performance-to-weight ratio a layer deeper, consider also that your criteria for performance may be different than mine. One of us may demand that a tent’s most important performance criterion is its wind resistance, while the other of us may demand that the tent be as resistant to condensation as possible.
Ultralight backpacking is more about a decision-making framework (e.g., weight vs. cost/performance/safety/comfort), understanding how gear design influences performance, studying risk assessment, learning the skills that allow you to depend less on gear, and questioning the status quo (industry) recommendations for what is safe, comfortable, and required for backpacking.
Ultralight backpacking is about skills and intentionality in various contexts, not pack weight – and this is what characterizes it as a distinct practice within the overall backpacking community.
By pack and paddle: 13 days (no resupply), 105 miles – carrying 45-55 pound packs with packrafting gear to the crest of the Chinese Wall, Bob Marshall Wilderness, Montana (2014). This trip would have not been possible for these teenagers without applying an ultralight ethos.
During a consulting project for the Marine Expeditionary Rifle Squad (MERS) back in 2010, I was tasked with working with their equipment procurement and development divisions to reduce the weight of the individual camping equipment (ICE) carried by squad members in Afghanistan. Considering that they carried a pack with an average weight of 120 lb (ranging from 110 to 140 depending on their role in the 13-member squad) and that their ICE comprised more than 40 pounds of this equipment, I was pretty confident that I’d be helping them drop their pack weights significantly. Alas, while my team was able to reduce their ICE by more than 40 percent, it made zero difference in changing their average pack weight, which remained the same. Why? Because they were trained to carry 120 lb, and the reduction of ICE simply made room for more bullets (and other weaponry). So was this an application of ultralight backpacking? I’d argue “yes” – ultralight backpacking principles allowed them to become more effective, and more powerful, combat soldiers.
Some of the criticisms against ultralight backpacking seem to come from idealogues outside the community who aren’t engaged enough in the study of “ultralight backpacking” to understand exactly what they’re criticizing.
I posted an example of this on Twitter, which seeded some feisty discussion.
Great example of an author who has spent very little time connecting to, or understanding, the ultralight backpacking community, but still loves to write authoritatively about it: https://t.co/ySHgYcMPX1
Criticizing ultralight has become chic in the broader backpacking community as well, with videos and blog posts featuring clickable titles, such as Why I Quit Ultralight Backpacking, Stupid Light: Why Lighter Isn’t Always Better, and Ultralight Backpacking will Make You Soft.
Interestingly, some of the authors who produce much of the content that seems critical of ultralight backpacking are practitioners themselves of ultralight backpacking ideology and skills. Their criticisms are thus, not so much criticisms of core principles of ultralight backpacking, but instead, address the dogma associated with ultralight backpacking.
Some of this dogma is based on the easily-communicable claims that:
ultralight gear doesn’t work (or is too light),
ultralight backpacking is expensive,
ultralight backpacking is unsafe,
ultralight backpacking is uncomfortable,
the ultralight backpacking community is elitist,
ultralight footwear causes injuries…
etc.
Granted, I can offer a number of examples that support these ideologies. Likewise, I can offer a number of examples that refute these ideologies.
Maybe we shouldn’t outsource our intellectual autonomy to ideological principles that often break down when they are actually applied in practice. Unfortunately, as our society increases its thirst for clickbait, we are tempted to formulate a simplified worldview from headlines and sound bites.
Slay the clickbait. Adapted from Morio’sPerseus by Benvenuto Cellini. Wikimedia Commons, CC BY-SA 3.0.
To advance our knowledge of ultralight backpacking in a meaningful way, publishing ideological sound bites seems irresponsible to me. However, in an internet age where success is equated to clicks, niche publishing communities depend more and more on financial models based on advertising and affiliate revenues. Maybe these financial models are the real culprits, and bloggers are simply adapting with strong financial motivations to bait readers.
While I am grateful for our own advertising and affiliate revenues, and their ability to help us stay in business for nearly 20 years, we are growing increasingly less dependent on them. Given our strong subscription base and continued membership growth, we don’t depend on clickbait or “Best Ultralight Gear of 2019” affiliate shills in order to pay our bills or our employees. My own passion is rooted in creating the content that advances the knowledge of those of you who want to experience meaningful growth in your quest to lighten your pack while pursuing your adventure goals. The desire to focus on high-quality information instead of maximum traffic was the driving motivation behind the recent launch of our podcast, the production of YouTube videos that focus on depth instead of view stats, and investment into comprehensive content such as the Canister Stove Gear Guide, StoveBench, or long-form story video content that immerses the viewer in an experience that requires some commitment on their part.
Whether developing personal skills, investigating the scientific basis of how things work, researching healthy living, or trying to sort out (accurately) how policies are created and executed by our government agencies, I’ve always placed a very high level of value on being careful, intentional, objective, and open to different perspectives. Many of our members and readers share these values, and this value framework has shaped Backpacking Light’s editorial direction over the years.
But we live in a new era where elitism (and the style of criticism that’s borne from elitism) seems to dominate public discourse about anything and everything. It’s worth exiting that unproductive social lane, not only for the sake of the health of our community but also so you can remain engaged in the study of ultralight backpacking in a thoughtful and meaningful way without getting distracted by clickbait content and demagogues that don’t actually contribute to the advancement of our outdoor knowledge and experiences.
The meaningful study of information, careful interchange of thoughtfully-crafted discourse, and the engagement of the brain for quiet thinking and problem-solving will always remain at the core of what I want to publish here at Backpacking Light. These values frame how I wish to facilitate the growth and development of the ultralight backpacking community, and will provide the basis for how we talk about ultralight backpacking here.
So if you’re looking for articles or videos about the “Best Ultralight Tents of 2019” or “Why Ultralight Backpacking Doesn’t Work” or “The 10 Biggest Mistakes Ultralight Backpackers Make” or “The 7 Things You Can Do Today To Drop Your Pack Weight to 10 Pounds or Less” – then you’ve probably come to the wrong place.
Those of us who are fortunate enough to call the first world home face a unique crisis of cultural identity when it comes to determining our status within our culture.
Gamification (including the exchange of badges and emoticon reactions) of social media and forums is a testament to people’s thirst to be recognized, and distinguished, within a community. More than one of us has desired, adopted, or been recognized as an “ultralight backpacker” or “SUL” etc., or at the very least, received compliments about our gear list spreadsheets or Lighterpack graphs.
On the surface, this sort of identity assignment allows communities to compartmentalize their members in an easily-understandable fashion (e.g., tarp campers, bushcrafters, thru-hikers, Dyneema addicts). It’s worth noting here that the assignment of these identities is sometimes overt (publicly bestowed upon the members by the community), but often simply self-assigned (whether publicly or privately) by the members themselves. The assignment of these identities spawns further compartmentalization (e.g., pack weight breakpoints that divide the extent to which you actually practice ultralight backpacking). Inevitably, what originally brought the community together results in fragmentation as a result of identity sub-cultures within the community. Of course, this isn’t unique to ultralight backpacking. It’s an inevitable equilibrium point in all communities – citizens, family members, PTA boards, scout troops, political parties, religious communities, etc.
Identity culture, compartmentalization, and simplification through definitions are not inherently bad things. However, acknowledging their presence and recognizing their limitations is necessary if we are to release our hold upon them, and advance our sport and our community culture. Setting aside identities and the criteria that define them will allow us to foster a community that is open to new members, new ideas, and new methods that we can add to our growing arsenal of chaotic and unordered tools that we affectionately know as ultralight backpacking.
If you enjoyed this article and it resonated with you, please consider joining our community and becoming a member to support our efforts to help hikers thrive in the backcountry.
Most advice about minimalist footwear can be rejected outright. Often, the advice is given by hikers who haven’t put in the time required to understand the complexity and depth of foot biomechanics and the long-term effects of overuse that is endured by walking for decades. Here are some guiding principles if you want to keep hiking into your sunset years, so you can delay the inevitable onset of overuse conditions like hallux rigidus.
I would rather die on a trail than in a hospital bed.
However, I have a lot of trails I still want to hike. I would prefer that my last trail day comes well after entering Old Age.
Over the past several years, I’ve been studying how lifestyle choices affect the longevity of our biomechanical systems. I’m fascinated by how badly we can screw up our feet with bad shoe choices, under-recovery after high-exertion events, and not knowing when to throttle back our physical output.
That’s my motivation for writing this post.
Thus, I’ve come to believe that much advice about minimalist footwear for backpacking (i.e., hiking while carrying a heavy pack, for multiple days in a row) can be rejected outright.
Often, the advice is given by hikers (and the marketing people who work for shoe companies) who haven’t put in the time required to understand the complexity of foot biomechanics and the long-term effects of overuse that is endured by backpacking (and other athletic endeavors) on a regular basis for several decades.
Here are some guiding principles to consider if you want to keep hiking into your sunset years, so you can delay the inevitable onset common overuse conditions that sneak up on you in middle age – like hallux rigidus (arthritis in the big toe joint).
Give your toes plenty of room.
Altra and others build shoes with nice, big toe boxes. Allowing your feet to splay naturally inside a shoe distributes stress among more joints and soft tissues in your foot, so you don’t concentrate it too much in one spot, like the MTP joint.
Maximum flexibility and thin cushioning isn’t always a good thing.
Stiffer soles and lots of midsole cushion seem to run counter to the “barefoot” movement, which has been pretty trendy for several years.
But remember, you are carrying a pack (which should be as light as possible), and traveling over rough terrain, for days at a time without the opportunity to rest your feet and allow them to heal and recover.
The heavier your pack, the rougher the terrain, the faster you hike, and the longer the trip, the more cushion you’ll need.
And a sole that is a little bit on the stiffer side will help prevent the overuse injuries that plague hikers when they accumulate decades of trail miles. Stiffness also provides a hedge against injuries related to hyperextension of the MTP joint and metatarsal stress fractures.
Wearing only one type of shoe is not healthy.
Hike in more than one different type of shoe, often. Mixing up your hiking footwear (hiking in several different types of shoes) helps develop comprehensive strength and adaptation to walking because different shoes create stress across different sets of soft tissue groups and joints.
These guidelines aren’t gospel. Yes, you can carry a heavy pack on rough terrain over long distances with minimalist (lightly cushioned, highly flexible) footwear. We just have to acknowledge that with that decision comes some risk for short-term acute injuries (e.g., hyperextension, stress fractures), and accelerated wear and tear on cartilage tissues. I’m not asking you to follow my advice, just to consider the risks.
The shoes I’m wearing right now.
Here are my favorite shoes – I switch them up often when I train, and even on a backpacking trip, I may bring two of them:
Altra Lone Peak 4 – a zero-drop, wide toe box, well-cushioned shoe. My favorite shoe for very long daily distances on trail.
La Sportiva Akyra – a technical shoe with an outstandingly grippy sole. My favorite shoe for off-trail travel that doesn’t require a lot of rock scrambling.
Scarpa Zen Pro – a stiff approach shoe. Not awesome for high mileages, but I can still cover 15 or 20 miles a day in them without foot pain. Terrific when I start adding Class 2-4 terrain to my routes, or when I have to hike long stretches of snow in crampons or spikes. My favorite shoe for scrambling and snow hiking.
Hoka Stinson ATR 5 – a recovery shoe, for when I need to nurse bruising injuries to the bottom of my foot.
I prefer shoes and orthotics that put the foot into a neutral position. If you want extra cushion in your shoes, check out the heat-moldable cork Performance Thick footbeds from Sole. These live in my Scarpas but I can see the utility of having them in your trail running footwear as well. Just be sure to size up your shoes to accommodate their volume.
What size shoes for backpacking?
Most hikers don’t size up enough, and their toes and forefoot get cramped. that causes all sorts of problems. My foot measures at just a shade over a men’s US size 8. I wear 9’s or 9.5’s in Altra, 10’s in La Sportiva, 9.5’s in Scarpas (with the Sol footbed), and 9.5’s in Hokas.
Since I started sizing at least 1.5 sizes up in most models (1.0 size in some Altras), my foot comfort increased dramatically. My arch has actually developed over the past 20 years from being nearly flat-footed, and I’ve never suffered from plantar fascia pain.
Your shoes may not matter so much if only…
A lot of attention is paid to the question “what shoes should I buy?”
A lot less attention could be paid to that question if we maintained healthier, leaner body weights, and spent more time on fitness development. Over the past 3+ decades of backpacking, I’ve learned something that has almost entered into my own personal gospel: the leaner I am, and the more attention I give to physical training, the less my shoes matter.
Disclaimer: This post contains affiliate links to products that I’ve purchased and have used for many years. They work for me, but they may not work for you. Don’t buy anything just because someone else found value in them. Do your homework and gather data based on your own experience.
In this episode, Ryan offers some practical guidelines for managing wet gear, condensation, and camp chores if you have to be holed up in a tent during a prolonged period of inclement weather.
In this episode, Ryan offers some practical guidelines for managing wet gear, condensation, and camp chores if you have to be holed up in a tent during a prolonged period of inclement weather.
Outline
What happens inside a tent in inclement weather?
Relative humidity and dew point
How condensation forms
Effects of excess moisture vapor
Effects of temperature drops
How to manage condensation
Convective air flow using differential ventilation
This episode of the Backpacking Light Podcast is supported and kept advertising-free by Backpacking Light membership fees. Please consider becoming a member which helps support projects like this podcast, in addition to a whole slew of other benefits!
In this episode longtime BPL author Doug Johnson gives us a run-down of his favorite ultralight backcountry seating options reviewed in our new gear guide.
Stream
In this episode longtime BPL author Doug Johnson (right) gives us a run-down of his favorite ultralight backcountry seating options.
Summary
Tired of sacrificing comfort for a low base weight? So is Doug Johnson, a longtime BPL author on a multi-year quest to discover a luxurious-but-ultralight backcountry experience. Doug has treated himself (and his family) to extensive cook systems, thick sleeping pads, and cozy hammocks – now he’s turned his expert eye to the world of ultralight backcountry seating.
It’s a fascinating gear category, and one with wildly different approaches to solving what appears to be a simple problem – how to sit comfortably at the end of a long day. Andrew and Doug get things started by setting some parameters – no sit pads allowed in this podcast (or stools, or hammocks, or…well…just give it a listen, you’ll catch on).
Doug touches briefly on the design elements and performance considerations of each category, then elaborates on some of his favorites seats in each category. He finishes by choosing his two favorite seats before taking a brief sidetrack into the hammock world.
As they wrap up, Andrew challenges Doug to make a believer out of any die-hard gram counters that might be listening.
Doug’s journey from die-hard Ultralighter to Ultralight Family Man.
What are the parameters of the conversation?
Leaning back
Weight limit
Comfort!
No hammocks, pads, or stools
Categories, Performance Considerations, and Design Elements.
Inflatable Seat Kits
What they are and how they work
Pros
Comfy
Light
Compressible
Easy to move around
Cons
Low to ground
Expose sleeping pad to sharp things
Brings dirt into your shelter
Less and less of them around (newer options on the market)
Doug’s favorite
The Big Agnes Cyclone SL Chair Kit
On-Ground Pole Supported Seats
What they are and how they work
Pros
Light
Minimalist
Cons
Low to ground
Can be uncomfortable depending on the model
Collapse when you stand up
Doug’s favorite
Doug liked the Mountainsmith Slingback more than the Litesmith QwikBack UL but he wasn’t wild about either one!
The QwikBack UL, in particular, has some design issues.
Suspended Seats
What they are and how they work
Pros
Fairly light
Packs down fairly small
Keeps you off the ground
Great for kids!
Cons
Needs hardware to be able to hang
Need specific locations/vegetation in order to set up
Foot position
Doug’s favorite
Doug found the Dutchware Netless Hammock Chair to be a good comfort-to-weight ratio…particularly for kids or smaller users.
Frame Seats
What they are and how they work
Pros
Comfortable!
Good leg angle
Keeps you off the ground
Stable
Cons
Relatively heavy
Not super-compact
Unstable in sandy soil
The Alite 2-Legged Monarch Chair is an interesting design that is strong in loose soil where other frame chairs fail.
Doug’s favorite
Doug is a huge fan of the REI Co-Op Flexlite Air Chair and Helinox Chair Zero – in fact, these are his favorite options out of all the seats he tested.
For an in-depth comparison of these two chairs (including math, a flow chart, and lots of exciting diagrams), check out Ryan’s article and video.
Final Thoughts
Doug takes a brief side-trip into hammock land
Andrew gives Doug 45 seconds to make a believer out of a theoretical “determined to be uncomfortable” listener.
This Hyperlite Mountain Gear Junction Backpack Review features a pack with a lightweight Dyneema Composite Fabrics body, Hardline woven fabric side and hip belt pockets for durability, and a mesh back pocket for storing wet gear.
Introduction
The Hyperlite Mountain Gear Junction backpack offers a similar physical configuration (one large rear pocket, two side pockets, two hip belt pockets, roll-top closure) as their Windrider, Southwest, and Northrim packs, but in a slightly different fabric configuration.
In short, the Junction offers a lightweight fabric main pack body, woven fabric side and hip belt pockets for durability, and a mesh back pocket for storing wet gear. A comparison of the material specs for all four packs can be found in the “Compared To…” section below.
The Hyperlite Mountain Gear Junction backpack features a large rear mesh pocket for wet gear storage and two Hardline side pockets that resist snagging on brush and tearing from sharp contents.
The Junction is available in two sizes (2400 and 3400 cubic inch main pack bag volume). In this review, I’m using a Junction 3400 in size Large.
I believe that the Junction 3400 is the most versatile pack in HMG’s product line, and should be considered by anyone looking for a do-it-all pack that is highly water-resistant, durable, comfortable (with loads of less than 30 pounds), and has the perfect pocket configuration that can be adapted to most hiker’s trekking styles and preferences.
Two zippered pockets on hip belt with #5 YKK zipper
Hip belt with 1/8 inch closed cell rigid foam, 1/4 inch closed cell foam, and spacer mesh
Shoulder straps with 3/8 inch closed cell foam and spacer mesh
Adjustable sternum strap with self-tensioning elastic and whistle
Hydro port and internal mesh hydro sleeve
Removable, contoured aluminum stays
1/4 inch foam back panel pad
Compression System
roll-top closure system with side compression straps for vertical compression
side compression straps for horizontal compression
top Y-strap compression can be used to secure gear
Seam sealing on all side seams and behind all sewn-on pack features
Bar-tacked reinforcements on all stress points
Four exterior tri-glide buckles for optional pack accessory straps
Ice axe loop
Made in USA (Maine)
Specifications
Materials:
Body: DCH50
Bottom: DCH150
Side External Pockets: Hardline
Rear External Pocket: Polyester Mesh
Hip Belt Pockets: Hardline
See “Compared To…” section below for additional discussion and specifications about each of these materials and how they compare to the materials used in the Hyperlite Mountain Gear Windrider, Northrim, and Southwest backpacks.
Dimensions:
Junction 2400
Junction 3400
Weight
30.1 oz (853 g)
32.0 oz (907 g)
Load Capacity
40 lb (18 kg)
40 lb (18 kg)
Internal Volume
2400 cu. in. (40 L)
3400 cu. in. (55 L)
Center Pocket Volume
300 cu. in. (4.9 L)
300 cu. in. (4.9 L)
Side Pocket Volume
2 x 150 cu. in. (4.9 L)
2 x 150 cu. in. (4.9 L)
Hip Belt Pocket Volume
2 x 55 cu. in. (0.9 L)
2 x 55 cu. in. (0.9 L)
Total Pack Volume
3110 cu. in. (51 L)
4110 cu. in. (66 L)
Top Circumference
37.5 in (95.3 cm)
40.0 in (101.6 cm)
Bottom Circumference
33.5 in (85.1 cm)
33.5 in (85.1 cm)
Height (Fully Unrolled)
30.0 in (72.6 cm)
34.0 in (86.4 cm)
Back Width
10.5 in (26.7 cm)
10.5 in (26.7 cm)
All specs above were provided by the manufacturer. Note that these dimensions are similar to the Hyperlite Mountain Gear Windrider 2400/3400, Southwest 2400/3400, and Northrim 3400.
Actual Measured Weight
The actual measured weight of our production model pack (3400, torso size L) is 32.8 oz (930 g).
Commentary
I’ve been using (and abusing) Hyperlite Mountain Gear backpacks since the company launched in 2010. I’ve used HMG packs for alpine and ice climbing, backpacking, packrafting, backcountry skiing, and day-tripping. I’ve worn out HMG pack fabrics as a result of alpine scrambling, busted hip belt seams when I loaded them with up to obscene amounts of weight on long expeditions, and shredded mesh pockets while bushwhacking. This is the context for the commentary I present in this section.
Pocket Materials and Usability
The most unique feature of the Hyperlite Mountain Gear Junction backpack, when compared to the Windrider, Southwest, or Northrim, is the material configuration of the external pockets.
Hyperlite Mountain Gear uses three different materials in the external pockets of their various packs (refer to the table in the “Compared To…” section below for exact specs):
Mesh – best for visibility and stowing wet gear
Hardline – best for content privacy, durable storage of sharp items, and bushwhacking
DCHW – best for extreme durability and abrasion resistance
I find mesh pockets to be most useful for stowing wet gear (ground cloth, tarp or tent fly, raingear), and Hardline pockets most useful for stowing sharp items (tent poles, camera tripod) that have a history of poking holes in my mesh pockets.
My YouTube video review includes a bit about how I organize my gear in the Hyperlite Mountain Gear Junction backpack.
I prefer the DCHW (fully-woven Dyneema + DCF) pockets of the Northrim for rock scrambling (desert canyons, alpine climbing), but appreciate the Hardline+mesh pocket configuration on the Junction for backpacking and most off-trail trekking and bushwhacking.
Having shredded the side mesh pockets on a Hyperlite Mountain Gear Windrider while bushwhacking through slide alder, willow, birch, and burn areas, I’m not enthused about mesh side pockets. The Hardline side pockets on the Junction are a welcome addition.
Likewise, I also found the Southwest pack (which uses Hardline for all of its external pockets) to be lacking, because I wanted the ability to stow wet gear in a mesh pocket. That the mesh pocket is located on the rear of the Junction, protected from snagging while bushwhacking, is important to note.
Thus, I think the pocket configuration of the Junction (Hardline side pockets, rear mesh pocket) provides the best configuration that is versatile enough to meet the needs of most hikers.
Water Resistance
The DCH50 and DCH150 fabrics used in the body of HMG’s packs, including the junction, are waterproof and absorb less water than virtually any other pack fabric I’ve used. Bonded seams and the roll-top design of HMG packs make them virtually waterproof. Even while packrafting, I seldom worry about the gear inside my pack, and simply stow it inside seam-taped stuff sacks (no dry bags).
Packbag Durability
The DCH50 used in the body of the junction, and the DCH150 used on the bottom of the Junction, are plenty durable for virtually any type of on-trail or light off-trail trekking.
My DCH50 backpacks have only suffered from durability issues when I take them on alpine scrambles around sharp limestone (e.g., the Bob Marshall Wilderness) or in sandstone slot canyons (e.g., the US Desert Southwest). In that environment, I’ve even blown holes in the DCH150 bottoms of my HMG packs. That’s an environment where I’d want a full-spectra bottom and external pockets, like what is available in the Hyperlite Mountain Gear Northrim pack.
Load-Carrying Comfort
All of Hyperlite Mountain Gear’s 2400-series and 3400-series packs have a manufacturer-claimed load carrying capacity of 40 pounds (the larger 4400-series and 5400-series packs offer load carrying capacities of up to 65 pounds). It’s important to note before we dive into this discussion any further that this is a recommended load limit and not a load that’s necessarily going to be comfortable.
Like the Windrider, Southwest, and Northrim packs, the Junction’s load-carrying engineering is simple: a foam back pad, two aluminum frame stays, lightly padded hip belt, padded shoulder straps, no load lifters, and no hip belt stabilizer straps.
I’ve used the Hyperlite Mountain Gear Porter 4400 and 5400 more than any other HMG pack – often with loads exceeding 50 pounds. This is the amount of weight I will typically carry on longer (10+ days) trips without resupply, and often with packrafting and/or alpine climbing gear.
However, I have seldom packed their smaller (2400, 3400) packs with more than the manufacturer-stated load carrying capacity of 40 pounds. And so, I was curious about how these smaller packs fared when pack weights went up. For example, with a 15-pound base weight (common for me during the summer when I’m carrying camera equipment), 10 days of food (16 pounds), and the 4L of water (8 lb) I usually carry when I’m dry-camping above the treeline – I’m pushing the 40-pound mark.
For evaluating suspension performance at a specific load, my wife took two measurements: one from the ground surface to the midline of the hipbelt, and one from the ground surface to the top of the frame. The difference between these two measurements is the effective torso length of the pack under load. The effective torso length of a pack under load has a high degree of correlation with perceived comfort. Thus, using the quantitative analysis from the suspension performance protocol, a pack’s comfortable load-carrying capacity can be derived by determining the load at which the suspension performance factor (P) = 0.
The following chart illustrates the suspension performance of the Hyperlite Mountain Gear Junction 3400:
From this chart, a comfortable load-carrying capacity can be estimated at around 31 pounds. This is certainly in line with my experience with the Junction. At weights significantly greater than 30 pounds, the Junction’s minimalist frame starts to collapse significantly, becoming shorter than my body’s torso length. This prevents effective weight transfer between the shoulders and hips.
At 40 pounds, the shoulder straps start to pull downward and backward, straining shoulder muscles. By the time the pack is loaded with 50 pounds, be prepared for significant collapsing of the hip belt structure.
Given the Junction’s minimalist hip belt padding (1/8″ closed-cell rigid foam + 1/4 closed cell foam + spacer mesh) and shoulder strap padding (3/8″ + spacer mesh), once the frame of the pack starts to collapse at weights above 30 pounds, don’t expect it to maintain a high level of comfort.
If you have a shorter torso and expect to regularly carry weights greater than 30 pounds, consider sizing up one size. The longer frame length of a larger torso pack will then give you some wiggle room at heavy loads.
Torso Sizing and Comfortable Load Carrying Capacity
Here is Hyperlite Mountain Gear’s pack sizing guide:
Small (15.0” – 17.0” torso)
Medium (17.0” – 19.0” torso)
Large (19.0” – 21.0” torso)
Tall (21.0”+ torso)
Noting that your torso measurement is the vertical distance between your iliac crest and your 7th cervical (C7) vertebra.
When unweighted, our size Large Junction had a measured pack torso length (defined as the vertical distance between the crest of the shoulder straps and the midline of the hip belt) of 19 1/8 inches. My torso as measured from C7 to about one inch below the iliac crest (the point where I want the midline of my hip belt to ride) is about 17 3/4 inches. Thus, someone with a torso that measures in the “large” range as defined by Hyperlite Mountain Gear may find that their pack has a lower comfortable load-carrying capacity than identified in this review.
Strengths
Solid fabric side pockets, combined with mesh rear pocket, provide the ideal blend of durability (side pockets) and wet gear storage (rear pocket) that gives this pack versatility over a wide range of trail and off-trail conditions.
Packbag is nearly waterproof and absorbs very little water.
High-quality construction, durable materials, and attention to detail.
Some attachment options (two plastic loops on each rear panel-side panel seam, daisy connection at bottom of roll-top strap on rear panel) can be used to rig trekking poles, ice axe, etc. (additional straps not included).
Aesthetics of equipment design are not as important to me as performance, but I appreciate careful aesthetic design. One of my favorite packbag features is a tapered design – a smaller cross-section at the bottom and larger cross-section at the top. This prevents the concentration of weight too low, which causes the pack to sag. In addition, this allows me to keep more light, bulky items at the top of the packbag for easy access during the day, including my extra layers, cook kit, and tent (that I can quickly pitch to wait out a storm).
Weaknesses
Minimalist suspension and thinly-padded harness may not be comfortable for some users at loads exceeding 30 pounds unless you have well-conditioned trapezius muscles and some internal hip padding built into your body.
Torso sizing seems on the short side – consider sizing up one size.
Hip belt pockets are integrated with the belt (instead of free-floating), so rigid items in the pockets or overstuffed pockets can interfere with hip belt shape.
Ice axe loop is located below the center of the rear mesh pocket, so when the pocket is full, the loop cannot be used.
Side pockets are pretty deep (a storage advantage) but contents may be difficult to access if you have shorter arms.
Hip belt pockets on the newest generation of Hyperlite Mountain Gear packs are now larger than in older versions. I can easily pack 1,000 Calories of high-caloric-density snacks in a single pocket. However, since hip belt pockets aren’t free-floating (i.e., the inside back of the hip belt pocket is the front face of the hip belt), overstuffed pockets, or pockets stuffed with rigid items, can affect the hip belt from molding to your body and prevent maximum belt-body contact surface area.
Compared To
The table below compares all six of Hyperlite Mountain Gear’s fabric configurations (3400 cubic inch main body size was selected to compare weights consistently).
Junction 3400
Northrim 3400
Windrider 3400 (White)
Windrider 3400 (Black)
Southwest 3400 (White)
Southwest 3400 (Black)
Weight (oz)
32
35.1
31.9
34.8
32.1
35
Load Capacity (lb)
40
40
40
40
40
40
Body Material
DCH50
DCH150
DCH50
DCH150
DCH50
DCH150
Bottom Material
DCH150
DCHW
DCH150
DCH150
DCH150
DCH150
External Side Pocket Material
Hardline
DCHW
Mesh
Mesh
Hardline
Hardline
External Back Pocket Material
Mesh
DCHW
Mesh
Mesh
Hardline
Hardline
Hip Belt Pocket Material
Hardline
DCHW
Hardline
Hardline
Hardline
Hardline
MSRP
$345
$410
$345
$365
$345
$365
Material Descriptions:
DCH50 – 50 denier polyester face fabric laminated to a Dyneema Composite Fabric backing (3.5 oz/sq. yd.)
DCH150 – 150 denier polyester face fabric laminated to a Dyneema Composite Fabric backing (5.0 oz/sq. yd.)
DCHW – 375 denier 100% woven Dyneema laminated to a Dyneema Composite Fabric backing (5.0 oz/sq. yd.)
Hardline – 210 denier woven nylon with 10×10 mm 200 denier Dyneema ripstop (4.9 oz/sq. yd.), water-resistant coating (900 mm)
Mesh – 100% polyester open mesh (4.4 oz/sq. yd.)
Which Hyperlite Mountain Gear Pack is Best for Me?
Based on the specs in the table above, here are the most obvious use-case scenarios for each pack:
Windrider – provides the best visibility into pocket contents, best water drainage from pockets
Southwest – more durability than the Windrider, best for bushwhacking
If you only want to own one HMG pack, and you spend most of your time on trail or off-trail in open or bushy terrain, the Junction may be your best option.
If you need more durability for long expeditions in desert canyons or alpine limestone, check out the Northrim.
If you plan to regularly carry loads in excess of 30 pounds, consider sizing up one torso size. If you plan to regularly carry loads in excess of 40 pounds, consider a 4400-series pack.
I don’t recommend the Junction if your average pack weight (your pack weight at the mid-point of a trip) exceeds 35 pounds. This shouldn’t be much of a problem for trips up to a week in length if your base weight is less than 20 pounds and you’re not carrying more than a liter or two of water at a time.
How we acquired these products: Product(s) discussed in this review were either acquired by the author from a retailer or otherwise provided by the manufacturer at a discount/donation with no obligation to provide media coverage or a product review to the manufacturer(s).
We do not accept money or in-kind compensation for guaranteed media coverage: Backpacking Light does not accept compensation or donated product in exchange for guaranteed media placement or product review coverage.
Affiliate links: Some (but not all) of the links in this review may be “affiliate” links, which means if you click on a link to one of our affiliate partners (usually a retailer site), and subsequently make a purchase with that retailer, we receive a small commission. This helps us fund our editorial projects, podcasts, instructional webinars, and more, and we appreciate it a lot! Thank you for supporting Backpacking Light!
The RaidLight HyperLight MP+ Waterproof Jacket is one of the lightest no-frills rain jackets on the market.
Introduction
The RaidLight HyperLight MP+ Waterproof Jacket is one of the lightest no-frills rain jackets on the market. Though designed for the storm-surprised trail runner, the soft finish quality and 3 oz (85 g) weight could be attractive to a minimalist-minded backpacker looking for an ultralight waterproof layer. In this review, we specifically examine the women’s version, but a men’s version is available as well.
**EDITOR’S NOTE** The Raidlight Hyperlight MP+ is a rain jacket fromRaidlight, a brand specializing in trail-running gear. It should not be confused with any products from Hyperlight Mountain Gear.
Photo: RaidLight
Features and Specifications
Features
Stuffs into hood pocket for storage
Taped seams
Slim fit
Watch window on left wrist
Elastic wrist cuffs
Thumb loops
Elastic hood with slim visor
Elastic waist
Reflective strips on hood, back, and arms
Soft, quiet fabric
The watch window is one of the coolest features on the RaidLight Hyperlight MP+.
Specifications
All manufacturer-reported specifications for the RaidLight Hyperlight MP+, including weight, are identical for the men’s and women’s version.
Weight: 3.0 oz (85g)
Waterproof rating: 20k mm
Breathability rating: 25k
Membrane: 4-Way Stretch MP+ Membrane
Zipper: waterproof
Fabric
Membrane: 100% Polyurethane
Shell: 100% Polyamide
Finish: DWR treatment
Waterfall testing in Zion National Park.
Review Context
I spend close to 200 days a year in the backcountry as a professional educator and guide. I’m continually trying to improve my rain-jacket game. I consider it a mandatory piece of equipment because it can be the difference between comfort and discomfort. In very cold, wet, and windy conditions – it’s a safety item as well.
I’m always searching for a jacket that is lightweight and compact enough to “forget about” in my pack and yet gives me full protection during an all-day storm. I want a jacket that performs equally well during active pursuits like hiking and scrambling as well as passive activities like cooking and providing first aid.
I ask myself the following questions when choosing a rain jacket:
What level of rain will this handle? A sprinkle? A deluge? A monsoon?
How easily can I pack it? Will it fit in an easily accessible part of my pack?
Will it function as a multi-use piece of gear? Can it be used as a wind shell? A pack cover? An insulator?
What are the bushwacking capabilities of this layer? How well will hold up to abrasion?
Is this harmonious with my current layering system?
I primarily tested the Raidlight Hyperlight MP+ on a 10-day backpacking trip in Big Sur, California. Luckily for this review, it has been a rainy spring in central California. We experienced 4 in (10 cm) of rain during our trip. When it wasn’t raining, we were “swimming” through Pacific coast fog. Temperatures ranged from the low 70s to the low 40s.
I also tested the Hyperlight MP+ while:
Trail running through mist
Standing under waterfalls in Zion National Park
Cycling through light rain
All-day fog in the Big Sur Mountains.
Performance Assessment
I evaluated the RaidLight Hyperlight MP+ by the following criteria:
Finish quality
Fit
Zipper
Durability & Breathability
Compressibility
Finish Quality
The RaidLight Hyperlight MP+ utilizes taped seams, lightweight polyamide fabric, and a DWR treatment.
Taped seams are a must for rain gear. The seams on the RaidLight Hyperlight MP+ are soundly taped, but I do wonder how well they will hold up to long-term use due to the light fabric. The DWR treatment on the lightweight polyamide fabric was sufficient waterproofing (I did get wet, but it wasn’t from fabric soak-through – see the “Zipper” section below). The fabric itself is incredibly soft and quiet – when I pulled it out of the box my first thought was, “this fabric is supposed to keep me dry?”
Fit (length, hood, cuffs)
The RaidLight HyperLight MP+ features a non-adjustable elastic hood.
The hood fits snugly with enough room to go over a baseball cap. As a weight saving measure, the elastic band is not adjustable.
Demonstrating the fit of the RaidLight Hyperlight MP+.
The Hyperlight MP+’s zipper reaches to just under the chin. I found this design to be a little uncomfortable – I got some chafing with the zipper all the way up. This design had ramifications once it started to rain – see the zipper section below.
Thumb loops keep the sleeves in place but I worry about their long-term durability.
The elastic thumb-loops functioned as expected, keeping the sleeves in place during activity. My worry is one of durability: the seam connecting the fabric and loop doesn’t seem secure enough to hold up to long term use. I don’t see them lasting long, particularly not with the kind of use I’d be giving this jacket as an outdoor professional. On top of that, I found the loops to be somewhat uncomfortable on my thumbs – the thin elastic loop digs into the skin a little.
I have an athletic build and stand 5’5” and 130 pounds. I found the RaidLight Hyperlight MP+’s fit short in both the torso and arms and too tight for a layer beyond a thin fleece. I’d like to see this jacket cut slightly more roomy – even if it added a little weight. Of course, that’s a backpacker talking – most trail runners are going to layer this over a thin shirt.
Zipper
The RaidLight Hyperlight MP+’s zipper design allowed some moisture in during a four-hour rainstorm.
The waterproof zipper is my main gripe with the RaidLight Hyperlight MP+. As seen in the photo above, I experienced significant moisture entry around the zipper during a four-hour rain and hail storm in the Big Sur. I believe this came from the design of the zipper rather than its waterproofing – because it chaffed my chin, I had to leave it unzipped slightly, allowing water to enter from the top.
Durability & Breathability
The RaidLight Hyperlight MP+’s fabric is so soft that it almost feels like tissue paper. It breathes well – making it ideal for shielding you from light rain during heavy exertion. The downside is the fabric’s fragility – this is not the rain jacket I would grab first for off-trail excursions or bushwhacking of any kind.
Compressibility
The MP+ is fairly compact for a rain jacket, compressing down to slightly larger than palm-sized. The built-in stuff pocket is located in the hood. The jacket fits into the pouch easily (no struggling to get it stowed) and continues to compress if necessary – meaning it’s easy to cram into whatever nook or cranny you have available in your packing system.
Product Strengths and Limitations
Strengths
Incredibly soft and quiet – unlike standard hardshell fabrics
The clear watch window is a nice touch
So light and compressible (3 oz / 85 g) that I lost it a few times in my pack
Minimalist design for weight savings – the trail running pedigree is evident here
Limitations
Short torso and short arms – no room underneath for anything beyond a light fleece
Uncomfortable elastic thumb loops
Uncomfortable zipper design when fully zipped; allows for water entry during a hard storm if not fully zipped
Lack of features (pockets, adjustable hood, etc) might be a turn-off for some
Falls victim to the curse of women’s gear – only available in bright blue with a hot pink zipper
Commentary
The RaidLight Hyperlight MP+ excels as a breathable waterproof layer capable of fending off light-to-medium rain. Anything more than that and you might get wet, due to a short hem, minimalist hood, and the need to keep the zipper unzipped a few inches for comfort.
The RaidLight Hyperlight MP+ can have a seat at the ultra-light backpacker table. That table should have less than 20% chance of precipitation and temperatures above 50 F (10 C). The overlap between ultra-running gear and ultralight backpacking gear is growing but still imperfect – and that shows in this jacket.
The fabric feels great and has above average breathability for a waterproof layer – what you’d expect from a jacket designed for moving fast and working hard. As a runner, I can appreciate the minimalist lack of features and weight-saving (i.e., not very roomy) cut. But as a backpacker, I want to be able to move freely and access pockets without exposing my insulating layers to moisture. You just can’t do that in this jacket. However, the Hyperlight MP+ does function well as a wind shirt when paired with a light long-sleeved layer underneath, so it does get points in the “multi-use gear” department.
Using the clear watch window to check the time while standing under a waterfall in Zion.
Some of the design features – like the elastic thumb loops and under-the-chin zipper, were uncomfortable. The clear watch panel is a cool and thoughtful touch.
Finally, as a professional in the outdoor industry and a woman in my thirties, I don’t want my only color option to be baby blue with hot pink.
Compared To…
Here is how the Raidlight Hyperlight MP+ compares to a couple of possible options for an ultra-light backpacking rain jacket in terms of price, performance, and features. The weights listed here reflect women’s sizes.
Pertex Shield+ 2.5-layer waterproof breathable laminate on nylon
None
Adjustable
One, at chest
Roomy
While the Raidlight Hyperlight MP+ is the lightest jacket in our table, it is also the most minimally featured and tightest fitting. This design demonstrates the Raidlight Hyperlight MP+’s origins as a jacket aimed at trail runners and highlights its limitations as a piece of ultralight backpacking gear.
Rating: Above Average
I recommend this jacket to a trail runner who occasionally backpacks, or for absolute ounce shavers who can be confident they will only have to contend with light showers during a trip. The weight is hard to beat, and the fabric feels great, but the short, slim cut makes it vulnerable to competition from similarly priced jackets like the Outdoor Research Helium II Rain Jacket or ZPacks Vertice Jacket.
Where to Buy
Buy the Women’s Raidlight Hyperlight MP+ at Raidlight.
Buy the Men’s Raidlight Hyperlight MP+ at Raidlight.
You can watch our video review of the Arc’teryx Zeta FL rain jacket here and read our print review here.
Disclosure
How we acquired these products: Product(s) discussed in this review were either acquired by the author from a retailer or otherwise provided by the manufacturer at a discount/donation with no obligation to provide media coverage or a product review to the manufacturer(s).
We do not accept money or in-kind compensation for guaranteed media coverage: Backpacking Light does not accept compensation or donated product in exchange for guaranteed media placement or product review coverage.
Affiliate links: Some (but not all) of the links in this review may be “affiliate” links, which means if you click on a link to one of our affiliate partners (usually a retailer site), and subsequently make a purchase with that retailer, we receive a small commission. This helps us fund our editorial projects, podcasts, instructional webinars, and more, and we appreciate it a lot! Thank you for supporting Backpacking Light!
Membership Required
This feature requires an active Backpacking Light Membership.
Premium Articles
You're currently viewing a free preview of a member exclusive premium article. Our premium articles include in depth journalism and insights from the Backpacking Light editorial team.
Get full article access by subscribing to a Premium or Unlimited Backpacking Light membership!
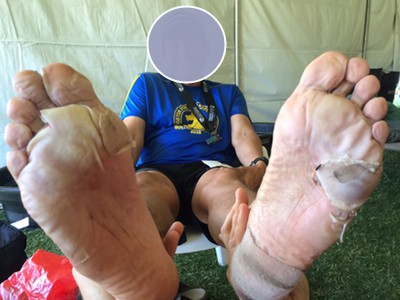
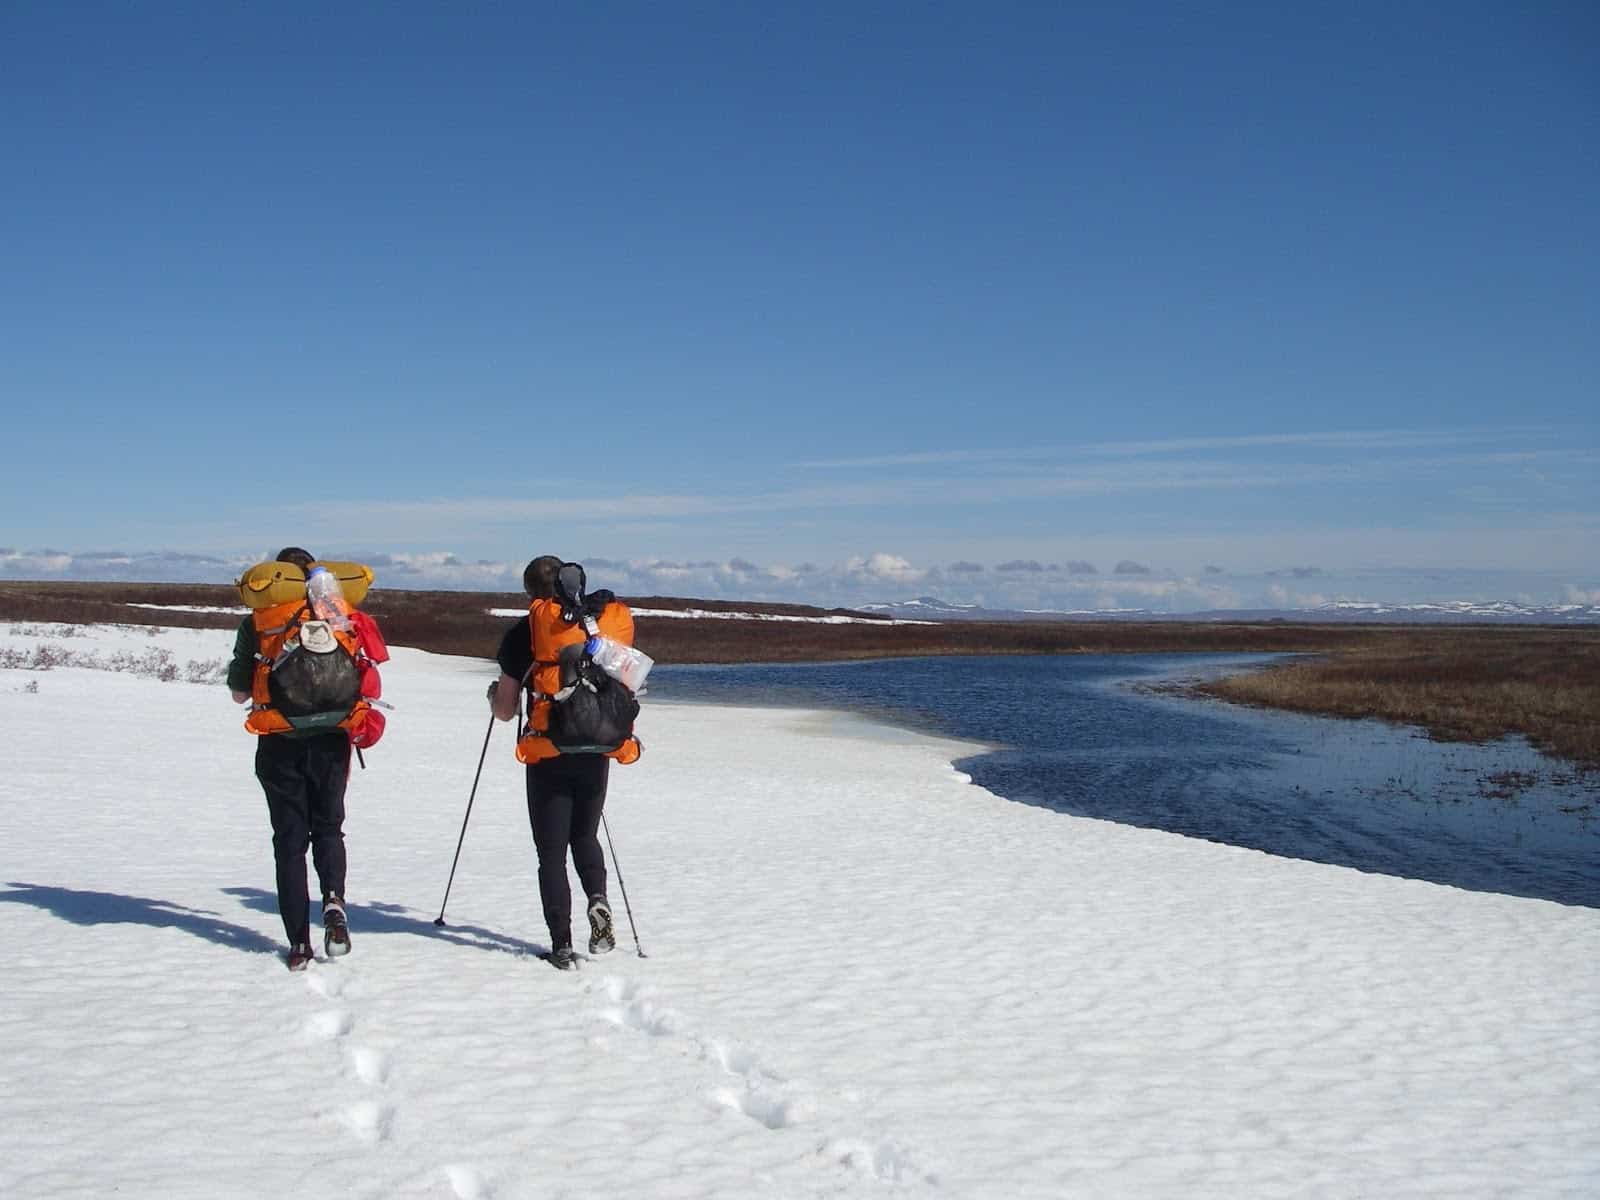
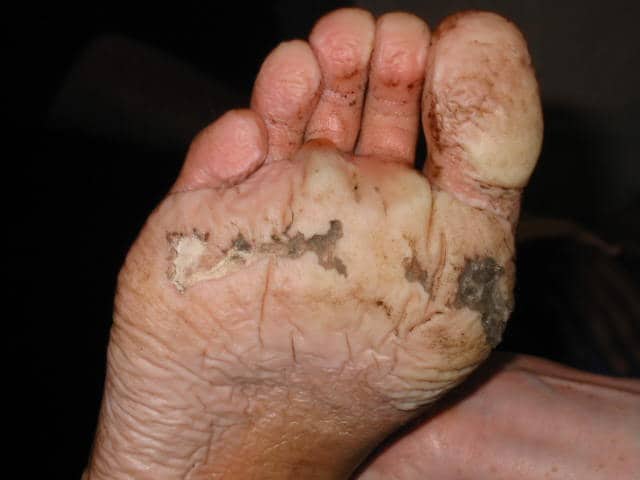
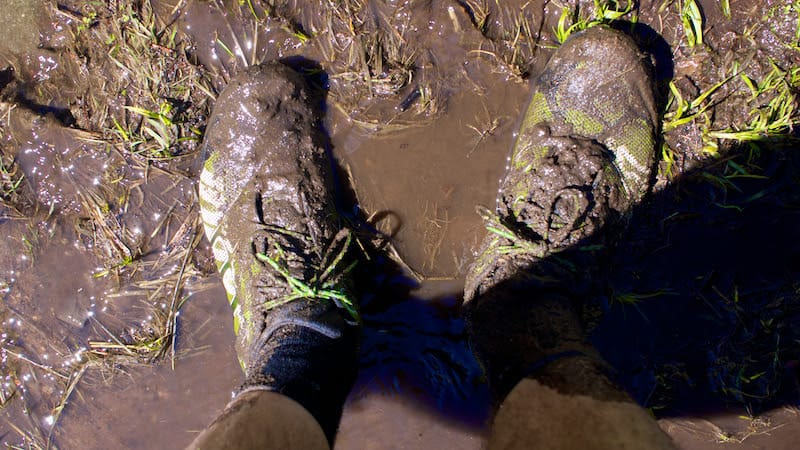
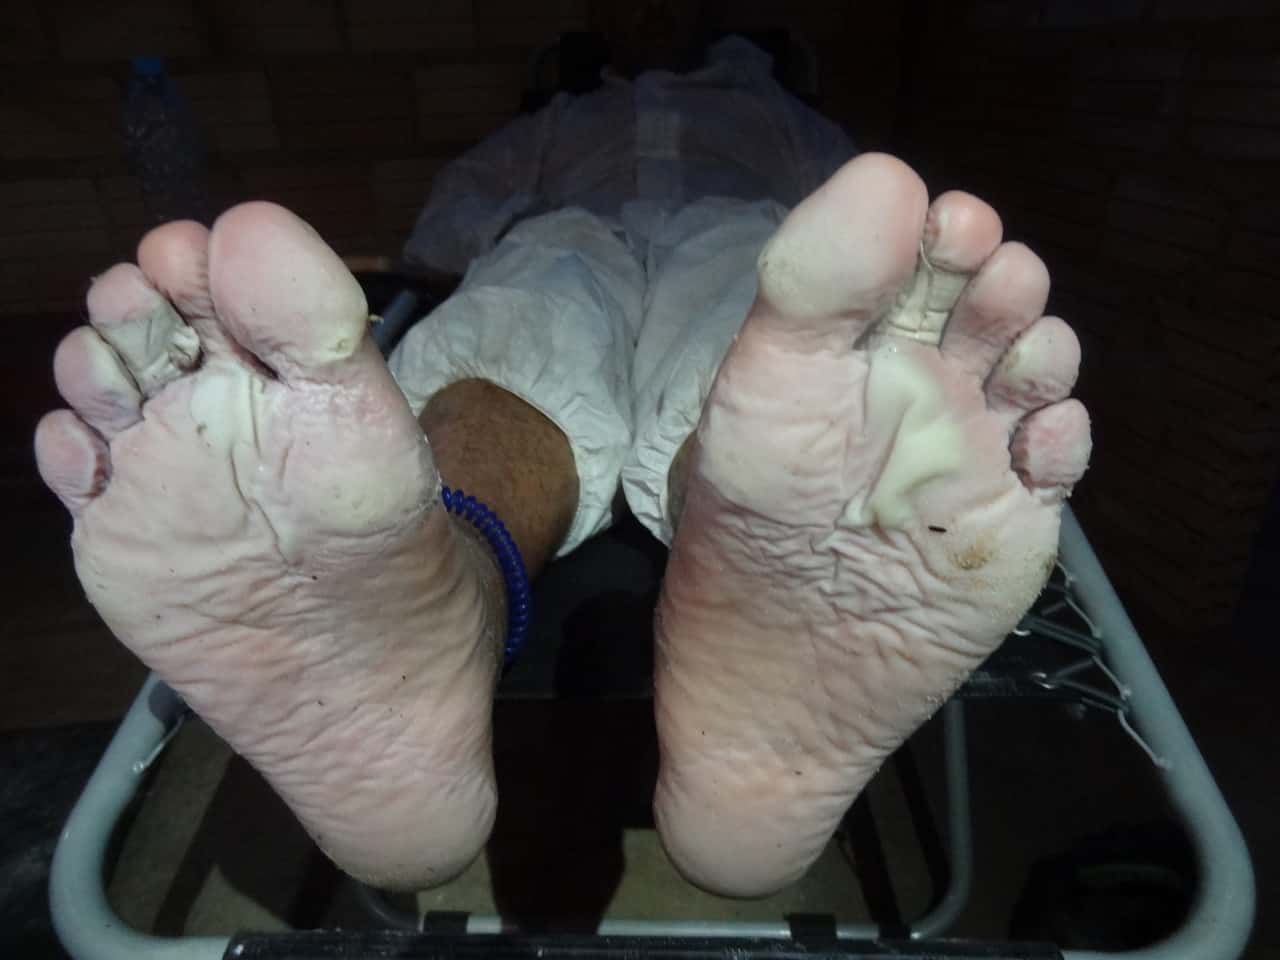
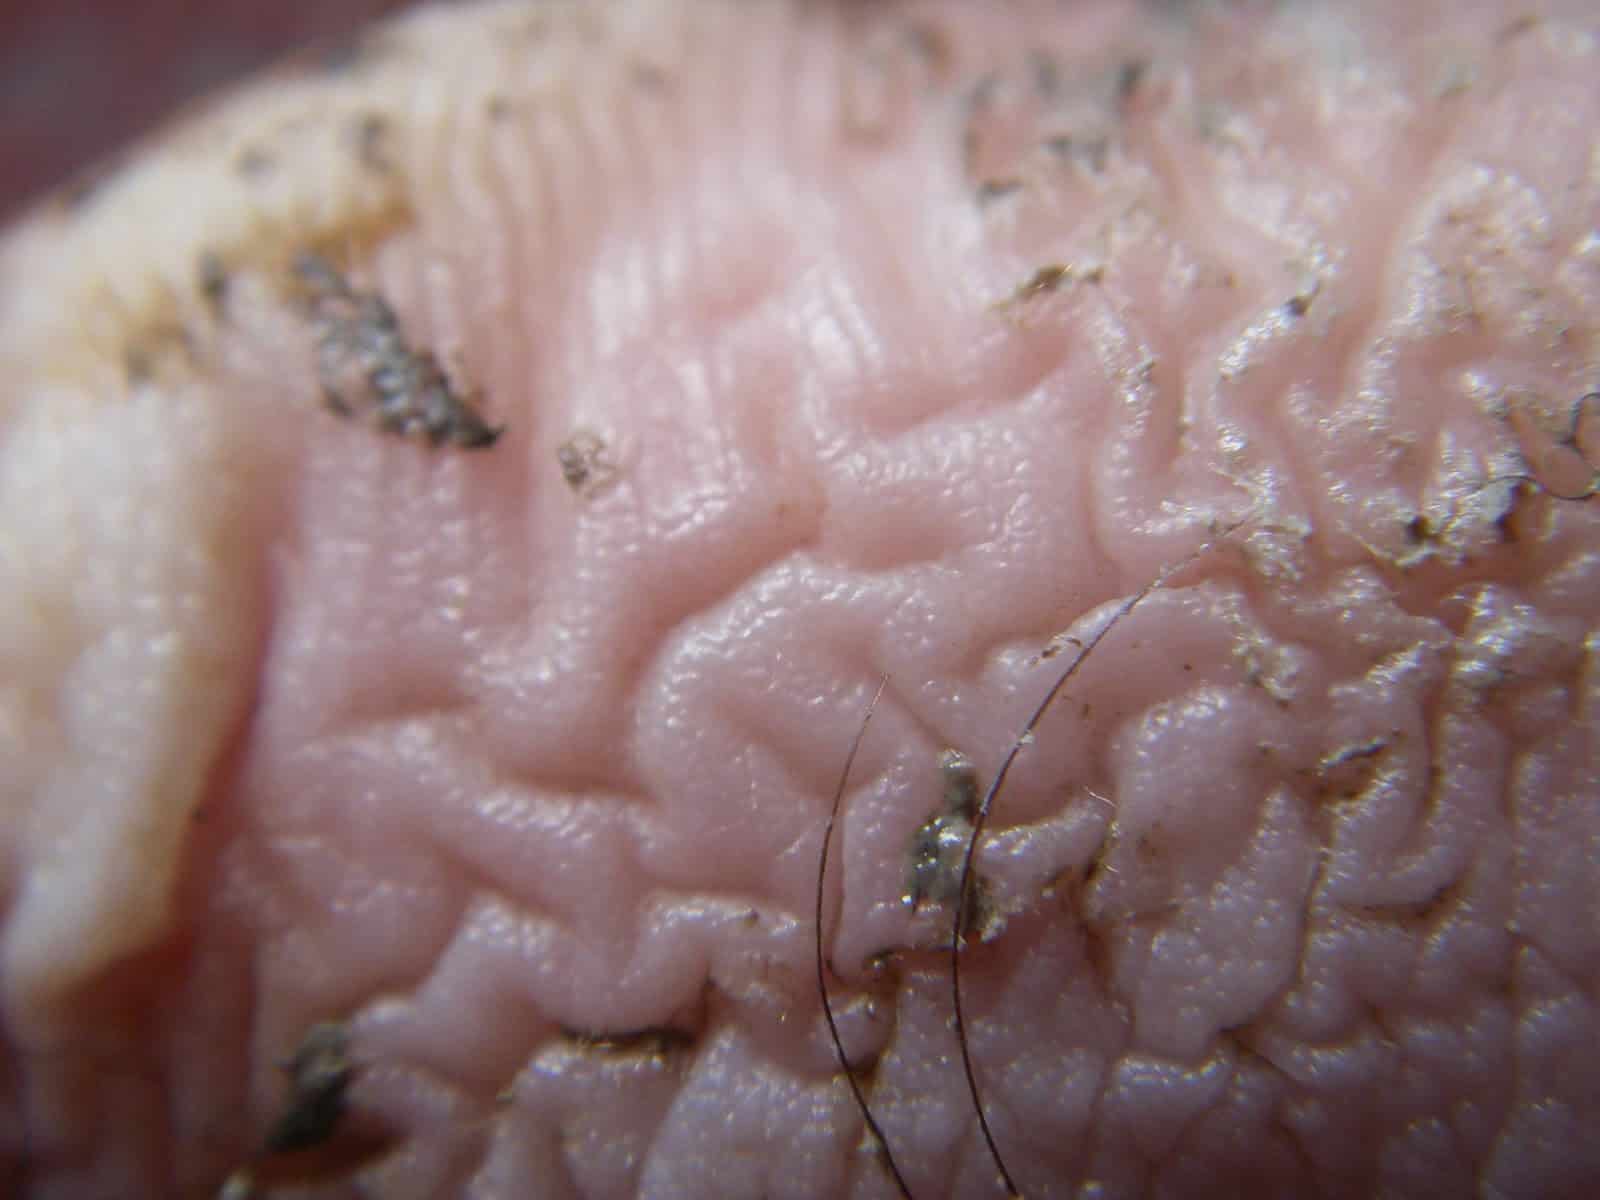

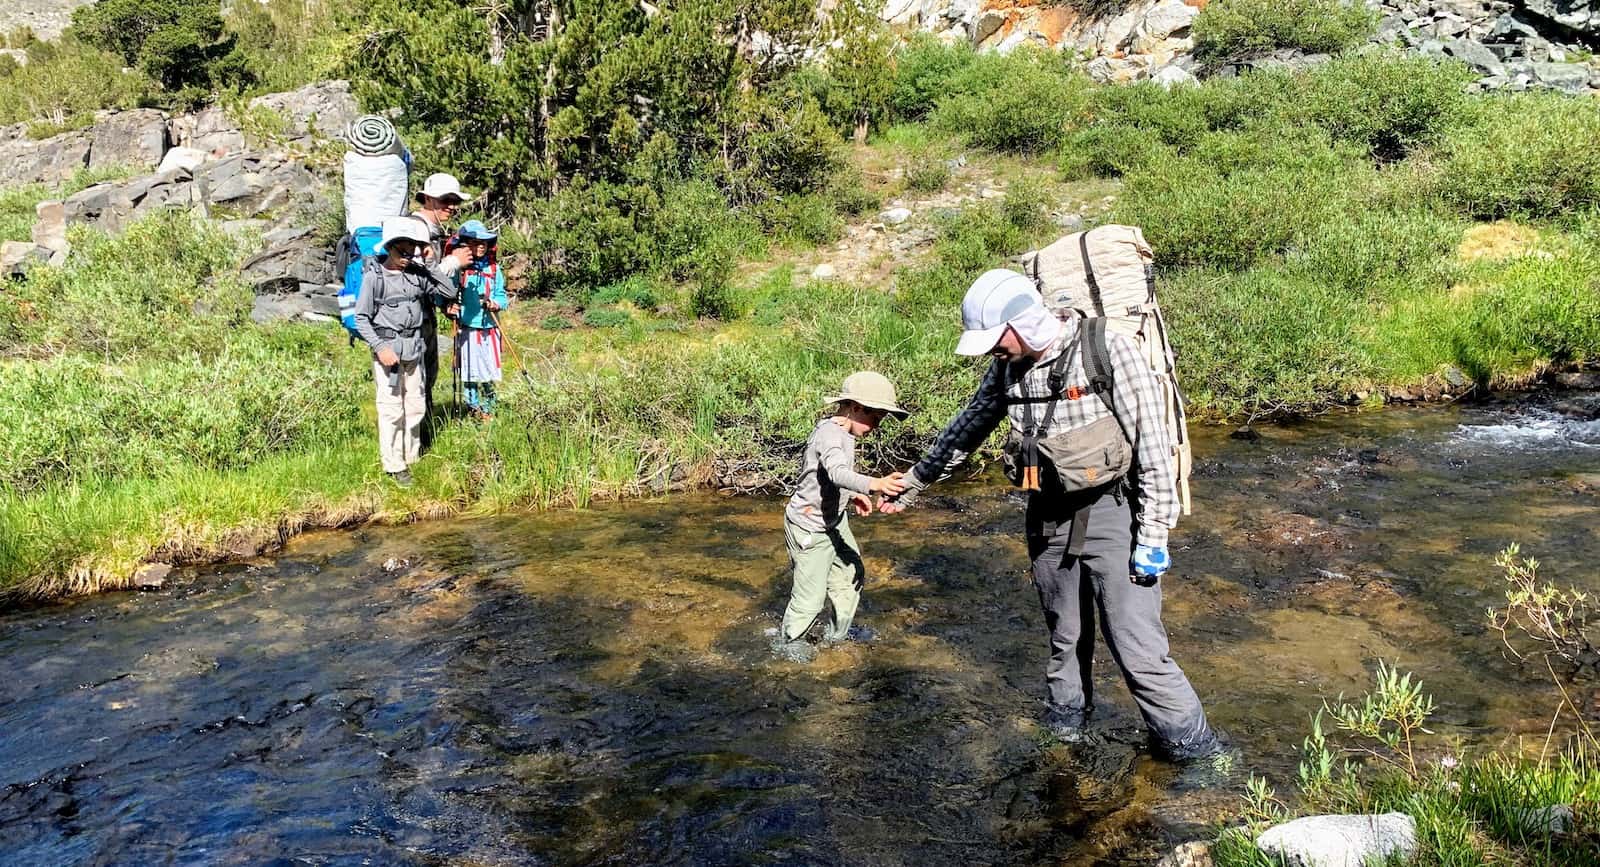
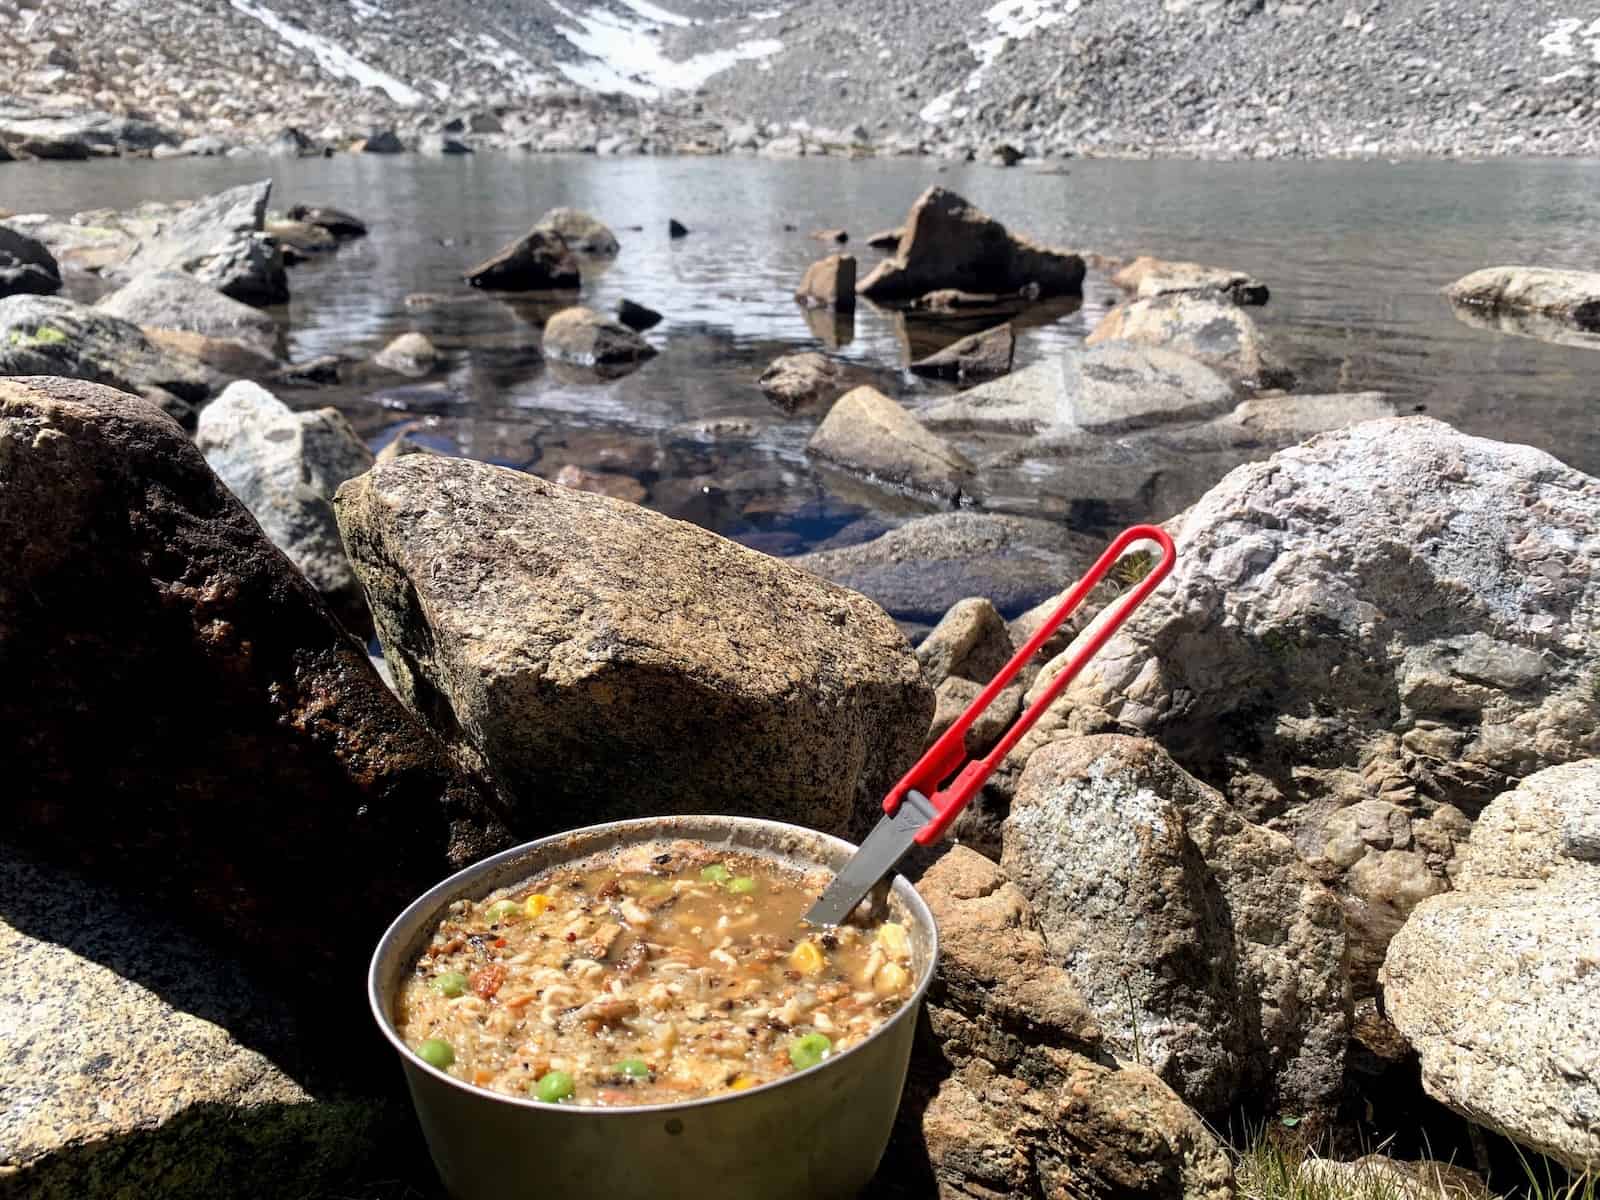
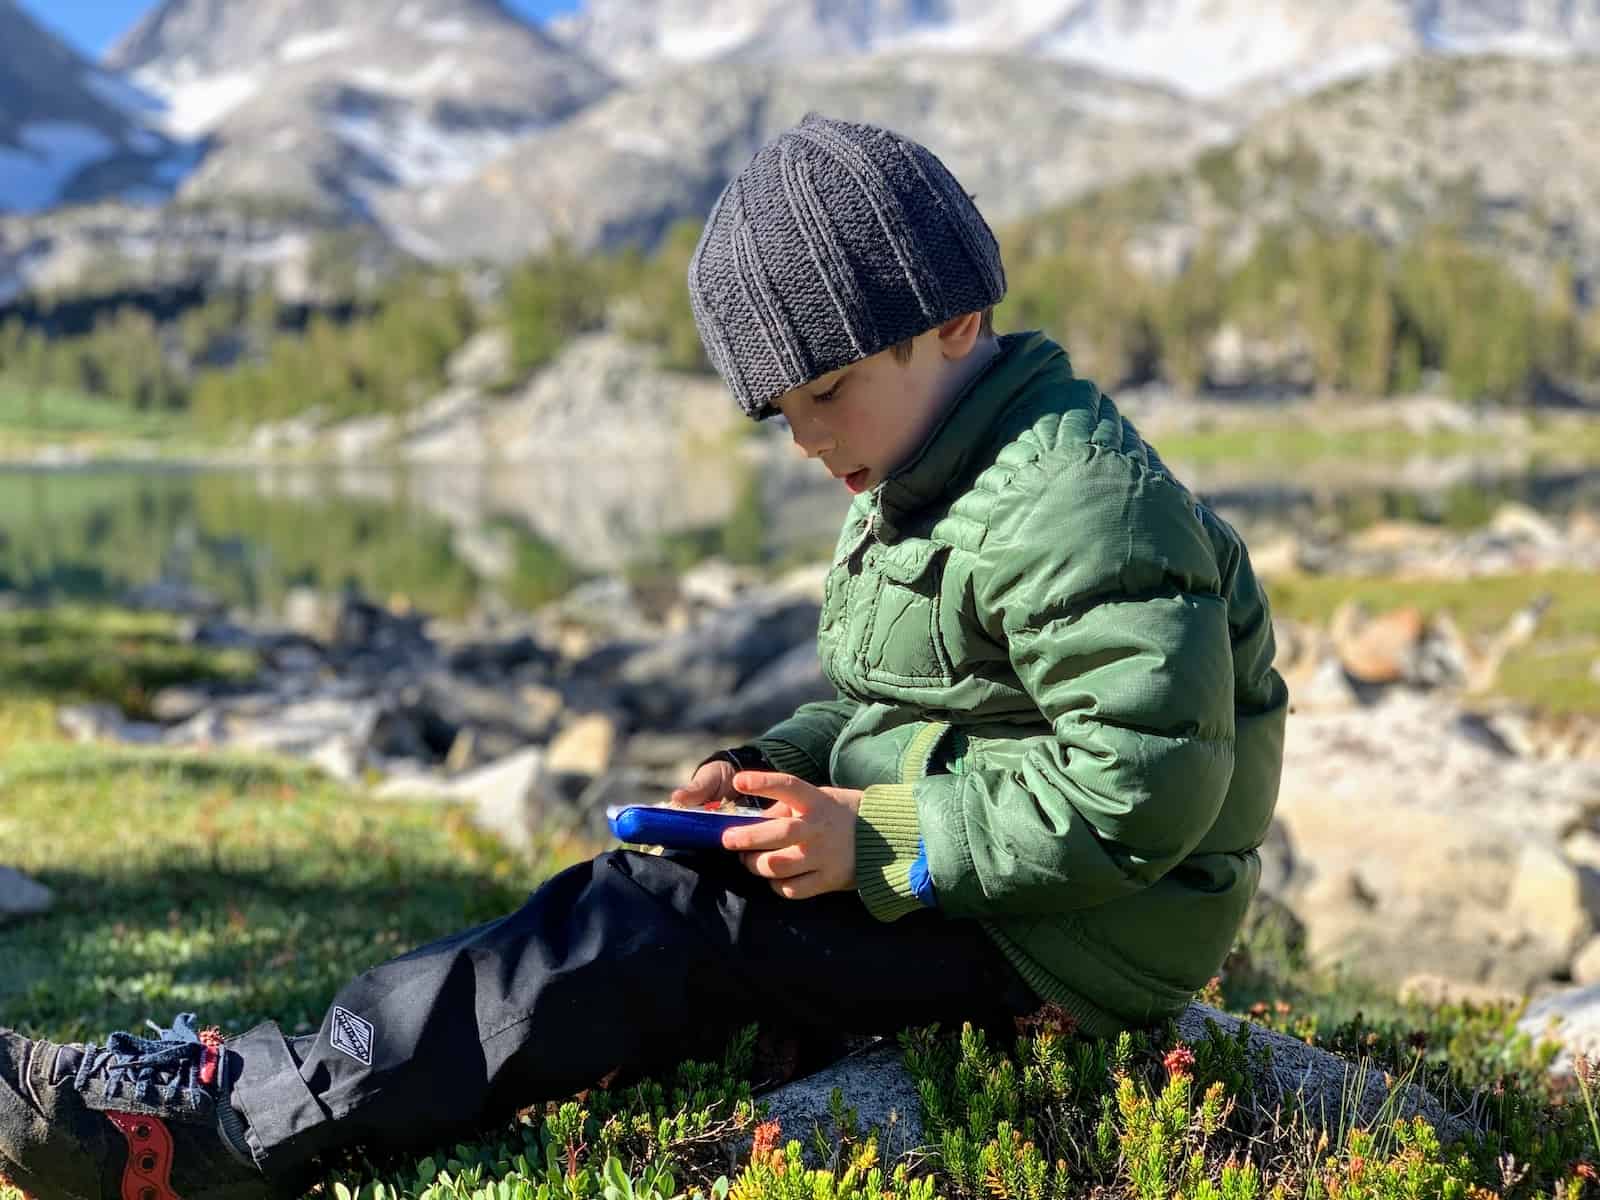
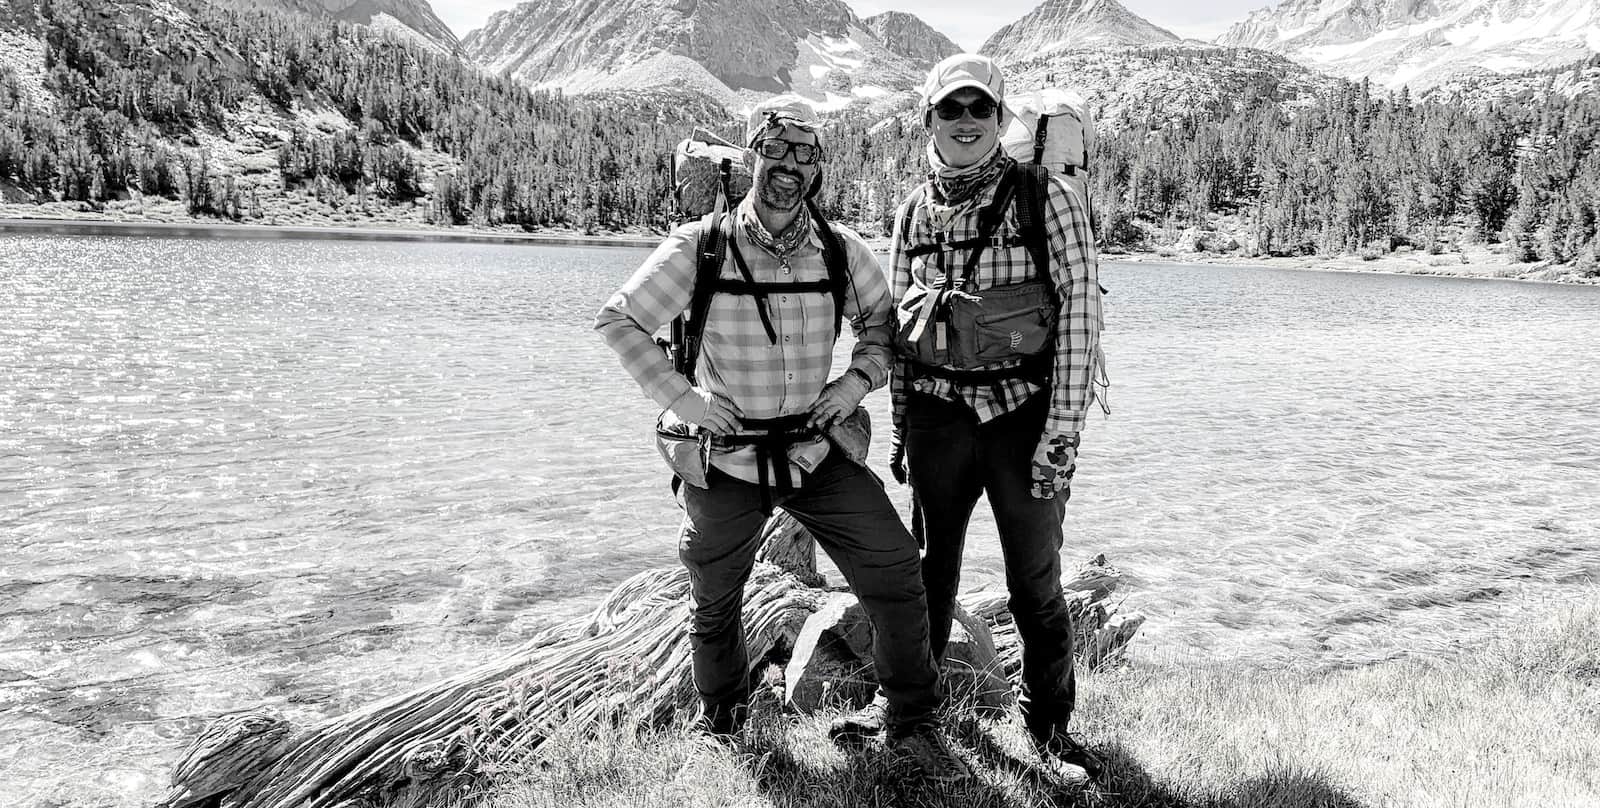


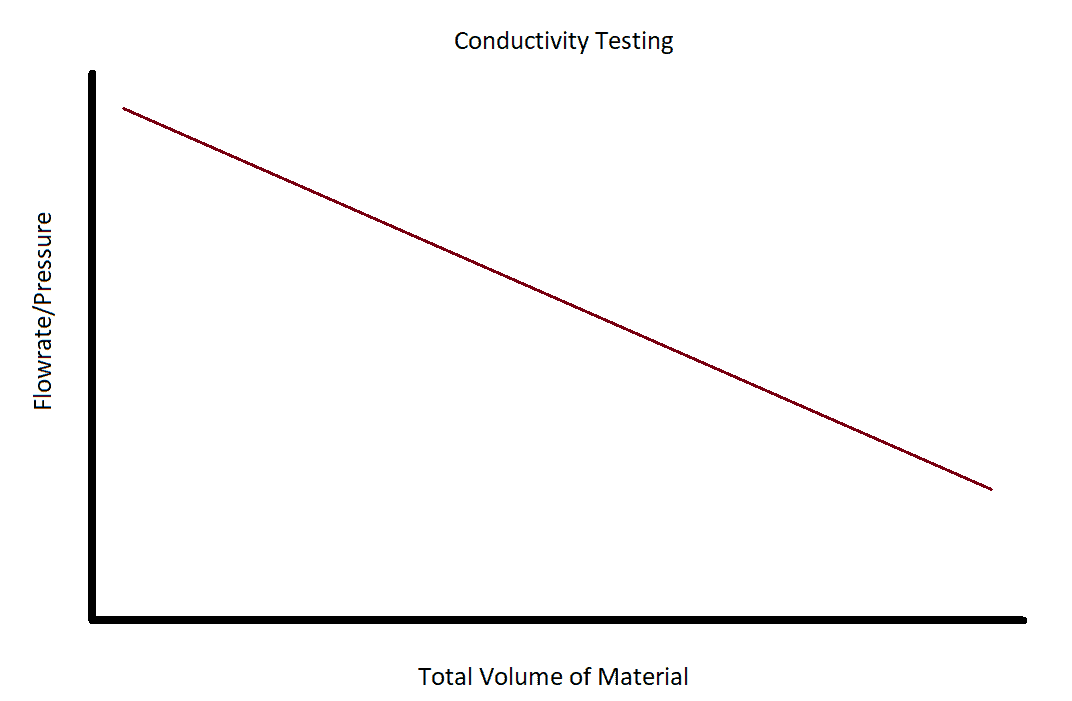

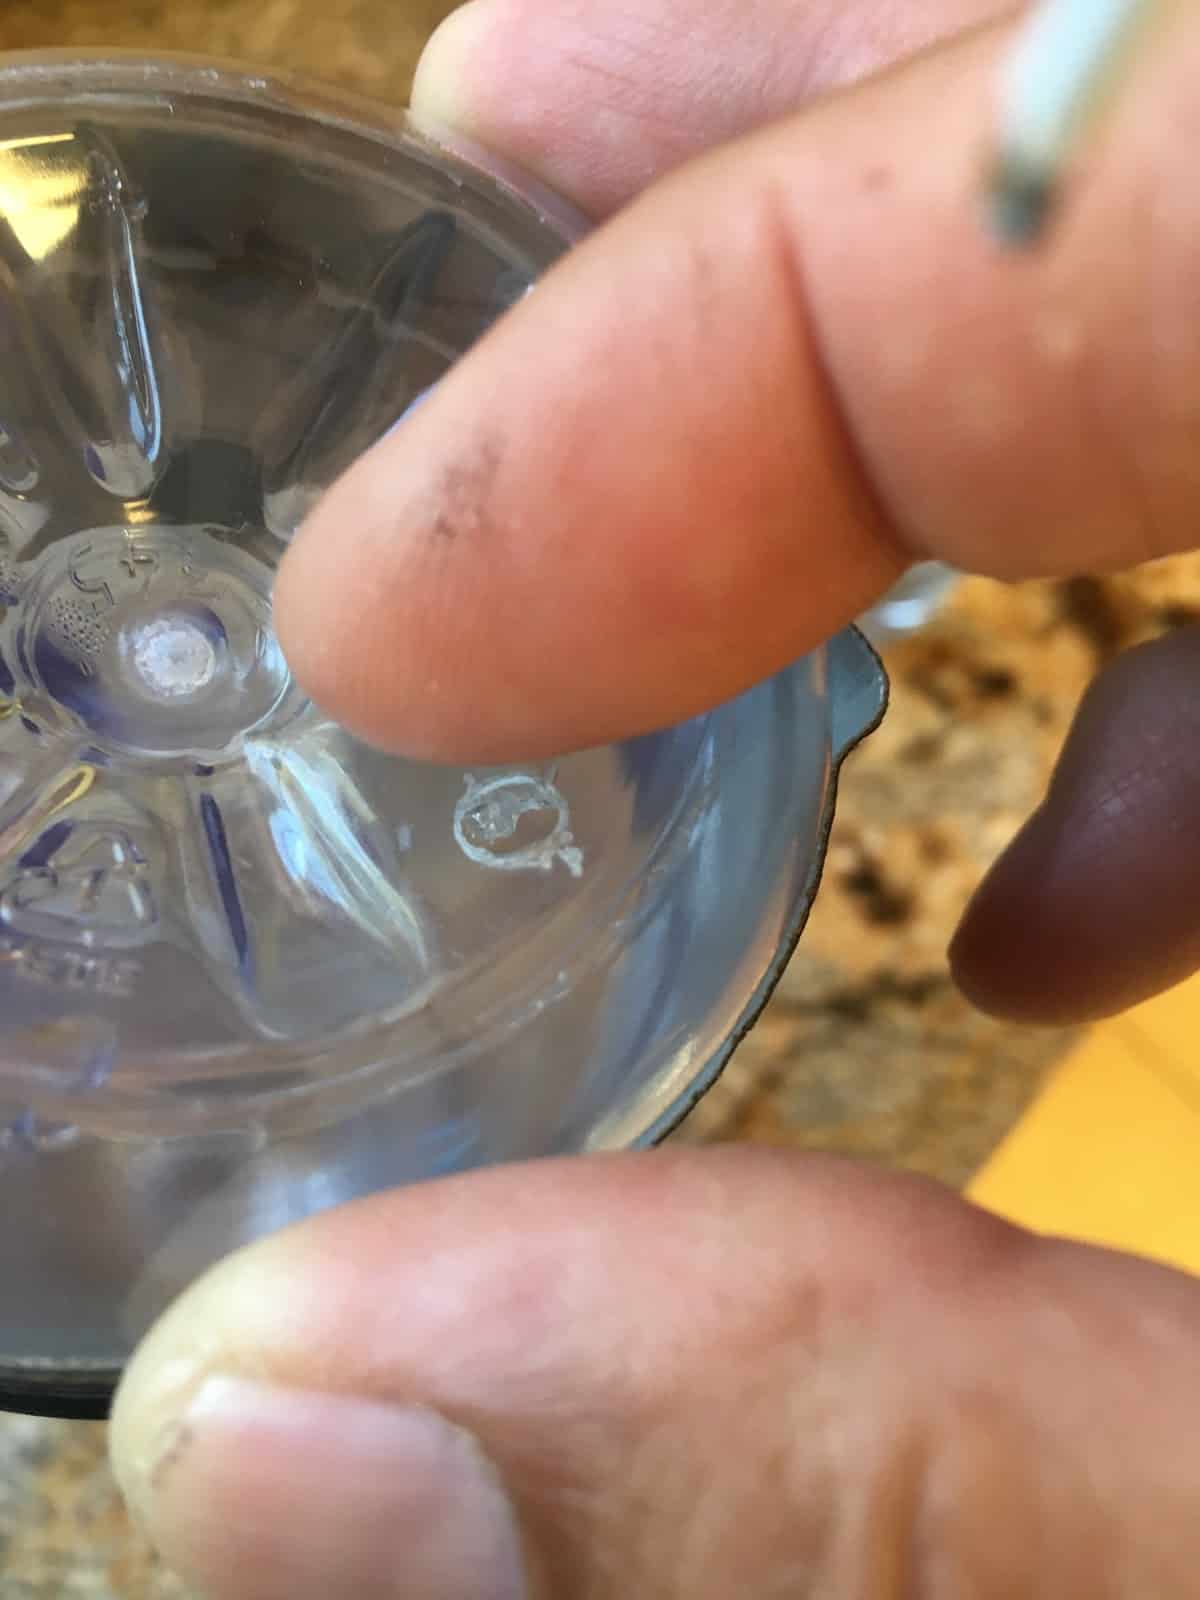
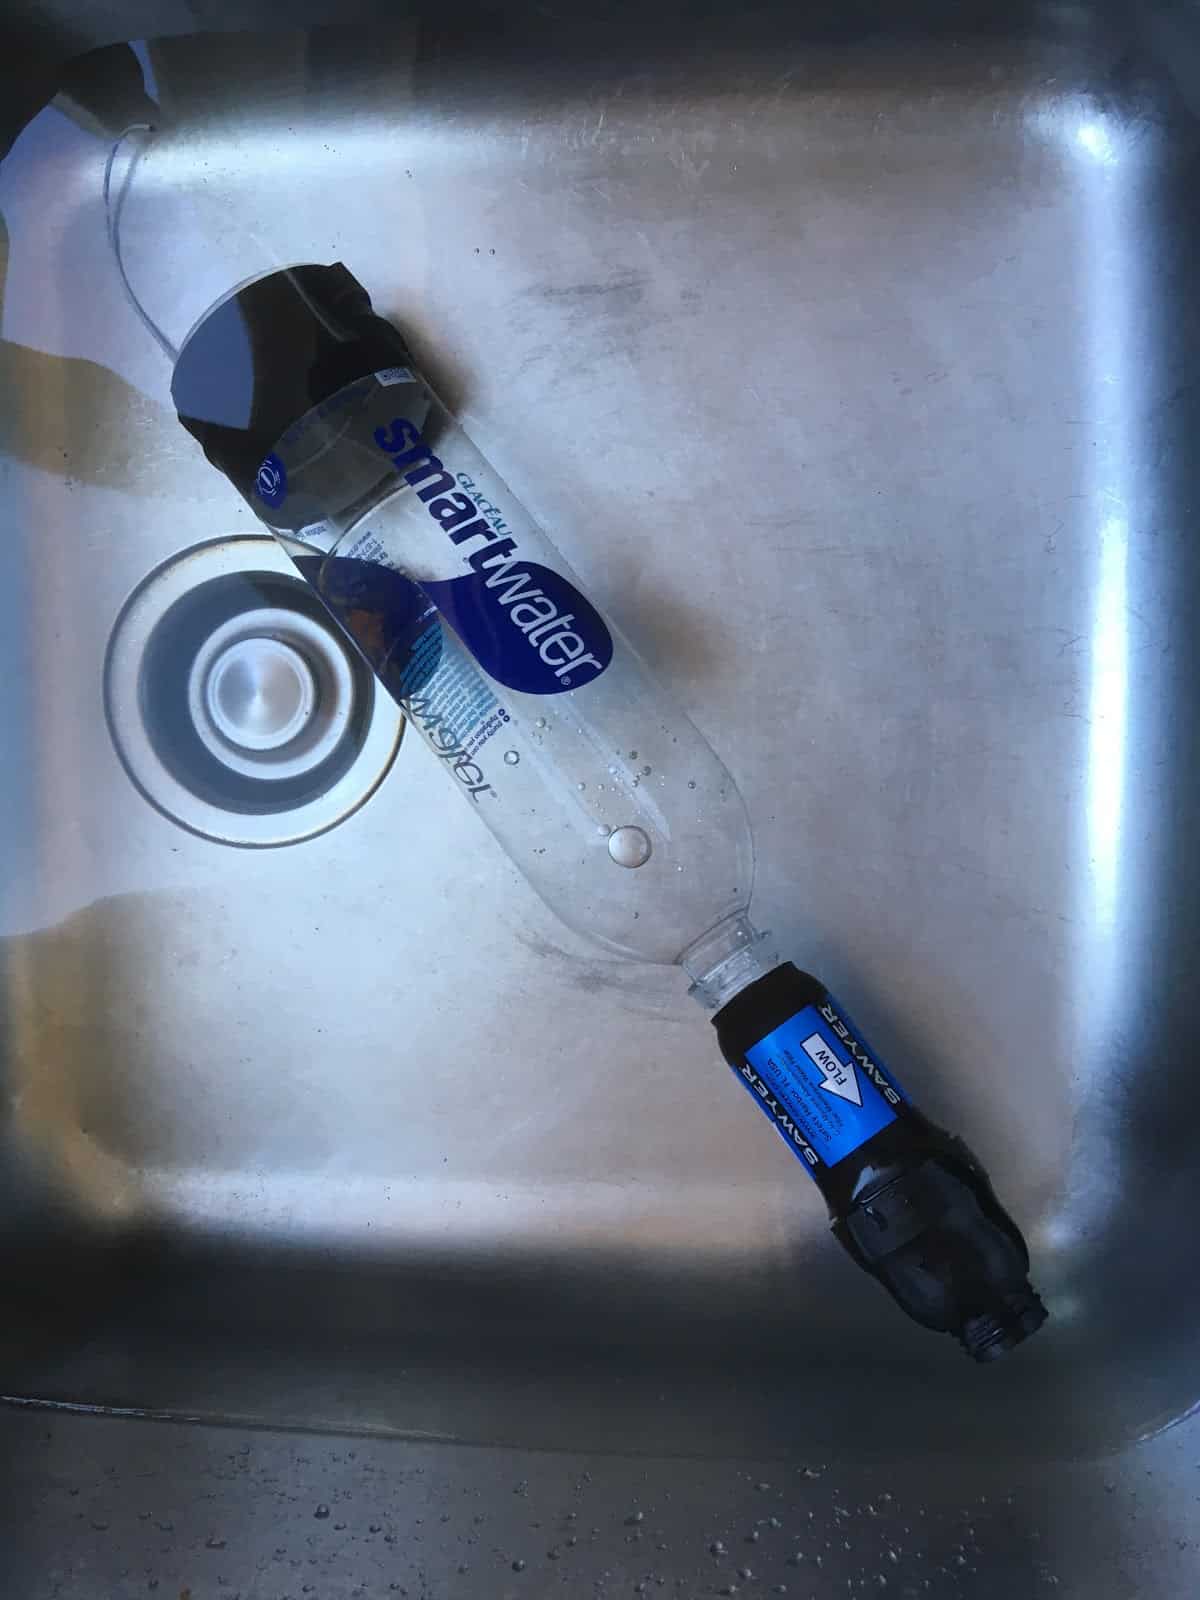 Step 5: Place your finger over the hole on the bottom of the water bottle and raise the bottle/filter assembly out of the water. Water should not flow out of the filter (there may be a few residual drips, and that’s OK).
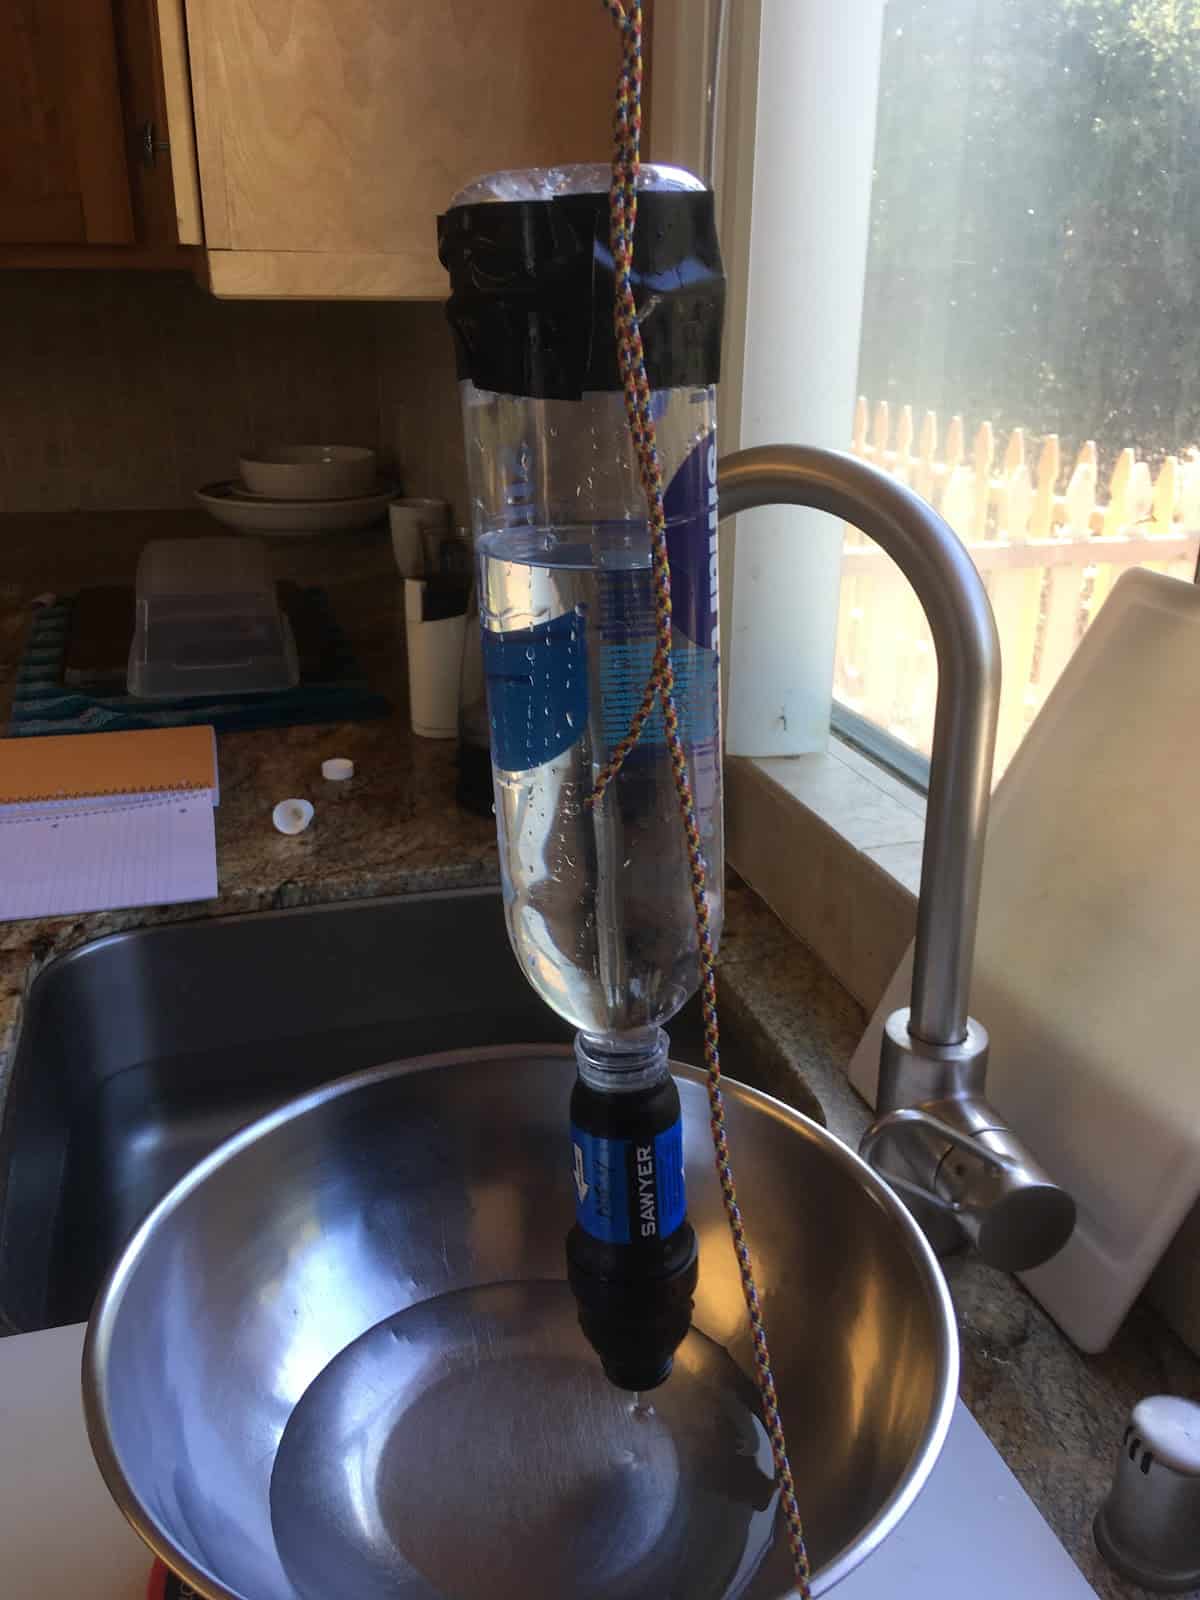
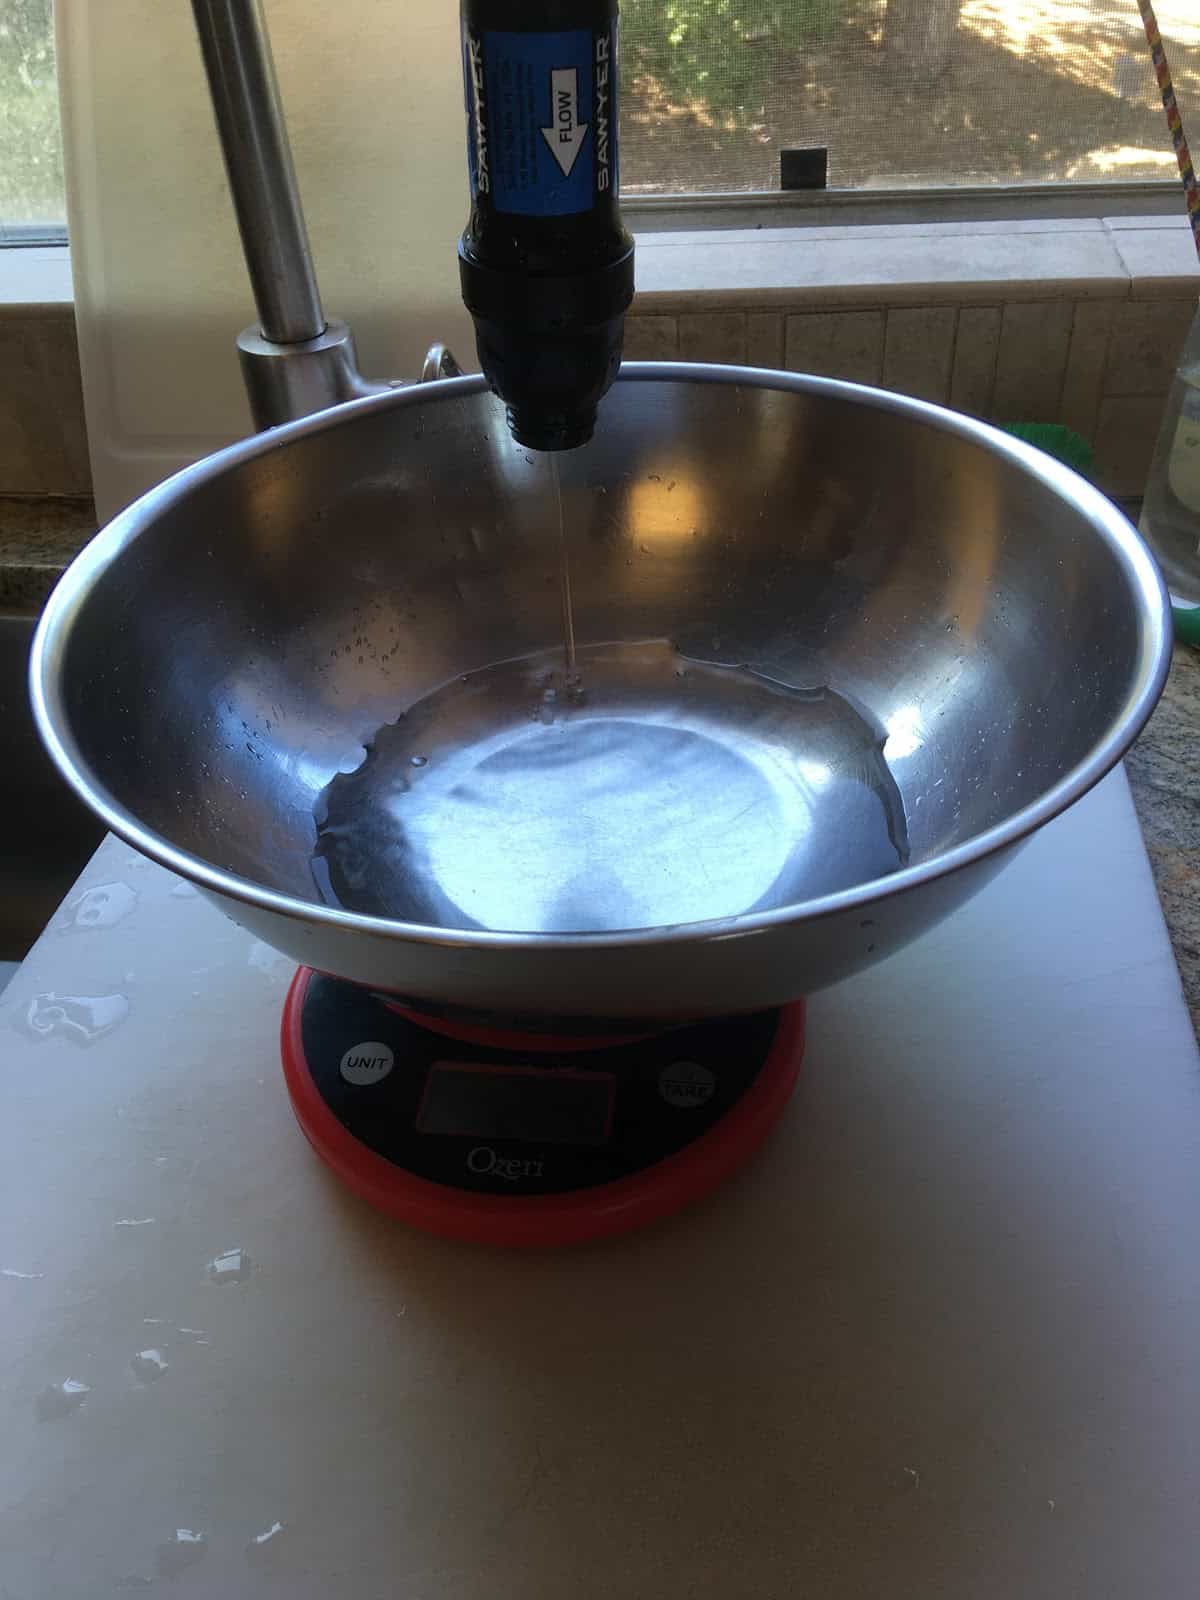 Step 8: When the scale reads 500 grams (16.9 oz), record the time (in seconds) and end the test.
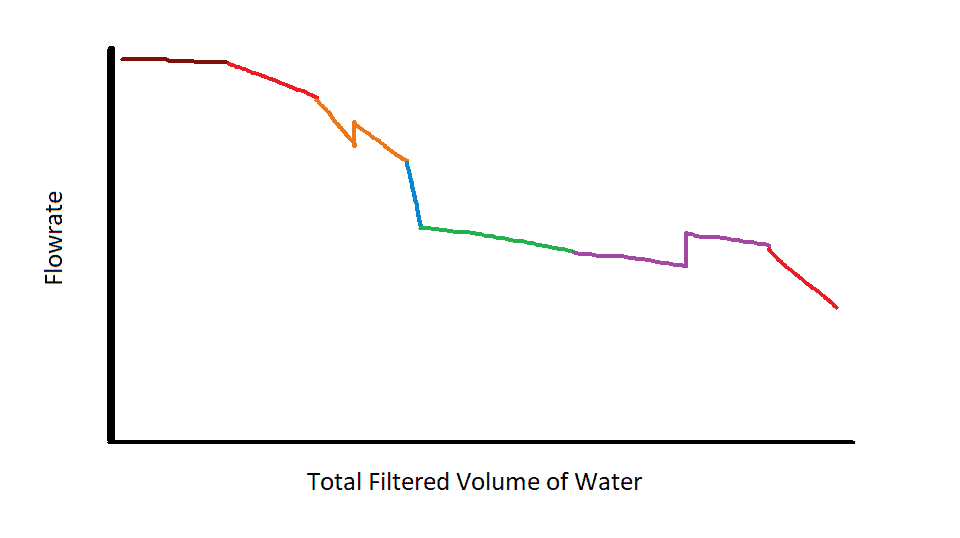
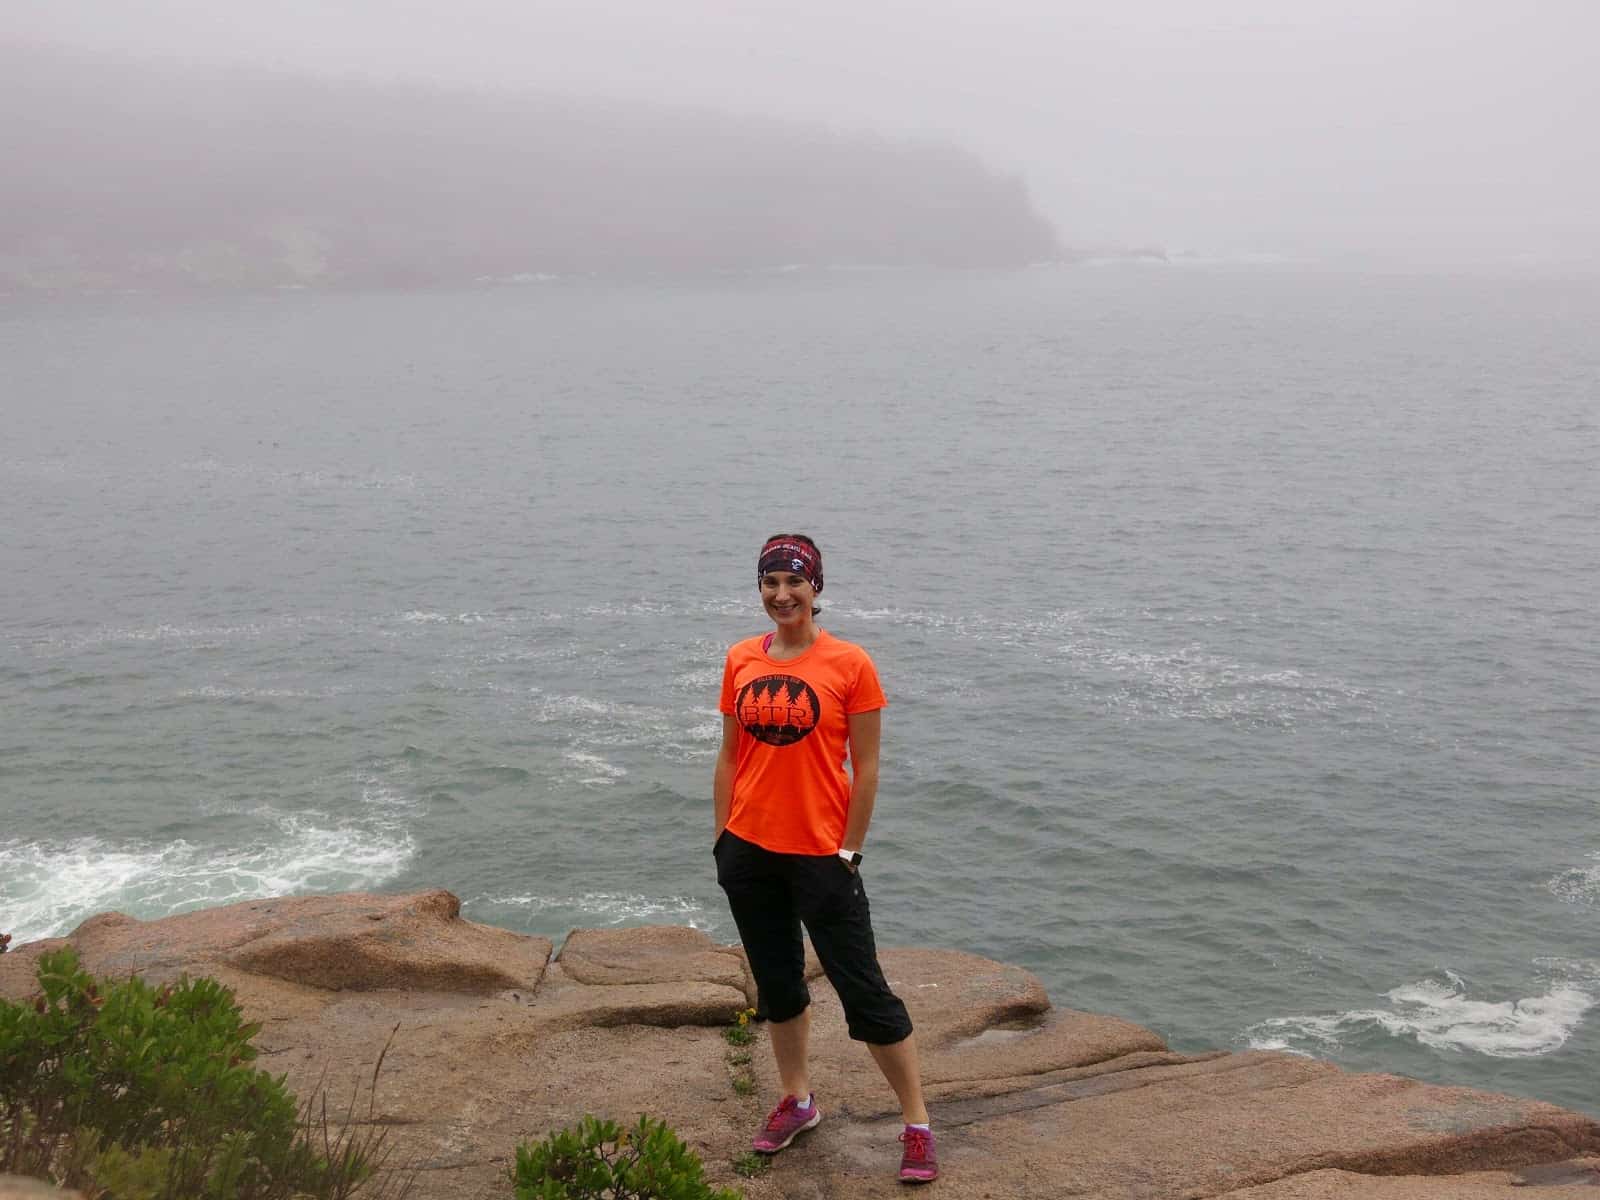
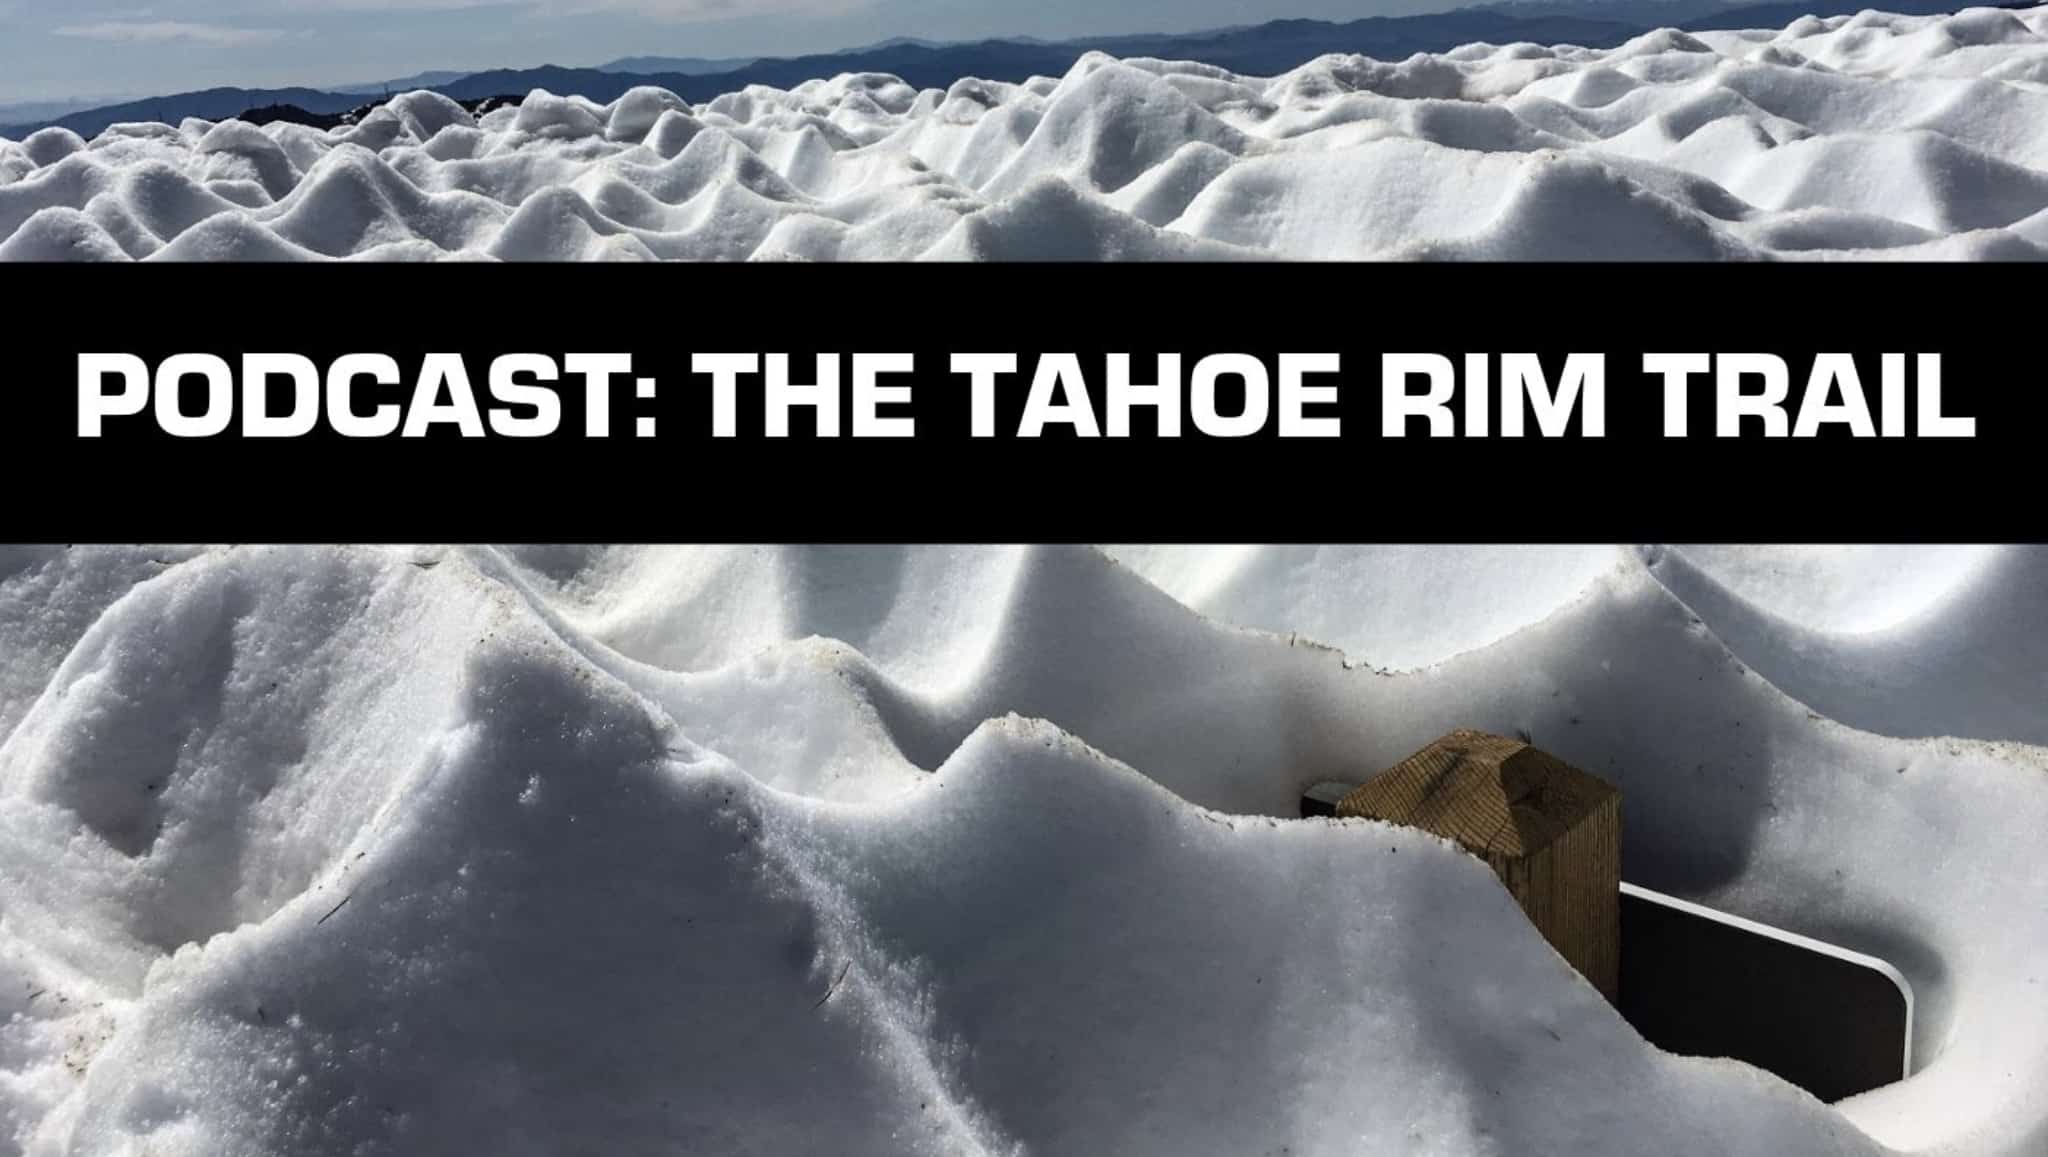
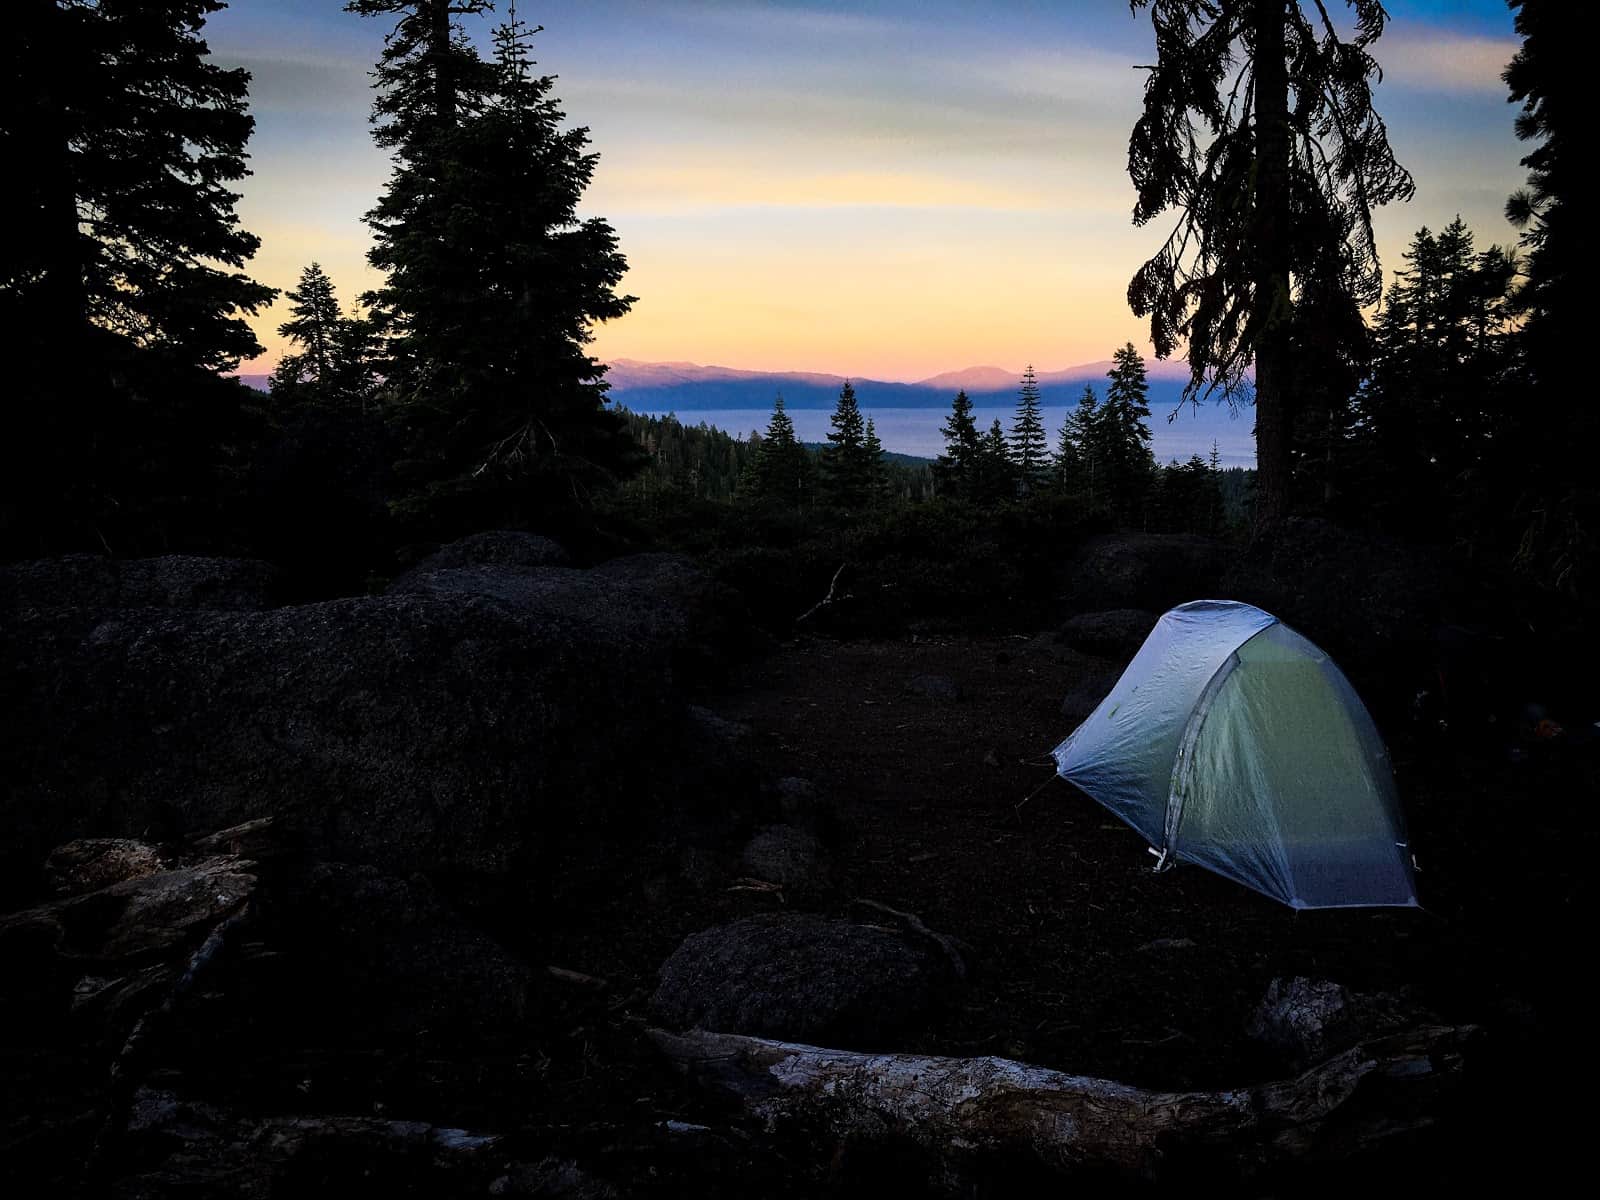
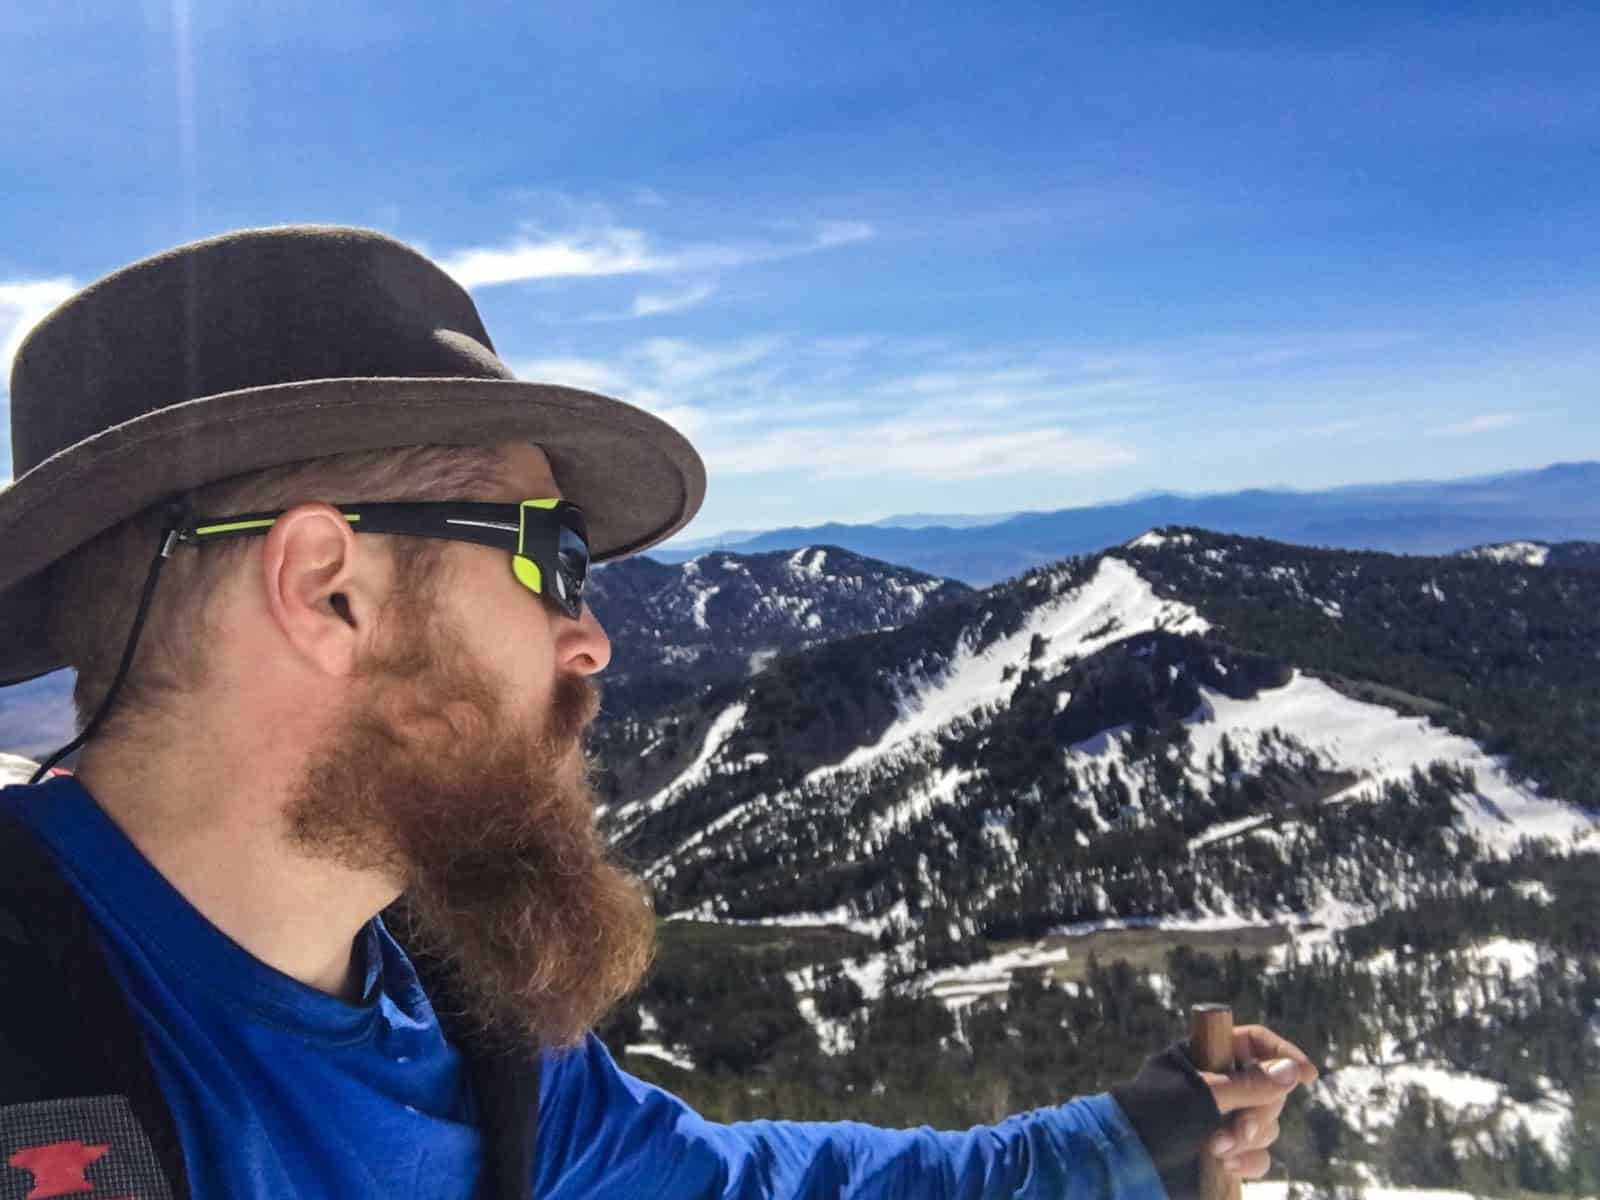
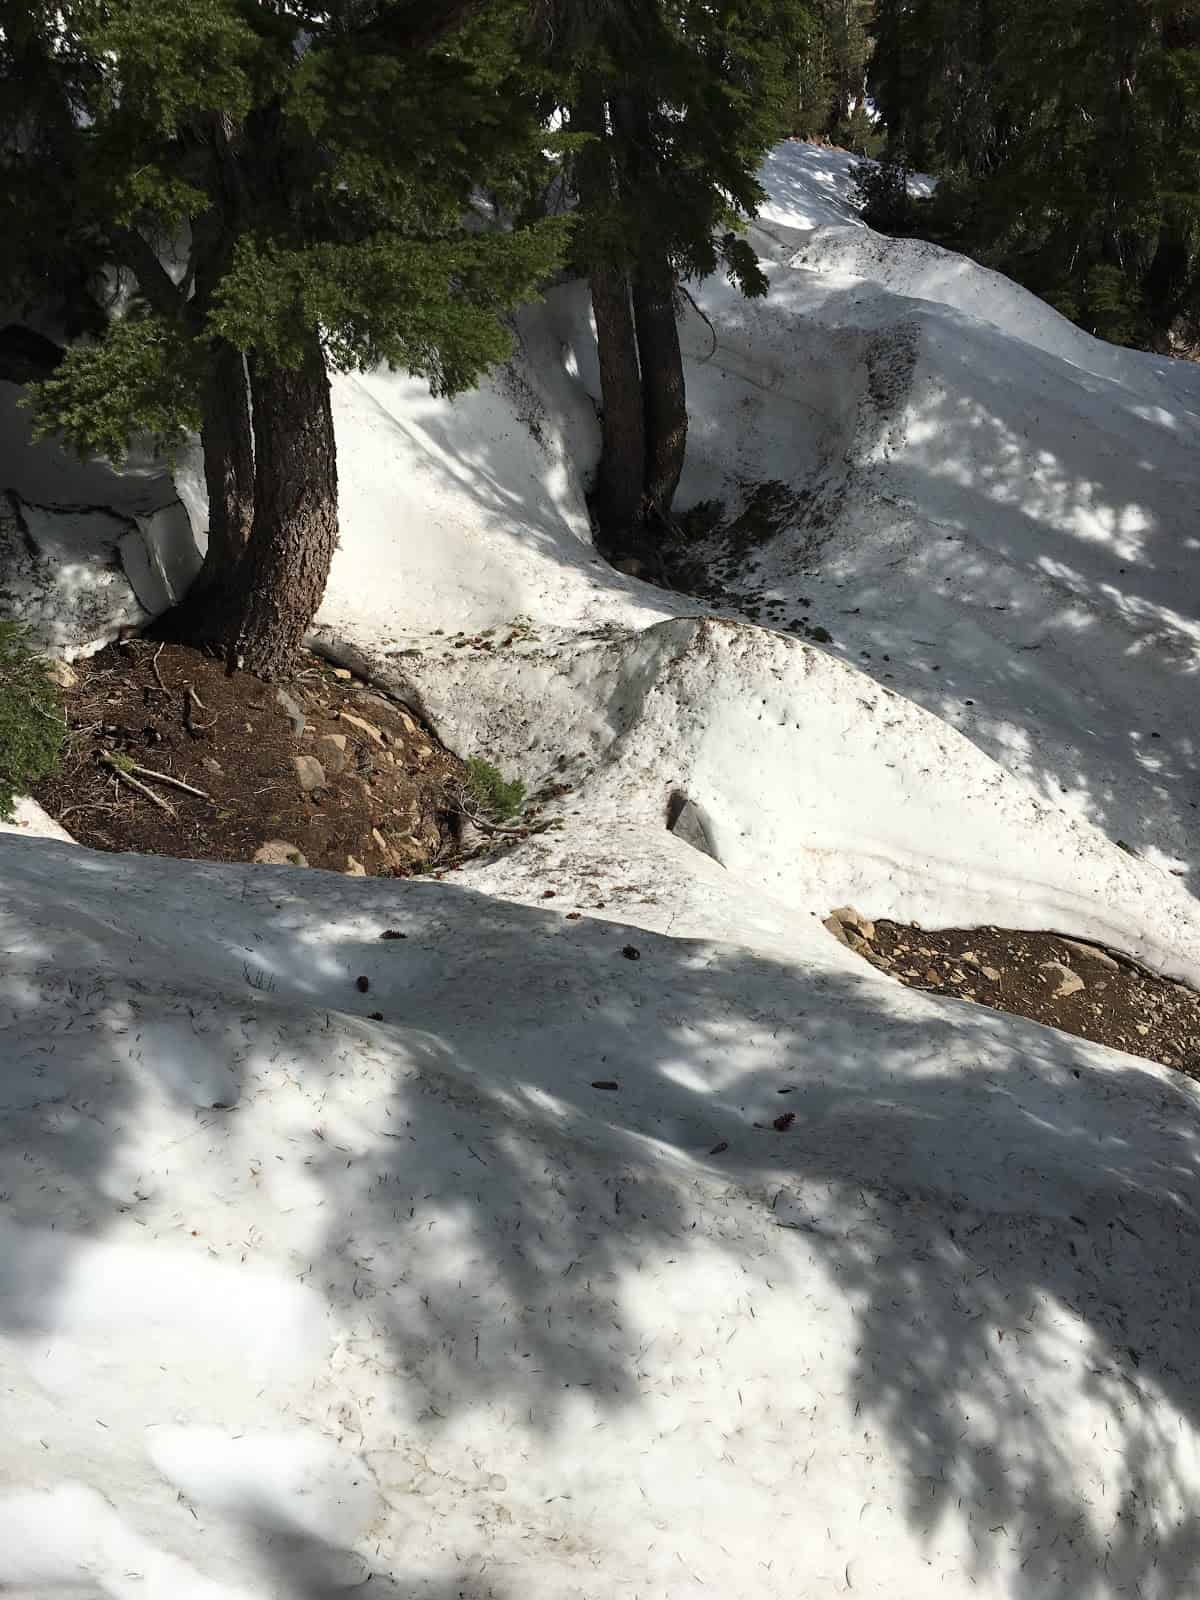
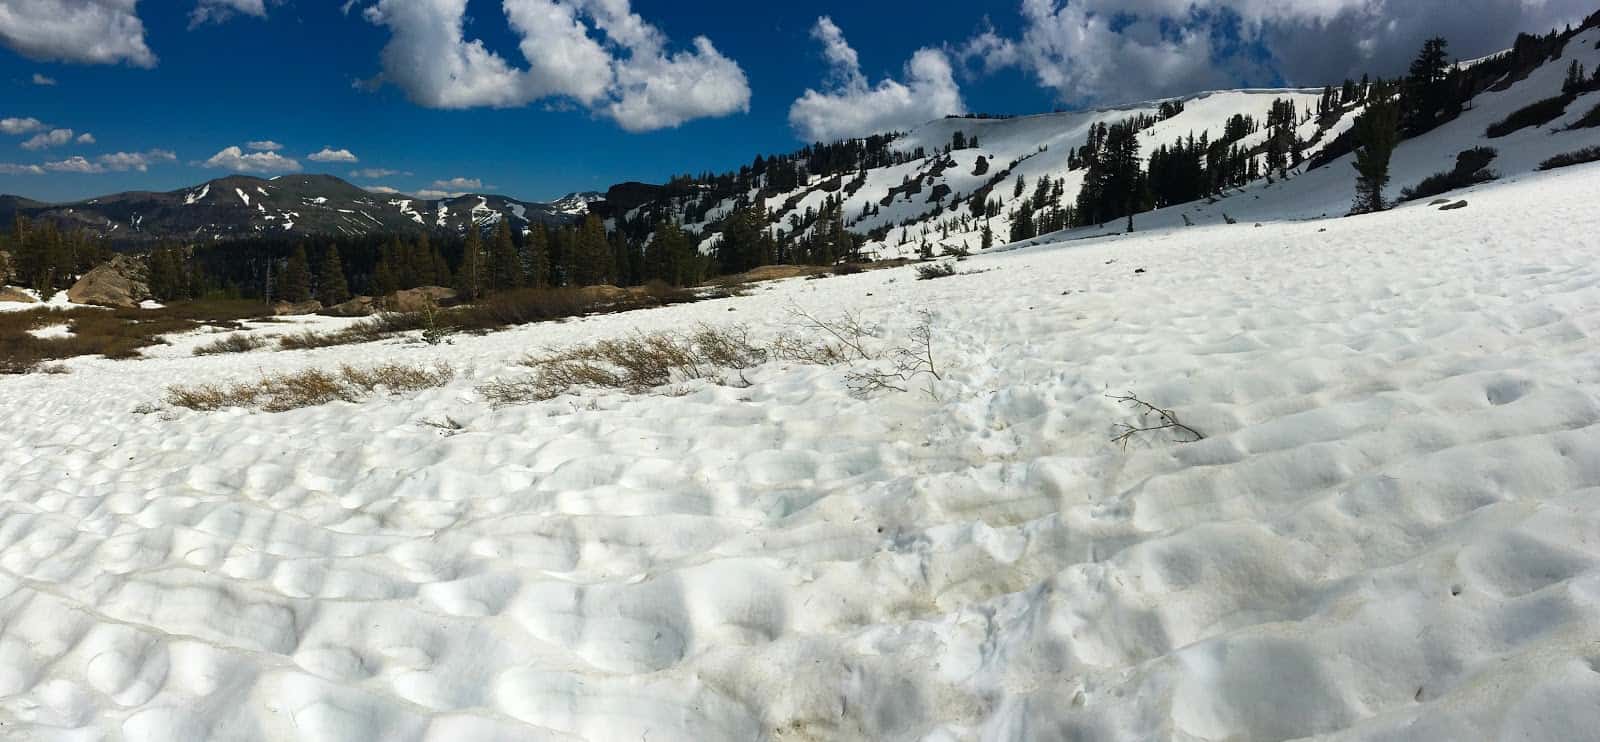
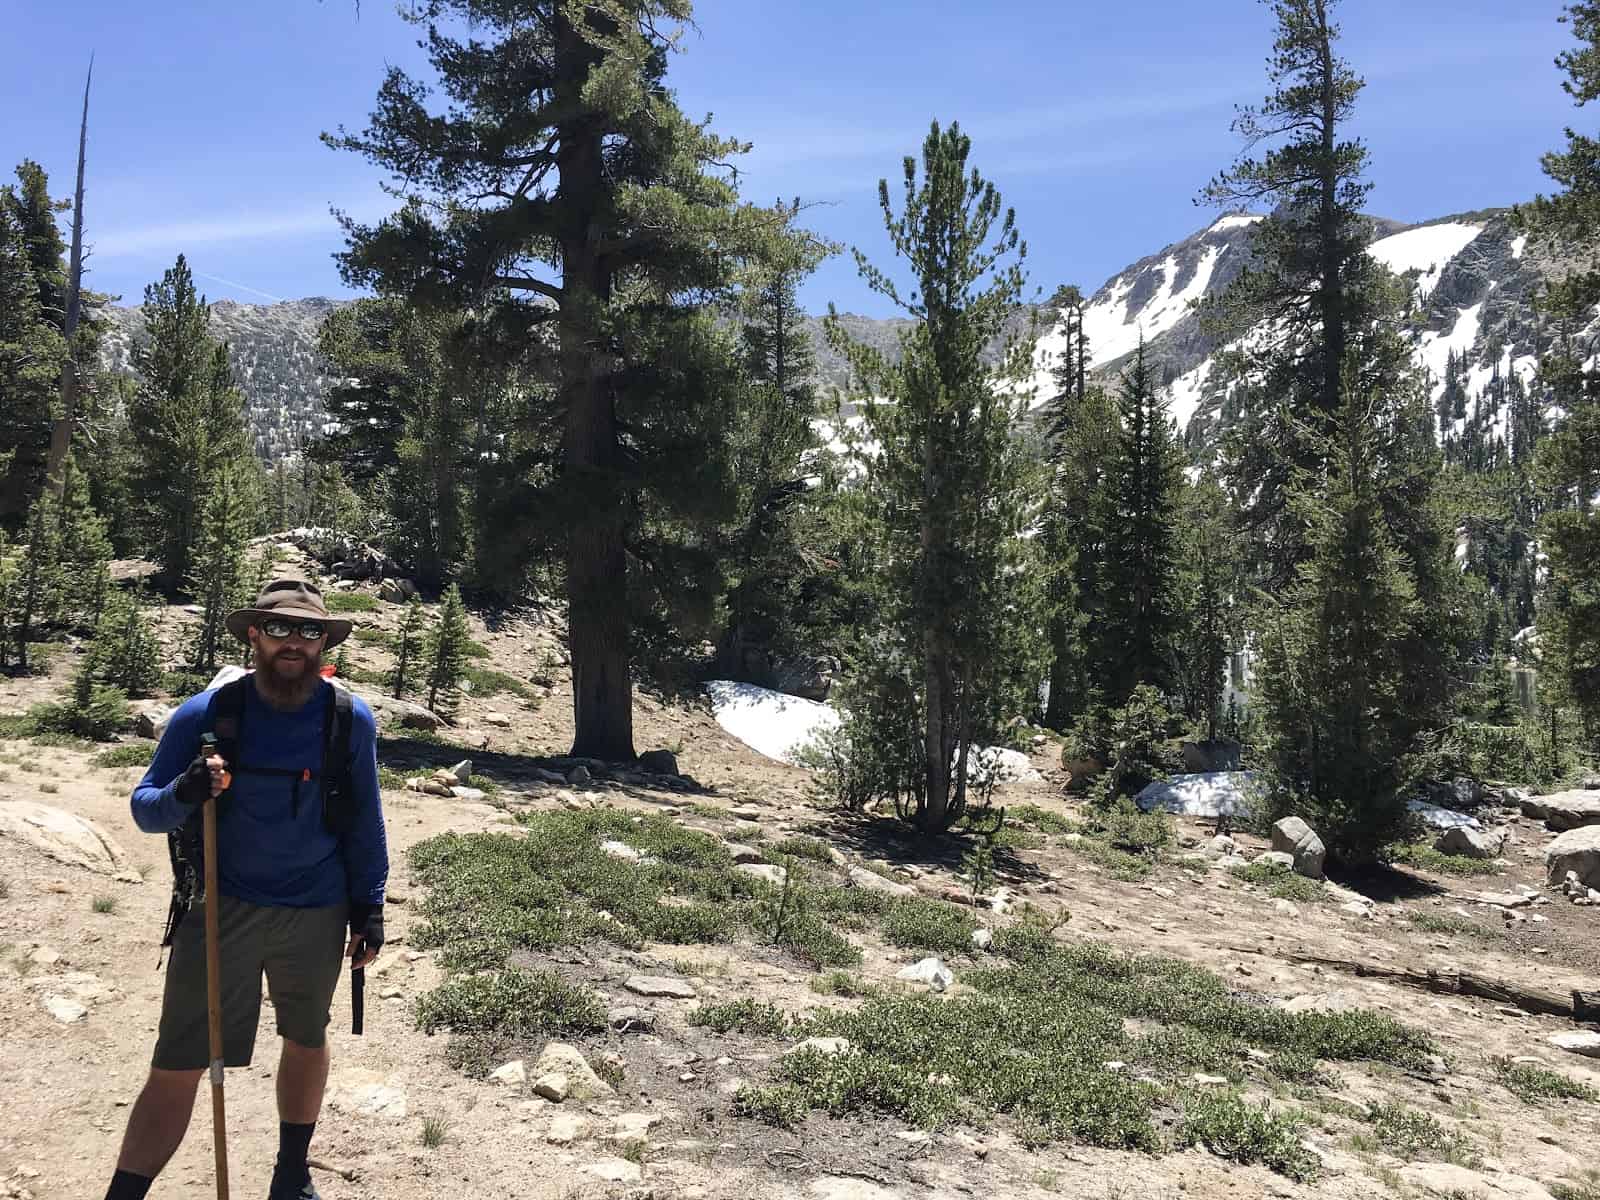
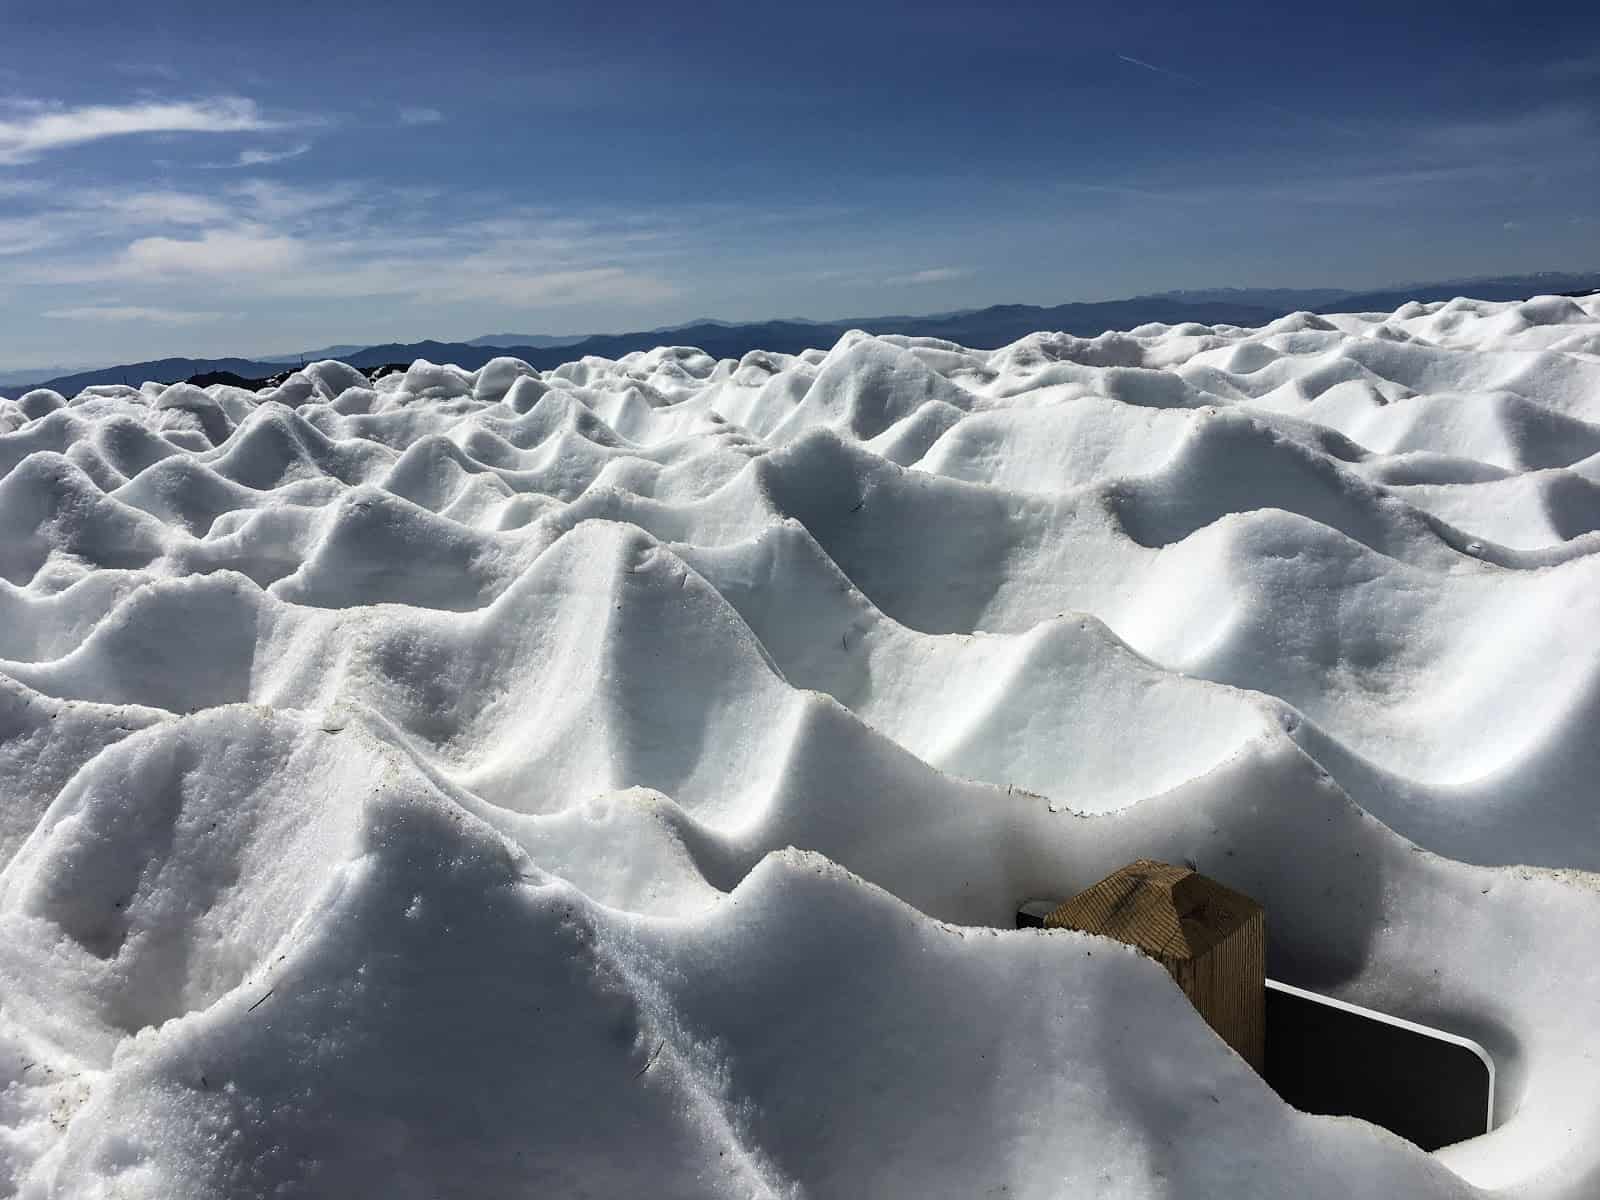
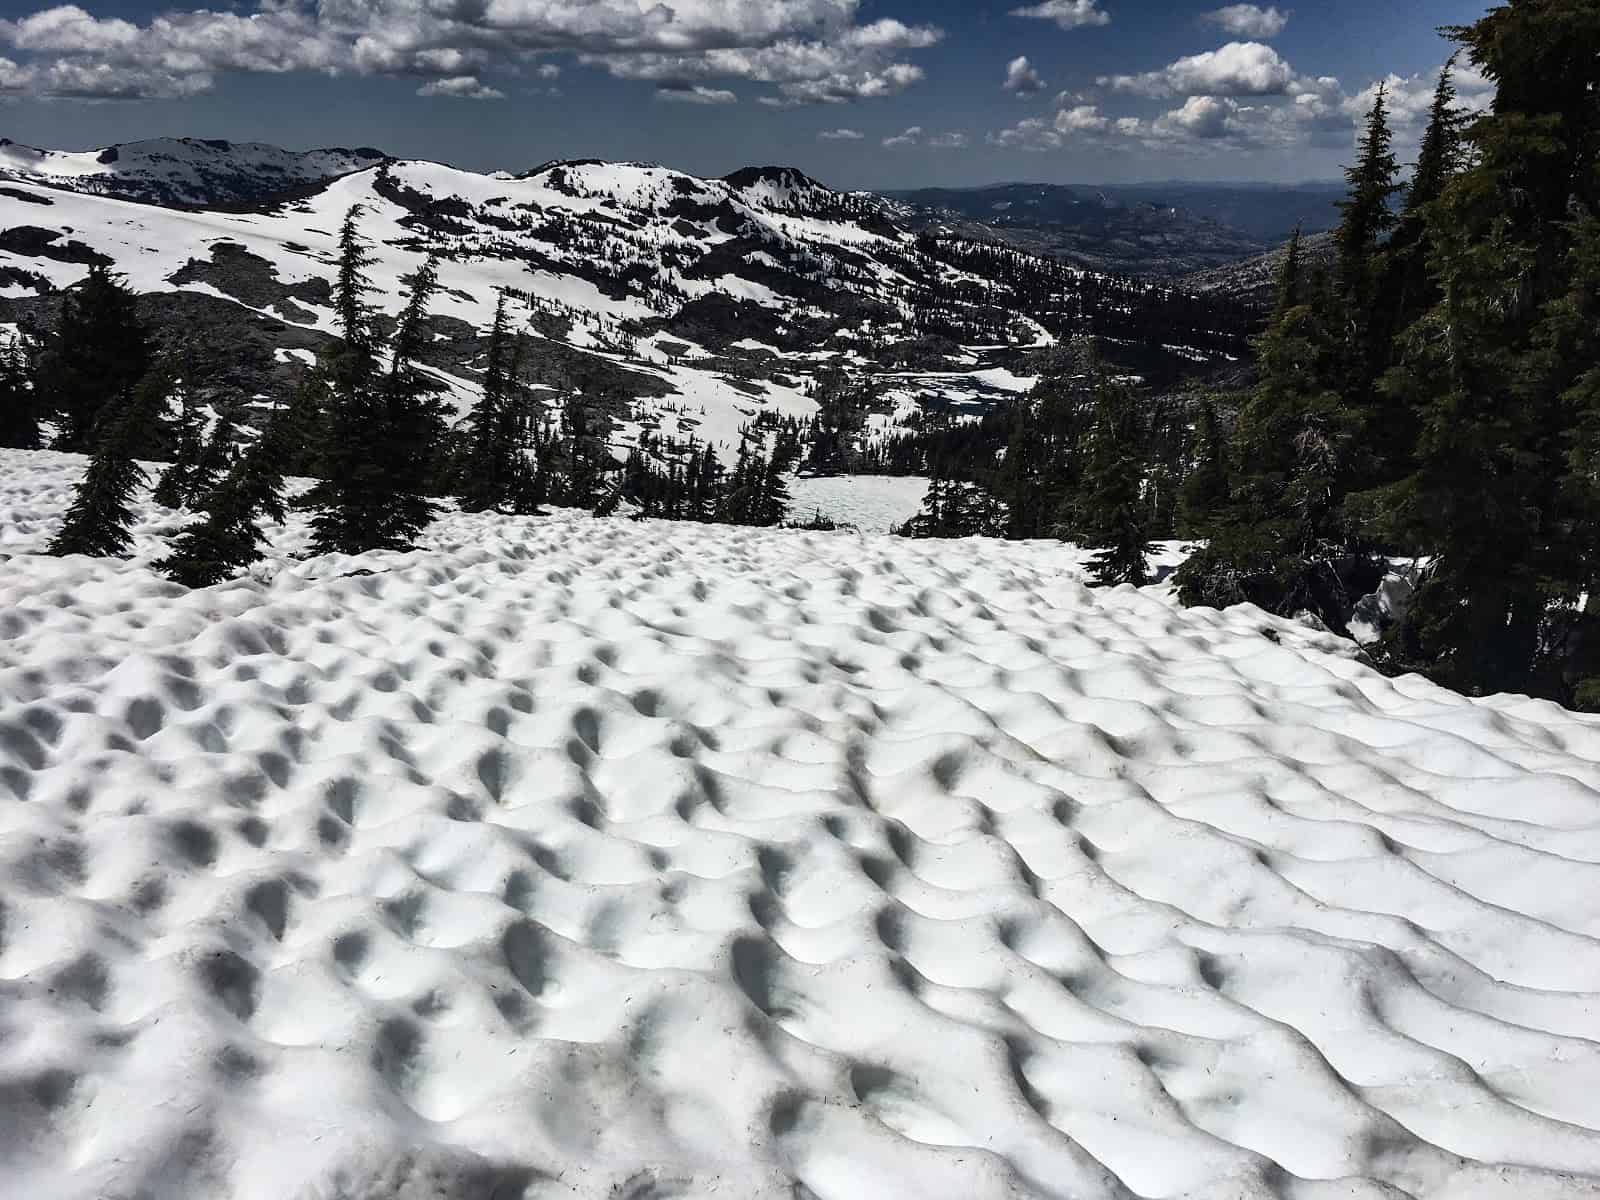

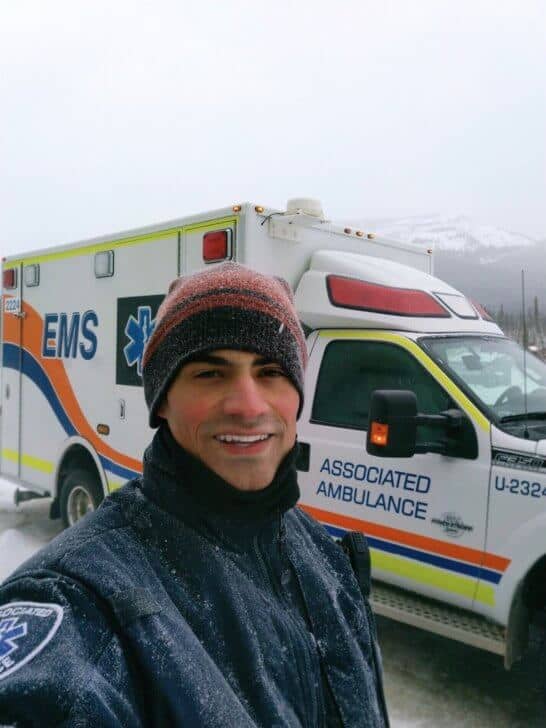

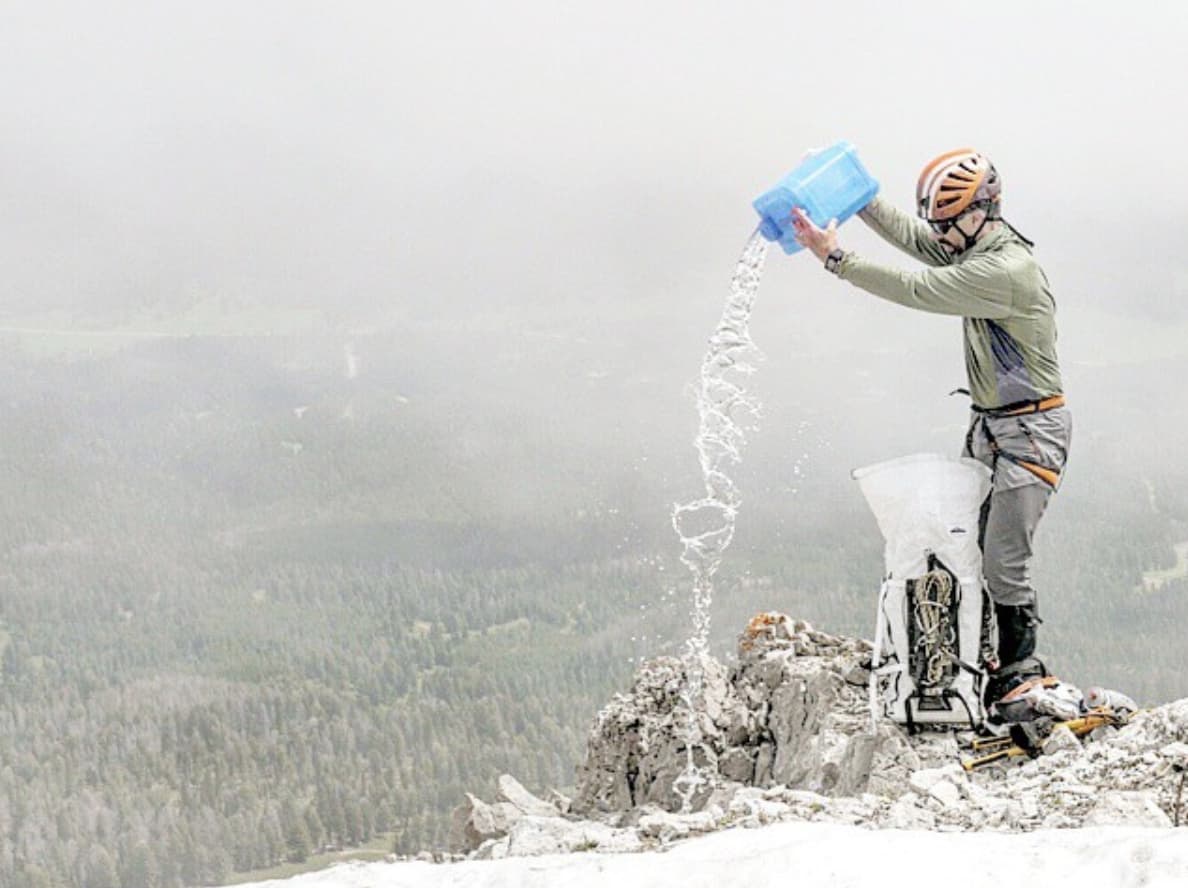
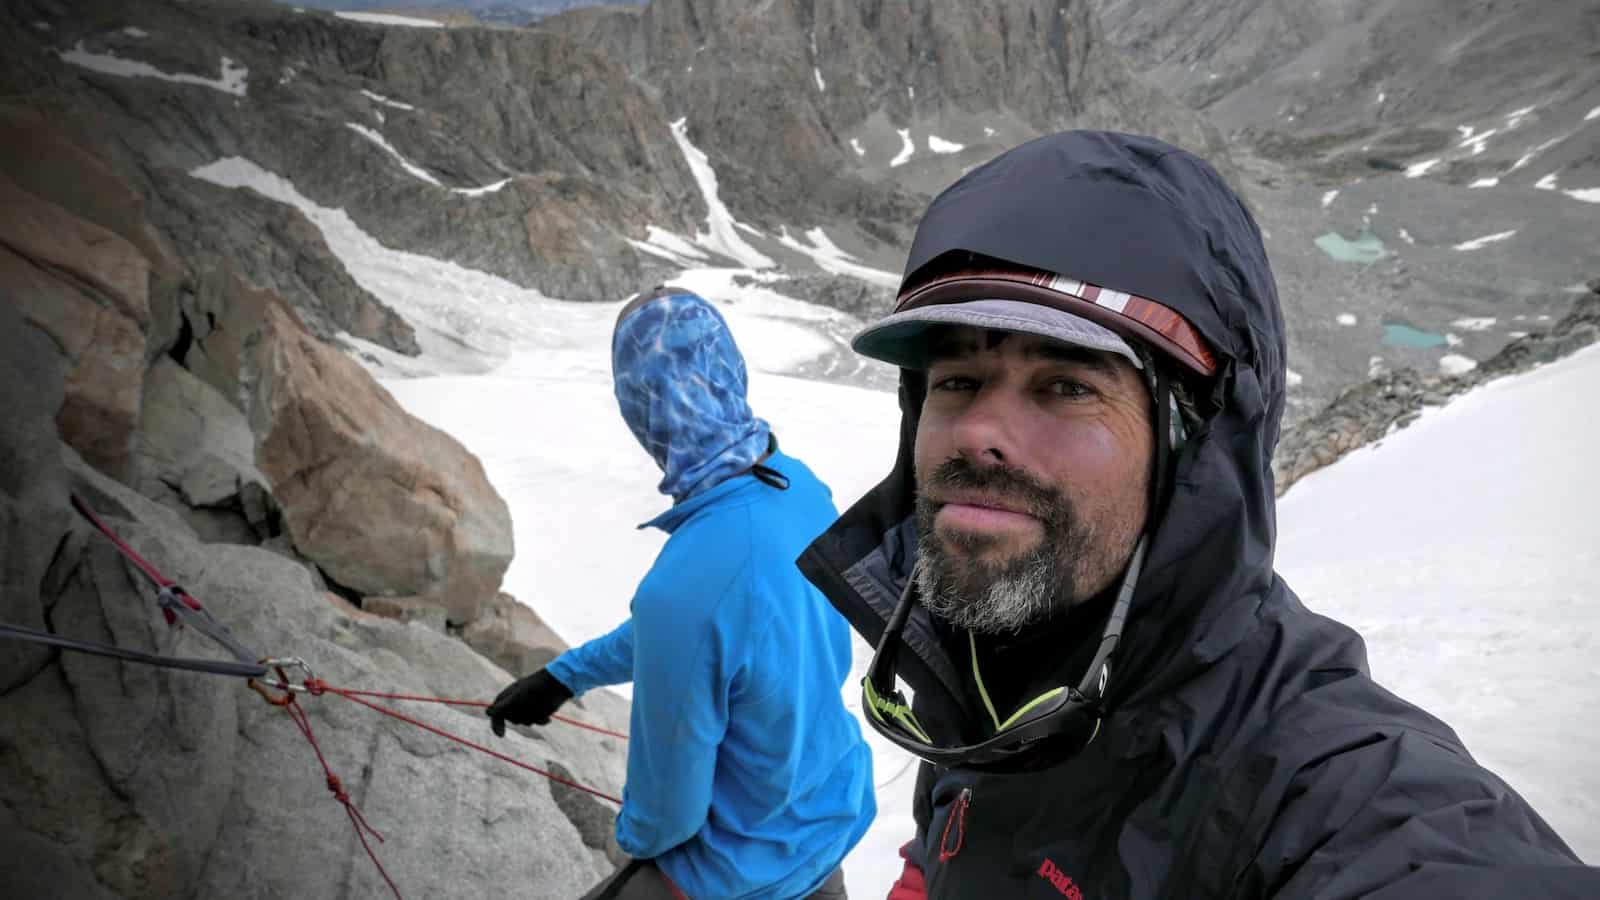
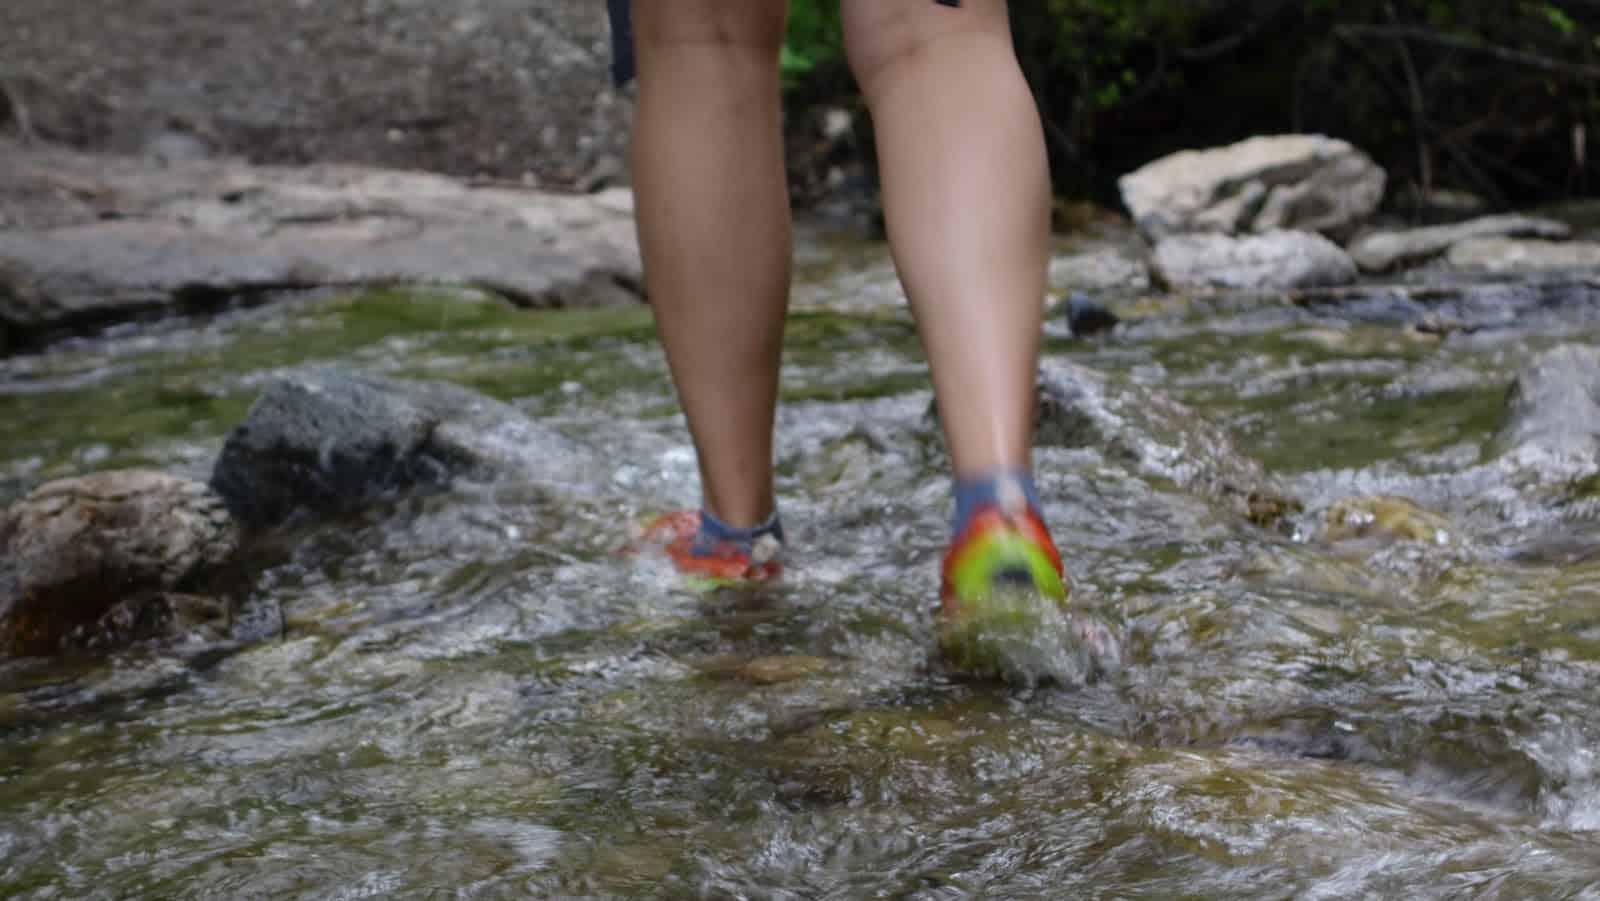

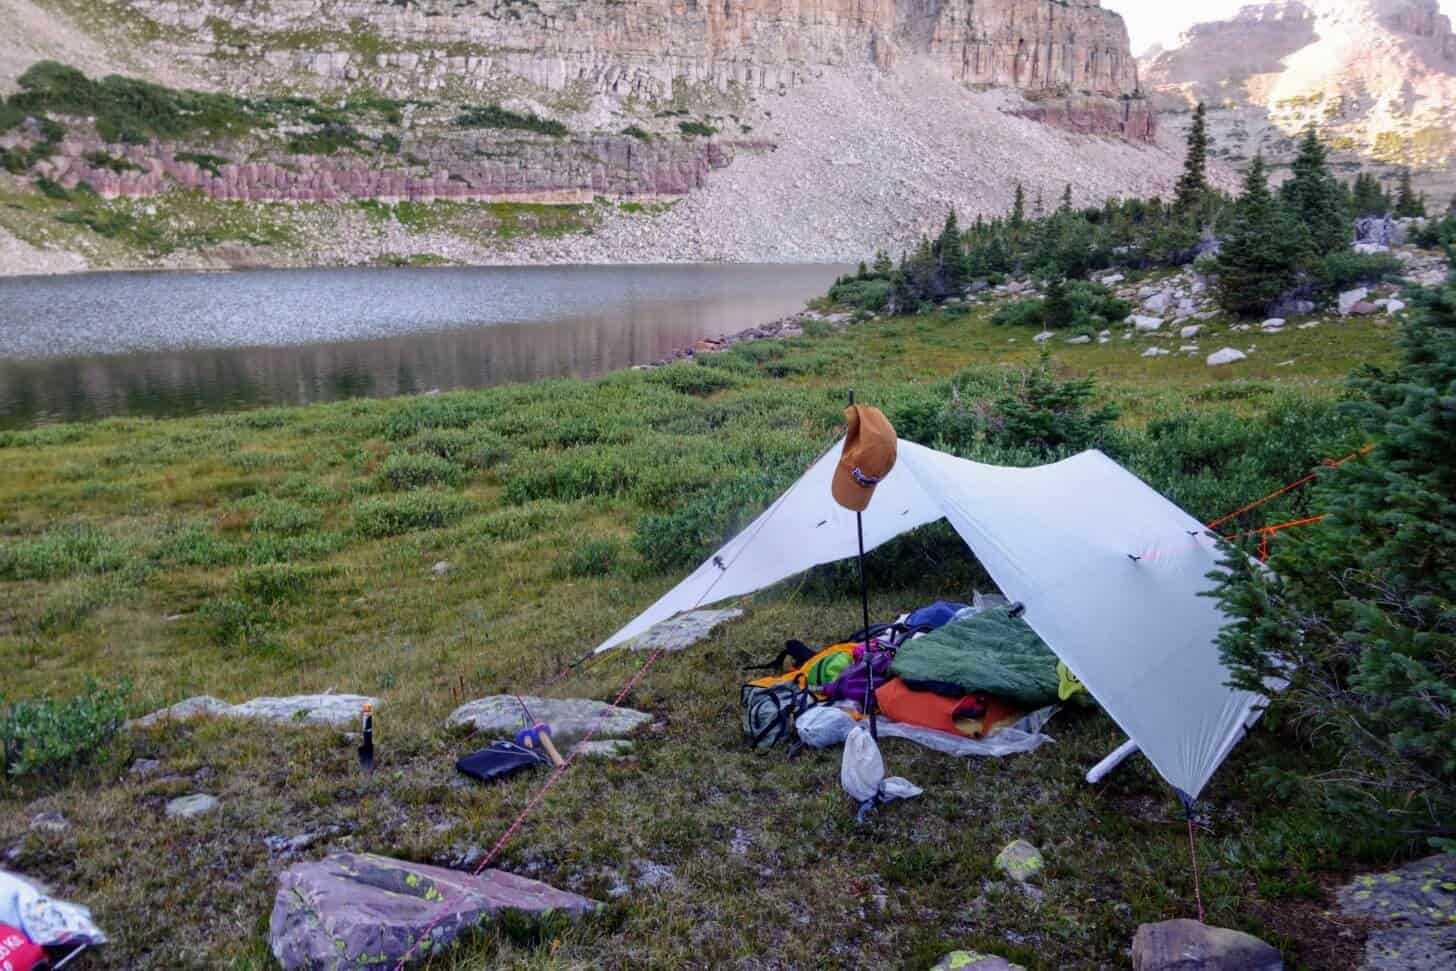
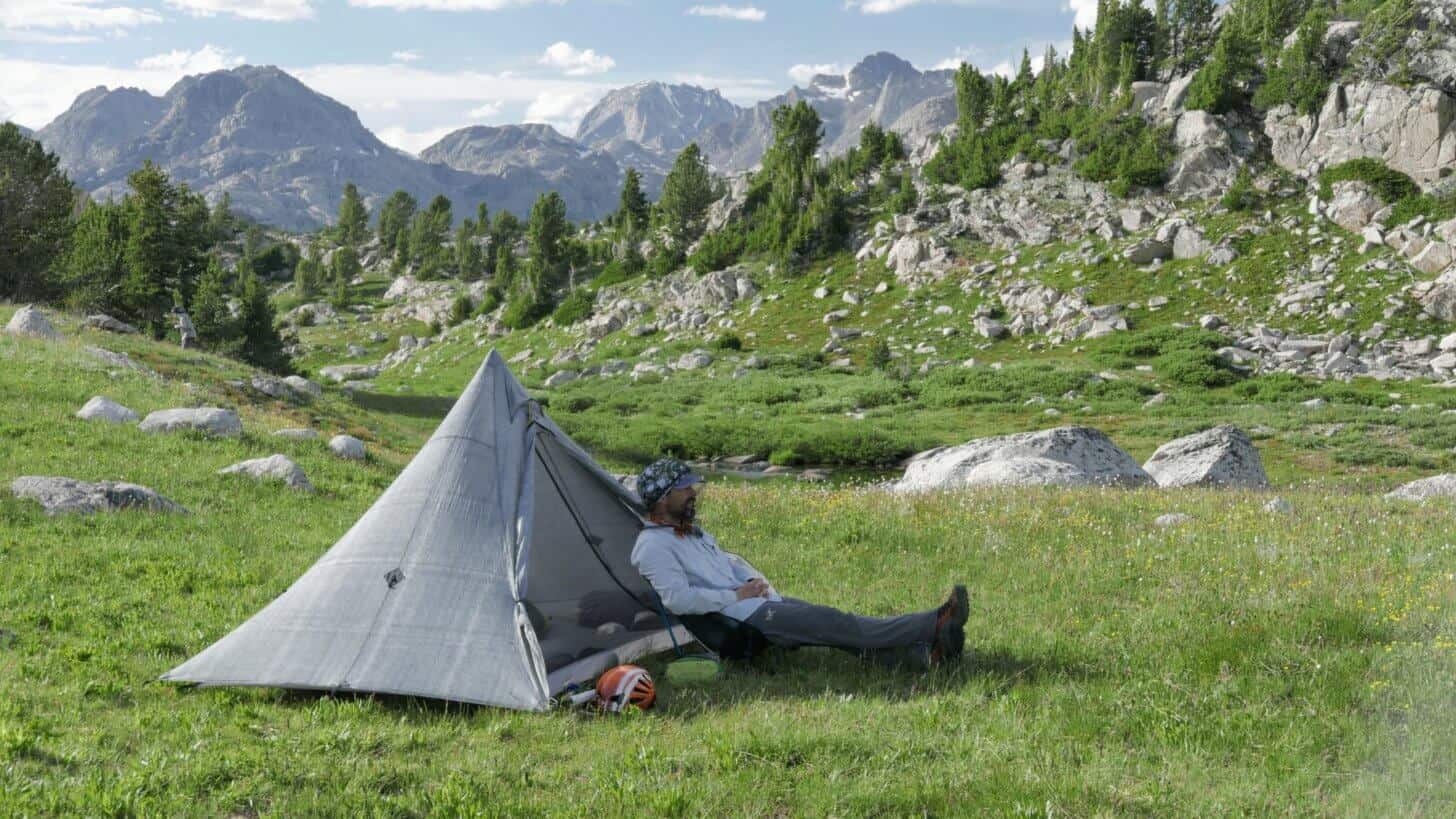


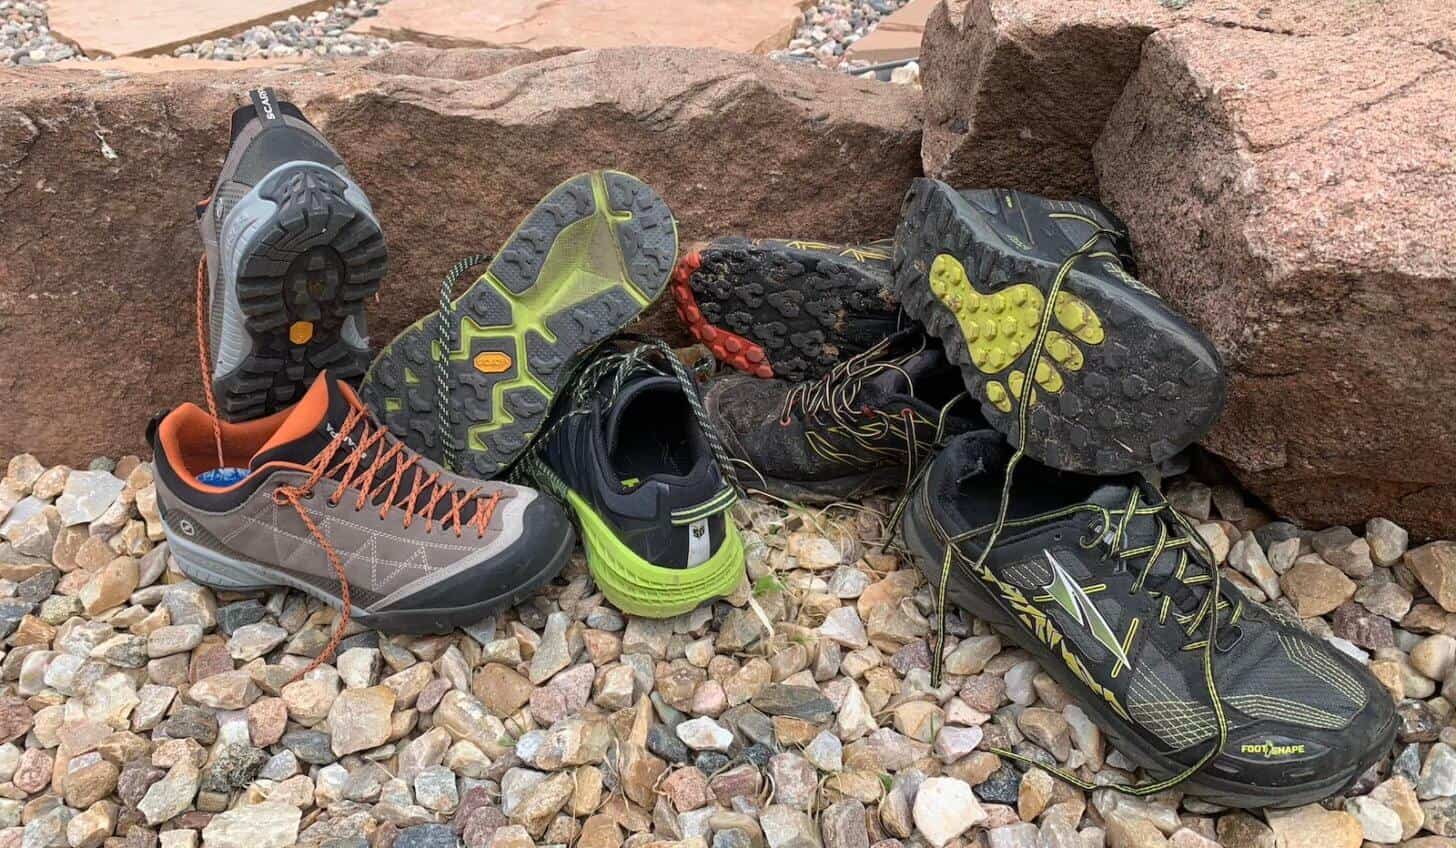

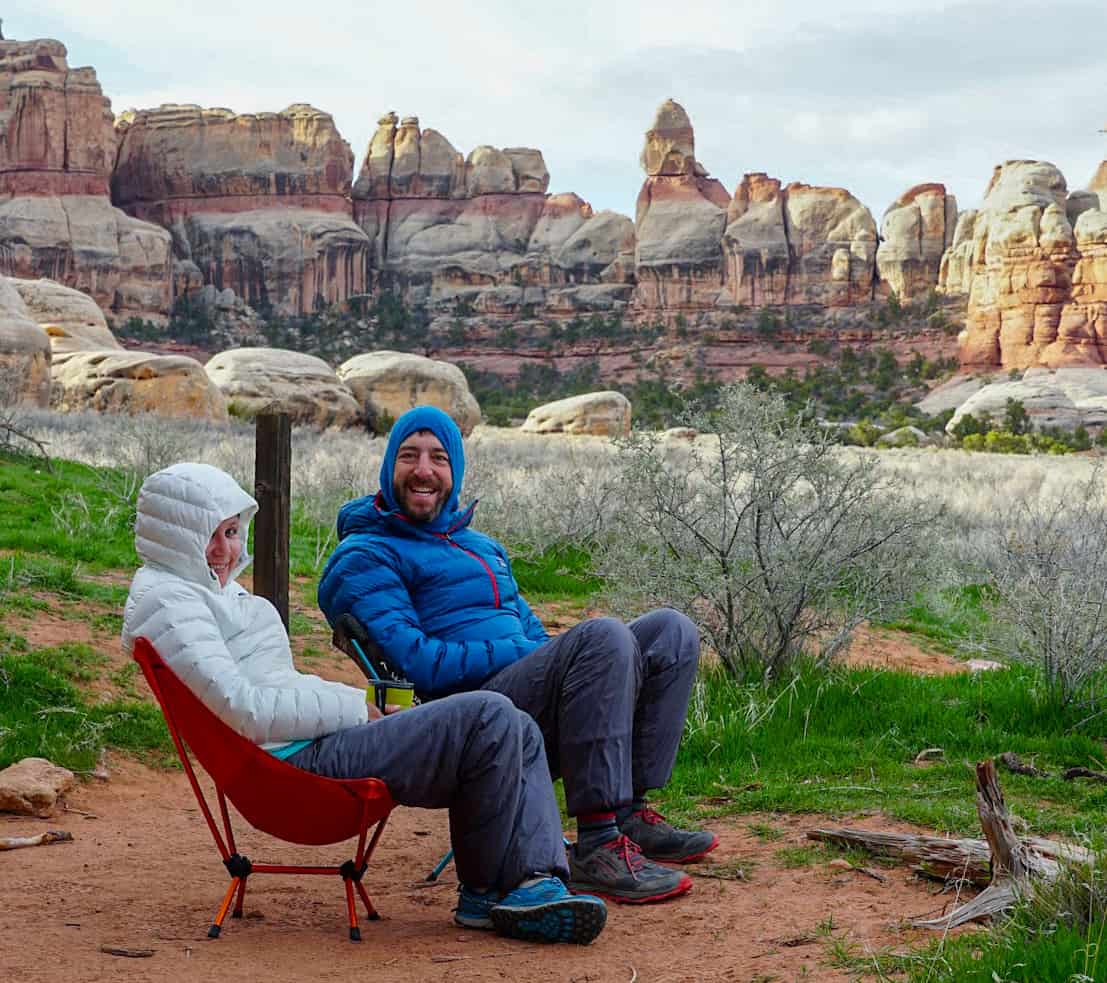
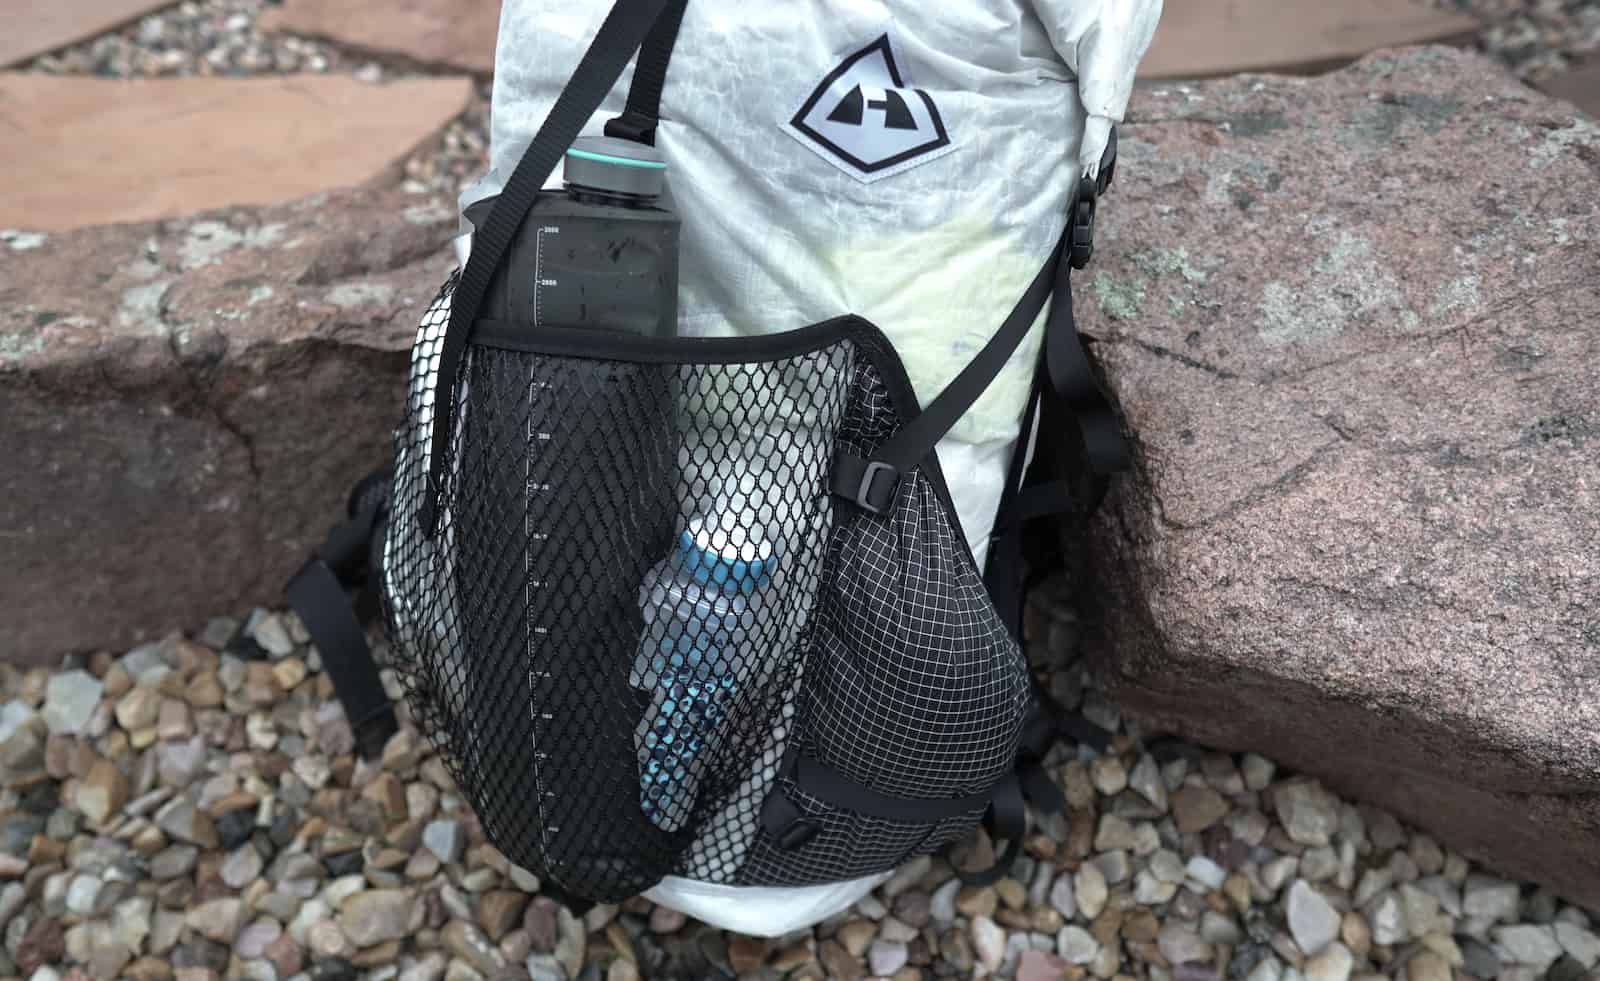
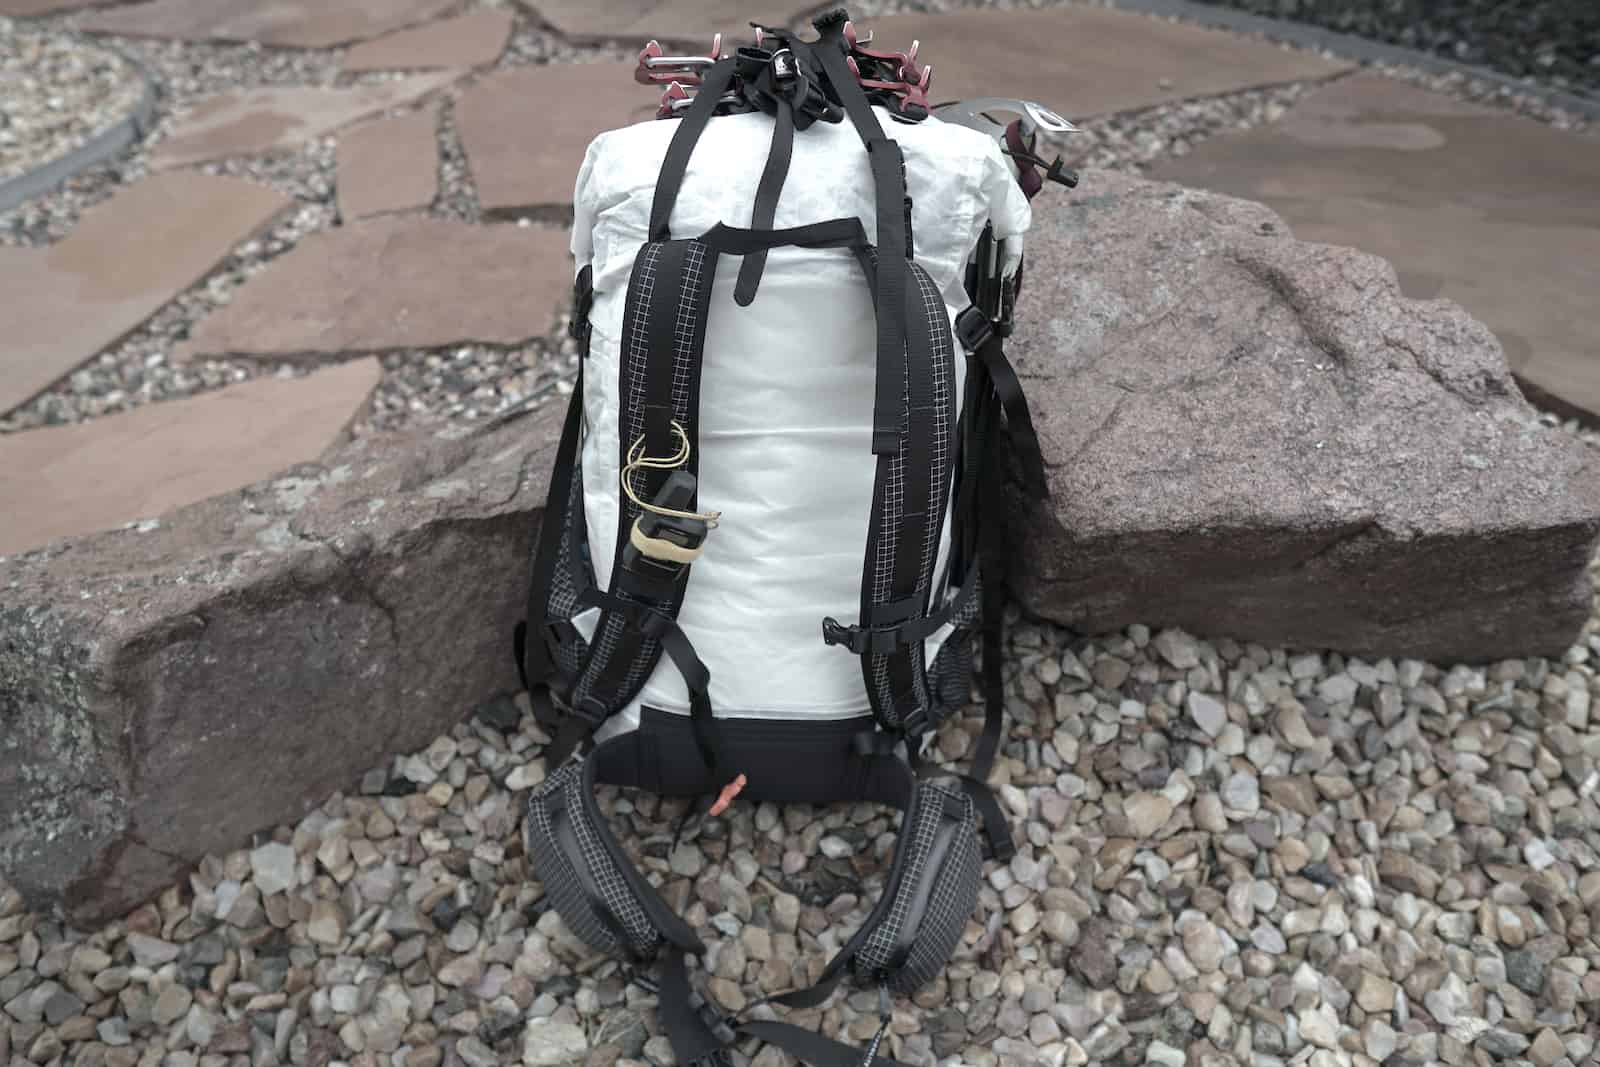
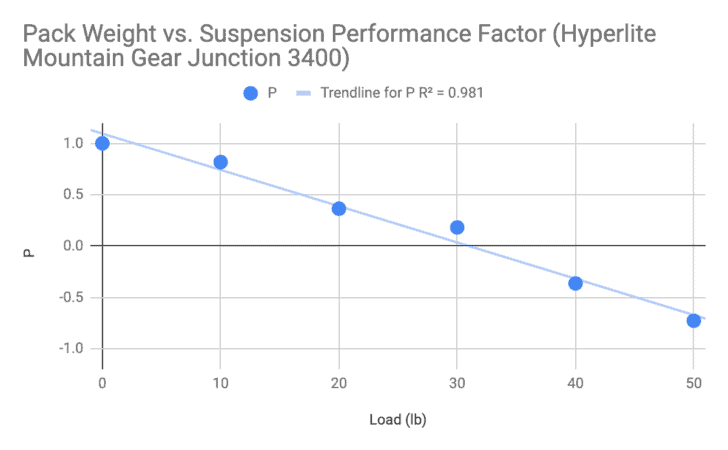


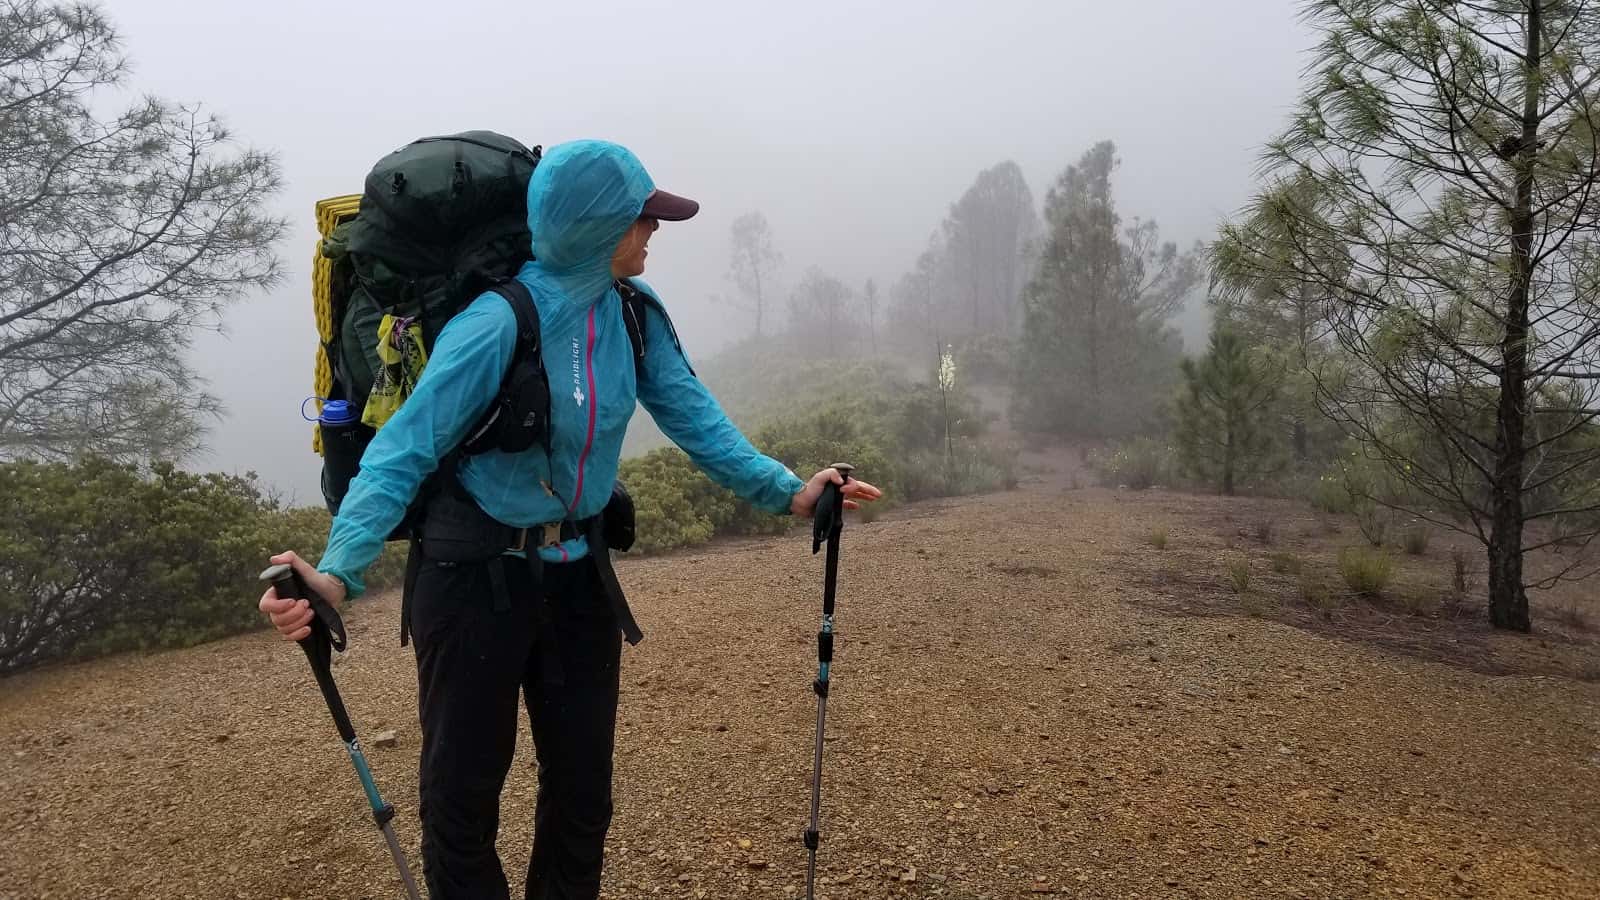
 Photo: RaidLight