This episode of the Backpacking Light Podcast features highlights from our recent round of canister stove reviews.
Canister stoves are notoriously difficult to compare accurately. Variations in testing conditions and methodology make any head-to-head comparisons suspect at best, especially when using manufacturer generated data. That’s why we developed StoveBench and spent hundreds of hours applying the methodology to virtually every sub-four ounce upright canister stove on the market.
After that they spend some time laying the groundwork for stove comparisons: how they define the category, how they judge stove performance, and how they went about testing those performance considerations.
The last half of the pod is a convo covering a few of the stoves that stood out in the gear guide (good and bad!). As the episode unfolds, Ryan shares his thoughts on how design features affect performance, and Andrew gets into cost considerations. The guys wrap the episode with the champs: the two stoves that stood out in nearly every test. Spoiler alert: they aren’t the lightest.
What is an upright canister stove canister (how do we define the category)?
What are the advantages and disadvantages to using an upright canister stove?
The Tests
We put the stoves through their paces. Not all of them survived unscathed.
Control Test
High Volume Test
Wind Test
Cold Test
Stress Test
Stability Test
Compatibility Test
Noise Test
Ignitor Test
Simmering
The Judging
All our stoves were special, but one one of them had to get the rose!
Cost – %5
Weight – 10%
StoveBench Score – 50%
Ignitor Durability – 5%
Pot Stability – 10%
Compactability – 10%
Noise – 5%
Simmering Grade – 5%
The Stoves
What stood out? We break it down for you (and discuss design considerations along the way). For an entirely comprehensive look at the upright canister stove market, check out the gear guide.
Sponsors: Help us Keep the Podcast ADVERTISING-FREE!
This episode of the Backpacking Light Podcast is supported and kept advertising-free by Backpacking Light membership fees. Please considerbecoming a member which helps support projects like this podcast, in addition to a whole slew of other benefits!
In addition, some of the links on this page may be affiliate links that refer to our partner merchant retailers. If you follow a link and then make a purchase, we receive a small commission which goes a long way towards helping us pay for podcast production, hosting, and bandwidth fees! Thanks for supporting us in this way!
Contact
You can contact us at podcast@backpackinglight.com, or follow us on social media –
We do not accept money or in-kind compensation for guaranteed media coverage: Backpacking Light does not accept compensation or donated product in exchange for guaranteed media placement or product review coverage.
Affiliate links: Some (but not all) of the links in this review may be “affiliate” links, which means if you click on a link to one of our affiliate partners (usually a retailer site), and subsequently make a purchase with that retailer, we receive a small commission. This helps us fund our editorial projects, podcasts, instructional webinars, and more, and we appreciate it a lot! Thank you for supporting Backpacking Light!
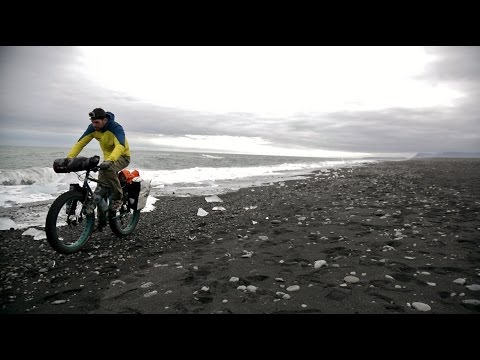
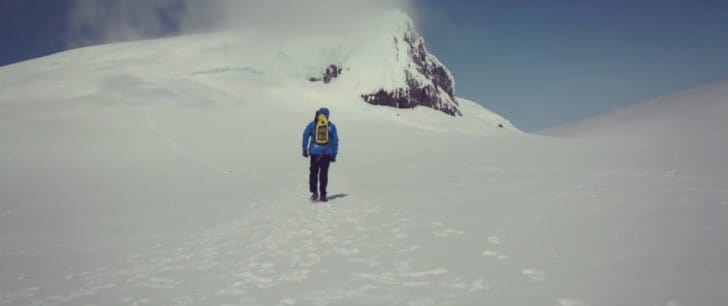
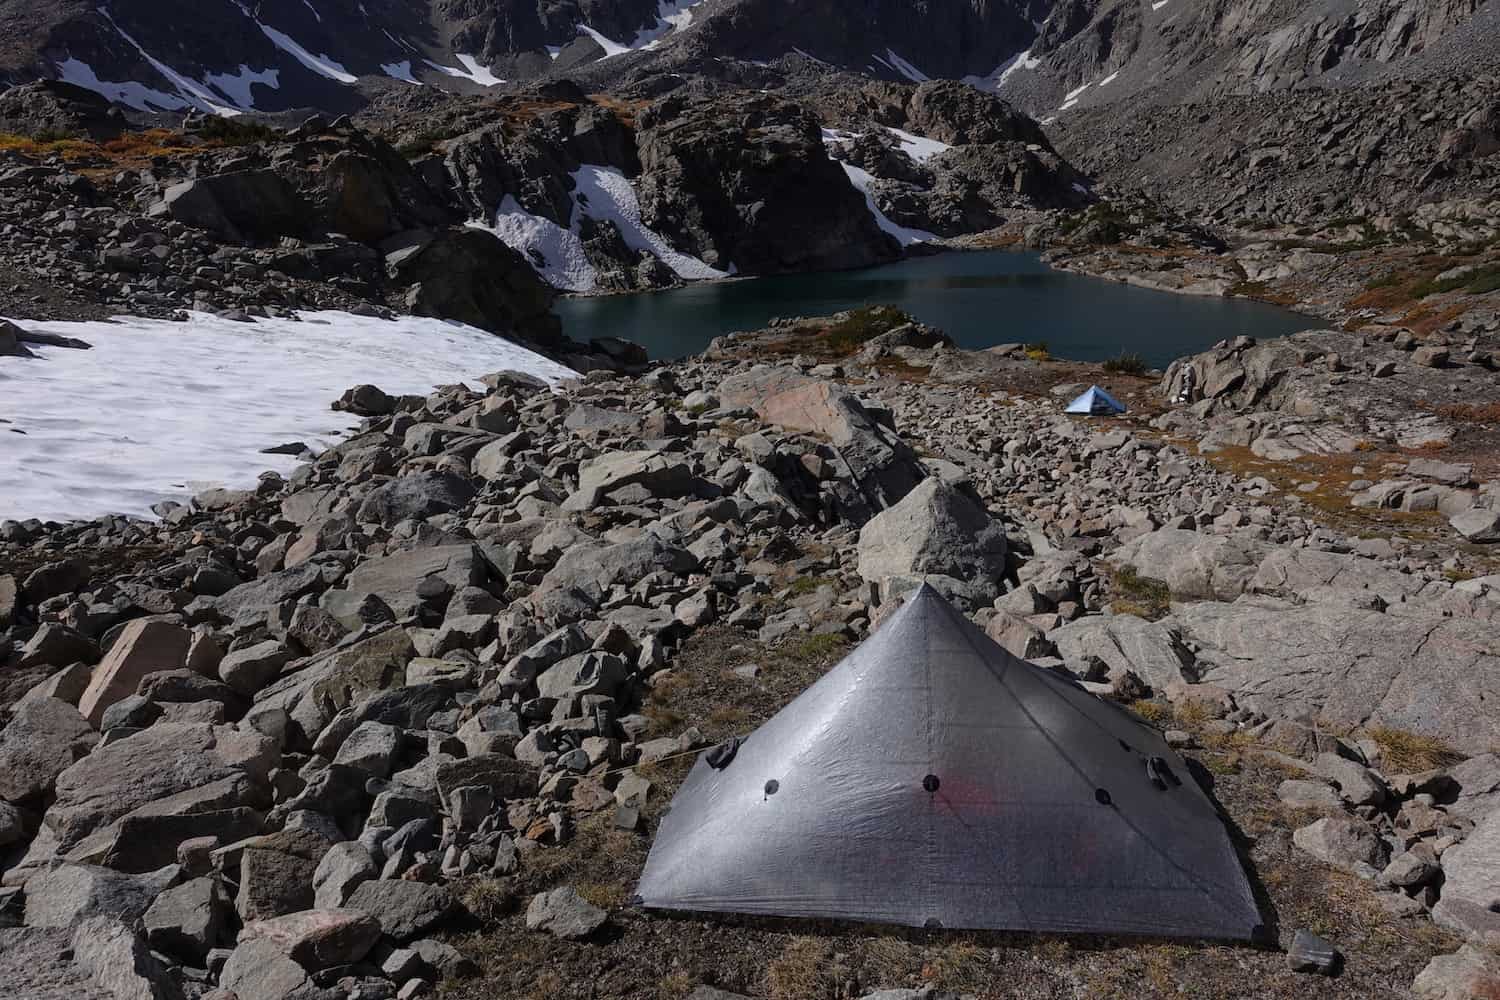
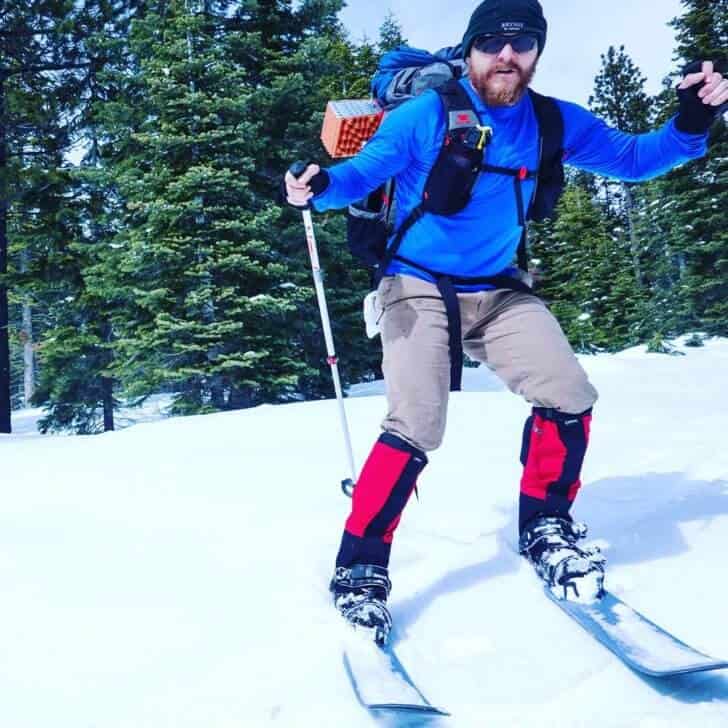
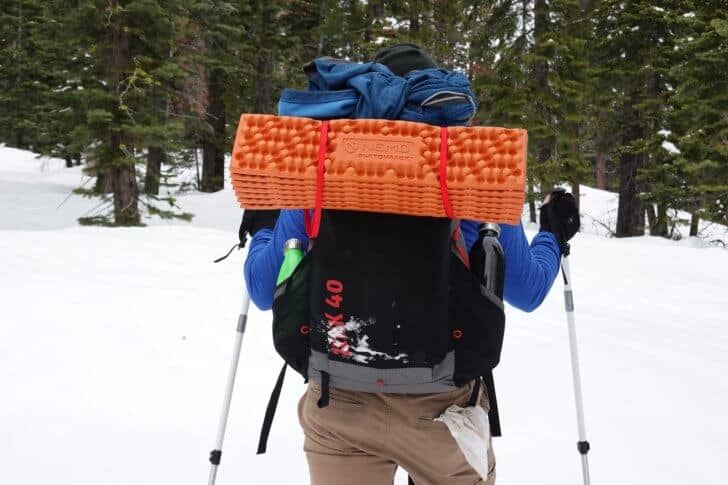
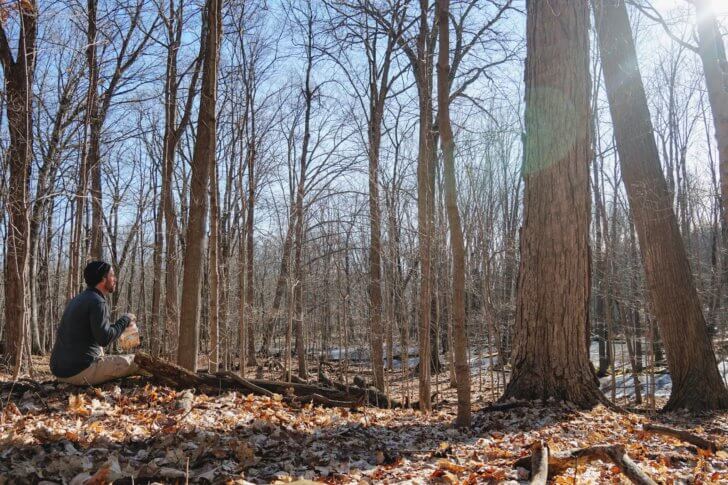
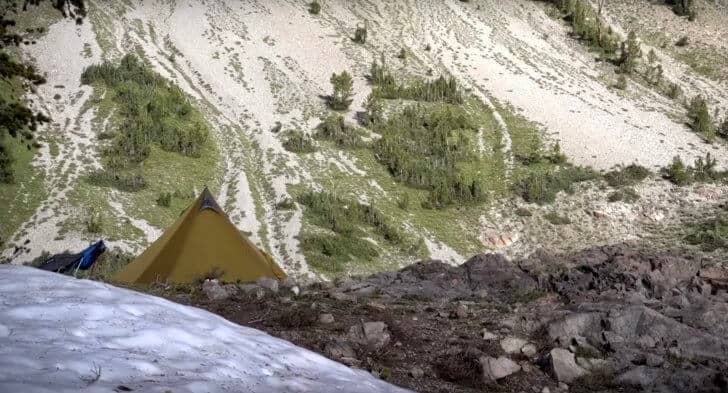
Unseasonably cold May temperatures and a winter storm warning were too much to pass up, so we set out for an overnighter in SE Wyoming.
Introduction
This May, unseasonably cold temperatures and a winter storm warning were too much to pass up, so my son Chase and I set out for an overnighter in SE Wyoming.
We hiked about 16 miles, some on trail, but much of it off-trail through snow, swamp, tussocks, and bushwhacking through aspen, pine, and fir forests.
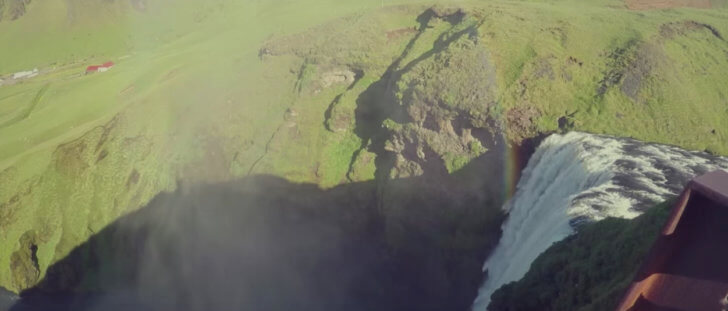
Here’s the trip video:
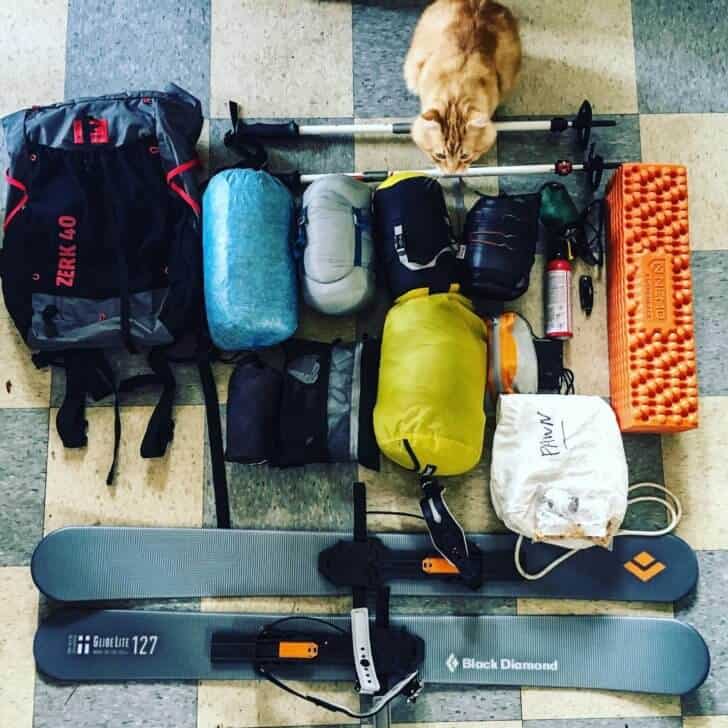
Selected Gear
My starting skin out weight, including 3+ lb of camera equipment, food, and all worn/carried items was about 25 lb (not including water, of which I didn’t usually carry any (exception: I filled up 3L of water for a dry camp after we cooked dinner by the creek).
Shelter
Tarptent Notch (weight includes stow bag, extra stakes and guylines, silnylon canopy, and partial mesh inner tent)
GoPro HERO7 Black, mic adapter, external mic, tripod, extra batteries, lens pen, Lume Cube Air Lights (2), and some iPhone accessories (Moment tele lens / ND filter for B-roll shot between 32:43 and 34:17 in the video)
48 oz
Weather Station
Two Kestrel Drop loggers (one for inside the tent, one for outside), Kestrel 5500 Weather Meter meter with Kestrel 5000-Series Elite Wind Vane, small tripod, some notetaking supplies, extra batteries
10 oz
Phone / GPS / etc.
iPhone XS in a Moment Case, 10000 mAh battery bank. Apps I use in the backcountry: Gaia GPS App, Kindle, Filmic Pro, Notes
The Uberlite was too cold for a 21 deg F night, sleeping on wet ground. In the middle of the night, I removed the foam back pad from my pack, placed it under my torso on top of the Uberlite, and slept great the rest of the night. I should have brought my Gossamer Gear Thinlight pad to use with the Uberlite, or a warmer inflatable pad like my Therm-a-Rest NeoAir Xtherm.
My feet were cold – again – I place blame on the Uberlite. I wrapped them in waterproof stuff sacks mid-way through the night and it was manageable. I wish I had my down socks.
I appreciate the weight of the Enlgihtened Equipment Enigma, considering its temperature rating, but I certainly missed the wide girth and insulated collar of the REI Magma Trail Quilt I’ve been using most of this spring. I would have rather had that bag, it’s more comfortable overall, but a 21 deg F night would have been pushing its limits pretty hard.
Chase used Katabatic Gear Palisade (30 deg F) quilt, and wore lightweight long underwear and an 8 oz Goosefeet Down Hoody at night. He was a little cold, but I heard him snore, so I know he got at least a few hours of decent sleep.
The Suluk46 Uki bucksaw is a wonderful tool – my favorite “extra” when I know I want a campfire. Time to retire my folding saws now.
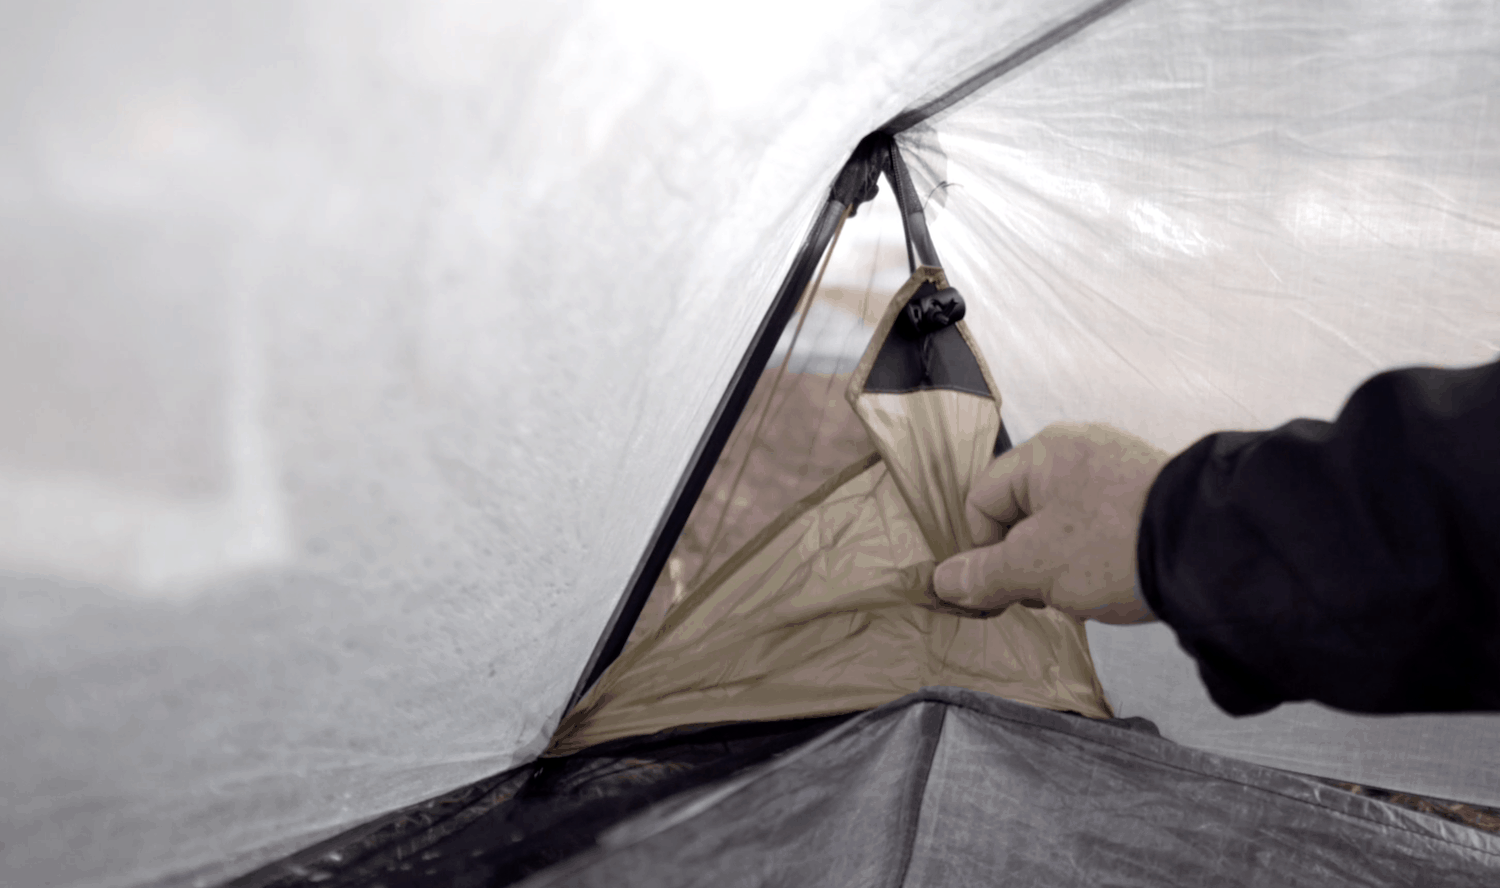
I was too busy filming (and carrying my camera rig) to use the trekking poles but needed them for the tent. I have to rethink tent poles for my Notch. I have the aluminum set from Tarptent but they’re too wobbly. Maybe it’s time to invest into some custom-made stiff carbon poles for my Tarptents.
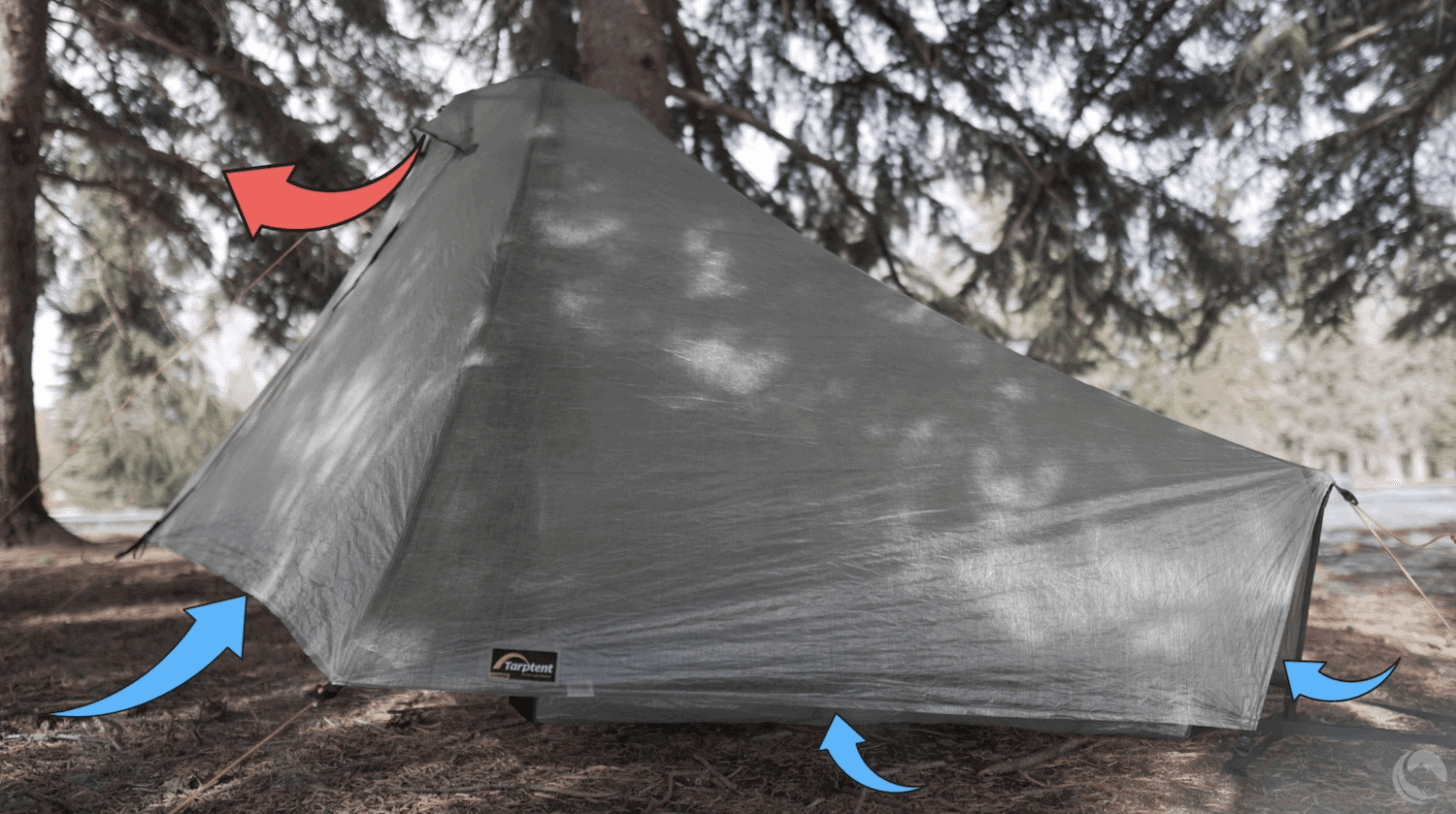
The Tarptent Notch is a great tent in these conditions, but I was wishing for a fly that went all the way to the ground and a full-mesh inner, both of which would be better in wind and snow.
I brought four 8-inch MSR Ground Hog stakes for the two ends and two vestibule doors for the Notch. These stakes have the highest holding power:weight ratio of any stakes I’ve tested, and I want to be able to tension the Notch’s silnylon canopy as tight as possible for wind resistance and snow loading. I brought lighter stakes (MSR Carbon Core) for the rest of the guylines.
As I continue to use the MSR Pocket Rocket Deluxe stove in the field, the more I like it for its performance in cold and windy conditions.
Patagonia Provisions Smoked Salmon is the best-tasting fish I’ve ever eaten on the trail. My dad has been smoking salmon and steelhead since we were kids, and I grew up in Seattle. As a result, I’m a bit of a salmon snob. This one passes my test with flying colors.
The BeFree filter continues to perform for me in a wide range of conditions. The creeks we encountered weren’t exactly clear (some color from spring runoff), and cold temperatures can slow filtration rates. It performed exceptionally well as usual, with no clogging. And the current filter I used on this trip has seen more than 50 days of use.
I wore the rain pants and the mitten shells only at night in camp, but I would have needed them on the trail if the temperatures had been 5 or 10 degrees warmer and the snow that was falling was wet/heavy slop.
I didn’t need 10,000 mAh of battery bank capacity. I really only need to charge my phone once on a 24-hour trip. I gotta shop for a smaller, lighter battery. Any suggestions for an ultralight 3000 mAh battery?
I was very disappointed in the quality of the B-roll I shot with my iPhone, Moment tele lens (58 mm), and ND filter between 32:43 and 34:11 in the video. The shots between 34:12 and 34:16 were shot without the lens and ND filter, and they turned out great. Same settings on all the shots (24p, 1/48 sec., low ISO). Something’s going on with that Moment lens / ND filter combo that I need to sort out.
I brought 36 oz of food for the trip but only ate about 25 oz. I did grab a Jimmy John’s sandwich on the way out of town! The GTG chowder was funky. Not a pleasant mix of ingredients.
Final Comments
Overall, in spite of gear glitches here and there, I had a really wonderful time on this trip.
We saw pushed hard enough, but not to the point of suffering.
The weather was chilly but I remained comfortable 95% of the time.
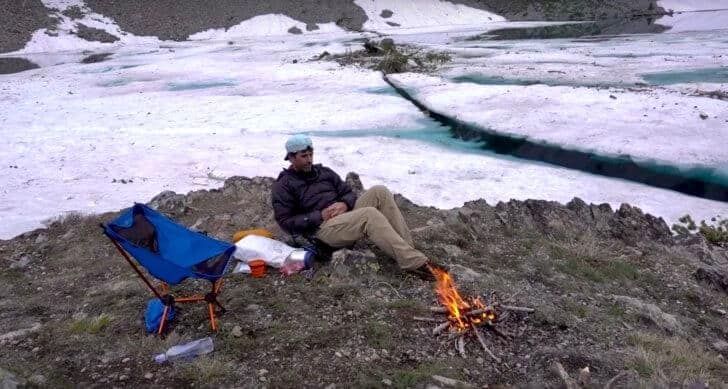
Sitting by the fire made me really, really happy. So did not running into any hormonally-charged moose.
The bird life we saw was remarkable – herons, ospreys, falcons, and a dozen different songbirds.
Nature is restorative and healing and I cannot imagine experiencing it like this on a regular basis.
Spending time with Chase out in the wilds is a rare treat that I’ll always cherish. We started Backpackinglight.com when Chase was two years old. He turns 21 at the end of this month. Every trip I take with him, I ask: is this the last one? Huge thanks to my wife, Stephanie, for encouraging us to go.
We do not accept money or in-kind compensation for guaranteed media coverage: Backpacking Light does not accept compensation or donated product in exchange for guaranteed media placement or product review coverage.
Affiliate links: Some (but not all) of the links in this review may be “affiliate” links, which means if you click on a link to one of our affiliate partners (usually a retailer site), and subsequently make a purchase with that retailer, we receive a small commission. This helps us fund our editorial projects, podcasts, instructional webinars, and more, and we appreciate it a lot! Thank you for supporting Backpacking Light!
The Helinox Chair Zero is probably the most beloved lightweight camping chair among hikers who pay attention to the weight of their kit.
The reason for this is that when it was introduced, it was the lightest “real” chair on the market. At just over a pound, it still offered all of the benefits and features of a comfortable chair, including an off-the-ground seat, a suspended seat that cradled your back and hips, a supportive backrest, and enough height so that your feet settled on the ground well below your hips.
Biomechanically, these are the key ingredients to relieving strain from the musculoskeletal system in a way that promotes, rather than hinders, restful recovery after hiking all day. (Chairs for backpacking should be designed with similar features as chairs for long-distance driving, with the goal of reducing biomechanical stress; unlike office chairs, where the goal is to foster a healthy posture with core activation).
While a backpacking chair isn’t commonly carried by thru-hikers or fastpackers who spend little time “camping” on their hikes, it’s becoming less and less of a luxury item now that chair weights are decreasing, and more options hit the market.
The REI Flexlite Air Chair is new for 2019. It’s made with lighter materials and is a slightly more compact design than the original REI Flexlite Chair. The latter chair weighs 12 oz more than the Flexlite Air, and is a little more stable under heavier loads.
* Measured weights do not include the included stow bags for each chair – only the pole/hub set, and fabric seat.
Performance Notes
Weight Capacity:
No discernible differences could be observed between the stability of the two chairs when I sat in each one with 75 pounds of barbell plates in my lap and I wobbled around. Both chairs offered a terrible experience! I weigh 165 lb, and without artificial weight in my lap, found them both to be stable enough while sitting on firm soil.
Leg Angle:
Leg angles were measured by extending feet forward until the front edge of the seat fabric starting digging into my hamstring.
The lower leg angle of the Helinox Chair Zero makes it more comfortable to extend your legs forward (i.e., less knee bend) without the front edge of the seat digging into your hamstring. This is more comfortable for some. However…
The higher leg angle of the REI Flexlite Air Chair combined with its deeper seat cradle your hips and body more comfortable, while in a normal sitting position with legs folded near the chair.
Back Height:
The higher back height of the Helinox Chair Zero provides enough noticeable increase in fabric to increase comfort notably, regardless of your height (but especially for taller sitters). The back fabric edge may dig into your back when you lean far backward, and that may be disconcerting to some.
Folded Size:
The more compact folded size of the Helinox Chair Zero is primarily an issue only when comparing the paper specs provided by the manufacturers of these two chairs. Actual measured dimensions are much closer, and both chairs fit sideways into most of the larger (55+ L) backpacks I tried.
Final Commentary & Recommendations
I recommend both of these chairs. They are well-constructed, durable, and the lightest of their kind on the market.
To save additional weight, you have to give up four-leg stability and/or ground clearance (e.g., the Alite Mayfly), use a chair without a supportive, cradling seat (e.g., the Trail Chair), use a chair without a supportive backrest (e.g., a bear canister or stool), or just sit on a little piece of foam (which really only serves to keep your butt dry and clean, offer no biomechanical advantages whatsoever).
My current chair of choice is the REI Flexlite Air Chair. It’s slightly lighter than the Helinox. I find the Helinox to be marginally more comfortable, but not worth the extra 1.9 oz for me!
Doug is putting together a more comprehensive camp chair review that will be published in the coming months – stay tuned!
Dream Chair?
This type of design – four legs, off-the-ground seat, and a backrest – should be the gold standard for backpacking chair comfort. However, there is an opportunity for improvement, weight savings, and innovation. Expectedly, these advances would come from the cottage community rather than mass-market manufacturers such as REI or Helinox:
Lighter weight and more stability (less wobble) can be accomplished by using carbon fiber tubing. Thick-walled tubing and outer ferrules may have to be used to resist breakage.
Lighter weight and less water absorption (faster dry time) can be accomplished by using fabric such as the 1.0-oz Dyneema Composite Fabric used in tent floors (e.g., Tarptent, ZPacks, Hyperlite Mountain Gear).
Perhaps there is some market opportunity by using lighter weight materials with a lower weight rating.
And how about some type of chair kit that mates with trekking poles to create a four-legged, off-the-ground chair with a nice seat and backrest?
How we acquired these products: Product(s) discussed in this review were either acquired by the author from a retailer or otherwise provided by the manufacturer at a discount/donation with no obligation to provide media coverage or a product review to the manufacturer(s).
We do not accept money or in-kind compensation for guaranteed media coverage: Backpacking Light does not accept compensation or donated product in exchange for guaranteed media placement or product review coverage.
Affiliate links: Some (but not all) of the links in this review may be “affiliate” links, which means if you click on a link to one of our affiliate partners (usually a retailer site), and subsequently make a purchase with that retailer, we receive a small commission. This helps us fund our editorial projects, podcasts, instructional webinars, and more, and we appreciate it a lot! Thank you for supporting Backpacking Light!
Today’s episode is a TECH SHORT. In this episode, we talk about StoveBench: Backpacking Light’s new protocol for standardizing stove performance comparisons.
We just published our huge Upright Canister Stove Gear Guide, in which we evaluated over thirty different backpacking stoves, eventually putting 17 through a variety of StoveBench tests. In light of that article we wanted to take a few minutes to more fully explain StoveBench.
In developing StoveBench, Ryan’s goal was to create a protocol capable of producing replicable results from home testing spaces all over the world.
Ryan begins the episode by explaining two important metrics: power and efficiency. Andrew gives a little backstory on why it was necessary to create StoveBench, and Ryan explains the protocol’s nuts and bolts.
After that the guys run through a few of the frequently asked questions surrounding StoveBench.
Outline
Introduction
Ryan and Andrew introduce today’s topic: The StoveBench Protocol.
The Convo
The StoveBench protocol is an effort to decrease variables and increase accurate testing results when measuring the performance of backpacking stoves.
First of all, what are we measuring?
What is efficiency?
What is power?
Why did Ryan develop StoveBench?
The need became evident as BPL began researching and writing its forthcoming Upright Canister Stove Gear Guide.
Manufacturer provided data is dependent upon unknown variables
Ambient temperature of the lab, fuel, and water
Elevation of the lab
Amount of fuel inside a testing canister
Size, shape, and material of the testing pot
Temperature of the water before boiling
Saline content of the water
And so on!
Ryan wanted to create a system that could be replicated easily so as to add to the general knowledge of the ultralight community.
How does StoveBench work?
What are we testing?
What data are we collecting, and what tools are we using?
What is a StoveBench score?
What are the strengths of StoveBench?
What type of fuel are we using?
What is the average sample size of a StoveBench test?
Common StoveBench questions
What pot size, shape, and material did you choose as the StoveBench baseline, and what are the possible ramifications of those choices?
Can StoveBench be applied to other types of stoves: wood burning, alcohol, integrated stove systems, etc?
Won’t elevation skew the results? In order to get a better stove bench score, couldn’t you just hike up a mountain?
Aren’t stoves more efficient when you run them below full throttle? How will this affect StoveBench Scores?
Is this all going over people’s heads? For the average hiker, doesn’t “boil time” just matter the most?
With the nearly endless combination of fuels, pots, stoves, windscreens, etc, what is the practical application of arriving at a StoveBench score derived from standardizing variables?
What are some other potential flaws with the protocol, and what can we do about them?
Sponsors: Help us Keep the Podcast ADVERTISING-FREE!
This episode of the Backpacking Light Podcast is supported and kept advertising-free by Backpacking Light membership fees. Please considerbecoming a member which helps support projects like this podcast, in addition to a whole slew of other benefits!
In addition, some of the links on this page may be affiliate links that refer to our partner merchant retailers. If you follow a link and then make a purchase, we receive a small commission which goes a long way towards helping us pay for podcast production, hosting, and bandwidth fees! Thanks for supporting us in this way!
Contact
You can contact us at podcast@backpackinglight.com, or follow us on social media –
We do not accept money or in-kind compensation for guaranteed media coverage: Backpacking Light does not accept compensation or donated product in exchange for guaranteed media placement or product review coverage.
Affiliate links: Some (but not all) of the links in this review may be “affiliate” links, which means if you click on a link to one of our affiliate partners (usually a retailer site), and subsequently make a purchase with that retailer, we receive a small commission. This helps us fund our editorial projects, podcasts, instructional webinars, and more, and we appreciate it a lot! Thank you for supporting Backpacking Light!
The Sawyer Micro Squeeze combines the flow-rate of the Sawyer Squeeze with the weight savings of the Sawyer MINI.
Introduction
Photo: Sawyer
The Sawyer Micro Squeeze is the latest in Sawyer’s ongoing line of palm-sized hollow-fiber water filters. In theory, the Micro combines the flow-rate of the Sawyer Squeeze with the weight savings of the Sawyer MINI. Like its older brothers, the Micro is versatile and easily connected to any 28mm water bottles, including, of course, the beloved Smartwater Bottle. That being said, this review is not a head-to-head comparison of the three available Sawyer filters. It might be more useful to backpackers looking to cross over from chemical or ultra-violet treatment than it will be to users trying to decide if they should upgrade their current Sawyer filter.
Category Overview
Hollow-fiber filters utilize a bundle of miniscule tubes (think tiny, tiny straws) all bunched together into a matrix. The tube walls are pocked with microscopic pores: holes large enough for water to pass through, but not bacteria, cysts, or protozoa. Note that viruses are not included in this list: to take care of those, you want a purifier as opposed to a filter. In most filter systems the pore size is .1 or .2 microns.
Hollow-fiber filters offer a wonderful weight-to-performance ratio – at least at first. They are prone to clogging over the lifetime of the filter, and their performance can sometimes decrease precipitously from out-of-the-box peak flow rates, even after backflushing (methods of backflushing differ from product to product).
Lots of chemical treatment or ultraviolet uses have a story about choking down gritty, possibly tadpole-filled water. On the other hand, lots of filter users have stories about irreversibly clogged filters. In general, when using a hollow-fiber filter, it’s best to find the clearest, most sediment-free water possible.
One downside inherent in most hollow-fiber systems is this – you have to keep them above freezing. Some amount of water is more-or-less always trapped inside a hollow-fiber filter. When that water freezes, the resulting ice crystals can tear larger holes in the membrane. All sorts of things you definitely don’t want living in your lower intestines can then freely pass through these larger pores.
There’s a wide range of filters available on the market, from the 2 oz Sawyer MINI to the 16 oz, pump utilizing MSR MiniWorks Ex. We’ll consider the Sawyer Micro (and compare it to other filters) within the following framework: it belongs to a family of compact, sub-6 oz filters that utilizes .2 micron or less hollow fibers to filter a liter of water in three minutes or under using a squeezing method to force the water through the filter.
Features and Specifications
The Sawyer Micro Squeeze weighs about 2 oz (56.69 g) out of the box and 2.2 oz (62.36 g) after ten uses.
Features
Comes with a 32 oz squeeze pouch, backwashing plunger, cleaning coupling, spare gasket, and drinking straw.
Removes: bacteria, protozoa, and cysts (including E.Coli, giardia, vibrio cholerae, salmonella typhi, and microplastics.
Rated for up to 100,000 gallons.
Can be attached to standard water bottles or inline to hydration packs,
Combines the weight of the Sawyer Mini with the flow-rate of the Sawyer Squeeze.
Specifications
Weight of filter: 2 oz (56.69 g)
Weight of filter (measured after ten uses): 2.2 oz (62.36 g)
Weight of 32 oz bag (measured): 0.7 oz (19.84 g)
Weight of cleaning coupling (measured): 0.2 oz (5.66 g)
Total field weight (filter, 32 oz bag, and cleaning coupling): 3.2 oz (90.71 g)
Filter pore size: 0.1 microns
MSRP: $27.95
Performance Notes
The Sawyer Micro Squeeze comes with a 32 oz squeeze bag, an extra gasket, a drinking straw, a cleaning coupling, and a backwashing plunger.
This section will be divided into multiple parts, with each part corresponding to a step in the process of filtering water with the Sawyer Micro Squeeze.
Water Collection
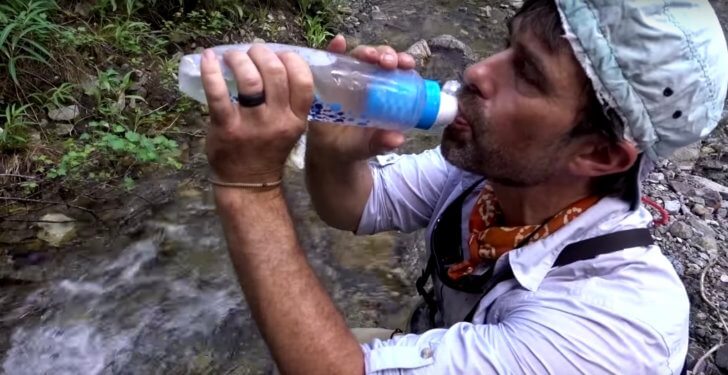
The flexible 32 oz squeeze bag is easiest to fill in flowing water.
The Micro comes with a collapsable 32 oz squeeze bag which serves as the primary dirty water reservoir. Bags of this type are easily filled in flowing water but are troublesome in still water – particularly if the water is shallow. Luckily my water source for this test was a swiftly flowing creek. The water was lightly sedimented but mostly clear when held up to the light. My bag filled in a matter of seconds, and I was able to hold one corner in such a way as to prevent my hands from getting wet (the ambient temperature was 36 F).
Prepping to Filter
Filtering with the Micro is easier with the squeeze bag than it is with a Smartwater bottle, but don’t squeeze too hard or wring the bag.
After filling the bag, it is simple to attach the filter, flip the whole thing over, and begin squeezing into a clean water reservoir. I found attaching the filter to a Smartwater bottle to be only fractionally less easy than attaching to the squeeze bag.
Filtering
Sawyer makes a point of telling you not to squeeze too hard – the warnings are all over the packaging and the website. I can see why. It’s very tempting to squeeze as hard as you can thinking that increased force will increase flow rate. Not so. After playing around with pressure I found a steady, even pressure to be the best option.
Squeezing the bag in this way was simple. As the amount of water in the bag decreases you have to adjust your hands and the bag in order to keep the pressure on. If the water is cold, your hands will be cold as well.
It takes a little practice to get the technique down, especially because you should not wring or twist the bag. Sawyer squeeze bags have a long history of failure, partly because of misuse and partly because it’s difficult to make a lightweight product that stands up to repeated, daily hydraulic pressure.
Sawyer re-designed the bags for the Micro – they are lighter and more flexible than the originals. However, it’s still possible to find examples of the new bags rupturing. Sawyer recommends careful attention to cleaning and maintenance of the filter to prevent undue pressure (see the Backflushing section, below).
In any case, the spotty nature of squeeze bag longevity is what leads many backpackers to use Smartwater bottles as a dirty water reservoir. While you can squeeze short bursts at a time into your mouth fairly easily (or use inline with a hydration bladder) using a Smartwater bottle as reservoir for filtering multiple liters of water is a little more difficult.
Like the other Sawyer filters, the Micro attaches easily to any 28mm bottle. This use has it’s problems though.
To see what I mean, let’s examine the data from my initial “First Looks” flow rate testing.
Here’s the chart from my initial round of testing, in which I used the included 32 oz squeeze bag to fill a 1L Smartwater bottle to just below cap level. My Micro was brand new and was used five times with tap water prior to this test (in the packaging material Sawyer says that the first few uses will be slower because of a dry filter).
SAWYER MICRO SQUEEZE TEST – WITH POUCH
TEST #
Time to Filter 1L (M:SS)
1
1:30
2
1:40
3
1:29
4
1:44
5
1:49
Here’s a similar test, using a 1L Smartwater bottle as the dirty water reservoir instead of the included pouch.
SAWYER MICRO SQUEEZE TEST – WITH BOTTLE
TEST #
Time to Filter 1L (M:SS)
1
2:51
2
2:24
3
2:44
4
3:12
5
3:00
And for comparison purposes, here’s data from an MSR TrailShot filter from the same water source on the same day. The TrailShot was lightly used and well-cleaned before this test.
MSR TRAILSHOT TEST
TEST #
Time to Filter 1L (M:SS)
1
2:47
2
2:45
3
2:50
4
2:44
5
2:55
Before we go any further, some caveats.
These tests are by no means meant to be comprehensive. Flow rate is highly dependent upon water clarity and age of filter (and by age, we mean “the amount of gunk a given filter has had to deal with in its lifespan). This data is merely meant to serve as a baseline.
Why didn’t I compare the Micro to the Squeeze or Mini? Why did I use the MSR Trailshot, which functions in a slightly different way, as opposed to similar products from the same brand which functions more or less identically? Short answer: I don’t own the Sawyer Mini or Squeeze. Even if I did, I would have needed filters of comparable age and use for the data to be relevant.
This is a First Looks review, meant only to record initial thoughts on a product. There’s undoubtedly an extensive BPL Filter Gear Guide on the horizon in which all the above factors will be taken into account. Until then, hopefully, these little tests are helpful.
In my tests, using the 32 oz squeeze bag was close to a minute faster per-liter than using a Smartwater bottle. The reason is this: After squeezing about a quarter of the water from the bottle, the bottle deforms and it becomes difficult to exert enough pressure to keep a steady flow going. The only solution is to flip the bottle over, unscrew the filter enough to allow air to flow into the bottle and restore pressure, re-screw the filter, flip back over, and continue filtering. Repeating this process two-to-three times per liter of water is what accounts for the increased time when filtering with a Smartwater bottle. In short – I’d opt for the squeeze bag over a bottle any day. But, if the squeeze bag breaks, you may not have a choice.
Backflushing
All filters clog. Backflushing is a necessary facet of successful filter use, and the ease with which the process happens in the field is a major performance consideration. The Sawyer Micro not only comes with a kind of plunger for high-pressure at-home backflushing but also an adaptor ring that allows you to backflush in the field using a water reservoir. This is handy, light, and easy – provided you don’t lose the ring.
Commentary
One downside to the system: cold hands while squeezing.
I can say this: The Micro is light, the Micro is cheap, and the Micro seems to work well enough, at least for shorter trips and particularly when using the included squeeze bag. Watch out for cold hands, and be careful with the bag. Backflush regularly – maybe even once a day while in the field, more if your water sources are bad.
I’m worried that Micro’s filter isn’t replaceable. If it did happen to freeze or become irredeemably clogged, I’d rather just replace a filter than a whole piece of gear. That being said, a replacement filter for the TrailShot is more expensive than buying the Micro all over again.
I like Sawyer’s pressured backflushing system more than the “just shake it” system some other brands offer – but again I have no hard evidence that it is any better. It just seems like it would be.
Which brings me to my final point: writing this review made Ryan Jordan and I decide that BPL needs a FilterBench Protocol similar to our recent StoveBench Protocol. Only then can the performance metrics of the category (flow rate, resistance to clogging, resistance to failure when frozen, ability to clean when it is clogged) be fairly judged. At the very least a sort of FilterBench Lite test is in order, wherein brand new Squeeze, MINI, and Micro filters are pitted head-to-head under a variety of stressors.
Until then, it’s hard to definitively recommend the Sawyer Micro over any other available filters in this category (see Compared To… section below).
Product Strengths and Limitations
Strengths
Tries to match the weight of the Sawyer MINI while maintaining an increased flow-rate from that model.
Versatile and adaptable.
Can be used inline with a hydration system, or you can squeeze directly into mouth.
Want some more user thoughts on the Sawyer Squeeze Micro? Check out our forum.
Review Disclosure
How we acquired these products: Product(s) discussed in this review were either acquired by the author from a retailer or otherwise provided by the manufacturer at a discount/donation with no obligation to provide media coverage or a product review to the manufacturer(s).
We do not accept money or in-kind compensation for guaranteed media coverage: Backpacking Light does not accept compensation or donated product in exchange for guaranteed media placement or product review coverage.
Affiliate links: Some (but not all) of the links in this review may be “affiliate” links, which means if you click on a link to one of our affiliate partners (usually a retailer site), and subsequently make a purchase with that retailer, we receive a small commission. This helps us fund our editorial projects, podcasts, instructional webinars, and more, and we appreciate it a lot! Thank you for supporting Backpacking Light!
The REI Quarter Dome SL 1 is a single person, side entry, single side vestibule, double wall, mostly mesh inner, semi-freestanding tent.
Introduction
The REI Quarter Dome SL 1 is a single person, side entry, single side vestibule, double wall, mostly mesh inner, semi-freestanding tent. Its trail weight (fly, poles, inner) is only 32.3 oz (916 g) and it costs only $280, about $75 less than the category average.
The video review below provides detailed setup instructions for both inner-first and fly-first pitches. I also discuss how I camp and organize gear in a tent like this and performance in windy and humid conditions. Much of the information in the review is applicable to all tents in this category and not necessarily unique to the Quarter Dome SL 1, so users of similar tents from Big Agnes, MSR, or Nemo may find some value in it as well.
This category of tents (single person, side-entry, single side vestibule, double wall, mostly mesh inner, semi-freestanding) has evolved significantly over the past five years.
The tents have become appreciably lighter and roomier, owed primarily to a hub-based pole set that creates a pseudo-geodesic panel framework. The primary US manufacturers include REI, Big Agnes, Nemo, and MSR.
We’ve included a comparison table below (see the Compared To… section) with ten models having a trail weight (fly, inner, and poles) of less than 3 lb. These tents have an average trail weight of 34 oz / 964 g (range is 23 oz / 652 g to 48 oz / 1361 g) and an average cost of $353 (range is $280 to $450).
The REI Quarter Dome SL 1 has a trail weight of 32.3 oz (916 g) and a cost of $280, which makes it the best value of the bunch.
Features
Double wall, single entrance, side entry.
Full mesh inner tent with 4 in (10 cm) bathtub floor.
Trapezoidal floor plan.
Vertical sidewalls.
A shock-corded hub-and-pole assembly is color-coded to simplify setup.
A large door on the rainfly vestibule for ease of entry can be rolled out of the way when unzipped.
Stake-out vestibule with a large side entrance for easy entry and adds storage space for your gear.
Roof vent improves airflow and helps control condensation.
Exterior guyline tie-out loops and rainfly rollback loops provide setup options for different types of weather.
Four pockets and six hang loops help organize the interior.
Reflective stake loops and guylines.
Fly/footprint minimalist pitch option lets you leave the tent at home and use the fly, poles, and footprint (sold separately) as a lightweight shelter, or aids in pitching the outer tent (fly) first and inner tent from inside.
Includes a stuff sack, stakes, guylines, and tighteners, as well as a pole-repair tube, a pole bag, and a stake bag.
Specifications
Weight (actual measured values):
Fly: 11.2 oz (318 g)
Inner tent: 11.8 oz (335 g)
Pole set: 9.2 oz (261 g)
Stakes: 3.9 oz / 111 g (includes ten 6 in (15 cm) v-channel aluminum stakes w/head cords)
Floor dimensions: 88 x 35/27 in / 224 x 89/68 cm (L x W head/foot)
Floor area: 18.9 sq. ft (1.76 sq. m.)
Vestibule area: 9.6 sq. ft. (0.89 sq. m.)
Peak height: 38 in (97 cm)
Pole material: 7000 series DAC aluminum
Fabrics:
Fly fabric: ripstop nylon
Floor fabric: ripstop nylon
Inner tent: noseeum mesh
Performance Notes
After using this tent in rainy and humid conditions, I found condensation management to be excellent, attributable to an ideally-located and generously-sized roof vent and steep fly walls.
I also suspected that the fly fabric was made with a low emissivity material, at least when compared to the silnylon and polyurethane (PU) coated nylon fly fabric samples in my possession. Using standardized emissivity measurement methods that use an infrared temperature sensor and an adjustable-emissivity thermal imaging camera, I was able to confirm this suspicion. However, my methods are crude, so I don’t yet have enough confidence in my data to publish comparison numbers.
Wind-resistance is very good and the tent stays quiet and stable in winds up to about 30 mph (the maximum I experienced in this tent) – assuming it’s pitched properly and tightly with all of its stakes and guylines.
A vestibule that’s roomier than most single side entry tents, four interior mesh pockets, and six hang loops gives you plenty of options to stay organized.
Strengths
One of the lightest and most affordable tents available in this category (see Compared To section below) without using expensive, less durable materials (e.g., exotic fabrics, low denier fabrics, or carbon poles). Best value in its category.
Canopy (fly) pitches very tight, as a result of quality design and manufacturing and enough fabric stretch. This helps with snow shedding, wind stability, and condensation resistance.
Very quiet and stable in wind, when pitched properly with all stakes and guylines.
Can be pitched fly-first in inclement weather (optional footprint required, sold separately).
Generous vestibule space.
Inner tent floor area is large enough for a wide, long pad with additional room inside for gear storage.
Vertical sidewalls help minimize getting water inside the tent during entry and exit in rain.
Fly fabric doesn’t sag in response to increasing humidity/rainy conditions when the tent is properly pitched and tightened initially.
Good condensation performance.
Limitations
Fly buckles can be difficult to snap in very cold weather (small, hard to use with mittens or gloves).
Vestibule door zipper guard is very drippy if opened in wet conditions, and some of the water can enter the tent upon entry/exit. A slight awning over the door and as part of the open vestibule would be helpful here.
Compared To…
In the following table, the REI Quarter Dome SL 1 is compared to other similarly-sized double-wall, mostly mesh inner, semi-freestanding (i.e., no trekking pole tents), side entry tents that have a maximum trail weight (fly, inner, poles) of 48 oz (122 g). This table features US tent manufacturers only.
* Note: the Tarptent Rainbow is a hybrid single/double wall tent, but has been included here because of its similarity to other 1-person, side-entry, single-vestibule tents.
If price and weight are plotted against each other and a linear trendline is regressed to the data, we can get a feel for the value provided in this market category:
Points above the line represent a below average value while points below the line represent an above average value. The farther away a point is from the line, the worse (or better). This makes the Big Agnes Manzanares HV UL1 and the MSR Hubba NX 1 the lowest value tents and the REI Quarter Dome SL 1 the highest value tents.
This analysis comes with a few caveats:
It’s only applicable to the tents in the table above.
It only considers weight and cost in the value proposition – not other performance metrics.
Review Rating: Recommended
The REI Quarter Dome SL 1 earns a Recommended Rating for its wind stability, condensation resistance, livability, and value.
The only thing separating it from a Highly Recommended rating is that it’s still a half pound heavier than the two lightest tents on the market in this category – the Nemo Hornet Elite 1 and the MSR Carbon Reflex 1. However, at $170 cheaper than either of those options, the REI Quarter Dome SL 1 offers a very compelling option when it comes to its price:weight ratio.
How we acquired these products: Product(s) discussed in this review were either acquired by the author from a retailer or otherwise provided by the manufacturer at a discount/donation with no obligation to provide media coverage or a product review to the manufacturer(s).
We do not accept money or in-kind compensation for guaranteed media coverage: Backpacking Light does not accept compensation or donated product in exchange for guaranteed media placement or product review coverage.
Affiliate links: Some (but not all) of the links in this review may be “affiliate” links, which means if you click on a link to one of our affiliate partners (usually a retailer site), and subsequently make a purchase with that retailer, we receive a small commission. This helps us fund our editorial projects, podcasts, instructional webinars, and more, and we appreciate it a lot! Thank you for supporting Backpacking Light!
A detailed review of the Therm-a-Rest Vesper 20F Sleeping bag over 3 seasons of use including detail commentary.
Introduction
Photo: Therm-A-Rest
The Therm-A-Rest Vesper 20F represents another step in a growing trend: mainstream gear companies increasingly catering to the ultra-light crowd (the REI Magma Trail Quilt 30, which we’ll compare to the Vesper to later in this article, is another example of this phenomenon). The Vesper is EN/ISO safety rated for a range around 20 F (-6.7 C) with a comfort rating of 32 F (0 C). Premium materials and a no-frills but elegant design combine to form a 19 oz (539 g) down quilt that packs down small, making the Vesper a powerful tool in an ultralight sleep system.
Features and Specifications
Features
Differential cut enclosed footbox
DWR treated shell
Horizontal baffle orientation
Perimeter side baffles to minimize down migration
Insulated, adjustable collar with snap closure
Box-sewn baffles
SynergyLink™ sleeping pad connection system
Nikwax Hydrophobic Down™
RDS certified down
Four-point-compression stuff sack included
Made in China
Unisex
Specifications (size regular)
Weight: 19 oz (539 g)
Temperature Rating*: 20 F (-6 C)
Fill Type: 900 fill Nikwax Hydrophobic Down
Fill Weight: 12 oz (340 g)
Loft Height: 4.5 in (11.4 cm)
Dimensions: 75 x 58 in (191 x 147 cm)
Compressed Dimensions: 8 x 5.5 in (20 x 14 cm)
Shell Fabric: 10D Nylon RipStop (DWR treated)
Lining Fabric: 10D Nylon RipStop
MSRP: $379.95
*More on this in the Temperature Rating and Warmth section
Review Context
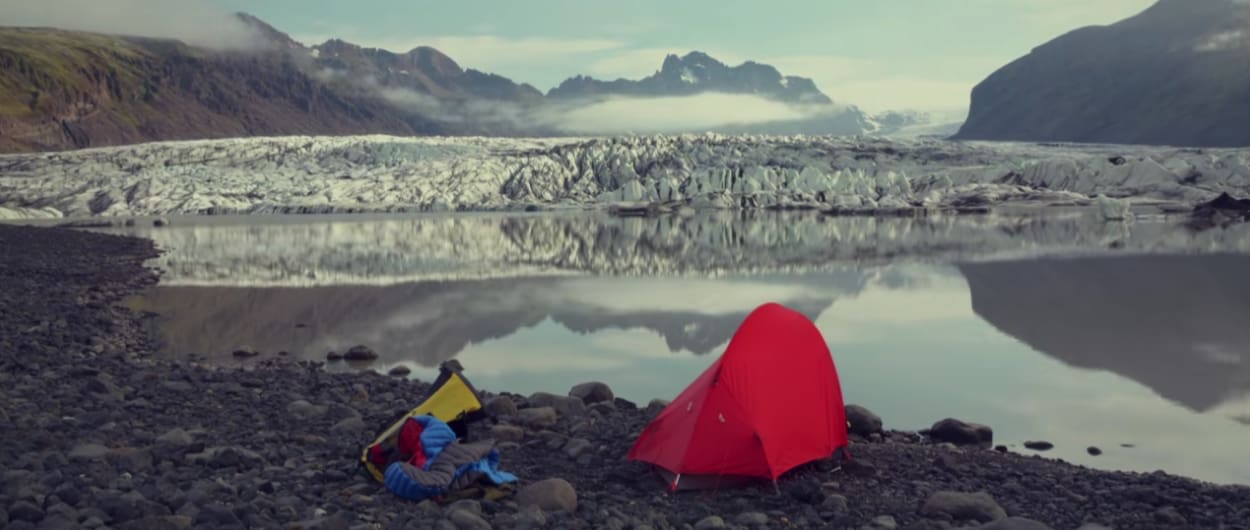
The Wind River Range in Wyoming can make anything look small. But the Vesper is diminutive when compressed.
I’ve logged more than 2,000 trail miles and nearly 200 nights in quilts of various makes and models, so I know what I like in a quilt. To me, the ideal quilt should sit at the sweet spot of minimalist design and functionality. A quilt plagued by cold spots, drafts, or lack of coverage doesn’t do anyone any favors no matter how light it is. Similarly, a quilt that has too much material or too many extra features might as well be a mummy bag.
A good quilt needs to allow for more temperature control than a mummy bag while still remaining firmly affixed to a sleeping pad. It needs to shave ounces by utilizing the most minimal amount of fabric possible while still being wide and long enough to provide coverage for a side sleeper. A well-designed quilt should retain its loft over a long period of time, be as breathable as possible while still being water and moisture resistant, and be sewn and baffled in such a way as to minimize cold spots and down migration.
Some companies design quilts to be multi-functional; manufacturing quilts that can be opened completely like blankets – allowing for more flexible temperature regulation, decreased drying time when laid flat in the sun, or even worn around camp as a poncho. These are nice features but only one of them is extremely practical: having the capacity to lay a quilt out completely flat in a patch of sunlight is massively useful in the event of a catastrophic soak, or even a run of humid nights.
As for temperature control, I personally haven’t found blanket-style footboxes to be any more efficacious than simply adjusting my head insulation or rearranging the upper part of the quilt. I’ll discuss footbox styles (and why I believe Therm-A-Rest’s approach to the Vesper to be the best option) in greater detail later in this article.
I spent many of my outdoor nights sleeping in a quilt that was designed to be used as a poncho on chilly mornings (in fact that feature was one of the reasons I bought that quilt). I quickly learned that four inches of loft is a cumbersome thing to wrap around yourself while doing camp chores or, more terrifying, cooking over the unregulated flame of an alcohol stove. So I’m fine with quilt designs focusing on functionality rather than bells and whistles.
Description of Field Testing
The Vesper was my companion on every extended and short-term trip I took between July 2018 and April 2019. I spent upwards of 30 nights in the Vesper across three alpine seasons, including while at altitude, in four different shelters, and with three different sleeping pads. In short: optimal conditions for quilt testing!
A summer trip to Wyoming’s Wind River Range provided ample opportunity to put the Vesper’s DWR treatment and hydrophobic down through their paces. I followed that up with a ten-day trek through the Absaroka-Beartooth Wilderness in Montana – where nighttime winds were gusty and high-altitude early fall-temperatures dropped into the low thirties.
Finally, I took the Vesper out on several multi-day late fall / winter / early spring excursions in the eastern Sierra Nevada. Overnight temperatures on these occasions sometimes dropped into the teens, and were on average closer to the mid-twenties.
My base layers were mostly Brynje wool thermo mesh t-shirt, leggings, and beanie with thick Darn Tough wool socks. Occasionally I used an Icebreaker merino wool t-shirt and Smartwool leggings.
Performance Assessment
My performance assessment of the Therm-A-Rest Vesper 20F will consist of the following considerations:
Materials
Baffles
Quality
Pad Connection
Temperature Rating and Warmth
Cut, Design, and Special Features
Materials
10D nylon is light, breathable, and silky. The Vesper’s shell is treated with DWR, and easily shed moisture and condensation over the course of my testing.
At this point, it should come as no surprise that high-end quilt and bag manufacturers are using silky, lightweight fabrics for both shell and lining. The Vesper is no exception. Therma-A-Rest utilizes a featherweight 10D Nylon RipStop fabric on both the shell and lining of the Vesper, and the result is a quilt that is a tactile pleasure to sleep in. The fabric is quiet, soft, and so thin as to be translucent in direct sunlight. The upshot is you can easily find and mitigate clumps of down if necessary, although that isn’t much of a problem with the Vesper’s baffle design.
The shell is treated with DWR, and it easily shed the mist and splashes I encountered during several intense rainstorms in the Winds. Likewise, a quick shake in the morning flung away the cold-weather condensation that collected on the surface of the quilt in the eastern Sierra Nevada. I never felt clammy, stuffy, or drafty while sleeping in this quilt – so my judgment is that Therm-A-Rest managed to balance breathability and wind/water resistance in its choice of fabric. I certainly didn’t notice any rips, tears, or runs in the fabric after sustained use, so it seems to be sturdy enough. I’d be careful with it though.
The author helpfully demonstrates exactly how NOT to dry out a quilt made from 10D nylon. From this angle the hybrid baffle design (horizontal with perimeter side baffles) is apparent.
If I had one fabric gripe, it would be this: I’m a fan of dark colored fabrics on the interior of my bags to aid drying on longer trips (full disclosure: I have no measurable evidence that a black or dark fabric dries faster than light fabrics in direct sunlight. Anecdotally though … yes). By contrast, the Vesper is a light grey. This color choice also tends to show stains and smudges.
The Vesper is stuffed with 12 oz (340 g) of 900 fill RDS certified Nikwax Hydrophobic Down.
Therm-A-Rest stuffs the Vesper with 12 oz (340 g) of 900-fill Nikwax Hydrophobic RDS certified goose down. This is premium stuff (most quilts come standard at 800 or 850 fill) and likely accounts for a good chunk of the Vesper’s $379.95 price tag. The payoff is a quilt that compresses extremely well but lofts up to a thickness of around 4.5 in (11.4 cm) and boasts an impressive warmth-to-weight ratio.
Baffles
“Vertical or horizontal?” – this is the eternal question. In my experience, vertical baffles mitigate the down migration that can happen over a long period of sustained use. Vertical or hybrid (horizontal on the chest and vertical on the legs) baffles are now quite common in both quilts and sleeping bags. Therm-A-Rest goes old school with the Vesper and uses a horizontal baffle system – with a twist. The horizontal baffles extend about halfway down the sides of the bag. From there, a smaller series of perimeter side baffles takes over.
Horizontal baffles with perimeter side baffles to mitigate down migration. From this angle, you can also see the adjustable collar: essentially just a long, narrow baffle with a snap closure and a drawcord for adjustments.
Horizontal baffles were my chief concern with the Vesper’s design: I have several quilts with horizontal baffles, and all suffer from cold spots in the baffles at the head end because of down migration into the sides of the baffles. So far, Therm-A-Rest’s use of perimeter baffles seems to be working: I haven’t experienced any noticeable down migration or cold spots using the Vesper, despite the side baffles seeming slightly under-filled. Holding the Vesper up to the light reveals areas in the side baffles that seem altogether lacking in insulation. Again, I haven’t noticed any side drafts in the Vesper, so this is likely an extremely precise weight and design consideration. However, if you are the kind of person for whom the phrase “twenty percent overstuffed” holds great importance, the low fill volume in the side baffles is likely to bother you.
The horizontal baffles are 5.5 in (13.9 cm) wide. All the baffles in the quilt are box-sewn, meaning there are thin layers of mesh between the seams to prevent down migration between the chambers. This contrasts to a sewn-through style, where the liner and shell are sewn together to create a barrier. Sewn-through can create cold spots but is lighter, where as box-sewn adds material (i.e. weight) but avoids creating points of zero insulation.
I’m happy that Therm-A-Rest went with a box baffle system in the Vesper. I wonder how many ounces they could have dropped with a sewn-through design, but they were already down to 19 oz (538.6 g) so they probably figured that they had some wiggle room. Ultimately I feel it’s the right choice. As I’ve already said, the Vesper is remarkably draft free and warm. Box baffles certainly play a part in that.
Quality
Cascade Designs (parent company of Therm-A-Rest) has a well-deserved reputation for tightly constructed products. The Vesper meets these standards … for the most part. I’d say that 99% of the seams and stitching are tight, even, and well-sewn. It’s perhaps unfortunate timing that after thirty nights of use I noticed the first loose threads (only two of them) while photographing the Vesper for this review.
Loose stitching on my sample of the Vesper.
The extremely thin 10D Nylon probably doesn’t help either – as the thin, light fabric may not hold stitching as well as heavier fabrics. I reached out to Therm-A-Rest about this issue and was told that my sample Vesper was produced on a different manufacturing line than the consumer products which were produced later. Small manufacturing flaws are not uncommon in such cases as, according to Therm-A-Rest, “sometimes we see slightly less quality control with the sample line.” Our experience here at Backpacking Light backs this up, so we are considering the loose threads on this sample Vesper to be a non-issue.
It will be interesting to see how the stitching holds up over even longer sustained use: I plan on using the Vesper on upcoming thru-hikes of the Tahoe Rim Trail and Arizona Trail at minimum.
Sleeping Pad Connection
The SynergyLink Connectors are Therm-A-Rest’s solution to the pad connection problem. Here the pad is upside down for illustration purposes. If someone was occupying the quilt the elastic connector would be pulled tight across the bottom of the pad.
Out of all the design elements found in quilts, perhaps nothing has as much variation as sleeping pad connection systems. Hooks, buckles, straps, cords: everybody seems to have a different approach. I’m a fan of Therm-A-Rest’s solution – a stretchy elastic cord with a plastic toggle on either end. Therm-A-Rest calls it a SynergyLink Connector. The toggle slips through a small loop on the sides of the Vesper and then the cord feeds underneath your pad to slip through a corresponding loop on the opposite side of the quilt. The resulting tension is just enough to keep the Vesper from being drafty while still allowing for freedom of movement.
The SynergyLink Connector is essentially an elastic strap with a small plastic T that feeds through small loops on either side of the Vesper.
The system is simple, elegant, and versatile: there are two loops on either side of the Vesper, one high up on quilt and one about two-thirds of the way down. You can choose which loop you’d like to use based on your sleeping style.
Of course, you can also always just leave the strap at home (but why would you at 0.1 oz / 2.8 g). Therm-A-Rest seems to know that ultralighters love hacking away at extraneous bits of fabric: why else would they make it removable in the first place? This is, in fact, my only problem with the system. The SynergyLink connector is so small and so light and so easy to attach and remove that it is easily misplaced (if you leave it hooked into the Vesper it sometimes comes loose and falls to the ground when you pull the quilt out of the compression sack).
This puppy is easy to lose. Use caution.
After nearly losing it several times I took to storing the SynergyLink Connector in other places: a sundries bag, inside a sleep sock, in a zippered compartment of my pack. Basically anywhere but inside the compression sack with the Vesper. In the future I might experiment with ways of permanently or semi-permanently affixing the connector to one of the loops. A small rubber band might do the trick.
Temperature Rating and Warmth
The Vesper 20F is comfort rated to 32 F (0 C) and limit rated to 20 F (-6 C). These numbers are worth digging in to, as they are one of the chief reasons to choose the Vesper over a competing quilt.
Much ink has been spilled over how temperature ratings in sleeping bags aren’t standardized in the same way that, for instance, R-Value in sleeping pads is. In fact, there is a standardized system, it’s just that not every gear manufacturer chooses to rate their bags according to it.
For instance, here’s a snapshot of the temperature specs for a competing quilt, taken from the product page of REI’s website.
Temperature Rating Specs from a competitor to the Vesper at REI.
Now here’s a snapshot of the temperature specs for the Vesper, also taken from the REI product page.
Temperature Rating Specs from the Vesper at REI.
See the difference? Both products have a temperature rating, but only the Vesper has a tested lower limit and tested comfort temperature.
This is because Therm-A-Rest has on-site cold chambers and testing facilities that conform to the EN/ISO standards. Do other manufacturers have these facilities? Sometimes … but Therm-A-Rest seems to make it a point of pride to be accurate in their temperature numbers and they go out of their way to achieve EN/ISO certification on their quilts and bags.
Additionally, Therm-A-Rest has developed a handy visual graphic to help prospective buyers hone in temperature needs even more. Here’s the one for the Vesper.
Recommended Temperature diagram from Therm-A-Rest for the Vesper Quilt.
Most companies are only going to give you one number, say, 20 F (-6 C). What does this number mean? Will you be comfortable at that temperature? Shivering? Bitterly cold but not dying? It’s different for every company, and they don’t always tell you which is the case.
This is why I so appreciate Therm-A-Rest’s attempts at transparency. I found their ranges to be right on: I was comfortable in a light beanie and base layer at 30 F (-1 C) and warmer. Any colder than that and I needed to start tossing on an extra layer or two (though not much). At 20 F (-6 C) I needed the Waterbear Hood and an insulating mid-layer like a fleece or long-sleeved shirt on top of my base layer. Temperatures in the teens required a down jacket or an additional quilt for maximum comfort.
Of course, this is all subjective. Experience and sleep temperatures vary wildly from person to person. But Therm-A-Rest is as precise and open about it as possible, and that is a great thing when making an expensive purchasing decision on a major piece of gear.
Cut, Design, and Special Features
Footbox Design
Broadly speaking, you could divide quilt footbox styles into two categories: fixed and unfixed. The footboxes on the unfixed models, like the Nemo Equipment Banshee or the Jacks R Better Sierra Sniveler, cinch closed because the quilts themselves are designed to be opened all the way (blanket style) if desired. This “lay-flat” design is ideal for claustrophobic sleepers, drying out wet quilts, or (in the case of the Sniveler) wearing the quilt as a serape.
Therm-A-Rest goes with a weight saving, simpler approach: a fixed footbox. The result is a quilt that doesn’t open all the way like a blanket but also avoids the cold spots that are all but inevitable with a cinch-close footbox.
The Vesper’s footbox has an ergonomic structure designed to accommodate a back sleepers upward pointed toes without undue loft compression. Some quilt foot boxes are designed to accommodate sleeping pads in addition to hiker feet (see the Nemo Equipment Siren, read our review here) but the Vesper’s footbox is a “feet only” space.
The Vesper’s footbox is sewn with a “differential cut”, meaning the inner shell is cut in such a way as to allow the insulation to stay lofted even when pressure (from toes or ankles, for instance) is applied from inside the bag. A differential cut is valuable in preventing cold spots (particularly with horizontal baffles), and I’m happy that Therm-A-Rest chose to utilize one in the footbox of this product.
An ergonomic, sewn-closed footbox with a differential cut.
Adjustable Collar
From this angle, you can really get a good look at just how lofty the adjustable collar is. Note the large loop on the cinch cord — a thoughtful design feature that allows for manipulation with gloved hands.
The Vesper’s draft collar is one of its best features. This narrow horizontal baffle runs along the top of the Vesper and closes from behind with a simple snap button. A bright green drawstring (with an extra large loop to accommodate gloved fingers) cinches the collar to the desired circumference. Far from being constricting, the collar is wide enough to be comfortable but lofty enough to be warm and cozy. I was shocked at how quickly I came to appreciate it.
The author awkwardly demonstrates the use of the adjustable collar.
Dimensions and Fit
I found the Vesper’s 75 x 58 in (191 x 147 cm) dimensions to be plenty large enough to accommodate my relentless nocturnal rotations. That being said, at 5’6, 165 lbs, I’m not the world’s broadest-shouldered backpacker. Hefty backpackers might want to go with a size long, which runs 79 x 61 in (201 x 155 cm) at the cost of an additional 2 oz (28 g). That size difference represents the limit of the customizations available for the Vesper I’m afraid. Customization is one of the benefits of the cottage industry quilt market, and if you like your sleep system precisely dialed in you might not want to go the Vesper route.
Compressibility
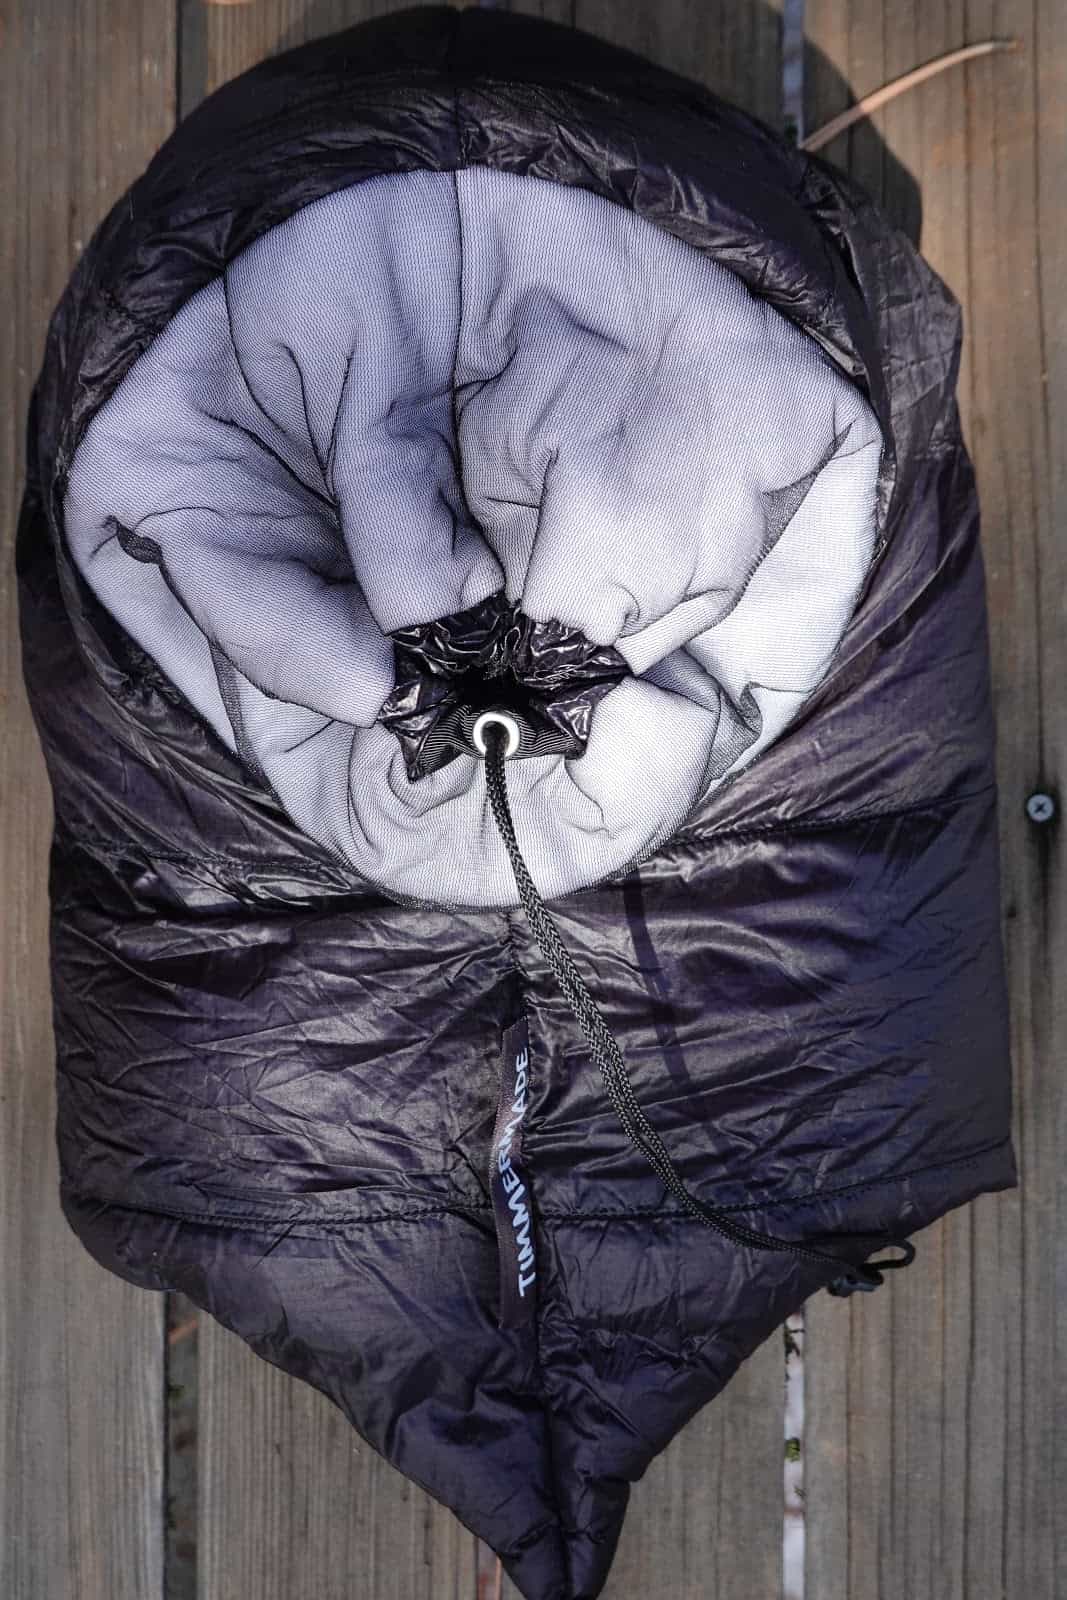
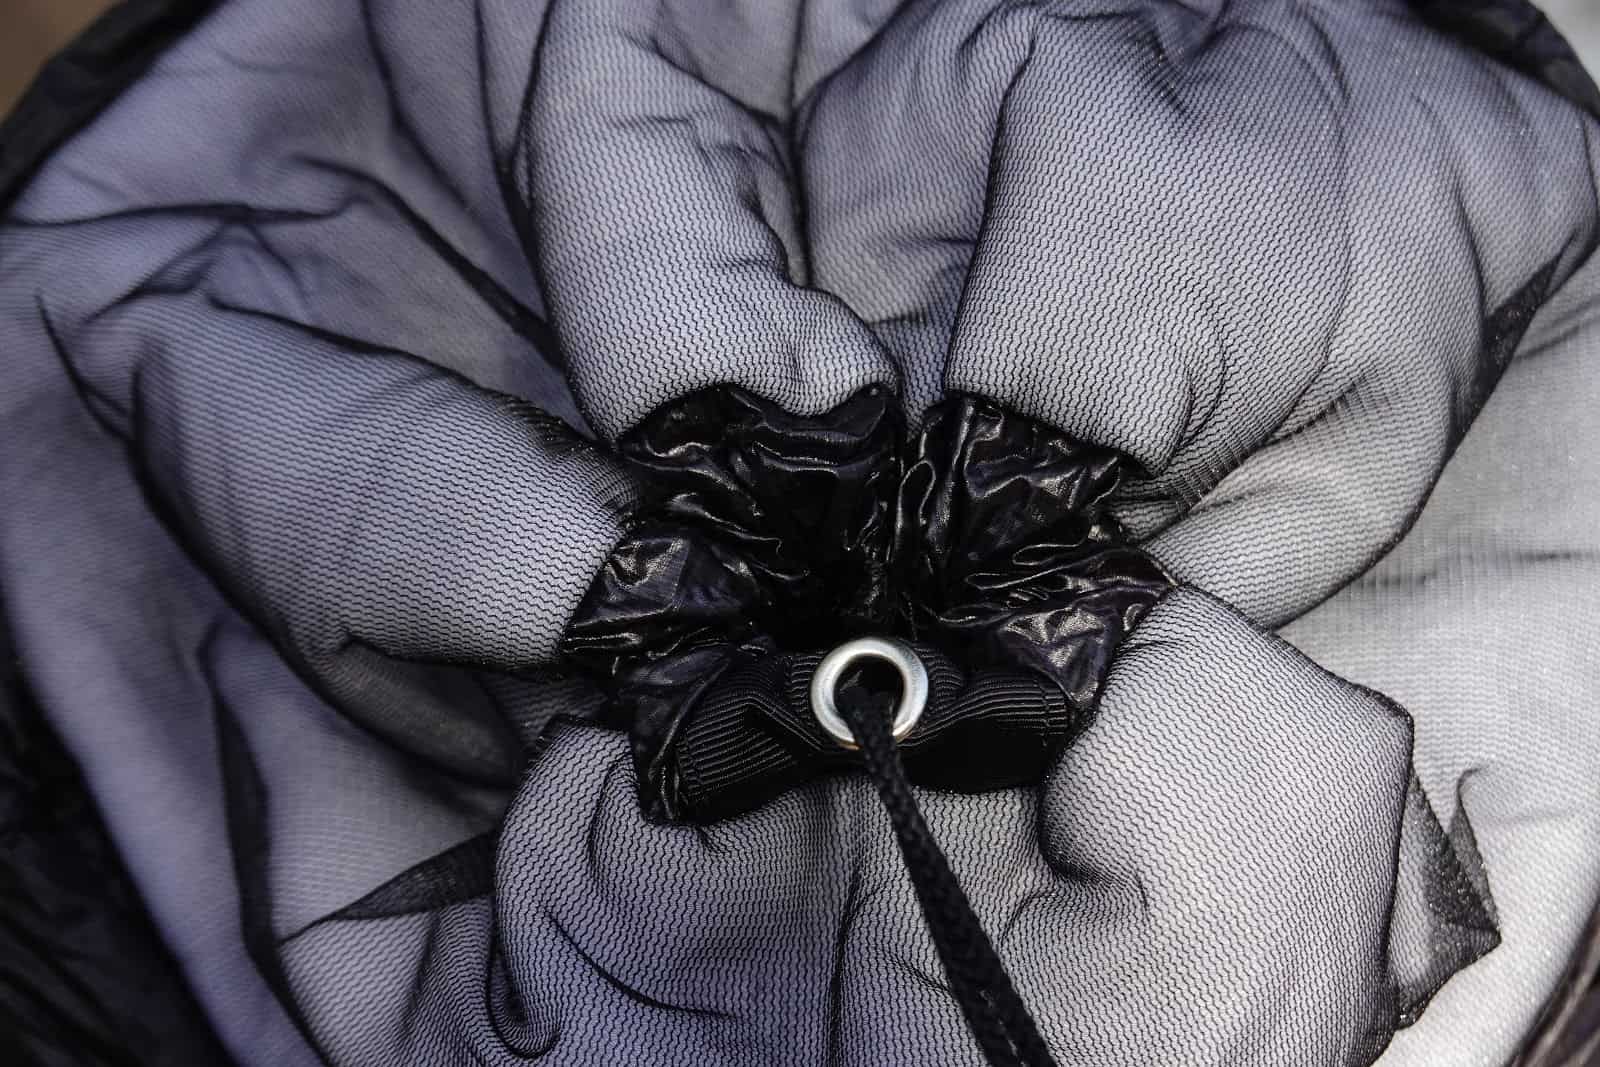
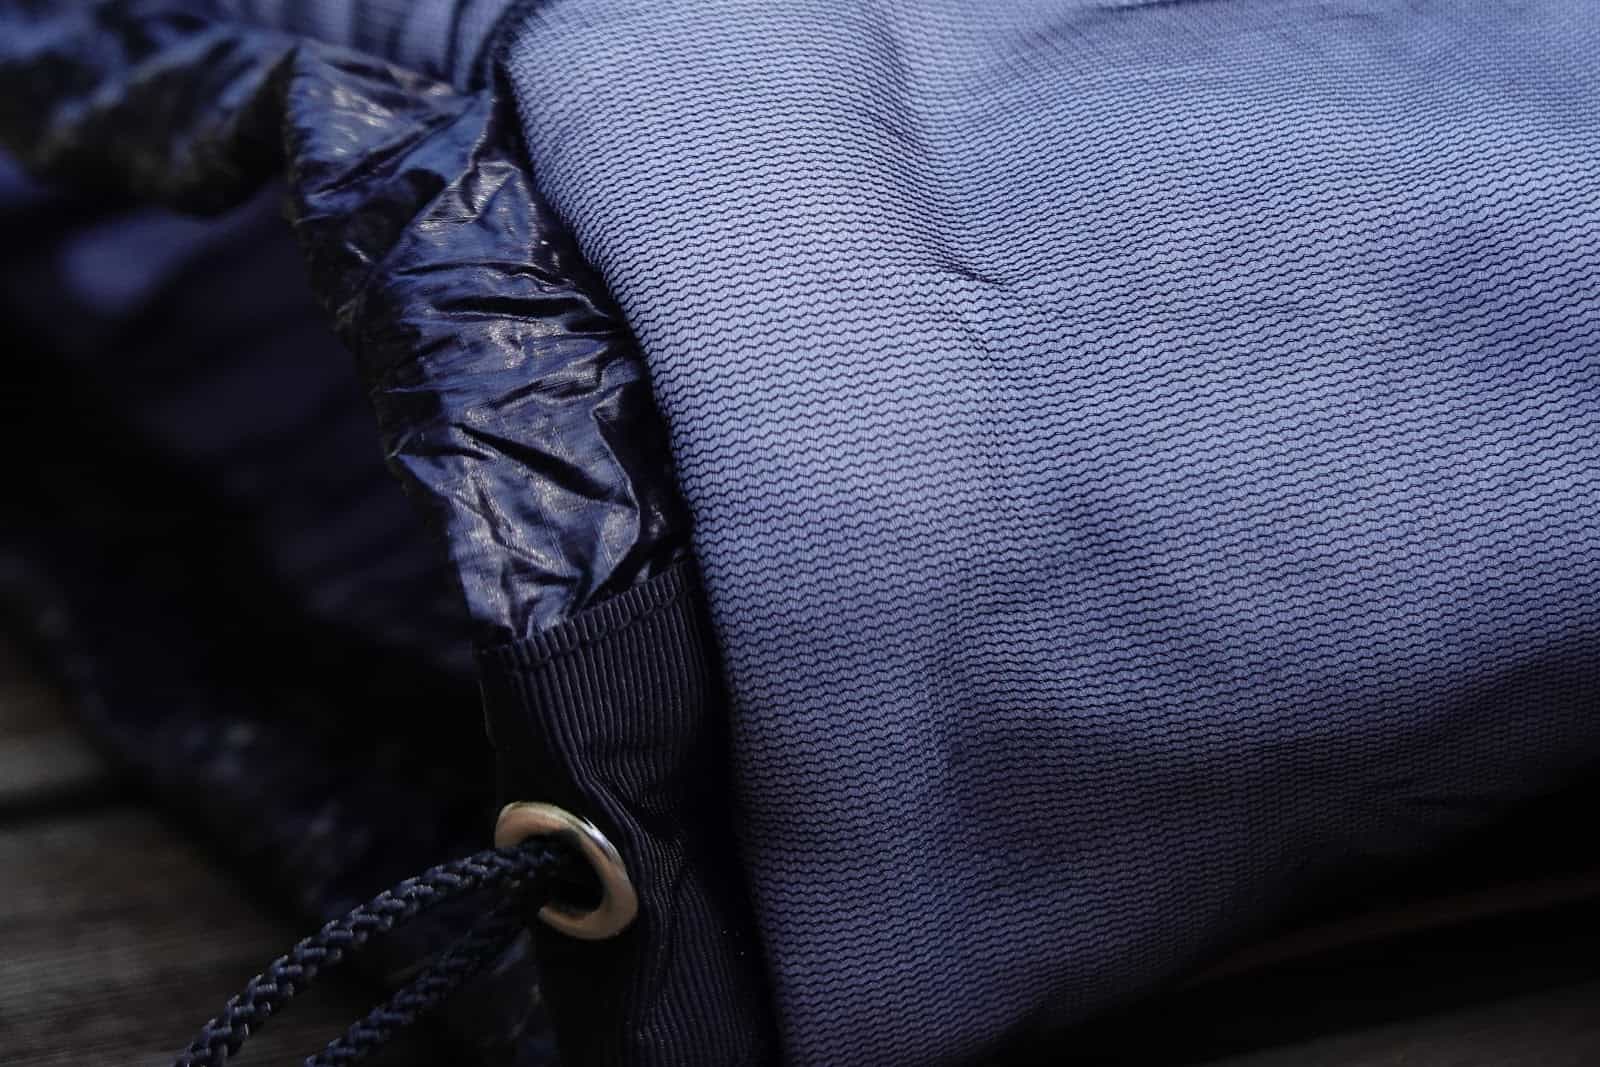
The Vesper’s small packed size is one of its best features, particularly for the warmth you get!
You’d be hard pressed to find a quilt of comparable warmth and weight that compresses down to a smaller size than the Vesper. In my opinion, this is one of the Vesper’s strongest selling points. When paired with an ultralight sleeping pad (like, say, the UberLite) you have a supremely warm and comfortable (for its weight) three-season sleep system that takes up a relatively small amount of space in a minimalist pack.
Personally, I’m not a fan of the four-point strap and lid style compression sack that comes with the Vesper. The sack itself is fine: perfectly sized for the quilt, well-constructed, and functional. I just find all those straps to be a little unwieldy and, well, un-elegant.
I don’t like fiddling with all these straps on the compression sack. But this is likely the best sack for the job.
I prefer a roll-top style compression sack. But it’s very likely you couldn’t get the Vesper compressed down to such a diminutive size in a roll-top style sack, so I can live with the one that comes with the Vesper. (For what it’s worth, I haven’t tried seeing how the Vesper compresses in other styles of compression sacks … I’d love to hear what other users have accomplished).
Product Strengths and Limitations
Strengths
Excellent warmth-to-weight (and size) ratio
Supreme packability
Premium materials: soft DWR treated nylon & 900 fill RDS hydrophobic down
Solid construction
Differential cut footbox
Design hits the sweet spot between useful features and minimalist aesthetic
Collar is comfortable and nicely sized
Sleeping pad connections system is elegant, functional, and weighs 0.1 oz (2.8 g)
Limitations
Some loose stitching after thirty nights of use (is likely a flaw in my sample product)
Can’t be customized the way cottage brands can
Sleeping pad connection system is easy to lose
Can’t be opened like a blanket
Compared To…
For this comparison table, I chose quilts that weigh from 17.5 oz (496 g) to 20 oz (567 g).
down collar, cord clip system attaches to top of pad rather than underneath
Western Mountaineering AstraLite Baffled Top Quilt
17.5 oz
26 F (-3 C)
850
horizontal
none
fixed
shell: 7D nylon; liner: 10D nylon
two flat elastic loops
elastic-laced adjustable bottom closure
Enlightened Equipment Enigma
17.94 oz
30 F (-1 C)
850
U-shaped
Downtek
fixed, round
10D nylon
elastic straps and clip
snap and drawstring neck closure
Kammok Bobcat Trail Quilt
20 oz
45 F ( 7 C)
600
diamond shaped
Downtek
snaps and drawcord closure
Atmos 20D ripstop nylon
straps
underquilt conversion, can lay flat like a blanket
ZPacks Solo Quilt
19.5 oz
20 F (-7 C)
900
hybrid vertical/horizontal
none
fixed
7D Ventum ripstop nylon
flat clip and strap
30% overstuffed, flat clip and elastic cord neck closure
Nunatak Arc UL
19.4 oz
20 F (-7 C)
900
hybrid vertical/horizontal
Hyperdry optional
fixed
10D with customizable options
standard straps (running under pad) or shockcord (running under body) optional
optional edge tension control for high draft adjustability, drawcord neck closure standard
I want to spend a few moments comparing the Vesper to another recent addition to the quilt market: The REI Magma Trail Quilt 30. This is a worthwhile comparison because both quilts are recent offerings from long-established gear manufacturers with track records for well-considered design and strong execution. Both quilts weigh 19 oz (538.6 g) and utilize some form of hydrophobic down. Both quilts have a fixed-footbox design, an adjustable collar with a button snap closure, and hybrid style baffles (the Vesper has horizontal baffles with perimeter side baffles, while the Magma has horizontal baffles across the torso and vertical baffles down the legs). Neither quilt can be customized beyond ordering different sizes (Regular and long for the Vesper, short, regular, and long for the Magma).
So, with similar features and similar weights, which bag is warmer? As we’ve examined, this question can be tricky. The Magma has a temperature rating of 30 F (-1 C). What does this mean, exactly? Hard to say. The best we can do is turn to REI customer support, which provides this feedback on a customer question.
So using this as a reference point, we can assume that both quilts will provide similar comfort at similar temperatures. But because the Magma isn’t ISO rated (as opposed to the Vesper, see the Temperature Rating and Warmth section of this review) we don’t know.
The Magma utilizes sewn-through baffles as opposed to the Vesper’s box-baffles, and I think that has to come into play warmth-wise in some way.
One thing that is measurable is this: the compressed size of both quilts relative to their width and length. The Magma packs down to 4.75 x 13 in (12 x 33 cm) while the Vesper compresses to 5.5 x 8 in (14 x 20 cm). That’s a significant difference inside a pack. Also, it’s quite an effort to get the Magma compressed down that small (this according to our forthcoming Magma review as well as anecdotal user comments on the REI website). On the other hand, it’s a cinch to get the Vesper into its sack and compressed.
The Vesper manages this win despite being two inches wider at the shoulders and having 1.5 oz (42.5 g) more fill weight than the Magma. Therm-A-Rest likely achieved this by using 10D fabric over the Magma’s 15D and 900 fill down over the Magma’s 850 fill.
These differences show up in the price tag, however. The Vesper retails for $379.95 while the Magma goes for $299.00. At those price points, you might just be getting more quilt for your buck with the Magma.
Commentary
I was lucky to be able to test this quilt in such a variety of conditions and with so many different sleep system combinations. It performed well across the entire spectrum of my test: shaking off moisture and drafts, providing flexible temperature management, and keeping me warm at night while being virtually unnoticeable in my pack during the day.
This last point is the most salient to me, and the factor that places the Vesper on the “shelf of honor” in my gear closet. What is the ultralight ethos if not the utilization of well-designed gear that is as light as possible while still being extremely functional? That is the Vesper. It does its job with just enough frills (snap collar, pad connection system) to be effective but not enough to add unneeded ounces.
A focus on premium materials and intentional design choices means you end up with a quilt that provides ample coverage for all but the largest and most restless of sleepers. In addition, the Vesper compresses down to a size that is just a little ridiculous.
Review Rating: Highly Recommended
The Vesper 20F is a superior product: it excels in field performance, design, and material choice. Its warmth-to-weight and warmth-to-size ratio are top of class, and it handles inclement weather as well if not better than any other down quilt or bag I’ve come across. The design is precise and the manufacturing quality is as high as you would expect from Cascade Designs (which is to say, extremely high). The loose threads on my sample Vesper are not likely to be found on the consumer runs of the product.
My minor gripes like fabric color, stuff sack type, and an easily losable pad connector pale in comparison to the Vesper’s main strengths: just how warm of a quilt Therm-A-Rest manages to squeeze into such a small and light package. I consider the Vesper to be one of the top three quilts available at the moment, and as such I believe it deserves a Highly Recommended rating.
How we acquired these products: Product(s) discussed in this review were either acquired by the author from a retailer or otherwise provided by the manufacturer at a discount/donation with no obligation to provide media coverage or a product review to the manufacturer(s).
We do not accept money or in-kind compensation for guaranteed media coverage: Backpacking Light does not accept compensation or donated product in exchange for guaranteed media placement or product review coverage.
Affiliate links: Some (but not all) of the links in this review may be “affiliate” links, which means if you click on a link to one of our affiliate partners (usually a retailer site), and subsequently make a purchase with that retailer, we receive a small commission. This helps us fund our editorial projects, podcasts, instructional webinars, and more, and we appreciate it a lot! Thank you for supporting Backpacking Light!
This Nemo Equipment Siren Quilt review covers a warm-weather backpacking quilt that packs a feature rich, ultralight punch.
Introduction
The Nemo Equipment Siren Quilt is a warm-weather backpacking quilt that packs a feature rich, ultralight punch.
The Siren has a silky feel, comes with a well-designed stuff sack, and boasts a lifetime warranty from Nemo. I found the pad attachment system to be a little problematic, however.
Photo: Nemo Equipment
Features and Specifications
Features
100% Responsible Down Standard (RDS) Certified
Vertical baffles
Backless design
Stretch footbox
Cord sleeping pad connection system
Compression stuff sack
Mesh storage bag
NEMO Lifetime Warranty
Specifications
Shell and lining fabric: DWR 10D Nylon Micro Ripstop
Fill power: 850 down
Fill weight: 10 oz (285 g)
Temperature Rating: 45F (7C)
Minimum weight: 21 oz (600 g) – Author verified at 19 oz (538g) without compression sack
Packed size: 14.0 x 5.5 in diameter (35 x 14 cm diameter)
Fits Up To 6 ft (183 cm)
Shoulder Girth: 53 in (135 cm)
Hip Girth: 48 in (122 cm)
Knee Girth: 39 in (99 cm)
Description of Field Testing
My First Look at the Nemo Equipment Siren consisted of preliminary indoor testing with an eye towards build quality, fabric appeal, down loft and consistency, and design considerations. My limiting factor on further testing was extreme cold conditions in the Canadian Rockies at the time of writing this article (this is, after all, a warm-weather quilt).
My future trips with the Siren include a two-week excursion to one of Canada’s most remote and northern National Parks. As such, I intensely focused on accurately judging the potential performance of the Siren. I cannot afford a gear failure on this trip; my life could depend on it.
Good things come in small packages.
Product Strengths and Limitations
Strengths
Luxurious feeling fabric
Superior construction quality and attention to detail
Tiny packed size
Beautiful stitch quality
Spacious footbox
Well-designed compression sack
Drying loops on bottom of quilt
Limitations
Slightly heavier than competing quilts of similar temperature ratings
Pad attachment system is fiddly (especially in mittens and gloves) and presents a strangle hazard for child backpackers
No length or gender options
No options for customization
Yellow interior color attracts aphids in the Canadian Rockies
Warm weather insulation version only
“Stretchy” footbox doesn’t seem to stretch all that much
No length or gender options
Compared to….
Quilt
MSRP
Weight
Fabric
Fill
Length
Shoulder Width
Temperature
Customizable
Nemo Equipment Siren Quilt
$269.95
19 oz (538g)
DWR 10D Nylon Micro Ripstop
850 FP down fill
80 in
(203 cm)
53 in (135 cm)
45F (7C)
No
Enlightened Equipment Revelation Quilt
$255.00
15.81 oz (448 g)
10D Nylon
850 FP down fill
78 in (198 cm)
54 in (137 cm)
40F (5C)
Yes
Loco Libre Gear 40° Ghost Pepper Topquilt
$283.00
15.7 oz
(445 g)
Argon 67
800 FP down fill
80 in
(203 cm)
52 in (132 cm)
40F (5C)
Yes
The Nemo Equipment Siren Quilt is a one-size-fits-all, one temperature rating, non-customizable product. Such limited choice is in contrast to much of the quilt market where small and cottage manufacturers still dominate (though larger manufacturers are making in-roads). In this case, the Nemo Equipment Siren Quilt is suitable for users up to 6 ft (183 cm) and for temperatures of 45F (7C).
Let’s dig into this. For a similar price as the Siren, I could get a customized quilt rated for 40F (5C) weighing in at 14.71 oz (417g) in my beloved purple color from Enlightened Equipment.
I will stop here and say this: I have a quilt from Enlightened Equipment. Though I’m fond of my quilt, I find the Enlightened Equipment build quality is not as even and regular as Nemo Equipment. There are fabric differences as well. Even in the yellow color (which acts as a magnet for aphids in the Canadian Rockies), I prefer the feel of the Nemo Equipment 10D Ripstop to the 10D nylon fabric of my Enlightened Equipment quilt. I will also say that I am not a fan of my Enlightened Equipment stuff sack and replaced it before I even tested the quilt. Not so with the Nemo Equipment compression sack. If I stuff the Siren, it will likely be in the provided stuff sack.
Commentary
My first thought when unpacking the Nemo Equipment Siren was, “This is the most intuitive compression sack I’ve ever seen straight out of the box.”
This compression sack is a design masterpiece for two reasons:
It is large enough to stuff the quilt easily and quickly: no frustrating struggle when packing up on the trail.
It features four strap tensioners, two of which are attached to buckles, making compression easy while wearing gloves or mittens or while in a hurry.
The Siren’s thoughtfully designed compression sack is easy to handle with gloves.
My second thought after unpacking the Siren was, “How did such a lofty quilt fit into such a small bag?” The 850 down is of premium quality and is RDS certified. I searched for feather quills and escaping down and did not feel any as I squeezed and probed the quilt top to bottom.
The 10D ripstop Nemo uses on their bags and quilts is one of my favorite outdoor fabrics; it is soft, silky, and luxurious.
Nemo Equipment imparts high build quality into every quilt or bag I have ever seen of theirs. The Siren is no exception. I couldn’t find any loose stitches or stray strands anywhere on the quilt. The Siren also features two loops at the bottom for hanging to dry, a thoughtful touch.
So fluffy!
The Siren’s toebox is massive: 12 in deep (30.5 cm) and17 in wide (43.18 cm). Nemo calls it a “stretch footbox”. I didn’t notice much stretch in the fabric, though it’s not entirely without stretch either. Nemo Equipment’s idea here is to make the quilt draft-less by anchoring the quilt underneath sleeping mats of all sizes.
The Siren also features two snaps and a pair of elastic drawstrings at the mouth of the quilt for anchoring both ends down to prevent drafts. I like to thrash around a bit and will likely not want to anchor it this way often, but I will test it on my upcoming trips to see if I change my mind.
The Nemo Equipment Siren Quilt features a deep and wide foot box with two hanging loops for drying. Pictured here with the Nemo Equipment Insulated Tensor Ultralight Mummy Regular Sleeping Pad tucked inside the foot box.
This brings me to the only feature I dislike on the Siren: the cord anchoring system. The design is minimalist, ultralight, and adaptable to almost any sleep mat size. However, I’m not a big fan. The cords are light, and they catch on everything. They are not cooperative when sliding a sleeping mat inside the quilt, especially when wearing gloves and bulky layers. I ended up with cords on the bottom of the mat and top of the mat. As I crawled in and out of the quilt, I snagged the cord on my neck.
The system is great in theory and will work for some people, but it is not ideal for me. It would not be a deal breaker for me either, especially considering that this quilt is intended for warm-weather and wearing gloves while using the cords will not always be a given.
Though I prefer Enlightened Equipment’s stretch straps and buckle anchoring system by far, I also recognize it is more bulky and heavy than Nemo Equipment’s cord system. There are some positives to Nemo’s approach: the cord is reflective and has free-flowing anchor eyelets, allowing the cords to tighten without a hitch once they are in the correct place.
The Nemo Equipment Siren Quilt’s cord system is minimalist, ultralight, and adaptable to almost any sleep mat size. I found it awkward and problematic to work with though.
One thing I have always appreciated about Nemo Equipment is their attention to small details. With the Siren that attention manifests itself in the superior fabric quality, excellent stuff sack design, and thoughtful drying loops. While I think the pad attachment system could use some work, overall, I am excited to use the Nemo Equipment Siren Quilt in the 2019 season.
How we acquired these products: Product(s) discussed in this review were either acquired by the author from a retailer or otherwise provided by the manufacturer at a discount/donation with no obligation to provide media coverage or a product review to the manufacturer(s).
We do not accept money or in-kind compensation for guaranteed media coverage: Backpacking Light does not accept compensation or donated product in exchange for guaranteed media placement or product review coverage.
Affiliate links: Some (but not all) of the links in this review may be “affiliate” links, which means if you click on a link to one of our affiliate partners (usually a retailer site), and subsequently make a purchase with that retailer, we receive a small commission. This helps us fund our editorial projects, podcasts, instructional webinars, and more, and we appreciate it a lot! Thank you for supporting Backpacking Light!
The Hyperlite Mountain Gear Dirigo 2 is a two-person, hybrid single/double wall, two-vestibule Dyneema Composite Fabrics (DCF) tent that can be pitched with two trekking poles. This review assesses wind loading, snow loading, rain, condensation resistance, ease of setup, livability.
On the leading edge of the last bomb cyclone storm cycle that hit the Rockies and Midwest this spring (April 2019), I was hoping to get in a quick 24-hour trip up in the high country of Wyoming’s Snowy Range.
Introduction
On the leading edge of the last bomb cyclone storm cycle that hit the Rockies and Midwest this spring (April 2019), I was hoping to get in a quick 24-hour trip up in the high country of Wyoming’s Snowy Range.
Apparently, the pressure bars compressed a little bit more than what was predicted, and I faced some breezy conditions that were a little more than what my ultralight shelter system could handle, so I retreated in the middle of the night.
Enjoy the video:
Summary Notes
Route:
My route followed snowmobile trails across summer roads for a couple of hours, and then up into the untracked backcountry via spruce forest, subalpine fir, traversing high benches in cliffy terrain, and finally into a glacial cirque at 10,800 feet. I arrived in camp a little more than an hour before sunset.
My route back down to the trailhead was a little different. Since I was navigating in a blizzard in the dark, I opted for a longer but safer route through less steep terrain, intersected a summer road bed, and then used a summer road network to weave my way back to my original approach route.
Weather:
Temperatures ranged from about 23 F to 41 F during the trip, with wind chills near 0 F.
Winds increased from 10-15 mph (gusting to 20+ mph) at the beginning of the trip to 40-50 mph (gusting to 65+ mph) by the time I decided to bail.
Skies were partly cloudy, with periods of bright sunshine, on the hike in. During the night, I couldn’t see any stars, and the weather devolved into whiteout conditions. I assumed it was a result of a snowstorm, but after reviewing satellite image history upon my return, the night skies were actually totally clear. The source of the whiteout was 100% a result of windblown snow – a ground blizzard.
Instrumentation:
I recorded weather data (temp, humidity, etc.) using two Kestrel Drop D3FW devices (one inside the tent, one outside – although from watching the video you’ll see that the conditions weren’t so different between the two!).
I was able to monitor weather data from all devices from inside the tent, using Kestrel apps and a Bluetooth connection to my smartphone.
Gear Notes:
Shelter: I used the Hyperlite Mountain Gear Dirigo 2 tent on this trip. Admittedly, this isn’t the type of conditions the tent is designed for. In fact, these conditions would be problematic for any three-season shelter. However, I was able to gather some pretty good data and experience with the shelter that should add value to my forthcoming review of the Dirigo.
Guylines: stock HMG guylines attached to 1mm Dyneema cord. I experienced two failures of the cord in two separate wind gusts, which broke the cord. On another guyline, the thin Dyneema cord tore through a stock HMG guyline (the 1mm Dyneema was attached to the HMG guyline with a sheet bend with an extra bight).
Sleeping pad: A Nemo Astro Lite (insulated) – large size. This is the comfiest mattress I own but it doesn’t have sufficient insulation for sleeping directly on snow at subfreezing temperatures. I should have added a thin foam pad. It’s not as warm as my NeoAir XTherm, but far more comfortable.
Sleeping Quilt: I used the REI Magma Trail Quilt 30 and wore all of my clothes to bed. The quilt performed like a champ and kept me warm and dry enough, even with wind and spindrift blowing through my shelter.
Buff: My merino Buff was a critical piece of equipment during the night. I wore it as a face tunnel to keep spindrift out while I was trying to sleep. I would have rather had something like the new Timmermade Waterbear Hood.
I mostly felt pretty calm during the whole experience. I suppose I attribute that to having experienced these conditions before, having gear (except for the shelter system) that was matched to the conditions, and knowing that even if I retreated in the middle of the night in a storm, I could simply go slow, make decisions carefully, and I’d get out safely.
I’m very appreciative for a high enough level of fitness that provides me with a lot of reserves to manage adversity when needed, without facing the anxiety that comes with being too fatigued or sore to have bailout options.
Stormy conditions can manifest themselves at high elevations long before a weather reporter down in town starts to experience them.
Disclosure
Affiliate links: Some (but not all) of the links in this review may be “affiliate” links, which means if you click on a link to one of our affiliate partners (usually a retailer site), and subsequently make a purchase with that retailer, we receive a small commission. This helps us fund our editorial projects, podcasts, instructional webinars, and more, and we appreciate it a lot! Thank you for supporting Backpacking Light!
The Timmermade Waterbear Hood is a cottage-crafted down sleeping hood with a twist – a Climashield tunnel for warming the air around your face on extra-cold nights. I used the Waterbear Hood on a frigid eastern Sierra late-winter trip. It kept me cozy in my quilt while providing flexible options for warmth in variable shoulder-season conditions.
Features and Specifications
Features
Hybrid down / synthetic insulation construction.
Drawstring Climashield tunnel can be cinched closed to create a pocket of warm air around the nose and mouth while not losing loft due to condensation.
Climashield tunnel can be tucked out of the way when not in use.
Multi-functional garment: wear it around camp on chilly mornings/evenings, during the day during rest stops; it also makes a good bicycle pogie.
The drawstring Climashield-and-mesh tunnel creates a pocket of warm air around the mouth and nose on extra-chilly nights. This feature sets the Waterbear apart from other down sleeping hoods.
The 10D Argon 67 ripstop nylon is silky and comfortable against the skin.
Climashield tunnel can be tucked out of the way (back into the hood) when not needed.
The garment is well-constructed: the stitches are even and tight, the materials are high-end, and the design is well-considered.
Cottage industry customization is available as needed. Options include 950 FP down, entirely synthetic insulation, lower temperature ratings, and a variety of fabric colors.
Limitations
The garment may feel claustrophobic to some.
Can be overkill for warm sleepers and many ultralight hikers don’t find a down hood necessary (particularly if they utilize other hooded insulation layers).
In comparison to other popular down hoods on the market, it is slightly more expensive.
Compared To…
Let’s compare the Waterbear to two popular offerings on the market: ZPack’s Goose Hood and Katabatic’s Crestone Hood.
All three hoods utilize premium lightweight fabric shells, comparable downs, and similar styles (a crescent-shaped cut around the neck and drawstring feature around the face)
The Waterbear hood shares the features of standard down sleeping hoods with one big exception: an adjustable Climashield-and-mesh tunnel.
The Waterbear’s addition of the Climashield tunnel adds about a quarter of an ounce. The rest of the weight difference is due to the Waterbear’s box baffles and 2.5 in loft (other, less lofty Waterbear models might be a more accurate comparison, but this is the model I had to test). The tunnel is the feature that most separates the Waterbear from other down hoods, other than that it performs as you would expect any down hood to perform. The Waterbear is slightly more expensive than the Goose Hood and Crestone Hood. The cost is likely a reflection of the size of the Timmermade operation.
Commentary
Climashield handles moisture well. The insulation remains warm even after breathing through it all night long: indeed, this is the whole point of the design. I found that any moisture it gathers dries quickly in the morning with a little sunlight.
Dan Timmerman dreamed up the Waterbear because he hated breathing frigid air, even in moderately cold temperatures. By enclosing synthetic Climashield insulation in a fine mesh and attaching that insulation to the opening of a standard down hood design, Dan created an extremely versatile system that pairs the warmth and compressibility of down with the moisture resistance of synthetic. By drawing the Climashield tunnel partly or entirely closed, you can create a pocket of warmth around your face that prevents you from inhaling frosty air but still allows for air exchange. The Climashield handles the moisture from your breath exceptionally well, while the down around your head, neck, and ears is as toasty warm as expected.
I used the Waterbear on a three-night trip where overnight temperatures dropped into the teens (I paired the hood with a 20F down quilt, the Nemo Switchback, and the Therm-A-Rest UberLite). I slept in Brynje wool mesh base layers, wool socks, and a cheap off-brand synthetic-blend sweater.
I was skeptical at first: I’m sensitive to things around my face, particularly as I’m trying to sleep. Sometimes even a standard down hood is too much for me, and I tend to prefer a beanie/Buff combo for quilt sleeping. So I had some hesitation going into this test.
It turns out my fears were unfounded. By night two I was mostly used to the enclosure around my face. By night three I was relishing the warmth and flexibility the system provided. I generally started with the Climashield tunnel completely open and cinched it progressively tighter as temperatures dropped through the course of the evening. By early morning I was breathing warm air through a completely cinched tunnel of synthetic insulation and mesh (this has the unintended but welcome side-effect of blocking out a little bit of light, should you decide to sleep later than the sun). While I occasionally found the system to be a tad claustrophobic, the added warmth was worth it for the most part. Many ultralighters find down hoods to be too warm, even with quilts, and prefer some combo of hat/buff/balaclava/hooded insulation layer. If you are one of these people, you aren’t going to want or need the Waterbear.
The tunnel’s mesh-and-Climashield construction allows for air exchange while maintaining warmth. I was surprised by how breathable the system was, despite feeling a little claustrophobic at times. That being said, if you have doubts about the usefulness of a down hood in the first place, the Waterbear is not going to tempt you.
As much as none of us would like to admit we degrade the loft of our down bags and quilts by pulling them over our heads and breathing into them, sometimes it happens. I know I’m occasionally guilty of it, especially on frigid mornings. The Waterbear hood eliminates the temptation. One thing to note: if you decide not to use the Climashield tunnel at all, remember to tuck it back into the hood; otherwise it will fall into your face when side-sleeping.
The system has all the versatility you’d expect from a down hood: you can wear it around camp or on breaks, and it’s excellent for restless sleepers. It compresses well (as you’d expect from a primarily down product) and fits easily into a quilt stuff sack or anywhere else you want to store it. Some users might find the nylon a little loud around the ears while tossing and turning, but anyone already accustomed to sleeping in a down hood won’t be bothered.
I’m bald, so I had a lot of skin-to-fabric contact while wearing the Waterbear. The premium materials used in the construction feel soft and silky against the skin. The stitches are even, tight, and rock solid. The internal seam running the length of the hood is unobtrusive: it never bothered me while trying to sleep.
The Waterbear hood is carefully sewn and well constructed from soft 7D Argon 67 ripstop nylon.
The Waterbear Hood has all the hallmarks of an excellent cottage industry product: a smart and field tested design paired with loving execution, ultralight materials, and customizable options. Timmermade also sells a fully synthetic version that weighs in at 2.1 oz (28.3 g) that may be more interesting to warm sleepers.
It may be a few ounces heavier and a few dollars more expensive than traditional down hoods, but cold sleepers, some shoulder-season and winter quilt users, and down hood aficionados will appreciate the ingenuity, versatility, and comfort the Waterbear Hood brings to a cold-weather sleep system.
How we acquired these products: Product(s) discussed in this review were either acquired by the author from a retailer or otherwise provided by the manufacturer at a discount/donation with no obligation to provide media coverage or a product review to the manufacturer(s).
We do not accept money or in-kind compensation for guaranteed media coverage: Backpacking Light does not accept compensation or donated product in exchange for guaranteed media placement or product review coverage.
Affiliate links: Some (but not all) of the links in this review may be “affiliate” links, which means if you click on a link to one of our affiliate partners (usually a retailer site), and subsequently make a purchase with that retailer, we receive a small commission. This helps us fund our editorial projects, podcasts, instructional webinars, and more, and we appreciate it a lot! Thank you for supporting Backpacking Light!
My intention was to link the most active volcanoes of the island. I would travel 410 miles on my fat bike, carrying all of my own food and gear, combining mountaineering and fat biking in the traverse.
Introduction
This article provides accompanying information to my film volcanofatbike, which documents my attempt to cross Iceland by fatbike.
About the Author
First of all, let me introduce myself a Little, I’m Gerard Anton (b. 1984) a dentist from Barcelona, I love mountains, outdoor sports, photography, travel, and adventure.
My backpacking background is:
2012 – Trail du Mont blanc – 6 days
2013 – Snow Trekking in Svalbard – 5 days
2013 – John Muir Trail (Yosemite to Mt. Whitney Portal) – 9 days (11kg backpack)
2014 – Trekking in Nepal – 17 days.
2014 – Iceland North to South in 8 days.
2015 – Crossing of Iceland via Fatbike – 12 days
2016 – Teide 0 to 4000m in Canary Islands – 2 days.
2016 – Annapurna Circuit Nepal – 11 days
2017 – Tasermiut Packrafting 230 miles in Greenland
Planning the Adventure
I started participating in adventure races in 2002 and I’ve been competing in mountain sports since then as well. In 2014 it first time in Iceland. I hiked the Laugavegur trail and I fell in love with the country. I knew I had to come back to do something more than a hike, so I researched quicker, but still lightweight alternatives to backpacking and began purchasing gear for this next adventure.
I noticed my first fat bike in Spain in 2013. I had never tried one but thought that their ability to navigate in snow was an advantage for some expeditions, and in particular, I had Iceland in mind. Iceland has some of the biggest glaciers on the European continent, including the Vatnajökull (Europe’s second largest glacier, only behind the Svalbard Glacier). It is often crossed by 4×4 off-road vehicles and skiers with pulks training for polar expeditions. So why not follow their tracks via fatbike?
My intention was to link the most active volcanoes of the island. I would travel 410 miles on my fat bike, carrying all of my own food and gear, combining mountaineering and fat biking in the traverse. The first difficulty that I found was the lack of information on the glacier crossings and mountain weather in these regions. It seems that not many locals travel that deep into the mountains of the region.
Beginning the Expedition
I arrived in Reykjavik on July 15th. As I stepped into the airport I saw a television showing closed roads and blizzard conditions in the mountains. I asked some people in Reykjavik, and 2015 had been one of the coldest year of the last century. I started the route in a black sand beach near Skogafoss, on the southern side of the island. There is a crashed Super Douglas DC3 US army plane near that location. The crew all survived the impact, but the plane was abandoned rather than recovered, meaning the weather-beaten remains are still standing at the crash site.
The waterfall at Skogafoss.
The early miles of the trek are relatively easy until Skogafoss. From there I had to push my bike up a hill, gaining 3950 ft (1200 m). It took the whole day. The snow did not take long to appear as once I passed 2000 ft (600 m), I saw it for the first time of the expedition. It was wet and heavy snow, formed by a light mist and warm temperatures, that made pedaling nearly impossible. I spend the rest of the day pushing my fat bike up to the pass between the Eyafjallajökull and Katla Volcanoes.
Attempts on the Eyafjallajökull and Katla Volcanoes
My first goal is Eyafjallajökull (5465 ft; 1666m), the famous Icelandic volcano that last erupted in 2010 put European flights out of their regular flight patterns for 20 days. I camped in snow, but with good weather. Early in the morning, I took my mountaineering gear and began the trek to the summit. There was little visibility due to snow and wind, so I navigated with the GPS trying to avoid seracs and crevasses. Part way up, I realized that snow is covering my footsteps and that I will need to follow my GPS route to return back base camp. After two hours, I nearly reach the summit but was blocked by a large serac that surrounded the entire summit. Just 50m remaining until the summit but I had to go back. I’m not carrying ice climbing axes and crampons, and the serac provided too much of a hazard. As I was going alone, I had to know when to bow to the elements; it is important to know when to say no.
Traversing Eyafjallajökull.
After that, I attempted to climb the Katla Volcano. This one is 11.8 mi (19 km) east of my camp. On my way to Katla’s summit approach, I found a hut with a ranger. Because of the large number of crevasses, he tells me that it is not possible to safely summit alone. Plus, the last two people to attempt Katla in 2012 had to be rescued by helicopter. I decided that it is wiser listen to the ranger and not to tempt fate, so I followed the route back to camp, this time going down to Thórsmörk, and then to Landmannalaugar. This part of the trail is supposed to be very difficult: there is a pass with fixed ropes and some cliffs. I had to be very careful in some sections. The people that I met here were completely shocked to see me with my fat bike in this terrain!
Descending into the valley after turning around before reaching the Katla Summit.
Once in I arrived in Thórsmörk, I spent the night there. The next day I reached Askja Lake, which was covered by wet, heavy snow which forced me to spend thrice the amount of time I expected on this portion of the expedition as I had to push my bike. At times the conditions forced me to take my gear off the bike, push the bike up, and return for the rest of my gear. These tough conditions, combined with two days of rain and snow, resulted in my gear getting wet and I had no opportunities arise to dry my gear nor to recharge the batteries for my Garmin inReach and my camera via a solar panel.
En route to Landmannalaugar, I fell off my bike and lost my sunglasses. Sunglasses are an important piece of gear in a snow landscape as snow blindness is a hazard. I was forced to improvise: I wore my tubular balaclava covering my eyes – as the fabric was thin, I was able to see through it.
Although I was moving slower than I would have liked, I reached the foot of the Katla Volcano. It is one of the most active volcanoes in Europe, erupting every seven to ten years, although since the last eruption was in 1999, it is due to erupt in the near future. The Katla Volcano (4960 ft / 1512 m) is not a technical climb and the primary concerns for those attempting it are those typical of any trek in high alpine terrain. It took me approximately two and a half hours to climb. Due to heavy cloud cover, it may not have been the best day to climb the peak, but I finally did reach the summit.
Vatnajökull and Oraefajökull
After two more days of travel, I arrived at the foot of the Vatnajökull Glacier. During peak season, the base camp at the glacier’s foot is usually full of activity, but the winter conditions have made it so it is empty. Also at the basecamp is an Iceland Safe Travel Agent, who, upon listening to my plan tells me that it isn’t possible to cross the glacier due to the high volume of snow and the heavy, wet quality of the snow. It would not be crossable until August. This seemed like the worst news I could hear at this point in the expedition. This was my goal, and I was being forced to rethink my plans.
What could I do now? I could go home, but I had been planning this trip for eight months and I did not want to go home without fulfilling my goal. I decided that to accomplish as much as possible, I should go to the southeast and attempt the highest mountain in Iceland, Oreafajökull (6923 ft / 2110 m). Beginning this leg of the journey was hard – not physically, but mentally. I could not complete my original goal, so the best I could do was to reach the last of the volcanoes I had originally planned to climb via a different route.
The summit of Oraefajökull, Iceland’s largest volcano and highest peak.
After two days of pedaling, I reached the foot of Oraefajökull. The weather was ugly and it was not the best day to attempt to reach the summit. I am on an adventure though, so I hid my bike and began climbing the 2100 meters to the summit. It was long and tough, lacking a path, and covered in snow. After four hours, and walking around two crevasses I had reached the summit.
Return to Civilization and Debriefing the Expedition
I returned to my fat bike and cycled for two days in a headwind until I came to Reykjavik. Looking back at this journey after two years, I find that I have learned a lot about backpacking. Sometimes in your life, you win and sometimes in life you learn. In Iceland, I learned a lot. Vatnajökull lies there, calling me; perhaps I will try to cross it again (maybe in August).
The author’s campsite where the Jökularloon Glacier meets the sea.
The most important thing in making adventure backpacking successful is preparation. You must go light. But instead of throwing out gear and getting the lightest gear, it is best to jettison the gear that is inessential and not useful. The weather in Iceland is tough, windy, and rainy nearly every day, making durable and warm gear essential, even when trying to stay lightweight.
What Would I Change?
I would have invested in a heavier tent. The wind on the glaciers can be hard and the possibility of wind breaking your tent in the night is a real possibility.
I would bring snow stakes for my tent, to ensure that the tent stays staked to the ground in high winds. I used an ice axe on this trip, but a pair on points would be better than one.
My camera (a Nikon 7100) was too heavy. I would carry a compact camera in the future. Cameras of similar quality now exist for half the weight.
Gear List
Item
Description
Weight
Notes
Tent
Vaude Hogan UL Argon 1-2P
3.28 lb (1.49 kg)
My lighter, Six Moon Designs Lunar Solo Tent is not tough enough for the Icelandic wind. This item represents a balance between being lightweight and tough.
Fat Bike
Surly Ice Cream Truck
35.3 lb (16 kg)
A super heavy, iron bike, but it is nearly indestructible. Reliability of this equipment was for me, a higher premium than weight.
Vargo 750 ti pot, Vargo Titanium Foldable Spork, China Titanium Stove
6.7 oz (191 g)
I love this combination.
Jackets
Outdoor Research Gortex Jacket
1 lb 7 oz (650 g)
Salomon Bonatti Jacket
4.6 oz (130 g)
Trangoworld TRX2 850 Down Jacket
1 lb 5 oz (590 g)
Sunglasses
Adidas Evil Eye Sunglasses
0.9 oz (26 g)
Sleeping Bag
Mountain Hardware Phantom 32
1 lbs 6 oz (629 g)
I am considering lighter options, such as a quilt for future expeditions
Sleeping Pad
Camp Essential Light Mat
11.1 oz (315 g)
I will be changing my pad in the future due to back problems. On more recent trips I have been using the Thermasrest NeoAir xLite.
Long Underwear
Merino Wool Long Underwear
14.8 oz (420 g)
This is the best warmth to weight ration I have found for use during the night.
Phone
IPhone 4S
3.9 oz (112 g)
Shoes
Teva Sandals
10.2 oz (290 g)
For river crossings.
Ice Axe
Petzel Snowwalker
14.6 oz (415 g)
Crampons
Salewa Alpinist Aluminum
1 lb 8 oz (680 g)
Mountain Boots
Millet Supertrident GTX
1 lb 3 oz (550 g)
Work well with the crampons.
GPS
Suunto Ambit Peak 3
3 oz (86 g)
Garmin Etrex 20
5 oz (141 g)
Solar Panel
Goal Zero Nomad 7
1 lb (460 g)
Used to charge GoPro and InReach systems.
Emergency Communications Device
Delorme InReach SE
6.7 oz (189 g)
Trekking Shirt
Helly Hansen
Bike Repair Kit
various tools and replacement items
10.4 oz (295 g)
First Aid Kit
Adventure Medical Kits .5
3.7 oz (105 g)
Water Treatment
Saywer Squeeze
3 oz (86 g)
Final Tips for Those Planning to Go To Iceland
I have been to Iceland four additional times since this expedition and I would share the following tips to those who are planning a trip:
In the summer it can rain every day. Make sure to take a good waterproof rain jacket, perhaps two. You can dry one while you wear the other in camp. It is important to stay dry. Summer is not always warm, and a sunny or rainy morning does not mean that the weather will continue after five minutes from now.
The Icelandic people are friendly and will gladly help you if you need it!
It is not necessary to take a headlamp in July. Almost the whole day is daylight.
Take a good camera and enjoy the amazement you will enjoy in this wild place.
The Tarptent Aeon Li is one of the lightest solo (1-person) backpacking tents available. Made with Dyneema Composite Fabrics (DCF), the Aeon is a single-wall design featuring a zippered side-entry with a vestibule. The Aeon requires 4-7 stakes and is pitched with a single trekking pole.
Introduction
The Tarptent Aeon Li is one of the lightest solo (1-person) ultralight backpacking tents available. Made with Dyneema Composite Fabrics (DCF), the Aeon is a single-wall design featuring a zippered side-entry with a vestibule. The Aeon requires 4-7 stakes and is pitched with a single trekking pole.
Photo: Tarptent. Subject is 7 feet tall.
See my review of the Tarptent Notch Li, which discusses some of the features that the Notch Li has in common with the Tarptent Aeon Li, including PitchLoc corners, Dyneema Composite Fabrics, and magnetic door closure tabs.
The following video provides an in-depth analysis of the Tarptent Aeon Li:
(note: due to some wind noise, keep your finger on your volume control if needed so you can hear the narration during wind gusts):
Features
Single trekking pole support, no pole in your living space
Front vestibule can be completely rolled back with no apex guyline required
Fits people up to 7 ft / 213 cm tall (claimed)
Generous vestibule for excellent gear storage space
Rollaway vestibule doors for ventilation, views, and moisture management
PitchLoc™ foldable carbon fiber strut corners on back wall with integrated line tighteners for taut pitch
Trekking pole handle can be pitched up or down
Reflective spectra cord guylines
Catenary ridgeline seams
MSRP $535
Specifications
Fabrics: Dyneema Composite Fabrics (DCF) – 0.51 oz/yd2 (canopy), 1.0 oz/yd2 (floor); fully taped and waterproof to 8,000+ mm hydrostatic head pressure rating
Sleeps: 1 (floor area ~ 18.3 sq. ft.; vestibule area ~ 8.6 sq. ft.)
Seasons: 3+
Weight: 15.8 oz / 448 g tent body (includes guylines, struts, and stuff sacks) + 1.7 oz / 48 g stakes (included)
Interior Height: 47 in / 119 cm
Floor Width: 30 in / 76 cm
Floor Length: 88 in / 224 cm
Stakes: 6 x 6 in / 15 cm Easton Nanos (included)
Packed size: 14 in x 4 in / 36 cm x 10 cm
Source: TarptentSource: Tarptent
Commentary
Vestibule doors can be rolled up and secured out of the way with magnetic clips for expansive views and an open front porch. The apex guyline (shown) is optional but recommended for windy weather.
What’s Unique about the Tarptent Aeon Li?
The market for lightweight solo tents weighing less than two pounds is quite crowded, comprised of dozens of both single- and double-wall designs from both cottage and larger manufacturers.
While it’s tempting to use the metric of weight for delineating product categories, it’s probably more appropriate to look at functional metrics when comparing products to each other.
In that context, these features characterize the Tarptent Aeon Li:
1-person capacity.
Trekking pole-supported structure.
Fully-enclosed shelter (i.e., includes integrated walls and floor).
External vestibule.
These features allow us to narrow the product category and excludes shelters requiring shock-corded pole sets, 2+ person capacity shelters, and floorless shelters such as tarps and pyramids.
Other important criteria include:
Single-wall design.
Dyneema Composite Fabric (DCF) materials.
That leaves a limited number of shelters meeting these functional criteria, with the most obvious competitor being the ZPacks Plexamid.
So what makes the Tarptent Aeon Li unique among this field of competitors?
1. Carbon fiber support struts.
The two back corners of the tent are each supported by two carbon fiber struts in an inverted-V configuration (Tarptent calls this a “PitchLoc” corner). A third (vertical) strut along the midpoint of the back wall, combined with the PitchLoc corners, help create a vertical wall along the back of the tent.
PitchLoc corners are comprised of two carbon fiber struts in an inverted “V” configuration that increases stability and living space. They are backed by a mesh screen (for ventilation) and a nylon panel (adjustable from the inside of the shelter).
The presence of the struts creates the effect of a raised canopy, thus minimizing the chance that your sleeping bag will contact the lower edges of the sidewalls. A conventional pyramid design achieves the same effect without the struts – it just requires a larger canopy and larger pitched footprint. Thus, the geometric benefit of the struts is their ability to allow the tent to pitch with a smaller footprint (i.e., stakes closer to the tent).
The most impactive benefit of the strut system (and specifically, the PitchLoc corners), is that the PitchLocs create triangular structural elements that make the tent more wind resistant and more resistant to deformation as a result of snow loading. The difference in wind resistance and snow loading capability between a conventional pyramid shelter and the Tarptent Aeon is noticeable. It makes me wonder why manufacturers of conventional tarps and floorless pyramids aren’t incorporating structural elements into their designs. Maybe we will someday see tarps and pyramids incorporating the PitchLoc elements brought to market by Tarptent.
2. Carbon fiber peak strut
A carbon fiber strut situated horizontally at the peak of the tent, when combined with the vertical support pole (e.g., a trekking pole), creates a “T”-shaped structural element. When tension forces from the front and rear corner guylines are exerted on the T, the T provides resistance to torsional motion that allows the tent to be supported without the need for a front guyline. This type of structure is in contrast to typical pyramid designs, which require the front corners to be situated well in front of the top of the support pole. You can thus pitch the Aeon with a wide, nearly-vertical front opening (when both sides of the vestibule are rolled away) for expansive views and no guyline tripwires.
Inside view of the carbon fiber peak strut.
3. Precision design, cut, and sew (treat each of these individually)
The Tarptent Aeon Li is designed by a talented engineer (Henry Shires) who has an acute understanding of material properties (including DCF) and structural design. As such, the cut-and-sew (and bonding) processes have already taken into consideration a careful analysis of force distribution and aesthetic quality, resulting in a finished product that not only looks beautiful (when pitched properly), but also remains surprisingly stable in response to high wind and snow loads (considering that this is a one pound shelter).
Strengths
Generous interior volume for sitting up, moving around, stowing gear, and avoiding sleeping bag contact with sidewalls of shelter.
Well-ventilated: includes perimeter mesh around bathtub floor, two large (adjustable) interior vents, full front mesh door, rollaway vestibules, and peak vent.
Resistant to wind and snow loading, owing to structural elements formed by carbon fiber struts (total of 6 throughout shelter), and adjustable height.
Resistant to heavy rain and moderate spindrift, due to adjustable pitch height, bathtub floor, and overlapping vestibule doors.
Magnetic loops that secure zippered door and overlapping vestibule doors are much easier to use than toggles or hook-and-loop straps.
Peak strut allows the tent to be pitched without a front guyline, so when the vestibule doors are rolled back there are unrestricted views and no guyline to trip over.
Vestibule peak provides several inches of overlap over vertical front mesh tent door, so rain doesn’t enter tent if vestibule is open/rolled away (unless there’s wind driving rain towards the inside of the tent).
The generous vestibule is large enough for an expedition pack and gear.
Downward sloping mesh from top of bathtub floor to bottom of shelter canopy keeps condensation droplets from gathering on the shelter floor.
PitchLoc structures at back corners reduce footprint size, so the tent can be pitched in more compact spaces that pyramids of similar interior usable volume.
Dyneema composite fabrics (DCF) fabrics are easy to repair, maintain tension in cold and wet conditions, and provide a high tear-strength-to-weight ratio.
DCF fabrics may be more condensation-resistant than nylon and polyester fabrics because of lower material emissivity.
Seam strength and strong, non-stretch fabrics combined with longer, stronger tent stakes, allow for staking the tent at extremely high levels of tension (20+ pounds per stake), which dramatically improves its wind resistance.
There is a mesh perimeter screen sewn between the bathtub floor and the bottom edge of the canopy. The top of the bathtub floor sidewalls is higher than the bottom of the canopy, so the mesh panel slopes downward away from the shelter floor. The slope allows condensation dripping down the inside of the canopy to hit the mesh and stay off the floor.The PitchLoc corners form mesh ventilation windows. The windows are adjustable from inside the tent by way of a nylon panel, and can be completely dropped for maximum ventilation.Condensation management: the Tarptent Aeon offers multiple options for air intake – through the vestibule (left), under the sidewalls (center), and through the PitchLoc corner vents (right). A small peak vent allows warm, moist air to escape.
Limitations
Magnetic loops that secure doors could be extended with a pull-tab for easier one-handed operation, especially with cold-weather gloves or mittens.
Hook-and-loop patches on overlapping vestibule doors are not as easy to use as a zipper, but generous overlap and bottom clip (that clips both doors together) provide good wind and rain protection.
Setup and configuration are quite easy but requires some geometric adjustments if pitched on uneven ground (as do most pyramid-style designs) to maintain proper tension between the stake-out points and shelter peak.
Struts prevent the tent from being packed horizontally inside a backpack. Removing the struts is possible, but requires extra time when pitching and striking the tent.
Dyneema composite fabrics (DCF) fabric used in the canopy is a lighter weight fabric (0.51 osy) that is prone to puncture if the shelter is pitched near sharp twigs or poky desert plants.
Compared To
Tarptent Aeon vs. Floorless Pyramid
For similar interior volume, the Aeon requires a smaller footprint.
The Tarptent Aeon with the integrated single-wall inner tent is a lighter combination than a pyramid tarp with a separate inner tent.
A pyramid tarp with a separate mesh inner tent is better at managing condensation under most circumstances. A pyramid tarp with a separate fabric inner tent is better at managing cold winds and spindrift.
A pyramid tent is typically easier to pitch but requires more stakes than the Aeon to provide similar wind stability.
The Tarptent Aeon is better at managing heavy snow loads.
The Tarptent Aeon pitches with no support pole in the sleeping area.
The 10 oz (284 g) Locus Gear Khufu DCF-B (and before that, the standard CTF model) has been my primary shelter for the past decade. The Tarptent Aeon Li is a compelling option for when I’d like a little extra bug protection.
Tarptent Aeon vs. Double-Wall Tent
Tarptent Aeon is lighter.
Tarptent Aeon is simpler to set up and take down.
Double-wall tents generally provide better condensation management.
Tarptent Aeon vs. A Dual-Trekking Pole Supported Shelter
Tarptent Aeon may be simpler to pitch, and lighter since it’s built around just one support pole.
Tarptent Aeon may be the better option for users who do not use trekking poles, or who may only use one. If you’re not a trekking pole user, you can purchase a 4.2 oz pole (fixed length) from Tarptent, or an adjustable carbon fiber pole from Ruta Locura (I recommend a 3-section 0.450 pole with max length of 48-49 in). The max height you can pitch the Aeon is about 47 in (199.4 cm), but a slightly longer pole is useful if the ground is uneven.
A dual-trekking pole shelter may be more wind-stable than the Aeon, but this is highly dependent upon the shelter.
A dual-trekking pole shelter may offer better livability in terms of wider floor area, dual side entrances, and dual vestibules.
Tarptent Aeon Li (DCF) vs. Shelters Made with Other Fabrics
DCF may be more resistant to the formation of condensation over a wider temperature range due to DCF having a lower emissivity than nylon or polyester.
DCF doesn’t stretch as much as nylon or polyester and tends to be more wind-stable.
DCF’s lack of stretch allows it to maintain tension across a wide range of temperatures and moisture content than nylon or polyester, so once the tent is tensioned properly, it’s not likely to sag over the course of a cold, wet night.
DCF manufacturing requires high levels of precision in terms of engineering design, fabric cut and sew, and seam bonding, so mistakes in manufacturing are magnified in the form of uneven stress distribution across fabric panels and seams that can lead to flapping in the wind and structural failure.
The Tarptent Notch Li shares many of the Aeon’s features, but sets up with two poles and sports two vestibules and two doors.
Want to learn more about DCF? Check out the BPL podcast: we do a deep dive into the fabric’s strengths, limitations, and best uses.
Product Review Disclosure
Updated September 15, 2018
How we acquired these products: Product(s) discussed in this review were either acquired by the author from a retailer or otherwise provided by the manufacturer at a discount/donation with no obligation to provide media coverage or a product review to the manufacturer(s).
We do not accept money or in-kind compensation for guaranteed media coverage: Backpacking Light does not accept compensation or donated product in exchange for guaranteed media placement or product review coverage.
Affiliate links: Some (but not all) of the links in this review may be “affiliate” links, which means if you click on a link to one of our affiliate partners (usually a retailer site), and subsequently make a purchase with that retailer, we receive a small commission. This helps us fund our editorial projects, podcasts, instructional webinars, and more, and we appreciate it a lot! Thank you for supporting Backpacking Light!
In this episode, we talk to Alaskan writer, biologist, and adventurer Caroline Van Hemert. Caroline is an ornithologist who, along with her husband Pat, undertook a 4,000-mile human-powered journey from Bellingham Washington to Kotzebue, a small town high above the arctic circle.
Podcast Sponsor: REI
This podcast has been made by possible by the generous support of REI. Please consider supporting Backpacking Light and REI by using the affiliate link below to shop at REI. We receive a small commission if you end up placing an order if you use the link, at no additional cost to you. Thank you!
In this episode, we talk to Alaskan writer, biologist, and adventurer Caroline Van Hemert. Caroline is an ornithologist who, along with her husband Pat, undertook a 4,000-mile human-powered journey from Bellingham Washington to Kotzebue, a small town high above the arctic circle.
Caroline’s written a book about her journey, The Sun is a Compass. The book weaves together a lot of threads: the path Caroline’s life took to get to the start of her journey, her relationship with her husband, her life as a scientist, her feelings about motherhood: it’s a great read.
Our interview covers all that and more. So sit back, relax, and enjoy our conversation with Caroline Van Hemert.
Outline
Andrew introduces the subject of their interview: Caroline Van Hemert.
Andrew tries to digest the scope of Caroline’s journey.
Where Caroline grew up and how she found herself on long adventures.
A German word for “restless need to migrate”.
Finding parallels between birds and humans
Trip logistics.
What was Caroline most worried about, and did those fears pan out?
The challenges of trip planning, even with modern tools.
Advice for planning similar routes.
Lean on local contacts!
What makes an elegant route?
Breaking down the different modes of human-powered transportation.
Rowing, skiing, hiking, packrafting, and canoeing.
Which of these things did Caroline enjoy the most?
Caroline recommends training strategies for trips with a variety of physical demands.
What was her low point, and how did she overcome it?
Arctic biting insects
Peeing in a food dish
Cooking methods.
Indispensable gear.
Sacrificing gear for weight considerations.
Conflict, outdoor partnerships, and risk management.
The pros and cons of adventuring with a romantic partner
This episode of the Backpacking Light Podcast is supported by Backpacking Light membership fees. Please considerbecoming a member which helps support projects like this podcast, in addition to a whole slew of other benefits!
In addition, some of the links on this page may be affiliate links that refer to our partner merchant retailers. If you follow a link and then make a purchase, we receive a small commission which goes a long way towards helping us pay for podcast production, hosting, and bandwidth fees! Thanks for supporting us in this way!
Contact
You can contact us at podcast@backpackinglight.com, or follow us on social media –
We do not accept money or in-kind compensation for guaranteed media coverage: Backpacking Light does not accept compensation or donated product in exchange for guaranteed media placement or product review coverage.
Affiliate links: Some (but not all) of the links in this review may be “affiliate” links, which means if you click on a link to one of our affiliate partners (usually a retailer site), and subsequently make a purchase with that retailer, we receive a small commission. This helps us fund our editorial projects, podcasts, instructional webinars, and more, and we appreciate it a lot! Thank you for supporting Backpacking Light!
This review of the Zerk 40L Fastpack provides a first look at Mountainsmith’s new ultralight backpack aimed at thru-hikers.
Introduction
The Zerk 40L Fastpack represents Mountainsmith’s first stab at an ultralight backpack aimed specifically at thru-hikers doing big mile days with few breaks. Inspired by trail running packs, the Zerk is designed to give you access to food, water, and essential gear while being comfy enough to leave on all day. The design is centered around wide, thick shoulder straps and a removable foam framesheet.
Photo: Mountainsmith The Zerk 40L Fastpack
Mountainsmith designed the Zerk in collaboration with thru-hikers, specifically Mountainsmith athlete Tom “The Real Hiking Viking” Gathman. Such partnerships can sometimes feel like marketing gimmicks, but I had reason to believe that Mountainsmith takes these things seriously. I’m a professional photographer/videographer, and the Mountainsmith Tanuck 40L, designed with photographer Chris Burkard, is my all-time favorite camera bag because it feels like a backpack designed by a photographer.
Going into this initial First Looks review, I hoped that the same “on the front lines” design and execution would spring from the collaboration between Mountainsmith engineers and the thru-hiking community.
With all this in mind, I took the Zerk out for a quick two-day, one-night cross-country skiing excursion in the eastern Sierra Nevada.
Everything pictured here, minus Bothy the Cat and the trekking skis, found a spot inside or outside the Zerk 40L. The Zerk is a well-organized pack, particularly with regard to its external pockets and lashing systems.
Features and Specifications
Features
Wide, cushy shoulder straps
Dual mesh shoulder pockets with drawstrings
Shallow, diagonally cut side pockets
Outer secondary mesh side pockets
Wide roll-top enclosure with over the top webbing
Large front stretch pocket
Elastic gear attachment points located high on shoulder straps
Integrated shoulder-strap safety whistle
Stabilized with a two-piece Atilon and EVA foam panel (no frame sheet or stays)
Removable non-load bearing waist belt
Removable bear-can straps with multiple attachment points
Removable reflective front bungee
Hydration system port and internal attachment
Specifications
Dimensions: 18.5 x 11.75 x 5.75 in (47 x 30 x 14.6 cm)
Weight (including all straps and waist belt): 28 oz (793.78 g)
Superior external organization: with good planning, you can hike all day and never take this pack off.
Shoulder straps are wide, comfortable, and secure.
Shoulder strap pockets are well placed, large, and hold items securely.
Side pockets are cut diagonally, allowing you to reach water bottles easily.
Foam stabilizing back panel is comfortable and seems to breathe well.
The bright orange, reflective accents are a nice safety touch.
The “designed by a thru-hiker FOR thru-hikers” element feels genuine.
A mass-produced minimalist pack with cottage industry features.
Limitations
Shallow, diagonal cut side pockets don’t hold bottles securely.
Removable bear-can attachment straps are hard to get on and off.
Compression straps seem to pull a bit “sticky”.
Stitching on one of the mesh pockets is already coming loose: worrisome for a pack that is built to last for thousands of miles.
Compared To
Product
Mountainsmith Zerk 40L
Granite Gear Crown2 38L
Dimensions
18.5 in x 11.75 in x 5.75 in (47 cm x 30 cm x 14.6 cm)
22 in x 14.75 in x 7 in (55.9 cm x 29. 84 cm x 17.78 cm)
Weight
28 oz (793.78 g)
33.5 oz (950 g)
Volume
40 L (extended), 32 L (compressed)
38 L
Suggested Load
30 lbs (13.6 kgs)
35 lbs (15.87 kgs)
Load Lifter straps
No
yes
Frame
Removable dual layer Atilon and EVA foam
Removable PP frame sheet
Pack Material
100D Nylon HT w/200d Spectra Double R/S TPU
Robic High-tenacity nylon (100D and 210D)
Internal Organization
One compartment
One compartment
External Organization
Four side pockets, four shoulder strap pockets, one rear mesh pocket, removable bear canister webbing, removable lashing bungee
Two hip belt pockets, two side mesh pockets, one rear mesh pocket, removable lid with pocket
Closure Style
Roll-top with over the top webbing
Roll-top with over the top webbing
Hip Belt
Removable, non-load bearing
Removable, load bearing with pockets.
MSRP
$219.95
$184.95
The Zerk’s features are most commonly found on cottage industry packs (the shoulder strap pockets and diagonal side pockets remind me of our recent review of the Atom). Likewise, the price point and weight are similar to the classic Gossamer Gear Mariposa. For the upcoming Gear Review, I’ll be sure to do in-depth comparisons of the available cottage industry frameless and minimalist packs. But for this short review, I wanted to compare the Zerk to another mass-produced pack of a similar weight, volume, internal organization, and load capacity – the Granite Gear Crown2 38L.
The manufacturers advertise both packs as slimmed down options aimed at the ultra-light crowd. The Crown2’s volume sits squarely between the Zerk’s compressed 32L volume and its extended 40L volume. It does so at the cost of about 5.5 oz (155.9 g) of weight. The Crown2 has a recommended load of 35lbs (15.87 kgs) as opposed to the Zerk’s 30 lb (13.6 kg) capacity. The Crown2 achieves this with a thick hip belt and a plastic molded removable frame-sheet. Removing the frame sheet gets Crown2 down to 25.6 oz (754.1 g), 2.4 oz (68 g) lighter but significantly less stable than the Zerk.
The Crown2 makes a nod towards accessibility with large mesh hip-belt pockets, but other than that has roughly the same accessibility as many other mass-produced packs. The shoulder straps and hip-belt are industry standard designs.
These features are why the Zerk stands out among mass-produced packs: trail running inspired shoulder straps and a foam frame sheet that give it killer comfort-hauling chops for its weight class. Those same features allow for excellent and unusual (for mass-produced packs) pocket placement.
Commentary
The Zerk 40L Fastpack is many things, but it isn’t a marketing gimmick. It feels like the Zerk was designed by a foot-sore, achy-shouldered thru-hiker with nothing to do but daydream about how he would change his pack if he could. One thing to keep in mind though: At 28 oz (793.78 g) the Zerk isn’t the lightest minimalist pack available. It wasn’t made to be. It was designed to sit at a crossroads of comfort, accessibility, durability, and weight.
This First Look will focus on two of these elements: accessibility and comfort. An extended, more comprehensive Gear Review is forthcoming in summer 2019. In that review, I’ll elaborate on the factors discussed here. At that point, I’ll also be able to speak to the long-term durability of this pack, as well as make a more in-depth comparison to other minimalist frameless packs.
The Zerk 40L Fastpack’s main strengths are comfort and accessibility. Both are enabled by the wide trail running inspired shoulder straps.
To start with, the Zerk gives you easy access to frequently used pieces of gear. Single compartment roll-top enclosures are common in minimalist packs, but where the Zerk shines is its external organization. It has four well-placed shoulder strap pockets, two on each strap, with the upper pocket nesting inside of the lower pocket. The top pocket cinches with elastic cord, making it ideal for securing electronics or small water bottles. The bottom pocket is cinched permanently with elastic, and it’s roomy enough to hold snacks or other small pieces of gear.
On my testing trip, I fit my Sony Rx100vi, my iPhone 6 and case, a can of bear spray, 800 calories worth of snacks, a small pocket knife, headphones, and spare camera batteries in the shoulder strap pockets. All these items felt secure, and I especially appreciated knowing that my camera and phone were easy to reach but safe behind an elastic drawcord. Hikers with larger phones (or marginally larger cameras) should have no problem: the pockets swallowed both those items with room to spare. If needed, the shoulder-strap pockets could easily fit chapstick, a small tube of sunscreen, a lighter, a contact lens case, or other sundries on top of all the other items I’ve mentioned.
Wide shoulder straps give plenty of space for deep, stretchy pockets. In this photo, mine are holding a camera, extra batteries, 800 calories of food, bear spray, my phone and wallet, extra batteries, a pocket knife, headphones, and chapstick.
The Zerk has a removable webbing system for bear-canisters or other bulky items. I used it to attach my Nemo Switchback to the pack. I like this system for three reasons. The first is that if you don’t have any bulky items you can leave the webbing at home without having to cut it off permanently. The second is that there are multiple attachment loops all over the pack, giving you the flexibility to attach gear where you want to attach it. The third is that the webbing (along with the side compression straps, removable bungee, and logo) are bright red-orange. The logo and bungee are reflective. Not only will this help you find your pack in the dark, but they also add an extra layer of safety during hunting season.
Removable bear-canister webbing can attach at multiple points (orange loops) or be removed completely. I used the webbing to lash my CCF pad to the back of my pack.
The removable bungee is designed to give you more lashing options for the outside of the pack. I can’t speak to its effectiveness as my sample pack seems to have shipped without one. Once Mountainsmith sends me a bungee I’ll be able to address its functionality in my longer review.
The dual side pockets are also worth mentioning. The upper pockets are fashioned from the same Spectra material as the rest of the pack. They are shallow and diagonally cut, with the upshot being I could easily reach and replace my 1L Smartwater bottles on the go. The downside? The bottles were not secure. They consistently fell out when I bent over to adjust my ski bindings or fetch a dropped trekking pole. I even lost a bottle entirely in the deep snow through which I was skiing.
I find the trade-off worth it. But if your trek involves talus scrambling, bushwacking, or snowdrifts, keep an eye on those bottles. You can always use the side compression straps to secure gear that doesn’t need to be reached on-the-go.
Shallow, diagonal cut side pockets give you easy access to your water bottles. The trade-off is water bottles that fall out when you bend over.
The lower side pockets are roomy, with an elastic band across the top for more security than the upper side pockets. I used these pockets to hold lunch, trash, and a small bag of sundries and, like the larger side pockets, was able to access these items without breaking my stride.
The back stretchy mesh pocket is large, the entire width of the pack. Other than that it is pretty standard — handy to store items in, but not accessible while walking.
For this First Look, I ate all my snacks and lunch on the go, never taking the Zerk off during my eight-to-ten hour skiing days. I’m happy to report, without any exaggeration, that this is the most comfortable mass-produced pack I’ve ever worn. Well designed, extra-thick shoulder straps and a comfortable foam internal structure seem to be the contributing comfort factors. It will be worth seeing how all that thick foam breathes once temperatures warm up.
I was testing a few other pieces of gear, so I had some extra items. My total weight (including food and water) came in between 24 and 28 lbs (10.88 to 12.7 kgs). Mountainsmith recommends a load no heavier than 30lbs, but even at these upper ranges, the pack was comfortable and secure. For my upcoming Gear Review I’ll overload the pack to determine its comfort at greater-than-recommended loads.
I noticed two drawbacks to the Zerk during my initial testing. The first is that I struggled with attaching and removing the optional bear-canister webbing, even with warm hands in the comfort of my home. Specifically, only one of the attachment loops gave me problems. In a similar vein, the compression straps seem a bit “sticky” to tighten. We’ll see if both of these things loosen up with prolonged use.
For some reason, this particular loop gave me trouble. Time will tell if it loosens up or not.
The second issue I noticed was one of durability: a small amount of stitching around the elastic on the upper-right shoulder strap pocket seems to have come loose. A minor thing, so minor that it was difficult to get a good picture, and I ultimately decided not to. That being said, it’s a tad worrisome after two days of use on a pack designed to last thousands of miles per year at 20, 30, and 40 miles a day (a paraphrase of the Mountainsmith marketing copy). Time will tell if this is a one-off fluke or something that will happen to stitches elsewhere on the pack.
All in all, I’m highly impressed with this pack. Within the first hour of my test, I shortlisted the Zerk as my pack of choice for my next long-distance hike. It’s comfort, security, and well-designed exterior organization are all top-notch, especially for the price point. I look forward to testing its durability and comfort over a more sustained period.
The Zerk has similar features to the Atom by Atom Packs. You can read an in-depth review of that excellent pack here.
Going frameless? Here’s some advice from our forum.
Disclosure
How we acquired these products: Product(s) discussed in this review were either acquired by the author from a retailer or otherwise provided by the manufacturer at a discount/donation with no obligation to provide media coverage or a product review to the manufacturer(s).
We do not accept money or in-kind compensation for guaranteed media coverage: Backpacking Light does not accept compensation or donated product in exchange for guaranteed media placement or product review coverage.
Affiliate links: Some (but not all) of the links in this review may be “affiliate” links, which means if you click on a link to one of our affiliate partners (usually a retailer site), and subsequently make a purchase with that retailer, we receive a small commission. This helps us fund our editorial projects, podcasts, instructional webinars, and more, and we appreciate it a lot! Thank you for supporting Backpacking Light!
Backcountry Foodie – Ultralight Recipes for Outdoor Explorers by Aaron Owens Mayhew, MS, RDN, CD. is a cookbook containing 50 dry-based ingredient recipes along with detailed nutritional information for each. The target audience is backcountry adventurers looking to expand their dining options, drop some consumable weight, save money over pre-packaged meals, and those concerned with their nutritional intake.
The book provides unique recipes with both “at home” and “in the field” instructions. It also provides enough detailed nutritional information to allow for proper meal planning for multi-day trips. Finally, downloadable label files are available for each recipe to aid in keeping track of the meals while on the go.
Dry ingredient based recipes which can be assembled in under 5 minutes
Printable food label sticker templates.
Only digital copies currently available
* Trace amounts of nuts and gluten may be present in the raw ingredients
Review Context
I am a longtime oatmeal-and-trail mix, barebones, ultralight backpacker who is looking to expand my backcountry kitchen toolkit. Generally, my trips are two or three days in length with the occasional week-long trek thrown in. In my non-backpacking life, I have high standards for food, particularly as I spent a decade working professionally in Chicago kitchens.
In evaluating this cookbook, I considered:
Recipes – A recipe should be straightforward, easy to follow, and contain ingredients that are simple to source.
Organization – Recipes should be easily found and appropriately grouped by meal or some other logical categorization.
Ease of use – Is the format simple to understand with any necessary information readily available?
When creating a meal plan, I believe an ultralight backpacker should consider:
Kcal/oz – The food needs to be calorie-dense and lightweight.
Nutritional value – I feel better when I eat better; my recovery is faster and I can log more miles.
Convenience – From ingredient sourcing through clean up, less time working on meal preparation is more time spent hiking or enjoying the scenery.
Taste – A backcountry meal is more than just fuel. It can provide a much-needed pick-me-up and add enjoyment to the end of a long day. It should taste good!
Description of Field Testing
Upon receiving the cookbook, I began collecting ingredients and working through the recipes, initially testing them in my home kitchen. After testing at home, I selected seven recipes for field testing: two from the Breakfast section, two from the Lunch & Dinner Section, one Snack, and two Beverages. My selections included both cook and no-cook options.
Field testing of the recipes took place under winter conditions in southeast Michigan. Temperatures ranged from daytime highs around 45F to morning lows in the high 20s. There was little-to-no precipitation. During weekend hikes I would alternate days of cold meal preparation with hot meal preparation using an alcohol stove. I treated the final weekend of testing as a tune-up for a planned Isle Royale National Park speed hike, allowing me to note my impressions of energy levels after logging 10+ mile days on my feet.
Performance Assessment
I based my performance assessment of Backcountry Foodie – Ultralight Recipes for Outdoor Explorers on the following criteria:
Cookbook organization
Cookbook ease of use
Recipe convenience
Taste
Impressions of energy level and nutrition
For the evaluation of the recipes themselves, I’ll focus on the seven recipes I field-tested over my shakedown weekend. My no-cook day consisted of a breakfast of Raisin Pecan Ramen and an afternoon meal of Lemon Pepper Bean Spread. My evening treat was Coconut Ginger Milk. For my cook day, I prepared a breakfast of Lemon Blueberry Oatmeal and an afternoon meal of Thai Peanut Ramen. In the evening I treated myself to a decaf Peppermint Latte. On both days I supplemented with a Chocolate Almond Butter snack while walking.
I found the cookbook easy to use. Each recipe fits on a single page and contains a list of ingredients, at home directions, field directions, nutritional information, and summary information. The summary information proved to be very helpful in meal planning, providing ‘At a Glance’ information regarding preparation method, potential allergens, vegan/vegetarian information as well as preparation and cooking time, the number of servings created, and the weight per serving. When used in tandem with the nutritional information, it was very easy to meal plan for my weekend hikes.
Generally speaking, the recipes are very convenient. Both at-home and in-the-field meal prep were straightforward with no hiccups. I was able to complete the at-home portion of meal prep in under two minutes per-meal. My cold-soaking days went off without a hitch. All of the ingredients rehydrated well without any additional heat. Similarly, I had no issues with the recipes that needed cooking (I used an alcohol stove). The biggest hurdle I faced throughout the entire process was sourcing the ingredients.
Meal prep was very quick and easy.
Even though I live in a large city, I had trouble sourcing a number of the ingredients locally. I spent an afternoon traveling from grocery to natural food store to camping supply company to another supermarket. The author does provide online sources for ingredients via links on her website, and I could have saved myself some trouble by sourcing online. If you are under a time crunch, as I was, you might have to use ingredient substitutions.
The book lists the recipes in cups, tablespoons, and teaspoons. With an intended audience that likely weighs their toilet paper for fun, providing weights for the individual ingredients (to allow for scale measurement when assembling the recipe) would have been a nice touch. I found that my weight for the completed Lemon Blueberry Oatmeal was a couple of ounces higher than the listed weight. Using a scale to measure out ingredients makes for more repeatable recipes and ensures that the weights are dialed-in with precision.
Taste
Taste is subjective, but I found these recipes to be delicious. Many of the recommended ingredients were ones I’d not used before. I found they added enjoyment and variety to my outdoor dining experience. Coconut milk powder is a fantastic ingredient that I wish I had known about back in my pastry chef days. Same with True Lime Powder, which added a burst of flavor to the Thai Peanut Ramen. None of the recipes I tested were duds.
Hot prepared Thai Peanut Ramen, substituting rice noodles
Impressions of energy level and nutrition
The layout of Backcountry Foodie – Ultralight Recipes for Outdoor Explorers lends itself well to caloric analysis. On both my no-cook and cooking days, I was able to consume over 3000 calories. My intake of protein, fats, and carbohydrates was well balanced. My energy levels were high and seemed consistent throughout the day.
Product Strengths
The format and layout of the cookbook contribute to painless meal planning and easy backcountry cooking.
The author balanced the flavors in her recipes. She uses spices, sweets, and acids skillfully, creating dishes that were a pleasure to test. Nothing that I tested (or tasted) was bland.
The provided nutritional information and easy-to-interpret sidebar graphics help ensure adequate caloric intake.
Once I started measuring out the recipes, I realized how much less expensive it is to create my meals as opposed to buying freeze-dried, pre-packaged offerings.
Product Limitations
I wish that the ingredient lists had measurements listed in grams or ounces.
While the author provides online sources for all the ingredients she uses in Backcountry Foodie – Ultralight Recipes for Outdoor Explorers, I found myself wishing that more of the items were available at my average mid-western supermarket.
Compared To Your Typical Ramen and GORP
Overall the recipes from Backcountry Foodie – Ultralight Recipes for Outdoor Explorers outperformed my usual backpacking diet of oatmeal pouches for breakfast, GORP for lunch, and ramen for dinner. My old standbys win if I am judging the basis of convenience; there is not much easier than tossing a few bags in my kit and calling it good. There is something to be said for variety, though. Aaron’s recipes introduced me to ingredients I had never considered using in backpacking food. The change was welcome on the basis of taste alone.
I felt better physically after eating Aaron’s food. An afternoon meal of GORP and water sits pretty heavy in the stomach, particularly on the third or fourth day in the field. It seemed to me that I was better able to get back to hiking after eating the afternoon meals of Lemon Pepper Bean Spread or Thai Peanut Ramen.
Commentary
Even though I have over ten years experience in the professional kitchens of Chicago and scores of backpacking miles under my belt, as I flipped through the pages of Backcountry Foodie – Ultralight Recipes for Outdoor Explorers, it dawned on me that I was really missing out on a cheap, easy way to enhance my enjoyment while spending time outdoors. It also occurred to me that my old standbys were somewhat lacking in complete nutrition.
A breakfast of cold-soaked Raisin Pecan Ramen in southeast Michigan.
I honed my outdoor culinary chops during my time with the Boy Scouts, and my backpacking menu was an old and familiar one. The pack list was simple. Packaged oatmeal for breakfast, trail mix and beef jerky for lunch, and a pre-packaged freeze-dried meal for dinner.
As the years have gone on the menu hasn’t changed much. Beef jerky left the pack list when I became a vegetarian. I added coffee to my breakfast and replaced the expensive freeze-dried meals with cheap ramen and bouillon. It was a bland backcountry diet. Working through the cookbook, it became clear how easy it can be to add new recipes to the rotation that won’t sacrifice convenience, cost a fortune, and will taste great.
The Thai Peanut Ramen recipe is a great example of the quick and easy steps Aaron has laid out in her book.
Step one: I make certain I have all the ingredients on hand. Some of the ingredients are hard to find at your local corner store, so plan accordingly or be prepared to make substitutions.
Step two: I grab any tools I’m going to need. For Aaron’s recipes, the list of tools is blissfully simple; storage containers and measuring spoons. I mentioned earlier that I wish the book had weights for each ingredient listed, but I admit it is much faster to build out a recipe when you are simply scooping out the parts.
Step three: pack it all up. Put the ramen noodles and dehydrated carrots in a bag, measure the other dry ingredients in a separate bag and measure out some peanut butter and some coconut oil. That’s it. For longer trips, I would simply just bring a bunch of peanut butter in one container and use it across multiple meals. I might do the same with the coconut oil as well, though I might substitute olive oil as I find it to be more versatile.
Ingredient assembly for Thai Peanut Ramen
I found Backcountry Foodie – Ultralight Recipes for Outdoor Explorers to be a fantastic resource. The individual recipes stand stand up well. They are simple to prepare, nutritious, and filling. Every recipe I tried was quite tasty. However, the greatest strength of the book is the nutritional information which allows readers to build their own nutritional, balanced meal plan for their outdoor adventures.
How we acquired these products: Product(s) discussed in this review were either acquired by the author from a retailer or otherwise provided by the manufacturer at a discount/donation with no obligation to provide media coverage or a product review to the manufacturer(s).
We do not accept money or in-kind compensation for guaranteed media coverage: Backpacking Light does not accept compensation or donated product in exchange for guaranteed media placement or product review coverage.
Affiliate links: Some (but not all) of the links in this review may be “affiliate” links, which means if you click on a link to one of our affiliate partners (usually a retailer site), and subsequently make a purchase with that retailer, we receive a small commission. This helps us fund our editorial projects, podcasts, instructional webinars, and more, and we appreciate it a lot! Thank you for supporting Backpacking Light!
Ryan and Stephanie Jordan venture into Idaho’s Sawtooth range for a couples backpacking trip.
Introduction
Many years ago, inspired by Alastair Humphrey’s concept of microadventures, and to feed my insatiable desire to sleep in wild places, I started creating video journals of trips where I spent less than 24 hours in the backcountry, including:
But it’s been a while since I video-journaled a more conventional 24-hour trip (in a shorter-form video format like the original episodes of the 24 series) and I really wanted to share a recent trip that Stephanie and I took in the mountains of Idaho.
Not in Idaho! Ryan and Stephanie hiking in Rocky Mountain National Park, Colorado (Photo: Lindi Chatterton.)
Context
Over the past few years, our family has taken a couple of extended road trips across the west in our popup camper. Our usual loop travels through Wyoming, Colorado, Utah, Idaho, Nevada, California, and back, spending time hiking and camping in the Rockies, Wasatch, Uintas, Sawtooths, and High Sierra.
Road-trip, Jordan-style. A solar-powered popup camper on our Tacoma carries bikes, skis, packrafts, and backpacking gear as we travel the west. Venue: an off-grid USFS campground in Idaho.
These road trips are time to regroup, visit our favorite places in the west, and enjoy some time in the wilderness.
So while spending some time in Ketchum, Idaho (where our son Chase was attending the Sun Valley Summer Symphony Music Institute) during the summer, Stephanie and I figured we could steal away on a quick “24” up in the mountains north of town while Chase was in class! Poor kid.
One of the highlights from our trip was watching mountain goats and kids traverse the steep hillside across from our camp.
Watch the Video
Enjoy the video, and stick around to the end, where we answered questions submitted via social media on the topic of “couples hiking”.
Q&A: Couples Backpacking
We solicited questions about couples backpacking via our social media channels and answered them in the Q&A at the end of the video. Here are the questions:
What happens when you are both equally convinced that you are correct about opposite navigational decisions? – andrewmarshallimages via Instagram.
How do you cope with inclement weather and expectations of things that cannot be controlled? My partner is new to backpacking so weather can be discouraging for her. Especially because I am a magnet for bad weather it seems, but I’m used to it at this point. – Carlos via YouTube.
Do you find yourself getting out together more now that Chase is away at college? – b_rogers_99 via Instagram
When I think back on all the times I took girlfriends camping when I was in my 20s I can’t help but feel remorse for being such a blowhard ‘expert’ that mansplained everything and had to show off my cool gear. My way was the best way and we had to hike big miles, etc. I constantly see young men who have no self-awareness and are blind to the wants and needs of their partner like they are in Ikea, not in the woods. How do you get people to weigh their own wants and expectations to their partners? – hoagietime1 via YouTube.
What is the best way to cope with physical and mental differences during the hike? How to keep your partner’s morale high? Especially during hard stretches – multicam_sokol via Instagram.
Do you pack extra luxury items when you go backpacking together? – NaLona Brato via YouTube.
What are the benefits of having “break hikes” where you hike separately but end at the same location? – jsherman51 via Instagram.
Do you find that when you are backpacking with a romantic partner you have more or less conflict than with a non-romantic hiking buddy? How about when you and your partner are with a larger group? – TheBestBackpacker via YouTube.
Gear Notes
Sharing: We shared some stuff – repair, first aid, water treatment, and firestarting supplies; stove, and shelter.
We shared a number of essentials, including our water treatment kit, which consisted of only the Katadyn BeFree 20 oz filter bottle. For the clear mountain streams of Idaho, it served us well enough!
Sleep & Shelter System: We’ve used couples’ bags, quilts, and our own bags, and we sleep more comfortably in our own sleep systems (pads, quilts, pillows). That way, Stephanie can have her 10 deg F quilt and I can have my 40 deg F quilt and neither one of us gets too hot or cold! We used the My Trail Co. Pyramid 3 shelter with netting insert (it was the peak of bug season!). It’s weather resistance, reasonable weight, and terrific living space (including headroom) makes it one of our favorite shelters for couples.
The MyTrail Co. Pyramid 3 is spacious for a couple, reasonably-priced, and offers a solid, stable, taut pitch. We’ve weathered some pretty severe winds in this shelter through the years. Our only advice if you expect to encounter bad weather is to upgrade the four load-bearing corner stakes to 8″ MSR Groundhogs. Ounce-counters will want a lighter inner tent as well. At 34 oz, the stock Nest inner tent is heavier than it needs to be, unless you desire the durability of a heavier floor.
Packs: Stephanie carried a frameless pack (My Trail Co. Backpacking Light 70L). A frameless pack is critical for her back comfort – she has a degenerative spinal condition called spondylolisthesis and most internal frame packs have not been so great for her. I carried a Hyperlite Mountain Gear Porter 5400, which allows me to carry the bulk of the load, and the large volume makes it really easy to pack – just throw stuff in and call it good. With a light load on short trips, less attention needs to be paid to precision packing and weight distribution!
The MyTrail Co. Backpacking Light 70 is a well-built and highly functional pack suitable for light and bulky loads. Its frameless design makes it very comfortable for people with spinal discomfort who suffer from pressure points caused by internal frame components. Plus, it’s one of the best value packs on the market, at only $165.
Some other gear we used on this trip that Stephanie and I really like:
My favorite shoe for rocky terrain (talus, scree). I brought two pair of shoes on this trip (my second pair – Altra Lone Peaks) for some side-by-side testing. I definitely prefer the Lone Peaks for trail running and backpacking on trails.
My Chisos 40 is seven years old and has been my summer staple for hundreds of nights. It’s still going strong and I don’t see myself retiring it anytime soon.
I just don’t think I can ever go back to being confined in a mummy bag again. The Enigma 10 offers an impressive loft:weight ratio if you customize it with the lightest possible materials.
Now discontinued, which is too bad. It’s the most stable and comfortable chair design I’ve used. Helinox could have knocked it out of the park with a lighter fabric and pole set…
Photochromic, polarized lenses in a lightweight wrap design; lightweight glass is durable and scratchproof. A nearly perfect feature set for backpacking.
We’ve used these for years. A great addition to a two-person cook kit to supplement an integrated canister stove like the Windburner. One of us eats out of the cook pot, the other out of this bowl.
In spite of reports of failures and slow flows, we’ve been using the BeFree since it came out a few years ago and have never had a problem with it. A fast, easy-to-use system. Read our review here.
Camp chairs give us relief for our aging backs and allow us to cook and enjoy the fire in comfort.
Disclosure
Thanks to the following companies who provided gear and financial support to help us put this video together:
Some (but not all) of the links in this review may be “affiliate” links, which means if you click on a link to one of our affiliate partners (usually a retailer site), and subsequently make a purchase with that retailer, we receive a small commission. This helps us fund our editorial projects, podcasts, instructional webinars, and more, and we appreciate it a lot! Thank you for supporting Backpacking Light!
A first looks review of NEMO Equipment’s Switchback Sleeping pad based on initial impressions at from at home and in the field.
Introduction
Photo: Nemo
The Nemo Switchback sleeping pad has a bright orange hue which is the first thing that catches your eye. The eye-popping color isn’t the real selling point in NEMO’s new foldable closed-cell sleeping pad, though; it’s the ratio between its thickness and packed size. Until now, Therm-a-Rest’s Z Lite Sol has been difficult to improve upon. With the Switchback, NEMO has created a pad that is measurably thicker than the Z Lite Sol while matching that pad’s folded dimensions and virtually matching its weight and cost.
Features (Size Regular)
Hexagonal nesting pattern
Dual-density Axiotomic™ foam
Metalized thermal reflective film
Folding panel design, rectangular shape
MSRP: Regular: $49.95
NEMO Lifetime Warranty
Clever engineering and a hexagonal nesting pattern allow the Switchback to match the competition in packed dimensions while outdoing the competition in terms of thickness (Photo: NEMO).
Specifications (Size Regular)
Manufacturer provided weight: 14.5 oz (415 g)
Measured weight: 15 oz (425 g)
Manufacturer provided packed size: 20 x 5 x 5.5 in (51 x 13 x 14 cm)
Measured packed size: 20.5 x 5 x 5.5 in (52.07 x 13 x 14 cm)
Manufacturer provided unfolded dimensions: 72 in x 20 in x 0.9 in (183 cm x 51 cm x 2 cm)
Measured unfolded dimensions: 72 x 20.5 x 0.9 in (183 x 52.07 x 2 cm)
Temperature rating: 20F to 35F (-7C to 2C)
Product Strengths
It is 20% thicker than comparable pads at identical folding dimensions.
The taller nodes theoretically allow for more trapped air for better insulation.
It maintains the same utility and near-indestructibility of all closed-cell pads.
Clever engineering measurably improves a stagnant product category.
Product Limitations
It is unproven if the added thickness improves comfort.
The durability of the metalized thermal reflective film over the long term is unknown.
The nodes begin to crush down after repeated use.
Slightly more expensive than the competition.
Compared To:
The NEMO Switchback (orange) shown side-by-side with the Therm-a-Rest Z Lite Sol (yellow). From this view the difference in node patterns is apparent (Photos: Therm-A-Rest & NEMO)
Let’s compare the Switchback to the ubiquitous Therm-a-Rest Z Lite Sol. It seems a reasonable choice as both pads have identical packed dimensions and utilize the same folding structure.
Product
NEMO Switchback
Therm-a-Rest Z Lite Sol
Weight (Regular)
14.5 oz (411 g)
14 oz (396.89 g)
Thickness
0.9 in (2.28 cm)
.75 in (1.90 cm)
Packed dimensions
20 x 5 x 5.5 in (51 x 13 x 14 cm)
20 x 5 x 5.5 in (51 x 13 x 14 cm)
Unfolded dimensions
72 x 20 x .9 in (183 x 51 x 2.28 cm)
72 x 20 x .75 in (183 x 51 x 1.9 cm)
R-Value
unavailable, NEMO provides a temperature rating of 20 F to 35 F
2.6
Node pattern
Hexagonal
Egg-carton
MSRP
$49.95
$44.95
Sourcing
Imported
Made in the USA
Glancing over the table, you can see that the two pads have identical length, width, and packed dimensions. The Switchback weighs a scant .5 oz more than the Z Lite Sol (My scale measured the Switchback at 15 oz as opposed to the 14.5 oz measurement provided by NEMO, but I’m willing to chalk that up to my consumer grade scale). The difference in node patterns is readily apparent, especially when viewed side by side (see above photo). The Switchback’s hexagonal pattern is what allows it to be nearly 20% thicker than the Z Lite Sol despite being the same size when folded.
The Z-Lite Sol is made in the USA, while the Switchback is imported. The price difference is negligible.
Commentary
Like all closed-cell pads, the NEMO Switchback makes a hardy seat during rest breaks. A metallic film reflects body heat, but I have reservations about the film’s long-term durability.
The NEMO Switchback is an example of a product that manages to reap measurable improvements from a stagnant category by utilizing elegant design. Who knows how much time and energy went into re-imagining the tried-and-true egg carton pattern? The result is a pad that is 20% thicker than the competition, with larger nodes that theoretically make for more comfortable nights.
The metallic heat-reflective film seems to perform at industry standards. That includes the film’s tendency to rub off. It’s a common problem — personally speaking, I’ve never used a pad where the reflective film didn’t rub away after repeated use. The nodes also seem to be crushing slightly. Again, not unusual, and if past experience is any indication, it would take hundreds of nights of compressing the foam to notice a practical difference.
The heat-reflective film is wearing from the tips of the nodes after only a few uses. Such wear is a common problem in closed-cell sleeping pads, and practically the only way they deteriorate over time (other than foam collapse after hundreds of nights).
Does the Switchback’s elegant design and execution translate into added comfort? Hard to say. Subjectively, I found the texture of the hexagonal pattern to be a little strange. I got used to it after a bit, but the initial impression after a lifetime of sleeping on egg-crate patterns was odd.
It was also hard to nail down just how much the Switchback’s added thickness improved upon the standard amount of comfort inherent to a foldable closed-cell pad. Some evenings I felt I could tell a difference, others, not so much. My takeaway is this: extra thickness at identical packed dimensions and at virtually the same cost and weight certainly can’t hurt. If you like your current closed-cell pad, I wouldn’t be rushing to your local gear shop to make a change, but if it’s time for an upgrade, it’s hard to go wrong with the Switchback.
Are closed-cell foam pads not for you? Check out the UberLite.
Disclosure
How we acquired these products: Product(s) discussed in this review were either acquired by the author from a retailer or otherwise provided by the manufacturer at a discount/donation with no obligation to provide media coverage or a product review to the manufacturer(s).
We do not accept money or in-kind compensation for guaranteed media coverage: Backpacking Light does not accept compensation or donated product in exchange for guaranteed media placement or product review coverage.
Affiliate links: Some (but not all) of the links in this review may be “affiliate” links, which means if you click on a link to one of our affiliate partners (usually a retailer site), and subsequently make a purchase with that retailer, we receive a small commission. This helps us fund our editorial projects, podcasts, instructional webinars, and more, and we appreciate it a lot! Thank you for supporting Backpacking Light!
Membership Required
This feature requires an active Backpacking Light Membership.
Premium Articles
You're currently viewing a free preview of a member exclusive premium article. Our premium articles include in depth journalism and insights from the Backpacking Light editorial team.
Get full article access by subscribing to a Premium or Unlimited Backpacking Light membership!

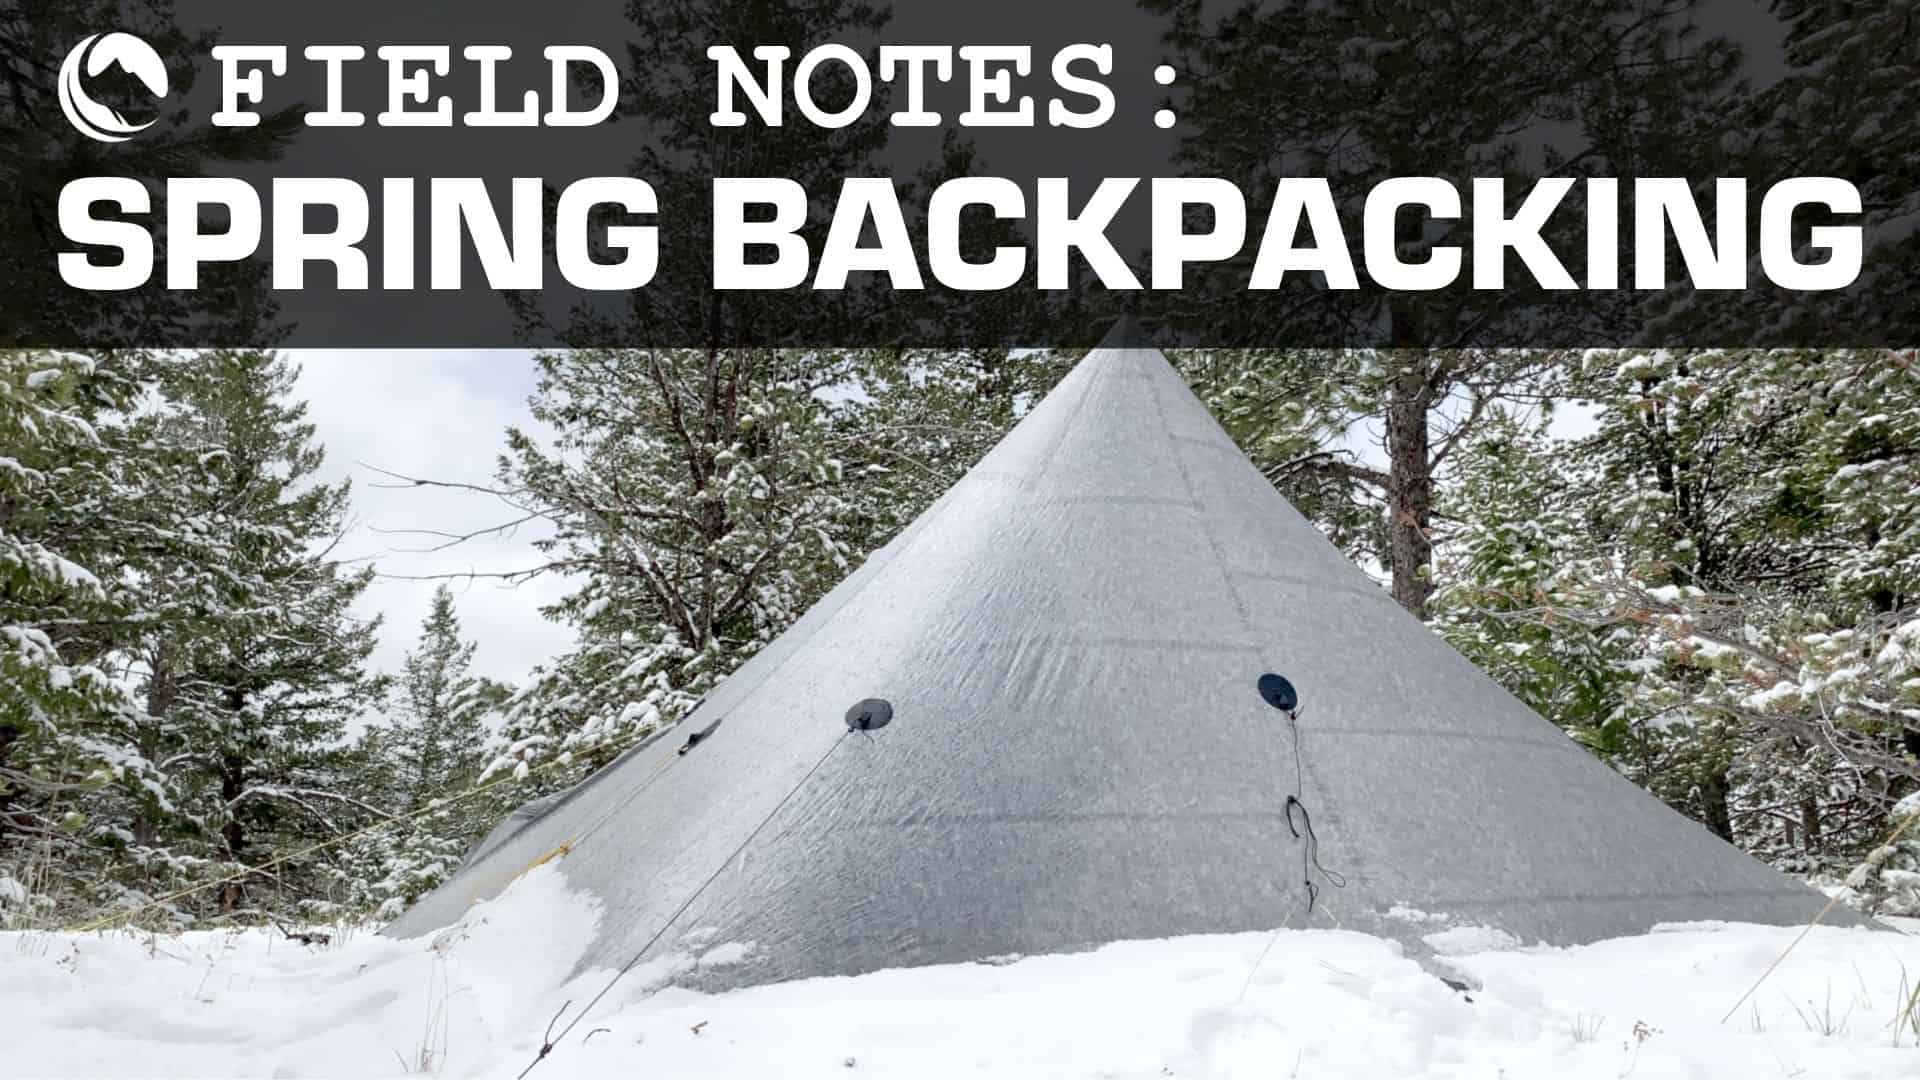

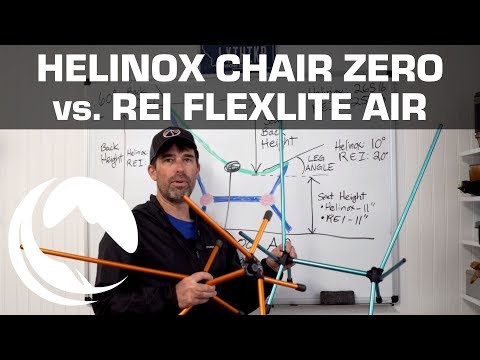
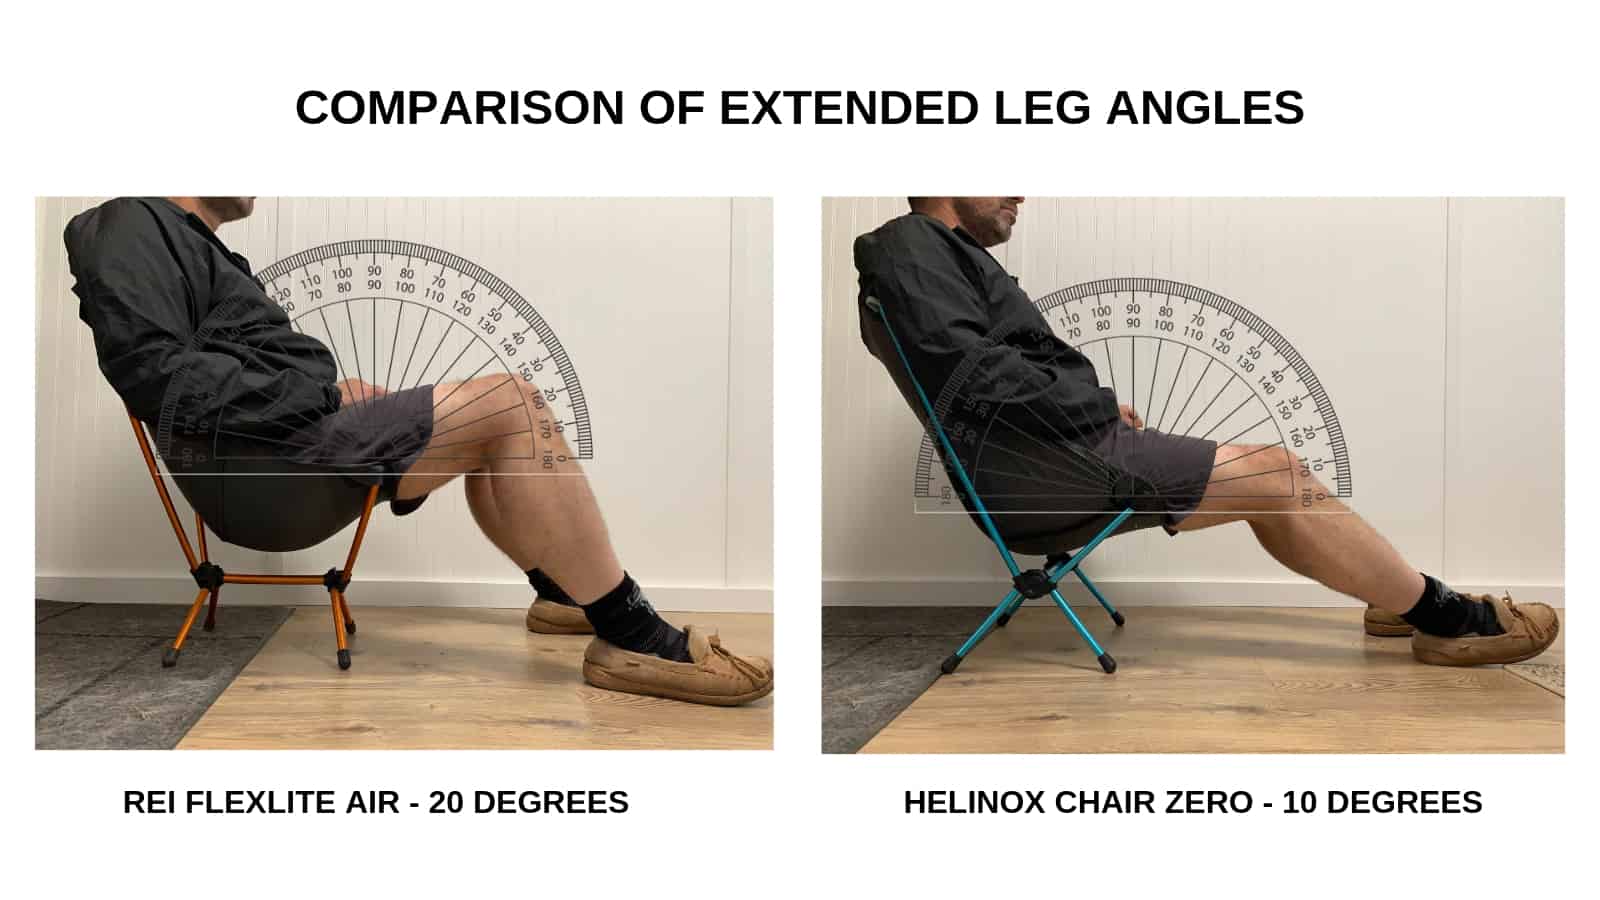 Back Height:
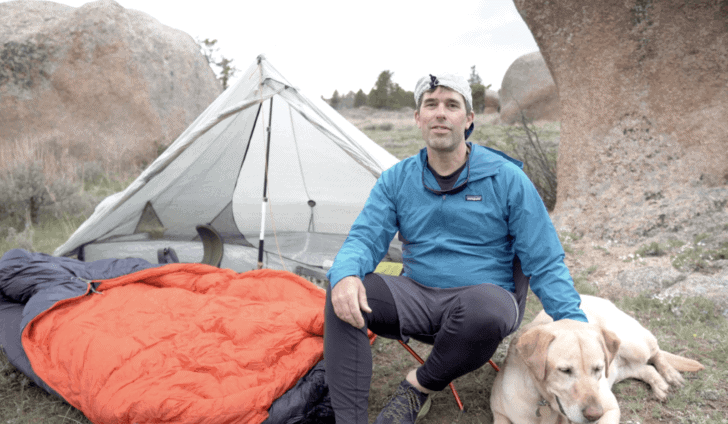


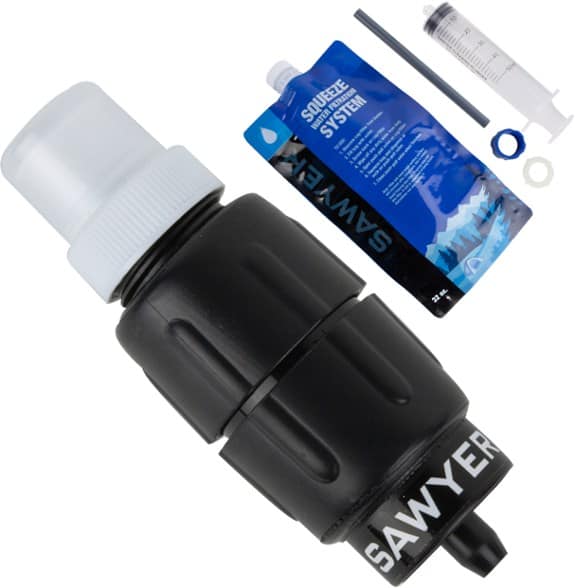
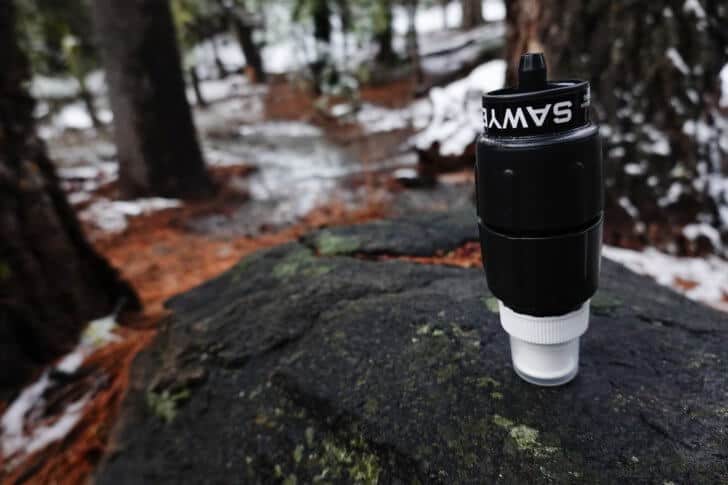
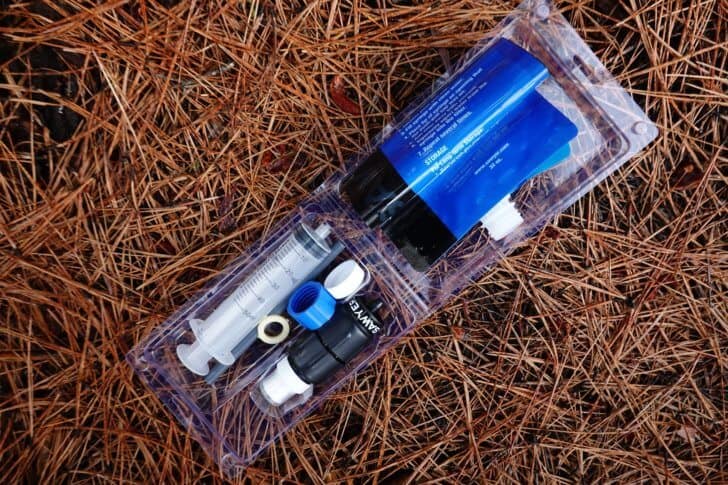
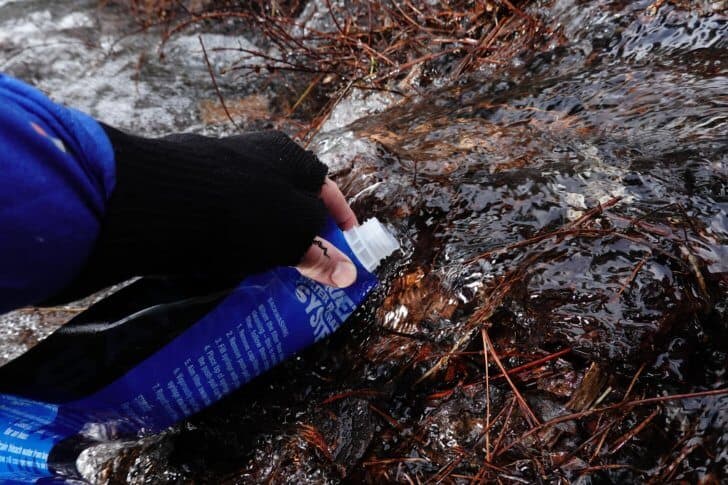
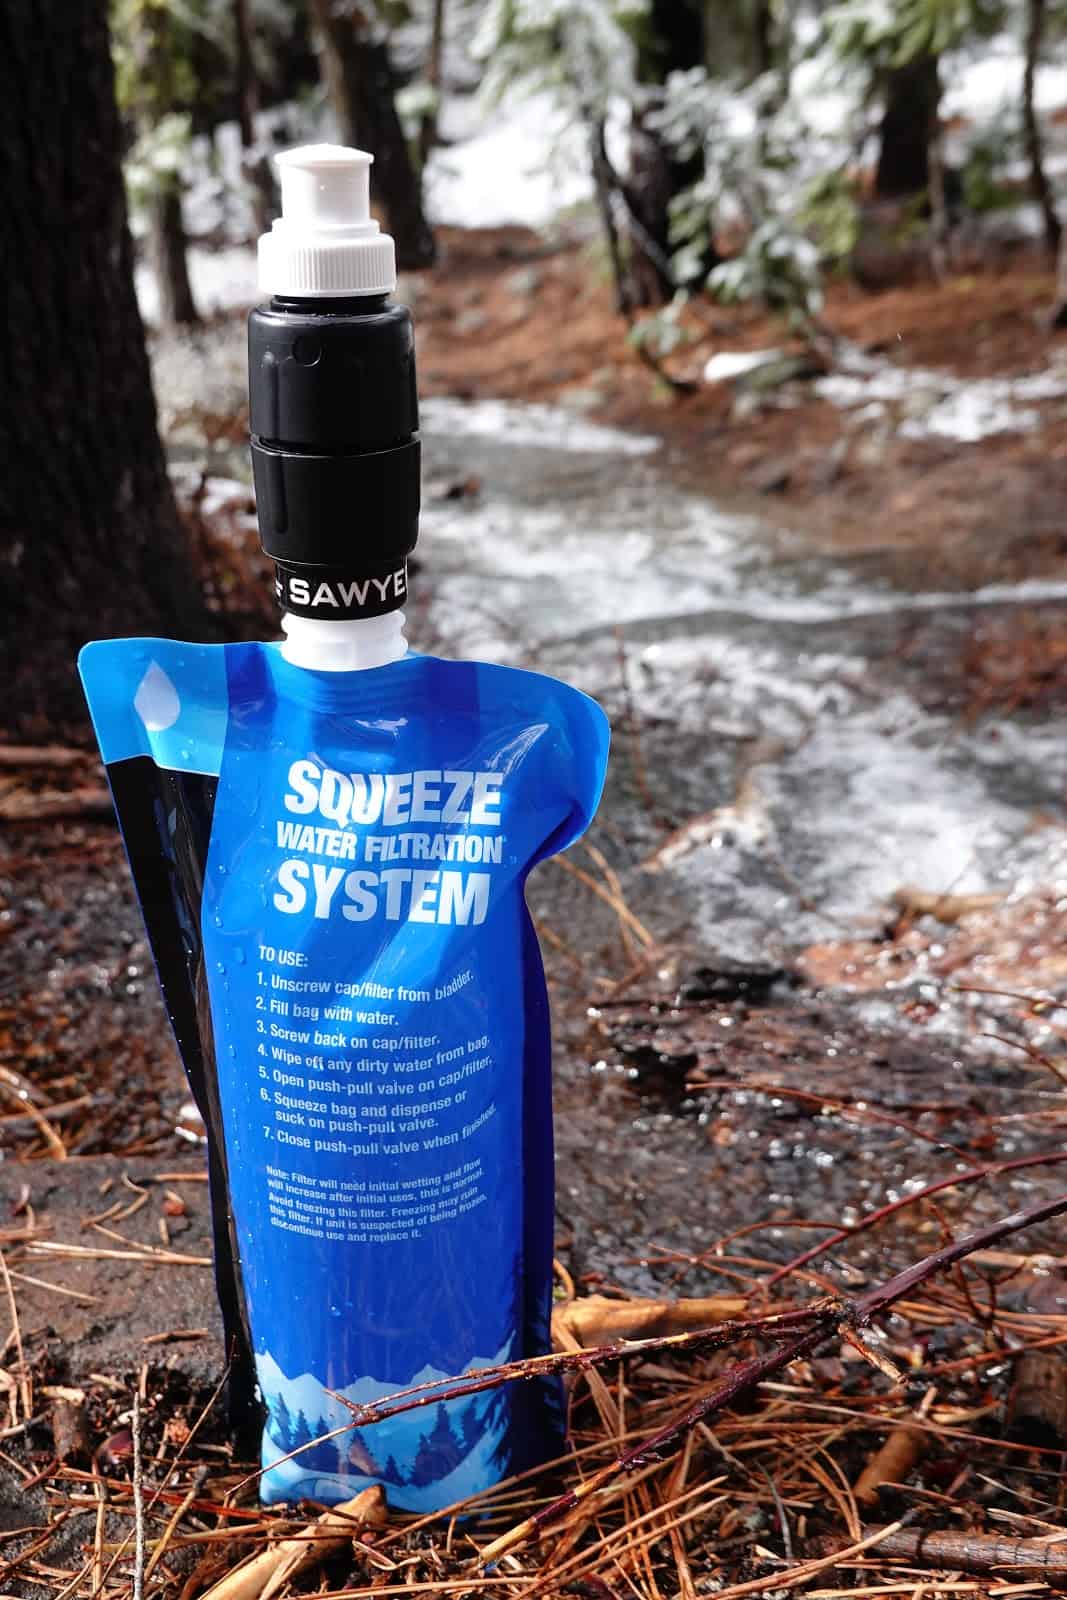

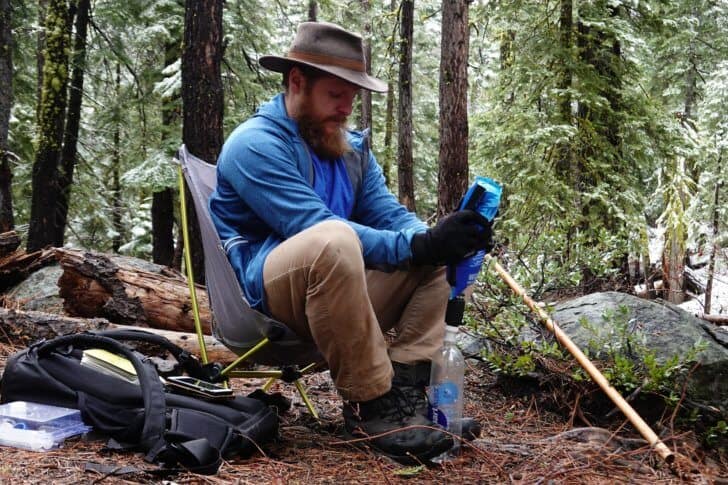

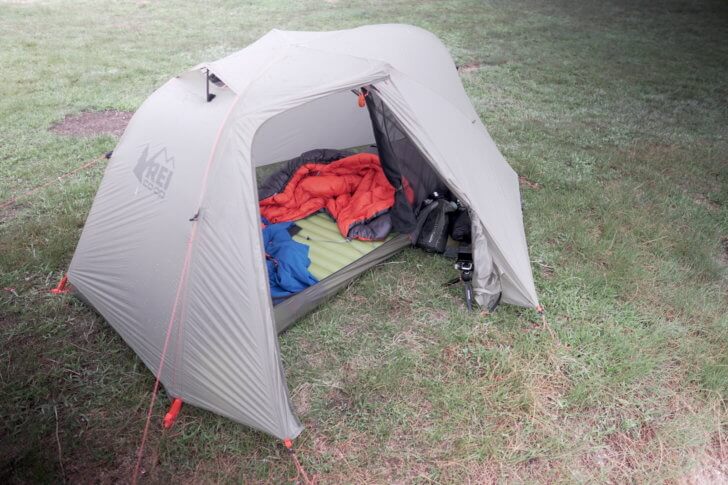
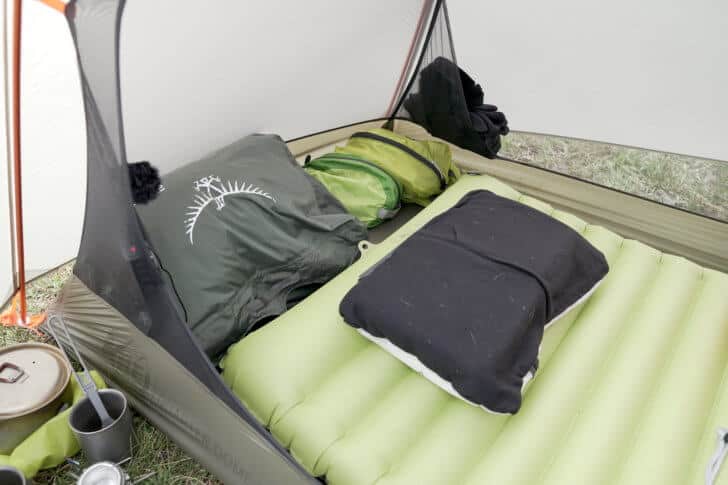
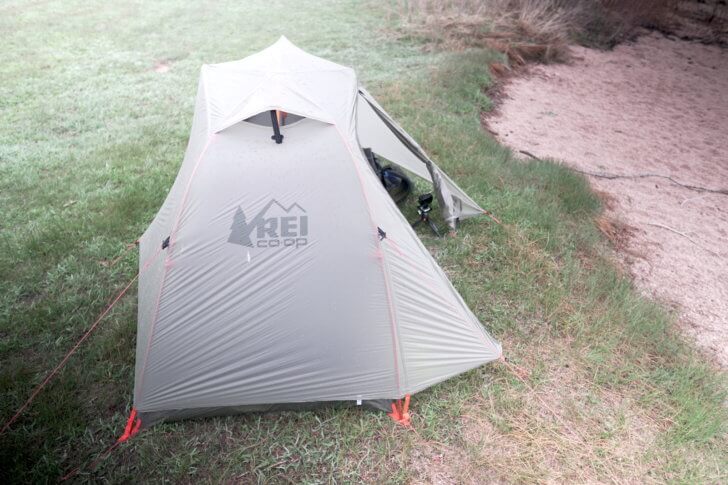
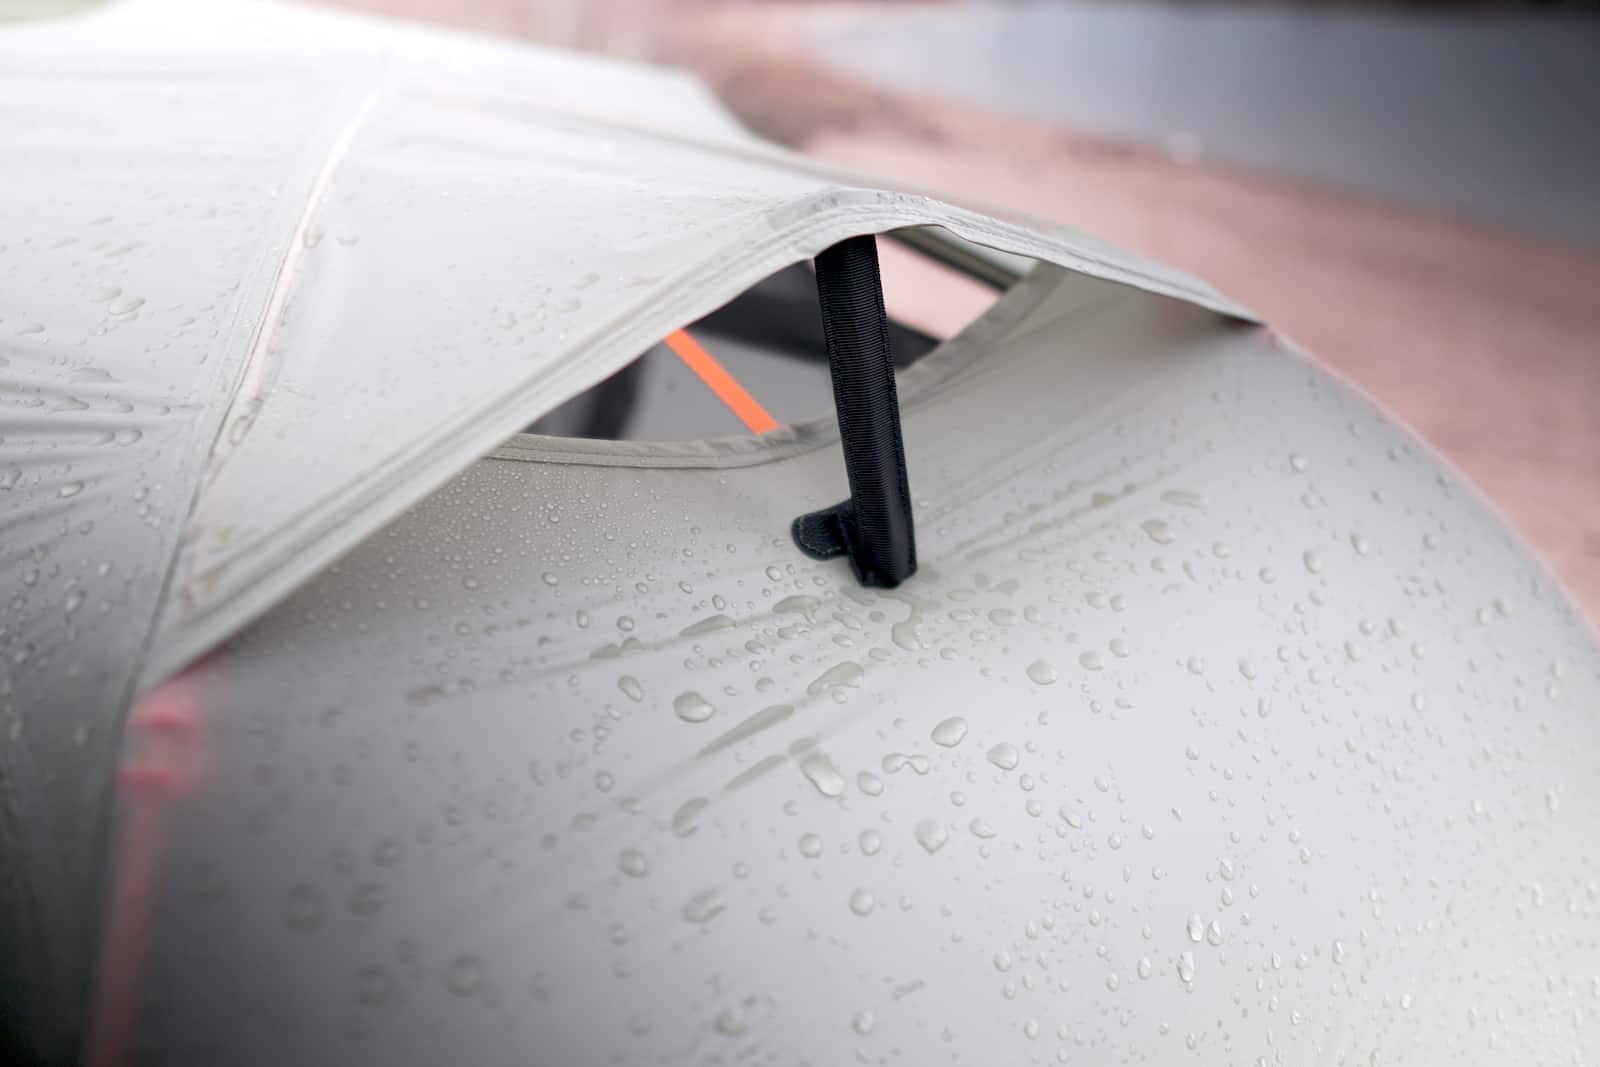
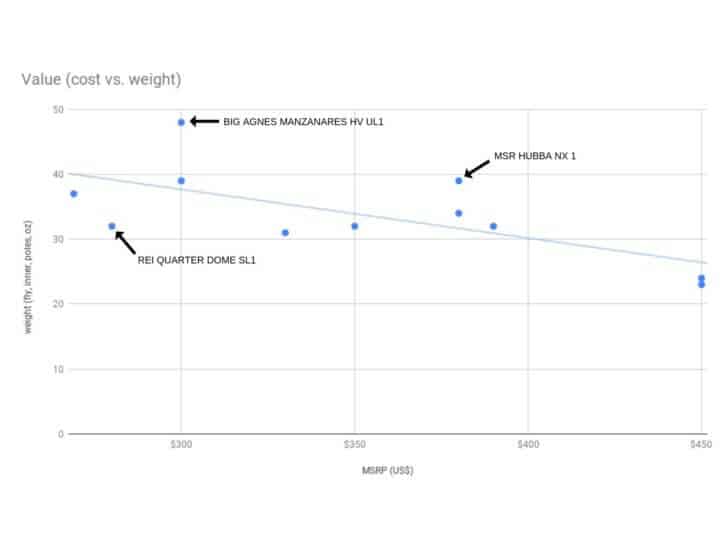
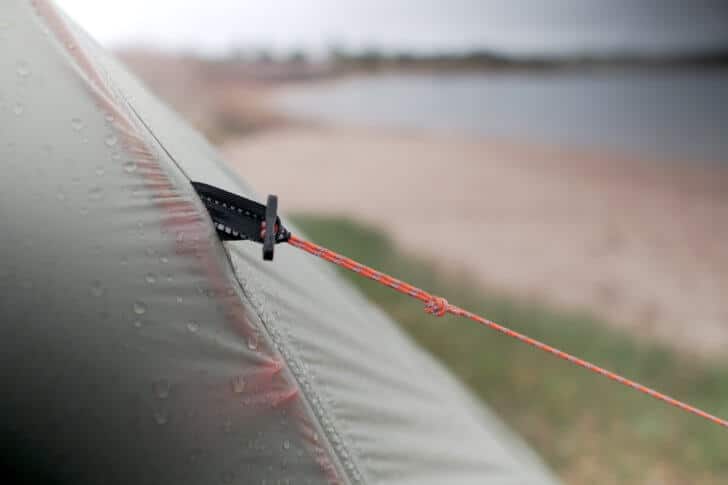
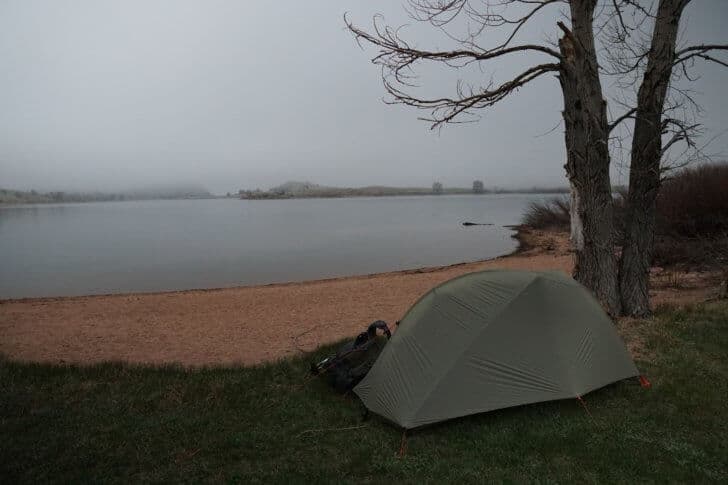
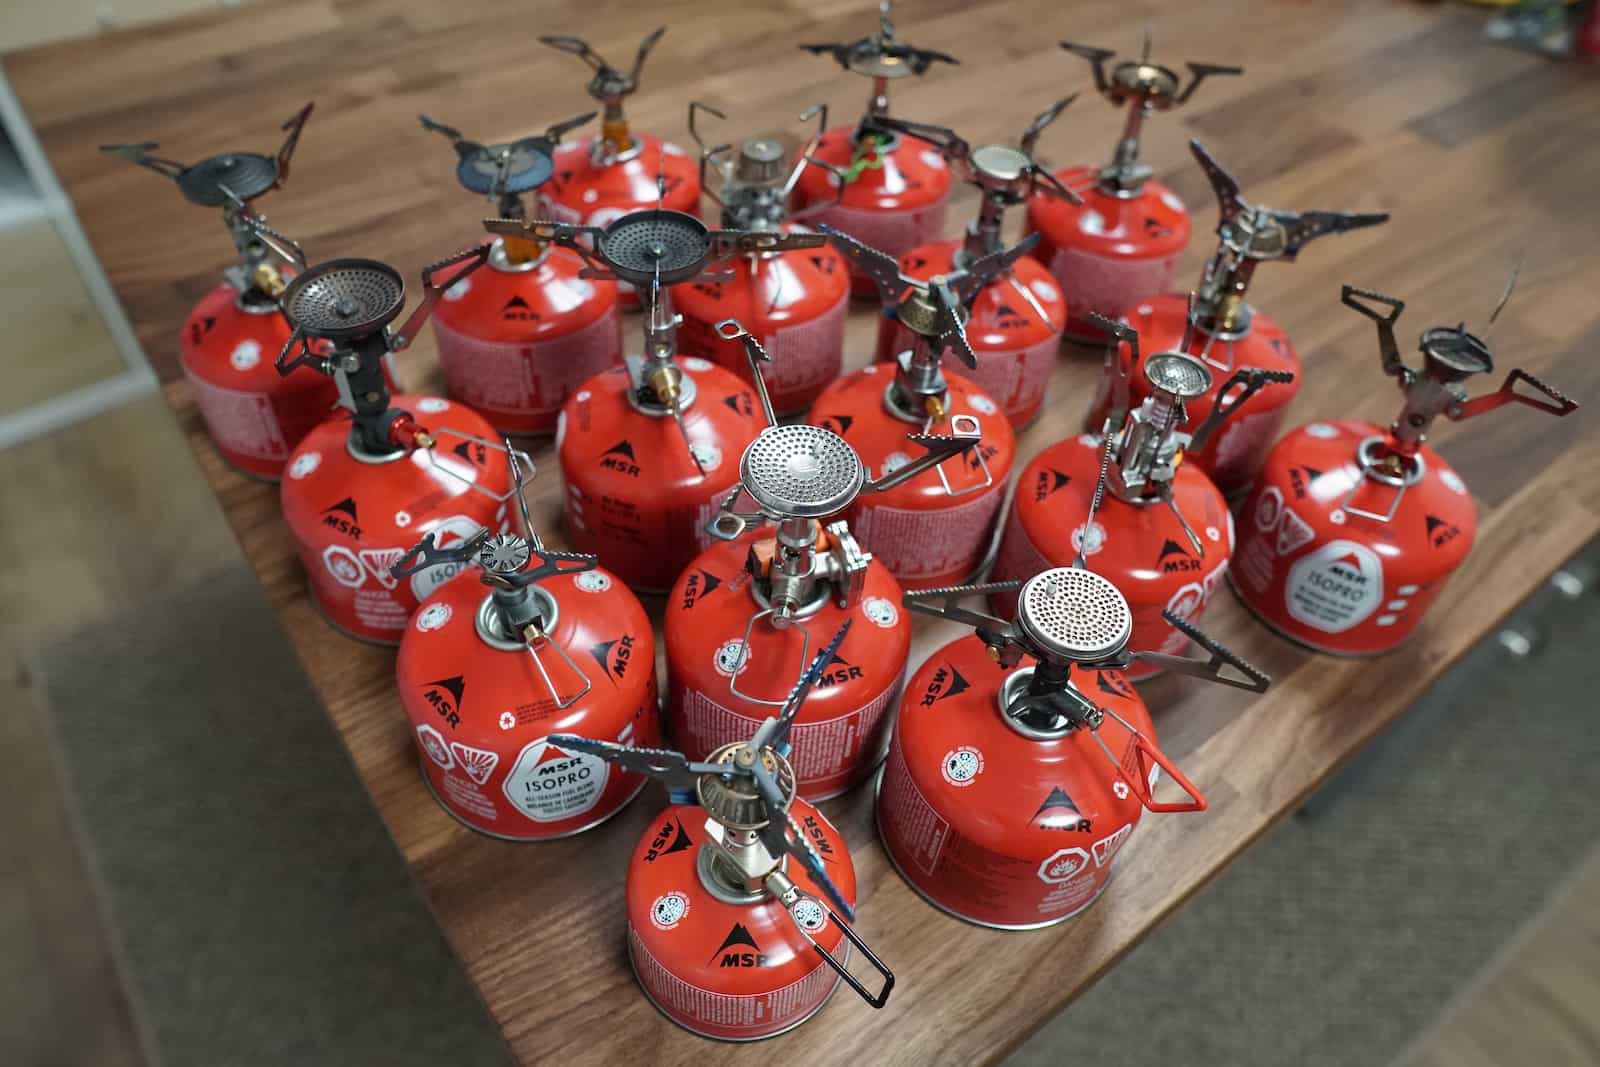
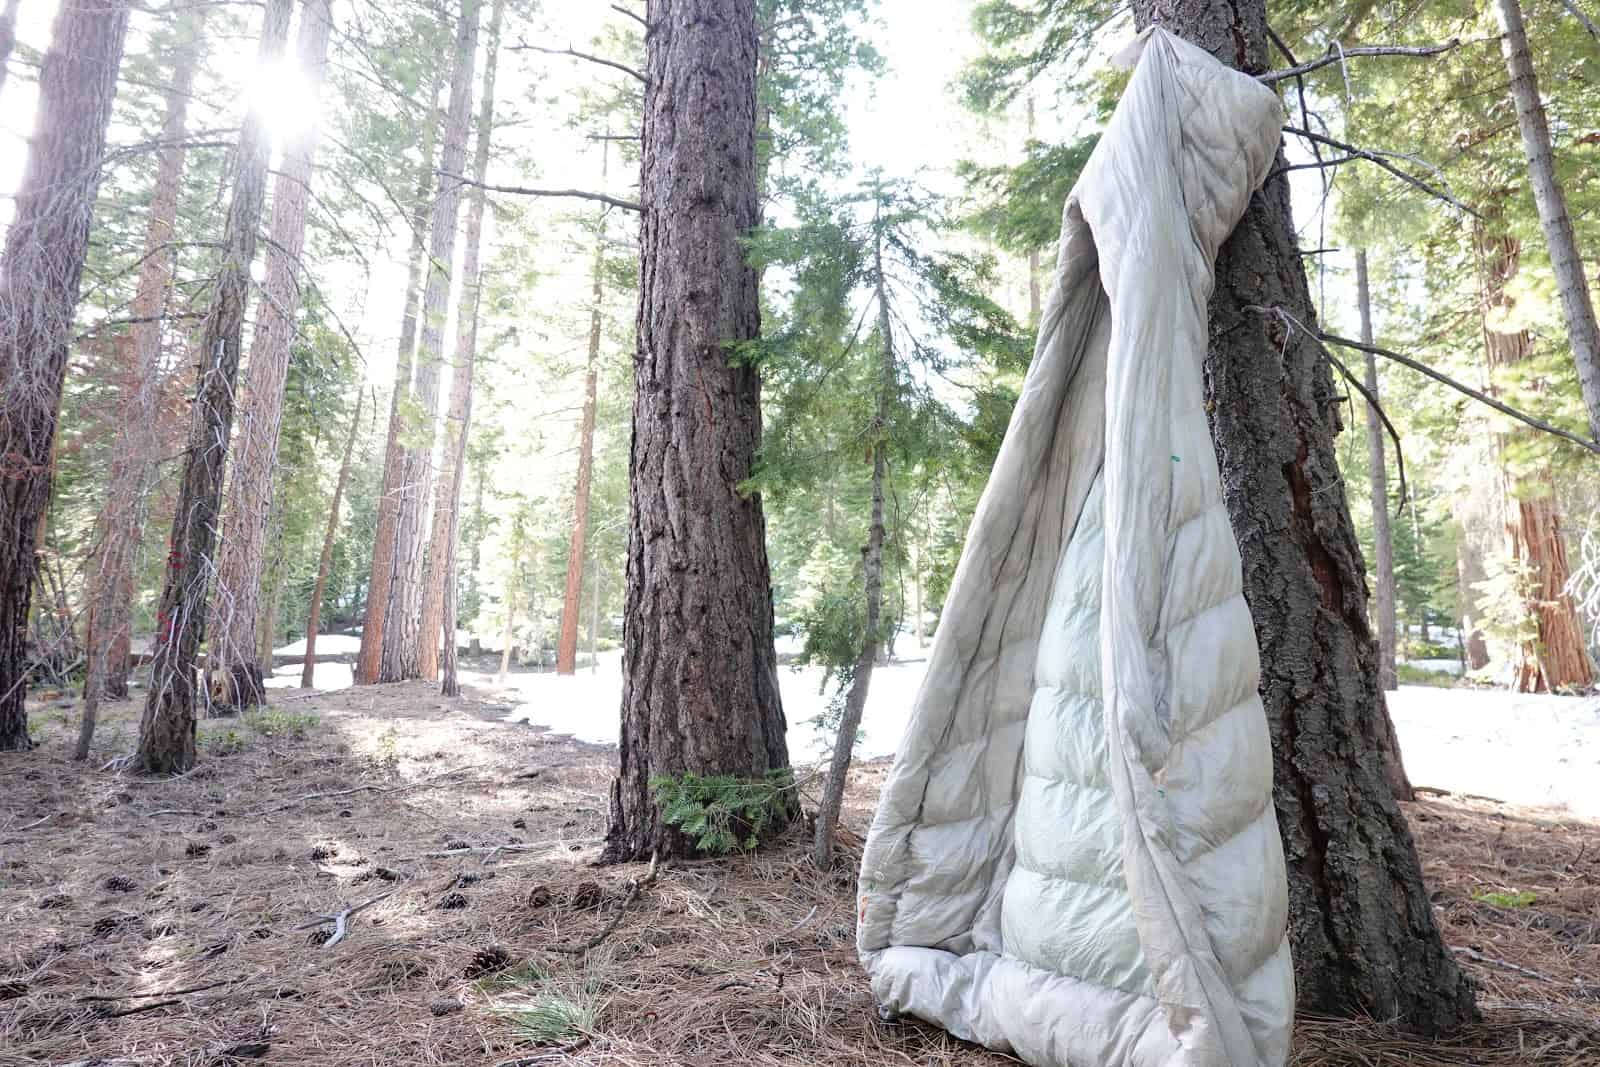
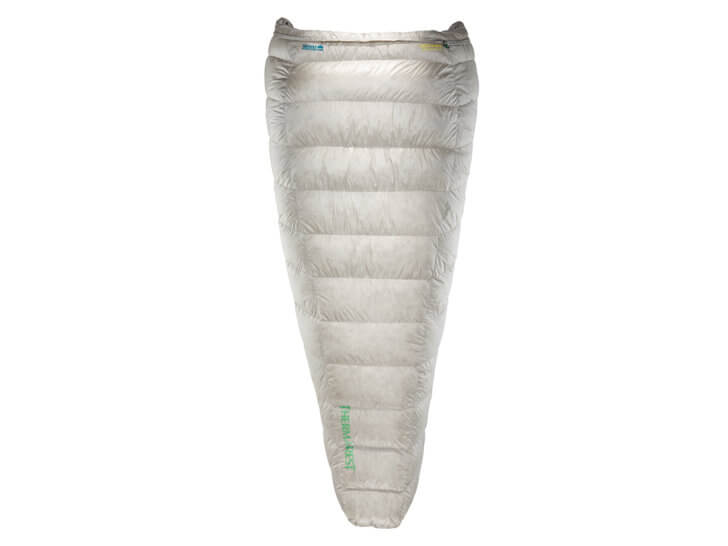


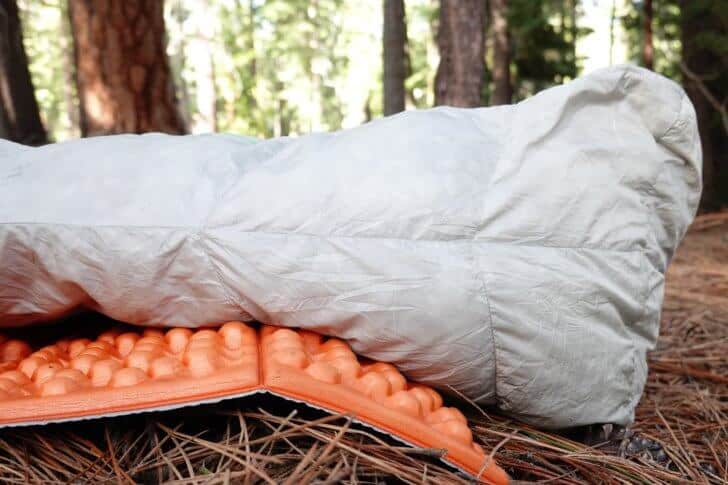
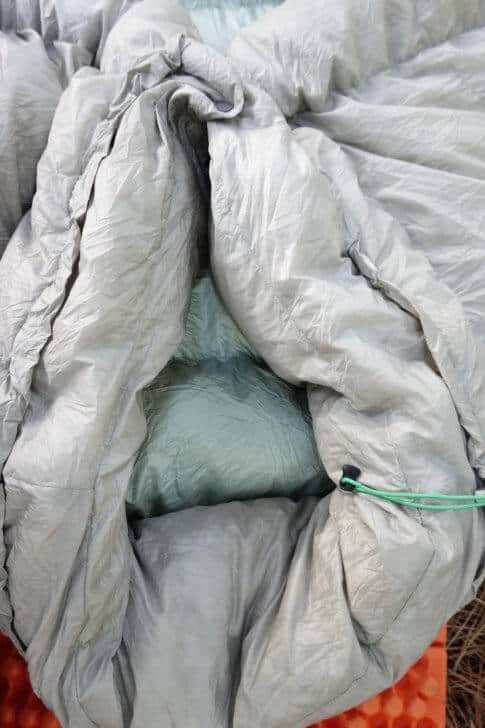


 The Vesper 20F is a superior product: it excels in field performance, design, and material choice. Its warmth-to-weight and warmth-to-size ratio are top of class, and it handles inclement weather as well if not better than any other down quilt or bag I’ve come across. The design is precise and the manufacturing quality is as high as you would expect from Cascade Designs (which is to say, extremely high). The loose threads on my sample Vesper are not likely to be found on the consumer runs of the product.
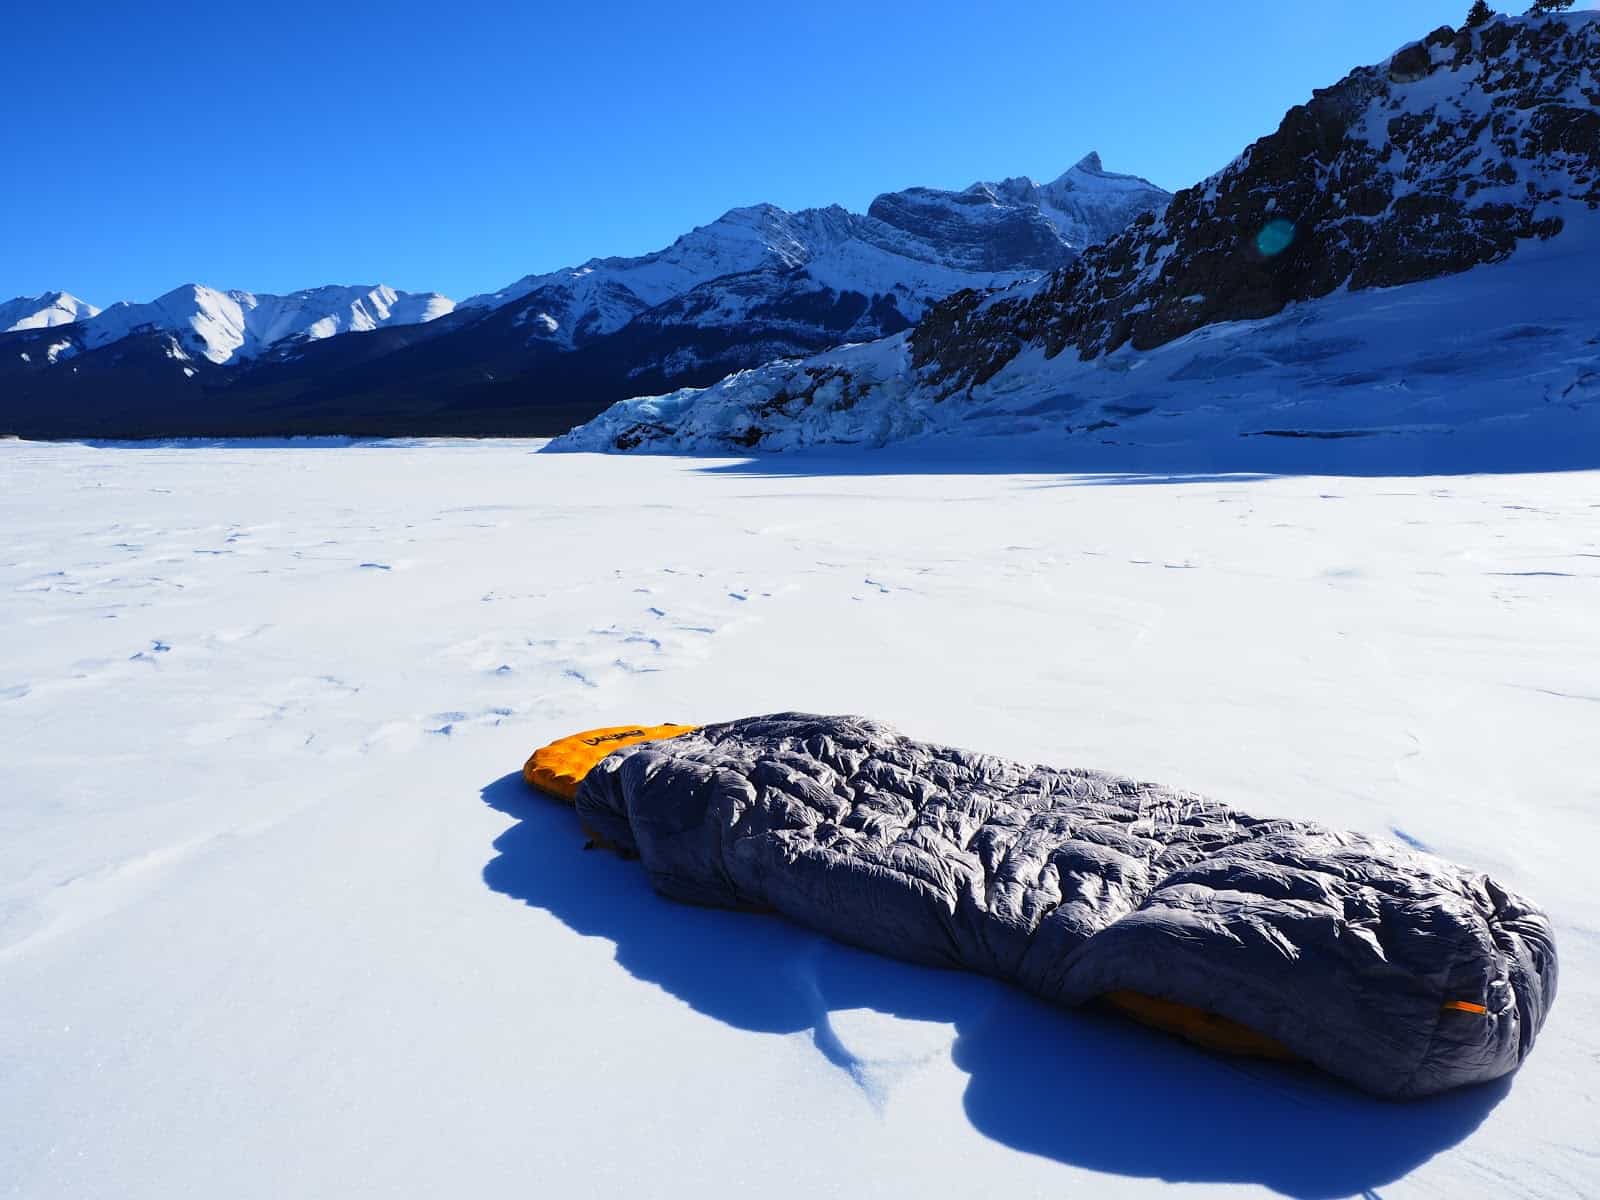

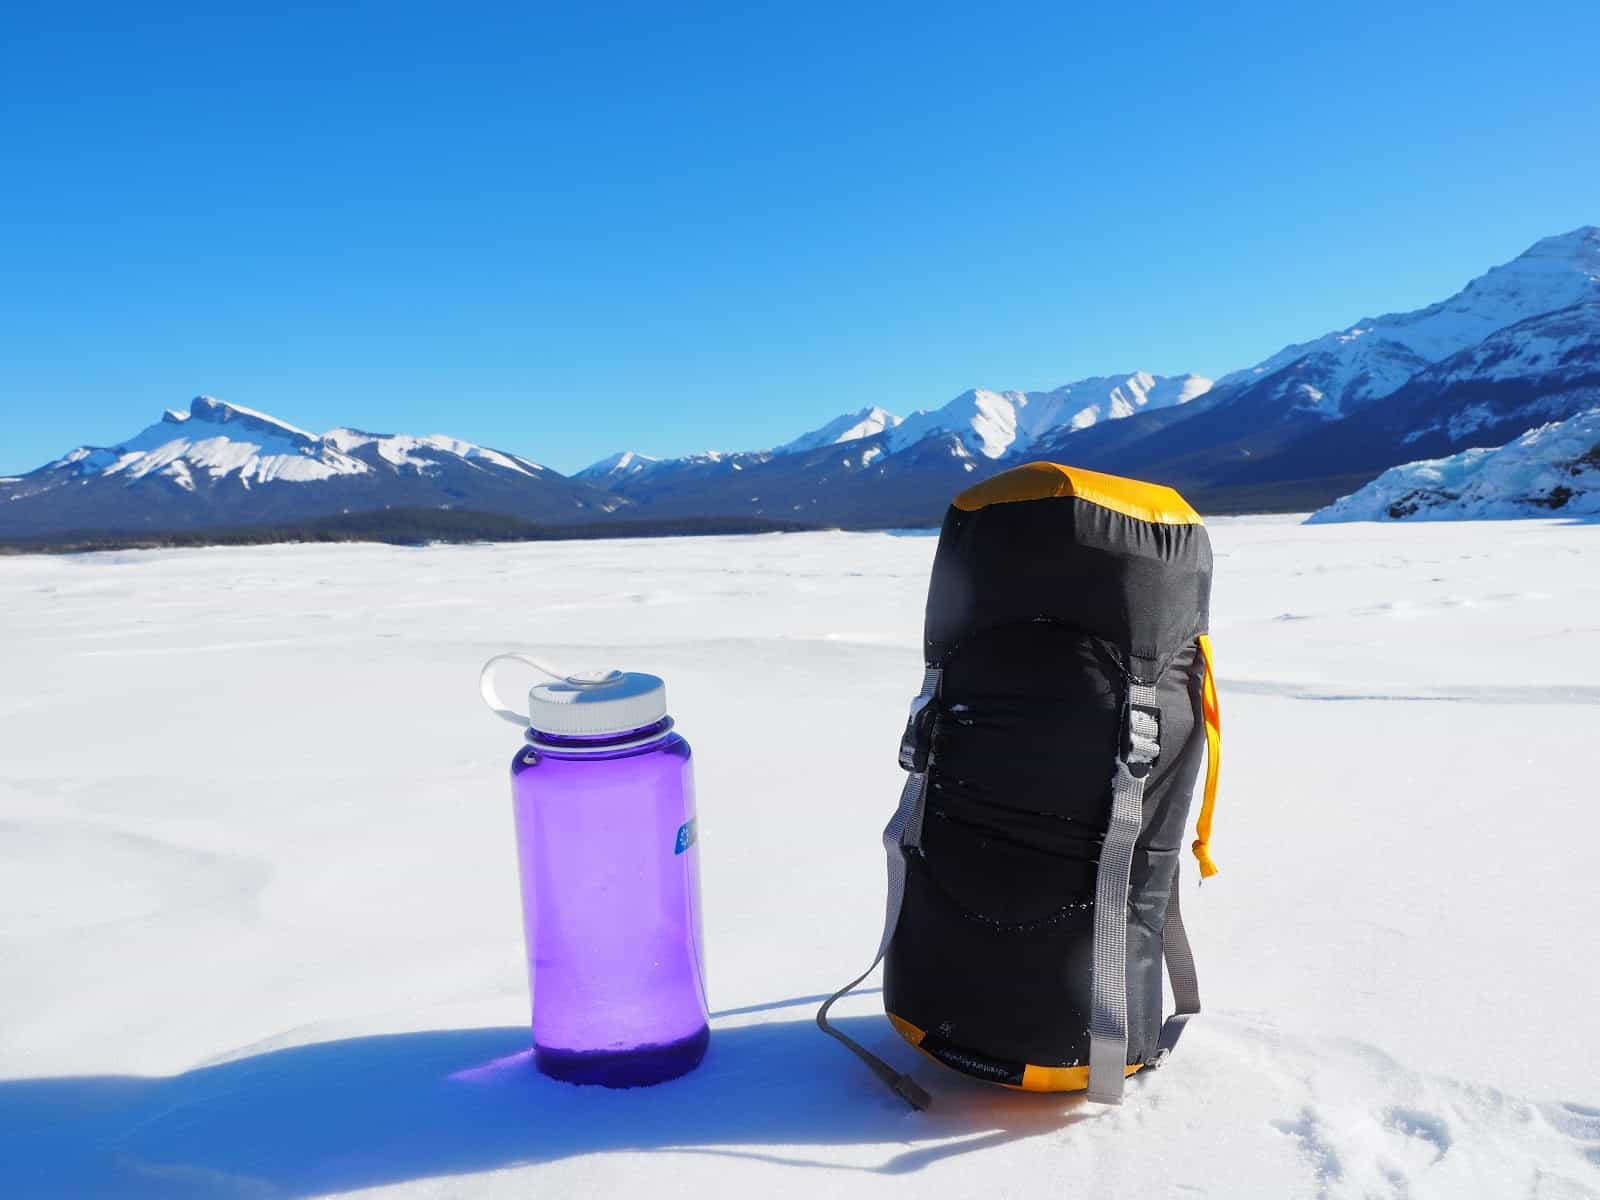
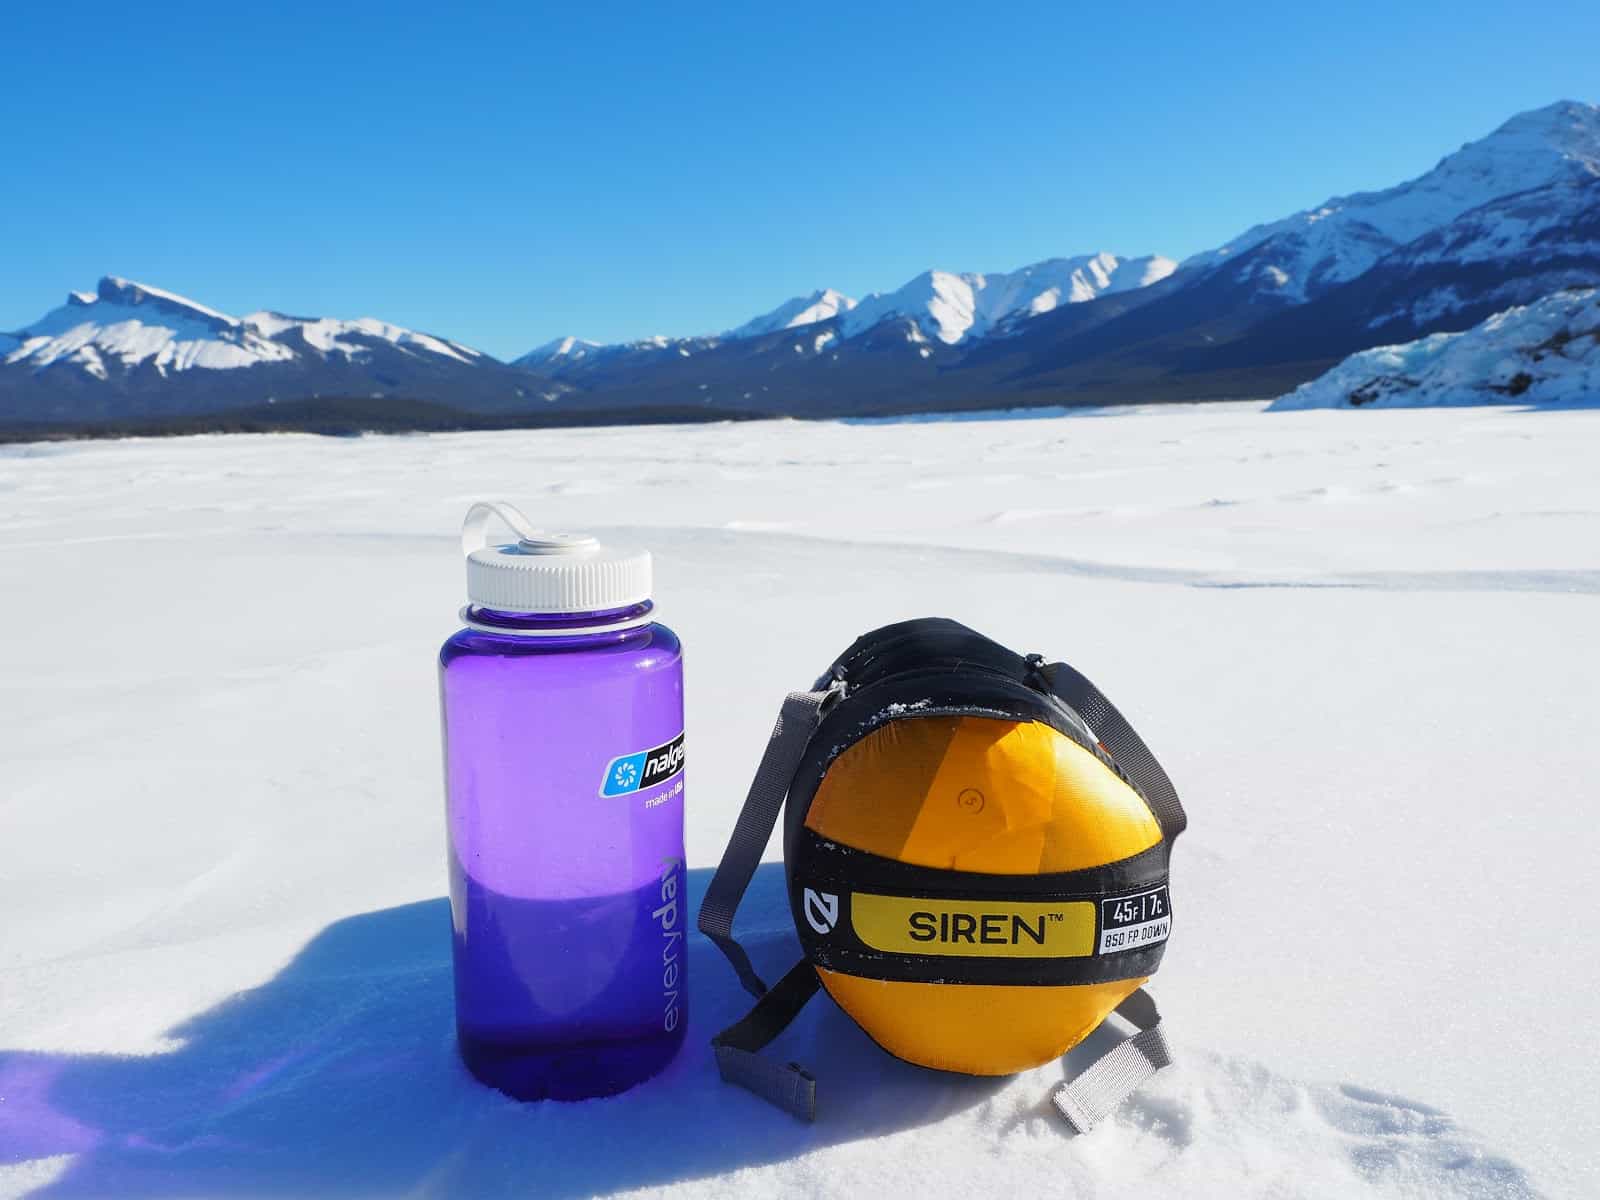
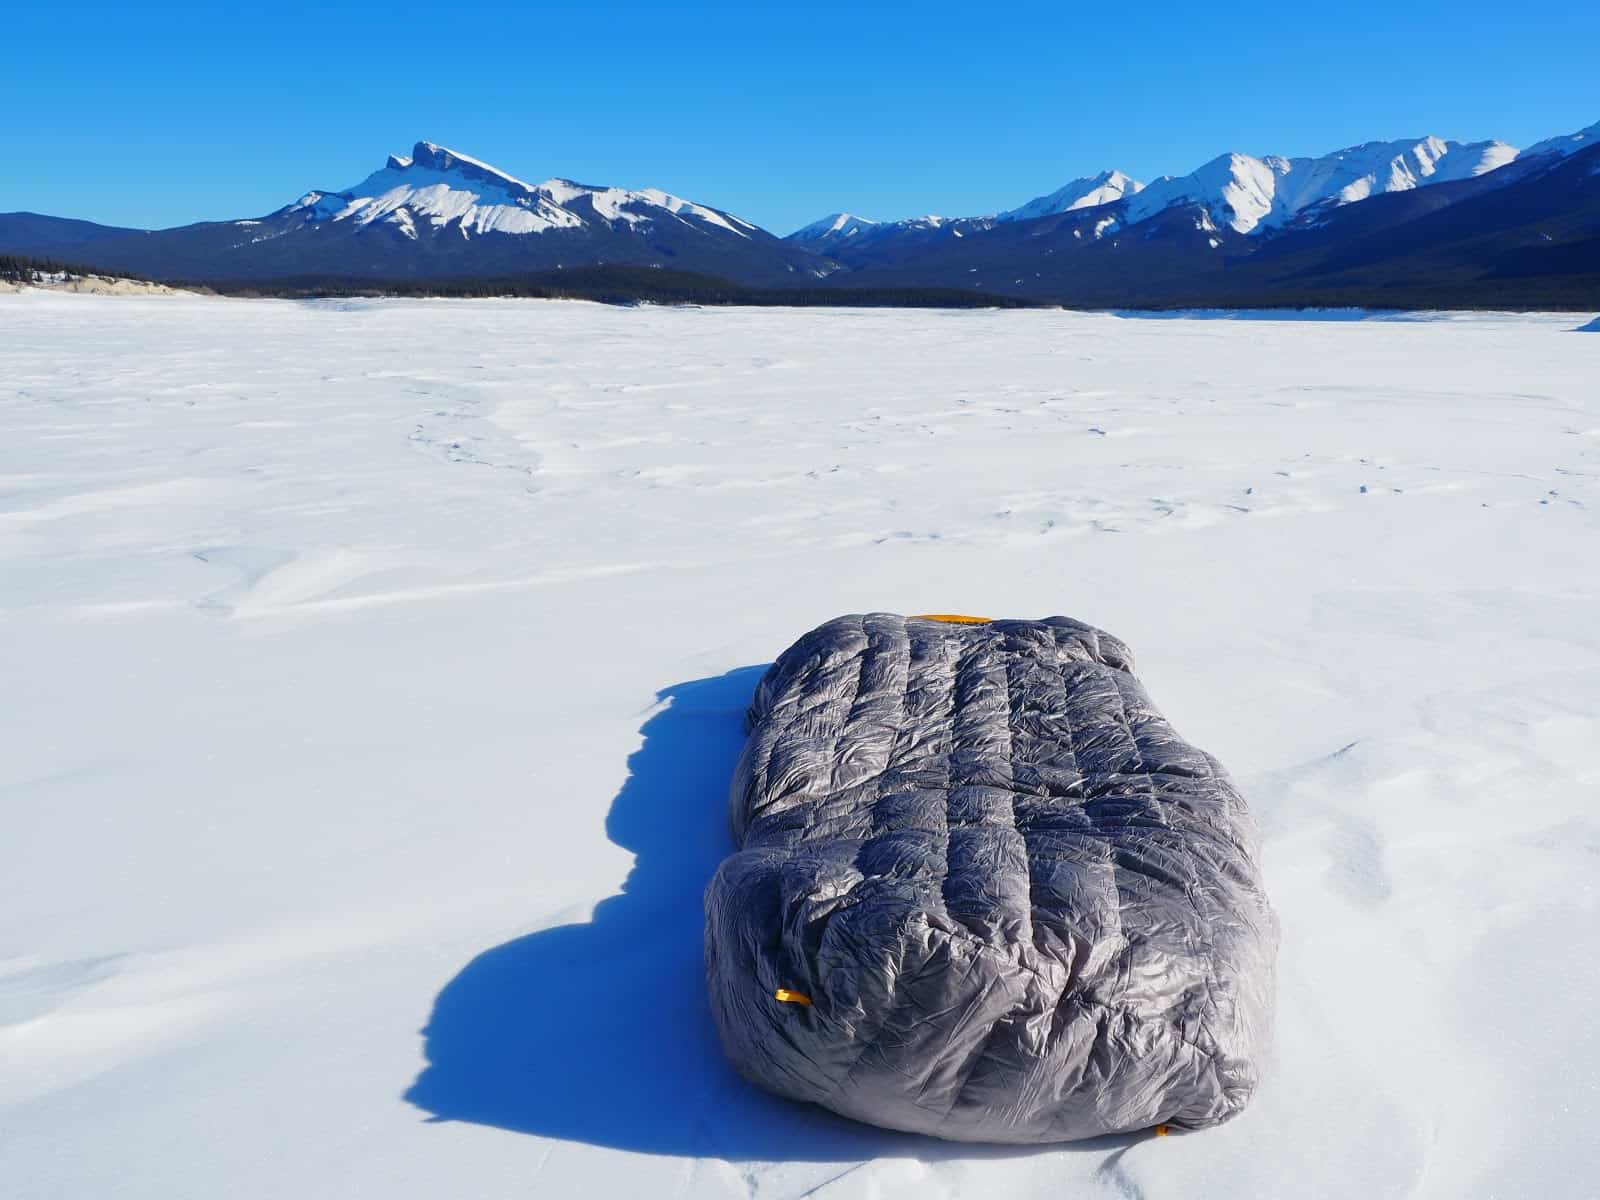

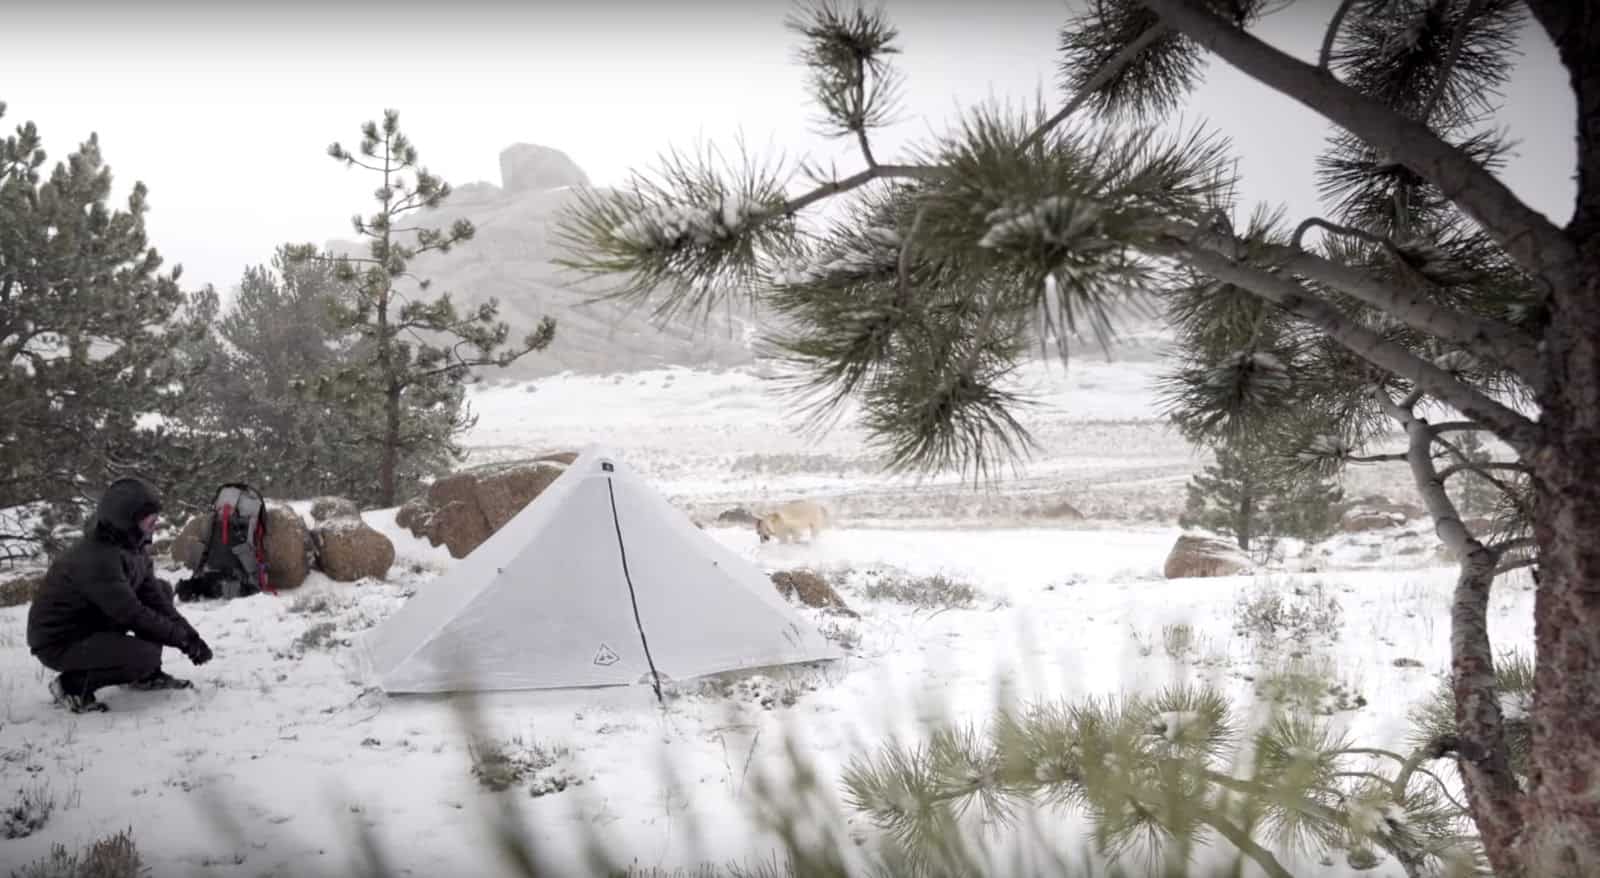

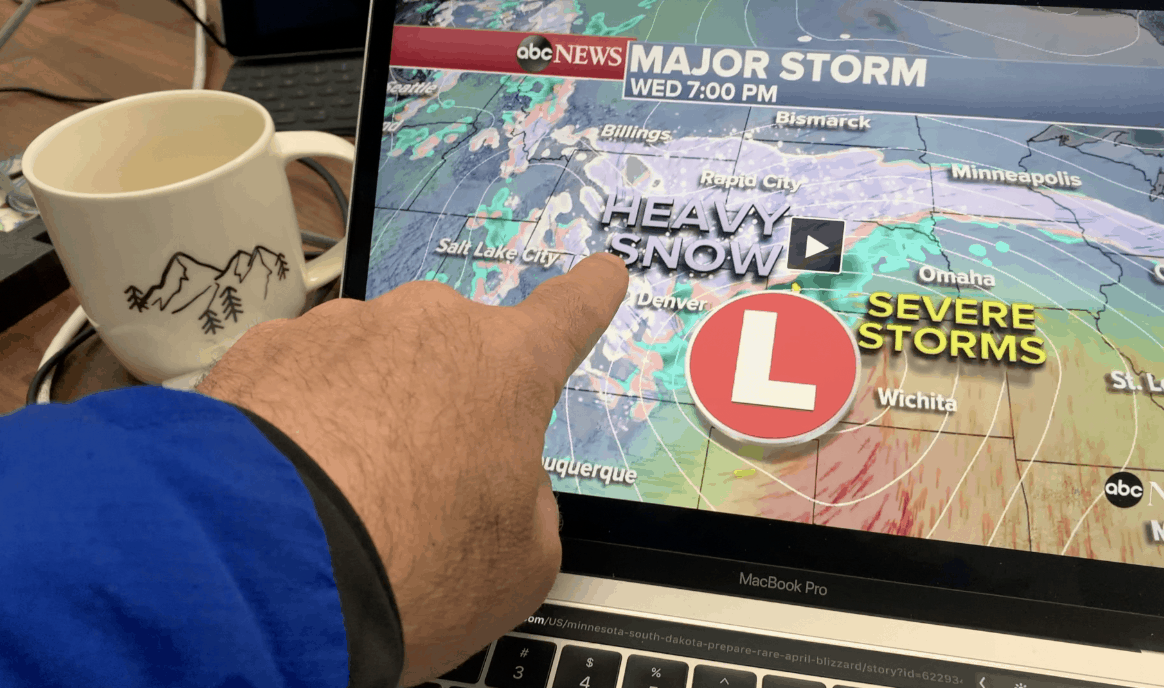
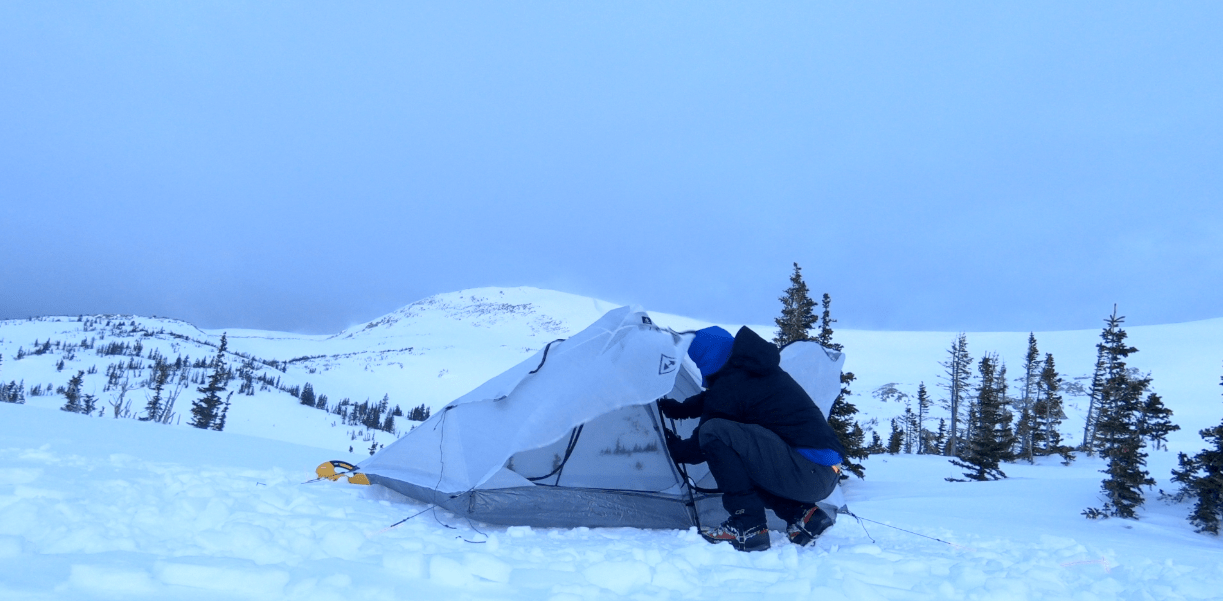 Gear Notes:
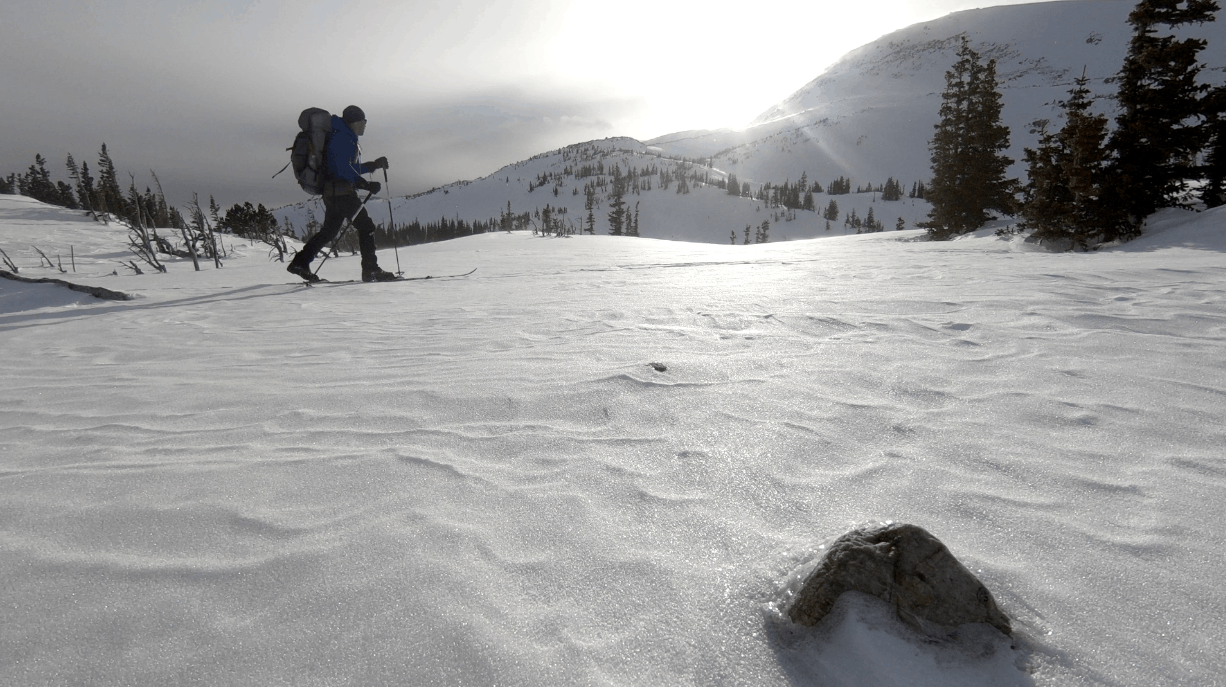 Lessons Learned: