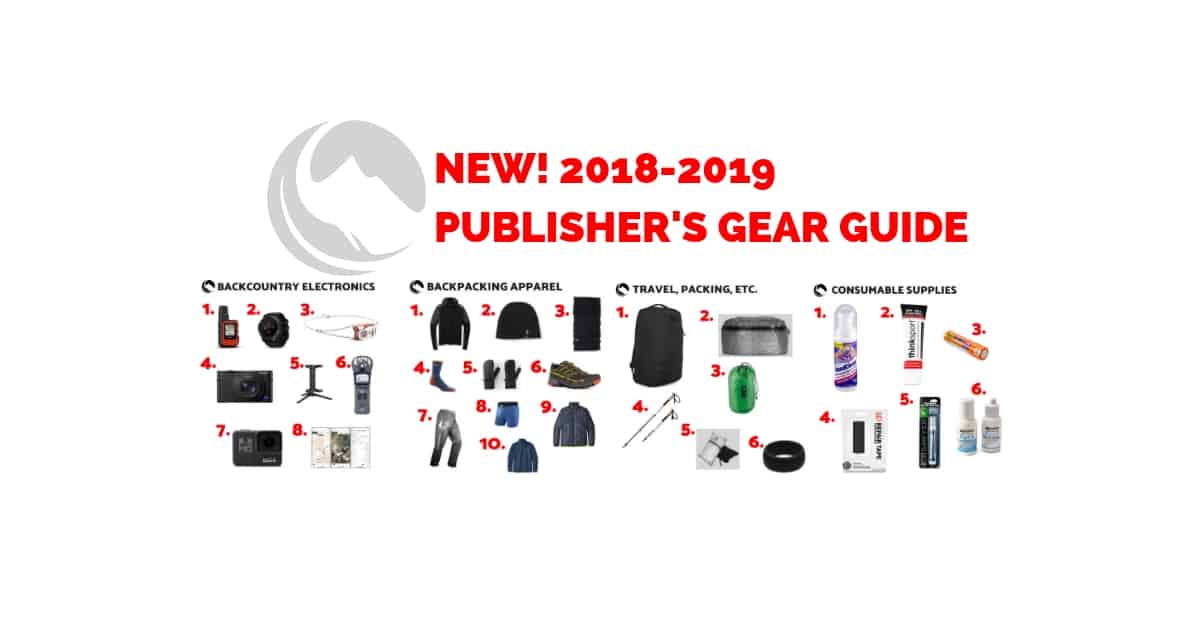
You don’t have access to view this content.
MYOG Ultralight Fastpacking ‘Tivy’
Step by step instructions on how to construct my MYOG tivy model and videos and pictures of it in use.
Step by step instructions on how to construct my MYOG tivy model and videos and pictures of it in use.
You don’t have access to view this content.
You don’t have access to view this content.
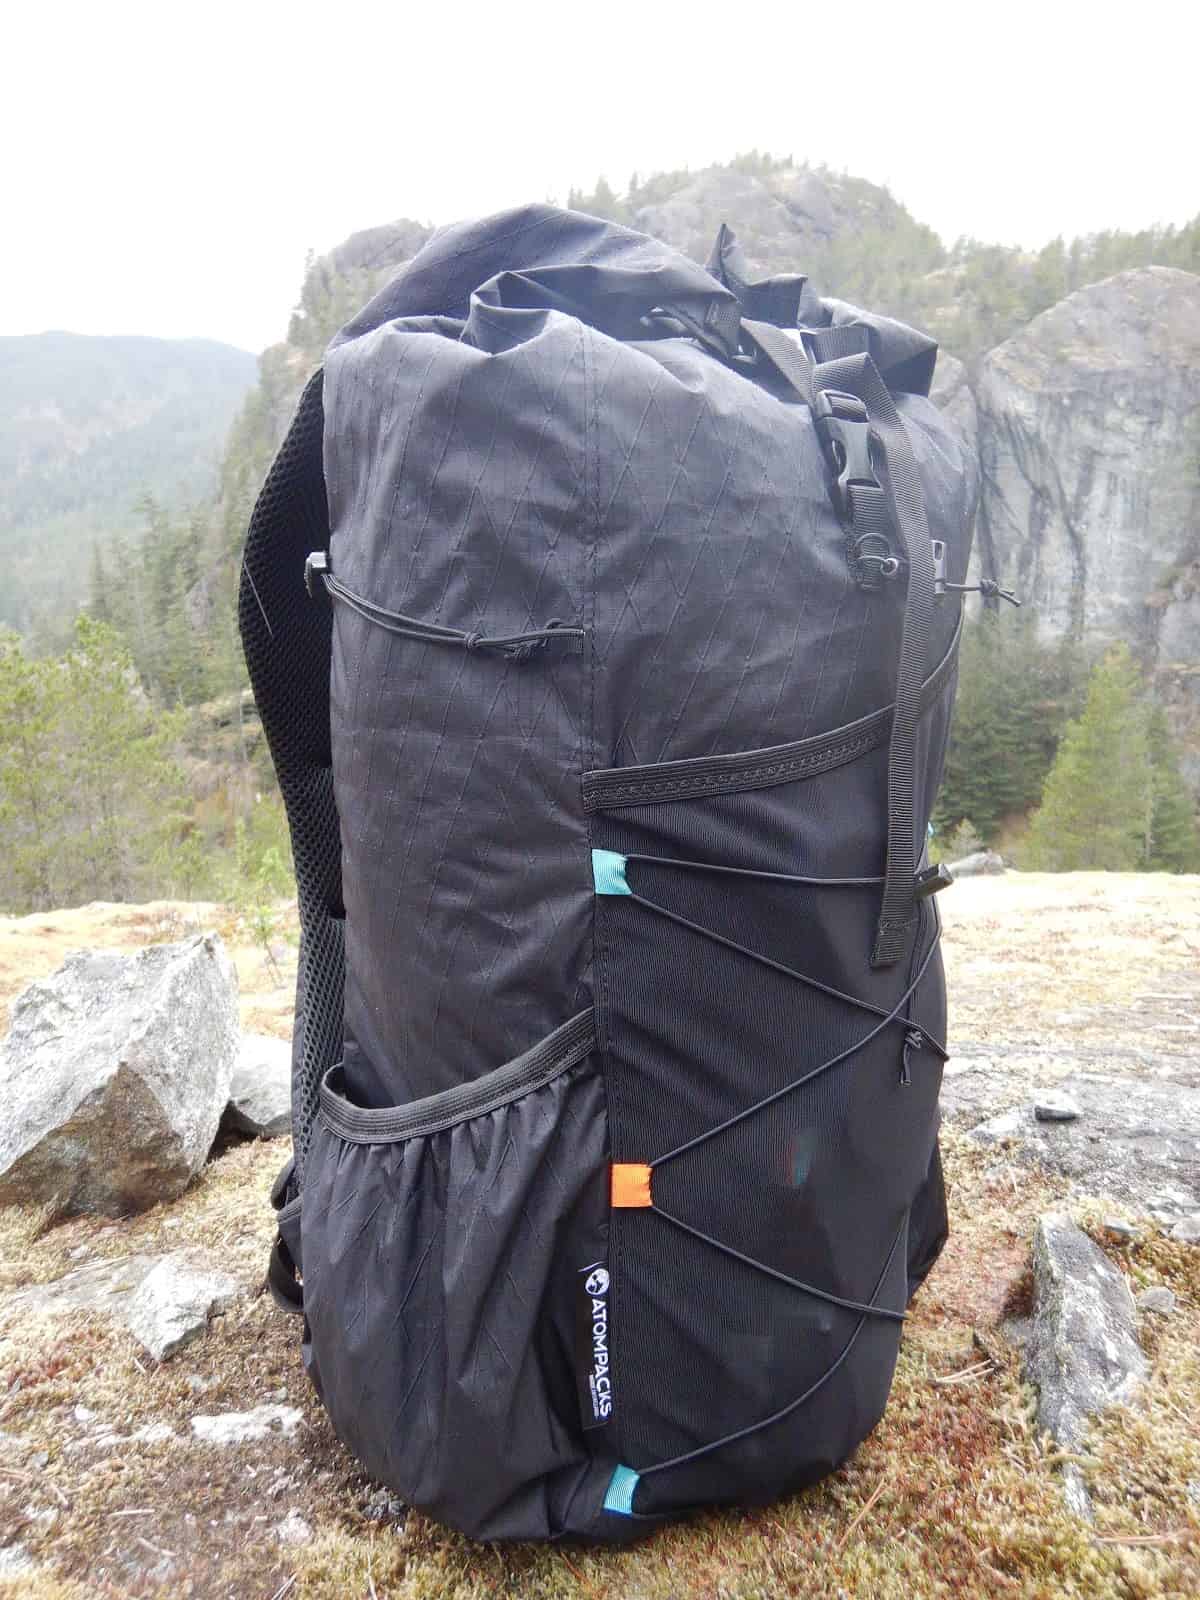
The Atom is a simple pack with a clear mission, having a minimal design and being built for fast and efficient travel.
You don’t have access to view this content.
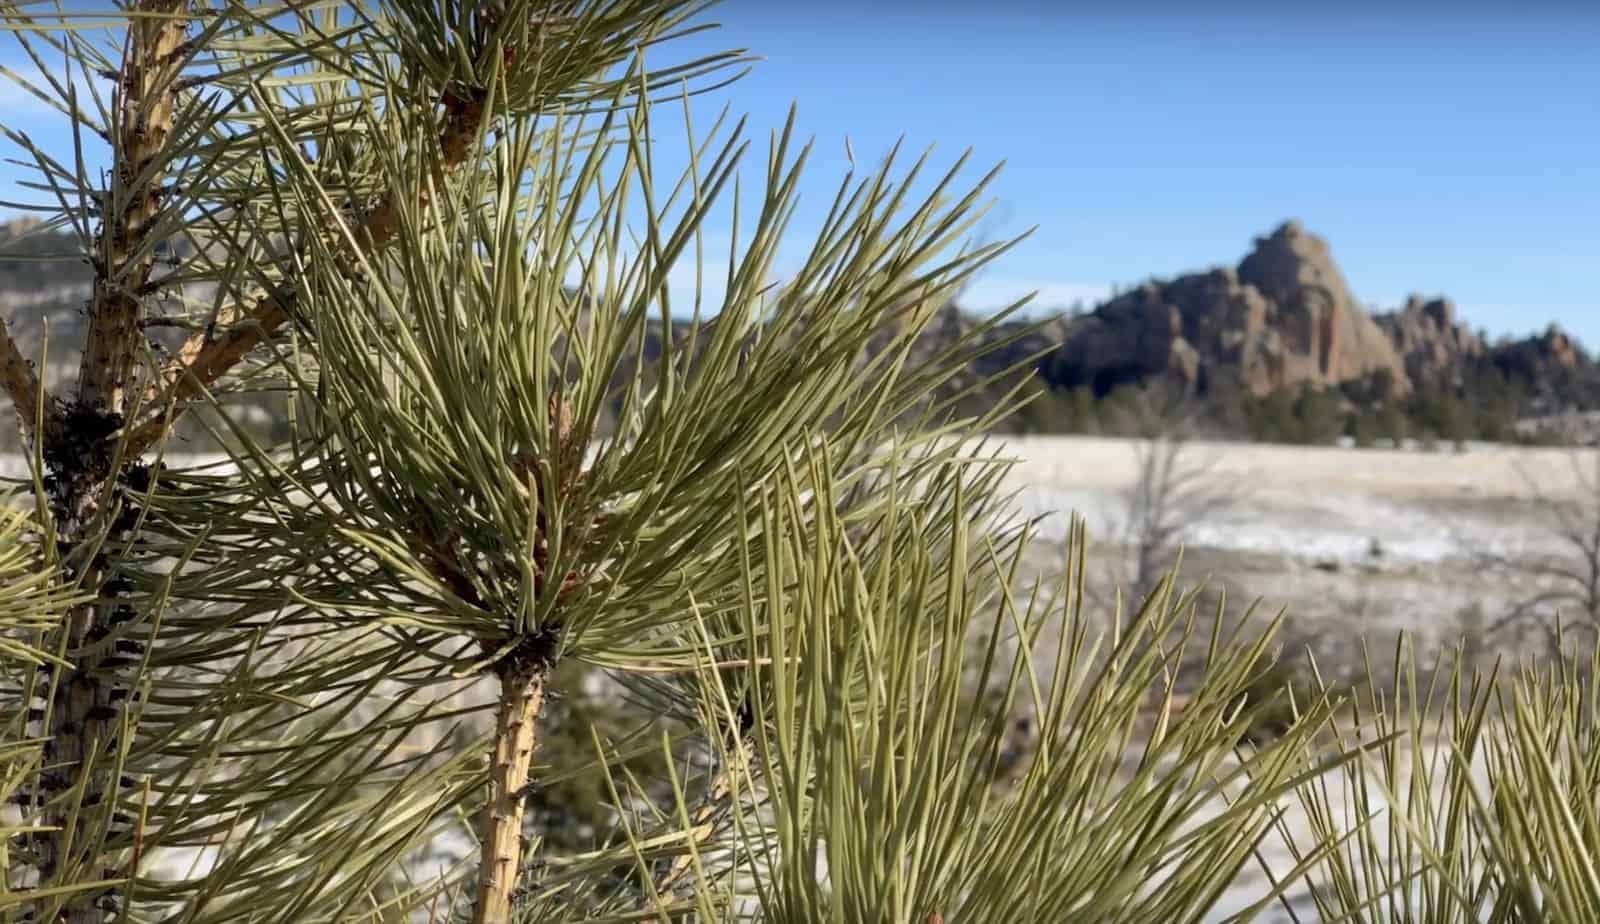
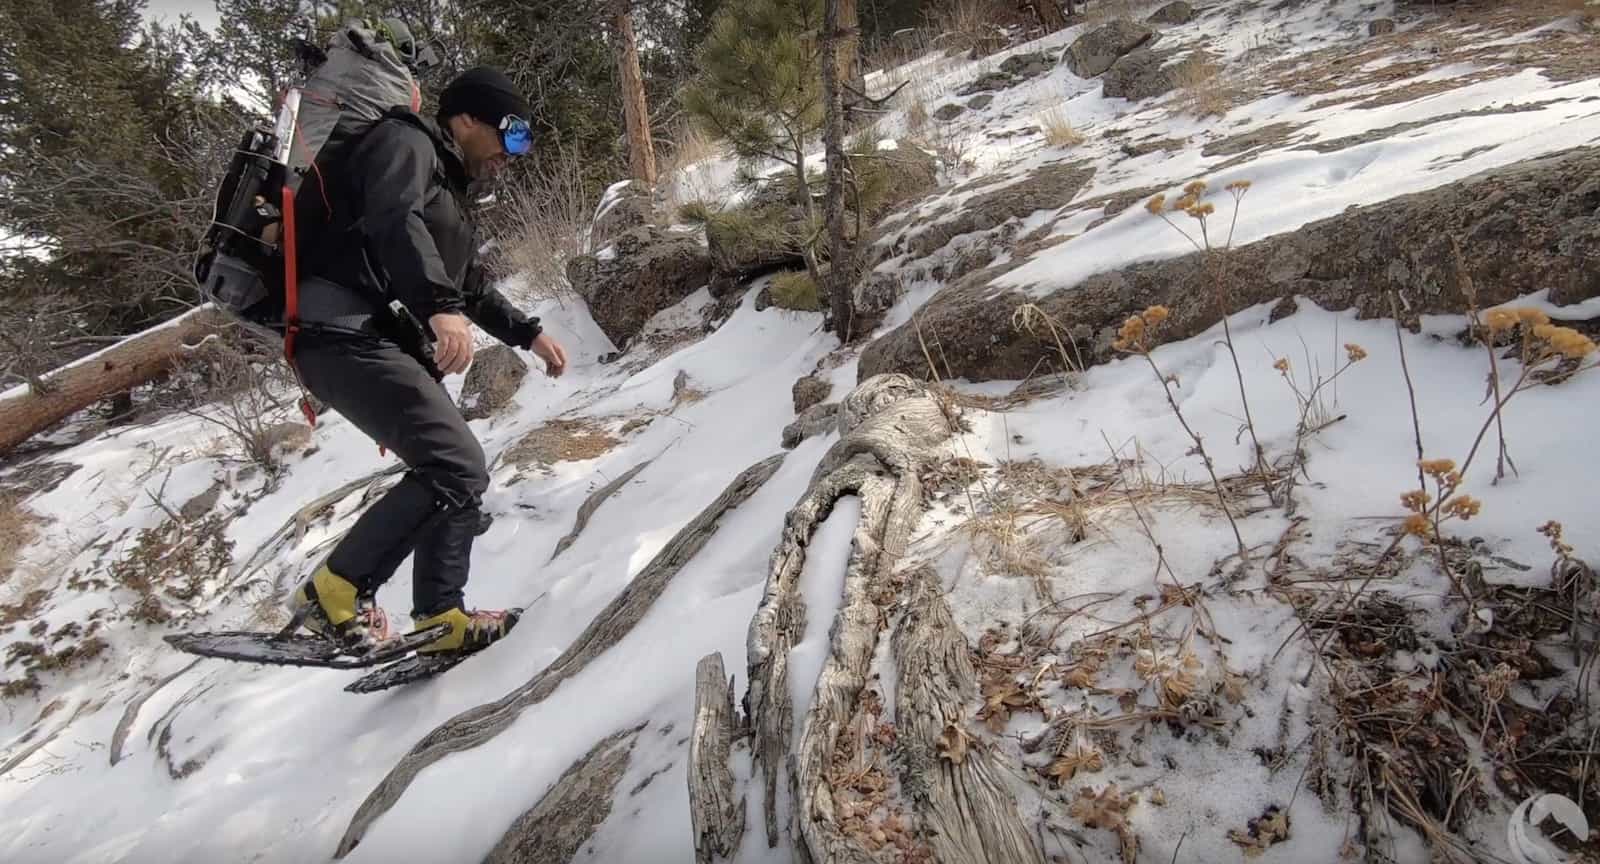
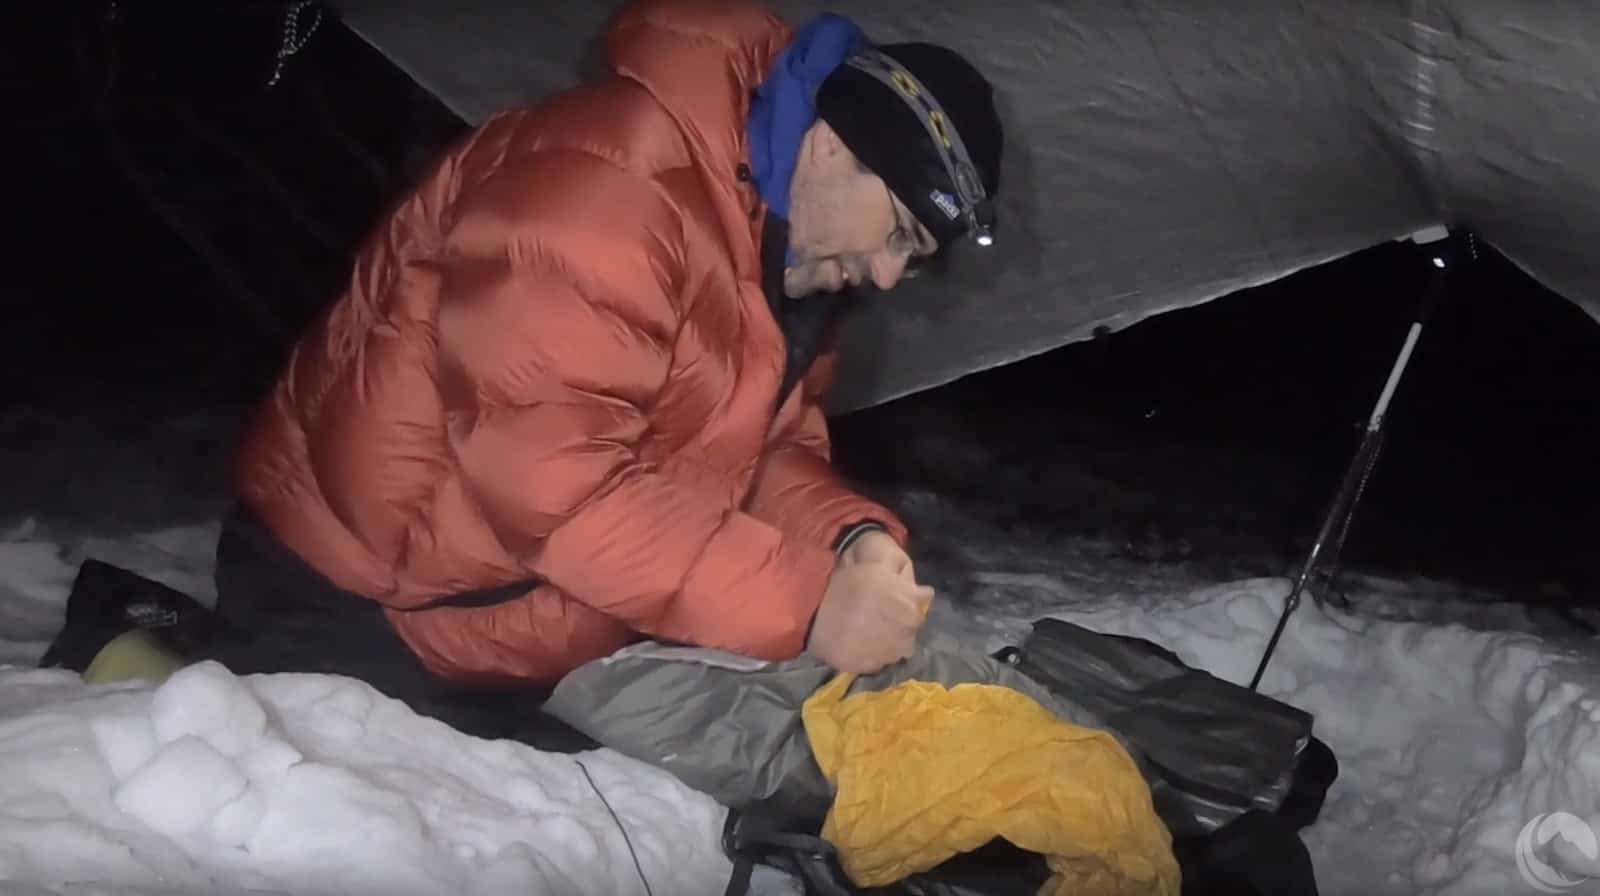
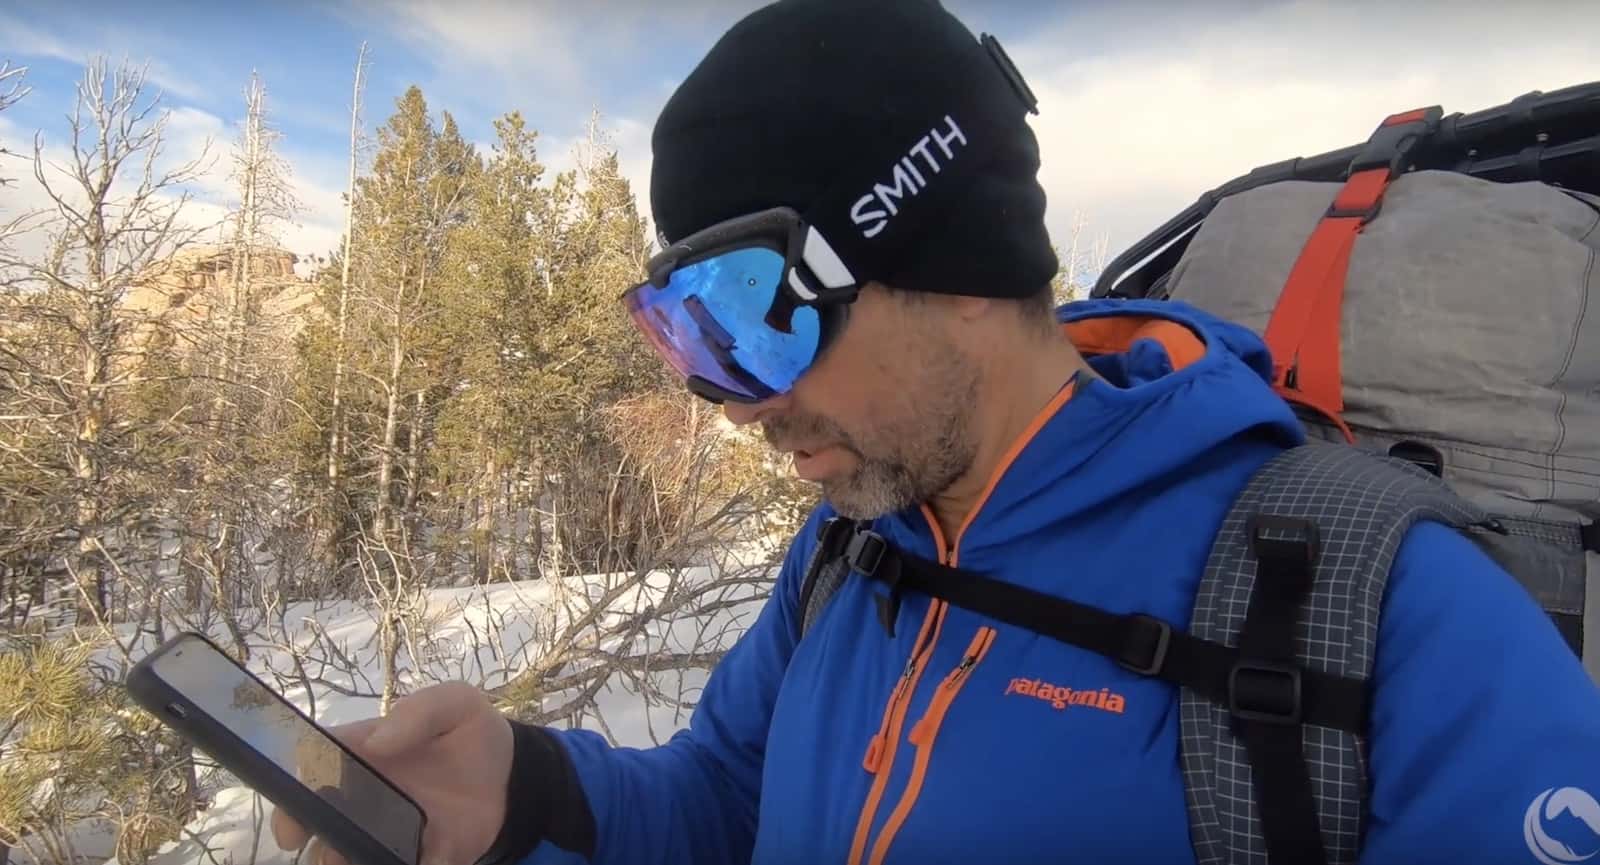
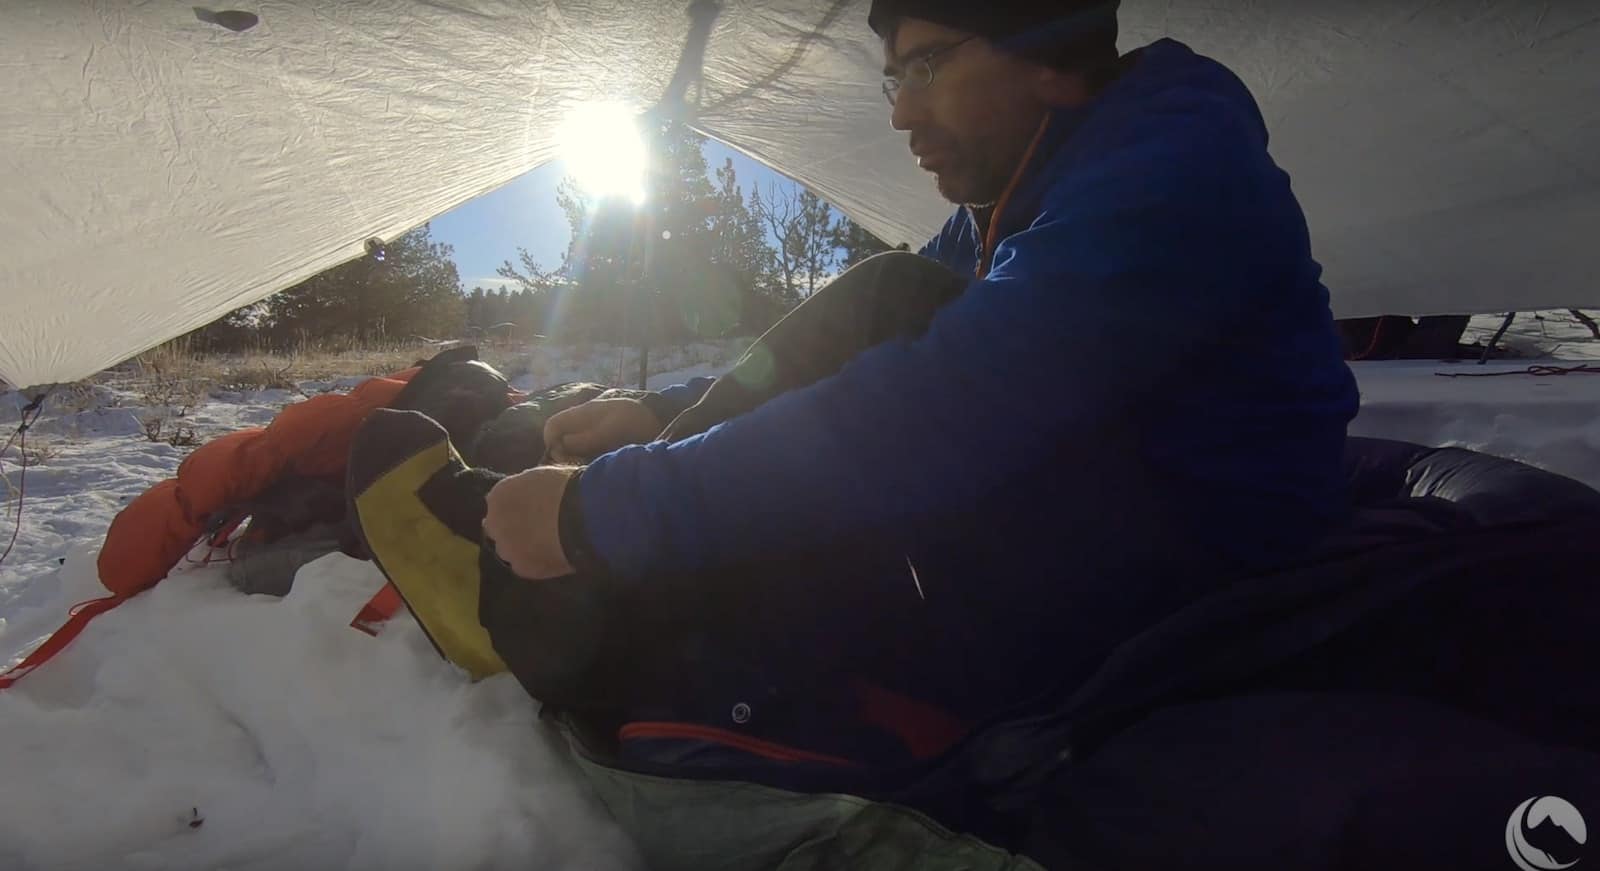
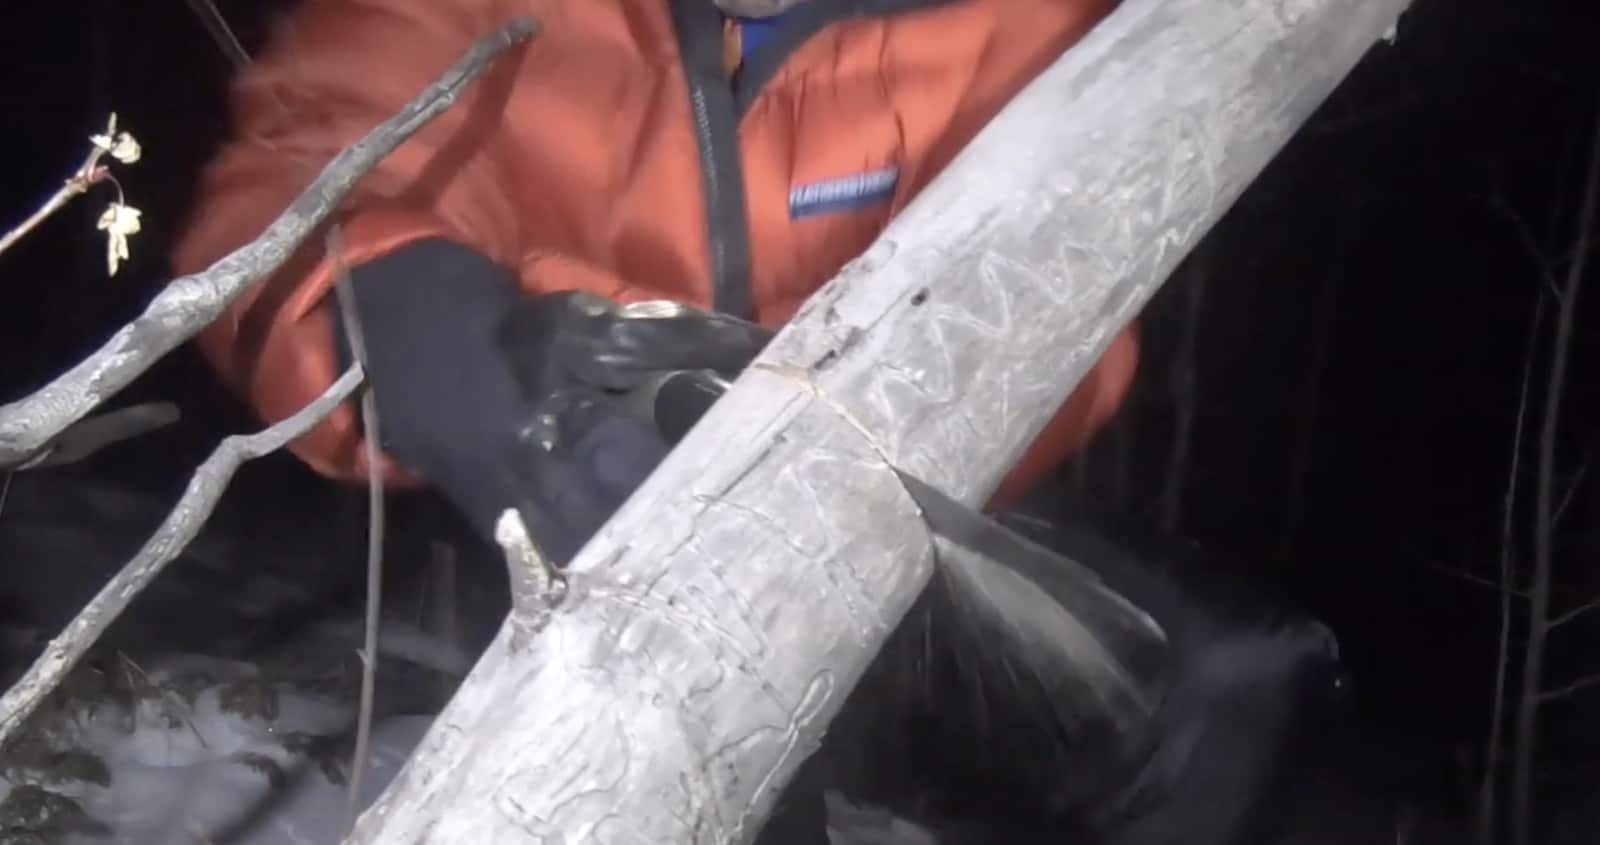
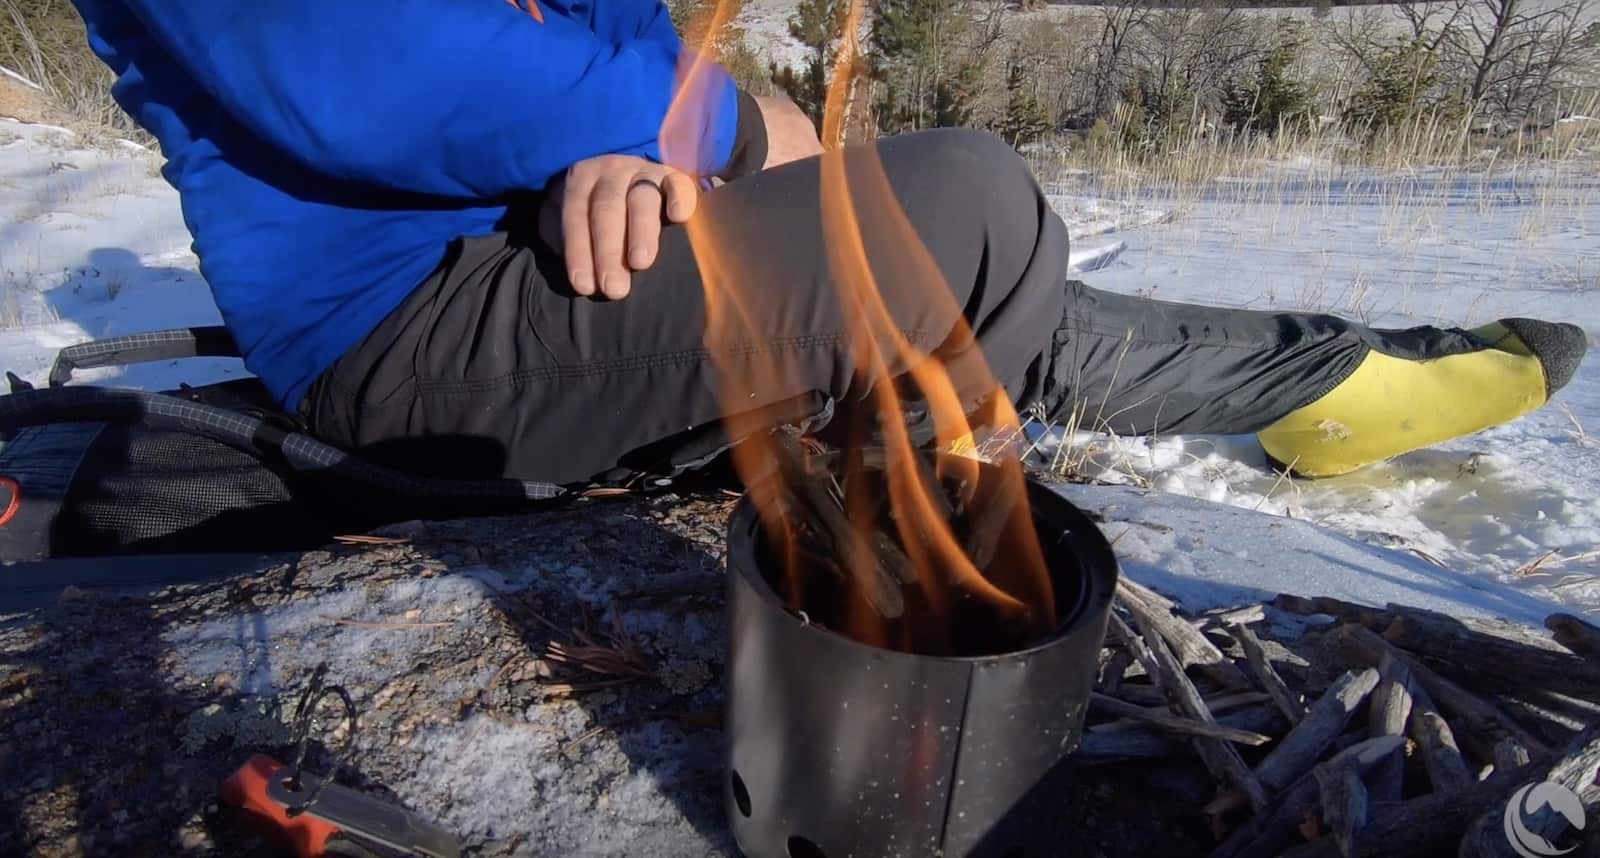
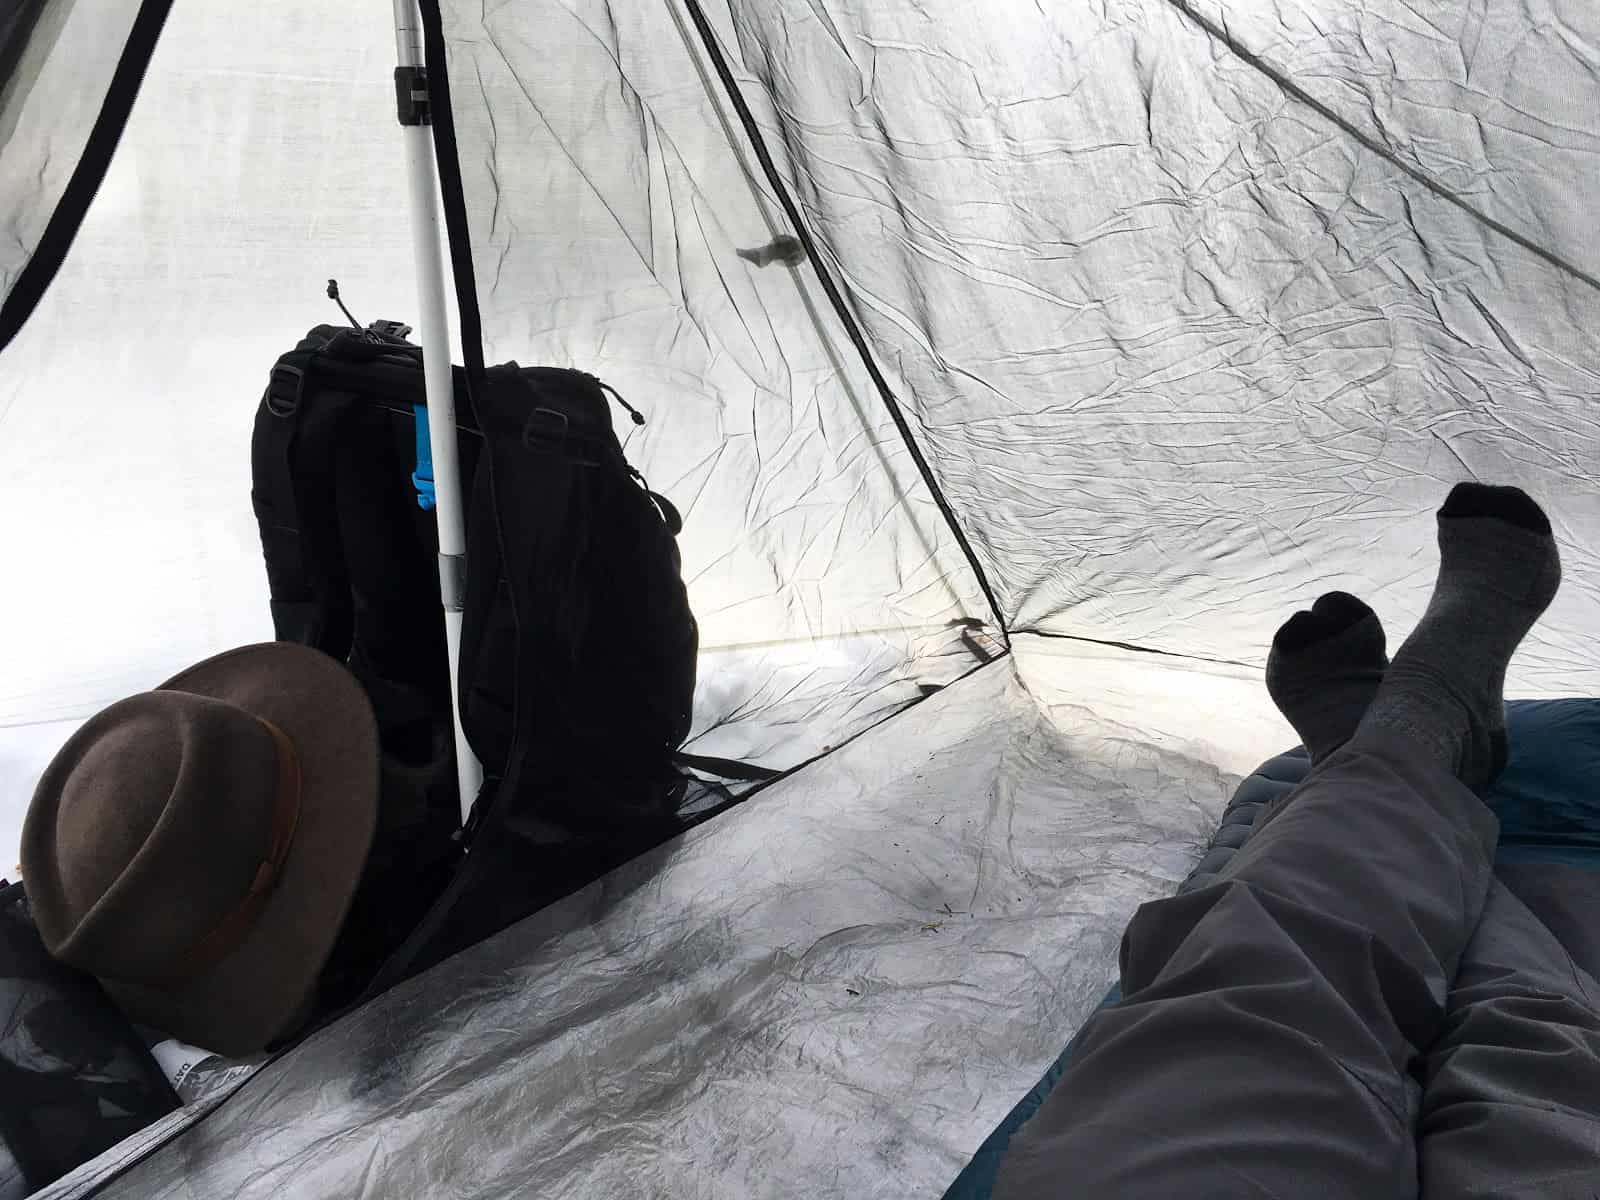
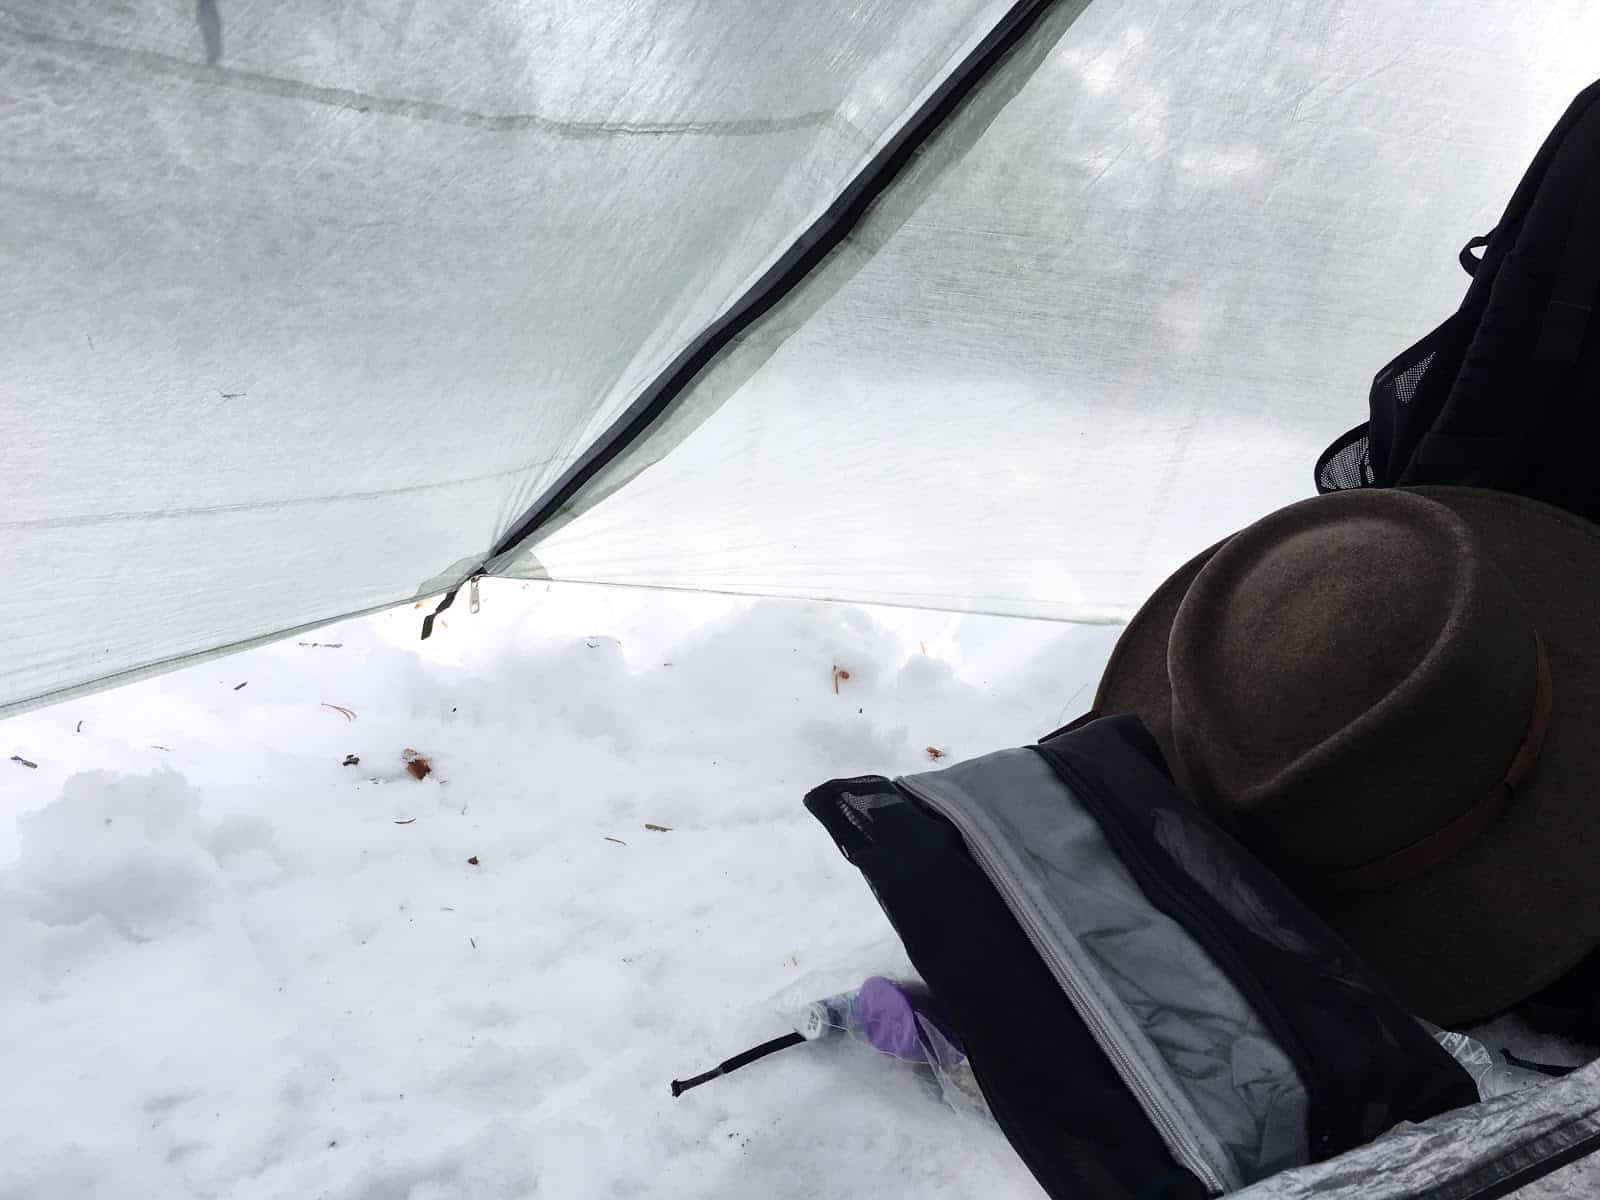
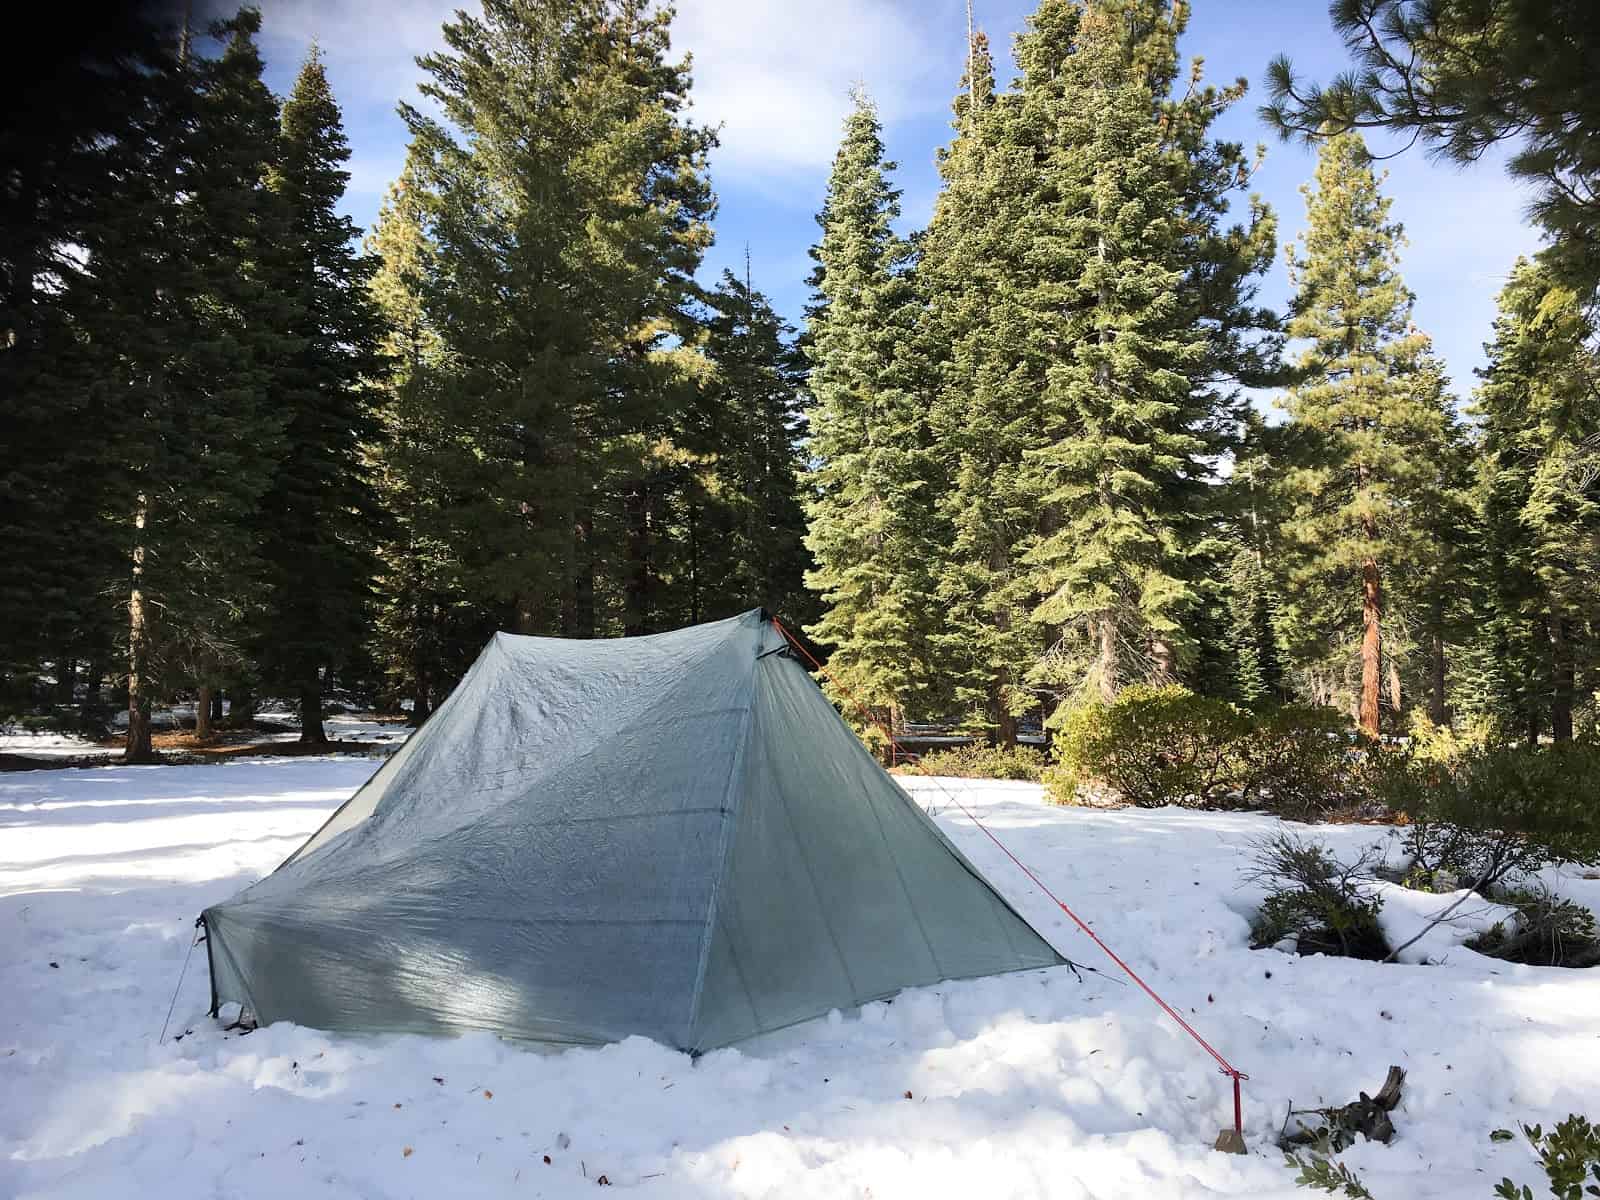
Lightweight backpacking in winter: field notes from SE Wyoming – tarp camping, firebuilding, wood stove cooking, and more (VIDEO).
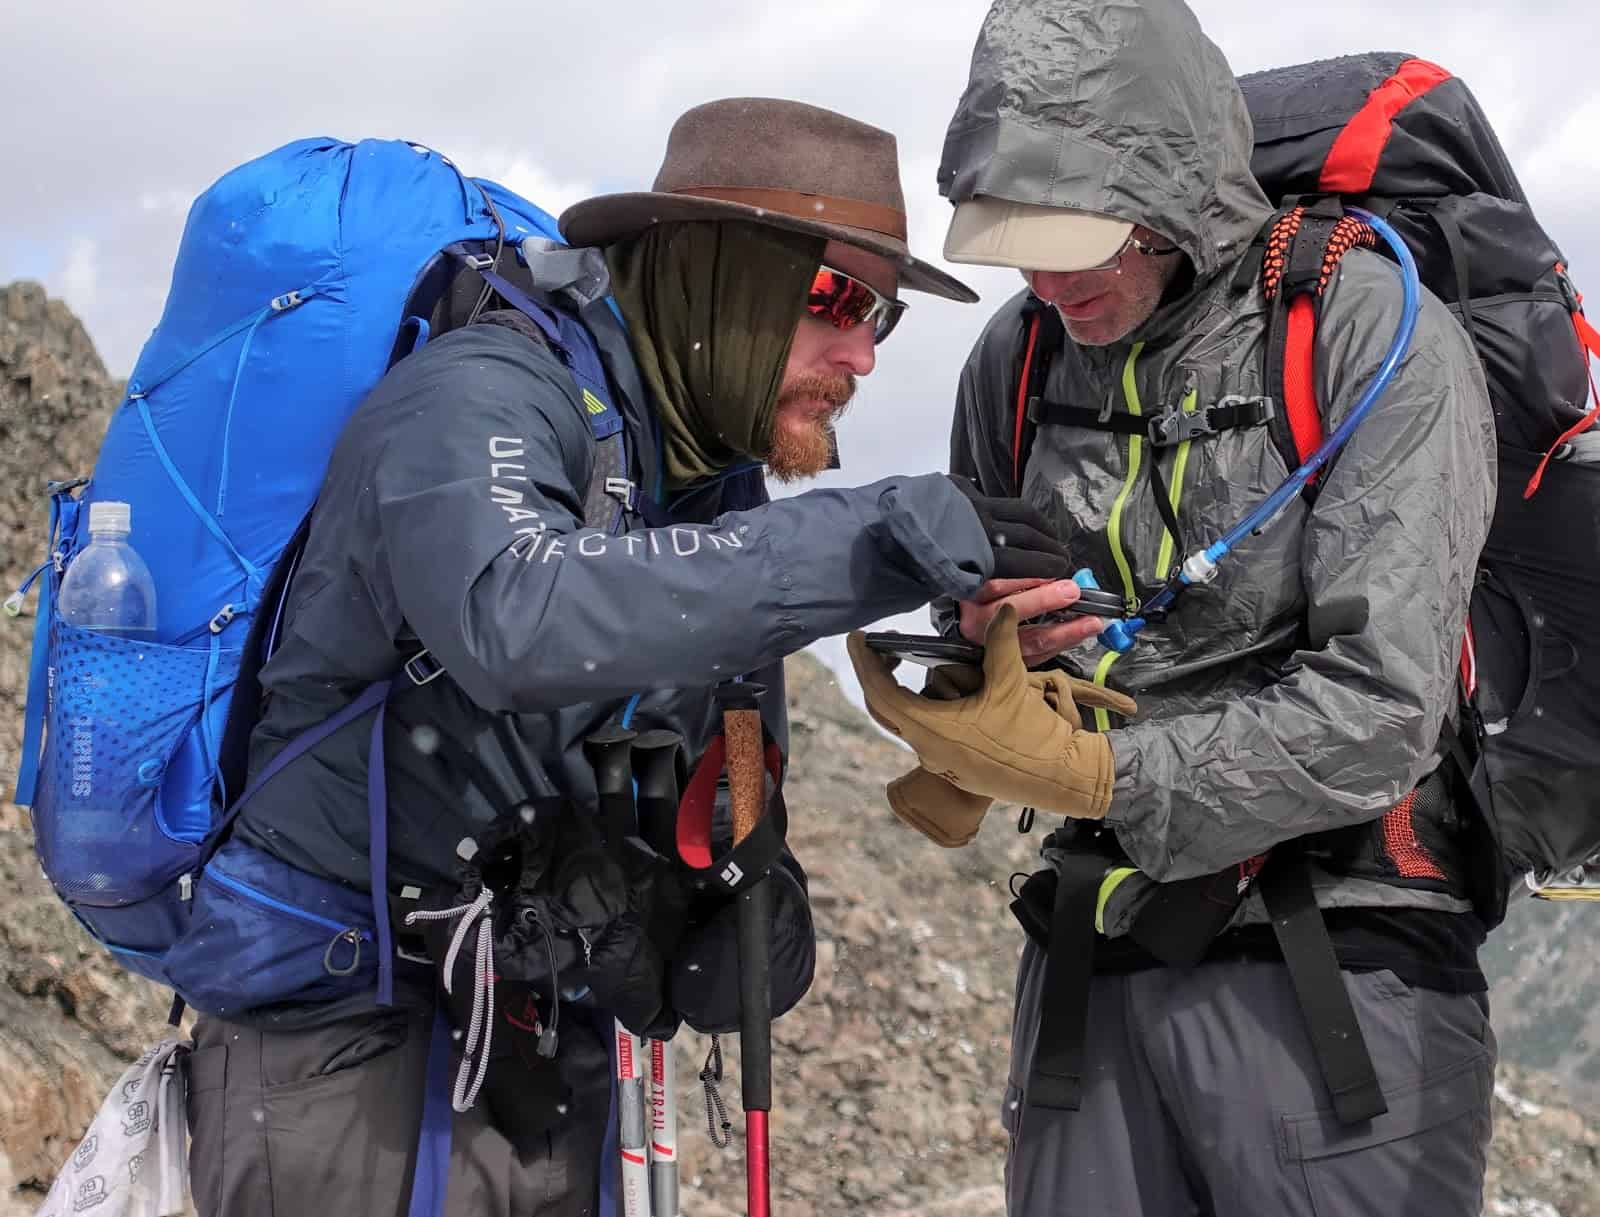
Winter backpacking (i.e., backpacking in snow and/or cold) can be intimidating. Gear that is heavy and bulky, long nights, hiking through deep snow, dealing with cold temperatures and wind – these are some of the challenges of hiking in the winter.
This winter, I filmed an overnight trip I took in SE Wyoming. The area where I hiked is crisscrossed with a summer trail network and frontcountry picnic and camping areas that aren’t accessible during the winter. I hiked through these areas but ventured further into the backcountry where I spent the night.
Low temperatures dropped to the upper single digits (deg F) and the snowpack was variable from zero to several feet.
The video is presented in a vlog-style chronological narrative that includes some skills instruction, some gear commentary, and some reflections of my experience on the trip.
This article provides more insight into my gear list, as well as post-trip notes.
For more info, listen to the related podcast about winter backpacking gear!
Watch the Video:
All gear items link to the actual product that I used on this trip, except items marked with an asterisk (*). In the latter case, I proposed a similar substitute.
| Worn/Carried (oz) | In Pack (oz) | Consumables (oz) | |
|---|---|---|---|
| TREKKING FOOTWEAR & TRACTION | - | - | - |
| merino wool ski socks | 2.5 | - | - |
| waterproof-breathable socks* | 2.6 | - | - |
| waterproof-breathable mid-height, zero-drop trail running shoes | 25.5 | - | - |
| neoprene overboots with eVENT gaiters | 13.5 | - | - |
| technical snowshoes with SS crampons | 55.0 | - | - |
| high-strength, cork-grip, collapsible carbon trekking poles w/snow baskets | 16.8 | - | - |
| CLOTHING WORN WHILE TREKKING | - | - | - |
| merino wool fishnet s/s t-shirt | 3.5 | - | - |
| active insulation pullover hoody | 10.3 | - | - |
| breathable hooded wind jacket | 3.8 | - | - |
| viscose/spandex boxer briefs | 3.1 | - | - |
| double-knit polyester long underwear bottoms | 3.5 | - | - |
| stretch softshell pant w/dual-entry cargo pocket | 13.6 | - | - |
| ultralight fleece backpacking hat | 1.1 | - | - |
| lightweight merino wool neck gaiter | 1.7 | - | - |
| snow goggles with spherical photochromic lenses (VLT 30%-50%) | 4.0 | - | - |
| waterproof-breathable glove w/leather palms, gauntlets, and high-pile fleece inner | 6.5 | - | - |
| CLOTHING WORN IN CAMP | - | - | - |
| wind-resistant fleece glove liners | - | 1.8 | - |
| ultralight down hooded winter parka | - | 18.7 | - |
| * | - | 10.7 | - |
| extra socks for sleeping | - | 2.5 | - |
| NAVIGATION & COMMUNICATIONS | - | - | - |
| smartphone / case | 7.6 | - | - |
| gps navigation smartphone app w/maps | - | - | - |
| 365 Lumen Cree XM-L2 T6 neutral white LED CR123V headlamp | - | 2.8 | - |
| 4.5 Lumen coin-cell IPX7 keychain light | - | 0.3 | - |
| mini satellite messaging device | - | 3.5 | - |
| PACKING | - | - | |
| DCF internal frame pack, custom, stripped | - | 46.6 | - |
| rectangular compression sack for sleep gear | - | 3.3 | - |
| rectangular, stand-up zip sack for minor essentials | - | 1.1 | - |
| durable stuff sack for fire kit | - | 0.9 | - |
| DCF11 stow sack for cook kit | - | 1.1 | - |
| pepper spray (for moose/mountain lion) | 13.1 | - | |
| SHELTER | - | - | |
| claw-style snow shovel | - | 6.4 | - |
| 8.5' x 8.5' DCF flat tarp | - | 11.3 | - |
| 1.2mm Dyneema cord w/polyester sheath for knotting | - | 0.6 | - |
| eVENT bivy sack w/DCF floor | - | 13.1 | - |
| 1/8" 72x20 CCF pad | - | 2.4 | - |
| R5.7 72"x20" inflatable insulating pad | - | 15.4 | - |
| inflation pump bag | - | 2.0 | - |
| microfleece/DCF pillow sack w/DIY foam | - | 3.8 | - |
| 10 degree 850 down sleeping bag | - | 30.6 | - |
| FIRE KIT | - | - | - |
| folding saw, 7 TPI | - | 6.8 | - |
| drop-point 3" batoning knife with custom sheath | - | 4.7 | - |
| waterproof firestarting tinder | - | 0.1 | - |
| solid fuel tablets | - | 1.0 | - |
| magnesium fire starter | - | 0.8 | - |
| COOKING & WATER KIT | - | - | - |
| 1100 ml titanium pot with bail handle | - | 4.5 | - |
| unbreakable folding spoon | - | 0.3 | - |
| titanium wood burning stove | - | 2.5 | - |
| curly birch custom-carved wooden mug* | - | 2.5 | - |
| food storage / animal protection | - | 7.6 | - |
| 2L soft water bottle, wide-mouth | - | 2.8 | - |
| 2L soft water bottle, wide-mouth | - | 2.2 | - |
| benzalkonium chloride hand sanitizer repackaged in 0.5 oz bottle | - | 0.5 | - |
| FOOD | - | - | - |
| cashews | - | - | 4.0 |
| cookies | - | - | 2.0 |
| herbed mushroom risotto | - | - | 8.0 |
| meusli | - | - | 5.0 |
| smoked trout | - | - | 8.0 |
| pretzel roll | - | - | 5.0 |
| coffee, tea | - | - | 0.5 |
| food packaging | - | 2.0 | - |
| WORN/CARRIED WEIGHT (lbs) | 11.7 | - | - |
| BASE PACK WEIGHT (DRY) (lbs) | - | 13.6 | - |
| PACK WEIGHT + CONSUMABLES (lbs) | - | - | 15.6 |
| TOTAL SKIN OUT WEIGHT (lbs) | - | 27.3 | |
| OTHER GEAR CARRIED and not included above (camera gear, non-essential duplicates I brought along for testing) | - | - | - |
| Camera Equipment | - | 46.8 | - |
| Tall Carbon Fiber Tripod | - | 28.5 | - |
| environmental data logger | - | 1.2 | - |
| hiking crampons w/rubberized platform base for overboots | - | 25.7 | - |
| ultralight waterproof-breathable rain jacket | - | 7.6 | - |
| TOTAL EXTRA GEAR (lbs) | - | 6.9 | - |
Thanks to the following companies for making this video possible through financial and/or gear support:
* These companies have entered into sponsorship agreements with us in 2019 in our effort to support our effort to produce more engaging content and reduce our reliance on network advertising (e.g., “Google Ads”). Thank you!
Updated September 15, 2018
Today’s episode is a SKILLS SHORT where we’ll discuss the philosophy and skills of lightweight winter backpacking.
Today’s episode is a SKILLS SHORT where we’ll discuss the philosophy and skills of lightweight winter backpacking. This episode marks the first of our BPL Podcast Shorts: 15- to 20-minute episodes that focus on a news item, a piece of gear or tech, or specific ultralight backpacking skills.
This format won’t replace our long episodes. Instead, it will supplement them, so make sure you are subscribed so you don’t miss anything!
As we recorded this episode, a huge winter storm was rolling across large parts of the country.
So that made us think: how can we take the ultralight ethos and apply it to winter backpacking: a situation that usually requires more gear and a heavier pack?
After introducing the new format and the episode’s topic, Ryan jumps straight in: listing off the building blocks of a sub-15 lb two or three-night kit. You might be surprised at what gets left out!
From there, the guys segway into a brief conversation around the idea of minimizing inputs in the outdoors.
INTRODUCTION
Ryan and Andrew introduce the new podcast format and the episode’s topic: winter backpacking skills!
THE CONVO
The question is this: How can we create a warm and light winter backpacking kit that meets our needs in the backcountry? And what skills do we need in order to compensate for the things we are leaving behind? Ryan and Andrew jump right in.
You can contact us at podcast@backpackinglight.com, or follow us on social media –
I put together a 4-minute video montage with my initial thoughts about the Black Diamond Glidelite skis that includes footage from both tracked and untracked trails, with inclines up to about 15 degrees.
I’ve been using the new Black Diamond Glidelite Snow Trekker Skis (“trekking skis”) this winter. I have the 127-cm model with Universal Bindings, which can be used with any type of footwear. I’ve been skiing in Altra Lone Peak Mids (usually with a neoprene overboot) with them this winter.
This is a Flash Review meant to communicate my initial experience with the product – it’s in no way a comprehensive review that reflects use of this product in a wide range of conditions.
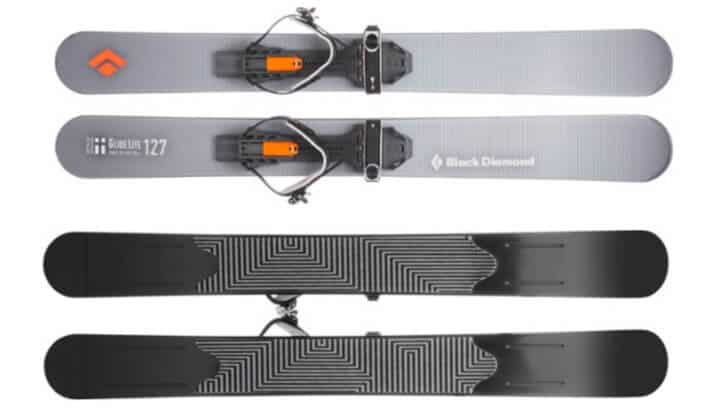
I put together a 4-minute video montage with my initial thoughts about the Black Diamond Glidelites that includes footage from both tracked and untracked trails, with inclines up to about 15 degrees.
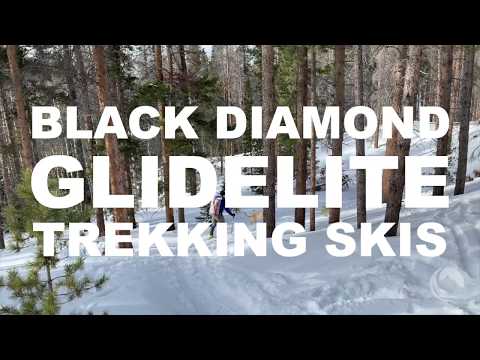
Better than snowshoes?
Better than a conventional backcountry skiing setup?
(Thanks to Mrs. J for the camera work!)
This Gear Guide features GPS App Reviews, including AllTrails, Gaia, Google Maps Offline, Guthooks, Hiking Project, MapMyHike, Outdoor Active, Ramblr, REI – National Parks, Spyglass, and ViewRanger.
With the rise of the smartphone within the last decade there has been a corresponding rise in navigation apps. As the hardware has become more durable with longer battery life, as well as the growing affordability in solar powered chargers and battery banks, the use of a smartphone as navigation in the field has become much more practical than it has been in the past.
For the purposes of this review, I will be looking at apps that can be found on both iOS and Android platforms. There may be some good apps that are excluded because they can only be found through one or the other but for this article, we are taking an ‘all or nothing’ approach.
Many of these apps are free but require a membership or in-app purchase in order to get the most out of the app. The apps being reviewed will include:
This list is not comprehensive! New apps are being developed and introduced all the time. In addition, this list doesn’t include some apps that have been around for awhile (like Topo GPS) because I don’t have personal experience with them.
In this review, I will be looking at what are the most important criteria for a navigation app. These features include:
For those who plan on taking a longer hike and might not want the added weight of a battery bank or those who prefer a good old fashioned printable map, this feature is key. Being able to plan a route in the comfort of your home office and then transfer it to your phone or print it out gives more options for how to navigate during the trek.
With modern cell coverage, it’s hard to find places without coverage within 50 miles of a freeway or 100 miles of a town. Even so, many of the canyons we get into or the mountains that we climb will not have any signal. This means that an app that uses your phones GPS function is far more useful than one that doesn’t.
The GPX file standard has been around since 2004 and has become a vital part of every GPS unit since. GPX records your longitude and latitude in decimal degrees while elevation is recorded in meters or feet. Depending on what you are using GPX to monitor, it may be important to note that times are not recorded in local time but in Coordinated Universal Time (UTC). Simply put, this is the system that allows you to mark waypoints and share them across multiple platforms and devices. This is crucial when marking a point for a group with some members using a dedicated GPS device like the Garmin inReach Mini while others are using an app on their phone and others using printed maps.
When planning a short hike or a longer trek, using an established trail or bushwacking from point to point, it’s nice to know where you’re going, how you are going to get there and what points of interest are along the way. If you’re venturing into new territory, it’s nice to know where a water source can be found or where a nice camp spot might be. It can also be nice to know what hazards can be found and where they can be found along a given route. This is where routes and waypoints come in. Will an app allow you to mark a waypoint with a detailed description? Can a photo be attached to a waypoint? Will waypoints and routes automatically coordinate or are extra steps needed?
If you are doing any kind of training then this is crucial. For those of us who want a minimal amount of multifunctional gear, a navigation app that can also record speed and distance is vital. This function can also be used to predict how long it will take to get from waypoint to waypoint or how long it should take the fastest or slowest members of your group to get from point to point. A good speed and distance tracker can help you know if you need to pick up the pace or if you can take a few more pictures along the way.
Knowing your elevation can tell you everything from why you can’t seem to catch your breath to how much fuel to bring on a hike. Being able to easily access an accurate altitude reading can be a vital tool in staying safe while summiting a mountain while tracking elevation gain or loss is crucial for performance tracking as well as monitoring for altitude sickness.
Scroll Right to See All Table Contents
| Downloadable Map | GPS Navigation | Compass | Import/Export GPX Trax | Routes and Waypoints | Speed Tracker | Distance Tracker | Elevation Tracker | Altimeter | Cost | |
|---|---|---|---|---|---|---|---|---|---|---|
| AllTrails | Yes | Yes | Yes | Yes | Yes | Yes | Yes | Yes | Yes | Free - $29.99 |
| Gaia | Yes | Yes | Yes | Yes | Yes | Yes | Yes | Yes | Yes | Free - $19.99 |
| Google Maps Offline | Yes | Yes | No | No | No | No | No | No | No | Free |
| Guthooks | Yes | Yes | No | No | Yes | No | No | No | No | Varies |
| Hiking Project | Yes | Yes | No | Yes | Yes | No | No | No | No | Free |
| MapMyHike | No | No | No | No | No | Yes | Yes | Yes | No | Free - $29.99 |
| Outdoor Active | Yes | Yes | Yes | Yes | Yes | Yes | Yes | Yes | Yes | Free - $8.99 |
| Ramblr | Yes | Yes | No | Yes | Yes | Yes | Yes | Yes | Yes | Free - $10.00 |
| REI - National Parks | No | Yes | Yes | No | No | No | No | No | Yes | Free |
| Spyglass | No | Yes | Yes | No | Yes | Yes | Yes | Yes | Yes | 5.99 |
| ViewRanger | Yes | Yes | Yes | Yes | Yes | Yes | Yes | Yes | No | Free - Varies |
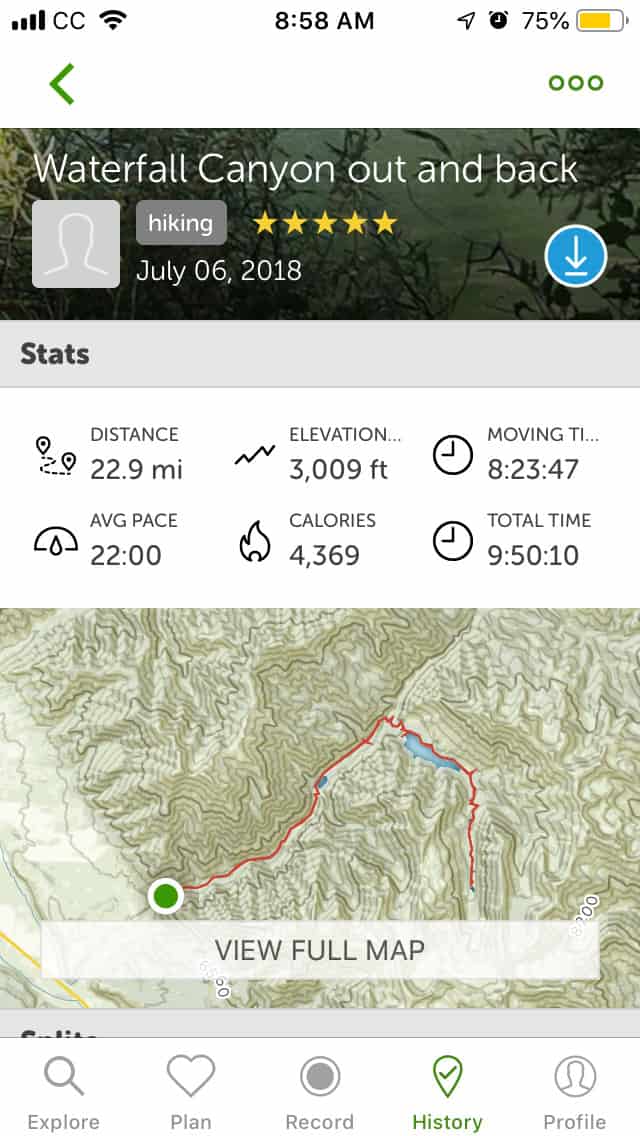
AllTrails allows you to record routes then access the statistics and map all in one easy to read screen. Expanding the map is as easy as a touch!
This app contains hiking, biking and running trails all around the world. All Trails boasts 50,000 trail maps as well as reviews and photos regularly updated by its millions of users. This allows dog lovers, hardcore hikers, mountain bikers, and other users to give local and valuable recommendations for everything from city park walking trails to the Continental Divide Trail and everything in between.

All Trails is a powerhouse app that integrates trail reviews and beta – a benefit for some users, the added clutter may get in the way of others looking for a cleaner navigation experience. Although the interface is not as elegant as Gaia, All Trails is a strong competitor in this market and has all of the features required for a positive navigation experience. It earns our Recommended Review Rating (read more about our ratings here).
One particularly nice feature of Gaia is the ability to assign pictures as waypoints. This allowed my Brother-in-law to follow the route that I took and use a better camera to take higher quality pictures.
Gaia has been showcased in several publications including the New York Times and Outside Magazine. This app is designed to give hunters, hikers, offroaders, backcountry skiers, mountain bikers and professional guides a one-stop solution to their mapping needs.
 Gaia’s feature set, highly customizable display, powerful interface, frequent app updates, map layers, ease of use, and outstanding desktop/tablet trip planning features earns this app our Highly Recommended Review Rating (read more about our ratings here).
All the familiarity of one of the most widely recognized mapping tools around the world. Although much can be said for this app, in the context of a navigation app for hikers the big draw is being able to record directions to a trailhead and even take a detailed photo of the area around a destination.
This app doesn’t support waypoints or any of the tracking functions of the other GPS apps on this list.
Guthook’s app shows its elevation profiles complete with waypoints, which makes planning and navigating easier.
A great app for set trails, Guthook allows you to find waypoints including camping spots, water sources, and great data for the towns that you’ll pass through on longer hikes. Users are able to update current conditions on any of these waypoints but are unable to set waypoints of their own. The elevation profile can tell you where you are along a trail and the distance to the nearest waypoint. Unfortunately, it doesn’t allow you to track your personal data. Importing and exporting GPX are also unavailable.
MapMyHike’s primary screen demonstrate that it’s niche market is the fitness market, showing important workout statistics but no navigation tools.
More of a fitness tracker than a Navigation App, Map My Hike is developed by Under Armor and will give you all the data you need to optimize your performance including community challenges to help you stay motivated. It can be connected to other apps and wearables including the various Garmin and Fitbit models.
Outdoor Active’s ability to plan out a route on a desktop then seamlessly access it on your phone makes it especially nice.
Outdoor Active is designed specifically for hiking, cycling, and mountaineering. This app allows a user to plan out trips of any kind using the desktop site or the app independently or in unison. This makes sharing with friends one of the easiest parts of the planning process. In addition to the tracking and mapping features that we expect in a navigation app there are also some considerate safety features. These include an emergency call option as well as up to date weather conditions.

Because of the social media lean to Ramblr exploring routes from around the world is only a fingertip away.
Rambler is designed with sharing trips across social media in mind. It allows you to plan trips, track all of your vital statistics. You can also plot waypoints and attach photos as well as videos. You can also download maps based on Apple and Google map data for offline use. All of this is integrated with Facebook and Twitter to seamlessly and effortlessly share your treks across a wide range of groups and friends.
Using the same program as HikingProject, each National Park has trails and destination gems that can be sorted by activity, and difficulty.
This app contains complete trail data for many of the most popular National Parks. You can search for hikes in each park using a map display. Each park also has a “best of” list to search for hikes. Hikes can be sorted by difficulty rating, star rating, or elevation profiles. There is also community input giving insights into camping, guided tours, and best seasons to go.
REI – National Parks also comes with a real-time GPS tracker that includes an elevation profile on a terrain or satellite map. In the case of an emergency, you can also send your coordinates to rescuers.
If you want a printable map, the app can link you to nps.gov where they have a small selection to choose from.

Spyglass functions as a hi-tech compass that includes a sun/moon/star finder, rangefinder, sextant, inclinometer, and angular calculator in addition to the expected GPS tracker, speedometer, altimeter, and waypoint tracker.
All of the operations work in 3D with augmented reality. This allows you to track stars on a cloudy night or overlay directions and info over the camera or a printed map.
The overall interface is a step below its competitors – I would describe the map and elevation profile as clunky – but in the overview tab industry standard statistics are presented in an easy to interpret way.
Viewranger gives you the option of downloading maps for offline use but it uses a credit system per map or you can download bundles for a higher price. With that little caveat, you can browse maps and routes posted by some pretty credible sources such as the trekkers at Backpacker Magazine.
Like many of the other navigation apps, you can track location (which can be shared privately in real time with select friends), speed, and distance. What sets this app apart from the others is the ability to use your phone’s camera to show peak names, trails, and waypoints with the Skyview function.
One of the key features to consider with a navigation app is planning. The two key features for planning are the ability to import/export GPX and download maps for offline use. If you can’t plot points at home to be used in the field in offline mode then maybe you can download someone else’s route and piggyback off of their adventure. If an app won’t let you do either then it probably isn’t worth much as a navigation app.
Alltrails, Gaia, Outdoor Active, Ramblr and Viewfinder do well in this category. Outdoor Active unfortunately has a tendency to crash when adding a photo waypoint while recording a route. Google Maps Offline has the ability to download maps for offline use but they are meant for street-level views not trail level use.
On the export end of things, it is nice to keep a record of where you’ve been for personal records or to show your friends how cool you are. Alltrails, Gaia, Outdoor Active, Rambler and Viewfinder are strong in this category as well, although they all require you to purchase an upgraded membership or pay per download.
In one way or another, all of these apps give you the chance to download maps. The feature works especially well with All Trails and Gaia who allow you to plot a trail with waypoints on your desktop and easily move them to your phone. Guthook also does well with an easily downloadable map but doesn’t give you the option of adding your own waypoints.
It’s easy to say that you’ve been there and done that but it’s entirely different to have accurate statistics to back up your claims. It’s also nice to be able to track performance and improvement or to know that the next waterhole, campsite or summit is a specific distance away. For this, you need to accurately know your position along a route to track your speed and elevation along with distance traveled and distance to the next point.
Almost all of the apps do well in this category or they don’t track this data at all. I was able to communicate with the developers at Guthook and they are working to integrate a speed tracker in future updates.
A tricky point is whether or not an app actually tracks your elevation or just gives an elevation profile of your route. In general, if an app will track your elevation then it will also give you an elevation profile. Conversely, just because an app gives an elevation profile doesn’t mean that your ascent or descent has been tracked. Anyone with basic math skills can work around this but for those who don’t want to do the math at the end of a long day the tracking feature is important.
If you’re looking for a good all-around app for navigation purposes then All Trails and Gaia are the two to choose from. They both have easy to navigate planning and tracking features and are easy to share across platforms and devices. Gaia has an especially customizable readout that will allow you to see the information that is most important to you and not worry about the other stuff.
Gaia’s feature set, highly customizable display, powerful interface, frequent app updates, map layers, ease of use, and outstanding desktop/tablet trip planning features earns this app our Highly Recommended Review Rating.
If you are looking to do something more specific like a National Park or the Continental Divide Trail then you may want to go with Guthook or REI National Parks. Guthook is especially nice for hikers who are shy on experience in the backcountry and may need the frequently updated information that Guthook provides.
For those that are more interested in using an established social media site to share your exploits then Ramblr is for you. It has all of the tracking features with an emphasis on syncing with your social media accounts.
If you’re most interested in fitness and tracking health improvements, Map My Hike is made by Under Armour and will sync with everything from your GPS enabled shoes to your watch while Viewranger will sync with your phones health tracker app.
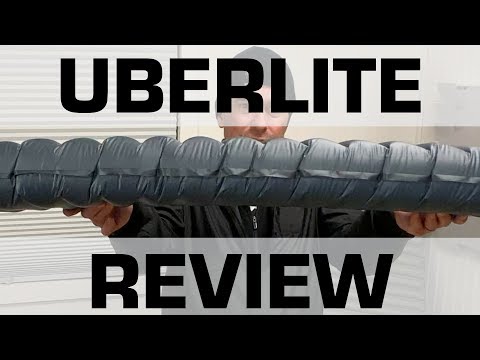
This Therm-a-Rest NeoAir UberLite review presents our performance assessment of the lightest full-sized air-filled sleeping pad on the market.
This Therm-a-Rest NeoAir UberLite review presents our performance assessment of the lightest full-sized air-filled sleeping pad on the market.
The Therm-a-Rest NeoAir UberLite is an 8.8-oz inflatable air mattress (i.e., size “regular” – 20 in wide x 72 in long). Users of the Therm-a-Rest XLite and XTherm will recognize the UberLite’s shape and basic design. The UberLite is a little over three ounces lighter than the XLite. It also packs down smaller and sleeps more quietly. The tradeoff? Warmth.
Here’s how the three mummy-shaped pads in the Therm-a-Rest NeoAir line compare:
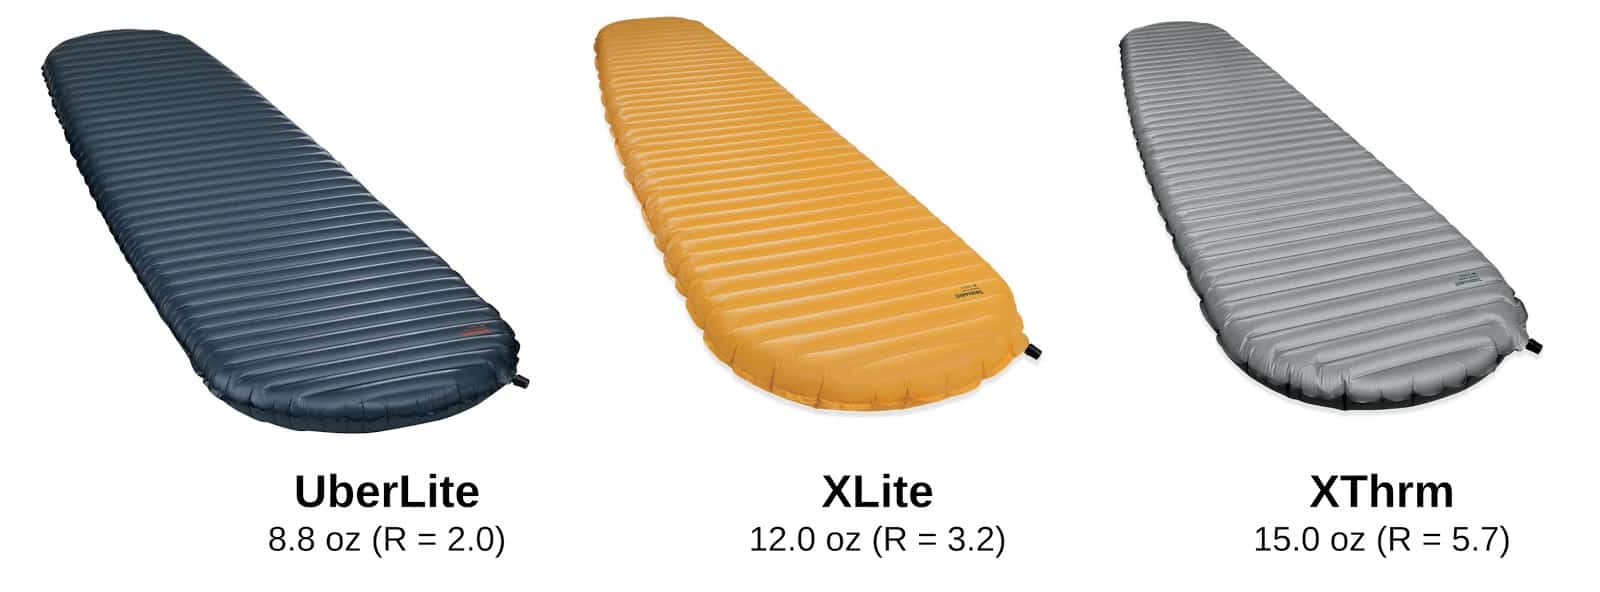
| UberLite | XLite | XTherm | |
|---|---|---|---|
| Weight | 8.8 oz | 12.0 oz | 15.0 oz |
| Packed Size | 6.0 in x 3.5 in | 9.0 x 4.0 in | 9.0 x 4.0 in |
| Top Fabric | 15 denier ripstop nylon | 30 denier ripstop HT nylon | 30 denier ripstop HT nylon |
| Bottom Fabric | 15 denier nylon | 30 denier ripstop HT nylon | 70 denier nylon |
| R-Value | 2 | 3.2 | 5.7 |
| MSRP | $179.95 | $169.95 | $199.95 |
All specs are for a regular-sized pad (20 in width x 72 in length x 2.5 in thickness). The UberLite is also available in short and long sizes.
In addition to the obvious differences in weight, warmth (R-value), and packed volume, you can see that the Therm-a-Rest NeoAir UberLite is made with lighter fabrics. Therm-a-Rest claims in particular that the UberLite’s top fabric is quieter than the fabrics used in the other two pads, a performance feature we’ll look at in this review.
Watch Ryan Jordan’s video about how he uses the Therm-a-Rest NeoAir UberLite for winter camping, as well as a summary of the findings presented in this review:
Why choose an inflatable air mattress in the first place?
Closed cell foam pads (generally) insulate better (higher R:thickness ratio), are tough, have multiple uses (e.g., stove windshield, lounge pad on abrasive ground, internal pack frame), are significantly cheaper, and weigh about the same.
For instance, check out the specs for the Therm-a-Rest RidgeRest SOLite. This pad gets you more utility at virtually the same weight as the current gold standard in inflatable mattresses, the Therm-a-Rest NeoAir XLite – for a fraction of the cost.
| NeoAir XLite | RidgeRest SOLite | |
|---|---|---|
| Weight | 12.0 oz | 14.0 oz |
| Packed Size | 9.0 x 4.0 in | 20.0 x 8.0 in |
| Top Fabric | 30 denier ripstop HT nylon | cross-linked polyethylene closed cell foam |
| Bottom Fabric | 30 denier ripstop HT nylon | cross-linked polyethylene closed cell foam |
| R-Value | 3.2 | 2.8 |
| MSRP | $169.95 | $29.95 |
The answer is one word: comfort.
Those who can sleep well on a textured and relatively thick closed cell foam pad are a special breed. Hikers that can wake up feeling rested after a night on a very thin foam pad are even rarer. If your dedication to ultralight backpacking means you are willing to suffer sleepless nights in the pursuit of ounce shaving, you are one tough cookie. But I would argue that sleep deprivation will eventually catch up with you and degrade your hiking performance regardless of how light your pack is. The longer your hike, the more this is likely to come into play.
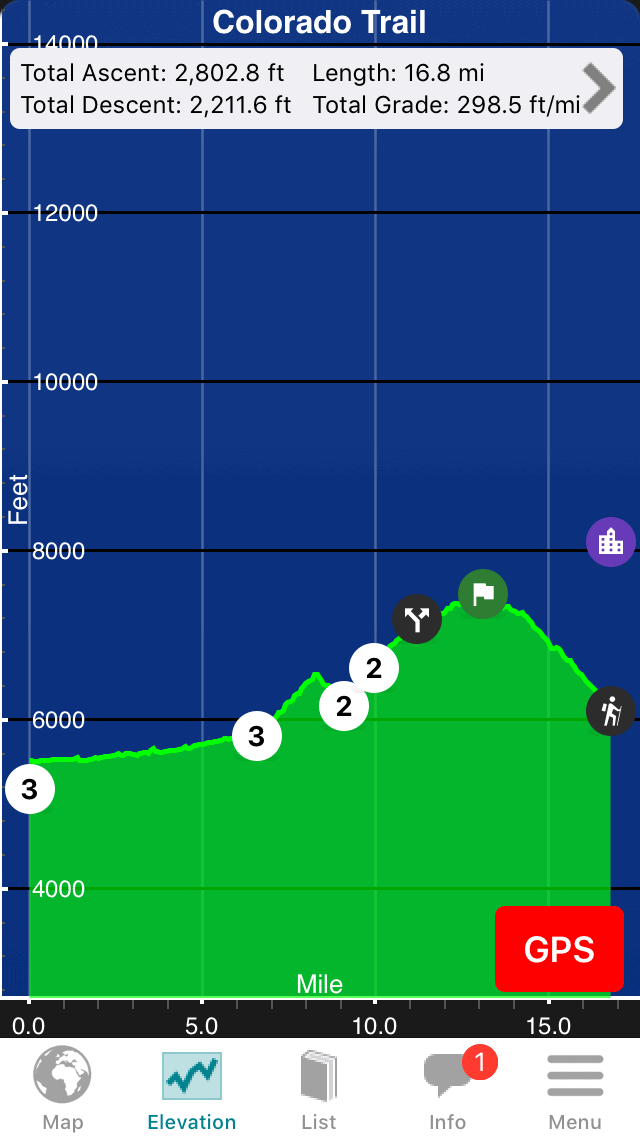
It is true that most bodies and minds will adapt (somewhat) to sleeping on a thin closed cell foam pad. I thru-hiked the Appalachian Trail and Colorado Trail using a 5/8″ closed cell foam pad, and eventually got (sort of) used to sleeping on it. But I never got what I would consider an excellent night’s sleep, and suffered extensively from numb shoulders and achy hips.
So while R-Value, durability, and price are all important considerations for an inflatable mattress, comfort is king, especially if you are the type of person where comfort on a closed cell foam pad is elusive. Or, should I say, the comfort-to-weight-ratio is king. It is the chief factor that separates inflatable air mattresses from other types of pads.
Of course, comfort is subjective, particularly where sleep is involved. If it were easy to objectively quantify comfort we’d all be sleeping like kings every night in the backcountry. I don’t have to tell you this isn’t the case! So you’ll see words like feels and seems pop up from time to time in this review, particularly where comfort is concerned. I can only offer you my subjective opinion here, and provide you with anecdotal data that will allow you to extrapolate what your own experience might be. In all other performance metrics (weight, durability, etc.) I remain as objective as possible.
Therm-a-Rest recommends the UberLite for summer use. Production samples of the mattress were not available until the late summer of 2018, so I was not able to test the UberLite in peak summer conditions. In some ways, that limitation works out nicely. I think that the average user of this mattress will not contain herself to summer conditions but will instead be sleeping on the UberLite across three seasons, depending on conditions. Rare is the backpacker that can afford to own a separate mattress purely for summer temperatures.
I tested the UberLite across the late summer and fall, in three mountain ranges, and at elevations ranging from 5,000 ft to 11,000 ft.
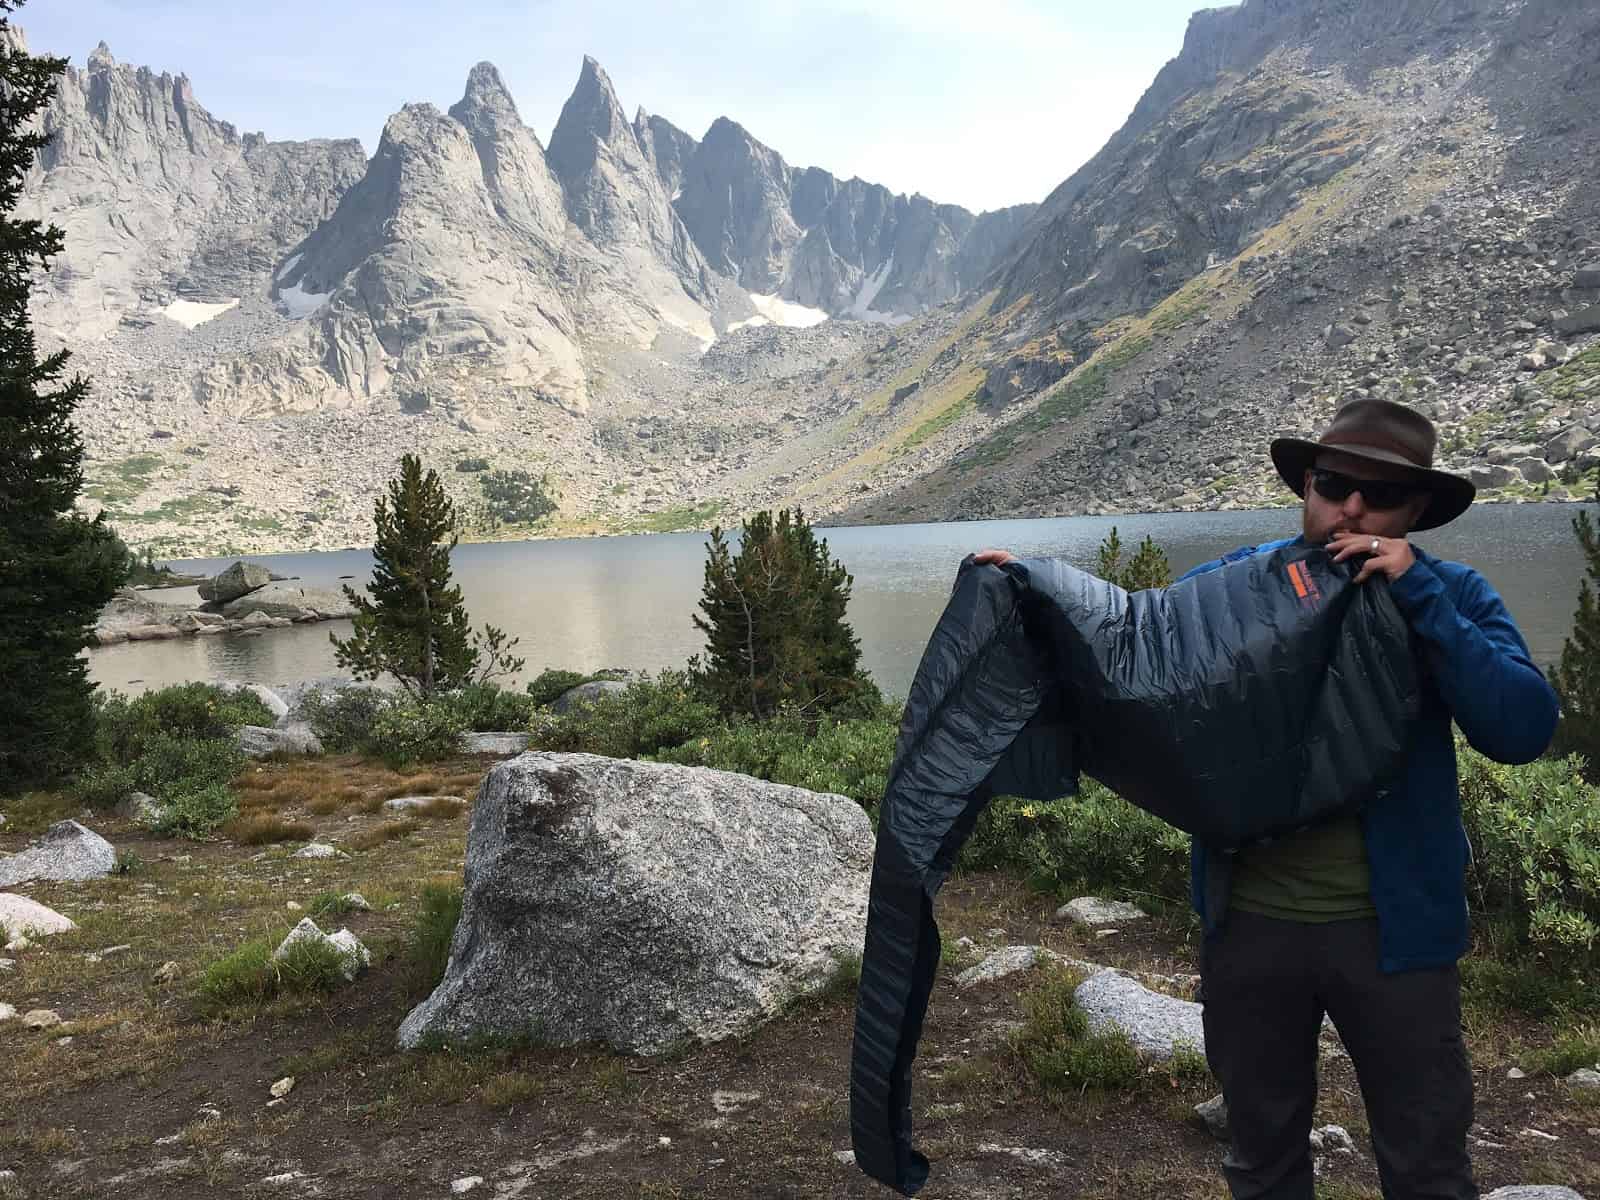
My first wilderness test was a two night trip in the Wind River Range in Wyoming in late summer. Both campsites were 10,000 ft to 11,000 ft. Conditions at night were windy with light-to-heavy rain and temperatures dropping just below freezing. Daytime hikes consisted of steep climbs and high elevation peak bagging, with correspondingly low mileage.
My second test was a six-night off-trail trek through Montana’s Absaroka-Beartooth Wilderness in early fall (story about that trek here). Campsite elevations ranged from 6,000 ft to 10,000 ft. Evening temperatures ranged from the low 20s (deg F) to mid 30s (deg F) with occasional high winds and light rain. Daytime hiking consisted of steep ups and downs over high passes and through dense brush. Long hiking days (up to 12 hours a day) with up to several thousand feet of elevation gain, combined with inclement weather and chilly nights provided a good backdrop for testing an ultralight sleep system and evaluate its ability to help me recover each day.
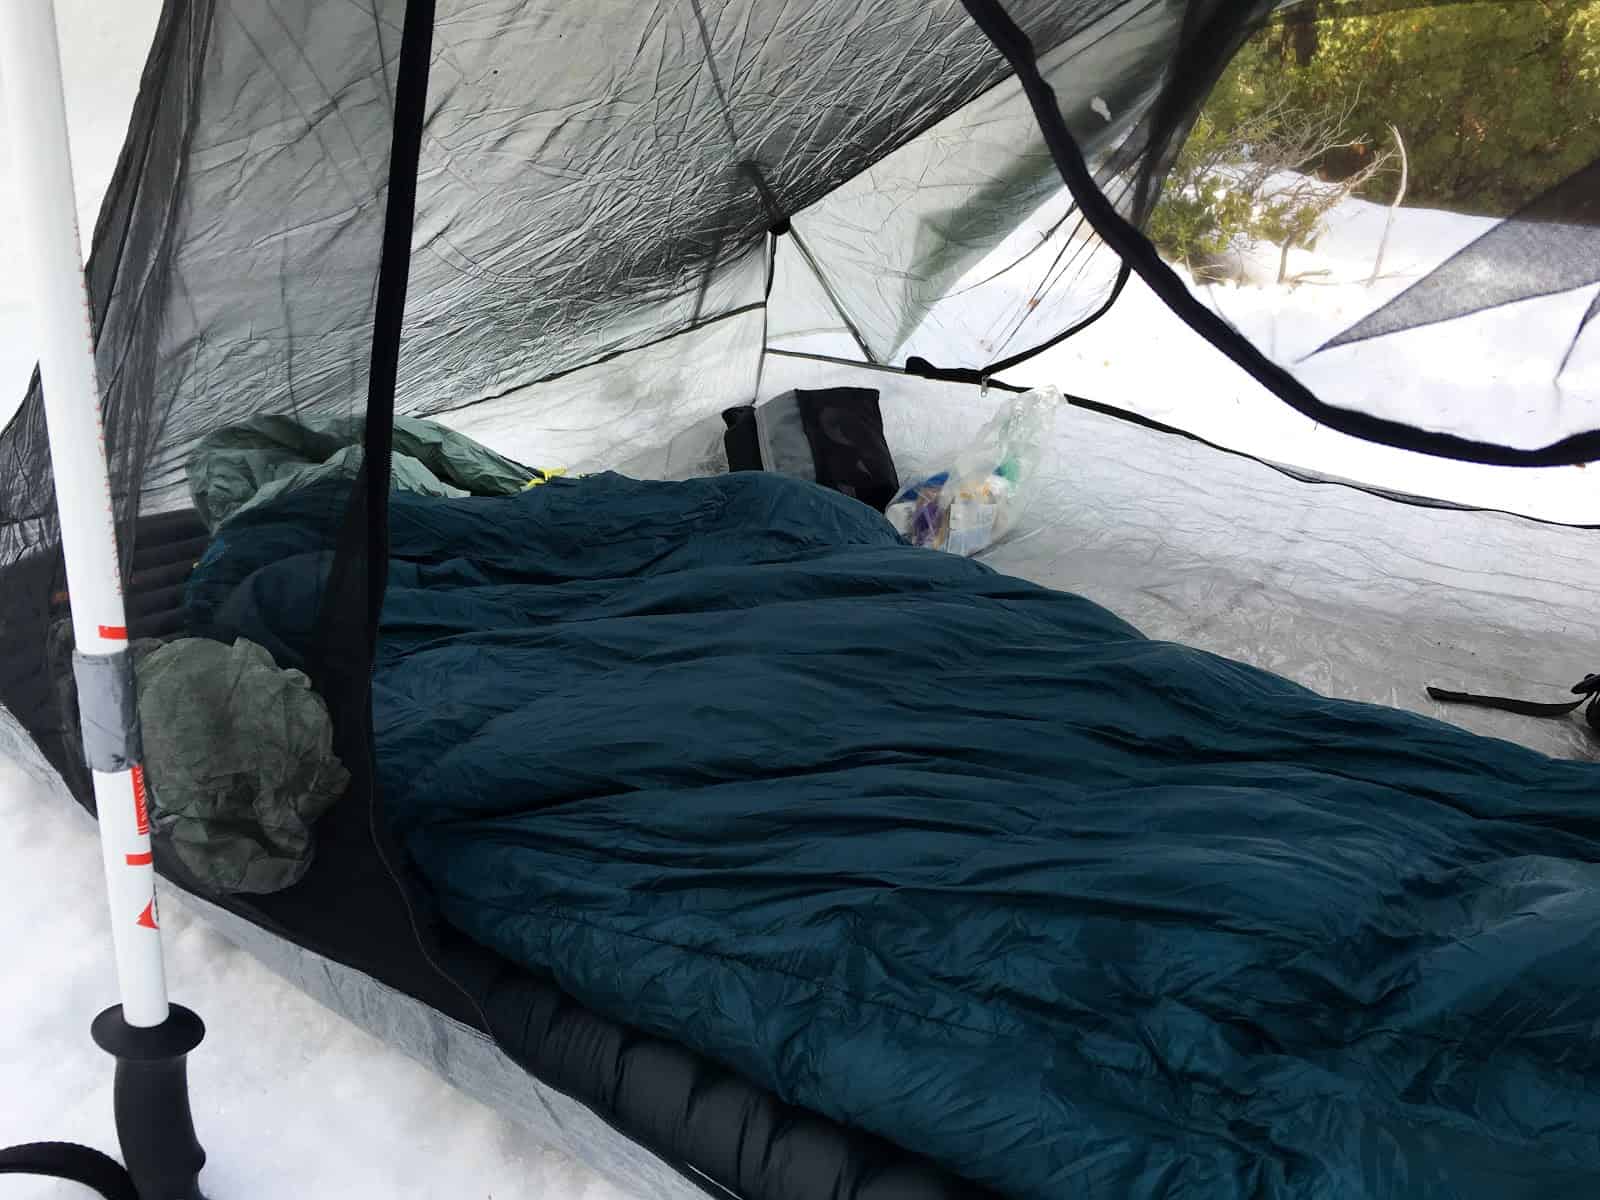
Finally, I tested the UberLite on several late fall one and two-night excursions in California’s Eastern Sierra. Overnight temperatures fell to the 20s and 10s (deg F), with occasional light to moderate snow. Daytime hiking was characterized by high-mileage days through shallow snow.
I’m 5 ft 6 in (168 cm) tall, weigh 160 lb (73 kg), and used a regular sized mattress.
My performance assessment of the Thermarest UberLite addresses the following items:
I’ve listed these items in order of what I judge to be greatest to least importance – for me.

Let’s start with warmth.
The UberLite has an R-Value of 2.0. Therm-a-Rest claims this makes the UberLite the warmest sub-10 oz (284 g) inflatable mattress on the market. To the best of my research ability, they are correct. This low R-Value is the reason Therma-A-Rest doesn’t rank the UberLite as a three-season mattress.
Longtime Therm-a-Rest users will know that the UberLite’s older brother, the XLite, carries an R-Value of 3.2, making the XLite more comfortable across a wider range of conditions. However, Therm-a-Rest designers achieve this extra warmth in the XLite through a secondary layer of material inside the pad they call ThermaCapture. ThermaCapture is somewhat famous for being loud. I once heard an Appalachian Trail thru-hiker describe her first few nights on the trail as “a symphony of crinkling, crackling, and crunching emanating from the shelter and every tent within five miles.” According to anecdotal reports in the Backpacking Light forums, some users find the ThermaCapture in their own pads to be quiet enough but are kept awake by the ThermaCapture on the pads of their tent/shelter mates.

The UberLite does not use ThermaCapture. Instead, it relies on the internal structure of the mattress (Therm-a-rest calls it a “triangular core matrix”) to fight heat transfer (the XLite also has the same internal structure). On the one hand, the UberLite is comfortable because it is a reasonably quiet pad. On the other, it may feel less warm in some environmental conditions than some other inflatable pads on the market.
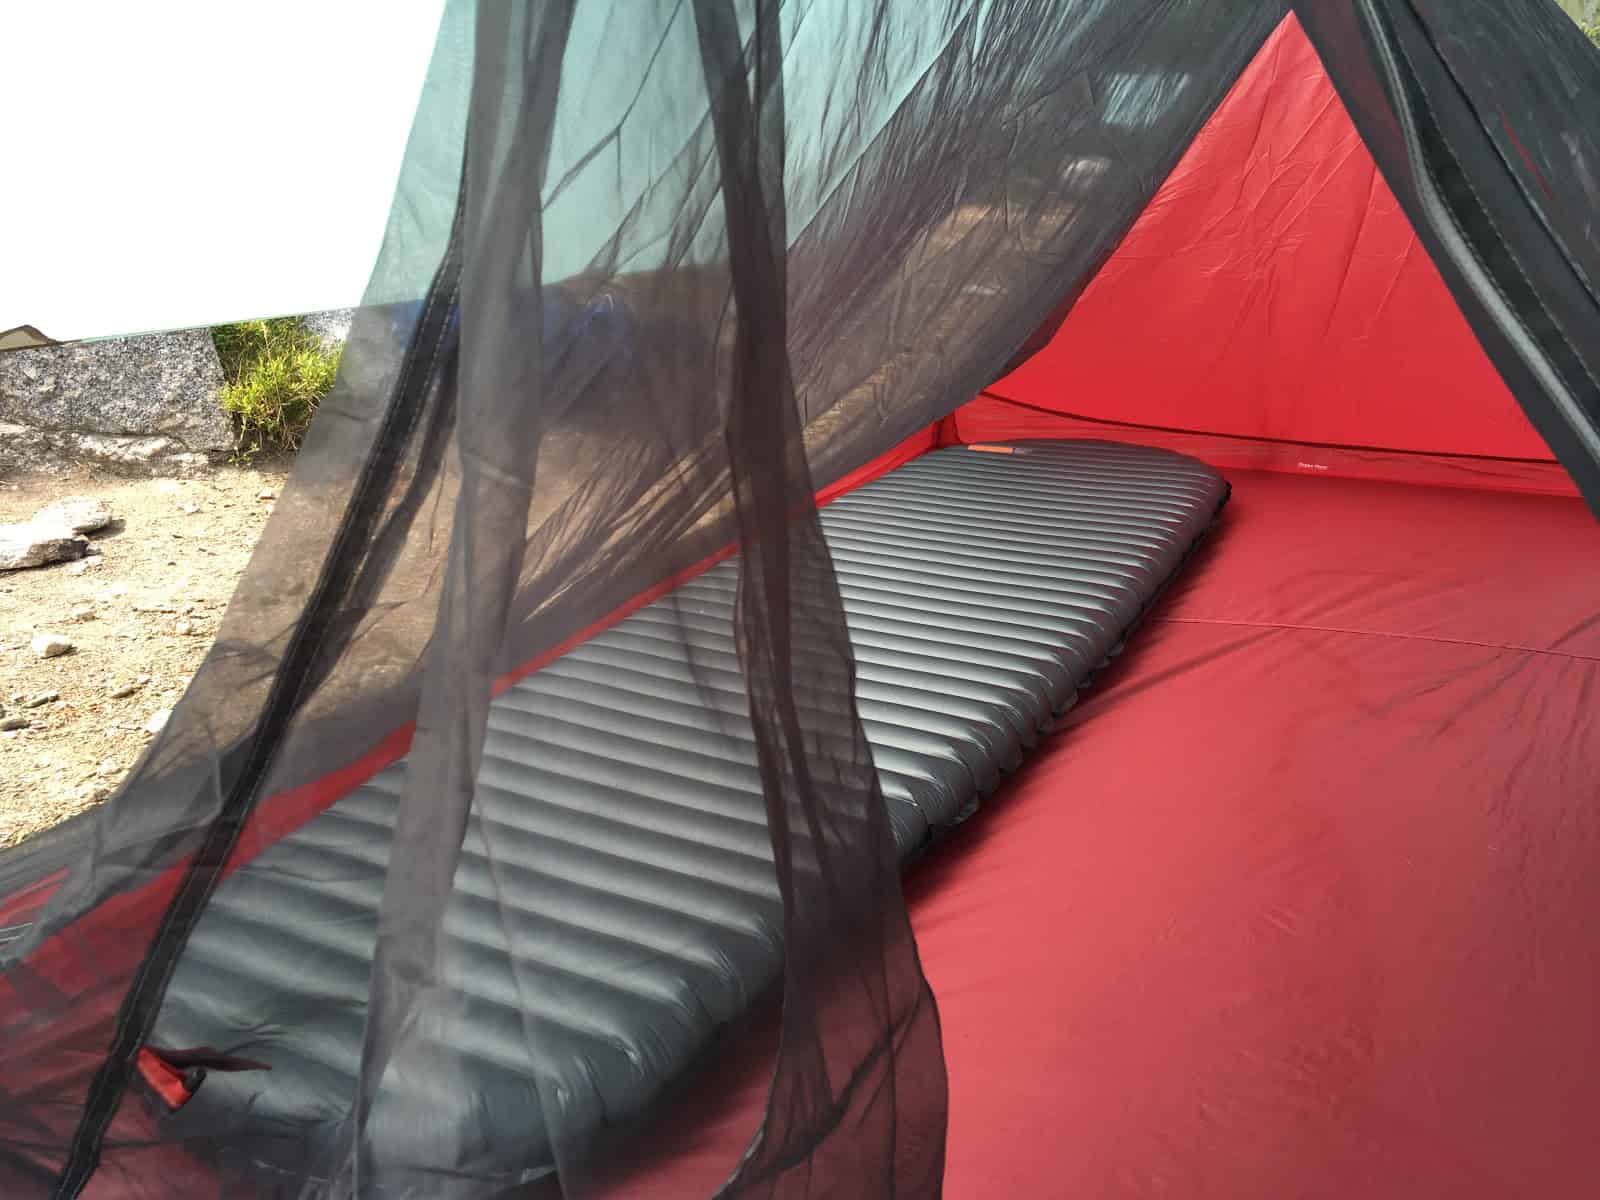
As I mentioned in the description of field testing, I slept on the UberLite in below freezing temperatures at least six or seven times. Compensating for the 2.0 R-Value wasn’t all that difficult, particularly as I’m a quilt user and already accustomed to throwing on a few extra articles of clothing before falling asleep. I’d make sure to have a thin insulating pad to place under the UberLite if snow was in the forecast (e.g., the Gossamer Gear Thinlight Foam Pad).
Fabric noise and R-Value are objective, but the question of “how does it sleep” is a little more difficult to nail down. My opinion is that the UberLite cradles the body and prevents pressure points just as much as the average 2 to 3 in thick (5.1 – 7.6 cm) inflatable mattress with horizontal baffles. I usually spend my nights rotating from side to back to side and back again, and I think the mattress performs equally well in side-sleeping and back-sleeping scenarios. My hips and shoulders felt well-supported without being too firm, even with the mattress inflated to max capacity.
Ryan Jordan, who has extensive experience with the NeoAir XLite and XTherm pads, has also tested the UberLite and his experience echoed mine. He felt that differences in support between the three pads was marginal, and all three offered similar latitudes of comfort adjustment by controlling air capacity using the valve.
The UberLite is a no-frills piece of gear. Don’t expect it to cradle you with thicker side baffles or support your neck with an integrated pillow. Most ounce-counting ultralight backpackers will likely appreciate the design simplicity and weight savings.
In short, the UberLite gave me as good a night’s sleep as I usually get on any other sub-15 oz inflatable mattress. For certain there are more comfortable inflatable mattresses on the market, but do they come close to matching the UberLite’s high level of comfort, small packed size, and light weight? Not by a long shot.

Weight and compressibility are the UberLite’s two biggest strengths. If you are going to purchase this piece of gear, you are going to do so because it weighs 8.8 oz (249 g) and compresses down to a tiny size.
Therm-a-Rest’s marketing materials claim you can fit the UberLite in your back pocket. They’re right, even if it wouldn’t be comfortable. You will certainly have no trouble finding a good spot in your pack for it. You could even compress it in with your sleeping bag for simplicity’s sake if you wanted to.
I can’t overemphasize the size and weight of this product: if you’ve maxed out the ounce savings in your current kit, the UberLite can take you another step forward.
Therm-a-Rest claims that the NeoAir UberLite has a packed size of 6.0 in x 3.5 in. If the pad could be perfectly folded, this is an accurate claim. Realistically, you can expect a packed size in the range of 7.5 in x 3.5 in during actual field use.


The UberLite is constructed of thin 15 denier ripstop nylon on the top and 15 denier nylon on the bottom. In other words, it’s so thin you can see through it in the right light. Exactly how this translates to long-term durability remains to be seen. I can tell you that after occasional and consecutive night use in two seasons, it has yet to spring a leak. That being said, I was cautious with this piece of gear – extremely cautious.

15 denier nylon is not a fabric with which you can be rough. Choosing to use the UberLite means you are committing to paying attention to where you are setting it down, where you are blowing it up, and precisely what type of detritus is littering the surface of your shelter. We were unable to puncture either side of the pad with both green and dry spruce needles, which was a huge relief! The real puncture enemies of this pad would include desert and prairie diaspores, burs, and sharp bits of rock underneath the pad while you sleep.
The UberLite comes with a repair kit that includes two patches and two glue dots to adhere the patches. The total weight of the repair kit, minus the instructions, is 0.2 oz (6 g).
The upcoming thru-hiking season should be a revealing test case for the long-term reliability of this mattress. My suspicion is that novice hikers will be punching holes in the UberLite left and right, while more experienced users will baby it accordingly. Still, accidents happen, and they will happen more often with a fabric of this thickness. I’ll say this: I wouldn’t use the UberLite if I were sharing my tent with a dog, and I wouldn’t use it without a ground sheet or shelter floor to protect it.
My wife and my cat both know it: I’m a notoriously fidgety sleeper. Despite constant rolling and re-adjusting, I had no trouble staying on the mattress, which is 20 in (51 cm) at its widest point and 72 in (183 cm) length from tip to tip (size regular). The UberLite utilizes horizontal baffles. Some back sleepers prefer vertical baffles, but I’ve always found horizontal baffles to work just fine for back sleeping. Some larger users may disagree.
The UberLite retains its structure well when under pressure. After letting out an estimated 5% to 10% of the air from the point of maximum pressure, I still had to exert effort to get the mattress to bottom out from my body weight.
The 15 denier nylon fabric is somewhat slick and may slide around on your shelter floor (depending on your floor material). The usual fixes apply: painting silicone strips on the bottom of your shelter floor or using a thin insulating pad underneath the mattress.
I was able to consistently inflate the UberLite to maximum pressure using 15-17 breaths in just over a minute at an average elevation of 6,500 ft. The nozzle is the standard Therm-a-Rest variety: unscrew to open and screw to lock closed. While inflating you can push the valve forward with your tongue to temporarily close it off, allowing you to inhale more deeply or to keep air from escaping as the air pressure increases inside the mattress during the inflation process.
After opening the valve and letting the mattress deflate on its own for a few seconds, I was able to consistently roll it back up and put it in the stuff sack in about 2.5 minutes. The mattress reliably re-compresses to its stowed size and always fits back in the stuff sack with room to spare.

The nozzle resides on the upper right-hand corner of the UberLite. The nozzle placement makes it easy to reach up and let a little air out to dial in your favorite pressure. The best practice with the UberLite is to start at full pressure and let out a little air at a time while laying on the mattress. The nozzle placement technically allows you to bend it up towards your mouth to re-inflate while laying on the mattress, but I wasn’t ever able to make this work. On cold nights where the internal pressure of the mattress dropped, I had to remove my body from it entirely to re-inflate to my desired pressure. This is consistent with our experience using other inflatable sleeping pads.

The bonded seams on the UberLite appear to be reliable and sound, with no material differences in construction quality or methods when compared to the NeoAir XLite or XTherm.
The surface fabric is satiny, but bare skin pressed against it overnight would likely be uncomfortable. The UberLite and the included stuff sack both come in a dark greenish-bluish-grey. The shade is difficult to see around camp at twilight, so I placed a small square of bright orange tape on my stuff sack to avoid having to search for it.
Some users will appreciate the dark tone, especially those who disliked the bright yellow of the XLite. It’s purely an aesthetic choice and has no bearing on the performance of this particular product.
Therm-a-Rest sources its materials worldwide but assembles its products in America.
Scroll right to view all columns.
| Brand and Model | Weight | R-Value | R-Value:Weight (oz) Ratio | Thickness | Packed dimensions | Fabric Type | Baffle Orientation | MSRP |
|---|---|---|---|---|---|---|---|---|
| Therm-a-Rest NeoAir UberLite | 8.8 oz | 2 | 0.23 | 2.5 in | 3.5 in x 6 in | 15D Nylon | horizontal | $179.95 |
| Therm-a-Rest NeoAir XLite | 12.0 oz | 3.2 | 0.27 | 2.5 in | 4 in x 9 in | 30D rip HT Nylon | horizontal | $169.95 |
| Sea to Summit Ultralight Mat | 13.9 oz | 0.7 | 0.05 | 2 in | 3 x 6.5 | 40D nylon | quilted | $99.95 |
| Big Agnes Insulated AXL | 10.6 oz | unavailable, Big Agnes rates to 32F | 0.2 (approx) | Outer: 3.75 in; Inner: 3.25 in | 3 in x 6.5 in | Rip-stop nylon | quilted | $179.95 |
| REI Flash Insulated | 15.0 oz | 3.7 | 0.25 | 2 in | 4 in x 9.5 in | Laminated 30D ripstop polyester | quilted | $99.95 |
| NEMO Astro Lite Air Pad | 13.9 oz | Unavailable, NEMO rates to 35F-45F | 0.15 (approx) | 3.5 in | 3 in x 8 in | 20D PU Polyester | horizontal | $109.95 |
| Klymit Inertia X-Frame | 8.5 oz | Unavailable | 0.02 (approx) | 1.5 in | 3 in x 6 in | 30D top / 75 D bottom polyester | vertical | $119.95 |
| Exped Airmat HL | 10.9 oz | 1.9 | 0.17 | 2.8 in | 2.8 in x 7.1 in | 20D Polyester | vertical | $109.00 |
I’ve chosen to compare the UberLite to a sampling of inflatable mattresses that weigh 15 oz (425 g) or less and represent the lightest air pads from Therm-a-Rest, Big Agnes, Nemo, REI, Sea to Summit, and Klymit. All data is for regular or standard size mattresses in the 20 in x 72 in size range.
Therm-a-Rest shaves weight primarily by utilizing a 15 denier fabric. The Exped and NEMO mattresses both use a 20 denier fabric, while all the other mattresses in our table use 30 denier fabric. Klymit saves weight by using a skeleton design that doesn’t maintain full coverage under the body. The result is a sleeping pad that simply can’t compete with the others in an R-value or sleep comfort comparison. Now that the UberLite is as light as the Klymit Inertia X Frame pad, the advantage of the latter (weight savings) has disappeared in favor of the more comfortable UberLite.
In terms of estimated R-value-to-weight ratios, the UberLite is near the top of the pack, and easily the highest amongst all pads weighing less than 11 oz.

Is the introduction of the Therm-a-Rest NeoAir UberLite a game changer? It could be, depending on where you are in your ultralight journey, and what pad you are currently using.
Let’s review some highlights. The NeoAir UberLite:
Therm-a-Rest has chosen to prioritize weight and volume over features, added insulation, and fabric durability.
The long-term ramifications of these design decisions on durability are not yet evident. The upcoming thru-hiking season will tell us a lot about how the UberLite holds up to long-term daily use. Certainly many Therm-a-Rest users have found the quality of the XLite and XTherm to stand the test of time, and it’s unlikely that a brand with the reputation of Cascade Designs (the parent company of MSR, Therm-a-Rest, and Platypus) would introduce a new product without thorough field testing.
If you are looking for an all-around inflatable mattress to keep you extra-cozy and extra-toasty in all seasons, this is not the piece of gear you need. Likewise, if you can save two-to-four ounces somewhere else in your pack, you might want to consider a mattress with more features and more warmth. But if you have bottomed out in the ounce-counting game, the UberLite has the potential to shave your base weight even further while still keeping you reasonably comfortable.
If you are a warm sleeper who finds herself sweating through the night on something like the NeoAir XLite or REI Flash, then the UberLite can save you even more ounces. If you typically bundle up while sleeping on the XTherm when temperatures are above freezing, avoid the UberLite!
With careful planning, appropriate clothing choices, and a knowledge of what temperature ranges you can handle, the UberLite has three-season qualifications, but beware of winter and winter-like conditions. On a purely subjective note, I found it to be plenty warm in shoulder season conditions at just-below-freezing temperatures. For these scenarios I used a 20 deg F rated quilt and some extra layers on my body.
For crushing high miles in mild conditions, the UberLite is going to be very hard to beat. Nothing in its comfort class can match the packed size and weight of the NeoAir UberLite. For this reason it has earned a spot in my summer thru-hiking kit, and I see no reason not to bring it along in shoulder seasons as well.

The Therm-a-Rest NeoAir UberLite is currently the lightest and most packable air-filled sleeping pad on the market that provides at least 2.0 inches of thickness, and a standard 20×72 footprint. In addition, it features outstanding manufacturing quality and quiet fabrics.
The UberLite will allow serious ultralighters to shave some ounces while still getting a good night’s sleep. The UberLite will appeal to existing NeoAir XLite and XTherm users who are seeking a quieter sleep and a lighter pack, or Klymit Inertia X-Frame users who are tired of suffering cold nights just to carry a sleeping pad in this weight class. In addition, the UberLite makes sense for ultralight backpackers who have previously been committed to closed cell foam pads, and want to save more weight and increase their sleeping comfort. If long-term users report the kind of ruggedness found in other Therm-a-Rest inflatable mattresses, we may consider bumping this rating to a Highly Recommended.
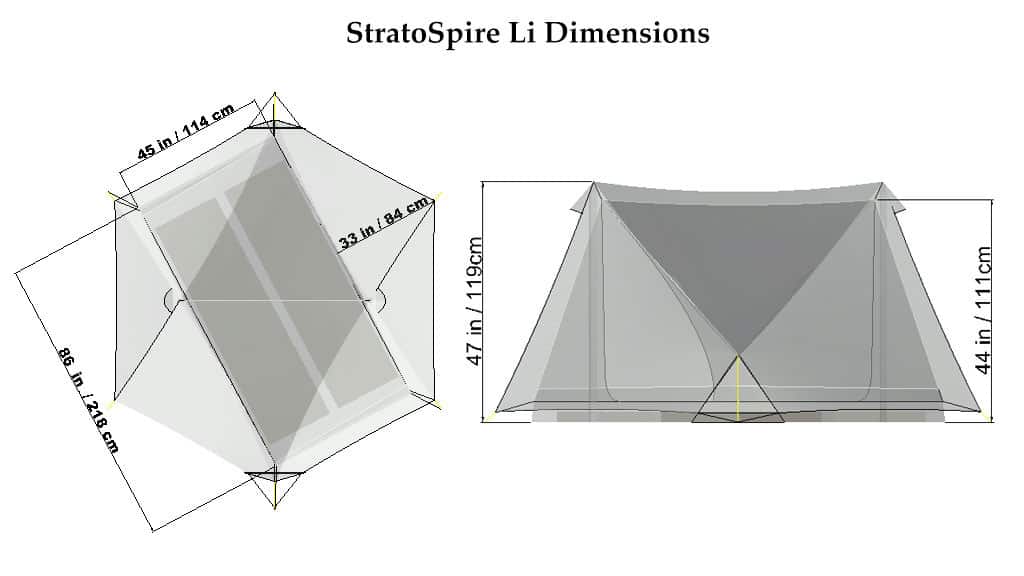
Tarptent’s Stratospire Li is a two-person DCF shelter with well-considered features and has enough chops for year round use.

The Tarptent Stratospire Li is a roomy and stable two-person DCF shelter with well-considered features. It sets up quickly, stays taut in rough conditions due to DCF construction and Tarptent’s proprietary built-in tensioners, and has enough chops for year round use. I tested the Stratospire Li during an eight-day trek through Montana’s Absaroka-Beartooth Wilderness in the summer/fall shoulder season. Weather conditions were all over the map, meaning I had the opportunity to observe this shelter’s performance during clear (but cold) nights, light rain, mist, light snow, and driving wind.
The Stratospire Li is most similar to the Zpacks Duplex: both are two-person DCF shelters designed to set up with trekking poles. An in-depth head-to-head performance review of the two is in order, but in the meantime, we can compare some of the basic features and specifications.

| Shelter | Zpacks Duplex | Tarptent Stratospire Li |
|---|---|---|
| Total weight | 19 oz (538.7 g) | 26 oz (737.1 g) |
| Tent body material | 0.51 oz (14.5 g) / yd² Dyneema | 0.51 oz (14.5 g) / yd² Dyneema |
| Floor material | Floor: 1 oz (28.3) / yd² | Floor: 1 oz (28.3) / yd² |
| Trekking pole position | Centered | Offset |
| Design | A-frame (six panels) | Octogonal (8 panels) |
| Vestibule | 2 | 2 |
| Doors | 2 | 2 |
| Independent interior | No | Yes |
| Interior Height | 48 in (121.9 g) | 45 in (114.3 cm) |
| Interior Width | 45 in (114.3 cm) | 45 in (114.3 cm) |
| Floor Length | 90 in (228.6 g) | 86 in (218.4 cm) |
| Stakes | 8 required (0 included) | 6 required, 2 optional, ( 6 included) |
| Cost | $599.00 | $679.00 |
The Duplex is a few inches longer and taller (interior) than the Stratospire Li. It features an A-frame six-panel design and weighs 19 oz (538.7 g). The Stratospire Li features an octogonal eight-panel design and is about $80.00 more expensive than the Duplex. It weighs 26 oz (737.1 g). The fly can set up independently from the interior. Both shelters are constructed of identical weight Dyneema Composite Fabrics and measure 45 in (114.3 cm) across the bottom of the floor.
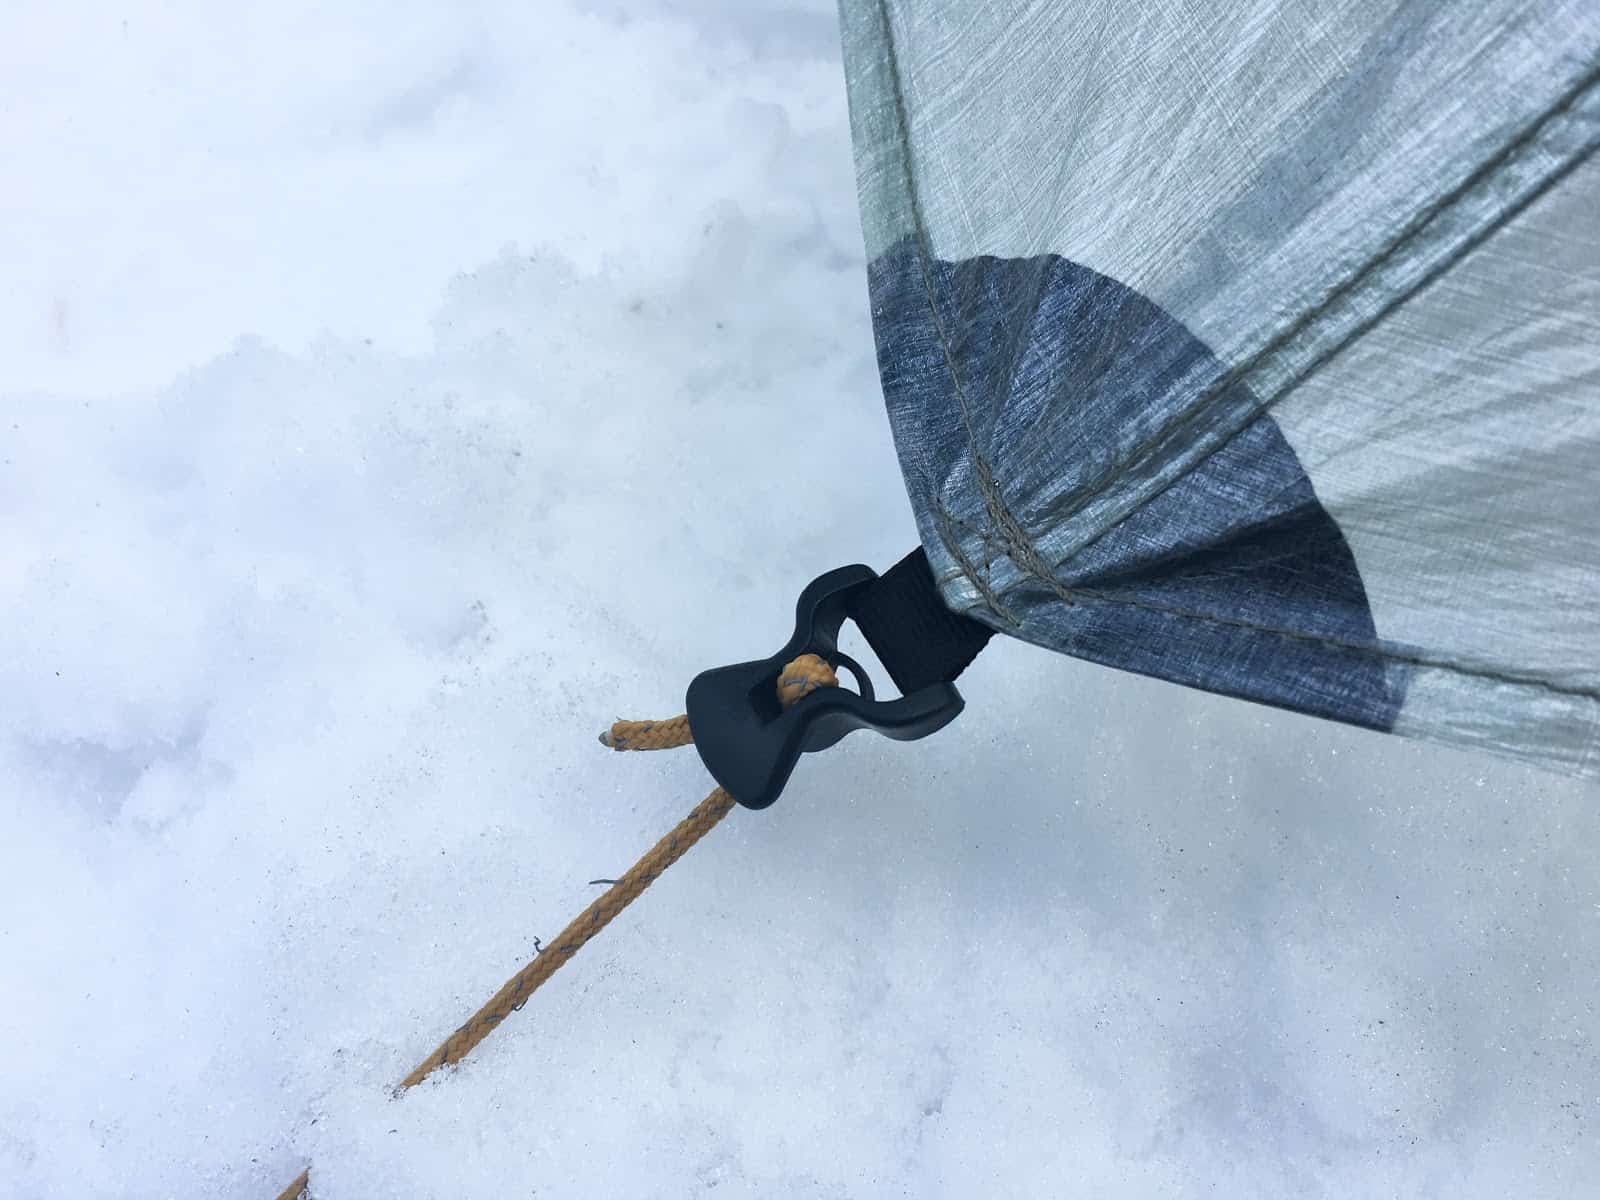
This is a roomy, tough, well-designed shelter. Tarptent rightly lauds the Stratospire Li’s performance in windy conditions.. The eight-panel design minimized noise and flap on a long, cold, windy night high in the Beartooths. The ridgeline remained tight (with the aid of the two optional stakes and tie-outs), and the integrated line tighteners were taut after ten hours of high-speed gusts. In short, Montana threw quite a lot of wind at this shelter, and it didn’t budge. I was camping with a group of ten hikers, and I was one of the few who passed an uneventful and cozy night.
The floor of the Stratospire Li is rectangular, but the fly is octagonal, and the trekking poles are offset. This can require a bit of thinking during setup, particularly if you are in a tight situation or your spot isn’t optimal. DCF fabric has very little stretch, meaning your stake angles and placement need to be a bit more precise than with a silnylon shelter. Make sure to watch Tarptent’s setup video. After viewing that and pitching the shelter a few times in a yard, I had no problem getting the shelter pitched in under two minutes.
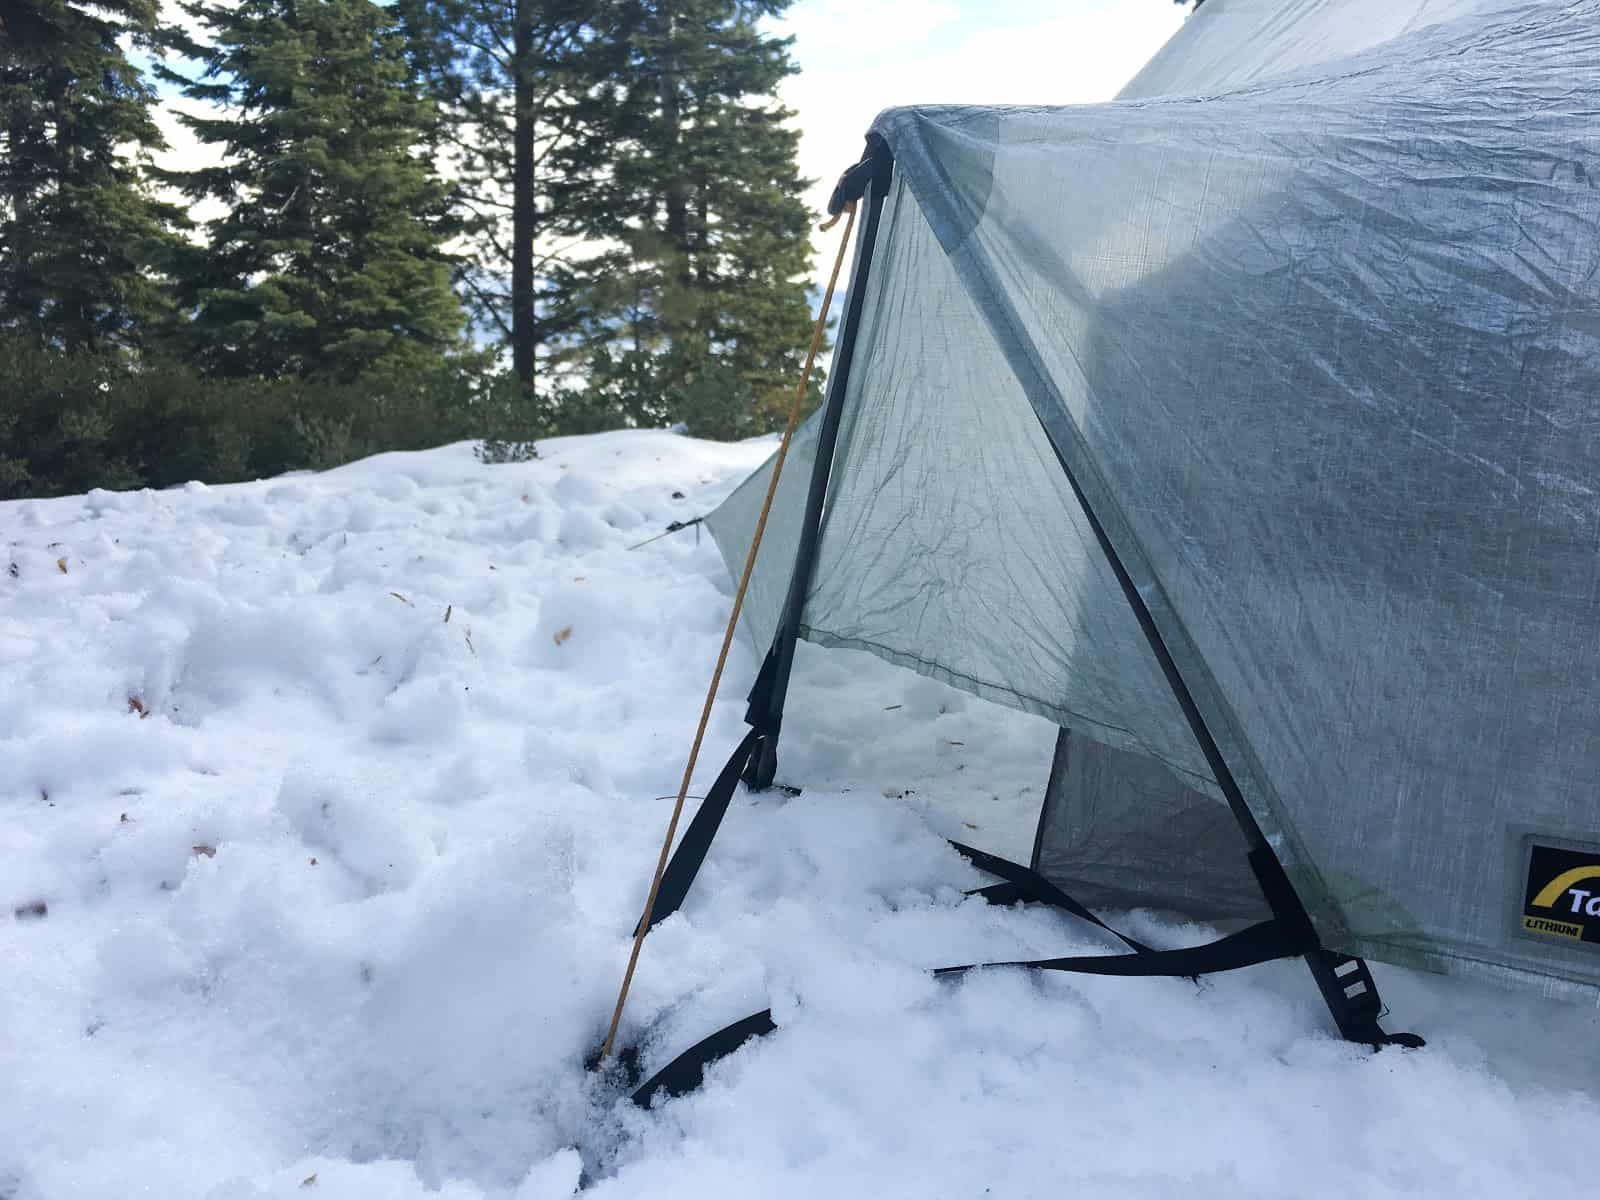
The shelter sets up with trekking poles in a handle-down configuration (although Tarptent sells an adaptor to allow the handles to face up). I’ve used a silnylon Tarptent for years and never worried about poking a hole in my shelter with the carbide tip of the trekking pole, but something about the nearly seven-hundred dollar price tag of the Stratospire Li gave me pause every time I set it up. The good news is, should you happen to (carelessly) puncture the Stratospire Li, the DCF construction makes it much easier to patch than silnylon.
The shelter is roomy, with a 45 in (114.3 cm) wide and 86 in (218.4 cm) long bathtub floor. The apex height is 45 in (114.3 cm) tall. This space accommodates two standard sized sleeping mats with ease (or one standard mat and one wide mat with slightly less ease). There’s plenty of room to sit up and change clothes, even for tall hikers. Two doors and two vestibules make sharing the shelter as comfy as it gets, as well as optimizing airflow and views for those dramatic campsite days.
The vestibules are gigantic, more than large enough to accommodate cooking, wet gear, packs, dogs, or children. Tarptent sells an attachment to turn this vast space into a separate compartment should you be traveling with a child.
One side effect of these large vestibules is that the edge of the fly is quite far from the bathtub flooring after zipping the doors. The distance eliminates the “up-splash” problem (in heavy rain, water can splash up from the puddle created by the fly) occasionally experienced by smaller Tarptents.
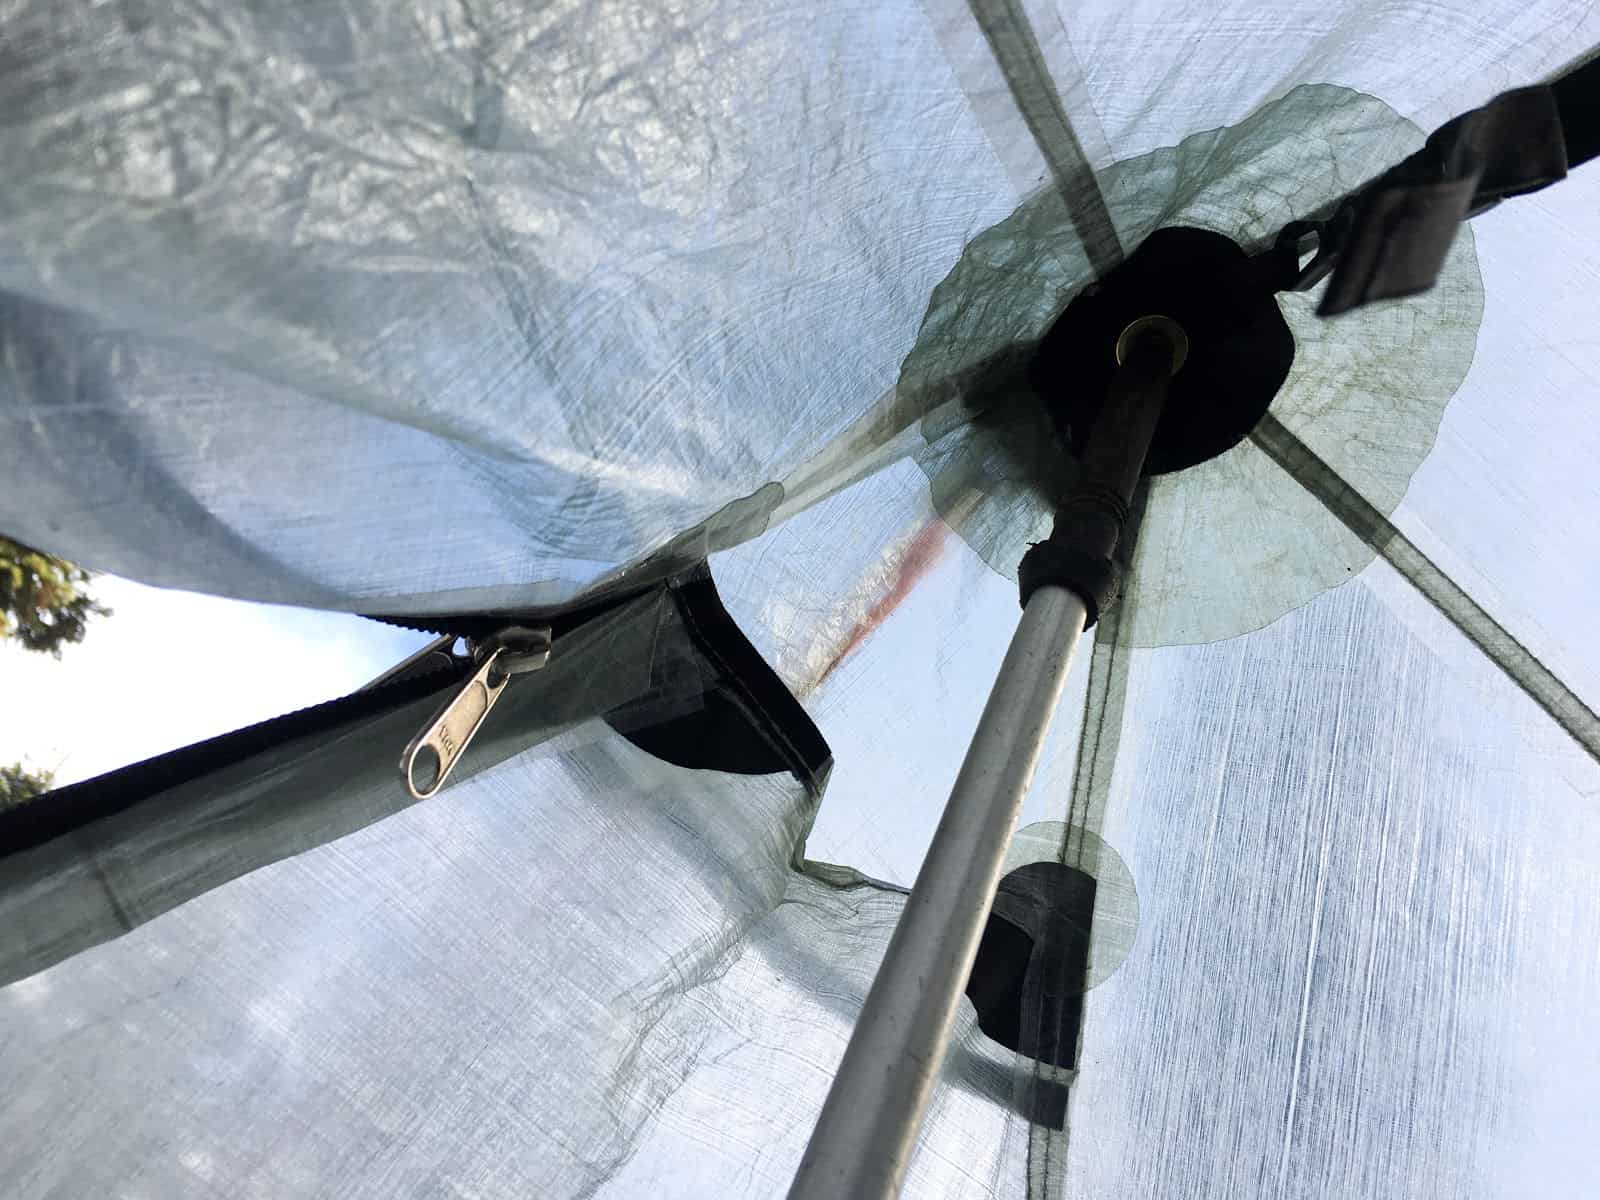
Tarptent loaded the Stratospire Li with thoughtful features: floor and apex adjustment straps, storm sealed zippers, zipper flaps for drip protection, and magnetic closure loops to roll the outer fly up and out of the way.

The zipper flap also snaps up out of the way with a magnet. Remember to do this before unzipping, or you will have a stuck zipper.
I love this magnet system, and I wish it was also on the interior mesh door. Instead, that door rolls up with a clip and loop system, something I occasionally found challenging to manipulate with cold or gloved hands.


The Stratospire Li is a bulky tent when rolled and stored. The carbon fiber struts in the PitchLoc corners are removable if you feel like stuffing, but Tarptent recommends rolling to improve the lifespan of the DCF. I found the stuff sack to be large enough that rolling was not much of a pain, particularly if you follow the manufacturer instructions. That being said, the tent did feel chunky in my pack and required that I re-think my regular pack organizational system.
The interior pockets at the corners of the mesh doors felt small. Bulky, light items such as a Buff or stuff sacks tended to fall out throughout the night. Storing smaller, heavier items like a headlamp or a pocket knife are the ideal use for these pockets.
Tarptent sells an optional solid wall interior for extremely cold or windy conditions. Adding a solid wall interior would beef up an already storm-resistant tent, and give it some four-season potential. However, I’d be concerned that the Stratospire Li’s shallow pitch angle could give it some problems with heavy snow loads, though the DCF will not stretch under load and will shed snow better than silnylon.
Further testing is required, particularly to see how the tent fares in winter conditions, and in comparison to the Zpacks Duplex. Until then, this is a well-designed, well-constructed, thoughtfully realized shelter with enough toughness to withstand a wide range of seasons and conditions. Large, cozy, and stable while remaining ultralight, it won’t let you down—assuming you can stomach the price tag.
Updated September 15, 2018
StoveBench defines a protocol that is used to measure two important backpacking stove performance features (power and efficiency) in order to determine a single, quantifiable performance factor called the StoveBench Score.

StoveBench defines a protocol that is used to measure two important backpacking stove performance features (power and efficiency) in order to determine a single, quantifiable performance factor called the StoveBench Score.
Power is important because it characterizes a stove’s ability to perform well in adverse conditions (e.g., wind, cold temperatures, cold water). Efficiency is important because it defines a stove’s ability to conserve fuel and save weight for the hiker. Most consumers are enamored by reported boil times (a measure of power), while most ultralight backpacking gram-counters are enamored only by fuel usage amounts (a measure of efficiency). In actual use outdoors, both are important to consider.
This article introduces the StoveBench protocol and presents the definition of the StoveBench Score and how to determine it using the protocol.
As a case study, the protocol is applied specifically to the testing of upright canister stoves. Future applications of StoveBench will be applied to other types of stoves. In addition, special considerations, limitations, potential sources of error, and other applications of StoveBench are discussed.
Listen to our podcast about StoveBench to learn more (click here for the podcast show notes):
Backpacking stove manufacturers often report the performance of their stoves in terms of:
In addition, ultralight backpackers, in particular, are interested in a metric that defines the mass of fuel required to boil a certain amount of water (a measure of the stove’s efficiency). Calculating this metric is popular amongst the more serious kitchen-counter stove testing enthusiasts.
However, the conditions during which these metrics are determined are not necessarily standardized from manufacturer to manufacturer or stove tester to stove tester and can’t necessarily be used to compare stove models from different brands.
Therefore, we have developed a protocol at Backpackinglight.com that we’ll be using in our stove reviews, called StoveBench (a portmanteau derived from the term benchmark, a type of test that defines a standard point of comparison).
In particular, we don’t see metrics that define “power” (e.g., boil time, burn rate) or “efficiency” (mass of fuel required to boil a certain volume of water) as mutually exclusive performance indicators. After all, any manufacturer can optimize stove performance for one vs. the other. However, balancing both power and efficiency with system weight is a design and engineering challenge of developing and using any cooking system (which may include multiple components, such as the burner, fuel container, windscreen, heat exchanger, pot, and lid). After all, a stove that is 100% efficient but takes 20 minutes to boil a pint of water, or doesn’t have the power to boil water in cold temperatures or breezy weather is as disadvantageous as a stove that boils a pint in three minutes but requires 50 grams of fuel.
Thus, the real purpose of StoveBench is to provide a meaningful way to compare different stoves so that efficiency, power, and fuel economy are implicitly defined in a single quantifiable performance factor.
The goal of the StoveBench Protocol is to produce a numerical “performance factor” that considers both a stove’s power output (proportional to its boil time) and its fuel efficiency (proportional to the amount of fuel used during the test) during a standardized stove operation test, during which a stove will be used to heat some predetermined amount of water.
This StoveBench Score (“F”) can be described as follows:
F = output ÷ input
In any cooking scenario, output is defined primarily by water volume and temperature change (heating). More energy is required to heat larger volumes of water, and to change the temperature by more degrees.
Input is defined primarily by time (more energy is used the longer a stove boils) and fuel mass (more energy is used by a greater amount of fuel).
It follows that higher values of F are better, as they represent higher levels of output (water volume boiled) for a given amount of input (energy expenditure).
Therefore, F can be written in these terms:
F = [ V ⨉ ΔT ] ÷ [ t ⨉ M ]
where
For example, a test performed under the following conditions at sea level might look something like this:
The calculated StoveBench Score would thus be:
F = [ 0.5 L ⨉ 100°C ] ÷ [ 4 min ⨉ 15 g ] = 0.83 L•°C/min•g
Which can be read in layman’s terms like this: in this test, this stove was capable of heating up 0.83 liters of water by 1 degree Celsius (or, 1 liter of water by 0.83 degrees Celsius) in one minute using one gram of fuel.
The StoveBench Score will vary across different test conditions, being influenced by factors such as:
However, because the StoveBench Score is normalized for water volume and temperature differential, it has the potential to be less sensitive to factors such as the elevation of the test location or starting water temperature, which means that across a narrow range of test environments and materials used, results should compare relatively well. Unfortunately, manufacturers seldom publish the details of their test protocols, emphasizing the importance of testing stoves using a standard methodology when comparing stoves from different brands, or in different environments.
For example, let’s consider two tests using a well-known canister stove from a major US brand.
Test #1, performed by the manufacturer, is conducted with water having a starting temperature of 70 °F (21.1°C), an ending temperature of 212 °F (100°C), and water volume of 1.0 L. In this test, the manufacturer reports a boil time of 3.5 minutes and 14 g of fuel consumption. The StoveBench Score is thus calculated as follows:
F = [ 1.0 L ⨉ 79°C ] ÷ [ 3.5 min ⨉ 14 g ] = 1.61 L•°C/min•g
Test #2, performed by the author, is conducted with water having a starting temperature of 32.9 °F (0.5°C) and an ending temperature of 199 °F (92.7°C), noting that these tests are conducted at an elevation of 7,205 feet, where water boils at a lower temperature than at sea level. A 0.85 L titanium pot was filled with 0.5 L of water for the test, and the stove operated at full power. The boil time was 3 min 5 sec and 11.3 g of fuel was consumed. (Full details of the test protocol are described below in the “Materials and Methods” section of this article.) The StoveBench Score for this test is thus calculated as follows:
F = [ 0.5 L ⨉ 92.2°C ] ÷ [ 3.08 min ⨉ 11.3 g ] = 1.30 L-°C/min-g
The differences between the two results are not dramatic (F is only 20% lower in Test #2), given significant differences in starting water temperature, water volume boiled, and elevation of the test location. However, the differences highlight the need to ensure standardized testing when comparing the performance of different stoves.
This is important because the vast majority of “gear guides”, “best stoves” comparisons, and stove reviews simply re-publish manufacturer-reported performance data, and make judgments accordingly, without regard for the factors that influence stove test results.
A stove’s efficiency can be loosely defined as its ability to minimize waste heat. Heat is wasted via a number of processes, including incomplete combustion of fuel, a flame pattern that causes heat to spill up the sides of a pot vs. being targeted to the bottom of the pot, and heat losses from the pot itself (e.g., always use a lid!).
Efficiency is a function that balances fuel economy with flame power. A high-power stove aids efficiency by delivering more heat in a shorter period of time which can combat system heat losses. However, a high-powered flame can also waste more heat because the heat cannot be absorbed into the water fast enough.
Consideration of efficiency is built into the StoveBench Score, which is calculated from both boil time and fuel usage. Short boil times (high power) and low fuel requirements (high fuel economy) both contribute to higher StoveBench Scores.
Specifically, the fractional contribution of stove performance by fuel economy is defined by the Feconomy = [ V ⨉ ΔT ] ÷ M part of the StoveBench Score equation, and the fractional contribution of stove performance by flame power is defined by the Fpower = [ V ⨉ ΔT ] ÷ t part of the StoveBench Score equation.
Since efficiency can be defined as the ratio between the actual amount of fuel used in the test and the theoretical amount of fuel that should have been used in the test if the stove was operating at 100% efficiency (i.e., no heat loss), the StoveBench Score is particularly useful for comparing stoves of different types (e.g., alcohol vs. compressed gas vs. liquid gas), where inherent inefficiencies in both the heat capacity of fuels and heat losses in stove systems will be reflected by both Feconomy and Fpower.
Often, there is a direct correlation between heavier stoves and stoves that are more efficient. Thus, the StoveBench Score is a versatile metric that can provide a backpacker with valuable information about which stove type might be best for a given set of water heating requirements based on trip duration and required water volumes. The StoveBench Score can provide the foundation for a variety of subsequent analyses to aid the hiker in evaluating different stove systems. For example, the StoveBench Score divided by the total cook kit weight (which might include the stove, fuel container, pot, windscreen, etc.) would provide valuable insight into the performance:weight ratio of a particular stove and cooking system.
What follows are the materials and methods used in a standardized protocol for determining the StoveBench Scores for any stove type.
In general, the standard (“control”) boil test of the StoveBench protocol measures stove performance under the following conditions:
The following table describes my own test environment and instrumentation in more detail.
| Ambient Environment | Indoors; Air Temperature = 19.5 °C +/- 0.5 °C, thermostat-controlled fanless convection heater; RH = 20-40% (monitored); elevation = 7205 feet above sea level. |
| Water | 500 g of water (0.5 L) +/- 2 g; measured starting temperature = 0.5 to 5.0 °C (water temperature stabilized by ice); stopping ("boiling") temperature = 91.0 °C (measured temperature at the beginning of a rolling boil at this elevation) |
| Water Temperature Measurement | HTI HT-9815 Digital Thermometer w/K-type Thermocouple Sensors (±1 °C accuracy, 0.1 °C resolution) |
| Weight Measurement | Adam Equipment CBK 8a scale, 4kg capacity, 0.1g accuracy (calibrated) |
| Stove System Thermal Imaging | HTI HT-18 Thermal Imaging Camera, -20 °C to +300 °C range, image resolution 220x160 pixels. |
| Infrared Temperature Measurement | Etekcity Lasergrip 1080 Infrared Thermometer, 0.1 °C resolution. |
| Water Heating Container | titanium pot with lid (0.85 L capacity, 5.0 in wide x 3.75 in height, 4.0 oz dry weight) |
What follows are the specific materials used in the application of the StoveBench Protocol for upright canister stoves:
| Fuel | 80/20 mixture of isobutane/propane; 227 g net weight canisters between 30% and 80% of their fuel capacity* |
* Canisters are retired when fuel capacity reaches 30% or less when changes in internal canister pressures can skew results materially. At high canister capacities, high canister pressure causes excess heat losses that can skew results materially when stoves are operated at full throttle. See below for more details.
As part of a series of new Backpacking Stove Gear Guides, we are planning on releasing our upright canister stove gear guide later this month.
What follows is a small selection of control boil test results (using the protocol above) from one test batch that included 18 models of upright canister stoves (the final gear guide will include approximately 25 models). For the purpose of this article, brand and model names have been hidden. They will be revealed with the rest of the results in the upcoming gear guide.
Results have been sorted by order of highest to lowest StoveBench Scores.
| Model ID # | Boil Time (mm:ss) | Fuel Usage (g) | StoveBench Score - F (L•°C/min•g) |
|---|---|---|---|
| 1 | 3:30 | 8.3 | 1.56 |
| 2 | 2:45 | 13.2 | 1.25 |
| Average | 3:30 | 12.3 | 1.16 |
| 3 | 4:05 | 10.9 | 1.02 |
| 4 | 3:10 | 19.7 | 0.73 |
The StoveBench Score rewards not only stoves that have good fuel economy (low fuel usage), or stoves that have high power output (low boil times), but stoves that are efficient – that can deliver a high amount of power for the least amount of fuel.
Error percentages will be higher when using consumer-grade instrumentation (e.g., digital kitchen scales and meat thermometers). For example, a typical made-in-China digital kitchen scale has an accuracy of 0.1 oz (3 g) with linearity of up to 0.2 oz (6 g). With this much potential error introduced in the measurement of fuel consumption during a single boil test, replicate testing becomes even more important. Verification of scale accuracy with calibration standards is important, even for at-home stove testing enthusiasts.
This concern is propagated by Betty Crocker et al., based on the common kitchen practice of putting a teaspoon of salt into a pot of water to make it boil faster. In other words, do differences in the concentration of solutes have an effect on boiling time?
For those of you that think physicochemistry is fun (you have a copy of the CRC-HCP by your bedside), consider the basic principles that:
So, at what sort of solute concentrations does this make a difference?
A 1% solution of salt water (e.g., 10 g of salt dissolved in 1 kg of water) will increase the boil time by about 1% (physics fans: use the heat equation Q=MCΔT) to determine this). Adding more salt starts to tip the scales, however, and by the time we reach a 5% solution of salt, the boil time is decreased by about 1.5%. Of course, these calculations are based on a perfectly efficient system (where 100% of the heat produced by the fuel is transferred to the water). But even with highly inefficient (10% to 40% efficiency) stove systems characteristic of solid fuel, alcohol, and gas stoves without pressure regulation, the effects of solutes on boil times are likely negligible relative to the other sources of variability inherent in performing testing like this.
In other words, we are talking about minute effects on the boil time and concentrations of salt that would make your water unpalatable.
For my own testing, I use tap water that has a total dissolved solids (a measure of solutes) concentration of less than 100 mg/L (0.01%).
For tests involving canister stoves, the amount of fuel remaining in the fuel canister could impact results.
As a fuel canister is used, the volume of fuel inside a canister decreases (which also decreases the pressure and resulting flow rate of fuel that is delivered to the burner).
In addition, fuel mixture composition could change, but that effect is probably not as dramatic as it’s assumed to be.
To evaluate this effect, the control boil test described above was repeated using a stove that does not include a pressure regulator (since the effects will be less dramatic on a stove that has a built-in pressure regulator). A 227 g (net weight) canister containing a mixture of 80/20 isobutane/propane was used for this test.
Boil times, fuel consumption, and StoveBench Scores are presented in the following chart as a canister is used from full capacity to nearly-empty capacity.
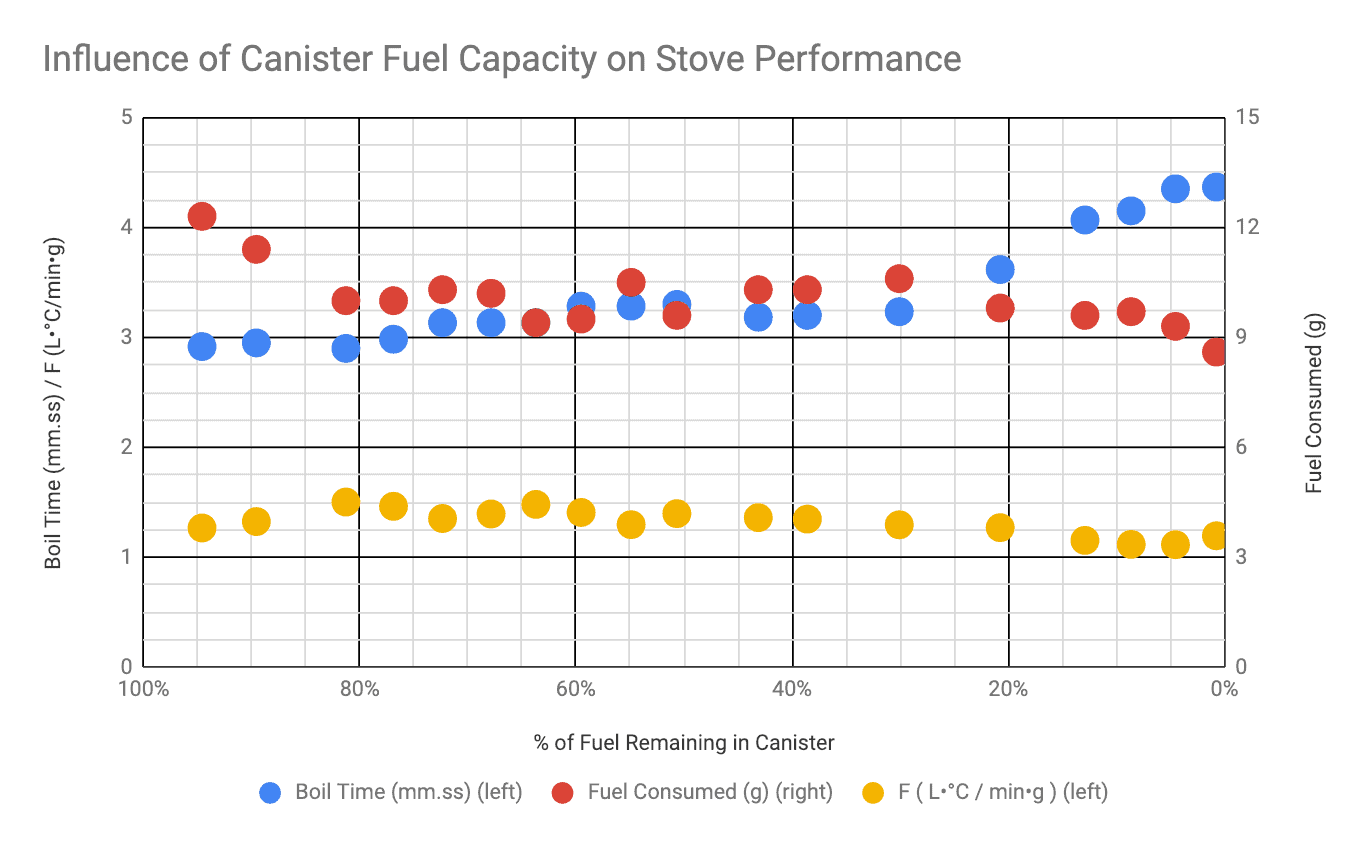
The following table provides a basic statistical analysis of all tests performed for this canister:
| Boil Time (mm.ss) | Fuel Consumed (g) | StoveBench Score - F ( L•°C / min•g ) | |
|---|---|---|---|
| Average | 3.4 | 10.08 | 1.32 |
| Standard Deviation | 0.49 | 0.83 | 0.12 |
| StDev% (100 x Standard Deviation / Average) | 14.5% | 8.2% | 8.9% |
Based on examining the graph above, I attribute the high variability to the high pressures in the canister when full (or nearly full), and the low pressures in the canister when nearly empty. Here are my conclusions when examining the graph, noting, in particular, those values that are near to or exceed +/- one standard deviation from the average values. StDev% is a useful statistic for estimating the range of error of experiments that should be repeatable. For the purposes of this protocol, I’m hoping for a range of StDev% of +/- 5%. From the table above, all three ranges are outside this criterion.
Based on these observations, the most reliable repeatability for the two measured performance metrics (boil time and fuel consumption), and the calculated StoveBench Score, occurred when canister fuel was in the range of 30% to 80% of its capacity.
With this restriction in place, if all tests performed at capacities exceeding 80% and lower than 30% are discarded, we can examine the resulting statistics:
| Boil Time (mm.ss) | Fuel Consumed (g) | StoveBench Score - F ( L•°C / min•g ) | |
|---|---|---|---|
| Average | 3.16 | 10.1 | 1.39 |
| Standard Deviation | 0.13 | 0.41 | 0.07 |
| StDev% (100 x Standard Deviation / Average) | 4.1% | 4.1% | 5.0% |
This constraint results in StDev% values for boil times, fuel consumption, and StoveBench Scores that are 5% or less.
Consequently, all tests measuring StoveBench Scores will be performed when the canister is within the 30% to 80% range of fuel capacity.
These results indicate that (at least for upright canister stove tests adhering to the control protocol defined above), a StoveBench Score can be interpreted to have an experimental standard error (defined by +/- 1 standard deviation) in the range of +/- 5.0%.
Running a stove at full throttle probably wastes unnecessary heat when using stoves that don’t have built-in pressure regulation. Most users will “feel” that their stove needs to be turned down a little in order to run it more efficiently, but thermal imaging can reveal the effect more objectively.
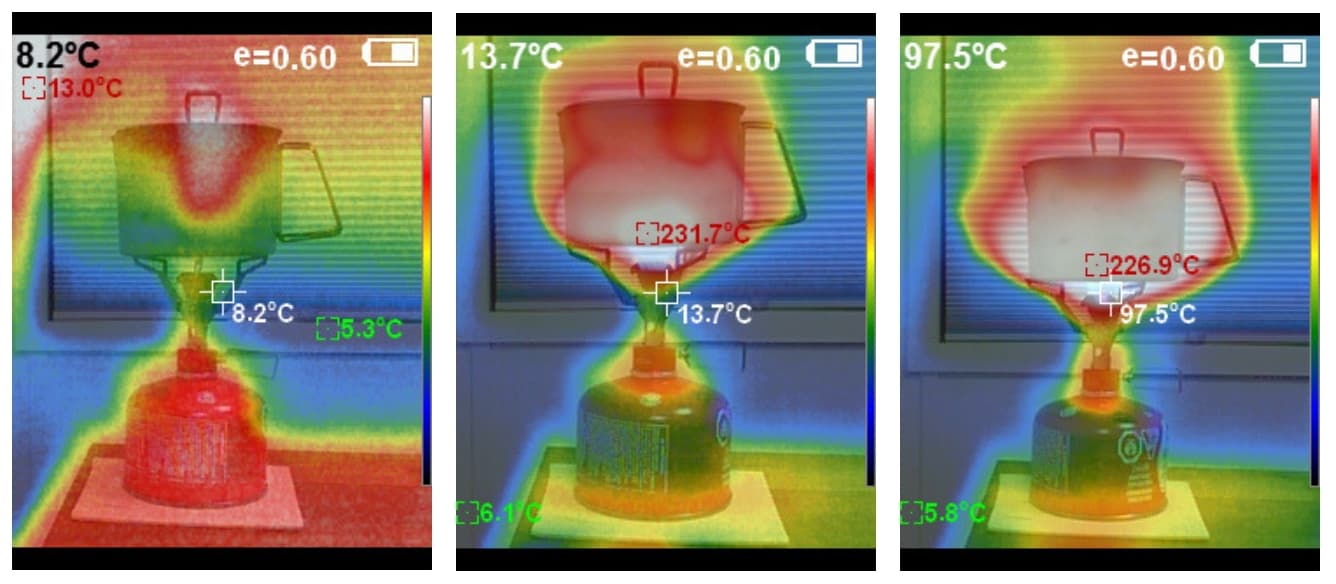
Unfortunately, without (extremely difficult to make) direct measurements that correlate the fuel valve orifice opening, fuel valve handle positioning, and a stove’s heat output, running a stove at any output level less than 100% (fuel valve handle turned all the way counterclockwise so the fuel delivery orifice is at its maximum) will introduce too much subjectivity that may interfere with test repeatability and/or performance comparisons between stove models.
That said, having a control test at full throttle provides a good foundation for further testing where stove output is controlled by the fuel valve handle, and results of this type of comparison testing will be presented in our forthcoming Upright Canister Stove Gear Guide.
Interestingly, the effect of wasted heat was much more significant for canisters having a fuel capacity that was greater than 80% (see “Do changes in canister pressure skew results?” above), suggesting that operating a stove at full throttle has more detrimental impacts when using fuller canisters. I used thermal imaging to verify this.
Large pots don’t necessarily match so well with small burners, or low power fuels (e.g., solid fuel tablets). On the other end of the spectrum, small pots get overwhelmed by large burners, resulting in significant heat loss and fuel waste.
I recognize that burner-pot mismatches will result in a stove system that perhaps scores lower than it should in the control test protocol defined here.
This control test protocol is optimized for solo cooking in three-season conditions (small pot volume, low water volume). Users should consider StoveBench results for large pots and large water volumes as part of any burner’s overall performance, and not rely solely on the control test described above before choosing a stove for boiling larger volumes of water.
This is a controlled testing environment where we’ve arbitrarily defined a set of test conditions and a test protocol that gives us repeatable results that can be used to identify one performance metric benchmark that we can:
Yes, of course. The rationale for determining a StoveBench Score is applicable for any type of stove and fuel, including solid fuel (e.g., hexamine tablets), alcohol, upright/inverted/integrated canister stoves, liquid fuel (e.g., white gas, kerosene) stoves, or wood stoves.
We’ll be developing protocols for each of these stove types as part of the StoveBench program.
StoveBench Scores for stoves using different fuel types will differ primarily as a result of the specific energy capacity of a fuel (i.e., energy per weight), and the efficiency of the benchmarked stove system (e.g., stove/pot/burner combination).
When we publish stove reviews and gear guides, we’ll also include a metric equal to the StoveBench Score divided by the stove system weight. This will (perhaps) represent at least some of the benefit of carrying so-called ultralight stove systems (e.g., solid fuel and alcohol), even though these stoves use fuels that don’t contain as much specific energy (energy per gram of fuel) in them as gas stoves.
In addition to Control Boil Tests (described above), we are devising a number of other performance scenarios that will be featured in upcoming reviews and gear guides, including:
Our first round of StoveBench Scores will be released later this month when we publish the results of our new Upright Canister Stove Gear Guide, which will include StoveBench Scores for all of the above scenarios from a subset of the approximately 25 canister stove models being reviewed in the Gear Guide.
You don’t need fancy instrumentation to run your own StoveBench tests. In fact, your own tests can be extremely valuable for our community!
If you can reasonably measure the temperature of your water and measure fuel consumption weights, then you are well on your way to running your own StoveBench tests.
Here’s a short video that illustrates how I run a StoveBench Control Boil Test for an upright canister stove:
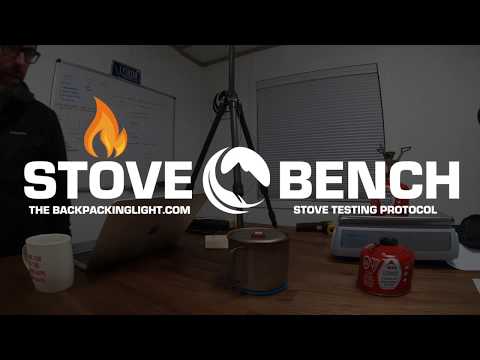
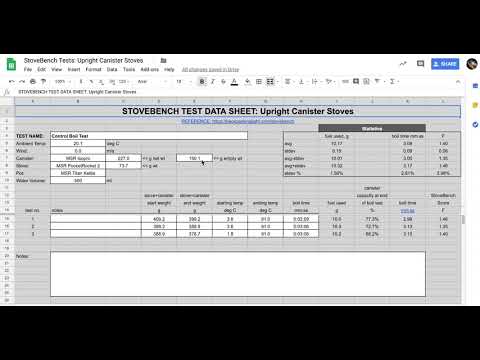
I use the following spreadsheet template for each test I run:
Here’s a video that shows how I use the spreadsheet test template:
We are building a user database of StoveBench Scores calculated from your own test environments and protocol parameters.
We’ll be publishing this information in a subsequent article to be published in early February 2019. In addition, if this information proves to be valuable to our community, we’ll be releasing a live version of the database (with real-time updates as new user tests are submitted) as well.
When interpreting StoveBench Scores, do so with an understanding of this protocol’s limitations and error sources (outlined above). When interpreting StoveBench Scores calculated from user-submitted test data to our database, consider that different test environments, different types of measurement instrumentation, and differences in protocols may result in StoveBench Score variability that may not be present when we perform our own StoveBench tests in our own laboratory environment. The StoveBench database will distinguish between user-submitted stove testing data and stove testing data we perform on behalf of Backpacking Light that adheres more strictly to the protocol described herein.
Finally, the StoveBench Score is not the holy grail of stove performance. While it can factor into your decision-making process to purchase a stove, or select a type of stove for a particular trip, there are other issues of importance as well: the dry weight of the system, the starting weight of the system including fuel, the environment you are cooking in, the cost of the fuel, the allure and satisfaction that comes with making a homemade stove, brand loyalty, and so much more. So, let StoveBench be one of your guides in making decisions, but not your only one.
The author wishes to acknowledge Roger Caffin, Hikin’ Jim Barbour, Gary Dunckel, and Jerry Adams for their helpful and critical reviews of the StoveBench protocol.
Our 18th year of publishing has brought some exciting new things to our community! Here’s a review of our top highlights from the last year, and what’s coming up in 2019.

Our 18th year of publishing has brought some exciting new things to our community! Here’s a review of our top highlights from the last year, and what’s coming up in 2019.
Two new staff joined our team in 2018:
These new additions round out our little team of 10. If you’re new here, we are:
Of course, our community wouldn’t be complete without also including and acknowledging our trekking guides, contributing authors, part-time contractors, and of course, the thousands of people who purchase memberships each year and support Backpackinglight.com.
Before the global financial crisis hit in 2008, Backpacking Light published a podcast. We released more than 50 episodes about stories, gear, and more when advertising dollars dried up and we had to shutter the program.
In 2018, we re-launched the podcast! Andrew is producing it, and Andrew and Ryan are co-hosting it. It’s been met with a terrific response from our community – check out our 5-star ratings in iTunes and subscribe today!
Our 2019 podcast calendar is shaping up to be even better, as we add new episode formats (shorts!).
Listen to our top 3 podcasts of 2018:
In response to requests from our members to provide more in-depth technical instruction behind topics of interest to the backpacking community, we launched our new Outdoor Skills and Tech Webinar Series in 2018.
Our first three episodes were a huge hit. In case you missed them, here they are:
Don’t forget, all webinars are FREE if you’re an Unlimited Member, and very modestly priced if you’re not.
Our next webinar, to be available in early 2019: Backpacking Stoves: Science, Design, and Analysis for Selecting a Stove and Saving Fuel Weight!
2018 saw our most successful year ever with our Wilderness Adventures guided trekking program up in Montana’s Absaroka-Beartooth Wilderness.
In 2018, we launched a new Guide’s Training Program and conducted our first ever Whitetail Trek – a comprehensive program to help people plan and execute challenging, off-trail routes in a mountain environment.
2019 Enrollment has started off with a bang – save your spot now and join us on a trek in Montana!
In 2018, we experienced the largest % growth in our membership since the financial crisis hit in 2008, and the highest fraction of membership renewals ever! This is great news for us, because it serves to stabilize our revenue, re-invest into new programs (like the podcast, webinar, new staff, and more content!), and *best of all* – allows us to make some very welcome changes when it comes to advertising (see below for more info).
Your memberships and renewals are critical for our long-term financial stability and contribution to the outdoor industry – we are grateful for you being a part of our community!
Gear Reviews have always been and will continue to be, a core part of our content strategy. In 2018, we made a very strong push to publish reviews that were timely, technical, and free from the bias that’s inherent in so many gear reviews published online.
The primary problem with gear reviews today is that publishing them is motivated by the dangling carrot of affiliate revenue.
As such, gear review headlines are written for click bait (“Best stoves/tents/backpacks of 2018!”) and feature lists (listicles) of popular gear that will deliver the publisher good revenue. However, seldom do these types of articles feature trustworthy comparisons by writers who actually use the gear or have an in-depth understanding of gear design and performance.
Backpacking Light receives affiliate revenue, of course, but since our core revenue comes from Membership Fees, we are in the fortunate position to provide gear reviews that are more in-depth, based on extensive field use, and provide you with information that helps you make wise buying decisions – not just getting you to click a buy button for the sake of putting affiliate revenue in our pockets. In addition, our membership fees help us review gear from non-affiliate vendors, allowing us to represent the overall market in a more meaningful way.
Here’s a list of our most popular gear reviews, gear guides, and state of the market reports from 2018:
With the introduction of the podcast, the webinar series, our Wilderness Adventures Guide’s Training and Whitetail Treks, and new video series about trekking poles and canister stoves on YouTube, we’ll be continuing to emphasize teaching solid backcountry skills to our community in 2019.
In 2018, navigation skills proved to be our most popular area of interest:
Four stories, in particular, proved to be wildly popular with our community in 2018, so if you haven’t had the chance to view some of this beautiful photography and read some of the most engaging trip narratives of the year, don’t miss these stories:
In response to user feedback for improved website navigation, we created a new sticky, responsive, website navigation menu and took it live in 2018. This has had a huge impact on website usability and has significantly improved the time that our users spend on our site.
We’ve continued to work under the hood on website performance. We are experiencing substantial growth in traffic, and it’s vital for us to make sure the website keeps running smoothly by maintaining, optimizing, and upgrading the performance of our server platform and codebase. Increases in membership revenue in 2018 have allowed us to make substantial improvements in site speed. As an example, our Recent Forum Posts page (one of our most popular pages, that requires a heavy database query), requires an average of 2.1 seconds to load. Compared to where this page was in 2015 (12+ second load times), we’ve come a long way!
The primary problem now with website performance is network advertising. But, we’re fixing that in 2019. See below for more info!
We have lots of exciting things already in motion for 2019:
And how about those awesome network ads?
How about “saying goodbye to them”?
Network advertising – ick. You know, like Google Ads. We’re transitioning away from all network advertising in 2019, and reducing the number of impressions we are serving dramatically.
We are moving towards a site sponsorship model where site sponsors participate in our community in a more meaningful way, rather than just blast their banners to our community. Stay tuned as this program kicks off in January – which is when you’re going to start seeing a decrease in tasteless, annoying, and irrelevant ads!
During this transition, you’re also going to see website page redesigns come into our forums and articles, to improve readability, clean things up and make them more aesthetically appealing, and make the site more functional and easy to read across all types of devices!
Thank you for being a part of the backpackinglight.com community, and we hope you enjoy a healthy and happy 2019 with lots of trail miles!
Backpacking Light’s editorial team, guides, contributors provide their favorite gear choices in BPL’s Staff Picks gear guide for 2018.
The Backpacking Light Staff Picks Gear Guide offers what we consider to be our personal recommendations for high-quality, high-performance, lightweight backpacking gear that we’ve actually used this year.
– The Employees, Editors, Guides, and Contributing Authors of Backpacking Light

MyTrail Co UL 35 Backpack – $72 from MyTrail.
Learn More
This is a great little pack that can do double duty as a daypack or a pack for those with ultralight and compact loads. It’s 20 ounces, holds 35 liters, is well-built, and costs less than $100. In the XS size, it is also a great pack for children, such as my 9-year-old daughter, Lily. It fits her perfectly, it’s easy for her to use, and it’s a great size for the loads that a young backpacker should be carrying. I highly recommend this bargain of a pack!
– Doug Johnson
Editor’s Note: For a pack at this price, I don’t think I’ve ever seen anything that has this sort of quality. Top shelf? No. Worth twice as much as the cost? Oh yeah, easily! ^rj
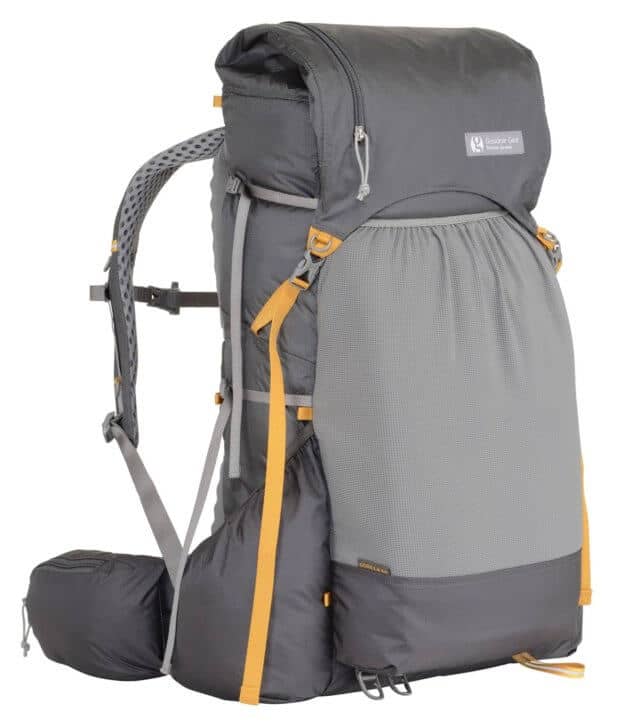
Gossamer Gear Gorilla 40 Backpack – $215 from Gossamer Gear.
The Gossamer Gear Gorilla became my go to pack for short trips in 2018. With a well-integrated frame, padded shoulder straps, and hip belt, it carried up to 25 pounds so gracefully that I seldom even thought about it. The large hip belt pockets, easily accessible side pockets, and big, stretchy front pocket made packing for 4 days a breeze and kept necessities handy during the day.
– Dave Swink
Editor’s note: Glen et al. have spent 20 years in this business doing the right thing – taking care of customers. Take a chance on one of their products. If you don’t like it, they’ll make it right.
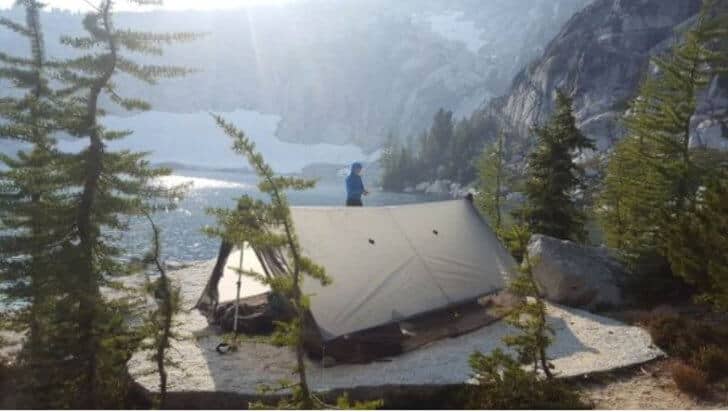
Oware NetTarp 5 – $315 from Oware USA.
This year, our Scout troop started using an Oware NetTarp5 and it is a GREAT group shelter. With space to easily fit five Scouts, full rain and bug protection, and enough guyline tieouts to manage moderate winds, this is a 47 oz. shelter that cuts pack weight of group gear considerably. It’s a reasonable $315 and the craftsmanship is excellent. It is a floorless shelter which means there is no floor to damage; when our cheap polycro groundsheets wear out, we’ll just buy new ones! A bonus is that the NetTarp5 does double duty as a dry and bug-free cooking or hangout shelter.
– Doug Johnson
Editor’s Note: Dave and the crew at Oware have been a huge part of my evolution as an ultralight hiker. He supported me in the Arctic 1000 when everyone else was warning me not to be stupid. Oware’s bivy sacks and tarps are among the best in terms of value. ^rj
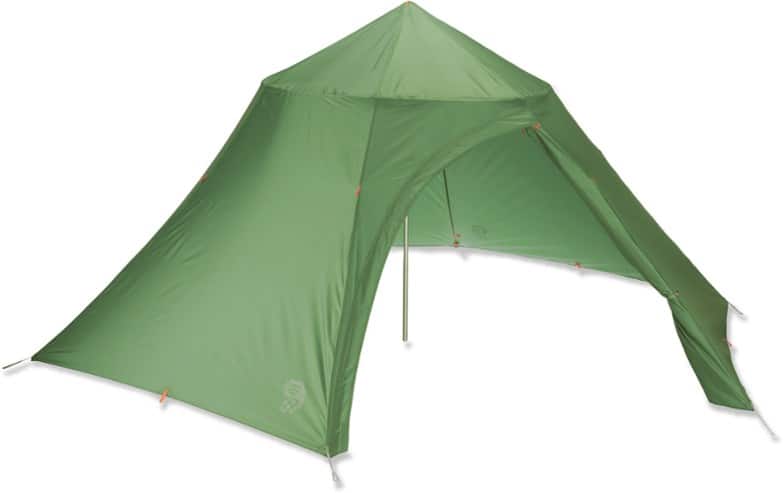
Mountain Hardwear Hoop Dreams 4 Tent (out of production).
The Mountain Hardwear Hoop Dreams 4 tent. It’s been out of production for a few years so I picked it up super cheap from an REI Garage Sale. It’s a 7d silnylon that weight in at 13 oz and is about the size of a Nalgene so I can stick it anywhere. As with any single wall tent, I’ve had some condensation issues but for the weight and usability I don’t mind.
– David Hosmer
Editor’s Note: I had the chance to review and test this before it hit the market. The hoop creates a lot of space, especially useful in winter. If you can get your hands on a used version, snatch it up. This one’s a goodie. ^rj
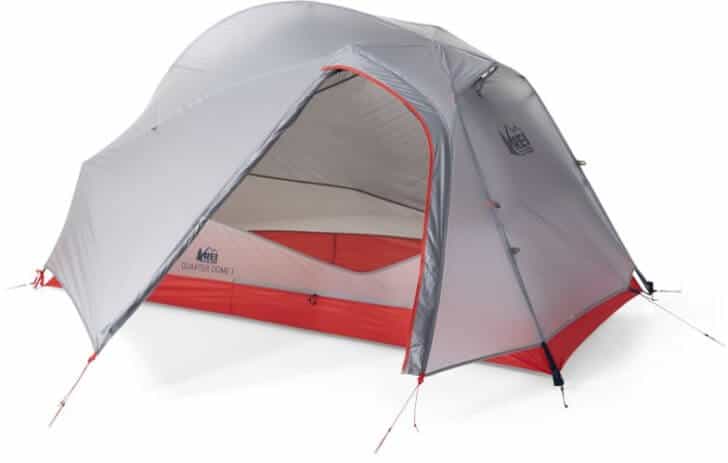
REI Quarter Dome 1 Tent – $279 at REI.
I have used this shelter a number of times in Montana and Utah. It is not as light as a tarp, but as a (mostly) free-standing, double-wall option it is very light. It has withstood wind, heavy snow and rain – with much more stability than most “ultralight” tents.
– Kevin Fletcher
Editor’s Note: The right mix of poles and guylines, this one surprised me. A far better version of the old Quarter Dome, especially for inclement conditions. When we got hammered with a blizzard in the Beartooths, I couldn’t believe this tent was actually maintaining its structure. Well done, REI. ^rj
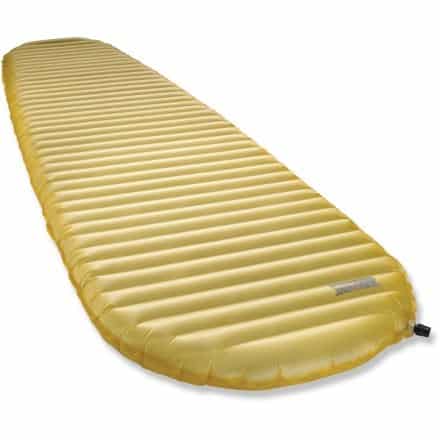
Thermarest NeoAir Lite Women’s XL Lite – $160 from REI.
The Thermarest NeoAir Womens Xlite sleep mat is another favourite I never leave at home. It is warmer and lighter than the mens version. I sleep better in the hills than at home now. Love it.
– Mark Webb
Editor’s Note: The absolute best inflatable sleeping pad ever produced for the ultralight hiking community. ^rj

Enlightened Equipment Revelation Down Custom Quilt – $225+ from Enlightened Equipment.
Enlightened Equipment got a nice 7D fabric figured out in the last year and its enabled even lighter sleeping quilts from them. I think sleeping quilts are a perfect application for the lightest nylons, so I’ve been delighted with my 40F Revelation with 950 FP down and 7D fabrics (inside and out). Mine weighs just 12.01oz and has been a big part of enabling a UL renaissance for me in 2018.
– Dan Durston
Editor’s Note: Stephanie and I have a Revelation 7d 950 fp 10 deg F. We fight over it. She usually wins. ^rj
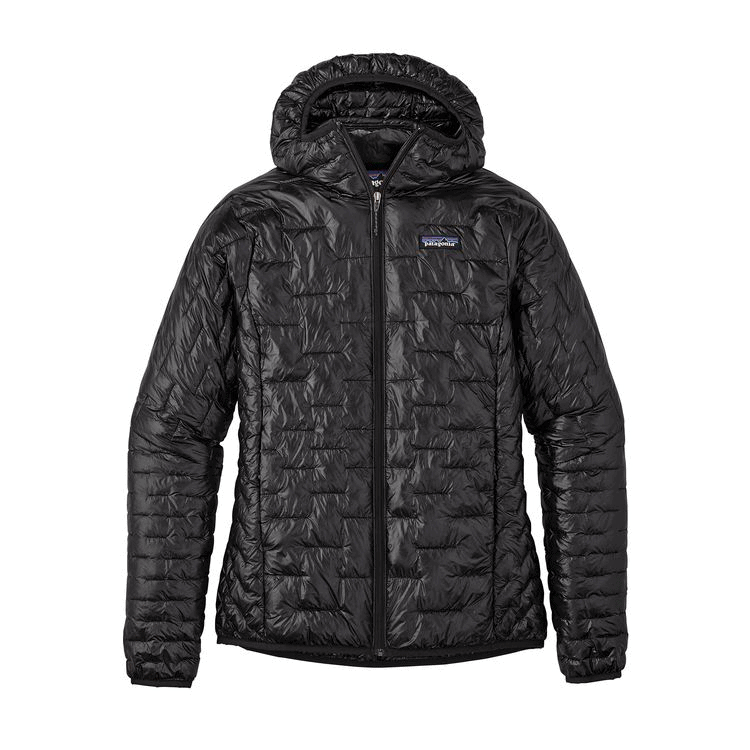
Patagonia Micro Puff Insulated Hoodie – $299 from Patagonia.
All the awesome features of an insulated jacket for the trail (light weight, compressible, durable) with a fashionable fit for going out on the town when I drive back from the trail. My favorite features: elasticized wrists that cover my fleece mitten cuffs easily, deep pockets for storage and hand warming, windproof shell (hey I do live in WY!), and a hood that fits better than any I have ever worn. I’ve worn this jacket for the past three months almost everyday for outdoor activities and casual/dress up fare (I’ve even worn it to the symphony!) and I’m in love. Mostly, because it’s so lightweight, yet surprisingly warm.
Patagonia will continue to receive my support not only for the quality and durability of their products, but because they are passionate about protecting public lands, and their activism for the environment is inline with my own.
– Stephanie Jordan
Editor’s Note: This is one of those situations where I get this really cool piece of gear (review here), I write a review about it, ask her to proofread it, and she says, “Oh, I’m gonna need me one of those…” – ^rj
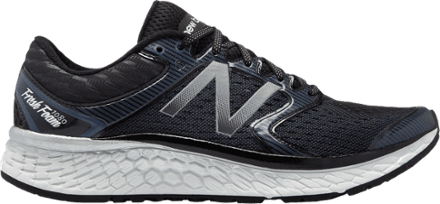
New Balance Fresh Foam 1080 Road Running Shoes – $150 from REI.
I like New Balance shoes because they are available in a 4E width, plus they have good traction. So many niche brands only come in an ‘average’ width of D or E. Narrow shoes invariably give me (and many others) blisters; wide fittings do not. The NB 1080 shoes are wide enough, have a reasonable grip, and they seem to have an improved foam for the inner sole – hence their being in the ‘Fresh Foam’ category. They seem to be up to version 9 now for the model: rather popular.
In fact, I challenge you to the following test. Get the inner soles out of your current shoes, take off your shoes and socks, and stand on the inner soles. Now see just how far the sides of your feet overhang the inner sole at the front. If you overhang more than a little, that means your shoes are compressing your feet – which easily leads to all sorts of pain, suffering and foot problems.
What sort of problems can you get? If the shoes are too narrow the bones inside your foot will grind together. If this goes on for too long, you can get blisters under your toes, or worse still there can be internal damage, with bleeding. When such damage happens the blood can diffuse to the sole of the foot. I’ve seen it, and it’s not good.
– Roger Caffin
Editor’s Note: Learn more about Minimalist Shoes for Backpacking and watch this video. ^rj
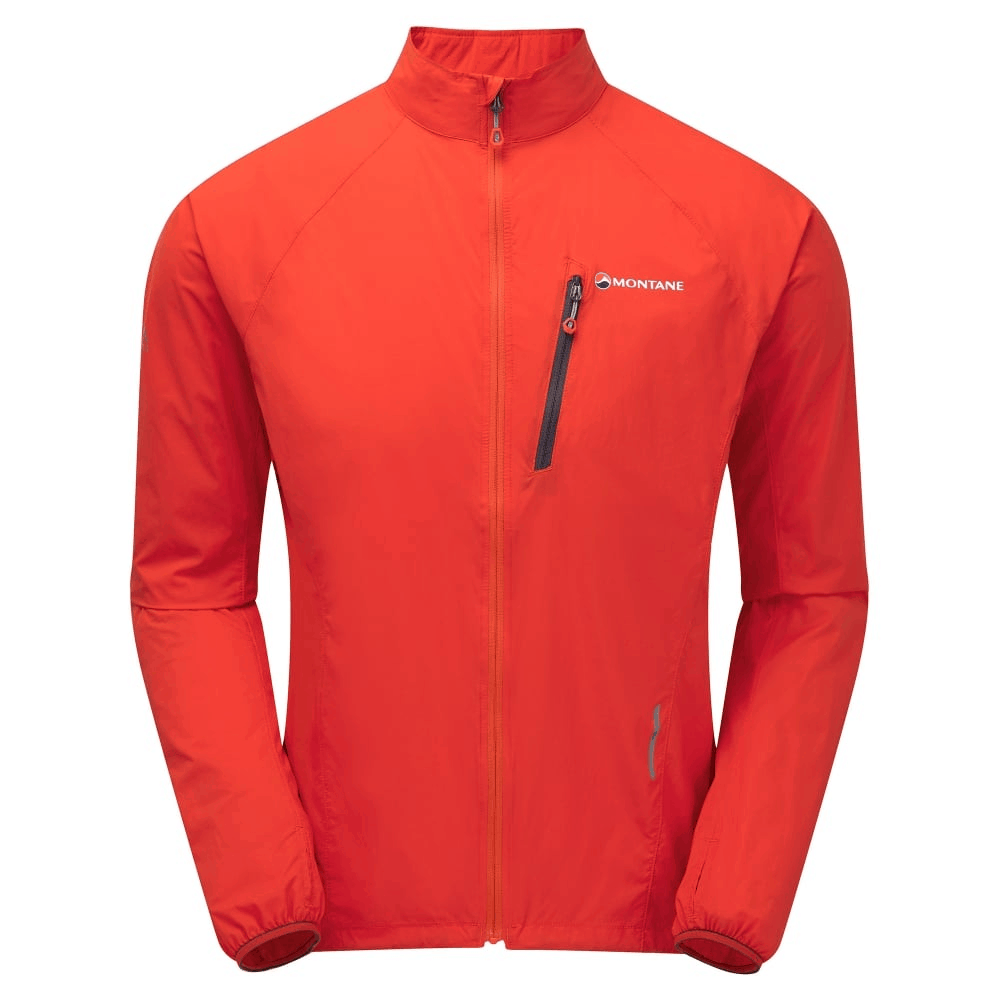
Montane FeatherLite Trail Jacket – $90 from Montane.
I have been walking in the mountains for over 40 years and I had never tried a windshirt up until about 3 years ago and when I brought this Montane windshirt on a trip. I couldn’t believe the difference that such a lightweight jacket could make – it added warmth but I didn’t get wet from sweat (usually a problem for me as as soon as I start climbing). It is surprisingly water-resistant too. I find I am not having to stop and change as often as I used to. I know, I’m late to the windshirt party but I’m happy to have arrived!
– Mark Webb
Editor’s Note: Remember this blast from the past? ^rj
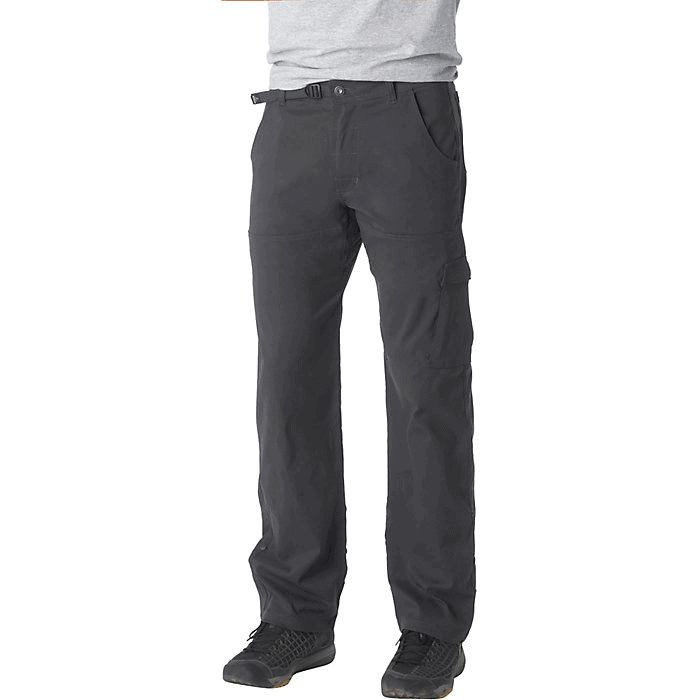
Prana Stretch Zion Pants – $85 from REI.
Pants are not glamorous backpacking gear. Instead, my Prana Stretch Zion convertible pants are a quality tool, like a good carpenter’s hammer. They are notable because they fill all of my mundane pant needs so well. Very tough, comfy (stretchy!), good pockets in the right places, warm, breathable, cool, water resistant, good looking, and convertible to shorts. OK, maybe they are glamorous gear!
– Dave Swink
Editor’s Note: All of my favorite pants are Prana pants. Dave’s not kidding – tough, comfy, pockets, and good lookin’. ^rj
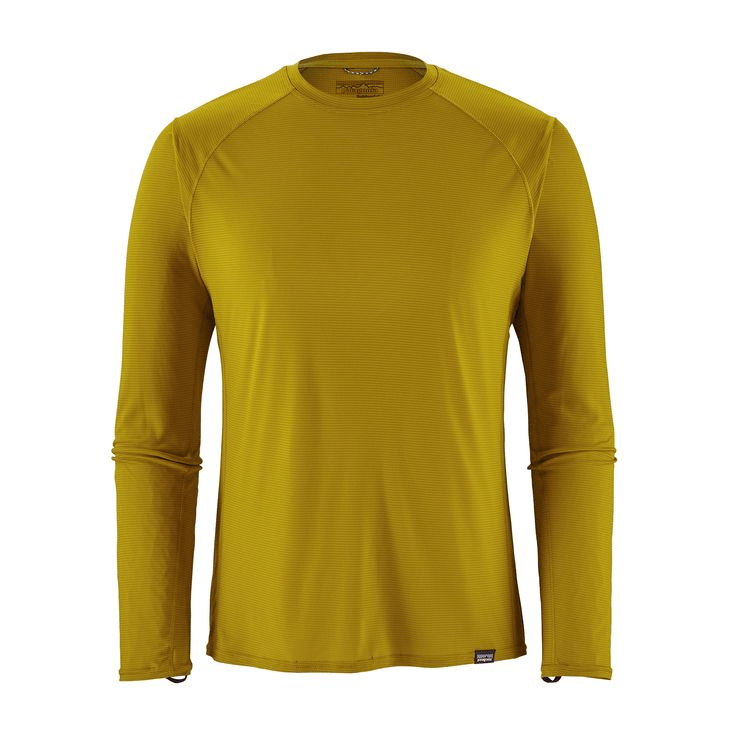
Patagonia Men’s Capilene Lightweight Crew – $49 from Patagonia.
Ever since GoLite stopped making their superlight base layers I’ve been on the hunt for a satisfactory replacement while milking the last life out of my GoLite apparel. The Lightweight Capilene from Patagonia has finally provided that and thus has become my go-to baselayer. The medium T’s are 71g (2.5oz) and have a nice slim fit and long enough torso length. It’s also quite a bit more durable than anything in merino that is even close to this weight. They even have thumb loops on the long sleeve ones.
– Dan Durston
Editor’s Note: I prefer wool for a top base layer, unless I’m running in warm weather, but the LW Cap line is bar none – the highest performing base layer (function:weight ratio) for ultralight backpacking. ^rj

Patagonia Cloud Ridge Jacket – $249 from Patagonia.
The Patagonia Cloud Ridge Jacket has served me well on multiple backpacking trips in the mountains of Montana and the Utah desert. It is light, breathable, and keeps me dry in rain and snow. It is also my go to shell for backcountry skiing. In inclement weather I can wear it without working up too much of a sweat because of its very good breathability. It packs small enough – but it’s not in the class of ultralight shells that most of the readers here are going to get giddy over. For me, as a guide and active year-round adventurer, I need more durability (economy is important to me), so a 13 oz jacket that I wear often is not such a great sacrifice.
– Kevin Fletcher
Editor’s Note: Ultralight has its limits, and one of those limits is durability. If you spend as much time in the brush and canyons as Kevin does, maybe consider spending a few more ounces on a more durable rain jacket. ^rj

Smartwool PhD Base Layer Hoodie – $110 at REI.
Since the demise (holes) of my last round of merino hoodies, I’ve been trying others (Ibex, Icebreaker, Patagonia, Arc’teryx) for the past few years, and have finally settled in on the Smartwool PhD Light Base Layer Hoodie. Worn alone, it’s my primary 3-season base and hiking layer (except during biting insect season). Layered over a short-sleeve merino fishnet shirt, it’s the most comfortable cold weather (winter) base layer system I’ve ever worn. And it has thumb loops and a great-fitting hood!
Merino wool is IMO superior to synthetics for next-to-skin base layers in cold weather. Merino wool fibers absorb moisture into the fiber’s interstices, minimizing the rapid “flash-off” cooling effect you feel with synthetics after you sweat, and then stop to rest. The same process means less moisture on fiber surfaces to promote microbe-induced body odor production. This particular hoodie is neither skin-tight nor baggy – for me, it’s the perfect fit for backpacking (I have a pretty normal body type – not fat, not skinny).
– Ryan Jordan

GSI Outdoors Ultralight Nesting Bowl and Mug – $8 from Backcountry.
My wife and I have used a range of bowls for our dinners when walking, and not all of them have been satisfactory. Eventually, we found the polypropylene GSI Inform bowls. They come as a nesting set in orange or blue, and are sometimes sold in sets with small bowls (mugs). We have been using them since 2009.
The interiors are about 120 mm (5.3″) diameter and 55 mm (2″) high and weigh ~43 g (1.5 oz) each. They hold about 600 mL (20 fl oz) when full: unwise, and more than we could eat anyhow! The official website dimensions are larger: I assume they were measuring the outsides.
Original review here.
– Roger Caffin
Editor’s Note: Bowls are unnecessary “extras” if you’re a young, strapping thru-hiker, but for the rest of us, provide quite a bit of convenience and luxury, especially if you’re hiking as a couple or a group with a shared cook kit. ^rj

PET Rocket Bottles in front of Roger Caffin’s Tent.
There are expensive water bottles of all sorts, and bladders too. The expensive bottles are all heavy and not very big; the bladders seem to fail at regular intervals. We use the 1.25 L ‘rocket-base’ PET bottles you get with fizzy drinks and fizzy mineral water. They are about 90 mm (3.5″) in diameter and 300 mm (11.7″) high, and weigh 43 g (1.5 oz) each. All things considered, they are effectively free. Americans seem pretty enamored with similar bottles, like those from Smartwater or Gatorade.
Whether they leak and how durable they are are key questions. Some of my PET bottles are well over 10 years old and still in regular use. Unlike some rectangular Nalgene bottles I have (but no longer use), the PET bottles do not shatter. Nor do the caps leak under pressure. Much of this is due no doubt to the fact that they are rated for holding fizzy drinks at high pressures, which means all sorts of food regulations come into play, at least here in Oz.
They also handle impact very well. I took a couple of these bottles and filled them nearly full, and then hurled them up into the air – about 4 m (13′), while standing on sheet rock (in the US you call this “paver stones”). The bottles bounced on the sheet rock with no damage, apart from very minor scratches. They didn’t leak either.
– Roger Caffin
Editor’s Choice: Rocket bottles! They also double as rocket bottles! ^rj
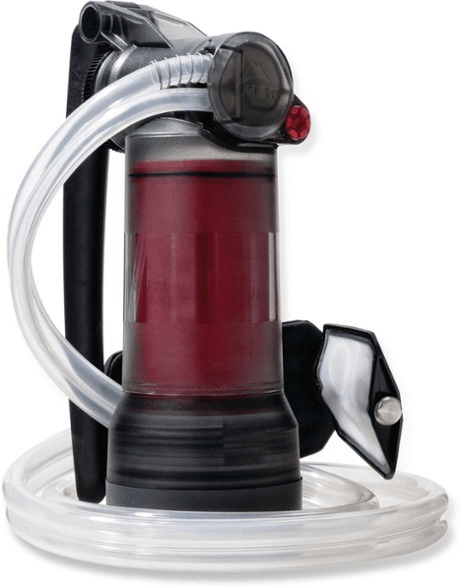
MSR Guardian Purifier – $350 from REI.
My favourite piece of kit is the MSR Guardian purifier pump-style water filter. I know, this is Backpacking Light and it’s not exactly light weight at about 17oz (500g). However, it gives me water quickly without having to wait for chemicals, and it’s field serviceable and more reliable than other filters. It doesn’t really take much effort or time to fill my 2L Platypus water bottle. Its best feature: rock-solid protection from bacteria and protozoa, something that can’t always be claimed by chemical treatment methods, at least in a short amount of (treatment) time.
– Mark Webb
Editor’s Note: The most efficacious filter on the market and the only hollow-fiber filter capable of virus removal. ^rj
Zelph Starlyte Stove – $18 from Zelph Stoves.
A Trail Designs Caldera Cone with a Zelph Starlyte stove. I don’t have as much control over the temperature but for what I’m cooking on the trail and how light and foolproof the setup is I don’t mind. Here’s a neat article comparing Zelph and Trail Designs Stoves I wrote earlier this year.
– David Hosmer
Editor’s Note: The decision to combine two different brands of windscreens and stoves will cause some forum outrage for a few days. ^rj
Katadyn BeFree Collapsible Water Filter Bottle (0.6 L) – $40 from REI.
I love how versatile and light the BeFree is. I can quickly fill it up and have water to drink – the flow rate is fast! Ryan wrote a review about it here last year, and when I went hiking with him in 2018, he was still using it! I can also easily fill it up and then squeeze the water into a pan for cooking. I used it this year on the Wilderness Adventures Whitetail Trek, with no issues at all.
– Kevin Fletcher
Editor’s Note: I’ve been using the BeFree on nearly every trip for two years and still haven’t experienced a failure. I love this bottle for its ability to deliver clean water *fast*. ^rj

Ursack Major – $80 from REI.
The Ursack Major is my primary tool for food storage. It fits perfectly at the bottom of my Hyperlight Mountain Gear Porter 4400, while the ease of use compared to a bear bag and comparatively lightweight (to a bear canister) but durable construction make it my go to food storage system wherever it is allowed. This is mandatory gear for our Wilderness Adventures program, and rightly so – our land management agency, the USFS, prefers it to bear bag hanging, and it prevents the one very risky thing that causes animal encounters in the wilderness – sleeping with your food.
– Chase Jordan
Editor’s Note: Don’t sleep with your food. The Ursack gives you no excuse. ^rj

Garmin inReach Mini – $400 at REI.
The Garmin inReach Mini Satellite Communicator was far and away the most exciting piece of gear I added to my kit in 2018. Having access to fully-featured GPS (especially when paired with my smartphone) and two-way SMS communications in a 3.5 oz device still blows my mind. Read my full review here.
I can’t wait until the inReach can receive an AirDrop of an iPhone photo and upload it to Instagram or the BPL forums. No, not for all y’all, per se, but so my wife and mom and fishing pals can see all the big fish I’m catchin’ in real time!
– Ryan Jordan
This 3.5 ounce device is incredible. On trips this year, we have shared map locations and messages with family while canoeing for weeks in Boundary Waters, Minnesota. We have kept the families of Scouts at ease by sending quick text messages about the fun we were having in the backcountry. We also have had the security of knowing that help would be on the way quickly, if that were ever needed. The inReach Mini is so small that we carry it everywhere now, and it’s one of my favorite pieces of gear.
– Doug Johnson
Editor’s Note: For most of you, this device exists so you can maintain a good relationship with your loved ones, and keep them at ease. Don’t underestimate the positive value of that. ^rj
GoPro HERO7 Black – $400 from REI.
I featured the GoPro Hero 7 Black in my Publisher’s Gear Guide this year. The more I use it, the more I’m starting to believe that this may be the perfect video camera for the ultralight backpacker. It’s light, tiny durable, waterproof, captures high-quality 4K footage, slow-motion video, and has terrific image stabilization. But my favorite feature is its speed of use: I can pull the camera out of my pocket, press the record button, the camera turns on, and starts recording. When I’m done, I hit the record button again, recording stops, and the camera shuts off. A great camera for shooting video rapidly.
– Ryan Jordan
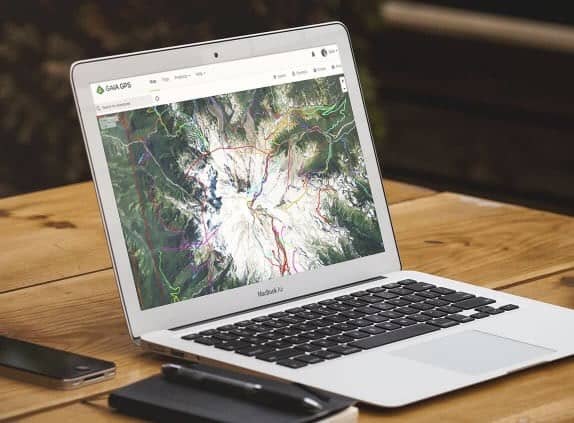
Gaia GPS – Membership starts at $20 per year at Gaia.
The Gaia GPS App underwent a major interface and functional overhaul this year, which made this already best-in-class app even better. Gaia GPS is the cornerstone of my route planning, tracking, and navigation system. The fact that it works seamlessly across all of my devices (web, iPad, and iPhone) makes it a very compelling option for me.
– Ryan Jordan
Editor’s Note: Be careful of how much time this App sucks from your day! ^rj
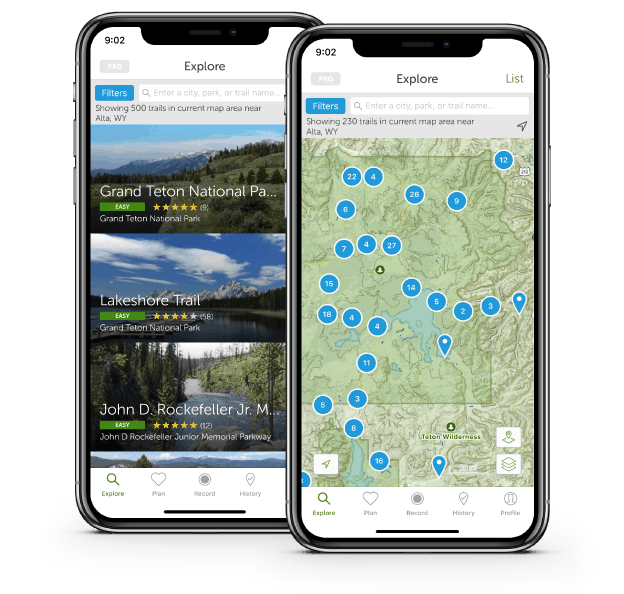
AllTrails – Premium version starts at $30 annually at AllTrails.
GPS apps! I use AllTrails and Gaia depending on if I’m going out alone or with my scout troop. Both have been easy-to-use tools to help me get where I want to go.
– David Hosmer
Editor’s Note: I got nothin’ here. I’m addicted to Gaia. ^rj

YNAB – Memberships start at $7 per month at YNAB.
I started using this personal finance budgeting app two years ago and have found it to be an outstanding tool for helping me to use my money in ways that maximize my happiness. After years of prioritizing trips over money, I am now prioritizing paying off student debt and working an office job. However, getting out in wild places is soul-satisfying like nothing else. My goal is to minimize my expenses such that I can quickly pay down debt AND take unpaid time off for trips. With YNAB, I assign a purpose for every dollar I earn. I particularly benefit from the Wish Farm Method to save for things I want, such as a flight or gear.
– Max Neale
Editor’s Note: GREAT choice, Max. Sometimes I think if we spent less $ on gear and more on travel to go hike in wild places, we’d be a lot happier. ^rj
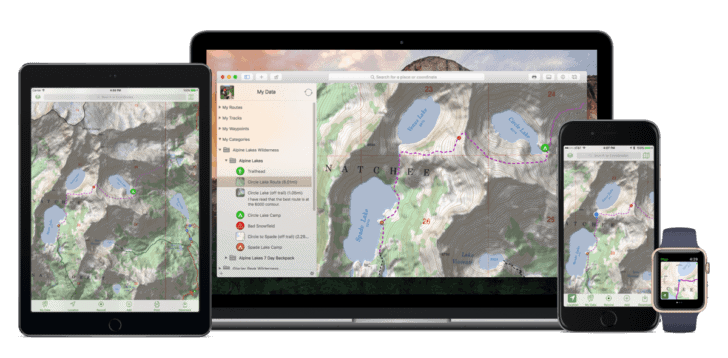
Topo Maps+ – Memberships start at $59 annually at Glacier Peak.
Glacier Peak Studio’s mapping application for Mac OSX and iOS has become my favorite mapping application on the iPhone. The ability to store different topographic maps, including CalTopo, the in-house Glacier Peak Studio maps, Backroad Mapbooks for Canada, topographic maps for New Zealand, and Satellite Imagery makes it invaluable for planning and revising routes on the fly. In addition, it comes with a fully functional route planning system that interacts with the native trail system data, distance and elevation trackers, and an advanced waypoint system that allows notes and photos to be attached to locations, and the ability to tag routes, tracks, and waypoints to organize them by day and expedition.
– Chase Jordan
Editor’s Note: So … why are you looking at Canada maps? Hmmm… I hope I’m invited. ^rj
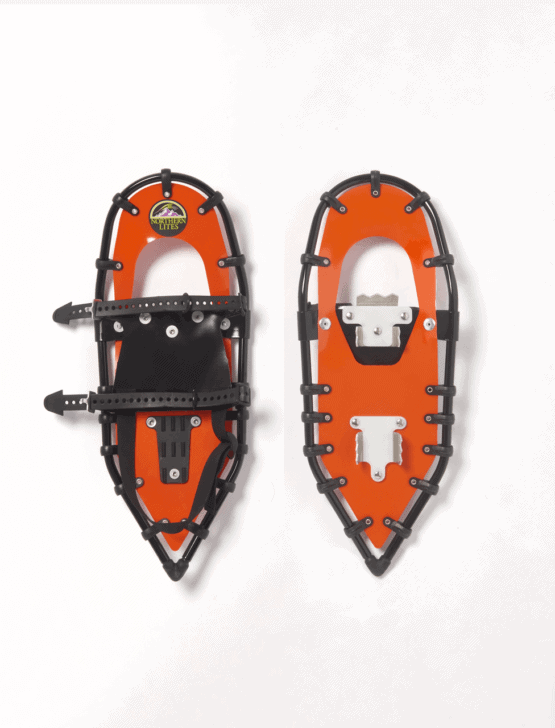
Northern Lites Race Snowshoes – $229 from Northern Lites.
Snow hiking with a winter-weight backpack calls for serious flotation to prevent wallowing about, but in the late spring 30″ snowshoes can be overkill. The Northern Lites Race Snowshoes give me just enough flotation and traction on consolidated snow while keeping the hike fun. I was the envy of the other hikers in the 2018 Guide’s Trek in Montana’s Beartooths when wearing these nimble beauties.
– Dave Swink
Editor’s Note: Envy doesn’t even begin to describe the feelings we had. Great choice for snowshoes! ^rj
Tenkara Rod Co. Mini Teton – $175 from Tenkara Rod Co.
I’m no Tenkara expert, which is why this rod checks all the boxes for making it into my pack anyways. Its packs very small (14″) and a complete setup (rod, extra tippet, soft case, flies, fly case) weighs just 4.3oz (the rod comprises just 2oz of that). Even though I’ve barely caught anything with it, it has provided a lot of amusement and a better connection to the backcountry as I try to figure out what the fish are eating.
– Dan Durston
Editor’s Note: A full tenkara kit for less than 5 oz? Don’t underestimate the value this could bring to your backcountry experience. Loads of fun! ^rj
Rite in the Rain All Weather Copier Paper – $33 from Rite in the Rain.
Circumstances have prevented me from spending a lot of time backpacking this year but I have found some time to research and plan off-trail routes for future trips. I’ve been assembling dense guides consisting of maps with relevant layers, photos and text using page layout software and printing these on Rite in the Rain All-Weather Copier Paper. I’ve found that I can print double-sided in a color laser printer at work and not have to think about keeping my maps dry in the field. Hopefully this research will pay off in the mountains next summer!
– Matthew King
Editor’s Note: Yes, my paper of choice as well. Durable, light, and totally waterproof. ^rj
Shackleton’s Way: Leadership Lessons from the Great Antarctic Explorer – $14 from Penguin Books.
This is a bit of an unusual choice – Margot Morrell and Stephanie Capparell’s analysis of Sir Ernest Shackleton’s leadership is valuable for anyone who spends significant time in the backcountry. The ability to lead oneself and others is key for succeeding in expeditions as they increase in complexity, and Shackleton is the adventurer whose leadership abilities we should all strive for. The fact that this book also translates the lessons into lessons for the business world makes this read applicable beyond the trails and woods backpackers haunt! One of my favorite reads I’ve been assigned while at the University of Wyoming.
– Chase Jordan
Editor’s Note: Thank you for completing your reading assignment. You’re a good kid. ^rj
Smith Redmond Polarchromic Sunglasses – $239 – $249 from REI.
These sunglasses fit securely and comfortably during the gamut of outdoor activities I love: hiking, biking, cross-country skiing, snowshoeing, trail running and of course fishing. Their coverage provides great protection in windy conditions. They provide all-day comfort on the trail, and the photochromatic lenses adjust in dim light on the drive home. I used to buy cheap sunglasses, because I wasn’t sure I wanted to spend a ton of money on something that I might leave sitting on a log. I’m so glad Ryan talked me into these grown-up sunglasses, because now I may just beat him to the biggest fish rising! Spotting fish is so much easier for me now! These lenses are glass, scratch resistant, polarized and so clear to see through. These are a great everyday all around pair of sunglasses!
– Stephanie Jordan
Editor’s Note: You look amazing when you wear these. Rrrrowl. ^rj
QALO Strata Arrow Silicone Ring – $20+ from REI.
All-purpose sport wedding ring. Choose from many different designs and colors. Don’t want to lose your diamond in the snow due to cold weather? I don’t blame you. Happened to me once in a parking lot while I was scraping my car windows. Shot off my hand into a foot of snow. I had to call Ryan to come help me comb the area. We did find it miraculously. Ryan has had his come right off while paddling – it sank to the bottom of the Thorofare River! This option is so much better. Made of Medical-grade silicone, comfortably stays in place, is malleable and pinch-resistant when holding onto trekking/ski poles, lifting weights with metal barbells, grasping ice axes and bicycle handles. I use to get horrible blisters during activities, this ring has changed all of that. If you fall in love with your Qalo rings, like we have, this organization will happily take your gold and diamonds to build wells for clean water in third-world countries.
– Stephanie Jordan
Editor’s Note: Thank you for not holding me to the societal standard of spending two months of salary on a wedding ring. Also, spending two months of salary on a wedding ring may have actually allowed me to buy you TWO Qalo Rings, so I owe you one. Pick it out, let’s go ring shopping. Then, let’s go hiking. Love you. ^rj
Updated September 15, 2018
Ari Jutkowitz goes backpacking in the Adirondacks to the tune of 161 miles over the span of 8 days. He shares his thoughts and experiences.
Vleis are marshy clearings often crisscrossed by streams and are commonly found throughout the Adirondacks. Ever since I first traversed this region, I have developed a healthy respect for these wetlands. They were the most similar thing to quicksand that I had encountered, and I had developed the not-altogether-unreasonable fear of crossing one in the dark and finding myself plunged deep into the muck, never to be heard from again. Now I found myself off-trail in the Adirondacks, balanced on a tussock in one of these vleis with a dozen braided, muddy river channels directly in my path.
This was not the adventure I had planned. THAT adventure had been a week-long traverse of the Adirondacks by packraft, incorporating some of the best whitewater the region had to offer. I had planned the route months in advance and then modified it over and over as river flow data became available causing me to cross off some of the smaller waterways. Finally, with one week to go, it became clear that I’d have to abandon the route completely. The Adirondack rivers were at all time lows, and local observers were reporting that even the Hudson River was a rock garden.
Unwilling to scrap the trip altogether, I hastily put together a new itinerary. The idea would be a fast and light traverse on foot, linking snowmobile routes, ski trails, established trails, and any other “lines” on the map to see the area in a different way. The total distance was 161 miles, approximately a marathon a day for six consecutive days. I knew that there would be some challenges related to this plan. Some trails might not exist anymore and others might not be publicly accessible. I’d be modifying my route on the fly if needed, and that would be part of the fun.
My trip began in the southern foothills of the Adirondacks at Glasgow Mills, a name on a map with no place associated with it, just a two-track disappearing into the woods. I took off on a snowmobile trail and was soon pleasantly surprised by the scenery.
The route was extremely wet and I was immediately thankful for the lightweight, quick-draining shoes I favored on these trips. Trying to avoid the often knee-deep puddles, streams, and boggy stretches of trail was an exercise in futility. Were the trails to improve, my shoes would dry quickly. Otherwise, I had a pair of designated sleep socks to warm and dry my feet at night.
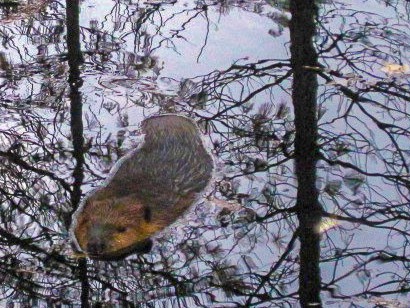

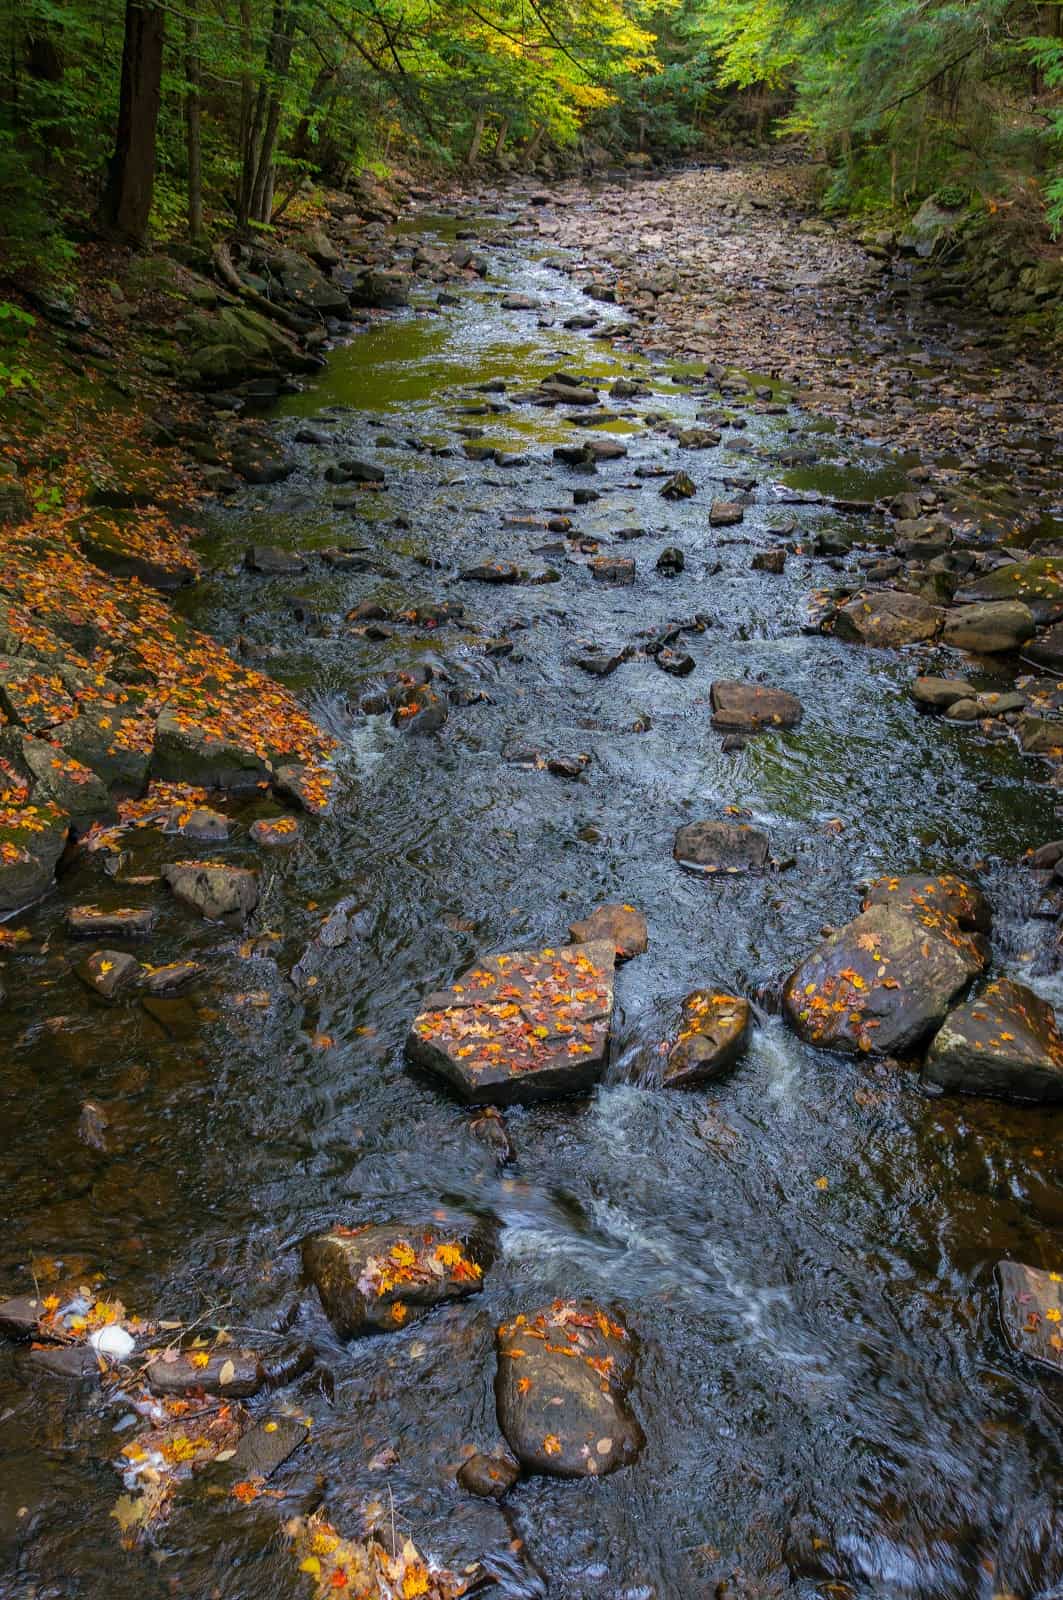

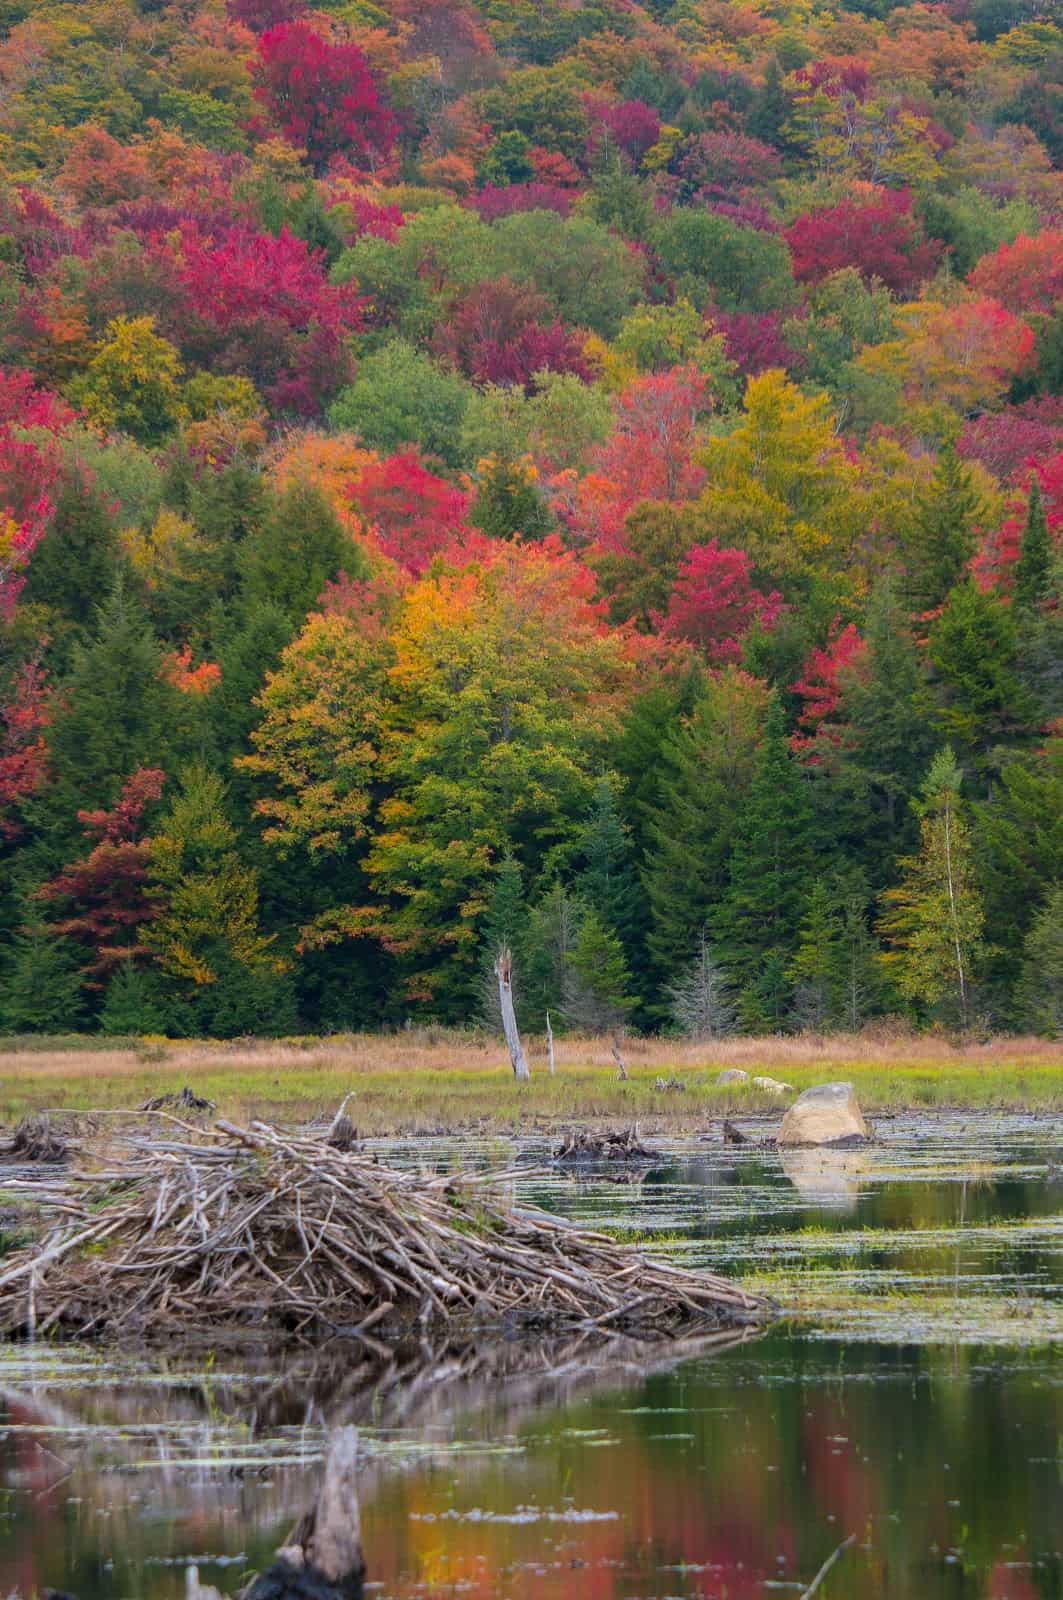
It was hard to find streams in these areas that didn’t have evidence of beaver activity, and I idly wondered if a beaver had created the vleis by damming the streams and flooding the plains, or if the vleis had created the beaver through adaptation to this type of environment. It is probably a combination of both, I supposed.

I ran into my first problem in this area, attempting to follow a foot trail that appeared on CalTopo, but not on any other map. I could figure out where the trail might once have been, but attempting to follow it turned into a game of guessing and bushwhacking. I held to my compass course, kept a lake on either side of me as handrails and eventually connected with a snowmobile trail further north. I would have many similar experiences in the next week, and the cycles of tension and relief resulting from route uncertainty added a depth to the experience that I rarely experienced on established trails. It did cost dearly though in time spent on navigation and in picking my way through, over, and around obstacles such as bogs, vleis, underbrush, and deadfall.
I hiked until well after dark, finally stopping when I couldn’t find my route anymore. I had been somewhere on an abandoned and overgrown snowmobile trail and would have to find it again in daylight. I threw down my bivy in the first flat spot I found, grateful to not have anything more to do to set up camp. I rewarded myself with a dry pair of socks and a steaming bowl of home-cooked baked ziti made with my sister-in-law, Caroline’s famous meat sauce. This was the ultimate camp comfort food. Today had been a good day, and I was soon down for the count.
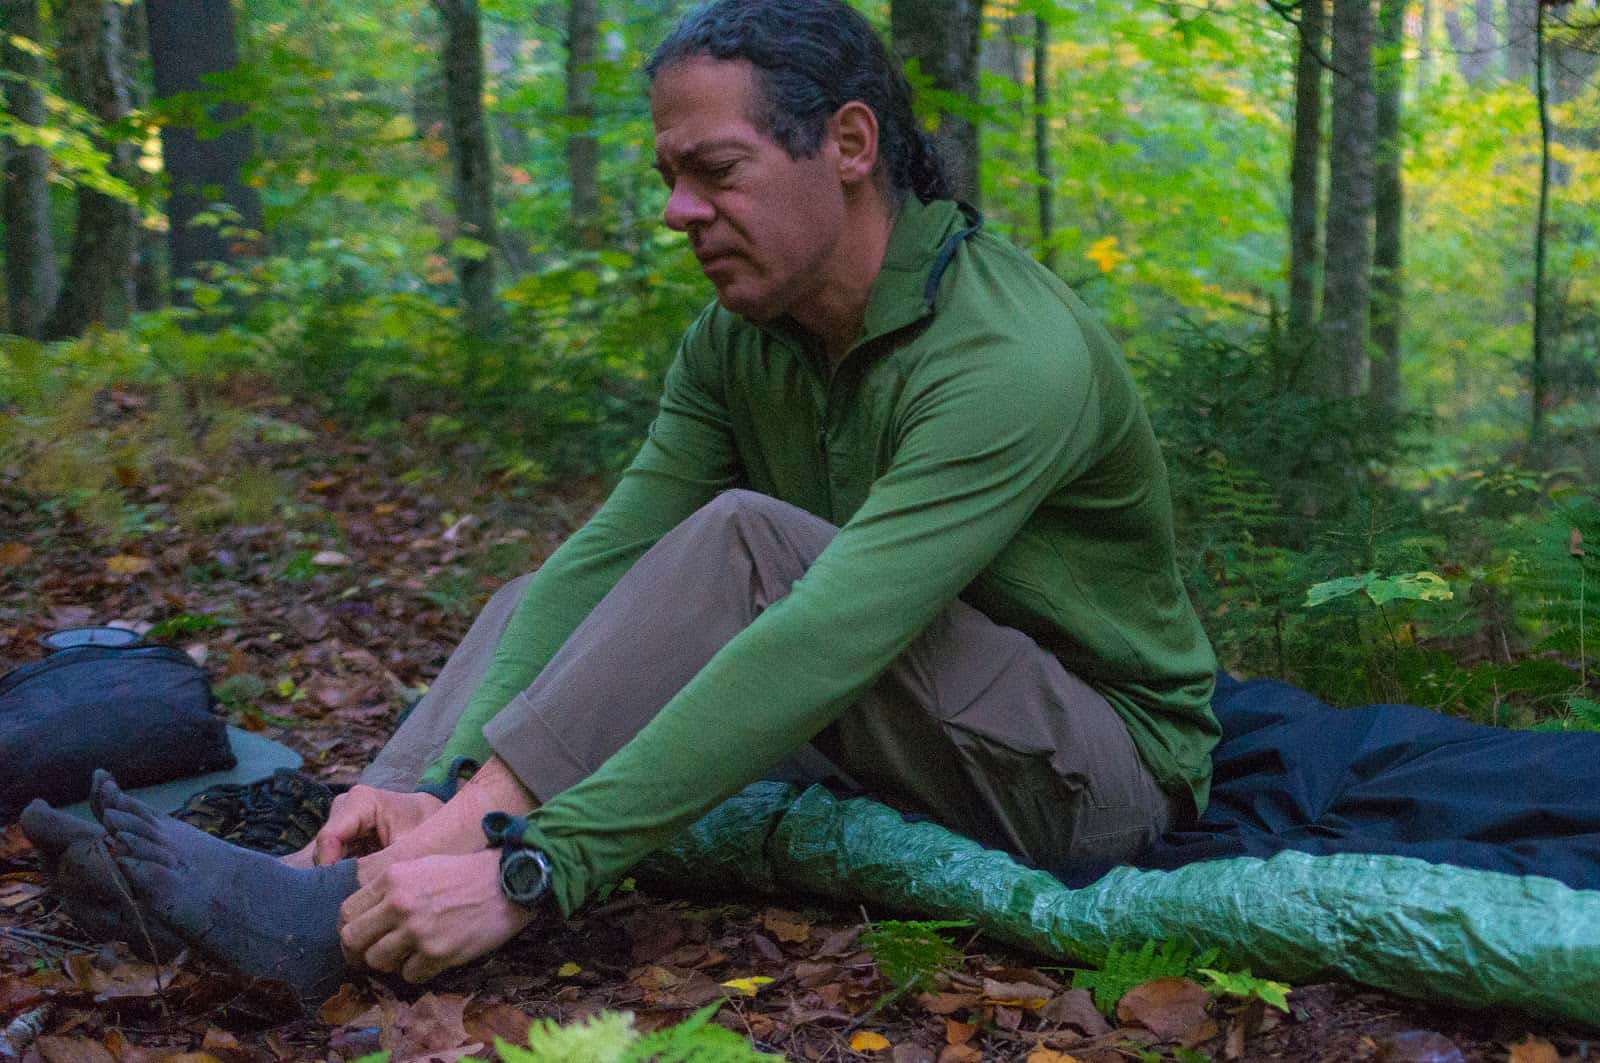
Day two began with more route problems. The trail around Kennel’s Pond had been posted private property, and I paused for a while, wondering how to access the Clockmill Corners trail beyond it. I could either take a 10-mile road walk along route 10 to work around this area, or get a little more creative. Seeing more of route 10 was not real high on my bucket list, so I decided to backtrack a little and get on the snowmobile trail again. Maybe there would be an unmapped branch heading in the right direction. A quarter mile up the road, I noted faint evidence of a small, footpath disappearing into the brush and with nothing to lose, I decided to see where it went. Almost too fortuitously, it accessed a heavily overgrown two-track that was not on my maps but appeared to parallel the route I had planned.
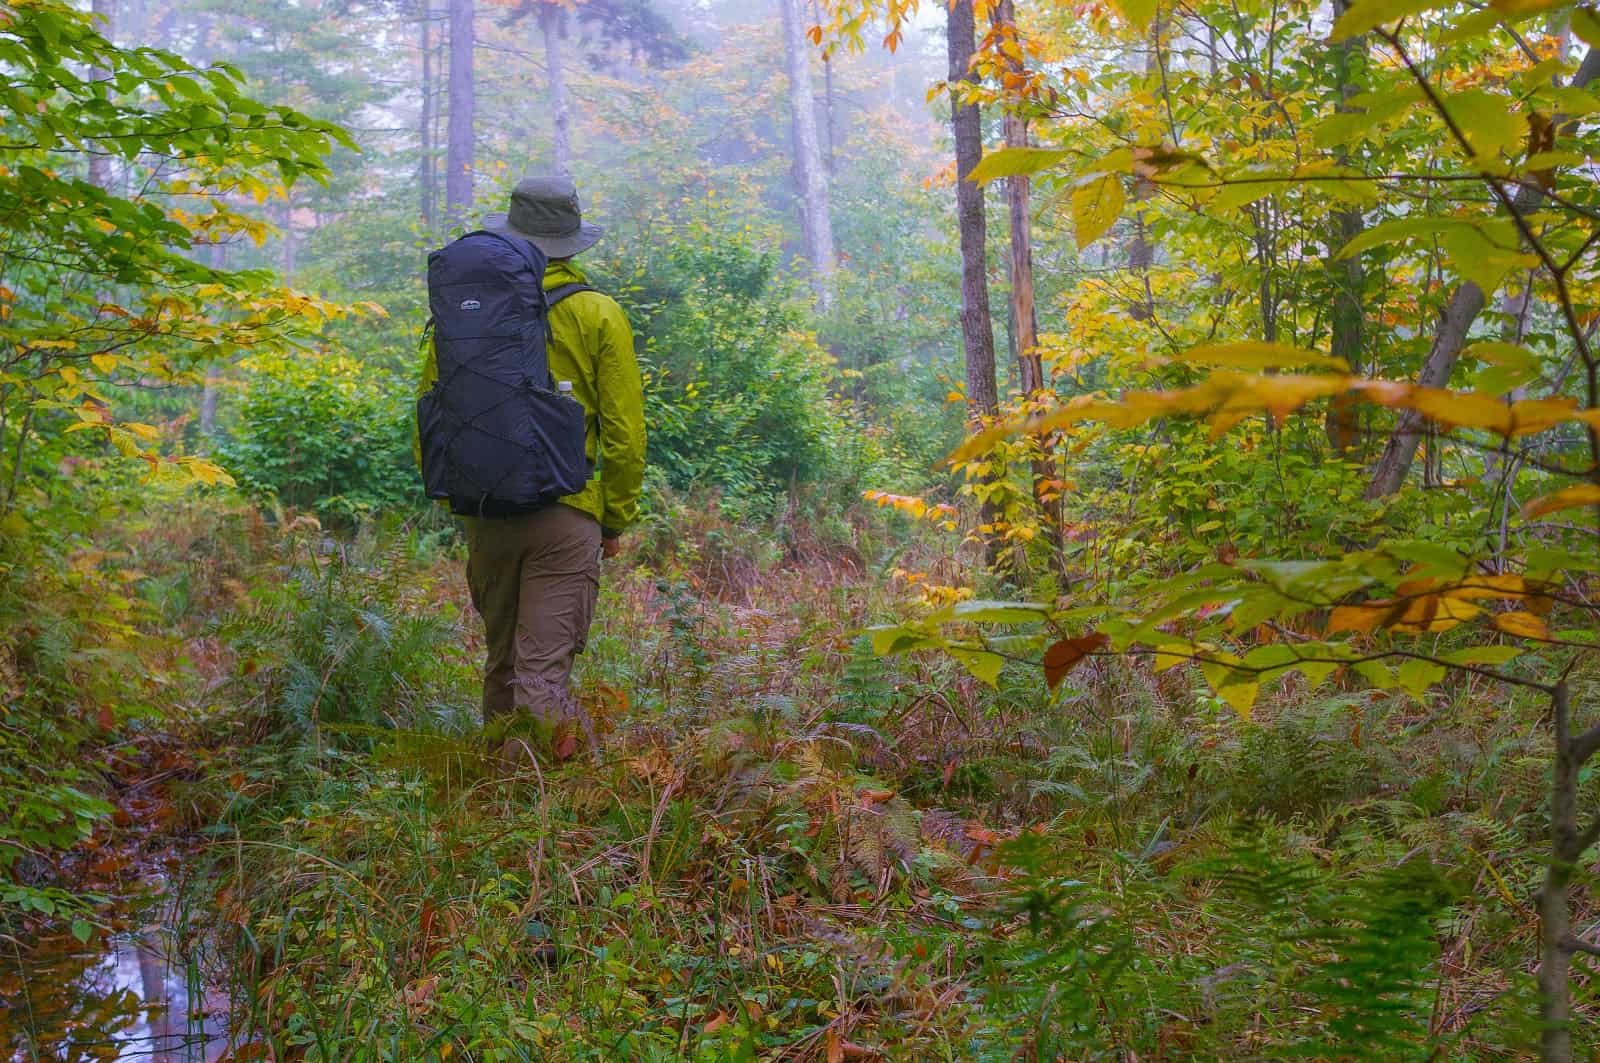
The two-track was overgrown and thick with deadfall, but I was able to follow it without too much difficulty up and over the foothills west of Kennel’s Pond, consulting the compass around my neck frequently to make sure I wasn’t getting too far off route. When I was roughly parallel with the end of Kennels Pond, I bushwhacked east and sighed in relief as I found a DEC snowmobile trail there. This seemed like as good a time as any for breakfast, so I made some burritos with sausage, egg, mashed potato, and cheese and ate them contentedly on a large rock by the pond. I washed them down with a mug of coffee, feeling the tension leaving my shoulders as I sipped at the steaming beverage and listened to the sounds of the wetlands.
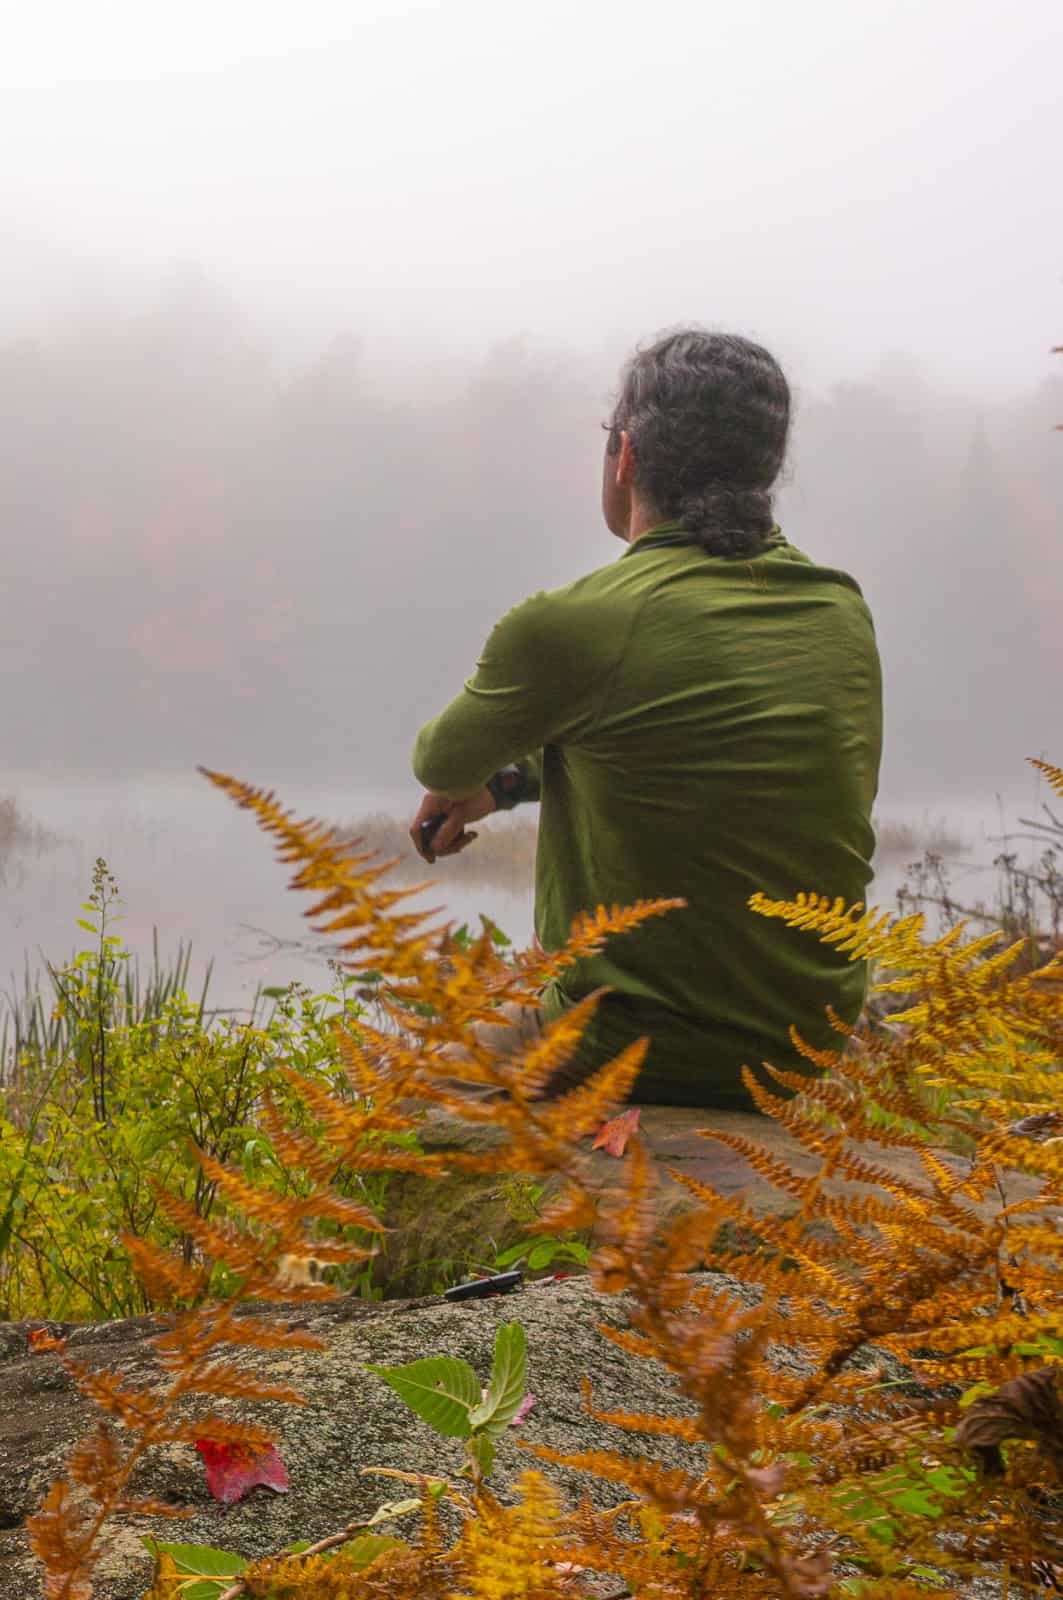
After breakfast, I continued on along the trail past vleis and backcountry lakes until I hit Clockmill Corners, another name on the map with no place. I had some concerns about the viability of my route from Clockmill Corners to Piseco (a trail was noted on CalTopo again, but not on any other map) but found an abandoned snowmobile route and decided to give it a try. The route was easy to follow at first but became progressively harder until it ultimately vanished and I found myself off trail again, face to face with a large vlei.
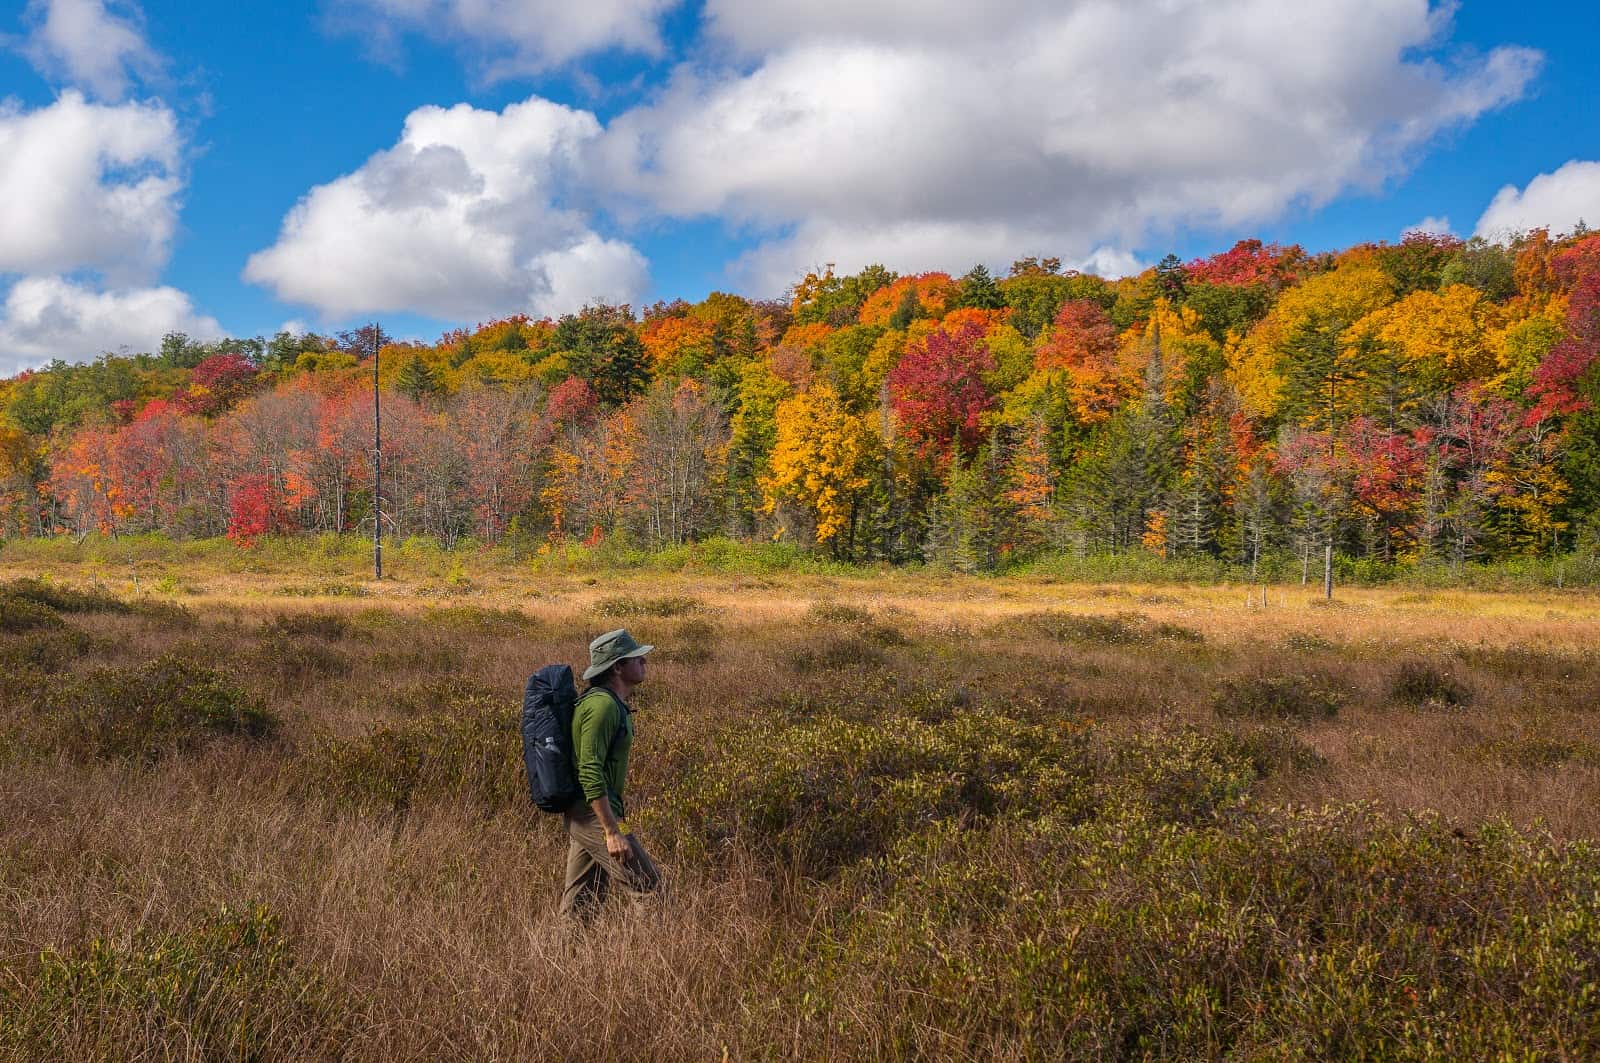
I consulted my map, which showed a trail crossing a stream and then running between Sheriff and Meco Lakes, so I decided to locate the trail.
The reality was less promising. Where the map showed the trail crossing the forked stream was actually the dead center of a vlei. Braided, silty river channels crisscrossed it, and the route apparently went straight across these into the trees on the far side. I could not see any break in the forest to suggest a trail had ever been there, nor could I find any obvious route through the swamp. I crept forward cautiously, closer to the main river channel. I was walking on a floating raft of spongy vegetation, and the closer I got to the river channel, the less stable it felt. Any minute now, my foot was going to break through. I looked toward the main channel. Who knew how deep the mud lay there? I envisioned the option where I made it to the channel and managed to swim across. Best-case scenario saw me crawling out the far side covered in muck like a drowned swamp rat. More realistically, I’d lose a shoe in three feet of mud, or get myself stuck. There was no option I could imagine where I came out smelling like a rose, literally.
Discretion being the better part of valor (and sanity), I ultimately decided to bushwhack around the foot of the mountain that bordered the swamp to the east. At times, I pushed through the thick forest underbrush, hopping from one faint deer trail to another to ease my passage. Where the forest was too thick, I’d move closer to the swamp, wading through mud, but avoiding the deeper channels.
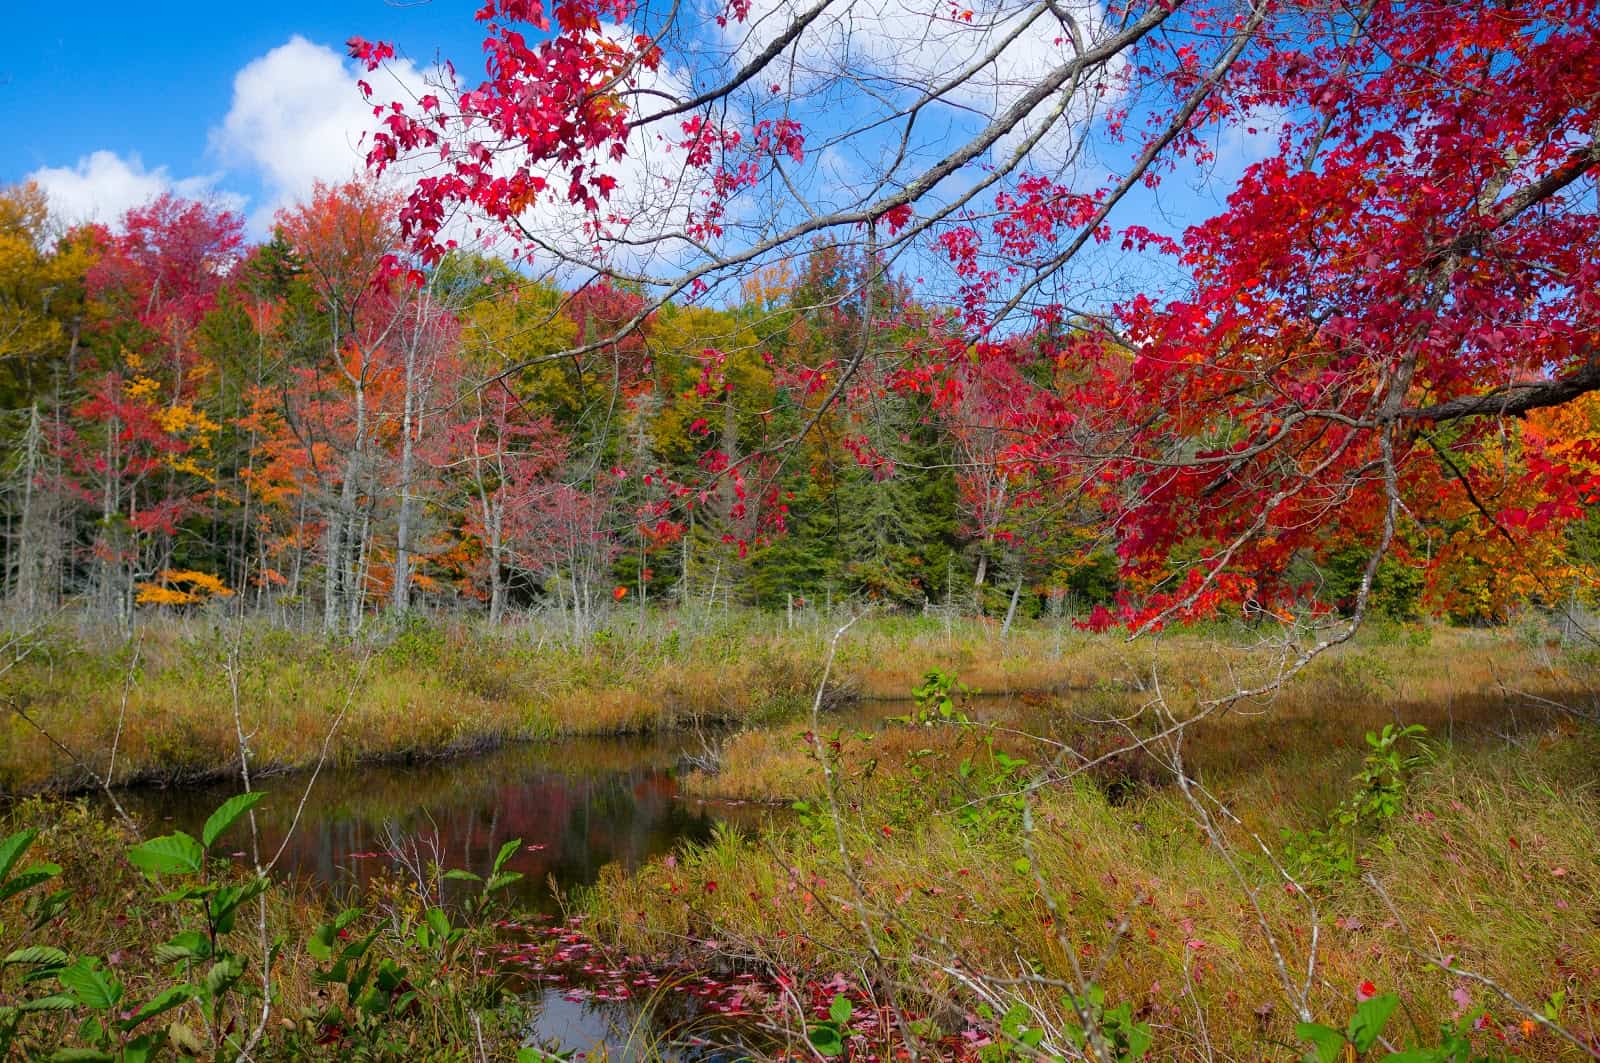
Finally, to the north of the unnamed mountain, I connected with the snowmobile track seen on the map and took this into the town of Piseco. I had fantasized about celebrating my escape from the swamp with a giant burger and beer, but with tourist season at an end, the town was closed and I walked in silence along seven miles of Country Road 24 around Piseco Lake, my longest road walk of the trip. With their never-ending sameness of tread, road walks beat up my feet more than any other type of hiking, and halfway through, I was ready for a break.
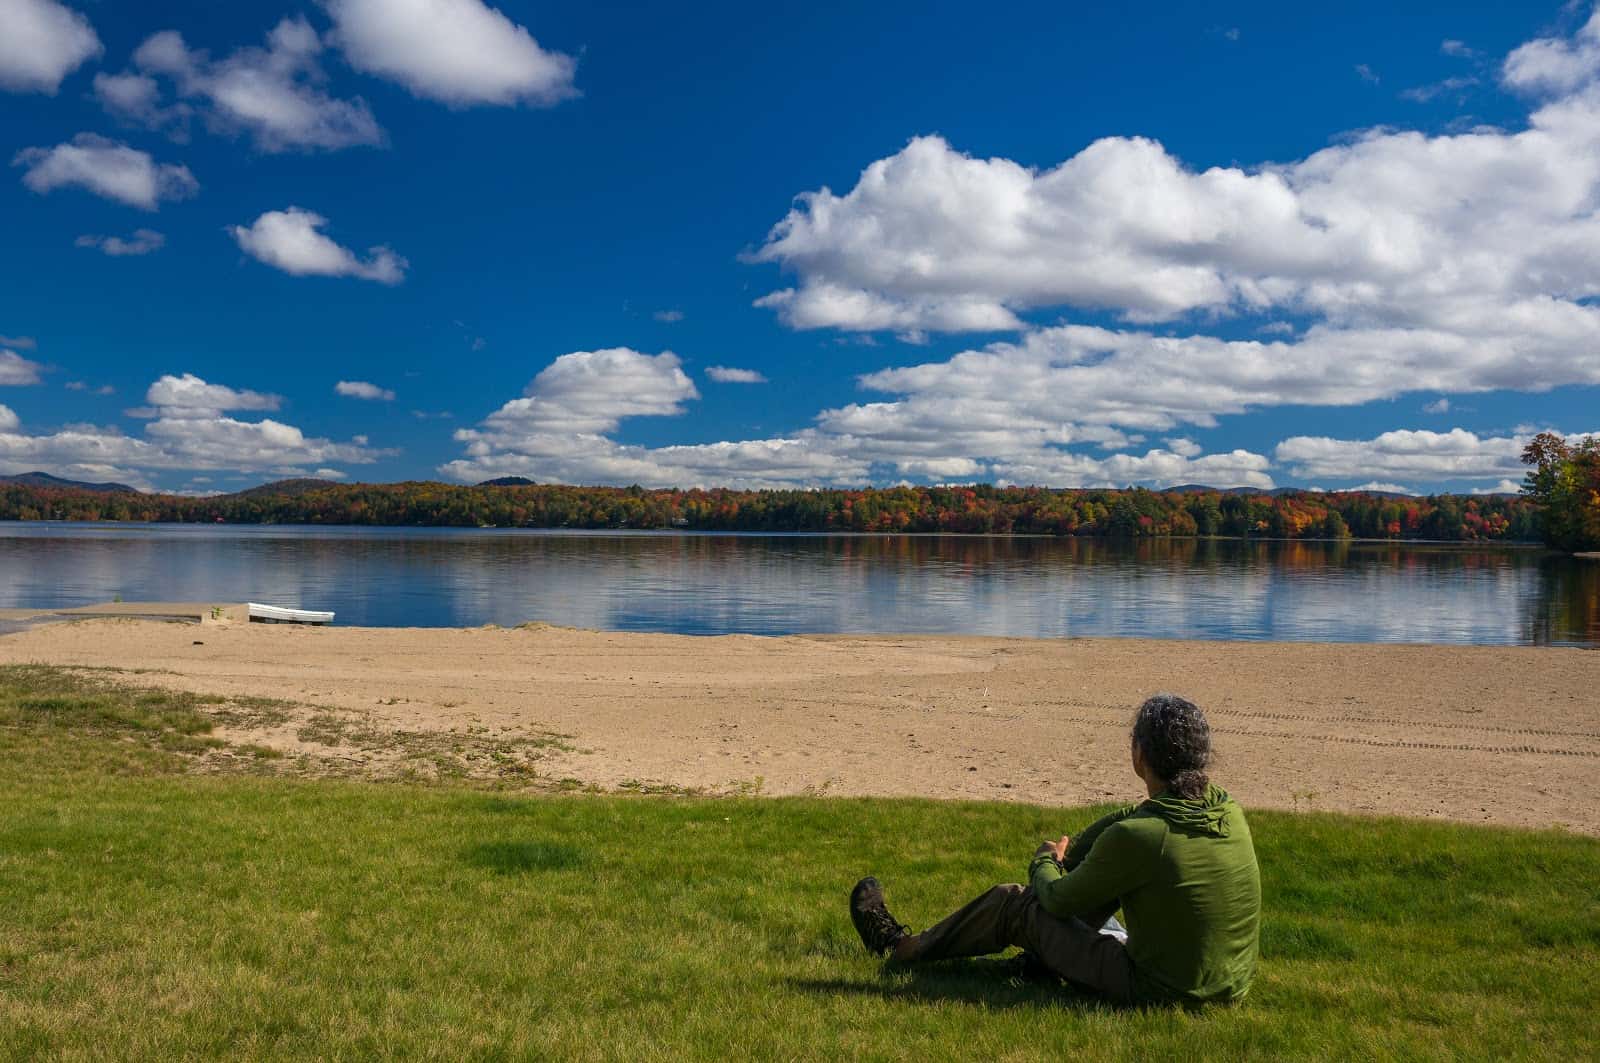
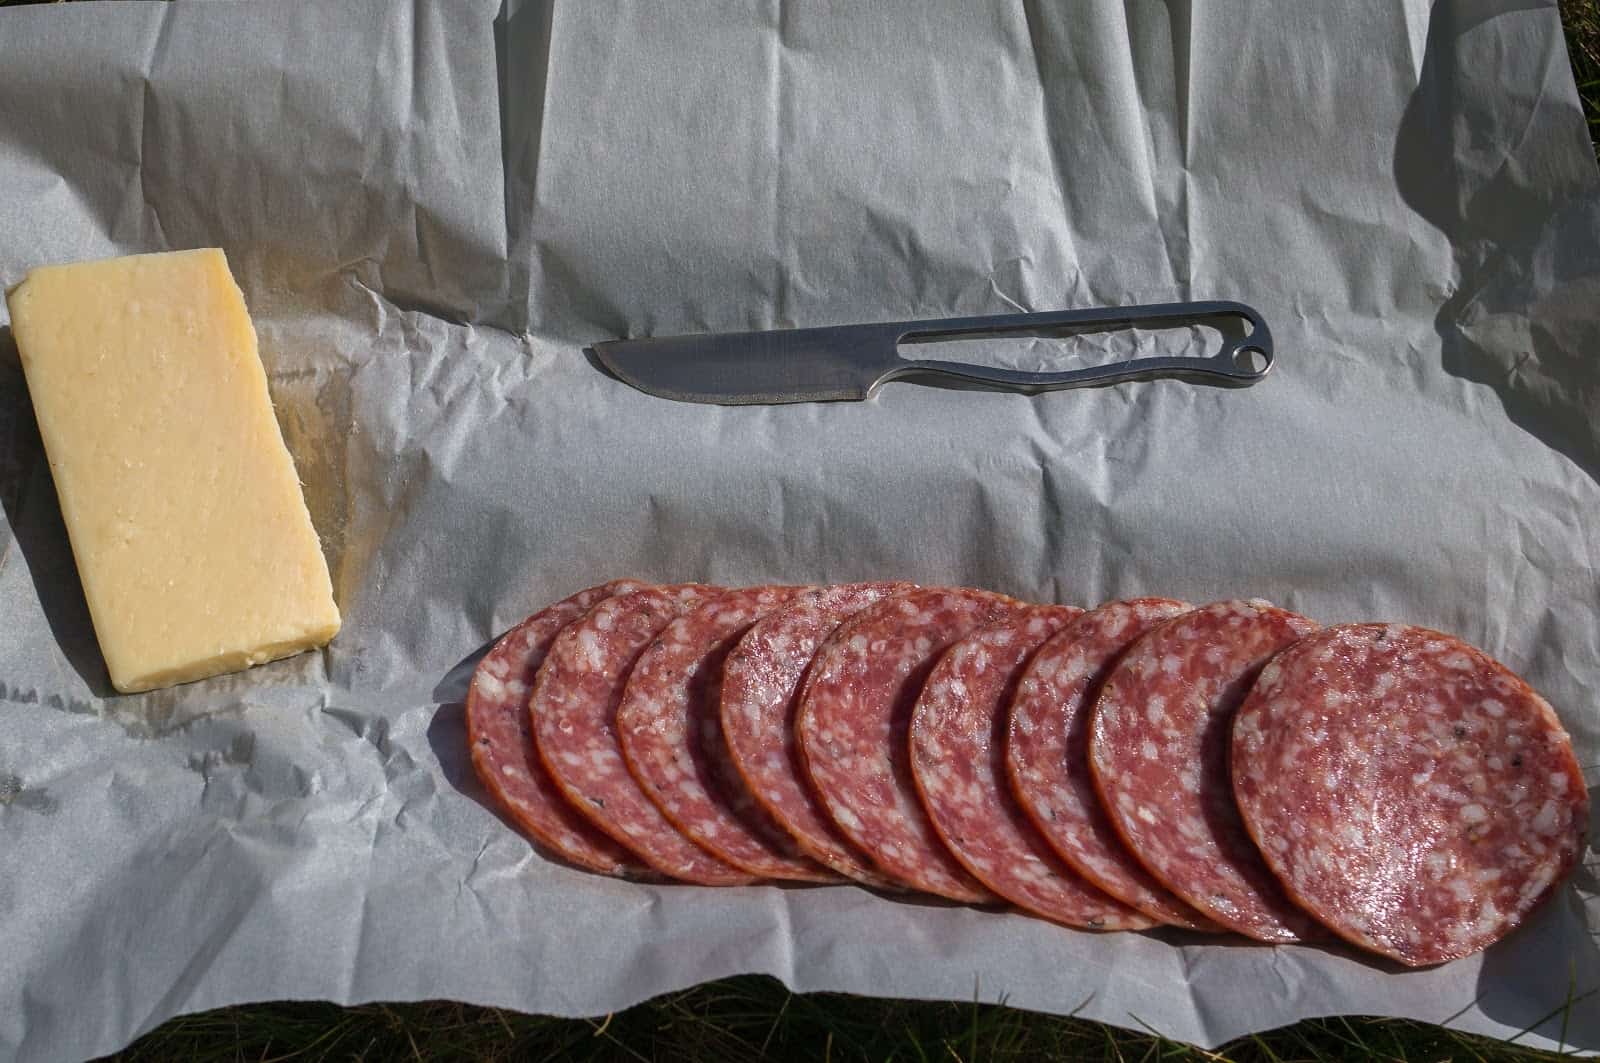
After lunch, I continued along toward the “airport”, planning to hook up with a northbound backcountry ski trail. There were many unkempt apple trees along the way, and I picked one every now and again to munch on. The apples were green, stunted, and splotchy, like a cross between a golden delicious and a crabapple. They looked like they’d be buggy, but I carved them with my knife as I walked and found them refreshingly tart, juicy, and delicious. Finally back on the trail, my feet felt rejuvenated and I walked on well past dark.
A few hours later, my feet were plotting a mutiny and I was having trouble remembering why I liked to do stuff like this in the first place. I found a well used clearing a couple hundred yards off trail lit my stove, and threw down my bedroll. Viola, camp was made before my water had even boiled. I took off my shoes and sat on a stump, savoring the unfamiliar but enjoyable feeling of not walking. Dinner tonight was an experiment I called Cowboy Pasta. It was roughly equal parts tomato sauce and salsa, both from my garden, spiced heavily with cilantro, cumin, and red pepper flakes. I had thrown in a can of great northern beans and some pastured pork sausage, cooked it down a little and then dehydrated the whole mess. It was served over a giant heap of pasta shells. Well seasoned with hunger and dosed liberally with some Jamaican Jonkanoo hot sauce, it was passably good, though warmth and volume were probably its two best traits. The Jonkanoo was a gift from a pre-veterinary student I had worked with this summer. I’d had her class over for potluck dinner one night and they had crowded into the kitchen, jostling, joking, and getting in each other’s way as they each cooked their dishes. Every time I used the hot sauce, I remembered how the little house had filled with laughter that night. Still smiling at the memory, I retired contentedly to my bivy.
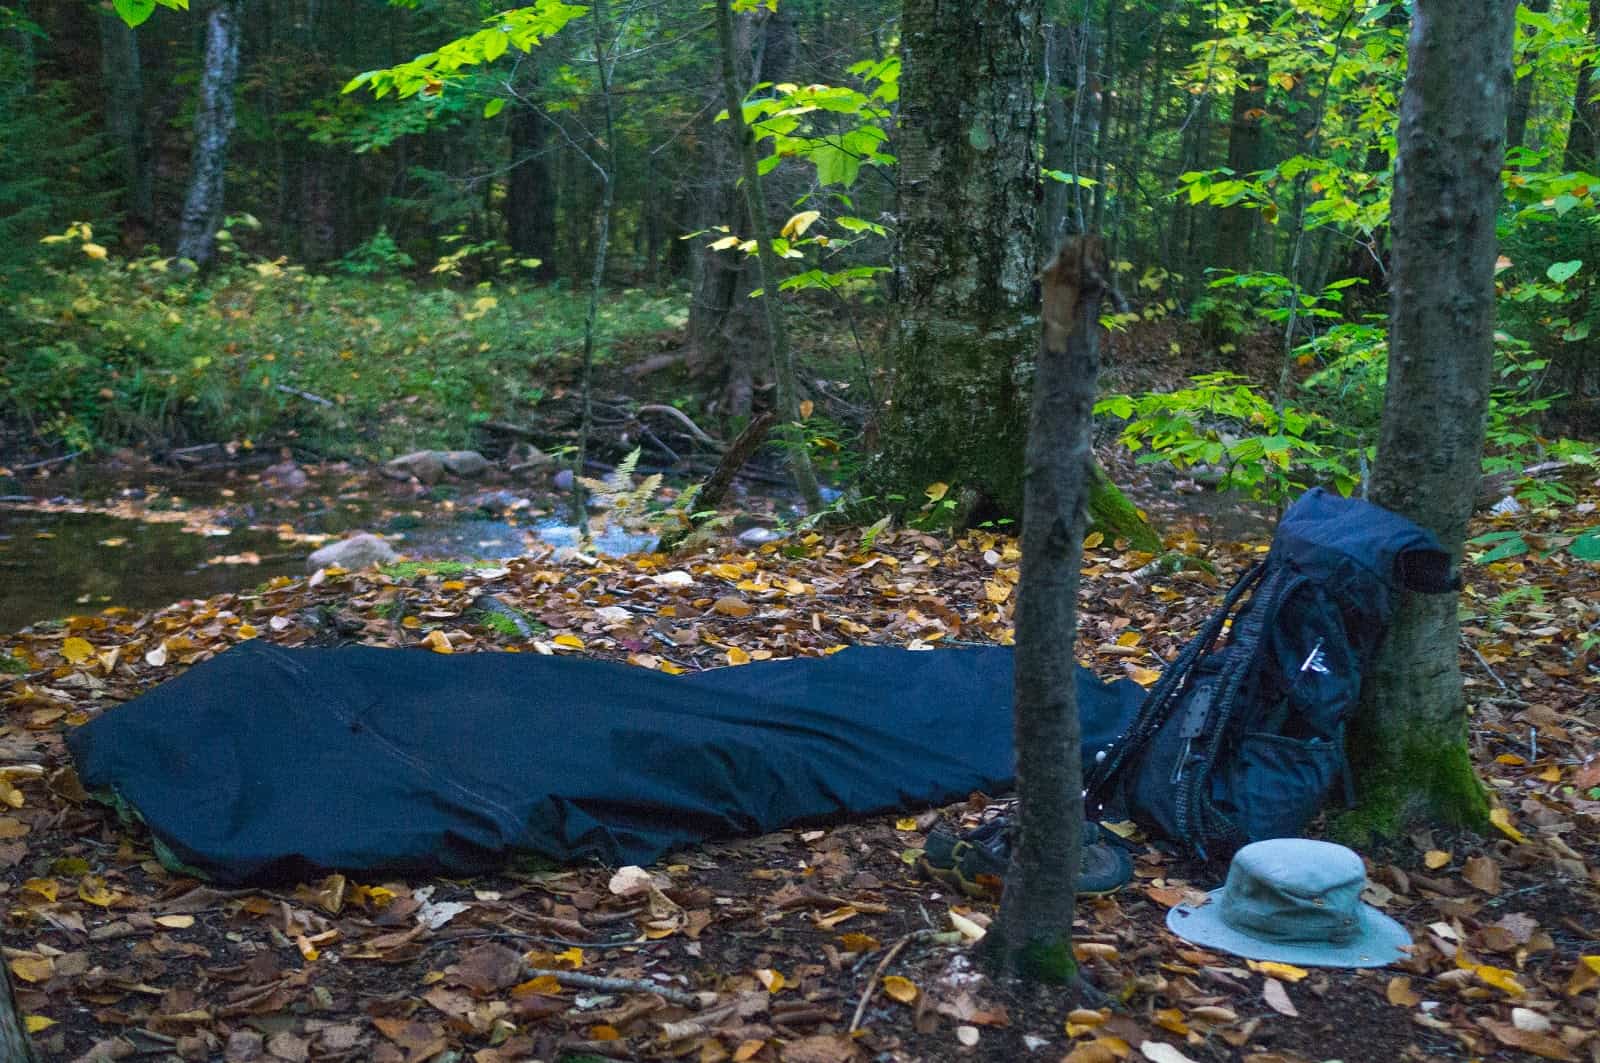
Given the option, I’d much rather sleep outside than confine myself to a tent. I love being able to see the stars at night, feel the breeze on my cheeks, wake to the crunch of autumn leaves as a bear pads through the forest… oops, did I just dream that? That was going to keep me up for a while. Anyway, I do enjoy the freedom that a lightweight bivy gives on these kinds of trips. There is not any real weight savings over the newer shelters on the market and they’re not much fun in a storm, but the convenience of being able to quickly throw down anywhere and sleep that much closer to nature made it my “go to” option if weather was likely to be halfway decent.
I woke early, stuffed my quilt into my pack, and within 10 minutes was on my way to the biggest mistake of my trip. Today’s itinerary took me on ski and snowmobile trails to Jessup Road. There I’d connect with a trail to Otter Lake. CalTopo had suggested a foot trail that ran north of Otter Lake all the way up toward Pillsbury Lake where I would hopefully connect with the French Louie Trail and then complete a big loop through the West Canada Lakes Wilderness. Unfortunately again, this trail appeared on no other map, and the past two days had taught me to be very leery of what I might find. The hike to Otter Lake was uneventful, but no amount of effort could turn up any shred of evidence of a trail north of the lake. I bushwhacked for some time, cutting east and west where the trail should have been but could find no breaks in the dense undergrowth, not even a game trail. Finally, I looked back at the map and calculated the time it would take at my current snail’s pace to travel cross-country to Pillsbury Lake. It wasn’t going to happen in the time I had available. I sadly headed back to Otter Lake, and the time it took me to get there through the dense jungle of brush validated my decision.
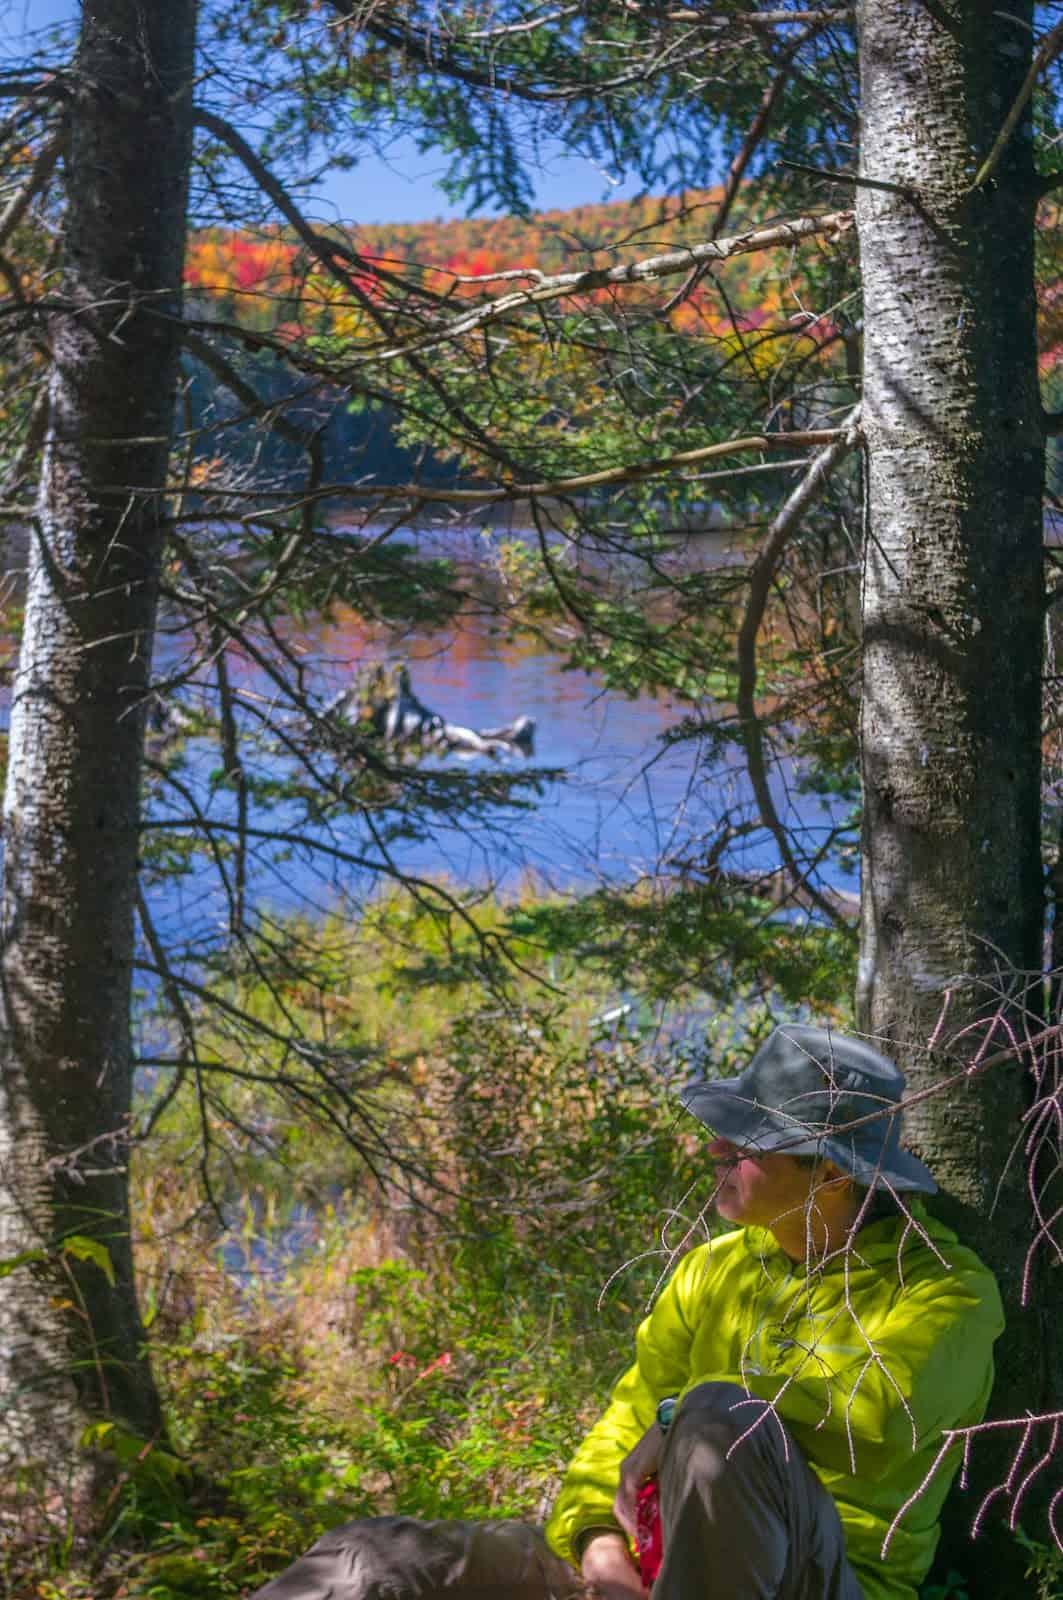
It was time for an attitude adjustment. I boiled some water for coffee and pulled out all the stops on breakfast. I assembled some bacon, egg, and cheese bagels, with a sweet red cheddar made from pastured cows milk. As I side dish, I rehydrated some hash browns. I held back a handful of the crispy potato strings to be added back in at the end. This would give my dish the crunch of real hash browns.
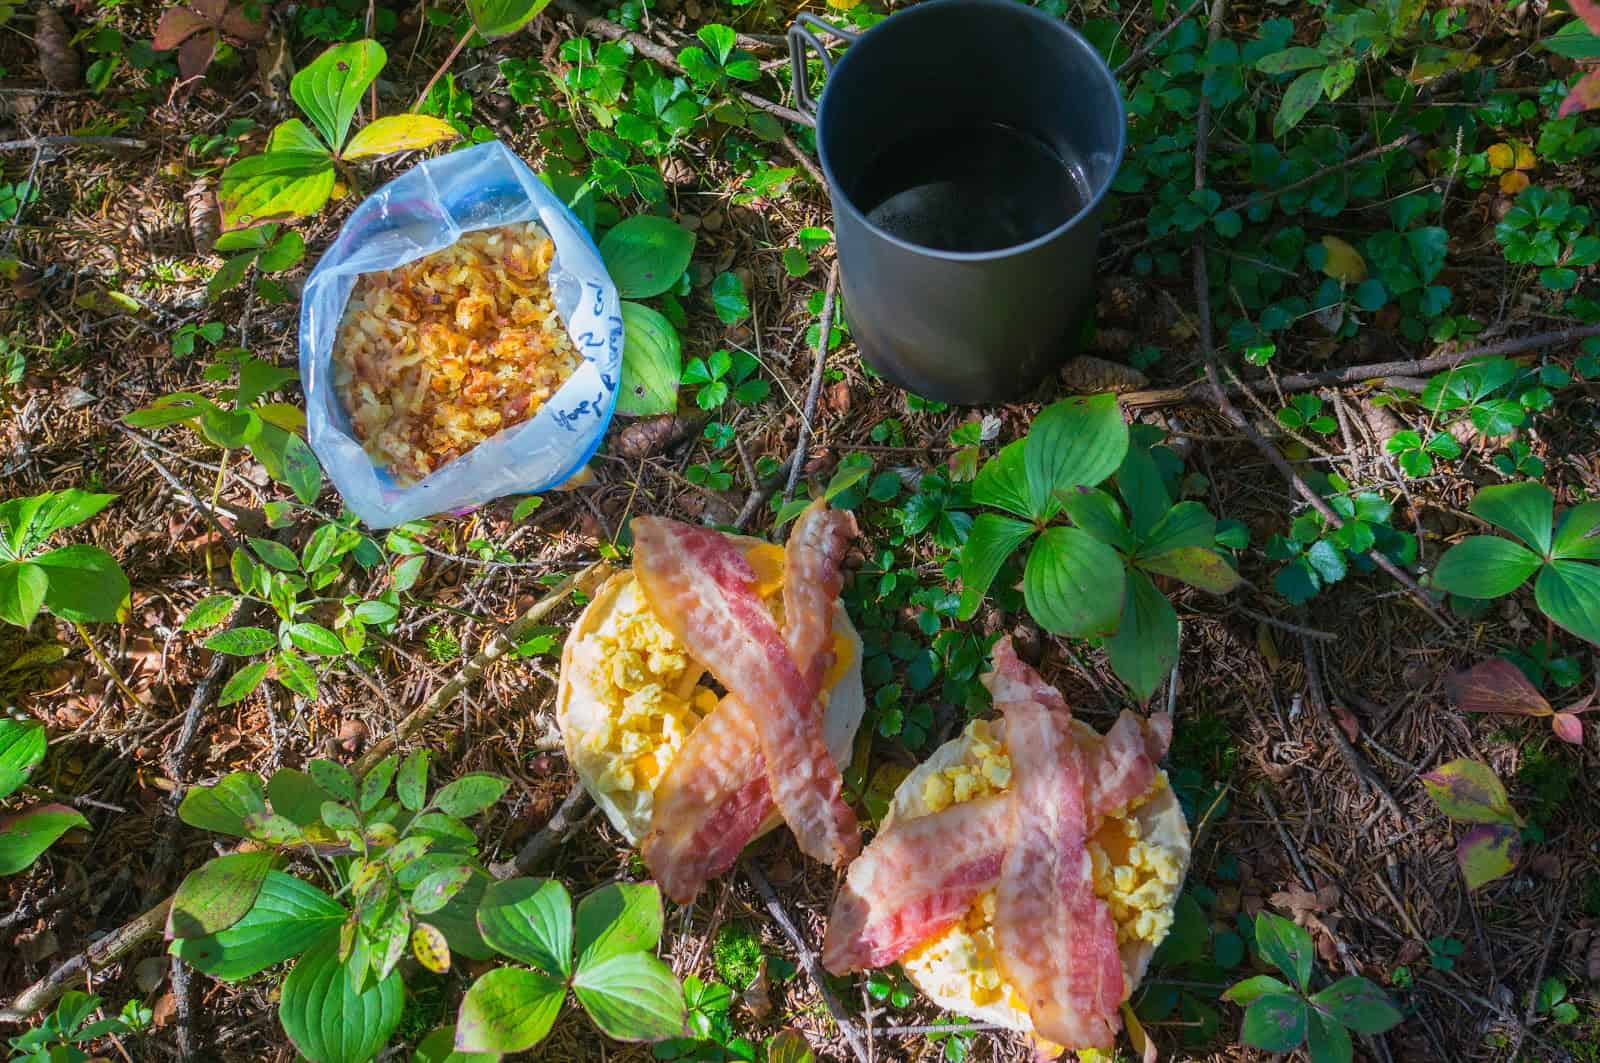
My mind once again clear, I headed back down to Jessup Road and connected with a trail to Spruce Lake. I was finally making forward progress again, but had lost most of the day. It was now 2 pm.
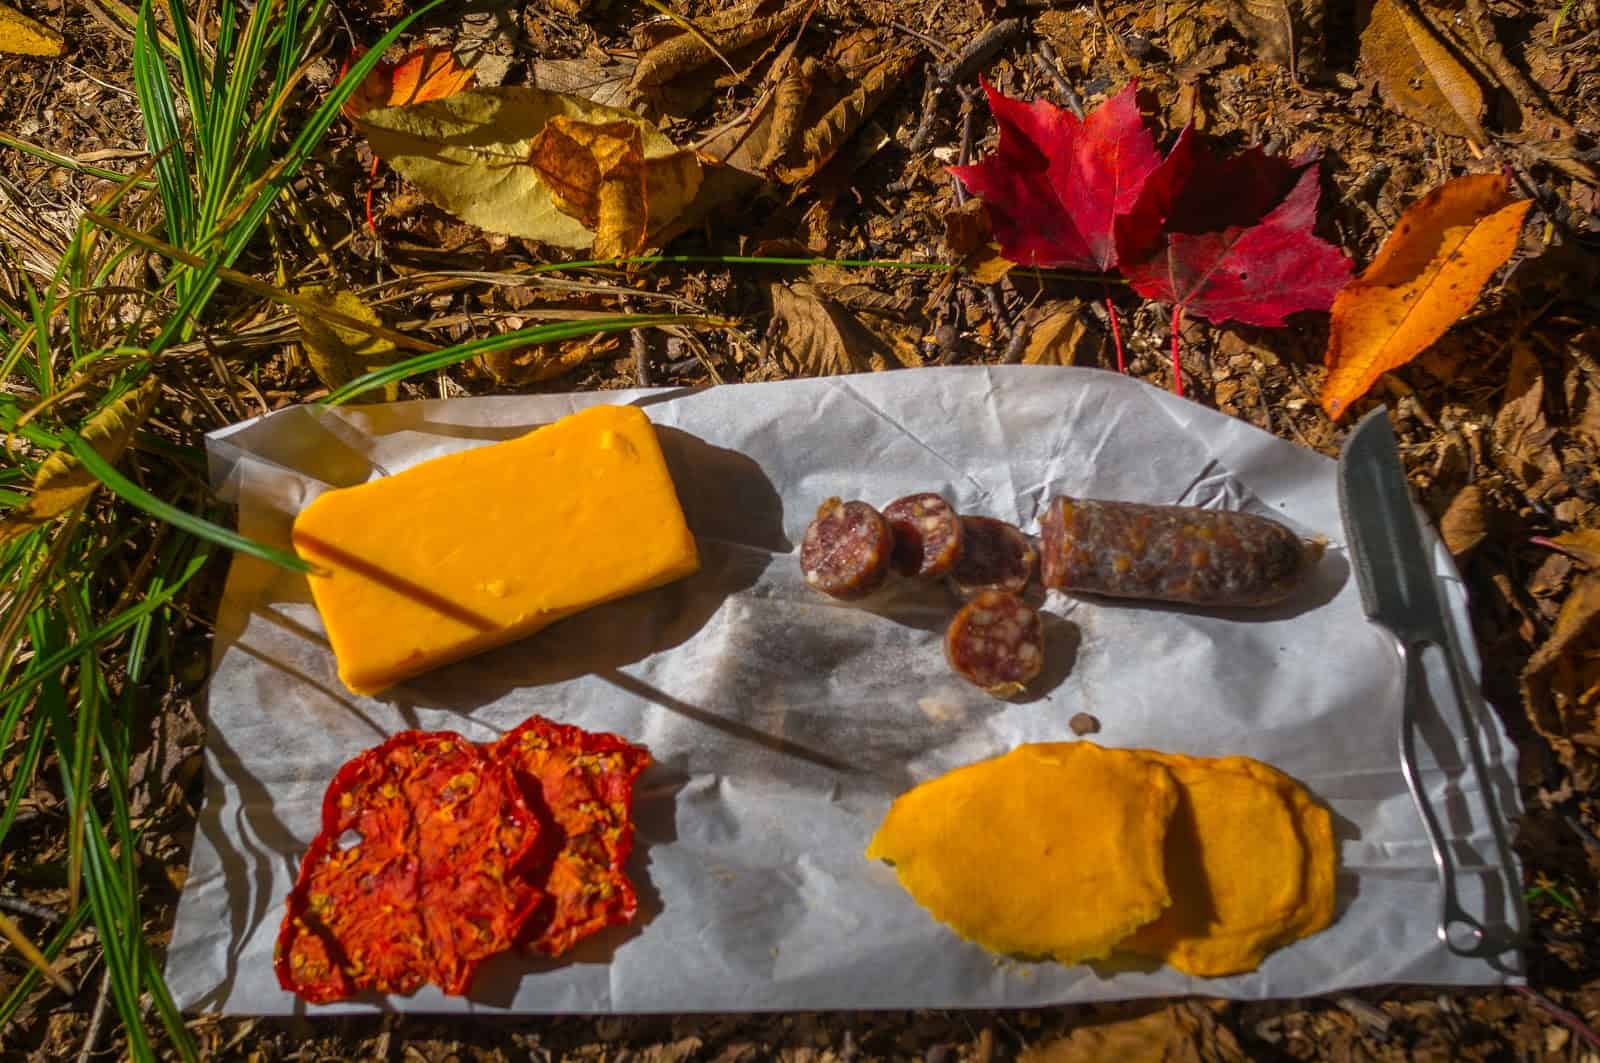
I continued onward to join the French Louie Trail from the west, hiking late into the night once again to make up for the morning’s error. When I finally reached Pillsbury Lake, I felt like I had done enough for one day and gratefully stopped, or collapsed; whatever you want to call it.

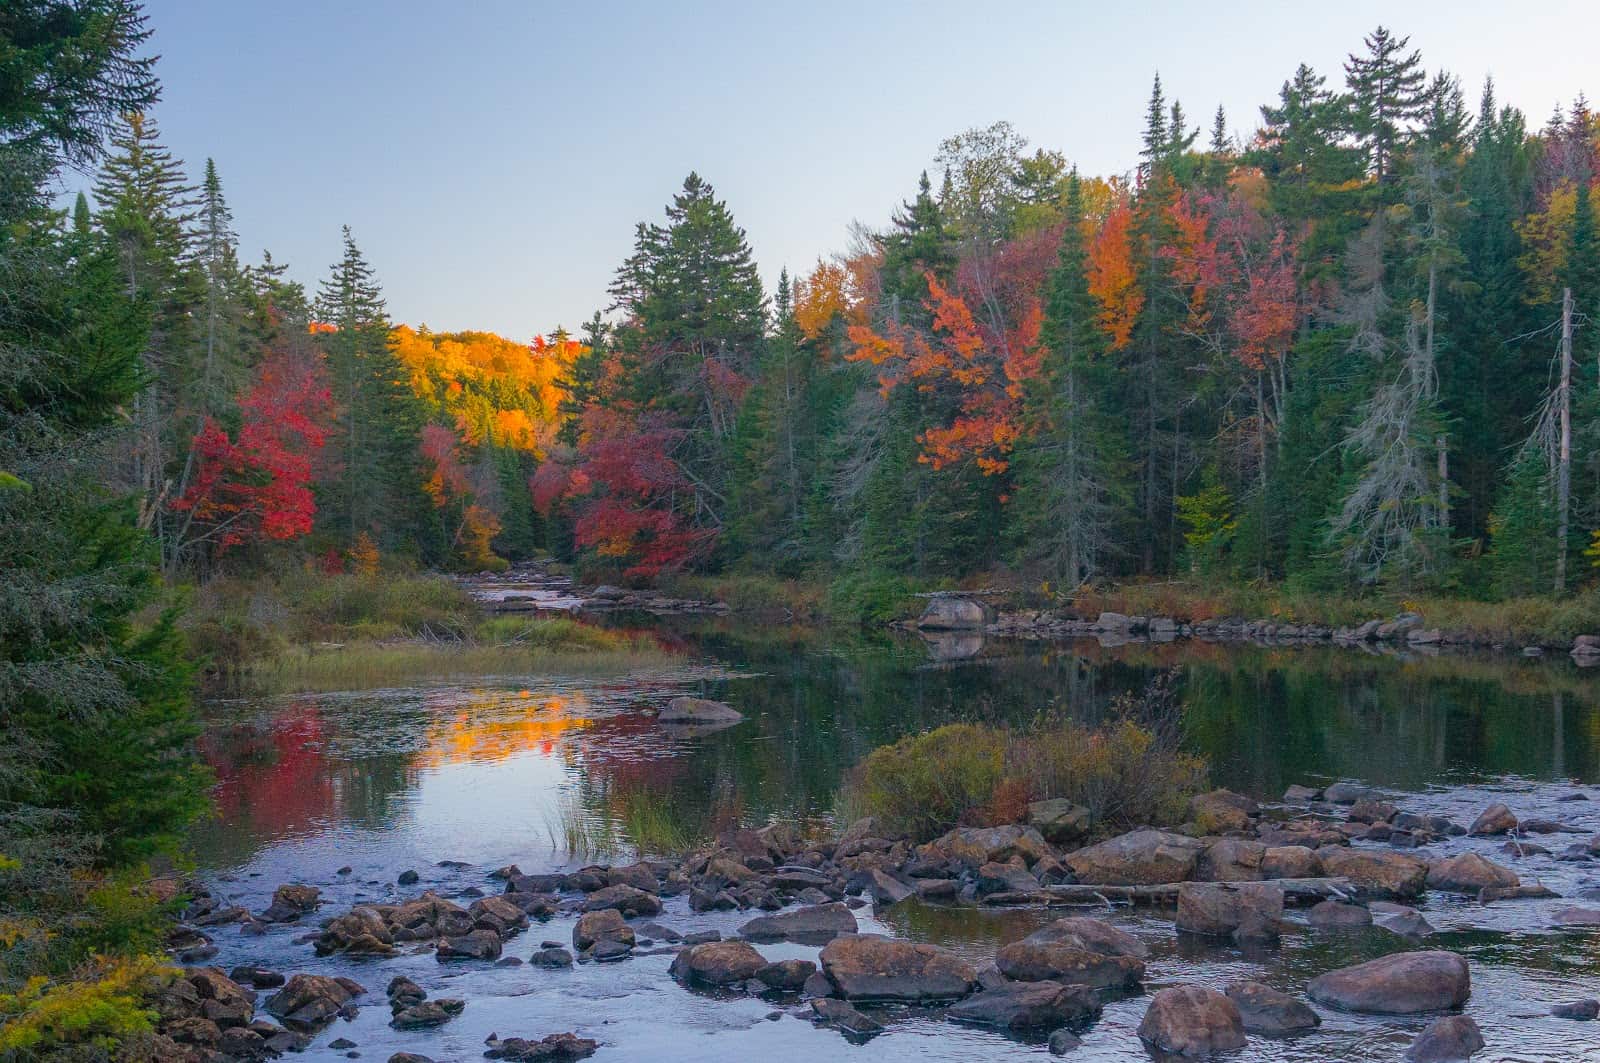
I’m embarrassed to admit it but one of my favorite dinners on trail right now is a Thai inspired noodle dish that incorporates ramen noodles, peanut butter, soy sauce, rice vinegar, sesame oil, chili sauce, crushed peanuts, cilantro, and some freeze dried chicken into a 1,000 calorie mess of steaming goodness. I had made the seasoning packets with my foodsaver to keep the liquid ingredients from leaking. I always saved it for a night when I knew I’d need a little pick-me-up and tonight was that night. Sitting in an Adirondack style lean-to slurping hot noodles, everything was all right with the world again.
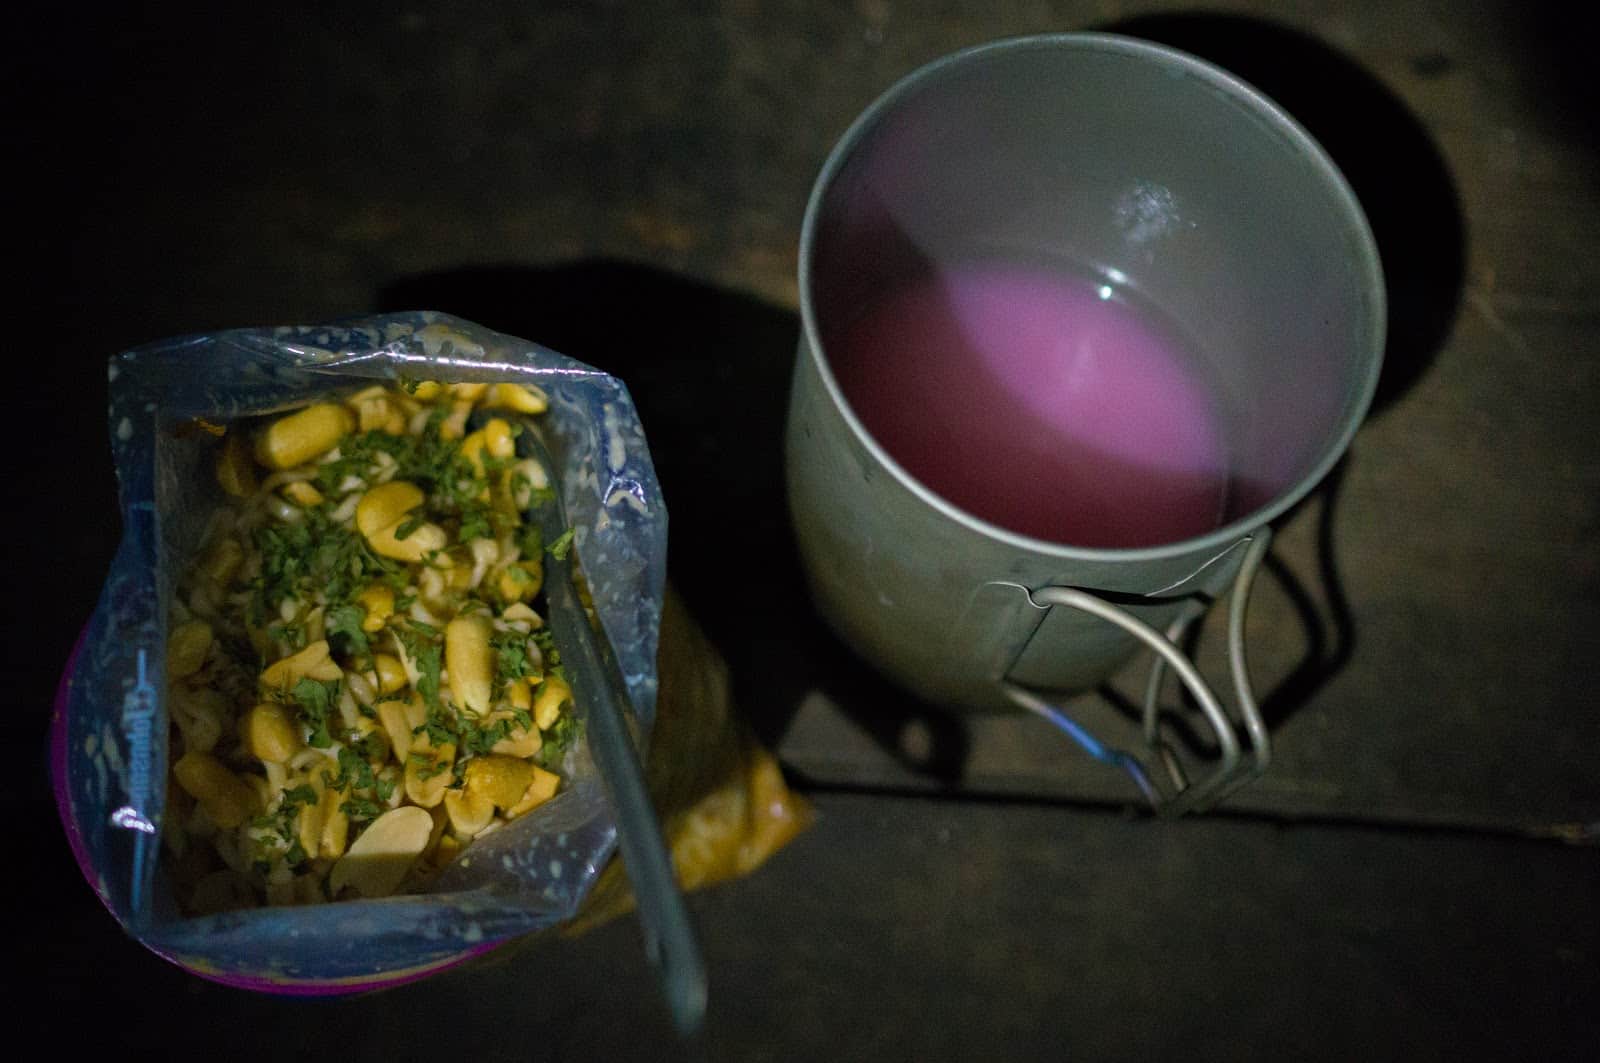
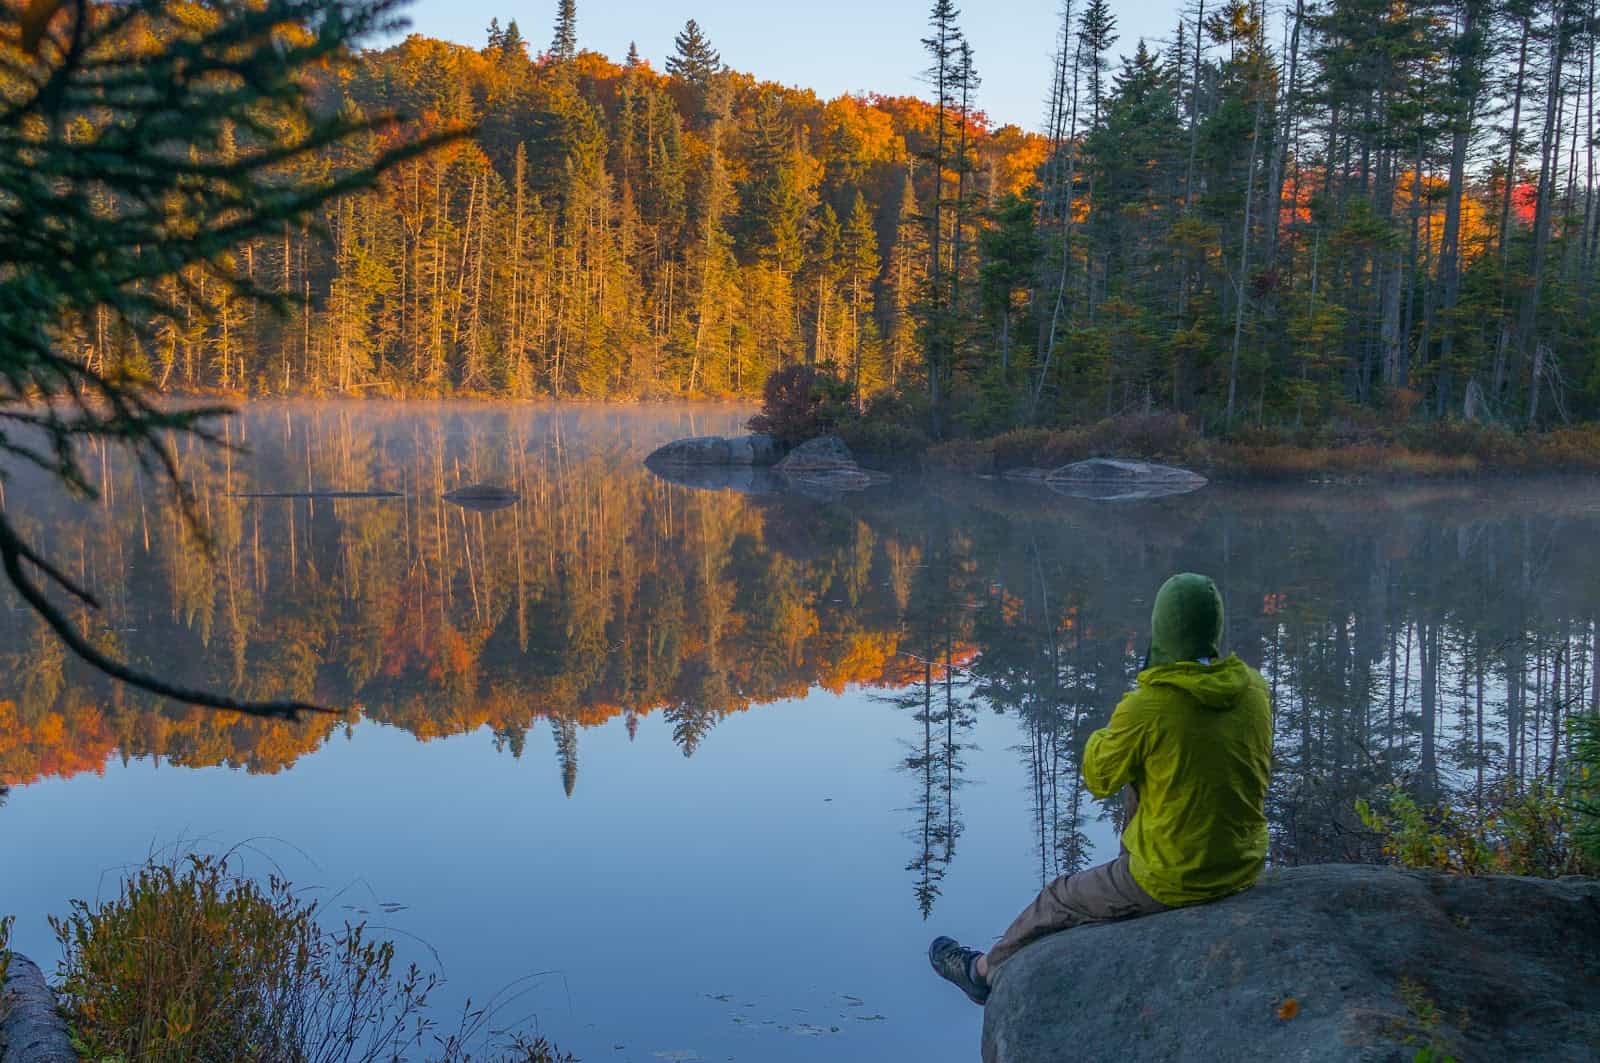
Having been expecting a week of packrafting, I had not conditioned myself for this type of trip, and my body was starting to break down. I was bone-weary, bruised, and scraped, and was starting to develop some repetitive use injuries. The next two days of travel would be on familiar trails, and I suddenly found myself relieved of the responsibility of knowing exactly where I was at all times, of making navigating decisions, of having to work my way through whatever obstacle I was facing. My mind began to wander; distancing itself from the physical suffering I was experiencing.
I met her through a friend. She had wild red hair that matched her adventurous spirit, piercing green eyes, and a great laugh. She was refreshingly direct but could be intuitive and subtle when called for, like when relating to my older daughter. We hit it off almost immediately. I cooked her dinner one night, my signature ahi tuna parfait, rack of lamb with rosemary and port wine reduction, celery-root mashed potatoes, and a flourless chocolate cake that was just this side of orgasmic. We ate in a pool of warm light at the kitchen island, the rest of the house dark and quiet around us. “I’d like you to stay,” I said. She stayed.
A few weeks later, I surprised her with a quick getaway to the Caribbean. We explored the island, ate at beachside stands, swam with turtles in the bay, and slept beneath a mosquito-netting canopy overlooking the ocean. I loved to watch her laugh with the locals. She had a way of making people feel immediately comfortable. I didn’t want to admit it, but I was already in love.
We were married at our little farmhouse, in the field by the barn and garden, surrounded by close friends and family. I had been secretly taking dance lessons and she let out a squeal of delight after we were announced as husband and wife and she realized what I had done. We danced through the evening, until our friends gave each other knowing glances and left us to ourselves.
She called me one day in a panic, as I was getting ready for my annual fall adventure. “My car broke down. I’m stranded in the middle of nowhere. I’ll never make it to my meeting tomorrow. “ “Don’t worry,” I said. “Just find someplace comfortable to hole up. I can be there in four hours. “ “But, your trip,” she said. “You’ve been training for weeks. I’m sure I can find another option.” “I don’t want another option,” I replied, “I like the option where you need help and I drop everything and come running. I’m grateful for this chance to show you that you are more important to me than anything.”
The years passed. We traveled the world, we tended our little farm, and we watched the girls grow up. We did things together and apart, but mostly we enjoyed spending time together. Adventuring or gardening, it didn’t matter.
I got cancer when I was 73. By the time they found it, it had spread through my abdomen. The doctors talked about chemotherapy but they weren’t sounding optimistic. This wasn’t for me, the hospitals, treatments, sickness, and loss of dignity. I had lived a good life and was ready to let go. “I need you to stay,” she said. “Please. For me.” I stayed.
Another hospital room. I held her hand as she rested, and we laughed about old memories. “You don’t need to stay here with me all day,” she urged. “Go see the kids.” “I’m grateful for the chance…” I started. She finished the sentence for me and laughed quietly. “Why do you always say that? You proved it years ago.” “I’ll never take you for granted,” I answered.
She slipped away that afternoon and I sat by her bedside, holding her hand and weeping silently. I followed her later that week, my vows finally fulfilled.
I was climbing Blue Mountain in the rain, wracked by loss and scrubbing tears from my eyes. Somewhere else in my head, my rational self was laughing at me. “You’ve been pushing too hard. Too little sleep, not enough food. You’re totally coming unhinged, dude!” I was barely crawling up the mountain at this point. I had always prided myself on mental toughness, the ability to keep moving forward no matter what, but it was one thing to keep plodding along and another thing to keep MOVING. It was time to focus. I charged the mountain with renewed purpose, trash-talking for motivation. I guess I was trading one form of crazy for another. “Come-on Blue Ridge, Is that all you got? IS THAT ALL YOU GOT? I’m gonna walk all over you, Blue! I hope you got another pitch in you cause I can do this all day long. You hear me? ALL DAY LONG, Blue!” My tiredness forgotten, I was soon up and over; hoping the trip down wouldn’t be too bad. “ALL DAY LONG,” I told myself again, and this time I believed it.
Yesterday I had walked along the Cedar River, past the brilliant colors of the Cedar River Flow. I remembered the fall colors and the meals, but little else. I had eaten biscuits and gravy for breakfast and I’d do it again in a heartbeat.

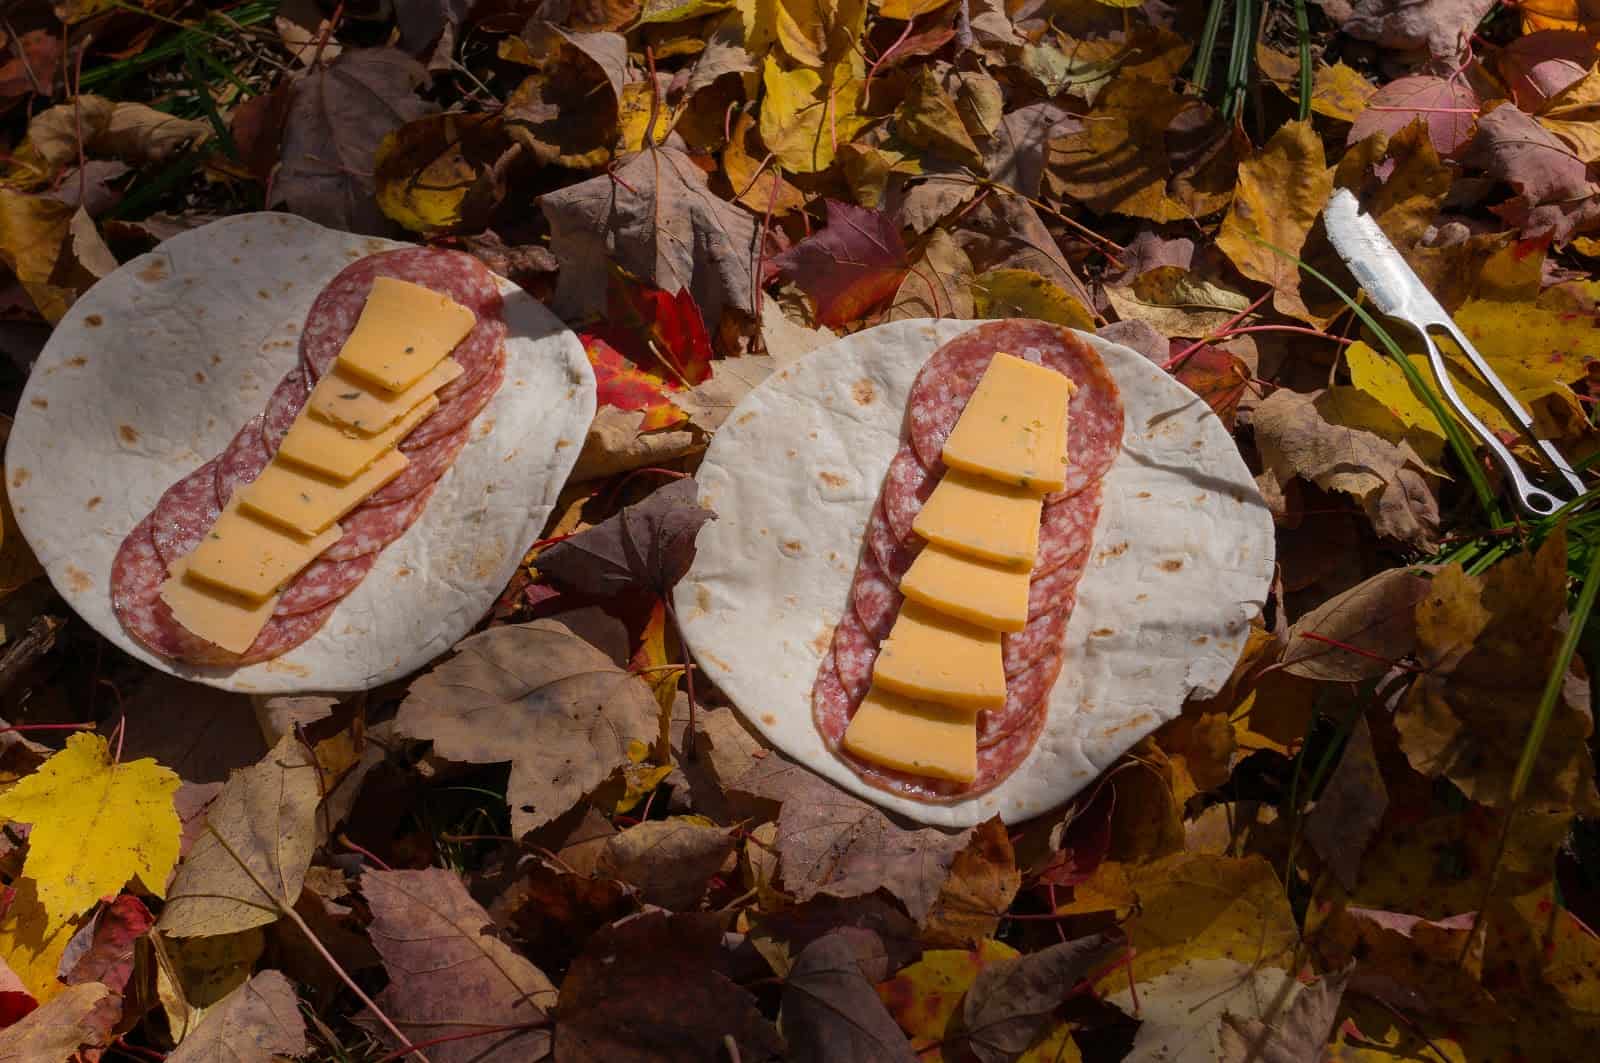
Still hungry, I also devoured a bacon cheddar wrap made with the leftovers from the other day’s breakfast. So simple, yet so good- I’d have to remember this trick for next time.
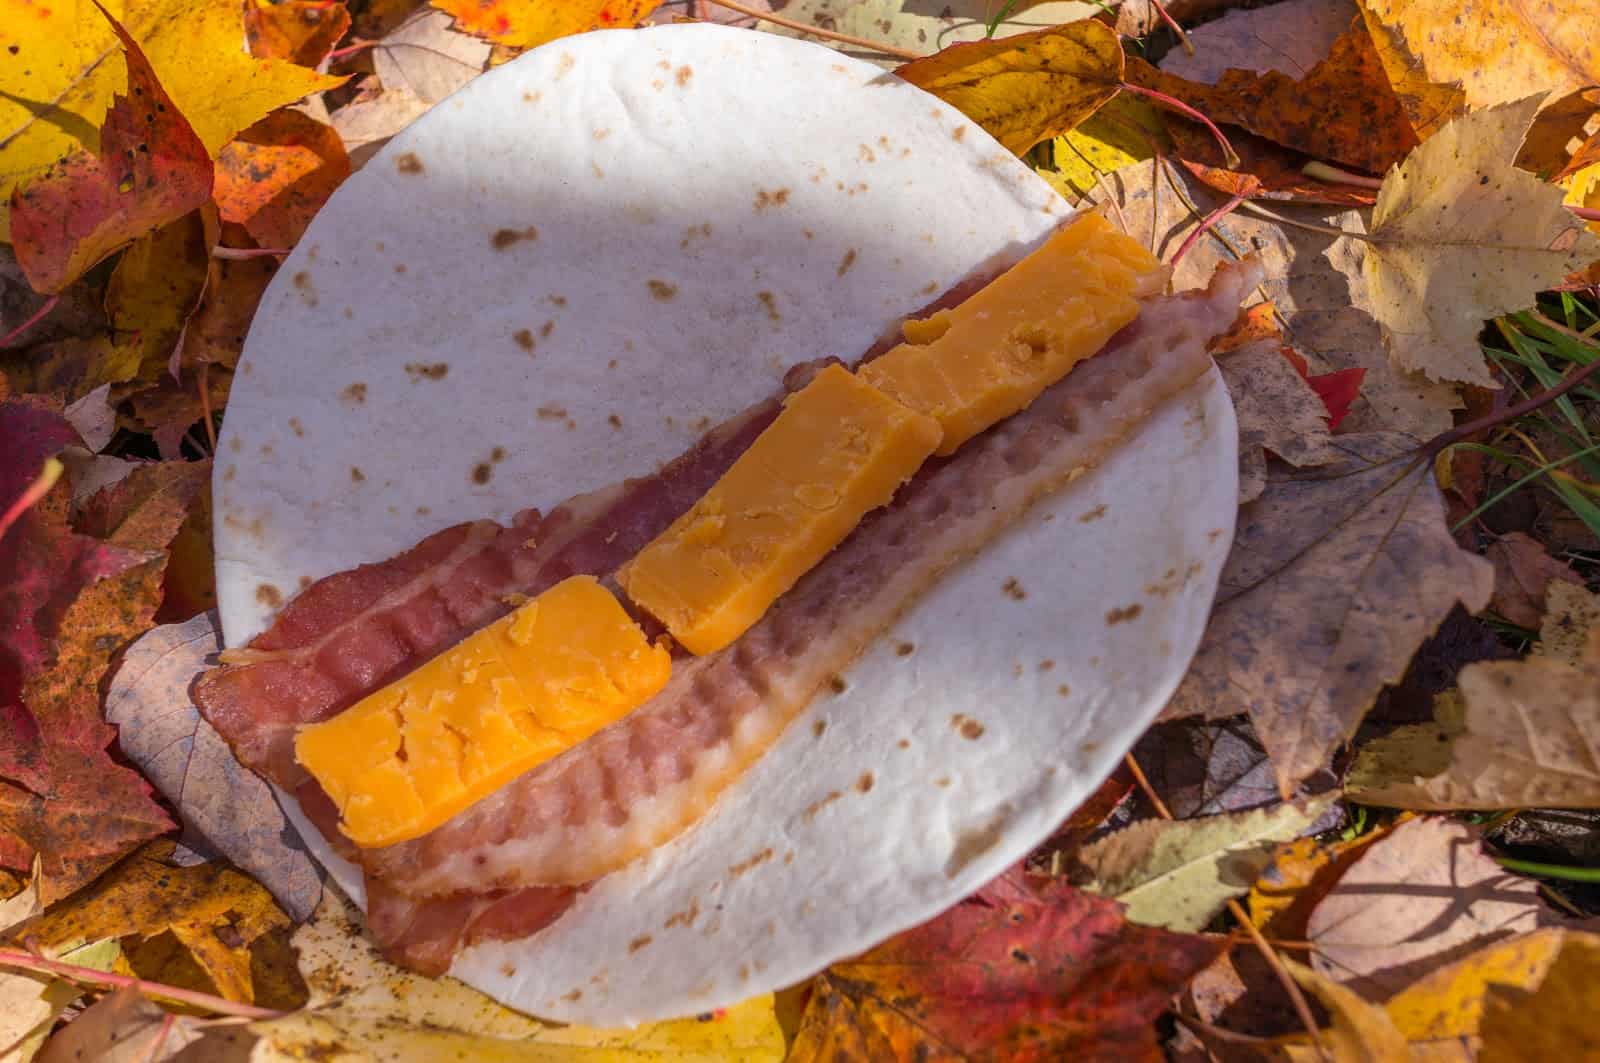
I met her online through a popular backpacking website. She was quiet but playful with dark hair and eyes. She worked with autistic kids. We had developed a long-distance friendship over time and eventually decided to meet up for a hiking trip. We were exploring the Superior Shoreline in 3 feet of snow. The weather was brisk but clear, and the sunlight sparkled off the ice formations on the lake. Conversation flowed easily and the day passed pleasantly. Later, as we huddled in a snow trench beneath our quilts, she whispered mock plaintively, “I’m so cold. Would you share your warmth with me?” Her eyes were twinkling.
I had spent the night on Cascade Pond. Dinner was my old backpacking standby, a giant bowl of pasta with a spicy homemade tomato sauce and sausage. Over the years, I had found my appetite increasing on trips like this, and nowadays I made most meals with at least 6 oz dry pasta and as much protein as I could stuff in the bag.
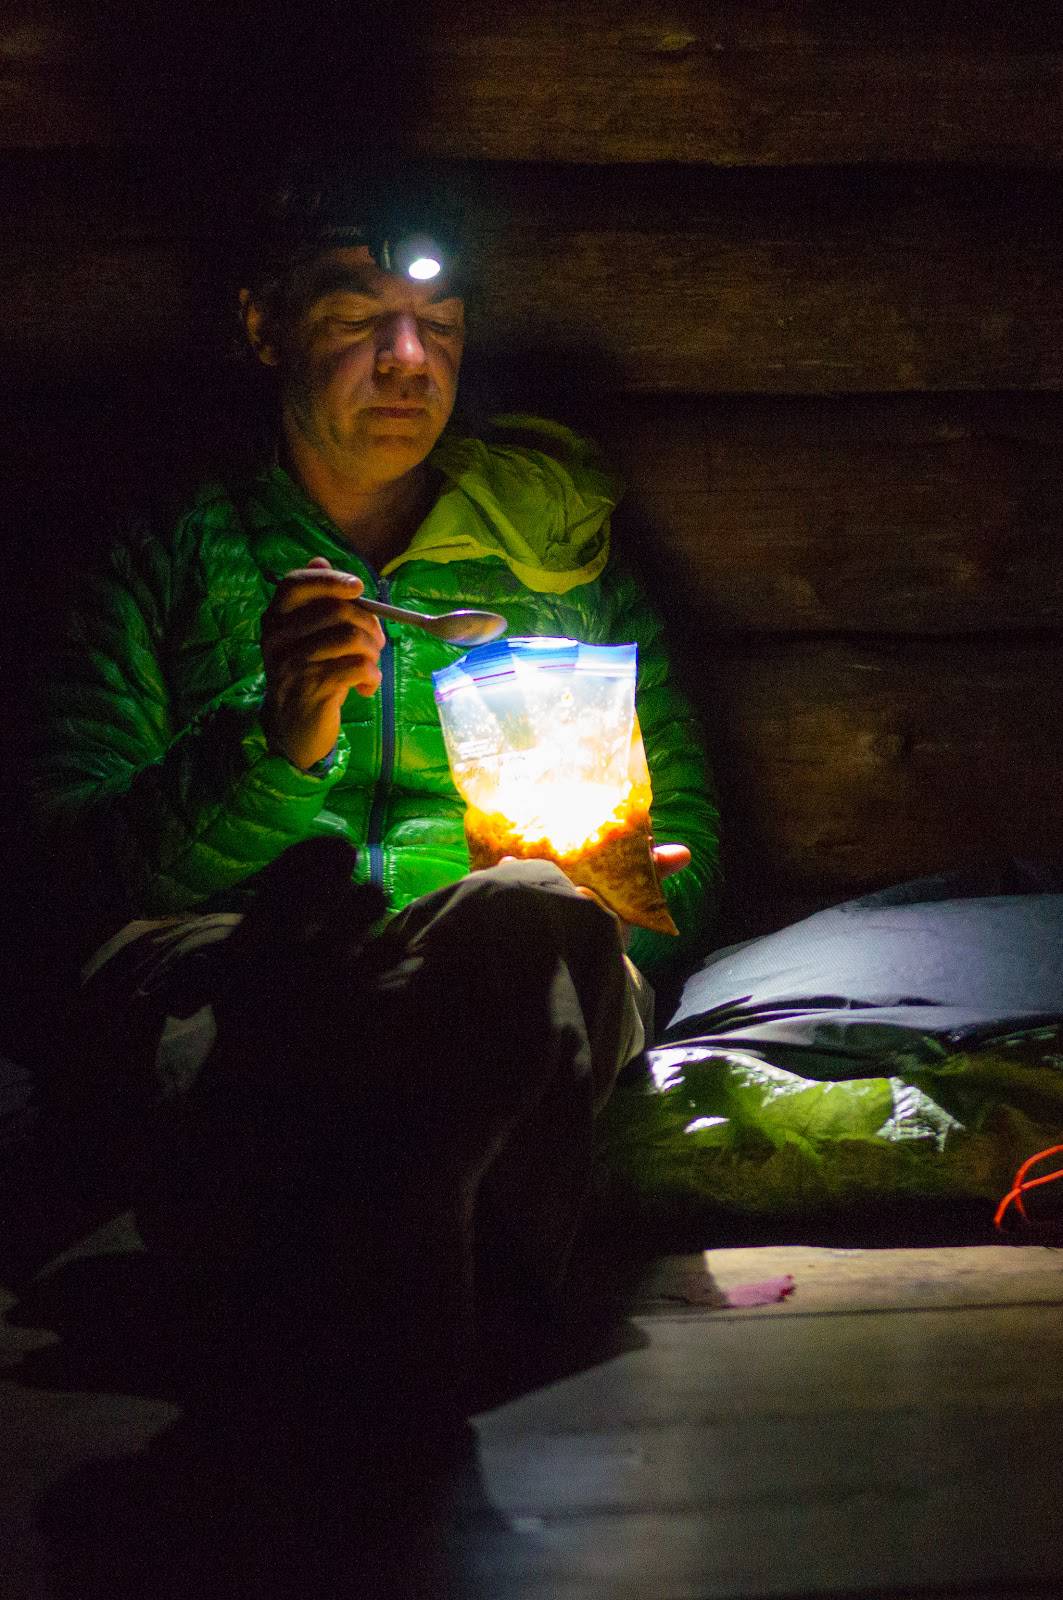
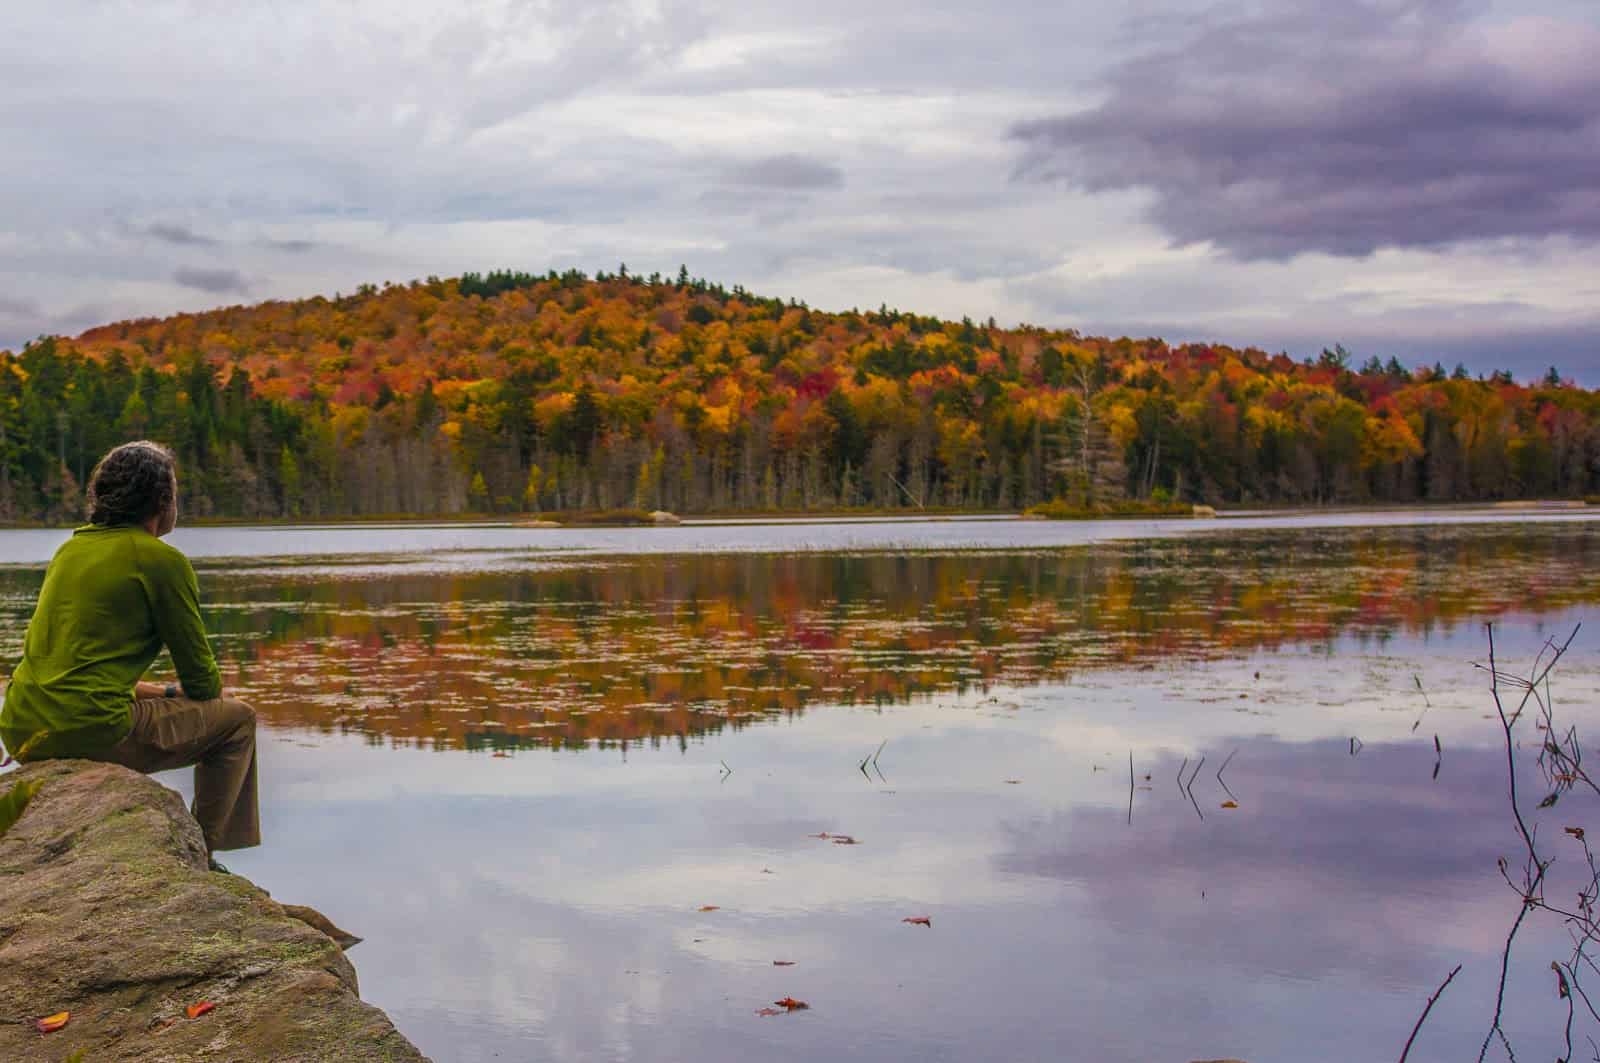
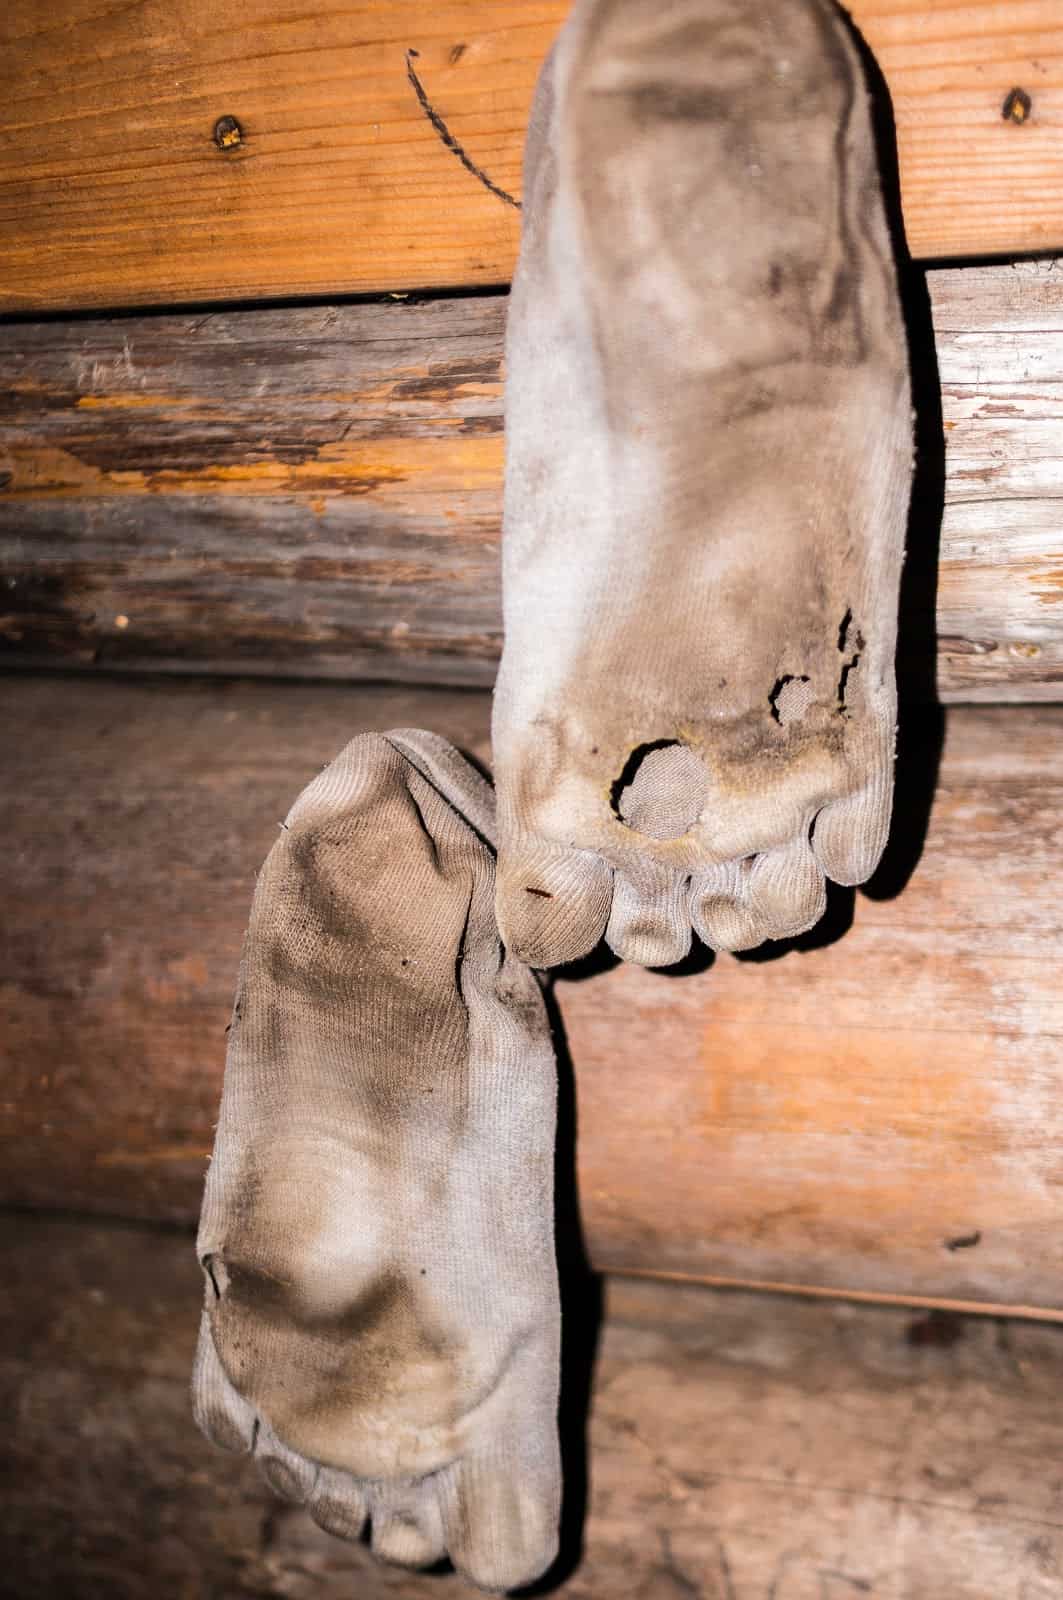
By Tirrell Pond, I ran into a couple sharing time together in the backcountry. They seemed content. They were packing up camp and offered me a bratwurst, “Fresh from the fire”, the man said. I wolfed it down unhesitatingly, wiped the grease from my chin, and looked around desperately for another. They asked me questions about my route and I chatted with them for a while, secretly hoping they’d remember some other treats they wanted to get rid of. When it became clear that no more food was forthcoming, I wished them well and continued on my way.
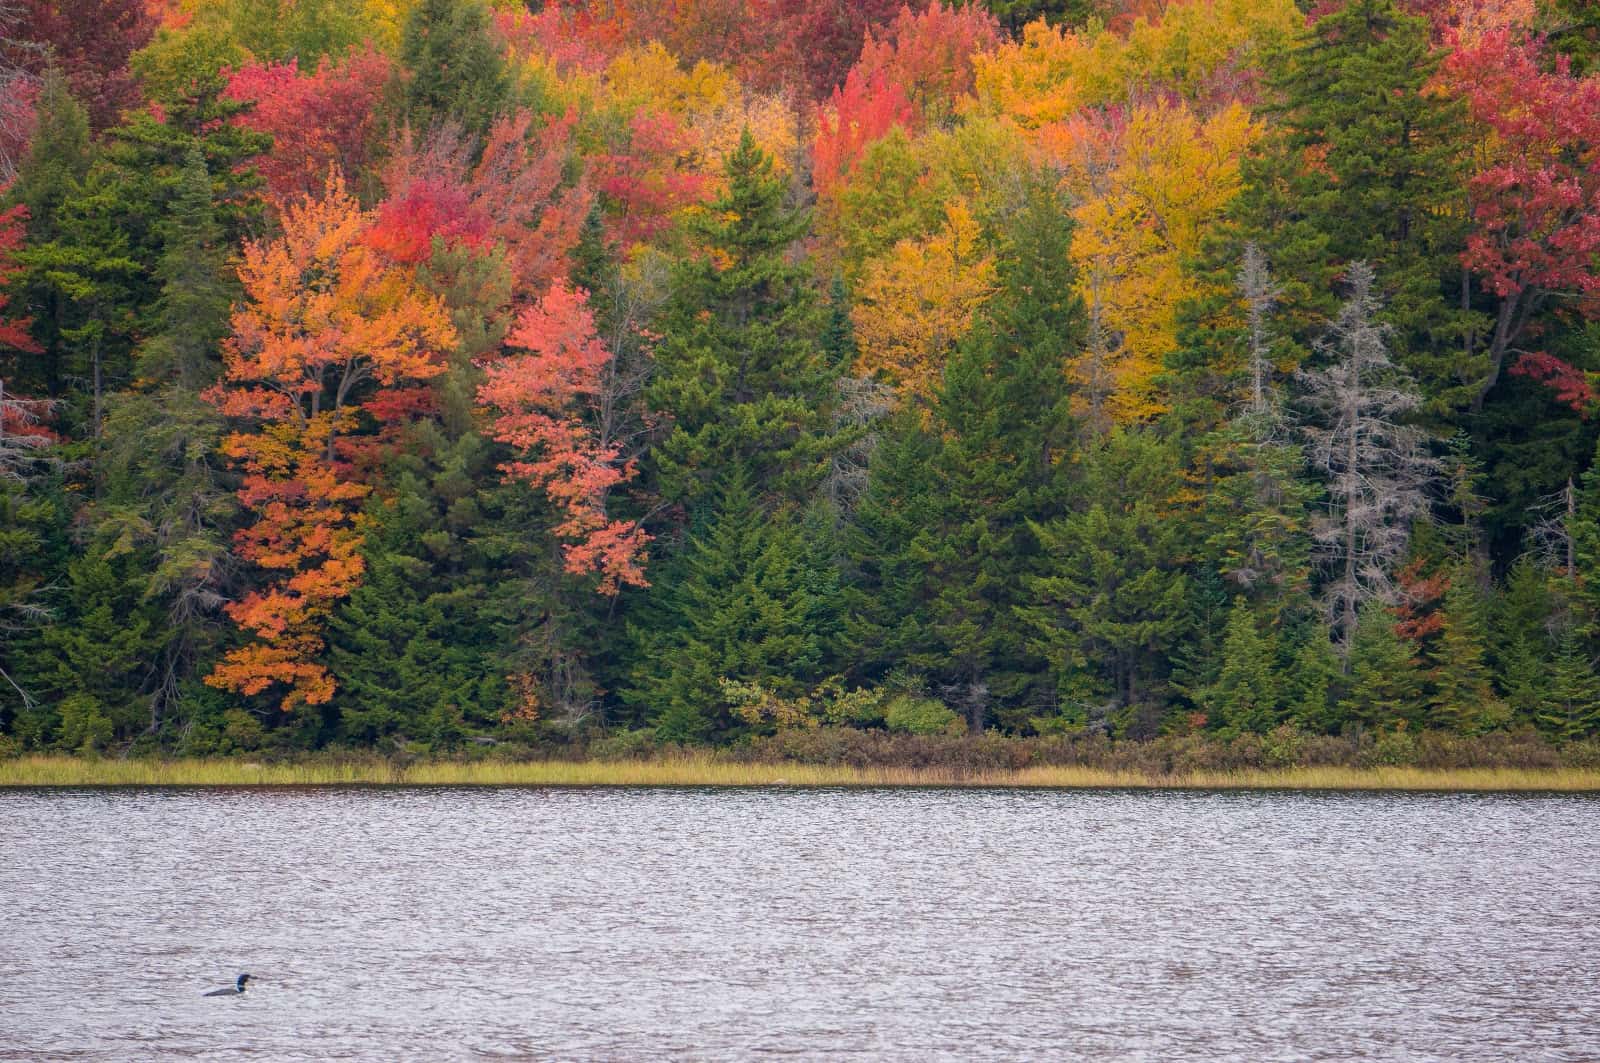

That night, I stopped early and watched the sun set over Long Lake. It had been an emotional day. I boiled water over a small campfire in a dirty soup can I had found so that I could drink my ethanol stove fuel. Don’t judge me. You weren’t there.
Dinner was a home-dehydrated beef stew. I’ve always found that dehydrating beef-based foods really takes something out of them and the best tasting stews at home can be bland and mealy on the trail. My strategy for dealing with this is to add seasonings and ingredients after dehydrating. In this case, I had added freeze dried peas for sweetness and “pop”, dried mushrooms for earthiness and texture, and a whole lot of minced onion and garlic from the spice rack. For good measure, I added a couple ounces of dried pasta too. For whatever reason, I really enjoy spicy foods on the trail, so I doused the stew with more Jonkanoo, and I could feel my face flush as I ate it.
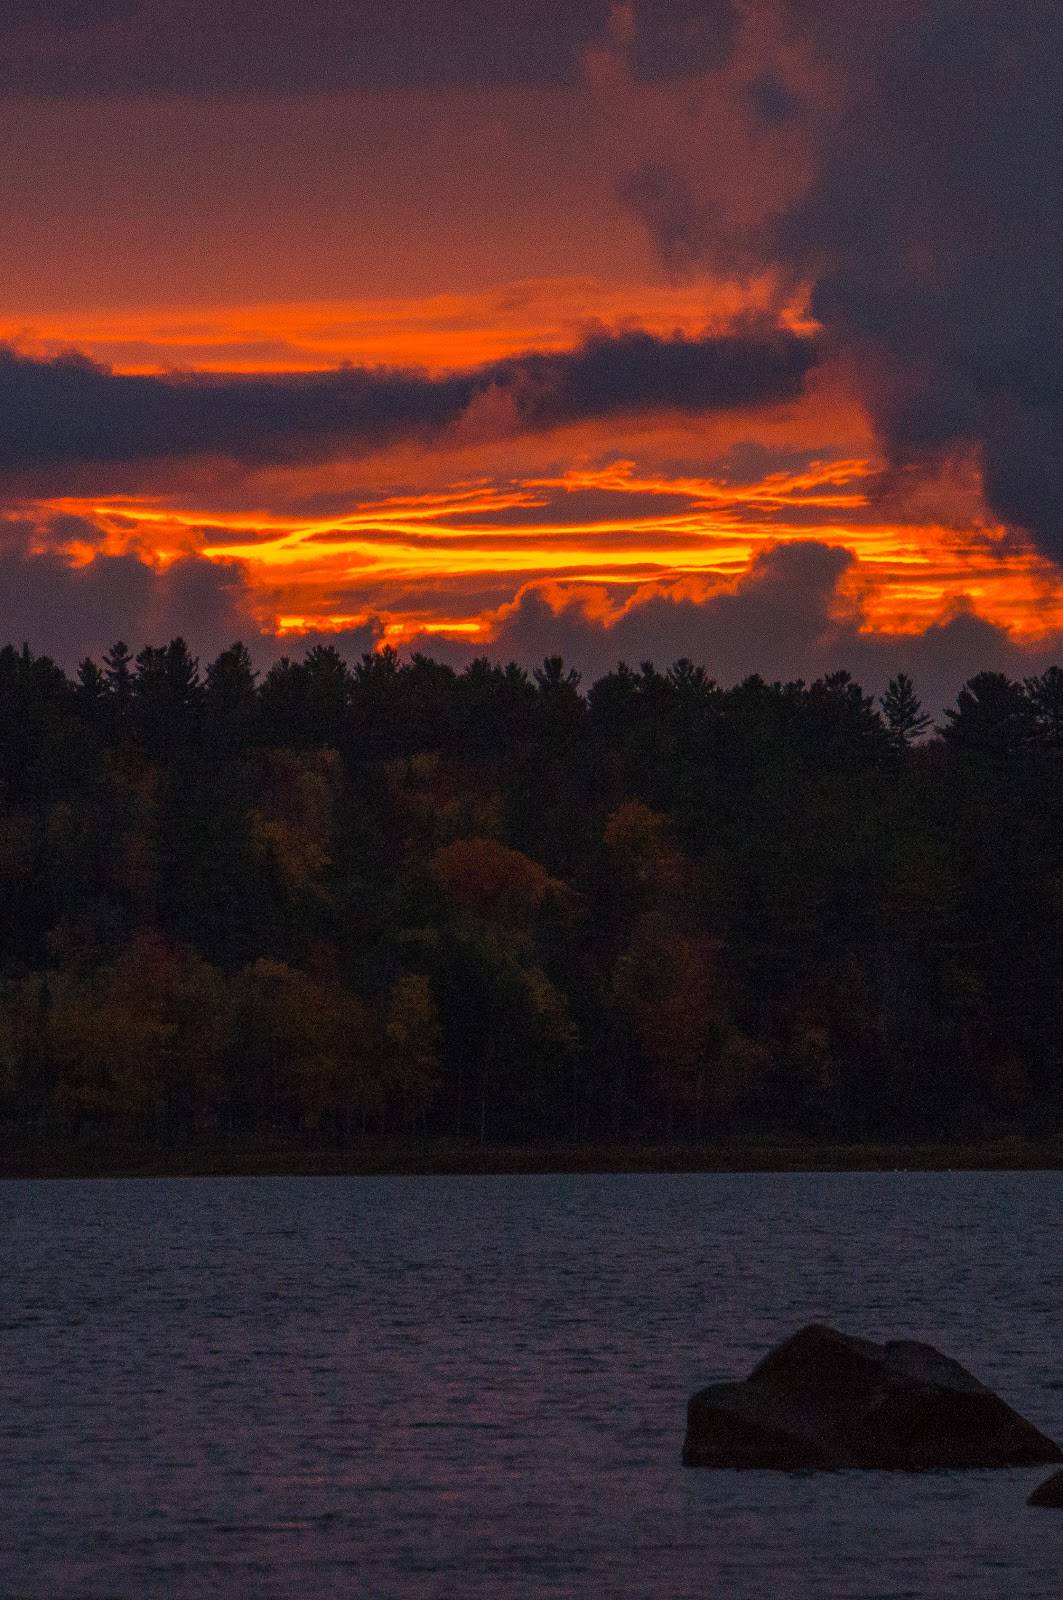
I fueled up with one of my favorite breakfasts, a casserole of artisanal bread, eggs, mushrooms, cheese, and sausage. People worry about dehydrating eggs, but it works really well when they are cooked into a dish. Made with eggs from our own free-range chickens, it was a beautiful gold color, sweet and earthy and savory all at the same time. I gave it a good squirt of extra-virgin olive oil for flavor, but in winter, it’s even better with butter. I’d spend the morning along Long Lake, before hooking up with a horse trail at Shattuck Clearing. I was looking forward to escaping the monotony of the familiar trail and seeing something new again.
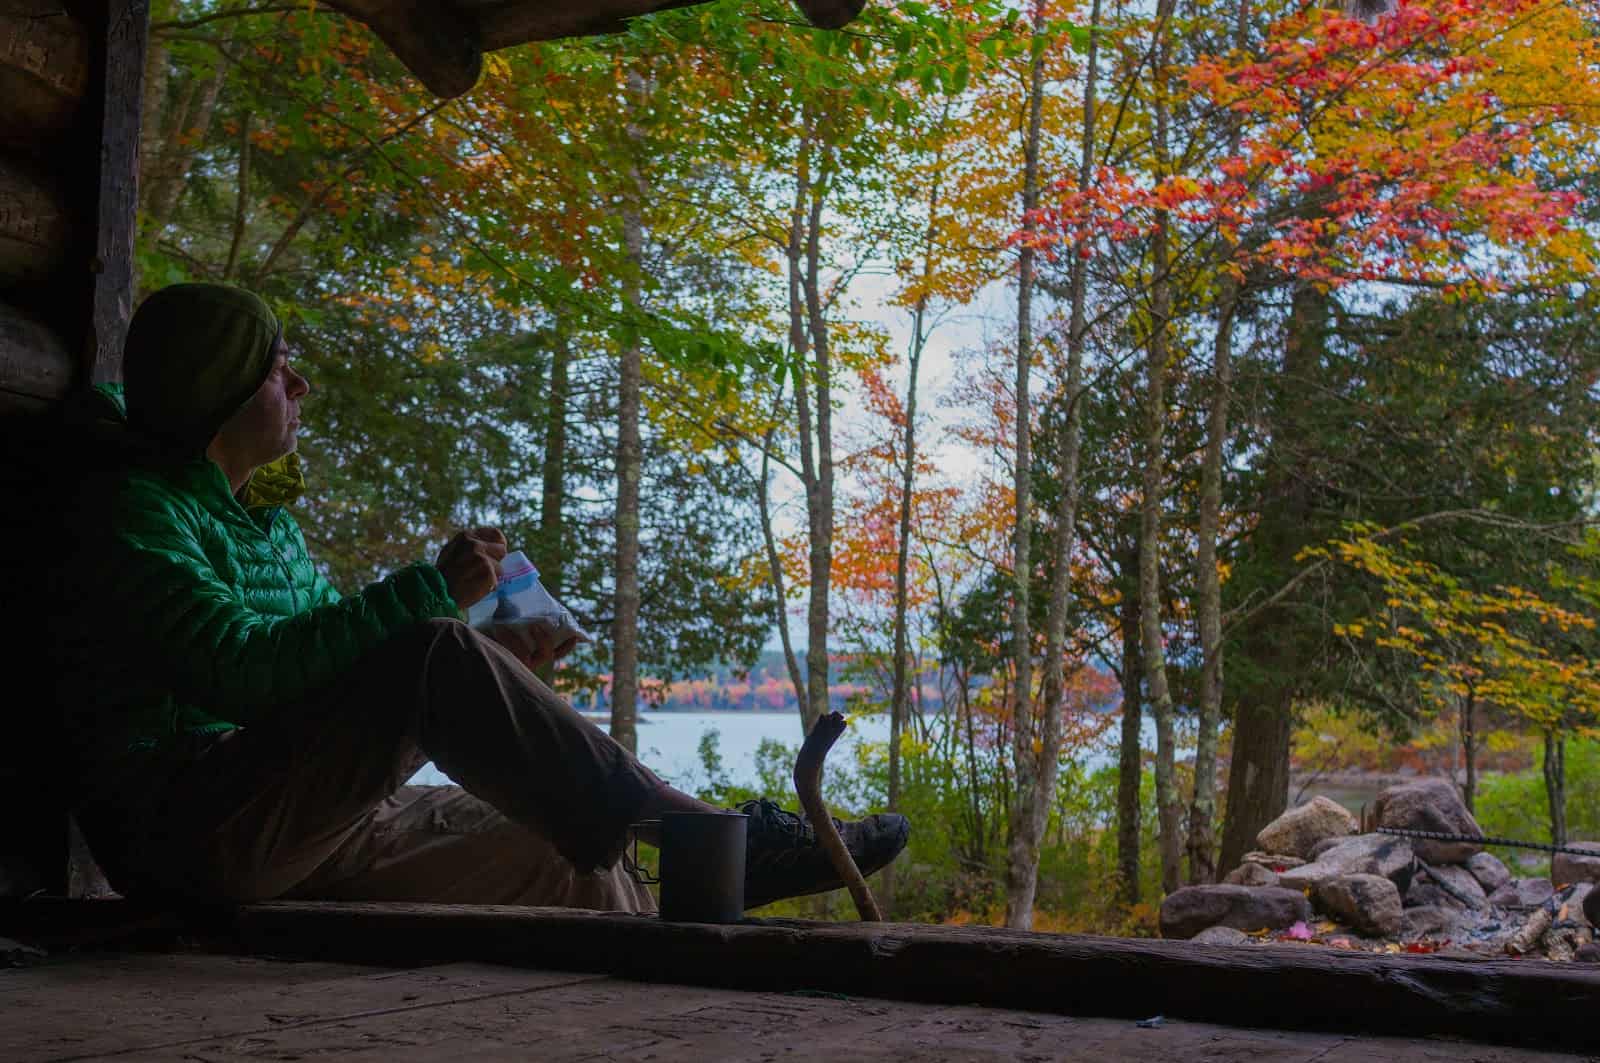
I was treating her dog, Mya, a Shih Tzu who had developed a blood disorder. Mya had been in the hospital for 5 days and was now on the road to recovery. In the months that followed, I’d see her every couple of weeks for rechecks and came to look forward to these visits. Apparently, she did too. She had noted the lack of a ring on my finger and asked one of the receptionists about it. She stopped by the next day with coffee and treats for the staff. She was wearing a blue pea coat and a white wool hat that barely contained her dark curls. She looked like autumn. “I think she likes you,” Nyssa whispered. Amy smiled and nodded quietly in agreement.
Over and over, the story repeated itself. They had different features, different interests, and different personalities, but the theme was always the same; someone worth sharing a life with. By the third day, I finally had to admit that my subconscious might be trying to tell me something, and the intensity of the message was altogether unexpected. I would have to explore these feelings a little more once I got home.

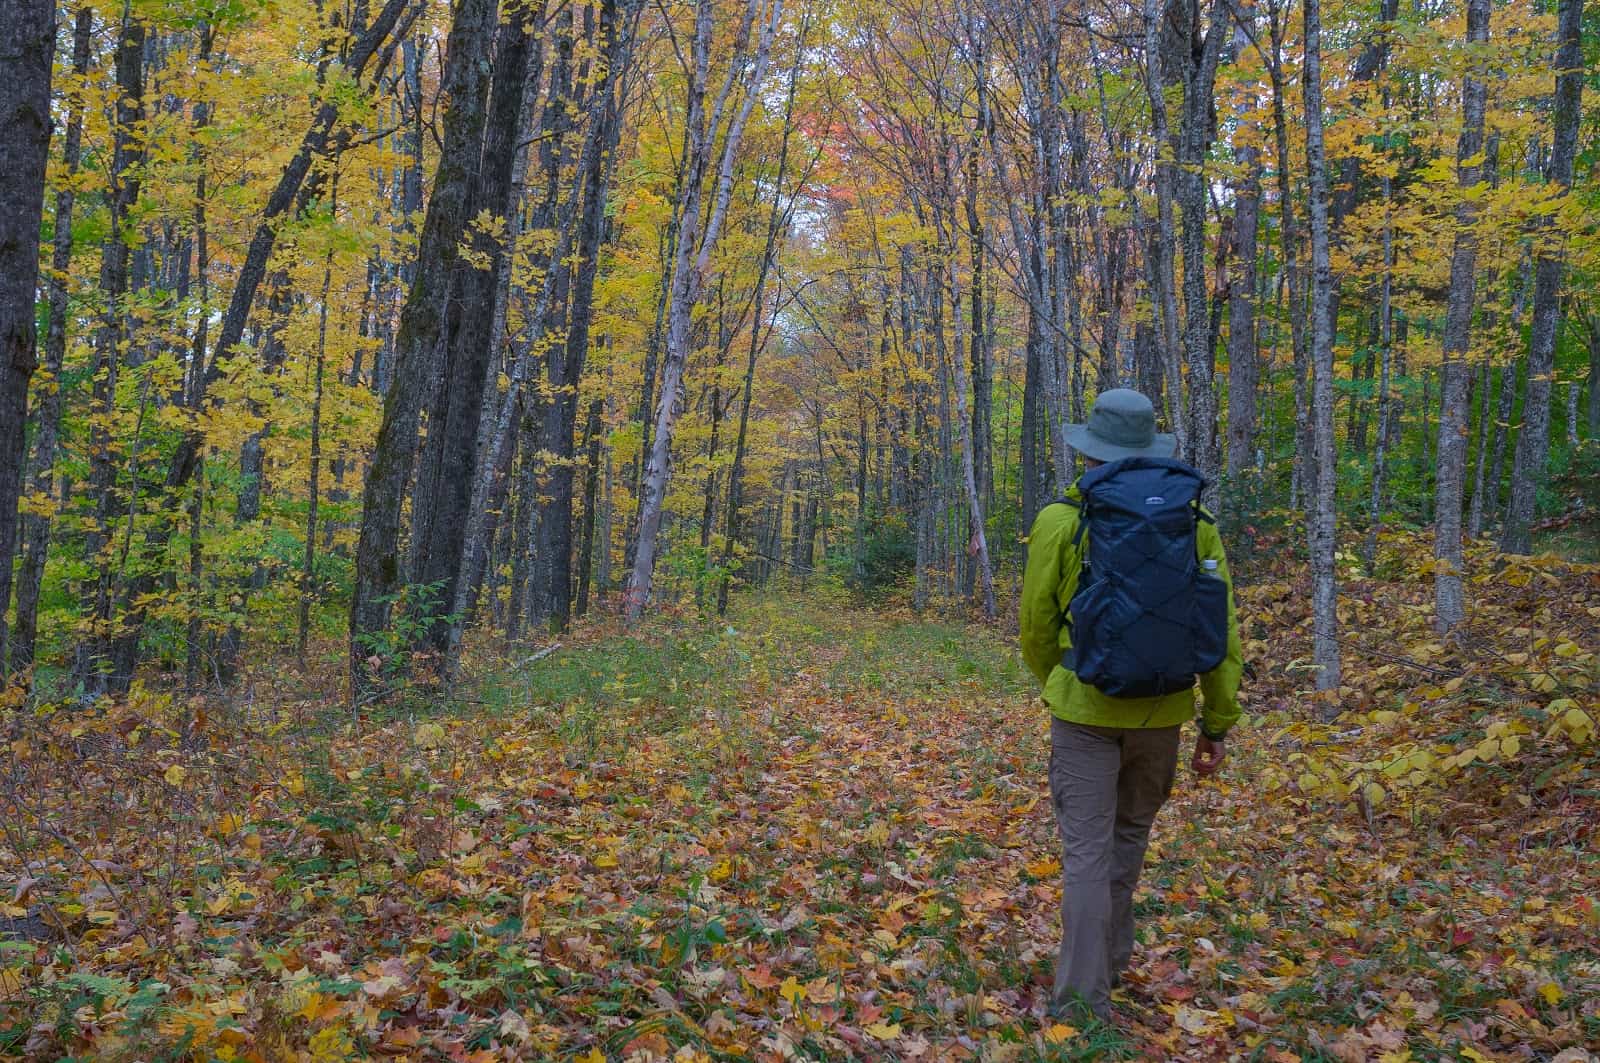
The horse trails along Moose Creek started out wide and clear, and I strolled along easily. There was little in the way of scenery, just a green tunnel through the forest. Past the Moose Creek lean-to, all evidence of trail maintenance vanished. The trail filled in with brush, saplings, and deadfall and I found myself practically bushwhacking once again. There were also many sections that were loaded with what I had come to call skank-pits.
Skank (definition): any substance that is particularly foul, unhygienic, or unpleasant. Alternate: to cheat or deceive.
These are areas of the leaf-covered trail that conceal knee-deep mud pits. I was cursing under my breath as I plowed through yet another 100-yard stretch of the stuff. I felt like I was missing out on some of the great scenery of this region in exchange for the chance to wade through mud and get torn apart by spiky plants. I decided that I wouldn’t recommend this trail to anyone who didn’t actually own a horse, but I was glad that I had seen it for myself just this once.

I stayed on the horse trail well past dark, hoping to find Duck Hole before making camp. The trail was unmarked and difficult to follow at night, and I ended up losing it briefly after going around a particularly large deadfall. I’m always amazed at just how quickly this can happen in the dark, particularly when the trail is pretty sketchy to begin with. You take a few steps in one direction then another trying to find what should be right there, directions seem to reverse themselves, and the next thing you know, you are alone in the blackness with no trail to be found. At least I had my pack with me.
This had happened to me years ago on another trail when I had gone to hang my bear bag away from camp as the sun was setting. In the minutes that it took, the sun had gone down, and I walked back in the direction of the trail in the dark. It wasn’t there. I tried again. It still wasn’t there. Now I couldn’t find my bear bag either. I was alone in the dark without any of my gear, just my knife, the compass around my neck, and a really small headlamp that couldn’t illuminate more than 10 feet in front of me. That was the last time I had ever let myself go off in the woods with an “ultralight” headlamp.
Now, as I had done back then, I paused and let the panic subside. I knew which direction I had left the trail. I took a bearing that should allow me to intercept it perpendicularly. I marked my current path to avoid compounding my mistake should I fail to find the trail. And then, there it was. It had hung a sneaky right turn at the deadfall and I had gone straight. With tangible relief, I continued on carefully until I finally made it to the Cold River. Grrr. I stared across 100 yards of river toward the darkness of the opposite bank; one final inconvenience before stopping for the night. With no changes of clothing to be had, wet crossings were not my favorite pre-bedtime activity. With barely a pause, I pulled off my pants and waded in.
It was my last night on the trail and I had saved the best for last; Bowtie pasta with chicken and broccoli in a spicy tomato sauce. I poured in the last of my olive oil for flavor and calories and shaved some curls of parmesan with my knife. Finally, I sprinkled dried parsley on top to finish the dish. I wasn’t sure how much flavor it added, but it looked nice. You eat with your eyes first, after all.
It had gotten frigid overnight, and I had woken briefly to pull on my jacket before falling back asleep. The next morning, my fingers were numb with cold as I broke camp, and I gratefully clutched a hot bag of mashed potatoes with bacon, eggs, and cheese in both hands, finishing up my breakfast before heading out. All I had left now was a bag of trail mix, and I silently congratulated myself on this fact. The epitome of successful meal planning is finishing up the last of your food as you are walking out. I walked with my hands stuffed deep into my pockets, wondering why I was so cold. I’d get my answer soon enough. As I passed Duck Hole, I noted with wonder that it was snowing. I’d find out later that it had dropped overnight to 20 F.
This would be an easy day, I thought. Just 15 miles past Henderson Lake, over Indian Pass, and back to my car by Heart Lake. I’d be eating a celebratory burger by 4 pm.
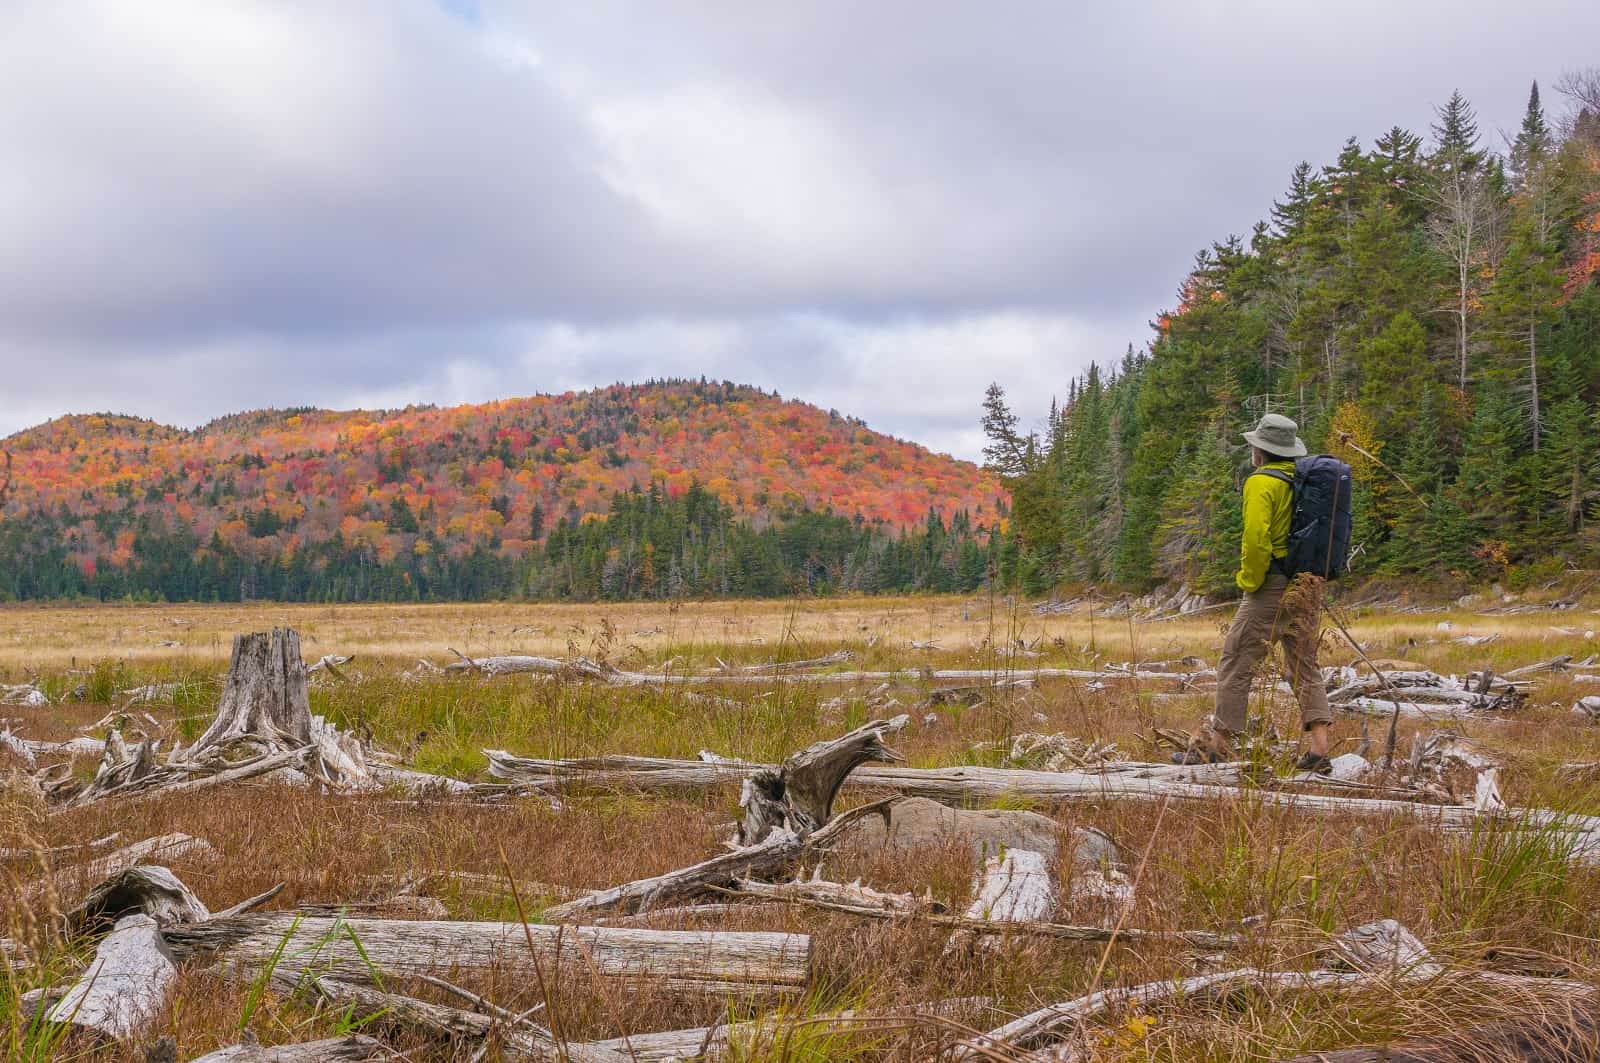
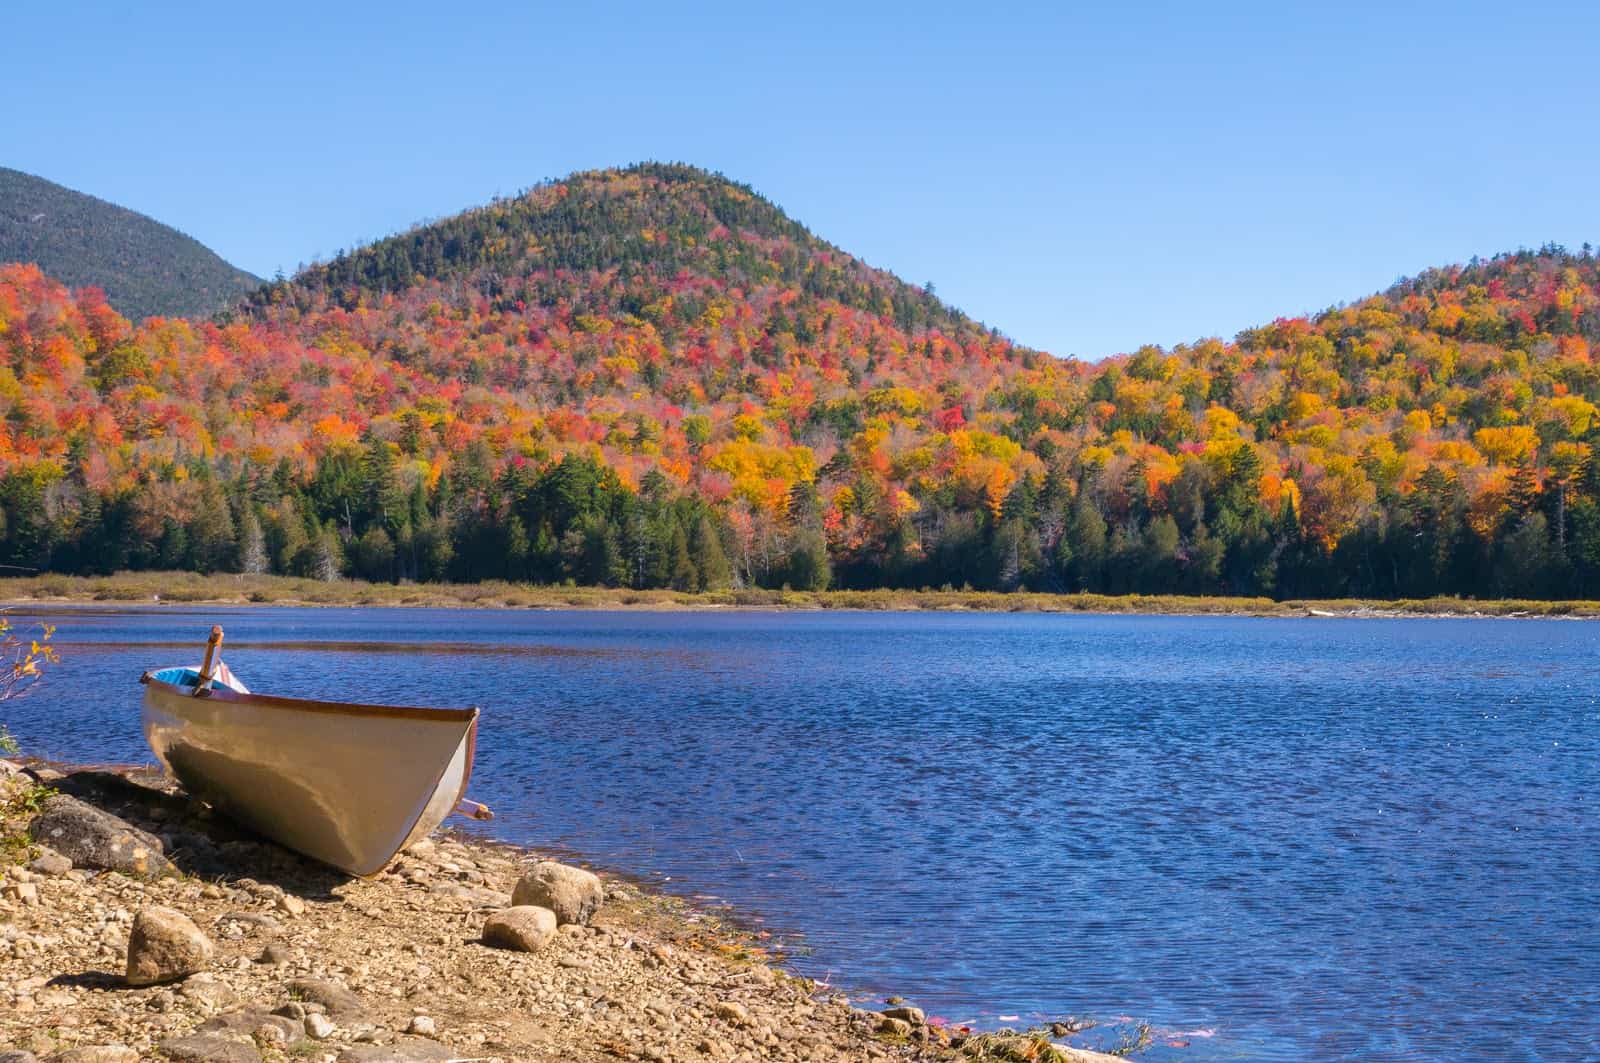
I continued on past Henderson Lake thinking about food. Just 6 more miles to go. Suddenly the trail markers disappeared and I found myself in a rocky gorge: This was Indian Pass. The route to Indian Pass was a strenuous climb straight up a boulder field and I suspected that it was unmarked so that the DEC could disavow any responsibility should someone die out here (“Nope, that’s not one of OUR trails”). Every now and then, I’d find a stone cairn and feel reassured that I was heading in the right direction. And then, a bunch of time would pass where I didn’t see one and I’d start to doubt.
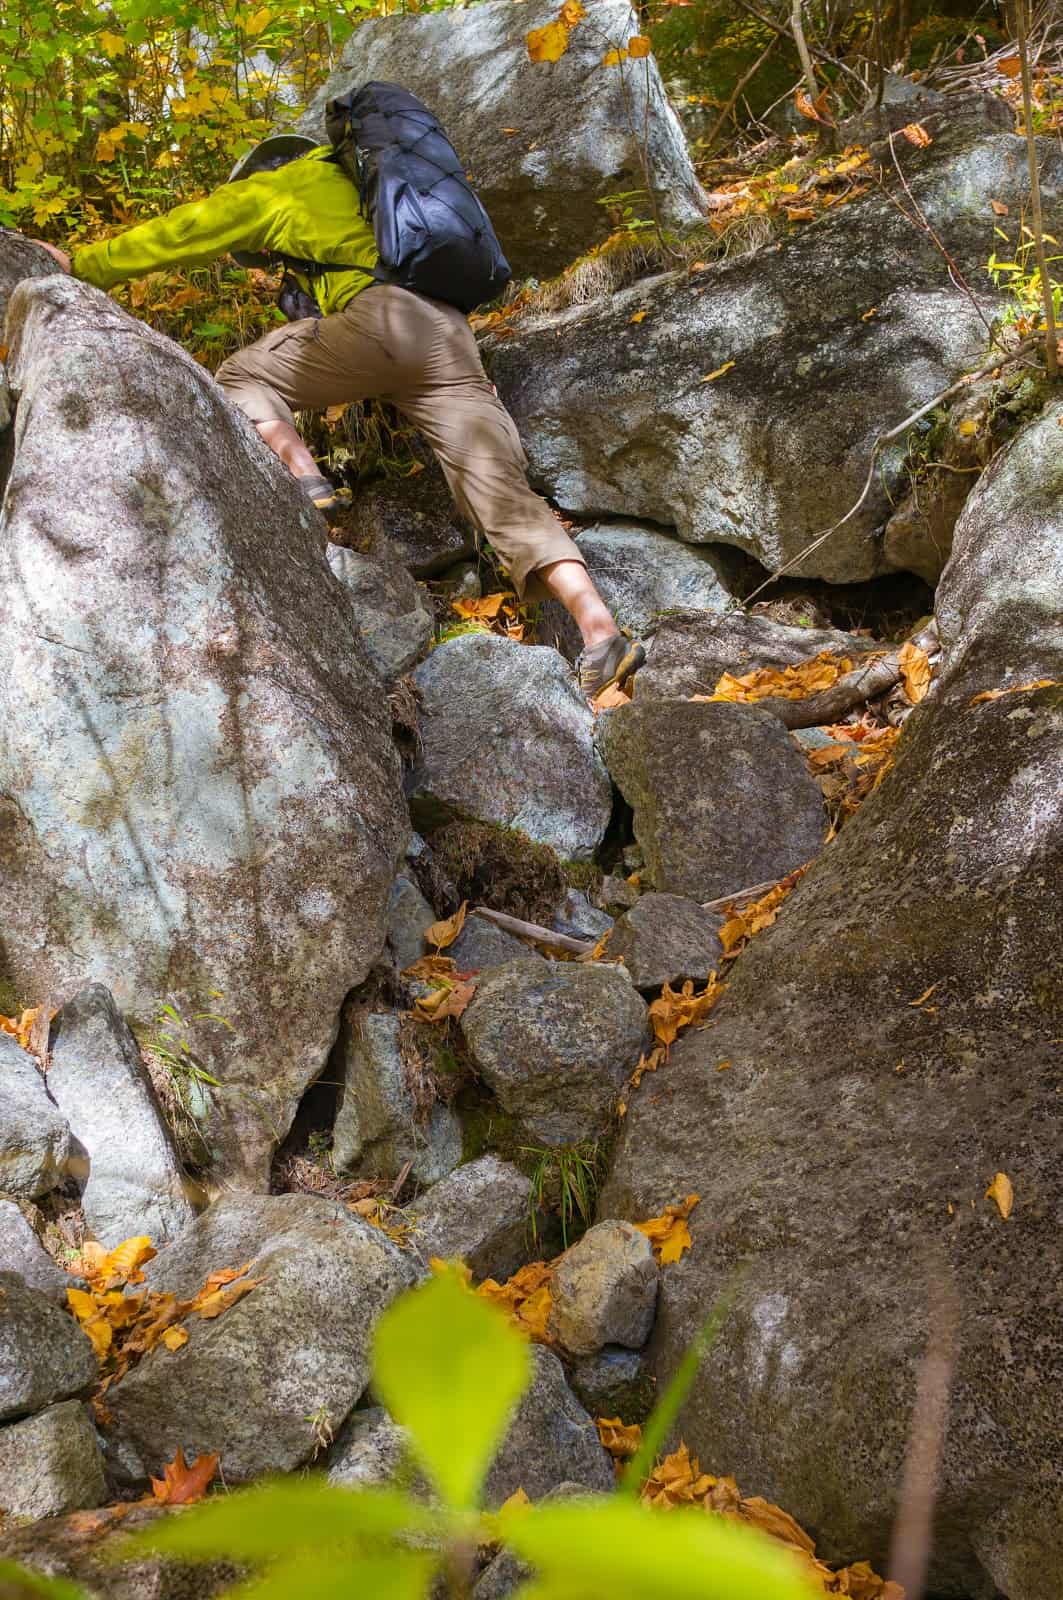
It was getting later in the afternoon, and I was still picking out my route, ever upward, starting to wonder if I’d be down before dark. This was not a route I’d want to attempt at night, but I’d be hard pressed to find a spot in this jumbled boulder field in which to bivy. All vestiges of fatigue and pain vanished and I climbed with purpose.
And suddenly the earth tilted and I was heading downward. Elated, I let gravity do some of the work and slip-slided my way toward Indian Pass Brook. After an eternity, the red markers re-appeared and I was back on trail. I still had a few hours before I’d reach my car, but I could already taste victory and ran onward, wings on my feet and my heart soaring. It’s funny – because if you asked me at any point in the past 3 days why I did this, I would have been hard-pressed to come up with a good answer. In fact, had a jeep pulled up in the backcountry right next to me and said, “Hey man, you need a lift?” I probably would have jumped in without hesitation. But suddenly the answer filled me. All the trials of the past week had come together to create this euphorically perfect moment, and I knew right then that I’d be doing it again soon.
I stopped briefly at a small stream to savor this feeling, taking my shoes off and dipping my swollen feet in the cool water, thinking about all that I had felt and experienced in the past week. In the end, I may not have gotten the adventure I had planned, but I did get the one I needed. Stripped of the responsibilities of work, home, and family, I had lived the past 7 days as my truest self, and in the process had learned something that I probably needed to hear right now. I had been injured, alone, hopeful, afraid, lost, found, dejected, determined, cold, and ecstatic. But through it all, I did what I have always done best; I put one foot in front of the other and kept moving forward. And in doing so, I had once again found myself worthy. I was me.
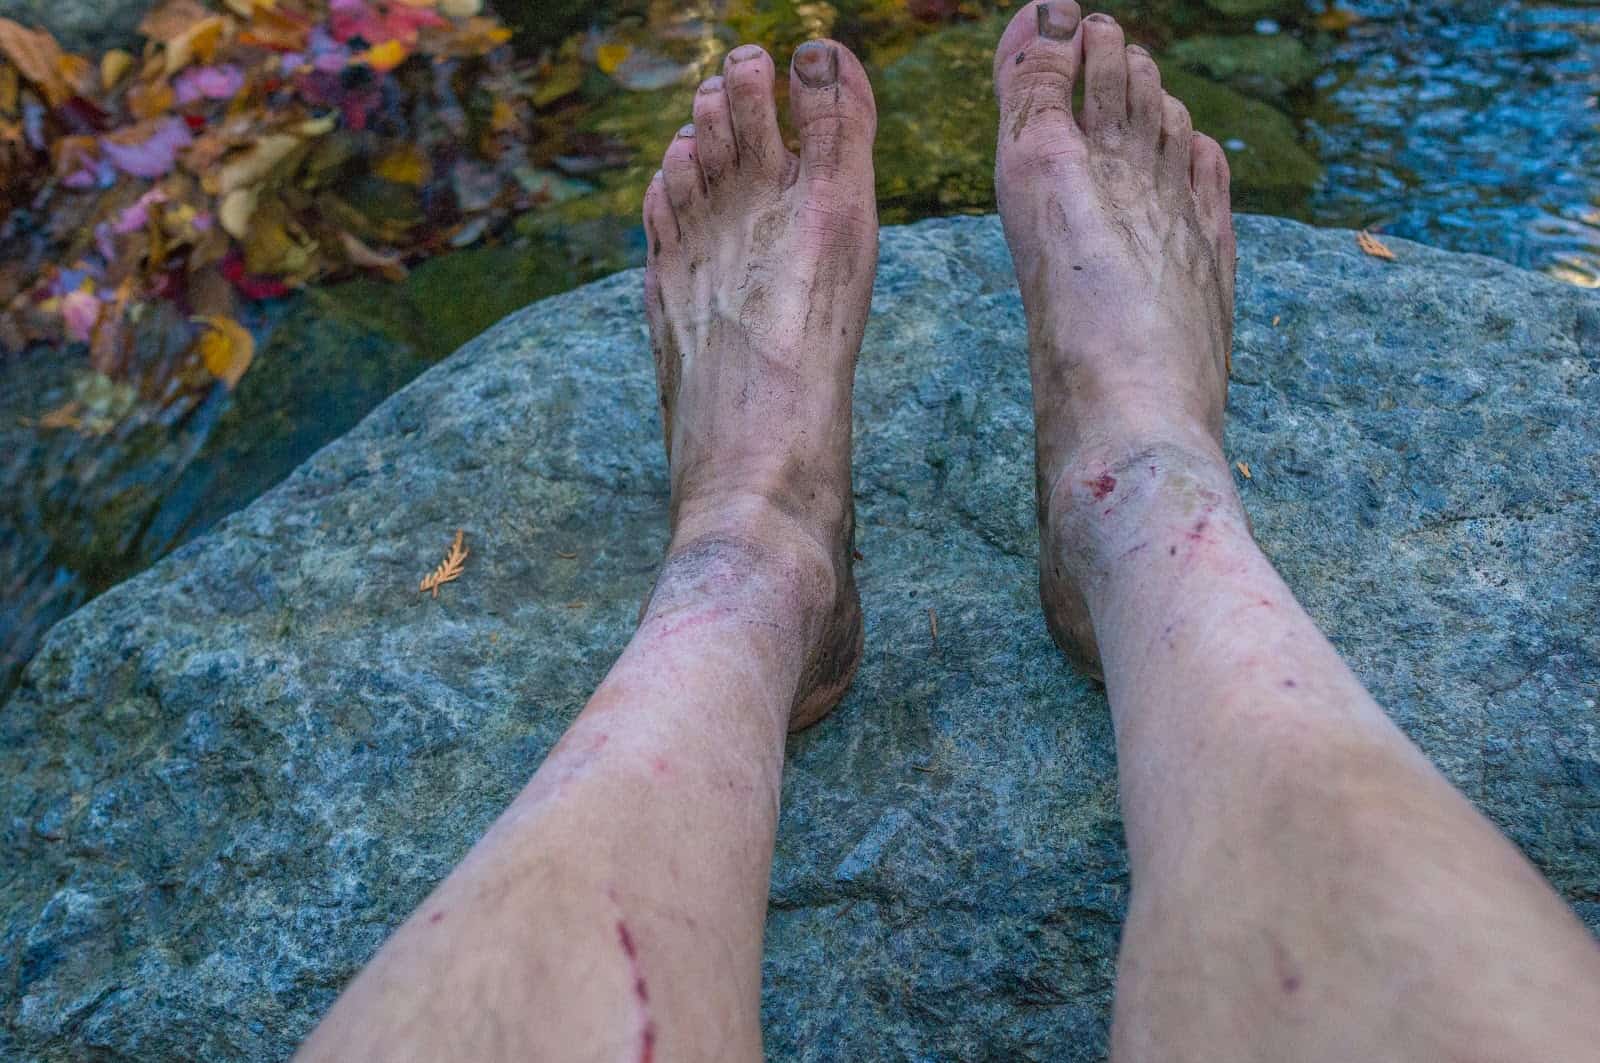
The house was quiet, dark, and comfortable. The kids wouldn’t be home until tomorrow, and I enjoyed the solitude. I put on Miles Davis’s “Kind of Blue”, opened a Guinness, and started a hot bath to soak away a week’s worth of accumulated grime. This was a 20-year-old ritual that had always helped to ease my reintroduction to civilization. Tomorrow, I would need to winterize the chicken coop, finish painting the barn trim, dig up the potatoes and onions, and pick the last of the cabbages. My heirloom pumpkins would also be ripening any day now. Thinking about these projects, I was content, self-contained once again. I liked the life I had created for myself. So what had happened this week? Was it real or just the product of an overstressed mind? Regardless, it was time to dip my toes back into that pool and find out. The possibilities were exciting.
This podcast dives into the science to answer the question: are trekking poles worth the weight?
This podcast is about trekking poles.
Trekking poles are a surprisingly contentious piece of gear in the UL world. Their utility and usefulness is endlessly debated, and the science that backs up manufacturer claims is all over the map. It’s a murky world, but Andrew and Ryan jump in with both feet (and two poles each) to help you make some sense of it.
The guys kick things off by interviewing Rob Shaul, founder and owner of the Mountain Tactical Institute. Rob makes a living training mountain athletes and military service members deployed in mountains regions, so he knows his stuff. MTI has conducted a few studies that measure the effectiveness of trekking poles on athletes under load. The interview covers those studies: how they were constructed and what they ultimately prove (or don’t prove).
In the second interview, Ryan and Andrew chat with James Marco, a longtime Backpacking Light member and experienced UL backpacker. James provides some context to some of the most well trod trekking pole questions and shares his tips for MYOG poles.
After the interviews, Ryan shares six or seven scientific studies in an attempt to shed light on the big trekking pole questions: do poles make you faster? Improve your balance? Save energy? Reduce strain and impact?
Next the guys chat about the most contentious trekking pole statements the internet has to offer. If you’ve ever been in a forum fight about trekking poles, chances are you’ve heard a few of the things they cover in this section.
This episode’s Gear section is a brief overview of BPL’s recent Trekking Pole Gear Guide. Ryan shares a few of his favorite poles, including a few that surprised him!
In the Hiker Hack’s segment Ryan talks trekking pole field repair, and Andrew has a question for listeners concerning a common thru-hiker trekking pole breakdown.
INTRODUCTION
Ryan and Andrew introduce the topic: Trekking Poles!
INTERVIEWS
Andrew introduces the first guest: Rob Shaul from Mountain Tactical Institute. Rob is the founder and head coach at the Mountain Tactical Institute in Jackson, Wyoming, where he trains and coaches mountain athletes of all kinds, as well as military service members deployed in mountainous areas.
Ryan introduces the second guest: James Marco. Jim has been a Backpacking Light member since November of 2010 and has been a frequent and valuable contributor to our forums through the years. He has several decades of hiking experience in the Adirondacks of New York among other places and has probably seen more trends come and go in the outdoor industry than most of us.
Scientific studies: Ryan and Andrew discuss some of the available trekking pole research to determine what, if anything, can be said (definitively) about the physiological benefits of trekking pole use.
RESEARCH
FACT or FICTION?
GEAR
HIKER HACKS
You can contact us at podcast@backpackinglight.com, or follow us on social media –
This article features lightweight down parkas (usually, full-zip jackets with hoods, a longer hem, and box-baffled construction) appropriate for winter backpacking, snowshoeing, backcountry skiing, mountaineering, and other cold-temperature activities.
You don’t have access to view this content.
Today’s Questions: Will you be holding a live film festival event this year? What do you think about adding a chat room at the backpackinglight.com website to allow members to interact with each other? Do you work from home, or do you go to an office every day? When are you going to offer another Lifetime Unlimited Membership sale? If I want to take my summer backpacking clothing and sleep system into winter conditions, what do you think are the most essential pieces of gear to add? Are you ever going to sell your Melanzana High Loft Hoodie?
You don’t have access to view this content.
My personal recommendations for ultralight and lightweight backpacking gear for 2018-2019 – gear that I’ve used all year in 2018 that includes the good stuff that’s staying in my kit for 2019!
This gear guide represents my personal recommendations for backpacking gear that is durable, lightweight, versatile and offers a very high level of performance for the cost.
My biggest gripe with most gear guides you see on blogs and magazine websites are that they include gear the writer/publisher has never even touched. The gear is selected based on its sales potential and ability to deliver affiliate revenue back to the site owner. Yes, there are affiliate links in this gear guide as well (see the affiliate disclosure at the end of this article) but only when they make sense – this gear guide contains the gear I actually use on a regular basis.
In addition, I’ve marked gear that I take on almost every trip with an asterisk (*), so you have an idea of the things that I consider nearly indispensable for backpacking.
This is an updated version of the Publisher’s Gear Guide (No. 1) I wrote last year, which represented my favorite gear that I used in 2017. Many of the items I covered last year remain in active use in my kit, and that Gear Guide remains relevant. This gear guide includes a couple of those items, but most of the items are new gear that was released in 2018 that I’m using or are items that are continuing to solidify their value in my regular backpacking kit.
Curmudgeon resistance aside, electronics are part of our backcountry experience and are here to stay. In the old days, backcountry electronics provided marginal benefit and weren’t so reliable in the hostile environment of the outdoors. That’s all changed, and we now have some extremely powerful devices that improve our safety, efficiency, and enjoyment of the backcountry.

The Garmin inReach Mini is the smallest, lightest, and most powerful satellite messaging device on the market. I’ve used the Garmin inReach Mini on every trip since its release this summer, and it’s been the most reliable device I’ve ever used to keep me in touch with my wife via text messaging when I’m on a trip. Learn more by reading my comprehensive review of the Garmin inReach Mini, which earned Backpacking Light’s Highly Recommended Rating.
Why I like it: It gives my wife a level of comfort knowing that I’m OK, and it gives me the option to change my itinerary if needed, and text someone to pick me up at an alternate location!
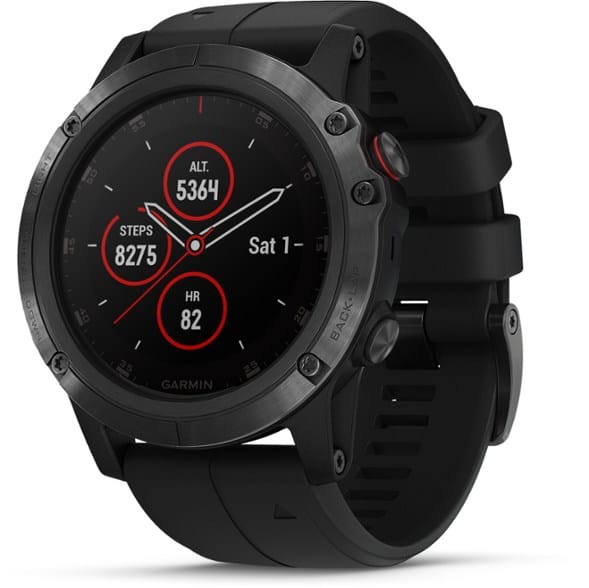
I wrote about this watch earlier in this year’s backcountry electronics gear guide and praised this watch as a hiker’s dream: GPS navigation, activity metrics, integration with my athletic training software, and Bluetooth integration to my smartphone and inReach Mini. The Garmin Fenix 5X Plus is a durable and beautifully manufactured GPS watch and is so critical to my ongoing training and fitness that I can’t imagine life without it.
Why I like it: It collects the data I need to monitor my training cycles, and gives me wrist-top access to all the data I need while hiking, including GPS positioning, inReach Mini notifications, and heart rate (exertion) feedback.

I’m rapidly getting over replaceable batteries, and am becoming increasingly attached to rechargeable devices for backcountry use. I carry an external battery (power bank) anyways for recharging my smartphone (which I use for mapping, journaling, and reading), so why not a rechargeable headlamp? The Petzl Bindi is my pick – it’s ultralight, very bright, and has a minimalist, comfortable headband.
Why I like it: Light, bright, little, durable, waterproof, comfortable, rechargeable.

I’ve been making images and movies with the Sony RX100 series since it was released in the summer of 2012. The newest version features a 200mm-equivalent zoom lens, which expands my creativity a lot in the backcountry! Here’s a link to a recent album of unedited photos taken with the Sony RX100 VI from a trip in the Idaho Sawtooths in 2018.
Why I like it: Big sensor, terrific photo processing engine, long zoom range, great video quality.
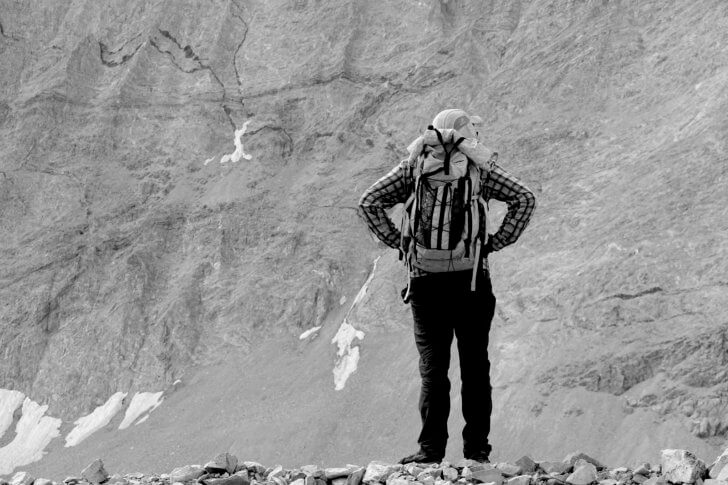
As smartphone capabilities increase, I find myself using my phone more and more, especially for video. I don’t often take a tripod into the backcountry on longer trips, but the tiny Joby GripTight One Micro gives me the flexibility to grab a stable shot when I need it. I can decouple the smartphone holder from the actual trip and use the little folding legs on my other cameras as well.
Why I like it: Ultralight and ultra-compact.
Between my smartphone, the Sony RX100, and my GoPro HERO7 (see below), I feel like I have a pretty compact and powerful arsenal of ultralight image-making equipment for backcountry travel. However, they all record low-quality audio. The little Zoom H1N allows me to grab high-quality ambient sounds (footsteps, water in a stream, rain pattering against a tent) and terrific narrative / vocal conversations that I can then plug into my movies later, or use on a podcast.
Why I like it: Broadcast-quality audio recording for ambient sounds and voice, in a very compact and lightweight package.
I’ve owned GoPro cameras since their first generation. However, the GoPro HERO7 Black is the first model that has me this enthused about using the little action camera. Professional quality footage with high bandwidth, high frame rates, log profiles that can be color-graded in post is a bonus. Out of the box with default settings, the GoPro HERO7 Black is an incredibly capable timelapse and movie-making machine. The best part about the HERO7 Black: it’s terrific image stabilization.
Why I like it: Fast, easy, pro-quality, tiny form factor offers perspectives you can’t get with other cameras, waterproof, stable handheld images!
Buy Now at REI
I’m not a professional filmmaker but I love the craft to make memories of our adventures. Here’s a quick video I shot using the GoPro HERO7 Black and edited on my smartphone using LumaFusion a few weeks ago.
I long ago ditched dedicated GPS units in favor of GPS Apps on my smartphones. After cycling through the usual array of popular apps, I finally settled on Gaia GPS for its power, ease of use, speed, and awesome hi-res maps.
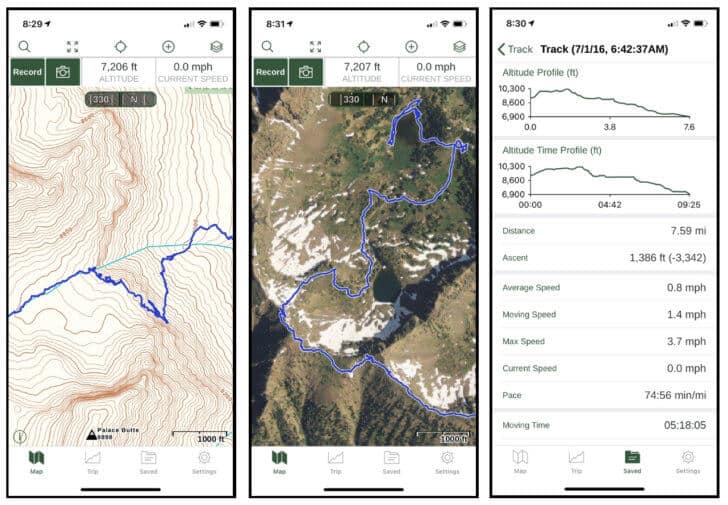
Why I like it: Easy to use, terrific user interface, very powerful features, massive map set available.

Choosing clothes for people is a tricky thing – clothing is personal. And in an age of fast fashion, trendy style, and Instagram, making apparel recommendations is sometimes met with resistance. Therefore, I’ve limited my apparel recommendations here to what I believe are clothing items that have the potential for a wide degree of acceptance by a large number of hikers, with an emphasis on versatility and value.

With a very comfortable athletic fit that works great for my own body type, the Smartwool PhD apparel line is probably the most comfortable next-to-skin wool apparel I’ve ever worn. It’s soft, holds its shape, doesn’t pill, and – my favorite feature of wool – is comfortable across a very wide range of temperatures. The Smartwool PhD Light Base Layer Hoodie under a breathable wind shirt like the Patagonia Houdini Jacket is my favorite trekking uniform in the cold, high, windy, mountain environment above the treeline.
Why I like it: Versatile across a wide variety of temperatures, most comfortable next to skin wool I’ve ever worn.


It’s hard to wax eloquent about a tiny little beanie cap, but the Smartwool NTS Merino 150 Beanie is too hard to pass up. A high-performance beanie for active use needs to be as light and thin as possible. Fleece is usually too hot for me, and most other merino caps I’ve tried are too thick. This one fits the bill perfectly and may be the most worn piece of headwear in my kit.
Why I like it: Light, pocketable, very comfortable against sensitive skin at the hairline.
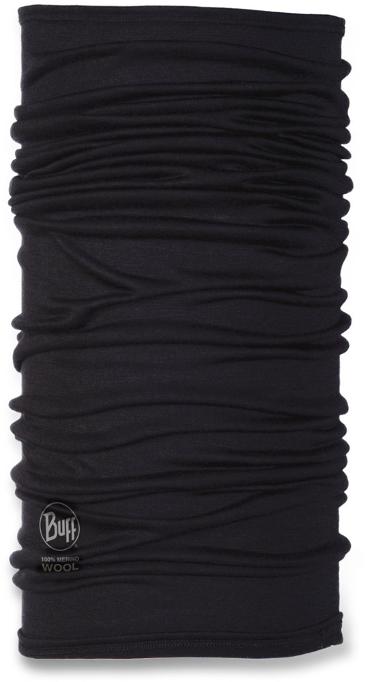
I use synthetic Buffs for summer hiking (they’re lighter) but prefer the Merino Wool Buff for winter, when snowy blizzards demand more face coverage and neck sealing. Merino wool is much more comfortable to breathe through on very cold days when moisture starts icing up the outside of the Buff.
Why I like it: Classic tubular neck gaiter design in a much more comfortable fabric.
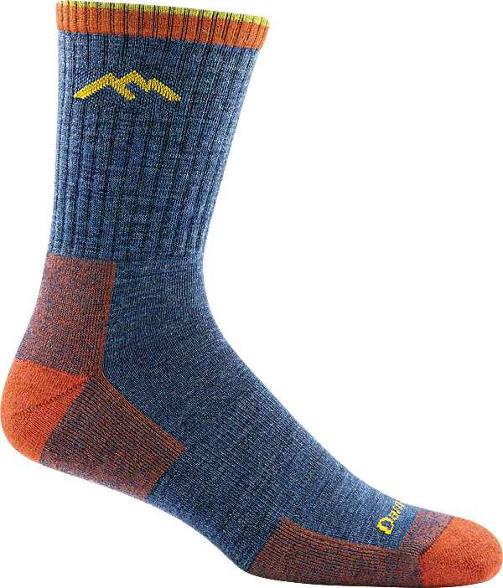
I’m not a sock loyalist. I wear merino wool blend socks from Smartwool, Patagonia, Injinji, and Darn Tough. But the Darn Tough Micro Crew Cushion sock is special. Everything about them is just about perfect for three-season hiking in mild weather when paired with ultralight trail running shoes.
Why I like it: The most versatile hiking sock I’ve used – not too light, not too heavy, not to high, not too low, great fit, durability.
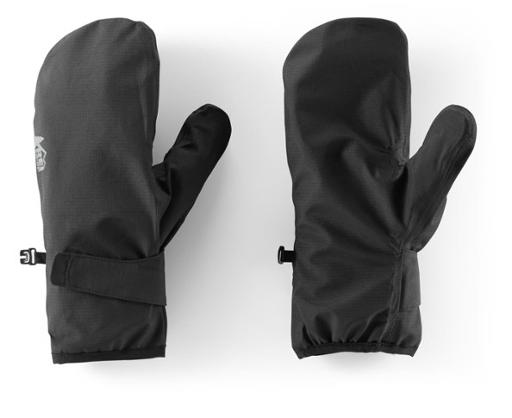
Waterproof mitten shells are only unnecessary until you need them, and then they add a level of warmth and comfort that can’t be taken for granted on cold, wet, windy days. My REI Minimalist GTX Mitten Shells don’t get used often, but when they do get worn, I get really happy. These are light and about as compact as you can get.
Why I like it: Pocketable! Super light! Good security at the wrist cuff.
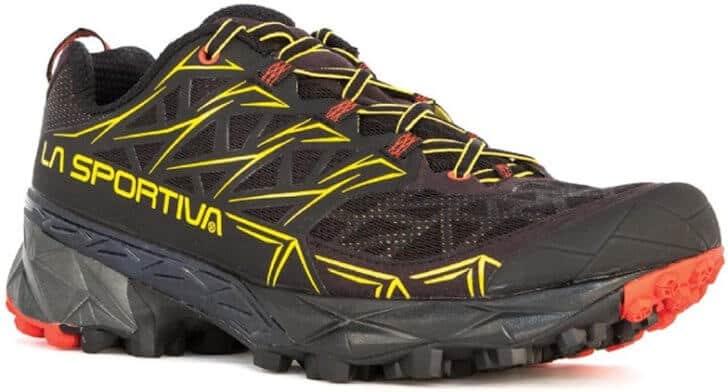
I’ve worn La Sportiva Ultra Raptors for technical hiking for years, but have worn out several pair when the uppers rip out on routes where I’m doing a lot of limestone scrambling or scree skiing. This year, I upgraded to the more durable La Sportiva Akyra, and I’m not lookin’ back. They are the best off-trail backpacking shoe I’ve ever worn.
Why I like it: More durable than Ultra Raptors, very stable and technical last for difficult off-trail conditions (especially scrambling, talus, and sidehilling).
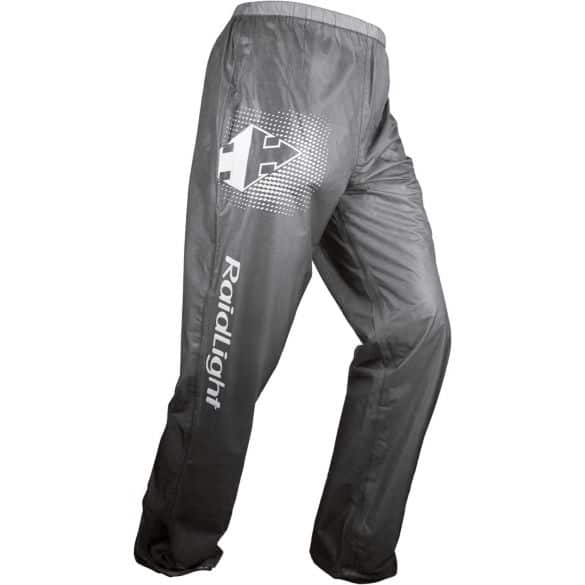
Rain pants spend most of their time in my pack, so they need to be as light as possible. The ultra-compact Raidlight Ultra MP+ fits the bill well. I find them to be a little less roomy than my other go-to pant, the ZPacks Vertice, but the 4-way stretch more than makes up for it and I appreciate the trimmer fit of the Raidlight while bushwhacking.
Why I like it: Truly ultralight, stows into a tiny space, stretch fabric.
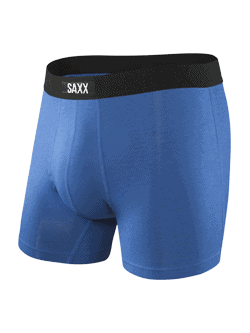
I wrote about backpacking underwear here but I’ve been waiting for the day when I can use the same underwear for both backpacking and daily wear. That day is much closer now than it was a few years ago, and a lot of it has to do with Saxx. Saxx Boxer Briefs are my favorite daily boxer brief and are entirely suitable for just about all of the outdoor activities I enjoy throughout the year.
Why I like it: They do it all – great for running, hiking, backpacking, and daily wear.
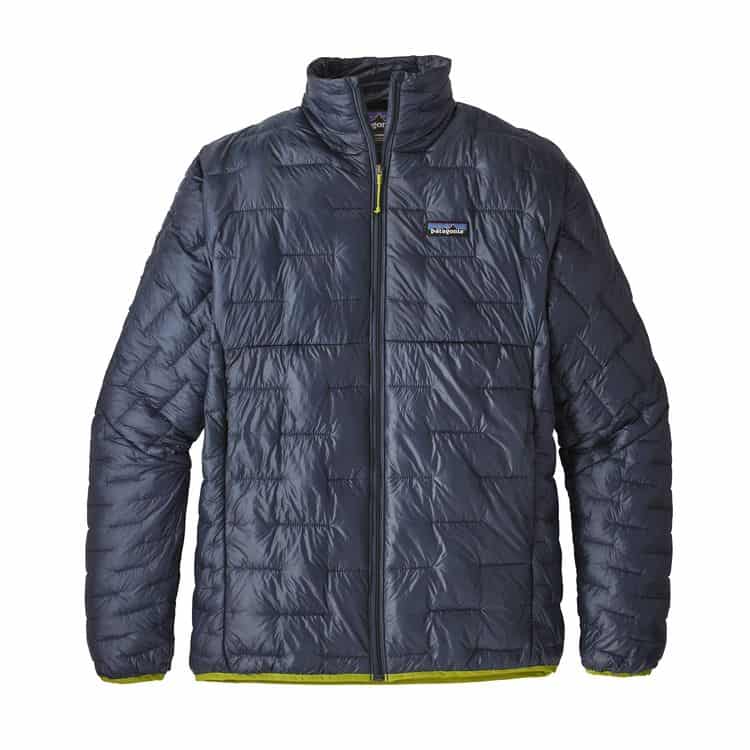
I have lots of good things to say about the Micro Puff Hoody, but always hoped a non-hooded version would be released which would make a better layering piece under a rain jacket. It’s here! And also in a vest version.
Why I like it: non-hooded, full-zip version is lighter, more packable, and a better layering piece under raingear while retaining all the benefits of the Micro Puff line.
An ultralight fleece under a rain jacket is one of my best defenses for staying warm and comfortable while trekking in the nastiest, wettest, windiest, coldest conditions I encounter. My choice is the double-faced Patagonia Micro-D, which is extremely breathable while capturing enough warmth to fend off hypothermia at short rest breaks.
Why I like it: One of the lightest possible fleece layers available for layering under raingear in extremely hostile (wet, cold, wind) conditions.
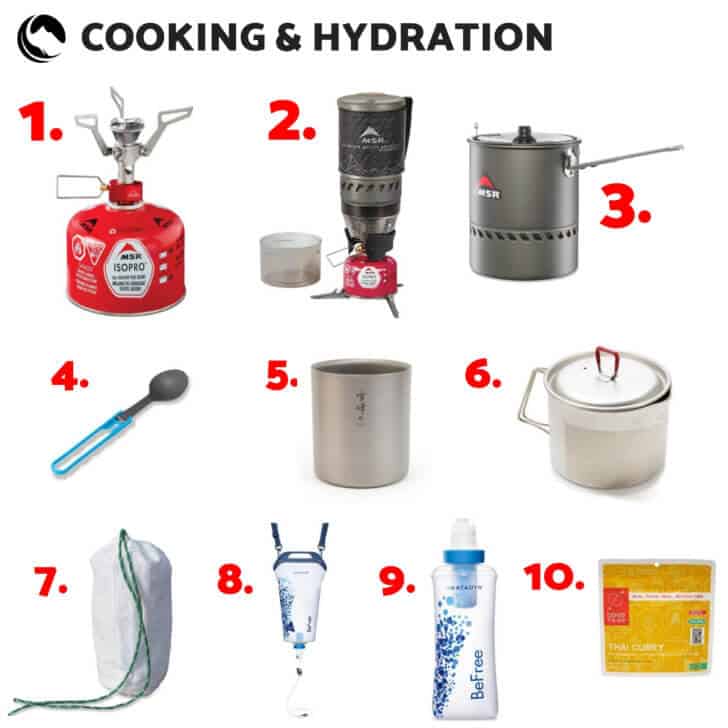
I’m going to focus on stoves here, but I’ll list my recommendations for other cooking and hydration items as well. The reason I want to focus on stoves is that there’s a lot of confusion and bad teaching out there about how to choose a stove. Here’s my very, very short mini guide:
Also, keep in mind that I have a personal bias towards MSR gear. I’ve used it for more than 30 years and have found its carefully engineered products to be more consistently reliable and durable than any other cooking brand, especially with stoves.
After experiencing the frustration of numerous stove failures through the years, I’ve become extremely picky about durability and manufacturing quality, and will happily accept an extra ounce or two for a stove that reliably allows me to start my day with coffee. After investigating dozens of stoves as part of our upcoming canister stove gear guide, I’ve settled on the MSR PocketRocket 2 as my go-to sit-on-top canister stove. I used it during the Wilderness Adventures Whitetail Trek in September and was so impressed with its power in the wind, pot stability, and quality that it’s starting to take the place of the integrated canister stoves that I usually take on alpine treks.
Why I like it: Powerful, durable, and lightweight stove works great in all but the windiest conditions.
Having been a Jetboil Sol Ti fan for many years, I was absolutely blown away when MSR released the Windburner. MSR solved the problem that’s been Jetboil’s Achilles’ heel since it was launched on the market – poor wind performance. Don’t believe me? Check out our data here. The MSR WindBurner is my favorite stove when I know I have to do some food simmering in windy conditions above the treeline while trekking in the alpine.
Why I like it: Best stove I’ve used for simmering food on low flame in windy conditions.
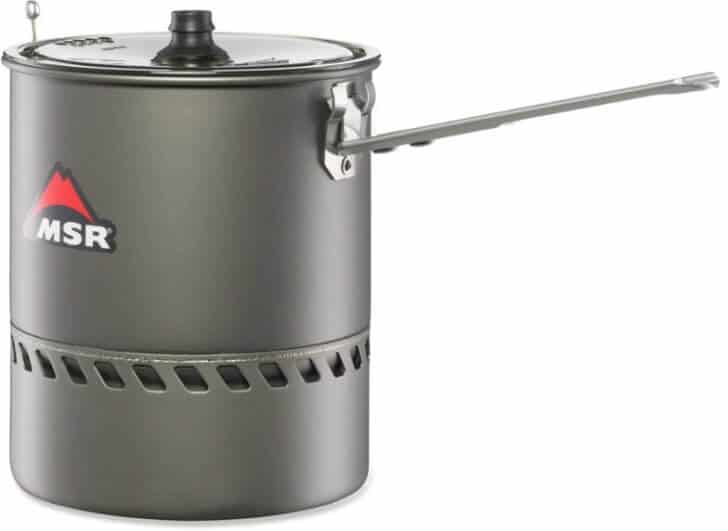
Raw power. That’s what the MSR Reactor is all about. And that’s why it’s my winter stove of choice for cooking in a windy blizzard or melting snow. When I want boiling water in very cold, very windy, snowy environments, and I don’t want to fiddle around with liquid gas, the Reactor gives me exactly what I need. In the winter, this stove very nearly qualifies as essential safety gear.
Why I like it: A virtually “storm-proof” stove that has the power to melt snow and boil water very fast in cold, windy blizzards.
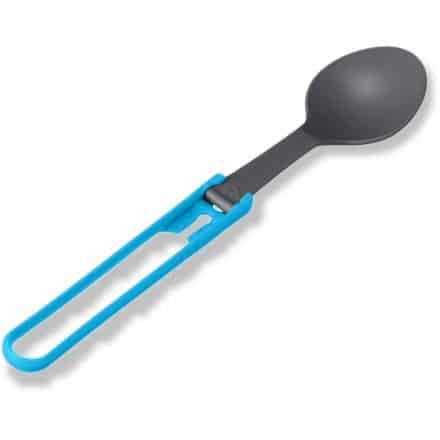
Why I like it: Virtually unbreakable, very compact, much lighter than my old titanium utensils.
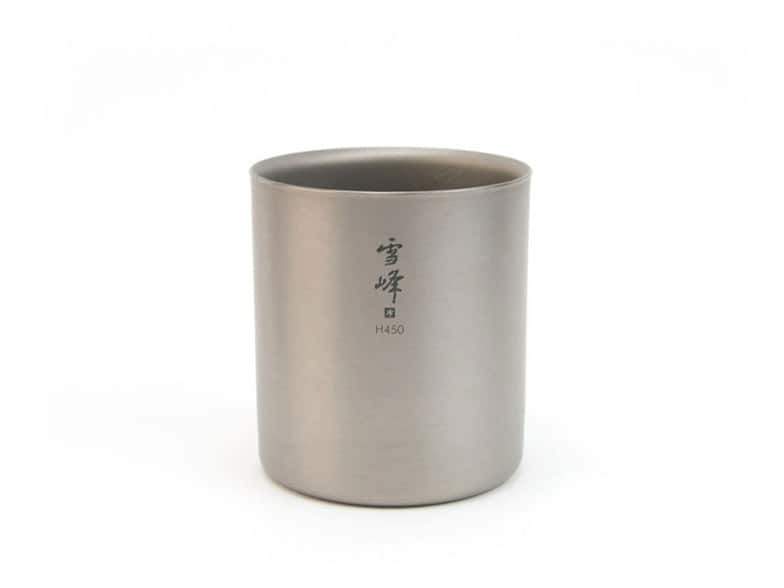
Why I like it: Beautiful no-handle design, lightest double wall mug, superb for both trail and daily use!
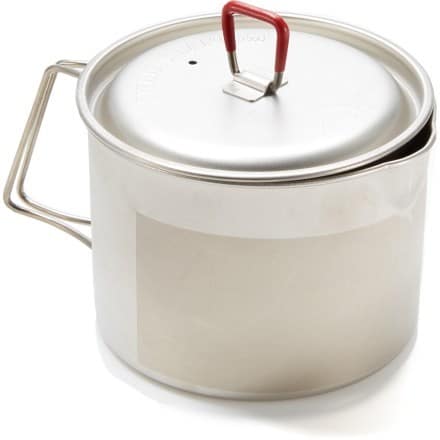
Why I like it: Much higher quality than the Toaks 750 with a tighter fitting lid, more fuel-efficient shape, larger volume.
Why I like it: So much nicer to carry in your pack than a hard-sided bear canister.
S29: Buy Now at REI S29 XL: Buy Now at REI
Why I like it: Light, very simple to use, lots of water can be treated in very little time.

Why I like it: The fastest method to get drinkable water.
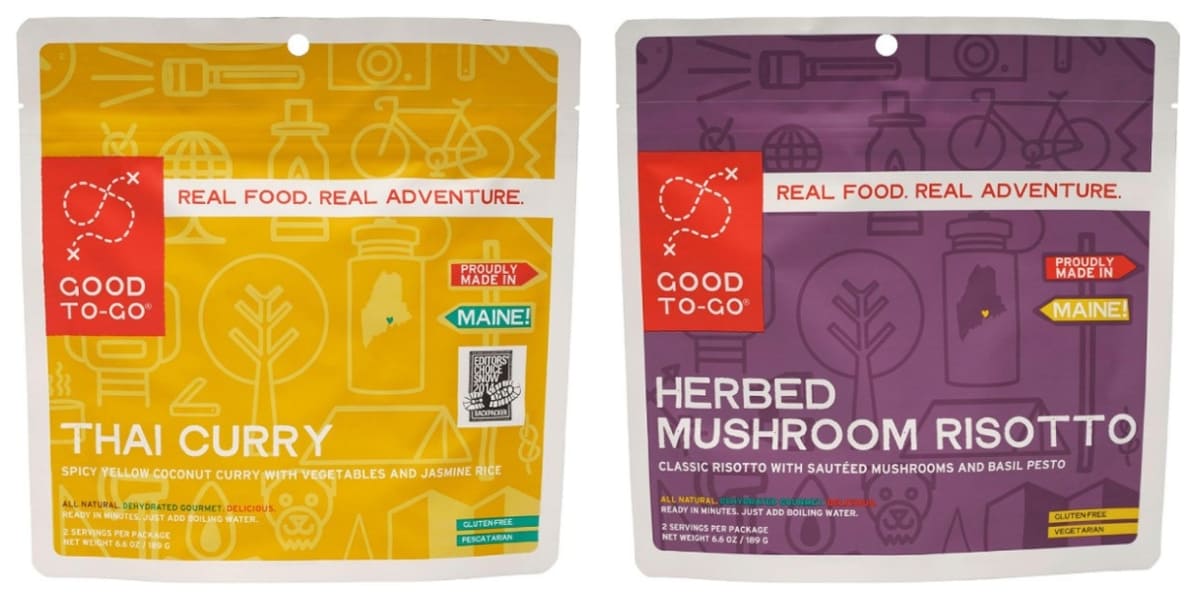
Why I like it: Vegetarian, very good flavor, no gross ingredients. My favorites are Thai Curry and Herbed Mushroom Risotto, which I reviewed here.
At the beginning of the season, I like to purchase my consumable supplies in bulk, so I never run out. I’ve been using most of the items in this section for several years, but a new item made the list this year (the Thinksport sunscreen) – an easy-to-spread, non-greasy zinc oxide formulation.

Why I like it: Sans alcohol is great for cold temperature use, benzalkonium chloride is one of the best for hygiene.
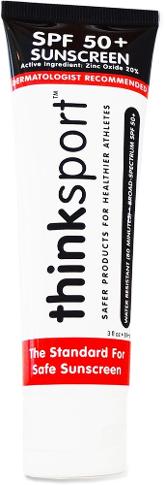
Why I like it: Smooth application and resistant to sweat and water dilution, but it’s still zinc oxide!
Why I like it: No flavor, resilient, very protective even in wind, snow, water, and high altitude sun.

Why I like it: Sticks to most fabrics, easy to shape, resistant to washing and wearing and bending more than other repair tapes.

Why I like it: My favorite non-toxic insect repellent in my favorite form factor – a tiny spray tube!
Why I like it: My go-to water treatment chemical for the past 15+ years, imparts no foul flavor, and chlorine dioxide does a better job at penetrating particle-attached biofilm than iodine or chlorine, making it a more efficacious option for water that is anything less than crystal clear.

In industries (travel luggage, outdoor packs) that have become infected with fashion, trendy designs, and product line turnover, GORUCK has remained blissfully immune to it all. Utilitarian designs, understated but luggage-worthy fabrics, and manufacturing that focuses on durability over the speed of construction are the hallmarks of my favorite travel pack, the GORUCK GR1 Rucksack.
Why I like it: It’s going to last my whole life, holds enough to travel with my computer, clothes, dopp kit, and more.
Why I like it: Waterproof, packs gear with less dead space than cylindrical stuff sacks. I use one for sleeping gear and camp clothes (quilt, pad, pillow, puffy jacket, long underwear bottoms, extra socks), one for shelter (shelter, stakes, ground cloth, pole jack), and another for food.

Why I like it: My favorite stuff sack fabric, very water resistant, high-quality manufacturing.
Why I like it: Highest quality trekking pole I’ve ever used, most durable carbon pole I’ve ever used, FlickLock Pro lever clamp locks are absolutely secure in all conditions. If you are looking for ultralight trekking poles, check our recent trekking pole gear guide.

Why I like it: Dual use item is more comfortable when stuffed than stuff sacks, fleece feels great against the skin. We reviewed the pillow in more detail here.
Why I like it: I never have to remove it, I never notice it, it will never fall off in cold or wet conditions.
If you want to give or receive experiences instead of gear, consider one of these!
When you click the “Buy Now” button for any of these products, you’ll be taken to a checkout page. Be sure to check the “Is this a gift?” Checkbox!

A Backpackinglight.com Membership is the primary source of revenue for us. It allows us to maintain the website and forums, pay honoraria to authors in our community, and fund public projects like the Podcast and Film Festival.
Buy or Gift a Subscription Now
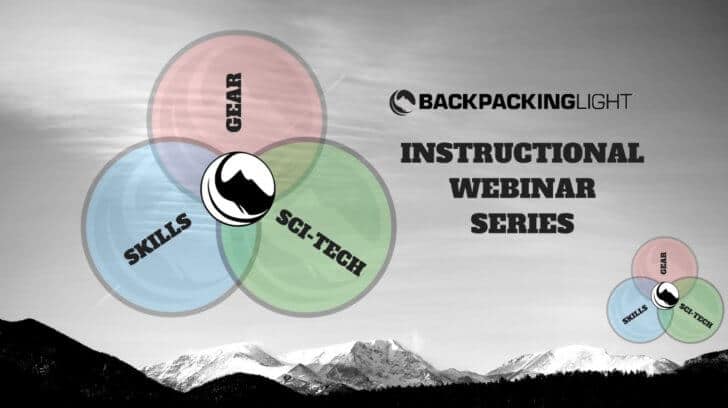
Backpacking Light webinars were launched in 2018 as a means of exploring topics in more technical depth. They are a great way to experience outdoor science, engineering, and design in a way that’s just not available anywhere else.
The 2018 Webinar Series included:
2019 will explore topics that include route planning and navigation skills, trekking pole science, film and photography techniques, and more!
Our signature online course Ultralight Backpacking Boot Camp is the most comprehensive collection of video lessons about ultralight backpacking available and is targeted to people who want to learn a solid foundation of ultralight backpacking philosophy, gear knowledge, and wilderness skills.
Buy or Gift the Boot Camp Now
For a pinnacle experience in a wild and remote wilderness, spent with other ultralight backpackers who are passionate about exploring more with less, consider taking a guided Wilderness Adventures trip with us!
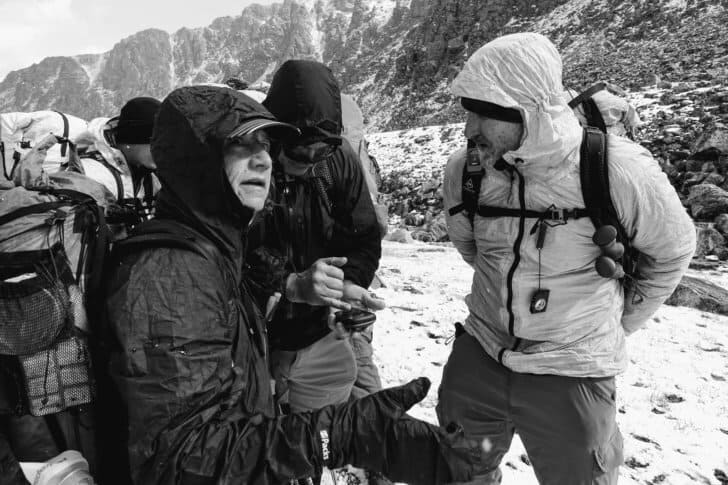
Navigating through off-trail terrain in the Absaroka-Beartooth Wilderness on the 2018 Wilderness Adventures Whitetail Trek.

Support your National Parks and buy an annual 2018-2019 America the Beautiful National Parks Pass (or the 2019-2020 Pass here). My top recommendation for a birthday, anniversary, graduation, or wedding gift!
Buy a National Parks Pass at REI
Our nation’s largest outdoor retailer is a member-owned co-op that gives back a 10% dividend on all purchases to its members. Add to that benefit it’s powerful lobbying voice for preserving human-powered recreation on public lands, local education clinics at its stores, supporting cultural diversity in outdoor recreation, and its contribution to trail building from local trails to national long-distance trails, and an REI Membership ends up being a pretty good deal for all of us as a community.
Buy an REI Membership
The gear in this gear guide represents my personal recommendations for ultralight and lightweight backpacking gear.
The choices are my own and reflect gear that I actually use. They are not based on any sort of consensus among the Backpacking Light staff. No manufacturer has negotiated or paid for a product placement here, as is the convention in so many online gear guides. As such, the gear I recommend here reflects my own personal style of hiking and camping.
The Gossamer Gear Mariposa 60 is a high volume ultralight backpack that is capable of carrying heavier loads.
The Gossamer Gear Mariposa is a 60-liter internal frame pack that falls somewhere between an ultralight pack and a medium-weight pack capable of carrying heavier loads. It is considered a high volume ultralight backpack. Gossamer Gear recently re-designed the hipbelt with the purpose of improving load distribution and increasing pocket size.
I’ve recently begun enjoying treks with my children. For this reason, I’m carrying a little more weight than I once did. I tested the Mariposa 60 with this use in mind.
I was impressed by the features, functionality, and comfort of this pack—especially as the design itself is simple. The pack is spacious and has seven pockets. It met my needs while trekking and kept my gear accessible and organized.
(from Gossamer Gear’s Website)
I tested the Mariposa 60 on a multiple-day hike in Montana’s Beartooth Range in mid-July. My base weight for the trip was twenty-two pounds. I hiked and camped at around nine thousand feet elevation. The weather was typical of the area and season: sunshine with a few overnight showers and one large storm with rain and hail.

My performance assessment of the Gossamer Gear Mariposa 60 will address the following items:
The Mariposa 60 is a simply designed lightweight backpack with well-thought-out features. The fabric used in the Mariposa 60 is heavy in high-abrasion areas and lighter where possible to save weight. The quality of stitching and seams are on par with any other high-end backpacking manufacturer. The pack is aesthetically pleasing and seems designed to last.
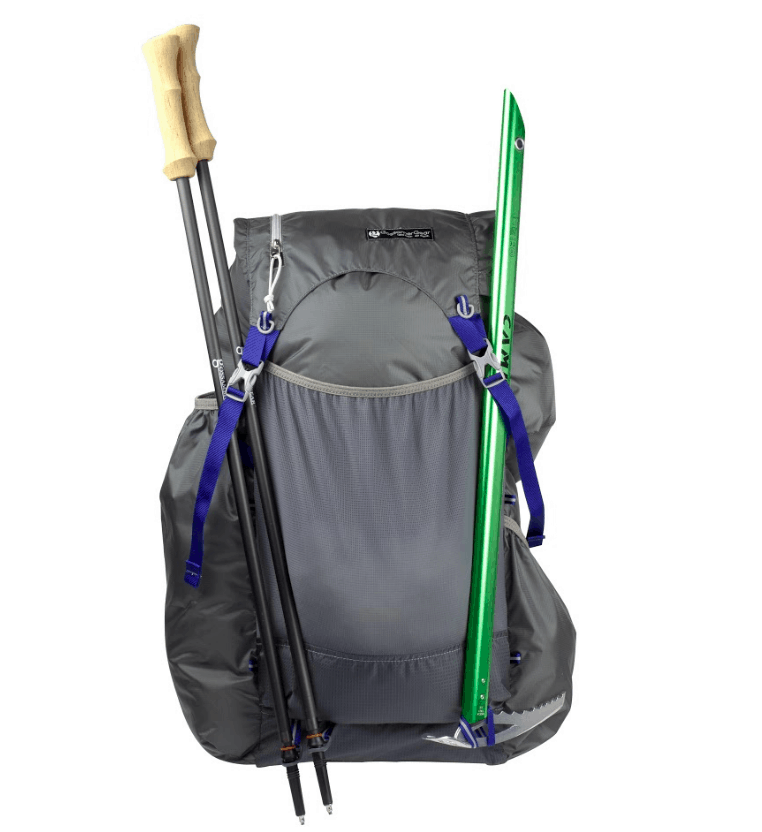
Gossamer Gear offers both the pack and hipbelt in multiple sizes so you can get the fit dialed in with precision. The result was a pack that felt just right on my six foot one, one hundred and seventy-pound frame. It hugged my body and felt secure.
When I first tried on the pack I felt like the shoulder straps were too close together. I felt some pressure on the outside of my neck. But once I loaded the pack the feeling vanished and never returned.
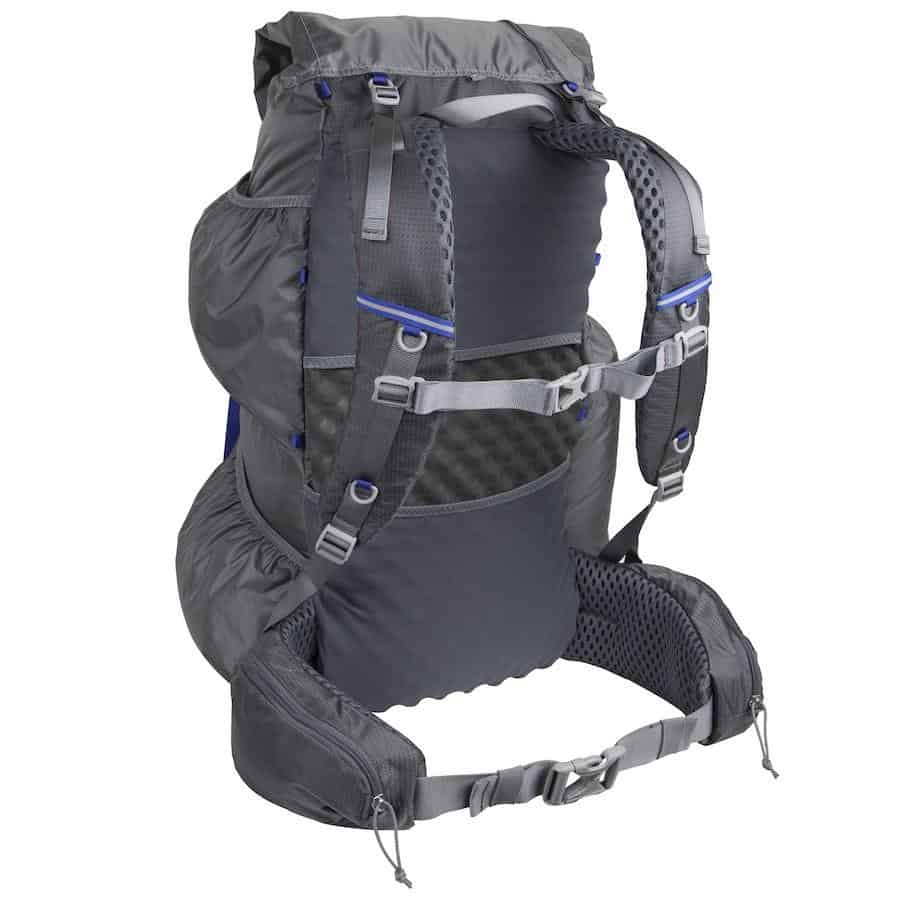
A lack of breathability is a common complaint about this pack. Gossamer Gear has created a combo internal pack frame/sitting pad designed to increase airflow. The pad, called the Air Flow SitLight Camp Seat, is designed to slide into the pad pocket of the Mariposa 60. Ostensibly this adds structure to the pack and increases breathability. I didn’t notice my back being less sweaty while testing the pack with the SitLight seat inserted. However, it did seem to increase air flow slightly.
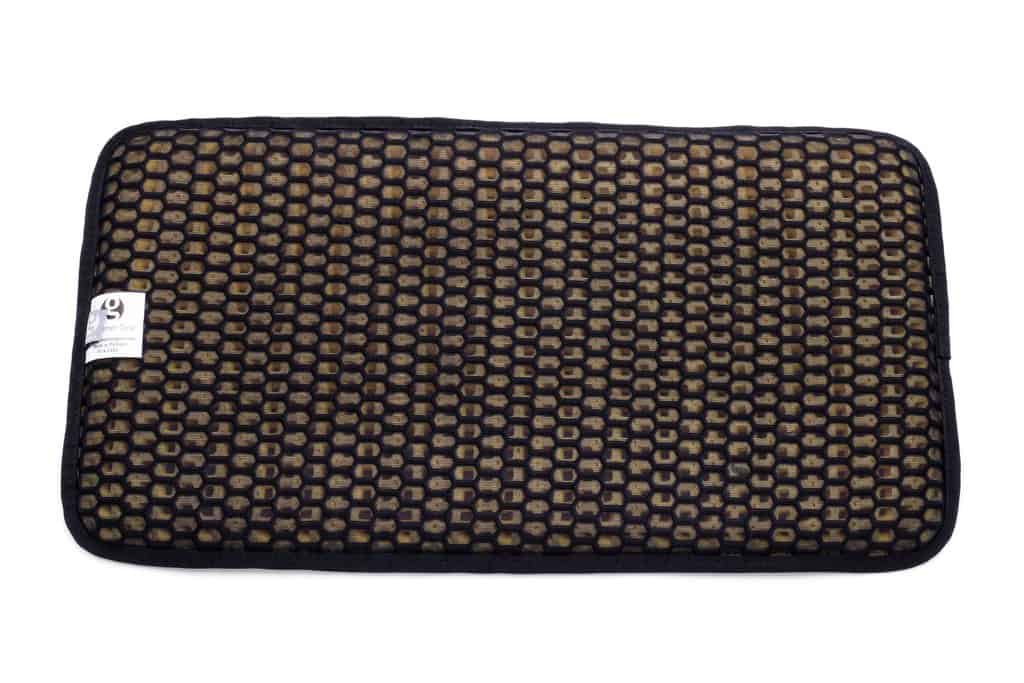
Gear accessibility is the main strength of this pack. I’m used to a very simple pack design: one main compartment and two pockets. So it was a novel experience to use a sub-two pound pack with seven outside pockets. The quantity and location of the pockets is a plus for a backpacker who enjoys organized gear systems.
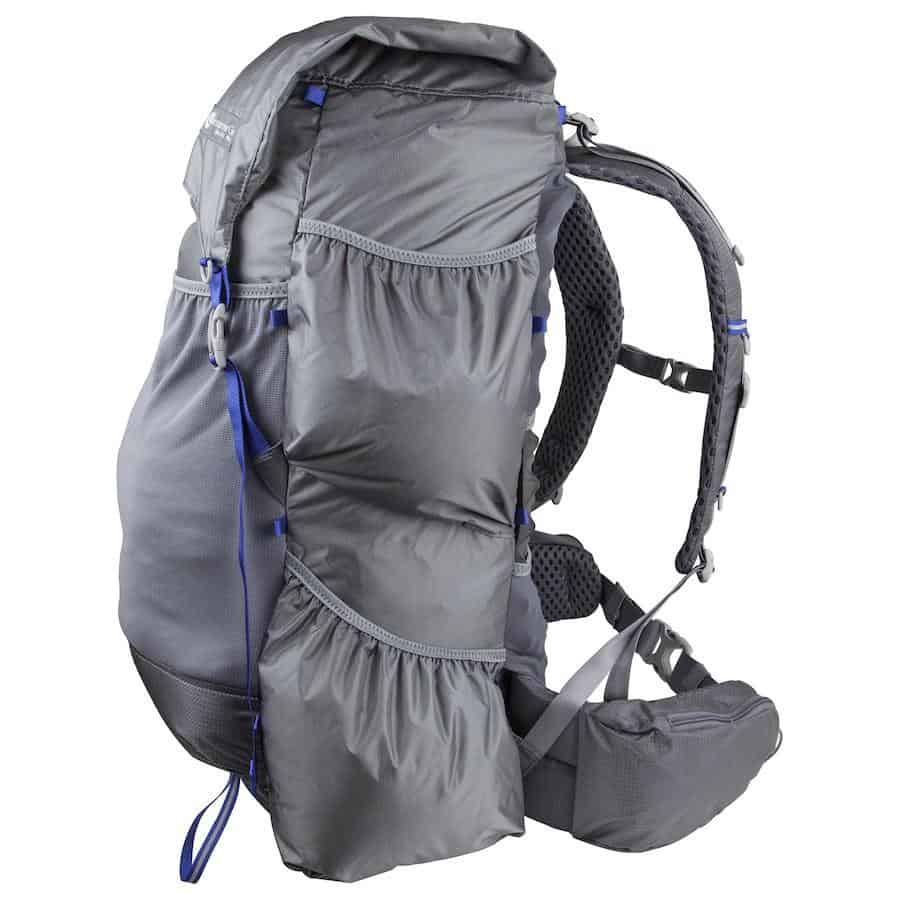
The water bottle pocket (right-hand side of pack) is technically accessible without removing the pack. However, I’m flexible and use soft-sided water bottles, and I still struggled to reach it at times.
The large hip belts are ideal for gear storage and organization. I kept my map, Garmin Foretrex 301, headnet, and snacks all in one hip belt pouch. In the other, I stored my lunch, allowing me to eat as I hiked.
The mesh pouch on the back of the pack is spacious and lets you expose wet gear to the air for quicker drying.
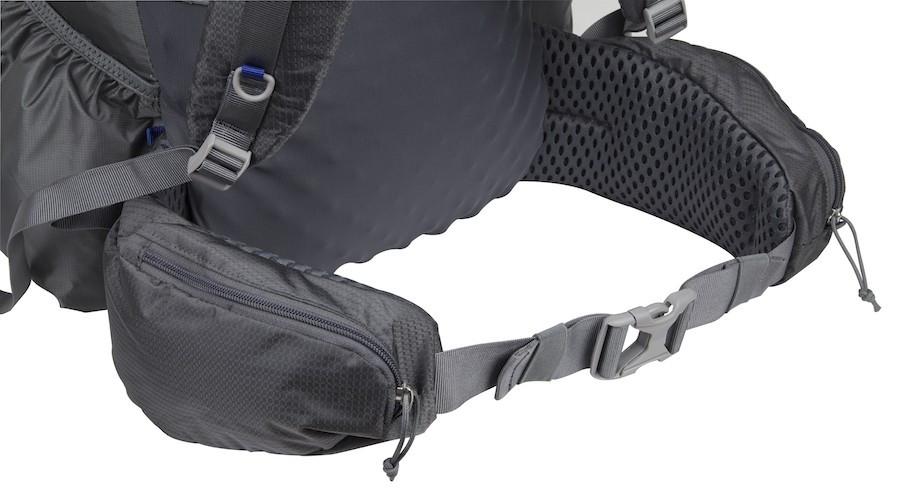
The Mariposa 60 is more pack than many ultralight backpackers want or need. On trips that necessitate more gear or volume than usual (like when hiking with children), this pack excels. The large and numerous external pockets make for gear that is easily stored and quickly accessible. The recently re-designed and enlarged hipbelt pockets were a winning feature in my book.
Updated September 15, 2018
The Arc’teryx Zeta FL Jacket is a Gore-tex Paclite Plus rain jacket that features a trim fit and hip length. It has articulated tailoring in the hood and arms, a full-length water-resistant zipper, two handwarmer pockets with water-resistant zippers, elastic hem and wrist cuffs, and an adjustable hood aperture.
The Arc’teryx Zeta FL Jacket (women’s model here) is a Gore-tex Paclite Plus rain jacket that features a trim fit and hip length. It has articulated tailoring in the hood and arms, a full-length water-resistant zipper, two handwarmer pockets with water-resistant zippers, elastic hem and wrist cuffs, and an adjustable hood aperture.
(Note: The new Arc’teryx FL and SL product lines – which includes the Arc’teryx Zeta SL Pant also featured in this review, and the slightly heavier and more durable Arc’teryx Zeta SL Jacket – is targeted specifically towards the lightweight backpacking community.)

The most notable features I have observed during my preliminary review of the Arc’teryx Zeta FL Jacket and Arc’teryx Zeta SL Pants included the comfort of its fabric during high-perspiration activities, its exceptional manufacturing quality, the elegant simplicity of its feature set, dual handwarmer pockets and a very nice hood.
At 7.2 oz (size M), the Arc’teryx Zeta FL Jacket is certainly in the class of jackets that are considered “ultralight” today (i.e., less than 8 oz).
The Arc’teryx Zeta SL Pants offer long ankle-to-thigh water-resistant side zippers, a zip-and-snap fly, and adjustable elastic waistband. The Arc’teryx Zeta SL Pants weigh 8.6 oz (size M).
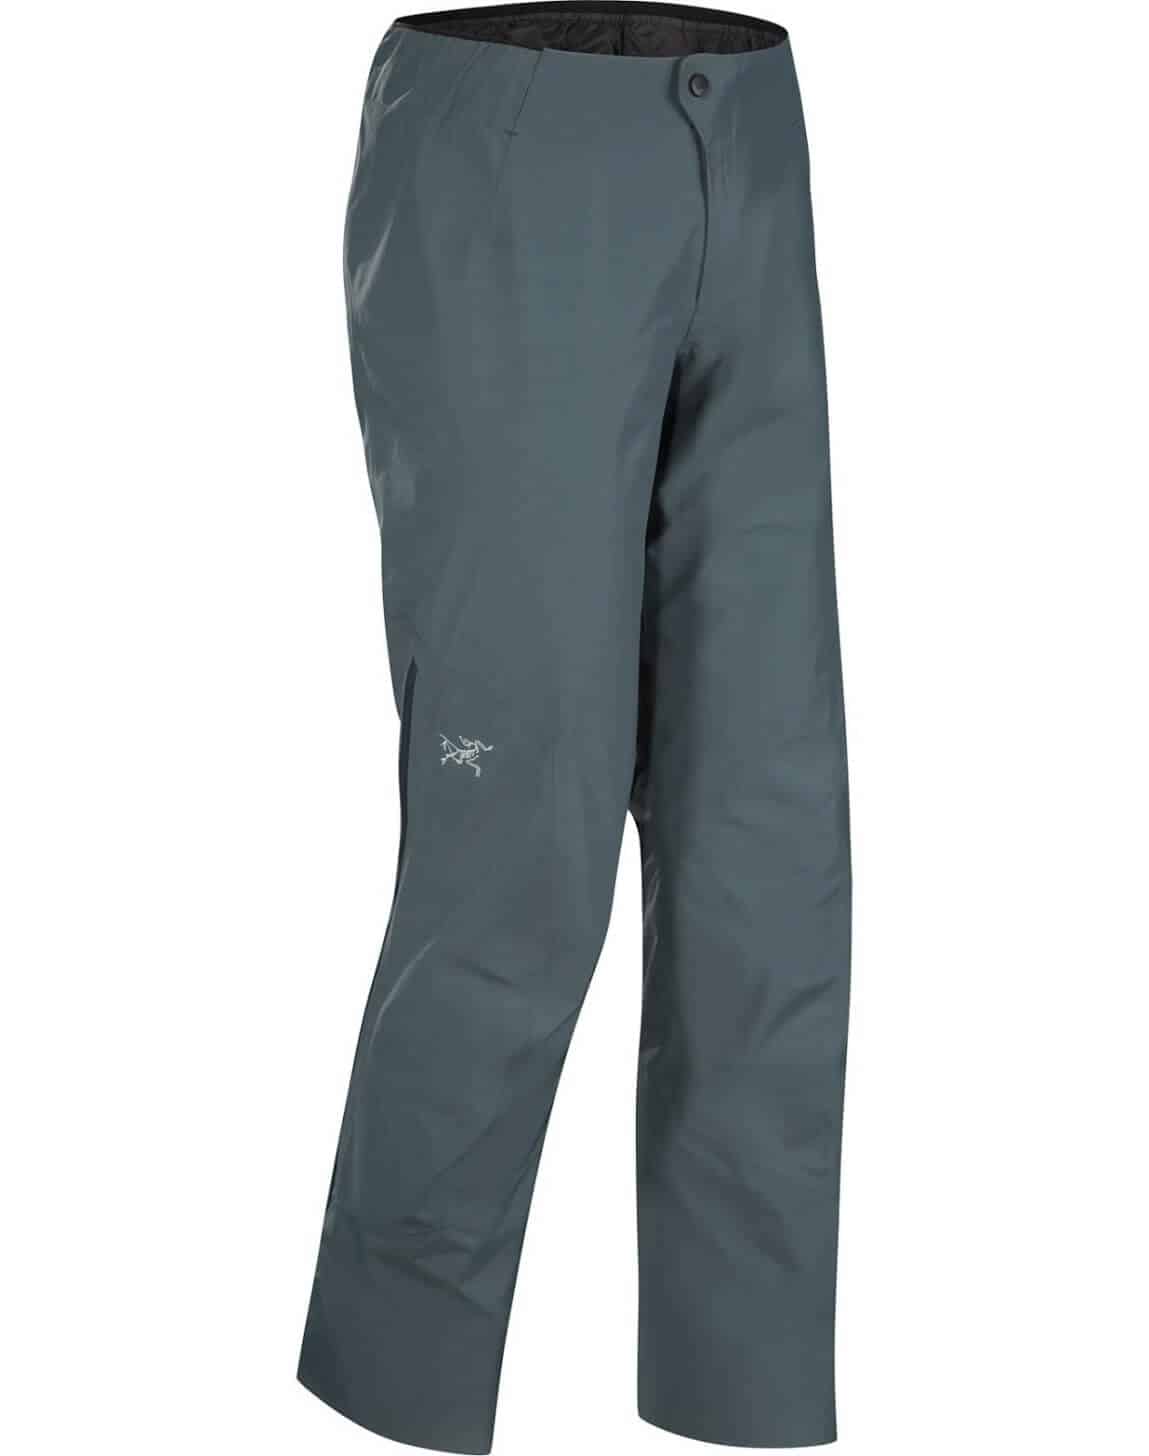
Arc’teryx Zeta FL Jacket:


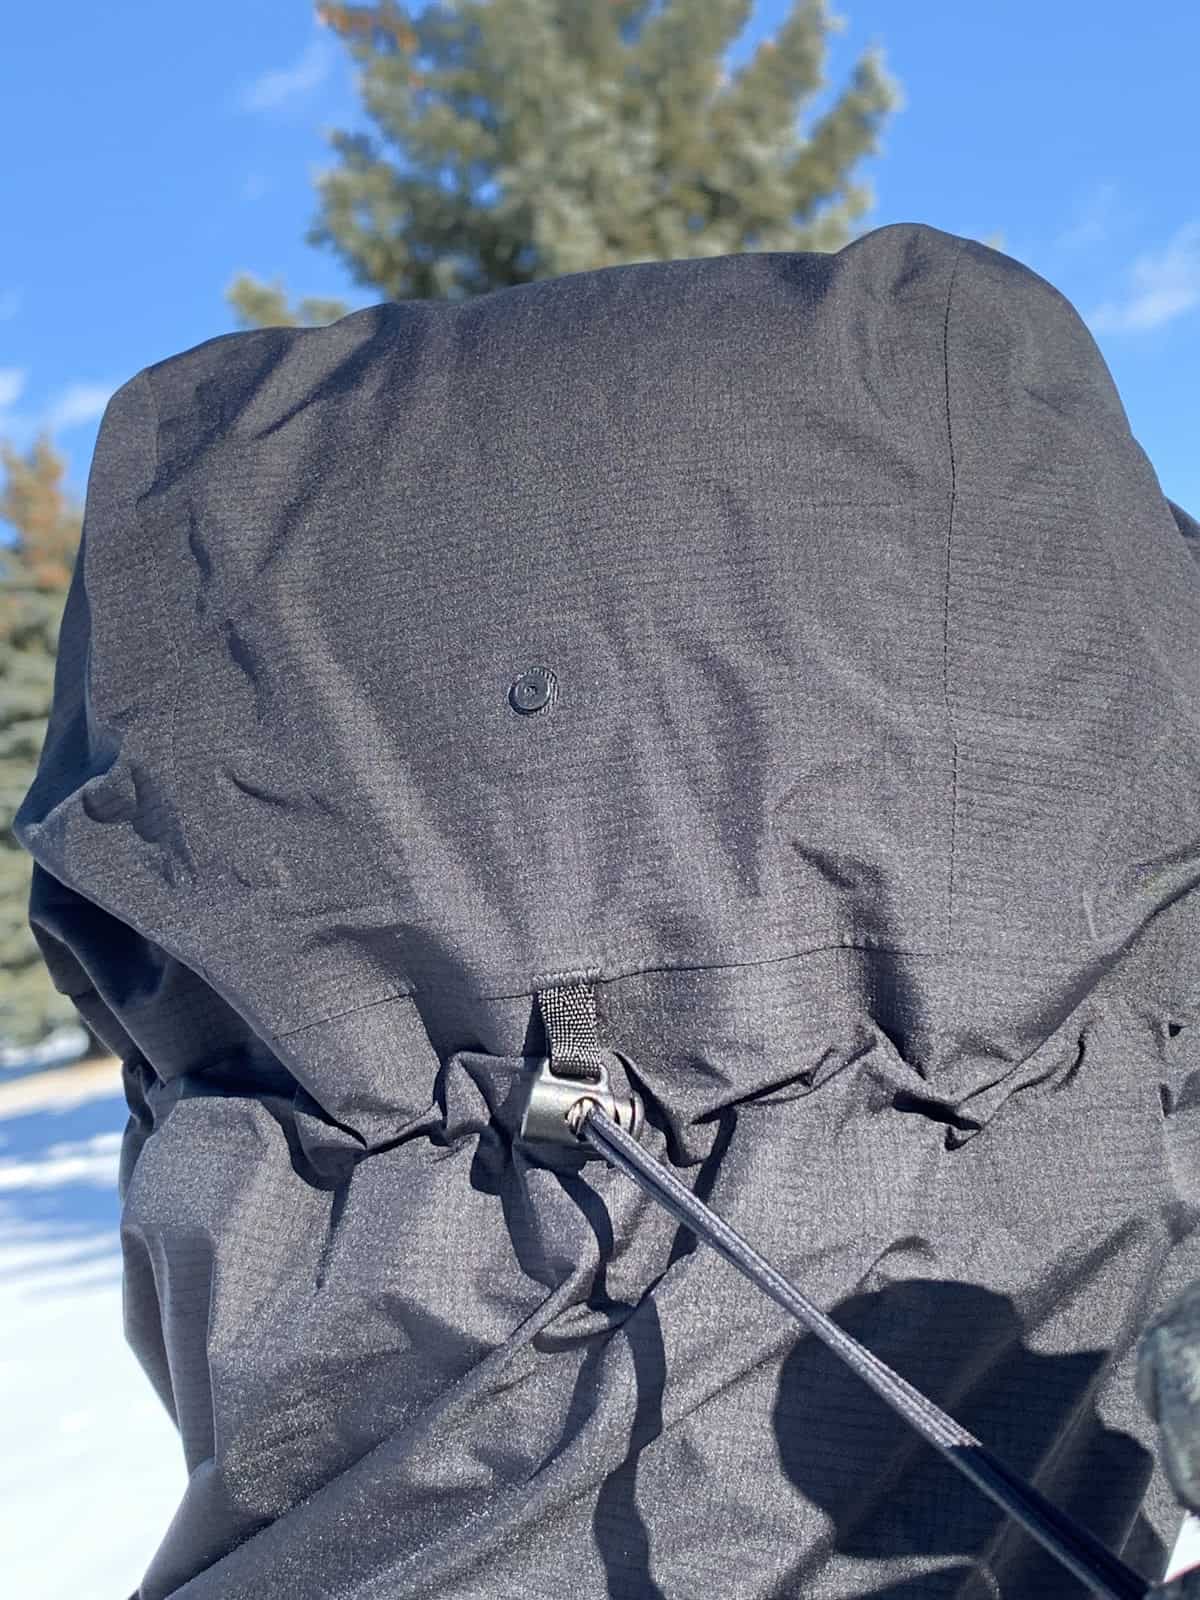
Arc’teryx Zeta SL Pants:
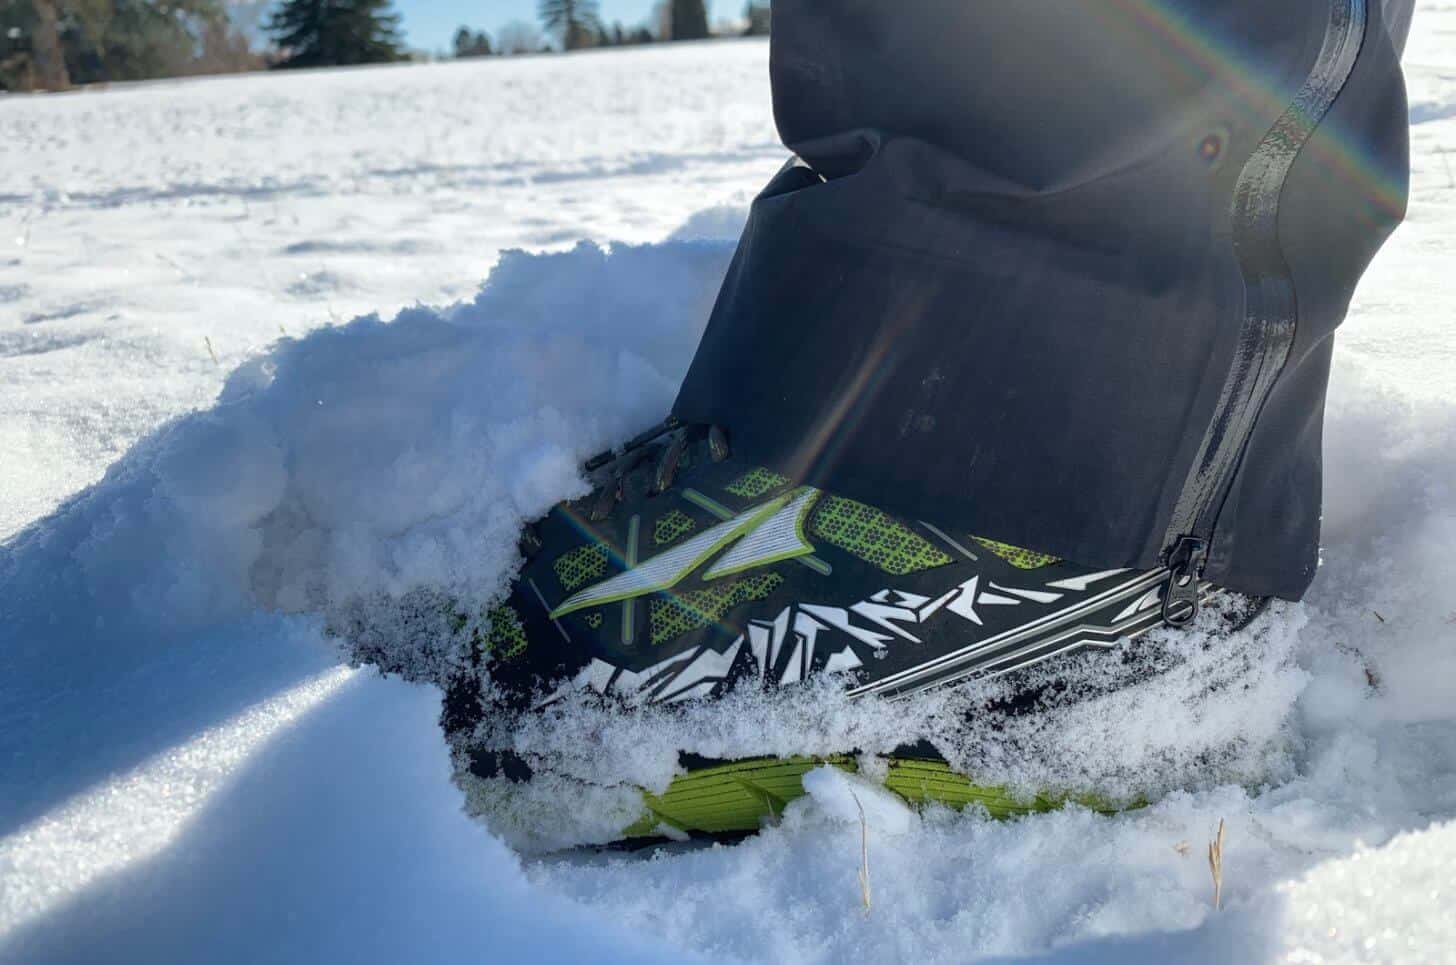

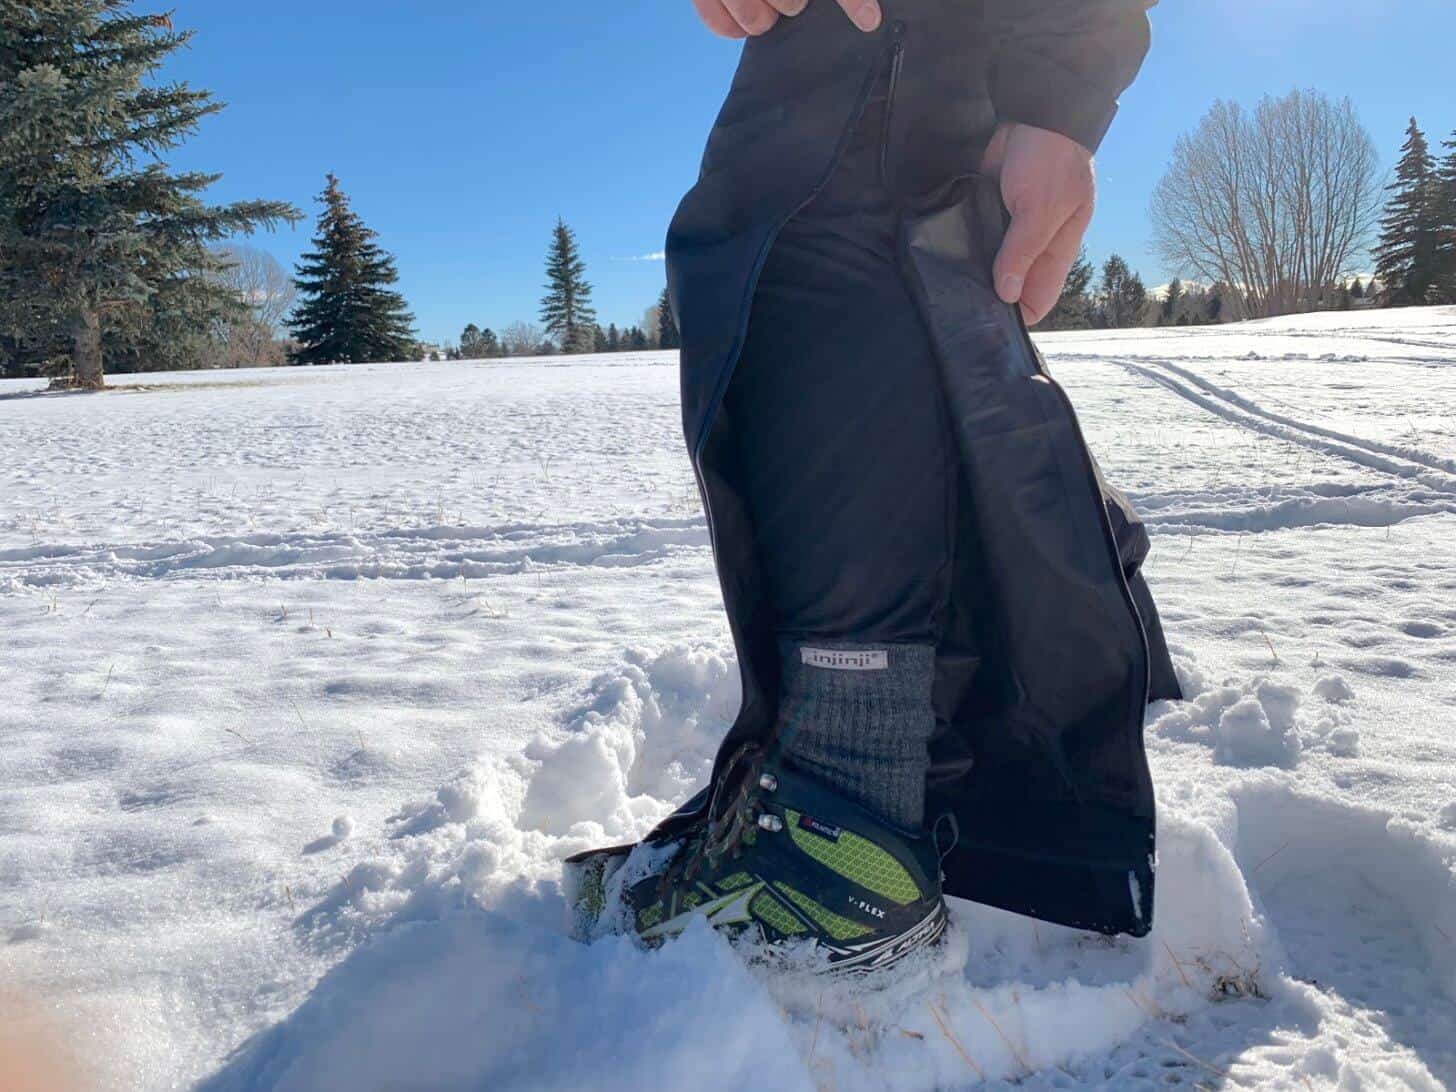
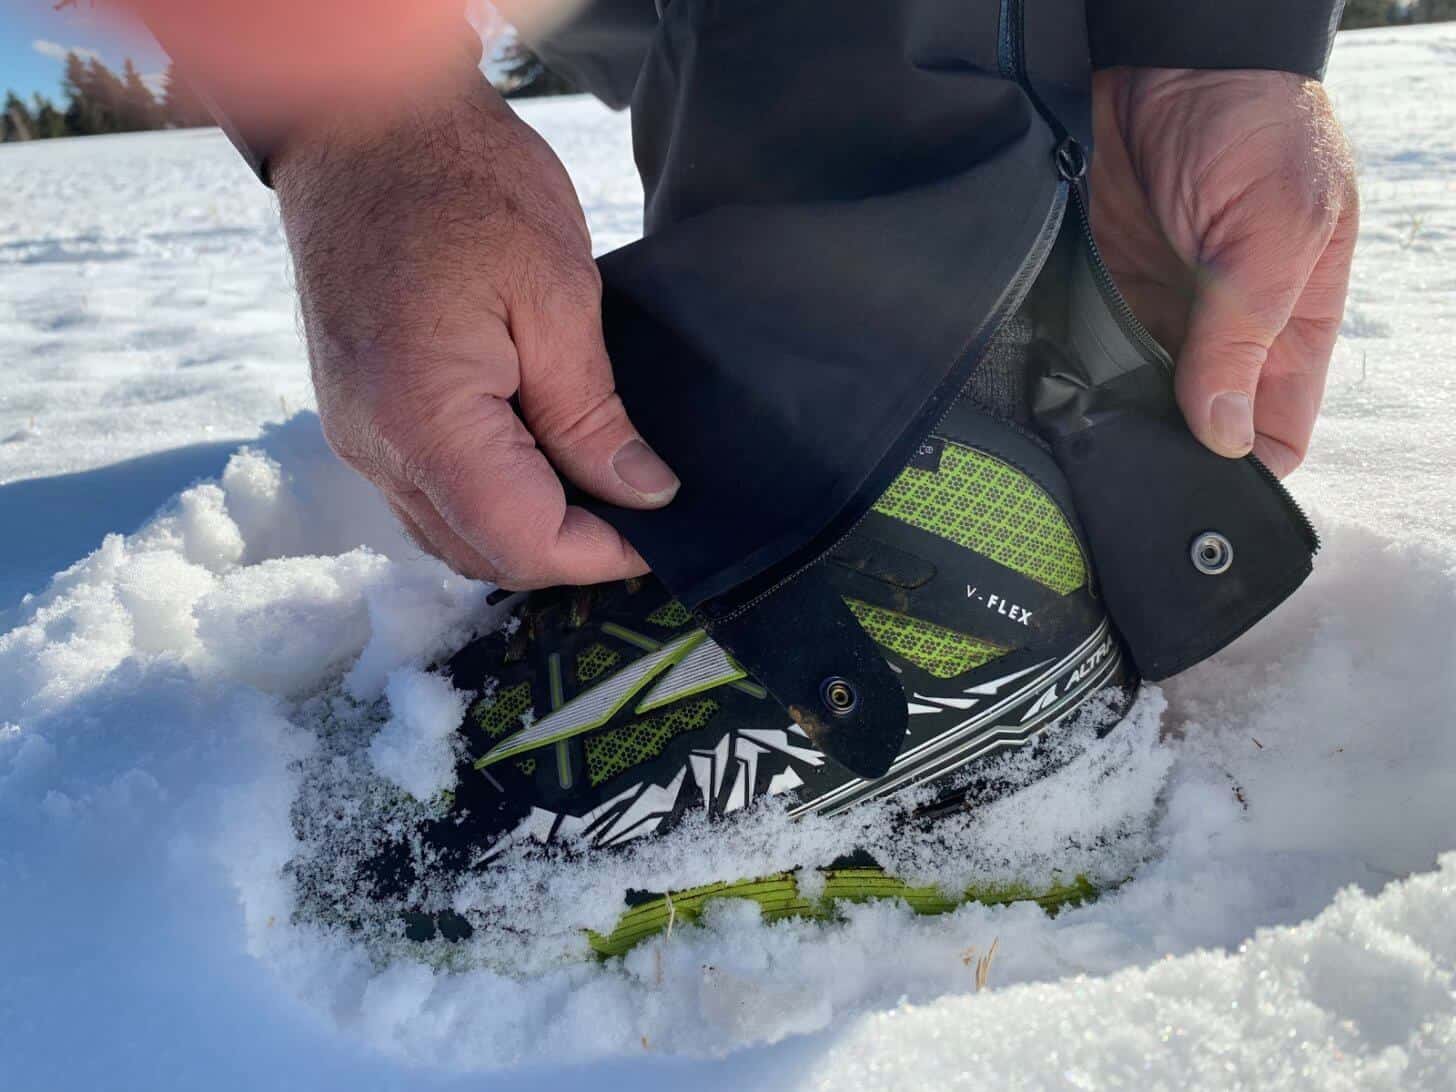
Arc’teryx Zeta FL Jacket & SL Pants:
Arc’teryx Zeta FL Jacket:
Arc’teryx Zeta FL Pants:
I’ve tested the Arc’teryx Zeta LT Jacket and SL Pants primarily in the sub-freezing winter conditions that we are currently experiencing here in Southeast Wyoming while running, hiking, and cross-country skiing.
The following video features more in-depth commentary while performing a sweat-out-and-recover field experience during a winter blizzard on the Laramie Plains.

Updated September 15, 2018
This lightweight trekking poles gear guide discusses the scientific justification for/against poles, and features reviews of 14 models.
By Ryan Jordan and Andrew Marshall
This gear guide features trekking poles of various designs that weigh less than about a pound per pair. We screened 109 models from more than a dozen manufacturers and culled the final list down to 14 models for a more detailed analysis and review.
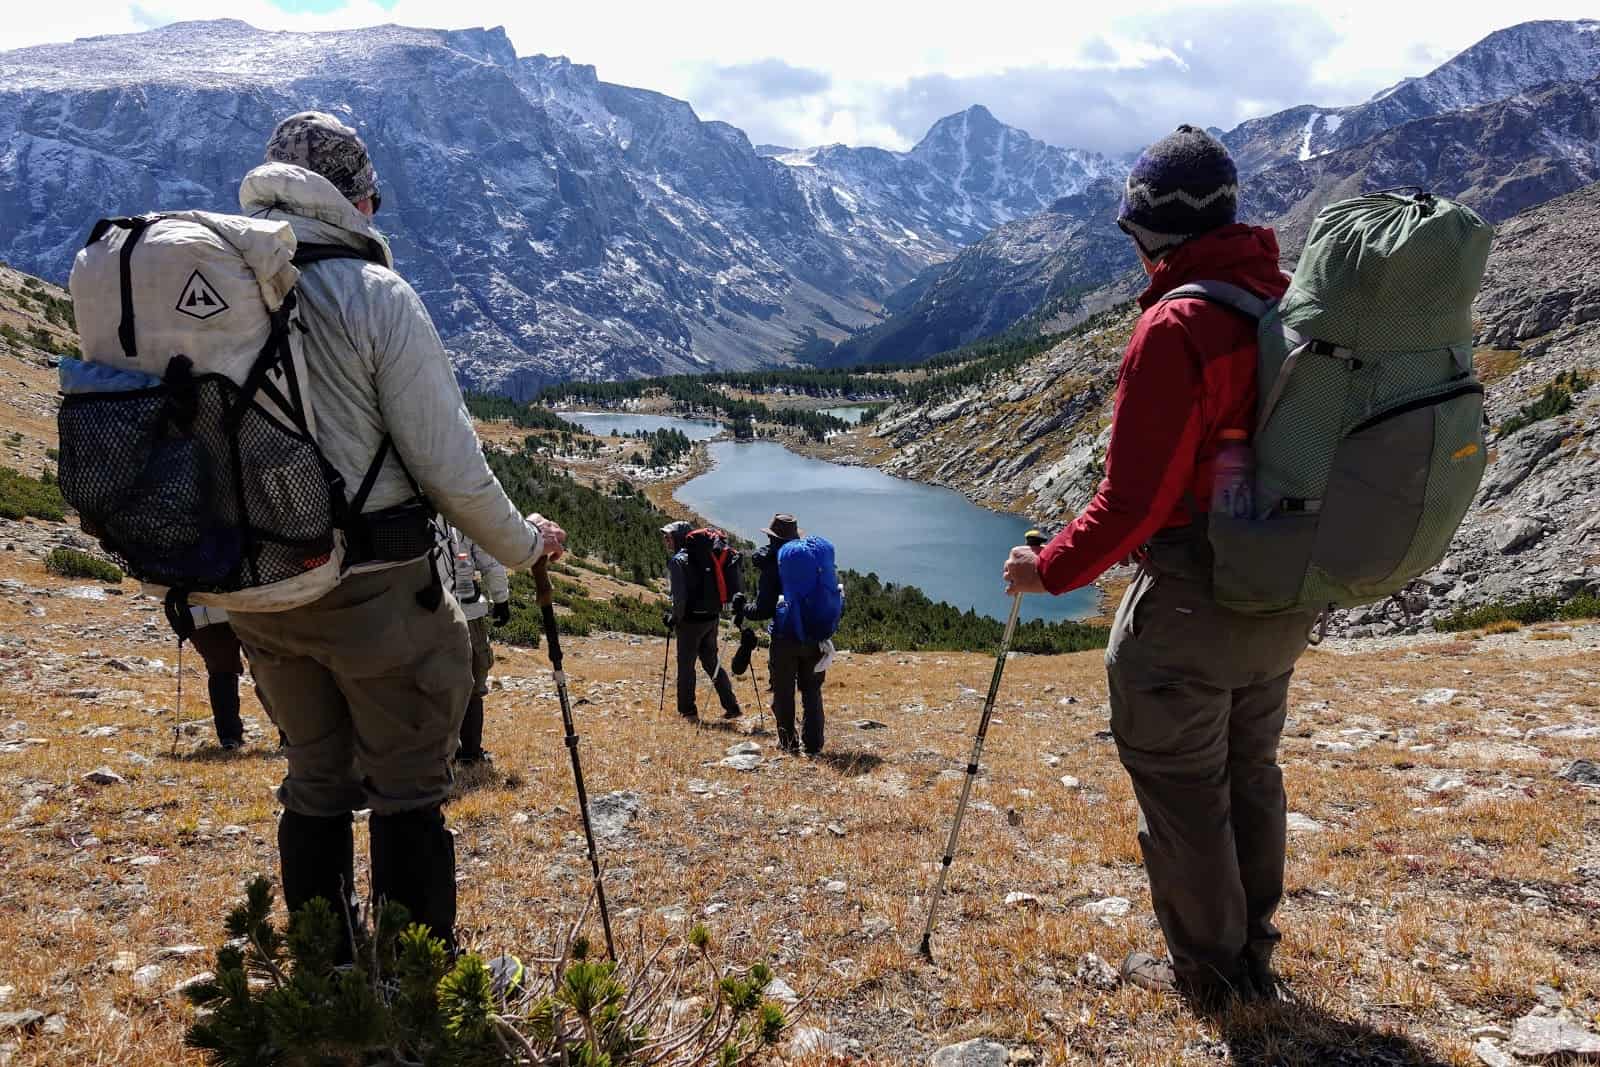
In addition, you’ll find numerous trekking pole skills videos in this gear guide that will aid you in making informed buying decisions and help you use trekking poles properly to get a reasonable amount of performance out of them.
This gear guide will include:
Trail running poles are typically minimalist in nature; they are compact (usually via a folding mechanism), and have minimalist grips, straps, and tip housings. Some are suitable for hiking. Likewise, some hiking poles (as included here) are also suitable for trail running. This gear guide does not include poles marketed exclusively to trail runners.
Ski poles usually have plastic or rubber grips for better friction with ski gloves, a fixed length, and include snow baskets (sometimes not removable) as a matter of routine. A variety of ski poles known as slalom poles have bent shafts. Ski poles are not included in this gear guide.
Nordic walking poles are longer than trekking poles, have different tip styles (most often, rubber), and narrow-diameter grips without much ergonomic shape to them because Nordic walking technique doesn’t favor a tight grip. Nordic walking poles are built for speed and exaggerated arm motion and are not generally considered to be appropriate for trekking. This gear guide does not include Nordic walking poles.
Staffs are usually taller and thicker poles, often made of wood, decorated with little metal trophy badges, and are most often carried by Scoutmasters and other people who enjoy going slow, carrying a lot of gear weight, and feeling nostalgic. We don’t review them here.
Walking poles are poles marketed specifically to a consumer market of fitness-minded people who don’t care so much about gear performance but want to feel good about using gear that looks cool – like the trekking poles carried by ultralight backpackers. Walking poles aren’t reviewed here.
Well, that depends. Do you wear a lab coat, are you a YouTuber/blogger, or someone who wants to get the most practical performance out of their hiking gear?
People who wear lab coats (the science guys) have performed a wide range of studies that tout the benefits of trekking poles. Some of these benefits include:
Manufacturers of trekking poles love these studies although a seemingly equal number of people who wear lab coats have performed studies that refute these same claims. Science enthusiasts who like to criticize scientists claim that the results are inconclusive because of poor experimental design, too few subjects, unrepeatable experiments, and more.
That leaves us with YouTubers and bloggers who make money by convincing their viewers/readers that they must purchase trekking poles because they offer enormous benefits for every person on the planet. It’s hard to blame them. They have to pay their camper van payment, after all. We’re not immune to this bias, but we do our best to resist it. Be sure to review our affiliate disclosure at the end of this report.
So let’s stick to the concrete benefits of trekking poles without trying to convince you that truth can be pulled out of nowhere:
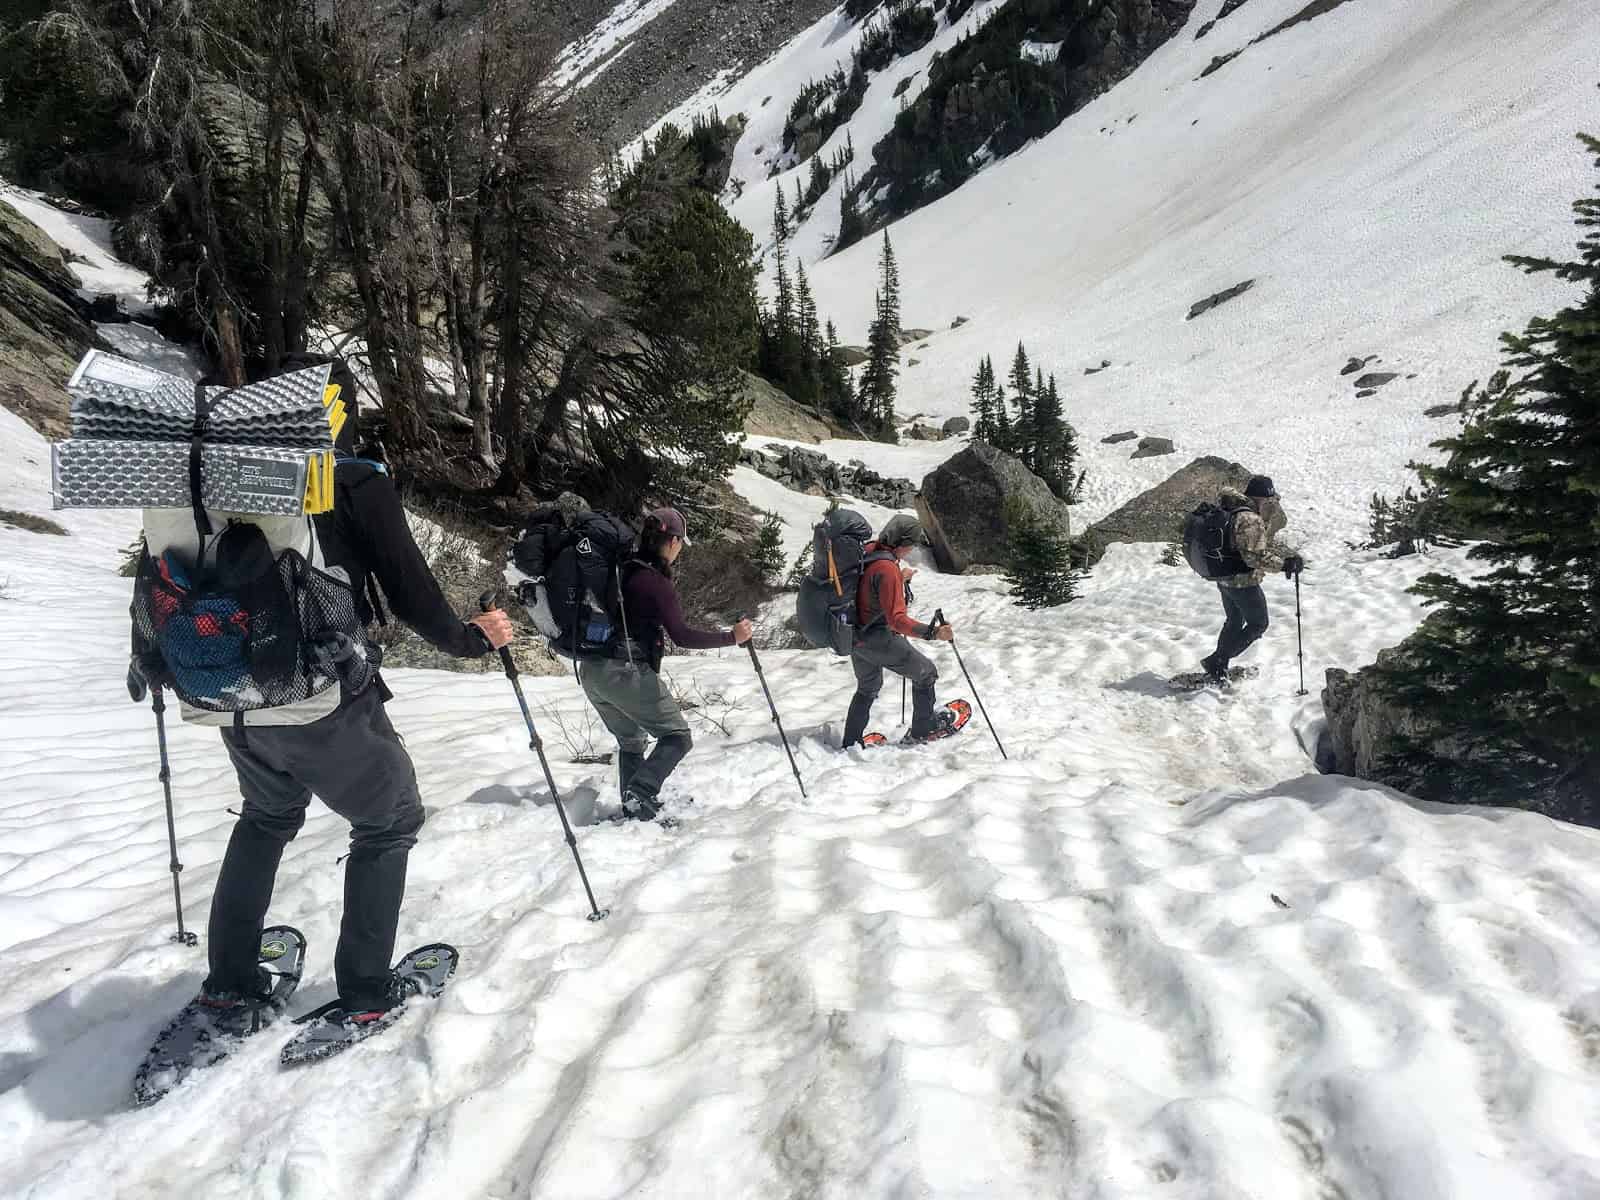
Are trekking poles useful for maximizing your physiological performance on a trail with little elevation change? Probably not. The data doesn’t support it. For example, here’s a study that suggests that hiking pole use increases energy expenditure while hiking uphill. Ouch! How do we expect to promote trekking pole sales with science like this?!
Are trekking poles going to “save” your knees, wrists, elbows, hips, back, neck, or feet? Probably not. The data doesn’t support it.
Can trekking poles be used as a weapon against wild animals? Possibly, but we don’t review that performance criterion in this gear guide.
Do trekking poles make you look like a more experienced hiker? Maybe, maybe not. Just be sure you learn how to use them.
Trekking pole shafts are made of either aluminum or carbon fiber tubing. Although carbon fiber is known for its high strength-to-weight ratio relative to other materials, one can’t really make the conclusion that carbon trekking poles are lighter than aluminum ones. Instead, the best we can do is compare two hypothetical pole shafts that have the same diameter and wall thickness.
For these two hypothetical pole shafts:
The lightest available trekking poles are made of carbon, but they’re also poorly durable and are prone to breakage near the pole tip when the tips get stuck in mud, vegetation, snow, or talus.
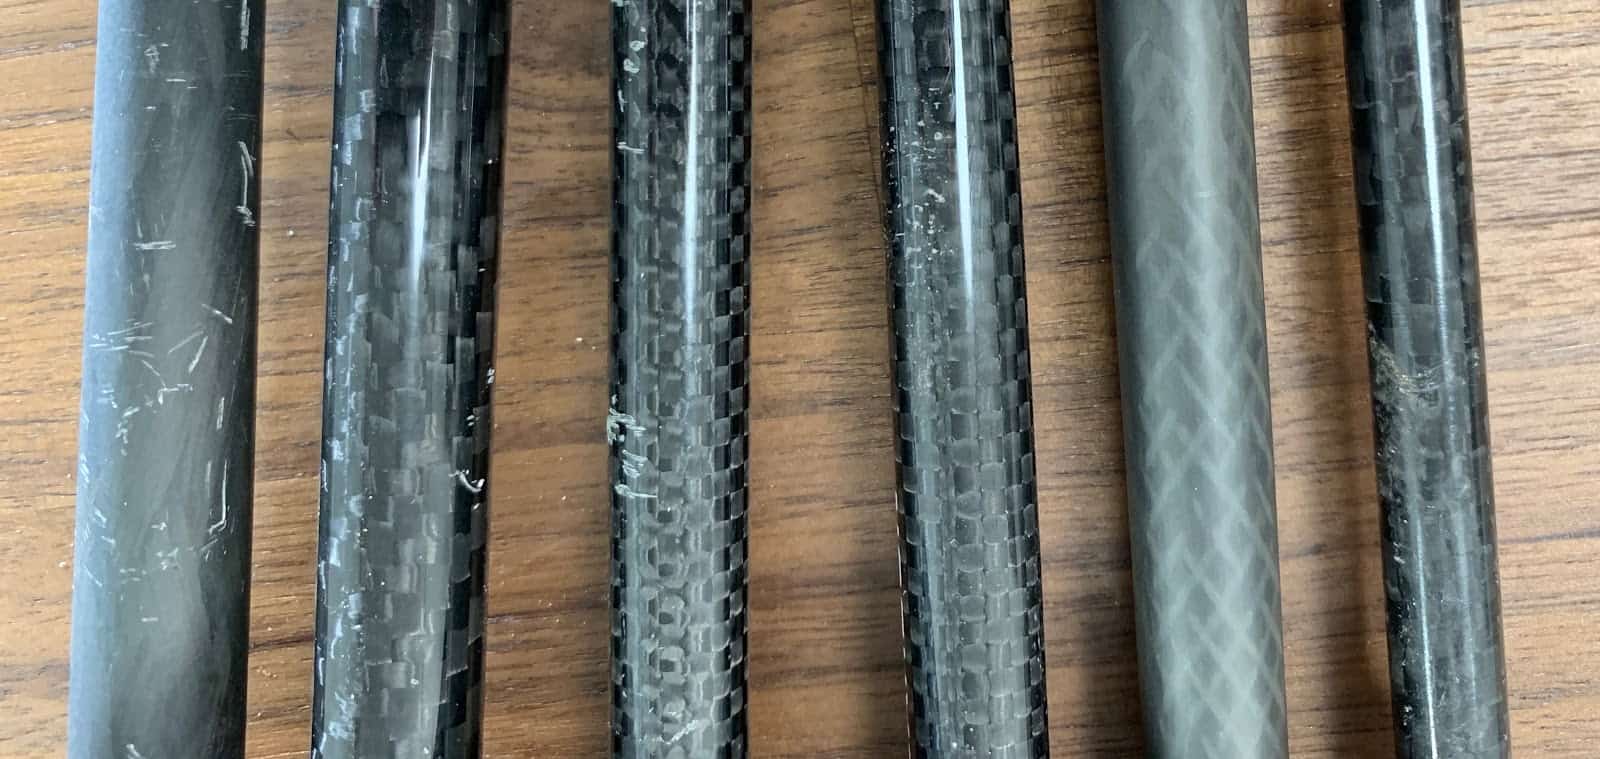
Bent pole shafts are used primarily in slalom ski racing poles, where they offer some efficiency when tucking them behind you as you clip gates. They offer no utility for slow-motion sports like hiking, backpacking, snowshoeing, and Nordic skiing.
There are three major types of pole locking mechanisms: Twist-lock, lever clamp, and push button. Less common mechanisms also exist: foldable and hybrid.
This video illustrates the different types:

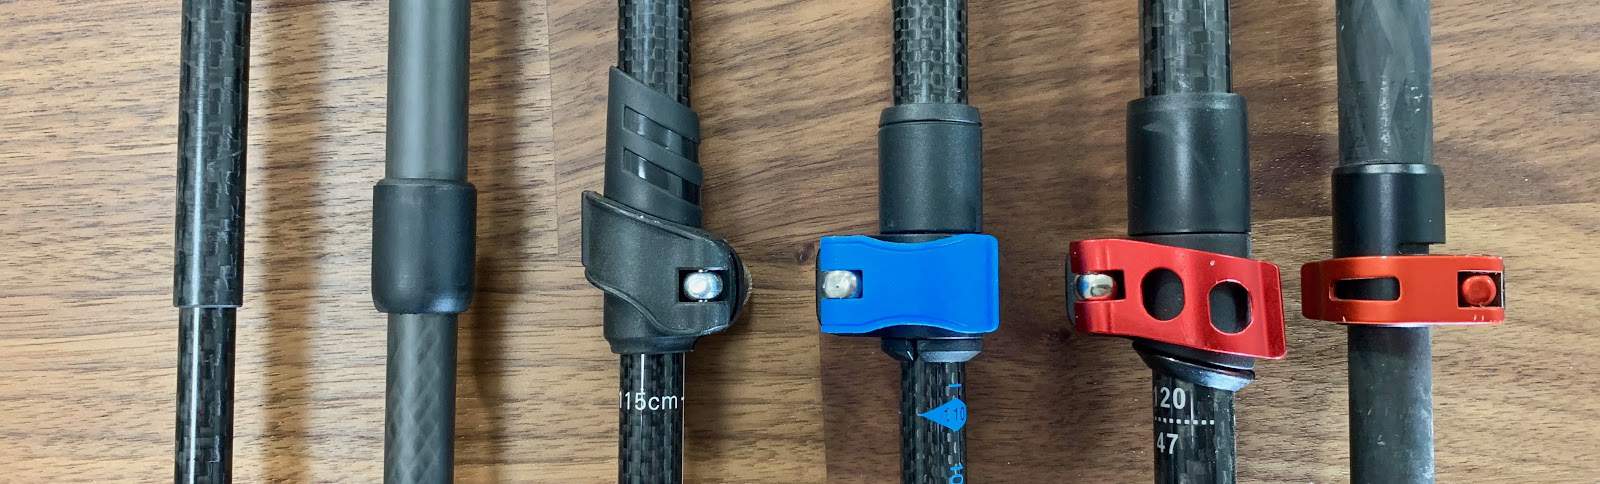
Trekking poles with so-called shock absorption mechanisms in them (springs) are supposed to “reduce impact.” That sounds like a neat benefit, doesn’t it? Impact reduction must translate into preventing a catastrophic ligament tear while hiking, right?
However, the science that arrives at this conclusion is sparse and dubious. Research from the Department of Biomechanics and Kinesiology at Germany’s Tübingen University suggests that anti-shock mechanisms can reduce peak impact forces by as much as 40%. However, the link between “reduction of peak impact forces” and “protection of muscles, ligaments, and joints” (as Leki claims) is a very weak one. Worth noting is that while Leki supports this claim by referring to the aforementioned “study”, no source in a peer-reviewed journal is provided, so it wasn’t possible to verify whether the study was independent, or funded by a pro-trekking pole actor (e.g., trekking pole manufacturer).
In another study, researchers did not discover any meaningful difference in load transfer forces between the foot and ground among hikers carrying weighted packs on level terrain, whether the hiker was using shock-absorption poles, non shock-absorption poles, or no poles at all.
A review of anecdotal experiences from other hikers posted to our forums indicates a mixed preference for anti-shock trekking poles:
However, the anecdotal evidence against anti-shock poles was not only more prevalent, but based more on direct observation of instability, noise, mechanical failure, increased weight, and higher cost:
It’s worth noting here that Leki has introduced a new type of shock absorption mechanism that is based on the elasticity of stiff rubber introduced as a bulbous gasket above the tip of the pole. Having used poles with these new shock absorption mechanisms, I (Ryan) do find that they are quieter and stiffer than traditional spring-loaded shock absorption assemblies. However, I’m not convinced that they are worth the added weight or swing effort.
That said, it is the opinion of the authors of this review, based on a lack of authoritative scientific evidence, anecdotal user reports, and common sense, that anti-shock poles probably offer no utility for backpackers who are interested in maximize the performance-to-weight ratio of their trekking poles. In addition, we are in favor of simplification over unnecessary complication in order to minimize mechanical failure points.
Therefore, anti-shock poles will not be included in this gear guide.
One user who posted on the same forum perhaps summed it up best: “Maybe I’m not getting it, but I never understood the point of the shock. I just figured it was a marketing thing.”
Yep, us too. Buyer beware.
The ergonomics of trekking pole grips are defined by the grip material, knob/cap size and material (grippier is better, larger is better), trigger finger rest, palm rest, extended grip, extended grip friction (channels or ribs), and extended grip palm rest.

The grip material is the part of the pole most often in contact with your body, so choose wisely.
Foam grips are the lightest and most comfortable (when new, at least). Rubber and cork grips are heavier and more expensive but easier to clean.
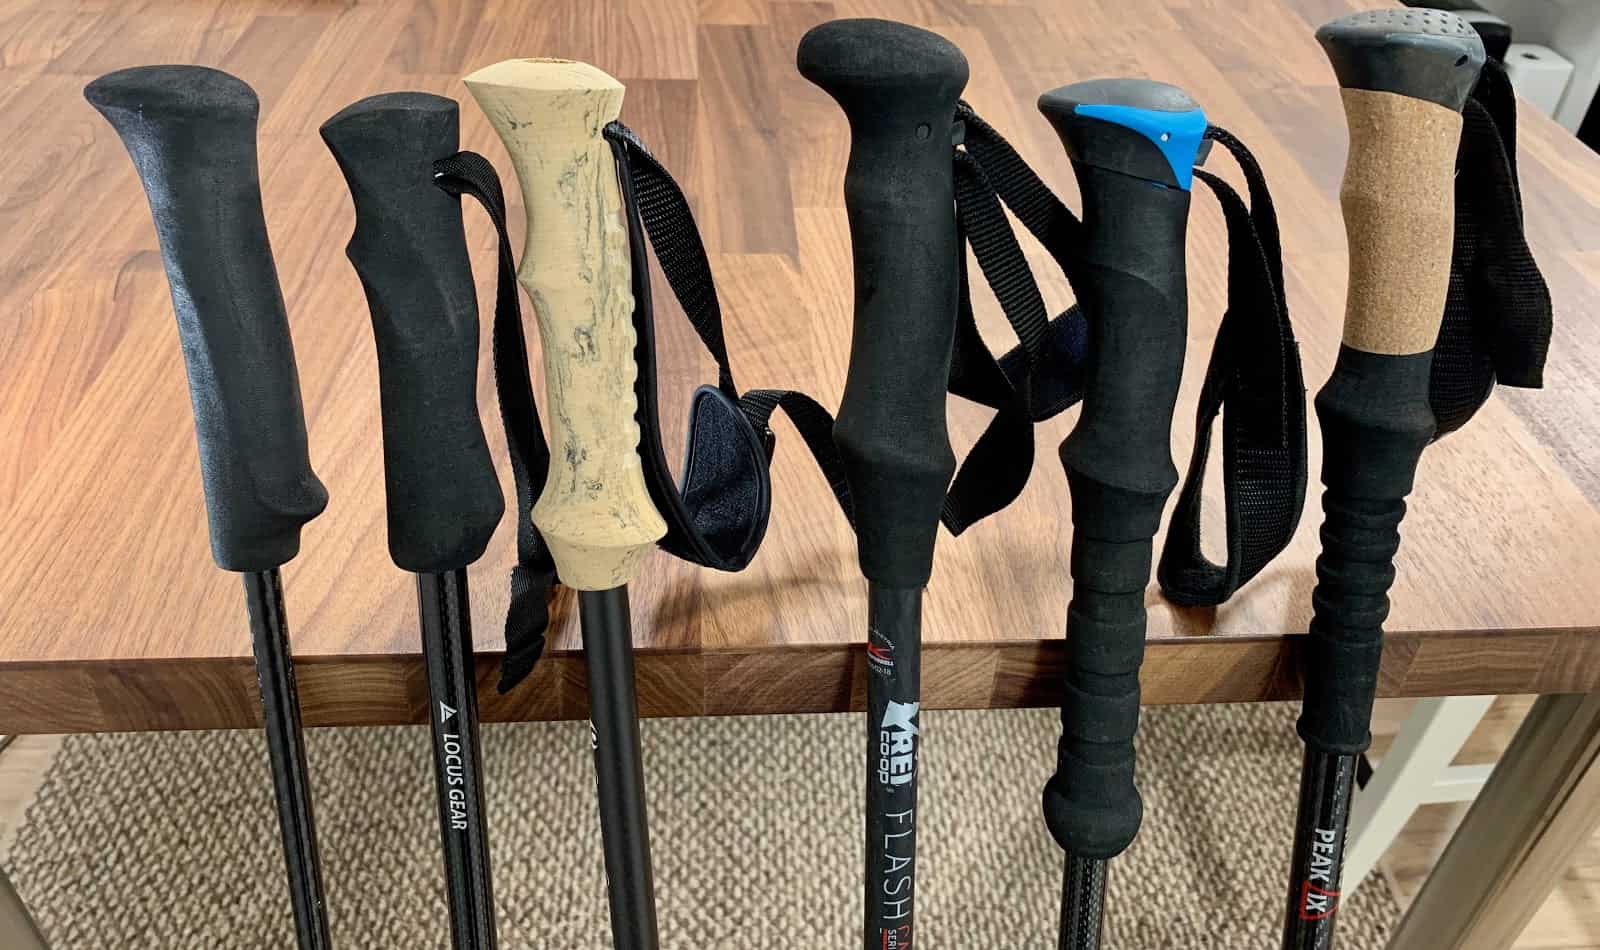
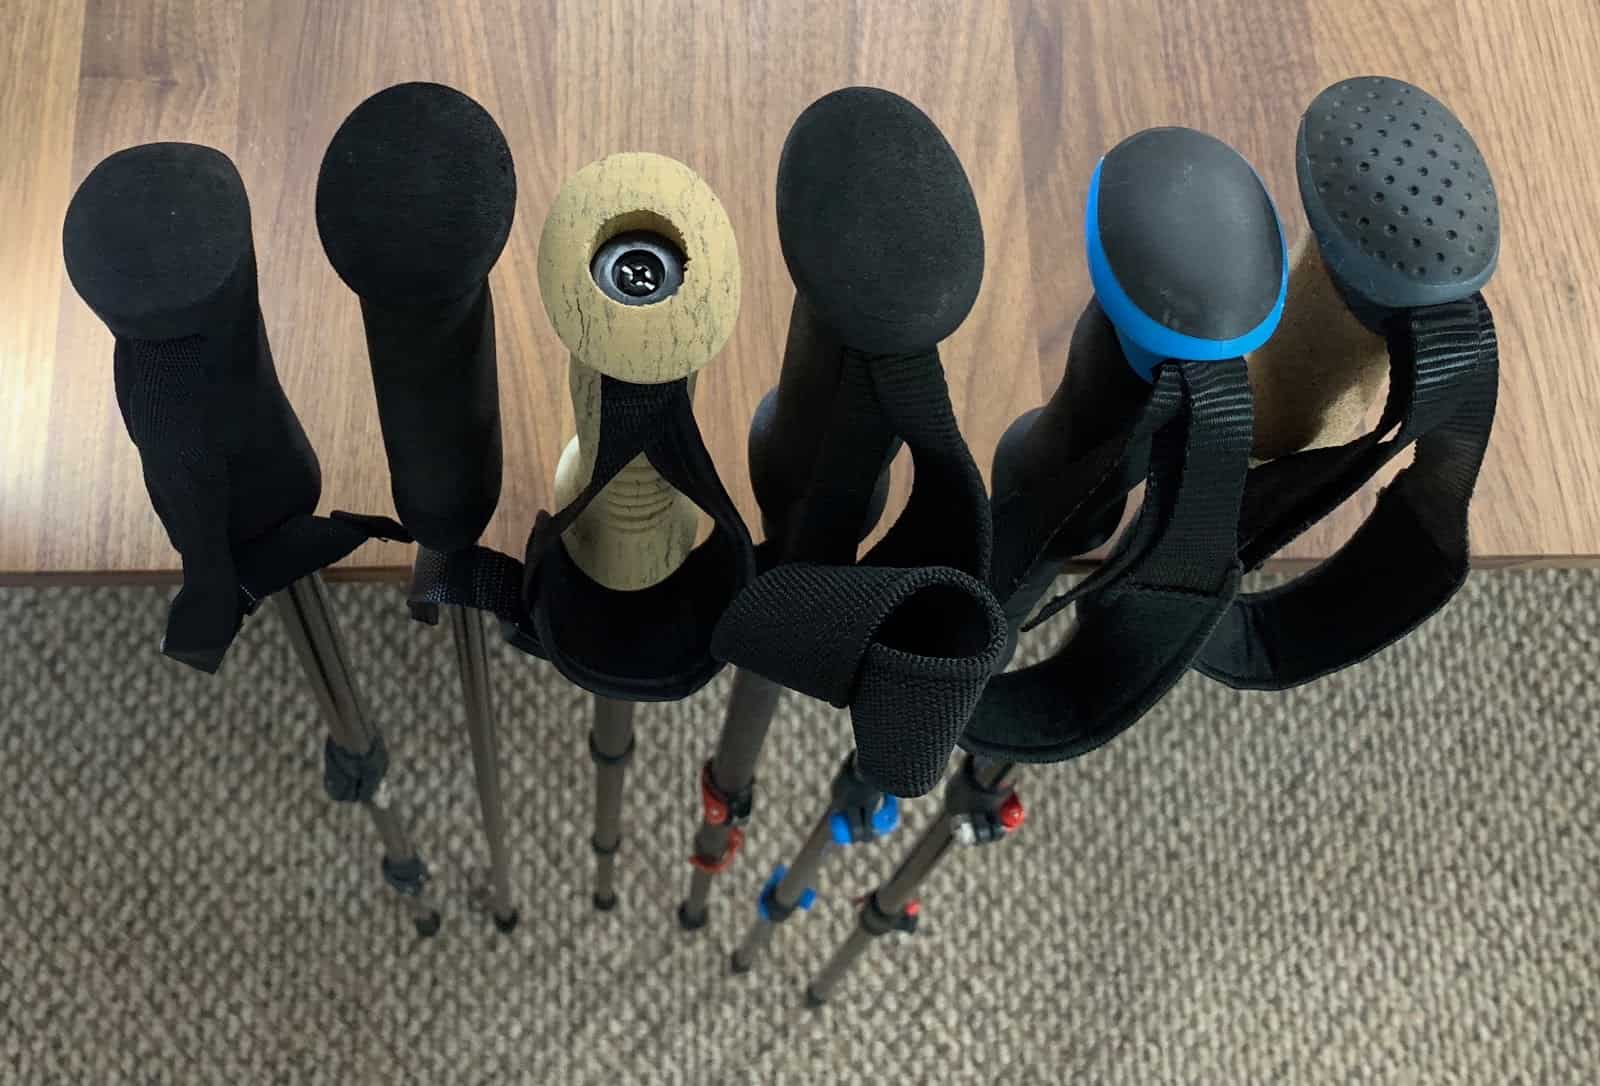
Some companies market “ergonomic grip angle” as a trekking pole feature. Such grips are angled about 15 degrees “forward” and are proposed to keep the arm and wrist in a more naturally-aligned position.
Once again, no scientific evidence exists that supports this claim, and at least amongst the hiking community, anecdotal evidence is conflicting. Most people who identify as lightweight backpackers tend to prefer non-angled grips because of cost savings, experience that suggests that they don’t offer any benefit, and perhaps their intrinsic bias against marketing BS.
Ergonomically (theoretically) a forward grip angle would only benefit faster hikers who plant their poles ahead of their stride, and use poles that are typically shorter in length than what manufacturers advise. The extreme (and probably the only appropriate) manifestation of this are the 45-degree angled and very short Pacer Poles, which customers seem to rave about.
On some models, you’ll find a foam tube surrounding the shaft below the main handle. This allows you to “choke up” on steep climbs rather than taking the time to adjust the poles to a shorter length.

Foam is essential for an extended grip because you’re wrapping your hand around the shaft instead of contouring it around an ergonomically-shaped hand grip. Foam is sticky and helps you maintain that grip. Some extended grips are ribbed for additional friction.
Straps or no straps?
Manufacturers use three strategies for straps: no straps, wide straps lined with wicking fabric, or something in between.
Straps offer three key benefits:

Wide straps with wicking fabrics are comfortable for long ascents but add weight.
Think twice before purchasing strapless poles, or removing straps from your poles. I (Ryan) used to be a passionate advocate for strapless poles due to their aesthetic simplicity, but I’ve since reversed my position about straps. For off-trail travel in steep and mountainous terrain, poles with at least rudimentary straps on them are essential for me.
I (Andrew) agree wholeheartedly. I’ve lost strapless trekking poles on complicated river fords. Additionally, straps allow you to loosen your grip on the pole over easy terrain, giving your hands a break on long (thru-hike) expeditions.

Most trekking poles ship with carbide-tipped plastic end caps. Carbide is durable and provides a precise grip on rocky terrain.
You can purchase aftermarket rubber tip caps that slip over the carbide tips. The advantages to rubber tip caps is that they don’t leave holes on the side of the trail (some feel that this is an important leave-no-trace consideration on heavily-used trails), dampen the “click-click-click” noise of the tips coming into contact with the ground on every pole plant, and provide better traction on some types of rock (but only when dry, and only if the poles are planted nearly perpendicular to the ground surface). Some thru-hikers carry them for long road walk sections.
Rubber tips add weight, and we’ve found so many on the trail that have fallen off that they are a meaningful source of trail litter in high-use areas.
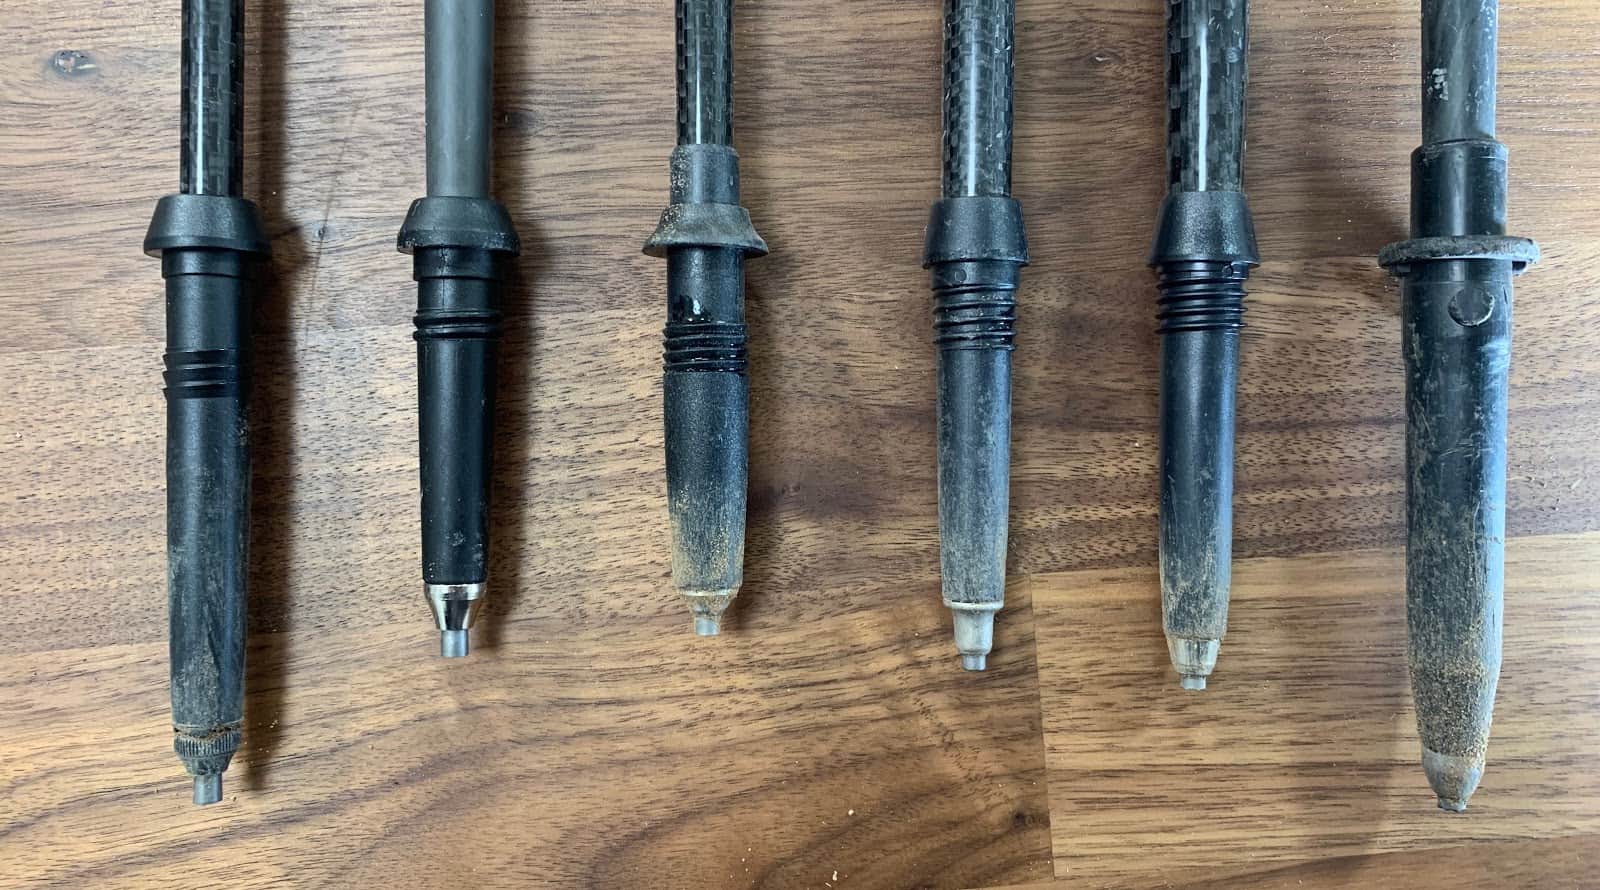
Poles without tip baskets are lighter, swing easier, and can be placed more precisely when navigating steep and rocky terrain because the tip isn’t hidden by the basket.
Baskets come in two primary sizes: small baskets are about 1-2 inches in diameter and larger baskets are about 3-4 inches in diameter. Smaller baskets are designed to keep the pole from penetrating in deep mud, spongy tundra, talus, and hard snow, while larger baskets are for winter travel in powdery snow.
Small baskets are useful for mud, tundra, talus and snow because if your pole penetrates too deeply, your forward momentum may break the pole shaft.
The following criteria are used to evaluate trekking pole performance in this gear guide:
Straps add versatility and function for travel off-trail on terrain that is soft (e.g., snow, mud, tundra) or terrain with holes (e.g., talus, tussocks).
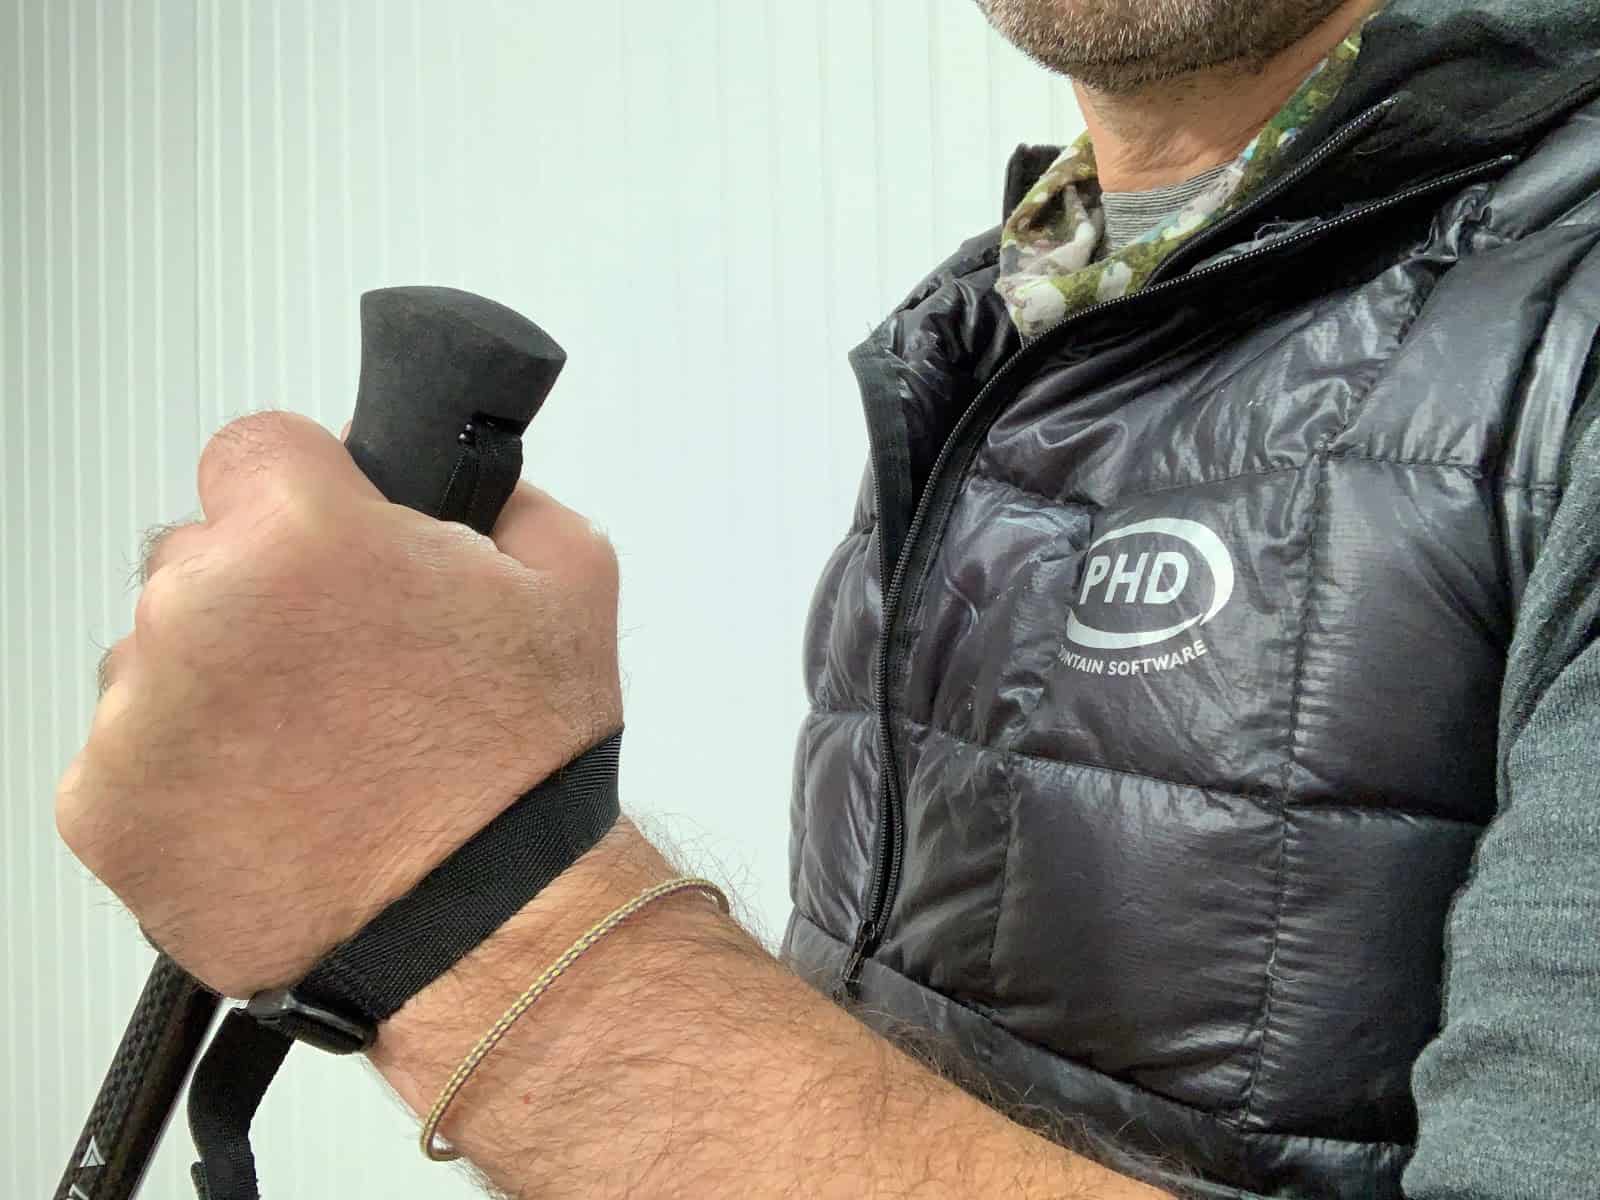
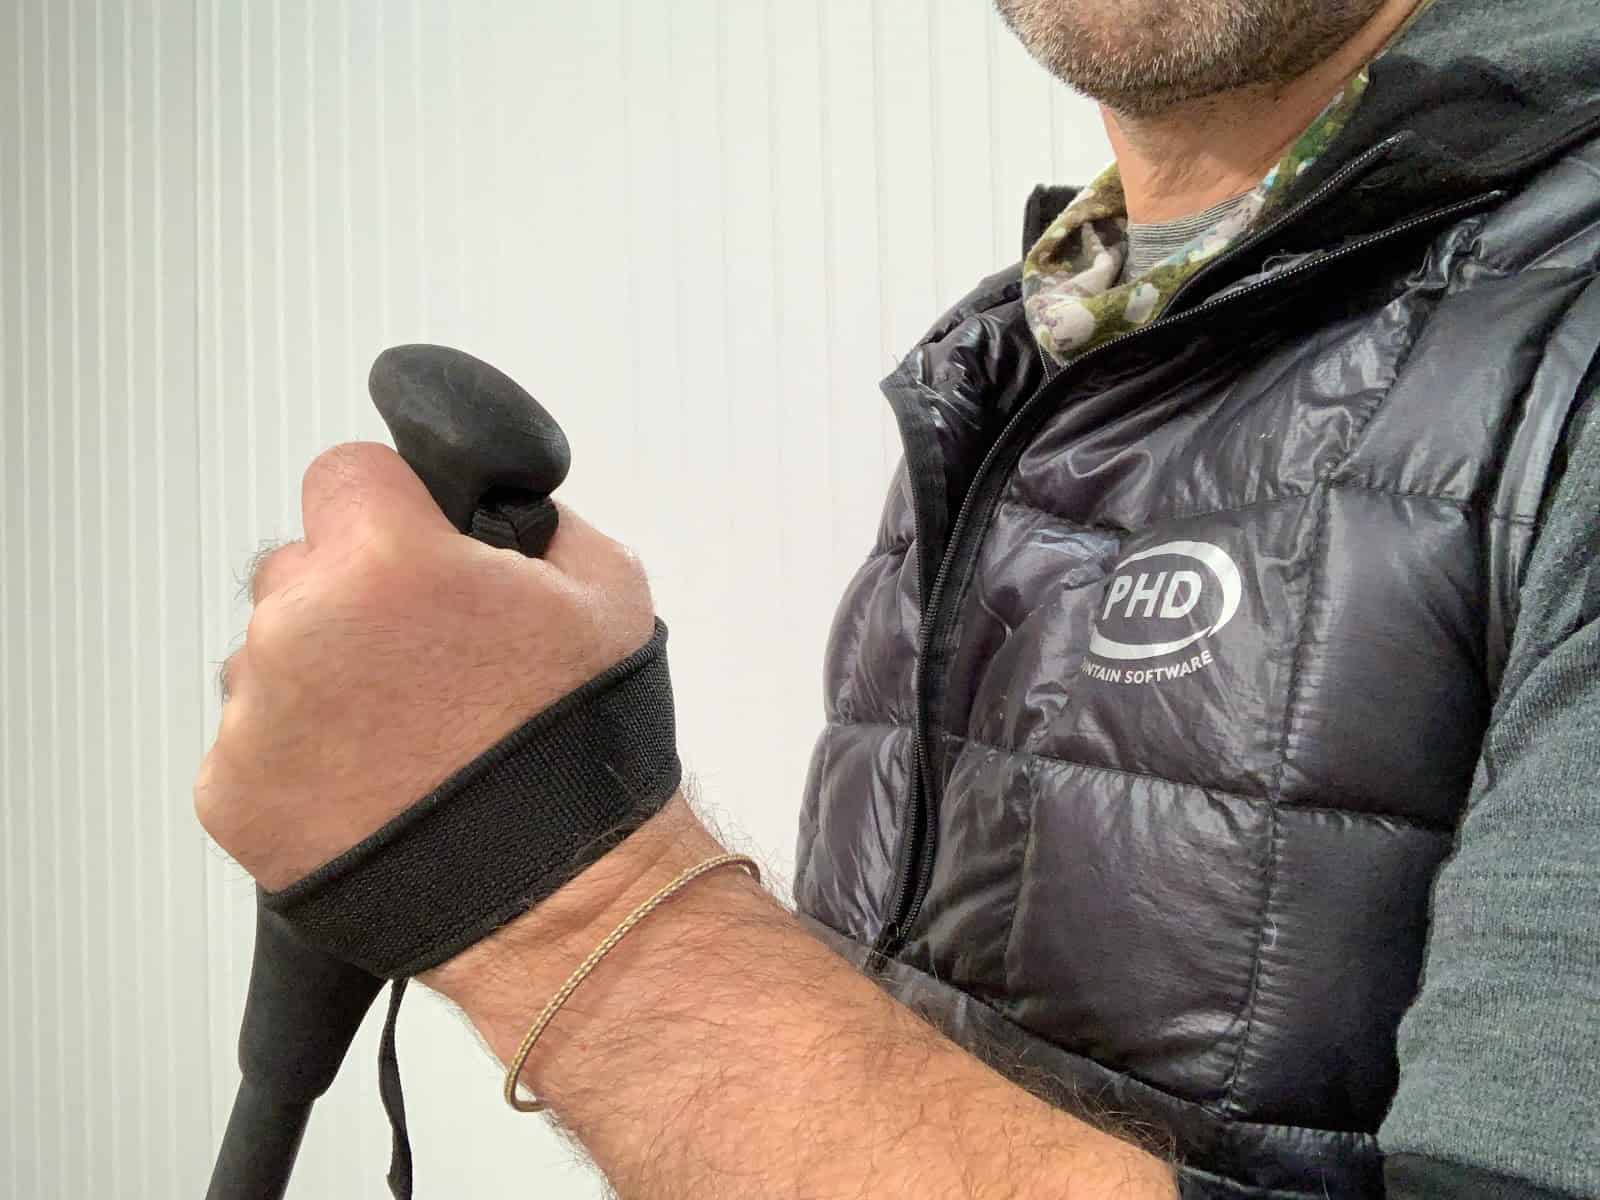
And, extended grips allow for a pole to be used more optimally on short steep ascents without taking the time to adjust them.
Although preferences vary, it’s generally recommended to use a pole length that allows your elbow to maintain a 90-degree angle (or perhaps slightly less). This gives you the most stability and comfort over long periods of time.

That also means that on steep climbs or descents, the pole length will need to change in order to maintain this optimum angle.
When hiking downhill, you can adjust the pole to be slightly longer to add stability and keep your body more level.
When hiking uphill, shorten the poles to add upward power to your movement.
On slanted ground or traverses, you can adjust individual pole length accordingly.
Of course, this all assumes you are using an adjustable pole. Some ultralight hikers do not consider the advantages of adjustability to be greater than the weight saving advantages of a fixed length pole, and instead, adjust the angle at which they use the pole accordingly (reference the video for how this is done).
Also, the locking mechanisms of adjustable poles are occasionally prone to failure or compromise (e.g., they get stuck or don’t engage as a result of dirt intrusion). Some poles can be difficult to adjust when wet or cold, especially when wearing mittens.
Adjustability also comes into account when considering use with a shelter, but we’ll treat that separately. See below.
Collapsibility of poles is a factor to consider under two circumstances: when traveling and when storing in or on a pack.
Fixed length poles complicate all of the above factors. Another consideration, especially for thru-hikers or others who need to re-supply on long trips, is that many restaurants and places of business prefer that your poles be well stowed and tucked away so as not to accidentally knock over merchandise or your fellow shoppers.
Utilizing a shelter that sets up with trekking poles is a great way to turn a single use item into a multi-use item – thereby saving weight. Most shelters that set up with trekking poles require, at least technically, an adjustable trekking pole. This allows for flexibility in pitch and location (depending on shelter design).
If you choose to use a fixed length pole you might find yourself with fewer options. You can always do some research and buy a pole length that best suits your shelter or vice versa. A solution for fixed lengths poles that are too long is to angle the pole off center from the shelter. If your pole is too short, several cottage industry brands sell pole jacks to raise the height.
Finally, there is the MYOG solution. Many enterprising hikers simply build a fixed length pole that matches the needs of their shelter and hiking style.
Pole material is not usually considered to be a factor under most conditions when the pole is used for shelter support. However, I (Ryan) have snapped carbon fiber poles in high winds when two poles were lashed together for a large (four-person) pyramid shelter, and I’ve snapped carbon fiber trekking poles and bent aluminum trekking poles under extreme snow loads during winter conditions.
The poles in our Gear Guide range from 2.7 oz to 11 oz (individual pole weight). It’s hard to notice the difference between poles that weigh 8 vs. 9 oz. However, we found the difference is more noticeable and dramatic once the difference becomes about 30% or more. And the difference in weight while hiking between a 3 oz pole and an 11 oz pole is almost mind-boggling.
A trekking pole is carried in the hand, meaning its weight must be considered differently than weight carried in a pack.
The “swing effort” (force, e.g., in ft-lb) required to use a trekking pole is proportional to the product of its weight (e.g., in lb) and the position of its center of mass measured by its distance from the grip end of the pole (e.g., in ft).
For example, let’s compare two poles each having a length of 120 cm (3.9 ft). Pole A accurately represents the lighter poles in this gear guide, while Pole B accurately represents the heavier poles in this gear guide.
Pole A has a total weight of 100 g (0.22 lb). It has a foam grip, a lighter tip housing, and a single-piece carbon fiber shaft. Its center of mass is measured at 36 cm (1.2 ft) from its grip end. Its swing effort is thus calculated as 1.2 ft x 0.22 lb = 0.26 ft-lb.
Pole B has a total weight of 350 g (0.77 lb). It has a rubber grip, heavier tip housing, a tip basket, and a three-piece adjustable aluminum shaft. Its center of mass is measured at 42 cm (1.4 ft) from its grip end. Its swing effort is thus calculated as 1.4 ft x 0.77 lb = 1.1 ft-lb.
Thus, it wouldn’t be a far stretch to assume that Pole B requires more than 4 times the amount of effort to swing while hiking. Other assumptions go into this model, of course (which includes the angular and cartesian displacements of the hiker’s swing and the effects of gravity during the swing), but you get the idea. In other words, swinging a heavy pole gets real old, real quick.
This video illustrates another example – where a heavier pole actually has a swing effort that is lower than a lighter pole!

In this example, consider the following stats:
| Pole ID | Pole Weight (oz) | Distance from Center of Mass to Grip End (in) | Swing Effort (ft-lb) |
| C | 14.5 | 17.0 | 1.28 |
| D | 18.0 | 12.0 | 1.13 |
Remember, the weight of a piece of gear doesn’t always tell the whole story about its performance!
But here’s the caveat.
Scientific evidence suggests that caloric expenditure of heavy vs. light vs. no poles makes a difference only during exaggerated swing motions (picture those super-cool fitness walkers on beach boardwalks in California!), and that it doesn’t make a huge difference for people walking or hiking with a natural swing gait.
However, backpackers will certainly appreciate lighter swing weights over the course of a long, all-day hike or a long distance hike (e.g., thru-hike), because it will make pole placement easier and relieve some arm strain caused by swinging poles thousands of times per day.
Alternatively, there is the question of durability vs. weight to consider. A heavy weight does not necessarily always indicate a stronger pole: there are factors of design and construction quality to consider. That being said, many poles at the light end of the spectrum are built from carbon fiber, which is more prone to breaking under lateral strain than the aluminum poles.
A hiker moving at a moderate pace might initiate contact between his trekking pole and the ground anywhere between 20 to 40 times a minute. That adds up over miles, days, and years of use. For this reason, the difference in lifespan between a well constructed trekking pole and a shoddy one might be more readily apparent than in other pieces of gear.
The poles in this gear guide range from $30.00 to over $150.00. Cost varies with construction, design, material, and point of origin. Some hikers buy cheap poles knowing that the poles might not last long. In some cases, it’s just as easy to break an expensive carbon fiber pole as it is to snap an inexpensive one!
We surveyed 109 models of trekking poles from Gossamer Gear, Ruta Locura, Komperdell, Black Diamond, Helinox, Locus Gear, ZPacks, Mons Peak IX, REI, Leki, Montem, Hiker Hunger, Kelty, and Mountainsmith having weights ranging from 2.7 oz per pole to 11.0 oz per pole.
Here’s a chart showing their weight distribution:

The average weight of the trekking poles surveyed was 16.1 oz/pair. The standard deviation of these weights was 4.1 oz/pair. Using those delimiters, we thus define three categories of poles we arbitrarily call “heavy” (all poles heavier than average), “light” (all poles lighter than average), and “ultralight” (all poles lighter than the average minus one standard deviation).
In this gear guide, we are only considering poles that fall into either the ultralight or light category during our preliminary survey.
Of the 45 models that met the “light” or “ultralight” criteria, we hand-picked a selection that we felt provided a representative overview of various designs from both mass-market and cottage-branded manufacturers.
Excluded from the gear guide, notably, are poles manufactured by OEM Chinese factories that sell branded products to end-point suppliers. These are the typical poles you find at large online shopping sites like Amazon under a variety of brand names. Most of these poles are inexpensive, manufactured by one of only a handful of large Chinese manufacturers, and are of dubious quality.
The following table highlights the products featured in this Gear Guide. When multiple sizes of a given model were offered, we selected and tested models that spanned a 115-125 cm range as much as possible. When there was an option for a model with or without straps, we selected the model with straps.
In addition, we included two models in the table – the Gossamer Gear LT3C and LT4/4S – that have been discontinued. However, these poles are so iconic amongst those of us in the ultralight backpacking community that we couldn’t help but include them for comparison purposes.
| Model | Length | Weight Per Pair | MSRP |
|---|---|---|---|
| Gossamer Gear LT3C* | 120 cm | 5.6 oz | discontinued |
| Ruta Locura Yana | 78 cm - 135 cm | 7.5 oz | $155 |
| Gossamer Gear LT4S* | 90 cm - 140 cm | 9.2 oz | discontinued |
| Komperdell Carbon Trail Ultralight | 120 cm | 9.4 oz | $150 |
| Gossamer Gear LT5 | 60 cm - 130 cm | 10.0 oz | $195 |
| Helinox Passport Featherlite Twist Lock | 53 cm - 120 cm | 10.4 oz | $140 |
| Black Diamond Distance Carbon Z | 120 cm | 10.5 oz | $170 |
| Locus Gear CP3 | 65 cm - 135 cm | 10.6 oz | ¥13,800 (approx. $130) |
| Helinox Passport Tension Lock | 115 cm | 11.0 oz | $150 |
| Black Diamond Distance Carbon FLZ | 105 cm - 125 cm | 12.7 oz | $190 |
| ZPacks Ultralight Carbon Fiber | 62 cm - 142 cm | 13.4 oz | $100 |
| Mons Peak IX Tiger Paw Carbon | 62 cm - 135 cm | 13.9 oz | $150 |
| Komperdell C3 Carbon Pro Compact | 90 cm - 120 cm | 14.5 oz | $160 |
| REI Flash Carbon | 105 cm - 140 cm | 14.8 oz | $140 |
| Leki Carbon Ti | 100 cm - 135 cm | 15.2 oz | $180 |
Let’s review the key design features and performance benefits for each of these models.

With the discontinuation of Gossamer Gear’s lightest pole model (the LT3C) The Ruta Locura Yana is now one of the lightest (if not the lightest) trekking pole on the market that includes a strap (at less than 4 oz/pole).
Advantages:
Disadvantages:
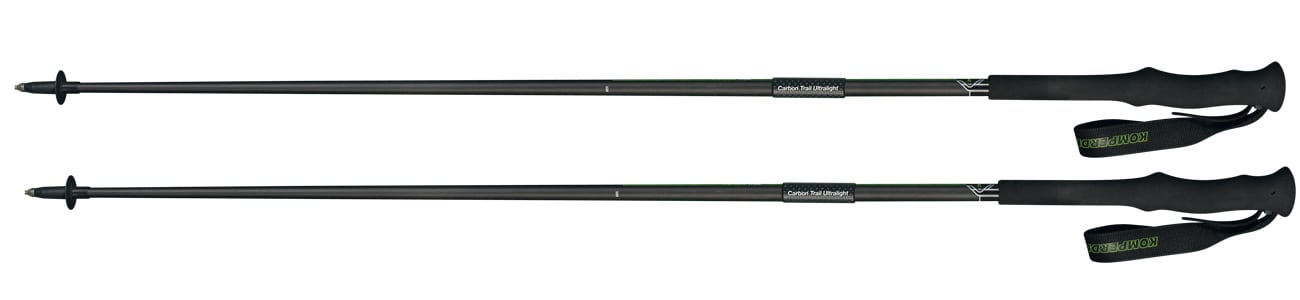
Lightweight foam handles with extended grips and comfortable straps are great, but lack of a palm rest or extended grip ribbing/channeling compromised the function of the Komperdell Carbon Trail Ultralights. Photo: Komperdell.
The Komperdell Carbon Trail Ultralight is an extremely stiff, fixed length pole with extended foam grips and a wide, comfortable strap. In terms of pure trekking performance – using the pole while hiking – its performance-to-weight ratio is unmatched. This pole uses the same shaft as the old Stix poles we built and marketed under the Backpacking Light brand several years ago.
Advantages:
Disadvantages:

One of our favorite grips! Very comfortable, ergo foam grip – but alas, no grip extension. A grip extension and lever clamp adjustability mechanisms would elevate the LT5 into “best-of-the-best” in lightweight trekking poles (caveat: for trail use)! Photo: Gossamer Gear.
The Gossamer Gear LT5 is a three-section carbon, adjustable pole with minimalist straps. With a collapsed length of only 60 cm (24 in) it’s the most collapsible telescoping pole featured in this gear guide – a notable achievement for a pole that weighs only 5.0 oz.
Advantages:
Disadvantages:
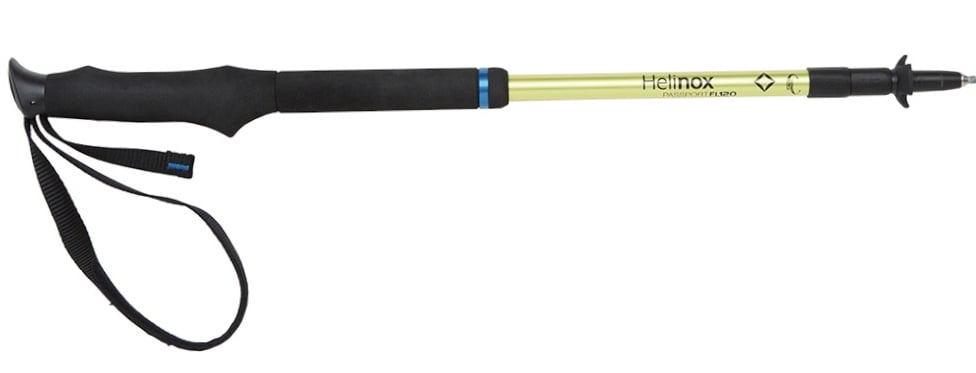
The lightest aluminum pole in this review, the Helinox Passport Featherlite Twist Lock are compact (collapsing to 21 in) and light (5.2 oz/pole). The high-quality DAC aluminum shaft is strong for its weight, but the pole suffers from quite a bit of flex and the twist-lock mechanisms are the most difficult to use of any pole in this gear guide in cold and wet conditions. It’s available (if you can find them!) in max lengths of either 120 cm or 135 cm.
Advantages:
Disadvantages:
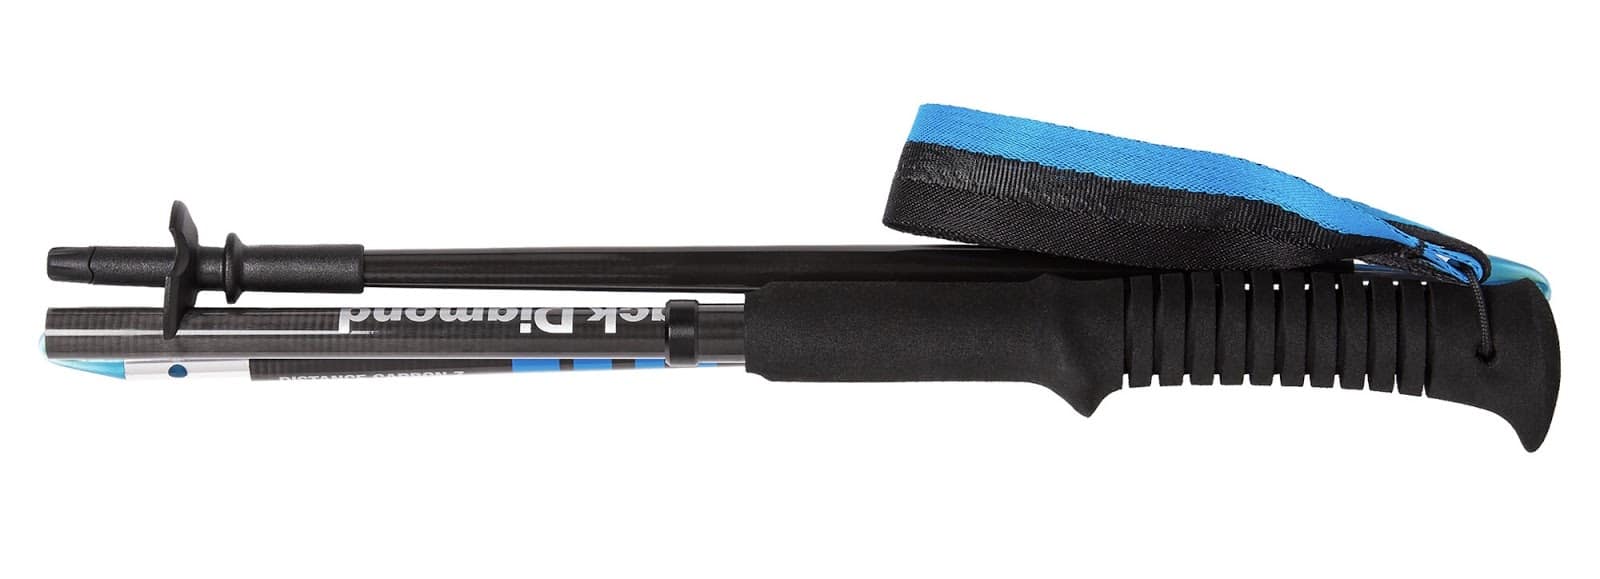
A channel-cut foam grip makes the Black Diamond Distance Carbon Z a very comfortable pole to hold, but lack of a palm rest at the bottom of the grip extension limits its potential. Photo: Black Diamond.
The lightest folding pole in this review, and thus, the lightest “tiny-when-collapsed” pole in this review (5.3 oz each and 16 in long when collapsed), the Black Diamond Distance Carbon Z is a solid choice when light weight and collapsibility are your most important criteria.
Advantages:
Disadvantages:
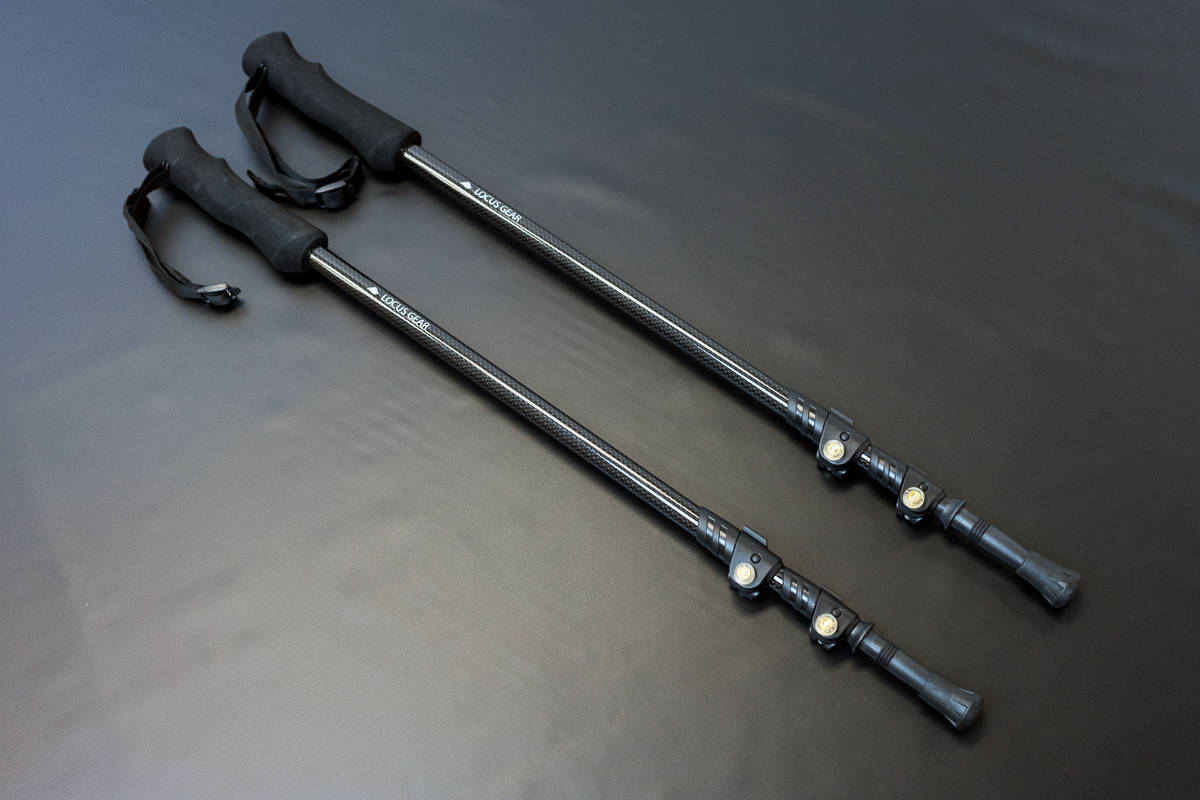
Minimalist grips and straps are the defining features of the Locus Gear CP3 trekking poles. Photo: Locus Gear.
The Locus Gear CP3 is a carbon, three-piece, telescoping pole that collapses to a length of 26 in and weighs only 5.3 oz per pole. Its key design characteristics are its lever lock mechanisms for adjustability and its minimalist grip and strap.
Advantages:
Disadvantages:

The Helinox Passport Tension Lock folds to a tiny size, making it a terrific option for travelers, day-hikers, and trail runners. Photo: Helinox.
Similar to the Twist-Lock model of the same name, the Helinox Passport Tension Lock is a non-adjustable folding pole that collapses to a length of only 14 inches – the shortest of any pole in this review. Otherwise the Tension Lock model enjoys the same advantages and suffers from the same disadvantages as its lighter Twist-Lock cousin.
Advantages:
Disadvantages:
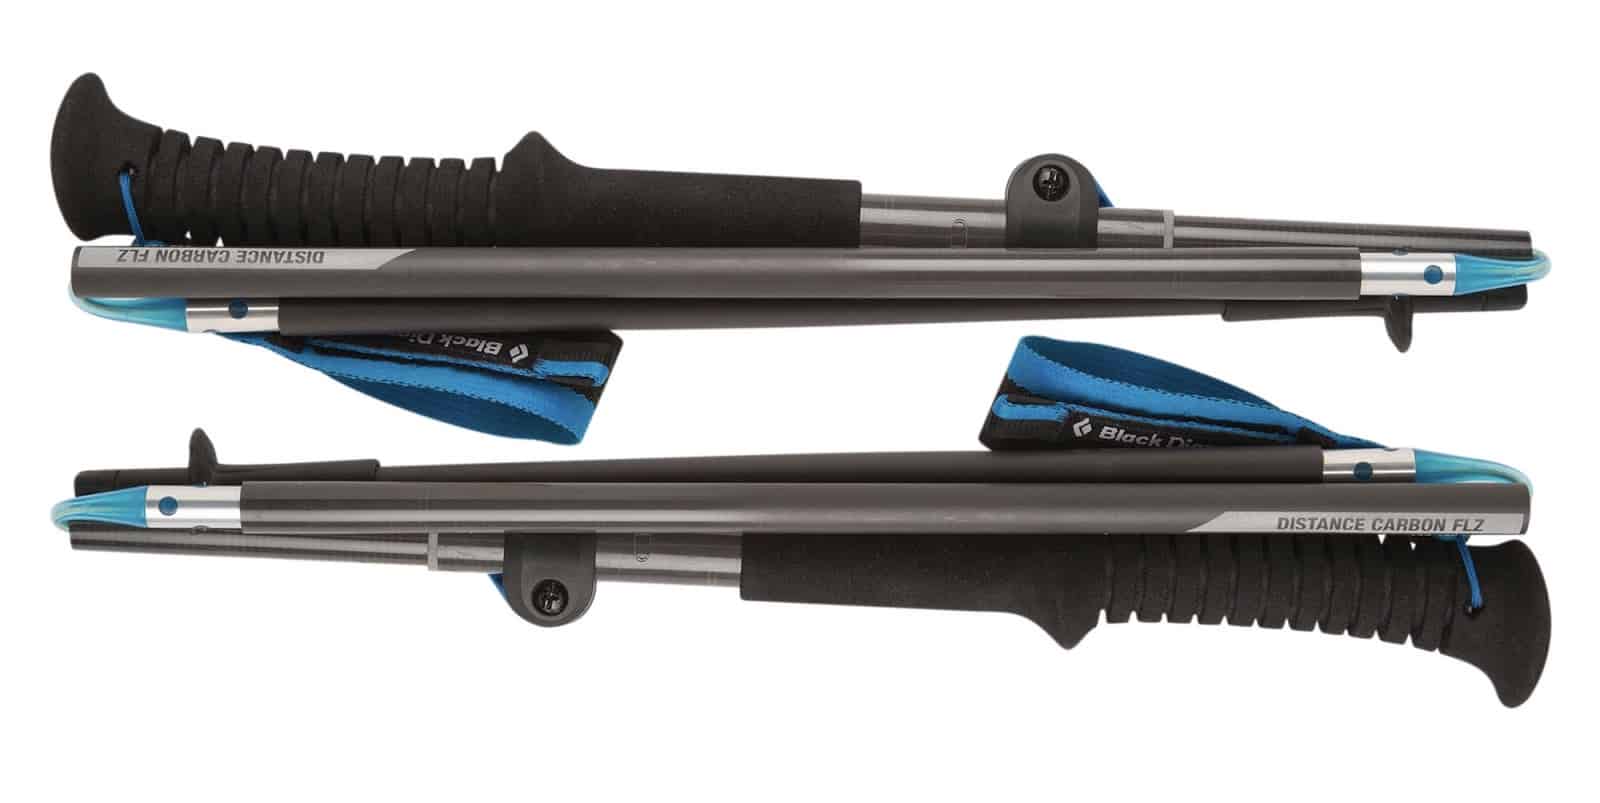
Only slightly heavier and less compact than the Helinox Passport Tension Lock, the Black Diamond Distance Carbon FLZ offers a more comfortable grip and strap, with some adjustability provided by a single upper lever clamp mechanism. That makes it a more versatile choice for ultralight backpackers. Photo: Black Diamond.
A very short collapsed length (14.6 in), light weight (6.4 oz/pole), and a terrific extended grip/strap combo, the Black Diamond Distance Carbon FLZ is one of the best all-round lightweight poles on the market, whether folding or otherwise. The FLZ model adds some adjustability!
Advantages:
Disadvantages:
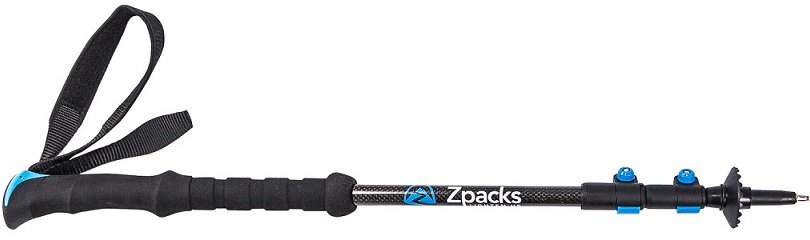
ZPacks Ultralight Carbon Fiber poles offer the best extended grip palm rest of any pole in this review, making it a complete grip package. No small feat for a $100 set of adjustable poles that still weigh less than 14 oz/pair. Photo: ZPacks.
Surprisingly inexpensive telescoping carbon fiber poles, the $100 ZPacks Ultralight Carbon Fiber poles are not as light as what we’d expect from a cutting-edge cottage manufacturer (6.8 oz per pole). Plastic hardware but higher quality manufacturing quality make them rattle less than the slightly lighter Locus Gear CP3 poles, but the grip/extended grip/strap combo make these more versatile and comfortable than the Locus Gear model.
Advantages:
Disadvantages:

A thoughtful grip-strap-extended grip package, metal hardware, and stiff shafts make the Mons Peak IX Tiger Paw carbon a compelling option if you’re looking for a full-featured pole. Photo: Mons Peak IX.
Mons Peak is new to the backpacking gear game, but don’t discount their first entry into the trekking pole market. The Mons Peak IX Tiger Paw Carbon is one of the highest-quality poles in this review. The carbon shafts are stiff, thick, and strong, and the metal lever adjustability mechanisms are high quality and perform very well in cold and wet conditions – the best of any trekking pole in this gear guide. As the lightest pole in this review with a cork grip, it also includes a very useful extended grip and comfortable pole strap.
Advantages:
Disadvantages:
An aesthetically beautiful design, the Komperdell C3 Carbon Pro Compact sure looks good. Add some channeling and a palm rest to the extended grip and it could be close to perfect. Photo: Komperdell.
Once beloved by ultralight backpackers, Komperdell C2 and C3 Carbon Pro poles (including the Komperdell C3 Carbon Pro Compact) have undergone solid design improvements through the years. However, for the weight, there are other as-good-or-better options for telescoping carbon trekking poles, including the Mons Peak IX Tiger Paw Carbon and the REI Flash. Nevertheless, the C3’s remain a viable contender even though they are among the more expensive poles in this gear guide.
Advantages:
Disadvantages:
The REI Flash Carbon is a well-built pole with virtually no vibration or rattle, and has the stoutest tip of any pole in this review, which protects the lower carbon shaft.
Finally, a pole that extends to 140 cm – the REI Flash Carbon. This will be a benefit for taller hikers or those that appreciate the flexibility (as we do) of being able to pitch one end of our shelter (such as a tarp or TrailStar), or the center of our pyramids, higher in good weather for added ventilation.
Advantages:
Disadvantages:
The Leki Carbon Ti is Leki’s lightest pole. An outstandingly comfortable foam grip is hampered by an uncomfortable strap and a smooth extension grip without a palm rest. However, the pole is solid, vibration-free, durable, and well-built. Photo: Leki.
As the second most expensive set of poles in this review ($190), and the heaviest (7.6 oz/pole), the Leki Carbon Ti has a bit of convincing to do before it can win the hearts of backpackers with an eye towards weight savings. Nevertheless, as Leki’s lightest pole, it’s worth including here for those of you who have been drinking the Leki kool-aid for the past few decades. It’s the highest-quality, most vibration-free pole in this review, and it offers the most comfortable hand grip.
Advantages:
Disadvantages:
If your poles spend a lot of time on your pack, or you use them primarily for shelter-pitching and the occasional downhill, we recommend the Ruta Locura Yana.
If you’re in the mood for thousands of miles of trail hiking, and don’t feel a compelling need to have a collapsible pole for travel or bushwhacking, check out the Komperdell Carbon Trail Ultralight. These poles are for the AT thru-hiker. Pair it with a carbon pole jack from ZPacks or Ruta Locura if needed for shelter pitching.
Foldable poles will always be the most compact – they are ideal for runners carrying tiny day packs, or travelers (just tuck them away in a small suitcase). Our pick blends collapsibility with a very comfortable extended grip and strap combo: the Black Diamond Distance Carbon Z.
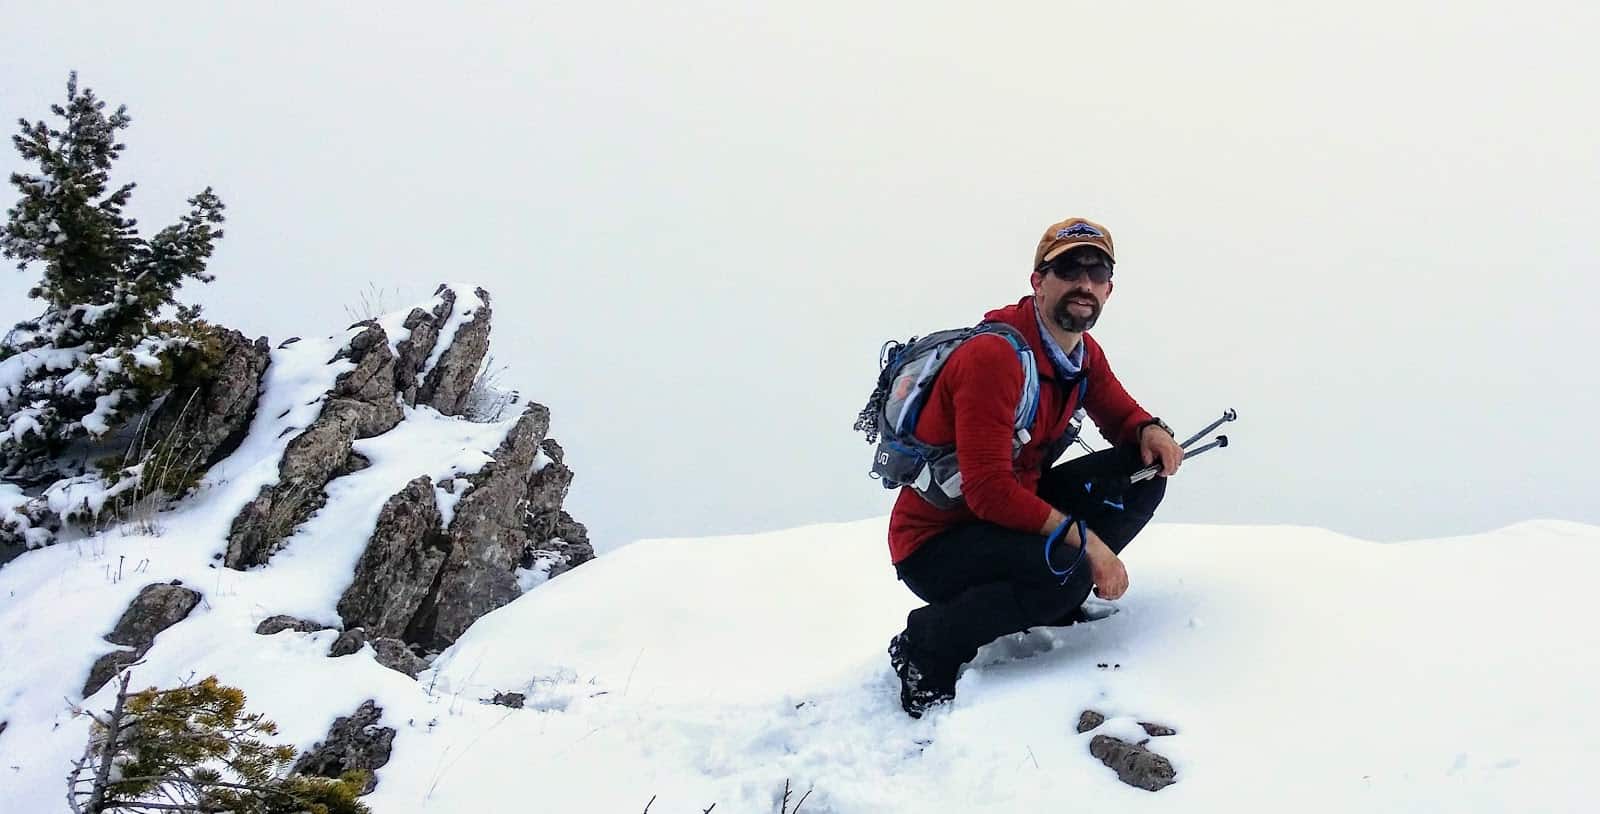
Durability and weight do go hand in hand here. Don’t ignore the Ruta Locura Yana. They offer a limited feature set but they are the most durable poles we’ve ever seen in this weight class (i.e., poles than weigh less than 5 oz apiece). For absolute durability (if you spend a fair bit of time off-trail or in rough terrain), consider the Mons Peak IX Tiger Paw Carbon,the REI Flash Carbon, and the Leki Carbon Ti.
The cheapest poles in this review – the ZPacks Ultralight Carbon Fiber – aren’t just inexpensive, but they are also among the most versatile. Good grip, good strap, extended grip, wide range of adjustability, and good stiffness for stability on descents.
The most versatile among the “ultralight” poles are the Ruta Locura Yana (adjustable, light, and strong) and the Black Diamond Distance Carbon Z (terrific grip/strap, collapsibility).
The most versatile among the “light” poles are the Black Diamond Distance Carbon FLZ (same benefits at the Carbon Z model, but with some adjustability) and the Mons Peak IX Tiger Paw Carbon (best grip/extended grip/strap combo of any pole in this review, plus a wide range of adjustability).
Not sure about trekking poles for you? Consider a cheap and easy DIY option to test the waters:
Materials:
Updated September 15, 2018
 Loading...