Articles (2020)

Purple Rain Adventure Skirt Review

An increasing amount of hikers are turning to skirts and kilts for greater mobility and versatility in the backcountry. I felt it high time to give it a try

Introduction

An increasing amount of hikers are turning to skirts and kilts for greater mobility and versatility in the backcountry. I felt it high time to give it a try. I reviewed the Purple Rain Adventure Skirt in size small.

Purple Rain was founded by Appalachian Trail Thru-Hiker Mandy “Purple Rain” brand after she was unable to find a hiking skirt that matched her needs. She hand sews each product in Oregon.

purple rain
Photo: Purple Rain

Features and Specifications

Features

  • Yoga style moisture wicking waistband
  • Dual double-access pockets
  • Water-repellent
  • Light
  • Quick drying
  • Minimalist design
  • Wrinkle resistant
  • Anti-microbial finish
  • Available in sizes S to XXL
  • Currently available in purple, black, and sandstone (note: different colors come in different fabric blends)

Specifications

  • Skirt body material: 74% polyester, 22% nylon, 4% spandex
  • Waistband material: 90% polyester, 10% spandex
  • Waistband dimensions: 4 in (10 cm)
  • Skirt body dimensions: 16 in (41 cm)
  • Skirt length: 20 in (51 cm)
  • Measured weight: 4.3 oz (121 g)

Review Context

Wearing a skirt can feel like less protection when compared to shorts or pants. While testing this piece of gear I was considering the following: bugs, brambles, abrasions, brisk temperatures, and modesty.

Choosing a skirt requires more careful consideration of layering. I layered mine with an IceBreaker Siren Bikini, Colghan’s Mesh Pants, MEC Women’s Watchtower Pants, and Outdoor Research Women’s Verglas Gaiters. I also used Sawyer Permethrin (insect repellent) on the skirt and mesh.

For rain gear, I used MEC Women’s Hydrofoil Jacket and Pants. If I had to choose again, I’d select a rain kilt or poncho to retain the freedom of movement provided by the skirt.

Description of Field Testing

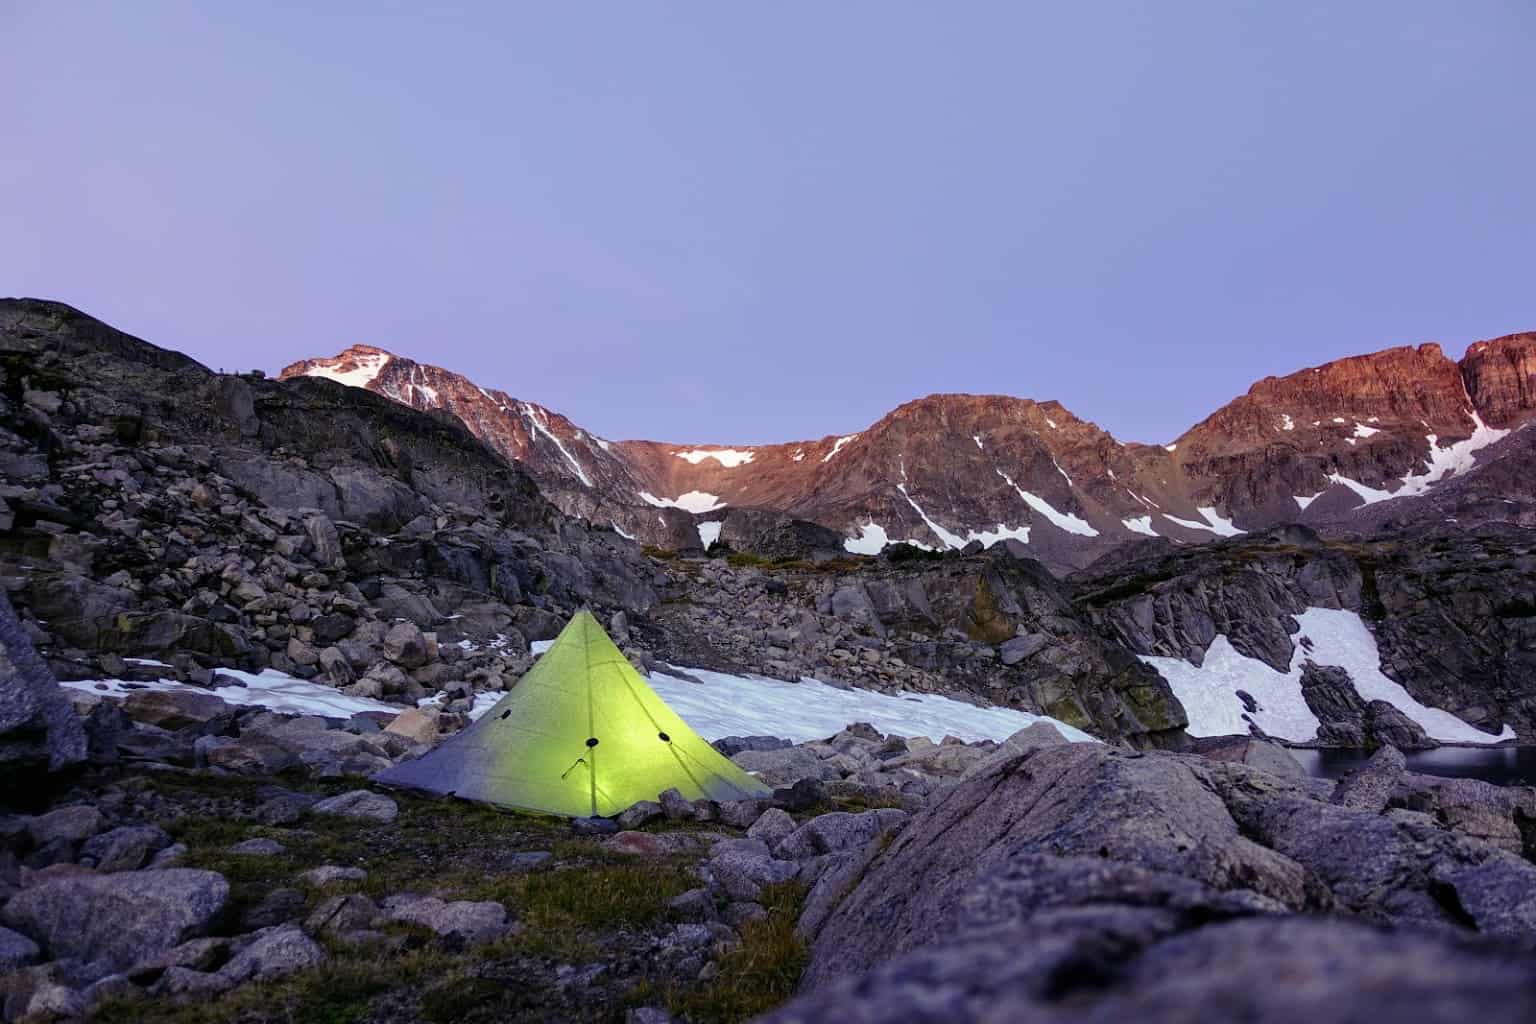
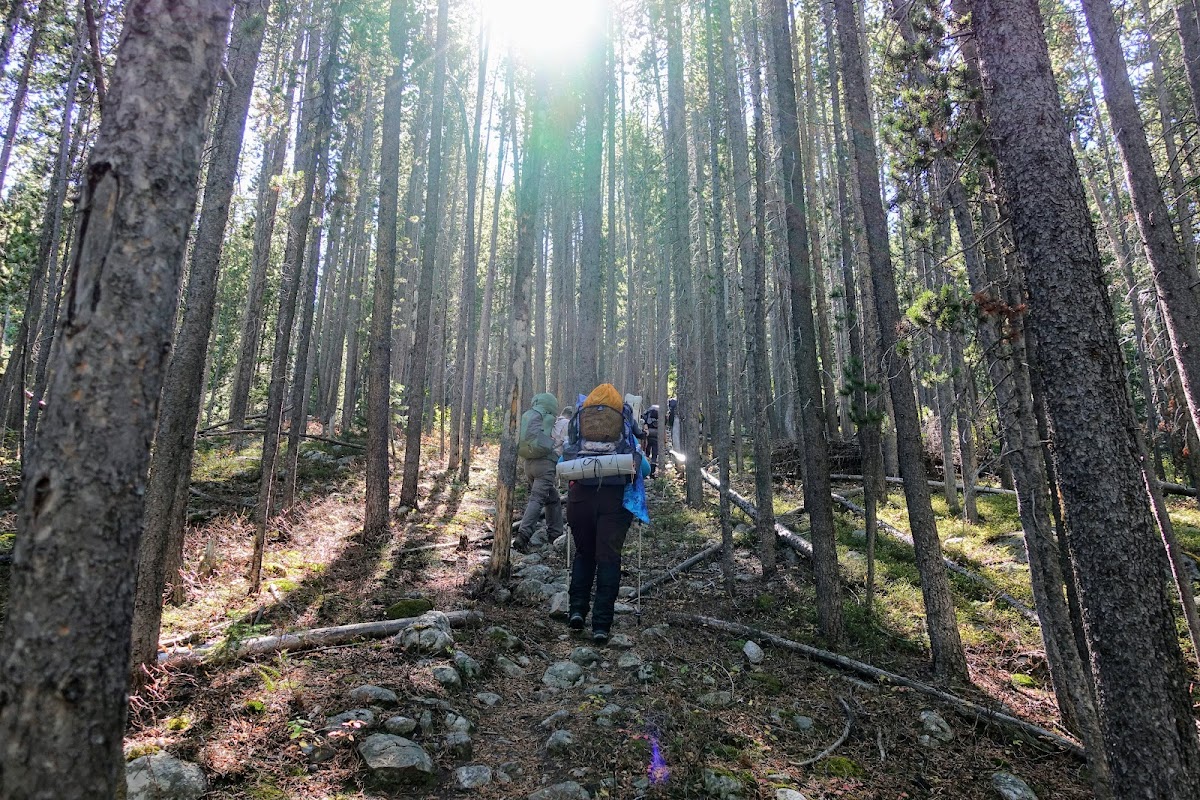
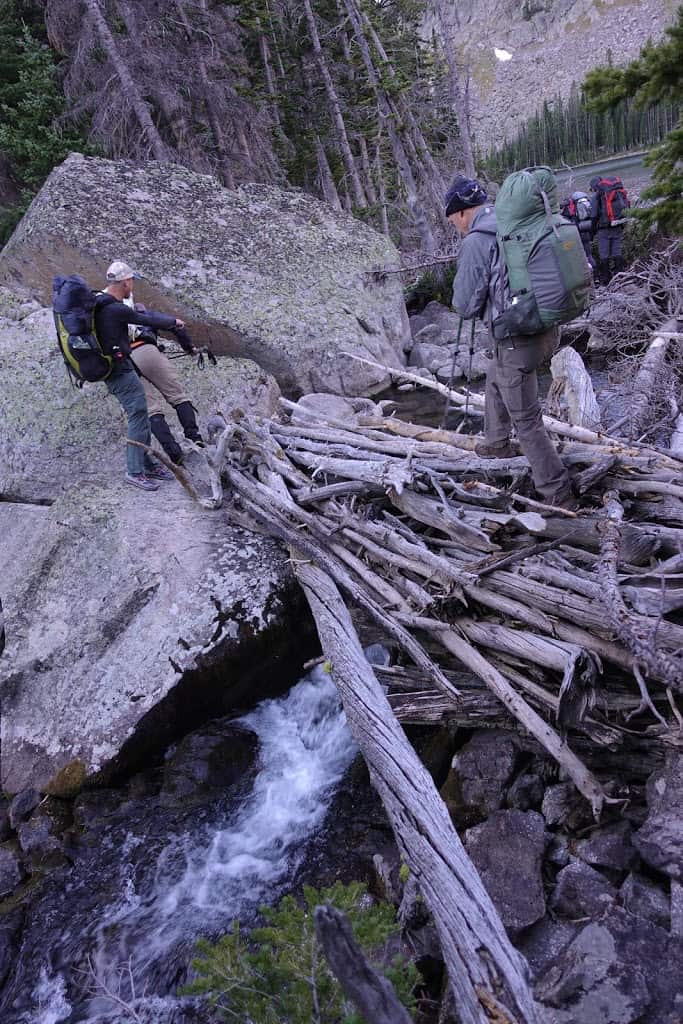
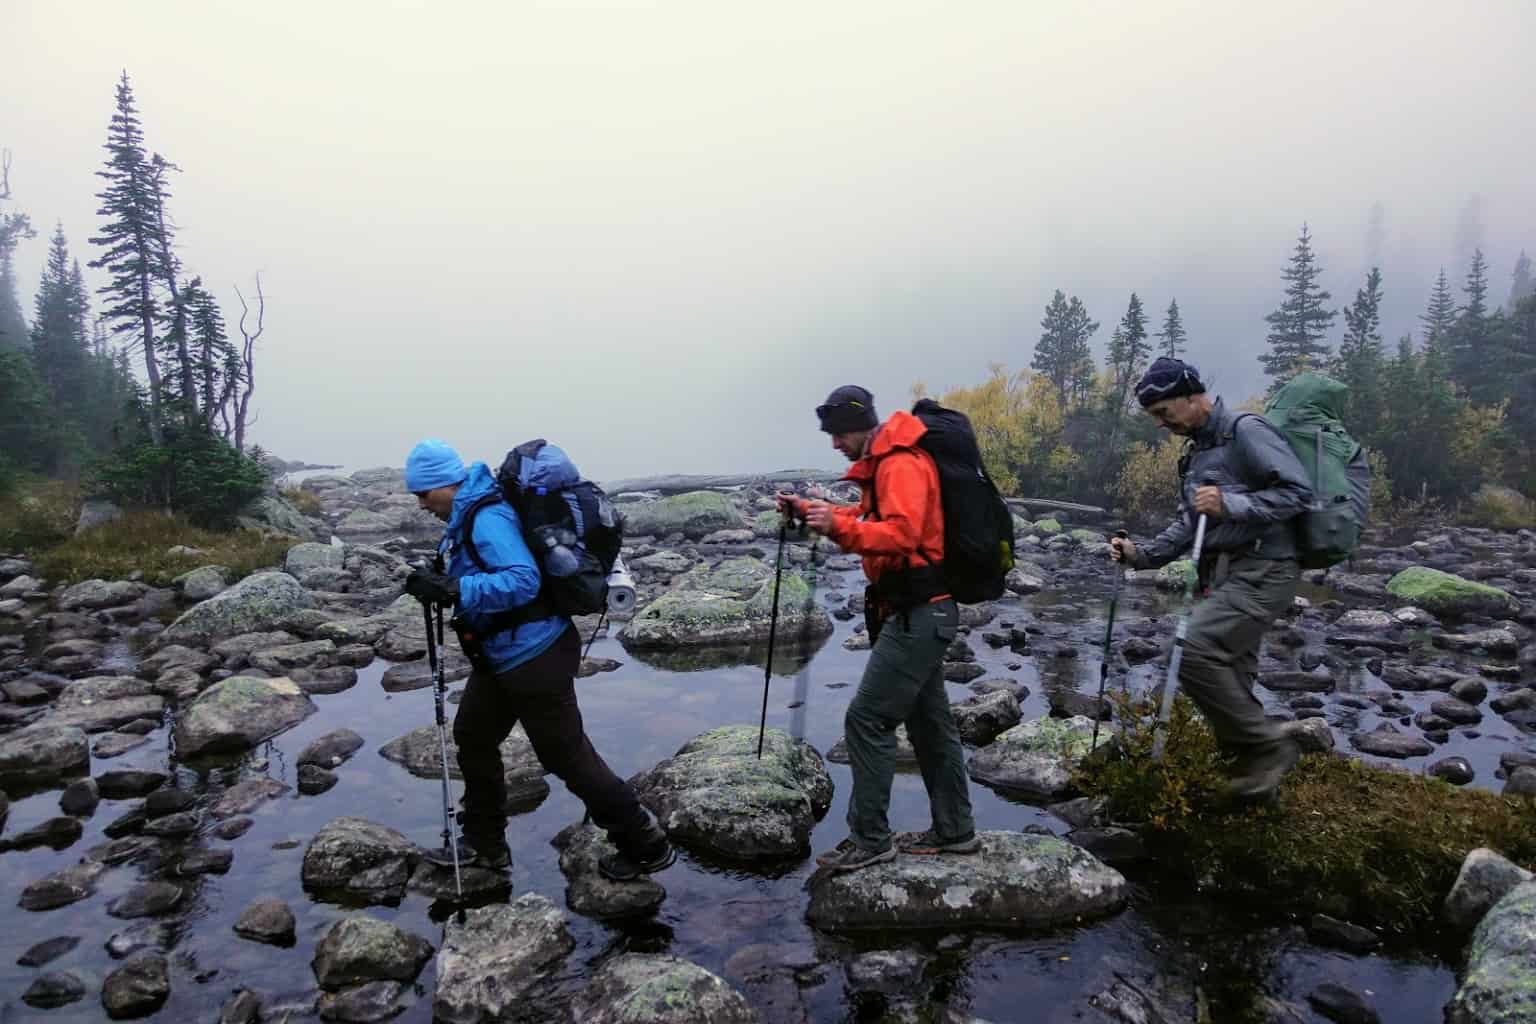
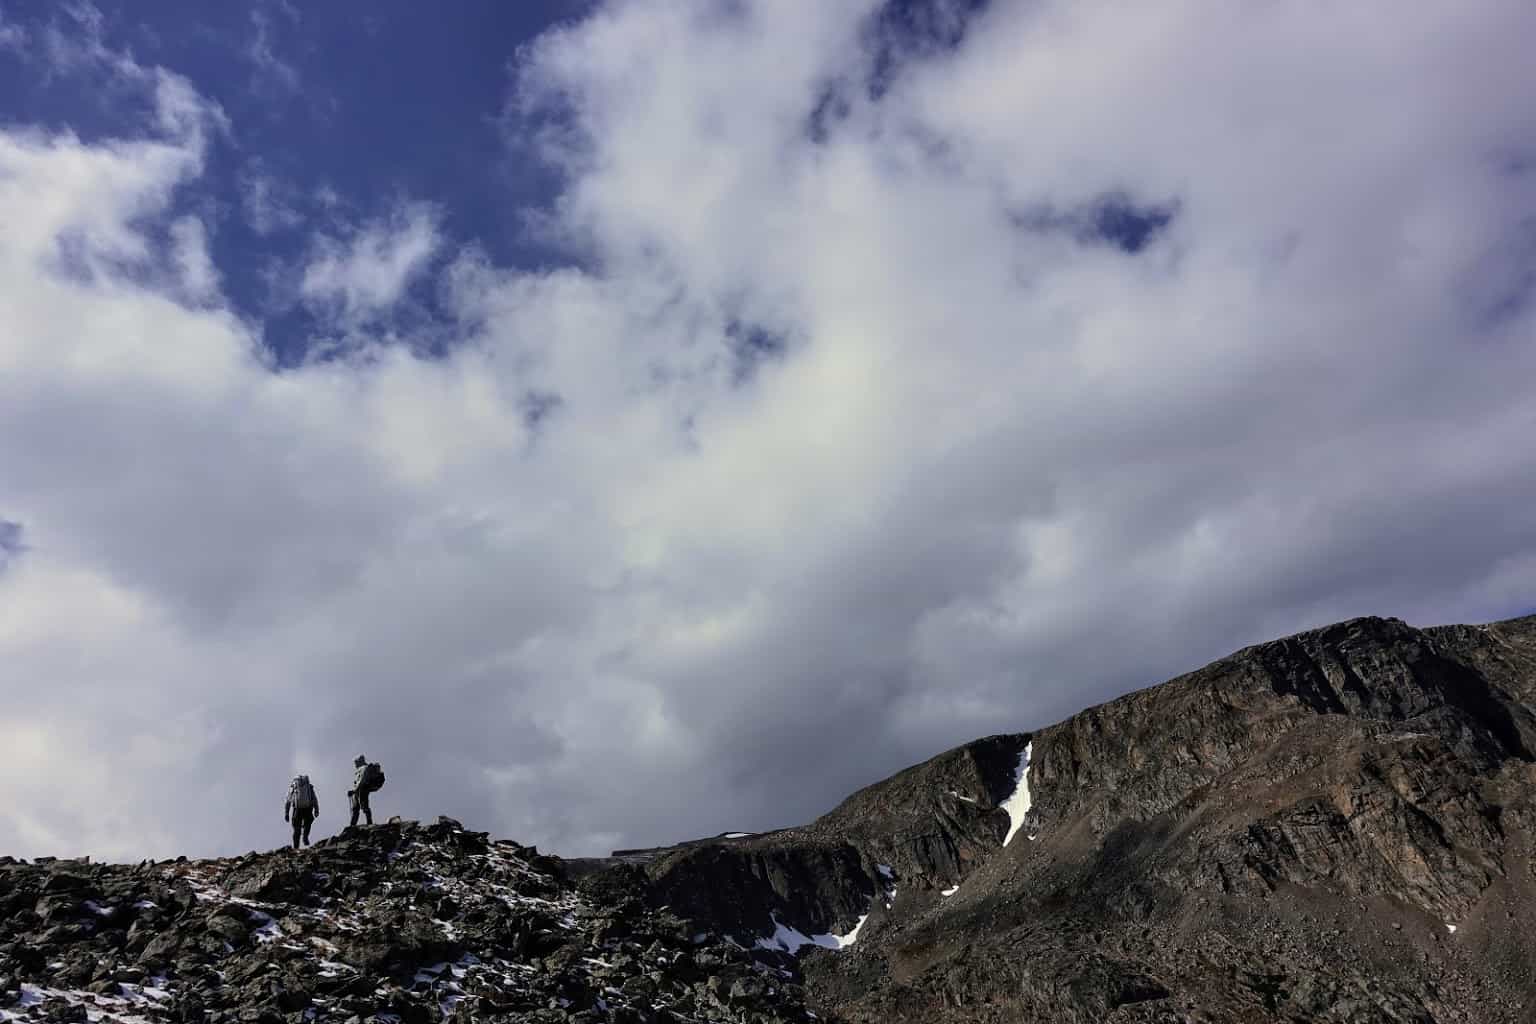
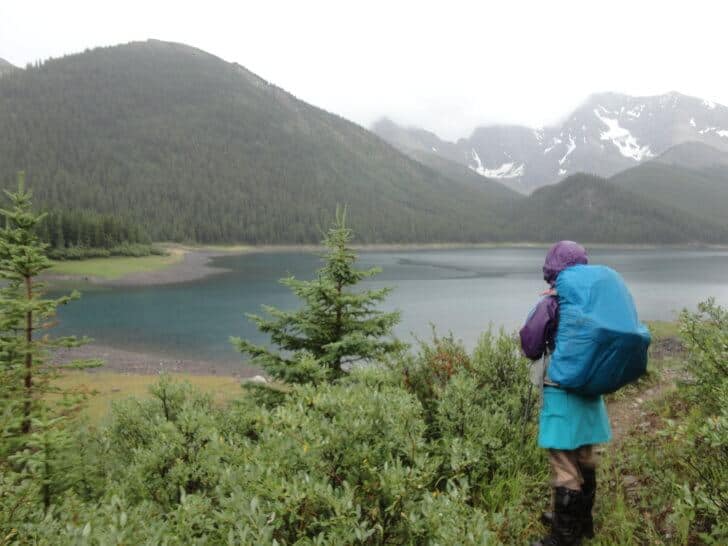
I tested this skirt while hiking up the Marvel Pass Trail to Mt. Assiniboine, an exposed Canadian Rocky environment, and along the West Coast Trail in British Columbia, a coastal rainforest. All told, I wore the skirt for fifteen days in two different sets of conditions.

Performance Assessments

Construction and Fit

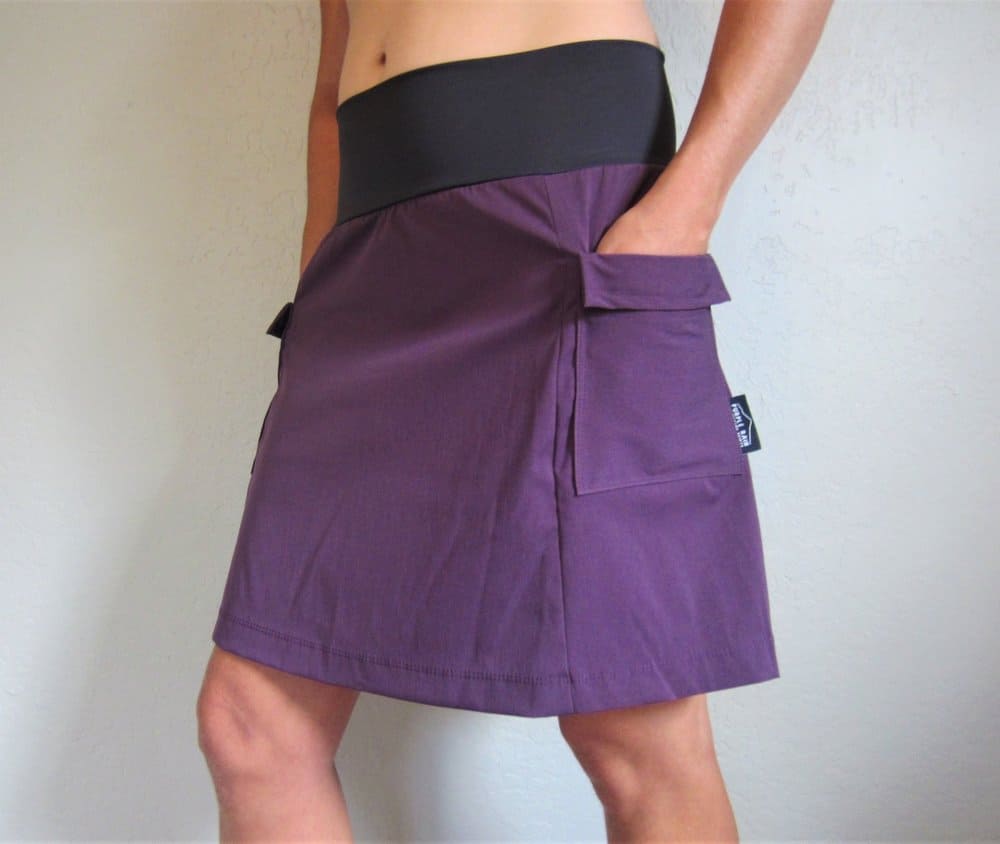
The skirt is a simple A-line tube design with five main pieces: a waist, two side pieces, a front panel, and a back panel. Two double pockets grace either side. The blended synthetic fabric feels sturdy with just the right amount of stretch. The waistband is soft and smooth against the skin and wicks moisture effectively. The skirt is flat and low-profile under my pack.

The double-sided pockets are generously sized and especially nice for storing photography equipment. The inside pocket lacks an enclosure while the outside pocket velcros shut. I could slide my lens caps, filters, and small camera accessories into the flapless pocket when not shooting. The velcro flap pocket was handy to keep small fast-access items like a GPS, gloves, compass, or phone comfortable and secure.

The stitches are tight and even, the hems and seams are straight. This is a well-constructed garment.

DSC02139 728x546
The Adventure Skirt’s rugged construction can stand up to a lot of scrambling and scraping, such as when shooting photographs (Photo: VenderVelden).

Staining, Soaking, and Drying

I began testing the Purple Rain Adventure Skirt by accidentally spilling bacon grease on it. I didn’t give the stain (or the scent) time to set in, I immediately began soaking the skirt in a creek. The upshot was I was able to get a solid idea of what it takes to fully soak and dry the skirt.

It took three full submersions to soak the skirt. During the first submersion, the durable, waterproof repellent fabric shook off ninety percent of the water. After wetting the skirt down, I took it back to the campsite and began scrubbing it with biodegradable soap flakes from my mess kit. I rinsed the soap out over a cat hole about an hour later. I hung the skirt up to dry in my vestibule and hunkered down in my tent for the night.

After two hours, the skirt body was damp but almost dry, while the waistband was slightly moist. Ambient temperature was about fifty degrees Fahrenheit. I was not able to gather any humidity data.

The fabric held a mark from the bacon grease even after machine washing at home, but that is to be expected.

Weather Resistance and Protection

I spent a full day in the rain wearing the Purple Rain Adventure Skirt, during which the precipitation ranged from heavy showers to light sprinkles. The fabric resisted soaking well, even during heavy showers. It took several hours to gain significant moisture but never actually soaked through. The seams and areas where gear stretched the fabric of the pockets seemed to be slightly less water resistant.

What little moisture the skirt did absorb was quickly shed (within forty-five minutes) once the sun came out.

It would have been easy to pull on rain pants underneath the skirt, but I never felt the need. The skirt provided enough protection from the elements.

DSC02012 665x728
The Adventure Skirt’s seams are slightly less water resistant than the rest of the garment.

Bugs, Brambles, and Bushwhacking

The Adventure Skirt held up well when bushwhacking through dense underbrush. It provided adequate protection from brambles and bugs, especially when paired with full-length gaiters and bug pants. After multiple days of scrambling, I was far less scratched than I thought I would be when I first picked up the skirt.

DSC02061 728x546
Versatility is a primary strength of the Adventure Skirt. Rain pants are easily pulled on underneath the skirt (Photo: VanderVelden, Owl Lake, Alberta, Canada).

Modesty

I found the skirt to be an ideal length for my thirty-two-inch inseam. The skirt fell to just above my knees. Everything above my knees was covered adequately, even when ascending hills. I would be careful when doing yoga or intense scrambles, though, as the skirt tends to “creep” in these situations.

That being said, I had no problem staying covered while crawling and climbing around in search of good photographs.

The Adventure Skirt far outstrips pants or shorts when it comes to backcountry bathroom-breaks. You don’t have to remove it, and it is easily adjusted back into place in a hurry when necessary.

Warmth and Temperature Control

I would wear the Purple Rain Adventure Skirt at any temperature that would normally require shorts. Unlike shorts, regulating temperature by adding and removing layers underneath the skirt was simple.

That being said, I did find myself carrying a heavier insulating layer than I normally would, while wearing long pants. Other users may find they do not need a heavier layer, but my winter layers routinely make their way onto summer backpacking trips in the Canadian Rockies.

P8130178 728x546
My field testing encompassed a variety of rainy, chilly, and windy conditions. I stayed comfortable in the Adventure Skirt throughout, primarily due to the ease of layering underneath the garment (Photo: VanderVelden).

Performance Summary

  • Durable construction
  • Comfortable fabrics and design
  • Highly water-resistant
  • Easy layer transition compared to shorts and long pants
  • Large, versatile pockets

Conclusion

Strengths

  • Smooth, soft waistband
  • Easy access to open top pockets
  • Secure access to Velcro flap pockets
  • Weather resistant
  • Fast-drying
  • Versatile layering options

Limitations

  • Requires bug deterrent (spray, Permethrin or mesh pants)
  • Mid-weight base layer recommended
  • Gaiters recommended

Commentary

I would wear a Purple Rain Adventure Skirt instead of shorts on any trip. I found the skirt comfortable, durable, functional, and versatile. Increased privacy while changing layers and using the bathroom were unexpected but considerable benefits. I will likely never wear shorts again.

Rating: Recommended

rsz bpl recommended

The only reason I cannot give the Purple Rain Adventure Skirt a Highly Recommend score is because of its limited functionality when scrambling over rocks.

I have tried a few other types of skirts in addition to the Purple Rain Adventure Skirt and found their wider A-line cut or pleated cut an asset for scrambling. A slightly roomier profile or pleating across the hip might give more flexibility and freedom of movement when scrambling. For frequent scramblers, I would recommend the slightly longer and wider profiled Purple Rain Adventure Kilt.

In every other area, I found the Purple Rain Adventure Skirt exceeded my expectations. I am a dedicated skirt convert, and the Adventure Skirt tops my list in this category.

Where to Buy

Related Content

  • Our community talks about skirts quite a bit. Check out conversations on wearing kilts on the PCT, the JMT, and a DIY Hiking Skirt.
  • Emylene suggested a poncho or rain kilt for use with a skirt. Here’s a conversation on cottage brand rain kilts.

Product Review Disclosure

Updated September 15, 2018

  • How we acquired these products: Product(s) discussed in this review were either acquired by the author from a retailer or otherwise provided by the manufacturer at a discount/donation with no obligation to provide media coverage or a product review to the manufacturer(s).
  • We do not accept money or in-kind compensation for guaranteed media coverage: Backpacking Light does not accept compensation or donated product in exchange for guaranteed media placement or product review coverage.
  • Affiliate links: Some (but not all) of the links in this review may be “affiliate” links, which means if you click on a link to one of our affiliate partners (usually a retailer site), and subsequently make a purchase with that retailer, we receive a small commission. This helps us fund our editorial projects, podcasts, instructional webinars, and more, and we appreciate it a lot! Thank you for supporting Backpacking Light!

Q&A on the Publisher’s Blog

I’ll be starting a new Q&A series where I’ll answer questions about lightweight backpacking, the outdoor industry in general, outdoor gear technology, Backpacking Light behind-the-scenes and future strategy, outdoor lifestyle, minimalism, and more!

You don’t have access to view this content.

Wilderness Adventures 2018 Whitetail Trek (Photo Essay)

As part of the Backpacking Light Wilderness Adventures program, Trek Director Kevin Fletcher and I led a guided trip across the Absaroka-Beartooth Wilderness in Montana in September 2018. This photo essay tells the story of that trek.

Introduction

As part of the Backpacking Light Wilderness Adventures program, Trek Director Kevin Fletcher and I led a guided trip across the Absaroka-Beartooth Wilderness in Montana in September 2018.

This program, dubbed the “Whitetail Trek”, was a new program for us where we gave the group a start and end point and let them plan their own trek across the range.

The process framework for planning the trip generally followed what is described in my recent article about off-trail route planning.

This photo essay originally appeared on Instagram – please follow Backpacking Light on Instagram for more visual inspiration, stories, and BPL news.

Photo Essay

image 6

Day 0: Route Planning – For the final Wilderness Adventures Trek of 2018, 11 of us are convened in #redlodge #montana and staring at satellite imagery to see if we can find a route across the northern Absaroka-Beartooth #Wilderness.


Day 1: “Consider Your Future” – We leave the trailhead mid-morning and start working our way towards the end of a giant alpine lake. At the end of the lake, we’ll take a left at a creek, leave the trail, and begin our ascent into the heart of the Absaroka-Beartooth Wilderness.


Day 1: The First Bushwhack – After 6 miles of trail, crossing the creek, and leaving the lake, we start our forest bushwhack. Up, up we go.


Day 1: Racing the Sun – With the steepest part of our first-day route still ahead of us, we are racing against the setting sun. A good off trail route is measured by the extent to which we use our hands for upward propulsion, and this is indeed a good one.


Day 1: Dinner at the Talus Cafe – After 3,000 feet of elevation gain, with most of that off trail through forest and boulder fields, we arrive at an alpine lake near the treeline at dusk and enjoy a hard-earned dinner on the talus-y lakeshore. Kevin (foreground) fiddles with ramen, Andrew (right) chews fuel, and Jim (left) wisely ponders what the next day might bring as he looks upward.


image 9

Day 2: Logjam – We start trekking at dawn and begin the tedious process of finding a route from our camp in the trees to the talus and tundra a few thousand feet above us.


Day 2: Tundra Must Be Earned – We want to reach the tundra – the high grassy plateaus that are the hallmark feature of the Beartooth Mountains. But getting there requires some hardship. This morning, father-son duo Chris and Nick crawl their way upward on steep talus and scree.


Day 2: The Plateau – Another few thousand feet of elevation gain through talus, scree, and cliff bands finally spits us out on the incredible tundra of one of the Beartooth’s many high plateaus. Now, a traverse across the plateau leading to an exit back down to the tree line before the storm hits.


Day 2: Descent – With three options to choose from and a storm system coming, we make the decision to traverse the entire plateau and exit at the far end. Tonight we will descend and camp below the treeline after 12 hours of trekking today.


Day 3: Storm Day – As we expected from the forecast, today a storm rolled in and would be howling snow and other such drama up on the high plateaus, so we’d spend our time down in the trees, walking trails down a valley and then up and over a high pass to our hopeful destination. This would be another “all-day walk”, required if we are to complete the traverse and reach our ultimate destination, where our exit vehicles are parked.


Day 3: In the Clouds – As the day wears on, the temperatures drop and we are hiking in a cold, wet, misty cloud all day. Now it’s time for the climb up into it as we head for a pass that is 3,200 feet higher.


image 7

Day 3: Where? – As evening approaches, and light fades, we are still climbing towards a pass in the soup.


image 8

Day 3: Nightfall – Our final stream crossing brings us to the lakeshore of our hoped-for destination as the last bits of daylight escort us to a camp.


Day 4: Wet – This morning we are up before dawn and trekking at first light. In the midst of our bushwhack to get up and away from our forest camp and into the mountains again, we find ourselves in the meat of foul weather. Cold temperatures, snow, and wind accompany us through game trails, bush, talus, and blowdowns. But alas, up we go.


Day 4: There? – Through the unfocused aperture of minor breaks in the storm, we try to visualize a route through the talus and find our way to the mountain col that will deliver us to the next valley.


Day 4: Breakup – As the storm starts to lose some energy, a brief respite reveals the ominous and beautiful spires across the valley.


Day 4: The Pass – After intermittent whiteout, wind, snow, and graupel, we make the final push to the pass.


image 11

Day 4: The Pass – We finally reached the high pass in the face of a driving blizzard where snow and graupel stung our faces as we climbed and winds strong enough to knock us off balance greeted us at the little col.


Day 4: Down -Thankfully, we decoded the off-route signature that brought us over the final pass that would lead down to our exit valley. The storm broke, but high winds and cold temperatures kept us bundled up. Now, a few thousand feet of descent and one more exploratory journey up the valley before we exit.


Day 4: Valley Meandering – After dropping a few thousand feet of elevation and zipping up the valley on a trail, we leave the trail again and work our way back to the high peaks for the next few days.


Day 4: Camp – We trek well into the evening hours to reach a tundra camp at treeline, at the base of the steep slopes that will take us back up to the alpine country tomorrow.


Day 5: Small and Big – This morning starts off once again with another big, steep climb, leaving the shadows of the valley below and working up to a more hostile environment dominated by rock and ice. As we ascend, we turn back and look at the massive wall of mountain flanking the other side of the valley and can’t help but think how we are so small, in this land that’s so big.


Day 5: Rubble – Taking a moment at mid-day to stop and wonder at the sheer scale of rubble found at the highest elevations in the Beartooths.


Day 5: High Pitch – Amidst a sea of rock, we discover small alcoves where our little tents can be pitched. Here, high above the treeline, the fall winds are a constant reminder that ultralight shelters can be a limiting factor when it comes to nighttime comfort and safe protection from the elements. Two years ago, our group of September trekkers spent the night huddled behind a large boulder because their shelters wouldn’t remain standing in response to the extreme winds that the Beartooth Plateau delivered to them. So today, we hedge our bets by building rock walls, tucking into little depressions in the topography, and using all of our guylines and stakes.


Day 5: Celebrate? – As the evening light faded on our last night on the trail, we celebrate the challenge of weaving a non-obvious route through challenging terrain in one of the rockiest landscapes in the West.


image 10

Day 5: The Final Night – As the night sky fades and we seek reprieve from the wind up here, we begin to settle into the tension that comes with tomorrow being the last day of our trek. The finish brings with it the dichotomy of tomorrow’s unknown route off this plateau vs. the anticipation of pizza and beer at a Red Lodge tavern.


Day 6: Finding a Way Down – On our final day, we still have a ways to go, and need to solve one final off-trail puzzle to get us back down to the valley trail. From our camp, we discover granite benches and grassy tundra ledges like this one that @wentworthphoto is walking on – towards the cliff edge. What will we find there?


Day 6: Solving the Puzzle – Seemingly, we are cliffed out, but Tim scouts the cliff edge and believes he “may” have found a way down. We won’t know for sure until we give it a shot, because the slope is too steep to see all the way down.


Day 6: Into the Abyss – We cautiously make our way over the cliff edge and find a line downward that only reveals itself a few dozen feet at a time. But we have faith. And if that doesn’t work, I guess we go back up!


Day 6: The Chute (Oh, snap!) – After snaking our way a few hundred vertical feet through granite slabs and cliff bands, we find a steep chute that we believe to be our last obstacle before the bushwhack down to the valley trail. The chute is choked with vegetation, talus, scree, and slabs. We make our way downward, crab-walking. Near the bottom, B yells, falls, and hearing the snap of her ankle, goes into shock. // Clinging to the side of a steep mountain isn’t a great spot for an evac, so after a half hour break, we give B some ibuprofen, trekking poles she can use for crutches, and slowly soldier on, hoping the swelling in her ankle holds it together until we reach the trailhead. // (Post-Trip update: the ankle injury was a torn ligament and broken bone, requiring a few months spent in a walking boot.)


Day 6: C’est fini – After a bushwhack through the forest, we arrive at the exact switchback in the trail where Ryan left his titanium spork sitting on a log some time ago. After picking up the utensil, we meandered down the valley trail to our cars, feeling the immense satisfaction that comes with completing a trek full of adversity, uncertainty, incredible scenery, sketchy weather, and great people. // L to R: Ryan, Chris, Andrew, Kevin, Tim, Les, Barbara, Jim, Rhondel, Paul, and Nick. // Average pack weight for this 6-day Trek was about 25 lbs, range was 23-27 lbs. // There’s beer and pizza waiting for us in Red Lodge, so we gotta go now. Thanks for following our trek this year!

More Info

Episode 6 | Backcountry Filmmaking and Photography

Backcountry filmmaking and photography used to required thirty or more pounds of gear. Here’s how to produce great media at minimum weight!

Stream

Subscribe

Summary

This podcast is about backcountry filmmaking and photography.

It used to be that creating professional photography and video content in the mountains required thirty or more pounds of gear. Not anymore. An explosion of innovation over the last few years means that you can now tell stories and capture adventures with a high degree of quality while maintaining a low pack weight and a minimalist mindset.

In this episode, Andrew and Ryan dig deep into the tools, skills, and philosophy you’ll need to enhance your backcountry photography and filmmaking skills. They get started by immediately jumping into the interview: an engaging and energetic discussion with filmmaker and ultralight backpacker Chris Smead. Chris’ film “Rae Lakes” won the Members’ Choice award at the inaugural Backpacking Light Film Festival in 2017, and he’s been creating non-stop ever since.

Chris shares his journey as an artist, the tools and techniques he uses to tell his stories, actionable tips to help any budding filmmakers in the crowd, and some bonus marriage advice. The interview wraps up with a speed-round and a pitch for a California hiker event called the Switchback Showcase.

After the interview, Ryan and Andrew take a deep dive into camera gear. What makes a camera well suited for adventure filmmaking and photography? What are the different options? How do your choices affect the outcome of your final product? All these questions and more are answered.

The guys continue the conversation by jumping in to some listener questions: What is the most efficient way to improve photography and filmmaking skills? What are the best ways to spend a limited budget? Are there times when you shouldn’t be taking pictures?

The Gear and Hiker Hack sections are concerned with batteries and power sources—how to charge them, how to keep them charged, and which ones to use.

Finally, Andrew and Ryan share what they’ve been up to lately. Ryan is making movies and Andrew is dressing for success Norwegian style.

Outline

  • Ryan and Andrew introduce the episode topic: photography and filmmaking in the backcountry.
    • Andrew used to be a filmmaker, is now a professional photographer and artist.
    • Ryan is an avid photographer and is beginning to experiment with backcountry filmmaking techniques.
  • Ryan introduces this episode’s guest: Chris Smead.
  • Guest interview:
    • Chris details his background in the outdoors.
      • Has always been a hiker
      • Discovered backpacking in 2004
    • Chris and Ryan talk about Chris’s film Alcove
      • Out of Chris’ comfort zone (new environment)
      • Chris had a brand new camera
      • Chris would bring better audio tools in the future.
    • Chris and Andrew talk about Chris’ film Rae Lakes
      • A film that represents Chris’ marriage.
      • The film was about Chris introducing his wife to serious backcountry travel.
      • The weather took a turn for them (high snow levels).
      • Going over Glen Pass
      • When to put the camera down?
    • How Chris got started as a filmmaker
    • Getting from 0 to 70% good
    • The best mistake Chris has ever made: editing his own footage
      • Being aware of his mistakes
      • What to cut, and how to fix mistakes when your shots are bad
    • Generating ideas
      • Chris plans a trip
      • Plans his gear, shots, and story
      • Build the story based on the trip
    • Biggest challenges of backcountry filmmaking
      • Permits
        • Chris is a rule follower!
        • Can be a challenge
      • Weight of gear
        • Ultralight backpacking gear allows Chris to carry more camera gear.
      • Who needs a permit and why?
        • Getting a permit is easy if you confirm to the Wilderness Act.
        • Fuzzy lines between commercial and non-commercial (social media).
        • What areas do you need a permit? (BLM, Wilderness, National Parks, etc)
        • Chris’ tips for getting a permit.
          • Educate or encourage
    • Favorite gear
    • What is Chris’ favorite part of filmmaking?
      • Shooting
      • Editing
      • Motion graphics
      • Also enjoys composing music
        • If he does too much of it himself it is easy to get sick of the project.
        • Recently he has been cutting films to scores written by other people.
        • Music influences the cut
      • Prefers to be behind the camera (out in the wilderness)
    • Collaboration
      • Chris started out all by himself
      • Composer from Tiny Lunatic
      • Adds creative input, makes the project more interesting
      • Working with a colorist named Bruce Goodman
      • Two sound guys from the film industry
      • Director of Video at Stanford university
    • Chris’ films are very personal
      • You need a human element in a story
      • About the experience overall: not just the scenery.
    • The best ways for a novice to learn the craft of filmmaking
      • Editing your own footage is a help
      • Shooting on whatever you have. Just make your movie!
    • Balancing the ultralight ethos with filmmaking: what do you leave at home?
      • Chris got to a certain point and then couldn’t go any further with ultralight.
      • Filmmaking pushed him to go to the next level with ultralight?
      • The average videographer’s tool kit is not gonna work on a backpacking trip.
      • His weight varies according to the trip he’s on.
    • Post-production workflow
      • First thing Chris does is cut the trailer, this helps him get a feel for what footage he has and what his story will be.
      • Then he goes through and cuts each day chronologically.
      • He uses Final Cut X.
      • Lots of other people use Avid or Premiere.
    • Motion graphics
      • Chris got into motion graphics because he needed to fix his mistakes
      • He uses Motion 5
    • What makes a good adventure filmmaker?
      • The ability to capture the experience
      • Authenticity
      • Your tools don’t matter as much as the story
      • Technology is very accessible.
      • The bar has been raised.
      • Pro = engaging story
      • “Unsupported” by Jason Fitzpatrick
      • Andrew says backpacking is inherently unsexy. Ryan and Chris disagree. Convo ensues.
    • What does Chris feel is his responsibility as a filmmaker?
      • Encouraging people to get out into the woods.
      • Seeing places on film encourages people to care about stewardship.
    • Festival Submission
      • Filmfreeway is a good solution for festival submission, it’s what we use at Backpacking Light for our Adventure Film Festival.
      • Formatting for festivals can sometimes be difficult!
    • The High Sierra Trail film
      • A real learning experience for Chris.
      • Picked up by a lot of festivals, including some unusual ones Chris wasn’t expecting!
    • Chris’ next film: Highline.
      • Highline Kickstarter Link: http://kck.st/2OuHlhU
      • Official Highline website: https://highlinefilm.com/
      • Follows the founders of Zpacks.
      • Also goes into the history of the trail.
      • The personal stories of his characters.
      • Trailer just released, film premieres in summer of 2019!
    • Lightning Round!
    • Switchback Showcase
      • A benefit for Big City Mountaineers
  • Interview follow-up discussion: How mistakes can make your project better.
    • Jaws Shark
  • How can we reduce the barriers to photography and filmmaking in the backcountry.
  • What has changed in the last few decades?
    • The Red
    • Professional camera gear can be out of reach for the average backpacker
  • What are some tools that are lightweight, easy to use, affordable, but maintain a high level of quality.
    • Ryan’s Seven Criteria
      • Water resistance
      • Decent sound
        • On board mic
        • Or ability to plug in external mic
      • Some form of internal stabilization
      • 24p capability
      • Slow motion
      • Small and light
      • Rapid and simple workflow
  • Camera families
    • DSLR
      • Big and chunky
      • A great value (good final product for your money!)
      • Limited by budget? This is the way to go.
      • Canon or Nikon?
    • Mirrorless
      • Smaller and lighter on average.
      • Ryan on Olympus and Panasonic cameras
      • Interchangeable lenses
      • A full frame mirrorless like the Sony A7 line is similar in capability to a DSLR while weighing almost a pound less
      • Ryan shoots with the Sony a6500
    • Point and Shoot
      • Small and light
      • Fixed lens
      • Some zooming ability
      • In the past – no access to manual settings
    • Action Cam
      • GoPro still leading the way
        • Ryan shoots with the Hero7 Black
        • Good footage that holds up well in post processing
        • Good slow motion
        • Waterproof
        • Good sound in camera!
        • External mic input
        • Unique camera angles are possible
        • Some shot flexibility
    • Smartphones
      • Pros
        • Flexible footage options
        • Slow motion
        • 4k
        • Control over manual settings and bit rate using third party software
        • Rapidly improving cameras and sensors
        • More and more pros are using phones to rapidly create projects
        • Ryan likes these external lenses for wide and tele shots!
        • Can fit on the lightest available gimbals.
        • External audio inputs
        • Newest Google, Apple, and Samsung phones are all waterproof
      • Cons
        • Not nearly as much internal stabilization as an action cam.
        • Lens choices (and therefore shot variety) still limited.
      • Andrew sells prints of fine art photography that he took on his smartphone.
      • Lots of national magazine covers are now shot on smartphones.
      • The phone is a multi-use item.
      • Software and Workflow in the field
        • You can create content before you ever get home
        • You can review your footage while you still have time to do a reshoot.
        • Makes things simpler and faster
        • Filmic Pro (access to manual settings)
        • Moment  (access to manual settings)
        • iMovie (for video editing, comes preloaded on Apple devices)
        • Adobe Rush (video editing on mobile, desktop, and tablet)
        • Adobe Lightroom (still photography editing on mobile, desktop, and tablet)
      • Phone photography and filmmaking technology has allowed these creative processes to be much more accessible to people from all walks of life and income levels.
  • Listener Questions
    • What is the best way to improve my photography and filmmaking?
      • Don’t get caught up in the gear – focus on improving your skills!
        • This applies to any aspect of backcountry travel.
      • The Bare Bones Camera Course for Film and Video
      • Change your point of view
      • Stable footage and good quality audio
      • Shooting ratio
      • Study and Practice
        • Seek out good documentaries
        • Study painters and other artists
      • Use the right tool for the job
        • Where is your media going? What is the endpoint?
        • Understanding these questions has an impact on how much weight you are okay with bringing.
    • I’m an experienced photographer but I want to start shooting video. What do I need to know?
      • Many of the skills are the same.
      • Move the camera…with purpose!
      • Shoot motion
      • Motion = time
      • Be conscious of rhythm and flow
      • Don’t make all your cuts match the music
      • Study the way that stories work
        • Three act structure
        • Story arc
        • Hero’s journey
      • Free Solo…watch this film!
    • What is the most efficient use of my money?
      • Lenses (assuming you are using an interchangeable lens system)
      • Small tripod
      • Decent mic
    • Are there any ethical or philosophical reasons NOT to take pictures or make video in the backcountry?
      • Screen time saturation
      • Cell phones and go pros are less intimidating to documentary subjects.
      • Drones can be distracting
  • Gear
    • Solar
      • Two scenarios where solar is worth it
        • A suuuuper long trip with no re-supply.
        • A trip where you have the luxury of sunny days and lots of spare time.
    • Spare batteries
      • Cheap
      • Easy to use, just pop them in with no interruption
    • Power Banks
      • Used for rechargeable devices with no swappable battery.
    • Charging strategies
      • Keep your batteries warm
      • Drain your battery all the way down before recharging.
  • Hiker Hacks
    • Water bladder problem from last episode
    • How to keep batteries warm?
      • What does cold mean?
        • Below freezing is when batteries really start to be affected.
      • Remove batteries from the device when possible.
      • Don’t keep your camera inside your jacket! Can cause condensation issues.
    • Do you have solutions for keeping batteries warm or solving electronic condensation issues? Email us at podcast@backpackinglight.com
  • Here and Now
    • Ryan
      • Looking at mobile device filmmaking
    • Andrew

IMG 8333

Feedback, Questions, Tips?

  • Submit them to podcast@backpackinglight.com or Twitter and get featured on our next podcast!

Credits

  • Backpacking Light – Executive Producer
  • Ryan Jordan – Director and Host
  • Andrew Marshall – Producer, Host, and Editor
  • Chris Smead – Guest Interview
  • Look for Me in the Mountains – Music

Sponsors: Help us Keep the Podcast ADVERTISING-FREE!

  • This episode of the Backpacking Light Podcast is supported and kept advertising-free by Backpacking Light membership fees. Please consider becoming a member which helps support projects like this podcast, in addition to a whole slew of other benefits!
  • In addition, some of the links on this page may be affiliate links that refer to our partner merchant retailers. If you follow a link and then make a purchase, we receive a small commission which goes a long way towards helping us pay for podcast production, hosting, and bandwidth fees! Thanks for supporting us in this way!

Contact

You can contact us at podcast@backpackinglight.com, or follow us on social media –

Disclosure

  • We do not accept money or in-kind compensation for guaranteed media coverage: Backpacking Light does not accept compensation or donated product in exchange for guaranteed media placement or product review coverage.
  • Affiliate links: Some (but not all) of the links in this review may be “affiliate” links, which means if you click on a link to one of our affiliate partners (usually a retailer site), and subsequently make a purchase with that retailer, we receive a small commission. This helps us fund our editorial projects, podcasts, instructional webinars, and more, and we appreciate it a lot! Thank you for supporting Backpacking Light!

Resources, Tools, and Processes for Planning Nontechnical, Off-Trail Backpacking Routes

The purpose of this article is to document the process I often use to plan and execute off-trail trips in the mountains using digital mapping and navigation tools.

You don’t have access to view this content.

Sierra Designs High Route 1FL Tent Review

The Sierra Designs High Route 1P Tent is a three-season tent designed for withstanding variable conditions while remaining (sort of) light.

The Sierra Designs High Route 1P Tent is a spacious three-season tent designed for withstanding variable conditions while remaining (sort of) light. The High Route is versatile in relation to weather, usability, and functionality. It was designed to the specifications of Andrew Skurka, long-distance backpacker and a National Geographic “Adventurer of the Year” recipient.

HighRoute front flyopen SD17 PC 33026.1464369693.1200.1200 20708.1526062886.1280.1280
Photo: Sierra Designs

Features and Specifications

Features

  • Three season tent with some usability in mild winter conditions
  • Pyramid-inspired design
  • Pole-reinforced vertical doors
  • Steep walls (added space)
  • Both side doors are able to be guyed out for ventilation
  • 5-inch awning vents
  • The bug nest and tarp can set up separately
  • Pole placement is offset
  • The stuff sack is oversized to make re-packing easier
  • Large enough to accommodate two people in a pinch

Specifications

  • Minimum weight: 2 lbs 5 oz (1.05 kg)
  • Packaged weight: 2 lbs 12 oz (1.25 kg)
  • Number of doors: 2
  • Gear storage area (tarp area + nest area): 17.3 ft2 (1.61 m2)
  • Interior area (tarp): 36 ft2 (3.34 m2)
  • Interior area (bug nest and floor): 18.8 ft2 (1.75 m2)
  • Internal peak height (tarp): 48 in (122 cm)
  • Internal peak height (nest): 43 in (109 cm)
  • Awning height: 38.5 in (98 cm)
  • Length (tarp): 108 in (274 cm)
  • Length (nest): 90 in (229 cm)
  • Width (tarp): 48 in (122 cm)
  • Width (nest): 30 in (76 cm)
Sierra Designs High Route 1
The Sierra Designs High Route One Person Tent set up on a backpacking trip in Montana’s Belt Range.

Description of Field Testing

The field testing consisted of a multiple-day trip in the Belt range of Montana during the last week of September. We set up our camp at six thousand feet and day hiked from there. The weather was typical for the area and season: nights in the twenties and a few snow flurries. We were camped down in a sheltered ravine and so did not encounter a large amount of wind.

My performance assessment of the Sierra Designs High Route One Person Tent will consist of the following items:

  • Features
  • Design
  • Usability

Features

The Sierra Designs High Route sets up with trekking poles. The side doors can stake out into spacious porches, making entering and exiting the tent easy and also allowing for a good amount of ventilation on a humid night. The steep walls add considerably more space compared to many other one-person shelters. The five-inch awning vents help keep condensation to a minimum—I woke up dry every morning.

The tarp and the bug nest can be set up separately. Although this is technically a one-person shelter, using the tarp by itself could accommodate two sleepers and would lighten the weight of the shelter system. Even with the interior bug nest set up inside the tarp, the tent is large enough to accommodate two people in a pinch.

The pole placement is offset so as to not block entrances or encroach on the sleeping area.

The Night Glow feature is a small translucent compartment that dangles from the top of the tent interior. Placing your headlamp inside this compartment turns the harsh LED beam into a diffused glow. It only weighs .7 oz (20 g) but is easy to remove should you choose not to carry it.

Design

The High Route’s design is simple. It is roughly pyramidal in shape, adding stability in wind and inclement weather. The design requires that the corners of the tent be staked out at ninety-degree angles (perfectly square) with forty-five-degree pull angles on the stakes in order to achieve a good pitch.

The tent is set up by staking out the corners and inserting the trekking poles tip down into a grommet at the bottom of the lower zipper. You can then raise the tent by popping the trekking poles up from the inside, keeping the interior of the tent dry during bad weather. Velcro cuffs on the inside of the side door material keep the trekking poles in a supportive position even in high winds.

The porch-able side doors create extra living space and ventilation when needed. A side release buckle halfway down the side doors lets you porch the doors mid-way without creating tension on the zipper. Similar side release buckles at the bottom of the doors make zipping hassle free.

IMG 0218
Buckles at the bottom of the side doors take tension of the zipper during use.

The Fly Fabric consists of Silicone coated 20D Ripstop Nylon and the floor consists of 30D Ripstop Nylon, so both elements should hold up to use and abrasion.

Usability

This is a heavy one-person tent. That being said, it is sturdy, spacious, and easy to use. Set up is simple after a little practice. The expansive headroom in conjunction with the steep walls simplifies changing clothes and other inside-the-tent chores. The extra space is especially nice when hanging out in the tent after dark but before bed. This roomy design requires a larger amount of fabric, hence the added weight.

The interior bug net and floor set up with a five-point clip system that allows for a large degree of flexibility. One upshot is it gives you the option to create one large vestibule or two smaller vestibules on each side. This was a benefit to us during testing as our camping spot was extremely unlevel.

Sierra Designs High Route 3
Porch-able side doors and an interior that clips in at five separate points create an extra large vestibule space.

Commentary

I love the stability and versatility of this tent. It is roomy and has well-designed extra features like the zipper buckles and the “Night Glow”. However, the Sierra Designs High Route is a little heavy compared to other ultralight one-person shelters.

Editor’s Note: According to his blog, Andrew Skurka chose not to renew his contract with Sierra Designs in January of 2018. Before parting ways with the company, he developed a plan to overhaul this tent. The new version will arrive in the spring of 2019, its name will not change, and this current design will be phased out. According to Skurka it will be ten ounces lighter than the current version and considerably less roomy. The price will remain the same.

Where to Buy

Related Content

Product Review Disclosure

Updated September 15, 2018

  • How we acquired these products: Product(s) discussed in this review were either acquired by the author from a retailer or otherwise provided by the manufacturer at a discount/donation with no obligation to provide media coverage or a product review to the manufacturer(s).
  • We do not accept money or in-kind compensation for guaranteed media coverage: Backpacking Light does not accept compensation or donated product in exchange for guaranteed media placement or product review coverage.
  • Affiliate links: Some (but not all) of the links in this review may be “affiliate” links, which means if you click on a link to one of our affiliate partners (usually a retailer site), and subsequently make a purchase with that retailer, we receive a small commission. This helps us fund our editorial projects, podcasts, instructional webinars, and more, and we appreciate it a lot! Thank you for supporting Backpacking Light!

KS Ultralight Gear R-50 Backpack Review

The KS Ultralight R-50 is a backpack designed for a variety of applications including climbing, hiking, and snow sports.

The KS Ultralight R-50 is a backpack designed for a variety of applications including climbing, hiking, snow sports, and many others. It boasts a minimalist but rugged design that could appeal to ultralight backpackers looking for gear able to withstand a beating.

P2040523
Photo: KS Ultralight Gear

Features and Specifications

Features

  • “Joker-Hat” top closure
  • Padded waist belt with .3 in (8mm) foam
    • 500D Cordura on the outside
    • 3D Mesh on the inside
  • .4 in (10mm) foam shoulder straps
  • Removable .78 in (20 mm) sternum strap with whistle included
  • Optional side pockets
  • Daisy chain on pack and hip belt
  • Removable waste pocket (optional)
  • Removable Front pocket with key holder hook (optional)

Specifications

  • Pack weight: 16.9 oz (480 g)
  • Pack volume: 50L (open), 45L (rolled down)
  • Pack body fabric: Cordura 1000D
  • Waist pocket fabric: X-Pack VX21
  • Front pocket fabric: X-Pack VX21
KS Ultralight.2jpg
The author wearing his KS Ultralight Gear 50L Backpack in the Beartooth Mountains of Montana.

Description of Field Testing

I tested this backpack while guiding for Backpacking Light in the early and mid-summer over two separate trips. The varying conditions of each trek gave me an opportunity to fully explore this pack.

The first trek was during the first week of June in Montana in the Beartooth Range. We spent some time between nine thousand and eleven thousand feet. We came across a plethora of conditions including sunshine, rain, and snow. The snow was deep enough that we were very thankful we brought snowshoes.

KS Ultralight 1
The author wearing his KS Ultralight 50L Backpack, showing off the guitar strapped to the side of the pack.

The second trip was during the early part of July, and we had nothing but sunshine and glorious weather. We spent several days between nine thousand and eleven thousand feet.

Performance Assessment

My performance assessment of the KS Ultralight R-50 will address the following items:

  • Finish Quality
  • Fit
  • Functionality
  • Durability

Finish Quality

The R-50 is a minimalist backpack, but it is evident that KS Ultralight was careful and intentional in its construction. The seams are reinforced with ribbon (like most backpacks) but are also reinforced in areas of extra stress: the hip belt, shoulder harness, and where any webbing is sewn.

Fit

The R-50 fit well. I am six-foot-one and around one hundred and seventy-five pounds. The shoulder straps rode comfortably, and I didn’t have to keep transferring weight back and forth between hips and shoulders like I sometimes do. The hip belt also fit well.

The pack length was perfect for my torso. The KS Ultralight was comfortable even after dozens of miles and several days.

Functionality

The R-50 is just large enough to accommodate short ultralight multi-day trips. I was able to pack all my gear into the 45L space for my short guide trips. This would be a struggle on longer trips.

The pack comes with optional aluminum stays along the backside. I don’t carry a bedroll or anything else that could be used to provide stability to a frameless pack, so the stays helped the pack feel more solid while hiking.

There is no padding on the body of this pack. I placed my insulating (soft) pieces of gear strategically inside the pack in order to provide a little padding. I found it to be comfortable as long as I packed carefully.

I utilized the removable waist pockets as well as the removable front pocket and enjoyed having select pieces of gear so accessible. I also appreciated that both the removable waist pockets and the front pack have waterproof zippers. I was able to open and close the waist pocket zippers with one hand, which comes in handy while snacking on the go.

Durability

The Cordura fabric is very tough. Finding a pack that is both light and durable can be difficult, but the R-50 checks both boxes. This pack is solid and can take a pretty good beating when compared to other pieces of lightweight backpacking gear.

I am usually very careful with my gear. With this pack, I was intentionally not as careful because I wanted to evaluate the Cordura’s resistance to abrasion. After using and abusing the R-50, the only wear spot I was able to notice is on the corner of one of the removable waist pockets. The rest of the pack shows little-to-zero wear. The areas where the shoulder straps meet the pack all look like new. The same goes for the waist belt, the daisy chain on the pack, and the hip belt.

Commentary

I found the KS Ultralight R-50 to meet my needs in many areas of ultralight backpacking. The pack is minimal yet fits well, rides comfortably, packs easily, and keeps some of my most needed gear accessible. The aluminum stays give the R-50 a little more support than the standard minimalist pack, but you still have to pack carefully and make wise gear choices. This is a rugged pack that can take a beating and will last a long time, even in less-than-optimal circumstances.

Where to Buy

Related Content

Product Review Disclosure

Updated September 15, 2018

  • How we acquired these products: Product(s) discussed in this review were either acquired by the author from a retailer or otherwise provided by the manufacturer at a discount/donation with no obligation to provide media coverage or a product review to the manufacturer(s).
  • We do not accept money or in-kind compensation for guaranteed media coverage: Backpacking Light does not accept compensation or donated product in exchange for guaranteed media placement or product review coverage.
  • Affiliate links: Some (but not all) of the links in this review may be “affiliate” links, which means if you click on a link to one of our affiliate partners (usually a retailer site), and subsequently make a purchase with that retailer, we receive a small commission. This helps us fund our editorial projects, podcasts, instructional webinars, and more, and we appreciate it a lot! Thank you for supporting Backpacking Light!

Podcast 005 | Navigation

This podcast is about route planning and navigation skills and discusses a case study in complex navigation.

Stream

Subscribe

Summary

This podcast is about route planning and navigation skills and discusses a case study in complex navigation.

In September 2018 eleven people ventured into Montana’s Absaroka-Beartooth Wilderness on Backpacking Light’s Whitetail Trek, our premier Wilderness Adventures program for intermediate-to-advanced ultralight hikers.

Our group faced snow, hail, cold temperatures, and windy exposed conditions above treeline. The vast majority of our route was off-trail on tundra, through bush, and on steep off-trail terrain with unstable talus and scree.

One of the program goals was to learn the skills and confidence necessary to plan a route and navigate off-trail in the mountains. Today’s episode examines navigational strategies and tools through the lens of the Whitetail Trek.

Ryan and Andrew get things started by giving you a brief rundown of the trip before introducing this episode’s guest. Chris Schultz is an M.D., a hockey player, and most importantly (to us!) an ultralight backpacker who participated in the trek.

After the interview, we guys cover a range of navigation topics: tools and resources for finding your way, books, apps, maps, and getting lost.

Ryan touches on how the planning is going for next year’s Wilderness Adventures trips, and Andrew introduces the new podcast segment Hiker Hacks. We wrap up the show with a brief discussion about risk management, and Andrew plugs a great book he’s been reading lately (spoiler alert: it’s a scary one!)

Podcast 005 guest Chris Schultz (R) discussing route options with his son Nick (L) just below the summit of Froze-to-Death Plateau in the Absaroka-Beartooth Wilderness. Ryan Jordan photo.

Outline

  • Ryan and Andrew introduce the episode topic: navigation and the BPL Whitetail Trek.
    • This is one of Ryan’s favorite BPL experiences!
    • Andrew digs the mental side of the situation.
  • Ryan introduces this episode’s guest: Chris Schultz.
  • Guest interview:
    • Chris gives his reasons for joining the trek and shares his extensive backcountry experience.
    • The guys talk gear prep and strategies.
    • Physical training for steep, off-trail travel
      • Chris was coming off a hockey injury coming into the trip.
      • The terrain was demanding – Montana does not mess around!
        • Chris was worried about the altitude but it didn’t end up bothering him.
        • Challenging talus, scree, snow, and steep descents and ascents.
      • The best way to train? Get out and hike more!
        • Also, be at your ideal body weight. Don’t carry extra weight in the form of metabolized doughnuts.
    • The route planning process:
      • Available online tools, including Google Earth, AllTrails, HIllmap, and Caltopo.
      • USGS quadrangle maps.
      • The general area where we hiked.
      • Slope angle analysis is an excellent tool for off-trail navigation, since it eliminates routes that we know are too steep and dangerous.
      • Summit Post is a great crowd-sourced information tool – it turns out that climbers like to post detailed information about the approaches to mountains, and those approach routes provide valuable beta for trekkers!
      • All of these tools are more powerful when combined with each other!
      • Route planning is not a linear process!
        • It’s iterative and chaotic.
        • (Especially when a large group is involved!)
      • Chances of route success depend on:
        • Weather conditions.
        • Ambition of the group.
        • Little-to-no data, and our ability to read terrain in real-time.
      • Our final route did not look like the planned route!
    • Changes to route on the hike:
      • Day one went pretty well – as planned!
      • Day two was challenging and ambitious:
        • There were three route changes in one day!
        • Some of the worst boulder hopping in the northern Rockies? Ugh.
        • Froze-to-Death Plateau: as intimidating as it sounds.
      • By day three, all bets on the original route were off – and required a radical change in expectations.
    • What new navigational skills did Chris learn on the trip?
      • He’s a map and compass guy, so…
      • He learned a lot about electronic navigation!
      • Sometimes different tools in a large group can conflict with one another. A difference in philosophy?
      • You have to re-learn navigational skills with each trip (especially if you don’t do it that much).
      • Sometimes it all boils down to your next twenty steps – don’t spend all your time looking at a map when you could be viewing nature in Real HD!
    • Grizzly Bear Territory:
      • Chris and Ryan are pretty experienced in grizzly country.
      • Andrew? Not so much.
      • Strength in numbers.
      • One encounter is all it takes to build some pretty serious safety habits.
    • Bonus Questions
      • If Chris could do one thing differently? Listen to the podcast to find out!
      • If he had one takeaway? Ultralight is the way to go, man!
        • Fitness level + gear intentionality = astounding success.
    • Leadership and fatherhood.
    • The group learned a lot and had a wild time!
  • Ryan and Andrew break down the conversation
    • Ryan always asks about gear on the trip:
      • The main challenge of this trip had nothing to do with gear!
      • Once you get your gear dialed in … other things reveal themselves.
    • Andrew was fascinated by the group dynamics under stress.
  • Getting lost.
    • If you know what you are doing, it’s not difficult to find your way in mountainous areas with minimal tree cover.
      • Heavily forested areas with subtle contours are more challenging.
  • 2019 Wilderness Adventures registration launches in November!
    • This season was the best yet. Why?
    • The Whitetail Trek was a new format and will be offered next year as well.
    • Early enrollment for Unlimited Members begins Nov 16th.
    • Public enrollment begins November 26th.
  • Check out the Whitetail Trek photos on Instagram – we tell the whole story of the trek!
  • Gear!
  • Hiker Hacks
    • How do you get a hydration bladder to dry out completely and quickly for storage?
  • Here and Now
    • Ryan can’t wait to get back to the Beartooths for the Wilderness Adventures guide’s training next summer, and is in the process of planning this event already!
    • Andrew has been thinking about risk management on “easy” adventures.
      • Andrew and Ryan’s thoughts on risk management and backcountry safety.

Feedback, Questions, Tips?

  • Submit them to podcast@backpackinglight.com or Twitter and get featured on our next podcast!

Credits

  • Backpacking Light – Executive Producer
  • Ryan Jordan – Director and Host
  • Andrew Marshall – Producer, Host, and Editor
  • Chris Schultz – Guest Interview
  • Look for Me in the Mountains – Music

Sponsors: Help us Keep the Podcast ADVERTISING-FREE!

  • This episode of the Backpacking Light Podcast is supported and kept advertising-free by Backpacking Light membership fees. Please consider becoming a member which helps support projects like this podcast, in addition to a whole slew of other benefits!
  • In addition, some of the links on this page may be affiliate links that refer to our partner merchant retailers. If you follow a link and then make a purchase, we receive a small commission which goes a long way towards helping us pay for podcast production, hosting, and bandwidth fees! Thanks for supporting us in this way!

Contact

You can contact us at podcast@backpackinglight.com, or follow us on social media –

Butt in a Sling (BIAS) Hammock Review

Butt in a Sling (BIAS) is a cottage manufacturer based in Tennessee, USA that makes some of the lightest and most comfortable hammocks on the market. Their hammocks are all eleven feet (335 cm) long and use ridgelines for a consistent hang. The Weight Weenie Micro is the original model and is available in a variety of widths while the Weight Weenie Micro HD 1.0 is available in one width and uses a slightly heavier and softer fabric. Both hammocks are available with a variety of options. Add the BIAS Suspension Kit and Nano Buginator bug net, and you have a versatile, comfortable, and ultralight hammock setup!

You don’t have access to view this content.

Hyperlite Mountain Gear Porter 5400 Backpack Review

Light and large: our Hyperlite Mountain Gear Porter 5400 Backpack review – a lightweight pack with the chops for carrying large loads.

Introduction

We’ve published other Hyperlite Mountain Gear Backpack reviews here, including the Windrider and the Porter 4400. I’ve used the latter pack on a number of expeditions up to two weeks’ duration without resupply. The heaviest weight I’ve carried in it was around 55 pounds, which contained food, gear, and packrafts for a traverse of the Bob Marshall Wilderness. It’s been the pack I’ve used the most during the past 5 years while guiding for our Wilderness Adventures Program.

On my Bob Marshall trip, I have to admit that 13 days’ of food, plus packrafting gear, filled the 4400 cubic inch volume (72 liters) of the pack quite easily, and I still had stuff strapped to the outside. On that trip, I yearned for a larger pack bag.

So when Hyperlite Mountain Gear released the Porter 5400, my curiosity was piqued. Here’s my quick review.

hyperlite mountain gear porter backpack review collage
Front, back, and side views of the Hyperlite Mountain Gear Porter 5400. Photos courtesy of Hyperlite Mountain Gear.

Features

  • Made in USA (Maine)
  • Four external, vertical daisy chains for attaching a rear pocket, water bottle holders, or extra gear for trip-specific customization
  • Removable, contoured aluminum stays
  • Dyneema® Hardline shoulder straps with 3/8” closed cell foam and spacer mesh
  • Internal plastic frame sheet for added back panel support
  • 1/4” foam back panel pad
  • Compression System
  • Roll-Top closure system with side compression straps for vertical compression
  • Six side compression straps for horizontal compression
  • Top Y-strap compression – designed to secure gear
  • Internal zippered pocket
  • Dyneema® Hardline dual-density hip belt with 1/8” closed cell rigid foam, 1/4” closed cell foam, plastic stiffener, and spacer mesh
  • Dyneema® Hardline zippered pockets on the hip belt with #5 YKK zipper
  • Adjustable sternum strap with self-tensioning elastic
  • Ability to stow two ice axes on daisy chains
  • Seam sealing on all side seams and behind all sewn-on pack features

Specifications

  • Weight (Manufacturer Claim): 3.06 lbs / 48.96 oz / 1387g
  • Weight (Actual Measured): 3.19 lbs / 51.0 oz / 1446 g
  • Load capacity: Up to 65 lbs
  • Materials (listen to the DCF podcast for more details):
    • Body: DCH150 – polyester laminated to a Dyneema Composite Fabric backing for a total fabric weight of 5.0 oz/yd2
    • Bottom/Rand: DCHW – 100% woven Dyneema laminated to a Dyneema Composite Fabric backing for a total fabric weight of 5.0 oz/yd2 (but with better abrasion resistance than the polyester-based DCH150)
  • Volume:
    • Interior: 5400 cu. in. (85L)
  • Dimensions:
    • Top Circumference: 48.5” (114.3cm)
    • Bottom Circumference: 40.5” (95.3)
    • Height (fully unrolled): 40.8” (97.8cm)
    • Back Width: 10.5” (26.7cm)

Review Context

I’ve used the Porter 5400 for much of the past year. The two longest trips I’ve taken with it include an 8-day trek in the Eastern Sierra a few treks across the Absaroka-Beartooth Wilderness. I carried about 45 pounds in the Sierra, and about 25-35 pounds in the Beartooths.

hyperlite mountain gear porter 5400 backpack review 1
Hiking with one of my favorite people – fellow Backpacking Light Wilderness Adventures guide Jonathan Davis. Where else? Off-trail in the Beartooths, of course! With the Hyperlite Mountain Gear Porter 5400 and the accessory stuff pocket attached to the back.

Strengths

  • Lots of volume for bulky loads;
  • Simple design, simple suspension, nice aesthetic;
  • Extremely low water absorption weight;
  • Nearly waterproof;
  • Durable fabrics and non-snagging materials make it good for bushwhacking and scrambling;
  • Extremely durable bottom/rand.

Limitations

  • It’s white: it gets dirty;
  • Simple design limits access to gear without exterior accessory pockets/attachments;
  • Hip belt pockets are integrated into the curvature of the hip belt and are small, which limits their usefulness for stowing food and other essentials you need to access readily while hiking;
  • Manufacturer’s load-carrying capacity specification (65 lbs) is rather optimistic if you value comfort.

Commentary: Light and Large, Why?

Hyperlite Mountain Gear backpacks are characterized by the following features:

  • Dyneema Composite Fabric pack bags with taped seams and roll-top closures for low water-absorption and waterproofing;
  • Minimalist suspensions featuring thinly padding shoulder straps, hip belts, and back padding; twin aluminum stays; and no load-lifting mechanism to transfer weight between shoulders and hips.

This philosophy works well when load weights are low.

“Low” of course is a matter of personal interpretation.

I’ve debated the merits of pack load suspension systems with Demetri “Coup” Coupounas (founder of GoLite and MyTrailCo) for years. His rationale is simple: all weight is ultimately transferred to the body’s energy systems and how it’s carried is irrelevant. Coup’s packs are frameless, and carrying a 60-pound load in them seems reasonable to him. Glen Van Peski (founder of Gossamer Gear) uses frameless packs as well. But he has a reputation for stashing things in pockets. I’m not sure if it’s to pad his gear weight spreadsheet or if it’s to improve the load carrying comfort of the pack.

On the other end of the Spectrum lies Dan McHale, who vehemently believes that any load above about 15 pounds should be carried in a pack with some type of load-supporting suspension that feels good while you’re hiking – i.e., all-day comfort.

I’ve owned and used packs from GoLite/MyTrailCo, Gossamer Gear, Hyperlite Mountain Gear, and McHale for more than two decades, and I tend to lean towards Dan McHale’s preferences that some extra weight spent on a suspension’s load-carrying performance is weight well-spent if you’re going to spend all day on the trail.

However, suspension comfort comes at a price.

Mesh and padding in the lumbar and back, straps, belts – these features absorb a lot of water and can be slow to dry in very wet conditions. And don’t negate the additional weight that comes with increasing the sophistication of a suspension – webbing, buckles, special fabrics, molded foams, etc.

I own an 85L McHale Windsauk and an 85L (5400 cubic inches) Hyperlite Mountain Gear Porter. The Porter weighs a pound less. The McHale carries heavier (> 30 lb) loads more comfortably.

So that begs the question, is there a place in the market for a pack that can hold an enormous amount of gear, but may not be the most comfortable pack for heavier loads?

I’d argue that the answer is yes, and the Hyperlite Mountain Gear Porter 5400 addresses this unique niche well.

The obvious applications for a light-and-large pack are those cases where gear is bulky, but not necessarily dense (e.g., high weight, low volume):

  • Packrafting;
  • Winter travel;
  • Camping with a hot (stove) tent;
  • Family backpacking where you may be carrying bulky items for other family members (e.g., sleeping bags, parkas, a large shelter).

One final comment on a particular criticism that I’ve seen levied towards this particular pack as well as other manufacturers who do away with “load lifter strap systems”. Many users feel that load lifters are absolutely essential for heavy loads and that without them, the load pulls you “backward” and creates unnecessary strain on your shoulders. My response to this is fairly simple: the torso length of your pack is too short. Load lifters are not a critical piece of a pack suspension puzzle. Pack fit, on the other hand, most certainly is. Manufacturers, retailers, and users alike are guilty of bad pack fitting. I’m only 5′ 7″ tall, but I have a long torso, and almost always gravitate towards large-sized packs.

The Hyperlite Mountain Gear Porter 5400 is no different – I can comfortably carry 35+ pounds in a size Large pack. But a size Medium? Not so much. The difference is like night and day.

Where to Buy

Product Review Disclosure

Updated September 15, 2018

  • How we acquired these products: Product(s) discussed in this review were either acquired by the author from a retailer or otherwise provided by the manufacturer at a discount/donation with no obligation to provide media coverage or a product review to the manufacturer(s).
  • We do not accept money or in-kind compensation for guaranteed media coverage: Backpacking Light does not accept compensation or donated product in exchange for guaranteed media placement or product review coverage.
  • Affiliate links: Some (but not all) of the links in this review may be “affiliate” links, which means if you click on a link to one of our affiliate partners (usually a retailer site), and subsequently make a purchase with that retailer, we receive a small commission. This helps us fund our editorial projects, podcasts, instructional webinars, and more, and we appreciate it a lot! Thank you for supporting Backpacking Light!

Nemo Equipment Astro Insulated Lite 25L Sleeping Pad Review

The Nemo Equipment Astro Insulated Lite 25L sleeping pad is a plush sleeping pad that adds a touch of luxury to backcountry sleeping. Although discontinued by Nemo, this unique pad may be worth scouring remnant inventory and used gear sales – as of the publication of this review, it may offer the best luxury-comfort-to-weight ratio of any sleeping pad ever manufactured.

Introduction

The Nemo Equipment Astro Insulated Lite 25L sleeping pad is a plush sleeping pad that adds a touch of luxury to backcountry sleeping. This unique pad may offer the best luxury-comfort-to-weight ratio of any sleeping pad ever manufactured.

nemo
The Nemo Equipment Astro Insulated Lite 25L Sleeping Pad (Source: Nemo Equipment)

Features and Specifications – 25L

25 refers to the pad width (25 in), and L refers to the long length (76 in). Don’t confuse this pad with the more conventionally-sized Nemo Astro Insulated 20R (20 in wide x 72 in long).

Features:

  • PrimaLoft insulation
  • Extra width (25 in) and length (76 in)
  • Built-in pillow baffle
  • Micro-adjust air valve
  • Included stuff sack and repair kit

Specifications:

  • Materials:
    • 20D PU polyester ripstop fabric
    • PrimaLoft insulation on the top of the pad
  • Weight (pad only): 23.4 oz (664 g) measured (manufacturer claim: 23.0 oz)
  • Weight (stuff sack and repair kit): 1.0 oz (29 g)
  • Measurements: 25 in x 76 in (64 cm x 193 cm), rectangular shape
  • Thickness: 3.4 in (8.6 cm) measured (manufacturer claim 3.5 in)
  • Thickness at pillow baffle: 5.25 in (13.3 cm) measured
  • Cost: $149.95

Review Context

I am currently working on an article for Backpacking Light about ultralight luxury. I’m exploring how an ultralight backpacker can add luxury items to an ultralight kit to increase backcountry comfort, enjoyment, and relaxation. For me, a luxury sleeping pad needs to meet the following criteria:

  • It has to be 25 inches wide for stretching out
  • It has to be at least 72 inches (6 feet) long
  • It must be insulated for use in 3+ seasons
  • It needs to be thick – thicker than my 2.5-inch NeoAir XLite
  • It needs to be comfy!

These criteria come with a weight trade-off of course – for comparison, the long NeoAirXLite is 16 oz (0.45 kg).

Description of Field Testing

I field tested this pad on a variety of trip types, environments, and weather conditions over a six-month period. I used it on a ten-day canoeing and backpacking trip in Yellowstone National Park, a winter trip off the coast of Olympic National Park, and a glacier climb of Mount Adams in Washington’s Cascade Mountains. Temperatures ranged from 20 to 90 deg F (-7 to 32 deg C) during these trips.

IMG 8083 1456x1092
Using the Nemo Equipment Astro pad on a winter trip to Olympic National Park. This is a cushy backpacking setup! Note the closed-cell pad in the background for size and thickness comparison.

Performance Assessment

My wife Amy and I spent our testing nights fighting over who got to sleep on the Astro. It is simply the most comfortable pad we have ever used in the backcountry (prior to reviewing the Big Agnes Insulated Double Z, that is).

At 3.4 inches thick (my measurement), the Astro sleeping pad is 36% thicker than a Thermarest NeoAir XLite pad. It has similar horizontal baffles (i.e., baffles that are perpendicular to the length of the body) that are more comfortable than vertical baffles (i.e., baffles that are parallel to the length of the body), especially on a pad this thick. The additional thickness means that you can decrease air pressure to settle into the pad and still be suspended off of the ground.

IMG 7590 1456x1092
The Micro-Adjust valve uses a push/pull mechanism to open and close, and twists to lock.

The Astro utilizes a Micro-Adjust valve to fill, empty, and adjust the air pressure in the pad. The valve extends for filling or to release air in small amounts. It pushes closed and turns to lock. There is no screwing needed with this valve. It’s easy to make small adjustments while laying on the pad – just pop open the valve to release air or to add a few puffs. This is a useful feature in a high volume air pad, where small changes in air pressure can make a huge difference in comfort.

Inflating the Astro takes more work than most other pads. While inflating with lung power is possible, I preferred to use a Camp-Tek Microburst or NeoAir Mini Pump with the pad.  An inflation bag is also a good alternative with this pad. Deflation is not as fast as with a “quick dump” valve found on some other pads, but it is typical of many other backpacking air pads. Laying on the pad during deflation speeds things up.

This pad is the large version, which is 25 inches (64 cm) wide and 76 inches (193 cm) long. The added width allows for broad shoulders and gives stomach sleepers room to spread out their arms. Parents can use the extra space to snuggle up with a small child. The length allows tall hikers to keep their legs completely on the pad. This is especially important with a thick air pad because legs hanging off all that height is uncomfortable. You will need to take tent size into account with a pad this wide. For example, two of these pads will fit inside a Tarptent Double Rainbow but will be a bit too wide for a Zpacks Duplex.

IMG 7586 1092x1456
The Astro is nearly 3.5 inches thick, with 5.25 inches of thickness at the pillow baffle – THICK by ultralight backpacking standards!

The Astro includes a pillow baffle at the head end of the pad, providing an additional two inches of thickness. For back or stomach sleepers, the additional thickness may be enough to leave a pillow at home. When using a pillow, the baffle holds the pillow in place and boosts a pillow’s height. I was surprised at just how much I loved this feature – it worked well in the field and added a significant amount of comfort to the sleeping experience.

Primaloft insulation enables this air pad to be used well beyond the summer months. I tested this pad down to about 20 deg F and found it to be as warm as most insulated air pads. Compared to a Thermarest NeoAir XTherm, the Nemo is not as warm. I doubt if it would be a great pad on the snow. However, I slept warm in my quilt in a variety of three-season conditions. The Primaloft insulation is attached to the top (green side) of the pad – sleep with the green side up for extra warmth or with the grey side up for summer nights.

The primary drawback of air pads is the potential for leaks. I never experienced a leak while using the Astro, including after two nights of sleeping on rough volcanic gravel. Regardless, carrying a patch kit while using an air pad is always a good idea.

I found the durability of this pad to be excellent. The Astro comes with a patch kit, and the included stuff sack holds both pad and kit.

This sleeping pad is expensive, retailing at $149.95. However, it’s cheaper than a comparable NeoAir and similarly priced to other insulated air pads on the market. I think this pad is a good value, given the features and durability.

Product Strengths and Limitations

Strengths

I am pleased with the performance of the Nemo Equipment Astro. It is a luxury item that I bring on the majority of my trips for the following reasons:

  • This pad is comfortable. The pillow baffle is a great feature that eliminates the need for a separate pillow for back or stomach sleepers and reduces the pillow thickness needed for side sleepers.
  • It is warm. I was able to use this pad in below freezing conditions and slept warm. It’s not as warm as my NeoAir XTherm winter pad, but it’s as warm as most three-season pads I’ve used.
  • The horizontal baffles are comfortable and supportive.
  • It is durable. After many nights, including two nights camping on volcanic rock, the pad is not leaking.
  • The Micro-Adjust air valve makes it easy to get just the right air pressure.
  • $149.95 is a reasonable price for this pad.
  • I sleep better on this pad!

Limitations

  • Not all tents have the width for wider pads, especially when sleeping double in a two-person tent. Be sure to check your tent’s width before switching to a wide pad (this pad is available in a standard 20-inch width as well).
  • It takes significant lung power to inflate a pad this big. A dedicated inflator such as the Camp-Tek Microburst, NeoAir Mini Pump, or an inflation bag like the Exped Schnozzel is very useful when inflating this pad.
  • The thickness fell a tiny bit short of the manufacturer’s claim of 3.5 in, no matter how firmly I inflated it. I measured its maximum thickness at 3.4 in.

Compared to…

There are quite a few options on the market when looking for large, luxurious air pads. I have extensive experience with the Thermarest NeoAir XLite large and the Big Agnes Insulated Double Z:

Thermarest NeoAir XLite – Long

  • 2.5 inches thick (.9 inches less thick than the Astro)
  • 16 ounces (7.4 ounces lighter than the Astro)
  • Tapered mummy shape (vs. the rectangular Astro)
  • No built-in pillow
  • $50 more expensive at $199.95

Big Agnes Insulated Double Z – 25” x 78”

  • 4 inches thick (.6 inches thicker than the Nemo)
  • 29.9 ounces (6.5 ounces heavier than the Nemo)
  • Tapered foot end (vs. the rectangular Nemo)
  • Smaller built-in pillow
  • Identical price – $149.95

I found the Nemo Astro Insulated Lite sleeping pad to be more comfortable than the NeoAir pad.  The comfort of the Nemo and Big Agnes pads were much more comparable. The heavier and thicker Big Agnes was more comfortable, but not by much.

IMG 7582 1456x1092
The Nemo pad is a half-inch less thick than the Big Agnes Insulated Double Z but has a larger pillow area.
IMG 7599 1456x1092
The Nemo – 25 in x 76 in (63.5 cm x 193.04) and Big Agnes – 25” x 78” (63.5 cm x 198.12 cm) pads in stuff sacks.

Commentary

I’m sold on the Nemo Equipment Astro Insulated Lite sleeping pad. It is not the lightest of pads at just under 1.5 pounds, but it may provide the best comfort to weight ratio on the market. It has the width to spread out, the length to keep my long legs on the pad, and the insulation to bring it into sub-freezing conditions. The Micro-Adjust valve is easy to adjust while lying on the pad, allowing you to get the air pressure dialed in for maximum comfort. The built-in pillow baffle is a well-thought-out feature. My wife and I loved this pad so much that we bought a second one – no more backcountry arguments over the Nemo pad! I highly recommended this insulated air pad.

Where to Buy

Related Content

Disclosure

Product(s) discussed in this review were either acquired by the author from a retailer or otherwise provided by the manufacturer at a discount/donation with no obligation to provide media coverage or a product review to the manufacturer(s). Backpacking Light does not accept compensation or donated product in exchange for guaranteed media placement or product review coverage. Some (but not all) of the links in this review may be “affiliate” links, which means if you click on a link to one of our affiliate partners (usually a retailer site), and subsequently make a purchase with that retailer, we receive a small commission. This helps us fund our editorial projects, podcasts, instructional webinars, and more, and we appreciate it a lot! Thank you for supporting Backpacking Light!

Atom Packs “The Atom” Backpack Review (First Looks)

The Atom is the smallest and lightest backpack offered by the UK’s Atom Packs. It is a specialized tool aimed at the fast and light hiker.

Introduction

The Atom is the smallest and lightest backpack offered by the UK’s Atom Packs. It is a specialized tool aimed at the fast and light hiker. The pack is highly customizable as Atom offers a range of choices in material and features.

The Atom is available in several volumes – all small (30L, 35L, and 40L) – and comes equipped without a frame or hipbelt in the standard configuration. Rather than prioritize load carrying, the Atom keeps the product weight low and focuses on usability with a variety of fast access features and pockets. The Atom is clearly designed as a companion for ultralight high mileage hikers.

Atom Pack
Source: Atom Packs

Features and Specifications

Embracing minimalism, I opted for the Atom in the smallest 30L size with a large torso.

  • Listed Weight: 360g (12.7 oz)
  • Measured Weight: 417 g (14.7 oz); Note: some, but not all, of the difference between listed and measured weight, can be found in the customizations I ordered in the pack. Mine had one shoulder strap pocket added (+13g, 0.5oz) and bound internal seams (+12g, 0.4oz)

I also opted for the VX21 fabric for the back panel rather than 500D Cordura nylon to increase waterproofness, which shaves 14g (0.5oz).

As I mentioned, the pack is fully customizable, but for the purposes of this test, I went with the standard configuration: two side pockets, two shoulder strap pockets, no hipbelt, and a bottom snack pocket with a trash port. The Atom also has a stretch mesh front pocket, haul loop, and a roll top (which clips to itself but does not strap down at the sides).

Commentary

My first impressions of the Atom were dominated by how diminutive it is. You need to have a highly refined kit to get more than a day’s worth of food in the 30L Atom. I can fit three to four days worth of food in the pack while running with a base weight kit of about six pounds. A more typical but still ultralight and compact solo kit allows about two days of food, while a bulky kit barely allows for food at all. The pack is at its best with a seven to eight-pound kit, two days of food and Tenkara fishing rod tucked along for a weekend of wandering.

My initial impressions of quality are favorable. The pack passes my “quick quality” test, which is to ask “is it nicer than something I could sew myself?” I found a wiggle here and there on close inspection of the seams, but overall it’s put together well. The internal seams are bound and have a sturdy and professional look and feel.

Once on the trail, it’s obvious that the shoulder straps are well-designed. They have an S-curve shape that hugs the shoulders well and ensures the pack stays in place, although I still value the sternum strap for stability when jumping over trees and other technical maneuvers. For this same reason, I wish I’d added the optional webbing hipbelt. I’m happy to carry 15 – 20 lbs on my shoulders, but a webbing belt would be valuable to keep the pack stable during those times when I’m scrambling over boulders or bending to tie my shoes.

Atom Packs Atom Flash Review 2
S-shaped shoulder straps offer a secure fit.

The shoulder strap pockets are a treat. They are sized well for items like a phone, GPS unit, or snacks. The pockets hold these items securely while remaining accessible. Atom Packs took a bit of a design gamble with a basic fixed elastic opening, but they judged well, and the result is a simple, easy to use pocket (no fiddling to cinch and uncinch it). The upper size limit for these pockets is my Nikon W300 camera, which is a little larger than many point-and-shoot cameras and just squeezes in. The side pockets are of average construction. They work fine but are hard to reach – they sit a bit high as the pack is shorter than average.

The bottom pocket is a revelation in pouch convenience. It works well for any item that is too large for the shoulder or hip belt pockets but needs to remain handy. You can stash food, windshirts, and maps here and retrieve them rapidly. The trash port into the back of this pocket is also a smart touch. It’s a bit hard to find when reaching blind, but this improves with use, and it’s a nice secure place to store trash on the go. While handy, the use of stretch mesh on the bottom of the pack is a trade-off between durability and convenience. It’s another example of how specialized this pack is – well suited for light hikers who take care of their gear and push big miles, but not a good fit for folks that favor heavier gear or are hard on packs.

Atom Packs Atom Flash Review 1 2
Less ideal uses include multi-pitch trad climbing…
Atom Packs Atom Flash Review 1 1
…and ski mountaineering.

Compared To

The closest competitor to the Atom is the Simple V2 pack from Palante. The Simple V2 offers a similar feature set including a bottom mesh pocket, but the Atom has the advantage of being a bit lower-priced and fully customizable. If you’re experienced with packs this light, and you know what you want, the Atom provides the opportunity to get exactly that.

Other packs worth comparing to are the Katabatic Knik (42L, +14 oz), Zpacks Nero (30L, +11 oz) and Flow Pack (35L, +10 oz) from Little River Packs. Generally speaking, the Atom stands out by offering more refined construction and full customization.

Closing Comments

The Atom is a pack for hikers who have their gear pared down to a minimum, and a fastpacking hiking style that matches the pack’s focus on minimal loads and quick access to essentials. It will be interesting to see how well the weight vs. durability trade-offs (like the mesh bottom pocket) hold up after substantial miles. Durability and usability on high-mileage treks with a minimal kit will be the focus of my longer-term review of this pack, which will be published here later this year.

Where to Buy

Related Content

  • We reviewed another customizable pack from Atom Packs here.
  • Interested in ultimate customization? Learn how to make your own UL pack.

Disclosure

Product(s) discussed in this review were either acquired by Backpacking Light from a retailer or otherwise provided by the manufacturer at a discount/donation with no obligation to provide media coverage or a product review to the manufacturer(s). Some of the links in this article may be affiliate links. If you follow one of those links to a retailer’s website and subsequently make a purchase, we’ll receive a small commission on the sale, at no additional cost to you. This helps us create new content at Backpacking Light, and we greatly appreciate your support!

Atom Packs Atom Flash Review 3

MSR PocketRocket 2 Mini Stove Kit Review

The MSR PocketRocket 2 Mini Stove Kit is a complete cook-and-eat solution for one person, featuring a stove, pot, bowl, lid, and pot lifter.

Introduction

The MSR PocketRocket 2 Mini Stove Kit is a complete cook-and-eat solution for one person, featuring the MSR PocketRocket 2 stove, a .75L (16-23 oz) anodized aluminum pot, bowl, transparent lid with drinking/straining ports, and an ultra-light pot lifter. I have used the MSR PocketRocket 1 (PR 1) stove system for many years. It has always been a compact and trustworthy cooking system. MSR pushes those features even further with this new design. It retails for $79.95.

msr pocket rocket 2 mini stove kit a
Source: MSR.

Features and Specifications

Total weight for the PR 2 Mini Stove kit including burner unit, 1-liter cooking pot, pot grip, eating/drinking bowl, and stuff sack is 9.8 oz (278 g). Adding a can of isobutane fuel (which will fit inside the stove kit) at 7.4 oz (210 g) brings the entire stove kit and fuel to 17.2 oz (488 g). The MSR isobutane fuel containers hold 3.9 oz. (110 g) of isobutane. The MSR isobutane rates as a four-season fuel for use on cold winter trips.

The following table provides a comparison of weight and specs between backpacking stove / cook kit models.

Make Model Liquid capacity Stove kit weight w/o fuel Fuel weight Total kit weight for use w/fuel
MSR PR 2 0.75 liters (.79 quarts) 9.8 oz (277.82 g) 7.4 oz (209.78 g) 17.2 oz (482.50 g)
MSR Windburner 1 liter (1.05 quarts) 15.5 oz (439.41 g) 7.4 oz (209.78 g) 22.9 (649.20 g)
Jetboil MicroMo 0.8 liters (.84 quarts) 12 oz (538.64 g) 7.4 oz (209.78 g) 26.4 oz (748.42 g)
Jetboil Flash 1 liter (1.05) 13.1 oz (371.37 g) 7.4 oz (209.78 g) 20.5 oz (581.16)

Note: we previously reviewed the MSR Windburner here – it’s worth reading that review in the context of this one so you are familiar with the tradeoffs between weight, wind performance, and fuel efficiency for an integrated system like the Windburner vs. a standard canister stove system like the Pocket Rocket.

All the components of the PocketRocket 2 cook system nest down within one another, a new feature and a vast improvement over the previous iteration (see photo for comparison). This feature leads to a reduction of about 50% volume and slightly less weight over the PocketRocket 1 cook system.

msr pocket rocket 2 mini stove kit b
Source: MSR.

While an intrepid ultralight backpacker can build a lighter cook kit using thin-walled titanium cups, carbon fiber pot lids, 1-oz canister stoves, and the like, the PocketRocket 2 kit represents one of the lighter and best-integrated systems for self-contained packaged kits on the market.

image4
Comparison of PR 1 (left) and PR 2 (right) showing cup/bowl, fuel canister, boiling kettle, and burner unit.  All items are inside the PR 2 stuff sack on the right while the PR 1 requires separate components and more pack space.

Performance Assessment

The performance of the MSR PR 2 is rated at boiling 1L of water in three minutes, thirty seconds with an output of 8,000 BTUs. MSR rates this stove to burn at the maximum flame for sixty minutes using a 3.9 oz isobutane canister. If one assumes that each one person hot meal will require two cups of water and four minutes to boil, each 3.9 oz isobutane canister will provide hot water for fifteen meals.

MSR did a good job packing useful design into a small package. As you can see in the comparison photo, the PR 2 is even more compact than the PR 1. The new design allows the three pot support arms on the burner unit to twist and fold down, making it tiny enough to nest inside the 0.75-liter pot that comes with the stove kit.

image2
My original PR1 along with the GSI kettle. Note the red plastic case for the burner unit. Thumb drive for scale.

This design is an improvement over the PR 1, which required a red plastic case for the burner unit because when you folded the potholders, they pointed up and could punch through a pack. With the new foldable design, you are free to leave the plastic case behind and lighten up even more.

image1
The burner units of the PR 2 on the left and PR 1 on the right. Thumb drive for scale.
image3
Burner units of the PR 2 (left) and PR 1 (right) with the pot holder arms folded. Note how compact the PR2 burner unit is with the arms folded. Thumb drive for scale.

Commentary

The PR 2 does not come with a fuel canister holder, which makes the stove unit and water in the pot more stable and safe. Without one of these, it would be a snap to upset a pot of boiling water, putting you at risk of a hot water injury and or loss of hot water. In my opinion, a stove with a liter of hot water on it is too unstable to use without a canister holder – the center of gravity is too high, and the ground surface in your camp is likely to be somewhat uneven.

image6
Fuel canister stand on an isopro fuel container.
image5
Folded fuel canister holder.
  • The PR 2 also lacks a windscreen. I have used a PR 1 for years in a variety of situations (including alpine environments and stormy evenings) and have never needed a windscreen. The PR’s power, along with a minimal amount of shelter, makes one unnecessary. However, if you desire a windscreen, I suggest rolling up some heavy duty aluminum foil and packing that along. Windscreens for canister stoves have been discussed at length here previously in articles here, here, here, and here.

The PocketRocket 2 is designed to fit in a minimal space in your pack in a compact volume (about four by five inches). The weight of the cooking unit including fuel is 17.4 oz (487 g), and that includes burner, fuel canister, 110 g of fuel, a bowl/drinking cup, handle for pouring, and a lid. An added fuel canister holder for cooking stability will add about an ounce. This system is a reasonable investment if you are looking for a well-designed lightweight backpacking stove and cook kit.

The kit can be lightened by about two ounces by leaving the plastic mug at home, replacing the stock pot grabber with a carbon fiber one, and replacing the plastic lid with a carbon fiber lid.

Editor’s Note – I used this stove and cook kit while on a media trip in the Wind River Range (Wyoming). I can echo all of Chris Servheen’s observations – with one addition. One cold morning (pre-coffee) I placed the cooking pot on the stove and ignited the burner … only to immediately melt the eating/drinking bowl which I had failed to remove from the bottom of the pot. The bowl is clear and when nested onto the pot is easy to miss. Normally I would chalk this up to human error brought on by inattention on an early morning. However, several other professional gear reviewers on the trip mentioned that similar things had happened to them or their acquaintances. Even representatives of Cascade Designs noted that it was a common problem. It’s no reason to avoid this piece of gear – but be vigilant! – Andrew Marshall

Where to Buy

Related Content

Disclosure

The manufacturer provided complimentary samples of the products in this review with no obligation required to publish a review. Some links in this review may be affiliate links: if you click on a link and place an order with one of our affiliate merchant partners, Backpacking Light receives a small commission on the sale, at no extra cost to you. These commissions help support our website and create new content – and we’re grateful for your support.

Hummingbird Hammocks Reviews: Single, Single+, Pelican, Warbler, and Suspension System

Hummingbird Hammocks offers a variety of Made in the USA hammocks and accessories including three hammocks, two hammock tarps, a bug net, and other accessories. They have some unique features such as Button Links that eliminate the need for carabiners and integrated tree straps with whoopie slings which simplify the suspension system and make setup very easy. They also offer what is likely the lightest hammock on the market – the Single Hammock, which weighs a scant 5.6 oz. Can the lightest hammock also be the most comfortable?

You don’t have access to view this content.

ThruNite Ti3 Flashlight Review

The ThruNite Ti3 is a diminutive but rugged little flashlight that can produce as much as 120 Lumens of brightness on a single AAA battery.

Introduction

The ThruNite Ti3 is a diminutive but rugged little flashlight that can produce as much as 120 Lumens of brightness on a single AAA battery. It is worth noting that the Ti3 at 18 g (.63 oz) with battery is somewhat lighter than any headlight I have, even my UL MYOG models which start at 52 g (1.8 oz). This weight difference alone makes it worthy of consideration as a piece of ultralight gear. The Ti3 arrived with an explanation that ThruNite has a newer production version coming out shortly.

Thrunite 1
Photo: ThruNite

The Ti3 arrived in a small tin box with all the accessories stored away inside under the foam. There’s a clip as shown here and a little clip on some chain, all of which I quickly discarded.

Thrunite 2 1

Instead, I made a loop of fluoro nylon string ( I used 330 mm), large enough to easily slip over my hand but small enough that it would not fall off.

The genius of the Ti3 rests in its size to brightness ratio. A single AAA Lithium battery powers it. The flashlight is only slightly larger than the battery itself. That is TINY! The marginally larger head contains the electronics that handle the modes.

Thrunite 3

Features and Specifications

Price 16 USD
LED Cree XP-G2 R5
LED life 20+ years
Length 70 mm (2.75 in)
Diameter 14 mm (.55 in)
IPX-8 waterproof to 2 m (6.56 ft)
Made in China
Weight without battery 12 g (.42 oz)
Weight with AAA lithium battery & string 17.7 g (.62 oz)
Firefly mode 0.04 Lm, 115 hr life
Low mode 12 Lm, 6.3 hr life
High mode 120 Lm, 0.5 hr life

The flashlight first activates in Firefly mode, the lowest power setting with the most extended battery life (115 hours). You can bump it up to a higher power by turning it off and on again quickly. Do that three times, and you get a high power strobe operation. You get back to Firefly mode by leaving the light off for >10 seconds.

You activate the light by screwing the head of the flashlight down onto the body a bit. In effect, you are screwing the contact in the head of the flashlight down onto the battery. This action can be achieved with the thumb and forefinger while the rest of the fingers hold the body of the light. No actual switch or button is required!

Thrunite 4

The head of the flashlight is not loose on the body: there is a replaceable O-ring between the two parts which makes the twisting operation smooth and keeps the light waterproof. ThruNite provides a replacement O-ring. It was hard to measure, but my best guess is 9 x 1 mm. ThruNite recommends a minimal amount of silicone grease when replacing the O-ring.

You could compare the Ti3 with any of the button flashlights on the market – the ones generally based on a CR2032 coin cell battery. Button flashlights are smaller and lighter, but we would be talking about just a few grams difference here –  in one case 16.5 g (.58 oz) vs. 17.7 g (.62 oz). The big difference to my mind is the expected life of the battery. The button cells, typically CR2032, are rated at 250 mA.hr at a trickle discharge rate, significantly less at a flashlight discharge rate. Those button batteries are designed for low-power uses. The AAA Lithium battery, on the other hand, is rated at 1250 mA.hr at a significant discharge. The official specifications don’t go as low as the Firefly mode. The AAA battery has much more guts.

Field Testing

I found the Ti3 extremely simple to use in practical situations.  I was able to quickly orient it in the dark and activate it with one hand. Firefly mode is all one would need in a tent –  it is quite bright. Outside the tent, the Firefly mode is still bright enough for casual excursions, while the battery life is long enough that I didn’t feel the need to keep turning it off and on. I just let it dangle from my wrist on the string loop.

Commentary

The Ti3 is a featherweight flashlight that punches far above its class.  The ease of use, powerful AAA battery, and rugged construction are all attractive features. The holding loop was easy to modify and the Lumens provided in the low power Firefly mode are more than adequate for interior tent use and casual after dark wanderings. On top of all that, my wife said it best.

“It’s cute!”

Where To Buy

Disclosure

The manufacturer provided complimentary samples of the products in this review with no obligation required to publish a review. Some links in this review may be affiliate links: if you click on a link and place an order with one of our affiliate merchant partners, Backpacking Light receives a small commission on the sale, at no extra cost to you. These commissions help support our website and create new content – and we’re grateful for your support.