The Hyperlite Mountain Gear REpurpose water bottle is a recycled aluminum bottle developed with the lightweight outdoor community in mind.
Introduction
The Hyperlite Mountain Gear REpurpose water bottle is a recycled aluminum bottle developed with the lightweight outdoor community in mind. Thoughtfully crafted by the only metal bottle manufacturer in the US, carrying this bottle not only lightens your load, but it also reduces your carbon footprint and gives back to the community.
This single-walled bottle weighs only 5.8 ounces when empty and 32 ounceswhen full. The REpurpose bottles comes with a dual-loop, quarter-twist cap that makes it easy to attach, seal, and keep track of with minimal effort when you are out and about. Made with fully repurposed materials, this durable bottle can be recycled even after it has lived its last day on the trail with you.
Features and Specifications
Features
Made in Washington State, USA
Baked on, BPA-free TrueShield food grade coating inside and out
Quarter-twist cap with double loop attachment points
Bottle and cap are fully recyclable
Smooth (white) or textured grip (black) finishes available
Specifications
Material (bottle): Repurposed Aluminum
White Bottle Weight: 0.36 lbs, 5.80 oz, 165g
Black Bottle Weight: 0.36 lbs, 5.90 oz, 167g
Height: 10 in, 25.4 cm
Diameter: 3.18in, 8.08cm
Commentary
I found this bottle after a (surprisingly difficult) search for a metal bottle under 6 ounces to replace my plastic water bottle habit. Of course, a disposable plastic bottle is the holy grail go-to for the ultralight community, but I wanted to lessen my footprint and move away from plastic in my consumables. The popular metal-bottle options can weigh up to about a pound when empty, and I wanted a metal bottle that weighed less than half of that. I finally found it in the Hyperlite Mountain Gear REpurpose bottle at a measly 5.80 ounces.
I was surprised by the REpurpose bottle’s lightweight feel (especially for a metal bottle). Every fellow hiker and coworker that’s taken an interest in it responds with a “Wow!” after picking it up. This bottle comes with TrueShield inside and out, a BPA-free, food-grade coating so no odors or tastes will transfer to or from the metal. It also makes it easy to clean. A quarter-twist cap (with double loop attachments that makes it easy to secure to your pack) shaves weight that would be added by a fully threaded twist cap.
Available in two finishes, white/smooth and black/textured, each has their own benefit. The white/smooth bottle is a tiny bit lighter for the self-proclaimed gram weenies out there, and the black/textured version offers a better grip and is less likely to slide out of your hand or pack pocket when out on the trail.
The lightweight trade-off for this bottle is the single-walled construction. The REpurpose is not insulated – it will hold boiling water but it will not protect your hands from the heat, or keep your ice cubes icy for 24 hours like the heavier insulated bottles are able to. The single-walled construction is more likely to sweat in the summer months and freeze when you’re out on the trail in winter.
Overall, Hyperlite Mountain Gear stayed true to their name with this lightweight bottle. Unless you have an external sleeve or insulation, it probably won’t replace your all-season double walled do-it-alls but might be a good option if you want to move away from plastics.
The manufacturer provided complimentary samples of the products in this review with no obligation required to publish a review. Some links in this review may be affiliate links: if you click on a link and place an order with one of our affiliate merchant partners, Backpacking Light receives a small commission on the sale, at no extra cost to you. These commissions help support our website and create new content – and we’re grateful for your support.
Over the summer months Ryan and Andrew are taking a break from the long format episodes to bring you a few different variations on the podcast. This episode features a conversation with a few of the Backpacking Light Wilderness Adventure guides. Kevin Fletcher, Dan Wielenga, and Adam Van Zee all joined Ryan in the Beartooth Wilderness in June for a guide training. In the car on the way home, conversation turned to the philosophy and “soft skills” of ultralight backpacking.
Later in the episode, Ryan gives a brief rundown of the new Garmin inReach Mini and previews the upcoming BPL Trekking Poles gear guide. Andrew is moving to Lake Tahoe and considering a 2019 PCT thru-hike.
Outline
Ryan and Andrew introduce the episode format
Ryan introduces the guides he will be talking to
Guest interview, Round Table Format: Backpacking Light Wilderness Adventure Guides Kevin, Dan, and Adam
How to define ultralight backpacking?
Simplicity
Weight range 15 – 25 pounds
Doesn’t necessarily mean having super high end gear
What works for you?
Length of trip (expedition style) can mean heavier packs even if ultralight skills and ideas are being practiced
Base weight vs food weight
Ultralight is a mindset
Ultralight can often be misinterpreted
Does the classic “cutting the handle off the toothbrush” move automatically make you an ultralight backpacker?
It’s a first step!
Ultralight backpacking is a methodology
Application of methodology across different types of trips
Skills, techniques, certain types of gear that allow you to simplify systems
Streamlined systems
Focus on experience
Reducing complexity leads to a reduction of packweight—in general
Multi-use items
Some ounces are worth adding for the sake of experience
Those items and that experience is different for everybody
Baking soda vs toothpaste
Going light helps you have a better experience
Searching for the optimal experience is a process that involves subtracting and sometimes adding weight over time
The search for simplicity is also an individual pursuit
How minimalism is misunderstood
Not just about what is necessary vs not necessary
What adds value?
Item evaluation and how to determine if it enhances experience
One item at a time
Research
Can it be lighter? Can it be eliminated?
Hiking in groups where not everyone is lightweight
How much are folks enjoying the experience?
How tradition and lack of experimentation leads to a mistaken belief about the importance of items
Education
Exploring the idea that certain pieces of gear are necessary for certain experiences
Depth vs breadth of experience
Lightweight backpacking as a gateway for family / loved ones
Ultralight backpacking = more fun?
Intentionality and research
Cottage gear companies
Systems
Changing one part of the system often leads to changing other parts of the system
Enjoyability of the experience
How much more can you see and experience with a lighter pack?
Travel farther, see more
Options opened up
Durability and quality of gear – how important is it?
What drives your gear choices?
Marketing vs actual needs
Hard Skills / Performance / Longevity
Ultralight octogenarians
Family Backpacking
Children experiencing the wonders of nature
Ultralight methods allow families to backpack enjoyably
For kids the outdoors should be fun
The challenges of outfitting a family with gear affordably
Longer trips with families
Ultralight backpacking as a catalyst for quality time with friends / loved ones
Less investment of time and energy
Lowering the barriers to get to the trailhead
Ryan and Andrew break down the conversation
Pros / cons of solo vs group backpacking
The affordability of ultralight backpacking
What is ultralight backpacking about?
Materials?
You can go as light as possible and spend a lot of money, or you can go ALMOST as light as possible and spend far less
Hard skills and gear vs philosophy, soft skills, and relationships
Gear
Garmen InReach Mini
Two way satellite messaging
Allows wilderness trips at times when zero communication is not an option
Pairs with smartphone
Half the size and weight of the old InReach
Huge step forward
Bluetooth pairing to phone
Using device for messaging without the smartphone is extremely clumsy
Smartphone needed for messaging / mapping
Retails for $350.00 plus service plans
Check out the review on the website! Link below.
Here and Now
Ryan and Chase backpacked the Snowy Range and went off trail
Ryan is hip deep in trekking poles, screening over a hundred models for the upcoming Trekking Pole gear guide
Poles are still pretty heavy in general
Folding poles
Durability of poles over time
Shaft material
Common failure points on poles
Personal trekking pole preferences
Trekking pole strategies for getting your hands free quickly
Sponsors: Help us Keep the Podcast ADVERTISING-FREE!
This episode of the Backpacking Light Podcast is supported and kept advertising-free by Backpacking Light membership fees. Please considerbecoming a member which helps support projects like this podcast, in addition to a whole slew of other benefits!
In addition, some of the links on this page may be affiliate links that refer to our partner merchant retailers. If you follow a link and then make a purchase, we receive a small commission which goes a long way towards helping us pay for podcast production, hosting, and bandwidth fees! Thanks for supporting us in this way!
Contact
You can contact us at podcast@backpackinglight.com, or follow us on social media –
This Tritensil Review features a knife/fork/spoon set done in hard plastic. You can reassemble to make a long-handled spoon or fork.
The concept of the Tritensil® came about from over twenty five years of first hand wildland firefighting and military experience. The weight and volume limitations of these two communities extends to almost every other outdoor adventure. When you have to carry all of your gear, there is an old saying that ounces equal pounds and pounds equal pain. By combining a scalloped knife into the spoon handle, the Tritensil provides the full capabilities of a fork, spoon and knife in a two piece set. Whether the main course is soup or steak and yes, this knife will cut steak, the Tritensil will have you covered.
The Patented interlocking handle design provides a nesting configuration for compact storage without the need of special clips, bands or cases. Not only are the fork tines and knife protected from damage while nesting but the storage configuration keeps the two Tritensil pieces snuggly secured to each other minimizing the chance of loss and unwanted noise. The interlocking design also allows the Tritensil to be configured into an extended Spork almost doubling the overall useable length for those times you may find yourself eating out of a pouch. Learn more at https://www.tritensil.com/
How the bits clip together.
Features and Specifications
The Tritensil is made from a proprietary BPA, BPS and BPF Free, RoHS Compliant, FDA Food Grade Polymer making it lightweight.
Standard:
20 g (0.7oz)
MSRP: USD $9
Mini:
8.5 g (0.3oz)
MSRP: USD $7
Colours red, blue, orange, pink, purple and ‘tactical green’ which is almost grey.
Someone mentioned these in a BPL Forum thread and they looked interesting, so I contacted the company to see if they were interested in a product review. They were, so I suggested they send me a couple of sets. They sent me a box full!
What to do? Clearly, the best path would be to farm most of the sets out to other known BPL members, to get their comments as well, so I did. The call went out to Australian members as the cost of postage back to the USA would have been too high. So we will start with my comments, then go on to comments from others.
Photo: Tritensil.
Commentary by Roger Caffin
It’s a knife/fork/spoon set done in hard plastic. There is a fork with a medium-length handle, and a spoon with a knife for a handle. The set comes neatly packaged together. You need to read the instructions to be able to separate the two bits – they come apart with a definite click. The interesting thing is that you can reassemble the two bits to make a long spoon or fork: good for getting to the bottom of deep pots and bags.
In fact there are two versions: a standard size and a mini size. Most of our comments are about the standard size bits as most of us thought the mini size was too small. It will be clear when the comments apply to the mini size.
The spoon size and shape are OK. The bowl has a good shape and size for holding stew and soup, and does not have spork slots (tines) which make the bowl less practical for anything liquid. The knife handle on the spoon is a bit strange. As mentioned, you can clip the fork onto it to make long handle. That does mean you have either a spoon or a fork – and possibly a slightly messy hand when the other end dribbles downwards. Well, yes, a bit um: lick fork clean first. Without the fork extension the spoon handle is a bit short, but still usable.
The fork was more difficult to test as I don’t normally carry one. Perhaps think of it as a freebie part of the extended spoon handle. That said, the tines are very strong and wedge-ended for penetration. Not sure any of our bushwalking food would need that. I tested the tines at home on the hard biscuit crust of a quiche my wife made: they went through the crust with no problems.
One reason the tines are so strong is that they are bigger/fatter than metal tines. I found that trying to pick up a lump of cooked potato or pumpkin tended to split the lump rather than pick it up. Oh well – back to the spoon.
I have little faith in knives made of anything other than steel: in general they don’t work. However, while this knife looks blunt, the serrated edge was strong and did cut quite a few things like wholemeal bread, hard cheese and dry sausage (aka salami). It did better than I expected.
However, the asymmetric nature of the edge means the blade tends to shear off sideways at an angle. I found I could compensate for this after a while by seriously angling the blade from the start. That just feels a bit strange. Also, the blade is a bit narrow in my opinion, so that spreading butter and jam is more difficult than with a wider blade. Ah yes – clean the spoon end thoroughly before trying to use the knife end.
Commentary by Franco Darioli
Franco’s range of cutlery, by Franco Darioli. Going from the left we have an Opinal folding knife, a BPL long Ti spoon, a SnowPeak spoon, a Powerport spork (same factory as LightMyFire?), a LightMyFire spork, GSI fork and spoon, an unbranded wooden spoon (ex kitchen?), a bambu spoon (‘bambu’ is the brand) a Sea to Summit spoon, and finally the Tritensil bits.
Having spotted the Tritensils a couple of years ago , I was surprised that there could be a new twist to the Spork/Foon type of eating utensils. That is because over the years I have tried many different versions (I still have some), eventually opting for the long Ti spoon and the Opinel knife (about 50 g combined, feel free to faint now) because they work for me. Most of all I prefer the feel of the wooden spoons but they are not long enough to reach the bottom of my Caldera Cone caddy or the 700ml pot without rubbing against the side. The same applies to the other spork/foon combos. This one, the Tritensil looked promising.
When assembled and used as a spoon it is as long as the BPL Ti version. The fork bit does not interfere with the handling. The knife works for hard cheese and slicing salami but not as well, for me, as my Opinel. However, unlike with my knife, the Tritensil bits leave no taste that I can detect. I deliberately tried tomato based meals as well as curry. The feel in the mouth is good too, better than Ti, at least until Ti warms up.
It is the best version of this type of eating utensils I have tried so far, but I am used to the long spoon/Opinel combo (my only knife) and I have an my emotional attachment to the Opinel (I had one as a kid).
Commentary by Gordon Bedford
Photo: Gordon Bedford.
What can one say about a knife, fork and spoon set? I have used a spoon and a lightweight folding steel knife as standard equipment for years. The spoon is a white plastic polymer material, Lexan I think. I have never bothered with a fork except when car camping. Then along comes the Tritensil knife fork and spoon set.
I liked the colour orange, easy to distinguish from other objects and not lose in the grass. There are other colours available.
I was skeptical of the design at first. Will I cut myself on the knife when holding the spoon? My hands are dirty. Hold it as a spoon and the knife gets dirty. Hold it as a knife and the spoon gets dirty.
I quickly got the knack of clipping and unclipping the two utensils. How long before wear and tear would prevent that, only long term use would tell.
The spoon functioned like a spoon. I didn’t find anything different about it. Holding the knife end felt strange at first but I soon became accustomed though it never felt smooth and easy to manipulate.
I used it in the bush on walking trips twice for a total of three nights. I only took the knife/spoon. The knife has a serrated edge and functioned surprisingly well. I used it to cut cheese and apple.
At home I found the knife cut bread and even roast lamb. Nevertheless it is not designed to cut a big loaf of bread. It was not great at spreading. How long the serrated edge would stay sharp, time will tell. I suppose it could be sharpened with a small round file.
I tested the fork at home. It has an inch ruler along one edge. It is not really a stabbing fork but worked fine on softer foods. It worked reasonably well with noodles. However the wide rectangular design meant it was not as easy to manipulate as a normal table fork.
The knife is inferior to a steel knife. I would still carry my light weight Deejo knife: it is sharper and can be used for a wider range of tasks. It is also easier to keep clean. I have no intention of carrying a fork.
There is a mini set with teaspoon type dimensions. I didn’t review these. My conclusion is that I will not replace my usual spoon and knife with the Tritensil set. However if you like to include a fork to eat with, then it could be worth a try.
Commentary by Simone Zmood
Photo: Simone Zmood.
Overall, we thought the cutlery felt solid and each piece was comfortable to hold. We liked the way the spoon/knife (spife or knoon – what is it called?) and fork clipped together securely and they were easy to separate. Before I provide any more comments, I should give some background on our eating style to provide context for my comments below. When going on multi-night trips we usually have breakfast in a bag at camp or on the track after we have walked for a while, a non-cooked lunch (or all-day scroggin/trail mix), and one-pot meals for dinner so we normally only take a spoon or a spork. Having a piece of cutlery that is long enough to stir the food in the pot without burning fingers is also important to us. Since we did not manage to try this cutlery on an extended trip, I will describe our thoughts on their utility for breakfast and conjecture somewhat for the other eating scenarios.
My husband used the full-sized spoon to eat breakfast out of a zip-lock bag (above). He did notice the serrated edge of the knife whilst he held the spoon but felt it wasn’t a major issue. I used the mini spoon and it wasn’t long enough to easily eat out of a bag without getting food on my fingers but was fine when eating out of a small container. My hands are smaller than hubbie’s so the mini spoon was fine but I also noticed the serrated edge of the knife whilst using it. Since neither of us were cut by the knife, I suspect this is something I would get used to. The shape and depth of the spoon was comfortable to eat from, and the small one still held a decent amount of food.
We often carry fresh food for the first dinner or fresh fruit and veggies for the first few days, so I tested the small knife on a crunchy persimmon (above). My fingers got a bit juicy and I think it would be easier to cut with the bigger knife. Whilst the knife cut well, I still think my little Spyderco Ladybug knife cuts better (and the latter is dual purpose having been used to carve a replacement paddle on an overly exciting packrafting trip). Since the knife is part of the spoon, it would come along on a trip for no extra weight. We didn’t use the fork but it looked solid.
I liked the way the spoon and fork could reverse-clip together to create a spoon with an extended handle. Whilst we didn’t test it, the full-size extended set up would be long enough for our couple cook pot and the short cutlery set would work for my solo kit.
The manufacturer provided complimentary samples of the products in this review with no obligation required to publish a review. Some links in this review may be affiliate links: if you click on a link and place an order with one of our affiliate merchant partners, Backpacking Light receives a small commission on the sale, at no extra cost to you. These commissions help support our website and create new content – and we’re grateful for your support.
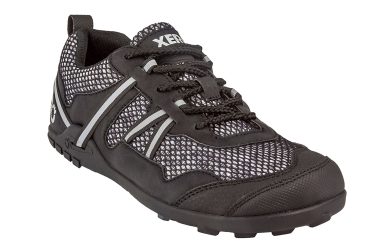
This Topo Athletic Terraventure review features shoes that have narrow heels, a wide toebox, and minimal drop.
Introduction
Photo: Topo Athletic
The Topo Athletic Terraventure shoe is advertised as being narrow at the heel but wide at the toe box – this means they do not fit the usual formula for shoe sizing. They only come in one width. Topo Athletic lists these shoes as 4/5 for cushioning, 3/5 for support (1=neutral), and 4/5 for stiffness. They retail for US$110/pair. Topo Athletic sent us two pairs of shoes of size 10.
Here’s a summary of the specs (courtesy Topo Athletic):
First Impressions
Pair of shoes as delivered.
As delivered the new shoes still had that faint manufacturing smell, so we aired them outside for a bit. They came with some funny foot-shaped paper mache inserts to hold their shape. Some brands just stuff the shoe with wadded up butchers paper, others don’t bother. Since the shoes come in a conventional shoebox, I have to wonder whether the inserts are needed.
The soles felt slightly stiff at first, but this is very common. The lacing was in place, up to the top holes but skipping the second top (blue marks in the above photo). The tongue has a lace loop (green marks) through which you thread the laces: that helps keep the tongue from slipping downwards or sideways. The laces were quite long enough and knotted well.
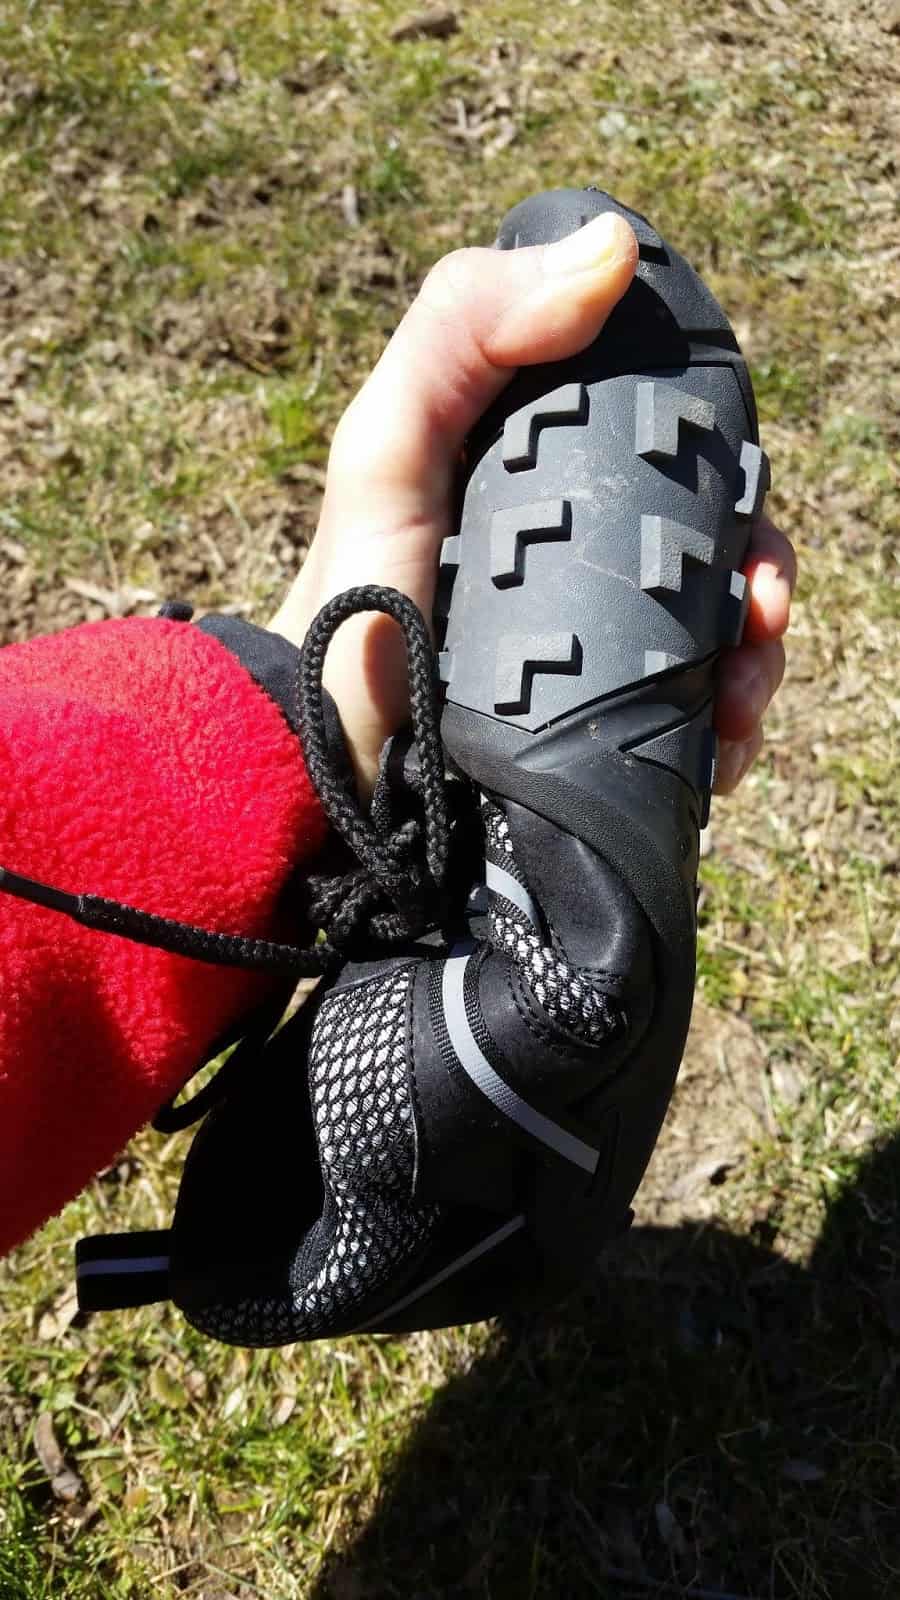
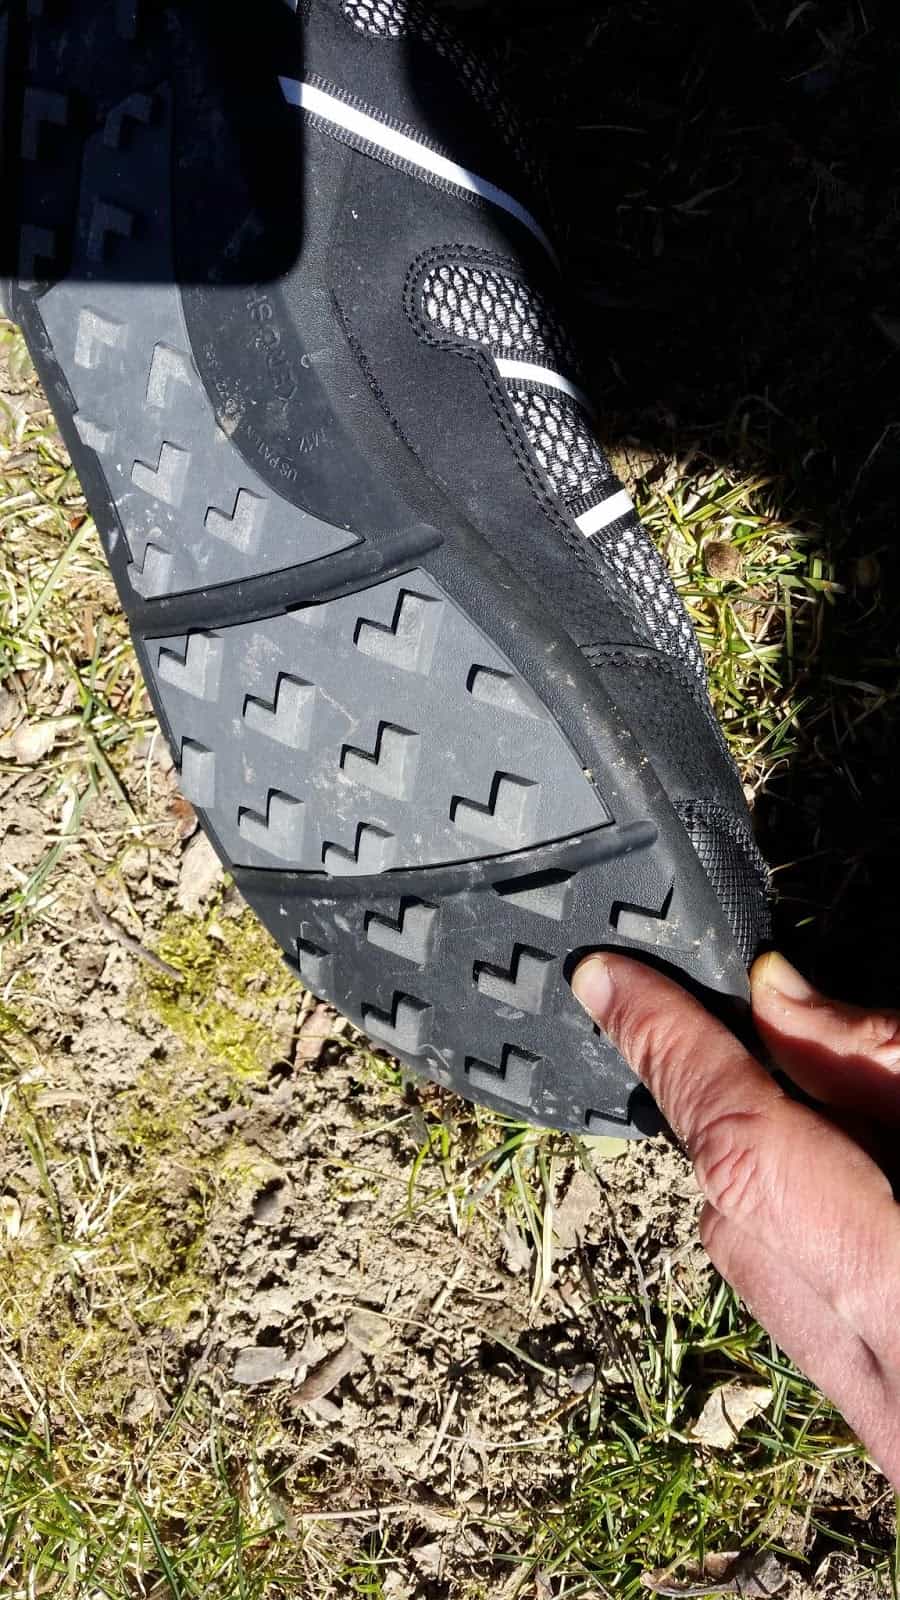
These are trail running shoes, not street running shoes, so they are a bit heavier in construction around the sole. The sole has large lugs which should be OK in mud. Clay might stick, but clay always sticks. The sole felt stiff in torsion, which is good for edging on steep terrain. The rand (obvious in the first photo) is solid so you can kick things without hurting your toes – things like unseen rocks on the track.
The upper has a thick mesh construction for ventilation. This means that water will flow in if you are crossing rivers (and flow out as you walk them dry on the other side!) It also means that dust can get in, although sand not so much as the holes in the mesh are not too large.
The shoe has an almost flat inner sole under a stock removable footbed. There is a very slight contouring in the region of the arch of the foot, but more at the side than underneath. It seemed that there was a noticeable rise under the ball of my foot, but the sole was flat inside. This impression went away after a day or two.
A big claim Topo Athletic makes is that the shoes have narrow heels and a wide toe box. The heel is not all that noticeable, but there are quite cushy heel-retaining lumps (purple markers in the image above) on both sides at top. They were noticeable at first but they faded from consciousness after a short while. However, they do seem to work, preventing my heel from lifting very far.
The tongue has side gussets to help keep dirt and mud out and is adequate in length (it may even be considered long relative to the average trail running shoe, as there is a generous amount of tongue protruding above the top of the lacing). As mentioned, there is a laces loop 1/2 way up (green markers in the image above), which is usually worth using.
The outer uses a fully bonded construction with thin plastic (probably polyurethane) laminated in places to the mesh fabric for reinforcing or decoration. This is lighter than having separate fabric layers or suede sewn on and unlike leather does not shrink when drying out. Apart from the webbing loops used for the laces, there is no other stitching visible on the surface.
We measured the shoe weight as 319 g (11.3 oz) per shoe for a size US 10. I dare say they could be lighter, but they do have a quite rugged sole.
Sizing
Like so many other brands, the shoe size is given with no indication of width, although Topo Athletic claims that the Terraventure has a wide toe box. Well, they do look wide from above – unlike Italian fashion shoes sometimes described as winkle pickers. A very slight drop of ~3 mm from heel to toe is noted. The middle of the shoe (as opposed to the toe region) is not wide – it is meant to hold your foot in place.
Regarding an inquiry about shoe width that I made to Topo Athletic, they replied that “all of our shoes are a standard D, but more towards an E in the forefoot.” This was not encouraging for me, as I normally take a 4E fitting!
Field Testing
Topo Athletic sent us two pairs, both size 10, so both my wife and I did the testing. The first thing both my wife and I noticed was that the shoes are indeed not a 4E in width. This was a problem. However, the toe box is rather more flexible than average. I found that after swapping from our standard thick wool Darn Tough Vermont Boot Socks to thin (nylon) Gobi Wigwam liners, the fit improved a bit. I then changed the lacing to skip one of the lower hole pairs (red markers above) and this also helped. For width reasons I am not sure I would take these on a week-long walk, but they are fine on day walks.
The shoes were delivered with the laces installed to the top holes and skipping the second top. This left my heels feeling a bit loose. While changing the lacing pattern I threaded the laces through both the top holes as well. I usually do this as it seems to make the shoe grip my foot much better. My wife, however, was happy to leave the top holes unused and just use the second top ones.
A subsidiary problem is that my left foot is slightly bigger than my right foot. Some compromise is often needed. In any event, my big toes were a safe distance from the front of the shoe. After some testing, I am left thinking that the shoes may run slightly under-size. That is, perhaps a 10.5 might have been a better fit.
Fast walking on road, track and bush was no problem. Any perceived stiffness in the sole disappeared after the first hour or two. However, I found it essential to leave the shoes laced quite loosely. Are they an E fitting at the front, or possibly a 2E? Either way, the soft mesh sides proved to be fairly conformable.
On the edge of a sandstone scarp.
Going up and down wet and dry sandstone slabs and boulders and along scarp edges showed very good grip on the sole, and a definite lack of twisting. I quickly became quite confident of their grip. Going downhill on very rough terrain was also reliable, including one time when I was perhaps under less control that I should have been (ahem). The soles did work well. Some other reviews say the shoe is responsive: I have no idea what this means as shoes have never responded to me. I think it is marketing gibberish. Nevertheless, it’s generally accepted in the running community that cushioning and responsiveness are mutually exclusive, i.e., a responsive shoe is the opposite of a cushioned shoe somehow.
As far as I have seen, the removable insoles in most joggers are always some type of closed cell foam (CCF). For example, New Balance insoles usually have a cut surface on the bottom face: you can see the cells, and these often hold a little moisture and rather more fine sand. These Topo insoles have a smooth underside (from moulding), and they do not hold water or sand. This seems like a good idea.
However, there is one gotcha to watch out for. The front of the shoe has a heavy rand, as usual, and this curls over onto the top at the front. But the top edge has a significant protrusion on the inside, and the edge of my big toenail did catch on it at times. If you walk with your toes curled up you might have a problem; if you walk with your toes curled down or with nice thick wool socks you will never notice.
Summary
Very solid, good grippy sole, and really not that expensive. They lack “features” like arch support, pronation control and gel soles, which is excellent. They depart from the conventional shape, so whether they will suit your feet or not I cannot say – that’s up to your feet. They would be worth trying on though. Just be aware that they may not be suitable for those with very wide feet.
Where to Buy
Topo Athletic Terraventure shoes are available at REI. Using these buy links helps support Backpacking Light (more info in the disclosure below).
The manufacturer provided complimentary samples of the products in this review with no obligation required to publish a review. Some links in this review may be affiliate links: if you click on a link and place an order with one of our affiliate merchant partners, Backpacking Light receives a small commission on the sale, at no extra cost to you. These commissions help support our website and create new content – and we’re grateful for your support.
This article presents the results of some cursory material construction tests using the newer Dimension-Polyant (DP) fabrics from the LS, VX, and WX families, as well as seam-taping using DP-supplied seam tapes. The context here is MYOG/DIY backpack construction.
Introduction
This article presents the results of some cursory material construction tests using the newer Dimension-Polyant (DP) fabrics from the LS, VX, and WX families, as well as seam-taping using DP-supplied seam tapes. The context here is MYOG/DIY backpack construction.
Tested Fabrics
This shows one of the new DP fabrics LS 07 sewn to an older DP fabric VX 04. The LS 07 consists of a light woven ripstop inner layer bonded to a ‘non-woven’ face layer. I gather that between the two layers there is a layer of plastic film which does the bonding and makes the fabric seriously waterproof and dimensionally stable. This seems to be how some of the Dimension-Polyant fabrics I have tested are made.
The older VX 04 is a very light X-grid fabric which I had: a red ripstop nylon face fabric bonded to a quite light inner fabric with a strong X grid of black threads between them to give diagonal strength.
On the left we have a rear view of the two fabrics sewn together face to face with a single line of Rasant 70 thread with a stitch length of 1.35 mm. Thread tension has been adjusted to put the thread cross-over ‘inside’ the fabrics. In the right we have the face view of the same pair. While the seam has been pressed down with my thumbnail, you can see that the hem region still sticks up. I would almost never use such a single line of stitching on outdoor gear.
This photo follows the above format. The fabrics are labelled. LS 21 is a heavier version of the LS 07. The outer face of the LS 07 is so light you can see the ripstop of the inner face showing through.
These two fabrics represent a different approach. Each one has a stronger inner face fabric as shown at the left. At the right we have the front face of a very heavy layer of plastic film. Sandwiched between the two you can see an X grid as in the VX 04 fabric.
One could in fact argue over which is the ‘front face’ on either of these two fabrics. If resistance to water is your primary concern you would run them as described. However, if abrasion resistance is your primary concern you might well reverse them as the woven fabrics are quite strong. I would particularly note the way the X grid fibres make the plastic film stick up.
Pack Seams
There are all sorts of fancy seams around; this seam is what I use for my packs and a lot of other gear as well. I start with the basic single line of stitching as seen in the previous photos, fold the hem over hard and over-sew a second line of stitching down the middle of the hem allowance (a process called seam felling).
In the far left hand panel of the photo here, the edge of the hem is to the left. The line of stitching on the right is the original seam, and the line of stitching on the left is the second line or the over-sew. This is the ‘back face’.
In the next panel (i.e., middle left) we have the ‘front face’. The single visible line of stitching is the over-sew; the first line is of course hidden.
The middle right panel is the same as the far left panel except the hem is pointing the other way. (I am never perfectly consistent.) The far right panel repeats the middle left.
Depending on the stiffness and thickness of the fabric, the cross-over of the threads (the lockstitch that secures the top and bottom threads during machine sewing) can be well-buried or slightly visible from the top. It does not matter too much as long as the cross-over is not up on the surface. You will note that some of the lines of thread show a slight wiggle. You can eliminate this wiggle by adjusting the thread tension, but increase it just a shade too far and the whole seam may pucker. Trying to straighten the seam out with tension can harm the thread. A slight wiggle will not (in my experience) materially reduce the strength of the seam.
Seam Sealing
Having sewn the test seams, we now move on to the seam sealing tape. This was supplied by Dimension-Polyant, although I privately suspect it is a commercial PU seam seal tape brought in from a specialist manufacture to match their needs. Why not, after all?
The tape has a light side and a dark side and holds the Universe together. Oops, sorry, that’s duct tape. It has a PU side and an adhesive side, with the adhesive being thermally-activated. It is not tacky. There is a slight bow to the tape, with the concave side being the adhesive. Taylor North of Dimension-Polyant gave me these instructions (i.e., answers to the key questions):
What temperature is required to activate it (think domestic iron)? Use the low setting on an iron.
What pressure is required when bonding? More is better :).
Can it bond to the outer DWR surface of something like VX04 (older stuff)? Yes, it should stick well but I didn’t have any VX04 to try it.
What surface should it be applied to with the newer fabrics? Can be applied to either the film side or woven side of the material.
Panel 1 shows the tape bonded onto the VX 04 and LS 07. This was first done through a sheet of paper with the iron set between ‘Low’ and ‘Medium’ (for what that is worth). The tape bonded, but I then tried with the iron directly on the tape (ie no paper). The PU did not melt and adhere to the Teflon-coated iron plate, although it did get a bit soft. I think the ripples near the top may be my thumb-print.
Something to note for later on is that the adhesive seems to have gone right through the light taffeta to the black X grid threads inside. Also to note is that without the second line of stitching to hold the hem down, it is likely that the hem would lift and the tape would quickly wear through.
Panel 2 shows the tape bonded to the LS 07 / LS 21 set, with the LS 21 being on the right. Yes, there really is tape in this photo. You can detect it where it makes a shiny reflection over the stitches and right at the top where the tape is slightly creased. The result looks very good.
Panel 3 is on the other side of the LS 07 / LS 21 set. The tape has bonded fairly well to the somewhat plastic surface, but note the faint cloudiness at the bottom. I left this here as it shows where the tape really needs a bit more heat and pressure. I would not accept that finish on some gear. However, would you put this tape on the outer surface? That is a separate question.
Panel 4 shows the tape on the LS 07 / WX 20 set. Bonding is good to the LS 07 fabric, but not so good to the plastic surface of the WX 20. There are clearly air bubbles along the stitching and over the raised X grid threads. Once again, this could be fixed with a bit more pressure and maybe a firmer substrate under the fabrics.
To really make the point, this photo shows what can happen if you go to fast and too lightly. The white spots are all air bubbles, carefully angled to catch the light. Once again, this fault could be repaired, but it shows rather well what can go wrong, especially with the raised X grid threads. They may be acceptable for sails, but I suggest not for outdoors gear.
Alternatives
This photo shows some seam sealing on the inside of my (MYOG) summer pack. This pack has been through the wringer, with well over 6 months continuous use in Australia and Europe. I will go through some details.
First, the main seam sealing has been done with 3M9485 transfer tape faced with PU-coated 70 denier blue nylon fabric. The adhesive layer is relatively thick and has managed to handle the thin X grid threads. I treat this pack as waterproof. My question here is whether the Dimension-Polyant PU tape would last as long – against abrasion.
The heavier horizontal red fabric has been applied over that part of the pack back which rubs against a horizontal part of the pack frame, to protect the fabric. I try, but things just seem to rub, and this is especially obvious where the black X grid threads are showing through. In fact, in a couple of places it seems the X grid threads themselves have worn through, while the red face fabric has survived (mostly).
Summary
The rather novel LS 07 and LS 21 fabrics need to be field tested. How well will the non-woven faces handle scrub, cliffs and general abuse? I simply do not know. It will depend very much on how well the fibres are embedded into the plastic.
The fabrics with heavy X grid threads are bound to be strong over all, but the thick threads themselves represent serious weak points in outdoors gear. Make these fabrics without the X grid threads and they would be much better – for us. It may be that they would not be strong enough for sails. I am sure the volume of fabric sold for outdoors gear will be a tiny fraction of that sold for sailing.
The heat-bonding PU tape works, provided you use enough pressure and the right temperature. It seems better on the lighter fabrics. However, how long it would last in a high-flex environment with some abrasion – that remains to be seen.
Disclosure
These materials were all supplied by Dimension-Polyant except as noted.
We are currently testing the Garmin inReach Mini 2 and comparing its performance to the original model. Results will be published at this URL in the form of an updated review shortly after Garmin releases the inReach Mini 2 on February 1, 2022.
Browse our curated recommendations in the Backpacking Light Gear Shop – a product research & discovery tool where you can find Member gear reviews, Gear Swap (used gear) listings, and more info about specific products recommended by our staff and members.
The Garmin inReach Mini currently represents a “gold standard” for lightweight satellite messaging devices.
The category of satellite messaging devices includes products that are capable of the following core features:
The ability to trigger an SOS signal to an emergency search-and-rescue network.
The ability to send location/tracking/SMS messages to friends, family, or colleagues.
In addition, some of these devices are capable of two-way messaging (the ability to also receive messages from friends, family, colleagues, or search-and-rescue personnel).
The Garmin inReach Mini falls into this latter category – it’s a two-way satellite communications device and, at only 3.4 oz, represents one of the lightest available devices in this category. Arguably, the Garmin inReach Mini is probablythe most feature-rich and powerful product when compared to all satellite communications devices that weigh less than 5 oz.
Review Rating: Highly Recommended + Guide’s Gear
The Garmin inReach Mini is the smallest, lightest, and most powerful satellite messaging device on the market.
As a standalone device, it offers GPS navigation, two-way messaging, location sharing, and weather forecast retrieval. Paired with a mobile device and the Earthmate app, the Garmin inReach Mini is a highly capable and easy-to-use mapping GPS with a much faster interface for managing and composing messages. The Garmin inReach Mini is tiny in size, light in weight (3.4 oz), durable, waterproof (IPX7), and features a very high-quality build.
In addition to receiving the Backpacking Light Highly Recommended Rating (info here), the Garmin inReach Mini is also recognized with our Guide’s Gear label (info here).
Where to Buy
The Garmin inReach Mini is not yet widely available at specialty retailers. REI online currently maintains the largest inventory.
SOS (ability to trigger an interactive emergency SOS response coordinated with 24/7 search-and-rescue monitoring services via the GEOS network, with response confirmation and status messaging)
SMS (ability to send and receive text messages via SMS-capable telephone numbers and email addresses using integrated virtual keyboard or pairing to a mobile app)
inReach-to-inReach communications (ability to communicate directly to other inReach users via SMS, including location sharing)
Location sharing (ability to share location and tracking points with friends/family via the web-based MapShare portal)
Weather forecasts (ability to request point weather forecasts for current locations and planned destinations)
Smartphone integration (ability to integrate with Apple/Android Garmin EarthMate mobile app for easier messaging and access to additional features, such as mapping, aerial imagery, and NOAA charts)
Wearable/handheld device integration (ability to send and receive messages via other Garmin-enabled devices, including some wearables and handhelds)
Specifications
Network specifications
Satellite network: Iridium
Coverage area: 100% global
General specifications
Physical dimensions: 2.04 in x 3.90 in x 1.03 in (5.17 x 9.90 x 2.61 cm)
Weight: 3.4 oz (97 g) (verified by author)
Impact resistance rating: MIL-STD-810F
Ingress rating: IEC 60529 IPX7 (can be used in rain/snow, can be immersed in water up to 3 ft (1 m) depth for up to 30 minutes
Working temperature ranges
Operating: -4 deg F to 140 deg F (-20 deg C to 60 deg C)
Battery charging: 32 deg F to 113 deg F (0 deg C to 45 deg C)
Battery
Type: lithium-ion (internal) rechargeable
Replaceable? Sort of (see review below for details)
Capacity: 1250 mAh
Manufacturer-claimed battery life: Up to 50 hours at 10-minute tracking with 2-minute logging (default); up to 30 hours at 10-minute tracking with 1-second logging; up to 20 days at the 30-minute interval power save mode; and up to 1 year when powered off
Point location capacity: 500 (waypoints, favorites, locations)
Route capacity: 20
Preloaded maps: None
Ability to add/view maps? No
Aviation-specific software and service integrations
Garmin Pilot App (Android)
Lockheed Martin Flight Services (LMFS)
Adverse Condition Alerting Service (ACAS)
Surveillance-Enhanced Search and Rescue (SE-SAR)
Enhanced Special Reporting Services (eSRS).
Other software and service integrations
Garmin EarthMate mobile App (free – Apple/Android)
Garmin Explore Web App (free – unlimited cloud storage for trip planning and device management)
Garmin inReach Sync App (free – Windows/Mac application used for syncing device data directly to a computer)
Garmin inReach Service Plans (additional cost – required for SOS, live tracking, messaging, and data syncing)
Review Context
I’ve been carrying a satellite communications device of one type or another since 2004 when ACR Electronics released the consumer-targeted Terrafix 406 personal locator beacon. Considering the 12-ounce weight and $640 price tag of that device, it’s safe to say that satellite communications devices have come a long way since then.
Since then, I’ve field-tested each of the following messaging devices on more than 100 multi-day backcountry trips:
SPOT Messenger (Gen 1, Gen 2, and Gen 3)
SPOT X
DeLorme/Garmin inReach SE/SE+ and Explorer+
GSat Micro
Iridium NAL SHOUT Nano
In addition, I own and carry an Iridium 9575 Extreme satellite phone, which is my device-of-choice for trips where I’m guiding clients. It’s also what Backpacking Light issues to its guides for our Wilderness Adventures treks. The ability to communicate by voice directly with medical professionals for in-the-field consultation has proven to be an invaluable asset for guided trips.
Finally, I’ve rented and carried the Inmarsat iSatHub Terminal for satellite broadband use several times for photo and long-form live blogging from the backcountry.
Of these devices, the GSat Micro and Iridium NAL SHOUT Nano are best integrated with commercial OEM applications. The iSatHub Terminal is a highly-specialized (and heavy) broadband device that offers capabilities significantly beyond the needs of most recreational backcountry users. Likewise, these devices won’t be considered further in this review in the context of evaluating the market position and performance of the Garmin inReach Mini.
In addition to the devices listed above, a new consumer category of satellite devices is emerging. This category – satellite “hotspots” – is perhaps best represented by the not-yet-released Somewear Labs Global Hotspot, which (unlike devices from Spot and Garmin) requires a smartphone for messaging. The Somewear Hotspot reflects the continuing trend in this category towards miniaturization and smartphone integration. SPOT released a similar device called the Connect in 2011 but met with terrific resistance among users due to its inability to pair with seemed like half the phones on the planet. The SPOT Connect has been discontinued.
Worth noting: Iridium has nearly completed the deployment and installation of its new broadband satellite network, Iridium NEXT/Certus. This should dramatically decrease the cost of satellite broadband services, increase its availability and access to the consumer, and spur innovation in developing the next generation of satellite communications devices.
The following table compares the key overall features of the most popular messaging devices available now from SPOT and Garmin, and soon from Somewear.
Device
Weight
MSRP
GPS Navigation
Messaging
Keyboard Type
Smartphone Integration
Weather Forecasting
Visual Map Display
SPOT Gen3
4 oz
$150
no
1-way, canned only
none
none
no
no
SPOT X
7 oz
$250
yes
2-way
Integrated (physical)
none
no
no
Garmin Inreach SE+
7.5 oz
$400
yes
2-way
Integrated (virtual)
Yes, optional
yes
yes
Garmin inReach Explorer+ (*)
7.5 oz
$450
yes
2-way
Integrated (virtual)
Yes, optional
yes
yes
Somewear Global Hotspot
3.0 oz
$320
No, requires mobile app
2-way
none
Yes, required
yes
no
Garmin inReach Mini
3.5 oz
$350
yes
2-way
Integrated (virtual)
Yes, optional
yes
no
(*) The Garmin inReach Explorer+ includes features tyipcally found in high-end mapping GPS units, including a pre-loaded base topo map set, a pressure altimeter, and compass.
From this table, you can readily identify the unique benefit of the Garmin inReach Mini: It’s the lightest 2-way messenger that doesn’t require (but notably, allows for the use of) a smartphone to enhance usability and features (e.g., a visual map display).
Setting up the Garmin inReach Mini
To show how the Garmin inReach Mini works and highlight some of its core features, I’ll walk through the exact process I used for setting it up, preparing it for first-time use, using its various functions on a hike, and evaluating post-trip data.
Unboxing
In the box:
inReach Mini device (97 g / 3.4 oz verified on my digital scale)
Micro USB cable (3 ft)
Carabiner harness adapter (4 g)
Spine mount adapter (13 g, includes screw)
Carabiner (13 g)
Allen wrench for adapter screws
My very first impressions upon holding the Garmin inReach Mini:
It seems very well-built and durable and has the feel of an expensive device that exudes high manufacturing quality.
It’s really small – much smaller than I thought it would feel (see photo below; for context, I wear size Small gloves).
Hardware Interface
The Garmin inReach Mini has six buttons (A-E) and one interface (F):
Power on/off (recessed to prevent accidental push)
Up/Down (2 buttons; used to toggle between menu items)
OK (used to select a menu item)
Return (used to go back to a previous menu)
SOS (protected by a snap cover to prevent accidental push)
Micro-USB interface (protected by a snap cover to prevent dust/moisture ingress)
Attachment Adapters
The Garmin inReach Mini ships with two adapters for attaching the device:
A carabiner harness adapter, which consists of a screw, a 3/4″ loop of 5/8″ nylon webbing, and a carabiner. The total weight of these three items is 17 g. Instead of using this adapter, you could also tether the unit to your pack using a thin piece of cord affixed to a strap anchor on the device.
A spine mount adapter, which can be used to attach the Garmin inReach Mini to a variety of device mounts sold by Garmin (e.g., suction cup mounts for car windshields, Molle strap mounts for backpacks, and bicycle handlebar mounts).
I expect to stow my Mini in a backpack pocket (either my top lid or hip belt pockets), and don’t see the utility of using either type of mount. However, I could see the benefit of attaching a cord tether for packrafting or backpacking so I don’t accidentally leave the device somewhere. For backpacking, I made a 10-inch long tether loop using 1mm Dyneema core cordage for girth hitching the unit to a loop on my pack, belt loop, packraft grab loop, etc. It weighs 1 g.
Charging the Device
When I unpacked the Garmin inReach Mini from its box, it was about half-charged. A 3-foot micro-USB charging cable is included. The USB port is on the left side of the unit, protected beneath a rubberized cap.
After draining the unit’s battery, I was able to fully charge it (using wall power) in 118 minutes.
Powering Up
When you first power up the device, you are taken to the Device Setup menu, which gives you the option to either Activate or Skip.
Upon selecting Activate, you are instructed to visit inreach.garmin.com to activate the device.
However, before activating your Garmin inReach Mini, you need to decide what you want to do with the device, so you can wisely select the plan that has the best value for your needs.
Shopping for an inReach Service Plan
Garmin inReach devices require a service subscription through the Garmin inReach Global Satellite Technology service plan to use live tracking, messaging, syncing, and SOS features.
To signup for a plan, you must have your inReach device in hand; then you can signup here.
Decision #1: Personal or Professional Plan?
Professional plans include tools that allow for the centralized administration of several devices. Based on Garmin’s subscription marketing copy on their website, it’s implied that advanced API access for developing custom inReach applications is only available with professional plans. I’ve heard conflicting reports about this, and couldn’t confirm directly with Garmin before this review’s publication time. If API access is important to you, then you may have to consider a professional plan.
Otherwise, the overwhelming majority of recreational end users should select a personal plan.
Decision #2: What Plan Level?
Four plan levels are available:
Safety – The minimum plan suitable for users who only want to use the inReach for “just-in-case” emergencies. It includes an unlimited number of SOS messages and preset SMS sending, and ten custom text messages per month. Surcharges are otherwise levied for location pings, tracking points, and message overages. One basic weather request per month is included, but premium (more detailed) weather requests come with a surcharge.
Recreation – The plan that will appeal to most recreation users, because it offers unlimited tracking and location pings, and 40 custom text messages per month.
Expedition – The power user plan, offering unlimited text messages, tracking points, location pings, and basic weather requests. The only surcharges are for premium weather requests.
Extreme – Same as Expedition, but tracking intervals are decreased from the standard interval of 10 minutes to 2 minutes. The Extreme Plan may be of interest to pilots and cartographers.
Decision #3: Freedom Contract or Annual Contract Plan?
Garmin offers both annual contracts and month-to-month service plans (called “Freedom” plans). Here’s how they compare:
Plan Type
Activation Fee
Minimum Term
Upgrade Fee
Downgrade Fee
Billing Frequency
Annual
$19.95, one time
1 year
none
$24.95
monthly
Freedom
$24.95, annually
30 days
none
none
monthly
In addition to the prices above, users are also subject to the federal Universal Service Fund fee and any applicable state and local taxes.
In addition, non-U.S. customers are subject to applicable VAT.
The following table outlines the inReach service plan pricing structure as of June 2018:
My Choice
For my own needs, I knew that I didn’t need a professional plan, as I don’t manage a device fleet.
In addition, I wanted the ability to post relatively frequent updates to both social media channels as well as to communicate with my family and company staff. And although I still appreciate the ability to use a satellite phone for medical emergencies, the ability to save more than half a pound, and rely on the inReach Mini alone, is awfully tempting. Regardless, It wouldn’t be hard for me to exchange several dozen text messages during a multi-day trip. Weather updates would be interesting to have as an option, but not a critical requirement for me in most situations. The one exception to this would be if I wanted to camp in an exposed location above the treeline. In that case, I’d certainly like to know if thunderstorm activity was in the forecast!
So the question I had to answer was this: how many text messages would I have to send to make the Expedition plan more economical than the Recreation plan?
For an annual contract, the difference between the Expedition and Recreation plans is $25/month. Since that Recreation Plan offers 40 text messages without overages and charges $0.50 for each message thereafter, the additional cost of the Expedition plan is only worth it if I’m sending a monthly volume of 90 or more messages.
Here’s how it all works out:
Takeaways:
If you’re sending and receiving less than 40 messages per month, the Safety Plan offers the best value.
If you’re sending and receiving between 40 and 90 messages per month, the Safety and Recreational plans offer similar value.
If you are sending more than 90 messages per month, the Expedition Plan offers the best value.
Interestingly, if all you are concerned about is messaging, there are no advantages to purchasing the Recreational Plan. The only real benefits it offers over the Safety Plan are unlimited location pings and tracking.
In other words, the Safety Plan offers the best value if you need only messaging capabilities, and the Recreational Plan provides the best value if you also need tracking capabilities.
The next graph reinforces this conclusion:
Takeaways:
If you need less than 120 location pings (including tracking points) per month, the Safety Plan offers the best value.
If you need more than 120 location pings (including tracking points) per month, the Recreational or Expedition Plans offer the best value and are further dependent on your messaging needs (see previous graph).
To put this into perspective, if you ping a location (or send a track point) once a day (for example, each night you arrive in camp), then the Safety Plan offers you up to 120 days of usage before it becomes more costly than the other two plans.
On the other hand, if you ping a location every 10 minutes, and hike about six hours a day, then the Safety Plan becomes very costly after only two days of use (after which you will have used 120 location pings).
A similar analysis can be made for a “Freedom” contract. With a difference in cost of $30/month, the only scenario that makes the Expedition plan worth the extra cost is if I’m sending a monthly volume of 100 or more messages.
I knew that I had the option of upgrading without penalty. I wanted to be able to record my route using fairly frequent tracking intervals (as frequently as once/hour, i.e., 50 to 80 points for a weeklong trek). This makes the Safety Plan a reasonable option. However, while tracking was a nice feature, I was more interested in two-way messaging capabilities (otherwise, I might consider a Spot Gen3) to stay in communications with my family and staff. Therefore, for me, the Recreational Plan was the most viable option.
When evaluating whether or not to select a Freedom or an Annual Contract, I wanted to know how many months of use per year were required to make the Annual Contract a better value. Noting that the Freedom contract requires an “annual service fee” and the Annual contract requires only a one-time initiation fee, here are the results of my analysis:
These graphs show that if you want inReach service for more than about 8-9 months of the year, then an Annual Contract may be a better value for you. However, my guess is that most users, who hike during the fair-weather summer window of June through September, will benefit from the privilege of suspending their service and opting for Freedom contracts.
As for me, I opted for the Freedom contract. As a matter of personal financial principles, I wanted to have the flexibility for month-to-month activation/deactivation as needed. As a Recreational plan subscriber, I have to acknowledge that the price of this “freedom” could be as much as $100 per year if I maintained my service for all twelve months of the year.
Signing up for Service
To sign up for service, as instructed by the device, visit inreach.garmin.com:
The process for signing up is very straightforward, and just enough instructions are provided to guide you through the process without undue duress. The process involves seven steps:
Entering your device information (IMEI number and Authorization Code, which are provided on the device screen once you select Activate and press the OK button), email address, and account password.
Entering your personal information (name, address, phone numbers, and any emergency medical info that would be provided to search and rescue personnel).
Entering your emergency contact information (primary and secondary contact names, phone numbers, and email addresses).
Selecting your contract type (Annual or Freedom) and plan type (Safety, Recreational, Expedition, or Extreme).
Selecting your SOS Features:
GEOS Emergency Response Coordination (included with all plans).
Additional GEOS Search and Rescue Benefit Program (provides up to $100,000 in search and rescue resources for an additional $17.95/year).
GEOS Worldwide Medical Evacuation (provides up to $1M for a lifesaving evac for an additional $129.95/year for US and Canada or $175/year for International coverage).
Entering your billing information.
Reviewing and confirming all of your information.
The entire process took me less than 10 minutes to complete. Upon confirming, an activation status window pops up:
It disappeared after about a minute, and I was returned to a screen that listed the final steps required to complete activation:
Activation: Take the inReach outside with a clear view of the sky and press the OK button to begin the (final?) activation process. The device then acquires a GPS fix, sends an activation request, and then waits for the activation confirmation. This process took about 5 minutes to complete.
Bluetooth Pairing: Upon pressing the OK button, the device walks you through the process of pairing with your smartphone via Bluetooth. The pairing process took about 15 seconds with my iPhone SE.
Test Message: Upon completing Bluetooth pairing and pressing the OK button, the device notifies that you have a new message from testinreach@garmin.com. I replied to the message to confirm that everything was working OK (up to five test messages per month can be sent for free). A confirmation reply (to my reply) came in a few minutes.
The inReach Website
At this point, with the device working, I went to my account at inreach.garmin.com, and discovered the location of my inReach on the map:
The inReach website offers eight functions, each accessible via a tabbed menu:
Home – provides access to subscription and billing information, and some overview statistics of usage (tracking points, messages, etc.).
Map – displays an overview map (topo, road, or aerial imagery) with device location, tracks, routes, waypoints, etc.
Inbox – provides a cloud-based location for all inReach messages.
Contacts – provides the ability to enter contact info for the people you contact the most. This can be synced.
Messages – provides the ability to edit both Preset and Quick messages that are available from your device. Here’s the difference between the two:
Social – allows you to toggle on/off public visibility of the MapShare service, where people can track your progress, or link your Facebook and Twitter accounts.
Account – provides all of the same setup info (and the ability to edit it) that you entered/selected upon signing up for a service plan.
Sync – provides instructions for syncing your inReach info (contacts, waypoints, routes, etc.) from the website to your device, and between the Earthmate mobile app and your device.
Syncing the inReach Mini
The Garmin inReach Sync application (available for Windows/Mac) is required to sync the inReach Mini to the inReach website via your computer to install available updates, as well as syncing contacts, quick text and preset messages, and other data.
The inReach can also be synced via the Earthmate mobile app.
Setting Up the Garmin Earthmate Mobile App
The Garmin Earthmate app (available in both Apple and Android versions) can be used to pair the Garmin inReach Mini to your smartphone. I use an iPhone SE. The app runs smoothly, and I’ve never observed any crashes, hangups, bugs, or slow processing times using the app.
The app gets mixed reviews from users, but most reviews are very positive. As always, read app user reviews with a grain of salt. Many critical reviews are not detailed enough to provide context outside of a user’s reactive frustration.
I found the app very easy to use, with an intuitive user interface, and have no complaints about it worth mentioning here.
Before using the Earthmate app on a hike, I downloaded the Garmin Base Data and Garmin Topo North America map sets (about 250 MB of data), along with the USGS Quad Sheets and Color Aerial Imagery maps for the areas of the Medicine Bow National Forest near my home where I spent most of my hiking time. The latter two map sets for my home hiking area added another 1 GB of data.
Accordingly, I’d repeat this step (downloading local maps) before trips taken to other areas as well.
For most trail hiking, the Garmin Topo North America map set is sufficient. I like USGS Quads if I’m doing any cross-country navigation, and I like Color Aerial Imagery for identifying river hazards for packrafting trips, and potential campsite locations.
Using the Garmin inReach Mini in the Backcountry
The number of things the Garmin inReach Mini can do is pretty incredible, given its diminutive size and weight. However, at this point in the review, I think it’s important to distill what I believe are the essential core functions of the device: GPS, messaging, and weather forecast retrieval.
The Garmin inReach Mini as a GPS Device
The Garmin inReach Mini offers what I would call basic GPS functionality.
“Basic,” in the sense, that its screen doesn’t offer a high enough resolution (128 px square) for integrated mapping functionality that distinguishes basic from advanced GPS units.
As with any basic GPS unit, the Garmin inReach Mini can perform the following functions:
Location Fix, Sharing, and Waypoint Marking
After navigating to the device’s Location menu and waiting for a GPS fix, your current location’s latitude, longitude, and elevation are displayed on the screen:
Then, upon pressing the device’s OK button, you have the option to either share the location via messaging or mark the location as a waypoint.
GPS Navigation
As with any GPS, the Garmin inReach Mini provides the ability to navigate towards any waypoint, or along a route. Once a waypoint is selected, and the Navigate feature is activated, you can monitor progress towards the waypoint on either the unit’s home screen or its navigation screen:
In addition, the inReach Mini provides a “compass” page that provides data about your speed and “direction”:
But it’s a bit misleading – the direction indicates the direction of travel and has nothing to do with device orientation, as one might expect with a magnetic compass.
Route Tracking
Finally, in addition to navigating towards waypoints and monitoring your travel speed and direction, you can record a route by tracking.
Once the tracking feature is selected, you have the option to specify both the send interval (the time interval for which tracking messages are sent to MapShare; 10 min (default), 20 min, 30 min, 1 hr, 2 hr, or 4 hr) and the log interval (the time interval for logging locations along your route for better route resolution (1 sec, 1 min, 2 min (default), 5 min, or OFF).
It’s worth noting that using a log interval of 1 sec drains the battery quite significantly; however, this might be a useful interval if creating high-resolution route tracks and more precise distances are important to you.
The Garmin inReach Mini as a Messaging Device
The GPS and tracking features discussed up to this point would make the Garmin inReach Mini a compelling choice as a standalone GPS unit. It offers GPS and tracking features similar to those found in other small and light basic GPS units such as the Garmin Foretrex 601 (3.1 oz).
However, GPS functionality alone is not what makes the Garmin inReach Mini so appealing – it’s the inReach Mini’s messaging features that make it such a powerful device. The only other devices that integrate a functional GPS as described above, with two-way messaging, are heavier (e.g., the inReach Explorer+ and inReach SE+ at 7.5 oz and the Spot X at 7.0 oz). The primary advantage of the inReach Explorer+/SE+ is an integrated color screen that can display high-resolution maps. The primary advantage of the Spot X is the integrated physical keyboard that makes typing messages easier.
That the Garmin inReach Mini, as a two-way messaging device, also includes highly functional GPS navigation features, makes it a far more valuable device than what may be the most popular device in this category, the Spot Gen3 (which weighs 4.0 oz, can only message 1-way, has no custom messaging abilities, and no integrated GPS navigation features).
Therefore, let’s explore the Garmin inReach Mini messaging functions, which include location messaging, text messaging, weather forecasting, inReach-to-inReach device messaging, and social media sharing.
Location Messaging: Sending Locations with the Garmin inReach Mini
Location data can be sent in one of two ways:
A Location Without a Message
A location (either your current location or a preset location or “waypoint”) can be sent to any contact’s email or mobile phone number.
Included in the location data are the latitude, longitude, elevation, whether the hiker is moving or stationary, a link to the location on a map at inreach.garmin.com, and the device owner’s name.
A Message With a Location Attached
Optionally, a location can be “attached” to any outgoing text message. In this case, the location data isn’t included in the message, but a link to the location on a map at inreach.garmin.com is.
Whether a location is sent with or without a message, clicking the link reveals the location on the map and the data associated with that location:
Conveniently, the recipient can use the map interface at inreach.garmin.com to view the location, the sender’s message (if any), and reply to the message directly (see reply box in upper right-hand corner). As with most online maps, the recipient can zoom in and out, and change map layers between road maps, topo maps, and aerial imagery.
Using the Garmin inReach Mini as a Text Messaging Device
One of the Garmin inReach Mini’s most important features to me is the ability to exchange text messages with friends, family, or company staff.
The process by which text messages are sent and received on the device itself is straightforward and uncomplicated.
However, for frequent (non-emergency) messaging, my frustration level with using the device’s virtual keyboard achieved sky-high status. Can you imagine toggling through an alphabet using only up/down and select keys to craft the high literature that is a text message? Granted, there are some rudimentary autocomplete options available, along with a rather non-intuitive order of key presses for backspacing, front spacing, symbols, capitalization, and punctuation, but after spending half an hour mastering the not-a-keyboard interface, my fingers were seriously aching.
Lessons learned:
If you are going to use the Garmin inReach Mini for emergency text messaging (other than canned preset and quick text messages), and you won’t be pairing it with the Earthmate mobile app on another device, learn how to use the virtual keyboard.
If you are going to use the Garmin inReach Mini for frequent text messaging and are not a fan of acquiring carpal tunnel syndrome as a result of rapidly pressing the same three buttons a thousand times to compose a single message, plan on pairing your inReach Mini with a mobile device with a real virtual keyboard (e.g., iOS or Android smartphone) running the Earthmate app.
If you don’t hike with a smartphone, but want the two-way messaging features of inReach devices, consider instead the bulkier and heavier inReach SE+ or Explorer+, both of which offer full virtual keyboards where characters can be selected with the four-direction device toggle. For a Blackberry-style physical keyboard (which provides the best typing experience of any satellite messaging device), take a look at the Spot X device.
This short message only required a few hundred button presses. Maybe you could do better.
Weather Forecasting with the Garmin inReach Mini
One of my favorite features of the inReach service is the ability to download point location weather (current conditions and forecast) to the device.
Garmin’s weather forecasts are delivered by the Dark Sky weather network, known for its terrific API and weather modeling techniques that are among the best available (not considering one recent and very funny hiccup).
I’m a bit of a weather forecasting junkie. I’ve been using Dark Sky weather forecasts nearly since they launched, and have found it (anecdotally, at least) to be more reliable at rain, thunderstorm, and wind forecasting than any other network I’ve tried (and I’ve used dozens).
A weather forecast can be downloaded to the Garmin inReach Mini for either your current location or a specified waypoint, to help you answer questions like “What will the weather be like at our Friday night campsite?”
All weather forecasts include the following data types for both current and future forecast times:
Temperature;
% chance, total volume (e.g., in inches) and type of precipitation (e.g, light rain, heavy rain, sleet, hail, snow);
Humidity %;
Wind speed and direction;
Barometric pressure.
Accessing a basic weather forecast via the Earthmate mobile app.
Two types of weather forecasts are available. They offer the same data types, differing only in the frequency and duration of the forecasts:
Basic – for the cost of a single text message, the Basic forecast provides forecast data for a total of 2.5 days (60 hours) after the request:
Every two hours for the first 12 hours;
Every six hours for the next 48 hours.
Premium – for $1.00 per request, the Premium forecast provides forecast data for a total of 5 days (120 hours) after the request:
Every one hour for the first 12 hours;
Every two hours for the next 12 hours;
Every three hours for the next 12 hours;
Every six hours for the next 36 hours;
Every twelve hours for the next 48 hours.
The Basic forecast takes a minute or two to download once the request has been sent by the inReach Mini. The Premium forecast seems to take about three to four times as long to retrieve on average.
I can see the benefit of the long-range (more than 2.5 days) forecast provided by the Premium weather service in the following case:
I’m still going to be in the backcountry for the next several days;
I’m in need of a longer-range forecast if it means that a severely inclement weather forecast will result in a possible route change.
I can also see the benefit of a forecast with a higher level of frequency (e.g., a short-term forecast that is hourly instead of every two hours), but usually only in the case where I’m trying to time the crossing of a high pass during thunderstorms, or on a mountaineering trip where down-to-the-hour route decision making may be required.
Otherwise, I think most backpacking scenarios would benefit significantly from having a basic weather forecast, and only incrementally, if at all, from having a premium weather forecast.
Messaging to other inReach Devices
All Garmin inReach Devices (including the Mini) can communicate with each other through satellite messaging. This feature would be of great value for parties who split up during a trip and wish to communicate their locations, status, or meetup times and locations to each other.
Having hiked in parties that have split up (either voluntarily or involuntarily), this capability might be a significant stress-reducer! On many occasions, our split party has failed to meet up at a specified time and place. In addition, as a guide, I’ve had to split parties in order to send small subgroups out to the trailhead for assisted self-evacuations of clients, and it would have been nice to have been able to communicate with the evac crew during the evac and subsequent rejoining of our main party later in the trip.
Of course, this capability requires that each separate subgroup of a split party is carrying their own inReach device.
The process of messaging from one inReach device to another is simple: every inReach user account is assigned a unique inReach email address for inReach-to-inReach communication. If you have an inReach device you can send a message from your inReach to another inReach by using the inReach address for the recipient.
Posting to Social Media: MapShare, Facebook, and Twitter
The Garmin inReach Mini can be connected to MapShare, Facebook (both personal profiles and pages you manage) and Twitter accounts. This connection is created during account setup at inreach.garmin.com. Once connected, the device must be synced to inreach.garmin.com using either the Garmin Sync application on your computer or the Earthmate app on your mobile device. Once the sync is complete, “Post to Facebook” and “Post to Twitter” will subsequently appear in your messaging contacts. The process works seamlessly and is simple and elegant to use.
For this review, I’ve shared part of the track of a hike that Stephanie and I took in Wyoming’s Snowy Range on my MapShare page at https://share.garmin.com/bigskyry.
MapShare screenshot.
How does pairing the Garmin inReach Mini with the Earthmate mobile app enhance its GPS and Messaging functionality?
Using the Garmin inReach Mini as a standalone device is surprisingly easy but requires that you spend a day or two playing around with it to become accustomed to the hardware interface and software menu systems.
The only exception, as you might have guessed, is using the so-called virtual keyboard to compose text messages. That’s a nightmare.
With that in mind, if I was trying to save every ounce I could, but still needed a two-way satellite messaging device for emergencies, infrequent communications, and periodic check-ins with my family, I would prefer to carry the Garmin inReach Mini vs. the easier-to-use (but heavier) inReach SE+, inReach Explorer+, or Spot X devices.
So that leads me to an important question:
Is the Earthmate mobile app (and mobile device) worth the additional weight?
For me, the answer is a resounding yes. Here’s why:
The Earthmate mobile app allows me to compose text messages using a “real” smartphone keyboard. If you are ever forced to use the Garmin inReach Mini’s virtual keyboard to type a custom message, you’ll immediately find yourself in keyboard purgatory, and Earthmate is now looking like a pretty bright angel.
Earthmate allows you to manage all device functions from the app, including all setup and customization functions, message management, and waypoint and route management. It’s a well-designed mobile app that takes advantage of modern mobile UI design. Accordingly, it allows you to accomplish everything faster and more intuitively (especially messaging management).
Earthmate offers integrated mapping on the full-color, high-resolution screen of your smartphone. Therefore, it essentially provides me with all the features of the highest-end GPS units on the market. I can download detailed map overlays, and see my route and location on a map in real time.
Earthmate offers a magnetic compass feature.
Earthmate’s weather data interface allows me to scan and read weather data downloaded to the inReach Mini much faster and more effectively than on the inReach Mini device.
Earthmate allows me to use my smartphone’s UI instead of the device’s buttons. The entire experience is faster and more intuitive for me.
I usually take my smartphone with me on backpacking trips anyways for journaling, e-book reading, photography. So why not use it as my UI for the inReach Mini?
The Earthmate mobile app makes the Garmin inReach Mini a full-featured, hi-res, color mapping GPS with the ability to download detailed topographic maps and aerial imagery.
Performance Assessment
Device Hardware
The Garmin inReach Mini is durable, waterproof, well-manufactured, has rubberized buttons and holding surfaces, and a highly scratch-resistant screen.
It’s easy to read in bright sunlight.
And it’s almost comically tiny in size and lighter weight than any other satellite device I’ve used.
Battery Life
Battery life seems to be on par with the manufacturer’s claimed specifications.
Garmin doesn’t publish the battery capacity in its literature, but taking the unit apart is easy enough (although it will compromise its waterproofness and you’ll need to reassemble using a new gasket, new screw seals, etc. – don’t do this to your device).
The battery is a 1,250 mAh rechargeable lithium-ion battery.
Pairing the Garmin inReach Mini to a mobile device via Bluetooth, and maintaining live tracking and/or route logging does drain the battery a little bit faster, but much less than I thought. When I ran side-by-side comparisons of a three hours (no Bluetooth vs. Bluetooth pairing), the paired device drained the battery just two percentage points more than the unpaired device.
I was curious to understand how tracking and logging affected battery drain rates, and conducted a number of tests at various tracking and logging intervals, and then came up with the following approximations (which you can consider to accurate to within about 15%):
One track point seems to consume about 4 mAh of battery capacity. To put this in context, if logging is turned off and tracking is turned on at 10-minute intervals, a full battery can be used to track approximately 52 hours of travel.
One log point seems to consume about 0.005 mAh of battery capacity. To put this in context, if tracking is turned off and logging is turned on at 1-second intervals, a full battery can be used to log approximately 70 hours of travel. At 1-minute intervals, a full battery can be used to log approximately 400 hours of travel.
These numbers can be used to estimate battery drain rates given various combinations of tracking and logging rates.
Also to consider is that battery life will drain faster in response to the following:
Sending and receiving messages, including weather forecasts.
Pairing the device to a smartphone via Bluetooth.
Using the device (e.g., with the screen and backlight on).
Device Software
The Garmin inReach Mini’s software interface is familiar.
I’ve used Garmin GPS units, including inReach, Oregon, Montana, eTrex, and Foretrex models for many years. Garmin device evolution towards the classic four-button interface (up/down toggle, OK/select, and return (previous menu) that is now standard among GPS, digital audio, and digital camera manufacturers makes using the device intuitive and simple enough (with a little practice, if you’re new to this type of interface).
And, in spite of my somewhat snarky comments about the virtual keyboard, it’s about as good as you can get with a four-button interface, and honestly, with a little bit of practice, I have no complaints. I mean, c’mon – this is a tiny, 3.4-ounce device that packs an extraordinary amount of power.
My only wish is that it was capable of voice-activated command and speech-to-text transcription! How cool would that be?!
Inreach.garmin.com
The inReach website (inreach.garmin.com) serves two functions for the Garmin inReach Mini user:
Device and service setup, management, and route planning.
Messaging and location monitoring for private users (contacts).
I have no issues or complaints about the website, and it’s easy and intuitive to navigate once you find your way around.
Earthmate Mobile App
The Earthmate mobile app provides a very rewarding experience for me. I didn’t have to read any instruction manuals to figure out how to do everything that the app has to offer.
Granted, I’m a daily smartphone user, and that probably helps.
Earthmate is regularly updated and reflects contemporary mobile UI design, which makes it a effective interface for operating the Garmin inReach Mini.
MapShare
MapShare could use a little work.
I’m guessing that if I wanted to share my locations, tracks, and messages with my mom via MapShare, I’d have to spend a little time with her explaining how it all worked.
MapShare feels more like a technical software interface than a place where “family and friends” can follow along.
A simpler user interface that incorporates tasks and actions in a more obvious manner would be helpful to digital UI neophytes.
Overall Experience
The Garmin inReach Mini by itself provides quite a positive experience. If I were not a smartphone user, I wouldn’t hesitate to use the Mini vs. the other heavier, bulkier, and more expensive inReach devices. The ability to have basic GPS functionality, and the ability to exchange text messages with my wife while on a trek makes this device incredibly valuable to me – and her.
Add the Earthmate app on a mobile device with a color, hi-res display, and you now have an extremely powerful mapping GPS combined with a much faster and intuitive UI. Now it’s a rather robust and capable GPS and messaging system that far exceeds any other standalone mapping GPS or messaging device on the market – for less weight.
With MapShare, Facebook, and Twitter integration, you can feed your inner narcissist by ensuring that others can see that you are spending time hiking and camping in epic locations while they suffer #fomo in their cubicles.
Through the years, I’ve used satellite phones, Spot messengers, other inReach models, and even Inmarsat broadband satellite modems. However, none of these systems have offered the capabilities of GPS navigation, mapping, and two-way messaging for as little weight as my iPhone SE paired to a Garmin inReach Mini.
Strengths & Limitations
Strengths
Lightest standalone two-way messaging device on the market.
Durable and well-manufactured.
Easy to use and intuitive user interface with classic four-button interface.
Outstanding UI experience when paired to a mobile device and Earthmate app.
Social media integration via MapShare, Facebook, and Twitter.
Very reliable and reasonably fast satellite communications using the Iridium network.
Cheaper communications than a satellite phone.
Limitations
Limited screen size and resolution eliminates mapping as a feature when used as a standalone device.
Virtual keyboard is slow and difficult to use if the device isn’t paired with a mobile app on a smartphone.
Sorting out service plans and contracts is confusing. Too many options!
Compared To…
Iridium 9575 Extreme Satellite Phone
A satellite phone gives you voice calling capability that a messaging device can’t provide. However, before I started using messaging devices, I was using satellite phones to exchange text messages with friends, family, coworkers, medical consults, and rescue personnel. The Iridium 9575 Extreme is the model I currently use, and the model we send out with our guides for the Wilderness Adventures program.
The Iridium 9575 Extreme uses predictive text messaging in combination with the phone’s 12-button keypad (remember texting on your old bar- or flip-phone?). Composing text messages is much faster using this method than with the limited 4-button interface and virtual keyboard of the Garmin inReach Mini.
However, the Garmin inReach Mini is 10 oz lighter, much smaller, and several hundred dollars cheaper than an Iridium satellite phone. In addition, the service required to send and receive text messages is significantly less expensive than the service needed to maintain an active SIM on a satellite phone, on the order of hundreds of dollars per year for an equivalent number of messages sent and received.
Another primary advantage of messaging with a device like the Garmin inReach Mini vs. voice calling (and text messaging) on a satellite phone is that reception tends to be more reliable with a messaging device. When I attempt to send messages via my Iridium 9575 Extreme, I often have to retry sending them several times due to reception issues. I’ve yet to have a single message sending failure with the Garmin inReach Mini.
Stick with the satellite phone if you need voice-calling abilities. Otherwise, the Garmin inReach Mini (especially when combined with a mobile device and the Earthmate app) is a far more powerful and capable device for GPS navigation, mapping, and messaging.
Spot Gen3
The Spot Gen3 is only capable of one-way messaging using a very limited number of predetermined messages (check-in/OK, help, and SOS).
Otherwise, the Spot Gen3 cheaper and simpler to use.
The Spot Gen3 is also half an ounce heavier than the Garmin inReach Mini.
The Spot Gen3 still occupies a niche where a user wants a cheaper device with cheaper service that offers limited check-in (“I’m OK”) and SOS functionality. However, the Garmin inReach Mini sets a new standard for the amount of performance and capability that can be packed into a package this small and light.
Spot X, inReach SE+, inReach Explorer+
The Spot X features a Blackberry-style physical keyboard, making it the best option for composing messages if you don’t plan to pair your messaging device to a Smartphone. Otherwise, the Spot X is much bulkier and twice the weight as the Garmin inReach Mini.
Garmin’s other inReach models, the SE+ and Explorer+, features everything the inReach Mini offers in a package that includes a color display that is larger and has a higher resolution. This offers two key benefits: the ability to integrate mapping functions on the device, and a better virtual keyboard.
However, pairing any inReach device with a smartphone and the Earthmate mobile app makes GPS navigation and mapping an entirely different experience (in a good way). Thus, my need for the mapping and display capabilities of the larger devices is replaced by my smartphone anyways. For me, replacing my old inReach device (the SE+) with the Garmin inReach Mini is an easy decision.
Somewear Global Satellite Hotspot
Although not yet on the market, the Somewear Hotspot will find favor among users who simply want to use their smartphone as their primary GPS navigation, mapping, and messaging interface.
Unfortunately, the Somewear Hotspot won’t offer any of these capabilities when not paired with a mobile device, rendering its functionality “extremely limited” in the case of a mobile device failure, or if you just want to leave your smartphone at home. As a standalone device, the Somewear Hotspot will still be able to drop pins so people back home can track your progress, and the unit has an SOS button. This makes it more comparable to a device like the Spot Gen3.
However, I prefer the full capabilities of the Garmin inReach Mini when considering its functionality as a standalone device: GPS navigation, two-way messaging, and weather forecasting are available, all without pairing it to a smartphone.
Service Plans and Pricing Structure
Garmin inReach service plans are somewhat confusing and offer too many choices. I like the idea of a la carte services (pay for what you actually use) for occasional/intermittent use and unlimited usage plans for power users. I abhor contract plans, change-of-service up- and down-charges, and service initiation charges. Complex pricing structures are the products of the industry of “finance marketing” that has infected most telecommunications industries today.
Garmin would do well to create goodwill for their consumers by simplifying their pricing structures, making them easier to understand and make decisions without having to consider formulas and breakeven analysis requiring charts and graphs.
Spot X service plans reflect a more consumer-friendly approach to device usage pricing. When comparing Spot X service to inReach service, Spot X service is significantly cheaper.
It’s worth noting here that the Spot X uses the Globalstar satellite network, while the Garmin inReach Mini uses the Iridium satellite network. User reviews of both networks reveal important trends that suggest a much higher level of reliability (especially with messaging) using the Iridium network.
Should I wait for the next new device to come out?
In the next 12 months, you’re going to see more players in the satellite hotspot market (with similar capabilities as the Somewear device).
But these devices won’t provide any new capabilities that can be had with currently available devices, which offer:
Voice-calling and messaging (satellite phones);
One-way messaging (tracker-style devices like the Spot Gen3);
Two-way messaging and GPS units (inReach devices)
The primary limitation with today’s devices is the limited data bandwidth of the satellite networks they use.
Iridium is almost done building their new broadband network, with all of the satellites deployed and operation by the end of 2018.
Having used a broadband modem (Inmarsat iSatHub terminal) in the backcountry on a number of trips, the two features I find particularly interesting are:
Voice-over-IP calling;
Photo sharing.
So, the next wave of devices, available in 2019 and beyond, will sport these features and significantly change how we use devices for communications and trip sharing in the backcountry.
However, initial device costs and service pricing plans are expected to be quite expensive until market competition sorts it all out. If history is any indicator of the future, we are still three or four years away from seeing cost-effective consumer devices capable of broadband messaging, voice-over-IP calling, and photo sharing.
Until then, we can dream of the new inReach Mini+, a broadband-capable model that allows us to place and receive VOIP calls on our smartphone, post real-time photos from our trips to Instagram, and more.
For now, the Garmin inReach Mini is the market leader in this category, and will likely remain so for quite some time: it’s the smallest, lightest, and most powerful two-way messaging device on the market.
Using the Earthmate app on my iPhone SE, paired with the Garmin inReach Mini (stowed in my hip belt pocket – you can see the antenna sticking up) in Wyoming’s Snowy Range. Photo: Stephanie Jordan.
The author of this review purchased and owns the product reviewed herein. Some links in this review are affiliate links, which means if you click on a link to a retailer and subsequently make an online purchase with that retailer, Backpacking Light receives a small commission. This helps us maintain the site, create new content, and expand our product news coverage – we greatly appreciate this support!
The High Sierra Trail Film by Chris Smead explores the history and wonder of the John Muir Trail’s little brother in this festival circuit documentary.
Introduction
The High Sierra Trail (HST) begins in Crescent Meadow, at an elevation of 6,600 feet, on the western edge of the Sierra Nevada Mountains. From there, it spans 72.2 miles, ending at the peak of Mt. Whitney, the highest point in the continental United States at 14,505 feet.
Over the last several years, backpacking trails like the John Muir Trail (JMT) and the Pacific Crest Trail (PCT) have increased significantly in popularity, but few know about the trail many insiders refer to as the JMT’s little brother.
Most backpackers tackle the High Sierra Trail in 6 to 8 days and experience a total of 13,303 feet of elevation gain in the process. It is a strenuous hike and, as is true for all National Parks, dogs aren’t allowed. The best time to hit the trail is between July and September but, as anyone with experience hiking in the Sierra will tell you, the weather is always going to be the most significant variable.
Fortunately for those of us yet to experience the High Sierra Trail, Chris Smead, Director, Videographer, and Editor, and his friend John, frequent hiker and segment PCT backpacker, captured their experience over the course of six days on the trail.
They share their experience with us in The High Sierra Trail: A Documentary, which is narrated by William C. Tweed, a 30-year National Park Service veteran. The documentary premiered to a sold-out house on May 5th, 2018 at the Switchback Showcase in Campbell, CA and is currently being submitted for showings at more than 30 film festivals.
I was fortunate to receive a private showing of the film and briefly interview Chris, the film’s director. I’ll share more information on the film and where you can find it, my review of the film, as well as excerpts from that interview. But first, I’d like to share a brief history of the HST.
History of the High Sierra Trail
In 1926, Sequoia National Park was expanded from just the western section, which had become famous for the giant Sequoia Grove, to include much of the Eastern Sierra and Mt. Whitney.
According to narrator William C. Tweed, the HST is a reflection of the vision of a man named John Roberts White. White was the Superintendent of the Park Service at that moment in 1926 when Sequoia National Park was tripled in size. His motivation was to tie the old park to the new park without building another road.
White envisioned a trail where no trail had passed before. At that time in history, there was no easy route from the giant Sequoias of the original park, over the Great Western Divide, and up to the crowning jewel of the park’s expansion, Mt. Whitney.
Because the surveyors and engineers on the trail project were still unsure of the exact route the trail would take over the Sierra, the trail that was constructed over the course of the first two summers was finished at a grade that was slightly above perfectly flat.
In total, the trail required five summers to complete and was designed, according to William C. Tweed, “not just to get over the mountain, but to get over the mountain in the most scenic manner possible.”
Some of the most notable historical features of the High Sierra Trail include Precipice Lake, the site of Ansel Adam’s famous 1932 photo Frozen Lake and Cliffs, the historic townsite of the utopian-minded Kaweah Colony (which was incorporated in to SNP in 1890), and the Smithsonian-built Mt. Whitney Hut for astronomical research, which has been there for over 100 years!
The Director’s Take
There are many challenges to filming a documentary on a remote trail in the Sierra wilderness. Fortunately, Chris had previously logged more than 60 treks throughout various parts of the Sierra before undertaking this project. He hiked the John Muir Trail back in 2016 and has also been on multiple backpacking trips in Alaska and Colorado.
According to Chris, however, his experience on the John Muir Trail “set the tone” for his passion of capturing the beauty we can experience through ultralight travel and sharing it with the world. “I’m not some pro film dude,” Chris said. “I’m a backpacking geek who started these little film projects.”
This particular project involved nearly a year’s worth of logistics prior to Chris and John even hitting the trail. Although Chris admitted that getting backcountry permits for the High Sierra Trail was much easier than for the highly-coveted John Muir Trail, the fact that he planned to film and produce a documentary meant he had to prove to the National Park Service that your film will act in their interest.
The Wilderness Act of 1964 prohibits a “commercial enterprise” in federally-designated Wilderness, including videography and photography that will eventually be used for any commercial purpose. As a result, Chris had to spend more than a month stating his case to the Park Service to obtain a permit to film along the High Sierra Trail.
For the Park Service, “it’s personal,” Chris said. Another individual with a camera on the trail can end up encouraging more people to go, which comes with additional concerns from the perspective of the folks tasked with responsible management of these lands. “One of the biggest threats to that land is people,” said Chris.
Eventually, Chris was able to obtain permission to film and he and John hit the trail on September 4th. Their packs weighed about 35 pounds, about 14 of which was camera gear alone. Their camera gear included a Sony SLR2 with four different lenses, a Sony Handycam, and a gimbal stabilizer. Their audio kit included a portable recorder, a shotgun mic with big fuzzy to reduce wind noise for the SLR2, and a smaller shotgun mic on the Handycam for “run and gun” purposes.
Chris said the biggest challenge of bringing everything you’d need to film for six days is power. Many multi-day hikers utilize solar panels to keep phones and smaller cameras charged throughout their trips (not an option for Chris, as he was burning through three or four batteries per day). In the end, he wound up calculating how much battery power he’d need for the entire trip and carrying a massive bag of batteries to last throughout.
One of Chris’ more significant challenges in the post-production process involved the footage he captured using the gimbal stabilizer. When I interviewed him, Chris admitted he had never used this particular model of gimbal before. As a result, many of his shots wound up too bouncy to use, which resulted in a more extensive editing process and a lot of the nifty animations the audience will see throughout the film.
For aspiring nature videographers out there, Chris was adamant about passing along the lesson that you should always know your gear before you go. But with that said, Chris was also astounded by the post-production assistance he’s received from others who are interested in backcountry travel.
The audio crew for this film includes respected names like Bill Meadows and Alex Knickerbocker, whose previous work includes Mr. Robot and Fast and Furious. Soon after the release of his first trailer, Bruce Goodman, a professional colorist who has worked several Hollywood Films and who is responsible for the coloring in the popular JMT film Mile, Mile and a Half, also approached Chris.
For his part, Chris seemed sincerely humbled by the support and passion of these Hollywood names wanting to help with his project. As he said in our interview, “previously, and still, my projects are selfish. I like the outdoors, and I like doing them.” But recently, Chris feels that his projects (he recently started a new arts collective called Outmersive Films) are beginning to take a direction and that his passion for the outdoors and capturing them can maybe, one day, serve a higher purpose.
“Our goal is to get people to go outside,” Chris said towards the end of our interview. He pointed out that there’s already a well-established infrastructure in place to protect public lands, but that the places that are at risk of losing federal protection are the “peripheral places where nobody goes.”
The problem, according to Chris and I’d say I’d have to agree, is, “why aren’t people going to these places?” He admits that the goal of this film is simple. It’s just to “encourage people to get outside.”
My Thoughts on the Film
Chris’s film brought back some fond memories for me as a backpacker who cut my teeth in the Sierra. I was fortunate to backpack the entirety of the John Muir Trail back in 2014. Being from the Sierra, I was shocked that I had never heard of the High Sierra Trail before seeing this film.
Many of the shots and animations in this film are astounding. Capturing the majesty of the Sierra is no easy feat, but Chris’s work on this film will show you the magnitude of the peaks in this region, the crystal clarity of the park’s lakes and rivers, and the deep-green density of the Sierra pine forests.
In my interview, I asked Chris about the biggest lessons he took away from this experience on the HST. He told me that he never fully appreciated how much learning the history of a trail before hiking it adds to the experience until he met Mr. Tweed and dove into the history of the HST.
This thought resonated with me because I’m a firm believer in the importance of understanding the vision and hard work that went into creating anything that we, the public, have the privilege of enjoying today.
The High Sierra Trail: A Documentary is an inspiring film that highlights the beauty of Sequoia National Park and showcases the effort required to complete a trail over the Great Western Divide.
Perhaps my favorite aspect of this film was the fact that the director clearly understands the importance of Leave No Trace backpacking and responsible management of our nation’s wild places. The National Park Service takes this latter responsibility very seriously, and we should be grateful for the work they do. After all, humans continue to be the greatest threat to the erosion and degradation of these magnificent natural areas.
Where to Watch the Movie
So, you’re interested? As I mentioned in the introduction to this article, the documentary has already been submitted to a number of film festivals. According to Chris, they are also working on setting up distribution of the film through iTunes. It will not be available on YouTube like some of Chris’s earlier projects.
The best places for you to stay up-to-date on recent developments with the distribution of the film and where you can see it are the film’s website, High Sierra Trail. Once there, be sure to enter your email address to receive updates on where you can see the movie. You can also follow Outmersive Films on Facebook for the latest news and information!
And of course, here’s the trailer:
Related
The Backpacking Light Adventure Film Festival promotes stories about human-powered adventure travel. Submit your film or attend an online or live festival event!
Watch the 4K film Alcove, also by Chris Smead, as Chris and Ryan Jordan explore the rugged canyon country of the Colorado Plateau.
The Prospector is the flagship pack from Atom Packs, a British Company. Each pack is hand-built to order by owner Tom Gale, and the packs are made either as a standard configuration or fully customizable. This Atom Packs Prospector Review takes a first look at this rucksack.
Introduction
The Prospector is the flagship pack from Atom Packs, a British Company. Each pack is hand-built to order by owner Tom Gale, and the packs are made either as a standard configuration or fully customizable. The packs are made-to-measure for your back length. The basic model weighs 22.9 oz (650 g) and is customizable with an impressive variety of options. Tom seems very open to discussing your requirements and built me a pack that I would not have been able to spec elsewhere.
Features
Available as a standard model with preset options as defined by the manufacturer, or as a build-to-order, customizable, bespoke lightweight backpack.
45 L volume (standard model) that can comfortably carry loads of up to 35 lbs (15 kg).
35 L and 55 L volume options also available (My customized pack is 60 L, so larger packs are an option).
Side pockets (2.5 L each) with drain holes that are easy to access and deep enough to hold plenty of gear.
Roll-top closure.
Removable top and side compression straps.
Sternum strap.
Ice axe loop.
Customizable options:
Shoulder pockets: 0.5 oz (13 g) each.
Bottom snack pocket: 1.1 oz (30 g).
Removable internal pocket.
H2O port (comes as standard, but can be removed if you don’t want it).
Load lifters.
Hip belt pockets.
Specifications
Weight (base model with no add-ons): 22.9 oz (650 g).
Main body fabric: VX21 (standard); customizable as VX07 for 1 oz (28 g) weight savings.
Heavy-duty bullet mesh front pocket.
Side pocket fabric: VX21 (standard); customizable as VX07 for 0.4 oz (12 g) weight savings.
Base: VX21.
Frame: 1mm HDPE sheet with a removable and mouldable aluminum stay.
Body back panel: 500D Cordura.
Back panel padding: 10 mm closed cell foam.
Commentary
I requested a 60 L backpack for review, and Atom Packs owner Tom Gale constructed it with a sturdier frame, thicker plastic, and two stays instead of the standard one as he realized I would be carrying heavier loads with it. This adds 2.1 oz (60 g) to the total pack weight including a frame sheet of 33.5 oz (950 g). With almost every possible option added to it, it is still impressively light for a pack of its size. A standard Prospector has 45 L of volume, weighs 28.2 oz (800 g), and has a 3.5 oz (100 g) frame sheet.
At 60 L and about two pounds, this is an impressively light pack for the level of comfort and practicality it provides. The back frame is well padded and successfully transfers the weight to the hip belt. I particularly like the mesh pocket for stowing away my wet tent (this is Britain, after all!). I use the bungee cords to store my rain gear which gives me easy access to it without having to open the primary storage compartment of the backpack.
The optional hip belt pockets are accessed with a zipper that runs across the top and are roomy enough to hold a few snacks and a compass. The optional shoulder strap pockets are the perfect size to store a GPS or mobile phone. The bottom pocket is easily accessible whilst wearing the pack, and I find it useful for tucking in maps and gloves. If you didn’t have the optional shoulder or hip belt pockets, this would be an ideal place to store snacks and similar necessities.
I like the backpack’s aesthetic look, and it seems well constructed with sturdy, waterproof fabrics. The seams are not taped, but with very few seams to leak, and the fact that I always use dry sacks inside my pack, it was personally not a big deal.
I tested the pack immediately after receiving it with a 3-day hike in the UK, carrying 30 lbs (14 kg). The pack was comfortable from the very start, and I had no issues whatsoever. The only concern I had on my first inspection was the hip belt clip for a pack built to carry up to 40 lbs (18 kg) seemed a little small; however, so far it has been perfectly adequate, and any weight savings is appreciated.
My favorite pack to date has been the ULA Catalyst, and with the additions I specified, the Prospector compares very favorably to it. I am testing it more rigorously on the TGO Challenge across Scotland this year, after which point I will present a more comprehensive review here at Backpacking Light.
In this episode we tackle the science, myths, and dogma surrounding backpacking food and nutrition. Featuring guest Brian Rigby, certified sports nutritionist and author. We tackle food and nutrition issues as they relate to thru-hiking, ketogenic diets, plant-based diets (veganism and vegetarianism), gluten-free issues, and macronutrient-micronutrient nutrition. Some questions we ask: what are the caloric and nutritional needs of backpackers? Why do we need to address dogma and pseudo-science in this field? We also take a look at some new cooking and water treatment gear and discuss what’s going on in the world of Backpacking Light right now.
In this episode we tackle the science, myths, and dogma surrounding backpacking food and nutrition. Featuring guest Brian Rigby, certified sports nutritionist and author. We tackle food and nutrition issues as they relate to thru-hiking, ketogenic diets, plant-based diets (veganism and vegetarianism), gluten-free issues, and macronutrient-micronutrient nutrition. Some questions we ask: what are the caloric and nutritional needs of backpackers? Why do we need to address dogma and pseudo-science in this field? We also take a look at some new cooking and water treatment gear and discuss what’s going on in the world of Backpacking Light right now.
Outline
Andrew’s experience with backpacking nutrition during his Appalachian Trail and Colorado Trail thru-hikes
How does activity level influence caloric burn rates?
Words of caution about using a metabolic rate calculator
What about using fitness trackers or apps for estimating caloric expenditures?
Nutritional Considerations
Is a calorie a calorie, or is there something about calorie quality that needs to be considered for backpacking vs. caloric density (calories per unit weight).
How about high caloric density junk foods? Yay or nay?
How long do we have to spend on a trail before junk food catches up to you and nutrition becomes important?
How about the lack of B vitamins in processed foods?
Health vs. performance on a junk food diet
3 days vs. 3 months on the trail: macronutrient ratio differences?
Transition diets: lifestyle vs. on-the-trail
What about high fat, low carb (e.g., ketogenic) diets for backpackers?
Advantages, disadvantages, and risks
Impact on anaerobic power systems
Ketogenic diets – applicable for ultralight backpacking?
Be careful when reading thru-hiker “testimonials” about ketogenic diets
Can we tap into our body fat stores for backpacking energy, and save food weight?
Bonking
Can high fat, low carb diets mitigate the effects of “bonking” (i.e., what are the impacts on glycogen?)
The advantage of a high-carb breakfast before hitting the trail
Strategies for minimizing bonking for both high-carb and low-carb diets
Micronutrients
What’s the best way to maintain micronutrient balance on the trail?
Does food processing impact micronutrient quality?
The reality of Vitamin C: how much we really need
The Emergen-C myth
Thru-hiker needs for micronutrients and the risks of “pizza-gorging town stops”
How often do we need to be eating high-quality, micronutrient-rich foods (e.g., fresh fruits and vegetables) on a long-distance hike?
How about multivitamins?
Are any type of supplements needed for backpacking?
How about for vegans/vegetarians?
How about for women?
Specific strategies for vegetarian and vegan backpackers
Protein considerations: legumes, whole grains, and pseudo-grains
Calcium for vegans?
How does altitude and/or cold environments impact our food planning?
Do we need more carbs, or less carbs?
Clothing or calories? Considerations for staying comfortable in cold temperatures.
Challenging pseudo-scientific belief systems
Example: Ketogenic diets
Micronutrient requirements
What is the single best thing we can do with our food to improve backpacking performance?
How do we mitigate injury and illness?
What’s the risk of under-nutrition / caloric deficit with respect to overuse injuries and/or illness?
What is the best way to facilitate body repair during a backpacking trip?
Replenishing glycogen
Triggering muscle protein synthesis
Listener Q&A
What is the best way to eat keto/fat-adapted on the trail?
Andrew’s experiences with keto
What is the best way to eat vegetarian on the trail?
Ryan’s experiences with vegetarian/vegan
Protein, Omega-3 and calcium considerations
What’s the best way to eat gluten-free on the trail?
Ryan’s experiences with celiac and gluten-free youth on Scout trips
Next podcast topic: Guide’s Roundtable – a roundtable discussion about ultralight backpacking, life, and public lands protection with our trekking guides, to be recorded live in the field during our Guide’s Training Trek in June 2018.
Sponsors: Help us Keep the Podcast ADVERTISING-FREE!
This episode of the Backpacking Light Podcast is supported and kept advertising-free by Backpacking Light membership fees. Please consider becoming a member which helps support projects like this podcast, in addition to a whole slew of other benefits!
In addition, some of the links on this page may be affiliate links that refer to our partner merchant retailers. If you follow a link and then make a purchase, we receive a small commission which goes a long way towards helping us pay for podcast production, hosting, and bandwidth fees! Thanks for supporting us in this way!
This gear guide features several dozen options for freeze-dried and dehydrated backpacking dinners from many different brands and provides nutritional information on each one for comparison purposes.
Introduction
Pre-packaged, dehydrated and freeze-dried backpacking dinners might be a good option for you to consider if you don’t have the time, skill, or supplies to make your own.
I own and use some meal preparation equipment (e.g., a dehydrator and a vacuum sealer) and enjoy making my own backpacking meals with ingredients that I source myself. However, I also appreciate having the option to grab a few pre-packaged backpacking meals when I’m short on time.
This gear guide features several dozen options for dehydrated and freeze-dried backpacking dinners from many different brands. Numerous sortable data tables are included in this gear guide to provide a plethora of nutrition data and metrics for comparison purposes.
Freeze-Dried and Dehydrated Backpacking Dinners: Category Description
Freeze-dried and dehydrated backpacking dinners included in this gear guide met the following criteria:
They can be “cooked” by pouring boiled water into the food pouch and waiting a set amount of time (defined by the manufacturer) for the food to rehydrate. Meals that require cooking on a stove (e.g., simmering), or transfer to another container for eating, are not included. In addition, this gear guide does not include so-called self-heating meals (e.g., OMeals), which are neither dehydrated nor freeze-dried.
All meals in this gear guide are generally considered to be evening entrees. Snacks, desserts, appetizers, and breakfast foods are not included.
They are available in either 1- or 2-serving sizes (in a few cases, manufacturers have specified 1.5 or 2.5 servings). When multiple serving size options are available, the larger serving size is included, since that more closely represents the amount of food for a hearty meal for one person. Smaller people, older people, or youth may find some of the meals to provide too much food for a single serving meal.
The food brands are actively distributed through specialty outdoor retailers, so there is a high likelihood that you’ll actually find them if you need to make a last-minute run to pick up food for a trip!
I settled on a selection of five brands that cover a diverse array of both dehydrated and freeze-dried ingredients. Some meals are organic, some are vegetarian, some are vegan, and some are gluten-free. The meat dishes include beef, chicken, turkey, and seafood as ingredients.
It’s worth noting that cooking times vary wildly but tend to be similar within each brand and food type:
Mountain House: 8-9 minutes
AlpineAire: 10-12 minutes
Mary Jane’s Farm: 10-12 minutes
GOOD TO-GO: 10-12 minutes (15-20 minutes for some)
Backpacker’s Pantry: 15-20 minutes
Many brands offer meals with a potato flake base. These meals are ready to eat in about 4-5 minutes.
Cooking times depend on the volumetric quantity of ingredients that are freeze-dried vs. dehydrated and the size of the ingredient pieces and granules (e.g., potato flakes require less time to rehydrate than noodles).
Most meals contain a mixture of both types of dried food. Freeze dried ingredients usually require less cooking time than dehydrated ingredients.
The longer a meal takes to cook, the higher the probability that you won’t have piping hot food by the time the meal is rehydrated and ready to eat. Cooking times are estimates only. Cooking times will be even longer at higher altitude (because water boils at a lower temperature), or in cold temperatures where heat loss out of the bag is faster. You can mitigate some of these effects by inserting the package into a bag cozy of some sort while it’s cooking.
When I started backpacking, only Backpacker’s Pantry and Mountain House dehydrated and freeze-dried backpacking dinners were worth considering. Back then, during the 1980s, they were only marginally worth considering. Texture and taste left a lot to be desired. Advances in food drying technology and ingredient processing, along with several more big brands entering the market, makes freeze-dried and dehydrated backpacking meals much more palatable! Some of them are downright gourmet.
The following table provides a summary of the packaged meals included in this gear guide.
(Using the Table: This table is sortable, searchable, and consists of multiple pages of data. Scroll right to see all data columns on small screens. Try a search for “Mountain House” if you want to filter for a particular brand!)
All meals in this gear guide were categorized based on the major food types of interest to those who aspire to follow a particular diet strategy, including:
Meals with meat (these include beef, chicken, and turkey)
Vegetarian meals (may contain dairy products)
Vegan meals (no meat or dairy)
Gluten-free meals
These types are noted in the table below.
(Using the Table: This table is sortable, searchable, and consists of multiple pages of data. Scroll right to see all data columns on small screens. Try searching for “chicken” or “vegan” as examples of how to filter the entries for various search terms.)
Calories = fuel. Generally, most hikers will consume 400-800 Calories during their evening meal, which helps replenish glycogen stores, repair muscles, and provide metabolic fuel until morning.
Macronutrients
Most backpackers who are students of their own nutrition will attempt to dial in a particular macronutrient ratio, defined as carbohydrates:fats:protein. One common ratio is 50:35:15, which simply means that 50% of your calories are coming from carbohydrates, 35% of your calories are coming from fats, and 15% of your calories are coming from protein.
Some backpackers try to increase the caloric density (e.g., expressed as Calories per ounce) of their food by increasing the percentage of fat in their diet (which has a caloric density of 9 Calories/gram vs. proteins and carbohydrates, which have a caloric density of 4 Calories/gram). A typical high-fat backpacking diet may have a macronutrient ratio that looks something like 35:50:15.
Proponents of ketogenic and other low-carb diets for athletic activity rely upon diets where less than 10% of their total caloric intake is from carbohydrates, where energy is derived primarily from fat metabolism instead of glycogen stores in the liver and muscles.
For most (non-fat adapted eaters), a high load (100-150 g) of carbohydrates during the evening meal helps replenish glycogen stores consumed over the course of several hours of hiking.
Protein (at least 20 g per meal) helps with muscle repair.
Saturated Fats and Cholesterol
In the raw data table at the end of this gear guide, saturated fats and cholesterol numbers are reported as an FYI for those with chronic diseases that require monitoring the dietary intake of these nutrients. Neither one likely has any meaningful impact on short-term backpacking performance.
Sodium
A diet void of sodium is risky for backpacking. High levels of physical exertion, especially during warm temperatures, results in perspiration and sodium loss that can lead to conditions such as hyponatremia. One diet that can be particularly problematic is one that rigidly adheres to plant-based whole foods with no processed foods or ingredients. The extremely low sodium in this type of diet is risky for backpackers, who may expel up to several grams per day of salt through perspiration.
Conversely, some people monitor sodium intake as part of chronic disease management.
Fortunately, for backpacking, we can afford to take in a little extra salt here and there since we are engaging in an activity that expels quite a bit more of it than if we were sitting at our desk back at the office.
Dietary Fiber
Dietary fiber increases stool softness, volume, and regularity (reduces constipation). High fiber diets (especially common among those who eat plant-based diets) are great for backpacking, but when combined with vigorous exercise, may increase your required toilet paper supply dramatically.
Sugars
The sugar content of these foods is provided in the raw data table at the end of this gear guide primarily for those interested in evaluating the potential glycemic and insulinemic impacts of foods.
Macronutrient Specifications (Per Package)
This table is sortable, searchable, and consists of multiple pages of data. Scroll right to see all data columns on small screens.
(Using the Table: This table is sortable, searchable, and consists of multiple pages of data. Scroll right to see all data columns. Try a search for “vegan” or “pad thai” to see how the search-and-filter function works!)
If you are looking to minimize your carbohydrate intake, look for meals that have a low net carbohydrate density (total carbs minus dietary fiber, per weight unit).
Backpacker’s Pantry Pesto Pasta with Salmon (9.7 net carb (g)/oz, i.e., net carb density of 34%).
Mountain House Chicken Fajita Bowl (11.8 net carb (g)/oz, i.e., net carb density of 42%).
The average net carb density for all meals in this gear guide is 15.2 net carb (g)/oz (net carb density of 54%).
High Net-Carb Options
For those who do not eat a ketogenic or other fat-adapted diet and need a very high carb meal after a particularly long day of hiking, consider these high net-carb density options:
AlpineAire Foods Honey Lime Chicken (27.5 net carb (g)/oz, i.e., net carb content by weight = 97%).
AlpineAire Foods Pepper Beef with Rice (23.3 net carb (g)/oz, i.e., net carb content by weight = 82%).
GOOD TO-GO Pad Thai (20.6 net carb (g)/oz, i.e., net carb content by weight = 73%).
Backpacker’s Pantry Beef Pho (20.0 net carb (g)/oz, i.e., net carb content by weight = 71%).
Best Value: Calories per Dollar
The meals in this gear guide have an average cost of $1.30 per 100 Calories, and range from $0.62/100 Cal to $3.20/100 Cal. Prices represent current backpacking dinner sale prices at REI as of the time of publication. Some items are on sale during REI’s Anniversary Sale, others remain listed at their MSRP.
Average cost by brand:
AlpineAire – $0.99/100 Cal
Backpacker’s Pantry – $1.15/100 Cal
GOOD TO-GO – $1.36/100 Cal
Mountain House – $1.68/100 Cal
Mary Jane’s Farm – $2.10/100 Cal
The following meals give you the most calories per dollar spent:
I’d like to say thank you to Stephanie Jordan for performing the data research for this review!
Disclosure
Some links in this review may link to our affiliate merchant partners. If you click on a link and subsequently make an online purchase with that retailer, Backpacking Light receives a small commission on the sale at no extra charge to you. This helps us maintain the website and create valuable content – thank you for supporting us in this way!
Late last year, United States President Donald Trump took action for national monument reduction in Utah, Bears Ears and Grand Staircase-Escalante. This article explores the issues.
Late last year, United States President Donald Trump took action to reduce the size of two national monuments in Utah, Bears Ears and Grand Staircase-Escalante. His decision marked the first time in more than 50 years that land protection rollbacks have occurred at this scale. The decision has sparked intense debate over the President’s right to take such action and, more importantly, what kind of precedent this action could set for the future.
On one side, GOP (Grand Old Party, otherwise known as the Republican Party) politicians and many rural Utah residents that regard these protections as a federal overreach are delighted for the opportunity to establish their own regulations to protect and maintain these lands.
Shortly after Trump’s decision, Utah Republican Representative John Curtis sponsored a bill to officially recognize the two smaller monuments and prohibit new mining and drilling operations on the original 1.3 million acres. It would also create a new pair of management councils for each monument, which would be comprised of state, local, and tribal representatives.
But on the other side, local tribes and environmentalist groups are worried about the immediate threat to those lands and the dangerous precedent this might set. Shaun Capoose, a member of the Ute Indian Tribe Business Committee and the Bears Ears Coalition points out that the bill sponsored by Rep. Curtis gives President Trump the authority to hand pick members to sit on the aforementioned councils, including those from tribal areas.
Capoose says the bill would essentially be “a return to the 1800s when the United States would divide tribes and pursue its own objectives by cherry-picking tribal members it wanted to negotiate with.” He argues that tribal governments should retain the right to select their council representatives, not the U.S. federal government.
To more fully understand the potential impact of this decision, let’s start by taking a look at what exactly was included in the proclamation signed at the Utah State Capitol on December 4th, 2017.
What The Proclamation Means and Where it Came From
The terms of the proclamation championed by the President and Interior Secretary Ryan Zinke state that Bears Ears National Monument will be reduced by about 85 percent and will now include about 315 square miles of land.
Likewise, Grand Staircase-Escalante will be reduced by about 48 percent, a reduction from nearly 3,000 square miles down to 1,569 square miles. These maps tell the visual tale of the size and significance of the rollbacks.
Source: Outdoor AllianceSource: Outdoor Alliance
At the start of the year, President Trump ordered Zinke to review a list of 27 national monuments. Under the terms of the 1906 Antiquities Act, the President has broad power to declare federal lands as monuments. Some of the controversy, however, lies in whether the specifics of the act also grant the President the authority to remove protections from federal lands without Congressional approval.
In addition to Bears Ears and Grand Staircase-Escalante, Zinke also recommended reductions for Nevada’s Gold Butte National Monument and Oregon’s Cascade-Siskiyou National Monument. Decisions on these reductions have yet to be made. Also, Andrew Marshall’s recent story here, Wandering in a Thirsty Country, provides more information on recent developments at Organ Mountains-Desert Peaks National Monument.
Presidents have actually taken action to redefine the boundaries of national monuments on a number of occasions, the latest of which came in 1963 when President John F. Kennedy changed the boundaries of Bandelier National Monument in New Mexico, effectively reducing the amount of land under federal protection by just under 1,000 acres.
Trump’s decision, however, is far and away the largest land protection rollback attempted under the auspice of the Antiquities Act. Under Zinke’s advisement, President Trump has removed approximately 1 million acres from Bears Ears and another 300,000 acres from Grand Staircase-Escalante.
History of the ‘National Monument’ Designation
As mentioned earlier, the Antiquities Act of 1906 was a major step to give the President the power to designate historic buildings and archaeological sites as “national monuments.” Theodore Roosevelt declared Devil’s Tower in Wyoming America’s first national monument in September 1906 and subsequently designated 17 other national monuments during his administration.
According to the original proclamation that established Devil’s Tower, Roosevelt cited that the tower was “such an extraordinary example of the effect of erosion in the higher mountains as to be a natural wonder and an object of historic and great scientific interest and it appears that the public good would be promoted by reserving this tower as a National Monument.”
According to an article from the Harvard University Press on the origins of the Antiquities Act, one of the original motivating factors behind the passing of the Antiquities Act was the fact that many Native American cultural sites were being looted and in danger of disappearing entirely. A large group of scientists lobbied for the act because they believed these sites could not wait to be protected by slow-moving congressional action.
Since Roosevelt’s time in office, every president aside from three, Nixon, Reagan, and George H.W. Bush, has used their authority to establish national monuments. In total, more than 120 national monuments have been dedicated since 1906.
According to the National Park Service Archaeology program, however, several of these monuments were later abolished or redesignated by Congress. For example, the 85th Congress redesignated Petrified Forest National Monument a National Park in 1958 and Cinder Cone National Monument (created by President Teddy Roosevelt) was later incorporated into Lassen Volcanic National Park by the 64th Congress in 1916.
A Brief History of Land Preservation and Management
The mission of the National Park Service is to “[preserve] unimpaired, the natural and cultural resources and values of the National Park System for the enjoyment, education, and inspiration of this and future generations.”
Going back to the 1800s there were many elegant voices, including John Muir and Henry David Thoreau, who proclaimed the importance of protecting and preserving lands for the enjoyment and betterment of future generations.
Some on the government side, like forester Gifford Pinchot, believed that parks were best managed by a Forest Service promoting “the greatest good for the greatest number” through the well-managed regulation of timber and other resources.
Pinchot’s philosophy led to the damming of Hetch Hetchy Valley to provide a safe, stable water supply for the growing population in San Francisco, a move that more staunch conservationists like John Muir and Henry David Thoreau were ardently opposed to.
While these two sides adamantly debated the benefits of strict conservation versus responsible use and management, their debate signaled a vast improvement over the incredibly resource-intensive practices of the 1800s.
As a result, areas like Lake Tahoe benefited. Now known for forests as far as the eye can see and a lake with crystal clear water as blue as the sky, anywhere between 70 and 90 percent of the region’s forests were clear-cut during logging and mining operations throughout the late 1800s.
The establishment of Tahoe National Forest in 1905 helped to preserve some Native American travel routes, villages, and summer gathering sites but also served to slow logging and mining operations and set the stage for the region’s shift from a mining and logging hub to a year-round tourism destination.
Where Do We Go From Here?
In the years since the Park Service’s creation in 1916, countless individuals from all over the world have made use of America’s system of national parks, monuments, and landmarks. The value of untouched land, however, is hard to quantify.
Attempts to quantify the value of untouched land require the consideration of quality versus quantity, but it’s also a question of economic viability in contrast to the proverbial question of what’s best for the people.
Preserving a small section of canyon that was once home to the Anasazi Native Americans, for example, could provide insights into the history of the climate in that area and the downfall of a once-prominent people. The information that can be learned in this canyon can arguably provide more benefit than the economic gains that could be found by commencing mining or drilling operations in the region.
So, just what are we gaining by blocking development and restricting certain activities on these lands?
For many, there are countless intangible benefits to preserving a portion of our country untouched. For starters, the history, artifacts, and natural wonders that are preserved in America’s national park system are expansive, and potentially unmatched by any other country in the world.
But much deeper than that, untouched land, or ‘wilderness,’ gives us a place to disconnect from the concrete jungles where so many of us spend 99% of our lives. It was John Muir who said: “Thousands of tired, nerve-shaken, over-civilized people are beginning to find out that going to the mountains is going home; that wildness is a necessity.”
Trips away from the regular, man-made landscape we frequent provide space to reflect, time to disconnect from technology, and opportunities to connect with Nature; a connection that can – and must – be rekindled.
But for some, the financial gains and job growth that come with increased mining, drilling, and other ventures outweigh the intangible benefits of untouched wilderness, and they too have a point. These economic gains can be reinvested in education, healthcare, social programs, and much more. These are all important to improving the overall quality of life here in the United States, and thus, we encounter the tricky balance that lawmakers and politicians are asked to strike.
Many of us depend on open, wild spaces to maintain our quality of life, but increasing access to affordable healthcare and the improvement of our education system are also noble initiatives that would seem to be amenable to many Americans.
Others believe that, in preserving “the natural and cultural resources” of this country, we have simply halted the harvesting of these resources for times of greater need. But has that need now arrived? And what do we lose from a cultural and historical standpoint by opening previously federally designated preservation sites to the development and the potential harvesting of natural resources?
It is true that part of the platform that President Trump ran on centered on the idea that the federal government needed to spend more time solving domestic problems and devote more money to improve the quality of life for “everyday Americans.”
In my graduate studies, we discussed sustainability as it related to tourism. One of the core ideas we looked at was the struggle to give equal consideration to economic, environmental, and social-cultural ramifications of tourism decision-making.
When approached from the perspective of sustainability, it made sense to utilize and cultivate resources that are more “local.” This means reducing foreign resource extraction and the importing of goods and materials and investing in domestic resources while also making a plan for the renewability of these resources.
Survivalists advocate the preservation of America’s natural resources and reliance on extracting resources, goods, and materials from the rest of the world for as long as possible.
I am still personally struggling with the challenges to both perspectives, but I often come back to the same basic question: is it better to become the greatest nation in the world by succeeding in making every other nation worse, or is it better to cultivate an internally sustainable system that many other countries in the world could model for their own benefit?
For my part, the latter certainly sounds like a more ethical approach that has the best chance to improve quality of life for the entire global community.
A Final Question to Consider
Perhaps the biggest question that the president’s decision to downsize these two monuments brings up is whether the federal government is the best entity to preserve these lands or whether state and local governments should play a larger role.
In the speech he gave to announce the rollbacks of the monuments, President Trump spoke directly to Utah residents (but also possibly to the entirety of the American people) when he said, “Your timeless bond with the outdoors should not be replaced with the whims of regulators thousands and thousands of miles away. I’ve come to Utah to take a very historic action to reverse federal outreach and restore the rights of this land to your citizens.”
The President’s statement was well received by some and viewed as mere lip service to others. Supporters, such as Utah’s Republican Senators Orrin Hatch and Mike Lee, appreciate the opportunity to decide how land in their region should best be used. But interestingly, President Trump’s statement contradicts the philosophy of the first proponents of the federal land management, such as Gifford Pinchot, who believed that a responsible federal regulatory body would be best suited to manage significant national resources to ensure “the greatest good for the greatest number.”
Opponents, some of whom have already filed lawsuits blasting the proclamation as illegal, lament what they believe to be an abuse of presidential power due to the lack of clarity over whether this action is protected under the Antiquities Act, and an affront to one of the nation’s largest collections of dinosaur fossils (in the case of Grand-Staircase Escalante) and sacred tribal lands (in the case of Bears Ears).
An overwhelming majority (98%) of public comments since the decision show support for keeping the monuments as they were and even Secretary Zinke acknowledged that “comments received were overwhelmingly in favor of maintaining existing monuments.” But Zinke later went on to dismiss those comments as “a well-orchestrated national campaign organized by multiple organizations.”
Interestingly, however, some polls conducted in Utah and throughout the Western states have turned up a variety of results both for and against the rollback. A January poll conducted by the Colorado College, for example, found the state almost evenly split on the subject, with 49% of Utahns opposed the reduction while 46% supported it.
Closing Thoughts
The question of who is best equipped to manage these lands is very difficult and complex. There are many interests that must be heard, and history suggests that coming to a solution that is amenable to all parties is nearly impossible.
Perhaps those with the deepest pockets and strategic connections have more influential voices than others. We’ve seen the need for further development and the potential for economic gain win out over desires for conservation and preservation time and time again, i.e., Hetch Hetchy Reservoir and Glen Canyon Dam and Lake Powell.
But there will always be power in a well-organized and driven public opposition. As we move forward, it’s important that the federal government remains engaged with every group that has an interest in these areas and, indeed, in any national park or national monument that comes into question in the coming years.
The value of land and, more specifically, its value to future generations, cannot be estimated. It comes down to a question of ethics, and I for one would like my children to grow up with the ability to travel far and wide across this country, the ability to escape cities and developments and find open, untouched natural spaces, and pride in the fact that the United States has, and will maintain, the world’s greatest system of National Parks.
When Donald Trump took office he appointed as his Secretary of the Interior Ryan Zinke, a former member of Congress with a 4% lifetime score from the League of Conservation voters. Like Trump’s other cabinet members, much ink has been spilled concerning Zinke’s qualifications, the “fox guarding the henhouse” nature of his appointment, the various scandals that have surfaced during his time at Interior. Perhaps less well known to the general public is that Secretary Zinke, under orders from President Trump, recommended major changes to ten of the nation’s National Monuments. The most famous and contentious of these Monuments are Bears Ears and Grand Staircase – Escalante. But Organ Mountain – Desert Peaks, tucked away in a quiet corner of New Mexico, made the list as well.
“You’re gonna wanna watch out for danger noodles,” Ray Molina says as he steps into the shade of his house on the edge of the Organ Mountains-Desert Peaks National Monument.
“Minimalist” would be the trendy way of describing Molina’s desert sanctuary. Someone less kind or less millennial might use the word “shack”. It’s a one room affair, hand built by Molina from timber, concrete, and adobe in a style that easily pre-dates the Spanish conquistadors. The doors and windows are simple openings draped in plastic and cloth. An ancient lawn chair, baked into a sandy non color by the extreme solar radiation of the Chihuahuan desert, perches on the roof.
“Danger noodles?” I ask. I’ve only been in the southwest for a few months, and I assume Ray is referring to some, as yet unknown to me, species of cactus.
“Rattlers,” he calls from inside the house. I’m standing outside and staring at a skull that Molina has propped up next to the door, wondering if I need to make some gesture of respect before entering. Under the vast desert sky, the thought is not absurd.
“Usually they stay down in my basement but sometimes they come—”. A long silence followed by a creative string of cursing. Molina comes bouncing out of the house, his brown, bald pate shining. “Danger noodle! Danger noodle!”, he calls, and I can’t tell if the rise in his voice is fear, excitement, or both.
I look down at my feet and feel the hair on the back of my neck start to stand up. Molina is a bit of a packrat and all of a sudden my monkey brain is turning every scrap of hose, length of wire, and strand of rope that litters the yard into a “danger noodle”. I feel the urge to climb a tree and have to squelch a burst of panic as I realize that the low ground cover of thorns and prickles that surrounds me is not going to cut it.
It occurs to me, not for the first time, that the Chihuahuan Desert functions as a constant reminder of man’s vulnerabilities: his dependence on water, his tendency to fry in the sun, and his utter puncturability by flora and fauna alike. These are Cormac McCarthy’s old stomping grounds and truly it is no country for anybody, really, old men least of all. And yet, here we are, standing on the edge of a National Monument that protects pre-European archaeological sites. People have been dodging “danger noodles” here for a long, long time.
The guardian of Ray Molina’s casita.
***
The Monument is an Obama era designation, spanning nearly half a million acres in four separate parcels just outside of Las Cruces, New Mexico. Heading west from San Antonio, drive five hundred miles across the expanse of Texas until you run out of state. Now you’re in El Paso. Now turn north and drive through almond orchards until you see the wrinkled stone of the Organ Mountains jutting up from the floor of the desert, and you’ve arrived in Las Cruces. It’s a sleepy city of a hundred thousand souls, but this is New Mexico, so that also makes it the second largest city in the state. There was a time when Las Cruces was simply a bathroom break between El Paso and the outdoor adventure that awaits in northern and central New Mexico: White Sands National Monument, the Gila Wilderness, the biking and skiing of Santa Fe. Then a group of disparate communities raised their voices together and, in a process that spanned over two decades, finally got the Monument designation. It was a victory of grassroots organizing that eventually involved small businesses, advocacy groups, native tribes, backpackers, mountain bikers, hunters, bird watchers, archaeologists, geologists, artists, trail runners, historians, and local politicians.
“This all just fell into place where a group of people were all committed to the same purpose. All of these voices were elevated at the same time, which is really incredible,” says Carrie Hamblen, CEO and President of the Las Cruces Green Chamber of Commerce.
According to Hamblen, the Green Chamber of Commerce became one of those voices in 2013, when it became evident that the Obama White House wanted an economic factor to bolster the ecological and archaeological arguments behind designating the monument.
“We commissioned an economic impact study that showed that with a monument designation fully running, $7.4 million dollars would come back in this community, eighty-eight jobs would be created and $560,000 in annual and local taxes would be created,” Hamblen says. We’re sitting in her office, the walls of which are papered with dramatic photographs of the Organ Mountains, maps of trail networks, and a framed copy of the Presidential Proclamation that transformed the desert surrounding Las Cruces into a National Monument.
One of Hamblen’s jobs is to work with local businesses to help them capitalize on the designation, and she appears to be good at it. Every restaurant in town, from local coffee shop to upscale winery, seems to have an OMDP themed offering on its menu. Every year the local business get together with the Convention and Visitors Bureau and Chambers of Commerce to throw a month long “Monument to Main Street” celebration. The festivities include music, entertainment, and vendors on Main Street, as well as tours and events in the Monument itself.
As I leave her office, Hamblen hands me a large green sticker with the silhouette of the Organ Mountains emblazoned in stark white. “People don’t call it the government’s monument. They call it our monument.” she says. Above the white peaks on my sticker, the words “Organ Mountains – Desert Peaks Means Business” are emblazoned in bold font.
A new sign, not yet degraded by the harsh conditions of the Chihuahuan desert, is indicative of the infrastructure improvements brought by the monument designation.
David Crider, owner and operator of Southwest Expeditions, agrees wholeheartedly with that sentiment. Crider was running rafting trips down the nearby Rio Grande long before the Monument was a thing. But when the Obama administration started to get serious about a designation, Crider sensed a business opportunity and got involved in the grassroots effort to push it forward.
“We want to make Las Cruces a destination city. And we’re trying to bring attention to the Monument itself,” says Crider. He’s an outside the box thinker, and his ideas extend well beyond walking and riding tours in the desert. Southwest Expeditions conducts aerial flyovers of the geologically unique areas and piles tourists into actual stagecoaches, bouncing them along the historic Butterfield Stagecoach trail.
“Any other place you look where there’s a National Monument, it increases businesses income, and I mean everybody from hotels to service businesses to touring operators like ourselves,” says Crider. “It’s a huge uptick. When you have National Monument status in a town, that attracts people from all over the world, not just your local area.”
It probably goes without saying that not everybody agrees. With a new administration in the White House, the Organ Mountain – Desert Peaks National Monument now finds itself existing in an uneasy limbo, caught between Secretary of the Interior Ryan Zinke, President Donald Trump, ranchers, corporate interests, the outdoor community, and the people of Las Cruces itself.
***
I’m hanging out with Ray Molina at his casita because he’s promised to take me on a bike tour of one of the Monument’s many signature sights, the Kilbourne Hole Volcanic Crater. Molina opts to leave the danger noodle resting comfortable against the wall of his house and we mount two of his fat bikes, pedaling into the soft sandy washes and arroyos of the western Monument.
Fat bikes are essentially mountain bikes with huge, soft, oversized tires. Think of a human powered dirt bike and you might be on the right track. As best as anyone can tell, they were originally developed in northern climates to deal with snow related traction issues but were quickly adopted by riders in the southwest to overcome the sandy pits and mushy gravel that litter the valley floors here. Ray was unquestionably one of the first people in the mountain bike community to use fat bikes, before they were commercially available he used to build them himself from spare parts. Possibly he was one of the inventors of fat bikes, that’s certainly what I’ve been told, but on this issue he is characteristically vague. In any case, he is expert in their use, guiding me through a thigh-high forest of evil looking plants and deep sand traps that would bring any normal bicycle, or even hiker, to an ungraceful halt.
The huge, soft tires of a fat bike make it the ideal tool for traveling the sandy washes and arroyos that bisect the valley floors of the OMDP.
The flora of the Monument is worth noting here. In my time backpacking, hiking, and mountain biking the high Chihuahuan desert I’ve yet to brush up against anything that doesn’t immediately draw blood. Prickly pear and barrel cactus sprinkle the landscape along with spine laden mesquite trees and the long, wavy spears of iconic ocotillo. Any and all of these plants will send a dagger straight up through the sole of your favorite minimalist trail running shoe or reach out from the side of the path and gouge a shallow furrow in your skin. Even bushes like the creosote, which don’t technically have thorns, are rough enough to give you scratches with a casual touch.
In my mind, the most dangerous of these plants is the lechuguilla, a type of agave plant with tough, broad, upthrust leaves that each end in a three-inch razor sharp tips at just below knee level. Locals call them “shin daggers.” The indigenous peoples of this area used lechuguilla tips as actual needles, a fact which comes as no surprise to me when I step off my bicycle for a restroom break and sink two of the barbs directly into the fleshy muscle of my calf. The tips are so sharp that the puncture doesn’t even register until I remove my leg, at which point the sensation is one of exquisite pain. As I watch inch after inch of vegetation slide out of my skin, Molina takes the opportunity to tell me a story about someone he knows who fell off a mountain bike and landed on a lechuguilla. This unfortunate soul promptly had his lung punctured. Ray’s tales are always tall but this one I believe. By the time I am home that night, the muscle of my calf will be so sore and contracted that I can barely walk. My wife will pour hydrogen peroxide into the tiny wounds and call me a sissy as I try not to wail like a small child.
So it’s with great care that Molina and I navigate around the vegetation. The landscape is sparse but dramatic. To the west the Potrillo Mountains rise above us. To the north, so do the Robledo and Uvas Mountains, and to the east: the Dona Ana and Organ ranges. The desert stretches out all around us, uniform and mostly flat, until suddenly we are on the lip of a volcanic crater two miles long and a mile and a half wide. Kilbourne Hole is a rarity, geologic evidence of volcanic activity without a mountainous rim.
A thunderous boom echoes across the crater, drawing our attention to the right. Two Toyota Tacomas are parked on a slight rise above the crater rim. Four or five young, fit looking men and women are lounging in camp chairs, drinking beer and chatting. One of them is lying prone on a blanket, pointing a long rifle into the crater. The boom comes again, and the sun glints off a spent shell casing as it spirals through the air to join a litter of brass on the desert floor.
“Rattleheads,” Molina says. I assume this means “firearm enthusiasts” but before I can ask he is pedaling towards them. “Gotta let them know we are headed down there so they don’t shoot us,” he calls over his shoulder. “Plus, they have beer!”
***
Here is the interesting thing about the Organ Mountain – Desert Peaks National Monument. Before it was a National Monument it was already federally owned land, overseen by the Bureau of Land Management. On BLM land, almost anything goes. You can walk where you want, camp where you want, fly drones, bring dogs, ride horses, slackline across canyons, and fire rifles into volcanic craters. In late 2017, a flat earth conspiracy theorist and amateur steam powered rocket scientist decided to launch himself into the atmosphere to prove that the earth is shaped like a frisbee. His launch site of choice? BLM land. To the BLM’s credit, they quickly halted his launch. But the point is, he thought they might have allowed it.
The BLM seems to exist in a different time and place, a slice of western history where you are free to do whatever fool thing you want as long as you don’t bother anyone else while doing it. When the land around Las Cruces was designated as a Monument, the BLM retained control and management of the acreage, which means to a large degree that freewheeling spirit remains intact.
As someone who’s formative outdoor experiences occurred in the beautiful but tightly managed and heavily populated Appalachian Mountains, I find this disorienting and more than a little anxiety inducing.
“Stay on the trail,” my inner voice whispers as I follow Molina down into the crater after notifying the rattleheads of our presence but failing to receive any free beer.
“What trail?” I whisper back to myself. “There is NO trail!” The implication, at least in my head, is one of isolation. You are on your own here. If you hurt yourself following a man you barely know into an ancient volcanic crater, if you succumb to snakebite or bullet or sudden onset cactus wound infection, there is no easy way for anyone to get you out. We are currently an hour by four wheel drive from the nearest road, and from there a while still to anyone with a medical degree. I’m an experienced backpacker with nearly 3,000 trail miles under my belt, much of it in areas technically more remote than this, but something about the Chihuahuan Desert feels more lonely and more intimidating than anything else I’ve ever experienced.
The bottom of Kilbourne Hole is sandy and crystalline, the remains of the lake that once filled the crater after the volcanic activity ceased. Astronauts from the nearby NASA facility once trained here, and it’s easy to see why. Though not exactly alien, the landscape is harsh enough that you can imagine it putting the proper fear of suit pressure loss into prospective space travelers.
Reaching the end of the crater, Molina and I stare up at the basalt cliffs that rim the entire formation except for the narrow cleft we had originally descended two miles earlier.
“Hmmmm,” Molina says, eyeing the nearly vertical rock fall. It stretches forty feet above us, something I know because I looked it up after I got home, under the mistaken impression that having an exact figure would make me feel less queasy about having climbed it. “I thought there would be an exit here.”
“You’ve…never done this before? So we turn around and go back the way we came, right?” I ask. Molina shakes his head and grins.
“No man, it’s an adventure!” he says. It’s hard to argue with that, and I follow Molina’s lead, slinging the fat bike over my shoulder and picking my way up the cliff face.
“Watch out for danger noodles!” Molina calls from ahead of me. “They love this shit.”
Thirty adrenaline filled but rattlesnake free minutes later, Ray and I are safely out of the crater and working our way back towards his house. He stops to talk to the rattleheads one more time on the way back, this time managing to score a beer.
Carrying the bikes up the last section of basalt cliffs that form the rim of the Kilbourne Hole.
A few weeks later I’m mountain biking on a different trail network in El Paso and I bump into Don, the man who introduced me to Ray Molina in the first place. I tell him about the ride, the danger noodles, the crater, the precarious cliff ascent, which despite my light tone might be one of the most dangerous things I’ve ever done in the backcountry. Don shakes his head and grins.
“Nobody does crazy stuff like Ray. Nobody.”
***
This is one of the most salient points to remember about the Monument, what I keep coming back to in conversation after conversation. It’s BLM land. Outdoor enthusiasts are free to do basically whatever they want, whenever they want. The crazier the better. Four wheeling, dirt biking, hot air ballooning, you name it. People can and do take advantage of this freedom. The flip side is that it has far less developed sections than public land managed by, say, the park service.
I ask about this while talking with Angel Peña, the Regional Conservation Director for the Conservation Lands Foundation, and Patrick Nolan, the Executive Director of Friends of the Organ Mountains.
“BLM land is room to roam,” Peña says. “Walk that way and go for it. There’s parts out here that you need a four by four to see. And I think that people appreciate the lonely nature of it.”
“It’s part of the attraction,” adds Nolan.
I remark that it can be intimidating for the average family, seeking a little outdoor bonding time, to explore.
“I think it’s big enough to do both,” Nolan says.
It is, of course, one of the classic conservation dilemmas. The more rigid the protections on public land, the more difficult it is to get the public to use the land. It’s an argument that can occasionally divide groups who would otherwise be on the same side of the issue. The OMDP is no exception, with various interest promoting and speaking out against further development and infrastructure. Nolan is hopeful, though.
“That’s something we need to figure out for sure,” he says, referring to the infrastructure vs. conservation dilemma. “But we’ve demonstrated an ability to come to a consensus in building this monument and getting it designated, so I don’t think that’s going to be an issue for us.”
***
In my quest to better understand the OMDP, I set out to explore the developed sections that are easily accessible to the general public.
The Organ Mountains as seen from the Sierra Vista Trail: a rugged thirty-mile multi-use trail that runs from Las Cruces, NM to just north of El Paso, TX.
One such route is the Sierra Vista Trail, which winds along the base of the Organs from Las Cruces, tracking thirty miles south to the northern limits of El Paso. A good two day/one night hike or one day mountain bike ride, the trail is technically moderate in terms of elevation and strenuousness. I traveled it twice, once on foot and once on bike, and found it to be more challenging than it looked on paper, mostly because of the tread. The ground underfoot gets alternately more rocky and more sandy the further south you go. Like a lot of places in the Monument, you will occasionally be watched by cattle, who will definitely have a better idea of where they are than you will.
The author’s father taking a break on the Sierra Vista Trail. Travelers in the Chihuahuan Desert are wise to bring their shade along.
Roughly twenty miles in the trail simply vanishes into the desert, leaving you to navigate by dead reckoning, landmarks, and compass before it reappears some ten miles later. Given the open views this is not a daunting task, but of course, it’s made more challenging by the fact that the second you lift your eyes up to the horizon you are going to walk straight into a lechuguilla. Trust me.
North of the Sierra Vista Trail is the Dripping Springs Campground, from which you can hike the Baylor Pass Trail, a challenging sixteen mile out and back, or the Pine Tree Trail, a more moderate four-mile loop through a shady ponderosa forest. Shade of any kind is rare enough in this landscape for this to be a unique experience. This is still the OMDP, however, and it is not interested in coddling you. Even the well-marked and highly trafficked Baylor Pass Trail is preceded by a weather beaten yellow sign which states, “Caution: People have died while climbing in these mountains.” This gives my wife, joining me for this hike, a moment of pause.
We stop at the base of the sign to check our packs one last time for water, food, umbrellas (for shade), sunscreen, duct tape and band-aids, lighters, fully charged phones, back up batteries, pocket knives, paper maps, and other odds and ends. Overkill, you might say, for a sixteen-mile day hike, but my feelings of anxiety about this desert, first planted adventuring with Ray Molina and brought to flower after losing the Sierra Vista Trail, are now well established.
A foreboding sign at the base of Baylor Pass Trail.
We start up the path and much to my surprise enjoy a perfectly lovely, blessedly danger free day. The colors that surround us are the yellow ochre and turquoise blue that you only seem to find in the southwest, and the higher up we go the more the browns give way to increasingly vibrant greens. Coming over the pass and turning around, the dramatic face of the Organs loom directly over us. In the distance we see a sparkle on the mountain side – a stream. Actual running water, with all of the lush vegetation that accompanies it. We stop to eat lunch on its banks and I experience a moment of dissonance – ten miles and two weeks to the west I’d been riding along on a fat bike behind Molina with the absolute certainty that an unrepairable flat would mean, at minimum, dangerous dehydration and severe sunburn. That’s assuming the danger noodles didn’t get me first. Now I’m on a well-marked trail eating pistachios with my wife and looking forward to a leisurely stroll back to the car. In fact, I find myself feeling disappointed that our hike didn’t involve a possibility of bodily harm. Patrick Nolan was right. The OMDP is big enough for both experiences.
The author takes a moment to appreciate the beauty of the OMDP.
***
The real question is this: is it big enough for all interests?
When Donald Trump took office, he appointed as his Secretary of the Interior Ryan Zinke, a former member of Congress with a 4% lifetime score from the League of Conservation Voters. Like Trump’s other cabinet members, much ink has been spilled concerning Zinke’s qualifications, the “fox guarding the henhouse” nature of his appointment, the various scandals that have surfaced during his time at Interior. Perhaps less well known to the general public is that Secretary Zinke, under orders from President Trump, recommended major changes to ten of the nation’s National Monuments. The most famous and contentious of these Monuments are Bears Ears and Grand Staircase – Escalante. But Organ Mountain-Desert Peaks, tucked away in a quiet corner of New Mexico, made the list as well.
To Zinke’s credit, he traveled to New Mexico to see the Monument for himself, interact with the community, and speak to local business. But according to everyone interviewed for this story, the “community, and local businesses” ended up being a pretty specific group of folks.
“He met with a small group of about ten people. People that oppose the monument. So he didn’t take the time to talk to folks who support it,” Patrick Nolan says. He comes from a background of community organizing, and there is real bitterness in his voice. Carrie Hamblen agrees.
“The thing that was concerning is that Secretary Zinke was up at the Farm and Ranch museum meeting with select people for forty-five minutes at a time, for four hours. It was very tight-lipped. Very controlled. And very concerning that it was that controlled.”
“And that’s where we were all protesting,” says Angel Peña, taking up the story later. “And he just drove right past us to meet with ranchers and the Farm Bureau and the Cattlemen’s Association. He had a meeting with tribes where the tribes felt like they weren’t listened to. And then one with elected officials, where all but one support the monument.”
When asked to address these statements, the office of Secretary Zinke did not respond.
Back to Carrie Hamblen. The edge in her voice is a combination of weariness and anger: “During the time that Secretary Zinke was here, we had a town rally, and he was invited,” she says. “And we had about six hundred to seven hundred people at the convention center who were all supporting the monument, and he did not show. So, we were really concerned that he was not considering the majority of people in this community. He was listening to a select group of voices, mainly ranchers, and we were worried that they had his ear.”
So now we’ve arrived at the ranchers, the final group of people involved in this increasingly tangled story. Many of the businessmen and women raising cattle on this land have done so for generations. And while they do not make up the majority of the Las Cruces community, they have the ear of Congressman Steve Pearce, the only member of the New Mexico delegation that didn’t fully support the designation. To be clear, Congressman Pearce’s stance is that the Monument should only cover the Organ Mountains (the area containing most of the developed sections previously mentioned). Not the Potrillo section where I rode with Ray Molino, not the Robledo and Uvas sections containing most of the archaeological sites, and not the Dona Ana section to the north of the Organs.
When asked for a comment, the Congressman Pearce’s office directed me to a statement he released after Secretary Zinke’s visit.
It reads in part, “Since 2008, I have been working with the local community to establish a compromise that protects the Organ Mountains-Desert Peaks National Monument (OMDP) while preserving the multiple uses that public lands provide. By designating this monument under the Antiquities Act, the Obama Administration ignored this work and created an overly burdensome and harmful footprint – roughly 500,000 acres extending roughly 59 miles from corner to corner. The size and complexity of the Organ Mountains raise serious economic, security, and access concerns that cannot be appropriately addressed without resizing the monument’s footprint.”
A break in the fence-line allows hikers, but not cattle, to reach the top of Baylor Pass. The ranching community around Las Cruces, NM is vocal in its distaste for the size and scope of the OMDP.
Given who Secretary Zinke met with during his time in New Mexico, and given his well-known stance on other issues, most everyone was expecting him to recommend shrinking the size of the Monument. He certainly did so with Bears Ears, Grand Staircase – Escalante, Katahdin Waters, and others. So everyone, pro and anti-monument voices alike, were shocked when he recommended not to shrink the boundaries. Instead, his recommendations focus on border security, risk assessment of the nearby military facilities, and infrastructure development.
So why didn’t he shrink the boundaries? The text of his recommendation is not clear on this point, and once again when asked for comment his office did not respond.
David Crider, who showed Zinke around the Monument during his visit, has a few ideas.
“In my opinion, there was enough pressure put on him from grassroots…what he saw with his own eyes out here, that led him to do that,” Crider says. “Seemed like he already had an agenda coming out. They were going to do their quick fact-finding, but they had already made a decision, that kind of thing. But when he came out and did not chop us up, it was like, okay maybe he listened. Maybe there was enough pressure put by enough organizations and enough grassroots that they backed off of that. We’ll take whatever we can get.”
Carrie Hamblen, Patrick Nolan, and Angel Peña all feel the relief as well. But they also feel unsatisfied and apprehensive. In his recommendations, Secretary Zinke also advocates changing the language of the Proclamation to be less restrictive on traditional uses (for this read ranching), and that has the pro-monument crowd both a little upset and a little confused.
“They want to open it up for ranching, but that’s where it gets too nuanced. I mean, you can already ranch out here. We will see cattle. And that hasn’t changed. So what does that mean?” asks Angel. “It was already federal land. It was, and it is. Managed by the BLM.”
Carrie Hamblen points out that Secretary Zinke’s recommendation is just that: a recommendation. President Trump is free to listen or not, and no one knows what the famously volatile Commander in Chief might end up doing. As Patrick Nolan puts it, “We don’t know what’s coming next. We have every anticipation that something else is going to happen. And we have to prepare for that.”
***
Providence Cone, also known as Rattlesnake Ridge. The holes in the foreground are called metates and were used for grinding grain by the natives who first inhabited the area.
When Peña and Nolan offer to show me some archaeological sites in the Monument, I’m all for it. I show up to their offices in my hiking duds, backpack fully loaded, ready for more spine-tingling adventures. I feel a little silly when I notice neither of my guides looks like they are going on an expedition, as I do.
This place. I simply cannot get my danger meter correctly dialed in.
We clamber into Peña’s truck and roll out to the rutted BLM roads of the Monument, occasionally stopping to open cattle gates. Peña is excited to take me to one of his favorite spots.
“You’ll see, you’ll see. This place does all the talking for itself,” he says.
We park the truck between some creosote and hike to Providence Cone, a lonely, weathered knob rising a few hundred feet from the desert floor. Mountains surround us in every direction, and Peña points out landmarks, following each with a story or bit of local color. He’s quick to mention that Providence Cone’s nickname is Rattlesnake Peak.
“Because there are a lot of rattlesnakes, I assume?” I ask.
“Oh yeah, for sure,” he says, smiling. “Big juicy ones.”
Happier now that at any moment I could be injected with life-threatening venom, I follow the group up the cone until we come across some faded petroglyphs: ancient markings chipped into the stone by ancient peoples. The rocks crawl with spirals, animals, human figures. Angel points out a fish-like creature with legs. From our vantage point, I can see the thin thread of I-10, quick flashes of steel and glass, but the sound of the road does not reach us. The air is motionless, rare for this dusty place, and there is no insect or animal noise. Only twice in my life have I experienced such absolute stillness. The first was in Colorado, at two in the morning, at thirteen thousand feet under the ridiculous sprawl of the Milky Way. The second is this moment here, technically within sight of a major American highway but in reality a thousand years in the past, in a place that was not America and belonged to people who were not American.
A view of Providence Cone.
This is only one of many archaeological sites in the Monument, and the increased resources that should soon start flowing here to study and protect these areas goes a long way towards explaining why the designation was, for some, a necessity. But just as Zinke’s recommendations displeased the pro-monument crowd, so too did they irritate the anti-monument groups. Several ranchers spoke publicly in a joint statement released by Congressman Pearce in the days after the recommendations came down from Interior.
“Failing to reduce the monument’s footprint will create a ‘taking’ of our private deeded lands and our State of New Mexico grazing leases, which will destroy our operation…,” said John Keck, a local rancher.
Another rancher, Carol Cooper, had this to say: “The current boundary of the OMDP National Monument surrounds a number of ranches that have significant state or private lands. Without changing the footprint, private land and State Trust Lands will, inevitably, be controlled by the Federal Government. Reducing the footprint of the monument is the only way to protect individuals, businesses, and our community from the negative effects of the monument designation.”
In researching this article, I reached out to several members of the ranching community, particularly those who made the joint statement with Congressman Pearce. I was met with silence or, in one case, was accused of already having a viewpoint and not being interested in telling a fair story. For this reason, I can only speculate as to the ranching community’s concerns. Certainly, from an outside perspective, it seems that nothing has changed, that their access rights have not been curtailed and their businesses not harmed. Many of their statements, as well as the statement of Congressman Pearce, seem to reference what might happen – governmental abuse of power, future restrictions of grazing privileges – rather that what has happened.
“We still have not seen any data or anything supporting the rancher’s concerns, but we still want to hear their voice, and I’ve always encouraged them to be part of the public meetings that are concerning the management plan,” Carrie Hamblen says.
“There’s a historical distrust here, of the federal government. And I think they (Secretary Zinke and the Trump Administration) exploited that. There was a time when the federal government handed over monuments to the park service, and the park service then restricts all access to monuments. That’s why people don’t trust [the federal government],” says Angel Peña.
“They’re like ‘you’re just going to turn this national monument into a national park! And then I can’t even take my dog out there anymore.’ But that really is the cool thing about BLM national monuments. They are there for multiple use, you can continue to do these different types of things. It’s the nuance of the whole damn thing.”
Angel breaks off talking to me and begins to mimic two sides of a conversation, looking left and right as he speaks.
“I don’t trust you; they’ve done it everywhere else,”
“Yeah but that’s not BLM!”
“Well, you’re still the federal government!”
“It’s all the same, in their eyes,” he says, returning to normal conversation with me. “But they can all be managed differently, and they can all be based off what the community really wants, the best use of the land.”
Just a few of the many petroglyphs that litter the OMDP. First nations created petroglyphs by chipping away at the weathered outer surface of the stone. Although some of the animal and human figures are self-explanatory, the meaning of many petroglyphs is lost to time.
***
Peña points out ridgeline, hazy on the horizon, where a massacre occurred in the 1800s. Exactly who was massacred, Apache or white settler, warrior or soldier, changes based on who you ask. Like a lot of things in the west, the story has endless vantage points, and what you see is dependent on where you are standing.
Below Providence Cone, Peña takes us to the remains of an ageless habitation. Walking the ruins, his expert eye identifies foundations, stone chips from toolmaking, fire rings, hollowed pits called metates that served as primitive grinding bowls for grain. He shows me how to identify shards of ceramic, and I squat down into the dust and pick up a thumbnail-sized piece of clay that was first shaped by human hands at least half a millennia ago. Next to it is a bullet shell, the brass bleached grey by sun and time. I hold them both in my hand and look out towards the massacre ridge.
Nuance. Vantage points. Everybody wants something from this land: excitement, danger, political leverage, beauty; to use it, to preserve it, to develop it for recreation or resources, to leave it untouched. Is there enough of it to go around, enough of it for everyone to get their way? Hasn’t that always been the problem? Even if everyone could get their way, does everyone deserve to? Are all concerns equally valid? I think back to the rancher who responded to my email with frustration and distrust, claiming that my article was already written in my head, my mind already made up.
I carefully place the shell casing and the ceramic shard back where I found them, under the linear shadow of an ocotillo, side by side in the ancient sand. I stand and follow the others back to the truck. I’m lost in thought, but not too distracted to look for danger noodles.
Of the approximately 70 different sleeping bags I’ve used, the Patagonia 19 Degree Sleeping Bag is the most comfortable all-purpose mummy bag for use above freezing.
Introduction
Of the approximately 70 different sleeping bags I’ve used, the Patagonia 850 Down 19 Degree is the most comfortable all-purpose mummy bag for use above freezing.
Based on specifications alone, the backpacker interested in saving the most amount of weight on a sleeping bag may pass over the Patagonia 19 Degree bag unless a high priority is placed on features that add to user comfort, like a center zip or roomy interior, or durable fabrics.
The Patagonia 19 Degree down bag would also be a great choice for three-season car camping, backcountry base-camping (where you spend a small portion of the trip carrying the bag), and for alpinists or winter hikers who sleep wearing a down parka and insulated pants. I do not recommend this sleeping bag if your primary use is long-distance backpacking where weight-savings is critical.
However, if you want a sleeping bag that’s very comfortable, versatile across a wide range of activities as described above, and light enough for occasional backpacking trips, the 19 Degree is worth considering.
The Patagonia 19 Degree down sleeping bag was designed for alpinists. It has an extra large foot box for sleeping with climbing boots on, a center zipper that makes using your arms easier when sitting up, an extra wide cut for wearing insulated pants and a parka, and an interior fabric that’s more durable than the exterior fabric – in case a boot lace hook snags on the fabric.
I tested this bag over the course of nine weeks of backcountry travel, and used it side-by-side with three other top models (see below for a comparison table).
I adore the comfort of the Patagonia 19 Degree but found that it is not as warm as other bags that weigh the same amount.
Three primary attributes affect its performance-to-weight ratio: less loft, extra wide cut, and the omission of an adjustable neck baffle. Unless you have a large chest (perhaps men’s XL) or are wearing a down parka, or simply appreciate some room inside of your mummy bag, the Patagonia 19 Degree down bag may be too wide for you.
Testing the Patagonia 850 Down 19 Degree sleeping bag in Wrangell-St. Elias National Park. Great views from the sleeping bag!
Features and Specifications
32.9 oz (933 g) in size Regular;
Box-baffle construction with 850-fill down;
Extra large foot box for sleeping with climbing boots on;
Extra wide torso for sleeping with a down parka and pants;
1.2 oz/yd2 (40.7 g/m2) 15-denier nylon interior fabric is stronger and more durable than the exterior fabric (0.85 oz/yd2 or 28.8 g/m2 15-denier nylon) for wearing climbing boots and a harness inside the bag;
Interior fabric is soft against the skin and especially comfortable for sleeping naked;
Three zippers for venting and sleeping with a climbing harness tied to an anchor.
Review Context
I am passionate about sleeping bags because having the best one for a specific application can save a lot of weight and helps me sleep well. I have found that sleeping bags are one of the most important gear items to dial in when doing a trip that’s physically challenging, because of the performance and weight differences across the range of sleeping bag designs. Making the right choice for a sleeping bag is important to me so I can get a good night’s sleep that helps my body recover during physically demanding expeditions.
My research question for testing this sleeping bag was: “Is the Patagonia 19 Degree sleeping bag the best all-purpose three-season sleeping bag on the market?”
Field Testing & Research
I used this bag for eight weeks of backpacking and camping in Wrangell St. Elias National Park, Alaska. My mother used it for a weeklong backpacking trip in southern Utah. This review also benefits from my conversations with a friend, who used it for the Alaska Wilderness Ski Classic (AWSC), a 200-mile ski race in the Arctic (note: most people bring -20 F (-29 C) sleeping bags for the AWSC, not a three-season bag).
I interviewed Casey Shaw, Manager of Advanced Research and Development at Patagonia, who helped design this sleeping bag, to learn more about its unique baffle construction and his rationale for certain design elements. Also, I am fortunate to have a collection of what I believe are some of the world’s best sleeping bags, which made it easy to compare this bag to others.
The bags I personally own are: Feathered Friends Lark UL 10, Katabatic Gear Palisade, Katabatic Gear Grenadier, Nunatak Gamut 20, Feathered Friends Spoonbill, Feathered Friends Penguin 20 + Groundsheet, ZPacks Twin Quilt, and Western Mountaineering Puma GWS -25. Therefore, this review of the Patagonia 19 Degree down bag should be considered in context with my experience with these bags.
Drying the 19 Degree bag, inside out, in the sun. Wrangell-St. Elias National Park.
Performance Assessment
Warmth
Everyone I know who has used this bag wishes it were warmer for its weight.
Based on my field experience with four similarly-spec’d bags (including the Patagonia 19 Degree), I assigned my own effective temperature rating to each bag – that temperature below which I usually found myself uncomfortably cool without wearing clothing. That effective comfort rating is noted in the table below.
These comfort ratings are significantly lower that the manufacturer’s bag rating. Keep in mind that I’ve assigned them based on field conditions, wearing no clothing, and the fact that my body type is relatively thin (so there’s a bit of extra interior room to warm up).
As you can see in the table, other sleeping bags that weigh the same amount are somewhat warmer. I only recommend the 19 Degree bag for use down to the 40s F (4.5 C to 10 C). As soon as temperatures drop lower, I needed to wear more clothing and ended up wishing I was inside one of my other sleeping bags. However, this bag is incredibly comfortable for use in warmer weather and could be worth considering, if comfort in camp is more important than saving weight. See the Comfort section below to learn more.
The table below compares the 19 Degree bag to three close competitors – the Katabatic Gear Grenadier 5, the Feathered Friends Lark UL 10, and the Western Mountaineering Versalite 10.
Scroll right as needed to view entire table.
Name
Weight (oz)
Fill Power (cu. in./oz)
Fill Weight (oz)
Fill Volume (cu. in.)
Shoulder Girth (in)
Waist Girth (in)
Foot Girth (in)
Loft (in)
Effective Comfort Rating (deg F)
Katabatic Gear Grenadier 5
28.1
900
18.6
16,740
61
43
38
3.75 (single side)
30
Feathered Friends Lark UL 10
32.0
900
20.0
18,000
60
56
38
6.5
35
Western Mountaineering Versalite 10
32.0
850
20.0
17,000
62
53
39
6.0
35
Patagonia 19
32.9
850
19.7
16,745
60
57
41
5.5
40
What follows is a summary of the attributes that reduce the Patagonia 19 Degree down bag’s warmth compared to other sleeping bags in this weight class.
Less Loft
This bag has less loft compared to other sleeping bags that weigh the same amount.
The most striking example is the Katabatic Gear Grenadier quilt, which has approximately 1.5 in (3.81 cm) of additional single-sided loft than the Patagonia 19 Degree (3.75 in vs. 2.25 in)! The Feathered Friends Lark UL 10 and Western Mountaineering Versalite also have significantly more loft than the Patagonia 19 Degree bag. All of these three competing bags weigh slightly less than the 19 Degree and have more durable exterior fabrics.
Extra Wide Girth
Manufacturer-reported circumference (girth) specifications (especially at the waist and foot) are found in the table above. The photo below shows that, compared to an average mummy bag, the 19 Degree is wider from just below the shoulders all the way down to the ankles.
The extra space is beneficial for three things:
Sprawling out. There’s lots of room for your legs. I can even sit up cross-legged, which is not possible in most bags.
If you have a large torso. Perhaps men’s extra large?
Wearing high-loft down pants and a down parka.
My friend Katie Strong used the Patagonia 19 Degree down bag for the 2017 and 2018 Alaska Wilderness Ski Classic races and a wide variety of backpacking and backcountry skiing adventures since then. Here’s what she said about the bag’s fit:
“I like the foot space, especially because I generally have things like a warm water bottle down in that area. I also like that there’s room to put something under my knees for body position comfort, and in the winter I’m trying to keep almost everything in my bag with me. BUT, I don’t like all the space in the upper torso area. Even with a down jacket on and all sorts of things shoved in the bag with me, it’s too wide (for me). I have to be careful so that my arms aren’t falling off my pad (and getting cold) and would prefer to be held in a bit more. I’m not sure who needs that much space, but I guess when they’re doing sizes, they only modify the length and not the girth??? I don’t actually know, but the upper torso area feels like it’s made for a very large-around person. I feel very strongly that it’s too wide in the torso. And I’m a person who struggles with claustrophobia!”
Notice the substantial extra width of the Patagonia 19 Degree bag (left) compared to the Feathered Friends Lark. The 19 Degree is wider from the shoulder to below the knees and has an oversized foot box for sleeping with climbing boots on.
Non-adjustable neck baffle
Most 15-degree down sleeping bags have an adjustable neck baffle that seals out cold air. I have found this to be an essential feature for use below freezing. Depending on the efficacy of the hood design, it can also be beneficial for temperatures in the 40s.
The Patagonia 19 Degree down bag has an overstuffed neck baffle that wraps around the neck area. It is not as large as conventional neck baffles and, more importantly, there is no mechanism to cinch it tight around the neck. It is better than nothing, but it does not eliminate air transfer between the inside and outside of the bag.
The photos below show the neck baffles on the Patagonia 19 Degree and the Feathered Friends Lark 10 (which weighs less than the 19 Degree and is somewhat warmer).
The Patagonia 19 Degree bag has a non-adjustable neck baffle that is not effective at sealing out cold air. I prefer higher-loft and cinchable neck baffles for use at temperatures below freezing.The Feathered Friends Lark UL 10 has a high-loft adjustable neck baffle that seals in warm air. A snap secures the zippered end and the drawcord lies at the other side.
Are vertical baffles better?
I had a long conversation with Casey Shaw, Manager of Advanced Research and Development at Patagonia, about vertical baffles in sleeping bags. The key takeaway from the conversation and my experience with this bag in the field suggests that vertical baffles provide better stabilization of down. Vertical baffles also use less material than horizontal baffles. Casey “spent a day doing the math” to determine if vertical baffles are lighter than horizontal baffles and said, “they save a small amount of weight.”
Most other bags with vertical baffles use Insotect Flow, which is a mesh barrier that does not completely seal the chamber. This makes it easier to fill the bag and reduces cost, but it’s possible for down to migrate from one chamber to the other. The 19 Degree bag is segmented into three parts and has fully sealed baffles.
Weight
The 19 Degree bag weighs 32.9 oz (933 g) in size Regular (suitable for users up to about 6 ft 0 in tall). This amount is similar to other $400-$500 down mummy bags, which all have around 20 oz (567 g) of down and weigh around 32 oz (907 g).
All of the quilt-style sleeping bags I’ve used have a much higher warmth-to-weight ratio than the Patagonia 19 Degree. For example, the Katabatic Gear Sawatch is warmer than the 19 Degree (3.25 in of single-sided loft) and it only weighs 24 oz (680 g) in size regular. That’s 22% less. See the specifications table above for additional comparisons between bags of similar weight.
Comfort
This is the most comfortable mummy sleeping bag I have ever used. Hands down. No competition. The main drivers of its exceptional comfort are the extra space, center zip, extra large foot box, and the interior fabric.
Extra space
Like beds, wider sleeping bags are more comfortable than narrow sleeping bags. The Patagonia 19 Degree is one of the wider mummy bags on the market. When I’m inside the bag, touching one side, there’s an extra 8 in (20 cm) of space on the opposite side of my hip. I wear size 32 pants.
Hood
This is not your average sleeping bag hood. It is vastly more sophisticated – more like the hood on a down parka. But does it perform better? I found that it is very comfortable when wide open and when partially closed. However, it is not comfortable when cinched tightly and the lack of a neck baffle encouraged me to pull the hood tight more than I do with other bags. Overall, I prefer the hood on a traditional mummy sleeping bag.
Hood and center zip on the Patagonia 19 Degree (right) compared to a traditional mummy bag (left).
Center zip
The center zip, which is composed of three separate zipper pulls, makes it easy to use your hands while sitting up inside the bag or vent the lower leg area while the hood is open. If you’re a climber perched on a precarious ledge, you can clip into an anchor and run the rope through the bottom of the zipper, without reducing access for your hands or having the rope near your face while you’re sleeping.
Backpackers may appreciate center zips as well for tasks like cooking, sitting up, and reading. I found that reading in the bag was more comfortable because I could lay on either side and still have my shoulders and head covered. Overall, I find that the center zipper significantly increases comfort compared to traditional sleeping bags with zippers on one side.
Through all of my field testing I did not observe any significant heat loss through the zipper area, which is protected by large baffles on both sides of the zipper. Katie Strong, who has used the bag in colder temperatures than me, also reported no significant heat loss in this area.
The center zip is unequivocally more comfortable than a side zipper. As you can see here, the 19 Degree bag has three zipper pulls, which provide lots of options for ventilation.The center zipper allows you to drape the bag over your head and shoulders and still use your arms. Here, I’m sleeping on a dry glacier (see the ice). The air temperature was 31 deg F (-0.5 deg C).
Interior fabric – great for sleeping naked
The Patagonia 19 Degree bag uses the Houdini fabric on the interior. This 15-denier fabric has a textured surface that creates friction (heat) when you slide your body over it. All other sleeping bags I’ve tested use smooth taffeta fabrics on the interior. They feel cold next-to-skin when you enter the bag. If you like to sleep naked in a sleeping bag, you might benefit from this fabric choice. Casey Shaw, the bag’s designer, told me that he loves to sleep naked.
Durability
The bag we tested for nine weeks had one substantial durability issue and two less significant issues. For the substantial issue, we sent the bag to Patagonia’s Forge (the advanced development group) for inspection. They cut it open and determined that the interior baffle stitching came undone and all of the down in that baffle escaped elsewhere! This happened after washing the bag. It’s unclear if the baffle failed during use or if it was not constructed properly at the factory. Patagonia sent a replacement bag.
The two less significant durability issues we encountered with this bag were:
The exterior stitching on one foot box baffle failed.
The hood drawcord “keeper” failed.
See the photos below for details.
The stitching came undone on one of the foot box baffles. See the area between the two arrows.All Patagonia sleeping bags attach the extra hood drawcord in a loop inside the closure mechanism (shown at left). After several weeks of use, this failed and we cut the extra cord off (shown at right).
Highly durable interior fabric
The interior Houdini fabric weighs 1.2 oz/yd2 (osy) (41 g/m2). Other fabrics used in ultralight sleeping bags weigh half as much! The tear strength of the Houdini fabric is approximately two and a half times greater than the lightest fabric Patagonia uses, a 0.8 osy nylon on the Patagonia Micro Puff Hoody.
Patagonia chose a tougher and stronger fabric for the interior in case a boot lace hook snags on the fabric and because climbers sleep inside the bag with a harness on and with a fuel canister and water bottle inside the bag. I do not believe the interior fabric choice offers any significant benefit to the backpacker (with the exception of next-to-skin comfort).
Versatility
The primary attribute that makes a sleeping bag versatile (able to be used across a wide range of conditions) is its girth. Bags with adjustable girths, such as all quilt-style sleeping bags, can adapt to different body sizes and different amounts of clothing.The Patagonia 19 Degree is versatile in the sense that is has a large girth and can, for most people, accommodate a significant amount of insulated clothing without reducing the loft of either the bag or the clothing.
The Patagonia 19 Degree also has a versatile amount of insulation that strikes a good balance between both warm and cool conditions. Overall, for a hooded mummy bag, this bag ranks above average for versatility. If it were warmer, it would rank near or at the top.
Strengths and Limitations
Strengths
The extra space and soft next-to-skin fabric make the bag very comfortable.
The center zip is more comfortable than a side zip and has significant advantages for technical climbers. For backpackers, the center zip offers some usefulness because the bag can be draped over your head for activities that involve sitting up.
The foot box is large enough for sleeping with boots on or storing a fuel canister and hot water bottle. Backpackers may appreciate the wider girth for contorting into more comfortable lower body sleeping positions.
Due to its high tear strength, the interior fabric is well suited to sleeping with boots on or perhaps cuddling with a small dog.
Limitations
The girth is too wide unless you appreciate the extra room, have a large chest (perhaps men’s XL), or are wearing a down parka.
Its relatively low warmth-to-weight ratio – a result of its wide cut and heavier fabrics.
Cold air enters through the neck opening because there is no adjustable neck baffle.
Some of the author’s ultralight sleeping bags. From lightest to heaviest, left to right: Patagonia Hybrid, Katabatic Gear Palisade, Nunatak Gamut Apex (synthetic insulation), Katabatic Gear Grenadier, ZPacks 10 Degree Twin Quilt, Feathered Friends Spoonbill.
Compared To
Feathered Friends Lark UL 10
This is my personal favorite all-purpose mummy sleeping bag due to its high warmth-to-weight ratio and its ability to keep me comfortable below freezing.
This is very similar to the Lark UL 10 in that it is warmer, and warmer for its weight than the Patagonia 19 Degree bag. I prefer the Lark’s hood and neck baffle closure system, which has snaps instead of velcro.
This is my personal all-time favorite one-person sleeping bag because it is shockingly warm for its weight. I have used this extensively for winter trips where saving weight is the top priority, and it also vents well for use in summer. If I were to have just one sleeping bag (for my trips mostly in Alaska), I’d choose this one. It is warm enough for winter, lightweight, and highly versatile.
I haven’t used this bag, but the research I’ve done suggests it is a very good value. $350! Ryan Jordan has used this bag extensively and has positive things to say about it in his Publisher’s Gear Guide. In addition, it was featured in the 2017 Backpacking Light Staff Picks by Backpacking Light Wilderness Adventures Director Kevin Fletcher.
Above Average: Compared to all three-season down mummy bags available, the Patagonia 19 Degree is above average because it is more comfortable. However, I do not recommend this sleeping bag for “ultralight backpacking” per se – there are plenty of other options that are warmer for the weight, including quilts.
Recommended: I do recommend the Patagonia 19 Degree bag if one or more of the following is true: (1) you have a large torso; (2) you want a bag with extra space for more comfort: (3) you are an alpinist and intend to sleep with your climbing boots on inside the sleeping bag; (4) you are looking to purchase one mummy bag that’s large enough to wear insulated pants and a down parka, and store other winter essentials (e.g. water bottle, fuel canister, gloves, etc.); (5) you want the most comfortable bag for sleeping naked; (6) you want a highly versatile and comfortable bag suitable for a wide range of activities that include car camping and base camping.
The manufacturer provided this sleeping bag to us with no obligation to review it. Some links above may be affiliate links, which means this: if you follow a link to a merchant website and then make a purchase, we may get a small commission on that purchase. That helps us maintain backpackinglight.com – thank you!
This review compares the boil time and fuel consumption performance of the Trail Designs 12-10 and Kojin alcohol stoves, and the Zelph Starlyte and Starlyte Mod alcohol stoves, under a variety of wind conditions.
The Hyperlite Mountain Gear Shell Jacket is made using Dyneema Composite Fabric bonded to a polyester fiber outer face for durability, and to a monolayer eVENT membrane on the inner face for breathability.
Summary: In this episode, we dive into the design, manufacturing, and applications of Dyneema Composite Fabrics. We interview Wes Hatcher, Applications Manager for DSM Dyneema, along with cottage ultralight backpacking company founders Graham Williams (CiloGear), Mike St. Pierre (Hyperlite Mountain Gear), Joe Valesko (ZPacks), Henry Shires (Tarptent), and Glen Van Peski (Gossamer Gear) and discuss the relevance of Dyneema Composite Fabrics for apparel, shelters, backpacks, and more.
What are Dyneema Composite Fabrics?
History and evolution of Cuben Fiber & Dyneema Composite Fabrics
Role of the Backpackinglight.com MYOG Community in Cuben Fiber applications in the mid-2000s
Guest Interview: Wes Hatcher
From the America’s Cup to DSM Dyneema Outdoor Applications: A Brief History
Dyneema Composite Fabrics: What are they, exactly? A fabric? A fabric family? A process?
How Dyneema Composite Fabrics are manufactured? What is the material composition of the fibers, adhesive films, and face fabrics/films in DCF?
What parts of DCF are “Dyneema”, “Mylar”, PET, TPU, PU, polyester/nylon/Dyneema wovens?
What is the primary advantage of non-woven construction, and how does this advantage contribute to the unique strength of Dyneema Composite Fabrics?
What are the key performance properties that make DCF different from woven nylons or polyesters?
What is the environmental/energy cost of producing DCF?
Vs. other high-strength fibers, or sil/PU-coated wovens?
Lamination of wovens to DCF – how is load-bearing affected?
What is the real purpose of laminating a woven nylon, polyester, or Dyneema fabric to a DCF construction?
What role does DCF play when laminated to waterproof-breathable fabric constructions, such as eVENT?
Does DCF offer advantages for waterproof-breathable fabric constructions over traditional membrane/coating-fabric sandwiches?
Product Commentary: Hyperlite Mountain Gear “The Shell” Jacket | Review
Why is DCF so expensive?
True or false? Is DSM Dyneema having supply problems with respect to DCF output?
What technological advances in DCF are coming that might be of interest to ultralight shelter manufacturers?
Application of DCF for packrafts
Application of DCF for non-flat-panel shelter design (e.g., Locus Gear Geodesic Dome Shelter)
We have DCF packs, shelters, stuff sacks, apparel, packrafts – what’s going on in other markets that might be of interest to us in the backpacking community?
How about footwear?
Are shelters, or packs, a better application for DCF?
Addressing criticisms of DCF durability (Van Peski, Valesko, Williams, St. Pierre)
Use of DCF in shelter floors? (Shires, Valesko, St. Pierre)
Best methods to construct DCF seams – sewing, bonding, bonding-then-sewing, sewing-then-bonding (Shires, Valesko, St. Pierre, Williams)
What are the main alternatives to DCF? What about silpoly in shelters? (Shires, Van Peski, Valesko, St. Pierre)
How expensive are DCF fabrics? Is it worth it? (Van Peski)
Availability of DCF to smaller cottage manufacturers/MYOG-DIY enthusiasts?
One cottage manufacturer (not one that we interviewed, and who shall remain anonymous since they didn’t grant us permission to use their statement) wrote in and told us that DCF comes with “exorbitant prices for marginal benefit and there is always someone willing to spend too much to make them feel better.” (responses by: Van Peski, Shires, St. Pierre, Valesko)
Environmental impact of DCF (Williams, Shires)
Ryan’s favorite DCF pack, and shelter
The best application for fully woven Dyneema/DCF? A 46″x28″ zippered-sleeve unknowingly made by one of the manufacturers featured on this podcast
This episode of the Backpacking Light Podcast is supported and kept advertising-free by Backpacking Light membership fees. Please consider becoming a member which helps support projects like this podcast, in addition to a whole slew of other benefits!
This Xero Terraflex review features shoes that should interest both trail runners and ultralight hikers looking for a true minimalist shoe option for rugged terrain: super-flexible sole, zero drop, some cushioning, and very good traction.
Introduction
The Xero Shoes Terraflex should interest both trail runners and ultralight hikers looking for a true minimalist shoe option for rugged terrain.
A super-flexible sole and “zero drop” between heel and toe will satisfy those looking for a natural, quasi-barefoot experience where the foot is free to move and flex and form is not compromised by excessive structure or support. The sole contains just enough cushion to shield the foot from rocks, while offering very good traction. It’s a great choice when rocky terrain or long distances would make barefoot or more extreme minimalist options too slow or painful, or otherwise impractical.
As a caveat to those who have been wearing conventional footwear with elevated heels and other forms of support, you may discover, like me, that you love the more natural experience of minimalist footwear, but make sure to transition slowly so that you don’t overwhelm muscles and tendons that aren’t used to the experience.
Features and Specifications
Men’s size 9 advertised at 9.6 ounces (my size 12 without the insoles weighed in at ~9 ounces according to our kitchen scale)
Includes 2 mm removable insoles
Contains 3 mm of foam cushion (mid-sole)
4 mm (height) lugs on the sole
Sole are backed by a 5,000-mile warranty
Zero drop, meaning there’s no elevated heel
Wide toebox
Source: Xero Shoes
Review Context
For ultralight backcountry travel, the hiker, trail runner, or fast-packer might want to consider the following performance criteria:
Lowest possible weight, to prevent fatigue
Good traction on slippery surfaces, like wet rocks, loose dirt, dry leaves, or mud
Protection from rocks and other sharp objects
Dries quickly so you don’t walk around with wet feet all day
Flexible sole and wide toebox, allowing the foot to work naturally
Description of Field Testing
When the Terraflex shoes arrived, I started out by wearing them around town, just to see what they felt like on sidewalks and in the house. I took them out for a run on a path which is a mix of dirt, clay, and grit, and tested them with some short hikes on- and off-trail in order to evaluate traction and comfort on steep slopes, sticky mud, rocky paths, and forest floors covered in dry leaves and abundant deadfall.
Given the heavy snowfall we’ve experienced this winter, I ended up wearing them on several hikes with snowshoes, including an overnighter with a heavy pack. Given conditions and timing, I haven’t had a chance to wear them on a long trail run, but have made some judgments from my experience wearing similar minimalist shoes during ultra-distance trail races and multi-day FKT attempts, such as thru-running New York’s 350-mile Long Path.
Probably not what the manufacturer had in mind as the primary use for the new Terraflex.
Performance Assessment
My assessment of the Terraflex covered the following criteria:
Comfort
Protection
Natural fit
Traction
Comfort
I found these shoes very comfortable. The materials on the inside of the shoe feel soft, and my feet were fine without socks.
As someone who who rarely wears boots, even in the winter, I found the Terraflex kept my feet warm during the overnight snowshoe hike, where conditions were moderately cold (mid-20 F’s) with 2+ feet of snow. Snow shoes and hiking crampons both strap on securely to the shoes, without discomfort. (However, I’m generally not as happy wearing micro-spikes on trail-running shoes, because the elastic straps are either too tight and put a lot of pressure on my toes, or they’re too loose, and the spikes fall off.)
The tread consists of moderately aggressive lugs (4 mm height), but the ride was still very smooth even when walking and running on hard surfaces. I used to wear the INOV-8 X-talons, which have more prominent 8 mm lugs, which were great for mud, but on pavement I could feel those lugs pressing up into my feet, which was a little awkward (felt like driving over a rumble strip). That’s not the case with the Terraflex.
Protection
During the testing, I felt the Terraflex afforded very good protection against rocks, certainly much more than I get when wearing Vibram Five Fingers, and comparable to the INOV-8 Trailroc’s I used to wear (before they stopped offering zero-drop). Based on my experience with the INOV-8s, I’d expect the Terraflex to perform admirably during long trail runs, including ultras.
As a caveat, a little more protection means a little less sensation of the ground. That’s an unavoidable trade-off.
Natural Fit
As someone who has been running in ultra-minimalist shoes for several years and now runs and hikes barefoot, too, I have no tolerance for shoes with unnecessary restrictions. The Terraflex is a great fit for me: snug overall, cinches down tightly over the instep to prevent the foot slipping back and forth, and plenty of room in the toe box for the toes to splay and wiggle. As noted above, the shoes are “zero drop,” meaning no elevated heel, and there’s no arch support.
An important test of a minimalist shoe is the ability of the sole to twist and flex, because that’s the quality that allows the foot to feel and conform to the ground and stretch and move naturally. You can easily crumple the Terraflex into a ball, or squeeze or twist the sole.
The company’s website advises that the Terraflex runs a little small, and indeed, I found size 12 on the tight side, even though for most other brands I normally wear 11.5. It may be that Xero Shoes run a little smaller than other brands, or that there is some variability in the manufacturing process. In any case, the company has a free exchange program, and the customer service department was very responsive when I needed to swap out sizes.
Traction
Traction is hard to measure objectively, but when your foot slips out on a slimy rock, that sure gets your attention!
Based on my testing, I’d describe the Terraflex’s traction as very good.
The treads consist of V-shaped lugs which are 4 mm in height. There’s a trade-off in lug height: the taller the lugs, the deeper you can bite into loose surfaces, like sand, dirt and mud – but tall lugs tend to reduce the total area in contact with a flat surface, like the face of the rock, where your ideal traction would come from the slick rubber tread of a rock-climbing shoe.
For conditions in upstate New York, the biggest traction concerns in my experience are scrambling over sandstone ledges and running through layers of dried leaves. While we have our share of muddy patches, we don’t typically see long stretches of soft dirt. For these conditions, the Terraflex lugs seem pretty optimal, and I think they’d perform really well in some of our local Hudson Valley races like the Escarpment Trail Run, Manitou’s Revenge, or the SRT Run/Hike.
Based on my experience running out west, I think they’d be great on sandy, gravelly, and rocky terrain, too. If I were going to go run Leadville again, or climb to the top of Mt. Whitney, I’d wear the Terraflex.
Product Strengths and Limitations
Based on my testing, I’d expect the Terraflex to be a strong contender in the field of minimalist trail-running shoes, thanks to the combination of comfortable natural fit, good traction, and protection against rocks and other rough surfaces.
One potential limitation I was not able to explore in my testing was the Terraflex’ performance in wet conditions. While I don’t mind wet feet for a day or two, over a protracted period wet conditions raise the risk of blisters, and shoes with soft uppers sometimes take a long time to dry. Should you wear Terraflex in rainforests, swamps, or monsoon conditions? I’m not sure.
I also don’t know how durable they’ll prove to be. However, the shoe comes with a 5,000-mile warranty on the sole, which is reassuring. (Xero Shoes didn’t hesitate to honor that warranty on a pair of Prio running shoes which I beat to pieces in the rocky Catskills.)
The biggest limitation to keep in mind is that for people who are not used to minimalist footwear, it’s wise to transition slowly. The zero drop feature and lack of any internal support are positives for minimalist runners and hikers used to moving naturally, but if you transition too quickly from conventional footwear, you could overwhelm muscles and tendons and risk injury.
Compared To….
After a burst of popularity a few years ago, true minimalist running shoe sales have declined, and many of the major brands have backed away from the market. For example, INOV-8 no longer offers zero-drop shoes.
According to an informal poll of barefoot and minimalist runners, another well-regarded zero-drop trail shoe would be the Merrell Trail Glove, which is slightly lighter at 7 ounces, offers 3 mm lugs, and is also designed to be worn sockless. Vivobarefoot’s Primus Trail is also cited as a favorite.
Altra markets zero-drop trail running shoes, but because of the thicker soles, they are not regarded by everyone as truly minimalist. These might be an option for someone who wants more protection against rocky surfaces.
Sandals represent another minimalist option. They’re great for summer running, and obviously not ideal for winter conditions (although some people have been known to wear them with toe-socks and microspikes). I’ve found they require very careful foot placement on steep and slanted surfaces, otherwise the straps can bite painfully into soft skin. That said, the winner in last year’s SRT Run/Hike’s 70-mile division (which follows a pretty rugged trail through the Shawangunk Mountains) wore sandals, so they’re worth considering for ultralight hiking as well as trail racing.
Vibram Five Fingers offer a very natural experience, as the soles are light-weight and extremely flexible. I’ve used and enjoyed them on rocky trails and bushwhacking through the forest. For rougher surfaces, friends recommend the V-Trails.
Commentary
Now that spring has finally arrived in New York, I’m really looking forward to ditching the snowshoes, spikes, and heavy pack and getting back into ultralight mode, whether hiking or running. This may surprise some readers, but my first priority will be to drop shoes altogether and go barefoot, which for me is the most fun mode of experiencing the mountains.
Having said that, barefoot tends to be slow, especially on rocky trails, so on those hikes and runs where I have serious miles to cover (or when I want to keep up with fast-paced friends), the Terraflex is going to be my go-to shoe, as for me it’s exactly the right solution to the problem of sustaining a minimalist experience over long distances and rugged surfaces.
Provided that you’re used to a flexible zero drop shoe, I wouldn’t hesitate to recommend them for ultra-distance trail races and multi-day fastpack adventures.
As part of this review and in the context of my affiliation as a Backpacking Light contributor, I received a complimentary pair of Terraflex shoes from Xero Shoes with no expectation or obligation to publish a review.
Some links in this review may be affiliate links, which means if you click on the link to this product and make a purchase at the retailer website, the retailer will contribute a portion of the sale to help support Backpacking Light. It doesn’t increase your cost, and it helps us maintain our site, fund content development, and grow member services! Thank you!
Membership Required
This feature requires an active Backpacking Light Membership.
Premium Articles
You're currently viewing a free preview of a member exclusive premium article. Our premium articles include in depth journalism and insights from the Backpacking Light editorial team.
Get full article access by subscribing to a Premium or Unlimited Backpacking Light membership!
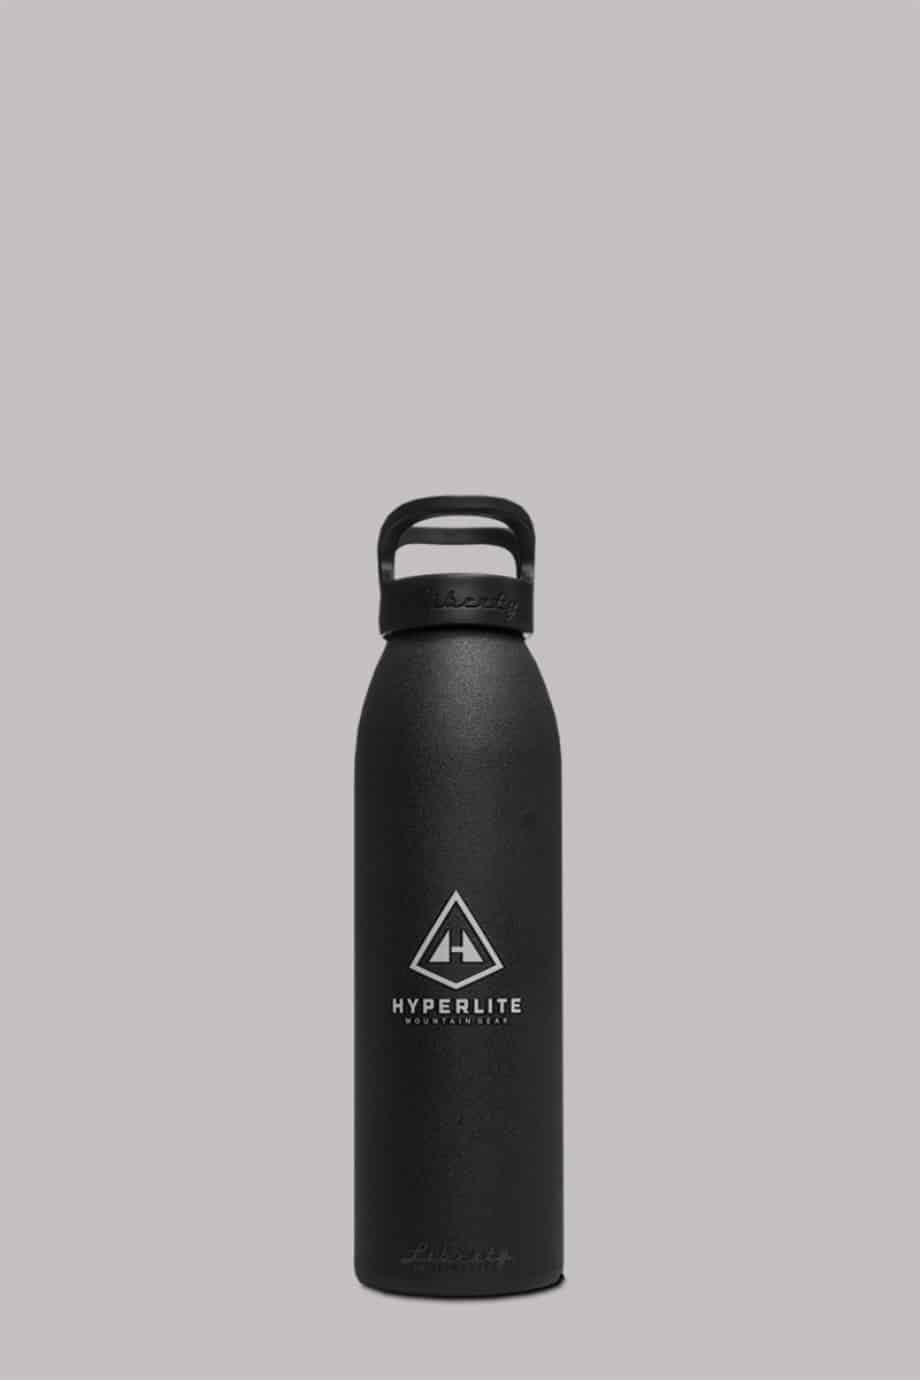

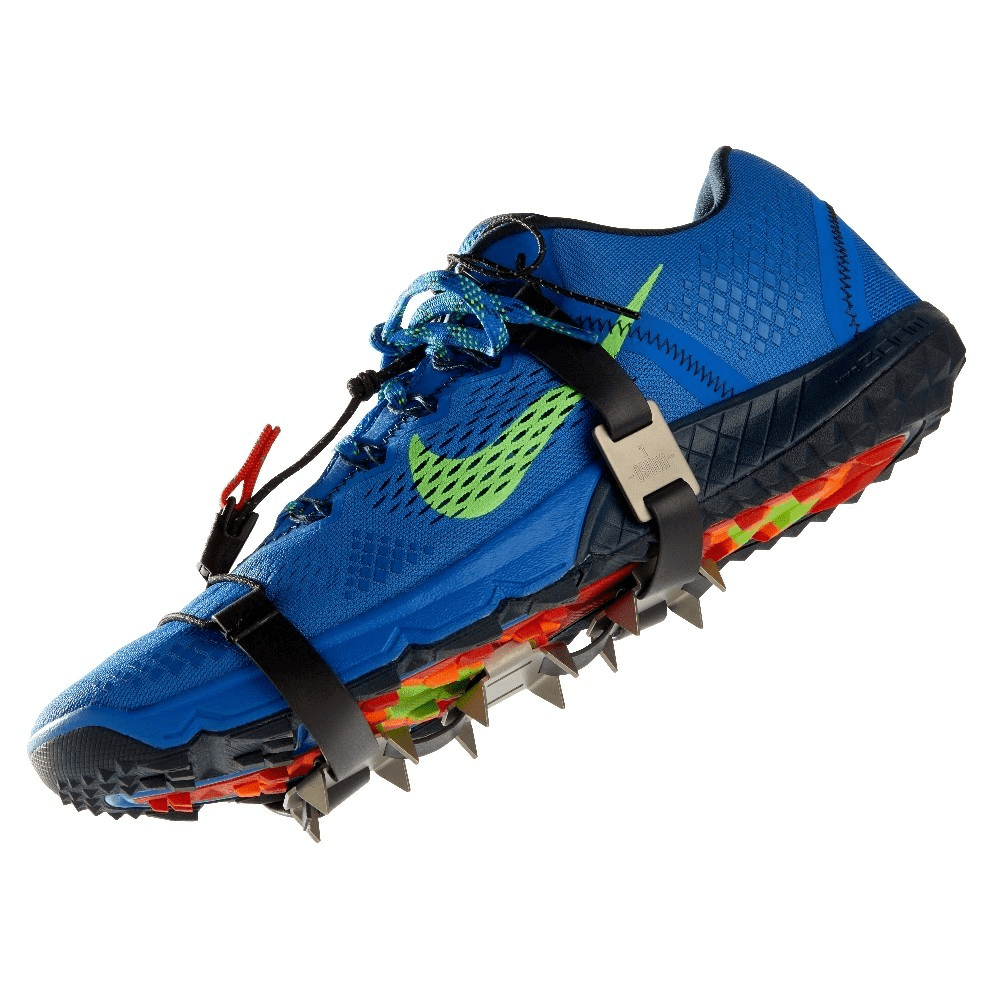
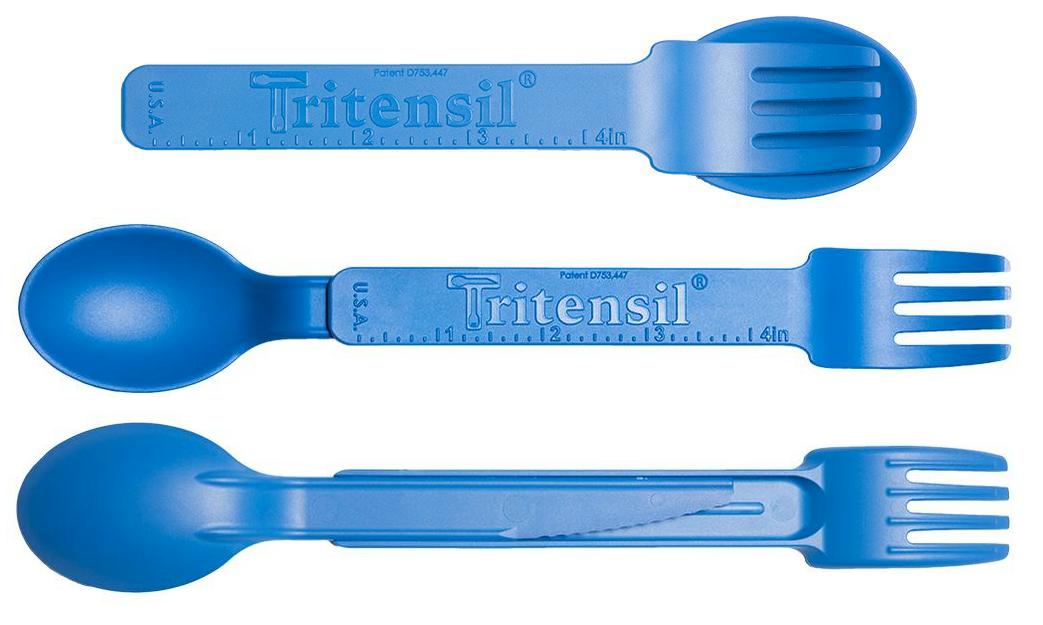
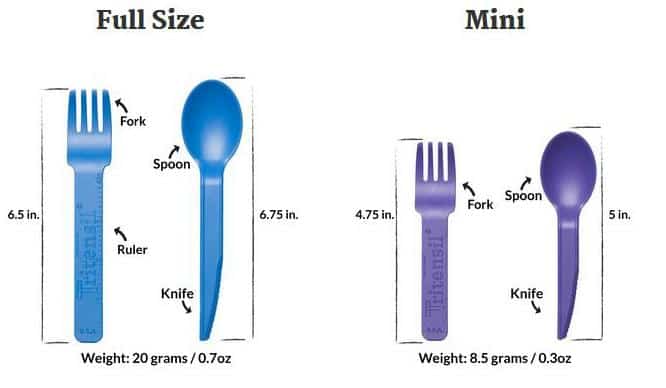
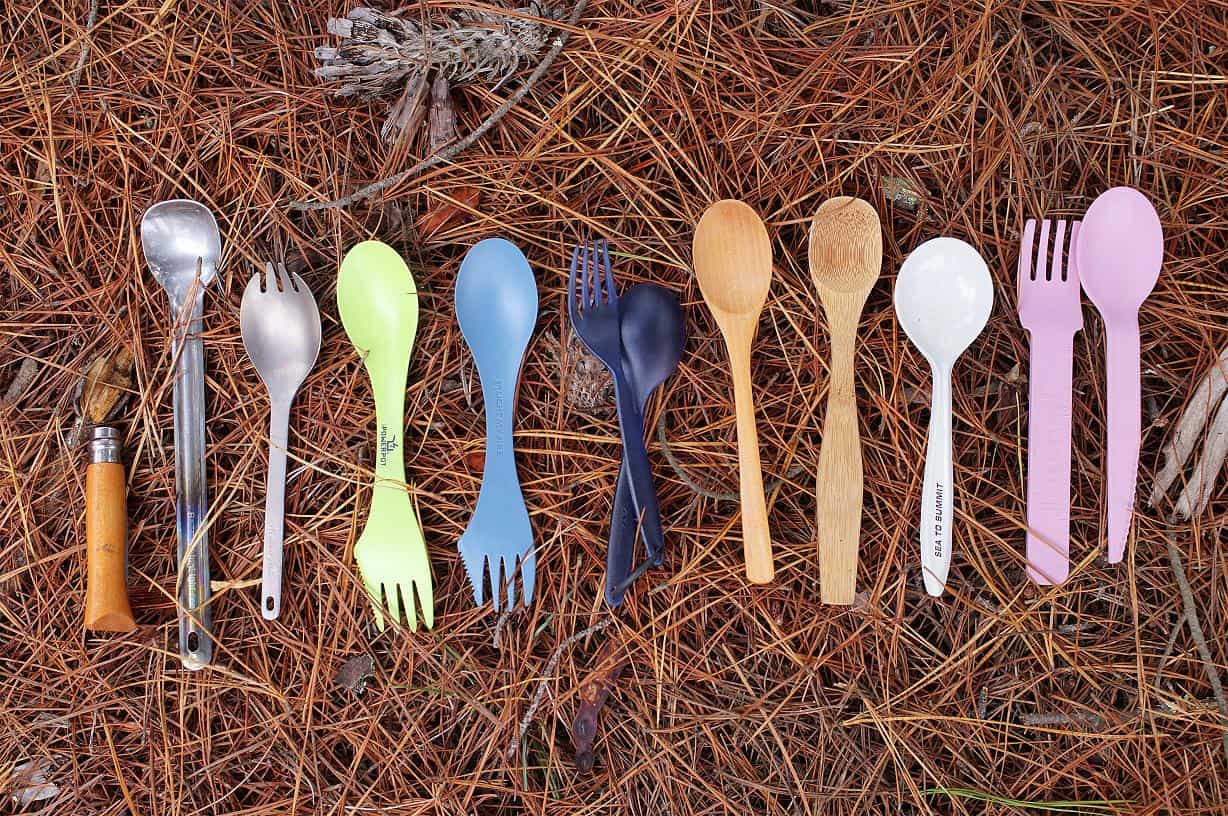
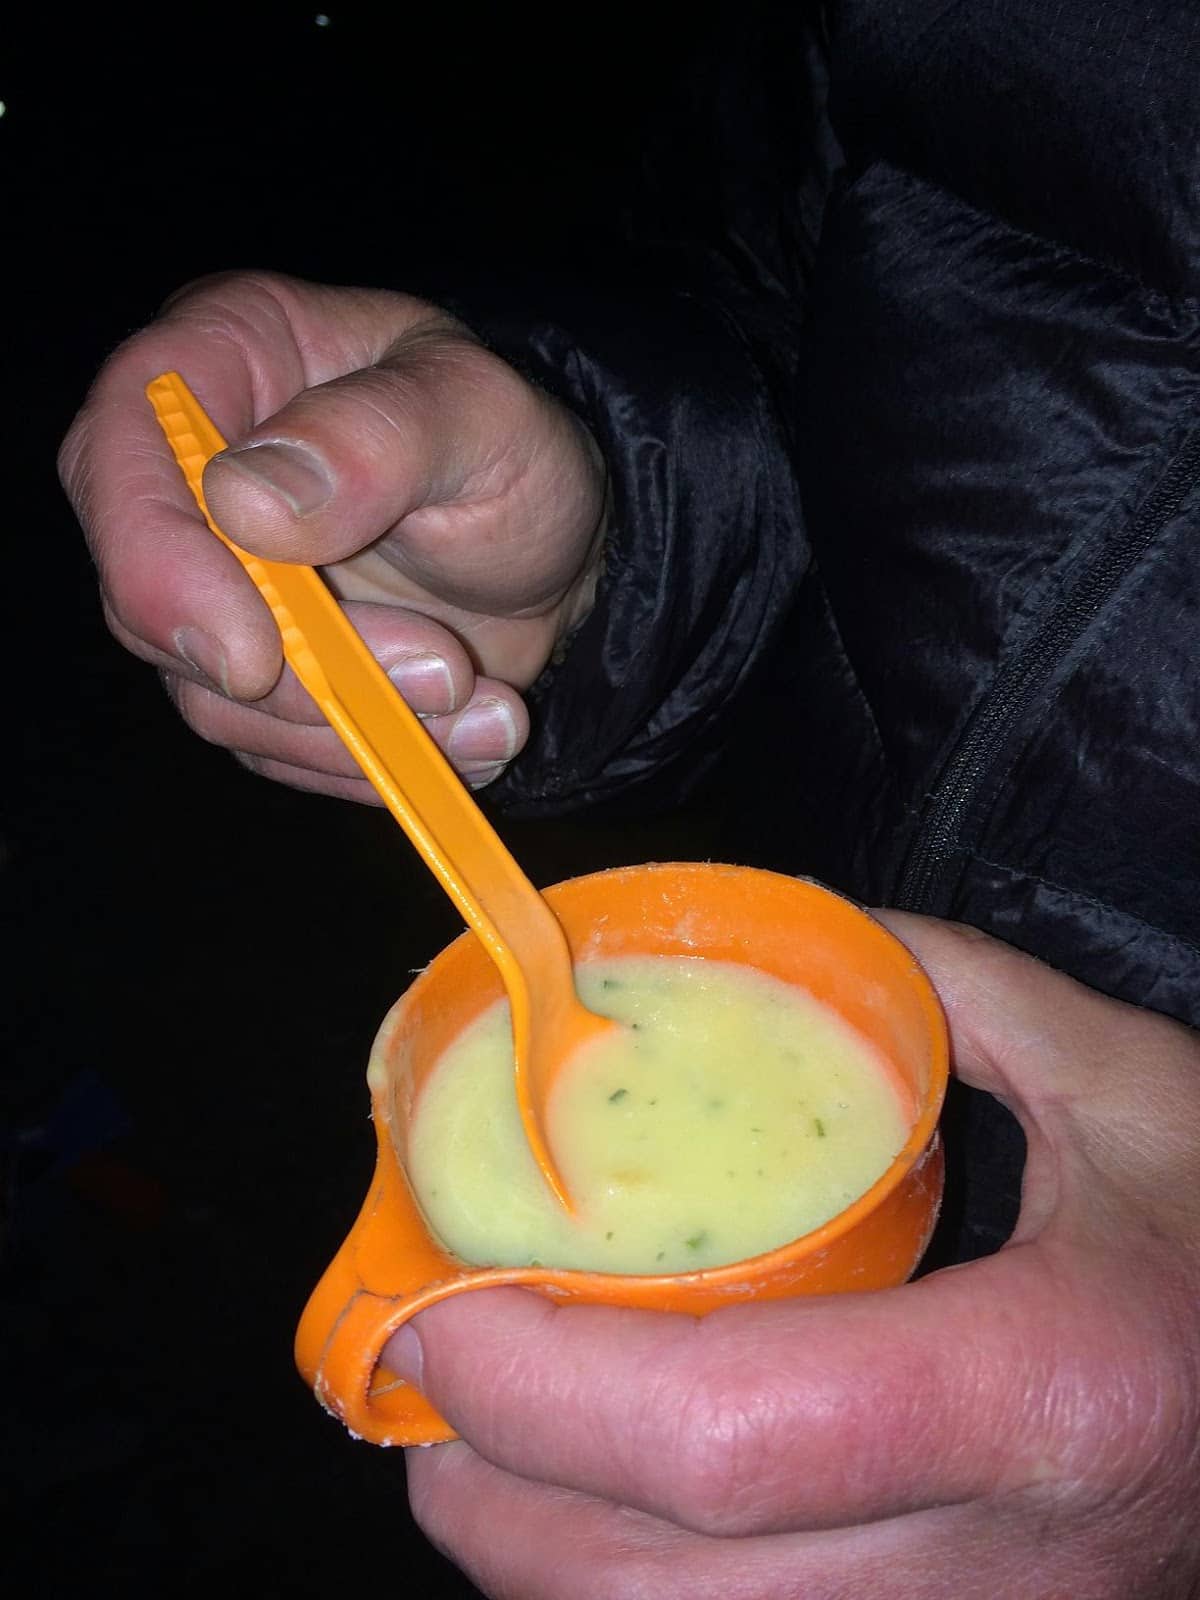
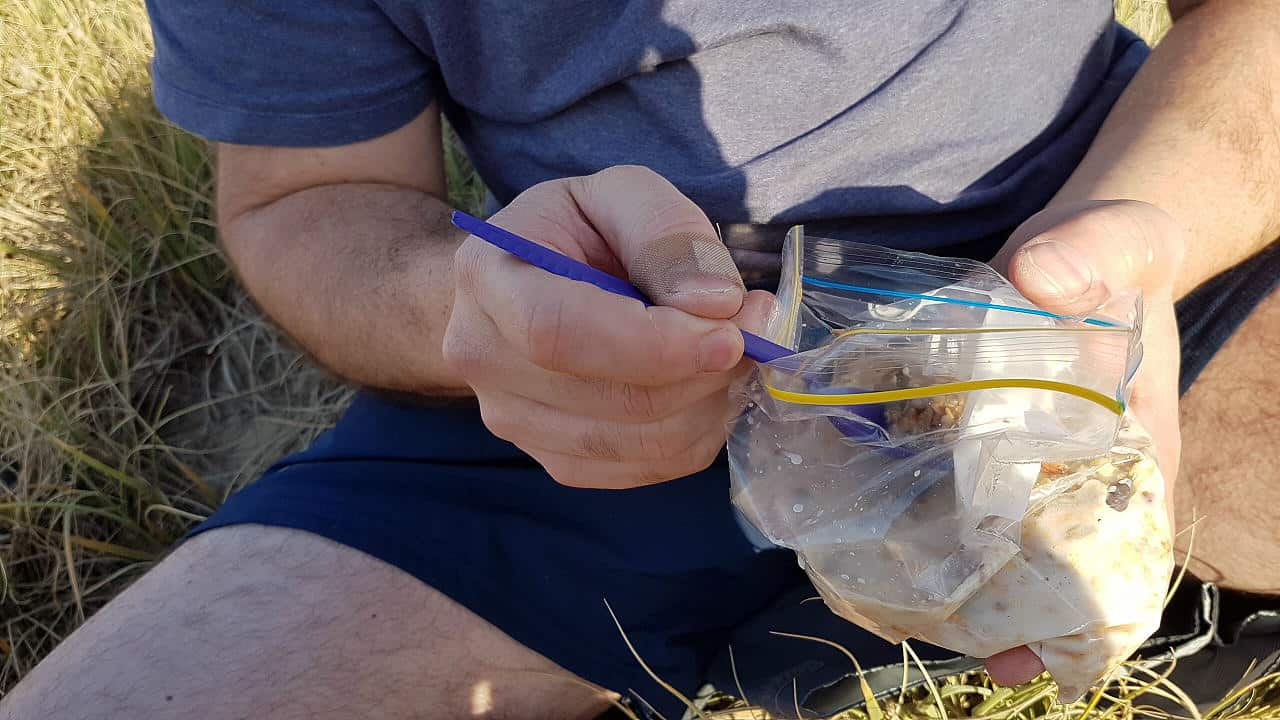
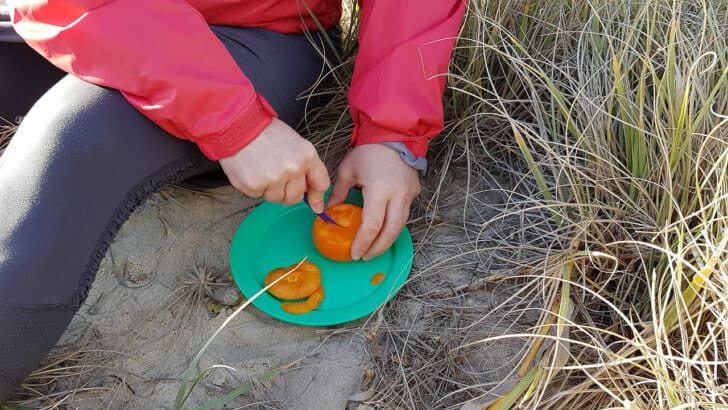
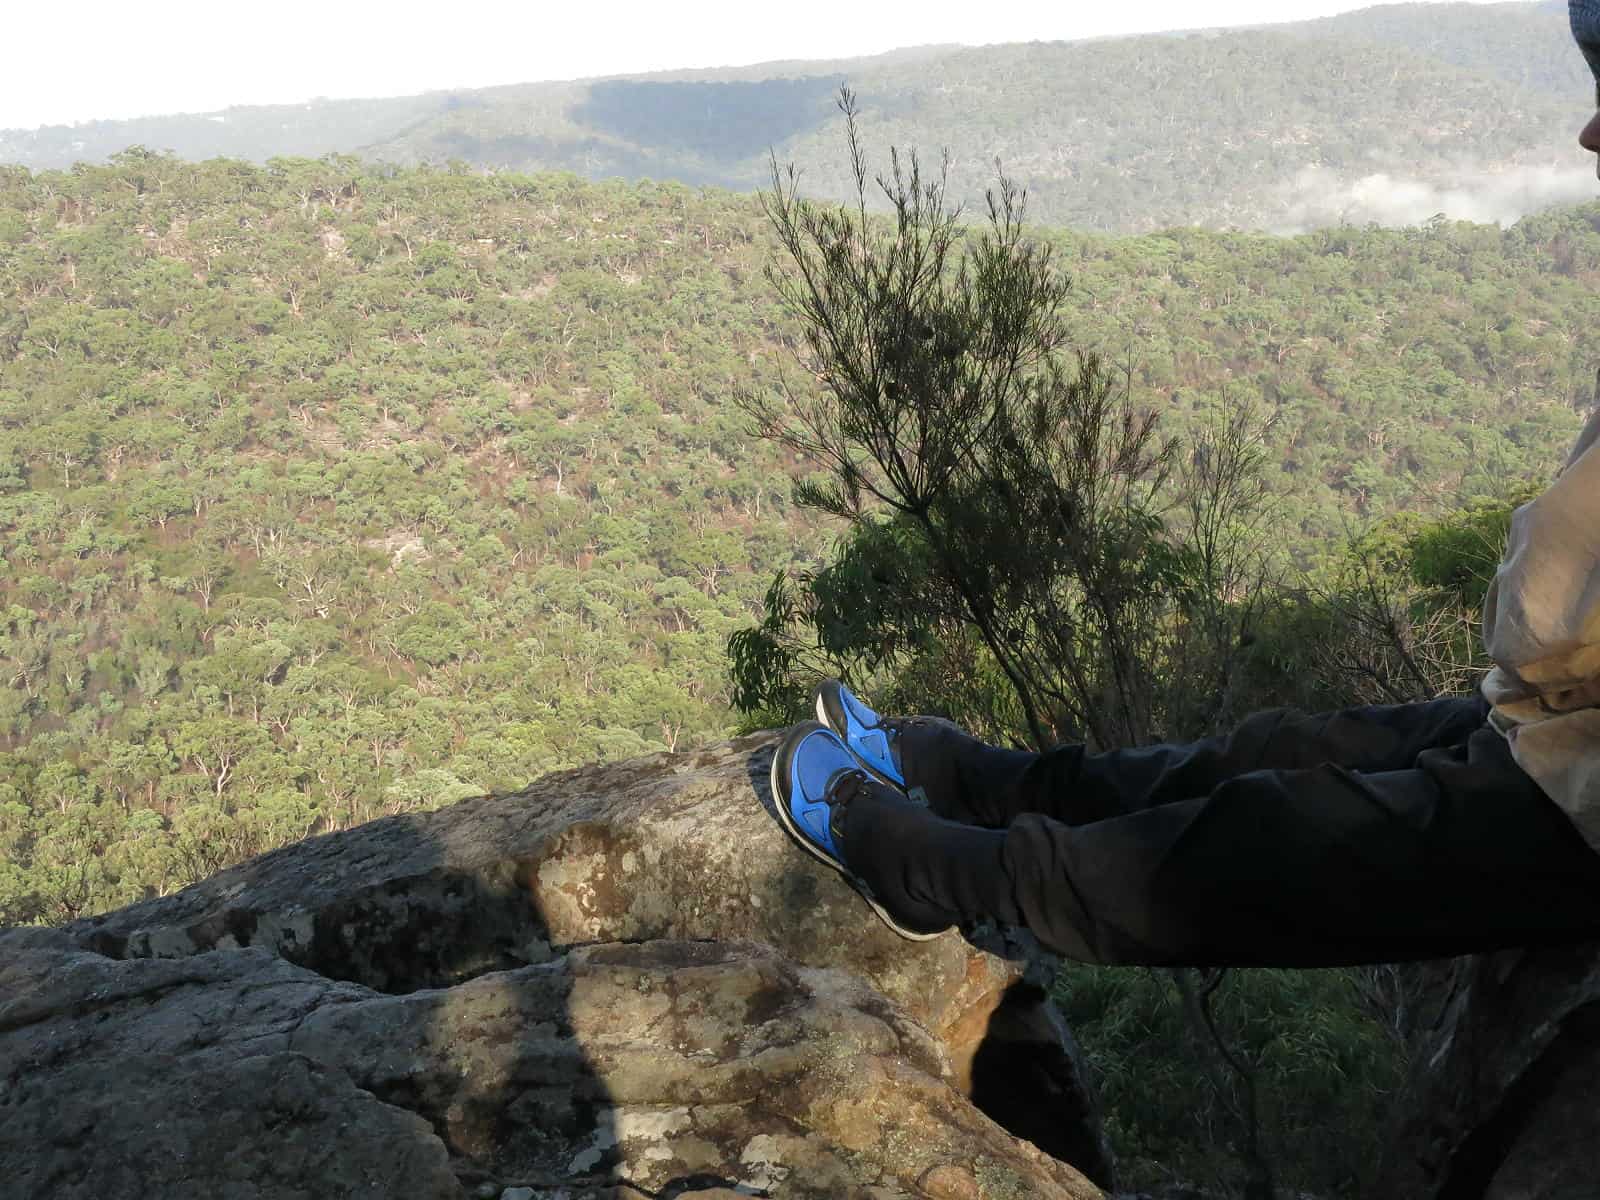
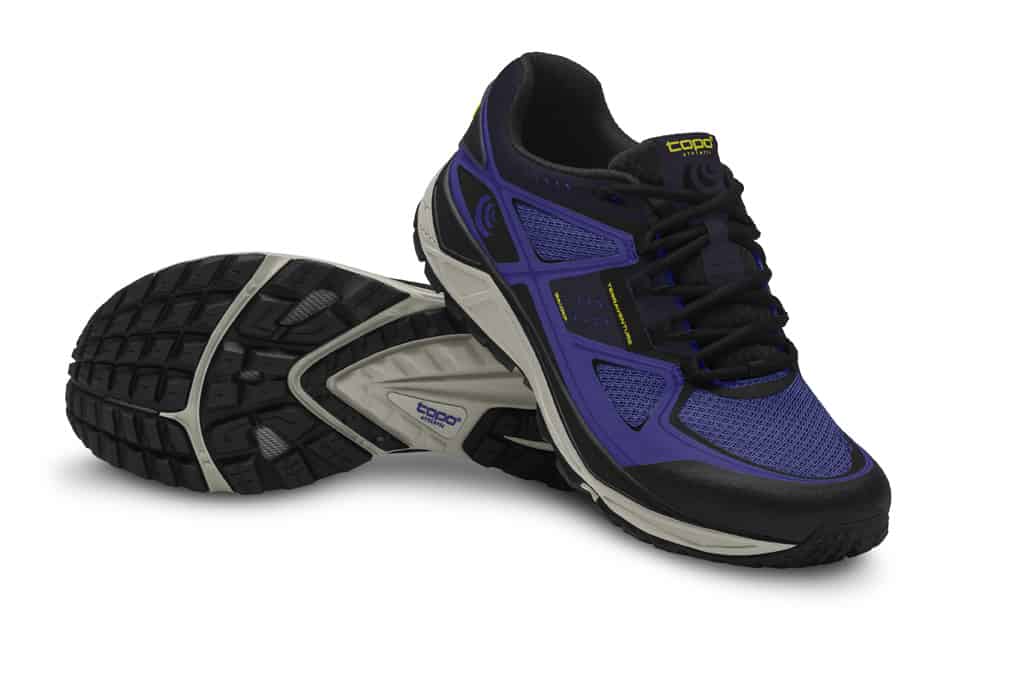
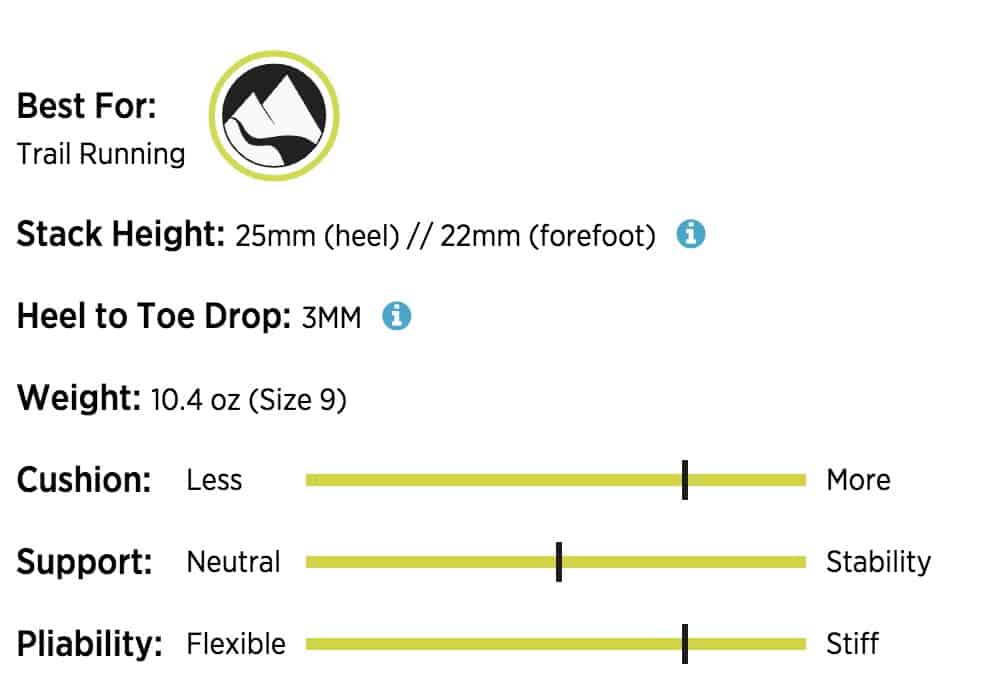
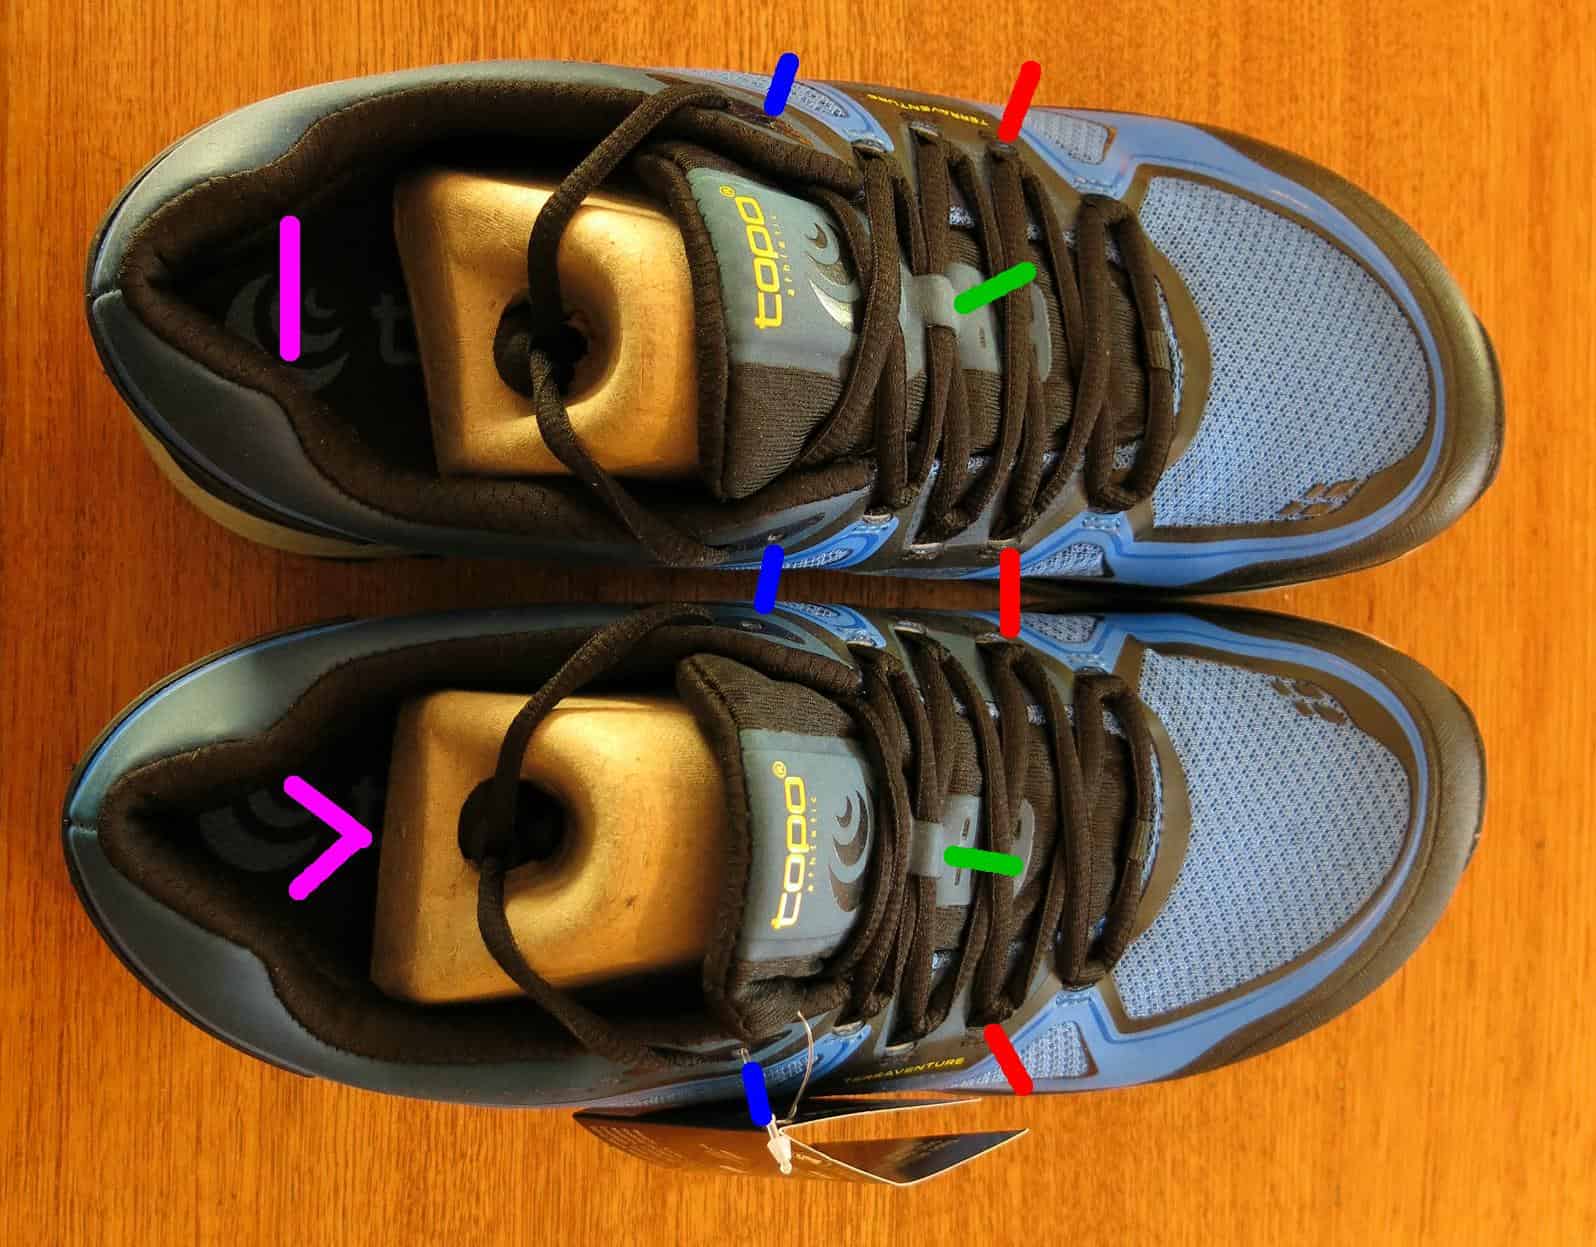
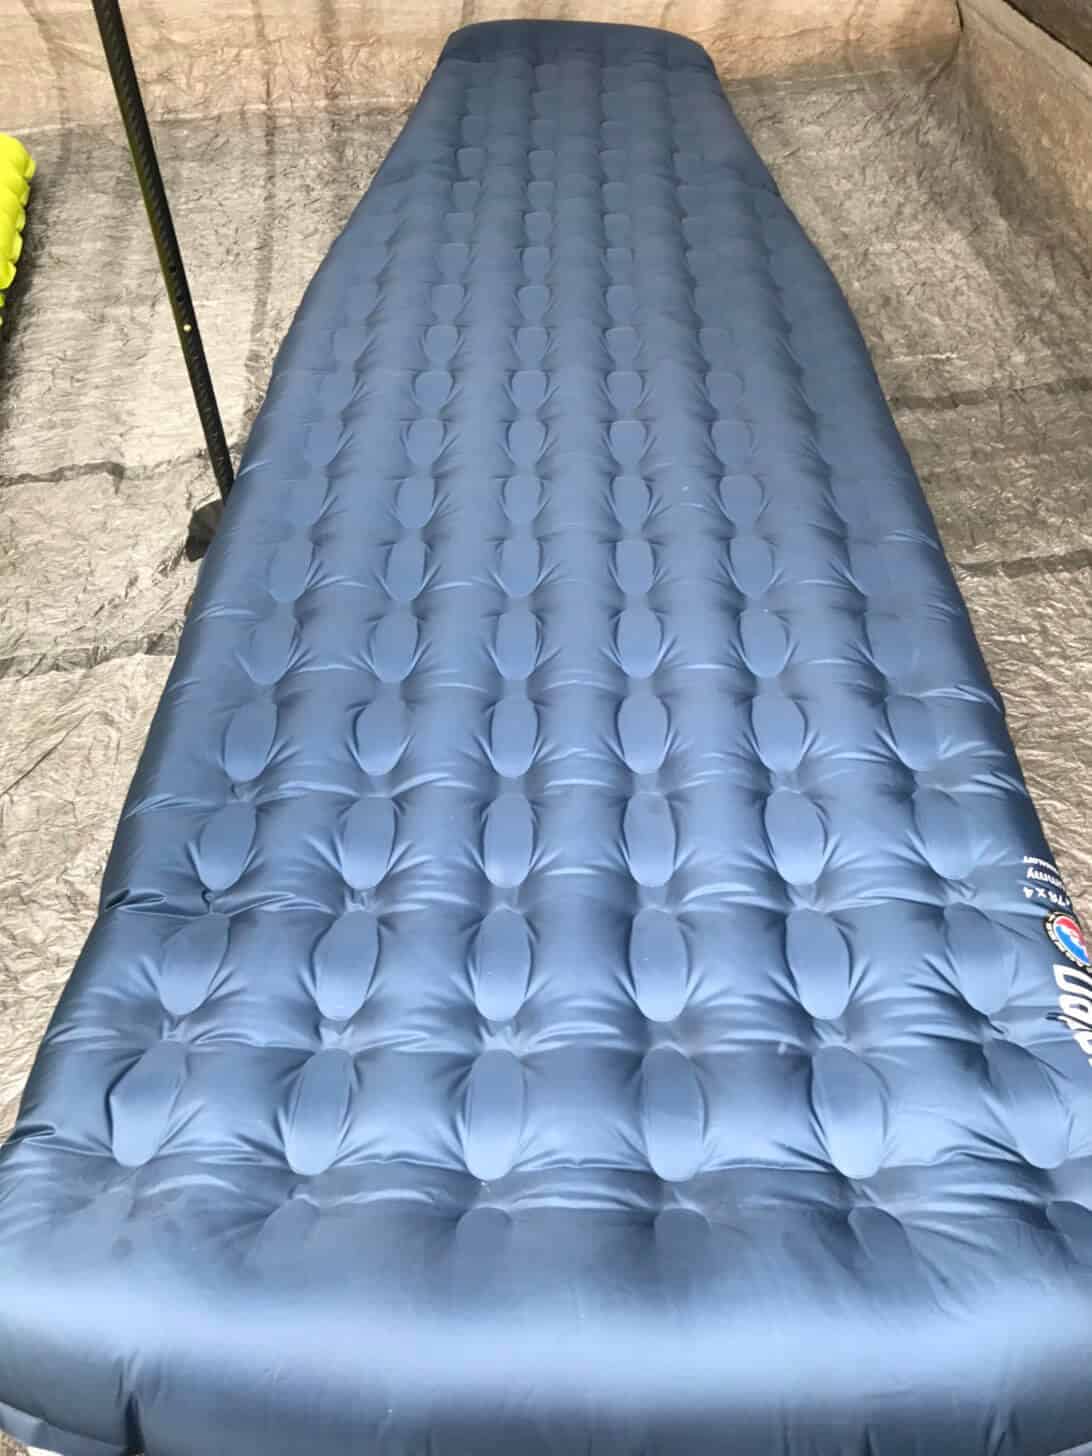
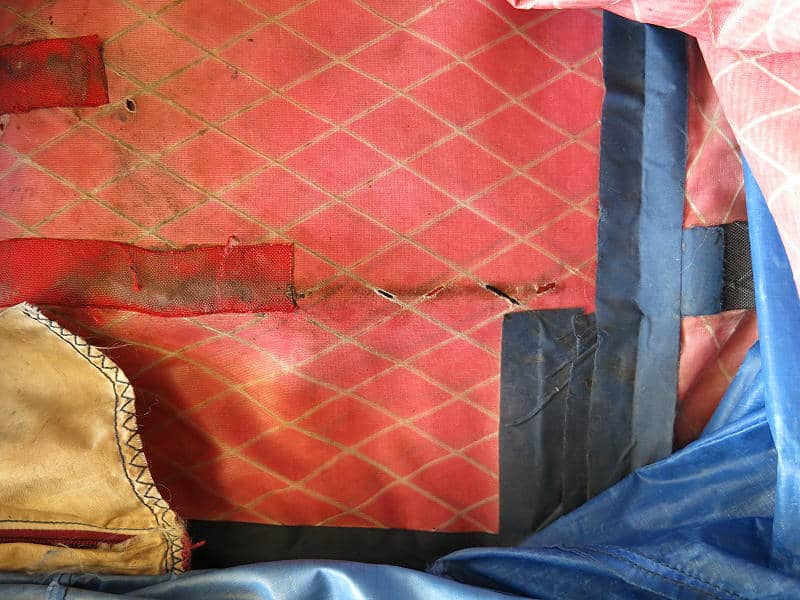
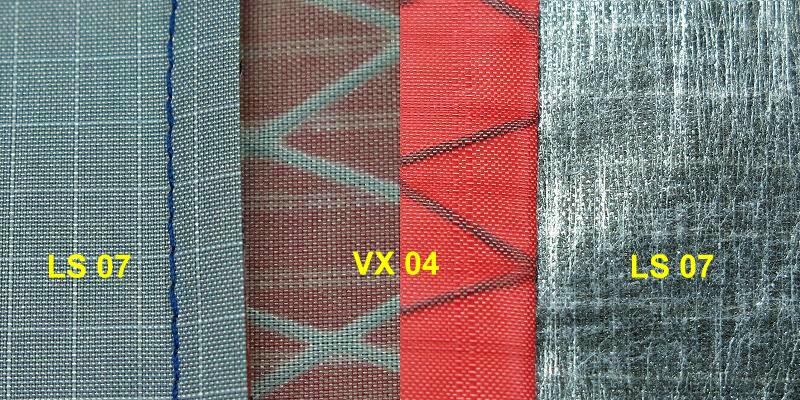
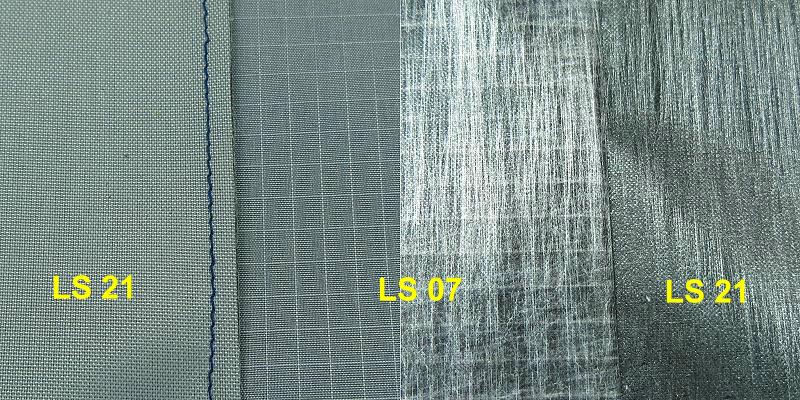
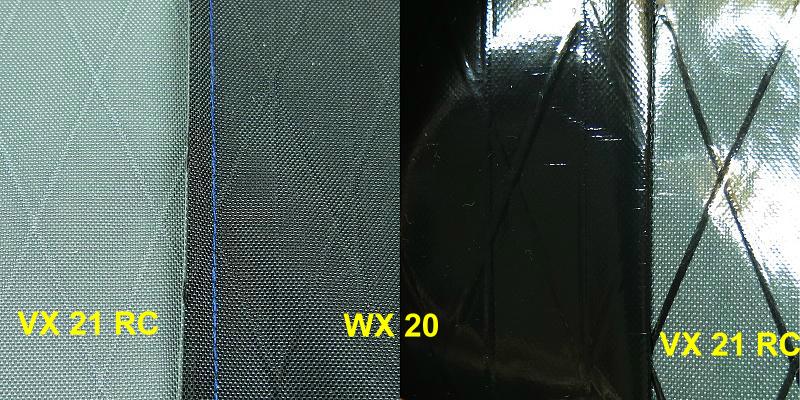
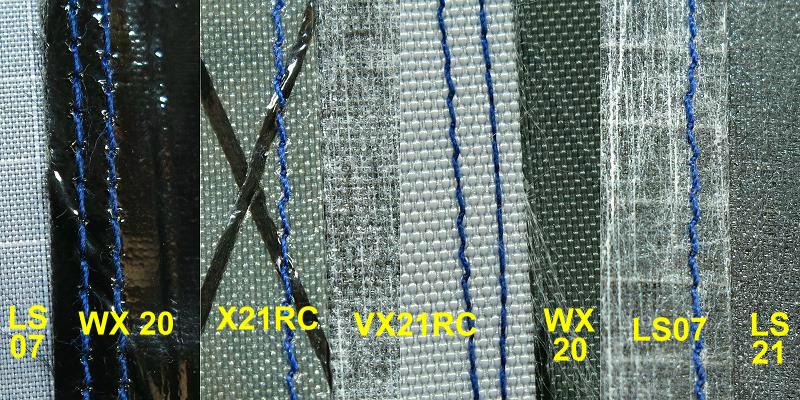
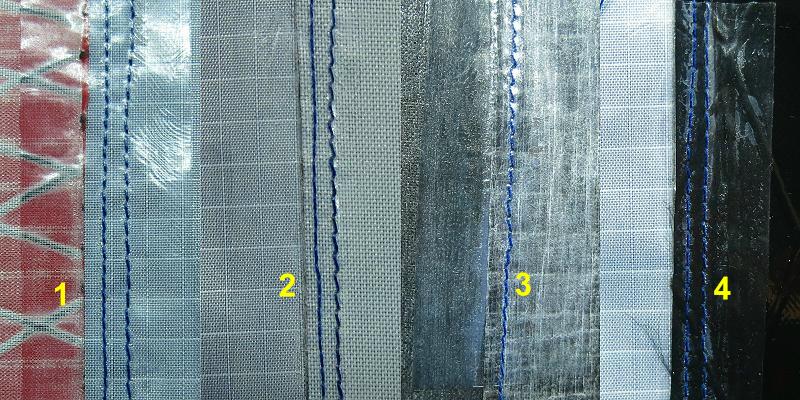
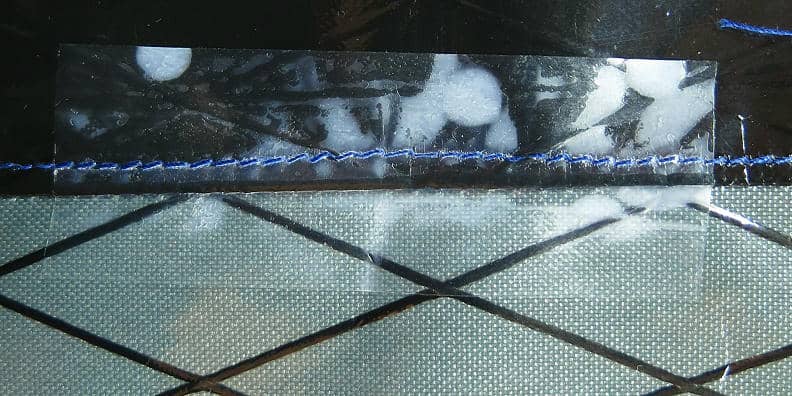


 Where to Buy
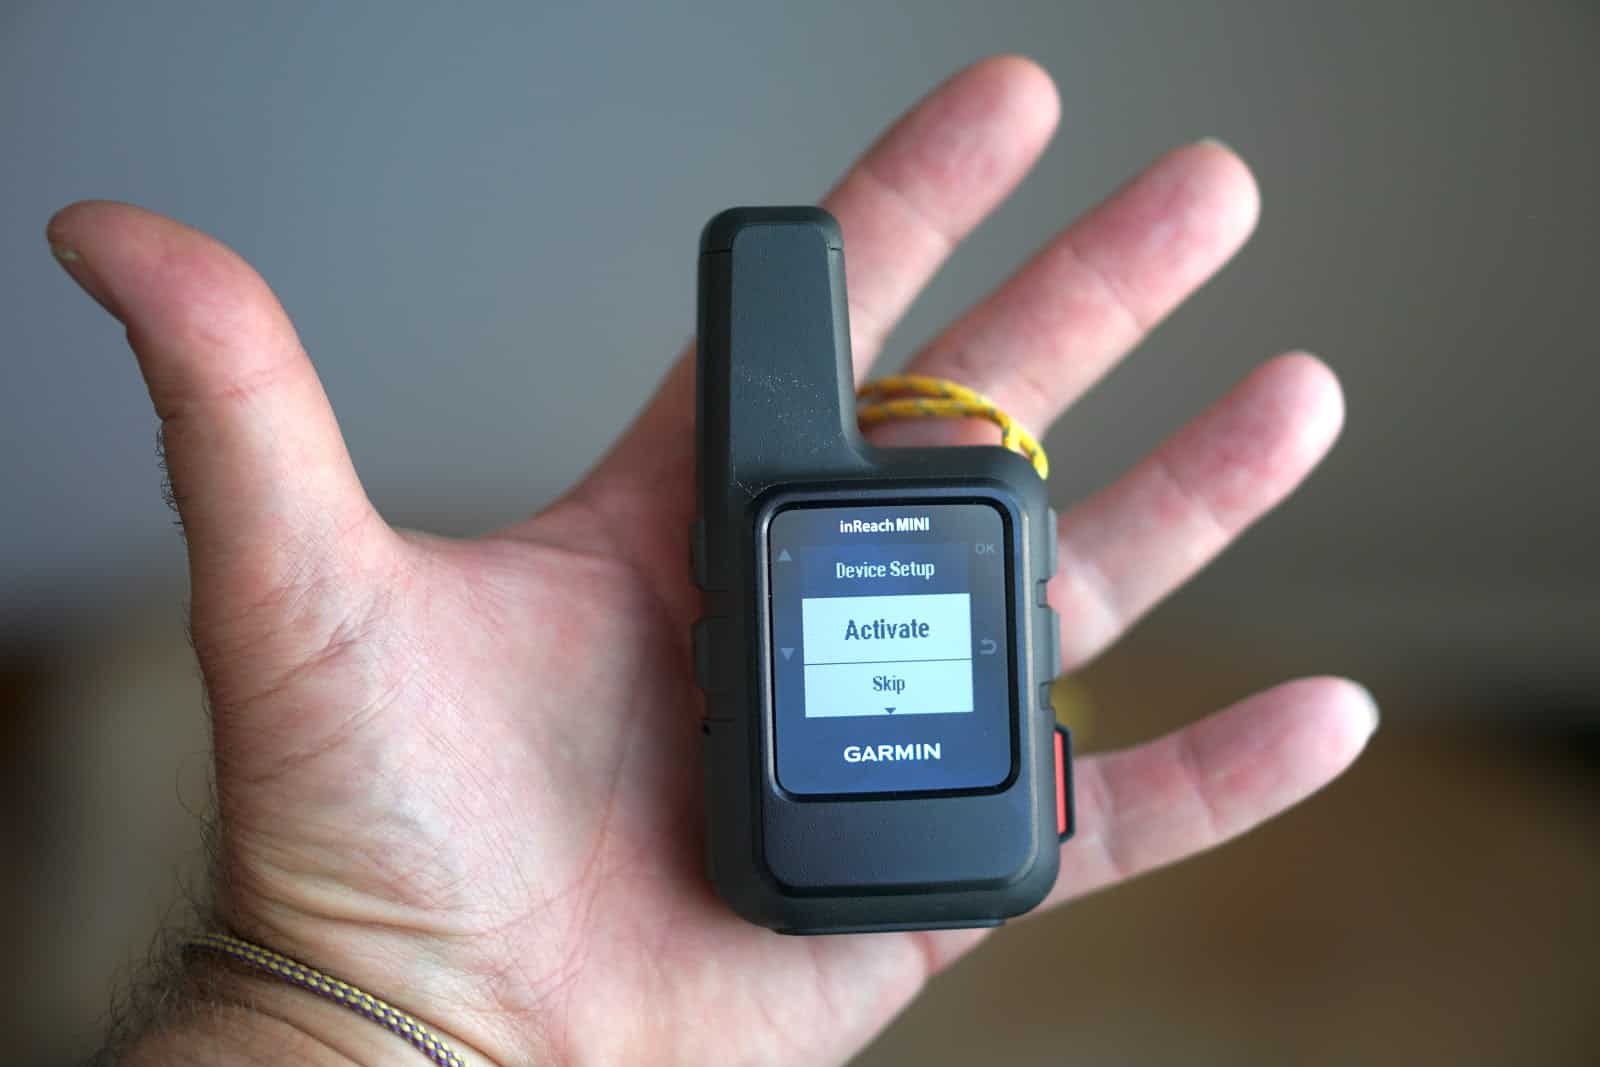

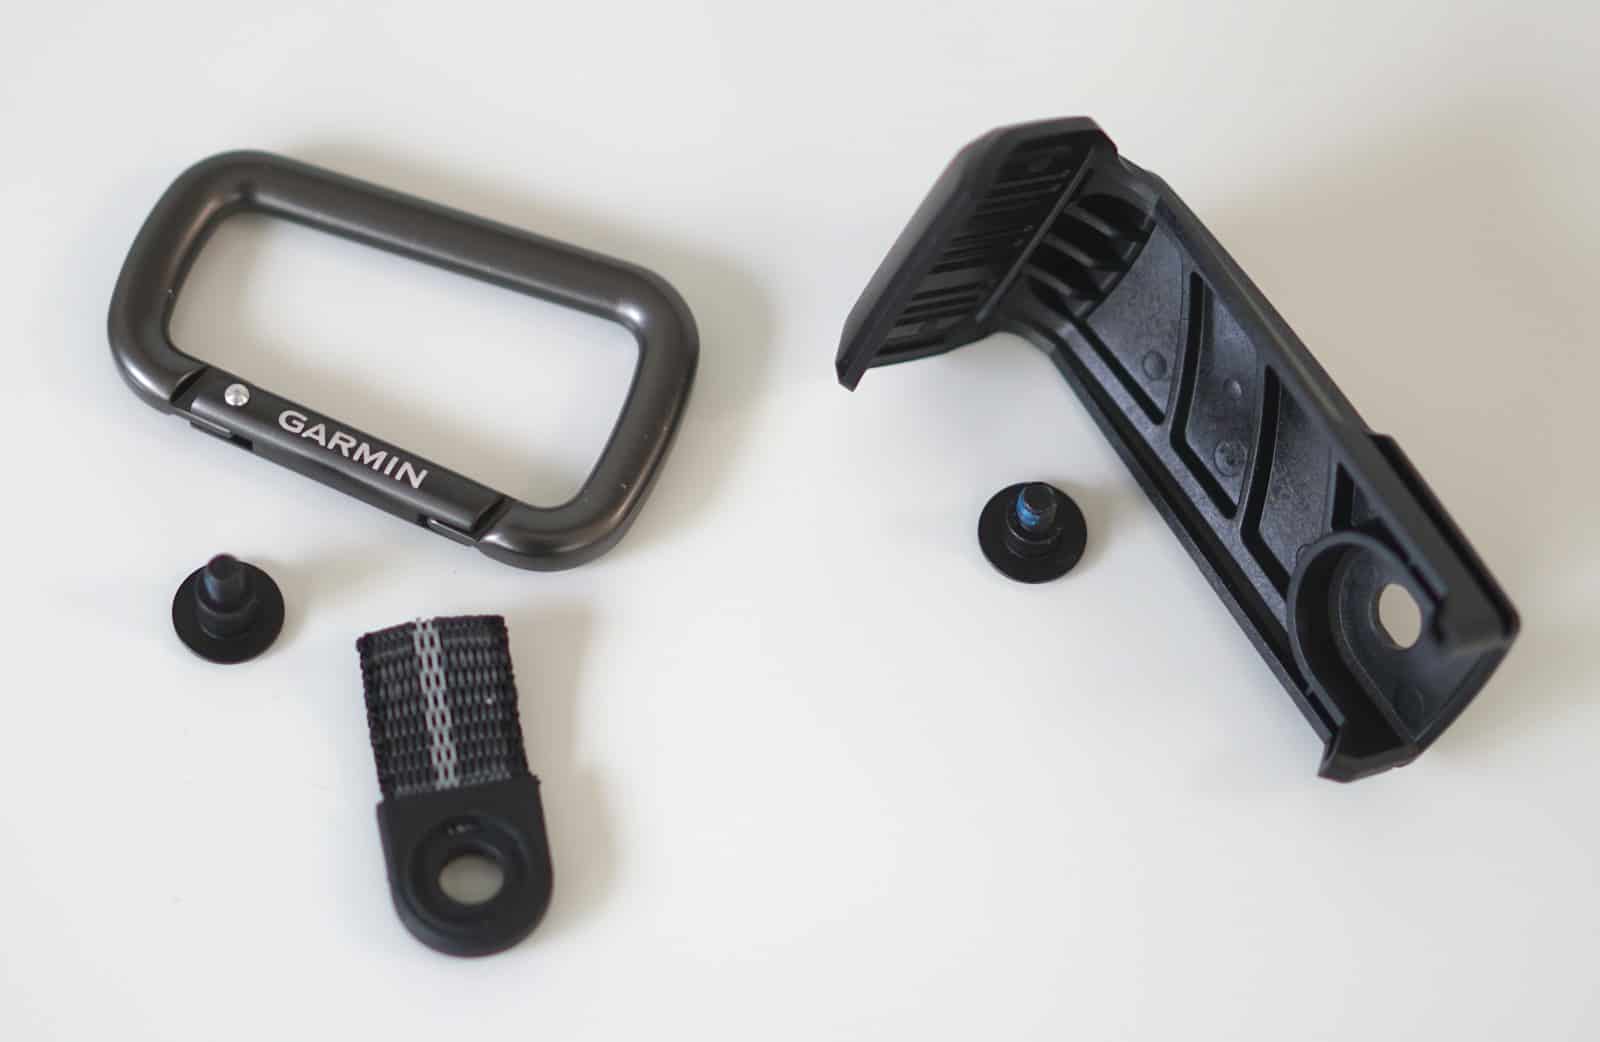
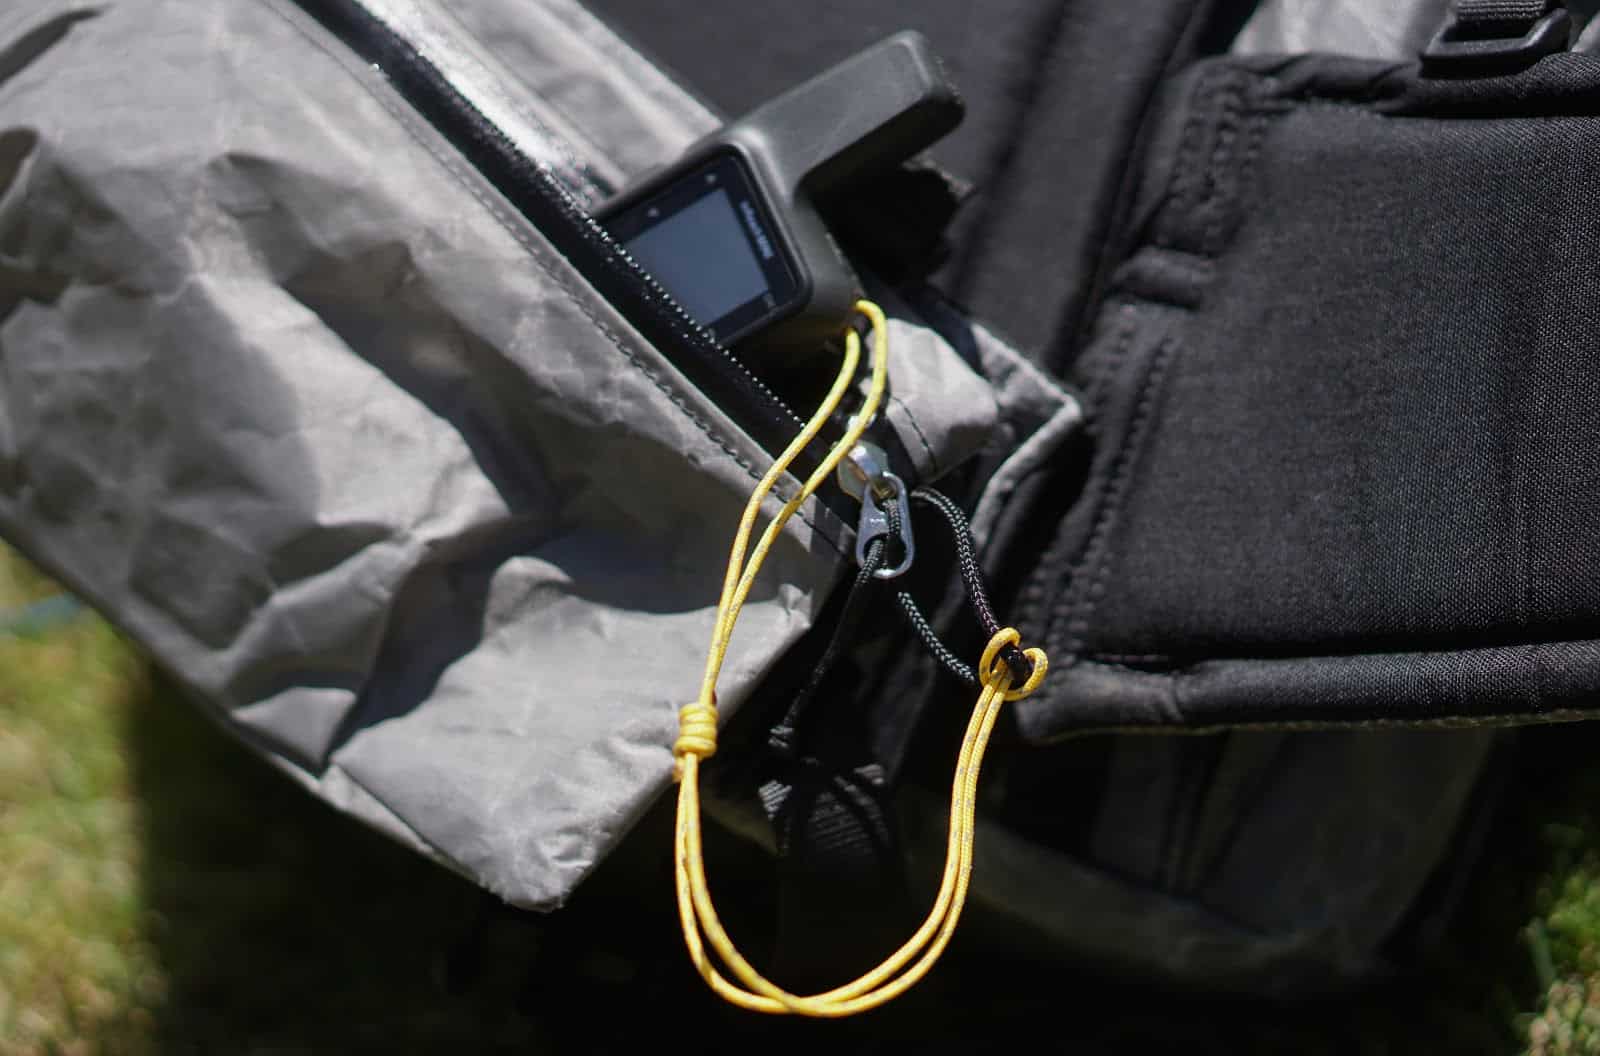

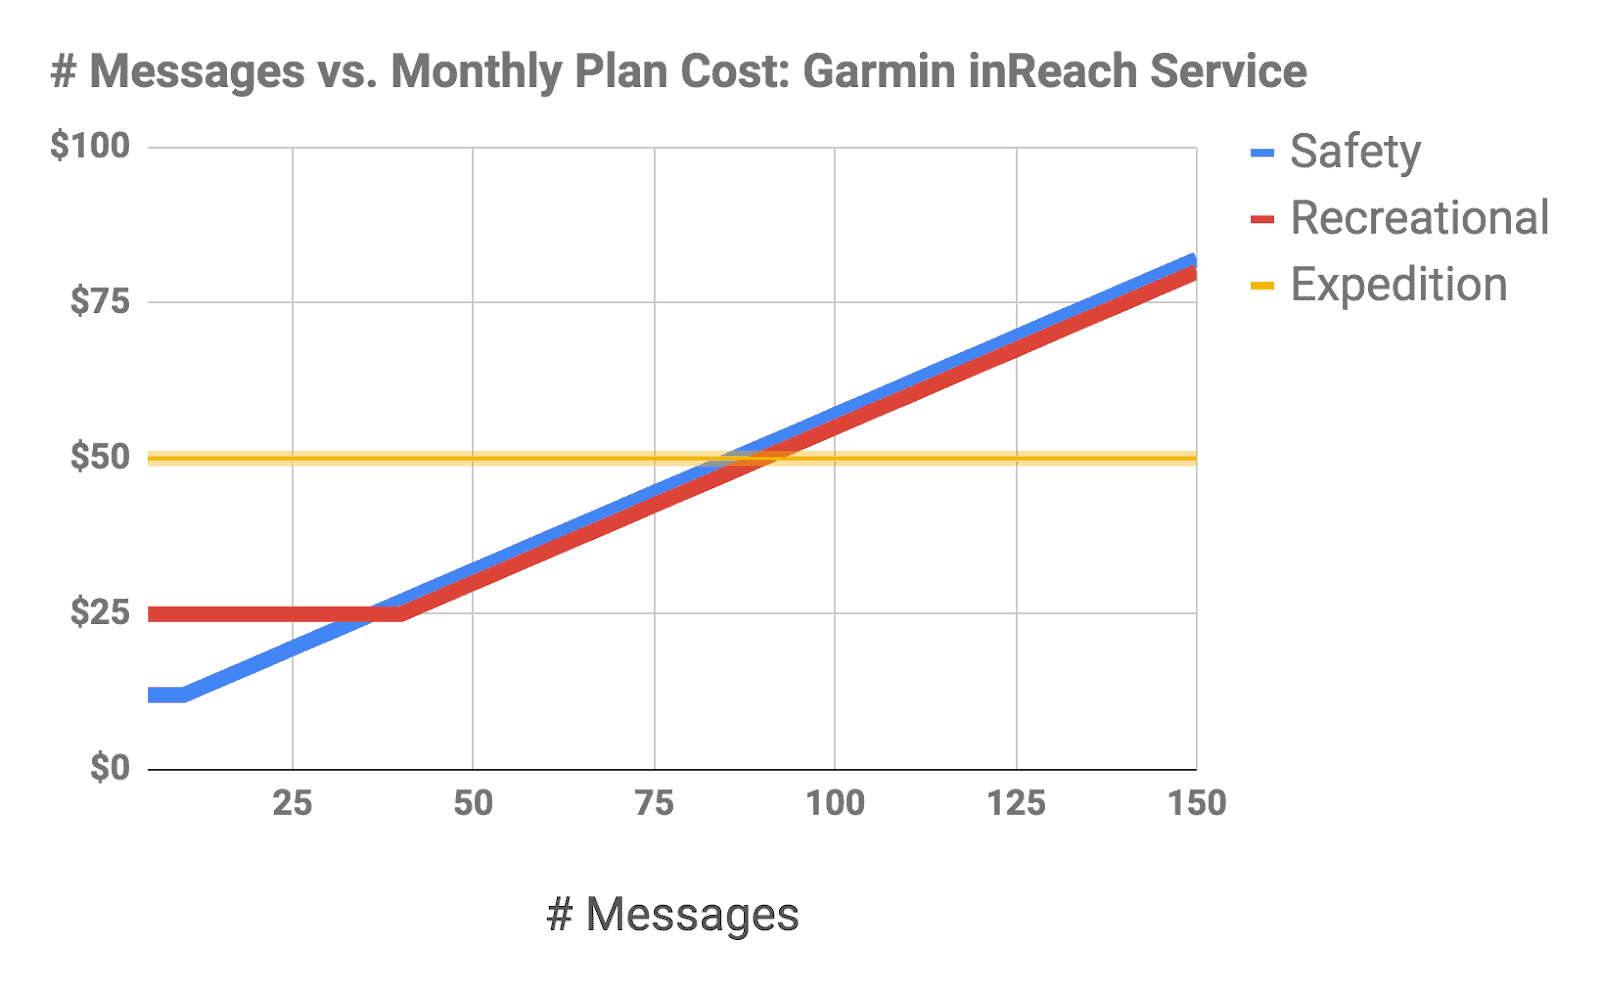
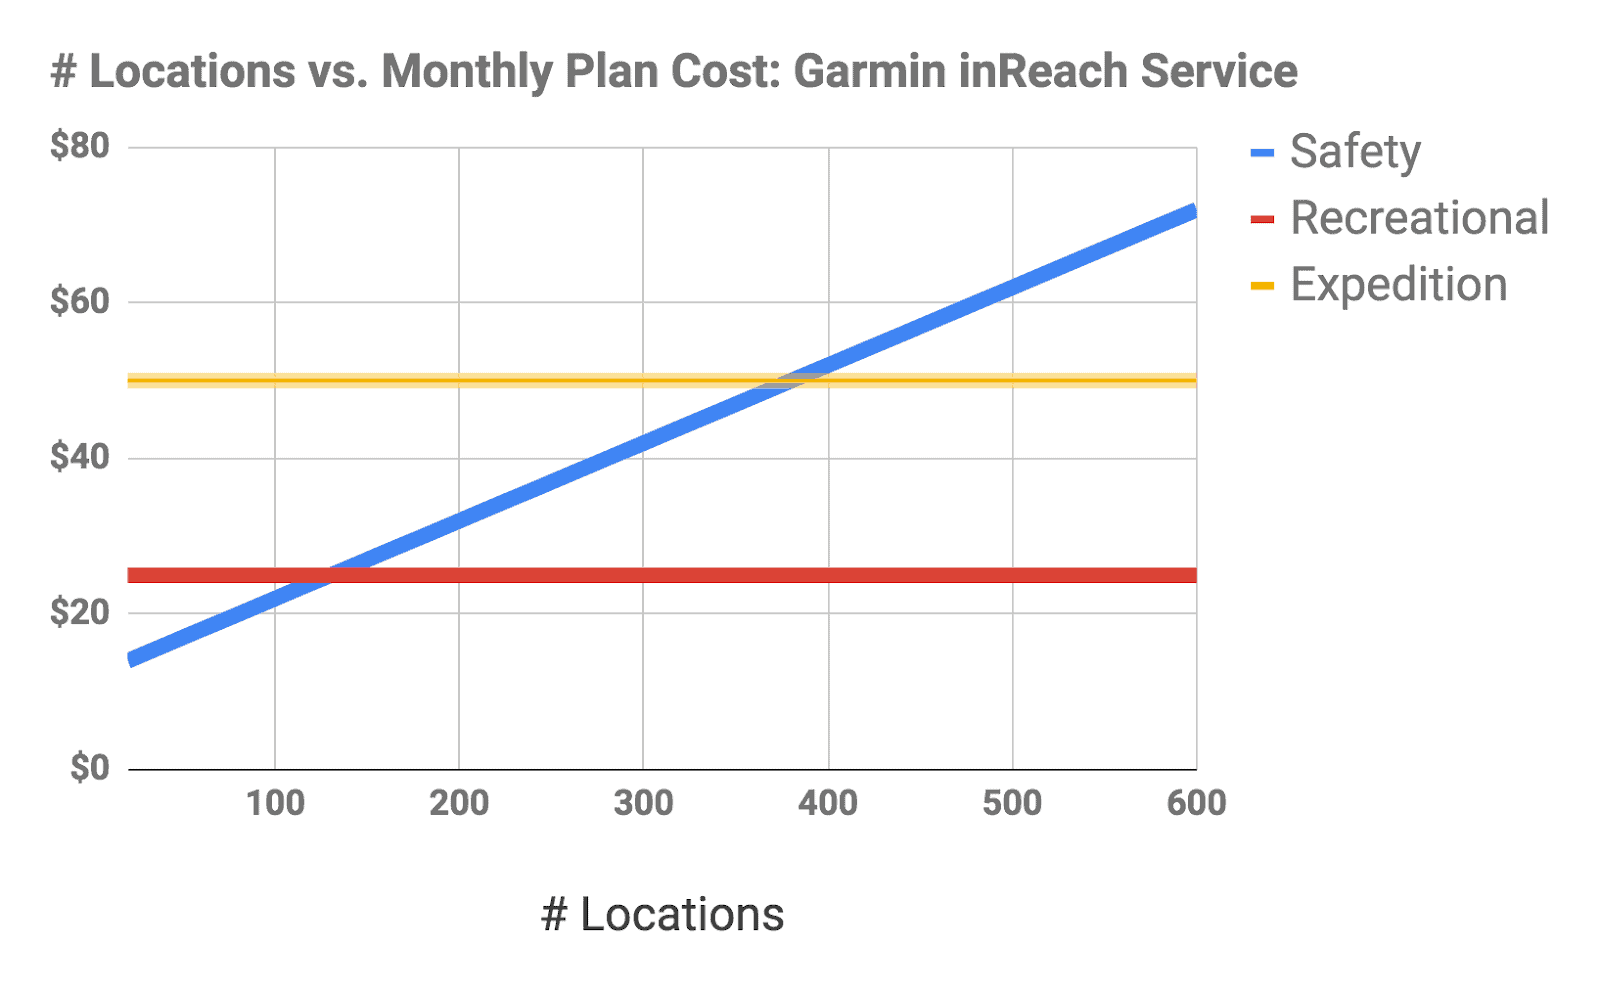

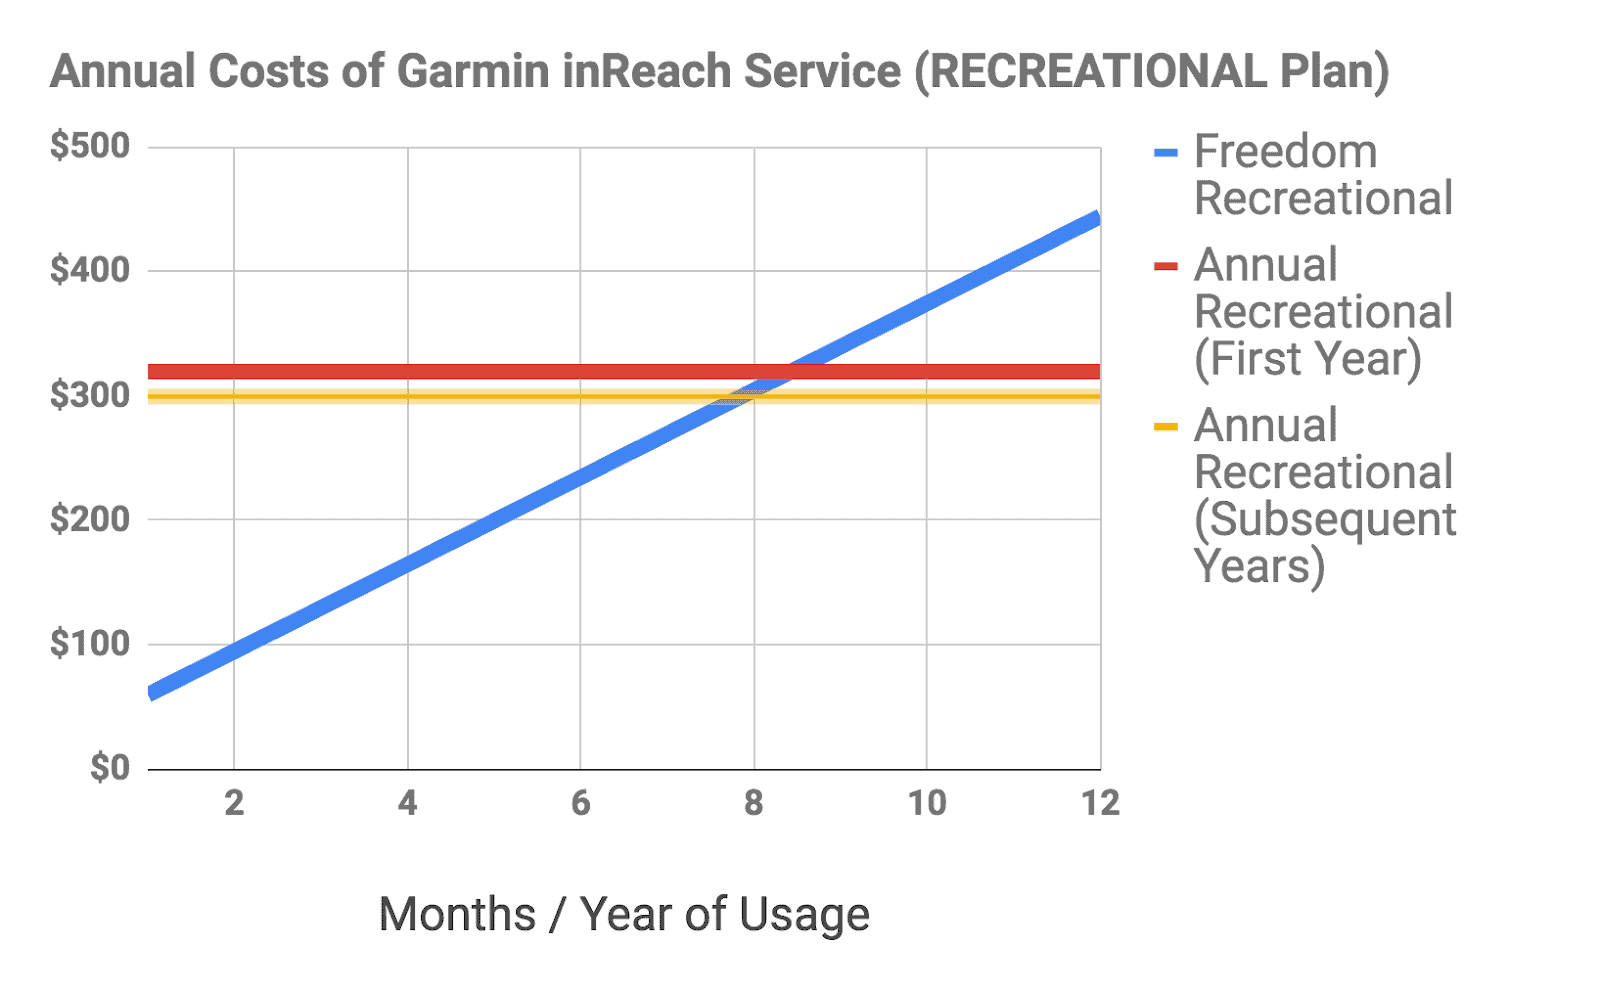
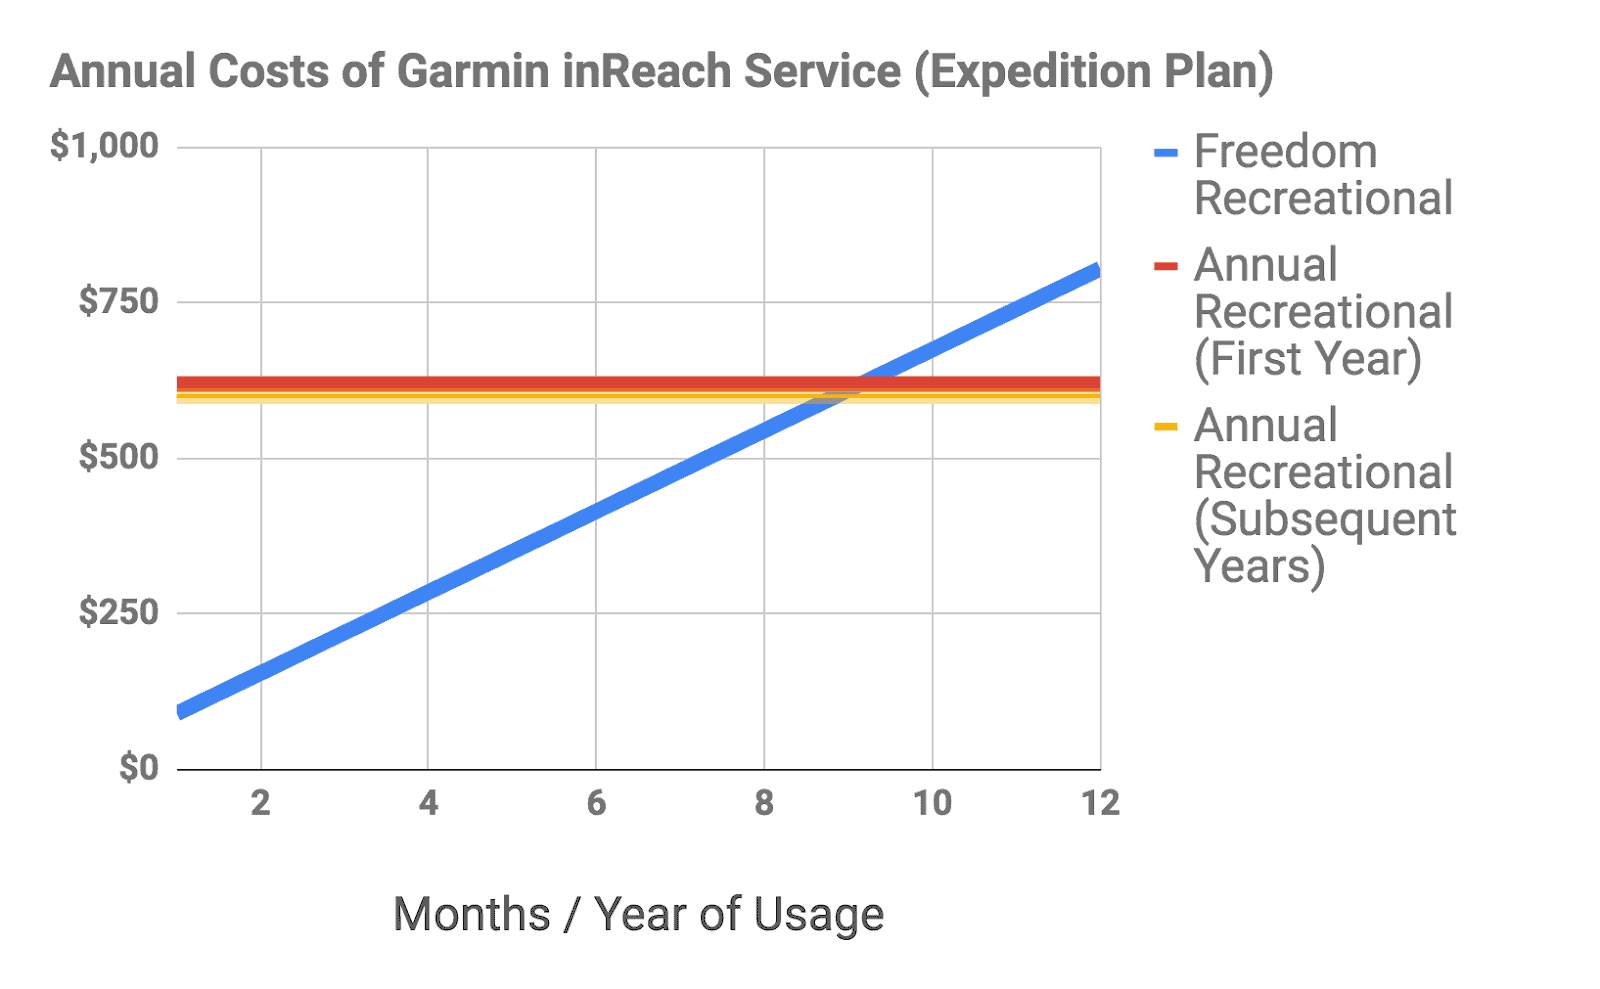


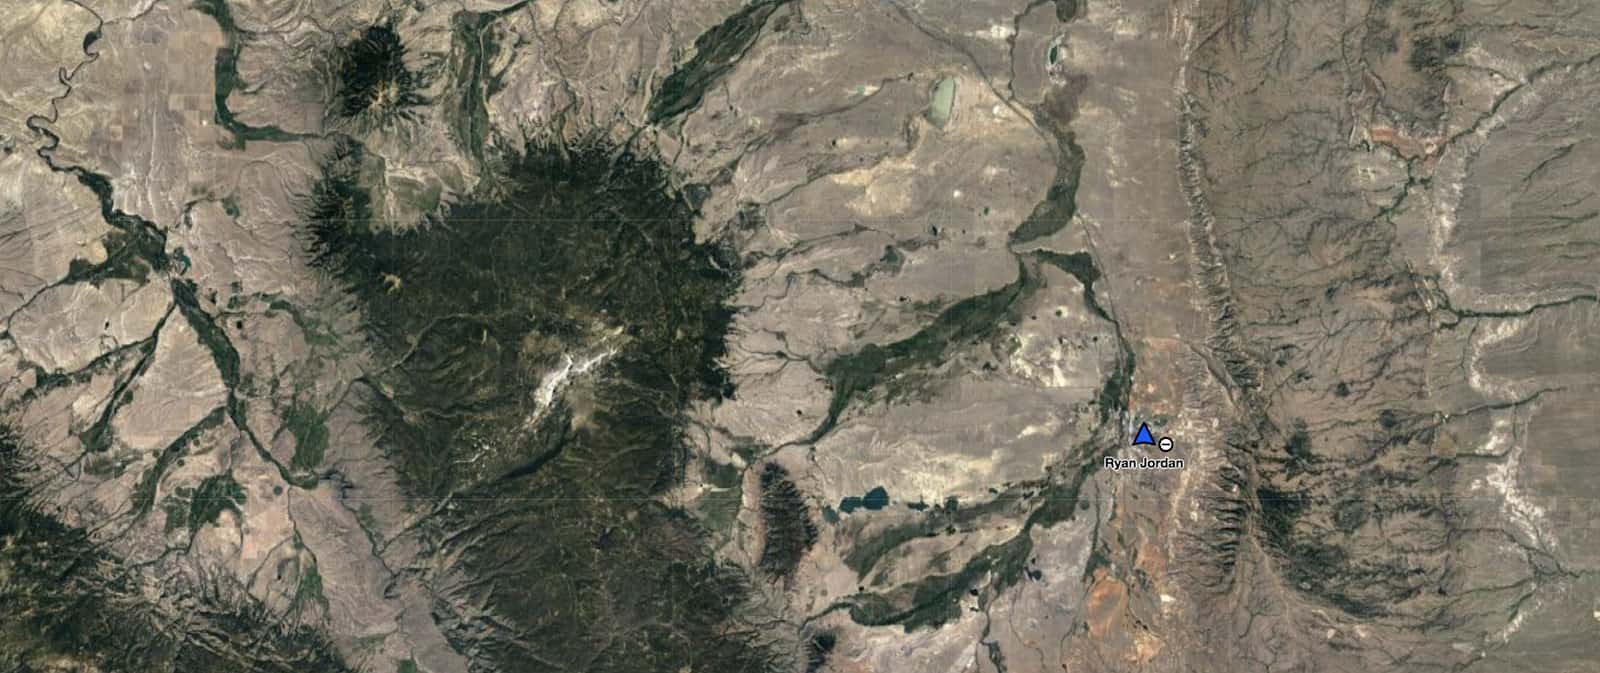
 Social – allows you to toggle on/off public visibility of the MapShare service, where people can track your progress, or link your Facebook and Twitter accounts.
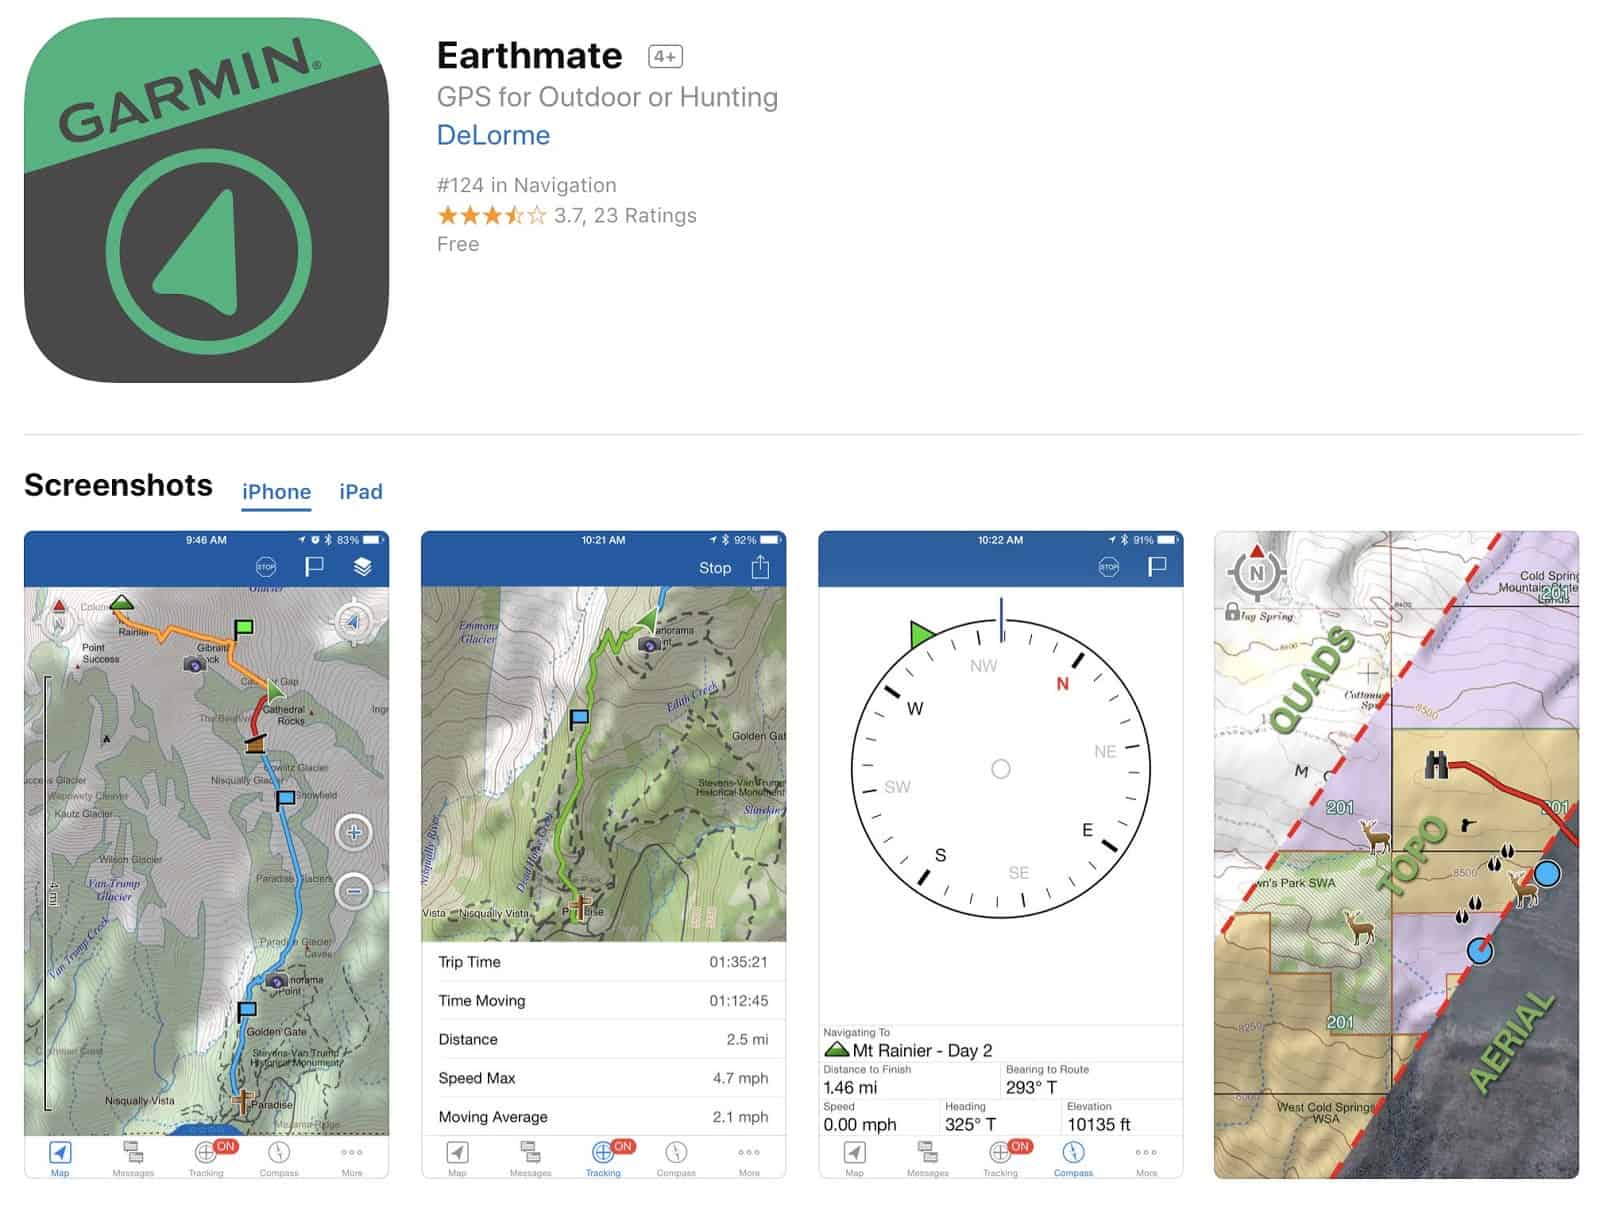
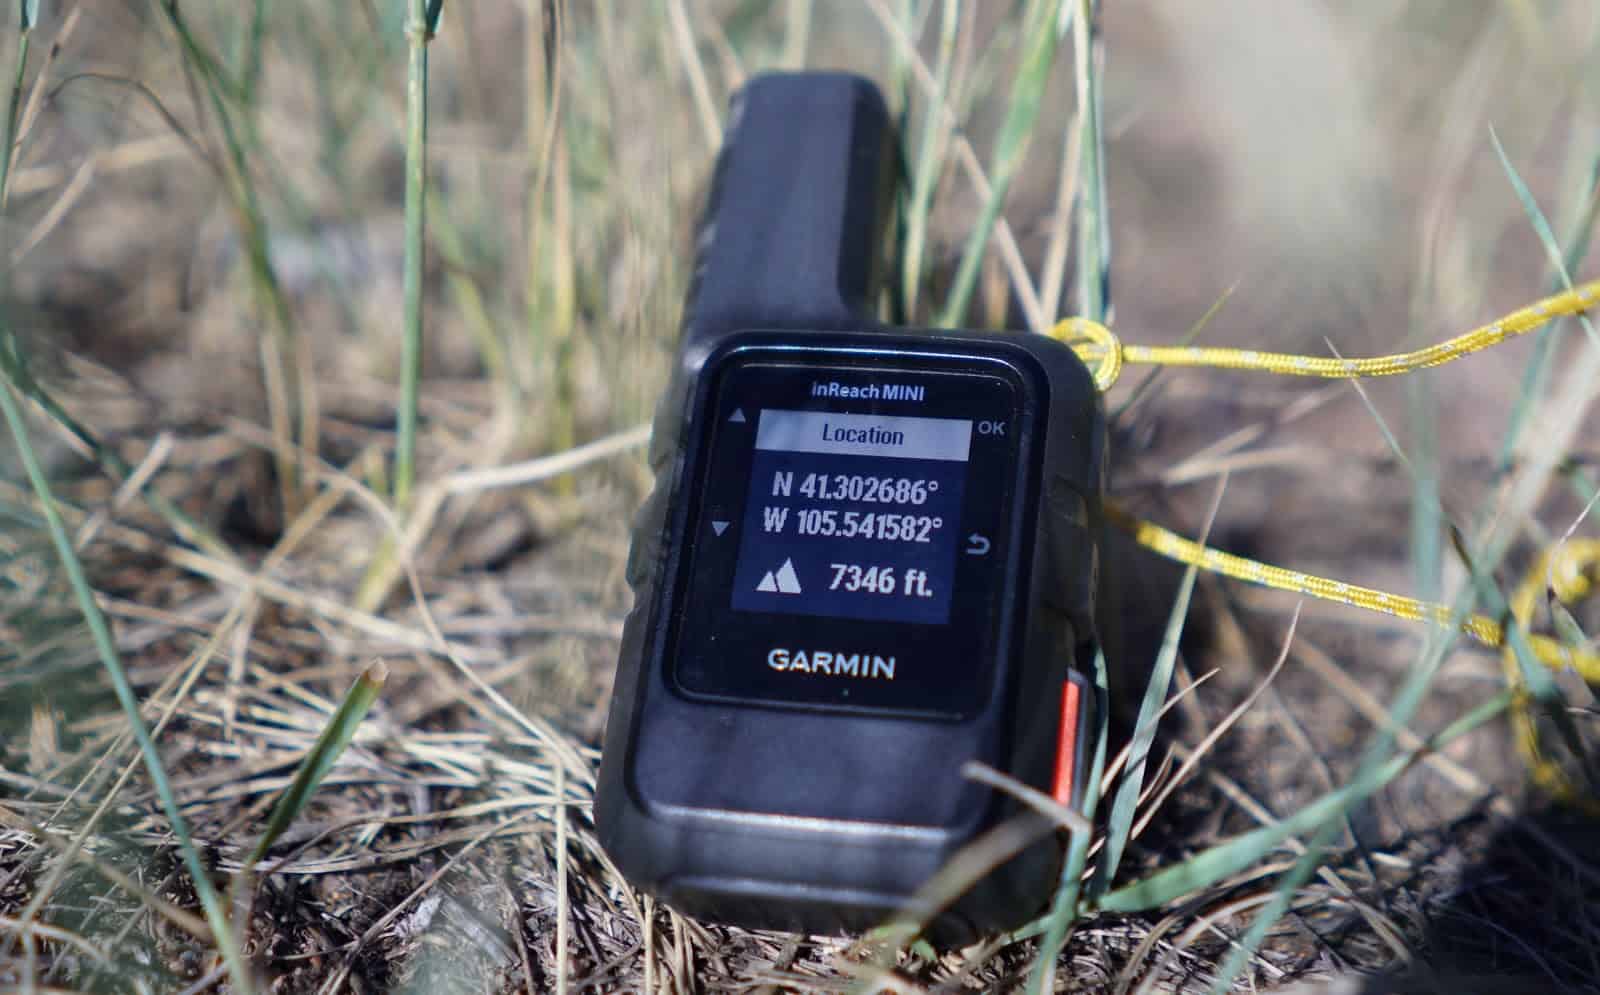
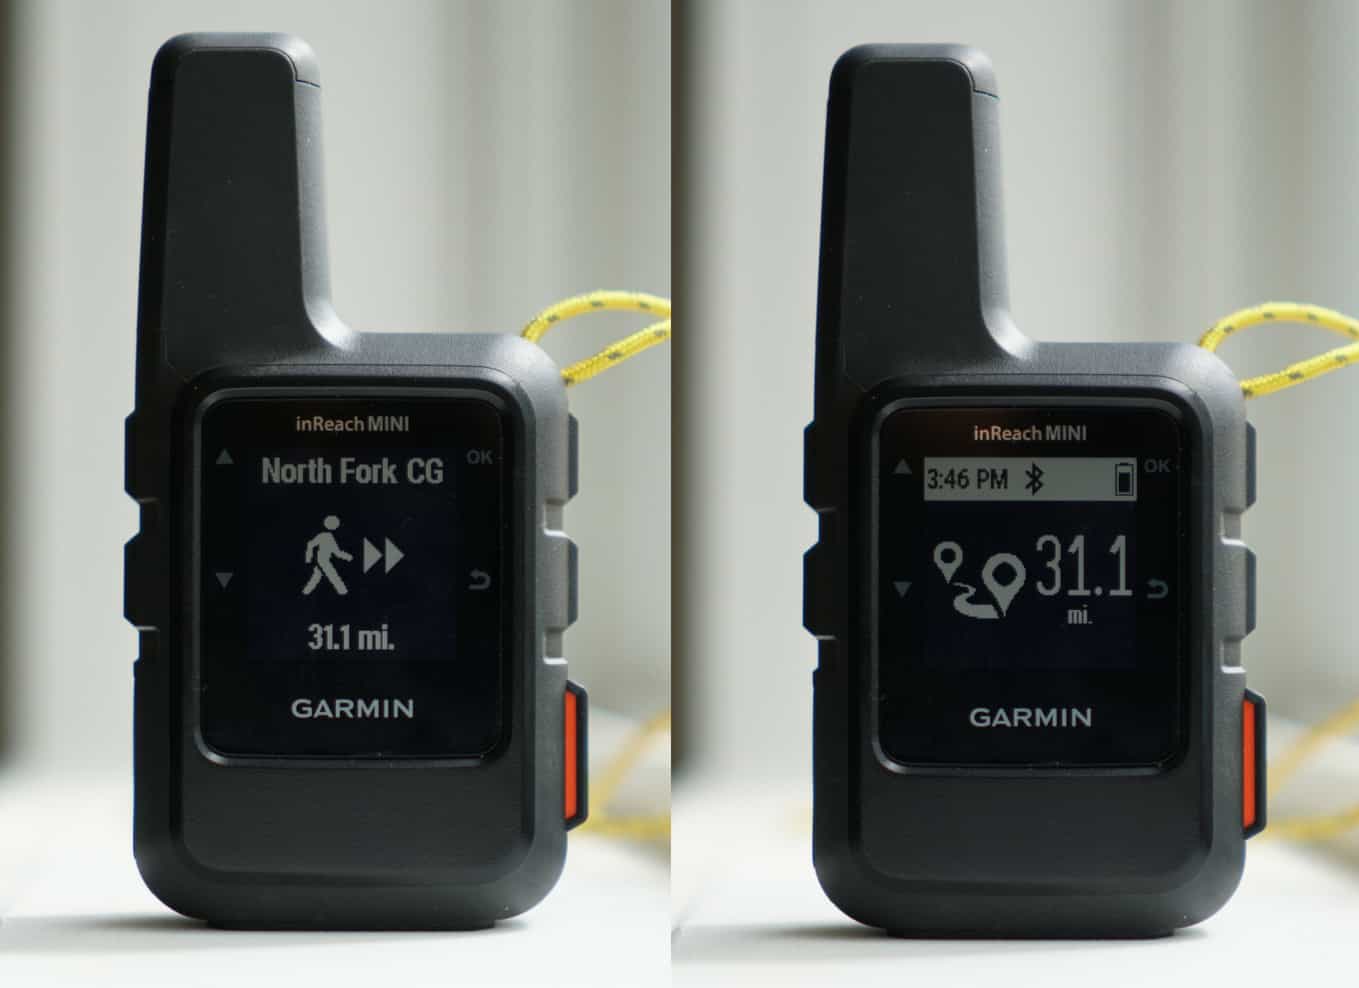
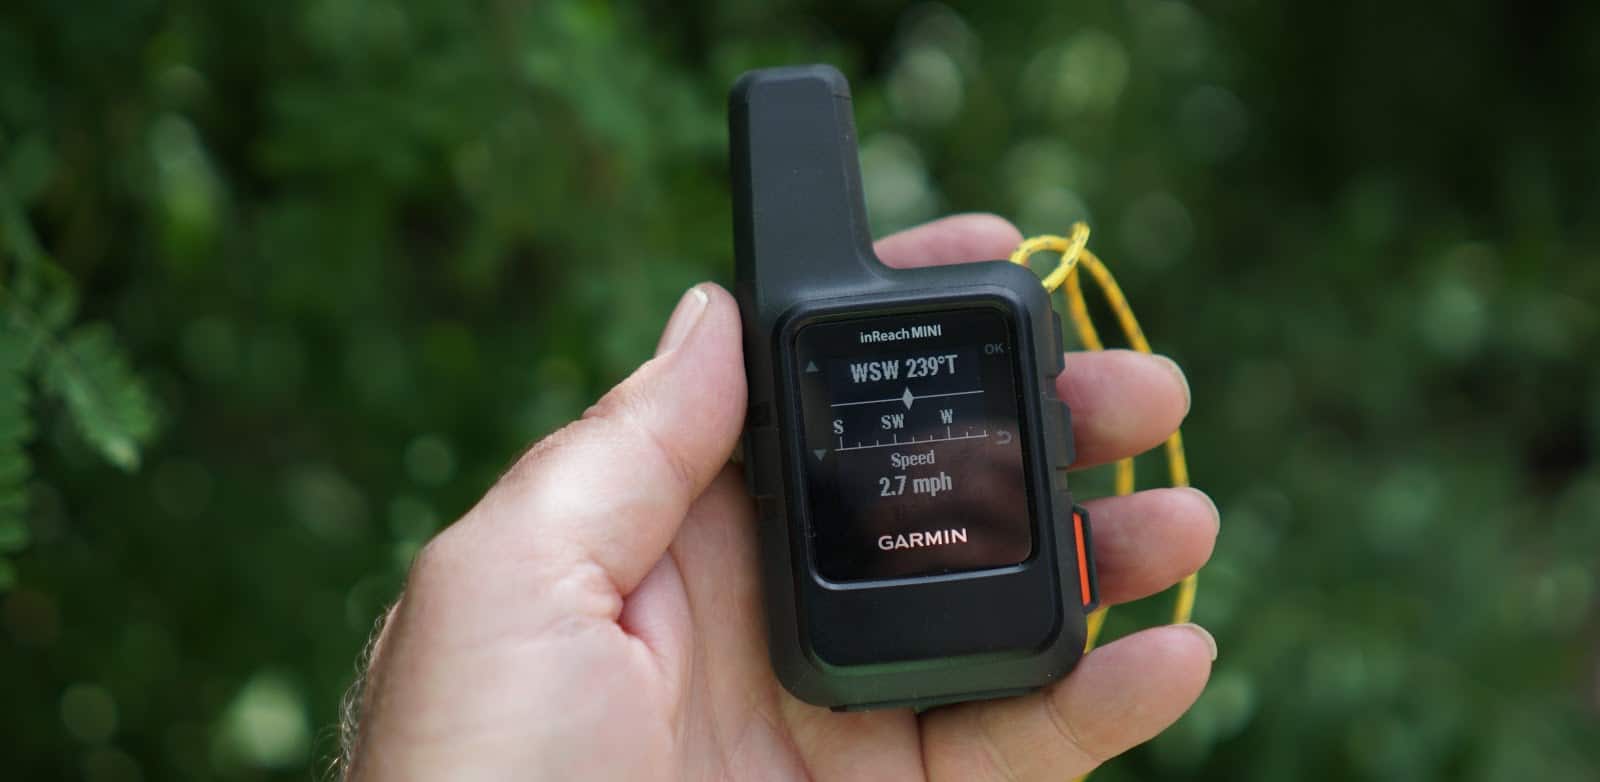
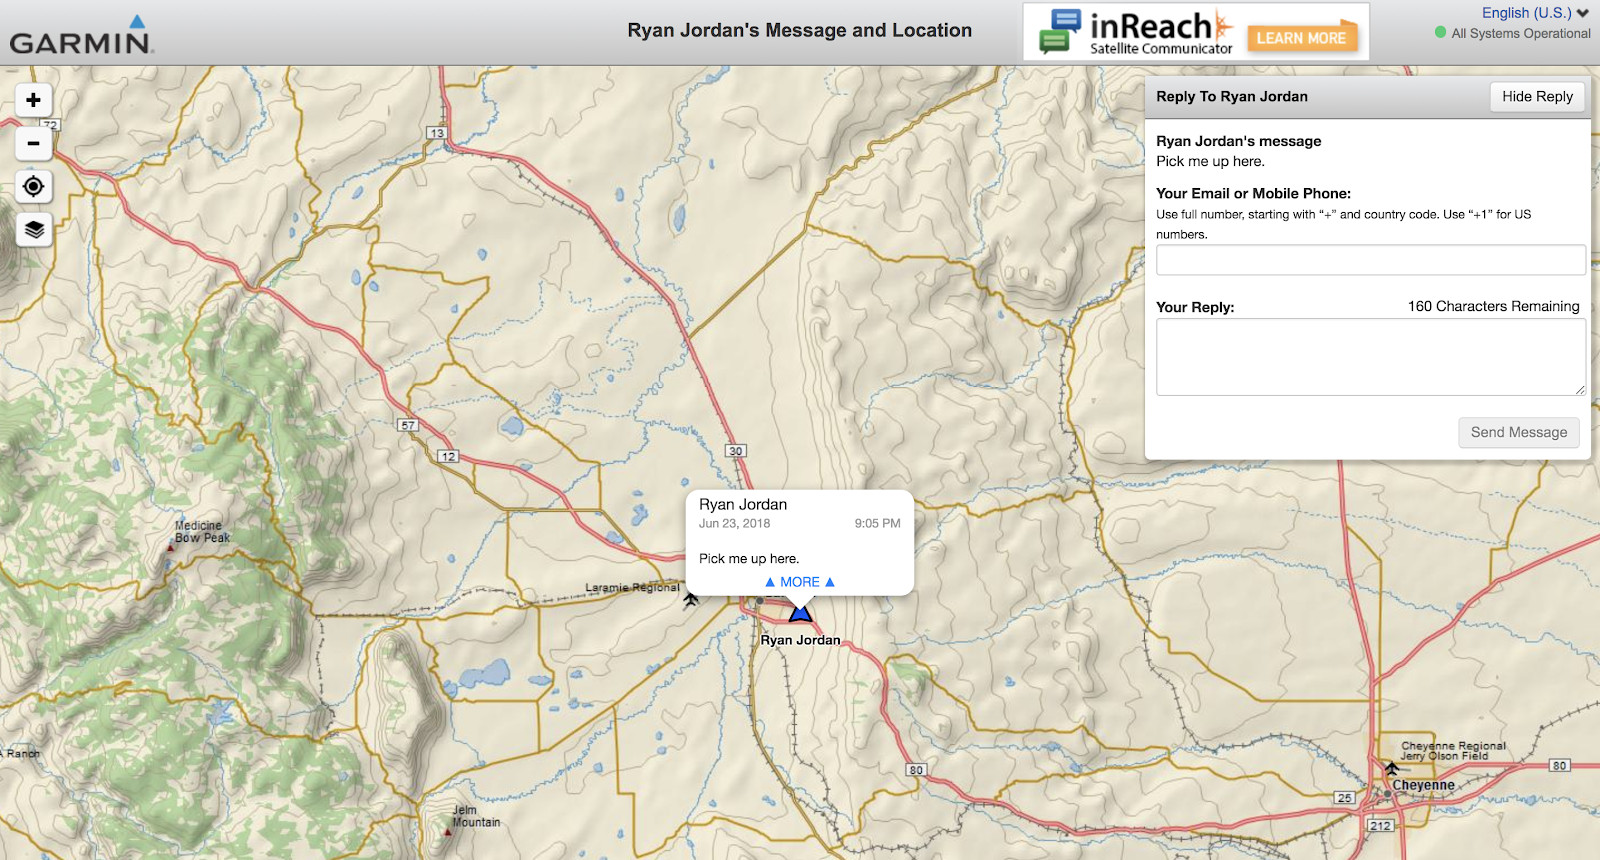
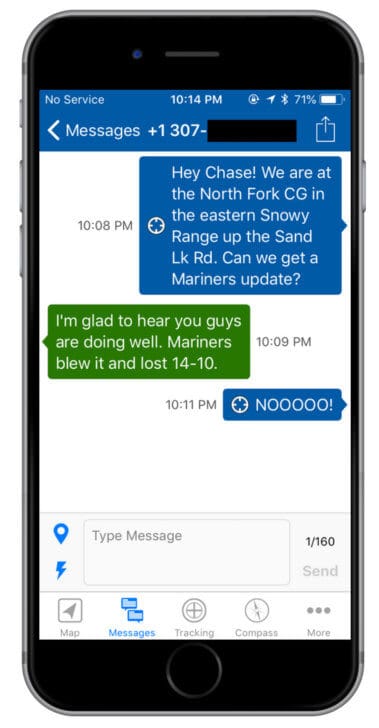
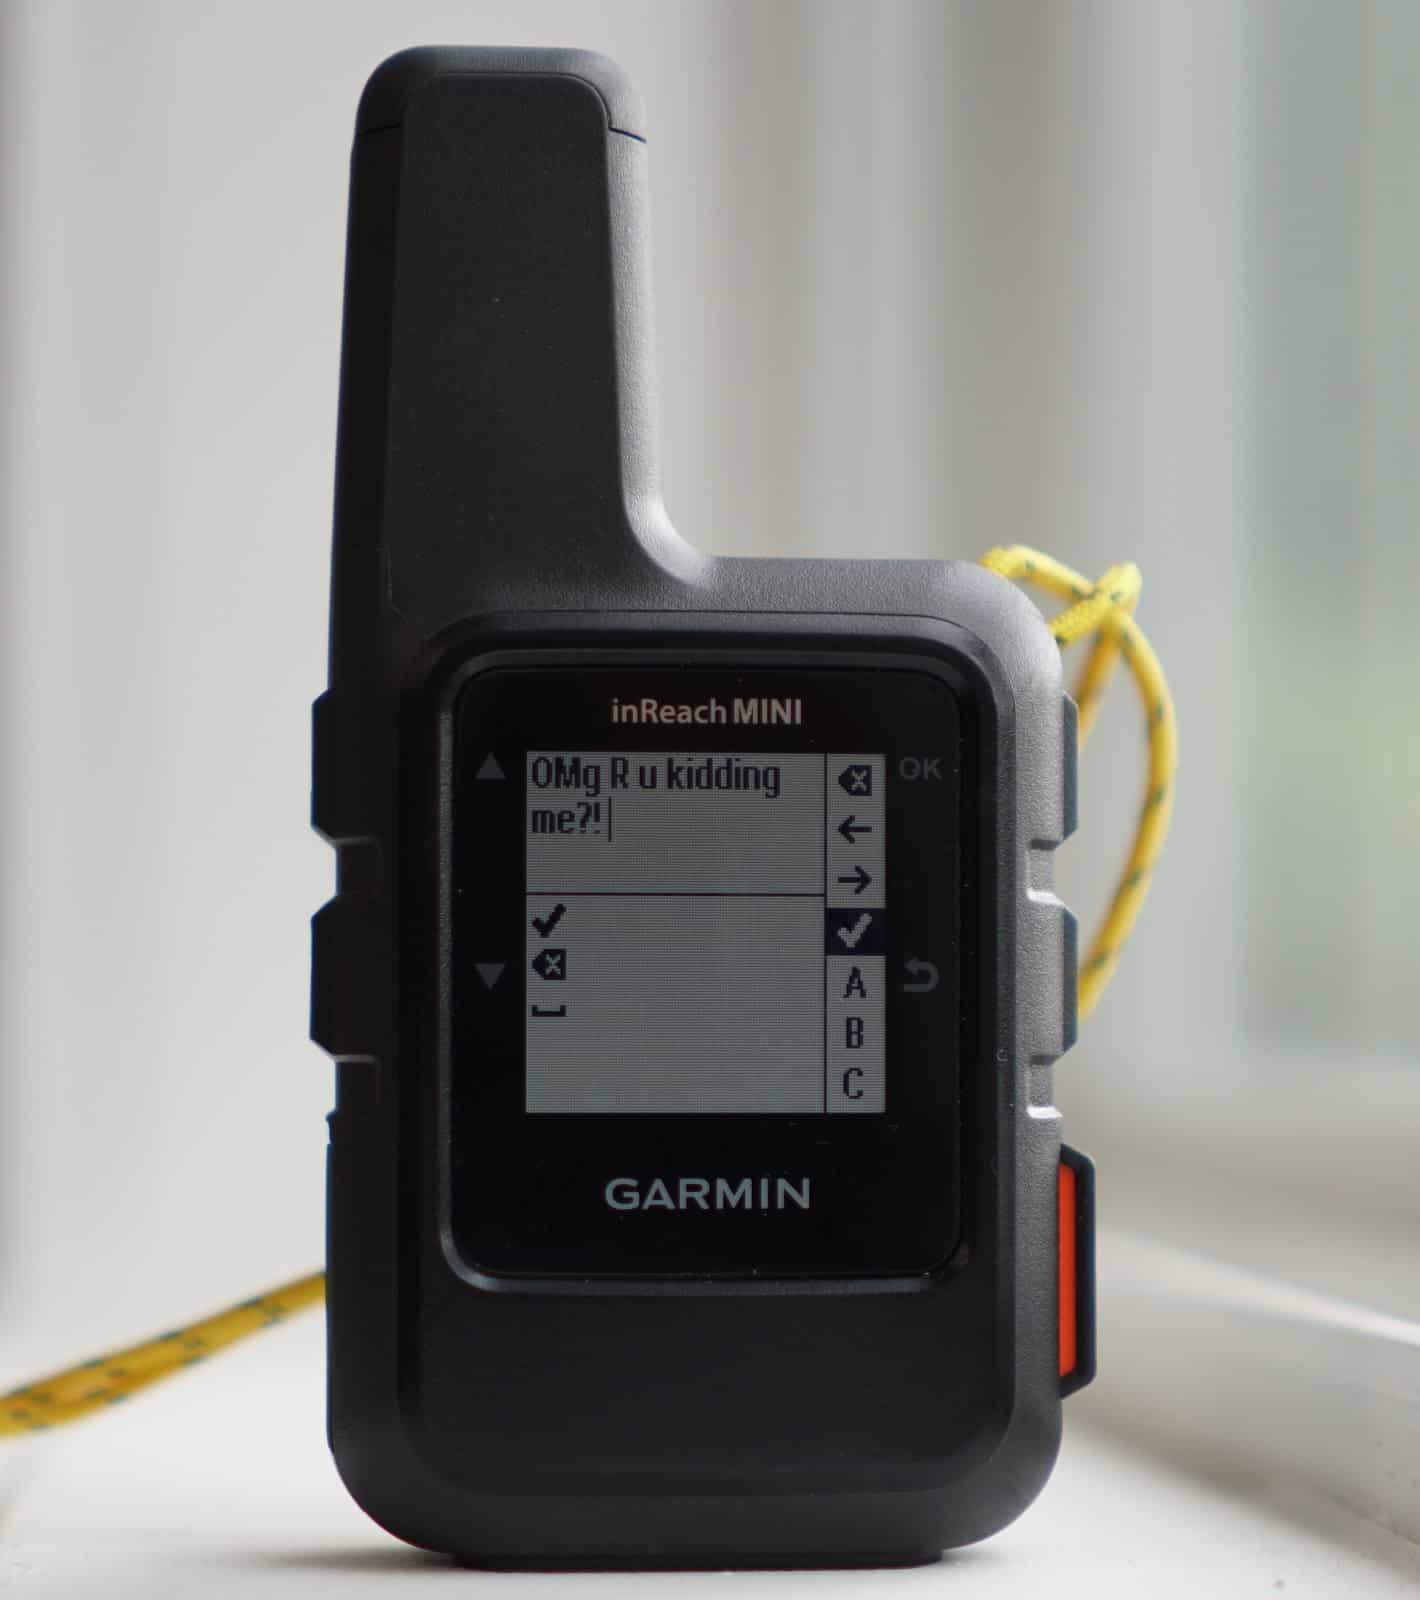

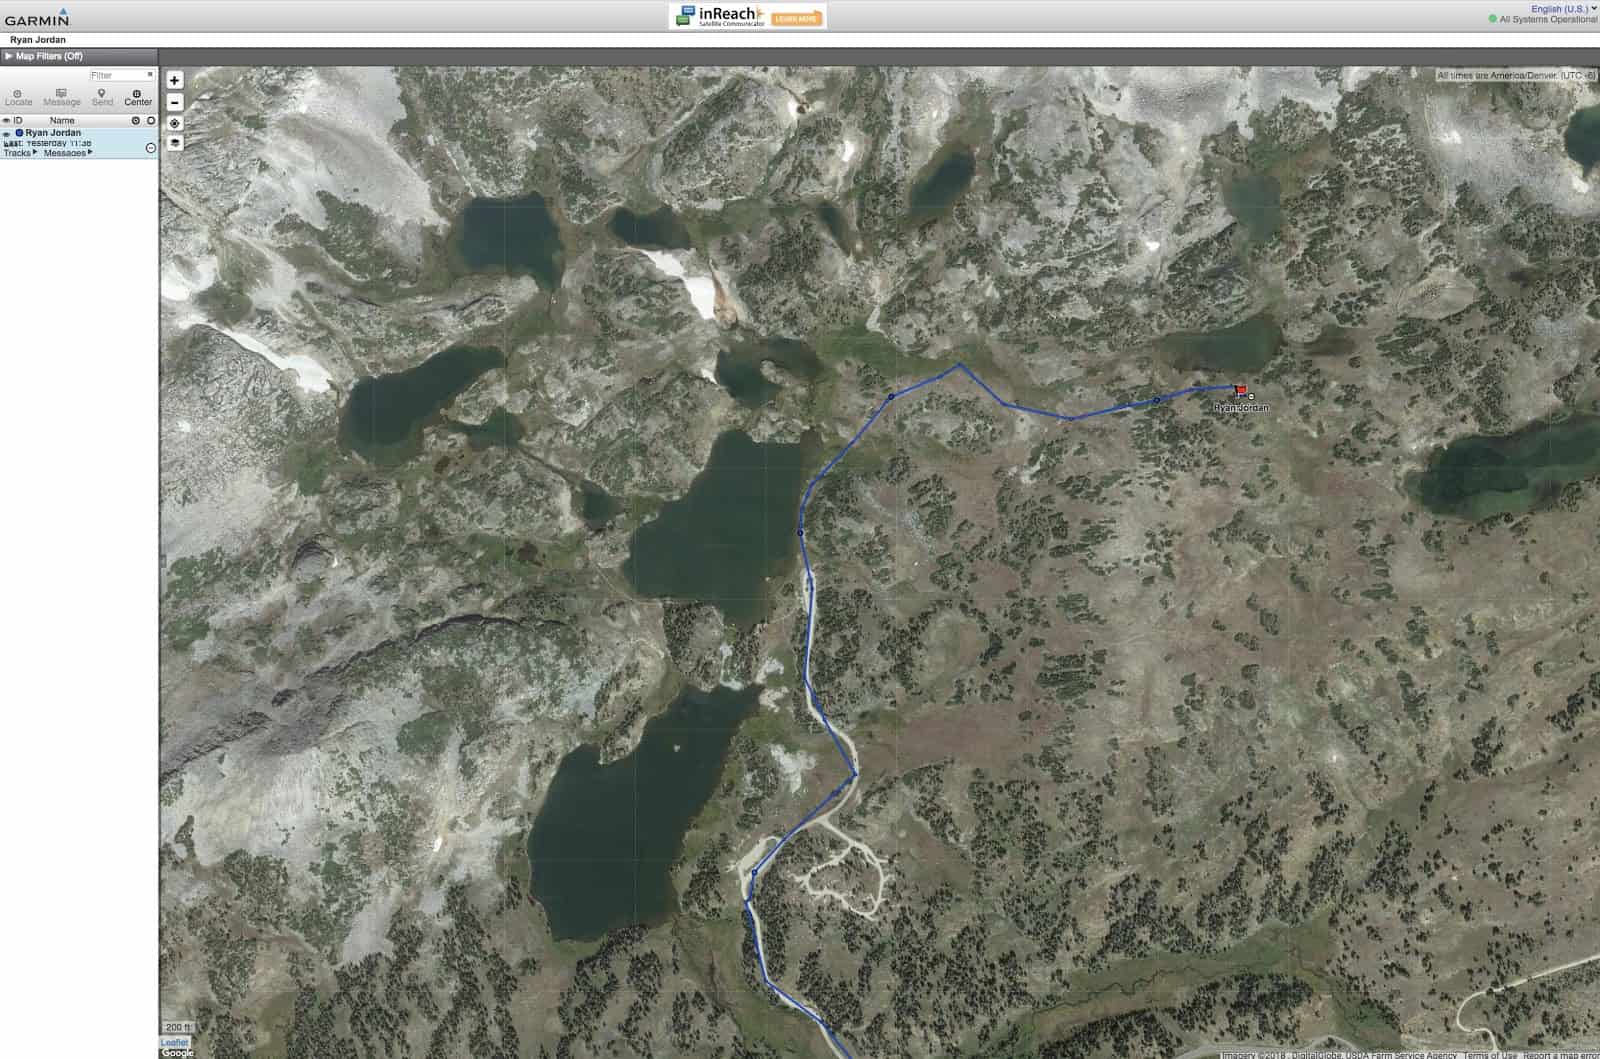


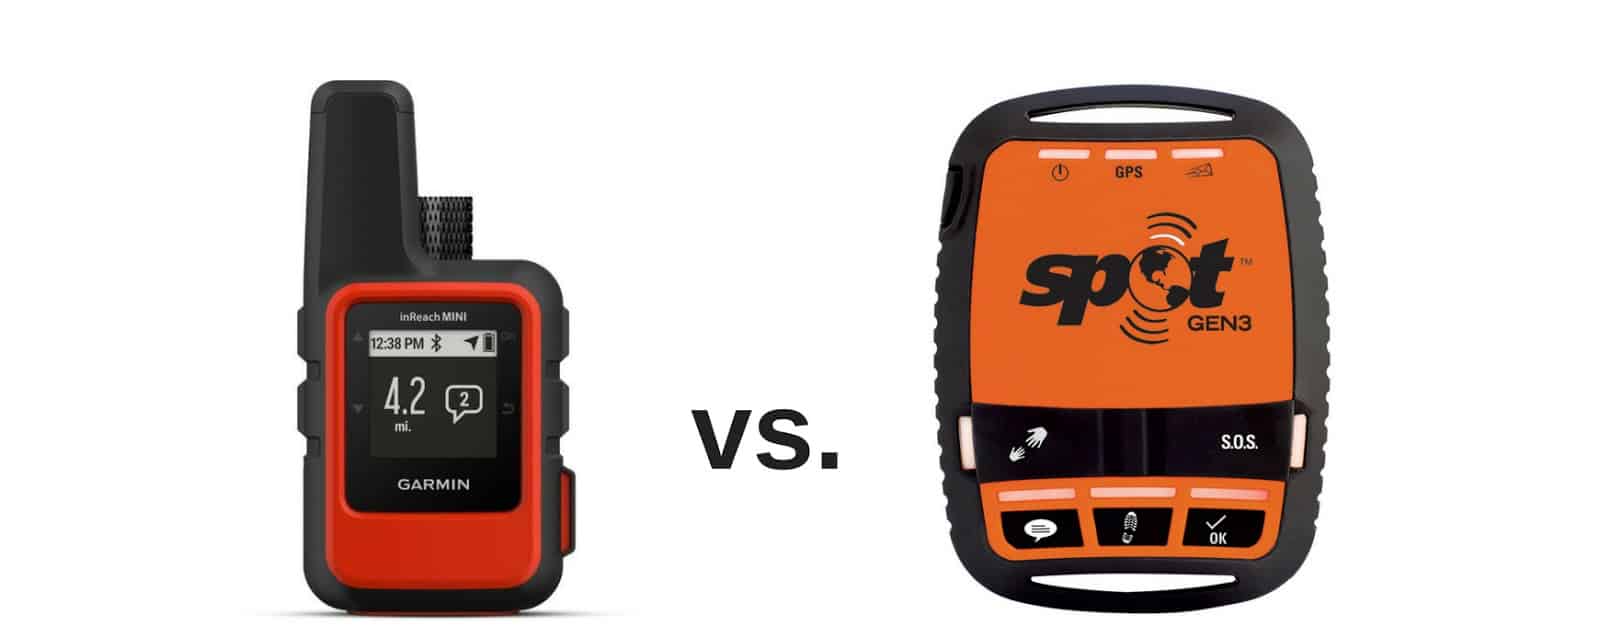
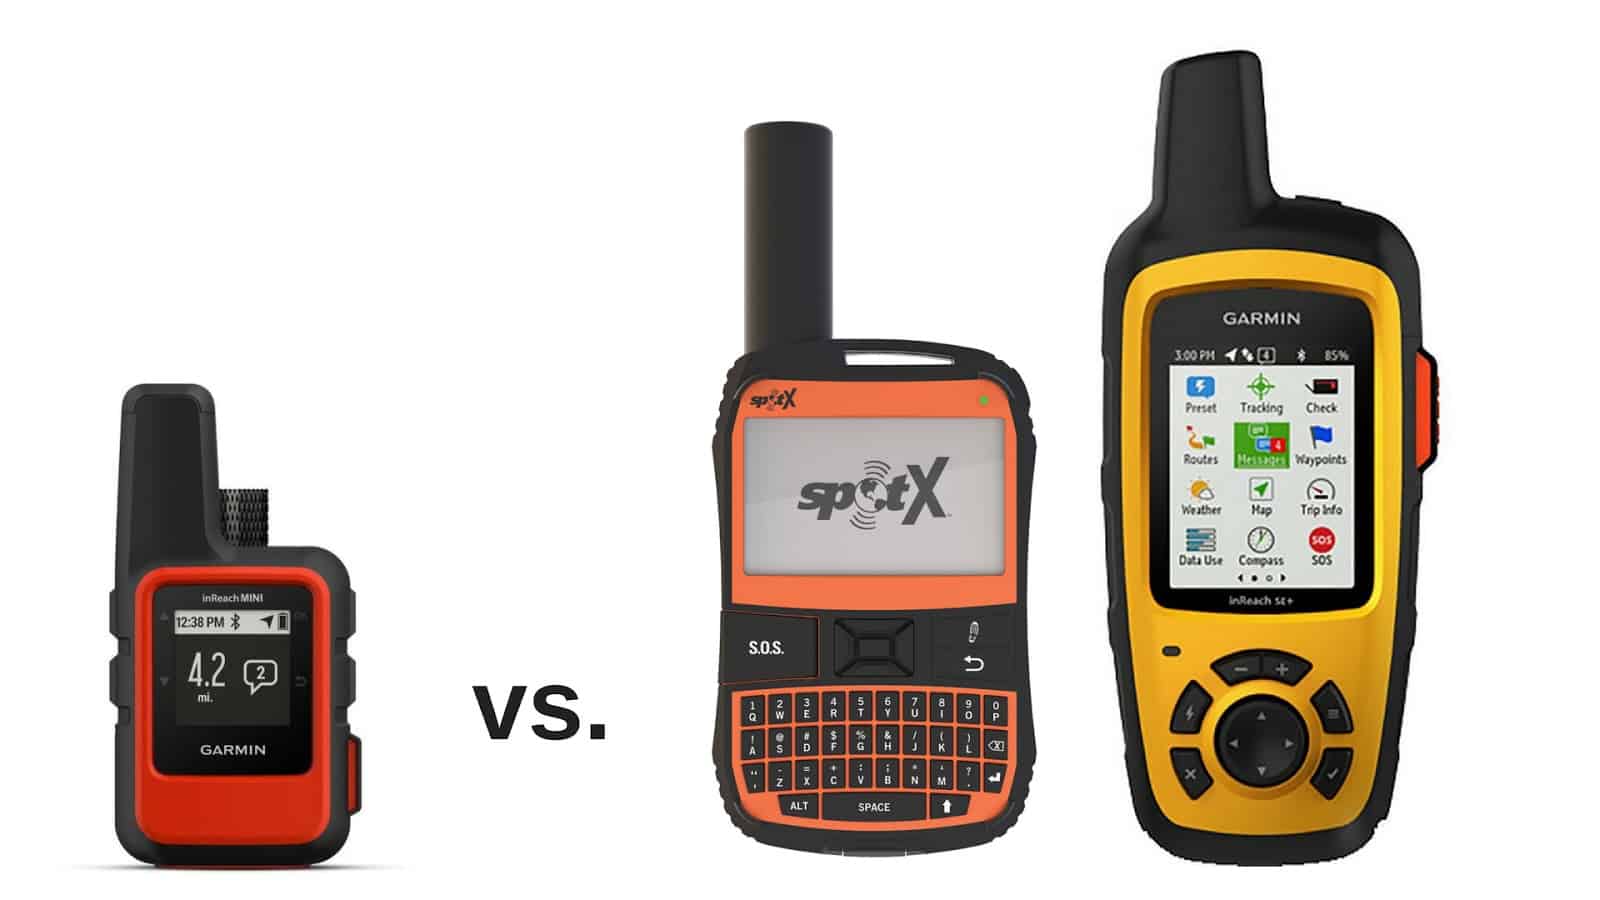
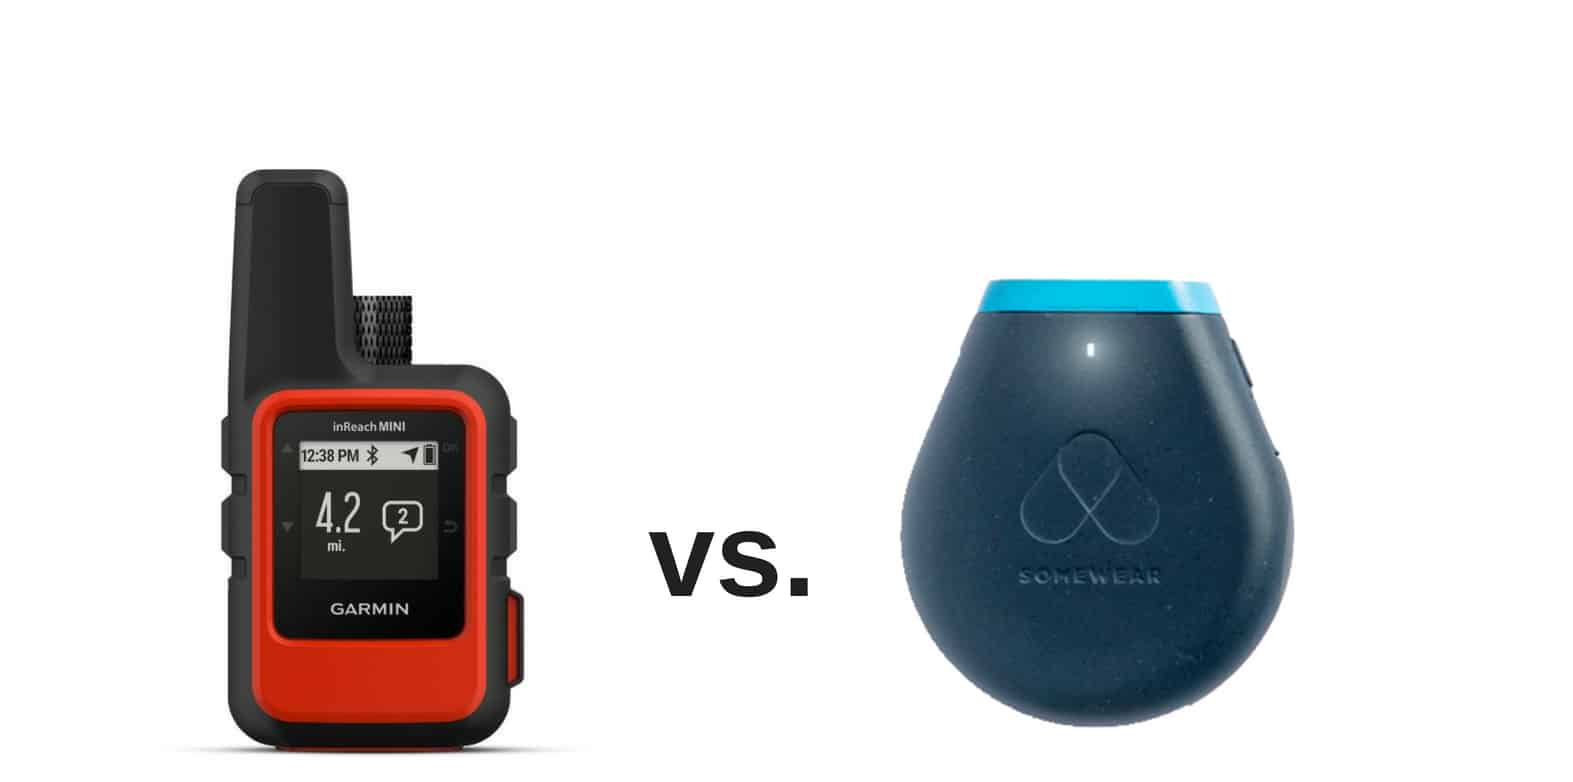
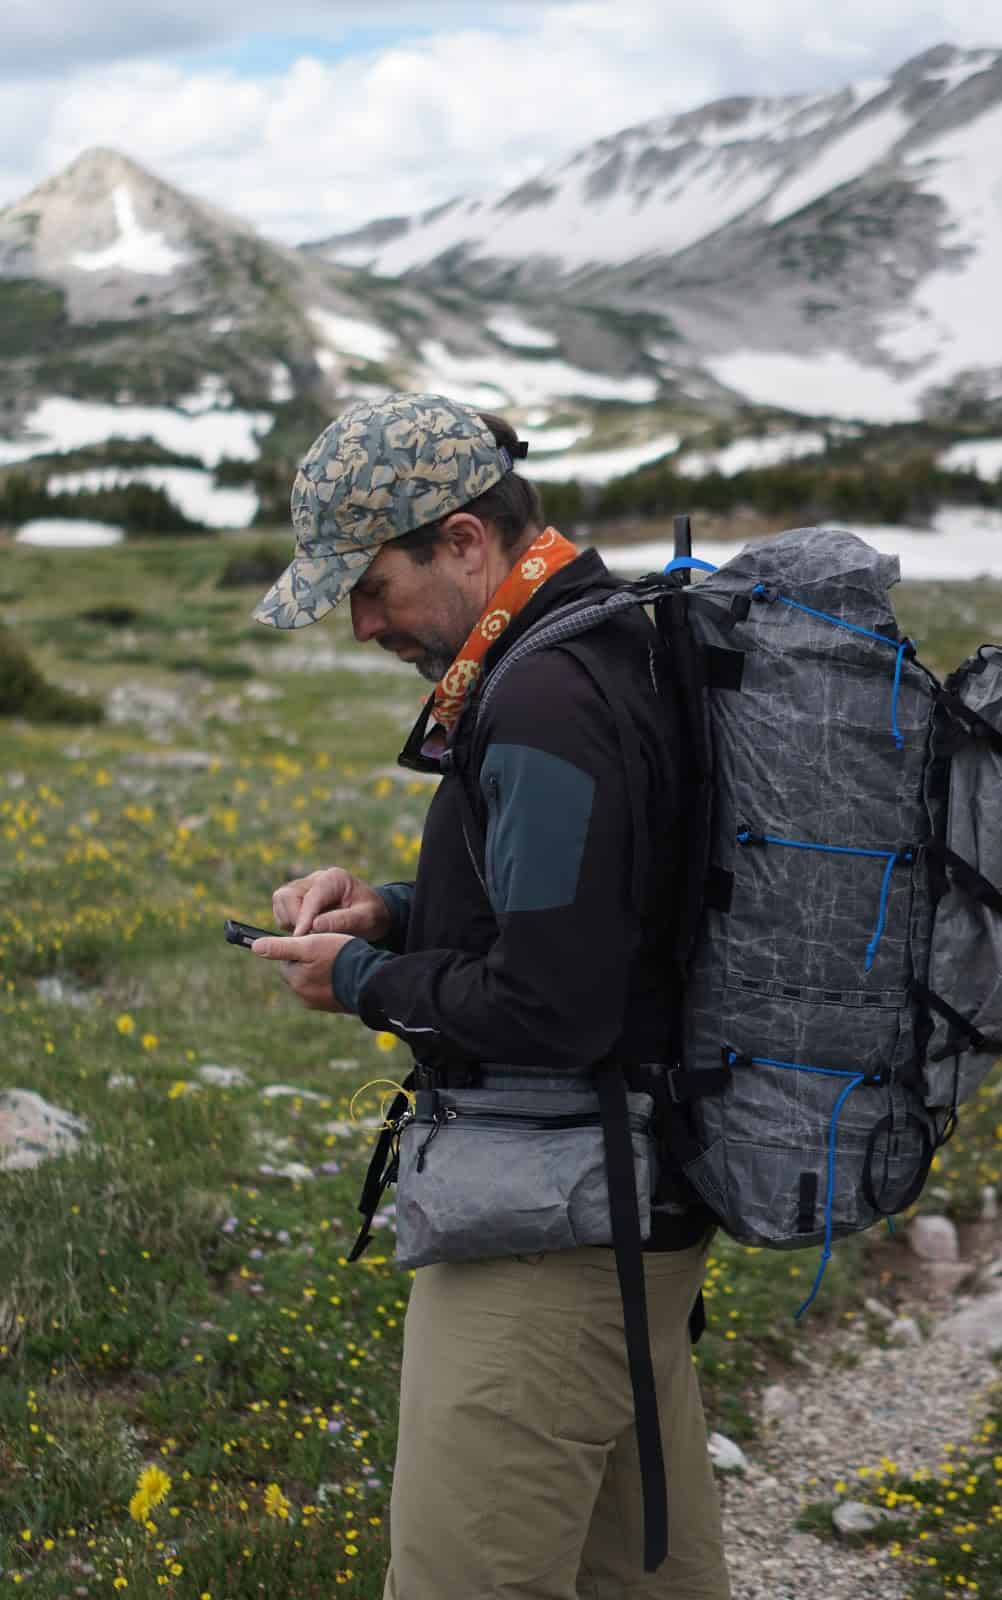
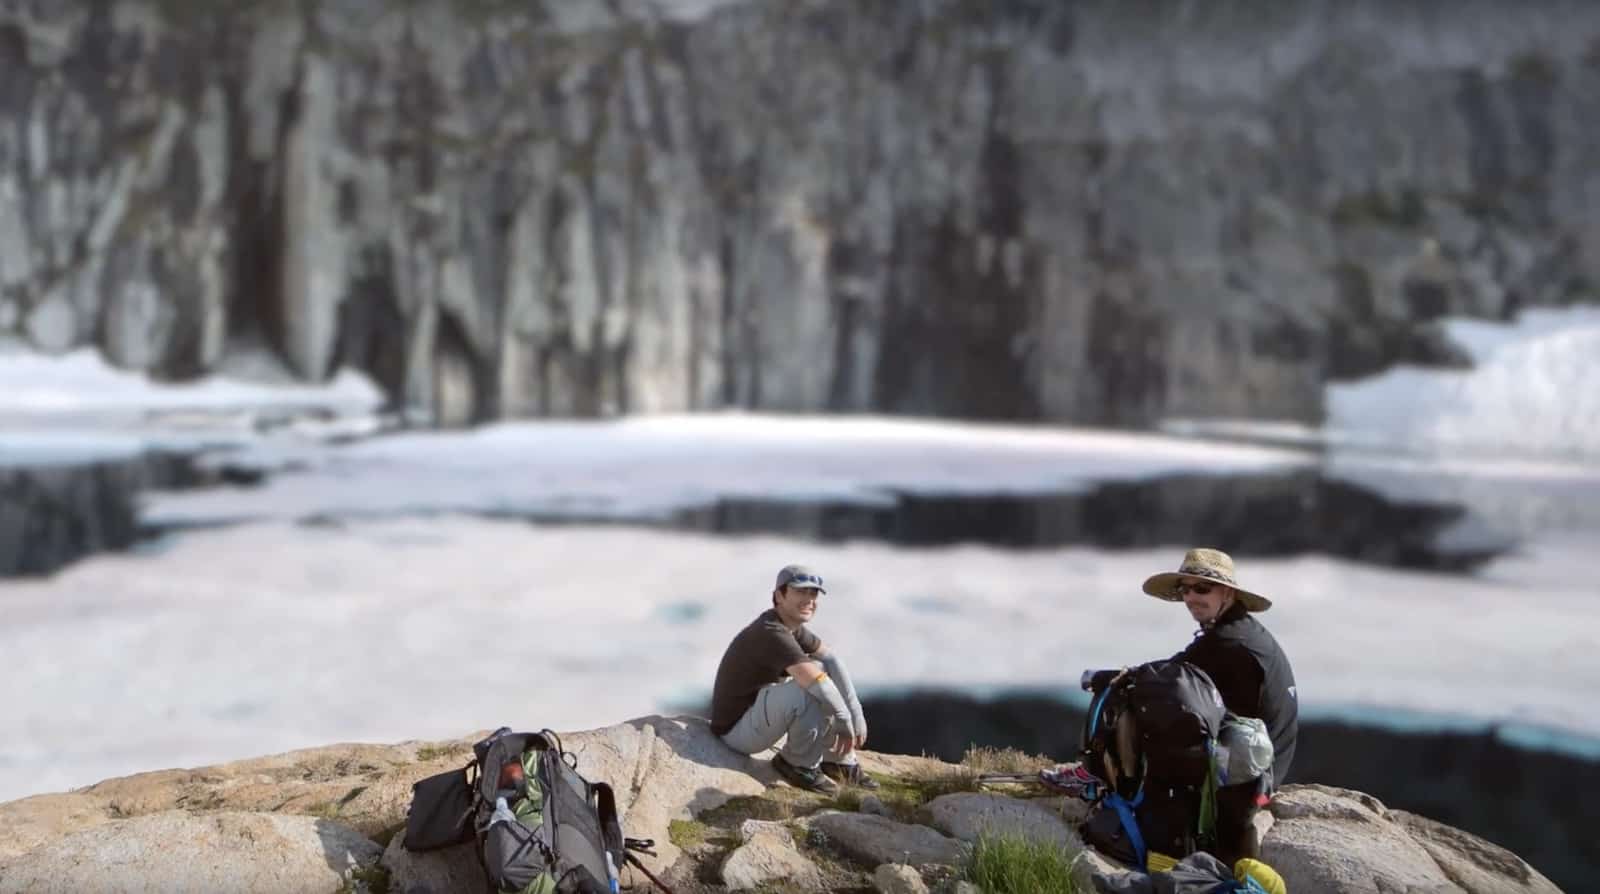
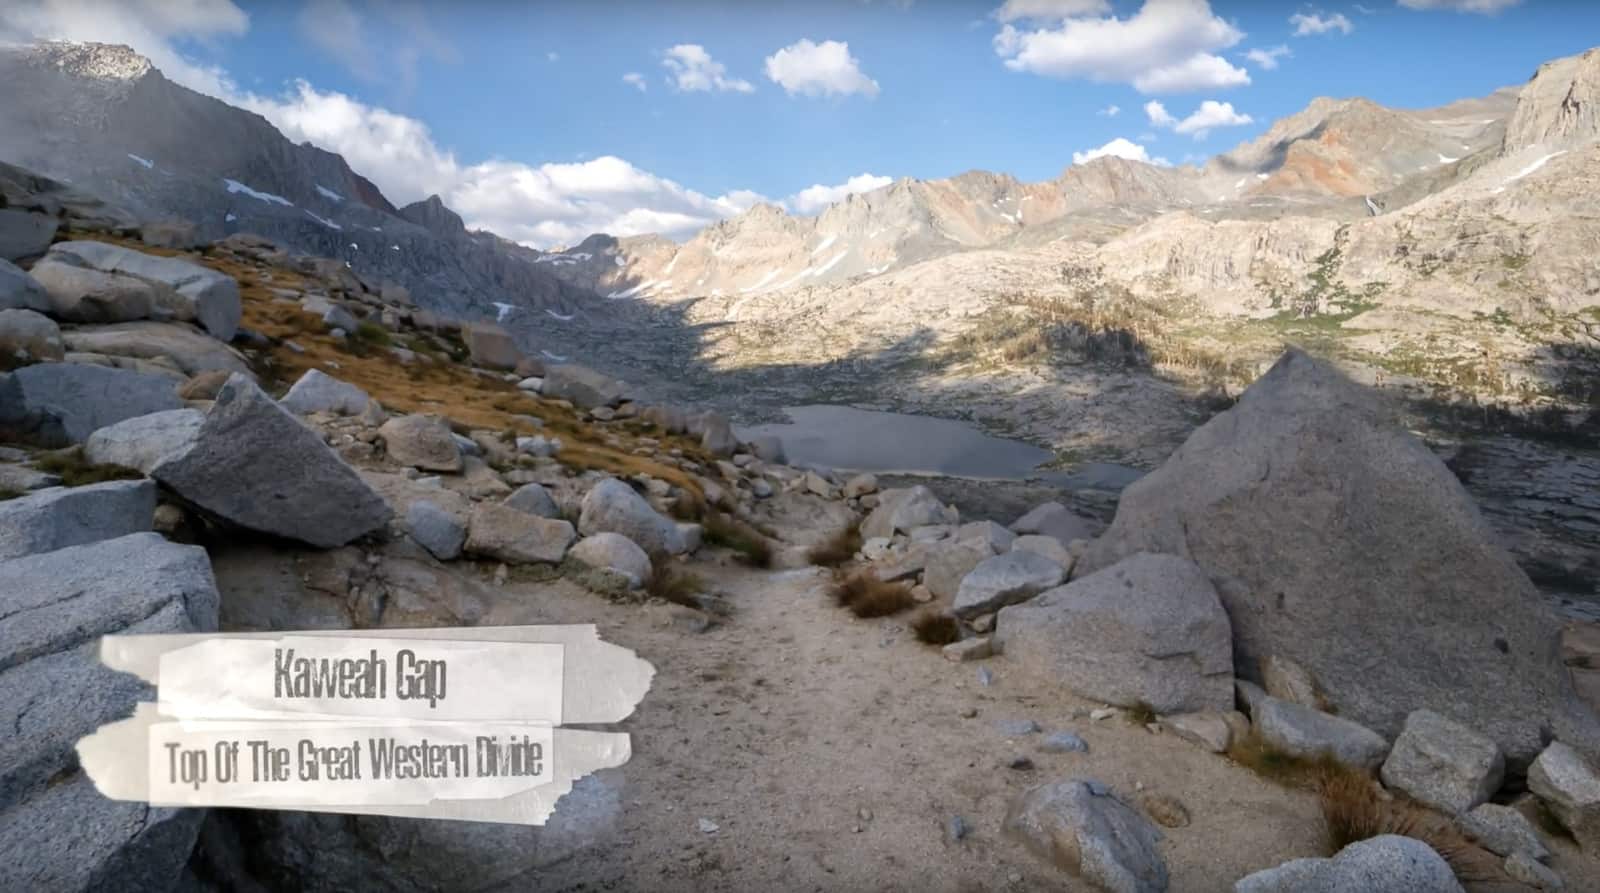


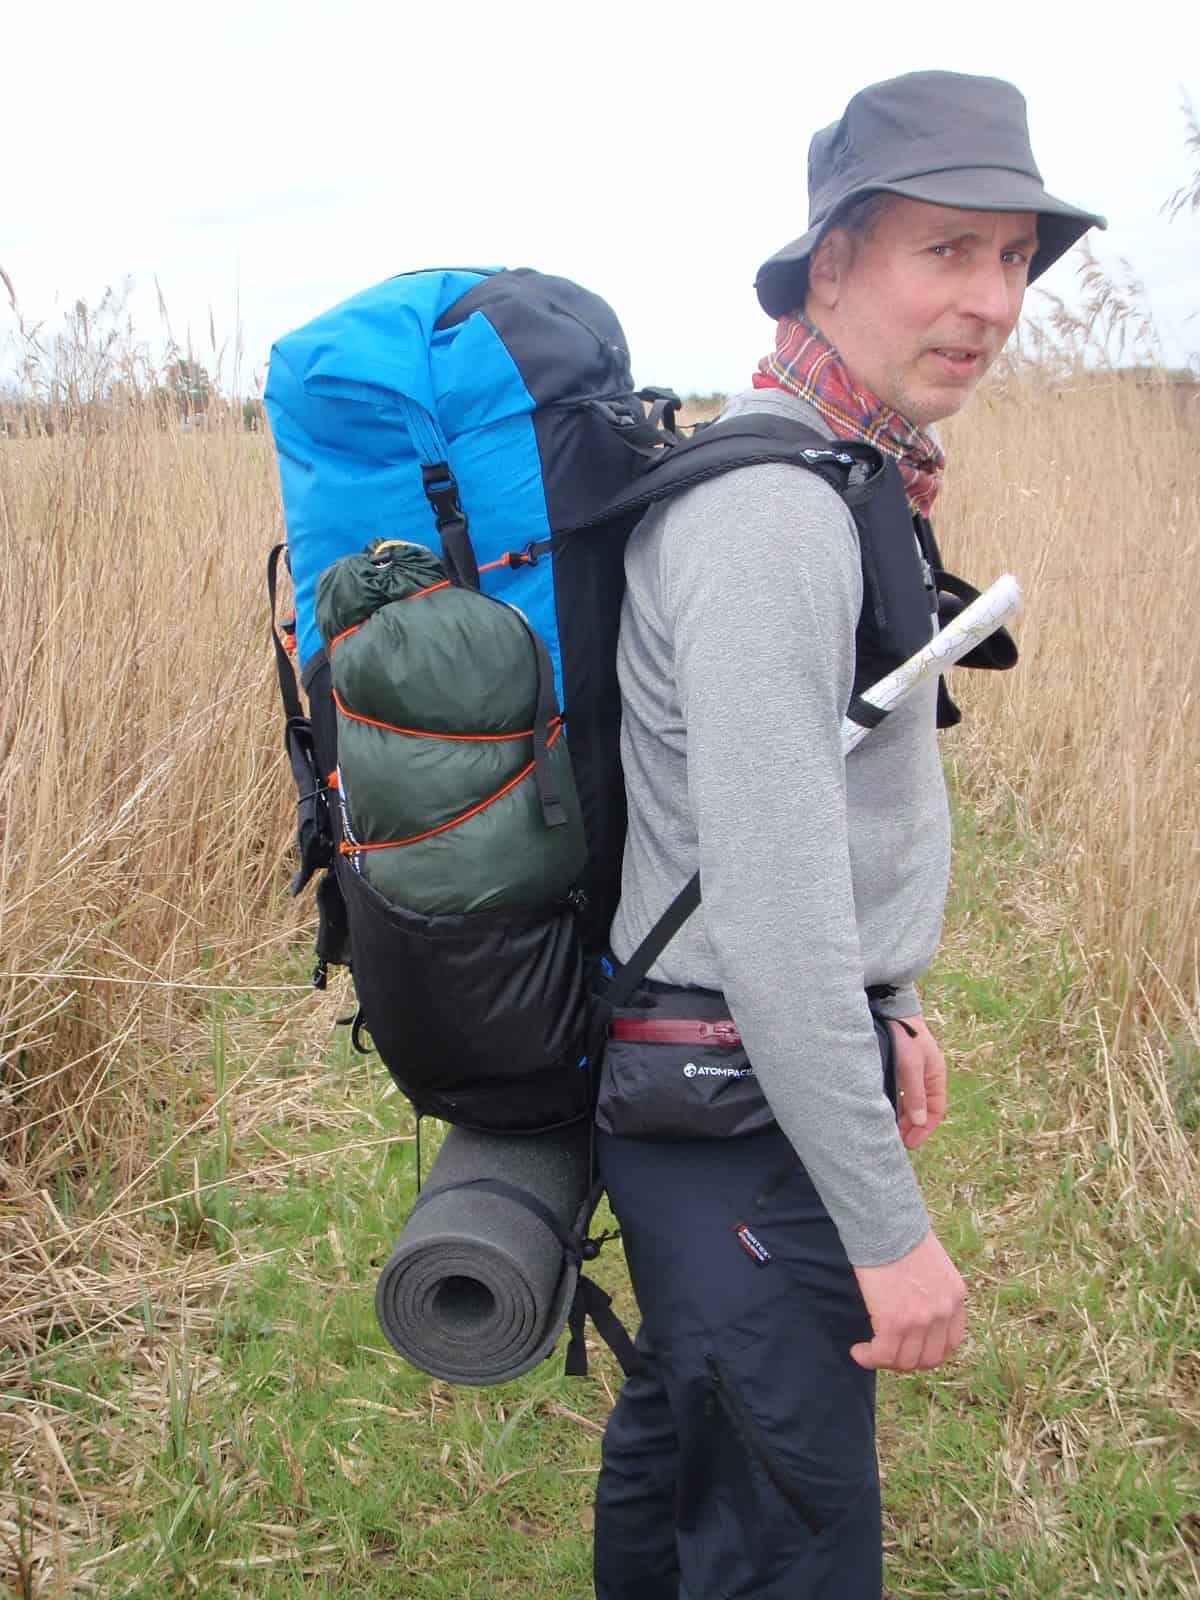
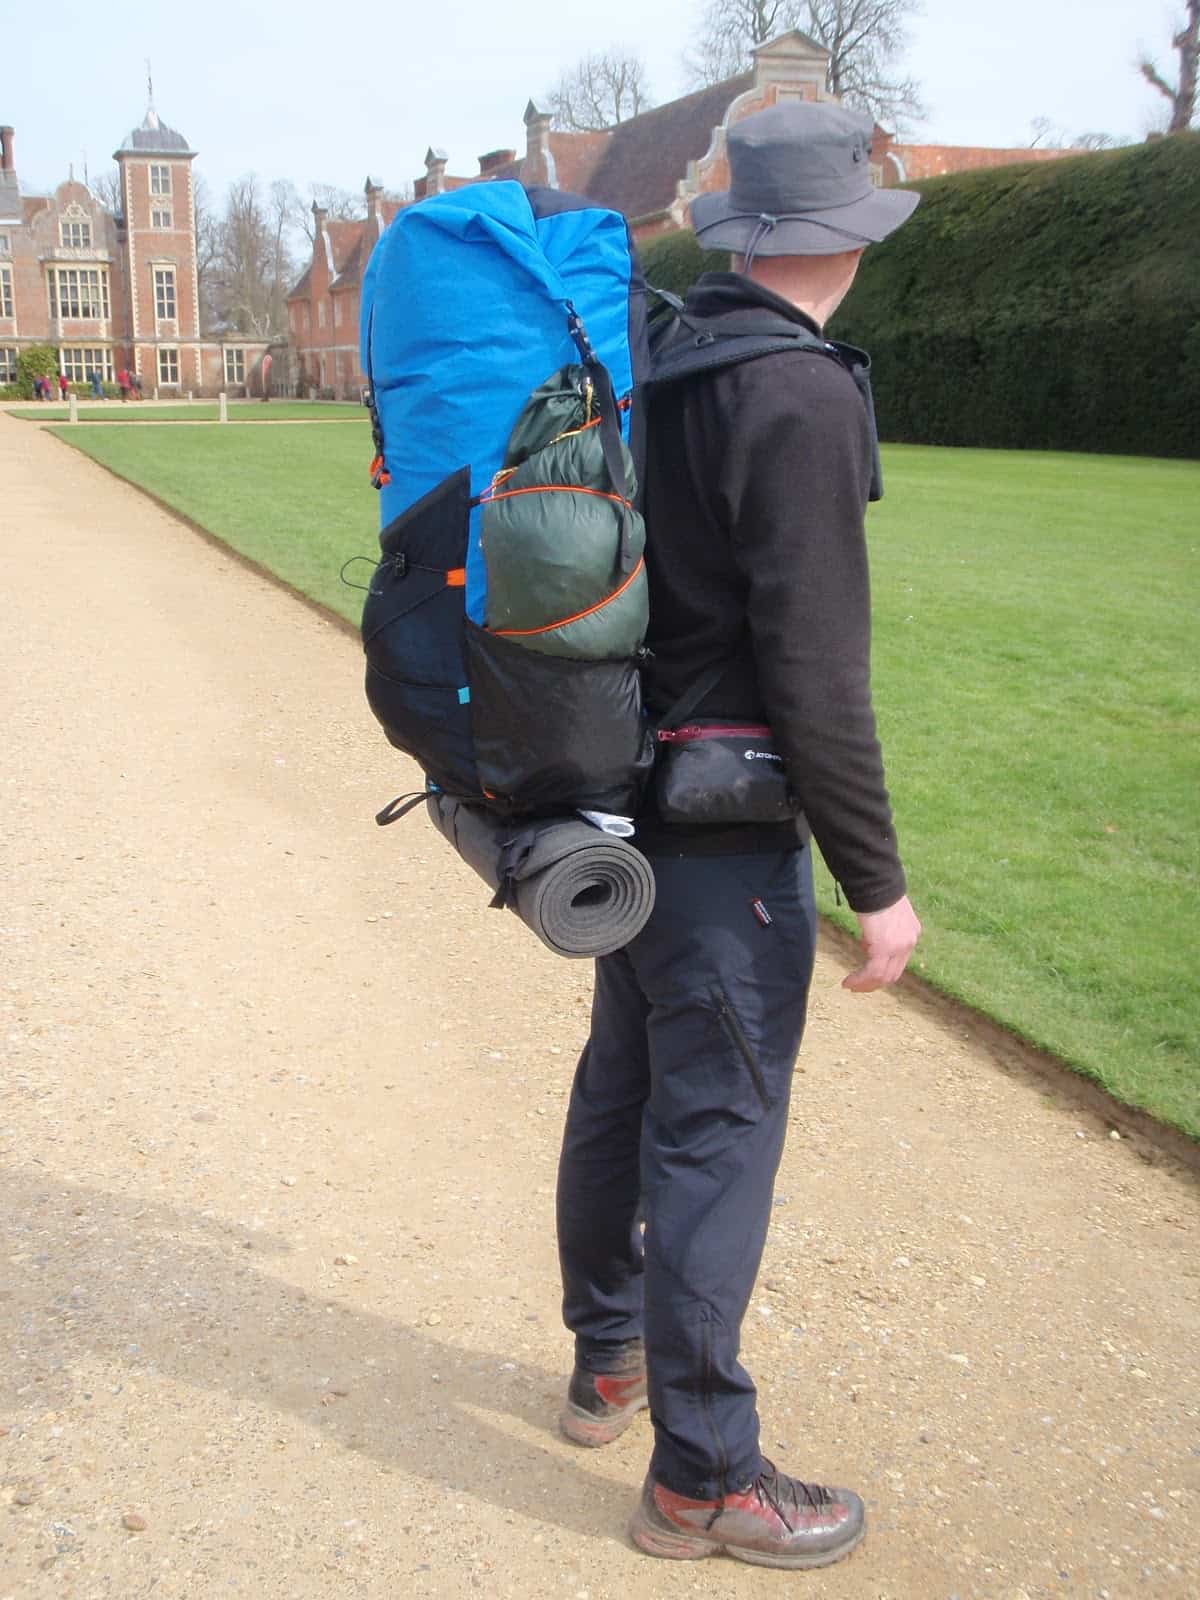

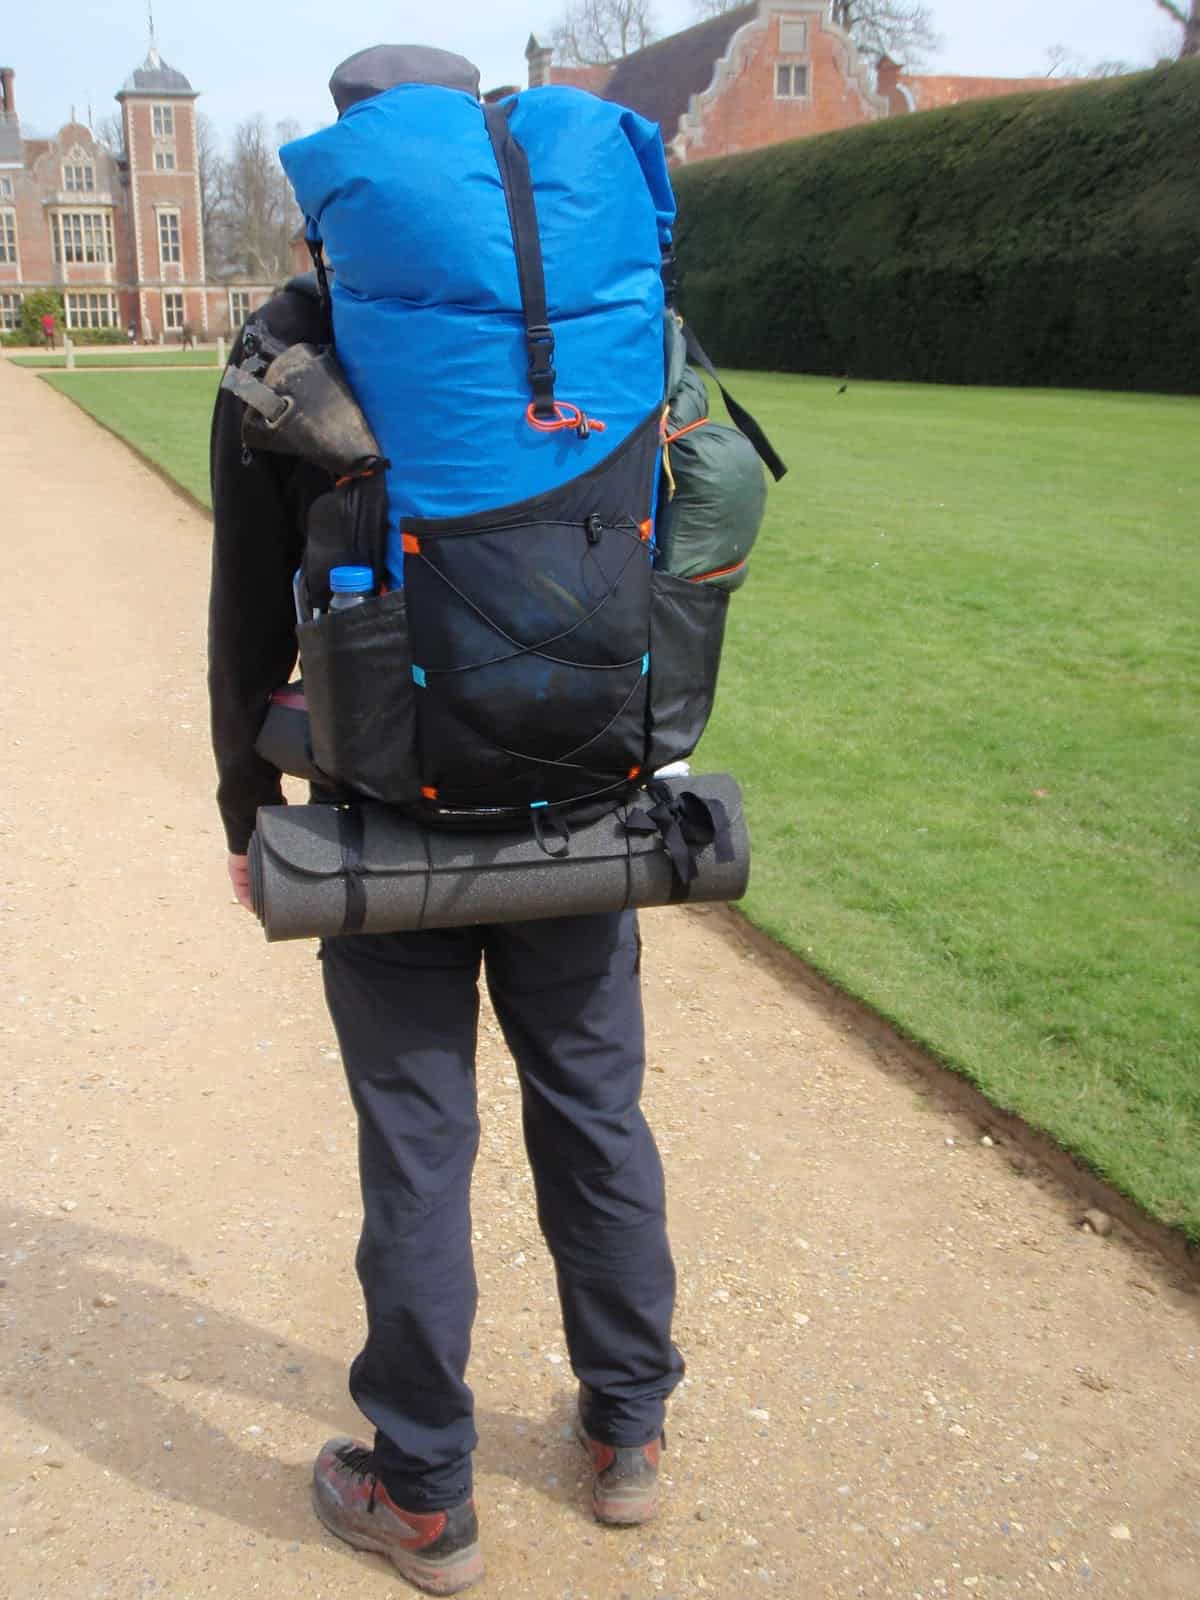
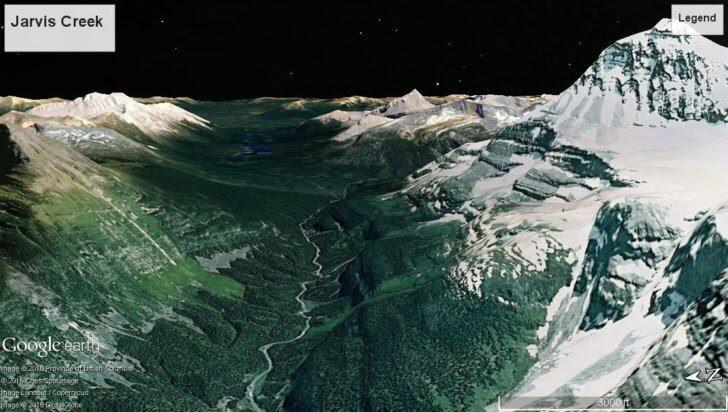


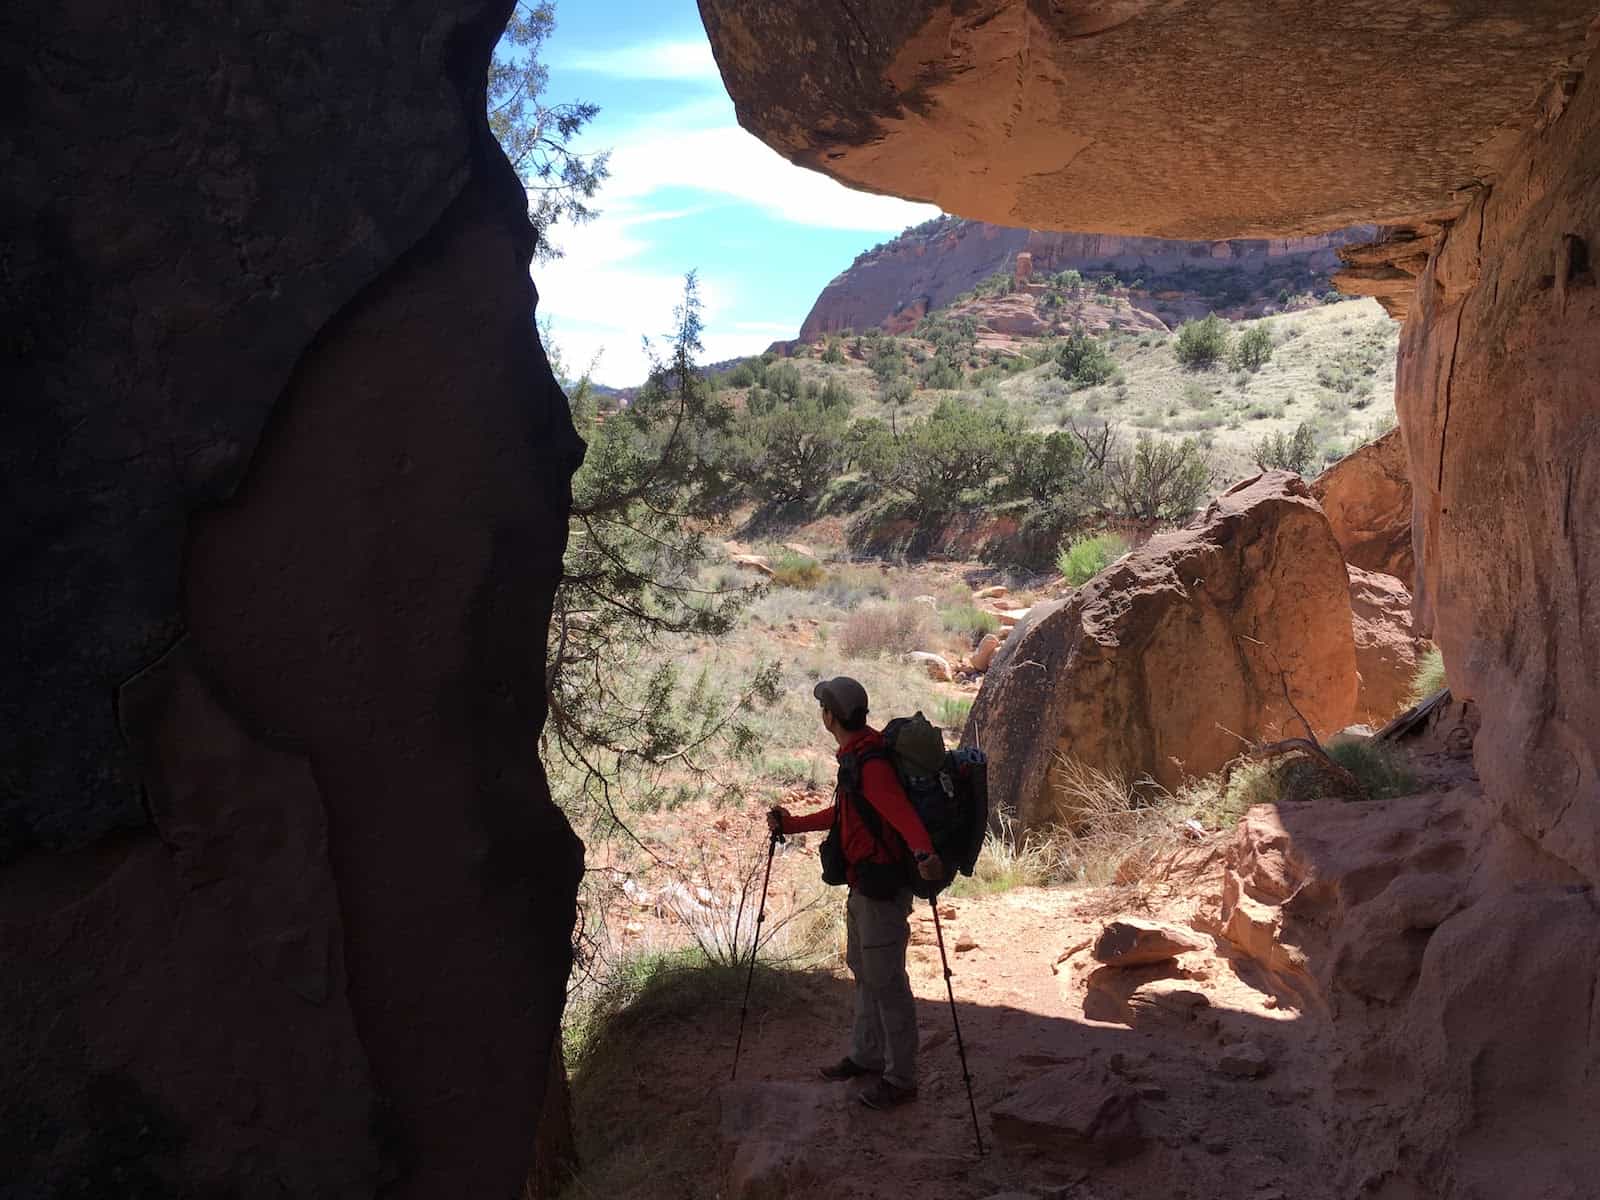

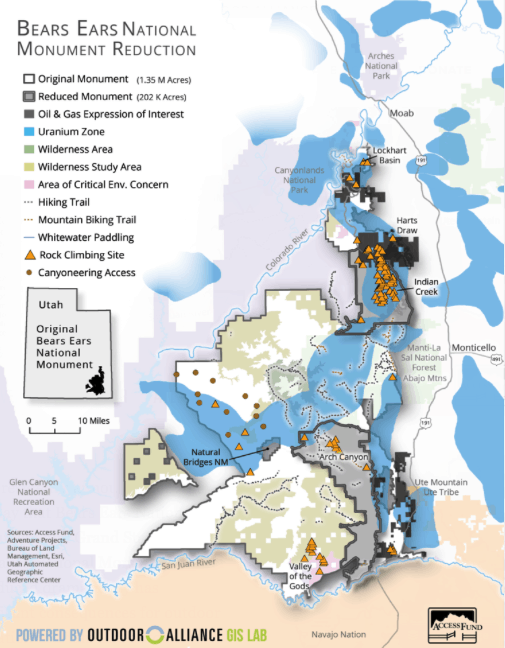

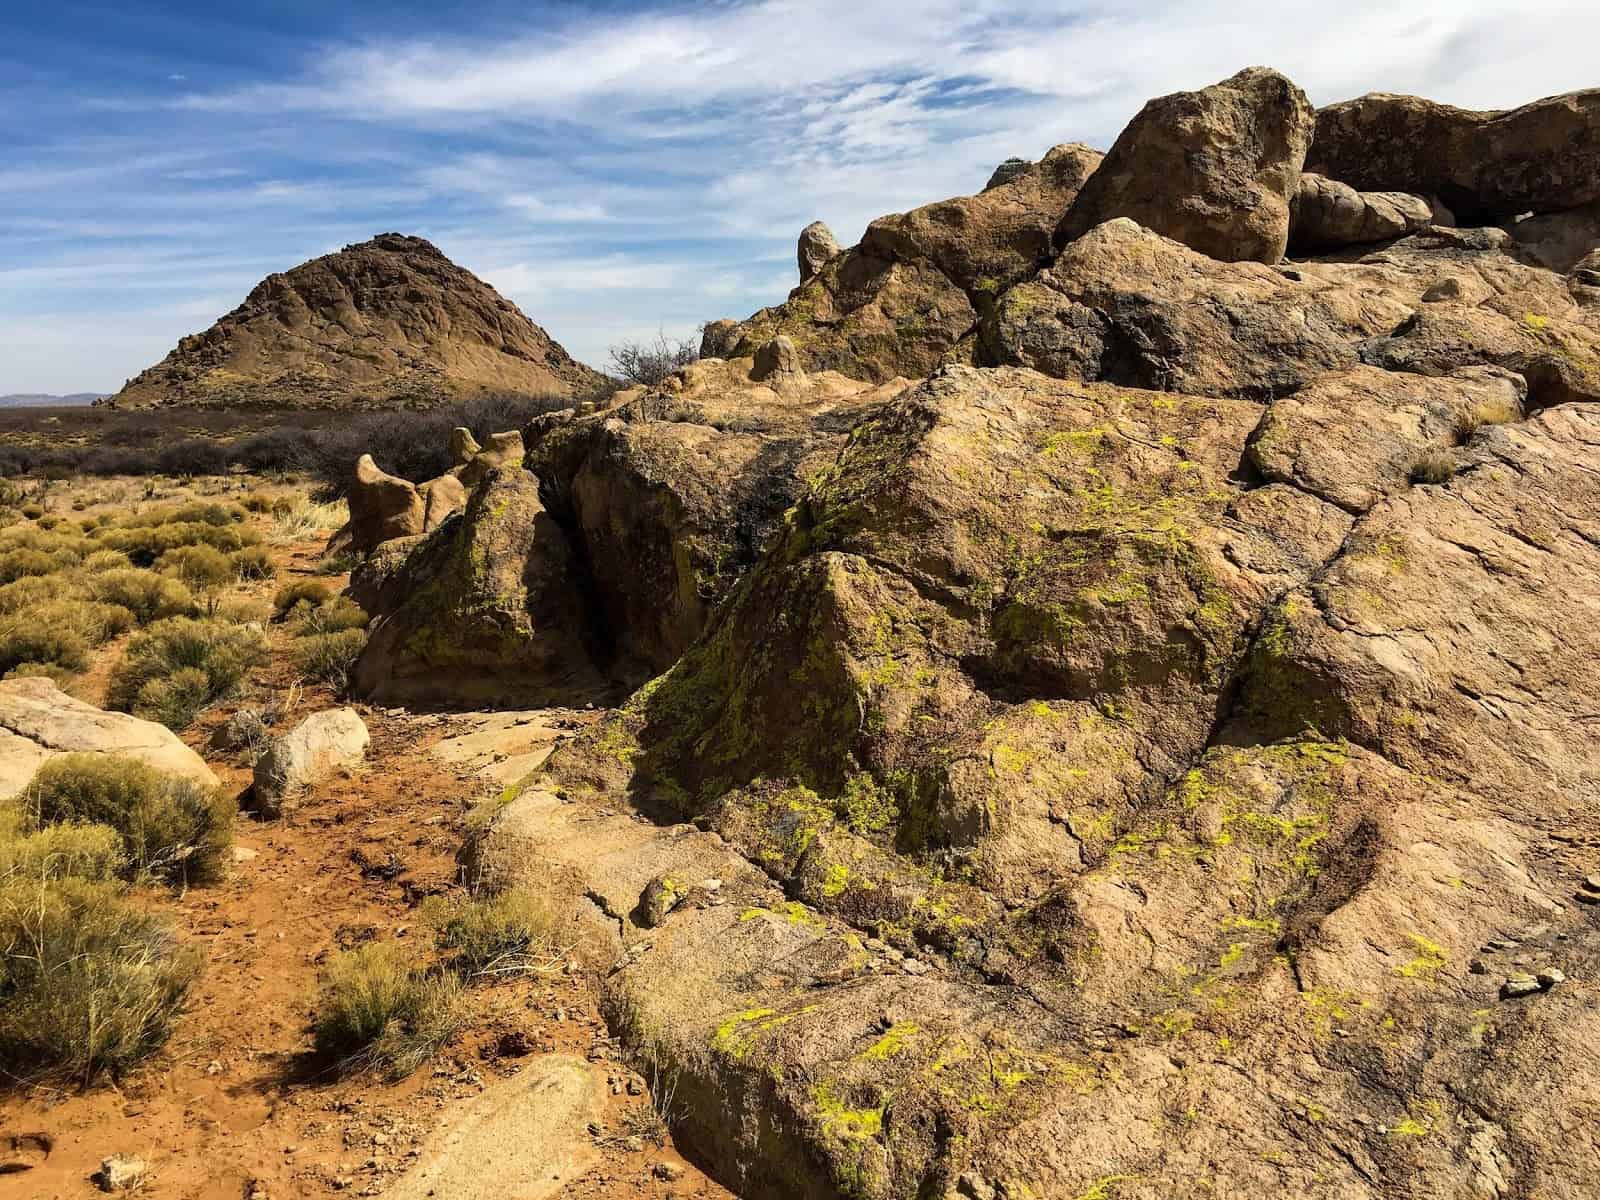

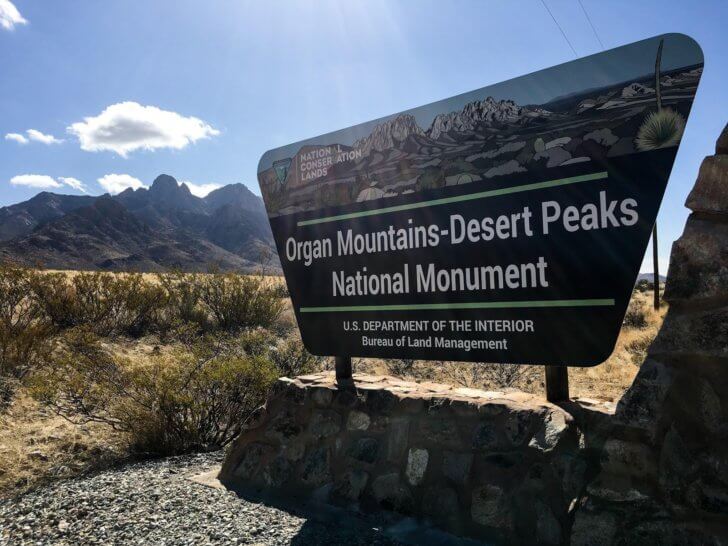
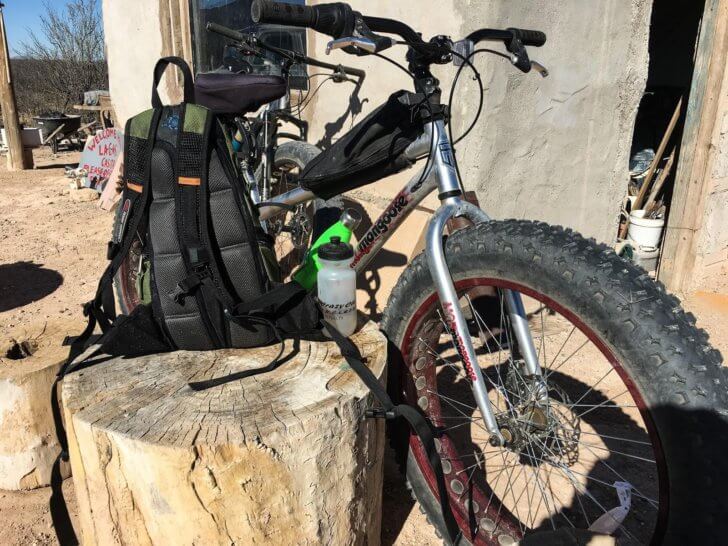
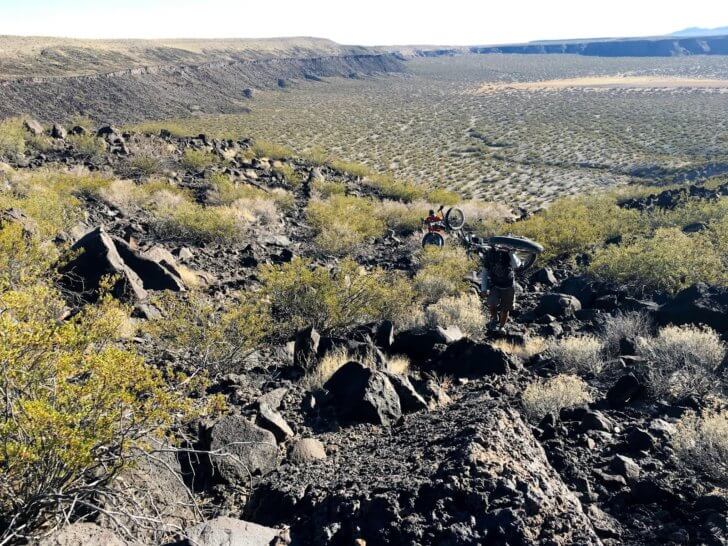
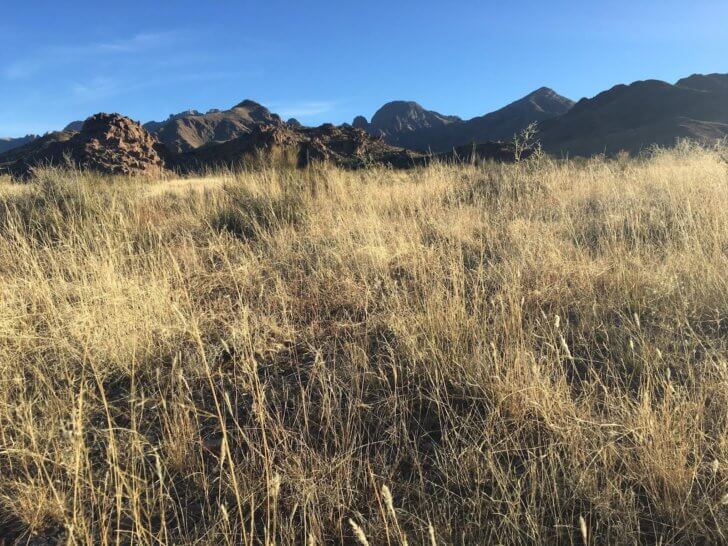
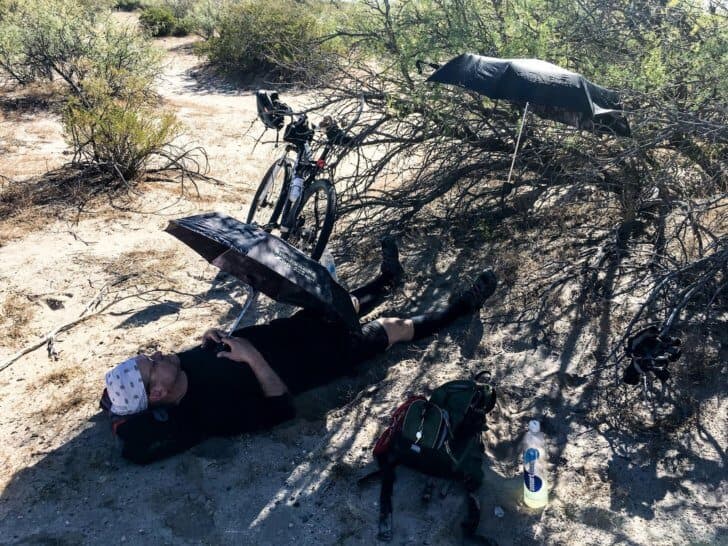


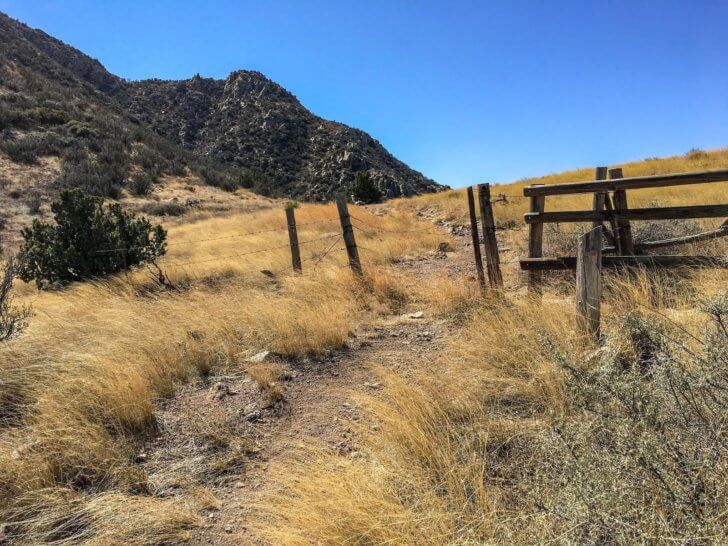
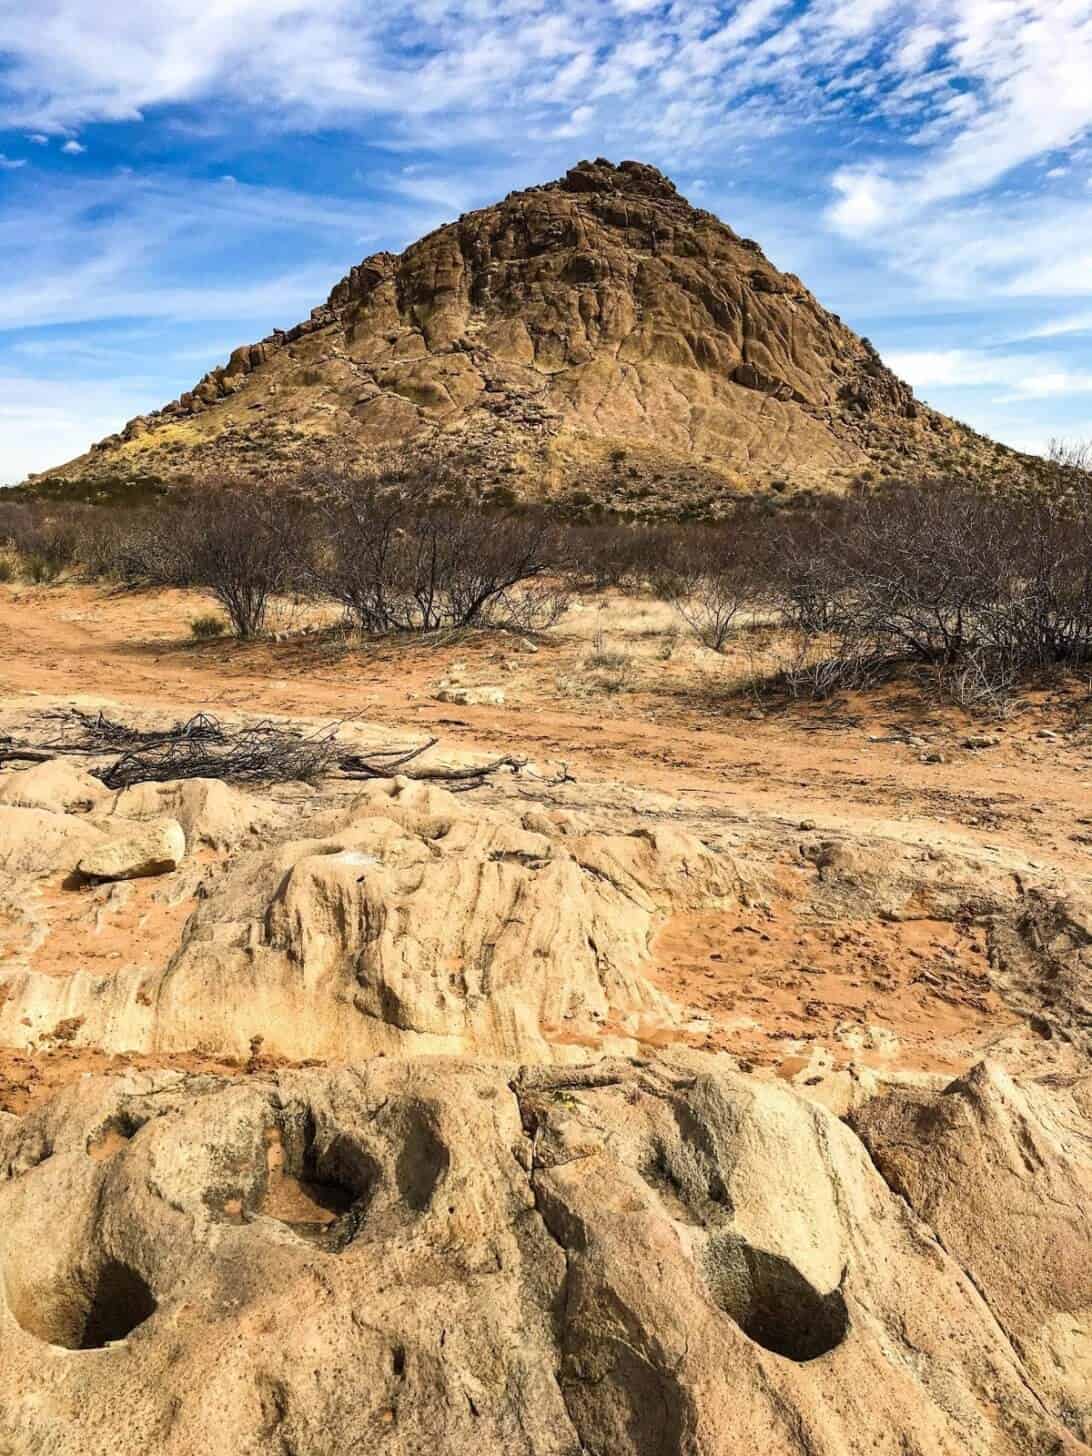

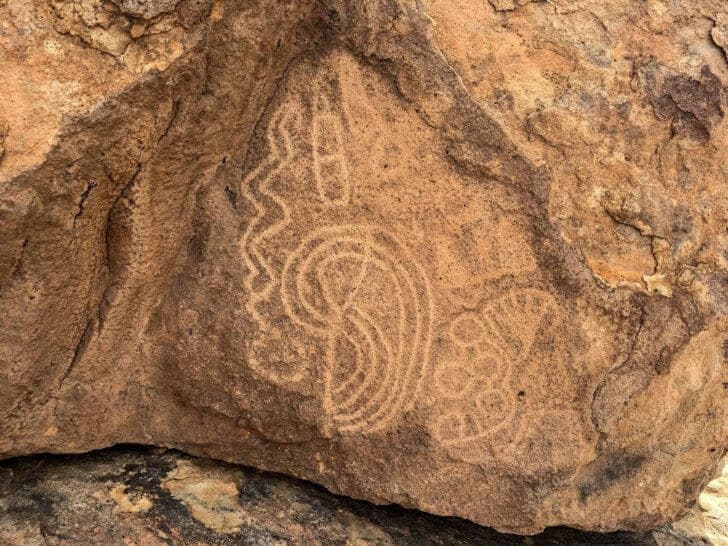
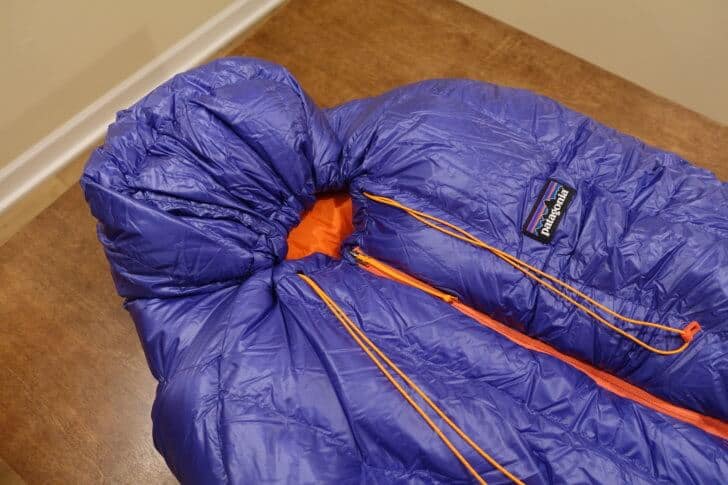
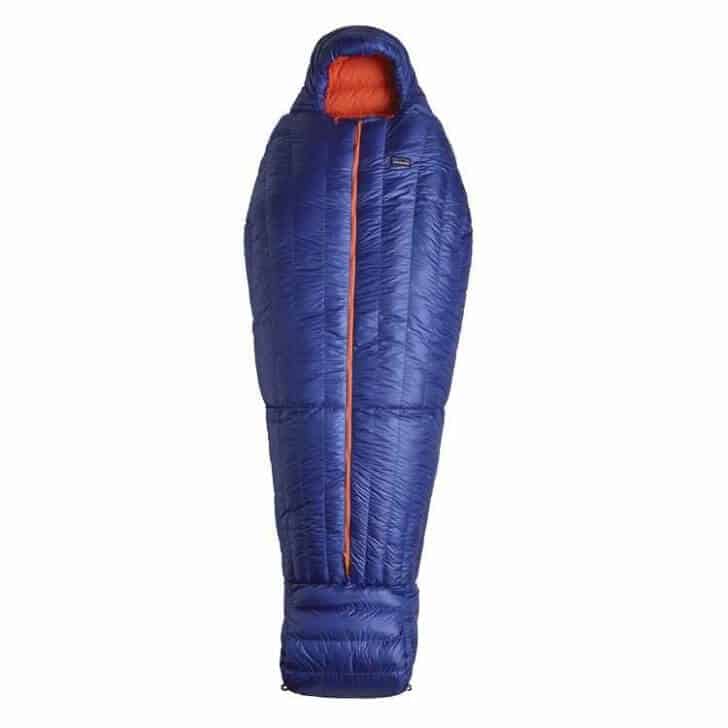

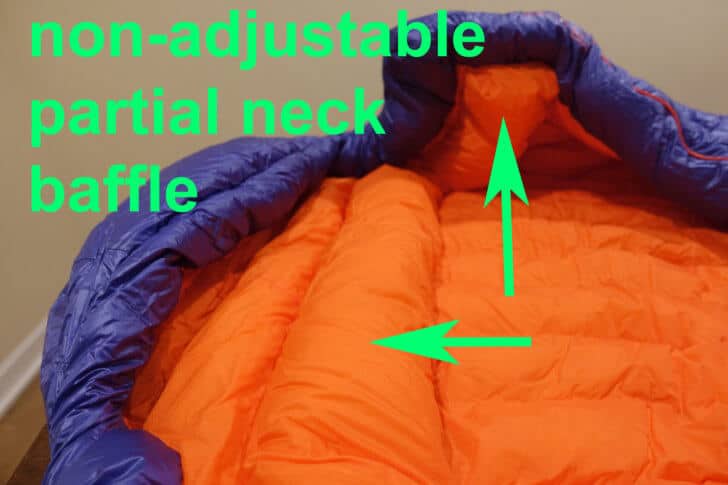

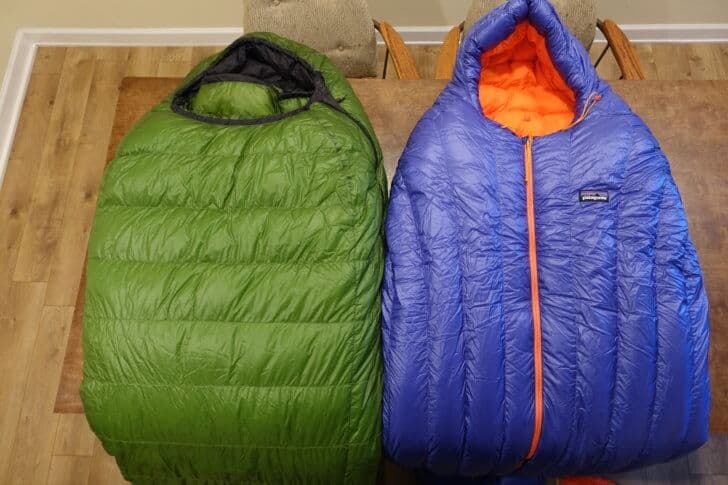

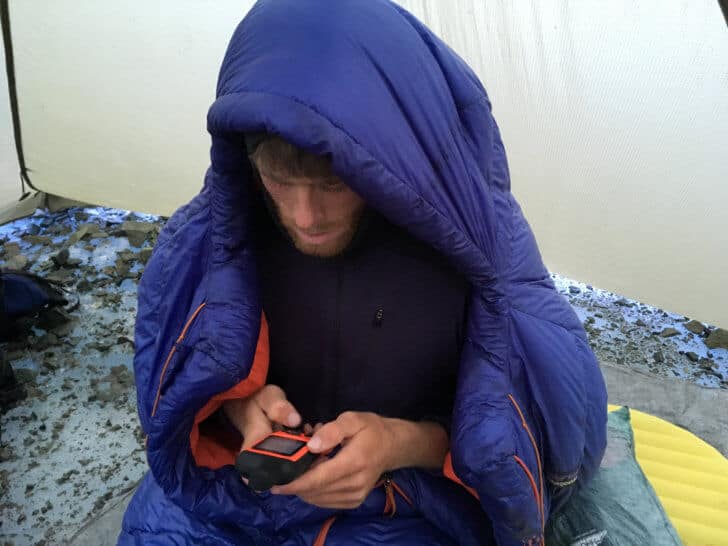
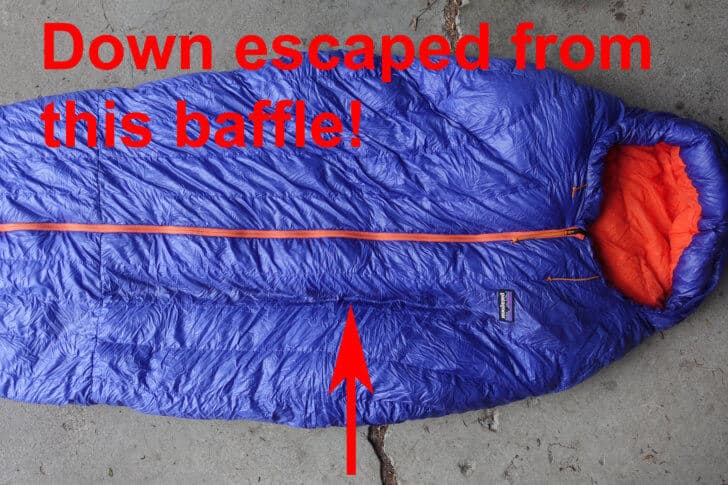
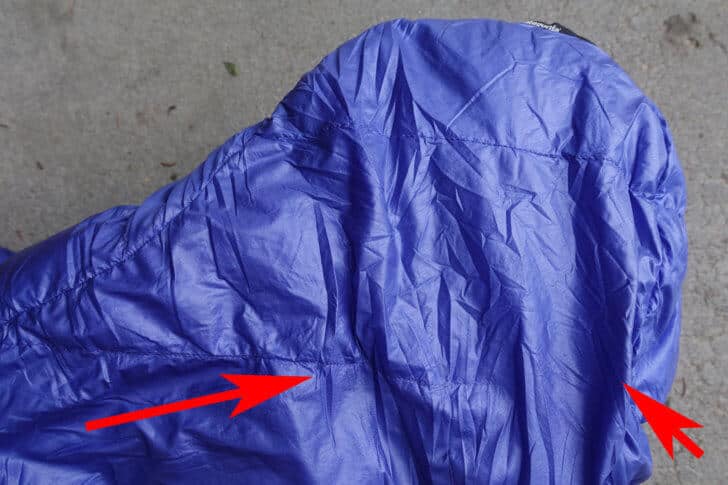

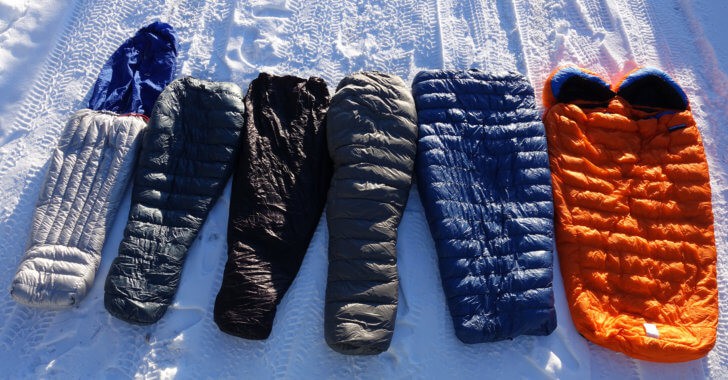
 Recommended: I do recommend the Patagonia 19 Degree bag if one or more of the following is true: (1) you have a large torso; (2) you want a bag with extra space for more comfort: (3) you are an alpinist and intend to sleep with your climbing boots on inside the sleeping bag; (4) you are looking to purchase one mummy bag that’s large enough to wear insulated pants and a down parka, and store other winter essentials (e.g. water bottle, fuel canister, gloves, etc.); (5) you want the most comfortable bag for sleeping naked; (6) you want a highly versatile and comfortable bag suitable for a wide range of activities that include car camping and base camping.
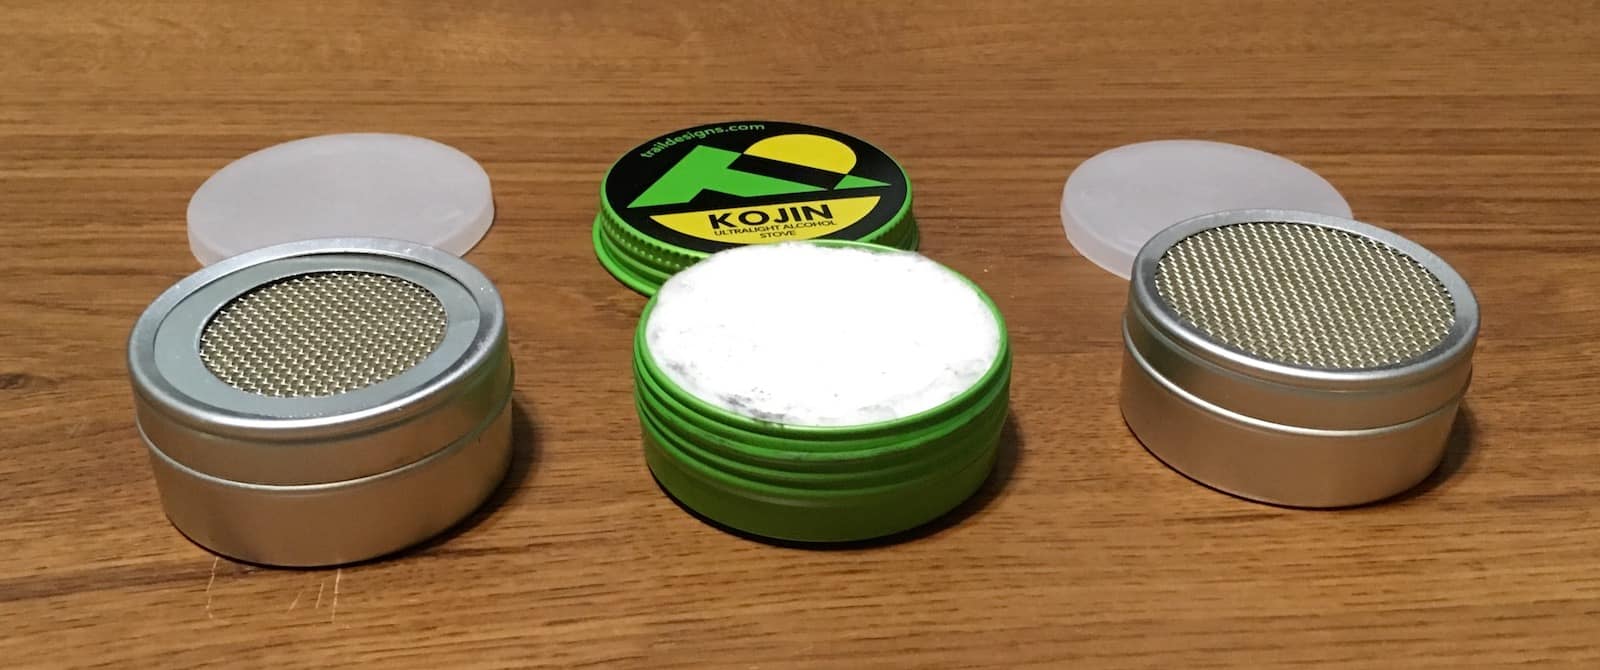

 Summary: In this episode, we dive into the design, manufacturing, and applications of Dyneema Composite Fabrics. We interview Wes Hatcher, Applications Manager for DSM Dyneema, along with cottage ultralight backpacking company founders Graham Williams (CiloGear), Mike St. Pierre (Hyperlite Mountain Gear), Joe Valesko (ZPacks), Henry Shires (Tarptent), and Glen Van Peski (Gossamer Gear) and discuss the relevance of Dyneema Composite Fabrics for apparel, shelters, backpacks, and more.