This Hyperlite Mountain Gear Stuff Sack Pillow review features a waterproof stuff sack by day, and a pillow by night.
Introduction
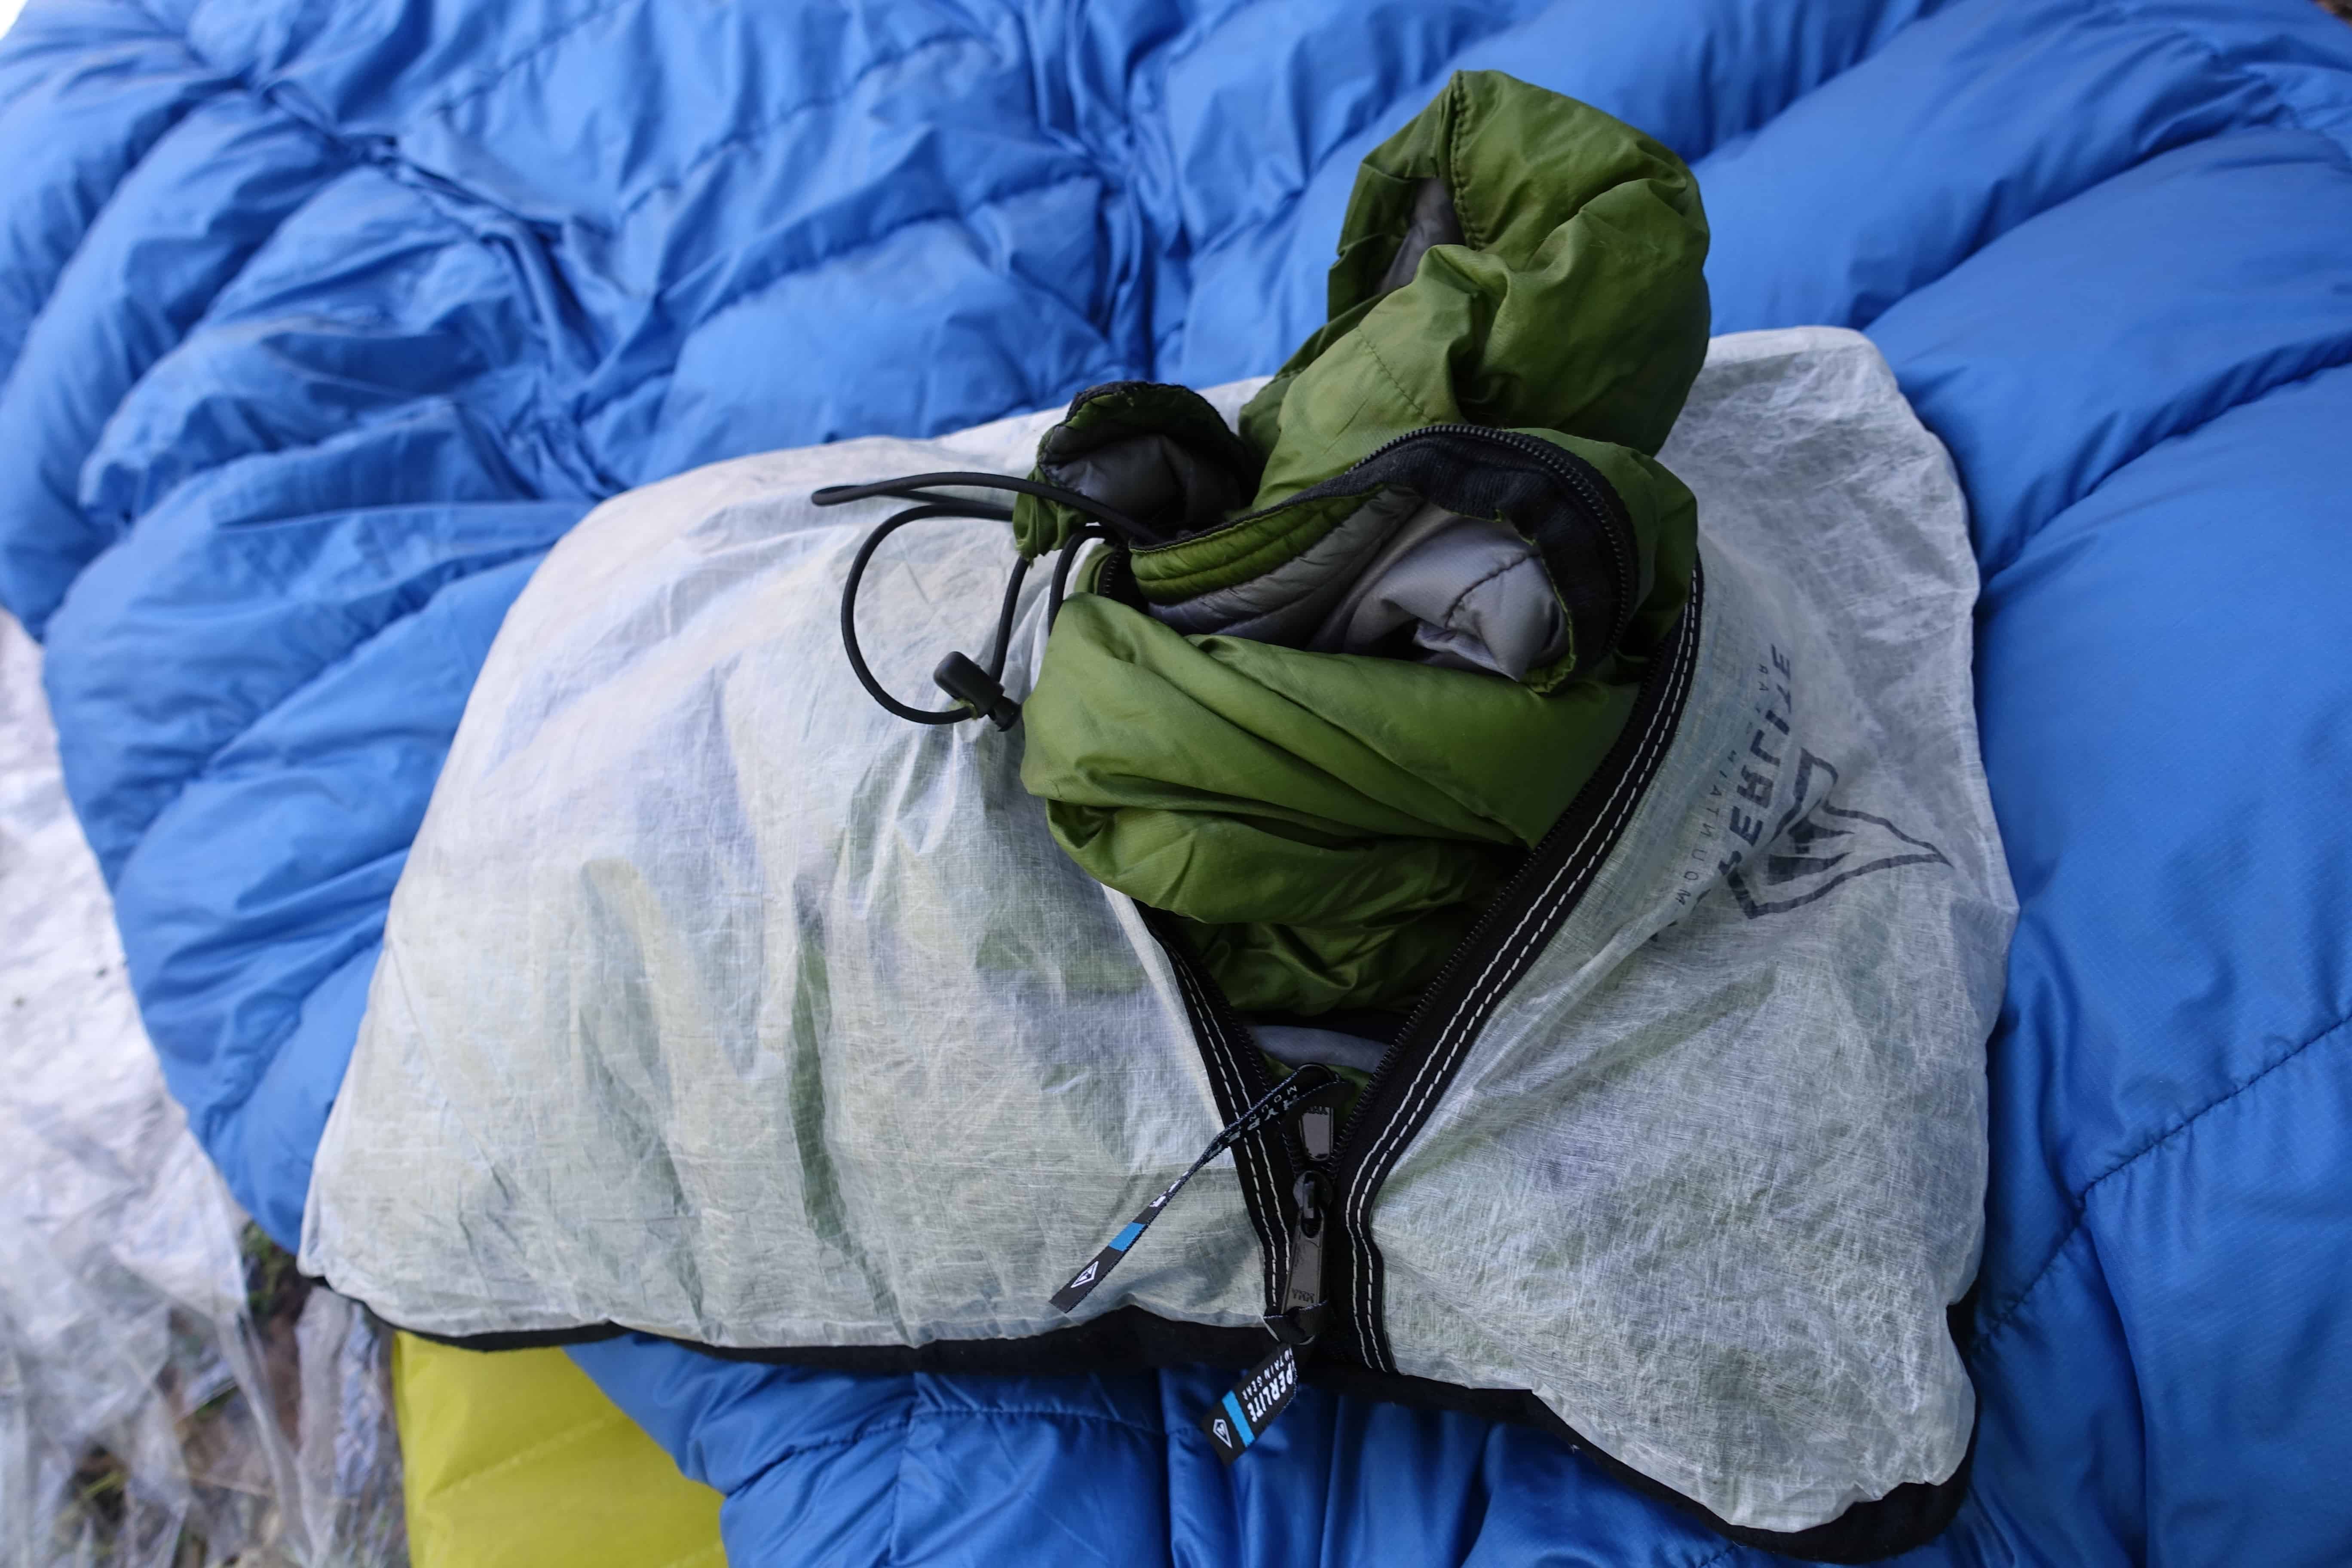
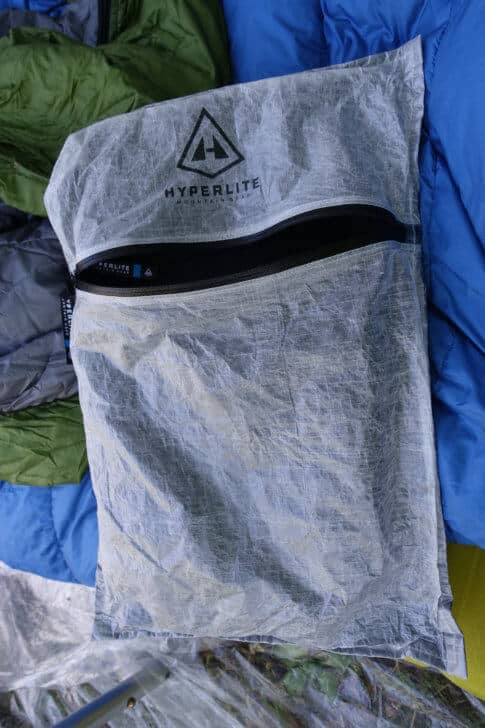
The Hyperlite Mountain Gear Stuff Sack Pillow (I reviewed the size large in DCF8 fabric) is a rectangular stuff sack with a zip closure that is reversible and has a fleece interior on one side. It is a waterproof stuff sack by day, and a pillow by night. It is among the lightest pillows on the market and a true dual-purpose item.
The author is clearly happy with this simple, ultralight, and reasonably priced pillow.
Features and Specifications
Features:
Waterproof stuff sack
Reversible with Polartec fleece interior
Dyneema Composite Fabric (formerly Cuben Fiber)
Pillow loft and firmness adjustable by adding or removing clothing
Reversible with interior Polartec 100 weight fleece
Weight: 1.6 oz. (45 g) measured (manufacturer claim: 1.4 oz. (40g))
Measurements: 17 in x 12 in (43 cm x 30 cm)
Cost: $45
The Hyperlite Mountain Gear Stuff Sack Pillow is a 1.6 ounce, zippered, waterproof stuff sack that is reversible with a soft fleece interior on one side.
Review Context
A pillow is considered by many to be a luxury in the backcountry. I have certainly felt that way in the past, having used jackets, stuff sacks, packs, or even shoes as a substitute for a pillow. As I’ve grown older, however, I’ve increasingly seen a pillow as a necessity for a good night’s sleep. For me a backpacking pillow needs to meet the following criteria:
It has to be light. A pillow is a luxury item, but it has to be light enough to be carried for most trips. For me, that means less than 3 ounces.
It should be multi-purpose, if possible. Non-dedicated items make it into my pack more often.
It needs to be thick- I’m a side sleeper. Having adjustable loft is important for a pillow to be usable by a variety of users.
It needs to be comfy!
Description of Field Testing
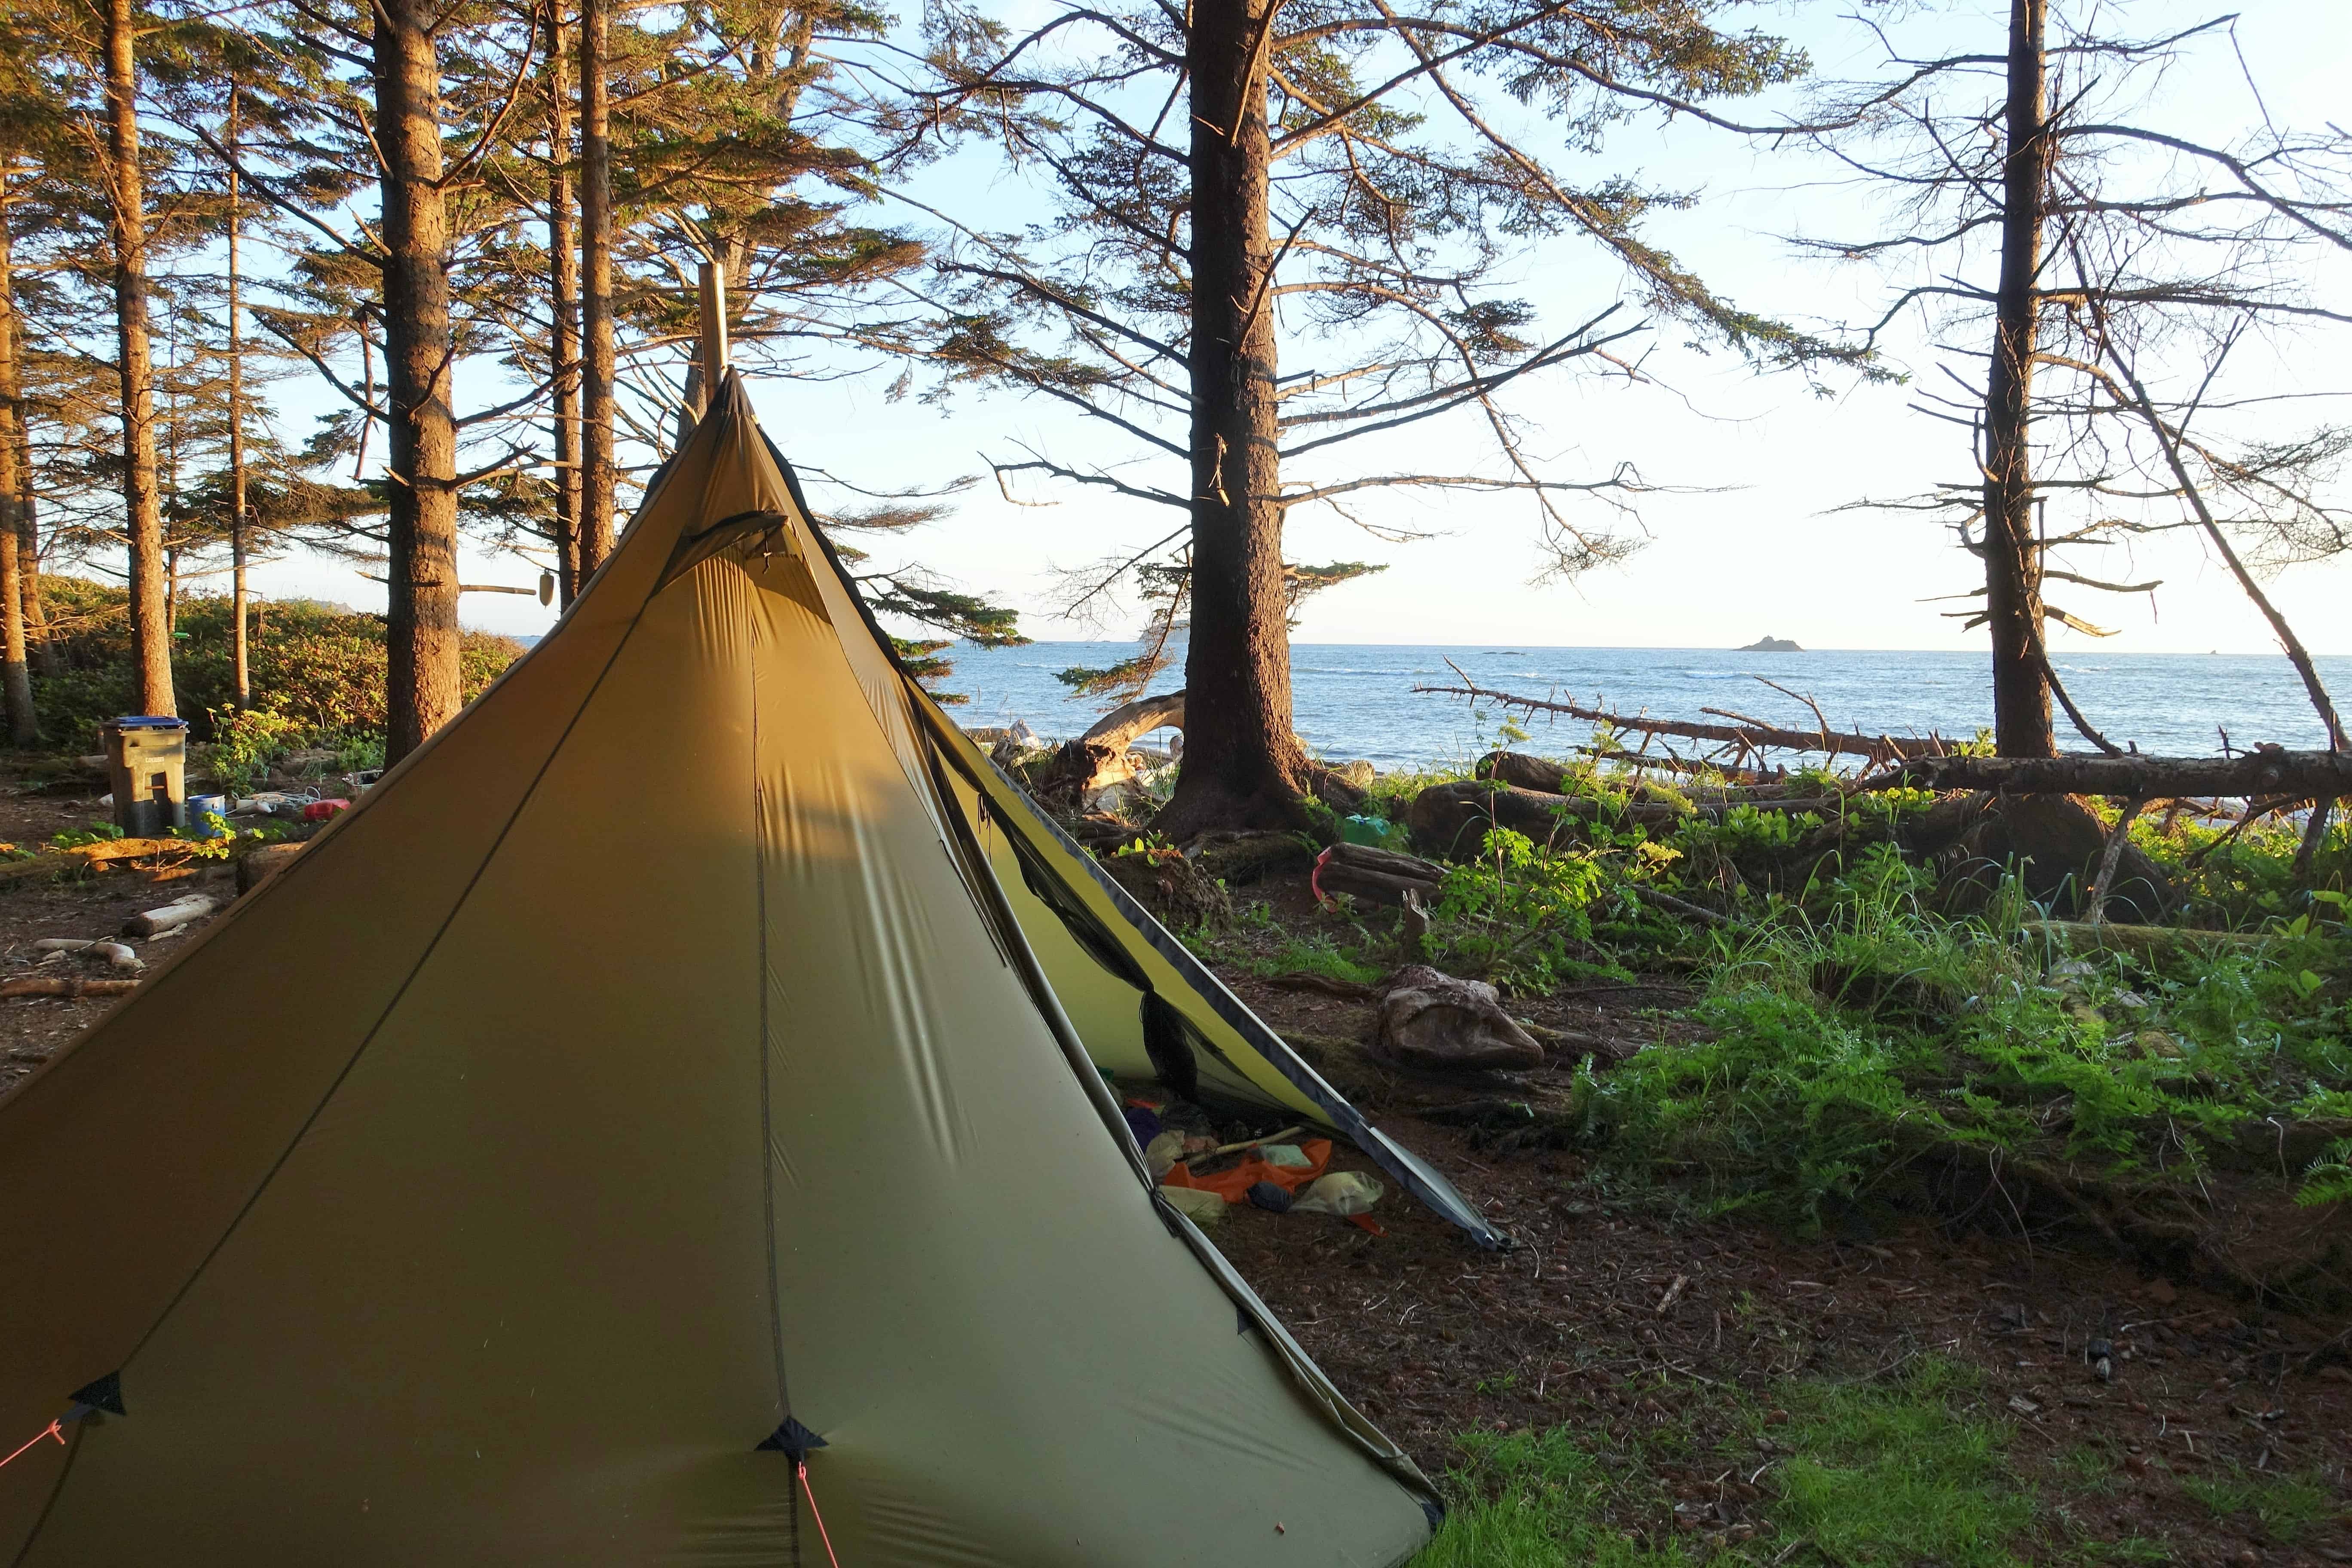
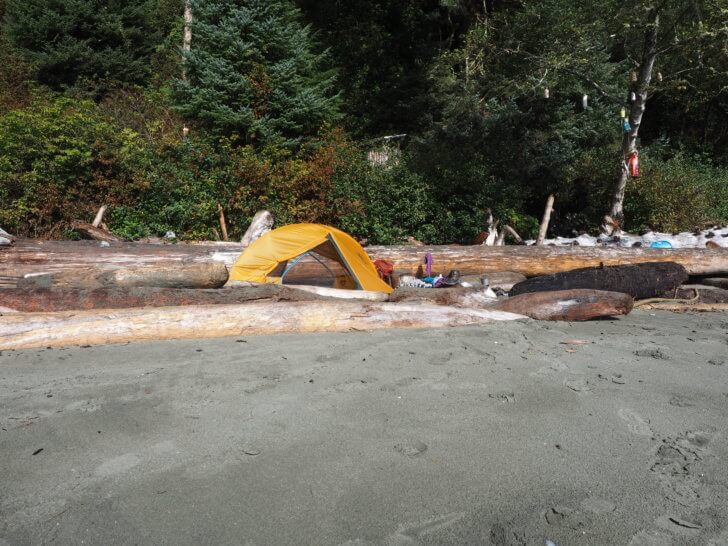
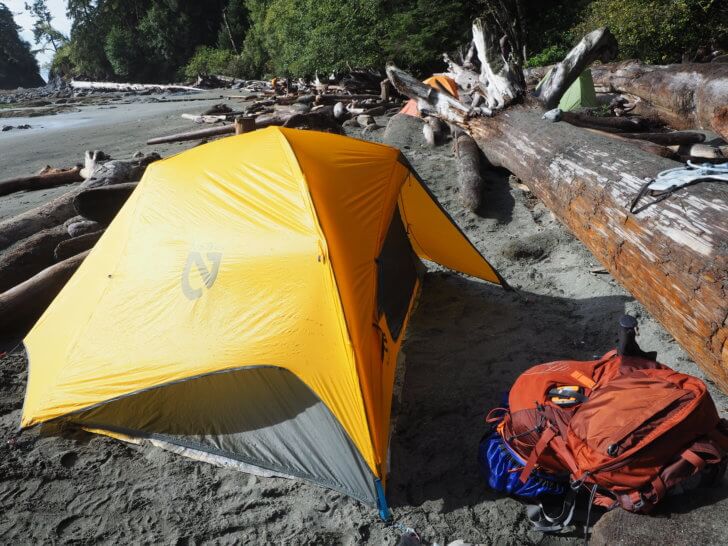
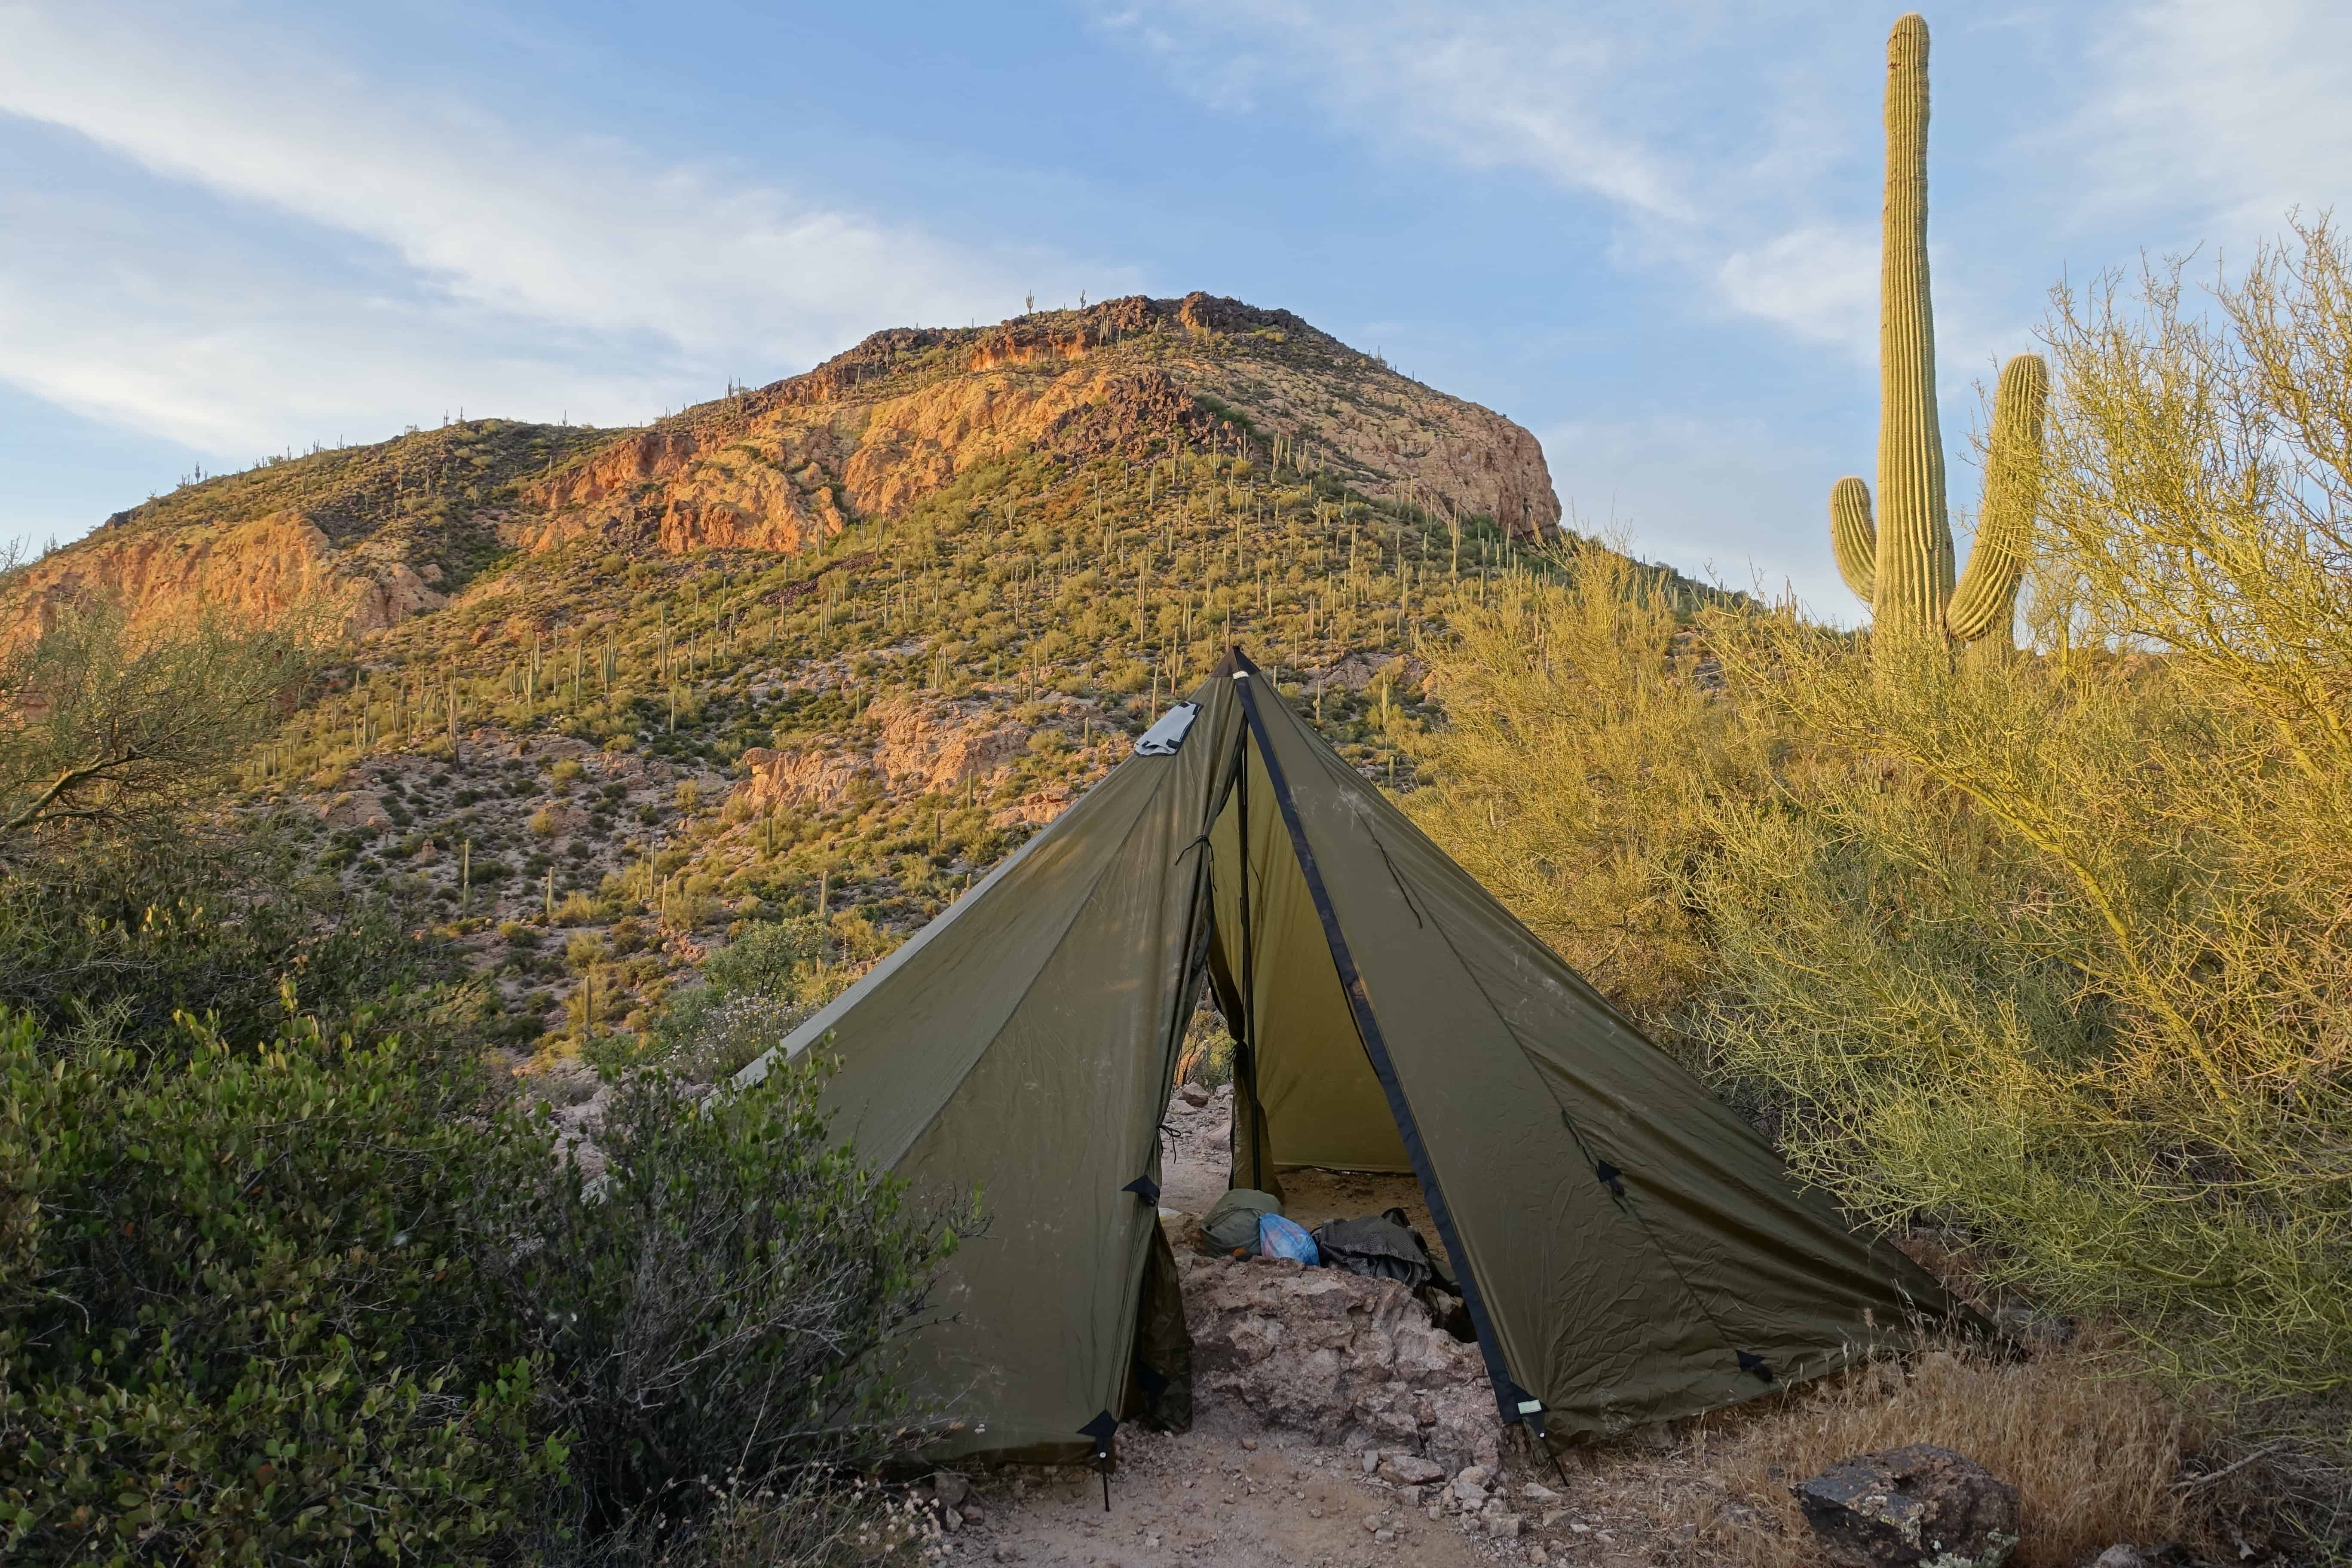
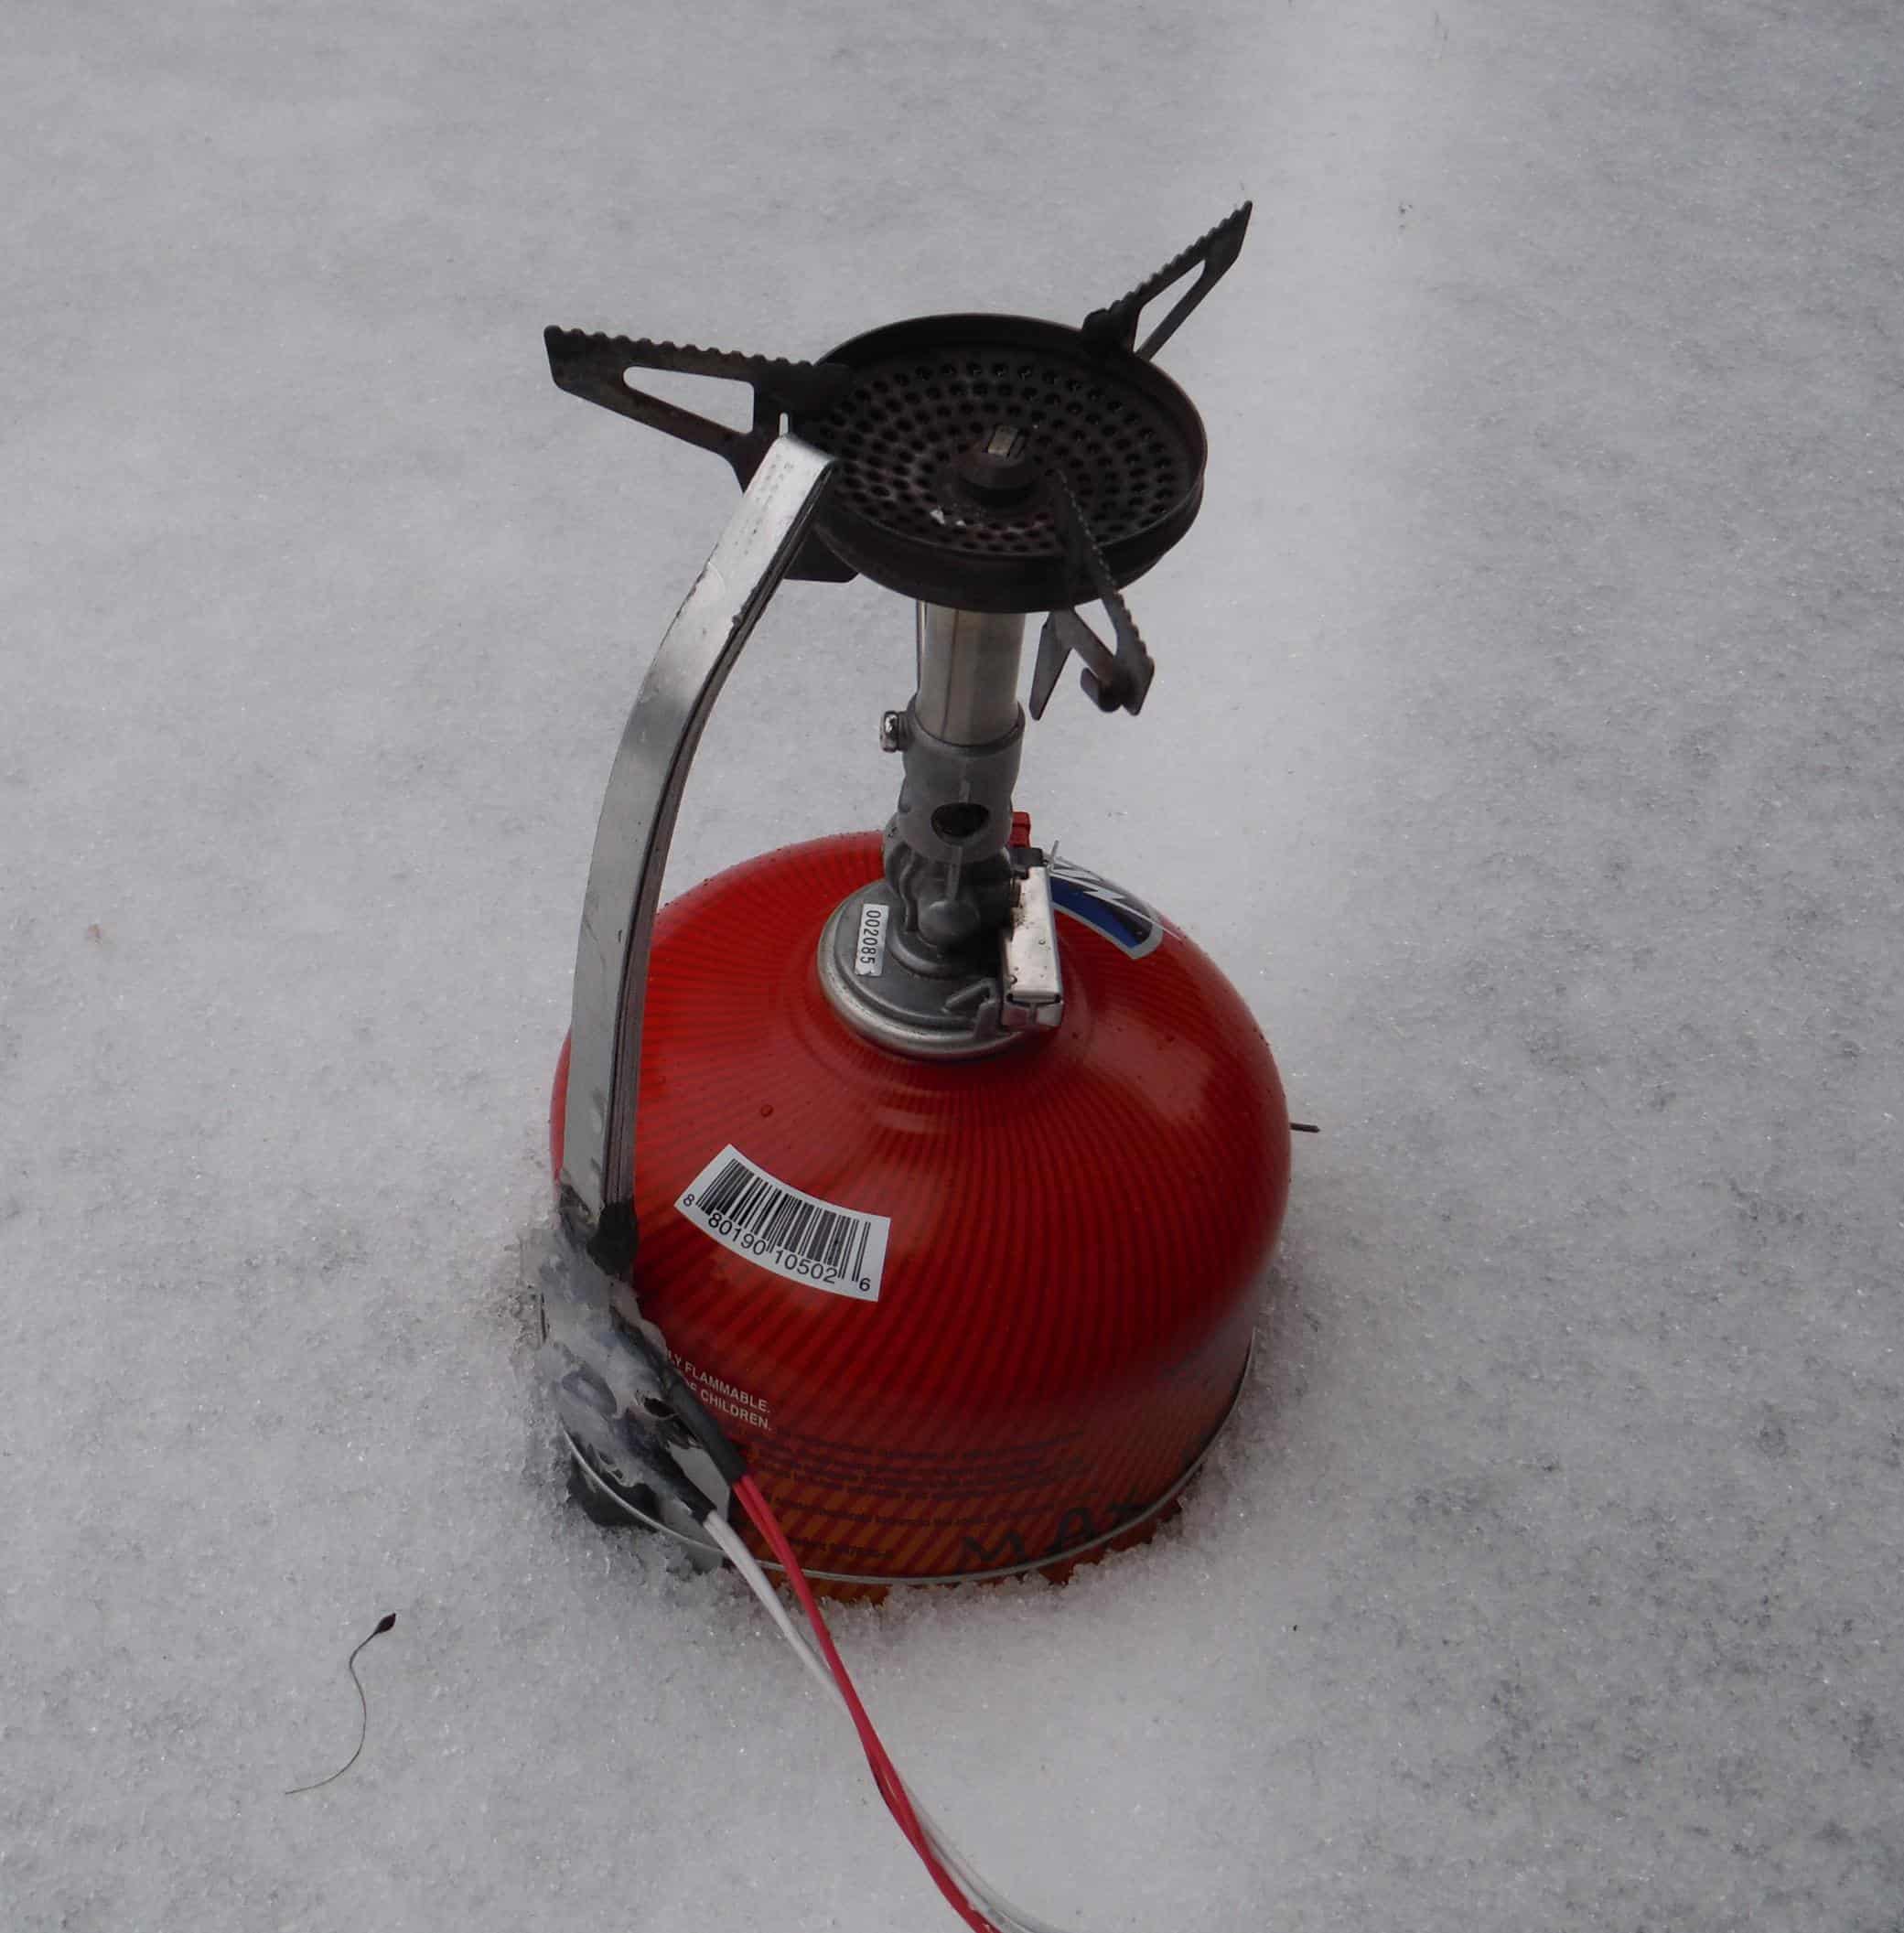
I used this pillow on many, many trips over a one year period. I used it in many settings: an overnight volcano climb in Guatemala, multiple trips on the Washington Coast, in deep snow in the Cascades, and in the deserts of Arizona. The pillow was tested in a comprehensive variety of trip types and environments.
Performance Assessment
Over the course of this review, I spent many nights using the Hyperlite Mountain Gear pillow. I initially thought I would use it primarily for family backpacking or base camp trips, but it quickly became a piece of gear I don’t go without. That’s because it is a highly functional and waterproof stuff sack, and also a comfortable pillow with adjustable loft.
The pillow is a highly functional stuff sack that weighs just 1.6 ounces. It is constructed with seam-taped Dyneema Composite Fabrics DCF8 fabric, formerly known as Cuben Fiber. This fabric is known for being durable, highly waterproof, and very light. A dual-sided, waterproof YKK zipper is highly water resistant, making the stuff sack functionally waterproof, but not submersible like a dry bag. I left it out in the rain one afternoon, zipper side up, and experienced no leaking. I typically use the sack as a clothing stuff sack and have found that the rectangular shape is easy to pack, alongside round shapes, such as cooking pots, and stuff sacks. When used as a stuff sack, the fleece is protected, keeping it clean and dry.
I have found that excellent craftsmanship is typical of products from Hyperlite Mountain Gear, and this pillow is no exception. The sewing is excellent, the seam-taping is perfect, and the materials are all the highest quality. Knowing that your gear was hand-made in the USA only adds to the satisfaction.
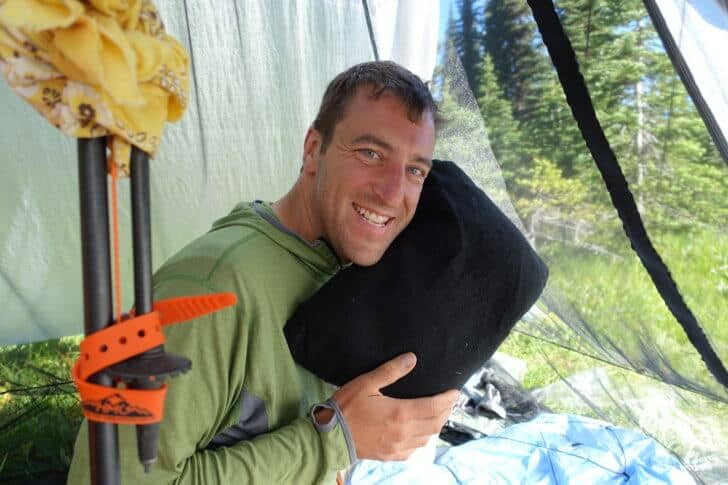
By turning it inside-out and adding clothing, it turns into a comfortable pillow.
When using it as a pillow, the sack is turned inside out and filled with items to make a pillow. The Polartec fleece is warm and soft to the skin. I typically used an insulation jacket and a couple of smaller clothing items to make my pillow, which is pretty flat. Adding another jacket or pair of insulation pants fills it up for a higher loft pillow. I also experimented with other items such as freeze-dried food packages and found that this worked fine, especially if clothing is layered over the top. The DCF8 fabric becomes soft and quiet with repeated use and is also less slippery than Sil nylon fabrics, helping the pillow to stay in place through the night.
The downside of this pillow is that you need to have items to put inside, such as extra clothing. On trips where I’m really pushing the boundaries of my system, I sometimes wear all of my extra clothing to bed, potentially limiting the use of this pillow.
Cuben Fiber typically means high cost, due to the cost of the DCF fabric itself. At $45, though, this pillow is reasonably priced and similarly priced to other dedicated pillows on the market. I found the large pillow to be a great size for me, but a small size is also available for $35.
Product Strengths and Limitations
Strengths
I was very happy with the performance of this pillow. It is a luxury item that I now bring on many trips because of these reasons:
Dual-purpose and adds less than 1oz compared to similar-sized DCF stuff sacks.
It is adjustable: just add more padding to increase loft.
$45 is a reasonable price and the materials and craftsmanship are excellent.
Limitations
While this pillow is a great product, there are some potential drawbacks:
If you are a person who often doesn’t have extra clothing at night, this may not be the pillow for you. You can use other items, but clothing really works best. The small size would require less clothing if that is a concern.
A dedicated pillow is a bit more comfortable, depending on how you sleep. For example, I find the Sea to Summit Aeros Premium to be better for side sleeping. However, it’s also heavier and bulkier.
The pillow weighted 1.6 ounces on my scale, slightly more than the manufacturer’s claim of 1.4 ounces.
Compared to…
The other pillow I’ve used recently is the Sea to Summit Aeros Pillow Premium. Here is how it compares to the Hyperlite Mountain Gear (HMG) pillow:
Sea to Summit Aeros Pillow Premium
Dedicated pillow (not dual-use)
2.8 oz (79 g) – 1.2 oz heavier than the HMG
13.4 in x 9.4 in (34 cm x 24 cm) – smaller than the HMG
4.3 in (11 cm) deep and contoured- deeper than the non-contoured HMG
When comparing the two, the Aeros Pillow is definitely more comfortable for a side sleeper. For back and stomach sleepers, I found the Hyperlite Mountain Gear pillow to be very comfortable, as well as lighter and dual-purpose.
Commentary
I love the Hyperlite Mountain Gear Large DCF8 Stuff Sack Pillow. The name is a mouthful, but this product is simple and highly effective. It will continue to go with me on all of my ultralight backpacking trips because it adds so little to my pack weight and makes for a more comfortable night’s sleep. The price is reasonable and it is a durable and well-constructed piece of gear. I have found that an air pillow can be more comfortable for side sleeping, but it’s also a bit heavier. If you’re used to sleeping on silnylon stuff sacks, the HMG pillow is a huge upgrade.
Where to Buy the Hyperlite Mountain Gear Stuff Sack Pillow
Disclosure
Product(s) discussed in this review were either acquired by Backpacking Light from a retailer or otherwise provided by the manufacturer at a discount/donation with no obligation to provide media coverage or a product review to the manufacturer(s). Backpacking Light does not accept compensation or donated product in exchange for guaranteed media placement or product review coverage without clearly denoting such coverage as an “ADVERTISEMENT” or “SPONSORED CONTENT.”
This Katadyn BeFree Review features a video discussing the highlights of this water bottle filter technology that’s both ultralight and fast.
Introduction
I spent many years as an engineering research scientist in a university environment. One of my favorite research programs that I managed included a number of multi-year portable water treatment technology and water quality studies, in the context of backcountry recreation, military deployment, and disaster relief.
It was during these years where I learned to despise portable water filters for their weight, slow treatment times, effort (arg, the pumps!), ease of clogging, and difficulty of cleaning.
It is because of these disadvantages that I’ve learned to love ultralight treatment technologies like tablets and chemical kits.
Filters of course have evolved through the years. We’ve seen lighter pump filters, gravity filters, inline filters, and filter bottles.
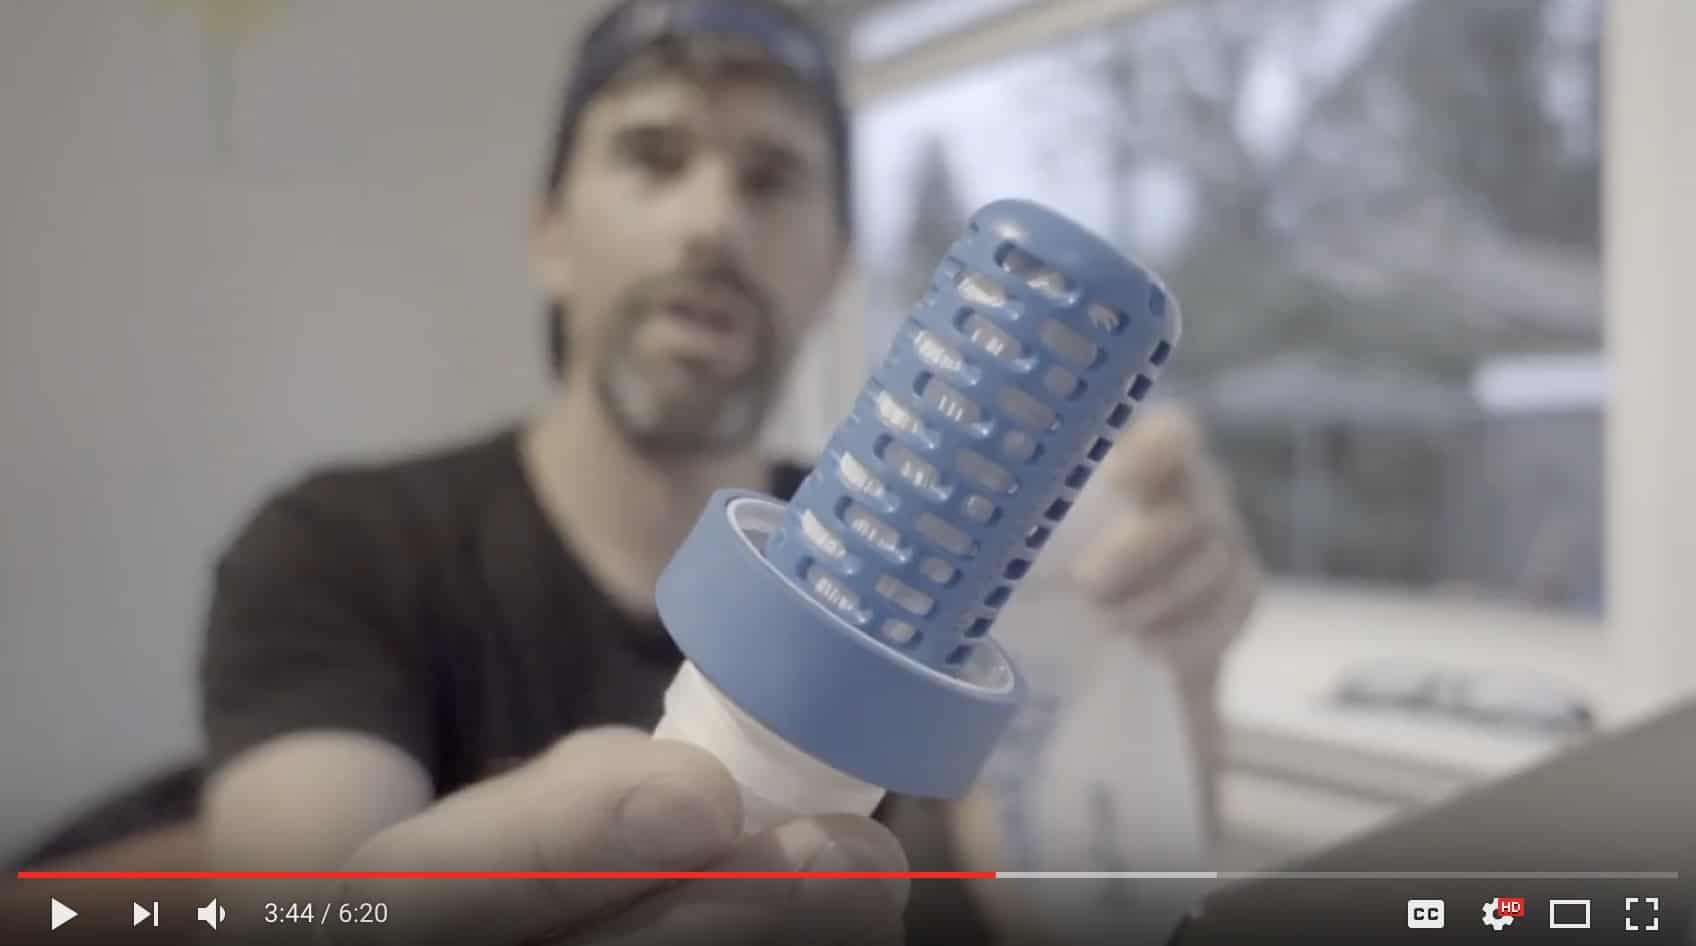
But not until the introduction of the new Katadyn BeFree Water Bottle Filter have I experienced a (truly) lightweight filter option that treats water as fast, in a package so compact. The 0.6L bottle is about a 2-oz package (2.5 oz is the approximate wet weight that I measured, which includes residual water from a treatment cycle), and it comes in a larger 1.0L size and a gravity filter model as well.
Watch the video to see my brief commentary about the filter and what I think about its throughput using clean water. Stay tuned for a more comprehensive review – I’m using this as my primary water treatment technology this summer and fall.
As I mentioned in the video, I’ve been partial to a chemical kit (Aquamira) for many years. Its “durable” (no mechanisms to fail), imparts minimal taste (and actually improves the taste of nasty water sources), is light, doesn’t fail when freezing (filters can crack), and is simple to use. There’s still a wait time with Aquamira (on the order of 15-30 minutes depending on the quality and temperature of your water source).
I’ve also used Steripens and gravity filters in various contexts. There are a lot of different ways to treat water in the backcountry!
This Nemo Equipment Blaze 2P Tent review features a product comparison and photo spread of the sub two pound five ounce tent dome style.
Introduction
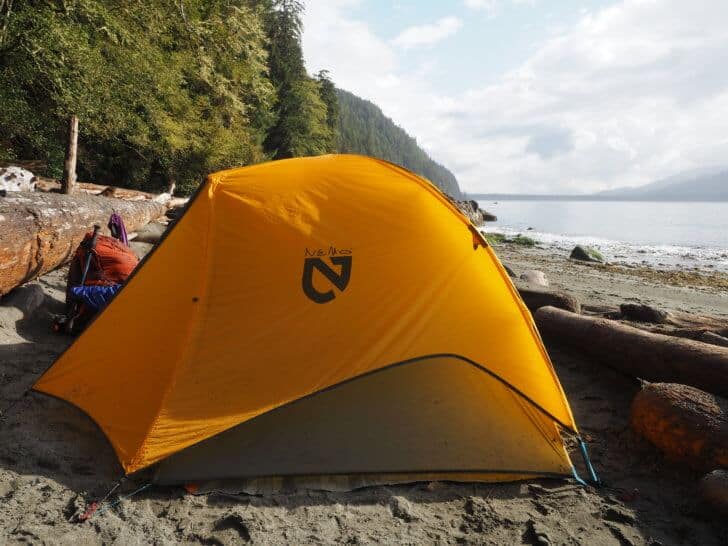
From the Rocky Mountains to Coastal Rainforest the Nemo Equipment Blaze 2P Tent has been my constant 2016 backcountry companion. Nemo has been making ultralight shelters for a while and I was somewhat surprised to find a single pole, double wall, dome style tent in the sub two and a half pound category. Depending on how you pack this tent, it sits at exactly two pounds. I was intrigued. I contacted Nemo for more information, and they offered to send me one out to try. Now, I was beyond intrigued and into excited.
I used the original 2010 Nemo Equipment Meta 2P since I bought it almost seven years ago. I’ve been happy with my little Nemo Equipment Meta 2P. The online reviews were mixed (in my opinion, because single wall shelters were unfamiliar to most users) but aside from the over two and a half pound weight, I loved the tent, and it was a great introduction to single wall shelters.
For the 2016 season, a switch to a double wall shelter, with a single pole means much simpler gear splitting for the trips I have booked for the year. My only other complaint with my original shelter has always been the limited ability to divide it between two packs. Not needing my trek poles for set up also means I can leave one or both behind which on some trips is my preference. Even with the pole packed in, it is lighter than many trek pole tents.
Packed Size:17 x 5 in diameter / 43 x 12 cm diameter
Vestibule Fabric:7D PeU Nylon Ripstop (1200mm)
Fly Fabric:7D PeU Nylon Ripstop (1200mm)
Canopy Fabric:No-see-um mesh
Floor Fabric:20D PeU Nylon Ripstop (1200mm)
Color:Elite Yellow
Performance
Nemo Equipment Blaze 2p Tent in the coastal rainforest of Canada’s West Coast Trail.
Field Testing
Stuffing
The Nemo Equipment Blaze 2P tent was shipped to my address. I opened the box and found a neatly packaged tent inside. The actual weight of the tent was 998g (2 lb 2 oz). The packed size was compact, and I found stuffing the tent back inside the sack easy. The tent stuff sack has the option of being two sizes. One where the tent is stuffed poles in and one where the ten is stuffed poles out. Two sets of drawstrings allow stuffing options. I didn’t pack using the stuff sack (I was load sharing most trips), but the sack is nicely made and relatively light.
Stock Photo – Nemo Equipment Blaze 2p Tent StuffedStock Photo: stuffed with poles removed.The entire Nemo Equipment Blaze 2P Tent compared to a 1-liter water bottle.Diameter comparison of the Nemo Equipment Blaze 2p Tent with a 1-liter water bottle.Nemo Equipment Blaze 2p Tent fly and body stuffed with pegs and poles removed compared with a 1-liter water bottle.
During a particularly wet rainforest trek on Vancouver Island, British Columbia, Canada; I stuffed the rain fly in a large Ziplock freezer bag to keep it from dripping on any of my other gear. The main body of the Nemo Equipment Blaze 2p Tent will also fit in a large Ziplock freezer bag. This method gave me the option of squeezing the air out of the bags and effectively ‘vacuum packing’ the tent to save space and keep other gear from getting soaked when packing the tent wet. The heavy plastic of the Ziplock bag also protects the tent’s delicate, ultralight fabric.
Floor and Footprint
The tent stitching is high quality and well taped. The fly fabric is airy light and almost transparent. The floor is slightly more solid but is delicate. Because of abrasive rocky ground conditions, I decided I would make a footprint.
I had a SOL Mylar Blanket kicking around my gear trunk, which is not exceptionally light ( 320g / 11.3oz) but was available and had a possibility to add warmth to my shelter. The tarp was almost the perfect size, and I only had to trim it a bit. I had to cut a couple of grommets off and replaced them with Coleman Replacement Grommets I’ve had in my major-at-home-gear-repair box for several years. The weight is comparable enough to a Nemo Equipment Blaze 2P Footprint ( 208 g / 7.3 oz), I didn’t have to look for Tyvek, and the price was right (free: after depreciation of the tarp and grommets which were sitting around doing nothing anyway.). After my modifications, my footprint weighed 286g (10.1oz)
Assembly
Assembling the tent the first time around didn’t require a structural engineer, but almost. (I make this observation with tongue in cheek, I haven’t assembled a dome style tent in a decade. Single wall trek pole tents have some pitching advantages.) One diagonal pole suspends screen house’s clips and the fly anchors to the four corner pegs. The vestibules have two separate guy-out pegs.
Step One: The Air Pole design has a unique clip which takes a bit of maneuvering but works well and saves weight.Step Two: Insert the clip Screen house into the fly clip.Final step: snap the screen house to the air pole.
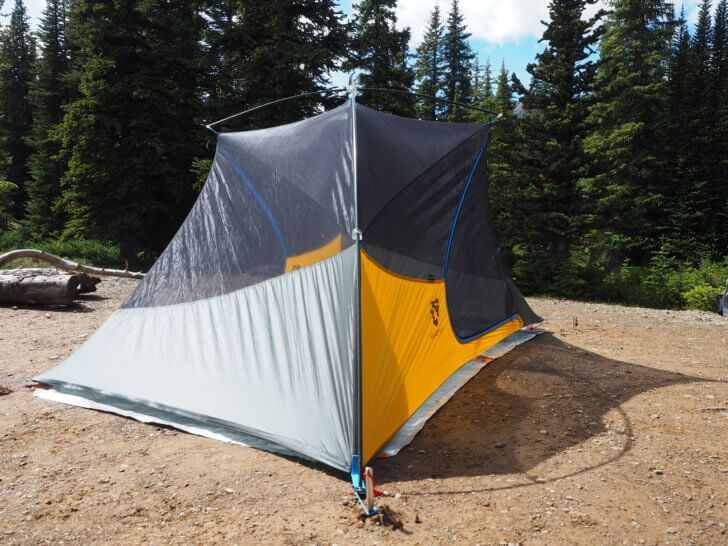
This tent is unconventional but user-friendly and intelligently designed. After pitching a couple more times, I discovered I could pitch the fly before pitching the interior mesh by stretching my MYOG footprint, placing my stakes, and resting the poles against the “Y” structure then anchoring my fly. Using this method I could pitch my mesh under cover if rain interfered.
The shape of the Nemo Equipment Blaze 2P Tent is unconventional, to say the least. Skyline Trail, Jasper, Alberta.
After a couple of practice runs, I could set up the Nemo Equipment Blaze 2P Tent in a matter of minutes without any assistance. Stuffing the tent when packing up took very little time or skill. I slid the tent poles in and stuff the screen house, tent fly and pegs in the included stuff sack.
Overnight Use
The two door and two vestibule design of the Nemo Equipment Blaze 2p Tent is invaluable. Once two sleeping pads and quilts are laid down on the floor, the Nemo Equipment Blaze 2p Tent is stable and barely needs pegs for anything but holding the vestibules tight.
I found I had plenty of toe and headroom and could even place some of my important equipment, like cameras, over my head. Thoughtful interior features in the Nemo Equipment Blaze 2P Tent improve the comfort and livability of the tent. Interior features could be clipped out to save ounces, but I kept them. First I found two side door pockets (one on each side), which were helpful for stashing some small items like ear plugs and eye masks. Second, the pole framework of the Nemo Equipment Blaze 2p Tent has built in loops for making a small indoor clothes line. Third, at the very peak of the tent, there is a small pocket designed for stowing headlamps to use as interior lighting without blinding your tent mates.
The gossamer-like fabric of the Nemo Equipment Blaze 2P Tent did not leave me feeling exposed while inside my tent at night or during the day.
Rain Use
Of all the features I tested while using the Nemo Equipment Blaze 2p Tent, I tested its capacity to resist rain the most. Not only did this tent resist the rain, it dried in twenty minutes or less when the sun came out. During particularly rainy treks through the Canadian Rockies, I often packed the fly in a large Ziplock freezer bag, stuffed it in the brain of my pack and would pull it out to dry whenever the rain gave me enough of a break.
Insect Resistance
Insects? What insects? I went all over Canada with the Nemo Equipment Blaze 2P Tent, there were mosquitos, horse flys, sand fleas and dozens of other biting nuisances, just not inside the tent. During my trip up Marvel Pass to the Mount Assiniboine Lake Valley, there were thousands of blood-thirsty mosquitos. At nightfall, I would dive into the Nemo Equipment Blaze 2P Tent and leave the little monsters outside. Occasionally insects would make a home between the fly and the tent body, but as long as they were outside and away from me I didn’t care.
The Canadian Rockies biting insects had no chance against the no-see-um mesh of the Nemo Equipment Blaze 2P Tent.
Performance Summary
The Nemo Equipment Blaze 2P exceeded my expectations of an ultralight tent. The tent is feature rich and well designed.
Product comparison
A fair product comparison requires similar main features. These products are fully enclosed, sleep two occupants and have all required features. Stakes, mesh, poles, floor, seam sealing and any other additional features required to make each product comparable, are added to the price and weight.
To view the entire table, hover over it and scroll right/left!
Manufacturer
Model
Body Fabric
Max Weight
Wall Style
Floor Type
Floor Space
Height
Poles
Packed Size
Dual Entry
Vestibles
Seasons
Price
TarpTent
Stratospire 2
1.1 oz Silnylon
2lbs 9 oz / 1.3 kg
Double
Bathtub
Tent: 31 sq ft / 2.9 sq m
Vestibule: Unspecified
50 in / 127 cm
2 Trek
16 in x 4 in / 41cm x 10 cm
Yes
2
4
349.00 USD
LightHeart Gear
Duo Tent
30D 1.1 oz Silnylon Ripstop
2 lbs 5 oz / 1.1 kg
Single
Bathtub
Tent: 38.2 sq ft / 3.6 sq m
Vestibule: Unspecified
45 in / 114 cm
2 Trek
Unspecified
Yes
2
3
400.00 USD
Nemo Equipment
Blaze 2p Ultralight Backpacking Tent
7D Silnylon Ripstop
2 lbs 5 oz / 1.1 kg
Double
Bathtub
Tent: 30 sq ft / 2.8 sq m
Vestibule: 13 sq ft / 1.2 sq m
40 in / 102 cm
1 Folding
17 x 5 in dia / 43 x 12 cm dia
Yes
2
3
449.95 USD
Zpacks
Duplex Tent
.51 oz Cuben Fiber
1 lbs 7.2 oz / 659 g
Single
Bathtub
Tent: 28.1 sq ft / 2.6 sq m
Vestibule: Unspecified
48 in / 121 cm
2 Trek
7 in x 13 in / 18 cm x 33 cm
Yes
2
Unspecified
609.00 USD
Mountain Laurel Designs
Duomid with innernet
1.35 oz Silnylon
1 lb 6.6 oz / 640.7 g
Double
Bathtub
Tent: 40+sq ft / 3.7 sq m
Vestibule: none
56 in / 142 cm
2 Trek
Unspecified
Yes
0
4
330.00 USD
Summary
Strengths
Sub two-pound weight double wall tent
Two doors
Two vestibules
Small, compressible packed size
Insect resistant
Storm worthy
Fast drying
Limitations
Short floor length
Delicate floor fabric
Recommendations
Taller users should put their head underneath the pole corner of the tent and feet under the peg only anchor.
Groundsheet or footprint is highly recommended.
Wrap large packs in a garbage bag when left in the vestibule in rainy conditions.
Review Rating
Review Rating Summary
After just over three-hundred miles (500 km) in two months sleeping in this tent, I haven’t found a single flaw in the Nemo Equipment Blaze 2p Tent design for my use. Simply, the Nemo Equipment Blaze 2p Tent is my favorite piece of equipment since, well, ever. A full tent system that rivals a tarp and bivy for weight is uncommonly good. Throw in the fact, the Nemo Equipment Blaze 2P Tent has two doors and two vestibules, and the comfort, convenience, and practicality of this tent is through the roof. I can’t think of a bad thing to say about it.
There are only three minor comments I would make in contrast to my glowing experience with this tent:
1) The clip fly and pole system take some practice to figure out.
Nemo Equipment would be wise to include assembly diagrams on the tags of the tent. I spent the first four or five setups assembling the fly incorrectly which in turn gave me a sagging pitch. This is why I included photos of how to assemble the clip system in this article. When the clip system is assembled correctly, the pitch is tight and well ventilated.
2) The vestibules are not huge, there is room for a pair of boots, trek pole handles and most of a 45 + liter pack.
I would not count on the vestibule to completely cover my pack and have room to stick my feet into the vestibule and put on my boots outside the tent. On the other hand, any vestibule beats not having one at all. In high precipitation conditions, I recommend wrapping packs in a plastic recycling bags anyway. The Nemo Equipment Blaze 2p Tent has two vestibules and the overall size of the vestibule is a non-issue. Other users might like to know the actual vestibule size.
3) Some users may find the Nemo Equipment Blaze 2P Tent a bit short.
I’m five-foot-one, any tent I crawl into is long enough for me. I loaned the Nemo Equipment Blaze to a six-foot-tall friend for a weekend to get his impression. He found the Nemo Equipment Blaze 2P Tent had just enough length for his frame. For anyone taller than six-feet-tall, this would be a one man tent in his opinion. I would say, two people under five-foot-ten will be more than comfortable. Nemo Equipment Blaze Tent’s floor space and headroom will be satisfactory for anyone up to six-feet. I would love to see Nemo Equipment design an extra large version of this tent to cater to the tall ultralighters out there.
Concluding Statement
The Nemo Equipment Blaze 2p Tent has proved to be a worthwhile investment. The unusual and technical design is intuitive and feature-rich for its sub-two-pound weight. If I were to select a tent for another season of adventure again, I would pick the Nemo Equipment Blaze 2p Tent without a single reservation. The Nemo Equipment Blaze 2p Tent is storm worthy, light, insect proof and comfortable.
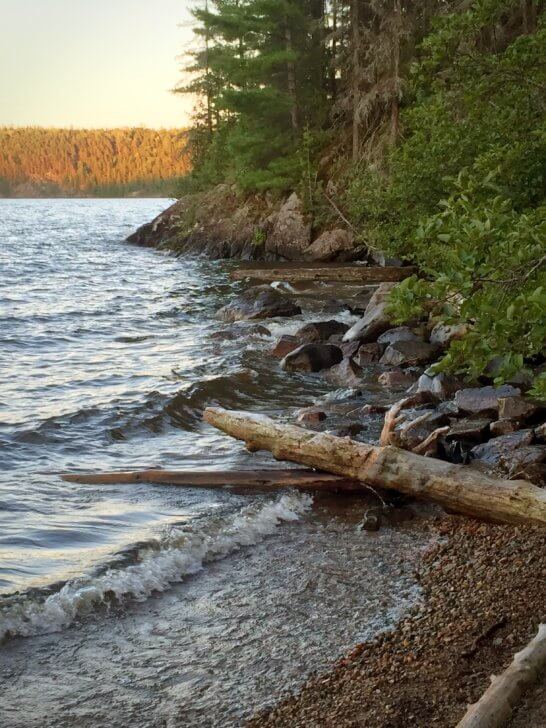
Keeping mice, sand fleas and rain out in a coastal rainforest is not an easy task. The well designed Nemo Equipment Blaze 2P Tent exceeded the expectations I made on it. Pictured at Thrashers Cove, Vancouver Island, British Columbia, Canada.
Where to Buy the Nemo Blaze 2P
Related Tents
The Nemo Blaze 2P is one of several tents that have recently been introduced to the ultralight market that focus on lighter fabrics, fewer (and thinner) poles, and perhaps a semi-freestanding (instead of a truly freestanding) design that requires a stake or two to maximize floor space. Like the Nemo Blaze 2P, the following tents offer interior space that isn’t occupied by vertical poles (as in pyramid-style tents). The NEMO Hornet 2P and MSR FreeLite 2 offer double doors and double vestibules, while the Fly Creek HV 2 Platinum is front-entry:
Disclosure
Product(s) discussed in this review were either acquired by Backpacking Light from a retailer or otherwise provided by the manufacturer at a discount/donation with no obligation to provide media coverage or a product review to the manufacturer(s). Backpacking Light does not accept compensation or donated product in exchange for guaranteed media placement or product review coverage without clearly denoting such coverage as an “ADVERTISEMENT” or “SPONSORED CONTENT.”
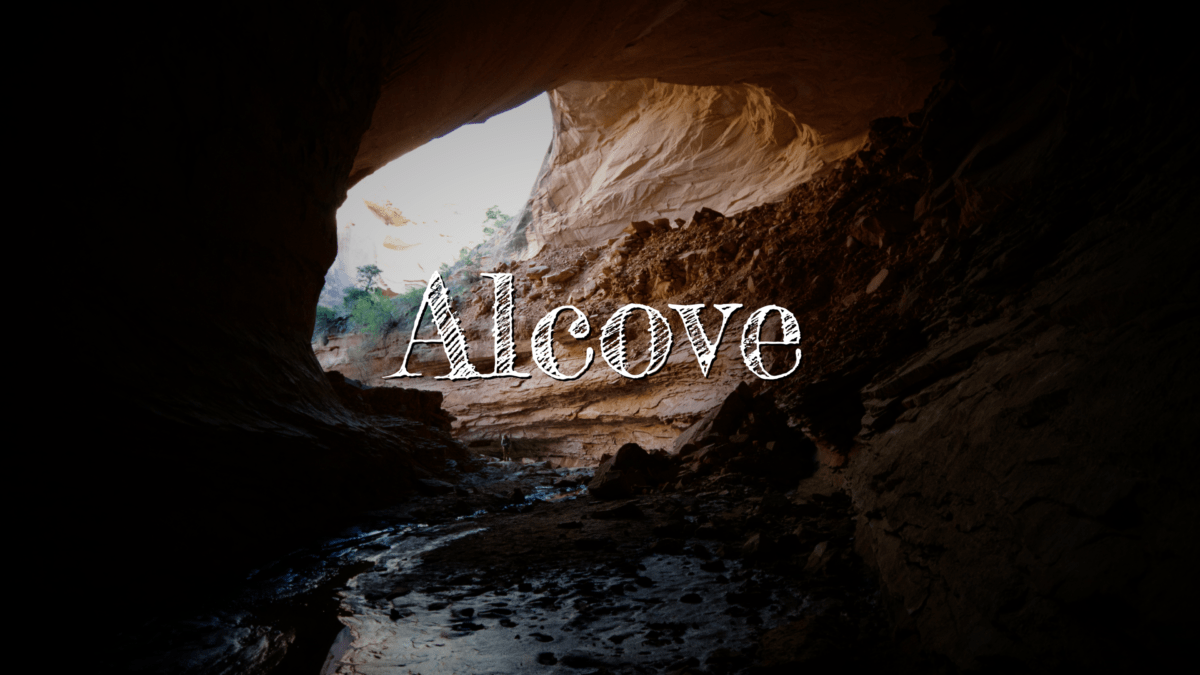
Alcove is a story about a backpacking trip that Chris Smead and Ryan Jordan took during the Spring of 2017. It explores Chris’s perspective on doing something different than what he’s used to – hiking in remote canyons on the Colorado Plateau.
This post from the Publisher’s Blog (available to Unlimited Members only) shares insight into the speed improvements that our new server framework is expected to deliver, as well as a tentative date set for the migration.
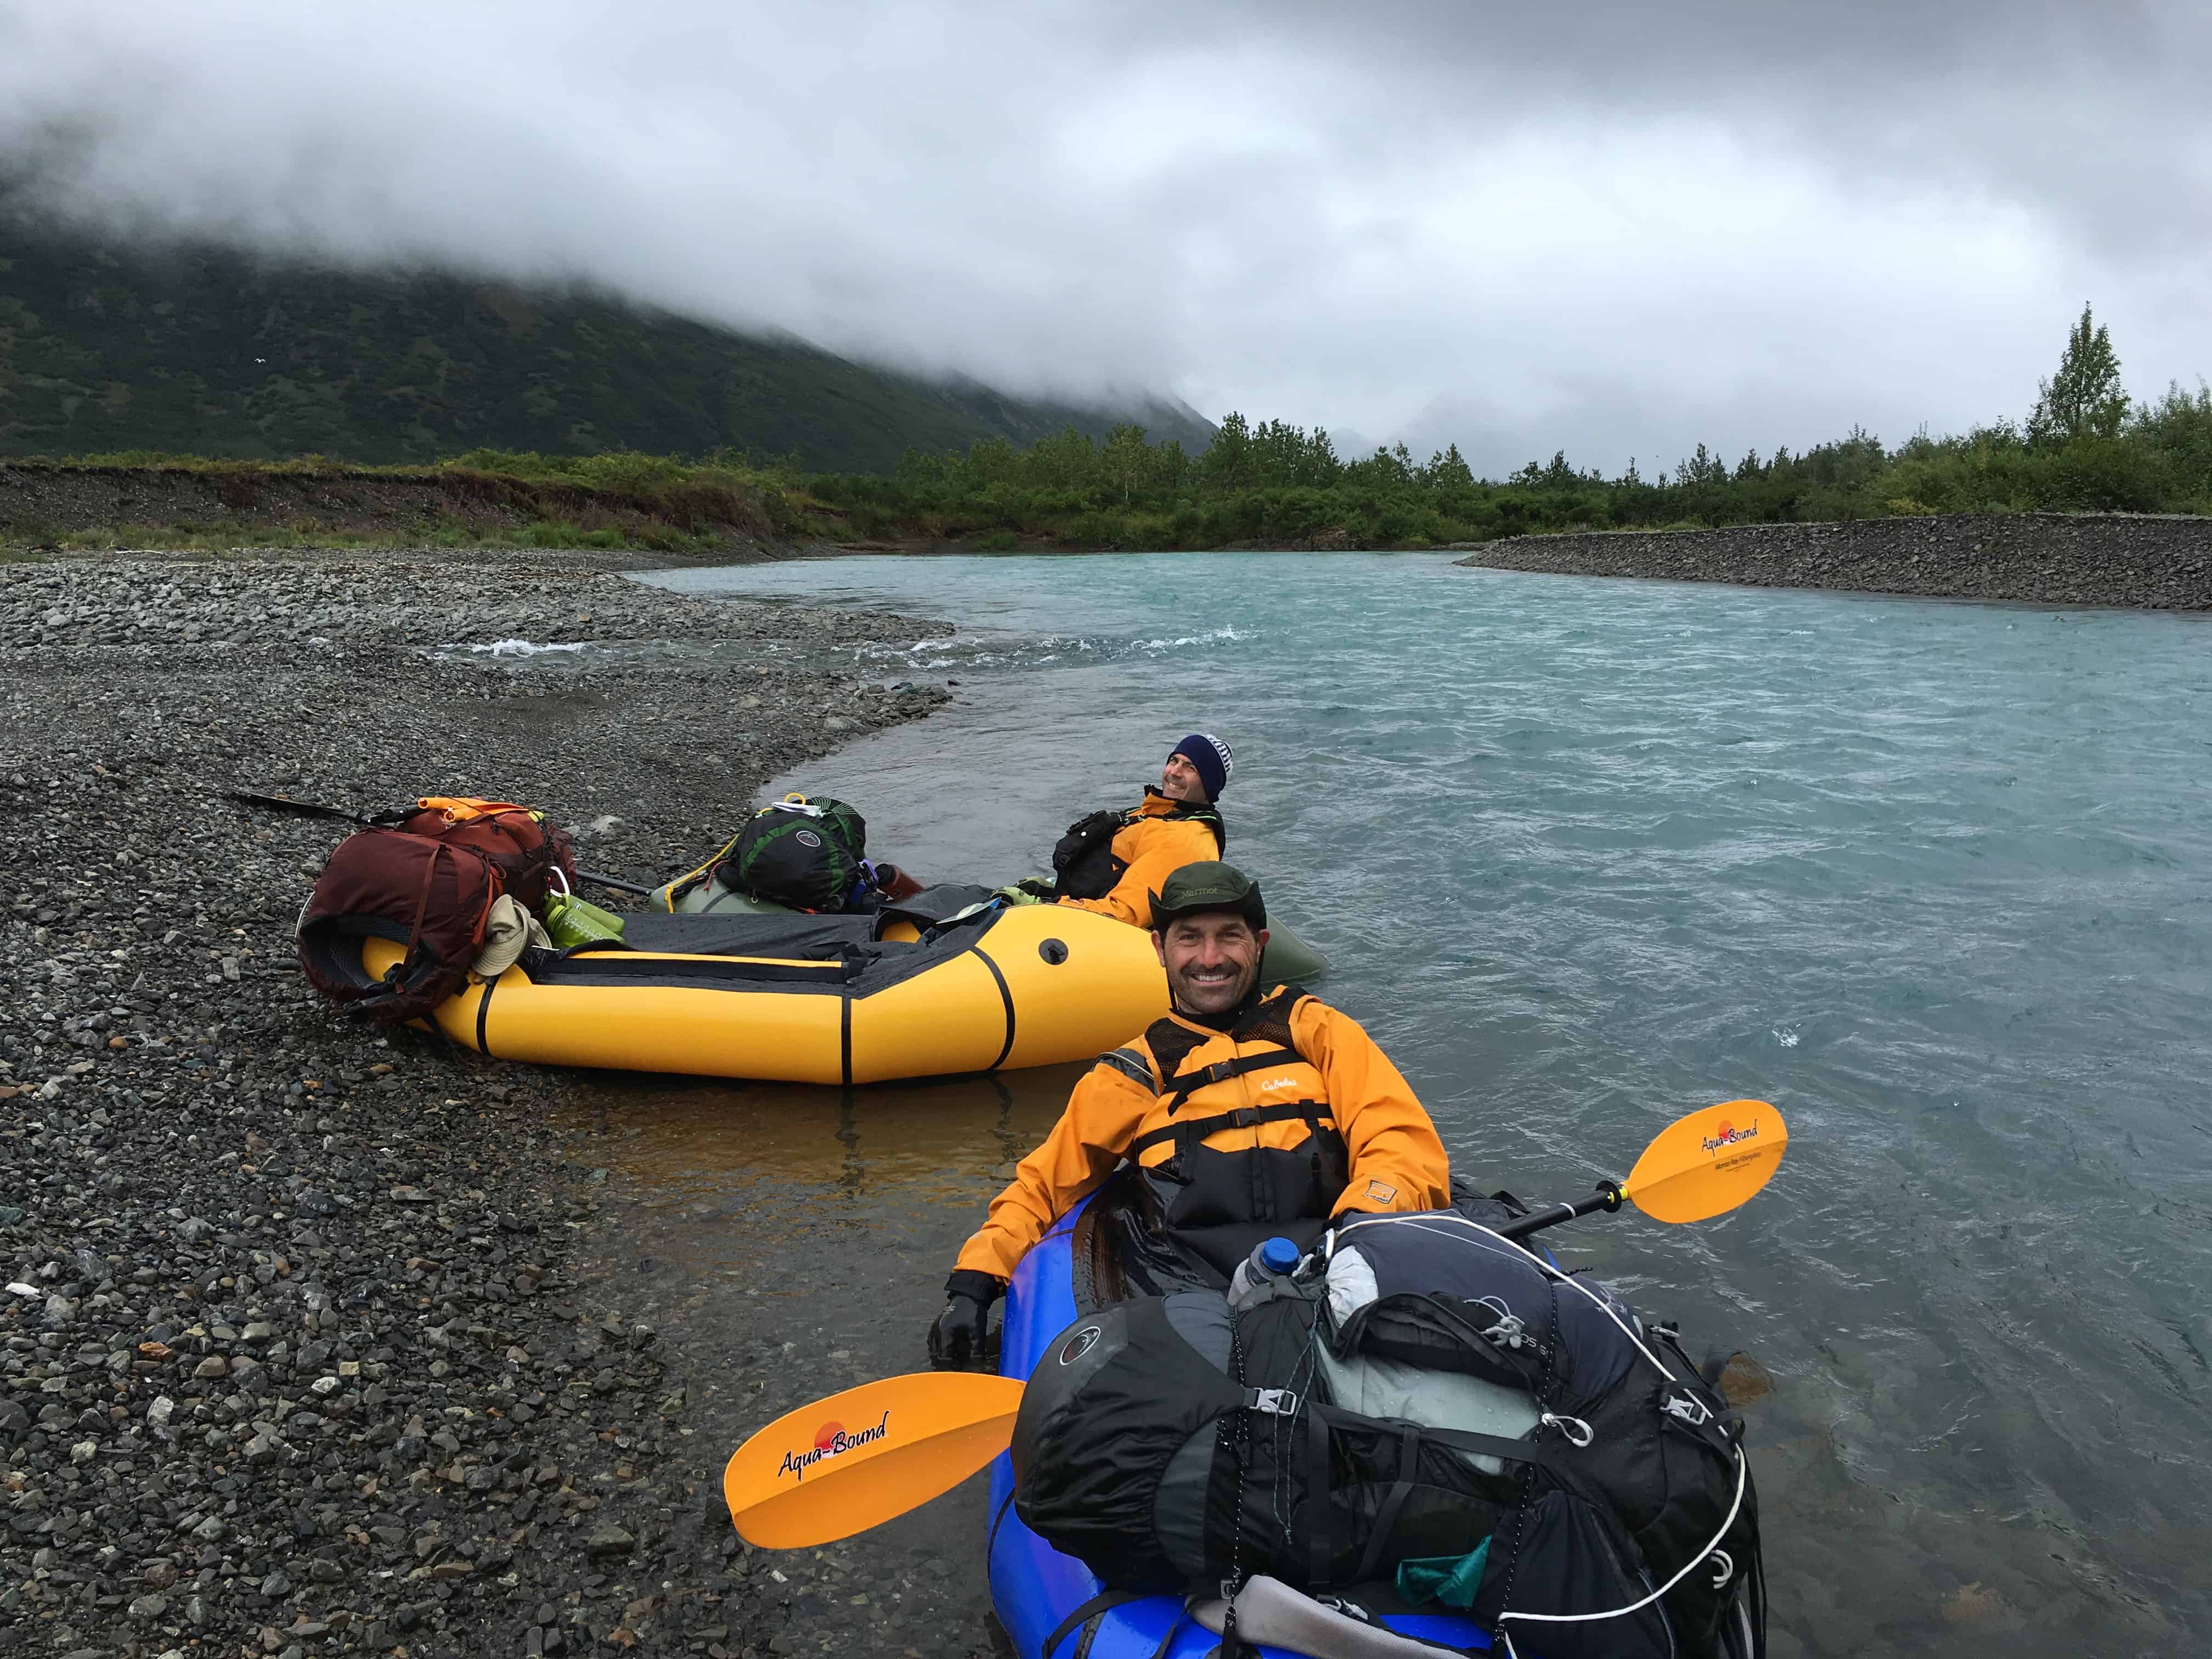
Morry Steinbach, Vince Jajuga, and I completed a trip packrafting Southwest Alaska from Heart Lake in Togiak National Wildlife Refuge to Tikchik Lake in Wood-Tikchik State Park from July 29-August 5, 2016. We ran Milk Creek, paddled Chikuminuk Lake, and backpacked into the Tikchik River which we floated to Tikchik Lake. We covered approximately 82 miles (132.0 km) total over seven days of packrafting and backpacking.
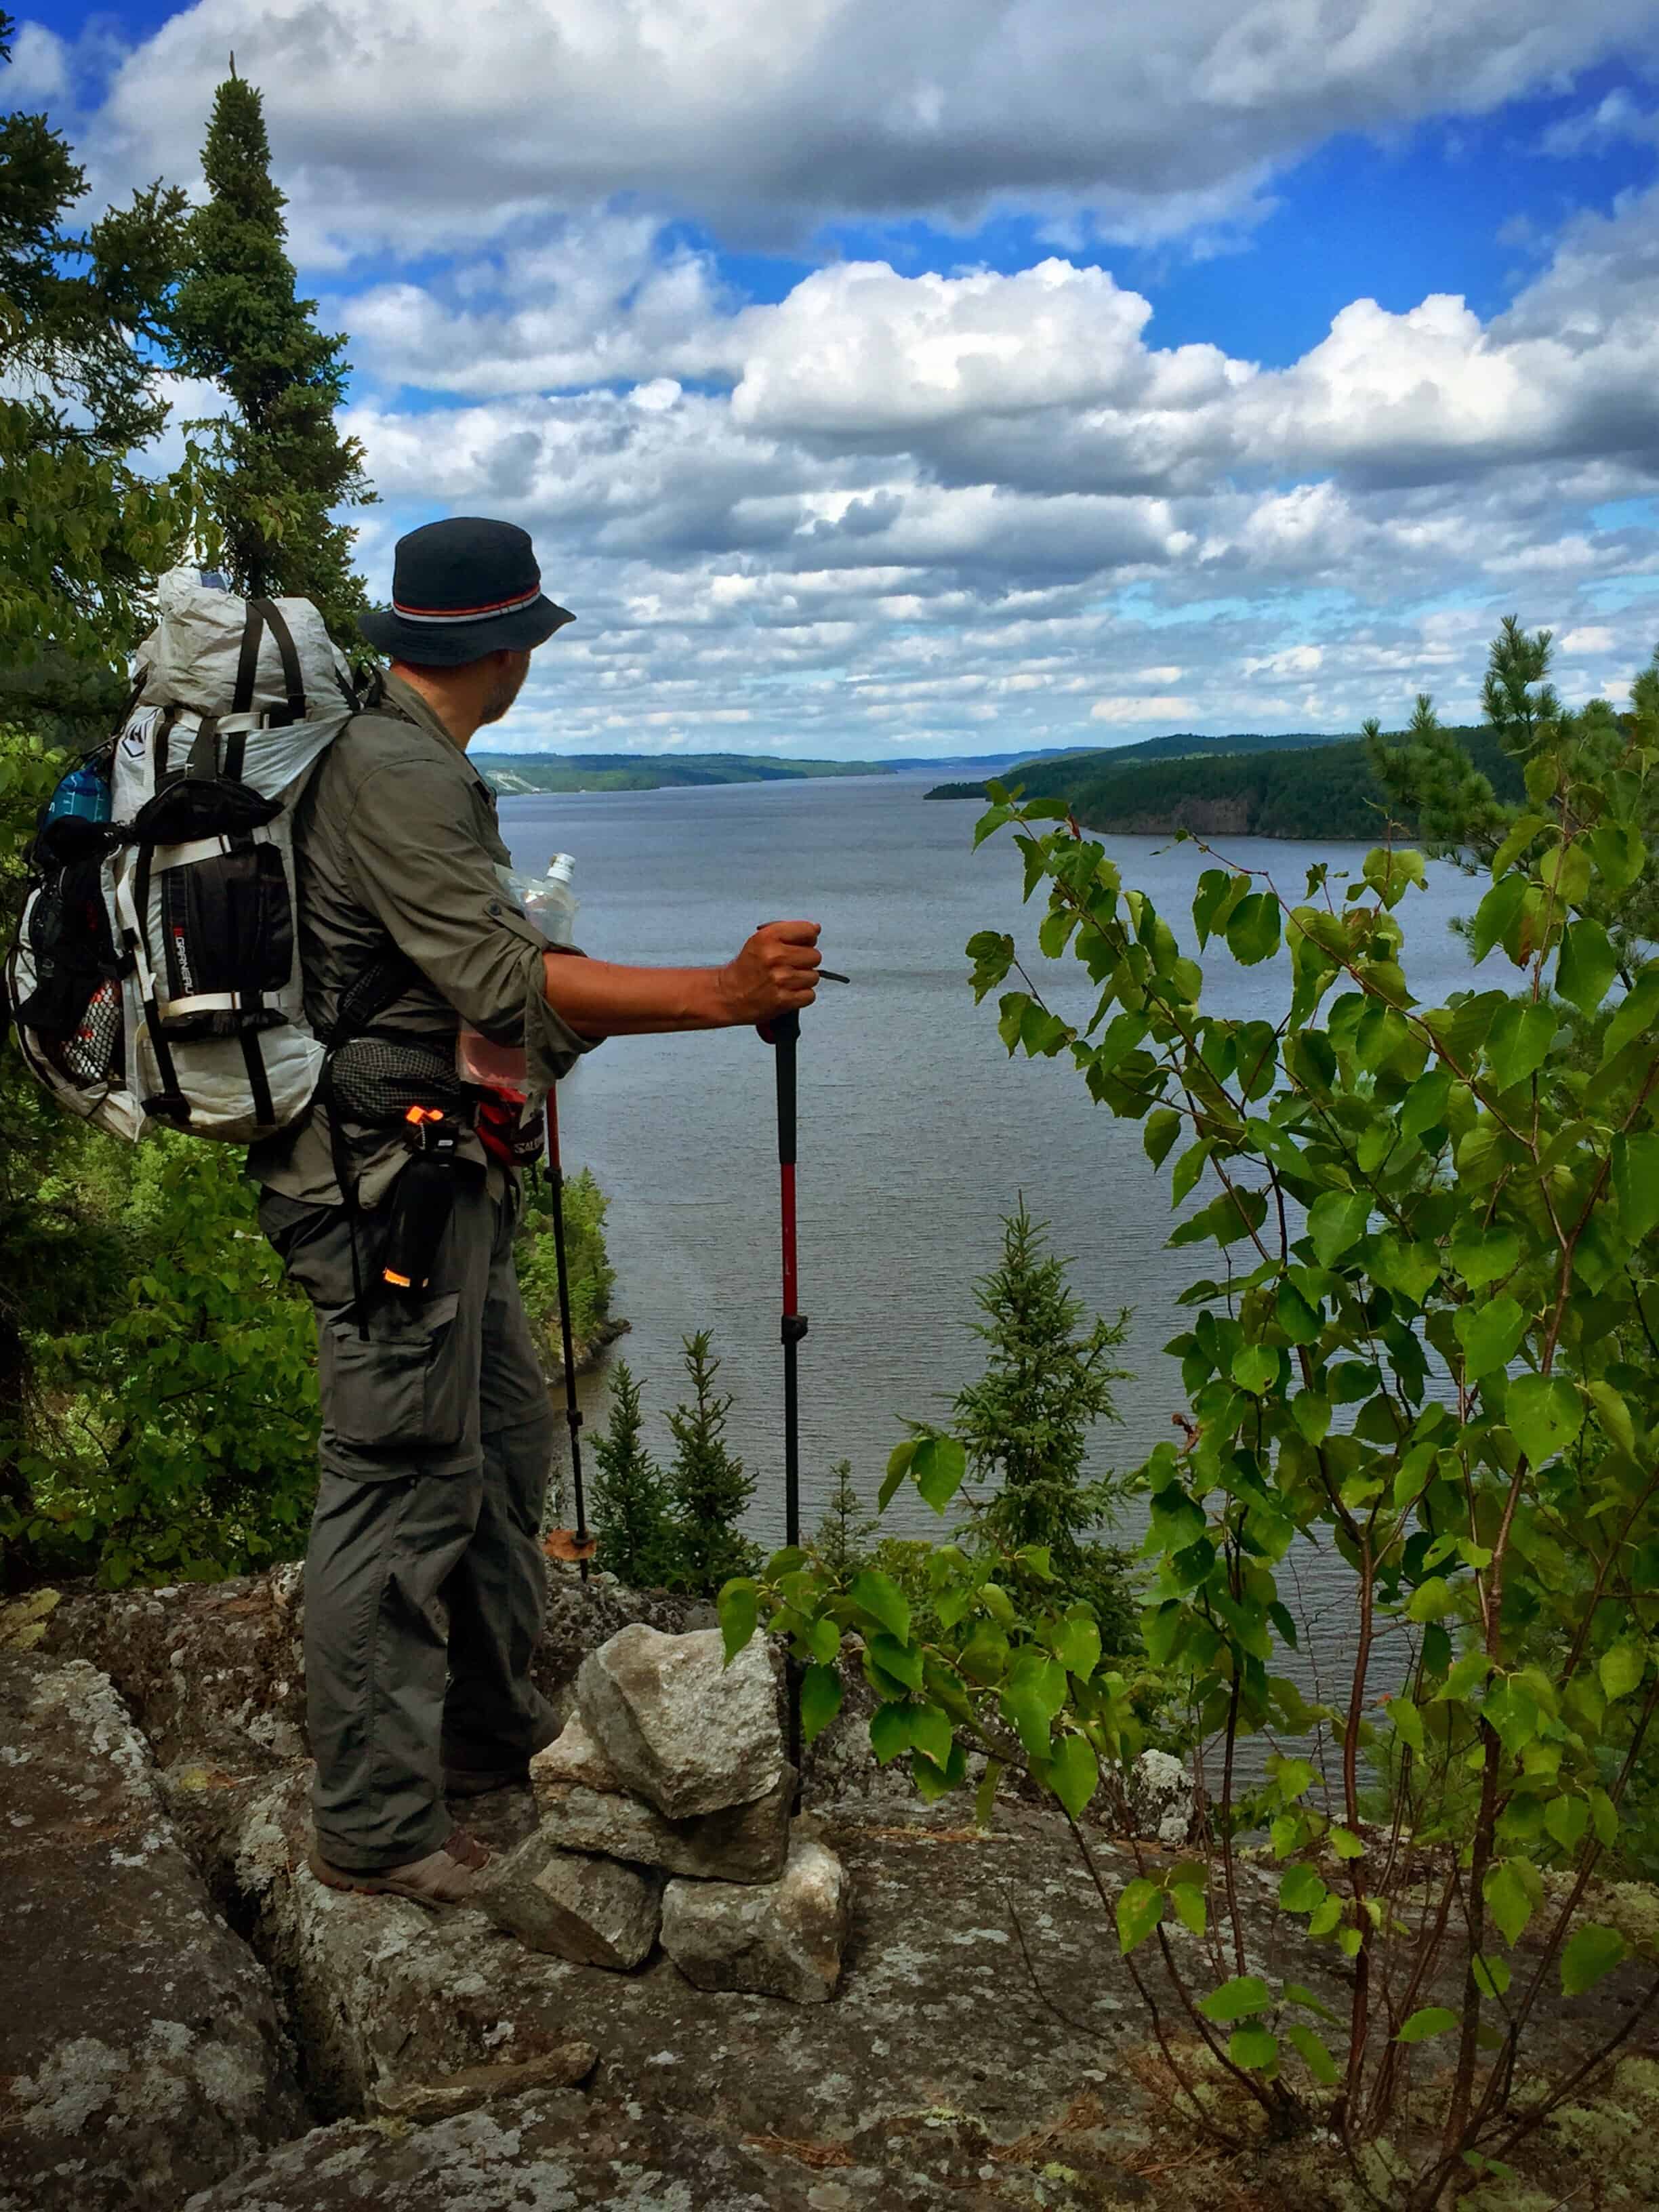
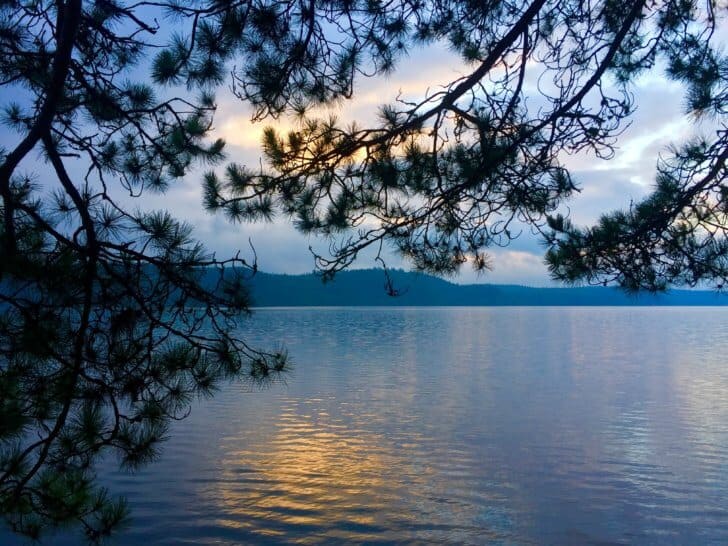
Hiking the Ottawa-Temiskaming Highland Trail, one of Ontario’s gems – is not without its challenges. Leanne tells us about its rewards, too.
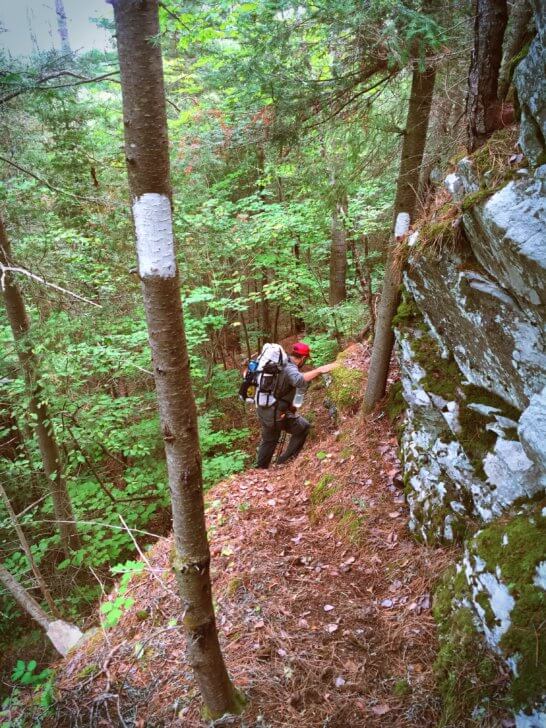
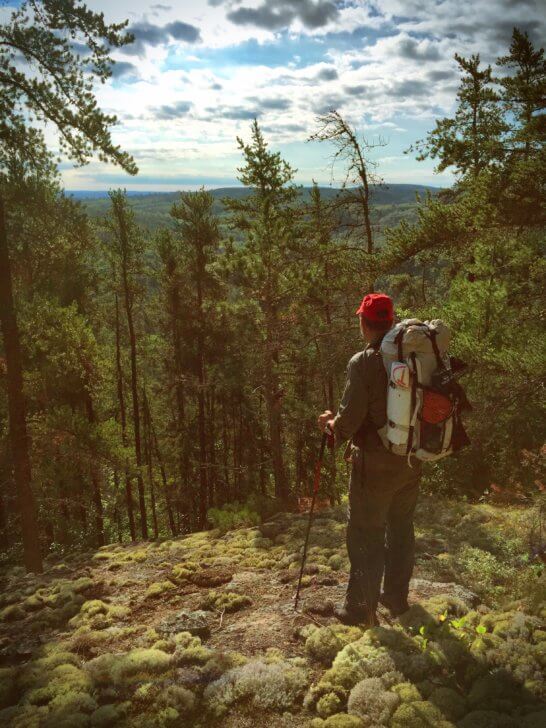
The Ottawa-Temiskaming Highland Trail is one of Ontario’s best-kept secrets. It is at once more rugged than the LaCloche-Silhouette Trail in Killarney Provincial Park, more challenging than the most difficult sections of the Bruce Trail, and harder than both of the Lake Superior Coastal Trails we have done. Also, I think it may be the most challenging trail in Ontario. It offers those who would brave it a real wilderness experience: few road access points; miles of overgrown trail that follow through plants and vegetation higher than your waist; dozens of downed trees requiring bushwhacking; and relentless, unforgiving, almost vertical, climbs.
As we followed various parts of the trail, I wasn’t sure if ravenous velociraptors would greet us, or smiling Hobbits offering to share Second Breakfast. I rated the wildness factor somewhere between the jungles of Jurassic Park and the forests in the Fellowship of the Ring. It was untamed and much less traveled than any other trail in Ontario. However, the blazes are close together and easy to spot.
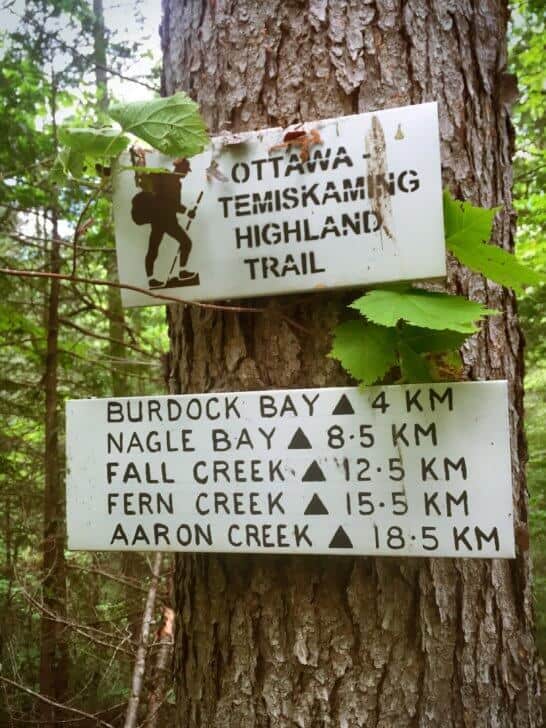
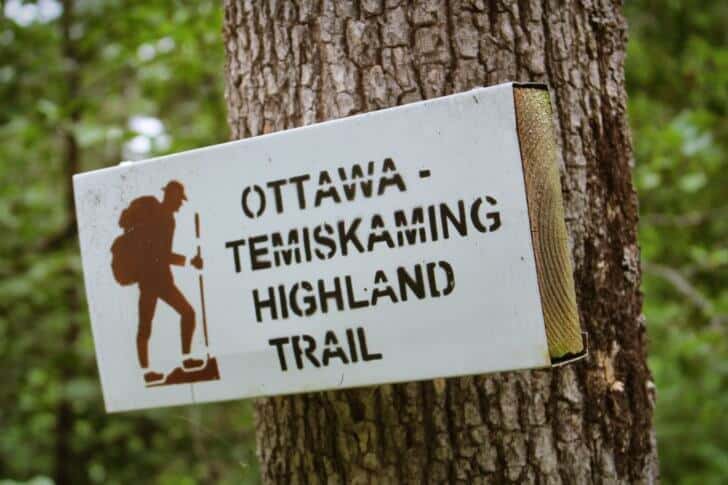
Hand painted sign on the trail.
The trail traverses through the wilderness area known as Temagami, Ontario, and follows the shoreline of Lake Temiskaming and the Ottawa River. Also, Temagami is a rather loosely defined area which includes a network of provincial parks, conservation reserves, crown land, and over 1491.2 mi (2400 m) of interconnected canoe routes and hiking trails.
Incidentally, the area, together with the Lake Temiskaming and Ottawa River system, was home to the First Nations people who trace their settlement back 6000 years ago and was later home to European explorers, traders, loggers, hunters, trappers, prospectors, and coureur des bois. Rich in human history and heritage, Temagami has become a world-class destination for hikers, canoeists, kayakers, and other outdoor adventurers seeking a true wilderness experience. Geologically diverse, the area has many of Ontario’s highest ridges and oldest growth pines. We determined to make our journey, aware of the area’s rugged quality and beauty of the ancient, old growth pines that hold the secrets of generations and the pristine, crystal clear lakes that are, for the most part, untouched by man.
Nastawgan Trails, a non-profit charitable organization incorporated in 2000, led by Murray and Vicki Muir, had the idea for this trail and it is their work that led to its creation. Working in conjunction with the Ministry of Natural Resources, Ontario Parks, and local citizens, their mission was to “plan, establish, maintain and promote a four season non-motorized trail network… to make the Temiskaming area a world class recreational tourism destination.” Nastawgan is the Ojibwa word for “traditional travel routes” developed by the First Nation people thousands of years ago.
To a large extent, these routes still exist and are used today. Murray and many volunteers work tirelessly to clear and mark the trail. There are hand painted signs with distances to the next campsites that add to the charm and sense of seclusion of the trail. Accordingly, guides facilitate the use of the trail through scheduled section hikes in what is clearly a labor of love for Murray and his team.
Our first exposure to the Ottawa-Temiskaming Highland Trail was a four-day, “out and back” hike of a section of the trail in August of 2015. We hiked from the northern terminus at Latchford, Ontario to Friday Lake. Consequently, the purpose of this short trip was two-fold. We wanted to use the challenging terrain as training for our upcoming trip along the Lake Superior Coastal Trail in Pukaskwa National Park later that summer. Also, we wanted to get a preview of the trail for our 2016 plan to hike the full length of the trail (which is the subject of this article). As you might expect, the trip from 2015 is a separate adventure on its own, but I wanted to share the story of our first day on the trail from that time.
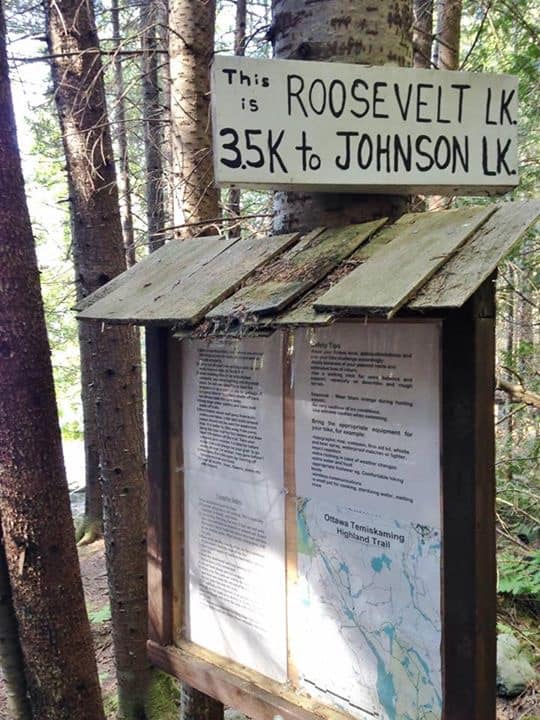
Ottawa-Temiskaming Highland Trail, August 2015: Day 1, Latchford to Roosevelt Lake
Tirelessly, we were slogging through some thick overgrown sections of the trail and Stephen was about 10 ft (3 m) ahead of me. All of a sudden he stopped and I heard him say something. I thought he was talking to himself.
“@#%$! Something just bit me, right under my shirt!”
“What?” I said, coming up to where he was now standing still.
He was pulling his shirt away from his body and looking at his belly. “Something bit me, hard!”
How on earth could something get under your shirt and bite you, I silently wondered. Also, I thought men are such babies sometimes. Really, they do exaggerate and have no concept of real pain and oh my God, get over it already. We ARE in the backcountry …
And then I felt an excruciating, piercing jolt of pain on my inner right elbow. Then another one on the side of my right breast. And two more on my right calf….
Confused, I looked down at my breast and saw a big black bug the size of a quarter biting right through my shirt and bra. As you might expect, I screamed and tried to brush it off. It came right back. I looked in horror at my other wounds and saw three more giant creatures feasting on my flesh. I tried to swat at the one at my elbow. And then in some weird slow-motion moment, all sensation and awareness ceased. My brain objectively studied these creatures and saw that they had wings. And the wings seemed to have spots. And they were eating me. Alive. I was standing there, unable to do anything about it.
“Run!” The word brought me back to awareness. “Run,” Stephen shouted at me.
Clumsily tripping over my poles in my haste, I ran down the trail and Stephen followed. We ran for about 1000 ft (300 m) before we stopped. Thankfully, the flies did not follow us.
“It hurts Stephen! Holy @#$%, it hurts so much,” I said, with tears springing to my eyes. “What were they?”
“I’m not sure,” he replied, as he grabbed his First Aid kit. Rubbing Afterbite on the affected areas provided some relief, but already the bites were turning red and swelling in a 1-inch (2.5 cm) radius around the bite. Also, although we didn’t see any stingers in our skin, we couldn’t decide if we had walked into some wasps’ nest or if they were something else. After a few minutes’ rest and regaining our composure, we set off on the trail again. We resolved to add some anti-histamines to our kit for the next trip.
Once home, we were able to determine that they were horseflies. I knew both from my memory of what they looked like and pictures of the bite marks found on the internet. As we realized now, they are actual predators that bite and suck blood, members of the family Tabanidae.
Horseflies hunt in groups of 4 or 5 (this is the exact number that attacked us) and are most active in hot, humid weather, and areas like the damp, overgrown, old growth forests of Temagami. With six different mouth parts built for cutting, tearing, and piercing, and jaws built like scissors, female horseflies rip into human and other mammalian flesh to find protein in blood that they need to produce eggs. As you might guess, it was horrifying to see these parts enlarged in pictures on the internet. They looked like medieval torture implements. No wonder the pain was so intense. We called them demon spawn.
The taxonomic classification system in biology lists horseflies as follows:
Kingdom: Animalia
Phylum: Arthropoda
Class: Insecta
Order: Diptera
Family: Tabanidae
Genus: Tabanus
Also, I think they are blood sucking spawn, man-eating, pain-inflicting, ferocious predators – the species? Horseflies.
With the memory of the pain receding, we continued for a few more hours until we reached our campsite for the evening at Roosevelt Lake. We couldn’t put our gear down and get our shoes off fast enough to get into the lake. As our bodies were made new again with the cold refreshing waters, the day’s efforts were soon forgotten.
A half an hour later, we hung our wet clothes on the clothesline, and we set up the tent. It was time to eat. I arranged our sleeping bags and inflated the pads in the tent while Stephen got dinner ready. Then, I heard him call out.
“Um, Leanne, we’ve got company!”
“Yay!” I thought to myself, imagining some hikers coming down the trail. “Someone to talk to!” Carefully, I crawled out of the tent and headed towards where Stephen was getting the food ready, about 20 ft (6 m) away. Suddenly, I saw Stephen grab something and walk briskly to the lake. I heard the BANG just as I saw them: 2 black bear cubs and a mama bear. They had just climbed down a tree about 20 ft (6 m) away and were headed in our direction, but the bear banger scared them. They scampered off into the bush in the opposite direction. As you might imagine, I was thankful that Stephen had the foresight even in a moment of panic to walk to the water’s edge and release the bear banger over the lake where the reverberation made the sound much louder than it was.
Also, we didn’t know if the bears had been up in the tree all along from the time of our arrival and watched us swim, or if they silently climbed while we were busy setting up camp after our swim. Either way, we decided it would be wise to make a lot more noise when we arrived at sites and to do a quick scan of nearby trees.
The rest of the evening passed uneventfully. As the sun began its slow descent across the lake, we were in awe of the peace that began to extend through the valley and gently settle our souls.
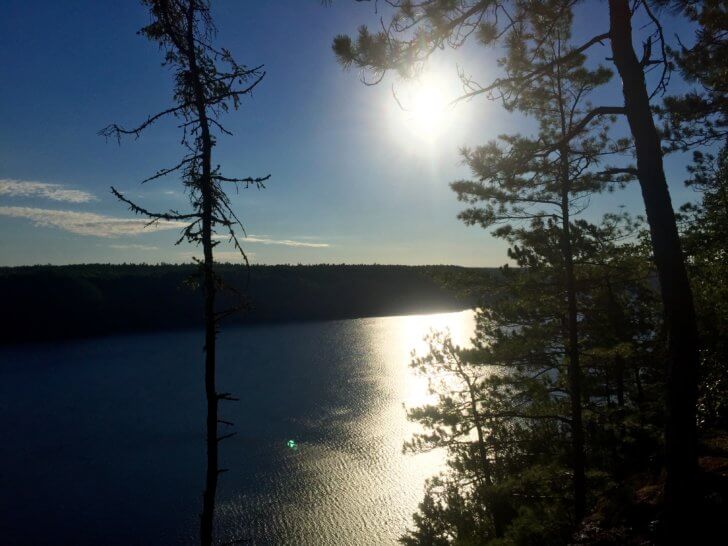
The hand-painted signs add to the feeling of isolation and seclusion out on the trail.The view overlooking Temagami’s vast wilderness from Singing Pine Lookout.
Follow me to August 2016, and our trip on the rest of the trail. Here are some high-level statistics regarding the journey:
Eight days total length (self-supported, no re-supply; approximately 30-35 lbs [13.6-15.9 kg] packs) although we had prepared for a total of 10 days as a precaution (food and time);
75 mi (120 km) total distance;
19,730 ft (6014 m) total elevation gain;
19,127 ft (5830 m) total elevation loss;
8 hours average hiking each day.
The 2016 Expedition
Day 1: Thorne to Unknown
Distance: 9.5 mi (15.32 km)
Elevation Gain: 868 ft (265 m)
Elevation Loss: 452 ft (138 m)
On the 22nd, we left early at 4:30 AM to begin the 5-hour drive from Toronto to Temagami, Ontario. Our plan was to meet our shuttle driver, Doug Adams of Northland Paradise Lodge, in Temagami at 10:00 a.m. He then shuttled us to the southern terminus of the trail at Thorne, Ontario, another 2-hour drive from the lodge. Thorne is a small community of about 300 people located just across the Ottawa River from Témiscaming, Quebec.
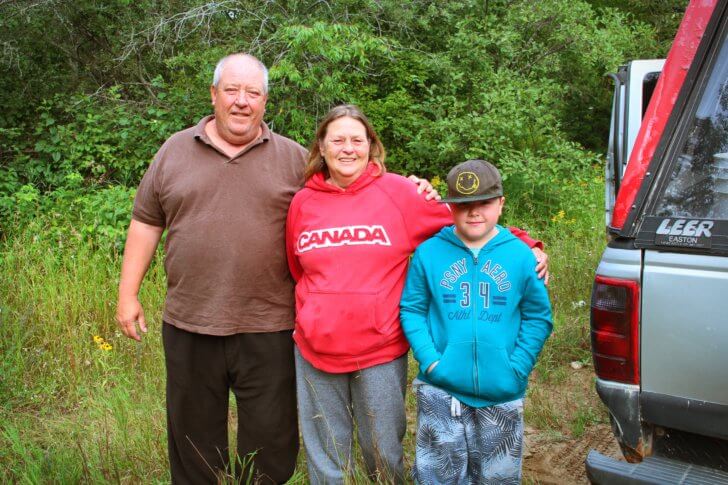
Our arrival was a bit delayed due to construction traffic just south of Temagami on Highway 11. When we arrived, Doug and his wife, Marge welcomed us. I must pause here, and tell you about Doug. Doug is a larger-than-life, rough and tumble, old-school survivalist. As owner/operator of Northland Paradise Lodge for over 30 years, he has many tales to tell. He can clean a fish in under a minute and cut and package a moose in thirty. He’s had a trap line for 30 years and in that time, has not once bought meat from a grocery store.
Also, he’s an accomplished photographer who takes his camera wherever he goes. As Doug explains, even during a 5-minute drive, the perfect “photo op” could present itself: a bear, a 12 point buck, a lynx, a moose, etc. Stunning photographs line the walls of his lodge.
Also, you can add Environmentalist to the list of Doug’s accomplishments. About twenty years ago, he single-handedly galvanized the support of locals, First Nations, and the town council when the Ministry of Natural Resources (MNR) decided to clearcut an old growth forest adjacent to his property. This decision was around the time that Bob Rae, the former Premier of Ontario, and other activists, chained themselves to bulldozers to protest and stop the clearcutting of the old growth forests in Temagami.
Thanks to Doug’s efforts, a 2,000-acre ancient ecosystem of giant red and white pines up to 5 ft (1.5 m) in diameter, and a variety of at least twenty-five different species of rare northern orchids attained protection. Not only did he save the area, but he also researched the history of the forest and suggested a name honoring the First Nations’ presence in this area. Today, it is known as The White Bear Old Growth Forest.
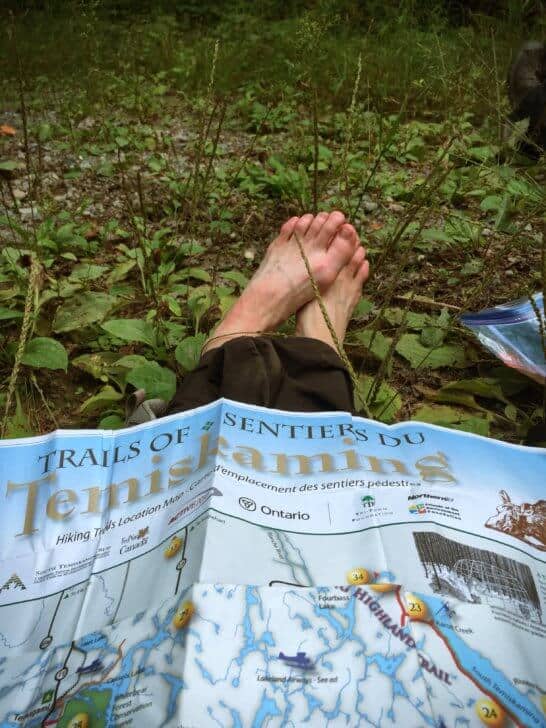
Finally, we arrived at Thorne, armed only with handwritten directions for this first section of the trail, as it was just newly opened and there was as of that date, no map ready for this part. Unfortunately, the GPS coordinates on the website gave us trouble prior to the trip and we could not get them to download successfully. We even called the IT specialist for the website but were still unable to download them. As it happened, about two days after we returned they downloaded without issue.
Doug was on the Board of Directors for Nastawgan Trails and had procured the directions for us. We knew from our experience the previous year from the northern terminus at Latchford that the trail was exceptionally well-blazed. The Ministry of Natural Resources would not allow signage on their lands, so we only had the handwritten directions. Also, we had maps for all the other sections.
Many thanks to Doug for confirming our pick up point at Friday Lake eight days later. We set off from the Nurse’s station in Thorne about 1:00 PM. As expected, following the handwritten directions to find the trail proved challenging initially. There were several ATV trails and MNR roads crisscrossing throughout the area. Also, we followed what we thought was the right course according to the note. Within the first 1.5 miles (2 km), we encountered a significant stream crossing ad decided to cautiously pass by Giant Hogweed on our left and right. Trying to give the noxious weed enough room, we were careful to not brush up against it as the photo-reactive sap can cause intense burns and blistering.
Eventually, we came to the road described in the directions and followed it until we came to a stream with a bridge that had been removed. We walked through the creek and up and over the embankment. The road continued as far as the eye could see. Unfortunately, we began to fear we had missed the trail somehow and backtracked to follow the road in the opposite direction. After walking 3.5 miles (6 km), and not seeing any sign of trail, we thought maybe the original path was right, and we had just not gone far enough to see where the trail started.
So we decided to double back. But by now it was close to 6 PM, and we were hungry, worried, and frustrated. It was time to think about where to camp for the evening. With dashed spirits, we decided to camp on a Ministry of Natural Resources side road where there was a clearing in the forest and a fire pit. Apparently, Ministry of Natural Resources staff had camped here, and it was disappointing to see the condition of the site. Unfortunately, garbage and propane stove tanks littered the area.
This photo demonstrates what being lost looks like.
We had supper and set up camp for the night. Our game plan for the next day was to continue down the road, and if we did not find the trail by the end of the day tomorrow, we would have to call Doug and get him to take us to another access point.
Day 2: Lost as Hell to Ottertail Creek
Distance: 9.3 mi (15.07 km)
Elevation Gain: 1419 ft (433 m)
Elevation Loss: 1868 ft (569 m)
We arose early with determined spirits to find the trail and finally get this trip started. After a quick breakfast, we broke camp and headed back out to the Ministry of Natural Resources road around 7:15 AM. We thought that the trail would branch off the road if we just went far enough. If we didn’t see it, we had a good sense that the Ministry of Natural Resources road would lead us to a county road. Ideally, we could then get our bearings.
Approximately, a half an hour later we came to a main road. This scenario made us happy, as we thought that we were on McLaren Road. Although there was no sign on the road itself, we thought that it would be a 3 or 4 mile (5 or 6 km) walk to another access point at Ottertail Creek. Consequently, we decided to flag down the next car that drove by just to make sure we were on the road we thought we were.
Fortunately, within 5 minutes, a pick-up truck came up the road, and we flagged it down. We said, “Hi there!” “We seem to be a bit lost. Could you please tell us what road this is?” “Oh sure,” said a friendly grandfatherly figure. “This is McConnell road.” Oh. Not what we thought at all. We asked, “Does this road take you to McLaren road? How far is it?” He replied, “Um, yeah, but oh geez, it’s about 18.5 m (30 km).”
I’m sure our jaws hit the ground. We looked at each other. Unfortunately, we had gone the wrong way and were much farther west than we thought. “Well, have we passed Emerald Lake?” we asked. We knew that Emerald Lake was near the access point at Ottertail Creek. He replied, “Nope. That’s where we’re going fishing.” We must have looked stunned. He continued, “Do you want a ride? We could take you to Emerald Lake.”
Now, I have never hitchhiked in my life, ever. Uh-uh. No way. Too dangerous. It’s a good way to get yourself killed, dismembered, or to go missing.
Stephen looked at me. I could see a grandmotherly figure and a young grandson, maybe eight years old, in the cab. Without hesitation, I smiled and said, “That would be so great. We’re so lost, and it would take us all day to walk there.” And with that, he moved aside the fishing gear in the back of the truck and cleared room for us to sit. Happily, we tossed our packs in and then hopped in ourselves.
A long bumpy ride later, we saw the sign for Emerald Lake, and we pulled over to the side of the road.
For a split second, I thought, ok this is it. This is where we’re going to get dismembered.
The driver came around to the back of the truck and said, “Well, you know it’s only another 10 kilometers to Ottertail Creek. Would you like us to take you all the way?”
We smiled and said, “Well, if it’s not too much trouble that would be great!”
And 15 minutes later they let us out at Ottertail Creek. It turns out that Randy and his wife Louise were taking their grandson, Ryan, fishing. Fortunately, they were nice people, not killers lurking on the back roads waiting for lost hikers. As you may have guessed, we thanked them profusely as they saved us a day of walking. We had read about Trail Angels on the Pacific Coast and Appalachian Trails, but we didn’t know they existed so far to the north. These lovely people were our Trail Angels. We tried to give them gas money, but they would not hear of it.
Our Trail Angels: Randy, Louise, and Ryan.
So with handshakes and many thanks, our Trail Angels returned down the road back to Emerald Lake. We turned to the map once more. It appeared the trail would pick up about 3 miles (5 km) down an ATV trail where McLaren road branched off. With buoyed spirits, we set off again.
After walking about 3 miles (5 km), we still had not found the access point. Once again we second-guessed ourselves and turned around, thinking we were wrong or had missed the trail. The map was clear that it should have been there. We had backtracked for almost 2 miles (3 km) when Stephen abruptly said, “No. This is stupid. It has to be the other way; we just didn’t go far enough. There’s no other way it could be according to the map.” So once again we turned around and this time, went a bit farther. We could hear a stream flowing, and we saw white blazes on the trees across the river. HALLELUJAH!
Never in our lives have we ever been so happy to see trail blazes. And then, the sign. The trail sign. We crossed the river at a dry spot and stopped for lunch before picking up the trail. Now we could finally start this trip, after falling behind schedule by a day.
Crossing the river bed to pick up the trail at Ottertail Creek.
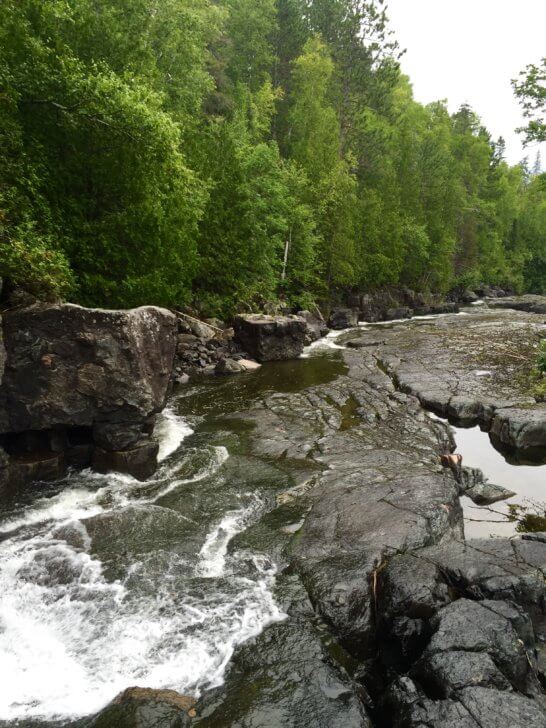
The afternoon saw us following along a gorge with beautiful waterfalls and dense overgrowth lining the path. At this point, we didn’t care what condition the trail was in as long as we had blazes to follow, and we could readily discern them from this point on.
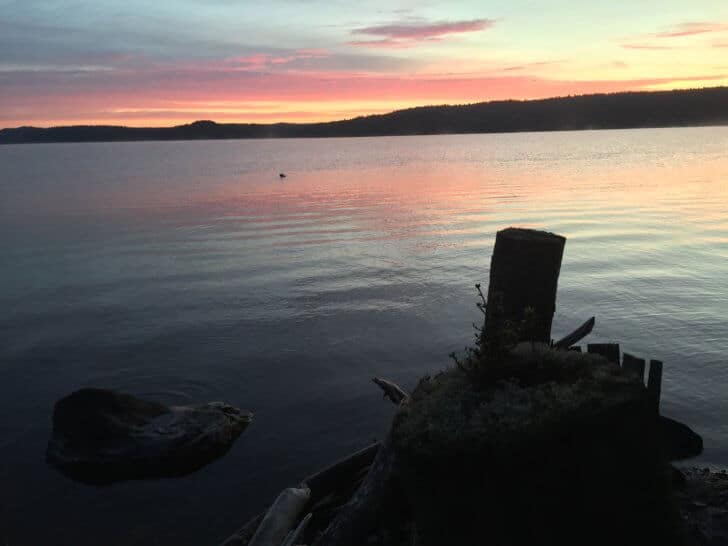
Eventually, we came to our first campsite where Ottertail Creek emptied into the Ottawa River. It had a small sandy beach and a view of the river with Quebec on the other side. With thanks to Trail Angels, we set up camp for the night.
Looking out across the Ottawa River. The Quebec wilderness is on the far side.Our private beach at the campsite where Ottertail Creek meets the Ottawa River.
Day 3: Ottertail Creek to Not A Creek
Distance: 8.5 mi (13.82 km)
Elevation Gain: 2693 ft (821 m)
Elevation Loss: 2624 ft (800 m)
We arose to a lazy sunrise radiating pink and yellow hues up over the Quebec wilderness and into the Ottawa River valley. Breakfast on the beach was muggy and sticky. We knew it was going to be a hot one.
Looking north on the Ottawa River from Ottertail Creek campsite.The pink sunrise gave way to a soft golden glow as the sun rose over the Quebec wilderness.An early pink sunrise fills the Ottawa River Valley.
We started out at 7 AM, and before long, we were soaking wet with sweat. With the humidex, it must have been 104º F (40 ºC). Consequently, we didn’t know it but we would spend the next four days soaked, either from sweat or rain.
Walking through a dense section of forest, we surprised a marten who did not hear us coming. Slender and agile, he quickly scampered up the tree, but his curiosity got the better of him. He kept stopping to get a better look at us. His face was a cross between a fox with a long slender snout and a cat with tiny triangular ears. He looked cute and cuddly. But I remembered reading somewhere that they are quite vicious. I wondered if he was sizing us up and deciding if he could rip us to shreds with his long sharp claws.
We continued. Unfortunately, the combination of the relentless ups and downs of the valley and the humidity caused us to drink more water than we had anticipated. Our hydration bladders held 1.6 qt (1.5 L) each, but we were rapidly drinking it all. Stephen ran out before our next water source.
Maybe it was just a little dehydration delirium (I was trying to be very conservative with my water), but I had visions of our dead, dehydrated bodies being found two years later by some random hikers. I must remember to write in my journal, I thought, how much I love my girls so that when someone finds my body, my girls will know I thought about them near the end.
An inland lake was the perfect spot to have a short break and replenish our water.
Shortly after that, we came across a small inland lake. Exhausted and drenched in sweat, we stopped for a break and to refill our water.
Feeling better, we pressed on through more of the same – up and down and up and down – until we finally came to our campsite. The sign said 984 ft (300 m) to the site – but it was almost vertically straight down a massive hill. Unfortunately, our tired legs reminded us that the descents could be much worse than the ascents in many ways.
Also, this particular campsite looked like it had never seen any campers. With the hill to get down, we could understand why. We set up camp and went for a refreshing dip, clothes and all, in the chilly Ottawa River. We hung a clothesline right on the shore hoping to catch a breeze to dry our clothes, but the humidity was still so intense that they did not dry.
A red shirt hanging on our clothesline caught the attention of a small family fishing on the river. They motored over close to us and told us they had been fishing around there for years and had never seen any campers there. The family didn’t even know it was a campsite. They thought that this location was in the middle of nowhere. Consequently, we had a hard time convincing them we were, in fact, sane, hiking through such humidity, dense forest, and elevation.
As we turned in for the night, tired and sweaty, it began to rain. At least it waited until bedtime.
Day 4: Not-A Creek to Owl Creek
Distance: 9 mi (14.56 km)
Elevation Gain: 4877 ft (1487 m)
Elevation Loss: 4841 ft (1476 m)
A humid morning takes shape on the Ottawa River on the fourth day.
We awoke to another hot, sticky, mug-fest of a day, with wet clothes that did not dry out from the previous day and a wet tent and tarp from rain overnight. We didn’t know it yet, but this day would prove to be the hardest of the trip with a total elevation gain of 4877 ft (1487 m). It WAS the Ottawa River Valley, after all. All we knew was that the steep ups and downs kept coming at us with no relief. Needless to say, they were ubiquitous and relentless. Again, we found ourselves sucking up our water quite rapidly.
We passed through dense forest with damp mossy carpeting on the floor where we found our feet sinking inches into the wet softness. Obviously, there had been inland streams and rocky beds. We bushwhacked through waist-high vegetation and blow downs and marveled at the size of the trees.
We came across some discarded antlers on the trail that appeared well-chewed and gnawed. Shed antlers, we later found out, can be a source of calcium, phosphorus and other minerals in areas where these may be scarce in the soil. Apparently, some small animals, maybe squirrels, rabbits, or mice, had availed themselves of the opportunity.
Later in the afternoon, we both began to feel a bit wobbly-kneed and weak. We had been on the move since 7:00 AM and the combination of extreme humidity and the substantial physical effort on the immense climbs was taking its toll. Fortunately, we stopped for a brief rest and decided to break out the salt pills as a pre-emptive measure before we became further depleted. This determination turned out to be a wise decision and gave us a boost to keep going until our next stop.
The hard physical effort of the ups and downs continued. To distract me, I began singing Tragically Hip songs in my head. The refrains of Wheat Kings slipped in and out of my mind – “Wait and see, what tomorrow brings.” Their final concert in Kingston, Ontario, which we had watched on TV not too long before our trip, kept playing in my mind. I was thinking about how courageous Gord Downie was. If he could battle brain cancer and tour across Canada, I could surely do a few hills.
Before we knew it, we arrived at a site we had identified on the map to have a small break. We immediately dropped everything, stripped down, and jumped into the lake for a refreshing swim. Taking our time to rest a bit, we soaked up the sunshine as some of the oppressive humidity began to lift. Suddenly, a familiar humming noise caught our attention, and to our delight, a shimmery green hummingbird hovered in front of us and looked straight at us for a split second before realizing that my pink shirt hanging on a nearby bush was not a flower full of nectar.
The afternoon we saw more climbs than earlier that morning. We were rewarded for our efforts with some spectacular views of the river. Our campsite for the night was beside the ruins of an old Trapper’s cabin, and we could see the rusted remnants of mattress springs, part of an old stove, and other relics. Sleep came quickly that night despite the heat and also came dreams of a trapper’s life.
A mid-trail peek at the Ottawa River.Dense forest along the trail.
Day 5: Owl Creek to Aaron Creek
Distance: 10 mi. (16.55 km)
Elevation Gain: 2930 ft (893 m)
Elevation Loss: 2963 ft (903 m)
We arose to a promise of a cooler day. The humidity did not seem quite so oppressive. This change in the weather was a welcome relief as we knew we still had some climbing to do. We weren’t out of the valley yet and the map showed us several lookout points. Lookout Points, we began to realize, were really map makers’ code for “Get Ready For One Hell Of A Climb”.
Another stunning morning in the Ottawa River Valley.
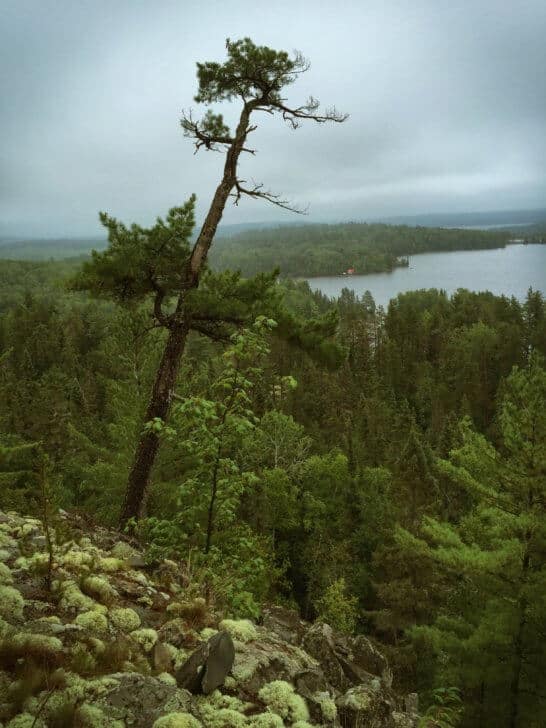
Our first lookout came early in the morning. After some climbing, we came across an area of flat rocks overhanging the valley. This spot was called The Perch. The sun was still rising in the sky to the southeast but looking more north, the view was awe-inspiring. With one glance at the beauty, all the hardships we endured to get to this point seemed small. We became lost in the moment.
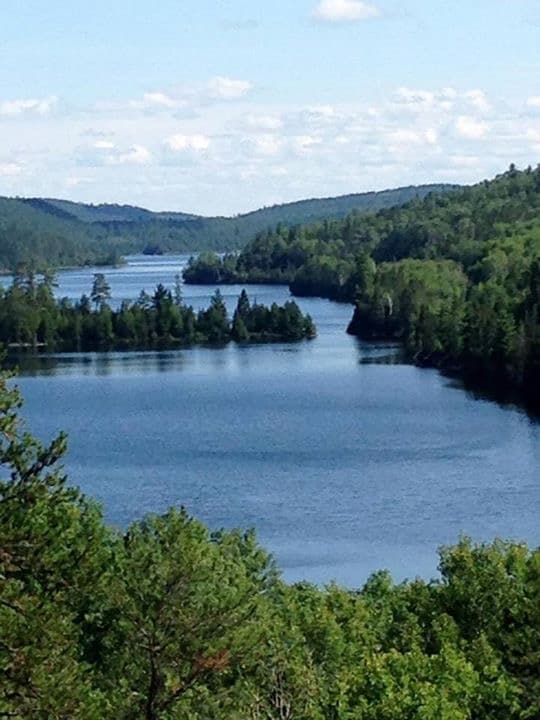
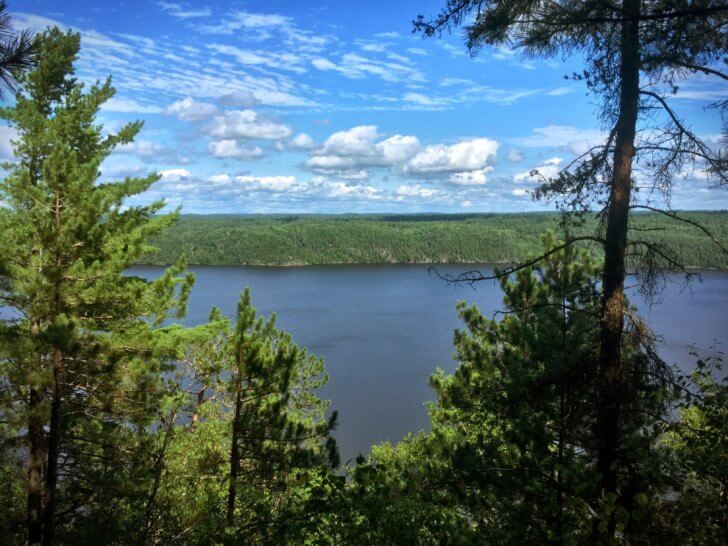
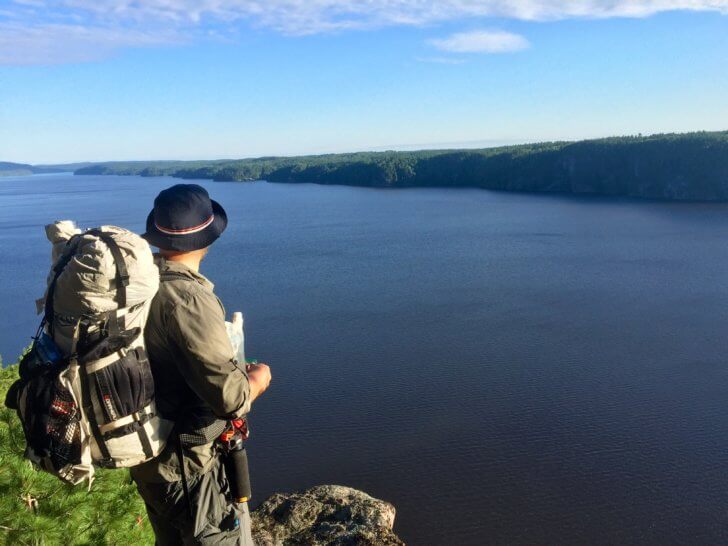
The view from The Perch. From this vantage point, the Ottawa River was immense.
The trail headed into the forest again and we immediately encountered a massive hill that took about forty minutes to climb. As we descended, we came across what appeared to be the leg bones of a moose. Doug told us the wolves in the area decimated the beaver and moose populations. We wondered if a wolf had eaten this one.
The afternoon took us to two more spectacular lookouts. At the Guiding Spirit lookout, we paused for a few minutes and enjoyed the silence and solitude, and the view. Stephen asked me if the Spirit was guiding me. “Yes,” I said. “Right to the next campsite!”
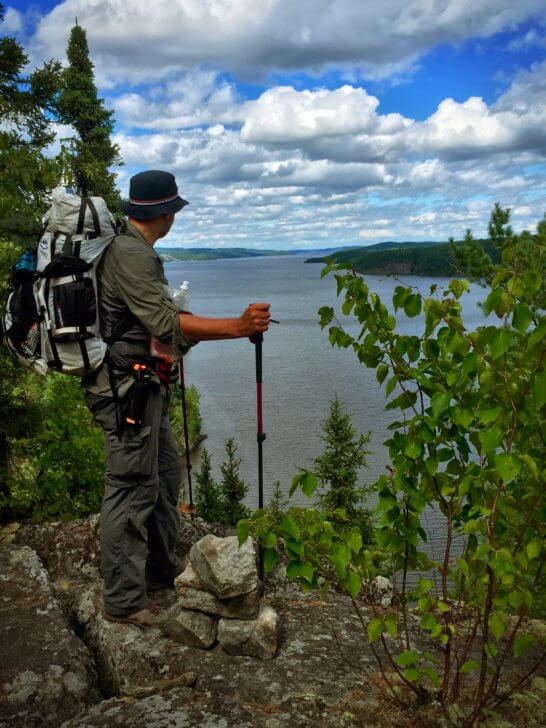
Looking out onto the river from Guiding Spirit Lookout.At Guiding Spirit Lookout the rugged nature of the trail proved spectacular.
Our next lookout point was Moose Lookout. Here we could imagine a moose wandering up and pausing to look out over his kingdom. Everything the light touched was his.
Hiking back into the forest once more, Stephen didn’t notice that he had stepped on a wasp’s nest that was right in the middle of the trail. As I approached where he had just stepped, I could hear a growing, buzzing sound and I could see swarms of wasps angrily buzzing around their crushed nest. I avoided them on the trail. Luckily we avoided what could have been a nasty situation.
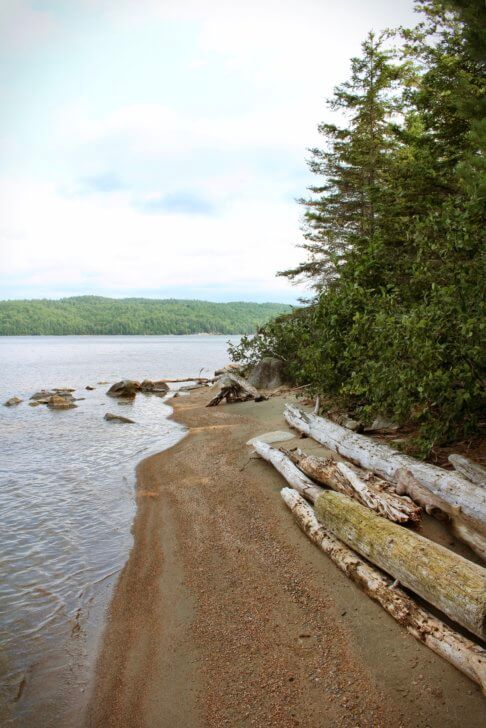
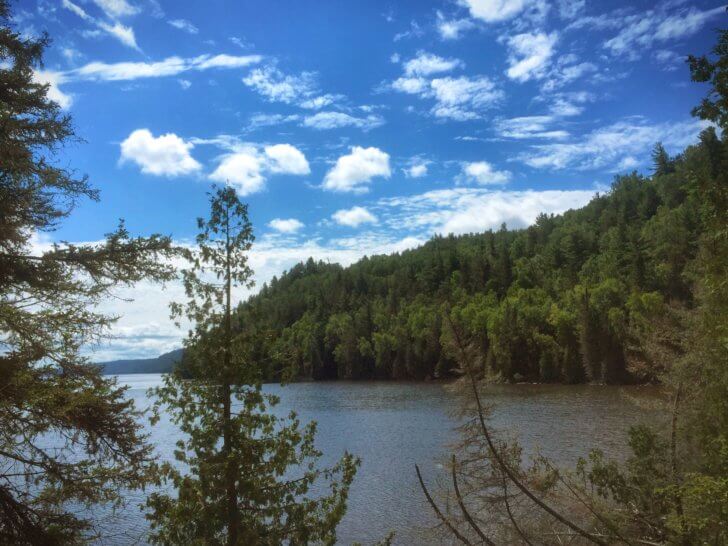
Our campsite for the evening was at Aaron Creek, and it is here that the Ottawa River begins to merge into Lake Temiskaming. We had a beach all to ourselves, strewn with driftwood and dreams.
A rocky beach at Aaron Creek, our campsite on the fifth day.
Day 6: Aaron Creek to Matabitchuan Power Generating Station
Distance: 10 mi (16.28 km)
Elevation Gain: 3188 ft (972 m)
Elevation Loss: 3099 ft (945 m)
As the sun rises higher over the Quebec wilderness, the valley comes to life.Another pink morning on the Ottawa River at Aaron Creek.
Another beautiful sunrise greeted us on our 6th morning on the trail. Counting the days, we realized that it was Saturday but had no sense of time otherwise. There were no calendar days.
Back on the trail, we began quickly climbing once more. Regarding elevation gain, this was our second highest daily total. The climbs were many and so steep that we shortened our grip on our hiking poles and used them as picks to gain more leverage as we moved upwards. The trail proved ruthless.
We climbed down the trail.Enjoying the view on the trail. Dense forest as far as the eye can see.
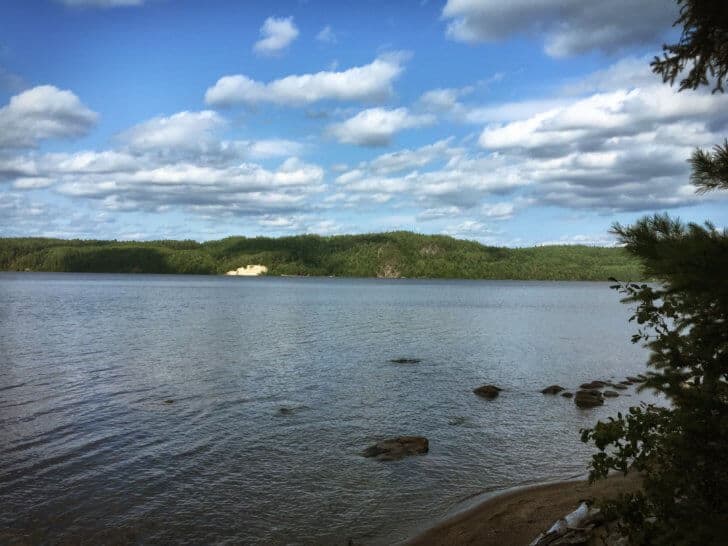
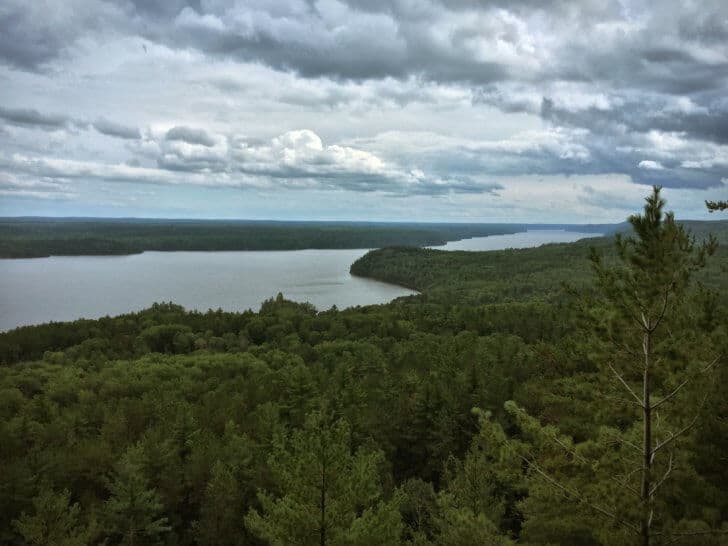
But the climbs, as always on this trail, rewarded us with stunning lookout points. One particularly memorable view was the Ottawa River Lookout. Here you could see where Lake Temiskaming and the Ottawa River merged. It was truly a beautiful sight from this vantage point and gave us a new appreciation for the immense nature of the Ottawa River, Lake Temiskaming, and the wilderness on both the Ontario and Quebec sides.
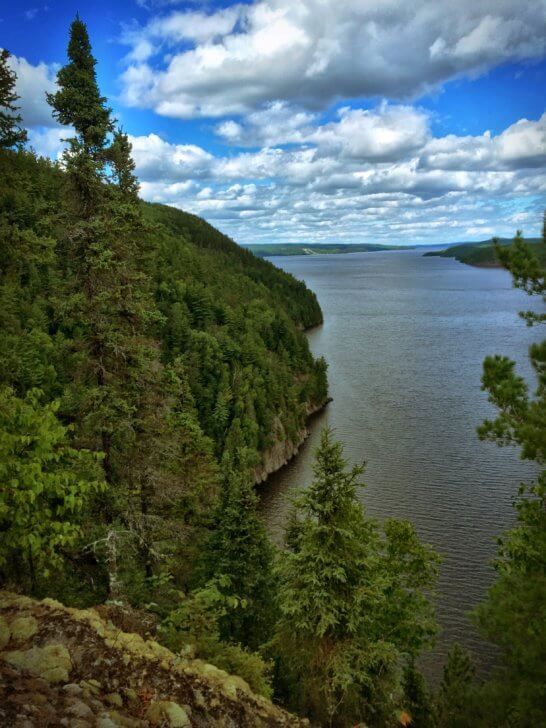
The view from the Ottawa River Lookout, where the Ottawa River meets Lake Temiskamimg.The view from Jack Pine Lookout.
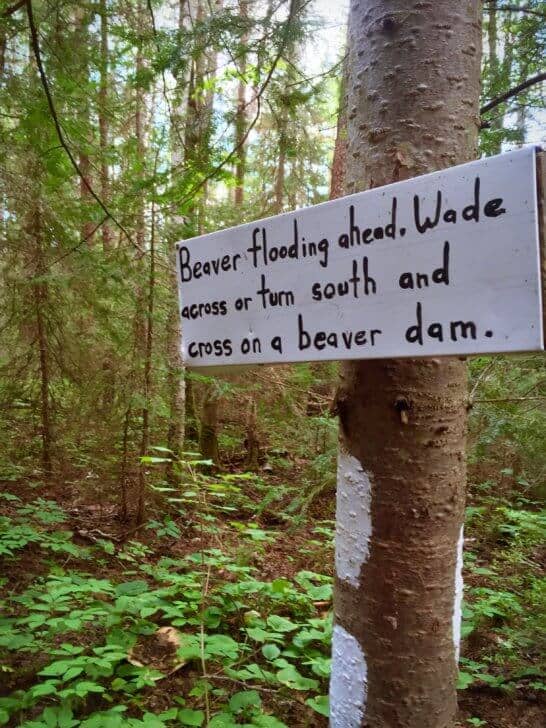
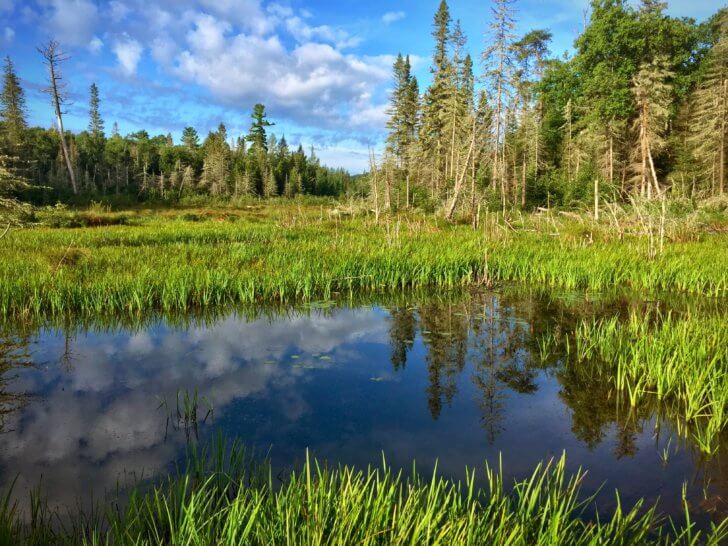
Finally turning inland and leaving the climbs behind, we encountered a beaver dam. Now this wasn’t a regular beaver dam. This was the Hoover Dam of beaver dams. It even had its own sign on the trail. You could either wade through the flooding (shorter, but wet) or go around on the dam. We didn’t know how deep the flooding was so we chose to cross over the dam. It seemed to go on forever; I think it took 20 minutes to cross. Thick vegetation higher than our waist was grasping at our clothes and packs as we walked.
The Hoover Dam of beaver dams coming up.The flooding caused by the beavers.
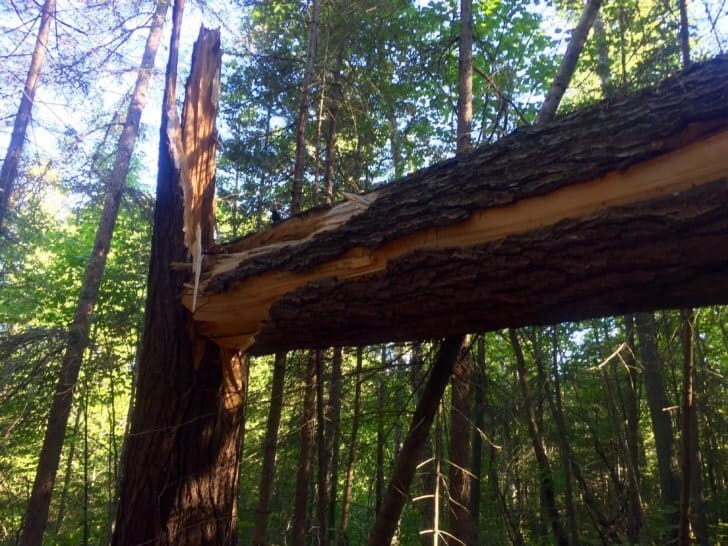
Throughout the trail, we encountered hundreds of blowdowns, requiring us to use various combinations of going around, under, or over the fallen trees. At one point we even broke out the saw to cut away some branches blocking the trail. A little trail maintenance was a small price to pay for that kind of beauty. After arriving home, we learned that there had been a tornado through this particular area of the trail earlier in the season.
Later in the afternoon, we could not find the canoe campsite that was on the map near Beaver Mountain (we later found out it didn’t exist anymore) We decided to push on to Matabitchuan Power Generating station where the map indicated there was an area to camp.
The trail was confusing between Beaver Mountain and the power station, but we eventually found where it continued on the other side of the station. Just as we arrived, it began to rain. We quickly set up our shelter and tarp in a field across from the station hoping to wait it out. Around 7:00 PM it finally stopped raining. It was hot, humid, and buggy, and we were tired and hungry. A little self-inflicted misery crept into our moods. Later, we apologized for what we said when we were tired and hungry.
The rain continued overnight and we were dismayed to find some water had entered the tent. We had carelessly left some gear at the bottom of the tent near our feet that had pushed the bathtub floor of our Zpacks Duplex out past the pitch of the tent roof, allowing water to flow in. This was definitely a lesson learned the hard way as we tried to soak up several large puddles that had gathered at our feet.
Day 7: Matabitchuan Power Station to Gorrie Lake
Distance: 8.5 mi (13.85 km)
Elevation Gain: 2244 ft (684 m)
Elevation Loss: 1696 ft (517 m)
We packed up the wet gear on an overcast, misty morning and picked up the trail at the mouth of the Matabitchuan River. We soon forgot the previous night’s misery as the beauty of the river revealed itself. Rocky, tree-lined cliffs edged the Matabitchuan, and the trail followed the river closely.
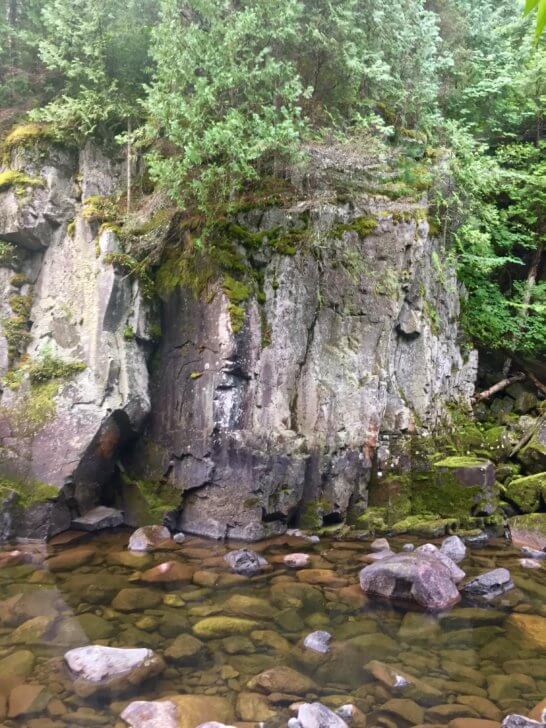
Soon we came to a series of waterfalls cascading over flat rock shelves. A hydro dam, many miles farther down the river, prevented its full force from roaring over the rocks, decreasing the volume of water. Bare rocks between the falls and water flow made it possible to step right into the river bed. We looked at each other and smiled, dropped our packs on the river’s edge, and began to explore. Jumping from rock face to rock face, we walked down the middle of the river bed and enjoyed a view of the falls.
Picking up the trail at the Matabitchuan River.One of the several little waterfalls along the Matabitchuan River.Getting personal with the waterfalls.Walking along the river bed.
The trail continued along the river’s edge until we could see the hydro dam in the distance. Here it turned inland and upwards once again. We weren’t done climbing yet. It was still misty, and a light rain fell as we approached a couple of lookout points. Once again, our breath was taken away as we gazed at the beauty before us. Fourbass Lookout was astounding; the lake was expansive and surrounded by vast wilderness.
The view from Fourbass Lookout.A tenacious tree clings to the cliff at Fourbass Lookout.
Making our way down into the valley, we decided to take a small break at Fourbass Lake and try to dry out our wet gear. We hung several clotheslines; everything was wet and needed a good hour to dry out. We were making good time that day and could afford to take a little extra time there. There was a stiff breeze blowing, but it was also still slightly misting. It was hard to discern if the wind was strong enough to overcome the misty rain still blowing. Darker clouds blew in from the north and threatened us with heavier rain.
It was a constant battle which required much vigilance: we had to be ready in a split second to take everything down if the heavier rain fell. The dark clouds moved around the lake and dissipated. We ate lunch and decided it was time to hit the trail again. And, of course, just as we had everything packed up and ready to go, the sun came out, along with blue skies and fluffy clouds, but we could not linger. We hoped that the sunshine would follow us to our next campsite.
Just as we left Fourbass Lake, the sun and blue skies came out.
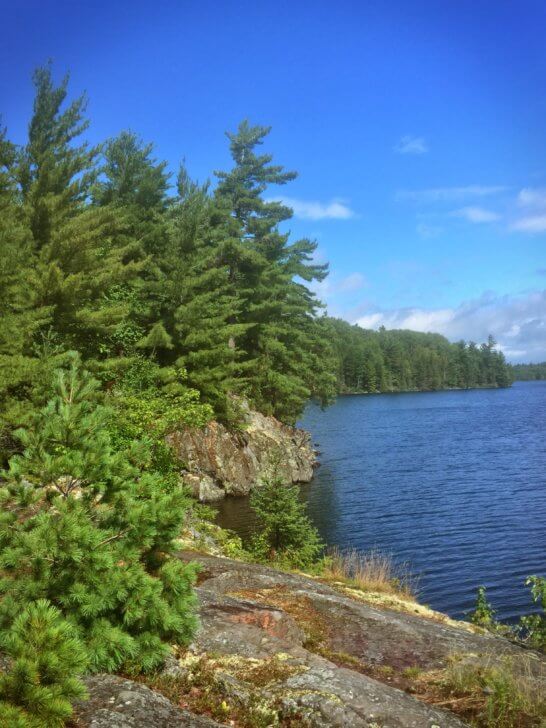
The sun did indeed follow us as we made our way to Gorrie Lake, which was to be our last campsite on the trail. This lake was crystal clear; pristine and untouched by human activity.
Arriving at Gorrie Lake, our last campsite of the trip.The pristine crystal clear water of Gorrie Lake.
We were able to get our wet gear dry and enjoy the warm sunshine on our shoulders.
It was here that I unknowingly walked through poison ivy trying to find a private place to relieve myself. We had been so careful the whole trip and had identified its presence at many other places along the trail. I thought the itchy spots around my ankles were due to bugs or mosquitoes and I didn’t look closely at them. It was only over the next 2 days that I realized what it was.
On the small beach here, I was wading in the water and just taking in the trees, blue sky, and the lake. That familiar humming sound caught my attention and less than 6 inches away from my nose, a hummingbird hovered, looking me in the eye. It soon realized my purple tank top was not a flower and disappeared.
Day 8: Gorrie Lake to Friday Lake
Distance: 9.5 mi (15.17 km)
Elevation Gain: 1511 ft (461 m)
Elevation Loss: 1584 ft (483 m)
We awoke with a certain sadness that always plagues us when we know our trip is coming to an end. Today would be our last day on the trail.
A misty morning sunrise on Gorrie Lake.The early morning mist cleared and revealed a beautiful sunny day as we left Gorrie Lake on our last day.
The early morning fog gave way to warmth, and we set out by 7:00 AM. We passed through some rugged sections of the trail and several small lakes. The climbs were now less intense and not as frequent. The oppressive humidity had lifted, and hot summer temperatures remained.
The gnarly trail heading inland.A beautiful sky and reflection visible as we passed through Snort Lake.
We made good time and decided to stop at Price Lake so I could soak my poison ivy afflicted ankles in the lake. The cool water provided welcome relief for the itchy, irritated blisters. It was here that we met up with the only other hiker we saw on the entire trail: a young man named Andrew soloing from Latchford, the northern terminus, to the Matabitchuan Power Station where friends were picking him up. We chatted with him for quite awhile and he described for us a close encounter of the bear kind. Not to be outdone, we told him our bear story from Roosevelt Lake last season.
The cold waters of Price’s Lake were soothing on my poison ivy afflicted ankles.
We pressed on and upon arriving at Friday Lake, the time seemed to have passed too quickly. The trail was not as rugged and we had made good time. It was the end of our journey and we weren’t quite ready for it. It was time to call Doug, our shuttle driver, to pick us up. Our journey ended here at Friday Lake, even though the trail continued, as we had completed the remainder of the trail to the northern terminus.
At the Lodge, we picked up our car and drove into the local town, Temagami, to perform our two post-trip rituals. The first: the traditional throwing away of the stinky, sweaty, mud covered, swamp infested, never-quite-dried from rain, sweat, and lakes, and beyond-all-hope-of-redemption, trail shoes. Yep. Into a garbage can they went. No amount of washing or laundry detergent could save them.
Our second ritual: ICE CREAM CONES. The most decadent flavor we could find, with cheers of the ice cream to our fantastic trip.
Our customary ice cream cheers at the end of our journey.
That afternoon, we drove to North Bay where we ate and stayed overnight at a hotel. The hot meal, hot shower, and soft bed felt amazing on aching, tired, and hungry bodies.
A few days later at home, we were talking to Murray and Vicki Muir, the founders of the trail. We told them how we could see that the construction of this trail was a labor of love for them and how grateful we were to them for their vision. Vicki mentioned that I was one of about only five women that they know of who have completed the entire trail. A big smile spread across my face. The beauty we had seen and the difficulties we had faced were forever etched in my heart. Despite all of the challenges, we had to overcome over 19,700 feet of total elevation gain, being lost, poison ivy, rain, extreme humidity, dehydration, bushwhacking, scarce water, and missing campsites, I knew that this trip was ultimately wildly successful. Why would I deem it so after all of these difficulties?
It seems to me that these very difficulties are what make a trip worthwhile and memorable. It brings out our best and worst. And learning how to cope with them, and soldiering through, and smiling anyways, makes us both stronger and more humble human beings.
It is facing ourselves in the wilderness; stripped down to nothing except what we carry on our backs, and the strength we carry in our hearts, that brings us closer to who we are meant to be. Through this comes much happiness and great peace. And every single person who finds peace inside themselves makes this world just a little bit better, don’t you think? Besides, what’s an adventure without a little adversity? It all makes for a better story.
“The wild requires that we learn the terrain, nod to all the plants and animals and birds, ford the streams and cross the ridges, and tell a good story when we get home.” – Gary Snyder
Chris Smead, who produces Backpackinglight.com’s “According to Chris” video series, goes through his ultralight video gear.
Join Chris, a BPL member and Amateur Film Maker, as he walks us through this 10-minute video on the ultralight video gear he uses to capture his backpacking adventures. From gear (and how to carry it) to video editing software, Chris talks about what he considers to be the best ultralight video gear. He also shares valuable lessons learned and how to make the most of the images you capture while backpacking. Stay tuned for more “According to Chris” film series here on Backpackinglight.com throughout the year.
This post from the Publisher’s Blog (available to Unlimited Members only) shares results from our Members Podcast Interest Survey, and gives you the inside scoop asking the question: “Is Backpacking Light going to publish a podcast?!”
You don’t have access to view this content.
Membership Required
This feature requires an active Backpacking Light Membership.
Premium Articles
You're currently viewing a free preview of a member exclusive premium article. Our premium articles include in depth journalism and insights from the Backpacking Light editorial team.
Get full article access by subscribing to a Premium or Unlimited Backpacking Light membership!