This post from the Publisher’s Blog (available to Unlimited Members only) offers some comments on the nature of ultralight design and the opportunities that await designers and manufacturers of ultralight gear.
Evaporative heat loss in upright canister stoves extends boiling times and changes fuel mixture composition. Here’s how to combat it.
Introduction
Upright canister stove performance is negatively affected by low temperatures (see The Effect of Cold on Gas Canisters and refer to forum threads here and here). Evaporative cooling is the culprit: as fuel evaporates from a canister when a stove is in operation, the canister temperature drops. This generates a negative feedback loop that then slows down evaporation (More detail about the process is offered in the article The Evolution of a Winter Stove). Evaporative heat loss in upright canister stoves causes extended boiling times and changes in fuel mixture composition that results in the hiker stockpiling partially-filled canisters that are often never used again.
Quantifying evaporative cooling in canister stove systems is the purpose of this article series.
I have measured how the temperature of a canister drops due to evaporative cooling by using an upright canister stove in the cold, covering a number of different parameters including air temperature, canister size, and how full it is. From this, I have determined a simple rule for determining at what minimum air temperature a canister can be used.
I have also measured the temperature for a couple of use case techniques which allow you to operate at air temperatures below freezing.
Finally, I propose a different paradigm for canister stove use, where you carry just as much fuel as you need for a particular trip, such as is done with alcohol, white gas, and Esbit. This lets you eliminate the partially-filled canisters that accumulate after trips.
Test Equipment
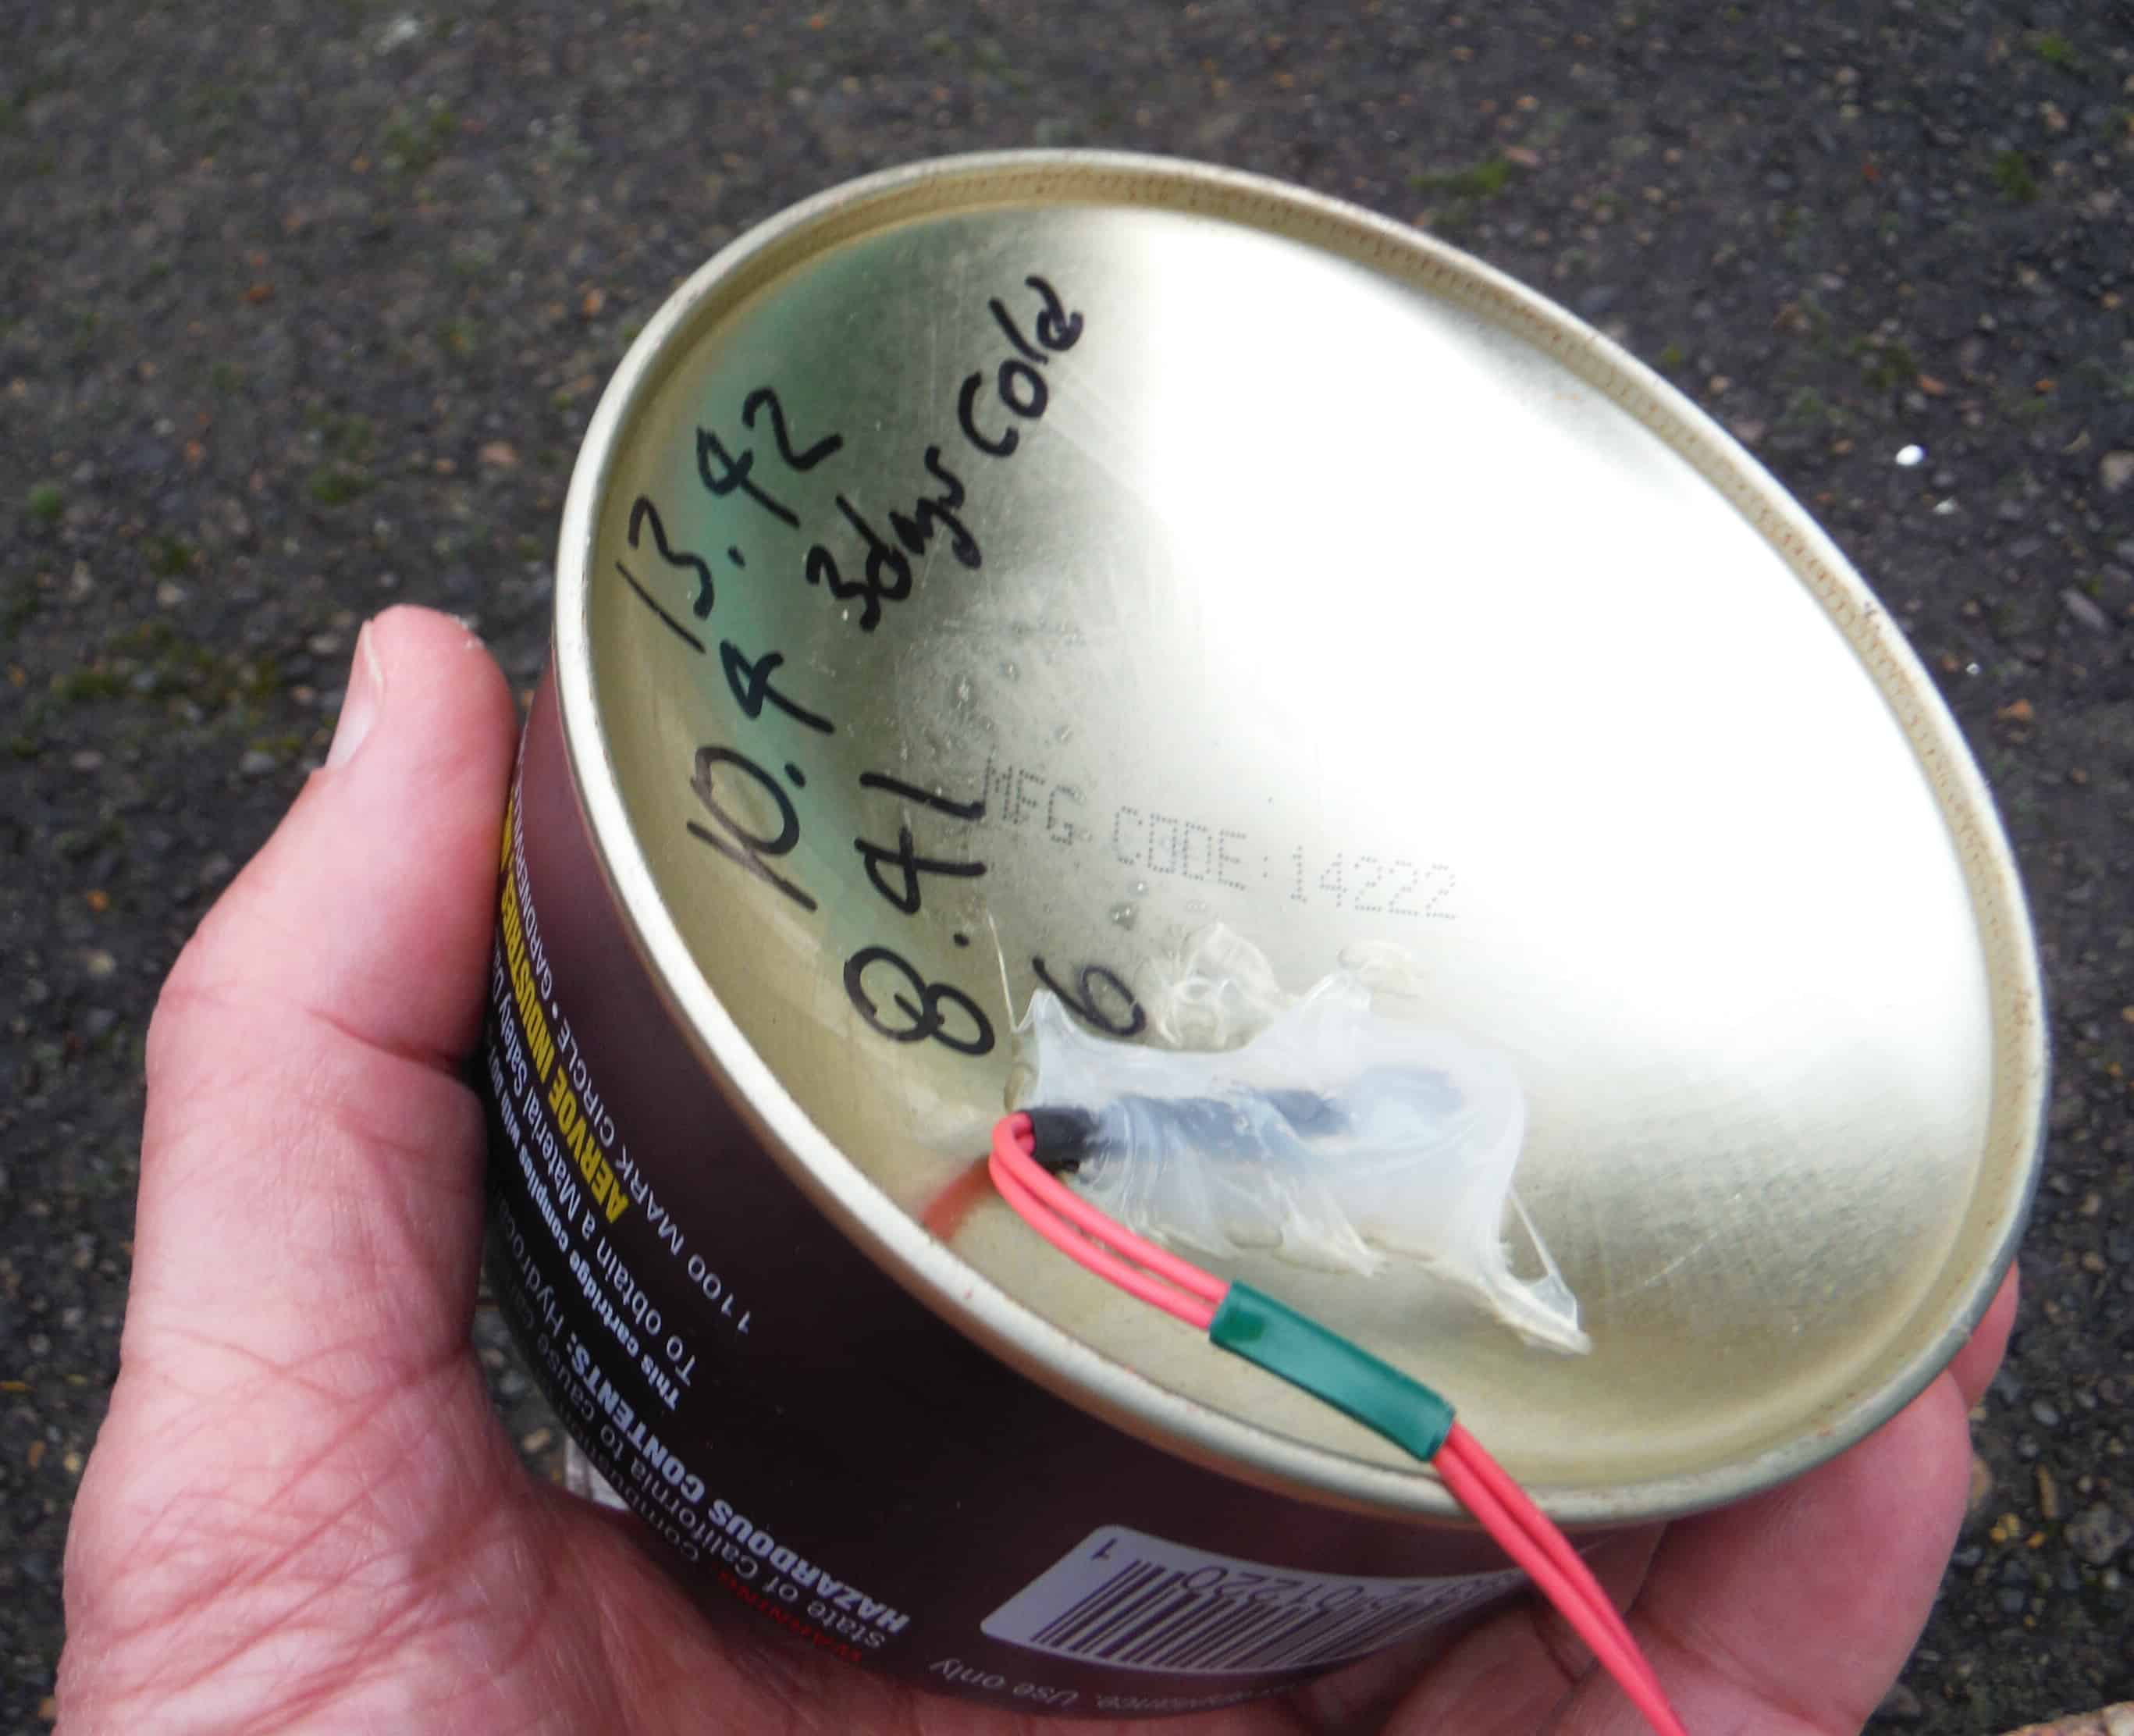
I used LM335 Zener diode temperature sensors. They come in the familiar plastic molded TO-92 package with three leads like old style transistors. The third lead is for calibration but I don’t use that; I just calibrate in software. The voltage across the diode is nominally 2.73 Volts at the freezing point of water (~273 Kelvin) and it varies by close to 10 mV per degree C from there. Their biggest error is a scale error around absolute zero so I calibrate that out using the triple point of water. I use a Labjack U3 data logger to read the data into my PC and I use Excel to generate plots and do calculations.
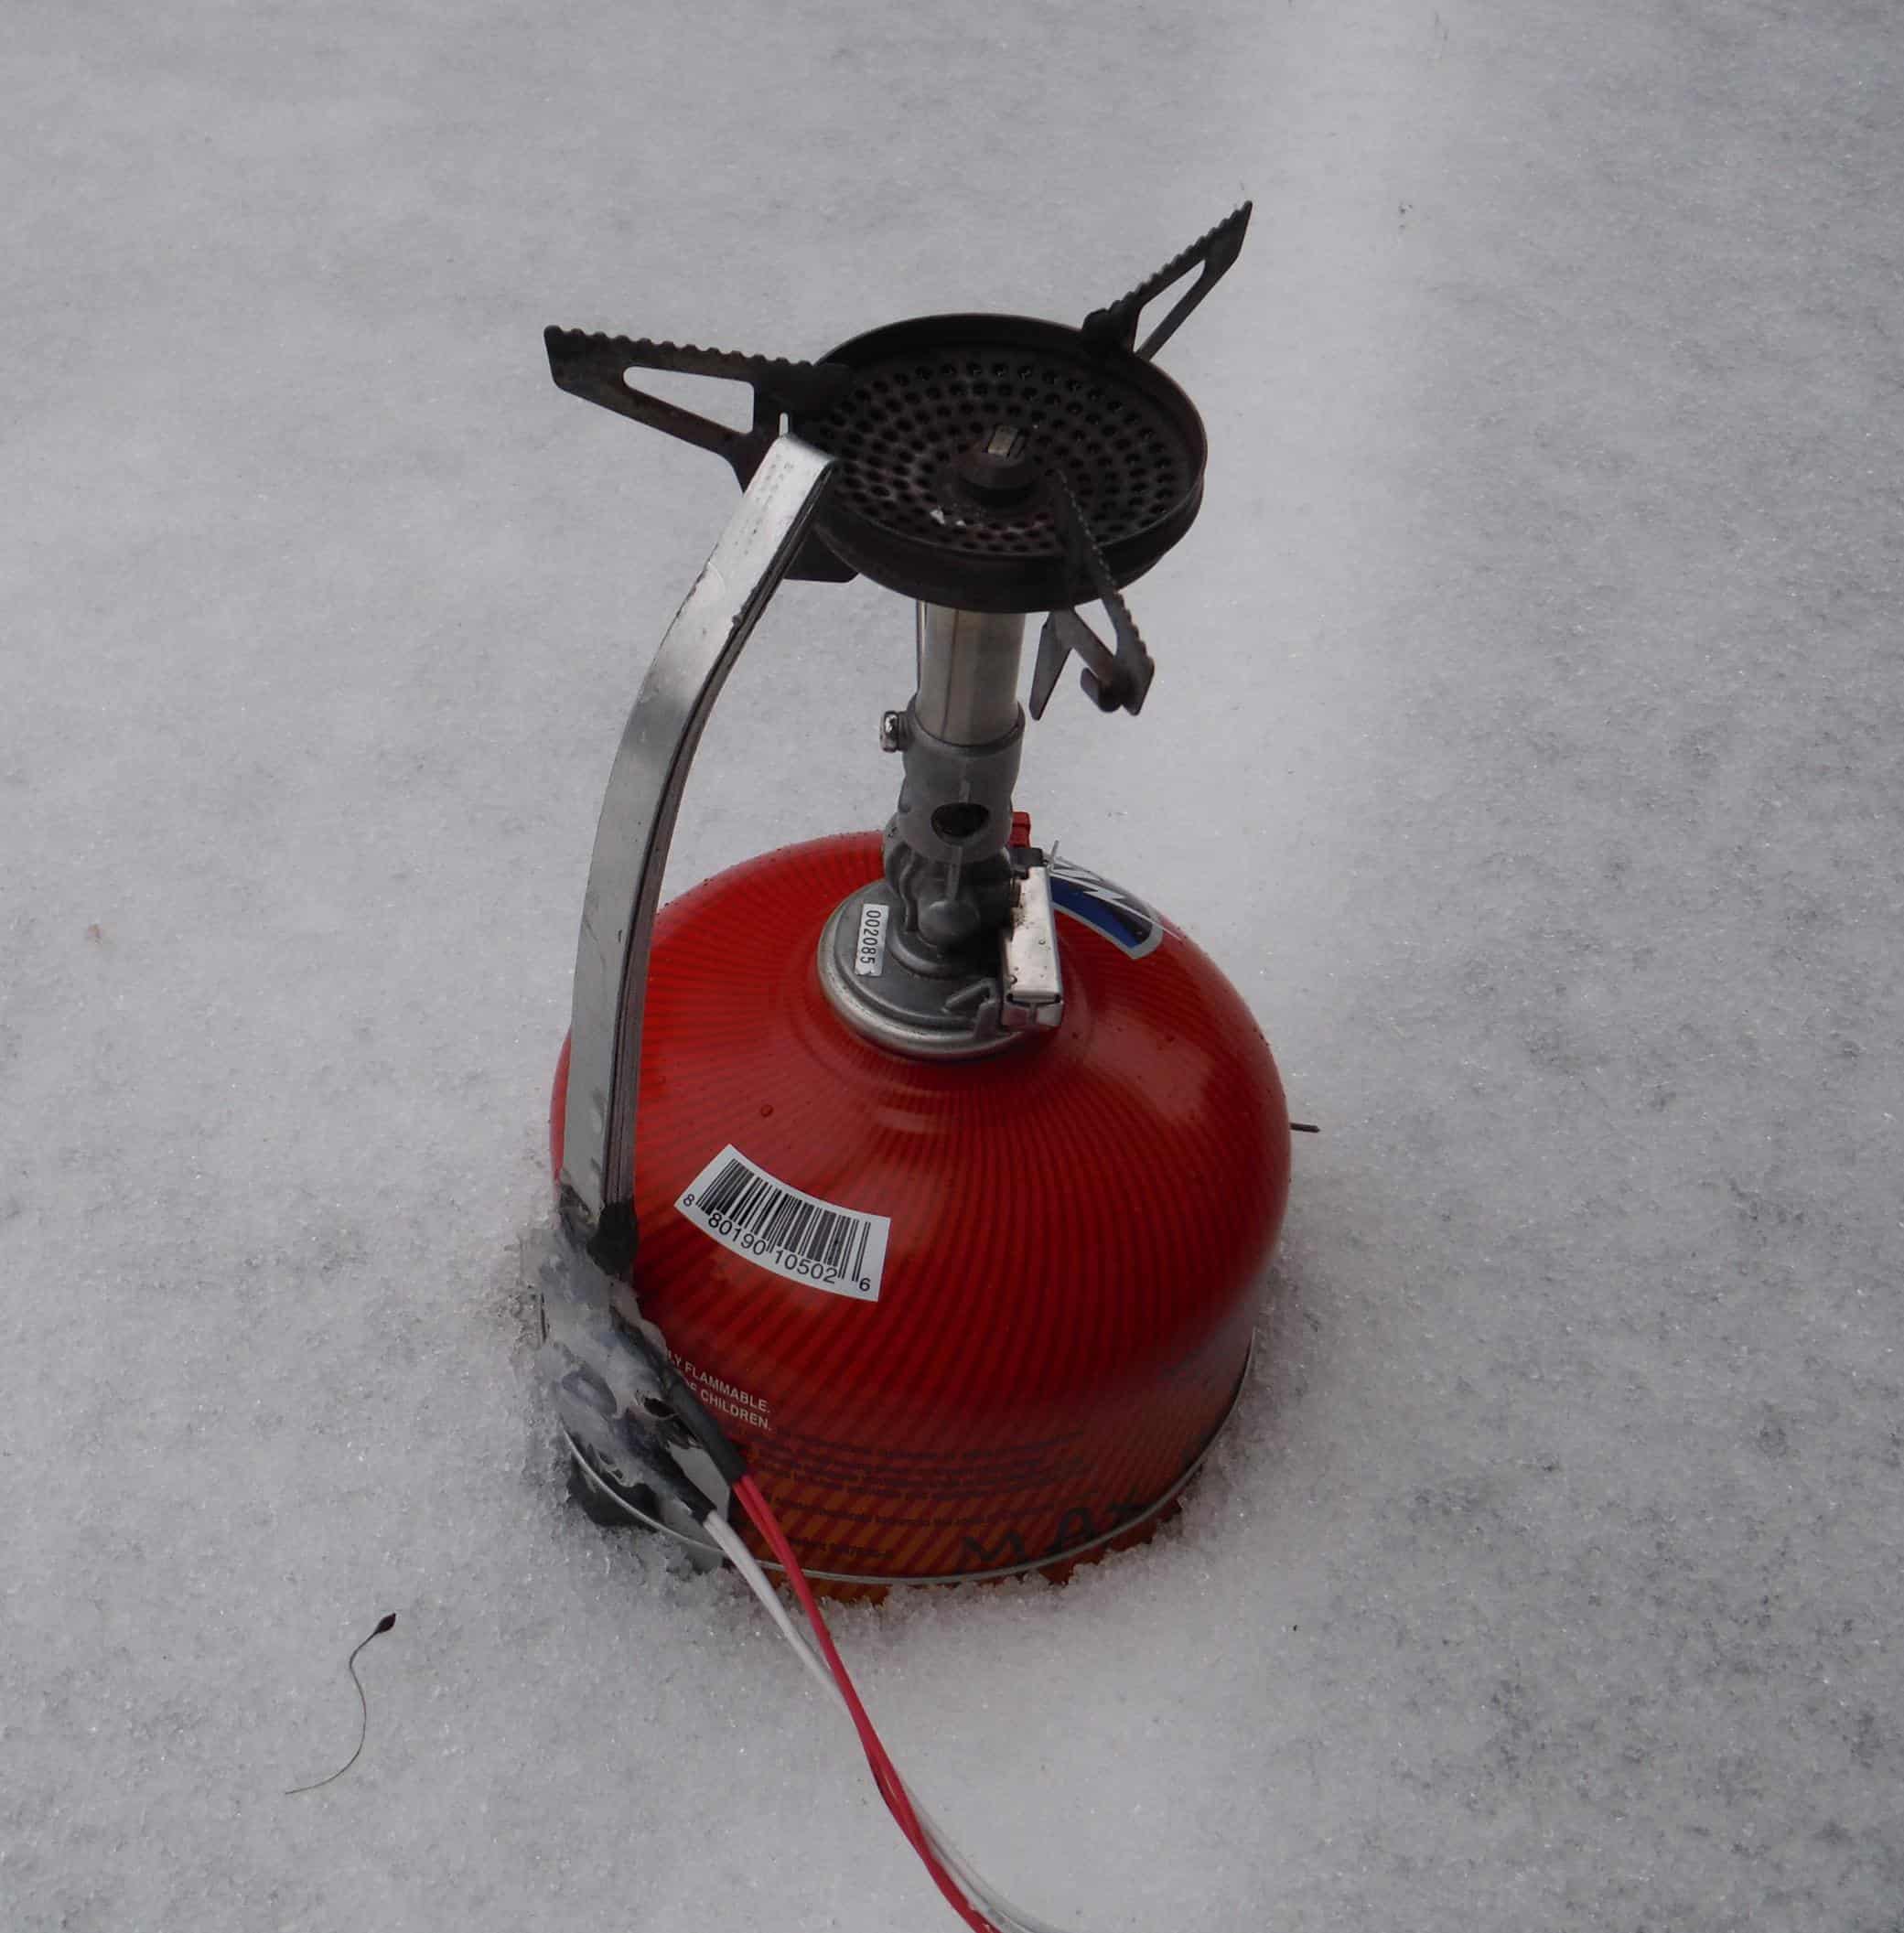
The LM335 sensor measures the temperature of what it is clamped to – it’s a thermometer. I clamped the temperature sensor to the bottom of the canister and put silicone where the clamp wasn’t and let it cure, then removed the clamp and put silicone where the clamp had been and let that cure. This silicone insulation isolates the sensor from the world while the sensor is in close contact with the canister. As a result, the sensor should fairly accurately measure the temperature of the side of the canister. Putting the sensor on the bottom as shown keeps it away from radiant heat from the burner.
There is liquid butane inside the canister, next to the sensor, so the sensor should in practice fairly accurately measure the temperature of the liquid.
I did my measurements while operating normally, boiling a pint of water, at some air temperature. You can do things like putting your canister into ice water or into the freezer to simulate cold temperatures, but it’s too difficult to correlate that with actual use, and of course the canister tries to match up to the ambient anyhow. It’s better to just use the stove to boil water like I do when backpacking, making a cup of coffee or whatever.
Butane and Its Mixtures
Although it has has been discussed a few times, it is worth noting that ‘butane’ canisters really contain a mixture of propane, isobutane, N-butane, and other gasses. I will provide more data later in this series that reflects how the mixture affects canister performance. For now, just note that because the label says ‘butane’ it does NOT mean the contents are straight (pure) n-butane. This is not common knowledge.
There is a boiling point for any mixture (whatever it is), below which there is not enough vapor pressure to push gas out of the canister. Above that ‘boiling point’ the internal pressure will force fuel vapor out of the canister, but that temperature will vary as the mix in the canister changes. This is actually the definition of ‘boiling point’.
While we are at it, please note that what is in the canister is a true mixture: the different gasses are not separate. So the behavior of a propane/n-butane mix (for example) is intermediate between the behaviors of straight propane and straight n-butane. How they evaporate is a bit complex.
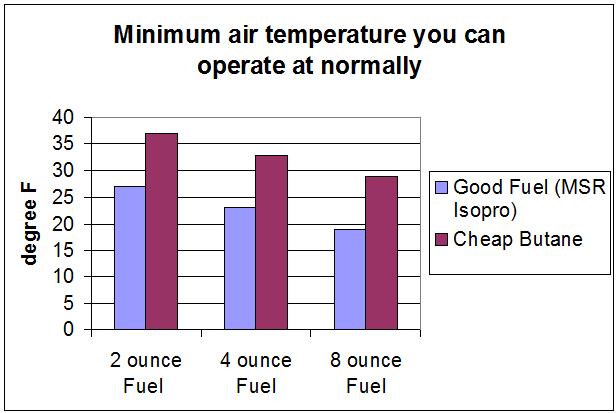
Good fuels like MSR IsoPro contain mostly isobutane which has an 11 F (-12 C) boiling point. Adding some propane to this takes the boiling point further below that. What the article The effect of cold on gas canisters showed was that the percentage of propane falls as the canister is used up. I will conservatively say the boiling point of the MSR canister is 10 F – just below the boiling point of pure isobutane. I call this “the good stuff”. There are other brands: I just happen to have some IsoPro canisters (IsoPro does NOT stand for ‘iso-propane’: such a chemical does not exist).
Then there are the cheap fuels like the ‘butane’ canister I got at the Korean grocery for $1.25 for 8 oz. I measured the boiling point for one of these as 20 F (-7 C). This is in between the boiling points for n-butane and iso-butane, so it must contain a mixture of isobutane and N-butane (BP 31 F or -0.5 C). The easiest mix to produce during gas refining has a mixture of isobutane, N-butane, and other gasses, so I think the 20 F boiling point is typical, but I have only looked at two brands. I call this ‘cheap butane’. There are also brands of canisters that perform close to cheap butane but at a higher price.
I just used cheap butane for my testing. The fact that it has a higher boiling point is convenient because it’s never cold enough where I am for testing the ‘good’ stuff near its boiling point. I have calculated what the performance would be with the good stuff – I just subtracted 10 F (5 C) from all the cheap butane results. I did verify this a little – I used some MSR IsoPro at 18 F (-8 C) and the results were consistent.
This boiling point temperature is just the starting point. The first strategy for reducing the lowest temperature you can operate at is to get the good stuff. You can operate an upright canister with the good stuff at 10 F (5 C) lower than with cheap butane.
From here on I will be making references to canisters with a variable amount of a gas or gas mixture. For the purpose of this article, I was carefully refilling canisters. More on this later.
Experimental Results
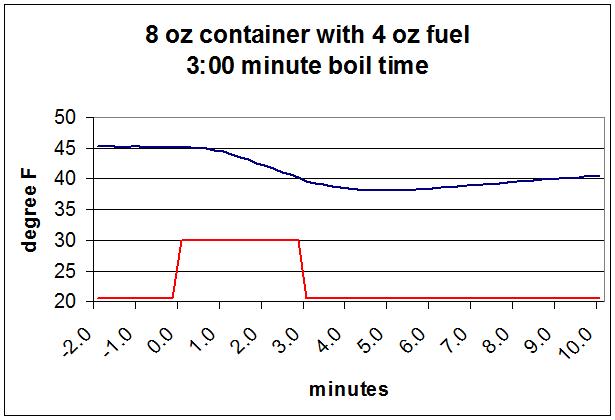
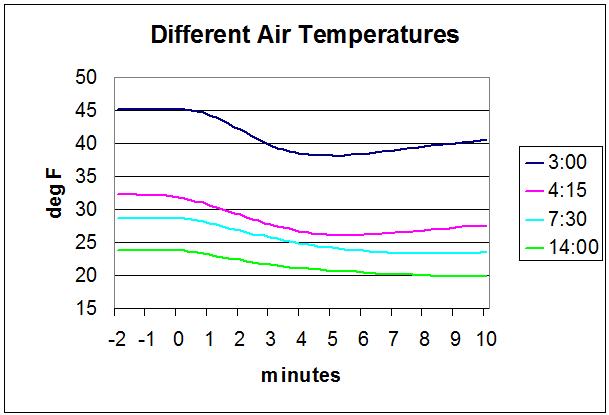
I started with an 8 oz canister (typically 220 g) was half full of cheap butane and an upright Soto Windmaster stove. I boiled 16 oz of water. The water started at about 50 F (10 C). I heated it to 212 F (100 C). The sensor on the underside is of course directly below the butane liquid. I did the same thing for all my tests so they can be compared.
The dark blue line is the temperature of the probe under the canister, which will be very close to that of the butane inside. It started at the ambient temperature of 45 F (7 C) and dropped to 38 F (3 C) over the course of boiling the water. After I turned the stove off it started rising back up. The red line shows when the stove was burning. It took 3:00 to boil the water, and this is as fast as this stove goes.
The temperature at the surface of the butane inside the canister where it’s evaporating will start dropping as soon as the stove starts burning, but you can see that the drop in the temperature at the bottom of the canister is delayed by about a minute. It takes that long for the fall in temperature to propagate down through the butane, through the canister wall, and into the sensor. I expect that the last two delays will be relatively short. I’m going to assume the minimum the sensor gets to is the close enough to what the butane actually gets down to before it starts to rise again.
The minimum temperature of the fuel (about 38 F or 3 C) was well above the boiling point for my ‘butane’ (which was measured as being about 20 F or -7 C). That meant there was plenty of butane vapor to drive the burner at full speed during the 3 minutes it took to boil the pint of water. The Soto regulator would not allow a higher rate regardless of pressure/temperature. A more conventional needle valve would do the same, although different stoves will take a little longer or shorter time to boil a pint of water.
In the course of boiling the pint of water, the temperature at the bottom of the canister dropped 7 F (4 C). It takes energy to evaporate the fuel that leaves the canister to be burned. That energy comes from the liquid fuel in the canister dropping in temperature. This is evaporative cooling.
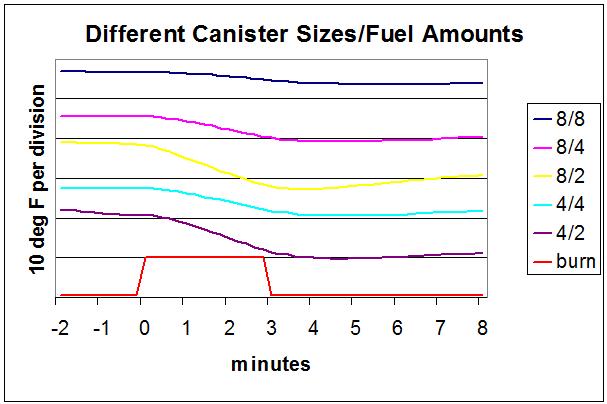
Then I did the same thing at several other air temperatures, all with an 8 oz canister and 4 oz of fuel.
The dark blue line was for an ambient air temperature of 45 F (7 C).
The purple line was for an ambient of 32 F (0 C). The stove started at a normal level but after a couple minutes slowed down noticeably. It took a little longer to boil – 4:15 rather than the normal 3:00. The butane got down to 26 F. This was close enough to the 20 F boiling point for this fuel, that the rate of butane evaporation was a little less, so the stove didn’t burn as fast, so it took longer to boil. I would consider this totally acceptable. This is the start of cold temperature performance degradation.
The light blue line was for an ambient of 28 F (-2 C). The stove started a little slowly, then got much slower. It took 7:30 to boil – more than twice as long as normal. The butane got down to 23 F (-5 C). The rate of evaporation was way less at this temperature so the stove burned much more slowly. To me, if it takes twice as long to boil my patience level is exceeded. I would consider this unacceptable.
The green line was for an ambient of 24 F (-4 C) air temperature. It took 14 minutes to boil, and the butane got down to 20 F (-7 C). The flame was so feeble as to be unusable in my opinion, although it eventually did boil. This is my measure of the boiling point for this fuel: 20 F. There was plenty of time for the system to stabilize, so the temperature I measured was close to the actual temperature of the fuel.
For all cases the burn started at minute 0 on the plot. For the 24 F case the stove continued burning past the end of the plot.
The measured temperature drop varied a little with air temperature:
Ambient of 45 F ; Drop of 7 F
Ambient of 32 F ; Drop of 6 F
Ambient of 28 F ; Drop of 5 F
Ambient of 24 F ; Drop of 4 F
Simplistically, the temperature drop should be the same in all cases, but it wasn’t. I think that when the stove was running at a lower power for a longer time, there was more opportunity for the surrounding air to warm up the canister back up and cancel out some of the temperature drop.
From here on I will (somewhat arbitrarily) define four levels of operation:
The butane stays >6 F above the BP – normal operation
The butane stays between about 3 and 6 F above BP – slow but still usable, doubles the boil time at the bottom of this range
The butane gets to <3 F above BP – I would call this unusable, although if patient you might still get water to boil
Butane temperature below BP – not even a feeble flame
Evaporative Cooling for Different Canister Sizes
All of the above was for an 8 oz canister half full. I tested a number of combinations of canister sizes and fuel amounts:
8 oz canister with 8 ozs of fuel – full
8 oz canister with 4 ozs of fuel – half full
8 oz canister with 2 ozs of fuel – mostly empty
4 oz canister with 4 ozs of fuel – full
4 oz canister with 2 ozs of fuel – half full
For each, I boiled a pint of water and measured the temperature of the canister. For each run, I used the coldest air temperature that I had data for that had a 3:00 boil time.
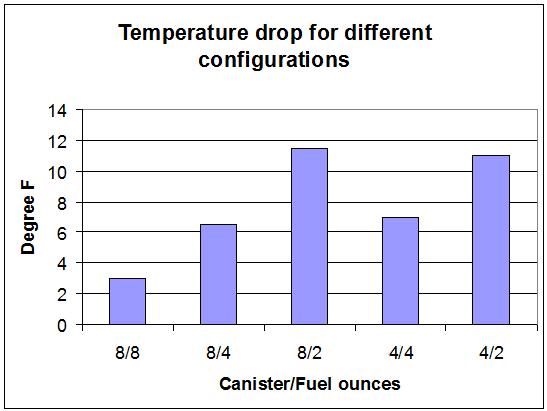
The top line is the temperature for an 8 oz canister with 8 oz of fuel. The next line is an 8 oz canister with 4 ozs of fuel and so on. The red line shows when the stove was on.
Note that I offset the lines on the plot so they wouldn’t be on top of each other, but they all have the same scale for temperature drop. For example, the top line, 8 oz canister with 8 oz fuel dropped about 0.3 divisions, so that would correspond to 3 degree F.
Summary
So, for example, if you use a full 8 oz canister (8/8) the temperature drop is only 3 F, so the minimum air temperature for normal operation is calculated thus:
BP for this fuel = 20 F
Margin for sufficient evaporation rate = 6 F
Evaporative cooling temperature drop = 3 F
Minimum air temperature for normal operation = 20+6+3 = 29 F
You can see that the results depend mostly on the amount of fuel (or its thermal mass). The 8 oz canister might be bigger than the 4 oz canister, so the steel in the 8 oz might have more thermal mass, but the experimental data says that the canister size is largely irrelevant. The small differences seen in the graph between the cases is simply experimental error.
The minimum air temperature you can normally operate at for a 3 min boil time for different amounts of fuel is shown next:
If there is less than 2 ozs of fuel the temperature drop will be even more. I tried to measure this, but there’s so little fuel I couldn’t get good measurements. 1 oz of fuel will have half the thermal mass of 2 oz, so it will cool down twice as fast – although the thermal mass of the canister will start to be significant soon. The temperature drop with 1 oz fuel might be about 16 F (9 C).
You can go about 3 F colder than this if you don’t mind doubling the time it takes to boil, or you can go 6 F colder if you don’t mind waiting 15 minutes to boil and the wind doesn’t blow the flame out. That could be limiting.
Case Study (A Technical Analysis)
I have used an MSR Isopro canister with 2 oz of fuel in it at 18 F air temperature and the boil time was 4 minutes. I was too lazy to measure the temperature, but I can estimate it. With 2 oz of fuel, there should have been 11.5 degrees F of evaporative cooling. With a 4 minute boil time, the fuel should have got to within 6 degree F of its boiling point. Thus, the boiling point of this fuel should be about 18 – 11.5 – 6 = 0.5 F (-17.5 C).
I conservatively use 10 F (-12 C) for the BP of the good stuff, which is what happens when most of the propane has been preferentially evaporated off, but my canister had not had its propane boiled off. Hence the lower number.
For both equations, T is the temperature in degree C. You have to weigh these by the mole fractions and add to get the total pressure. I calculated above that the BP of the Isopro fuel seemed to be about 0.5 F. For that temperature, to get the total pressure to be 1000 mBar so vapor would come out of the canister, the mole fraction must be 0.11 propane and 0.88 isobutane (assuming there are no other gasses). Multiply by 0.8 to get a mass percentage of 9% propane and 91% isobutane. They say it’s 20% propane, 80% isobutane. It’s difficult to measure this so maybe they don’t worry about meeting that spec and figure 9%/91% is close enough. Maybe they’re more concerned with minimizing N-butane, which is actually a good thing. Or maybe I’ve made a math error.
A Strategy for Cold Weather
All of the above leads to a simple strategy for cold weather usage – bring a full 8 oz canister. Many people already do this and have assumed it works because the full canister will have lots of propane in it, but my data suggests that a major reason it works is because of the thermal mass of the fuel. There is in fact a bit more to this, and we will come back to it in Part 4 of this series.
Appendix: Background Theory
The calculation of evaporative cooling is straightforward. We will switch units here and work in metric: it’s easier. Note that the Specific Heat, Heat of Evaporation, and the Heat of Combustion are about the same for n-butane, isobutane, and propane, so the amount of evaporative cooling should be about the same for all fuel types. We will assume n-butane.
The heat of evaporation of N-butane is 386 Joules/gram. That is, it takes 386 J to evaporate 1 g of N-butane. So if you know how much fuel you have used, you know how much energy you have used.
The Specific Heat of N-butane is 1.675 J/gC. This means that 1.675 Joules are released if you cool 1 g of N-butane by 1 C. The specific heat of steel is ~0.49 J/gC (different alloys give slightly different figures).
I use 7 g of butane to boil a pint of water, so 7*386 = ~2700 J were used to evaporate the fuel. That energy has to come from the fuel, which will cool down as a result.
I started with 114 g of N-butane in my canister, and the steel canister (nominally a 110 g one) weighed 85 g. Cooling 114 g ‘butane’ by 4 C gives 4*114*1.675 = 764 J. Cooling 85 g of steel gives 4*85*0.49 = 167 J, for a total of 931 J. This is much less than the 2700 J required.
I cannot easily explain why it cooled so little. It is possible that some heat got into the canister and fuel from the ambient or from the hot gasses from the flame. It is possible that the canister was also picking up some radiant energy from the flames as well.
If so, that means we really must pay attention to what heat can get fed back into the canister during operation. If we are smart, that feedback can be hugely helpful.
This post from the Publisher’s Blog (available to Unlimited Members only) offers a peek into our content queue – what’s coming in the next several weeks?
This post from the Publisher’s Blog (available to Unlimited Members only) takes a behind-the-scenes look at what we’re doing to cut our page load times by half in 2017.
Chris Smead presents “Snowshoeing Yosemite Point”, a film in 4K about a beautiful winter trek accomplished in lightweight style!
About The Film “Snowshoeing Yosemite Point”
A half dozen times a year you’ll find me in Yosemite. The valley is so visually dynamic that it never gets old. The crowds can be overwhelming at times, but the snow chain requirements and severe flooding in January of 2017 provided the perfect opportunity for me to enjoy the valley in peace – snowshoeing Yosemite Point.
I arrived the night after the park re-opened to the public. Yosemite and Bridalveil falls were roaring in full force. The snow was fresh on the steep Upper Yosemite Falls trail, and every hour or so there was a thunderous boom as ice broke free from the nearby granite wall which kept me on my toes.
I spent 2 beautiful nights on the rim that I documented in this short film. I hope you enjoy it.
Gear Notes
Favorites
Smartwool sock liners under Defeet Woolie Boolie socks
Brooks Cascadia Trail Runners
40below overboots
Chainsen Light Spikes (for Icy sections lower on the trail) and Northern Lites Snowshoes (for snowy sections).
Goosefeet down pants, and custom parka stuffed with 7oz of fill.
Snow Anchors: Lawson Ti Snow Anchors work great. Unfortunately they’re currently out of stock. I believe Lawson is working on a new design.
Meh
MSR Windpro Stove and Primus heat exchanger pot. Heavy, and I emptied a large 230g canister in 2 nights. I’m still on the lookout for a more efficient snow melting system.
Didn’t Use
My Rocky’s Goretex Socks. The 40 Belows were ample protection from moisture in these conditions.
Filmmaker Bio
Chris Smead: Lightweight backpacking and music are my passions. Amateur film making is how I bring those passions together. I’m a husband and father of 2 living in San Jose, CA and consider the Sierra my home away from home.
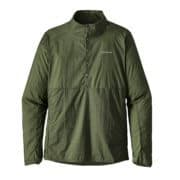
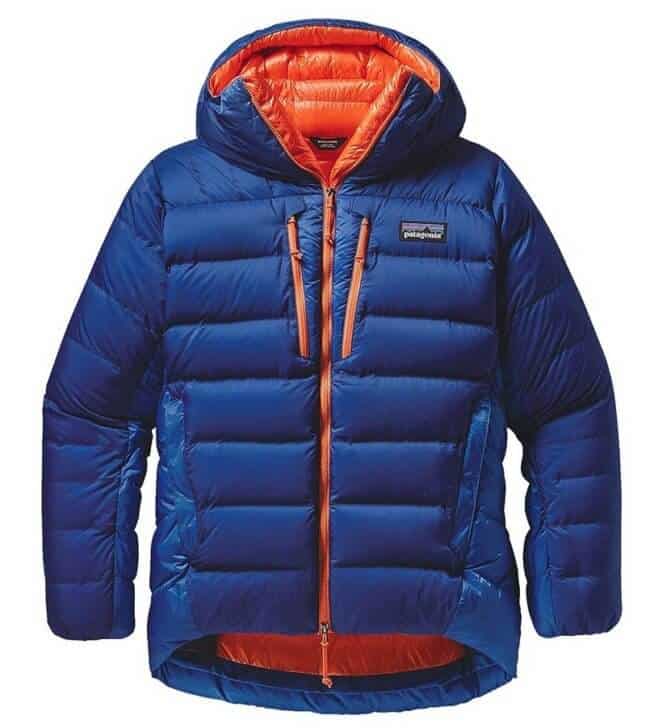
This Patagonia Airshed Pullover Review features a new type of wind shirt that focuses on maximizing the air permeability of the fabric.
Introduction
This Patagonia Airshed Pullover Review features a wind shirt made with fabric that is more breathable (i.e., higher air permeability) than traditional wind shirt fabrics. The shirt represents a shift in wind shirt design. It moves away from weather protection (e.g., resistance to light rain or snow). Also, it signifies a move towards maximizing breathability during high levels of exertion.
This review describes the design and feature set of the Patagonia Airshed Pullover. In addition, it compares the garment to a few other wind shirts on the market. It also provides some commentary about how it fits into an ultralight layering system, and summarizes my field experience to date.
Listen to this 3-minute audio Gear Brief for an overview of the Patagonia Airshed that discusses its most important feature: the breathability of the fabric.
Note: In the audio recording, I said that my sample of the Patagonia Airshed Pullover weighs 3.7 oz. This is an error – its actual weight is 3.4 oz (size M).
The Patagonia Airshed Pullover. Photo: Patagonia, Inc.
Features
100% nylon ripstop with stretch;
DWR (durable water repellent) finish;
Stretch fabric at cuffs and hem;
Zippered chest pocket converts to stuff sack;
1/4-length chest zipper.
Specifications
Body fabric: 1.3-oz 20-denier 100% nylon mechanical stretch ripstop with a DWR (durable water repellent) finish;
Hem and cuff panels: 4.2-oz 79% nylon/21% spandex jersey;
Weight: 3.7 oz (104 g) (as reported by the manufacturer).
Field Use and Review Context
My field use of the Patagonia Airshed Pullover is limited to approximately 30 days of daily wear that includes snowshoeing and hiking in mountains of Southern Wyoming and the Medicine Bow National Forest. I’ve been a faithful wind shirt user for several years and I can’t recall any backpacking trips during the last decade where I haven’t taken and used a wind shirt.
My primary wind shirt of choice for the past three years has been the Patagonia Houdini Jacket (hooded). However, I’ve been experimenting recently with both the Patagonia Airshed Pullover and the ZPacks Ventum Jacket, so the latter two constitute my frames of reference for this review.
That said, without long term experience using the Patagonia Airshed Pullover, I’m unable to comment authoritatively on its durability and fabric wear nuances. In addition, my use has been limited to the dry weather (little to no precipitation), cool temperatures (20 to 45 degrees F), and the reliably breezy winter winds of southern Wyoming. Without long term testing and use in other seasons and environments, this review has thus been classified as a Flash Review (i.e., a gear review meant to introduce the reader to new or otherwise untested gear).
Snowshoeing with the Patagonia Airshed Pullover on a sunny but cool and breezy day in Wyoming’s Snowy Range, Medicine Bow National Forest. Here, I’ve layered the Airshed over a thin polyester base layer for high-exertion snowshoeing with a day pack at temperatures around the freezing point. Photo: Stephanie Jordan.
Compared To…
I compared the Patagonia Airshed Pullover to the following:
Patagonia Houdini Jacket – a full-featured (full-zip, hooded) wind shirt from Patagonia;
Patagonia Houdini Pullover – a similar (pull-over style) wind shirt from Patagonia, as well;
ZPacks Ventum Wind Shell Jacket – a full-zip, hooded wind shirt that represents one of the lightest available.
Patagonia Houdini Jacket. Photo: Patagonia, Inc.
Patagonia Airshed Pullover vs. Patagonia Houdini Jacket
Fabric
1.2 oz, 15 denier nylon fabric comprises the Patagonia Houdini Jacket, while 1.3-oz, 20-denier nylon makes up the Patagonia Airshed Pullover.
Both fabrics have a similar DWR treatment (C6 DWR finish).
The higher air permeability of the Airshed’s fabric (50-60 CFM; Source: email exchange between author and C. Simpson, Patagonia Inc.) makes it more breathable. It’s perhaps, less wind- and water-resistant. It has a faster dry time than the fabric of the Houdini (1-2 CFM; Source: ibid).
There should be little if any noticeable difference in durability between these two fabrics.
Fit
When I compared the fit of the Patagonia Airshed Pullover to the Houdini Jacket, I found that the fit of the Airshed Pullover to be slightly more trim.
The slightly stretchier fabric seemed to accommodate movement in the Airshed as well as in the Houdini Jacket.
There is no meaningful difference in the center back length of the jackets for the size medium that I compared.
Features
The Patagonia Houdini Jacket has a full zipper and a hood. It should offer both better protection from the elements and more flexible ventilation options.
The Patagonia Houdini Jacket features elasticized fabric cuffs and a drawcord-adjustable hem. The Patagonia Airshed Pullover, however, uses stretch woven fabric panels at the cuff and hem. Neither of which is adjustable.
Weight
The Houdini Jacket has a manufacturer-claimed weight of 3.6 oz vs. the Airshed’s claimed weight of 3.7 oz (note: the actual weight of my size M sample of the Airshed is 3.4 oz and the actual weight of my size M Houdini Jacket is 3.6 oz).
Patagonia Houdini Pullover. Photo: Patagonia, Inc.
Patagonia Airshed Pullover vs. Patagonia Houdini Pullover
Fabric
The Patagonia Houdini Pullover and Jacket are made from the same 1.3-oz 20-denier nylon fabric (see comments above).
Fit
The Patagonia Houdini Pullover and Jacket have a comparable fit and center back length (see comments above).
Features
The Patagonia Houdini Pullover features a kangaroo-style hand pocket. The Patagonia Airshed Pullover, however, features a zippered chest pocket.
While the Patagonia Houdini Pullover features half-elastic cuffs, the Patagonia Airshed Pullover features stretch-woven fabric cuffs. The Patagonia Houdini Pullover features a snap-up neck opening. On the other hand, the Patagonia Airshed Pullover features a zippered opening.
The Patagonia Houdini Pullover features half-elastic cuffs, while the Patagonia Airshed Pullover features stretch-woven fabric cuffs.
It also features an elastic drawcord adjustable hem. The Patagonia Airshed Pullover, however, features stretch-woven panels in the hem and no drawcord.
Weight
The Houdini Pullover has a manufacturer-claimed weight of 3.5 oz vs. the Airshed’s claimed weight of 3.7 oz (note: the actual weight of my size M sample of the Airshed is 3.4 oz).
ZPacks Ventum Jacket. Photo: ZPacks.
Shown: Patagonia Airshed Pullover vs. ZPacks Ventum Wind Shell Jacket
Fabric
The ZPacks Ventum Wind Shell Jacket is made from 0.7 oz ripstop nylon with air permeability in the range of 6-7 CFM (source: email exchange between author and J. Valesko, ZPacks LLC). It is less breathable than the fabric used in the Patagonia Airshed Pullover (50-60 CFM).
I can easily draw a breath through the Airshed fabric. However, I cannot do so without great difficulty through either the Houdini or Ventum fabric. I don’t notice much difference in the effort required to draw air through the Houdini vs. Ventum. The Ventum is a lighter and thinner material than used on the Airshed. It will likely be less durable in long term use and perhaps in seam strength.
Both fabrics are DWR-finished. They resist moisture penetration well enough. The long-term durability of the DWR for both fabrics, however, is unknown.
Fit
The ZPacks Ventum Wind Shell Jacket has a significantly roomier fit (by at least one full size) and longer back length (by more than 1.5 in/3.8 cm) than the Patagonia Airshed Pullover.
Features
The ZPacks Ventum Wind Shell Jacket does not have a pocket, whereas the Patagonia Airshed Pullover features a zippered chest pocket.
The ZPacks Ventum Wind Shell Jacket has a full zipper and a hood. It should offer both better protection from the elements and more flexible ventilation options.
While the ZPacks Ventum Wind Shell Jacket features elastic cuffs, the Patagonia Airshed Pullover features stretch-woven fabric cuffs.
The ZPacks Ventum Wind Shell Jacket features an elastic hem. The Patagonia Airshed Pullover, however, features stretch-woven panels in the hem.
Weight
While the ZPacks Ventum Wind Shell Jacket has a manufacturer-claimed weight of 1.9 oz, the Airshed’s claimed weight is 3.7 oz. (Note: My size S sample of the Ventum weighs 1.8 oz, and my size M sample of the Airshed weighs 3.4 oz.)
Comparison Summary Table
This table features horizontal scrolling to view additional columns.
The Patagonia Airshed Pullover is not the first wind shirt to use so-called ultra-breathable “air-permeable” fabrics. The Arc’Teryx Squamish and the Rab Windveil also come to mind. However, the Squamish and Windveil are both full zip hooded jackets that weigh 5-6 oz. The Airshed is a simpler pullover style that weighs 4 oz and may be a better option for those who are on the fence about asking the questions:
Should I carry a wind shirt?
Can’t I just use my rain jacket?
Let’s discuss both of these questions in some detail and see where the Patagonia Airshed Pullover fits in.
Should I carry a wind shirt?
A wind shirt offers the following advantages:
It can be layered over a base/mid layer to provide wind-(and perhaps, intermittent rain/snow) resistance with more comfort (better breathability) than what a rain jacket offers.
It can be layered under a mid layer to provide some evaporative cooling resistance (i.e., it behaves like a semi-permeable vapor barrier) in very cold conditions. This type of use mitigates the “flash-off” cooling effect (the use of body heat to evaporate accumulated perspiration in your clothing system) when you stop after a period of high output.
It provides sun and biting insect protection.
Many lightweight backpackers believe that a wind shirt offers significant versatility to the layering system. Considering that a wind shirt usually weighs less than 4 oz, it’s hard to argue that point.
Others believe that a wind shirt is better off replaced by a light fleece layer, which provides more breathability while hiking. While true, it comes at a weight penalty. For example, my lightest fleece is a 100-weight pullover that weighs about 8 oz. There is also a loss of versatility. Fleece is so permeable to the wind. It’s not a great option for sun or insect protection in warm temperatures.
To Breathe or to Repel Weather?
The Achilles’ heel of a wind shirt has always been low fabric breathability. It has most often been made of ultralight fabrics that are heavily calendared to improve strength, water-resistance, and/or aggressive DWR treatments. In fact, many wind shirt proponents will do their best to wash out the DWR treatment to improve breathability using aggressive detergents. While this does help, it doesn’t solve the fundamental problem of increasing the air permeability of the fabrics.
That’s where the Patagonia Airshed Pullover comes in. It’s more air-permeable fabric should improve the comfort and versatility of the wind shirt not only for active wear but also for warmer temperatures. The wind shirt provides for protection from the sun and/or biting insects.
Of course, the increase in air permeability may come at a cost as well, for both wind and weather resistance.
Perhaps asking a wind shirt to perform the function of a rain jacket is asking too much.
Can’t I just use my rain jacket?
If a wind shirt provided a very high level of resistance to wind and rain, then its functionality might overlap some with that of your rain jacket. Of course, this violates one of the core tenets of ultralight backpacking philosophy (“don’t take more than one item that can perform the same function”).
Thus, for a wind shirt to provide unique functionality in your clothing system, it must be differentiated from your rain jacket in a meaningful way:
A rain jacket provides extreme inclement weather protection (i.e., it’s impermeable to wind and precipitation) at the cost of breathability. The wind shirt, however, is there to provide extreme breathability (at the cost of weather resistance).
A (waterproof!) rain jacket should keep outside moisture from penetrating your clothing system. The wind shirt, on the other hand, should maximize the transport of internally accumulated moisture (perspiration) to the outside.
Therefore, it makes sense, perhaps, that a wind shirt should be made of fabrics that are as breathable as possible while still providing the minimum possible protection from sun, wind, and bugs – especially for active conditions.
That said, I would personally welcome the trend for a wind shirt to be as breathable as possible, rather than as light as possible. The Patagonia Airshed Pullover is a step in the right direction. Now, if it only had a hood and a full zipper…
Where to Buy the Patagonia Airshed Pullover
Patagonia Airshed Pullover Review: Disclosure
The manufacturer provided a complimentary sample of this product to Backpacking Light with no expectation for a review.
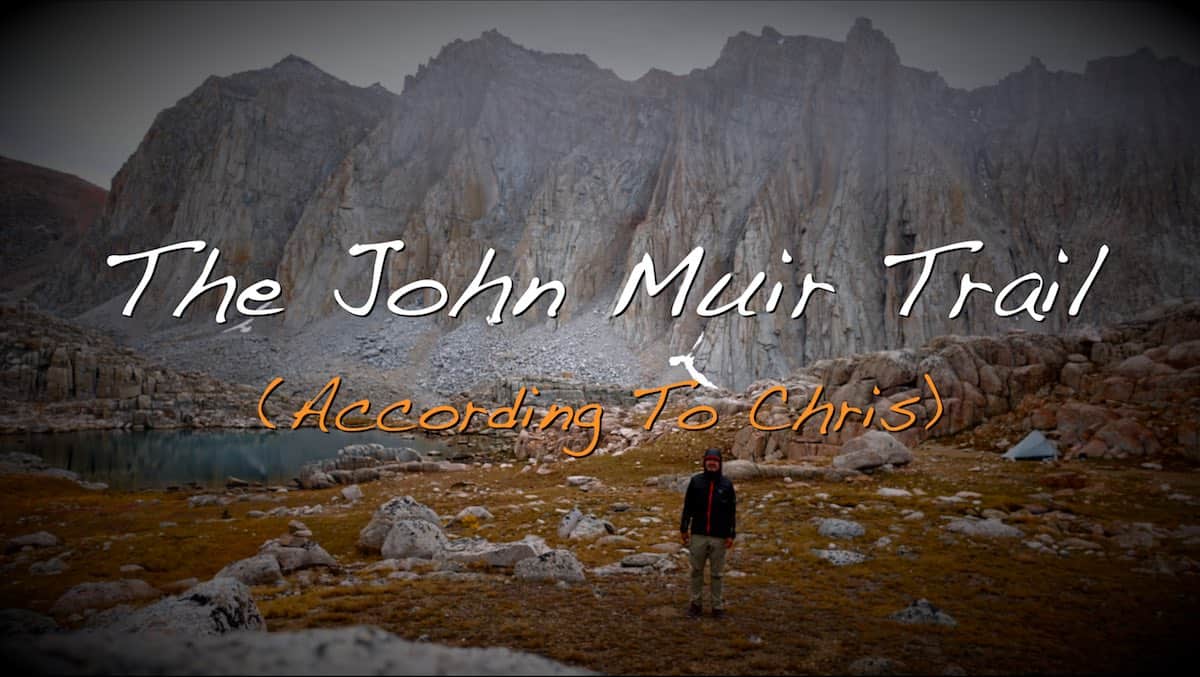
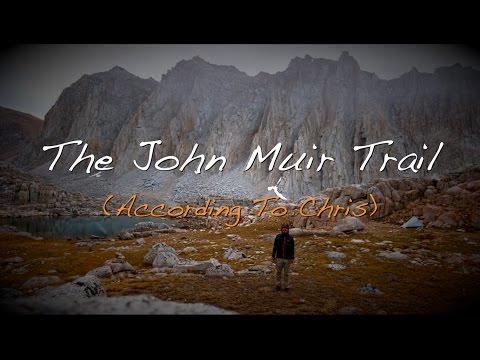
Christopher Smead tells his story in this John Muir Trail Movie – the JMT according to Chris. Read the backstory & gear notes, too.
Watch The Film
Watch Christopher Smead’s terrific debut into expedition filmmaking in his John Muir Trail movie, “The John Muir Trail (According to Chris)”:
Backstory
For me, the John Muir Trail is more than just a temporary adventure. It’s a big deal. It’s my happy place.
It occupies so much of my mental space that it feels like part of the foundation that I’m built upon. I hiked sections of the trail over the years, watched every documentary I could get my hands on, read trail maps and trip reports, and scrolled through countless pictures online.
I looked forward to completing the entire trail for years.
Everything about the trip – the planning, preparation, time away, independence, and the outdoors seems to represent part of who I am.
I’m not an athlete, an artistic film maker, or a famous musician.
Pretty much the opposite actually. I’m a 37 year old husband and father of two. I work at a large hi-tech company in the Silicon Valley. About ⅓ of my diet is candy and soda.
And I love ultralight backpacking.
Besides a few crude Youtube videos, I’ve never made a movie.
But I wanted to make a movie about my time on the John Muir Trail.
I wanted to preserve the memories for myself and also for my kids. If the market crashes, you lose your job, or go through a breakup, the mountains are still there. That anchor in life is something that’s vital for me, and I want my kids to have that, too.
I hope this film inspires them to seek the Sierra.
This is the JMT as I Experienced It
This film captures a unique view of the John Muir Trail that’s accurate to the reality I experienced. I hiked the trail solo in August and September 2016. Every thru-hiker’s experience is unique and different, but one thing is certain: however you experience the JMT, it’s awesome out there!
Making the John Muir Trail Movie and Soundtrack
Deciding on cameras was a struggle. I invest heavily in keeping my pack light. I check all the cottage gear company websites regularly looking for new innovations to help me save an ounce. So carrying a 8lb DSLR wasn’t going to work for me.
The solution for me was a 10 oz Sony Rx100, and a GoPro. My strategy was to not let the cameras take over the experience, so some key moments were missing footage that I had to improvise with animations.
I had no real experience with video editing except for a few crude videos I made using free editing software. I had zero experience with animation.
For this project, I ended up purchasing Final Cut Pro, Motion 5 and some 3rd party plugins. I’ve always been a pretty technical guy. So after some Googling and fiddling around, I was able to make it work.
As for the soundtrack, I’m a hobby musician, and I have a small recording studio in my spare bedroom and a variety of instruments.
So why not make the soundtrack? :) The songs were focused musically around the JMT experience. Not necessarily lyrically. With 2 toddlers at home, I had to record while they were sleeping. Vocals had to be tracked quietly. So I heavily drove them with analog preamps and compressors to get it to cut through the mix. This created a specific kind of breathy saturated effect that reminds me of the acoustical response of Sierra granite. Specifically between Mt Hitchcock and Mt Whitney. Next time you’re there, clap, and listen. It sounds cool!
The end product is far from the organic acoustic guitar/banjo sound most would expect. I’m not the most organic guy. Heck, the one song where I played ukulele didn’t sound right to me until I added the synth beats and arpeggiator!
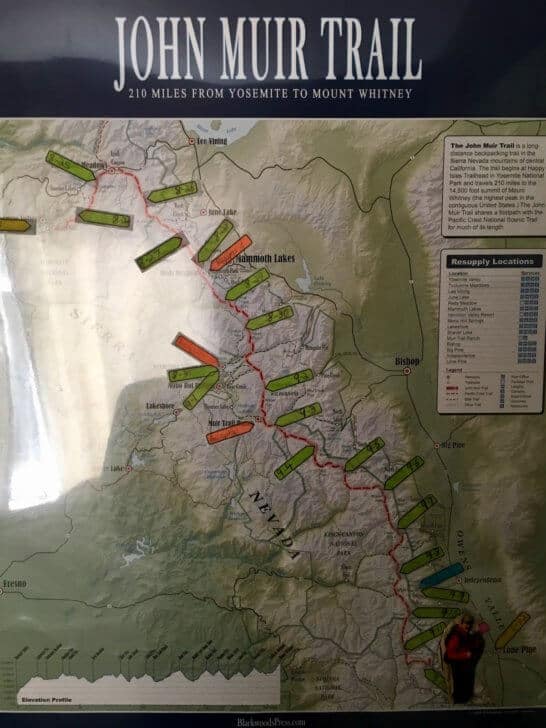
BlackwoodsPress JMT Guide & Wall Map – The wall map was a great way for my kids to track my progress at home. I even used this map in the film for the animated map sequences! See the photo above to view the map.
GlobalStar 1700 Sat Phone – For checking in on the family.
Meh:
Arcteryx Phase SL Baselayer – New ones only come in dark colors and no longer reflect heat well for use as a sun shirt.
Eclipse Sun Sleeves – Loved them when they stayed on. But I had to constantly adjust them when they slid down.
I don’t know if I would have ever pursued the JMT if it weren’t for all the inspiring trip reports and information I’ve learned here at Backpacking Light. I’m on the site daily. Thanks for existing :)
View our staff picks for the best backpacking gear of the year – recommendations from our editors and guides for hiking and backpacking gear.
Introduction
Some gear is old, some is new. But what we pick below is simply our favorites from the year. We may have used it once, or we may have taken it on every trip. It’s the stuff we couldn’t live without in 2016!
It’s just a simple bit of 3 mm CCF foam, but we take it with our Exped Synmat UL7 all the time.
It buffers the bottom of the air mattresses from the ground (rocks and spikes), from the snow (frozen condensation), and in this photo from the slightly rough wooden floor of Happys Hut in Kosciusko National Park.
The foam weighs very little and the mats are a little bulky, but they are worth it.
Where to Buy the Exped Synmat UL7 Air Pad
[expand title=” Click to Find the Best Price” trigclass=”awesomearrows”]
[/expand]
MYOG Vortex Burner Stove
My latest creation, of course, includes the large pot stand. Fully discussed in our series on my Vortex Winter Stove. It works really well, and the pot stand is super stable. It boils and it simmers gently. This was dinner on night 3 of the Kosciusko National Park trip.
Photo: Roger Caffin.
Learn more about the theory, design, and manufacture of the Vortex Winter Stove.
MSR Titan Pot
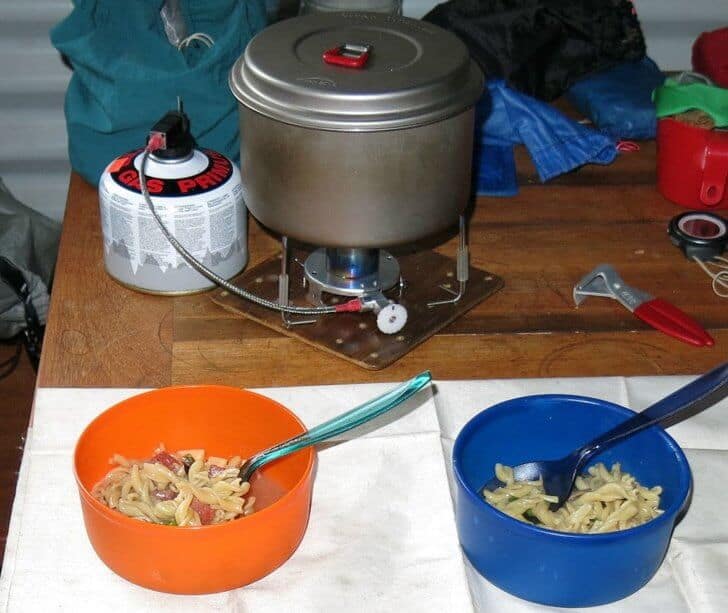
I’ve previously reviewed the MSR Titan Pot at Backpacking Light “a few years ago” (!). This is the large one: 1.5 L, 115 g (4.06 oz), with a tight-fitting lid 58 g (2.05 oz). It has looked after the two of us since 2006 with almost no marks, burns, scorches or whatever – and I COOK our dinners. We do not do freezer bag cooking.
Dinner this night was Fettucini al fungi, with extras. We ate the lot.
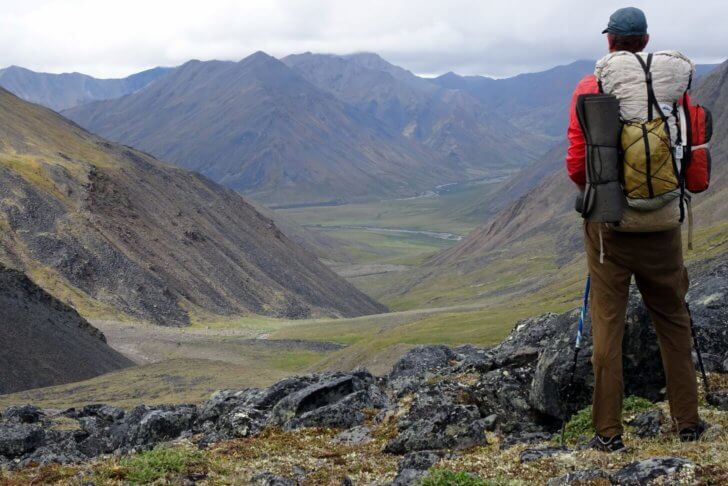
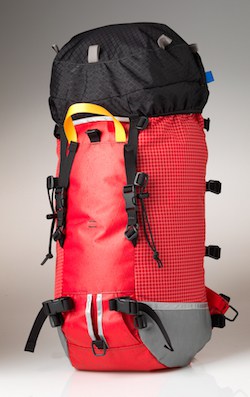
I have used this for several years on long treks in Alaska, the Sierras and for Coast2Coast Sweden. I have carried my gear and up to 16 days of food and fuel in it. It is one of my favorite packs of all time and certainly the best really big one.
Durable fabric, nearly-waterproof construction, load-carrying capacity for large volumes and heavy weight, low water absorption, and simplicity in design and styling make this a desirable pack for long expeditions.
Where to Buy the Hyperlite Mountain Gear Porter 4400
[expand title=” Click to Find the Best Price” trigclass=”awesomearrows”]
[/expand]
Exped Synmat Hyperlite M Sleeping Pad
This mat has replaced my Neoair Xlite Short during 2016. At 360 grams it outweighs the Neoair by 130 gram, but I still feel it is an OK trade. The Hyperlite is almost full length (my feet hang over the edge, no problem) even for a tall guy like me.
Photo: Exped.
Where to Buy the Exped Synmat Hyperlite Sleeping Pad
[expand title=” Click to Find the Best Price” trigclass=”awesomearrows”]
[/expand]
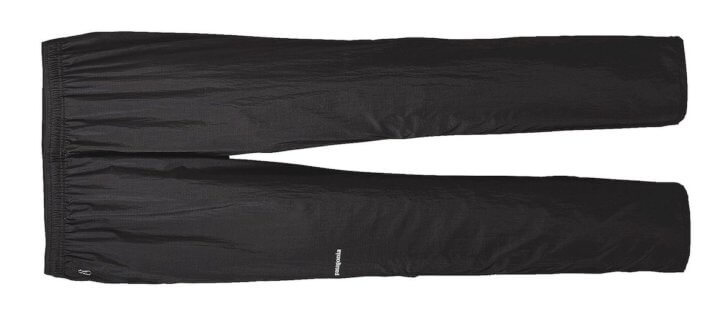
Patagonia Houdini Wind Pants
These are an extremely lightweight pair of pants marketed for running. I recently bought a new pair, replacing my old ones. At 100 grams they are seriously lightweight, windproof and extremely fast drying. I have used them on a month long trek in the Brooks Range of Alaska as well as for numerous shorter treks before they began falling apart. They are not as durable as heavier pants, but wonderful to wear and even more wonderful to carry in my pack when I switch to shorts.
Photo: Patagonia.
Where to Buy the Patagonia Houdini Wind Pants
[expand title=” Click to Find the Best Price” trigclass=”awesomearrows”]
[/expand]
Doug Johnson is a staff contributor for Backpacking Light, and is raising two young hikers, Fire Mage and Lily. View Doug’s author archive.
Doug Johnson
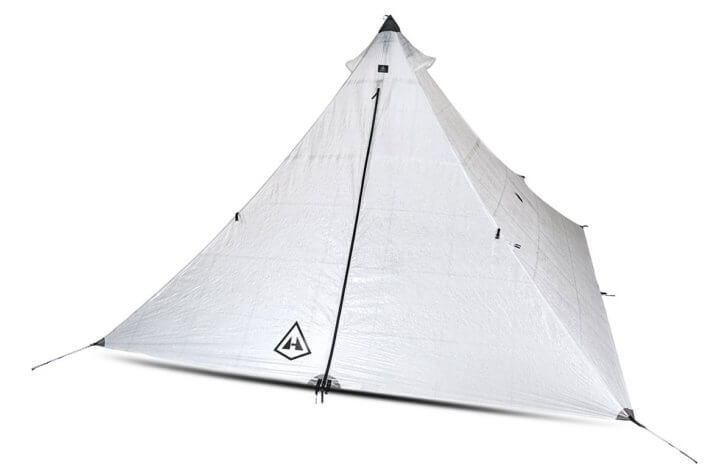
Hyperlite Mountain Gear Ultamid 4 Pyramid Shelter
At 3 pounds for the mid with the floored insert, the Ultamid 4 is an amazing family tent, and it’s been with us on many family trips. But it’s also been a 2.5-pound shelter with the floorless insert as a spacious 2-person tent on the Northern Loop of Mount Rainier and it’s been on snow trips with the mid alone for 1.5 pounds. This shelter is very expensive, but it can replace several shelters, and will last for years.
Where to Buy the Hyperlite Mountain Gear Ultamid 4
[expand title=” Click to Find the Best Price” trigclass=”awesomearrows”]
[/expand]
Ruta Locura Sorex Carbon Fiber Stakes
I use these stakes in the 9-inch version in sand, in rocks, in frozen ground, and in snow, and they are my favorite. On a recent trip I bent titanium stakes, broke the heads off of Easton aluminum stakes, and shattered first-generation Rota Locura stakes, but these stakes, with the aluminum heads, came through unscathed. This is what I’ve found on many trips before- they are light, hold well in all conditions, and are very strong. For 2017, they also come with a cord loop for easy removal, and I’ve got some on order. These stakes are my favorites.
Photo: Ruta Locura.
Learn more about the Sorex Carbon Fiber stakes at Rutalocura.com.
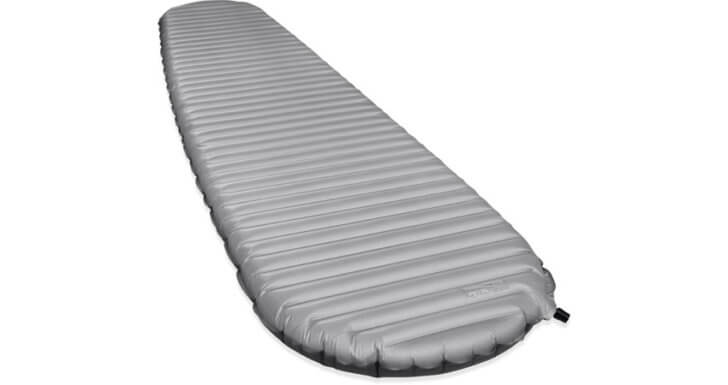
Therm-a-Rest NeoAir XTherm Sleeping Pad
After trying several different pads, I’ve settled on the NeoAir XTherm as the pad for our entire family. We have four of them and have found them to be very warm, reasonably lightweight, reliable, and very comfortable. My kids always sleep warm on their XTherm pads, and we add foam pads in the deep winter for extra assurance of a warm night. While gear selection for each family trip can be challenging, the sleeping pad decision is easy! The only challenge is finding the discontinued short XTherms for the kids, as they’ve become quite rare.
Photo: Cascade Designs.
Where to Buy the Therm-a-Rest NeoAir XTherm Sleeping Pad
[expand title=” Click to Find the Best Price” trigclass=”awesomearrows”]
[/expand]
Kevin Fletcher is the Trek Director and a guide with Backpacking Light’s Wilderness Adventures program.
Kevin Fletcher
Kelty Cosmic Down 20 Sleeping Bag
I must admit that one of the main reasons I like this bag is its affordability. It packs small and has a solid warmth-to-weight ratio. I used it often during the year, from a chilly desert trip in May to our last Wilderness Adventures trek this October in the Beartooths – a colder-than-expected trip that delivered bitter cold temperatures and the first heavy snows of winter.
Water-resistant down, a reasonable price point, lightweight fabrics, and a well-fitted hood all add up to make the Kelty Cosmic Down 20 Sleeping Bag a solid value.
Photo: Kelty.
Where to Buy the Kelty Cosmic Down 20 Sleeping Bag
[expand title=” Click to Find the Best Price” trigclass=”awesomearrows”]
[/expand]
ZPacks Duplex Tent
I used this tent on our October “winter” trip in the Beartooths and was surprised by how easy it was to set up, its superb wind resistance, and ability to resist a heavy snow load that delivered more than a foot of fresh snow overnight.
Photo: Ryan Jordan.
Learn more about the ZPacks Duplex Tent at zpacks.com.
Scott Powd’air Skis
I love these lightweight backcountry touring skis! Being so light, I was concerned with how they would perform on the downhill, but they tackled soft powder, wet powder, and breakable crust to make them a versatile backcountry touring tool.
Outdoor Research Echo/Sentinel Ubertube Neck Gaiter
On a whim, I purchased the OR Echo Ubertube Neck Gaiter (the men’s version is called the Sentinel). It sat in my closet in my box of scarves for a year or so. Finally, I decided to test it out. The Ubertube may be the most versatile item of kit I own. I use it to block out the sun, insulate my neck, cool my neck, hold my hair back, filter particulates out of my water or my nose and mouth and anything else I can think of. It weighs next to nothing (20g) and is handy to have around.
Retailers say this about the Echo Ubertube: “Variety is the spice of life and the hallmark of the tube. Wear it as a scarf, hood, bandana, headband, or mask.” I’m wearing it in my bio photo (above).
Photo: Outdoor Research
Where to Buy the Outdoor Research Echo/Sentinel Ubertube Neck Gaiter
[expand title=” Click to Find the Best Price” trigclass=”awesomearrows”]
[/expand]
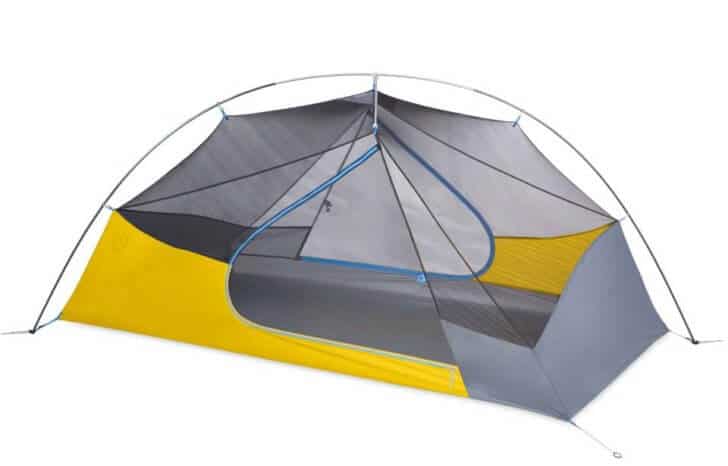
Nemo Blaze 2P Tent
This tent is amazing! It’s light (2 lb 5 oz – 1 lb 2.5 oz per person), stable, and waterproof. One crossing pole hybridized with two corner stake-out points and a small crossbar maximizes livability and stability while saving weight. It has the interior space of a rectangular dome without needing two crossing poles intersecting at all corners. It has two doors, two vestibules, 43 square feet of space and good headroom. I almost literally lived in this tent this summer. In total, I’ve spent about 5 weeks in the tent and it performs in everything, from high winds to torrential rain. I haven’t tested it in the snow yet but it has seen a great deal with me and I’m impressed.
Photo: Nemo.
Where to Buy the Nemo Blaze 2P Tent
[expand title=” Click to Find the Best Price” trigclass=”awesomearrows”]
[/expand]
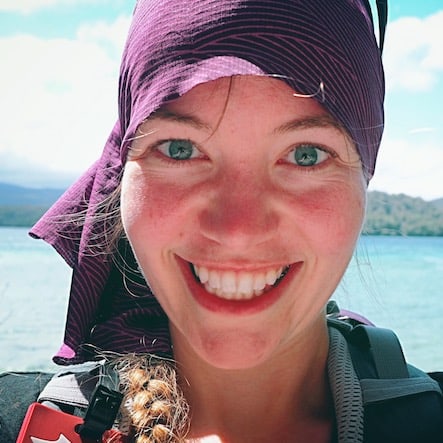
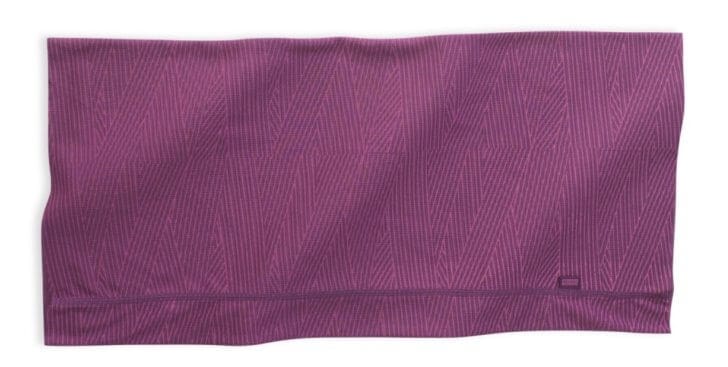
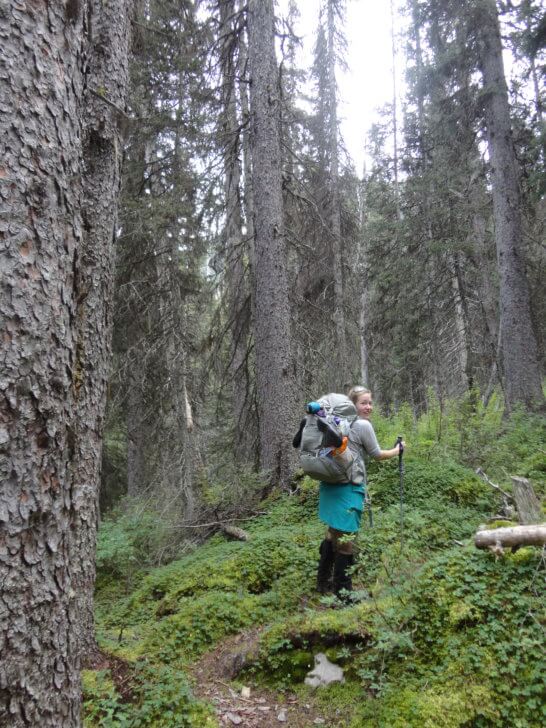
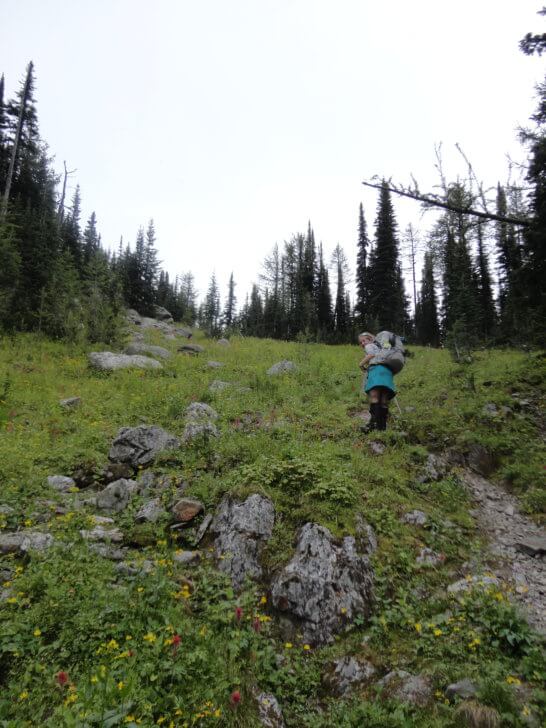
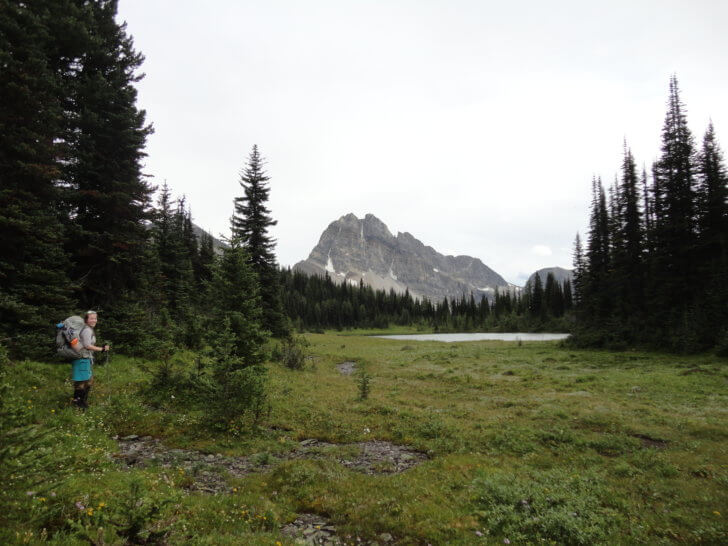
Purple Rain Adventure Skirt
I hate wearing hiking shorts. Readers kept asking questions about hiking in skirts and kilts, I felt I needed to experience hiking in a skirt and provide them with answers. The skirt is lighter, cooler, easier to make wardrobe changes and maintain modesty than any other lower body garment I have ever worn. After the review was done this skirt has made it on every trip I’ve made. From Canada to New Zealand I recommend this skirt.
Photo: Emylene VanderVelden.
Where to Buy the Purple Rain Adventure Skirt
[expand title=” Click to Find the Best Price” trigclass=”awesomearrows”]
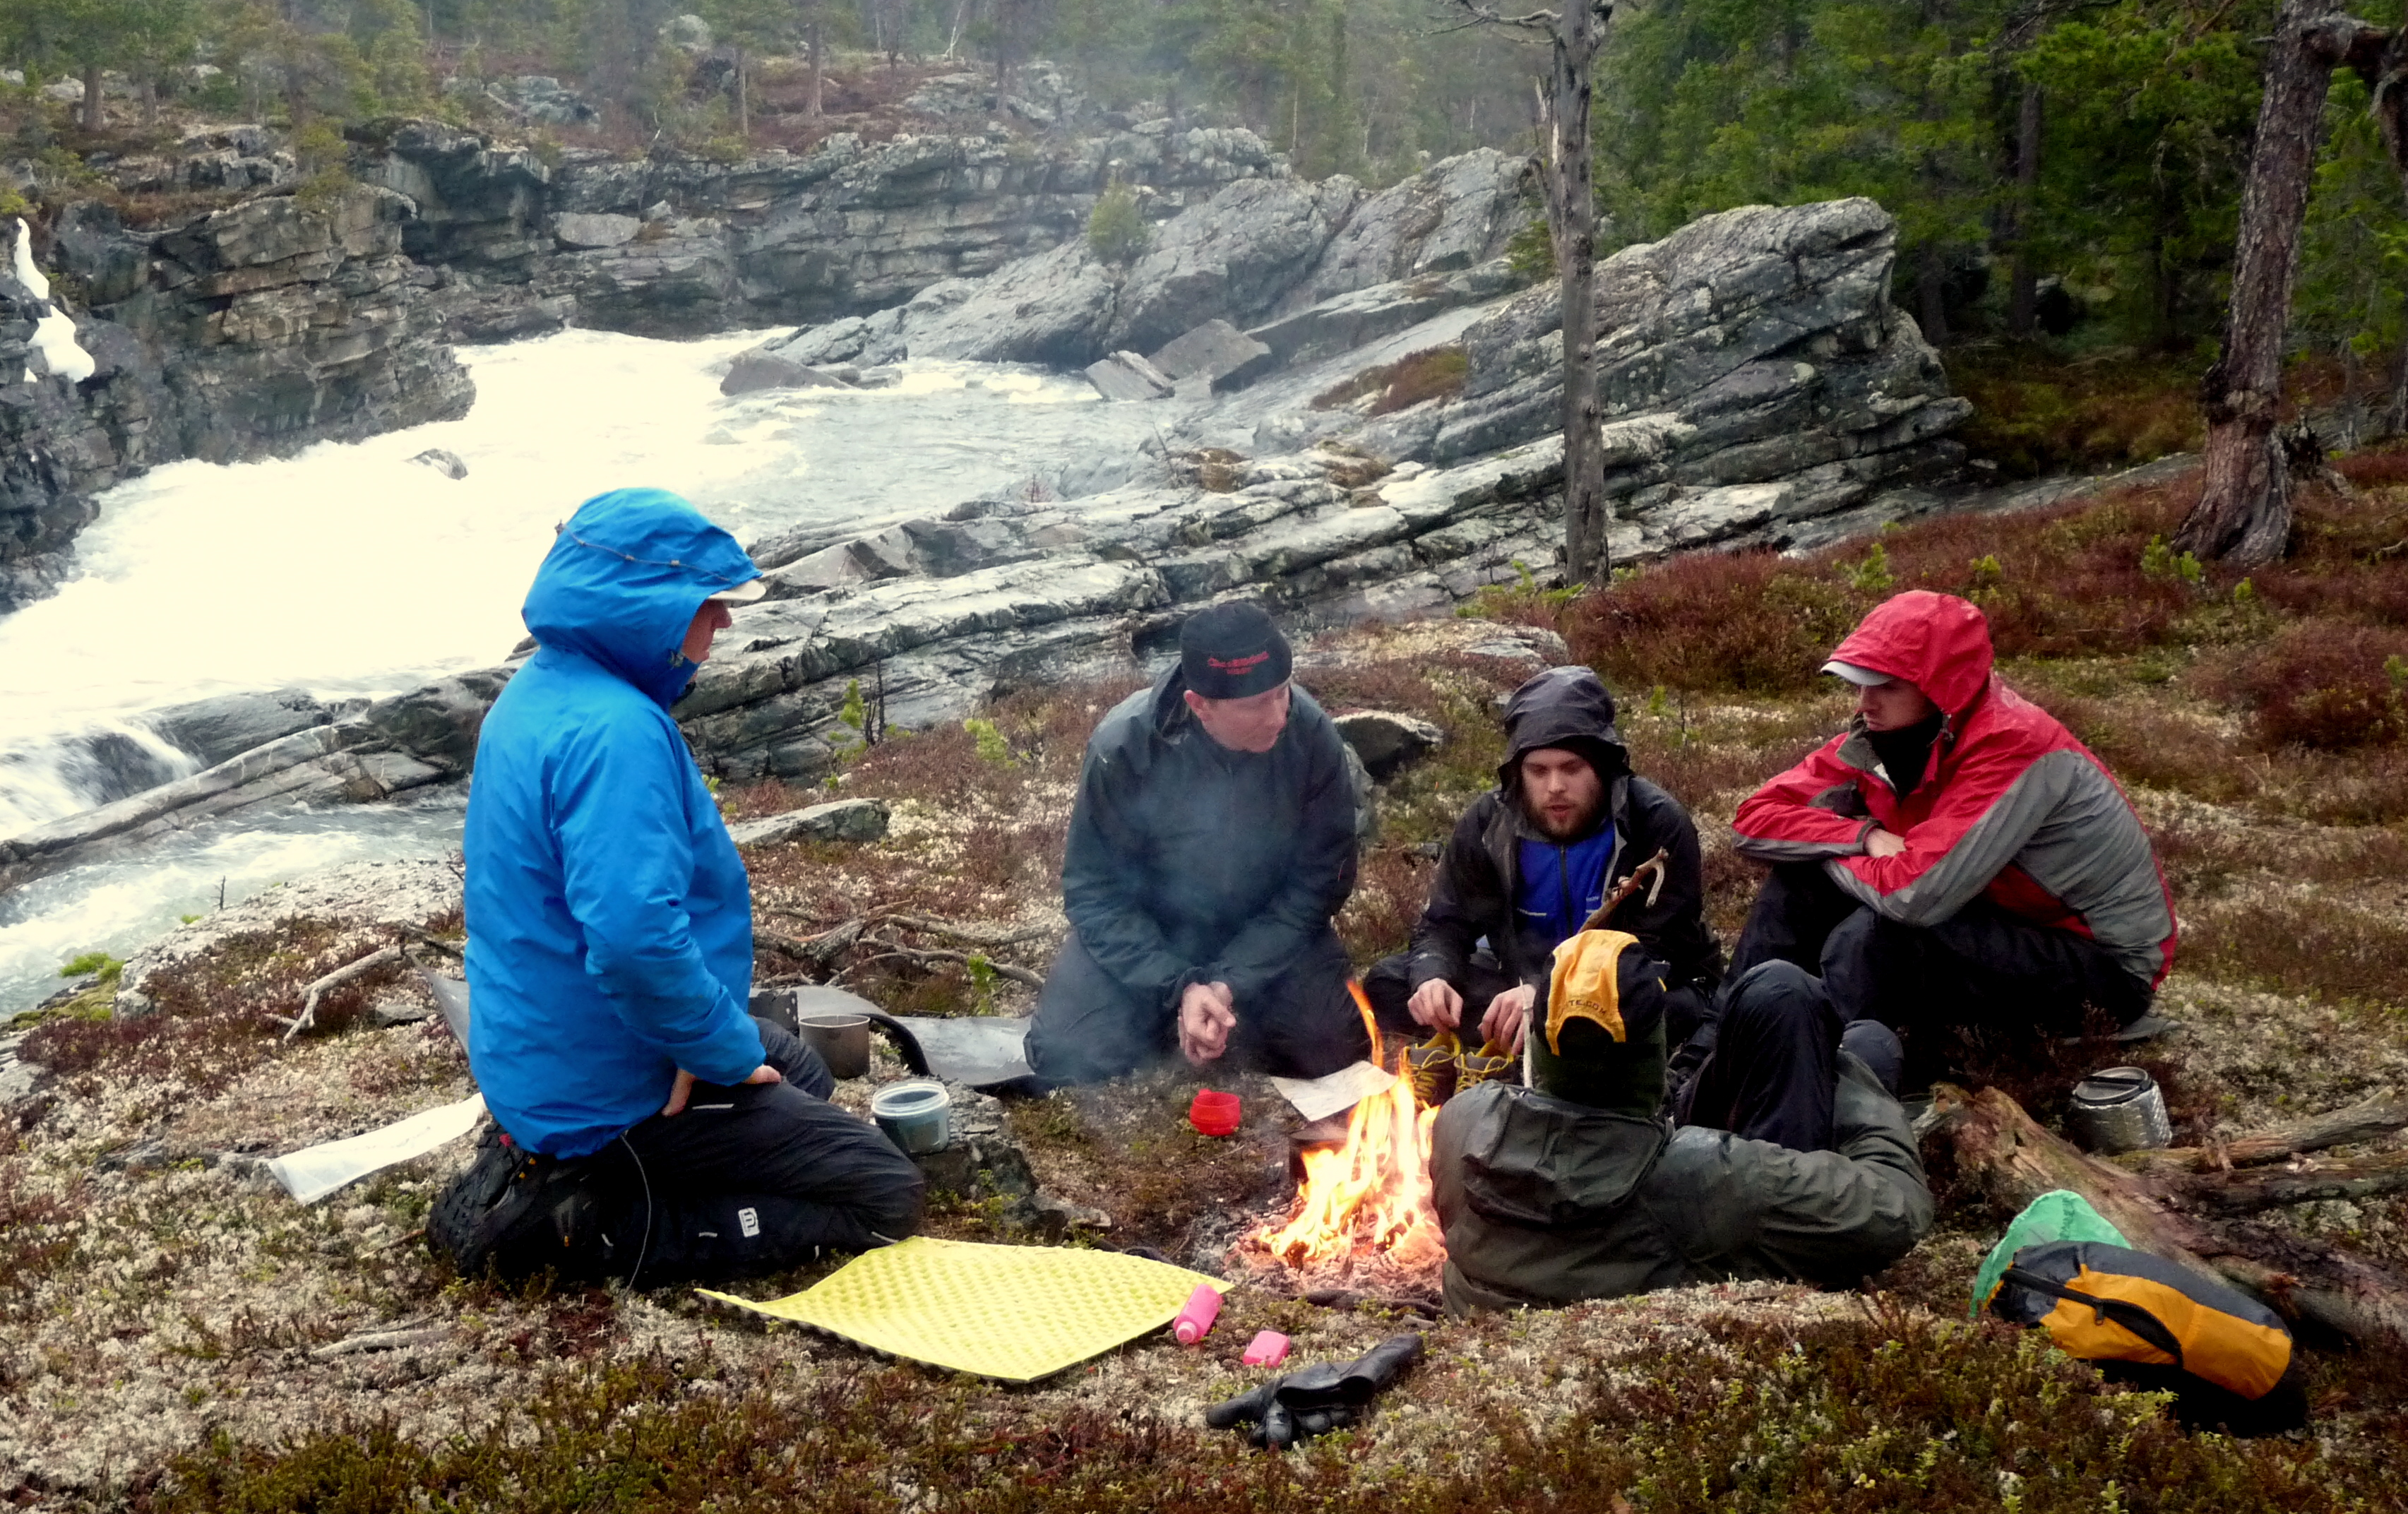
I’ll offer my three gear picks but first, I have to highlight my passport – yeah, it’s not gear but it has changed my adventure vacationing. Most American citizens focus on Montana/Wyoming then skip right to Alaska. There are some very wild and scenic areas in the Canadian Rockies and they don’t get a lot of love (at least from US residents).
OK, on to gear:
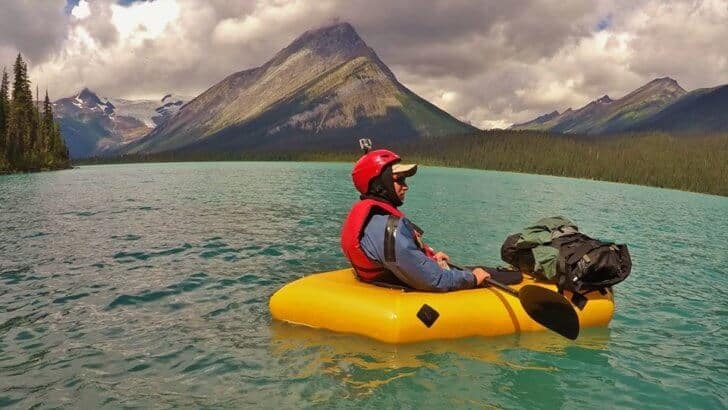
Kokopelli Nirvana Raft
One of my favorite rafts on the market and also one of the cheapest! This raft enabled me to access Some really remote areas in Canada where hiking would not have been very practical. Also exploring down a river that probably hasn’t been run in years (if ever) is the closest thing to real exploration available to most people.
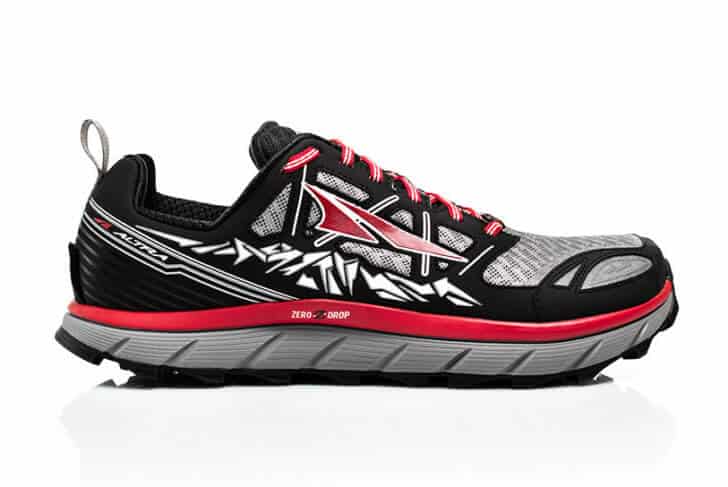
I have wide feet so most shoes don’t work for me. The Lone Peak 3.0 fixes the problems of the earlier versions of the Lone Peak. Finally, a shoe that is comfortable and has good performance when I’m hiking off trail.
Photo: Altra.
Where to Buy the Altra Lone Peak 3.0
[expand title=” Click to Find the Best Price” trigclass=”awesomearrows”]
[/expand]
GoPro HERO Action Camera
This was a major splurge for me in 2015/16 but it has been worth every penny (I purchased the Hero4 Silver model, but the new Hero5 Black offers the most features). It makes it easy to capture memories of my trips. I enjoy seeing old video clips and the wide angle also does a nice job capturing the sweep of big mountain panoramas for still shots.
Photo: GoPro.
Where to Buy the GoPro Hero5 Black Camera
[expand title=” Click to Find the Best Price” trigclass=”awesomearrows”]
Normally used to wrap houses during construction, this lightweight, versatile, durable, and inexpensive fabric made of high-density polyethylene synthetic can be used for so many things: ground sheet, tarp, wind break, emergency shelter, etc. We were given the end of a roll for free and we cut a 7 x 9 foot piece to use as a groundsheet and tarp and added some grommets in the middle of the long panel to support a line to secure as a temporary shelter. When used with great knotsmanship, the possibilities are endless. We even used this to wrap around ourselves in a sudden downpour.
This was my go-to piece for hiking in the mountains of Montana in the fall. Lightweight and compact, it weighs in at less than 2 ounces and packs up smaller than a deck of cards. It was perfect when paired with a good base layer to keep the warmth in and the wind out in very windy conditions when an insulated layer would be too warm. I also really like the ingeniously crafted design of the hood that fits snugly and perfectly over the brim of your favorite baseball cap to keep your head warm when that wind picks up! This has become an integral piece of my layering system and I would never leave home without it!
We use this lightweight wood burning stove extensively through all seasons for our cooking needs. It is lightweight, inexpensive, and best of all, environmentally friendly: no gas canisters to carry and then dispose of back home. There are no moving parts to break down and very little assembly required. Fuel is readily available (unless you are above the tree line) and set up is quick and easy. It is efficient and clean burning, using twigs and small chunks of wood or wood chips left on the ground by some previous axe-wielding maniac. It can also be used in combination with a denatured alcohol burner for winter trekking or above the tree line.
Photo: Solo Stove.
Where to Buy the Solo Stove Lite
[expand title=” Click to Find the Best Price” trigclass=”awesomearrows”]
[/expand]
Where to Buy the Solo Stove 900 Pot
[expand title=” Click to Find the Best Price” trigclass=”awesomearrows”]
All of the lighter packs I’ve tried over the last six years sacrifice comfort and durability, and can’t come close to matching this pack’s versatility. It works well for everything–hiking, climbing, skiing, around town–and is, therefore, the only smaller pack I need. Available in three fabric options, my woven Dyneema version weighs 18 oz stripped, can carry supplies for up to a week, and is crazy durable. I don’t ever use the large waist belt or lid and generally remove seven of the metal attachment points, which weigh 0.25 oz. each.
Learn more about the Cilo Gear 30L Worksack at Cilogear.com.
DIY Water Bottle Parka
It cost me $30 to make four. I made several a year ago with Tyvek, Tyvek tape, and 5.0 oz Climashield Apex insulation and have used them at least 40 below-freezing days.The 1-liter size weighs 2.8 oz, which is 48% less than the Outdoor Research model and insulates an average of 21% better with an open top! Order materials from ripstopbytheroll.com, zpacks.com, or elsewhere. It takes me an hour-ish to build a parka for any size water bottle.
Photo: Max Neale.
Patagonia Grade VII Parka
This is the most sophisticated (and expensive) piece of clothing I’ve ever worn. If you’re able to afford it, the Grade VII is unbeatable for expeditions, high-altitudes, or frigid fast and light trips that push your limits. Cheaper alternatives to consider: the Montbell Frostline (20 oz, $240) or Feathered Friends Hooded Helios (17.5 oz, $340).
Photo: Patagonia.
Where to Buy the Patagonia Grade VII Parka
[expand title=” Click to Find the Best Price” trigclass=”awesomearrows”]
[/expand]
Chase Jordan is a staff contributor and editorial assistant at Backpacking Light. View Chase’s author archive.
Chase Jordan
Locus Gear Khufu CTF-3 Shelter
When I am part of a small group or adventuring solo, this shelter has quickly become my favorite choice when I hit the trail. It is lightweight (my setup with pole and tent stakes is approximately fifteen ounces) and it couples ease of setup with a small, yet comfortable footprint.
The shelter’s simplicity makes it easy to setup, allowing me to focus my time and energy in camp on enjoying the aesthetic of the visual beauty around me, and the activities available where I am camping: whether they are fishing, bagging a peak, or letting the scene stimulate my creative juices. The ease of setup allows me to focus on the intrinsic value of being outdoors, and not just the utility of surviving night to night.
Additionally, the shelter has a small floor plan, allowing me to find a stimulating scene to enjoy the late afternoon and evening in the shadow of, as I am not limited to the larger areas that I am limited to when using larger shelters or sharing a group shelter. Neither does the small floor plan equal discomfort when using the pyramid shelter in poor weather to shelter from a storm, as the headroom is spacious enough to carry out creative endeavors or entertainment without feeling cramped and claustrophobic. There is enough space for me to organize my gear as well. Essentially, the Khufu could be described as a miniature palace that can be set up anywhere you are adventuring.
Photo: Ryan Jordan.
Learn more about the Locus Gear Khufu at locusgear.com.
Moleskine Notebook
The Moleskine Notebook has allowed me to enhance my creative process in the outdoors and is essential to why I adventure in nature. As a Bachelor of Music student at the University of Wyoming, with emphases in viola performance and music composition, I find myself heavily inspired by the natural world almost every time I begin a new creative project. By using the notebook with music staff, I can begin a project while still within the wilderness – and am no longer limited to a simple outline in a journal of a work I will start upon my return to civilization.
For those who musical inclinations are not a part of their creativity, Moleskine also creates a notebook with blank pages for sketching, ruled pages for writing and journaling, and graph paper for designing your next engineering project. No matter what type of creative you are, these notebooks can allow you to begin your creative process in some of the most inspiring terrain you encounter.
Shop for other Moleskine Notebooks
[expand title=” Click to Find the Best Price” trigclass=”awesomearrows”]
[/expand]
Tenkara USA Iwana Rod
Tenkara USA’s Iwana rod maintains the simplicity of the tenkara philosophy, while its added length compared to shorter rods, such as the Hane, provides for allowing you to cast a little farther to get to those jumping fish that always seem just beyond the range of your rod. The added length does not make the rod cumbersome in wooded areas with a lack of casting space either, making this rod great for catching dinner in the forest stream, wooded lake basin, or alpine pool nearest to your camp.
Photo: Ryan Jordan.
Where to Buy the Tenkara USA Iwana
[expand title=” Click to Find the Best Price” trigclass=”awesomearrows”]
[/expand]
Trevor Shellenberg is an engineering research assistant at Backpacking Light.
Trevor Shellenberg
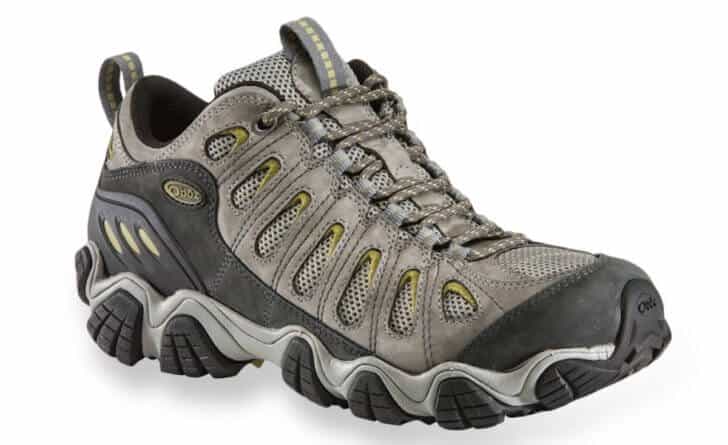
Oboz Sawtooth Hiking Shoes
Ultralight minimalist shoes may not be suitable for every person, or heavy pack weights: the Oboz Sawtooths are supportive (but light) boots that offer a high level of flexibility and reasonable breathability so my feet don’t cramp or overheat when carrying a big pack. A great all around boot.
Durability and traction are the hallmark features of the Sawtooths, but they are lightweight and have enough flexibility and breathability to make them worth considering by lightweight hikers looking for a more supportive shoe.
Photo: Oboz.
Where to Buy the Oboz Sawtooth Hiking Shoe
[expand title=” Click to Find the Best Price” trigclass=”awesomearrows”]
[/expand]
Black Diamond Revolt Headlamp
I’ve had this headlamp for almost 3 years and it’s never had an issue other than having to change the batteries. It has two different lighting settings (one for ambient task lighting, and the other for a bright concentrated navigation spotlight), each with their own progressive dimming function. It even has an extra red flashing hazard light setting. Water-resistant, battery efficient, and durable. My favorite headlamp I’ve had thus far.
Photo: Black Diamond.
Where to Buy the Black Diamond Revolt Headlamp
[expand title=” Click to Find the Best Price” trigclass=”awesomearrows”]
[/expand]
Outdoor Research Transcendent Hoody Down Jacket
I bought this jacket last year on sale at REI and have worn it nearly every day of the fall and winter. Whether I’m walking to school or cross country skiing in the Gallatin Canyon, this jacket always seems to eliminate that infamous Montana chill that’s so hard to thwart even with the best warm weather clothing.
Photo: Outdoor Research.
Where to Buy the Outdoor Research Transcendent Hoody Down Jacket
[expand title=” Click to Find the Best Price” trigclass=”awesomearrows”]
[/expand]
Eric Vann has served in various capacities at Backpacking Light, including Assistant Editor, Guide, and Wilderness Adventures Trek Director. View Eric’s author archive.
Eric Vann
ZPacks Duplex Tent
I use this tent because it is a very lightweight, two-man shelter, it is has a floor, and it feels like a real tent. Although roomy for two, it’s a palace for one and lighter than most solo tents on the market.
The outside vestibule is a dry place to store gear even in inclement weather. I’ve had no issues in this tent in strong winds, snow, or rain and have used it for almost 30 nights this past summer.
Learn more about the ZPacks Duplex Tent at zpacks.com.
Goosefeet Gear Down Parka
I’ve used this parka a lot because it is so light and it keeps me very warm. I sleep in it, wear it under my rain jacket in the cold and rain, and show it off around town to my friends. Generally, their reaction is surprise and wonderment on how it can be so warm and weigh so little.
Photo: Ryan Jordan.
Learn more about the Goosefeet Gear Down Parka at goosefeetgear.com.
Hyperlite Mountain Gear Porter 4400 Backpack
I’ve used this backpack for several years and I continue to use it because of its water resistance (almost water proof), its packing versatility, and its durability. I use it for mountaineering, packrafting, and backpacking and other than a few small holes I have had no issues with it despite several years of sustained abuse in a variety of conditions.
The HMG Porter 4400 is a popular option amongst BSA Venturing Crew One members. Photo: Ryan Jordan.
Where to Buy the Hyperlite Mountain Gear Porter 4400 Backpack
[expand title=” Click to Find the Best Price” trigclass=”awesomearrows”]
Over the course of the last four months, I may have spent half my waking hours (and a substantial amount of sleeping hours!) in this hoody.
A trim but stretchy fit, an extremely high level of breathability for an insulated garment, and light-but-cozy feel have made this a staple of my wardrobe in both the backcountry and frontcountry, especially when simply layered over a thin merino wool t-shirt – one of my favorite layering combinations.
Add a rain shell over the top for a bombproof system for extreme conditions above the treeline.
Where to Buy the Patagonia Nano Air Light Hoody
[expand title=” Click to Find the Best Price” trigclass=”awesomearrows”]
[/expand]
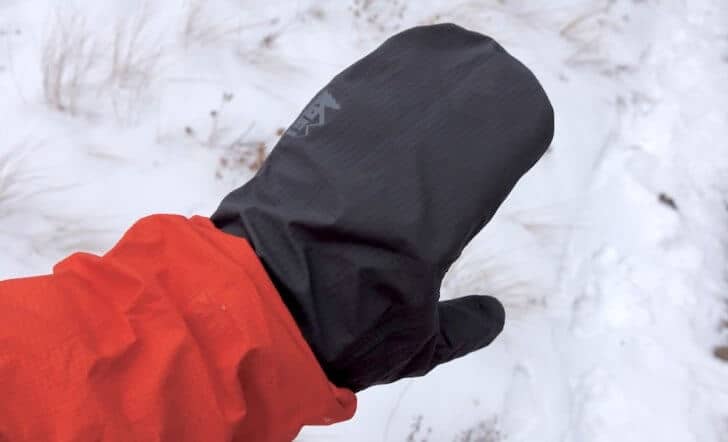
REI Minimalist Waterproof Mittens
Remember the old electric-blue, seam-taped Goretex mitten shells from Outdoor Research that weighed just over an ounce per pair from the 1990s? Their discontinuation sent waves of depression through those of us in the ultralight community that had come to rely on them for hand protection in cold and wet weather. I’ve tried replacements, including non-seam-taped and leaky mitten shells from my DIY bench and cottage manufacturers such as Mountain Laurel Design, but they’ve all fallen short. Now, REI has brought back one of the most beloved pieces of equipment that should have a home in every ultralighter’s kit. The REI Minimalist mitten shells are seam-taped, made with durable and breathable eVENT, have a hook-and-loop wrist closure, and best of all, weigh just over an ounce per pair!
Photo: Ryan Jordan
Where to Buy the REI Minimalist Waterproof Mittens
[expand title=” Click to Find the Best Price” trigclass=”awesomearrows”]
[/expand]
Montane Minimus 777 Pullover
In the old days, which weren’t that long ago, you’d be hard pressed to buy a decent rain jacket that weighed less than five ounces. You either had to give up durability (hospital bed sheet fabrics), breathability (silnylon), layering volume, a hood, or aesthetic appeal. The Montane Minimus Pullover combines all five of these components in a balanced way with the simple, functional, breathable, and stylish Minimus 777 Pullover. It’s been in my pack on nearly every trip this year and has earned its keep during what has been my wettest year of backpacking in several years.
Photo: Ryan Jordan.
Where to Buy the Montane Minimus 777 Pullover
[expand title=” Click to Find the Best Price” trigclass=”awesomearrows”]
[/expand]
What Are Your Picks?
Join us below and the forums and share your three favorite pieces of gear from 2016!
This Platypus Gravity Works filter review focuses on the key strength of the system: high treatment capacity for relative ease.
Editor’s Note
What follows is a brief review of a product that has been around for a long time: the Platypus GravityWorks filtration system.
We haven’t conducted a comprehensive long term review of this system to date, even though it’s a popular product with our reader base. Also, the Platypus GravityWorks filter is uniquely positioned as a viable option for group water treatment, and when considered in that context, it’s weight can be justified.
I’ve used the Platypus GravityWorks filtration system on some long treks with Scout groups. The context that made this decision justifiable included:
Assignment of water collection and treatment duties to an individual who is responsible for supplying water to the entire crew (thus avoiding the need to have each person use it in turn);
Travel in pristine mountain environments where water clarity is high (to avoid the risk of filter clogging as a result of dirty water from snowmelt / glacial melt).
This review provides an alternate perspective from someone who is newer to gravity filtration and is looking at using the Platypus GravityWorks filter for personal use.
– RJ
Introduction
This Platypus GravityWorks filter review will show how this water filtration system provides the backcountry hiker with a reliable and convenient means of filtering water while on the trail. Additionally, this system is available in two versions: The 4.0L (135 oz.) and the 2.0L (68 oz.) models which provide options for filtering water into a clean water reservoir bag or directly into bottles. Also, the gravity fed system offers a quick and effortless approach to filtering large amounts of water while leaving the user hands-free to work on other essential camp chores.
Features
8 liter (135 oz.) total water capacity (perfect for groups or water storage on those longs dry hauls)
Dirty zip-lock style bag
-Easy to fill by dipping the bag into water or using a cup to fill it from smaller sources
-Hanging strap with buckle
-Quick disconnect tube attachment
In-line gravity water filter
-Fast hands-free operation
-Easily backflush the microfilter for maintenance in the field
Clean reservoir bag
-Hanging strap with buckle
-Screw on hose adaptor for secure seal
-Hose shut-off clamp for storing and dispensing water at leisure
Storage sack
Options for using other Platypus products to create a system just right for you
Specifications
Weight:
-Manufacturer states 11.5 oz. (326 g)
-My scale reads 11.7 oz (331 g)
Dimensions: 3.25”W x 9.5”L
Filter Media: Hollow Fiber
Filter pore size (microns): 0.2
Flow Rate: 1.75 liters (59 oz.) per minute
Cartridge Life: 1500 liters (50721 oz.)
Effective against Protozoa, Bacteria, and Particulates
Ineffective against Chemicals/Toxins, Viruses
Field Use
I grew up on hand-pump operated water filter systems and knew no different until a recent rekindling of my adventurous spirit took me back into the wilderness last year. Seeing a gravity filter for the first time? It was a no-brainer… hands-free operation while leaving you available to do other essential camp tasks (not to mention no more sitting on a cold river bank away from the fire for 15 minutes trying to pump into a reservoir bag). Also, having less moving parts to break in my opinion is a winner! In my search for the latest and lightest gear, I found the Platypus GravityWorks system. Available in 4.0L (135 oz.) and 2.0L (68 oz.) versions which allow several options to integrate with other water storage products.
My Rationale for Selection
I selected the 4.0L version for two reasons: 1) Sometimes I hike in groups of 4-5 people, and I felt that this system would provide an excellent resource for supplying a large group. 2) There are areas that I hike where reliable water can be 10+ miles (16+ km) apart. Additionally, if I want to carry extra water, then I can use the up to 8 liters (271 oz.) water capacity to haul it.
Usage Context
That said, I used the system on an 18.3 mile (29.5 km)/2 day hike earlier this year just as it was starting to warm up here in Alabama. I carried the complete kit: dirty bag, clean bag, and all the hoses. Also, I never touched the clean bag or the hose attached to it. I used the dirty bag to scoop water from a nearby stream, hung it on a tree (the hang strap with buckle is a handy addition), and filtered the water straight into my water bladder. In the future, unless I plan to provide water for a group around a campsite, I will only carry the dirty bag with the hose and in-line filter attached which weighs in at 7.3 ounces (207 g).
I’ve gone the way of all the other crazy “gram-counters” out there utilizing electronic scales and spreadsheets to formulate the lowest possible pack weight, even cutting the tags out of my already lightweight tent. Who needs tags anyway? I don’t care about all that useless manufacturer information. WEIGHT! Or the lack thereof and the function of a product is all I care about. Also, I like for stuff to look cool, but that’s not so essential.
Performance
The system worked great when I used it in the field. It did what it was supposed to do, and you can’t ask for more than that. It filtered water quickly and cleanly. The water tasted great, and the whole operation was smooth from start to finish. In my testing, I found the filtering time for 4 liters (135 oz.) of water to be between 4:13 and 4:23. Of course, I have done one thing to adapt mine by cutting a small portion (6” or so)(152 mm) of the tubing to place on the clean side of the filter with the hose shut-off clamp attached. This makes a small portion of the clean tube ready for placement inside your bladder or bottle for filling.
The system is clearly marked to prevent contamination of the clean bag and the connection for each bag is different. They have a quick disconnect for the dirty side and a screw on attachment for the clean side. Also, the filter is also clearly marked with directional arrows indicating a direction of flow. While the zip-lock style opening of the dirty bag allows for easy water filling and emptying, and it’s large enough to clean and dry for storage. The screw off style cap on the clean bag allows for quick emptying as well.
Photos were taken on the Alabama Pinhoti Trail/Section 4 (April 2016).
Performance Highlights
Easy filling of the Dirty water bag using the wide zip-lock style opening.
No Pumping – Quick gravity filtration straight into your water bladder, bottle, or Clean water reservoir bag.
The bag material is sturdy and durable.
Straps on both bags include buckles to make hanging around long tree branches straightforward and efficient.
The in-line hose shut-off clamp can be used to control the amount of dirty water filtered into the Clean bag. It dispenses drinkable water from the Clean bag when you detach the hose from the filter.
Backflush capability enables frequent maintenance to ensure filter performance. Guidelines suggest a 4-second backflush with every use.
Summary
Strengths
Large capacity to accommodate groups or extra water storage along a dry trail.
Treatment is effective against Protozoa, Bacteria, and Particulates.
The absence of a pump gives the peace-of-mind that with fewer moving parts there is a lower chance of system failure.
Lightweight design with the option to reduce weight by leaving the Clean bag behind.
The system rolls up into a compact and easily packable bundle and comes with a storage bag.
Options for integrating with other Platypus accessories to customize your system.
Design allows for easy cleaning and drying for storage of both bags.
Clear plastic allows for easy inspection.
Cost is competitive with similar type filters systems.
Limitations
Other reviews have stated that with extremely dirty water the filter can become clogged with particulates. This may require pre-filtering water through a cloth before using the system.
The filter can freeze if not emptied and stored in a warm environment.
With shallow water sources, it can be difficult to fill the Dirty bag directly from the source. A cup can be used to remedy this problem.
The filter does not treat chemicals/toxins or viruses. A water “purifier” is needed if these are concerns.
Recommendations
I’ve only used the system once in the field, but it worked flawlessly, and I look forward to many more trips with my Platypus. It offers a user-friendly and speedy way to filter water while in the backcountry. I find it superior to pumping by cutting down the time and effort involved and eliminating the moving parts that are subject to break. If viruses are a concern UV or chemical treatment should also be considered. To me, the advantages of this system, as compared to similar systems on the market, are the overall capacity, weight, dirty water filling method, the clear reservoir bags, and the options Platypus offers for integrating accessories.
The 4.0L (135 oz.) version provides a way for me to collect large quantities of water from sources away from the campsite and carry it back for the night. If I fill my 2.5 liters (84.5 oz.) in-pack water bladder at the source then fill the dirty bag to take back to camp, I will have plenty of water in reserve to cook and clean. I will have enough water to refill all my containers before hitting the trail again. The smaller 2.0L (68 oz.) is also available with minimal weight savings and substitutes the clean water bag for a 2-liter soft bottle. Depending upon your specific needs either model should make a great addition to your kit.
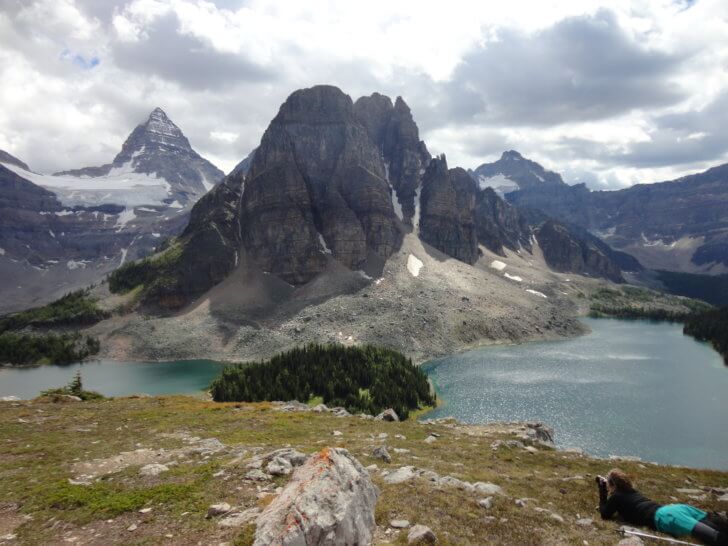
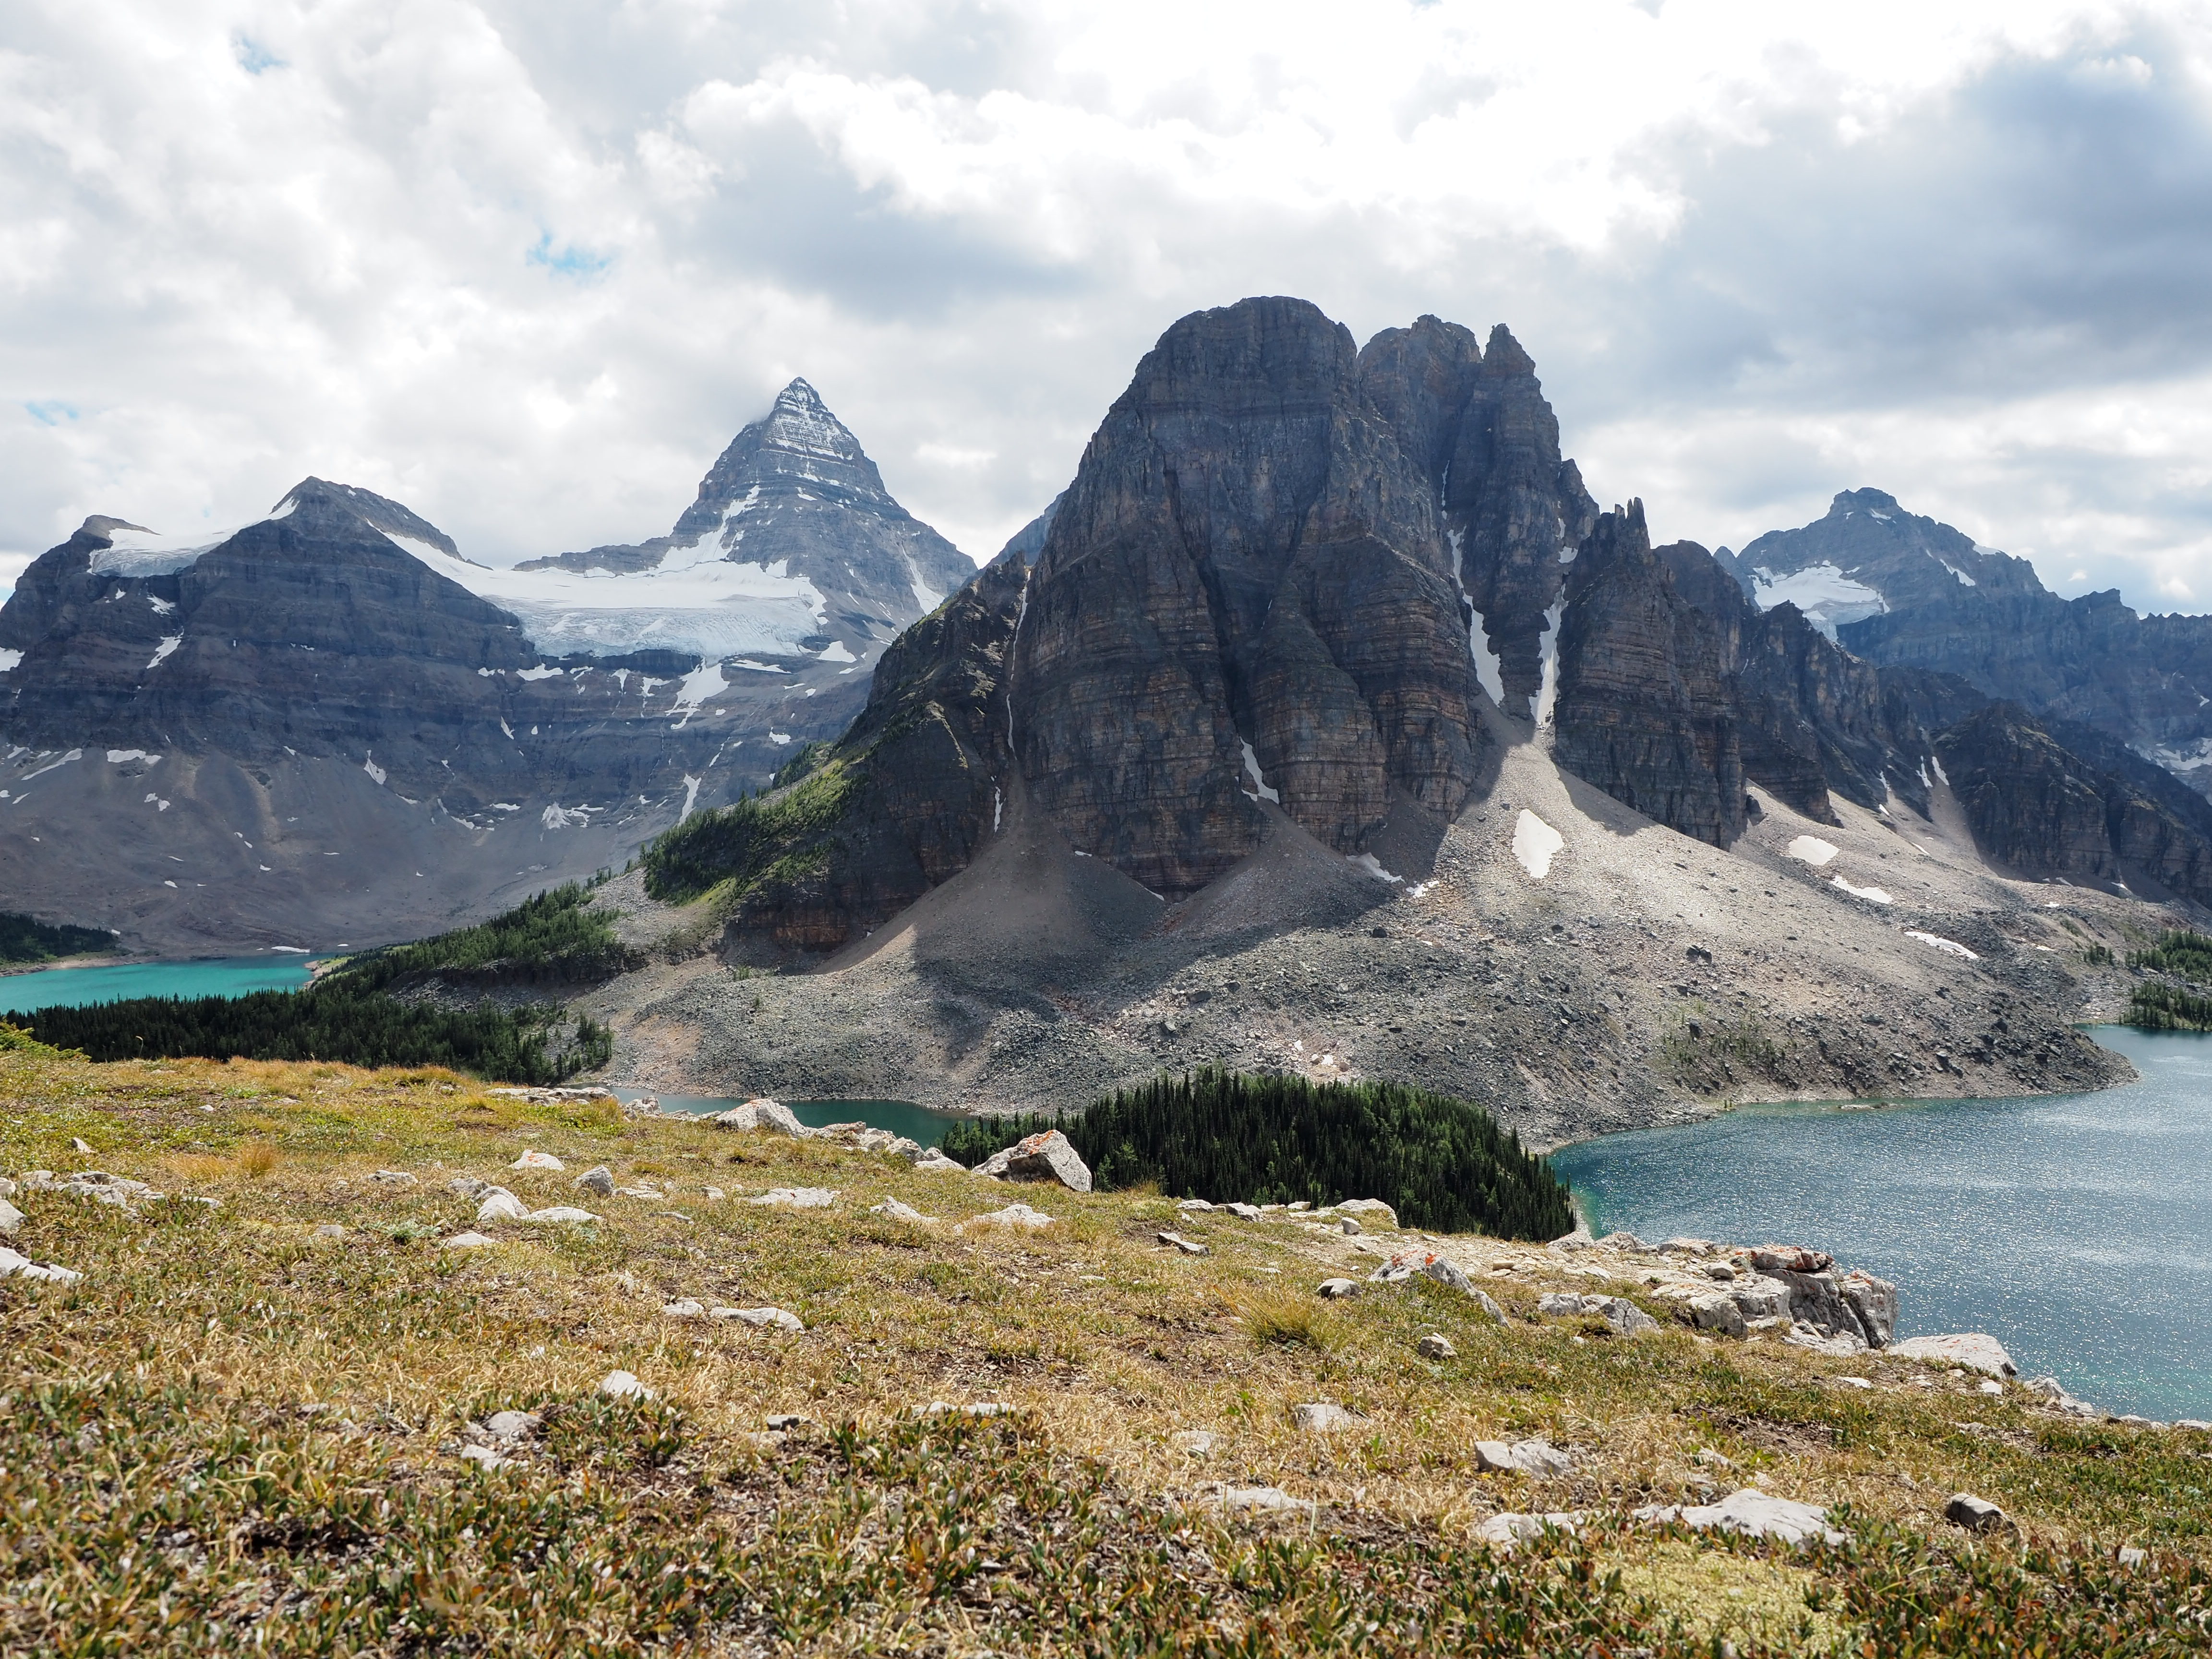
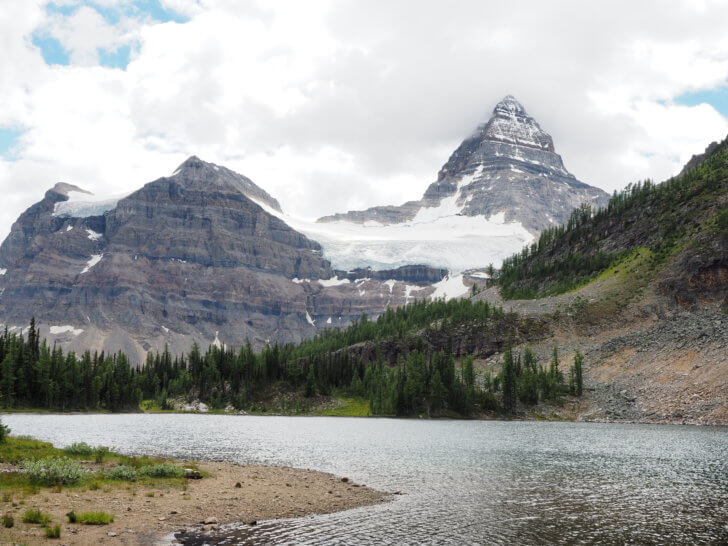
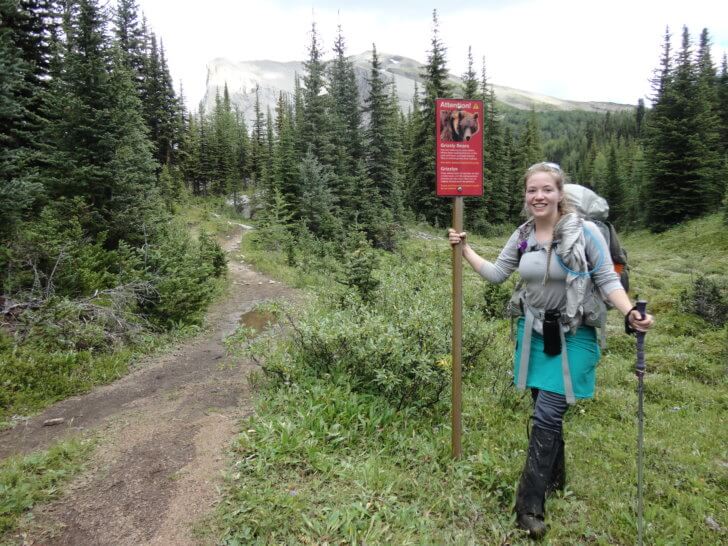
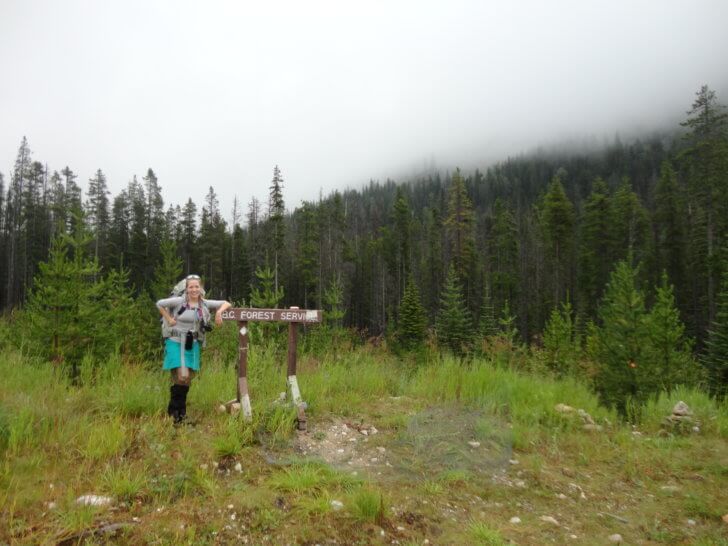
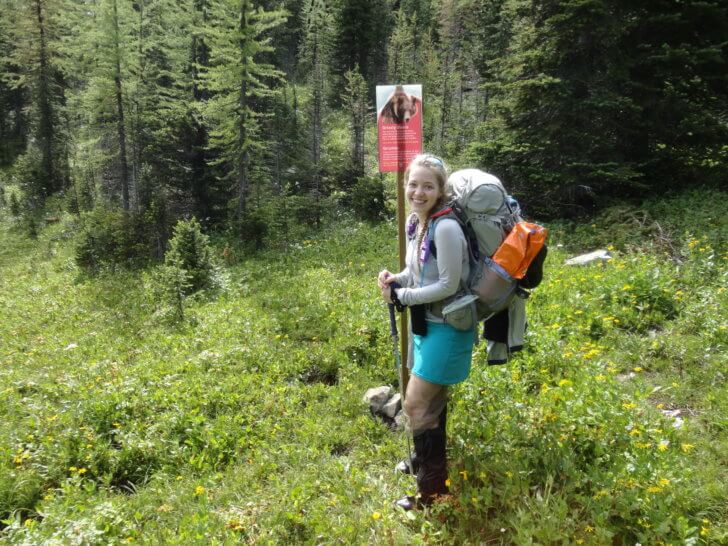
Backpacking to Mount Assiniboine through grizzly bear country requires you to pay attention! Enjoy the final day of our journal.
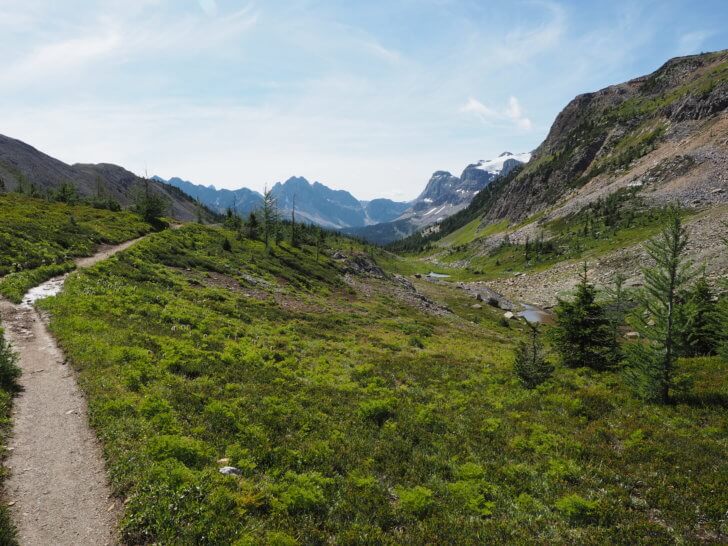
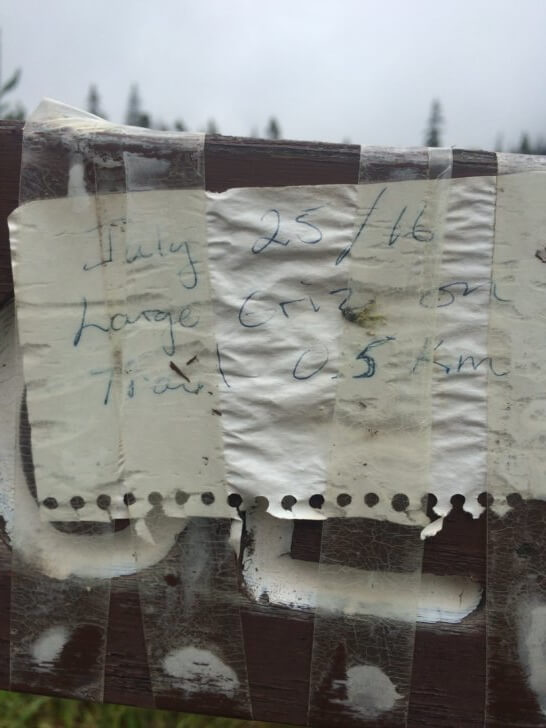
Day 4
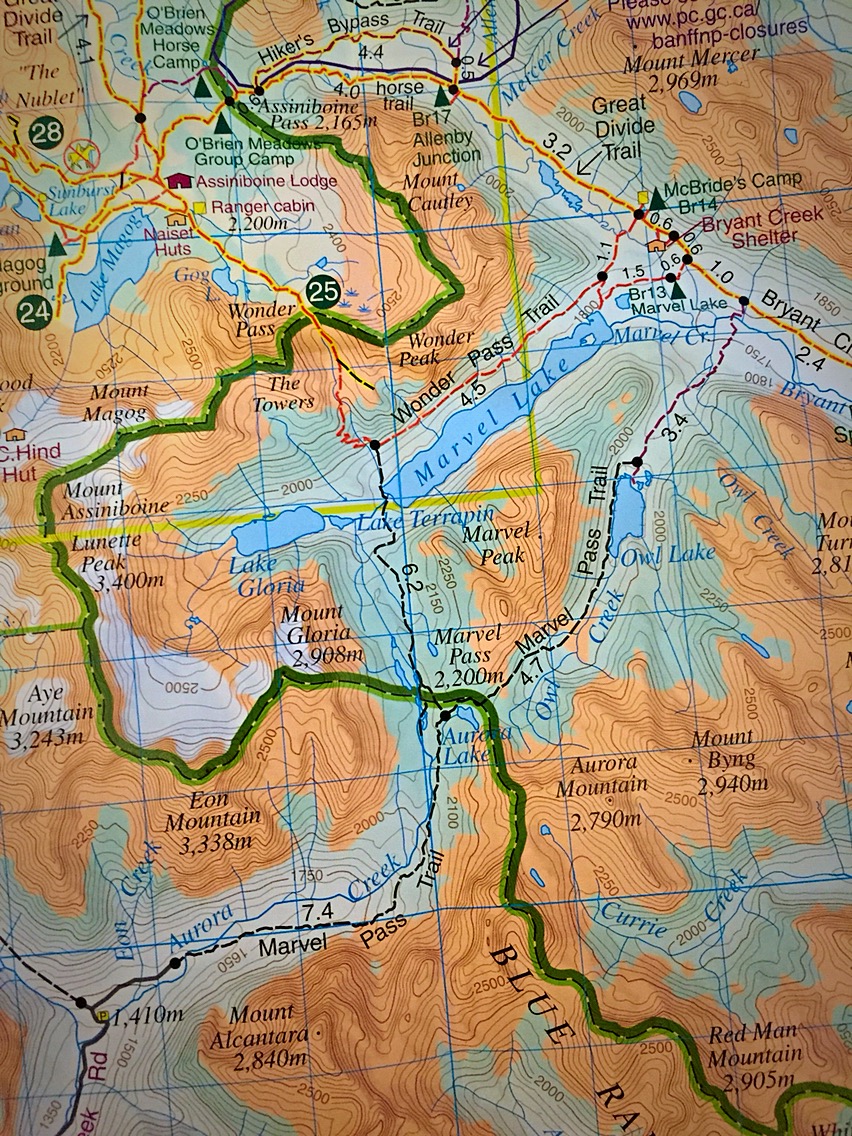
Wonder Pass
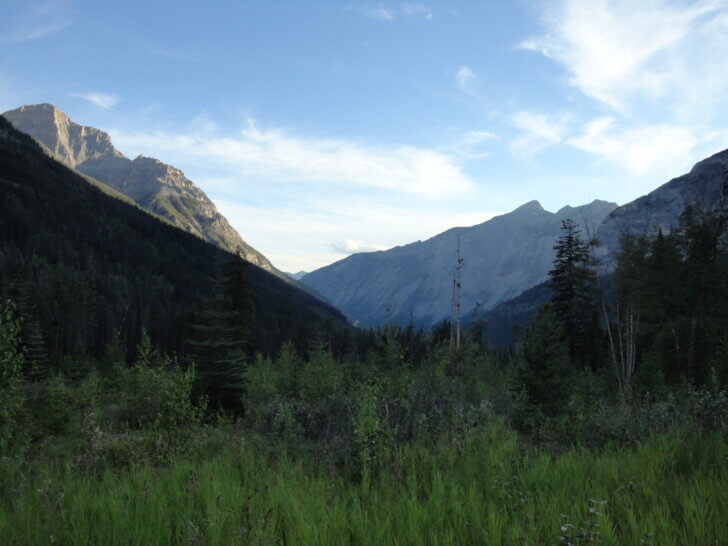
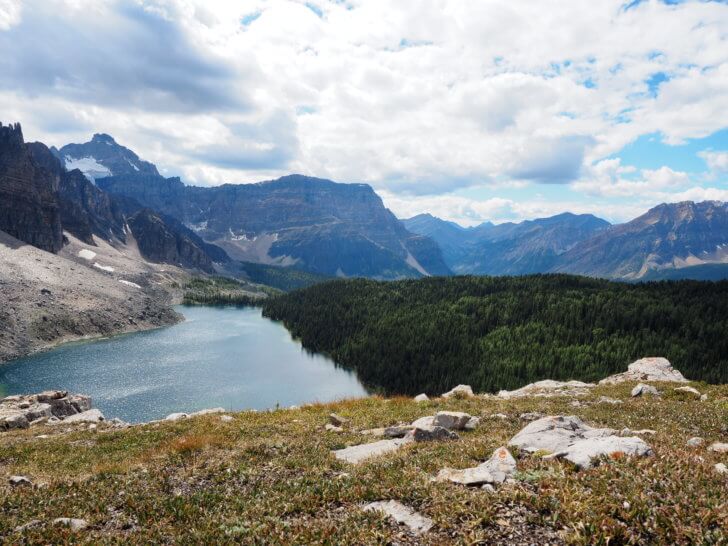
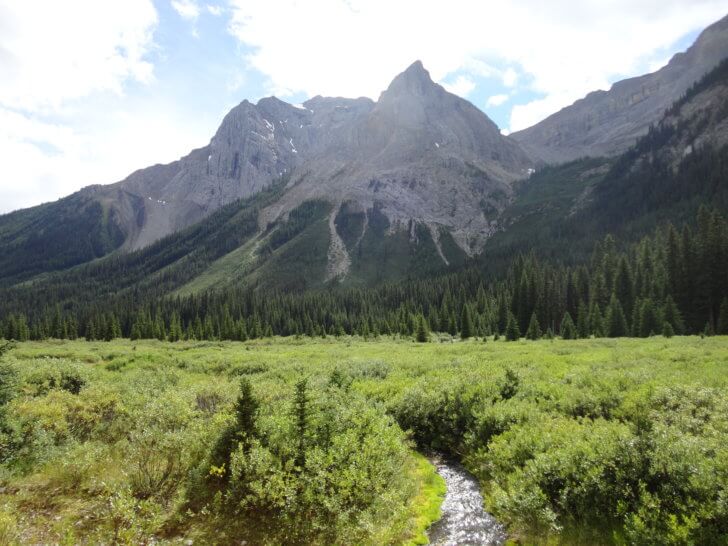
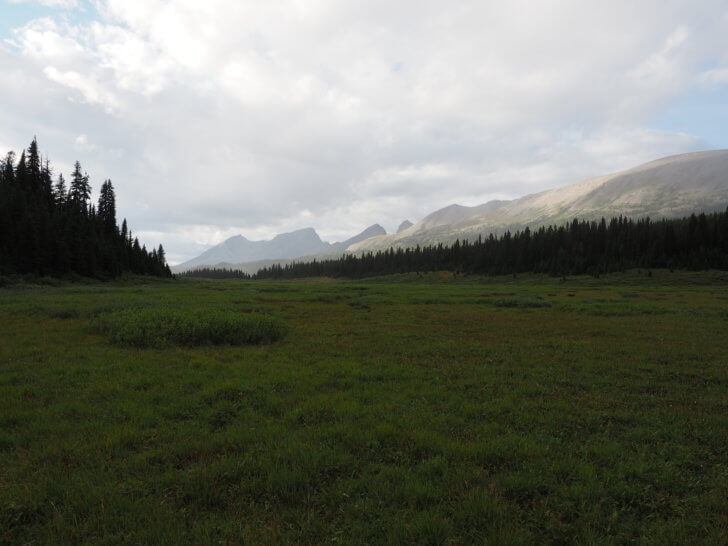
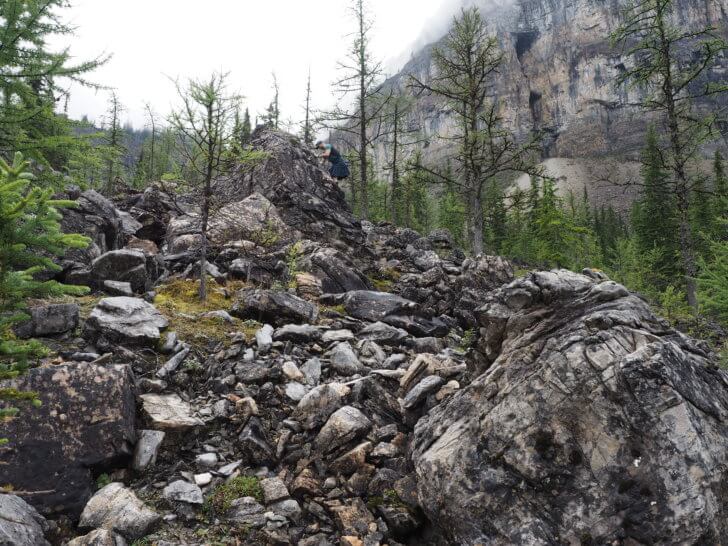
We start our morning early. The route we took backpacking to Mount Assiniboine was difficult enough: we have little hope that the other half of our planned loop back to Aurora Creek and the trailhead will be any shorter or easier. Again, we are both nervous as we get ready to cross through this area. Yesterday’s bear sightings do not bode well for the bear-free day I want to have.
A look behind from where I came.A look ahead to where I am going.The Towers overlook our way.
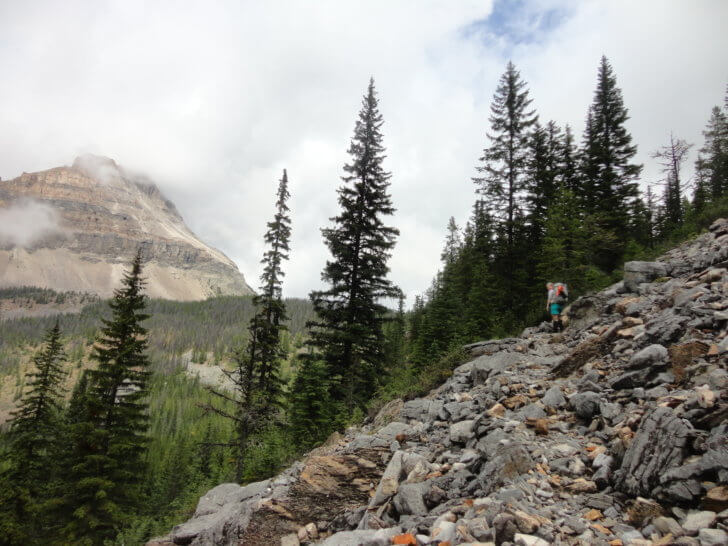
A Long Road Down
From the top of Wonder Pass, we drop down towards Marvel Lake.
The switchbacks here are steep and frequent. Unfortunately, my knees are aching, and I can see clumps of dirt torn up and bear scat littering the trail. I have goosebumps – do I sense a bear?
We shift gears and walk at “bear evasion speed” and turn up the Bluetooth speaker. For obvious reasons, I want off these switchbacks as fast as possible.
Near the bottom of Wonder Pass, we reach the junction to the Marvel Pass Trail. I am hungry and thirsty, but the prospect of stopping for lunch near a bear (again) forces my legs forward. An hour later, I give in to my hunger, and we stop for lunch. An eerie feeling is a constant companion.
We stop for about 15 minutes when I finally say: “Let’s pack up and get out of here, something doesn’t feel right.”
Craig has a similar instinct, and we pack up. No sooner do I shoulder my pack when from a switchback somewhere above, I hear the telltale warning from another hiker: “Bear! Bear!”
Hurriedly, I sprint down the switchbacks without looking behind. Craig and I yell back and forth to each other on the way down. A helicopter crosses overhead, and I groan inside. If the bear is running down the switchback behind us, then the helicopter is herding it toward us!
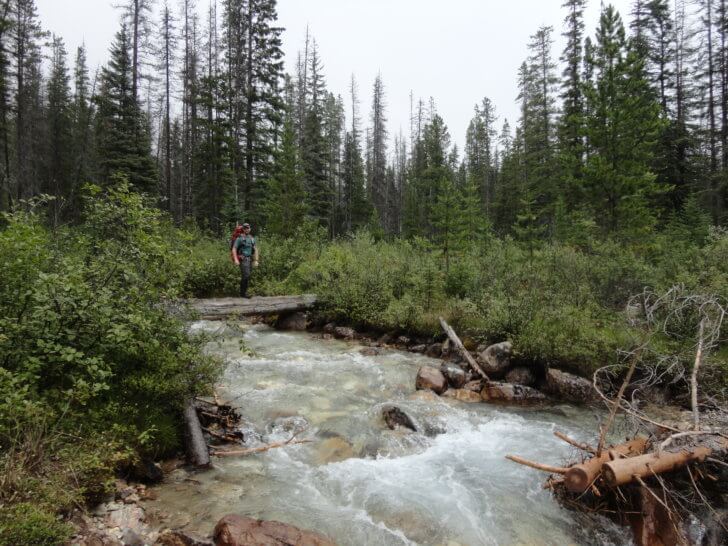
The Crossing
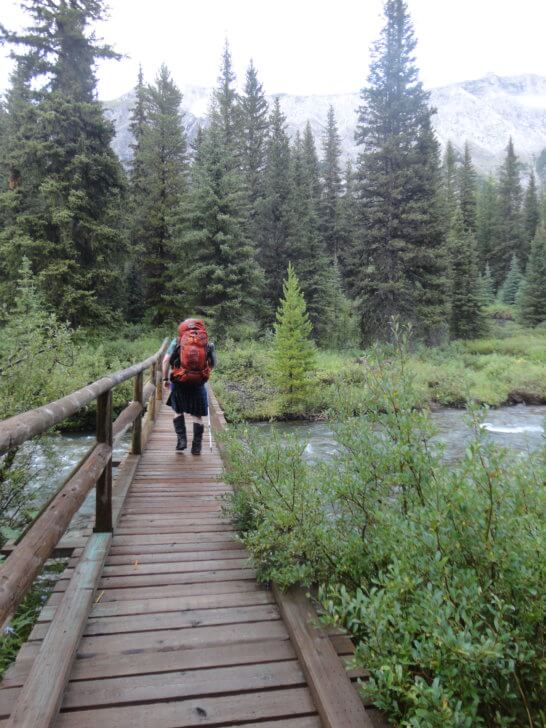
The trail levels out, and we continue sprinting down the path, leaping across fallen logs and boulders along the way. Suddenly, I am stopped short by a large creek which flows from Gloria Lake into Marvel Lake.
A slack rope and a slippery log are there to assist the crossing, but they are positioned upstream of a sweeper logjam. The water is fast and deep. A fall here is risky.
Luckily, I memorized the map earlier today. “This creek runs into Marvel lake. Downstream, there is likely to be a shallow peninsula where the creek runs into the lake. I’ll hike that way and see if there is a better crossing.” Craig seems relieved; he doesn’t care for this crossing anymore than I do.
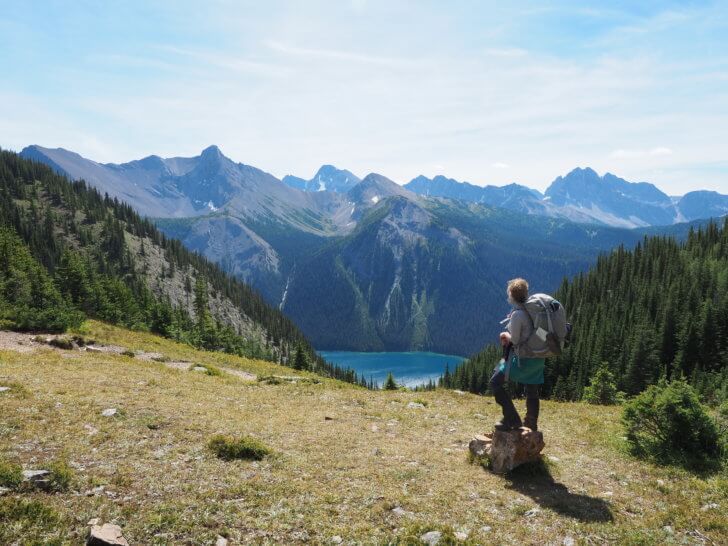
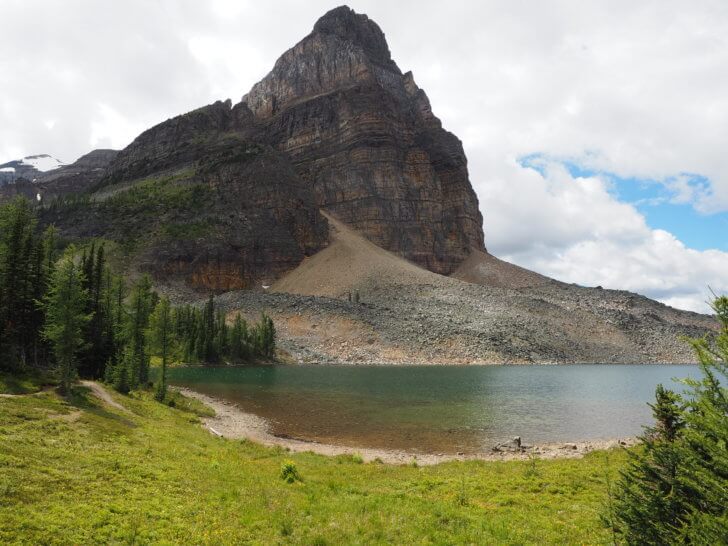
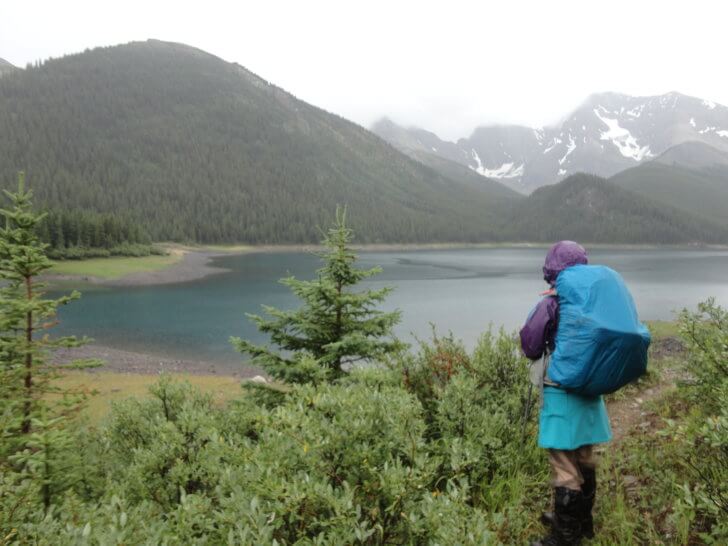
Marvel Lake
Just downstream from the risky log crossing, I find a much safer spot to cross. Consequently, my fear instincts settle down. So I take my pack off and take my boots off and prepare for an uncomplicated crossing with no risk of drowning.
The shore of Marvel Lake is the only place I felt safe in several hours.
The Other Side
Once on the other side of the Creek, I find myself in what feels like a fairy wonderland. Moss, mushrooms, and rocks look like they conceal fairy villages in little nooks.
Brightly colored mushrooms and toadstools spring up in mossy knolls and fallen logs on Marvel Pass Trail.
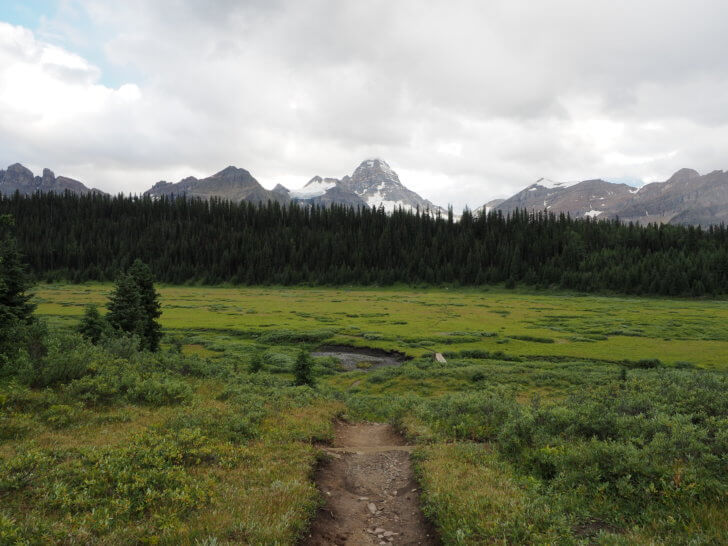
“There and Back Again”
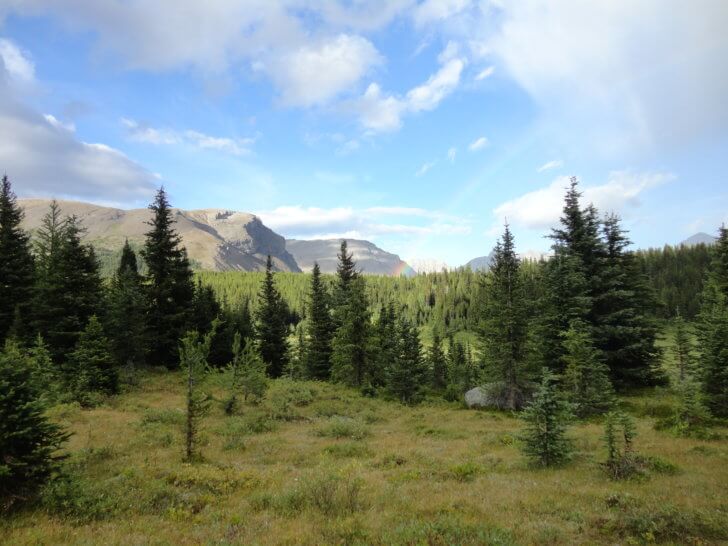
The West Fork of the Marvel Pass Trail (where we are hiking now) is much different than the low-lying marsh beds in the East Fork, where we hiked on the way into Mount Assiniboine a few days ago. Instead, the West Fork follows forest floors and dry creek beds up to Marvel Pass. Also, there are even fewer trail markers on the West Fork. Often, all that guides my way are aged cut lines and the occasional boot print from a solo backpacker who had crossed through recently.
By mid-afternoon, I am settled into “trudge mode,” and very little piques my interest along the way.
We pass Aurora Lake without a backward glance. Late afternoon was well upon us, and we are certain that we have at least 15 km (9 mi) ahead of us. We have already traveled 22 km (14 mi) today.
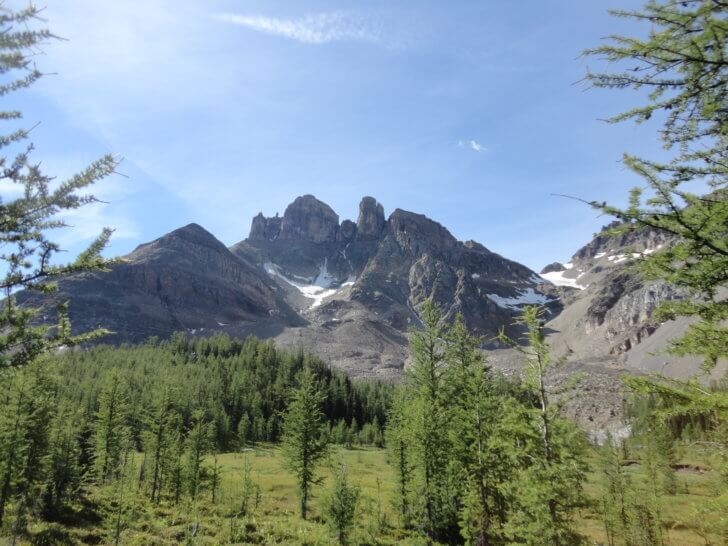
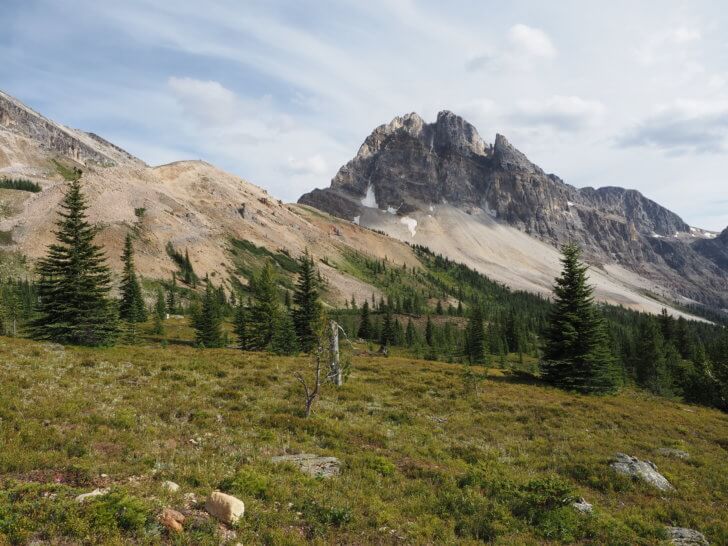
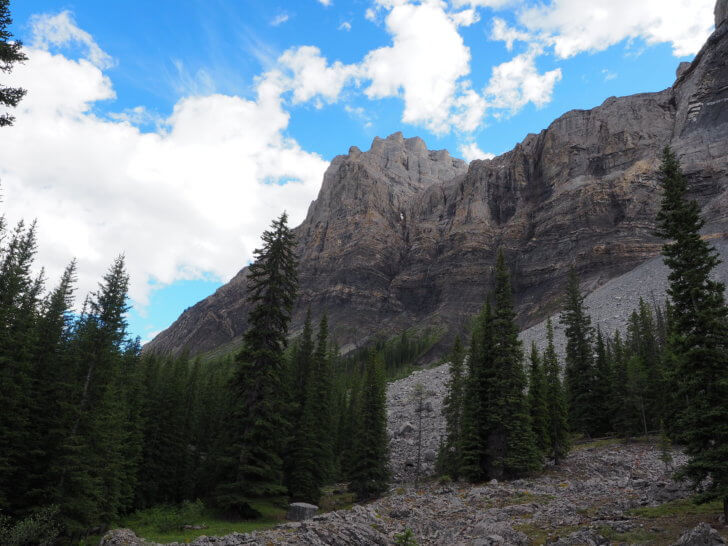
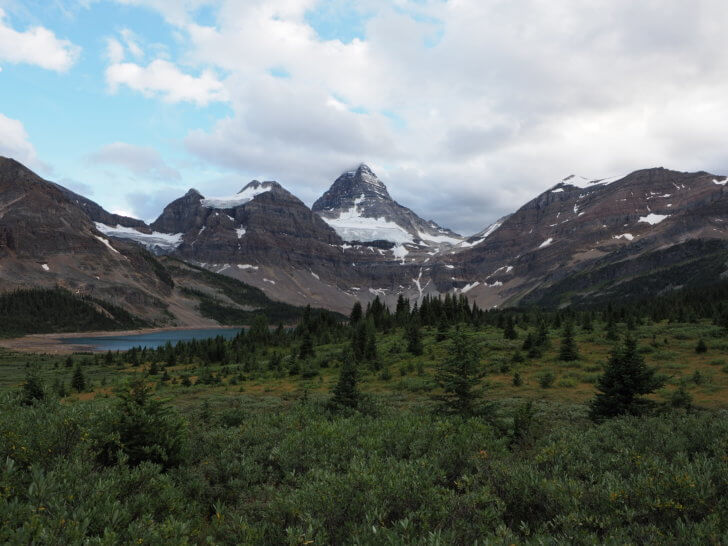
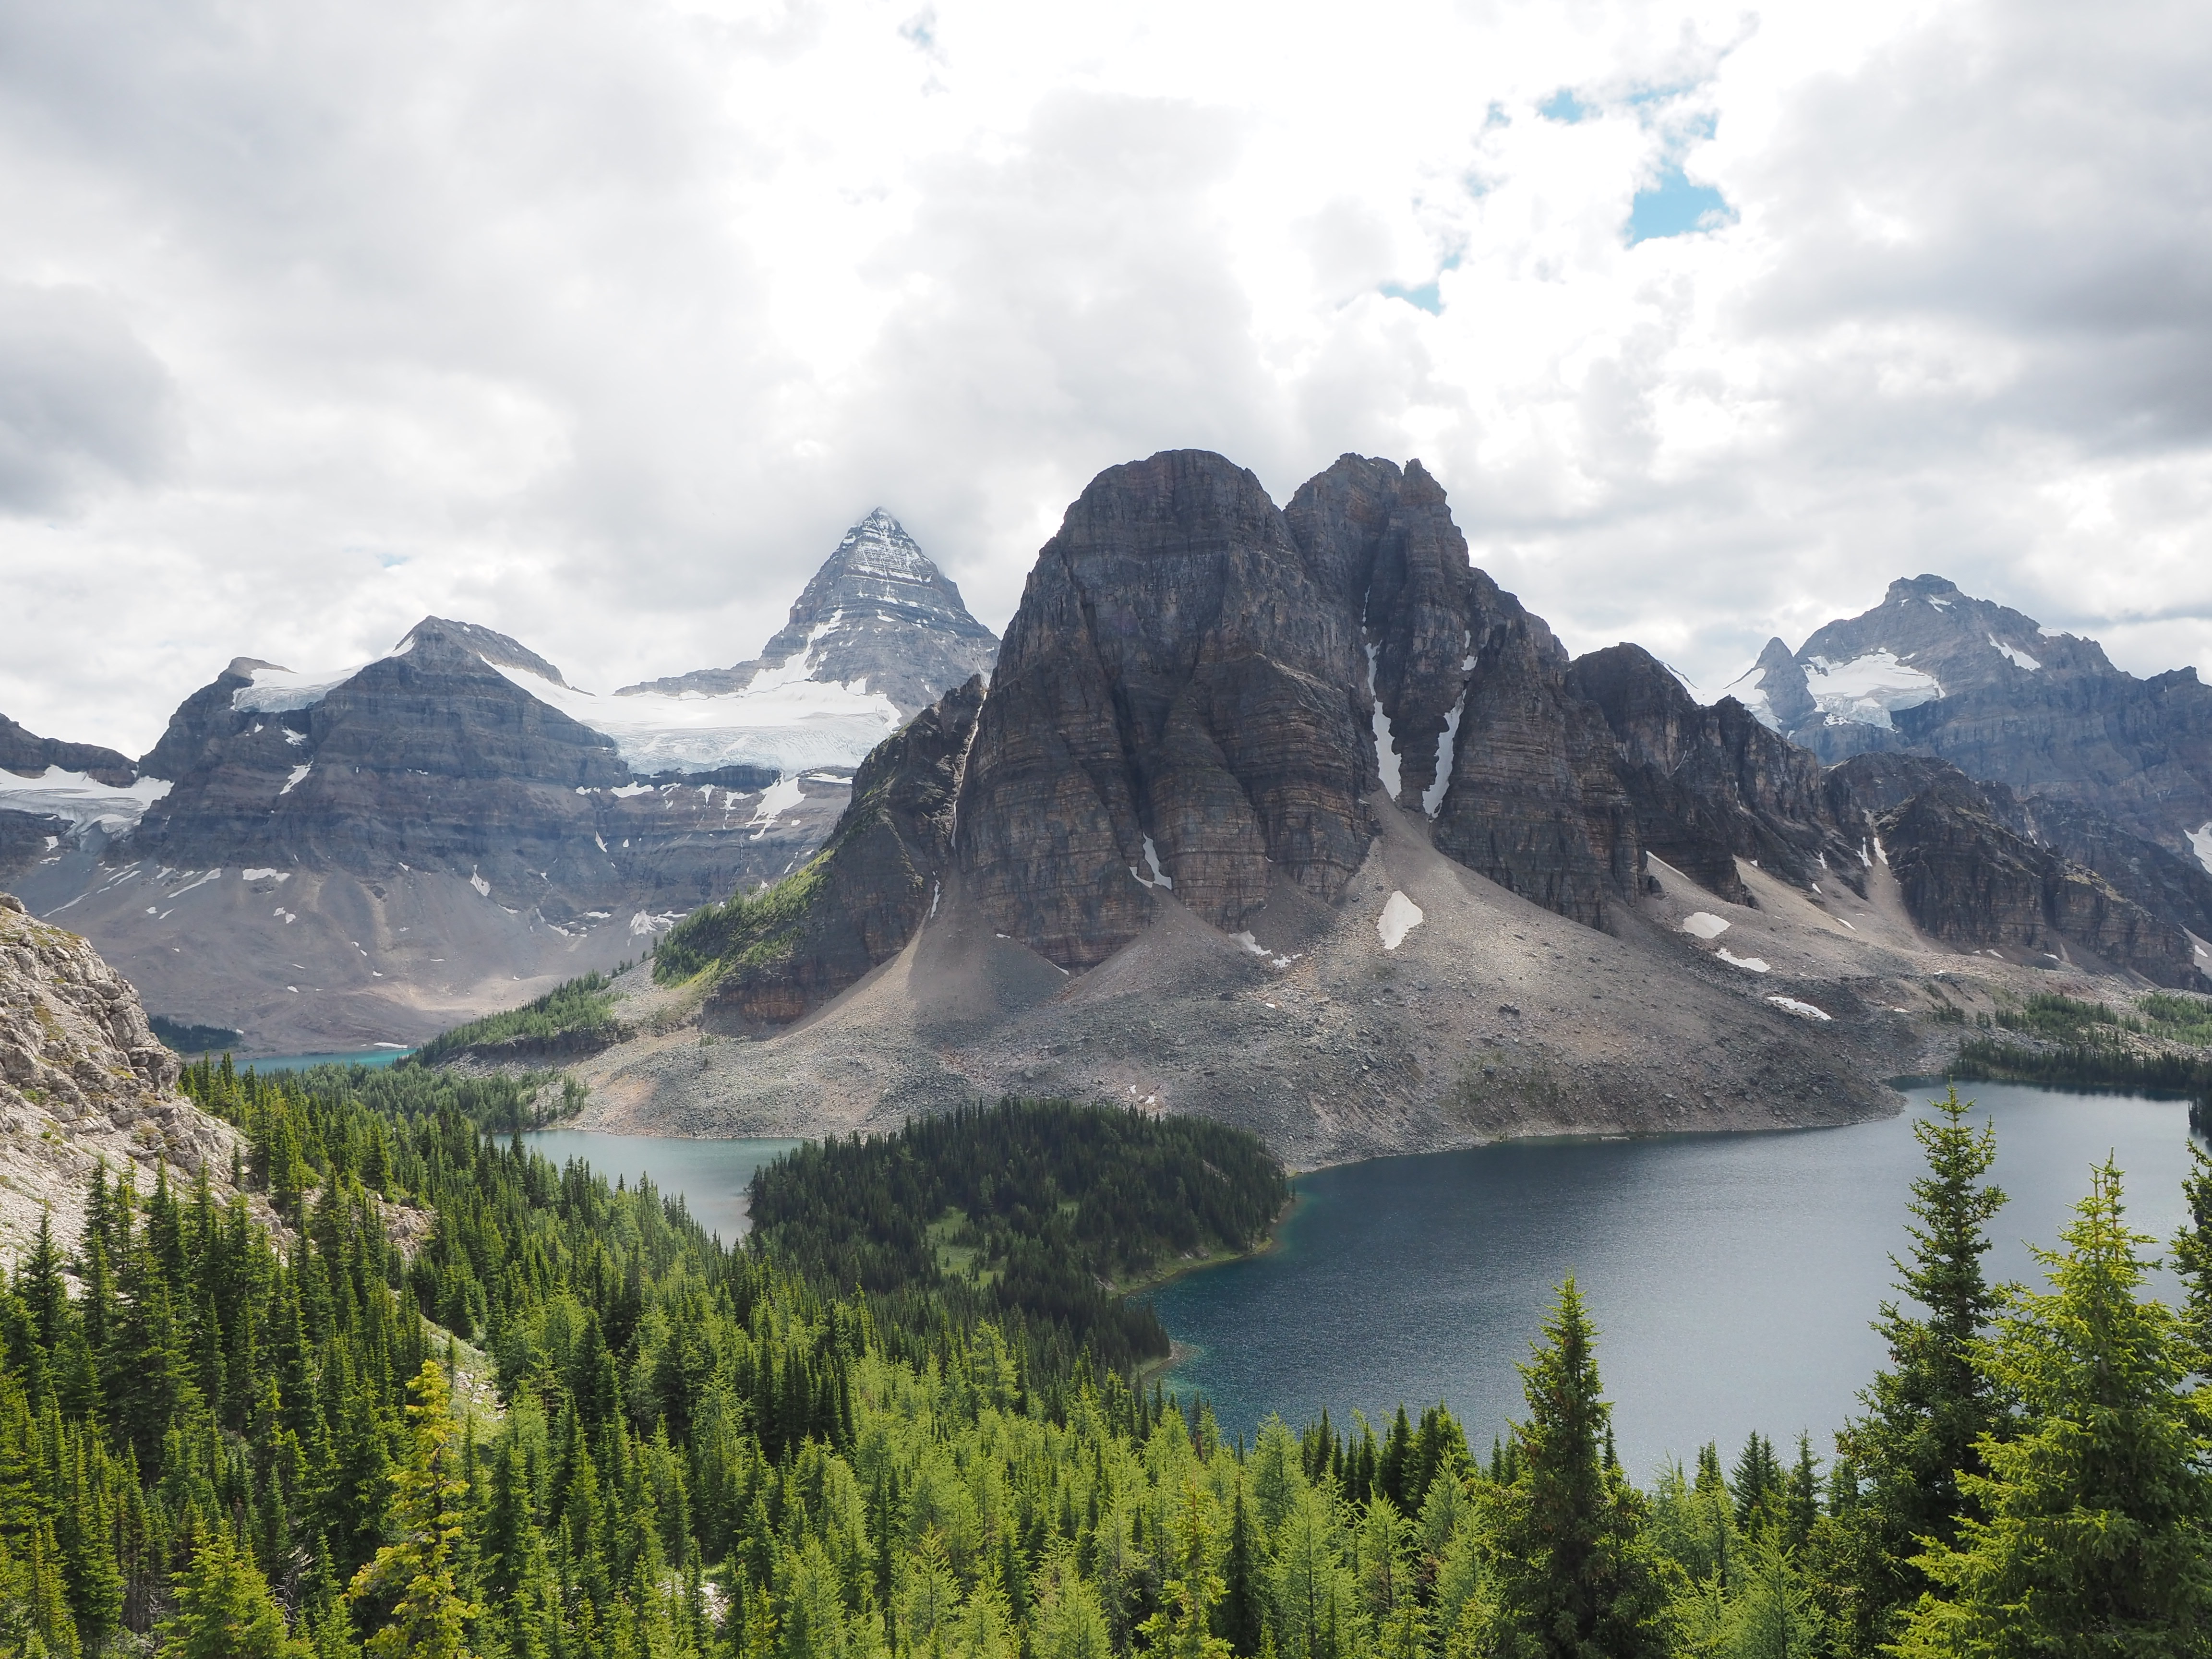
Pinnacle of Marvel Pass Backpacking Trail
After several hours of hyper-vigilant trekking, we reach the epicenter of Marvel Mountain and the tri-branched passes which offer inspiring views. Although cloudy and obscured in a mist on our trip towards Assiniboine a few days ago, Marvel Pass is open and clear with sunlight edging its peaks today.
Where it had been clouded and obscured in a fog on my way through; Marvel Pass was open and clear with sunlight edging its peaks.
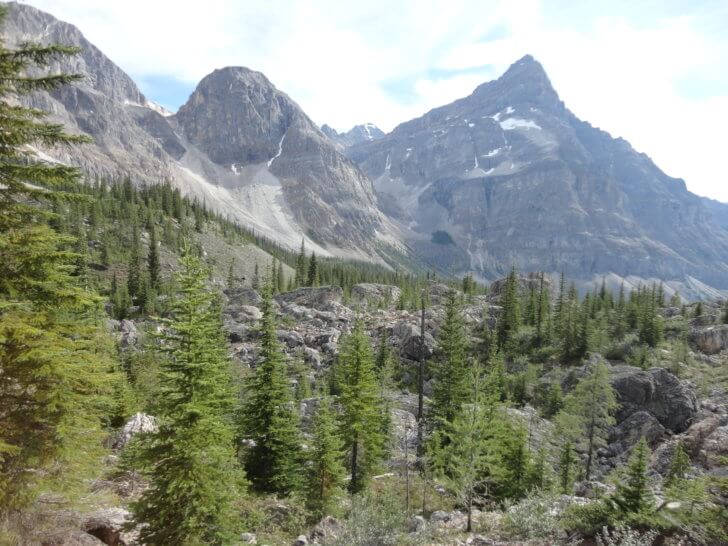
Every direction offers a new view; my fatigue is washed away in the shadow of Marvel Mountain. I desire to explore this alpine meadow.
Aurora Mountain bathes in warm sunlight.Mount Alcantara guides me toward the trail home.
Forced March
Although we still have several miles to go, I reluctantly leave the beautiful pass behind me and struggle through the increasingly dark forest. Predictably, the sun drops deeply behind the peaks, and the light is beginning to fail.
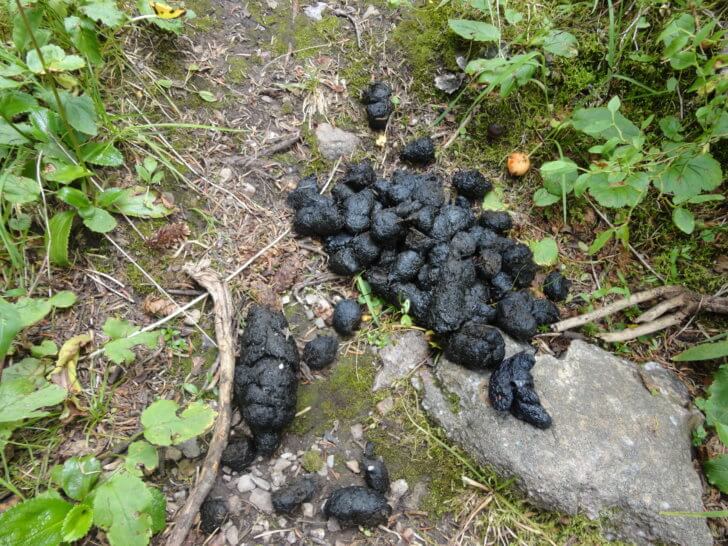
Not even dim light can conceal this scat.
Failing light forces me to hike much faster than my muscles like. Also, fresh bear signs make me uncomfortably aware of sounds in the forest.
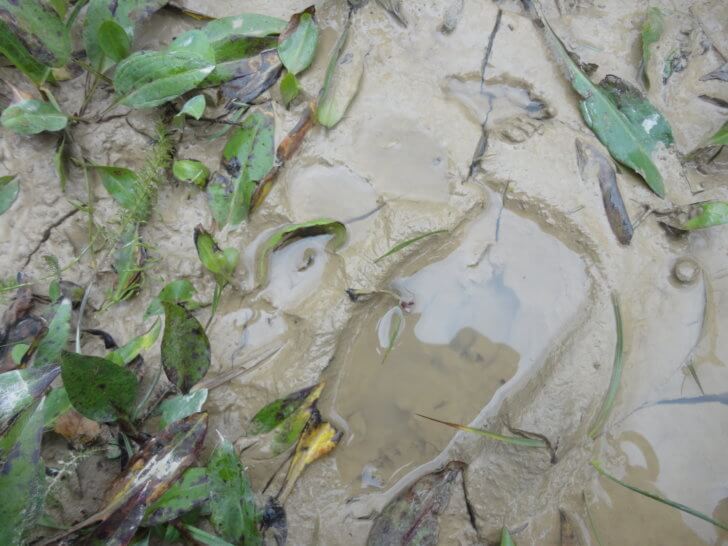
A bear track this new and this big can only mean one thing…Hike faster.
Unfortunately, hiking the last couple of miles to the truck is like walking on a razor’s edge.
I know about those warning signs that I had seen coming in on Marvel Pass Trail. Also, the scat and tracks I see now are new and large. Within 6 km (4 mi) of the truck, Craig yells, “Bear!”
We back off, grabbing for bear deterrents.
Craig fires off a bear banger. An exceptionally large male grizzly crashes through the trees with awkward grace. He breaks through to a meadow in the opposite direction of us.
The grizzly wants less to do with us than we want to do with him (is that possible?). Thankfully, within moments, we can hear him crashing far enough away that we begin to sprint down the trail in the opposite direction while talking as loudly as possible. If the bear circles back, we do not want to be anywhere near where he saw us last. However, we can’t keep up the fast pace for long; we have already put too many miles on our feet, and exhaustion and fatigue slow us both down.
When we reach the Aurora Creek Road, we slow to a moderately fast walking pace and glance in all directions with paranoia. Then, thirty minutes later we arrive at the truck. I have never been so happy to get back to my vehicle at the end of a hike. In what may have been record-setting time, I wash, change clothes, load gear, get into the truck and slam the door with finality behind me.
Reflections
A summary of this trip is challenging to describe. Do I start with the need to be prepared for encounters with wildlife? Perhaps the importance of having a backup of the most important supplies? Or perhaps the value of kindness on the trail? I could talk about the crucial skill of never outsmarting your common sense on safety decisions.
But this is Backpacking Light, and I do feel compelled to consider what unique aspects came out of this trip as a result of going light.
So within the context of lightweight backpacking, going light made this trip possible in two important ways:
First, in spite a few minor snags, I had everything I needed throughout the journey. I did lose my lighter, but I had enough matches to get me through. When Craig injured his knee, I had the tensor bandage he needed. When the map got lost, I had another copy on my camera’s memory card. Carrying a light pack still allowed us to complete the trip in relative comfort and safety.
Second, as I look back on the Marvel Pass Trail, I would say that most crucial point is this: I would not have been able to push as hard as I did for 114 km (71 mi) in four days if my pack was not pared down to lightweight essentials. At no point on my trip to Mount Assiniboine did my back feel sore or my feet hurt. Even after 37 km (23 mi) on the last day, I knew I could have easily hiked another 10 km (6 mi) – maybe more – if required. Not only was I able to push my mileage, but I was also able to push my hiking speed for extended periods of time.
Gear Lists
Notes on Gear Lists
Of all my weight numbers, I’m happiest with my Group Gear (weight < 2.7 kg / 6 lb per person). The Group Gear encompasses my shelter, cooking, repair equipment, first aid, navigation and emergency supplies for two people.
Part of going light is also being able to participate in hobbies and maintain enthusiasm and physical engagement (less fatigue!) while backpacking. To that end:
I carry some extra first aid supplies and items that contribute to my overall physical comfort;
I carry a relatively heavy camera, but using it to capture images is an important part of my enjoyment; On many occasions, I have left my camera behind to save weight, or I was pushing speed and time but lost some memorable moments and shots in the process. This summer I had a different goal, I reminded myself to look around and spend time taking photos because “I will not pass this way again.” If I wasn’t intentional about savings weight in other areas, I might not have the option to bring my heavier camera gear.
On first glance, my other weight numbers are less than impressive (in the context of what you might consider as “state of the art” in ultralight backpacking); however, when you subtract out photography equipment and items which were not in my pack the numbers seem much less daunting.
As you review my gear lists, consider your needs: what would you do if your gear weighed less, and what items would you enjoy more if you brought them?
Note: all numbers are rounded up the nearest half ounce, and all weights are rounded heavier than actual.
Group Gear
Item
Weight
Notes on Field Use
Nemo Equipment Blaze 2P Tent
2 lbs, 5 oz (1.1 kg)
product in review
Woods Cypress Kettle
9.1 oz (258 g)
First Aid Kit
9.9 oz ( 281g)
Repair Kit
7.6 oz ( 216 g)
MSR Pocket Rocket
2.9 oz (82.2 g)
Silva Ranger Compass
2.3 oz (65.2 g)
Banff - Mount Assiniboine Map
3.6 oz (103 g)
SOL Mylar Blanket
11.3oz (320g)
custom cut for Nemo Equipment Blaze 2P Tent
Outdoor Tech Buckshot 2.0
3.8 oz (108 g)
product in review
Tru Flare Bear Bangers
.4 oz (12 g) x8
consumable
used 6 of 8 bangers
*Emylene’s Portion of Group Gear: 2 lbs 11 oz (903 g)
Individual Gear
Item
Weight
Notes on Field Use
Osprey Aura AG 50 L XS
3 lbs 3 oz (1.4kg)
Removed brain
Actual volume available: 43 liters
Medium Exped Downmat UL 7
1 lbs 6 oz (623.7 g)
Enlightened Equipment Prodigy
26.50 oz (751.2 g)
Platypus 1.8 Liter Big Zip Hydration System
5.4 oz (153.1 g)
Carbon Water Flavour Filter
0.1 oz (2.8 g)
2 Mini Carabiners
0.3 oz (8.5 g)
Spork
0.3 oz (8.5 g)
Black Diamond Spot Headlamp
3.3 oz (93.6 g)
Black Diamond Women's Ultra Mountain FL Z-Poles 110 cm
9.5 oz (269.3 g)
single pole only
not carried
Cactus Creek Nylon 225g Bear Spray Holster
1.4 oz (39g)
Tru Flare Bear Banger Launcher
1.3 oz (37g)
Frontiersman Bear Spray 1% 225g Canister
7.9 oz (225g)
consumable
Olympus OM-D E-M5 Mark II
16.5 oz (469 g)
includes batteries
Olympus M. Zuiko Digital ED 12-40mm f/2.8 PRO Lens
13.5 oz (382g)
Joby Gorillapod
1.6 oz (45.4 g)
Apple iPhone 6
4.6 oz (129 g)
FRĒ for iPhone 6/6s Case
1.2 oz (35 g)
*Emylene’s total gear: 10 lbs 2 oz. (4 kg 899g)
*Actual carried weight in pack: 9lbs. 8oz. (4 kg 309 g)
*Actual carried weight in pack minus camera equipment: 6lbs. 10 oz. (3 kg 61 oz.)
Layers
Item
Weight
Notes on Field Use
Woman's Zamberlan Voiz GT Gore-Tex Backpacking Boots and Prescription Insoles
3 lbs 4 oz (1.4 kg)
not carried
Outdoor Research Women's Verglas Gaiters
6.5 oz (184.3 g)
not carried
Merino WrightSocks
2 oz (56.7 g)
not carried
2 Pairs of WrightSocks
2.2 oz (62.6 g)
MEC Watchtower Pants
8.3 oz (253.3 g)
MEC Hydrofoil Rain Pants
9.3 oz (263.7 g)
Colghan's Mesh Pants
1.6 oz (45 g)
product in review
Purple Rain Adventure Skirt
4.3 oz (121 g)
product in review
not carried
IceBreaker Siren Bikini
1.10 oz (31 g)
not carried
Seg’ments Merino Wool Base Layer
4.8 oz (136.1 g)
not carried
Smart Wool Bra
2.9 oz (82.2 g)
product in review
not carried
MEC Women's Hydrofoil Jacket
10.7 oz (302g)
MEC Uplink Vest
7.9 oz (224g)
Liner Gloves
0.8 oz (22.7 g)
Silk Scarf
1.8 oz (51 g)
*Emylene’s layers: 11 lbs (5 kg)
*Actual carried weight in pack: 2 lbs 8 oz (1 kg 134 g)
*Emylene’s actual total carried weight minus camera equipment: 11lbs 13 oz (5 kg 352 oz)
The Marvel Pass Trail is one route for backpacking Mount Assiniboine. Read this journal to learn about bears, gear, and more.
Day Three
Good Things Come to Those Who Wait
This morning, I meet a photographer who waited a couple of more hours than I did last night to catch the meteor shower. The photos were stunning. Not only did he capture the meteor shower, but also the northern lights. Hikers interested in backpacking Mount Assiniboine get to enjoy some benefits if they stay up late.
I kick myself for being impatient. But I realize that I have some physical limitations too. My injuries from last year have healed well, but I have some permanent consequences that limit what I can do. Also, I am concerned about my hiking partner. Craig has been limping a lot; his knee injury from our first day is giving him fits. He borrows a tensor bandage from a first aid kit this morning.
View Finder
This area (Lake Magog) is popular for a simple reason: it is otherworldly and beautiful everywhere – in the shadow of Mount Assiniboine.
The traffic of hikers and helicopters is usually off-putting for me, but here I find some security. Thankfully, the grizzly bears want to frequent the area less than I do. Having been entirely too close to two bears already, I have no desire to see any others outside the confines of my truck or a high powered zoom lens.
Here, there are several day hikes which can take you to indescribable delights.
I offer Craig an out, “we can just bum around Lake Magog for the day, or I can head out on my own if you want to put your knee up?”
I wanted to delve into the soul of this mountain. He needed some reprieve. We compromised and decided to climb the Nublet of Nub Peak. The Nublet is a short day hike to a vast plateau, underneath the higher vantage point of the Nub. On the way up there are three stunning crown lakes: Sunburst, Cerulean, and Elizabeth.
We start off in the afternoon to bypass the early morning backpacker traffic and have the trail almost entirely to ourselves for the rest of the day. Though I love the golden hours of sunrise and sunset, I love solitude more.
Sunburst Lake shimmers like an emerald under Wedgewood Peak.Cerulean Lake is the largest of the three lakes. From its shore, Mount Assiniboine rises as high king of the mountains.Elizabeth Lake imprisoned me on its shore for some time.
The Nublet
As anticipated, everything about climbing the Nublet is worthwhile. Every time I think the view can’t be more stunning, another turn up the switchbacks opens my eyes even more.
Standing on the Nublet, I was uncertain where to turn. I drank in the views and settled comfortably here for over an hour. From this vantage point, I overlooked Assiniboine Lodge, which is nestled in the valley below.Reminiscent of the Sydney Oprah House, the peaks visible from the Nublet captivate my lens and my heart. See the red roofs below?Even the lowliest of mountains visible from the Nublet would inspire the climb to a vantage point to view them.Overlooking the lakes below is as stunning as sitting on their shores.
Backpacking Mount Assiniboine: The Lodge
We return from the Nublet, and my sense of curiosity heightens.
From the Nublet, I see red-roofed structures, and I want to investigate them. Knowledge of a Warden’s cabin, small restaurant, and guest lodge are somewhat compelling. And I do feel responsible for reporting our two bear sightings to the Warden.
It’s now late afternoon, and we are not the only weary trekkers who think a cold beverage at the red-roofed restaurant sounds exciting.
As you might guess, the lodge is a hub for travelers in the Mount Assiniboine area. The owner is friendly and characteristically, a French Canadian. Also, the lodge carries a few supplies like maps and postcards. The owner gives us some old batteries out of a transponder for Craig’s headlamp.
The lodge is also a useful resource for trail information. To my chagrin, I learn that there had been a grizzly sighting at Wonder Pass earlier in the day…
Wonder Pass Was my route home.
Canadians
We return to Lake Magog in good spirits and make dinner.
The kindness of fellow backpackers never ceases to amaze me. I borrow a lighter from one of the other groups using the cooking area after recounting the tale of my disappearing lighter and match-rationing strategy. One of the ladies gifts me her lighter. “I’m flying out by helicopter; I won’t need it again,” she says.
As you might guess, a hot meal and hot chocolate were nothing short of delectable, but my satisfaction remains limited as Craig realizes that our map is missing.
If I was traveling along the hiker highway through Sunshine Ski Resort, I could do without a map, but I was hiking a trail of unknown condition back through Aurora Pass. I knew I had the map at Assiniboine Lodge; so we set off on the 5 km (3 mi) round trip and retrace our steps.
The extra miles are the last thing Craig’s knee needs. He hasn’t complained and except for the occasional yelp has said nothing about it. His limping masks his heroism. We arrive at the lodge and discover that the owner found our map and has set it aside for us.
I have never appreciated Canadians more than I did on this trip.
A Nighttime Foray
We return to camp (again).
I collapse on my bed and set my alarm for 11:30 PM. I nap while I wait for darkness and another chance to photograph the meteors. Three hours later I groggily climb out of bed and trek down to a meadow nearby. I shiver against the cold to stay warm; the temperatures are just above the freezing point.
I wait in the cold as long as I could, but I am risking hypothermia.
And my camera battery icon displays the low power warning only minutes after I take the batteries out of my warm pocket and immediately insert them into my camera. Clearly, I am too early; the meteor shower will not start in earnest for several hours, and I know I have long miles to make the next day. I give up and return to my tent disappointed, again.
After yesterday’s long day on the Marvel Pass Trail, we don’t greet “morning” until noon today.
We have less than 24 km (15 mi) of hiking on the well-traveled Bryant Lake Trail today. Neither of us feels pressure to rush this morning.
I wouldn’t want you to be responsible for waking me up. I’m in my Enlightened Equipment Prodigy Quilt and Hoodlum.
My “morning” (afternoon) starts badly as I realize the lighter I am carrying has disappeared.
I do have just enough emergency matches in my kit – one per cooked meal. I use two matches to light the stove for my morning boil.
We eat mashed potatoes and gravy and yesterday’s leftover snacks. After breakfast and choking down a liter of electrolyte-laced water and strong hot coffee, we pack up our gear and hit the trail.
Sunny Side Up
Breakfast, the sun, and time to recover and dry out gear are doing wonders for my mood.
After crashing through dense foliage and rain much of yesterday, the sunshine, a hiker highway, and the perception of fewer bears here feel like heaven. Our hiking day starts at 2:30 PM.
Sunshine changes the landscape and my outlook. I am glad to have heat after yesterday’s icy wind and rain cut through me.
Running Scared
Unfortunately, 10 m (30 ft) from the Bryant Creek Warden Cabin, we realize we had miscalculated the grizzly bear risk for Bryant Creek Trail.
Less than 7 m (20 ft) in front of us a young adult grizzly bounds across the path.
In contrast to yesterday, fatigue does not lead us to panic. Craig calls out “Bear!” and we move backward together, each of reaching for our bear deterrents. The bear appears to be a yearling and stares back at us from the meadow. Soon, he moves 60 m (200 ft) away, ambling parallel to the trail while looking over his shoulder at us. We calmly talk to him and politely tell him to go away.
“Where is his mother?” I ask.
Craig loads a bear banger. “I don’t see or hear her.”
“He’s just barely big enough to be on his own, but he might be,” I observe. My train of thought is interrupted. The bear begins to turn back, ambling up the embankment toward us. Craig fires off the bear banger. The bear turns and runs in the opposite direction into a clump of trees.
“Do you see him?” Craig asks. “I think I saw him running out the trees and further into the meadow,” I reply.
“Are you sure, I thought he was hunkering down in the trees there.” Craig’s eyes are questioning me. To be honest, I don’t know what I saw; the bear had moved unbelievably fast.
“I’m not positive. What I do know is: we should get out of here before Junior decides to come back or Momma comes looking for him.” I respond while starting to hike down the path.
I turn on the Bluetooth speaker and start bellowing to the trees:
I’m going this way bear, you go someplace else.
A Moment’s Peace
Aside from trail running, I have never hiked this fast in my life; intermittently, I run. We maintain this blistering pace for two and a half hours.
Clearly, I am as nervous as a cat on a hot tin roof, but I can keep this 5 km/hr (3 mph) pace with a full pack for only so long. We cross meadows and creek bottoms filled with ripe buffalo berries. I can’t see over the berry bushes in many areas.
My nerves remained on edge as I hiked through waist- to head-high berry bushes.
Finally, we reach a small clearing, devoid of berry bushes. The clearing backs up to a steep mountain peak and seems like a safe spot to stop rest. We pull out some high-calorie snacks. I inhale my portion and drink mouthfuls of cool water from my water bladder.
“If You Want to Get Out Alive…”
The water and food soothes my anxiety, but that doesn’t last long.
I relax and toy around with my new Olympus OM-D E-M5 II Camera. My peaceful solitude ends in ten minutes when a large sow grizzly lumbers up behind us, walking on the path.
Craig spots her first and yells “Bear!”
I leap to my feet. The bear eyes us over carefully to decide if we are friends, foes, or food. My hand holding the bear spray is shaking. Craig loads another bear banger. I touch his arm and point out the loose talus above us.
Loose talus and boulders littered the area around Mount Cautley’s unstable face. Would firing a bear banger start a rockslide?!
Luckily, the bear sidesteps the trail and disappears silently into the forest. I pack up and engage my “bear evasion pace” while talking abnormally loud.
“…Run for Your Lives”
At no point in my life have I ever scrambled up a trail with such a pace for so long.
Hours pass and the terrain and prevailing foliage do little to ease my concerns. The hiker’s bypass of the Bryant Creek Trail is closed this time of year, and we are forced to follow a steep horse trail instead.
Sadly, the switchbacks (or lack thereof) are taking a heavy toll on Craig’s knee and my cardiovascular system. We are pushing an uncomfortable pace up the mountain side, but the last bear was too close for comfort.
I want off this densely vegetated valley floor and up into the more (human-) populated subalpine valley near Magog Lake.
Having now seen two Grizzlies, I felt mildly like this sign was taunting me.
Top of the World
We pass another redundant “Beware of Grizzlies” sign, and push hard up a switchback-less climb that empties on a shelf above an alpine meadow. We catch our first glimpse of Mount Assiniboine in the distance.
In this valley, I am awestruck. In all directions, it is a beautiful masterpiece painted in mist and stone. All my exhaustion fades, and my hands seek out my camera to capture what my heart feels about what my eyes can see.
A kilometer from Lake Magog lies a meadow with unparalleled views. I spent several minutes staring out at the green sea surrounded by rocky cliffs and shrouded by mist.
Further Up and Further In!
We are so close to the Lake Magog Campsite that I can almost feel my Enlightened Equipment Prodigy Quilt enveloping me.
Mount Assiniboine captivates.
Murphy’s Law
Part of the reason I am here is because of the meteor shower which is occurring.
I booked two nights at Lake Magog to increase the chances that I would see the shower. After a high mileage day yesterday, followed by a speed mileage day today, I was on the verge of collapse after dinner. How can I stay up late to look for meteors?
Regardless, I stay up waiting for clearing skies. Patiently, I wait. I wait some more. Finally, I find myself shivering profusely, and cold temperatures have killed my camera battery.
Day 1: An unexpected day of adversity and uncertainty as the author begins the obscure Marvel Pass Backpacking Trail en route to Canada’s iconic Mount Assiniboine.
Introduction: “No Room at the Inn”
The six-hour drive from Radium (British Columbia, Canada) to Red Deer (Alberta, Canada), started what would be a string of unexpected incidents during a recent trip to hike the Marvel Pass Backpacking Trail (see Part 1 here to read about my preparations for this trek).
We leave Alberta at 6 PM, and arrive in Radium shortly after midnight. Our previous online booking of a local hotel failed: neither of us had a room, and most of the nearby hostels, campgrounds, and hotels are booked.
Finally, we locate the Gables Motel which has one double room left. Shortly after 1:30 AM, I am struggling to arrange my gear to be ready for an early morning. Consequently, I realize that no matter how long I stare at my gear; I won’t be able to make good decisions without at least a few hours of sleep.
I settle into my half of the motel room, and sleep restlessly.
The alarm goes off at 6 AM.
Day One – Marvel Pass Backpacking Trail
The Bridge, Sort Of
After a few short hours of sleep, I make my final gear selections and Tetris (that’s a verb) four days of food and gear into my 43L pack. I eat breakfast quickly.
Driving rain escorts us up mountain highways and logging roads. We are stopped by a bridge which has seen better days.
Rocks jam a gaping hole in a rotting plank in a sketchy bridge as water from the raging creek rushes below. Would the rotten, broken beam underneath support the truck as we crossed? Aurora Creek Road, Kootenay Land District, British Columbia, Canada.
After a short discussion and consulting the map, Craig and I decide not to cross the bridge in the truck. We are hours away from cell service on a rarely used road, and the risk of a disaster is not one we are willing to take.
An extra kilometer or two won’t make too much difference to our feet, will it? At 9:30 AM, we park the truck and begin our trek up the road. Dark clouds and fog threaten as sprinkling rain dusts our footsteps.
The Marvel Pass Backpacking Trail: Trailhead
Unfortunately, we underestimate the distance between the dilapidated bridge and our trailhead – what we thought was only one or two kilometers turn into more than 6 km (4 mi). After leaving the B.C. Forest Service trailhead sign, we follow cairns down into the creek drainage.
Beautifully green, but remote and foggy. Who is watching us from within the mist? (Marvel Pass Trailhead)“July 25/16 Large Griz on Trail 0.5km” – a note taped to the Marvel Pass trailhead sign. I can’t bury this very deep in my subconscious.
An impulsive buy of a Bluetooth speaker (the Buckshot 2.0 Speaker) which is synced to my cell phone and playing music, now seems like a godsend for letting dangerous wildlife know we are here. The remoteness of the Marvel Pass Trail means that no trail users will hear my music. It seems like a low-impact / high-reward piece of gear to bring.
The Enchanted Forest
I walk up the creek bottom in rain, heavy fog, and cold. With no views of surrounding peaks, this results in challenging navigation and drudgery. The only solace for these first five hours is the cheerful sound of burbling Aurora Creek.
I wonder how the surroundings look when not enshrouded in this ethereal, yet sinister mist. The mysterious forest feels close, but the mist conceals its secrets. Game trails carry me through buffalo berry and spruce. They clamor for my body and pack as if trying to hold me fast and prevent my escape.
The Ascension
At 2:30 PM, we have a break in the rain. The fog remains, but is lighter, and reveals the steep faces of nearby peaks. We follow occasional cairns through talus and scree and claw our way upward into an alpine valley.
Talus leads to boulders. A scramble yields a pleasant view.Talus and scree conceal the trail in places. Infrequent traffic on the Marvel Pass Trail leaves few clues except for the occasional piece of trail flagging tape left over from the 2015 trail maintenance crew.
The Valley
When we drop into the little basin near Aurora Lake, swirling mists reveal the outlines of neighboring peaks here and there but keep Marvel Pass obscured.
Marvel Pass is rarely observed by hikers due to its remoteness and prevailing weather. I am disappointed in not being able to see it but am somewhat consoled by the fact that I’d have another opportunity on the return hike out.
In the distance, a cougar shrieks. Consequently, I am compelled to put more distance between me and the direction from which I hear it.
The Marsh
We drop gradually through alpine meadows to the marshland surrounding Aurora Lake.
We observe bear sign: uprooted clumps of earth and stumps, scat piles (containing berries and fur!), and disconcerting warning signs posted by the land management agency to alert hikers that they’re not in Kansas anymore.
I’m smiling for the camera, but the sign says: “Grizzly Bears. You are entering an area where hikers have surprised bears in the past and been seriously injured. USE EXTRA CAUTION BEYOND THIS POINT.”
Disturbingly, fresh scat and torn up sod become more frequent as I hike through the marshes, shaking my nerves.
I check the time: it’s 3:30 PM. We have been pushing for six hours at a rigorous pace and haven’t stopped for more than a couple of minutes since we left the truck. We need to refuel and rest. Unfortunately, our concerns about the Marvel Pass Trail become more real. Of note, we discover that the trail route has been altered by last year’s flooding and the pass is much farther away than what my three-year-old map reveals.
Aurora Lake
Aurora Lake is basked in sunlight and seems like a lovely place for a camp.
However, because of bear activity here (it feels like a hostile environment, and it’s unsettling), I know that I just need to refuel and trudge onward to the Marvel Lake campground, where there will be more hikers and fewer bears.
I don’t know what the route ahead has in store. How much has the Marvel Pass Trail changed? Furthermore, my boots are soggy and my clothes are damp.
Aurora Lake itself is placid and calm, and the sunlight warms my chilled body for the first time in hours. But this area is infested with grizzly bear activity.
A Downward Spiral
Once past Aurora Lake, the Marvel Pass Trail becomes unrecognizable.
At times we are uncertain if we are on game trails or the designated trail. On a few occasions, we circle an area for several minutes trying to find the route. After some time, my confidence grows because we find signs marking the boundary between the Kootenay Land District and Banff National Park.
After one sign, we descend a steep slope via switchbacks towards Owl Lake. The switchbacks aren’t on the map.
A large animal has crashed down these switchbacks before us, leaving bent and broken branches in its wake. Bear scat halfway down the switchbacks reinforces my suspicion about this animal’s identity.
The rain returns while views of Owl Lake ease my fear that I took a wrong turn.
Seeing Owl Lake is temporary relief. It is now 6:30 PM. If my map is accurate and the trail conditions are good, we have at least three miles to go.
Then, looking down, I see the track in the mud.
Finding this track on the edge of Owl Lake heightens every sense. A giant grizzly bear is ahead of us. How far?
Death March
Exhaustion and nerves are a bad combination. Additionally, I am running low on water, and I have not eaten enough calories. Consequently, every stop we make is short. Keeping an eye out for a grizzly bear in the fading light does nothing to whet my appetite.
According to my map, the distance from the Marvel Pass Trailhead to the Marvel Lake Campground is 17.1 km (10.5 mi). However, our “GPS distance tracker” says we have already covered more than 21.8 km (13.8 mi), not including the extra 5 km (3 mi) we walked from the dilapidated bridge to the trailhead.
I want to rest, but I know there is a bear nearby!
I stop long enough to shovel high-calorie snacks into my mouth, but not a moment longer. Meeting a bear in the dark is not a prospect I want to think about. Craig is in a similar boat; he hasn’t been hungry either.
The Sum of All Fears
I stumble along behind Craig through a forest. He’s on bear watch.
Several hours earlier, we started taking turns walking in front and being hyper-vigilant to give one of us a mental break and maintain a higher level of alertness overall.
Suddenly, Craig yells and stumbles backward into me. I don’t know what grabbed him, but I let loose a blood-curdling shriek.
Fortunately, helpless laughter replaces my death cry. The sound of a large partridge flapping its wings reaches my ears.
“If you tell anyone this, I will swear it was the size of an emu and had talons and razor sharp teeth,” Craig says. Obviously, he is less than amused.
“I’ll back you up on it buddy, don’t worry,” I say, while still chuckling.
For the record, the partridge was the sized of an emu with talons and razor sharp teeth.
Darkness Settles
Unfortunately, the sun is setting. Consequently, my mirth and teasing went silent.
The only thing worse than meeting a grizzly up close and personal would be meeting a grizzly up close and personal in the dark.
My water bottles are empty and I don’t feel like taking the time to fill up and treat water.
Instead, I quicken my pace.
For a brief moment, my anxiety is relieved as I watch the sunset kiss the rain goodbye.
By now, we should only be a few miles from the Marvel Lake Campground. Again, I push my pace. My enthusiasm pays off, and we soon cross the not-so-dilapidated bridge at Bryant Creek.
Craig crosses Bryant Creek in Banff, Alberta Canada wearing the Original Sport Kilt.
“Through a Veil, we See Dimly.”
Crossing the Bryant Creek Bridge leaves us stumbling and utterly lost in the dim light, and the trail disappears.
First, we hike in the direction we know should take us towards the Marvel Lake Campground and it reveals nothing but thick brush and creek tributaries. Craig falls headlong into a small brush-hidden tributary bed. He feels the grinding of bone on bone, accompanied by stabbing pain in his knee.
Somewhere in the fog of fatigue, I know I am making irrational decisions. Then, I make an executive decision: I will not trail blaze in the dark. Craig knows my logic is sound and hands over the lead. His fatigue matches mine and his knee pain intensifies with each step.
Then, we retrace our steps to the clearing where the trail disappeared. Searching in the dim light reveals nothing which resembles a trail. I can see where the creek bank has washed out and likely taken the old trail with it.
Methodically, we walk a short distance in each direction from the creek and attempt to locate a trail.
Night Hiking
A straight northward shot toward the Bryant Creek Trail reveals nothing but dense trees.
Next, we explore the opposite direction, away from the Marvel Lake Campground. After several minutes, we find a trail. Is it the right trail? The campground is in the opposite direction. I disobey my instinct, turn on my headlamp, and follow this trail.
Now on the trail, darkness has fully set in. Craig’s headlamp malfunctions and we are left to navigate in the dim light provided by a single lightweight headlamp. Fortunately, this trail resembles a hiker highway, and it does indeed lead to the Marvel Lake Campground.
We arrive at 11:30 PM.
Craig checks his GPS tracker: we hiked 35 km (21 mi) today, and haven’t seen a single human since we left the truck.
We fumble with gear in the dark, hang our bag of food on a bear pole, set up the tents, and call it a day.
The author tests out some lightweight gear on obscure Marvel Pass Trail en route to Canada’s iconic Mount Assiniboine.
Introduction
In 2015, a friend of mine and I vowed to go through all the “three and four boot” (rating system of scenic proportions) hikes in the Canadian Rockies guidebook: Don’t Waste Your Time in the Canadian Rockies. To that end, I selected a Mount Assiniboine backpacking trip as one I would venture in 2016. Conventional routes to Mount Assiniboine were uninspiring; on the other hand, stealthily trekking into the popular destination and retreating out the back way greatly appealed to me. I consulted my maps, and directly South of Mount Assiniboine lies an obscure trailhead in the Kootenay Land District: Marvel Pass Trail.
Mount Assiniboine Backpacking Trip Review
Planning and Preparation
The planning required to do the Mount Assiniboine Valley in British Columbia, Canada, includes: getting a map, booking required campsites or shelters, purchasing two backcountry permits, checking bear and weather reports and arranging transport to and from the trailhead.
“Two Roads Diverged in a Yellow Wood”
Research suggests there are two main routes to Mount Assiniboine. First, a bus from Canmore, Alberta or Banff, Alberta, can transport backpackers to Sunshine Ski Area. From Sunshine Ski Area, a relative southward trek leads to Mount Assiniboine. Trekkers can return from whence they came, or alternately, hike onward to Mount Shark Trailhead and plan a shuttle back to their vehicle or Sunshine. Additionally, backpackers with extensive travel budgets can book a helicopter ride to (or from) Assiniboine Lodge to Mount Shark Trailhead or Canmore Alpine Helipad. As can be expected with a serviced route, the Sunshine route to Mount Assiniboine is well-maintained and occupied.
You can reverse the path. Backpackers may choose to start from Mount Shark and hike (or fly) to Mount Assiniboine Lodge. The North-Westerly route follows popular Bryant Creek Trail. Horses share it. For a short time, mountain bikes share the path. Bryant Creek Trail is busy and well-traveled.
Additionally, I found one reference to an Eastern route through Marvel Pass to Owl Lake in one of the oldest and most exhaustive guidebooks for the area. Despite Google searches and consulting half a dozen guidebooks for the area, I cannot find any accounts of travel on the Northeast route through Marvel Pass to Wonder Pass. You locate the route in The Canadian Rockies Trail Guide (where I found the Northeastern route reference) and on the Banff and Mt. Assiniboine Gem Trek topographical map, except to acknowledge the existence of Marvel, I have found few detailed references. My curiosity piqued.
“I Took the Road Less Traveled by”
I reviewed the features of each trail, contrary to common sense, selected the most remote route. A day-hike ends at Aurora Lake, but Marvel Pass continues, diverging and intersecting with Banff National Park’s Bryant Creek Trail and or Wonder Pass and leads into Mount Assiniboine Provincial Park.
Little information exists about my route into and out of Mount Assiniboine Provincial Park. Almost no information was available online about Marvel Pass Trail beyond Aurora Lake. After Aurora Lake, the trail diverges around Marvel Peak: one route following Marvel Pass to Wonder Pass and the other following Owl Creek to Owl Lake.
I planned on traveling into Mount Assiniboine via Owl Lake and out via Wonder Pass. I consulted some other locals I know: most hadn’t even heard of the route, a couple had heard of it but never done it and those who had done it hadn’t done it some years. One of my neighbors had traveled the area extensively on skis in his younger years and knew there was an old route used by bear hunters. His fatherly concern about the bears caused me to pause. I had no updated trail reports, but I did have decade old tales of incredible sights and warnings of possible dead-fall, washouts, and grizzly bears.
A close-up of the route in the Gem Trek Banff – Mount Assiniboine Map.
Travel Style
One of my best friends has opted to accompany me on almost every week long trip I take this year. He’s a good sport and an exceptional trail-mate. I say: “mountains” and he shows up wearing a pack with a camera in hand.
This particular trip, he is proving he is a glutton for punishment. I asked:
Hey, I’m backpacking Mount Assiniboine, want to come? Wait…. Before you say yes: I have no idea if there is still a trail on the route I chose and oh… it’s a grizzly bear habitat.
He didn’t even bat an eyelash. All I had to promise were a few decent trail meals. Poor guy: I plan meals, and he carries the heaviest equipment through grizzly habitat and all for an opportunity to do a bucket list hike.
Logistical Notes
Permits
Banff National Park and BC Parks require Backcountry Permits to stay at Marvel Lake Campground and to enter and stay in Mount Assiniboine Provincial Park. I will be driving through Banff National Park, but I will not require a Canadian National Parks Pass because I will not be stopping in a National Park on route to Kootenay Land Use Area. My trailhead rests on Crown Land, no passes or permits for camping or having my vehicle are required.
Transportation
I can drive to my trailhead in about six hours. On the other hand, my trailhead rests at the end of a poorly maintained mining road. Unlike the conventional route, there is no “trail bus” to the trailhead. A truck or high clearance SUV becomes necessary as the road is rough and poorly maintained.
Lodgings
I could complete this trip by booking various lodges or huts (used primarily for hunting and fishing). Not carrying any shelter system would lighten my load. Be that as it may, I am content in my Nemo Equipment Blaze 2P. Shelters are an excellent option during inclement weather or backcountry ski and snowshoe season. Some campsites in the area are free (Porcupine and Mitchell Meadows Campgrounds). I needed cash for other campsites (Og Lake and Lake Magog) but no reservations. Other sites require reservations and a fee (any of the Bryant Creek Campgrounds). For my purposes, I planned to bypass the lodges and huts but needed to book a campsite at Marvel Lake.
Other Travel Options
Other options to enter Mount Assiniboine via helicopter, mountain bike or horse to portions of the park is possible with permits and bookings. Not all trails are accessible via alternate travel methods.
Other Activities
Regulations permit hunting, fishing, and horseback riding in some areas with proper licenses and equipment.
Equipment Notes
This particular trip comes with some equipment challenges. In addition to gear testing, I have a triad of unique considerations: bears, navigation, and crossings.
All Things Gear
I’m testing several pieces of gear this trip. I’ve played with each piece but haven’t relied on them yet. The gear in test mode includes:
1. Garmin eTrex Vista HCx
I picked this used GPS up from a member of the local mountaineering club, and I snagged the Garmin All Canada GPS Maps on Amazon. This route seems an acceptable spot to try the GPS, and the topography of the area makes it truly unnecessary.
I’m doing a review on the Purple Rain Adventure Skirt, and the main concern folks had using skirts were brambles and mosquitoes. In other words, I can’t think of a more appropriate trip to test and confirm or deny if nettles and mosquitoes are as terrible as imagined.
Nemo Equipment sent me an ultralight tent to review at the beginning of the season. I’ve slept in the Nemo Equipment Blaze 2P in my backyard once and am ready to test it out on the trail. Mosquitoes will be vicious in this area; a fully enclosed tent is an appropriate choice.
I received this quilt at the beginning of the season and have completed a couple of car camping trips with it, but this will be its first backpacking trip. It may be slightly warmer than necessary, but the passes can be cold and unforgiving in any season, and I want to test it out in the worst way. Stay tuned for my Performance Review later in the year.
5. Girls XL Free Country Power Down Vest
Costco had a special on kids’ down vests. I am small enough I can wear kids’ clothes, and I bought this vest for $22. Notably, the vest is filled with duck down, is made with 7 denier polyester fabrics with polyester stretch side panels, a zip front, two slash zip pockets and two internal patch pockets. Giving my $22 vest a whirl is exciting.
Bears and Scares, Oh My….
Bear are a primary concern and particularly grizzly bears. 2016 has been an active year for bears. February started with black bear waking up a month and a half early, and March began with grizzlies waking up two weeks early. Bear No. 122 awoke. First, he’s big, bad and famous for eating a black bear. His range, of one thousand square kilometers, includes Mount Assiniboine, and humans have sighted him within forty kilometers of my route.
Three weeks before my trip, a park-wide bear warning was issued by nearby Kananaskis Provincial Park. Two bear attacks in two days made me nervous about my route through a creek bottom filled with buffalo berries. Reading the news stories, I could see the bears were not completely at fault. Human flight reactions may have intensified the bears’ defensive behavior into attacks, and the quick use of pepper spray minimized damages. Intellectually, this makes me feel better. Practically, I’m concerned my flight reaction might kick in, despite knowing better.
I am not counting grams and ounces on bear safety equipment this bear season. Through seldom traveled, my route is prime berry grazing. Passing through creek beds dictates proper management of the predator situation. I hold bears in the highest respect, but am fully aware how much damage large animals can do.
Bear Kit Content
bear bell
pen launcher
banger cartridges
bear spray
bear bagging kit
Also, an iPhone to sing along with, a whistle and a Spot GPS Locator are in my kit. The kit remains overstocked, but I feel I have little other recourse.
Navigation
Marvel Pass Trail has one fork. A straight northward shot at Aurora Lake leads to well-traveled Wonder Pass. Conversely, a meandering North East shot on the Eastern facing slope of Marvel Peak following Owl Creek leads to the established Bryant Creek trail. I will take my Spot GPS locator beacon on this unreported route. The Marvel Pass Trail is an ideal location to test a GPS.
Crossings
This trail follows the floodplain of several creeks and tributaries, and topography suggests soggy footed terrain. As a matter of fact, in the first ten miles (17 km) there are at least nine water crossings. Courses of tributaries and creeks may have changed after the 2013 and 2015 flooding of the area. I could not find any updated maps of the streams or tributaries.
Catch up with Emylene in the next installment in Mount Assiniboine Provincial Park in British Columbia, Canada. More pictures, gear information and tales of adventure and misadventure to follow in Part 2.
This Hanchor Marble backpack review addresses how well Hanchor succeeded at rethinking several key components of a traditional backpack.
You don’t have access to view this content.
Membership Required
This feature requires an active Backpacking Light Membership.
Premium Articles
You're currently viewing a free preview of a member exclusive premium article. Our premium articles include in depth journalism and insights from the Backpacking Light editorial team.
Get full article access by subscribing to a Premium or Unlimited Backpacking Light membership!