You don’t have access to view this content.
How to Buy Outdoor Gear – Functional Analysis
The outdoor market is ripe with marketing ploys and distractions. Jorgen shares the tool he uses to buy outdoor gear – functional analysis.
The outdoor market is ripe with marketing ploys and distractions. Jorgen shares the tool he uses to buy outdoor gear – functional analysis.
You don’t have access to view this content.
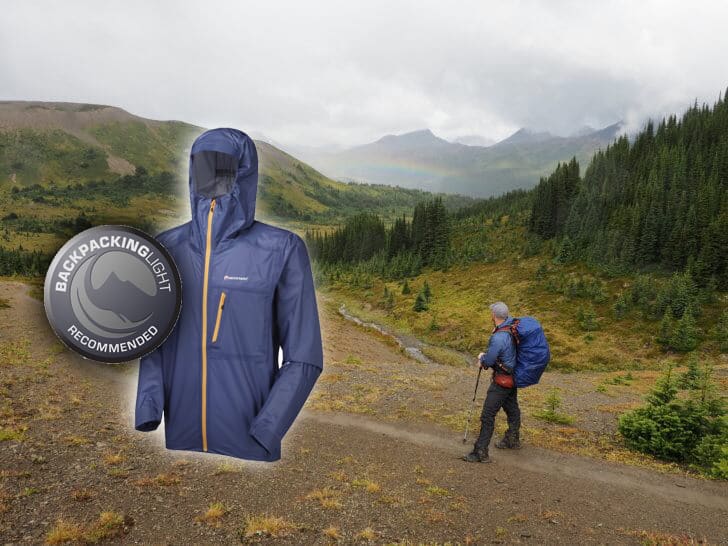
This Montane Minimus 777 Jacket Review investigates the ultralight design, waterproofness, breathability, durability, and comfort of this sub-6-oz jacket in sustained rain.
You don’t have access to view this content.
Choosing functional and lightweight backpacking gear is tough. What roles do comfort, durability, and aesthetics play in decision-making?
You don’t have access to view this content.
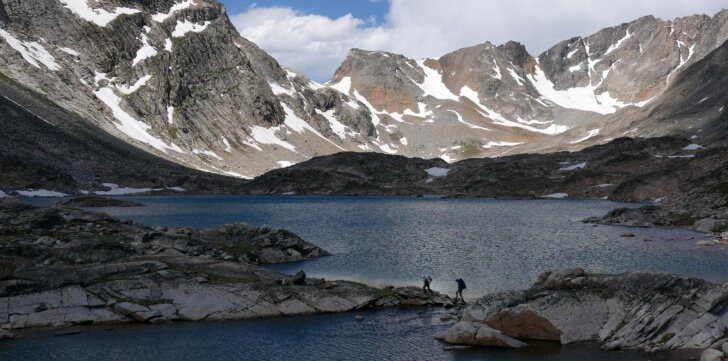
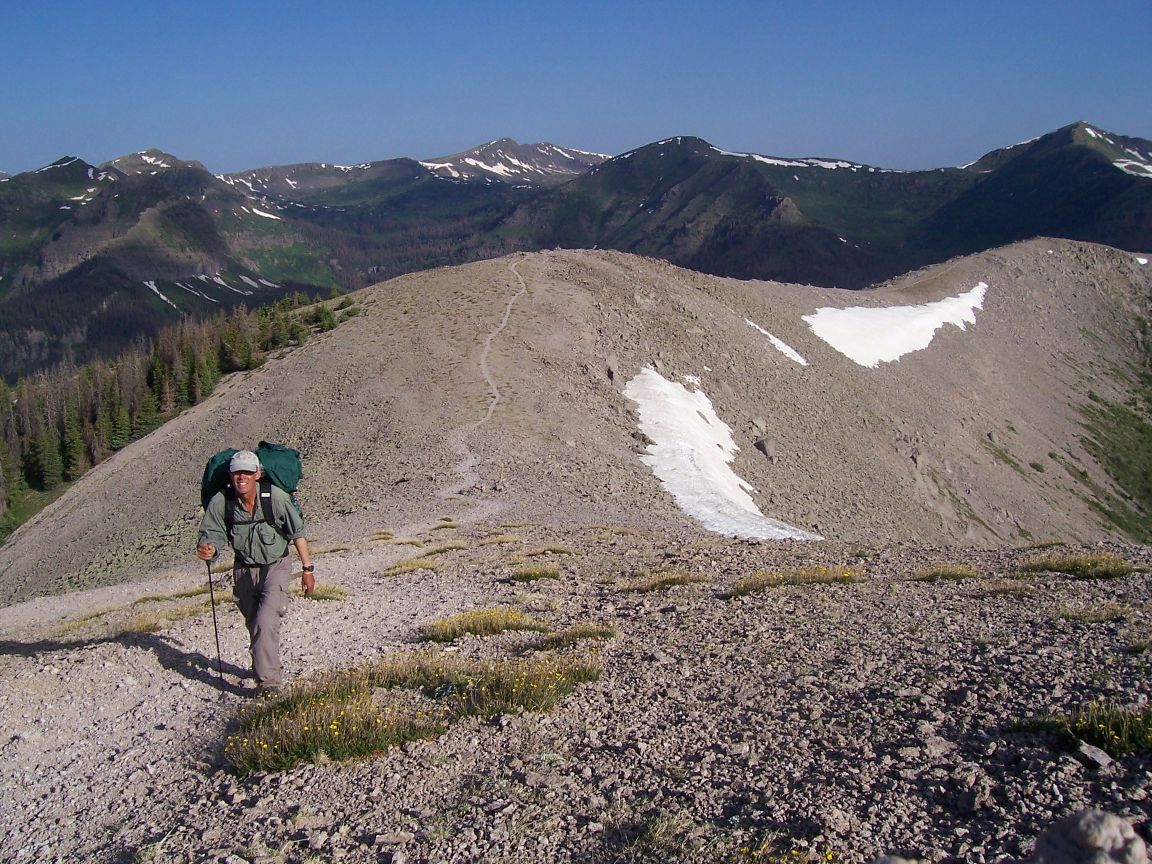
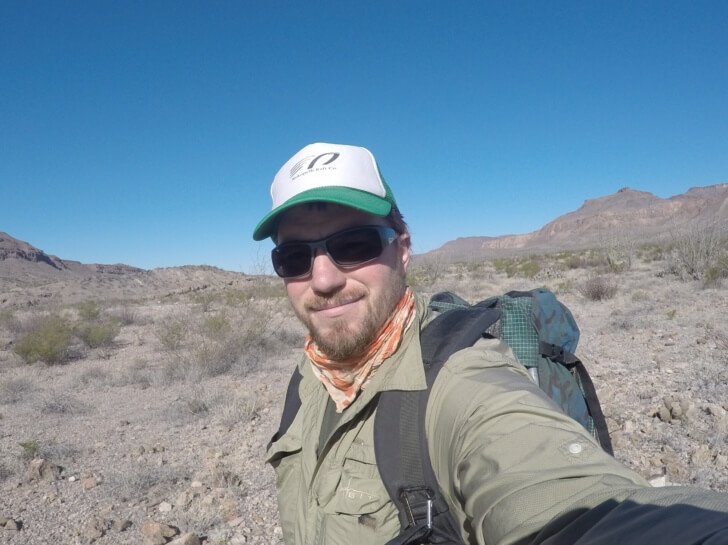
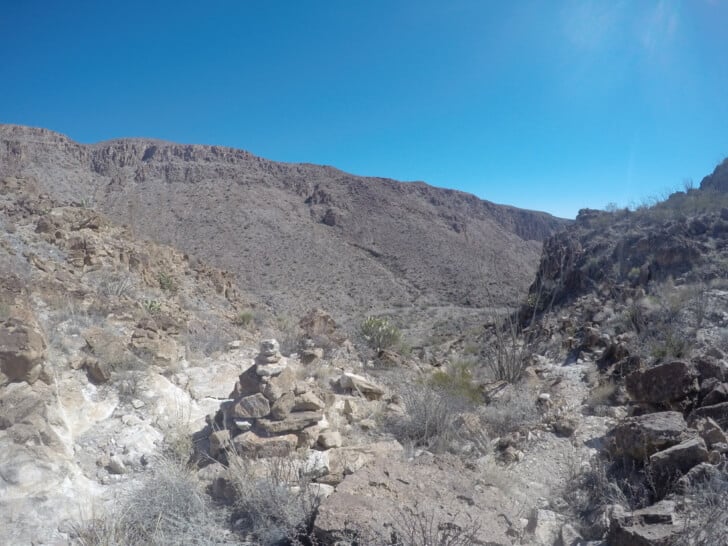
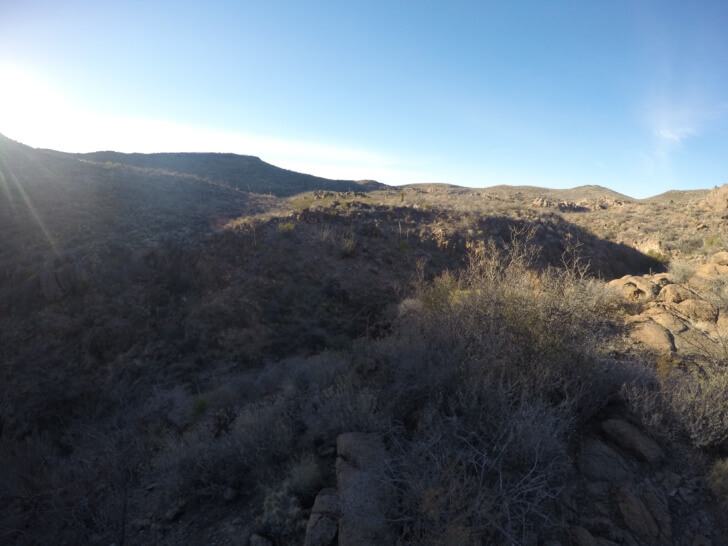
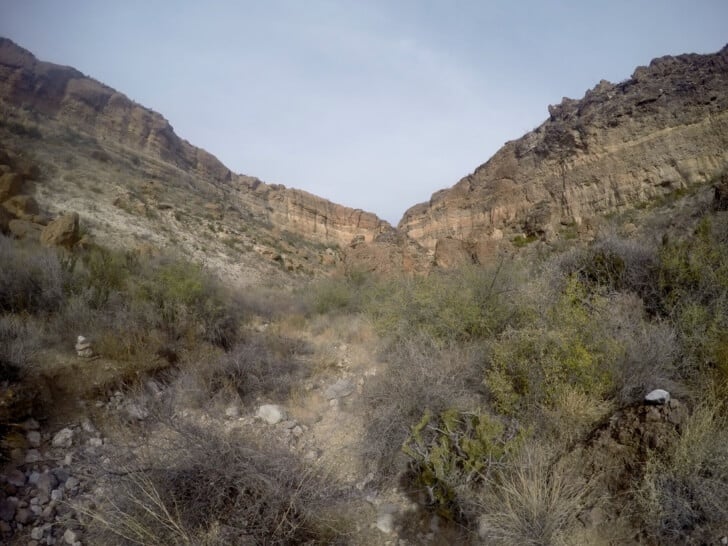
The Rancherias Loop Trail in Big Bend State Park is one of the last wild places in West Texas. With few visitors and stunning scenery, it is not to be missed.
Hiking Big Bend Ranch State Park will take you to one of the few truly wild places in West Texas. The park gets few visitors, trails are faint, and access involves a long drive on back roads. The rewards are amazing scenery and solitude rarely found in West Texas. I hiked the Rancherias Loop Trail, one of the best hikes through the State Park. The hike leads over mountains, mesas, and through canyons. It is supposed to take at least three days, and the ranger said I might need four. I took that as a challenge and completed the loop in two days!

Details:


In the desert, I typically carry a minimal gear kit but with a heavy duty pack to haul water. That system has worked well in other areas, and it worked well on this trip.
My pack was lighter on this trip because I carried less water; each day I was able to grab water at springs. My base weight was probably around 11 pounds (4.99 kg) so with food and water I probably started with around 24 lbs (10.89 kg) total. I could have carried a lighter pack, but I was perfectly happy with my MYOG version of the Seek Outside Unaweep. This particular version was around 2.7 lbs (1.22 kg) and very comfortable.
I carried a 20 degree down quilt rather than my lighter 40-degree (4.44°C) synthetic quilt. It was a good call. Up in the mountains the temperature was around 40°F (4.44°C) and maybe a bit less. My synthetic quilt was okay at 40 (4.44 C) on short nights but when it’s dark for close to 12 hours you want a bit more insulation.
I go stoveless in the desert. For one thing, I’m only out on short trips, so it’s not a huge hardship to eat one or two cold dinners. It also saves weight and bulk when I have to carry more water. Despite the cool weather, I sweated a lot in the sun. So I enjoyed salty snacks.
I typically bring a GoPro and a regular camera. Under the right conditions, GoPro cameras can take decent still shots, so I had been thinking for a while about attempting a trek with just the GoPro to see how it worked. As it turned out, my regular camera died right before the trip so I didn’t have much choice in the matter. The GoPro shots were okay, but it was clearly not as sharp or as flexible as a regular camera. I saw a herd of Javelinas in one canyon, but my pictures just turned out as fuzzy blurs. That and similar experiences motivated me to buy a camera with a 30X zoom.
Most of my problems had more to do with human error (mine and the GPS) than with the trail being tricky to follow. It appears whoever made the Trimble Outdoors GPS track took a rather different route than I did in several key places
I learned that it was better to trust the map that I bought at the State Park Visitor Center. As far as I could tell the map was all right with the possible exception of the area around Rancherias Springs. The map seemed to show the trail on one side, but the trail I followed was on the other side of the creek. It’s not a big deal because the trail was pretty beaten down and there were cairns along it. The Rangers at the visitor center were very knowledgeable by the way. One gentleman had worked for the park since the state of Texas purchased the land for a state park years ago. He showed me off-trail routes for next time when he heard that I finished the loop in 2 days.
Just like you watch for hypothermia in the mountains I’ve learned to watch for overheating or dehydration in the desert. Even though it was not that warm, the sun exposure was high most of the time. Even in light clothes, I could tell I was losing a lot of water to sweating. A few times when I thought I was a bit too warm, I stopped in the shade to cool off. I felt like I did fine until the very end when I pushed myself a bit too hard and fast to get to my car. I finished a bit dehydrated and downed two Gatorades at the first gas station on the way home.
This Patagonia Nano Air Light Hoody Review takes an first look at a lighter iteration in the popular apparel category of “active insulation”.
This Patagonia Nano Air Light Hoody Review takes a first look at a new product: a lighter iteration in the increasingly popular apparel category of “active insulation”.
These garments are insulated (usually with a synthetic fill). Instead of the insulation being sandwiched between layers of tightly woven (and often calendared) fabrics that enhance water resistance (but limit breathability), active insulation garments are shelled and lined with soft, stretchy woven fabrics that have very high levels of air permeability.
The Patagonia Nano Air Light Hoody is currently among the lightest of these garments, owing to its light insulation, light fabrics, and simple design – a pullover style with partial front zip, hood, one pocket, and no cuff or hem adjustments.
I’ve experimented with several other “active insulation” pieces in the 13 to 17 oz weight range from Patagonia, Arc’Teryx, and Stio. I find them too warm to hike in for most backpacking conditions, even in the winter. But with the introduction of the Patagonia Nano Air Light Hoody, so-called “active insulation” tops are now in a similar weight class as hooded 50-100 weight fleece and ultralight, sewn-through-baffled down tops.
This may complicate gear selection for some, but those who spend a fair bit of time wearing a lightly insulated garment while trekking in cool and cold conditions should start paying attention to this category.
With a warmth-to-weight ratio higher than fleece, water-resistance that is markedly better than down, and a next-to-skin feel that is better than both, the Patagonia Nano Air Light Hoody could very well become a useful component in a lightweight backpacking clothing layering system.
This video captures my thoughts on the role of a lightweight active insulation piece in a backpacker’s clothing system:
While I think the Patagonia Nano Air Light Hoody would be a suitable primary insulation layer in summer conditions, I think its real strength is revealed as one of two insulating components for colder and/or inclement conditions trekking. One insulating layer would be optimized as an active layer while moving (i.e., the Patagonia Nano Air Light Hoody), and the other layer would be optimized for a maximum warmth-to-weight ratio (i.e., a high-fill down jacket). I plan to incorporate the Patagonia Nano Air Light Hoody into a four-piece torso layering system (where the Patagonia Nano-Air Hoody would effectively replace a 4 oz wind shirt) this fall as follows:
Of course, I think there is potential to incorporate an active insulation piece like the Patagonia Nano Air Light Hoody into a variety of different layering systems, and I’m looking forward to experimenting with it throughout the winter.
 More Info: More information about the Patagonia Nano Air Light Hoody is currently available at the Patagonia website. Also, stay tuned for a more in-depth review here at Backpacking Light.
Buy Online: Click this link to visit Patagonia.com to learn more or buy this product: Patagonia Men’s Nano Air Light Hoody.
Similar To: If you are looking for the slightly heavier full-zip version of this jacket, try the highly-rated Patagonia Nano Air Hoody, available from REI.com or Patagonia.com. This version would be more suitable for colder winter conditions, as a primary insulation piece for three-season conditions in the mountains, or for hikers who run colder and have a more difficult time staying warm.
Disclosure: The manufacturer provided a sample of this product to the author with no agreement, requirement, or obligation for media coverage of any kind. Thinking about buying this gear? You can support Backpacking Light in the process: if you click on the link to this product and make a purchase at the retailer website, the retailer will contribute a portion of the sale to help support Backpacking Light. It doesn’t increase your cost, and it helps us maintain our site, fund content development, and grow member services! Thanks!
Luke Schmidt tests his wilderness skills with a Glacier National Park packrafting trip over Ptarmigan Pass and down the Belly River. He shares photos from the trip and the gear he used.
You don’t have access to view this content.
The newly released New Balance 1080v5 shoes have “fresh foam” technology to minimize running wear on the body without compromising stability.
The New Balance Fresh Foam 1080v5 running shoes are a cautious New Balance venture in running shoes with a slightly softer sole. They have not gone as far as another well-known shoe company went some time ago with gel soles and air cushioning, which is just as well. That crazy marketing idea resulted in too many sprained and torn ankles (and probably worse), due to a complete lack of proprioceptive feedback (i.e., you could not feel the ground). The New Balance 1080v5 shoes with their, “Fresh Foam” technology have just enough cushioning at the heel to remove that pounding heel strike shock you get when running on hard surfaces while leaving your feet fully aware of the surface you are running on.

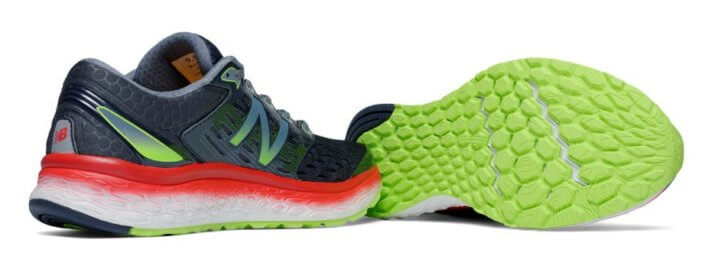
What is this “Fresh Foam” anyhow? New Balance claims it’s “designed for serious lasting power, it’s our most substantial Fresh Foam cushioning execution yet.” Perhaps, they heard that customers were complaining that the typical foam sole tends to break down far too quickly leaving an intact upper and a compressed and uncomfortable footbed.
(Direct quote from New Balance website, using their terminology. Some of this may not mean much to you or me).
We received two pairs of the New Balance 1080v5 running shoe in Men’s size 10 width 4E, for Sue and myself. (Sue gave up on those weird “Womens sizes” decades ago to avoid suffering). We have been wearing the NB Leadville V2 shoes for our morning runs, so we switched to these for comparison. Our run is about 8 km (5 mi.) long; it starts on asphalt but soon turns into a mixture of ironstone rock, pebbles, and sand. The edge of the (country) road is a bit rough; the surface of the dirt track has plenty of sticks and stones to keep our attention. We also traversed some pebble-covered hills which require care in both directions.
The softer heel strike is nice, while the front of the sole is thinner for good proprioception and plenty wide enough for stability. Feedback from ground to brain is good. The road traction is fine in both wet and dry conditions, and the fit (for us) was good. The shoes are quite light too. We don’t really have any criticisms at this stage.
The New Balance 1080v5 running shoes are good for running on moderately uniform surfaces, and reasonable trails. I would not use them for mountain running on really harsh terrain, but they are not meant for that. Just make sure the shoes you buy are wide enough for your feet (and wear some nice thick wool socks).
Disclosure: some of the links below may be affiliate links, which means if you place an order at one of these retailers, we receive a small commission on this sale. This helps support Backpacking Light, thank you!
[insert_php]
$affiliate_id = 152258;
$strUrl = ‘http://classic.avantlink.com/api.php’;
$strUrl .= “?affiliate_id=$affiliate_id”;
$strUrl .= “&module=ProductSearch”;
$strUrl .= “&output=” . urlencode(‘html’);
$strUrl .= “&website_id=189374”;
$strUrl .= “&search_term=” . urlencode(‘New Balance 1080’);
$strUrl .= “&search_results_layout=” . urlencode(‘list’);
$strUrl .= “&search_results_fields=” . urlencode(‘Merchant Name|Thumbnail Image|Product Name’);
$strUrl .= “&search_results_count=3”;
$strApiResponse = file_get_contents($strUrl);
$strHtml = <<<END
$strApiResponse
END;
echo $strHtml;
[/insert_php]
Luke Schmidt shares photos and commentary from his solo Teton Wilderness Packrafting trip on Pacific Creek and discusses some of his gear choices.
You don’t have access to view this content.
Time to celebrate the beauty found at the integration of wilderness, photography, and lightweight human-powered travel! Submit your favorite wilderness photo and win a free trek with Backpacking Light in Montana!
Time to celebrate the beauty found at the integration of wilderness, photography, and lightweight human-powered travel – the theme for this wilderness photo contest is simple:
Photo Contest Theme: Wilderness Adventure!
Submit your favorite wilderness adventure photo and win a free trek with Backpacking Light in Montana!
Hey, and here’s a cool thing: prizes are transferable, so if you can’t make a trip, send a pal, or your mom!


SPOT Gen3 provides location-based messaging and emergency notification technology that allows you to communicate from remote locations around the globe. It offers custom tracking interval options, motion-activated tracking, long-life battery and more. Learn how one hiker used his SPOT Gen3 in a life-saving rescue involving another hiker with a heart condition.
 About SPOT Gen3
SPOT Gen3 provides location-based messaging and emergency notification technology that allows you to communicate from remote locations around the globe. It offers custom tracking interval options, motion-activated tracking, long-life battery and more.
Backpacking Light staff editor Emylene VanderVelden just embarked today on a journey in the Mount Assiniboine area of the Canadian Rockies, and you can track her progress on a map here.
The SPOT is a popular device carried by solo and ultralight backpackers, and many of our readers believe it to be worth the weight (4 oz with batteries). Backpacking Light has reviewed the SPOT since it’s launch at an Outdoor Retailer Show more than a decade ago. Each generation improves and becomes more compact, more accurate, and more functional than the last.
Learn more at the SPOT Website.
For the purpose of this article, we are highlighting a backcountry rescue story that was initiated by a SPOT device.
I’m 37 years old and I live In Sydney, Australia. I enjoy outdoor activities including bushwalking, backpacking, bike packing and mountain bike endurance racing. I also enjoy traveling which works out quite well.

I have been mountain biking for nearly 20 years and I’ve started bushwalking and backpacking when I moved to Sydney about 6 years ago. About 4 years ago, I also added bike packing to the list – I need more free time! In terms of backpacking I usually do 2-day trips during the weekend and I have done one longer trip in Tasmania; the Overland track.
In my free time you can usually find me in one of many National Parks near Sydney; the Blue Mountains, Royal National Park and Ku-ring-gai Chase National Park, etc. But my favorite so far is definitely the Overland track in Tasmania. Next trips on the to-do list are Laugavugar (Iceland August 2016) and a Manaslu trek (October 2017).

To me the most important thing with backpacking is to make sure I don’t hurt myself. I have fairly weak ankles and knees which is always on my mind whatever trip I am on. I don’t care if you think I look stupid when I’m using trekking poles. In terms of local hazards, there are numerous venomous snakes and spiders in Australia but again with a bit of caution you’ll be just fine.
I was walking the overland track in Tasmania, Australia with my girlfriend. This is advertised as a 6-day hike with a few potential side tours; we added an extra leg and ended up making it a 7-day trip covering over 90 kilometers. We were about halfway on the track, near the New Pelion hut, when the emergency unfolded.
The rescue actually involved somebody else. There was a 36-year-old man from Queensland who was experiencing heart problems near the New Pelion hut. Luckily there was a nurse in the hut who was also walking the track. The nurse took care of all the first aid; all I did was push the S.O.S. button as I was the only one with a SEND (Satellite Emergency Notification Device). The Westpac rescue helicopter had to fly the patient and his wife to Hobart (the capital of Tasmania) hospital. It took about 2.5 hours after the signal got through before the chopper arrived. It was close to midnight on Christmas Eve. The patient has been thoroughly tested since and it turned out that one of the valves in his heart was leaking a little bit.

Again, I was quite lucky there was a nurse in the area and he was quite clear about this being an emergency. I fully trusted him in his professional judgment and went ahead and pressed the SOS button.
As previously mentioned, I fully trusted the nurse’s judgment. I didn’t really think too much about it before or after.

As I had never used the S.O.S. button before, I had no idea what to expect and how long it would take for anything to happen. One thing I do remember is that there was one genius who pitched his tent on the Heli platform. We told him to move his tent ASAP after I pressed the button.
Probably climb up Mount Ossa (highest mountain in Tasmania) and try and get some mobile phone reception. This would not have been fun as it was dark and it would have cost me at least 4 hours from where we were. Like I said without my SPOT, I don’t know if the man would have survived.

Disclaimer: This content is considered Sponsored Content and exists as a result of a paid placement or other type of exchange involving goods, services, or cash. As such, it has not been subject to the rigors of editorial review, and does not represent an endorsement of the advertised / sponsored product or service by Backpacking Light or its staff.
Best practices when trip planning includes: booking transportation, gear selection and packing tips for complex backpacking trips.
Nine years ago, a friend of mine planned a backpacking trip for twelve hikers and asked if I wanted to go. Though I had been hiking, horseback riding, and camping most of my life, I knew little about logistics of planning a backpacking trip. In September 2007, I took an inexperienced and impulsive leap onto one of Canada’s most challenging and scenic trails.
My first West Coast Trail (WCT) trip, though memorable, did not reflect a fine example of backpacking skills. Due to inexperience and lack of planning, WCT 2007 was one of the best/worst experiences of my life. Failure is a better teacher than success. From an overstocked pack to poorly suited footwear, the trip was a learning experience like no other. I broke a foot bone, sprained several tendons, had to borrow trekking poles to use like crutches, and met a sports injury doctor who mercifully taped me back together long enough to survive the trail. All in all, I completed the trail because I had some great friends, a couple of trail miracles, a tenacious attitude (which defied common sense), and realized that two feet and a heartbeat is the only exit off the WCT.

Years later my planning skills are considered strong by my backpacking companions. Most prefer to let me handle planning details. To my chagrin, I learned “the hard way” so my friends wouldn’t have to. This year, I’m planning to backpack the West Coast Trail in British Columbia, Canada…again.
After a decade of trial and error, I will share the twelve crucial points of complex backpacking trips planning to avoid making common mistakes.
Some people have trust-funded travel accounts. Most of us have to budget and plan to head out. My first WCT was a whim; I vaguely knew where I was going. My friends were going, and I wanted to go too. I’d never seen the ocean or been to a rainforest. I loved and hated it. Time has numbed my memory of the bog (less aptly called a rainforest), but white sandy beaches remain engraved in my memory.
I am intentionally choosing to endure the muddy trudging to get to the most beautiful places I have ever seen. I know how bad the conditions can be, I’m mentally and physically prepared for what lies ahead: I could not say the same ten years ago.

A backpacking trip is not the place to determine that the trip mates on board may not be enjoyable company. If in doubt, take some shorter trips with proposed companions. Make sure that being in high-pressure situations for several days is workable for everyone on the trip.
Of the twelve companions on my 2007 WCT, I didn’t like seven of them by the time it was over. Of the five people I still liked, I only travel with one of them now. For this trip, I picked a friend I’ve done intense trips with before. We mesh well, have equivalent experience, and have similar styles of trekking.

This should not come as a surprise: understanding tidal charts on a coastal hike is important. Knowing that buses to the trailhead only run every other day is crucial. And realizing that there are impassable channels and rivers that require that you book ferries to cross is vital. Knowing pays, plan accordingly. Purchase trail guide books, read online articles and trip reviews, look at pictures and gain the critical information.
In spite of having made the trip before, I purchased the updated guidebook for the area and downloaded the topographical map. I’ve already looked up the proposed tidal schedule for my trip and how low tides have to be for me to cross at certain key points.
When dealing with complex travel arrangements, being on time is crucial. Any extensive backpacking trip is fraught with timelines. Handle transportation and mother nature’s schedules with finesse. Miss a bus, ferry, or tide and a trip can be waylaid or canceled.
Just remember, though, trips like the WCT can take six to eight months to plan; there can be good reasons to delay or reschedule. When the forecast on Vancouver Island calls for six days of rain its best to reschedule as the coast can take an exceptional turn for the worse with rogue waves and lightning strikes. Always have an alternate plan. Worse comes to worst, and I’m bussing to Tofino, staying in a hostel, taking surf lessons, and soaking in the hot springs.
For a solid trip you need three types of cash:
If it doesn’t have a proven, daily purpose it does not go in the pack. If I don’t know if an item has a proven, daily task, I did not prepare properly by testing my gear. Ten years ago, I packed things I never used because someone told me I should. I packed ill-suited gear because it seemed like a good idea. I had extra clothes which were extra wet clothes by day two. I didn’t factor in how much anything weighed. I didn’t properly test my boots. I had worn them lots and they were worn and not in good condition for a backpacking trip. The boots leaked, slipped, rubbed, and were generally worn out. I know better and do better now: happy feet, happy backpacker.
Recently, my most disappointing but crucial tests were with trail runners. After the nerve damage to my foot during the West Coast Trail expedition in 2007, I have relied on full grain trekking boots to support my foot. Trail runners have always appealed to me and I gave them a try. I can manage a short day hike in trail runners, I cannot manage a full backpacking trip. I like how trail runners feel for a day, but limping for days on end is not appealing.

Some trips can be navigated on impulse, but thru-hikes and longer backpacking trips are not the places to learn instincts or to find out about travel quirks. The WCT trail permits, on average, sell out in forty-five minutes on the first booking day. Trail booking starts eight months before I plan on hitting the trail and four months before the trail opens for the season. My flights to the coast can be booked for under four hundred dollars in January; by August flights will have more than doubled. In addition, there is one flight to the coast which will arrive on time for me to make the only bus connection to the trailhead for two days. I will know where I am going and research travel logistics. This could be the difference between going backpacking – or camping at a transit terminal for two days.
Long, complex hikes are not the place to try and learn basic skills like fire starting. They are also not the place to bring out gear which has never been out of the box. Well-being in the backcountry is a personal responsibility. Each individual is responsible for individual and group safety. On my first WCT trip, I had no idea how half the equipment worked.
Today, I can field strip and reassemble every piece of equipment in my pack and my partner’s pack and treat simple injuries without batting an eyelash. Learn vital information before the trailhead. On the WCT, “need-to-knows” include: what bear and cougar tracks and scat look like, how to read tide tables, basics of firestarting, first aid and topographical navigation. Don’t plan on learning on the way. When cold, wet, sore, tired, and hungry, learning new skills does not come easily.
For the WCT 2007 trip, a local summer camp gave us some of their leftover meal supplies for our trip. As grateful as I was for free food, some of it was stuff I would have had a hard time choking down at home. Being hungry did not improve the flavor or make the pudding cups lighter to pack. I played with my food for all but two meals (Mac and Cheese and Beef Tacos) and ate a lot of dried fruit. My other key mistake was I had no idea how much I would actually need to fuel my body. I had at least ⅓ more food than I needed. The weight was unnecessary and if I had done a calorie calculation I would have known better.
Today, my friends often turn to me as the backpacking foodie. I have everything from lightweight trail pizza to trail pies and everything is portioned, weighed, taste-tested and packed with care. I like my food, and I want to eat it at the end of the day, because I have already tried it.

Planning a big hike without training is a bad idea. Most backpackers have a “moment of clarity” when they realize they are not eighteen years old anymore and have to treat their body accordingly. For the WCT 2007, I was athletic and active, but I did little to prepare my body for several days of backpacking. I paid dearly; I lived on anti-inflammatories and was so exhausted at the end of the day I could barely talk.
My ten-year older and wiser self has to do better just based on my physiology (see my article My Journey from Injury to the Canadian Rockies for details.) The worst place to have an epiphany, about not being as fit or young as before, is on a backpacking trip. I walk into every trip being aware of each of my body’s shortcomings and have physically and mentally prepared to compensate for them. I can do a hike without training, but I will regret it. Be kind to the body: train for difficult hikes.

Being at the airport with no ticket or passport is a problem. Standing at a bus stop with missing gear is a bigger problem. Being on the trail with a stove and no fuel is beyond aggravating. Double check bookings, reservations, and gear; hopefully, anything you miss is a small thing. I was fortunate on my 2007 WCT, I didn’t have to plan logistical details. I would have been completely out of my depth if I had been in charge of logistics.
The WCT 2016 requires me to register a vehicle for parking at an airport; hop on a flight; rent a car; pick up a box of consumable gear; drop off a rental car; catch a bus; put off-trail equipment into storage; book a campsite overnight; attend a mandatory info session; ride a ferry and hike the worst terrain of the trail with a late day start; all in less than 24 hours. Just as in nailing down bookings, missing the mark on any of those steps can end a trip abruptly.
As a new backpacker, I made more than my fair share of mistakes. I’m impulsive and confident by nature, but I lacked the experience to put those traits to good use.
I’ve made and will continue to make mistakes, backcountry and otherwise. My mistakes have made me who I am and are a part of my story. The challenge of a backcountry adventure should not prevent the adventure from happening. Face challenges, take risks and make mistakes in a calculated way. Everything is better when you make it home from the backcountry unscathed. On a final note, though these are the “best practices” sometimes breaking the “rules” makes for an adventure which couldn’t happen otherwise.
Planning a complex trip the first few times is nerve-wracking. With a little bit of preparation, it can be more easily managed and pitfalls avoided. As experience is gained in trip planning, the process becomes easier, predictable and more enjoyable. It took me a couple of years to build up the confidence to backpack again after the WCT. I would rather see backpacking newcomers enjoy their first trip and not dread the next one.
This fall, I’ll put my money where my mouth is and offer a first-hand look at my planning skills and inevitable improvisations when I publish my Notes from the Field on the West Coast Trail at backpackinglight.com.

Underwear acts as a moisture (sweat) transfer layer to keep you reasonably dry “down there”. This guide highlights some important considerations about materials, design, fit, weight, and performance criteria when selecting a pair of hiking underwear (or shorts).
Underwear acts as a moisture (sweat) transfer layer to keep you reasonably dry “down there”. This guide highlights some important considerations about materials, design, fit, weight, and performance criteria when selecting a pair of hiking underwear (or shorts).
The most popular underwear material is polyester, sometimes with a little Spandex (Lycra) mixed in for a stretchy fit. Merino wool is a great choice that minimizes odor when worn for several days in a row, but isn’t as durable as synthetics. Some people go commando (no underwear), which can be a bit uncomfortable if you wear abrasive nylon trekking pants, and on hot days, can result in sweat accumulation that can cause inner thigh chafing. Others replace underwear with a typical running short that has a liner brief in it. If you suffer from inner thigh chafing (or have never hiked long distances in warm weather), consider selecting a tight-fitting “running short” – they fit like tights but are short, with inseams ranging from 6 to 11 inches.
The lightest polyester briefs will weigh in the range of 1-2 oz. Merino wool and Spandex blend boxer-briefs with longer (6″+) inseams can be less than 4 oz if the fabrics are thin.


Ryan J – I chafe. Briefs and commando are out. Merino is my favorite material for underwear, but because of chafing, I’ve worn out too many pairs of merino boxers to count. These days, I go with short tights used by runners. I like the color black, and shorts without “underwear waistbands” so I can wear them alone around people without feeling like I’m waltzing around in my skivvies. I like an inseam in the 6-10 inch range, and I look for the lightest weight polyester / nylon / spandex blend I can find – something less than 4 oz in a size “M”. My all-time favorite pair of trekking undies – the original GoLite Stride shorts, which I still love and use.
Eric – Tight, form-fitting spandex is not for me, but Ex Officio Boxer-Briefs seem to have the right amount of stretch for a good fit without being restrictive. I find them comfortable even into the second week of a long trip.
Andy – I prefer Patagonia Silkweight (a.k.a. “Daily”) Capilene Boxers. They remain cool in hot temps, reduce chafe well enough for me, and with odor-resistant fibers, seem to feel clean even after 7-10 days in the field.
Pat – Ultralight and minimalist for me: the Rab Dryflo 80 brief only weighs 1.4 oz.
Ryan C – I wear Ex Officio Give-N-Go Boxer Briefs. Long and snug for chafing resistance, fast dry time, with no unusual accumulation of stinkiness beyond what I perceive to be my own normal ;) One under-the-table (sic) feature is the nicely-shaped pocket that keeps the cajonnes off your legs (note: this feature is found on the Sport model). Guys know this to be a feature…
The following products represent our guide-curated recommendations for participants in the Wilderness Adventures program.

Patagonia Men’s Strider PRO Shorts 5″ Inseam
Guides’ Comments: This is a running short with built-in liner – a great option if you prefer to hike in real shorts.

ExOfficio Men’s Give-N-Go Boxer Briefs
Guides’ Comments: Customers love these, as evidenced by strong reviews found all over the internet. A durable option for chafing resistance.

SmartWool Men’s NTS Micro 150 Boxer Briefs – Wool
Guides’ Comments: Great stink resistance, and extraordinarily comfortable next to skin. They are somewhat form-fitting, but don’t have the confining feel of a compression short. More durable than we expected for merino wool.[/caption]

Guides’ Comments: If you prefer loose-fitting polyester underwear, and don’t want to break the bank, this is a solid option. For a little softer feel (and a little higher price), take a look at the Patagonia Daily Boxer-Brief.
![]() Guides’ Notes are gear briefs outlining a specific category of gear as a resource that has been developed for participants in Backpacking Light’s Wilderness Adventure Treks program. It includes an overview of the category, tips for saving weight on gear in this category, as well as very specific product recommendations from our Guides, with links to purchase those products online.
Guides’ Notes are gear briefs outlining a specific category of gear as a resource that has been developed for participants in Backpacking Light’s Wilderness Adventure Treks program. It includes an overview of the category, tips for saving weight on gear in this category, as well as very specific product recommendations from our Guides, with links to purchase those products online.
Disclosure: the product links above may include affiliate links. Backpacking Light receives a small commission on sales when you place an order via one of our affiliate partners if you visit their website by clicking on an affiliate link. This helps support our efforts, thank you!
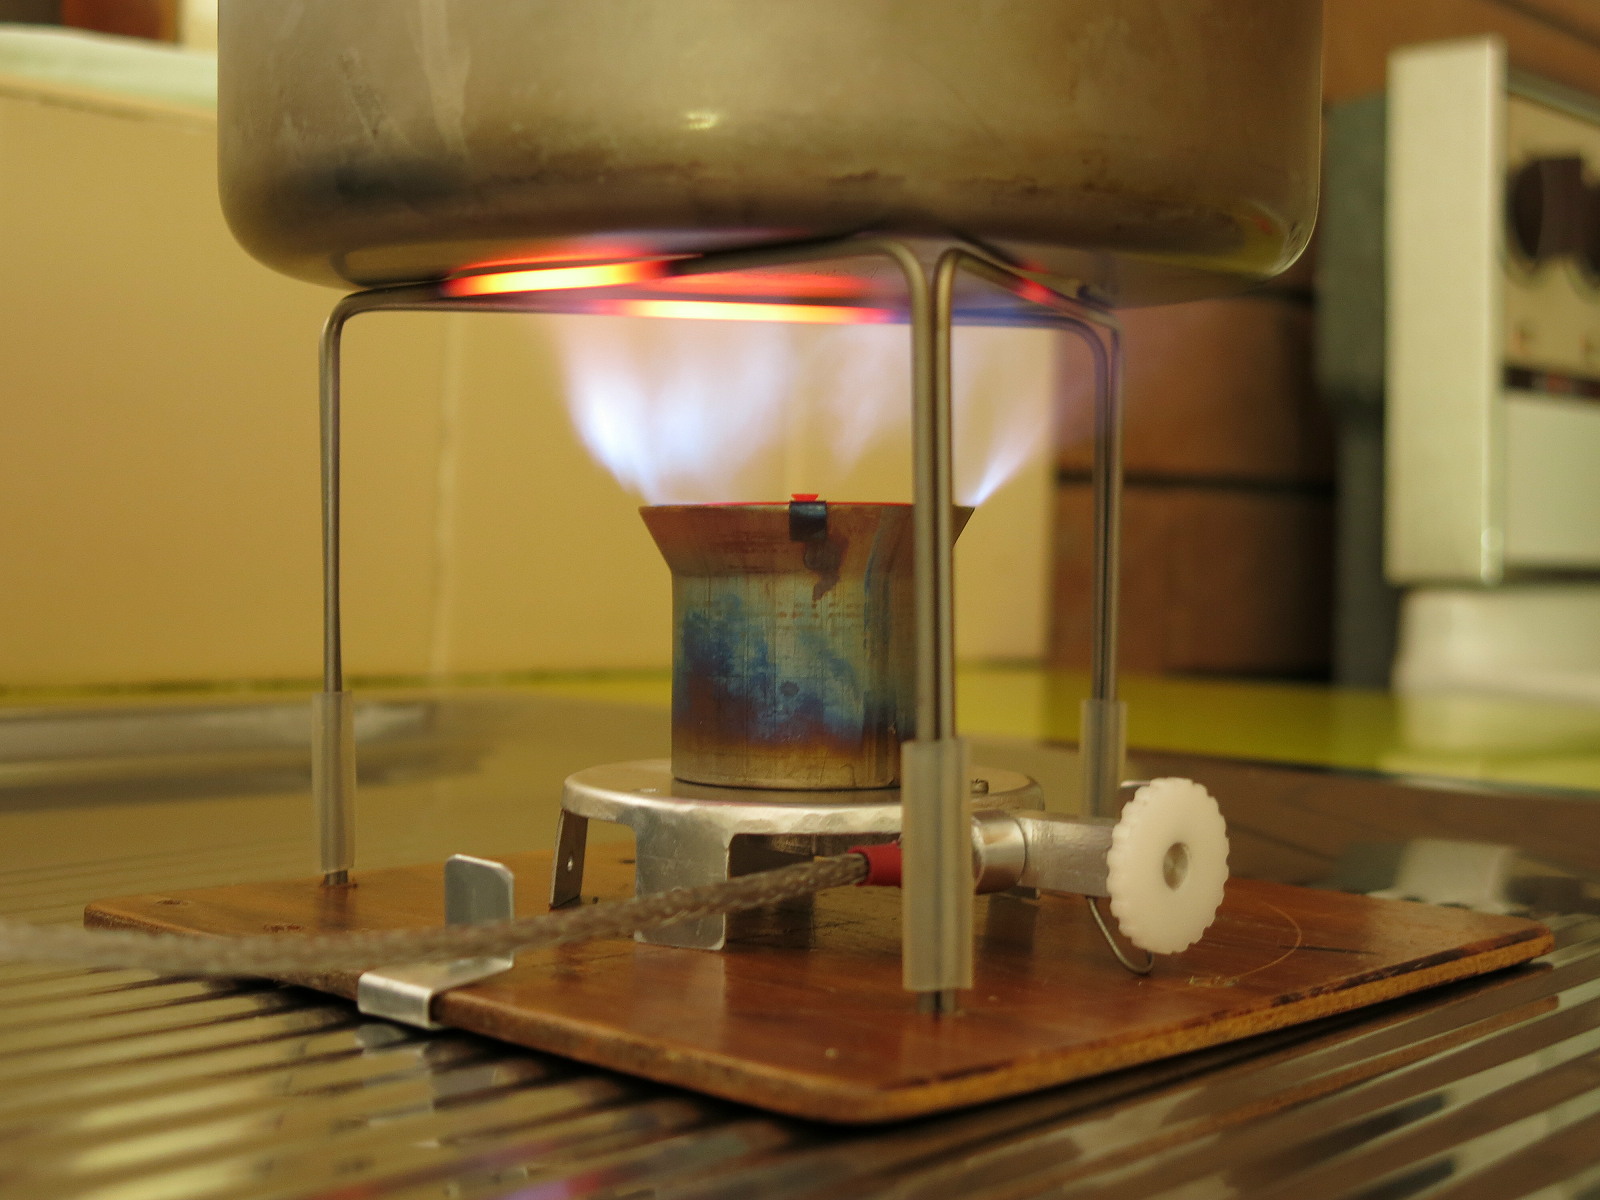
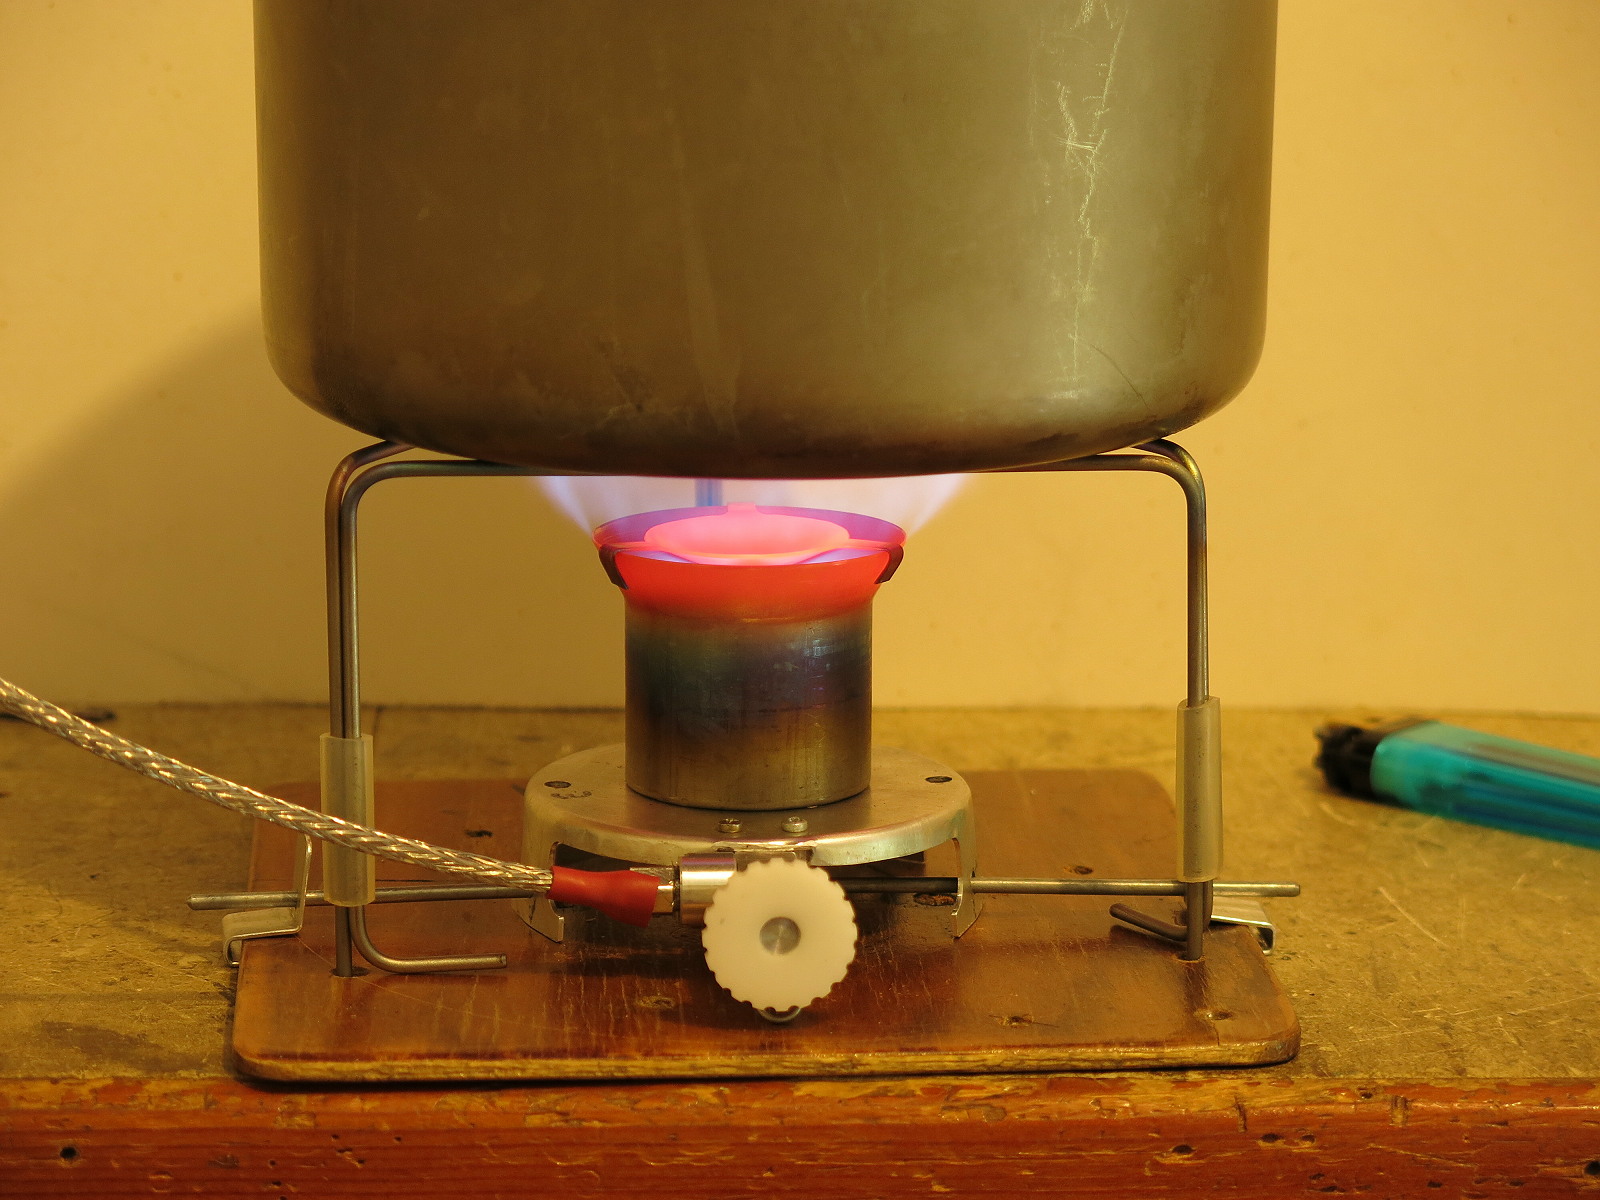
In part 5, Roger Caffin shares his design for a pot support for the vortex burner as a solution for an ultralight winter DIY backpacking stove system.
You don’t have access to view this content.
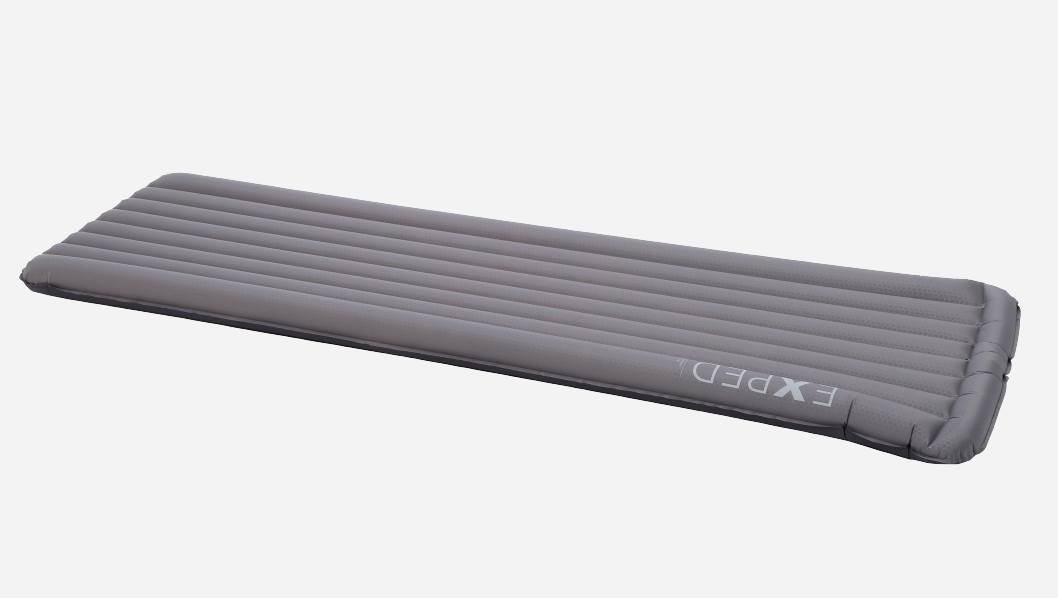
Back injuries and poor sleep patterns lead the author to purchase an expensive mat: will it be worth it? A trial of the Exped DownMat UL 7.
You don’t have access to view this content.
In part 4, Roger Caffin tests the vortex burner in the lab and in the field as a solution for an ultralight winter DIY backpacking stove system.
You don’t have access to view this content.
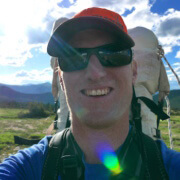
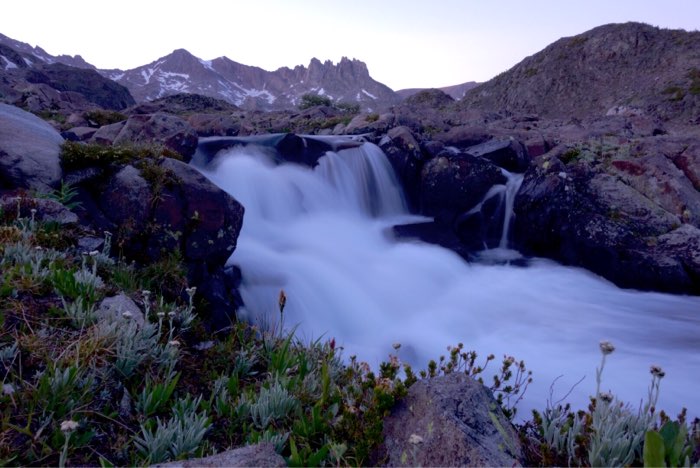
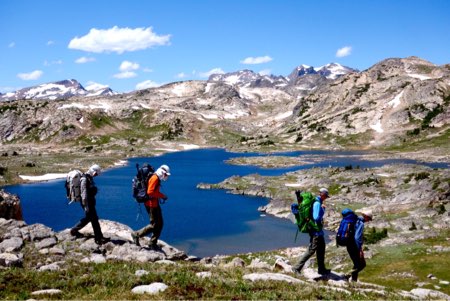
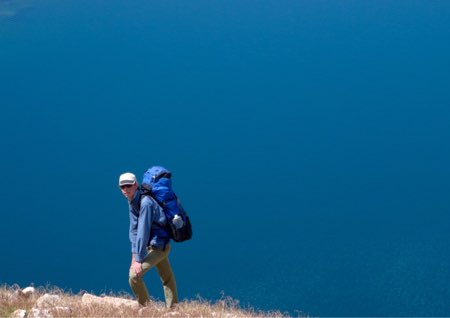
Live dispatches via satellite from an expedition in Montana’s Absaroka-Beartooth Wilderness: Day 12 – Exit to the Beartooth Cafe
Day 12: July 20
The younger ones woke up early this morning which means one of two things: we did not hike enough hard miles yesterday, or today is the final day of the trip and the exit trailhead awaits.
Regrettably, it’s the latter.
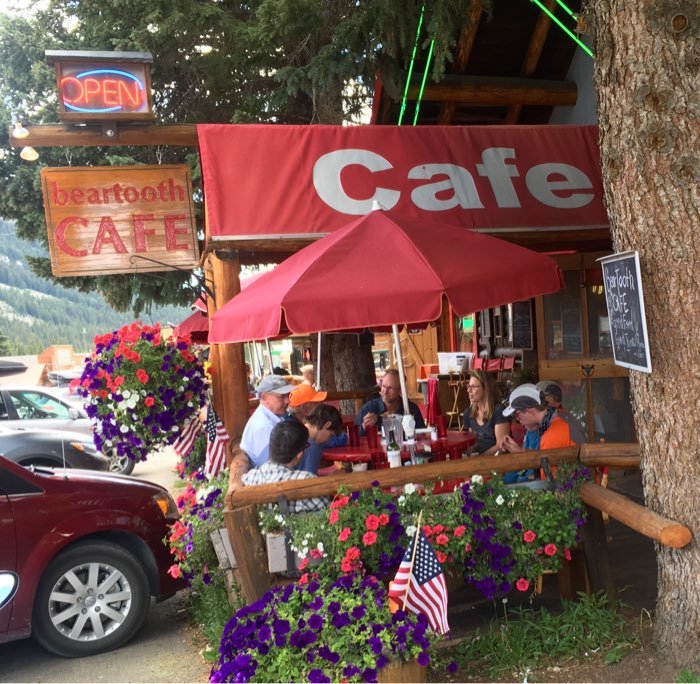
Often at the end of these trips, I’m ready for a hot shower, a real meal, and some time back home to do civilized things. This time, I’m ready to pick up a resupply in Cooke City and continue heading south, weaving in and out of the Absaroka Crest en route to Togwotee Pass.
But alas, that will have to be deferred to another day.
Sitting in my shelter this morning, drinking a coffee with a view of Mount Villard out my door, I couldn’t help but reflect on the value of spending time in Wild Places and attempting objectives worth suffering for.
We have been out for 12 days, through talus and trial, and remain happy friends still. Such is the outcome of being part of our little community of Venturing Scouts and their families that appreciate the benefits of spending time in wilderness, and with each other.
I’ve called Montana home for more than two decades now and have spent more time in the Absaroka-Beartooth Wilderness than any range of mountains other than the Olympics of Washington State. I call the A-B my home range. Having hiked nearly all of its trails, caught fish out of more than 75% of its 300+ fishable waters, and climbed its highest peaks and passes, this trip was a reminder that I feel like I’ve barely scratched its surface. Over the past 12 days, I’ve seen new vistas, traveled new off trail routes, fished new lakes, and collected new experiences with a very competent team of outstanding young men, with whom I would travel through the wilderness anytime.
See you for elk burgers at the Beartooth Cafe in Cooke City.
Until next time —
Godspeed,
RJ
Crew One is a Venturing Crew of the Boy Scouts of America, chartered by Backpacking Light to promote expedition leadership and wilderness high adventure skills development in youth 14-20 years of age. Learn more at Crew1.org.
Get away for a few days with like-minded wilderness enthusiasts and learn the skills of ultralight wilderness travel with Backpacking Light: join us on a Wilderness Adventures Trek.
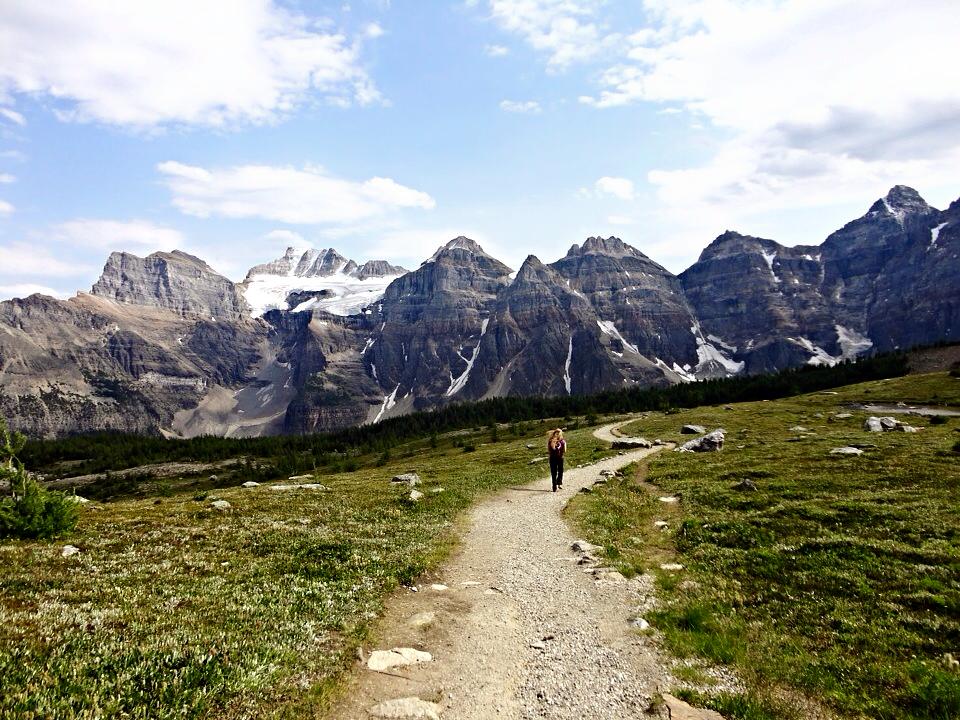
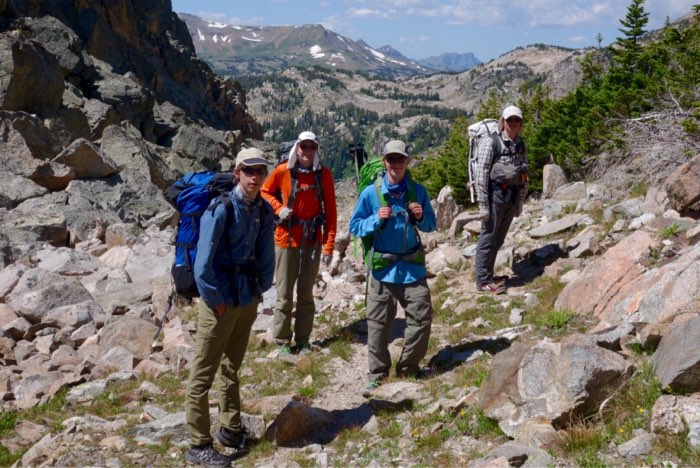
Follow this live expedition blog as Backpacking Light’s Ryan Jordan, Eric Vann, and five others weave their way through glacial cirques, tundra meadows, and talus fields in Montana’s Absaroka-Beartooth Wilderness July 9-20. Dispatches will be posted to the Backpacking Light Facebook page, Instagram feed, and the backpackinglight.com home page.
Live dispatches via satellite from an expedition in Montana’s Absaroka-Beartooth Wilderness: Day 10 – Sky Top Lakes
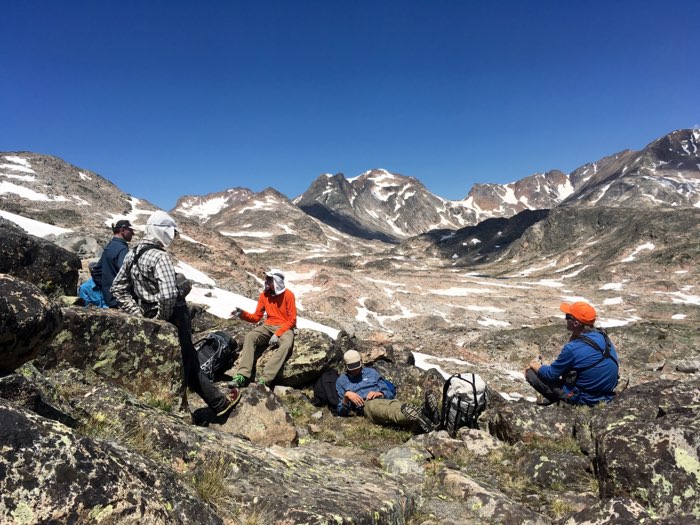
Day 11: July 19
I got to bed late last night due to negotiations with the mountain goats that were not entirely successful. Only one guyline got nicked and fortunately didn’t result in any more damage than a dislodged tent stake which I found this morning.
Last night was our warmest night, with the temperature not dropping below 40 degrees F. This morning’s clear skies came with a blazing sun and only a slight breeze, promising a hot day of trekking, for the mountains at least.
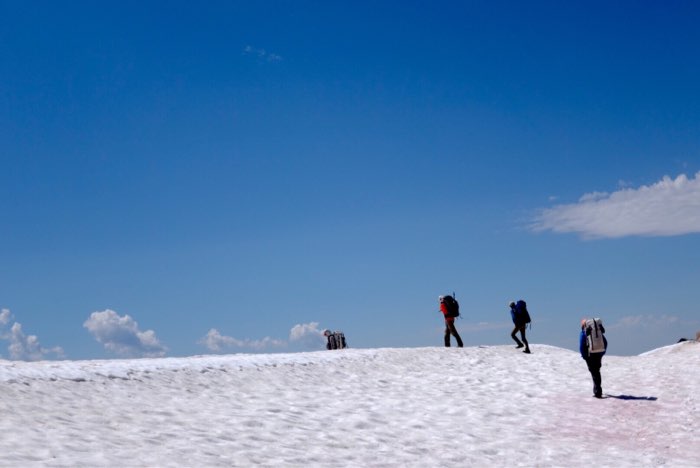
We left camp mid-morning and started walking up a steep talus slope towards a col that divided the Sky Top Lakes and Aero Lakes Basins. Upon reaching the col, which sits right below The Spires, we enjoyed expansive views of the south faces of Glacier Peak and Mount Villard.
We scouted a few different routes down and decided to head south through a gentle draw filled with snow and easy talus. From the bottom of the draw at the Rough Lake-Upper Aero Lake col, we dropped down to Upper Aero Lake and skirted its southeast shore on granite ledges and tundra benches.
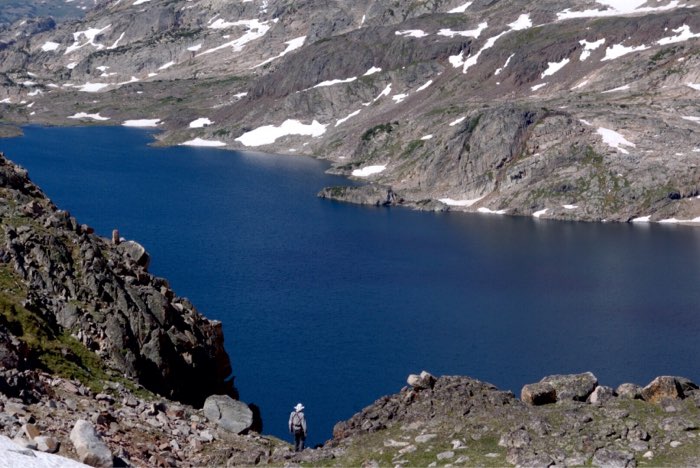
The Aero Lakes (Upper and Lower) have to be seen to be believed. They are alpine oceans compared to what most people know to be “alpine lakes”. Each of them a mile long and nearly as wide, it takes several hours to circumnavigate their rugged shorelines.
Upper Aero Lake sits at an elevation of 10,140 feet above sea level and has a surface area of 292 acres. It receives a plant of nearly 30,000 Yellowstone Cutthroat every six years and they grow to fat, healthy proportions. Lower Aero Lake sits just below 10,000 feet, is a little smaller at 190 acres, and is populated by trout that drift down the creek from Upper Aero. Since Upper Aero was last planted in 2012, I was banking on the probability that by now the fish would be big, and still plentiful.
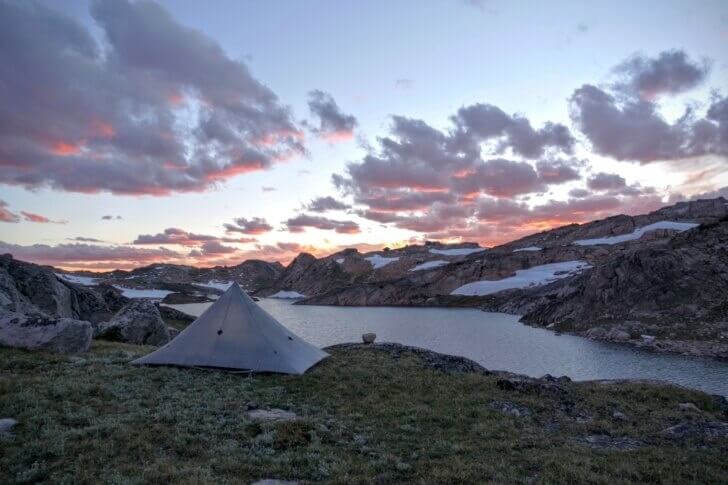
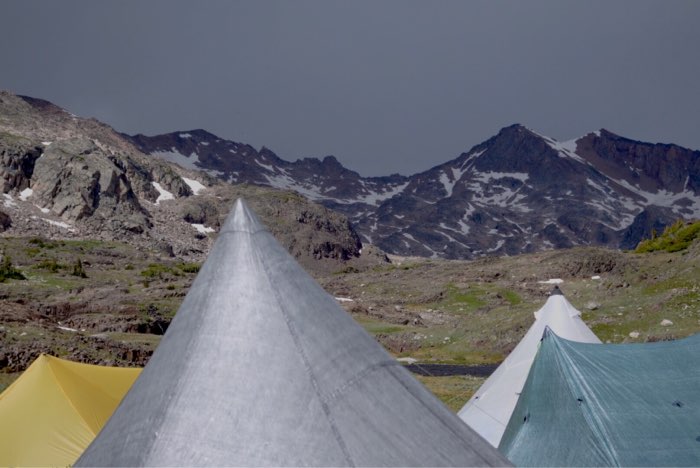
We moseyed down to the rocky tundra between the two lakes and set up camp on the softest bench we’ve seen since we left the meadows below Whitetail Peak a week ago.
We got the shelters set up just in time before a thunderstorm moved in and dumped rain and hail on us. Once the storm subsided, I treated and drank a liter and a half of water to get caught up from a hot, dehydrating hike, and tried to soothe the severe sunburn on my right hand – I forgot my Glacier Gloves – a mistake I regret. For the past several days, we have been trekking at high altitudes in intense sun, over lots of snow. It’s been tough to manage the UV exposure.
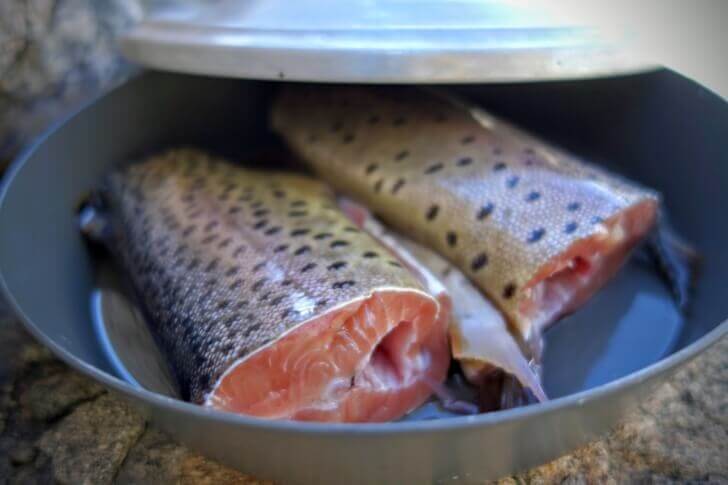
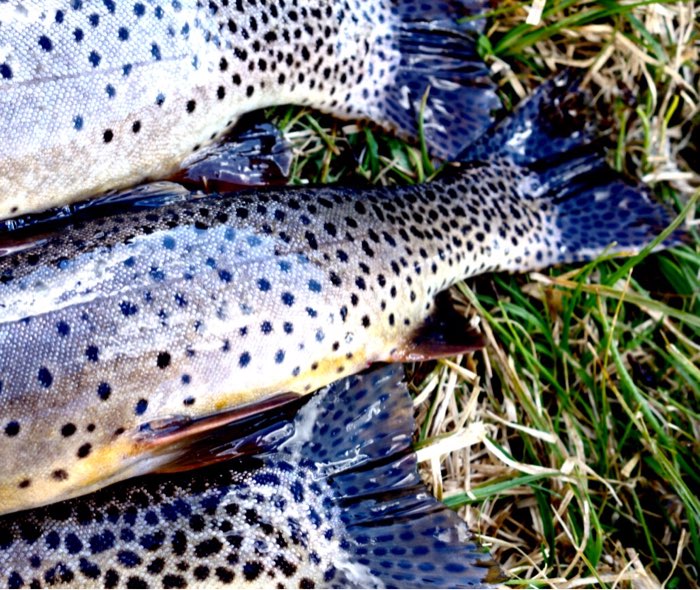
This evening, I strung up the tenkara rod and managed to bring three fat trout back to camp. By the time I had poached and deboned the fish, we had a fry bake filled to the brim with three pounds of meat for dinner.
After dinner and the moonrise I presented a case study that stimulated a lively discussion about legality, ethics, and morals – a mental exercise that allows for the exchange of different ideas and perspectives in a way that challenged us all.
I also wrote a celebratory Haiku about our trip, and shared it with the group tonight, with feeling:
Ye Rock of my soul
Let your love overwhelm me
My sweet sweet talus.
Upon retreating back to my tent, and writing this journal entry from my chair with my down quilt draped over me, I notice the grunting of what has now become a regular visitor: a mountain goat is rustling around somebody’s pee spot about 20 feet from my tent.
Tomorrow we exit.
Godspeed,
RJ
Follow this live expedition blog as Backpacking Light’s Ryan Jordan, Eric Vann, and five others weave their way through glacial cirques, tundra meadows, and talus fields in Montana’s Absaroka-Beartooth Wilderness July 9-20. Dispatches will be posted to the Backpacking Light Facebook page, Instagram feed, and the backpackinglight.com home page.
“Buck” Nelson might be the closest thing to a modern mountain man. Read Jorgen Johansson’s interview with the man who loves the outdoors.
You don’t have access to view this content.
Live dispatches via satellite from an expedition in Montana’s Absaroka-Beartooth Wilderness: Day 10 – Sky Top Lakes
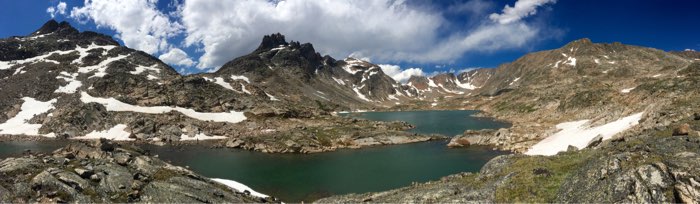
Day 10: July 18
Last night’s rowdy thunderstorms created an electric air. Before the lightning came, we heard the humming in our carbon fly rods and felt the static in our hair.
After the worst of the storms plowed through camp late last night, I heard grunting coming from the direction of my Ursack, and my pee spot. Shining my light over, I saw a mountain goat pawing at my food bag, which was tied to a chockstone secured in a boulder crack. I shooed it away with a granite fastball which sent it trotting over towards Eric’s tent. Fine by me. I put in earplugs, and went back to sleep.
In the morning, I listened intently to Eric’s own goat story…
We left Fossil Lake and wandered up the meadowy draw of its inlet until we found talus and snow that took us up a snakey route to a high col dividing the hydrology of Fossil and Cairn Lakes. From there, we climbed up to the Absaroka Crest once again and entered the beautiful Sky Top Lakes basin.
Not satisfied with the 4.5-star views in the lower basin, we proceeded higher over talus, snow, and granite ledges to the Fourth Lake, and are now camped in rocky tundra there at 10,436′.
Our view into the upper cirque is unparalleled, framed by Tge Spires, Mount Villard, the dramatic South Face of the Montana High Point, Granite Peak, and Cairn Mountain. I can see Granite’s summit out the doors of my pyramid tarp, just two miles away.
Two high point parties wandered through en route to establishing their base camps for an attempt at Granite’s summit tomorrow. One fellow was wearing a Backpacking Light cap and turned out to be a customer from California. It always warms my heart to run into BPLers “in the wild”!
In addition to their beauty, Sky Top Lakes are famous for weather, fish stories, and the highest concentration of mountain goats in the range.
This is a hostile spot. The wind blows incessantly here, and through the years I have experienced some of the worst storms the Beartooths have to offer in this drainage. There is no cover – no trees or shrubbery of any sort – only rock and snow. The high peaks concentrated in this area create their own drama when prevailing weather slams into them. The lakes are some of the last to melt in the Beartooths. Once, almost 15 years ago, I visited here in August and Lakes 5, 6, and 7 were still frozen.
And, if I’ve ever seen a fish in these lakes, I won’t be writing anything about it.
A mountain goat ewe and tiny, curious kid have been visiting us all afternoon, licking our pee spots and wandering to and fro through camp. I don’t have the heart to hurl another rock at the ewe or the adorable little kid (those innocent dark eyes…ugh!), so I’ll just keep the Ursack a little closer tonight and maybe head over by Eric’s tent to pee.
Skies are clear as I write this at 10 pm, and the wind is howling and whistling through the ridge tops. But it’s warm enough to sit in my chair with my sleeping bag draped over me, huddled in my down parka, and watch the light of the full moon cast its eerie glow on the Sky Top Glacier as the last light turns the sky from blue to indigo.
Goats are mewing in our camp and I can hear the footprints of the ewe, and what sounds like a few dozen of her closest friends, trotting to and fro. I hope they don’t trip over the myriad guylines that are spun like a spiderweb to secure my tent in the Sky Top Winds.
Tomorrow is our last full day in the Wilderness and we plan to make the most of it by pursuing large trout over the divide to the west.
Godspeed,
RJ

Follow this live expedition blog as Backpacking Light’s Ryan Jordan, Eric Vann, and five others weave their way through glacial cirques, tundra meadows, and talus fields in Montana’s Absaroka-Beartooth Wilderness July 9-20. Dispatches will be posted to the Backpacking Light Facebook page, Instagram feed, and the backpackinglight.com home page.
Live dispatches via satellite from an expedition in Montana’s Absaroka-Beartooth Wilderness: Day 9 – Fossil Lake
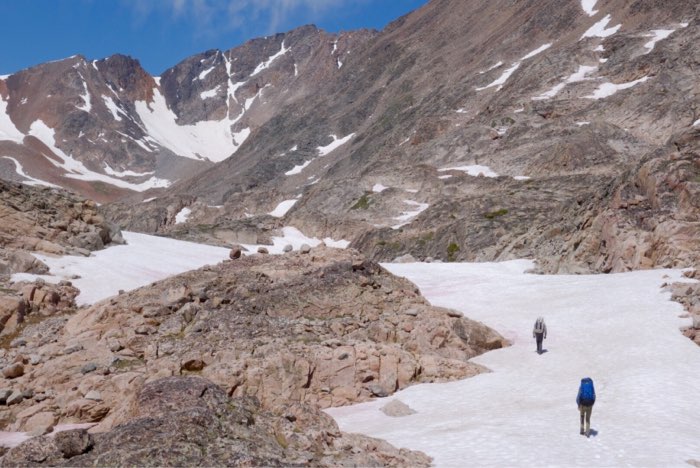
Day 9: July 17
The day broke calm and clear, but frosty.
I had pitched my tarp at the base of a west-facing forty-foot cliff so I didn’t get to enjoy the warmth of the morning sun. Instead, I shivered as long as I could and then packed up my chair and coffee kit and moved to a sun-warmed granite slab overlooking Lake of the Winds’ eastern shore.
After some fishing, we packed up and had a map session, using the big map spread out in an oriented position on the slab and secured at its four corners with granite stones. Now that we were entering the final 1/4 leg of our trek, we reviewed our exit options in case there was too much snow for us to safely cross Sky Top Pass. A doe and buck mule deer wandered into the back of our campsite and curiously looked on while we searched for more lakes with big trout prospects on the map.
We left camp and circumnavigated slabs and ledges around the lake’s south shore and then started a nearly direct line due NW towards Fossil Lake. Our first pass, a Kindergarten climb of only 80 vertical feet, dropped us into the beautiful Gallery Lake basin with a pretty waterfall cascading into the lake’s northeast shore.
From Gallery, we got distracted talking about silly things and got suckered into an inviting climb to the north of our target pass, which was going to drop us into our intermediate destination at Lake of the Clouds.
Instead, we found ourselves more than half a mile northeast of the lake in a little tussocky meadow containing the headwaters of the lake’s inlet stream.
Realizing our error, we decided to stay on this bearing and enter the Fossil Lake basin via a pass that was a a bit west of the route that most backpackers take from Lake of the Clouds, and upon our arrival at this seldom-visited 10,280-foot col, we enjoyed one of the finest scenic vistas I have ever seen in this range.
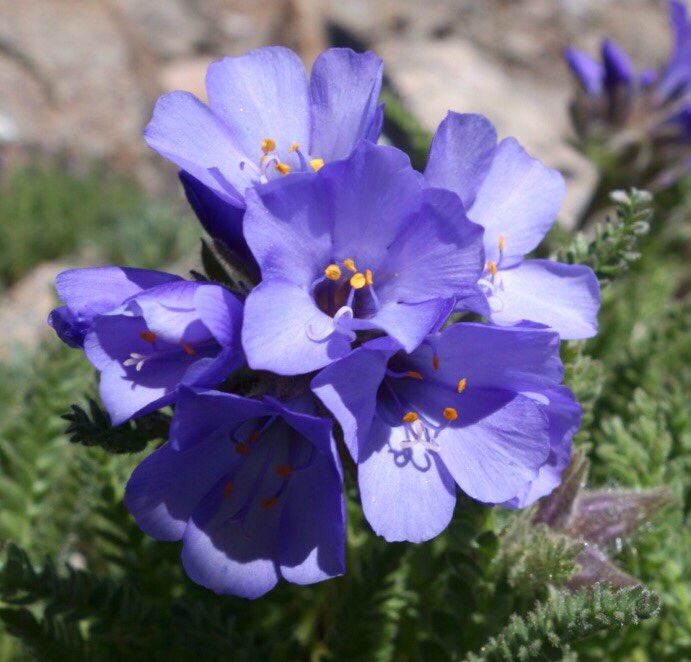
We stopped here for a long time, solving world problems and such (which seem easier when your packs are off and you’re restfully reclined in a patch of wildflower-laced tundra), as well as identifying all of the peaks on the horizon.
These peaks included a spectacular panorama comprised of some of the Big Ones of the Beartooths: Iceberg Peak (11,552′), Mount Wilse (11,831′), Glacier Peak (12,200′), Mount Villard (12,344′), the Montana High Point, Granite Peak (12,799′), and Cairn Mountain (12,200′).
While at the pass, we were able to recon our exit route over the Villard-Granite col and were surprised to see its east face choked with much more snow than we thought would be there. Giant cornices that we could see with the naked eye from five and a half miles away still protected the top of the col. And so, since we don’t have our snow climbing gear with us, we will have to formulate an alternative exit plan…
The route down was steep and a little precarious, as we walked “over an invisible fall line” to a deep, unnamed lake tucked away on a high bench overlooking Fossil Lake.
On the way down, we discovered talus litter: a deflated helium party balloon, undoubtedly released by accident by some crying kid at a four-year old birthday party down in Billings. This is the second balloon that we’ve found in high elevation talus on our Crew expeditions, so now we are wondering about the wilderness impact of helium balloons at parties down in town…
We reached Fossil Lake in the mid-afternoon and are camped on its exposed North Peninsula. We managed to catch several nice cutthroat trout, a half dozen of which made their way into our dinner stews.
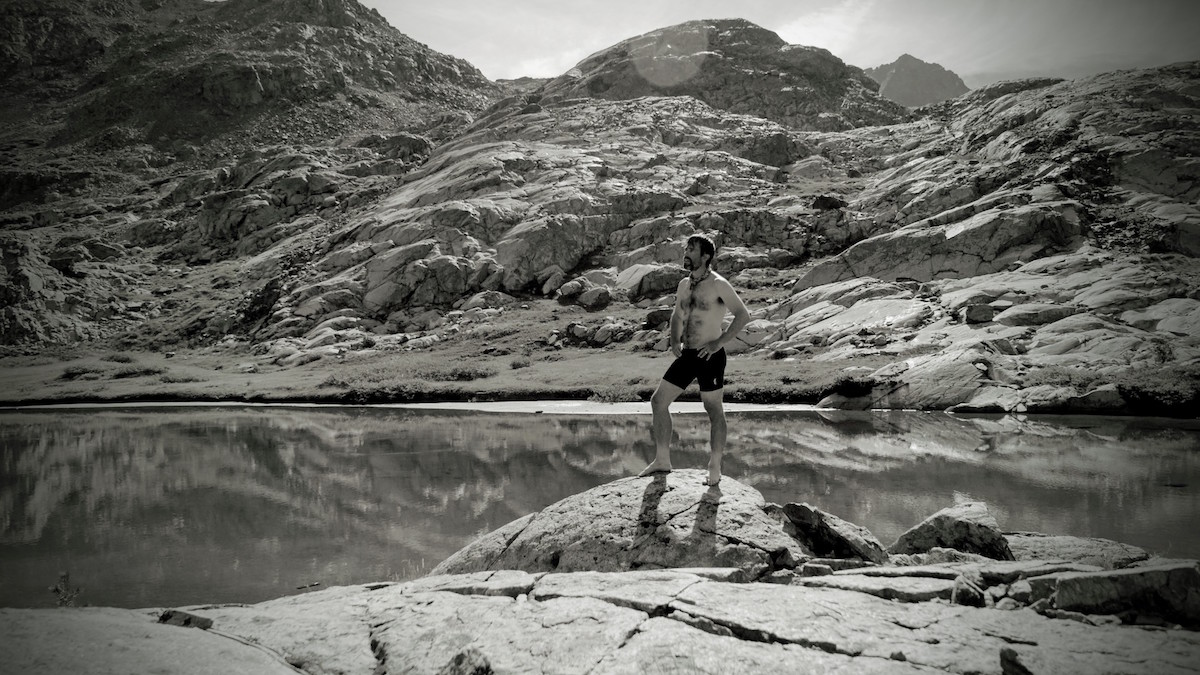
I took a swim today in the lake and I think my heart stopped beating when I dove in. It was the coldest mountain swim I’ve had in a decade. I may be getting too old for this sort of nonsense. Once I recovered with a hot coffee and some time engulfed in my down jacket and sleeping bag, I came back to life and fished for a bit more. We were caught a bit by surprise as a thunderstorm moved in, so we scurried back to our tarps and broke down our carbon fishing rods just as lightning bolts flashed overhead.
As we are a late dinner under the nearly-full rising moon, a giant meteor streaked across the southwestern sky, in a flaming glory of orange, green, and blue. We saw bits break off of it and vaporize quickly, but the meteor disappeared across the horizon with no apparent intent of burning out soon. None of us had ever seen anything quite like it.
This brings us to the end of our ninth day. Ominous dark clouds are building up to the west, and thunder is booming, so it’s time now to batten up the hatches and brace for the next round of storms.
Tomorrow: Sky Top Lakes? After that, maybe we wander out to the southwest and walk into Cooke City, where we can get burgers.
Godspeed,
RJ

Follow this live expedition blog as Backpacking Light’s Ryan Jordan, Eric Vann, and five others weave their way through glacial cirques, tundra meadows, and talus fields in Montana’s Absaroka-Beartooth Wilderness July 9-20. Dispatches will be posted to the Backpacking Light Facebook page, Instagram feed, and the backpackinglight.com home page.
 Loading...