DIY Backpacking Stove: An Ultralight Vortex Burner for Winter Backpacking: Series Outline
- Part 1: Background and Theory
- Part 2: Research and Development
- Part 3: Mechanical Design
- Part 4: Lab & Field Testing
- Part 5: Pot Support
Part 5: Pot Support
Pot Supports
You cannot put a pot ON a Vortex Burner: it has to rest a bit above the top. Upright burners usually have little folding pot supports, although these are often a bit small and may be unreliable with wide pots. I did not want to engineer something complex for my Vortex Burner ultralight winter stove, as “complex” usually means “heavy” and expensive (and very often a riveting machine). Several solutions presented themselves for the pot support.
One solution is to stick 3 Ti wire tent stakes into the ground around the stove in a triangle and to sit your pot on them. Variations on this theme include three rocks (an idea several thousand years old, and pre-internet as well) and a (Ti) wire grill over the top of the stove. The rocks are not always available: they may be under several meters of snow while a grill is stable but rather heavy (and may sink into the snow as well). The tops of Ti wire stakes are not always all that reliable as supports (they’re rounded), and that idea does not work on a hut table or in the snow anyhow.
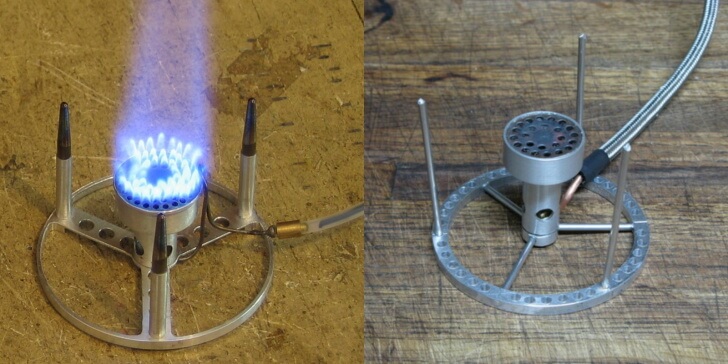
The above photo shows two variations on the tent peg idea: both are rigid rods going up from frames, like tent pegs. Yes, the burners look very similar, but I think I have the photo credits correct. Tony’s uprights have aluminum rods at the bottom and tapered titanium rods at the top, to take the heat. Tony’s version includes a visible heat exchanger loop, but the loop looks a bit too delicate for me. There are other similar designs to be found in the BPL Forums.
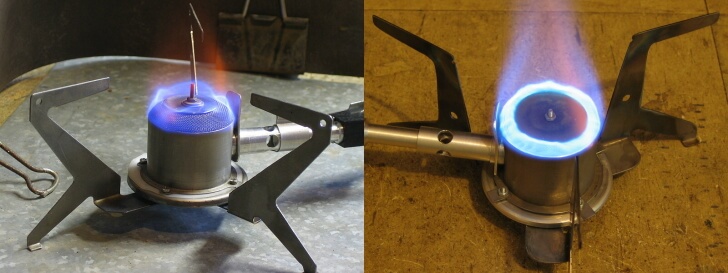
More sophisticated ideas involve collapsable (by pivoting) tripod supports as shown here. The two different tripod supports were, of course, milled out of titanium sheet. The one on the left is preferred over the one on the right, as it puts the bulk of the metal as far away from the flames in the center as possible. That minimises the amount of CO production due to quenching of the flames by the pot stand. For more information on that, see our 6-part series on carbon monoxide. Machining these forms out of sheet metal is a bit complex and wastes a lot of rather-expensive sheet titanium. However, the big hassle is making the right angle bend in each arm in exactly the right place and at exactly the right angle – while the titanium is red hot. It was difficult.
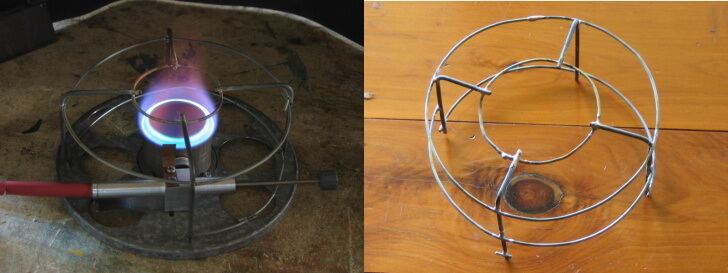
Here we have the wire cage idea. Some have made versions of this using wire mesh (or “wire cloth” in the USA). On the left, we have a version made with Ti wire rolled around a former and spot-welded into loops. Then some legs were bent up, and the whole lot was spot-welded together. Holding all the wires in exactly the right positions was … complex: a lot of jigs were needed. The problem with this design was that I simply do not trust the spot welds enough to use the design in the field. The joints may look solid, but a certain percentage failed with rough handling. I explained why this happened in a previous part of this series. The one on the right is far more solid: brazed bits of steel fencing wire comprised it, but it was too heavy.
Of course, there have been plenty of ideas featured at BPL, for instance, a pot stand for alky stoves by Jay Ham in 2005, a more robust pot stand for groups using an aluminum coffee can by Benjamin Roode in 2011, and another pot stand for alky stoves using some very cunning wire work by Steve Schweitzer in 2015. But there have been lots more.

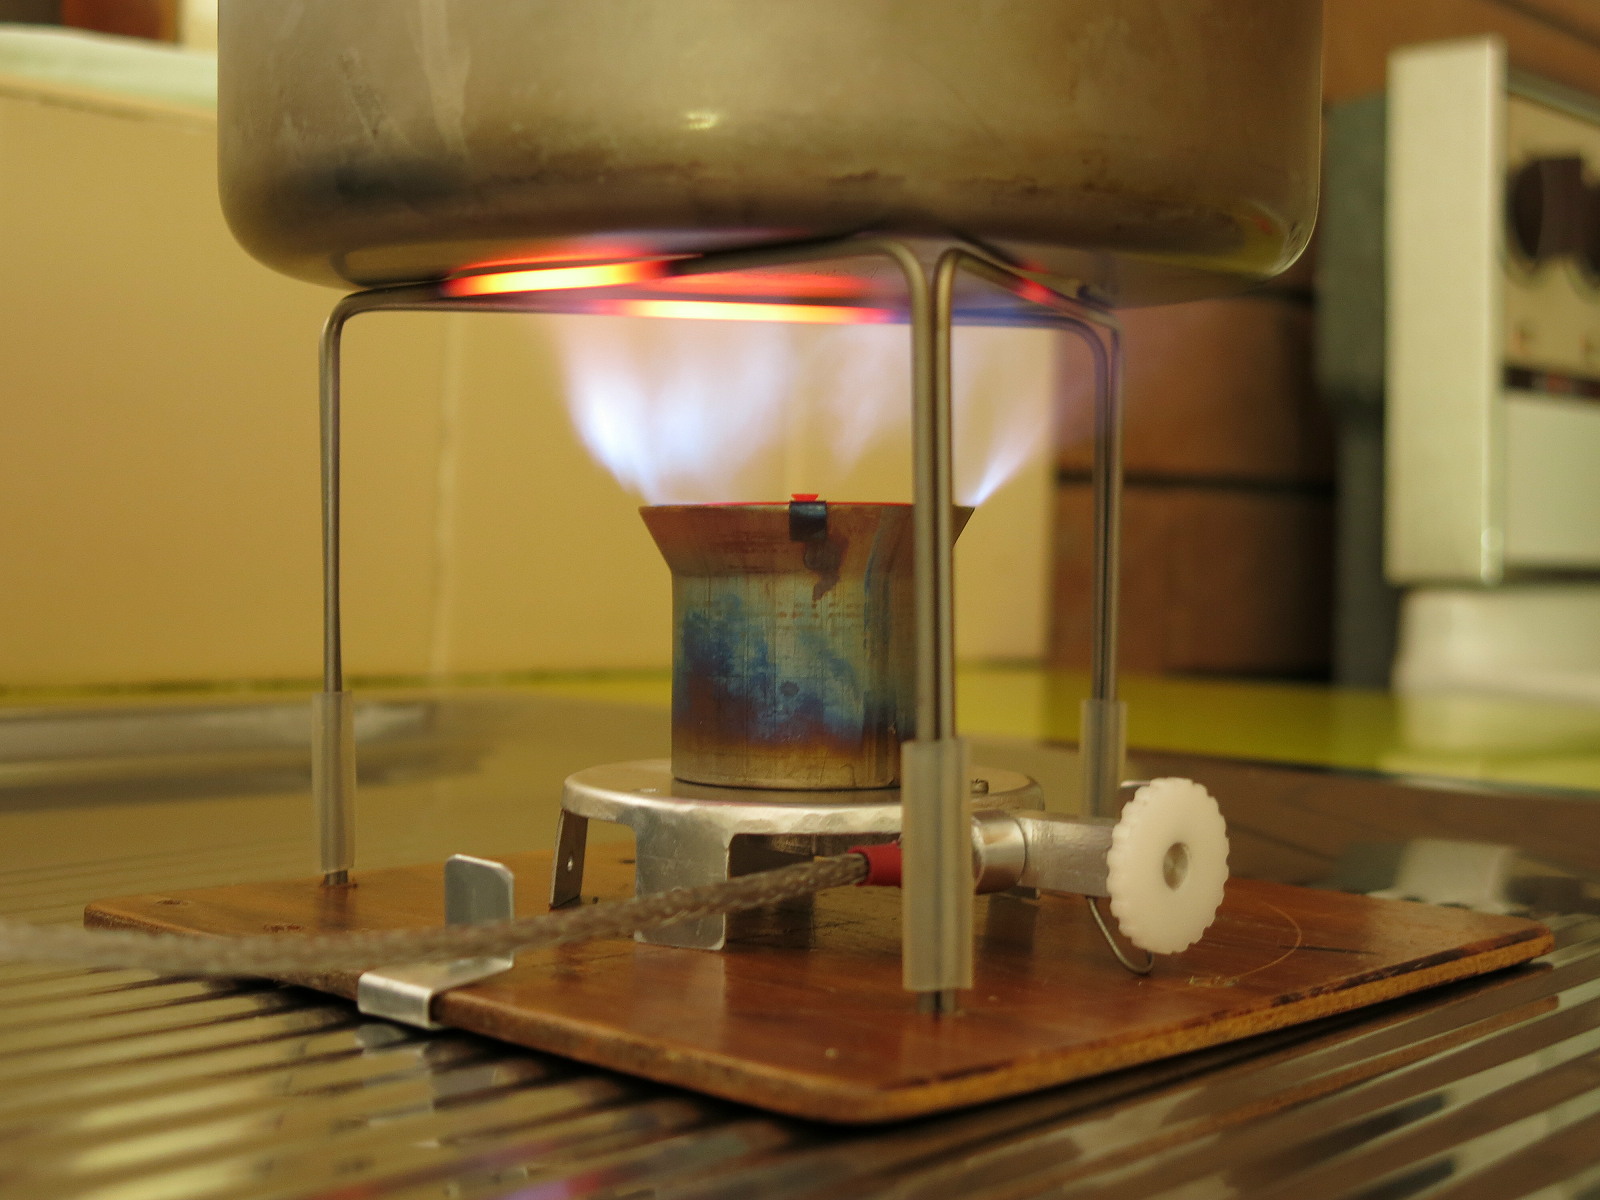
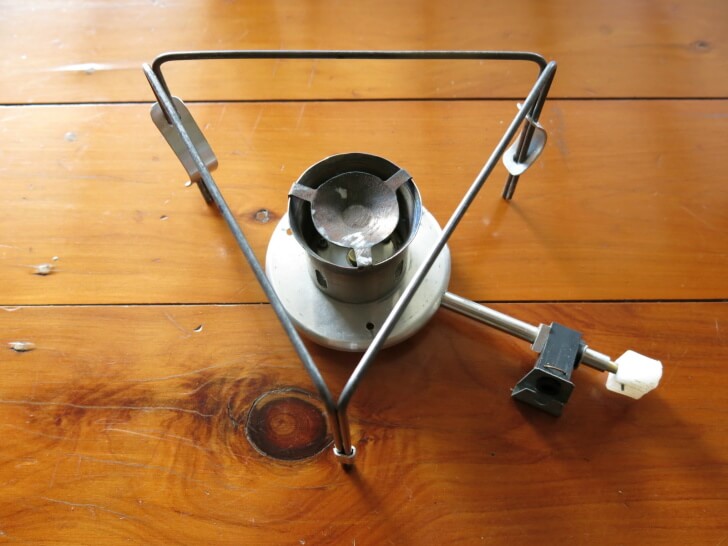
Needless to say, I had my ideas. My solution was to bend up some 2.4 mm Ti 6Al-4V ELI welding wire into a folding tripod frame to go around the burner, as shown here. No spot welding is involved, and no complex wire spirals (which are the very devil to make in Ti wire). By using a bending jig I had made some time ago, I was able to get a very repeatable version of these legs. The jig did not make sharp bends with can fracture in Titanium; rather, it made bends with a tolerable radius of curvature. By happy coincidence, one long length of the Ti welding wire was just the right length to make three of these legs. However, the example shown here is an early model, and the pot is a bit higher above the burner than is needed. Also, the pointy legs can sink into snow or dirt and unbalance the pot. Further evolution becomes necessary.
You will note that the titanium wire is glowing bright red in the middle. Steel wire does this too, but it gets a bit soft and bendy at this temperature. Aluminum wire … would be a little puddle on the base board by now. The 6Al-4V Ti alloy manages to cope, provided one is not rough with it.
A problem which has long plagued this design of pot support (it is NOT original by any means) is how do you link the legs together, in a non-wobbly manner, without incurring a lot of weight or vast tricky fiddles. I tried sprung metals designs as shown here, and I also tried some light coil springs of exactly the right internal diameter (ID). The coil springs worked rather well when I got them with exactly the right ID, but it was hard getting them on the legs. It would be better to have something which was easier to assemble, at least for the third joint. That’s the one you need to undo to pack the lot down flat.
You may note that the front (3rd) joint in the photo is a very small aluminum spring clip (MYOG of course). That makes opening the tripod out and packing it down easy. True, that joint is not as proof against wobbles as the other two, but with the only minor care, I found the other two were sufficient for stability. In effect, the other two braced the front joint. But I was not happy with these ideas.
My preferred solution for linking the legs together is to use short lengths of thick-walled silicone rubber tubing (~3 mm ID), as shown in the previous photo. The Ti wire is not very heat-conductive, and the silicone rubber compound can take a lot of heat (more than most plastics). I found that the silicone rubber sleeves have no problems at all if placed near the bottom ends of the legs. In fact, I found the bottom ends of the legs only got “warm” in normal use. If you make each sleeve of tubing about .79 – .98 in, (20 – 25 mm) long they cut out almost all wobble but are not too heavy. The tubing is flexible but elastic: you can push it around a bit, including over bends in the Ti wire. The third joint in the design as shown has to be separable if you want to fold the tripod up for packing.
However, while this tripod could be quite stable on soil and some other surfaces, there is nothing to stop it from moving across a base board and off onto (into?) the snow. Or maybe one joint could sink into the soil a bit, tipping the whole lot sideways. OK, you would have to be doing something a shade silly for this to happen, but late at night when you tired, mistakes can happen. I don’t like mistakes with stoves.
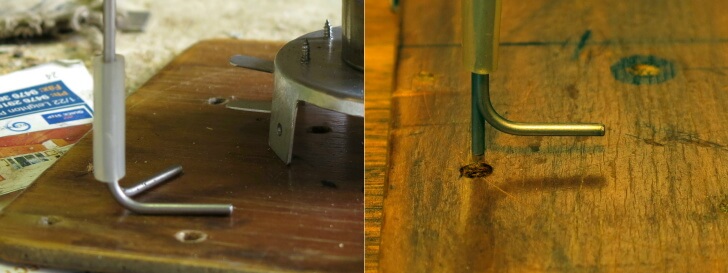
The basic tripod idea is good, but it can be improved. To stop the bottom ends of the legs digging an unknown distance into the soil, I bent them inwards at right angles to make “feet,” as shown in the left photo here. These feet provide far more support on all sorts of surfaces. That was a good start, but those feet can slide around on a hard surface rather easily. If that does not worry you, then the design is complete. (The screws and metal tabs on the stove in the left-hand photo are from when I was experimenting with variable air holes sizes.)
To get more stability, I started with the foot idea and modified the design to give one foot for support and one short straight peg-leg for location, as shown on the right. The tip of each straight leg sockets into a hole in the 3-ply base board I use: one hole is seen just in front of the leg. The peg part only sticks out about .12 – .20 in. (3 – 5 mm) beyond the bottom of the matching bent leg or foot, just enough to key into that hole. Yes, that does mean most of the pot weight can be sitting on the leg with the bent foot – but you still have three points of support – a tripod, and in practice that works fine. I think the friction between the silicone rubber sleeve and the straight leg stops the straight leg from sliding up under normal loads as well. On the other hand, if you make the straight leg stick out a few more millimeters, nominally going through the hole in the plywood, then you might have the pot resting on that part of the leg when using a hard surface. It is still a tripod, so who cares? On snow or soil, it would not matter either way.
Member Exclusive
A Premium or Unlimited Membership* is required to view the rest of this article.
* A Basic Membership is required to view Member Q&A events

Discussion
Become a member to post in the forums.
Companion forum thread to: DIY Backpacking Stove: An Ultralight Vortex Burner (Part 5: Pot Support)
In part 5, Roger Caffin shares his design for a pot support for the vortex burner as a solution for an ultralight winter DIY backpacking stove system.
Nice idea (UP, that is), but I’ll have to wait till later in the season.
I really like the triangular, collapsable pot support. Light, very stable (like a 3-legged milking stool) and compact when disassembled – not to mentioned deucedly clever.
Hi Eric
The stability depends on two things. First, the triangular support. That much is obvious.
But it also depends on the stiff 3-ply base and the clips holding the pot support. They prevent any movement of the bottom of the legs. it turns out that the base and clips are very important.
Cheers
Rog,
Yes, it’s necessary to have that plywood base for stove support in winter but using an aluminum base for only the stove (to reduce overall 3-season weight) means the three leg support won’t wobble when set on decently level ground. Most sit-on-ground stoves these days use three legs for this reason.
I once made a round 1/8″ plywood base with small aluminum leg “grips” for my MSR Dragonfly stove for winter use until an aftermarket plastic stove/fuel bottle holder hit the market.
Many backpackers are irredeemable tinkerers, thankfully.
Eric B.
Many backpackers are irredeemable tinkerers, thankfully.
Huh? Do you mean some are not??? :)
Fettucini al Fungi for dinner. Back from trip last night. Sub-zero every night – meant to be early summer.
Cheers
Become a member to post in the forums.