Top Stories
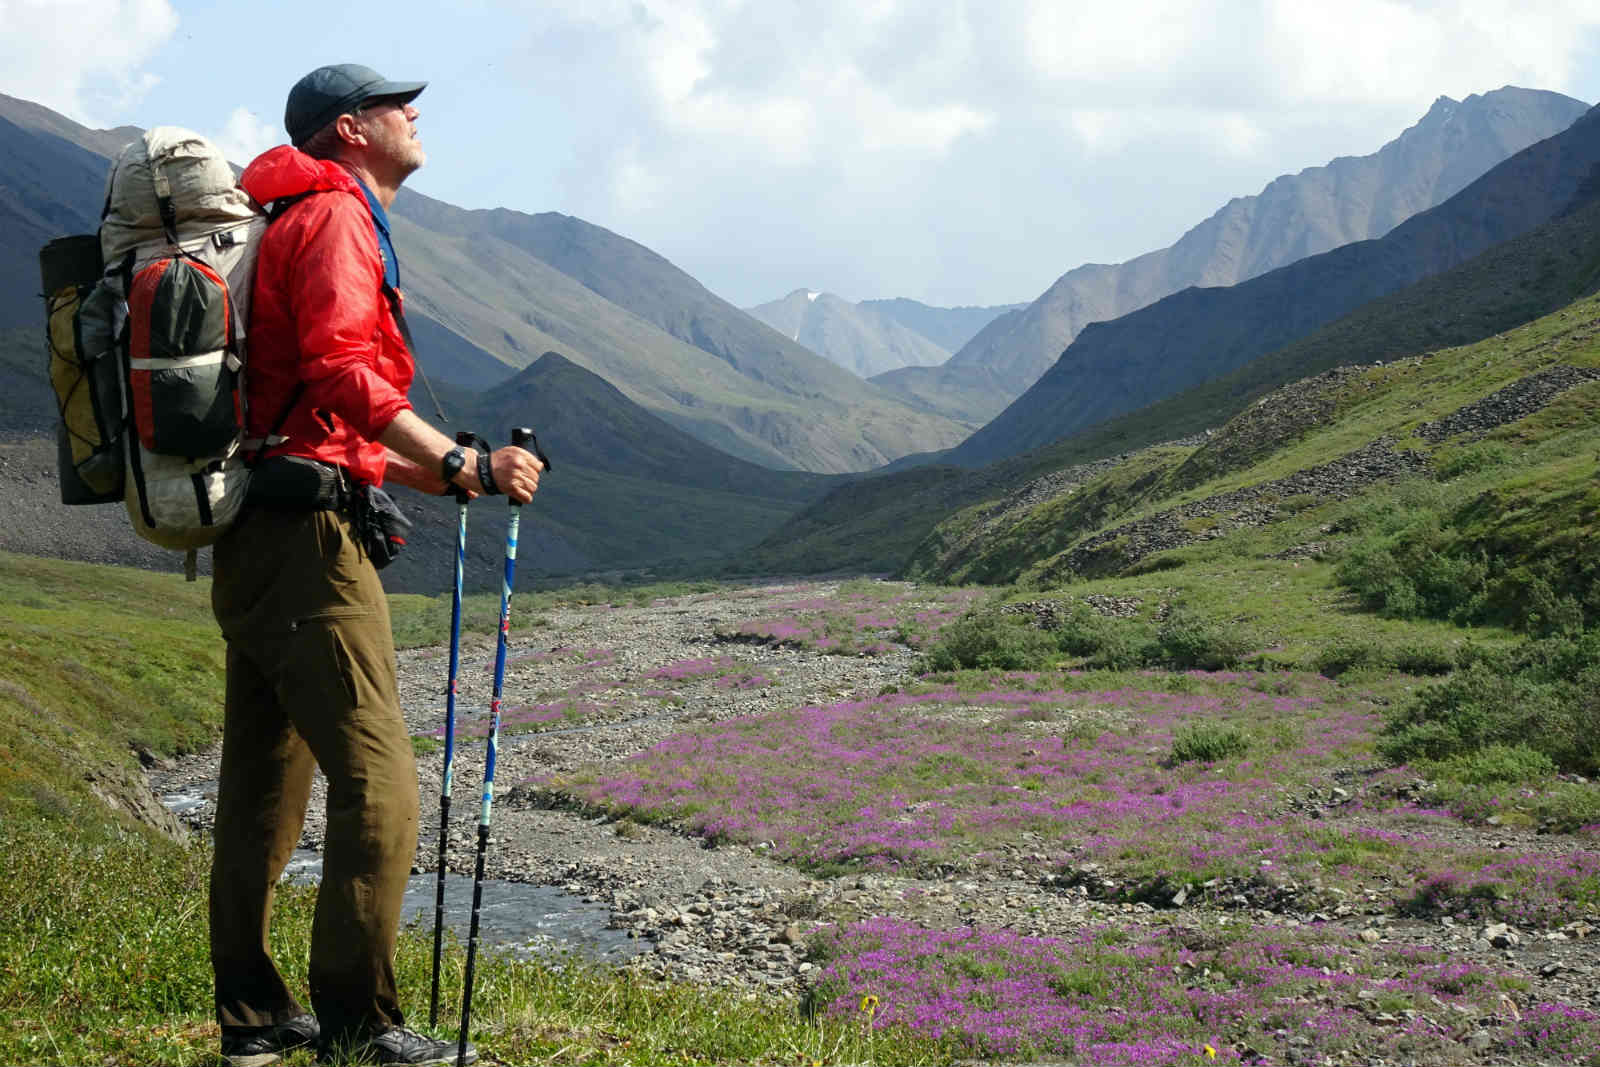
Woman Plans Five Year Trek Walking the Americas
Bethany Hughes who already has completed the Pacific Crest Trail is planning a 20,000-mile (yep you read that right!) trek from Ushuaia, Argentina to Barrow, Alaska. Her trip will begin in December and Hughes plans to take her time along the way stopping in local villages and inspiring others to pursue their goals. Expecting to face hardships along the way including wildlife, winter in the Andes, scorching jungles, and high mountain passes, she is most concerned about the people she might face as she crosses through dangerous countries in South and Central America. To mitigate these risks she has learned martial arts and has taken wilderness survival courses. Her trip is expected to take five years and she has lined up some friends to keep her company on various sections as she journeys northward.
- Read the full report on Hughe’s plan to walk the length of two continents from Deseret News.
Sunset on the Trail
IMPORTANT: If you don’t see the photo immediately below, just click this link to refresh the page, and you’ll be good.
#Backpacking @joshsupertramp: #sunset #clouds Visions of a sunset just appear When I close my eyes Takes me closer … pic.twitter.com/AD9scAT5Ps
— iArrow GPS (@iArrowApp) October 10, 2015
Author Writes Book on Her Pacific Crest Trail Transformation
Aspen Matis has faced incredible hardship in her life. She grew up with overbearing parents and during her freshman year in college she was raped. For a time, Matis stuffed these emotions inside until she reached a breaking point. Turning this frustration into something constructive, she left her hometown in Massachusetts and struck out on the PCT which she had section hiked previously. Her decision to do this came out of a love of hiking and the outdoors from her childhood, and a desire to face the hardships that had infiltrated her life. Each day was a challenge and a risk as she embarked without proper clothing or adequate gear, but with each step on the trail she felt more empowered and began to let go of her weaknesses and shame. After completing her trek, she enrolled in a writing program at The New School in NYC where she met her mentor, Susan Shapiro. Later, she completed her book, “Girl in the Woods” which she dedicated to Shapiro. Matis plans on donating $1,000,000 and 5% of the proceeds from her book to RAINN, Rape, Abuse and Incest National Network.
- Read the full report on Matis’s incredible journey from The Villager.
Beginner Trail in Zion
IMPORTANT: If you don’t see the photo immediately below, just click this link to refresh the page, and you’ll be good.
Tips: A less-traveled, beginner-friendly backpacking trip in @ZionNPS http://t.co/E6iiSs9JQG pic.twitter.com/DUC1Hpznh5
— Wilderness Society (@Wilderness) October 13, 2015
REI Skips Black Friday Mayhem With #OptOutside
At the end of October, REI announced all their stores will be closing for Black Friday. This big announcement has rippled through the outdoor industry with Outdoor Research following suit and REI’s decision has garnered praise from many of its customers. The financial loss from this decision will be significant as Black Friday is one of the busiest days of shopping each year and REI will pay all 12,000 of its employees for work that day even though no one will clock in. REI insists that it is not focussed on the dollars and cents and instead has shifted its priorities to getting people outdoors and rewarding employees by giving some of them a four-day weekend to spend time with their families.
- Read the interview with Ben Steele, Chief Creative Officer for REI, about this shift and the #OptOutside Campaign from Gear Junkie.
- Watch the video below to see an interview with REI CEO Jerry Stritzke on Good Morning America.
IMPORTANT: If you don’t see the video immediately below, or see a “Sorry…” message in the video player, just click this link to refresh the page, and you’ll be good.

Dog-Friendly Backpacking Trail Near Seattle.
IMPORTANT: If you don’t see the photo immediately below, just click this link to refresh the page, and you’ll be good.
Dog Friendly Backpacking Near Seattle – Chikamin Peak to Snoqualmie Pass http://t.co/6G0zThYBbV via @YDWWYW
— John Soltys (@moosefish) October 12, 2015
APPALACHIAN TRAIL FUGITIVE JAMES HAMMES PLEADS GUILTY TO WIRE FRAUD – According to Daily News, Hammes agreed to a plea deal in his $8.7 million case which called for him to divulge the details on how he extorted his former company, a Ohio Pepsi-Cola bottler.
Expeditions
Man Crosses Scotland by Foot
David Brown joined the Great Outdoors Challenge sponsored by the British outdoor magazine, “Great Outdoors” for a 13-day, 200-mile walk from west to east across Scotland. The Great Outdoors Challenge helps about 300 people each year with the logistics and advice to complete this trek. On his trek from sea to sea, Brown learned to savor the moments in quiet while alone and experience the joy of meeting another hiker on the trail and swapping stories. While on the trail, Brown stayed in hostels or bed & breakfasts every couple of nights but that was not to say his trip was without hardship. Harsh weather forced Brown to wear all the warm clothing he brought on one particularly stormy day which tested his determination and fitness. Also Scotland’s hills are round and bare so what appears to be the summit often turns out to be just another ridge as the hill stretches skyward.
- Read the full report on the Great Outdoors Challenge from National Post.
Girl Completes One-Year Backpacking Journey Across Latin America
Elodie, author of Further But Closer, wrote the story to chronicle her year spent in Latin America where she was determined to live as the inhabitants do and experience their lifestyle. She spent the year backpacking and exploring countries across Latin America. From the food to the sights she was fully engaged in the experience. She produced a video showing her travels and all she learned.
- Watch the video showing her experience living as a local from Daily Motion.
Friends Reunite for 8-day Trip in Arctic Circle
Ten friends from Knoxville, Kentucky ventured to Gates of the Arctic National Park. Their trip was filled with the usual hardship brought to you by the Brooks Range; wet conditions, tundra, and mountain passes are the ingredients for a challenge and a memorable trip. Halfway through they faced a raging stream and used teamwork and ingenuity linking arms and step by step forded the stream because there was no turning back. Even reaching the park entrance is an adventure as the surrounding area is devoid of roads, cell phone service, and other amenities of modern living. After a plane flight into the heart of the park from Bettles, Alaska (year-round population of 12), some adventures along the way both by plane and foot, and a plane flight back to Bettles these adventurers were ready to share their stories with their family, friends, and the world.
- Read the full report on the Brooks Range adventure from Knox News.
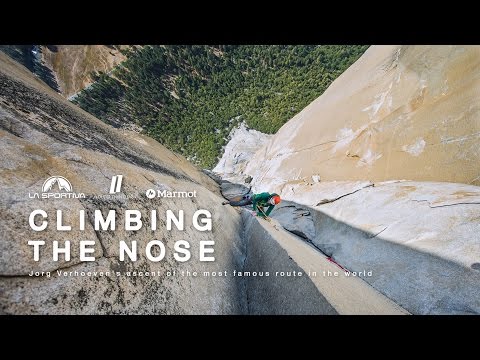
CLIMBING THE NOSE OF EL CAPITAN – The video below shows European climber, Jorge Verhoeven’s October 2014, thirty-day attempt climbing the nose of El Capitan which has only seen four ascents since 1993.
IMPORTANT: If you don’t see the video immediately below, or see a “Sorry…” message in the video player, just click this link to refresh the page, and you’ll be good.
IMPORTANT: If you don’t see the photo immediately below, just click this link to refresh the page, and you’ll be good.
16 Trips to Add to Your Bucket List
Who needs a vacation? “16 Astounding Backpacking Trips To Add To Your Bucket List” http://t.co/FR9mlDaOI0 (via @BuzzFeed)
— Sierra Club (@sierraclub) October 19, 2015
FIRST TIME TO HAWAII? – Daily News has these trail recommendations for you.
BOARDPACKING ON WESTSIDE VANCOUVER ISLAND – Elder SUP reports on some friends who strap their gear to a stand up paddle board as a way to look for adventure.
Outfitters Hard at Work in Denali National Park
IMPORTANT: If you don’t see the photo immediately below, just click this link to refresh the page, and you’ll be good.
See outfitters working in Alaska’s DENALI NATIONAL PARK #backpacking #climbing @DenaliNPS http://t.co/DWyG8II5I3 pic.twitter.com/4RuMyZ0ruh
— Brown’s Guides (@BrownsGuides) October 12, 2015
MOTHER AND DAUGHTER THRU-HIKE JOHN MUIR TRAIL – Kaweah Commonwealth reports on mother-daughter duo who spent the summer hiking the JMT.
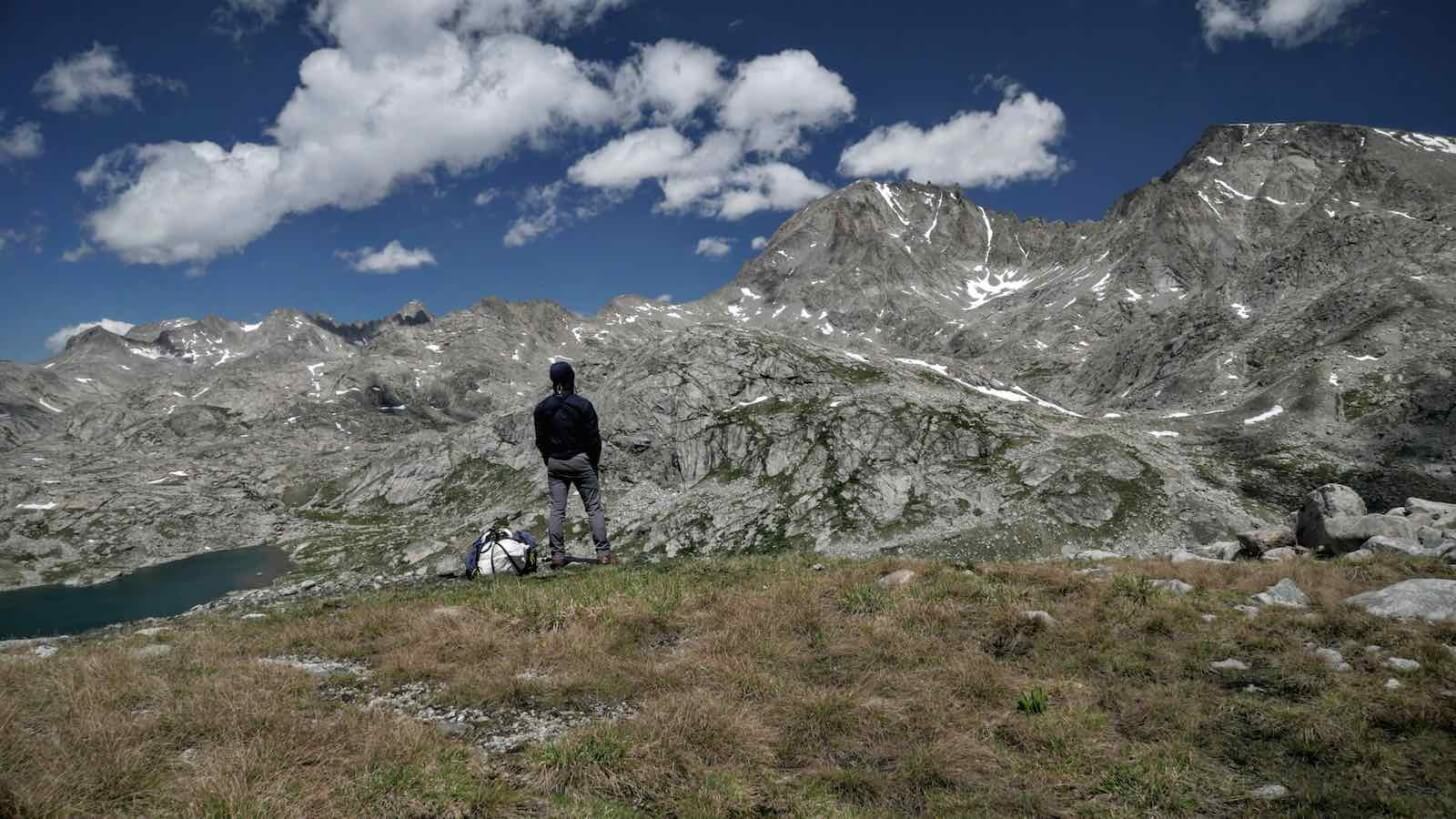
Photo of the Month
Wouter Boer an adventurer from the Netherlands who explores much of Northern Europe stops to in northern Scandinavia for an iconic photo along the rim of a glacier.
IMPORTANT: If you don’t see the photo immediately below, just click this link to refresh the page, and you’ll be good.
A photo posted by Wouter Boer (@wouter.boer) on
Skills
Ingredients for Planning an Expedition
Alastair Humphreys is a well-traveled man. That’s actually a bit of an understatement. He has traveled across India by foot, Iceland by packraft, across the Empty Quarter Desert with a cart, and has even biked across the whole world – a journey that took four years. These adventures have given him a lot of perspective about life and what it takes to plan an expedition. He insists that the best adventures are simple, but agrees that they may not be easy. He does believe they are worth it as challenges lead to learning and memories. In his recent blog post, Humphreys lays down the basic ingredients for planning an expedition and the steps needed to make those dreams a reality. In addition to covering equipment, budget, training, and logistics Humphreys also interviews other experts who offer their insights on the best ways to start your next adventure.
- Read the full report on the expedition ingredients from Alastair Humphreys.
10 Ways to Go Lighter
Although we subscribe to Backpacking Light, a refresher on some tactics to lighten your load is never a bad idea. Sometimes they are obvious taking less gear, choosing trekking shoes over boots, and choosing lighter versions of the gear. Other times methods like looking for ways to multi-task and cut redundancy in your gear can make a significant difference in your pack weight. Going light is a mindset where you challenge yourself to see how much you can really leave behind.
- Read the lightweight techniques from Camping Canuck.
5 Tips to Seeing More Wildlife on Your Thru-Hike
IMPORTANT: If you don’t see the photo immediately below, just click this link to refresh the page, and you’ll be good.
5 Tips for Seeing More Wildlife on Your Thru-Hike: https://t.co/RMCk7AoVbC by @WildWhiteBlazin #backpacking #hiking pic.twitter.com/gGYaV1PqPX
— Appalachian Trials (@AppTrials) November 2, 2015
10 Beginner Tenkara Tips
Any new endeavor can be frustrating if begun the wrong way. On the flip side, there is no substitute for learning the right way to do something. The same is true with Tenkara Fly Fishing. Tenkara rods are a great compliment for your lightweight kit swapping food rations for a rod and tackle. Plus tasty, fresh fish is a blessing on any backpacking trip. Furthermore, they offer another form of wilderness recreation and a way to unwind after a long day. Before you begin this sport, there are some tips that will increase your enjoyment and decrease your frustration. Tenkara, devoid of a reel and and a lot of line is already a step ahead of traditional fly fishing in terms of simplicity. Nevertheless, learning proper techniques under an expert, having the right gear and fishing equipment, and learning trout behavior can make a big difference and increases your success rate.
- Read the beginner tenkara tips from Section Hiker.
How to Budget to Travel the World
IMPORTANT: If you don’t see the photo immediately below, just click this link to refresh the page, and you’ll be good.
Looking for a Saturday morning read? See how I budgeted to travel 14 countries over 2 years- http://t.co/zOrTG8UImh pic.twitter.com/cKRXOu3YBD
— i come undone (@icome_undone) October 10, 2015
TRAINING FOR HIKING MAKES A DIFFERENCE – According to Poughkeepsie Journal, Hiking is fun only as long as you are in shape. For a long thru-hike or a multi-week adventure there is time to work into your fitness, but for a shorter expedition a lack of fitness can lead to misery and sometimes it becomes impossible to complete your trip’s goals. Fitness is only acquired through persistent training.
Gear
Andrew Skurka Completes Long-Term Review of Third Generation SPOT
Andrew Skurka has used his third generation SPOT for several years with an estimated 100 days over the last two years so he feels comfortable giving a long-term review. In his review, Skurka stresses that there are a lot of emergency and non-emergency satellite devices available and they all have strengths and weaknesses, and the most important factor for choosing a device is the intended use. The third generation SPOT is ideal for someone who values the weight of every item in their pack and doesn’t mind one-way communication. In some, circles the latter may be viewed as a weakness while it is a blessing for others who want to have an ability to communicate in an emergency without the temptation of a two-way communication device like a satellite phone. There are severe limitations with one-way communication; SPOT only has four features, OK, Help, SOS, and Custom Message, so in emergencies with multiple injuries, unique terrain features, or other complicating factors SPOT may be inadequate to address the scenario. As a result, it is best for shorter, less remote trips where access to advanced medical care is not too far away. For long expeditions, the SPOT should be accompanied by a two-way communication device that can facilitate the complicated features of the scenario and coordinate evacuation.
- Read the full report on the third generation SPOT from Andrew Skurka.
A Geek’s Guide to Ultralight Backpacking
IMPORTANT: If you don’t see the photo immediately below, just click this link to refresh the page, and you’ll be good.
Great article from @chrisbrinleejr on #UltralightBackpacking https://t.co/4XReA1yxzC
— Hyperlite Mtn Gear (@HyperliteMGear) October 29, 2015
Gear Comparison Table Simplifies Trip Logistics
Often times, choosing the right gear for an expedition can be very taxing. It’s even worse when you don’t have the right information or have to spend hours scouring the internet doing research. It is much easier to make decisions when the information is right in front of you, and all you have to do is classify the type of trip you are doing, and characterize the expected weather conditions and the difficulty of terrain. Mark of Mark’s Walking Blog recognized this fact so he compiled a list of the UL sleeping bags and quilts 1 lb or less. The result is a very comprehensive and detailed table showing weight, price, construction, links to reviews, and comments for a wide variety of UL sleeping bags and quilts. He has plans to add more gear comparison tables so keep your eye out.
- Checkout the UL sleeping bags and quilts gear comparison table from Mark’s Walking Blog.
Are Trekking Poles Needed?
IMPORTANT: If you don’t see the photo immediately below, just click this link to refresh the page, and you’ll be good.
Trekking Poles – Are they needed while #hiking & #backpacking? Thoughts from the community: http://t.co/bYCtSWg0lx pic.twitter.com/XOQufEJHyn
— TrailGroove Magazine (@TrailGroove) October 12, 2015
Deuter Fox 30 Backpack Review Works Well for Kid’s Backpacking Trips
Some of the challenges associated with backpacking or hiking with young kids aside from the obvious are those associated with subpar gear. Often kids’ backpacks are poorly constructed and fall apart easily. The Deuter Fox 30, a 2 lb 10 oz pack although not necessarily ultralight carries well and has enough space (2,000 cubic inches) for kids to carry their sleeping bag and some other items. The Deuter Fox 30 is an adult pack shrunk to kid size which teaches them how to pack a real backpack from an early age.
- Read the full review from Trail Cooking Blog.
LIGHTEST REUSABLE RAZOR NOW AVAILABLE FOR PRE-ORDER – The travel edition of the 3d printed Nylon Ockham Razor is now available for pre-order on Indiegogo and Kickstarter.
MCNETT CORPORATION ACQUIRED BY COGHLAN’S LTD. – McNett Corp makers of Gear Aid (Tenacious Tape) and Aquamira announced earlier this month that it was being acquired by Coghlan’s Ltd of Canada which makes a range of outdoor accessories. Business is expected to continue as usual and Duane and Nancy McNett former owners of McNett Corp. are looking forward to their retirement.
People
With His Wife as His Support Team 74-Year-Old Man Hikes the Appalachian Trail
After years of wanting to hike the AT, Michael Venus delegated some of the responsibility of his mechanical engineering business to his son and decided to hit the trail. His wife, Rita was his support staff and made the thru-hike possible. She would bring him dry clothes after rain and bananas to keep his potassium levels up during his 6-month thru-hike. Each night, she would drive him to the nearest hotel except for a few days when he slept in a tent or cabin. He endured the hardships of the walk; the physical toil and the loneliness and in the end he became the fourth oldest man to hike the Appalachian Trail. He was never really alone, his wife was shadowing him the whole way. Aside from keeping herself busy as his “sherpa,” Rita became a tourist exploring and shopping in trail towns from Georgia to Maine. Her help was not only indispensable from a logistical standpoint but her backbone of encouragement and practicality helped Michael finish the trip. Near the end, as the trail winds through New Hampshire, the terrain increases in difficulty and the weather worsened, Rita’s support and advice enabled Michael to take it one step at a time and ultimately finish the thru-hike.
- Read the full story about this dynamic duo from NJ.
Hendrik Morkel Enjoying the Via Dinarica Trail
IMPORTANT: If you don’t see the photo immediately below, just click this link to refresh the page, and you’ll be good.
Day 3 of my #ViaDinarica #backpacking trip: https://t.co/3HHUUgzTHX #hiking #mountaineering pic.twitter.com/UpkwuiyMoO
— Hendrik Morkel (@hendrikmorkel) October 15, 2015
A Man and Woman meet on the Pacific Crest Trail and Marry
Before Claire Henley left on her PCT thru-hike in April 2015, she told her family she was going to meet her future husband on the trail. And she did. Two weeks after “Big Spoon” (her husband’s trail name) caught up to her on the trail they knew they wanted to be married. They say you get to know people very fast on the trail as you get to see their genuine self as they struggle with the rigors of the trail. Shortly, after the proposal and calls to their respective families, Claire and Big Spoon were married in a remote Los Angeles county courthouse. Afterwards they set off on the trail again, together to finish their hike.
- Read the Claire’s account of her Pacific Crest Trail adventure and Marriage from Chattanoogan.
88-Year-Old Women AT Hiker Offers Advice from 40 Years of Trail Hiking
Nancy Weaver has spent forty years hiking sections of the Appalachian Trail. She started out backpacking with her late husband and her sons, and now goes out with friends. Over the years, she’s learned the lightweight way to do it. After years of observing people struggle under the weight of lots of gear they never used, Weaver concluded that the best strategy was to not bring a lot of gear because you need to carry it. She thrived on minimalism and perseverance as she met all the challenges she faced whether bears or torrential rain with determination.
- Read the advice on making hiking a lifetime committment from Al.
The Six Characteristics of Successful Thru-Hikers
IMPORTANT: If you don’t see the photo immediately below, just click this link to refresh the page, and you’ll be good.
6 characteristics of successful thru-hikers: https://t.co/Zk2ECIpvvp #AppalachianTrail #Hiking #Backpacking pic.twitter.com/hwSnSkKKAY
— Appalachian Trials (@AppTrials) October 30, 2015

Tom Hills running in Scottish Highlands. Photo by Chris Davies courtesy of Sidetracked.com.
MAN RUNS UP SULIVEN MOUNTAIN IN SCOTTISH HIGHLANDS – Sidetracked has the story of Tom Hill a trail runner. While we don’t think any records were set, Chris Davies with camera in tow follows Tom Hill up the mountain and in the process shows us that running can be meditation.
IMPORTANT: If you don’t see the video immediately below, or see a “Sorry…” message in the video player, just click this link to refresh the page, and you’ll be good.
SENIOR HIKING GROUP GIVES NEW MEANING TO “VITALITY” – Centre Daily News shares the story of a group of seniors who get outside every Tuesday morning for a hike in Central Pennsylvania.
HEATHER ANDERSON SETS RECORD FOR APPALACHIAN TRAIL – Heather “Anish” Anderson, a personal trainer from Seattle recently set the record for the fastest known time in a self-supported fashion on the Appalachian trail. Outside Online writes how it may have been her determination from being a trainer that gave her the mental edge to do the impossible. Also read, my interview with Anish about her life and her recent accomplishments on Backpacking Light.
TRAINING TIPS FROM A 74-Year-Old AT THRU-HIKER – ABC News reports on the training she undertook to prepare her mind and body for the grueling trail.