Cold weather, snow, small tent – and a hot wood stove
Imagine skiing all day, having had six second-last runs with your mates as the sun goes down. You are happy, but a little cool, damp, tired, dehydrated and hungry, and the snow is gently covering up your tracks so that tomorrow will be all about more fresh tracks. Just think of the joy of walking into your tent, heaving off your ski boots, sitting down and within 3 minutes having a glowing, gently growling slow combustion stove, fueled by fire damaged snow gum sticks (a truly renewable fuel with no environmental cost for its creation, transport or containment). Instantly it is warming you and your little tent with the power of a 890 watt radiator, there’s a gentle fire-light glow flickering around the tent, and your gloves and jackets are hanging up to dry. What’s more, a big hot soup or coffee for two will be ready to drink in 15 minutes time, and more water is coming from snow to save that dreaded trip to the creek. ââŚahhh he exaggerates a little âŚ.â That was my dream of heaven on earth.
Now it is a reality and it comes with only a 500 – 600 g weight penalty that can be discounted by the weight of an alternative conventional stove and fuel load. It also delights me that this comfort and fun comes in unlimited quantity with little cost to the planet (or to me) and what I consider to be a manageable risk. Â Follow my story if you think you might like to camp like this.
A Brief History of Micro Stoves for Tents
Oh what would I give for a nice warm tent stove tonight
Portable wood-burning tent stoves are not new. They have been and still are used by many nomadic people around the world where life might be death without a stove. A skiing friend once handed me a page ripped out of a Reader’s Digest article. It showed an orange, conical Reindeer Herders tent at sunset with a flue pipe protruding through the conical top. He said with a big grin “Tim, look at the similarity of this setup to yours.” We agreed that there is seldom anything that is strictly new and all that we really do is improve things with the wonderful technologies and materials that our age has blessed us with.
North America seems to be at the centre of light-weight tent stove development and this is not surprising when you consider the temperatures that winter walkers an skiers must live and play in. Many portable stoves are available from companies such as Four Dog Stoves. However, at 8 lb these are not what one might call ‘ultralight’. On the other hand, one of the latest stoves by Titanium Goat is light (737 g) and seems, by my standards, to have reached the status of ultralight.
Titanium Goat WiFi stove
This elegantly designed stove is made of titanium. It appears to have a good flat and stable cook top but it is considerably larger than what I had in mind for my use in a small tent. It can easily be loaded up with a considerable amount of wood for an extended burn time, but the issue of balancing this feature with a clean burn appears to remain a problem. I also have concerns about uncontrolled air leakage from the extensive butt joins between the fine (0.12 mm) titanium foil side wall and the base and top plate (my estimate of the total join length is 1,600 mm). I can imagine how the rigors of high temperature heat distortion and packing and unpacking would diminish the quality of the seal. The need for âflue pipe dampersâ and âspark arrestorâ screens appears to me to be addressing a stove design deficiency rather than an improvement to stove design.
The Kifaru Oval stove is another exemplar ultralight stove and has been compared by an owner (Muelman) who has both WiFi and Oval stoves. He indicates that the Oval is even lighter but in his carefully considered opinion the WiFi is the leader in many design aspects including the leg support for the stove and the cook top and the stove assembly. For both stoves I would also raise the issue of how to support a hot stove on a deep snow surface. Snow melts.
My Stove Development Journey – Lessons from Failures
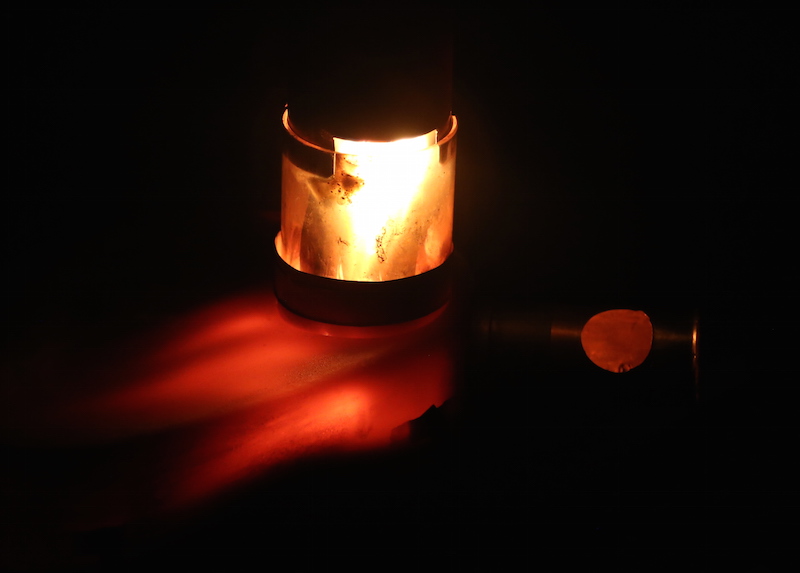
My goal was to design and build an utralight tent stove that gets a good balance over the following: light weight, packability, mechanical strength, chemical durability, cost, convenience, fuel efficiency, plus use of damp bush sticks for fuel. It also needed to provide heat to warm bodies, dry clothes, melt snow, and prepare hot drinks and food. Light from the stove to illuminate the tent would be a bonus and of course it had to be safe – in a tent. I also wanted the stove to be able to be conveniently used on the ground or in deep snow in cold and windy conditions and to be able to have the comfort of a tent snow pit while still using the stove.
During the development process I also set a somewhat difficult goal of having all the stove components stored inside the stove body and to have absolutely minimal assembly of the stove when deploying it (with cold hands). Along the way I discovered that I also wanted my stove to be very small and compact so that it would produce intense radiant heat rather than just being an air heater.
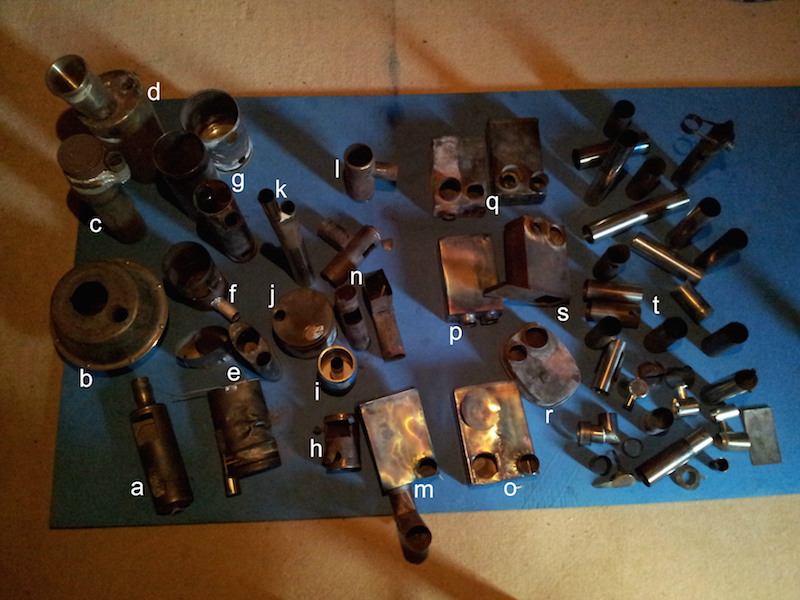
A wheelbarrow full of not-quite-right stoves: success has many wannabe fathers and failure is a bit of an illegitimate offspring, but fortunately we learn most when we fail.
In the photo above we have the following
Stanley thermos flask stove
double dog food bowl stove
Thermos stove with cook top
inverted SS can stove with boiler cup insert
toffee tin stoves (3) with pole mounts
modular stacked tuna tin stove
assorted (3) biscuit tin stoves
micro bean can stove
bean can boiler pot with flue pipe passing through the pot
flat cake tin stove with cook top
slender vertical pipe burner stove
modular secondary air injector
box stove with cook top and side burner attachment
various (3) alternative side burner attachments
box stove with boiler pot hole with cover
box stove with side burner port and flue pipe port on end to increase usable area of cook top
well used (2) box stoves
stronger Bento Box stove with rounded pack friendly shape
box stove showing partly opened sliding access door
assorted stainless steel and titanium foil fittings for micro stoves (everything to the right of r and s)
Well if you look at my barrow load of not-quite-right-stoves I should be an expert, but it is not so. I still have a lot to learn and I keep them as a reminder of what does and does not work and they are a great resource to have on hand when I wish to quickly plug something together to try out a new idea.
The Start of Things
My first stove was made from a big Stanley thermos flask. It sat in a small metal dish in the middle of the circular tent on an insulation pad on the top of my ground sheet. It was a very elegant design (so I thought at the time!) as you can see from the photo where the flue pipe doubled as the centre pole of my tent.
Stanley Flask stove, âa thing of beauty … but donât try this in the bushâ
The Stanley stove itself was pack-friendly when slipped into an old bushwalking sock. In contrast the flue pipe/tent pole (aluminium vacuum cleaner tubes) was dirty, smelly and the joints would get locked together with tar. It was consequently carried in a separate fabric tube on the outside of my pack.
Encouragingly, the stove made lots of radiant heat but it required fiddly small, sawn and split wood fuel blocks to sustain a good burn. Too much heat would come out of the base which would melt through objects placed below it. I have a ground sheet with a perfectly round dish shaped hole in it to remind me of this. This heat leakage would make the stove unusable on a deep snow surface, as the tent slowly sank.
It had another fault in that the burn was very unstable. It would burn too strongly and make much smoke, and then it would go weak before it would go strongly again. I added a secondary adjustable air port high up on the flask to both âburn excess smokeâ and to reduce the primary air flow that caused the excess smoke. Having both air ports with flow restrictors on them made a big improvement. However it was a constant fiddle keeping the burn rate under control, the flue would be smelly with tar and be horrible to backpack.
One cold night up on the Victorian High Plains by Ropers Hut the quality of the wood must have been too good and the smoke burner must have worked too well! Yes, you got it, the flue pipe/tent pole melted! At least there was no tar to worry about and the silnylon tent lives on.
The Next Stage
After this lesson I only used roll-up stainless steel or titanium flue pipes, and I pitched my tent with a separate tent pole (or no pole at all, which is my favorite setup, but that is another story). This meant that the flue pipe could be very light, long and compact as it did not need to be strong.
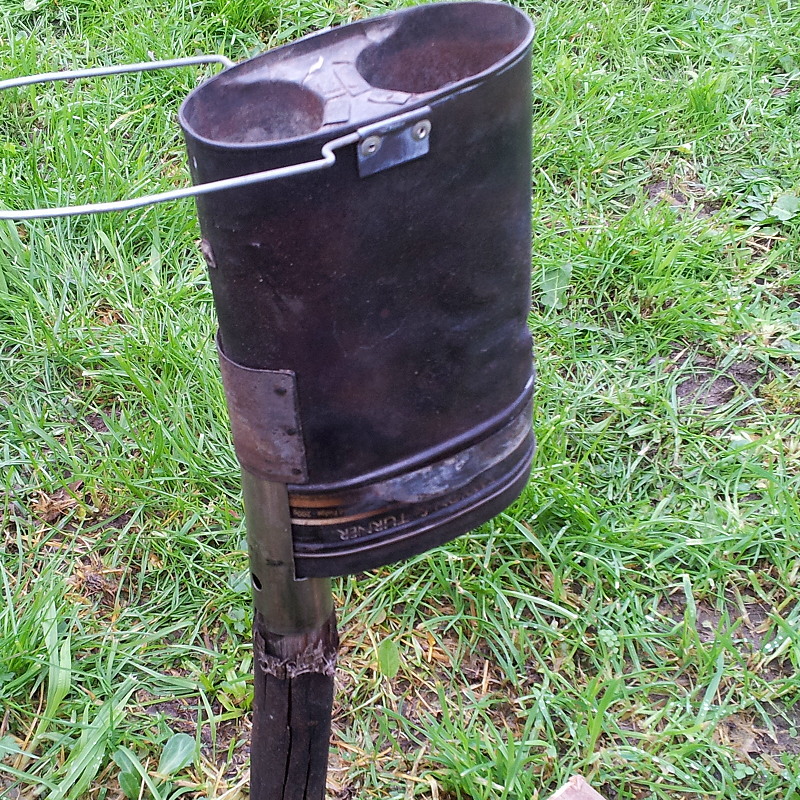
Toffee Tin Stove mounted on a wood pole stuck in the ground
This change was very significant: it allowed me to mount the stove on a single wood pole to keep it up off the ground or snow. That is, the pole was only required to support the stove, the cooking pot and the wood drying rack (to be described later), and not the tent. With this new design a lovely area became available for a suspended wood drying and storing rack below the hot stove. Part of the rack, or all of it, can be covered with aluminium cooking foil. It reflects heat from the stove back into the wood and also provides a convenient surface for storing and drying little pieces of wood that are very valuable for fire management, but would other wise fall into the snow.
I also learned that if this drying rack was made big enough and the sticks on it were long enough it formed a large natural barrier to prevent accidental contact of clothing and sleeping bags with the stove. The stove’s fine metal foil components even âsound a warningâ if the rack is touched.
I persisted for a while with many conventional stove designs (with generally upward burning flames), but the poor control of burn rate and associated messy tar deposits and very limited cooking capacity did not match up well to my dream stove. So it was back to the drawing board for a radically better design where easy fueling under wet cold conditions, burn stability and a good camp cook top for thirsty and hungry skiers would be paramount.
Wood Burning Theory and Clean Efficient Combustion
Efficient clean wood combustion takes three sequential steps. The first involves the pyrolysis of smoke (gases, tar and soot) from the wood. The second step is the combustion of the gas by a moving flame (~1000 C). The third step is the direct flame-less combustion of the charcoal at around ~1300 C, (TC Forensic and Scientific Services which produces intense heat at the site of combustion, much like the coals in a blacksmith’s forge.
In a good stove design enough of the heat from the flame and the charcoal burning is fed back into the incoming fuel to sustain the pyrolysis (gasification) and the flame. This can be done variously with direct radiant heating, conduction of heat through metal stove parts and pre-heating of the air supply. Furthermore, the pyrolitic smoke should pass through/over the hot charcoal bed as it burns to raise the temperature of combustion and help with the less combustible smoke components such as tar and soot. As the flame and hot reaction gases flow toward the flue pipe, they should be turbulently mixed with air and slowed down in a large heat exchanger void to complete combustion and the transfer of the heat to the stove body.
In an ideal design these processes would be in balance with a steady heating of wood for pyrolitic production of wood gas, combustion of gas and maintenance of a hot coal bed to aid complete combustion. These issues are described in detail by Aprovecho Research Centre.
Many of these burning conditions can be achieved in inverted gas burner stoves such as the Stickman Stove. These are portable devices which have no flue pipe, are limited to batch loading, and no longer work properly when âtopped-upâ with fuel while burning. Nice, but not what I wanted.
Some people will claim that such clean burning occurs in rocket stoves as describe in Wikipedia. In these stoves the fuel is usually hand fed and they do not have fully inverted burners. I disagree with this claim as such stoves can shoot a flame into the air: this demonstrates that the combustion is not completed in the stove. The same criticism applies to boastful tent-stovers who claim that they made a cone of fire 2 feet high at the top of their flue pipe.
Rocket mass heaters are clean and efficient burners and are very popular for DIY home heating/cooking projects. See for instance the article at Instructables
.
Typical rocket mass heater, illustration by www.richsoil.com
They generally use a small inverted self regulating pyrolysis/burning chamber without the self-feeding of fuel as described in exemplar stove designs from the Aprovecho Research Centre cited above. They require a large (oil drum size) and heavy insulated chamber for completion of the combustion at high temperatures and large surface area and volume for heat exchange. Regardless of the theory, these stoves can burn wood completely and cleanly at very high temperatures and in a steady manner. A miniature one of these stoves might be welcome in a walker’s small tent, but probably not in their backpack.
However, I have used these designs as an inspiration for my developments. I just made my stoves very small and disproportionately reduced the mass. ‘I just made a rocket mass heater without significant mass’.
Heat Sources for Comfort in a Small Tent
You are in a small tent in the snow. Do you want a slow source of heat for the air in the tent or an instant source of radiant heat for your body and wet equipment? Probably you will want both. You see, while warm air is nice, it will rapidly rise to the top of the tent and be constantly cooled by the tent canopy and by the very necessary tent ventilation.
I find that the direct radiant heat from the surface of the stove gives the most comfort. That is why we back our bums up to a fire place in an otherwise warm room, and friends who share my tent on mountain trips agree with this choice and gleefully pop more sticks down the fuel tube. For this reason, my stoves have been designed to have a small surface area, prioritized for cooking and giving off intense radiant heat, rather than having a big surface area acting as an air heater.
It is timely to mention that, with such intense heat, any metal containing such a fierce burn (such as titanium or stainless steel with or without vitreous enamel coating) will be oxidized, so some form of refractory protection (a possible subject for another article) will be required if the stove is to have a long service life. The evidence for this statement is in some of the eroded components within the âbarrow load of not quite right stoves’ shown above. Yes, fire combined with oxygen can absolutely eat titanium or stainless steel, much like aluminium, once the protective oxide film is broken.
The next Part will describe my best stove so far that builds upon these ideas and the achievement of others. While probably understating the true number of not-quite-right predecessors I will be calling this stove ‘Micro Snow Stove Mk15’.
Bio for Tim Clark
Tim chasing freshies in Japan
Tim is a retired research scientist who just can’t stop tinkering with technology, and is a serial inventor. He is not a pyromaniac (he claims), but he loves fire. His house has 4.2 kw of grid-connected solar panels, a 30 evacuated-tube off-grid hot water service and a 2.8 L solar kettle on his house and another on his yacht.
He has a passion for wild places, back country/telemark skiing, bushwalking, camping, sailing and diving. He considers that as a concession to his ‘mature’ age he has earned the privilege of warmth and unlimited hot cocoa in the wilderness.
Replace stock parts in your Jetboil PCS with a carbon fiber lid and sub-one-ounce stove burner, and save nearly 3 oz on the weight of your cook system.
Notes from an eleven-day Wind River backpacking trip via a high route adjacent to the crest of between Spider Lake and Flagstone Lake.
Introduction
In July, I joined BSA Venturing Crew One on an eleven-day trek via a high route adjacent to the crest of Wyoming’s Wind River Range between Spider Lake (near Angel Peak) and Flagstone Lake (near Klondike Peak).
Our expedition goal was simple: to complete a high route through the Northern Wind Rivers involving cross-country and glacier travel, with opportunities to bag a few big peaks along the way.
This report includes a photo journal (Part 1) (refer to my trip journal for the full story, originally published live via satellite at my personal website) and a trip review (Part 2) that includes summary notes about training, travel style, trip logistics, and some of the group and individual equipment I used.
Part 1: Photo Journal
Route Description
Section 1 – 12 miles (trail): Elkhart Park to the lakes SW of Bald Mountain Basin via Pole Creek Trail, Highline Trail, and Fremont Trail;
Section 2 – 8 miles (off trail): Lakes SW of Bald Mountain Basin to Lake 10813 in Indian Lakes Basin via Spider Lake, Wall Lake, and the Elephant-Harrower Col;
Section 3 – 4 miles (trail): Lake 10813 to Upper Titcomb Basin via Indian Basin and Titcomb Basin Trails;
Section 4 – 15 miles (off trail): Upper Titcomb Basin to Green River Trail at Pixley Creek (Beaver Park) via Bonney Pass, Dinwoody Glacier, West Sentinel Pass, Gannett Glacier, Klondike Glacier, Flagstone Lake, Tourist Creek, and Green River;
Section 5 – 9 miles (trail): Green River Trail at Pixley Creek to Green River Lakes Trailhead via Green River Trail.
In summary, the total route length was approximately 48 miles, with about 10,300 feet of elevation gain. We spent 11 days on the route, which included two layover days for peak bagging, fishing, and rest. A link to our route can be found at Hillmap.com.
Photo Journal
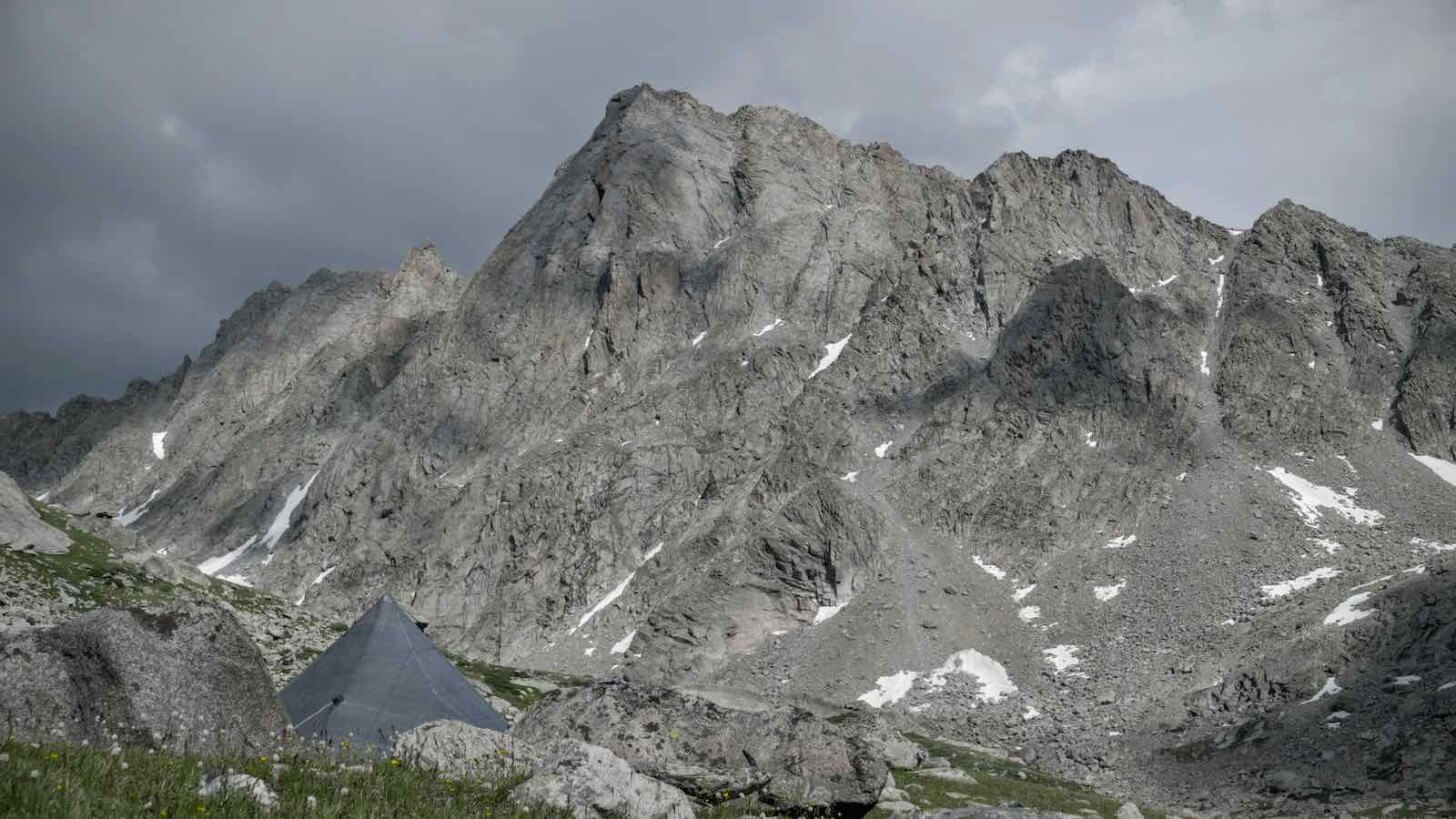
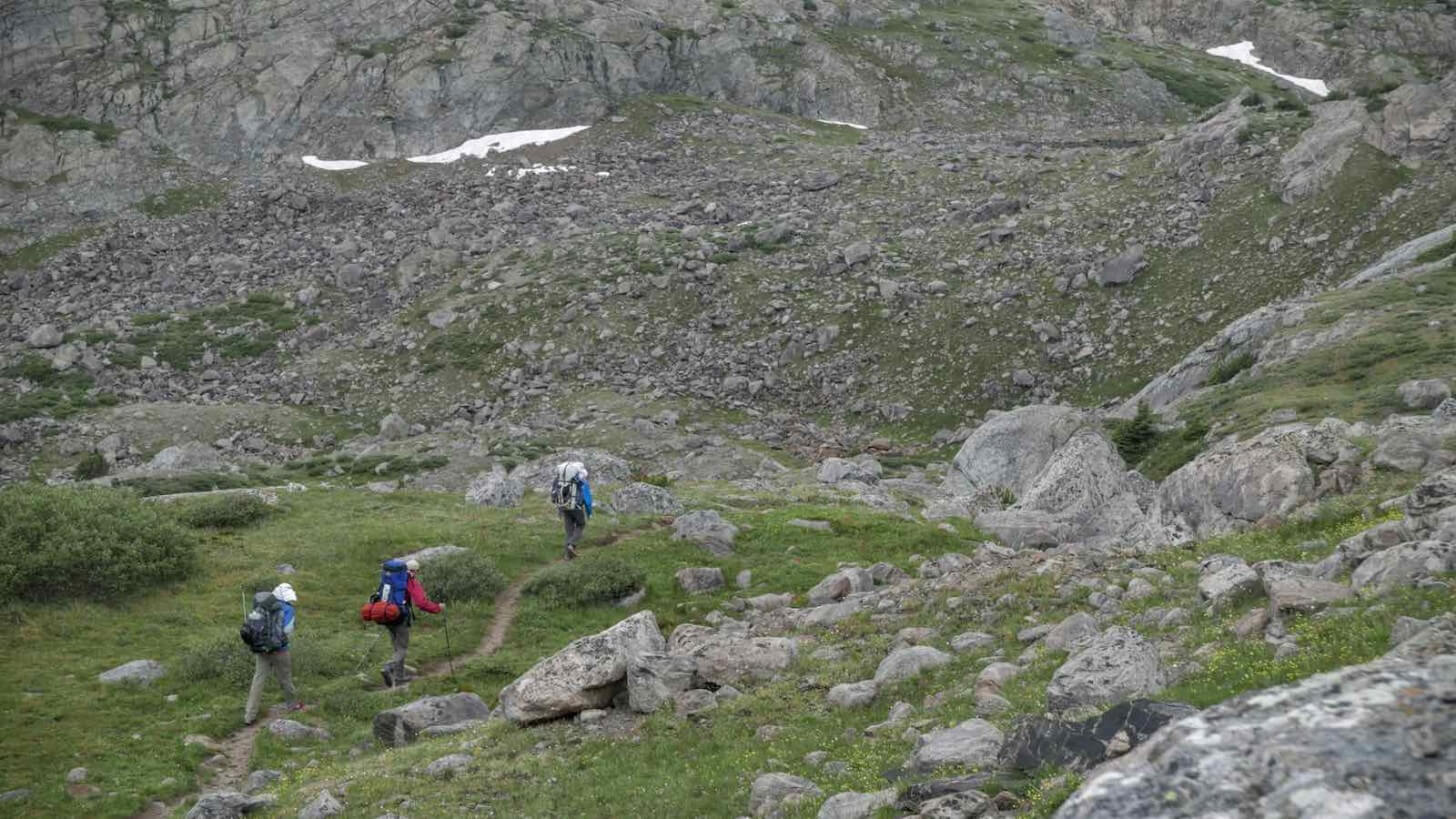
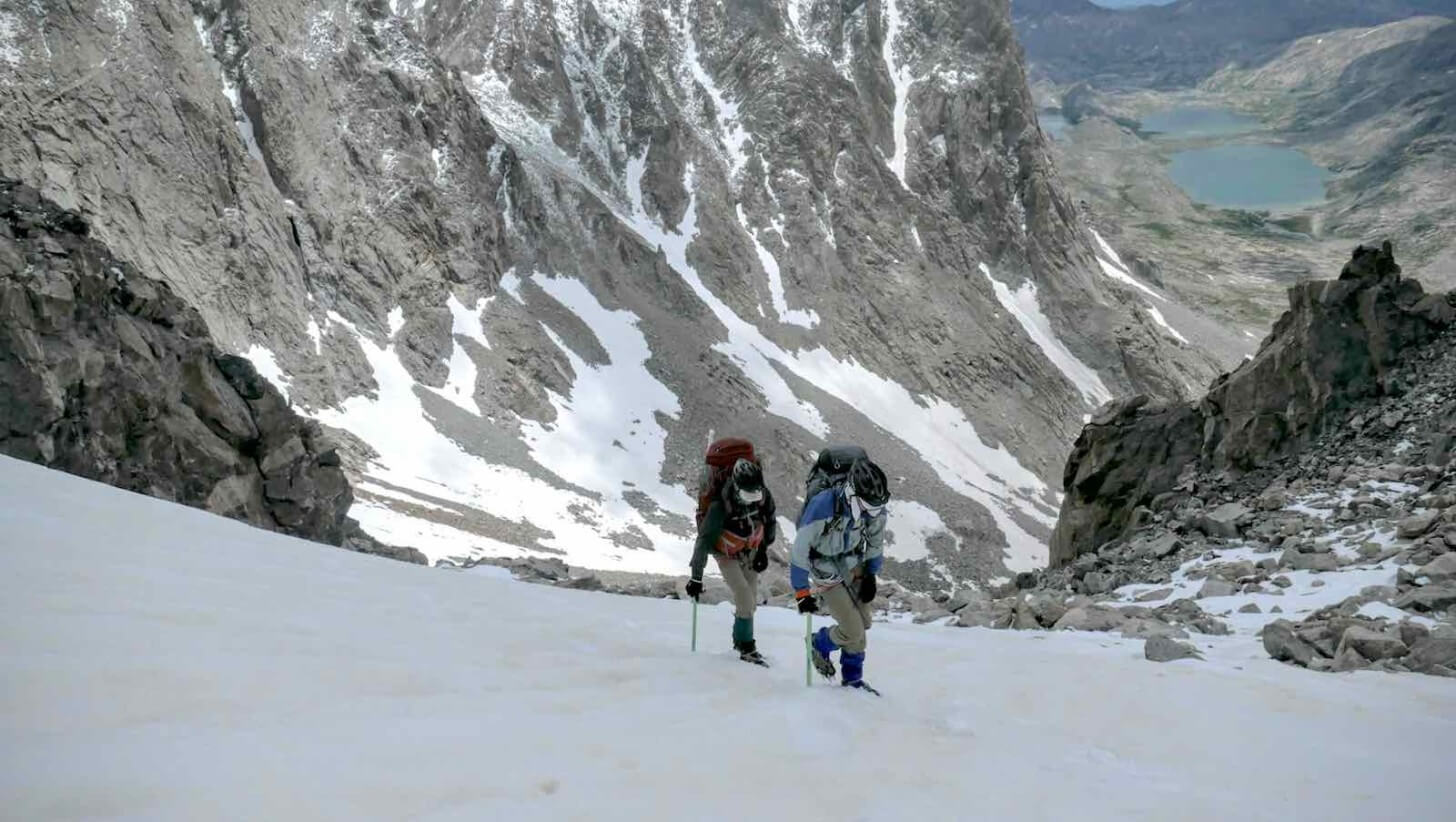
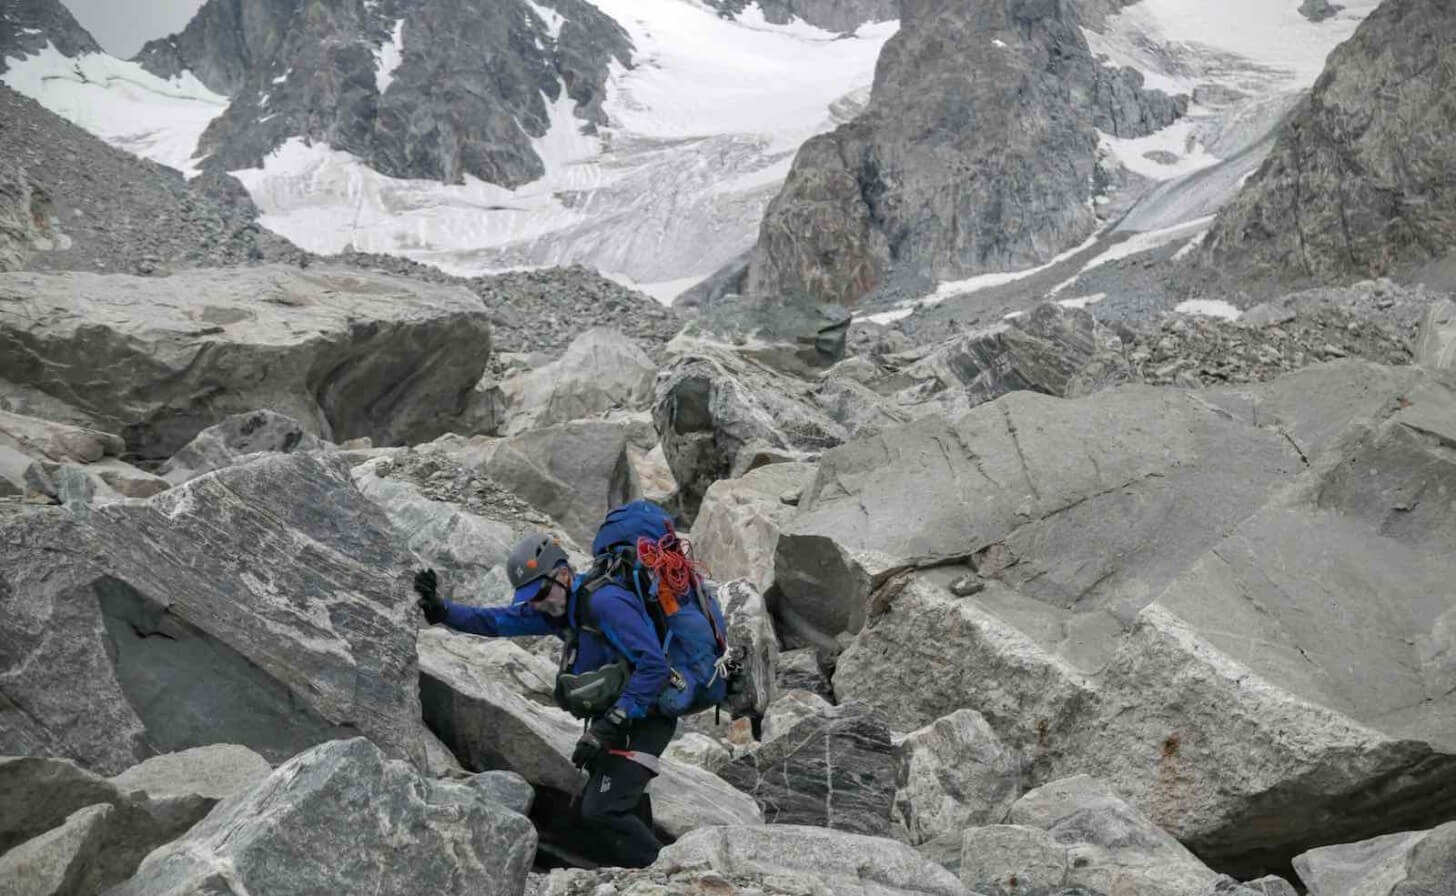
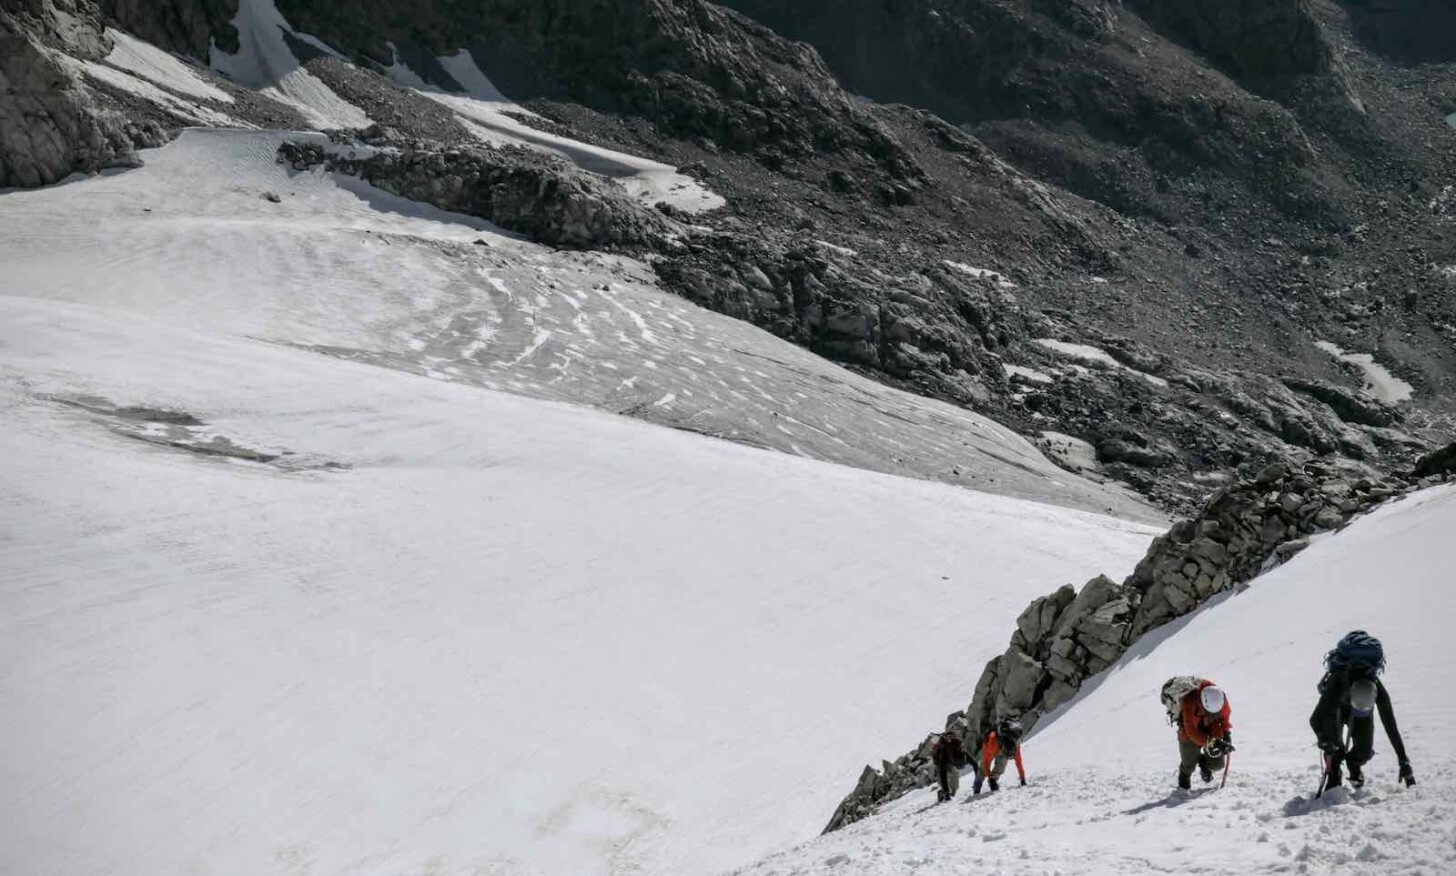
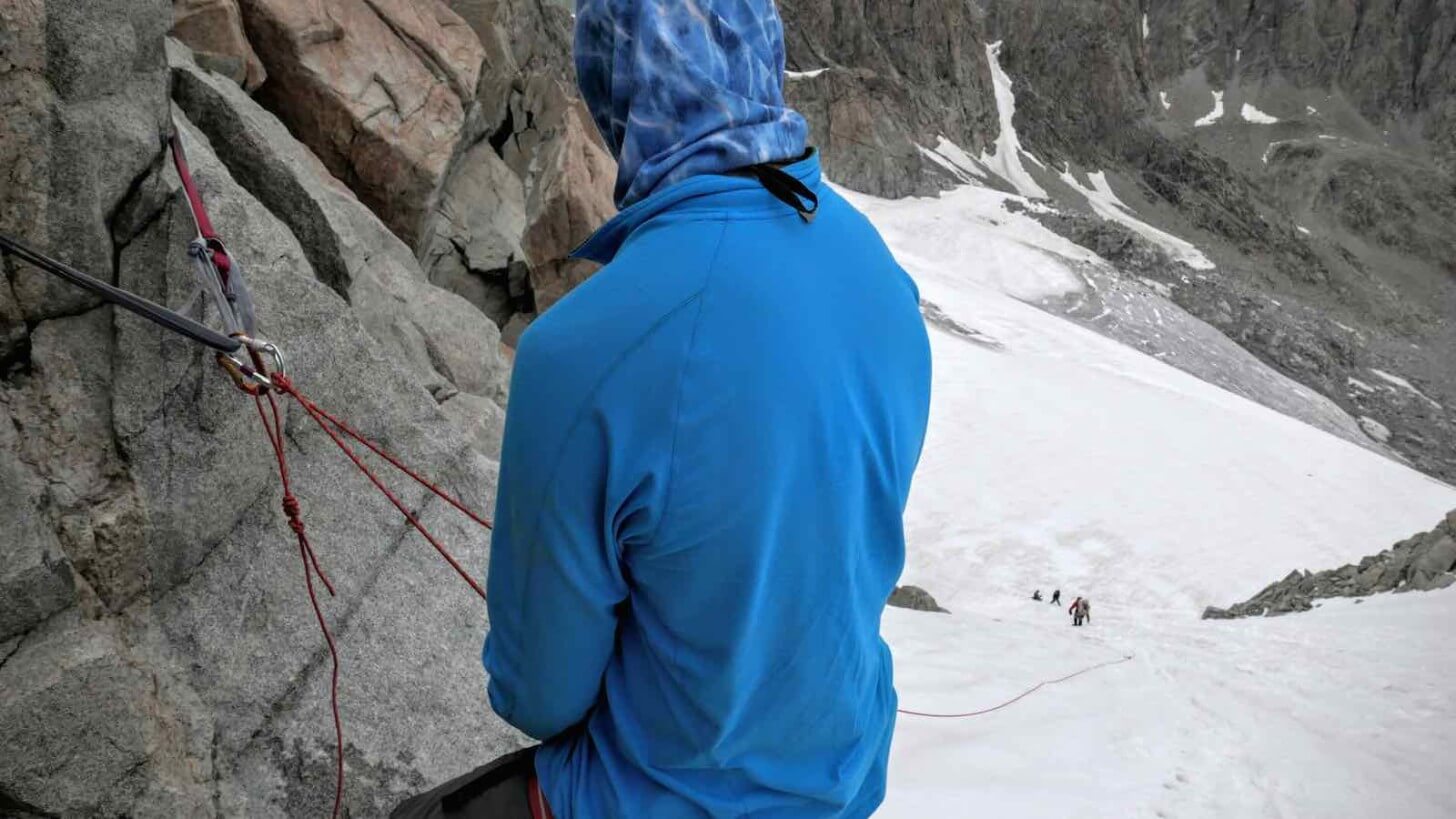
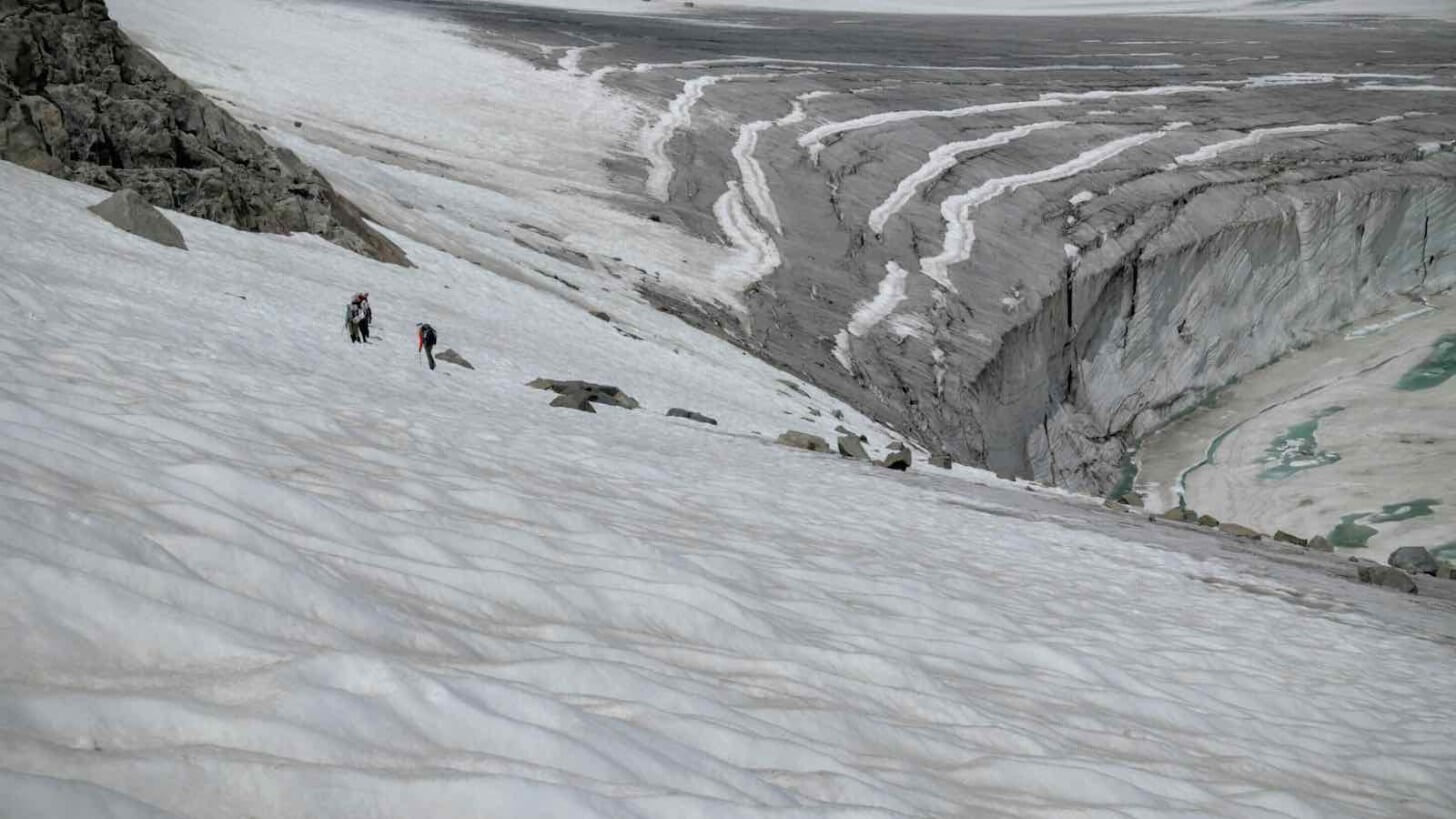
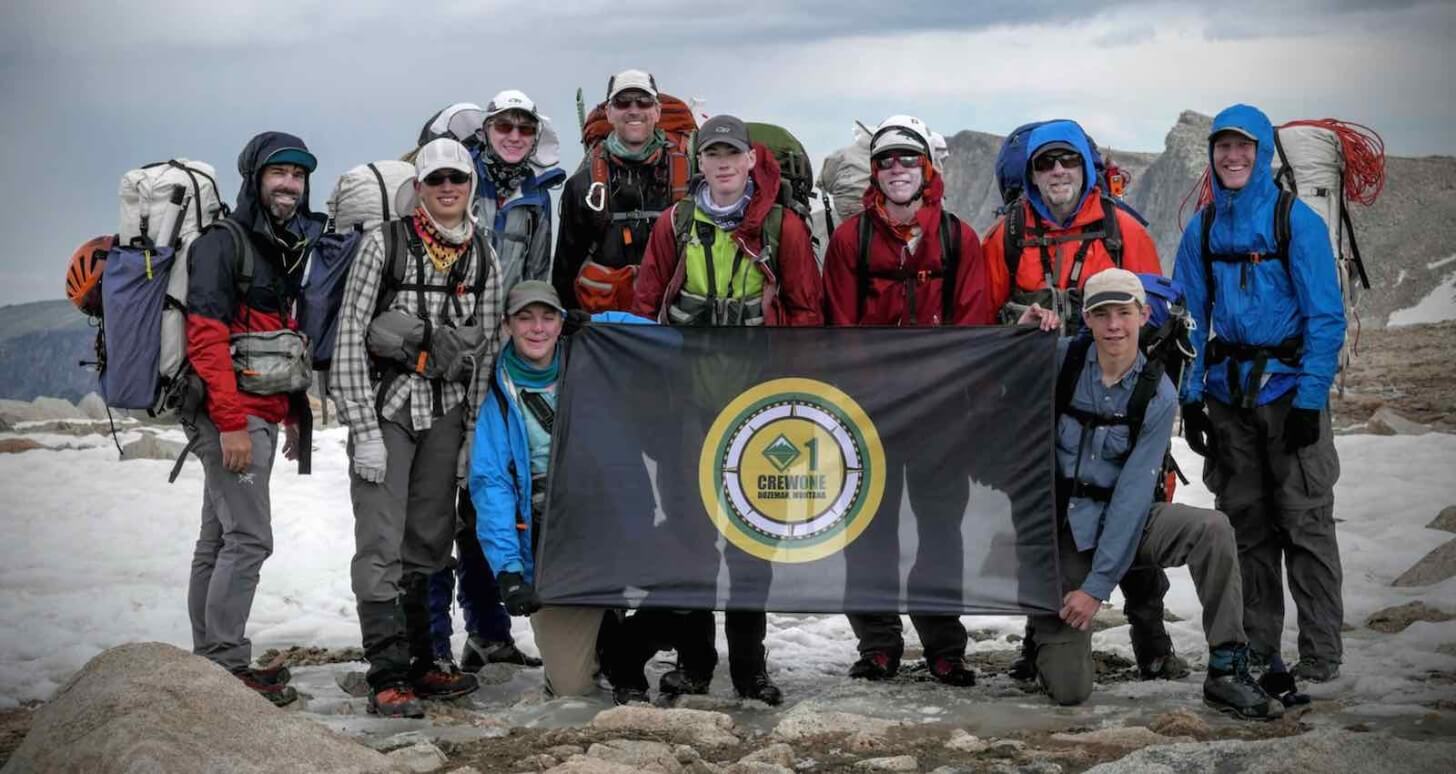
Day 2: Our first wet stream crossing – Pole Creek in the vicinity of Pole Creek Lakes, at about 9,800′. This turned out to be our only substantial stream crossing, which is rare for most longer treks through the Wind Rivers. Early in the season during a normal snow year, this particular crossing can be a deep wade through swift and dangerous water, as can many high altitude streams in this range.Day 2: Camp at Spider Lake in Bald Mountain Basin, elevation about 10,500′. Angel Peak (12,402′) and Angel Pass, a popular and easy crossing of the Wind River Crest (also the Continental Divide) in this area, are in the center background of the photo. Crew One uses Hyperlite Mountain Gear UltaMid 4’s (shown) as their primary expedition shelters.Day 3: Off trail on the spectacular tundra bench traverse between Bald Mountain Basin and Wall Lake, which stays between 10,600′ and 11,100′ the entire way. This photo was taken towards the end of the traverse, as we begin our descent into Wall Lake (shown).Day 4: Navigation meeting at Wall Lake. Each trekking day began with a morning meeting going over the maps. Much of this particular route was planned on the fly, without predetermined camps or specific routes in mind, so this daily routine kept us thinking about our progress towards our goals, and exit strategy.Day 4: Taking in the view of the Wind Rivers’ second highest summit, Fremont Peak (13,743′, left) and Jackson Peak (13,517′, right) from a vantage point just north of Col 11800+ separating Elephant Head and Harrower Peaks. This rarely-traveled route involves a little more elevation gain than the more popular route between Wall Lake and Indian Basin via Col 11220+ to the south, but with dramatic views of Fremont Peak’s south face, the route over Col 11800+ offers far more inspiration!Day 4: Harrower (a.k.a. Ellingwood) Peak (13,052′) is one of the most sought after climbing objectives in the Wind Rivers because of the classic 1,400′ rock route up its northwest buttress (the left skyline in the photo). So to be able to pitch my little tent with its doors facing such an iconic objective was quite a treat! My camp was located on a tundra bench above Lake 10813 with this view of Harrower’s east face. Our route to get here from Col 11800+ descended the easy (Class 1/2) talus slope angling out to the right-hand side of this photo.Day 5: Today the crew took a layover day at Lake 10813 for some day hiking, fishing, and climbing. A few of us climbed the Class 3 southwest ridge of Fremont Peak. From this view on the mountain’s upper slopes, we enjoyed the climber’s perspective of Mistake Lake (foreground), Upper Titcomb Lake (the big one), Lower Titcomb Basin, and Island Lake (in the far distance).Day 5: From Fremont’s summit, we spied our first view of the Winds’ highest summit, Gannett Peak (13,804′, and also the Wyoming High Point). We would also attempt this one later in the trip. Admittedly, on this blustery, snowy, windy, and dark day, Gannett’s black summit block capped with a gigantic snowfield looked imposing.Day 6: We had a few miles of trail on which to travel after reaching Indian Basin, so it was nice to be able to travel quickly on easy terrain through such a beautiful alpine environment. Throughout the day, however, the weather deteriorated dramatically. At dawn, we awoke to temperatures in the mid-50s F, and by noon, it was sleeting and 35 F. We had been hiking all morning in a cold rain and robust winds, and our attempt to cross a high pass that day would be thwarted. We were forced to stop and camp on tundra benches below Mount Helen, seeking refuge under our pyramid tarps. Our original plan was to cross high passes (including Knapsack Col) and attempt to climb Gannett from the west via Glacier Pass, but this delay required us to revise our route and plan for an approach to Gannett from the east (via Bonney Pass), so we could continue heading north and complete a traverse of the Dinwoody Glacier complex as well while still meeting our exit day goal.Day 7: I peeked out my tent the next morning to find that the cloud cover had lifted and patches of blue sky revealing the potential for a successful crossing of Bonney Pass today. Bonney Pass is the steep-looking white stripe splitting the Continental Divide (low point of the ridge in the photo). Helen Peak is at the top of the massive buttress rising up from the tundra bench where my tent is pitched.Day 7: The climb over Bonney Pass is relatively steep (35 degrees or so) and a fall here with a heavy pack would be problematic, especially when traveling in a group. We used ice axes and crampons a number of times on this route, including here, and relied upon extensive training this spring back in Montana that gave everyone experience in self-arrest and solo travel on steep snow and alpine ice.Day 7: Bonney Pass provides one of the finest views of Gannett Peak’s south aspect. At 12,800+ feet in elevation, the pass is only a thousand feet or so lower than Gannett’s summit, but we’d lose a few thousand feet in elevation on our descent to a basecamp for Gannett before attempting the climb. Here, Backpacking Light editor and Crew One Adviser Eric Vann does his best to contain enthusiasm for being at nearly 13k on such a beautiful day.Day 7: After descending the Dinwoody Glacier, we enjoyed its infamous terminal moraine, affectionately known as the “Miserable Mile”. We’d traverse it three more times before heading north.Day 8: A “leisurely” alpine start (4:40 AM) combined with drive, ambition, and fitness, had us up to the top of the Gooseneck Couloir, the crux of the Gannett climb, not long after sunrise, softening the ice a bit, but not too much, thus making the 45-degree climbing secure enough to climb solo. The perfectly timed strategy had us on the summit, 3,000 vertical feet above our basecamp, after a four-and-a-half hour climb.Day 8: By the time we descended the couloir, the sun had turned the snow to a rotting, slippery mess, so we rigged a belay rope from a slung horn and belayed some of our party members and a few in another party down the steepest pitch with one of our 5.5 mm Dyneema glacier ropes.Day 9: An early start the next morning took across the dazzling and heavy glaciated terrain of the Gannett and Klondike glacier complexes. This day turned out to be the gem of the trek – steep terrain, large crevasses, exposure, and a route that stayed as high as possible while still remaining in the realm of “semi-technical backpacking” rather than “technical mountaineering”.Day 9: The highlight of the day was a traverse of the Klondike Glacier below the east face of Pedastal Peak. With rockfall tumbling down from the rotting cornices above, and the hundred-foot ice cliffs of the glacier falling away below us, we navigated through a maze of deep, hidden crevasses. Shortly after this photo was taken, we would rope up and continue in full-on glacier travel mode, gingerly testing the integrity of rapidly-melting snow bridges using our ice axe shafts.Day 9: We finished our traverse along the Wind River Crest, thinking that the hard part was over, so we flew the flag and relaxed a bit. Little did we know what the next two days had in store for us before reaching the Green River: the loose, steep scree, giant talus, and bushwhacking of the Tourist Creek drainage.Day 9: Chase exiting the rubble of upper Tourist Creek en route to our final “high” camp at Flagstone Lake.Day 10: Where there’s a rock, there’s a way. Navigating big talus near 10,000 feet as we weave our way down to the Green River through this maze of complex terrain.Day 10: After sleeping in, taking for granted the route down lower Tourist Creek, and tucking into talus caves to hide from a rowdy lightning storm for awhile, we didn’t exit Tourist Creek until just before dusk. After putting in some nighttime trail miles along the Green River, we finally reached a campsite north of Squaretop Mountain and enjoyed a midnight meal.Day 11: Parting shot, Green River Lakes and Squaretop Mountain.
Part 2: Trip Review
Training
Our Crew participated in a rigorous training program prior to this trek. We’d be carrying heavy packs (45 to 60 lbs) with glacier climbing gear and 11 days of food, and traveling over challenging terrain that would include talus, scree, snow, and glacier ice. Our training model was based on Scott Johnston’s and Steve House’s Training for the New Alpinism, started in November of 2014 (8+ months prior to the beginning of the trek), and involved a very high volume of aerobic base training combined with core and lower body strength training, and a muscular endurance program during the latter third of our training period.
I will be writing a far more comprehensive review of this program for Backpacking Light in the future, as I’ve been training directly under Scott’s coaching. However, for the purpose of this trek, following the general guidelines as prescribed by this program proved to be one of the most beneficial investments of time for our Crew. This year, we were in the best shape we’ve ever been in for a trek, and for the most part, the physical challenges posed by carrying heavy packs on a glaciated high route through this range proved to be the easy part.
In addition to physical training, we did a fair amount of technical training prior to the trip: rope management, self-belay, ice axe arrest, crevasse rescue, and perhaps most valuable: steep, solo snow climbing on slopes of 35 to 50 degrees up the couloirs and faces of our local mountains. This experience gave our Crew the security required to move quickly through this type of terrain without the hassle and risk that comes with traveling unbelayed on rope teams, or the impractical time requirements that come with traveling belayed on rope teams with large groups.
That a group of teenagers can be asked to invest a serious amount of time at great cost to the freedom in personal time afforded to most of today’s youth was one of the more inspiring outcomes of attempting this route.
Trip Planning & Preparation
We began planning this trip in October of 2014. We originally planned to attempt a glacier traverse in Washington’s Olympic Range, with an Olympus summit attempt part of the route. However, upon learning about Washington’s abysmal snowpack this year, and the risk that came with the probability of road and trail closures, chossy rock, and fire risk, we changed our route to the Wind Rivers a few months prior to the trek. This required some logistical adaptation (transportation, etc.), but little functional change in terms of trip planning, training, or preparation.
Generally, we operate as a group of subcommittees, and this model worked well for distributing the workload required to take on a group expedition of this caliber. A few members would take on food planning (meal planning, purchasing, and packaging), a few members would take on consumable supplies and group equipment, two of us took responsibility for assessing climbing gear needs including acquisition, someone took charge of arranging transportation and vehicle shuttles, and I took on the role of planning and executing the glacier travel and alpine climbing training curriculum.
Since one of the core functions of our youth team is to learn the art of expedition leadership, having every member involved in trip planning and preparation is critical for carrying out this aspect of our mission.
Travel Style
We functioned autonomously in two organized groups: one group of six youth (split into two groups of three, each of which shared a cooking kit and shelter), and one group of five adults (who shared three shelters). In addition, two adults were assigned to each of the two youth cooking groups, while the remaining three adults formed their own cooking group. Generally, the adults function as “casual observers”, because we allow the youth to lead and make decisions while we enjoy the fruits of simply having to follow and/or advise them when asked, or needed for safety reasons.
We always travel together, as a single group. The only time we deviated from this plan was on our layover days when smaller teams formed to go day hiking, fishing, or try for a peak summit.
h3 Logistics (Transportation and Permits)
Because the Wind Rivers are within reasonable driving range of our hometown (the distance can be covered in about eight hours), we were able to hike at least five miles on each of our first and last days of the trip, without requiring overnight staging stays at motels or frontcountry campgrounds. This, of course, lessened the burden on supervising adults who would already be taking significant amounts of vacation time, and reduced the cost of the trip for the participants. We carpooled to and from the trailhead in two vehicles (one SUV and one truck).
Vehicles were shuttled from Elkhart Park to Green River Lakes by a licensed and bonded shuttle service out of Pinedale, Wyoming.
Permits are not normally required for hiking in the Wind River Range, but Scout groups are required to file them with the Pinedale Ranger District, which we did. Responding safely to unexpected weather hazards resulted in deviating from our permitted route, and in some cases, our permitted camps, but in the end, we finished at our intended final exit point on time. Our actual and planned routes were similar for the first five days and last two days, but significant deviations occurred during Days 6-9 because of the cold front that hit us on Day 6. We also learned later that we had been permitted for two nights in an area where “organized groups” were not to be permitted, indicating some communications disconnect within the land management agency governing the area in question. In addition, one of the camps on original permit application had been denied, forcing us to apply for an alternate route that in the weather conditions we faced, would have been quite dangerous. I outline some of these observations simply to state that in this case, the beuracracy of the permitting process became a burden for our group, rather than a particular benefit to the land management agency. While I understand the need to distribute use in crowded areas, we saw very few people on this trip, only two organized parties (both NOLS groups), and in the historically most crowded area on the west side of this part of the range (Titcomb Basin), we only encountered one other individual (a solo trekker from Germany attempting a high route traverse of the entire range). On the east side, staging for a Gannett summit below the Dinwoody Moraine, we encountered a few parties, but on our summit day, we were only one of three parties on the mountain.
Equipment Notes
Group Gear
Cooking Gear: As a group, we shared some meals (breakfasts and dinners, with the exception of the two layover days, for which we all packed our own no-cook breakfasts snacks), along with cook kits (one kit shared by 3-5 persons) which included the following items:
4-Qt Open Country Aluminum Kettle: This is one of the lightest gallon-sized pots on the market. It’s uncoated and cheap ($15) which means we can use it for open fire cooking without feeling too badly about trashing it with soot or washing it out with abrasive glacial sands.
MSR WindPro II Stove: With large water volumes and cool mornings and nights, our cook groups operated these stoves in their liquid-feed, inverted canister mode, which decreases boil times. With the included stock windscreen and heat reflector (and operators that pay attention!) we usually count on using about 0.5 oz of fuel per person per day, which is enough for boiling three full pots of cold water (one for breakfast, two for dinner). Each 3-person cook group brought a net weight of fuel of 16 oz (e.g., one large sized MSR IsoPro fuel canister), which turned out to be just enough fuel for this trip (we did pack a few smaller canisters as insurance for the entire group but didn’t need them). Each stove kit included a Light My Fire Firesteel for lighting the stove, a minimal repair kit, a bottle of hand sanitizer for the cooks, and a tiny pot scrubbing pad.
Fry Bake: We shared two fry bake kits for our group, which included a 9-inch nonstick MSR Fry Pan (includes a handle), an aluminum plate converted to a pan lid with a wingnut and screw, a plastic spatula, and a tiny bottle of oil. We use the fry bakes for cooking fresh trout, as well as frying tortillas and pasta. We used them very little on this trip (we didn’t fish much for food, and planned mostly light-as-possible packaged meals requiring only boiling water) and could have left them home without missing them. On trips where we have more time to cook and are less concerned about saving weight, they prove to be a wonderful addition for group morale.
For individual eating, each person brought one 3+-cup capacity eating container (most commonly, the Antigravity Gear 4-Cup Screw Lid Container with Cozy). Dry food is rationed into each person’s eating bowl, and boiled water from the group cook pot is distributed accordingly. Each person then becomes resposible for their own cleanup.
Some meals require cooking pasta (in particular, we favor a whole-grain penne for our homemade meals that is not available in freeze-dried form), which we do in the group cooking pot. Once the pasta is cooked, some of the pasta water is temporarily discarded into someone’s (clean) eating bowl, with the remainder being used for the sauce base. Once the sauce ingredients are added, we simmer the meal further for a few minutes, then add back some of the extra pasta water discarded previously to bring the sauce to a delectable consistency. Cleanup is typically easy: teenagers have an uncanny ability to remove all traces of food from a pot, and glacial silt takes care of the rest.
Food Packaging and Storage: Group meals were packaged in 2 mil poly bags, purchased from the bulk section of our local bulk foods grocer. Individual meals (lunch snacks) and other individual rations (e.g., hot drinks) were packaged in quart-sized zip closure bags. All of these bags were then packaged into odor-proof Loksak 12.5″ x 20″ O.P. Saks, protected by Ursack S29 bear-resistant food storage bags (two per person were required for a trip of this duration). We secured our Ursacks by bear-bagging them with our glacier ropes below timberline, tying them to trunks of scrub trees at timberline, or tying them to chockstones lodged in cracks or under glacier remnants sitting atop granite slabs when above the timberline.
Water Treatment: In the past, we’ve shared water treatment supplies (usually Aqua Mira kits) as a group, assigning one or two members of our expedition team to be responsible for meeting each person’s need for clean water. For this trip, we issued individual Aqua Mira kits to each person and placed responsibility on the individual to maintain their own hydration needs. This was a positive change, and worked well, as long as each person took the responsibility to fill their water bottles and start their Aqua Mira premix batches early enough at rest stops or prior to leaving camp so as not to hold up the rest of the group.
Shelters: Our group shelter of choice is the Hyperlite Mountain Gear UltaMid 4, which we use to house 3 or 4 youth members. Each shelter is rigged with a full set of 2mm Dyneema-core guylines and includes a stake kit of 16 MSR Groundhog stakes. We use an adjustable pole leftover from the GoLite era (the adjustable aluminum GoLite Shelter Pole) to keep setup fast and simple, and allow us to use trekking poles if needed for day hiking
Each camper brings their own ground cloth (the Gossamer Gear Polycro is a popular choice) or simple bivy sack (e.g., Adventure Medical Kits Escape Bivy). Headnets provide us with mosquito protection. We all use down quilts or summer-weight sleeping bags, mostly in the 25-to-40-degree temperature rating range, supplemented of course with down jackets and hoods or hats on chilly nights.
Glacier Travel and Crevasse Rescue Gear: Roped glacier travel is not often practiced in the Wind Rivers. Most of its glaciers are small with minimal crevasse risk. The Dinwoody Glacier complex, however, is a notable exception. The Dinwoody, Gannett, Gooseneck, Klondike, and Grasshopper glaciers are heavily crevassed and early in the season, snow cover hides some gaping holes (crevasses) in these icefields. I’ve often traveled solo through this area, and on nearly every early season (May through July) trip here, I’ve managed to plunge at least to my thighs through a rotten snowbridge at least once. The odds of a crevasse fall increase with group size, inexperience, pack weight, and afternoon travel, so we elected to hedge our bets by being prepared for roped glacier travel.
That said, the risk wasn’t terribly high, owing to a thin seasonal snowpack and relatively cold temperatures on our trek. However, the day we traversed the bulk of the Dinwoody complex (Day 9) proved to be our warmest and sunniest day, and we hit the worst of the crevasse risk (the Klondike Glacier below Pedastal Peak) in the late afternoon after several hours of warming. As we traversed above the ice cliffs, we began to punch through several rotting snow bridges, and found hidden holes large enough to swallow a bus, so we roped up – the only time we roped up on the trip except during our descent of Gannett Peak’s Gooseneck Couloir.
Since we knew our rope systems would be used “just in case” rather than as a matter of course, and we didn’t know going into the trip exactly how much glacier travel we’d actually be doing, we kept our kits extremely minimal with an eye on weight:
Glacier Travel Rope: Blue Water Titan 5.5mm x 50m (one rope per 4 to 5 persons). I love this rope. It weighs 2.2 lbs and represents the state of the art and safety in ultralight glacier travel. The rope is classified as a static rope, but falling into a crevasse on it, or taking a follower fall while belayed, you’d never know it. I wouldn’t want to take a leader fall on it, but there’s enough stretch so as not to separate you from your intestines in a low-angle or short fall. There is an uprising in the mountain guide community that static ropes may actually be safer for low angle glacier travel (it is easier to arrest falls in low-stretch systems). For many of my alpine treks, I’ll carry a 25m length that is used to belay followers up or down short sections of Class 4+ rock or snow terrain, or use it as a pack haul line for mountaineering and canyoneering. I’ve rappelled on one frequently, and while it takes a little cajones to first rap down lines that seem more like dental floss, I’ve done it enough that my confidence on Titan for short raps and belayed follower climbing is high. WARNING: This isn’t a recommendation. Use of this rope for glacier travel, crevasse rescue, belayed climbing, or rappelling is well outside the conventional recommendations of the mountaineering community.
Crevasse Rescue Gear: Through the years, I’ve spent a lot of time, money, and equipment failure testing crevasse rescue equipment that is “reasonably” compatible with ropes like the Titan rope described above. Most traction devices and pulleys are designed for ropes with a minimum diameter of 8mm, and kernmantle sheath density and materials consistent with those ropes. I have to admit that I have yet to find a “perfect” system that preserves 100% of the strength of the rope, but I’ve found enough devices to work well enough in a basic heavy crevasse haul using a Z-pulley system to keep the weight down, setup and operation simple, and load to failure high. Consider this an experimental setup for informational purposes, and use at your own risk. Our Crew spent several hours training with this kit and testing it in scenarios with full body and pack weight hauls out of vertical drops, but not enough is yet understood about ultralight systems like this to ensure that they are adequate in all crevasse rescue scenarios. Of course, no system is 100% foolproof, so the system you decide to bring, more than anything, should be compatible with your own risk tolerance.
Harnesses: Camp XLH 95 or Camp Alp Racing (carried by each climber);
Carabiners: Four wiregate + two locking (carried by each climber);
Traction Pulley Systems: Petzl Micro Traxion Pulley + Petzl Tibloc (each mated to a locking carabiner; carried by the uphill lead/caboose on each rope; downhill lead/caboose would carry a lighter two-Tibloc system);
Anchor Slings: 7mm width sewn Dyneema slings (2x60cm + 1x120cm carried by each climber);
Prussik Loops: 7mm width sewn Dyneema slings mated to wiregate carabiners for Kleimheist knot rigging, carried by each climber, also used in concert with Z-pulley systems and self-belay during crevasse rescue);
5mm Perlon Accessory Cord: 30 ft carried by each climber to use as climber-to-Prussik loop material and miscellaneous alpine anchor building);
Snow Pickets: Yates Expedition Pickets, one per rope team, carried by the uphill climber.
In addition to the above, each climber carried an ice axe (most commonly, the Camp Corsa) and wore crampons (most commonly, the Camp XLC 490 Universal, Camp Tour Nanotech Universal, or Kahtoola KTS). All climbers wore a lightweight mountaineering boot for glacier travel (Scarpa Marmolada, La Sportiva Trango S, or Salewa Rapace).
My Individual Gear
I won’t discuss in detail all of the gear that I used, but I do feel the need to highlight my packing, shelter/sleep system, and footwear.
Packing: My pack for the past three years has been a prototype of the Hyperlite Mountain Gear Full Dyneema Porter 4400. Mine is a slightly customized model with a longer extension collar, and the weight is a little less than four pounds with an external rear pocket attached. Gear is stowed in Hyperlite Mountain Gear CF8 or CF11 stow bags for waterprotection and organization. The bag is large enough to creatively pack (inside and outside…) enough personal gear and food for a two-week multi-sport expedition. This might include enough gear for belayed Class 4+ alpine scrambling and steep snow and glacier travel, a whitewater packrafting kit, and if necessary, an expedition bear canister (e.g., Bearikade Expedition) plus a full Ursack S29 for overflow.
Since most of my week-or-longer expeditions involve copious amounts of alpine climbing, scrambling, or bushwhacking, along with the seam stress incurred carrying 40 to 60 pounds of packrafting and/or alpine climbing gear, I became weary a few years ago of having to buy a new pack every year or otherwise having to constantly repair light fabrics that had been trashed by alpine scrambling. My Dyneema Porter has one tiny hole in it (suffered in a fall down a steep scree slope on this trip), but otherwise, has held up well and promises to do so for many more expeditions.
Shelter and Sleeping: For this trip, I brought my own solo shelter system – a Locus Gear Khufu CT3 with a mesh insert for insect protection. Mosquitoes were rather thick on warmer nights below 11,000 feet, and the added protection of the inner was welcome. However, my preference on this trip would have been to pair this shelter with a half-inner to provide more vestibule space for stowing gear and managing wet items more efficiently with the shelter doors buttoned up.
I used a Katabatic Gear Chisos down quilt (14 oz), NeoAir X-Lite size regular pad (12 oz), Exped Schnozzel inflation bag (2 oz, also used to stow gear inside the pack), Exped UL Down Pillow (2 oz), Goosefeet down pillow cover (1 oz), and a Goosefeet down parka (9 oz) for in-camp warmth and sleep comfort – a system I’ve been using regularly for the past several years for all of my long trips between July 4th and Labor Day in the Northern Rockies of MT, ID, WY, and UT, and the High Sierra in CA. I cannot recall one night where I ever wanted a different system – until the night of the cold, wet storm that hit us on Day 6 on this trip. The only change I would have wanted would have been a quilt and a parka with a more water-resistant outside fabric, and perhaps a little bit of down overfill, to cope with the cold, wet conditions that would have degraded loft had the weather not improved and the storm lasted longer.
Footwear: In April 2015 I suffered a Grade 2 sprain of the metatarsophalangeal (MTP) joint of my left big toe while on a long training trek in Montana’s Bridger Range. Since the toe had not completely healed prior to this trip, I was unable to carry a heavy pack with soft-soled (e.g., trail running) shoes. We all had to bring mountaineering boots, anyways, so rather than bring an extra pair of shoes, I opted to bring only my boots and do all of my trekking and climbing in them. My boots of choice were the Scarpa Marmolada, a model available outside the U.S. that I have been climbing in for the past year. They provide enough rocker to be comfortable trekking long days in them (I find them more comfortable even than my Scarpa Zen approach shoes, which are recognized as some of the most comfortable approach shoes on the market), they have soles that are stiff enough for steep cramponing (I’ve frontpointed up to 70 degree alpine ice in them without problems), have a flexible upper for effective French crampon techniques (e.g., pied-a-plat), and what is perhaps the best alpine climbing outsole available – the very well-designed Vibram Mulaz S. The combination of stiff midsole, edgy outsole, and flexible upper means that I’m able to easily climb mid-5th class rock in these boots. Having an ultralight moutaineering boot like this (21 ounces per boot, in Size 42!) certainly blurs the lines between trekking and mountaineering, and opens up a vast opportunity for mountain travel for the backpacker who is unwilling to give up all-day comfort in their footwear. On this trip, I suffered little discomfort – certainly no blisters – even while carrying a heavy pack for long days. My feet were most fatigued on our long glacier travel day (Day 9) from Dinwoody Creek to Flagstone Lake, but this day offered its share of footwear challenge from steep sidehilling and frontpointing in crampons on icy glaciers, talus, and loose scree. Admittedly, I was eager to take my boots off when arriving at camp that evening, and my forefeet were sore from the lack of midsole cushionining. That said, I was very surprised how comfortable these boots were, and I appreciated their stiffness for glacier travel, rock scrambling, and loose scree gullies. Look for a more comprehensive, long-term review of this boot from me after a few more mountaineering trips.
Summary
My hope with this report is that it has given you enough information (photographic inspiration, trip objective and summary, route information, and equipment information and rationale) about this adventure to provide an overview of our experience in the Wind Rivers on a glaciated high route. In addition, perhaps you’ll find some practical or inspirational value in this report that you can use to help you in planning your own expeditions to the Wind Rivers or elsewhere at some point in the future!
Above all, I hope that it will stimulate some discussion in the comments below. I’m always eager to learn about what other folks are doing to save weight and maintain safety on treks that bridge the gap between technical hiking and mountaineering.
Top stories, hiking, backpacking, people, and all things outdoors.
Introduction
If you’d like to submit a link to a timely (fresh) story for us to consider including in our next installment, please send it along to submissions@backpackinglight.com with the subject line “BPL NEWS DIGEST”.
Top Stories
Grizzly that Killed Yellowstone Hiker Euthanized
Authorities have found the Grizzly bear that attacked and killed 63-year-old Billings Montana resident Lance Crosby. The bear was matched by its hair. The Grizzly sow has been Euthanized. Two cubs were captured with her, and authorities are working on relocating them to a facility accredited by the Association of Zoos and Aquariums. The attack took place near the Elephant Back Loop Trail. The park officials stated that an important reason for the decision to euthanize the bear was that Crosby had been partially eaten and cached so that the bear could come back to eat later. They also stated that attacks like this are not the kind that mean a sow is simply protecting her cubs.
Katahdin lay in the midst of Baxter State Park where issues with thru-hikers not keeping with park rules has caused park officials to talk of moving the end of the AT to another location. Citing use of alcohol, group size, camping, and other restrictions as factors. When Scott Jurek completed the AT in record time last month, he was photographed celebrating by spraying chapagne. This was apparently one of the rules that was broken by Jurek that day. He was fined for littering (spilling alcohol), traveling in a group larger than twelve, and public drinking.
Plague contracted in Yosemite – Los Angeles county officials are trying to figure out where in Yosemite a girl contracted the plague. Los Angeles Times.
Expeditions
Five Destinations to Hike in Idaho
If you are in the Idaho area and looking for places to hike, you may want to try these trails. The Gearhart Mountain Wilderness, which has a 13-mile trail that runs through the area. Big Indian Gorge (Steens Mountain), which offers a total of 17 miles if you travel all trail distances, and 2,000 feet of elevation gain. Elkhorn Crest Trail has an even elevation most of the hike (8,000) feet. Strawberry Mountain Wilderness, the summit of Strawberry Mountain is 9,038 feet and there is enough trail to hike 14.5 miles. Eagle Cap Wilderness, home to alpine lakes and waterfalls, there are 17 mountains and no shortage of scenic views.
While looking for media and expeditions news, I stumbled upon a Youtube channel that I had not yet seen. Marwi On the Trail is a channel that follows Marcella Wigg, a 22-year-old woman that is using videoâs uploaded to Youtube to document her thru-hike of the Appalachian Trail (North). She has been posting content regularly since the beginning of her adventure. She is providing gear reviews from the trail on the different gear she has been using. She also covers some ladies specific topics. In her latest video, she had reached the Trailside Zoo in New York.
IMPORTANT: If you don’t see the video immediately below, or see a “Sorry…” message in the video player, just click this link to refresh the page, and you’ll be good.
Expedition Shorts
Seeking Solitude in Northern California? -Trails that offer more seclusion- Outdoor Project.
A photo posted by Backpacking Light (@backpackinglight) on
Skills
Be Certain that You are Ready Before You Hike
The list of ways to prepare for an upcoming trip is important. Be ready ahead of time by exercising regularly and eating a healthy diet. Make a gear list, or check a friendâs to see what you need to bring. Know how to read a map and compass. Let people know where you plan to go and stay with that plan. Find out what conditions to expect for weather and what type of wildlife you will encounter. Plan to enjoy yourself and the world that you are traveling through. Packing less may mean that you can take a camera to document the journey, or carry more of your favorite snacks.
BATONING WOOD WITH A KNIFE – Survival Lilly shares her tips for batoning wood with a knife.
IMPORTANT: If you don’t see the video immediately below, or see a “Sorry…” message in the video player, just click this link to refresh the page, and you’ll be good.
SAFETY TIPS FOR HIKING – Simply Hike shares some ideas on how to stay safe while hiking.
IMPORTANT: If you don’t see the video immediately below, or see a “Sorry…” message in the video player, just click this link to refresh the page, and you’ll be good.
Gear
Outdoor Retailer Summer Market 2015
Outdoor Retailer Summer Market 2015 is the biggest trade show for all things outdoor sports products related. It just wrapped up last week. With all the different manufacturers in the market there presenting what will be their latest and lightest products for 2016. Will Rietveld and Janet Reichl were there and provided coverage on all the gear pertinent to our hobby. Be sure to check out the article here on BPL as well as their article on Gossamer Gear so that you wonât miss a thing.
Gear Shorts
METALLIC TENT TO BEAT THE HEAT– Look at this tent that is made to reflect the sunâs heat on GearJunkie.
TOP GEAR PICKS– Read about Dave Collinsâ top rated gear picks on Clever Hiker.
Media
Wind Drinkers Part 1
The Bridger Ridge Run celebrates 30 Years.
IMPORTANT: If you don’t see the video immediately below, or see a “Sorry…” message in the video player, just click this link to refresh the page, and you’ll be good.
Wind Drinkers Part 2
IMPORTANT: If you don’t see the video immediately below, or see a “Sorry…” message in the video player, just click this link to refresh the page, and you’ll be good.
MERU FILM REVIEWED ON GEAR JUNKIE
“Meru will appeal to both to hard-core climbers and flat-landers alike”-Gear Junkie.
Introductory Reviews of the Trail Designs Toaks 850ml Ti Pot + Fissure Ti-Tri Bundle, Fenix EO5 Keychain Flashlight, and the Discovery Trekking Outfitters Ultralight Towel.
Trail Designs Fissure Ti-Tri Bundle (with different pot.)
Trail Designs Toaks 850ml Ti Pot + Fissure Ti-Tri Bundle
The Skinny
A lightweight multi-fuel stove made of premium materials that provide a cooking solution for most scenarios.
The Specs
Light weight.
Flexibility in kit.
Variable weight depending on chosen accessories.
My Take-
This stove is awesome! Multiple fuel options and all of them work well. If carrying fuel doesnât suit you, just burn wood. While testing this stove system I was pleasantly surprised to see the ease of setup, and flexibility of options. It was a breezy day (11 mph wind) when I tested the stove, that did not seem to affect it at all. The Fissure Ti-Tri is an excellent wind barrier. The optional Inferno Ring works great when you are burning wood and doesnât add much weight to the package, especially if you are planning to leave the fuel bottle home. I tried all three fuel types (Esbit, denatured alcohol, and wood) and they all worked well. I boiled (rolling boil) 62-degree Fahrenheit water (2 cups) in 8.03 minutes at an elevation of 4426 feet, and 72 degrees Fahrenheit outside using one Esbit fuel block. Using 20 ml of denatured alcohol I was able to get a rolling boil in 7.15 minutes at the same elevation and 75 degrees Fahrenheit.
Toaks 850ml pot that is included with Trail Designs kit.
I did not time the wood burning boil since using wood to make a fire evokes a completely different experience and takes much longer to do. Using the optional Inferno Ring and fire grate, I was able to get a really nice fire going under the same windy conditions. Most all of the pieces nest into the Toaks 850ml pot that comes with the kit (as long as you are only taking one burn method). Itâs recommended to use a zip-lock bag to keep the fuel bottle in while you are packing it, that way it wonât leak under altitude and barometric pressure changes. The cap of the fuel bottle does have an o-ring or washer inside to reduce leaks, and there is a provided measuring cup that is marked with ml, cc, tbs, fl oz. and drams measurements. When using the 12/10 stove itâs recommended to only use denatured alcohol (per instructions) and fill it with no more than 40 ml. I tried boiling water with 15 ml first and found that it burned all the fuel before bringing it to a boil, it gave me a simmer. Moving my amount up to 20 ml worked just fine to get a rolling boil that last roughly four minutes. Who is this stove system for? I think it would be great for the experienced lightweight backpacker looking to upgrade to a different system than what they currently have. I think this is a good entry level stove for someone that doesnât have a lightweight system and wants to migrate from a canister stove. If you need versatility in your system, then this stove system is for you, especially since they offer many different configurations when ordering.
This little flashlight is smaller than my pinky finger. The three lighting modes on this are great. I like it more than the previously reviewed Thrunite TI-3, mainly because I think the lighting modes are a little more useful at 8, 25, and 85 lumens. This is an update to the older model that had a mostly diffused lens. This newer version of the E05 has more of a clear lens with a very slim ring around the outside of the lens to diffuse some of the light. It comes with a key ring and a spare o-ring. I used the key ring to pair it with a Victorinox Mini Champ Midnight, because I misplaced it twice while testing it out. The pocket knife made it a little easier to keep track of. One accessory I wish this light had come with would be an optional pocket clip so that I could reverse the clip and attach it to the brim of my hat. Iâm not sure that I would need to carry it while backpacking. I usually only carry a handheld backup light if it can also serve in place of a headlamp. However, this is an excellent keychain light!
This towel contains silver chloride. It did have a bit of a chemical smell until I used and washed it a few times. I also noticed that there was a reddish color coming out (possibly the silver chloride, or maybe some excess dye) in the water when washing it. That stopped after about three wash cycles. As for the performance of the towel, it dries you off very well. I found that it has great absorbency. Laying the wet towel outside it dried very quickly. The Extreme Ultralight 34âx28â works well as a bandana, the back hangs down enough to cover my neck (which I really like). DTO lists the weight below 3 ounces. On my scale it was reading 3.4 ounces. I will let you decide if you want to add that weight to your pack. I have never taken a towel on a backpacking trip, but I like this one since I can use it as a bandana or kerchief. It absorbs better than a microfiber towel, and there is a good color selection available. The DTO website shows that there are two other sizes, 19âx19â and 34âx58â.
The 60-Second Backpacker is a video series that provides bite-sized shorts about equipment, techniques, and philosophy of ultralight backpacking.
Episode No. 2: Trim the Fat
Carrying extraneous equipment and supplies that don’t serve your primary objectives of hiking and camping on a wilderness trip can rapidly balloon your pack weights. In this episode of The 60-Second Backpacker, you’ll learn why packing only the essentials, replacing equipment with skills, and limiting nonessential items to only those things that compliment your trip goals are critical for maintaining a low pack weight.
IMPORTANT: If you don’t see the video immediately below, just click this link to refresh the page, and you’ll be good.
In this week’s news: Crew One completes #windrivers 2015, bear advice from a controversial figure, compare tent options, and more.
Introduction
If you’d like to submit a link to a timely (fresh) story for us to consider including in our next installment, please send it along to submissions@backpackinglight.com with the subject line “BPL NEWS DIGEST”.
Top Stories
Bear Takes a Swipe at Backpackerâs Tent in Hopes for Food
Following the safety rules for food storage and preparation was not enough to deter a grizzly bear in Glacier National Park. Doug Kelley and his fellow backpacking friends had set up their tent and sleeping bags a few hundred yards away from their official cooking and eating area. While preparing dinner, they were surprised by a grizzly bear. They thought the bear was certainly interested in the food that they had, but amazingly the bear headed for the backpackerâs tent. Park officials say that it is likely that the bear had found food in a tent in the past, or it was possible that the tent smelled of food from a prior trip.
A short commentary that brings up a pertinent question. Is technology ruining our perception and experience in the outdoors? It seems like everywhere you look nowadays you can find someone walking around talking to a camera pointed at…themselves. There is definitely no shortage of apps for tracking our progress while working out, hiking, skiing, etcetera. Is it evolving how we experience what we do? How different is it to go for a nice hike when you are documenting the trip with the expectation of sharing it with peers across the internet?
CAMPING NUMBERS DOWN BACKPACKING NUMBERS UP – Study shows that less people are camping, and more people are backpacking. Highcountry News.
Expeditions
Backpacking from the Eyes of a Beginner
Lillian Schrock recently took a backpacking trip for the first time. She had grown up car camping as a kid. It didnât take her much time to realize the differences. Those differences left her with some very positive realizations about backpacking.
Crew One at the end of the Glacier Traverse on Day 10, on the Continental Divide at 12,500Ⲡabove the headwaters of Tourist Creek.
Traversing above the Klondike Glacier ice cliffs below Pedestal Peak.
Crew One Successfully Treks the Wind Rivers Range
Backpacking Light is the sponsoring organization for BSA Venturing Crew One (crew1.org), a youth organization comprised of 14-20-year-olds with the goal of fostering expedition leadership and wilderness travel skills. Crew One recently completed an 11-day trip through the Wind River Range in Wyoming. The Wind River Range spans about 100 miles and includes dozens of peaks higher than 12,000 feet in elevation. The highest peak is Gannett Peak and the second highest peak is Fremont Peak – and Crew One summited both – along with completing a glacier traverse of the Dinwoody, Gooseneck, Gannett, and Klondike Glacier Complexes. The expedition journal, sent live as satellite dispatches, are available on RyanJordan.com.
If you plan on taking your dog hiking you will want to make sure that they are ready for the trip. Know what gear to bring for your pup. Get them in shape with you before you leave especially if you are planning a longer trip. Find out about the locale for what types of other wildlife may be where you plan to hike. Follow trail etiquette and remember to follow Leave No Trace principles.
When youâre out there scrambling up to the pinnacle of the mountain, or trying to cover 15 miles in a day at a 3.4 mile per hour pace…what do you dream of eating? There are freeze dried foods. Good old raisins and peanuts. Goo gels, chewy âfruitâ things, Jerky. Maybe your thoughts wander to double cheeseburgers or a steak dinner. Does any of this sound familiar? This article discusses some of the ways to make trail food a tastier experience than just instant noodles or handfuls of gorp. What are your favorite trail foods? Let us know in the comments below.
FIND THE PERFECT DESTINATION -Loadout Room talks about how to find the perfect camping, backpacking, or hiking destination here.
GRADE ONE SCRAMBLING – Get some advice about grade one scrambling from SimplyHike.
IMPORTANT: If you don’t see the video immediately below, or see a “Sorry…” message in the video player, just click this link to refresh the page, and you’ll be good.
Gear
Big Agnes Vs. Mountain Hardwear
The Mountain Hardwear Super Mega UL2 Vs. the Big Agnes Fly Creek UL2. Both meant to be lightweight tents for backpacking. Both very close in size and weight. But which one rates higher? âUpupaepopsâbreaks down the pros and cons of these two competitors.
IMPORTANT: If you don’t see the photo immediately below, just click this link to refresh the page, and you’ll be good.
Complete contents of pack and clothing that will be worn. Photo courtesy of Cesar Valdez from Cesar and the Woods.
Gear List for 2015
Cesar Valdez is sharing his updated gear list for 2015. Cesar is in his own words âmostly a section hiker.â He is currently residing in Sweden. He updated his gear list from last year and posted the complete list with weights on his blog, as well as posting a video on Youtube. His shoes are probably one of his most controversial pieces of gear. You will have to check his blog to see what I mean. Total skinout weight was listed at 11.85 pounds.
SLINGFIN IS IN THE BACKPACKING TENT MARKET -Read about the Slingfin 2Lite on Indefinitely Wild.
10.4 POUND UL KIT – Andy Siminski wants you to see what he is carrying in his UL kit. He has a link provided in the information section with a complete list.
IMPORTANT: If you don’t see the video immediately below, or see a “Sorry…” message in the video player, just click this link to refresh the page, and you’ll be good.
People
Dr. Lynn Rogers Shares Advice on Bears
Dr. Lynn Rogers has studied bears for over 48 years. His work has been seen as controversial at times. According to the Wildlife Research Institute in Elly Minnesota, he has radio-tracked over 100 bears in Minnesota, and studied one of them for at least 22 years. He is said to have formed trusting relationships with bears, even mothers with cubs. Recently he shared his advice on what to do if you encounter a bear in the wilderness with Gear Junkie. Although his work may be seen as controversial, he has a very long track record with many awards, publications, and research and educational positions.
Campfire Chronicles Discuss their Upcoming Yosemite Trip
IMPORTANT: If you don’t see the video immediately below, or see a “Sorry…” message in the video player, just click this link to refresh the page, and you’ll be good.
Hiking Moel Siabod
IMPORTANT: If you don’t see the video immediately below, or see a “Sorry…” message in the video player, just click this link to refresh the page, and you’ll be good.
A vegetarian Option for backpackers that offers organic ingredients.
The Specs
Vegetarian meal option.
Organic ingredients.
Dry weight is 4.1 ounces.
My Take-
Bring a skillet with your cookpot if you want to be able to cook this meal without a mess, and some extra spices to really make this meal tasty. I spent two years of my life eating a modified vegetarian diet (vegetarian and no dairy). While in search of dehydrated meals that were suitable for my needs this was one of the meals that I found and I decided to try it out on a trip. Directions per label call for one cup of boiling water and ten minutes to rehydrate the meal, add included organic olive oil to a skillet on medium heat (this may require removing the skillet from the heat frequently depending on your stove, or you can easily burn the noodles leaving a very hard to clean skillet) and fry noodles for additional five to ten minutes. The noodles were still somewhat crunchy, the vegetables were chewy, and the overall taste was bland. I really wished that I had brought some extra spices or some sriracha chili packets to add some flavor to this dish. I decided that needing to bring a small skillet with me in addition to my cook pot was not worth the weight addition and looked for one pot meals only after that. I tried cooking this meal again at home and found that the addition of spices like red chili flakes and salt made the flavor much better. This meal has 410 calories, 13 grams of fat, 1200 mg of sodium, 62 grams of carbohydrates, 5 grams of dietary fiber, 8 grams of sugar, and 11 grams of protein according to the label.
Ultra thin, flexible, and lightweight wallet made to eliminate the problems associated with a traditional leather billfold.
The Specs
Holds up to 24 cards.
Divided cash and receipt pockets.
Lightweight ripstop nylon.
Weighs .4 ounces.
Material wicks away moisture, is fast drying, very thin, and tough.
My Take
I have had so many wallets in different designs and eventually decided to stop using all of them with an exception of a few. When I received this wallet for testing I was enthusiastic to see if it could accomplish what the companyâs slogan (âEnd wallet buttâ) said on the box. The material is a really light and soft ripstop nylon. The cards sit side by side in the wallet, top row, bottom row, right and left sides. This makes the overall height and width a little larger than my last wallet, but it also allows the wallet to flex a bit when I sit down. The inside of the card slots has a rubber strip near the front of the opening to aid in keeping cards from sliding out. I havenât had anything fall out of the wallet so far despite only using a few cards in each slot. I really like the divided pocket for carrying cash and receipts. It is deep and has plenty of room for cash. I did find that the softness of the wallet makes it a little more work to insert receipts than I have with a traditional billfold. This wallet is not hot in my pocket, it doesnât bother me after wearing it all day, and it is so light. My only concern is that sometimes I go to pull it out of my pocket and I canât tell which side of my pants I put the wallet in because it hardly feels different from my other empty pocket (this could be bad on laundry day). This is the SoftTech Nylon Original model. There are other models available from All-Ett including leather models. This model is available in three colors, black, pebble brown, and beryl Blue.
This portable charging system is small, charges quickly, and meets IP68 Military standards.
The Specs
Rapid recharge via included usb cable.
Rubber exterior.
3000 mAh battery.
2.1 Amp input and output.
My Take
Iâve been using this portable charger for the last few weeks. I have taken it with me to work, on trips and camping. I get about two full recharges on an iPhone 4, and I am able to charge while I am using my phone. My wifeâs iPhone 5s gets a little less than two charges out of the MyCharge. There are two ports built into the MyCharge, one is standard sized USB, and the other is Micro-USB which is where you plug the cable in to recharge the device. You can charge the MyCharge while you are charging your phone, which could come in handy if you were short of outlets and needed to charge both. You can also charge the MyCharge from your laptop’s power supply while you charge your phone from the MyCharge. Pro Tip: If you want to look like the ultimate âTech-Nerdâ you need to have as many portable electronic devices sitting around you all at once, you could throw in some headphones and a camera and then you may be recognized as a full on âTech-Junky.â All jokes aside, this is a good solution for short two-day trips to keep your phone or other USB chargeable devices charged. Weight on the MyCharge is 3.9 ounces which make it a little heavy to be considered an ultra-light solution. The size is comparable to other chargers on the market like the Kodiak mini charger, but it has a larger charge capacity with higher output of amperage as well as meeting a greater rating for shock, dust, water, and temperature resistance.
Microadventures are exactly that – tiny little trips with minimal fuss, minimal gear, and maximum bang for the buck.
What is a Microadventure?
The term “microadventure” was coined by Alastair Humphreys to represent, at its core, a trip taken very close to home for a short period of time. It involves less time, less prep, less gear, and less cleanup.
The Benefits of a Microadventure
I texted BPL Editor Jonathan Davis at 4:57 PM:
“Wanna go spend the night up on Saddle Peak 2nite? Leaving the Middle Cottonwood TH at about 8pm.”
Jonathan used our microadventure as an opportunity to test the backpack we affectionately call “The Medicine Chest”. Note that his headlamp is at the ready, in preparation for our nighttime hike up the mountain!
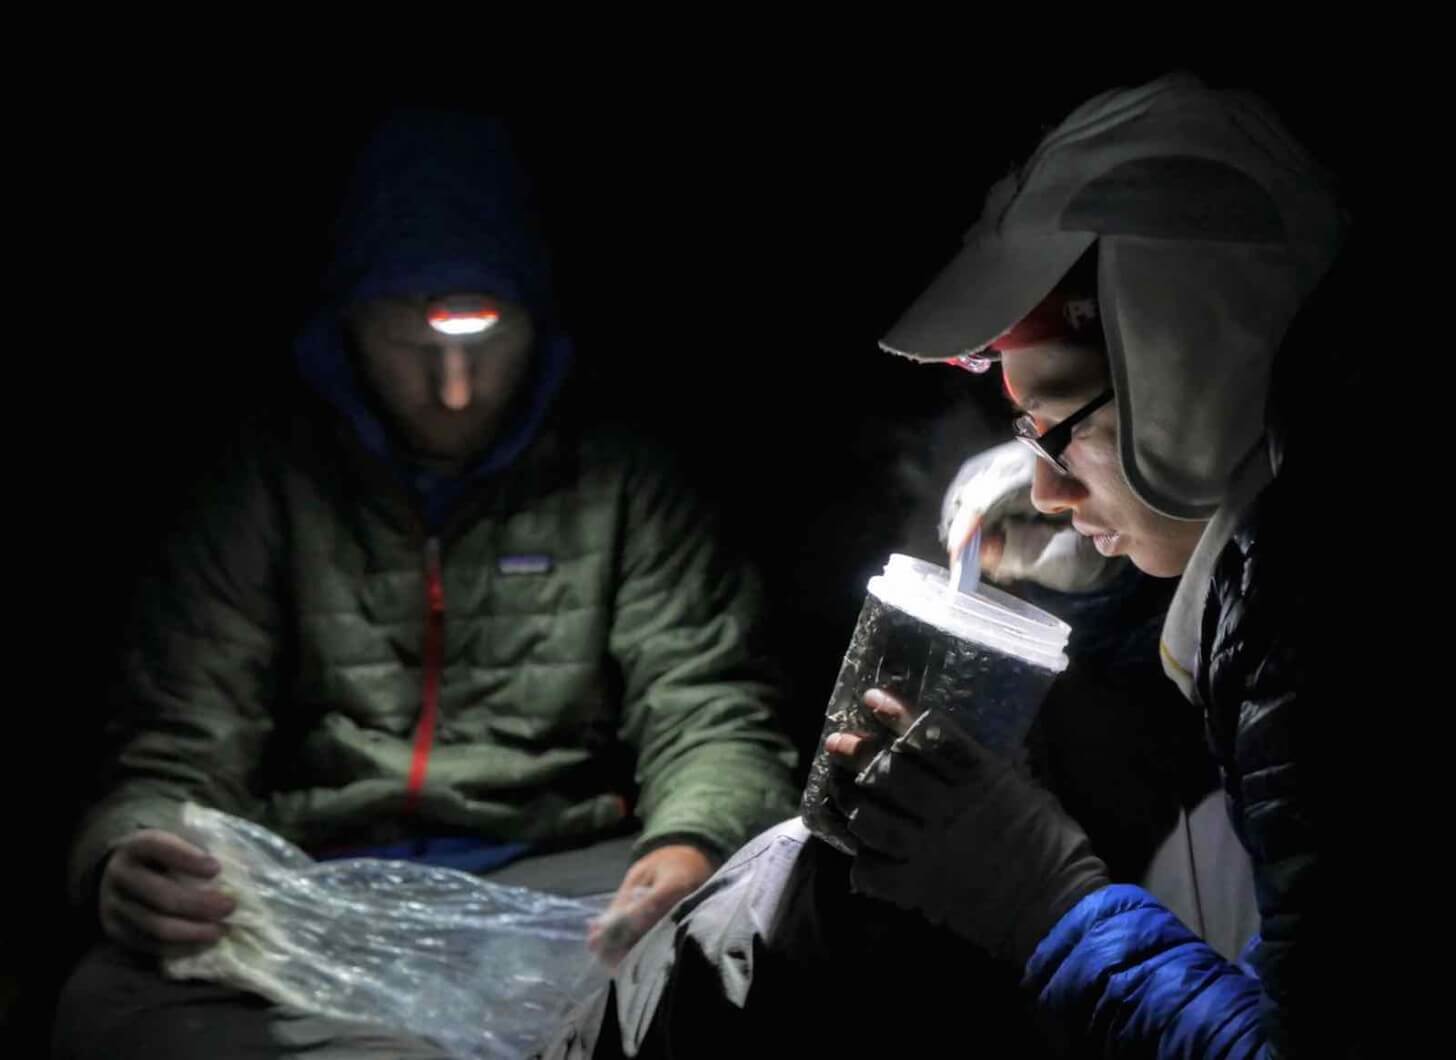
By 5:25 PM, he had the blessing to go from his wife. By 6:19 PM, all of our logistics were sorted out in terms of gear, food, etc. By 8:15 PM, we were hiking. By 10:30 PM, we had put in several miles and a few thousand feet of elevation gain, and were settling in with our bivy sacks in a meadow and brewing up a freeze-dried meal as a late-night snack. We were back in town by late morning the next day.
Microadventures should be just that – little tiny bits of activity with no barriers that should prevent you from going.
The benefits of a microadventure are many:
They require little time and energy to prepare for, or cleanup from.
They require little physical, mental, or emotional investment if things don’t go as planned.
They require little sacrifice in terms of time spent away from family, jobs, or other responsibilities.
They’re fun.
For the low cost of participation, the benefits are extremely high!
Within an hour, we were in a high meadow, the little flickering lights of the Gallatin Valley now far below, and darkness rapidly approaching. As we hiked higher, and the night fell darker, we gained freedom.
For me, the primary benefits of a microadventure are even less tangible than those listed above. Microadventures provide an emotional release valve that allows me to effectively cope with the constant strain of managing personal and business financial matters, a to-do list that grows at a faster rate than it shrinks, the complex logistics of owning and sharing one car in a family where three sets of busy schedules need to be constantly synchronized, and the challenge of preparing for and cleaning up from summer expeditions, business travel, and anxious visits with the in-laws!
What to Bring on a Microadventure?
Deciding what to bring will depend on a variety of circumstances: options you have available to you, the immediate weather forecast, and your own styles and desires.
Our camp consisted of little more than two bivy sacks hidden behind a grassy knoll at the edge of a stand of trees, only 50 yards from the trail but out of its view. Situated on a bench, we still had a view of the valley below that we had ascended the night before.
When Jonathan and I went on our microadventure together, I knew the following would dictate my equipment and supply needs:
I had a packed schedule during the afternoon before we left, and I knew I wouldn’t be able to fit in making dinner or eating out before hitting the trail. I knew that I wanted hot food at camp when we finished our hike, so I’d need a stove, pot, fuel, and food. I grabbed my MSR Reactor, which still had a partially used canister of fuel packed inside of it, and an old freeze dried meal (Mountain House Spaghetti!) from a miscellaneous food bin. I threw in a few packets of Gu gels from my training supply that I knew would get me to camp, a few more that I knew would get me back home, and a packet of Via for a morning brew. Double checking the little dorm fridge in my garage, I found a forgotten, half-empty 500 ml box of wine tucked back in the corner, ignored the expiry date, and threw it in the pack.
I would be arriving to camp late, in the dark. I’d need a headlamp! And I didn’t want to fool around with pitching a tent. I didn’t bother to check the weather forecast, but I decided to grab two bivy sacks (one for me, one for Jonathan), and call it good. If it was going to rain, I was confident we could deal with it by tucking under a tree stand.
Layers? I simply wore what I had on at the time – a t-shirt, some nylon work pants, wool socks, and trail running shoes. I added a rain jacket and down vest, and figured I’d stay warm enough for the rest of the time with just my sleeping quilt.
I knew where I was going, so we skipped the map, compass, GPS, etc.
Microadventures strip off so much of what we deem “essential” about backcountry travel. The result: the clarity and focus required to think, contemplate, meditate.
What about the other “essentials”?
First aid kit? Nope. I could suffer a cut or bruise ’til I got back home.
Toilet supplies? Natural materials!
Sunglasses and sunscreen? For hiking in the dark and early morning? Mostly forested trail? No snow? Why bother?
Firestarting kit? I had a sparker in my stove kit and I suppose if I really needed a fire, I could light it using the stove.
Knife? This has always been a funny one to me. The only time I’ve ever found myself in need of a knife was to win a battle separated between me and Calories by stubborn food packaging!
Extra food? I knew where a stash of miner’s lettuce was up in the canyon where we were hiking, as well as a few edible roots and flowers. But essential for an overnight microadventure? Certainly not – heck, we could have fasted for the duration plus another day and been just fine.
What to Do on a Microadventure?
I threw in a camera to snap a few photos, but other than the little box of wine, we didn’t plan on any extravagant entertainment. After all, I had a pal with me. Mix a pal with a late night, no distractions, and a few sips of a favorite drink, and (*gasp*) you might actually have to talk. This fosters relationship and forges bonds. I can’t think of anything better to do on a microadventure.
I woke up early, and while Jonathan was snoozing in his bivy sack, I laid on my stomach to have a closer peek at the wild plants. There’s something about looking at a paintbrush flower – a flower that I’d seen thousands of times during a lifetime of rambling in the wilds – up close and backlit by the sky above, that allowed me to see it in a new way.
When I go solo, I try not to plan “activities”. Microadventures are ultimately vehicles of R&R for me. Sometimes I like to do nothing at all except look at the natural world around me. More than anything, it gives me an appreciation for the simplicity of having to do nothing – allowing thoughts to pass in and out of my head in a state of relaxed, dynamic meditation. For me, this is a fast road to relaxation, a positive mental and emotional state, and ultimately, gratitude for my life. In and of itself, that’s a worthy and refreshing goal for any microadventure.
That said, some microadventures are necessarily filled with activity: the need to go capture some photography for a story, test out and record (write notes about) first impressions of a new piece of equipment, achieve some type of physical training goal, or find a quiet spot to immerse myself in some research reading with no other distractions.
Microadventure Tips: Top 5
The key to a successful microadventure is to ensure that preparation and execution should not employ an expedition mentality: keep them simple!
Here are my Top 5 tips for keeping macroadventures simple.
1. Simplify the Menu!
When I think of a microadventure, the most complex part of trips for me is food planning, packaging, and preparation. I employ a few strategies to simplify this process:
Focus on cold, no-cook foods;
Start the microadventure after an early dinner (especially in the summer, when days are long) and return before the next day’s dinner;
2. Simplify the Camping Bed!
I like to go on a microadventure when the weather forecast is fair – that means I can get away with sleeping out under the stars, or at least, in a simple bivy sack.
3. Simplify the Clothing System!
To keep clothing needs to a minimum, I prefer to take less clothing and rely on my sleeping bag for warmth in camp.
4. Be Ready at All Times!
Keep your microadventure pack hanging on a hook by the door – packed and ready to go with the following items:
Backpack
Sleeping Bag
Sleeping Pad
Bivy Sack
Rain Jacket
Headlamp
One pound of assorted snack foods that can be eaten cold
Local map & compass
Microadventuring clothes to wear: trail shoes, wool socks, trekking shirt and pants, and ballcap
It’s astonishing what you can accomplish with just a minimal kit like this! If it’s ready to go, you may be even more astonished by how often you use it!
5. Do Your Own Thing! (and Adapt Accordingly)
Your microadventures may not look like mine. Adapt accordingly, and create your own microadventure philosophy. Maybe you wish to create a framework for a bikepacking, packrafting, car camping, day hiking, or urban microadventure. Regardless, think about the absolute minimum you need to accomplish it and build from there. Remember, a microadventure should be easy to plan and easy to execute. Don’t create barriers or you won’t be a microadventurer.
Conclusion
Microadventures are ideal pursuits for busy professionals, people who need to escape the confines of modern civilization for a bit, families with kids, and inexperienced adventurers. Plus, they are a great quick fix for those who regularly adventure on more complex expeditions and simply want to try new gear or skills.
My normal weekly routine involves guzzling a few cups of coffee in the morning while checking email, sorting out my daily schedule and priorities, and at times, reacting to the urgency and panic of the day. Here, I enjoyed slow joe while not doing any of this, and it was wonderful. I hope to translate this habit back into my life, regardless of whether I have WiFi or not! Perhaps you have learned something about going on microadventures that you can use to improve your quality of life?
Share Your Microadventure Stories
I hope this article stimulates some discussion that might be valuable for others who are considering a microadventure or two in the near future. A few questions for the readers:
What value (benefits) have your microadventures provided for you?
How long does it take you to prepare for a microadventure?
What gear and supplies do you bring on your microadventure?
What life lessons have you learned by going on microadventures?
Share your microadventure photos and stories in the forum below!
GEO is a single-serve, disposable pourover filter containing freshly roasted artisan coffee.
Introduction
The perfect cup of backcountry coffee may not exist, but GEO brings us a little bit closer.
GEO is a single-serve, disposable pourover filter containing freshly roasted (ground) artisan coffee from Little Red Wagon Coffee Roasters. It’s available in a variety of origins, and packaged in individual serving packs or in a resealable air-tight zip closure bag with either six or twelve pourover filters.
Watch the Video
Watch the video below to see GEO in action, and see how the brewing process works in the field.
IMPORTANT: If you don’t see the video immediately below, or see a “Sorry…” message in the video player, just click this link to refresh the page, and you’ll be good.
Review
Little Red Wagon is a craft roaster in Bozeman, Montana. They roast single-origin coffees in six-pound batches in a custom-built, tiny San Franciscan SF-6 roaster. Coffees are sourced seasonally, from farms around the world with whom they have developed personal relationships. The intimacy of knowing the entire process from farm to cup gives Little Red Wagon a level of authenticity – they know what they’re doing and the quality of the coffees they produce speaks for themselves.
Among lovers of coffee, it seems that French-pressed and pourover brewing methods yield brews that elicit the highest levels of satisfaction from their sippers. Both methods have been adapted to backcountry use, but suffer from a bit of fuss in managing both the ground coffee and the cleanup and disposal of the sludge from the brewing equipment.
GEO takes a different approach by sealing the grounds in a disposable pourover filter “cone”, which is in turn sealed into an airtight bag that holds one, six, or twelve servings. Each cone weighs just over half an ounce (20 to 21 grams, to be exact). The end result is a very clean, no-mess product that creates an outrageously good cup of coffee.
Strengths
Clean – no messy grounds to clean out of filter cones, mugs, etc.;
Excellent flavor – fresh-roasted coffee in dated packs;
Weaknesses
Short cup disclaimer – the bottom of the pourover hangs about 1-2 inches below the hangers at the rim of your mug, so if you have a short cup, not all water will exit the pourover filter until you begin to pull it out of the cup; so to extract that last bit of brew, hold the pourover over the cup after your final pour.
Wet grounds disposal – this isn’t a weakness of this particular product, but for any brewing method using coffee grounds; you have two options: (1) place the pourover in the sun to allow the grinds to dry, and then pack them out in their original packaging or a plastic zip bag dedicated to the waste; or (2) bury the grinds in a cathole or scatter them if it’s allowed and consistent with minimum impact camping regulations in your area.
If you’d like to submit a link to a timely (fresh) story for us to consider including in our next installment, please send it along to submissions@backpackinglight.com with the subject line “BPL NEWS DIGEST”.
Top Stories
Scott Jurek- Record Holding Ultra Runner Completes A.T. for New Record
You may have heard of Scott Jurek in the ultra running world for his many records. He authored âEat and Runâ, a book that profiles his life and career. He set the American record for longest distance on all surfaces in twenty-four hours by running 165.7 miles. He has arrived at a new record completing the Appalachian Trail in 46 days 8 hours and 7 minutes. He covered on average 50 miles a day and traveled through 14 states. The Appalachian Trail Conservancy recommends taking 5 to 7 months to complete the AT giving an even larger perspective of Jurekâs accomplishment. His record was with support, he summited Mt. Katahdin with his wife Jenny, who served as crew member the whole way. This record provides no trophy, the Appalachian Trail conservancy doesnât have an award for speed. Nevertheless, this will be marked on Jurekâs long list of accolades in an already impressive career.
Wind Rivers 2015- Scouts Pose for a Pre-Trip Photo (Photo Courtesy of BSA Venturing Crew One).
BSA Venturing Crew One Traversing Glaciers in Wyoming- the Wind River Range
Backpacking Light is the chartering organization of BSA Venturing Crew One of Bozeman, Montana – a group of 14-20 year olds with a focus on learning expedition leadership and practicing it by planning wilderness expeditions in remote locations. Last year, Crew One completed a 13-day, the 105-mile traverse of the Bob Marshall Wilderness by foot and packraft without resupply. This year, they are in the Wind River range of Wyoming, attempting a glacier traverse of the northern range with a summit attempt of the Wyoming High Point, Gannett Peak (13,804′) for good measure. They left on July 13, and will return on July 23. Stay tuned for more stories about their expedition here at BPL.
Read the journals from Crew One’s Bob Marshall 2014 Expedition on RyanJordan.com.
Three Sisters Survive While Being Lost
Three sisters were lost for almost a week on the Gros Ventre Wilderness. They were originally heading to Turquoise Lake but realized that they were lost. Megan, Erin, and Kelsey Andrews-Sharer had decided to move off trail and reroute when one of the sisters began to develop blisters on her feet. The girls had a compass and updated map of the area but got confused about where they were. Once they couldnât decipher where they were on the map any longer, they decided to stay put near water and wait for someone to come to them. The plan worked out as search and rescue found them, but only after they had been out there for five days.
BEAR CANISTERS NOW REQUIRED – If you are planning a trip into the Maroon Bells Snowmass Wilderness, you may want to read this. Aspen Daily News Online.
NEW VISITORS CENTER OPENS FOR MOUNT ST. HELENS – Read about the new visitors center at Mount St. Helens on OregonLive.com.
Expeditions
Journey Across the Sierra High Route
Traveling over sheer, rocky, and sometimes unmarked terrain, is not only physically exacting, it is also a challenge for the mind. The Sierra High Route has roughly 40 miles of itâs almost 200-mile length on the trail. With 30 miles shared with the John Muir Trail the trails touch but are very different. Rocks are mainly what the high route have to offer for you to travel on. The high route is exactly that, where the J.M.T reduces elevation the High Route stays elevated. It took Chris Brinlee Jr. and Gilberto Gil only two weeks to complete the High Route. See the many photographs that they took along the way and a detailed account of the trip, as well as a look at some of the equipment used on the journey.
A compass, a map, your packed gear, food, water, first aid, and your skillset are all important things for any backpacker to have. The skillset which you have honed can prove to be one of the most beneficial items in your gear list that allows you to enjoy your travels and have the ability to go lighter. Do you know how to use a compass and map? I know that may seem like a silly question to some that are experienced backpackers, but to someone that is new to backpacking it can be something that seems unfamiliar. This video gives some insight on how to use a compass with a map while traveling on land. As any skills and training knowledge goes, it is your responsibility to learn them properly. You are the person responsible for your own safety while backpacking, and this video is only meant to be a starting point for navigation, not the only training that you should seek.
IMPORTANT: If you don’t see the video immediately below, or see a “Sorry…” message in the video player, just click this link to refresh the page, and you’ll be good.
Skills Shorts
S.U.L. GEAR LIST – Here is a great video from Chad at Stickâs Blog showing his current super ultra-light gear list for a trip where he is expecting some storms. In the video, he covers pack selection, gear, food, and why he is packing what he chose.
IMPORTANT: If you don’t see the video immediately below, or see a “Sorry…” message in the video player, just click this link to refresh the page, and you’ll be good.
A GREAT TASTING SMOOTHIE RECIPE – Are you working out with a long trip in mind? Runnerâs World shares a post workout recipe that is great for the summer heat.
Gear
Three Stoves Compared
Light weight wood burning stoves are the matter of topic in this article. Looking at three stoves in particular. The Solo stove, a natural convection inverted down-gas gasifier, this stove has two small points on top and bottom of the burn chamber allowing oxygen to enter which provides a less smoky flame. The Sierra Zip Stove, utilizing a small battery powered fan to boost oxygen into the fire. There is a new ten-ounce version of the Zip Stove available in titanium. Lastly, there is the Emberlit Fireant Multi-Fuel Stove, weighing 2.8 ounces being made of titanium, and the ability to consume wood, esbit fuel, and trangia fuels which give this stove some flexibility.
Josh Kato Wins Worldâs Hardest Mountain Bike Race
Josh Kato is a 40-year-old nurse from Washington State who recently won the Tour Divide, which is touted as the worldâs hardest mountain bike race. It took him 14 days, 11 hours, and 37 minutes to set the newest race record, beating the old record by a full day. He was biking on average 190 miles per day and a total distance of 2,745 miles. Kato rode 700 miles last year with injuries and an infection and has not raced in 24 years before deciding to race the tour divide. At the last 45 miles of the race, out of water, Kato decided to stop and drink two liters from a culvert on the side of the road, this helped him push past the leg cramps that he was experiencing and make it to the finish line a whole 20 minutes before the next competitor would arrive.
IMPORTANT: If you don’t see the video immediately below, or see a “Sorry…” message in the video player, just click this link to refresh the page, and you’ll be good.
Get a Quick Look at the Jackson Hole Mountain Bike Park
IMPORTANT: If you don’t see the video immediately below, or see a “Sorry…” message in the video player, just click this link to refresh the page, and you’ll be good.
The Missouri RIver from Epic Montana
IMPORTANT: If you don’t see the video immediately below, or see a “Sorry…” message in the video player, just click this link to refresh the page, and you’ll be good.
Is the Iceman Science or Science Fiction?
Language warning: this video does have some swearing in it.
IMPORTANT: If you don’t see the video immediately below, or see a “Sorry…” message in the video player, just click this link to refresh the page, and you’ll be good.
Hike the Wind Wolves Preserve with the Adventures Archive
An electrolytic water purifier with a rechargeable battery and built-in solar panel for backup recharging. Potent enough to eliminate giardia and cryptosporidium, this handheld purifier uses electricity to make saltwater into a solution (mixed oxidant disinfectant) that will purify dirty water.
h3 The Specs
Scaleable treatment allows you to treat from 1 to 20 liters of water.
Solar powered backup for charging, one hour of direct sunlight gives enough charge for 1 liter of water treatment.
Ready to use, no need to pre filter water.
Cost effective
Designed to meet military specifications for freeze/thaw drop and crush resistance.
Lasting protection, residual disinfectant extends protection to water that is not immediately consumed.
High value due to the very low cost of operating device (salt required to make brine solution).
No batteries to replace, charge with usb or solar power, purifies 150 liters + per full charge.
My Take
This product is effective water treatment for most all waterborne pathogens, including cryptosporidium, e-Coli, and giardia. There are backup means of charging built in, reducing my concerns for taking it into the wild. Instructions on the purifier are easy to follow, and there is a waterproof quick-start guide that covers the instructions for purifying water, as well as showing conversions for amounts of water into liters. Weight on the purifier was 3.7 ounces on my scale and 4 ounces after I filled it with salt. The Brine bottle empty weighed 9 grams, filled it was 43 grams. Test strips (in provided container) weighed 30 grams. The quick-start guide weighed 11 grams. There is a small carry pouch provided which weighed 9 grams. The total weight with salt reservoirs filled, brine bottle filled, quick-start guide, pouch, and test strips (in provided container) together weighed 7.3 ounces. Using the purifier was easy for me. I could see that using it on winter trips may be a little harder if I were shivering cold, but that could be avoided with more prior preparation. The flexibility of being able to purify different amounts of water is nice, and there are varied wait times for if you suspect giardia or cryptosporidium presence in the water (giardia wait 30 minutes, cryptosporidium wait 4 hours). Compared to the other water treatment options on the market I feel like it is a good value over the life of the product. While it is a bit more complex to use than something like a Sawyer Mini, it is proficient in purifying most of the water treatment needs you may encounter while backpacking.
A poly/cotton blend shirt made purposefully for outdoor sports with a casual style suitable for everyday wear.
The Specs
Drirelease with FreshGaurd heathered single jersey, 85% poly 15% cotton.
UPF 15 for added sun protection.
Flatlock Seams for comfort.
Quick drying.
Weighs 5 ounces.
My Take
Wearing cotton while in the mountains is not something that I personally do often. If I am going to be in a hotter climate like the desert, or just choosing casual wear for spring and summer, I will usually wear cotton. The rest of the year I will be wearing synthetics, wool, or down. This shirt, however, is not simply cotton. I have worn several poly/cotton blends in the past and found that they are very comfortable in most climates. The addition of cotton in a small amount can also give the garment a softer feel. A blend like this does dry quickly, especially if you have direct sunlight on it. The flatlock seams are nice and a personal preference when I am wearing a pack or doing anything involving aerobic activity. The fabric is made to withstand holding odors. UPF protection is a nice addition and is something that I like in all of my garments.
A waterproof, seamless sock with wicking liner available with differing levels of thermal protection.
The Specs
Wicking liner
Breathable
Seamless and snug fit
Silent-knit technology
windproof
My Take
These socks are comfortable. There are multiple models available. This model is the “Lightweight Waterproof Sock- Calf Length”, which is intended to be protection against light splashes as opposed to submersion. With three layer construction, they are a bit stiffer than the usual wool sock. My initial suspicion was that these socks were going to be hot. They are warm, and my feet do sweat in them. After splashing through puddles and creek crossings, my feet were drier than if I were wearing my regular socks. They also seem to wick moisture fairly well, but after wearing them all day my feet will be mildly moist. I turn the socks inside out and they are dry in the morning. Turning them inside out also reveals that there are in fact seams in the construction of these socks, they are very flat and I did not feel them at all while in use. The box warns against twisting, wringing, or puncturing socks. I assume this would affect the waterproof membrane. Instructions for washing are to either hand wash and drip dry, or machine wash on low temperature and tumble dry on low temperature then turning them inside out midway through drying cycle. Weight on my scale was 4.2 ounces which are a bit too heavy for me to want to switch from my merino socks. I am more likely going to use these socks for short jaunts into the mountains, and maybe pick up Hanz heavier pair that is meant for fly fishing.
The 60-Second Backpacker is a video series that provides bite-sized shorts about equipment, techniques, and philosophy of ultralight backpacking.
Episode No. 1: Weigh Your Stuff
Not knowing what your backpacking gear weighs is a barrier to lightening your pack effectively. In this episode of The 60-Second Backpacker, you’ll learn why digital scales, spreadsheets, and being honest with yourself are the foundation for lightening up!
IMPORTANT: If you don’t see the video immediately below, just click this link to refresh the page, and you’ll be good.
In this Week’s News: It’s time for the 2015 Packraft Roundup, a father scares a bear away to save his son, five trails to know in the Colorado area, get to know Leslie Hittmeier, and much more!
Introduction
If you’d like to submit a link to a timely (fresh) story for us to consider including in our next installment, please send it along to submissions@backpackinglight.com with the subject line “BPL NEWS DIGEST”.
Top Stories
2014 Packraft Roundup: Photo courtesy of The American Packrafting Association
2015 Packraft Roundup!
The American Packrafting Association 2015 Packraft Roundup is happening July 12-14, 2015 on the North Fork of the Flathead River! The Roundup will take place at the group campsite at Big Creek Campground on the North Fork… the same place that was used last year. The schedule is still evolving, but hereâs a list of some of the things you can look forward to:
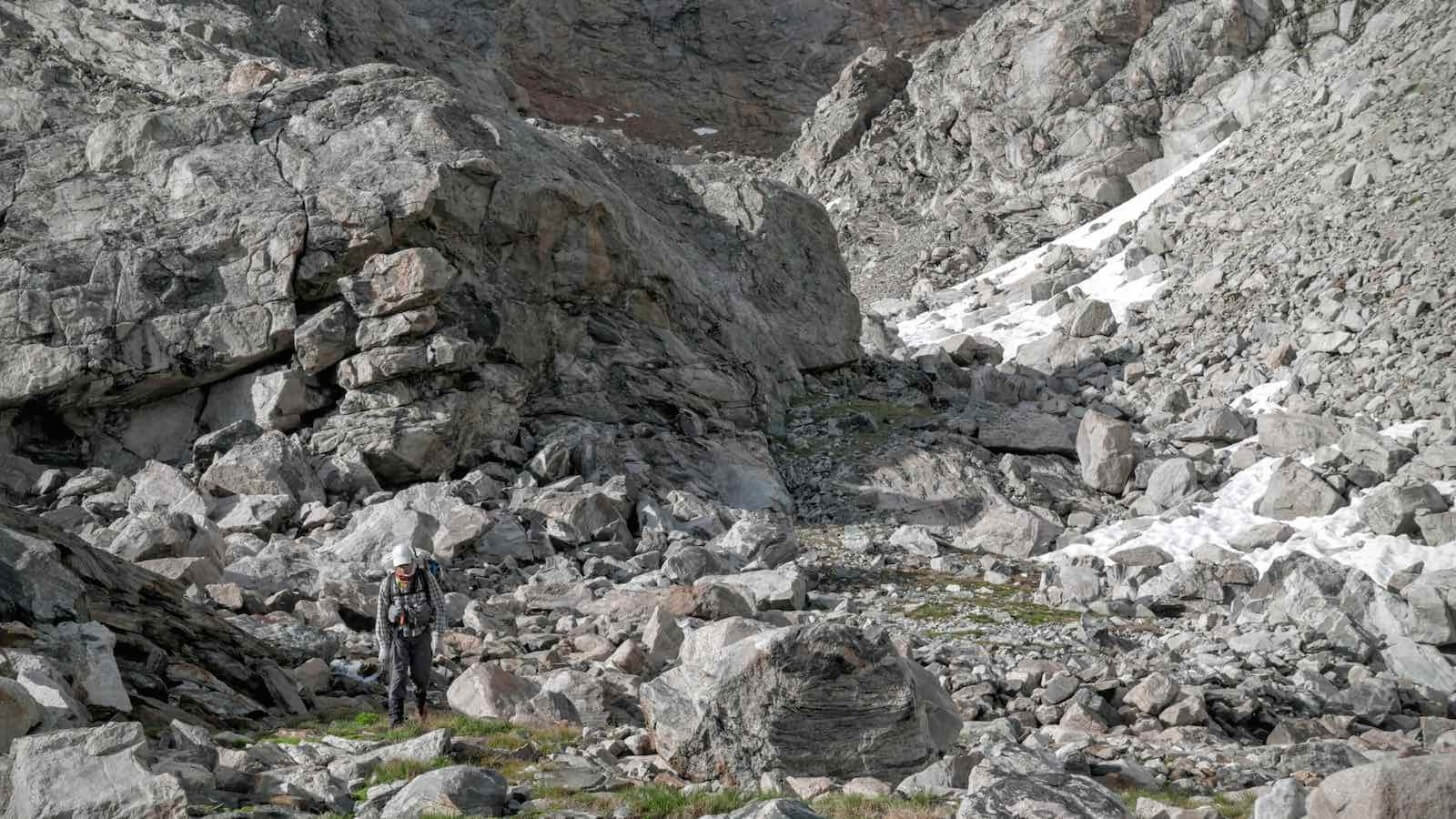
Program begins Sunday evening, July 12th and runs through Tuesday, July 14th.
Packrafting opportunities of different levels of difficulty on the North Fork and surrounding streams.
Bike-rafting instruction and trip opportunities! We are lucky to have two of the bike-rafting-est people on the planet, Casey Greene, and Steve Fassbinder, willing to lead clinics and bike-rafting floats.
Family float! Yes, you are welcome to bring your kids with you to the Roundup and if you are interested, we will have a group family float.
Group BBQ on Monday night, July 13th, organized by APA. Your registration fee for the Roundup includes this BBQ.
Keynote Speaker – Rich Rudow! Rich Rudow has been using packrafts to link up technical canyons in Grand Canyon NP for as long as anyone. He has been instrumental in packraft policy in Grand Canyon NP. Rich has pushed the envelope of exploration in his pioneering of scores of technical canyoneering descents in Grand Canyon. He will be talking about all this and more in his Keynote address.
Swiftwater Safety Institute is offering two packraft-specific swift water rescue and safety courses in the days prior to the Roundup. They are offering a 3-day âcompleteâ course from July 10-12, and a 1-day âcrash courseâ on July 12th. Space is limited.
Father (Greg Alexander) and son (Gabriel Alexander) were backpacking in the Smoky Mountains when their campsite was visited by a black bear. They had their food hung away from the campsite where they were sleeping in hammocks. Gabriel was pulled out of his hammock by the bear. His father Greg awoke and was able to scare the bear away. A swift hike to a nearby lakeside campsite was made where local campers with a boat provided a ride across the lake, and eventually the two made it to the hospital via airlift. Gabriel Alexander came away with multiple lacerations but was declared stable by doctors. When asked about the experience the duo agreed that the chances of a bear attack are rare and should not keep people from getting out of doors.
If you are looking for some hikes that you can do over the summer and you live in the Colorado area, you may want to try these hikes. Blue Lake Loop near Monte Vista, an eighteen-mile loop described as being âwild and remoteâ. The loop straddles the Continental Divide and was once home to the last known Colorado Grizzly. Bear Creek Trail to Engineer Pass near Ouray is a shorter journey that is rich with views and places to adventure. Approximately seven miles in there is a campground. Four Pass Loop near Aspen provides 10,000 feet of vertical gain and 26 miles of travel. Macey Lakes near Westcliff located in the Sangre De Cristo mountains. The seven-mile hike up will provide great views and plenty of challenge for the experienced hiker. Lastly, Sand Ramp Trail in Sand Dunes National Park and Preserve. A sandy trail with forest glens and views of the Sangre De Christo Mountains are what to look forward to when hiking this less elevated trail.
Upcoming backpacking trips are in the works for youths ages 12-14 with the Chippewa Nature Center. This trip will follow the shores of the Manistee River from July 13-17. Another trip for youth ages 14-16 is planned at Porcupine State Park on July 28- August 5. Both trips provide a CNC adventure leader. Registration fees and membership fees can be found on Chippewanaturecenter.org.
A photo posted by Leisa Wharington (@the_glass_studio) on
Skills
Five Principles of Going Lighter
Getting your base weight or skin-out weight down is something that we all focus on here at B.P.L. In the forums you can get a lot of insight into reducing weight. There are several principles involved to the practice. Leaving home non-essentials, looking for items that have multiple purposes, and reducing the weight of essential items are all things that are going to aid in the total weight reduction of gear that you carry. Some of the best ways to learn about going lighter are from fellow hikers.
Solitude, exceptional views, and stories that I can take home with me are all things that I look forward to when backpacking. Add great food to that list and my trip becomes epic. Dehydrated food doesnât usually equate to a memorable meal (at least not in a good way) for me. I have been on trips where friends were venturous enough to pack in steaks for the first night. That was an exceptional treat! Smoked sausage Jambalaya also sounds like it would be delicious.
BECOMING AN OUTDOORS WOMAN – Ladies in the Michigan area may want to check this out. UpperMichiganssource.com.
PATAGONIA CULTURAL EXPEDITION – Take a trip to Patagonia with N.O.L.S and learn some mountain skills.
Gear
Choosing Gear
Knowing what gear to take on a trip is important. Before you go on a multi-day trip you will want to assess what items will be key for a safe and fun adventure. Making a gear list before you leave will help you to not leave out something important. Knowing information about the locale of where you will be hiking can aid in what to bring with you. Are you expecting wet weather? Are you going to sleep exposed in a sleeping bag, or are you going to need to pack a shelter? Do you have the appropriate clothing layers for the trip you are taking? Outside Online shares their take on how to be ready for your backpacking trip.
Mountain Hardwear Menâs Drummond Short Sleeve Shirt- Reviewed
There are a lot of choices on the market for shirts made with outdoor activities in mind. For me, the choice is usually consisting of something that is going to be comfortable in several climates for extended periods of time, and hopefully won’t smell horrible after a few days of wearing it. A traditional style shirt with modern materials and fit can provide things that can be beneficial for the backpacker. Ultraviolet protection, insect repellant finishes, antimicrobial, breathable and moisture wicking fabrics all add to the list of features available to you today. See how the Mountain Hardwear Menâs Drummond stacks up from the perspective of Isaac Tait.
WHAT TO EAT – A look at which premade meals are the tastiest, and which meals are not so delightful. The Stranger shares five foods to try while backpacking, plus a recipe.
FUEL FOR THE FIRE – Read a review about Wetfire Tender from All that Humains.
Not only is she photographing some of the most amazing things that people can do, Leslie Hittmeier is also doing those things with the people that she writes about and photographs. Based out of Montana, Wyoming, and Colorado she is on the go working and enjoying life at the same time. She has an excellent collection of photos and multimedia on her website. You can follow Leslie on Instagram by searching for @lhittmeier.
Hiking can be challenging enough if you are in perfect health. Hiking with Diabetes presents a different set of challenges on top of the things that are already presented in a backpacking trip. The Living Vertical Podcast aims to give insight to being outdoors and getting more active even if you have diabetes. The latest podcast features an interview with Josie Johnson, a seventeen-year-old girl who has had type one diabetes since she was eleven years old. She discusses her first backpacking trip and the experience that she had.
IMPORTANT: If you don’t see the video immediately below, or see a “Sorry…” message in the video player, just click this link to refresh the page, and you’ll be good.
Tenkara Fly Fishing in the Sierras.
IMPORTANT: If you don’t see the video immediately below, or see a “Sorry…” message in the video player, just click this link to refresh the page, and you’ll be good.
Learn one way to make a Mint Tin Stove.
IMPORTANT: If you don’t see the video immediately below, or see a “Sorry…” message in the video player, just click this link to refresh the page, and you’ll be good.
These lessons are aimed at beginners and are based on experiences while hiking the JMT. They are adaptable to any hiking setting and can certainly make the trip more enjoyable.
La Sportiva Helios SR: The La Sportiva “Impact Braking System” outsole consists of U-shaped lugs oriented in opposite directions for traction while climbing and braking while descending, steep terrain. One scenario where I really noticed its effectiveness: hiking or running on trails that were steep, dry, and dusty, with a loose “ball-bearing” type surface of grit and pebbles.
La Sportiva Helios SR
The Skinny
A neutral trail shoe with a sticky sole that is designed to be used on technical trails.
The Specs
Forefoot rock plate
Hydrain mesh on upper for breathability
8.1 ounces or 230 grams
2 mm drop
My Take-
Shoes with a wide forefoot, like the Altra Lone Peak (my staple for trail hiking for the past several years), have their place, but steep, technical terrain is not one of them. I’m constantly on the lookout for an ultralight trail shoe that has a slipper-like fit, low drop, a sticky and well-designed sole that can be used in both loose crud and bare rock, and is narrow enough for technical placements but wide enough for a decent fit without being sloppy.
I (Ryan) have had my eyes on the La Sportiva Helios SR since it was announced and have been eager to try them. I finally had the chance to put them through their paces on a recent trip to the Tetons. Here are my first impressions:
On the steep, dry, dusty, and pebbly city trail network flanking Snow King Mountain, I found the lugs to provide some of the best traction I’ve ever experienced in a trail shoe. They brake, and I felt sure of my footing on these types of trails, even running at moderate speeds. La Sportiva calls it the “Impact Braking System” – i.e., “a proprietary technology in outsole design where the lugs of the soles are oriented in opposing slanted directions. This opposition increases braking power by an average of 20% and decreases impact forces by an average of 20%.” I have no way to measure it but can certainly say that it works – at least on dry, loose dirt.
La Sportiva is well known for their sticky rubber, and the Helios SR offers it in spades. Traction while scrambling on steep, Class 3-4 rock in the Northern Tetons was terrific.
Having a full-length rock plate is not always necessary, and it adds weight. The forefoot rock plate of the Helios SR, however, is a welcome addition to the shoe, and dramatically improves my confidence while moving fast on rocky trails, especially while carrying a heavy pack.
In short, the La Sportiva Helios SR is very light, well-cushioned, sensitive to the terrain underfoot, protective (due to the rock plate), and offers effective traction on a variety of terrain surfaces. It’s very low cut is unobtrusive and its last shape provides a positive balance of forefoot room (size up one size for more comfort) and technical control.
A lightweight, small and simple water filtration system that can screw onto many threaded bottles.
The Specs
.1 microns filter
Removes 99.9999% of bacteria (salmonella,cholera and E. coli).
Removes 99.9999% of protozoa (cryptosporidium and giardia).
Exceeds EPA recommendations for removal rates.
No chemicals or batteries required.
Weighs 3.4 ounces with total kit.
My Take
There are so many ways to filter or clean your drinking water. The Sawyer Mini Water Filtration System makes the process fairly simple. It comes with a 16 oz. collection bag that the filter can screw directly onto. A straw to connect to the bottom of the filter if you only had a large mouth container, like a pot. The filter itself which is clearly labeled for ease of use. Finally, there is a large syringe provided for backflushing the filter. The filter can also be attached inline on a hydration system, or it can be screwed directly onto another bottle of common size like a standard water bottle. The manufacturer says that it will filter 100,000 gallons. I (Jonathan) have had no issues with using the filter while connected to a bottle, but I have not tried to install the filter inline on a hydration bladder type system. This may not be a winter solution for everyone since you cannot let the filter freeze. I think there are preventative measures one could take to keep the filter from freezing, like keeping near your body while on the move and while sleeping. The specs listed above are provided from the manufacturer, I have not performed any laboratory testing on this product. I have used the filter and have not gotten sick from using it, so I am pleased with the results.
Nalgene Flask: Shown with all pieces together and taken apart.
Nalgene flask
The Skinny
A BPA-free flask that comes with a sleeve and 1 oz. shot cap.
The Specs
Weighs 4.2 ounces with all pieces, 1.8 ounces with just bottle and cap.
BPA free.
12 ounce capacity.
Outer sleeve is removable.
My Take
A flask is not on my top list of priorities when I (Jonathan) am backpacking. However, I was gifted one of these recently and decided that I would find out the different ways I could use it (aside from the obvious). The flask does have some handy features. The cap is a two piece construction. The outer cap is a 1 oz. shot and the inner cap is similar to a standard water bottle cap but sturdier. The standard threads mean that you can replace it with the cap of almost any regular water bottle cap if you accidentally lost it. The outer sleeve is also BPA free and serves nicely for water collection and it also has a measurement mark on it showing 1 oz. and 1.5 oz. My Sawyer mini will also screw right on to the neck of the flask. If you wanted to use it just for water, the outer sleeve and shot cap being removed brings the weight of the flask down significantly from 4.2 ounces to 1.8 ounces. The flask also has measurement marks on it showing ounces (counting by twoâs) and milliliters. I find this helpful if you like to keep track of how much water you are consuming while you are on the go. The shot cap is initially somewhat hard to separate from the inner cap after a few uses it becomes easier to remove. The outer sleeve does not provide a positive friction that holds the sleeve on by itself, so I would say that it is best to carry the flask inside your pack or on a side pocket. If you are looking for a flask that is somewhat lightweight and donât want to worry about leaks, consider trying the Nalgene flask.
An historical comparison of the philosophies of two of the leading pioneers of conservation and the wilderness regions they helped create.
You don’t have access to view this content.
Membership Required
This feature requires an active Backpacking Light Membership.
Premium Articles
You're currently viewing a free preview of a member exclusive premium article. Our premium articles include in depth journalism and insights from the Backpacking Light editorial team.
Get full article access by subscribing to a Premium or Unlimited Backpacking Light membership!