Part 4: Getting the Best out of a Micro Snow Stove Mk15
This article is in four parts:
- Part 1: A Micro Wood Burning Stove For Alpine Tents – Dream or Virtual Reality?
- Part 2: Micro Snow Stove Mk 15 For Alpine Camping
- Part 3: Using Micro Snow Stove Mk 15
- Part 4: Getting The Best Out of a Micro Snow Stove Mk 15 – The Dream Becomes a Reality
Introduction
Please read this article in context of the previous three articles. Article 1 is about my dream of an ultra-lightweight heat source when skiing and snow camping and my lessons from failures. It also tells how I was teased and spurred on by the amazing protracted and intense heat energy that is released by the efficient combustion of a hand full of bush sticks. The second article is about my best stove so far, the Micro Snow Stove Mk15, that largely met all my defined requirements. The third article is about the very important basics of safely and effectively using the stove under field conditions that are invariably difficult and when heat from a stove matters most. Now this fourth article is about supplementary DIY tools to take and make in the bush when using the stove and also safety, care and maintenance issues.
Tools, What I Take and What I Make In The Bush
DIY Bow Saw
I made this simple little saw from part of the leg of a discarded aluminium beach chair, and a small bush saw blade. It weighs only 5.29 oz. (150 g) and is a serious wood cutting instrument that is easy to make.
Modified Anvil-secateurs
My favorite secateurs are the anvil type (rather than bypass cutters) from Aldi, and they weigh 8.47 oz. (240 g). I replace the plastic anvil with a stronger one made from a 1.65 in. (42 mm) long piece of aluminium “L” section. I hold the replacement anvil in place by a steel rivet salvaged from a beach chair. Lastly, the anvil is shaped to match the shape of the original plastic one.
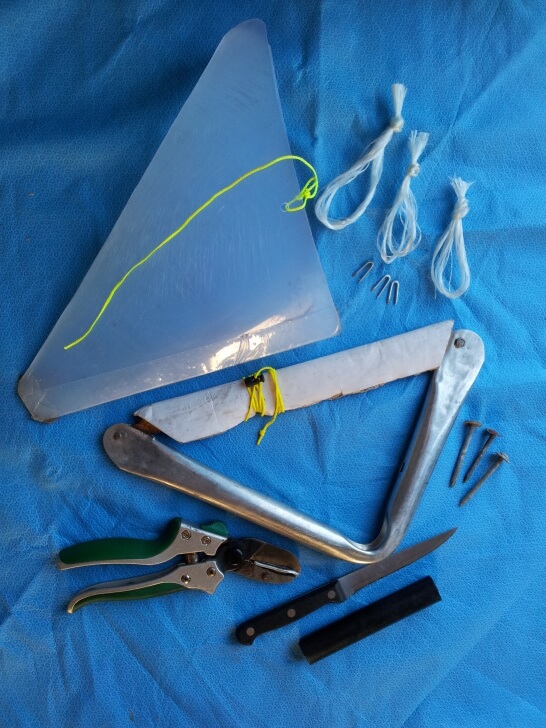

Splitting Knife
I use those cheap TV steak knives “…..yes, but wait; there’s more type that are found in every op-shop…” and grind off the teeth to leave a smooth, sharp blade that I use as my regular camping knife. I make a blade guard out of a flattened piece of ½” (12.7 mm) poly pipe. I make sure the metal of the knife is good quality, not too hard to be brittle, not too soft as to bend, and capable of holding a good sharp edge (it should be able to cut out a bean can lid and still be sharp enough to pair wood easily). Lastly, give it a good workout splitting wood at home to test its quality before taking it on a trip. My splitting knife doubles as my general purpose knife for fishing etc., and cooking knife, so it adds no extra weight. I find a quality knife with a riveted handle (as shown above) is much more long lasting than those with molded plastic handles that crack easily with the impact of splitting.
Wood Sawing Stop
I use a spring head roofing nail (rather stout and not easily bent) and drive it into a suitable sloping branch on a tree (using the wooden mallet) to make a safe sawing stop for efficiently cutting fire wood billets etc.
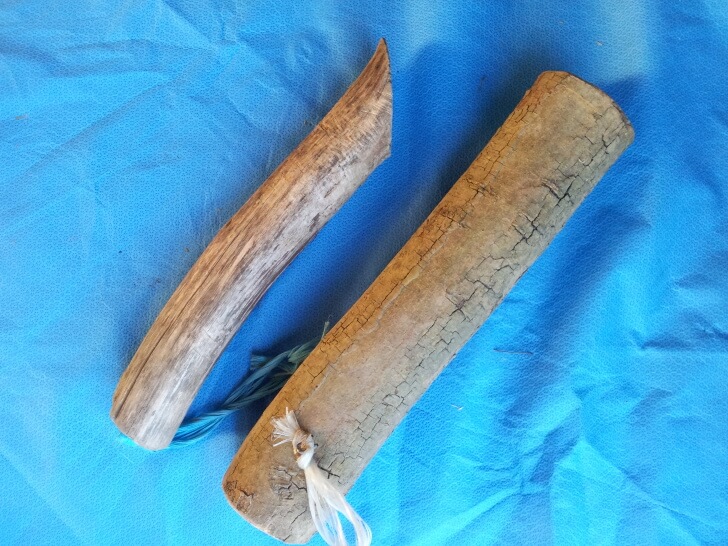
Bush Mallet and Wood Splitting Anvil
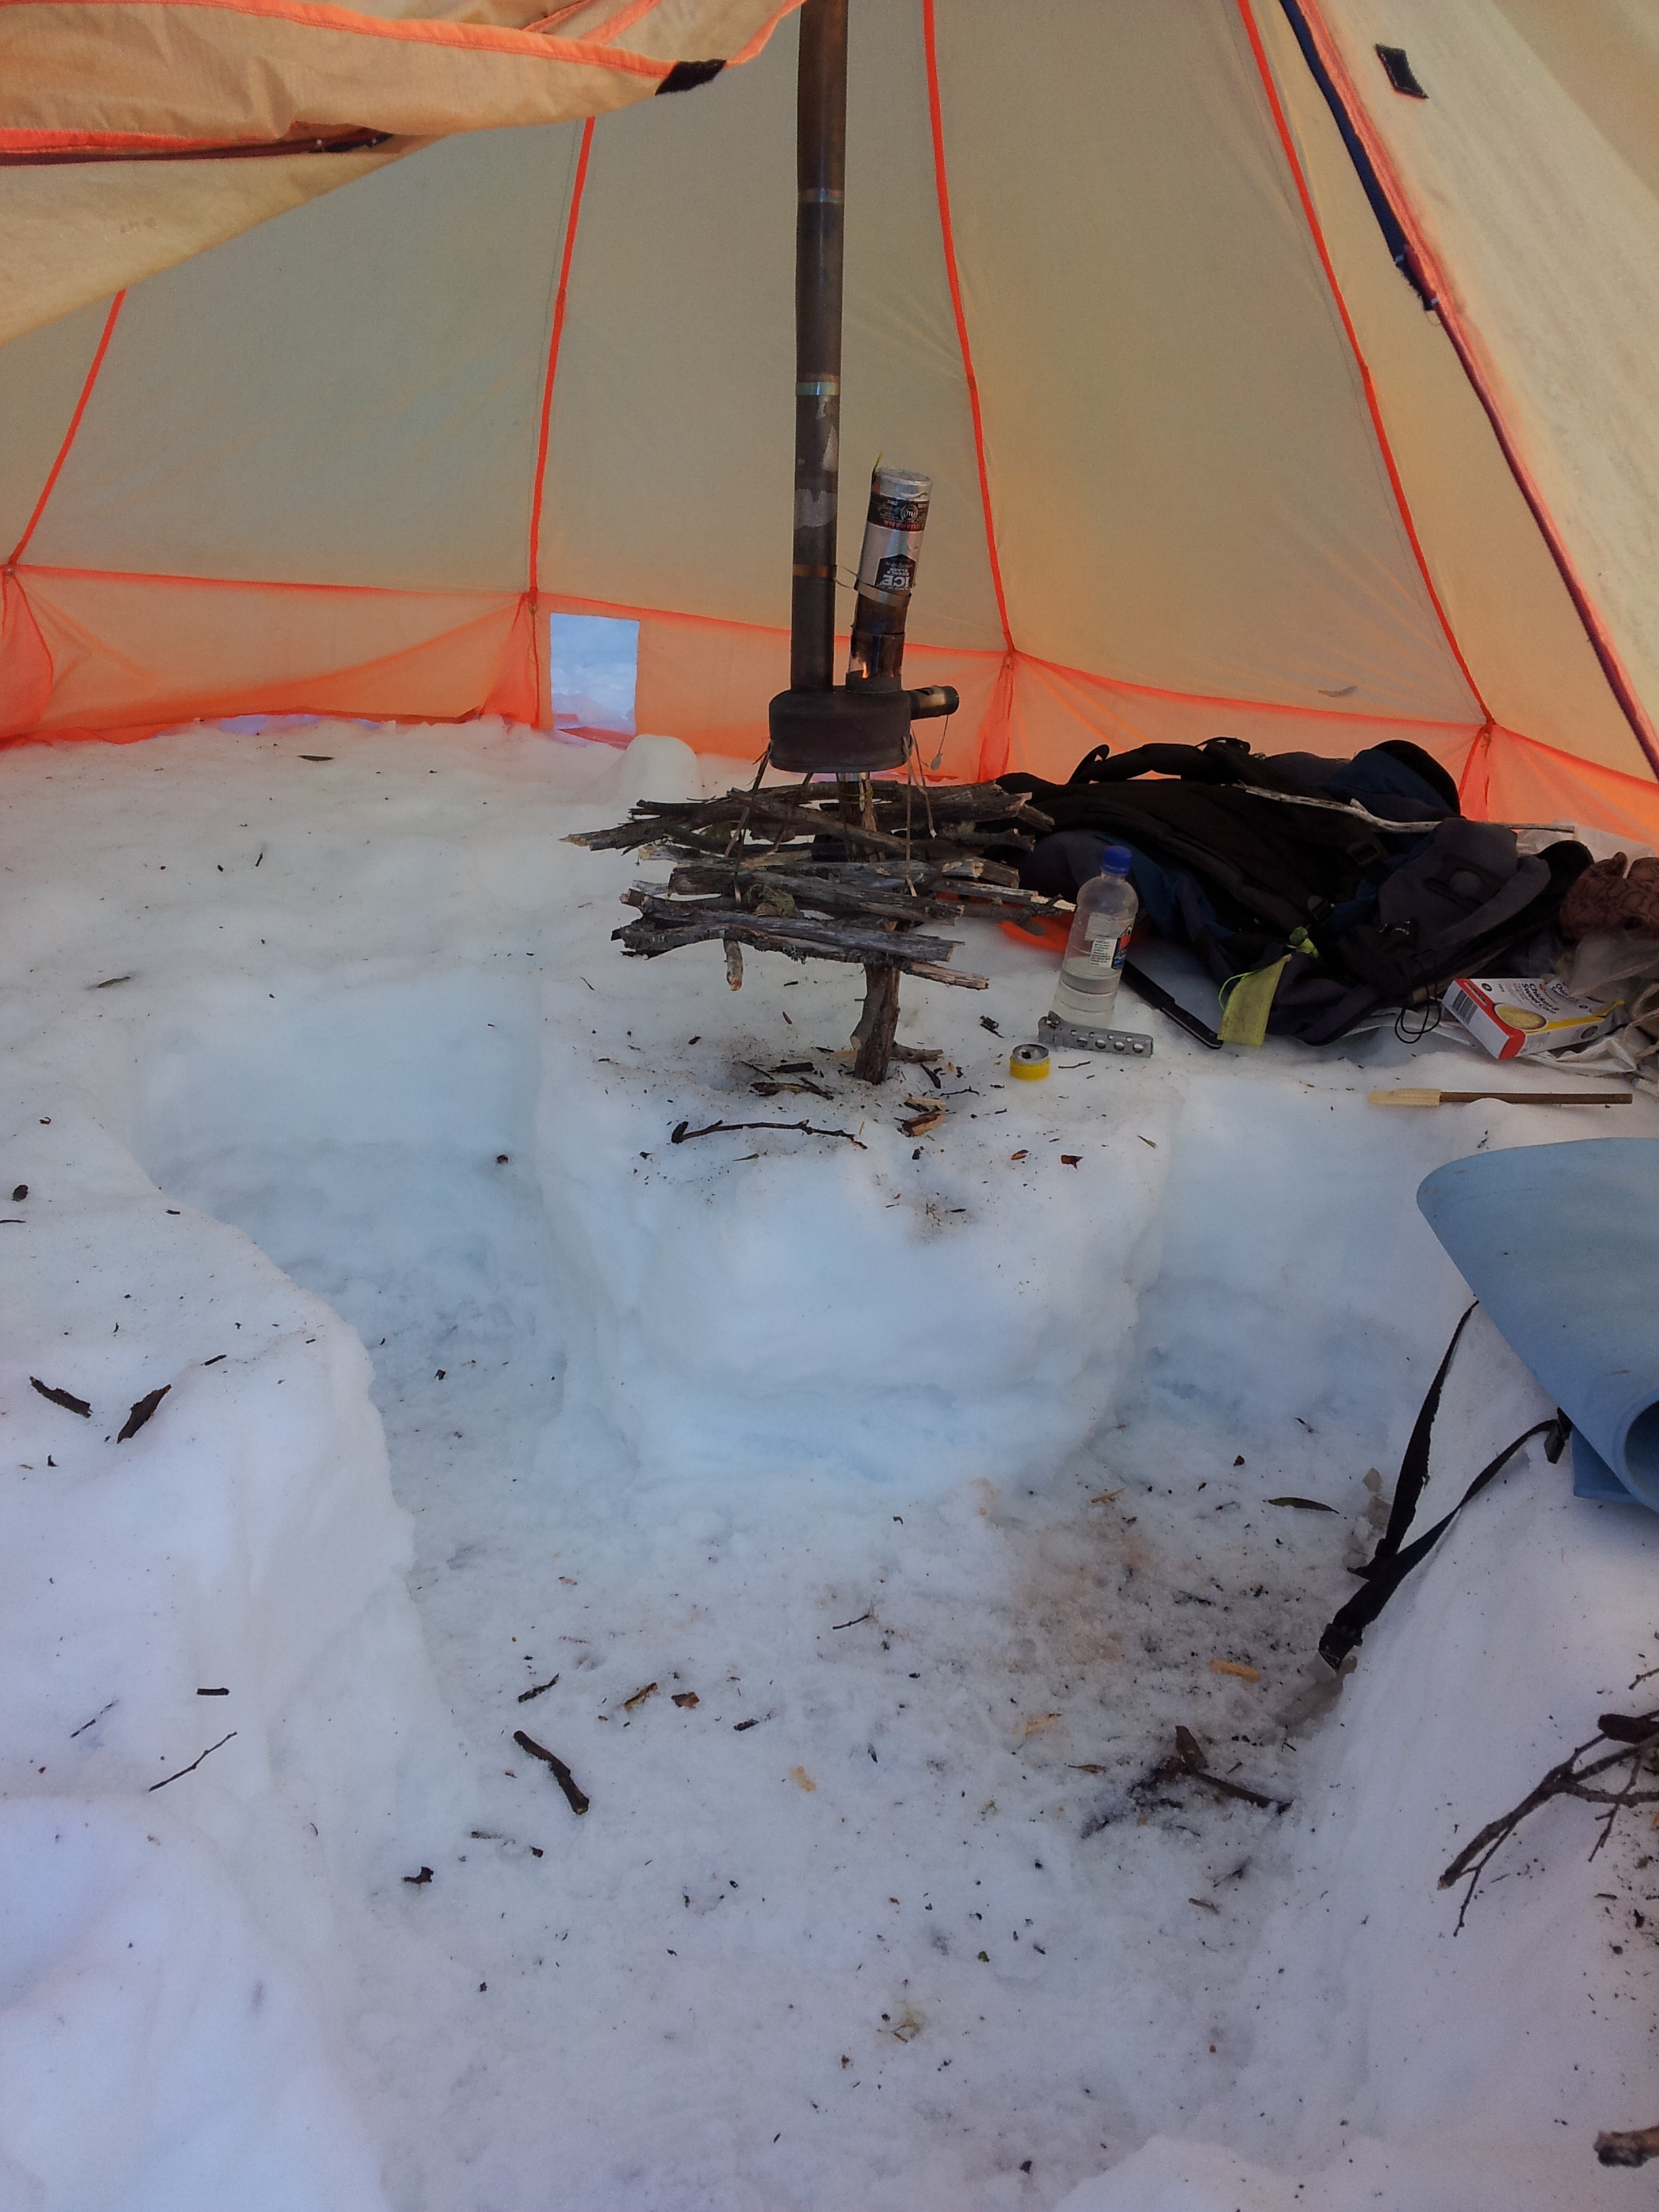
I cut a solid piece 15.75*1.97-2.36 in. (400*50-60 mm) diameter section of branch to use as a bush mallet (for wood splitting, etc.) and another bigger piece to use as a wood splitting anvil inside the tent. In bad weather, a warm tent is the best place to split and prepare the fire wood sticks, and I drive the splitting anvil deeply into the snow at a convenient location in the tent. The location should be such that it is comfortable to work at while sitting in the pit, but not too close to things that could damaged by a “miss-hit” or the action of the bush mallet.
I staple some hay band loops to the wooden tools and hang them in the snow gums to use during my next visit. As my father taught me, I take a little care with making these hand tools as this makes them safer, more functional, and comfortable to use. Also, when left hanging above the high snow level at a campsite they are usually respected as tools and are there for my next visit.
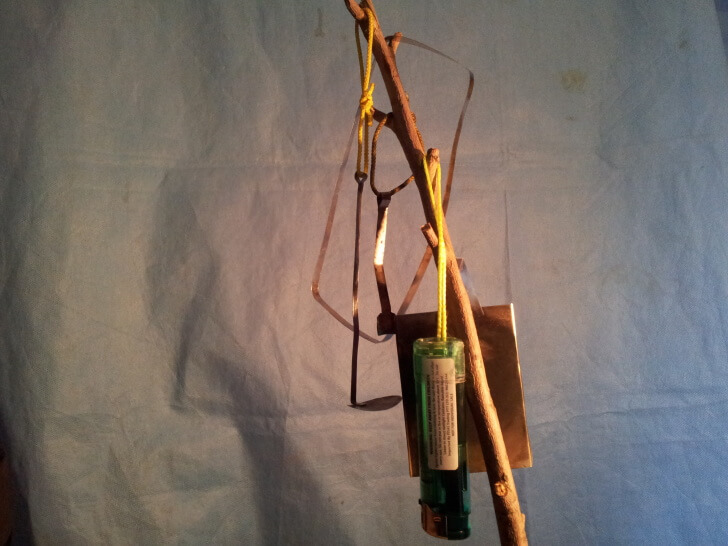
Bush Stove Mounting Pole
I cut a point on the bottom end to make it better to drive into snow and soil. I finish the top end by paring it down a 1.18 in. (30 mm) diameter, allowing for removal of bark (it should be a tight fit in the stove mounting socket). Now I can hear some of you saying “the stove heat is going to char the post top”. The answer is “no” and I do a careful test of the temperature of the socket that goes over the post. I should always be able to touch the mounting socket with my forefinger and feel no pain. The socket has such a large surface area for radiating heat and such a thin connection of stainless steel (which is a very poor conductor) that it does not get hot.
Tool Hangers
The very small tools that I use with the stove are easily misplaced or lost, so a selected twig or laterals on a wooden tent pole can be used to safely and systematically hang the tools ready for use.
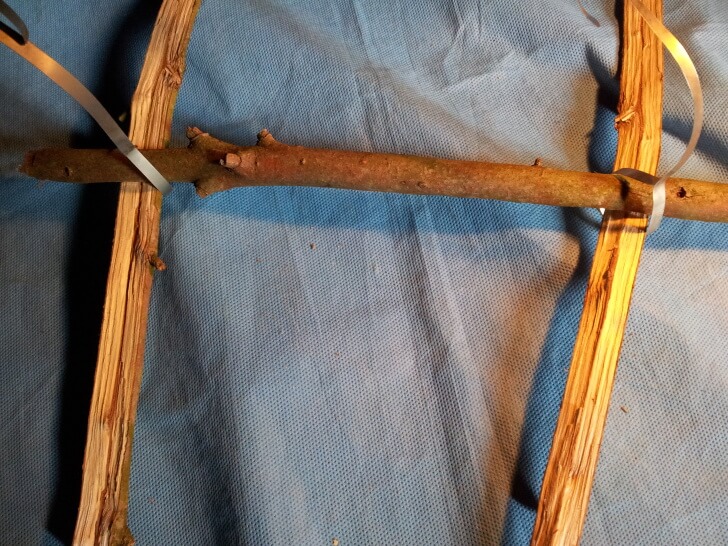
Wood Drying Rack
I select two straight branches of ~ 236.57*.98-1.57 in. (~ 600 *25-40 mm) diameter for the drying rack frame while collecting fire wood billets. I split these branches to make two longitudinal and about seven cross beams to dock to suitable lengths with the secateurs. The drying rack hangers have loops of ~ .98 in. (~25 mm) diameter on the lower ends. These are designed to receive two cross sticks through the loops.
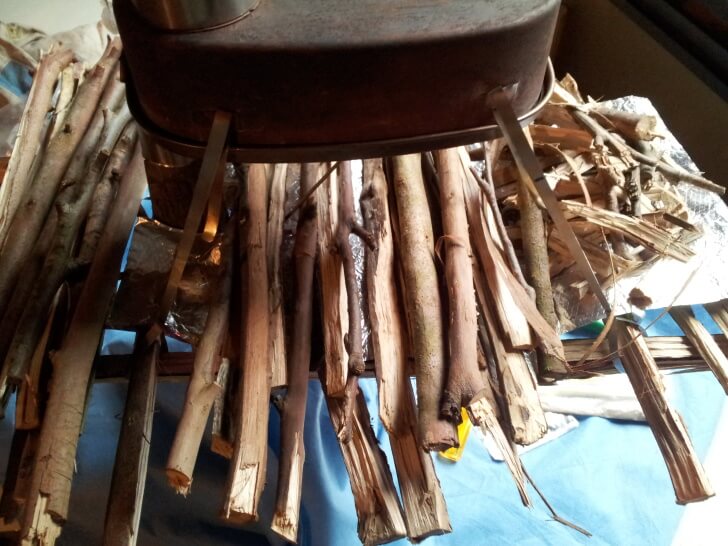
After placing the cross beams in place, I like to put some cooking foil on the rack to reflect radiated heat back. It also provides a storage/drying space for all sorts of small wood pieces that come about from preparing fuel sticks, and these are always handy for stove management. It is a bit of a fiddle fitting the foil around the stove stabilizing strut, but in my experience, it is well worth it, particularly when base camping for multiple nights at the one site.
Tent Lighting
Winter gives us short days, and if you are like me, you ski all day and come back to the tent only when you must. This means that most of your time in the tent with the stove burning will be night time. Consequently, good lighting is critical for running and managing the stove. The stove can provide some nice light through the burner glass, and enough light to see that your mates are laughing at your jokes. However, supplementary lighting will be needed.
I use a very small overhead LED lamp hung from the tent apex and carry back up lights including solar powered ones. I find that tea light candles do not work well or at all when snow camping. The wax will not melt enough, and the wick goes without molten wax. The wick material burns away. My modified turbo ceramic candle is an interesting alternative, but that is a story for another day.
Preparation of Waxies
I cut multiple sheets of newspaper into strips that are about 3.94 in. (100 mm) wide. Then I roll them up together in a coil and tie a string around the circumference to hold the coil together and form an “extraction handle.” I get an old saucepan from the op-shop and melt down old candles or jam wax so that I can flood the paper roll with wax. I lower the coil of paper in and let it become saturated with wax. Using the string, I remove the paper slowly from the wax allowing it to drain back into the pot. Then I quickly put the roll on some more newspaper sheets and quickly peal the layers apart while the wax is still warm. I spread the individual strips out separately to cool on the newspaper. When the strips are cooled I bundle up about ten strips and cut off at intervals of about .79 in. (20 mm) to make the finished waxies.
Great Fire Starters- But They Stink
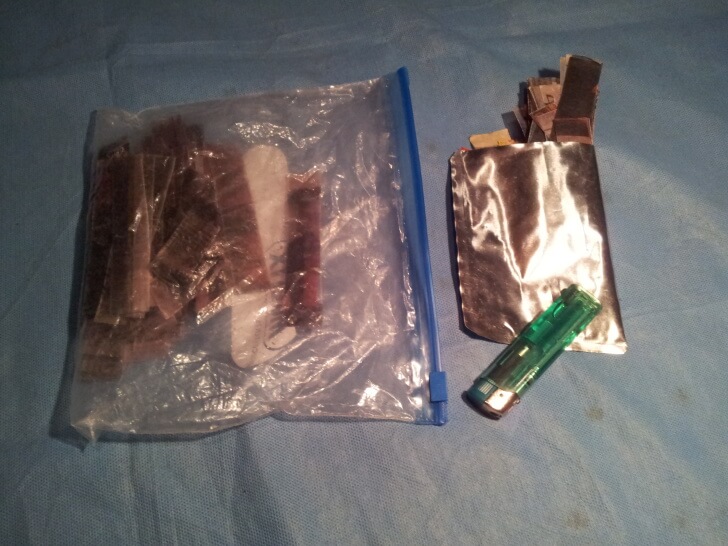
Having extolled the virtues of waxies, it grieves me to admit that apart from some thick Eucalyptus bark soaked in wax I have found no better fire starter than the commercial white fire starter blocks that many people use to start household wood fired heaters. A small piece/s (1 cc volume) will easily start the micro stove if there is adequate fine tinder to kindle the burn. I think both the success of the fire starter, and the fragility of the flame of the fire starter is due to the slow release of the hydrocarbon fuel from the white matrix (that is not really that flammable). It provides protracted gentle burning and for this reason, it is superior to waxies that burn much brighter, but for a much shorter time. The fragile burn of the fire starter means that you must light it in place because if it is first lit and then dropped into place, the shock will extinguish the flame. So this is where a long nose lighter or preferably a waxie is needed to gently start the burning of the fire starter that is normally out of reach of a normal match stick or lighter flames.
Now I have the bad news. The hydrocarbon in fire starters permeates most available small plastic containers. The escaping vapor can easily contaminate food in your pack and quickly diminish the burning value of the fire starter. For this reason I use an aluminium M&B style screw cap container (hard to find these days). Or, preferably, I use a blood glucose test strip tube, or an aluminium Berocca tube, and cover the plastic press-in lids with an aluminium cooking foil membrane to stop the hydrocarbons from escaping through the lid. This may sound a bit iffy, but it works well, and the glucose test strip tube is thin enough and short enough to fit inside the rolled up 78.74 in. (2,000 mm) flue pipe to still leave room for the primary air port valve assembly to also fit inside while backpacking (described later). I also find it best to cut up the fire starter at home with a sharp knife. This way they can be cut into sizes that will fit efficiently inside the tube and be ready for immediate use. I find that blocks of about .39*.39*.20 in. (10*10*5 mm) fit efficiently in these small tubes and more or less can be used according to the quality of starter wood chips.

Sifted Ash Supply
I use fine ash to form an air seal around the joint between the stove body and the inverted access lid. At home, I use a fine metal sieve to obtain a small supply of fine ash dust. I put about four teaspoons full into a small zippy bag, and this will last a long time as it takes very little to fill the crack. It is worth sieving as it will pack into the seal better. Fine soil will also do the job if you forget the ash.
Member Exclusive
A Premium or Unlimited Membership* is required to view the rest of this article.
* A Basic Membership is required to view Member Q&A events

Discussion
Become a member to post in the forums.
Companion forum thread to: Backpacking Wood Stove for Alpine/Snow Camping, Part 4: Dream Becomes Reality
This series explores the use of a Backpacking Wood Stove for warmth in the winter. Part 4 covers using the Micro Snow Stove in the field.
Hi YungBen, I will try to make some videos and post them on youtube.
Tim
Hi Anthony, I got the fuzed quartz glass from China, but it is not easy to get in small quantities. You don’t need the glass to make the stove as it is just a nice extra, but it will work just fine with a stainless steel fuel tube going all the way down to the stove box. I make the refractory render myself from very simple available houshold chemicals. The reaction it is a bit dangerous, if you are not very careful (but I am an experienced chemist). Again you can make the stove without this render, but it will not last as long with the render. If you get your stove made I could possibly send you a little ‘pill-bottle’ of render if it is allowed in the post. Alternatively I could give you details of the render by PM if you would like to send me a PM through BPL.
Tim
Thanks Tim – I failed chemistry in University so I dare not try to make my own render!!!
Hi Anthony, I had an ‘overnight thought’ that if I could find the original youtube posting with the sodium silicate preparatin instructions I could post that (then it would not be on my head if it all went wrong). I make the sodium silicate (very carefully!) in bulk quanities in the most concentrated form (with the least water added). It should be a clear liquid and it has the consistency of honey when cooled. Now comes the safe bit. Then to small quantities of the sodium silicate stock I add various refractory minerals and metal oxides to make the render. My best formula so far is sodium silicate stock 100g, talcum powder 10g, Iron oxide 10g. After mixing these together well I add a little extra water ~40g to give the mix a thinner consistency for painting as a thin layer. I apply the render with an old tooth brush and use a hard scrubbing action to work the render onto the surface and, at this stage for first coats, I add a little aluminium oxide powder to the work surface and scrubbbing this helps to abraide the metal surface to make the render bond to it. When I do a second coat or maintence coatings of render or repairs I usually leave out the auminium oxide as the coating can be much thinner and have a smoother finish.
Regarding the fuzed quartz tube, you could try pyrex or borosilicate glass. It will not be as resistant to heat shock and will devitrify (oxidize and go opaque), but it should work with care. One of my new experimental stove is made of fused quarts and is already showng signs of devitrification in the hottest parts, but light comes though quite well. Also I should remind you that with any glass component (quartz or borosilicate) that any rigid stainless steel component put tightly inside the glass will crack the glass when heated and also any ss component put tightly around the outside of the glass that that is allowed to become tight when hot can crush the glass when cooling. I have many broken glass tubes and ss tubes with stretch marks resulting from from this differential expansion and contraction.
Hope this helps.
Tim
Hi Tim
Would a chem labs spatula work to spread the render? Just wondering – sounds about the right consistency.
I have many broken glass tubes and ss tubes with stretch marks resulting from from this differential expansion and contraction.
Having a smashing time, wish you were here … Much fun.
Cheers
Hi Roger, Good to hear from you. My skiing is just about over. No I don’t think a spatula would woud be appropriate, I probably have given you the impression that the coating is plastered on by calling it a ‘render’. I used this name so that I would not the term ‘paint’, as this would be mixed up with fire resistant paint that I also tried (and failed). The render in my case is very thin and it seems to work better if it is put on as a thin layer with a brush and it can be topped up with extra layers if a thicker coating is required. An old tooth brush does a good job and I use boiling water to soften the neck of the handle to put an offset angle on the brush head. The stiff bristles act on the aluminium oxide abrasive to give a lovely cutting action to make the sodium silicate ‘wet’ the ss or titanium surface where it may have got contaminated with oil from contact with my skin.
I have some ss tubes that have got a bit skewed on the fused quartz tube during cooling of the stove and the stretch marks are so detailed that I can see the bulge of the fire polishing on the end of the glass tube. In these cases the only way to get the glass out was to start a fire in the stove to heat it up again.
Tim
Hi Tim
Yeah, I was thinking ‘cement render’. No worries.
Cheers
Tim:
Would love to see a you tube video. When I read your explanations I feel like I’m Jesse Pinkman and you’re Walter White….
Hi Anthony, I will start doing a video this weekend. I have a youtube chanel (thingy) and have put some slide shows of my gear on there plus a few skiing videos, and am not sure about puting the links into my BPL posts etc, so you may feel like reversing the two characters when it comes to me using this technology. You may be able to help me in this regard (I have only crawled out from under a rock recently with regard to world wide web!)
Tim
Tim:
When you are writing a forum post there are some letters and symbols just above your text box: B I etc. Third from the right is one that looks like a paper clip. Click on that and paste the url from your youtube video there. To find the url just look up at the address bar on your browser when the vid is playing on youtube.
Or if you have a youtube channel just let us know the name of the channel or your youtube user name that should allow us to browse the videos you’ve posted there.
Hi Anthony and YungBen,
I have made the first video and published to youtube. Hope it works! I will make the rest in the series when time permits ( roll up flue deployment, stove deployment, start up, flame out recovery and cooking—–it should get easier)
Regarding posting the url, I don’t see a paper clip. the third box in from the right has what looks like ‘LI’.
I will just try typing in the url
or
My youtube channel (I think) is:
Tim Telemark
or
searching on youtube home page for ‘micro snow stove’ brings it up (second from the top of the list)
I am posting another vidoeo of my ‘multistove2 unpacking’. you may be interested in it.
Let me know if anything works.
I am off for another ski trip (last for the season, but expect a big snow dump), so will be unable to reply for a bit.
Tim
Great video but it would be better if the sound was much louder. At full volume I couldn’t hear some of your words.
Hi Richard, Thanks for your comments. I don’t know what to do about the audio being so low. I am using a gopro and it only seems to pck up my voice well when I am almost on top of the camera.
Tim
While I have also made my own waxed-soaked fire starters, this seems like a lot of work. Any green grocer is happy to part with a waxed, corrugated cardboard box which provides years worth of fire starters in any size you wish to cut.
P.S. a 10 cm x 10 cm or 15 cm x 15 cm square makes a nice base for a canister stove on unstable ground and doubles as a fire starter if needed. Especially recommended on a snow-camping trip. And it’s free.
For vegan backpackers there are these:
But more common in my town, if you don’t hew to closely to Leviticus:
Hi David, It sounds as though you have got it all covered with your way of making waxies.
I have used such corrugated cardboard, but for my little stove my thin waxies are a lot more efficient to carry and I can afford to carry more of individual waxies on a long trip. Also it is not much trouble to make them, it is a case of “easier done than said”.
Tim
David
At the risk of seeming stupid, what IS in that box????
Cheers
Crabs
As James knows, crabs It’s a low-res pic, but Dungeness, I’m pretty sure. One of 5 species harvested commercially in Alaska. We use large waxed-cardboard boxes to move frozen moose, caribou, salmon, and halibut meat around. The tourists think you need the boxes with a styrofoam liner and an unwaxed cardboard outer box, but 50 or 70 pounds of anything, frozen, stays frozen for a long time like 24-48 hours as airline luggage. I’ve seen a sports fisherman checking 6 x 70-pound boxes at the ticket counter in Anchorage. It takes a LONG time to get through that much seafood. My family of 4 is set for the year with 30 sockeye salmon and 4-5 halibut in the freeze – maybe 160 pounds of fillets.
Roger, do Australians say “fill-it” like Brits and South Africans or “fa-lay” like the French? American usage is fa-lay for food and fill-it for laying weld material into a junction.
Tim: MYOW (make your own waxies), of course. I cut the waxed corrugated cardboard into 1″x1″ or 1″x2″ pieces and if I don’t need as much firestarter, peal the three layers apart for a thinner piece.
That’s a LOT of frozen fish!
Oz – close to ‘fill-it’, or maybe closer to ‘fill-et’, for both meat and weld. Most of us would easily recognise the French pronunciation as well.
Cheers
Hi David, Re MYOWs, I used to do the same thing striping them apart, but my newspaper waxies are already stripped and I can carry 100-200 for a long trip and they are very compact and ready for immediate use in a flame-out recovery that will be demonstrated in a future video.
Tim
Hi YungBen and others, Back from my last (probably) ski trip for the Aussie season. Please see my latest video upload about the unpacking of the roll up flue pipe and the use of the titanium ‘snail-tail-rolley’ for the efficient and safe management of the flue pipe. I hope the audio is improved. Probably, removing the GoPro from the water proof housing will help, but it meant that I needed to get the welder going to build another tripod connector for the inner GoPro. At least I learned how to weld a 1/4″ SS BSP nut to SS foil! I am still working on the stove set up, start up and flame out recovery and cooking. it has taken all night plus some more to upload a 4 min video. Is this normal?
Has anyone looked at my Multistove2 video? What do you think of this little stove (not the quality of my beginers video)? Tim
flue pipe
and Multistove unpacking
Hi Tim
SS foil or Ti foil for chimney?
I am going to guess SS foil for the rest if you are welding to it.
Cheers
Hi Roger,
Interesting question. The simple answer is both SS & Ti. Since the thin foil makes them so light the weight advantage of the Ti is very small. I have used both and they work well and have a similar heat memory for holding the flue pipe shape after heat conditioning. The pipe in the video is SS. I think the SS is superior with regard to resistance to chemical attack at high temperatures and it is certainly cheaper to purchase and lastly I have more stock of SS than Ti. Your question also seems to imply that you expect Ti not to weld as well as SS does? Well in my case the welding of SS and Ti is equivalent ie most welds are very good and occasionally I get a dud and I can usually find the reason for the fault if the machine adjustments are not quite right or the electrodes have not been adequately cleaned and ‘tuned’. Have I understood your meaning correctly?
Tim
Hi Roger, Regarding welding I thought you might like this. In my desperation to get more audio volume from my GoaPro videos I needed to have some way of mounting the ‘inner’ GoPro on my tripod. So after a few failures I can weld a 1/4″ BSW nut to 0.15 mm SS foil to make a lovely little camera mount that weighs in at only 4.8g. Tim
https://onedrive.live.com/?cid=339EAC4F57A66D43&id=339EAC4F57A66D43%21467&parId=339EAC4F57A66D43%21387&o=OneUp
Become a member to post in the forums.