Articles (2020)

Jacks ‘R’ Better Shenandoah Summer Quilt REVIEW

Rectangular down quilt that weighs less than a pound and has features that adapt it for top blanket or hammock underquilt use.

Introduction

Jacks 'R' Better Shenandoah Summer Quilt REVIEW - 1
The Jacks ‘R’ Better Shenandoah Universal Quilt under a Hennessy Adventure Racer hammock. Ken Knight snapped this photo with the author in the hammock. I am going through an iteration of adjusting the quilt suspension system so that the quilt is next to the hammock body when I’m inside without compressing the loft. My head is at the end nearest the camera. I later tightened the bungee of the JRB Suspension System so the quilt is drawn closer to that end of the hammock.

The Jacks ‘R’ Better Shenandoah Summer Quilt is a rectangular, sewn-through, lightweight down quilt. One end can be formed into a foot box for use as a top quilt in a hammock or on the ground, and grosgrain loops along with the included Suspension System allow the quilt to be hung under a hammock for insulation. It’s carefully constructed of lightweight, high-quality materials and is the lightest weight commercially available option for several applications. But top blanket only users pay a small weight penalty (probably about an ounce and a half) for unneeded features.

What’s Good

  • Actual loft higher than specified
  • Wide enough in on-the-ground quilt mode to limit drafts when turning from side to side
  • Shell fabric is downproof and water resistant
  • Drawcord and toggles allow it to be secured around one’s shoulders to seal in warmth when used as a quilt
  • Multi-use as a quilt or hammock underquilt

What’s Not So Good

  • Multi-use design adds weight compared to a top bag-specific design

Specifications

  Year/Model

2005 Jacks ‘R’ Better Shenandoah Summer Quilt

  Style

Quilt

  Fill

6 oz (170 g) of 750 fill power goose down (current models now use 800 fill power down)

  Loft

Measured loft 1.8 in (4.6 cm); claimed loft 1.2 in (3.0 cm) (claimed loft for current model is 1.5 in (3.8 cm))

  Manufacturer Claimed Temperature Rating

45-50 °F (7-10 °C)

  Weight

Measured weight Regular 14.4 oz (408 g); manufacturer’s specification 15 oz (425 g) Regular, 16 oz (454 g) Long; JRB Suspension System 1.6 oz (45 g); silnylon compression sack 1.2 oz (34 g)

  Sizes

Regular, 78 x 48 in (198 x 122 cm); Long 86 x 48 in (218 x 122 cm)

  Fabrics

1.1 oz/yd2 (37 g/m2) ripstop nylon with DWR

  Features

Sewn through every 7.5-inches (19 cm); drawcord and toggles at both quilt ends; foot box formed by Omni-tape (like Velcro but non-scratchy) and drawcord closure; silnylon compression sack; loops and JRB Suspension System for use as a hammock underquilt.

  MSRP

$169.95 (Regular), $189.95 (Long)

Jacks 'R' Better Shenandoah Summer Quilt REVIEW - 2
Here the green Shenandoah Summer Quilt rests below the blue Hennessy Adventure Racer hammock, and blue tarp above. Both ends of the quilt have a drawcord with toggles so the quilt can be adjusted to lightly hug the hammock ends. The JRB Suspension System is a set of bungees with carabiners on each end that is used to suspend the quilt under the hammock. The Suspension System black bungee can be seen here girth hitched to the hammock support cord with the mini carabiners clipped to loops on the hammock corners.

Performance

I tested the Jacks ‘R’ Better Shenandoah Summer Quilt sleeping on the ground on Cedar Mesa in southern Utah, and under a tarp in the High Uintas in northern Utah. I used it with a hammock as the sole underquilt on a chilly night in the High Uintas, and added it to the No Sniveller underquilt on a winter trip in the White Mountains of Arizona.

Unlike the top bags I’ve slept in with uninsulated bottoms and insulated tops (Rab Quantum Top Bag, Western Mountaineering Pod 30, Mountain Laurel Designs Devotion 40), the Shenandoah Summer Quilt is wide enough, at 4 feet, to keep out drafts even for a toss-and-turning side-sleeper like myself. As expected, I sleep warmer if I am careful to tuck the quilt under me after I turn over and/or use a bivy sack. Since the quilt is hoodless, I add a fleece hat, and then a windshell hood as sleeping temperatures cool.

Jacks 'R' Better Shenandoah Summer Quilt REVIEW - 3a
The Jacks ‘R’ Better Shenandoah Summer Quilt as part of a tarp camping system in the High Uintas of Utah.

The Shenandoah Summer Quilt is lightweight – 14.5 ounces for the test sample – and has multiple uses. For the three or four-season hammock hanger, the quilt can be used alone as a top blanket or underquilt in the summer, or added as a second underquilt in colder weather. And of course it can be used as a top blanket when sleeping on the ground. Its versatility comes at a price though – an ounce or two of extra weight. A ground-use-only quilt could lose weight with a tapered and permanent foot box (no Omni-tape or foot end drawcord) and no grosgrain side loops – but keep the head end toggle and drawstring. A dedicated hammock top blanket could have those changes plus be half a foot narrower and significantly lighter.

There is one gram-adding option I’d like to see on this quilt – and Jacks ‘R’ Better offers it. Their Stealth Universal Quilt is the same as the Shenandoah Summer Quilt but with the addition of a No Sniveller-style head hole so it can be used as a warm poncho. I was really impressed by the amount of comfort this feature added to cool nights in camp when I was testing the No Sniveller.

Jacks ‘R’ Better has recently updated the notions on the Shenandoah Summer Quilt with lighter toggles and drawcord while keeping the overall weight constant.

Missing from this review (and for all sleeping bag reviews published here, for that matter) will be an assessment of whether or not the sleeping bag performs adequately at temperatures near its manufacturer-reported temperature rating. Click here for the complete Backpacking Light Position Statement on Sleeping Bag Temperature Ratings.

Jacks 'R' Better Shenandoah Summer Quilt REVIEW - 4
The Shenandoah Summer Quilt with bottom drawstring cinched closed and Omni-tape strips secured to form a foot box.

What’s Unique

The Jacks ‘R’ Better Shenandoah Summer Quilt is the lightest hammock underquilt commercially available. It’s also the roomiest quilt available for the weight and loft. Versatility (hammock underquilt, ground and hammock top blanket) and the combination of features (width, loft, and price) make it stand out. Other companies offer good and even better options for specific uses: Speer Hammock offers a wonderful dedicated top blanket at about the same weight and loft and a better price; the narrower Nunatak Arc Ghost has a tapered foot box and lighter weight than the Shenandoah Summer Quilt, and has higher loft; and the MontBell U.L. Alpine Down Hugger Thermal Sheet is wider, but has less loft and is not set up for hammock underquilt use.

Recommendations for Improvement

The Jacks ‘R’ Better Shenandoah Summer Quilt fills a niche. I’d like to see Jacks ‘R’ Better apply their quality construction and materials to offer a lighter weight/same loft quilt for ground sleepers. With the changes outlined above, final weight could be in the range of 12 ounces for a 45 °F quilt. With the lower construction and material costs (no Omni-tape or foot end drawstring), the price could be very reasonable.

Mountain Laurel Designs Devotion 40 Sleeping Bag SPOTLITE REVIEW

Is an 11-ounce, 40-degree bag possible? Nunatak thinks so, and now so does Mountain Laurel Designs.

Overview

The Mountain Laurel Designs Devotion 40 is an 11-ounce hoodless top bag with a generous 3.1 inches of loft on top and an enclosed, fabric bottom. The bag is wearable, with a bungee-closed bottom and snap at the collar so the side zipper can be partially undone to form an armhole. The tested bag also has a short armhole zipper opposite the side zipper (optional) so both arms can be outside the bag.

Ron Bell of Mountain Laurel Designs has designed the Devotion series of bags for sub-5-pound three-season and sub-10-pound winter pack weights. The Devotion 40 cuts weight with very lightweight fabric and notions, high quality down (900 fp), and a slim width. The size Regular Devotion 40 is too narrow for Backpacking Light Publisher, Ryan Jordan (shoulder girth 49-50 inches), and just wide enough for me (shoulder girth 44 inches). The Regular length is long enough for my 5’10” frame.

I’ve had a prototype of the Devotion 40 for a few nights sleeping thus far. My preliminary findings follow.

The fabric bottom of the Devotion 40 is narrower than the insulated top. The Devotion 40 is warmest when I sleep on my back and the insulated top just drapes to the sleeping pad on both sides. Sleeping on my side, there is a gap in insulation at my back that lets in drafts even after I shift the bag for best coverage – that’s both with, and without, a pad bungeed to the bottom of the bag. The down portion of the bag is just wide enough to cover the top and two sides of my body when I’m on my back. When I shift to my side, the bag insulation must now cover my front, back and one side – but it’s not wide enough to do that. The Devotion 40 circumference is large enough for me and even allows me to wear an insulated top inside without loft degradation. In fact, the Devotion 40 is very similar in width measurements to the Western Mountaineering HighLite, a favorite of mine. The Devotion 40 would be warmer for side sleepers if the insulated top accounted for a greater percentage of the bag’s circumference. But keep in mind I’m talking about an 11-ounce bag here!

Mountain Laurel Designs specifies that their temperature rating is dependent upon practicing good lightweight techniques including using a bivy sack and wearing all your clothing. Thus far in my testing, I’ve found a hooded down vest (another Mountain Laurel Designs prototype) to be a perfect complement to the Devotion 40. Backpacking Light co-founder, Alan Dixon, has long recommended wearing an insulated top to get the most out of a top bag and that advice is true for the Devotion 40. The hood of the vest acts as an articulated sleeping bag hood since it shifts with you as you roll and, more importantly for me as a dedicated side sleeper, the vest’s torso insulation keeps the chill off my back when I’m on my side.

Wearable – It’s a nice option to be able to sit up or even stand up while wearing the bag yet still have your hands free. The footbox of the size Regular Devotion 40 is just wide enough to slide up over my 44-inch hips, making for cozy bathroom breaks. There is no insulation on the back of the bag, but sitting leaning against a tree with foam pad behind you might be adequate (although there will still be no down on the tops of your shoulders – a spot that gets cool on me). I tried out the Devotion 40 briefly in a hammock and it shows real promise. After donning the bag like a garment, it was easy to get into a bottom entry Hennessy hammock and then cinch the bottom of the Devotion 40 closed. I didn’t feel any drafts during a short nap, and am eager to try the Devotion 40 out overnight in a hammock.

The Devotion 40 is designed for extremely weight conscious backpackers. It has lots of loft for the weight and a lot of thoughtful details such as a snap at the top of the zipper, tethered cordlocks and bungee closures at foot and neck, zipper tabs with attached pulls on the inside and outside of each zipper, and loops and supplied bungee for attaching a sleeping pad. There is only one other commercially available sleeping bag/quilt this light, the Nunatak Arc Edge (see our review of its big brother, Arc Ghost here). Tom of Nunatak and Ron of Mountain Laurel Designs take markedly different approaches to 11 ounce, 40 °F top bags.

Features and Specifications

  • Style: Hoodless top bag
  • Backpacking Light measured weight: 11.1 oz (315 g)
  • Down: 5 oz (142 g) of 900 fp size R
  • Baffles: sewn through, continuous across top of bag, spaced 8 in (20 cm) apart
  • Backpacking Light measured loft: 3.1 in (7.9 cm) average at baffle center
  • Manufacturer temperature rating: 40 °F (4 °C) when used with a bivy sack and wearing all your clothing
  • Shell fabric: Momentum 90 DWR, 20d x 20d symmetrical tight weave nylon taffeta, 0.9 oz/yd2 (30 g/m2), interior is heat calendared for downproofness (the test sample has different shell fabric)
  • Bungee sheaths: Epic by Nextec, 1.7 oz/yd2 (58 g/m2)
  • Thread: Decot Tex 30 and 40 water resistant hydrophobic poly wrapped poly thread for strength and micro size needle to prevent down leakage at seams
  • Notions: 45 in (114 cm) #3 YKK water resistant zipper; Bungee 0.65 g/ft; Mini Cordlocks 0.03 oz (0.7g) each
  • Sizes:
    Size Weight oz (g) Shoulder Girth in (cm) Foot Girth in (cm) Fits Height ft-in (cm) Fits Weight lb (kg)
    Small 10.5 (298) 54 (137) 40 (102) 5’6″ (168) 145 (66)
    Regular 11.1 (315) 58 (147) 42 (107) 5’11” (180) 180 (82)
    Large 11.9 (337) 62 (157) 45 (114) 6’3″ (191) 210 (95)
    X Large 12.5 (354) 66 (168) 48 (122) 6’6″ (198) 240 (109)
  • Included: Spinntex Pro (0.97 oz/yd2, 33 g/m2) stuff sack, average weight 0.35 oz (10 g), mesh storage sack, bungee and two cordlocks to secure pad to bottom of bag
  • Features: bungee drawstring foot and neck, snap closure at neck, insulated top is 60% of the total girth for wrap around side insulation, loops along the bottom seam to be used to secure a pad to the bag or tighten girth, 45 in (114 cm) water resistant side zipper
  • Options: Devotion 40 PRO with no zippers or foot opening, 10.25 oz (291 g), $155; 16 in (41 cm) armhole zipper on side opposite standard zipper; Epic fabric (adds 20% weight and 10% price); 20% overfill $40
  • MSRP: $175 S and R, $185 L, $195 XL

Gregory 2005 G Pack Backpack REVIEW

Comfortable, light (but it should lose half a pound), and compact backpack with enough capacity and load control to support multi-day outings.

Introduction

A compact, top-loading, internal frame backpack, the Gregory G Pack incorporates lightweight materials and numerous features while hitting the stores at a competitive price. The G Pack elbows its way into a very crowded market segment where it might get lost in the mob if it weren’t for its effective load control and comfort – characteristics often missing in this group.

What’s Good

  • Frame and suspension are effective and comfortable without stays
  • Compression scheme manages diminishing loads
  • Six external pockets, four accessible while wearing the pack
  • Floating, removable top pocket
  • Light and effective axe/trekking pole carriers
  • Three sizes to fit more hikers

What’s Not So Good

  • Considering the reduced-weight fabrics, it should weigh 8 ounces less
  • Won’t accommodate most bear canisters
  • Lower compression straps interfere with side pockets
  • Too-short sternum strap also lacks an elastic damper
  • Dark fabrics make it hard to see pack contents
  • Fabric top-pocket zipper wicks water inside
  • Test pack suffered seam failures

Specifications

  Manufacturer

Gregory

  Year/Model

2005 G Pack

  Style

Internal frame, top-loading, drawstring closure, detachable top pocket

  Volume

Size medium tested: 2700 ci (48 L)

  Weight

2 lb 15.4 oz (1340 g) as measured; manufacturer specification 2 lb 12 oz (1245 g)

  Fabrics

G 70 silicone-nylon and 210d coated ripstop nylon body and top pocket; nylon mesh pockets; breathable foam shoulder straps, backpads and hipbelt

  Features

Floating top pocket lid with single zip compartment and key keeper, 7-inch extension collar, mesh pockets on sides, back, and hipbelt wings (five total), internal hydration pocket and one hose port, front-center daisy chain, two carry loops and straps for poles or tools, thermoplastic Exo-Frame, load lifter straps, Wraptor stabilizers, sternum strap

  Volume To Weight Ratio

57 ci/oz size medium (based on 2700 ci and a measured weight of 47.4 oz)

  Comfortable Load Carrying Capacity

25 lb (11.4 kg) estimated comfortable load carrying capacity for an average person carrying the pack all day

  Carry Load to Pack Weight Ratio

8.3 (based on 25 lb and a measured weight of 2.96 lb)

  MSRP

$149

Performance

The top-loading G Pack – 2700 cubic inches (48 L) in size medium – is part of Gregory’s Anti-Gravity series (large and small G Packs are also available). It sports an interior hydration reservoir pocket, one hose port, a removable lid pocket, two mesh side pockets, a mesh center front pocket with daisy chain, two mesh hipbelt pockets and an HDPE “Exo-Frame.” The chimney-style backpanel separates two breathable backpads and a lumbar pad to create an air channel. This review evaluates the G Pack’s ability to carry the recommended load, its packing flexibility, and life with it in the field.

Capacity and Loading Schemes

The G Pack is smaller than the average short-haul, three-season backpack but certainly adequate for weekends and a bit longer. While the G Pack fills quickly, it manages to hold my typical solo kit and up to about four days of food. Obviously, more compact gear ekes out more days, especially the sleeping bag, shelter, and carried clothing. A three-season synthetic bag for example, gobbles up a big chunk of the pack’s interior while a 2-pound or smaller down bag is a lot less greedy. Copious external pockets actually make the G Pack a lot more spacious than the volume specification suggests.

Gregory G Pack Backpack REVIEW - 1
Because of its several spacious pockets (left), the G Pack holds more than its capacity specification suggests. A comfortable suspension (right) works to minimize the day’s aches and pains.

Sample Gear List

  • Shelter: GoLite Hex 2 and groundcloth
  • Sleeping Bag: Western Mountaineering Ultralight
  • Sleeping Pad: Therm-a-Rest Prolite 4 Short
  • Kitchen: Primus Ti Alpine stove, 220 g cartridge, MSR Ti kettle, MSR Ti mug, etc.
  • Food, hangsack, and cord
  • Water and Treatment: 1-liter AquaStar and bottle in one side pocket, 750 milliliter bottle in the other, 3-quart Nalgene canteen (carried empty)
  • Clothing: Typical three-season kit
  • Other Necessities: Toiletries, first aid kit, glasses, headlamp, map & compass, etc
  • Extras: Camera (carried outside), film, GPS

The top-loading G Pack requires no unusual packing tricks; it responds well to the typical light, medium, heavy, medium progression from bottom to top. Excess clothing, along with rain and wind gear can go in the front pocket (when it’s not being used for wet gear) and the sleeping pad gets strapped either to the daisy chain (which is stabilized from above by a strap) or crosswise, beneath the top pocket. I use the inner hydration pocket when day hiking, but not for overnights because I usually need the interior space. The side pockets hold as much as a liter of water each or a host of small gear and snacks. Angled elasticized pocket tops ease access while wearing the pack, but the lower compression straps run diagonally across them and limit access when cinched tight. Two mesh pockets adorning the hipbelt wings host snacks, sunblock, lip balm, a small camera and the like. These are larger than typical belt pockets, covering each belt wing entirely.

No fewer than five straps anchor the floating, removable top pocket, helping to keep it centered. The pocket has a single zipped compartment with a key-keeper inside. Two ice axe loops and corresponding toggled elastic straps on the main packbag work well for carrying trekking poles, and are acceptable for heavier ice axes. They can handle a light monopod but not a hefty tripod.

Gregory G Pack Backpack REVIEW - 2
Elastic cords and toggles (left) are used for the axe/pole keepers. The floating top pocket (right) can be centered with changing load volumes.

With considerable wrestling, a Bearikade Weekender (9 inches wide x 10.5 inches high) fits vertically but it leaves little useful space once there. This probably isn’t a pack for touring in aggressive bear country.

Fit

The tested medium G Pack is specified to fit 17.5 to19.5-inch torsos. My torso measures 19.5 inches using Gregory’s fit kit, putting me on the cusp betwixt medium and large. After trying both sizes, I felt the medium fit me somewhat better in length and girth, although the shorter pack limited load lifter strap effectiveness. Because the pack has no back length adjustment, fitting is important before purchase. In sum, while the test pack fit me very well I urge anyone on the long end of the fit range to test a loaded one before purchase.

Gregory G Pack Backpack REVIEW - 3
Wraptor Stabilizers (left) tie into the shoulder straps. They effectively rein in the pack load (right) as an alternative to the more typical hipbelt stabilizer strap.

Once I’ve hoisted the G Pack and sequentially adjusted the various straps (waist belt, shoulder straps, sternum strap, top load control straps), it molds nicely to my hips and back. The Wraptor Stabilizer scheme integrates bottom load control with the shoulder straps, eliminating more-typical hipbelt load control straps. Looking at this system it’s not clear to me why it works, but it does. The semi-rigid Exo-Frame backpanel dispenses with a stay through molded U-section channels and doesn’t sag or collapse under load. Compared to the original G Pack, the new version has an impressive improvement in comfort and load control.

In Use

I can be a lazy packer and the G Pack is pretty forgiving. If I’m not careful loading the main compartment, the pockets can swallow an amazing amount of overage. So long as the front pocket isn’t loaded down with heavy items, its use doesn’t seem to affect load balance or control.

Keeping within Gregory’s suggested maximum 25-pound load limit, I found the G Pack effectively maintains control and comfort. Approaching 30 pounds, the pack sags and pulls away from my back, so the maker’s recommendation is right-on.

Gregory G Pack Backpack REVIEW - 4
Generous hipbelt wing pockets (left) keep snacks, supplies and tools handy. The extra-large front pocket (center) is daisy-chain reinforced and supported from above by an adjustable strap. Access to large side pockets (right) is hampered by load control straps.

On terrain both level and steep the G Pack performs very well, providing excellent balance and load control and not interfering with pole use. I didn’t experience any sore spots, and adjusting the shoulder straps during the day helped reduce fatigue. The sternum strap is too short and lacks elastic damping. I got so tired of it I swapped in the elastic one from the original G Pack, something Gregory ought to do too.

Partial loads are well controlled via the load compressor straps (absent on the original model), the bottom load control straps do interfere with side pocket access though. The several top pocket straps help keep it centered as pack volume drops.

Wear and Tear

My technical travel with the G Pack occurred mostly while cross-country snowshoeing, offering plenty of bushwhacking, face-plants and general backcountry mishaps. No matter, the pack’s condition is fine with only minor fabric abrasion and padding distortion. The various light and heavier weight fabrics are strategically well placed and no snags appeared in the mesh. However, a seam unraveling in two places atop the packbag indicated sewing or thread defects. Although not in critical spots, their presence raises the question of whether there will be more seam failures (key stitching is bias-taped).

Gregory G Pack Backpack REVIEW - 5
A seam failure exposes the extension collar drawstring.

Tracking the Changes

Comparison with the original G Pack shows considerable evolution. Capacity is down, weight is slightly up and new features abound. The biggest changes are to the suspension, which now includes Gregory’s Wraptor Stabilizer system and Gullwing hipbelt.

The original’s flat thermoplastic framesheet with oval-section aluminum stay is gone, replaced with a fairly complex Exo-Frame framesheet. The new framesheet, no longer removable, has stiffening channels molded into it where stays might once have resided.

The original’s huge wrap-around bucket pocket has been divided into three pockets (side and center), a more useful arrangement, and the top pocket is better controlled by an additional anchor strap.

There’s the welcome addition of a drinking hose port and the odd replacement of the waterproof top pocket zipper with a plain one that wicks water. The sternum strap lost its elastic damper. G 30 fabric has been replaced by stronger, heavier G 70 cloth and last but definitely not least, are four new compression straps not present on the original (the first G Pack had poor load control when less than full).

The differences in load control and comfort are dramatic, with the new pack better in every way. The only potential downside is the lower capacity, but more capacity is available by going to Gregory’s Z Pack.

Assessment

Our sample medium pack weighs 47.6 ounces, 3.6 more than specified (+7.7%), and has a suggested (and realistic) 25-pound load limit (22 pounds, net). The G Pack is suitable for lightweight hikers who prefer a frame and who keep their load volumes small. It also makes a capacious day pack that’s especially useful in winter, although it has no specific provision for carrying snowshoes or skis.

The G Pack is a comfortable and compact backpack for weekend and somewhat longer trips. It’s not especially wide and keeps mass close to the body, which helps load control and maneuverability. The angled pack bottom makes steep downhill travel safer at the cost of reduced pack volume. A host of external pockets provide quick-access versatility and overload capacity.

What’s Unique

Gregory’s Wraptor Stabilizer system and Exo-Frame framesheet provide comfort and load control while eschewing metal stays or perimeter frames.

Recommendations for Improvement

  • Cut the weight by half a pound and keep its comfort and feature set
  • Lengthen the sternum strap and add an elastic damper
  • Use a lighter color fabric to improve interior visibility
  • Add a shoulder strap drinking hose clip
  • Use a water-repellent zipper on the top pocket
  • Mind the stitching

Osprey Stratos 34 Backpack REVIEW

New for 2006, the Stratos 34 daypack provides all the features, fit, and comfort you can ask for from a general use daypack. It’s also bomb-proof, and heavy by our standards.

Introduction

With their 2006 introductions, Osprey will have more pack models than brands of cereal in your grocery store. The new Stratos line alone has five models. I tested the Stratos 34 general use daypack/overnight backpack – the largest of the Stratos line, and found a lot of nice features. The Stratos 34 is very similar to the popular Osprey Atmos 35, which was introduced in 2004. In this review I take a hard look at the Stratos and compare it to the Atmos 35. My pick of the two my surprise you.

Photo: The incredible balanced rock in the photo is for real, and can be found in the Red Canyon Recreation Area outside of Bryce Canyon National Park in Utah.

What’s Good

  • Panel loading
  • Excellent fit
  • Four outside pockets plus hipbelt pockets provide lots of convenient storage
  • Internal hydration sleeve plus additional water storage in backpanel cavity
  • Well ventilated backpanel
  • Straightjacket compression system
  • Very comfortable suspension system

What’s Not So Good

  • No hydration tube ports on main compartment
  • No hydration bladder hanger in mesh backpanel cavity
  • Mesh hipbelt pockets allow contents to get wet
  • At 2 lb 13.8 oz., the Stratos 34 is not lightweight

Specifications

  Manufacturer

Osprey

  Year/Model

2006 Stratos 34

  Style

Internal frame, panel loading

  Volume

Size Medium tested, 2100 ci (34 L)

  Weight

2 lb 13.8 oz (1.3 kg) measured weight; manufacturer’s specification 2 lb 10 oz (1.2 kg)

  Fabrics

210d high tenacity nylon, 210 x 420d ripstop nylon, two-way stretch-woven nylon with Lycra

  Features

AirCore tensioned mesh backpanel, contoured spacer mesh shoulder harness and hipbelt, two side compression straps, two front compression straps, large front panel access with double slider zipper, two side stretch-woven pockets, stretch-woven front pocket, two zippered mesh hipbelt pockets, upper frontpanel pocket with water resistant zipper, internal hydration sleeve with two side ports, zippered access backpanel hydration storage, load lifters, sternum strap with whistle, haul loop, dual ice axe loops, ski loops on lower sidepanels

  Volume To Weight Ratio

45.9 ci/oz size M (based on 2100 ci and a measured weight of 45.8 oz)

  Comfortable Load Carrying Capacity

20 lb (9.1 kg) estimated comfortable load carrying capacity for an average person carrying the pack all day

  Carry Load to Pack Weight Ratio

7.0 (based on 20 lb and a measured weight of 2.86 lb)

  MSRP

$139

Performance

Building on the success of their lightweight Atmos pack line, with its innovative AirSpeed frame and mesh backpanel, Osprey is launching its Stratos line of general use daypacks with AirCore frame and mesh backpanel. The Stratos 34 is the largest of the Stratos line. It is a panel loader similar in size and features to the popular Atmos 35 (I will address the similarities and differences later in this review).

Osprey Stratos 34 Backpack REVIEW - 1
Front and side views of the Stratos 34. Osprey’s StraightJacket compression system utilizes the two straps on the front of the pack (left photo) to connect to the two open buckles on the side of the pack (right photo) to reduce pack volume for smaller loads.

The AirCore frame and tensioned backpanel borrow from the AirSpeed design found on the Atmos packs. It consists of two fiberglass struts that anchor into top and bottom Delrin Acetal (high-strength plastic) wings. The assembly fits tightly into a mesh pocket and anchors to a center stabilization disk attached to the main packbag. The result is a concave frame and tensioned mesh backpanel with a cavity behind it.

The AirCore design with its tensioned mesh backpanel is form-fitting and allows full air circulation. It molded to my back like a water bed. While other packs use spacer mesh or other porous fabrics to increase ventilation between the pack and your back, the tensioned mesh backpanel virtually eliminates the wet-shirt-behind-the-backpack issue. Needless to say, this design is a winner, especially in desert environments.

The Stratos 34 suspension system consists of sewn-in spacer mesh contoured shoulder straps and hipbelt. The hipbelt is fairly thin (about 1/4-inch) and soft, but wide to distribute weight. The front buckle uses Osprey ErgoPull straps, which employ a pulley design to apply pressure evenly.

Osprey Stratos 34 Backpack REVIEW - 2
The Stratos 34’s frame and suspension (top left) is full-featured, capable and comfortable. Its AirCore frame and backpanel (bottom left) consists of two concave composite struts creating a cavity that is covered with mesh. There is a zippered access at the top of the backpanel (bottom right) that allows a water bladder (or other gear) to be inserted in the cavity. My sample pack did not have a hanger for a water bladder, so the bladder slumped in the bottom of the cavity as it was depleted (top right).

The mesh backpanel has a zippered access and hydration tube port at the top, so the cavity can be used to hold a water reservoir or a Platypus flask. My sample pack did not have a clip at the top to suspend a reservoir. Inside the main compartment there is a hydration sleeve big enough to hold a 3-liter water bladder. The specifications say that this pack has dual side hydration ports, but my sample pack did not have them. Rather, there was a slit connecting to the backpanel cavity and its one top/center hydration port.

When you add in the capability of the side pockets to carry water bottles, this pack has copious water-carrying capacity – as much as 10 liters – making it especially suitable for desert hikers or adventure racers. I personally liked to put my hydration bladder in the backpanel cavity because it saved room in the main compartment and my back kept the water warm in the wintertime.

The outside of the pack is adorned with useful features. There are three large stretch woven pockets on the front and sides that will hold water bottles or an assortment of stuffable items. The side pockets are ample, big enough to hold two slender 1-quart bottles in each one, and you can reach a water bottle with the pack on. A roomy mesh-lined pocket with water resistant zipper at the top of the frontpanel provides secure storage, and has a key clip inside. It’s big enough to hold your lunch. In the same location there are two elastic accessory cords to help attach items to the front of the pack. The mesh hipbelt pockets are bellowed and run the full length of the hipbelt wings; the zippered opening is 8 inches long. The pockets are most useful for smaller and more stuffable items. A compact digital camera will fit, but the mesh pocket does not provide much protection from dirt or weather.

Osprey Stratos 34 Backpack REVIEW - 3
Pockets everywhere, six in all. The top of the frontpanel has a large security pocket with water resistant zipper (top left). The frontpanel stretch-woven pocket (top right) will hold a jacket, and more. There is a large stretch-woven pocket on each side (bottom left), and each one is large enough to hold two slender water bottles. Each hipbelt wing has a full-length zippered mesh pocket (bottom right), providing lots of room for smaller items.

As I mentioned, the Stratos 34 is a panel loader. The front panel zipper is about ¾-height with a double slider. All of the zippers on the pack have Osprey’s new finger loop zipper pulls that are really slick. The frontpanel has Osprey’s Straightjacket compression system, which provides two straps to attach gear to the front of the pack, or extend over the pack to clip to a buckle on the opposite side to compress the entire pack for smaller loads. Each side of the pack has a lower ski loop and upper strap to attach skis or other gear.

With its innovative frame and full-featured suspension system, the Stratos 34 is capable of carrying weighty and bulky loads, and attaching various pieces of gear (skis, snowshoes, snowboard, accessory sack) to the outside. I tested it with loads ranging from 15 to 25 pounds and settled on 20 pounds as a comfortable load carrying capacity (the maximum comfortable load an average person can carry in this pack all day). It’s well designed and highly versatile. It easily handled every task I put it to.

So, how does the Stratos 34 compare with the popular Atmos 35? The Atmos has an aluminum alloy frame, smaller internal hydration sleeve, and perforated foam shoulder straps and hipbelt for better ventilation. Its frame is stiffer and may carry more weight, but it has two side compression straps instead of the Straightjacket compression system. The lower compression straps extend over the side pockets, which is a nuisance, and the frontpanel comes to a point near the top, which is a bit funky.

I measured the weights of the Atmos 35 and Stratos 35 (in size medium) at 41.2 and 45.8 ounces, respectively. Bottom line, neither pack is really lightweight, so if weight is your most important factor in choosing a daypack you will probably want to look elsewhere. I personally feel that weight is not the most important factor in choosing a day pack, because you only carry it for one day at a time, and carrying a loaded day pack is good conditioning for backpacking. More important (to me) is selecting a pack that really fits well, carries comfortably, and has all the features I need, while keeping weight to a minimum. Based on these considerations, my choice of the two is the Stratos 34. I like its design and feature set better – it’s a very rugged, user-friendly, and versatile pack.

What’s Unique

The Stratos 34 AirCore frame with tensioned mesh backpanel is an innovative design that really works to provide a form-fitting backpanel with plenty of ventilation.

Recommendations for Improvement

I had to look hard to find any faults with the Stratos 34. It would be nice to have a small strap to hang a water bladder in the mesh backpanel cavity, rather than just dropping it in. It would be nice to have side hydration ports on the main compartment to work with the internal hydration sleeve. Overall, the Stratos 35 is heavier than I would prefer due to the use of heavier fabrics and plastic frame components, but every part is functional and this pack is built to last a lifetime.

Osprey Exposure 36 Backpack REVIEW

A feature-laden pack designed for alpine climbing and ski mountaineering that doesn’t translate well for general purpose use.

Introduction

The Exposure 36 is the smallest of Osprey’s Exposure series, a line of packs designed to meet the needs of climbers and ski mountaineers. If you are heading out for an all day summit attempt, an afternoon of ice climbing, or a long slog through the backcountry looking for that perfect virgin slope, then the Osprey Exposure 36 might be just the pack for you. The Exposure 36 is jam-packed with features to help you carry the specialized gear of these activities, and packs them all into a well-built three pound package. But how about general use – is this a good all around 36 liter pack?

What’s Good

  • Comfortable harness system
  • Low profile keeps the load close to your back
  • Many nice features for carrying skis and ice gear
  • Haul loops and daisy chain are useful for alpine climbs

What’s Not So Good

  • Small diameter main compartment makes this pack less friendly for general purpose use
  • Low volume side pockets have limited utility
  • Fabric won’t hold up to hauling

Specifications

  Manufacturer

Osprey

  Year/Model

2005 Exposure 36

  Style

Internal frame, top loading, floating top pocket

  Volume

Size Large tested, 2400 ci (39 L)

  Weight

3 lb 1 oz (1.39 kg) measured weight; manufacturer’s specification 3 lb (1.36 kg)

  Fabrics

210d twill and 210 x 420d ripstop nylon on main body, 500d plain weave nylon on top and bottom

  Features

Removable floating top pocket with lash points and under lid rope tie-ins, sewn-in rope compression strap on spindrift collar, Pixie-P easy release buckle and strap can be adjusted up or down daisy chain, side ski/compression straps, picket wand side pocket, leashless tool holster/shovel wing, gear loops on built-in hipbelt, three-point haul system, hydration compatible, ErgoPull hipbelt, load lifters, sternum strap, full length single stay and HDPE framesheet

  Volume To Weight Ratio

49.0 ci/oz size L (based on 2400 ci and a measured weight of 49 oz)

  Comfortable Load Carrying Capacity

25 lb (9.1 kg) estimated comfortable load carrying capacity for an average person carrying the pack all day

  Carry Load to Pack Weight Ratio

8.17 (based on 25 lb and a measured weight of 3.06 lb)

  MSRP

$129

Performance

I used the Osprey Exposure 36 in the Arizona mountains all winter. Winter here means cool weather for rock and alpine climbing – no ski mountaineering or ice climbing. Most of my trips have been general rock climbing, exploratory climbs and bushwhacks, and alpine style rock climbs on some of Arizona’s best peaks. The Exposure 36 is designed purely for these types of vertical pursuits.

Its most notable feature is the long, narrow design of the main compartment. This design keeps the weight of the pack load close to your body, and makes it easier to maneuver with the pack while climbing or skiing on steep terrain. The small diameter of the main compartment does limit the use of the pack. Certain gear just won’t fit very well into the pack – sleeping bags and ropes most notably. Osprey has included rope tie-ins under the lid to facilitate carrying a rope on the outside of the pack.

Osprey Exposure 36 Backpack REVIEW - 1
The narrow profile of the Exposure 36 is useful while climbing or skiing, but limits the pack’s utility.

The low profile is a significant benefit if you must wear the pack while climbing, as I did while climbing the 3 pitches on the remote north face of Rincon Peak. Following moderate climbs such as Rincon Peak was easier with this pack than other packs with similar volume. The built in daisy chain is a great feature on long climbs. I hung the pack at every belay, giving my shoulders a rest and making it easy to sort through gear.

Osprey Exposure 36 Backpack REVIEW - 2
The built-in red internal daisy chain helps keep gear easy to find while climbing and can also be used to hang the pack at belay stations.

The gear loops that are built into the hipbelt came in handy a couple of times. But if I am using gear that might be stored on the gear loop, I am also probably wearing a climbing harness, which makes the gear loops redundant in those cases.

Osprey Exposure 36 Backpack REVIEW - 3
The gear loops built into the hipbelt can be used to store gear, but I usually had a climbing harness with gear loops and didn’t need another set of gear loops while climbing.

Another climbing feature included with the pack is the three point haul system. Three attachment points are sewn into the upper pack to ease the setup of a haul system. The haul loops make it easy to set up a haul, and they keep the shoulder straps from being used to carry weight during a haul. But don’t think that this makes the pack into a good small haul bag. I recommend you haul the pack only for very short distances when absolutely necessary, as the fabric on the Exposure 36 is not nearly as tough as the fabric on well-designed haul bags. The pack would be shredded very quickly on any significant haul that was less than vertical.

Carrying a big load is a delight with the Exposure 36. For a small volume pack, it can carry a lot of weight very comfortably. I found the harness system and hipbelt very comfortable, and could easily carry 25 pounds on the 3000 vertical foot approach to Rincon Peak. I also carried heavy loads out to local crags on several occasions – intentionally stuffing the pack with as much weight as possible, about 30 pounds. Even with this weight the pack was quite comfortable on moderate approach hikes.

The Exposure 36 has an HDPE framesheet that is accessible from a zipper in the main compartment. A single, full-length aluminum stay runs down the center of the framesheet. I found the frame itself to be comfortable, even after a long day of climbing. The Osprey ErgoPull hipbelt adjustment system is easy to use and applies pressure quickly and evenly across your waist. The ErgoPull system is noticeably lighter and less bulky than the large webbing and buckle systems on most climbing packs.

Osprey Exposure 36 Backpack REVIEW - 4
The shoulder harness and hipbelt on the Exposure 36 are comfortable with a 25 pound load and are easy to use.

The Osprey Exposure 36 has a number of features to assist the ice climber and backcounty skier. Carry points are included for skis, snow shovel, and ice tools. Dual side compression straps help keep the load stable and close to your back; and a small pocket on the left side is designed to carry wands or snow pickets. Their small volume won’t carry much else besides energy bars or other small non-essential items.

Osprey Exposure 36 Backpack REVIEW - 5
The small left side pocket is useful for narrow items such as pickets or wands, but won’t fit a water bottle or other larger items.

A hydration sleeve is built into the main compartment, along with a hydration tube port at the top of the pack. The hydration sleeve will easily fit a 100 ounce reservoir. A clip in point to stabilize the reservoir is not included.

Overall, I found the Exposure 36 to be very good at what it was designed to do. It is my pack of choice for any day-long alpine outing. But it is too small for overnight trips and too heavy to carry along with another pack – so it is best suited for day outings. The specialized feature set, light weight and good load carrying capacity combine to make it a great choice for serious, day-long climbing ventures.

Osprey Exposure 36 Backpack REVIEW - 6
The main compartment has a sleeve for a hydration reservoir.

What’s Unique

The Osprey Exposure 36 has a strong combination of features for alpine climbing, ice climbing and backcountry skiing. At 3 pounds, it is lighter than most packs with these features and has a fair price ($129) for a pack with such an extensive feature set.

Recommendations for Improvement

Osprey has clearly designed the Exposure 36 for climbers. The Exposure 36 is well designed for a narrow range of activities, but a small increase in the diameter of the main compartment would increase the pack’s utility. By also including well-designed compression straps climbers would still get the load control they need.

Black Diamond Shadow 55L Backpack REVIEW

A solid – read, heavy – and well-designed climbing pack with a unique Y-frame capable of carrying a lot of weight.

Introduction

The Shadow 55L is a lightweight backpack that utilizes clever design and numerous attachment points to provide a pack capable of hauling heavy, dense loads. Its use of lightweight fabrics make it lighter than similar-sized climbing packs on the market. Is it the solution for lightweighters looking for a framed pack for heavier loads?

What’s Good

  • Great frame and harness for heavy loads
  • Rigid aluminum Y frame
  • Lightweight self-healing body fabric
  • Durable materials
  • Removable dual-density foam backpanel doubles as sleeping pad
  • Plenty of straps and tie-on points
  • Removable lid and frame to create a lighter summit pack

What’s Not So Good

  • Loaded down with straps and excess ‘features’
  • Heavy for its capacity
  • No side pockets

Specifications

  Manufacturer

Black Diamond

  Year/Model

2005 Shadow 55L

  Style

Internal frame, top loading, drawstring closure, floating top lid

  Volume

One size 3360 ci (55 L)

  Weight

3 lb 11.8 oz (1.69 kg) measured weight; manufacturer’s specification 3 lb 7 oz (1.56 kg)

  Fabrics

Main body is 210d silicone and polyurethane coated ripstop nylon, heavy nylon reinforcement on high wear areas. Hypalon daisy chains and gear attachment points

  Features

Floating top lid with two connecting straps, 10-inch extension collar with dual drawstring closure, floating top pocket with waterproof zipper, key clip and bungee, two expandable side compression straps, no external pockets, dual ice tool sleeve, crampon patch, three plastic reinforced haul loops, load lifters, hipbelt stabilizers, sternum strap

  Volume To Weight Ratio

56 ci/oz (based on 3360 ci and a measured weight of 59.8 oz)

  Comfortable Load Carrying Capacity

35 lb (16 kg) estimated comfortable load for an average person carrying the pack all day

  Carry Load to Pack Weight Ratio

9.38 (based on 35 lb and a measured weight of 3.73 lb)

  MSRP

$179

Performance

At only 3360 cubic inches volume and weighing 3 pounds 12 ounces (my measurement) the Black Diamond Shadow 55L is outside the range that we normally consider lightweight. However it has a very capable frame and suspension system and is aimed squarely at the climber hauling heavy, dense loads.

Black Diamond Shadow 55L Backpack REVIEW - 1
The Shadow 55L is the largest in the Black Diamond backpack lineup. Appealing features for climbing include a narrow shape, solid haul loops, plenty of gear attachment points and the ability to cinch the straps tight to provide load stability.

The primary weight saving feature of the Black Diamond Shadow 55L is the use of a unique silnylon fabric. This is not the 1.1 oz/yd2 silnylon beloved by ultralight tarp makers, but a much heavier diamond ripstop that has both a silnylon and a polyurethane coating. This material is claimed to have the remarkable ability to self-heal small punctures. I punched small holes with the awl on my knife and following a bit of massaging it was very hard to find the holes again. This self-healing was surprisingly effective for holes with up to 1/8-inch (3 mm) diameter. This fabric is rugged enough for normal use although it is not very abrasion resistant; and the parts of the hood that use the silnylon material have picked up minor damage from abrasion during testing. The wear areas on the body, lid, and base are well-reinforced with heavier fabrics.

The Shadow has a wide, stiff hipbelt combined with a large and firm lumbar pad to provide an excellent platform for transferring heavy loads to the hips. At first I found the combination a little uncomfortable, but after longer use I ceased to notice the stiff padding and it felt remarkably comfortable. The shoulder harness, while not as well padded as most on the market, is firm and capable of carrying a good bit of weight. Carrying 16 kilograms (35 lb), or more, the harness was remarkably comfortable. The pack is exceptionally solid and stable, which is a great feature in a climbing pack. The only time the load was less stable was when the pack was overfilled with the extension collar filled right up, then it became a little top heavy and inclined to swing around.

Black Diamond Shadow 55L Backpack REVIEW - 2
The Shadow has a shoulder harness and wide, stiff hipbelt along with a rigid yet flexible frame, enabling it to support heavy loads.

The Shadow has a one-size-fits-all harness that minimizes weight by eliminating extraneous adjustment straps and buckles. It has a torso length of 20 inches (51 cm) from the center of the hipbelt to the top attachment point of the load lifter straps. Black Diamond says it is suitable for people with 18 to 21 inch back lengths, which seems reasonable. At 5 feet 10 inches this back length fit me just fine; much taller or shorter people might struggle.

The main point of a pack is to carry a load comfortably, so a little extra weight can be forgiven if a pack carries exceptionally well. Here the Shadow excels. The 4.2 ounce rigid Y frame provides great support, even under heavy loads exceeding 50 pounds. The volume is only 3360 cubic inches (55 L) with an extra 1300 cubic inches (21 L) in the extension collar, however a load has to be pretty dense before you can fit 50 pounds into the pack. Of course there is the opportunity to strap things on the outside, and the Shadow 55L has lots of unique attachment features. Instead of a crampon patch it has two straps with clips, and for ice tool attachments it has a little sleeve with clips at the bottom and bungees at the top. These straps are generally useful for climbers and well thought out, but they all contribute to the weight. The lightweight backpacker who only occasionally takes ice tools and crampons might wish for simpler, lighter, traditional attachment straps.

Black Diamond Shadow 55L Backpack REVIEW - 3
The Y-frame is made from aluminum rod. It provides the basis for the load-carrying abilities of the pack, and at the same time provides good freedom of movement.

The floating lid is attached with two straps that can usually be clipped with one hand – a nice touch. The lid can be instantly unclipped to form a little daypack. Unfortunately the straps supplied are too short for use as a daypack and there aren’t others on the pack that can be scrounged for the purpose.

Black Diamond Shadow 55L Backpack REVIEW - 4
The Black Diamond Shadow 55L has numerous tie-on points for climbing gear.

Apart from the lid, the pack has no external pockets; not even a stub pocket for anchoring snow stakes or poles. The main pack has two internal full-height pockets, one for a foam backpanel pad and one for the aluminum Y frame and a water bladder. I felt a terrible ultralighter’s urge to start cutting out this extra fabric.

The Y-frame has my pet peeve – plastic end protector caps that become unglued from the aluminum and get lost in the innards of the pack when the frame is removed. The frame is held in place by big Velcro tabs that seem redundant. The frame is most easily removed by gently flexing it from the pockets.

The foam backpanel pad has two layers, a 1/8-inch (4 mm) thick closed cell foam and a stiffer white foam material of the same thickness. In a pinch the pad can be unfolded to form a sleeping mat 44 inches long.

Black Diamond Shadow 55L Backpack REVIEW - 5
The removable foam backpanel pad has two layers of different densities.

While the foam pad (which tapers from 11.5 to 10.5 inches wide) is a little narrow for a comfortable sleep, it is enough to make all the difference on a forced bivy. Like many packs with removable padding, getting the foam and Y frame back into their tight pockets is a bit of a struggle and not something to look forward to on a cold morning with clumsy fingers. At bit of practice at home is warranted.

The pack has one neoprene reinforced hydration port (which needed enlargement with a knife to fit a mouthpiece through) and a bungee on the shoulder to hold a drink tube.

The pack can be stripped down to 42.6 ounces for use as a summit pack by removing 16.3 ounces of lid and frame. The hipbelt is not removable. The weight breakdown of the unmodified pack is given in the table below.

Component Weight (oz)
Lid 6.6
Frame 4.5
Foam 5.2
Main packbag 43.4
Total 59.7

Compared to similar packs in the Backpacking Light Gear Guide this is a mid-priced pack with a midrange weight. Where it stands out is its attachment points for climbing gear and its weight carrying capacity.

What’s Unique

  • Little Velcro tags to keep the straps out of harm’s way
  • One-handed fastening of the main compartment straps
  • Aluminum Y-frame
  • Dual-density foam backpad
  • Self-healing silicone and polyurethane coated nylon

In the final analysis this is a fairly heavy pack for its volume by today’s lightweight standards. However it is a very capable load carrier, and for dense climbing loads that exceed the capacity of a frameless pack this may be just what you need.

Recommendations for Improvement

Some further refinements I would like to recommend are:

  • End caps that stay attached to the frame
  • More attention to saving weight – trim excess fabric around seams, use fewer layers of fabric in the harness, and eliminate one of the internal pockets

GoLite Rodeo Backpack REVIEW

Lightweight and versatile snow sports pack with nice features, but falls short in some areas.

Introduction

New for 2006, the frameless GoLite Rodeo at 1500 cubic inches (23 liters) is labeled as a snowboard pack. It has a snowboard sleeve and MP3 player holder, which makes it rock for snowboarders, but it’s versatile enough for a lot of other uses. How does the Rodeo rate as a general snow sports pack, or year-around pack?

What’s Good

  • Lightest snow sports pack we know of
  • Two panel-loading compartments
  • Case for MP3 player or ultra compact digital camera
  • Zippered water-resistant hipbelt pockets
  • Sheds rain and snow
  • Pockets for valuables, goggles, shovel
  • Sleeve for avalanche probe or shovel handle
  • Excellent construction and durable
  • Versatile enough to use as a general-purpose daypack

What’s Not So Good

  • Limited volume for extended winter day trips
  • Limited weight carrying capacity because of its frameless design and thin/soft shoulder straps and hipbelt
  • Hydration system only, no water bottle pockets
  • No ski loops (but skis can be carried on the sides)
  • Hipbelt pockets are not easily accessible

Specifications

  Manufacturer

GoLite

  Year/Model

2006 Rodeo

  Style

Frameless, panel loading, snow sports pack

  Volume

Size L tested, 1500 ci (23 L)

  Weight

1 lb 14.5 oz (865 g) measured weight; manufacturer’s specification 1 lb 12 oz (790 g)

  Fabrics

Main pack body is Arrowhead Cordura polyurethane-coated nylon, top pocket and hipbelt pockets are SilLite HG, front is 420d Cordura twill, bottom is X-pac composite

  Features

Contoured air-channel mesh backpanel, contoured shoulder harness with detachable neoprene MP3 holder, two side compression straps, snowboard sleeve, water-resistant zipper on main compartment, zipper shovel pocket with probe/shovel handle sleeve, webbing hipbelt with hip padding, two zippered hipbelt pockets, top secure storage pocket, side tool holders and loops, internal hydration sleeve, fleece-lined internal pocket for goggles

  Volume To Weight Ratio

49.2 ci/oz size L (based on 1500 ci and a measured weight of 30.5 oz)

  Comfortable Load Carrying Capacity

15 lb (6.8 kg) estimated maximum comfortable load an average person can carry all day

  Carry Load to Pack Weight Ratio

7.9 (based on a 15 lb load and measured weight of 1.91 lb)

  MSRP

$110

Performance

Since the GoLite Rodeo pack has a snowboard sleeve, it would be easy to label it as strictly a snowboard pack. But that would be unfair. For one thing, the snowboard sleeve is easily detached with four side-release buckles, yielding a versatile pack with two panel compartments on the front. For another, other gear (such as skis, snowshoes, a gear bag, or whatever) can easily be attached to the frontpanel instead of a snowboard. In my testing process, I approached the Rodeo with an open mind to see what it could or could not do well.

GoLite Rodeo Snow Sport Backpack REVIEW - 1
The GoLite Rodeo is a 1500 cubic inch panel loading snow sports pack. The front (left photo) has a sleeve for attaching a snowboard, snowshoes, or shovel. The sides (right photo) have a small pocket and hold-down loop for carrying poles.

The Rodeo is essentially a frameless backpack. It does have a 1/8-inch thick flexible foam framesheet that provides a little rigidity, but it is not capable of transferring weight to the hipbelt by itself. For weight transfer to occur, the pack body needs to be stuffed tight with gear to create a “virtual frame” that transfers weight to the hips through its rigidity.

Four contoured mesh-faced foam panels sewn to the backpanel provide padding and channels for ventilation. The contoured shoulder straps are wide (2.5 inches) but they are thin (1/4-inch) and soft, which is good and bad. Their width helps to distribute weight, but their thinness and softness are not conducive to carrying heavier loads. Similarly, the hipbelt consists of two short lightly padded wings attached to a 1.5-inch mesh belt. Since the Rodeo does not have an internal frame, pack weight is split between the shoulder harness and hipbelt, and its weight carrying capacity depends on your ability to carry weight on your shoulders.

GoLite Rodeo Snow Sport Backpack REVIEW - 2
The Rodeo has a thin foam backpanel (top left) with contoured padding attached. Shoulder straps (top right) are wide but thin and soft. The hipbelt consists of short thinly padded wings and webbing.

The Rodeo has several features that make it a specialized winter sports pack, but do not interfere with it functioning as a good general purpose daypack. There are two panel-loading main compartments. The inner compartment is mainly used to stow clothing and has a water-resistant zipper to keep moisture out. It has a hydration sleeve and a fleece-lined pocket for goggles inside. The outer compartment has a sleeve inside for an avalanche probe or shovel handle. A snow shovel with a detachable handle will fit inside, plus a few small clothing items.

Outside pockets on the Rodeo are a mixed bag. There is a zippered security pocket at the top of the pack, a good place for valuables. On one of the shoulder straps there is a neoprene foam pocket for an MP3 player or ultra compact digital camera (anything larger is a tight fit). I found the location good for convenience and keeping the electronics out of the snow when I set the pack down. Each hipbelt wing has an attached zippered water-resistant pocket to conveniently stow smaller items. However, when the pack is on, the hipbelt pockets are located under your elbows, so they are not easy to access. Each side of the pack has a small tool pocket and hold-down, which can be used for ski or trekking poles.

GoLite Rodeo Snow Sport Backpack REVIEW - 3
An exploded view (top left) of the Rodeo shows its two panel-loading compartments plus a panel for attaching gear to the outside. A water-resistant security pocket at the top (top right) has ample room for valuables and/or small items. The hipbelt pockets (middle left) are water-resistant and roomy, but not very easy to reach under the elbows. GoLite includes a shoulder strap mounted padded case (middle right) for an MP3 player or small digital camera. Inside the main compartment resides a fleece-lined pocket (bottom left) for goggles or glasses. The outside panel-loading pocket (bottom right) has a sleeve for a shovel handle (shown) or avalanche probe. The shovel blade can also be put in the pocket or carried assembled under the outside gear sleeve.

Note that hydration with the Rodeo pack is by hydration bladder only. There are no side pockets to carry water bottles. In the wintertime this approach actually works better – the hydration bladder is against your back to keep the water warmed, and an insulated sleeve on your delivery hose (not included) keeps water from freezing.

The most noticeable feature on the Rodeo is the snowboard sleeve on the frontpanel. Rather than a gear cradle, which is attached at the bottom, the sleeve is open on four sides and is attached with two straps and four quick-release buckles. I tested it with a snowboard, backcountry skis, and snowshoes and found that it handles a snowboard or snowshoes well. A snowboard slips under the sleeve, while snowshoes can either be secured to the face of the sleeve or under it. Each strap has two neoprene patches to grip items and prevent them from sliding.

GoLite Rodeo Snow Sport Backpack REVIEW - 4
Although the GoLite Rodeo is targeted as a snowboard pack, it will carry other snow conveyances reasonably well. Skis (left) are best attached on the sides under the panel straps, with the tips tied together in an A-frame to spread the tails. Snowshoes (center) can be attached under the outside panel or over it (as shown), leaving room for a snow shovel. The pack easily cradles a snowboard (right) and carries it well, although there is some tendency for the board to hit your calves.

Skis are best carried on the sides of the pack so they don’t interfere with walking. Since the pack does not have ski loops, I attached them under the panel straps on the sides of the pack. This arrangement worked, but was far from ideal because the skis blocked access to the panel-loading pack.

As far as roominess, I found the Rodeo’s 1500 cubic inches (23 L) adequate to pack my normal cold weather alpine day tripping gear, but it was a tight fit. I would prefer an extra 500 cubic inches, part of it in the form of two durable X-pac lower side pockets instead of the small pole pockets.

Besides volume limitations, I have some concerns about the comfortable weight carrying capacity of the Rodeo. The pack weight with my normal winter day trip gear, including food and water, is about 12 to 13 pounds. Attaching a snowboard or backcountry skis adds another 8 to 10 pounds, bringing the total weight up to about 20 to 22 pounds. That kind of weight goes beyond the comfortable load carrying capacity of this pack. In contrast to GoLite’s rating of 25 pounds, I feel that the maximum comfortable load for the Rodeo is around 15 pounds, 20 pounds at the most. The pack does not have a frame, and the shoulder straps and hipbelt are too thin and soft for comfortably carrying weight. It gets down to how much weight you can comfortably carry on your shoulders.

Bottom line, the Rodeo is a lightweight in more ways than one. Although it is the lightest snow sports pack we know of, it is short on volume and weight carrying capacity. Most snow sports packs have an internal frame and a more substantial suspension system for carrying weight, which also make them relatively heavy for their volume. The Rodeo is designed to attach a snowboard, but doesn’t really have the weight-carrying capacity to carry it plus normal snow sports and cold weather gear. But the Rodeo concept still has hope. Its present design is suitable for carrying lightweight snowshoes. If a lightweight frame (like the corrugated plastic frame in the GoLite Vision Pack) and a more substantial suspension system were added, the Rodeo could do the job and still weigh significantly less than many other snow sports packs.

So how versatile is the Rodeo? The snowboard sleeve easily detaches with four side-release buckles to yield a fairly normal year-around daypack. The top pocket and two panel compartments allow good organization and convenient access. Its volume and weight carrying capacity are about right to carry everything needed for an alpine day hike, or to carry gear for yourself and a companion. The main deficiency is side pockets; I would prefer to have two durable side pockets mounted low to provide a space for water bottles and frequently used gear.

GoLite Rodeo Snow Sport Backpack REVIEW - 5
Beyond snow sports, I carried the Rodeo (sans snowboard sleeve) on several dry weather day hikes, and found it to be a lightweight, comfortable, and versatile daypack. But I missed having side pockets. The balanced rock in the background is a common sight in southern Utah.

What’s Unique

The Rodeo is especially suited for carrying a snowboard, and it provides places to put specialized winter sports gear (avalanche beacon and probe, shovel, and goggles) to keep them handy.

Recommendations for Improvement

Although the Rodeo is lightweight and versatile, it falls short in the volume and weight carrying capacity needed for alpine day tripping carrying a snowboard or skis. Some specific recommendations are:

  • Increase the volume to about 2000 cubic inches to provide adequate room for bulky cold weather clothing
  • Add a lightweight removable framesheet (perhaps similar to the one in the Vision pack), and add more and stiffer padding to the shoulder straps and hipbelt
  • Add durable lower side pockets for water bottles or convenient storage
  • Move the hipbelt pockets from the side to the front to make them more convenient
  • Add ski loops to the lower sides to make the pack more suitable for carrying skis

Integral Designs Pertex Wind Jacket SPOTLITE REVIEW

A 4.5 ounce jacket with quality components.

Overview

The Integral Designs Pertex Wind Jacket is a 4.5 ounce (as measured, size large) windshirt with few frills but some nice touches. It is heavier than the lightest jackets on the market, but includes a full zipper, a hood and more durable fabric than some of the lighter wind shirts. And it’s $80 price tag is quite attractive.

The Pertex 685 fabric in this wind shirt is tougher and heavier than the thin fabrics on 3 ounce wind shells. At 1.85 ounces per square yard it is double the fabric weight of the lighest windshirts. But the fabric is noticeably tougher than the lighter fabrics and has a comfortable, soft feel. I did not do long term testing, but am confident this jacket would last longer and stand up to tougher treatment than most 3 ounce wind shirts. The number 4.5 YKK zipper is also heavier than in “those other windshirts”. The jacket fits easily into the included silnylon stuff sack, which adds a skinny 0.2 ounces to the total package.

I’ve had my Pertex Wind Jacket out on a number of winter training runs, along with some short overnight trips. I have found it to be at the upper end of breathability and comfort among the many wind shirts I have tested this winter. On warm uphill runs it stays dryer and cooler inside the jacket than most other windshirts. I could do my usual run up Brown Mountain in the Tucson mountains with the zipper completely closed and still stay reasonably dry and comfortable. In similar conditions, most other jackets needed to be opened at the chest to prevent overheating. The shaped hood is comfortable and fits securely over your head despite having only elastic closures. It is a good bivy jacket, and I’ve used it with success in combination with a light insulating layer. The hood is especially comfortable in a bivy; it lacks annoying drawstrings and toggles, but the elastic hood closure is comfortable and stays on your head in a night of tossing and turning. The fit of the jacket runs smaller than most – consider upgrading one size if you want a roomy cut or if you have long arms. Overall construction quality is good, with nicely finished seams and reinforced stitching at the zipper ends.

If I had to complain about anything in this jacket it would be the relatively small sizing. This can be easily remedied by sizing up. Although not the lightest jacket on the market, it has a durable zipper and fabric, and it’s $80 price tag beats just about every other competing wind shirt.


Left Image: The hood on the Pertex Wind Jacket is comfortable and hugs your head, but lacks adjustability. Right Image: The Pertex Wind Jacket packs down into a tight package in the included stuff sack.

Features and Specifications

  • 4.5 oz (128 g) as measured, men’s size L; Manufacturer’s specification, 4.9 oz (139 g), stuff sack is 0.2 oz as measured
  • Full length zipper
  • Hood with elastic closure
  • Elastic hem and cuffs
  • Pertex 685 shell fabric with DWR, 1.85 oz per yd2, 40d microfibre ripstop nylon
  • No pockets
  • Silnylon stuff sack included
  • MSRP $80

Petzl MYO XP LED Headlamp REVIEW

Three-watt collimated LED headlamp with rear-mount battery pack that misses perfection by just a couple of features.

Introduction

Petzl MYO XP LED Headlamp REVIEW - 1

To borrow from author Dan Jenkins, the Petzl MYO XP is almost dead solid perfect. This high-output LED headlamp is very bright and in two innovative triumphs, offers a turbo-like boost mode and an optical diffuser to tame the pencil beam into a soft floodlight. It’s very well crafted and likely to last for many seasons of hard use. It’s comfortable to wear and offers the option of a removable top bucket strap, all at a fairly reasonable weight. Dead solid perfect status is denied only because the MYO XP lacks current regulation and true waterproofness. So very close.

What’s Good

  • Very bright output that’s superbright using boost mode
  • Optical diffuser that tames the pencil beam into a soft floodlight, without resorting to auxiliary LEDs
  • Battery life indicator
  • Removable top bucket strap
  • Tiltable lamphead
  • Hideaway power switch
  • Beefy, snag-protected power cable
  • Solid build quality

What’s Not So Good

  • No current regulation
  • Not immersible
  • At 6 ounces with batteries, not particularly light

Features and Specifications

  Manufacturer

Petzl

  Year/Model

2005 MYO XP

  Type

Single 3-watt collimated LED headlamp with rear-mount battery pack

  Weight

Measured: 5.9 oz (170 g) with 3 alkaline AA batteries
Manufacturer’s specification: 175 g with 3 alkaline AAs

  Batteries

3xAA alkaline, lithium, NiMH cells

  Regulated?

No

  Immersible?

No

  Headstrap

“Bucket”-style with removable topstrap

  Modes

Three intensity levels, plus boost and flash

  Features

Flip-up diffuser lens creates a floodlight
Battery condition indicator helps track remaining illumination time
Lockable power switch and ratcheted tilting lamphead

  Manufacturer’s Battery Life Claims

70 / 90 / 170 hours usage in hi/med/low modes

  Manufacturer’s Beam Distance Claims

45 /35 / 20 m (148 / 115 / 66 ft) beam range with fresh batteries in hi/med/low modes

  MSRP

$70

Overview

The flood of ever more sophisticated and useful LED headlamps continues, and this is one tide backpackers are happy to swim in. Enter the Petzl MYO XP, Petzl’s powerful foray into the all-LED high-output technical headlamp market. It’s bright, it’s versatile, and it weighs 6 ounces with three AA alkaline batteries.

The MYO XP employs a single, collimated, high-output 3-watt Luxeon LED that throws a bright white pencil beam a long, long way. It has three brightness levels plus flash; in addition, the XP offers a “boost” mode that gives high-intensity light (ranging from 150-200% of high mode in our tests) for a brief period. Another trick in the MYO kit is the floodlight feature. Using a low-tech answer to a high-tech dilemma, the XP is fitted with a flip-up diffuser that broadens the normal pencil beam into a broad floodlight for camp use. Petzl also provides a battery life indicator to track power consumption.

Petzl MYO XP LED Headlamp REVIEW - 2

Petzl MYO XP LED Headlamp REVIEW - 3

The Petzl MYO XP headlamp uses a very effective diffuser lens (right) to tame the hyperbright LED’s pencil beam into a soft, broad campsite and reading light.

My measurements show the MYO XP to be the brightest light I’ve yet tested. With new alkaline batteries, high output was 1,540 lux and boost mode a dazzling 2,900. Particularly effective is the diffuser lens, which tames the hyperbright LED’s pencil beam into a soft, broad campsite and reading light. A strictly optical alternative to multi-LED schemes, Petzl clearly has a winning approach with the lens.

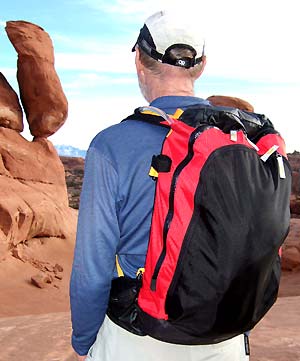
The MYO XP also addresses the dilemma of whether to go with a simple or bucket-style headband by making the top strap easily removable. This slender strap provided adequate stability for running and other high-impact nighttime activities.

Design and Construction

Controls and Operation

Two button switches perch atop the MYO XP lamphead. The larger and taller button operates the combination power and mode switch in this sequence: high, medium, low, flash and off. There’s no mode memory on power-up so the XP always starts on high. The second button – smaller and shorter – is the boost switch. Boost works independently of the power/mode switch, providing maximum output regardless of what mode the light is in, including off. The boost switch is a press-and-hold affair that puts the XP in boost either until released or it reaches the preset time or heat limit – whichever comes first. Upon reaching the temperature limit, boost is disabled until the lamphead has cooled sufficiently. Petzl specifies a 20-second maximum boost time; I achieved maximums somewhat short of that with fresh batteries, greater than that as the batteries wore (understandable, because heat was no longer an issue). Boost intensity decreases with battery condition.

Petzl MYO XP LED Headlamp REVIEW - 4

Petzl MYO XP LED Headlamp REVIEW - 5

Petzl MYO XP LED Headlamp REVIEW - 6

Two buttons on top of the MYO XP lamphead control power and mode. The smaller button (on the left) is the boost switch. The larger button is the power and mode button. To the right is the battery power meter. (Center photo) The power cord is routed through the hinge pivot ensuring that a snagged cord won’t change the lamphead pivot angle.

Lamphead

The ratcheted lamphead adjusts from straight ahead to a downward tilt greater than 45 degrees. It reliably holds the set position. There’s not much upward tilt from horizontal, which might be a limitation to some users. As an added feature, rotating the lamphead upward to the maximum amount possible places a locking tab over the power switch. While it’s still possible to operate the power and boost switches in this position, doing so accidentally is unlikely. A colored LED on the lamphead’s side blinks the batteries’ general condition whenever the lamp is running. It’s green initially then changes color as the batteries wear, first to yellow-orange then red-orange.

Petzl MYO XP LED Headlamp REVIEW - 7

Petzl MYO XP LED Headlamp REVIEW - 8

Petzl MYO XP LED Headlamp REVIEW - 9

(Left) The pliable rubber battery box cover peels away from the base for access and can be opened with gloves on. (Middle) While correct battery alignment is marked using large +/- symbols molded into the black battery case, they’re not as obvious as I’d like, nor are the positive and negative terminals easy to tell apart. (Reversing battery polarity can zap an LED light in short order.) (Right) The thick power cable is stoutly reinforced on either end and has a short coiled section to take up slack and reduce shock to the cable ends should it ever snag in use.

Battery Box and Power Cable

The pliable rubber battery box cover peels away from the base for access; there are no screws or latches and no tools are required. It can be opened while wearing thin-to-medium gloves or mittens, but I needed bare hands to change batteries. The cover is permanently attached and cannot be lost. While correct battery alignment is marked using large +/- symbols molded into the black battery case, they’re not as obvious as I’d like, nor are the positive and negative terminals easy to tell apart. (Reversing battery polarity can zap an LED light in short order.) The batteries are held tightly in place to prevent their accidentally falling out. A single clip holds the power cable to the right side of the headstrap. The thick cable is stoutly reinforced on either end and has a short coiled section to take up slack and reduce shock to the cable ends should it ever snag in use. If you do snag it you won’t yank the lamphead from the set angle because the cable enters the lamphead through the pivot point. It’s the most confidence-inspiring power cable I’ve seen, and indicative of the MYO XP’s meticulous and robust design.

Headstrap

Petzl MYO XP LED Headlamp REVIEW - 10
A familiar bucket headstrap design with a twist, the MYO XP’s top strap is half the width of the main strap and is removable.

A familiar bucket headstrap design with a twist, the MYO XP’s top strap is half the width of the main strap and is removable. It clips in with slender buckles that don’t look up to the task but proved adequately stout in our test; they do require a tool to open, though. The main strap can be removed for washing but doing so requires a rather elaborate unweaving process. It helps to pay attention so that reweaving isn’t too painful.

Petzl claims water resistance for the MYO XP and I agree with this assessment. It’s clearly not protected against immersion but isn’t going to be affected by moderate rain. I also note that because the lamphead is quite recessed to accommodate the diffuser lens, it collects spray and dust and will likely collect snow and ice in wintry conditions, but with the benefit of being very safe from mechanical damage. Ours remains scratch-free.

Performance

With fresh batteries the MYO XP is bright, very bright. In high mode it’s the brightest headlamp I’ve yet tested and in boost mode, it’s more than twice as bright as the next brightest – testament to what a 3-watt LED can do. Note that in all modes other than boost, the 3-watt light is “underdriven;” that is, putting out far less light than it’s capable of. There are at least three practical reasons for this: 1) At 3 watts considerable heat is generated, requiring an aggressive heatsink to dissipate heat and protect both the LED and the circuitry; 2) battery life would be dramatically reduced and 3) output that intense is seldom, if ever needed by backpackers for extended periods. In practice, the XP’s output is similar to that of a 1-watt headlamp until the boost call is placed to the engine room. Then, it melts all comers.

I measured beam intensity and width at all output levels from our standard 2-foot distance, with and without the diffuser lens in place. The bare, collimated LED throws a beam typical of other Luxeon-powered headlights: narrow and very bright white in the beam center, surrounded by a far dimmer halo (beam spill). The diffuser lens broadens the beam into a soft, even and wide floodlight with no hotspot. Of note also, is the light’s color quality. Compared side-by-side with a Gerber 3-watt Luxeon flashlight, the XP’s beam is a very neutral white versus the flashlight’s rather sickly yellow. Flashlight aficionados call this color variation the “Luxeon lottery” and it looks as though our MYO is a winner.

At 2 feet the bare MYO XP beam center is 5-6 inches wide. Flip up the diffuser lens and the beam broadens dramatically to about 2 feet wide – a huge change. The diffuse beam’s intensity appears even to the eye but our light meter showed a drop of about 50% from beam center to edge, 1 foot off-axis. Fifty percent may sound dramatic but to the eye it’s literally not detectable, because eyes easily compensate for such a minor difference. By contrast, the bare LED beam drop-off at 1 foot is roughly a thousand-fold. This, you see.

MYO XP
Output Intensity (in Lux), measured from 2 feet
Bare Diffuser
Center 1 ft off-axis Center 1 ft off-axis
High 1,560 18 85 35
Medium 890 10 48 24
Low 325 5 17 10
Boost 2,900 40 180 75

Because the MYO XP lacks current management, output doesn’t settle into an extended steady period like effectively regulated lights. In high mode the initial dazzling output drops like a rock, losing a third of its intensity in the first hour, dropping to initial medium level at 4 hours and to fifty percent of initial power at 5, so the gaudy maximum lux measurements need to be taken with a grain of salt. High mode never did exhibit a flat output stretch in the 24 hours I ran the test.

Medium mode also drops steadily from the start, but not as precipitously as high mode. It took almost 12 hours to drop fifty percent and over 20 hours to drop to initial low mode equivalent. Perhaps most importantly, from 12 hours onward medium mode outperformed the high mode and took almost 40 hours to drop to the level high was at when I terminated that test (100 lux), yielding an extra 16 hours of use. I let the medium test run on to investigate wringing as much life as I could out of a single battery set. Output seemed to hit a base level of about 50-60 lux and settled there from hours 47 to 60, when I terminated the test. The residual light output was similar to what you’d get from a button cell light with half-used batteries, certainly not light you’d go predawn climbing with but still enough for simple campsite activity.

Petzl MYO XP LED Headlamp REVIEW - 11
Petzl MYO XP LED Headlamp run times.

Tests run at room temperature (70-80 degree F) with alkaline batteries from a single batch.

I did some boost mode “snapshots” during the medium mode test to track relative output as the batteries wore. I used medium because our feeling is that nighttime travel is best accommodated by hiking with medium mode (or even low) using boost occasionally as required. I only did a few boost tests, with each only long enough to collect a measurement because I didn’t want to measurably impact battery life. There’s no question that frequent boost use will noticeably reduce battery life; however, I believe that medium plus occasional boost will far outlast high using no boost. Initially, boost is about three times medium output (2,900 vs. 890). At 12, 16, and 20 hours it’s more than double (1,140 vs. 435, 1,040 vs. 380, 850 vs. 335). Once output has dropped much below 200 lux the boost mode didn’t visually differ from switching it to high, regardless of the measurements.

Maximum boost duration ranged from about 18 seconds to 22 or so. Boost time seems temperature limited when batteries are fresh and time limited when they’re well worn.

Petzl’s specs are for the battery meter to change to yellow when batteries are 70 percent drained and red at 90 percent. During our tests the meter stayed on green until output dropped below about 400 lux. I never saw what I’d describe as yellow; it’s possible I simply missed it, but the first change from green I’ve noticed is to orange, then orange slowly becomes reddish over time. Even at a dim 50-lux output it’s an orangey red. I’ll cautiously call the power meter somewhat useful. Note too that due to battery rebound, after the light’s been off for a time even weak batteries will give a period of relatively bright light and the meter can bounce back to green, only to revert to orange in a few minutes. Wait for a while after first turning on the light to gain a fair assessment of battery health.

In the Field

I took the MYO XP on several adventures, both nighttime navigation exercises and backpacking trips. In either role it’s a very, very competent headlamp. Banish any lingering thought you may have that incandescent lights still hold a role in the backpacking market – LEDs can now do it all. The XP is bright in a useful way: the light is a natural white and free from distracting artifacts and weird color-fringing. The beam throws a long, long way and there’s still enough spill to illuminate off-axis features such as trail blazes. Petzl’s “killer app” may be the boost mode, which erases any doubts about what’s ahead when needed but allows the light to run at a much lower intensity the vast majority of the time.

As I noted, my favored nighttime navigation mode is to use the MYO XP in medium, occasionally relying on boost to get through sketchy spots. This approach both extends battery life and preserves night vision. The only fly in the ointment is holding the boost switch down to use it, a bother when using trekking poles or, say, navigating a slippery log while stream crossing. Perhaps a single-push timed mode would be better?

The rap against single LED, high-output (1-watt and greater) headlamps is that they lack a truly useful nontechnical light for camp chores and reading. The XP’s diffuser puts that concern to rest without resorting to hanging extra low-output LEDs on the lamphead, an approach every maker uses, including Petzl. Those of us who fashion homemade diffusers for our Eos’s can only gaze longingly at the broad even beam created by this little flip-up lens. Multi-LED schemes seem excessively complicated and hopelessly archaic in the face of this low-tech but entirely effective tactic.

The MYO XP is comfortable for long stints. It’s balanced and the battery pack doesn’t dig into the scalp. The little top strap proves up to the task of stabilizing the light in our tests; trail runners shouldn’t be put off by its slender profile. Without the top strap the light is still comfortable but will likely slip if you’re engaged in a limbo competition around the campfire. Like all headlamps using separate battery packs, the XP isn’t too comfortable for reading in bed while lying on your back; however, the rear-mounted batteries stay nice and warm under a hood during cold weather, an important performance consideration.

Batteries, and Realistic Run Times

Three AA batteries provide long life at 69 grams per set for alkalines, 44 grams for lithiums. The weight-conscious will likely compare the XP against less hefty lights that use two AAs or three AAAs; base your decision on whether you can get by with a single set of batteries with the heavier XP so to avoid carrying spares. Use our runtime charts as a rough guideline for projecting your likely use. A predawn wintertime summit bid presents a completely different consumption scenario than a summer’s week on a well-established trail.

Petzl’s battery life claims seem hopelessly optimistic. While it’s true that one can still perform very simple tasks in the faint glimmer of an LED on ninety-percent dead batteries, the notion of performing technical nighttime navigation is a dream, to be generous, once they’re that far gone. There’s a huge difference between traveling a rocky trail and finding a spork in your backpack.

Assessment

The MYO XP ups the performance bar with the highest output I’ve yet measured from an LED headlamp. And, the diffuser lens is so effective it renders the competition that combine a Luxeon with two or more 5 mm LEDs moot. Few fair-weather backpackers will need the XP’s lighting prowess unless they plan on nighttime off-trail exploration or predawn climbs, but when the weather turns foul and the days shorten this light becomes a very attractive option, at a reasonable 6 ounces. (The Tikka XP headlamp addresses the lightweight crowd by offering a smaller, lighter 1-watt Luxeon-plus-diffuser light that also features boost mode.)

Who’s this light for? Many lightweight backpackers will never require the XP’s dazzling regular output or boost mode. Anybody who’s through-hiked the PCT carrying only a button-cell flashlight would be hard to convince to take along a full-featured high-output headlamp, but for anybody tackling extended after-dark travel, winter camping, predawn climbs, trail running or caving, it’s likely that the MYO XP will leap onto your short list.

As I review this XP there’s little apparent direct competition except the new Princeton Tex Apex, a heavier and more complex headlamp (but regulated and immersible). As it stands, the 3-watt XP easily outperforms our current favorite Princeton Tec Eos, but at considerably greater weight and cost.

Value

At $70 the MYO XP is an expensive headlamp but given its performance, versatility, cutting-edge 3-watt Luxeon LED and material and build quality, it’s priced on par with the competition.

What’s Unique

Extraordinarily bright technical light also becomes a very friendly campsite light by using the diffuser lens (no auxiliary LEDs). Boost mode untangles the trickiest of nighttime mysteries. Removable top strap gives users the welcome option of either having the extra support and stability or avoiding the unnecessary annoyance. Battery life indicator reduces guessing about the available remaining light. Coiled power cord eliminates branch-snagging slack and helps protect the connections. Build quality inspires confidence.

Recommendations for Improvement

The MYO XP would benefit greatly from effective current regulation, now pretty much standard in this market segment. A single-push timed boost mode would leave hands free for more important tasks, and no usefulness would be lost if it were programmed so that a second push switched boost off. Slotting the battery box strap guides would make it easier to remove for comfort while reading in bed. Correct battery alignment should be more obvious in dim light and by touch. Battery life indicator colors could be better delineated. I’d also like to see Petzl upgrade the MYO XP to be immersible.

Vaude Lightwing Ultralight Tent REVIEW

Two-person, three-season, double wall tent with a high price but a sturdy build.

Note: the Vaude Lightwing has been discontinued by the manufacturer but is still available from some retailers.

Overview

Vaude Light Wing Ultralight Tent REVIEW - 1
The Vaude Lightwing Ultralight all buttoned up. It performed well after a night of nearly 3 inches of heavy, wet snowfall that rapidly melted as the day warmed up.

The Vaude Lightwing Ultralight is a two-person, three-season double wall tent. Vaude has created a tent that tries to mix a lot of roominess, lightweight design, sturdy fabrics, and reasonable setup into one package. The Lightwing has an internal surface area of just over 32.5 square feet and retains a fairly high 38.5 inch ceiling throughout much of the tent, making the tent feel remarkably roomy for its light weight of 4 pounds 5.1 ounces (1.96 kg). This is not a tent for people who want to relish the views; a single screen insert in the front door is the only window. Vaude’s selection of durable materials for this tent certainly increases the overall weight, but also increases the sturdiness of the tent. At $423, the Lightwing is expensive but it built to last many seasons.

In Brief

  • Decent internal surface area and height make this a comfortable tent especially for backpackers or mountaineers used to close quarters.
  • The tent breathes quite well despite its lack of windows or other ventilation.
  • Set up can be a challenge, especially in windy conditions.
  • Vestibule should be larger.
  • The inner tent sags, and under heavy snow pressure can easily come into contact with the outer wall and/or your sleeping bag if you are lying near the tent wall.

Specifications

  Year/Model

2004 Vaude Lightwing Ultralight

  Style

Double wall tent with floor

  Fabrics

Outer fly: double sided silicone coated 40d ripstop nylon; inner tent: 30d ripstop nylon; floor: PU coated 40d ripstop nylon

  Pole Material

Aluminum

  Weight Full Package
As supplied by manufacturer with all included items

4 lb 5.1 oz (1.96 kg) measured weight; manufacturer’s specification 4 lb 5.8 oz (1.98 kg)

  Weight Manufacturer Minimum
Includes minimum number of items needed to erect tent

4 lb 1.3 oz (1.86 kg) measured weight

  Weight Backpacking Light Minimum
Same as Manufacturer Minimum but with 0.25 oz (7 g) titanium stakes and 0.004 oz/ft (0.37 g/m) Spectra guy lines

4 lb 0.6 oz (1.82 kg) measured weight

  Area

Floor area (measured) 32.5 ft2 (3.02 m2); manufacturer’s claim: 35.0 ft2 (3.25 m2)
Vestibule area (measured) 6.25 ft2 (0.58 m2); manufacturer’s claim 8.1 ft2 (0.75 m2)

  Floor Area/Backpacking Light Minimum Weight Ratio

0.54 ft2/oz

  Dimensions

Length: 122 in (310 cm)
Width: 64 in (163 cm)
Height: 38.5 in (97 cm)

  MSRP

£240 ($423 USD)

Usable Features / Ease of Use

Vaude Light Wing Ultralight Tent REVIEW - 2
Setting up the Lightwing Ultralight can be a challenge even with mild breezes.

The Vaude Lightwing Ultralight is more difficult to set up than its simple design appears, especially in windy conditions. First, you run the 13-foot pole through its sleeve and insert it into the far end grommet, then you have to manhandle the whole structure to get the pole into the grommet at your end. This is made more challenging because you are working with a large sail at this point. Even a slight breeze can have a great impact on the tent as you struggle to get the pole into the second grommet. Once the pole is in place, staking the tent is next. Adhering to the directions and trying to stake out the front and back pole ends of the tent first, is challenging because the provided stakes do not always stay in the loops. I found it was better to quickly stake out the outer wall corners, then work on the inner tent, and finally the two pole ends. If at this point you decide the outer wall should be pulled further from the inner wall, you can use the provided guylines, but we found this was not generally necessary. The last step is to place the short spreader pole in place. This is tricky even in mild conditions because everything is already taut and inserting this pole requires a fair bit of force.

Vaude provides lightweight (0.35 oz / 10 g) aluminum stakes that are easy to pound into the ground but sometimes pop out of the tent loops at either end of the pole because of their L-shaped design with small heads (10 mm by 15 mm). This isn’t a problem with the stake out points around the rest of the tent since the small plastic D-loops fit snugly around the stake flukes.

Vaude Light Wing Ultralight Tent REVIEW - 3
A tall backpacker sitting inside the Vaude Lightwing with plenty of headroom.

The Lightwing has plenty of room inside and storage options including two 12- inch long by 7.5-inch high wall pockets for storing small items and sidewall and ceiling loops for hanging items.

Weight / Sizing

The complete tent package, which includes the tent, 10 stakes, guylines, and an extra aluminum rod for use as a pole segment replacement, is contained in two stuff sacks and weighs 4 pounds 5.1 ounces. A minimal field kit with eight lightweight tent stakes, tent, and two poles contained in one stuff sack tips the scales at 4 pounds 1.3 ounces.

Usable Space

The Vaude Lightwing Ultralight feels remarkably roomy for a tent with a floor area of only 32.5 square feet. The nearly vertical walls, the mostly rectangular floor, and the overall height of the tent combine to create a more spacious interior than you would expect. Problems with space start to become noticeable when tall people sleep in the tent. While the first 72 inches of the floor form part of a nearly perfect rectangle, the remaining length of the tent is compromised by the inward curve of the back wall. People using long (78 inch/198 centimeter) sleeping bags may feel cramped when trying to stretch out.

The tent walls, while fairly vertical, have a tendency to bow in which affects the perceived usable space in the tent.

Vaude Light Wing Ultralight Tent REVIEW - 4
The vestibule is not very large, but the front flaps can be opened up all the way in nice weather.

The vestibule, though small, is suitable for stowing backpacks and wet shoes. Fully battened down, the vestibule provides complete protection from the outside world. When the weather is clear you can unzip the vestibule in either direction. Opening the vestibule using the bottom to top zippers creates a large, easily accessible opening, but also creates a large area of flopping fabric that cannot be secured. In general, it is better to use the top-to-bottom zipper even though this results in a smaller entry to the main door.

The tent is very bright inside. Despite the fly’s deep forest green color, the inner tent is a cheery light yellow that gives the shelter a spacious and inviting feel.

Wind Stability

The Vaude Lightwing Ultralight held up quite well under moderately windy conditions, especially when pitching the ends into the wind. However, the large sidewalls with no side guyouts had significant deflection with 40 mph side gusts. It is important that the fly is pitched tightly and that all the stakeout points are used under heavy wind pressure.

Storm Protection

The shelter kept rain and snow out. It is important to provide a taut outer wall pitch, especially in snowy conditions. One night when I pitched the outer wall close to the inner tent, several inches of wet snow fell and caused some deflection of the inner tent surface. Although I was lying right next to the tent wall, no condensation appeared on my sleeping bag at any time, and once I tapped off the snow the deflection eased.

Ventilation / Condensation Resistance

Vaude Light Wing Ultralight Tent REVIEW - 5
The one 18-inch wide by 9-inch tall semi-circular window improves ventilation but provides a minimal view.

The Lightwing Ultralight has one 18-inch wide by 9 inch tall semi-circular window built into the front door. Even if you open the vestibule up completely there is not much of a view. With just this single window to provide ventilation I expected condensation problems, especially after I completely sealed the tent, but the Lightwing performed very well. Moisture moves easily through the inner tent wall and collects on the inside surface of the outer wall where it quickly evaporates.

Insect Protection

The Vaude Lightwing Ultralight is completely bug proof. But this is not the shelter I would choose for escaping bugs for hours – the single, smallish window would turn minutes into hours.

Durability

The rain fly is made of silicone coated 40 denier ripstop nylon, with a 30 denier ripstop nylon innerwall, and 6-inch high bathtub style floor built from polyurethane coated 40 denier ripstop nylon. These are, by lightweight standards, heavy-duty fabrics. I have no worries about pitching the tent directly on the ground. I have used the tent on multiple backpacking trips and left it pitched outside in my southeast Michigan backyard through the latter portion of the winter and early spring. I’ve seen no signs of deterioration.

Value

The Vaude Lightwing Ultralight is a solidly built tent that can certainly handle three-season weather. It can also hold its own in many wintertime conditions, though Vaude does not call this a four-season tent. The tent is built to last a long time even if you treat it roughly. If you don’t care about views and need a tent that will protect you from all but the worst weather, this shelter is worth considering even at the relatively high retail price of $423 since it is quite durable.

Recommendations for Improvement

  • The stakeout points at the ends of the main pole do not provide a secure attachment point with the provided stakes. I recommend providing different stakes for the endpoints.
  • Providing midpoint stakeout points on the inner tent would help reduce the natural inward deflection of the sidewalls.

Tips

  • Don’t peg the pole ends of the tent immediately after you get the long pole in place, since the pegs will not stay in. Instead stake out the outer wall first, and then work on the inner tent and the stakeout points at the pole ends.
  • Stake out the outer wall as far from the inner tent as you can. This helps reduce the chance the outer wall will sag against the inner tent.

Suunto X9i GPS REVIEW

Wrist-mounted 2.7 oz GPS unit targeted at done-in-a-day activities, tested with Topo! 4.0 mapping software.

Introduction

I spent extensive time testing the original Suunto X9 wrist-mounted GPS (see X9 Review). In that testing I found a number of problems that hobbled its usefulness, especially for the North American market. Since then, Suunto has extensively revised and improved the X9 (now the X9i):

  • It has significantly improved GPS reception — on par with similar wrist-mounted GPS units like a Garmin ForeTrex
  • It is compatible with National Geographic Topo! version 4.0 electronic mapping and waypoint management software via a USB interface.
  • It is now compatible with the combination of North American Datum 1927 and UTM coordinates.
  • It now includes a USB cable to connect it to a computer.
  • It is not field rechargeable and still has poor battery life and an awkward menu system making basic task performance cumbersome.

Test Conclusions for the new X9i and Topo! Interface

With the revised X9i, Suunto addresses many of our criticisms of the original X9. The new X9i is far more useful in the field than its predecessor, especially in North America. The X9i can still benefit from improvements in battery life and user interface for navigation tasks, but these are minor gripes.

The X9i is targeted for done-in-a-day activities. It is at its best when the GPS receiver is on full time and you are not worried about running out of battery power. The X9i focuses on performance measurements like speed, distance, and altitude gain and loss, more than navigation. This is in keeping with industry trends. GPS manufacturers are putting their dollars and technology development into the hot portion of the market — wearable, personal-performance-measurement GPS units. Garmin is focusing just as hard on this market with their Forerunner series. To Sunnto’s credit, the X9i holds to some of its navigational roots with a barometric altimeter and magnetic compass, which the Garmin Forerunners lack. Still, it may be a while until GPS manufactures design a slim profile, watch sized GPS unit focused on navigation.

What Worked

  • The X9i USB interface with Topo! works. I was able to download waypoints created in Topo! California into the X9i and verify them in the field. The required USB cable is provided with the unit.
  • The NAD 27 datum and UTM coordinate problem is resolved. The unit correctly reports NAD27 UTM coordinates that agree with USGS NAD 27 maps labeled with light blue UTM tick marks. Naming the datum selections in the X9i, rather than using numbered codes as in the original X9, is a huge help when in the field (and the paper manual is back home). The inclusion of the “NAD27ca” datum is a nice touch.
  • GPS fix times are significantly improved. Cold fixes – greater than 24 hours since the last fix or after large geographic movements – are a bit longer than with Garmin units but are now at least in the same ballpark. A Garmin cold fix runs 45 seconds to 5 minutes versus the Suunto X9i’s 1 minute, 15 seconds to 6 minutes. Warm fix times – less than one hour – are on par with Garmin units, usually requiring 15 to 20 seconds. Sometimes the X9i was a few seconds faster.
  • GPS fixes under limited sky views are greatly improved. The X9i performs on par with the Garmin units, both in fix times and the ability to get a fix in difficult situations. Anytime the Garmin unit could get a fix the Suunto did as well. Likewise, both units were unable to get a fix in similar situations. During my testing, neither unit was able to get a fix where the other could not.
  • I took the X9i on a 10-mile trail run in a fairly open canyon with some intermittent tree cover. It did a reasonable job of keeping a GPS fix, under reporting mileage by around 10%, which was not unexpected. Garmin wrist-mounted GPS units also underreport mileage by a similar amount on this route. This seems to be something to do with occasionally missing GPS reception, and the unit’s mileage calculating algorithm compensating for it. I’ve noticed that GPS units, even with a perfectly clear sky view, do not have completely accurate mileage, although they’re more accurate with a clear sky view than in areas with intermittent reception. To date, non-GPS, accelerometer driven units like the Suunto T6 are more accurate in heavy foliage and/or deep canyons.
  • In addition to charging from a multi-voltage adapter (110 volt for US) you can recharge the X9i from any powered USB port on a computer, laptop, or similar device.

With Topo! Version 4.0 you can download or upload waypoints to the Suunto X9i. Connection to the computer is via a USB cable (provided with the X9i). This makes loading waypoints into the X9i a piece of cake.

What Didn’t Work

  • Battery performance relegates the X9i to done-in-a-day activities, which meshes with the X9i’s focus on personal performance measurements rather than navigation.
  • The X9i is not as accommodating to those who are more interested in GPS navigation — users that want to quickly turn the GPS reception on and off to perform brief navigational tasks and conserve battery life. Operation of the unit in this manner is slow and cumbersome compared to units like Garmin ForeTrex series.
  • Battery life continues to be an issue for the X9i on extended trips. The Garmin units like the ForeTrex with longer run times and field replaceable batteries have a significant edge. I only take the X9i on day trips or longer trips where I intend to use the X9i’s GPS functions for limited periods. There is still a niche for units like the X9i and I like taking it on day trips, trail runs, when I paddle, or possibly a long weekend backpacking trip. But with a spare set of AAA batteries I can get 48 hours of continuous navigation with a Garmin ForeTrex. This is enough to use the ForeTrex on a fulltime navigational basis for a weeklong trip (7 days at 7 hours on-time per day for the GPS). One will not get 48 hours of GPS navigation out of an X9i.
    [Note: A few of our readers reported recharging the old X9 in the field with its docking cradle loaded with a 9 volt battery. This was a heavy and awkward solution but it worked. For the time being, the X9i is not field rechargeable. Suunto says a field recharging option is in its future but gives no date.]
  • It would be really, really nice to be able to add alphanumerically named waypoints in the field. Using “date and time” or “RIVER” from a pull down list of preset names is not the same as selecting your own six-character alphanumeric name.
  • The menu system required for performing a few simple and important tasks is slow and awkward. In particular, quick access to a GPS position and quickly marking a waypoint (needed when one is on a trip and trying to conserve batteries and so typically the GPS is off). By contrast, the Garmin wrist-mounted units let you do these tasks much faster, especially marking a waypoint.
  • The X9i is still hard to use. I was reasonably familiar with the X9 operation a year ago and have used Suunto wrist units as my primary navigational tools — Vector, X6, and T6 – for some time. I still found the new X9i a challenge to use in performing all the functions I wanted. (And yes, I didn’t read every page of the 98 page PDF manual, but neither will most users.)
  • In particular, many users may be confused by the complex interrelationships between the Activity settings, Navigation settings, and the various GPS fix modes. This includes keeping track of whether the GPS is running or not. This increases the likelihood that you’ll accidentally leave the GPS receiver on and unintentionally drain the batteries. Using the manual fix mode to conserve battery life is the most confusing mode of GPS operation.
  • The menus are still deeply nested for many important navigational functions. Marking a waypoint is still five menus down, takes 19 button presses and can only be accessed from the Navigation screen. Needless to say this slows operation down and may give you sore button pressing fingers.

Conclusion

Despite the remaining glitches, the X9i is a big improvement over the original X9. I regularly enjoy my X9i for training, on day trips, and even long weekend outings.

The ideal ultralight, wrist wearable, GPS unit of the future would combine the best features of both the Suunto X9i and the Garmin ForeTrex. With the industry focus on done-in-a-day activities and performance measurement, it may be awhile until we see a slim wrist unit with a barometric altimeter, a magnetic compass, and good navigational GPS functions all rolled into one. Until then you’ll have to decide between:

1) The slim wrist mounted form, barometric altimeter, and excellent magnetic compass of the Suunto X9i

or

2) The excellent navigational functions, ease of use, good battery life, field replaceable batteries, and lower price of the Garmin ForeTrex 101 (it’s wrist wearable, albeit in a bulky design, and lacks a barometric altimeter, and magnetic compass).

Specifications and Features Suunto X9i

  • Weight: 2.72 oz (77.0 g) with battery – weighed by Backpacking Light
  • Size (H x W x D): approximately 2.0 x 2.5 x 0.6 in (5.1 x 6.4 x 1.6 cm), excluding band
  • Battery Life: 4.5 hour for 1-sec GPS updates to over 2 months with GPS off using Time and/or Alti/Baro modes only (Suunto reported times – not tested for X9i – assumed to be close to battery life of the old X9)
  • Battery Type: Lithium Ion, non-replaceable, rechargeable up to 500 times
  • Barometric Altimeter: Yes
  • Electronic Compass: Yes, tri-axial, can operate at up to 30° angle
  • WAAS Enabled: No
  • Screen Resolution (H x W): 74 x 84 pixels
  • Screen Size: 0.81 x 1.07 in (2.1 x 2.7 cm)
  • Display Type: Black and white LCD
  • Auto Locate GPS Fix: Not available
  • Cold GPS Fix: 1 min 15 sec to 6 min – Backpacking Light field tests
  • Warm GPS Fix: 15 to 20 sec – Backpacking Light field tests
  • Waypoint/Route Memory: 500 waypoints/50 routes up to 50 waypoints each
  • Trackpoints: 8000 (25 tracks)
  • Additional Memory: No
  • Additional Memory Type: N/A
  • Computer Interface: Yes, Windows PC via USB cable (possibly Mac via Topo! 4.0 software)
  • Basemaps: No
  • Additional Maps: No
  • Water Resistance: 330 ft (100 m)
  • Celestial Info: Yes, sunrise and sunset only
  • Included Equipment: Universal voltage charger (110 volt for US), USB cable for computer interface/charging, Trek Manager Software, extension wrist strap which enables you to wear the X9 with a heavy jacket.
  • MSRP: $499

MSR Hubba Hubba Tent REVIEW

Double wall tent for two that weighs just over 4 lbs and has a unique pole hub system that makes it a breeze to pitch.

Overview

MSR Hubba Hubba Tent REVIEW - 1

The MSR Hubba Hubba uses a single pole hub system and a shorter center pole in a unique configuration for a super fast pitch and impressive usable space. At less than 4.5 pounds, this double wall tent is a spacious home in the field with good wind stability to boot. With the fly off, the large mesh panels offer some of the best views available in a tent. Further, the 2005 model improves on this great design with dual doors and vestibules as well as greater frame rigidity – and at a weight increase of just 2 ounces. If you are looking for a well rounded, lightweight, double wall tent, the MSR Hubba Hubba definitely deserves your attention.

What’s Good

  • Brilliant pole/hub system makes set up a snap
  • Additional cross pole extends headroom, making this a very spacious tent
  • Mesh inner tent provides excellent views and is a comfortable escape from bugs
  • Durable materials hold up well to field abuse
  • At a minimum weight of 4 pounds 2 ounces (1.88 kg), it is a good compromise between weight, durability, and usable space

What’s Not So Good

  • Single door is inconvenient for two (2005 model features dual doors)
  • Single vestibule is barely large enough for two people’s gear (2005 model features dual vestibules)
  • Fly doesn’t go to ground level, allowing for gusts to blow underneath and rain to splash the inner tent in the corners
  • Needle stakes, although tough, are painful to use

Specifications

  Year/Model

2004 MSR Hubba Hubba

  Style

Freestanding double wall tent with floor

  Fabrics

Floor: 70d 190T nylon, 5000 mm PU (polyurethane) coating; Body: 70d 190T nylon taffeta; Fly: 30d ripstop nylon with PU and silicone coating

  Pole Material

Aluminum – DAC Featherlite SL sectional pole (five sections with two aluminum hubs) and single cross pole

  Weight Full Package
As supplied by manufacturer with all included items

4 lb 6.9 oz (2.11 kg) measured weight; manufacturer’s specification 4 lb 0 oz (1.80 kg)

  Weight Manufacturer Minimum
Includes minimum number of items needed to erect tent

4 lb 2.3 oz (1.88 kg) measured weight

  Weight Backpacking Light Minimum
Same as Manufacturer Minimum but with 0.25 oz (7 g) titanium stakes and 0.004 oz/ft (0.37 g/m) Spectra guylines

4 lb 1.7 oz (1.86 kg) measured weight

  Area

Floor area: 30 ft2 (2.8 m2) Vestibule area: 9.5 ft2 (0.9 m2)

  Floor Area/Backpacking Light Minimum Weight Ratio

0.46 ft2/oz

  Dimensions

Length: 86 in. (220 cm)
Width: 50 in. (130 cm)
Height: 42in. (110 cm)

  MSRP

$289

Performance

MSR Hubba Hubba Tent REVIEW - 2

MSR Hubba Hubba Tent REVIEW - 3

The single pole hub system of the MSR Hubba Hubba is extremely easy to use: extend the pole sections, slip the ends into the corner grommets, and attach the inner tent with plastic clips. A brilliant design.

The MSR Hubba Hubba features a pole hub system similar to that found in Big Agnes and Vaude tents. However, the configuration is unique with a side entrance instead of a narrower entrance at the end. This layout gives it the advantage of using a symmetrical pole (same size hub at each end) for super quick pitching. To set up the Hubba Hubba, you first extend the main pole system; pole sections slide into the aluminum hubs similar to how pole sections connect at the sleeves – quick and easy. Next, the pole unit is connected to grommets at each corner of the inner tent body. Twelve plastic snaps connect the mesh inner tent to the pole, erecting the tent. A floating cross pole is then inserted with two grommets and two plastic clips. (In the 2005 model, this pole is connected to the main pole with an aluminum swivel, increasing rigidity and ease of set up).

MSR Hubba Hubba Tent REVIEW - 4
A unique floating pole worked fine but wasn’t as rigid as it could have been. (In the 2005 model, the pole is permanently attached at the center with a swivel.)

The fly attaches to the floating pole with a grommet on each side. It attaches to the tent body via a grommet at each corner and adjustable straps. A minimum of two stakes is required for proper fly tension, but a total of thirteen stakeout points are provided (four on the inner tent and nine on the fly). The MSR Hubba Hubba is one of the fastest double wall tents to pitch that I’ve used. With minimal practice, a basic taut pitch can be achieved in just a few minutes.

MSR Hubba Hubba Tent REVIEW - 5
During breaks on an especially buggy hike, we used the Hubba Hubba as a bug-free relaxation palace. The tent is very spacious inside and the views are stellar.

The inner tent of the Hubba Hubba is almost entirely mesh with only a small nylon panel on the top for reinforcement. While not as warm as a nylon inner tent, the all-mesh inner gives the best views of any double wall shelter I’ve seen. Further, the inner tent is exceedingly breathable, keeping the inner tent almost completely condensation free. What little moisture did condense in the tent was only on the small upper panel and this was very minimal. There is consistent air space between the fly and the inner tent, further helping with ventilation and condensation resistance. While there is no vent in the rain fly, it pitches about 4 inches above ground level, allowing breezes to enter the tent. In wet conditions, we did experience some condensation on the fly but not in our living space.

The 30 square feet of floor area makes for a comfortable living space for two hikers. Even a 6 foot 4 inch hiker was comfortable in this tent. The area to space ratio of 0.46 ft2/oz was right in the ballpark of other freestanding double wall tents in its class. For example, the Sierra Designs Lightning at 0.48 and the Big Agnes Seedhouse SL2 at 0.50 are only slightly better in this category. However, the Hubba Hubba blows these other tents away in the usable space category. The extra cross pole opens up the headroom and creates more-than-vertical sidewalls. This makes the tent much larger inside than its competitors. There was plenty of room for two hikers to sit up and play cards when waiting out a storm.

MSR Hubba Hubba Tent REVIEW - 6
Even with the doorway completely open, the tent is still covered. The single doorway made entrances and exits tough for two but the 2005 model features dual doors and vestibules – a serious improvement.

We tested the 2004 model, which has a single doorway and vestibule. The vestibule is large enough for a couple of medium sized packs and shoes – pretty average for a tent in this class. However, the second pole pushes the fly several inches past the tent floor, meaning that the inner tent is protected when the fly is opened during a downpour. The single side door means that you have to climb over your partner to get out of the tent, which was a nuisance at times. (The 2005 model features dual doors and vestibules with a reported weight increase of just 2 ounces – additions that dramatically improve the usability of the tent.)

MSR Hubba Hubba Tent REVIEW - 7
Large mesh pockets at each end provide excellent storage.

For interior organization, there is a huge mesh pocket at each end of the tent with enough space to fit several ditty bags, paperbacks, or items of clothing. The additional storage was a welcome change from the minimal pockets found in most lightweight tents. While the mesh fabric seems fragile, stuffing the pockets beyond capacity didn’t cause any durability issues.

MSR Hubba Hubba Tent REVIEW - 8
The MSR Needle stakes are tough as nails but hard on the hands.

The Hubba Hubba comes with MSR Needle stakes. While I was completely unsuccessful in bending them, the sharp angles are hard on your hands. Despite this fact, they survived being pounded in with rocks and provide solid placements in even the rockiest locations. Personally, I prefer titanium skewers that are easier to place and remove. Kelty Triptease-style guylines with reflective sections were very tough and reflect like laser beams at night – very cool.

An optional footprint ($39.95) can be matched with the rain fly and poles to create a "tarp-shelter" that weighs a reported 3 pounds 1 ounce (1.4 kg), dropping a full pound off of the tent weight. This provides an option to save some weight and have a freestanding tarp when conditions allow.

MSR Hubba Hubba Tent REVIEW - 9
The MSR Hubba Hubba holds up well to storms, keeping out rain and showing a surprising lack of deflection in moderate winds.

When conditions turn stormy, the MSR Hubba Hubba holds its own but does show its three-season limits. The rain fly is fully taped and never leaked and the covered entryway keeps the interior dry when getting in and out of the tent. It is critical to stake out the front and rear of the tent to avoid rain splashing against the mesh inner walls. Despite a proper pitch, a windy two-day downpour caused some water to splash in on the corners, wetting gear in the corners of the tent. While this was a serious early winter storm and probably beyond the reasonable range of the tent, this problem could be avoided by extending the nylon floor a couple inches higher in the corners. During more reasonable rainstorms, though, we experienced no problems. Even when pitching the tent in muddy grass, the floor did not soak through.

With the flat triangular sides and broad roofline of the Hubba Hubba, I incorrectly assumed that the tent wouldn’t hold up well when the winds picked up speed; I was pleased to find that the design works quite well in these conditions. Nine guyout points on the fly give very secure pitching options and the geometric shapes of the tent spilled wind surprisingly well. Even in gusts into the 40 mph range, the Hubba Hubba held up just fine.

After extensive field testing by a variety of different hikers, this tent has shown no durability issues. The only wear the tent shows is one small snag on the large stuff sack. All critical seams are reinforced and all seams are taped. This is a quality tent.

At $299.95, the MSR Hubba Hubba is in the ballpark of other tents in its class such as the Sierra Designs Lightning ($249) and the Big Agnes Seedhouse 2SL ($299). However, it offers an overall package that gives you a lot for your money. Good wind stability and storm protection, excellent usable space, the best views around, a competitive weight, and now featuring dual doors and vestibules…all these add up to an excellent value for a three-season, double wall tent.

What’s Unique

The hub pole system, while used by a few other companies, is best applied in this symmetrical layout with a side entrance. It is fast to put up and doesn’t limit door size. The cross pole extends headroom dramatically and also keeps the inner tent dry when the fly is open. Tent angles resist deflection in moderate winds and allow for a taut rain fly.

Recommendations for Improvement

My biggest problems with the tent have been addressed with the 2005 model changes. These include:

  • Single door is cramped for two people – current model now has two doors
  • Single vestibule is small for two people – current model has two vestibules
  • Floating pole system lowers ceiling height and limits frame rigidity – current model has a center pole that is permanently attached by an aluminum swivel
  • A weight increase of only 2 ounces (claimed) is well worth the increase in usability to this tent. Great job improving on a great design MSR!

However, the tent would also benefit from:

  • A slightly higher bathtub floor to protect from splashing rain, especially at the corners
  • A vent in the fly for increased ventilation during humid conditions

Hilleberg Akto Tent REVIEW

A four-season solo tent that weights just 3 pounds, offers excellent usable space, is very durable, and provides full storm protection…does the Hilleberg Akto have a down side?

Overview

Hilleberg Akto Tent REVIEW - 1

At just over 3 pounds, the Hilleberg Akto is lightweight for a four-season solo tent. The Akto provides comfortable living space and a generous vestibule for weather-protected gear storage and cooking. The inner tent pitches with the outer tent, keeping things dry during set up. Good ventilation is provided through a door vent and zippered vents at each end of the sleeping space, although the end vents are hard to access while inside the tent.

Stability in high winds and rain protection are excellent, but performance during heavy snow loads is poor. While you can bang the snow off the tent while you are inside (as you should with any tent), on numerous occasions (in blizzards that brought over 12 inches of snow) snow buildup on the large unsupported sides caused the tent to collapse. Keeping the Akto structurally sound in these conditions is possible but requires more effort than other designs. Snow load strength notwithstanding, the Hilleberg Akto provides an excellent balance of livability, storm protection, and light weight in a four-season tent. In fact, it is the best spring/fall and low-snow winter solo tent we’ve ever used.

In Brief

  • Outstanding stability and stormproofness when wind and rain protection are needed
  • Vestibule is roomy and can be opened while sheltering the inner tent from rain for cooking, ventilation, or reduction of the claustrophobic psychosis that commonly occurs in solo shelters
  • Inner tent is pitched with the fly to keep the interior dry while pitching in the rain
  • Moderately complicated to pitch properly, but a little practice yields big rewards. Requires multiple stakeout points and a large footprint due to its guyline network
  • Single pole design limits headroom at ends of tent but provides good headroom when sitting up
  • Chimney vent and dual end vents allow good resistance to condensation and ventilation, although end vents are difficult to access from inside the tent
  • Single pole design collapses under moderate snow loading

Specifications

  Year/Model

2005 Hilleberg Akto

  Style

One-person double wall, single pole hoop tent with detachable inner tent

  Fabrics

Outer tent is constructed of double silicone-coated waterproof ripstop nylon (Kerlon 1200) with a reported tear strength of 12 kg (26 lb), fabric weight of 50 g/m2 (1.47 oz/yd2). Inner tent is constructed of a lighter version of the same ripstop nylon material, but finished with a water repellent coating intended to facilitate breathability while providing protection from condensation dripping from the inside surface of the outer tent. Reported fabric weight of inner tent is 35 g/m2 (1.03 oz/yd2).

  Pole Material

DAC Featherlite (seamless extruded aluminum)

  Weight Full Package
As supplied by manufacturer with all included items

3 lb 6.3 oz (1.54 kg) measured weight; manufacturer’s specification 3 lb 8 oz (1.56 kg)

  Weight of Components

Ounces Grams
Pole 6.2 177
Pole Bag 0.1 5
Tent Stuff Sack 0.9 27
Flysheet 1 lb 6.4 oz 636
Inner Tent 1 lb 0.7 oz 473
Stakes (12) 4.2 119
Stake Stuff Sack 0.4 12
Pole repair sleeve 1.1 31
620″ Guylines (6 total) 2.3 67
Total 3 lb 6.3 oz 1.54 kg

  Weight Manufacturer Minimum
Includes minimum number of items needed to erect tent

3 lb 2.4 oz (1.43 kg) measured weight

  Weight Backpacking Light Minimum
Same as Manufacturer Minimum but with 0.25 oz (7 g) titanium stakes and 0.004 oz/ft (0.37 g/m) Spectra guylines

2 lb 15.4 oz (1.34 kg) measured weight

  Area

Floor area: 18.3 ft2 (1.7 m2)
Vestibule area: 8.6 ft2 (0.8 m2)

  Floor Area/Backpacking Light Minimum Weight Ratio

0.39 ft2/oz

  Dimensions

Length: 87 in (220 cm)
Width: 36 in (90 cm)
Height: 36 in (90 cm)
Vestibule Width: 30 in (75 cm)

  MSRP

$355 USD

Usable Features / Ease of Use

Hilleberg Akto Tent REVIEW - 2
The Akto’s extensive guyline system requires a fair amount of space to pitch properly.

You can pitch the inner and outer tents of the Hilleberg Akto simultaneously, or during wet multi-day trips you can pitch the outer tent first. This approach allows you to crawl inside to get out of the rain while organizing gear, changing clothes, or cooking. Then you can attach the dry inner tent, crawl inside the inner, and you’re dry and happy. This design also allows you to keep an outer tent that is wet from condensation or rain separate from the inner tent. The Akto is one of the few outer-pitch-first designs that works flawlessly in the real world.

It is moderately difficult to pitch the tent due to eight stakes being required to secure the tent and the need to create well-positioned guyline angles to prevent ends from sagging. A good pitch comes with practice, but even with experience may require some readjustment. However, sliding adjusters make this easy work. Hilleberg claims that the tent can be pitched with a minimum of four stakes, which it can, but significant sacrifices are made in terms of wind stability.

Weight / Usable Space

At slightly more than 3 pounds, the Akto is lightweight for a solo four-season tent. The single pole design provides good headroom while sitting up, but poor headroom at the ends and for performing tasks when lying down. Tent fly footprint is not particularly large, but the Akto takes up a lot of space due to its long guylines.

Due to the nearly vertical sidewalls, usable space for a solo tent is excellent. The ability to detach part or the entire inner tent to create extra workspace without wetting the interior is valuable for using the tent in the rain.

The vestibule is roomy and provides plenty of space for both cooking and gear. The main vestibule door offers a well-tensioned zipper that keeps the fly “drum-tight,” but offers ease in controlling ventilation. End vents in the rain fly provide controllable ventilation, but are difficult to access from inside the tent.

Hilleberg Akto Tent REVIEW - 3
Bugs and weather permitting, the Hilleberg Akto can be opened wide to enjoy the scenery.

Wind Stability

Wind stability of the Hilleberg Akto is excellent. Ironically, the tent seems to perform best when pitched broadside to the wind. In this type of pitch, the pole (properly guyed) provides structural stability. Pitched with the end of the tent into the wind improves ventilation but significantly sacrifices stability in very high winds (greater than 40 mph), placing undue stress on the windward stakes and sometimes causing them to dislodge (this should be a consideration when using ultralight skewer style stakes and/or pitching the tent in softer soils). Broadside, the Akto is stable even in winds to 50 mph (we did not test the tent in winds higher than this).

Hilleberg Akto Tent REVIEW - 4
The Akto’s hoop design provides good rain protection and does a superb job of shedding broadside winds.

Storm Protection

The Akto provides excellent rain protection, simply by nature of its design. The hybrid cylindrical shape of the outer tent sheds rain well. If pitched properly, the shape prevents rain from pooling on the fly, with one caveat: the Kerlon 1200 fly material stretches considerably in response to temperature change and requires an adjustment of guylines (and possibly an adjustment of stakes) in order to maintain a very tight fly pitch as temperature of the fly fabric drops. The vestibule can be opened two-thirds of the way in a hard rain with no fear of getting the inner tent wet, with the benefits of better ventilation.

Snow loading is another story; the single pole design and relatively flat roof pitch does not support snow loads well. In storms that brought less than 6 inches of snow, the roof collapsed to the point of limiting usable space in the tent and the ends collapsed inward (guylines did not provide enough structural stability to resist snow loading). On two occasions the tent structure completely collapsed under the snow load (an all-day storm that brought 12 inches of snow and another all-night storm that brought more than 24 inches of snow). Snow loading can be partially mitigated by the judicious (and increasingly complex) use of guylines attached to the single pole at various angles that provide tension both parallel and perpendicular to the pole, but this does not address the collapse of the tent ends when snow accumulates on the roof. This tent requires more attention by the occupant to minimize snow loading and the accumulation of snow on and near the ends of the tent. We spent more time outside shoveling snow from around the tent, and banging snow off its roof, than in other solo tents pitched side by side in similar conditions, including the LightWave Crux zr0 cylq, Integral Designs MK1Lite, and a Sierra Designs Ultra Light Year.

Light snowstorms were not a problem. All was well as long as we banged snow off the fly from inside the tent, so that airspace was preserved between the inner and outer tents. However, during the nighttime blizzard, we had to exit the tent to shovel a few times during the night. The most serious problem of having a tent that completely collapses flat in a snowstorm is the risk of not finding it again. After day skiing away from camp during the first storm, we did indeed return to a campsite with one tent (the Akto) apparently missing. A few pokes of an avalanche probe found the tent, but a more serious issue occurred: moisture from the collapsed outer fly wall of the tent completely soaked the inner tent – and a down sleeping bag. The whole scenario proved to be a reasonably frightening experience, not because the occupant was at risk of hypothermia, but because he had to share a sleeping bag with a fellow that snores quite loudly.

Hilleberg Akto Tent REVIEW - 5
The Akto’s generous vestibule scores big on foul-weather livability.

Ventilation / Condensation Resistance

Notwithstanding the Akto’s abundant venting options, the tent is of course still subject to significant condensation buildup in the right combination of conditions. However, the tent’s design allows for reasonable moisture management that is on par with other tents in its class.

The Akto’s lightweight nylon inner tent is a refreshing departure from the full-mesh inner tents that are now becoming the industry standard on ultralight three-season tents. Because the nylon inner tent constitutes a legitimate second “wall” it provides far more protection from condensation droplets, and is significantly warmer than tents with mesh inner tents. Consequently, the Akto is an excellent choice for a cold weather double wall tent. The downside of this design feature is that air doesn’t move as freely throughout the shelter and therefore, the Akto runs the risk of overheating in warm conditions. While camping in July in Yellowstone National Park, with overnight temperatures in the 50’s and mosquitoes buzzing all about while a light rain fell, closing the vestibule just a small bit turned the inner tent into a rather uncomfortable sauna, and we were wishing for a little more mesh for ventilation! But since the Akto is billed as a four-season tent, it’s probably unfair to ding it badly on its suitability for warmer summer conditions. The heat retention and condensation protection of the inner tent’s full fabric construction make it particularly well suited for fall, winter, and spring camping (assuming you don’t get buried in heavy snowfall).

Hilleberg Akto Tent REVIEW - 6
Large end vents offer excellent ventilation, but are difficult to adjust from inside the tent (you have to adjust them from inside the vestibule).

Ventilation is easily controlled in the Akto by a very large vestibule and zipper that can be opened at least two-thirds of the way while still protecting the inner tent from hard rain. Two vents in the end aid in airflow, and help keep condensation on the fly to a minimum when a light breeze is present. They work well – when cooking in the vestibule (with the vestibule closed) we could feel cool air being drawn from the end vents and chimney vented out the vestibule’s upper eyebrow vent.

Hilleberg Akto Tent REVIEW - 7
Eyebrow vent maintains its shape with the aid of a wire stay.

Durability

The Hilleberg Akto has proven to be a very durable tent. After several months of use in very stormy fall, winter and spring conditions, we experienced no durability issues whatsoever. Once, just for kicks, three of us decided to glissade down a 400-foot snow slope on the Akto’s flysheet. It was exciting – double-silicone coated nylon is a very fast material! And the flysheet suffered no damage, which was remarkable considering the terrible abrasion potential of spring corn snow. (A similar exercise with the PU nylon-coated fly sheet of a Sierra Designs Flashlight tent pretty much ruined that tent forever with holes and rips.)

Value

At $355, the Akto is a comfortable and well-constructed solo tent that shines in all conditions except huge snow loading. It is the best spring/fall and low-snow winter solo tent we’ve ever used. That alone makes it worth the money.

Recommendations for Improvement

  • Simplified pitching that reduces the number of stakeout points on the ends.
  • Adding two small hoop poles at the ends and a single guyline on each end at the apex of these poles would significantly improve snow loading and ease of pitching.

Tips

Practice pitching the Akto at home before you have to do it in a storm – this tent requires some familiarity to maximize performance and minimize pitch time. Once you become familiar with its quirks however, it really does provide a fairly effortless pitch, and would be among our top choices for weathering sustained rain and wind.

It’s not the best choice as a solo shelter where heavy snows are likely, but can be managed well enough with a bit of effort.

Finally, the extensive and moderately convoluted guyline system can make unpacking and sorting things out a bit of a hassle. If you take the few necessary seconds to wrap the guylines in rubber bands, or rigging them in a knotted coil, before packing the tent in its stuff sack, this ceases to be an issue and makes set up quick and painless even in tough conditions.

GoLite Virga Rain Jacket SPOTLITE REVIEW

6 ounces! 80 bucks!

Overview

For Fall 2006, GoLite introduces the Virga rain jacket, a simple jacket with few features, and weighing in at a mere 6 ounces. The limited features of the Virga include a full front zipper and storm flap and that’s about it for high-end components. The rest of the jacket uses absolute minimal features to keep the weight as low as possible and includes elastic cuffs, elastic closures on the hood, no hem closure, no pockets, and GoLite’s Alchemy 2 waterproof/breathable fabric. And perhaps best of all, the Virga carries an attractive price tag – only $80.

Alchemy 2 is GoLite’s lightweight entry into waterproof/breathable fabrics. It has a ripstop nylon face fabric with DWR treatment, a microporous hydrophilic PU coating and a silk protein inner layer added to enhance vapor transmission and prevent clamminess. Breathability specifications on the Alchemy2 fabric indicate it is less breathable than eVent or Gore-Tex XCR, but more breathable than the Nanolite fabric in the new Sierra Designs Isotope. Alchemy2 has a breathability spec of 10000 g/m2/day, while eVent is 28000, Gore-Tex XCR is 21000 and the Sierra Designs Nanolite is 3000.

We saw an early Virga at the recent Outdoor Retailer Winter Market, but have not had one in the field yet. The fit seemed quite good on my torso, with generous sleeve length and pretty good torso length. The photo at right is a size large on a 6’4" frame. The simple hood closure consists of a two inch elastic section on each side of the hood. There are no adjustments in the hood, and it will not be as secure as more adjustable hoods in really nasty weather. If you are facing into a driving rain, it seems likely that some moisture will sneak in the sides of the hood, and the hood itself may blow off your head in heavy wind. There is no closure system or adjustments in the hem – something I don’t mind at all as I rarely use this feature on most jackets. We will take the Virga out into the field this summer and report on its performance and durability. The Virga will be available in the fall and at only $80 is quite a deal. With the Virga, GoLite has created an attractive new option for ultralighter’s looking for waterproof/breathable rainwear.

Features and Specifications

  • 6.0 oz (170 g) as measured, men’s size L; Manufacturer’s specification, 6.0 oz (170 g)
  • Full length zipper with storm flap
  • Elastic hood closure (one elastic section at each temple)
  • Elastic cuffs
  • No hem closure at waist
  • Alchemy 2 WPB fabric
  • No pockets
  • MSRP $80

Specifications Alchemy2 Fabric

  • 60 g/m2 fabric
  • Waterproof to hydrostatic head of 10,000 mm
  • 10,000 g/m2/day breathability
  • DWR Treatment
  • 100% Ripstop Nylon Face fabric with microporous, hydrophilic printed PU coating backing.

Sierra Designs Isotope Rain Jacket SPOTLITE REVIEW

Full featured rain jacket that is under 6 ounces.

Overview

Among our staff, the Sierra Designs Isotope rain jacket at 4.4 oz was the talk of the show at Summer Outdoor Retailer. Since then it gained an ounce, but is still under 6 oz. Even better it has features that one would expect in a jacket twice its weight.

Changes in Nanolite line from summer OR

  • Uses a more waterproof fabric* (see fabric specs below)
  • Isotope weight goes up 25% (4.4 oz summer OR to 5.5 oz current version, due probably to a more waterproof fabric)
  • Hoodless version, the Neutron jacket, dropped from the line

Even with an ounce weight gain, the Sierra Designs Isotope is still the lightest waterproof/breathable fabric rain shell on the market. Sierra Designs targets the jacket for what 95+% of US outdoor enthusiasts carry a rain jacket for. That is, short shower protection and done-in-a-day activities. Kudos to Sierra Designs for doing this for under 6 oz and for well under a hundred bucks. Compared to over priced, stripped down rain jackets designed for hardcore adventurers and climbers, the Isotope also has all the features that the average outdoor hiker expects — two zippered hand pockets, a full length front zipper with storm flap, and a full drawcord at the hem and hood opening. The jacket is as supple as many ultralight windshirts and compacts to a small size. I can stuff a large Isotope in my pants pocket.

The compromise? The Isotope’s fabric has only 800 mm waterproofness (many WP/B fabrics are around 10,000 mm). Sierra Designs claims that the Isotope jacket is made for light to short rain so don’t expect it keep you dry in a day long downpour. We found the recent version of the jacket kept water out with the exception of leaking pocket seams. The jacket should be reasonably waterproof all round once Sierra Designs corrects this problem in the next production run.

Since summer OR, we’ve had a chance to test two versions of the Sierra Designs Isotope Jacket. Our first sample used a less than perfected prototype fabric* (see more below) and was not completely waterproof in an hour long rainstorm. But it was a true 4.4 ounces! Since then Sierra Designs revised the fabric to have a heavier and more waterproof membrane.

The fabric revision seems to have worked. The new Nanolite fabric on our current test version is reasonably waterproof. In a hard 15 minute downpour I had no wet spots or leakage around the hood, shoulders and upper body—places that jackets normally leak. To my surprise, after about 5 to 10 minutes of good rain the bottom of the front pockets started to fill with water. Eventually the water wicked into my shirt getting it wet from the hem to above my navel. Upon closer inspection, I found that the pocket seams were un-taped. A call to Sierra Desings confirmed the manufacturing plant had neglected to tape the pocket seams on the Spring run of the Jackets. The Fall run of Isotope jackets will have taped pockets seams.

At 3,000 g/m2/day the Nanolite fabric is in the lower-to-middle of the pack for breathability. It is not as breathable as fabrics like Gore-Tex XCR or eVENT. Without any venting options other than a full length zipper this might not be the jacket for sustained uphill hiking in the rain.

The Isotope hood could use improvement. The single drawcord adjustment on the hood is difficult to operate. I had to cinch the drawcord a bit and then inch the hood fabric along the drawcord, re-cinch the drawcord, and repeat a number of times to finally close and even out the hood opening. One should probably adjust the hood at home or in camp, and then only make minor adjustments on the trail. Finally the jacket lacks a brim. For serious rain I used a billed cap in conjunction with the hood.

In summary, the Isotope trades some fabric waterproofness and breathability for weight and features. The current version of the Isotope jacket is probably a good light rain or shower jacket. For those that don’t mind a bit of leakage, it may suffice for more inclement conditions and longer periods. Once Sierra Designs fixes the leakage around the pockets in the Fall production version, it should be a much improved jacket — possibly doing a deal better in significant rain than Sierra Designs advertises.

Features and Specifications Jacket

  • Manufacturer Specified Weight: 5.5 oz (156 g) Men’s large
  • Backpacking Light test samples: 5.6 oz (159 g) and 5.2 oz (147 g) Men’s large
  • Also available in a Women’s model, Mfr weight 4.4 oz Medium
  • Price is still $89
  • Available in March 2006

Specifications Nanolite Fabric

  • 39g/m2 fabric
  • V22x17 D nylon Meryl ripstop

  • Waterproof to a hydrostatic head of 800 mm
  • 3,000 g/m2/day breathability
  • PU microporous coating on fabric. (SD claims the membrane is microporous.) After application to the fabric, the PU membrane is lightly acid etched to eat pores in the PU membrane and improve breathability. (Note: the fabric in the first demo jacket last summer failed waterproofness. The manufacturer over acid etched the fabric and it had little or no PU left.)
  • Retains 80% of its DWR after 20 washings

Redfeather Alpine 30 Snowshoe REVIEW

A heavy, all-purpose snowshoe with an excellent crampon system.

Introduction

Redfeather claims that their Alpine snowshoes are “nearly best at everything.” While I found that the stainless steel crampons of the Alpine 30 performed amazingly well, the rest of the package was lacking. At 4.8 pounds (manufacturer’s claim) the Alpine 30 was one of the heaviest snowshoes we tested and the extra weight was not justified by their overall performance in the field.

What’s Good

  • Eagle crampon system offers excellent traction in various conditions and terrains
  • Delta Hinge pivot strap provides outstanding lateral support
  • Easy on, easy off thanks to a well designed ratcheting heel strap

What’s Not So Good

  • Stiff Delta Hinge pivot system flips snow up your back and also causes the front of the snowshoe to dive, sometimes inducing falls
  • Comparatively heavy at 4.6 pounds for the pair

Specifications

  Manufacturer

Redfeather

  Year/Model

2005 Alpine 30

  Dimensions

9 in wide x 30 in long (239 cm x 76 cm)

  Surface Area

Measured surface area 224 in2 (1445 cm2), manufacturer specification not available

  Frame

6000-series aircraft-grade aluminum alloy tubing, 3/4 in (2 cm) diameter

  Deck

Hypalon II

  Binding

“Ultra Binding” – straps over the toe area and a ratcheting heel system

  Crampons

“Eagle Crampon” system – powder coated stainless steel with “Delta Hinge” pivot strap

  Weight

Measured weight 4.6 lb (2.09 kg) per pair; manufacturer specification 4.8 lb ( 2.18 kg)

  Load Rating

Up to 220 lb (100 kg)

  MSRP

$209 with Ultra binding; $199 with Pilot binding

Performance

The Redfeather Alpine 30, at 4.6 pounds (my measurement), is the heaviest snowshoe we reviewed. While loaded with features, the added weight was very noticeable during use. Below, I discuss the pros and cons of the Alpine’s features in relation to their weight.

The Redfeather Alpine 30 uses the Ultra Binding system, which is very similar to the Control Binding used on the Redfeather Trek 30. Both consist of flexible plastic side supports and a 5-inch hard plastic base. The binding is tightened with two nylon straps that cross the foot in three places: one independently adjustable strap across the toes and one strap that crosses over both the arch and the top of the foot. The flexible plastic heel strap uses a ratcheting system that is extremely easy to use, even with cold hands or while wearing over-mitts. This system consists of a short ratchet lever alongside a release. When the lever is extended fully it locks the release open, allowing quick removal of the heel strap.

Redfeather Alpine 30 Snowshoe REVIEW - 1
While the bindings of the Redfeather Alpine 30 were secure and easy to use, they allowed my heels to rotate inwards causing a pigeon-toed gait.

I enjoyed the security and simplicity of the bindings, but they caused my heels to turn towards the inside of the snowshoes and the snowshoe toes to rotate towards each other. While this “pigeon-toe” effect was much more pronounced on the Redfeather Trek snowshoe, the Alpine had similar problems. After prolonged use this began to cause knee and ankle pain in both legs.

The Redfeather Delta Hinge pivot system is basically a standard pivot strap that widens into a trapezoidal shape under the ball of the foot. On the underside, a large aggressive toe-crampon is attached directly to the same strap. The decking material is also attached to the pivot strap from behind, sandwiched between the pivot strap and bindings, which restricts the binding’s pivot range. Compared to other pivot designs, the Alpine 30’s pivot strap does not allow the snowshoe’s tail to drop sufficiently to clear snow. Rather, the tight pivot strap caused snow to be flung up my back and occasionally over my head. I can only wonder how much extra effort I expended each time a load of snow was thrown.

The limited pivot range gives the snowshoe a tendency to “dive” in soft snow. This caused me to bury the front of the snowshoe and land on my face numerous times. I had to be very aware of my feet at all times, and running was not an option. In addition, because the front of the snowshoes did not raise properly when I was performing side-hill traverses, the tail of the leading snowshoe would catch the front of the trailing snowshoe, tripping me in the process. The problem with the Delta Hinge pivot system persisted through many miles of testing by several testers.

Redfeather Alpine 30 Snowshoe REVIEW - 2
The decking on the Redfeather Alpine 30 is sandwiched between the crampons and bindings such that the decking has to stretch for the crampon/binding system to pivot. The decking between the hinge and the crampons never stretched or loosened up. This caused multiple problems including “nose-dive” and snow flinging. Notice the snow being flipped up in the right photo.

On a more positive note, the crampon system on the Alpine 30 is amazing! Another reviewer and I tested them to their limits on a section of the Timberline Trail on Oregon’s Mt. Hood. We traversed into Zigzag Canyon, a 1200-foot-deep gorge on the shoulder of the mountain. There were places where a loss of traction would mean an unplanned glissade, followed by a free-fall to the bottom. Cool, rainy days followed by cold nights during the trip meant the snow had an icy crust in some places and was slushy wet in others. These were conditions where we needed boot crampons and an ice axe, not snowshoes and trekking poles. The Alpine 30 crampons handled the situation with no problem. After learning to trust the crampons, they were the only part of the snowshoe that I didn’t have to constantly think about.

Redfeather Alpine 30 Snowshoe REVIEW - 3
The crampons on the Alpine 30 gave me the confidence to scale steep ravines and wind-packed ridges with little worries, other than my fear of heights.

As for durability, the Alpine 30 performed very well with the exception of the decking paint. The heavy duty aluminum frame along with stainless steel crampons make for very solid snowshoes, though at the price of extra weight. The only signs of wear I found after long-term use under varied conditions, were loss of paint on the decking and a slight bend to one of the toe crampons. These are not necessarily negatives. In areas where the paint rubbed off the Hypalon decking material showed little or no fraying. The damage was purely cosmetic. The bent crampon was strictly because of misuse on my part. I used these snowshoes while making rocky river crossings and while hiking on short stretches of bare dirt. An aluminum crampon would have been damaged to a much greater extent.

Redfeather Alpine 30 Snowshoe REVIEW - 4
Even after using the Alpine 30 in conditions Redfeather most likely never intended, the only damage I found was loss of decking paint and a single bent crampon.

Overall, the performance of the Alpine 30 was lackluster. I liked the ease of use of the bindings and the rock solid crampons, but I’m not willing to carry over 4 pounds on my feet when there are much lighter, and better performing, snowshoes available at comparable prices.

What’s Unique

The Eagle crampon system is rock solid and provides superb traction. They are powder-coated stainless steel, and took a beating while showing little wear.

Recommendations for Improvement

The problems I had with the Alpine 30 are tied to the Delta Hinge pivot system. Providing a cutout in the decking around the bindings and toe crampons would allow the snowshoe to pivot more, avoiding the major heel rebound and “nose-diving” problems I encountered.

Also, these snowshoes are very heavy at 4.6 pounds (in the 30-inch length). Lighter materials all around would make the Alpine 30 much more appealing.