


You don’t have access to view this content.
Denali Light: The 2009 Attempt
A light and kind-of fast expedition on one of the world’s great mountains.
A light and kind-of fast expedition on one of the world’s great mountains.
You don’t have access to view this content.
A lot to like and a great value for a 30 F rated down mummy bag weighing only 19 ounces.

The Spiral Down Hugger #3 introduces MontBell’s new Spiral Stretch System and 12 denier fabric, which together reduce the weight of a sleeping bag by 2 ounces.
Like MontBell’s existing Super Stretch System, their new Super Spiral Stretch System is unique. Basically MontBell found an alternative way to create a stretchy sleeping bag and save some weight to boot. The technology is best described in their own words: “New for 2009, MontBell has incorporated a classic tailor’s technique to address sleeping bag comfort issues. By integrating a woven fabric ‘cut on the bias’ and orienting the fabric’s warp and weft threads at 45 degrees to major seam lines, the sleeping bag becomes more fluid or elastic in nature. Additionally, ‘spring like’ crimped fibers are used in the weave of the fabric to capitalize on their inherent stretch properties.” Rather than the traditional horizontal or vertical orientation of the down tubes, they are oriented on a 45 degree angle and appear to spiral around the sleeping bag.
The new Spiral Down Hugger line also introduces MontBell’s new 12 denier Ballistic Airlight sleeping bag fabric. Switching from 15 to 12 denier fabric plus spiral construction reduces the weight of a sleeping bag by about 2 ounces. Apparently MontBell is very satisfied with the new technologies because they intend to extend the Super Spiral Stretch System across their entire sleeping bag line (available March 2010), replacing the current Super Stretch technology.
The main features of Spiral Down Hugger #3, rated at 30 F, are its spiral construction, 12 denier fabric, 800 fill power down, sculptured hood, and three-quarter-length auto-locking zipper. The manufacturer claimed weight is merely 19 ounces for size Regular and 20 ounces for size Long.
My initial reaction to this bag is: “How did they do that?” Frankly, I don’t know, but they did it, and the design works. The 5.5 inch baffled down tubes do not spiral completely around the sleeping bag as the name implies. Rather, the tubes on the top and bottom panels are oriented at a 45 degree angle but run in opposite directions. It would seem like the construction would get complicated at the hood and foot ends of the bag, but MontBell makes it look simple: the spiral construction terminates to a sculptured hood by adding one rounded chamber, and the foot end is neatly finished as well.
I have always been impressed with MontBell’s Ballistic Airlight nylon shell fabrics and Polkatex DWR finish, but the new 12 denier shell on the Spiral Down Hugger is truly remarkable. It’s the softest sleeping bag fabric I have seen, and it sheds water like a duck’s back.

The Spiral Down Hugger’s hood (left) covers the face very well. It draws easily via a simple braided cord and cordlock. On the inside, the bag has a thinly insulated flap that covers the zipper (right), rather than a puffy down-filled draft tube.
The Spiral Down Hugger has a YKK #5CN two-way auto locking zipper, which is used on most lightweight sleeping bags these days. This zipper has separate pulls on the outside and inside of the bag and automatically locks, so it doesn’t open by pulling the sides of the zipper or expanding the bag during the night. To insure that the zipper stays fully zipped, there is a Velcro tab at the top of the zipper, and the Velcro does not stick to the bag’s fabrics.
I tested the Down Hugger #3 on a number of summer and early fall backpacking trips, with nighttime temperatures ranging from 26 to 41 F. I slept under the stars and in various single wall shelters.
MontBell’s sizing is a bit different from other manufacturers; size Regular fits to 5 feet 10 inches and size Long fits to 6 feet 4 inches. I needed a size Long to fit my 6 feet/170 pound frame, and found the fit much to my liking. There is plenty of room inside to wear extra clothing to extend the bag’s warmth, but it didn’t feel too roomy. With the bag lying flat, I measured the bag’s relaxed shoulder girth at 61 inches and extended girth at 72 inches.

The Spiral Down Hugger is indeed stretchy. The left photo shows me lying flat on my back with my arms at my sides; the right photo shows the bag’s expansion with my arms raised above my chest. The benefit of a stretchy bag is the bag tends to conform to my body, so I don’t have to heat up any more inside volume than necessary.
Another remarkable finding from my testing is the bag’s zipper works almost flawlessly, meaning it doesn’t snag very easily. After recently testing a couple of bags with wretched zipper snagging problems (The North Face Beeline and Mountain Hardwear Phantom 32), it’s a pleasure to sleep in the Spiral Down Hugger. (Have you ever had the problem of having an urgent need to pee in the middle of a pitch black night, and the darn zipper snags on your bag?) As shown in the previous section, MontBell uses a thinly insulated flap over the zipper, rather than a puffy insulated draft tube. Eliminating the draft tube allows the zipper to operate more smoothly, but the zipper is not as insulated as it is in other sleeping bags.

I tested the bag’s water repellency by placing a puddle of water on the bag and checking for leakage after an hour. To my amazement no water soaked through. This was verified in my field tests, where the bag did not absorb any water when I brushed against wet tent walls.
I measured the bag’s double layer loft at 3.75 inches, which gives a single layer loft of 1.9 inches. From our table of estimated temperature ratings based on measured loft (read our Backpacking Light Position Statement on Sleeping Bag Temperature Ratings, 1.8 inches of single layer loft translates to about a 30 °F rating, so the Spiral Down Hugger #3 is on target. Please take the time to read the referenced article and note that sleeping bag warmth depends on a number of factors.
The Spiral Down Hugger #3 is not the loftiest bag around with a 30-32 F temperature rating (see comparison table below). I found its warmth to be average. In my field testing, my methodology was to wear my basic sleepwear (dry wool socks and microfleece top, bottom, and cap) inside the bag initially, then add insulated clothing later in the night if I got cold, noting the time and temperature when I got chilly. On nights when the temperature dropped down to freezing just before sunrise, I started getting chilly around 4:00 a.m. when the temperature was around 35 F. After donning my insulated clothing (or better yet putting it on the evening before), I was able to stay warm in the Spiral Down Hugger down to 26 F, and probably could have handled even colder temperatures.

The stuff sack provided is tapered and has two drawcords to stuff the bag down to bread loaf size. It’s simply too tight. In my opinion, the two drawcord design is overkill, extra weight, and overstuffing may damage the down over time. I prefer a stuff sack that does not overstuff a down bag, although it takes up a little more room in my pack.
The following table compares the MontBell UL Spiral Down Hugger #3 with some popular 30-32 F rated ultralight mummy style down sleeping bags. All of the bags have baffled construction, and the data are manufacturer specifications for a size Regular bag.
| Manufacturer | Model | Temperature Rating (F) | Single Layer Loft (in) | Weight of Down (oz) | Fill Power | Total Weight (oz) | Cost US$ |
| MontBell | UL Spiral Down Hugger #3 | 30 | 1.9 | 10 | 800 | 19 | 229 |
| Mountain Hardwear | Phantom 32 | 32 | 2.0 | 10 | 800 | 22 | 290 |
| Western Mountaineering | SummerLite | 32 | 2.0 | 10 | 850+ | 19 | 315 |
| Marmot | Hydrogen | 30 | 2.0 | 11 | 850+ | 25 | 319 |
| The North Face | Beeline | 30 | 2.4 | 10 | 850+ | 22 | 279 |
By the numbers, the MontBell UL Spiral Down Hugger compares favorably with other bags in terms of down quality, weight, and cost. It lags a bit in loft compared to the others, but its loft does meet our minimum expectation of 1.8 inches (single layer) for a 30 F rated sleeping bag. Note that its US$229 cost is a great value compared to the other bags, and its weight matches the Western Mountaineering SummerLite bag.
I really like the Spiral Down Hugger’s soft lightweight shell fabric, fit/roominess, non-snagging zipper, hood, and light weight. It’s very easy to fall in love with this bag, and it’s a great value compared to other ultralight 30 F rated sleeping bags. However, it is not quite as warm as the Mountain Hardwear Phantom 32, and definitely not as warm as the Marmot Hydrogen, which I have also tested. I have not personally tested the Western Mountaineering SummerLite. Bag sizing and the Down Hugger’s lack of a down-filled draft tube probably contribute to the differences. That said, the bottom line for me is to wear my camp clothes (wool socks, insulated jacket and pants, fleece cap) in my sleeping bag anyway, and I typically have no problem staying warm down into the mid 20’s F, so the Spiral Down Hugger #3 will do just fine.
|
Manufacturer |
MontBell |
|
Year/Model |
2009 UL Spiral Down Hugger #3 |
|
Style |
Hooded mummy with full length zipper |
|
What’s Included |
Sleeping bag, stuff sack, cotton storage bag |
|
Fill |
800 fill-power down, 10 oz (283 g) size Regular, 11 oz (312 g) size Long |
|
Construction |
Box, 5.5 in (14 cm) baffles |
|
Measured Loft |
3.75 in (9.5 cm) average double layer loft, manufacturer specification not available |
|
Claimed Temperature Rating |
30 F (-1 C) |
|
Stuffed Size |
5.3 x 10 in (13.5 x 25 cm) |
|
Weight |
Size Long tested Measured weight: 1 lb 4.9 oz (593 g) Manufacturer specification: 1 lb 4 oz (567 g) |
|
Sizes |
Regular fits to 5 ft 10 in (1.52 m), Long fits to 6 ft 4 in (1.93 m) |
|
Fabrics |
Shell and lining are 12d Ballistic Airlight nylon 0.86 oz/yd2 (29 g/m2) with Polkatex DWR. Fibers are solid core. |
|
Features |
Spiral stretch system, three-quarter-length two-way auto-locking zipper with inside and outside pulls, draft flap on inside of zipper, Velcro tab at top of zipper, sculptured hood, braided drawcord and cordlock closure on hood, tapered stuff sack with two drawcords, heat transfer logos |
|
MSRP |
Regular US$229 Long US$249 |
Lightening up on Alaska’s classic mountaineering route.
Editor’s Note: This feature originally ran in Issue 10 of Backpacking Light Magazine (print version).
For many of the one thousand registered climbers, Denali’s West Buttress is the ultimate extension of their years of backpacking. But after several seasons on the mountain, I am surprised at how quickly lightweight tactics get kicked to the curb on this grueling 13,000-foot ascent. Most climbers on the route barely move under towering packs supporting crushing loads of seventy-five pounds or more. Sadly, this seems to be the norm, something you just have to endure if you want a shot at the top of North America. In 2007, Agnes and I put together a little experiment to see if that’s the hard truth.
The goal of our Denali Light Expedition was to combine equipment and techniques from ultralight backpacking and alpine climbing to execute a safe, self-sufficient, and most of all enjoyable ascent of the West Buttress in fourteen days. Our project did not include prior acclimatization: we took two weeks to properly acclimate and move up the mountain, just like everyone else. We also employed the standard expedition tactics of moving our supplies up the mountain in carries. This practice is also critical to helping the body acclimate before moving to a higher camp. After a lot research, planning, and tough decisions, our pack weights dropped down to just twenty pounds. On the mountain, we cruised between camps, clocking a mere three hours where others typically report twelve. We moved unencumbered and arrived in camp feeling fresh. It was too bad that a mega-storm system shut down the upper mountain for over two weeks. Our fourteen-day itinerary ended after seven days sitting at the 14,300-foot basin camp with three failed attempts to move higher.
To keep in the spirit of our experiment, I pared down the camera kit to the bare minimum. On past expeditions, I have hauled a complete selection of lenses, lights, and accessories for two Nikon camera bodies to meet the needs of an assignment. For this project, I selected the Nikon E8400 as my sole camera. This ‘mini digi’ had everything I needed to produce high quality publishable images from our project. The Nikkor ED glass produces crisp images with good contrast and color saturation. The camera’s true optical 24-85mm lens (135 format equivalent) is appealing to someone who prefers wide-angle lenses. The 8MP size produces publishable full-page images in a RAW format.
| Nikon E8400 w/ battery | 16.5 oz |
| Spare battery | 2.5 oz |
| CF card x2 | 1 oz |
| Ultrapod | 1.5 oz |
| Total for kit | 21.5 oz |
Click on any of the photos below to view them in a gallery.

Clouds swirl over the South Face of Denali as seen from the landing strip on the Southeast Fork of the Kahiltna Glacier, in Denali National Park and Preserve, Alaska. Over a thousand climbers attempt to reach the mountain’s 20,320-foot summit during the peak months of May and June. Denali is the highest mountain in North America.

May 21, 2007 Our minimalist Stephenson Warmlite 2RL set-up next to more serious expeditions at Camp One (7800 feet) on the lower Kahiltna Glacier. Even without a single guy line, the 2.75-pound Warmlite sheds wind and snow like a champ. But if that sort of thing makes your palms sweat, the 11.5-pound Trango 3.1 (background) sports dozens of tie downs.

May 22, 2007 Multi-purpose, plain, and simple was the key to our cooking system. All our meals were just-add-hot-water, allowing us to bring one four-liter aluminum pot for melting snow. The MSR XGK stove provides the BTUs required to melt large quantities of dry snow in a short amount of time at high elevations.

May 22, 2007 Climbers endure high winds at the Camp Two (11,000 feet) basin. Gusts to sixty miles per hour put our shelter system to the test early in the trip, giving us confidence to move higher on the mountain.

May 19, 2007 Agnes Stowe ‘lugs’ her entire kit up Motorcycle Hill, a steep 700-foot climb above the 11,000-foot camp. Our heaviest days were those where we moved to the next camp. In addition to our entire set-up, we also packed food and fuel for four days during these moves.

May 25, 2007 Climbers ascending to Windy Corner while on their ascent of Denali’s West Buttress. Most parties, including ours, make two trips around Windy Corner to cache supplies before moving to the 14,300-foot basin camp. This also helps with acclimatizing.

May 30, 2007 Agnes Stowe gets breakfast going while hunkered down at the 14,300-foot basin camp on Denali’s West Buttress. We employed an 8 x 10-foot Integral Design Siltarp as an oversized vestibule. It served the dual purpose of a cooking shelter in high winds that brought wind chill values off the chart and provided shade during the heat of the day when temperatures can reach over 100 degrees in the tent. Sometimes these two extremes exist only hours apart.

May 28, 2007 Agnes Stowe celebrates her 25th birthday at the 14,300-foot basin camp. No birthday cake here, but a big bowl of chocolate fudge pudding with a couple of candles was a good substitute, not to mention lightweight.

May 28, 2007 Climbers pick over supplies being given away by descending teams at the 14,300-foot basin camp, also known as Barter Town. Groups heading down the mountain try to ditch excess food and gas to lighten their loads for the long haul back to the Kahiltna Glacier landing strip. Coveted items are unopened cheese or butter, anything with processed meat, and unused pee bottles.

May 31, 2007 Climbers gather around Mark Dzikowski, of Alberta, Canada to listen in on the nightly weather report at the 14,300-foot basin camp. Weather forecasts are broadcast nightly at eight o’clock for different areas of the mountain.

May 29, 2007 Packed for our move to the 17,200-foot high camp, Agnes Stowe ascends to the steep headwall at 15,500 feet on Denali’s popular West Buttress route. High winds combined with cold temperatures to create a double whammy that turned us back three times from making high camp.

May 30, 2007 Towering loads make their way up to the steep headwall at 15,500 feet on Denali’s West Buttress route. The average pack weight on a West Buttress trip sits at sixty-five pounds.

June 1, 2007 Climbers ascend the steep headwall at 15,500 feet where the National Parks Service maintains ropes to aid climbers in reaching the ridge crest at 16,200 feet. Fixed ropes and permanent pickets are located at all the technical sections, leaving you to provide basic gear in case of a self-rescue situation. Many climbers carry excessive amounts of technical gear with miles of cord, numerous screws and dozens of heavy carabiners.

June 2, 2007 After two weeks high on the West Buttress, we returned to Kahiltna International and a cache of post-trip goodies; a pound and a half of thick cut bacon, a fifth of tequila, and lemon-lime Gatorade for margaritas. Agnes gets busy while we wait for a pilot.

June 2, 2007 Climbers crash out at the Kahiltna Glacier landing strip after an all night descent from the 14,300-foot camp on the West Buttress.
| Matt’s | Agnes’s | ||||||||||
| CATEGORY | ITEM | BRAND | MODEL | WORN | PACK | CATEGORY | ITEM | BRAND | MODEL | WORN | PACK |
| FOOTWEAR | Shell Boots | LOWA | Denali Plastic Boots | 65.2 | FOOTWEAR | Shell Boots | Koflach | Degre Boots | 60.6 | ||
| Insulating Boots | Intuition Sports | Denali Liners | 10.8 | Insulating Boots | Intuition Sports | Denali Liners | 7.6 | ||||
| Camp Boots | Outdoor Research | Camp Mukluks | 15.2 | Camp Boots | N/A | 14.8 | |||||
| Gaiters | Outdoor Research | Expedition Gaiters | 12.2 | Gaiters | Outdoor Research | Expedition Gaiters | 9.6 | ||||
| Liner Socks | Smartwool | Liner Socks | 3.5 | 3.5 | Liner Socks | SmartWool | Liner Socks | 2.6 | 2.6 | ||
| Socks | Smartwool | Socks | 4.0 | 4.0 | Socks | SmartWool | Socks | 3.2 | 3.2 | ||
| Vapor Barrier Socks | Integral Designs | Vapor Barrier Socks | 2.4 | Vapor Barrier Socks | Integral Designs | Vapor Barrier Socks | 2.4 | ||||
| TREKKING CLOTHES | Bottom Base Layer | Patagonia | Activist Tights | 8.6 | TREKKING CLOTHES | Bottom Base Layer | Patagonia | Lightweight Capilene Bottoms | 6.6 | ||
| Bottom Shell Layer | Marmot | Full-Zip Precip Pants | 10.4 | Bottom Shell Pants | Patagonia | Dimension Pants | 20.2 | ||||
| Top Base Layer | Patagonia | Lightweight Capilene Tee | 4.5 | Top Base Layer | Patagonia | Midweight Capilene Tee | 3.4 | ||||
| Top Mid Layer | Lowe Alpine | Midweight Top | 8.4 | Top Mid Layer | Patagonia | Capilene 2 Zip Neck | 5.0 | ||||
| Top Insulating Layer | Mountain Hardwear | Windstopper Fleece | 23.0 | Top Insulating Layer | Mountain Hardwear | Windstopper Fleece | 20.0 | ||||
| Top Shell Layer | Patagonia | Spector Pullover | 6.8 | Top Shell Layer | Patagonia | Spector Pullover | 6.2 | ||||
| Warm Hat | Wigwam | Stocking Hat | 2.0 | Warm Hat | Smartwool | Hat | 2.4 | ||||
| Base Layer Gloves | Patagonia | Liner Gloves | 1.2 | Base Layer Gloves | Patagonia | Liner Gloves | 1.2 | ||||
| Shell Gloves | Black Diamond | Shell Gloves | 3.4 | Shell Gloves | Black Diamond | Shell Gloves | 3.4 | ||||
| Eye Protection | REI | Glacier Glasses w/Case | 4.6 | Eye Protection | Smith | Empire Sunglasses w/Case | 2.6 | ||||
| Bottom Base Layer | Patagonia | Tights | 8.6 | Bottom Base Layer | Patagonia | Midweight Capilene Bottoms | 9.0 | ||||
| Bottom Insulating Layer | Monbell | UL Inner Down Pants | 7.2 | Bottom Insulating Layer | Montbell | UL Inner Down Pants | 5.8 | ||||
| Top Base Layer | Under Armour | Long Sleeve | 7.8 | Top Base Layer | Under Armour | Long Sleeve | 6.0 | ||||
| Top Mid Layer | Patagonia | Capilene Midweight Long Sleeve | 7.2 | Top Mid Layer | Patagonia | Capilene Midweight Long Sleeve | 6.0 | ||||
| Top Insulating Layer | Patagonia | Micro Puff Pullover | 12.0 | Top Insulating Layer | Patagonia | Micro Puff Pullover | 10.8 | ||||
| Top Insulating Layer | Sierra Design | Down Parka | 27.0 | Top Insulating Layer | Montbell | Ventisca Down Parka | 26.8 | ||||
| Face Protection | Mountain Hardwear | Balaclava | 1.4 | Face Protection | Seirus | Balaclava | 2.6 | ||||
| Face Protection | Columbia | Neck Gaiter | 1.5 | Face Protection | Comfort Skins | Neck Gaiter | 1.2 | ||||
| Eye Protection | Uvex | Goggles | 6.0 | Eye Protection | Bolle | Goggles | 5.4 | ||||
| Shell Gloves | Outdoor Research | Mittens | 10.2 | Shell Gloves | Mountain Hardwear | Subzero Down Mittens | 11.0 | ||||
| Liner Gloves | Black Diamond | Liner Gloves | 2.2 | Liner Gloves | Patagonia | Liner Gloves | 1.2 | ||||
| TREKKING GEAR | Self Arrest Ski Poles | Black Diamond | Whippet and Ski Poles | 20.6 | TREKKING GEAR | Self Arrest Ski Poles | Black Diamond | Whippet and Ski Poles | 20.6 | ||
| Ice Axe | C.A.M.P. USA | 70cm XLA 210 | 10.0 | Ice Axe | C.A.M.P. USA | 60cm XLA 210 | 8.8 | ||||
| Crampons | Black Diamond | Sabretooth | 33.8 | Crampons | Black Diamond | Sabretooth | 36.2 | ||||
| Harness | Black Diamond | Alpine Bod | 14.0 | Harness | Black Diamond | Alpine Bod | 17.8 | ||||
| Carabiners | C.A.M.P. USA | Nano x6 | 7.2 | Carabiners | C.A.M.P. USA | Nano x6 | 7.2 | ||||
| Ascenders | Petzel | Tibloc x2 | 2.8 | Ascenders | Petzel | Tibloc x2 | 2.8 | ||||
| Runners | Mammut | Spector 24″ Sling x2 | 1.3 | Runners | Mammut | Spector 24″ Sling x2 | 1.3 | ||||
| Ice Screws | Black Diamond | 4″ Express Screw x2 | 5.6 | Ice Screws | Black Diamond | 4″ Express Screw x2 | 5.6 | ||||
| Rope | BlueWater Ropes | 8.8mm x 60m | 48.0 | Rope | BlueWater Ropes | 8.8mm x 60m | 48.0 | ||||
| Snow Picket | MSR | 24″ Snow Picket x2 | 14.0 | Snow Picket | MSR | 24″ Snow Picket x2 | 14.0 | ||||
| Snowshoes | Northern Lites | Backcountry Rescue | 43.0* | Snowshoes | Northern Lites | Backcountry Rescue | 43.0* | ||||
| Shovel | Snowclaw | Guide Aluminum | 12.0 | Shovel | Snowclaw | Guide Copolymer | 6.2 | ||||
| Avalanche Probe | Mammut | Probe | 7.0 | Water Bottle | Nalgene | Softside Bottle x2 | 15.6 | ||||
| Water Bottle | Nalgene | Softside Bottle x2 | 15.6 | PACKING GEAR | Backpack | GoLite | Gust w/Straps (S) | 20.0 | |||
| PACKING GEAR | Backpack | GoLite | Gust Pack (M) | 20.0 | Sled | Paris Company | Big Boggan w/Bag | 84.0* | |||
| Sled | Paris Company | Big Boggan w/Bag | 84.0* | CAMPING GEAR | Shelter | Integral Designs | Siltarp2 | 16.0 | |||
| CAMPING GEAR | Tent | Stephenson | Warmlite 2RL | 44.2 | Stakes | SMC | Snow Stakes x7 | 9.0 | |||
| Sleeping Bag | REI | Sub Kilo -20, Regular | 60.0 | Sleeping Bag | REI | Sub Kilo -20, Short | 57.0 | ||||
| Sleeping Pad | Therm-a-Rest | 3/4 UL | 15.4 | Sleeping Pad | Therm-a-Rest | 3/4 UL | 15.4 | ||||
| Insulating Pad | N/A | Blue Foam Pad | 8.4 | Insulating Pad | N/A | Blue Foam Pad | 7.8 | ||||
| Bowl | Nalgene | 32 oz Container | 10.3 | Stove | MSR | XGK w/Kit | 20.0 | ||||
| Eating Utensil | Lite-My-Fire | All Purpose Utensil | 2.5 | Cooking Pot | Open Country | 4L | 11.4 | ||||
| Water Bottle Insulation | Outdoor Research | Bottle Parka x2 | 18.4 | Bowl | Nalgene | 32 oz Container | 8.3 | ||||
| Fuel Bottle | MSR | 33 oz | 15.6 | Eating Utensil | Lite-My-Fire | All Purpose Utensil | 2.5 | ||||
| MISC GEAR | Repair Kit | Duct Tape, Nylon Patches, Sewing Kit, Therm-a-Rest Repair Kit, Clamps | 6.0 | Water Bottle Insulation | Outdoor Research | Bottle Parka x2 | 18.4 | ||||
| Pee Bottle | Nalgene | Canteen | 2.2 | Fuel Bottle | MSR | 33 oz | 15.6 | ||||
| Reading Material | Book | 2.0 | MISC GEAR | First Aid Kit | Homemade Kit | 4.0 | |||||
| Camera | Nikon | E8400 w/Battery and Cards | 21.5 | Toiletries | Dr Bronner Soap, Toothbrushes, Toothpaste | 6.0 | |||||
| CONSUMABLES | Food | 14 Days | 411.9* | Pee Funnel | Freshetta | 1.0 | |||||
| Fuel | 1 gallon Container | 128.0* | Reading Material | Book | 2.0 | ||||||
| Water | 1 Liter | 32.0 | CONSUMABLES | Food | 14 Days | 411.9* | |||||
| Total Weight | oz | lbs | Fuel | 1 gallon Container | 128.0* | ||||||
| Total Weight (Worn/Carried) | 390.4 | 24.4 | Water | 1 liter | 32.0 | ||||||
| Total Base Pack Weight | 355.8 | 22.2 | Total Weight | oz | lbs | ||||||
| Total Weight Consumables (Sled) | 571.9 | 35.7 | Total Weight (Worn/Carried) | 316.9 | 19.8 | ||||||
| Total Initial Weight (Pack + Sled) | 927.7 | 58.0 | Total Base Pack Weight | 345.0 | 21.6 | ||||||
| Full Skin Out Weight | 1318.1 | 82.4 | Total Weight Consumables (Sled) | 571.9 | 35.7 | ||||||
| Total Initial Weight (Pack + Sled) | 916.9 | 57.3 | |||||||||
| * Cached at 11,000 ft camp with one day of food | Full Skin Out Weight | 1233.8 | 77.1 |
The stated goal wasn’t to make everything else a little bland, but this trip was beyond the pale. And yes, everything else IS just a little bland afterwards.
This was the first Wilderness Trekking II course offered by BackpackingLight, advertised as a primer for thru-hikers with world class instructors Andrew Skurka and Glen Van Peski. The class was treated to an amazing trek the length of the Wind River Range in Wyoming, crisscrossing the continental divide several times over high mountain passes. Travel was both on and off trail, traversing glaciers, late summer snow packs, and talus. As a final treat, we crossed Texas Pass to view the Cirque of Towers and climbed Wind River Peak. Every member of the class will treasure their memories of that singular experience, for, as one friend commented after seeing pictures of the trip, “It makes everything else a little bland.”
As with all BPL courses, the participants were encouraged to exchange ideas before coming to Bozeman. Enrollment for the class started off slowly, but some, like Joe and Pat, got a head start and actually met at Philmont Scout Ranch in New Mexico. They selected topics about the Winds in order to develop a short presentation to share with the group during class, and topics ranged from the wildlife to the geology of the region. The night before the course, the group planned to meet at Montana Ale Works, a local restaurant, for some pre-trip carb loading. This turned out to be a great way to introduce ourselves and share our anticipations and a few reservations about the upcoming trek. It’s not hard to spot fellow backpackers, and we all found our way to the same table. Lisa, Matt, Todd, Pat, and Joe passed the time with good food, cold beer, and conversation that could have gone on most of the night. Alas, our chauffeur, Ryan Connelly, arrived to take us to Lion’s Ridge, a cozy mountain retreat in the forest outside of Bozeman.
On Sunday, we met upstairs first thing in the morning to start getting ready for our adventure in the Winds, with one additional member. Lars had missed out on the night before, so we filled him in on names and faces. Mike Clelland, Backpacking Light’s course coordinator, introduced the instructors. In addition to Andrew and Glen, we also would have Sam Haraldson joining us for the second half of the trek. We quickly got to work, weighing gear and ensuring every item in our packs was truly necessary. Postage scales dotted the room so that we could carefully weigh each item before making the decision to carry any additional ounces. Food was distributed for breakfast and supper and was combined with the snacks/lunch we brought, then carefully weighed as well. Demonstrations for the day included bear bag hanging and Mike’s famous poo-poo class. We finished the afternoon session by selecting items to carry in the first aid kit. We were especially mindful of foot care items, which would come in handy the second week. After all the choices were made and the gear packed and put away, we were treated to a slide show and presentation about planning Long Distance Excursions by Andrew. We saw how he used his maps, planned his routes, and formulated his meticulous spreadsheets and data books – it all added up to many hours of work, all required for a successful adventure.
We were up early on Monday and anxious for the walking to begin. Packed, with breakfast eaten, we filed into an old school bus piloted by Ryan C. We had a bumpy seven-hour ride ahead of us, and we wanted to get to the trail by mid-afternoon. Lunch was a stop at grocery store with an amazing deli. It had a Chinese hot bar and a sushi bar that made plates to order. After lunch, we rolled through Jackson Hole Wyoming and got a great view of the Tetons. We were impressed, but we had no idea that this was just a sample of the sights that were in store for us.
At around 4:00, we arrived at Trail Lake Trailhead. Dry and dusty, it didn’t look like much.
That changed as Andrew guided us up Glacier Trail. We came to a good-sized stream crossing within the first few turns and scattered up and down the bank, looking for a way to cross without getting wet. Crossing streams and wet marsh areas quickly became a common event, belying the trailhead’s dusty introduction. As we gained 2,800 feet in elevation, the scenery grew more and more spectacular. As twilight settled, we did too, choosing a bench near Arrow Mountain. We were not near water, so we all raided our snack supplies to make a supper.
At first light, we broke camp and headed out to find a source of water and therefore breakfast. We walked up on two other backpackers who were finishing a trip, and while we would see a few other travelers in the Winds, they were few and far between. Breakfast was enjoyed beside a glacial lake. Gear was laid out to dry under the bright sun, and Andrew demonstrated an alcohol stove and caldera cone. After breakfast Glen and Andrew gave a demonstration on how to pack up in the morning with an emphasis on efficiency rather than speed.
At lower elevations, the trails are used by horses. Their hooves leave the damp trails in pretty rough shape. After a couple of hours of stumbling over softball size rocks and dirt clods, Andrew suggested we travel off trail. We approached our first major obstacle – the Dinwoody Creek. “Creek” is a misnomer, as all the group saw were rocks, rapids, and fast moving water. Although Andrew assured us we could ford, the group decided to travel along the river and find a more comfortable place to cross. A slower moving section was located after a short hike, and everyone got to try something new: swimming with a pack on their back. Well, almost everyone. Glen is so tall that he just walked across!
After the swim, the group split, with the idea of meeting at Upper Inkwell Lake. Following vague trails and steep terrain, several of us went ahead to set up camp. There are literally dozens of lakes in the area, and it was hard to be certain that we were at the right lake. Given that, the two groups missed each other and ended up spending the night apart at separate lakes.
The next morning, Wednesday, Glen told his group that he and Andrew had discussed going over Scenic Pass during the day’s hiking. So Glen, Pat, Matt, Joe, and Todd decided to head for the pass and wait for Andrew’s group. Meanwhile, Andrew, Lars, and Lisa thought it best to stay put – they were confident that they were at the right lake and assumed that the others would realize their mistake and find them. After waiting patiently at the lake for a bit, Andrew decided to take a leisurely run through the area looking for Glen’s group. On the way, he encountered some climbers that had camped at Echo Lakes and confirmed that the other group had not camped there. While Glen’s group was eating breakfast at the pass, these same climbers approached and informed them of Andrew’s search for them. After a brief hike back down, Glen’s group came across Andrew running through the woods. They all headed to Inkwell Lake to find Lisa and Lars comfortably waiting and watching fish jump out of the water. We used this situation as a valuable learning opportunity on many levels, but most importantly on map reading and route finding.
Andrew decided to have members of the crew take turns as navigator to help improve these skills. Joe was the first “volunteer” and was handed the map and given a destination. Being from the east and accustomed to well-maintained hiking trails, this was a challenge. With help from Andrew, Glen, and Pat, he managed to navigate across a ridge and up to a snow pack. He was probably the most surprised person in the crew when he eventually reached the correct destination. His navigation skills improved to the point that he became comfortable finding routes and locating positions on maps.
That night, our goal was Moose Lake. It’s funny how maps and terrain all begin to look alike. We were sure we had found Moose Lake no fewer than three times, and yet each time we crossed another ridge, there was another lake that could fit its description. Even Andrew and Glen were baffled by the similarity of the series of lakes. Switching to a larger scale map helped to locate us and prevent further confusion, and we enjoyed a tasty supper and made camp, falling to sleep quickly and deeply.
Thursday would be our first big climb. The route headed above treeline and approached the Continental Divide. We passed glacial lakes, snow packs, and talus fields. The air got thinner and the views more breath-taking. We finally reached the top of North Indian Pass and were greeted by spectacular views of our next challenge – Knife Point Glacier and South Indian Pass. While the climb up was challenging, the trip down the other side was thrilling. Each of us got to experience “screeing” down a rock slope: balancing on your feet and letting the loose scree carry you along. At the bottom, we decided to clean up and go swimming. Glacial lakes are cold, no matter how bright the sunshine, but the result is a briskly refreshing dip in clear, turquoise water. After a short nap on the warm rocks, we started to climb up to a bench for supper and camp. The night was spent at the base of Knife Point Glacier and a roaring river of near freezing water.
Friday morning was highlighted by the crossing of South Indian Pass by way of Knife Point Glacier. Knife Point is among the largest grouping of glaciers in the Rocky Mountains and walking on a permanent slab of ice and snow was a real treat. Our afternoon consisted of heading for an overnight camp near Barbara Lake about five and a half miles from the re-supply point, where Glen would leave us and Sam would take his place.
Waking before dawn on Saturday morning, we packed up what little trash we had and prepared to hike to the designated trailhead. In a tearful revelation, one of our fellow trekkers, Lars, told us of his plans to leave the expedition. Lars was struggling physically – he had lost his appetite and had “the runs,” arriving at the Switcheroo with over half of his food uneaten. He was concerned that should this continue, there would be no good place for him to bail out, and his condition was unlikely to improve on the trail. Sharing good-byes and shivering in the chilly morning air, we left Lisa at Barbara Lake with most of our gear. She volunteered to stay behind with the extra gear, to rest, to save room in packs for the coming week’s worth of food, and to lighten the others’ loads. Matt, Todd, Joe, Lars, Andy, Pat, and Glen bolted for the trailhead near Fremont Lake, about an eleven-mile round-trip from our campsite. After a couple of miles, Pat treated a hot spot on his left foot that would slowly morph into a full-blown blister. The parking lot at the trailhead was crowded with cars, horse poop, and conventional backpackers overloaded with what looked like literal tons of gear.
Experiencing the tiniest bit of front country after six days in the backcountry was a strange feeling. We arrived at the trailhead at 9:30 a.m. and met an energetic Sam Haraldson: hyped-up on caffeine and waiting for us with decadent doughnuts. Sam also had food, fuel, Aqua Mira, and miscellaneous materials for our resupply. After repacking, we said our last goodbyes to Lars and Glen, slathered on sunscreen, and charged back down the trail to rendezvous with Lisa around midday. The group outdid themselves racing down the trail and back, something that would haunt us a few days later. The day ended with ten more miles back up into the high country, and we all were tired and footsore by evening.
While the pace of the first half of the trip was fueled by enthusiasm, the second half was tapered by blisters and weariness. Pat’s came first – a hard to treat blister on the ball of his foot. Dr. Skurka’s foot clinic was officially opened each morning, payment in anything edible cheerfully accepted. First we tried superglue, which didn’t work. Leukotape alone seemed to make things worse. At one point, when we thought infection was imminent, we discussed exit strategies for medical attention. We finally hit upon the solution – triple antibiotic ointment, gauze bandage, leukotape and mole skin. Once Pat’s foot was on the mend, Joe appeared at the doctor’s door with the same ailment. Could blisters be contagious? At least we now had a solution that worked.
Breaking throughout the day to check on blisters slowed our pace, yet we all continued on as a now well-oiled team. In order for the group to make any progress, we had to learn to get water together, have snacks ready, adjust layers, and we even tried to time our “bio breaks” in sync!
The next couple days were shorter in mileage, adjusting for a longer in-camp breakfast and an earlier evening camp. This gave us time for an evening campfire, which further enabled us to get to know one another. Our group was diverse in ages and backgrounds, yet we all shared a common goal and bond – lightweight backpacking. The campfire discussions were sometimes serious, often educational, and occasionally hilarious. The same can be said for the campfire building, but that’s a whole ‘nother story.
On Sunday, not only did we have a “double pass” day, we also tried to outrun a thunderstorm. The morning started with Angel Pass and was followed shortly by Hay Pass. We then skirted a rather large lake and headed for a saddle and Boulder Creek Valley. The skies were darkening, but we thought we could miss the rain. We all scampered along the talus as the winds picked up and the temperature dropped. We were treated to some raindrops and chilly weather, but we managed to miss the worst of it. This was to be our only thunderstorm, although we did get sprinkled on a few more times.
By Tuesday, blisters were on the mend, and we could pick up the pace a little. First, we headed to Bonneville Basin, then on to the Washakie Drainage, where we caught our first glimpses of the backside of the Cirque of the Towers. We got to camp a little later – a nice spot along Washakie Creek and were treated to a blue and gold sunset. We decided to forgo the campfire in order to get up early head for the Cirque.
Wednesday and Thursday were the scenic highlights of the trip. Wednesday started with a hike up the often sheep-infested drainage to Texas Pass. It looked harder that it was – a well defined use trail helped us along. Now if only we had a way to get more oxygen! This was one of our highest passes at 11,400 feet.
The Cirque is an amphitheater of vertical walls, jagged peaks, and pointed spires – all with whimsical names like Wolf Head, Shark’s Nose, Warbonnet, and Pingora. We sat in amazement and digested the beauty for a couple of hours before heading down to Lonesome Lake. Our armpits told us it was time for another bath, so we all jumped in for a brisk but refreshing – and much needed – clean-up. Once dry, we continued down the drainage to a camping spot that would put us in striking distance to Wind River Peak – our grand finale at 13,192 feet.
To say the climb went on forever would be an understatement, though we knew it had to stop at SOME point. The clear air made landmarks appear closer, the lack of oxygen made for a snail’s pace. The airplane-like views from the top were well worth it, though, and we enjoyed a long and well-deserved rest. We thought it an appropriate place for a final group photo, and just as we had finished, a NOLS group arrived at the top (with much larger packs!). They were kind enough to take a few more photos of the group. We discovered that they were a Wilderness Medicine Institute Course and were all doctors. Thankfully, we didn’t need their services and headed on. “It’s (literally) all downhill from here!” we all thought as we set off.
After fourteen miles or so of horse-trodden trail, we paused just short of the parking lot along the east bank of the Popo Agie Creek and began to unwind. We found a picnic area at the trailhead that would be the setting for our last trail supper. Just as we finished eating, reminiscing, and suggesting, Ryan and the magic schoolbus pulled up. We loaded the bus, opened all the windows, and began the drive back to Bozeman. After nearly two weeks of scrambling on rock and hiking off trail, it felt a bit creepy to step off the bus at an all-night convenience store and set foot on a flat surface. It’s not something you’d notice living in a city, but flat surfaces are largely a human artifact. No other creature feels an apparent need to level terrain.
A microwaved cheeseburger temporarily satisfied Pat’s craving for protein, and we stayed overnight at a flatlander’s camp to sleep under the stars on a levee beside the Wind River. Motorhomes, travel trailers, and generators to power televisions and light up the night – dependencies we had briefly escaped – crept back into our reality. The grassy soil along the river bank cradled us all to eventual, pensive sleep. Up at dawn and eager to reintroduce restaurant foods, we made our way to Thermopolis for a pig-out-style breakfast at the local diner. The long ride back to Bozeman was filled with recollections of the trail, stories of what we would do back home, and card games. At times, the bus fell silent as we pondered the separation of the strong fraternity that had developed during the trek. A lunch stop at the grocery in Livingston, Montana was almost surreal. Scanning the grocery aisles, some saw only inedible packaging concealing something within. The produce department, bakery, and delicatessen finally turned up items that could be visually enjoyed and eaten. You couldn’t help notice the stares and distance most of the other shoppers gave us; the wilderness aromas had left us unapproachable. Finally, the welcome sight of Lion’s Ridge was a homecoming of sorts.
On Saturday afternoon, we all gathered with Mike Clelland and Jamie Hunt upstairs at Lion’s Ridge. Everyone raved about the experience and gave even higher praise for all three of the instructors. It was agreed that the beauty and grandeur of the Winds was the perfect backdrop for this course. The remoteness of the area required us to rely on our skills to remain both safe and comfortable. We were forced to find our direction and routes solely from map and compass, without clues from trails and signage we would have come across in many other locations.
There were a few suggestions offered to help improve the course. The first was to take steps to ensure that all participants were physically up to this type of expedition. This is a very strenuous course, and each person involved should be in top condition in order to travel 143 miles at high elevations over such rugged terrain.
Finally we were free to head to the showers. Water never felt so good. Dirt that was earned honestly washed down the drain, and without two weeks’ of facial hair, familiar faces we had known just two weeks before were still somehow changed from our experience. A little more skilled, but more connected with both the land and each other. With cleaner clothes and fresher smells, we headed out to celebrate our reentry into the civilized world. We gathered where it all started: Montana Ale Works, for one last meal among friends that had experienced an unbelievable odyssey. Recounting the trip with smiles and laughter, we shared great food and cold beer. The evening ended with goodbyes in the parking lot. We each went our separate ways, but we will always be connected by our Wilderness Trekking experience.
|
|
|
|
|
|
|
|
|
|
|
|
|
|
|
|
|
|
|
|
|
|
|
|
|
|
|
|
|
|
|
|
|
|
|
|
|
|
|
|
|
|
|
|
|
|
My expectation for a small game rifle is to be able to shoot a very small and compact group on a target at 25 yards or less, and the Pak-Rifle makes my heart beat faster.
The Pak-Rifle weighs 16 ounces and shoots 0.22LR shells, which weigh less than 0.11 ounces apiece. If one is trekking through areas where upland birds and small game abounds, then adding 20 ounces of rifle and shells can allow you to spend many more days in the backcountry than what might be possible simply by carrying all of your own food. A similar argument can be made for an ultralight fishing kit. Consequently, equipment that can be used for foraging and hunting deserves some consideration for trekkers undergoing longer journeys in remote locations where food weight might become prohibitive and resupply logistics are challenging.

The Pak-Rifle is more than capable of bringing down small game: rabbit, squirrel, turkey, fawn deer, and in the case of this trek in Montana’s Bridger Mountains, a blue grouse – arguably the finest tasting of all small game animals.
I am a hunter. Thus, I make no judgment about the ethical use of firearms in the backcountry, and I support the advance of technologies that allow for their legal and responsible use. I see the ultralight rifle as a tool for the hunting enthusiast that desires to reduce their weight carried in the backcountry, or for the long distance trekker interested in reducing their weight of food carried by improving their foraging, hunting, and fishing options. Use of a rifle may not be permitted in all jurisdictions, and I do not condone the breaking of laws that prohibit their use under any circumstance. Further, the purpose of this review is to provide the reader with an understanding of how the rifle may be used in a hunting context, and I make no judgments about its appropriateness, effectiveness, or utility as a weapon for self-defense. I do not carry the Pak-Rifle for self-defense. It is strictly a tool for hunting small game, and its primary purpose in my kit is to allow me to reduce the amount of food weight I have to carry while on a long distance trek.
My expectation for a small game rifle is to be able to shoot a very small and compact group on a target at 25 yards or less. To put this in context, 25 yards is about the distance I am able to get in proximity to the “larger” end of small game that can be killed with a 0.22LR bullet (porcupine, fawn deer, sage grouse), while most other small game can easily be approached within 10 yards or less (e.g., blue grouse, squirrel, rabbit). Because most 0.22LR rifles are designed with longer barrels and no small amount of weight distributed throughout the gun, their accurate range is often much greater than 25 yards.

The Pak-Rifle’s rear peep sight is entirely sufficient for small game hunting at close range. An aftermarket 4 x 20 scope can also be attached and is available from the manufacturer.
Because the Pak-Rifle is so light and subject to movement caused by the user while aiming (unless the rifle is mounted on a bipod, which I deem to be unnecessary for its intended context), its accuracy beyond 25 yards may be less so than a conventional 0.22LR rifle. However, with practice, its accuracy at 25 yards or less appears to be superb (even with its nonadjustable rear peep sight), and I’m easily able to consistently shoot a two-inch grouping in a target while shooting patiently from a sitting position with one elbow braced on my knee. At closer range, that grouping becomes tighter of course (< 1 inch at 10 yards), and affords me the ability to shoot most small game and upland birds in the head to minimize damage to the choicest parts of the animal's meat.
Of course, use my accuracy test with a grain of salt. The only thing it really tells you is how well one particular rifle (my sample), and one particular shooter (me) shoots, from a relatively unstable position (sitting). Maximum accuracy will always be gained on a bipod, or from a bench rest, or from a prone position, and it was outside the scope of this review to provide detailed accuracy data. My experience with the Pak-Rifle is that its light weight makes it a little less accurate (in my hands!) than a conventional .22 rifle at long distances (> 40 yards) when I was standing or sitting, but that at close range (< 25 yards), I found no difference in a Pak-Rifle versus a conventional 0.22 in my ability to shoot accurately (or inaccurately, as the case may be!).
I think the use of peep sights on a rifle this light is entirely appropriate. Other options include both ghost and open sights. Ghost sights, used on combat guns for rapid sighting, would provide faster time-to-fire (and probably greater accuracy) for large game that is moving, but would be unnecessary for small game that is hunted while still (the most common scenario I’ve encountered while small game hunting). I prefer peep sights rather than open sights, although admittedly, peep sights require a little bit of research and training to use most effectively.
In comparison to a conventional 0.22 rifle (which weighs three to five pounds), the act of carrying the 16-ounce Pak-Rifle in one hand while trekking is simply joyous. When I carried my conventional rifle, I first stowed it along the side of my pack in a side pocket, with the compression straps of the pack securing the rifle to the side. Then, upon encountering game, I would have to unsaddle my pack, retrieve the gun, load the gun, get into position, etc. I eventually made a stock holster that allowed the butt of the stock to be seated into a small holster affixed to my hip belt, with a strap on my shoulder strap that secured the gun while I was hiking, so I could use trekking poles.
However, that was a cumbersome solution, more appropriate for hunting big game with heavier rifles than small game. Consequently, when I am actively hunting when trekking, I simply forgo trekking poles and carry my rifle in hand. With a heavy gun, this is a laborious chore. With the Pak-Rifle, carrying the gun all day in one hand is almost inconsequential with respect to trekking comfort, and doing so keeps it ready at all times. The end result: with the Pak-Rifle I am able to shoot more game and be a more effective hunter.

The Pak-Rifle breaks apart into two pieces that are each about 17 inches in length.
The Pak-Rifle is a breakdown rifle that separates at the chamber by rotating the barrel off the rest of the gun as it disengages a release pin. The result is that the original length of the gun (33 inches) can be collapsed into two parts that are less than 17 inches in length. Consequently, the Pak-Rifle is easily stored inside just about any ultralight pack, which is useful on busy trails where carrying a gun might intimidate others that you encounter on trail. I try to be as sensitive as possible to others while I carry a gun. Many of our local trails close to home are frequented by families with children, and I often find that carrying a gun is a barrier to engaging conversation when I meet them on the trail. Thus, I really like that I can stow the gun and keep it hidden while on the trail, focusing my primary hunting in more remote locations where I don’t expect to encounter other folks.
The Pak-Rifle offers a few neat usability features. My favorite is that the hand grip is actually a hollow chamber with a screw cap closure for storing shells (I can fit about ten or so 0.22LR shells inside the handgrip). The screw cap is removable and weighs 0.16 oz. A few dozen more rounds can be stowed in the butt stock tube, but accessing it requires a flathead screwdriver to remove the aluminum butt.

The chamber inside the hand grip is accessed by a screw cap and can accommodate about ten 0.22LR shells.
The other feature worth noting is an LED barrel light that is sufficient to hunt at night at very short range (< 10 yards). I find it immensely useful for rabbit hunting. The LED light is removable and weighs 0.3 oz.

The LED barrel light is useful for hunting rabbits at night, but is removable if you’re a gram counter.
The processes of loading, cocking, firing, and discharging the empty shell casing are all incredibly simple affairs and review of such can be found in the following video:
Other features sold as aftermarket accessories offered by the manufacturer include a laser sight and a 4 x 20 scope (both include mounts). I haven’t had the opportunity to test these accessories, but would be quite interested in equipping the Pak-Rifle with a scope for extending my range a little (although it’s important to realize that for a rifle like this, the use of a scope is probably more a matter of personal preference than utility). Then again, there is something to be said about the low bulk, minimal weight, and simplicity of the stock rifle, and therein lies much of its appeal to me as an ultralighter. The laser seems to me to be more of a toy accessory for the non-hunter, or for the weasel hunter interested in attracting the animal to very close range (based on evidence of my use of lasers with my cat). I can’t imagine the laser being useful as any sort of aiming device for the backpacking hunter.
The Pak-Rifle is manufactured from aluminum, carbon fiber, stainless steel, and cromoly.
The receiver and most accessory parts are manufactured from aluminum, while most fasteners and parts subject to high wear are manufactured from stainless steel. The barrel is made of carbon fiber and has a cromoly liner (that part of the barrel through which the bullet travels). Carbon fiber is also used for the tube that comprises the butt stock of the rifle. The end result is a rifle that is as light as possible, with durable components (stainless steel and cromoly) in the most essential areas. The only reservation I have about durability is the use of a thin-walled carbon fiber tube for the butt stock. The rifle will require some care in handling and stowage to prevent the stock from cracking or breaking. I do not see this as a significant limitation or design flaw, however. The tube can easily be replaced if needed, and the stock weight (which comprises only a remarkable 1.26 oz of the rifle’s weight!) is too appealing to consider heavier materials, given the target context for the Pak-Rifle.
As is, the Pak-Rifle is a simple, ultralight, and thus rather remarkable incarnation of a small game rifle. However, I can foresee the temptation to make a few modifications to achieve the absolute lightest possible 0.22LR shooter available: removal of the butt stock, shortening the barrel, eliminating the breakapart option, and eliminating the light. The result would be a 0.22LR gun that would be 13 inches in length and quite probably, less than 12 ounces. However, such modification might be illegal in some countries or states, since the gun as modified might then be classified as a pistol. Further, making these changes would reduce its accuracy and possibly limit its most useful range to 15 yards or less.
The advantages of a small game rifle in general are many in terms of its philosophical ability to allow a trekker to extend the length of their expedition by minimizing food carried and hunting game en route. The unique advantages of the Pak-Rifle relative to other small game rifles, and especially, other 0.22LR rifles, include:
The limitations of the Pak-Rifle are few. In fact, I think the short list below is a bit of a stretch since these items address issues that would not necessarily be unique to an ultralight rifle:
I have few recommendations to improve the design of the Pak-Rifle. I do believe that no more than 0.5 oz could be spent on increasing the durability of the carbon butt stock tube, reengineering the shape and size of the aluminum butt stock tube cap, and making the cavity inside the butt stock tube accessible without using a screwdriver. As is, however, the Pak-Rifle is far and away the leading option for the ultralight aficionado interested in hunting small game while trekking.

In addition to being a competent small game gun, the Pak-Rifle is a terrific introduction for the child learning to shoot. The Pak-Rifle doesn’t have a safety, so it requires more rigorous safety protocols when handling and, of course, adult supervision. Here, my son Chase practices on a water bottle target in the Uinta mountains of Utah.
Sure, it’s lighter than its DSLR brethren, but it’s also heavier and bulkier than its compact cousins. Does it offer improvements to justify carrying the additional weight and bulk?
The rapid evolution of digital photography has spawned so many cameras capable of producing technically outstanding images that we have taken it for granted. The result is that we spend more time peeping at pixels, MTF charts, and plots of dynamic range performance with Stouffer Step Wedges than we do learning how to capture presentation-quality photographs, or learning how to digitally develop them in a way that allows the printed or web-based versions to show off the camera’s capabilities and (as importantly) the photographer’s vision.
For me to investigate the technical minutiae about high ISO noise reduction, the sharpness of the veins on a leaf ten yards away from the lens, or whether the sensor can capture 8.5 stops vs. 9.2 stops of dynamic range at its optimum ISO is a bit like delineating whether an alcohol stove on our kitchen counter uses 0.45 oz of fuel per pint of boiled water or, God forbid, a ghastly 0.50 oz of fuel per pint.
To drive this point home, I captured images of several landscape scenes with a Sigma DP2, Olympus E-P1 (with its m.Zuiko 17/2.8 lens), and Panasonic GF1 (with its Lumix 20/1.7 lens), and produced 16 x 20 enlarged prints from each camera1.
And at first glance, I couldn’t tell the difference between any of them! Not in dynamic range, not in detail resolution, and not in color rendition. In fact, the differences were so minor that I had to spend several minutes investigating the images with a loupe before I was able to make any meaningful conclusions about image quality. At first this surprised me, so I showed a sample set of the images to Sam Haraldson and Addie Bedford, my officemates, and their conclusions were the same as mine.
Here are those conclusions:
Producing high-quality 16 x 20 prints from 35mm (or smaller) film cameras with consumer grade lenses, or from digital cameras with small sensors, is nearly impossible. The fact that any of these images (which all come from sensors 5-10X larger than the sensors in compact cameras, but from cameras that weigh a pound or less!) can compete with each other at a 16 x 20 print size is thus a remarkable achievement in digital photography, and one that easily exceeds any expectations that most of us backpackers have for image production. Further, that a 4.7MP image from the Sigma DP2 produced images with more detail and aesthetically pleasing colors than either the E-P1 or GF1 is even more remarkable, and a testament to the fact that Sigma’s gamble on using Foveon sensors in their cameras may continue to have long-term competitive significance.

Several 16 x 20 print enlargements were made from several competing cameras to investigate (primarily) detail resolution and (secondarily) color tone, dynamic range, and noise.
Thus, it is in this context, especially after comparing large prints between comparable cameras, that I am reviewing the Olympus E-P1. Sure, it’s lighter than its DSLR brethren, but it’s also no small bit heavier and bulkier than its compact cousins. Consequently, for me to upgrade to a camera like this for backpacking purposes, it must offer substantial improvements in areas other than image quality in order to justify carrying its additional weight and bulk. In addition, the fact that the smaller Sigma DP2 and its similarly-positioned Panasonic GF1 produce images that seem to be better than those produced by the Olympus E-P1 means that the E-P1 has a steep hill to climb in order to find its way into my pack, to replace my Sigma DP2, which until now, has sat alone in its ability to produce technically outstanding images among any other camera and lens combination that weighs less than a pound.
The Olympus E-P1’s unique feature is that it is a member of a very small number of cameras that hold the distinction of being among the lightest interchangeable lens cameras available. They are both lighter and smaller than DSLRs, while appearing to offer the creative flexibility of using interchangeable lenses and offering image sensor sizes similar to those found in DSLRs.
The following table compares the body, lens, and system weights of the few cameras that currently occupy the niche defined by a compact body size and mid-sized sensor (i.e., a sensor that is significantly larger than those found in most compact cameras, while significantly smaller than a full frame (24mm x 36mm) image sensor).
Weight Comparison of Selected Camera Systems (Compact Size, Mid-Sized Sensors)
| Type | Body | Body (including Battery) Weight | Lens | Lens Weight | Total System Weight |
| DSLR | Olympus E-450 | 15.0 oz | Zuiko 25/2.8 | 3.7 oz | 18.7 oz |
| Interchangeable Lens Compact | Olympus E-P1 | 13.4 oz | m.Zuiko 25/2.8 | 2.6 oz | 16.0 oz |
| Interchangeable Lens Compact | Panasonic GF1 | 12.3 oz | Lumix 20/1.7 | 3.5 oz | 15.8 oz |
| Interchangeable Lens Compact | Ricoh GRX | 6.6-7.1 oz (est.) | GR 50/2.5 | 9.3 oz | 15.9-16.4 oz (est.) |
| Integrated Lens Compact | Leica X1 | 11.0-11.5 oz (est.) | Leica Elmarit 24/2.8 | Incl. in body | 11.0-11.5 oz (est.) |
| Integrated Lens Compact | Sigma DP2 | 10.5 oz | Sigma 24/2.8 | Incl. in body | 10.5 oz |
The controversial Leicaphile Erwin Puts probably has a leg up on digital photography image quality – and more important, image quality context – than most of us:
“…colour reproduction is a science and a complicated one. It is very difficult, at least in my opinion, to make general statements about the colour quality of a specific camera. A reviewer can present as much factual evidence as one can handle, but subjective conclusions should be used very sparingly.” – from Puts’ website, Tao of Leica.
I would say that the same context could be applied not only to color, but also to dynamic range, noise, and detail resolution. Most important, I would use my subjective conclusions about the image quality of the Olympus E-P1, as I conveyed earlier when comparing the character of its image quality to that of the Sigma DP2 and Panasonic GF1, as Puts would say himself, sparingly!
The most important question, then, is one that I must ask myself, and provide an answer from my own perspective only:
Does the Olympus E-P1 provide image quality (with any lens) that is substantially better than my much lighter and more compact Sigma DP2 that would justify me carrying its additional weight and bulk?
Fortunately, my analysis of the E-P1’s images both on screen and in print reveal an answer to that question that is a simple, but not necessarily resounding: probably not.
That’s not to say that the E-P1 is incapable of producing technically outstanding images. Quite the contrary. It’s just that the DP2 can hold its own quite well, and for the type of photography that I am most interested in (landscapes of the places through which I walk, and the activities of the people that I’m walking with, such as camping, cooking, and fire-chatting), I prefer the character of the DP2 images (which feel moodier, with richer color, more dimensionality – like film, but sharper) than the character of the images from the Olympus E-P1 (which feel duller, more digital-looking, flat, and rather sterile – sort of like the images from every other digital camera out there).
Finally, I would like to close this discussion of image quality with two considerations. First, when assessing the image quality of a camera, consider what the out-of-camera JPGs might look like (or, for the RAW aficionado, what the RAW files look like with minimal processing such as white balance, tone curve, and exposure correction). This is the area where I am most critical of the E-P1 relative to the DP2, and why I feel the latter looks more like a high quality film and why the former looks like every other digital image out there.
The second consideration is how a photo developer might feel about the RAW images coming out of the camera. The photo developer is that person who spends hours in a darkroom (either chemical or digital) tinkering with image color, contrast, bypass techniques, or push processing to take what the camera has captured to film (or sensor) and create something that reflects the developer’s unique vision. To that end, I think the Olympus E-P1 will satisfy most developers, even relative to the Sigma DP2. My criticisms with the E-P1 images from a developer’s standpoint is that I believe the sensor inadequately captures the color and detail (relative to the DP2) that gives the developer of E-P1 files less latitude than what is at the disposal of the developer of DP2 files, which is remarkable when you consider that E-P1 files offer nearly three times the pixel resolution of DP2 files.
Other important criteria to assess when reviewing a camera are those things that contribute to a camera’s accessibility: its size, weight, simplicity, and ease of use.
The Olympus E-P1 creates images that seem to be as technically sound as those of a larger compact DSLR, for marginally less size and weight (e.g., the nearly-as-small-and-light Olympus E-450). However, it does not appear to be capable of creating images that are technically superior to the significantly more compact and lighter Sigma DP2. Thus, we’ll have to look elsewhere for justification for the size and weight of the E-P1. Its unique feature (relative to the Sigma DP2, at least) is its ability to use interchangeable lenses (see “Versatility” below). Since the use of interchangeable lenses has virtually no bearing on its “accessibility” (in fact, one could argue that an interchangeable lens camera is less accessible than a fixed lens camera due to added weight and bulk, and most certainly, is more complicated), trying to make the argument that the Olympus E-P1 offers unique “accessibility” features relative to the entire camera market seems a bit of a stretch.
The real question to be asked relative to how the Olympus E-P1 stacks up to other options is this: for the additional size and weight, does it offer benefits in simplicity and ease of use? To answer this question, let’s walk through the mechanics of taking photographs with the E-P1.
The E-P1, like just about every other digital camera out there, offers fully automatic operation (lens focus, exposure metering, and ISO) that simply requires that you turn the camera on and press the shutter button. That’s a good thing, because you’ll appreciate automatic control for certain situations (opportunistic candids and inclement weather), and of course, it’s valuable to the photographic novice while they are learning the technical skills of manual photography.
In addition, the E-P1 offers a plethora of customization options, artistic functions, and creative options that I have no intention of documenting in this review (you can read about them elsewhere), and in fact, I will build a case about why this sort of complexity is inconsistent with my ethos of simplicity that lies at the core of my lightweight backpacking philosophy.
For now, however, I’d like to explore the Olympus E-P1’s ability to be responsive and intuitive for a discriminating photographer who desires manual control of key operations (focus, exposure control, and ISO), as well as access to key functions of particular importance that might be employed intermittently but not infrequently, including the toggling of shooting modes, the adjustment of exposure compensation, the separation of autoexposure lock (AEL) from autofocus lock (AFL), and use of the self-timer.
Most digicam users are baffled by having manual focus as a benefit. With the speed of autofocusing lenses ever increasing, and the accuracy of autofocus becoming more successful with each new generation of autofocus sensors and motors, it might seem that the utility of manual focus is fading.
Most DSLR users gave up manual focus (for the most part) long ago and seem rather happy to have done so. To promote manual focus as a benefit of a contemporary digital camera may seem a little akin to either photosnobbery or marketing suicide. But on a camera that touts manual control as a benefit (e.g., the Ricoh GRD and its successors, the Sigma DP1/DP2, and the Olympus E-P1), the mechanism by which a lens is manually focused is an important one. Here’s why.
One important reason to be able to manually focus a camera is that it decreases the time you have to hold your camera up to your eye and disrupt the actions (and reactions to the camera) of human subjects while zone focusing. This is important to me in backpacking photography, because I like to hike with people (not just myself!) and I enjoy capturing their candid reactions to wilderness travel.

Zone focusing allowed me to capture this image from my hip with the Sigma DP2, without reaction from my very cold and wet packrafting companions while we recovered from hypothermia in the Bob Marshall Wilderness.
Zone focusing is the act of setting your focus manually (often while the camera hangs down at your hip) to an approximate distance between your camera and the desired subject, then lifting the camera to your eye, snapping the photo, and immediately dropping it. One modification of zone focusing that requires a little extra time (depending on the quality of your camera’s autofocus vs. your skill at manual focus) is that of making microadjustments to the focus while the camera is held to your eye. Zone manual focusing is the fastest technique for shooting, is an essential one to learn for capturing the candid mood of a scene with human subjects at close range, and is commonly used in photojournalism, documentary, and street photography.
But is zone focusing important in “backpacking photography”? If your primary subjects are static mountain vistas and posed photos of your trail partner by mileage signs, then the answer is a resounding “no.” However, if part of your photographic style depends on capturing candid moments of those you are hiking with, I’d encourage you to master the technique of zone focusing and use a camera with a manual focus process that allows for it.
So, back to the E-P1. Let’s discuss how the E-P1’s manual focus process works.
Built into the camera’s firmware is an option called “MF Assist,” or “manual focus assist.” MF Assist is a process by which turning the manual focus ring of the lens sends a signal to the camera body to “do something.” That “something” on the E-P1 is the triggering of an enlarged (e.g., 7X or 10X) view on the LCD of the part of the image that you are trying to focus on. The idea is that at 1X magnification, the LCD screen cannot resolve enough detail to provide you with accurate focus, but at 7X or 10X magnification, the pixel resolution provides sufficient resolving power that allows you to manually focus the lens with accuracy. The process is simple and works well.
In addition to having MF Assist triggered by the movement of the focus ring on the lens, the E-P1 can also enter (and exit) the MF Assist mode through a series of button pushing (this is the only way you can manually focus third party manual focus lenses with the E-P1, including Leica M-mount lenses, since their manual focus rings cannot communicate to the E-P1 body), but this particular process severely interrupts the normal workflow of image capture, and I can’t recommend it for anything other than landscapes and other still subjects2.

This series of images illustrates the progression of focusing manually with the E-P1 in combination with lenses that adhere to the Micro Four Thirds standard (i.e., lenses for which MF Assist is activated by turning the focus ring on the lens). The top view shows the image out of focus at its normal magnification. Once the lens focus ring is turned, the camera automatically enters MF Assist mode (middle view, at 10X magnification), which is a magnified view of the subject that can be used to manually focus the lens. Pressing the shutter button halfway exits MF Assist mode and returns to normal LCD magnification (bottom view), at which point in time the scene can be reframed and the image captured.
Having used both Leica and Voigtlander rangefinders since the 1980s, I found the manual focus of the E-P1 to be vastly inferior in both usability and speed, and I cringe whenever the comparison is made between a rangefinder and the Olympus E-P1. I even pulled out my old Canon AE-1, my first manual focus SLR (and quite inferior to my Leica M6 in terms of manual focus ability), and found myself yearning for even its poorly lit viewfinder and through-the-lens focus view.
In spite of these limitations to MF usability and speed, the E-P1 relies on centering the focus subject when using MF Assist3, much like a rangefinder. So, the process of taking a photo is similar: center the subject you want in focus, manually focus the lens, reframe the composition, and take the shot. The effectiveness of the process is limited primarily by the poor quality of the LCD (low resolution and dim screen in bright light). Other reviewers universally criticize the limitations of the E-P1’s LCD screen. Manual focus is not currently coupled to any external viewfinder that Olympus offers, so for now, it remains a crippled and tedious process that relies on the photographer viewing the LCD.
Regardless of these limitations, accuracy is quite good using MF Assist. Consequently, while its complicated usability (entering a zoomed screen, finding the subject, focusing on it, zooming out, reframing, and then snapping the photo) and slow speed (accurate focus requires, sometimes, several iterations through the desired focal plane) disqualifies the E-P1 as a reasonable camera for manually focusing candid photographs of moving subjects (especially since there is no feedback on either the lens or the viewfinder for zone focusing distances, like there is on the Sigma DP1/DP2), it does not disqualify the use of manual focus when you have the time and patience to fiddle with it, as in the case when shooting static scenes. I still find the feature useful, but only for more creative shots at wider apertures where complicated foregrounds or mid-range subjects fool the autofocus sensors and algorithms of the E-P1, as in the image below.

Here’s a scene that fooled the autofocus sensor of the E-P1. I used MF Assist to focus on a plane of grass just beyond the two or three foreground grass stalks, giving the image a very shallow depth of field that faded smoothly to the background grasses.
When comparing the Olympus E-P1’s manual focus ability to that of the Sigma DP2, notable differences exist:
In general, manual focus is a more enjoyable experience on the Sigma DP2, requires very little fiddling, and is intuitively operated by a dedicated thumbwheel. Unfortunately, the low quality LCD screen of the DP2 makes fine focusing less accurate at wide apertures and close subjects than with the E-P1. While the E-P1 can be fine focused to a high degree of accuracy, the process is more practical for slow photographers who have the patience to fiddle with it. Both fine and coarse focusing seem faster with the Sigma DP2.
In addition to full auto (iAUTO), program shift (P), scene (SCN), artistic (ART), and video modes, the E-P1 offers, most importantly, aperture priority (A), shutter priority (S), and manual (M) modes. These modes are toggled by a thumbdial that sits on the top left of the camera. The dial is recessed into the top plate of the camera (which some will say contributes to the E-P1’s aesthetic appeal and pocketability, perhaps) and thus is adjustable by sliding the knurled dial with your thumb. It’s more difficult to use with cold fingers than traditional protruding mode dials because you can only operate it with the thumb, instead of a thumb and forefinger.

A comparison of the mode dials between the Olympus E-P1 (top) and the Sigma DP2 (bottom). The Sigma DP2 hides most of its non-shooting related functions in a menu activated by setting its mode dial to SETUP, a brilliant feature. The Olympus E-P1 doesn’t have a particularly complex mode dial, certainly, but the camera’s simplicity could certainly be improved by discarding the gimmicky ART, SCENE, and iAUTO modes, and adding a SETUP mode to the dial. As a photographer with only a rudimentary understanding of exposure control, I still yearn for a digital camera that discards P and S modes and gives the shooter the options to shoot in full manual (M) or aperture priority (A) modes. The result would be the replacement of the mode dial with a shutter speed dial (with control of aperture on a lens ring), with an A setting on the shutter speed dial that would allow the camera to enter its aperture priority mode.
In contrast to the E-P1’s eight shooting mode dial positions, the Sigma DP2’s seven positions are a little different. In addition to P, A, S, M, and video modes (modes that also exist on the E-P1), the Sigma DP2 offers an audio capture mode and a setup mode. My suspicion is that few of us are interested in a dedicated audio capture mode as a core camera feature, and I wish Sigma would drop it in favor of a more capable video mode. However, that’s a small thing. A much bigger thing is Sigma’s brilliant SETUP mode. The SETUP mode is engaged for activating the camera’s setup menu – those functions that are rarely used (fourteen menu items are allocated in this mode). The benefit to this is that the resulting main camera menu that is engaged upon pressing the menu key while in a shooting mode is limited to essential functions related to shooting. The result is a vastly simpler menu system that gets big points for ease of use, something that seems completely foreign to Olympus, Panasonic, Canon, and Nikon these days. The E-P1 is no exception, and we’ll address its menu system later on in the review.
I long for the days when cameras were cameras instead of computers with lenses. Exposure control was managed by dials with tactile feedback and easily readable visual labels rather than by complicated configurations of nested button presses that lacked intuitive use and are nigh impossible to operate in the dark or with the LCD screen turned off (to save batteries while in the backcountry).
Manufacturers like to think they are appeasing us by offering so-called “multi-function” dials that spin and click and are capable of doing many different things. This does not seem to me to be a step in the right direction, but rather quite a lot more than a stone’s throw in the wrong direction from the simplicity, speed, and visual and tactile feedback of the dedicated shutter speed dials and lens aperture rings of yesterday. Well, yesteryear.
Adjusting aperture in either A or M modes on the Olympus E-P1 is a simple affair. A very usable thumbdial (with, thankfully, no button press option!) on the back of the camera allows one to easily change apertures. The dial is difficult to use with gloves, but easy to use with cold fingers. Unfortunately, visual feedback of the aperture value is limited to viewing on the LCD screen, but the poor quality of the LCD screen in bright light makes determination via visual feedback difficult.

The upper thumbdial (silver dial in the upper right) is the primary exposure controller on the Olympus E-P1, and is used to adjust aperture in A mode, shutter speed in S mode, and aperture in M mode. It works well, offers good tactile feedback, is located in the right location, and thankfully, doesn’t have a dual use function as a depressable button. The lower thumbwheel, however (black ring at lower right surrounding the AF, ISO, WB, frame advance, and OK buttons) is an ergonomic disaster that is difficult to use in normal environmental conditions, and frustrating with cold fingers. The wheel is extremely difficult to rotate without pressing one of the other feature buttons (i.e., AF, ISO, WB or frame advance).
Adjusting shutter speed in S mode is exactly the same as adjusting the aperture in A mode – you simply use the upper thumbdial. However, setting the shutter speed in M mode is a less simple and more aggravating affair, since the upper thumbdial is allocated to the aperture setting. Instead, a lower thumbwheel is used. Unlike the upper thumbdial, the lower thumbwheel has four clickable buttons embedded underneath it (up, down, right, and left), and these buttons are easily pressed accidentally while rotating the dial, thus opening the door to accidentally (and often, unknowingly) adjusting the ISO, AF mode, WB, or frame advance/self-timer. This lower dial provides poor tactile feedback due to a very small contact surface area and low relief knurlings and is thus nearly impossible to operate correctly with cold fingers. This was the single most maddening control that I experienced on the E-P1.
Adjusting ISO on the E-P1 is as simple as Olympus wants you to make it, or as complicated as you would like to choose to make it (sic). It requires that the ISO button be pressed once (note: the ISO button is the “up” button underneath the lower thumbwheel) to enter the ISO selection mode, followed by one of three ways to actually adjust the ISO (yes, three – no kidding – either the upper thumbdial, the lower thumbwheel, or the left/right buttons), and finally, pressing either the OK, Fn, playback, menu, info, exposure compensation, on/off, or half-pressed shutter buttons to confirm your selection4.
In addition (hang with me, we’re almost done), you can change ISO by pressing the menu button, scrolling down to the custom setup menu (which you have to activate elsewhere through more button pushes, since it’s not a default menu), button down to one of nine menu choices, then button down to one of another ten menu choices, and then select your ISO setting. Be careful, though, because the same buttons that allow you to confirm your ISO selection as described previously don’t work the same in this menu!
Oh, wait! There’s one more option for changing ISO. Pressing the OK button while in shooting mode activates so-called “Quicksets” or “Quick Menus.” Using this method, the selection, setting, and confirmation of ISO is only as little as four to ten clicks away!
What choices we have for selecting something so simple as ISO! It’s like being able to take one of ten different but intersecting (and unsigned) trails to the same destination!
This technical “brilliance” (sic) in usability is not limited to the setting of ISO, of course. Similar paths can be chosen for AF mode, white balance, frame advance/self timer, and a host of other functions. Manufacturers will tout all of this as a usability feature, while the plethora of options and configurations and paths confuse beginners (“Why do we need to do this so many different ways?”), confound the pros (“Why do we need to do this so many different ways?”), and baffle those of us that place an extremely high priority upon simplicity and elegance of operation and design (“Why do we need to do this so many different ways?”). It makes me think that the usability engineers that designed these functions first selected one way of doing it, found that their focus groups couldn’t figure it out, so they added another dozen ways in the hopes that random and chaotic button clicking might eventually reach the desired result5.
And herein lies the primary problem with today’s digital camera design philosophy, which is almost universal among Panasonic, Olympus, Canon, Sony, and Nikon: feature vomit. And let me tell you, the E-P1 is bathed in it from head to toe, and it stinks.
Thankfully, there is a dedicated and clearly labeled ISO button, so the process is not too painful once you familiarize yourself with the camera. But the real pain is in knowing that there are at least three other ways to set the ISO, and these other ways complicate the menus and operation of the camera because they compete with your intelligence when you are searching for other functions buried in the menus that are not deserving of their own buttons.

How to set ISO on the Olympus E-P1. I cannot imagine, for the life of me, how any usability engineer could look at this diagram (which is entirely accurate) and feel pride in their ability to simplify the setting of a function that has such a fundamental impact on the quality of your photograph and type of exposure you create.
Adjusting exposure compensation is thankfully, a great deal simpler than adjusting ISO, and there are only two ways to do it (which is one too many, ahem). Next to the shutter button sits a small exposure compensation button (+/-). To set exposure compensation, you simply press this little button with your index (shutter) finger, and while holding it down, scroll the upper thumbdial left (to underexpose the image) or right (to overexpose it). As soon as you select the setting you want, you simply release the shutter finger from the exposure compensation button, and you’re ready to shoot.

Adjusting exposure compensation with the E-P1 requires that you hold the exposure compensation button on the top of the camera with your index finger, while rotating the upper thumbdial to adjust the setting. The process is simple and works well, and can be performed (thankfully) without immersing yourself into the complex menu structure of the camera’s software.
The only disadvantage to this method is that pressing, and then releasing, the exposure compensation button without adjusting the exposure compensation value, toggles the use of the upper dial between aperture adjustment (in A mode) or shutter speed adjustment (in S mode) and exposure compensation. So, you may think you are in A or S mode and are able to adjust either the aperture or shutter speed with the upper dial, but you may accidentally find yourself only able to adjust the exposure compensation. A click of the exposure compensation button toggles you back into either A or S adjustment mode for the upper dial. Confused? Just wait until you accidentally do this in the field under bright light when you can’t see the feedback of what’s going on in the LCD screen and you’re baffled at your camera’s behavior! Here’s another classic example where multiple possible behaviors from alternative uses of the same buttons can lead to confusion and unnecessary complexity. The potential secondary side effect is inciting wrath in a user seeking peace in the wilderness.
Apart from two dedicated +/- buttons (which some argue will be more complicated than this setup, especially since those buttons may be accidentally pressed), the hold-and-spin ergo may be the best system for adjusting exposure compensation that I’ve used in any camera, film or digital. Unfortunately, the fact that simply clicking the exposure compensation button toggles the upper dial function ranks this process right up there with the worst I’ve seen. Having more than one way of doing things is not necessarily the best and provides a strong argument for simplicity. Oh! How I yearn for a digital camera that will simply get out of my way so I can focus more on taking the photo than operating the instrument.
The only other manual function (in addition to exposure control, manual focus, and ISO setting) that I find essential in precise digital photography is that of separating autoexposure lock from autofocus lock. Fortunately, the Olympus E-P1 offers a dedicated AEL button for the thumb that can be held down (and, thankfully, unlike exposure compensation, not locked when clicked once!) to lock exposure while the scene is reframed for autofocus (activated with the half press of the shutter button), and then reframed again for composition. The process of separating AEL, AFL, and releasing the shutter is fluid, simple, and perfect on the E-P1.
For me, access to the self-timer function and the ability to adjust between its short-timer mode (2 seconds) and long-timer mode (10 seconds) easily are critical. I use short-timer modes for capturing scenes using slow shutter speeds on a tripod, I use long-timer modes for self-portraits, and I use both of them often – every day on every expedition I take.
To capture a photograph with the self timer, five or six presses involving three different buttons are required: first, press the bottom of the lower thumbwheel to enter the frame advance mode, then press the right side of the lower thumbwheel (or the upper thumbdial – with Canolypanasonikon, we have to have options, you know!) either three or four times to enter the 12s or 2s self timer modes, respectively, then press the OK button to confirm your selection. The process is repeated to exit the self timer mode, but instead requires only four or five presses of the same three buttons. Whew!
A similarly complicated button pushing fiasco is required to engage the self timer on the Sigma DP2. Apparently, progress comes slow. A-hem.
However, this is one area where the new Panasonic GF1 really shines. The frame advance mode is toggled by a real, live switch, located on the top of the camera. One control. It’s beautiful. But we’ll reserve assessing that in more detail until that review is published.
I know photographers that have never had a camera fail in the field, and I envy them.
I have not enjoyed the same experience. Perhaps I’m a little careless, or a little lazy, or a little hasty in my processes. Or maybe I’m just not lucky. I’ve fallen in a river and destroyed a Contax T3, I tripped over a tripod and cracked a Leica lens, and I’ve sent at least three compact digital cameras to the paperweight graveyard by exposing them to continuous rain and snow.
That’s why when I went to the Arctic in 2006, I left my Leica M, my DSLR, and even my Contax at home, in favor of a Pentax Optio W60i, a tiny and rugged waterproof camera. Reliability and battery life (which I calculated upon my return home to be more than 500 shots per ounce of spare batteries!) were absolutely the most important features when selecting a camera for that expedition. And while the images I captured there couldn’t compete on a technical level with a high-res scan from my Leica M3 shooting Velvia 50, or my DSLR, or the E-P1, I was still able to shoot a full page magazine spread for The Great Outdoors and record the sound of a howling wolf that aired on National Public Radio, in addition to the scores of photographs that effectively documented my expedition.
Therefore, when I evaluate a camera for environmental robustness, I look at moisture resistance (especially for winter trips, when snow seems to find its way into everything), dust resistance (especially for windy or desert environments), ruggedness and build quality (when I expect to hang the camera from a piece of AirCore around my neck while I bushwhack or scramble through desert canyons or mountain talus), and battery life (for long expeditions).
The Olympus E-P1 offers no unique resistance mechanisms to dirt and moisture, although it does have an ultrasonic mechanism for keeping the sensor clear of fine dust particles that may attach themselves while exchanging lenses in the field.
However, what does seem to be unique to the E-P1 that I’ve not found to be the case with any other camera (film or digital) other than perhaps a Leica M6-M8, is its solid build quality. There are no jiggly or moving parts, and the body seems to be meticulously engineered. What is immediately noticeable is its density. You really have the feeling that the internal parts inside the camera are well-protected, and that the metal body can protect the camera from bouncing around. The body of the E-P1 truly feels like a working man’s camera that is going to last a long time.
I can’t say the same for the two kit lenses that ship with the E-P1: the m.Zuiko 17/2.8 and the m.Zuiko 14-42/3.5-5.6. They have the plasticky feel of cheap goods that don’t inspire confidence when they are sticking out from the body of the camera while swinging on a neck strap.
Battery life on the E-P1 leaves a lot to be desired. Cold weather performance is abysmal and warm weather performance is marginal. This is worth serious consideration for long trips, because the E-P1 is not a pocketable camera, so batteries can’t be kept warm in the camera in a pocket like they can with a pocketable compact. Under my normal use, I’m getting around 100 to 200 shots (depending on temperatures, ranging from 20 F to 50 F) per ounce, and far less than that when shooting video. In comparison, I can get 200 to 400 shots per ounce of battery with the DP2 and 150 to 300 shots per ounce with the Panasonic GF1.
I’m a prime lens kind of guy, and I’ve always adhered to the purist, if antiquated view, of allowing my own two legs to serve as the lens zoom. I was also borne into film photography with a Leica rangefinder, and it’s hard to let go of the perception that prime (non-zoom) lenses always afforded one with the ability to produce the best possible images.
However, I have to admit that there are situations where a modest zoom lens is awfully nice. I think it’s more important for compact cameras with small sensors (from which images cannot be aggressively cropped due to low image detail) than for cameras with larger sensors, but the ability to use small zoom ranges and effective scene framing saves some post processing time back home, and a little walking time in the field.
Therefore, when assessing the capabilities of the Olympus E-P1 in the context of producing images at different focal lengths, then it must be compared not only to compact cameras (with small sensors) with built in zoom lenses, but also to larger DSLRs.
When comparing the E-P1, and say, its m.Zuiko 14-42/3.5-5.6 kit lens, to a compact zoom camera, it’s clear that the E-P1 offers a substantial gain in image quality over most compact zooms. In fact, the difference in image quality between the E-P1 with a zoom lens attached and a compact zoom at an equivalent zoomed focal length may be more dramatic than the difference in image quality between the two cameras at short focal lengths: the larger lens will deliver more image information to the larger sensor and produce a better image. In most cases, the image quality will be noticeable in both high-res files online (1200-1600 pixels) and in modestly enlarged prints (8 x 10 and larger).
Therefore, it will be up to the individual user to decide for themselves whether or not the added weight and bulk of the Olympus E-P1 and a zoom lens will be worth the potential increase in image quality. If one shoots primarily landscapes, then I would argue that the benefit is small. If one shoots primarily portraits and desires the shallower depth of field that a mid-range zoom provides, then the advantage may be more significant. Likewise, if one shoots primarily wildlife, then the tradeoffs between weight and image quality become very significant, and the E-P1 starts to look like an attractive alternative to the DSLR, while offering much higher image quality than compacts.
One aspect of photographic imaging that is often lost on compact camera users is that of the creativity afforded to the photographer through various combinations of lenses and image controllers (camera bodies). The three most important controllable features, for which extremes do not exist in compact cameras, are aperture, shutter speed, and focal length.
Larger sensors combined with wide aperture lenses can create shallow depths of field that offer significant creative opportunities for the photographer, because of (a) the ability to shoot hand held in low light, and (b) the ability to isolate an in-focus subject from an out-of-focus background. Likewise, ultra-fast shutter speeds can be used to minimize the depth of field in bright light, and ultra-slow shutter speeds can open up options for starlight photography, or impart those silky looks to waterfalls we find on the trail. In addition, compact cameras often struggle with image quality in both macro, extreme wide angle, and telephoto photography, both of which can be strengths of the interchangeable lens camera, with the right lens.
To me, this is the single most important feature of cameras like the Olympus E-P1. The ability to combine the E-P1 with one of its four native lenses (two of which are on the market now, two more of which will be available in early 2010), or with an adapter, a wide variety of fast primes from Leica, Voigtlander, Olympus, and others, affords significant creative opportunities that are simply not available to compact camera users. For example, the m.Zuiko 9-18mm lens offers a very wide angle of view for dramatic landscapes, while the m.Zuiko 14-150mm lens offers a longish telephoto for wildlife photography. Unfortunately, Olympus has not fully convinced me that this type of creativity will happen soon for the E-P1. Missing from the lens line are lenses with very fast apertures (none exist that are less than f/2.8), and specifically, fast prime lenses. One promise of the Micro Four Thirds standard was to be the availability of fast, shorter focal length prime lenses that were lightweight and tiny. While the m.Zuiko 17mm f/2.8 gives us light and tiny, it fails to give us fast, and its image quality leaves a lot to be desired.
In addition to still image creativity, many of us are looking to replace two cameras in our kit (a still camera and a video camera) with a single camera capable of producing quality video as well. Long gone are the days where 640 x 480 video is acceptable, and we certainly want HD! The Olympus E-P1 doesn’t fail to deliver in this regard. It produces terrific HD video, and combined with the variety of creative lens options available for it, it can deliver cinematographic results that are nothing short of stunning. Missing from the E-P1’s video package, however, is the ability to capture more than ten minutes of video at a time (as a result of antiquated encoding standards), and the ability to capture audio via an external microphone.
I used to place a very low priority on gear value, demanding technical performance above all else. The current recession has changed my view. I keep more gear for a longer period of time, will elect to repair gear today that I would have replaced two years ago, and I no longer feel compelled to simply upgrade to the latest new thing simply because one exists.
Thus, my expectations for a digital camera are that it should last a pretty long time. Heck, I still love shooting my now-obsolete Ricoh GRD, which in spite of its shortcomings remains one of my favorite compact cameras. In addition – brace yourself now – it still produces images for online viewing and 8 x 10 prints that neither you, nor anyone else, could distinguish from my images taken with the larger and heavier E-P1! So, to me at least, my GRD has been a very high value camera.
The real value of the Olympus E-P1 is not in its ability to produce technically superior images when compared to existing cameras on the market. Nor is it in its ability to make photography easier or simpler (quite the contrary, in fact!). Nor is it in its ability to compete technically and aesthetically with a DSLR (it has no viewfinder, no built in flash, and is slower to use). The real value of the E-P1 is in its ability to offer creative imaging options, like a DSLR, for less weight and bulk. Unfortunately, because this is its primary selling point, and it lacks the simplicity, environmental robustness, and image superiority of smaller cameras like the Sigma DP2, its value proposition is questionable. A small and light DSLR can be purchased for less money while offering similar imaging performance for a weight penalty of less than a quarter of a pound, and a compact mid-size sensor camera can be purchase for less money while offering a package that is significantly smaller and lighter than the E-P1. In addition, the introduction of more compact mid-size sensor cameras, including the Pansonic GF1, the Leica X1, the Ricoh GXR, and the Samsung NX will muddy the waters further and will more than likely make the value proposition of the Olympus E-P1 an even tougher sell.
I used the Olympus E-P1 nearly every day for three months. I desperately wanted to fall in love with it. However, when the day was done, I listed the following things about the camera that absolutely drove me crazy:
However, I’m not completely critical of the E-P1, and the things that I loved the most about the camera while shooting with it were:
In conclusion, I think the Olympus E-P1 is going to be a tough sell to the lightweight backpacking community accustomed to carrying compact cameras. If you carry a mid-size sensor compact, like the Sigma DP2, you probably do so for one reason: image quality. If you were to upgrade to the Olympus E-P1 and expected to achieve technical image quality significantly higher than the DP2, I think you’d be disappointed. On the other hand, if you carry a small sensor compact, you probably do so because the image quality it produces might be acceptable enough for your end uses: publishing photos online, or printing small enlargements, perhaps. For you, the Olympus E-P1 will simply be nothing more than a heavier, more expensive, and bulkier brick.
And so, I think the Olympus E-P1 might make sense to two groups of users: those who currently carry DSLRs, and those who carry compacts but want to increase the creativity of their image capturing. The Olympus E-P1 will certainly aggravate most avid DSLR users because of its lack of a viewfinder, lack of a built in flash, and slow operation (especially autofocus). However, I think you can get used to all of these things, and you’ll find yourself rather pleased that you’ll be able to have a “DSLR-like kit” in the backcountry for less weight and bulk.
Finally, I think those of you who carry compacts but want to increase the creativity of your image capturing will be thrilled by what the E-P1 and similar cameras have to offer. However, I’d caution you to wait and let the market mature. My next review will be detailing the E-P1’s primary direct competitor: the Panasonic GF1, and there’s more on the horizon, including the next upgrade from Olympus, the long awaited E-P2 (which includes an electronic viewfinder and an option for an external microphone).
It is difficult to identify strengths and weaknesses for cameras because the strength of one camera for one photographer might present itself as a weakness to another. Consequently, the recommendations I make herein for “improving” the E-P1 are based primarily on how they might serve my needs first, and possibly, the needs of others who adhere (perhaps too rigidly!) more to an ethos of lightweight backpacking and less to an ethos of photography. In that context, then, I make the following recommendations for improving the E-P1:
A camera with the endearing and rugged form factor of the Olympus E-P1 that addressed items #1-6 above would result in a camera for which I’d give a Recommended rating. A camera that addressed these items in addition to #7 and #8 would certainly stand on its own and be unique enough to warrant a Highly Recommended rating, and one for which I’d happily trade my Sigma DP2 for the added weight and bulk.
I think it’s important to close with something positive about the E-P1. As I write this review, I have a dozen cameras in front of me. The one that feels the best in my hand is the Olympus E-P1. Its form really is beautiful, and that aesthetic has been a redeeming quality of the camera that, in the field, allows it to overcome some of its shortcomings. For creative snapshooting, when I want the creative qualities of certain lenses, without worrying too much about the finest details of imaging performance or the lack of simplicity in the underlying menu structure, I really do enjoy photographing with the E-P1. That in and of itself is a very important quality to a camera. The tactile feedback you get from holding a camera, framing a scene, focusing the lens, adjusting the shutter speed, and releasing the shutter – this is as important to my photographic experience as developing the images in Photoshop upon my return home. To that end, the E-P1 does not disappoint, and it is that feature alone that distinguishes the E-P1 from the vast majority of digital cameras on the market today.
So, I hope that the following gallery of images leaves you with some confidence at the E-P1’s ability to capture beautiful photographs – ones that I will enjoy looking at for a very long time.
These photographs have been processed in Adobe Camera Raw and Photoshop to my tastes based on how I wanted to convey the look of the scene to the viewer. If you are looking for out of camera images, they are available elsewhere on the Web, en masse, and publishing more of those here would do little to enhance the conclusions in this review. I never look at a single camera as an island technology in my overall digital workflow, but rather, as an integrated component of a larger whole out of which I demand what is most important to me in the end: an image that I’m proud to have framed, captured, and developed on my own.
Click an image below to view the image gallery.

Gallatin River Fog Lifting. The Gallatin River is one of Montana’s most scenic rivers. It flows out of Yellowstone National Park as a meandering meadow stream in a high valley that is commonly engulfed in fog during early summer mornings. This is one of the most beautiful images I captured with the E-P1 (with the m.Zuiko 14-42/3.5-5.6 lens), balancing the blue sky and water very well with the green foliage and white clouds without dramatic casting or contamination.

Causey Headwater. Causey Reservoir near Ogden, UT is a haven for stillwater boating, fishing, and high desert hiking. Chase and I explored the intimate and lush depths of its creek inlets in July via packraft. When greens dominate the scene, the E-P1 and the m.Zuiko 14-42/3.5-5.6 captures them well, but subtle green casts of color on the rocks had to be removed using a layer mask in Photoshop.

Uinta Brook Trout. There may be no trout more inviting to photograph than a brook trout, like this one from a high mountain lake in Utah’s western Uintas. The E-P1 struggles with subtle greens, like the body on the trout in this photograph. I boosted green color a little using a layer mask in Photoshop. Lens: m.Zuiko 14-42/3.5-5.6.

Columbine. Columbine may be the universal mountain flower of the West. One disadvantage of Olympus’ current Micro Four Thirds lens lineup is the lack of fast lenses that can create shallow depth of field. Even when isolating a flower with the m.Zuiko 14-42/3.5-5.6 lens at 42mm and f/5.6, the background is too busy for my tastes.

Lake Tenkara. Chase and I spent the summer practicing Tenkara fly fishing techniques on both streams and lakes. Olympus cameras are well known for their ability to capture images where rich blue skies and water dominate the scene, but the camera and lens combination proved completely incapable at capturing the true color of Chase’s stark red shirt, notoriously one of the most difficult colors to produce with any of my cameras. I think I should just get him a new shirt. Lens: m.Zuiko 14-42/3.5-5.6.

Indian paintbrushes in the Uintas. This image has been desaturated aggressively in the area around the flowers, and slightly in the flower petals themselves, to simplify color rendition in what was originally a very color-busy photograph. Lens: m.Zuiko 14-42/3.5-5.6.

Talus field in the Western Uintas. These are the types of images that mean the most to me, and any camera I use must afford me the ability to candidly capture them. For this image, I prefocused the E-P1 using manual focus so I could focus on framing the shot without worrying about autofocus lag. This image has been slightly desaturated in Photoshop to calm down that darn red shirt. Lens: m.Zuiko 14-42/3.5-5.6.

Cottonwood Meadows. One of my all time favorite hiking destinations within twenty miles of my house. This was the same location of Episode 3 of “24,” but it looks rather different in the movie because of the snow! In early summer, the meadows and forests offer a range of greens that are a spectacle to behold. This type of image is where the high dynamic range of the E-P1 really shines. You can pull a lot of detail out of dark shadows, especially when they are dominated by single color shades (greens in this image). I equalized tonal range in this image using layer masks to brighten and darken selective areas, instead of reverting to high dynamic range techniques, which often look unnatural. Lens: m.Zuiko 17/2.8.

Tobacco Root Sunset. One of my favorite features of Micro Four Thirds cameras is their ability to accept (with adapters) my M-mount lenses. This photograph was captured with a Voigtlander Super-Heliar 15/4.5, which renders sky colors with what some photographers call “creaminess.” Unfortunately, the E-P1 offers no in-camera image processing that is optimized for third-party lenses, so don’t expect your photographs to look the same on the E-P1 as they do on your Leica M.

Garnet Mountain Lookout. Here’s another one taken with a Voigtlander lens – this time the 35/1.4 Nokton. That this camera and lens can deliver this kind of color information to the sensor of the E-P1 is remarkable to me, and one of the greatest advantages of cameras with larger sensors, and lenses with quality optics. Whenever I’ve tried to capture these types of images with small sensor cameras, they are fraught with noise, ungainly lens flare, muddy shadows, and poor dynamic range.

Pyramid at Hyalite. Clouds were breaking in the wake of a storm, bringing bright sunshine as well as shade on the mountains beyond, and creating a shaded foreground. The dynamic range of this image was too high to be captured by the E-P1, so I exposed the image as dark as possible without clipping highlights. I then used a layer mask in Photoshop to draw out detail in the dark areas of the image, and was very pleased with the noise-free results and rich colors that resulted. Lens: m.Zuiko 17/2.8.
1 To produce the image, I captured the photograph (with the camera on a tripod) at ISO 200 and f/5.6 as a RAW file (with shutter speed set to an EV value as low as possible without clipping highlights). It’s worth noting that all images were captured at an aspect ratio of 3:2, and because I was shooting with prime lenses that had slight differences in 35mm equivalent fields of view, I usually engaged my legs a little bit for zooming in and out so each camera captured the same scene, to avoid focal length artifacts that would have biased the capture of scene details. Images were imported into Photoshop CS4 through Adobe Camera Raw 5.5 with no sharpening or other preset adjustments (other than normalization of white balance). Once in CS4, I applied curve correction to distribute luminance across the entire dynamic range. I exported the images as 8-bit TIFF files (without upsampling the Sigma DP2’s 4.7MP image size to produce the same resolution as the 12MP E-P1 and GF1), and sent it to a professional lab for printing, with no modifications performed by the lab.
2 Or for anyone possessing unusual amounts of patience.
3 There are exceptions to this, but they require so much button pushing and fiddling that it’s not worth using, let alone discussing.
4 Don’t press the AEL/AFL, frame advance/self-timer, or delete buttons, however, because they will not confirm your selection!
We are pleased to announce the winners of our 2009 Reader Photo Contest!
We received 312 photo submissions and were overwhelmed by the popularity of this contest with our readers. We’d like to offer a sincere thanks for all photographers who submitted photos, but due to the high number of submissions, we are unable to publish them all!
Our contest jury was comprised of seven Backpacking Light staff and members of our peer review committee, and included: Brian Barnes, Alan Dixon, Rick Dreher, Ryan Faulkner, Ryan Jordan, Mike Martin, and Don Wilson.
Photos were sent to jurors at 800 pixels on their longest side (unless they were submitted smaller) and blinded with respect to both captions and photographer identity during the scoring process.
Each juror selected thirty photos out of an initial pool of 312 entries. Then, thirty-three entries (which comprised those photos that were selected by at least four of the seven jurors) were assigned a score in each of the following categories:
Photos were given 1 to 3 points in each category:
Each juror also assigned what they believed to be the importance of each category with a relative weighting factor, and the final weighting scale resulted from an average of the individual weights assigned by all jurors. Thus, the categories were weighted as follows:
Finally, all photo scores were normalized on a scale of 1 (lowest) and 100 (highest), and ranked accordingly.
Prizes are awarded to the top three photographs, and we also recognize the thirteen photos that were scored in the final round.
Click on an image to open a larger version in the image gallery.

Sunrise at Mesa Arch in Canyonlands National Park, UT (HDR). By Sean Mahoney. Canon 20D. Score: 81.7
Sean wins a lifetime membership to backpackinglight.com and a $100 gift certificate to the backpackinglight.com store.

Old Rag Boulders by Moonlight, Old Rag Mountain, Shenandoah National Park, VA. By David Johnston. Canon Xti. Score: 75.9
David wins a lifetime membership to backpackinglight.com and a $50 gift certificate to the backpackinglight.com store.

Me and my tarp, night shot near the South Sister, OR. By Casey Cardwell. Canon 450D. Score: 75.0

An early start on a climb over Thatchtop Mtn. in RMNP found us at Zone Lake for sunrise. The fresh air, fresh snow and new day gave a very profound start to the trip. By Ed Huesers. Pentax istDS. Score: 75.0.
Both Casey and Ed win a lifetime membership to backpackinglight.com.

Cumberland Island, GA, taken about a mile north up the beach from Seacamp. By Charles Hill. Olympus C-740. Score: 73.7

Two hikers stop for a brief break atop 12,000-ft Frigid Air Pass high in the Maroon Bells Wilderness of Colorado. By Lawton Grinter. Nikon D40. Score: 73.0

South Fork Eagle River, Chugach Range, AK. By Luke Osborne. Canon Powershot A60. Score: 71.7

Canyonlands National Park (UT). By Rog Wilmers. Canon 20D. Score: 70.9

Mosquito on wet silnylon – the inside of my homemade 10×12 tarp with beaks and a catenary ridgeline. Cuba Gulch trailhead, Lake City, CO. by Jeremy Cleaveland. Pentax Optio WP. Score: 70.2

Pukaskwa National Park, Ontario. By Rog Wilmers. Canon G9. Score: 69.1

Near Balanced Rock in Arches National Park, UT after an intense rainstorm. I was incredibly lucky to catch this rainbow and the brooding clouds shortly before sunset. By Sean Mahoney. Canon 20D. Score: 68.1

Cascade on a tributary of Red Creek, Dolly Sods Wilderness, WV. By David Johnston. Canon Xti. Score: 64.6

Cooking lightweight hot lunch on the Pacific Crest Trail. In the vicinity of the Suiattle River, Glacier Peak Wilderness, WA. By Andrew Wilson. Olympus Stylus 790SW. Score: 59.6
The number of outstanding images we received was extremely high. As you can see from the jurors’ selections above, the highest rated photos included those that offered a range of attributes that may or may not have included technical brilliance or perfect color. In fact, most jurors ranked overall aesthetic, originality, and relevance as higher criteria. Telling is the fact that these photos, which we felt possessed the most character, were taken with a wide variety of cameras from a high end DSLR to a compact and inferior quality waterproof camera. This reinforces the old adage that a bad camera in the hands of a good photographer will produce better pictures than a good camera in the hands of a bad photographer.
Happy snapping, on or off the trail!
Episode 3: The first big snowfall of the season (in September!) had us traversing the Hyalite-Cottonwood divide for snow hiking and camping.
Snow comes to the mountains of Montana intermittently throughout the summer. I usually see more serious snow arrive in September, but even those storms are usually pretty short and kept to the higher elevations. October is where it’s at if you’re a snow junkie, but in some years, even October in Montana can make you feel like you’ve been erroneously displaced. In other words, until the snow really comes to the Rockies (usually in December!), all bets are off and any reliability in snow forecasting is sketchy at best.
That’s why I was pretty excited to watch our first big snow of the year come across the radar in late September.
By September 28, with snowflakes falling and piling up, I contracted a cold. After a few days in bed, I couldn’t stand it anymore: I was itching to get outside and film another episode of “24.” I may have not quite been healed, as I felt awful on this hike. I was exhausted, I froze, my head hurt, my body ached, and I couldn’t stomach any food.
But it was Montana’s first big snow of the season, and I wanted to see it!
I have no regrets. My friend Ryan Connelly and I enjoyed each other’s company in one of the most beautiful locales close to my home, on one of my favorite routes: a traverse of the Hyalite-Cottonwood divide.
Twenty minutes of driving, a few hours of hiking, an overnight camp on the ridge, and another half-day of hiking brought us right into the back door of our friend Seth’s home on upper Cottonwood Creek. Snow, wind, and cold temperatures in the first part of the hike gave way to warm sunshine as we hiked out. It all added up to the perfect recipe for an overnight getaway.
Most of that snow has melted, Indian Summer has come again, but I’m not depressed that it’s only nine more months until summer. I love snow hiking… ultralight style, of course.
I knew it would be cold, so I considered that in my camp/sleep clothes.
Sleeping Pad: I slept on snow. In addition to a TorsoLite and the pack for my feet, I augmented my ground insulation with a few downed fir boughs placed underneath the tent. This made a world of difference and negated the need for a foam pad. I’m not sure I’d want to rely on this strategy for all of my winter trips (it takes time and doesn’t work above the treeline…), but for this type of trip where I was keeping the packed kit simple, it was perfect.
Sleeping Bag and Clothes: I hadn’t swapped out my summer quilt for something warmer yet (my winter bag was in my crawl space, and I was too lazy to go get it) so I simply added some puffy clothes (a Cocoon Hoody, Pants, and Balaclava) and kept the quilt in my kit. I normally carry the quilt and hoody, so the pants and balaclava were a luxury, but I was glad I had them. Temperatures in the teens and a stiff breeze kept the camp cold. I skipped the rain gear (it would be too cold to rain), so the only other clothing I had was what I normally wear while hiking: a wool hoody, a baseball cap, a windshirt, Powerstretch gloves, a pair of synthetic tights, wool socks, and my shoes. The only glitch in the system was that I didn’t have gaiters or an extra pair of socks. I had cold feet most of the night, and it was terribly uncomfortable.
Shelter: I brought a tent (gasp!), as I sometimes do when I see the forecast for wind or blizzard conditions. My tent was designed and built for me by Roger Caffin and is a single-wall shelter with carbon fiber poles. I’ve found it to be the most blizzard-resistant shelter I’ve ever used that still weighs two pounds or less.
Cooking: I brought a small pot, a mug, a spoon, and a firestarting kit. Any excuse to hang out by a fire on a long winter night is good enough for me. The warmth and cheer were welcome.
Pack: I brought the Arctic Dry Pack on this trip, primarily for its simplicity. I’m drawn to the idea of having a packbag that’s completely waterproof without additional protection. I knew I’d be wallowing through snow-covered tree limbs on the trail, and I like the security of knowing my gear will stay dry.
Photo/Video Gear: Most of the video and photos were taken with a Panasonic Lumix DMC-TS1, a small waterproof HD camera. I also had along an Olympus E-P1, but after falling on the trail with it around my neck on the first night, snow melted into the lens housing, and the lens stopped autofocusing. I kept it in my pack the rest of the trip, dried it out when I got home, and it appears to work perfectly again.
These photos were captured with the Panasonic TS1.

Snow fell intermittently in response to a storm exiting the area. Evening skies offered drama and beautiful color. This photo was processed in PhotoShop to deemphasize the detail of the scene and show off the incredible colors of the sky.

A sliver of alpenglow finds its way through heavy storm clouds on the eastern slopes of the Hyalite drainage.

I wound my way along benches to the ridge on the horizon, the Hyalite-Cottonwood divide. Fresh snow casts an eerie glow as sunset wanes.

Upon my arrival in camp, my highest priority was fire, followed by soup. I was wet from falling in the snow while hiking in the dark, and cold from the wind blowing across the ridge at my camp.

My shelter of choice for this trip was a beautiful, two-pound masterpiece of engineering created by Roger Caffin. I’ve weathered some ferocious storms in this single-wall tent, and it’s my go-to shelter when I just don’t want to fiddle with a shelter in blizzard conditions.

Ryan Connelly hiked into my camp and greeted me around midnight, then joined me on the hike out. The morning dawn clear and cold, with fresh snow covering everything.

Cold temperatures kept the snow dry and smoky, and my shoes stayed surprisingly dry – until I had to cross a creek later down the canyon.

We saw the temperature swing from about 15 degrees (overnight low) to nearly 55 degrees as we dropped in elevation and the next day warmed up. Here, Ryan successfully avoided trail bombs awaiting on the fir branches. I was not so lucky.
GoLite Footwear has developed a unique underfoot suspension system that largely accomplishes their intentions. The shoes are comfortable, but there are durability concerns for the soles.
I haul myself out of my packraft and onto the rocky shore, wet from the tops of my farmer johns down to the GoLite shoes on my feet. Grasping my paddle with one tired arm, I reach down with the other and grab the pack, strapped to the bow of my packraft, and pull both it and the raft out of the water and onto the rocks. Looking down the river at the souse hole I narrowly avoided (by arresting myself on the shore), I wonder if I’m up to rafting Bear Trap Canyon, which is running at 4000 cfs. Time for some portage.
Mounting the pack and packraft onto my back, I join the other Backpacking Light instructors moving downriver over wet stones and up steep banks. As I move along, I’m impressed by how well my soaked shoes grip the rocks and dirt – I feel very stable on my feet and am able to move securely down to the next put-in site.
A couple of months earlier, I called GoLite Footwear and asked to test the two lightest models from their latest line of shoes. GoLite Footwear, whose name is licensed from GoLite, LLC in Colorado, was founded by Doug Clark, who had worked at Timberland as the chief innovation officer. While there, he and his team developed a line of shoes that were designed to stabilize the foot during off-pavement travel by combining a hard footbed with an outsole consisting of soft lugs made to absorb the uneven surfaces of the ground. They called this "Soft Against the Ground" technology. In 2008, Clark bought the rights to GoLite Footwear from Timberland and formed New England Footwear, which now manufactures GoLite Footwear shoes.

2007 Sun Dragon upper
In 2007, GoLite Footwear introduced its first line of shoes. The lightest in the lineup, at 10.9 ounces, was the Sun Dragon.

2007 Sun Dragon sole
Its Trail Speed outsole consisted of fourteen widely spaced lugs in a symmetrical pattern. Initial reviews of the shoes were very positive: Carol Cooker said, “My favorite shoe for backpacking is the GoLite Sun Dragon. When I wear Sun Dragons, my feet don’t get that hamburger feel after a long day of hiking up and down uneven, rocky trails.” Andrew Skurka used them exclusively on his Great Western Loop hike and said, “These shoes are really great, truly revolutionary. For a backpacker, it means less pointy stuff to give you foot bruises, better traction on snow, and better traction on dirt and rocks.” After a backpacking trip to the Olympic Coast, Doug Johnson said, “While I was skeptical at first, this system has won me over. The shoe conforms to trail irregularities when running and hiking, keeping the foot level and providing better shock absorption. The large lugs also provided excellent traction in mud and sand – a difference that was obvious.” Everyone also seemed very pleased with the shoes’ large toe box design.
Then things began to fall apart – literally. Due to a problem in the manufacturing process, the fabric on the vamp of the shoe began deteriorating after about sixty miles of use.

Courtesy of Carol Crooker
The company corrected the manufacturing problem, and the 2008 shoes showed increased durability. However, with both the 2007 and 2008 models, users found that the soles of the shoes wore down more quickly than other brands.

Courtesy of Carol Crooker
The Sun Dragon on the left has three months of wear, compared to the new sole on the right.

2009 GoLite Footwear Competition
After great anticipation, my shoes from the 2009 line finally arrived in the mail. The lightest shoe in this year’s product line is called the Competition, or Comp for short. A men’s size 9.5 US weighs 12.96 ounces per shoe (367 grams) by my scale.

2009 GoLite Footwear Competition
The Comp features what GoLite Footwear calls a TPU Cage, which is the web of thermoplastic glued to the shoe’s mesh upper. It is designed to offer protection and stability to the upper shoe.

GoLite Footwear Competition’s loose mesh
The mesh upper, dubbed the NeoForm Seamless Upper, is a seamless loose mesh. The shoe also has GoLite Footwear’s Debris Shield, which is the thermoplastic and leather toe cap that protects the front of the shoe. The back portion of the shoe is protected by a sewn-in leather strip.

Interlock Lacing System on Comp
One of the more interesting features on the shoe is the Interlock Lacing System, a piece of material that is sewn into the inner sole, wraps around the side of the foot inside the shoe, goes through eyelets, over the top of the tongue, and finally through the shoe laces. It is designed to keep the foot from sliding forward and hitting the front of the shoe.

GoLite Footwear Comp sole
GoLite Footwear has changed the design of its uniquely lugged sole. It seems that people either really liked the idea of the big lugs or found them too aggressive looking and wouldn’t buy them. Responding to this feedback, GoLite Footwear has replaced the symmetrical lugged sole with what it calls Trailclaws and Paw Pads. The Trailclaws are lower profile lugs around the outside of the sole and the Paw Pads are smaller tread on the center of the sole.

GoLite Footwear Comp Trailclaws and Paw Pads
By making these changes, the company hopes to maintain the Soft Against the Ground effect while providing a more versatile shoe that will work well on hard-packed trails.
As mentioned earlier, their Soft Against the Ground technology is designed to keep the foot stable and cushioned on rough and uneven surfaces. They achieve this through a rigid last with a rigid polyurethane layer under that, which protects the bottom of the foot. Between the rigid polyurethane layer and the rubber outsole is a very soft polyurethane layer that absorbs the irregularities of uneven terrain.

GoLite Footwear Fire
The second lightest shoe in the 2009 lineup is called the Fire. It weighs 13.04 ounces per shoe (369 grams) by my scale for a men’s size 9.5 US.

GoLite Footwear Fire sole
The Fire’s insole, midsole, and outsole are identical to the Comps’.

GoLite Footwear Fire upper
The difference between the two shoes is in the upper half: the Fire is designed to be more rugged and durable than the Comp. The Cage is made of EVA and is thicker and more protective of the shoe’s seamless mesh upper. The mesh is tighter and has a higher thread count than the Comps’.

GoLite Footwear Fire toe

GoLite Footwear Fire heel
Instead of leather, the debris shield and the hill are covered with a rubberized fabric.

GoLite Footwear Fire Interlocking Lacing System
Another interesting difference between the two shoes is the Fire’s Interlock Lacing System: instead of one strip of material linked to the laces, the Fire has two. More on this later.
I wanted to compare the two models side-by-side, so for my first trips I wore a Comp on one foot and a Fire on the other. I switched the feet the shoes were on so the soles of each pair would wear evenly. I used the shoes for snowshoeing, backpacking, trail running, packrafting, bushwhacking, and even for some short races on asphalt. I took pictures of the wear on each model as the testing progressed.
Of course, the first thing I did when the shoes arrived was put them on. They were both very comfortable with no pressure points and with plenty of room in the toe box. The laces ran smoothly through each eyelet and were easy to cinch up. My heel tended to slip up and down a little as I walked, so I laced up the second eyelet at the top of the tongue, adding enough tension to secure my heel nicely.

GoLite Footwear adjustable footbed system
The second thing I did was take out the manufacture’s footbeds and put in a pair of Superfeet. In doing so, I discovered a virtually unadvertised GoLite Footwear feature. Their footbeds have a system where, by adding or removing attachments to the footbed, one can adjust the fit of the shoe from wide to medium to narrow. At first I thought this was a completely wasted idea, seeing as I never use the footbeds that come with the shoe. In this criticism, however, I was wholly unjustified.
As my sock needs went from heavy winter socks to thin running socks, I was able to add or remove these footbed attachments under my Superfeet so that my shoes always felt like they were the perfect width. This made the shoes far more versatile than any other trail running shoes I had owned before. I usually need a wide pair for winter trips and a narrow pair for warmer trips. Now I had two shoes in one.
It was then time to take the shoes outdoors. My first outings were snowshoe trips in the mountains of southern Oregon. The snow in the Cascades is either completely frozen or sopping wet. On these trips, the shoes performed like any others I had used snowshoeing: soaked during the day and frozen solid at night. But, as described above, the shoes were wide enough that I could wear my trekking socks and Gore-Tex oversocks in them without losing the blood flow to my feet. Between the two models, I found that the Comps, with the more open mesh, were a little colder and less protected from the snow than the Fires.
I began backpacking and trail running early in the season, which meant a mix of muddy ground and snow mounds. The shoes’ grip was phenomenal. While my trip partners were sliding around on the slippery terrain, my shoes were staying put pretty well. It felt like the lugs around the edge of the sole were grabbing the ground and keeping my feet where I had placed them.
I found that I turned my ankles less than I normally do. That is one of the intended features of the Soft Against the Ground concept. The shoe sole compresses on uneven ground and minimizes the impact of the feet and legs. Of course, this can only provide stability to a certain extent – when I moved on side hills or over rocks or in a washed-out trail, I still turned an ankle from time to time.
The shoes provided plenty of cushion against the ground overall, but not in a way that was noticeably superior to other trail runners I’ve used. After hiking in them for several days, the bottoms of my feet were sore (especially my heels), which is similar to my experience with other shoes. Perhaps my feet were less sore then they would have been in other shoes, but not so much that I could perceive a measurable difference.
The shoes fit me well. Using the variable width footbeds, my foot didn’t slip around, nor were they too tight, and by snugging down the laces, my heel stayed in place. I did, however, run into a problem with the Fires: before running or backpacking, I would tighten down the laces to secure my foot in the shoes. After a few miles, my fifth metatarsal (the bone just down the foot from the pinky toe) would hurt to the point that it became debilitating. Afterwards, I inspected the sides of my feet and found them swollen in the area of the fifth metatarsal.
The problem came from the Interlocking Lacing System (the straps inside the shoe that wrap around the foot and connect to the laces). Cinching down the laces put too much pressure on that part of my foot. I didn’t experience that with the Comps and concluded that the second strip of material in the Fire was the cause. I removed the laces from the front loops, in effect making them like the Comps. This eliminated the problem.

Wear on sole after backpacking and trail running
I took the shoes packrafting; the Comp on one foot and the Fire on the other. As I stated at the beginning of the article, I was impressed with how well the shoes gripped the wet rocks along the shore. They were no match for the slippery, moss-covered rocks in the river, but I think the only solution to that problem would be crampons. The shoes transitioned well from the wet river to the dirty side hills. Both shoes drained equally well and stayed equally wet. The leather on the front and back of the Comps got pretty dirty, but this was an aesthetic, not functional, issue.
At the end of this instructor training rafting and packing trip, I noted something very interesting about the soles of the shoes: the soft polyurethane part of the sole, that was not covered by rubber, puffed out and lost its definition.

Wear on the sole after packrafting
It didn’t affect the feel of the cushioning, but it did have an impact on the sole’s durability.
I chose to take the Comps on the 2009 Wilderness Trekking I course to see if the mesh and leather on the lighter shoe could stand up to a lot of abuse. I took the one shoe that had been packrafting and one that had not. We hiked from early in the morning to late in the evening every day, most of this off trail on aggressive terrain. The results were fascinating.

Wear on upper after wilderness trekking course

Wear on toe after wilderness trekking course

Wear on heel after wilderness trekking course
As you can see from the pictures above, the upper part of the shoe held up very well. I wore ankle gaiters and, apart from dirt, there was not much difference between the protected and unprotected upper. Although the mesh had relatively large holes, particles did not get in my shoes. The surprise was on the underside of the shoe.

Wear on sole after wilderness trekking course

Wear on sole after wilderness trekking course
The sole of the shoe that I had taken backpacking and running, but not packrafting, had obvious wear and tear compared to before the trip and one of the lugs had come unglued.

Wear on the sole after packrafting and wilderness trekking course
The sole of the shoe that had been on the rafting trip, however, lost all of the rubber on the lugs and a significant portion on the heel. Clearly, the extended time being wet had a substantial impact on the adhesive material between the polyurethane and rubber.
GoLite Footwear has developed a unique underfoot suspension system that largely accomplishes their intentions. The shoes are comfortable and the uppers are durable. I would like to give them a Recommended rating; however, because of the lack of resiliency on the soles of the shoes, I can only rate them Below Average for the suggested retail price. If GoLite Footwear can fix this durability issue, these will be great shoes. I would definitely wear them again, but with the understanding that they will only last me one season.
|
Manufacturer: |
GoLite Footwear |
|
Year/Model: |
2009 Competition 2009 Fire |
|
Materials: |
Competition – Upper: Ballistic Mesh and TPU Cage; Outsole/Midsole: Rubber, TPU and PU Fire – Upper: Mesh and EVA Cage; Outsole/Midsole: Rubber, TPU and PU |
|
Last: |
Competition – Anatomically Contoured Fire – Anatomically Contoured |
|
Size: |
Competition – Mens 9.5 with medium width footbed Fire – Mens 9.5 with medium width footbed |
|
Weight: |
Competition – 12.96 oz (367 g) Fire – 13.04 oz (369 g) |
|
Colour: |
Competition – Skyway and Rifle Green Fire – Navy and Black |
|
MSRP: |
Competition – $120 Fire – $130 |
A warm, refined sleeping bag, but not the lightest in its class.

The Mountain Hardwear Phantom 32 features 15 denier shell fabric, 800 fill power down, a full length zipper, and a sculptured hood. Weight is 23.1 ounces (measured) for size Regular.
A three-season down sleeping bag is a core item for ultralight backpacking because it offers the best combination of warmth, light weight, and seasonal versatility. I prefer a mummy style bag rated at around 30 F for mountain backpacking. The mummy design eliminates drafts, I can wear extra clothes inside and “mummy up” to extend the bag’s warmth on cold nights, and I can open it up and use it as a quilt on warm nights.
The popular Mountain Hardwear Phantom 32 sleeping bag (with a temperature rating of 32 F) has been around a few years. Its main features are 15 denier (0.85 oz/yd2) shell fabric with DWR, 800 fill power down, a full length side zipper, and a six chamber sculptured hood.
It has received a few refinements along the way, and Mountain Hardwear deserves kudos for keeping the upgrades nearly weight neutral. The original Phantom 32 had a 2/3-length side zipper and weight of 22.7 ounces, while the current bag has a full side zipper and weighs 23.1 ounces. Weight saving refinements throughout the bag nearly offset the added weight of a longer zipper.
The Phantom’s lightweight shell fabric has a very soft hand, and its taffeta lining is very durable. The #5CN YKK zipper auto locks, so it doesn’t open when you expand the bag, and it operates from outside or inside the bag.
I measured the bag’s average double layer loft to be 4 inches (single layer 2 inches), which agrees with the manufacturer’s specification and is similar to other bags with the same temperature rating. From our table of estimated temperature ratings based on measured loft (read our Backpacking Light Position Statement on Sleeping Bag Temperature Ratings), 1.8 inches of single layer loft translates to about a 30 F rating, so the Phantom 32 has a little extra loft. Please take the time to read the referenced article and note that sleeping bag warmth depends on a number of factors.
Mountain Hardware describes the Phantom’s sizing as a “snug mummy fit.” Size Regular fits a person up to 6 feet tall; that’s my height, and it fits me perfectly. When looking at sleeping bag dimensions, I look for adequate shoulder girth. A snug bag is good for staying warm (no excess volume inside to warm up), but it also has to be roomy enough inside to wear extra clothing without being too tight. I found the Phantom 32, with 60 inches of shoulder girth, to be just right for me.

I tested the Phantom 32 on seven late spring, summer, and early fall backpacking trips in the mountains of southern Colorado. Nighttime temperatures ranged from a cool 38 F down to a frosty 15 F.
Although the Phantom 32 is not the loftiest bag around with a 30-32 F temperature rating (see comparison table below), I found it to be quite warm. In my field testing, my methodology was to wear my basic sleepwear (dry wool socks and microfleece top, bottom, and cap) inside the bag initially, then add insulated clothing later in the night if I got cold, noting the time and temperature when I got chilly. On most nights down to freezing, I stayed adequately warm in my basic sleepwear, although I got a little chilly when the “4:00 a.m. freeze” occurred. I noticed that the temperature when I felt chilly varied somewhat, from 30 to 35 F, depending on weather, shelter, and metabolic activity. I felt the coldest when I was hungry during the night.

There is a small Velcro tab at the top of the zipper to further insure the zipper doesn’t open unintentionally. The right tab includes a patch to park the Velcro so it doesn’t catch on clothing. The Velcro doesn’t stick to the bag’s fabrics.

The “single-handed drawcord” on the hood (left) actually requires two hands to operate: squeeze a small cordlock with one hand and pull the drawcord with the other hand. There are actually two drawcords: an elastic drawcord in the lower part of the hood and a grosgrain drawcord in the upper half that are tied together and tighten simultaneously when pulled. The hood (right) has six down chambers that wrap around the head and covers the face well, and places a breathing hole right at your mouth.
On three really cold nights – down to 19, 18, and 15 F – I wore my insulated camp clothing plus my rain jacket and pants inside the bag all night, and managed to stay warm. On the 15 F night I was camped at 12,500 feet following the passage of a cold front that produced 45 mph winds the night before that had me hanging onto my Tarptent. I knew it was going to be a cold one, so I wore everything in my pack at bedtime, and ate some nuts to generate metabolic heat. It worked and I managed to stay warm at 15 degrees in a 32 F rated sleeping bag. On warmer nights I unzipped the bag and used it as a quilt. That’s the versatility of a three-season down mummy bag – with a little resourcefulness I can use the same bag to comfortably sleep with nighttime temperatures ranging from 50 down to 20 F, and occasionally colder than that when you have to.
The Phantom’s shell is quite downproof; I observed very little down coming through the shell fabric or stitching during my testing.
The following table compares the Mountain Hardwear Phantom 32 with some popular 30-32 F rated ultralight mummy style down sleeping bags. All of the bags have baffled construction. Data are manufacturer information for a size Regular bag.
| Manufacturer | Model | Temperature Rating (°F) | Single Layer Loft (in) | Weight of Down (oz) | Fill Power | Total Weight (oz) | Cost US$ |
| Mountain Hardwear | Phantom 32 | 32 | 2.0 | 10 | 800 | 22 | 290 |
| Western Mountaineering | SummerLite | 32 | 2.0 | 10 | 850+ | 19 | 315 |
| Marmot | Hydrogen | 30 | 2.0 | 11 | 850+ | 25 | 319 |
| MontBell | Spiral Down Hugger #3 | 30 | 1.9 | 10 | 800 | 20 | 229 |
| The North Face | Beeline | 30 | 2.4 | 10 | 850+ | 22 | 279 |
As you can see from the table, the Phantom 32 compares favorably to similar sleeping bags in loft, weight, and cost. The Western Mountaineering SummerLite bag is three ounces lighter, but it costs a bit more too. The MontBell Spiral Down Hugger #3 appears to be the best value.

Although the bag has a narrow grosgrain strip on each side of the zipper to create a channel for the zipper to glide in (left), it simply does not work very well. The zipper snags easily and frequently (right) on the grosgrain strips, draft tube, lining, and outside shell. It helps a lot to straighten the zipper before zipping it.

The stuff sack provided has two drawcords to stuff the bag down to bread loaf size. It’s simply too tight. In my opinion, the two drawcord design is overkill, extra weight, and overstuffing may damage the down over time. I prefer a stuff sack that does not overstuff a down bag, although it takes up a little more room in my pack.
Overall, the Mountain Hardwear Phantom 32 is a highly refined sleeping bag. It’s filled with 800 fill power down and has good loft, but it’s not the loftiest among its peers. It has a number of important factors on the positive side of the ledger: snug sizing (but has adequate room to wear clothing inside), down filled draft collar, two-way locking zipper that operates from the outside and inside, excellent hood, lightweight downproof shell, durable lining, and no Velcro damage to fabrics. However, there is a negative side too: the zipper snags badly, and the stuff sack is over-engineered.
From an ultralight point of view, its full length zipper may be a drawback too. Personally, I am content with a one-third or one-half length zipper, or none at all. A short zipper still allows easy entry and exit, and allows the bag to be unzipped and used as a quilt on warm nights. However, manufacturers seem to perceive that consumers want a full length zipper; even Western Mountaineering puts a full length zipper in most of their bags. What do you think? Post your opinions in the attached forum.
|
Manufacturer |
Mountain Hardwear |
|
Year/Model |
2009 Phantom 32 |
|
Style |
Hooded mummy with full length zipper |
|
What’s Included |
Sleeping bag, stuff sack, mesh storage bag |
|
Fill |
800 fill-power down, 10 oz (283 g) size Regular, 11 oz (312 g) size Long |
|
Construction |
5-inch baffles |
|
Measured Loft |
4.0 in (10 cm) average double-layer loft, manufacturer specification 4.0 in (10 cm) |
|
Manufacturer |
32 F (0 C) |
|
Stuffed Size |
7 x 10 in (18 x 25 cm) |
|
Weight |
Size Regular tested BPL Measured Weight: 1 lb 7.1 oz (655 g) Manufacturer Specification 1 lb 6 oz (624 g) |
|
Sizes |
Regular fits to 6 ft (1.83 m) Long fits to 6 ft 6 in (1.98 m) |
|
Fabrics |
Shell is 15d Superlight 0.85 oz/yd2 (29 g/m2) high tenacity nylon with DWR, lining is 20d 1.2 oz/yd2 (41 g/m2) nylon taffeta |
|
Features |
Full length two-way auto-locking zipper with anti-snag panel and down filled draft collar, zipper pull operates from inside or outside, small Velcro tab at top of zipper, six chamber sculptured hood with down filled face gasket, single handed elastic/grosgrain drawcord on hood, comfort footbox |
|
MSRP |
Regular US$290 Long US$305 |
Hiking through the French Pyrenees is challenging for any young couple hoping to enjoy some relaxation and romance in between climbing passes and breaking camp. The afternoon heat – often ending in a violent thunderstorm – brings more than one overloaded backpacker to boiling point. Now enter a six-kilo, breast-fed, three-month-old baby. Great family trip or a bad idea?
Editorial assistance provided by Roger Caffin
It all started long before our first child arrived, with the simple idea to walk the Pyrenees from coast to coast, a distance of about 900 kilometers (560 miles). Previous experiences in the same mountains were pleasant, and after 3,000 km (1,860 mi) in the Indian and Nepalese Himalaya, walking was almost equal to being. The only real challenge seemed to be making the existential experience of walking in nature as pleasant and healthy for our daughter Flora as it already is for me and my wife, Fany.
By the time we set off on the Atlantic coast, reaching the other coast seemed a dream from the past, just a little too ambitious, but this big dream gave us the motivation needed to carefully prepare ourselves. Besides, at least we got started on some trek. We both get the shivers at the thought of succumbing to social pressures to finally act like we’re “supposed” to: buy a car and go for all-inclusive Club Med holidays. So we decided to at least give it a try and see where we would get. As soon as we could no longer guarantee our daughter’s safety, which happened 250 km (155 mi) later, we called it quits. Before that point, all three of us enjoyed a trekking and camping experience that I would recommend to any newly expanded family who feels the need to get some fresh air after the first hectic months with a newborn. I would also recommend it to any baby who wants to get to know the parents and the world he or she just entered.
Hendaye, France, on the Spanish border. What a place to start: A magnificent bay where lush green mountains meet the Atlantic Ocean, and two countries embrace each other.

The beach front at Hendaye, our starting point.
For a large chunk of our gear, the journey started earlier. Three packages with diapers, gas cartridges, and weight-saving items such as toothpaste samples and exact amounts of instant coffee and muesli bars had left the French West Coast to spots on the map that sparked our imagination. Every five or six days, we picked up a package that saved us from carrying a few extra kilos of oversized food-packs and from panicked searches for diapers, in case the only grocery shop in the village just ran out of stock. We could always start this logistic operation over for the next stretch, if we wanted to move on.
Walking meant preparations like buying ultralight equipment and leaving impromptu discussions with pediatricians behind. The doctor we have, here in Belgium, advised us to walk below 3,000 meters (~9,800 feet), sleep below 2,000 meters (~6,500 feet), and go up slowly, which is no problem in that area. When we presented our coast to coast idea to her, she was more encouraging than worried, adding that carrying our daughter that much would be great for her development. With adrenaline pumping though our veins, every single of these first steps felt like a victory, every new view a discovery. Being on the move is what brought Fany and I together in the first place, and after a month on the move with Flora, I can surely conclude it has brought us, as a family, together as well. This strong flow of inner energy more than compensated for the deep fatigue my wife still felt, only three months after a complicated marathon delivery.

Happy girls.
It was not always easy for Fany to even think of starting such a long trek. In the first six weeks, Flora cried doggedly, sucked all the energy out of my wife, and did not give us any respite in the nights. These were the strange times when even my wife, who earlier had hated to end a rather exhausting 500 km (310 mi) honeymoon trek in West Nepal, entertained some doubts about the whole idea. That’s also when we discovered that internet forums can be a rough environment with lots of harshly expressed opinions, especially when you head off with a false start, but with some balance, they can also be a useful tool to solve your problems and get motivated again.
With the help of experienced hikers and all the other information available on Backpacking Light, we managed, among other things, to cut our pack weight just enough to bring our new passenger in without carrying more kilos than before. Carrying an Osprey Exos 46, with 14 kilos (31 pounds) that included a full water and food load, went rather well. However, in combination with the sling to carry our daughter in front, the load did get really heavy, not because I was reaching a third of my own body weight, but because the shoulder straps were not close enough to my shoulders due to the sling. With some help from the chest strap, the setup worked for the few times that I carried Flora for the last two or three hours of the day.

A fully-laden Nick with pack and Flora.
For the most part, my wife was fine with her old and heavy Marmot pack that came to around 5 kg (11 lb) when filled, plus a total weight of around 7 kg (15 lb) in front: Flora and her sling. Being sandwiched between a baby and a backpack does not give your body much room to cool down, but the small Marmot pack is carried on the hips, and the tiny shoulder strip is just for balance, not for carrying. She bought the 1-kg, 10-liter pack four years ago (much lighter options exist today) when a hernia in the neck threatened to keep her from backpacking at all.

Fany and Flora, ready to go walking.
It took a mental switch to be so intensely gear-oriented for this trip, but the end justified the means. With a baby, there’s not much of a choice if you want to go trekking and camping: it’s going to be a lightweight trip or no trip at all.
One of the advantages of the GR10 is how you start. On day one, you really walk away from the hectic city and the coastal boulevard into the tranquility of the first forested hills dotted with little lakes. Leaving the beautifully painted and charming village of Sare at 4:00 p.m. on the second day, we soon bumped into a Belgian couple we had seen earlier. She stood silent at some distance from him, her face showing signs of a recent cry, which Flora repeated just a little later. No wonder. Although we had taken a four-hour siesta under a shadow-giving tree in the hottest hours of the day, the sun was still frying backpackers like a broiler. Before you freak out with “Oh, my goodness, they fried their baby!” please know that Flora never felt a glimmer of a sunbeam on her skin. She had a big sunhat and just to be sure, we always walked with a black storm-proof and lightweight mini-umbrella.

Nick with Flora in front and a big umbrella for shade.
Even then, day two showed us that our walking strategy wouldn’t work. The 100% cotton Maya Wrap sling was the best one available for walking in warm weather, but we soon learned up to which temperature Flora agreed, and 30 C (86 F) in the shade was way above her comfort level. The limited amount of baby-safe bottled water came in handy on that day as an extra dose of fluids above and beyond the breast milk, but we decided to stop walking at noon from the next day onwards. Plenty of gites, refuges, small hotels, and camping opportunities allowed us to choose the length of our daily walks, as we had figured out before we got started.
Getting walking no later than 6:00 a.m. has disadvantages, but experiencing the awakening of nature before the majority of mankind gets up compensates for the early morning bleariness. The bakery was not yet open at that early hour, but when we left Ainhoa on day three and asked a lonely old guy sitting in front of his home when it did open, he spontaneously went inside and came back with some bread. The hospitality of the Basques or the advantage of walking with a baby? It did not take us long to discover that trekking with a baby on board often made things easier, from making contact with the locals to being given the best room or camping spot.

Flora in the tent.
Before you think we just used our baby to get extra benefits, a few words on why carrying a baby around for a couple of hours every single day is actually a healthy, enjoyable, and good thing for the baby as well (as long as it’s not too hot or wet). I guess you can easily fill a library with books and leaflets on how to take care of babies. Every author seems to claim a radically different approach, many times contradicting each other. Ask any scientist or pediatrician and there’s a little less confusion on the benefits of carrying your baby for a few hours a day. Extensive research showed that increased carrying reduces infant crying by 43% on average1. We didn’t use a stopwatch for every second she cried, but our own experience lies along that plane: she cried much less on the trail than she did at home. Many other studies show that carrying your baby gives him or her a good balance between safety and freedom, resulting in confidence towards the surrounding environment and ultimately leading to a better self-confidence and self-image2. I don’t seriously think Flora realizes she’s laughing at herself, but as a matter of fact, she does love to be before a mirror ever since our trek.
But back to the science. According to our pediatrician, babies who are carried have much less chance to develop back pains at a later age and contrary to popular belief, science has even shown that carrying a baby can improve the backs of the parents who carry them. Even for Flora’s reflux problem (throwing up too frequently and painfully), studies have shown that being carried helps better then lying down the whole day.

Descending a steep hillside with Flora.
I will not go into detail on the many important health benefits of being able to swap our polluted city air – where ozone frequently passes alarm levels in summer among many other air pollution problems – with fresh mountain air for almost a month. I prefer to elaborate on a few simple observations we made, complementary to what science and doctors told us. The day Flora was born, the midwife told us that she’s a very curious person. Many friends with babies also observed and remarked on this. We got a better understanding what that meant on her first camping trip at the age of six weeks.
After walking for three hours in which she mostly slept comfortably in her sling, Flora woke up upon our arrival at the camping site. This was the usual time to cry as loudly as her small body could manage in order to get her evening meal as quickly as possible, but when she left the sling surrounded by greenery, flower smells, and singing birds she was just stupefied. For at least a full ten minutes, a very long time in the world of hungry babies at evening hours, she just quietly looked, mouth fully open. Despite some rain in the night, the first camping weekend surely begged for more.

Traveling safely through rough country.
While trekking through the Pyrenees, it soon became clear that Flora just loved it. I can imagine that if she was able to talk, babies in the daycare center she now spends time in would envy her. Imagine sitting in a sling and being carried around. You can choose from two constantly playing movies showing you all kind of different colorful images, one on the left and one on the right. Natural smells and sounds change frequently. The air is fresh. If you don’t like the left movie you can switch to the right one and back, at any time you like. You can also go to sleep as soon as movie-watching gets boring or as the comfort of feeling the body warmth, hearing the heartbeat, and recognizing the smell of your now familiar parent just brings you in a perfect mood for some cozy napping. Most of the time, Flora opted for sleep after some ten to fifteen minutes of curious movie-watching, making her total sleep time higher then when she was at home. The only problem for us parents: once she was in the sling, she wanted to see a movie and even once she was asleep, she also wanted you to keep moving. We like walking, so it wasn’t a major problem, but the toilet stops were real pit stops: every single second counted!

Flora warm in mummy’s fleece.
An early start in perfect, crisp morning temperatures, an old basque cemetery, walking on an easy trail along a ridge and arriving at noon in a farm (Ferme Esteben) – a gite with rooms and good local food… what more can you wish for? To top it all off we met Richard again. Richard is an Australian guy who first survived cancer and was now walking the whole coast to coast on his own, at the age of sixty-one. From day one, our paths crossed once in a while, but now, with the gite just for the four of us and some personal stories exchanged, it felt like an intense mutual understanding of something we can’t share with most of the people we know and love. Finding meaning in life by the steady movement of our bodies in fresh air, by contemplating on the border and horizons in view and in life, by the healthy fatigue and hunger after a good day of walking. The life with just ourselves, then some total strangers who can so suddenly become friends. At that point, whether you are sixty-one, a nursing mother, a father, or a three-month-old doesn’t matter. We’re all humans searching for a pure bond with nature, ourselves, and other human beings.
On day four we took our first shortcut, avoiding a stretch described as a technical descent on loose rocks. It turned out that the easy track that briefly went into Spain still became a little more adventurous then we anticipated. We only just got started when strange noises rapidly came closer. We stopped. Grab some rocks! While Fany reached for the ground, a deer jumped over the track, some ten meters behind her. The wild boar that had been chasing it didn’t follow, and while we couldn’t see the boar, I know only one animal which makes the sound we heard. Fortunately, those guys are actually vegetarian, and the small deer must have just bothered him. The insect that got hold of Flora’s neck shortly thereafter was clearly non-vegetarian, and with her screams filling the valley for a few minutes, day four did become a headache.
When arriving in Bidarray later than expected and more tired than we had hoped, our luck turned back. We knew the camp site had some rooms available, but we could never have dreamt of arriving at this cosy little chalet and having it totally to ourselves, surrounded by flowers and with a lovely and remarkable larger-than-life host. Errekaldia was like a lost paradise, tucked away in a deep corner of the Pyrenees, and as we were not in any hurry, we just stayed and socialized with the locals for a full four days, taking it a day at a time, not even knowing if we would continue our trek. Having a one-way ticket, plenty of time, and no real time table, we just chilled. We lingered long enough to empty our heads, play with Flora, cook and eat together with the locals, get to know the Basque culture, recharge our mental batteries, and only then think of the best possible way to get going again.

Strolling along in the hills with baby.
There was a last train station two days from here, and we thought it would be good to end our holiday with at least two more easy days of walking, then see what to do. However, once we did get on our feet again, it was with such joy and new energy that on this fifth day of walking we trekked 23 km (14 mi) in less than six hours time, shortcutting two long GR10 stages in one day to arrive in Saint-Jean-Pied-de-Port before noon. It turned out that the decision to stay put for a full four days without even thinking of the walk before us relieved any remaining stress and gave us wings. Having been so close to giving up, persisting and then seeing that actually it was possible to enjoy it, for all three of us, the whole day long, was as great as a bonding experience on the trail can get. It was still dark when we left the medieval little town early the next morning, and from that day we walked 18 km (11 mi) on average, often arriving at 10:00 or 11:00 a.m., with sufficient energy left to enjoy the afternoons as well. We deviated a lot from the GR10 and walked more on asphalt than anticipated, but the main point was that we walked, and we all enjoyed it very much.
Before you, as someone who probably came in touch with the walking virus and as a trek-loving new parent or as aspiring parents start planning, packing, or making babies, there are, unfortunately, just a few things we do want to mention… and some excuses that we have to make.

Nick making camp, while Flora stretches.
To those few campers sleeping in tents located within a range of, say, 50 meters (~165 ft) around our tent at the camp site of Saint-Engrace, the night of 23 July: we’re really terribly sorry. You might think we tortured our child between 12:33 and 12:55 a.m. To me it seemed like two hours, but my wife did check the time. Our best guess is that Flora really didn’t like her nightmare and constantly kept on repeating that observation as loudly as she could for some horrible twenty-two minutes. It took her another hour to get back to sleep, but that was just our problem, not everyone else’s. For once, getting up early and leaving before the rest awoke had another advantage as well, but in case you were there: again, we’re really sorry.
Although we had had successful calm nights in dormitories or rooms with no sound protection for neighbors before that, and even knowing that night was a big exception, we decided that we would keep more distance between us and other trekkers in the nights. I had to run three times with soup, spaghetti, and dessert up and down from the cozy refuge in Arette-la-Pierre-Saint-Martin to our tent located downhill, outside hearing distance, to feed the mum who stayed there with Flora, but this seemed less inconvenient then sleeping next to other people again. Speaking of food: we only ate dry packed food once and managed to find good meals, fruits, and vegetables all along the way so Fany and Flora got their daily vitamin intake properly, together with the vitamin drops that we also give at home.
So yes, we had to make some compromises. We switched from cheaper refuges and dormitories to small and better isolated hotels and rooms, or camped, with one exception later on. Another hard part was the afternoon, when us parents decided not to show Flora any movie because of the heat. A few small toys came in handy for the time awake, and we found plenty of volunteers to keep her busy for a few minutes, but going to sleep was harder with both movement and darkness missing. We managed, but today we sometimes find ourselves wiggling from one foot to the other while standing in a bookshop, even without Flora or a sling in front.

A shady campsite, Fany cooking.
We also managed to avoid the worst weather problems by getting to our destinations really early and checking both the forecast and cloud developments during the day. It helped that I am in the habit of trying to read weather developments, and I did some reading up on predicting mountain weather. Despite a few short but intense thunderstorms passing by in afternoons, we never had a single drop worth a mention while walking. There was an unexpectedly furious wind storm in Iraty at the surprisingly early hour of 6:00 a.m., without a cloud in sight, but we managed to tuck the baby away sufficiently and walk slowly but safely. Although Flora started the trek with a minor cough, for which we visited a doctor two times in the first four days, she got over it while walking and never had any health problem whatsoever for the rest of the trip, apart from that single insect bite.
The only really threatening weather situation we encountered with a baby in the mountains turned out to be neither storm nor heat. While crossing the tree line above Saint-Engrace and entering a vast pasture with nothing standing out but a few cows and their drinking tubs, we suddenly stepped into a soup of clouds embracing us like a blanket. It felt like meeting the wrong guy at the wrong place and time. At this very spot, the guidebook warns about a lack of trail and way-marking for only a very short stretch, and indeed, at some point there was just a grass-covered hill disappearing into the fog, ten meters from anywhere. By staying calm, using whistles, and sending out one person to go and search on compass course from a fixed point and back, we managed to cross the section after two frightening hours and many false leads. I don’t know how precise GPS devices are these days, and perhaps they could have shortened our search a bit. However, retracing our steps towards the village, which we had left three hours earlier, would not have been too difficult along the forest trail.

Feeding time for Flora, above the murky valley weather.
We never lost each other and there were trekkers before and after us. Once we crossed the section and got back to clear way-marking and a path, we met a group of three older, panicking, stranded walkers with no decent jackets, maps, route descriptions, or ideas on what to do since the thick fog blocked them, over two hours before. Needless to say that if you can’t even prepare the basic gear for yourself, follow a clear path even in the fog, and stay calm in any situation in the mountains, don’t even think of bringing a baby on board.

An early start for Col d’Iseye, before it gets hot.
Three days later, we crossed the Col d’Iseye (one of the several 2,000+ m passes we navigated) while the fog was playing hide and seek with us. When it came up, the blanket was complete; when it retreated, we enjoyed great views of peaks cleaving through a sea of clouds. We were in and out of the soup in seconds, but with clear way-marking, a good map, and experience in trail-finding we never got into trouble. Despite the fog’s best efforts fog at disorientation, we confidently walked the last meters straight into the sun, which just came up from the other side. While Flora was watching a predator bird pass just beside us, we stood there in silence, looking at the peaks popping up from the fog on both sides. Although not on the GR10, the crossing of the Col d’Iseye turned out to be one of the most stunning moments of the whole trip.
The main reason why we called it quits after the Col de Torres was surprisingly more a technical problem than fatigue, health, or weather problems. Taking big high steps on a steep and, for the first time, wet hill with rounded stones and a baby in the front, while sometimes needing one hand to hold on to a rock, quickly becomes tricky. As we have experienced before, the highest central Pyrenees have plenty of such steep sections, and safety was our number one concern.

The wild one!
The problem was that any detours are harder to find there. If we really wanted, we could have continued by using major roads or a very long detour, but that would have been a real shame. We had already walked more asphalt than ever before, avoiding the most difficult sections of the GR10, but several days along a road was not worth the compromise. When we added all things up and looked back on what we had already done, we decided that we were satisfied for now.
We may try that stretch next year. By then, Flora will be old enough to ride in a papoose on the back, not hindering us on the big uphill steps. If we can leave early in July, before the worst thunderstorms, in good dry weather and somehow manage the logistics and, where necessary, some detours, expect to meet us somewhere along the trail between Arrens-Marsous and Bagnères-de-Luchon in 2010.

The freedom of the hills.
| Nick’s |
Pack | Fany’s |
Pack | Flora’s Bits | & Pieces | |
| Gear and Clothing | grams | ounces | grams | ounces | grams | ounces |
| Tent | 1827 | 64.4 | ||||
| Backpack | 1060 | 37.4 | 1025 | 36.2 | ||
| Sleeping Bags (703 grams each) | 1406 | 49.6 | ||||
| Therm-a-Rest Mats | 433 | 15.3 | ||||
| Foam Mats + Garbage Bag | 223 | 7.9 | ||||
| Fleece Jackets (2) | 628 | 22.2 | ||||
| T-Shirts (2) | 403 | 14.2 | ||||
| Socks (2) | 159 | 5.6 | ||||
| Underwear (2) | 112 | 4.0 | ||||
| Gore-Tex Shells (2) | 790 | 27.9 | ||||
| Pants (2) | 574 | 20.2 | ||||
| Misc Toiletries: Toilet Paper, Soap, Tweezers, Nail Clippers | 72 | 2.5 | 60 | 2.1 | ||
| Towel | 69 | 2.4 | ||||
| Sunscreen | 72 | 2.5 | ||||
| Toothpaste, Brush | 22 | 0.8 | ||||
| Sunglasses | 53 | 1.9 | 78 | 2.8 | ||
| Compass, Map & Case, Guide, Pen | 189 | 6.7 | ||||
| Notebook | 28 | 1.0 | ||||
| Paperback | 145 | 5.1 | ||||
| Camelback | 207 | 7.3 | ||||
| Softsided Water Bottles (2) | 70 | 2.5 | ||||
| Stuffsack | 87 | 3.1 | ||||
| Buff/Scarf | 32 | 1.1 | 137 | 4.8 | ||
| Garbage Bag Liner | 75 | 2.6 | ||||
| First Aid Kit | 27 | 1.0 | ||||
| Pot, Lid | 310 | 10.9 | ||||
| Cups (2) | 46 | 1.6 | ||||
| Pot Grabber | 44 | 1.6 | ||||
| Matches, Lighter | 27 | 1.0 | ||||
| Stove | 94 | 3.3 | ||||
| Average Gas Weight | 255 | 9.0 | ||||
| Windscreen | 46 | 1.6 | ||||
| Pocket Knife | 83 | 2.9 | ||||
| Sporks (2) | 20 | 0.7 | ||||
| Torch, Batteries (2) | 162 | 5.7 | ||||
| Lumix Panasonic Camera, Case | 177 | 6.2 | ||||
| GSM, Extra SIM Card | 82 | 2.9 | ||||
| Ear Plugs, Eye Cover | 22 | 0.8 | ||||
| Plastic Bags | 18 | 0.6 | ||||
| Tickets, Passports, Cards | 82 | 2.9 | 82 | 2.9 | ||
| Bumbag | 38 | 1.3 | 38 | 1.3 | ||
| Water Filter | 283 | 10.0 | ||||
| Cellphone Charger | 80 | 2.8 | ||||
| Spare Battery | 20 | 0.7 | 0.0 | |||
| Emergency Blanket | 81 | 2.9 | 81 | 2.9 | ||
| Repair Kit | 46 | 1.6 | ||||
| Umbrella | 249 | 8.8 | 249 | 8.8 | ||
| Cord | 30 | 1.1 | ||||
| Whistle | 12 | 0.4 | 12 | 0.4 | ||
| Baby Stuff | ||||||
| Baby (1) | 6500 | 229.3 | ||||
| Sling | 607 | 21.4 | ||||
| Diapers (4/day, Post Package/5 days, 2 Spares) | 440 | 15.5 | ||||
| Toilet Paper | 20 | 0.7 | ||||
| Vitamins | 45 | 1.6 | ||||
| Baby Oil | 25 | 0.9 | ||||
| Thermometer | 12 | 0.4 | ||||
| Skin Cream | 15 | 0.5 | ||||
| Towel | 23 | 0.8 | ||||
| Socks | 26 | 0.9 | ||||
| Short Bodysuit | 108 | 3.8 | ||||
| Long Bodysuit | 83 | 2.9 | ||||
| Pyjamas | 112 | 4.0 | ||||
| Sweaters (2) | 316 | 11.1 | ||||
| Trousers | 73 | 2.6 | ||||
| Warm Hat | 24 | 0.8 | ||||
| Sun Hat | 23 | 0.8 | ||||
| Toys (3) | 92 | 3.2 | ||||
| Mattress | ||||||
| Bib | 24 | 0.8 | ||||
| Ear Cleaner, Nose Cleaner | 23 | 0.8 | ||||
| Anti-Reflux Gel | 55 | 1.9 | ||||
| Baby Powder | 16 | 0.6 | ||||
| Plastic Bottle | 28 | 1.0 | ||||
| Mineral Water | 250 | 8.8 | ||||
| Average Food and Water Weights | ||||||
| Vitamins | 15 | 0.5 | ||||
| Spices | 15 | 0.5 | ||||
| Cheese | 100 | 3.5 | ||||
| Mixed Nuts | 100 | 3.5 | ||||
| Dried Fruit | 100 | 3.5 | ||||
| Chocolate | 75 | 2.6 | ||||
| Tea, Coffee | 25 | 0.9 | ||||
| Sugar | 25 | 0.9 | ||||
| Bread | 250 | 8.8 | ||||
| Water Filter | 1000 | 35.3 | 1000 | 35.3 | ||
| Biscuits | 200 | 7.1 | ||||
| Soup Mix | 60 | 2.1 | ||||
| grams | ounces | grams | ounces | grams | ounces | |
| Average Distributed Weights | 12828 | 452.5 | 4158 | 146.7 | 7751 | 273.4 |
| kilos | pounds | |||||
| Nick’s Load (Pack) | 12.8 | 28.3 | ||||
| Fany’s Load (Pack + Flora + Bits & Pieces) | 11.9 | 26.3 |
1 Hunziker, U.A., Barr, R.G. (1986). Increased carrying reduces infant crying: a randomized controlled trial.
2 Kirkilionis, E. (1995). Wahrnehmen, Erfaren und Üben beim Körperkontakt. Praxis der Psychomotoriek.
Trim-fitting ultralight three-season down jacket with a great shell and basic feature set, but its numerous horizontal seams allow down fragments to leak out.

The Rab Microlight Jacket has a Pertex Microlight shell, 750+ down fill and weighs 11 ounces (size Large). Rocky Mountain goats in the background, Rocky Mountain old goat in the foreground.
An ultralight three-season down insulated jacket with high loft down, very light shell fabric, a minimal feature set, and weight under 14 ounces is an essential part of an ultralight or lightweight backpacking kit for summertime backpacking in the mountains or shoulder season camping most anywhere. Down insulation provides the most warmth for its weight, so it’s the insulation preferred by backpackers and mountaineers in all but very wet conditions. An array of jackets is available – differing in fabrics, features, and amount of down insulation – so there’s a jacket to fit most hiker’s needs and preferences. Look for a Backpacking Light State of the Market article on ultralight three-season down insulated jackets in Spring 2010 that will present the options and assist with the selection process.
The Rab Microlight Jacket, as the name implies, utilizes Pertex Microlight fabric for the shell. Microlight, like other Pertex fabrics, is made of microfine filament yarns with an extremely close weave, and they are calendared to make them windproof and downproof. The fabric’s high density weave also enhances insulation by trapping more air inside. However, Microlight at 1.3 oz/yd2 is a bit heavier than Pertex Quantum at 0.9 oz/yd2. Microlight features DWR+, which is a unique durable water-repellent treatment which encapsulates each filament of the fabric with a hydrophobic polymer. This treatment gives excellent water shedding, and since it is not a continuous coating, breathability is not impaired. Another unique property of Pertex fabrics is their ability to disperse water. Where most nylon fabrics wick moisture directly through the weave, Pertex spreads it over a broad area by capillary action, so it evaporates more rapidly.

Front and rear views of the Rab Microlight Jacket. Features include a full front zipper, stand up collar, two side pockets, and zippered chest pocket.
The Rab Microlight Jacket shares several design elements with its siblings, the Microlight Alpine Jacket (hooded), and Microlight Vest. All have sewn-through 1.5-inch horizontal quilting to hold the down in place, two hand pockets, one zippered chest pocket, and elastic piping on the cuffs and hem.

The Microlight Jacket has two unzippered handwarmer pockets (left), and one large zippered chest pocket (right) that doubles as a stuff sack.
The down insulation in the Microlight Jacket is 750+. I asked Rab why they don’t use 800 fill power down to keep up with the competition, and their response emphasized the "+" sign after the "750," meaning their down has a minimum of 750 fill power, and is closer to 800 on average. Rab prefers to use a very conservative rating rather than inflate it for marketing purposes (not that others do…) so they call it what it is at the very minimum. From a consumer point of view, it still begs the question: "Is it, or isn’t it, comparable to ‘800 fill’ used by other manufacturers?"

Rab Microlight Jacket worn while backpacking on a cold fall day.
I tested the Rab Microlight Jacket on several summer and early fall backpacking trips in the southern Colorado mountains, where I camped at elevations up to 12,500 feet (3,810 m) and encountered snow, wind, rain, cold nights, and lots of beautiful scenery. I wore the Microlight Jacket as an outer layer on cold days, as a midlayer with a shell over it for extra warmth and wind protection, and in my 30 F (-1 C) sleeping bag to extend its warmth on below freezing nights.
The jacket has a trim fit, both in the body and sleeves, so it will only layer over a base layer and a thin sweater. Sleeves are set-in at the shoulders and are plenty long.
I really like the jacket’s roomy hand pockets, which will hold a bunch of smaller items in camp and keep them handy. The side pockets are not zippered and the elastic band in the binding has minimal stretch, so items can fall out if the pockets are overloaded. I found the zippered chest pocket handy for holding my digital camera to keep it dry and secure.

The jacket’s Pertex Microlight shell is very wind resistant and functionally waterproof (see next photo).

I tested the jacket’s waterproofness by placing a puddle of water on the shell for an hour, then checking for leakage. Nothing came through! Water eventually soaks through the seams in many jackets, but the Pertex Microlight shell on this jacket didn’t allow any water to soak through.
The Microlight Jacket is warm down to about freezing at a low activity level, and warm down to colder temperatures when worn as a midlayer while hiking or skiing. From past experience with a Pertex Microlight windshirt, I find the fabric not very breathable (because it’s calendered), but breathability is less important in an insulated jacket shell. Overall, the Microlight Jacket is extremely versatile (as are all ultralight three-season down jackets) and it saw a lot of use. I wore it during the day as needed, every evening and morning in camp, and inside my sleeping bag.

Although the Microlight Jacket’s 1.5-inch horizontal quilting is stylish and holds the down in place, the numerous seams also provide an easy route for down to escape. This microfleece top is covered with down fragments after wearing it under the Microlight Jacket in a sleeping bag overnight.
Two jackets closest to the Rab Microlight are the Patagonia Down Sweater and Mountain Hardwear Nitrous Jacket. The following table compares their specifications; manufacturer data for size medium are shown.
| Jacket | Shell Fabric | Insulation | Features | Weight (oz) | Cost (US$) |
| Rab Microlight | Pertex Microlight (nylon) | 750+ down | 2 unzippered hand pockets, zippered chest pocket, elastic cuffs and hem | 11.3 | 190 |
| Patagonia Down Sweater | Polyester | 800 down | 2 zippered hand pockets, drawcord hem, elastic cuffs | 11.0 | 200 |
| Mountain Hardwear Nitrous | Polyester | 800 down | 2 unzippered hand pockets with flap, zippered chest pocket, drawcord hem, elastic cuffs | 11.0 | 220 |
Compared to the closest competition, the Rab Microlight Jacket holds up well. Its Pertex Microlight shell is a plus, the down insulation seems to be comparable (see explanation above), and it’s a better value. Of course, this is a limited comparison; there are numerous other jackets on the market with different constructions and feature sets.
Overall, the Rab Microlight Jacket is perhaps a little more versatile than many of its brethren because of its medium level of insulation, trim fit, lack of a hood, and its pockets. This combination allows the jacket to more easily be worn as either an outer layer or midlayer, in a variety of outdoor sports, as well as for sport-casual dress. However, its numerous horizontal seams allow down fragments to exit. Also, the binding on the hand pockets does little to keep items from falling out; I would prefer to see an elastic piping like that used on the jacket’s cuffs and hem.
|
Manufacturer: |
Rab (http://www.rab.uk.com/) |
|
Year/Model: |
2009 Microlight Jacket |
|
Style: |
Full zip hoodless jacket |
|
Fabrics: |
Outer shell 30d 1.3 oz/yd2 (43 g/m2) Pertex Microlight with DWR finish, lining is a generic 30d downproof nylon |
|
Insulation: |
4.4 oz (125 g) of 750+ fill power down |
|
Loft: |
Measured two layer loft is 1.5 in (4 cm) |
|
Features: |
Sewn through construction with 1.5-inch horizontal quilting, down filled stand up collar, full front #45C YKK zipper with one slider and storm flap under zipper, two hand pockets, one zippered chest pocket, elastic cuffs and hem, 1.25-inch dropped tail, jacket stuffs into its chest pocket |
|
Weight: |
Size Large tested, measured weight 11 oz (312 g), manufacturer specified average weight 11.3 oz (320 g) |
|
MSRP: |
US$190 |
With temperatures that ranged from -5 F to 40 F, the Bob Marshall Wilderness threw some formidable weather our way and reminded us: this stuff ain’t for the faint of heart!
You don’t have access to view this content.
The E-620 is the lightest mid-sized or “crop sensor” format DSLR with all the functionality and image quality for serious backcountry still photography – even in difficult situations like handheld shots in low morning and evening light.

The Olympus E-620 is the lightest DSLR with:
Put another way, the E-620 is the lightest mid-sized or "crop sensor" format DSLR with all the functionality and image quality for serious backcountry still photography – even in difficult situations like handheld shots in low morning and evening light. In addition, there are a large number of lightweight Olympus 4/3 lenses with excellent image quality available for the camera. And with 4/3 lens cross-company compatibility, the E-620 can use 4/3 lenses from other manufacturers as well.
| Comparison of Mid-size Sensor Digital Cameras | |||
| Class | Camera | grams | ounces |
| Midsize Sensor | Olympus E-620, 25mm f/2.8 ED Zuiko "pancake" lens | 615 | 21.7 |
| Olympus E-620, 14-42mm f/3.5-5.6 Zuiko ED Zoom | 710 | 25.0 | |
| Canon EOS Rebel T1i, EF-S 18-55mm f/3.5-5.6 IS | 730 | 25.7 | |
| Nikon D5000, 18-55mm f/3.5-5.6G VR AF-S DX | 895 | 31.6 | |
| µ4/3 | Olympus E-P1 with 14-42 lens | 560 | 19.8 |
| Panasonic Lumix DMC-G1, 14-45mm f/3.5-5.6 kit lens | 630 | 22.2 | |
| Compact | Sigma DP1 with fixed 16.6mm lens | 285 | 10.1 |

One of the best assets of the Olympus 4/3 system is the depth of high quality lightweight lenses that are a perfect fit for backcountry photography. My favorite lens is the new Zuiko Digital ED 9-18mm F4.0-5.6. Only 9.7 oz, it takes excellent panoramic shots. FL 9mm, ISO 200, 1/320 sec, f/9
I found the E-620 quick and easy to use. Almost every function/adjustment is one or two button presses away. Many direct access external controls (buttons, control knob, and Super Control Panel) give zippy access to all commonly used functions. There is little need to get buried deep in the complex menus that sometime plague sophisticated DSLRs, though the camera is also extremely customizable if you want. The camera controls are so intuitive that my wife, who rarely uses a DSLR, came rapidly up to speed using the E-620. She mastered its basic adjustments and was taking good pictures after just a few hours in the field.

I was off scouting a route when my wife took this picture of an approaching storm over a skulled cairn. FL 15mm, ISO 200, 1/320 sec, f/10, Zuiko Digital ED 9-18 mm F4.0-5.6 [Photo: Alison Simon]
The E-620 has fast, effective, multi-point autofocus, and I found the exposure quite accurate. When it was off, the E-620 tended to underexpose and preserve highlights, which is what you want the camera to do.

Between the direct access buttons on the top and back of the camera and the Super Control Panel (left on the swivel LCD screen), almost every commonly used function or adjustment is just one or two button presses away.

The Super Control Panel is my favorite operational feature on the E-620. It is so fast and easy to use that I end up making far more adjustments for individual shots than I would if I had to dig deep in the menus of other DSLRs. This yields higher quality photos with only slightly more effort than just leaving the camera in its standard settings.

The rear camera controls: The flip LCD display can rotate so that the LCD faces inward and is completely protected. The "Fn" button in the upper right below the control knob is programmable for any camera feature you want to assign to it. While most functions are already readily accessible by dedicated buttons or the Super Control Panel, the "Fn" button gives you rapid access to a function like white balance. A number of the buttons are backlit for ease of use in low light.

Top of the camera showing the mode control knob, the single function adjustment knob, exposure control button, and the self-timer/remote button on the far left (which I use often in the field).
An optical viewfinder allows you to focus and compose your image in a way that an LCD display cannot match, especially in low light or bright daylight. LCD displays are lower resolution; it is difficult to see fine detail for precise shot composition or sharp focus (especially for P&S and compact cameras without optical viewfinders). LCD displays are also quite hard to see in bright daylight and, in low light, are grainy with skewed colors. Finally, they often have slow refresh rates and difficulty tracking and focusing on moving subjects. These cons are often also true for LCD-driven viewfinders (EVFs) like on the µ4/3 Panasonic Lumix DMC-G1 (although the viewfinder version of the LCD display does solve daylight readability issues). Finally, it is easier to hold a camera steady when it is pressed against your face with an optical viewfinder. LCD-screen-only cameras, usually held out at arms’ length, introduce more camera shake.
In an improvement over the E-520, the E-620 has the largest and brightest viewfinder for a small Olympus DSLR (excluding the E-3 and E-30). While a bit smaller than some other manufacturers’ mid-size DSLR viewfinders, I found the E-620’s viewfinder more than adequate to focus and compose shots, even in the low light of early morning or late evening.
The E-620 has made a significant improvement in dynamic range over its predecessors, especially in the ability to capture highlights. In fact, at ISO 200, it has one of the largest dynamic ranges of a lightweight DSLR. A high dynamic range, or the ability to capture both shadow and highlight detail in high contrast scenes, is one of my most important criteria for a backcountry camera. It can make the difference between a superb photograph and a throwaway.

This picture did not happen as anticipated. The sun was supposed to come up from the east and shed a glorious morning light onto the carpet of wildflowers in front of our tent. Instead, a blanket of low eastern horizon clouds blocked the most direct sunlight and kept the flowers lightly shaded, making the sky above the ridgeline much brighter in comparison. I was quite pleased that the sky exposed mostly blue (not white) and that there was definition in the clouds. FL 14mm, ISO 200, 1/125 sec, f/6.3, Zuiko Digital ED 9-18 mm F4.0-5.6

This is the worst time of day to take a picture with the highest contrast – deep shadows underneath an overhang on the dark side of the canyon and brightly lit upward facing surfaces on the sunny side of the canyon. The E-620 handles the contrast with detail in both, and beautifully conveys the sense of being in the hot canyon with a blazing desert sun. Bonus for the budding archaeologists: there is a small ruin in the picture, if you can find it. ISO 200, 1/320 sec, f/10, Zuiko Digital ED 14-42mm F3.5-5.6

Morning after thunderstorms: Alison is not only shadowed by the sun rising behind her, but also by the tent wall. Yet, her face and the inside of the tent have reasonable detail, and there is nice sky detail without blown highlights. This is due in part to the E-620’s excellent dynamic range and in part to the camera’s Shadow Adjustment Technology which "adjusts the exposure in the shadows while retaining all the detail in the bright areas." The price you pay for the increased shadow detail is a bit more noise with the detail. I like the effect in this picture and many others. I can usually live with a bit of shadow noise for the increased dynamic range to handle high contrast situation, so I tend to leave this function enabled. If I don’t like the result, I can revert to the RAW image, in which the effect is not applied. FL 14mm, ISO 200, 1/100 sec, f/5.6, Zuiko Digital ED 9-18 mm F4.0-5.6

I am not quite as happy with the Shadow Adjustment in this photograph. The noise in my face is a bit much for my taste, while the native cutthroat suits me right down to the ground. I’d guess that, backlit and with shade from the hat, my face would probably be dark and missing detail if not for Shadow Adjust. FL 30mm, ISO 200, 1/250 sec, f/9, Zuiko Digital ED 14-42mm F3.5-5.6 [Photo: Alison Simon]
The excellent JPEG output from the E-620 is time- and hassle-saving. In the past, I would usually only process the RAW images from my DSLRs. The JPEG output was so disappointing that it was usually faster to go to the source (RAW) and reprocess the photo from there. While giving me excellent final photographs, shooting RAW had a couple of disadvantages:
After shooting for almost three months with the E-620, I have learned to trust and appreciate its JPEG output to the point that I usually do not shoot RAW except for artificial light situations (or a few special circumstances outdoors). The JPEG files have a dynamic range large enough that I do not have to go back to RAW files to try and recover blown highlights (the E-620’s excellent exposure helps as well). Shooting JPEG only, my memory cards last a long time. And with only light processing of the JPEG files required, my actual output of pictures to the web or photographic prints has increased. And really, isn’t that the point of taking photos in the first place?
To be truthful, with a base ISO of 200 and in-camera image stabilization and seldom shooting at focal lengths longer than 25mm (50mm; 35mm equivalent), I rarely find it necessary to go to a higher ISO for my field shots – even handheld at dawn or dusk. The Zuiko lenses are usually quite sharp at larger apertures, which also helps. That being said, the Olympus E-620 does quite well up to ISO 800, with little noise or loss in detail. I would not shoot higher than ISO 800 unless there was absolutely no other way to get a photo.

This is a fairly typical early morning photo that poses little problem for a sharp handheld photo. There was no need to go to a higher ISO or use a tripod. FL 21mm ISO 200, 1/100 sec, f/5.6, Zuiko Digital ED 14-42mm F3.5-5.6
The only time I recently needed to move to an ISO higher than 200 was at the SPOT Press Conference at the OR Summer Market. The indoor light did not support shooting at longer focal lengths, and I needed to shoot from a distance. Combined with the E-620’s in-camera image stabilization, I was able to get reasonably sharp images without a lot of ambient light.

Astronaut and adventurer Scott Parazynski introducing SPOT Gen 2 at a press conference at ORSM 2009: It took both pushing the ISO to 800 and the in-camera image stabilization to get a reasonably sharp image shooting indoors without a flash. FL 40mm, ISO 800, 1/30 sec, f/5.5, Zuiko Digital ED 14-42mm F3.5-5.6
One of the best assets of the Olympus 4/3 system is the depth of high quality lightweight lenses that are a perfect fit for backcountry photography. Obviously, these lenses contribute to overall image quality, but because they are smaller and lighter than many competing manufacturers’ lenses, they lighten your total weight of camera gear .
My favorite lens is the new Zuiko Digital ED 9-18mm F4.0-5.6. Only 275 g (9.7 oz), it takes excellent panoramic shots. I don’t think anybody else sells an ultra wide angle zoom at anywhere near the 9-18’s weight/pricepoint. The environmentally sealed Zuiko Digital ED 12-60mm F2.8-4.0 SWD, while heavier than the 9-18, is regarded as one of the best digital zoom lenses on the market. Another highly regarded lens is the exceptionally sharp Zuiko Digital ED 50mm F2.0 Macro.
Note: 4/3 format has a 2x crop factor, meaning that the 35mm format equivalent focal length is twice the 4/3 format focal length listed above. Thus, the 9-18 mm Olympus 4/3 lens is the equivalent of a 18-36mm lens in 35mm format.

Here I was able to capture most of a lake, shooting at 11 mm using the very light 9.7 oz Zuiko 9-18mm F4.0-5.6. The photo is quite sharp with little noticeable distortion. FL 11mm, ISO 200, 1/200 sec, f/11, Zuiko Digital ED 9-18 mm F4.0-5.6

A detail of the lake, showing good detail and sharpness.
The E-620 works with a small 11-gram (0.4-oz) RM-1 infrared remote unit that came with one of my Olympus P/S cameras about five years ago. It is great for self-portraits and as a "cable release." I love that Olympus has retained compatibility for this small and light remote, especially after I ended up paying $80 for a heavier cable release for a Nikon D300.
The E-620 with stock 14-42 lens or 9-18 fits into a 170-g (6-oz) Lowepro Mini-Zoom case, which is easily carried with the strap over my shoulder and the camera resting on my chest. The whole setup, case included, weighs less than most mid-size sensor DSLRs.

Compact for a DSLR: The 6-oz Lowepro Mini-Zoom case easily accommodates the E-620 and Zuiko Digital ED 14-42mm F3.5-5.6 kit lens (left) versus the 24-oz Lowepro Toploader Zoom used by many to hold larger DSLRs (right).
My first thought at carrying a DSLR, even a small one like the E-620, on my chest while backpacking was "Not gonna happen, no way, nuh-uh." Still, tempted by the image quality improvements of the larger camera, I decided to give it a try. I was surprised how little it impacted my backpacking. Carrying the camera on trail is a cinch, but it usually stays on my chest for much of my time canyoneering and during cross-country mountain travel. At around Class III climbing, the camera goes into the top of my pack. Even so, I end up taking the camera out of the pack for more photos than I thought I would. The results are so good, I’m inspired to keep taking more pictures.

The anticipation is that this huge bulky thing bouncing around on your chest will drive you crazy, significantly impacting your hiking ability and marring your wilderness experience. In reality, the camera sits quietly on my chest, and much of the time I hardly notice it’s there. Obviously, the small size and weight of the E-620 tucked into a (comparatively) small case helps a lot. And when a photo opportunity arises, the camera is conveniently there and ready to go. [Photo: Richard Dixon, Nikon D40]
In the end it is a matter of personal choice where you draw the line on image quality versus weight and bulk. Some are happy taking pictures with a cell phone; others will never part with their 3.5-pound, full-frame Canon 5d mk II. I’ve even run into view camera photographers lugging ten to twenty pounds of camera gear deep in the canyons of southern Utah.
For me the E-620 hits the sweet spot of weight to performance for a backpacking camera. It comes very close to image quality of the best DSLRs at a fraction of the weight, bulk, and cost. It is light enough that it does not impact my hiking or wilderness experience. Thus, I take the camera on more trips and produce more high quality photographs. At the sizes I print, the E-620 yields large, sharp photographic prints, with excellent color and dynamic range – photographs that I am proud to have hanging on my wall. In summary, carrying the E-620 has reignited my enthusiasm and love for serious backcountry photography.
My only regret is that Olympus did not see fit to add HD video to the camera. With 1080p, 24 fps HD video with a decent codec and a jack for an external stereo microphone, this would be close to the perfect lightweight tool for professional quality still photography, and near professional quality backcountry videography. I can only hope the E-630 will add this feature. (If they do, I would expect a significant increase in price.)
|
MSRP: |
$599.99 (body only) $699.99 (with 14-42mm f/3.5-5.6 Zuiko Lens) |
|
Dimensions (W x H x D): |
5.11 x 3.7 x 2.36 inches (excluding protrusions) |
|
Weight: |
Manufacturer Claimed Weight: 1.04 lb (body only) BPL Measured Weight: 1.05 lb (body only) BPL Measured Weight: 1.15 lb .52 kg (body, memory card, battery) |
|
Memory: |
CompactFlash Type III (UDMA), Microdrive, xD-Picture Card |
|
Sensor size: |
17.3 mm (H) x 13.0 mm (V) |
|
Lens mount: |
Four Thirds Mount |
|
Megapixels: |
12.3 effective (maximum available is 13.1 at 4:3 aspect ratio) |
|
Screen: |
Hypercrystal LCD, 2.7 inches diagonal, 230K dots |
|
ISO sensitivity: |
Auto: ISO 200 – 3200 (customizable, default is 200 – 800) Manual ISO 100 – 3200, 1/3 or 1 EV steps |
|
Exposure modes: |
Auto, Program AE, Aperture Priority AE, Shutter Priority AE, Manual, Scene Program AE, Scene Select AE |
| Metering: | EV 1-20, digital ESP, center weighted average, spot |
| Focusing: | Single AF, Continuous AF, Manual Focus |
| File format: | RAW (12-bit lossless compression), JPEG, RAW+JPEG |
|
Recording image size: |
RAW 4032 x 3024 pixels JPEG 4032 x 3024 pixels – 640 x 480 pixels |
|
Image Stabilizer System: |
Built in (Imager shift image stabilizer) |
|
Drive modes: |
Single-frame shooting, Sequential shooting H, Sequential shooting L, Self-timer, Remote control |
| Flash: | Pop-up, plus hot shoe |
|
Viewfinder |
Eye-level single-lens reflex viewfinder |
|
Dust reduction: |
Supersonic Wave Filter (dust reduction system for image sensor) |
|
Shutter speed: |
P(Ps), S, A, M mode- 60, 14000 sec. |
|
Anti shock mode: |
Available (1 to 30 sec. selectable) |
|
PC interface: |
USB 2.0 High Speed for storage and camera control (MTP mode is available) |
|
USB/Video connector: – |
Dedicated multi-connector (Video NTSCPAL selectable, Optional Remote cable RM-UC1 is available) |
|
Battery: |
BLS-1 Li-ion battery (included) |
|
Included: |
Camera Body, Li-ion battery BLS-1, Li-ion battery charger BCS-1, USB/Video Multi cable, Eye piece cover EPC-1, Shoulder strap, OLYMPUS Master CD-ROM, Instruction manual, Warranty card |
Treat your leather nicely, THEN abuse the ever-loving daylights out of it.

Sno-Seal in containers (courtesy Atsko).
Some walkers like shoes with a leather trim, and some cross-country skiers prefer leather boots to plastic. Some people even wear leather shoes at home and to work. But no matter what the shoes and how the leather was tanned, if it gets wet again and again, it can suffer. The original leather treatment can get washed out, leaving the leather to go hard and shrink when it dries out. Once dry, it’s also likely to crack on flexing. Of course, wet leather is much heavier too.
You can use a range of treatments on leather, but many of them have problems or don’t work very well. In my experience, silicone treatment fails after a few hours: it just rubs off. Boot polish is better, but it is hard to get enough on the leather to really make a difference. Oils and greases go too far into the leather, get messy, and wash out easily. Fats let the leather rot over time and can go rancid. Beeswax, as used in Sno-Seal, apparently stays mainly near the surface of the leather, but seems to have the desired effect (lubrication of the leather) right through it. According to Atsko, once the solvent in Sno-Seal has evaporated, the beeswax stays a soft solid inside the pores of the leather up to 63 C (146 F): it does not leak out to get on socks etc.
Atsko claims that leather treated with Sno-Seal will still pass moisture, so you can treat the leather on shoes with a Gore-Tex membrane, and the membrane will still work. I don’t have much experience of this, but then my feet are rarely dry inside a membrane shoe anyhow.

My wife’s Salomon shoes after six weeks in Switzerland. Inset is the small pot of Sno-Seal we packed with us.
Atsko’s claims are not fanciful waffle either. The picture here shoes my wife’s Salomon joggers after six weeks walking in Switzerland in the summer of 2009, going over Alpine passes (a pass a day keeps boredom at bay…). The leather exterior on the joggers is still supple and in good condition, because I took some Sno-Seal in the little plastic pot shown and applied it with a bit of rag every couple days when the shoes were wet. The total weight for the pot of Sno-Seal and rag was a bit over 40 grams (1.4 oz), but I didn’t use the full pot by any means. I would have used more if the weather had been wetter. As to weight added, I would guess I used between 5 and 10 grams for the pair of shoes each time. Some of this would have worn off after a while.
Contrast that with what happened in 2007 in the French Alps when I didn’t look after her shoes this way. The leather exterior got soaked through for weeks on end, which stripped any tanning out of the material. When the weather cleared, the leather dried out, shrank, and cracked. My wife was nearly crippled by the reduced volume of the shoes: her feet were badly injured with internal bleeding, which started to leak through to the soles of her feet. Fortunately we caught the problem early enough that the damage to her feet was not permanent. I took the footbeds out of her shoes to make more room in them, and she managed to hobble to the next town – which very fortunately had a shoe shop. It was a worrying experience way up in the mountains at the time though (which is why we took the Sno-Seal in 2009).

My XC Nordic ski boots.
In 1991 my wife and I took up Nordic cross-country ski-touring, with light leather three-pin boots. My original pair of Scarpa Nortour boots are shown here, still in excellent condition in 2009. Actually, I had to repair some of the stitching at the toe early on, but the leather has been treated with Sno-Seal before every trip, and the boots are like new. A pity I outgrew the boots (size EU 42) recently!
Finally, I regularly use the Sno-Seal on yellow (pig-skin) riggers gloves for working around the farm. If I don’t do this, the gloves might last a year before cracking and breaking up; with the Sno-Seal treatment, the gloves seem to last up to five years easily. Since they are not cheap, it’s nice to get more bang for the buck with a little preventative maintenance.
|
Manufacturer |
Atsko |
|
Year/Model |
1933-2009 |
|
Manufacture |
USA |
|
Material |
Beeswax and solvent |
|
Capacity |
1 qt can, 8 fl oz jar, 4 fl oz tube, 1/2 flo oz sachet |
|
MSRP |
US$7.30 for 8 oz jar |
Episode 2: we focused on fast food preparation and the elimination of a whole lotta gear by hiking into a U.S. Forest Service lookout cabin.
You don’t have access to view this content.
How books about or by famous UL walkers, a sewing machine, and the most devoted UL community on the planet got me back on the trail and going light.
I live in Australia. It’s the smallest continent, but also the largest, most remote, and most isolated island. To top off all of that, I live in Perth, the capital of Western Australia, which is the most isolated capital city in Australia, and thus, in turn, the world. This creates some unique and interesting challenges.
The move to lightweight for me was more of a necessity rather than a personal goal to see how light I could hike, although my motivation is now changing. My frame and build do not allow for carrying heavy loads comfortably at all, and I figured that as I was out hiking to enjoy myself then I should do just that. More recently I was involved in two car accidents weeks apart and, as a result, have several prolapsed disks from C2 through to C7, which make things a little uncomfortable at times.
Initially I started hiking with the Cubs and then Scouts as a child. Back then, gear consisted of heavy external frame packs that provided no comfort at all with most, if not all of the weight, right on the shoulders. I recall carrying canvas tents, large Trangia stoves, and enough food and lollies to feed a small nation. Then one of two things happened: I lost interest, or being in the Scouts was no longer the cool thing to do. I don’t recall which it was, but none the less I gave hiking and backpacking up.

Memories of Scouting days – this is from a recent group I met whilst out performing track maintenance along the Bibbulmun Track. The group was out for a single night, yet managed to look like they were out for a week. As penance for having been so noisy during the night, I spent some time the following morning educating them on ‘Code of the Campsite.’ This involves things such as Be considerate and share the shelter; Protect the environment; Be clean – Pack it in, pack it out; Stay cool – Cook safe.
It wasn’t until late 2005, when my son was born, that I went down to the local hiking store and bought myself a nice pair of shoes (probably the only item I still use now), a pack, a sleeping bag, a stove, and a few other items I was advised were a must. I prepared myself to reacquaint with the hiking world. Looking back, I have to admit that one of the reasons I wanted to get back into hiking was simply because of the amount of new gear there was to explore (trap number one and the first of many). Another reason was so that I could prepare myself and be comfortable in my abilities to take my son out hiking when he was old enough. That time has now come, Cameron is four years old and enjoys being outside more than he does in. We have yet to go on an overnight hike together, but that is only a matter of time.
My first time back on the trail for a true overnight hike was along the Bibbulmun Track in Western Australia to a place known as Mount Cooke. At a total height of around 540 meters (1,772 feet), it’s one of the highest peaks along the trail (no altitude sickness there!). This hike was probably the best I have ever been on, and I still reminisce about it now. Not for the actual walk itself, although it was good, but more for the realisation that this stuff was way harder than I ever remembered it being as a youngster. My pack was heavy, and there had to be a better way to do this; surely there was lighter gear out there to make this more enjoyable. The gear list below will give you an idea of what I was carrying. There are probably even more items that I didn’t record at the time – you know, that stuff you just have to take with you, like an extra can of isopropane gas, just in case the one cup of water you boil runs the first can dry.

One heavy pack, over 13 kilos (28.6 pounds). I’m using a shoe cleaning station while out on a four-day hike along the Bibbulmun Track. These stations play a very important part in preventing the spread of Dieback, a destructive disease predominant in the area. Of course, the seat also provided some relief for the day’s walk.
Being off the trail for so many years, along with my recent trail experience, meant I needed to spend some time researching lightweight gear and its pitfalls. The most obvious place to start was the internet. It wasn’t long before I found a few websites that proved to be excellent resources. The first was a locally run Yahoo group, Aushiker, which connected me with some local hiking enthusiasts. One of the people I met online soon became a very good friend and hiking companion. One of the other people I met was the famous (infamous?) Roger Caffin, who soon put me onto Backpacking Light. His precise words to me were “PS: you need to subscribe to Backpacking Light to keep up with all this UL stuff.” I still don’t know why I hadn’t done my research before I had bought a heap of gear.
I happened to stumble across a Backpacking Light forum post where the topic was focused around a hiker in the United States by the name of Ray Jardine, who was apparently the godfather of lightweight hiking. I just had to know more about this guy, so I bought his book Trail Life and read it cover to cover over a weekend. That fact still amazes me, as until that day I had never read an entire book, I kid you not. I was so amazed by what I learned that I grew ravenous for more about Ray’s style. I jumped online, ordered a quilt kit, and put that together with attention to detail like I had never done before. I was so proud my achievement; I had made a quilt and knocked 300 grams off my weight with no real effort. The lightweight world was banging at my door and was also in my head continually. I dreamt about gear (still do, in fact!) and how much lighter it could be. After the Ray Jardine quilt and successful field trips with it, I progressed to a GoLite Ultra20 quilt and removed a further 360 grams from the original weight of my traditional sleeping bag, a Mountain Designs Travelite (1200 gram reduced to 540 grams).
My book collection started to expand, and included Hike Your Own Hike by Francis Tapon, The Last American Man by Elizabeth Gilbert, 98.6 Degrees: The Art of Keeping Your Ass Alive by Cody Ludin, and a host of many more, which have provided great inspiration. Research soon brought me a little closer to home, and when I looked at Australians who have motivated me to seek a lighter pack weight, there is the typical high profile thru-hiker or well known personality, but there are also people like the indigenous Aboriginals and bush swagmen of the late nineteenth and early twentieth centuries.
The Aboriginals led a nomadic lifestyle where they walked in search of fertile areas to hunt and gather, living off the land with as little impact to the surrounding areas as possible. This was the original “leave no trace.” The Aboriginals had the right idea from the start, which was about 50,000 years ago. They travelled light, generally carrying only what they needed to survive, a kylie (boomerang) and a gamai or spear. They built shelters (mia) out of tree branches, covered them with bark, and bound them together with grasses. When it was time to move on, these were generally left standing for the next tribe that passed through. Bush tucker was collected from the native plants and may have consisted of wild fruits such as figs, bush pear, and appleberries and vegetables such as rainforest spinach and potatoes. Kangaroos, emus, goanna, snake, and fish were common sources of meat and easily caught buy the skillful hunter.
The swagman, on the other hand, was not so much of a hunter and gatherer; he was simply a lone traveller walking from town to town looking for work on the farms. Much like the Aboriginals, swagmen carried only what they needed to survive, but rather than a kylie and gamai, it was a swag and a billy. Swag is an Australian term for a bedroll, and a billy is a pot or can with a wire handle used to boil water or cook food in. There were no tents or other luxury items.
If the Aboriginals and swagmen could do without, I saw no reason I couldn’t do the same. Now, I’m not saying I’m going to walk the trails with a spear or just carry a swag, but that mentality makes gear selection a little more careful and planned. I questioned my need to carry extra gas, then wondered if I needed gas at all, or if an open fire would do the job. In those areas where open flame is permissible, I packed accordingly. Those areas with fire bans forced me to consider what else I could bring that was still light in weight. For me, deciding what’s achievable in going lightweight is about looking at history, and what our ancestors and past civilizations did, how they lived, how they travelled. It is about knowing my limitations both physically and mentally, being comfortable with what I am carrying and ensuring it really is necessary – and most of all, doing all of this safely.
One of the challenges I faced in my quest to carry light and be a true lightweight hiker, apart from the lack of local resources due to geographical isolation, was funding. How was I going to pay for all this gear? Like most lightweight hikers, I turned to “Make Your Own Gear” or MYOG (at least now I speak the lingo of a lightweight hiker!). Pepsi can stoves were the first item I wanted to master, and boy, did I drink a lot of Pepsi over a short period. The stoves were successful to a point and served their purpose well. Going from an MSR Pocket Rocket to the alcohol style setup was interesting, and it taught me a lot about making things simple, with fewer moving parts to worry about. I later discovered titanium and have since used a Vargo Decagon stove and now more recently an Ultimate Survival Technologies WetFire stove. Continuing on with my newly found skill of MYOG, I went out and bought myself a sewing machine (my wife still ribs me about this), for a whopping $15 from a very good mate with whom I hike on a regular basis. I started with small stuff sacks and progressed to making my son a backpack. I have also made an insulated vest and a bivy based on the Six Moon Designs Meteor.
My first solo attempt at going lightweight backpacking didn’t come until March of this year, when I went out to one of my favourite spots, known as Helena Hut, in the Helena National Park. I had just purchased my first lightweight pack, a ULA Relay, second-hand from a forum and still think it’s one of the best things I own. I packed my gear for an overnight stay and hit the trailhead with a total weight of 6.5 kilograms (14.3 pounds) from skin out. I even carried my pack on one shoulder, just as Ray Jardine does, to see if it really was as effective as he says, and it was great. I was on my own with a pack the lightest it has ever been, and things were all coming together nicely.

First solo hike, ULA Relay Pack. Here I am on my first solo hike to a favourite spot known as Helena Hut. My weight from skin out was 6.5 kilograms including food for the night and water. This time of the year, winter clothing is not needed, so I was able to save a few kilos. Water is also not an issue, as there are two large water tanks at the campsite that are fed by the guttering system on the shelter.

First solo hike with my Ray Jardine quilt. Spending a night in Helena Hut with my newly sewn quilt was a great experience. Here I used a Tyvex groundsheet and my old Therm-a-Rest Prolite 4. The style of the shelters is very similar to that along the AT. My understanding is that during the construction of these shelters, some guidance was received by the Appalachian Trail Conservancy, with several visits from the ATC made out to Australia.
As my thirst for lightweight increased, so did the effort I had to go to get hold of things. One the drawbacks of being so isolated is that it takes a few years longer for some things to catch on, and hiking was one of those things. There are still no cottage-type companies running from here, and lightweight gear doesn’t enter into any conversations with store sales reps. In fact, they seem to promote carrying more as some kind way to increase the pleasure of walking, though I think it just increases the pleasure of a commission. I recall being in a store one day listening to the rep selling a couple everything they needed and didn’t need for a thru hike they were embarking on. I had to really bite my tongue when they were sold a six-egg holder to go with an open fire bread toaster. Something tells me that they may have eaten well, but were probably miserable on the trail.
One of the things that has kept my motivation going and helped me move towards an even lighter pack weight has been the generosity and helpfulness of the hiking community. I don’t know that I would be where I am now in achieving my goal of a 6-kilo pack had it not been for these people. Perhaps one of the best experiences came when I posted a note about wanting to buy a down jacket on the Backpacking Light forums. Shortly thereafter, I received an email letting me know there was one available, like new, and all I had to do was pay postage. How could I pass that up? I ended up with a Marmot down jacket that weighs 690 grams (24.4 oz).
Along the way, I’ve learned a few lessons:
What I’m focused on now is going even lighter, hiking smarter and safer, refining my gear list to something that I am comfortable with, and educating others met on the trail that there is a better way to do things. Bush tucker and survival skills are also something that I will be concentrating on in the coming months. I now volunteer myself to the Bibbulmun Track Foundation for trail maintenance and want to give something back to a place that has given me so much enjoyment.
Continuing my UL journey into my everyday life off the trail is helping me to better appreciate the non-materialistic things in my life. As someone once told me, “The best things in life are not things”.

Me and Andrew, Gringer Creek to Canning, Bibbulmun Track Western Australia. Photo taken at the trailhead close to Gringer Creek campsite before starting an ambitious four-day hike covering over 100 kilometres (62 miles) of the most undulating part of the track. It was during this hike that the lightweight style showed its true value, and it was STILL very tough going.
| Gear List | ||||||
| Pre-Lightweight | Post-Lightweight | |||||
| Sleeping | Weight (g) | Weight (oz) | Weight (g) | Weight (oz) | ||
| MD Travelite 500 Sleeping Bag | 1,200 | 42.36 | GoLite Ultra20 Quilt | 540 | 19.06 | |
| Therm-a-Rest ProLite 4 Mat | 736 | 25.98 | Therm-a-Rest NeoAir | 410 | 14.47 | |
| Therm-a-Rest Pillow | 264 | 9.32 | Removed | 0 | 0.00 | |
| Tarptent Double Rainbow | 1,274 | 44.97 | Tarptent Contrail | 690 | 24.36 | |
| Tyvek Groundsheet | 198 | 6.99 | Tyvek Groundsheet | 198 | 6.99 | |
| Total | 3,672 | 129.62 | 1,838 | 64.88 | ||
| Cooking | ||||||
| Gas | 234 | 8.26 | Esbit Tabs | 4 | 0.14 | |
| MSR Titan Kettle | 128 | 4.52 | Heineken Pot | 30 | 1.06 | |
| MSR Pocket Rocket | 86 | 3.04 | Esbit Titanium Wing Stove | 13 | 0.46 | |
| Orikaso Bowl | 32 | 1.13 | Orikaso Bowl | 32 | 1.13 | |
| Light My Fire Knife/Spoon Set | 10 | 0.35 | Light My Fire Knife/Spoon Set | 10 | 0.35 | |
| Plastic Cup | 58 | 2.05 | Plastic Cup | 58 | 2.05 | |
| Total | 548 | 19.34 | 147 | 5.19 | ||
| Clothing Worn | ||||||
| Sea to Summit Quagmire Gaiters | 342 | 12.07 | Sea to Summit Tumbleweed Gaiters | 80 | 2.82 | |
| Hat | 84 | 2.97 | Hat | 84 | 2.97 | |
| Hiking Shoes | 984 | 34.74 | Hiking Shoes | 984 | 34.74 | |
| Jumper | 700 | 24.71 | Marmot Down Jacket | 691 | 24.39 | |
| Long Pants | 624 | 22.03 | Long Pants | 320 | 11.30 | |
| Total | 2,734 | 96.51 | 2,159 | 76.21 | ||
| Clothing Carried | ||||||
| Beanie | 56 | 1.98 | Beanie | 56 | 1.98 | |
| Gore-Tex Rain Coat | 240 | 8.47 | Gore-Tex Rain Coat | 240 | 8.47 | |
| Socks Bridgedale(second day) | 96 | 3.39 | Socks DeFeet (second day) | 48 | 1.69 | |
| Shirt (second day) | 251 | 8.86 | Shirt (second day) | 251 | 8.86 | |
| Thermals Top and Bottom (sleeping) | 310 | 10.94 | Thermals Top and Bottom (sleeping) | 310 | 10.94 | |
| Thongs | 290 | 10.24 | Removed | 0 | 0.00 | |
| Total | 1,243 | 43.88 | 905 | 31.95 | ||
| Misc | ||||||
| 1.5L Water Bladder (full) | 1,614 | 56.97 | 1.5L water bladder (full) | 1,614 | 56.97 | |
| Nalgene Large (full 1L) | 1,120 | 39.54 | Water Container (full 1L) | 1,025 | 36.18 | |
| Nalgene Small | 94 | 3.32 | Removed | 0 | 0.00 | |
| Osprey Aether 60L Pack | 1,360 | 48.01 | ULA Relay Pack | 520 | 18.36 | |
| First Aid Kit | 386 | 13.63 | Mini First Aid Kit | 148 | 5.22 | |
| Garmix eTrex GPS | 200 | 7.06 | Garmix eTrex GPS | 200 | 7.06 | |
| Sea to Summit Silnylon Pack Cover | 90 | 3.18 | Sea to Summit Silnylon Pack Cover | 90 | 3.18 | |
| Petzl Tikka Plus Headlamp | 76 | 2.68 | Petzl eLite | 46 | 1.62 | |
| Toilet Paper | 50 | 1.77 | Toilet Paper | 50 | 1.77 | |
| Tealights x 3 | 52 | 1.84 | Removed | 0 | 0.00 | |
| Toothbrush | 4 | 0.14 | Toothbrush | 4 | 0.14 | |
| Toothpaste | 8 | 0.28 | Toothpaste | 8 | 0.28 | |
| Batteries x 2 AA | 48 | 1.69 | Batteries x 2 CR2032 | 6 | 0.21 | |
| Suncream | 60 | 2.12 | Suncream – Smaller Container | 20 | 0.71 | |
| 3G Mobile Phone | 92 | 3.25 | 3G Mobile Phone | 92 | 3.25 | |
| Total | 5,254 | 185.47 | 3,823 | 134.95 | ||
| Food | ||||||
| Breakfast x 1 – Cereal | 100 | 3.53 | Breakfast x 1 – Cereal | 100 | 3.53 | |
| Lunch x 1 | 200 | 7.06 | Lunch x 1 | 200 | 7.06 | |
| Dinner x 1 – Store Bought Dehydrated | 320 | 11.30 | Dinner x 1 – Home Made Dehydrated | 126 | 4.45 | |
| Coffee or Tea Bags | 8 | 0.28 | Coffee or Tea Bags | 8 | 0.28 | |
| Total | 628 | 22.17 | 434 | 15.32 | ||
| From Skin Out | 14,079 | 496.99 | 9,306 | 328.50 | ||
| kilos | lbs | kilos | lbs | |||
| 14.1 | 31.06 | 9.3 | 20.53 | |||
Lower volume ultralight backpack with removable stays and other components – so you can set up the pack for individual trips and personal preferences to your heart’s content.

The new Gorilla backpack is Gossamer Gear’s latest and greatest – 2800 cubic inches and 24.5 ounces (size Large). It’s constructed of durable fabrics and mesh and has a new contoured removable aluminum frame.
I still have my original Gossamer Gear G4 frameless backpack. It has a few holes in the bottom from scraping over rocks, but it’s still a perfectly good pack. Fast forward to the new Gossamer Gorilla pack, and you will notice some familiar features – front and side mesh pockets, rolltop closure, wide shoulder straps, sleeping pad sleeve, and you can still stuff socks for padding in the shoulder straps and hipbelt if you want. Conceptually, Gossamer Gear packs have not changed, but there are huge improvements in the details that make them a whole lot better. The new Gorilla backpack, with its durable fabrics and removable curved aluminum frame, is state-of-the-art Gossamer Gear. (And you can still purchase a new G4 if you need a replacement.)
Gossamer Gear introduced an ultralight removable frame in their Mariposa backpack back in 2004, consisting of two straight carbon fiber stays (0.9 ounce/pair) inserted into sleeves on the backpanel. The Mariposa could be used either as a frameless backpack or with the stays inserted to increase its load carrying capacity. The concept was a big advancement at the time (an ultralight frameless or internal frame backpack ALL IN ONE!), but the straight stays were less than ideal for pack fit and load-carrying comfort. After experimenting with several prototypes, they developed a curved aluminum stay (3.4 ounces) that fits into the same sleeves on the backpanel. I have tested both versions and can unequivocally say that the curved stay, along with other improvements incorporated into the Gorilla pack, are a big improvement. This pack is near perfection!
The new Gossamer Gear Gorilla is designed to be as versatile as possible. The pack comes in three sizes (S, M, L) and three hipbelt sizes are available. The pack body is the same for all pack sizes; the shoulder straps are simply sewn on at different heights to create different pack torso lengths. Many components (frame, hipbelt, sternum strap, shoulder strap and hipbelt padding, bungie system) of the pack are removable, so the user can choose the components he/she wants to use. Accessory hipbelt pockets are available for hikers who want to add them.
The Gorilla (2800 cubic inches, 23.2 ounces size Medium) is the second lightest internal frame backpack available. The lightest is the Gossamer Gear Mariposa Plus (3600 cubic inches, 22.3 ounces size Medium), which is constructed of lighter fabrics and has the same stay (yes, the stay is interchangeable, and older Mariposas can be easily retrofitted).
The key factors that differentiate the Gorilla (besides its lower volume) are more durable fabrics (210 denier PU coated ripstop body and durable stretch nylon pockets) and removable curved stay. The revised Miniposa (14.5 ounces size Medium) has the same dimensions and feature set, but it is constructed of silnylon and does not have a stay. The difference in weight between the two packs is 7.8 ounces, which is the weight added to the Gorilla by the removable frame and durable fabrics.

Views of the Gossamer Gear Gorilla: The front view (top left) shows the pack’s large front pocket made of durable stretch nylon. There are six loops in the side seams to attach a bungie system (not shown). The backpanel view (top right) shows the pack’s wide shoulder straps and backpanel sleeve to hold a sleeping pad. The hipbelt pocket on the left is my camera case, and the right pocket is a Gossamer Gear add-on hipbelt pocket ($15). A side view (bottom left) shows a lower mesh pocket designed to make water bottles reachable. And the top view (bottom right) shows the pack’s drawcord closure and top compression strap.
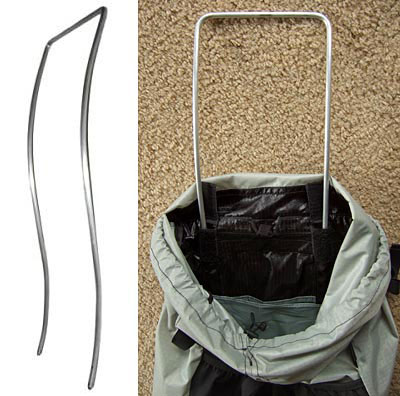
Gossamer Gear’s new curved stay (left) is made of aluminum tubing and weighs 3.4 ounces. It easily slips into sleeves sewn on the inside of the pack’s backpanel (right). A silnylon hydration sleeve is visible inside the pack.

Like other Gossamer Gear packs, the Gorilla has a mesh sleeve on the backpanel (left) that allows the user to insert a sleeping pad for padding. The mesh used in the sleeve is much improved over previous versions. Shoulder straps (center) measure nearly four inches wide from edge to edge, have removable closed cell foam padding, and are faced with 3D wicking mesh on the inside. The removable hipbelt (right, 4.1 ounces size Medium) is a similar width and construction.

The new stretch nylon pockets on the Gorilla are really stretchy and very durable. The bottoms of the three exterior pockets (one front, two side) are 210 denier ripstop nylon for increased durability.
Note that the Gorilla pack does not have a torso length adjustment, so it’s important to measure your torso length and choose the correct pack size. Hipbelt sizes are based on hiker girth. The only pack fit adjustment on the Gorilla is the shoulder strap length; the pack does not have load lifter straps or hipbelt stabilizer straps.
I tested the Gorilla on a number of on-trail and off-trail summer backpacking trips in the southern Rockies, carrying weights ranging from 10 to 25 pounds. For one quick overnight trip, I stripped the Gorilla down to a 15.6 ounce minimalist frameless backpack (I did leave the 0.4 ounce shoulder strap pads in) and carried 12.5 pounds. I also tested the pack fully equipped on walks near home with weights ranging from 25 to 35 pounds to determine its comfortable weight carrying capacity.

Fully loaded Gorilla pack with 21 pounds (left), and the same pack used on a day trip from a base camp (right).
My immediate (and continuing) impressions of the Gorilla are as follows:
The heavier loads I carried with the Gorilla were 21 pounds on a base camping trip with my wife, and 25 pounds on another trip where I carried a friend’s ridiculous 7-pound tent to help reduce his 40-pound-plus load (we talked a lot about how to reduce his pack weight!). I found the Gorilla, with all of its components, surprisingly comfortable carrying these weights. The wide shoulder straps really function well to distribute weight, so I did not have any shoulder strap pain at all, and tightening the hipbelt worked as expected to transfer weight to my hips.
From my weighted pack tests I conclude that the maximum weight carrying capacity (for me) for the Gorilla is about 30 pounds, and the comfortable weight carrying capacity is around 25 pounds. The stay in the Gorilla pack simply resides in sleeves on the backpanel. It is not anchored to the hipbelt at all, so there is no structural connection to support the weight. My opinion is that 25 pounds is a comfortable maximum weight for this pack, but it can easily carry up to 30 pounds when needed.
The Gorilla can be stripped down to a frameless backpack weighing 15.6 ounces (with 0.4 ounce shoulder strap padding left in). It requires some effort to remove the hipbelt and sternum strap, but once it’s accomplished, pack weight can be reduced by half a pound. The Gorilla is delightful to carry frameless with a light load; the wide shoulder straps distribute weight very well, and the 3D mesh backing minimizes sliding on the shoulders.
The following table compares packs currently available that have removable stays, allowing the pack to be used either frameless or with an internal frame. Note: information is manufacturer data for a size Medium pack.
| Pack | Total Weight With Stays | Volume (cubic inches) | Fabric | Stay Description | Stay Weight (ounces) | Adjustable Torso | Cost (US$) |
| Gossamer Gear Gorilla | 23.2 | 2800 | 210d ripstop | Contoured aluminum tubing | 3.4 | No | 165 |
| Gossamer Gear Mariposa Plus | 22.3 | 3600 | 70d ripstop | Contoured aluminum tubing | 3.4 | No | 160 |
| Six Moon Designs Starlite | 30.0 | 4200 | 210d Dyneema | 2 flat curved aluminum | 5.0 | Yes | 175 |
| Six Moon Designs Traveler | 31.0 | 3800 | 210d Dyneema | 2 flat curved aluminum | 5.0 | Yes | 190 |
Note that all comparable backpacks have a much larger volume than the Gorilla, so the Gorilla is in a class by itself. If you are looking for a smaller volume backpack with removable stays, the Gorilla is the only one available. If you need more volume for lightweight backpacking or bulkier loads, you have a choice of three pack models that have removable stays. Of those, the Gossamer Gear Mariposa Plus is the lightest by 8 ounces, but it does not have an adjustable torso.
Some readers may wonder why a 2800 cubic inch backpack needs a frame at all. The general rule of thumb is that a frameless backpack is comfortable to carry with loads less than 20 pounds. Of course that number will vary a bit up or down depending on hiker size and strength. For carrying more than 20 pounds, an internal frame backpack is recommended, and the sturdiness (and weight) of the pack will increase as the load increases. The Gossamer Gear Gorilla pack is extremely versatile because it can be used as a frameless backpack up to about 20 pounds, and the lightweight stay can be added to comfortably carry loads up to 25 pounds, or more. With food, water, and fuel, my pack weight is usually in the 17- to 21-pound range, occasionally higher for longer trips, so I find the frame to be a benefit on most of my trips.
Another potential issue may be the need for heavier, more durable fabrics in an ultralight backpack. There are definitely lighter packs available for ultralight backpacking, but they are strictly frameless backpacks. A removable frame backpack requires stronger fabrics to avoid damage from the stays wearing through or seams blowing out when the pack is under stress from heavier loads.
More durable fabrics also extend the life of the backpack considerably. The initial trend in ultralight frameless backpacks was to make them as light as possible, which meant really light fabrics like spinnaker and cuben fiber. And, yes, it is nice to have a super light pack for the times you want to backpack as light as possible. However, the current trend is to balance lightweight and durability, as evidenced by many of the current backpack models offered by Gossamer Gear, Six Moon Designs, Ultralight Adventure Equipment, and Mountain Laurel Designs. Pack designers and users have realized that incorporating durable fabrics into a pack does not increase weight that much, but it vastly increases durability and longevity. If you subscribe to that rationale, the Gossamer Gear Gorilla pack is an excellent choice.
Since I most frequently carry loads in the 17- to 21-pound range, I was inclined to use the Gorilla with all of its components because they simply work well together to provide a very comfortable pack that carries a moderate load very well. I personally found all of the features on the Gorilla worth their weight, except the bungie system, which I don’t find very useful, but it’s easily added when it’s needed. The 1.6-ounce SitLight pad provided with the pack is also very useful as a backpanel pad, if you don’t use a sleeping pad that is compatible with the pad sleeve (like the Big Agnes Clearview pad or Therm-a-Rest NeoAir pad). The bottom line is the Gorilla comes with a full complement of features, and most of them are removable, so you can set up the pack to match the trip and your personal preferences to your heart’s content. Or, if you simply use the pack the way it comes out of the box, it’s still very light and very comfortable to carry with moderate loads.
|
Year/Model |
2009 Gossamer Gear Gorilla (www.gossamergear.com/) |
|
Style |
Removable internal frame, top loading, roll down top with top compression strap |
|
Volume |
2800 cu in (46 L) total 2,400 cu in (39 L) in main pack body and extension collar 400 cu in (6.5 L) in front and side pockets |
|
Weight |
Size L tested, includes pack, frame, shoulder and hipbelt pads, bungie attachment system. Measured weight: 24.5 oz (695 g) Manufacturer specification: 24.2 oz (686 g) |
|
Sizes Available |
Unisex S, M, L; 3 hipbelt sizes |
|
Torso Fit Range |
Small: fits torsos 13-17 in (33-43 cm) Medium: fits torsos 16-20 in (41-51 cm) Large: fits torsos 20-24 in (51-61 cm) |
|
Fabrics |
210d PU coated ripstop nylon, 30d silnylon, 4.5 oz/yd2 stretch nylon |
|
Frame Material |
6061 aluminum tubing |
|
Features |
Durable fabrics, removable curved aluminum stay, removable hipbelt available in 3 sizes, removable/adjustable sternum strap with whistle buckle, removable padding in shoulder straps and hipbelt, removable front bungie system, sleeping pad sleeve on backpanel, one front and two side stretch nylon pockets with 210d ripstop nylon on bottom, twp side compression straps, Y-top compression strap, extension collar, drawcord closure, 3D wicking fabric on inside of shoulder straps and hipbelt and on the backpanel, hydration sleeve with two hose ports, ice axe loop, haul loop |
|
Volume To Weight Ratio |
114.3 cu in/oz (based on 2800 cu in and measured weight of 24.5 oz) |
|
Maximum Comfortable Load Carrying Capacity |
25 lb estimated comfortable load for an average person carrying the pack all day |
|
Carry Load to Pack Weight Ratio |
16.3 (based on 25 lb and a measured weight of 1.53 lb) |
|
MSRP |
US$165 |
|
Included |
Pack with curved aluminum stay and hipbelt, closed cell foam pads for hipbelt and shoulder straps, bungie system, SitLight pad for backpanel |
I got less – and more – than I bargained for.
You don’t have access to view this content.
The whys and wheres of catenary curves, with downloadable spreadsheet for calculating your own MYOG curve masterpieces.
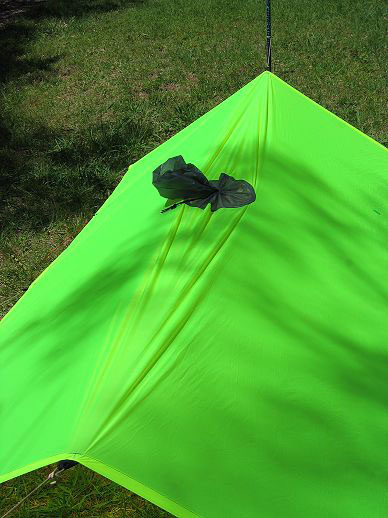
A straight ridge line in a tarp.
Consider the ridge line of the simple tarp shown here. There are crinkles all along the length. When it rains, these crinkles fill up with water (yes, a hose test confirmed that). Also, when the wind blows, the tarp is going to flap around the ridge line. Can one do anything about this?

Examples of catenary curves on ridge lines. Left: Gossamer Gear SpinnTwinn Tarp Review by Will Rietveld. Right: GoLite Shangri-La 4-Man Tent, in GoLite’s New Shelter Line for 2008 (ORSM 2007) by Will Rietveld.
The solution is of course well-known: you cut a curve into the ridge line, as shown in these two pictures, solving the problem – provided the curve is done correctly for that tarp or tent.

Example of a non-catenary curve on a ridge line.
However, it would be a serious mistake to think that the curve has to be a catenary curve. Other solutions to this problem exist, as shown here. This is a Macpac Olympus mountain tent, and I can testify that it can handle a storm without moving. In this case the ridge line is far more complex and is designed to keep the tent poles in exactly the right place.
However, the catenary curve has become traditional, and many people would like to be able to create one for their MYOG designs.
The origin of the catenary curve is appropriate for this: it is the curve taken by a freely-hanging chain suspended from the two ends. The simple version of the mathematics is for the case where the two ends are at the same height. Now while this seems appropriate, there are several cautions to be mentioned.
First, many tarps do not have their two ends at the same height. We may ignore this for our purposes, as the next point will dominate.
Second, the curve is for a freely-hanging chain, not for a chain with all sorts of tension being applied along its length. A tarp has guy ropes at various points, which will always interfere with the pure curve. Once again, we may ignore this for our purposes provided the curve is not too severe.

The basic catenary curve.
The curve itself is described by a COSH(theta) function. Fortunately, this function is available in most spreadsheets. We have plotted out a version here just as an example. You can calculate your own curve using this spreadsheet. You must change the ‘a’ and ‘b’ coefficients to suit your case. In this case, ‘a’ is the HALF-length of the curve, while ‘b’ is the amount of sag in the curve. Note that you MUST use the same units for the two parameters. The units can be feet, metres, furlongs or hand-widths – the math doesn’t care.
Once you have fiddled the curve to describe what you want, print out the table of XY values and plot them out on your fabric. Note that the curve generated may be used to describe the seam on your fabric OR the profile of the ridge line. If you put a three-inch sag in the curve on your fabric, the actual sag in the ridge-line will be less than this. However, this doesn’t matter one iota.
I suggest you experiment a bit before cutting out the curve on the ridge line of your fabric. Cut the fabric out with a straight ridge line – no curvature. Then mark out the line for a small sag, pin it together and string it up. Now you can see what that looks like in reality. If there isn’t enough sag, take it down, increase the sag parameter (b) a little, and try again. If you approach this from the ‘not-enough-sag’ side, rather than overestimating and having to reduce the sag, the pin holes will always be on the bit you cut off.
Once you have what you want, add the hem allowances, cut, and sew.
 © Beartooth Media Group Inc.
 Loading...


