


You don’t have access to view this content.
Cottage Stagnation and Recent Gems
Commentary on the (lack of) gear you can love from the cottage industry.
Commentary on the (lack of) gear you can love from the cottage industry.
You don’t have access to view this content.
The conclusion to Balls and Sunshine’s 2011 PCT hike. Is the best yet to come?
You don’t have access to view this content.
For fast, easy over-snow travel, combine the traits of a snowshoe and those of a ski. A short, fat ski would keep the maneuverability, packability and hopefully light weight of a snowshoe as well as the glide and easy trail breaking of a ski. How well does this theory play out in reality?

It took me decades to really care about skiing. Growing up in flat Ohio didn’t help, but even on trips further afield the lift-served, in-area alpine skiing never resonated. I usually got bored before my legs gave out or the lifts stopped running. Cross-country skiing was more my style, but I inevitably wanted to venture away from golf courses and groomed trails, where the floppy boots and skinny, plastic edged skis made the steep and narrow woods exciting in a way only enjoyable by those young people yet to realize their own mortality. Hiking, mountain biking, and kayaking always seemed like a better use of my time outdoors. I went to college in Iowa, and after graduation escaped further west to Utah and Arizona. I skied occasionally, at both alpine and cross-country areas, but as before failed to see the possibility inherent in skiing which made so many so fanatical about it.
Three years ago, I moved to western Montana to attend graduate school.
Even before the move I knew I’d need to learn how to actually ski. The most interesting areas for a wilderness traveler – the mountains – are in western Montana under snow for over half the year. A wilderness traveler has three options: stay home or in the lowest and most civilized valleys, get snowshoes, or learn to ski. I wanted to learn to ski, not primarily as a means of exercise or of kinesthetic enjoyment, but as the most efficient way to move around the snowy wilderness. Snowshoes are easy to use, but if driven with a modicum of skill, skis are almost always a faster and more elegant way to travel. Or at least, that was what conventional wisdom had to share with me, the unstudied newbie.
So I bought some short alpine touring skis on closeout and got some telemark boots and bindings. I went skiing, a lot. I got new boots and new skis; Karhu Guides, then the widest metal-edged waxless (fishscaled) ski available. I skied more, flailed a lot, got frustrated, and had a lot of fun. It didn’t take me long to realize that not only did none of the existing ski gear fit my needs particularly well, but that virtually all of the momentum in the market was concentrated on two distant ends of a spectrum. I wanted to ski along in the middle of that range, going from one point to another as I did on dirt during the summer, and there wasn’t much gear at all suited to doing so.

Amber Steed enjoys some backcountry alpine skiing in western Montana. Steep, deep powder with fat, heavy skis, two miles from the car.
The ski market as it exists today largely caters to pure alpine skiing or pure Nordic skiing. Alpine skiing is, to steal one company’s jingle, all about the down. Folks spend cataclysmic amounts of money to visit places to ride lifts so they can ski back downhill around lots of other people and then do it again and again. The equipment reflects this, being great for difficult, chopped up snow and knee-dislocatingly heavy. Virtually all backcountry skiing gear, be it alpine touring (heel fixed for downhill) or telemark (heel freed) is dedicated to doing what is in essence the same thing. The gear is lighter, increasingly much lighter, in order to make climbing slopes to ski down faster and more enjoyable, but skiing relatively steep terrain is still the raison d’etre. Even ski mountaineering race gear, where the application of technology has facilitated ski/boot/binding pairs which weigh less than a pair of alpine boots, is still circumscribed by the necessity of descending steep slopes quickly.
Cross-country skiing hasn’t changed much, in focus or application, since my youthful golf course exploits. Even the heavier boots and wider, metal edged skis meant for “Nordic backcountry” or “rugged touring” look and ski like fat Nordic race gear. This gear can be quite light, and in the right hands and under the right conditions travel through the woods impressively fast, but the not-right conditions slow such gear to a crawl, and these conditions, namely weird snow, breakable crust, ice, and tight trees and brush are all too common if your winter interests involve approximating summer backpacking routes. What was good snow last night will be miserable in the morning, and sometimes you’ll get all of the aforementioned in one place, together, a state of affairs which, in reasonable folks, engenders swearing and crying in equal measure. Quite simply, skis may be the best way to backpack in deep snow, but the skis and ski gear yet produced are not designed with such ends in mind, and their application in the arena of winter backpacking reflects this.
The temptation for many winter hikers is to buy some quality snowshoes, warm boots, and powder baskets for their trekking poles, then call it good. Even the poshest of snowshoes are cheap compared to ski gear, snowshoeing can be learned via the infamous ten-step program (take ten steps and you’re an expert), and their utility changes little from one snow condition to another. When deep snow combines with intense brush and deadfall, snowshoes and their compact maneuverability remain the most efficient option, but in most other conditions snowshoes are much slower than a well chosen set of skis, provided you have the skills to ski them. Snowshoes dig a crater with each step, and have to be lifted up and out before a step forward is taken. Skis apply their surface area more efficiently, and broad tips shove deep snow to the side as they slide forward with more effort applied purely to forward movement. When the snowpack is deep and the terrain is gentle and open, skiing is simple, and with practice almost automatic. You kick and glide forward with ample leisure to examine the splendor at hand. Once tasted, this ease is hard to give up for the ponderous gait, lower speed, and greater effort of snowshoeing.
|
|
|
So then, the obvious compromise is to combine the traits of a snowshoe and ski. A short, fat ski would keep the maneuverability, packability and hopefully light weight of a snowshoe as well as the glide and easy trail breaking of a ski. Many dedicated wilderness travelers who live and work in snowy, forested, steep regions have seen the need for such a tool. Jackson, Wyoming based adventurer Forrest McCarthy calls them fast shoes, while Nils Larsen and Francois Sylvain, designers of the Altai Hok, use the term skishoes. Messrs. Larsen and Sylvain are both long time ski industry insiders and were both involved with what is perhaps the Hok’s most prominent predecessor, the Karver and Meta short skis produced by Karhu in the early oughts. Both were short (120 to 130 centimeters), fat (100 to 110 millimeters underfoot), had metal edges and a permanent skin inserted level with the ski base taking up a majority of the surface area. These both fell out of production some time ago, though according to correspondence with Mr. Larson, forces other than market demand were to blame.
Fast shoes can thus be defined as short, wide skis with some sort of permanent traction device in or on their base, with all these features striving to synergistically maximize overland travel in woods, rolling terrain, and moderate mountains.
Why short? Maneuverability, packability, and light weight. Most of the reasons both alpine and cross-country skiers use much longer skis are not relevant for a wilderness traveler. Longer skis are stable at speed downhill, but in the rare cases that terrain allows opening the throttle 20 miles from the road, safety probably dictates that such an impulse be limited. Cross-country skiers use longer skis because the length maintains momentum and direction better, but these factors are largely negated by the trail breaking which is almost always a part of over-snow backpacking.
Why fat? Surface area is necessary for float in deep, light snow, and if we place an arbitrary, yet functionally proven cap of 150 centimeters as the longest a fast shoe ought to be, the ski must be fairly wide to maintain float. Wider skis are harder to put on edge, all things being equal, and that becomes a factor when boots must be chosen, as is discussed below. Finally, wider skis, especially wider ski tips, break through and float over crust, logs, and other junk which is part and parcel to skiing the terrain presented by circumstance.

The packability of short skis is highly relevant in many situations. Here the author finds the Hoks easy to attach to a packraft, during the aforementioned Bob Marshall traverse, and to strap to a mountain bike, to access spring skiing in Glacier National Park.
Why a permanent traction device? The only way to move forward absent skating or double poling (both rare, wonderful conditions in the backcountry) is to have something for grip on the ski. Ideally this would provide perfect resistance to backward motion and no resistance to forward motion, and thankfully such a thing has existed for the better part of a century in the form of kick wax. Sadly, kick wax is an unforgiving creature that must be well matched to the snow temperature and type. Sometimes this is easy to do and thus magically effective, such as the consistently dry 10 F (-12 C) powder snow you might find in Yellowstone during February. Other times it is an impossible nightmare, such as late on a spring morning when transitioning from overnight shade to sun, when snow instantly increases 15 degrees in temperature and 20 percentage points in water content. Carrying and effectively applying and reapplying (and reapplying, and thoroughly cleaning off before starting over) the correct kick wax is not a realistic option in many wilderness conditions.
The other proven options for over-snow traction are fishscales and skins. Fishscales being an alteration in the base material of a ski for it to grip directionally, skins being typically synthetic fibers arranged to be not unlike a thick, close-shorn, directional carpet. The fibers lay flat sliding forward, yet stand up to grip and resist backwards motion. Fishscales come in different designs, with a strong inverse correlation between grip and glide being to a certain extent intractable. Fishscales also work much better in wet, dense snow types. Light, very dry powder makes fishscales drastically less effective. With these caveats arrayed before you, it is easy to see why Messrs. Larsen and Sylvain chose to put a permanent skinsert in the base of their new fast shoe, the Hok.

The test set of 125-centimeter Hoks, with X-Trace bindings in place, showing the substantial tip rise, subtle tail rise, and moderate camber: all elements of a predictable and utilitarian backcountry tool.
Nils Larsen is something of a ski anthropologist. Videos he has made of the Altai peoples of northern Asia skiing on handmade skis can be found online, as well as material concerning Mr. Larsen’s own experiments with this most ancient of ski technologies. He named his new ski company after the Chinese mountains in which skiing may well have been born, and the company’s first model after one such group’s word for ski. Skiing evolved in this region of Asia, as it did in Scandinavia, for functional rather than recreational purposes. It is thus a fitting midwife for a backpacking ski. The Altai Ski website says that the Hok was designed for “pocket backcountry,” the sort of woods and thickets and low snowpack many residents of snowy latitudes have out their back doors; convenient terrain poorly suited to conventional ski gear and mindset. This is no doubt true, but it is my contention that for a considerable range of rugged over-snow backcountry travel the Hok is the single best tool yet commercially produced.
That there is a growing demand for this sort of short ski is obvious, because the Hok is quite similar to another fast shoe introduced recently, the Marquette Backcountry ski. Unlike the Hok, which uses traditional ski construction with a p-tex base, wood core, and metal edges, the Marquettes are blow-molded out of plastic. Marquettes are also marketed at pocket backcountry, and they excel at skiing soft snow in tight places. Sadly, they are not good tools for unpredictable, remote backcountry adventures. They lack metal edges, making them quite terrifying on hard snow and, as the chart below demonstrates, they are very heavy.
| Item | Weight (single) | Dimensions (tip, waist, tail) | |
| Gear Tested | 125 Hok Ski, bare | 2 lb 5 oz (1.0 kg) | 123, 109, 123 |
| X-Trace Binding (w/ mounting hardware) | 1 lb 2.5 oz (0.5 kg) | n/a | |
| Voile Mountaineer (w/ anti ice tape) | 7 oz (175 g) | n/a | |
| Comparison Gear | 185cm Karhu Guide (w/ full hardware) | 3 lb 12 oz (1.7 kg) | 109, 78, 95 |
| Marquette Backcountry Ski (w/ full hardware) | 5 lb 5.5 oz (2.4 kg) | 150, 130, 140 | |
| Atlas Run Snowshoe | 1 lb 5.5 oz (0.6 kg) | n/a | |
| MSR Lightning Ascent W’s 25″ Snowshoe | 1 lb 12 oz (0.8 kg) | n/a | |
| Tubbs Sierra 30″ Snowshoe | 2 lb 6.5 oz (1.1 kg) | n/a | |
| Boots used | Crispi CX4 (mondo size 28) | 3 lb 8 oz (1.6 kg) | n/a |
| Scarpa T2 (modified, mondo size 28.5) | 2 lb 14 oz (1.3 kg) | n/a |
That minimizing equipment weight is essential in maximizing efficiency and enjoyment in the backcountry is in these parts axiomatic (look at the current IP address). However, increasing weight in the name of efficiency can occasionally be the best option. For most hikers, shoes, even though they add weight when compared with bare feet, are faster and more fun. This weight versus functionality calculation is central in evaluating fast shoes versus snowshoes for types of trips, and is the question around which the final section of this review will orbit.
I obtained a test pair of 125 cm Hoks (they’ll be available in 145 cm lengths as well, though the dimensions and weight are not yet finalized) in early May, and used them for various trips around my home in NW Montana for about a month in late May and early June. We had an exceptional snowpack in the winter of 2010-2011, and while there was thus no shortage of terrain for testing, the snow types I was able to ski were necessarily limited. No powder was skied in the testing of these skis, but I did ski a wide variety of spring snows, from bullet ice to foot-deep rain-rotted corn, as well as heavy 24-hour-old snow. I skied the Hoks with the X-Trace universal binding and my usual trail runners (LaSportiva Crossleathers and Inov8 OROC 280s), as well as Voile Mountaineer three-pin bindings and two different pairs of plastic boots. The first were my Crispi CX4s, a three-buckle telemark boot considered to be on the lower and softer end of the spectrum of plastic boots. (They can be seen mounted on my bike in the above photo.) The second are an older pair of Scarpa T2s which I have heavily modified into touring-only winter boots. By touring I mean primarily rolling terrain where making horizontal rather than vertical miles is the goal of the trip. To this end I removed the tongues entirely, cut down the uppers, and ground down the material on the back of the cuff, among other things. With thermo-moldable liners they are very warm, have a great range of fore-aft motion, and provide plenty of side-to-side rigidity. For wilderness touring, especially in cold temperatures, they work very well.

The author’s touring-specific plastic telemark boots. Something comparable, such as the Garmont Excursion, would be a good match for the Hoks. Weights of the boots used in this test can be found in the above table.
I skied the Hoks on day trips to our local cross-country ski trails, closed ski resorts, and the rolling backcountry near both, all with both plastic boots as well as the X-Trace bindings. Mounted with Voile Mountaineers, I took them on easy ski mountaineering outings in the local mountains, and I used the Hoks with the universal bindings on the aforementioned Bob Marshall traverse, crossing miles of snow-bound terrain and passes over 7000 feet (2135 m) in elevation.
In short, I found the Hoks to be outstanding at all of these applications and to have no significant limitations other than those inherent to fast shoes. They are quite stiff both torsionally and over their length, the result being that they descend difficult terrain exceptionally well, provided that they are skied by a sufficiently stiff boot and are not pushed to excessive speeds. As a frame of reference, using both of the aforementioned plastic boots I skied the most difficult in-bounds terrain at Whitefish Mountain Resort (including North Bowl Chute, a double black) in funky half-melted conditions. The Hoks held an edge as well as any ski I’ve used, and the short length combined with the gradual curves and up-turned tip and tail made them extraordinarily easy to turn. I skied the X-Trace and trail runner combo at the resort as well, and found that, provided the snow was soft and fairly predictable, I could link turns down moderate runs (Toni Matt, top to bottom) with ease, though this did demand substantial attention from most of the muscles in my legs. At Mr. Larsen’s encouragement I skied the X-Trace mounted Hoks with a lurk, in the style of the skis namesake. This method of skiing quickly became great fun, and while a lurk is an inferior substitute for conventional ski poles when forward motion or weight are considered, the lurk technique might be kept in mind as a way to add an extra margin of control to certain descents on backcountry trips with less-supportive boots.

The author at Whitefish Mountain Resort, six weeks after the lifts stopped turning, skiing the Hoks and X-Trace bindings with trail runners and a lurk (a 7-foot pole from an alder bush). This tripodal way of skiing predates any major recreational use of skis by western cultures and allows low cut footwear to turn the skis with much less effort than “traditional” alpine style.
The Future of Backcountry Ski BootsThe perfect boot for backcountry skiing does not yet exist. Boots designed for backcountry alpine skiing, be it telemark or alpine touring, are heavy and historically choose to restrict fore-aft motion (and thus touring efficiency) in favor of downhill performance. The heavier variants of NNN (new Nordic norm) boots are beefed up Nordic race boots, and while by design they provide excellent range of motion for the flats, the interface between boot and binding (a metal bar in the boot toe is held by a metal clip in the binding) is widely considered to be a liability for turning and more serious terrain. The interface has more flex and play than a three-pin binding, and the toe bars are known to rip out under the more severe forces applied by wider skiis, taller boots, and trying to turn and/or stop in rugged terrain. The ideal backcountry boot for distance-oriented wilderness travel would provide the largely unrestricted fore-aft motion of a Nordic race boot with the side to side rigidity of a downhill boot, ideally at the same time and without flipping levers or tightening buckles. Unlike backcountry downhill, where laps of long slopes with extended transitions from up to down mode are common, the sort of backcountry travel I discuss here often has frequent transitions from flat striding to steep climbs and descents. As discussed in the body of the article, these descents often feature challenging snow and narrow trails. Efficient travel dictates that a complex gear transition not be needed to go downhill. My modified T2s demonstrate that it’s fairly easy to have good fore-aft ankle motion and sideways rigidity: a moderately tight upper buckle combines with a free flexing cuff to provide both at the same time. It does not ski like a big boot with a lean lock, but enough edge pressure can be applied, provided you stay centered on your skis, to make turns in very challenging terrain (albeit not at high speeds). The more exacting design element is sole flex. The ideal BC boot would flex with the ball of the foot like a lightweight hiking shoe, but resist torsion like a downhill boot. I’m unaware of any boot that comes close to balancing these well. A flaw of many fabric/leather NNN and three-pin boots is that they mate a fairly stiff plastic cuff with a flexible sole, and the latter prevents force from the legs being effectively transferred to the skis. This shortcoming can be addressed to a certain extent by excellent telemark technique and very strong legs, but has limited applicability to most users and does not point the way toward technical innovations. For the moment skiers are forced to compromise based on expected terrain and personal preference, favoring touring at the expense of turning, or vice versa. I have not been content with the options provided by such compromises, and my modified boots are a result. They have some sole flexibility, excellent sole resistance to torsion, good fore-aft flex and decent sideways stiffness at the ankle. The fore-aft flex compensates to some extent for the stiff sole. The thermo-moldable foam liners are blister-free if molded correctly (lots of toe spacers), and warm enough for temperatures below zero (F). Another approach was pioneered by Alaska endurance racers and detailed by Luc Mehl is his article Fast and Light Winter Travel. Luc used stripped down Dynafit rando race boots and the toe piece from a Dynafit alpine-touring binding. This system has a totally rigid sole, but the combination of good ankle flexibility and no resistance to forward rotation within the binding system makes this a reasonable option. Luc details the virtues at length in the aforementioned article. All of this is to say that when the market does not provide adequate gear, ingenuity and power tools can provide a good solution. |
Throughout the testing, on both downhill and rolling terrain, I was impressed with how little drag the skin insert provided. I had assumed it would be noticeably more so than the fishscaled skis I’ve used, but the additional resistance on all types of snow and all angles proved to be minimal. On one mountain descent I did notice that when transitioning snow types the skinsert tended to grab certain (wetter) snow types in a way which a well-waxed conventional ski would not have. On the whole, given the impressive grip of the skinsert and the minimal drag, I am quite sold on the idea. Compared with fishscales and even a good wax, the grip force per inch of the skins is very good, a particular asset when weird maneuvering over brush or melted out spots forces a skier to rely on a small patch of the ski for purchase. I do wonder about two potential downsides to the skinsert idea. The first is water absorption. Even skins rigorously treated with DWR and wax will get soaked in short order under many conditions, and while separate skins can be stored in your sleeping bag overnight, the possibility of a wet skinsert freezing into uselessness does occur to me. During the testing period I never had any nights much below freezing, so this must remain the territory of speculation. Vigilant use of skinwax to prevent icing of the skin should be considered a mandatory part of preventative gear maintenance.

Dirty and abrasive spring snow is hard on skis of any type. I was not responsible for all of the stains or lost skin hairs seen above, but this could prove to be an issue for long-term, intense users.
I also worry about the long term durability of the skinsert. Not so much its adhesion to the core of the ski, but the extent to which some abrasion-induced balding might occur over several seasons. It would take serious abuse to produce functional degradation, but I would be remiss if I didn’t mention this as a possibility.
The Hoks come with threaded inserts built around the common three-bolt pattern used in all common three-pin bindings. Burly three-pin bindings are reliable, cheap, and simple, and thus the only choice for this application. NNN bindings can provide comparable performance, but have a well-documented history of failing under serious use (the toe bar rips out), and thus are not an appropriate choice for anything but the most mild backcountry skiing applications. Threaded inserts not only save the consumer the effort of drilling holes, they make mounting and changing bindings fast and easy (blue Loctite on the bolts proved essential). They also save weight, as the area of the ski which needs to be reinforced in order to support binding screws and prevent pull-out is much reduced. Of course, inserts are only as good as their location, and on a ski like the Hok trail breaking ease (which favors a forward mount) must be balanced with downhill turning (which favors a rearward mount, especially in deep or weird snow). Messrs. Larsen and Sylvain were still in the process of tweaking this when the prototype I skied was made, and the production version will feature inserts mounted 2 centimeters behind those of my pair. I skied this position using adapters and agreed that it will provide the most balanced compromise.

The tip rise of the 125 cm Hok. The green grid is in inches.
The tip of the Hok rises about 3.5 inches over 7 inches of run (8.9 and 17.8 cm, respectively) (when the camber is uncompressed, both increase somewhat when the ski is weighted), both a good bit more than conventional skis. It’s not the fully rockered tip of the Marquette, but the added rise in the tip is a great aid in trailbreaking as well as in floating over irregularities when descending. Any more rocker would have likely had an adverse effect on the edge hold. The tail rise is much more subtle, just enough to allow some smear-turns but not enough to impede plunging the tail into the snow. The gentle sidecut is enough to allow for good turns on hard snow, but not enough that tracking is affected. All this and the light weight mean that insofar as the ski design is concerned, I cannot think of a single improvement. The Hok promises to float and break trail well, turn quickly, and deal with funky snow. It’s light and durable, and it’s simply a bargain at $200.
The X-Trace universal binding is more of a mixed bag. I likely will not be buying myself a pair of these, for reasons which have partly to do with this binding in particular, and partly to do with universal bindings in general.

The X-Trace at home on my couch.
The first challenge with a universal binding is making it durable enough for the backcountry, and on that ground the X-Trace succeeds admirably. I ought to note here that Altai is importing, not producing, the binding. When a ski binding is paired with floppy shoes or boots, lots of emphatic forces are placed on it, and the plastic in the base and toe plate of the X-Trace manages to flex evenly and well while seeming quite bulletproof. If anything, the whole binding is overbuilt, resulting in the porky weight noted in the above table, which when paired with the very light Hoks makes them borderline too heavy for the benefit they provide. The bindings function well enough. The adjustment mechanism is easy to use and doesn’t require tools, and the ratchet straps operate fluidly under all conditions. The forward motion is mediocre, and could be improved by moving the binding toe support back to place the end of the shoe closer to the pin line around which a ski boot pivots. This shortcoming is alleviated, but not eliminated, by using flexible footwear. The binding does a good job at holding the shoe stable within the binding, and a moderately good job at reducing diagonal or twisting flex. The pad under the toe buckle did display an annoying tendency to creep forward, and the geometry of the toe plate allows for ice to easily build up under the front of your toes, eventually requiring releasing the front strap to remove it.

The X-Trace in detail. Note the buckle misalignment during use, which created a pressure point. Also note the posts in front of the toes. The base plate slopes upwards there, trapping snow, which becomes ice under compression, eventually causing backwards toe pressure, which cannot be ignored.
Beyond all the details of the X-Trace, during the testing of it and the Hok I’ve developed deeper reservations about the extent to which universal bindings are appropriate in the weight to performance calculus all wilderness travelers ought to undertake. A look at table one reveals that the 125 cm Hok is a pound heavier than the Atlas Run snowshoe, one of the smaller and lighter snowshoes currently available. Even assuming a universal binding substantially lighter than the X-Trace, the weight gain with fast shoes would have to be made up by the efficiency of the setup. Whether this will be the case has much to do with the snow conditions and terrain expected on a given trip. The limitations of universal bindings are to a large extent tied to the footwear used, in my case trail runners. I do not think that rigidity and edge control will ever be anything but desperate with universal bindings and floppy shoes (even, I would imagine, lighter high-top hikers), and thus side hilling on harder snow and descending in anything but ideal conditions will be at best problematic. On my Bob Marshall trip I did not have anything close to ideal snow conditions, and found myself transitioning out of the Hoks and X-Traces to posthole on steep side slopes, crampon up hard snow, and even posthole down some slopes rather than crash and risk injury under the weight of the nasty wind-slabbed snow and my large pack. Small snowshoes would have been slower in many places, but would have been faster in others and would have saved me 51 ounces from my pack. Even with the Hoks at my disposal, I used the Atlas Run snowshoes on a similar trip two weeks later. It would take a lot of gentle terrain, and a distinct absence of steeper, more technical skiing, to justify the weight of the Hok and X-Trace combo over a pair of slower, lighter snowshoes.
I am, in short, skeptical about the breadth of application for universal bindings. For most spring trips where they’d be of use, that is to say when large sections of dry trail make hiking shoes a necessity, smaller snowshoes with an aggressive crampon may be the lightest and most efficient option in the grand scheme of a trip. A narrower ski could address some of the limitations here, but not in a comprehensive fashion.

Following black bear tracks in the Bob Marshall.
It’s difficult to compare the Hoks to other skis or snowshoes, or to evaluate them relative to other products, because the only close relatives are either out of production, like the aforementioned Karhu Sweeper skis, or built to different specifications and with inferior technology, like the Marquette Backcountry ski. The Hok defines its own category, using top of the line ski construction with a lightweight wood core, inserts, and metal edges to create a ski best suited to fundamentally different terrain than conventional backcountry skis. The Hoks are not the best tool for wide open, gentle terrain, like the plateaus of Yellowstone in winter. They’re not designed for backcountry downhill skiing, though their ability in technical terrain will surpass expectations. They are best for deep-winter travel in wooded terrain and on unbroken trails, places where glide is not a salient attribute and maneuverability uphill and down is essential for safe passage.
The choice of a permanent skinsert has potential drawbacks. Care will need to be taken to avoid icing of the skins, with prophylactic application of a DWR and skin wax a prerequisite, and more aggressive skin-drying tactics being perhaps necessary under extraordinary circumstances. Given that both fishscales and glidewax are each largely useless under certain conditions, and that skins work in all of them, the use of a skinsert is the most versatile choice available given current technology.
The need for a heavy boot to support the wider Hok is also a disadvantage, though only when viewed through the blinkered vision of mild winter conditions which would not already require heavily insulated double boots. Modern thermo-moldable boot liners are not only warm and comfortable when fitted correctly, the close-celled foam out of which the best liners are made is also largely impermeable to water. The lining fabric of the boot liner can get wet, but the foam insulation itself is incapable of absorbing water, and thus the whole assemblage is easily dried out. Under conditions where insulation of a certain magnitude is already a necessity, the added weight of boots for the Hok becomes less of a weight penalty than a performance boost.
Finally, the skis themselves are flawlessly engineered. The gentle sidecut, rounded tips and tails, and subtle rise/rocker on both ends represents a synergy of the best of modern ski design. The Hoks’ predictability in difficult snow conditions, and their applicability to a wide range of trips and terrains, is due above all else to solid design. A well designed and constructed fast shoe like the Hok, when paired with a set of burly three-pin bindings and light plastic or heavy fabric/leather boots should hit the sweet middle-of-the-road spot between light Nordic and heavy downhill gear. Such a set-up is the ski equivalent of a good light hardtail mountain bike: capable of making miles on smooth roads, difficult rocky trails, and everything in between. It is a ski rig focused on making distance in all backcountry conditions, and on doing so in an efficient and safe manner.
While exploring the narrow wooded valleys and buried trails of Glacier and the Bob, I won’t have to futz with applying and removing skins, or flail and overexert my triceps when fishscale grip comes up short. I won’t be wallowing in powder on showshoes, or quaking in terror 15 miles from the road at the top of a steep, fall line singletrack descent cut through dog-hair spruce. I’ll have the perfect tool for single and multi-day trips into quiet places away from just about everything: other skiers, snowmachines, avalanche danger. As I write this, last winter’s snow is a long way from melted, and much though I’ll value dry trail backpacking, the Hoks are going a long way to get me excited for when the snow starts falling again.
The Jacks ‘R’ Better Sierra Stealth Quilt is an ultralight summer quilt designed “with the ground sleeper in mind.” As the lightest of three wearable quilts available from JRB, the Sierra Stealth has a resealable Velcro head hole in the center that allows the quilt to be used as a serape around camp – eliminating the need for a lightweight jacket in addition to sleeping gear.
The Jacks ‘R’ Better Sierra Stealth Quilt is an ultralight summer quilt designed “with the ground sleeper in mind.” As the lightest of three wearable quilts available from JRB, the Sierra Stealth has a resealable Velcro head hole in the center that allows the quilt to be used as a serape around camp – eliminating the need for a lightweight jacket in addition to sleeping gear. Like other JRB quilts, one end can be formed into a foot box for ground sleeping and six lacing tabs on the sides can be used to secure the quilt around yourself or under a hammock. This review focuses on the quilt as used for ground sleeping.

JRB Sierra Stealth Quilt.
The quilt features a tapered cut, with a 52-inch (132-cm) width from the head down just past the hips, then tapering to 42 inches (107 cm) at the foot box to eliminate unnecessary weight. Two length options are available (78 in/198 cm and 86 in/218 cm) with the long size recommended for those over 5’10” (1.8 m). I got the long option for this review, and though it measured only 82 inches (208 cm) instead of the specified 86 inches (218 cm), I did not find myself wishing for four more inches (10 cm) of length (I’m 6 feet/1.83 meters tall).
The goose down fill is available at either 800 or 900 loft, with the latter being $15 more for a mere 0.75ounce (21.3 g) of weight savings. The stitch through baffle design is a weight savings over other down baffling methods and is meant for warmer temperature use (40-45 F/4-7 C).
Twenty-one-inch (53-cm) Velcro strips and a drawstring are used to transform the narrower end of the quilt into a foot box, which is necessary to keep the quilt in position while sleeping. A bit of experience using quilts makes it easy enough to keep the top end in position when rolling over on a sleeping pad, but the foot box is a must for the lower end. Traveling toward the head of the quilt, there are three sets of lacing tabs designed to “secure the quilt around a pad,” although I didn’t find this to be a very useful sleeping method as the foot box itself is much too small to fit around a sleeping pad. The tabs are handy for securing the quilt around your body when using as a serape or cape – to be discussed shortly. A second drawstring and the final pair of lacing tabs at the head of the quilt can be used to close the top if desired.
The uniqueness of the Jacks ‘R’ Better wearable quilts is just that – you can wear them like a jacket to keep warm in camp. There is a 12-inch (30.5 cm) Velcro opening halfway down the length of the quilt to poke your head through and wear the quilt like a serape. Though not nearly as cool looking as Clint Eastwood, the serape-mode is functional as a method of staying warm around camp without the need for another jacket. There is even a handy carabiner included on one of the lacing tabs to hold the quilt more snugly to your body and out of the way of any game changing cook fires. The dual-purpose nature of the wearable quilt makes it attractive for ultralight summer backpacking.
| Manufacturer | Jacks ‘R’ Better |
| Sizes | Regular: 78×52 in (198×132 cm) Long: 86×52 in (218×132 cm) Long Tested: 82×52 in (208×132 cm) |
| Weight | Manufacturer Claim: Regular 16 oz (454 g) Manufacturer Claim: Long 18 oz (510 g) BPL Measured: 18.7 oz (531 g) |
| Fill | 800 or 900 fill goose down |
| Loft | 1.5 in (3.8 cm) |
| Fabric | 1.1 oz, 30 denier ripstop nylon |
| Temperature Rating | 40-45 F / 4-7 C |
| Packed Size | 7x7x5 in (18x18x13 cm) |
| Stuff Sack | Manufacturer Claim: 1.2 oz (34 g) silnylon BPL Measured: 1.4 oz (40 g) |
| Price | $209.95 – $234.95 (reg 800 FP – long 900 FP) |
Summer camping with the quilt has been a pleasure. I’m one who likes to lie on my camping pad with my sleeping bag unzipped over me so I can spread more – so the quilt was a welcome weight savings over the typical 20 F mummy bag I’ve found myself lugging around in summers past.

The JRB Sierra Stealth is 52 inches (132 cm) wide through the head and shoulders, and tapers to 42 inches (107 cm) at the feed (right side). The foot section can be closed into a foot box via Velcro strips and tied at the top to keep it from opening (blue arrows). There are six lacing tabs to tie the quilt around you for draft prevention or when used as a serape (red arrows). The Velcro head hole is in the center of the quilt.
The closeable foot box is a key feature of any top quilt. Without the ability to tuck your feet in the bottom, the quilt would tend to migrate all over the place while sleeping (at least for me). There is a set of ties at the top of the Velcro section to keep it from separating due to movement and a drawstring at the bottom to close the hole. The drawstring at the bottom of the Sierra Stealth leaves a small half-inch hole when fully cinched up. On cooler nights the hole can be plugged with a spare sock before cinching the drawstring to eliminate drafts at the foot – a method I discovered in my efforts to find every available means to seal up drafts when one of my summer adventures dropped unexpectedly below freezing at night.
The JRB website says the six lacing tabs (three on either side) are to secure the quilt around a sleeping pad if desired. I don’t think this is a practical quilt tactic. The foot box is too small to stuff a pad into and still have enough wiggle room for your feet, and having the quilt wrapped around the upper portion of a sleeping pad and not the lower portion just invites warmth sucking drafts. On warm nights I felt no need to tuck the sides in, preferring the roomy feeling of the quilt simply lying on top. If I started to feel cool, it was easy to grab the open sides of the quilt and give them a quick tuck between my body and the sleeping pad to eliminate the drafts.

The open top quilt method preferred on warm nights (left). On cold nights I hooked the middle two lacing tabs (red arrow) together with the provided carabiner to use the quilt more like a mummy bag. This provided a means to keep the sides of the quilt tucked between me and the sleeping pad to eliminate drafts.
In cooler weather it was very important to keep the quilt tucked between me and my pad. On the cold nights alluded to above I found it difficult to keep the open sides of the quilt sealed against drafts until I used the included carabiner to hook the middle two lacing tabs together underneath me, as shown in the figure above (right). This turned the quilt into more of a mummy bag with an open slit on the bottom, much more manageable to keep tucked in and warm. Clipping the tabs together with the carabiner was easy to do after I climbed into bed, so there was no restriction on entry. I found it unnecessary to hook the remaining two sets of lacing tabs together. The lower section seemed to stay tucked fine and I naturally tuck the head end under myself or my pillow while sleeping. Having the middle two of the lacing tabs hooked together made a snug but comfortable width for my torso. A short length of cord could be used in place of the carabiner to add more width while still maintaining the tucking capability.
I personally didn’t find any use for the drawstring at the head end of the quilt. The lacing tabs at the top can be tied together and the drawstring used to tighten the opening around your neck, but with the lack of hood this seemed more like strangulation than draft reduction. I found it easy enough simply to tuck the top end of the quilt under my shoulders or pillow.
Rolling over took a little getting used to, as the roll-with-it technique I’ve used to keep my mummy bag breathing hole in place gave me a cool thrill until I twisted the quilt back around. By the end of the first night, I had mastered the roll inside method while leaving the quilt in place and avoiding troublesome drafts. After a little practice it takes only slightly more awareness when turning to keep the quilt stationary.
A word about the down and baffles – the down insulation tends to gather at the edges of the quilt. The baffles are about 6 inches (15 cm) wide and stitched across the width of the quilt. After several trips out I found that I had little insulation on top of me and most of the down had bunched at the edges, or tuck zone, where it is mostly useless, but there is a quick fix. By laying the quilt flat and using one hand to “sweep” the down back toward the center I was able to quickly recover the migrated insulation. This method is useful in planning ahead for cooler nights as you can effectively increase the insulation in the center of the quilt by stealing it from the edges, where it doesn’t serve as well.

When wearing the quilt, I attached the middle two lacing tabs together in front (left). This kept the quilt tight around my core like a jacket, allowing for easier management of camp tasks like cooking (right).
The wearable mode of the quilt is quite useful. Just open the Velcro strip in the center, slide it over your head and voilà, instant serape. The best way to secure the serape is to place the foot (small end) in the front, then grab the middle lacing tab on each side of the back and secure them together with the carabiner in front of you as pictured above (left). This makes the serape feel more like a jacket with the sleeves cut off. The quilt is kept close to your core and out of the way from destructive sources like cooking stoves. If your hands get cold, just tuck them back inside the flaps. Using the quilt as a jacket like this is functional for tasks in and around camp, but the bulkiness and lack of arms makes it a no-go as a replacement for your trail jacket.
The takeaway? If you need something to keep warm in the mornings and evenings while chillin’ and making food, save weight and wear the quilt. If you need something during go time, make sure to bring your normal jacket.
The JRB Sierra Stealth fits nicely into the niche of ultralight summer sleeping system. It’s well suited for trips where temperatures won’t drop below 45 F (7 C), and the wearable design means you can leave your jacket at home. The only recommendations for improvement are to include a small carabiner on each pair of lacing tabs, and do away with the drawstring at the head end.
Disclosure: The manufacturer provided this product to the author and/or Backpacking Light at no charge, and it is owned by the author/BPL. The author/Backpacking Light has no obligation to the manufacturer to review this product under the terms of this agreement.
Further discussion on the four individual categories, a review of the products tested within the context of each category, and a brief conclusion of ways in which various alternative rainwear products can be combined, both with each other and with WPB garments, to suit various hiking environments and conditions.
You don’t have access to view this content.
An unruly, heterogenous group, Dave divided it into four categories: simple poncho-tarp, complex poncho-tarp, alternative upper-body wear, and alternative legwear.
You don’t have access to view this content.
This single-wall, three/four-season, tipi-style shelter is the largest tipi in the VersaShelter line. A significant amount of the weight savings comes from the use of an all carbon fiber pole.
For families who want to do overnight backpacking trips or groups who need to set up a base camp, a larger tent is usually required. In both cases, this is a common scenario: the group carries their gear to a central location where a camp is established, from which day trips are launched. Tents used for this purpose are selected for their space, features, and comfort. They should be lightweight (if you are the parent you might have the whole thing in your pack), suitable for backpacking, easy to set up and enter/exit, and possess good wind stability, bug, and storm resistance. Tents in this category can also be used for car camping.
The Seek Ouside VersaShelter is a single-wall, three/four-season, tipi-style shelter. The largest tipi in the VersaShelter line, the 6-Person Tipi has almost a third more protected area than other shelters we have tested in the same weight class. A significant amount of the weight savings comes from the use of an all carbon fiber pole.

The Seek Outside VersaShelter after weathering a healthy east coast rain, showing the typical sag of wet, cold silnylon. When dry, the VersaShelter pitches much tighter, but imperfect manufacturing tolerances prevent a perfectly taut shelter with tension exactly distributed across the surface area of all panels.
| Year/Manufacturer/Model | 2011 Seek Outside VersaShelter 6-Person Tipi |
| Style | Four-season, six-person, tipi-style, single-wall, non-freestanding shelter, with front and rear doors. |
| Included | Tipi, pole, stakes, tensioners, pole storage bag, stake storage bag, tent storage bag |
| Fabrics | Tipi fabric is 30 denier ripstop sil-nylon 1.47 oz/yd2 (50 g/m2) |
| Poles and Stakes | One 15 mm diameter adjustable carbon fiber pole and 16 8-in (20-cm) plastic stakes |
| Floor Dimensions | 170 in (432 cm) long, 160 in (406 cm) wide |
| Features | Two zippered doors (front door has no-see-um mesh), Versa Vent peak vent which converts to a stove jack, sod skirt, guyline tie-outs, self-adjusting tensioners. |
| Packed Size | Tent Body: 12 x 9 in (30 x 23 cm) Pole: 26 x 2 in (66 x 5 cm) |
| Total Weight | Specified: 5 lb 3 oz ( 2.4 kg) Measured: 5 lb 9 oz (2.5 kg) |
| Trail Weight * | Specified: 5 lb 3 oz (2.4 kg) Measured: 5 lb 3 oz (2.4 kg) |
| Protected Area | Floor Area: 148 ft2 (13.3 m2) |
| Protected Area/Trail Weight Ratio | 28.5 ft2/lb (5.4 m2/kg) |
| MSRP | $749 |
| Options | Four-season DWR liner, siliconized fiberglass stove jack, titanium wood stove, floor (flat or bathtub), awning (which converts to a two-person tarp) |
*Trail weight: BPL’s measured trail weight includes the minimum required to pitch the tent: tent body, center pole, and 16 stakes.

The basic tent package (not including the optional floor).
The VersaShelter is a tipi-style shelter with an oval shaped footprint. It features a pole-forward design, which means that the center pole is closer to the front door of the tipi than the back. The reason for this design is to make the front entry a little steeper, while making the back a little shallower to accommodate for gear storage and/or stove use. The center pole is constructed out of carbon fiber and is adjustable in one-inch increments.
The tent has a full-height (from base to peak) zippered door on the front and a half-height zippered door on the back. Both doors have storm flaps, and the front door features a zippered no-see-um mesh panel. A second optional no-see-um mesh panel can also be fastened across the back door to allow for increased ventilation while minimizing bugs. Attached around the bottom perimeter edge of the tent is a four-inch sod skirt.
The peak vent (called the Versa Vent) is a square hole with velcro around its perimeter on both the inside and the outside. Attached to the velcro on the outside is piece of no-see-um mesh and a weatherproof storm flap. The mesh vent assembly can be removed and replaced with an optional siliconized fiberglass stove jack, or closed-off completely with a square silnylon panel.
Several tie-out points are placed on the inside and outside of the tent body, anchored at the seams. The external tie-outs can be used for guylines or attaching accessories (screens, etc.), and the internal tie-outs can be used for whatever you like (hanging lights, lines, etc.), or tying lines for additional wind stabilization.
The tent comes with sixteen Durapeg tent pegs and a full set of elasticized tensioners. The tensioners can be used (although not required) to both keep the tent pitch taut and to pitch the tent higher off the ground for increased ventilation. They are especially handy for situations on uneven ground where getting a good pitch might be difficult.

Left: A typical tie-out with the optional elastic tensioner in place. Right: The carbon fiber pole.

Left: The front door, partially open with the bug netting screen behind. Right: The half-height rear door.

Left: Attached bug-netting screen across the open back door. The screen can be attached from either the outside or the inside. Right: The rear door with screen, as seen from the inside. There did not appear to be any way to roll-up and tie back the rear door.

Left: The Versa Port peak vent with no-see-um netting and storm hood. Right: Another view of the Versa Port peak vent.

Left: Versa Port attachments: A fiberglas stove jack, a waterproof cover, and a no-see-um mesh screen. Right: The optional floor, tied-in around the perimeter.

The optional floor.
The tent takes some practice to set up properly. The set-up instructions are as follows:
The process is not quick and easy, especially if you are new at it. There were several times where I set up the tent and found that things weren’t quite right, making it difficult to get the fabric nice and tight. The tipi comes with a full set of elastic tensioners that can be used at each tie-out around the perimeter. Although not required, I found that I got consistently better results setting up the tent whenever I used the tensioners, as they are more forgiving and ensured consistent tension at all times.
Once set up, the amount of interior space available is huge. The tall center pole means a full-sized adult can stand near the center. When sitting, there is a lot of headroom available, making it possible for several people to sit in a circle around the pole. The amount of available floor space makes it easy to sleep six people, and since the floorplan is round, you can be creative with the layout of sleeping bags.
The large front door and mesh screen offer good ventilation. Although the front door zips right to the peak, if you are on the short side, you may find it difficult to unzip it all the way. Due to the slope of the wall at the front of the tent, we did find it somewhat difficult at times to unzip the doors from the inside, and the rear door did not have any way to tie it back.
The tent seams need to be sealed prior to taking it out in the rain. Sealing the seams around the peak and the peak vent proved to be a difficult process. The layers of fabric and the strips of velcro on both the outside and inside made it difficult for me to adequately get sealant in and around the thread holes. The end result was some leaking around the peak vent during a rain storm. On a related note, the protective hood over the peak vent does not cover enough of the vent, and so wind driven rain is prone to entering through the mesh (I have been told that this has been fixed in newer revisions).
The tent we received for review was a pre-production sample/prototype. The seams, while double-stitched, were not lap felled and they looked a little on the sloppy side. The center pole felt under-designed. We had also received a prototype titanium stove, which after some initial testing, didn’t inspire a lot of confidence. After communicating with the owner and outlining our initial impressions, we were sent a production version of the tent which also included a beefed-up pole. The stitching on the production version was much improved, and the pole felt much sturdier, but we experienced some failures with the updated tensioners. We opted not to test a production version of the stove as the cold winter weather was quickly transitioning to spring.

Left: Inconsistent and uneven seams in the pre-production version. Right: Testing the titanium wood stove. This version had some issues, but I have been told the production version has solved many of them. We opted not to review it as part of this article as it wasn’t production-ready in time.
Two tipi shelters that are similar in design to the Seek Outside VersaShelter are the Titanium Goat Vertex 7.5 and the Kifaru 6-Man Tipi.
The Titanium Goat Vertex 7.5 has an oval shape, similar to that of the Seek Outside shelter, with the pole being closer to the front door and a shallower slope towards the back of the tent. The Vertex is constructed out of the same 1.1 oz silnylon, has 133 square feet of covered space, and stands 7.5 feet tall. The Versa Port, at the peak of the tent, can be configured with either a vent or a stove boot. The tent is available with either an aluminum or carbon fiber adjustable pole. The aluminum pole version weighs 4 lbs 12 oz including tent, pole, stuff sack, and stakes, and retails for $750. The carbon fiber pole version weighs 11 oz less and costs $100 more.
The Kifaru 6-Man Tipi – also oval in shape – is constructed out of what they call UV coated paraglider fabric. At 14 ft 10 in long x 13 ft 2 in wide and 7 ft 6 in tall, it is similar in size and shape to both the Seek Outside and Titanium Goat versions. The tipi comes with a stove boot and storm flap, tent pegs, and an aluminum pole. The entire package weighs in at 6 lbs 4 oz and retails for $991.
When it comes to maximum floorspace for minimum weight, the VersaShelter is a worthy contender.
The Versa Shelter is well suited to western US alpine mountain environments – environments where there are large open spaces, few bugs, and the climate is relatively dry. In those conditions, the 6-Person Tipi is a good option for people who need a lot of space for groups of four to six people. For eastern climates where thick forests, tons of bugs, and lots of rain are the norm, this shelter may not be as well suited.
At the time of this review, this tent was still in its development phase. As a result, design changes were made along the way, and the last version we were able to test still did not reflect all of the changes in the current production version.
What’s Good
What’s Not So Good
Recommendations for Improvement
Disclosure: The manufacturer provided this product to the author and/or Backpacking Light at no charge, and it is owned by the author/BPL. The author/Backpacking Light has no obligation to the manufacturer to review this product under the terms of this agreement.
Incorporating a stand-alone trail crampon that works along with the snowshoe itself, the Mountain 28 eliminates the need to carry a separate traction device for conditions that call for grip, not float. Intriguing in theory, how did it work in practice?
With their Mountain Series of snowshoes, Kahtoola has come up with a two-part snowshoe system to cover a wide range of backcountry winter use. Incorporating a stand-alone trail crampon that works along with the snowshoe itself, the Mountain 28 eliminates the need to carry a separate traction device for conditions that call for grip, not float. I put it to the test over a two-week period to see how it performs for winter hiking.

| Manufacturer | Kahtoola Inc. (http://www.kahtoola.com) |
| Year/Model | 2011 MTN 28 |
| Weight | Manufacturer Specification: N/A Measured Weight ea: 35.8 oz (1015 g) |
| Size | Length: 28 in (71 cm) Width (at widest point): 8.4 in (21 cm) |
| Materials | Aluminum frame, synthetic CSM deck |
| Suggested Use | Multi-day backcountry trips, powder, unbroken trails |
| MSRP | US $289.00 |
The MTN 28 is the largest snowshoe made by Kahtoola, a company that got their start making flexible crampons for hikers. They have incorporated their Kahtoola Traction System (KTS) into these snowshoes that they say are, “designed for the technically advanced adventure.” The frame of the MTN 28 is made of 6061 T6 aluminum tubing. The 25.8-ounce (731-g) frame is 8.4 inches (21 cm) at its widest point and narrows at both the front and back. It also lifts up in the front 4 inches (10 cm) and 2 inches (5 cm) at the back.
The decking is made from a material called CSM (chlorosulfonated polyethylene), which is a synthetic rubber that has been bonded to a polyester fiber based core. Kahtoola says they chose it for its excellent flexibility and durability under all weather conditions, high resistance to puncture, and also because snow has a very hard time sticking to it. Flipping the shoe over, we see that triple-pointed teeth have been riveted to the deck for traction. A group of four is located in the center of the shoe with two more mounted further back to keep the shoe from having the tail slide down during traverses.

Top: The MTN 28 has an aluminum frame and a synthetic rubber deck. A steel binding plate sits under the ball of the foot. Steel traction teeth are riveted to the underside of the deck. Bottom: The binding plate has a T-shaped pull for the binding release and an oblong pull to reset the plate. When the steel bar is showing, as in the plate to the left, it is ready for action.
More teeth are incorporated into the steel binding plate at the front of the shoe. This is part of the SKYHOOK step-in system. The binding plate has a steel bar that runs across the plate which can be seen through the two slots on the top. Pulling a T-shaped handle on the side of the plate will slide the bar up, clicking and locking into place after it is completely clear of the slot. On the other side of the plate another pull, this one kind of oblong, releases the lock, allowing the bar to snap back to the ready position. As the binding plate is attached to the frame with a piece of CSM material, it will flex allowing the user’s boot to pivot downward.
The second part of the snowshoe is the 10-ounce (283-g) Trail Crampon. This piece is the rest of the binding. It consists of a hard plastic foot plate with the crampon points attached to the bottom. A piece of CSM material has been attached to the bottom to keep snow from balling around the crampon teeth. The plate can be adjusted to three different widths to accommodate a wide range of footwear. The top of the foot plate has a nylon strap that crosses the front of the user’s footwear and tightens with a sliding buckle. A rubber strap goes around the back of the footwear and hooks with an aluminum toothed anchor. A sliding plastic hook on the rubber strap keeps excess strap tucked in tight.
The ingenious thing about these snowshoes is the funny shaped crampon teeth that are the other part of the SKYHOOK system. These teeth slide into the slots on the binding plate and snap onto the bar described earlier, by stepping down on them. The bar locks onto the round notch on the teeth and stays there until the release is pulled to allow the bar to move out of the notch.
Because the Trail Crampon is attached to your footwear, it can be used as a stand-alone traction device for times that conditions warrant traction but not snowshoes. Icy trails that do not have dangerous drop offs (that would call for real crampons and ice axe) or frozen lakes are situations that often are better served by something like YakTrax or Kahtoola’s own (better performing) MICROspikes. But having the trail crampons of the MTN 28 lets you just pop the snowshoe off and go. Back to deep snow again? Step back into the snowshoe.
Once the Trail Crampon is attached, the MTN 28 has some formidable traction with twenty points of contact around the ball of your foot.

Top Left: The star of the show is the eight-point Trail Crampon. Top Right: When attached to the snowshoe, the MNT 28 has traction galore with more teeth than a great white shark. (Well, maybe not, but it has a lot!) Bottom: The Trail Crampon attaches to my boots and can be used alone on ice or hard packed snow. (Note the bent aluminum buckle).
I was asked if I could do a fast turn-around review of the MTN 28s. Due to the willingness of Kahtoola to get them to me quickly, I was able to get one overnighter on the North Country Trail in Chippewa State Forest, a dayhike starting at MB Johnson Nature Park and continuing along the Red River outside Moorhead, Minnesota, and a three-day backpacking trip in Voyageurs National Park at the border of Minnesota and Canada. Each trip saw different trail and weather conditions.
One thing I would like to share is the fact that in 2004 I was snowshoeing in Mt. San Jacinto State Park heading for the summit of the namesake peak. The snowshoes I wore were conventional shoes with a crampon only under the ball of my foot. While traversing, the back of one shoe slid out and I tore my meniscus, which led to knee surgery. Since then, I will not use a snowshoe that does not have excellent traction. (No, just “good” ain’t good enough…) I am pleased to say that the Kahtoolas fit the bill with maybe the second best traction I have used and seen to date, and I have owned seven pairs of snowshoes. I suppose this is to be expected from a company that makes crampons and slip-on traction devices.
Minnesota received record snowfall last winter. After it settled down, I was on top of three to four feet (1-1.3 m) most of the winter. Because it is so cold here, the snow does not solidify into the Sierra Cement I have spent most my life on. Instead, it stays loose and dry. Three days before my first trip with the MTN 28s, we had a crazy warm spell for two days that saw temps go above freezing, then it dropped back down near 0 F (-18 C) The result was snow with a hard crust and loose sugar-like snow beneath.
I took the shoes hiking on the North Country Trail and, when I parked where it crosses a Forest Service road, I saw that the snow covered road was almost ice. A bunch of snowmobile riders came up and stopped next to me as I was unloading to go. They said that the roads were so hard-packed that there wasn’t any snow to fly up and cool their engines so they needed to park a while to cool down. A couple were really interested in my pulk, so I asked one if they would mind taking my picture coming up the road they had just rode up.
They were right. The road was so slick that it would have been very hard to climb in just boots, especially with the weight of the sled pulling me back. Descending the road would have been scary. The Trail Crampons alone worked absolutely great. They bit into the ice and hard back very well.
Saying goodbye to the snowmobilers, I hit the trail. There was a hard crust there too that I thought might support my weight but, a few steps down the trail, I broke through and dropped about 18 inches (46 cm). Snapping the decks on actually proved to spread my weight out enough to mostly stay on the surface of the snow, which is much more desirable than slogging through deep stuff. When I did bust through, I only sank about 6 inches (15 cm). Not bad at all. The snowshoes worked great the entire weekend with no problems.
A few days later we got a storm that dropped 6 inches (15 cm) of fresh snow the first day. I did a dayhike on the second day of the storm while it was still dropping a bit more snow. The MTN 28s did well. They sank through most of the fresh snow, but did not punch into the deep snow that was there before. I did, however, encounter my first problem with the snowshoes here. After I had just started walking, I met two ladies coming back from their own hike on the nature trail. One asked what kind of snowshoes I had as she was in the market for her first pair. I showed her how the SKYHOOK system works and was embarrassed when I could not get the right one to snap back in. I made sure that the bar was back in place, I banged it to make sure there was not snow inside the plate, but it would not attach while stepping down. I finally had to resort to putting it on by hand, carefully smacking it so as not to impale myself.

Traction in action! Top Left: Trail Crampons alone worked well on a hard-packed icy road in the Chippewa Forest. Top Right: An icy slope on the Cruiser Trail System was no match for the MTN 28’s plentiful traction points. Bottom Left: Snowshoeing on fresh snow in falling snow along the Red River. (Lots of “snow” in that sentence…) Bottom Right: Punching deep holes on Elk Lake in Voyageurs National Park.
The last trip was a killer three days in Voyageurs National Park, where we were on miles of frozen lakes with either loose snow on ice, hard pack on top of ice with loose snow on top of that, or plain wind scoured ice. Once on land, we were on very deep untracked snow. Because of the extreme cold, (it was between 7 and -31 F (-14 to -45 C)) the snow was very loose and powdery.
The MTN 28s performed excellently on the lakes. There were some iced-over southern facing slopes that the snowshoe did a wonderful job ascending and descending, but the deep snow proved to be a bear for me. The 28-inch (71-cm) length just did not give enough flotation for a 215-pound (98-kg) guy. The way that the design narrows at the back takes away a lot of potential load-bearing surface too. There were times that I sank to my hip in spots with huge drifts. On more than one occasion I had to go back and try from a different direction as we were ascending, and I just could not get through it. My 168-pound (76-kg) hiking buddy was wearing 25-inch (64 cm) MSR Lightnings that, because of their shape, have more deck touching snow than my MTN 28s did. I really could have used a longer shoe. Considering that I was only carrying a daypack load and pulling a sled with my main gear, there is no way I could carry a 40-pound (18.1-kg) winter backpack through deep snow with the MTN 28s. Not everybody is a fat guy like me, so they may work just fine for lighter hikers. I bet they would work great for me on most of my old heavy California snow too. Powder hounds may want to look for something with a bigger deck.

The problem with the SKYHOOK continued the entire Voyageurs trip. They attach fine in the morning, but any time I took them off on the trail, at least one would have a hard time re-attaching even though I would stamp down on a firm surface to stand on. As I write this, they pop on and off just fine. Maybe it had something to do with the temperature or snow being clogged inside that was not coming out when I banged them to clear it.
One thing that was very impressive was how well they stay on my feet. I have owned many snowshoes that would pop off occasionally. Someone steps on my snowshoe as I am walking, or it catches a buried branch. Even the weight of deep snow as I drag my foot back up was enough to cause my foot to slip. I put the Trail Crampons on my Kamik Conquest boots when they first arrived and never took them off. I left the boots in my vehicle, putting them on at the trailhead. Not once did the rubber back strap pop off or the front straps loosen throughout the six days of use.
Looking back on all the trips that I have brought my YakTrax Pros on (to use at the start or finish of places like Arches National Park, where I had to go down a steep ramp to get to the desert floor, or San Jacinto State Park with its slick ramp at the tram station and trails that become solid ice for the first quarter-mile (0.4 km) because of all the tourist traffic), makes me really appreciate this design. Kahtoola kindly sent a pair of their MICROspikes for comparison. While the MICROspikes have much better traction than the YakTrax, neither are as stable as the Trail Crampon, and the lack of hassle and time wasted to get other traction devices out and put them on is a huge plus.
Another benefit of having the Trail Crampon on my boot instead of bindings that stay attached to the snowshoe is how nicely the decks pack. When nestled together (as seen to the right) they are only 2.25 inches (5.7 cm) thick. That helps when bushwhacking through trees that have thick branches, especially when I’m elevated 4 feet (1.2 m) above the trail by the snowpack.
As I was writing this, I took the Trail Crampons off and noticed that somehow one of the aluminum toothed-buckles that holds the back strap in place had bent. It had deformed to the point that I was unable to unhook the strap. For the life of me, I can’t figure out what I did to bend it. I don’t recall any huge shock to my foot while hiking. Kahtoola may want to switch the buckle to a sturdier steel one in the future.
Lastly, a note about the CMS material that constitutes the deck and covers the steel plate on the Trail Crampons: I did not experience any snowballing at any time over the six days of use. Snow does not stick to it. The material shows no signs of wear, even after walking on a lot of branches and rocks in Voyageurs. (The frames did pick up a few scratches.) I continued to use these for multi-day backpacking trips for the rest of the winter, which in northern Minnesota lasts until, oh, about May. If any durability or performance issues arise, I shall ask to amend this review.
What’s Good
What’s Not So Good
Disclosure: The manufacturer provided this product to the author and/or Backpacking Light at no charge and is owned by the author/BPL. The author/Backpacking Light has no obligation to the manufacturer to review this product under the terms of this agreement.
In this final part of the series we assemble the information gleaned from our field testing into an informative discussion with down to earth conclusions. We also present field test data for each individual jacket, comment on its utility, and identify standouts.
You don’t have access to view this content.
Everything about the Sierra portion of the PCT was harder this year. Balls and Sunshine faced record-setting snow, low food, dangerous water crossings, injuries, and a markedly slower pace.
BackpackingLight sponsored a father/daughter team on their PCT thru-hike in the summer of 2011. To get the full skinny on what a dynamic duo they are, read their first installment of adventure, Eleven Years Old on the PCT, then their second, We’re Going to Disneyland!

The snowy Sierra.
You may remember from our last article that we had just completed the first 700 miles of the PCT in the Mojave Desert. Everything about our experience in the Sierra Mountains was so different that you may find yourself checking our names from our last article to verify that this is the same story. The desert was such easy walking and even had ideal sunny-yet-cool weather conditions. We often found ourselves ahead of schedule and had extra time and energy each day to enjoy other forms of recreation in town or camp. You are about to hear a very kind of different tale from the mighty and wild Sierra Mountains.
I hiked the entire Sierra in 2010. Many were referring to that season as one of the highest snow years ever in the Sierra along the PCT. Everyone was telling us that no thru-hiker had ever seen more difficult trail conditions. I remember struggling through snow and high water 5 to 6 miles either side of the high passes. Once through the difficulties, I was able to enjoy the serenity these mountains offered. I had never before seen such rare and vast beauty! I was amazed by the 14,000-foot peaks, the endless alpine lakes, and the exotic trees. I told everyone later that the Sierra was the best but most difficult part of my hike. I looked forward to returning this year to share it with Sunshine. Stories of high snow were already swirling around Kick Off, and I remember telling Sunshine not to worry because I had heard it all before. I referred to it as “fear mongering.” Shortly after leaving Kennedy Meadows, we began running into snow in unbelievably low elevations. I tried referencing the previous year’s conditions so I had a comparison. When I realized that we were seeing snow 50 miles sooner and 2,000 feet in elevation lower, I knew this would not be easy. Please keep in mind as you read these accounts that Sunshine was never placed in any danger that we could not control. Nor did we take any undue risks with her safety. I have been mountaineering and long distance hiking for many years and am competent in all these skills. After hiking the Sierra last year, I knew that with some care and attention to detail, I could safely guide my daughter through. Also, even though I mention great hardship, we had a blast the entire time.

Hunkering down after a snow storm.
We had already been on the trail for six weeks and had our food consumption per day dialed in really well. We had been walking 27-plus-mile days in the desert, but knew that we couldn’t expect that here. On our first real difficult section in the snow, we planned for four days of hiking approximately 17 miles a day, then added a day of extra food. We’re good right? Nope! It took six days, and our appetites almost doubled! I knew that Sunshine was in a critical growth spurt and would not deny her calories, so I began rationing my food portions. I let her eat her fill at every meal, and I would eat whatever was left over. Other hikers saw our situation and wanted to help, but frankly, they were all experiencing the same problem. There was a ranch three miles off trail that we had sent a package to, but we had been told more recently that they weren’t open yet due to snow, so we didn’t figure them into our food planning. However, at the end of day four and watching our food quickly dwindling, it was worth the risk of adding miles for the chance of more sustenance.
The ranch was not open yet, but a few employees were there preparing the facilities for the following week. More importantly, our resupply package was there! We walked half a mile away before stopping to rip into a bag of Cheetos and devour several energy bars. We then camped two miles further down trail and ate a lavish double meal. Some how, we had sent ourselves so much food that we were able to share an extra meal with our friend Pellet, who was also running low. Once we arrived to Vermillion Valley Resort we took a well deserved day off, which consisted mostly of stuffing our bellies. Now we had a new problem which followed us all the way to Canada: over packing food! We were not going to run low again, no matter the cost in pack weight. We added a fourth meal of the day… second lunch. Despite my best efforts to keep my weight up, I lost almost 20 pounds in central California. Sunshine, however, gained 4 pounds there.

Sunset in the Sierra Mountains.
We later learned that the Sierra had 300% the snow pack of an average year. What’s this mean? Well to us it meant almost 500 miles of continuous snow. We saw very little snow-free trail in the Sierra, and what wasn’t covered in snow became a raging river from the melt. Our bodies were confused because the ambient temperatures were in the 90s, but we were in snow all day and freezing water up to my chest several times a day. It was like the top half of your body was in summer, but the lower half was in the dead of winter in Antarctica.

Example of what we saw every day.
The snow seemed like an insurmountable obstacle. No matter how hard we tried or how long we walked, we just couldn’t put in the miles we needed to stay on schedule. Remember, Sunshine was to start middle school in September. A 14-mile day became something to be proud of, and we often hung our heads in defeat after 10 to 12 miles. We began bringing absurd amounts of food instead of projecting progress. We didn’t set daily milage goals any more because it was too demoralizing to constantly fail. Instead, we chose to take each day one at a time and stopped hiking ridiculous hours. We pushed our goal to reach Canada to the backs of our minds and focused only on getting out of the snow and water. When we were above the tree line, we had to contend with sun cups. Sun cups are small depressions in the snow caused by uneven melting. They looked like an endless sea of footprints, but were too small for our feet to fit into, so our hips, ankles, and knees twisted and turned every which way with every exhausting step. Inside the forest, we had to climb steep irregular snow drifts up to 8 feet tall. These drifts were frozen solid, so we did a lot of slipping and sliding, expending outrageous amounts of energy. We did wear Yaktrax for traction, but will switch to MICROSpikes in the future. I believe the dependability will be worth the extra 6 ounces. The Yaktrax would slip off our shoes and break far too often.

Sunshine climbing Mather Pass.
Sunshine absolutely loved her 6-ounce carbon fiber ULA Ice Axe. I found having an ice axe blade on my trekking pole handle with the Black Diamond Whippet compensated for my clumsiness. We used these tools very often. We had both obtained Mt. Whitney climbing permits, since it was only eight miles off the PCT. However, Mt. Whitney was early in our snowy section, so Sunshine had very little self-arresting experience, and she was reluctant to trust her axe earlier that day on an icy descent. I knew she wasn’t ready for Whitney and told our small group that we wouldn’t make the climb. After realizing how much snow we had ahead of us, I wasn’t too excited to climb the tallest mountain in the Lower 48 any way.
Free Range announced at base camp that she wouldn’t be climbing the mountain either. This left only Goose from Missouri, who really wanted to do it. I knew that if I didn’t climb, Goose would miss his chance as well. I didn’t feel comfortable making that decision for him, so Free Range volunteered to watch Sunshine at camp while we climbed. It was a perfect sunny day and the mountain was still buried in snow, so we ice climbed and kicked in steps all the way to the summit. This is where No Knees was given his name the day before, after falling and sliding on his belly (and knees) several hundred feet, grinding all the skin off both knees before self-arresting.
The snow became so vast and endless that we really couldn’t enjoy the spectacular views. I remembered amazing places from the year before that I wanted to share with my daughter, only to realize five miles after passing it that I hadn’t recognized a major landmark because it was buried under snow. Navigation became so tricky that much of my view in the Sierra was that of my hand holding the GPS receiver. Many times, if I looked away for more than a few minutes we would spend great amounts of energy getting back on track (usually climbing uphill). Actually we were very blessed to have the GPS. I didn’t need one in 2010, so I didn’t bring one this time either. Beacon asked me if I wanted to borrow his extra GPS for the rest of the trip. Who brings an extra GPS on a 2,652 mile hike? Beacon, that’s who, and I sure am glad he did! Thank you, Beacon!
I carried a small length of cord to tie us together while glissading and crossing steams. After glissading together many times, Sunshine started doing it on her own. On one occasion, she slid away from me too quickly. As my 11-year-old sped away from me down the mountain, all I could do was yell “Plant your axe!” She instinctively rolled onto her belly and self-arrested like a pro. I was so proud of her. She later said that she did not hear me yelling. She really got good at glissading, and it became the highlight of each day for her.

Thanks to Thumper for the video!
On the positive side, we did cross over many streams on snow bridges instead of through the water. However, the water that we did cross was much higher and faster than usual.
We left VVR on the afternoon ferry. We planned to hike until there was one hour of daylight left, but the water crossings were becoming more frequent and tumultuous. After only four miles, we crossed a stream just below a sizable waterfall. Not only was the water past my waist, but I was getting drenched by water blowing off the falls. Like many crossings, I crossed five times in order to dump my pack, go back for Sunshine’s pack, then return for her. This gave me opportunity to take different routes through the water, finding the best crossing for her. However, it also put me in freezing cold conditions for an extended amount of time.

Balls and Sunshine, stream crossings as a team.

Sunshine crossing a creek.
Sunshine wore her water resistant BackpackingLight Cocoon Hoody, which amazingly kept her upper body dry and warm. I didn’t wear a coat at all and soon found myself shivering uncontrollably. I tried raising my body core temperature by continuing to hike, but 20 minutes later I realized that it was actually dropping quickly, and I was losing function in my arms and legs. We agreed that the best thing to do now was to set up camp and get into my sleeping bag and dry clothes. This warmed me up quickly, and we all rested easy that night. It rained the next night, which then turned to snow by morning. Wired was with us, and we decided to hunker down in our tents for 24 hours to let the storm pass. Sunshine and Wired had a great time playing cards while I slept most of the day away.

Wired and Sunshine playing cards during a storm
Arriving at Tuolumne Meadows in Yosemite National Park marked a huge milestone. We were done with the highest and most difficult passes. We were starting to see some breaks in the snow, which created a new problem: higher and faster water. Two hikers had drowned in one of the upcoming creeks, and two highly respected and experienced thru-hikers turned back on another, deeming it impassable just days before our arrival. We called my beautiful and wonderful wife, Teresa, from our town stop before Tuolumne, asking her to meet us for an extended break. We took four days off, hoping the waters would crest and even recede. I suggested to Sunshine that we should drive 200 miles north and walk south back to where we left off, giving the water two more weeks to go down. She wouldn’t hear of it. She indefatigably said, “I’m not flip-flopping, Dad!”

Teresa and Annika came to visit us at Tuolomne Meadows.

The whole family relaxing together at Yosemite Falls on the 4th of July.
We had a great time seeing the sights as a family in Yosemite. Spending time with her mother and sister was just what Sunshine needed. It also gave us time to put together a great team of hikers to ensure each others’ safety through the toughest section yet. Wired, the voice of reason. Bottle Rocket, the ER nurse. Thumper, the mountaineer. Snow Blind, the motor to keep us moving. Little Jimmy, the Eagle Scout. Sunshine, the reason to be cautious. Me, the navigator.
We took our time, choosing the best routes. We seemed to always take many extended breaks getting lost in deep conversation. Everyone had a great sense of humor and morale was high. We all got along well and had a great time in camp each night before crashing into the deepest sleep of our lives. It turns out that most of the “death defying” crossings weren’t all that bad. We did do some swimming, but even that became fun in a positive group setting. We knew we were all doing something amazing and were proud of our decision to continue. On many occasions, we would have to strip the wet clothes off, down to our skivvies, and sun ourselves on hot granite boulders for up to an hour after particularly difficult high river crossings just to regain strength and warmth.
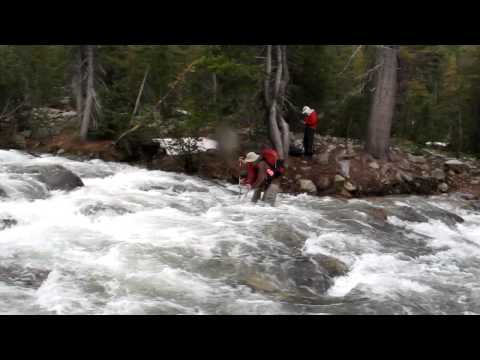
Thanks to Thumper for the video!
Considering the potential, we actually had very few brushes with injury. The most common owie was scraping our knees, knuckles, and elbows on the hard crusty snow. I scraped up my shins pretty good once crossing a rocky stream. I also had a cut on my leg that got pretty infected from the dirt and grime of northern California. I had to lance, clean, and treat it twice a day.
Sunshine contracted a strange and painful rash on her feet. She had just switched to wool socks, so we thought she might be allergic. We bought new synthetic socks on our next stop, but the rash came back. We then deducted that she must be allergic to the factory detergent since we didn’t pre-wash the socks before wearing them for the first time. We washed the socks at the next town and the problem was finally solved.

Sunshine’s mysterious foot rash.
I noticed early on that when she fell or scraped herself up, nothing fixed it faster than a watermelon Starburst. She would go from crying to smiling and giggling before the one piece of candy was gone. One day while glaciating standing up, she took a bad tumble twisting her leg and then landing on a rock with her knee. It looked bad, she was crying and writhing about in pain. Noah rushed over to help, but didn’t know where to start. I worked my way up the steep hill saying that I had her medication. Noah looked at me curiously as I handed her a Starburst. The first piece calmed her down, but she still had tears in her eyes. I gave her a second one, and she began to smile. After finishing the candy, she stood up, brushed herself off and resumed walking like nothing ever happened. We later referred to more serious injuries as “two Starburst injuries.”
Once we reached Lake Tahoe, we knew that the end of our snow was in sight. We still had 100 miles of snow, but it was becoming less frequent and easier walking. Most importantly, we were able to bump up our milage to 20-mile days there. This called for a celebration… hiker trash style! You have no idea how it thrills the heart of a mother to hear her 11-year-old daughter exclaim over the phone, “Guess what Mom? We’re doing a Reno run tomorrow!” We rented a car (Snow Blind almost got kicked out of the rental company for looking homeless), piled in as many smelly hikers as we could and headed for the closest casino. We gorged ourselves at an all-you-can-eat buffet. Seriously, just because you can eat everything there doesn’t mean you should. Sunshine and I played video games in the arcade while the others tried their hand at poker. Snow Blind got kicked out of there too because he was under age, but I still think it had to do with looking homeless. The next day we all went to the Olive Garden (they didn’t seem to mind the homeless look there) and REI.

Sunshine and Butterfly on a trail ride at Drakesbad.

Yea! We made to the California/Oregon border!
As we entered northern California, the trail became more clear, and we picked up our pace and milage. Soon, we were in this wonderful pocket of Trail Angels every few days. Mike let eight of us stay at his place (with a hot tub) for the weekend while he was away climbing in Yosemite. It was great seeing the new, thinner, and rejuvenated Bill at Pooh’s Corner. Bill and Margaret of The Red Moose Inn at Sierra City are so generous to the hikers. During hiking season, they close their business to everyone but hikers and then only charge for the cost of food. Sunshine had a great time playing with the kids at Honker Pass. We loved getting to know Piper’s Mom and Lowell in Chester. I can never say enough wonderful things about Ed and Billie at Drakesbad Ranch in Lassen National Park. Not only do they provide hikers with free showers and use of their hot spring pool, but they only charge hikers half price at their five-star restaurant. Ed also made arrangements for Sunshine and her sister to take an afternoon trail ride on horse back. They absolutely loved it. We later stayed the night with Joanne by Mt. Shasta for a badly needed break.

The mosquitoes really came out after we got out of the snow.
Once the trail was completely clear, there was no stopping us. Teresa and Annika drove down and began meeting us at jeep roads when they could, supporting us so we only had to carry food (such as glorious hoagie sandwiches and homemade cookies from Grandma Schuck) and water for the day. We quickly resumed high 20s and low 30-mile days. We regained our strength and vigor with the help of “home” cooked meals and family support many nights. We reached the PCT mid point by day 90. This seemed momentous and ominous at the same time. It took us 90 days to hike half way to Canada, but we only had 60 days left to finish. Could we do it? I guess you’ll have to read my final article next month about Oregon and Washington.

Balls and Sunshine at the PCT midpoint.

Yea! Real trail at last!
Thank you for following along on my journal and especially for your words of kindness and moral support. This really helped us continue on and was an invaluable source of our success.
In the Sierra, there seemed to be endless amounts of snow. I’m not saying it was boring. It was a lot of fun. It was basically a HUGE roller coaster. I love my ice axe. It is now my trophy. It is super light, cool looking; and ONLY MINE. Who doesn’t want that? We climbed the tallest point on the PCT, Forester Pass (13,200 ft), in the last hour of daylight. Because it was almost dark when we summited, we cowboy camped on the top of the pass. Every star in the sky was out. There were a ton more than you would see in the city. You could count them starting now and you wouldn’t be alive by the time they were all counted. The sky was basically one huge star. People usually ask if it was cold, and I tell them I don’t know, I was in my warm sleeping bag. We never got to swim because the lakes were iced over, but it was 90 degrees out. It was confusing.

Sunshine arriving at Forester Pass just before dark. Cowboy camping at the highest point of the PCT.
At Kennedy Meadows, we stayed in a trailer. At VVR we had a tab, so I asked Dad if I could get things for myself. I enjoyed having a lot of root beer. We hiked with Wired for a long time, but I wish it was longer. She is nice and pretty. Dad and I both enjoy her company. The good thing is she lives close to us so we can hike together during the year. Unlike some people, her and I have the same pace. Some people did not want to hike with us because they thought I would hike too slowly, but we ended up passing them later.
Mom visited us a couple times in the Sierra, for several days. Coming out of Tuolumne Meadows, we were hiking with Thumper, Snow Blind, Wired, Bottle Rocket, and Little Jimmy. We did many stream crossings with them. It was a great group. There was only one problem: our breaks got longer than we wanted because we all started talking instead of walking. We once crossed a knee deep stream and got to the other side and just stood there talking for 20 minutes without realizing we had stopped. Wired was the only one who noticed it. She just laughed and said we were funny and suggested we start walking to get to camp early. She was also the one getting everyone going in the mornings.

Sunshine doing homework in the tent.
Snow Blind had a jar of Skippy peanut butter in his outside pack pocket. On a stream crossing he (Skippy) fell out and floated downstream as we all yelled “Skippy! Skippy!” Snow Blind and I made a memorial to Skippy at camp that night. The rest of the week we talked about him as it he were a close friend. We would say “This is for Skippy,” or “Skippy would have wanted it that way.”
The Sierra was the most difficult thing I’ve ever done, but it feels awesome to have accomplished it on such a hard year.
A versatile shelter with a unique design, the Pentalite manages to bring something new to the realm of pyramid tent design: a large floorspace and optional full bug protection without a full-height inner bug net. The size, weight savings, and flexibility of this design make it a good candidate for a group backpacking, car camping, or base camp use. So far, so good, right?
For families who want to do overnight backpacking trips or groups who need to set up a base camp, a larger tent is usually required. In both cases, this is a common scenario: the group carries their gear to a central location where a camp is established, from which day trips are launched. Tents used for this purpose are selected for their space, features, and comfort. They should be lightweight (if you are the parent you might have the whole thing in your pack), suitable for backpacking, easy to set up and enter/exit, and possess good wind stability, bug, and storm resistance. Tents in this category can also be used for car camping.
The Nemo Petalite is a four-person, three-season, single-wall, five-sided pyramid tent. With the optional nest, the Pentalite converts from a floorless shelter to a fully enclosed, bug-proof shelter with bathtub floor and vestibule, while maintaining a rectangular sleeping area.
A versatile shelter with a unique design, the Pentalite manages to bring something new to the realm of pyramid tent design: a large floorspace and optional full bug protection without a full-height inner bug net. The size, weight savings, and flexibility of this design make it a good candidate for a group backpacking, car camping, or base camp use. So far, so good, right?

| Year/Manufacturer/Model | 2011 Nemo Pentalite |
| Style | Three-season, four-person, five-sided, pyramid-style, single-wall, non-freestanding shelter, with a single door |
| Included | Tent body, pole, stakes, two guylines, pole storage bag, stake storage bag, tent storage bag |
| Fabrics | Tent body: 30 denier PU coated ripstop nylon 1.8 oz/yd2 (61 g/m2) Wedge (floor): 30 denier PU coated nylon 2.98 oz/yd2 (101 g/m2) and noseum mesh 1.0 oz/yd2 (34 g/m2) |
| Poles and Stakes | One 19-mm diameter aluminum pole and eight 6.25-in (16-cm) aluminum DAC V stakes |
| Floor Dimensions | 130 in (330 cm) wide, 146 in (371 cm) long, each side of pyramid 100 in (254 cm) wide, 72 in (180 cm) high at peak |
| Features | Five-sided design, large front door that can be rolled back to create three-sided shelter, side vents on three sides, removable nest provides full bug protection and bathtub floor, roll-top dry bag stuffsack |
| Packed Size | 12 x 7 in (48 x 23 cm) for tent body in the stuffsack, folded pole measures 19 in long |
| Total Weight | Specified: 4 lb 15 oz (2.2 kg) Measured: 4 lb 10 oz (2.1 kg) |
| Trail Weight * | Specified: 3 lb 5 oz (1.5 kg) Measured: 4 lb 4 oz (1.9 kg) |
| Protected Area | Floor Area: 77 ft2 (7.1 m2) Vestibule Area: 20 ft2 (1.9 m2) Total Protected Area: 97 ft2 (9 m2) |
| Protected Area/Trail Weight Ratio | 15.6 ft2/lb (3.5 m2/kg) |
| MSRP | $370 |
| Options | Wedge (bathtub floor and bug mesh) $140 Footprint $50 Pawprint (fabric tent liner to protect floor of tent from the inside) $6 |
* Trail weight: Nemo’s published trail weight (they call it minimum weight) includes the body and poles. BPL’s measured trail weight includes the minimum required to pitch the tent: tent body, poles, and five stakes.

What’s included.
The Nemo Pentalite is a five-sided pyramid-style shelter. It requires a minimum of five stakes (one at each corner) and no guylines to setup. Additional stakes and guylines (included) can be used to improve the stability and ventilation.
The use of five sides – rather than the four used in conventional pyramid shelters – has allowed Nemo to add a couple of unique features to the design:
The shelter features an adjustable pole, which enables it to be pitched at varying heights for better ventilation or storm resistance. Three of the five sides have vents which can be guyed out to provide better air flow. Guying out the side vents also has the benefit of additional stability to the tent as well as additional volume by pulling out the sides.
The Wedge, an optional accessory, is another unique design element to this shelter. The Wedge is an insert that fastens into the shelter through a combination of zippers and Velcro, effectively adding full bug protection, a bathtub floor, and a vestibule space. What makes the Wedge unique is that it provides all of these features with minimum additional fabric. Other manufacturers typically design these inserts as a mesh pyramid with slightly smaller dimensions so that they fit neatly under the waterproof shelter. The Wedge fastens in by attaching to the interior of the shelter around the perimeter so that the mesh fabric is not required to go directly to the peak of the shelter all the way around. Another unique design element of the Wedge is that the center pole passes directly through the floor to prevent abrasion.

Left: Peak vent, from the outside. Right: Peak vent from the inside, can be zipped closed.

Left: Side vent, from the outside, doubles as a tie out for the guylines. Side vents can be pulled closed. Right: Side vent from the inside.

The pole-through-the-floor design prevents abrasion.
The set-up of the Pentalite is quite easy: with the door closed, stake out the five corners, then unzip the door and erect the pole. To improve tent stability, ventilation, and interior space, three more stakes can be used to guy out the side vents. The pitch can be tightened by pulling on the adjustable tie-outs at each stake, tightening the guylines, and by raising or lowering the center pole.
Once the tent is erected, the optional Wedge can be inserted to provide complete bug protection and a bathtub floor. The Wedge can remain in place when erecting or taking down the tent, eliminating that extra step if it is something you will always be using. Inserting the Wedge involves zipping it in around the door and attaching the bathtub floor using Velcro along the remaining three sides.

Left: The front mesh portion of the Wedge is zipped into the underside of the tent body. Right: The sides of the Wedge’s bathtub floor Velcro and snap to the bottom perimeter of the tent.
For four people, the Pentalite is comfortable. In fact, the main sleeping area of the Wedge has enough room for our family of five, the only caveat being the person in the middle has to be our youngest child as the pole prevents a full-sized adult from fitting there. As a family, we found the triangular shaped vestibule to be somewhat limited in its usability due to the shape (you can’t fit much gear in the corners). For three or four adults, the vestibule would be more than adequate.
When sitting up in the tent, headroom is at a premium along the sides. The center two people have great headroom while the people on the sides have the sloped roof of the tent to contend with. At the center of the tent, there is enough room for an adult to stand in a hunched position.
We took the tent out on a spring weekend family backpacking trip in the White Mountians of New Hampshire. The weather dipped into to the high twenties during the night, and fresh snowfall greeted us in the early morning. Although there were no bugs, we decided to use the wedge so that we could see how it worked. Overall, the tent performed well with some minor issues worth noting.

Left: Designed for four but wide enough for five sleeping pads. If you do this, the middle person had better be short due to the center pole. Right: Limited headroom near the sides, even for kids.
In fair weather, the tent size was quite adequate. It wasn’t until the snow started falling that things began to feel a little cramped. When backpacking with kids, there is a lot of gear, clothes, packs, and shoes to deal with. Usually this stuff ends up spreading around at some point or another; it can be difficult to keep on top of organization. Having a large usable vestibule space really helps out in this regard, especially in inclement conditions. When the snow started to fly, we found the vestibule to be too cramped for anything other than making a big pile. There wasn’t enough room for cooking or organizing gear. Because the door of the tent opens right to the peak, when the door is open the actual protected area of the vestibule is quite small.
When we pitched the tent, we were on a slight slope with our feet lower than our heads. The long side of the bathtub floor (the side with the mesh and zippered door) could not be staked out. The result was that the entire Wedge slid a bit downhill towards our feet. The only thing that kept it from sliding further was the center pole, which seemed to be putting quite a bit of stress on the floor.
Condensation that collected on the tent walls ran down and pooled on the floor.
When it was time to break camp, we removed the Wedge and used the large floorspace as a gear packing area. Everyone stayed warm and dry while we organized our packs. The final step involved a quick exit and takedown of the tent prior to hitting the trail. When used floorless, the full space afforded by the tent is very nice.
Weather resistance was good. The seams are all factory sealed.

Left: The triangular shape of the vestibule has limited protected space, especially with the door open. Right: With the Wedge removed, sorting out gear and getting ready to pack up on a snowy day.
Two other pyramid shelters similar in design to the Nemo Pentalite are the Oware 10×10 silnylon pyramid tarp and the GoLite Shangri-La 5.
The Oware 10×10 silnylon pyramid shelter sleeps two to four people and weighs in at 1 pound 10 ounces for the shelter, stuff sack, and some guyline (not including pole or stakes). Adding the optional 6-foot collapsible/adjustable aluminum pole adds another 14 ounces, bringing the total to 2 pounds 8 ounces (without stakes). While Oware does not have an option for an inner tent, they do have an option to add an strip of noseum mesh along the bottom edge of the tent to improve bug protection. The tent has a single door and no high vents, and the seams are not factory sealed. It retails for $249 for the tent, $29 for the pole, and an additional $90 for the bug netting.
The GoLite Shangri-La 5, while slightly smaller in square footage (90 sq ft) than the Oware pyramid and the Nemo Pentalite, is listed as a five-person shelter. Built using GoLite’s SilLite fabric, its stated weight is 2 pounds 14 ounces, including an adjustable aluminum pole and stakes. The shelter features a single door, a high vent, and also has an optional mesh insert (called the nest) for full bug protection. The nest weighs 2 pounds 11 ounces, has a bathtub floor, an extra layer of fabric in the center to minimize pole abrasion, and has one corner chopped off at the door to create a vestibule area. Due to the reduced area of the nest (71 sq ft), and the odd shape, the tent is best suited for no more than four people when using the nest.
Nemo has taken the time-tested pyramid design and added a few improvements that actually work: the five-sided shape, the unique side venting, and the optional Wedge are the features that set it apart in an increasingly crowded pyramid market. As a floorless shelter, it is comparable in weight to most other silnylon pyramid tents on the market. As a fully enclosed bug-proof shelter (with the optional Wedge), it is on the lighter end when compared to tents of similar size. The versatility achieved by this combination make it a compelling option for people who are looking for one tent to work in a wide variety of scenarios.
Since it is a single-wall tent and despite the additional ventilation, the Pentalite still suffers from condensation, but nothing outside of what is normally expected from a shelter of this type. With the door fully closed, the restricted perimeter ventilation with the Wedge installed, and four people generating moisture, it performs as well as could be expected. As stated previously, the only real downside in this configuration is the fact that when the condensation runs down the walls, it collects on the bathtub floor.
What’s Good
What’s Not So Good
Recommendations for Improvement
Disclosure: The manufacturer provided this product to the author and/or Backpacking Light at no charge, and it is owned by the author/BPL. The author/Backpacking Light has no obligation to the manufacturer to review this product under the terms of this agreement.
These highly anticipated poles made quite a splash at 2011 ORWM. The Xenon 4 Trekking Poles are light, compact, easy to use and reasonably priced. How did they stand up to testing?

The Xenon 4 Poles easily stow away alongside a water bottle in this GoLite Jam2.
These four-section collapsible poles weigh 9 ounces (280 grams) and cost $70. This is similar in weight, but half the cost of the nearest competitor, the Black Diamond Ultra Distance Poles, which received a Recommended rating. Can the CAMP Xenon 4 Poles achieve the same results at half the cost? Or are they, as Will Rietveld asked, too good to be true?
There is nothing revolutionary in the design or construction of the Xenon 4 Poles. They are made of four aluminum sections that pull together with the tug of a cord, just like an avalanche probe. The tip is pressed into one end, and a foam grip and nylon strap are attached to the other end. The 120-cm pole is bright orange and weighs 4.9 ounces (140 grams) per pole. A 135-cm length set is also available; it is blue and weighs 5.3 ounces (150 grams) per pole. The poles are available as of April 2011 at a retail price of $70.

Like an avalanche probe, the Dyneema cord and aluminum ferrules are the basis for joining the pole sections (left). A tug on the cord loop, located on top of the grip, eliminates cord slack and pulls the four sections together (center). Pulling the knot over the notch in the plastic cap locks the cord in place, forming a rigid pole (right).

The hand grip is very basic: foam with an unpadded strap and a loop of Dyneema cord (left). The adjustable strap and 8-inch (20-cm) grip allow adjustments in hand placement, which is necessary for a fixed-length pole (center). The foam grips have two small bulges on the top half, which helps the hand maintain a strong grip, and the bottom half has a slight taper (right).

The 50-mm baskets are easily removed with a few twists (left). Tungsten carbide tips are standard (right).

Kristin and I tested the poles on numerous hikes in the French Alps, Canadian Rockies, and Glacier National Park (pictured).
When I first tried the Xenon 4 Poles, I was more amazed by how flimsy they felt, rather than by their low weight. First off, the pole sections didn’t fit tightly together. Each connection has a bit of play, which can be felt by shaking the pole. Second, the sections are made of very light, thin aluminum that is not stiff. This combination of a flexible shaft and three semi-loose connections means that the pole is not at all rigid. The pole bends under a small amount of pressure that, on any other trekking pole, would go unnoticed.
I wasn’t sure how well the poles would fare on the trail. I double-checked the packaging and read that the poles were designed for light backpacking and sky running (Italian for high-altitude off-trail running). “Here goes nothing,” I thought.
On the second day of testing, Kristin slipped on a patch of slushy snow and the pole snapped under her weight. Her hand was not in the strap and the pole wasn’t caught in any hard spot, like rock or ice. She wasn’t wearing a backpack or running. She was simply walking and slipped.

I took this pictures just seconds after Kristin fell, to show the hiking conditions (left). The pole snapped in the center, with the internal ferrule being the weak point (right).
Before we had a chance to break the other pole in the field, we wanted to put it through BPL’s stiffness test. Unsurprisingly, it did not fare well.

BPL’s method for measuring pole stiffness: hang a 25-pound (11.34-kg) bag at the center of a 110-cm section of pole and measure the deflection from horizontal. The general range for lightweight poles is 2-4 inches (5-10 cm) of deflection. The Xenon 4 bent 15 inches (38 cm) before collapsing completely between the chairs.

Upon further inspection, we found that the pole was permanently damaged. The center ferrule was again the weak point (top). The bent ferrule resulted in 4 inch (10 cm) permanent deflection (bottom).
We contacted CAMP, who stated that other users had reported problems with the poles from the first round of production. CAMP supplied us with another set of Xenon 4 Poles to test.
There was no noticeable difference between the old and the new poles. CAMP did not specify what was wrong with the first production run or what they changed in subsequent runs. Kristin and I used the new pair of poles on a number of day hikes. The poles did not break on any hikes, but they also did not feel any stronger than the original set – they still felt alarmingly fragile. For example, I used the poles to help hop over a creek and I nearly fell in as the poles flexed wildly under my weight. I knew how weak these poles were and didn’t want to risk injury by depending on them.

Testing the second set of poles: as I lowered the 25-pound (11.34-kg) bag on the center, I measured pole deflection of more than 10 inches (25 cm) before it collapsed completely (left). As with the first set of poles, the center ferrule was the breaking point (center). The pole was permanently damaged in testing (right).
The rest of the poles’ features are a mixed bag. The basket is perfectly sized for hiking and can easily be removed. The wrist strap is unpadded, which saves weight, and is not uncomfortable. Many ultralight backpackers do not use wrist straps, so it is unfortunate that the wrist straps are not removable (unless you fancy a permanent dismemberment by cutting the straps off). I dissected one of the poles after it broke, and found that the wrist strap is held on by a simple zip tie. The foam grip is relatively comfortable, though it is not as easy to hold as other grips that have a more anatomical shape. The grips taper too much towards the bottom half to be very useful. Furthermore, the hole in very top part of the grip, to allow for the plastic cord lock, is uncomfortable to palm.
The closest competition, in terms of weight and design, are the Black Diamond Ultra Distance Poles. These three-section collapsible poles, which are also new as of spring 2011, weigh 4.75 ounces (135 g) and retail for $150. They have carbon fiber shafts, interchangeable rubber and carbide tips, left and right-hand specific molded grips, and utilize avalanche connector technology. The poles are available in 100-, 110-, 120-, and 130-cm lengths.

CAMP Xenon 4 – very thin compared to the already minimalist Fizan Compact.
Another attractive option are the Fizan Compact Poles, which are three-section collapsible, adjustable poles that weigh 5.6 ounces (158 g) and costs about $80 for the pair. The Fizan Compact have about the same strength as the Ultra Distance, cost nearly the same as the Xenon 4, and, additionally, offer adjustable length from 58-132 cm, for a weight penalty of only 0.7 ounces (20 g) per pole.
CAMP’s website touts that the Xenon 4 Poles are “the lightest trekking poles in the world!” At 5 ounces (140 grams) for the 120 cm length, the poles are not the lightest by any measure. The Black Diamond Ultra Distance poles are collapsible and weigh 4.75 ounces (136 grams). Gossamer Gear Lightrek 4 and Titanium Goat Adjustable Poles, adjustable but not collapsible, are 1.5 ounces (43 grams) lighter. With such a bold claim despite evidence to the contrary, CAMP’s credibility is brought into question. It is therefore unsurprising that the poles did not fare well in our rigorous testing.
The Xenon 4 Poles are essentially four sections of a tent pole with a cord lock and handle at one end and a basket and tip plugged into the other end. They are thin, light, and compact. However, they are very flexible and prone to breaking. As such, they are suitable only for hikers who put very little weight on their poles. For the rest of us, it would be worthwhile to invest in more durable poles, such as the Fizan Compact ($10 more) or Black Diamond Ultra Distance ($80 more).

CAMP Xenon 4 Poles in use above Chamonix Valley, looking onto the Argentiere Glacier.
| Manufacturer | CAMP |
| Year / Model | 2011 Xenon 4 |
| Style | Four-section collapsible, fixed length |
| Shaft Material | Aluminum alloy 7005 |
| Tips | Tungsten carbide |
| Grips and Straps | 8-inch (20 cm) foam grip with nylon strap |
| Lengths Available | (extended/collapsed, in cm): 120/32 (tested), 135/36 |
| Weight per Pole | Manufacturer: 4.9 ounces (140 g) Measured: 5.0 ounces (143 g) including 0.2 ounce (5 g) removable basket |
| Features | Compact collapsible aluminum poles; internal Dyneema cord; twist style removable 50-mm basket; adjustable nylon strap; foam grip; available in 120 or 135 cm lengths. |
| MSRP | $70 |
Disclosure: The manufacturer provided this product to the author and/or Backpacking Light at no charge, and it is owned by the author/BPL. The author/Backpacking Light has no obligation to the manufacturer to review this product under the terms of this agreement.
Manufacturers make lofty claims for the enhanced breathability of the new fabrics. I tested ten jackets under challenging and forgiving backpacking-type conditions, while recording temperature and humidity inside and outside the jackets, and reported my findings. Perhaps I didn’t experience “air and water vapor permeability so shocking you’ll swear it’s magic,” but I did identify some standouts and some promising trends of interest to backpackers.
You don’t have access to view this content.
On paper, the palatial space and bare-essentials engineering of this tent make it appear like a dream come true for ultralight group travel. How does it actually perform in the real world?
For families who want to do overnight backpacking trips or groups who need to set up a base camp, a larger tent is usually required. In both cases, this is a common scenario: the group carries their gear to a central location where a camp is established, from which day trips are launched. Tents used for this purpose are selected for their space, features, and comfort. They should be lightweight (if you are the parent you might have the whole thing in your pack), suitable for backpacking, easy to set up and enter/exit, and possess good wind stability, bug, and storm resistance. Tents in this category can also be used for car camping.
The MSR Twin Brothers is a four- to six-person, single-wall, four-season, double-pole pyramid tent. The largest single-wall shelter in the MSR line, the Twin Brothers boasts a six-foot peak height, steep walls, and 96 square feet of floor space.
A lot of work has gone into the design of this shelter to minimize weight: lightweight fabrics, non-adjustable aluminum poles, lightweight tie-outs, and a single door.

| Year/Manufacturer/Model | 2011 MSR Twin Brothers |
| Style | Four-season, four- to six-person, double-pole pyramid-style, single-wall, non-freestanding shelter with a single door |
| Included | Tent body, poles, stakes, two guylines, pole storage bag, stake storage bag, tent storage bag |
| Fabrics | Tent body is 30 denier PU and silicone coated ripstop nylon 1.68 oz/yd2 (57 g/m2) Floor is PU coated nylon 2.27 oz/yd2 (77 g/m2) |
| Poles and Stakes | Two 16 mm diameter aluminum poles and six 7.5 in (19 cm) aluminum Y stakes (MSR Groundhog) |
| Floor Dimensions | 96 in (44 cm) wide at center, 76 in (193 cm) wide at ends, 168 in (430 cm) long, 72 in (180 cm) high at peak |
| Features | Large floorspace, large door, high peak, snow flaps, and covered external peak vents. Hang loops allow the tent to be pitched without poles. |
| Packed Size | 20 x 7 in (51 x 18 cm) |
| Total Weight | Specified: 5 lbs (2.4 kg) Measured: 5 lb 4 oz (2.39 kg) |
| Trail Weight * | Specified: 4 lb 14 oz (2.2 kg) Measured: 5 lb (2.29 kg) |
| Protected Area | 96 ft2 (8.9 m2) |
| Protected Area/Trail Weight Ratio | 19.2 ft2/lb (3.9 m2/kg) |
| MSRP | $400 |
| Options | Tent footprint $60 |
*Trail weight: MSR’s published trail weight (they call it minimum weight) includes the tent body and poles. BPL’s measured trail weight includes the minimum required to pitch the tent: tent body, poles, and six stakes.

What’s included.
The Twin Brothers is a two-pole pyramid design. Two-pole pyramid tents allow the tent designer to increase usable floorspace without having to increase center pole height (and subsequent pole thickness/weight). Since this is not a free-standing tent, it requires a minimum of six stakes (one in each corner and one in the center of each side) and no guylines to set up. Additional stakes and guylines can be used to improve the stability and weather resistance.
The poles are fixed in height but offer some adjustment by changing their angle: by angling them inwards (towards the center of the tent), the height can be lowered slightly. The lack of adjustability means that there is no way to pitch the tent higher off of the ground without propping the poles up on a rock or something similar. Hang loops at the peak of the tent make it possible to pitch without using the poles by hanging it from above.
This is a floorless shelter, although an optional footprint is available that clips in along the perimeter to provide a waterproof barrier. The footprint is completely flat (i.e. no bathtub floor).
The tent features a single door at one end, two peak vents, one interior mesh pocket on either side, and snow flaps around the perimeter. All seams are factory sealed.

Left: Peak vents on both peaks, as viewed from the outside. Right: Peak vents, as viewed from the inside.

Left: Internal mesh pocket, one in the center of each side wall. Right: There are two adjustable tie outs on the front of the tent, one at each corner. All other tie-outs are not adjustable.

Left: Snow flaps. Right: Poles are not adjustable, but can be adjusted a little by changing their angle. The tent features a single door at one end.
The Twin Brothers sets up quickly: stake out the back of the tent with two stakes, stake out the front of the tent with two more stakes, insert the poles, stake out each side, then tighten the pitch by tightening the front two tie-outs. For increased stability in inclement weather, additional stakes and guylines (not included) can be employed.
The optional floor is installed by fastening it around the perimeter using the attached elastic cords. It is most easily done prior to inserting the poles. Once the floor is in place the tent can be erected/taken-down without removing it.
Listed as a four- to six-man tent, our experience has found that it can’t really comfortably hold more than four people despite the high square footage. The shape of the tent makes it difficult to take full advantage of all the protected space. Although long enough to sleep six people laying side-by-side along its length, the width at the ends of the tent are too narrow for a full-sized body. Additionally, sleeping two rows of three people laying side-by-side across its width is impossible due to the center poles. About the only way to fit more than four people would be to use the external hang loops instead of the poles for pitching the tent.
One thing apparent with this tent when compared to others of a similar design is that it is narrow. The narrow design makes for steep side walls which provide a few advantages: good headroom near the sides of the tent, excellent snow-shedding capabilities, and, when pitched with either end facing the wind, great wind stability as well.
Because we couldn’t fit the entire family into the tent at once, usage of the tent was limited to myself and a couple kids at any given time (not ideal for us). The tent was tested in fall and spring conditions, both with and without the optional floor. Based on our tests, the following observations were made:

Left: Four sleeping pads arranged length-wise in the tent. This is the optimum arrangement for this floorplan. Right: When sleeping pads are laid across the width of the tent, it is a little too narrow to comfortably fit a pad.

Moving the same sleeping pad to the center of the tent yields adequate room.
The only other shelter currently on the market that compares in design to the Twin Brothers is the Mountain Laurel Designs (MLD) Circus Tent. Otherwise, all other large-sized pyramid-style shelters use only a single pole. A couple of years ago the GoLite Shangri-La series included two large double-pole pyramid shelters (six- and eight-person), but those models have since been discontinued.
At 9 ft wide x 16 ft long x 6 ft tall, the Circus Tent features a 135 ft2 of protected area at a weight of 3 lbs 8 oz (not including poles). In order to pitch this shelter, your own pole system is required: either by strapping trekking poles together, using skis, paddles, or otherwise. Stated as being large enough to sleep four to eight people, the Circus Tent is one of the largest ultralight shelters available and, according to MLD is “about as large a tent possible with SilNylon that is strong enough in moderately strong wind.” It has two peak vents, interior hang loops and two doors. This tent retails for $495.
The design of this tent appears to be best suited for four people in cold conditions or dry climates. The low pitch, snow flaps, limited ventilation, steep sidewalls, and general storm-worthiness make this tent a great candidate for winter use. The lack of adjustable tie outs might be problematic in winter conditions as re-setting the stakes is a more complicated process. Adding additional adjustable line is recommended.
Groups and families looking for a general purpose three- or four-season shelter for backpacking or base camp use may find the Twin Brothers too specialized for their requirements. Ultralight backpackers, skiers, and snowshoers looking for a lightweight fall/winter shelter for more serious backcountry use will probably really like what this has to offer.
What’s Good
What’s Not So Good
Recommendations for Improvement
Disclosure: The manufacturer provided this product to the author and/or Backpacking Light at no charge and is owned by the author/BPL. The author/Backpacking Light has no obligation to the manufacturer to review this product under the terms of this agreement.
This part assembles the information from our testing and evaluations of integrated canister fuel stoves and provides a review of each stove.
You don’t have access to view this content.
The Flash is basically a flashier PCS and will eventually replace it.

| Manufacturer | Jetboil |
| Year and Model | Flash Cooking System |
| Materials | Aluminum pot, neoprene cozy, stainless steel burner, plastic bottom cover and top lid |
| Pot Size | 1 L |
| Weight | Measured total weight: 14.7 oz (417 g) Measured minimum weight: 11.0 oz (312 g) Manufacturer total weight: 14.0 oz (397 g) |
| Features | Aluminum pot, neoprene cozy with handle and temperature indicator, wing valve on burner with piezo igniter, drink-through lid with pour spout and strainer, bottom cover/measuring cup |
| Included | Burner, cook pot, pot support, canister tripod |
| MSRP | US$100 |
The Jetboil Flash Cooking System, introduced in spring 2011, is basically an updated version of the original PCS, and my understanding is that it will eventually replace the PCS. Compared to the Zip Cooking System, the Flash is more full-featured and has a larger 1 L cook pot. The additional features are a piezo igniter on the burner and a temperature indicator on the cozy.
According to our weight measurement, the Flash is only slightly lighter than the PCS, not a full ounce (28 g) lighter as the manufacturer specified weights would indicate. With a total weight of 14.7 ounces, the Flash is not lightweight, so it presents the same weight conundrum as the original PCS: we like its efficiency and performance, but we don’t like its weight.
For hikers looking for more cooking capacity, the Flash’s 1 L pot is a plus, but it has the same drawback as the original PCS – although the pot size is 1 L, the manufacturer cautions the user to not fill it more than half full because of the risk of boil-overs. And that caution is real; if you are cooking food in the pot, you need to watch it closely so it doesn’t boil over. It’s a mess if it does. For hikers who will cook a meal in-pot, the Flash will cook for two people, using care as mentioned.
In our performance tests, the Flash Cooking System is in the middle of the pack: average heating rate, excellent fuel efficiency, above average wind resistance, poor cold resistance, and acceptable burner control. Its fuel efficiency is excellent, as with all the Jetboil stoves, but it lacks the superior performance of the more advanced Sol systems. Burner control on the Flash (and Zip) at low settings is not as good as the other Jetboil stoves and the Primus Eta Solo stove. Its main strengths are its fuel efficiency and versatility. The Flash does not have the new Jetboil Thermo-Regulate™ Technology that maintains burner output as the fuel in the canister declines and improves performance at lower temperatures.
Jetboil’s range of available companion cups and accessories, and included pot support make this and other Jetboil stoves the most versatile in the group of stoves we tested. Although the stove’s cook pot is only 1 L, which is suitable for cooking in-pot for two people, larger volume pots are available to fit this stove, and the included pot support allows the burner to be used with conventional cook pots.
One bummer we found is the design is the connection between the cook pot and burner. A small slot on the base of the pot needs to line up exactly with a bead on the burner’s flange, then turned to lock. The design is awkward in use, but a Jetboil user gets used to it. Jetboil is basically stuck with the design in order to have all of their companion cups be backwardly compatible with previous models.
Overall, the Flash is just a flashier PCS, with more graphics on it plus a temperature indicator. Interestingly, its burner control is not as good as the original PCS. Its heating rate is a little faster, but otherwise its performance is pretty much the same as the PCS.
Disclosure: The manufacturer provided this product to the author and/or Backpacking Light at no charge and is owned by the author/BPL. The author/Backpacking Light has no obligation to the manufacturer to review this product under the terms of this agreement.
The lightest canister fuel stove in the world.

| Manufacturer | Monatauk |
| Year and Model | 2010 gnat Titanium Stove |
| Materials | Titanium and Aluminum |
| BTU/hr | 11,000 |
| Weight | Measured weight: 1.72 oz (48.8 g) Manufacturer weight: 1.6 oz (48 g) |
| Features | Large area burner head, three serrated retractable pot supports, wing valve |
| Included | Burner, hard plastic storage case with screw lid |
| MSRP | US$60 |
The Monatauk Gnat is currently the lightest canister fuel stove in the world, with a claimed weight of 1.6 ounces and 1.72 oz (48.8) g measured weight. That’s as light as some alcohol stoves.
The Gnat is constructed of Titanium and Aluminum alloy, has a 2-inch (5-cm) diameter burner head, and three serrated pot supports that swing out to provide a 4-inch (10-cm) footprint. To save weight, the stove does not have a piezo igniter, and also does not have pressure regulation technology.
The Gnat (1.7 ounces/48.8 g) combined with a Backpacking Light Firelite 900 SUL Titanium Cookpot (3.1 ounces/88 g) is just 4.8 ounces (136 g). Add a 4-ounce (113-g) canister of fuel and a lightweight windscreen and you have an extremely lightweight canister fuel cooking system.
The stove produces a dark blue flame that is adjustable down to a fine simmer, and the flame does not fade after being set.
The downside, of course, is wind. The performance of most conventional canister fuel stoves is severely impacted by any amount of wind; the wind simply blows the heat away. Some type of wind protection is warranted, but in doing so, one must be careful not to overheat the fuel canister.
The performance of the Monatauk Gnat depended on the testing conditions: with a moderate flame its heating rate was the slowest in the group, at full throttle it was in the middle of the group of integrated stoves tested. Unprotected in a 5 mph (8 kph) wind the heating rate was extremely slow, and with windscreen protection the heating rate was still quite slow because of turbulence effects. In cold conditions, the Gnat was the fastest of the unregulated stoves. Fuel consumption with a moderate flame in warm/calm conditions (the best conditions) is one-third more than the Jetboil Sol integrated stoves.
In general, a conventional top-mount conventional canister fuel stove, like the Gnat, is relatively inefficient in transferring heat to the contents of a cook pot. Heat is mainly absorbed through the bottom of the pot, so it helps to conserve fuel by using a moderate flame as much as possible. Use of a windscreen helps to route heated gases up the side of the pot to increase heat transfer. Cookpots with heat exchanger fins attached to the bottom are available from Jetboil and Primus that are meant to be used on a conventional canister fuel stove. These pots can increase heat transfer efficiency as much as 50%, but they are much heavier than an ultralight Titanium pot like the one mentioned above.
The bottom line is that although it’s possible to achieve a very lightweight cooking system with the Monatauk Gnat stove, the system only achieves efficient heat transfer in calmer conditions, and even then it’s not nearly as fuel efficient as an integrated stove.
Disclosure: The manufacturer provided this product to the author and/or Backpacking Light at no charge and is owned by the author/BPL. The author/Backpacking Light has no obligation to the manufacturer to review this product under the terms of this agreement.
Same features, nearly the same performance, and less expensive than the Sol Ti Premium Cooking System.

| Manufacturer | Jetboil |
| Year and Model | Sol Advanced Cooking System |
| Materials | Aluminum pot, neoprene cozy, stainless steel burner, plastic bottom cover and lid |
| Pot Size | 0.8 L |
| Weight | Measured total weight: 11.8 oz (335 g) Measured minimum weight: 9.2 (261 g) Manufacturer total weight: 10.5 (300 g) |
| Features | Aluminum pot, thin neoprene cozy with handle and heat indicator, lightweight burner with wing valve, piezo igniter, Jetboil Thermo-Regulate™ technology, drink-through lid with pour spout and strainer, bottom cover/measuring cup |
| Included | Burner, cook pot, pot support, canister tripod |
| MSRP | US$120 |
The Jetboil Sol Advanced Cooking System, introduced in spring 2011, is the same as their top of the line Sol Ti Premium Cooking System, except it has an Aluminum pot instead of a Titanium pot, and the cozy has a heat indicator strip on it. It uses the same burner as the Sol Ti. Opting for the aluminum pot saves you US$30, and its only 2 ounces heavier.
The Sol Cooking Systems are Jetboil’s lightest and most technically advanced integrated canister fuel stoves. Besides being lightened throughout, they incorporate the new Jetboil Thermo-Regulate™ Technology, which is a pressure regulator that maintains burner output as the fuel in the canister diminishes and improves performance in temperatures down to 20 F (-6 C).
Jetboil has made a concerted effort to lighten nearly every component of the Sol Advanced Cooking System: the cook pot is smaller, the top lid is a bit lighter, it has a thin neoprene cozy, and the burner unit is lightened up. It does still have a piezo igniter. The stove can be further lightened by eliminating the top cover, cozy, and bottom cover to reduce the weight to just 9.2 ounces (213 g), which is 1.7 ounces (48 g) more than the stripped Sol Ti Premium Cooking System.
In our performance tests, the Sol Advanced Cooking System was just behind the Sol Ti Premium Cooking System: fast heating rate (only the MSR Reactor and Jetboil Sol Ti were faster), excellent fuel efficiency, good wind resistance, excellent cold resistance, and excellent burner control.
Jetboil’s range of available companion cups and accessories and included pot support make this and other Jetboil stoves the most versatile in the group of stoves we tested. Although the stove’s cook pot is only 0.8 L, which is suitable for cooking in-pot for one person, larger volume pots are available to fit this stove that will cook in-pot for three people, and the included pot support allows the burner to be used with conventional cook pots to cook for even larger groups.
One bummer we found is the design of the connection between the cook pot and burner. A small slot on the base of the pot needs to line up exactly with a bead on the burner’s flange, then turn to lock. The design is awkward to use, but a Jetboil user gets used to it. Jetboil seems to maintain this design in order to have backward compatibility of their accessory pots with existing stoves.
Unlike the Sol Ti, the heat exchanger fins on the bottom of this stove’s pot are thicker and more durable, so this stove can be packed sans the bottom cap without concern for damaging the fins.
Overall, the Sol Advanced Cooking System is a good value, it has all of the features (except the Titanium pot) and most of the performance of the top of the line Sol Premium Cooking System, at a lower cost. It costs a little more than the Jetboil Flash and PCS, but the advanced technology and superior performance are worth the extra cost. The smaller 0.8 L cook pot needn’t be a deterrent; our tests find that this stove will quickly boil all the water you need, and if you want more cooking capacity consider getting Jetboil’s new 1.8 L Sumo Companion Cup.
Disclosure: The manufacturer provided this product to the author and/or Backpacking Light at no charge and is owned by the author/BPL. The author/Backpacking Light has no obligation to the manufacturer to review this product under the terms of this agreement.
An integrated stove from Primus similar to the Jetboil PCS, with a few design improvements but similar performance.

| Manufacturer | Primus |
| Year and Model | 2010 Eta Solo Cooking System |
| Materials | Aluminum pot, fabric cozy, stainless steel burner, plastic bottom cover and top lid |
| Pot Size | 0.9 L |
| Weight | Measured total weight: 13.7 oz (388 g) Measured minimum weight: 11.4 oz (323 g) Manufacturer total weight: 12.9 oz (365 g) |
| Features | Aluminum heat exchanger pot, QuickClick locking mechanism, heat-resistant fabric cozy with handle, burner knob valve and piezo igniter, drink-through lid |
| Included | Burner, cook pot, pot support, canister tripod, hanger |
| MSRP | US$120 |
The Primus Eta Solo, introduced in late 2010, is the newest member of their expanding line of fuel efficient and wind resistant heat exchanger stoves. It’s obviously targeted at the Jetboil PCS because of its similar design and size. The burner is in fact identical to the PCS because Jetboil initially obtained their burners from Primus. A few differences are: the Eta Solo’s pot capacity (0.9 L) is slightly smaller, its robust QuickClick locking mechanism holds the pot securely to the burner, the cozy is made of heat-resistant fabric rather than neoprene, there is no temperature indicating strip on the cozy, there is no cap/measuring cup on the bottom of the pot, and Primus includes both a pot support and a hanging system.
In contrast to the locking mechanism on Jetboil systems, Primus’ QuickClick locking mechanism is much more secure, especially if you plan to hang the stove using the included hanging system.
With a measured total weight of 13.7 ounces (388 g), the Eta Solo is 1.2 ounces (34 g) lighter than the Jetboil PCS and an ounce (28 g) lighter than the Flash. But it’s not lightweight; the weight conundrum is still there: we like its convenience and efficiency, but we are reluctant to backpack this much weight.
The 0.9 L cook pot on the Eta Solo will cook in-pot for one or two hikers. For more cooking capacity, Primus does not offer larger heat exchanger accessory pots that attach to the burner base. But they do include pot supports for using the burner with a conventional cook pot or heat exchanger pots designed to fit over a conventional canister fuel stove. The conversion consists of three individual pot supports that slip into holes on the burner, plus a separate plate around the burner to prevent deflected heat from overheating the canister. The Primus pot support system is not as elegant as the one Jetboil supplies, and the individual supports will fall out if the burner is tilted.
In our performance tests, the Eta Solo is in the middle of the pack: a slower heating rate, very good fuel efficiency, very good wind resistance, poor cold resistance, and excellent burner control. Compared to the Jetboil PCS (our benchmark for integrated stoves), the Eta Solo is slightly lighter, has a similar heating rate, slightly lower fuel efficiency, similar wind and cold resistance, lower versatility (larger heat exchanger pots to fit this stove are not available), and similar burner control. Overall, its performance and utility are approximately the same.
The main strengths of the Eta Solo are its sturdy construction, fuel efficiency (almost as good as the Jetboil stoves), excellent burner control, better locking mechanism, and the inclusion of a hanging system. However, it lacks the performance of the next gen Jetboil Sol systems.
Disclosure: The manufacturer provided this product to the author and/or Backpacking Light at no charge and is owned by the author/BPL. The author/Backpacking Light has no obligation to the manufacturer to review this product under the terms of this agreement.
Capable of handling all four seasons as either a single-wall floorless shelter or a fully bug-proof double-wall tent, the Nallo 4 GT can easily be tailored to meet a wide variety of environmental conditions. Is it the right tent for your family backpacking outings?
For families who want to do overnight backpacking trips or groups who need to set up a base camp, a larger tent is usually required. In both cases, this is a common scenario: the group carries their gear to a central location where a camp is established, from which day trips are launched. Tents used for this purpose are selected for their space, features, and comfort. They should be lightweight (if you are the parent you might have the whole thing in your pack), suitable for backpacking, easy to set up and enter/exit, and possess good wind stability, bug, and storm resistance. Tents in this category can also be used for car camping.
The Hilleberg Nallo 4 GT is a four-person, double-wall, four-season tunnel tent. The largest tent in the Nallo line, the GT designation of this tent means that it features an extended-length vestibule. The extra vestibule length is achieved by adding a third pole to the normal two-pole design of the Nallo series.
Although the extended vestibule and associated third pole add additional weight, the extra space has potential for creative use by families and large groups. On paper, the size and shape of the vestibule could – in a pinch – provide sleeping space for up to two additional people. For families with small children, the large porch area has the potential to be very beneficial for dealing with egress, gear, or cooking in inclement weather. Is the luxury of this additional space worth the extra weight?

| Year/Manufacturer/Model | 2010 Hilleberg Nallo 4 GT |
| Style | Four-season, four-person, tunnel-style, double-wall, non-freestanding shelter, with front entry and vestibule. |
| Included | Outer tent, inner tent, poles, guylines, stakes, pole repair sleeve, pole storage bag, stake storage bag, tent storage bag |
| Fabrics | Outer tent: Kerlon 1200 (30 denier ripstop sil-nylon) 1.47 oz/yd2 (50 g/m2); Inner tent: 30 denier ripstop nylon w/ DWR 0.94 oz/yd2 (35 g/m2); Floor: 70 denier PU coated nylon 2.65 oz/yd2 (90 g/m2) |
| Poles and Stakes | Three 9 mm diameter aluminum poles and twenty 6.3 in (16 cm) aluminum V stakes |
| Floor Dimensions | 83 in (211 cm) wide at head end, 87 in (221 cm) long, front height 46 in (117 cm) |
| Features | Large vestibule with multiple entry configurations. High vent in vestibule, low vent at foot. Multiple pitching options. |
| Packed Size | 19 x 9 in (48 x 23 cm) |
| Total Weight | Specified: 7 lb 8 oz (3.4 kg) Measured: 7 lb 11 oz (3.5 kg) with inner tent 5 lb 8 oz (2.5 kg) floorless |
| Trail Weight* | Specified: 6 lb 6 oz (2.9 kg) Measured: 5 lb 12 oz (2.6 kg) with inner tent 3 lb 9 oz (1.6 kg) floorless |
| Protected Area | Floor Area: 46.3 ft2 (4.3 m2) Vestibule Area: 34.4 ft2 (3.2 m2) Total Protected Area: 80.7 ft2 (7.5 m2) |
| Protected Area/Trail Weight Ratio | 14.0 ft2/lb (2.9 m2/kg) with inner tent 22.7 ft2/lb (4.7 m2/kg) floorless |
| MSRP | $795 |
| Options | Tent footprint (covers entire tent area, including vestibule) $98 Mesh inner tent $160 Stuff sacks and bags (various) $4 – $55 Guy line $18.50 Tent stakes and peg sets (various) $20 – $70 Extra poles $38 ea. Pole repair section and sleeve $6 Pole holders $0.75 ea. |
* Trail weight: Hilleberg’s published trail weight (they call it minimum weight) includes the outer tent, inner tent, and the poles. BPL’s measured trail weight includes the minimum required to pitch the tent: outer tent, inner tent, poles, and four stakes.

What’s included in the package.
The Nallo 4 GT is a three-pole tunnel design. Because it is not free-standing, it requires a minimum of four stakes (two at either end) and no guylines to set up. Additional stakes and guylines (all included) can be used to improve the stability and weather resistance.
The two main components of the tent system are the outer and inner tents:

Left:The adjustable tie-outs have lightweight metal rings for the tent stakes.This is to help prevent the tie-outs from cutting on the stakes in windy conditions. Right:Tie-outs for guy lines are strategically placed in multiple locations around the tent.
Three optional accessories were also tested as part of this review:
The standard way to pitch the Nallo is with the outer and inner tents attached. Pitching the tent in this fashion creates a robust, bug-proof, four-season, double-walled shelter. The outer tent can be pitched without the inner tent in floorless mode, and the inner tent can be easily added or removed without taking it down. Additionally, the inner tent can be pitched without the outer tent using the pole holders, creating a protected space from bugs while allowing for maximum ventilation. The outer tent cannot be pitched over an already set up inner tent.

Left: Outer tent pitched in floorless mode without the inner tent. Viewed through the vestibule door on the left side. Right: Viewed through the vestibule door on the right side.

Left: The front of the vestibule can be rolled completely back to form an open awning. Right: Five sleeping pads arranged in floorless mode with the front of the vestibule rolled back. Still room to spare.

Left: Outer tent pitched with inner mesh liner. Right: Five sleeping pads with the inner mesh liner. Things start to get cramped inside the inner tent.
Some other features worthy of note:

Left: External pole sleeves and plastic pockets are designed to handle an extra pole if required. Right: The adjustable vent at the foot of the tent can be rolled back in sections.
The basic set-up of the Nallo is relatively easy: stake out the back of the tent using two stakes, insert the three poles into the pole sleeves, then stake out the front using two more stakes. The pitch can be tightened by pulling on the adjustable tie-outs at each stake, and by tightening up the pole sleeves using the adjustable straps at the end of each pole. For additional stormworthiness, a stake can be added at the end of each pole and several guylines can be employed at various points around the tent.
For four people, the Nallo 4 GT is adequate, thanks mostly to the large vestibule. The main sleeping area has just enough room to hold four full-length sleeping pads. It is a perfect size if you have kids, but for four full-sized adults, it would be a little cozy. It would be spacious for three. If you want lots of space and comfort for four adults in this shelter, I would suggest that the fourth person sleep in the vestibule, or use it in floorless mode so that you have lots of room to spread out. For three people and gear, you probably wouldn’t need the GT version.
When sitting up in the inner tent, headroom is at a premium along the sides of the tent. The center two people have decent room for sitting up, but the people on the sides have the sloped roof of the tent to contend with. The situation is much improved when also using the vestibule or when the inner tent is removed, as there is room for everyone to spread out.

Left: Headroom is adequate in the middle, but drops off quickly near the sides. Right: Dad cooking in the vestibule while the rest of the family are warm and cozy inside. This is the standard inner tent which is constructed out of a DWR ripstop nylon for colder conditions. The front door has a zip-away panel with mesh as can be seen in this photo.
We took the tent out on a fall weekend family backpacking trip in the White Mountains of New Hampshire. The weather was cold (dipping to the high teens at night) and windy, with some snow at higher elevations. The tent performed very well. The two-wall design ensured that everyone was warm and comfortable. Although the tent did make lots of noise in the wind, it was nice and stable.
While designed for four people, there was enough space for our family of five; the vestibule was big enough for me to sleep in a lightweight bivy sack while still leaving room for all of our gear as well as space to cook. The large vestibule also made entry/exit a breeze for the kids (who are known to be a little clumsy when dealing with their footwear) making camping in foul weather a very pleasant experience. We also liked having two zippered entry doors as it allowed us to select our entry point based on the weather conditions.
When it was time to break camp, we took down the inner tent and used the large floorspace as a gear packing area. Everyone stayed warm while we got organized. The final step involved a quick exit and takedown of the tent prior to hitting the trail. Weather resistance is superb. The tunnel design is very stable in windy conditions. Because the tent is pitched right to the ground, there is little wind or water that is able to find its way in around the perimeter.
In New England, it is common for backcountry sites to have tent platforms. Pitching shelters that are not self-supporting can be a challenge, especially when they are large. The Nallo was just big enough to set up on a large wooden tent platform. Because it only needed four stakes, set-up was a relatively easy task.
There are few other shelters on the market that are similar in design to this tent at this size. The only one that would be considered equivalent is the Stephenson Warmlite 5R.
The 5R, while similar in overall size to the Nallo, has a few important differences: The inner wall and floor are not removable, and thus the tent cannot be used as a floorless single-wall shelter. There is no separate vestibule space, the floor extends across the entire bottom of the tent. The double layer of fabric only exists in the main body of the tent, not over the ends (although this can be added as an option). The tent has a door at each end. At 5 lbs 10 oz, the Warmlite 5R base price is $850, and only a few ounces lighter than the minimum trail weight of the Nallo.
If I were to describe this shelter in one word, it would be versatile. While it isn’t the lightest shelter in the lineup, it isn’t bad at all when you consider all the different ways that it can be used: In four seasons, outer only (single-wall, floorless), outer with ground sheet (single-wall, floored), outer and inner (double-walled), and inner only (screened sleeping area), with a variety of vestibule ventilation and entrance options. The stock weight can be trimmed by using lighter guylines and fine tuning the stakes, using lighter models where appropriate. If Hilleberg were to offer carbon fiber poles as an option, the weight could be reduced even further without losing any functionality.
This tent is seriously engineered. Out of all the tents I have ever used, this one feels like an incredible amount of thought and design went into every detail, with performance and durability being of utmost priority. It is also engineered to withstand virtually any four-season weather most regular people would encounter. This level of design does have a cost (both financially and weight-wise). If you are looking for one shelter to meet all your needs no matter what the climate or the season, for the weight, there are few others out there that can match it.
Disclosure: The manufacturer provided this product to the author and/or Backpacking Light at no charge and is owned by the author/BPL. The author/Backpacking Light has no obligation to the manufacturer to review this product under the terms of this agreement.
 © Beartooth Media Group Inc.
 Loading...


