Articles (2020)

Komperdell Featherlight Carbon Trekking Pole REVIEW

Stiff, light, reasonably priced fixed-length pole with contoured grip and wrist strap.

Introduction

Komperdell Featherlight Carbon Trekking Pole REVIEW - 1
The Komperdell Featherlight Carbon trekking pole is stiff! Here it supports a 20 pound pack with ease on Mt. Baldy in Arizona.

If you are hesitant about making the move to a fixed length carbon pole, the Komperdell Featherlight Carbon trekking poles are just the ticket. They have all the features and performance of a “regular” trekking pole – stiff, contoured grip, tapered shaft, wrist strap and carbide tip – except the weight (4.3 oz for 120 cm length). And, at about $100, they are among the least expensive carbon poles. One catch – plan on leaving the baskets on once you install them.

What’s Good

  • Among the lightest poles available at 4.3 ounces per pole
  • Unnoticeable flex under full body weight
  • Molded EVA grips are very comfortable
  • Perform and look like “real” poles with tapered shaft, contoured grip, wrist strap, and carbide flextip
  • Reasonably priced at about $100

What’s Not So Good

  • Carbon shafts are more easily damaged from sharp object side impact
  • I was unable to remove the press-fit baskets once installed
  • Fixed length poles are trickier to use as shelter supports
  • There are lighter poles

Specifications

  Year/Model

2006 Komperdell Featherlight Carbon poles

  Style

Fixed length

  Shaft Material

Carbon fiber, 16 mm (0.63 in) diameter

  Tips

Carbide Alpine flextips

  Grips

Molded EVA foam with wrist straps

  Grip Size

Medium-Large

  Weight Per Pole
(without baskets)

4.25 oz (120 g, pre-production pole) measured weight 120 cm (47 in) length; 4.6 oz (135 g, production pole with leather wrist strap) measured weight 135 cm (53 in); manufacturer’s specification: 4.3 oz (122 g) for 120 cm length

  Pole Length

Fixed: 43-53 in (110-135 cm) in 5 cm increments, 47 in (120 cm) length tested. Komperdell measures pole length from end to end – from the flex tip to the top of the grip.

  Baskets Included?

Yes – diameter: 2 3/8 in (6 cm), weight: 0.2 oz (7 g)

  Basket Type

Press fit / Komperdell

  MSRP

about $100

Komperdell Featherlight Carbon Trekking Pole REVIEW - 2
The Komperdell Featherlight poles look like “regular” fixed-length poles with their 16 millimeter shafts and substantial wrist straps; but weigh half what you might expect.

Performance

The Komperdell Featherlight Carbon poles are beauties. Each pole weighs an ounce to an ounce and a half more than the lightest trekking poles (Gossamer Gear Lightrek, Titanium Goat Goat poles, Bozeman Mountain Works Stix Pro) but the complete package of the Komperdell poles is well worth the nearly unnoticeable-in-the-hand extra weight. The Featherlight poles are more finished than the Titanium Goat poles (contoured grips with straps and better tips), they are much cheaper than the Bozeman Mountain Works Stix poles, and they are stiffer than the Gossamer Gear Lightrek poles. These one-piece carbon fiber poles look and perform like regular weight poles with their 16 millimeter top diameter, handle to tip taper, and super stiffness. Marketed as alpine ski poles, they make wonderful trekking poles.

The concern with carbon fiber poles is their strength, especially their vulnerability to sharp side impacts. I used the Featherlight poles on bushwhacking trips where I returned bloodied, bruised and with torn clothing but the Featherlight poles emerged with merely a few scratches. The toughest test was a class 3 scramble ascending 3000 feet in 2 miles up Siphon draw in the Superstition Wilderness of Arizona. Since the poles are fixed length, I used them when I would normally have stowed collapsible poles. The Featherlight poles earned my confidence when I pushed my full weight onto them with almost no discernable give. When I absolutely needed both hands, I carried both poles in one hand; the fixed length was cumbersome, but the light weight made it easy to maneuver them around rocks and brush. The poles took some hard bangs against rocks but have showed no signs of structural damage.

The molded foam EVA grips are superb. The trigger finger and bottom ridges protrude far enough that your hand rests easily in place without depending on the wrist strap in either a full grip position or in the hill climbing position with just thumb and forefinger resting on the bottom ridge.

Opinions are mixed on whether a wrist strap is needed on poles as light as these. The first time I used Gossamer Gear Lightrek poles I was very surprised to find I didn’t miss straps since I normally rest my wrist heavily on the strap during downhill scrambles. (With the Gossamer Gear poles I just put my hands on top of the grips on steep downhills.) Still, I appreciate the extra grip positions and support offered by the Komperdell Featherlight straps. The straps on the prototype poles I tested quickly frayed and looked unattractive on an otherwise beautiful pole. Komperdell is using very nice looking leather straps on their production poles. For those who don’t use a wrist strap or want to save about half an ounce per pole, cut the straps off without fear – the molded grips are perfect for strapless hiking.

The Komperdell Featherlight poles are incredibly stiff. There is a very slight flex on steep downhills with my full weight on the poles, but much less flex than on three-piece Leki Ultralite Titanium poles I have. The stiffness gives lots of confidence in these carbon fiber poles. The flex is much less than on some other carbon fiber poles as demonstrated in the photo above where a water-loaded 20 pound pack hangs from the middle of a Featherlight pole. For a more quantitative measure, I repeated Will Rietveld’s stiffness test by suspending a pole between two chairs and pulling downward at the center with a digital fish scale. The Featherlight poles bent less than 1 inch with a lateral force of 25 pounds applied as compared to 2 inches for the Life Link AT Superlight carbon poles that Will tested.

Komperdell Featherlight Carbon Trekking Pole REVIEW - 2

Komperdell Featherlight Carbon Trekking Pole REVIEW - 3

Komperdell will use a leather wrist strap on their production Featherlight poles.

The baskets are different not only from other brands’ baskets, but also from the usual Komperdell basket; they are press-fit rather than twist-on. The small baskets retain the wider diameter (2 3/8 inch) of previous Komperdell baskets (as compared to the small Leki and Black Diamond baskets). The Komperdell baskets are very flexible. I found it impossible to remove the baskets once they were installed. The basket and basket holder assembly can be removed together by bracing the basket holder between your feet and pulling up on the pole. (I easily pushed the basket and assembly back on the pole after removal and it continues to remain in place after severe use.) Komperdell has not responded to my questions about the basket design.

Fixed length trekking poles, although not as easy to use as collapsible poles, can be used for shelter support. Even if they are not the exact right length, small adjustments can be made by propping a pole on a rock or slanting it to mimic a shorter pole. Slanting a pole has the advantage of allowing an instant shelter tune up after sag has set in by moving the bottom of the pole to effectively lengthen it. For tarps or tents requiring a short rear pole, a strip of duct tape around the pole at the correct height will hold a girth hitch in place. Of course there may be some shelters where your fixed length pole will not be a workable tent pole. I used the Featherlight poles very successfully to support a Six Moon Designs Gatewood Cape shelter.

Compatibility With Trekking Pole Shelters

Shelter type and pole length required Usable with this shelter?
Gossamer Gear/Tarptent Squall Classic (42 in/107 cm) Depends on length
Tarptent Virga 2 / Squall 2 and Six Moon Designs Lunar Solo / Europa (45 in/114 cm) Depends on length
GoLite Trig 2 (48 in/123 cm) Depends on length
MSR Missing Link (54 in/137 cm) Only with extra support
Six Moon Designs Gatewood Cape (45 in/114 cm) Taller poles work well; pitches taller than the manufacturer recommendation

Komperdell measures pole length from tip to the top of the handle. Before you order, determine the correct pole length by noting the length your adjustable poles are normally set to. The strap and grip of the Featherlight poles allow quite a bit of height variability from your hand on top of the grip, to just hanging on to the bottom ridge of the grip, to a position below the grip by lengthening the strap to the max. The poles are wide enough to get a fairly good grip on just the shaft.

Komperdell Featherlight Carbon Trekking Pole REVIEW - 2

Komperdell Featherlight Carbon Trekking Pole REVIEW - 3

Once the press fit Komperdell basket is attached, it can’t be removed except by pushing the basket and holder assembly off the pole (left). The carbide tip gripped well (right).

What’s Unique

The Komperdell Featherlight Carbon poles are the lightest fixed-length carbon poles with contoured grips and straps – and at a great price. (The Life-Link AT Superlight poles are a bit less stiff, a bit more expensive and weigh a couple of ounces more per pole.)

Recommendations for Improvement

The Komperdell Featherlight Carbon poles are a polished package providing a great balance of stiffness, light weight, and features. The single visual flaw was the comfortable but sloppy looking pre-production wrist strap; Komperdell has moved to a very sharp looking leather strap for the production poles. My only suggestion is to change the press fit basket system to allow the baskets to be removed.

Osprey Talon 44 Backpack REVIEW

A roomy, comfortable, lightweight framed backpack with lots of pockets, good load control, an adjustable torso length, and a few weak spots.

Osprey Talon 44 Backpack REVIEW - 1
The mid-sized Talon 44 rides fairly low and won’t interfere with the head or a hat.

Introduction

The Talon 44 is the largest of a new series of “active light” packs from Osprey and the only one to feature a frame. A mid-sized, top-loading, internal frame pack, the Talon 44 incorporates lightweight materials (maybe too light if not handled with care) while offering plentiful features and an effective frame-type suspension.

What’s Good

  • Quite light for a medium-size pack with an effective frame and suspension
  • Comfortable and responsive
  • Compression scheme manages diminishing loads
  • Eight external pockets, six accessible while wearing the pack
  • Floating, removable top pocket
  • Bottom main-compartment zip
  • Adjustable torso length

What’s Not So Good

  • Some fragile fabrics and hardware
  • Load compression straps interfere with side pockets
  • Too-high sternum strap attachment points

Specifications

  Manufacturer

Osprey

  Model

Talon 44

  Style

Internal frame, top-loading, drawstring closure, adjustable top pocket-lid

  Volume

Size M/L tested: 2600 ci (44 L)

  Weight

Manufacturer: 2 lb 7 oz (1.10 kg); as measured: 2 lb 6 oz (1.06 kg)

  Sizes Available

S/M, M/L

  Torso Fit Range

S/M fits <19 in (48 cm) torso, M/L fits >19 in (48 cm) torso

  Fabrics

70d x 100d and 160d x 330d Nylon “Shadow Check”; stretch woven nylon-Lycra

  Features

Removable floating top pocket lid with internal and external ditty pockets; extension collar, stretch fabric pockets on sides and back and stretch mesh pockets on hipbelt wings and shoulder straps (seven total); “external” hydration pocket; two carry loops and straps for poles or tools and two sleeping pad straps, aluminum, composite and thermo-foam frame; adjustable torso length harness w/ load-lifter straps; Airscape ventilated back panel; “ergopull” hipbelt; sternum strap w/ whistle buckle; bottom zip main compartment access

  Volume To Weight Ratio

68.4 ci/oz (M/L)

  Comfortable Load Carrying Capacity

28 lb (12.7 kg) estimated comfortable load carrying capacity for an average person carrying the pack all day

  Carry Load to Pack Weight Ratio

11.8 (based on 28 lb and a measured weight of 2.375 lb)

  MSRP

$159

Performance

The Talon 44 is a comfortable and surprisingly spacious backpack for weekend and even longer trips. Its single main compartment is medium in width and somewhat short but deep, and swallows a good-size load. The floating top lid and numerous other pockets add considerable capacity. The frame-type suspension flexes with the torso and keeps mass reasonably close to the body – load control and comfort are good. Osprey’s careful selection of fabrics and hardware has kept the Talon 44’s weight quite low for a framed pack, but at some cost of durability.

Osprey Talon 44 Backpack REVIEW - 2

Osprey Talon 44 Backpack REVIEW - 3

Osprey Talon 44 Backpack REVIEW - 4

Osprey Talon 44 Backpack REVIEW - 5

Osprey Talon 44 Backpack REVIEW - 6

Plentiful pockets are a Talon talent.

Suspension System

Two vertical composite side struts run up either side of the back panel and connect to a tubular aluminum cross-member at the top. This cross-member provides the load control strap anchor points. Between the side struts is a fairly stiff HDPE foam panel, topped by softer shaped foam at various contact points with the back. The whole backpanel is covered by open mesh, creating what Osprey calls the “airscape.” The Velcro-anchored shoulder strap yoke attachment point is adjustable, giving the Talon 44 two to three inches of torso length range. The cut-foam hipbelt and shoulder straps are also mesh-covered, to enhance ventilation and reduce sweat accumulation. The hipbelt uses Osprey’s “ergopull” adjustment system, and the sternum strap attachment point is adjustable. There are no hipbelt control straps but there are four side compression straps.

Features and Utility

The Talon 44 is loaded with features. I’ll begin with the top-opening main compartment, which has an extra access zipper that completely opens the pack bottom, where most folks keep their sleeping bag or quilt. At the top is about a 4-inch extension collar. The main compartment is somewhat short and deep, meaning it handles large, bulky items more easily than many packs of this size. A Bearikade Weekender canister (9 x 10 inches) fits sideways; people who cram it to the bottom will appreciate the bottom zip. The pack is topped by a removable floating pocket. The zipped pocket has a small organizer pocket and key clip inside and a zipped mesh pocket underneath. Between the main compartment and back panel is a hydration pocket that can be accessed from the top without opening the pack. It has a top anchor strap for the water bladder. This scheme still reduces pack volume somewhat, but perhaps less than the typical reservoir-in-the-main-compartment approach. It definitely eases mid-day fill-ups.

Osprey Talon 44 Backpack REVIEW - 7
Bottom zip allows quick access to low items, such as a sleeping bag, or easy bear canister entry.

Seven pockets in addition to the lid adorn the Talon 44: two stretchy side pockets, a large stretchy front center pocket, two “gel” pockets on the shoulder straps and two roomy zipped pockets on the hipbelt wings. The side pockets easily handle 1-liter bottles, but are constricted by the side compression straps. Even so, they can be accessed with the pack on. The front pocket holds lots; e.g., it easily accommodates full raingear or other daytime clothing. None of these pockets is weather-tight.

Additional touches are a pair of axe/pole loops and anchors and a pair of straps on the lower main panel, useful for holding a sleeping pad or groundcloth as well as taking some stress off the zipper. Lots of reflective doodads mean you can watch your Talon be dragged quite a ways into the woods by mister bear, by flashlight.

The Talon 44 is a fine three-season weekend pack, even for less-than-meticulous packers. It’s easy to load and has excess exterior load capacity once the main compartment is full. In addition to the front straps, items can be strapped beneath the top pocket, and of course there’s the large front pocket. I’ve little doubt careful packers can squeeze in close to a week’s worth of gear and food.

Osprey Talon 44 Backpack REVIEW - 8
Front load straps and stowage beneath the top lid enhance the Talon 44’s capacity. Deep main body means the load extends far from the back, so heavy items must be packed close to the shoulders for best load control and balance.

Fit

The tested medium/large Talon 44 fit my 20-inch torso without my fully extending the shoulder strap yoke. However, despite the potential reserve length for taller hikers, I question whether load control would be as effective at full length. For me, load control is quite good. The Talon suspension is responsive, similar in design and feel to the last Mountainsmith Ghost. Once the pack is properly fitted, when the load control straps are snugged the vertical rods bend to form a springy load that feels lively. The hipbelt is comfortable, and strap end anchors reduce flapping.

Osprey Talon 44 Backpack REVIEW - 9
Velcro yoke anchor gives 2 or 3 inches of torso length adjustment.

While I’ve not used the Talon in warm weather, the various ventilation schemes handle sweat acceptably well in fall and winter. Approaching and passing 30-pound loads reveals the airscape suspension’s carry limits; I found up to about 28 pounds to be reasonable, even if the pack wasn’t full (many packs sag disconcertingly when partially filled). It’s important to use the side compression straps to reduce volume as the load diminishes. The sternum strap adjustment points seem oddly high; a lower option would suit me better than the range provided.

Assessment

After a few trail hours, the fit/no-fit question is generally answered with most backpacks. The Talon 44 passes this test for me. I’ve used other packs of similar volumes, and find the Talon 44 easier to pack while still being comfortable to carry. Higher, narrower packs are more maneuverable and generally control loads better than shorter, squatty packs, but can be a bear to pack with real-life loads – especially bulky items. The Talon 44 is a nice compromise in this regard. Osprey’s own Atmos series, with their trampoline-style “airspeed” suspensions, are more responsive but are also heavier.

Osprey Talon 44 Backpack REVIEW - 10
The “airscape” system provides lightweight ventilation through the use of contoured and die-cut foam, and netting.

I was the second to test this Talon 44 sample, and it exhibited more wear and tear than I’m used to seeing during a pack evaluation. Fabric snags and wear spots and a broken buckle are testament to the balancing act pack designers face when reducing weight. I’d caution anybody who hikes in very brushy conditions or subjects their packs to abrasive rock to be especially cautious of the Talon’s stretch fabric pockets. I’m also not sure the buckles can handle a lifetime of hard cinching. The pack bottom is a double layer of heavier fabric than used on most of the pack, so should endure reasonable abuse. The foam, webbing, zippers and mesh all came through the test in good condition.

Osprey Talon 44 Backpack REVIEW - 11
The Talon 44 suffered this broken buckle and some fabric wear.

What’s Unique

An effective frame-suspension multi-day pack that’s less than two-and-a-half pounds.

Recommendations for Improvement

  • Analyze fabrics and hardware in high stress/wear areas for adequate strength and toughness.
  • Lower sternum strap attachment points.
  • Consider adding a third, taller size.

White Box Stove REVIEW

While not the lightest around, this simple pressurised alcohol stove is remarkably robust.

White Box Stove The White Box stove, (image courtesy of White Box).
Note that in use the centre well is capped by the pot.

Overview

Unlike so many small alcohol stoves which are made from extremely light but very fragile bits of aluminium, the White Box Alcohol Can Stove is made from a more robust aluminium energy drink can. The construction is very simple, but the performance is, like many other similar pressurised alcohol stoves, quite powerful.

What’s Good

  • Robust!
  • Good alcohol capacity – 2 ounces
  • Quite powerful
  • Moderately stable on the ground

What’s Not So Good

  • Slow to prime
  • Flares when pot is removed
  • Not as light as some
  • Flame spread is much too wide for narrow pots and beer cans

Specifications

  Manufacturer

White Box (can be purchased via e-Bay or from www.gossamergear.com)

  Year/Model

2006 – Alcohol Can Stove

  Construction material

Aluminium drink can, ‘thick’-walled

  Construction process

Pressure fit and rivets

  Mechanical design

‘Pepsi-can’ style, 60 mm (2.3 in) diameter by 55 mm (2.1 in) high

  Jets

21, drilled around outside, 20 mm (Âľ in) down from rim

  Alcohol capacity

Open centre well claimed to hold up to 2 oz denatured alcohol

  Stove style

Looks like an open jet, but pressurised in use

  Windscreen

Matching windscreen is included

  Burn time

Depends on amount of fuel used

  Target use

One or two people, can take heavy pots and heavy use

  BPL measured weight:

Stove: 30 g (1.06 oz), windshield 27 g (0.95 oz)

  MSRP

US$20

Description

There are several different classes of alcohol stoves, depending on your personal preferences, but one major classification is between pressurised and unpressurised ones. In all of them the alcohol has to boil to create the vapour for burning of course; in the pressurised ones the vapour usually comes out of a ring of holes around the side, As they rise up to the pot on top the flames heat the stove to keep the alcohol boiling. Inside the pressurised class we have two main categories: those which are inherently pressurised and those which have an open centre hole and are pressurised by the pot sitting on top blocking that central hole. The White Box Stove fits into the latter category.

Many stoves in this class are made from very light aluminium beer or coke drink cans. As such they can be a little susceptible to damage. This White Box Stove is made from a thicker aluminium drink bottle – think miniature SIGG water bottle or conventional white gas stove tank. As such, the wall is much thicker and stronger. The company claims the drink bottles they use have walls 3 to 4 times thicker than found in ‘Pepsi’ cans. I measured the wall thickness in the White Box Stove as 0.040 millimetres (0.0016 inch), while an energy-drink can I measured had a wall thickness of 0.010 millimetres (0.0004 inch). That is 4:1. To be sure, the alloy used in the drink bottle may not be quite as hard as the alloy in a ‘Pepsi’ can, but I can certainly feel the greater rigidity in the White Box Stove.

The windshield supplied with the stove is made of aluminium foil with all the edges folded over for safety. There are small holes punched along the bottom edge. The windshield is the normal 600 millimetres (24 inch) long by a slightly higher than normal 90 millimetres (3.5 inch), and it weighs 27 grams (0.95 ounces). This is almost as heavy as the stove, and I found myself taking a lighter (17 grams or 0.60 ounce) windshield in its place. However, the White Box windshield is probably more robust than the lighter one.

The White Box company claims (on their e-Bay web site) to have sold some 1,900 of these stoves. That is a very large number: it may be that the solidity of the stove is commercially attractive- very understandable. (It also means someone has drunk a huge number of drinks out of those cans – no comment!) The warranty offered with the stove is for a free replacement if you manage to ‘burn this stove out’. I doubt this has happened very often.

However, the extra strength carries two penalties, and the most obvious one is the weight. The White Box Stove weighs 30 grams (1.06 ounces), while the moderately similar Mini Bull Designs Elite stove weighs about 7 grams (0.25 ounce). Whether the extra robustness and slightly greater diameter of the White Box Stove justifies the (slight) extra weight is something each user will have to decide for himself. I would point out that the extra weight of the stove is rather small compared to the weight of alcohol you need to be carrying for a trip of almost any duration.

The second penalty only appears when you compare the operation of the White Box Stove with a lighter competitor. The White Box Stove seems to take longer to prime and get going compared to some competitors. The leaflet which comes with the stove suggests the stove may take a minute or more to get going properly, and this is what I found. Of course, it is burning up alcohol while it is getting up to speed. It is never clear (to me) whether quoted burn times and fuel quantities allow for this priming.

I think there are several reasons for the longer priming time. It is obvious that the greater mass of aluminium will take some extra heating, but it is not the full story. The larger size of the stove may also mean it takes longer for the flames to spread the heat all the way down into the alcohol. But I think the larger size of the stove compared to something as small as the Mini Bull Designs Elite stove may mean there is a bit of a tendency in practice to put just a bit more alcohol into this stove. Of course, the more alcohol you start with, the longer it will be before it has been heated up to boiling.

White Box Stove - 1 The White Box Stove sheltered by rock and windshield.
(Windshield open for the photo.)

Performance

The White Box company claims (on their e-Bay web site) that their testing ‘has shown it can boil 2 cups of water in approximately 4 minutes with only 2/3 ounce of fuel and we were able to boil 3 cups of water in less than 6 minutes with only 1 ounce of fuel. It has boiled 6 cups of water in 12 minutes with 2 ounces of fuel.’

I tested these claims with the supplied windshield and an AGG 2 quart (1.8 litre) pot. The windshield is 90 millimetres (3.5 inches) high, and was spaced about 15 millimetres (0.5 inch) out from the AGG pot. I was able to match the White Box performance claim only if I held the pot up above the flame as soon as I had lit the alcohol. I could not match these figures if I waited until the jets around the outside had started burning. I think you have to use a real metal pot holder (rather than a glove or bandanna) to hold the pot above the stove while it is priming, and that is extra weight. In practice therefore I think you can expect slightly longer boil times in the field.

The instructions which came with this stove claim you can light the alcohol by putting a ‘lighter down into the large top hole of the stove’. Don’t try it: you will burn your fingers! Even on a hot day (33 C or 91 F) in a closed lab, the alcohol vapour did not seem to reach to the rim. For these stoves I use a small stick dipped in the alcohol to transfer the flame down into the centre well. Once lit I found I had to wait a little over a minute before the flames were coming out of the jet properly. That is a lot of fuel-burning time.

Once the stove has flames coming out of the jets around the side I found that the jets do put out a lot of alcohol vapour, making the stove quite powerful. In fact I found that the flames were coming well up the side of the AGG 2 quart pot I was using – which is not such a good thing. It means that a significant fraction of the flame heat is being wasted up the sides. It seems that a fast heating rate usually does mean that the efficiency drops. This could be improved by having fewer jets or by having the jets slightly smaller.

The AGG pot used in for my bench testing is reasonably large: almost 150 millimetres (6 inches) diameter. Even so, as mentioned above the flames were licking way up the side of the pot. Putting a smaller pot such as the MSR Titan Kettle or, worse still, a beer can pot on it results in very high flames and a lot of wasted heat and fuel. Reaching such a narrow pot while the flames are licking up the sides becomes an ‘interesting exercise’ if you are not carrying a metal pot lifter. Frankly, I found it rather hazardous.

I thought that the flames from this stove look very long compared with the flames from a similar stove such as the Mini Bull Designs Elite. This makes me think this White Box stove should preferably be used with large pots, cooking for two people perhaps. However, balancing large pots such as the 1.4 litre (1.5 qt) GSI Bugaboo pot (190 millimetres or 7.5 in diameter) on such a small stove presents its own problems. The Mini Bull Designs Sketti stove handles this rather well by being much bigger in diameter and lower in height.

Other Hazards

The instructions do mention that once the stove is running you should not take the pot off it. If you do the boiling alcohol in the centre well will send a column of flame leaping upwards, and this can be quite dangerous. Do not have your head over the stove in such a situation! Also you should be very cautious about using this stove inside a tent or under a tarp for the same reasons.

The carbon monoxide emission from this stove is quite significant, as with many other alcohol stoves. Use of it inside a closed structure such as a hut or tent could be quite dangerous for this reason.

What’s Unique

  • The robustness of this stove is its unique feature.

Recommendations for Improvement

  • If the jets were made a little smaller to bring the flames a little more under control, the stove would be both a bit safer and more suitable for use with small ultra-light pots. It might also improve the efficiency in terms of alcohol used.

Montrail Hurricane Ridge XCR Shoe SPOTLITE REVIEW

An old favorite gets a makeover, making it better than ever, but also a little heavier.

Overview

The Montrail Hurricane Ridge XCR is a wide-based trail shoe that has become somewhat of a classic with ultralight enthusiasts because of its weather protection and stability on rugged ground. The upgraded model, introduced in fall 2006, retains key elements that made the original so successful, and adds some newer technologies and features. How does the new shoe compare with the old one?

Montrail Hurricane Ridge XCR Shoe SPOTLITE REVIEW - 1
The upgraded Montrail Hurricane Ridge XCR.

Montrail seems to know not to mess with success. The new Hurricane Ridge shoe has the same sawtooth tread, all-weather upper, stretch fit tongue, broad toe box, and medial post for pronation control. It still has its flared, stable base and low-to-the-ground ride. However, there are a lot of changes, so we will take a closer look.

Montrail Hurricane Ridge XCR Shoe SPOTLITE REVIEW - 2
The new Hurricane Ridge’s outsole has a sawtooth tread very similar to the old model, and now uses Gryptonite GT sticky rubber to add extra traction.

Advancements in the new Hurricane Ridge include improved forefoot flexibility, a modified tongue to improve ease of entry, more mesh in the upper, a full-length protection plate, a stiffer heel cup, molded strap to provide more ankle stability, and a four-density EVA midsole, extra cushioning under the heel (called TerraHex), and new Gryptonite GT sticky rubber in the outsole. We won’t attempt to explain all of this, but suffice it to say that the new Hurricane Ridge embodies the newest technologies from Montrail.

These upgrades come with a weight penalty. Our measured weight of the new shoe for men’s size 12 is 3.6 ounces more than the old model.

When we compared the upgraded model to the previous model, we noted numerous changes throughout the shoe. It’s basically a makeover without sacrificing any of the key attributes of the old shoe. We did notice that the tread is a little narrower, mainly because the rand does not extend out past the edge of the upper. The broad toe box is unchanged, but the shape of the toe box has changed – the widest part of the toe box on the new model is further forward (see photo below). The modified tongue still makes entry a bit tight, but it seals well around the ankle to keep snow and debris out. We did not notice any change in forefoot flexibility over the old model. If anything, it seems slighter stiffer. And the new model has more exposed mesh in the upper for better breathability.

Montrail Hurricane Ridge XCR Shoe SPOTLITE REVIEW - 3
The new Hurricane Ridge XCR shoe (left) is a little taller than its predecessor (right), and has a little more rocker (toe area upturned more).

The fit of the new model is not identical to the old model. For Will, the old model fit his wide feet better than the new model, because the widest part of his foot (the metatarsal head) is further back from the toe end and better matches the toe box of the older model. The toe box of the newer model is also wide, but the widest part is further forward. Thus the toe box on the newer model felt tighter for Will. Janet, who has more normal feet, had no fit issues. The point we are making here is – don’t assume that the fit of the new model is identical to the old one.

Montrail Hurricane Ridge XCR Shoe SPOTLITE REVIEW - 4
Looking down (left), the numerous changes in the upper are apparent (new model on the left, old one on the right). The toe box (left and right photos) is just as wide as the previous model, but the shape is different. The insoles (right) show the shape difference quite well; the widest part of the toe box is further forward on the new model.

We used the old and new Hurricane Ridge as our WP/B trail runner of choice in our Lightweight Footwear Systems for Snow Travel project (to be published soon) and loved it. The outside fabrics on this shoe don’t absorb water, so we didn’t have any problem with the uppers soaking down to the membrane, which adds weight and chills the feet.

For snowshoeing, hiking in snow, or hiking/backpacking in wet conditions and warmer temperatures (above about 25 °F), these shoes are hard to beat. Their broad base with its grippy sawtooth tread gets superb traction, they are very stable and supportive in rough terrain, they’re very durable, and they’re reliably waterproof (most of the time). Worn with a tight-fitting gaiter over the top, these shoes stayed dry inside (except for some sweat accumulation) the majority of the time. Only in the most challenging situations, like hiking for hours in really wet snow, did the shoes wet through enough to dampen socks (we wore a vapor barrier sock next to our feet, so we know it wasn’t sweat accumulation).

At higher exertion levels, the Gore-Tex membrane does not transfer moisture to the outside as fast as its generated, so there was some moisture accumulation in our socks and the lining of the shoes. In cold temperatures, our feet stayed warm as long as we kept moving, but tended to chill if we stopped very long. We found the best solution for chilly toes was to change socks when our feet felt damp.

Will especially liked the room the wide toe box provides for his wide feet (especially the older model) and the snug seal around the ankle that keeps snow and debris out. We both found these shoes especially supportive and stable in rough terrain and an excellent choice for ultralight backpacking when wet conditions are expected.

Montrail Hurricane Ridge XCR Shoe SPOTLITE REVIEW - 5
The Hurricane Ridge XCR (old model shown) is a great all-around shoe for cool weather and wet conditions, and grips exceptionally well on a variety of surfaces. Here Will is climbing some ancient moki steps in southern Utah.

The only downside is the tread tends to fill up with mud and it takes a long time for it to clean out by itself.

Features and Specifications

  • Manufacturer: Montrail (www. Montrail.com)
  • Sizes: Men’s 7-15, Women’s 5-11
  • Features: Gore-Tex XCR lining, IntegralFit (snug heel, wide toe box), TerraHex heel cushioning, four-density EVA midsole, medial posting for pronation control, full length protection plate, Gryptonite GT sticky rubber in the outsole, slipper-type tongue opening
  • Weight: Measured weight men’s size 12 is 35.6 oz/pair (1009 g); manufacturer specification 28 oz/pair, men’s size 9 (794 g)
  • MSRP: $125 US

The eVENT Single Wall Tent: Here, Then Gone – What’s Replacing It?

Single wall tents made of the more-breathable-than-Gore-Tex eVENT fabric caused a lot of excitement upon their introduction a few years ago. At last, a nearly condensation free single wall tent was possible. Then suddenly, eVENT tents were no longer available. Now a new wave of fabrics touted as “highly breathable” are appearing in single wall tents. What happened? Are these new fabrics as good as eVENT?

You don’t have access to view this content.

SteriPEN Adventurer Water Purifier REVIEW

A reasonably light and very effective means of purifying water to EPA purifier standards.

Introduction

There is nothing worse than getting sick while out walking, and one cause is contaminated water. A big problem is you very often do not know whether the water in front of you is safe or not. There may be ‘bugs’ in the water: very small viruses, middle-sized bacteria or largish protozoa. There are four common ways used to convert water of doubtful quality into something you can safely drink – or to make those bugs harmless.

  • Boiling – takes a lot of time and fuel, leaves water hot or tasting ‘flat’
  • Filtering – does not take out the very small viruses
  • Chemicals – do not always work reliably, may take hours to be effective 1
  • UV light – as reviewed here

Boiling, though it consumes fuel and time, is very effective if you do it as part of cooking. Filters can be heavy, have limited filter life and with one exception filters do not remove viruses. Since those little rotaviruses (for example) are responsible for a lot of dysentery, it is unfortunate that filters let them through. There are a lot of different chemicals on the market for treating water, including iodine, chlorine and chlorine dioxide, but they all have the serious problems of residual smell and taste. In addition some by-products of these chemicals are not very nice.

The chemicals do work quite well against most viruses and bacteria and are very widely used for this purpose. However, their efficacy against protozoans (such as Giardia lamblia and Cryptospordium spp.) in cyst form2 is questionable within the short contact times suggested by most manufacturers (

Lacking a quick, perfectly effective chemical treatment, we are left with UV light, which has been used to deal with ‘bugs’ and purify water as far back as 1910. It has been used commercially for applications such as bottling plants and extensively for chemical-free community water supplies, and its popularity is increasing. However, you should note that UV treatment has no effect on any chemicals which might be in the water – especially nasties like agro-chemicals, solvents and so on. You will need to watch where you get your water from – but you’re probably doing that already.

What’s Good

  • Effortless operation
  • Lighter than any filter
  • Works for all bugs to EPA standards
  • Treats 1 litre (1 quart) in 90 seconds
  • No chemical smells or residuals
  • Can use rechargeable batteries

What’s Not So Good

  • It isn’t cheap
  • It relies on batteries, which it loads very heavily
  • Batteries are a little expensive (but cheaper than most filter cartridges)
  • I worry about breaking the quartz lamp cover
  • Solar Charger is a bit heavy – an overkill design

Specifications

  Manufacturer

Hydro-Photon Inc

  Year/Model

2006 SteriPEN Adventurer

  Weight

  • Basic Unit with Lamp cover and batteries 101 g (3.56 oz)
  • Nylon Sheath 28 g (1 oz)
  • Two spare CR123 Lithium cells 31 g (1.1 oz)
  • Solar Charger 160 g (5.64 oz)
  • Foam cover 26 g (0.92 oz)

  Size

  • SteriPEN Adventurer 160 x 40 x 23 mm (6.2 x 1.5 x 0.9 in)
  • Solar Charger 180 x 90 x 35 mm (7 x 3.5 x 1.3 in)

  SteriPEN Adventurer Case

Plastic, non-slippery

  Lamp housing

Quartz

  UV wavelength

254 nm, in the deep UV-C range

  UV transmission

Negligible through common plastics and glass

  System Control

Embedded microprocessor with safety interlocks

  Estimated battery life

About 60 L (60 qt) for 2 non-rechargeable cells in warm weather

  Solar Cell Area

130 x 55 mm (5 x 2.2 in)

  MSRP

US$129.95 for SteriPEN Adventurer; US$49.95 for the solar charger

Caution

A serious caution should be given here as this whole area of water treatment or purification is a minefield. Each vendor of a purification product will present a threatening analysis of the water problem and a glowing analysis of the effectiveness of the product he or she is selling. Unfortunately, while the sales pitches may be fairly truthful they are not always complete. I have found that the bits which get glossed over or left out are sometimes rather critical. Well, I guess no manufacturer wants to tell you the bad bits. Also, there is a specialised jargon involved, as discussed below. It can all be very confusing.

However, I am also aware that some products on the market are relatively ineffectual, and others use a lot of ‘weasel words’ in their claims. The manager of AccuFilter went too far and ended up in jail in 1996 for fraud after being prosecuted by the EPA for the second time. On the other hand, the information provided with the SteriPEN Adventurer seems complete and credible.

In real life many walkers never bother treating their water: they are just careful where they get it from – and they survive. If you combine this caution with the UV treatment, you should be doing well.

Method of SteriPEN Operation

Each photon of UV light contains some energy, and if the wavelength of the UV light is short enough the energy can be sufficient to cause a change somewhere in the chemical bonds inside the bugs. For instance, if the bug has DNA, the UV light can cause the thymine bases in the DNA to lock up with each other, which prevents the bugs from replicating (breeding). In general, if the bugs can’t breed and multiply inside you, they can’t do you any harm. Of course, you need fairly energetic photons for this, but light in the UV-C band can do this. A common source of this is a discharge lamp emitting at 254 nanometres (nm), although some fluorescent lamps can also be used. The EPA has a lengthy document 3 on the whole subject, although it is primarily focused on industrial-sized systems.

Large discharge lamps with adequate power came first; very small ones with enough power were developed only more recently. The SteriPEN uses one such small UV-C lamp, which looks very similar to the Philips TUV4T5 Germicidal Sterilamp used in the Aquastar product. The SteriPEN Adventurer uses a microprocessor to control the operation and is powered by two CR123 (photo) lithium batteries. The company claims the lamp will provide at least 9,000 effective doses of UV but to be on the safe side they have limited the operation to 5,000 doses, and the unit gives a warning when you have passed 4,900 doses. They can replace the lamp. I would add that 5,000 doses is a lot of water treated.

Effectiveness of UV-C light and the SteriPEN Adventurer

It’s no use taking something which is not going to work. Those home-made gravity-powered filters using a plug of cotton wool may be very light and very cheap, but they are not going to stop any viruses, nor any bacteria, and probably won’t stop protozoa. They might make the water look clean and give you a happy feeling, but that feeling might change to unhappiness a day later if you get dysentery. There are EPA standards for water purification which are designed to protect your health, and it is wise to use a purification method which meets those standards. In passing, you should note that while many filters meet the EPA standards for protozoa and bacteria they do not normally meet the standard for viruses. Only a product which meets the EPA standards for all three sorts of bugs can qualify as a ‘purifier’: the use of the word is legally restricted in this context.

It has long been known that UV light can disable viruses and bacteria. Up until recently it was thought that UV light could not kill protozoa, but in the 90s it was found that researchers were asking the wrong question. UV light does not ‘kill’ the protozoa, but it does stop them from reproducing inside your gut, and as explained above if they can’t breed they can’t hurt you. Once this was understood the popularity of UV-C treatment for community water treatment started to rise. However, some non-UV water-purification companies still do not even acknowledge UV treatment as an option.

While this may be getting a shade esoteric, field tests have shown that our waterways are starting to show traces of certain hormones, antibiotics, fragments of recombinant DNA and RNA and other complex biological agents. They are coming from industrial processes, agricultural wastes and sewage treatment plants. I have seen data that suggests the same UV radiation will incapacitate some of these nasties as well.

The big question then is whether the SteriPEN Adventurer meets EPA standards and whether it has EPA registration. I asked the company about this, and they replied:

While our company is registered with the US EPA (company number – 73679), the EPA does not certify non-chemical water purifiers. As SteriPEN uses no chemicals it is not certified by the EPA. Non chemical systems such as ours and filters may be tested to the EPA standard. If these non-chemical systems meet the requirements of the EPA protocol then their literature generally states “meets US EPA protocol.”

According to the Lab Test Reports I have read the SteriPEN Adventurer (and the older Classic) do meet the EPA requirements for treating all three sorts of bugs, and the SteriPEN Adventurer is advertised as a ‘water purification device.’ Backpacking Light has no means of running the very complex biological tests required for this so we will rely on the work of the independent test labs. I am satisfied by these reports.

Description

Steripen - 1 The SteriPEN Adventurer.

The pre-production prototype unit we received is shown here. The main difference between it and the production version seems to be the direction of the printing by the button. The black and yellow body holds two CR123 lithium (photo) batteries and the electronics needed to drive the UV lamp and control the operation. The little red arrow at the bottom of the picture points to a small pushbutton, which is the only control on the whole unit. The little green arrow to the right points to a LED which shines either red or green. The blue arrow points to a metal electrode: there is one of these on each side of the unit and they sense the presence of water. Somewhere inside the unit there is a lamp temperature sensor. The long glass tube is a strong quartz envelope enclosing the UV lamp itself. When traveling it is wise to put the cover over the lamp: it clips on very firmly.

To operate the unit you remove the cover from over the lamp, press the button once (for 1 litre) or twice (for 0.5 litre), and put the unit in the water to be treated. The metal electrodes must be below the surface of the water. The lamp comes on and stays on for the required time, then turns off. You are advised to stir the lamp around in the water a bit to make sure you irradiate all the water. The length of exposure depends on the number of button presses and the temperature of the unit; the microprocessor will calculate this for you. The variation in dosage time due to temperature is not large. There is some variation in efficiency of UV generation with temperature. The UV action on the bugs is not significantly affected by the water temperature.

The manual or booklet which came with the pre-production version had very brief operating instructions on page 3, while the rest of the booklet was devoted to marketing waffle. This is a pity – a smaller booklet with better instructions would have been appreciated. It may be that the production version will be better. Ultra-lightweight walkers may take some exception to the ridiculous claim on page 2 that ‘With the SteriPEN Adventurer, you’re carrying hundreds of gallons of pure water in your backpack …’ However, maybe I am being too harsh.

Safety Matters

Steripen - 2 Blue Light coming from the lamp – or not, depending on the angle of view.

If exposure to the UV light can bump off the bugs, what will it do to you? This is the obvious question. This was addressed in a document entitled ‘Common Questions’ which I received, but I am not sure whether this document normally ships with the SteriPEN unit. As the document explains, UV light will not go through either glass or the common plastics; these materials block the UV. In addition, the company says the UV light bounces off the water/air interface at the top of the bottle.

In the pictures to the left the discharge can be seen in picture A, but it seems to be missing in picture B. In the case of picture B the lamp is still on, but the viewing angle from above is such that the blue light is being reflected off the water/air interface. In picture A you can see the blue light, but this is visible blue light, not the UV-C light. The UV has been blocked by the glass wall of the bottle. You can see visible blue light from the top of the water. The company claims that the UV light will not escape in this way but will rather be reflected off the water/air interface. They claim to have checked this with a UV light meter.

Another obvious concern is the effect on your eyes if you could turn the unit on before putting it in the water and got the UV in your eyes. Well, you can press the button, but the microprocessor has a mind of its own and for reasons of safety won’t turn the lamp on until it senses water at the metal electrodes. For this to happen the lamp has to be underwater. So far so good. If you take the lamp out of the water while the UV lamp is running the microprocessor will detect the loss of water and shut the lamp off in about one second. It will also turn the LED on with a red colour as a warning that the treatment time was not completed. However, it takes about a second or two for the loss of water to be sensed, and in this time the UV light may be shining in your eyes, so don’t pull the unit out of the water while it is turned on!

So why can’t you put the unit in the water first, before pressing the button? The reason is again safety. It would be safe enough if the lamp really was under water, but this may not be so. If the bottom of the unit is wet from the last immersion, the water sensor can be fooled into thinking that the unit is under water even when it is out of the water. The unit could be fooled into thinking it was safely under water and thus turn on in your hand as soon as you press the button – and blast your eyes. To prevent this the microprocessor has a rule that the water sensor must be ‘dry’ when you press the button for it to work. There is a trap here: if the bottom of the unit is still wet from the last immersion when you press the button, the unit may refuse to operate. You may have to brush the sensors dry with a bit of rag before you push the buttons. I was caught a couple of times like this.

Field Testing

This unit may have only one (input) button and one (output) LED, but it does have a microprocessor inside it, and using it sometimes seems almost as complex as programming a VCR. Well, not quite, but I found the following ‘features’ from testing and reading the User Guide.

  • You have to turn the unit on before you put the lamp in the water.
            That is, putting the lamp in the water first does not work!
  • Pressing the button once turns the green LED on, first steady, then flashing fairly quickly.
            The unit requires quite a definite press of the button to work: it is not hair trigger
  • Pressing the button a second time makes the green LED flash quickly anyhow.
  •         However, I can’t tell beforehand whether it has been set to treat 1 litre or 0.5 litre.

  • The green LED goes off when the UV lamp goes on.
            But if it flashes slowly while the lamp is on it means you are between 4,900 and 5,000 cycles: a warning.
  • When the treatment is complete the LED will either flash slowly (for 1 L) or just stay on (for 0.5 L).
            More importantly the UV lamp goes off, which is much more noticeable.
  • If you take the unit out of the water before the time is up the UV lamp goes off within about 1 second and the LED glows red.
            but putting the lamp back in the water does not turn the UV lamp back on.
  • If you leave the unit turned on in the air, it will time out after about 15 seconds and turn off by itself.
            It is supposed to give one red flash when it times out.
  • Red flashing is obviously a warning, and has two meanings:
            fast flashing: low batteries – flashes for 8 seconds.
            slow flashing: lamp has done 5,000 operations and should be replaced.
  • You can cancel the operation when the LED has turned red by pressing the button for a moment.
  • You must dry the two sensors before you try to treat the second batch, or it may think the unit is in water still.
            This can be a real trap if you are not thinking!
  • Getting the lamp cover off is hard work: do it carefully so you do not break the lamp!
  • There is no residual disinfection property like with chlorine and iodine.
            More care may therefore be needed to keep the treated water clean.

Steripen - 3 Putting the SteriPEN in various water containers: it does not work with small-necked PET bottles.

Not listed above as a feature is the speed of operation, but that is because it is worth a separate comment. I have used most of the available filters over the years, and they take time to set up and then you have to sit there and pump for a while. That is, if you don’t have to stop and clean the filter half-way through. The pumping can be hard work. With the SteriPEN Adventurer I just sit there and stir gently for 90 seconds. Well, to be honest, my wife often does it while I do other things. With chemicals it does not take long to drop a pill in the water, or to mix Part A with Part B, but then you have to wait for 15 – 30 minutes (or more) before the water is safe. When you are thirsty, this can be a long time … I find I can wait the 90 seconds for the SteriPEN Adventurer fairly easily.

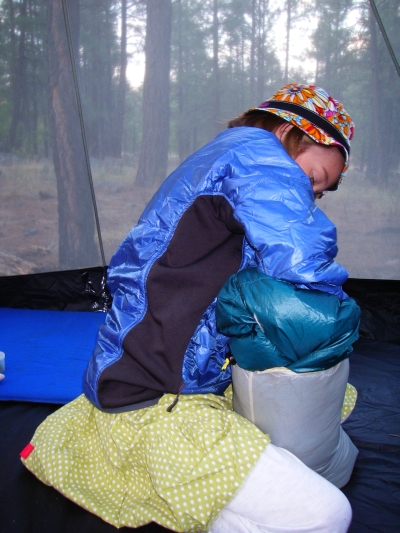
I did find that the SteriPEN Adventurer does not fit into every possible water container. In particular, it does not fit down the neck of my favourite ultra-light PET water bottles – which come free with every 1.25 litre bottle of fizzy mineral water. So using the SteriPEN has meant I have had to change how I treat our drinking water: now I do it in our cooking pot, with continuous stirring. I can pour the treated water into a bottle later. Mind you, since the lamp radiates out sideways rather than downwards the shape of the pot is just right for the light distribution from the lamp. I don’t think trying to treat water in a tall thin bottle is a good idea anyhow as the bottom region would not get much light. Alan Dixon has used a wide-mouthed hydration bladder for treating his water, as shown in the middle picture here, but the height of the bladder could be a problem. I don’t suggest you do it this way.

You should note that pouring water from one bottle into another after UV treatment is not without a risk: there is no residual purifying action once the lamp has been turned off. With Coghlans iodine tablets I know there is a trace of iodine still in the water which can handle later contamination. Since I currently use the same type of PET bottles for treated and untreated water, I have to be very careful to distinguish between the two (I put a spare rubber band around the neck of the treated water bottle)! Still, I can always use a little bit of the treated water to rinse out a ‘contaminated’ bottle; the chance of a harmful number of bugs being left in the bottle after doing that is very low.

Needless to say, my testing has been done on fairly clear water. After all, if the water is so turbid you can’t see through it then the UV light won’t get through it to the bugs either. It may make some sense to filter any mucky water through a bandanna or similar first – or to find better water if you can. But more importantly the presence of a small amount of dirt or organic matter in the water will not greatly affect the operation of UV light. This is very different from using a chemical, where organic matter in the water will soak up the chemical and may leave the bugs alive.

The User Guide recommends you do not use the SteriPEN when it is at a temperature below freezing. There are two good reasons for this. The first is that water below freezing may be … ice. Bit hard to stir the SteriPEN Adventurer in a block of ice! The second is that battery life for the 3 volt CR123A lithium cells does fall badly below freezing as shown in the graph below, and you need to look after those batteries. You may be aware that the Eveready e2 1.5 volt AA and AAA lithium cells have much better life in the cold than this, but that is because they have a different chemistry. The SteriPEN Adventurer is quite small, so it is no hassle to stick it in your pocket for a while to warm up.

I have found that people are sometimes more willing to use UV disinfection than chemicals because they want to avoid both the smell and taste of the chemicals, and to avoid their by-products. This is not a quantitative assessment, but for many walkers it is a real issue. One thing I can say is that the SteriPEN Adventurer does not seem to alter the taste of the water at all. This method of UV treatment may be the wave of the future.

Batteries

With the SteriPEN Adventurer you are dependent on the life of the two CR123A lithium batteries, and those little batteries are not cheap. A good pair of these will cost in the region of US$12 – US$14, although cheaper ones may be available (with less life). You can also use the unit with rechargeable lithium cells, and the company sells a padded carry case with a built-in solar panel on the lid for recharging. The company claims that the cost of operation amounts to about 11 cents per gallon (4 liters) purified with rechargeable batteries, but I have no idea how much they are paying for their batteries, and prices and quality can vary widely. Testing was done with both the rechargeable CR123A cells and the readily available standard CR123A non-rechargeable lithium cells.

Steripen - 4 Life of a CR123 under pulsed load (courtesy Duracell).

The current drain from the batteries starts out at about 1 Amp: this is a lot for the little CR123 cells. Fortunately they were designed for photographic use and can take that sort of load in short bursts. After about a minute, when the lamp has warmed up, the current drain drops to about 0.9 Amps. This represents a load of about 2.7 Watts (per cell), and typical battery life at that sort of continuous load is about 0.85 hours to 2.0 volts and 1.0 hours to 1.55 volts. I do not know the minimum voltage which the SteriPEN Adventurer will operate at as this is a little hard to test. However, this does not matter very much since when these cells reach their end of life the cell voltage falls quite fast.

With a pulsed load the life of the CR123A cell is longer, and we can treat the SteriPEN as a pulsed load, albeit a fairly harsh one. Using a graph from Duracell, we can see (thin blue cross hairs on the red line) that at 0.9 Amps and a low duty cycle the life of a cell can be as long as about 1,800 x 3 seconds to 2.0 volts, at ‘room temperature’ (RT). This is 90 minutes. The SteriPEN Adventurer takes about 90 seconds to treat 1 litre of water. This suggests that one set of CR123A Lithium cells will treat 60 litres of water, at ‘room temperature.’ At US$13 for two cells, that is about 22 cents per litre. I can’t tell you how many days walking this translates to as everyone’s water use is different. Remember that if you are going to boil some of your water for cooking, you do not need to treat that part with UV first.

The graph also illustrates the very bad effect sub-zero temperatures have on battery life! You can happily use the SteriPEN Adventurer in the snow if you warm it and especially the batteries up to body temperature first.

Steripen - 5 SteriPEN Adventurer battery compartment.

Replacing the batteries in the field is very simple with the SteriPEN Adventurer. The end cap is held in place by a screw, but this has a huge head with a huge slot (red arrow) which I can operate with my thumbnail or almost anything. It does not seem to jam at all. Undo the screw and the cap comes off. The batteries just slide out. Insert new ones with the small terminal pointed upwards as shown in the picture and replace the cap – there is a small retaining lug at the right hand side of the picture below the green arrow to hook in place. If you forget and put the batteries in upside down it does not matter as nothing will happen. There is a shaped contact at the tip of the green arrow which will only mate with the small battery terminal; it won’t connect with the large terminal at the other end of the battery. I won’t say it is foolproof, but it comes close. Check that the new batteries work by pressing the button. The green LED should come on. You can either now use the unit to purify water or just leave it alone. After a little while (about 15 seconds) the microprocessor will get tired of waiting, flash the red LED once and then cancel the operation.

If you are going to store the unit in the drawer for a long while between trips you are advised to take the batteries out during storage. I found the unit does draw a few milliamps when turned ‘off.’ This is because the microprocessor is running all the time, obediently waiting for your next command. This takes power. It is easy to take the batteries in and out between trips. The metal screw on the cap engages with a metal nut on the body (rather than plastic), giving the fastener a long life.

Steripen - 6 SteriPEN Solar Charger, open and shut, showing solar panel.

Solar Charger

The SteriPEN Adventurer will also take two rechargeable 3 volt CR123A batteries, but recharging these requires a special recharger. I have not seen any suitable generic rechargers on the market, but SteriPEN sells a solar-powered recharger for these called the SteriPEN Solar Charger. The charger’s case will also protect the SteriPEN Adventurer and comes with a foam cover (not shown) that can be tied onto the top of your pack. The company says the Solar Charger can recharge a pair of the CR123A cells in about 2 days if the sun is good, but if you recharge the batteries every day it certainly won’t take that long to top them up. For instance, if you have treated a few litres of water in the evening it should charge up with an hour or two of reasonable sunshine the next morning. I am not sure how one tells when the batteries are fully charged this way, but I gather the Solar Charger won’t hurt the batteries.

This is an interesting concept, but the empty Solar Charger weighs 160 grams (5.64 oz) while a pair of spare batteries weighs only 30 grams (1.06 oz). Each pair of rechargeable batteries will treat about 50 litres (100 pt) of water. The extra weight of the Solar Charger seems an unnecessary burden while walking – in general you would be better off taking spare batteries. I have yet to consider giving the Solar Charger the ‘UL treatment’ to reduce its weight for very long thru-hikes – that would of course completely void the warranty.

The Solar Charger can also be driven by a universal plug pack from the mains, and this option is far more useful in my opinion. The plug pack can take anywhere from 90 volts to 240 volts, which means it can be used around the world. (Australia, where I live, uses 240 volts). The plug pack has pins for an American wall socket, but adapters can be bought. The plug pack connects at the hole in the side of the Solar Charger shown with the red arrow. There is a red LED beside that hole: this glows brightly while charging, and dimly (if at all) when the batteries are fully charged. I guess it measures the current flow. This option seems to me to be the one I will use most of the time.

The Future

Frankly, I think that disinfection by UV has enormous potential for outdoors use. The current ‘wand’ may be a little heavier than we would like, and certainly the drain on the batteries is fairly severe. Within a few years I would hope to see suitable UV LEDS being available, and I am sure the company will be very eager to release an LED-based wand with ten times the battery life, running off two lithium AA cells. When this happens I want to see the UV light shining downwards into the depths of the bottle rather than out sideways as it does now. I can dream – in the meantime this unit works fairly well.

Ideally, when the new unit is introduced a new lighter solar panel might accompany it. This should be a flat unit consisting of just the solar cells, with a power lead coming out and a small socket on the new wand. That way you could recharge the cells in the wand while you walk.

What’s Unique

  • No chemicals – no taste (feature shared with Aquastar unit)
  • No long waits (feature shared with Aquastar unit)
  • Lightest UV treatment unit on the market
  • Comes with field recharger

Recommendations for Improvement

  • Move to UV LEDs
  • Have the UV light shine downwards into the bottle as well as sideways
  • Reduce current drain
  • Switch to two lithium 1.5 volt AA or AAA cells
  • Lighter Solar Charger panel, scrap the case

Footnotes

  1. eg Chlorine dioxide at 5 C (41 F) against Giardia and Crypto.
  2. Vendors of different chemicals may try to dispute this, but that’s what comes out of independent academic research.
  3. http://www.epa.gov/safewater/disinfection/lt2/pdfs/guide_lt2_uvguidance_draft.pdf

MontBell Versalite 20 Backpack SPOTLITE REVIEW

An 11.5 ounce lightweight toploading daypack with top pocket, side panel pockets, and hydration compatability.

Overview

MontBell’s 11.5 ounce Versalite 20 backpack was tested as a child’s “full-sized” backpacking pack (article coming out spring 2007), for which it worked very well. I also reviewed it as an adult’s lightweight daypack and present that review here. I used the Versalite 20 as a daypack from camp to collect water and carry day-tripping necessities (first aid kit, food, rainwear). For an adult traveling without kids, this pack could double as a sleeping bag stuff sack, though there are much lighter stuff sack packs available, this one being among the more durable. I also tested the Versalite 20 as a dedicated daypack. The durability and features were ideal for this use.

MontBell’s Versalite 20 is a simple pack. The harness is basic; lightly padded shoulder straps, 3/4-inch wide webbing waistbelt, and a sternum strap. Still, the fit is good and I found the pack comfortable loaded with 5-liters of water and essentials. Montbell added 3-D spacer mesh on the shoulder straps to disperse perspiration. No such luxury exists on the backpanel, which was 30-denier double ripstop nylon.

I feel the Versalite has just enough features, without overdoing it. There is a small top lid pocket, perfect for a windshirt and first aid kit. The mesh front panel pocket wraps around the front panel and lower side panels, and is accessible from either side while wearing the pack (like having two water bottle pockets). Inside, the Versalite has a hydration pocket with two exit ports on either side of the top pocket. A tool loop on the left side and a single side-release compression strap completes the package. Overall, the MontBell Versalite 20 is one of my favorite daypacks: simple, functional, lightweight, and reasonably durable.

Features and Specifications

  • Manufacturer: MontBell
  • Weight: 11.5 oz (326 g)
  • Volume: 1200 cubic inches (20 liters)
  • Materials: 30-denier double rip-stop sil-nylon and 210-denier nylon reinforcements
  • Features: top loading, top pocket, side/back panel pockets, hydration pocket, ice axe loop
  • Harness: padded shoulder straps, sternum strap, webbing hip belt
  • MSRP: $60.00

Gregory Iso Backpack SPOTLITE REVIEW

A full-featured and comfortable daypack using lightweight materials to keep the weight down.

Overview

The 1,200 ci Gregory ISO is a small volume pack designed for short, fast, and light trips. I used this pack mainly for long distance trail running, mountain biking, and day hikes. It certainly meets many requirements a fast-packing day tripper would have; lightweight, lots of pockets for organization and quick access, hydration compatibility, and Gregory’s well-known commitment to comfort.

Besides the main compartment, there is a zippered front pocket with three internal divider sleeves, an expandable helmet or “stuff it” pouch, an internal hydration sleeve (with backpanel accessibility), two side panel mesh water bottle pockets, and two zippered, mesh hip belt pockets. Most notable among these, the helmet pouch zippers tight along its sides when not being used, but expands and securely holds a helmet or other bulky objects with ease. Another nice feature is the zippered hydration bladder access on the backpanel that makes refilling the hydration bladder much easier without unloading the pack.

The hip belt pockets can hold a compact digital camera or a couple energy bars. These pockets are easy to unzip one-handed, but the zipper requires two hands to close. This was only a problem while mountain biking; not so much when hiking and running.

Although Gregory’s assortment of pockets are well designed, I personally don’t need so many pockets and internal dividers. Eliminating a few (or most of them) would not decrease functionality for me and the weight reduction would be preferred. Nevertheless, all of the pockets are well designed and easily accessed.

Gregory ISO Backpack SPOTLITE REVIEW
The Gregory ISO pack has a zipper backpanel access for refilling the hydration bladder.

Gregory’s ISO pack is very comfortable and stable. The wide hip belt, a necessary design element for useful hip belt pockets, offers great load distribution from the shoulders to hips. The shoulder straps with adjustable sternum strap conform well to my shoulders. Gregory uses 3-D spacer mesh for the backpanel, shoulder straps, and hip belt to disperse perspiration.

The ISO has a great compression system. Three 1/2 inch webbing straps compress the upper part of the pack. These use side release buckles to allow access to the main compartment and front pocket. The lower compression is more akin to a draw cord that is routed behind the side panel pockets, allowing the lower portion of the pack to be compressed without affecting side pocket accessibility. One pull of the centrally located webbing strap, and the lower portion of the pack compresses. This is a really great design.