You don’t have access to view this content.
Backpacking Light 101: The Art of Ultralight
A Lightweight Primer to Backcountry Travel for the Uninitiated.
A Lightweight Primer to Backcountry Travel for the Uninitiated.
You don’t have access to view this content.
Backpacking Light staff pick their favorite gear/cool dealio/place of 2010.
Previous Years
2009 Backpacking Light Staff Picks
2008 Backpacking Light Staff Picks
2007 Backpacking Light Staff Picks
Addie’s Note: I love end-of-year wrap-ups. The best of, worst of, funniest of – I can’t get enough of them! In that spirit, we cast the net a bit wider this year. I am included, for instance, despite not having backpacked since pregnant with my son (he’s now five). Maia is included, since she gets out more than I do, and we’re both staff any way! We requested favorite gear and a favorite lifestyle item from everyone, and what filtered in was varied. One Aussie chose to highlight his favorite locations rather than gear. One local (we won’t mention names, but her initials are “Stephanie Jordan”) chose not to write up anything but just list her picks and let your imagination fill in the blanks. We included MAIA, for cryin’ out loud!
This isn’t an “Editor’s Choice” or formal endorsement, just a list of stuff we like.
Enjoy – and don’t forget to add your own favorites in the forum below!
| BPL Staff Member | Favorites | ||
| Ryan Jordan | Inov-8 X-Talon 212 Shoes | Backpacking Light Absaroka Backpack | Hewlett-Packard 12C |
| Sam Haraldson | Beartooth Publishing Maps | Arborwear Tech Pant | HTC Droid Incredible |
| Will Rietveld | Gossamer Gear “The One” One-Person Single Wall Tent | Kooka Bay Sleeping Pads | Trail Designs Caldera Keg Cooking System |
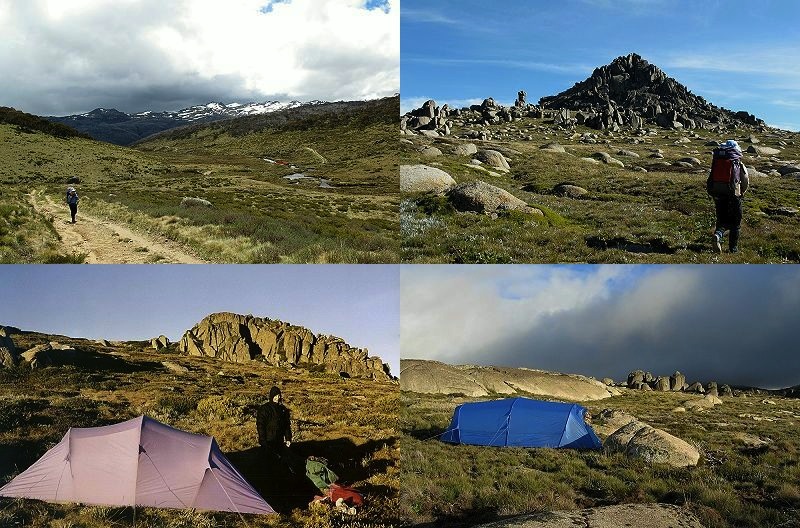
| Roger Caffin | Wollemi National Park | Kosciusko National Park in Summer | Kosciusko National Park in Winter |
| Chris Wallace | ULA Ohm Backpack | Backpacking Light Stealth Nano Tarp | Yoga |
| Mike Martin | Páramo Quito Jacket | Nalgene 16 oz HDPE Loop-Top Bottle | Stephenson Warmlite 2CR Tent |
| Ryan Connelly | MontBell Dynamo Wind Pant | DriDucks Scrap Rain Skirt | Spark-Lite and Tinder-Quik |
| Alan Dixon | SPOT2 Personal Locator | Mountain Laurel Designs SuperMid 2010 | Vortex Viper 8×32 Binoculars |
| Ray Estrella | EXOTAC nanoSTRIKER | Trail Designs Caldera Ti-Tri Fissure | Javan Dempsey/The Stateless Society 40 F (4 C) Quilt |
| Doug Johnson | FlyWeight Designs FlytePacker Packraft | Grand Shelters Icebox Igloo Building Tool | Apple iPhone 4 32G |
| Brad Groves | Hennessy Hammock Hyperlite A-sym Zip | Integral Designs eVent Pullover | La Sportiva Wildcat |
| Carol Crooker | Kahtoola Microspikes | Outsak UL | iPod Nano, 5th Generation |
| Addie Bedford | Tigi Rockstar Dirty Secret Dry Shampoo, assorted hats and felt flowers | Neosporin Lip Health Daily Hydration Therapy | Sorel 1964 Pac Boots |
| Stephanie Jordan | Ryan Jordan | Impossible-to-lose Magnetic Bottle Opener in GO CATS! Blue & Gold | Petzl e+LITE Headlamp |
| Maia | Accountability Collar | Beano | Hedgie |
|
|
Inov-8 X-Talon 212 Shoes | My XT212s (US Men’s Size 9) weigh 8.1 ounces (230 g) a shoe, so they are certifiably “ultralight.” I haven’t pushed them to the limits of performance, but I have worn out a few pairs in the past twelve months. I’ve worn them on talus, scree, slabs, tundra, bush, and snow. They excel on all of these types of terrain. I’ve worn them with heavy and light packs, off and on trail, climbing and descending and sidehilling, and with ultralight crampons and racing snowshoes and gaiters. In other words, they keep my life simple. I no longer make choices about “which shoe to take” – I just grab the XT212s. If Inov-8 succumbs to the business model of the shoe industry, they’ll phase them out or redesign them and ruin them. Until then, I’m stockpiling as many pairs as possible. Don’t wreck them by adding aftermarket insoles and don’t fool around with “easing yourself into” minimalist footwear. Just go cold turkey and do it. There will be tough times, but you may very well break through the wall and never look back.
Weight: 8.1 oz (230 g) per shoe |
|
|
Backpacking Light Absaroka Backpack | I’m a bit weary of fooling around with sloppy frameless packs on hard trips where I spend most of my time scrambling off trail, or where I’m carrying heavy loads of food and packrafting gear. A frame that is robust enough to carry forty pounds without collapsing and a harness system comfortable enough to distribute the stress a bit – this is weight well spent. I had a ball co-designing this pack with another hard-core adventurer, and we put the eight prototypes through the ringer before bringing it to market. I love that the pack is durable, supportive, absorbs very little water, and still weighs only two pounds. My production model weighs 28.4 ounces after I trim the excess off of the straps that I don’t need, and add back some Spectra cordage that allows me to lash my ice axe and packrafting paddles to it.
Weight: ~34 oz (964 g) |
|
|
Hewlett-Packard 12C | I love stuff that lasts a long time and remains useful. I’ve had this calculator for more than 20 years. The only other things that I’ve been with for more than 20 years and still enjoy are my Leica M6 and my wife. I’ve changed the batteries in her (the HP12C) only once, sometime in the late 1990s. It’s been dropped in the toilet (fell out of my shirt pocket when I leaned over to flush it), lost in the snow (it fell out of my backpack during a storm, and I found it a few weeks later after the snow melted), suffered spills of root beer and coffee, and endured several routine rinsings under the faucet to clean it up again. I still use it almost every day and scrub her (the HP12C) clean with a bristle brush and soapy water annually.
Weight: 3.9 oz (111 g) |
|
|
Beartooth Publishing Maps | For hiking in SW Montana and parts of Idaho, Wyoming, and Arizona, you simply won’t find a better map than those by Beartooth Publishing. Up-to-date, use-specific information (like local breweries!) in a convenient size and scale, all printed on waterproof, tear-resistant plastic.
Weight: varies |
|
|
Arborwear Tech Pant | These pants are light, but not ultralight. Why then have I made them my apparel choice of 2010, you ask? Because they exhibit a quality of extreme-uber-crazy-durability. I first purchased these pants in 2006 and have worn a single pair of them almost exclusively since (I kid you not). Whether you’re looking for a pant to hike in, work at the (laid-back) office in, play in the snow in, raft down a river in, bicycle in, or do just about any activity you can imagine in – not only will this pant hold up to the necessary abuse, it will do so in comfort and will dry quickly afterward. Constructed of an ultra-rugged nylon, these pants wear with the comfort of cotton, but have all the characteristics of nylon that I require as an outdoorsman.
Weight: 24.8 oz (703 g) |
|
|
HTC Droid Incredible | It’s a phone, camera, and GPS all in one. Put the device into “airplane mode” while you’re out of cell range to save battery life, and the GPS still functions for recording your hike and geotagging your photos.
Weight: 4.4 oz. (125 g) |
|
|
Gossamer Gear “The One” One-Person Single-Wall Tent | Gossamer Gear’s “The One” tent deserves a Backpacking Light Gold Award, if we had one. It has been around for a while and is time-tested; I have tested a lot of very nice tents, but this one really stands out. It weighs less than many tarps when you add in the weight of stakes, guylines, and groundsheet, yet it provides full weather and bug protection for one person plus gear, has a vestibule protected side entry, and good headroom. Optional sectional poles are available for hikers who don’t use trekking poles.
Weight: ~20 oz (567 g) complete (stakes, guylines, stuff sack included) |
|
|
Kooka Bay Sleeping Pads | I loved the Therm-a-Rest Prolite 3 and the Backpacking Light TorsoLite pads when they came out because they were so lightweight. But over time, like the closed-cell pads I used before them, I found them simply not comfortable enough for a good night’s sleep. Then came the Big Agnes Clearview pad, which is comfortable, but punctures too easily. Next came the Therm-a-Rest NeoAir, which is a wonderful pad. But the Kooka Bay pads blow them all away for light weight, comfort, adequate durability, and value. My favorites are the torso length pad (19/13.5 x 33 x 1.5 inches/5.6 ounces/$60) and mummy pad (60 x 20 x 2.5 inches/10.2 ounces/$80). Look for a Backpacking Light State of the Market Report in spring 2011 on Lightweight Inflatable Sleeping Pads.
Weight: 5.6-14.9 oz (159-422 g) |
|
|
Trail Designs Caldera Keg Cooking System | The Trail Designs Caldera Cone has transformed the alcohol stove into a cooking system as convenient and reliable (but not as fast) as a canister stove. And there are several advantages that make it better: no expensive disposable fuel canisters, inexpensive fuel, an enclosing windscreen for better thermal efficiency, and extreme light weight. My very favorite is the Caldera Keg system. The complete system for one person includes a caldera cone, Heineken or Foster’s cook pot and lid, alcohol burner, fuel bottle, cup/carrying case with lid, cozy, and stuff sack. It’s a complete cooking system at a weight that’s equivalent to a lightweight titanium cook pot.
Weight: 6.2 oz (176 g) |
Walking is not just about gear; it is also about places. So this year I decided I would feature some of my favourite places in Australia to go walking. Each hyperlink will open a new tab with a full-size pic.
|
|
Wollemi National Park | This is one of Australia’s largest National Parks, and it is very close to our biggest city Sydney. And yet, the vast overwhelming majority of Australians know it as little more than a place on a map. Very few actually go into it. The whole area was once a river delta where sand was deposited and turned into hard sandstone – up to 600 metres (1,969 ft) of it. Then it was slowly uplifted, but the rivers kept flowing to the east and cutting through the rock – yet the fault lines which developed ran north-south. The result is a rather flat plateau deeply incised by a tangle of gorges with massive sandstone walls. The scrub on top is dry and harsh; the jungle in the valleys is – well, jungle. Navigation can be extremely difficult, as there are few outstanding features and a little distance visibility. The area remained unclaimed by settlers in the early days of colonisation because it was just too wild and inhospitable, for which we are truly grateful: we love it. The first photo shows the junction of the mighty Colo River with the lesser-known Wollemi. The cliff walls are about 250 metres (820 ft) high here. Yes, there is a way down here, if you know where to look. The second photo shows a preferred method of travel in the area – walking in the river itself. Of course, you do run into quicksand quite often, but it beats thrashing through the scrub on the banks. The third photo shows us about to descend into the headwaters of the Coorongooba river, to fight the jungle for several days. The problem down there is that you don’t get to see all the wonderful cliffs, but there are still interesting things to be found. The last photo shows what can happen when the cliffs crowd too closely: you have to walk in the river and pray that it does not suddenly get very deep. This river, Running Stream, is blocked half way up its length by a rather large waterfall. Getting up that is devious. The gorge is blocked at the top end by a cirque of high rock walls. There is a hidden slot exit, but try finding it! (I once told a very experienced party that they would not be able to find the top of the exit, but they went anyhow. They had to be rescued – up top.) |
|
|
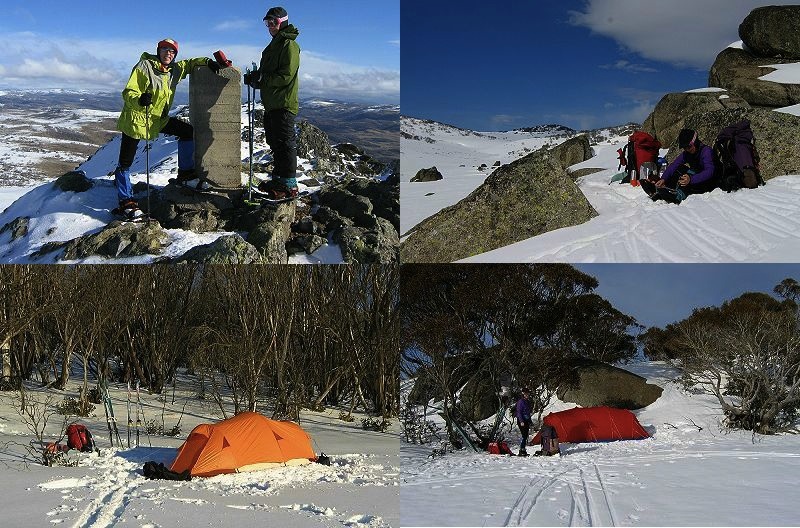
Kosciusko National Park in Summer | This is another one of our huge National Parks, with lots of high country. It was once leased out for grazing, but the leases were all cancelled many years ago when it became clear that the graziers (well, their sheep and cattle) were destroying the high country. Some of the locals are still a bit upset about their loss, but the rest of us rejoice. I am sure the area was once a range of high mountains, but Australia is an old, old tectonic plate, worn down almost to a granite nubbin. We value what we have left, but sometimes wish for slightly higher peaks. Instead we have a rolling country, wonderful for walking and XC skiing. Ah – just don’t go down the sides into the sub-alpine scrub: you may not return. The first photo shows Boggy Plain at the head of the Thredbo river. The valleys are grass while the ridges are tree-clad. Ever heard of frost-hollows? We have got them, and they make wonderful open walking. In the background we have residual snow on the Ramsheads, near Mt. Kosciusko (our highest mountain at 2,220 m / 7,218 ft) itself. The track is left over from grazing days. The next photo shows one of the Ramsheads – yes, that pile of granite boulders is all that is left. The way the granite boulders pile up is sometimes fascinating – some of Slartibartfast’s creations maybe. Further to the east in photo three, we have the Rolling Grounds with the Granite Peaks, and our old Olympus tent pitched in front of some of the residual granite. It might have been early autumn, but overnight it was definitely sub-zero, and my wife was grateful for her down duvet in the morning. Our gear has gotten lighter since then. The last photo is of my lightweight summer tent, pitched near a multiple creek junction known as Four Ways. The sky was a bit threatening that evening, but we survived the night – even if it did snow a bit. Taking a summer tent into that country is always a bit of a gamble. |
|
|
Kosciusko National Park in Winter | Well, the snow may not be wonderful, and it is getting worse each year, but what’s there is all we have. At least there is a huge expanse of it. Sometimes we go cross-country ski-touring with packs, for up to a week at a time. The rolling country makes that lovely, although the weather does not always cooperate. Other times we get out our rather light Australian Yowie snow shoes. The snow shoes can handle the really grotty snow when the rocks show through… And yes, we wear joggers with our snow shoes. The first photo shows the summit of Mt. Jagungal, way to the north of Mt. Kosciusko. In fact, Kosci, as we call it, can be seen very small on the horizon at the left side. This photo was taken rather late in the season when the snow was melting. The next photo shows a morning tea spot near Four Ways, tucked in behind some boulders to get out of the wind. Yes, we do get a lot of wind up there. A lot of ‘weather,’ actually. My wife is adjusting her old three-pin leather XC ski boots. In the next photo, the orange tent is one I made myself, a lighter version as it were of the Olympus tent shown before. That tent has taken some extreme weather at times up in the snows, but here the evening was fine. Once again we are using snow gums as a wind break. In the final photo, the red tent is my latest winter tent, lighter than the orange one, and pitched up high on a ridge with some snow gums and boulders to act as a wind break. We camped early that day and went exploring out to Tarn Bluff for a while. In this photo we have switched to NNN-BC bindings: lighter and the skis turn better. |
|
|
ULA Ohm Backpack | The Ohm has been my only pack for year-round use in the southeast U.S. for the last couple of years. Sure, I’ve flirted with other packs (What guy doesn’t? Just don’t tell my Ohm.), but ultimately come back to the Ohm every time. My first hands-on experience came as a result of pack fitting for my girlfriend, Robin. When I weighed the Ohm and found it to only be an ounce or so heavier than my Conduit, I ordered myself one. An ounce is a small penalty to pay for the frame and subsequent better carry. The weight listed includes a foam back pad, two hip pockets, and an interior pocket.
Weight: 24.7 oz (700 g) |
|
|
Backpacking Light Stealth Nano Tarp | When I found out about the Nano, I knew I had to have one. I was previously using an MLD Grace Duo, an excellent tarp for two, but the Nano is a great green color, and a good bit lighter. The Nano also required no seam sealing, thanks to the bonded ridge. I used the Nano on every trip where I slept solo, as well as on the WTS trips where I shared it. For one person, the coverage is superb. For two people, when pitched to the ground for a storm, it’s a bit tight but still usable. The weight listed includes the stuff sack, all guylines, and the MYOG addition of two hang loops placed along the ridge.
Weight: 6.5 oz (184 g) |
|
|
Yoga | I started doing yoga in 2009 as part of an exercise program and fell in love. I’ve tried to keep up with practicing once or twice a week since. There are times when I dread doing yoga, but I always feel great when I finish and am glad I pushed on. I’ve seen my flexibility increase dramatically, and I fully believe yoga contributes to keeping my body injury free. It has provided a great meditational benefit, as well as a way to let go of stress. The best parts are the weight and cost.
Weight: knowledge weighs nothing! |
|
|
Páramo Quito Jacket | Hiking in temperatures around freezing is always challenging. Precipitation comes as rain, sleet, freezing rain, and/or wet snow that melts on your clothing. And, here in north Idaho we seem “blessed” with more than our fair share of this kind of weather. If you wear a soft shell in these conditions, water will eventually penetrate your clothing defenses and you’ll end up cold and wet. If you wear a hard shell at more than a snail’s pace, your own sweat will eventually build up inside the shell and you’ll end up cold and wet. If you wear a poncho or use an umbrella, the wind will… well, you get the idea.
Páramo’s Analogy clothing takes a different approach to keeping you dry and warm. The system combines a thin, DWR-treated outer windshell with a hydrophobic, directional microfleece liner. The outer shell protects against wind and reduces the amount of water that reaches the liner. The liner relies on capillary depression to resist further water penetration, while a void gradient actively pushes any water that does penetrate back to the outer surface of the liner. The system is not technically waterproof as it cannot withstand much hydrostatic pressure, but the combination of the liner and shell is water-resistant enough to handle the cold, wet, windy conditions common in the UK where Páramo is headquartered. As the shell/liner combination has much higher air permeability (up to 2.5 CFM) than a conventional wp/b shell, the system is far more breathable than ordinary waterproof jackets. At first glance, the 18-ounce weight seems overly heavy. But the Quito Jacket is fully-featured with numerous pockets and venting options, as well as an excellent hood. Due to its liner, the jacket can replace both a mid-layer and hard shell in cold, wet conditions. It has become my favorite clothing piece for just about any conditions below 40F where it stays on my back rather than in my pack. Weight: 18.1 oz (513 g), size large |
|
|
Nalgene 16 oz HDPE Loop-Top Bottle | What, 2.5 ounces (71 g) for a tiny water bottle? Yes, yes, the hard-sided canteen is one of the first items to be replaced when a hiker sees the lightweight light. But things are a bit different in the winter, when the caps on small-mouth bladders can freeze shut or when you try to pour melted snow from your pot into a floppy bladder with a tiny opening. For snow camping, I like to carry two small, hard, wide-mouth bottles because of the wonderful things you can do with them when they are filled with hot water: They can be safely brought into your sleeping bag for warmth where a leaking bladder would be catastrophic. They are the perfect size to stuff into your wet socks or boots to help dry them overnight. While you’re eating breakfast, you can put them in your boots and experience the unbelievable luxury of putting on warm boots on a sub-freezing winter morning!
Weight: 2.5 oz (71 g) |
|
|
Stephenson Warmlite 2CR Tent | I’ve spent many a winter night in various shaped tarps and snow shelters, but at the end of a long day skiing or snowshoeing, when the temperature is falling and the wind is rising, it’s very hard to beat a fully-enclosed four-season tent. Warmlite tents have had a cult following for decades. They rely on extremely high tie-out and fabric tension to achieve their shape with a minimum amount of pole, stake, and material weight. The shape itself is designed to provide very high wind resistance, especially with such lightweight construction. The new “C” version of their tents are shortened two feet from the standard versions. This results in some weight savings, but more importantly reduces the amount of unsupported fabric between the two hoop poles, increasing the tent’s ability to handle snow loading. The total package creates a two-person, four-season tent that is lighter than just about any alternative of similar space and weather protection. The Warmlite 2CR tent does have its idiosyncrasies, though: It lacks a vestibule. Achieving the required high stake tension can be difficult at some sites. Pitching it properly and quickly requires a bit of skill and practice. Finally, managing condensation can be a bit tricky in calm conditions. Still, when you consider that most mountaineering tents with the same amount of usable interior space are two or three pounds heavier, learning the techniques to master its quirks is well worthwhile.
Weight: 39 oz (1.1 kg) |
|
|
Montbell Dynamo Wind Pant | The “wind pant” title is much too limiting for this lower layer. From early June through late September I wore this pant as my never-removed base layer. I comfortably walked on 85 F (29 C) sunny days and 30 F (-1 C) wet days. I walked in ’em, slept in ’em, scrambled in ’em, swam in ’em, and sat on ’em. At less than 3 ounces I was impressed that they would last a whole summer of disrespectful use and abuse in southwest Montana with NO tears! Expect to see them again next summer tromping around in the mountains.
Weight: 2.8 oz (79 g) |
|
|
DriDucks Scrap Rain Skirt | So far no one has caught a photo of me wearing this paragon of backcountry style. Paired with the wind pant above, this combo is my total solution to every combination three seasons of weather can dish out. After a few trips by the students in my adventure program, a pair of DriDucks pants is ready for a skirt transformation. A few snips and a bit of Tyvek tape later, you got an easy on, easy off, waterproof and very breathable/breezy rain layer.
Weight: 2.6 oz (74 g) |
|
|
Spark-Lite and Tinder-Quik | These are my constant companions in every backpack I own. Whether a backcountry ski, hike, or search and rescue operation, I count on the one-handed Spark-Lite and a Tinder-Quik to start my cooking, warming, navel gazing, and socializing fires. Sealed in one or two tiny Ziplocs, depending on your Ziploc trust level, they are bone dry and ready to warm up the night.
Weight: 0.3 oz (8.5 g) (more Tinder-Quiks for longer trips) |
|
|
SPOT2 Personal Locator | I took couple of high risks trips in remote locations this year – alpine climbing in the Andes (Cordillera Huayhuash) and a packrafting trip in Alaska. It was reassuring to know that I could summon help with the SPOT2. My family and friends were saved angst knowing I was OK each day as they tracked my Andean summits and progress along Alaskan rivers. But possibly the best feature of the SPOT2 was vicariously participating in my friend’s trips to exotic places like the Himalayas and the Pyrenees, etc. via a shared SPOT tracking page. Note: The SPOT2 is about half the size and weight of the original SPOT1. It is much easier to operate and delivers far greater message reliability.
Weight: 4.17 oz (118 g) with batteries |
|
|
Mountain Laurel Designs SuperMid 2010 | I usually sleep out in a bivy or under a tarp, but the MLD SuperMid was near heaven in the cold and wet Alaskan climate. I remember cheerfully cooking dinner inside the SuperMid while the wind shrieked across the tundra and rain pelted the walls. The tent is silly light for two people given its palatial interior space. It easily held all our gear with additional room to spread out, cook and eat dinner. In the morning we cooked, ate breakfast, dressed and packed up inside the tent – the entire time blissfully dry, warm, and sheltered from the wind. The last thing we did was step outside and pack up the tent body.
Weight: 24 oz (680 g) in silnylon |
|
|
Vortex Viper 8×32 Binoculars | More and more of my trips focus on pursuits besides backpacking and climbing. Photography tops the list, but birding and nature observation are catching up. There are many 8- to 12-ounce (227- to 340-g) compact binoculars on the market – Nikon ProStaff 8×25 are my pick – but these lack field of view and suffer in dawn and dusk, some of the best times to view wildlife. Thus, for the best views of birds and wildlife I prefer a mid-size 8×32 binocular. They have the best balance between optical quality and weight. The Vortex Viper 8x32s with ED glass and exotic lens coatings are close in optical quality to the very best $2,000, 8×32 binoculars from Leitz, Zeiss, and Swarovski. But the Vortex Vipers cost a just little over $300! (I don’t know about others but I am reluctant to take a pair of $2,000 binoculars on a backpacking trip. Things happen.) The Vipers are waterproof, fog proof, and rubber armored. At less than 20 ounces, they are within an ounce of the very lightest of high-end 8x32s on the market.
Weight: 19.4 oz (550 g) |
|
|
EXOTAC nanoSTRIKER | I have been carrying a fire starter of some sort attached to my safety whistle for as long as I have been hiking and backpacking. While they have gotten smaller and lighter over the years, it is hard to get excited about a stick that makes sparks. Then I found the EXOTAC nanoSTRIKER. This is the prettiest, most well designed fire striker I have ever seen. It is even 50% lighter weight than the Light My Fire Scout I had been using for the past seven years. It is made of 303 stainless steel and 6061 aircraft aluminum, with a 440C steel “striker” to spark the ferrocerium rod. The nanoSTRIKER packs down to a miniscule 3.4 in (86 mm) in length.
Weight: 0.5 oz (14 g) |
|
|
Trail Designs Caldera Ti-Tri Fissure | Last year saw me finally go to alcohol stoves, which I continued this year in a big way. I loved my first Caldera Ti-Tri but did not care for how much room it took up in my pack with its protective caddy. This led to the Caldera ULC Ti-Tri which I liked, but it was not as efficient as the regular cones. After discussing my thoughts and findings with the guys at Trail Designs, they let me buy the second ever Fissure, a two-piece titanium Caldera cone that completely fits (along with the 12-10 stove) inside of my Snow Peak Mini Solo pot. It instantly became my favorite solo cooking system, and I even shared it a few times. As I always carry the two Ti tent stakes needed for set-up anyways, the Fissure is perfect for me. While I just use it with the alcohol stove, it works with an Esbit GramCracker or can be configured for wood-burning mode also.
Weight w/stove: 1.4 oz (54 g) |
|
|
Javan Dempsey/The Stateless Society 40 F (4 C) Quilt | Over the past two years I have switched every sleeping bag I own rated above 0 F (-18 C) to quilts as I have found that they fit my toss-and-turn, side-sleeping style much better, and I love the reduction in weight and volume in my pack. While I own three beautiful quilts from Nunatak Gear, this year I had one of our BPL members (Javan Dempsey of The Stateless Society, the.stateless.society@gmail.com) make me a custom summer quilt based on a design that he and fellow member Greg Mihalik worked up. Made of Intrepid 0.9 nylon and filled with 7 ounces (198 g) of 900+ down, it has no straps or drawstrings, but is wide enough to tuck around and under me if needed. While I had been shooting for a 40 F (4 C) rating, this quilt served me well down to 33 F (1 C) in just my boxer-briefs and a shirt, which was not too surprising as it lofts up to 2 inches (5 cm) between the 1.5-inch (4-cm) baffles I specified. I ended up taking this sweet quilt backpacking more than any other quilt or bag in 2010.
Weight: 14.2 oz (403 g) in what would be considered a Long size |
|
|
FlyWeight Designs FlytePacker Packraft | I’ve been fascinated by packrafting for some time now, but didn’t dive in because of the cost. Further, I wanted a packraft for alpine lakes more than river running, and the extra toughness isn’t necessary for this lighter use. Enter the FlytePacker packraft. At barely over 2 pounds (< 1 kg) and at a reasonable $269, this is a packraft that I could justify in both cost and weight. I’ve only begun to play with this raft but it was the centerpiece of a multi-day trip with my 4-year-old son Henry this summer. It was an absolute pleasure to paddle around the lake, do some Tenkara fishing, explore some hard to reach talus fields, and to experience our favorite lake in an entirely new way. Then at night he slept soundly on it, making my Neo Air seem like solid rock in comparison. I can’t wait for further adventures with a FlytePacker!
Weight: 2 lb 0.5 oz (921 g) |
|
|
Grand Shelters Icebox Igloo Building Tool | I’ve had this tool for several years now and am quickly approaching my tenth igloo. I can’t think of a piece of gear that has added more fun to my trips – or to the kids in my neighborhood! At almost 5 pounds (2.2 kg) and with a building time (for me) of 3-4 hours, a case could easily be made for using a winter tent instead. However, the warmth, strength, and joy of sleeping in an igloo adds SO much to winter trips. Getting to camp and building an igloo has become a key part of the enjoyment of winter camping and the added warmth means I don’t have to worry about extra insulation or the weather outside – it’s always well above freezing inside. The Icebox tool makes building a perfect igloo an easy process, and unlike snow caves, you don’t need much snow; I’ve built igloos with neighborhood kids with as little as 4 inches of snow on the ground! Once built, I’ve only been able to destroy one by cutting it apart with a snow saw. I love igloos, my kids love igloos, and the Ice Box tool is a marvel of engineering that makes igloo-building a fun and successful process.
Weight: 4 lb 14 oz (2.2 kg) |
|
|
Apple iPhone 4 32G | I had an iPhone 3 and would often leave it at home on backpacking trips. The iPhone 4 goes with me every time now. It has a 5 megapixel camera and shoots clean HD video for recording my adventures (with easy Facebook posting on the way home). The built-in GPS works great for geocaching and with the Topo Maps app, I can have all the GPS-enabled USGS topos I want for just $7.99. In camp I can listen to a few songs if I feel the need and there is an LED flashlight as a backup. The compass works well, the Clinometer app is very accurate, and I have a Wind Meter that is surprisingly accurate as well. At night, I use Star Walk to learn new constellations and identify planets – it’s amazing. Battery life is an issue, but on a recent three-day trip I returned home with 93% battery remaining despite never shutting it down (add a solar charger and you might be good indefinitely). The secret to saving power is turning off the wifi, bluetooth, and using Airplane Mode (which still allows GPS to work). Increasingly, I leave my GPS, camera, and mp3 player at home in favor of this do-it-all wonder device. When there’s service, it even makes phone calls!
Weight: 5.0 oz (142 g) |
|
|
Hennessy Hammock Hyperlite A-Sym Zip | At just over a pound and a half, this hammock is easy for me to justify as a solo shelter. The new zipper option makes entry/egress a snap, and converting to camp seating just requires a zip and flip. It’s comfortable, light, and a joy to use. Put simply, this hammock compelled me to be a part-time hanger when others have not. Available now.
Weight: 1 lb 10 oz (737 g) |
|
|
Integral Designs eVent Pullover | Just the facts, ma’am: 10 ounces (283 g), sturdy three-ply eVent, good fit, and a hood. I’ve worn it comfortably when other shells would have sweated me out. Although it’s simple, it’s executed just right. (Note: This is essentially the Rab Demand Pull-on and is not ID’s current eVent Pullover Jacket.) Available spring 2011.
Weight: 10 oz (283 g) |
|
|
La Sportiva Wildcat | I bought two pair of these shoes and am considering a third. Great trail shoes are a pleasure to find. The Wildcats give me excellent stability, without impeding my natural gait, in a surprisingly light package. The fit works really well for me, and for a wide range of people as I’ve found in retail. The Wildcats seem to find their way onto my feet quite often.
Weight: 24 oz (680 g) per pair |
|
|
Kahtoola Microspikes | Winter is a wonderful time to hike in the Grand Canyon; the burning heat of summer is gone and so are the crowds. Last winter, I hiked from the South Rim of the Grand Canyon down the Hermit Trail, along the Tonto Trail and back to the rim along the Bright Angel Trail. Although the Tonto Trail was mostly snow free, the descent down Hermit was steep, rocky and sometimes ice-covered. Kahtoola Microspikes over my trail runners kept me upright and striding confidently throughout the descent. They provided great traction in steep ice and were undamaged by rocks.
Weight: 14.5 oz (411 g) |
|
|
Outsak UL | Continuing with the Grand Canyon theme, the critters along the Canyon corridor trails are very persistent and innovative when it comes to “hunting and gathering” food from unsuspecting hikers. I’ve had to drive off a skunk with pebbles and stare down overly bold ravens that still looked hungry – after they ransacked my pack. The lightweight steel mesh in the Outsak UL provides an ounce-counting solution to food protection from small critters. The Outsak UL I’ve listed has room for about four days of low volume food. It is also available in a smaller size.
Weight: 4.1 oz (116 g) |
|
|
iPod Nano, 5th generation | I love backpacking and reading, and I especially love combining the two. I’ve carried an iPod Shuffle loaded with an audio book on each trip for the last several years. The Shuffle is very light, but it is easy to bump the wrong button and lose your place in a book and there is no quick way to get back to your spot. This year I decided to upgrade and was excited by the look of the new iPod Nano. However, it turns out the touch fast forward is not well suited for the fine control needed to find a particular place in an audio book. What works perfectly is the click wheel found on other iPods, including older versions of the Nano. Refurbished 5th generation Nanos are available on the Apple website and elsewhere.
Weight: 1.2 oz (34 g) |
|
|
Tigi Rockstar Dirty Secret Dry Shampoo, assorted hats and felt flowers | My favorite hat weighs 3.2 ounces (91 g) when paired with a felt flower on the end of my braid. Anything that keeps me from having to wash my greasy head daily is a winner in my book. The citrusy-smelling dry shampoo keeps me from an awkward “why’s that girl trying to do dreddies?” look, and the hat and flowers cover over (or distract from) a multitude of personal hygiene sins. Also, I am endlessly lazy and these goodies keep me in bed a few precious minutes longer, at least until a certain cute kindergartener pops in demanding breakfast.
Weight: 6.3 oz (179 g) |
|
|
Neosporin Lip Health Daily Hydration Therapy | I am not really a lipstick girl. Shoot, I live in Montana, where lip balm counts as make-up. I go through a lot of balm in the dry climate up here, but it can be hit or miss. Some make the chapping worse, despite repeated application throughout the day! The Neosporin stuff is MAGIC. After about a week, I needed lip balm less often. It’s a weird product that exists to help you use less of it, but I’m wholly sold. It has 20 SPF so that my kisser stays looking youthful and wrinkle free… and without flavor/glitter/gloss, I can even slap it on my husband or son without remorse.
Weight: .35 oz (10 g) |
|
|
Sorel 1964 Pac Boots | By now it’s probably clear: I am not much of a backpacker (much less a lightweight one!) at this stage in my life. I am okay with this. So okay with it that I own a pair of boots that weigh 26 ounces EACH. They are pretty much amazing and almost all I wear the entire winter in the frozen chosen of Bozeman. I have paired them with a skirt and tights: VERY cosmopolitan. They keep my feet warm and keep me vertical on the ice that is so prevalent around here. +10 points for Pacs!
Weight: 26 oz (737 g) each |
Larger volume frameless backpack, with removable stays, designed to be both a travel pack and a capable backpack once you get to your destination.

Six Moon Designs Traveler backpack on an early summer visit to the high country.
The relatively new Six Moon Designs Traveler is a panel loading version of their popular (and proven) Starlite backpack. It’s designed to perform double duty as a lightweight travel bag and backpack. The volume of the main pack body is the same as the Starlite, as are the side mesh pockets, removable stays, sleeping pad pocket on the backpanel, and the suspension system. The difference is the panel-loading system, where you lay the pack flat and access the contents through a front panel. The pack has a zippered top pocket instead of the extension collar and roll-down top closure on the Starlite. The front of the pack has a zippered mesh pocket and two compression straps, compared to a large open mesh pocket and a drawcord compression system on the front of the Starlite.
Backpacking Light published a review of the Starlite back in 2004 and found it to have the highest comfortable load carrying capacity of all the frameless backpacks we tested. Does the Traveler perform as well as its seasoned older brother?
| Year/Model | 2010 Six Moon Designs Traveler (www.sixmoondesigns.com/) |
| Style | Panel loading with removable stays |
| Volume | 3800 cu in (62 L) total; 3000 cu in (49 L) in main pack body, 500 cu in (8.2 L) in side pockets, 300 cu in (4.9 L) in front pocket |
| Weight | 2009 model tested. Measured weight 31.6 oz (896 g) with stays, 26.9 oz (763 g) without stays; manufacturer specification for current 2010 pack 29 oz (822 g) with stays, 24 oz (680 g) without stays |
| Sizes Available | One size with adjustable torso length |
| Torso Fit Range | Adjusts to fit torsos 15-22 in (38-56 cm) |
| Fabrics | Body is 210d 4.5 oz/yd2 Dyneema Diamond ripstop, high wear areas are 420d pack cloth, outside pockets are a stiff mesh |
| Frame Material | Contoured flat aluminum stays 0.5 in wide x 24 in long (1.3 cm x 61 cm) |
| Features | Durable fabrics, removable contoured flat aluminum stays, removable hipbelt available in 3 sizes with or without pockets, 2 shoulder strap sizes, removable/adjustable sternum strap, zippered sleeping pad sleeve on backpanel, 1 zippered front mesh pocket, 3 side mesh pockets, 1 zippered top pocket, 2 front compression straps, daisy chain on top, 1 hose port (no hydration sleeve), 3D wicking fabric on inside of shoulder straps and hipbelt, load lifter straps, hipbelt stabilizer straps, ice axe loop, haul loop, bear canister compatible |
| Volume to Weight Ratio | 120.2 cu in/oz (based on 3800 cu in and measured weight of 31.6 oz) |
| Maximum Comfortable Load Carrying Capacity | 30 lb (13.6 kg) estimated comfortable load for an average person carrying the pack all day (with optional stays inserted and a folded ¾-length closed cell foam sleeping pad in the pad sleeve) |
| Carry Load to Pack Weight Ratio | 15.2 (based on 30 lb and a measured weight of 1.975 lb) |
| MSRP | US$180 |
| Options | Hipbelt pockets US$15, stays US$10 |
At 3800 cubic inches (62 L), the Traveler is a larger volume frameless backpack. It’s designed with long distance hikers in mind, as a translation of the company’s name implies – six months (moons) on the trail. Long distance hikers need a pack that will carry higher volume and weight when needed, like after a re-supply, yet will compress down to accommodate diminishing loads as well. According to the manufacturer, the Traveler is designed to do just that and double as a secure travel bag, but does it deliver on all accounts?
The key design element of the Traveler (and Starlite) is the combination of a backpanel sleeping pad pocket and removable stays. A folded ¾-length closed-cell foam pad (like a Z-Rest or RidgeRest) inserted in the pad sleeve gives the pack substantial vertical rigidity, so this is a frameless backpack that will comfortably carry a substantial load. With the stays inserted, the pack will comfortably carry even more weight and more effectively transfer weight to the hips.

Views of the Six Moon Designs Traveler pack. The front view (top left) shows the pack’s panel access, mesh front pocket, and front compression straps. The backpanel view (top right) shows a corrugated sleeping pad in the zippered pad sleeve (more on that below), contoured shoulder straps, and large (optional) hipbelt pockets. The left side (bottom left) has one tall mesh pocket, and the right side (bottom right) has two mesh pockets.

The pack has a removable hipbelt (left) that’s available in three lengths, with or without pockets, to fit different waist sizes. The hipbelt is 4.25 inches (11 cm) high and 3/8 inch (1 cm) thick. I tested the Traveler with a size medium hipbelt with pockets. The pockets (right) are some of the largest to be found; they will hold an assortment of smaller items for easy access on the trail, and they are functionally waterproof.

A fairly large bellowed mesh front pocket (left) is zippered to prevent the contents from falling out while traveling. It’s not as large as the front pocket on the Starlite. The sternum strap (right) has a wide vertical range of adjustment; I like to keep it lower on my chest as shown.

The torso adjustment at the top of the backpanel (left) attaches the shoulder harness at different heights. Here it is adjusted for the maximum length. The Traveler is available with two optional contoured flat aluminum stays (right, 4.7 oz/133 g, US$10) that slip into sleeves on the inside of the backpanel (inside the pack body).

The pack’s contoured shoulder straps (left) are 2.75 inches (7 cm) wide where they ride on the shoulders. A closed-cell foam pad in the zippered sleeping pad sleeve (right) on the outside of the backpanel provides back padding and vertical rigidity for the pack. The stays reside behind the pad on the inside of the backpanel.

Carrying the Traveler pack on a high altitude backpacking trip in perfect weather – life doesn’t get any better than this! (And I caught a cutthroat trout on nearly every cast in the lake too.)
I tested the Traveler on four backpacking trips, ranging from a winter backcountry ski trip to a mountain cabin to multi-day spring and summer mountain backpacking. I carried loads ranging from 18 to 22.5 pounds (8.2 to 10.2 kg), with and without the stays for extra support, and with different sleeping pads in the pad sleeve. To test it at heavier weights, I loaded it up at home with heavier gear plus bottles of water to attain pack weights up to 32.5 pounds (14.7 kg).
The Traveler’s performance strongly depends on the user’s needs, and it clearly performs best under a particular set of conditions. To reiterate, the Traveler is designed to serve both as a travel bag and long distance backpack. It’s a larger volume pack, and the user must have a need for that volume. It will also serve lightweight backpackers well, if their gear will fill up the pack and weight is in the 25 to 30 pound (11.3 to13.6 kg) range.
For me, the Traveler is a bit of a conundrum for ultralight backpacking. The pack has too much volume for my gear kit, so I load my sleeping bag and down jacket unstuffed in the pack to fill up the volume. The pack’s two front compression straps do little to reduce the volume of the pack for smaller loads, so the pack size stays about the same regardless of the load.
Secondly, the pack will indeed comfortably carry higher volume and weighty loads, but its dependent on having a folded ¾-length closed cell foam sleeping pad (like a Z-Rest or RidgeRest) in the sleeping pad sleeve in order to do that, plus the stays for heavier pack weights. The problem for me is I rarely sleep on a closed-cell foam pad anymore, so I don’t really need the foam pad other than as a pack stiffener. An inflatable sleeping pad or thin foam pad (like the Gossamer Gear NightLight) does little to stiffen the Traveler for carrying heavier loads.

The Traveler pack in use as a day pack from camp – not very pretty. The pack compresses very little to accommodate smaller loads.
I also like to use a hydration system. It weighs a little more than a couple of soda bottles or a Platy flask, but it’s more convenient and I drink more. It’s noteworthy that the Traveler does not have a hydration sleeve, but it does have a hose port from the top pocket. The choices for using a hydration system are to put the reservoir in the top pocket or put it in the tall side pocket on the left side of the pack (as shown in the photos). The latter actually works well because it is easy to refill. I pack some heavier items on the opposite side of the pack to balance the weight.
The main point of this discussion is the Traveler is not very versatile in terms of its ability to adjust to different volumes and weights. It is best suited for a person who carries a moderate volume/weight load, like a lightweight backpacker, a long distance hiker, and of course a traveler/hiker. An ultralight backpacker will be happier with a backpack in the 3000 to 3500 cubic inch (49 to 57 L) range that compresses and expands well to accommodate different size loads.
So, what is the weight carrying capacity of the Traveler? The short answer is it’s about the same as the Starlite, which is around 30 pounds (13.6 kg). In my carry weight testing, with the optional stays inserted the Traveler carried 32.5 pounds (14.7 kg) of backpacking gear with reasonable comfort, which is remarkable for a frameless backpack. The key design element is the pack’s sleeping pad pocket which confines a ¾-length closed cell foam pad between the user’s back and the stays. The stays and folded pad create a virtual frame much stiffer than is possible with a pad coiled inside the main pack bag. The caveat here is this performance is dependent on a folded ¾-length closed cell foam pad confined in the pad sleeve; without it, or with a thinner foam pad or inflatable pad, the pack’s weight carrying capacity drops considerably.
The Traveler can be used without the stays for lighter loads, or with the stays for extra support and weight transfer when carrying heavier loads. But it’s not a true internal frame backpack because the stays are not anchored to the hipbelt, although the load leveler straps are anchored to the tops of the stays. The stays act as a pack stiffener, working in conjunction with a rigid foam pad to create an “enhanced virtual frame,” but they do not provide the same support and weight transfer as a backpack with a built-in internal frame.
A folded sleeping pad as described is about 3 inches (7.6 cm) thick when compressed against the back, so it pushes the pack’s center of gravity outward. Consequently it’s important to load the pack so heavier items are against the pack’s backpanel, preferably in the center of the pack. Since the pack’s volume can’t be reduced very much, the Traveler performs best when the pack is fully expanded with a full load of gear.

One defect in my sample pack is the elastic binding on one of the mesh was not adequately sewn to the mesh, so a section of the mesh pulled out.
The following table compares packs currently available that have removable stays, allowing the pack to be used either frameless or with the stays inserted for extra support. Note: information is manufacturer data for a size Medium pack.
| Pack | Total Weight With Stays (oz/g) | Volume (cu in/L) | Fabric | Stay Description | Stay Weight (oz/g) | Adjustable Torso | Cost (US$) |
| Six Moon Designs Traveler | 29.0/822 | 3800/62 | 210d Dyneema | 2 flat contoured aluminum | 5.0/142 | Yes | 180 |
| Six Moon Designs Starlite | 30.0/850 | 4200/69 | 210d Dyneema | 2 flat contoured aluminum | 5.0/142 | Yes | 180 |
| Gossamer Gear Gorilla | 23.2/658 | 2800/45.9 | 210d ripstop | Contoured aluminum tubing | 3.4/96 | No | 180 |
| Gossamer Gear Mariposa Plus | 22.3/632 | 3600/59 | 70d ripstop | Contoured aluminum tubing | 3.4/96 | No | 170 |
The Six Moon Designs Starlite has a little more volume than the Traveler because it is a top loader with an extension collar, otherwise the packs’ dimensions, suspension system, and weight are very similar. The Gossamer Gear Mariposa Plus has similar volume to the Traveler and weighs 6.7 ounces (190 g) less, but its comfortable load carry capacity is less. The Gossamer Gear Gorilla is a smaller pack, so it is not a very close comparison.
The Six Moon Designs Traveler and Starlite have the same suspension system and are basically the same size pack. The difference is the Traveler is a panel loader and the Starlite is a top loader. The only real reasons for getting the Traveler instead of the Starlite would be: 1) use as a travel pack, and 2) a preference for a panel loading design. As a travel pack, the Traveler’s dimensions are too large to qualify as carry-on baggage on most airlines, and the side pockets are not zippered to make sure things don’t fall out.
For use strictly as a backpack, I would personally prefer the Starlite over the Traveler. The Starlite is a conventional top loader and has a little more compression capability than the Traveler, but it still does not have enough compression to reduce pack volume adequately for smaller loads.
To get the best performance from a frameless backpack (including when optional stays are inserted), its important to use a closed cell foam pad, either coiled around the circumference of the pack bag or folded against the backpanel to create a virtual frame to stiffen the pack and transfer weight to the hips. It’s also important to completely fill the pack so it’s a firm, solid unit. That is accomplished by purchasing a pack that has a volume close to the volume of your normal gear kit and using the pack’s volume adjustment and extension collar to handle smaller and larger loads. Applying these principles to the Traveler and Starlite runs into some potential obstacles: 1) if you use an inflatable sleeping pad, the pack’s weight carrying capacity is significantly reduced, and 2) the Traveler is a larger volume frameless backpack and it has limited volume reduction capability to accommodate smaller loads.
Overall, the Traveler’s (and Starlite’s) stellar performance is limited to a particular set of conditions (higher volume and weight, use of the optional stays, and a folded ¾-length closed cell foam sleeping pad). If that is your situation most of the time, this is your pack, especially if you travel a lot. However, if you use an inflatable sleeping pad, your gear kit is a smaller volume, and you don’t intend to travel with the pack, you would be better served with a smaller top-loading frameless backpack. If you consistently carry loads heavier than 30 pounds (13.6 kg), I recommend getting a an internal frame backpack rather than a pack with removable stays
The combination of a backpanel sleeping pad sleeve containing a folded ¾-length rigid foam pad and removable flat aluminum stays create an “enhanced virtual frame” that allows the Traveler to comfortably carry more weight compared to other frameless backpacks.
Disclosure: The manufacturer provided this product to the author and/or Backpacking Light at no charge, and it is owned by the author/BPL. The author/Backpacking Light has no obligation to review this product to the manufacturer under the terms of this agreement.
The ATF8 is almost everything I am looking for in a multi-function watch, without being merely a watch. It has proven to be accurate, durable, and easy to learn and use.

The new 1.6 oz (44 g) Highgear ATF8 puts a lot of features in a small, compact package. As part of the company’s Summit Series of products it is made with the outdoors person in mind. How does it work for backpacking?
The High Gear ATF8 is based on the company’s Alterra Multi-function watch. What’s the most noticeable difference? They lost the watch band. The ATF8 is made to be carried, not worn. It has a carabiner-style attachment for hanging from a loop or strap on a backpack. The carabiner can also fold into a groove in the back of the unit to make for a compact pocket carry. The carabiner ratchets as it closes and can be stopped in various positions to allow it to sit on display. A coin slot in the back lets the ATF8’s CR2032 coin-style battery be accessed.
The ATF8 has a slew of functions. It has dual time zones, compass, altimeter, barometer, standard chronograph, special ski chronograph, dual alarms and data logs for the chronograph and altimeter. I won’t get into all those – I didn’t use many! – but you can scan the company’s online manual for some light reading to acquaint yourself with all those bells and whistles.

The ATF has a carabiner-style attachment that may also be folded completely flat or left half-way to form a stand for the unit.

The ATF8 has five buttons around the side of the case (button functions described below). It’s in time mode here, where I normally keep it.
The ATF8 is equipped with a Swiss-made barometric sensor. The barometer measures the Absolute Barometric Pressure and calculates the Barometric Pressure corrected to Mean Sea Level. Once calibrated, the barometer tracks changes in pressure and will give a “weather forecast” in the form of a little icon in the upper right-hand area of the screen. The main temperature screen is found in barometer mode.
The altimeter function works with the barometer. When climbing or descending (and again, after calibrating the unit to your known elevation first) the unit uses the change in pressure to calculate the change in elevation. While in this mode, an altitude alarm can be set to alert one of reaching a desired elevation.

The ABCs of what I want from my device. Left: Altimeter mode with time and temp. Center: Barometer mode with pressure listed as Inches of Mercury and graph showing pressure trend. Right: Compass mode.
The last function I really use is the digital magnetic compass. It shows the current heading in quarter cardinal points (so the center one is your heading) and the current heading in degrees at the bottom of the screen. In the picture above, I am just one degree off straight north.
I received the ATF8 in January 2010 and have brought it on every backpacking trip since. Looking at my log, I have carried it for 621 miles (1000 km) to date. Most use has been in the Sierra Nevada of California, the rest in northern Minnesota.
Unless testing something else, I have been carrying one of the company’s AltiTech 2 carabiner-style units for the past six years. I like the ATF8 much better. I carry it attached to the shoulder or sternum strap of my backpack at all times. While I have tested watches, I do not care for anything on my wrist so I really like this style of carrying.
The main function that I use with any of these multi-function devices is the altimeter. As most of my backpacking is on trail and in mountainous terrain, I find that a good altimeter is easier and faster to track where I am on a map than with a compass.
I make a point to calibrate the unit at known locations, usually at the top of a pass. If I know beforehand where I am going to stop for the night, I will write that spot’s altitude on my map and recalibrate it when I get into camp too. Calibrating is easy to do, although having owned other of the company’s products helped I am sure. The ATF8 has done very well in its accuracy between calibration spots. It is normal to see a difference of around 20 ft (6 m) after a day that saw 4000 ft (1220 m) or more of elevation gain and loss. On one torture test I calibrated it on the top of Mt. San Gorgonio (11,499 ft/3505 m), drove back home to sea level for five days, and took it to Mt. San Jacinto (10,835 ft/3303 m) the next weekend. After all the time and elevation and pressure changes it was 120 ft (36.5 m) off.
Once in camp I set it to barometer mode and use it to track the temperature and the pressure/weather. The thermometer is very accurate but equalizes quite slowly. I checked it against a certified thermometer and it was dead on, after sitting for about five minutes. With a range of only 14 to 122 F (-10 to 50 C) I can’t rely on it for all my trips. In the Sespe Wilderness I was reading 119.5 F (48.6 C) in the shade at 3:30 pm, so it was probably hotter on the hike in. And more recently I was on the North Country Trail in northern Minnesota where I woke up to a reading in my tent of 19.8 F (-6.8 C) at 7:00 am. In another week or so I will be out of its range for lows. I would like to see a greater range.
The forecasting icons work well, but in the mountains the building thunderheads often tell me the same thing. ;-) On a recent trip in the Sierra I noticed the icon change to “rain” and told my brother-in-law that it seemed weird as it was pretty nice out. As we crested the next pass to start our descent to the trailhead we were treated to the sight of clouds which continued to build. By the time we got down it was raining. How dare I question the ATF8?

Left: the ATF8 hitches a ride on my pack’s sternum strap in the Sespe Wilderness. Right: the water resistance was tested hard in three straight days of rain on the Pacific Crest Trail. It survived, my rain gear did not…
While I don’t need a compass to orient by (and if I did, I would bring a true map-reading analog model) I do use one often to check heading to make sure I am on the correct trail. In flat Minnesota, the woods can be so thick that often the heading of the trail and lakes I pass are the only way to keep track of where I am. The digital compass of the ATF8 works great for this. And since I have been bouncing back and forth between California and Minnesota, the ease of recalibrating the compass and resetting the declination is a blessing. It takes me about a minute to set it for each state once I get there. From what I can tell the accuracy is spot on when compared to my two Rangers.
The alarm is very faint. I have used it only two times. Once to alert me to a turn-around time as I needed to go back to my camp before it got dark, the other an early wake-up. I heard the alarm when it went off while the ATF8 was hanging on my pack. I never heard it go off in my tent. This has been true of the AltiTech units too. It must be noted that my ears do not register high sounds well when background noise (like wind) is present, due to too much powder actuated tool (think guns) use when I was younger.
The unit is said to be water resistant to 5 ATM. High Gear says that it “is designed to be water resistant to a static pressure of 5 ATM and can be worn while showering and light swimming.” As I wrecked one of the AltiTechs by dropping it in 3 inches (7.5 cm) of water in a tiny creek along the Pacific Crest Trail, I did not put the swimming claim to the test. I did carry it in the rainiest backpacking I have ever experienced this spring in California, where many records for rainfall were set in 2010. I clearly remember three days of PCT hiking that it rained all day long. I left the ATF8 on my pack through it all, and it did fine. My rain gear, on the other hand, failed miserably. Well, I was miserable, that was for sure.
Because of where I carry the ATF8, it has seen its share of hard knocks when my pack falls over. As can be seen in some of the pictures, it is getting scratched up a bit but has proven quite durable so far. I am still on the original battery and even in the cold of the last trip it is showing no sign of wearing down. (When battery gets low, the display fades during use.) The blue EL backlight works well but I usually just use my headlamp to check it during the night.
If there was one thing I could change about the ATF8 it would be a way to disable the functions that I do not want or use so that I did not have to waste time scrolling back through them all to get to the ones I do use. My Kestrel lets me remove any functions I don’t need.
A way to scroll backwards would be even better. When I stop to take a quick heading with the compass, I just have to push one button. But to get back to where I to the time mode I have to push eight more, traveling forward through all the functions.
All told I am very satisfied with the ATF8, so much so that I gave my AltiTech 2 away. I look forward to many more trips with it feeding me my backcountry data.
Disclosure: The manufacturer provided this product to the author and/or Backpacking Light at no charge and is owned by the author/BPL. The author/Backpacking Light has no obligation to review this product to the manufacturer under the terms of this agreement.
Freedom of movement is the next advancement in internal frame backpack technology, but it appears to have limitations.

Black Diamond women’s Innova 50 (left) and men’s Infinity 60 (right) on a summer backpack in the southern Rocky Mountains. The large bagged item under the top pocket (right) is a plastic raft that someone abandoned at a wilderness lake.
Black Diamond introduced their Infinity and Innova backpacks in spring 2010. These are dedicated backpacking packs, not climbing packs. A much expanded line of backpacks of all types will be introduced in spring 2011.
By lightweight standards, the Infinity/Innova packs at 3.75 pounds (1.7 kg, size Medium) are just above our upper weight limit of 3.5 pounds (1.6 kg), but they are still lightweight considering the technologies they incorporate. What is remarkable, and why we decided to review the new Black Diamond backpacks, is their ergoACTIV suspension system. According to Black Diamond: most backpack manufacturers have now incorporated lighter weight materials and ventilated backpanels into their backpack line; the next innovation needs to be freedom of movement. In the ergoACTIV suspension system, the frame, shoulder straps, and hipbelt pivot and twist in concert with the hiker, allowing the backpacker to move unrestricted in any direction. The obvious questions from our standpoint are: does it really work, are the benefits useful, and if so, do they justify the weight of the technology?
| Year/Model | 2010 Black Diamond men’s Infinity 60 and women’s Innova 50 |
| Style | Built-in internal frame, top loading with floating top pocket |
| Volume | Infinity 60 is 3660 cu in (60 L), Innova 50 is 3050 cu in (50 L) for size Medium |
| Weight | Size L Infinity and size Small Innova tested. Measured Weight: Infinity 60 4 lb 3 oz (1.9 kg), Innova 50 3 lb 11.8 oz (1.7 kg) Manufacturer Specification: Infinity 60 3 lb 13 oz (1.74 kg), Innova 50 3 lb 12 oz (1.7 kg) for size Medium |
| Sizes Available | Men’s M, L Women’s S, M |
| Fabrics | 210d ripstop nylon and 400d nylon twill |
| Frame Material | HDPE framesheet with attached peripheral 6061 aluminum frame |
| Features | ErgoACTIV hipbelt, SwingArm shoulder straps, OpenAir backpanel, floating top pocket with zippered access (key clip inside), two stretch nylon side pockets, large front stretch nylon and fabric kango pocket, one fabric hipbelt pocket, two front tool holders, two concealed ice axe/trekking pole loops, four side compression straps, one top compression strap, two removable sleeping pad straps, load lifters, hipbelt stabilizer straps, adjustable sternum strap with whistle, pulley-type hipbelt, 3L internal hydration sleeve with one center hose port |
| Volume to Weight Ratio | 57.4 ci/oz for the Infinity 60, 49 ci/oz for the Innova 50 (based on 3845 and 2929 ci, respectively, and measured weights of 67 and 59.8 oz, respectively for the pack sizes tested) |
| Maximum Comfortable Load Carrying Capacity | 30 lb for the Infinity 60 25 lb for the Innova 50 Estimated comfortable load for an average person carrying the pack all day |
| Carry Load to Pack Weight Ratio | 7.16 for the Infinity 60 and 6.68 for the Innova 50 (based on 30 and 25 lb and measured weights of 4.19 and 3.74 lb, respectively) |
| MSRP | Infinity 60 US$220 Innova 50 US$200 |
The Infinity and Innova backpacks have a unique ergoACTIV suspension system that provides freedom of movement. It consists of three design elements: an ergoACTIV hipbelt connected to a pivot hub on the backpanel that allows the hipbelt to swivel, SwingArm Shoulder Straps that are connected to each other by a cable and housing that allow the shoulder straps to move from side to side in tandem with the hipbelt, and a V-Motion Frame that transfers weight to the hipbelt. These three components working together allow the backpack to freely move from side to side and twist to the right and left with the user.
The pack’s frame consists of a HDPE framesheet and attached peripheral curved aluminum tubing to create a very supportive unit in the vertical direction while providing some horizontal and torsional flexibility to conform to and move with the user’s back. The frame unit is bendable to create a customized anatomical contour to match the user.

The packs’ ergoACTIV hipbelt is attached to a pivot hub on the backpanel (left), which allows the hiker to lean unrestricted to the left and right. The bottom ends of the shoulder straps are connected by a cable and housing (like a bicycle brake cable) to provide about 1.5 inches (3.8 cm) of travel. The pivot hub (right) slides up and down and locks in position to provide 2.5 inches (6.4 cm) of torso length adjustment.

The pack’s OpenAir backpanel (left) provides ventilation and conforms to the user’s back; shoulder straps (right) are contoured and well padded. The suspension system on the women’s Innova pack is anatomically contoured for women.

Views of the Black Diamond Infinity 60: The frontpanel (top left) has a large capacity stretch nylon and fabric kango pocket; the backpanel view shows the pack’s pronounced lumbar pad, ergonomic hipbelt, and ventilated backpanel; each side (bottom left) of the pack has a stretch nylon pocket that can be reached with the pack on; and the top (bottom right) shows the pack’s roomy floating top pocket.

Pockets: The Infinity and Innova have a total of five pockets: a large capacity kango pocket on the front (left), two stretch nylon side pockets (center), one hipbelt pocket (right), and a large floating top pocket. The right side hipbelt pocket is (barely) large enough to hold a compact digital camera as shown; the left side is blank, without any strap or other means to attach an accessory pocket.

We tested the Infinity and Innova backpacks on several summer backpacking trips in the southern Rockies.
Our first time experience with the ergoACTIV suspension was: “Whoa, this pack is looser than a goose!” We are accustomed to backpacks that “stick” to our back, so the freedom of motion feature feels strange at first and requires some getting used to. The pack leans sideways with you, and twists as you twist. This freedom of movement is nice, but I wondered if it’s really needed for ordinary on-trail backpacking. After all, I am basically satisfied with a typical internal frame backpack that “sticks” to my back and allows me to comfortably carry a load down the trail.
On a solo trip, I carried a lighter load (24 lb/10.9 kg) in the Infinity 60 while hiking off-trail and found the freedom of movement feature more beneficial. When negotiating rougher terrain, it is helpful to carry a pack that moves with me, rather than restricts my movements. My conclusion is the ergoACTIV suspension performs well and is useful in situations where the extra agility is really needed, with the caveat of carrying a lighter load. A heavier load can throw me off balance when I’m in an awkward position, and the freedom of movement feature can work against me.
The heaviest load I carried with the Infinity 60 was 32 pounds (14.5 kg) while climbing a steady grade on-trail to gain 3000 feet (914 m) of elevation over 6 miles (9.7 km). With this heavier load (not all that heavy by conventional backpacking standards), I felt the pack weight concentrated on the pivot hub at the back of the lumbar pad, which caused some lower back fatigue by the end of the day. Also, the weight bearing down on one point at the back of the sternum pad caused the hipbelt to lever and press into my stomach, which was also uncomfortable. The problem was exacerbated by my tightening the hipbelt more to carry the heavier load on my hips. Note that most internal frame backpacks are designed to transfer and distribute weight to a much broader region of the hipbelt, rather than to a single point.
On a subsequent trip, carrying 28 pounds (12.7 kg) on secondary trails, I did not experience the problem, so there appears to be a threshold where pack weight concentrated on a single point (the pivot hub on the back of the sternum pad) causes discomfort. Overall, for me, the Infinity 60 carries loads up to about 30 pounds (13.6 kg) quite comfortably, but above that the concentrated weight on the pivot hub creates some less comfortable dynamics. For many lightweight backpackers, who carry loads in the 25-to 30-pound (11.3- to 13.6-kg) range, this should not be much of an issue.
Janet never really tested the upper load carrying limits of the Innova 50 pack, mainly because she has me to be the pack mule! She completely filled the Innova with bulky loads in the 15- to 18-pound (6.8- to 8.2-kg) range and was very pleased with the pack’s fit and comfort.
Overall, aside from the issue described above, the Black Diamond men’s Infinity and women’s Innova are very nice backpacks. They are exceptionally well designed and constructed to fill the needs of most lightweight backpackers. We especially liked the packs’ fit, contoured backpanel, anatomical hipbelt, comfort, large front kango pocket, large floating top pocket, and reachable side pockets. We would prefer two hipbelt pockets, rather than one, and a larger capacity to more easily hold a digital camera. For a new pack model, the Infinity/Innova gets most of the details right.
However, the ergoACTIV suspension is a mixed bag. It delivers freedom of motion quite well and remains comfortable (for me) up to around 30-pound (13.6-kg) loads, but with heavier loads, the concentrated weight on the pivot hub creates uncomfortable leverage on the hipbelt. This effectively limits the comfortable load carrying capacity of the pack to around 30 pounds (13.6 kg).
We are neutral on the benefits of the freedom of movement feature while hiking on a good trail. It’s nice, but it doesn’t make the load any lighter or easier to carry. However, the freedom of movement feature is appreciated much more while carrying light to moderate loads over rougher terrain. Also, it very likely will make a difference for traveling on skis or snowshoes, but we did not have an opportunity to test that out.
Weight-wise, the Infinity 60 compares favorably with similar backpacks. The current Osprey Aether 60 now weighs 4 pounds 14 ounces (2.2 kg) for size Medium, so the Infinity 60 is a full pound lighter, based on manufacturer data for size Medium. However, there are lighter similar-sized internal frame backpacks to be found, as covered in Roger Caffin’s state-of-the-market series on Lightweight Internal Frame Backpacks.
Disclosure: The manufacturer provided this product to the author and/or Backpacking Light at no charge, and it is owned by the author/BPL. The author/Backpacking Light has no obligation to review this product to the manufacturer under the terms of this agreement.
Hopscotch over lakes, skip the main trail, and discover the jewels of Peru.

Most of the trekking trails in the Cordillera Huayhuash are shared with local inhabitants and their herds.
While down-climbing through a steep, rocky ravine on our way to Laguna Jurau, I silently cursed our maps. Yes, “maps,” as in the plural of “map.” We brought two maps while circuiting the Cordillera Huayhuash Range. The first was a free map the size of an index card which showed the trails we wanted to use. The second was a 1:50000 topographical map which (teasingly) marked the passes, but not every trail over the passes. As we descended the second pass of the day (Punta San Antonio, at 5,010 meters), the trail grew fainter and fainter as the terrain steepened. It was five o’clock, and the sun would set in an hour. We could gamble that successfully navigating through the scree-filled ravine would lead us safely to the valley. Or, we could pitch our tent on the sloped mountain, 300 meters below the nearest water source, and look for the trail down to the valley in the morning. If there was another trail.
Moments like these really test a team’s communication, trust, and ability to tackle difficult problems. Danny and I had been traveling together through Latin America for the last 34 weeks and had experienced many highs and lows, but we took on surprisingly uncharacteristic roles in the dwindling daylight on this fourth day of our trek. Danny, usually calm and positive, was worried because we had no ropes, harnesses, and helmets, but we had not planned on coming across this type of terrain. I had never seen him scared or unsure, and fortunately this triggered my inner calm instead of my natural hysteria. I was supportive, markedly positive, and brave. Danny made the decision to continue climbing down through the gorge, and I listened carefully to his directions of “foot here, hand hold there” as he maneuvered us down the steeper walls.
Some might call it luck, but I give all the credit to my husband. He guided us through the ravine, and it provided safe passage to the valley. An hour after our panic, we shooed away some stray cattle and set up our tent in the fading light, on a small flat area not far from a trickling stream. Our view encompassed two mountain lakes, several glaciers, green sloping pastures, fragrant violet wildflowers, and no buildings, tents, or other people. Just us.

Our only semblance of a home: the Tarptent Double Rainbow nestled between bushes of wildflowers and steep lush pasture.
The Cordillera Huayhuash is a thirty-kilometer mountain range located in the Andes of Peru. It contains the towering snowy peak of Siula Grande (6,344 m), which was made world famous in the book Touching the Void. The trekking trails can be reached in six hours, mas o menos, by vehicle from Huaraz. Unfortunately Huaraz does not have a nearby or large airport, so the best option is to fly to Lima and take an eight-hour bus to the trekking capital of Peru. From Huaraz to and from the trailheads, we traveled in a variety of local buses, taxis, and hitches, which is much cheaper than hiring a personal vehicle. Although the Huayhuash is a bit tricky to travel to, the remoteness is part of its attraction.
Spending a few days in Huaraz can be part of an acclimatization plan because it lies at 3,052 meters above sea level. Danny and I had been slowly acclimating for seven weeks as we traveled south through the Andes of Colombia and Ecuador. Doing hikes and summits along the way prepared us for this week of sleeping every night above 4,000 meters.
It is not difficult to comparably “go light” around the Huayhuash because most other hikers are part of entourages with hired cooks, guides, and pack animals that carry most of the equipment. The trekkers carry only day packs with clothing and water. They also tend to stick to a set itinerary, and because we like our solitude, hopping from valley to valley over the high passes allowed us to avoid the crowds. In our seven-day hike around the mountain range, we came upon only three tourist groups and no independent hikers.

These mules walk from campsite to campsite, carrying the absurd amounts of gear needed for supporting large groups of tourists.
Danny and I did not have the luxury in selecting from a variety of gear when packing for this seven-day trip into the wilderness. We had only the gear in our two backpacks, which had allowed us to comfortably backpack in the jungle of Costa Rica, the mountains of Patagonia, and the remote beaches of Brazil. Additionally, Danny had the foresight to send our down jackets to our friend’s house in Huaraz. As it turned out, they were a necessity for staying warm in the winter weather we experienced in the Huayhuash.
The availability of public transportation in Peru, even to remote villages, makes traveling convenient if you can speak and understand a few phrases of Spanish and if you are not in a hurry. The collectivos frequently pick up and drop off the lively locals and their cargo, which may include live animals, furniture, and large sacks of fresh produce. We caught one of these minivans from Huaraz to Recuay, where we came upon a tourist group on a pitstop. They were headed to the same trail head as us, so we negotiated a ride with the driver.
The big, bright tents waiting for our van of loud foreign twenty-somethings at the trailhead encouraged us to take advantage of the last hours of daylight. We wanted to have much physical distance from the entourage to ensure we would not keep crossing paths throughout the week. As we all piled out of the van, Danny and I threw on our warm layers and swung on our packs. After answering the usual questions about where we were sleeping (“How can you fit a tent in your small pack?”), we headed over one of the lowest passes of the week, Cacananpunta, at 4,690 meters. After crossing the ridge, we did not see the group ever again.
Darkness approached as we entered the river valley, and we used our headlamps to guide us up the marsh to the lake, where we wanted to camp. When we saw the glistening reflection of Laguna Mitococha in the moonlight, we started searching for a clean, flat spot to pitch our tent. It is wonderful that most of the Huayhuash is pasture, because that makes for a soft place to rest one’s head. However, the pasture is food for a variety of animals which most definitely do not have Leave No Trace (LNT) training. It is hard enough to avoid stepping in a pile of poop, let alone find a whole poop-free two square meters to pitch a tent. Therefore, I prefer to search for a campsite in the dark because then I am blissfilly unaware of how much poop I am stepping in and sleeping on.

We were impressed with the abundance of hearty flowers found at the high elevations.
via Carhuac (Yanapunta) Pass (4,640 m) and Laguna Gangrajanca (4,245 m)
Trekking up the valley to sleep near the lake the day before took us off the main tourist circuit, so we started the next day by backtracking a few kilometers. Even though we met up with the main trail, we did not see anyone but a shy toddler and his father who offered to sell us Coca-Cola as we walked past their house. In the afternoon we cut off the main trail to search for a trilogy of lakes nestled under several glaciers.

After leaving camp, Danny rushed ahead to snap this shot of me hiking up the pass.
Jungle animals, exotic birds, blooming colorful flowers, white sandy beaches – I will trade them all for a view of a glacier and its lake. I can spend hours watching the sun move shadows across the turquoise chunks and perfectly smooth white-frosted slopes. I wait patiently for the crack and thunder of an avalanche, quickly scanning the mountain for moving snow. We traded a bit of comfort and convenience when pitching our tent, so that we could satiate our eyes with a view of the towering peaks and aquamarine lakes. Unfortunately, that meant cooking next to either a cow pie or a cactus. I chose the cactus.

Our favorite dinner recipe: 250 grams of whole wheat pasta, one half of a dried tomato soup packet, two cloves of garlic, and a handful of walnuts.
via Siula Punta (4,834 m) and Portachuelo de Huayhuash (4,785 m)
When I peeked out under the vestibule in the morning, I was not surprised to find frost on the grass, because I had awoken a few times in the night to shiver, cuddle closer to Danny, and fall back asleep. We were both surprised, however, to find that both vestibule zippers were frozen and inoperable. Closer inspection revealed that the inside of our tent was coated in ice as well. We needed no other excuse to stay in bed awhile longer. After discussing what we could do differently to keep me warm, we made the decision to wear our “skirt” the following evening. Danny and I have similar Rab jackets which zip together, and many times have slept with them encircled around our legs. I stuff my feet into a hood, and the sleeves take up space in our shared sleeping bag, reducing air volume. This strategy proved helpful the rest of the week, as we slept soundly despite finding ice in our tent the next four mornings.

Ice crystals add to the beauty of these miniature mountain plants.
Foregoing a hot breakfast, we kept warm by hiking up to the pass. At 4,834 meters, we laid out our tent to dry in the strong early morning sun, and cooked kiwicha oatmeal. With our stomachs full and our fingers thawed, we descended into the valley where we exhausted ourselves by jumping instead of walking. The terrain was a bit swampy, but we kept our feet dry by jumping from green mound to green green mound. With every leap, I felt a twinge of guilt for the beautiful mountain life I was crushing.

Mt. Carnicero reflected in a pool. By jumping onto these dirt mounds, we kept our feet dry.
It was a long haul to Lake Viconga. We skirted around the campsite full of bright tents and boisterous hikers and headed up into the valley toward the pass. The valley curved left and after twenty minutes, we found a flat spot to pitch the tent, out of sight from the lake. I cooked dinner, taking a short break to chase away a curious mule, while Danny shot photos of the bright red sunset.

Easily viewed from far away, the signs of a guided trip: big bright tents, lots of mules, cooking and camping next to the water source.
via Punta Cuyoc (4,950 m) and Punta San Antonio (5,010 m)

Danny turning around to admire the view near the top of Punta San Antonio.
The ascent up the first pass of the day was long, but gentle and did not prepare us for the severity of Punta San Antonio. While side-stepping up the steep grade of our second pass of the day, we encountered the only other tourist group of the week. They were descending from the pass and carrying only day packs. They enjoyed an afternoon hike while their porters built camp down the valley near the main trail. We inquired if they had come over the pass, but they had ascended the same trail and turned around at the pass. We asked if there was a trail on the other side of the pass, and they laughed and replied “no.” Even though we planned to hike down the other side of the pass, their answer did not worry us because the pass was marked on our small map, and these hikers were doing an out-and-back so they probably did not pay too much attention to the terrain on the other side. When we reached the top of the pass, I saw faint markings of a footpath on the crumbly rust-colored rock. Little did I know that the trail would not be visible much longer.

Perhaps the view distracted us from finding the trail.
As described in the beginning of this article, the trail did not really exist. We scouted many possible routes, ultimately deciding to down-climb a steep and narrow ravine. It was a scary few hours, but we eventually made our way down to the isolated canyon below and set up our camp in the last minutes of daylight.

Danny carefully down-climbing after having lowered his pack to a ledge three meters below.
via Laguna Sarapococha and Punta Rosario (5,060 m)
The Huayhuash is not inhabited by many people, but those who do live under the towering snow and ice capped mountains raise cows, sheep, llamas, pigs, horses, and mules. These animals create their own trails when grazing, so it is sometimes difficult to find a human-navigable trail when one wanders off the beaten tourist track. When starting the climb up Punta Rosario, we saw no main trail, but several trails that looked like they might be the under-utilized main trail. The pass symbol )( was on our map and we could see the saddle, but we were only guessing as to the route. There was plenty of evidence that the mountainside was regularly ascended or descended, but by whom or what? We tried to distinguish between mule poop and cow pies. Remnants of mules or horses likely means a pack animal, and signifies we found a trail appropriate for animals with only two feet.

A clear view of Siula Grande, the setting of Touching the Void.
One hundred meters short of the pass, we came upon half a dozen cows wandering near an almost barren lake. At this point, we were a full day’s walk from either valley and wondered how long these cows had been away from their owner, and if he knew they were missing. We stopped to give them a treat (cows find our urine fascinating in smell and taste) and made the last ascent to the pass.

Do animals need to acclimate? The lost cows at 4,960 meters.
A barely-visible trail over loose scree slowed us down on the descent into the next valley, but not as much as the tiny islands of beautiful green mountain flora. Every thirty meters I stopped to admire the existence and diversity of the patches of ground cover in different sizes, textures, and brilliant shades of green:

Even though we had a long day of hiking ahead, we could not resist a short excursion up to the glacier lake in the morning. After packing up camp, and following a river down the valley past cow-filled pastures, we encountered a remote homestead. The very friendly son of the patriarch described which trail we should take through the valley to reach the next town. We saw his father hiking up the valley wall and thought about following him, assuming he knew a shortcut to reach the next valley, but were told he was only searching for a lost vaca (cow).
A few hours later, we were regretting the choice to stay on the main trail. As we approached the pueblito of Huayllapa, we started noticing signs of civilization. The trail grew wider, and we encountered a few women in their beautiful native dress carrying firewood. The valley began to resemble a checker board with stone fences marking animal pens and crop fields. Above the city, we came across two local women manning a gate. As soon as they saw us, the closed the gate and waited. After a few minutes, we asked what we had to do in order to pass through the gate.
Huayhuash is not a park or a protected wilderness area. It is a collection of communities, and each community requires tourists to buy a ticket before passing through their region. We were told by several tourist agencies to bring $50US worth of soles per person because we would need to buy about eight tickets as we trekked around the Huayhuash. Our first ticket was purchased while we were still in the van on the way to the trailhead. A local road construction crew flagged down our vehicle and required us to buy their ticket, 15 soles (~$5US) a person, for passage.
This was to be our second, and final, ticket purchase. After a few minutes of awkward silence, we talked to the gate guards, and they asked us who else was coming behind us. Perhaps our guides and our mules? We stated it was just us two, no mas. The women asked several more versions of the same question, using simple phrases, and even threw in some English words to make sure we understood. When they finally believed us, we paid our 35 soles (~$12.5US) per person, and were admitted through the gate. Since our total ticket purchase was less than $20US per person, we believe that by hiking off the main trail, we unintentionally bypassed some of the check points.
Darkness set in about the time we reached Tapush Punta at 4,750 meters. We stopped to put on our warm layers and turned on our headlights. We continued slowly, with the goal of camping at Laguna Susucocha. An hour later, we were surprised to see lights coming up towards us. Two friendly locals met us on the trial, and told us to follow them to a flat spot near water to pitch our tent. We chose a spot not far from their small permanent tent covered with layers of tarps. We fell asleep listening to their laughter as they told stories around their cook fire. I did not understand their words, but the universal language of laughter made me appreciate their merriment in this remote spot, far from luxuries we take for granted.

We had inquired about the bus from Llamac to Huaraz when we purchased our regional Huayllapa ticket the day before. The women guarding the town gate thought the bus left Llamac at 2:00 PM. We have learned through much trial and error that in South America, if someone two days’ walk from a town gives you information about that town, it is more likely to be incorrect than correct. We assumed the bus time was probably not correct, but nonetheless it was a decent goal. We were on the trail by 6:00 AM with headlamps and down jackets. When we decided we were on track to meet our deadline, we relaxed a bit, and of course, that was when we took a wrong turn and lost some time.
When we finally found the correct trail, we came across two hikers with their guide. He told us the bus left at 12:30 or 1:00 PM. Danny ran down the trail to Llamac, only to learn we missed the 12:30 bus and there would not be another one until the next day. No one in Llamac owned a car, but someone owned a moped, and we thought about hiring him to shuttle us to Chiquian, the closest town in which we could find a taxi or bus to Huaraz. Since it was only 25 kilometers away, and we had several hours of daylight to spare, we decided to walk. Not twenty minutes into our trek on the road, we threw out our thumbs at a large truck spitting up gravel dust. The driver let us ride in the back of the flat-bed, and we sat on the spare tire and gripped anything we could find to stay put. Through dust and angular switchbacks down and up the river valley, we enjoyed a thrillingly wild ride to Chiquian. There we caught the first of three taxi and bus rides back to Huaraz, where we ate out for dinner. Twice.

This was the best photo Danny could snap while tightly holding on to the ropes securing the giant spare tire that we used as a seat.
| Category | Function | Item | Weight (g) |
| Worn/Used | Pants | REI Adventure Pants | 340 |
| Shirt | Icebreaker Bodyfit SS Atlas | 153 | |
| Icebreaker LS Chase Zip | 255 | ||
| Underwear | Icebreaker Bodyfit Boxers | 88 | |
| Socks | Generic, thin, lowcut | 28 | |
| Shoes | Lafuma Sky Racer | 964 | |
| Sunglasses | Generic | 20 | |
| Watch | High Gear Altimeter Watch | 57 | |
| Sun Hat | Montagne Dakar | 71 | |
| Trekking Pole | REI Peak UL Pole | 178 | |
| Map | 30 | ||
| Clothing Carried | Extra Socks | Generic, thin, lowcut | 28 |
| Icebreaker Hiker Lite Crew | 79 | ||
| Baselayer Bottom | SmartWool LT Bottoms | 170 | |
| Midlayer | MontBell Thermawrap Parka (2007) | 360 | |
| Shell | Rab Drillium | 340 | |
| Outer Layer | Rab Microlight Alpine Jacket | 348 | |
| Headwear | Generic fleece beanie | 57 | |
| Camp Shoes | Generic Crocs | 113 | |
| Gloves | Black Diamond Liners | 34 | |
| Sleep System | Sleeping Quilt | GoLite Feather (2003) (Modified 2-person quilt) | 680 |
| Stuff Sack | Granite Gear AirVent HD Dry Bag | 54 | |
| Pads | MontBell U.L. 90 (x2) | 578 | |
| Therm-a-Rest Z-rest (3 sections) | 57 | ||
| Pillows | MontBell U.L. Pillow (x2) | 127 | |
| Shelter | Tent | Tarptent Double Rainbow (w/out pole) | 907 |
| Ground Sheet / Tarp | Equinox Globe Skimmer UL 4’x8′ | 142 | |
| Cook System | Stove | MSR Superfly | 130 |
| Pot | Evernew 1.3 Titanium | 170 | |
| Water | Extra Plastic Bottle, 2L | 28 | |
| Purifier | First-Need XL | 453 | |
| Essentials | Headlamp | Black Diamond Spot | 128 |
| Repair Kit | Batteries, duct tape, sew kit, montbell patch kit, bleach | 170 | |
| Med Kit | Med book, various meds, latex gloves, matches, bandages, iodine, etc | 227 | |
| Photography | Panasonic DMC-TS1 | 181 | |
| Extra Battery | 20 | ||
| Joby Gorillapod | 45 | ||
| Pack System | Pack | Mountainsmith Ghost (2005) | 1020 |
| Packliner | Garbage Bag | 30 | |
| Consumables | Food | 800g/day x 6 | 4800 |
| Fuel | Doite Canister | 250 | |
|
6676 g / 6.7 kg |
||
|
5050 g / 5.1 kg |
||
| Max Carried (A+B) | 11726 g / 11.7 kg |
||
|
2184 g / 2.2 kg |
||
| Skin Out Total (A+B+C) | 13910 g / 13.9 kg |
||
| Category | Function | Item | Weight (g) |
| Worn/Used | Pants | Prana Janice | 184 |
| Shirt | Generic Synthetic Tank Top | 79 | |
| Underwear | IceBreaker Nature Bikini | 85 | |
| UnderArmor Sports Bra | 57 | ||
| Socks | SmartWool PhD Running Light Micro | 40 | |
| Shoes | Vasque Velocity w/orthotics | 879 | |
| Sunglasses | Generic | 31 | |
| Watch | Timex Ironman | 28 | |
| Sun Hat | Montagne Dakar | 71 | |
| Trekking Pole | REI Peak UL Pole | 178 | |
| Clothing Carried | Underwear | Generic synthetic (x3) | 142 |
| Extra Socks | SmartWool PhD Running Light Micro | 40 | |
| Synthetic loafer socks (x2) | 35 | ||
| Icebreaker Hiker Mid Crew | 62 | ||
| Baselayer Bottom | Icebreaker Rapid Leggins | 170 | |
| Baselayer Top | SmartWool MW Long-Sleeve Zip | 198 | |
| Midlayer | MontBell Thermawrap Parka (2009) | 303 | |
| Shell | Rab Momentum | 312 | |
| Outer Layer | Rab Microlight Alpine Jacket | 340 | |
| Gloves | Generic Synthetic Liners | 22 | |
| Headwear | REI Fleece Beenie | 51 | |
| Essentials | Toiletries | Toothpaste, tooth brush x2, floss | 56 |
| Sunscreen, hand sanitizer, facial wipes, lipscreen, mosquito spray | 283 | ||
| Entertainment | Mini playing cards and homemade Rummikub set | 42 | |
| Headlamp | Princeton Tec | 93 | |
| Water Bottle | Nalgene Small Mouth, 1L | 170 | |
| Utensils | Vargo Steel Spork | 34 | |
| Jetboil Extendable Spoon | 17 | ||
| Knife | Swiss Army Classic | 37 | |
| Bowl | Orikaso Bowl x 2 | 79 | |
| Pack System | Pack | GoLite Jam2 (2008) | 680 |
| Frame | Double Rainbow Pole | 212 | |
| Packliner | Garbage Bag | 30 | |
| Consumables | Food | 800g/day x 8 | 6400 |
| Water | Filled Nalgene | 453 | |
|
3408 g / 3.4 kg |
||
|
6853 g / 6.9 kg |
||
| Max Carried (A+B) | 10261 g / 10.3 kg |
||
|
1632 g / 1.6 kg |
||
| Skin Out Total (A+B+C) | 11893 g / 11.9 kg |
||
Planning a 2-day, 20-mile trip with my 11-year-old brother meant going SUL, as he wasn’t going to tolerate being babied with a lesser load.
You don’t have access to view this content.
I love gear, but I hate paying for it. Could I get a lightweight shelter, pack, sleeping bag, and sleeping pad for under $100? And if I could… how long would it last me?
 My Wal-Mart test kit.
Part of me loves gear. Lots of me hates paying for it.
When it comes to lightweight backpacking, why is cost so often the factor that weighs down a would-be hiker or torments an outdoorsperson looking for replacement gear? Space-age fabrics and titanium everything do loads to lessen your weight, but do an even better job lightening your pocketbook.
There are ways to skirt the cost, but they aren’t always the most efficient. Searching for end-of-season sales might save a few dollars, but puts you at the mercy of the stuff no one wanted for the season that just ended. Making your own gear is preferable, but tough when it comes to fashioning your own backpack, sleeping bag, or tent (if you want one).
I rolled this problem around in my head one day when getting ready for a weekend hike. I was making my food list when it dawned on me: where does everyone go for the cheapest stuff they can find?
Of course: Wal-Mart!
After my epiphany, I set over to Wally World (and to their online store) to see if $100 would outfit me for a good, lightweight hike. I focused on four things: a pack, a tent, a sleeping bag, and a sleeping pad. Those are usually the most expensive items a lightweight hiker needs on each trip (food, mess, and clothing/footwear are all much more subjective in my opinion).
My mission: outfit myself with these four pieces of equipment for $100 or less.
I scoured Wal-Mart’s website and store to find a backpacking outlay that most closely matched my getup for the times I’ve trekked the Appalachian Trail (no thru hikes, just a few section hikes). I succeeded in outfitting a rig that actually weighed less than my standard getup. I also noted that Wal-Mart’s huge stores have opportunities to find alternate items that can easily be converted into lightweight hiking gear.
Weight is the top priority, and looking at the labels on many of the products I picked up doesn’t help. In almost every case, the items I bought at Wal-Mart were mislabeled when it came to weight. For example, the backpack weighed 3.4 pounds instead of the listed 6.4 pounds. A great find, yes, but some of that weight must have come out of the hip belt and shoulder strap cushions. A lack of internal dividers may have also contributed.
Other mislabeled weights:
Another thing to note is that Wal-Mart’s supplies look like they wouldn’t last more than a week on the trail. I guess durability is something you sacrifice when you’re looking exclusively at cost.
Weight: 3.4 lb / 1.5 kg
Cost: $35 on sale, online
Support: Compared to both my Cerro Torre and my modified Columbia day-pack, this bag has little to no support. It’s an internal frame, and it has more internal room than my biggest long-hike pack – both things I didn’t expect to find at Wal-Mart. The straps will begin to dig in pretty quickly, especially if you overload this bag, which is tempting due to its large single interior compartment. The internal frame itself is light, which is good, but the whole bag seems flimsy, and repeated or long-term use will take its toll quickly. It rests well on the body, but the thin straps mean you have to really tie it onto yourself to get a good feel out of it.
Space: I could fit all of the Wal-Mart gear (tent, pad, bag, mess, stove) into this bag. The thin wall fabric meant difficulty in organizing and balancing the pack, but this fabric also cut down on weight.
Strength: Those thin walls don’t inspire confidence for the long trail. This cheap pack will last about as long as you’d think $35 would last for a larger backpack. Zippers are also a concern, but they’re not the worst I’ve seen on a backpack.
Overall: I liked the pack and would use it for a 2-3 day journey. Problem is, I don’t see it lasting much longer after that. Good beginner pack that I believe would help a friend get an initial feel for backpacking.

Weight: 2.8 lb / 1.3 kg
Cost: $24
Ease of setup: This tent needs to be staked and comes with standard pin stakes. You can easily substitute lighter stakes for this shelter. The rain fly is cumbersome to get on with one person. You might get a little frustrated with the classic design (not a dome tent), but we’re talking weight and economy here, not aesthetics.
Room: Lots of room inside, though I couldn’t share it comfortably with my wife, despite the packaging’s assurances that two can sleep in it. Great for a solo hike if you prefer an actual shelter.
Rain: Make sure to seal this tent, and all tents, before use.
Overall: It’s a good weight for a good price ($24) if you want to take a tent. Problem is, if you’re experienced, you can make a nice tarp shelter for much less weight and less money. A beginner might not want to worry about advanced lean-to-ism, so this is a good option (Note: both Wal-Mart and Target have several backpacking tent options both in-store and online).

Weight: 2.6 lb (surprise!) / 1.2 kg
Cost: $9
Comfort: I performed this experiment in the summer, so this bag was not comfortable for me personally – too warm. I’m sure up a mountain this 45 F (7 C) bag would be fine. Easy to get into, easy to get out. Not for cooler weather, as this is a standard rectangular bag.
Compressibility/storage: The bag leaves a lot to be desired in compressibility. The new version has a lot of loft, but it doesn’t get much smaller than the bag it comes in (it’s not a compression bag, either). Tying it with shoelaces or extra para-cord for other uses helps, but I’d like it to get smaller.
Overall: It’s a sleeping bag. If you play your cards right, it can help, but this is an area where going with a more expensive, lighter, and more easily compressible item will pay big dividends.

Weight: 1.2 lb / 0.5 kg
Cost: $10
Comfort: This is a standard foam pad without egg crate bumps or inflation. There is minimal support and comfort on ground, pavement, or hardwood flooring.
Compressibility/storage: The pad rolls up just like any other pad and is not very compressible.
Overall: A good simple pad. Another case where, if you’re just starting out, you might want to invest a bit more in a lighter pad with more support, possibly an inflatable one. If you’re feeling creative, you can cut strips off this standard pad and reinforce the shoulder straps of your bag for more shoulder comfort. You won’t be losing much from the pad.

The gear performed well on my one-night jaunt on the trail. The tent set up OK and proved to be roomy enough to enjoy. I didn’t see any rain on my trip; you will have to rig your own rain protection over the Wenzel as the seams and walls seem pretty thin. The bag kept me warm (when I was in it) but I tend to be a warm sleeper anyway, so I kept it open most of the night. It was soft and felt like it would insulate pretty well at the 45 F (7 C) rating. The sleeping pad was a standard thin sleeping pad. I normally use an inflatable pad, so this foam-only version was a little less plush. It did insulate from the ground well and kept roots or the odd stone (which I found under the tent after my test) from poking into me. The bag sat well on a SUBSEQUENT three-mile side hike DURING THE TRIP and had plenty of room for clothing, first aid, food, cooking, and even entertainment. The bag was by far the best buy of the kit: I’ll be using it until it falls apart, now that I’ve reinforced the shoulder straps.
I’ll be using this set-up for as long as it lasts, which I doubt will be very many trips. As the old adage goes: you get what you pay for. My estimate is that for this set-up, you’re paying for about a week’s worth of overnight backpacking, maybe two.
That’s not to say this is a bad deal. Just as you might not buy long-term furniture or gourmet food at a Wal-Mart, you shouldn’t expect top-of-the-line ultralight hiking gear. This is something to consider when weighing the cost versus the utility and longevity of these products. You’re getting most of the things you need for a good hiking trip in one, cheap place. They’ll work, and they’ll last you through the trip. Think of it as paying for one night in a motel room. Here, however, you’re getting a week in nature’s hotel room.
It’s a good set-up for shorter trips where you don’t want to worry about ripping your gear or replacing it afterward. It would also be nice for beginner backpackers who aren’t sure they are into the sport enough to spend the big bucks to get the better gear.
Does not include weight for food, clothing, or first aid.
| Listed Weight (lb / kg) | Actual Weight (lb / kg) | Price | |
| Backpack | 6.4 / 2.9 | 3.4 / 1.5 | $35.00* |
| Tent | 3.4 / 1.5 | 2.8 / 1.3 | $24.00* |
| Sleeping Bag | 3.0 / 1.4 | 2.6 / 1.2 | $9.00 |
| Sleeping Pad | 1.0 / 2.2 | 1.2 / 0.5 | $10.00 |
| Total | 13.8 / 6.3 | 10.0 / 4.5 | $78.00 |
| *Available online only. | |||
Results of 80 days (750 hours) of field testing of the new SPOT2 in Alaska, the Andes, the Pyrenees, and the Lower 48, including the Sierras and a southwest canyon system.

The new SPOT2 (right) is almost half the size and weight of its predecessor. It is easier to operate and delivers far greater message reliability, especially in Tracking Mode.
As we reported at the Press Release of SPOT Satellite GPS Messenger (SPOT2) at the 2009 Outdoor Retailer Summer Market, the folks at SPOT addressed many of our suggested improvements to the original SPOT1 in the Generation Two: SPOT Satellite GPS Messenger.
Now, after 80 days (750 hours) of field-testing of the new SPOT2 on three continents, we report improvement in three significant areas:
In the field, the SPOT2 is easier to use and delivers a much higher proportion of Tracking Point messages than its predecessor. In addition, the Web-based software that supports SPOT is also better and now has a separate social networking site, SPOT Adventures, to share your adventures/data with others. In summary, the combination of the physical SPOT2 unit and supporting software is beginning to look more like a mature technology.
What impressed us most about the SPOT2 was its performance in a difficult transmission situation, a “typical” southern Utah canyon system. On a five-day slickrock canyon backpacking trip, the SPOT2 successfully delivered a daily average of ~90% of Tracking Point messages. Every OK message made it out. We saw similar message delivery performance on bushwhacking days in Alaska.
| Weight | 4.17 oz, 118 g with batteries – BPL measured (4.8 oz, 137 g with carry case and biner clip) |
| Size | 3.7 x 2.6 x 1.0 inches – 93 x 65 x 25 mm – BPL measured |
| Batteries | 3 AAA – lithium only |
| MSRP | $170 ($150 retail) |
| Basic Service | $100 for one year (does not include Tracking Mode) |
| Tracking Service | $50 in addition to yearly service |
| Includes | Armband, case, and carabiner clip |

SPOT2 weight.
For those unfamiliar with how SPOT operates, please see our review of the original SPOT1, SPOT Satellite Personal Tracker – Full Review.
As we reported at the press release on SPOT 2:
Of all Gen 2’s improvements… the GPS chipset and improved antenna/transmission matter the most. Only these have the potential to improve the reliability of SPOT’s message delivery, especially in areas with tree cover or in deep canyons… It will take some time and field-testing to determine if Gen 2 has significantly improved message delivery reliability over Gen 1.
We are happy to report that the SPOT2 has made significant improvements.
In our field testing, the SPOT2 has improved the reliability of Tracking Point message delivery – probably our single greatest gripe with the original SPOT1. While not tested as extensively, the increased reliability in Tracking Points we measured should also translate into a higher reliability in transmitting the OK, Custom, Help, and SOS messages. We had 100% success of transmitting OK messages in our 80 days of testing.
The increased message reliably for SPOT2 is probably due to (listed in order of greatest contribution):
In “typical” mountain conditions (the Sierras, Andes, and Pyrenees, and the Talkeetnas in Alaska), the SPOT2 had a Tracking Point message reliability approaching 100%.
But what really impressed us about the SPOT2 was its performance in a difficult transmission situation, a “typical” southern Utah canyon system. On a five-day backpacking trip, even in a deep canyon with significant vegetation at times, the SPOT2 successfully delivered 88% of expected Tracking Points (best day was 98%). Every OK message made it out. Even on its worst day, it delivered 83% of Tracking Points. This is more than adequate for your emergency contacts to accurately track your trip.

A plot of our Tracking Points in a southern Utah canyon system. The SPOT2 is surprisingly reliable at transmitting Tracking Points in a deep canyon as indicated by the tightly grouped points with no obvious gaps.
Prior to using the SPOT2 in the Utah, I had warned my emergency contacts to not expect much in the way of Tracking Points due to the depth of the canyons we’d be traveling in. To all our surprise, it was easy to track our progress via the SPOT2 Tracking Points, even in the deep and narrow sections. After this experience, I have confidence that with a little intelligence on selecting a location, that the SPOT2 would successfully get HELP and SOS messages out of many popular southwest canyon backpacking destinations (but probably not very deep slots like Buckskin Gulch).
In Alaska, we averaged more than 90% of the Tracking Points on our bushwhacking days – also not the easiest transmission conditions due to frequently dense vegetation cover.
This canyon and bushwhacking data is a bit more impressive because in our field testing we didn’t bother to be particularly careful about SPOT2 use:
The combination of a very deep canyon WITH heavy tree cover was the only time we had significant gaps in Tracking Point transmission. On a three-day trip in coastal California, the SPOT2 had two Tracking Point gaps of approximately an hour. Both were from the bottom of a ~2000 feet deep, narrow canyon with trees. Even so, we had similar daily tracking percentages as on the southern Utah canyon trip, around 90%. Daily tracking percentages on the worst day (the day with the two gaps) was 82% and still more than sufficient to track the trip. Other days it was 90% or better.
SPOT2 is a significant improvement in the ease of operation over its predecessor and addresses the majority of our operational gripes with the original SPOT1. Most operations are fairly intuitive and the operational status of the unit easily understood. Each function has its own button, as well as its own status LED. There are also status LEDs for “GPS Fix” and “Message Sending.” There is a short SOS/basic instruction placard on the back of the SPOT2, and it ships with more detailed instructions (Quick Reference Guide) printed on a 2 x 3.5 inch fanfold plasticized card stock that is easily carried on the trail. With a new and much faster GPS chipset (acquisition in seconds rather than minutes), the SPOT2 gains a fix much faster and therefore operates much faster than its predecessor. In summary, both Amy and I are satisfied with the basic operation of the SPOT2.

Rear view of the SPOT2 showing SOS/basic instruction placard and the Quick Reference Guide printed on a 2×3.5-inch fanfold plasticized card stock that is easily carried on the trail.
A few functional observations:
Utilizing fully charged Energizer Ultimate 8x AAA Lithium batteries under the specified usage environments, the following guidelines apply to the anticipated battery life of the SPOT Satellite GPS Messenger:
| Mode | 100% clear view of sky | 50% clear view of sky |
| SOS (or Help if reactivated) | ~ 6 days | ~3 days |
| Track Progress | ~ 7 days | ~ 3.5 days |
| Check-in (OK) or Custom Msg | ~ 700 messages | ~ 350 messages |
Testing of SPOT under common usage environments has shown that battery performance can be degraded in operating environments where SPOT’s GPS must take a longer time to acquire your GPS location, such as trying to send a message indoors or under extreme canopies. For optimal performance, please try and utilize SPOT in locations with a clear view of the sky with the logo side up. SPOT also recommends that you carry extra Energizer Ultimate 8x AAA Lithium batteries.
| Mode | Mixed field conditions/Mixed sky view |
| Track Progress (lithium batteries) | 5.0 to 5.8 days (120 to 140 hours) |
| Track Progress (alkaline batteries)* | ~1.7 days (40 hours) near 100% success + ~1.7 days (40 hours) degrading success Total of 3.4 days (80 hours) |
| *Not a manufacturer approved use. Batteries of unknown expiry date. | |
In warm to hot weather in the Pyrenees, one new set of lithium batteries lasted twelve days for a total of 120 hours in Tracking mode, plus twelve OK messages, in total approximately five days of operation. This is right between the minimum and maximum operation time claimed by SPOT. Almost perfect delivery of six data points per hour was consistent until the unit shut down completely. The red low-battery warning came on after about nine days (90 hours), however, the unit continued to transmit data successfully until the batteries were completely dead.
In a combination of field testing in Peru finished up with testing outside Alan’s home (fairly benign transmission conditions) the SPOT2 lasted approximately 140 hours in Tracking mode until exhausted (including two OK messages per hiking day). In combined use in Alaska and a southern Utah canyon system, with a new set of lithium batteries, the red low-battery warning came on after about 100 hours of operation.
SPOT clearly specifies to only use lithium batteries. However, on a long walk where battery resupply is from small shops (for example on the Haute Route Pyrenee), lithium batteries are not available. As such, Amy used four sets of alkaline batteries over 31 days.
On average, the alkaline batteries gave approximately 40 hours of reliable delivery (at or near six data points per hour) followed by approximately 40 hours of degraded delivery, degrading to as low as 50% success. The red low-battery warning light came on after about 40 hours of use, roughly concurrent with the start of the degraded delivery. When delivery rates were low, the delivery pattern was often to show a couple of hours of data points at ten minute intervals, followed by a couple of hours with no data points. We cannot substantiate this speculation, but the pattern in the data suggests that when the alkaline batteries were low, delivery would fail if any conditions were not optimal (for example if the device had slipped into a vertical orientation, had less than perfect sky view, or less than optimal satellite configuration), but if the conditions were optimal, then delivery would still be consistently successful. Note: The battery expiry date/freshness was unknown as they were bought from tiny shops in fairly remote locations.
The manufacturer recommends a horizontal position for the most reliable message delivery. But the SPOT2 does not come with an effective “out of the box” method to mount the unit horizontally on a backpack. Most attempts to mount the SPOT2 with the manufacturer supplied mounting hardware (armband strap, or biner-clip), or just stuffing the SPOT2 in a pack pocket, result in the unit hanging vertically. While this is not the optimal transmission orientation, it turns out to be less of a problem for SPOT2 than the original SPOT1. Even with a “lazy person’s” vertical mounting, we had a high percentage of successful deliveries from SPOT2 even in difficult situations.

Lazy person’s vertical mounting of the SPOT2 used when field testing in a southern Utah canyon system (biner clipped to top pocket closure strap). While not horizontal, we still had a high percentage of successful deliveries from SPOT2, even in difficult conditions.

Horizontal mounting: Amy’s SPOT2 in a roughly horizontal position inside the pack. It rests on top of all the gear but under pack’s roll top closure (pack is shown from above with closure open). This method works well with roll top closures, common on many lightweight backpacks. Notes: 1) The SPOT2 is tied to a loop inside her pack. It never gets untied, so the only way it could get lost is if the whole pack is lost. 2) She has taped over three of the buttons in order to make absolutely certain they don’t get dispatched by mistake.
Amy’s under the roll top is only one solution for horizontal mounting on a backpack. We are certain that user ingenuity will devise many more methods for horizontal mounting.
Note: The following use of SPOT2 messages and their meaning is only used as an example. Readers are obviously free to use and interpret SPOT2 messages as they see fit. Alan carries a satellite phone and Amy does not. Therefore, there are some differences in our protocols.
Amy and I have been emergency contacts for each other’s trips since well before the advent of the original SPOT1. We both use the SPOT2 and have agreed upon the following interpretations for the four types of SPOT2 messages. Note that we use the Custom Message, Help Message, and SOS Message to indicate increasing severity of problems.
OK = We are OK and just checking in. Will generally do this starting hiking for the day at the end of the day when we make camp. We may occasionally send an OK at lunch, a summit, or significant point of interest. Also used to indicate that a significant deviation from route or schedules is “OK,” and to not worry.
Alan’s Custom Message = There is something up but it does not require rescue at this point. Start to closely monitor your phones (including mobile), email, trip blog, etc. Somebody is feeling ill, we have an orthopedic issue, terrible weather has set in, or we have significantly changed route or itinerary under duress, etc.
Amy’s Custom Message = There is something up, but it does not require rescue at this point. Monitor our SPOT locations and messages closely. Illness, injury, bad weather, unexpected ground conditions, etc.
Help = We have a problem we cannot solve and require rescue in 24-72 hours. Possible reasons include being lost or non-life-threatening illness/injury that is serious enough that the ailing person should not be left alone while the other goes for help. We are safe and this is not urgent, but we need assistance.
911 = We have a major problem that requires immediate rescue. Although you won’t receive this message, you are on the list to be contacted if it is sent out. (See below). We will not send this message unless we believe there is a serious threat to life or limb.
Alan carries a sat phone, and his protocol is this: Start to closely monitor your phones (including mobile), email, trip blog, etc. for messages, calls, and voice mails from our sat phone. Absence of messages from both SPOT2 and sat phone for 24 hours indicates a significant problem, since it is unlikely that both the SPOT2 and the sat phone will fail and that we haven’t managed to move into a good transmission area to send out some sort of message.
Amy does not carry a satellite phone, and her protocol is this: If there are no tracks or SPOT2 messages, it does NOT mean that we have a problem. It could be one of many reasons, but you should NOT worry about it. (dead battery, device lost or damaged, etc). In this case revert to protocols used before we started carrying SPOT2: assume all is well until 24 hours after our expected trip completion time, at which point Responsible Party should notify the appropriate agency to initiate SAR.
If the track shows regular progress and/or there are daily OK messages, assume that all is well, even if hikers are off course or out past their planned trip completion time. This would be a normal scenario if a trip is delayed or rerouted due to weather, unexpected on-the-ground conditions, or minor injury/illness.
In the SPOT2 account, the text for the 911 (SOS) message includes the following information:
The SPOT2 user leaves their login/password information with the Responsible Party/Emergency Contact, in case there are any problems with the account.
Pre-trip, the SPOT2 user sends tests for all four types of messages, OK, Tracking, Custom, and Help to all Responsible Parties/Emergency Contacts and makes sure they receive all email and text notifications, and that all messages show up on the Web tracking page.
Disclosure: The manufacturer provided this product to the author and/or Backpacking Light at no charge, and the author/BPL has/will return this product to the manufacturer upon completion of the review period of one year. The author/Backpacking Light has no obligation to review this product to the manufacturer under the terms of this agreement.
MontBell’s body-hugging stretch technology is lightweight and adds warmth, yet the bag extends to accommodate a wide range of sizes, shapes, and sleeping positions.

The MontBell UL Super Spiral Down Hugger #3 weighs 21 ounces (595 g) for size Regular and has more stretch than the UL Spiral Down Hugger #3.
Introduced in 2009, MontBell’s Spiral technology is an alternative way to create a stretchy sleeping bag and save some weight to boot. The Spiral technology is best described in their own words: “By integrating a woven fabric ‘cut on the bias’ and orienting the fabric’s warp and weft threads at 45 degrees to major seam lines, the sleeping bag becomes more fluid or elastic in nature. Additionally, ‘spring like’ crimped fibers are used in the weave of the fabric to capitalize on their inherent stretch properties.” Rather than the traditional horizontal or vertical orientation of the down tubes, they are oriented on a 45 degree angle and appear to spiral around the sleeping bag.
For 2010, MontBell has extended their Spiral Stretch technology to their entire line of sleeping bags. Thus the former “UL Super Stretch Down Hugger #3” is now the “UL Super Spiral Down Hugger #3.” That’s a mouthful, but it is descriptive. Whereas the previously reviewed MontBell UL Spiral Down Hugger #3 uses only the Spiral Stretch technology, the MontBell UL Super Spiral Down Hugger #3 (reviewed here) is a combination of the new Spiral Stretch technology plus the original Super Stretch technology (elastic stitching in the seams to create small “gathers” in the quilting), which allows the bag to contract and expand even more. So what are the differences between these two bags, and are these differences meaningful for backpacking?
The Spiral Down Hugger and Super Spiral Down Hugger share MontBell’s new 12 denier Ballistic Airlight sleeping bag fabric. Switching from 15 to 12 denier fabric plus spiral construction reduces the weight of a sleeping bag by about 2 ounces (57 g). In the Super Spiral series, that weight is added back due to the elastic stitching and slightly different bag lengths.
The common features of Spiral Down Hugger #3 and Super Spiral Down Hugger #3 are: 10 ounces (283 g) of 800 fill power down, 30 F (-1 C) temperature rating, spiral construction, 12 denier Ballistic Airlight nylon shell with Polkatex DWR, sculptured hood, and YKK #5 CN auto-locking zipper. The Super Spiral Down Hugger #3 no longer has a footbox drawcord to snug the bag around the feet, or shorten the bag.
The following table summarizes the differences between the two bags for size Regular.
| UL Spiral Down Hugger #3 | UL Super Spiral Down Hugger #3 | |
| Weight | 19 oz (539 g) | 21 oz (595 g) |
| Zipper Length | 59 in (150 cm) | 67 in (170 cm) |
| Shoulder Girth Range | 57-68 in (145-173 cm) | 53-75 in (135-191 cm) |
| Bag Lengths | Regular fits to 5 feet 10 inches (178 cm), Long fits to 6 feet 4 inches (193 cm) | Regular fits to 6 feet (183 cm), Long fits to 6 feet 6 inches (198 cm) |
| Cost | US$249 | US$279 |

MontBell UL Super Spiral Down Hugger #3.

The purpose of MontBell’s stretch system is to gently draw the bag around the sleeper, which increases warmth by eliminating excess volume inside the bag. The left photo shows the bag’s shell relaxed, and the right photo shows the same area extended. The stretch system allows the bag to accommodate people of different sizes and shapes and provide freedom of movement.
I have always been impressed with MontBell’s Ballistic Airlight nylon shell fabrics and Polkatex DWR finish, but the new 12 denier shell on the Spiral Down Hugger is truly remarkable. It’s the softest sleeping bag fabric I have seen, and it sheds water like a duck’s back.

The Super Spiral Down Hugger’s hood (left) covers the face very well and draws easily via a simple braided cord and cordlock. On the inside, the bag has a thinly insulated flap that covers the zipper (right), rather than a puffy down-filled draft tube. The zipper has inside and outside pulls, and there is a Velcro tab at the top of the zipper to secure it.

I tested the Super Spiral Down Hugger #3 on seven backpacking trips, with nighttime temperatures ranging from 25 to 52 F (-4 to 11 C) in various shelters, like the Hyperlite Mountain Gear Echo 1 shown.
MontBell has revised bag sizing in the Super Spiral series to conform with most other manufacturers; size Regular now fits to 6 feet (183c m) and size Long fits to 6 feet 6 inches (198 cm). I tested a size Regular and found it perfect for my 6-foot/170-pound (183 cm/77 kg) frame. There is all the room you could ever want inside to wear extra clothing to extend the bag’s warmth.
The Super Spiral Down Hugger (and the Spiral Down Hugger) has a simple and lightweight zipper track (see photo above) that works. I experienced very few instances of zipper snagging in my testing. Rather than a puffy down filled draft tube along the zipper, MontBell uses a thinly insulated flap, much like the storm flap on a jacket. Although I did not feel any drafts or cold spots along the zipper, it quite likely does not insulate as well a down-filled draft tube.
I measured the bag’s average double-layer loft at 4.4 inches (11.2 cm), which gives a single-layer loft of 2.2 inches (5.6 cm). From our table of estimated temperature ratings based on measured loft (read our Backpacking Light Position Statement on Sleeping Bag Temperature Ratings), 2.2 inches (5.6 cm) of single-layer loft translates to about a 20 F (-7 C) rating, so the Spiral Down Hugger #3 appears to be conservatively rated (please take the time to read the referenced article and note that sleeping bag warmth depends on a number of factors).
The Spiral Down Hugger #3, is not the loftiest bag around with a 30-32 F (-1 to 0 C) temperature rating (see comparison table below). I found its warmth to be “average.” In my field testing, my methodology was to wear my basic sleepwear (dry wool socks plus microfleece top, bottom, and cap) inside the bag initially, then add insulated clothing later in the night if I got cold, noting the time and temperature when I got chilly. On nights when the temperature dropped down to freezing just before sunrise, I started getting chilly around 4:00 a.m. when the temperature was around 35 F (2 C). After donning my insulated clothing (or better yet putting it on the evening before), I was able to stay warm in the Spiral Down Hugger down to 25 F (-4 C).
I tested the bag’s water repellency by placing a puddle of water on the bag and checking for leakage after an hour. Not a drop soaked through, and after removing the water, there was no evidence of a puddle being there. This was verified in my field tests, where the bag did not absorb any water when I brushed against wet tent walls, and contacted a wet tent floor in another case.

The stuff sack provided is tapered and has two drawcords to stuff the bag down to bread loaf size. It’s simply too tight. In my opinion, the two drawcord design is overkill, extra weight, and overstuffing may damage the down over time. I prefer a stuff sack that does not overstuff a down bag, although it takes up a little more room in my pack.
The following table compares the MontBell UL Super Spiral Down Hugger #3 with some popular 30-32 F (-1 to 0 C) rated ultralight mummy style down sleeping bags. All of the bags have baffled construction, and the data are manufacturer specifications for a size Regular bag.
| Manufacturer | Model | Temperature Rating F ( C) | Single Layer Loft in (cm) | Weight of Down oz (g) | Fill Power | Total Weight oz (g) | Cost US$ |
| MontBell | UL Super Spiral Down Hugger #3 | 30 (-1) | 2.2 (5.6) | 10 (283) | 800 | 21 (595) | 279 |
| MontBell | UL Spiral Down Hugger #3 | 30 (-1) | 1.9 (4.8) | 10 (283) | 800 | 19 (539) | 249 |
| Mountain Hardwear | Phantom 32 | 32 (0) | 2.0 (5.1) | 10 (283) | 800 | 22 (624) | 290 |
| Western Mountaineering | SummerLite | 32 (0) | 2.0 (5.1) | 10 (283) | 850+ | 19 (539) | 315 |
| Marmot | Hydrogen | 30 (-1) | 2.5 (6.4) | 10 (283) | 850+ | 25 (709) | 319 |
| The North Face | Beeline | 30 (-1) | 2.4 (6.1) | 10 (283) | 850+ | 22 (624) | 279 |
| Sierra Designs | Nitro 30 | 30 (-1) | 3.0 (7.6) | 12 (340) | 800 | 26 (737) | 289 |
By the numbers, the MontBell UL Super Spiral Down Hugger compares favorably with other bags in terms of down quality, fill weight, loft, weight, and cost.
I really like the Super Spiral Down Hugger’s soft lightweight shell fabric, fit/roominess, non-snagging zipper, hood, and low weight. It’s an excellent choice for an ultralight 30 F (-1 C) rated sleeping bag. It is not quite as warm as the Marmot Hydrogen and Sierra Designs Nitro 30, but it is not as heavy either. I have not personally tested the Western Mountaineering SummerLite, so I can’t comment on how well it compares in warmth.
The MontBell UL Super Spiral Down Hugger #3 stands out for its variable girth feature, superb shell fabric, nearly snagless zipper, easy to operate hood closure, and exceptionally light weight. This bag “hugs” your body as claimed, yet it easily expands as needed to accommodate different size people, varying amounts of clothing worn inside the bag, and different sleeping positions. Although the bag’s warmth is only average among its peers, that is not a particular problem for me since I typically wear my camp clothes (wool socks, insulated jacket and pants, fleece cap) in my sleeping bag anyway. The colder it gets, the more clothing I put on, so I typically have no problem staying warm down in a 30 F (-1 C) rated sleeping bag down into the mid 20s F (-7 to -1 C).
How does the Super Spiral compare with the Spiral Down Hugger? It provides a wider range of shoulder and hip stretch and has a longer zipper. The sizing for sizes Regular and Long are slightly different. Since I am a slender person, I would personally opt for the Spiral Down Hugger and save US$30 and 2 ounces (57 g). However, the Super Spiral Down Hugger would be a better choice for a larger person.
| Manufacturer | MontBell (www.montbell.us/) |
| Year/Model | 2010 UL Super Spiral Down Hugger #3 |
| Style | Hooded mummy bag with full-length zipper |
| What’s Included | Sleeping bag, stuff sack, cotton storage bag |
| Fill | 800 fill-power down 10 oz (283 g) size Regular 11 oz (312 g) size Long |
| Construction | Multi-Tube Construction with Flow Gate technology, 5.5 in (14 cm) baffles |
| Measured Loft | 4.4 in (11.2 cm) average double-layer loft Manufacturer Specification: “about 4 inches (10 cm)” |
| Manufacturer Claimed Temperature Rating | 30 F (-1 C) |
| Stuffed Size | 5.5 x 11 in (14 x 28 cm) |
| Weight | Size Regular tested Measured Weight: 1 lb 5.1 oz (598 g) Manufacturer Specification: 1 lb 5 oz (595 g) |
| Sizes | Regular fits to 6 ft (183 cm) Long fits to 6 ft 6 in (198 cm) |
| Fabrics | Shell and lining are 12d Ballistic Airlight nylon 0.86 oz/yd2 (29 g/m2) with Polkatex DWR. Fibers are solid core. |
| Features | Spiral stretch system, three-quarter-length two-way auto-locking zipper with inside and outside pulls, draft flap on inside of zipper, Velcro tab at top of zipper, sculptured hood, braided drawcord and cordlock closure on hood, tapered stuff sack with two drawcords, heat transfer logos |
| MSRP | Regular US$279 Long US$299 |
Disclosure: The manufacturer provided this product to the author and/or Backpacking Light at no charge, and it is owned by the author/BPL. The author/Backpacking Light has no obligation to review this product to the manufacturer under the terms of this agreement.
The Therm-a-Rest Haven is a simple sleeping bag: a zipperless down mummy bag with a bottom opening and pad straps that qualify it as a top bag. At about a pound and a half the Haven is light, packs small, and is relatively affordable for its (claimed) 20 F (-7C) rating.

The Therm-a-Rest Haven is part of a 2010 expansion of the Cascade Designs Sleep System, that was itself unveiled a couple of years ago. With designs that featured comfort ahead of low bulk and weight, the initial system targeted traditional campers. Presently the lone bag in the system’s new Fast & Light segment, the Haven is the first Therm-a-Rest bag for backpackers. Based on the specs, it seems to offer a light, compact, and affordable substitute for a typical 20 F (-7 C) down mummy bag. So, does it?
Viewed from most angles, the Haven is a typical mummy bag, sans zipper. Flip the Haven over, however, and you’re greeted by an elastic-edged opening that to me looks like a plant’s stoma as viewed through a botany class microscope. This partial underside puts the Haven in the top-bag category, but the design seems unique (because it has a hood and doesn’t open flat, the Haven is not a quilt). The opening extends from about the shoulders to mid-thigh and, as noted, is stretchy. Rather than use a fabric sleeve to attach a pad or mattress, the Haven has two straps that attach to strap loops at each end of the opening. Each 1-inch strap has an adjustable snap buckle closure and can be removed in seconds if not needed.
The full hood has a simple drawstring perimeter closure with thin cord and a tiny cord lock. A small snap-closure pocket, just below the hood opening to the right, is big enough for a watch, small flashlight, etc., but not glasses. With no zipper, there’s no draft tube, nor is there a draft collar.

In sum, the Haven is a simple mummy bag with a big hole underneath.
Haven specs list 11.6 oz (332 g) of 700 cubic inch goose down fill for the size long, 20 denier nylon ripstop shell with DWR finish and 30 denier calendared nylon taffeta lining. Heavier than some makers’ 10 denier and 15 denier shells, the Haven shell is also less delicate. Therm-a-Rest calls the fabric’s gray color “pewter” but in reality it’s a lot darker than, well, pewter. Call it “ouzel” and know that with this bag you’ll be able to blend invisibly with basalt should you so choose. While perhaps lacking a positive colorful impact on campsite cheer, it’s hard to imagine a more dirt-concealing color.
The down chambers are fully baffled including side baffles, so there’s no shifting the down between top and bottom to respond to the temperature (not too relevant in a top bag). The elastic around the bottom opening stretches wide, affording considerable mid-bag expandability.
The Haven’s materials and design place it in the mid-grade down bag category, which the price basically reflects.

Therm-a-Rest suggests using either a small tapered pad inside the Haven or a longer and/or rectangular pad outside, strapped underneath using the supplied straps. (They provided a size small ProLite to pair with the Haven for this test.)
The size large Haven tested weighs 25.2 ounces (714 g), including the 1.2-oz removable pad straps. Subtracting the manufacturer’s fill weight of 11.6 oz, the Haven shell sans straps is 12.4 ounces (352 g), or a bit more than half the bag’s weight. Some credit for the overall low weight can be chalked up to the lack of a zipper or draft tube, and the simple single-closure hood.
My length measurement essentially confirmed the 76-inch (193 cm) spec. It’s not meaningful to measure the top two girth dimensions because with the Haven’s design, one simply stretches the opening until the dimensions match. But how much stretch is too much? Empty and unstretched, the bag closes up and the hip and shoulder girth dimensions are well under the 60-inch (152-cm) spec. Because of this property it’s not very revealing to compare the Haven’s width specs to those of a standard mummy bag – the stretchy opening makes it perhaps more comparable to expandable bags such as those from MontBell and Sierra Designs. The non-stretchy footbox measures about 38 inches (97 cm) compared to the 40-inch spec (but it’s difficult to guess where to take this measurement in the tapered foot area).

The Haven ships with a coated nylon stuff sack and a ventilated storage sack. The 10×8-inch, 0.8 oz (25×20 cm, 23 g) stuff sack is, to my liking, small for this bag, requiring dense packing to fit. While I’ve substituted a larger one, it is still possible to fit the Haven in the supplied sack for those who don’t mind cramming it in, and I’d guess the regular fits much more easily. I hasten to add that no matter the stuff sack, the Haven packs small and takes minimal backpack space. The very nice storage sack is well suited to the task.

The Haven inhabited.
Per the specs, the regular Haven fits those up to 5’10” and the large up to 6’4”. Girth is said to be the same for the two sizes. At 6’ and 175 pounds I find the large Haven roomy in all dimensions, including my feet, leaving ample space to wear insulated clothing from head to toe without excessive compression of the loft. By comparison, a slender mummy bag like my 20 F Western Mountaineering UltraLite (size long, 60/52/38) constricts insulated clothing, especially at the hips and legs. The UltraLite is also bulkier and larger than the Haven. My 20 F Feathered Friends Swift (64/58/40) matches the Haven for room, but is heavier and bulkier still.
The Haven’s simple hood is nicely contoured and warm. It closes from the side using the single cord and cord lock and requires two hands to adjust. The hood is reasonably comfortable and snug around my noggin on cold nights, although when I turn, it doesn’t always turn with me.
Therm-a-Rest has adopted the EN 13537 European rating system and for the Haven claims a “comfort” rating of 30 F (-1 C), a “comfort limit” rating of 20 F (-7 C) and an “extreme” rating of -10 F (-23 C). The standard roughly translates as follows: a standard woman (sleeping in a “relaxed” position) should be comfortable to 30, a standard man (sleeping eight hours in a curled position) should be comfortable to 20 and at 10 below, the “standard woman can remain for six hours without risk of death from hypothermia.” Frankly, if I ever find myself at -10 in this bag, I need to hire a trip planner or a life coach.
Ah yes, per EN 13537, “standard man” is 25 years old, 173 cm (~5’8”) tall and weighs 73 kg (161 lbs); “standard woman” is likewise 25, 160 cm (5’3”) tall weighing 60 kg (132 lbs).
Measuring the Haven’s loft is tricky. I found a rough average of four inches (10 cm) total loft where there are both a top and bottom layer and about two inches (5 cm) of loft atop the bottom opening, where there is but a single (top) layer. The handy BPL estimated temperature rating chart indicates the Haven falls between a 30 F and 20 F bag, which is consistent with my experience.
Down chambers are evenly filled, but not stuffed “fat” in the fashion of the best bags. I don’t note any insulation gaps examining the bag with strong back-lighting.

Therm-a-Rest recommends the pad be inside for best cold weather performance (presuming it’s a pad that fits) and outside the rest of the time.
At home I paired several pads with the Haven, including a full-length Big Agnes Insulated Air Core, a small NeoAir and the small ProLite self-inflator. I didn’t find any problems with these combinations. I typically use a short pad and pillow, and that’s what I field-tested. After trying the short ProLite and NeoAir, I settled on the NeoAir as my top choice-comfort is excellent, warmth is sufficient, and it’s my smallest, lightest pad. While the NeoAir inside the bag blocks drafts more effectively than strapped outside, the somewhat rubbery fabric isn’t terribly comfortable against my skin, so I prefer it outside. (By contrast the ProLite fabric is more comfortable against the skin and lends itself more to use inside the bag.) The Haven straps encircle the pad and do a decent job keeping it in place and centered, thereby reducing drafts through the bag opening.

Snug hood. No entry here!
The Haven design merits extra attention to entry and exit. In theory there are two ways-through the bottom and through the hood-but in practice the hood opening is so tight the bottom opening is much more practical (endomorphs and contortionists can perhaps ignore my observations). Naturally, bottom access is quick and easy when no pad is attached but trickier with the pad strapped on. My routine is to slide my legs in first, scoot down to the end, then pull the top over my head. Once inside I adjust the pad and ensure the bag opening is pulled snug. After some practice this has become second nature. Ease of entry is also affected by the shelter used – low, tight quarters like a tunnel-style tent make it more of a challenge.
Especially because I’m a top-bag newbie, the Haven forced some habit adjustments. The biggest challenge is turning inside the bag to sleep on my side, rather than turning the bag with me as usual. If I turn the Haven sideways, the pad turns on its side too, and then I’m sleeping right on the ground. Turning sideways while leaving the bag in place sometimes has my face planted inside the hood.
The other challenge is ensuring the bottom opening remains covered by the pad, fending off drafts. This is mostly a finesse issue, because the Haven’s stretchy opening tends to stay somewhat closed – not completely – but normally enough to overlap the pad edges.

I slept in the Haven more than a dozen nights this season at altitudes between 7,000 and 10,000 feet (2,130-3,050 m). My shelters were one- and two-person Shires Tarptents and observed overnight temperatures ranged from the mid-50s down to the mid-20s, with the weather spanning mid-summer mild to cold and stormy with wind-driven snow and sleet. On the warmest nights I had to wriggle partway out of the hood to keep from overheating, and at these times would love some extra circumference in that opening. However, once my shoulders and arms are clear, there’s enough clearance around my chest.
On the coldest nights I wore long underwear top and bottoms and a knit cap and was sufficiently comfortable to conclude the Haven is a legitimate 25 F bag for my metabolism. The challenge is scrupulously keeping the bottom opening blocked by the pad, and here’s where having the pad inside might be better, as per Cascade Designs instructions, as opposed to my preference for strapping it outside. Whenever the opening is exposed, it’s announced by a blast of cold air, and as experience grew I got better at minimizing those moments. The key seems to be some combination of pad placement, pad strap tension and turning slowly rather than abruptly.

Soak test and results.
The liner fabric is pleasingly soft and the ripstop shell is reasonably water-repellant. In a one-hour leak-through test using a cup of water, none made it through to the tray beneath. Although the shell fabric did become wet, it dried quickly once the water was poured off. In the field, the bag fended off dripping tent condensation, but my test didn’t include any hard rain or spindrift. While the liner proved downproof, the shell regularly leaks small feathers, represented by a flurry appearing in the tent each morning. Since calendaring is skipped in the shell-perhaps to enhance breathability-minor down loss appears to be a tradeoff here. It’s no goosey blizzard, so I’m not concerned about actual loss of loft, but I’m also not accustomed to seeing so much, so routinely.
The bag closet to the Haven we could find is the Rab Neutrino SL top bag (20.5 oz, $225-250). It’s significantly more slender at 55/41/32 (140/104/82 cm) and Rab does not provide a temperature rating. It does, however, spec desirable 800 ci down and uses bits of Primaloft in strategic spots. It also has a short zipper. Two quilts roughly within the Haven’s specs and price range are the GoLite UltraLite 3-Season Quilt (27 oz, $295) and the Jacks ‘R’ Better Sierra Sniveller (23 oz, $270). Neither has a hood and both spec better down. The Sierra Sniveller adds versatility, being wearable as a sort of parka.
Many more-expensive options exist in the 20 F down bag/quilt category. (Comparison against quilts may be a bit off-target, since the Haven is basically a hooded mummy bag with a hole in the bottom.)
Some 20 F high-end mummy bags:
Some 20 F top bags/quilts:
The Haven is attractively priced at $240 (regular) and $250 (large). The scant few top-bag/quilt competitors are spec’d with higher-loft down and generally thinner fabrics and most are much more expensive. Haven “penalties” for its lower price are greater weight and packed bulk – it weighs more than it would with higher loft down and a thinner shell, but then it wouldn’t hit this price point. Detangling the EN 13537 ratings is tricky, as it’s murky as to whether I’m reviewing a 30 F bag or a 20 F bag. Whatever the claims, a 20 F rating seems optimistic for my metabolism in the testing conditions encountered. At the least, the Haven is not as warm as my 20 F standard mummy bags, which routinely take me past that temperature milestone wearing only boxers and a T-shirt to bed. Such is the challenge of comparing similarly spec’d bags among different makers. The Haven is easily a 30 F bag and for me, is comfortable at 25 F, as noted above.
With its relatively tough shell and liner fabrics and lacking a zipper, there’s nothing dainty about the Haven – it demands no special care and presuming the shell and stitching hold up, it should provide the long life typical of down bags (decades, in my experience). I can find no wear or damage to the test bag despite treating it sans kid gloves (other than ditching the too-tight stuff sack). Being zipperless, the Haven is simpler and lighter but perhaps at the cost of less flexibility in warmer conditions and added difficulty entering and exiting.
So the Haven is roomy, warm, inexpensive, and lighter than competing full mummy bags. Therm-a-Rest’s take on the top bag is a conservative one with respect to how much of a traditional sleeping bag they’ve retained, but for those who find quilts and the competing top-bags expensive, fussy, or drafty, this design may work for you.
| Manufacturer | Cascade Designs, Therm-a-Rest |
| Year/Model | 2010 Haven |
| Style | Hooded zipperless top bag |
| What’s Included | Sleeping bag, stuff sack, storage bag |
| Fill | 700 fill-power goose down, 10.6 oz (300 g) regular, 11.6 oz (330 g) long |
| Construction | 5-inch (13-cm) baffles |
| Measured Loft | 4 inches (10 cm) total, 2 inches (5 cm) top loft. |
| Manufacturer Claimed Temperature Rating EN 13537 | “Comfort”: 30 F (-1 C)
“Comfort limit”: 20 F (-7 C) “Extreme”: -10 F (-23 C) |
| Stuffed Size | 10 x 8 inches (25 x 20 cm) |
| Weight | Size large tested, measured weight: 25.2 oz (714 g) Manufacturer specification: 24 oz (698 g) with 1.2 oz pad straps |
| Sizes | Regular fits to 70 inches (178 cm) Long fits to 76 inches (193 cm) |
| Fabrics | Shell is 100% nylon ripstop, 20d, DWR finish Liner is 100% nylon taffeta, 30d, calendared for down-proofing |
| Features | Full single-drawstring hood, bottom opening, fully baffled, two removable pad straps with anchor loops |
| MSRP | Regular: US$240 Long: US$250 |
Disclosure: The manufacturer provided this product to the author and/or Backpacking Light at no charge, and it is owned by the author/BPL. The author/Backpacking Light has no obligation to review this product to the manufacturer under the terms of this agreement.
How do the classic fastpacking offerings by Ultimate Direction compare to a pack of today?

From left: the Ultimate Direction Voyager, WarpSpeed, and Rampage packs, as well as the Osprey Kestrel 48.
“Fastpacking” was coined as a term by Jim Knight during a 1988 traverse of the Wind River Range with Bryce Thatcher. In a 1988 article in UltraRunning Magazine, Jim wrote, “We were wilderness running. Power hiking. Kind of backpacking, but much faster. More fluid. Neat. Almost surgical. Get in. Get out. I call it fastpacking.” They completed the 100-mile traverse in just 38 hours. Bryce, an accomplished endurance athlete and climber, was also the founder and design guru at Ultimate Direction, a hydration product company.
My own fastpacking experiences began a few years earlier with a collection of the lightest gear I could assemble and with much less impressive trips than Bryce and Jim undertook. My own wilderness travel evolved from hiking and backpacking to trail running, ultra marathons, and peak bagging, and finally to lightweight multi-day trips that combined hiking and running. That original gear was, looking back some 25 years, surprisingly good and light.
I started with a Lowe Alpine pack that I made a number of modifications to, and for shelter, I either used a state-of-the-art Bibler Solo Dome (a 2.5-pound Gore-Tex single-wall tent) or an Early Winters bivy. My first sleeping bags also compare fairly well with those of today. An Early Winters Qualofill and a Feathered Friends down filled Hummingbird served me well. Food was mostly of the no-cook variety, and rain gear was Sierra Designs Micro-Lite pullover and pants. Although my gear was rather light, compact, and carried well when hiking, there was too much bounce when the pace quickened to a run.
In 1987 Ultimate Direction introduced the Voyager, the first overnight pack really suited to running. I bought one of the first Voyagers and then upgraded in 1988 to the newest Voyager, now with the Torso-Link suspension. The Voyager had many versions through the years and ranged in size from 1800 to 2400 cubic inches.
After the Wind River Range epic, Ultimate Direction devoted significant effort into their new Fastpack line of packs. I owned several versions of the Voyager, upgrading as models changed until the Voyager disappeared from the Ultimate line (as well as from my pack collection). I was, however, fortunate enough to advertise recently on the BPL Gear Swap and purchase a 1996 model Voyager. Ultimate’s Fastpacks took a big jump in technology in the late 1990s. The introduction of the Rampage, the WarpSpeed, and the original SpeedDemon day pack set the bar higher in pack design. This new series of Fast & Light packs utilized new materials, suspension, and features. How do the Voyager, Rampage, and WarpSpeed stack up against the packs of today?

The Voyager had foam molded water bottle pockets that were scalloped and angled for ease of access.
Ultimate Direction was founded in 1986 as a hydration pack company and in 1986, hydration meant water bottles. They later expanded into hydration bladders as well. Nearly all of the Voyagers had foam molded water bottle pockets. All the bottle pockets were sized for the 26- to 30-ounce SportFlask, with the exception of the last versions of the Voyager, which came with 54-ounce bottles in removable foam bottle pockets.
The early Voyagers had zippered flaps on the bottle pocket top, a nice feature for winter use. All the foam pockets were angled for easy bottle access and were placed to avoid elbow contact during the running motion. Some Voyagers had sewn in hip belt pockets while my 1996 model had removable pockets.
The key feature of Ultimate’s packs beginning in 1988 was the advent of the TorsoLink suspension system. The TorsoLink was a fully articulating suspension that allowed total freedom of movement while running.

The TorsoLink suspension is fully articulated for a great range of motion.
My 1996 Voyager is a 2000 cubic inch dual-zip panel loader. In addition to the main pocket, there are three other exterior pockets, a large stash pocket and bottom straps with a skid plate flap for carrying a sleeping bag, pad, or tent. There is also a hydration bladder slot in the backpanel.
Suspension on the Voyager is created with a 3/8-inch Delrin stabilizing rod and Evaporade, a special combination of perforated foams and mesh designed to create an ideal balance of rigidity, breathability, and padding in hipbelts and shoulder harnesses. In addition, the shoulder harness is fleece lined.
The shoulder harness attaches with Velcro into the backpanel for torso length adjustment.
The Voyager carries excellently in spite of its rather hefty weight of 53 ounces (without bottles). The foam gives shape and stability to the pack and allows for a natural running motion. Twelve to fifteen pounds is about the maximum carrying weight with the Voyager.
The WarpSpeed and its big brother, the Rampage, utilize lightweight fabrics with Dyneema grid fabric in wear areas. The Evaporade is thinner, lighter, and now faces the shoulder harness. Suspension is created with a removable, ridged foam frame sheet. The main pack bag has gone from the panel zip of the Voyager to a top load design. Water bottle pockets are now mesh fabric with an elasticized top for even more weight savings. Some other innovations include skeletonized buckles and quad buckles on the hip belt.

The water bottle pockets on the WarpSpeed and Rampage became more trim and lighter with the use of mesh fabric and an elasticized top. WarpSpeed on the left and molded foam pocket of the Voyager on the right.

Among the innovations Ultimate Direction had was the use of the skeletonized quad buckle.
To the best of my memory, the WarpSpeed was listed at 2700 cubic inches and the Rampage at 3400. The two packs are nearly identical with respect to sizing. The features include top pockets, interior hydration sleeve, mesh bottle pockets on the sides, a large stash pocket, daisy chain, ski loops and an exterior zippered pocket. Sewn in bellows hip belt pockets swallow up gear, including compact SLR cameras. The TorsoLink suspension continues, and with the rigid frame sheet and the weight limit, a runner’s comfort zone increases. I have had up to 30 pounds in the WarpSpeed, and when carrying in supplies to the cabin, as much as 45 pounds in the Rampage (these weights are greater than typical and to actually run with a pack, my personal limit is around 25 pounds).
The weight cutting measures were significant, with the WarpSpeed coming in at 40 ounces and the Rampage at 54 ounces, the same as the Voyager but nearly 1.5 times the capacity.
All three packs, with the convenient access to hydration and food, allow for a lot of miles between stops.
I have tried some of the lighter packs, like the Osprey Exos, for fastpacking and haven’t found them overly comfortable. However an Exos 46, at 54 ounces, compares evenly to the similarly sized Rampage. A newer pack that fits me very well is the Osprey Kestrel 48. Yet a large Kestrel 48 weighs 48 ounces and has a capacity of 2900 cubic inches, heavier than the larger Rampage.

The EvaporAide foam used on the UD packs was well ahead of its time for moisture management, but not quite as efficient as the modern Airscape used by Osprey.
Features of the older packs certainly stack up with any of the new. Water bottle access, large hip belt pockets and enough pockets in the main pack for good organization without being overwhelming are some high points with the UD packs. Hydration bladder sleeves are more accessible on the newer Osprey. Durability of materials has been very good with the Ultimate packs as well.
How about comfort? While the Kestrel is a very comfortable pack for me, when actually running with loads of 15 pounds, the Ultimate Direction packs have better freedom of movement and greater stability. As I said earlier, the load carrying limits of the UD packs are certainly well within what would be normally carried in light packs of their size. The Airscape suspension in the Kestrel is more breathable in hot weather, but the difference isn’t huge.
In conclusion, the Voyager, the WarpSpeed, and the Rampage were innovative designs, well ahead of the curve of pack design at the time and very comparable to modern packs. It is unfortunate that Ultimate Direction didn’t continue to fine tune these great designs and continue their lead in the fastpacking market… but old packs can be found if you know where to look!
Two-pound free-standing single-wall solo tent with lots of interior usable space, good ventilation, good wind and storm protection, and it sets up in one minute!

Alpine camping in the Big Sky International Mirage 1P, a one-person hybrid tent with a trail weight of 34 ounces (964 g) for the basic complete tent. Numerous options are available to lighten the tent down to about 25 ounces (709 g). (I scrambled through that pass in the background the next morning.)
The Big Sky International Mirage 1P is a one-person hybrid free-standing tent. What’s a hybrid tent? Well, we used to simply call them a single-wall tent, but technically the vestibule sides of the tent are double-wall and the ceiling of the tent is single-wall, so it’s now called a hybrid. If you want to simply call it a single-wall tent, that’s just fine.
What is unique about the Big Sky Mirage is its external X-configuration poles, which make it free-standing. The tent attaches to the poles with clips, so it can be set up in about a minute, conveniently. Some people would argue that the external poles and clip attachment is a weaker design in terms of wind stability and storm protection, so how well does it perform in the wind and rain? Also, how does the Mirage 1P compare with other lightweight solo tents?
Specifications provided below are for a basic complete tent with one door. On their website, Big Sky sells their tents a la carte, meaning you get to choose the number of doors (one or two), tent fabric, poles, stakes, carry sack, guylines, and accessories you want. Note that numerous options are available to create a tent lighter than the configuration specified. This is discussed further below.
| Year/Manufacturer/Model | 2010 Big Sky International Mirage 1P (bigskyinternational.com) |
| Style | Three-season, one-person, hybrid, free-standing tent with floor, one or two side entry doors, and two vestibules |
| Included | Tent body, two aluminum poles, six stakes with stuff sack, storage bag (selected a la carte) |
| Fabrics | Proprietary SuprSil weighs about the same (1.3 oz/y2/44.1 g/m2) as generic silnylon, and is claimed to be two times more waterproof and four times more tearproof; no-see-um mesh inner walls. Other optional shell fabrics available. |
| Poles and Stakes | Two aluminum poles and six aluminum 6-in (15-cm) Ultra-C stakes |
| Floor Dimensions | Manufacturer Specifications: 84 in (213 cm) long x 35 in (91 cm) wide at head end x 24 in (61 cm) wide at foot end (dimensions verified by Backpacking Light) |
| Features | Lightweight fabrics, large side entry door, two mesh storage pockets, one top vent |
| Packed Size | 18 x 5 in (46 x 13 cm) |
| Total Weight | Measured Weight: 2 lb 3.9 oz (1.02 kg) Manufacturer Specification: 2 lb 4.2 oz (1.03 kg) |
| Trail Weight | Measured Weight: 2 lb 2 oz (0.96 kg) Manufacturer Specification: 2 lb 2.7 oz (0.98 kg) (excludes stuff sacks) |
| Protected Area | Floor Area: 17.5 ft2 (1.63 m2) Vestibule Area: 7 ft2 (0.65 m2) Total Protected Area: 24.5 ft2 (2.28 m2) |
| Protected Area/Trail Weight Ratio | 11.5 ft2/lb (2.36 m2/kg) |
| MSRP | US$292.19 |
| Options | Second door US$50, SuprSil UL shell US$35, Let-It-Por II shell (Cuben Fiber) US$275, DuraLite Poles US$100, Guy lines and stakes US$16-24, Footprint US$17 |
The Mirage 1P is a single-wall tent (or hybrid if you look at the vestibule sides as double-wall) for one person (a two-person version, the Mirage 2P, is available). As with most Big Sky tents, the Mirage 1P is based on two poles in an X-configuration, making the tent free-standing. What’s unique about the Mirage is that the poles are external and the tent body is simply clipped onto the poles, which is the ultimate in convenience.
The Mirage 1P has a vestibule on each side of the tent. The basic tent has a zippered vestibule and zippered mesh entry wall on one side; the vestibule on the other side is only accessible from the outside. With the two-door option (adds 2.6 oz/74 g and US$50), the vestibules on both sides of the tent are zippered and there are two mesh entry doors. It may sound redundant for a solo tent to have two entries, but read on to understand the benefits.
The Mirage 1P is available with three different “skins” (shell fabrics), and I had the opportunity to test all three of them. Big Sky does not provide a specific description of their proprietary tent fabrics, but does provide some comparative properties in relation to generic silnylon and spinnaker fabric as follows:

Views of the Big Sky Mirage 1P (two-door version). Entry is from one or both sides (top left) via a zippered door in the vestibule. The top view (top right) shows the tent’s shape. The head end (bottom left) is 36 inches (91 cm) wide, while the foot end (bottom right) is 24 inches (61 cm) wide.

This series compares the one- and two-door versions of the Mirage 1P. The one-door version (top left) provides one entry protected by a vestibule; the back wall of the tent is mesh. The vestibule on the opposite side (top right) is accessed from the outside by reaching under the bottom or lifting it up. The two-door version (bottom left) allows entry from either side and provides easy access to both vestibules from inside the tent. It also allows both sides of the tent to be partially or completely opened up (bottom right) for better views and cross ventilation.

Features: the one-door version of the Mirage 1P has one top vent (left), while the two-door version has two top vents. And the one-door version has two mesh pockets (right) on the entry side, while the two-door version has two storage pockets on each side (total of four, one in each corner).

Big Sky has developed a lightweight composite tent pole called DuraLite that they claim is stronger and more durable than carbon fiber. The cost is about the same (US$100); weight savings compared to aluminum poles is 3 ounces (85 g). The photo also shows the SuprSil fabric and clip attachment to the poles.

I tested three versions of the Mirage 1P over a thirteen-month period: the basic tent with one door and aluminum poles (summer and fall 2009), a Cuben Fiber version with one door and DuraLite poles (midwinter), and the two-door version (shown) with SuprSil UL fabric and DuraLite poles (summer 2010). This provided ample time to evaluate the Mirage 1P and its options over a wide variety of conditions.
Set-up is very fast, about one minute. Simply spread the tent on the ground, stake the four corners, connect the poles to corner grommets, attach the tent’s clips to the poles, and stake out the vestibules. It doesn’t get any easier than that.
While testing the basic one-door Mirage 1P, I liked the fast set-up, protected side entry, and roomy interior. I did not find the back vestibule very useful because it can only be accessed from outside the tent by sliding things under the bottom edge. With its aluminum poles, the tent is quite stable in moderate winds, but I recommend using four guylines in heavy winds. It’s also very storm worthy, and kept me dry during numerous thunderstorms. The top vent will close to prevent wind-driven rain from entering the tent.

In midwinter I had the opportunity to test the very lightest version of the Mirage 1P: Cuben Fiber shell, one door, and DuraLite poles. The weight with stakes and carry bag is 25 oz (709 g), and cost is US$717 (!). It’s very impressive – resilient in snow and wind, and Cuben Fiber does not stretch when wet. I was reluctant to send it back!

I tested the basic Mirage 1P in the snow on several occasions and found it not well suited for snow (left). It will withstand a light dusting, but any significant amount of snow flattens the vestibules and could easily collapse the tent. With some air movement, the Mirage ventilates well and is very resistant to condensation. However, on a still night with a large temperature drop, it is still susceptible to condensation (right) like any other single-wall tent (double-wall tents too!).
The superlight version arrived in early summer 2010. This one has two doors, SuprSil UL shell fabric, SuprSil HD floor fabric, and DuraLite poles – the latest version. I took it on several summer backpacking trips to test it out, and managed to catch a few good thunderstorms with some good wind gusts.
The superlight version of the Mirage 1P withstood heavy downpours with aplomb. The tent stayed bone dry inside; there was no leakage through the open top vents. It’s notable that Big Sky silnylon tents do not require seam sealing by the user. I inquired about how they accomplish that, and got the usual answer: it’s proprietary.
The DuraLite composite poles are clearly stronger than the Fibraplex poles previously sold by Big Sky. They deflect in strong wind gusts, but not as much as the Fibraplex poles. They perform well in “normal” conditions, meaning occasional moderate winds and wind gusts associated with thunderstorms, but I would definitely add four guylines to the tent to protect my investment. However, be aware that the DuraLite poles are more flexible than aluminum poles, which allows the tent to deflect (lean) substantially in a strong wind gust, which can be scary at times, and they could fail in really serious wind. They also cost US$100 to save 3 ounces (85 g), so they are not very cost effective, and they really don’t save any weight when you consider the additional need for guylines.
I fell in love with the two-door version of the Mirage 1P. I am always trying to reconcile added weight with added functionality and benefits. For me, the second door is worth the 2.6 ounces (74 g) of additional weight. It’s actually a package, as when buying a car. The two-door option also gives you two top vents instead of one and four mesh storage pockets instead of two. It adds up to a lot better ventilation, roominess, and convenience. Going to the SuprSil UL shell fabric (saves 2 oz/57 g and adds US$35) offsets the weight of the second door. The SuprSil UL fabric is my personal choice, it’s softer than generic silnylon and appears to be just as strong.
Through my testing, I realized that the Mirage 1P is strictly a three-season tent. It will handle cold temperatures, rain, and wind just fine, but no more than a dusting of snow.

The latest version of the Mirage 1P uses a pair of clips to secure the poles at the junction where they cross, but the clips are loose and don’t tension the tent as designed. The previous version used a small buckle which secured the poles better.
The following table compares the basic one-door Mirage 1P with similar one-person single-wall tents with poles. The table does not include solo double-wall tents or solo single-wall tents that use trekking poles for support, because they are not a valid comparison.
| Tent | Floor Area ft2 (m2) | Vestibule Area ft2 ( m2) | Ventilation | Mfr.Weight oz (g) | Cost US$ |
| Big Sky Mirage 1P* | 17.5 (1.63) | 14 (1.3) | 1 top vent, raised side walls | 34.2 (970 g) | 292 |
| Tarptent Rainbow | 23 (2.14) | 6 (0.56) | 1 top vent, mesh perimeter | 34 (965) | 225 |
| Tarptent Moment | 18 (1.67 ) | 6.6 (0.61) | 2 top vents, 2 end vents, mesh perimeter | 28.8 (810) | 215 |
| Montbell Crescent 1 | 21.8 (2.03) | 2.6 (0.24) | 2 top vents plus partial mesh canopy | 33 (936) | 229 |
| *The Mirage 1P is available with one or two doors with vestibules; data are for the one-door version. | |||||
Some highlights and observations from the comparison table are as follows:
My personal choice for the Big Sky Mirage 1P is the two-door version with aluminum poles and the SuprSil UL shell fabric. The tent sets up exceptionally fast, has great ventilation, lots of usable space inside, and is very storm worthy and wind stable. However, the cost for that configuration adds up to US$360, which is a lot of gold for a single-wall solo tent.
Among the comparable tents, the Tarptent Moment is hard to ignore. It also sets up very quickly, weighs less, and costs much less. The drawbacks are that it’s not free-standing, it has higher than average condensation, and it does not have nearly as much usable space inside as the Mirage 1P. The ends of the Moment taper down to about 18 inches (46 cm) and are usable only as foot space and gear storage. In contrast, all of the interior space in the Mirage 1P is usable.
Another consideration is the weight of the poles – all of the tents in the table above require a dedicated poleset, which weighs 11.4 ounces (323 g) for the Mirage 1P. An alternative is to consider a solo tent that utilizes trekking poles for support, which reduces the tent weight considerably. The lightest trekking pole supported single-wall solo tent is the Gossamer Gear One, which is made of spinnaker fabric and weighs about 18 ounces (510 g) with stakes and stuff sack.
The bottom line – especially if you don’t use trekking poles, or don’t want to use trekking poles to support a tent, and you do want a free-standing solo tent that sets up fast and has loads of interior usable space – is there’s nothing that directly compares with the Mirage 1P.
Disclosure: The manufacturer provided this product to the author and/or Backpacking Light at no charge, and it is owned by the author/BPL unless otherwise noted. The author/Backpacking Light has no obligation to review this product to the manufacturer under the terms of this agreement.
Trip report and photo essay of a wildflower-filled circumnavigation of Oregon’s famed peak.
Circumnavigating Mount Hood in North central Oregon is a classic, challenging hike, one I completed in early September, 2010. One of my favorite parts of the hike were the many and varied views of Mount Hood.

Mount Hood from Cairn Basin.

Wildflowers in Paradise Park. Peak flower season is August, but there were still plenty around for my jaunt.
In 2006, there was a large flood that washed out the trail across the Eliot Branch. The Forest Service has officially closed the trail here, but many people are doing it anyway. There is a 75-foot gully you must climb into and out of, with a lot of loose rock and dirt and a risk of it falling onto you. There were yellow ropes on both sides to help, but a slide in August 2010 buried the rope on one side, which makes it that much more difficult (not to mention what would have happened to anyone on the route at the time of the slide).
The alternate route across the Eliot is to cross it higher up, at the foot of Eliot Glacier. Though most now take this route (including me), the Forest Service does not recommend it because it is off-trail. Off-trail travel isn’t encouraged so that hikers do not get lost.
In addition to the Eliot crossing, there are a number of other difficult stream crossings, each with elevation loss and gain into and out of the stream canyon, making this hike challenging. Several years ago someone was killed trying to cross one of these streams after several days of rain.
Because of these complications, the previous couple of years I hiked around the Three Sisters instead, which is easier, a little longer, and possibly more scenic. I was curious about the alternate high crossing of the Eliot, however, so I thought “It’s time to do Hood again!”
I did the Mount Hood hike in four nights/five days. Many people do this in less time, even in just one day, but I like stretching it out (and there’s no way I could do it in one day – two nights/three days is about my limit). I started at Tilly Jane, which is near Cloud Cap, a common starting point. Because of the Eliot crossing, the next time I do this I think I’ll start at Timberline Lodge, which is what most people do.

Map of trip
My pack base weight was 12 pounds, initial total weight 20 pounds. I make a lot of my own gear, so I’m testing some new iteration of at least one piece of gear on almost every trip. This was my second hike with a homemade tarp, and I used my trekking pole to hold it up, which worked quite well.
| CATEGORY | ITEM | BRAND | MODEL | WORN | PACK |
| FOOTWEAR | Boots | Lowa | Renegade GTX size 12 | 49.0 | |
| Socks | Bridgedale | Endurance Trekker | 3.4 | 3.4 | |
| Gaiters | Homemade | Nylon | 4.0 | ||
| CLOTHES | Bottom Pants | Homemade | Supplex | 8.0 | |
| Bottom Shorts | Homemade | Supplex | 5.0 | ||
| Bottom Underwear | Homemade | Supplex | 1.0 | 1.0 | |
| Top Shirt | Homemade | Supplex | 7.0 | ||
| Top Vest | Homemade | Climashield | 11.5 | ||
| Top Jacket | Homemade | Epic | 11.0 | ||
| Hat | 3.5 | ||||
| Hat | Homemade | Fleece | 1.8 | ||
| Balalclava | Homemade | Fleece | 2.2 | ||
| PACKING GEAR | Backpack | Homemade | Silnylon | 11.0 | |
| CAMPING GEAR | Shelter | Homemade | Silnylon | 11.5 | |
| Stakes | From old tent | Aluminum | 2.6 | ||
| Pole | Polesforyou | Aluminum | 1.5 | ||
| Sleeping Bag | Homemade | Climashield/Pertex | 29.0 | ||
| Sleeping Pad | Therm-a-Rest | Prolite | 16.0 | ||
| Flashlight | Princetontec | Fuel | 3.0 | ||
| Pillow | Homemade | Fleece/Foam | 5.0 | ||
| Stove | MSR | Pocket Rocket | 3.0 | ||
| Windscreen | Homemade | Aluminum | 0.6 | ||
| Cooking Pot | Titanium | 0.9 L | 5.0 | ||
| Spoon | Cutoff handle | Stainless Steel | 0.5 | ||
| Water Bottle | Reused Soda | 0.5 L | 1.0 | ||
| Water Bag | Platypus | 4 L | 1.0 | ||
| MISC GEAR | GPS | Garmin | 60CSx | 7.5 | |
| Camera | Olympus | Stylus 1020 | 5.5 | ||
| Cell Phone | 4.0 | ||||
| Radio | 4.0 | ||||
| First Aid | 8.0 | ||||
| Toiletries | 24.0 | ||||
| Misc. Junk | 24.0 | ||||
| CONSUMABLES | Food | 4 days | 96.0 | ||
| Fuel | Canister | 8 ounces | 13.0 | ||
| Water | 0.5 L | 17.0 | |||
| Total Weight | oz | lbs | |||
| Total Weight (Worn/Carried) | 89.9 | 5.6 | |||
| Total Base Pack Weight | 189.6 | 11.9 | |||
| Total Weight Consumables | 126.0 | 7.9 | |||
| Total Initial Weight (Pack + Consumables) | 315.6 | 19.7 | |||
| Full Skin Out Weight | 405.5 | 25.3 |
I didn’t bother bringing any water filter, as I have read that in alpine areas the chance of getting any parasites is small, if you get water from a snowmelt stream. I’ve done this on a number of trips, maybe 30 days total, and haven’t noticed any problems. After one trip I was a little sick, but it could have been anything.
My trip started at Tilly Jane, with a night at the nice campground before my hike. There are also generally fewer people than at other trailheads on Mount Hood. To get to Tilly Jane, follow the signs off highway 35 to Cooper Spur Ski Resort. Take the 9.5-mile gravel road to Tilly Jane (or Cloud Cap, which results in a slightly shorter hike). This gravel road was never very good, but after the recent forest fire they put in these water bars – my regular passenger vehicle scraped bottom once.
From Tilly Jane, the trail goes half a mile to Cloud Cap through an area that burned a couple of years ago. I happened to be there just before the forest fire and was required to evacuate, thwarting that trip around the mountain. The fire got to within about 100 yards of Tilly Jane. It’s interesting where the trail goes through the burned area.

Burned out area between Tilly Jane and Cloud Cap.
I took the crude trail up the ridge to the east side of Eliot Canyon, though there is no “official” trail until past Eliot. I met some people who said Eliot was impassable, but when I said I was determined to do it, an experienced guy said to follow the route I marked with red dots on the photo below.

The route I took across Eliot.
The trail up went on a knife edge ridge at places, and the wind threatened to blow me off. I was really wondering about just how far I was going to go on this trip. I find a trip more satisfying if there are moments where it’s challenging without being overly dangerous, and this was that moment. After going about a mile up on the ridge and after 1,000 feet of elevation gain I found the climbers trail that comes from the Cooper Spur shelter and goes down into the Eliot drainage.

Looking back up the climbers trail from down in the Eliot drainage.
From here, there was a faint trail with rock cairns about halfway across the Eliot drainage. At some point here, you get onto the glacier. It’s not at all obvious there’s a glacier, because it’s covered with loose rock that fell from above.
A word of warning here: walking on the glacier involves some risks. The ground is really unstable – I poked around in front of me with my trekking pole in places. There’s a risk of flood or rocks falling on you from above, though I don’t believe there are any crevasses. I got by this area as quickly as possible – not a good place to stop for a rest.
When I got to the other side of the Eliot drainage, I had to get up to the ridge. This was somewhat steep with loose rocks and was probably the most difficult part of the whole trip. I didn’t see any tracks where anyone else had gone the last half of crossing the drainage and getting up to the west side ridge. Once again, I wondered if I was really going to finish this trip. I think if I had gone up just a little higher it would have been easier… oh well, next time.
There was a crude trail going down from the west side ridge, generally following the edge of the ridge. There were places where it was knife edge and the wind wanted to blow me off again. This crossing of the Eliot is definitely adventurous, but other people were also successfully doing it.When I got down to near the real Timberline Trail, I could see where the lower crossing was on the other (eastern) side.

The lower crossing, officially closed, marked with red arrows. I tried to find it when I was going up the other side, but missed it, so you really have to look for it if you want to try this route.

Close-up of trail into 75-foot deep gully, marked with red arrows.
Finally, I made it down to the Timberline Trail. What a relief! It was only 3 miles from the trailhead and 1200 feet of elevation gain, but it took 2.5 hours. From here it was routine – passing Compass Creek, Coe Creek, Elk Cove, and Cairn Basin.

Mount Hood from Compass Creek.

From the west side of Mount Hood you get distant views of other Cascade volcanoes (from left): Mount Adams, Mount Rainier, Mount Saint Helens.

Crossing Coe Creek wasn’t too difficult, there were a number of logs across it.

Just as a comparison, here’s Coe from mid July 2005 – much more water and difficult to cross. Right when you get to the center you hit a place where the stream flow rate was much higher. Amazing how much force it puts on you. It kind of fools you because the water was only knee high. This is why you want to do Mount Hood in September when stream flow is minimal.

Wildflowers near Cairn Basin. I had planned on camping at Cairn Basin, but there wasn’t any drinking water convenient so I went about half a mile further. First day mileage was 10.5 miles, which is high for me, especially on the first day and especially with the difficult Eliot crossing. I was pretty tired. I found a small flat area, plopped my stuff down, and slept under the stars that night.

My set-up under the stars. About half the time I sleep without any tent. I like the freedom you get from seeing and hearing the wilderness. Sometimes I’ll set up the tarp, then undo guylines from a few stakes and set the tarp to my side, as shown. If it rains on me in the night, it only takes a few moments to set the tarp up.

If rain threatens, I have a small tarp that weighs 1 pound including pole and stakes. This was actually my second trip with this tarp, so I was eager to see how it performed, and I used it one night.

Mount Hood lenticular cloud from east of McNeil ridge before dropping down to Sandy. This day had the most elevation loss of the trip, almost 3,000 feet down to the Sandy River. The trail was easy the whole way.

After several miles, I joined up with the PCT, which I followed on the west side of the mountain. The trail is a little better maintained on this section, and even includes the only real bridge on the entire trip (when crossing the Muddy Fork).

Logs crossing the Sandy River. This will get washed out in the next big rain storm.
My second night was at a nice little site next to the Rushing Water creek a bit after it joins the Sandy River. My only problem with the site was that it was a bit marshy and buggy, and felt kind of close in a claustrophobic sort of way. Next time I’ll camp right at the Sandy River. I did 8.5 miles the second day. Not quite leisurely, but plenty of time to enjoy the scenery.
I camped out under the stars again, but I was rudely awakened the following morning at 6:30 to a bit of a mist. In Portland, the weather report said it would be cloudy, but here I was in those clouds. I had left my gear fairly protected but my sleeping bag got just a bit wet. I quickly got up and packed up my gear to avoid getting any wetter and then leisurely ate breakfast in the occasional mist.
The third day I had to gain back the 3000 feet of elevation I had lost the second day. The trail is mostly forested at the beginning, which would be nice in hot weather, but it continued to be misty and I was occasionally enveloped in clouds.

Most people attach a few things on the outside, like sleeping pad, bag, and tent, but this was pretty extreme. I think he was probably carrying more stuff than needed so he didn’t have enough room inside his pack. In my opinion, it’s better to have less stuff and a pack big enough to put it all in. Same thing with outside pockets – better to have enough room inside so you don’t need pockets, but most people, at least in the U.S., would disagree with me on that one.

After 3000 feet elevation of climbing, I reached Paradise Park, one of the most scenic areas of the hike. Fellow hikers were trying to see Mount Hood through the clouds.

Lots of berries. The blue ones are huckleberries and very good eating. Normally there are many huckleberries but this year, this was the only place I saw them in significant numbers. The red ones are mountain ash. Both are popular with bears.

A ways further along, I saw bear poop on the trail – he’s been eating those mountain ash berries. The tip of my boot is for scale.

A glimpse of Mount Hood through the clouds.

Paradise Park wildflowers.

A traffic jam crossing the Zigzag River. From Paradise Park to past Timberline, it gets pretty crowded – day hikers and backpackers from Timberline Lodge going to Paradise Park – tourists wandering away from Timberline Lodge – an occasional PCT thru hiker.

Mount Hood from the east side of the Zigzag canyon with some hikers in the foreground.
For my third night, I found a spot just down the Hidden Lake trail. Being so near to Timberline Lodge was a problem – there were many people walking by – but getting a ways off the main trail helped. I did 8.5 miles for my third day – not a lot of mileage, but it allowed me to take my time through Paradise Park and eat some huckleberries. I also took advantage of some afternoon sun to dry my sleeping bag, which was just a bit damp. It’s polyester, so it still maintains most of its warmth when wet.
It rained a bit over the third night, but my tarp kept me dry. This was the most rain and wind I have experienced with this version of MYOG tarp. So far so good! I ate breakfast in the mist, but sought shelter under a tree, which kept me pretty dry. It never rained enough to make the tree start dripping.
I made a jacket using Epic fabric by Nextec. I like it because it’s single-layer. The fabric weighs about 1.5 ounce per square yard. It’s supposed to be “silicone encapsulated” to be highly water resistant without requiring a lining, which saves weight. I was disappointed though, because my vest got wet on the shoulders underneath, even though it was only misting lightly. I will limit the use of this jacket to good weather when I don’t expect any significant rain and want minimum weight.
When I got home I tested several pieces of fabric – Epic, eVENT, Pertex Quantum, and some 200 denier nylon. Put a paper towel at the bottom of a one-inch deep plastic container, then fabric, then two cups of water. Let it sit for several hours. 200 denier nylon wetted through immediately. Pertex and Epic were okay for about an hour, but then wetted out – as soon as a little water gets through so that there’s water on both sides, then the water just streams through. eVENT was dry after four hours. I’ll have to make my next jacket out of eVENT and see how well it breathes.

Starting out for the day’s hike, the trail goes through the Timberline ski area. In the summer, there is one lift operating, taking skiers up to the Palmer glacier ski area, open all summer.

They were doing a bunch of remodeling on Timberline Lodge. Normally, I’d stop for a beer and a sandwich or burger, but this time, this is as close as I got.

About half a mile past Timberline Lodge, I passed over the crest of the Cascades. On the eastern side, all the clouds pretty much disappeared. It’s amazing how quickly this transition happens.

From here, the trail goes down to the White River crossing. This is usually the most difficult stream crossing of the whole trip, but it wasn’t too bad, this being September. I sort of “pole vaulted” across with my trekking pole. I’ve tried taking a trekking pole on a few trips recently, but this is the only trip where I thought it was really worth taking, because of the stream crossings. This was the only crossing on this Mount Hood trip without some small logs set up to cross on. A group crossed after I did.

Then, the trail goes up to Mount Hood Meadows. This is another ski area, which some people might think ruins the wilderness, but a lot of people enjoy skiing there so I’m sort of conflicted. I think that since they clear out the ski runs, there are much better wildflower meadows and open views of the mountain. A truck passed me, going up a steep gravel road, doing some sort of ski area maintenance.

A distant view of the Three Sisters.
My last night was spent just before Newton Creek, a nice little campsite I’ve stayed at before with a small drinking water stream. I did 8.5 miles for the fourth day. This is the last drinking water before tomorrow’s long slog up Gnarl Ridge.
There was a bit of sun so I spread my gear out, which was just a bit damp from that morning – especially my tarp, sleeping bag, insulated vest, and rain jacket. After a couple hours they were pretty dry.

My last day started with the Newton Creek crossing. Nice logs to walk over, but they were icy! A little early in the year for freezing temperatures. It’s totally open to the sky there, so it gets colder. My campsite in the trees was a bit warmer although still chilly. I underestimated the cold and didn’t bring quite warm enough gear. I should have brought a heavier coat or insulated vest.

The trail then goes up Gnarl Ridge. The upper reaches get really barren, which makes for lovely Mount Hood views.

Me.

The trail goes up to the high point of the hike, 7,300 feet elevation. There are still several snow fields to cross, but there’s a well worn trail, no need for any traction devices or anything. Most years the snow has melted off by now, but this was a cool summer and there was a lot of late spring snow.

The trail is marked with these large rock cairns with timbers. Early in the season this is all snow covered, and it would be otherwise difficult to find the trail.

Cooper Spur shelter is a stone shelter made in the 1930s (?). If you got caught by a snowstorm, this might be a good place to seek shelter. There are similar shelters on McNeil ridge and at Cairn Basin. I stayed in the McNeil Ridge shelter once when it started snowing on me. There are similar shelters in Paradise Park, Elk Cove, and on Gnarl Ridge, but these have fallen into ruin and offer no shelter.
The next time I do the round-the-mountain hike, I’ll start at Timberline Lodge, as there’s a much easier way to cross Eliot. When you get to the Cooper Spur shelter, walk over to it, go just below it, then keep going on the climbers trail another 0.1 mile, and you’re at the Eliot crossing as I described at the beginning. It saves the 1.5 mile up, 1,200 feet of elevation gain, and 1.5 mile down that I did by starting at Tilly Jane.
From the Cooper Spur shelter, it’s a mile down to the end of my hike at Tilly Jane, giving me 6.5 miles on my last day. I usually plan a multi-day trip to be fewer miles the last day – gives me a little flexibility in case something happens, like getting injured or if there’s a problem with the trail that requires a detour.
All right, it’s time to start planning the next trip!
We know plain air mats tend to be rather cold, but can this be alleviated by including a very thin layer of synthetic insulation inside the mat on one surface? This is what Pacific Outdoor Equipment have attempted to do with this very light Ether Elite 6 air mat.

Pacific Outdoor Equipment Ether Elite 6 Mat.
Self-inflating foam-filled mats are either very thin or quite heavy. An air-filled mat can be much thicker and lighter, but the design usually suffers from internal air circulation, which can make it a cold mat to sleep on. Pacific Outdoor Equipment have attacked this problem by affixing strips of a thin layer of synthetic insulation (which they call ‘Zonal Air Loft Thermo insulation’) to the inside of the top surface. The theory is that there will be enough of a thermal gradient across the insulation that the cooling due to air circulation will not be significant.
In order to minimise the weight of the mat, they have only applied the insulation to a (large) central diamond region, as seen in the photo here. As that is the area where most of your torso lies, the idea is reasonable.
We tried to measure the thickness of the insulation layer with a micrometer, but this was not really successful. It came out to about 0.6 mm (0.024") – but that was fully compressed by the micrometer and not a really meaningful result. (The fabric itself came out to 0.3 mm thick for the two layers, which is quite thin!) When the mat is in use and the top surface warms up, it seems that the insulation layer does relax a bit and fluff out. You can actually feel it fluffed up. That is normal – but even so the layer looks very thin. POE do not specify the width of the insulation strips, and we did notice some variation in this width between mats. The variation was not large enough to worry anyone, however.
POE claim a size of 51 x 122 x 6 cm for the 2/3 mat; we measured it as being 47 x 123 x 8 cm inflated fully, but this was with no load on the tubes. You will not get this thickness when you lie on the mat! The reduction in width is due to the way the tubes blow up: it is a bit wider at lower inflations. At reasonable inflation we found that a thickness of about 44 mm was a very generous estimate over a broad area. Blow the mat up too hard (to get greater thickness), and it gets a bit uncomfortable. Measure the clearance between your hips and the ground at a comfortable pressure and it will be much less. Even so, it is thicker than the average layer of foam.
We ended up with four mats between us (see below as to why), although one was supposed to be a hand-made prototype. The dry weights were 307 g, 317, 374 g and 371 g. POE claim 306 g on their web site. POE explained that it was probably due to a mistake in the factory: they have two very similar fabrics, with the lighter one meant to be used for these air mats and the heavier one for Dry Bags. They think the wrong roll of fabric was used in this case. This means you might want to check the weight of the mat when you are buying it to see what you are getting.
The mats seem quite air-tight: one was inflated fairly hard and left for a week indoors. There was little or no apparent loss of pressure.

The mat blown up in Will’s tent in the mountains.
Testing this mat was a little involved at first. Three samples were provided by POE for testing: two went to Roger Caffin and his wife Sue, and the third went to Will Rietveld. Preliminary testing of the first mat received by Roger showed up a problem: when the mat was deflated, folded lengthwise as recommended, and then rolled up, some of the insulation started to come loose inside the mat. It was being sheared by the rolling action.

Loose insulation.
POE was contacted and they claimed the mat was a hand-made prototype of less quality than the production units, and they replaced it. I have to say that the first mat did not look like a hand-made one, but who knows. I agree that the other mats did not seem to have as much of this loose insulation problem – although signs of it were still visible. Will saw a small amount of this problem on his mat as well.
Yes, the mats were taken on a number of walking trips by all concerned. Roger and Sue had some issues with theirs (we’ll get to those shortly), but they did find the mats rather comfortable on flat surfaces. On one trip Roger and Sue took one POE mat and one self-inflating Therm-a-Rest Prolite and swapped mats each night. We both agreed that the POE Ether Elite mat was ‘rather comfortable.’

Blowing up a mat.
A problem Sue noticed concerned blowing the mat up in the evening – that is normally her job while I stake out the guy ropes. The trip this photo was taken on was a rather hard one, and Sue was tired at the end of each day. Blowing up a mat tends to make one a bit dizzy. But this is a problem for most air mats which are not foam-filled and self-inflating.
Our previous review of the MSR NeoAir mats with its cross-ways tubes found that you could easily roll off the sides. The lengthwise tubes on the POE Ether Elite mat proved to be a lot more stable, with little or no tendency for rolling off. Will commented ‘the lengthwise tubes help to cradle the body,’ which is a fair description.
Some people have complained that with thicker air mats they notice the drop-off at the end of the mat where their feet hang over. None of our testers had any problem with this. Provided that you don’t inflate the mat hard, the ends do seem to give a bit, enough to avoid a hard feeling there.
Other issues follow.

Condensation inside the mat.
This is a problem which many people will have noticed with blow-up mats. Your breath carries water vapour, and when the ambient air is cold this water vapour condenses inside the mat. This photo was take the day after we got home from a four-day trip. You can see the water inside the mat – it’s the darker area. We got rid of the water by hanging the mat up on the clothes line in the sun for a day with the open valve at the bottom. This worked OK.
However, it must be said that this condensation problem will strike any mat which the user has to blow up himself. It is not unique to POE. Note that using a small pump solves this problem – but the pump will have a weight.

Blue loops holding two mats together.
A very annoying problem we noticed was that the mats slide something awful on a silnylon groundsheet. Tying two mats together with big loops around them did help once we got the mats into the right positions, but that only works when there are two of you. You can see one of the blue tape loops in the photo here: the other one is at the other end of the mats.
If the floor was tilted sideways at all, then things got worse. The mats would slide sideways and the side which hit the wall would then curl up in the air. There was one night in dark rainforest when the site was quite tilted – it was nearly dark before I found anything usable for the tent and I was grateful for it! That night we did slide sideways. I checked in the middle of the night and Sue’s mat had at least 2 tubes curled up the wall of the tent. She was sleeping half on mine. I didn’t mind: it was a bit cold that night anyhow, but the sliding around is a problem.

Silicone stripes on the underside of the mat.
This problem can be solved in the usual manner with some thin stripes of silicone sealant run down the lengths of the tubes, as shown here. I wish vendors would do this for us – but they don’t. Do it yourself – don’t hesitate! I just run the tube down the length of the mat and let the nozzle do the spread – I don’t even get silicone on my fingers.
I mentioned that the mats were comfortable. That includes being reasonably warm. Will commented "I found the pad to be warm down to about freezing when using a 30 degree bag," and Roger and Sue had similar experiences. Now POE have a strange claim for the R-value of this mat: they claim an R-value of ‘2 – 4’. What does this mean? We suspect that they are claiming a value of 4 for the regions where there is insulation, but only 2 for the other regions.

R-values for the mat.
Initially I thought that the claimed R-value of 4 was a bit high. However, we measured the R-value of the mat at various degrees of inflation, as shown in the graph here. The numbers on the horizontal axis show the separation of the measurement surfaces (ie top and bottom) in the insulation tester, in millimetres. Indeed, in a still horizontal test the R-value over the insulated section was above 4. For most of the cases here the insulation was on the top surface, as recommended.
You will see that as the mat is deflated and the thickness decreases (from 44 mm down to 14 mm) the R-value decreases. This is as expected. Comparing these results with actual field performance suggests however that all the values may be a little higher than would be experienced in the field. For a start, the gap under your shoulders and hip is going to be quite low – probably as low as or less than 24 mm if you have the mat inflated only to a ‘comfortable’ level. In fact, it isn’t hard to actually feel the ground under your hips if you try. But also, when you are sleeping on the mat you do move around, and this stirs the air up a bit. Moving air will be colder. All the same, the insulation layer does seem to be effective.
The bar labelled ’44 inv’ is an interesting case. Roger had noticed that the mat seemed colder when used upside down, so this test was at the ‘full’ inflation level but with the mat inverted: insulation face downwards. The R-value was lower, but not by much. Again, the still air in the mat while it was in the measurement system seems to have played a part here.
There is always a trade-off between weight and durability, and POE have made their choice. There is however a bit of a concern as to what is the ‘normal’ weight. There are also concerns about condensation collecting inside, the mat sliding around (which can be fixed), and some apparent fragility of the insulation strips. Apart from that, all testers found the mats nicely comfortable when inflated to a soft level, and useful down to about freezing.
| Dimensions (claimed) | 51 x 122 x 6 cm |
| Dimensions (measured) | 47 x 123 x 8 cm (but note comment!) |
| Weight (claimed) | 306 g |
| Weight (measured) | 307, 314, 373, 374 g (plus optional stuff sack and repair kit) |
| R-value (claimed) | 2 – 4 |
| R-value (measured) | Over 4 (but depends hugely on effective thickness) |
| Colour | Bright orange |
| MSRP | approx $60 |
Disclosure: The manufacturer provided this product to the author and/or Backpacking Light at no charge, and it is owned by the author/BPL. The author/Backpacking Light has no obligation to review this product to the manufacturer under the terms of this agreement.
Come see the softer side of making your own cozy fleece items!

Wearing the hat at Lake Ozette on the Washington State Olympic Peninsula in the winter.
Call it a beanie, toque or watch cap: I have used this for years, sometimes down to 20 degrees F when I’m hiking, or with a hood when I’ve stopped hiking. It’s somewhat rain resistant – fleece retains its warmth when wet and dries fairly quickly. Fleece is stretchy, so it stays on my head under the windiest conditions.
The hat is a single layer of fleece, with the bottom rolled back to make two layers over my forehead and ears. Warmth is easily adjusted by the roll of it: rolled less for more coverage of my forehead and ears, rolled more for less coverage.
I sleep in a top bag with my head completely exposed, to keep breath moisture from getting into the bag, and I wear the cap to keep my head warm. The set-up is good down to about 35 degrees F, and the hat weighs two ounces.
This is the same idea as the watch cap, except it’s longer (all the way down to my neck) with a cut-out for essentials like breathing and seeing. It’s bigger around than the hat, so I can easily wear the hat layered inside.
I find the balaclava too restrictive for day use. I use it to keep my head warm when I’m sleeping. I wear the watch cap underneath, and the combination keep me warm to below freezing, maybe 25 degrees F. Below, that I use a polyester batting insulated hat.

In my sleeping bag with watch cap and balaclava.
A pillowcase, you may ask? I’ve tried plastic pillows and stuff sack pillows, but I don’t like those materials against my face. I like a pillowcase to absorb some moisture and be soft against my skin. My pillowcase only weighs 1.5 ounces, so it’s a luxury I can afford in my weight budget.
Currently, I use a simple rectangular block of foam as pillow, but you could use a plastic blow-up pillow or spare clothes. I kind of object to spare clothes, because I want to be able to wear all my clothes and still have a pillow.
I previously had a pillowcase with a folded bottom so the raw edge wasn’t exposed, but my current iteration has a raw edge – it just doesn’t matter with fleece, which doesn’t unravel, but sort of curls up a bit on the raw edge. The pillowcase is two inches longer than the pillow and stretches a bit to fit the pillow fully inside it.

So soft and fluffy, it’s worth the (wee) weight penalty.
You can find fleece at your local fabric store. Malden’s Polartec 200 would be a better (lighter) choice. I used black, but they make it in many colors (or patterns, if you want to support your favorite sports team). Some fleece has longer fiber (pile) on one side, but I prefer two-sided.
Mark the fleece with a white “dressmakers marking pencil” (found at the same fabric store). The fleece fibers don’t allow a very precise line, but it’s good enough, and the pencil mark will wash or wear off. Cut the fleece with regular scissors or sewing shears, and raw edges needn’t be protected.
Use a 2 mm stitch length, normal stitch, reverse the stitch direction at the beginning and end of a seam to lock the stitch. Unlocked stitches will slowly come out. Sometimes I do a second row of stitches, but it’s probably unnecessary.
The only thing I don’t like about fleece is that it’s heavy for the warmth you get. Roughly speaking, warmth is determined by insulation thickness. I crudely measured by placing the material on a flat surface, holding a straightedge over the top surface, and measuring the thickness with a ruler. I also measured some polyester batting insulation with light nylon on the top and bottom.
| Fabric | Thickness (inches) | Weight (oz/yd) |
| Fleece | 1/8 | 6 |
| Polyester batting with lining | ¾ | 5 |
As you can see, the polyester batting is about six times thicker (warmer) for close to the same weight. This is a crude measurement, but however you calculate it, fleece is a lot heavier for the warmth.
Down provides even more warmth for the same weight, but for a small item like a hat, this doesn’t matter. I never have a large item of fleece clothing, like a jacket or pants, because of the excessive weight.
The trick is to have the hat loose enough to be comfortable (don’t cut off blood flow) and tight enough to stay on when it’s windy. Fleece is typically stretchier in one direction than the other. You want the stretchy direction to go around your head, not up and down.

Cut a piece of fleece 26 inches wide in the stretchy direction by 14 inches long.

Fold your fleece rectangle over so it’s half as wide. Sew it together half an inch from the edge, forming a tube or cylinder. Make sure the fabric is cut and sewn perfectly: you don’t want the cylinder wider at some places and narrower at others.
Now try the cylinder on your head and test for comfort and snugness. If it’s too loose, make another row of stitches closer in, making sure that the resultant cylinder is the same width all along its length. It’s easy to put in another row of stitches, but difficult to rip out a row if you make it too small, so don’t go too far in. The starting width should be big enough for even the biggest heads (like mine!). Don’t cut off the excess fleece until you’re all done. When you’re happy with the size, you can put in a second row of stitches for strength.

Next, put a row of stitches in a curved shape to close up the top of the hat. The exact shape of the curve isn’t important, though the cap will look aesthetically better if it’s an even arc. From the top of the curve to the bottom (where it meets the side) should be about 3 inches.

Cut off the excess fabric about 0.25 inch from the seam. The beauty of fleece is that the raw edge doesn’t unravel, so you don’t have anything else to do! (I have worn the hat shown for a few years, so it seems to have stretched out a bit at the bottom, and the width is no longer the same from top to bottom.)
Try the hat on. Fold up the bottom so it is double thickness over your forehead and ears and tweak, cutting some off the bottom to shorten it if needed.
The balaclava is made much the same as the hat, except that it’s wider because it doesn’t have to be tight to stay on in the wind, and so it will fit over the hat. It’s also longer to cover your neck, and there’s a hole for your face.
Cut a piece of fleece, 30 inches wide and 18 inches long. Fold in half and sew together, half an inch from the edge. Try it on, while wearing your hat. It should fit loosely. If it’s too loose, you can sew the seam closer.
When you’re happy with the width, sew a curved top, just like the hat. Cut off the excess fabric, 0.25 inch away from the seam.

Be careful cutting the face hole – fabric can’t be uncut. Make the hole on the side opposite the seam so that the seam of the balaclava runs up the back of your head. The exact shape isn’t critical. The measurements in the diagram below fit me, but you may want it a little different. You might want to try it on to determine where the hole should be in relation to important things like your eyes. Start with a very small hole, try it on, see which direction and how much bigger the hole should be, etc.
Start with a piece of fleece 10 inches wide (in the stretchy direction) and 20 inches long. This size works for my piece of foam (8.5 x 6.5 x 2 inches), which is only JUST big enough for comfort without being any bigger or heavier than necessary. You may prefer a different size, and if you simply stuff it with spare clothes, size isn’t that critical. If you have a plastic pillow, you will have to figure out your own dimensions.

Fold the fleece over in the long direction (this is opposite the two hats above). Sew on each side, half an inch from the edge, to form a rectangular sleeve. Try the pillowcase on for size and make it smaller if needed. Cut off the excess fabric 0.25 inch from the seam. Done and done!
My case weighs 1.38 ounces. The 8.5 x 6.5 x 2 inch piece of foam weighs 4.37 ounces. Total is 5.75 ounces, which is kind of a lot for a pillow, but it’s a luxury I choose to splurge on. Added bonus: the fleece is washable!
We asked, you answered! Responses to our solicitation for the best tarp pitch using the fewest poles, stakes, or guylines.
A while back, we asked readers for their best tarp pitches using the fewest poles or guylines. Presenting our favorites:
The best way to pitch a tarp is with NO poles, six stakes, and only ONE guyline!

I ran the ONE guyline from the front stake up through the poncho neck hole right to the overhanging tree branch. All the other corners are staked directly to the tarp. Fast, easy and the best!

Tarp Lean-to Shelter: A 9 x 12 foot tarp or plastic gives a 4-foot wide ground cloth under the single bed, a 3-foot wall, and a 5-foot awning. The reflector behind this fireplace is an inverted V of rocks as tall as you can easily roll into place. It also serves as a chimney to help channel smoke up, no matter which way the wind blows. By keeping the awning angled upward, it sheds rain off the back and doesn’t trap smoke.
It’s important to pick a site that will remain sheltered from later strong winds. A cross-pole, fallen log or tall rock behind tarp-wall provides a back-rest. Tarp size for a double bed is 9 x 18 feet. If biting insects are not a problem, I much prefer this to a tent. With a stack of firewood within reach, a back rest, and a view, it makes for a happy camp, rain or shine!
Got your own trick or tip? Post it in the forums below, or send it to us for possible publication. We want to hear what you have to say!
A lot of designers are moving to add lightweight options in their double-wall tent line-ups. Some have so many advantages and low weights that they may challenge the benefit of choosing a single-wall shelter!
You don’t have access to view this content.
This very lightweight wind shirt and pants are remarkably useful and versatile.

The unisex hooded MontBell Tachyon Anorak (left) weighs just 2.4 ounces (68 g), and the Dynamo Pants (right) weigh 2.8 ounces (79 g).
I have tested other wind shirts, but I strayed away from them because they are often too hot to wear while hiking and because I can save some weight by wearing my lightweight rain jacket and pants if I really need wind protection. Then I had the opportunity to test the new MontBell Tachyon Anorak and Dynamo Wind Pants and rediscovered how useful a wind shirt (and pants) can be. These are super-light, so they have little impact on my pack weight. Is there really a place for a wind shirt and wind pants in an ultralight backpacking kit?
The spring 2010 MontBell Tachyon Anorak is made of their 7-denier Ballistic Airlight ripstop nylon with Polkatex DWR finish, which is the same superb fabric they use for the shell of their X-Light Down Jacket. It has a 7.5-inch (19-cm) lightweight #3 zipper, an attached adjustable hood, elastic cuffs, and a drawcord hem. It’s hard to believe the weight is just 2.4 ounces (68 g, measured for size Large)!
The Dynamo Wind Pants are made of slightly heavier 12-denier Ballistic Airlight ripstop nylon with Polkatex DWR finish. They have an elastic waist with drawstring, a small key pocket inside, and 12-inch (30-cm) ankle zippers.
Both garments have a basic feature set to make them user friendly, while still keeping weight to a minimum.

Front (left) and rear (right) views of the MontBell Tachyon Anorak and Dynamo Wind Pants.

Details of the Tachyon Anorak: The attached hood (top left) has a Velcro adjustment tab on the back. The hood is sculptured to fit the head well (bottom left) and has an extended brim. A lightweight hem drawcord (top right) has one adjustor. The front zipper closes up to the chin (bottom right), and there are two drawcord adjustors to snug the hood around the face.

Details of the Dynamo Wind Pants: The waist (left) has an elastic waist band and drawstring, plus a small inside key pocket. The cuffs (right) have 12-inch (30-cm) high ankle zips, large enough to get my size 12s through.

I tested the wind shirt and pants during the spring and summer of 2010 on numerous backpacking trips and day hikes. The Tachyon Anorak was just the ticket for hiking a 12,000-foot (3,659-m) windy ridge in early summer (left). I love to camp on the alpine tundra, such as this camp (right) at 12,600 feet (3,840 m) where it is typically windy or breezy; the Tachyon Anorak and Dynamo Pants worn over an insulation layer makes life very comfortable.
For me (6 ft/1.83 m, 170 lbs/77 kg), the Tachyon Anorak and Dynamo Pants in size Large are a perfect fit. The sleeves and legs are just the right length, and both garments are roomy enough to wear over a thin insulation layer.
I found both garments to be especially useful. I wore the Anorak a lot during the day whenever the weather turned chilly, breezy, or downright windy. For me, the wind shirt worn over a baselayer while hiking is a dynamite combination, and I wear that combination a lot in the mountains where it is frequently cool and breezy.

Carrying a backpack over the wind shirt (left), did not abrade the wind shirt at all. I wore the pants in camp with my hiking shorts worn over them (right) so I could sit on abrasive rocks and logs without damaging the pants, and my shorts provided pockets. I kneeled on the ground many times with the wind pants on and did not damage the knees at all (of course I was careful not to abuse them).
The main difference between wearing a very lightweight wind shirt while hiking when it’s cool and breezy compared to using a lightweight rain jacket as windwear is that the wind shirt has a much broader comfort range. I can wear the Tachyon while hiking uphill carrying a backpack and stay comfortable much longer than I can with a lightweight polyurethane laminate rain jacket. The Tachyon completely blocks the wind and breathes well enough to stay comfortable, most of the time. However, when the breeze stops and the sun comes out, the anorak gets too warm and I have to take it off.
I did not wear the Dynamo Wind Pants as much as the Tachyon Anorak while hiking during the day. My legs don’t get cold as easily as my torso, so I simply wear them less. However, they really come in handy when I’m wearing hiking shorts and an icy wind suddenly comes up, or a shower. The pants (and anorak) will shed a short duration light rain or shower quite well – MontBell’s Polkatex DWR is excellent – but they will soak through eventually. When kneeling on wet ground, the knee area of the pants will readily wet through.

The anorak’s hood tends to balloon in a strong wind.
As I said at the beginning of this review, I had forgotten how useful and versatile windwear is until I tried these. The Tachyon Anorak, especially, is so lightweight, yet so effective and durable, that I don’t go on a trip anymore without it. Many readers in hot humid climates are probably wondering what I am talking about, so I better qualify that. Most of my hiking and backpacking is in the mountains from spring to fall, and in canyon country in fall to spring. The ideal conditions for a wind shirt are when there is some combination of cloudy, cool, and windy; and that occurs a lot where I hike.
The sweet spot for a wind shirt is to wear it over a baselayer. That combination is remarkably warm and comfortable over a wide range of conditions while hiking. The type and thickness of the wind shirt can be adjusted for the season and expected conditions. I find that a very thin wind shirt, like the Tachyon, is best because it is comfortable to wear over a wider range of conditions. I previously used a Montane Microlight wind shirt, which is a little heavier, and it is simply too hot to wear much of the time.
Overall, I am very pleased with the light weight, minimal and useful features, fit, durability, wind resistance, water resistance, and versatility of the Tachyon Anorak and Dynamo Wind Pants.
| Manufacturer | MontBell (http://www.montbell.us/) |
| Year/Model | 2010 Tachyon Anorak and Dynamo Wind Pants |
| Sizes Available> | Unisex anorak S to XL Men’s pants S to XL |
| Style | Hooded anorak Pullover pants with ankle zippers |
| Fabrics | Anorak is 7d Ballistic Airlight ripstop nylon Pants are 12d Ballistic Airlight ripstop nylon Both have Polkatex DWR finish |
| Features | Anorak: attached hood with front drawcord and rear Velcro adjustment, 7.5-in (19-cm) front YKK 3 zipper, elastic cuffs, hem drawcord, stuff sack included Pants: elastic waist with drawstring, inside key pocket, 11.8-in (30-cm) 3 zipper, elastic cuffs, hem drawcord, stuff sack included |
| Weight | Size men’s Large tested. Anorak Measured Weight: 2.4 oz (68 g) Manufacturer Weight: 2.3 oz (65 g) size Medium Pants Measured Weight: 2.8 oz (79 g) Manufacturer Weight: 2.8 oz (79 g) |
| MSRP | Anorak US$89, Pants US$69 |
Disclosure: The manufacturer provided this product to the author and/or Backpacking Light at no charge, and it is owned by the author/BPL. The author/Backpacking Light has no obligation to review this product to the manufacturer under the terms of this agreement.
Ever tried to use your stove in the cold only to find that it just won’t work, even although shaking the canister tells you there is plenty of fuel left? Then, when you check it at home to see what’s the matter, it works perfectly. What is going on?
You don’t have access to view this content.
 Loading...