Introduction
In my past two articles (here and here) I have described the critical importance of high Moisture Vapor Transmission Rate (MVTR) for removing moisture vapor from your clothing layers. By choosing a high MVTR waterproof shell, I can use one jacket to replace both a wind layer and a rain layer. This jacket provides excellent weather protection and comfort over a wide range of conditions while saving weight and space in my pack.
There is a problem with aspiring to wear high MVTR garments – finding which garments have high MVTR! Most manufacturers are happy to claim that their garments are breathable. Unfortunately, few actually publish MVTR measurements. Even when the results from standardized testing are published, they are not necessarily comparable given the number of testing standards that a clothing manufacturer can select.
In this article, I present MVTR, hydrostatic head (water resistance), and air permeability measurements for 18 waterproof-breathable shells from nine manufacturers. The shells in my test utilize numerous membrane and face fabric combinations. With these test results, we can understand how the clothing on which we spend our hard-earned money will perform and what features we are actually buying.
Here is what I have learned from the test results:
- This survey identified only three waterproof-breathable (WPB) jackets with what I consider to be very high MVTR. This means the opportunity to combine the functions of a wind and rain layer in a single, lightweight garment is limited.
- Gore-Tex membranes have generally high denier (fiber weight) face fabrics. High denier face fabrics reduce MVTR performance for any of the Gore membrane types. The best MVTR performance for any of the Gore membrane types will be achieved using the lowest face fabric fiber deniers.
- Gore-Tex membranes are all adequately air impermeable and waterproof. The variation among the garments will be in denier and MVTR, as well as in the feature set. In general, (excluding Gore Shakedry) the Gore Active or Gore Pro membrane will provide the best MVTR performance. However, laminating a Gore Active or Gore Pro membrane to a high denier face fabric will substantially reduce the MVTR performance. As you will see, laminating a 100-denier face fabric to a Gore Pro membrane produced the second-worst MVTR performance amongst the garments tested.
- Arc’teryx price points vary substantially according to fabric weight and membrane type. However, the performance metrics reveal that spending a lot more money may provide a more robust jacket but does not necessarily result in a significant change in MVTR, water resistance, or air permeability. Don’t buy more jacket than you actually need!
- Higher MVTR values are generally achieved with lighter-weight fabrics. The purchaser needs to think carefully about how much face fabric durability is required for their intended uses. If you are a rock climber and constantly rubbing against hard, sharp surfaces, then perhaps you need that 100-denier jacket. Just be aware that you should try not to sweat while wearing it.
Testing Methodology
18 waterproof-breathable jackets were tested for this project. All were new when tested with the exception of the Arc’teryx Beta AR. The jackets were selected to provide a mix of available membranes and fabrics. Of course, there are numerous membrane technologies on the market, so additional performance options may be available and may be tested in future articles.
The following tests were performed:
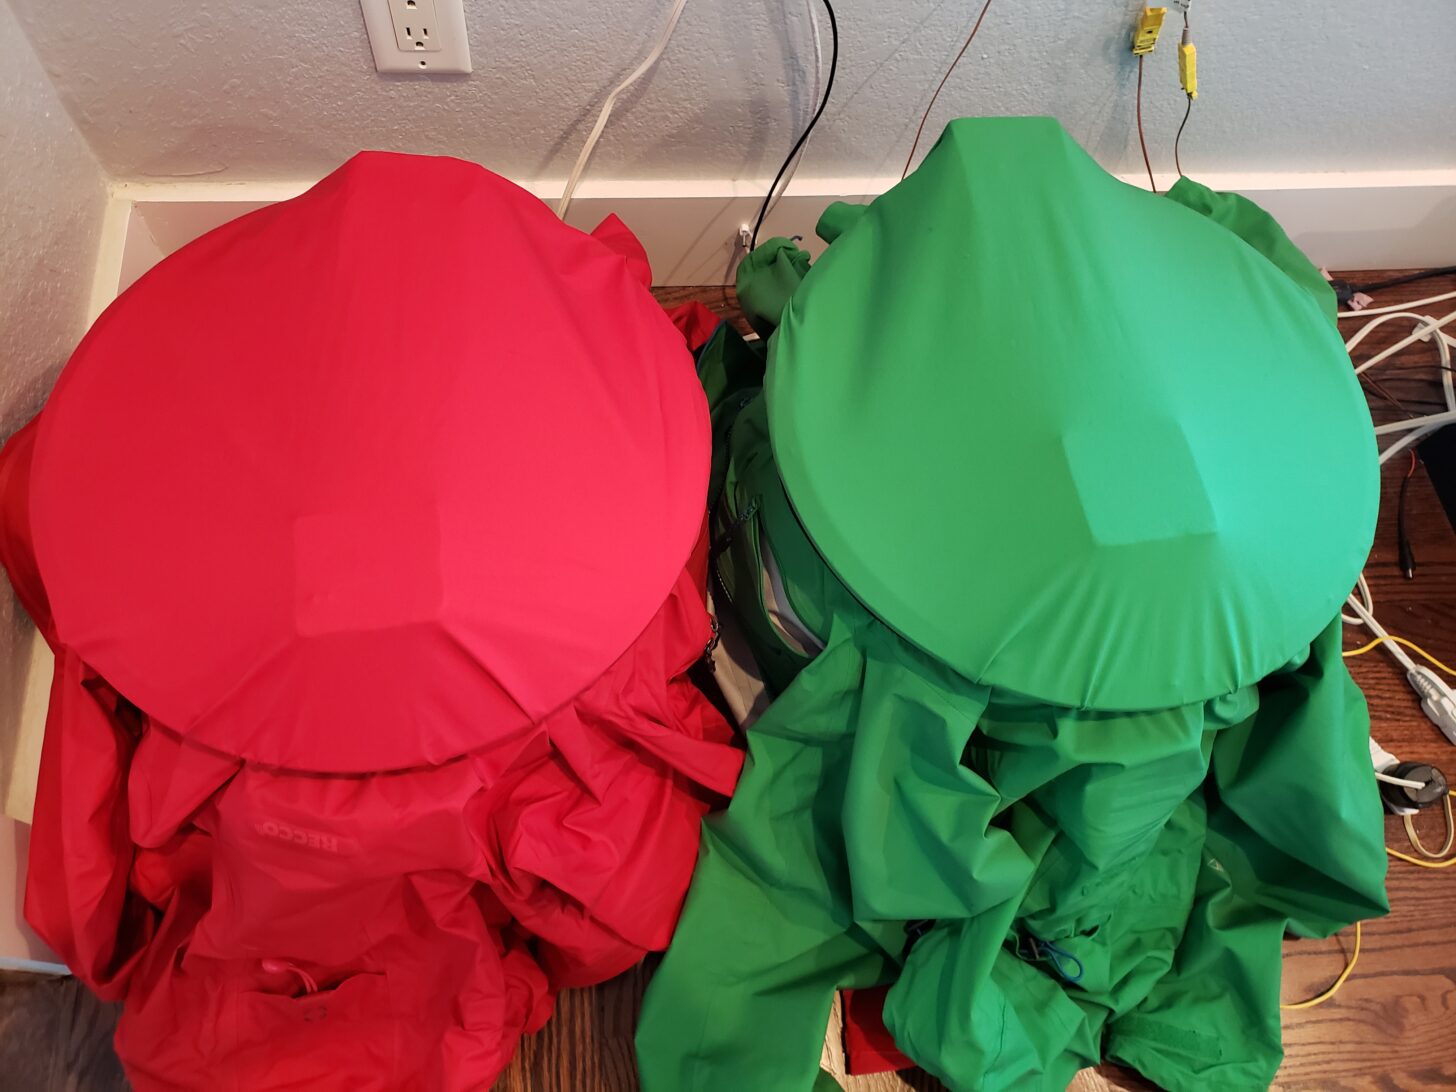
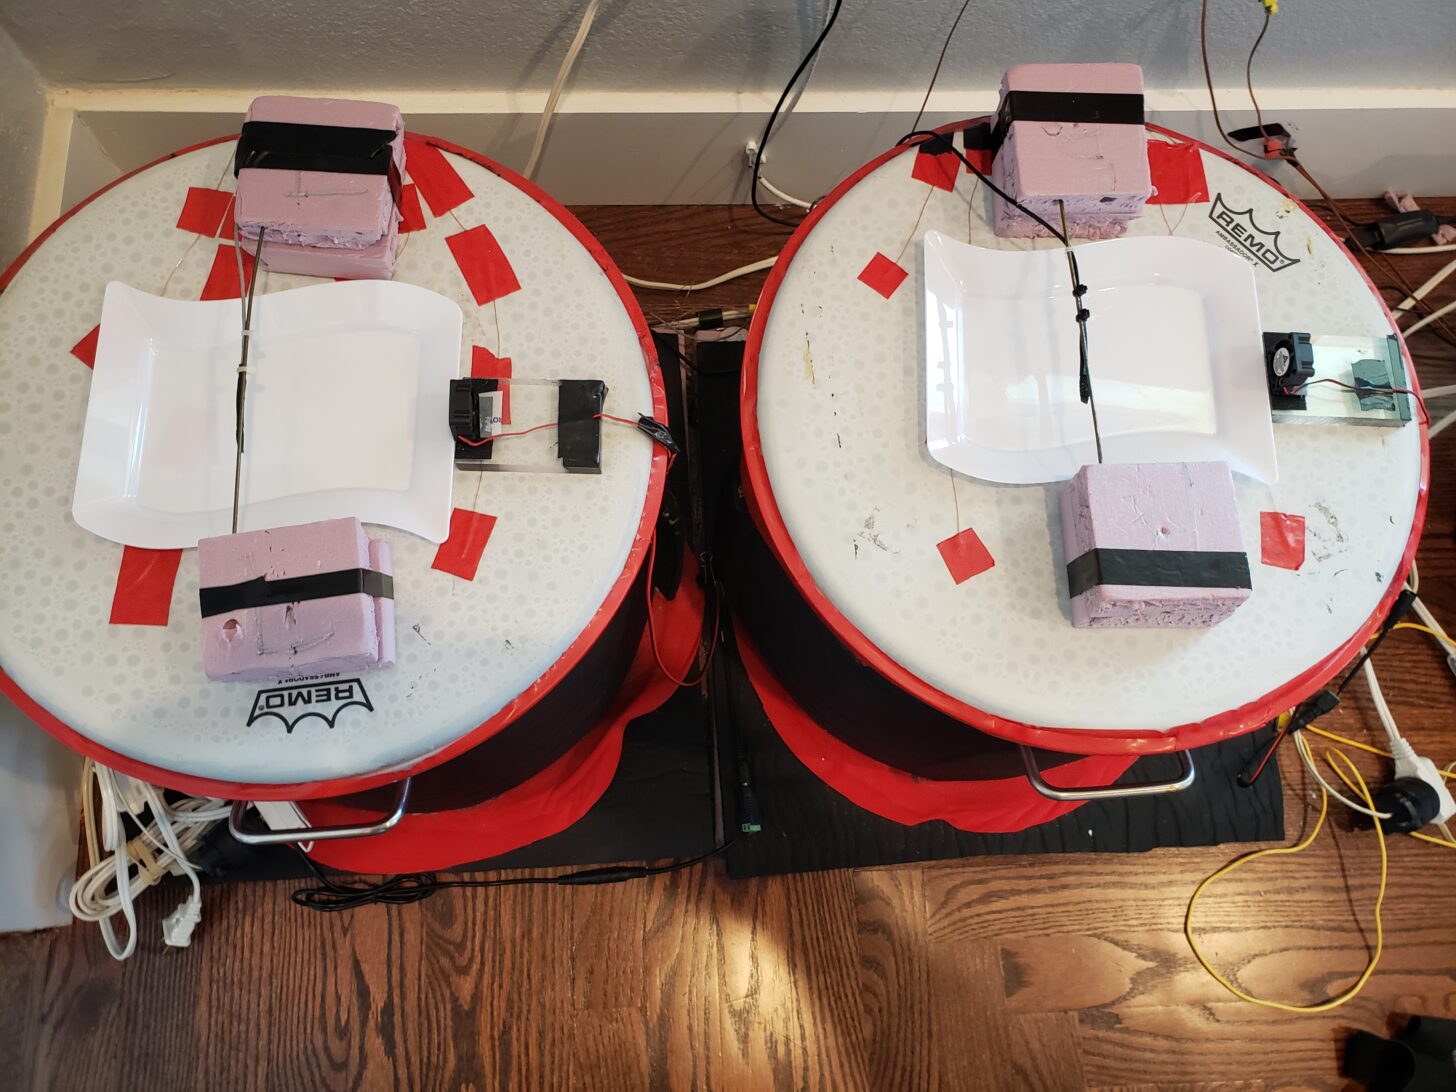
MVTR is measured using our permeation kettles. For this test, the kettle water is heated to a predetermined value, typically from 105 °F to 125 °F (41 °C to 52 °C). A tray containing 100 grams of 120 °F (49 °C) water is placed on the work surface of each kettle. This is our vapor source for the test. A small air circulating fan is placed at the foot of the tray. The fan continuously blows air over the water tray. A digital thermometer/hygrometer sensor monitors the temperature and humidity just below the garment bottom surface. A third thermometer/hygrometer sensor is located three feet above the kettles. This sensor measures the ambient temperature and humidity. The data from the sensors is used to control heating elements that adjust the water temperature in the permeation kettles to achieve a vapor pressure target. This target is typically 0.3 psi. The data from the three sensors is monitored by a custom program that controls the kettle heating element operation. Figure 1 shows waterproof/breathable garments mounted on the permeation kettles for testing. Figure 2 shows the testing components mounted on the permeation kettle work surfaces. Figure 3 shows a screenshot of the Lab View control program.
During the test, which runs for three hours, water evaporates from the tray and passes through the test garment. At the end of the test, each tray is weighed to calculate the quantity of water that passed through the test garment. This weight is then converted to units of g/m2/24 hr (grams/square meter/24 hours), a measure of MVTR.


Hydrostatic Head (HH) pressure is measured to determine fabric water resistance. The test is conducted according to ISO 811 for most fabrics. For lightweight fabrics, the test is conducted according to AATCC 208, which permits the use of a restraining device to prevent the fabric from splitting under test pressures. The test results from the two standards are not comparable. When you read a manufacturer’s water resistance test for light fabrics (7-10 denier fabrics and perhaps higher) be concerned that a restraint was likely used, and the published test result would probably not be reached unless the restraint was present to avoid failure of the fabric.
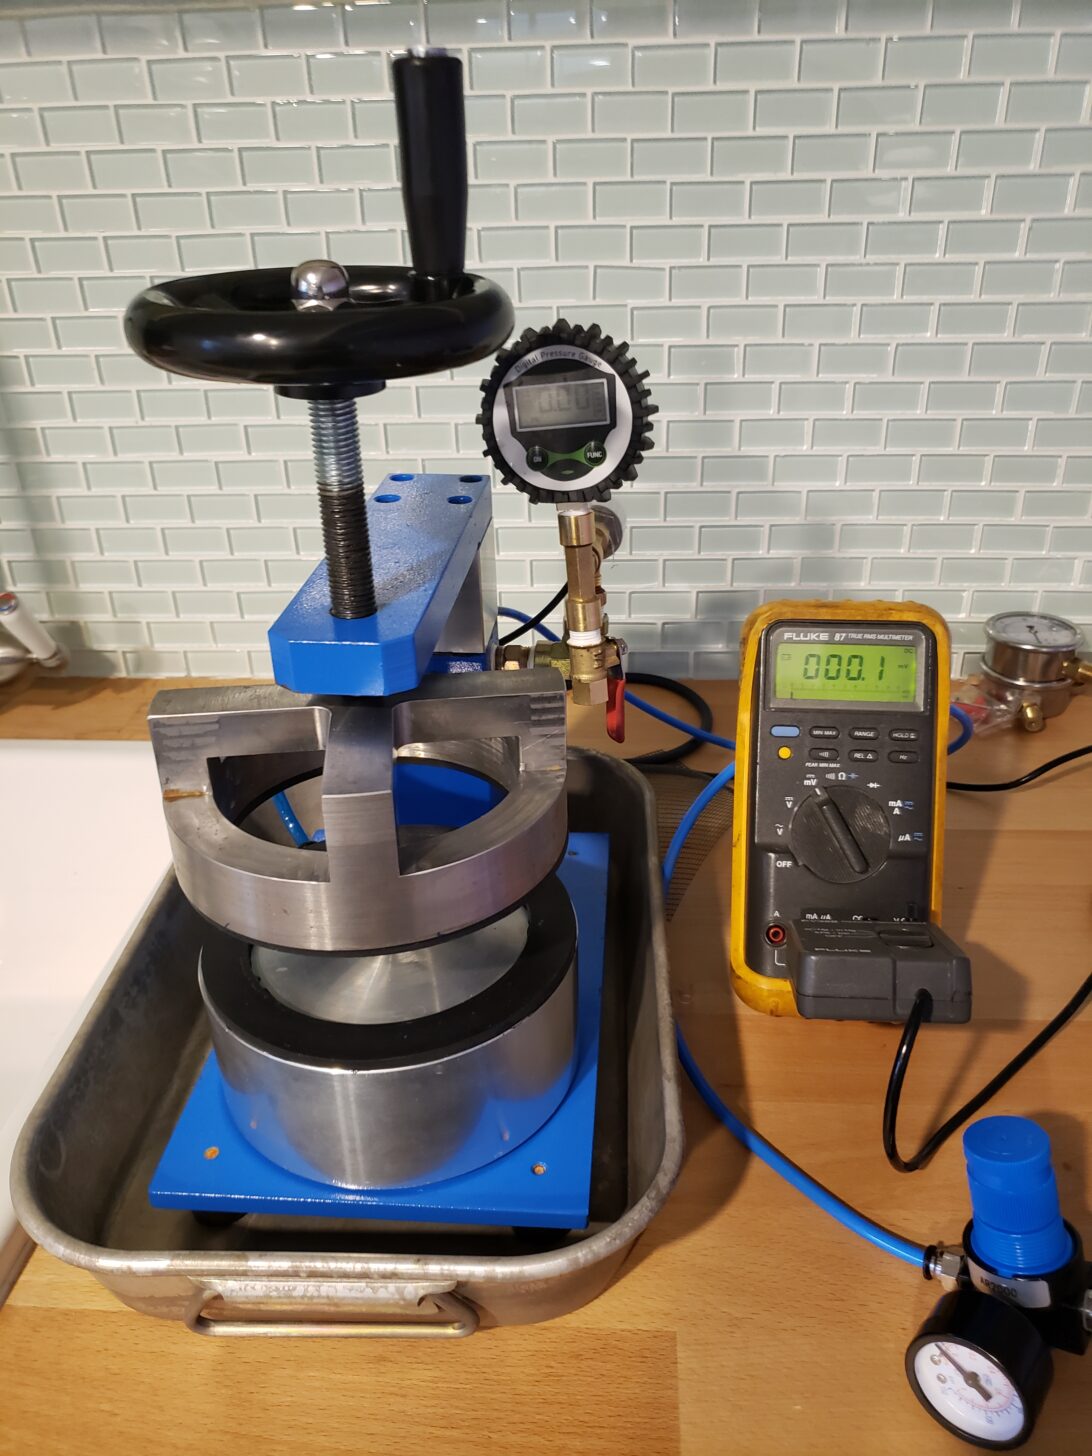
Figure 4 shows the test instrument (a Suter tester). To begin the test, the reservoir (lower tank) is filled with water. The test fabric is placed between the upper and lower clamps and then the top clamp is screwed down tight. Compressed air is slowly introduced into the reservoir which pushes water up against the test fabric. The air pressure is slowly increased until three water drops appear on the top surface of the test fabric. At this point, the test ends, and the failure pressure is recorded. Typically, three to five readings are obtained and averaged together. We generally run the test up to 16,000 mmwc (mm of water column) of pressure. A fabric that achieves this level of pressure can be assumed to be waterproof for most uses and weather conditions.

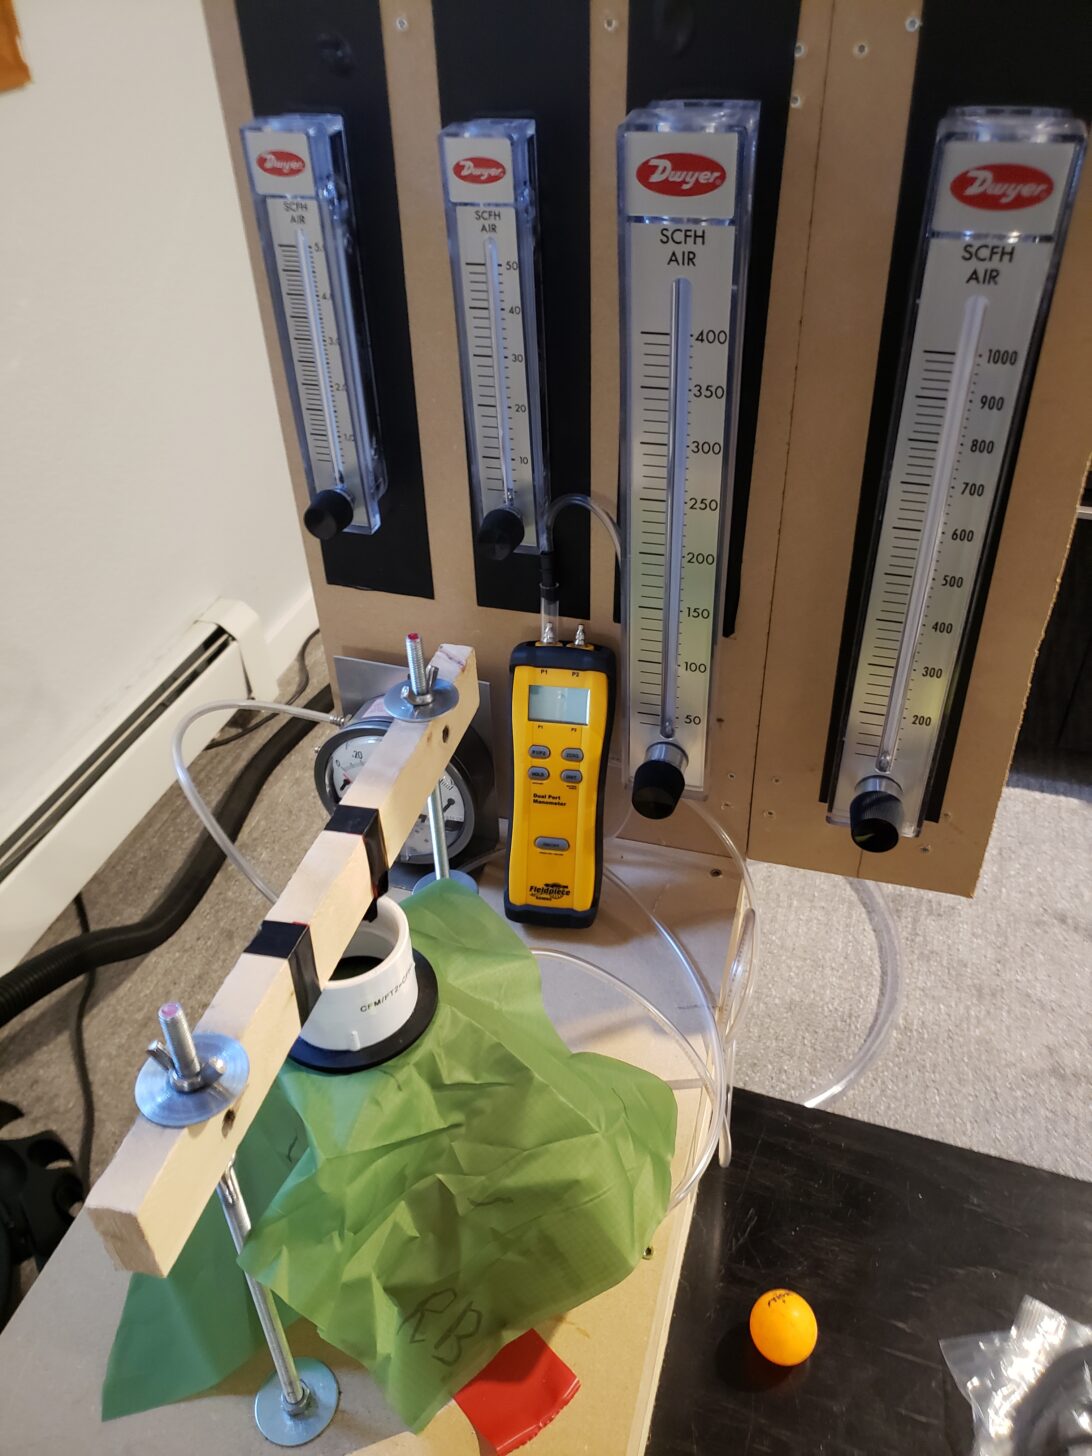
Air Permeability is measured according to ASTM D-737. Figure 5 shows the test instrument. In this test, a fabric is clamped within an air duct and pressured from the bottom so that a pressure difference of 0.5 inwc (inches water column) is present across the fabric from air flowing through the test instrument and exiting from the top of the duct. The air pressure difference across the fabric is measured by both a Magnehelic gauge and a digital manometer. The volumetric rate of airflow required to maintain this pressure is controlled and measured using one of four Dwyer flow meters. This number is then converted into units of CFM/ft2 (cubic feet per minute per square foot). This test is generally not necessary for a waterproof/breathable garment – they are typically air-impermeable, where impermeable is defined as less than 5CFM/ft2.

Member Exclusive
A Premium or Unlimited Membership* is required to view the rest of this article.
* A Basic Membership is required to view Member Q&A events


Home › Forums › By the Numbers: the Search for a High-MVTR Waterproof Breathable Shell Jacket