The OMM Kamleika Race lineup: Smock, Jacket and Pants. Photo courtesy of OMM.
Introduction
OMM is a British company that has been hosting adventure races since 1968, hence the name OMM, which stands for the Original Mountain Marathon. OMM also makes a full line of adventure racing gear and clothing, tailored towards that activity and the weather conditions typical in the UK: cool, wet, and windy. The products are equally appropriate for runners and ultralight backpackers, even though OMM designed them with adventure racers in mind.
OMM created the Kamleika shells to handle rain and wind at a minimal weight. OMM calls these their waterproof breathable soft shells, due to the soft, stretchy nature of the Gelanots fabric. The fabric alone makes the shells stand out, but our testing shows that these shells are well designed racing suits.
Specifications
| Manufacturer | OMM (www.theomm.com) |
| Year/Model | 2011 Kamleika Race |
| Fabric | Gelanots waterproof/breathable with four-way stretch |
| Features | All garments use Gelanots fabric throughout with taped seams, have water resistant zipper with zipper garages, and reflective detailing on front and back. |
| Pants | Knee-to-ankle side zippers, zippered pocket on right side only, elastic waist with draw cord, elastic ankles with draw cord |
| Smock | Elastic cuffs, thumb loops, rollaway hood with small brim, two-way front zipper, one externally laminated chest pocket, elastic draw cord on waist |
| Jacket | Velcro cuffs, rollaway hood with small brim and adjustable hood cord, double-ended zipper, two large externally laminated hand pockets, elastic draw cord on waist |
| Manufacturer Weight Size Medium |
BPL Measured Weight Size Medium |
Sizes Available | UK Retail Price | Cost in US* | |
| Men’s Pants | 6.7 oz / 190 g | 7.7 oz / 218 g | S-XL | £95 | $129 |
| Men’s Smock | 9.2 oz / 260 g | 8.9 oz / 251 g | XS-XL | £110 | $155 |
| Men’s Jacket | 10.6 oz / 300 g | 10.7 oz / 304 g | S-XL | £140 | $180 |
| Women’s Jacket | 9.5 oz / 268 g | Not Tested | XS-L | £140 | NA |
* US prices include shipping from the UK, and are based on the lowest prices available, which at the time of writing was with internet retailer wiggle.co.uk
Description
The most distinguishing aspect of the Kamleika clothing is the four-way stretch fabric, Gelanots. The fabric was developed in 1993 and is owned by Toyota Tsusho Corporation. There are a handful of other companies that use Gelanots, including Trew (USA), Earth Sea Sky (New Zealand), and Milo (Poland: see Winter ISPO 2011: Day 1). According to OMM’s website, Gelanots is a “polyester knit face fabric laminated to a 100% PU hydrophillic membrane” that weighs 109 g/m2. In terms of waterproofness, the fabric has a hydrostatic head of 20,000 mm. Breathability scores slightly lower than Gore-Tex, at 15,000 gsm/24hr.

The front, side, and rear views show the trim fit and minimalist design of the Smock and Pants.
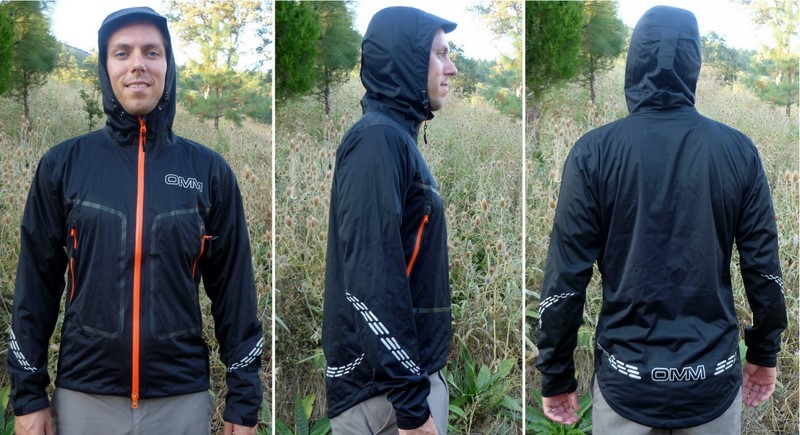
Front, side, and rear views of the Jacket, which has a full front zipper and two large pockets.

The front zipper on the Smock is 17 inches (42 cm), which is very long for a pullover. OMM uses a two-way zipper that enables venting of the torso while the neck area is still covered (left). The Smock has one 6.5 x 9.5 inch (17 x 24 cm) pocket on the left chest, accessed through a 6-inch (15 cm) zipper.

The Smock’s front zipper stops just above a backpack’s hipbelt, highlighting an advantage of the pullover design: no zipper and less fabric bulk underneath the hipbelt (left). The Jacket and the Smock have an elastic waistband that can be tightened with a cord-lock on the interior of each hip (right).

Smock and Jacket: The hood has an elastic draw cord and small brim. Note that the front zipper ends below the chin (left). A Velcro tab enables the hood to be rolled away so that the hood does not flap in the wind (center). The Jacket gains fore/aft hood adjustment with the addition of a second Velcro tab (right).

The Smock has thin elastic cuffs and thumb loops (left). The Jacket loses the thumb loops in favor of adjustable Velcro cuffs, but maintains the long sleeve length (right).

The Jacket steps up to the larger sized two-way YKK #5 front zipper that is 25 inches (63.5 cm) long (left). The large torso pockets on the Jacket are 8 x 10 inches (20.3 x 25.4 cm), accessed via 7-inch (17.8 cm) zippers (right).

The Pants have one pocket, on the right side, that is 5 inches (12.7 cm) wide and 11 inches (28 cm) deep with a 7-inch (17.8 cm) zipper (left). The side ankle zipper is 18 inches (45.7 cm) long, reaching up all the way to the knee (right).

In the front of the Pants, a small draw-cord cinches the elastic waist (left). A slightly larger draw-cord tightens the elastic band around each ankle (right).
Performance
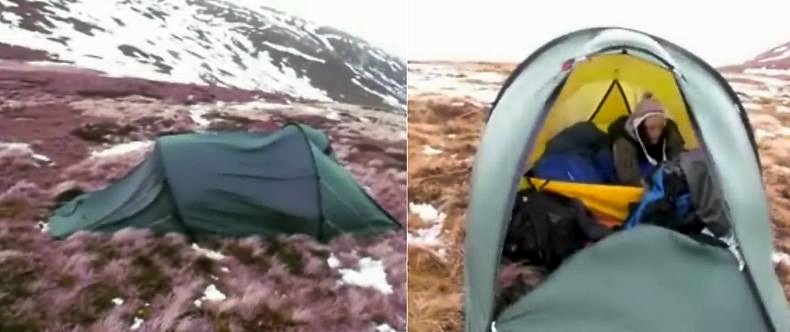
I used the Kamleika Race shells in the spring and summer of 2011. My testing grounds included Norway, Scotland, Ireland, Minnesota, and the Rockies of Montana and Canada.
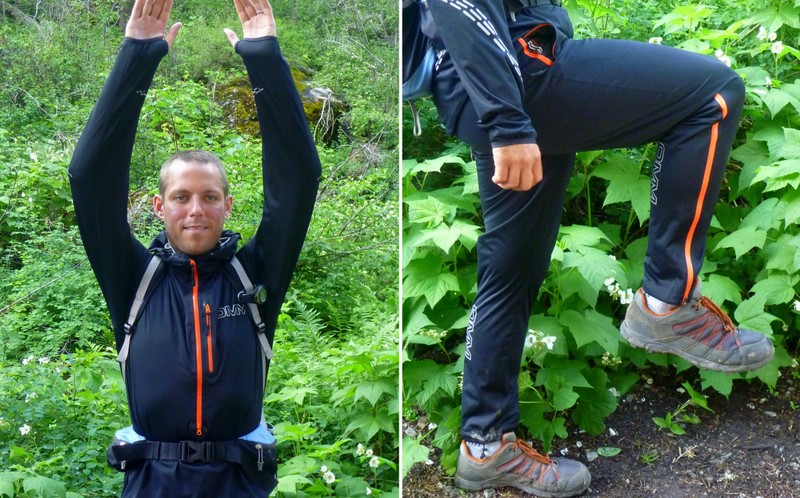
The benefits of four-way stretch fabric: my arms had complete freedom of movement even when wearing a backpack (left), and pant legs did not ride up when taking big steps (right).
The first thing that struck me is that the Kamleika Race kit is very snug fitting for a men’s medium, which is my standard size. It took me a while to get accustomed to the trim cut, but eventually I grew to appreciate it. I did not find it to be restrictive or especially tight in any one area. The leg, arm, and torso lengths were still plenty long for my 6’0” (183-cm) frame. The Kamleika clothing is snug all around, but long enough to cover the wrist, waist and ankles, and loose enough to fit enough insulating layers for three-season use. I could wear a medium-weight baselayer under the Pants. Under the Smock or Jacket, I could fit a thin baselayer and MontBell Thermawrap Parka and nothing more. This is generally all the insulation I need outside of winter alpine conditions. If conditions got really cold at night at camp, I could layer a down jacket over the Kamleika Smock. Finally, the fabric is very soft to the touch. It is very comfortable to wear: more like a track suit than a race shell.

A minor gripe is that the wrist on the Smock is a bit tight, and the thumb loop is even tighter. This likely led to the development of the small hole adjacent to one thumb loop.
One advantage of the stretchy Gelanots fabric is that it allows for snug fitting clothing without restricting mobility. This helps to reduce flapping and noise in windy conditions. I most appreciated this when I changed into other jackets and realized how much they flapped in the wind when the Kamleika did not.
OMM claims that the close fit helps with breathability as there is reduced air volume between the user and the shell. The idea is that with less air volume, humidity from perspiration has nowhere to go but out. I could not do any laboratory testing to verify this claim. However, I found the shells to have better than expected breathability in the field, so there may be some validity to this design. Breathability felt at least as good as Gore-Tex and other brands of proprietary fabric of similar waterproof technology. That being said, do not count on it being quite as good as eVent or the newest waterproof/breathable fabrics on the market: Polartec Neoshell or Gore-Tex Active.
The zippers all worked well: no precipitation leaked through and the zippers never got stuck on the fabric. OMM uses #3 YKK zippers on all of garments, except the Jacket’s front zipper, which is a #5 YKK.
I really liked the two-way zipper on the Smock and wish more pullovers would come with this feature. The Smock’s front zipper is quite deep, which allows excellent venting. The two-way zipper enables venting to be maintained while keeping the hood snug and secure, and the chin covered. For me, this is a small improvement that makes a big difference, and is one way that makes the Smock unique.
The Jacket has a two-way front zipper and therefore has the ability to do the same type of torso-venting while protecting the neck and head. I seldom, if ever, used this feature on the Jacket because the zipper starts below the hipbelt. To unzip from the bottom of the Jacket would require releasing the hipbelt, which is not always easy, safe, or practical to do while hiking. However, one advantage of the Jacket’s full front zip is it can vent the entire front of the torso and some hikers might prefer this over the Smock. Additionally, this was not an issue when I wore a backpack without a hipbelt, or didn’t wear a pack at all. In this case, the Jacket has the clear advantage in venting capability.
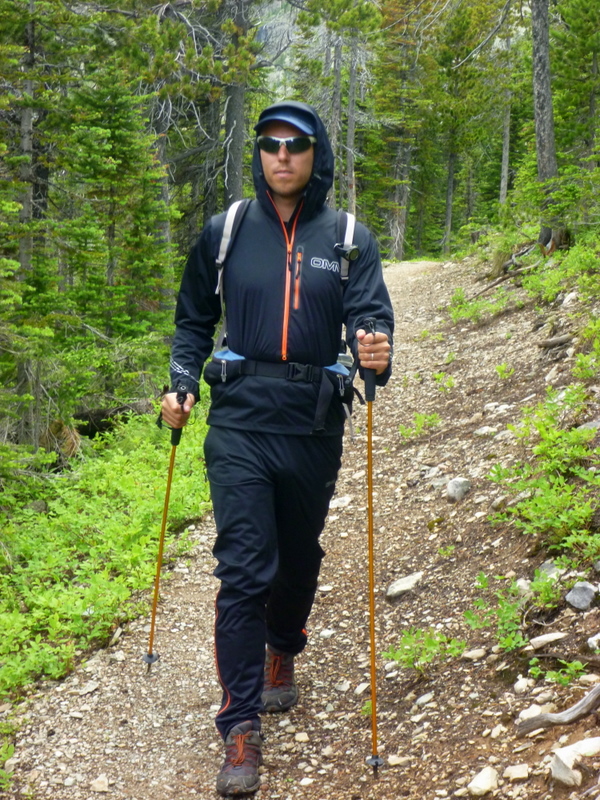
I often wear a sports cap while hiking, and the basic hood of the Kamleika Smock compliments this nicely. Note: I did not intentionally color coordinate my outfit with the Inov-8 RocLites and CAMP Xenon 4 poles!
The hood is relatively snug: there is room for an insulation layer, like a thick beanie or a mid-layer hood, but nothing more. I didn’t need to tighten the elastic drawcord as I have a rather large head for my clothing size. The hood’s brim is fairly small, so I found it was best to wear a billed cap underneath to keep the rain off of my face. It is easy to use the Velcro tab and roll away the hood, which keeps it from flapping in the wind.
The Kamleika Pants fit more snugly than the tops and are definitely tapered toward bottom. The generous ankle zips make it is easy to put on and take off the pants while wearing shoes. Of course is is possible to unzip the legs to help ventilate or just relax the fit around camp. Since the Pants taper significantly, it would be best to use them with shortie gaiters to prevent water from running down the pants into the shoes. I found that having only one pocket is generally fine since most UL packs have hipbelts to keep things accessible. I occasionally missed having a second pocket around camp, when my left hand was left out in the cold. However, when weight is concerned, one pocket was just fine. It is a really deep pocket that can swallow maps, P&S cameras, energy bars, and more. The pocket zips closed, ensuring that nothing will fall out.
The Kamleika kit is available in a light blue or black fabric with orange highlights. The women’s version will be available in red.
Assessment
In a market crowded with lightweight waterproof/breathable clothing, the Kamleika Race line stands out. A few design elements and the fabric choice, which leads to the particular fit, are what’s so unique about the clothing. It was an adjustment to get used to the snug fit. However, my mobility was never limited, thanks to the excellent stretch-properties of the Gelanots fabric. I appreciated the lack of extra fabric that would have flapped noisily in the wind. The narrow seam taping and simple design (few pockets, few seams) minimize barriers to breathability, thereby maximizing the fabric’s ability to transport moisture. Fabric durability seems good, but not the best, as one hole showed up in thumb loop. Only long term use will show whether this is an issue of concern. The soon-to-be-available women’s line is a very welcome addition.

Hiking in Banff National Park, Canada.
The feature set is well thought-out for three-season use in windy and rainy weather. The arms, torso and legs are all long enough to cover the wrists, waist and ankles. The hood is quite basic, but functions well enough. Some may be satisfied with the smallish brim, but those of us that typically wear a sports cap will appreciate the lack of redundancy of having a full brim and sports cap. OMM did not skimp on zipper length to save weight, but focused on functionality with the long ankle zippers on the Pants and the long front zipper on the Smock. There are only four pockets in all three garments combined, but they are all zippered, very large, and very accommodating due to the stretchy fabric.
Finally, the Kamleika shells represent an exceptional value. At the time of writing, OMM does not have direct distribution in the US. However, several UK-based internet retailers are willing to ship internationally. Due to tax differences, it is usually cheaper to have products shipped to the US as compared to buying it in the UK (as is often the case). As such, the price point for American customers is fairly low (see the table above).
The Kamleika pieces are all very light, but there are other shells available that weigh 1-2 ounces (28-57 grams) less. The Pants weighed one ounce (28 grams) more on my scales than the manufacture’s stated weight. There are also several new technologies that are far more breathable than Gelanots. While I learned to like the very snug fit, others might not be so comfortable with it and could consider buying one size larger. The small, minimal hood and lack of face coverage limits these shells to three-season usage. The shells worked really well in cold-to-cool temperatures, but I don’t think I’d be as comfortable in warmer weather, especially if the sun comes out or if there is no chance of wind. Nor would I be comfortable in really cold weather, as I would not be able to fit enough warm layers underneath the shells.
Acknowledgement
I would like to thank Kristin Tennessen for providing the photographs and editorial capabilities for this article.
Disclosure: The manufacturer provided this product to the author and/or Backpacking Light at no charge, and it is owned by the author/BPL. The author/Backpacking Light has no obligation to the manufacturer to review this product under the terms of this agreement.