Articles (2020)

Vasque Spindrift Trail Runners: Thinsulate insulated with Gore-tex First Look (Outdoor Retailer Winter Market 2005)

Lots of companies make Thinsulate insulated hiking boots with a Gore-tex liner, but not many make them in the weight range of a trail runner. For people that hate boots and avoid them at any cost (I’m one) this shoe may expand what you can do in the cold and wet!

To my mind, these may be close to the perfect winter day-tripping shoe in all but the coldest weather – even a long distance shoe in a mixture of mud, snow, and crud. All you need to add is an Integral Designs eVENT gaiter (or a spring gaiter). If the snow is hard and steep or there is ice, add some Kahtoolas. You’ll be set for anything short of vert ice and arctic cold.

SPECS

  • Mid-cut trail runner / light hiker (very low cut)
  • Weight: 2 lb 7 oz, men’s size 9
  • 200 g Thinsulate insulation
  • Gore-tex liner
  • EVA midsole with TPU plate
  • $100

Integral Designs eVENT Pants First Look (Outdoor Retailer Winter Market 2005)

SPECS

  • Fabric: 30 denier eVENT with a soft feel
  • Weight: 13 oz (370 g)

The bottom half of the Integral Designs (ID) eVENT jacket is finally here. The pants use a more durable 30 denier fabric that has a soft feel like Supplex. Pants get more abuse, so the heavier fabric is justified. They feature a snap-fly front and a waist adjustment made of elastic and Velcro. The pants have belt loops, and there are two, side waterproof zippers for pocket access. The cuffs have a zipper and bellows expander that allows you to put the pants on while wearing shoes and for adjusting to go over the top of hiking, climbing, or ski boots. There also are small loops to attach an instep cord that can hold them in place like a gaiter.

Inka Extreme Conditions Pen First Look (Outdoor Retailer Winter Market 2005)

If the Inka pen has not won a design award, it will. It is a marvel of precision-engineering and attention to detail, and it weighs 0.6 ounces! Its approximately 3-inch long body includes a split ring so that the pen can be attached anywhere. The cartridge is pressurized so that it can write at any altitude, angle, temperature, and underwater – and it writes smoothly. The case is hardened 304 stainless steel, and the pen grip is cast from high-strength lightweight composite. The pen grip snaps snuggly into place inside the steel case as its O-ring engages the internal groove. The pen is secure but can be quickly pulled from the case to make a note in any weather condition. The O-ring is a special rubber that allows the pen to be extracted from the case even in cold weather. For more leisurely writing, the Inka can be transformed into a full-length pen. The cartridge is shorter than a typical pen cartridge but lasts as long since ink is used more efficiently in a pressurized cartridge. Pressurized cartridge refills can be purchased inexpensively online, and regular cartridges can be purchased at any office store. The Inka pen carries a lifetime warranty. The pen debuted at this OR show and is the first offering from entrepreneur and designer Greg Adelman, an optical engineer based in Boulder, Colorado.

Inka pen closed, assembled full length, and the pen grip removed from the steel case

Writing under water

SPECS

  • Weight: 0.6 oz (0.5 oz without split ring)
  • Length closed: 3.15 in
  • Length full-size: 5.00 in
  • Temperature range: -30 to 300 degrees F
  • MSRP: $30
  • Website: www.inkacorp.com

NEMO Burrito – Air Supported Tent First Look (Outdoor Retailer Winter Market 2005)

NEMO is debuting a line of tents supported by air filled beams. Their idea is to create “some of the easiest to use, fastest to setup, and most compact tents . . . . for three season backpacking.” They are targeting their tents for adventure racers “or any kind of adventure where weight, speed and simplicity are paramount.” NEMO claims a setup time of 15 seconds for their two-person tent. Needless to say NEMO has a lot of patents pending on their tent designs.

The solo Burrito and its two-person brother, the Hypo AR, are squarely targeted at lightweight backpacking. The free-standing Hypo AR weighs 3.25 pounds and was not at Backcountry Basecamp but will be on the main show floor tomorrow. Stay tuned for another release about this two-person tent before the end of the show.

The one-person NEMO Burrito. The black arches front and rear are actually two redundant air beams, one inside the tent and one outside (four total for this tent).

Take a NEMO Air Supported Technology tent out of the stuff sack and attach the 4-ounce air pump and just pump it up. No more threading and clipping of tent poles. When you’re ready to take it down, let the air out, and fold it up.

NEMO Burrito has breathable Epic fabric for the majority of the shell (70%) supplemented by 30-denier silnylon (30%). A new fabric, 2 oz/yd2 Dimension Polyant X-Pac, forms a skeleton for high stress areas such as the air beams. The floor is a durable 70-denier coated nylon. According to Chris Dickey, the Burrito is a fully featured shelter somewhere between a bivy sack and a tent. At 3 pounds it is not the lightest solo shelter, but we’re still interested in taking one for a test spin to see if it has enough performance advantages to justify its weight. Obviously, we are a bit more interested in their Hypo AR. (NEMO claims that four friendly adventure racers can fit into this tent.)

Detail of some features: Two urethane windows, lots of tie out points, two side doors with mosquito netting (one on either side of the tent), and four vents. The multiple vents and Epic fabric should help with condensation inside the shelter.

SPECS for the Burrito

  • Single person, 3-season tent
  • 3 pounds
  • 18 ft2 (1.7 m2) floor area
  • 123 in (312 cm) long x 36 in (91.5 cm) wide x 27 in (68.5 cm) high
  • Main pitch with a single front and rear stakeout, additional stakeouts increase the stability of the tent in high winds
  • Includes a 4 oz pump or alternate lighter integrated pump
  • MSRP $295

SPECS for the NEMO Burrito vs. EMS MoonShadow

  • Single person, 3-season tent , EMS Same
  • 3 lbs 4 oz (tent is 3 lbs, but requires a 4 oz pump), EMS 2 lbs 15 oz. (no pump required)
  • 18 ft2 floor area, EMS 26 ft2 floor area
  • Nemo-No Vestibule, EMS 10 ft2 vesti
  • peak height 27’’ (can you sit up in it?), EMS 34”
  • Main pitch with a single front and rear stakeout, additional stakeouts increase the stability of the tent in high winds, EMS Free standing, 6 stake outs + guy outs.
  • Includes a 4 oz pump or alternate lighter integrated pump, EMS no pump (Easton Carbon Fiber frame)
  • Nemo MSRP $295 (available online Spring 2005), (available 4/05) Retail $239

Dynafit Randonee Ski Equipment, Now Lighter First Look (Outdoor Retailer Winter Market 2005)

Dynafit, the company with the lightest set of randonee skis, boots and bindings, just got lighter. This year they introduce a race ski, boot, and binding. Randonee racing is very popular in Europe and catching on in the US. The idea is lots of climbing, 5,000 feet or more per race, and surviving the downhills on your skis to get to the next climb. With all that elevation gain, weight is of the utmost importance. Dynafit uses carbon fiber in the ski construction, carbon fiber and titanium in the binding, and reduces the boot to one buckle – all to shave precious grams. We can certainly see an application for the race ski and boots for a fast and light day outing. And the new half-pound race bindings would work on many sturdier skis than the race ski.

For more conventional, non-race touring, Dynafit replaces the venerable three-bukle TLT 700 boot with a stiffer four-buckle boot, the Aero. According to Dyanfit, the CarveLite skis are replaced with the carbon fiber FreeRide 8.0 skis. Available in 155, 165, and 175 cm the FreeRide is wider and more shaped than the CarveLite. I demoed both the boots and the skis at the show. The boots are substantially stiffer than the 700’s and feel a lot more like a downhill ski boot. Aggressive skiers should love them. There is also a wider ski, the FreeRide 10.0 more suitable for powder that is only available in 178 and 187 cm lengths. FreeRide 10.0 is 3 lb (1360 g) per ski.

There was no spec book at the booth and a lot of interested people vying for attention so most of these numbers are from hastily jotted notes:

The new 8.3 oz (235 g) Dyanfit TLT Race Ti binding uses carbon fiber and titanium. That’s a pound for a pair of bindings!

Dyanfit TLT Race Boot: A lighter one-buckle version of the TLT 4. Weight 2 lb 6 oz (1080 g) per boot.

Dyanfit 4 Buckle FR Aero TF Boot: Weight 3 lb 14 oz (1800 g)per boot.

Race ski: Narrow, carbon fiber, lightest Dynafit ski by a margin. 1 lb 10 oz (737 g)!! per ski.

Free ride 8.0 ski: Carbon fiber, 1320 g per ski for 165 cm.

Komperdell Carbon Fiber Trekking Poles: Lightest Sectional Trekking Poles First Look (Outdoor Retailer Winter Market 2005)

Komperdell introduces a new line of all-carbon-fiber trekking poles. At 5.6 oz each for the women’s (compact) model and 6.2 oz each for the men’s model they are the lightest 3-section poles we know. As we’ve mentioned before, men, including many of our staff, may opt for the lighter “women’s” model.

Komperdell also introduced a new 2-section model that will be even lighter. How much lighter we don’t know, but they might be less than 10 oz for the pair! They were so new that they didn’t have a name or specs at the show. The 2-section poles also have a nice rubberized grip section on the shaft below the main grip.

Both poles use a new Duolock adjustment system that is 80% stronger than conventional locking adjustment systems. The poles adjust easily and are less prone to slipping when tightened, or jamming when untightened.

For about an ounce more you can get air-spring shock absorption (Airshock) with the poles.

Komperdell 2-section pole on the top and the 3-section “C3 Duolock” on the bottom. Note Reptile grip tape below grip handle on 2-section model.

SPECS

  • Women’s (compact): 5.6 oz each (6.5 oz with Airshock)
  • Compact grip
  • Packed size: 23.6 in (60 cm)
  • Max length: 49.2 in (125 cm)
  • Men’s: 6.2 oz each (6.9 oz with Airshock)
  • Full-sized grip
  • Packed size: 26.7 in (68 cm)
  • Max length: 55.1 in (140 cm)

Komperdell 2-section pole on the left and the 3-section “C3 Duolock” on the right.

Shoeboard — Combination Ski and Snowshoe First Look (Outdoor Retailer Winter Market 2005)

Do you love the ease and simplicity of climbing up a ridge on snowshoes but envy those skiers that make the trip back down in 20 minutes. Yeah, it takes you just as long to go down as it did to go up! If so, the Shoeboard may be for you.

Their literature claims: “Better than a snowshoe, good as a ski!”

Shoeboard in ski mode. This shows a binding very similar to a snowboard, but in snowshoe mode the binding pivots at the toe. There is a small necessities pouch at the back of the binding.

The Shoeboard is a short, plastic ski with a twist. Wings fold out on either side of the Shoeboard to increase surface area and flotation. Attach the rear crampon and you have an instant pivoting snowshoe with both front and rear crampons. When you’re done snowshoeing, fold in the wings and off you go down the mountain.

Shoeboard in snowshoe mode. Wings fold out from under the ski and a rear crampon attaches.

The Shoeboard works best with a snowboard boot. Unfortunately, we didn’t have boarding boots, so we could only watch as others tried them. They had a bunch of demos at the show and people were doing well with them. We saw a number of folks skiing with reasonable success on the demo slopes of Backcountry Basecamp. Other boots, like a Sorel, may work but will suffer stability issues when skiing if they do not provide enough ankle support.

Detail of the bottom of the Shoeboard in snowshoe mode with side wings, both crampons, and the pivoting toe.

We asked, but Shoeboard didn’t know the weight. We picked one up and it felt pretty heavy, but then it was doing duty as both a snowshoe and a ski. Price will be approximately $300. We tried their website www.shoeboard.com, but it’s not up yet. Best chance is to call them at (801) 633-3490.

Steel Kahtoola: Lightest 10-Point Steel Crampons First Look (Outdoor Retailer Winter Market 2005)

Kahtoola crampons have become deservedly popular. One can cover difficult snow and ice in the comfort and flexibility of trail runners or light boots. It’s traction for the masses. Outfitters want to rent them out, but the aluminum doesn’t hold up to day-in and day-out use – at least, not without a lot of sharpening. Kahtoola’s answer was to add a steel version to their line.

Bottom view: New steel model on left, and old aluminum model on right.

Only a bit heavier than their aluminum model, the steel version has a number of other advantages:

  1. With the durability of steel you can tackle a lot more rock and bullet-hard ice without having to resharpen your points all the time. This opens up more terrain to your Kahtoolas.
  2. The steel crampon points are half as thick and 25% longer for better penetration into hard snow and ice.
  3. The front strap buckle (the only wear point Kahtoola has seen) is now riveted.
  4. The steel version has a 3-D stamp relief to add rigidity to the front points.
  5. The steel version has a redesigned hinge plate that fits most shoes. For smaller shoes, a separate plate ships with the crampons for a one-size-fits-all right out of the box.

Bottom detail of the front points of both crampons. Note how much “pointier” the steel version is.

Top detail of the front of both crampons. Note 3-D stamp relief and new front strap attachment on the steel version.

SPECS

Aluminum:

  • Weight – 19.0 oz (540 g)
  • Points – 16 mm long x 4 mm thick

Steel:

  • Weight – 23.4 oz (662 g)
  • Points – 20 mm long x 2 mm thick

Getting the Most out of an MSR White Gas Stove: Maintenance Tips

Editor’s note: Don ‘Photon’ Johnston is a stove ‘geek’ and the inventor of the Photon Stove ™ alcohol stove. What follows is his advice based on over 10 years of MSR white gas stove use and observation.

MSR White Gas Stove Advice - 1
The author using an MSR WhisperLite Internationale (the original Shaker Jet model) to melt snow in the Beartooth Mountains of Montana. This older stove is still going strong after minimal maintenance.

MSR stoves are easy to maintain: it’s one of their most valuable features. No matter what happens in the field with your MSR stove, you will never miss a hot meal if you have done a little homework.

General MSR white gas stove advice:

  1. Get and carry the repair kit. Get the expedition version so you have available at home every part you might ever need and bring on trips only the parts that experience or fear tells you that you need to carry from it.
  2. Practice field repair at home. If you don’t have an instinct for mechanical things such that you rarely need instructions to do stuff, then practice field maintenance at home with long periods of forgetfulness between practices to make sure you have cleaning and O-ring replacements down. Know where the parts go and in what order. Know where the different sized O-rings go (which isn’t very hard if you only carry the two sizes I have actually used: the fuel bottle O-ring and the fuel tube O-ring that fits in the pump).

Things to expect based on my past MSR experience:

The fuel bottle O-ring will rarely need replacement; carry no more than one spare since it is most likely to expire from old age rather than damage. The fuel tube to pump O-ring is the most likely to need replacement; carry more than one spare until you know how things work out for you. Some folks have a problem with damaging this O-ring and others rarely have a problem. Carry a spare pump cup even though you probably won’t need it. The pump cup, the two O-rings I mentioned, and the tool from the repair kit are the minimum and probably all you will need in the field. You may want to carry additional items just in case your home checkout of the stove before packing isn’t up to par.

Always follow the directions for inserting the fuel tube in the fuel bottle so you don’t mess up that O-ring. If the pump doesn’t seem to be pumping, you can remove the plunger and flex the pump cup out wide a few times to restore it to full function. Only if it is damaged do you need to replace it. The repair kit comes with pump cup oil you can apply at home. You won’t need it in the field. The shaker jet works well but may not always be enough, so you need to be comfortable using the cleaning wire in the fuel tube and removing and cleaning the jet.

Clean fuel will mean you rarely have to clean the stove and may never need to disassemble it in the field. When filling the fuel bottle, pour the fuel through one of the Coleman fuel funnels that has a felt filter rather than a wire screen in the bottom. Very few times over the 10 or more years I’ve used an MSR have I had to disassemble or replace a part in the field. The shaker jet eliminated almost all stove problems in the field. Other field repairs only became necessary because I was lazy and didn’t check things before trips. A fuel bottle O-ring that was expiring once needed replacement after many, many years of service. Maybe twice I have replaced the fuel tube O-ring. I swapped out the pump cup once with the spare one in the kit I was carrying. The pump felt like it was sliding too easily and I couldn’t really pump up the pressure with it. The cup in the kit, not being restricted by the pump walls, had taken a set that was larger in diameter than the set of the cup in the pump. I figured the pump cup from the kit would seal a little better to the pump wall, and it did. After that, rather than replacing a pump cup in the field, I started just flexing the cup wide the first day out and, if needed, later on during the trip. I have never needed to replace a check ball, spring, or jet.

SimmerLite quirks I have seen to watch out for:

  1. The pump, like all MSR pumps, has plastic tubes that extend inside the fuel bottle. The long flexible one needs to angle away from the pump and rest against the inside of the fuel bottle wall. This is the fuel pickup tube and needs to rest on the bottom of the fuel bottle when attached to the stove so that it will use up all the fuel in the bottle. I saw one where the tube did not have enough bend in it to reach the sidewall. Even though the fuel bottle was not all that near empty, the stove would not stay burning because it was not getting a steady supply of fuel. When inserting the pump into the fuel bottle, you flatten this tube against the pump to get it into the bottle opening and it then needs to spring back enough to reach the wall of the fuel bottle. Before inserting the pump look at this tube to see that it has enough spring in its bend to reach the sidewall. You can flex the tube out if needed to restore the proper amount of deflection.
  2. I once saw a problem with the cleaning wire in the fuel tube. The wire is made from twisted wire cable commonly referred to as aircraft cable. I have never heard of or seen this problem except in a SimmerLite I saw this summer. After the cable had been removed as part of the cleaning procedure, it could not be pushed back in. The cable had lost some of the temper that maintained the wire twist and when pushing it into the fuel tube, the friction from pushing the wire around the bends caused the wire to untwist slightly and expand, increasing the friction until it could not be pushed any further. If this happens in the field, the stove will still work without this wire inserted or with the excess wire you could not push in cut off with wire cutters, if you carry them. Make sure you leave some wire extending out so you can remove the cut wire when you get a replacement. To use it this way, pump less pressure into the fuel bottle than you ordinarily would. Removing the wire reduces the restriction to fuel flow and MSR recommends less pressure in the fuel tank to compensate. (MSR will replace any defective part for free and even mail it to the post office of your choice. Just call them when you get to a phone.)

Conclusion

MSR white gas stoves are reliable (especially if you use clean fuel) and easy to maintain. With a minimal amount of knowledge, some practice at home, and preparation (purchasing and carrying a few spare parts and a tool, and checking out your stove pre-trip), you can count on a hot meal in the field with your MSR stove.

MSR White Gas Stove Advice - 2

Don has been an avid backpacker since 1988 preferring week long or longer hikes. He has one section of the Appalachian Trail left to hike (planned for 2005); he has completed the John Muir Trail twice, the High Sierra Trail, the Tahoe Yosemite Trail, the Northville Placid Trail, and The Long Trail. Don is the inventor of the “Photon Stove ™” alcohol stove. He designed and owns the original Arc Alpinist sleeping quilt. Working with Kurt Russell, he prompted the construction of, and owns, the first Nomad Lite-N-Airy tent. Don is a Network Administrator at a Montgomery County, Maryland High School.

Jetboil – French Press Option First Look (Outdoor Retailer Winter Market 2005)

We first reviewed the Jetboil at last year’s Winter OR show (Jetboil Stove First Looks Review), then went on to do more in-depth testing of this integrated cooking system (Jetboil Stove Review). Jetboil developed a system to efficiently transfer heat from a canister stove to the pot (even in the wind) – something that has been sorely lacking and completely missing from commercial canister stove design. This winter Jetboil adds elegance to backcountry coffee with a French press. Goodbye Cowboy coffee and grounds in the bottom of your cup. Now you can have a perfect cup of coffee without the bulk and weight of carrying a separate gourmet coffee pot. The screen and plunger exactly fit the cooking pot, it comes with a new top lid that works with the plunger, and, as you would expect from Jetboil, everything stows neatly away inside the cooking pot.

Grind up a bunch of your favorite beans (coarse for a French Press!) and have yourself some of the best coffee in the backcountry.

2004 Backpacking Light Staff Picks

Staff Favorites – Our gear picks from the 2004 hiking and backpacking season.

Getting a bunch of gear freaks like us to whittle their list of “favorite” gear down to three items is like asking an AT NOBO entering Maine to throttle back to ten mile days.

Nonetheless, what has to be done will be done, and we’ve managed to come up with a short list of favorite gear that we used in 2004.

This isn’t really an “Editor’s Choice” sort of deal in any formal sense, and it sure is heck ain’t an endorsement of Great Gear That Works For Everyone. It’s just a list of fine products that made their way – consistently – into our backpacking gear lists month in and month out over the course of 2004.

Enjoy – and don’t forget to add your own 2004 favorites in the forum below! Your BPL Eds

Backpacking Light Staff Member Favorite Pieces of Gear
Ryan Jordan PossumDown products Tilley LT3 Hat Bozeman Mountain Works Quantum Vapr Bivy
Carol Crooker Gossamer Gear Mariposa Salomon Tech Amphibian Icebreaker Superfine190 top
Vic Lipsey Bozeman Mountain Works TorsoLite pad AntiGravityGear pop-can Alcohol Stove Smartwool products
Alan Dixon Gossamer Gear G6 Backpack Tarptent Squall Garmin Geko 301
Ken Knight Ibex Icefall Jacket Tarptent Virga Nunatak Arc Alpinist
Jay Swan McHale Zero-SARC UL Pack Suunto Clip-On Wrist Compass Buff
Jay Ham Montrail trail runners Aqua Mira Clarke Original Tin Whistle
Doug Johnson Gossamer Gear Lightrek Poles Tarptent Squall Montbell U.L. Trekking Umbrella
Stuart Bilby Tarptent Squall Petzl Tikka Plus Snow Peak Titanium 1.4 liter Pot
Don Wilson GoLite Breeze Tarptent Squall Coleman F1 Powerboost
Will Rietveld Gossamer Gear G4 Pack Tarptent Squall ThermoJet Microlite Alcohol Stove
Blake Morstad SmartWool Socks Big Agnes Insulated Air Core Mattress Montbell U.L. Super Stretch Down Hugger #3 sleeping bag

Ryan Jordan, Publisher – Bozeman, Montana

2004 BackpackingLight Staff Picks - PossumDown products

PossumDown – gloves, hat, vest, it doesn’t matter (Backpacking Light store)


To have the temperature regulating and moisture management benefits of a natural fiber in a high-loft knit that is soft and comfortable next to the skin is like having sweet cream butter on your Sourjacks at Jedediah’s – i.e., one of life’s special little pleasures.

2004 BackpackingLight Staff Picks - Tilley LT3 hat


Tilley Hat (www.tilley.com)


After several years and a few thousand miles on the trail, it’s like an old friend: well-worn, comfortable, and a reminder of trials and good times. A great hat for sun, snow, and rain, and always breathable enough for high exertion activities. My favorite ways to use the hat: over a thin balaclava for winter hiking, or soaked in a stream and plopped soaking wet right on my head in the heat of summer.

2004 BackpackingLight Staff Picks - Bozeman Mountain Works Vapr bivy


Bozeman Mountain Works Pertex Quantum Vapr Bivy (Backpacking Light store)


My go-to bivy sack for just about any three-season condition – and sometimes even in the winter. It allows me to sleep under a small tarp and have unrestricted views and connection with the surrounding wilderness, while keeping wind, rain spray, or spindrift at bay. The Vapr Bivy was even my sole shelter during a 2-bivy climb to control spindrift on an attempted mid-winter traverse of the Mt. Index massif in Washington State.

Carol Crooker, Editor-in-Chief – Phoenix, Arizona

2004 BackpackingLight Staff Picks - Gossamer Gear Mariposa backpack


Gossamer Gear Mariposa Ultralight Backpack (www.gossamergear.com)


I love the Mariposa backpack. It weighs about a pound and has a very comfortable suspension system including back stays! Not having used a pack with a built-in internal frame in years, I was amazed at how light a water-heavy 26-pound load felt during a summer Grand Canyon backpacking trip using the Mariposa.

2004 BackpackingLight Staff Picks - Salomon Tech Ampibian shoes


Salomon Tech Amphibian shoes (www.salomonsports.com/)


These shoes are very light (my pair of men’s size 10.5 weigh 24.8 ounces), yet have just enough torsional and longitudinal rigidity to provide good support for my feet. The soles have a tread pattern with a defined heel that is aggressive enough to stop most slides on steep gravelly trails. The mesh keeps my feet cool in hot weather and allows the shoes to dry quickly in wet weather. With the one-pull lacing system and adjustable back, I usually just slide my feet into them. I’m happy wearing these shoes in 107 °F heat and while snowshoeing (adding some overshoes if my feet get cold) and just about every condition in between.

2004 BackpackingLight Staff Picks - Icebreaker Superfine190 shirt


Icebreaker Superfine190 long sleeved top (www.icebreaker.co.nz)


This is a very thin (190 g/m2) 100% Merino wool shirt. I like it for two reasons. First, the wonderful properties of high quality Merino wool. Second, my women’s size large top makes me feel almost elegant. The material is very high quality and the shirt has a tailored shape that fits me closely but is not too snug, and it drapes beautifully. (And it’s still machine washable!)

Vic Lipsey, Managing Editor – Seattle, Washington

2004 BackpackingLight Staff Picks - Bozeman Mountain Works TorsoLite pad


Bozeman Mountain Works TorsoLite pad (Backpacking Light store)


Just beautiful, especially in combination with a 2′ x 2′ piece of blue foam under my feet. For my 6’2″ and 225 pound frame, its 10 ounces does a great job smoothing high rocky ledges, and minimizes impact at low elevations where Northwest rain marathons extend tent time.

2004 BackpackingLight Staff Picks - Antigravity Gear pop can alcohol stove


AntiGravityGear pop-can alcohol stove (www.antigravitygear.com)


For any trip under three days, this is my preferred noodle maker. The all-in-one stove and pot-stand is simple, reliable, and cool to touch 30 seconds after it is extinguished.

2004 BackpackingLight Staff Picks - Smartwoold products


SmartWool. Almost anything made out of this stuff (www.smartwool.com)


The new microweight t-shirt works great under a windshirt for fall temps. At night, lightweight tops and bottoms. And after a few days on the trail, the odor doesn’t run your hiking buddy out of the tent. (Polypropylene wearers, get a bivy.)

Alan Dixon, Product Review Director – Washington D.C.

2004 BackpackingLight Staff Picks - Gossamer Gear G6 backpack


Gossamer Gear G6 Whisper Backpack (www.gossamergear.com)


Finally! With the G6 I can get my base pack weight to below 5 pounds and not use a poncho for both my raingear and shelter. Now I can use a catenary spinnaker fabric tarp and Quantum bivy sack for shelter and a combination of a Montane Vapour wind vest and Integral Designs eVENT rain jacket. I’m a big fan of the simplicity, freedom of movement and low weight of hipbeltless packs. The wide shoulder straps on the G6 carry up to 15 pounds in complete comfort. A long weekend with 10 to 11 pounds in the pack is cinch. I can squeak out a six-to-seven-day trip and keep my pack plus a liter of water at 18 pounds. Now I get within a half pound of Ryan on a pre-trip pack weigh-in.

2004 BackpackingLight Staff Picks - Tarptent Squall shelter


TarpTent Squall (www.tarptent.com)


At a pound and a half this is a happy (possibly the only) solution to my desire for an extremely light and well ventilated shelter and my wife’s desire to have something tent-like with complete bug protection. With our TorsoLite pads, and our Western Mountaineering Aspen bag spread over us quilt style the Squall is truly our backcountry “home.” Its simple and elegant design sets up in a few minutes. Catenary curves make for a taut pitch that’s surprisingly stable in the wind. Our Squall has weathered monsoons in coastal California, and sub-freezing, wind blown conditions on high Sierra ridges. What’s not to like?

2004 BackpackingLight Staff Picks - Garmin Geko 301 GPS


Garmin Geko 301 GPS (www.garmin.com) and National Geographic Topo! (nationalgeographic.com/topo/)


Why not travel smarter? Yeah I can do the map and compass thing and navigate fine (and one should be able to do this in case of GPS failure), but I do a lot of off trail-travel, and the Geko 301 more than makes up for its 3.5 ounces by aiding more efficient travel and better decisions. When used in combination with custom waterproof maps and waypoints from National Geographic Topo!, the Geko 301 is the ultimate navigational tool for the ultralighter. The Geko 301 has all the functions I need, fits in my pocket, and runs for about a half season (my use) on one set of batteries. I love the point and sight to a waypoint feature that the magnetic compass adds. In almost a year of use, the Geko 301 has already saved my butt in the featureless winter terrain of the Beartooth Plateau, and in the maze of mangrove channels and islands of the Everglades. And that doesn’t count a number of times I’ve used it in whiteout.

Ken Knight, Production Editor – Ann Arbor, Michigan

2004 BackpackingLight Staff Picks - Ibex Icefall jacket


Ibex Icefall jacket (www.ibexwear.com)


The Ibex Icefall jacket has been a long-time favorite softshell of mine. The Climawool Lite fabric has worked exceedingly well for me under a very wide range of conditions. For my style of hiking, the mix of natural fiber and synthetic fabric layers provides great utility whether I am hiking through cool spring or fall days, resting at a windy lookout, or hiking along a path in the northern woods during winter.

2004 BackpackingLight Staff Picks - Tarptent Virga shelter


Tarptent Virga with sewn-in floor (www.tarptent.com)


This shelter has proven a solid performer for me. It sets up very easily and has weathered massive bug swarms during Midwest and Canadian summers and gales on the Californian coast. For a solo hiker with not much gear who wants more complete protection than a basic tarp, the Virga is hard to beat.

2004 BackpackingLight Staff Picks - Nunatak Arc Alpinist sleeping bag


Nunatak Arc Alpinist Sleeping Bag (www.nunatakusa.com)


I like the mix of a quilt with footbox. The design affords me considerable wiggle room and keeps my feet warm to boot. I have never felt constricted inside the Arc Alpinist and that is perhaps its single biggest selling point for me.

Jay Swan, Copy Editor – Durango, Colorado

2004 BackpackingLight Staff Picks - McHale Zero Sarc UL backpack


McHale Zero-SARC UL Pack (www.mchalepacks.com)


As a charter member of “Team Torso,” I have a hard time finding packs that fit: even though I’m only 5’10”, my stubby legs give me a torso as long as someone 6 inches taller. I like my hip belts to actually fit around my hips. Many lightweight packs aren’t even manufactured in varying sizes, and when they are, even the large size usually has a belt that rides above my navel. Somehow, during a bleary-eyed web-surfing session, I stumbled upon the McHale Packs website.

McHale makes custom-fit packs based on each buyer’s measurements. The packs are somewhat modular; most parts can be removed or replaced with minimum effort. This makes it easy to adjust the pack’s size and features for a particular outing; it also facilitates repair. The Zero-SARC UL might be too large and heavy for the serious ultralight crowd, but it makes the perfect do-everything pack for my purposes. It’s well under 4 pounds and over 3,000 cubic inches. It compresses extremely well and fits, well, like it was custom-made. McHale’s prices were high when I bought it and have gone up since then, but I haven’t had a single moment of pack-envy since the day it arrived. As McHale points out on his website, one of his packs is a lot cheaper than three or four other packs that don’t work.

2004 BackpackingLight Staff Picks - Suunto clip on wrist compass


Suunto Clip-On Wrist Compass (www.suunto.com)


Whereas the McHale pack almost falls into the “if you have to ask, you can’t afford it” category, the $8 Suunto wrist compass is solidly in the stocking-stuffer price range. As a frequent business traveller, I actually use it as often for navigating in unfamiliar cities as I do in the mountains, I’m constantly amazed at how useful a compass can be when I have it with me 24/7. The rotating bezel even allows me to take reasonably accurate bearings. In terms of usage per dollar spent, this item easily tops my list.

2004 BackpackingLight Staff Picks - Buff fleece


Buff (www.buffusa.com)


Also in the stocking-stuffer category, the Buff is a simple microfiber tube that can be worn as a neck gaiter, hood, balaclava, hat, headband, face mask, and in various other configurations. I first read about it maybe five years ago in an article about adventure racing, and promptly ordered two from the then-exclusive North American distributor in Canada. They’ve since become reasonably popular after being picked up by REI and featured on the TV show “Survivor.” They weigh next-to-nothing and compress to the size of a small apple, but can add a surprising degree of warmth or sun protection. I now keep one permanently in the top pocket of my pack.

Jay Ham, Packing Systems Section Editor – Flagstaff, Arizona

2004 BackpackingLight Staff Picks - Montrail trail runners


Montrail trail runners (www.montrail.com)


Just about anything in their line-up fits my wide feet while still locking in my narrow heel. They also have great arch support right out of the box. As a testament to how much I like them, I found a model I liked on sale and bought five pair (Wasatch II; 28 ounces). I am just wearing out the first pair…four more to go!

2004 BackpackingLight Staff Picks - Aqua Mira water treatment


Aqua Mira (Backpacking Light store)


Repackaged, its weight goes unnoticed among the contents of my pack. It never clogs (I’ve burned up new Pur filter cartridges on a few trips where the water wasn’t exactly transparent), doesn’t require pumping, and doesn’t taint the taste. I don’t mind the wait time.

2004 BackpackingLight Staff Picks - Clarke Original Tin Whistle


Original Clarke Tinwhistle (www.clarketinwhistle.com)


At 1.1 ounces (key of D), it is absolutely the lightest way to beat the boredom of long winter nights. It is a six-hole whistle with three octaves made in the traditional “wood-plug” conical design. It sounds great and can play just about any tune, with practice; but is best suited to fast-played Irish folk. Cheap too, at around $15.00.

Doug Johnson, Shelter Systems Section Editor – Redmond, Washington

2004 BackpackingLight Staff Picks - Gossamer Gear Lightrek poles


Gossamer Gear Lightrek Poles (www.gossamergear.com)


They are so light – I hardly know they’re there. They absorb shock, they’re comfortable – they’ve made me into a full time trekking pole user. They don’t compact for times that I need to use my umbrella (see below) but even when I connect the pair together with a couple of Velcro straps, they’re still lighter than any telescoping pole on the market! Besides that, they also make this really cool sound when you swing them around. HIYA!

2004 BackpackingLight Staff Picks - Tarptent Squall shelter


Tarptent Squall (www.tarptent.com)


Being the shelter editor, I’ve tested many, many tents. The simplicity, spaciousness, ventilation, bug protection, and stability of the Tarptent makes this my first three-season choice every time.

2004 BackpackingLight Staff Picks - Montbell UL Trekking umbrella


Montbell U.L. Trekking Umbrella (www.montbell.com)


When you live in the Northwest, you get used to hiking in sprinkly rain that never ends. With a “brawlie,” I get to dress for the temperature, not the weather, keeping me a happy camper. Sure, others laugh – but not when I hike by wearing only a windshirt for a shell. And at 5.8 ounces, the super compact Montbell is lighter than the sweaty shell I left at home.

Stuart Bilby, Sleeping Systems Section Editor – Auckland, New Zealand

2004 BackpackingLight Staff Picks - Tarptent Squall shelter


Henry Shires Tarptent Squall (www.tarptent.com)


Only 27.8 ounces (787 g). Set it up in the cold, driving rain and in a couple of minutes I have a home away from home – for two. It withstands windblown rain, swarming bugs and strong winds. Elegant catenary curves, minimalist design – charming.

2004 BackpackingLight Staff Picks - Petzl Tikka Plus headlamp


Petzl Tikka Plus (www.petzl.com)


Lots of light, sits on the front of my head so I can read in bed, three levels of brightness. Lasts for ages on three AAA batteries but still gives enough light to travel by. (2.8 ounces, 78 g with alkaline batteries)

2004 BackpackingLight Staff Picks - Snow Peak Titanium 1.4L pot


Snow Peak Titanium 1.4 liter pot (www.snowpeak.com)


Great big mug. Wonderful expedition cup. Big enough to cook for three. Ensures you always have space for the spare food being passed around. OK, I despair about the lid with the folding handle that regularly dumps my dinner in the dirt. Corrosion-proof except for fuming nitric acid (and I don’t cook with that any more) and nearly indestructible – where even my most solid aluminum pots have become misshapen ruins, the Snow Peak has survived unscathed. (4.7 ounces, 134 g without the lid)

Don Wilson, Clothing Systems Section Editor – Tucson, Arizona

2004 BackpackingLight Staff Picks - GoLite Breeze backpck


GoLite Breeze (www.golite.com)


Although the Breeze has been around for a number of years, I still use mine more than any other pack I own (and I’ve got a closet full). For me, the Breeze is the perfect combination of simplicity, light weight and durability. And it has just the most needed features; huge outside mesh pockets and a big roomy collar. Some lightweight packs are too voluminous for me, but the Breeze seems just right for a three to five day trip when I’m going light. Mine is comfortable up to about 25 pounds, and bearable (for a while) up to 30 pounds. I love the freedom of hiking without a hip belt. At 13 ounces it is the pack I use when I am looking to cover a lot of ground. Sure, there are some lighter packs out there, but when I’m packing up for a trip and want to use my most functional lightweight pack, I usually come back to the Breeze.

2004 BackpackingLight Staff Picks - Tarptent Squall shelter


Coleman F1 Powerboost Stove (www.coleman.com)


My family and I took the F1 Powerboost to Alaska this summer, along with another lightweight stove and we never took the other stove out of the bag. If you are looking to do some real cooking, the Powerboost is unbeatable for a small light stove. It spreads the flame out evenly over a large surface area. Most small canister stoves will generate enough heat for nuclear fission, but concentrate it in 1 square inch on the bottom of your pot. We entered new realms of culinary expertise with the Powerboost – actually cooking Jiffy Pop popcorn on the shores of the Koyukuk River without burning any kernels. It was great for pancakes, eggs and stir frys, too. It is extremely well made and has a reliable auto ignition. The pot stand is wide and very stable. We didn’t feel like we had to constantly verify the center of gravity of our pot every time we moved it. It could be lighter, but at 4.5 ounces its still pretty light for such a functional stove.

2004 BackpackingLight Staff Picks - Coleman F1 Powerboost stove


Tarptent Squall (www.tarptent.com)


Several editors at Backpacking Light have included the Tarptent Squall in their list of favorites and I can understand why. The Squall is functional, with no wasted frills. At 27 ounces, including the sewn in floor option, my Squall is light, roomy enough for two, light enough for one, bug proof, stable in wind, and dry in all but the nastiest storms. Out here in the west, where it rarely rains for more than a day at a time, the Squall is all I need for three-season trips.

Will Rietveld, Cooking and Hydration Systems Section Editor – Durango, Colorado

2004 BackpackingLight Staff Picks - Gossamer Gear G4 backpack


Gossamer Gear G4 Pack (www.gossamergear.com)


This pack will soon be a collector’s item, but it’s still my favorite frameless pack. The Weminuche Wilderness is close to where I live, and I go backpacking every week in the summer. The G4 is great for a two to four day trip carrying 12-16 pounds. I love the large outside mesh pockets that will hold lots of stuff and keep it handy. And there’s plenty of room in the main compartment to just stuff everything in, no need to use stuff sacks or fold anything up. I even use it as a pillow at night!

2004 BackpackingLight Staff Picks - Tarptent Squall shelter


Tarptent Squall www.tarptent.com)


This 30-ounce single-wall two-person tent with floor goes up in a flash, two minutes max. It stuffs into a side pocket of my G4 pack, with the poles inside my pack. It’s luxurious for one person and roomy for two. Why do I like the Tarptent over a tarp? I don’t use trekking poles very much and the Tarptent’s integral poles make it easy for me to camp in the alpine zone above timberline where setting up a tarp without poles is difficult. The Tarptent is a no-brainer; I can camp anywhere. It’s plenty stormworthy; I have experienced some scary thunderstorms in the Tarptent, and stayed dry, although I was worried about being blown away with the tent a few times!

2004 BackpackingLight Staff Picks - Thermojet Microlite Alcohol stove


ThermoJet MicroLite Alcohol Stove (www.thermojetstove.com/)


What sets the ThermoJet apart from many other alcohol stoves, besides its light weight (3 ounces total), is that it is a cooking system, rather than just an alcohol burner. The components (alcohol burner, pot stand, and windscreen with simmer band) have been optimized to work together efficiently which is very important for an alcohol stove. This stove is fuel efficient, wind-resistant, and reliable. I have used it above 12,000 feet in breezy/windy conditions on many occasions. The ThermoJet is as easy to use as a canister stove, perhaps easier, because it comes with good wind protection.

Blake Morstad, Navigation Systems Section Editor – Bozeman, Montana

2004 BackpackingLight Staff Picks - Smartwool socks


SmartWool products (www.smartwool.com)


I’ve used SmartWool socks extensively for trail running, backpacking, and skiing and have never had problems with blisters. I have a Lightweight Crew that is great for all season usage. Not only does SmartWool wick better than all of the synthetic products that I have, it is also odor free, a point where most synthetic products fail miserably.

2004 BackpackingLight Staff Picks - Big Agnes Insulated Air Core mattress


Big Agnes Insulated Air Core mattress (bigagnes.com/)


Yeah I know that there are lighter weight sleeping pads, but I can’t go too long without this mattress. As a constantly tossing sleeper and one who sleeps on my side, the 2.5 inches of cushion has given me many restful nights. I’ve tried other pad options and usually experienced restless nights, which definitely affected my hiking performance. With PrimaLoft insulation this pad gives solid three-season performance. Another feature I love is the stuffed size of this pad, which is smaller than most self-inflating pads.

2004 BackpackingLight Staff Picks - Montbell UL Super Stretch Down Hugger #3 sleepb bag


Montbell U.L. Super Stretch Down Hugger #3 sleeping bag (www.montbell.com)


This 1.5-pound bag is a great option for those of us who don’t lay perfectly flat and in one position when sleeping. Sewn stretch baffles allow the bag to conform to the body while sleeping in almost any position. I have even sat cross-legged in the bag while chilling out in the tent.

High Gear Trail Audio 512

Are you someone who needs some Bach or Black Sabbath to round out that perfect wilderness experience? High Gear has just what you need! The Trail Audio 512 is a solid state MP3 player and an FM radio—all in a compact 3.5 oz, carabineer clip package with up to 17 hours of play on a single AAA battery.

We may risk revocation of our Sierra Club membership for such an indulgence but we can’t resist. We’re on the fast track to get one of the first units to try out.

High Gear Trail Audio 512 Built in 512mb flash memory
Plays MP3, WMA, and ADPCM formats
Equalizer (Pop, Classic, Jazz, Rock and user defined)
Built in USB 2.0
Negative black LCD with White backlight
FM radio with 12 station presets
FM recording with MP3 quality
Splash proof construction (splash seals on all buttons)
Up to 17 hours continuous play
Skip free solid state memory
Simple drag and drop for music and data files
Windows (98 or higher) + Mac OS 10
Line-in audio recording from other sources

Detachable Carabineer clip
High-performance Head-contoured headphones included
5.50 x 1.25 x 0.63 in (14 x 3.2 x 1.6 cm)
One AAA battery
Arm-band carrier optional accessory

Backpacking Light Position Statement on Sleeping Bag Temperature Ratings

2006 Revision by Mike Martin

Missing from our reviews will be an assessment of whether or not the sleeping bag performs adequately at temperatures near its manufacturer-reported temperature rating.

There are too many variables involved that influence user comfort, including not the least, intrinsic metabolism and physiology, which vary greatly from user to user. Consider also that an individual user may sleep warm one night while sleeping cold another night, even when environmental conditions and sleep systems are equivalent, and the mere concept of temperature ratings becomes somewhat unjustifiable. Add to all of this the effects of a user’s daily caloric budget (calories consumed versus expended), clothing worn, and amount of moisture in a sleep system (e.g., from condensation of perspiration vapor), and you have a process of such complexity that it has baffled the world’s best physiology modelers for years.

Thus, to “rate” a sleeping bag is simply an exercise in comparing the relative performance of similar systems under a fixed set of conditions. Further, to compare a manufacturer’s rating to real-world performance based on experiences of one – or even a handful – of product reviewers would not only be unfair to the manufacturer, it could possibly lead to a false conclusion by a reader that did not fit the physiological profile of our testing corps or did not experience the same conditions that we experienced in our tests.

Other magazines, other writers/reviewers, and countless numbers of people on Internet forums are quick to say “this bag was miserably cold at 10 degrees above its temperature rating”. Hey – did you ever stop to consider that maybe you screwed up and didn’t maximize the performance of the bag because of human error? Or maybe your body was trashed – metabolically deficient, dehydrated, or mildly hypothermic – and you weren’t astute enough to recognize that? Granted, we recognize that some manufacturers offer some outrageously inaccurate ratings – and we’ll certainly let you know when those bags come through our queue – however, we also recognize that just because the bag may not have kept one person warm at a given temperature, it may have caused another to overheat.

Consequently, the best we can do is to measure the loft and key performance features of the bag, comment on our subjective experience near the temperature rating of the bag, and ask you as an informed consumer to compare it to the loft and temperature ratings of bags from other manufacturers in order to make a wise decision. Nevertheless, we recognize that some guidance in correlating a bag’s loft to its warmth is useful to consumers. Table 1, below, represents our best effort at such a correlation:

Table 1, Single Layer Loft and Estimated Temperature Rating
Temp (°F) Loft (in) Temp (°C) Loft (cm)
50 1.2 10 3.1
40 1.5 4.4 3.8
30 1.8 -1.1 4.6
20 2.2 -6.7 5.6
10 2.6 -12 6.6
0.0 3.0 -18 7.6
-10 3.5 -23 8.9
-20 4.0 -29 10

Note that the loft figures in Table 1 are for single-layer loft. This is the thickness of the insulation on top of the sleeper; any insulation under the sleeper is ignored. Also, bear in mind that in addition to the physiological factors mentioned above, construction details of the bag, as well as environmental conditions can influence the warmth of a bag tremendously. Don’t expect to sleep out comfortably in your 3.5-inch thick drafty quilt in a sub-zero blizzard atop Mt. Rainier after a day of climbing 7000 feet and consuming 1000 calories of dehydrated goop, just because Table 1 says it should be warm at -10 degrees! Use this table only as a starting point to determine the warmth of your sleep system. Experiment under safe conditions to find out what works for you.

Western Mountaineering Pod 30 Sleeping Bag REVIEW

Review of one of the most coveted “top” bags from premium U.S. manufacturer Western Mountaineering.

Overview

western mountaineering pod 30 - 1
Western Mountaineering Pod 30

The Pod 30 is an elegant bag that is only insulated on the top and sides. It has a generous 4 inches of loft and is fully featured with a half zipper, hood, and an innovative flap system for securing it to a mat. The shell is very light ExtremeLite 20 denier nylon and the bag weighs only 18.8 ounces (532 gram) for the large size. It is well designed with high quality materials and comfortable to use.

In Brief

  • Very light top bag with plenty of loft
  • An integrated sleeping system of bag and pad. Use the Pod with one of two custom fitted Western Mountaineering pads.
  • Innovative pad tie-down system that allows the bag to contour to the sleeper and reduces air gaps and cold spots.
  • Half-length zipper
  • Light and comfortable
  • Pads that come with the Pod are heavy. Users may opt for using a lighter non-Western Mountaineering pad.

Specifications

• Manufacturer

Western Mountaineering

• Model

Pod 30

• Type

Top bag

• Sizes

Size large tested

Regular fits up to 6’0″ (183 cm)

Large fits up to 6’6″ (198 cm)

• Girth

Size large tested

Size Manufacturer Specification
shoulder/hip/foot
in (cm)
Backpacking Light Measurement
shoulder/hip/foot
in (cm)
Regular 62/53/39 (157/135/99) Not measured
Large 63/54/39 (160/137/99) 61/51/39 (154/130/99)

• Weight

Backpacking Light measurement

Manufacturer specifies bag alone weighs 16 oz (454 g) for size regular.

Pod 30 1 lb 2.8 oz (532 g) size large
Full-length standard air-only pad 1 lb 2.3 oz (519 g)
Self-inflating foam core pad 1 lb 10.5 oz (751 g)

• Fill type

850+ fill power goose down

• Fill weight

9 oz (255 g) size large, 8 oz (227 g) size regular

• Loft

4 inches (100 mm), Backpacking Light measured between baffles

• Manufacturer’s Rating

30 °F (-1 °C)

• Outer and Liner Material

ExtremeLite 20d nylon, less than 1 oz/yd2 (less than 34 g/m2) with DWR finish

• Hood

Yes

• Zipper

Half-length

• Model Year

2004

• MSRP

$260

Features

western mountaineering pod 30 - 4
Pad tie-down system fitted with a lighter weight (than fitted Western Mountaineering pads) standard foam pad

western mountaineering pod 30 - 2
Pod 30 underside with mat removed showing flaps that secure a sleeping pad to the bag

western mountaineering pod 30 - 3
Pod 30 with standard pad (inflatable, air only) inserted and air pad alone

Pad Sleeve

The Pod 30 is a top bag with insulation only on the top and sides. It uses an innovative flap system that wraps around the sides and ends of the sleeping pad to hold the pad securely to the bag. The flaps are held to the pad by bungee cords with cord locks. The uninsulated bottom section of the bag is much narrower than on most top bags, only 14 inches wide at the shoulders and hips, narrowing to 6.5 inches wide at the foot.

What’s Cool about the Pad Attachment System?

A particular problem with top bags is that a large air gap can form between the sleeper and the edges of the mat. This leads to warm air being pumped out of the bag when you move. The Pod 30 tie-down system prevents this by attaching the sleeping bag to the pad closer to the center of the pad. This adds slightly to the weight of the bag but means that the bag fits more snugly to the sleeper without forming a ‘tent’ to the edges of the mat. This makes the bag more comfortable for side sleeping than most top bags. The flaps that go underneath the mat are made of a tougher fabric than the shell material to resist damage from hard surfaces.

The Pod 30 is designed to fit a Western Mountaineering tapered inflatable pad, but can be used with rectangular pads. The Western Mountaineering inflatable pads come in two styles, air-only and a foam core self-inflating style. These mats are fairly heavy and more than a few ultralighters will switch them for something a bit lighter. It’s not much of a problem to cut down a standard foam pad to fit the Pod 30, or you can just use a rectangular mattress.

When using a rectangular pad, the flaps tend to pull away from the mat in the hip area. However, in general, the system provides an effective seal with the pad. The Pod 30 also works satisfactorily with a three-quarter-length inflatable mat combined with a pack at the feet although it takes a little extra effort to set up the flaps and bungees over a pack.

western mountaineering pod 30 - 5
The Pod 30 attaches to the mat away from the edges creating less of an air tunnel than most top bags. Left: Pod 30 with back sleeper, Middle: Pod 30 with side sleeper, Right: traditional top bag or quilt tied to edge of the pad.

Fabric

The lightweight shell fabric has an effective DWR coating. Even after many weeks of use, water spilled on the bag beaded up and ran off.

Zipper

I never found myself wishing for more than the half-length YKK zipper. My only complaint is that it does not have a locking head. The zipper slides very easily and if not fastened with the hook and loop at its top, it quickly unzips its full length. Both sides of the zipper have a stiffening tape to prevent snagging. Nevertheless, I found it easy to jam the delicate fabric in the teeth of the zipper. Fortunately, the fabric is solid enough that no damage occurred. There is a single down-filled draft tube on the upper side of the zipper. The zipper is not at the seam where the bag joins the pad and where the sleeper could lie on it, but is high up the side with insulation above and below.

western mountaineering pod 30 - 6
Pod 30 showing the fitted hood

Hood

The hood is a simple three-dimensional shape with a single drawcord around the opening. It has a reverse differential cut so that it lofts to fit around the head. It is lightly insulated and is tied to the pad at the back of the neck to allow the pad to act as insulation. Because the hood has much less loft than the rest of the bag, cold spots develop, especially near the opening. Wearing a warm hat helps to counter this effect.

A draft collar at the neck would help prevent losing warm air when moving about. A draft collar is included with the warmer model, the Pod 15.

Insulation

Except for the issues with the hood discussed above, the baffle compartments are a series of simple rectangles that keep the down in place effectively. The compartments are well filled with down and the bag has a good 4 inches of loft over the chest and legs.

The measured hip and shoulder girths are a little less than advertised on the Western Mountaineering web site, but the Pod 30 is still sized so that a medium sized person can wear bulky clothing inside it as additional sleeping insulation. It is a comfortable bag, easy to get into and use. On warm nights it is simple to stay cool by unhooking the pad and letting the uninsulated section move to the top. It is much easier to keep the drafts out than when using a quilt.

Performance

In the field, I felt the Pod 30 provided a similar level of comfort to other top bags with a comparable manufacturer’s temperature rating.

The pad attachment prevented cold air from reaching my back when I turned over and its unique attachment method reduced air gaps when sleeping on my side. Overall, I find myself pleased to put this light sleeping bag in my pack and, in combination with a variety of clothes, it is just right for a wide range of trips.

Missing from this review (and for all sleeping bag reviews published here, for that matter) will be an assessment of whether or not the sleeping bag performs adequately at temperatures near its manufacturer-reported temperature rating. Click here for the complete Backpacking Light Position Statement on Sleeping Bag Temperature Ratings.

Durability

The Pod 30 has the same 20 denier nylon for the shell and inner lining that all the Western Mountaineering ExtremeLite bags use. This particularly light material weighs less than 1 oz/yd2. Western Mountaineering warns that the fabric is not as robust or downproof as typical sleeping bag materials, however no damage occurred during my testing and only two or three feathers leaked out each trip. For the ultralight backpacker, the small sacrifices in downproofness and robustness are well worth the benefits in weight and packed volume. This lightweight fabric does tend to be fairly air-permeable, which slightly reduces its insulating effectiveness.

Value

This is a very light bag with great loft. Using top quality materials, Western Mountaineering provides a top bag with hood and zipper at a competitive price.

Recommendations for Improvement

The changes I would like to see in the bag are:

  • A little more loft in the hood to match the rest of the bag and some design work to shape the hood to better maintain loft around the opening.
  • A neck collar, although adding weight, would improve the rating of the bag. It is important to prevent warm air from pumping out and cold air in with top bags.
  • A locking head on the zipper.
  • A strap for tying the bag more firmly to the mat at the hip.
  • Make available a lightweight fitted foam pad weighing in the range of 8 ounces.

Classic Denali: Climbing America’s Highest Peak (Part 1, Summit Day Narrative)

Adventure On
Denali
Click to Enlarge


M Click here for Part 2

Editor’s Note: Rich McDrew and Dennis Swanson were recipients of a Backpacking Light Magazine Adventure Grant. Their grant award was based on some state of the art mountaineering and snow travel gear – including Ushba Altai Titanium Ice Axes, Northern Lites Snowshoes (on Denali? You bet!), and more. Rich and Dennis are no spring chickens – in their 60s, they were thrilled to share their success with us to the top of North America’s highest peak during a foul weather window that saw few successful summits among scores of attempts.

“Yo, Matt, I thought you were going all the way to high camp?” We had hopscotched with Matt and his friend Oakley since base camp, and he had passed us at the top of the fixed ropes on the headwall.

“I decided to leave my cache here and head back to 14. It’s getting late, and I don’t like the wind. Walk to the edge over there and look towards high camp. You can see snow drift whipping through the gap. But watch your step. Slip off that edge and it’s all over.”

We carefully but aggressively planted our crampon spikes in the icy snow as we made our way to the view spot.

“I don’t like the looks of this, Rich. It’s late. The wind is building and the temperature is dropping. We are exhausted. Our packs are too heavy. And Coombs’ book talks about the danger and exposure of the route ahead along the rocky ridge. Remember what Roberto said about the short stretches of six-inch wide trail with the 2,000 foot drop on each side? Maybe we should consider a bivouac in the snow bank and wait until morning.”

Rich looked at the blowing snow towards high camp and then at the fixed lines up Washburn’s thumb.

“Absolutely not. When we get to 17 we can set up our tent and wait out any weather in safety. We can make it OK. We’ll just take it slow.”

“I think it’s risky, but OK. You lead.”

For the first time in nineteen days on Denali’s West Buttress, Rich headed off first.

“We’ll see you and Oakley tomorrow, Matt. Take it easy heading down the headwall to 14,000.”

The route behind Washburn’s thumb was steep and exposed, and the fixed ropes provided a needed sense of security. Where the ropes ended, however, the unobstructed wind across the ridge was at gale force.

“Let’s make sure we keep a tight rope. If one of us is blown off balance, there is a good chance the 100 feet of rope between us will get hung up on a rock and help break the fall.”

“OK.”

We picked our way along the ridge, grabbing rocks when handy for support from the wind and otherwise relying on ice axes and ski poles. Soon visual contact was lost; only the tug-of-war with the rope confirmed two climbers were on the ridge.

“Dammit Rich, slow down.” Dennis yelled pointlessly into the wind while yanking on the rope in retaliation. He was struggling with the buffeting wind, the uneven, exposed terrain, his 60-pound pack, and the exhaustion that comes from overexertion at altitude. He adjusted his facemask in an attempt to unfog his glacier glasses. Suddenly he caught a glimpse of Rich on his hands and knees. Was he falling? He braced for the jerk that might pull them both off the mountain. But none came. Rich was crawling across an exposed section, keeping his center-of-gravity low to thwart the 70 -100 mph gusts.

* * * * *

“Any frostbite?”

“I don’t think so. I’m pretty cold and hungry, but the cheeks and fingers seem OK.

We had just arrived at a cold and windy 17,000-foot camp. It was 11:30 p.m. and we had not eaten anything except a few peanuts since 6:00 a.m. breakfast.

“We need to set up the tent quick. We’re sweaty, and it’s below zero and windy. Once the adrenalin wears off, we’ll crash, with a risk of hypothermia. We need to get into our sleeping bags ASAP.”

There were other tents set up behind snow block walls, but no empty protected sites. We squeezed the tent between two camps and, fighting the wind and cold, managed to set up the tent.

“I can’t believe you guys made it across that ridge in this wind. You’re tough. I thought for sure you would camp at 16,200. Do you want some tea or hot water?”

Roberto had heard us cussing at the wind and came out of his tent to see if we were all right. We had crossed paths and compared pack weights just below the fixed ropes on the headwall. He was traveling by himself, and even though he had done everything possible to reduce weight (including only carrying a couple days of food up to high camp), his pack was still over 65 pounds. This was Roberto’s second attempt to summit Denali; he had been beaten by bad weather two years prior.

“That’d be great. We’re out of water and can get into our bags without spending time to melt snow.”

As the shivering subsided inside the -40 degree down bags, the question remained, “Tell me again why we are here?”

* * * * *

“You know, one of the things I’d always planned to do when I retired was climb Denali. But like a lot of things as I have gotten older, it’s been crossed off the list.”

Eighteen months before the expedition to Denali, we were sharing a cup of coffee while planning an upcoming fishing trip.

“I’d be interested. Are you still serious?”

“Hell yes. I never found anyone to go with, and I’m not interested in a guided trip. Part of the fun and challenge is the planning and execution, plus you can pace yourself on your own schedule, which is critical at our age.”

“Let’s make a pact. Let’s start to think seriously about climbing Denali. We can look into the logistics, plan the trip, purchase gear, train, see how we feel about it. Maybe May 2004. If at anytime one of us feels it’s not safe, or it’s physically too much, or we are not ready, or our wives say, “Hell no, you can’t go,” or for any other or no reason we want to call it off, that’s OK. We remain friends. If it all falls into place, we go.”

“Deal.”

* * * * *

“Earlier, we saw a long line of climbers heading towards Denali Pass. There must have been thirty of them. I wonder how they’re doing. Looks like some climbers are coming back already.”

“Yeah, everyone was hanging out looking at the wind screaming through Denali Pass when those five experienced British climbers headed off. Then a bunch of other climbers geared up and followed. Monkey see, monkey do. When they got to Denali Pass, most of the second group turned around. I heard one team that continued were turned back before the summit, one guy with badly frostbitten fingers and another with frostbite on his cheeks. The Brits were fine, they all summited.”

It was the third day at high camp, and the first morning with any sun. But the wind was howling. The top of Denali looked like a hurricane was in residence at the odd moments when it was visible at all. And it was cold. The climbers who stayed in camp were kibitzing and waiting and watching, and secretly wondering if they should have attempted the summit today. After all, the weather had been lousy. One of the worst months of May in 20 years for summit days, and many experienced climbers, including a number of guided groups, had headed down without a summit attempt. Was it now or never?

“This was not our day, Rich. We’re slow and need an early start. And a still day. And I need more time to acclimatize. We can wait. We brought eight days of food and fuel up here and can stretch it to ten. We’ll miss our return flights anyway. The rangers did say there is a chance for a weather break, so maybe we’ll get lucky.” Dennis was trying to convince himself that they made the right decision to wait out the imperfect weather. “Let’s get up at 6:00 tomorrow and see if the weather looks good.”

* * * * *

The next morning was overcast and windy, so we postponed the summit attempt. But about 11:00 a.m. the wind died down. The weather break had finally arrived. The next day would be the day.

* * * * *

“Rich, let’s get up. It’s 5:00 and no wind.”

By now the morning regimen was routine, albeit still tedious, but we were ready to leave by 8:00. As we left camp, the sun was shining and it was still. The top of Denali looked quiescent. A perfect summit day!

“Hey. Why are you guys so slow? Do you need to acclimatize or something? Get out of the way so we can pass.”

We were slogging up to Denali Pass. The route is steep, and the footing is not secure. Crevasses await below; the route is notorious for falls and injuries. Many climbers were on the mountain, some anxious to move more quickly. Most, but not all, climbers on the mountain are friendly and supportive, and appreciate that we are all in a shared mission and experience.

“No problem. Just speak up. We’re always happy to let folks pass. We’re a bit slow because we’re old enough to be your father. Actually, in your case, your grandfather.” Ah, the impatience of youth. We all hope to be old some day. What’s the alternative?

Above Denali Pass, the route rises steeply, then at a lesser angle for about a mile before the final push up Pig Hill to the summit ridge. The effects of altitude were taking their toll. The day was waning and the weather was looking worse. Thin clouds obscured the top of Denali.

“Rich, we need to leave our rope and packs here.” We were at a small overlook above the base of Pig Hill, and we could see other abandoned packs scattered about. We had brought with us gear for an overnight bivouac, but the extra weight was becoming a burden that could interfere with reaching the summit. “The rest of the climb is so steep, one of us could never catch a fall by the other anyway. And we need to move faster.”

We moved out with a new lightness in our steps, but it was short-lived.

“How are you doing, Rich?” Dennis had been waiting for Rich. The advantage of hiking a bit faster is that you get to rest while your partner catches up, creating a self-perpetuating cycle.

“I’m fine. I just need to rest. This is steep! And the footing is bad. Think the weather will hold?”

“I’m worried about the fog filling in below. And the wind seems to be picking up. It’s already 6:00 p.m. and it’ll take us at least five hours to get back. We need to get to the top.” Dennis started up again.

The route traversed around the steepest section, but the snow was deep, and the exposure tremendous. There was too much snow for the best traction with crampons. Finally, the summit ridge was in view: a series of modest undulating hills and valleys, heading ever upward, but with the end out of sight. A narrow path that drops off several thousand feet to the south, and another frighteningly steep drop to the north.

“I think that’s the top, Rich. Grab my hand; we are going to make it to the top together.”

The weather had cleared, the wind had died down, and we had a 360 degree view from the top of Denali! It was 7:00 p.m. on Day 24 of our trip, and we were alone at the top of the North American Continent.

* * * * *

Postscript: We made it back to camp after midnight on Summit day, after struggling down the Denali Pass trail in heavy winds and windblown snow. After a rest day, we made it back to base camp at midnight on Day 28, after dodging the opening crevasses on the Kahiltna Glacier. Then we waited four days because weather prevented planes from landing at camp. Finally, on June 12 we flew out to Talkeetna, 32 days after we flew into Base Camp and first saw the massif of Denali up close and personal.

* * * * *

As someone once said, the difference between an ordeal and an adventure is attitude. We had an adventure!


M Continue to read Rich & Dennis’ gear notes in Part 2…

Garmin Foretrex 101 GPS REVIEW

Comprehensive review of the Garmin Foretex 101 GPS Review.

Overview

garmin foretrex 101 - 1
Foretrex 101 showing the six dedicated operation buttons as well as the straightforward main menu page; simplicity and ease of operation are strong suits of the 101.

garmin foretrex 101 - 2
The Foretrex 101 worn on your wrist frees up your hands while hiking.

The Foretrex 101 is a wrist-mounted GPS unit for the minimalist – small, lightweight, and waterproof. It weighs the same as the Suunto X9 to within a few tenths of an ounce. With street prices as low as $115 (manufacturer’s suggested retail price is $139), it is also minimalist on price. The Garmin Foretrex 101 focuses on the no frills basics of navigation in an easy-to-use unit. To meet size, battery life and price criteria, Garmin eliminated features such as topographic mapping, a barometric altimeter and a magnetic compass.

Having a GPS on your wrist has two benefits. It frees up your hands for climbing, paddling or trekking poles. It also gives you continuously readable navigation information. The Foretrex 101 can also be used as a small handheld unit by removing the strap. Without the strap, it is similar in function to the Garmin Geko 201, but is smaller and lighter. The Foretrex 101 compares in its wrist-mounted mode to the Suunto X9, except for the lack of an electronic compass and a barometric altimeter. It is also bulkier on the wrist. However, the Foretrex 101 has more reliable and faster GPS reception, a larger display and is significantly easier to operate than the X9.

Overall, the 101 is an excellent value for a GPS. It has just the right navigational features for backcountry navigation.

To summarize:

  • Among the very lightest and smallest GPS units
  • GPS performance as good as the eTrex and Geko series units
  • Excellent battery life (over 22 hours in battery save mode)
  • Wrist mounted – frees up hands; continuously readable information
  • Inexpensive
  • Easy to operate
  • Basic GPS/navigation functions (no support for internal maps). Missing magnetic compass and barometric altimeter. Some may wish to use the 101 in conjunction with a magnetic compass and barometric unit like a Suunto Vector.
  • Bulky for a wrist mounted unit and interferes with some clothing. Used without the wrist strap it is delightfully small and pocketable.

Specifications

• Weight

Backpacking Light Manufacturer claimed
2.9 oz (80.8 g) with batteries, without strap; 0.5 oz (14.2 g) strap only 2.6 oz  (73.7g) with batteries, without strap

• Dimensions

3.3 x 1.7 x 0.9 inches (8.4 x 4.3 x 2.3 cm) excluding band

• Battery Life

Normal mode (GPS always on): 15 hours (manufacturer), 16 hours (Backpacking Light tested); Battery Save mode: 22 hours 14 minutes (tested). Battery life tested using Energizer Max AAA alkaline batteries.

• Battery Type

2 AAA batteries

• Barometric Altimeter

No

• Electronic Compass

No

• WAAS Enabled

Yes

• Screen Resolution (H x W)

100 x 64 pixels

• Screen Size (H x W)

1.4 x 0.9 in (36 x 23 mm)

• Display Type

Black and white LCD with backlighting

• Auto Locate GPS Fix*

5 minutes

• Cold GPS Fix*

45 seconds (manufacturer); 42 seconds (Backpacking Light average)

• Warm GPS Fix*

15 seconds (manufacturer); 16 seconds (Backpacking Light average)

• GPS Accuracy

Normal GPS mode, less than 15 meters; WAAS mode, less than 3 meters

• Waypoint/Route Memory

500 waypoints/20 routes with 125 waypoints per route

• Trackpoints

10,000 (10 tracks)

• Additional Memory

No

• Additional Memory Type

N/A

• Computer Interface**

Yes, Windows PC, Macintosh with third party cable

• Basemaps

No

• Additional Maps

No

• Water Resistance

IPX7 (International Protection Code 7) – submersible in 1 m of water for up to 30 minutes

• Receiver

12 parallel channel GPS receiver

• Antenna

Built-in patch

• Celestial Info

Sunrise and sunset

• MSRP

$139

• Included Equipment

Extension wrist strap which enables you to wear the 101 with a heavy jacket, 2 AAA batteries, manuals

• Optional Equipment

PC interface cable (proprietary Garmin RS232 – different from the cable used with the eTrex and Geko series, $14.99 MSRP), USB to RS232 converter cable $60 MSRP, selected Garmin MapSource products, bicycle mounting kit
*Auto Locate Fix = GPS movement over 500 miles since last fix and/or more than 30 days since last fix. Cold Fix = More than four hours since last GPS fix and/or significant movement since last fix (you’d need to use a car or something faster to get far enough). Warm Fix = Less than four hours since last fix without significant movement (you can’t walk or run far enough in four hours to lose a warm fix).
**National Geographic Topo! now supports the Foretrex series with version 4.0. According to National Geographic there is currently no support (and may never be support) for the Foretrex series in Topo! versions 2.7 and 3.4.3. To download waypoints created in these older versions you’ll need to upgrade to Topo! 4.0 and merge the old waypoint file into a version 4.0 file before downloading to the Foretrex.

Features

In addition to the features specified above, the Foretrex 101 also has the following:

  • Six main pages or screens including: Satellite, Map, Navigation, Trip Computer, Timer, and Main Menu. The Trip Computer, Satellite, and Navigation pages can be customized by changing displayed fields.
  • Trip computer: Current speed, average speed, re-settable maximum speed, trip timer and trip distance.

GPS Field Performance

The Foretrex 101 has the same reported fix times as the rest of the Garmin lightweight GPS units, including the eTrex and Geko series. These lightweight units all use a similar GPS receiver and antenna. Reported fix times corresponded well with field tested fix times, as shown in the following table.

The Foretrex 101 is equipped with the capability to receive WAAS (Wide Area Augmentation System) satellite correction signals to increase positional accuracy. WAAS is not utilized when in the backcountry for the following reasons. First, WAAS decreases battery life for all GPS units when enabled. Second, since the WAAS system uses one of two geostationary satellites, reception can be difficult in all but open land and marine settings. Canyons and forested or mountainous areas frequented when hiking often do not receive strong WAAS signals. Third, increased positional accuracy achieved with WAAS does little to aid backcountry navigation where position accuracy is normally less than 15 meters without WAAS. Thus for most hiking activities, the WAAS mode is kept off.

Cold Start (minutes:seconds) Warm Start (minutes:seconds)
Average 00:42 00:16
Maximum 01:15 00:30
Minimum 00:27 00:08

Excellent GPS performance and fast fix times are not without compromise. The Foretrex 101 uses a larger patch antenna, requiring a larger plastic case than that required for a loop antenna (the Suunto X9 uses a loop antenna allowing for a smaller size but with poor GPS reception and slower fix times). The Foretrex 101 is much larger than the X9 and can interfere with clothing layers, gloves, and elastic cuffs on jackets. To alleviate interference, Garmin includes an extension wrist strap that can extend the strap allowing for the unit to fit over clothing layers. This solves the problem for warmer conditions, but having the unit exposed to the cold in winter conditions greatly shortens battery life. (If battery life is a concern in cold conditions, we suggest that you keep the Foretrex 101 in a warm pocket.)

The 101 maintained good satellite contact on trail runs and hikes in forested areas. Fast movement of the unit, antenna position, and clothing layer coverage did not appear to affect reception.

GPS Operation

garmin foretrex 101 - 3

garmin foretrex 101 - 4


garmin foretrex 101 - 5

garmin foretrex 101 - 6

Trip Computer pages showing the four screens available. Each of these fields can be customized. The Foretrex 101 pares the number of main pages on the unit to five screens (six if the Timer page is enabled). These main pages include the Satellite, Map, Navigation, Trip Computer, Timer, and Main Menu pages. This contrasts with the overwhelming number of menu pages on some other small GPS units. It is possible to change the displayed fields for the Trip Computer, Satellite, and Navigation pages, which is a useful feature. We liked customizing the Trip Computer page to include the trip odometer and overall speed, which displays average speed. The Trip Computer page is actually larger than the screen size containing four different sub-screens that can be chosen as the displayed screen for the Trip Computer page by simply scrolling up or down. Once a certain page is chosen, it is stored and displayed later as the contents of the Trip Computer page.

The Satellite page gives the user the option to choose between a Normal and Advanced Skyview. The Advanced Skyview displays the satellites oriented in the sky with signal bars for each satellite and accuracy with indication of a 2D or 3D fix. It also allows the satellite graphic to be oriented with the direction of travel. The Normal mode has only one signal bar and an accuracy value. We think that Garmin should have scrapped this Normal Skyview page and simply used the Advanced Skyview, which provides more useful reception information.

The Foretrex has six dedicated buttons, including: GoTo, Page, Enter/Mark, Up, Down, and Power. These buttons are well designed and provide a good tactile response, allowing for easy manipulation. The Power button is slightly receded into the Foretrex case to prevent an accidental power-on. Holding the Power button turns the unit on and off while a quick depression toggles the backlight on and off. Browsing between the five main pages is done by simply hitting the Page button. This action only advances to the next page in one direction, so if the Page button is accidentally depressed at the wrong time, the next main page will appear. To get back to the main page of interest, the user has to go through the remaining pages. This proved to be an inconvenience, which might be alleviated by having a Page Back button or giving the GoTo button two functions.

The menu levels in the Foretrex usually do not extend past two sub-levels, which makes operating the unit straightforward. One gripe is the process to turn off the GPS receiver, which requires at minimum six button presses. Turning off the GPS receiver is desirable if the user simply wants to use the Foretrex for time display between GPS fixes. This would eliminate the need to carry an additional timepiece. We’d like to see a combination of button presses that would turn off the GPS receiver quickly and easily.

Marking waypoints with the Foretrex simply involves holding the Enter/Mark button for two seconds. This brings up a waypoint window letting the user type a descriptive name (six characters maximum selected using a scrollable alphanumeric list) as well as choose a symbol for the waypoint. If default names and symbols are accepted, marking the waypoint requires only two button presses. The waypoints are stored in a list that can easily be browsed to find the point of interest. Routes are created from the waypoints by selecting from the waypoint list, which proved to be relatively easy, yet also time consuming. Downloading routes to the Foretrex from a PC is much faster. Individual waypoints can also be downloaded, which is superior to manual entry of waypoints in the Foretrex. People who buy the Foretrex 101 must purchase a Garmin proprietary PC cable to connect to a computer. The cable costs an additional $15 and is not always available as a standard stock item at local stores that carry the Foretrex.

An optional page within the Foretrex is the Timer page, which must be enabled to be displayed as one of the main pages. This page has a settable countdown timer, which is supposedly useful for sailing. Once the timer counts down to zero, the elapsed time begins. This countdown feature proved to be cumbersome when trying to simply record elapsed time, which we often wanted to do while hiking. Beyond the countdown issue, the Timer page had another drawback: the timer maxed out at 99 minutes and 59 seconds, as the display is unable to fit an additional hour digit. A similar timer exists within the Trip Computer page that measures moving time, although it requires the GPS to be turned on to determine whether the unit is moving. Timing functions are not normally found on handheld GPS units, but because the Foretrex is a wrist mounted unit we expected more chronographic functions. A simple stopwatch function in the Foretrex 101 would be desirable.

garmin foretrex 101 - 7
Menu showing the GPS modes

The Foretrex 101 can also be used without the wrist strap, making the unit comparable in size to the Geko 201. However, the absence of the strap made button presses less ergonomic. The overall size of the Foretrex without the strap is smaller than the Geko 201 and nearly an ounce lighter. We found the unit more comfortable in the pocket than the Geko 201.

Battery Life and Power Management

Battery life for the Foretrex 101 is impressive, with a reported and tested battery life of 15 and 16 hours, respectively, when the unit is in Normal GPS mode (GPS fix rate = once every second). When in Battery Save mode (GPS fix rate = once every five seconds), the Foretrex had a tested life of over 22 hours, which is substantially higher than many GPS units using AA batteries. The Foretrex 101 battery tests were performed using regular Energizer Max AAA alkaline batteries. With Energizer e2 Titanium batteries we would expect the 101 to have a battery save mode life in the range of 25 hours. This is comparable to the Geko 301 in battery save mode. See Alan Dixon’s Geko 301 and 201 review.

We liked the ability to change the Foretrex 101’s batteries in the field for multi-day, navigation intensive trips. The Foretrex 101’s brother, the Foretrex 201, uses an internal rechargeable lithium battery that cannot be replaced.

The Foretrex 101 has the capability to record a track while hiking, which is useful if conditions warrant leaving an electronic breadcrumb trail to backtrack later. Except in the case of whiteouts, however, this feature is not usually needed and it’s preferable to turn it off to save battery life. This is done by simply navigating to the Tracks menu and turning the Recording option to OFF.

Computer Interface and Software

As mentioned, the Foretrex 101 is capable of interfacing with a PC to download and upload routes, waypoints, tracks, and trackpoints. However, the unit doesn’t come with the required $15 cable (this is a new cable, different from the cable for the eTrex and Geko series). Computer download is the preferred way to enter waypoints when planning a trip since entering navigation information manually from a paper map can be tedious. Some type of mapping program (e.g., National Geographic Topo! or Garmin MapSend) is required. National Geographic Topo! version 4.0 now supports the Foretrex series.

Note: according to National Geographic there is currently no support (and may never be support) for the Foretrex series in versions 2.7 and 3.4.3. To download waypoints created in these older versions you’ll need to upgrade to Topo! 4.0 and merge the old waypoint file into a version 4.0 file before downloading to the Foretrex.

Display

The Foretrex uses the same screen as the Geko series, except that the Foretrex uses landscape orientation. The 100 x 64 pixel screen size allows enough information to be displayed on each screen to minimize the need for multiple screens and deeply nested menus. A quick press of the power button toggles backlighting on the Foretrex. A feature that we like is that once turned on, the backlight turns off after a user-defined period of time. When subsequent buttons are pressed, the backlight turns back on, illuminating the display. To turn the backlight off, press the power button quickly. We found the backlighting on the Foretrex effectively illuminated all parts of the screen.

Value

garmin foretrex 101 - 8
Size comparison between the Suunto X9 and the Garmin Foretrex 101

The MSRP for the Foretrex 101 is $138, with street prices as low as $115. We believe that the Foretrex 101 is a great value at this price. The Foretrex 101’s price is close to that of the Geko 201 and about $50 cheaper than the Foretrex 201. The Foretrex 201 only differs by the type of battery used and the inclusion of the PC cable. (If you intend to use a GPS for multi-day trips then the Foretrex 201’s inability to be charged in the field and lack of replaceable batteries are a concern.) When compared to the similarly priced Geko 201, which has identical features, the Foretrex 101 is lighter (with the strap removed), smaller, and has wrist-mounting convenience if desired. Compared to the Suunto X9, a similar wrist-top mounted GPS unit, the Foretrex 101 is about $550 cheaper (MSRP). The benefits of the X9 are a smaller size, an electronic compass, and an altimeter. The Foretrex 101 has much better GPS reception and is significantly easier to operate than the X9.

Recommendations for Improvement

Some recommendations for future iterations include:

  • More watch-like attributes such as a stopwatch and the ability to turn off the GPS receiver more easily when only a time display is needed.
  • Inclusion of a barometric altimeter and electronic compass. Possibly the Foretrex 301?
  • Include a PC cable with purchase and use a USB connection rather than 9-pin serial connection.
  • Reduce the size of the unit so that there is less interference with clothing.

Garmin Geko 201/301 GPS REVIEW

Comprehensive review of the Garmin Geko 201 and Garmin Geko 301 ultralight GPS units.

Overview

Garmin Geko 301 GPS - field shot
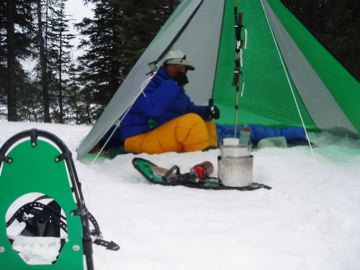
The author field testing the Geko 301 in the Uintas

Geko 301

The Geko 301 is my favorite GPS unit. When used in combination with custom waterproof maps and waypoints from National Geographic Topo! (or similar mapping/GPS interface software), the Geko 301 is a superb navigational tool for the ultralighter. Yeah, I can do the map and compass thing and navigate fine (and one should be able to do this in case of GPS failure). But why not travel smarter? I do a lot of off trail-travel, and the Geko 301 more than makes up for its 3.5 ounces by aiding in more efficient travel and better decisions.

The Geko 301 has all the functions I need, comfortably fits in any pocket, and runs for about a half season (my use) on one set of batteries. I love the accuracy, speed and simplicity of the point and sight to a waypoint feature of the 301’s magnetic compass. In almost a year of use, the Geko 301 has already saved my butt in the featureless winter terrain of the Beartooth Plateau, and in the maze of mangrove channels and islands of the Everglades. And that doesn’t count the number of times I’ve used it to navigate in whiteout. Finally, while the Geko 201 costs less, I advise most buyers to pay more to get the magnetic compass and barometric altimeter of the 301.

Geko 201

The 201 retains most functions of the 301 but excludes a magnetic compass and barometric altimeter. It also lacks the point and sight to a waypoint feature of the 301. If used in combination with a wrist mounted compass/altimeter or a simple magnetic compass, the 201 will get the job done. Similar in features and price to the 201, but smaller and lighter is the Foretrex 101 reviewed here. Both the Geko 301 and the Foretrex 101 use a new and more efficient processor for great battery life. The Geko 201 uses an older processor with higher battery drain and about 40% less run time than the 101 and 301. The Foretrex 101 is the same price as the Geko 201 but is lighter and more compact (without wrist strap), has the option of wrist mounting, has longer battery life, and an improved display format. The only disadvantage of the Foretrex 101 as compared to the Geko 201 is that the Foretrex 101 is harder to operate single handedly if the wrist mounting option is not used. It can be operated with a single hand but you need to either pinch it between your fingers and thumb or palm it and look at the screen sideways.

In Brief

Garmin Geko 301 and 201 GPS - 1
The Gekos: the 301 on the left in leave-it-on-a-rock-and-forget-it gray, with magnetic compass and barometric altimeter; the 201 on the right in never-lose-it yellow. My favorite: the 301 with its magnetic compass and newer processor resulting in less battery drain and more run time.

  • Among the lightest and smallest GPS units. Fit comfortably in almost any pocket. (Makes it easy to keep alkaline batteries warm in cold conditions.)
  • Fast, reliable GPS reception even in difficult situations. Acquires well while moving.
  • Excellent battery life for the 301(almost 26 hours with alkaline batteries in the battery save mode). Reasonable battery life for the 201 (15 hours with alkaline batteries in the battery save mode). AAA lithium batteries are now available for cold weather use.
  • Easy to operate.
  • Great point and sight to a waypoint feature with the 301’s magnetic compass. This feature is sorely missed on the 201.
  • Reasonably priced given their features. (A Suunto Vector, which lacks a GPS, is similar in price to the 301.)
  • To get the full potential out of the Gekos, use custom waterproof maps and computer downloaded waypoints from mapping/GPS interface software like National Geographic Topo!.
  • Smaller screens mean less information per screen and more screens to see data.
  • Both units lack support for internal maps like some larger units have.

Specifications

Geko 301 Geko 201

• Weight

3.3 oz (94.5 g) as weighed by Backpacking Light 3.2 oz (90.4 g) as weighed by Backpacking Light

• Dimensions

3.9 x 1.9 x 1.0 in (100 x 47 x 25 mm) 3.9 x 1.9 x 1.0 in (100 x 47 x 25 mm)

• Battery Life*

Normal mode (GPS always on) with compass on: 10 hr 01 min (tested); Battery Save mode with compass off: 25 hr 48 min (tested). Manufacturer reported 9 hrs “typical use.” Normal mode (GPS always on): 11 hr 10 min (tested); Battery Save mode: 15 hr 12 min (tested). Manufacturer reported 12 hr in Battery Save mode.

• Battery Type

2 AAA 2 AAA

• Barometric Altimeter

Yes No

• Electronic Compass

Yes No

• WAAS Enabled

Yes Yes

• Screen Resolution (H x W)

100 x 64 pixels 100 x 64 pixels

• Screen Size (H x W)

1.4 x 0.9 in (36 x 23 mm) 1.4 x 0.9 in (36 x 23 mm)

• Display Type

black and white LCD with backlighting black and white LCD with backlighting

• Auto Locate GPS Fix**

5 minutes 5 minutes

• Cold GPS Fix**

45 sec (manufacturer); 42 sec (tested average) 45 sec (manufacturer); 42 sec (tested average)

• Warm GPS Fix**

15 sec (manufacturer); 16 sec (tested average) 15 sec (manufacturer); 16 sec (tested average)

• GPS Accuracy

Normal GPS mode, less than 49 ft (15 m); WAAS mode, less than 10 ft (3 m) Normal GPS mode, less than 49 ft (15 m); WAAS mode, less than 10 ft (3 m)

• Waypoint/Route Memory

500 waypoints/20 routes with 125 waypoints per route 500 waypoints/20 routes with 125 waypoints per route

• Trackpoints

10,000 (10 tracks) 10,000 (10 tracks)

• Additional Memory

No No

• Additional Memory Type

N/A N/A

• Computer Interface

Yes, Windows PC, Macintosh with third party cable Yes, Windows PC, Macintosh with third party cable

• Basemaps

No No

• Additional Maps

No No

• Water Resistance

IPX7 (International Protection Code 7) – submersible in 1 m of water for up to 30 minutes IPX7 (International Protection Code 7) – submersible in 1 m of water for up to 30 minutes

• Receiver

12 parallel channel GPS receiver 12 parallel channel GPS receiver

• Antenna

Built-in patch Built-in patch

• Celestial Info

Sunrise and sunset Sunrise and sunset

• MSRP

$246.41 $149.99

• Included Equipment

Manual Manual

• Optional Equipment

PC interface cable (RS232), USB to RS232 converter cable, selected Garmin MapSource products, various mounting kits, cigarette lighter adapter, lanyard, belt clip PC interface cable (RS232), USB to RS232 converter cable, selected Garmin MapSource products, various mounting kits, cigarette lighter adapter, lanyard, belt clip
* Battery life tested using Energizer e2 AAA alkaline batteries
** Auto Locate Fix = GPS movement over 500 miles (800 km) since last fix and/or more than 30 days since last fix. Cold Fix = More than four hours since last GPS fix and/or significant movement since last fix (you’d need to use a car or something faster to get far enough). Warm Fix = Less than four hours since last fix without significant movement (you can’t walk or run far enough in four hours to lose a warm fix).

Features

In addition to the features specified above, the Geko 201 has five main pages or screens including: Satellite, Map, Navigation, Trip Computer, and Main Menu. The Geko 301 has six pages with the addition of an Elevation page.

GPS Field Performance

The Geko 301 and 201 have the same fast fix times and reliable reception as the rest of the Garmin lightweight GPS units, including the eTrex and Foretrex series. These lightweight units all use a similar GPS receiver, antenna and circuitry. Manufacturer reported fix times corresponded well with field tested fix times, as reported in the specifications table above. In most situations I got a warm fix in 10 to 15 seconds from power on. Plenty fast enough for even an impatient hiker like myself. Most of the time I acquired a GPS fix while on the move.

Both the Geko 201 and 301 can receive WAAS (Wide Area Augmentation System) satellite correction signals to increase positional accuracy. However most hikers and climbers do not use WAAS because it decreases battery life and, since the WAAS system uses one of two geostationary satellites, WAAS reception can be difficult in all but open land and marine settings. Canyons and forested or mountainous areas frequented when hiking often do not receive strong WAAS signals. Also, increased positional accuracy achieved with WAAS does little to aid backcountry navigation where position accuracy is normally less than 15 meters without WAAS.

The Geko units comfortably fit in just about any pocket without feeling bulky or weighing clothing down. (The Garmin eTrex units are just a bit too large and heavy to be considered pocketable.) The Geko units boot and acquire position quickly so it’s a breeze to pop one out of your pocket, turn it on, get a fix or point and sight to a waypoint (301 only), and put it right back in your pocket. At this point you can continue to navigate using your compass or wrist computer. Using this system you can go for months without changing batteries. Since using the GPS unit is fast and easy it does little to disrupt your hiking.

In cold weather, a pocketable GPS makes for warm batteries and long run times which is an advantage over wrist-mounted GPS units. I used the 301 on a five-day backcountry ski trip in below freezing temps. I did the navigation for the whole group, including manually loading scaled waypoints from the map each night. (The map, torn and coffee stained, was the last one in town but that’s another story…) At the end of the trip, the 301 was still near full battery capacity using alkaline batteries!

The Gekos maintain good satellite contact on trail runs and hikes in not too densely forested areas. Fast movement of the units, antenna position, and clothing layer coverage do not appreciably affect reception. The Gekos easily acquire signal while hiking so there’s no need stop to get a fix. I’ve had good success using the Gekos for canyoneering. That you can’t use a GPS unit in canyons is largely a myth. Unless you are in long and continuous slot canyons like Buckskin Gulch, with some smarts and care, you can get reception at enough points to navigate canyons with GPS. This does involve waiting for confluences, junctions, and other widenings, along with the advanced sky view screen to optimize reception. But it can be done! I’ve found a GPS exceptionally useful in canyons since they can be very confusing and entry and exit points are critical.

Magnetic Compass and Barometric Altimeter

Garmin Geko 301 and 201 GPS - 3 The Navigation screen on the Geko 301. Line up the pointer to the top center of the screen and the GPS is pointed in the direction of the waypoint you’ve selected. No walking needed with a built in magnetic compass. The data field at the bottom allows you to scroll through 12 data points including elevation, location, bearing to the waypoint, speed, estimated time of arrival, etc.

The Geko 301 is the smallest and lightest Garmin GPS with a magnetic compass. I find the magnetic compass very useful. I sight with the Navigation page pointer just as if it were a compass needle to get the direction to my next waypoint. Then I can turn off the GPS to conserve batteries and start walking to the waypoint. There’s no guessing and no possibility of an error translating GPS degree bearings to a separate compass. Another nice thing – the GPS unit automatically sets the right declination on the internal compass for the location.

Since the Geko 201 lacks a magnetic compass, you have to be moving for the Navigation page pointer to work (and the GPS has to be powered up adding to the battery drain). To get a direction to your waypoint, pull up the numeric degree bearing to the waypoint on the 201 and then transfer that bearing to a separate magnetic compass to sight to the waypoint. That takes time and requires that you keep declination and magnetic north versus true north consistent between compass and GPS. Unless you are alert and careful it’s fairly easy to make a mistake in translation and sight to the wrong point. (I have made mistakes when I was tired at the end of the day and rushing to make progress before dark.)

Note: When moving, the 301’s Navigation pointer will function the same as non-magnetic compass GPS units like the 201. When you are moving, the 301’s Navigation pointer ignores the compass and indicates the difference between the direction you’re walking and the waypoint. The speed at which the 301 changes from magnetic compass operation to indicating difference between your line of travel and direction to the waypoint is custom selectable. I usually set it so that the magnetic compass is operating when I’ve been traveling under 1 mile per hour for over 60 seconds. (That’s standing still to most folks.) The direction of travel pointer takes over if I’m walking faster than 1 mile per hour.

An altimeter can be a useful navigational aid. The barometric altimeter on the 301 is more accurate (if you calibrate to reference points occasionally) than GPS based altitude readings that are far less accurate than GPS horizontal positioning. If you are willing to run the 301 continuously, it will log altitude information the same as the history on wrist computers. Note: only in this manner is the Elevation page on the 301 useful. Rather than use the altimeter on the Geko 301, I prefer a watch altimeter like the one on my Suunto Vector, which is continuously readable, relatively accurate, and does not drain the batteries of the GPS.

GPS Operation

First, I’ll make a big pitch for using the Gekos with electronic mapping/GPS interface/waypoint management software like National Geographic Topo!. You won’t realize the full power of the units without it. I like printing custom waterproof maps with UTM coordinates and waypoints. This makes field use of the maps, on the fly navigational decisions, and field waypoint loading a lot easier. See more in the Computer Interface and Software Section below.

The Geko 201 pares the number of main pages on the unit to four screens (if you disregard the useless map screen). For the 301 we’ll ignore both the map screen and the elevation screen that requires the GPS be left on for it to be useful. That gets the 301 down to the same four screens as the 201: Satellite, Navigation, Trip Computer, and Main Menu pages. Each will be explained below.

Garmin Geko 301 and 201 GPS - 4
The fast way to select and navigate to a waypoint. I can complete this sequence, from the Main Menu page to the Navigation page in less than 10 seconds.

For me the Navigation Page is the heart of the Gekos. Here’s how I use it: After I boot the unit up and have a fix, I pump the page button five times to get to the Main Menu and navigate to a list of waypoints (usually nearest but sometimes list all). I select my waypoint and use the Go To Waypoint option, which takes me directly to the Navigation page. Here I know the distance to the waypoint and when the direction arrow lines up with the mark at the top of the screen it is pointing directly to my waypoint. No fussing around with bearings and a separate compass. When I have a bearing, I sight to it and turn my GPS off. If I’m interested I can also scroll through 12 separate fields on the bottom of the Navigation page including elevation, positional coordinates (I prefer UTM), and degree bearing to the waypoint.

After using the Geko for a while it will be second nature to operate the following sequence: power on the unit, press the page button five times to get to the Main Menu page; press OK and the down arrow twice and OK again to list nearest waypoints; use the down arrow to highlight a waypoint; and finally press OK twice to activate the GOTO waypoint function and end up on the Navigation page with the selected waypoint loaded. I know it sounds complicated, but in the field it’s quite easy. I can do this whole sequence in the field in less than 10 seconds. If you include the boot up sequence I can be sighting to a waypoint in 20 to 30 seconds and I can be walking while I do this.

Note: you can also follow a route and the Geko will automatically go to the next waypoint without you having to select it. There are pros and cons to both the single waypoint and route methods. User’s choice.

Garmin Geko 301 and 201 GPS - 7

I can’t see any useful purpose to the Elevation (301 only) and Map screens on the Gekos. To use the Elevation screen properly, you need to have the GPS on. I just skip over it and use my Sunnto Vector to handle all my altitude needs and to save GPS batteries. The Map screen seems to be some version of a video game rather than a useful navigation tool. I’d recommend skipping over it as well.

Garmin Geko 301 and 201 GPS - 5
The Satellite page in Advanced Skyview mode is helpful for getting a fix in difficult locations. It conveys far more information than the default Normal mode.

Garmin Geko 301 and 201 GPS - 6
Trip Computer page showing the four data fields displayed. Each of these data fields can be customized from a selection of over 30 possibilities. Choose carefully! These customizable fields make the Trip Computer a powerful navigation tool. The screen shown is a custom setup for use paddling our kayak in the Everglades.

The Satellite page gives the user the option to choose between Normal and Advanced Skyview. The Advanced Skyview displays the satellites oriented in the sky with signal level bars for each satellite and an accuracy indicator. This allows you to make decisions on how best to orient the GPS for best reception. I’ve used this screen with good success to get a fix in difficult situations like canyoneering. The Normal mode has only one signal bar and an accuracy value. We think that Garmin should have scrapped this Normal Skyview page and simply used the Advanced Skyview, which provides more useful reception information. The magnetic compass of the 301 makes the Advanced Skyview screen a bit easier to orient, with an option of keeping the screen oriented to the north. This makes it easier to figure out what may be blocking your view to that last satellite you need for a good fix. Sometimes it can be your body! Without a compass in the 201, you’ll need to know where north is to effectively use the Advanced Skyview screen.

The Gekos have five buttons: Up, Down, OK, Page, and Power. These buttons are designed to be operated by your thumb while cradling the Geko in your palm. The Power button is slightly receded into the case to prevent an accidental power-on. Holding the Power button turns the unit on and off while a quick depression toggles the backlight on and off. Press the Page button to go to the next page or screen. This only advances to the next page in one direction, so if the Page button is accidentally depressed at the wrong time, you’ll need to scroll all the way through to get back to your page.

To Mark a waypoint with the Geko, hold the OK button for 2 seconds. This brings up a waypoint window letting the user type a descriptive name (six characters maximum selected using a scrollable alphanumeric list) as well as choose a symbol for the waypoint. If default names and symbols are accepted, marking the waypoint requires only two button presses. Custom naming is a bit more cumbersome and the six-character limit is a bit of a challenge but I usually manage to give some sort of name I can remember to a waypoint. Waypoints are stored in a list that can easily be browsed to by either name or by listing the nearest waypoints. Nine times out of ten, I will locate a waypoint using the nearest list.

The Gekos will record a track while hiking or climbing if left powered on. This is useful if conditions warrant leaving an electronic bread crumb trail to backtrack later (for instance whiteout, featureless terrain, or a complex route up a mountain). I really wish I had done this once on a Mt. Rainer ascent on a late season crevasse ridden glacier!

The menus on the Gekos generally do not extend past two sub-levels, which makes operating the units fast and straightforward. One gripe is that the process to turn off the GPS receiver (not the unit, just the GPS portion of it to conserve batteries) requires at minimum six button presses. Manually loading waypoints in the field is an example of when the GPS receiver can be turned off to conserve battery power. The compass on the 301 is easily turned on and off by pressing the Page button for more than 2 seconds. We’d like to see a similar way to turn off the GPS receiver quickly and easily.

Battery Life and Power Management

Battery life for the Geko 301 is impressive. In Normal mode (GPS always on) with the compass on, the Energizer e2 AAA alkaline batteries lasted 10 hours and 1 minute. In Battery Save mode (intermittent GPS operation) with the compass off, the batteries lasted an astonishing 25 hours 48 minutes. Both these exceeded the Garmin reported 9 hours for “typical use.” The Geko 201 with its older less efficient processor did not last as long although it still did creditably – in Normal mode (GPS always on) 11 hours 10 minutes; and in Battery Save mode 15 hours 12 minutes. Now that there are lithium AAA batteries, AAA based units like the Gekos are on equal footing with AA battery based units for cold weather operation.

As mentioned earlier, the speed and simplicity of acquiring a fix with the Gekos means that the units is on for only a few seconds at a time. Using the GPS this way, one can go for weeks without needing to change batteries, even in cold weather and with alkaline batteries. Just keep the Geko warm in your pocket when not in use. I can easily get by for a week of navigation in sub freezing weather using alkaline batteries. Both these units compete in run time with many larger and heavier units using AA batteries.

We liked the ability to change the Geko batteries in the field for multi-day, navigation intensive trips. The smaller Foretrex 201 and Suunto X9 units both use an internal rechargeable battery that cannot be replaced. (The Fortrex 101, which is very similar to the Geko 201, uses replaceable AAA batteries.)

Computer Interface and Software

You won’t realize the full power of the Gekos without some sort of electronic mapping/GPS interface software. Entering navigation information manually from a paper map into the Gekos is tedious at best. The Gekos are capable of interfacing with a PC to download and upload routes, waypoints, tracks, and trackpoints. Computer planning then downloading routes and waypoints from the computer to the Geko is my preferred way to prepare for a trip. This requires some type of waypoint management software or better yet, an integrated waypoint management and electronic mapping software.

The Gekos do not come with a data cable or any software. You’ll need to purchase a Garmin proprietary PC cable to connect the Geko to a computer. You’ll also need to obtain software to interface with your Geko. There are some shareware programs that allow you to scan paper maps and download waypoints to the Geko. Garmin also offers some inexpensive waypoint management software. But by far the most powerful choices are electronic mapping/waypoint management programs like National Geographic Topo!. These can be on the pricey side – $100 for a set of 1:25K series maps for a state (but that’s the whole state of California). Maps at 1:63K scale are usually less expensive but are less useful for navigation and precise GPS work, although for casual navigation in a National Park, they may work fine. I did all right with an Everglades National Park Map at 1:63K.

In addition, I recommend printing custom waterproof maps with your routes and waypoints on them on waterproof map paper like National Geographic Adventure Paper. I prefer the Legal or Tabloid sizes and a UTM grid. Using UTM makes field use of the maps, on the fly navigational decisions, and field waypoint loading a lot easier. An 8.5 by 14 inch map can cover as much as 13 by 7.5 miles on each side of the paper and weighs less than a half ounce.

The Garmin cable that you can purchase is the old-fashioned serial interface as opposed to the more popular USB interface. Serial to USB adapters are available but I did not test this option.

Display

The Gekos use a 100 x 64 pixel screen. There’s enough information displayed on each screen to minimize the need for multiple screens and deeply nested menus. A quick press of the power button toggles backlighting on the Geko. A feature that we like is that once turned on, the backlight turns off after a user-defined period of time. When subsequent buttons are pressed, the backlight turns back on, illuminating the display. To turn the backlight off, press the power button quickly. We found the backlighting on the Geko effectively illuminated all parts of the screen.

Value

Garmin Geko 301 and 201 GPS - 8
Size comparison of the Suunto X9 and the Garmin Geko 301. Although the X9 is only 0.7 ounces lighter than the Geko 301 there is a significant size and volume difference between the two GPS units. The 301 is definitely not wearable.

Geko 301

The 301 is light, fast, reliable, and easy to use. It has most functions an ultralighter wants. It excludes most functions you don’t want (like sluggish, frustrating, power consuming and almost useless GPS loaded maps). The Suunto Vector wrist navigation computer, which lacks a GPS, is similar in price to the 301. Heavier GPS units with built in mapping and a ton of other stuff you don’t want or need can cost $500 to $600 or more. As such we think the 301 is good value.

Compared to the Suunto X9, a wrist-mounted GPS unit with similar functions, the Geko 301 is about $550 cheaper (MSRP). The benefits of the X9 are a smaller size and some continuously readable information. The Geko 301 has much better GPS reception, is significantly easier to operate than the X9, has much longer battery life, and the batteries are replaceable in the field.

Geko 201

I think that the Foretrex 101 is a better value than the Geko 201. Both have similar features and price but the Foretrex 101 is lighter (with the strap removed), smaller, has wrist-mounting convenience if desired, and a newer processor with better battery life. I also prefer the Trip Computer on the Foretrex to the Trip Computer on both the Gekos.

Recommendations for Improvement

  • Offer the Geko 301 in some color other than dull gray. Bright orange would be great and is a color not yet used in the Geko or eTrex line.
  • Include a PC cable with purchase and use a USB connection rather than a 9-pin serial connection.
  • Offer a wrist-mounted Geko 301 (possibly the Foretrex 301 with magnetic compass and barometric altimeter?).
  • Upgrade the Geko units to have the same scrollable Trip Computer page as the Foretrex series.