
Introduction
As winter approaches we face new and unique challenges with ultralight gear. In particular, cold and wet conditions reveals the limitations of ultralight footwear in acute ways. Flitting through the forest wearing 8 oz mesh sneakers and thin wool socks while carrying a light pack is one of the joys of ultralight backpacking. However, this joy can turn to discomfort as temperatures approach the freezing point and precipitation begins to fall. Avoiding wet, cold feet when backpacking requires skill in implementing a process, as well as carefully selecting gear. Both process and equipment are addressed in this article.
In a previous article I wrote about inclement conditions gear, I discussed a cold/wet weather footwear system that provides the basis for additional detail and rationale outlined in the article you’re now reading.

You know the routine.
You’ve been hiking all day, perhaps fording streams, and your feet, shoes, and socks are wet. Stormy conditions unfold, with the prospect of cold temperatures and freezing rain or snow for the next few days, and you realize that the prospect of drying out gear anytime soon has vaporized.
Things go OK as long as your moving along the trail, but as soon as you get into camp, your body’s internal combustion engine starts idling. The first place you feel the uncomfortable cold: your feet.
You may find it very hard to recover from cold feet. It’s not uncommon for ultralight backpackers to experience cold feet during their entire time in camp, with no hope of warming up until after they’ve been on the trail for an hour or two the next day…
Sounds fun, doesn’t it?
I can assure you that it’s not.
Add snow to the mix, and low temperatures below freezing, and you not only have a recipe for cold feet, you get to enjoy some meaningful pain as well.
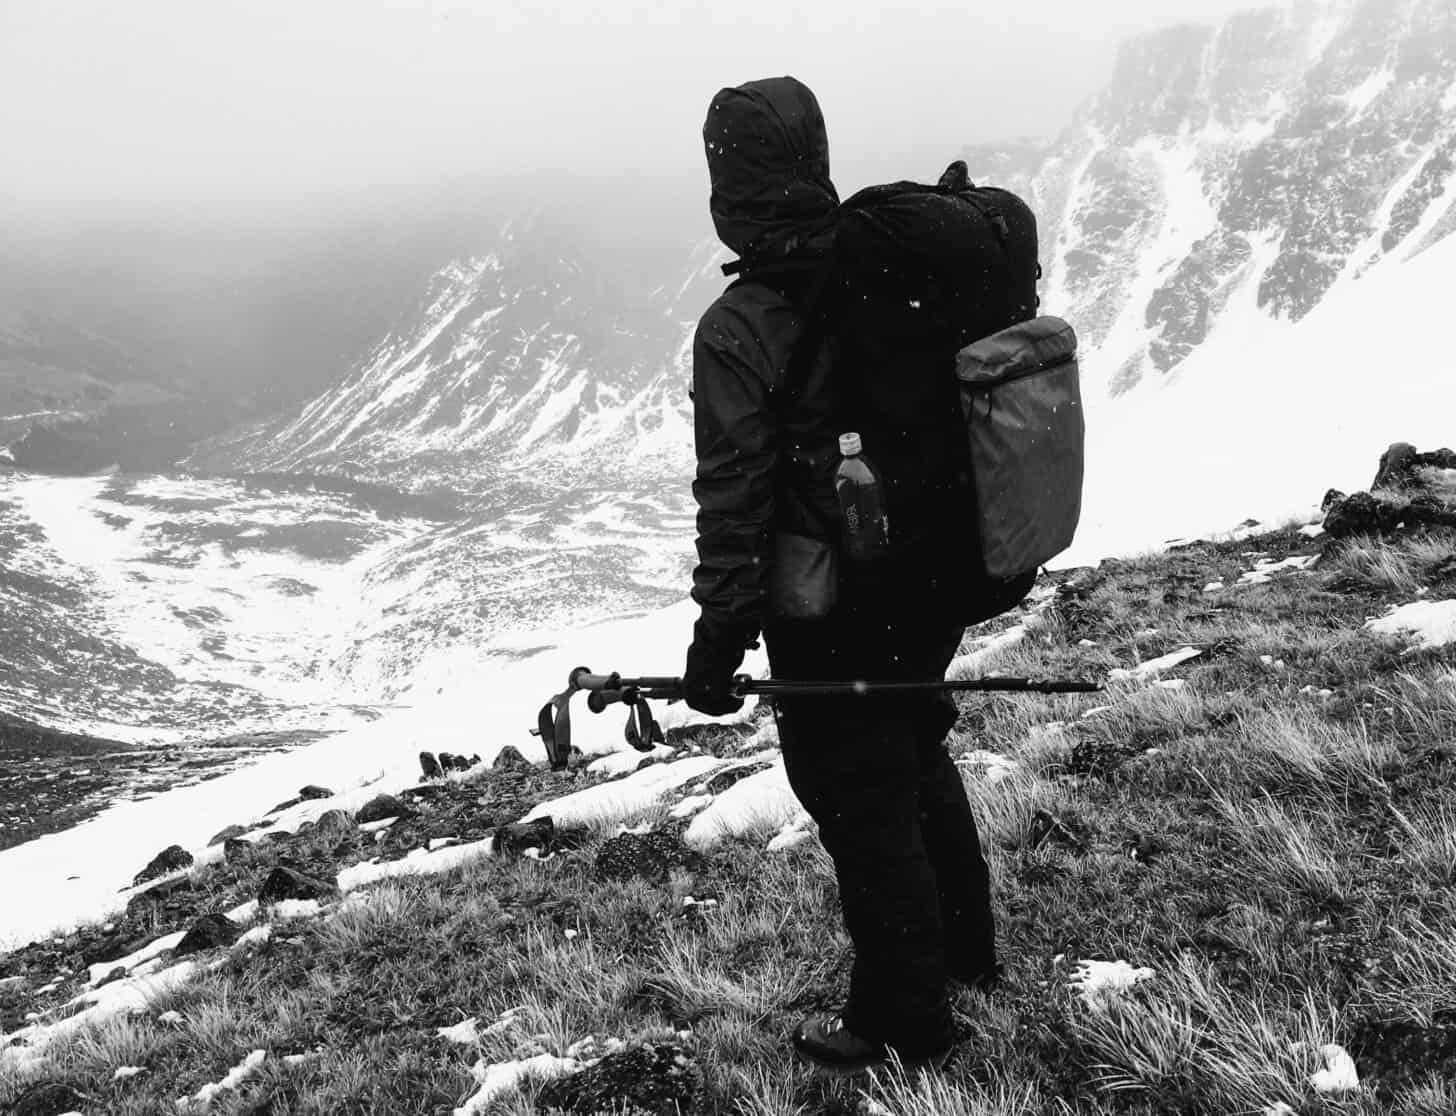
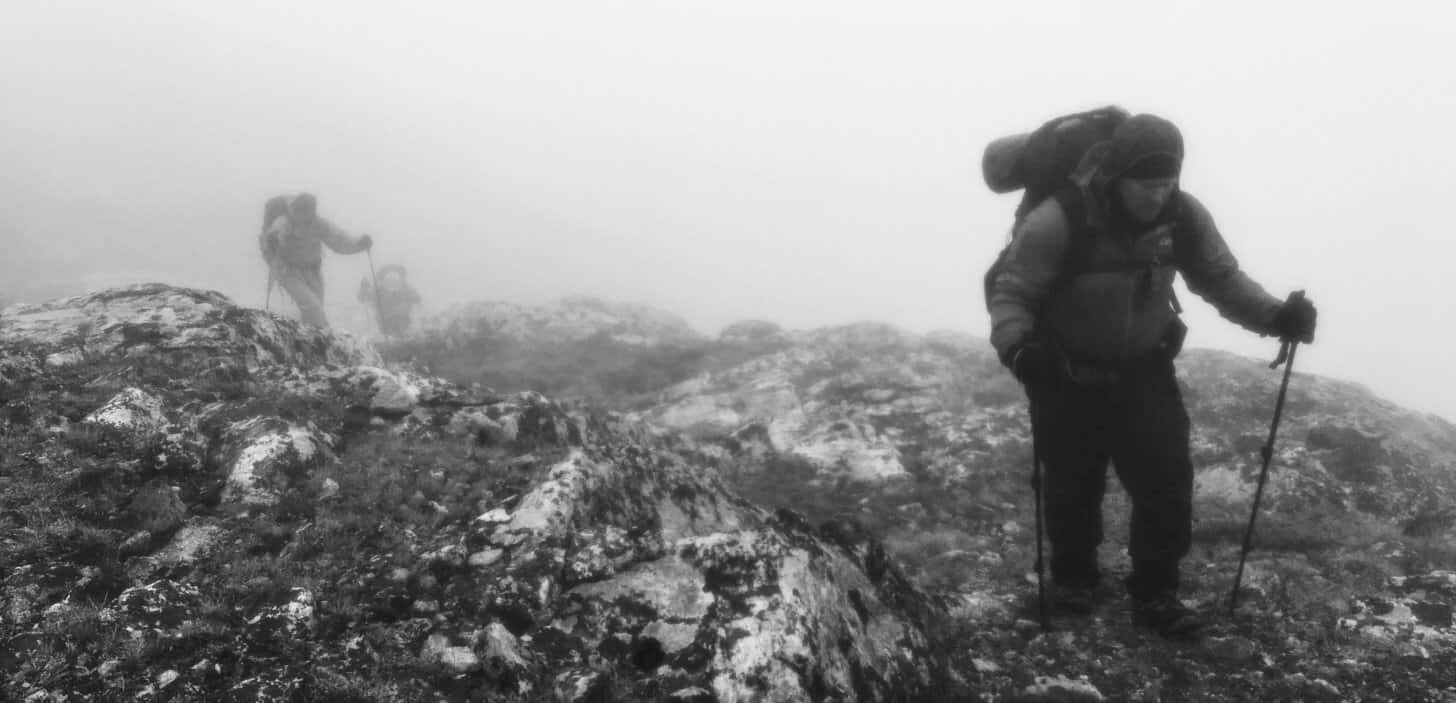
On our Wilderness Adventures Trek in Montana’s Absaroka-Beartooth Wilderness a few weeks ago, we experienced the full gamut of nature’s emotions: warm and sunny at our starting trailhead, and then four days of sustained cold, rain, and snow. We crossed the mountain passes. By the time we crested the last one at 11,000 feet, we were trudging through two feet of snow. That night, the low temperatures dipped into the teens.
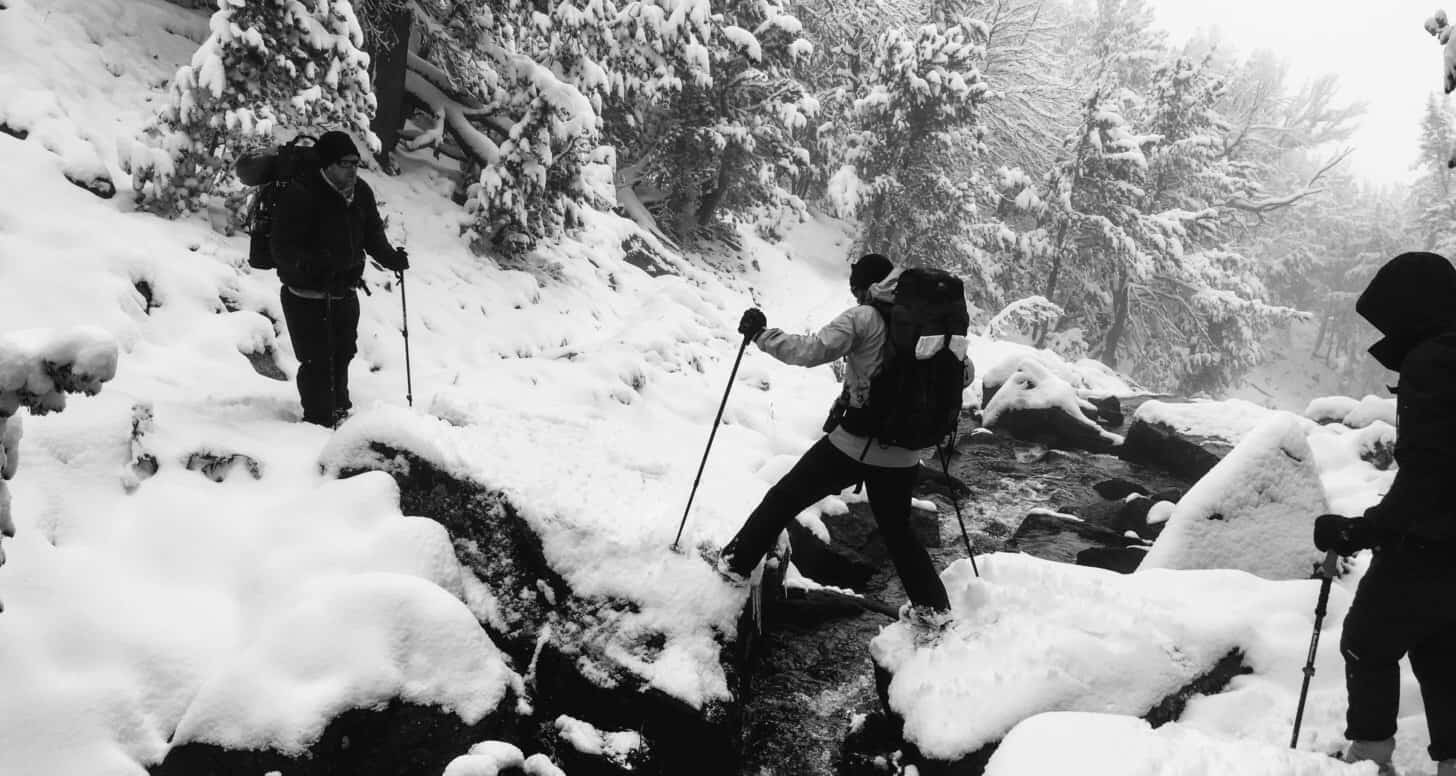
These are extremely challenging conditions for ultralight footwear.
Here’s how I mitigate these challenges with a carefully selected footwear “system” for inclement, cold conditions:
1. Keep moisture out of the inside of your shoes by using a calf-high gaiter in combination with a mid-height waterproof-breathable shoe.
Waterproof shoe, or no?
Normally I’m not a fan of waterproof-breathable membranes in my shoes because they create a hot, humid environment while trekking in mild weather that leads to maceration and blisters. However, if I know my feet are going to be exposed to perpetually wet, cold conditions, a shoe with a waterproof-breathable membrane helps keep feet warm(er) and dry(er) than meshy shoes that leak at every pore.
Shoe cuff height: low, mid, or high?
For snowy weather, a “mid” height shoe (with a cuff rising to just below the ankle) helps keep a gaiter seal intact without compromising the mobility of the foot-and-ankle joint.
Shoes: what I use
I’ve mostly been wearing the Hoka One One Tor Tech Mid WP for most of my inclement-conditions treks for the past 12 months. It’s a solid shoe, and I value (primarily) its cushioning when carrying a heavy(ish) backpack. It lacks an aggressive outsole, and its durability isn’t great (I’ve worn holes in the toebox mesh as a result of some rowdy bushwhacking), so while it remains my favorite for on trail use, its stack height and trail sole limit its sidehilling comfort off-trail.
A more technical option that I like very much that seems to offer a good balance between cushioning for packed trails and a technical-enough sole for bushwhacking and snow is the Altra Lone Peak NeoShell Mid. I’ve had the chance to test them briefly and they seem to tick all the right boxes for an inclement conditions off-trail shoe.
My other recommendation is the Salomon X Ultra Mid 2 GTX, a shoe that I have many years of experience with. This is a more durable option than the other two, and in my experience, maintains the integrity of the waterproof membrane better over time due to a more durable sandwich protecting the membrane. Caveat: if you have wide feet, you may struggle fitting this shoe once you add heavy and/or waterproof socks in it.
Gaiters: high or low, ultralight fabrics or more durability?
One important part of this system is the gaiter. I prefer calf-height gaiters to ankle gaiters – especially when snow is in the forecast and I know I may be trudging through six or eight or twelve inches of the fluffy stuff here and there.
There are a few cottage companies that make ultralight calf-high gaiters, including Mountain Laurel Designs and ZPacks, but after having gone through several pair of them (they are delicate, and easily suffer tears if you are spending any amount of time off trail in the bush), I prefer something more durable. In addition, these ultralight gaiters are fine for a rainy trail, but they fail to create a good seal at the gaiter-foot interface that effectively keeps snow out of your shoe.
My recommendation for a light-enough, very durable, calf-height gaiter that mates well with ultralight shoes:
Gaiters: what I use
For trail use and non-snowy conditions, I like the ZPacks Challenger gaiters.
For everything else (which seems like most of the time for me), I opt for the more durable and better-sealing ORRMH’s.
Rethinking the stream crossing
During the summer or otherwise mild weather, I don’t think twice about getting my feet wet at a stream crossing. It’s faster, easier, and safer simply to wade through a stream rather than try to find (often slick) rocks or logs to walk across. And I know my shoes and socks will dry rapidly in warm temperatures, and I know my feet won’t get painfully cold at night if they are a bit wet.
But in the near-freezing temperatures associated with many spring and fall trips I take, this isn’t always a great strategy.
So the final recommendation I have for keeping moisture out of the inside of your shoes is to avoid submerging them in stream crossings.
Take the time to scout for a dry place to cross.
Of course, sometimes this isn’t possible, and you’re going to get wet feet. Shoes with a waterproof membrane won’t drain, so consider spending some time on the other side of the creek taking off your shoes to pour the water out, and ringing out your socks. It’s worth it!
Waterproof socks for shallow stream crossings?
Another option for shallow(ish) stream crossings that I’ve found works well is to integrate a waterproof sock (durable plastic bags work great, I like these: ) between your warm socks and shoes. More on waterproof socks later.

2. Wear a highly insulative, crew height, merino wool/poly blend sock for additional insulation.
Thin, ultralight socks are fine for summer, but their limitations become painfully clear as soon as the temperature drops.
For cold, wet weather, consider upgrading to a mid- or even heavy-weight sock for more insulation. The primary disadvantage is that heavier socks dry more slowly. However, we’re not really counting on things to dry out, we’re instead trying to design a system that keeps you warm when it does get wet (and it will get wet).
Pure merino, pure synthetic, or a blend?
Pure merino sock fabrics are warm but hold a lot of water and dry slowly. Pure synthetic sock fabrics dry fast(er) and are more durable (socks are expensive) but are clammy. Strike a balance and look for a sock with a merino content of at least 65% for warmth, and a synthetic content (usually polyester) of at least 25% for some durability and faster dry time.
Ankle sock, or crew height?
Arteries that deliver warm blood to your feet run alongside both the inside and outside of your ankles. Keeping this region warm helps maintain warm feet in cold temperatures. I use a higher sock while hiking in cold weather than I do while hiking in the summer.
Trekking socks: what I use
I use a 66/34 (% merino / % synthetic) blend full-height, full-cushion sock in a heavier weight made by Darn Tough that provides a meaningful amount of warmth and loft even when soaking wet.
While I like the durablity of Darn Tough socks, I’ve also used a similarly spec’d model from Smartwool which seems to have a softer feel and better fit (less sagging when wet).
In spite of their differences, I’ve been happy with both and find them to be durable, warm, and comfortable.
3. When you arrive in camp, substitute your wet trail socks with a dry sock / waterproof sock combo to mitigate cold feet as temperatures drop.
I usually arrive in camp in the evening – an hour before dusk or right at dusk is a common arrival time. That means I’m getting to camp when I’m pretty tired, cold, wet, and right when temperatures are starting to plummet for the night.
My camp setup routine usually involves setting up my shelter and then finding a dry(ish) place to cook. By the time I settle down to make dinner, my feet start getting pretty cold.
So before I do that, I take an important precaution – I change my footwear system a bit.
Now, I’m not enthused about putting dry socks into wet shoes. That’s where a waterproof sock comes in handy. So, I take off my wet shoes, take off my wet socks, put on dry socks, put on waterproof socks, and then put my wet shoes back on.
This has a dramatic impact on my foot comfort for the rest of the evening, and I can’t recommend enough the need to incorporate this into your evening routine.
1–2 mil plastic bags (small garbage can liners are ideal) and seam-sealed silnylon stuff sacks are my favorite waterproof sock options. I’ve also used Gore-Tex socks with great success – just be sure to size them up so they can be pulled over your heavy wool socks – and don’t buy the kind that are “heavy” or “insulated” or have “fuzzy or wicking fabric linings” – they absorb too much water. Examples of socks to avoid are made by companies like SealSkinz, Showers Pass, and Stryde (it’s not that these types of socks are bad products, they just may not be the most appropriate for this context). Note that there’s some merit to neoprene socks, but they’re thick and heavy, and you may not be able to get your feet in your shoes with them on!
Waterproof socks: what I use

My favorite waterproof socks are Rocky Gore-Tex Socks. Size up at least 2 sizes larger than your normal foot size so they layer easily. Rocky Socks are difficult to find, so you may have to search for them at more obscure retailers. I buy mine online here.
I’m also a big fan of so-called “launch socks”, which are used by kayakers to launch their boats in shallow water. Kokatat makes a pair (they are available at OutdoorPlay or direct from Kokatat via Amazon), and they are excellent. They are only a little a bit heavier than the shorter Rocky Socks, but because they are calf-height, provide a very warm microenvironment for your lower legs, and can be used for deeper stream crossings.
Heavier still, but warmer, and more difficult to dry out, would be a pair of seam-sealed neoprene “dry socks”. These ones are tall (18″) and would be a good choice if you were facing lots of stream crossings.
Waterproof socks while trekking?
In addition to in-camp use, waterproof socks offer some on-trail advantages as well. They can prevent soaking your hiking socks at shallow stream crossings, and they provide some much-needed warmth during the first hour or two of trekking on a cold, wet morning.
4. Before you get into your sleeping bag, swap out your camp sock combo with a thin wool liner and a pair of ultralight high loft insulated socks.
Shelter is pitched, dinner cooked, bear bag hung – now it’s bedtime.
Remove your wet shoes, damp waterproof socks, and (probably a little damp) “camp socks” and swap out for cozy, puffy warmth with some ultralight insulated booties.
Sleep socks: what I use
My pick for an ultralight bootie is made by a friend and former employee of mine who runs a little cottage company. Wearing a very thin merino liner inside of the bootie adds a lot of comfort (better next-to-skin feel) and some warmth as well.

5. Stow wet footwear (shoes / socks/ gaiters) in a plastic bag and keep it close to your body so it doesn’t freeze at night.
You’re going to have some “wet stuff” (shoes, socks) and if the temperatures fall to much below freezing at night, you’re going to run the risk of having that wet stuff freeze. That’s going to make for a very uncomfortable routine in the morning when you try to put it all on, leading to cold feet and cold fingers as you try to manipulate frozen gear onto your warm feet.
The traditional “winter mountaineering” method for preventing this is to store wet gear (boots, socks, gaiters, etc.) in a plastic garbage bag and stow that inside your sleeping bag. This may be necessary for mid-winter conditions, when temperatures drop to the single digits or lower, but for fringe season backpacking, it’s probably not necessary. Temperatures may only drop to 15 or 20 degrees (F), and usually, it’s enough to keep your wet gear stowed “near you”. I stow mine in a plastic garbage bag or extra waterproof stow sack, and usually keep it right next to my sleeping bag and pad, where body heat has warmed that space to temperatures above freezing. Even on nights when I have frost in my shelter, sleeping in “close enough” proximity to my wet gear keeps it thawed well enough.
Final Thoughts: Shoe Sizing and Sock Rotation
Shoe Sizing – With thick socks and perhaps a waterproof sock layer, conventionally-sized shoes are not likely to be large enough to accomodate the extra bulk without compromising circulation in your feet. So be sure to size up your trail shoes to accomodate the added bulk. I usually size up one to one and a half full sizes (or more, depending on the brand).
Sock Rotation – Trail socks, camp socks, sleep socks? My goodness, how many pair of socks do I need?! I’ve accepted the idea that it’s OK to hike in wet socks. They’re going to get wet within minutes anyways, if the weather is pretty bad. So on a typical weekend outing, one pair of hiking socks is plenty. I’ll then keep one dry(ish) camp sock in reserve (also a hiking sock) and reserve completely dry merino sock liners for sleeping inside my down booties. For longer trips in sustained wet conditions, I may add an additional trail sock, but more likely, I’ll stick with one pair and wash them clean every few days.
Additional Resources
- View our Guide’s Gear List – gear recommended by the Backpacking Light Wilderness Adventures Guides (includes footwear selections as well as other gear for inclement conditions trekking in mountainous regions)
- Read my previous article about gear for inclement conditions trekking where I discuss a variety of gear systems, including (but not limited to!) footwear.
- Additional perspectives about non-summer footwear systems include Dave C’s tips for shoulder season footwear, Will’s presentation of different footwear systems used by several different people, and my own past perspectives on footwear systems for spring snow travel.
- Also, here’s a good forum search query that pulls up lots of threads about footwear systems for cold, wet conditions.
- Finally, find this gear on sale: consider using our Gear Finder Search Engine to find gear on sale. Try using these queries: waterproof trail shoes, smartwool phd socks, darn tough socks, or outdoor research gaiters.
TL;DR – Summary of a footwear system for inclement conditions
Keep feet warm(er) and dry(er) in wet (rain and snow) and cold (temperatures near and below freezing) conditions with the following system:
- Waterproof-breathable, mid-height, ultralight trail running shoe – sized up 1+ full size (this one if you value maximum cushioning, this one for a more technical sole, this one if you have narrower feet).
- Waterproof-breathable, calf-height, durable gaiter (this one for durability, this lighter one for light on-trail use).
- Heavier-weight merino blend socks (this one for durability, this one for better fit when wet).
- Waterproof socks or two seam-sealed silnylon stuff sacks or two plastic garbage can bag liners.
- Thin sleep socks and ultralight down booties.
Read the full article if you want to learn how to use this equipment system while on the trail, in camp, and in your shelter.
Disclosure: Some links in this article are links to affiliate merchant partners – if you click one of these links and complete a purchase, we receive a small commission, which helps support our website – thank you very much for this support, we greatly appreciate it!

Discussion
Become a member to post in the forums.
Roger: That makes sense.
Beyond just fuel efficiency though, what I meant to ask was how well the MSR stove actually works/doesn’t work in cold temps in comparison to a liquid fuel feed setup when one inverts the canister? I was assuming it would have the same poor fuel vaporization problem that other upright canister stoves have? Does this give similar problems and have to be managed accordingly in cold temps – i.e. by pre-heating the canister under your clothing or running the stove while sitting in a small tin of cold water to prevent canister freezing? Trying to weight the tradeoffs of a) significant overall cook system simplicity v/s b) the greater weight and any cold temp usability limitations.
The liquid feed (inverted canister) stove will work down to such a temperature that the fuel in the canister no longer boils. However, life is never that simple: if you have kept the canister just a bit warm in your pack, you could easily be talking about use at -30 C. If you let a bit of radiation from the flames hit the canister – and the canister just being in full view of the flames is almost enough, you could probably go even lower. Of course, you have to get the stove working to get the radiation feedback. Sounds like Catch-22, but not really.
What we do in practice is to keep the canister next to the water bottle in our packs. This means the canister is above 0 C if the water has not frozen. A canister at that temperature works just fine in the evening. Overnight we keep the canister under our quilt: again warm. The remote inverted canister stove is, in principle, far more reliable.
However, I must sound a warning about canisters which have been filled in Asia, especially China. There can be dust, dirt and waxes in the fuel, and these can cause (partial) blockages in the jet. I find a regular simple clean of the jet is needed with inverted canister stoves these days. It used not to be this way.
If you can keep the canister warm then an upright will also work, and there are ways of doing that with copper strips between the flame and the canister body. A search on ‘Moulder strip’ here at BPL, or on ‘alpine bomb’ elsewhere, will show you have that is done. Doubtless, some upright stoves will allow some reflected radiation down to the canister as well: Jerry Adams has a series here at BPL about that. Some quite good results have been had, but they take a bit more care and skill. Practice at home.
When you have a good windshield around the pot and the stove, you are trapping quite a bit of hot air. That hot air can also provide very good feedback to the canister under the burner. Some care needed: remember the ‘touch test’, but few have ever found a problem there.
Now, the infra-red stoves like the Reactor. They can provide some radiant feedback, but the body of the burner does block a lot of that feedback. So you may have more trouble with one of those types. A windshield will of course help.
Simple, ennit? The reality of winter walking is that a fair bit more skill is needed to be safe – but the rewards (scenery, lack of crowds, fun) are worth it.
Cheers
Thanks, Roger for the always thorough and always expert advice on this subject. Agree wholeheartedly about the many rewards of winter multi-day adventuring!
Wait, I thought this thread was about a footwear article.
Anyhow, one more plug for diver’s sox.
The beauty of wearing 3 mm neoprene divers sox is that even if they spring a leak in the seams your feet will still be warm due to the closed cell nature of the neoprene foam.
Yeah, that was a bit too much thread drift. Someone asked about stoves and I answered. My mistake. Sorry.
Cheers
Ryan tentatively endorses the Altra Neoshell. Based on my hike yesterday in Mt. Rainier National Park, I’d have to say, do not rely on these shoes for waterproofness. It was 100% chance of rain, and we knew we were going to get wet, but were still ok with getting outside for a dayhike. There was quite a bit of standing water on the trail, none over the laces, just large shallow puddles. As we hiked, we hit the snow line (slush line?)–2 inches of melting slush, as the day was warming as the storm system moved through. I ended up with completely wet squishy feet, and yes I was wearing gaiters. I usually use Sugru to attach a loop of line to the toe, so that the gaiter hook extends past the laces, and the laces are completely covered, although obviously that is not a waterproof seal. None of the water/slush was high enough to get into the laces, it all seeped in through the seam between the upper and the sole. While walking in the slush, my feet were also very, very cold, although once we left those conditions my feet weren’t as cold.
I’m going back to Inov-8 Roclite boots for conditions where I don’t need an insulated boot for snow, but need better waterproofness for wintery conditions. I’ll use the Altra NeoShells for conditions where I expect it to be wet, but not for walking up trails that have turned into a drainage ditch.
P.S.–There’s also a good review of the NeoShells on the TrailGroove blog.
http://www.trailgroove.com/blogs/
From what I’ve read the Altra NeoShell shoes don’t have a liner, only WP outer, so water comes in through the laces and tongue. Might be fine in dry snow but that’s about it.
What Diane sed. Plus this is tending towards the ridiculous for winter use. The only time I’ve ever used anything that low for winter was a GTX lined racing XC boot. And even then I was on skis that put me 2″ above groomed snow, not wading through snow.
For winter hiking & snowshoeing you truly need at least a “mid” height over-the-ankle boot. Warmer ankles, where blood vessels are much closer to the skin, are important unless you are going at 75% to 100% effort.
Eric B.
I don’t really agree with Eric about any need for mid-heights. We wear fairly ordianry low0cut joggers when we are snow shoeing, but with some precautions: for snow we use GTX-lined joggers; we wear WP synthetic snow-shedding covers (aka ‘spats’) over the shoes; we wear GTX gaiters with straps under the shoes. Works fine for us.
On the other hand, I do most certainly agree with Eric about keeping warm blood flowing through the feet. Essential.
Cheers
Capsaicin cream used by arthritis sufferers will force the capillaries of your skin to remain dilated, you’ll lose more heat through your feet, eat more calories, and your feet will stay warmer.
Or you can experiment with dry, ground cayenne pepper, but the cream gives you a much better chance at calibrating… the dry pepper won’t do anything till your feet start sweating, use too much ground pepper and you’ll be stopping frequently to break through ice and soak your steaming feet while wringing out your socks in ice water.
Also heat water, put it into a bottle and put it into the foot of your sleeping bag.
Problem solved: light plastic galoshes with sewn-in gaiter. Worry only about drying your socks, not the shoes themselves. Socks are a lot easier to dry, and you can always take an extra pair or two.
(about the above) My friend makes these at http://www.kvntrek.com/en/catalog/?g=14, and inside there’s a strap with strong velcro to secure the shoe around your foot.
While winter backpacking the following works wonders for drying out your gear:
When shown this the first time, i was astonished to wake up to almost things having dried pretty much completely!
Of course, this assumes full-on winter camping (eg, must be prepared to sleep on a snow surface at some point, versus the ground) where it’s common to supplement your pad with a second 1/2″ foam 3/4 length.
Welll Tom… maybe with a ribbed Ridgerest CFC pad beneath a self-inflating, foam filled mattress or especially ribbed air mattress like a Neo-Air it would work. This would permit air circulation for the moisture to move out. I will try it this winter.
In winter I’ve often put my pants shirt and other day clothes beneath my Thermarest Trail Pro, which I use for winter temps above -10 F. Seems to work well.
I just looked at the launch socks and wondered why not just use them for hiking in lieu of a gaiter, especially when you know you are going to have river crossings? It seems that eliminates the gaiter / shoe / sock overlap where you are likely to have ingress while submerged.
Become a member to post in the forums.