Yep. I learnt all about that when I learnt to cook in early primary school… haha
Topic
The Joule Thief: Yet Another HX Pot
Become a member to post in the forums.
- This topic has 117 replies, 21 voices, and was last updated 1 year, 5 months ago by
 .
.
Wow Jon, thanks for the offer! I got your message and I will definitely take you up on that offer! I should be able to send one JT and one JB your way shortly. I’m about to enter finals week, so I wont be needing them for a few weeks.
No worries if it ends up being to much work to adapt the Cheetah design. I definitely don’t want to take to much of your time without any tangible thing I can offer in return.
Hi David! Sorry for the late response. I tossed my gear in the car and shot to the Sierras during the memorial day weekend here in the states the second I finished all my school and work responsibilities for the week.
A pocket tarp is a great trade offer but I regret to inform you I already picked one up last year while I was preparing for the JMT. Shoot me a message though, maybe we can work something out! ;)
Hi Adam! Sorry for the delayed response.
there are some little observable and feelable defects in the resin on some of the parts of the bend, kind of looks like chips out of the resin, though this was like that new
I think I am actually having this issue with my lids! Did it look kind of like this?

This lid had a peel ply so the top is a matt texture like surface, but notice on the bend there our dips in the resin that kind of resembles what you described.
I think this is an issue relate to the radius of the bend, the pliability of the vacuum bag, the strength of the vacuum pump, and the fact Im doing a “wet lay-up” for the lids. Its makes it hard for resin to stay infused in area that aren’t experiencing the same pressure.
I’m hoping to switch the lids to a process that uses a “pre-preg” material and some 3D printed positive pressure aluminum clamp molds. For now, each lid is managing to take more time to make than the darn pots. That definitely needs to change if I want to sell these beyond friendly curious online acquaintances.
With the bot, obviously you don’t screw the lid on and stick it on a stove and make a bomb, you invert it and it rests nicely with a lip. Need to be able to do likewise with what you come up with…not neccessarily an additional lip but not shaped in a way that it will just annoyingly slide off.
This and what Roger mentions is the tricky part I’m having trouble with! I actually have a lid that seals quite nicely, but it can’t be used as a pot lid while boiling, I’d really like to figure out a solution that solves this.
It really seems like you have a better intuition/insight on the nature of the problem then I do, so I may come back here with some CAD screen grabs and pester you for opinions!
No worries, I would just like to help you move the product cincept forward. There seesm to be a lot of interest.
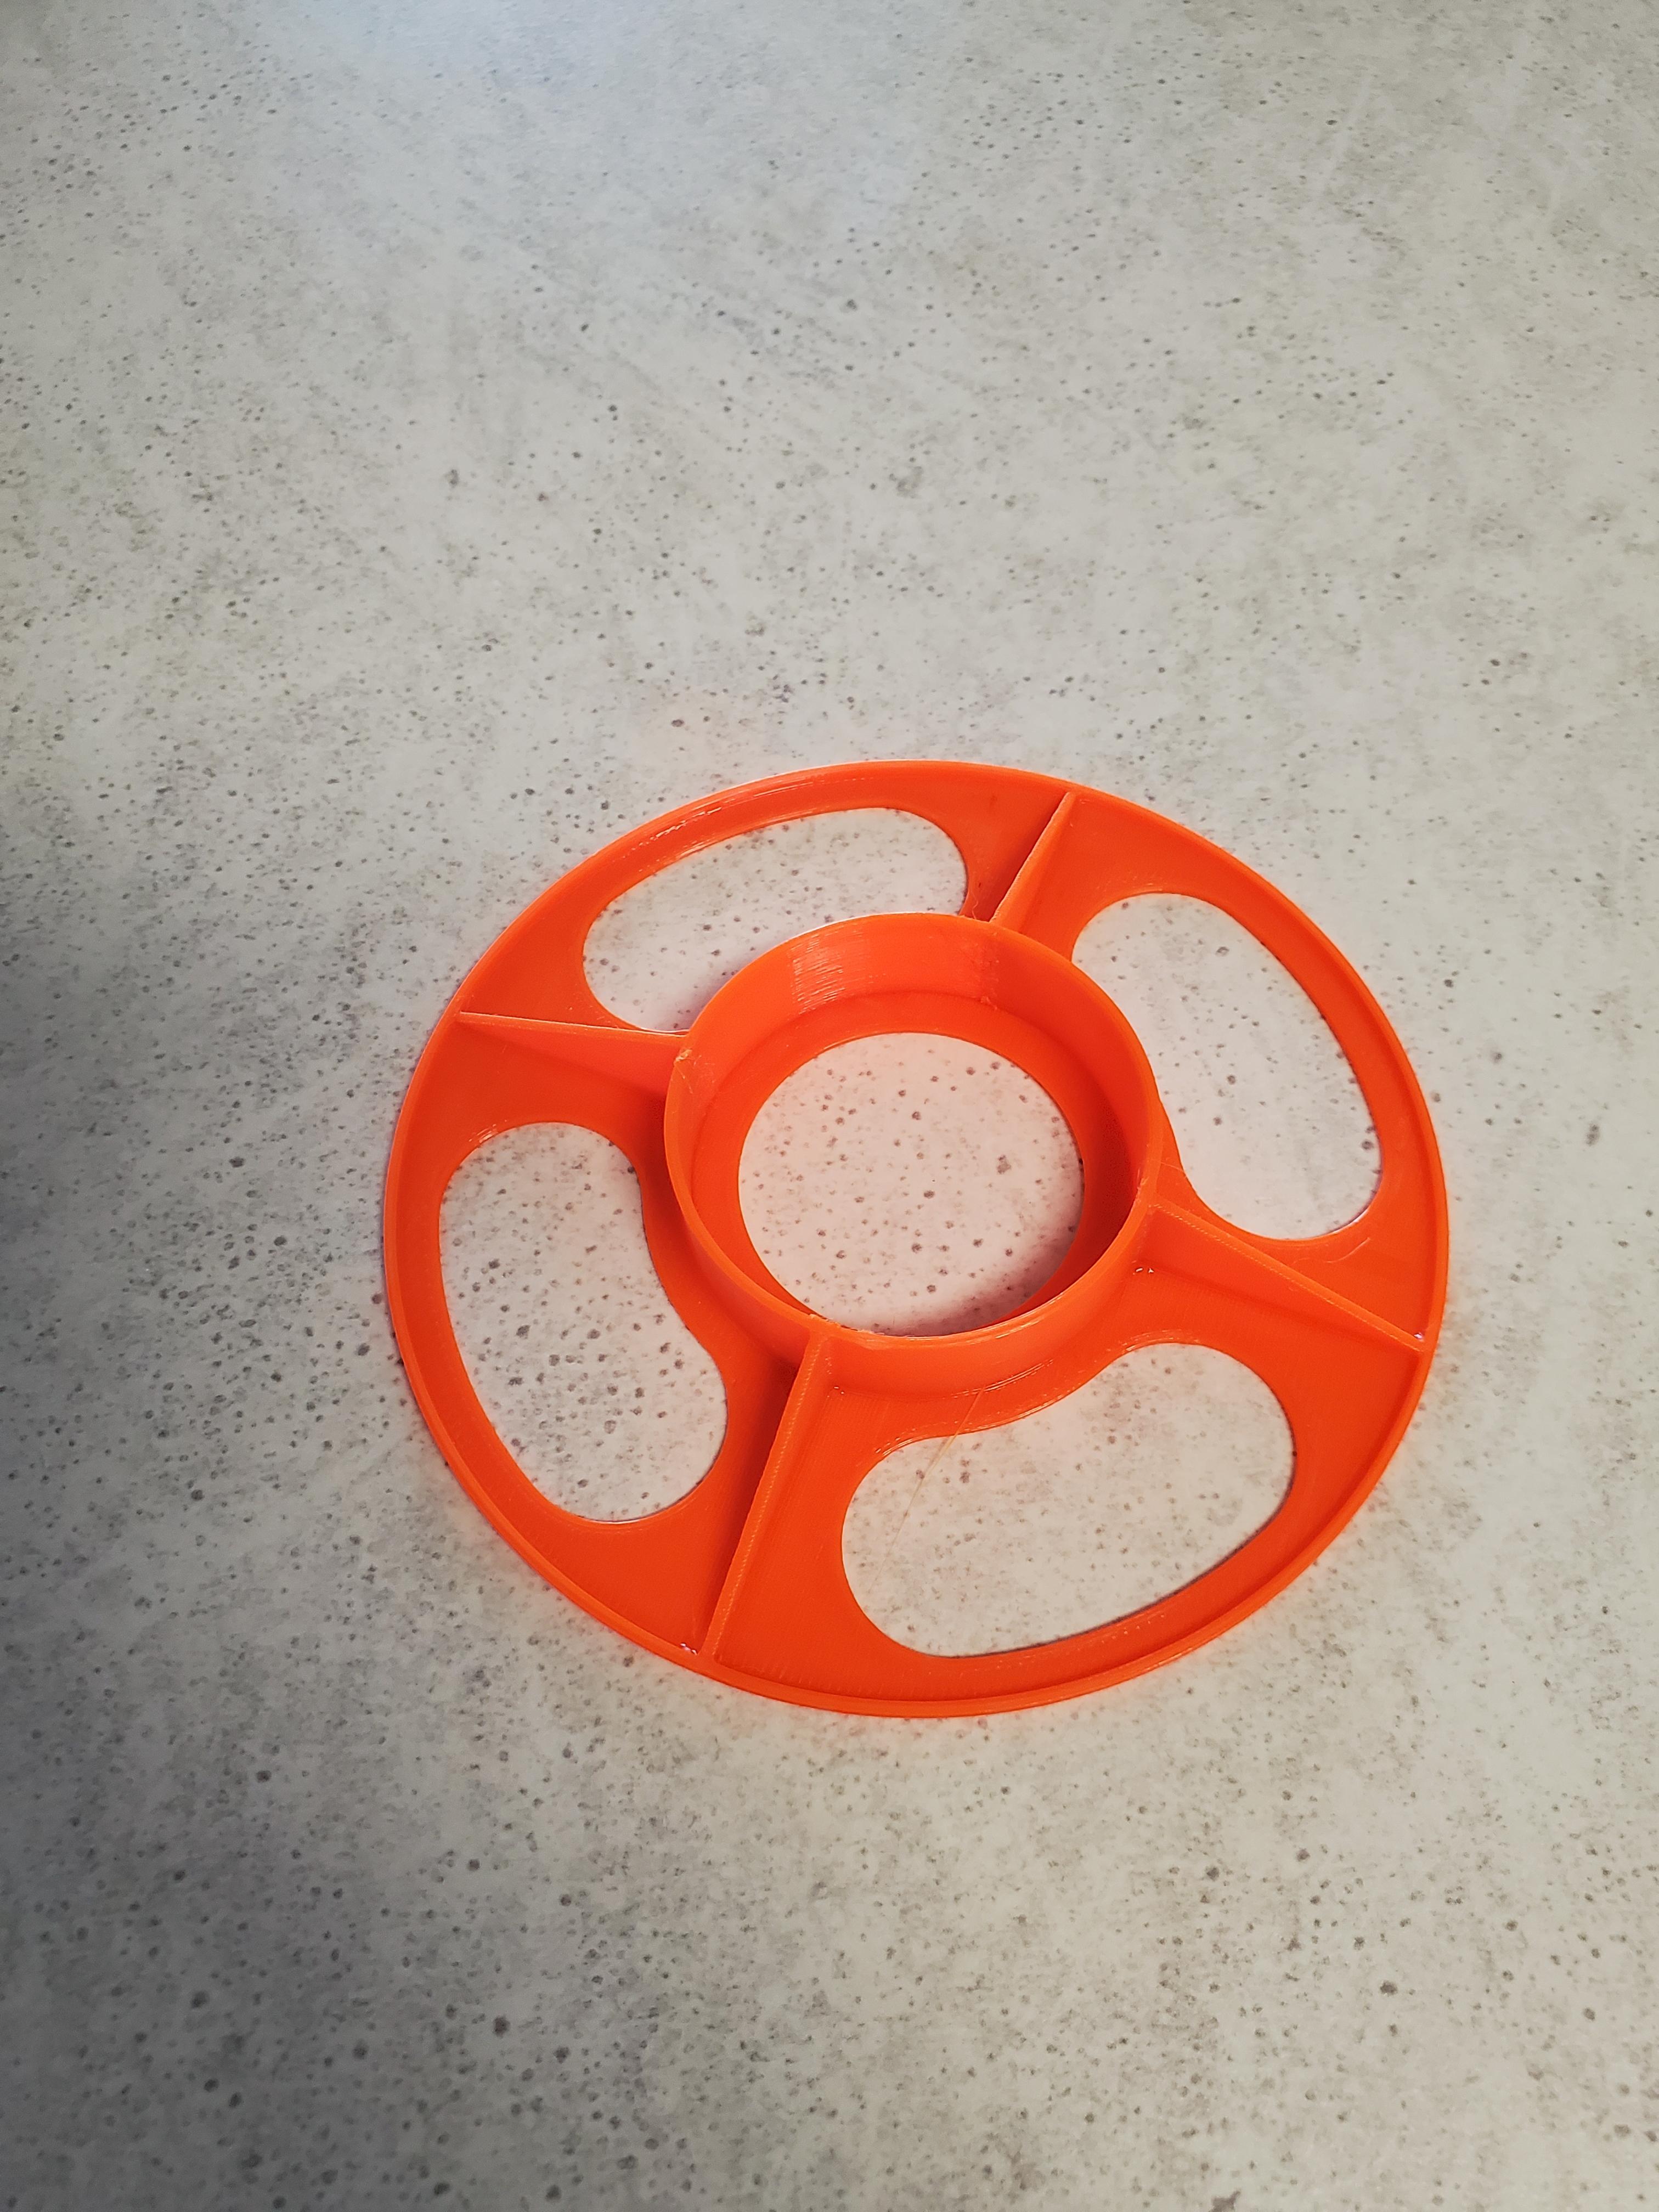
Okay, just a little post of me raving about a fuel canister stand Jan Rezac designed and posted here for people who live life on the edge by filling air horn canisters with fuel, thread on the subject found here.
I tried using one of these canisters with a JT for 2 trips, and although I loved the idea of the weight saved by pairing the mini canister with an ultralight fuel efficient pot, the hassle of balancing the darn thing was a pain.
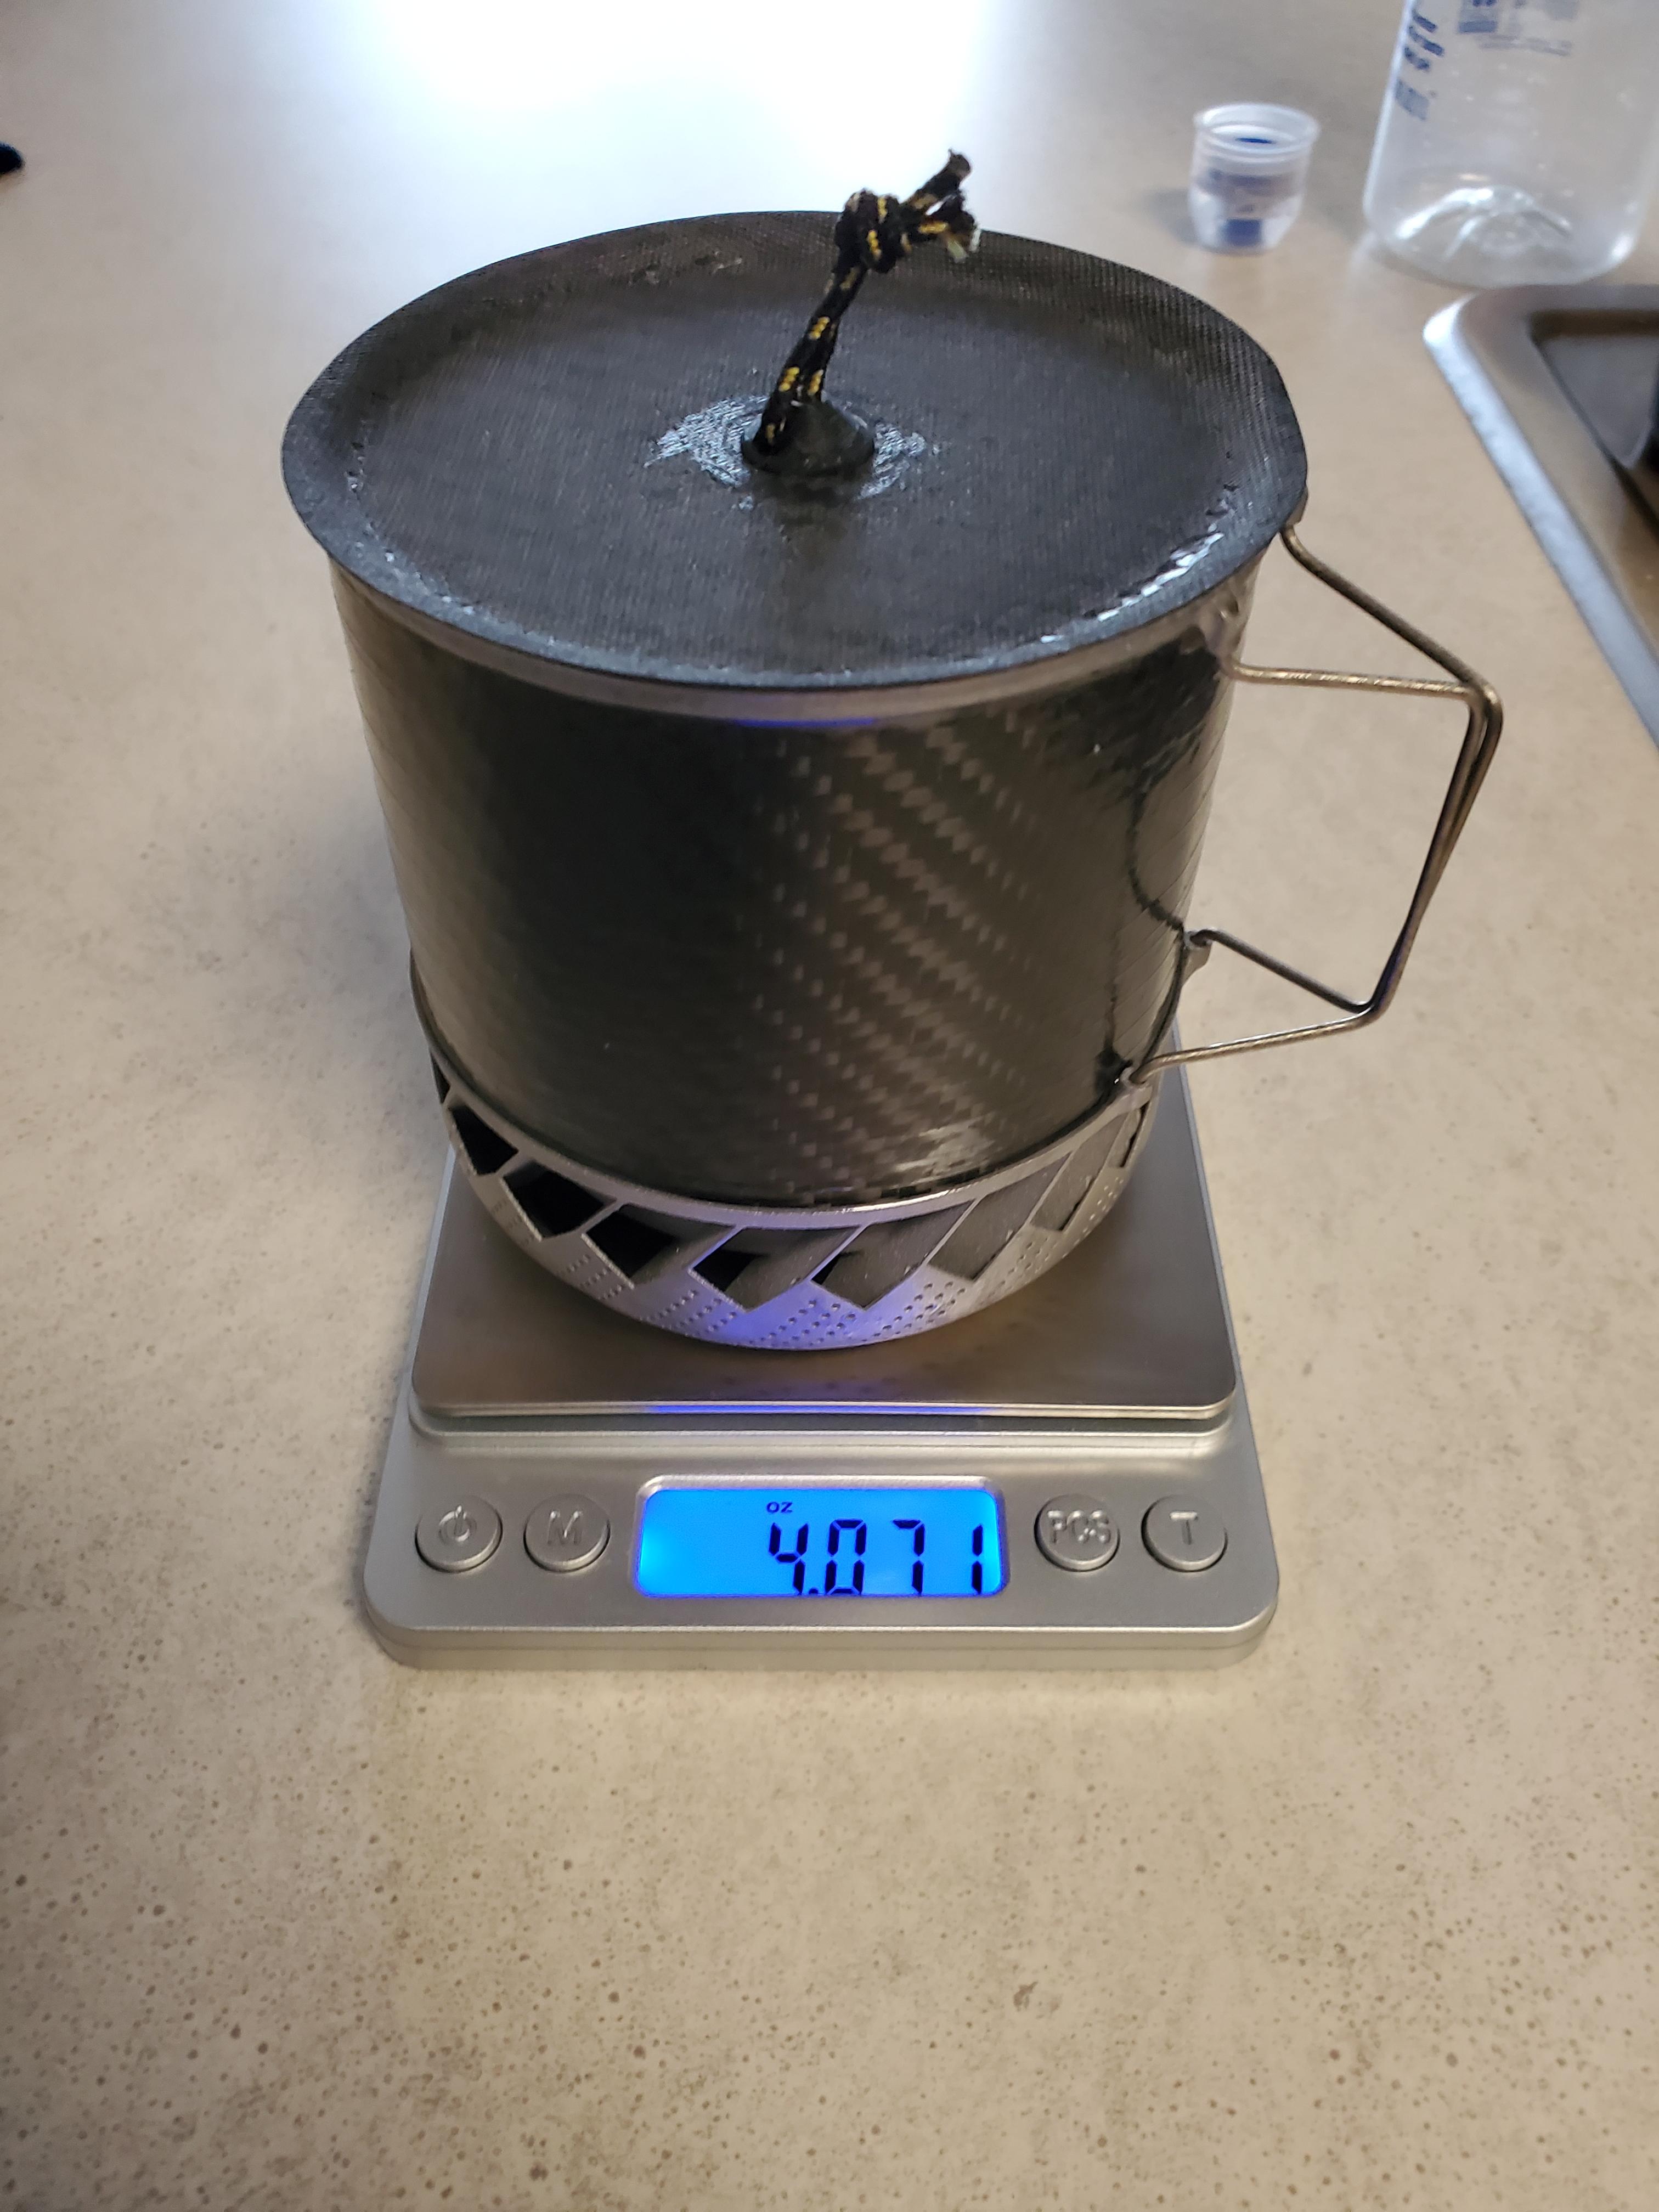
So when I saw Jan’s canister stand I instantly cloned it in Fusion 360, modified it for my canister and pot, and printed it in preparation for a trip to the Cottonwood basin. It came out at 6 grams like Jan said and for this trip I paired it with the JB because I hadn’t gotten to use the JB on a trip yet. Pot, empty fuel can, Jan’s stand, and a janky looking lid I made came out just over 4 Oz. Pretty neat!

I put 28 grams of fuel in the canister for the trip. The plan was a simple overnighter with my girlfriend to Cottonwood lake #3 to kick off the season in the Sierras. We ended up boiling 14 cups of water with 1.7 grams of fuel left over when we got home. This equates to about 4 grams burned per 2 cups boil. But that’s a bit misleading because I wasn’t bringing the water to a truel boil each time to conserve fuel.
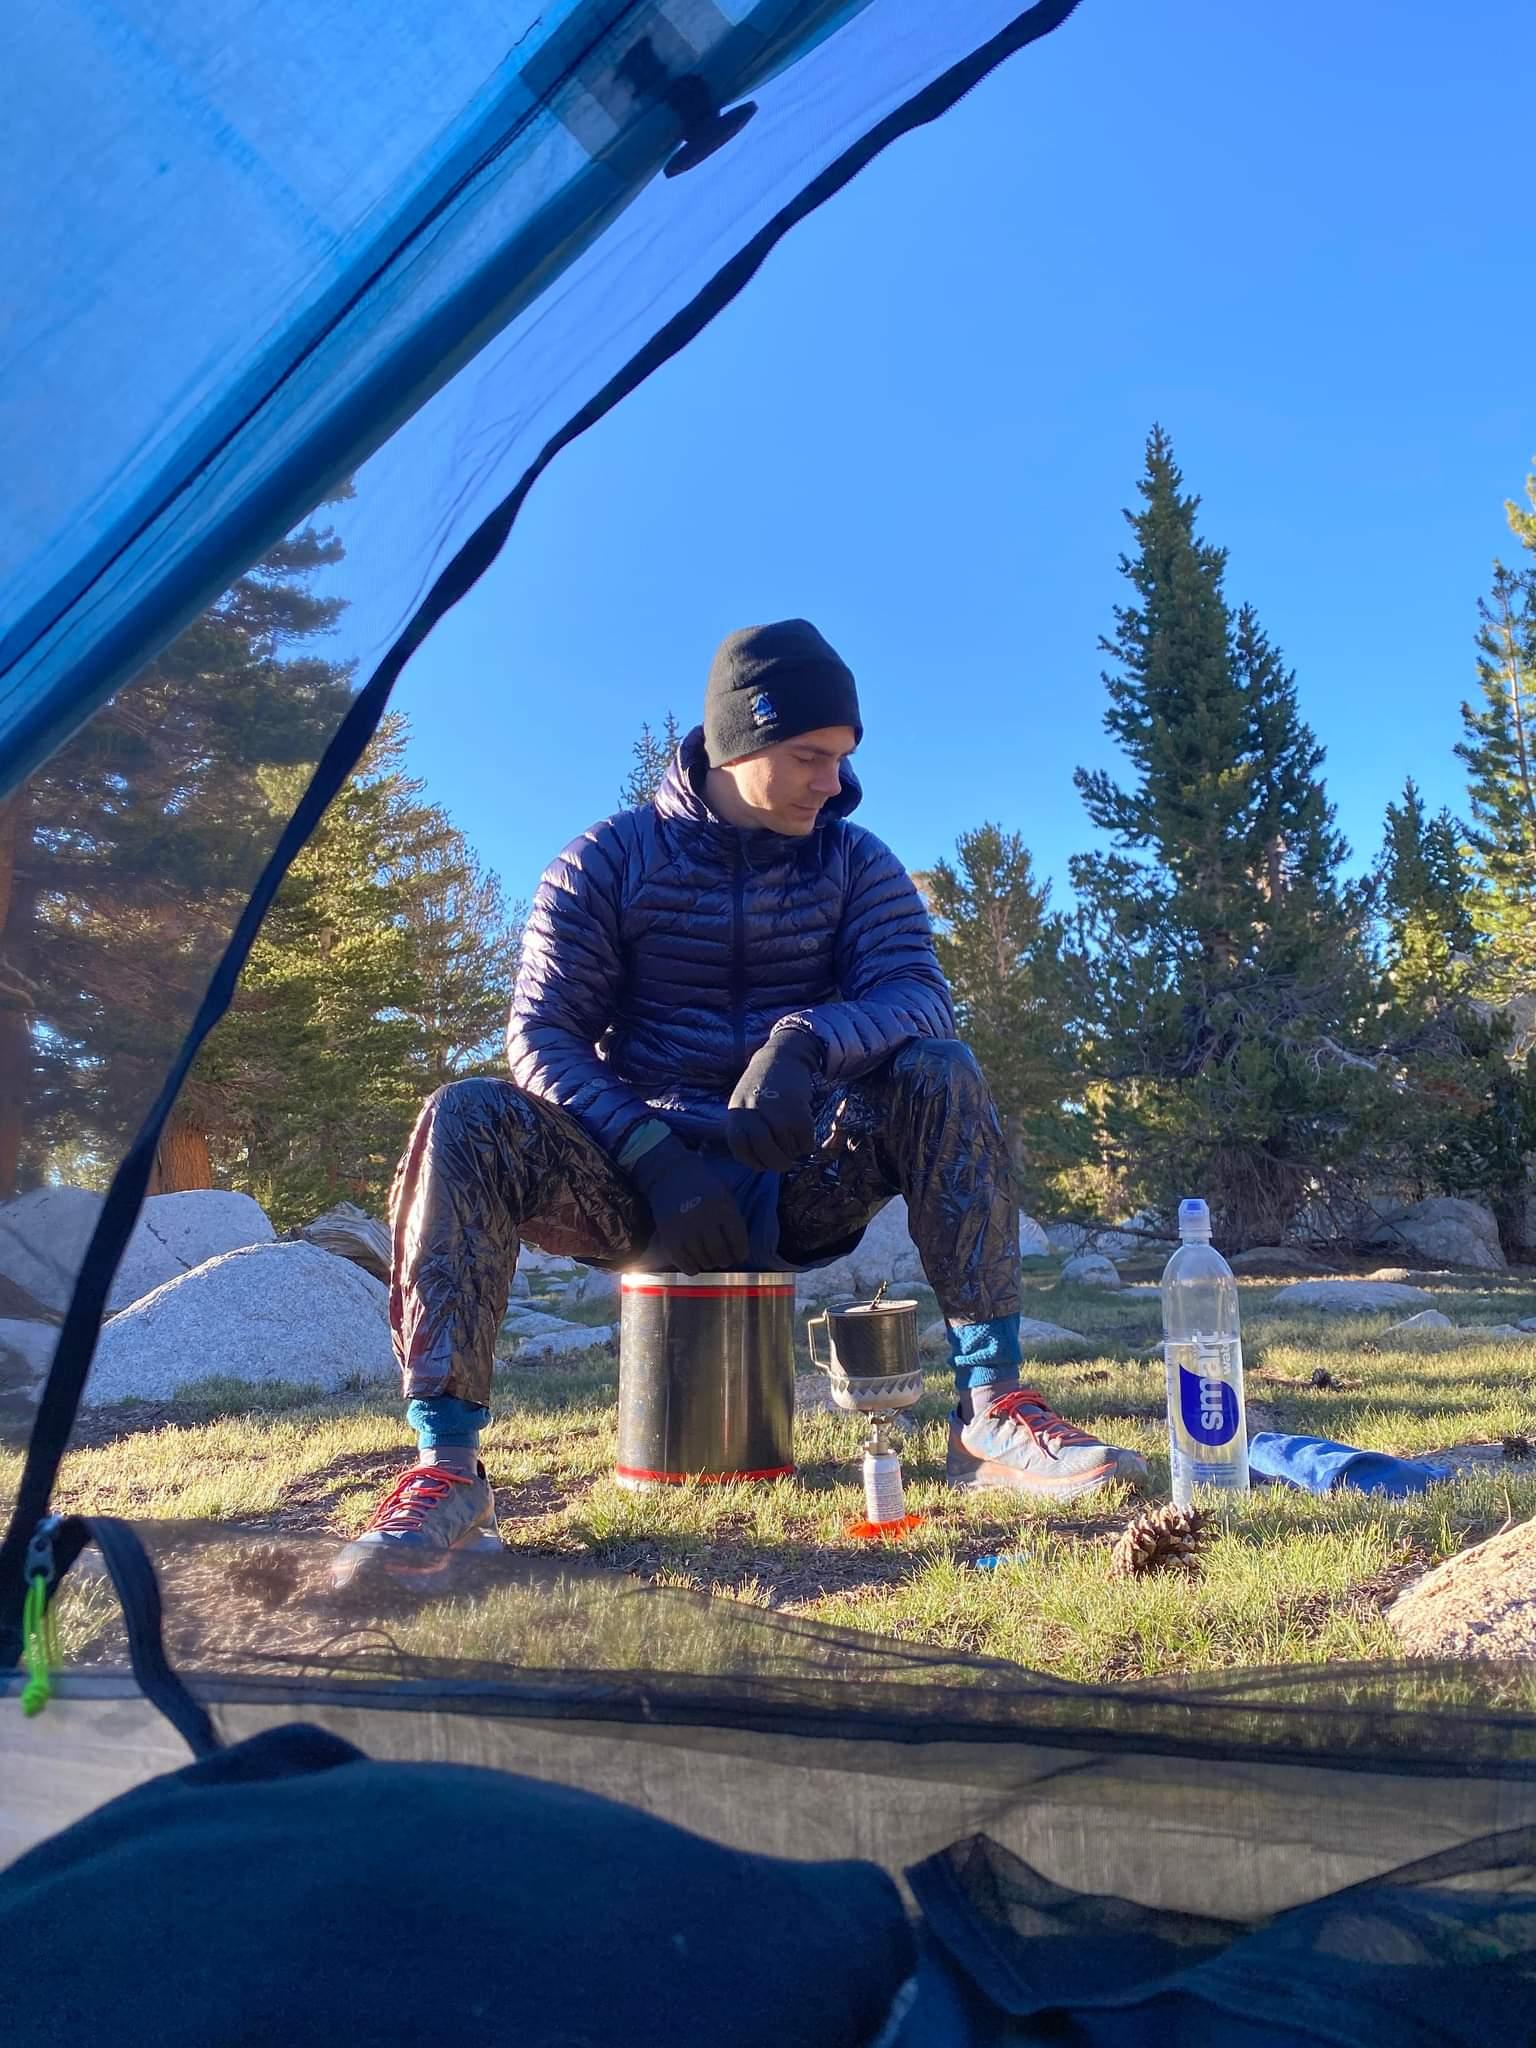
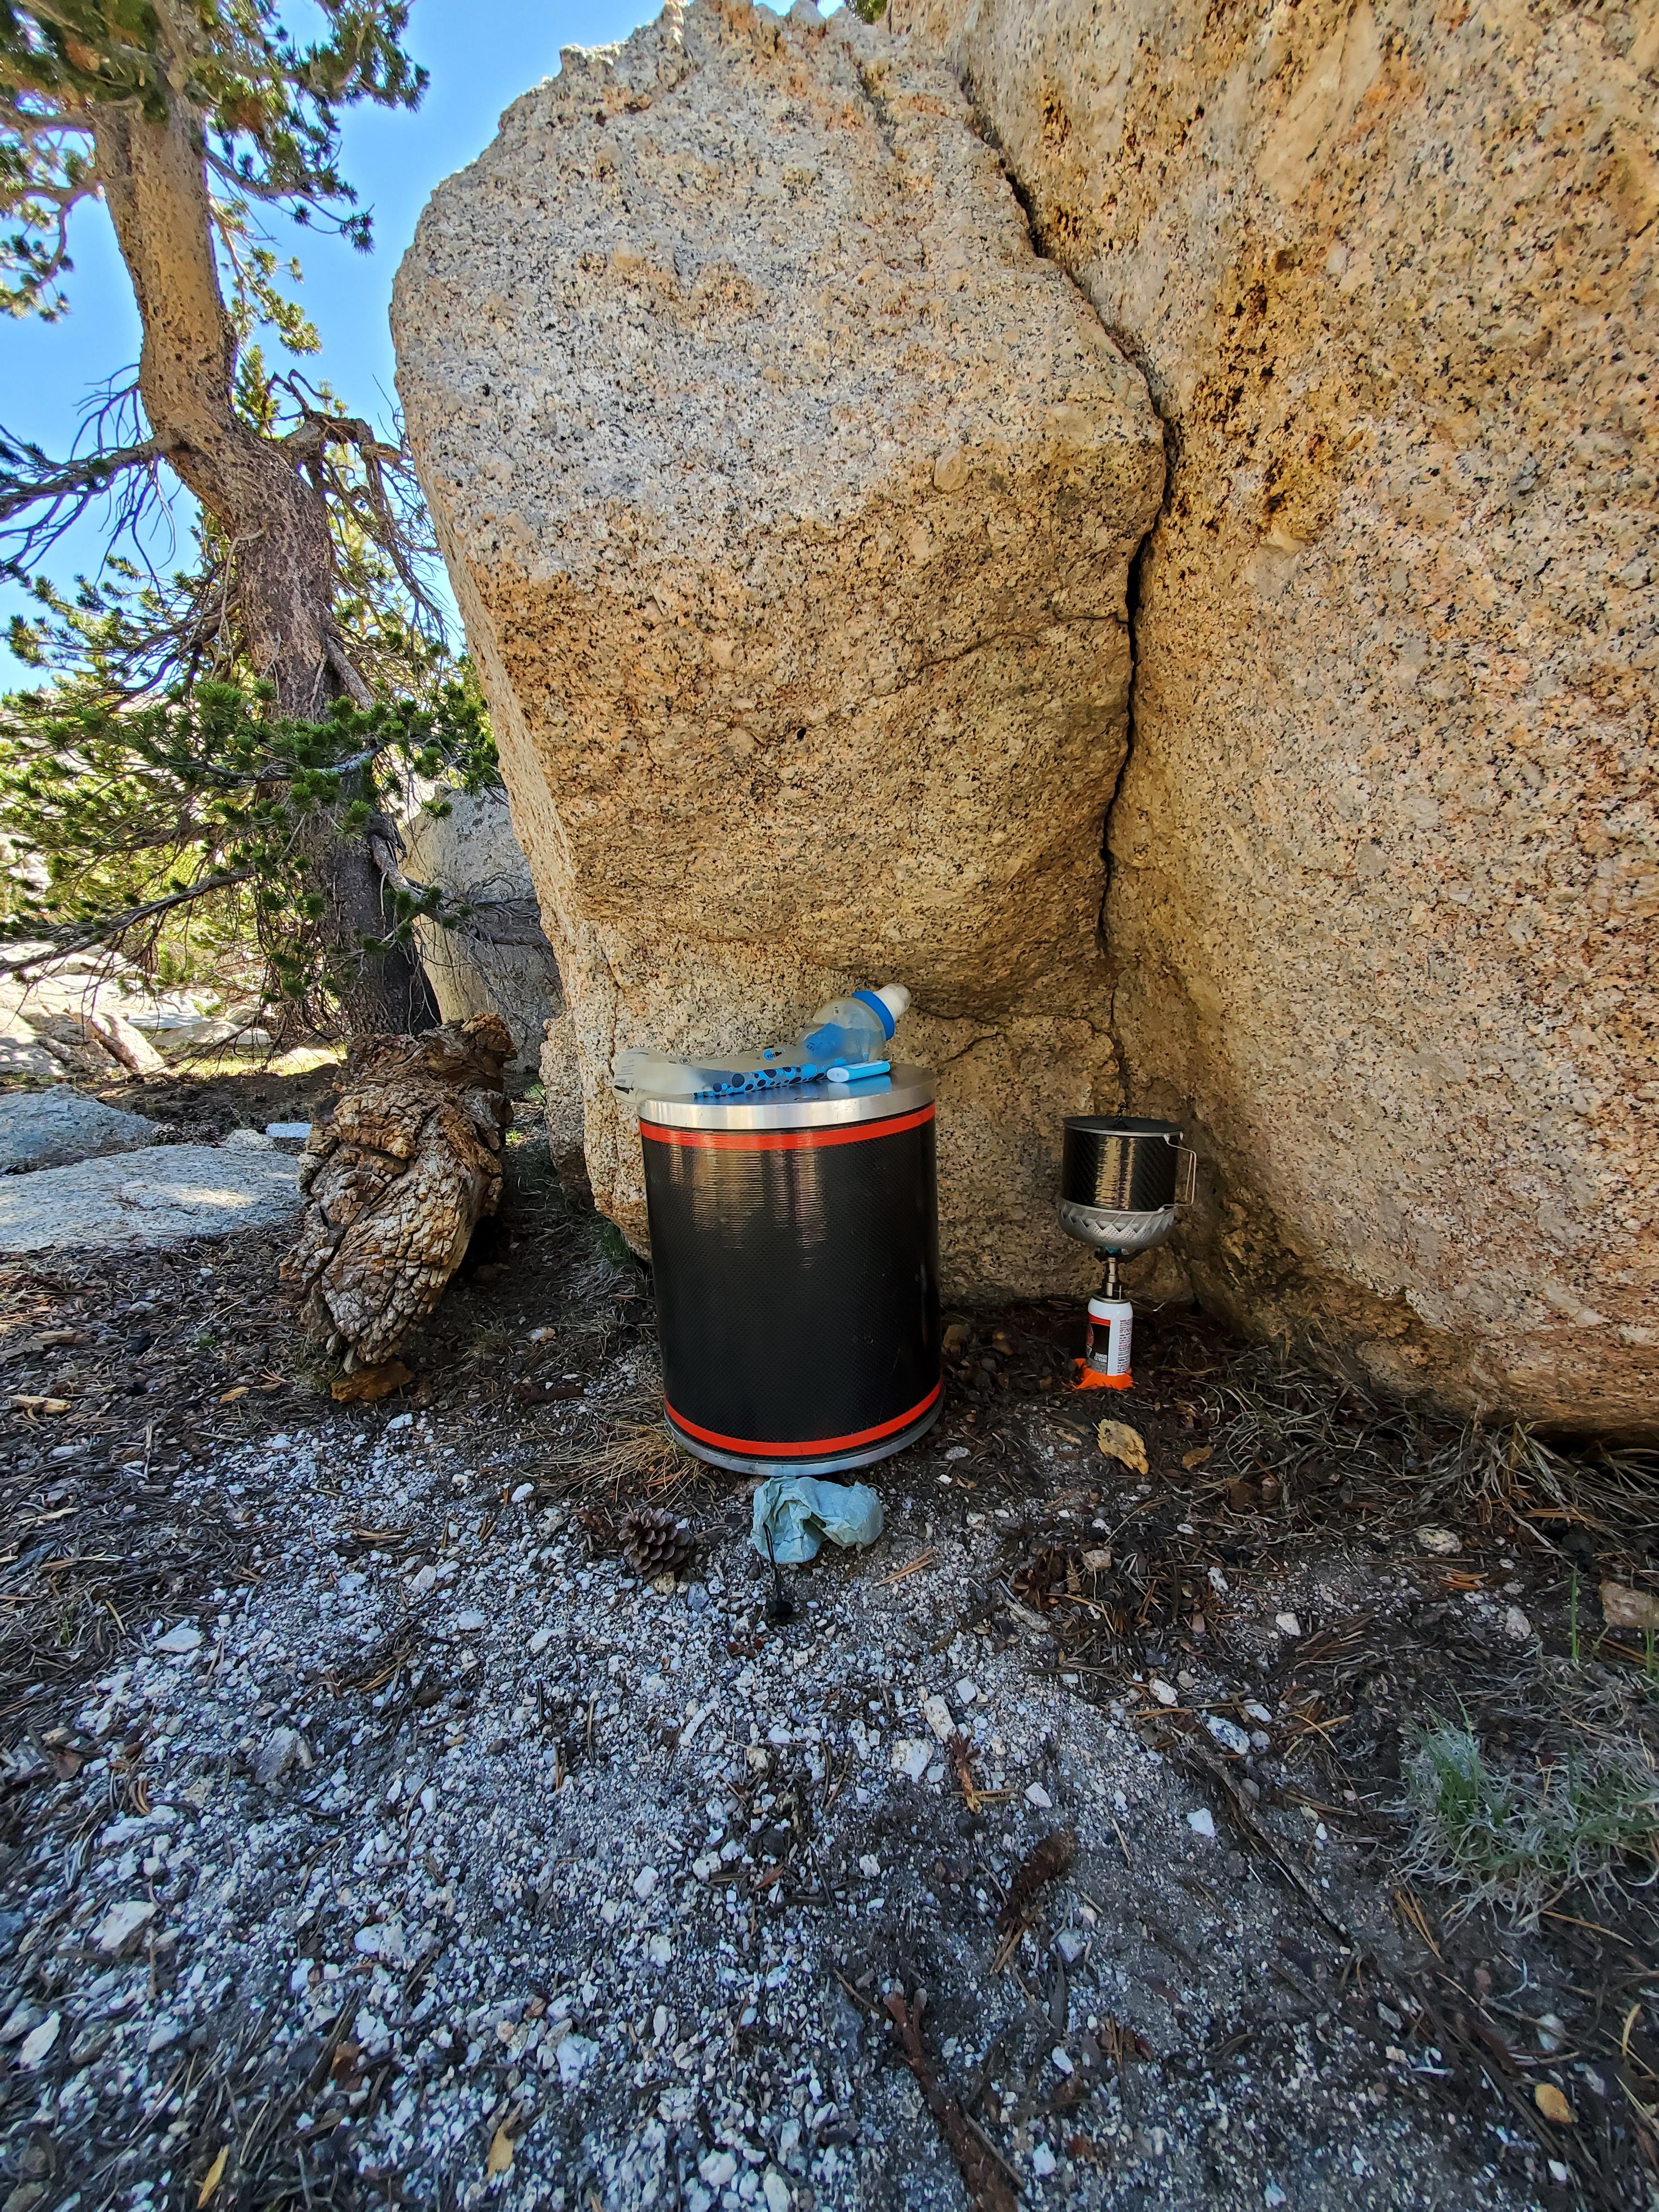
Another note was that it was pretty windy on the first day. Forecast said 35 mph gales, and it definitely felt like that. So camp selection was limited by the need for natural wind protection (we had the duplex) and a natural windscreen for the stove. Ended up finding a spot with the perfect rock to do boils behind. I definitely see the appeal of a man made windscreen for such a system though, it simplifies site selection on such occasions. I couldn’t help but find myself thinking “man, we could of had that site with that view if this stove/pot system had a screen the likes of what Jon makes!”
Anyways, thought I’d share the shenanigans.
A little bit of an update:
I’m finished with 3 out of 4 of my finals so I took a break from work and studying today to work on a possible cold soaking lid solution. Here are a few CAD screen grabs. Im looking at possibly doing a 3D printed aluminum outer ring. This is mostly because I want the rigidity the aluminum will offer, I’m limited on the tools I own and can use in my apartment, and i’m familiar with the metal additive workflow.

A CF center disk with be epoxied in place and coated on both sides with an NFS certified silicone.

The idea here is very similar to a BOT lid. Flip it one way to use the gasket and cold soak, flip it the other to use as a lid for boiling (maybe cooking? might be hard). Unlike the bot though, I hope to use shock cord to help keep the seal seated instead of threads. This should save significant weight and require no changes to the pot design itself… I’m just not sure how good of a seal it can make, I’ll keep you all updated.


As is, CAD is predicting a weight of 8.6 grams, but that doesn’t include the epoxy, silicone coatings, and shock cord.
In other news, I unfortunately won’t be sending a pot to Jon anytime soon due to the possibility of meeting David for a short backpacking trip together on the 28th so he can test out my spare pot and possibly buy it if he wants to. If he doesn’t buy it, I’m heading straight to lone pine post office immediately after hopping of trail and sending it straight to Jon for some awesome windscreen shenanigan’s :D
I also just placed an order for 1 of each heat exchanger to be printed again. I’m coming to realize I want to keep my 2 personal pots for my own hikes and thus need an additional spare JB and JT for sending around to people (like Jon) and sharing with those interested.
Curious to hear your feedback on the lid, I have no experience with designing for tight sealing gaskets so PLEASE bestoy some knowledge if you do!
Photo 3: that is rather similar to the seal on a Lindal valve (which works).
Thought: you don’t need a really high-qual seal for photo 3. A ‘liquid’ seal will do for most things, and carrying the pot+lid in a supermarket fruit bag will handle any very small drops which escape. Those bags are super UL.
Photo 4: you might want to put a couple of ridges on the top surface of the ring so it does not really seal – for cooking rice and pasta. That would not affect evaporation loss imho.
Design: the base looks horrible $$$ to make. Can you assemble it out of a couple of stampings instead?
Cheers
Thanks Roger! Great feedback, exactly what I was hoping for!
Remarks from photo 4: Sweet, I’ll add some radial ridges on the non sealing surface so it doesn’t actually seal like you say.
Design: Yeah I imagine a person with the right knowledge and tools can do it from stampings. For me though it comes down to tooling cost/space. I also don’t have any experience with stamping, but I can get the lid’s metal ring 3D printed for about $38… I cant buy a press or store it for that much though… nor can I pay a fab shop that much to figure out how to stamp one for me. So i’m kind of stuck trying to make industry rapid prototyping techniques work for my needs.
I would consider a hermetic seal for this design. There is too much surface area for the pressure to act upon. Even 1 psi across that lid would be difficult to seal. I think that your best bet may be a capillary seal: assume the contact surfaces will get wet and that will limit the amount of leakage. Even so, given the large diameter, maintaining a capillary seal will be difficult. Best wishes.
The printed stand is pretty cool…I need to get one of these fabricated!
If you’re looking for a windscreen, here’s my take on that.
Okay, kinda of an update for what’s in the works for this project.
Nothing new in physical form yet but I just placed the order for a revised cold soaking lid ring and a windscreen for a modified BRS 3000T Stove. Turns out the newer BRS-3000T have a shorter pot support span than my BRS-3000T and because of that, the Joule Bandit cant properly sit on the newer BRS-3000T stoves. So I designed the windscreen to also replace the BRS pot support legs as a work around.
Hopefully, within a month I’ll have an integrated stove solution along with a semi tight sealing cold soaking lid.
Here’s what such a system might look like. I was trying to learn CAD rendering todays so you get some nice looking pics.

And some CAD grabs of a cross section view. One packed and one unpacked system.

The windscreen is inspired by Jan’s solution for a BRS windscreen. CAD is predicating it will add 9.7 grams to the BRS, but I have to cutoff the BRS pot support legs to make it fit, so that might shave a couple grams. Hoping it will have no more than a net gain of 7 grams for the stove. I’m getting it 3D printed in aluminum, and its surprisingly affordable ($25) because it’s only weighs 9 grams and they charge by mass.
I suspect it can be made lighter and cheaper by making it via laser cutting Al and Ti sheet metal with a windscreen design that slides together like Zelph’s mini cones for the toaks ands sits on an Al plate attached to the BRS not to dissimilar from Jan’s windscreen. So future avenues for improvement ;)
In other news, I am really pleased with the little air horn canisters. So much so I’m convinced its the perfect companion for these pots. I’ve used the same one on 4 different trips now. The most recent was an attempt of the north big SEKI loop that turned into a 3 day Rae Lakes Loop trip because I injured my leg a bit 20 miles in on day one.
Also, David has shared with me the idea of using a custom thin wall extruded tempered aluminum tume instead of the CF. I did some basic CAD stuff and found that going down this route would add 17-21 grams to the pot. Considering that this would solve almost all health concerns I currently have with this project. It might be something I try out once I finish up with the cold soak lids, hard anodizing the HX, and stove integration system.
Turns out the newer BRS-3000T have a shorter pot support span than my BRS-3000T
Really?
Can you give us photos of both versions please?
Forgive my doubts, but I do know that there are about 12 different stoves on Amazon being advertised as ‘BRS-3000T’, but as far as I know only one of them is genuine. Some of the fakes look really dodgy to me.
Cheers
Ditto what Roger said, I too find it hard to believe that the BRS 3000t would make a significant change. Do verify that it is indeed a BRS.
On another note, historically, I have read numerous posts about the BRS stove overheating. In particular, during long simmers and boiling a lot of water. I am sure that you can track this down. The newer pot support design does two things that raises my concerns. First, it looks like the heat can transfer directly to the stove body. This could accelerate the problems mentioned above. Secondly, the new pot stand will do a great job of blocking wind gust out: it looks like it may trap air inside as well.
Long story short, $25 is cheap to experiment with and little to lose. I would invest in contact thermal probes (not and IR gun) and take thermal measurement between the 2 designs. My 2 cents.
It’s great watching your designs evolve. I like how closely the pot support design mimics the perforated foil around the base of the Windburner.
I’m pretty sure there has been a change in the design of the BRS pot supports, making them more robust to address failures. The photos below show an older “original” BRS on the right and two recent purchases on the left, and a closer view of new and old, showing the wider lower portion of the supports. But the span is the same, at least on these. Maybe it’s changed since I bought these late last year.
Re: BRS overheating, one way to prevent direct heat transfer from the pot support would be some kind of thermal break between the pot support and the stove body, perhaps by making the bottom plate out of some kind of insulating material, like the super-high temp CF they use to make racing car brake disks from a special carbon fiber material. That doesn’t help with overheating caused by heat trapped inside though. Test it as is. If it gets too hot, you could try opening it up by cutting out the little groups of four diamonds around the middle to make them into larger single diamonds to more air in and have less metal reflecting IR back in. And good to make it out of aluminum instead of SS or Ti too, since it conducts and radiates heat better.
Interesting, very interesting.
The CAD model is incomplete and wrong in some details, but that does not matter much.
I have to agree that the pot supports have been slightly altered in the two versions shown, but note reservation later. See figure below.

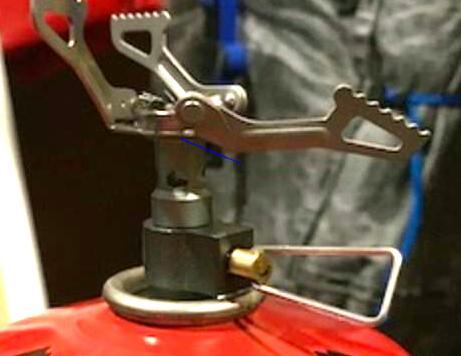
The photo shows what I regard as the original design, and this is what may be found in hordes of images on the web. It seems to be the same as the last photo, on the left.
The photo on the right has a straight under edge, as illustrated by the red line. There is no kink at the point indicated by the blue line. This is different from the original BRS-3000T.
Where life gets very confusing is compounded by the logo printed on the stove. The original logo is shown in my photo; a different logo is shown on the two stoves shown by David. Is this an evolution of the logo, or does it mean ‘copy’? Some of the versions of the different logo have the word ‘HAMANS’ under the block, other have Chinese characters.
I doubt the slight change in the shape of the pot supports have detracted from the design. But I am not sure that the stove labelled HAMANS is really an original BRS-3000T.
EDIT: looking at the BRS web site, I find that there has been no (advertised) change in the shape of the pot supports. They remain as I indicated, with the slight kink in the bottom edge. I will add that BRS is a MAJOR mfr of stoves in China, with a horde of different versions available (more than 25). They are not a backyard outfit. (They also make 5 different styles of crampons.)
EDIT2: you will also find a lot of the HAMANS brand on the web and on Amazon. They do not seems to be the same as BRS.
Cheers
Skip to the bottom for fun BRS-3000t stove stuff.
Jon:
I would invest in contact thermal probes (not and IR gun) and take thermal measurement between the 2 designs.
Great idea, I have plenty of micro controllers, I’ll look into ordering some contact temperature sensors today. Any insights into what I should be on the lookout for? I also know Roger has had some automated data logging devices using temperature contact probes before, so feel free to chime in Roger if you have some knowledge you’d like to share.
On a different note, I suspect your right Jon. Figured I’d give it a try, but aluminum just might be to thermally conductive for this use case. I’m also pretty certain the the BRS base is aluminum so this design offers a pretty easy path to the lindal valve for excess heat to flow to. Another issue is the design is apparently fragile. I did a few FE analysis simulations on it last night and found that it has a safety factor of 1.8 with a 40 N load on the support support ring to simulate a drop with a fully loaded 110g canister from 5 feet. It’s my understanding an ST of 3 or more is desirable in industry, so it might need to go back to the drawing board for its strength issues alone. Here’s a screen grab for the deformation from a straight down drop impact.
Getting the same part printed in Ti brings the price up to $97 and the weight up to 15.5 grams (both specs are higher than I would want). So if the Al version doesn’t work that great, I’ll finally have an incentive to learn sheet metal design stuff to try and work out an Al and Ti hybrid approach.
Roger:
The CAD model is incomplete and wrong in some details, but that does not matter much.
Yeah its just something I tossed together ASAP to confirm sizing and fit of the stove with the windscreen/pot. So definitely not something that is a 1-1 representation of the stove. Anything you noticed though that is wrong and might affect sizing/fit?
All you smart peeps:
I have a question for you stove experts while I still have your guy’s attention… assuming this doesn’t melt the O-rings in my stove and the plastic bits in the lindal valve… I have concerns on combustion efficiency, IDK how much this widescreen will starve the flame of oxygen, any ideas or advice from your own experiments on how to identify if that is an issue while testing?
The BRS pot support topic:
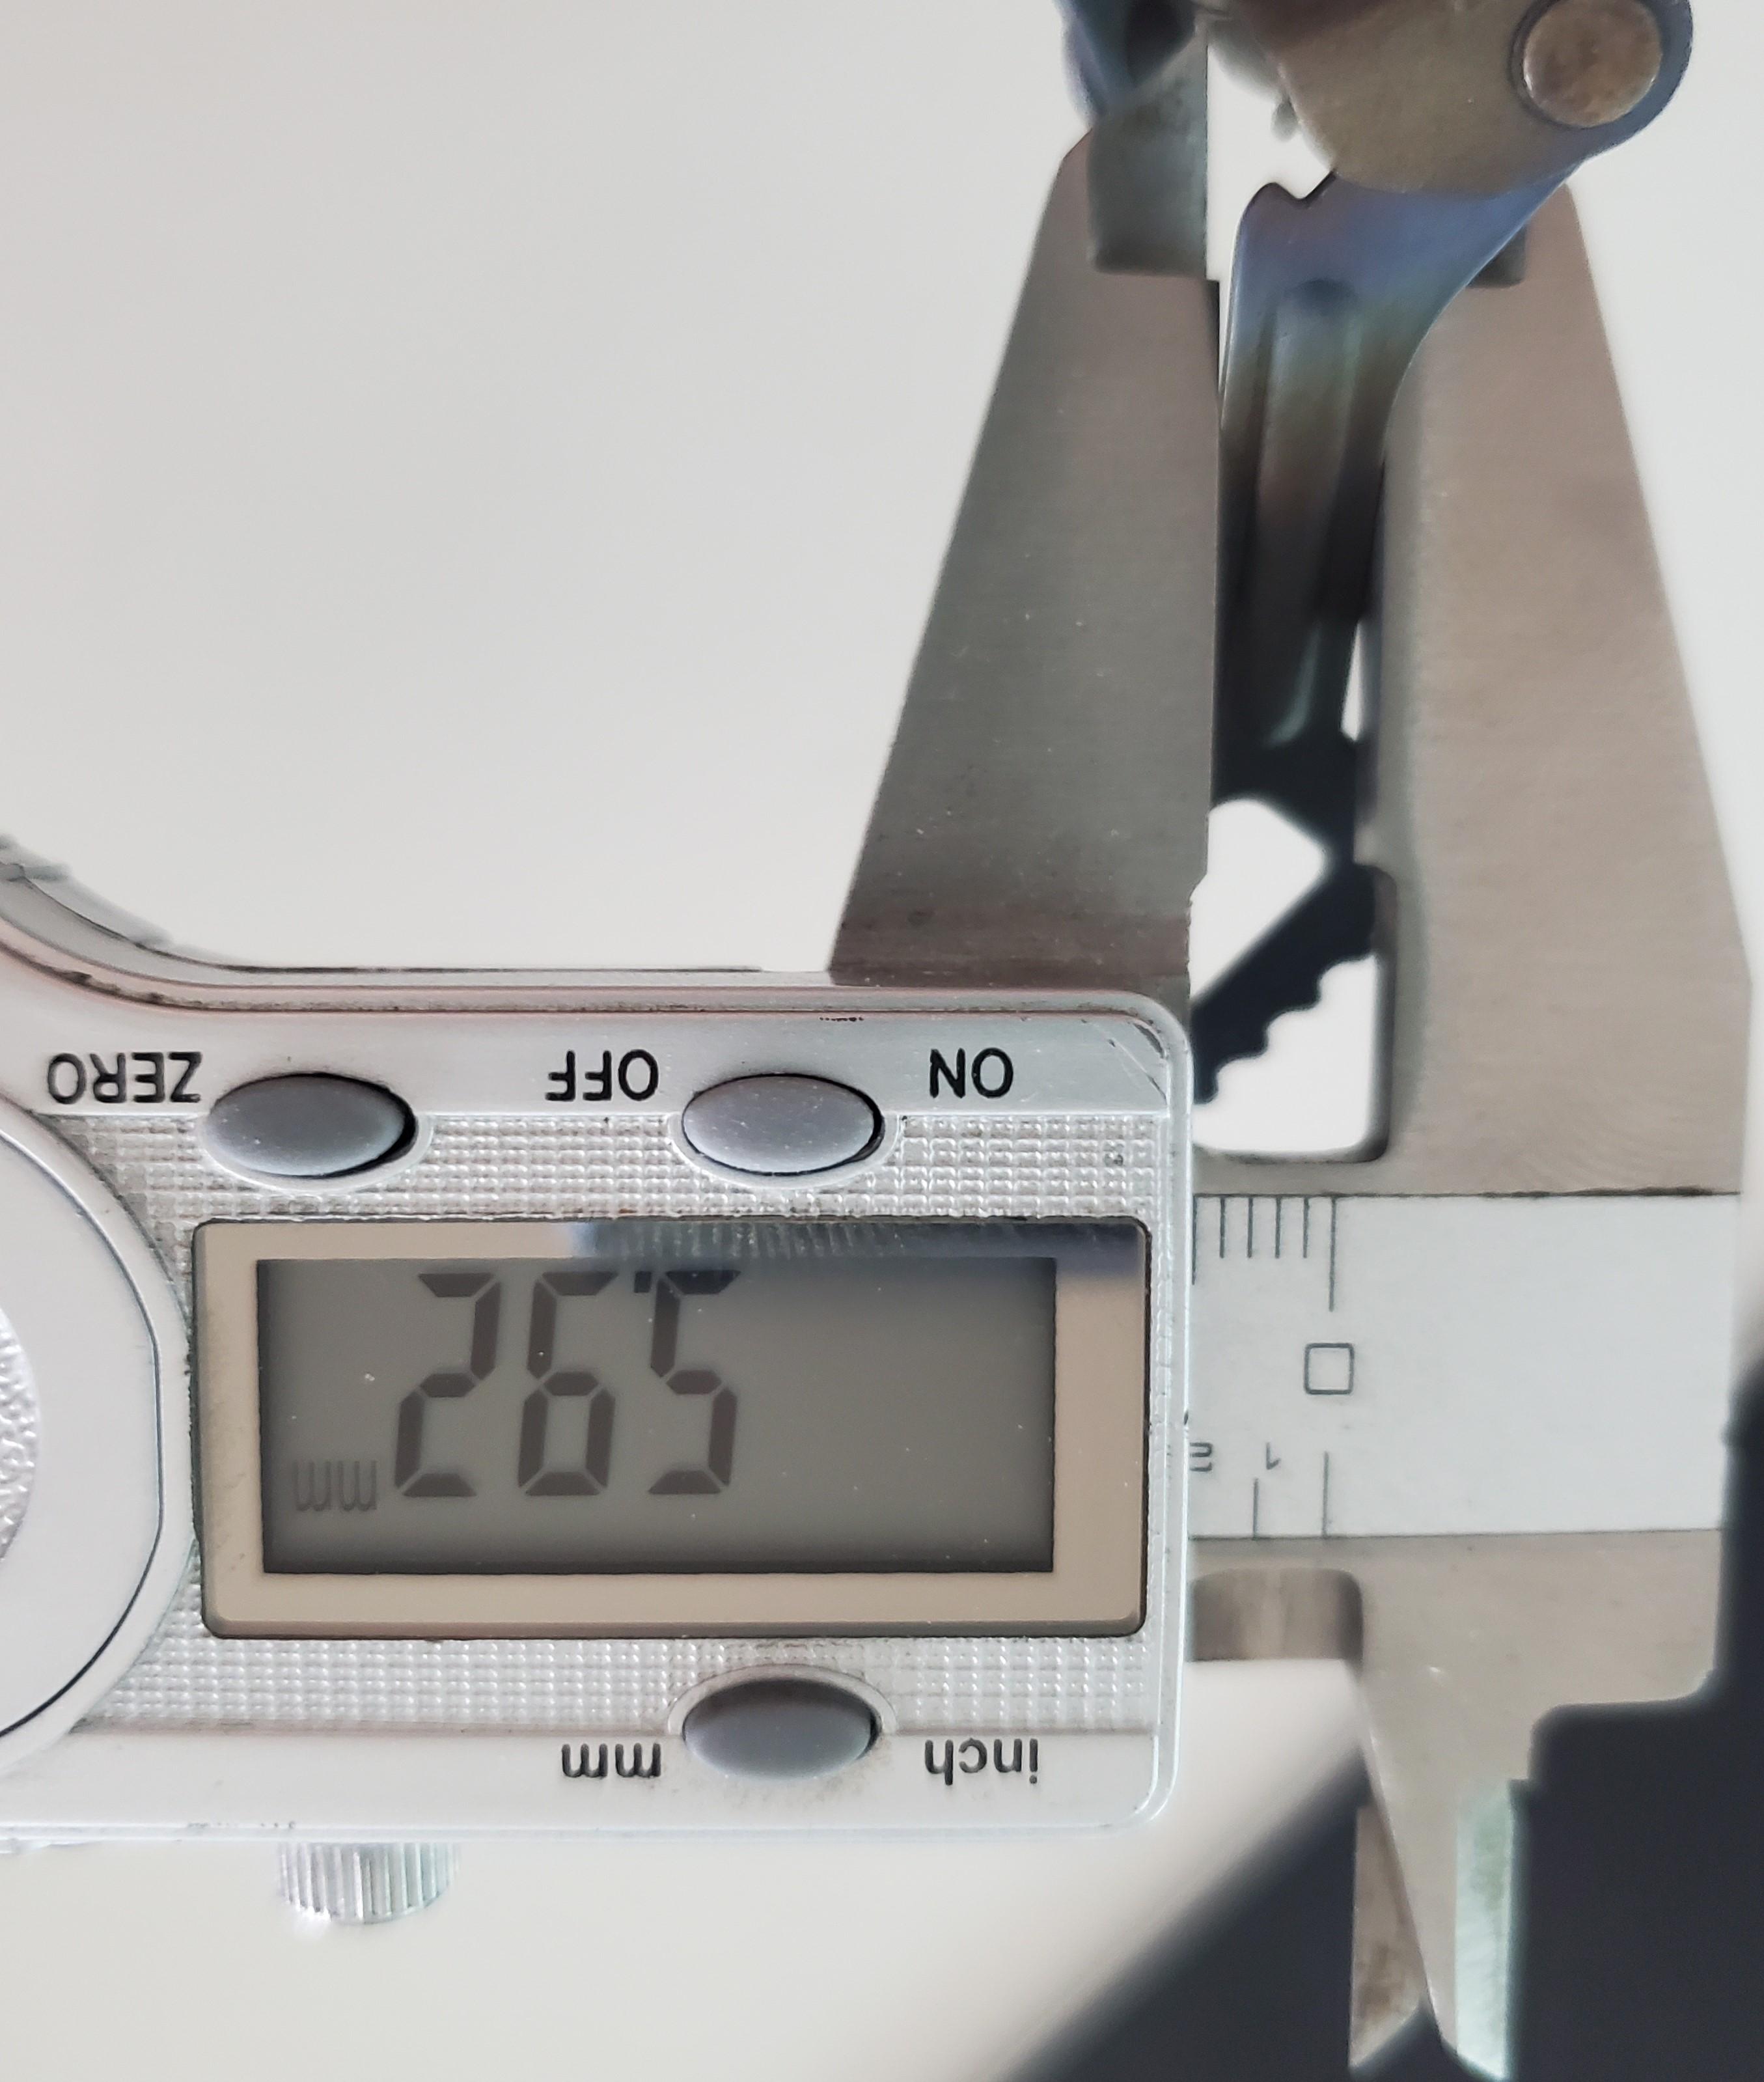
Okay so here are some pics of what I have. My old BRS on the left, and my newer one on the right.


The pot supports on my old one appear to be 0.7 mm longer. Its definitely not much of a difference and impossible to tell with the naked eye, but its enough to shift the resting place of JB ring from the outer groove of the old stove, to the outer side of the outermost crest of the new BRS. I had to cut off that last crest on the new stove so the JB can fit on it stabally enough, but now its exceptionally hard to set it up just right.


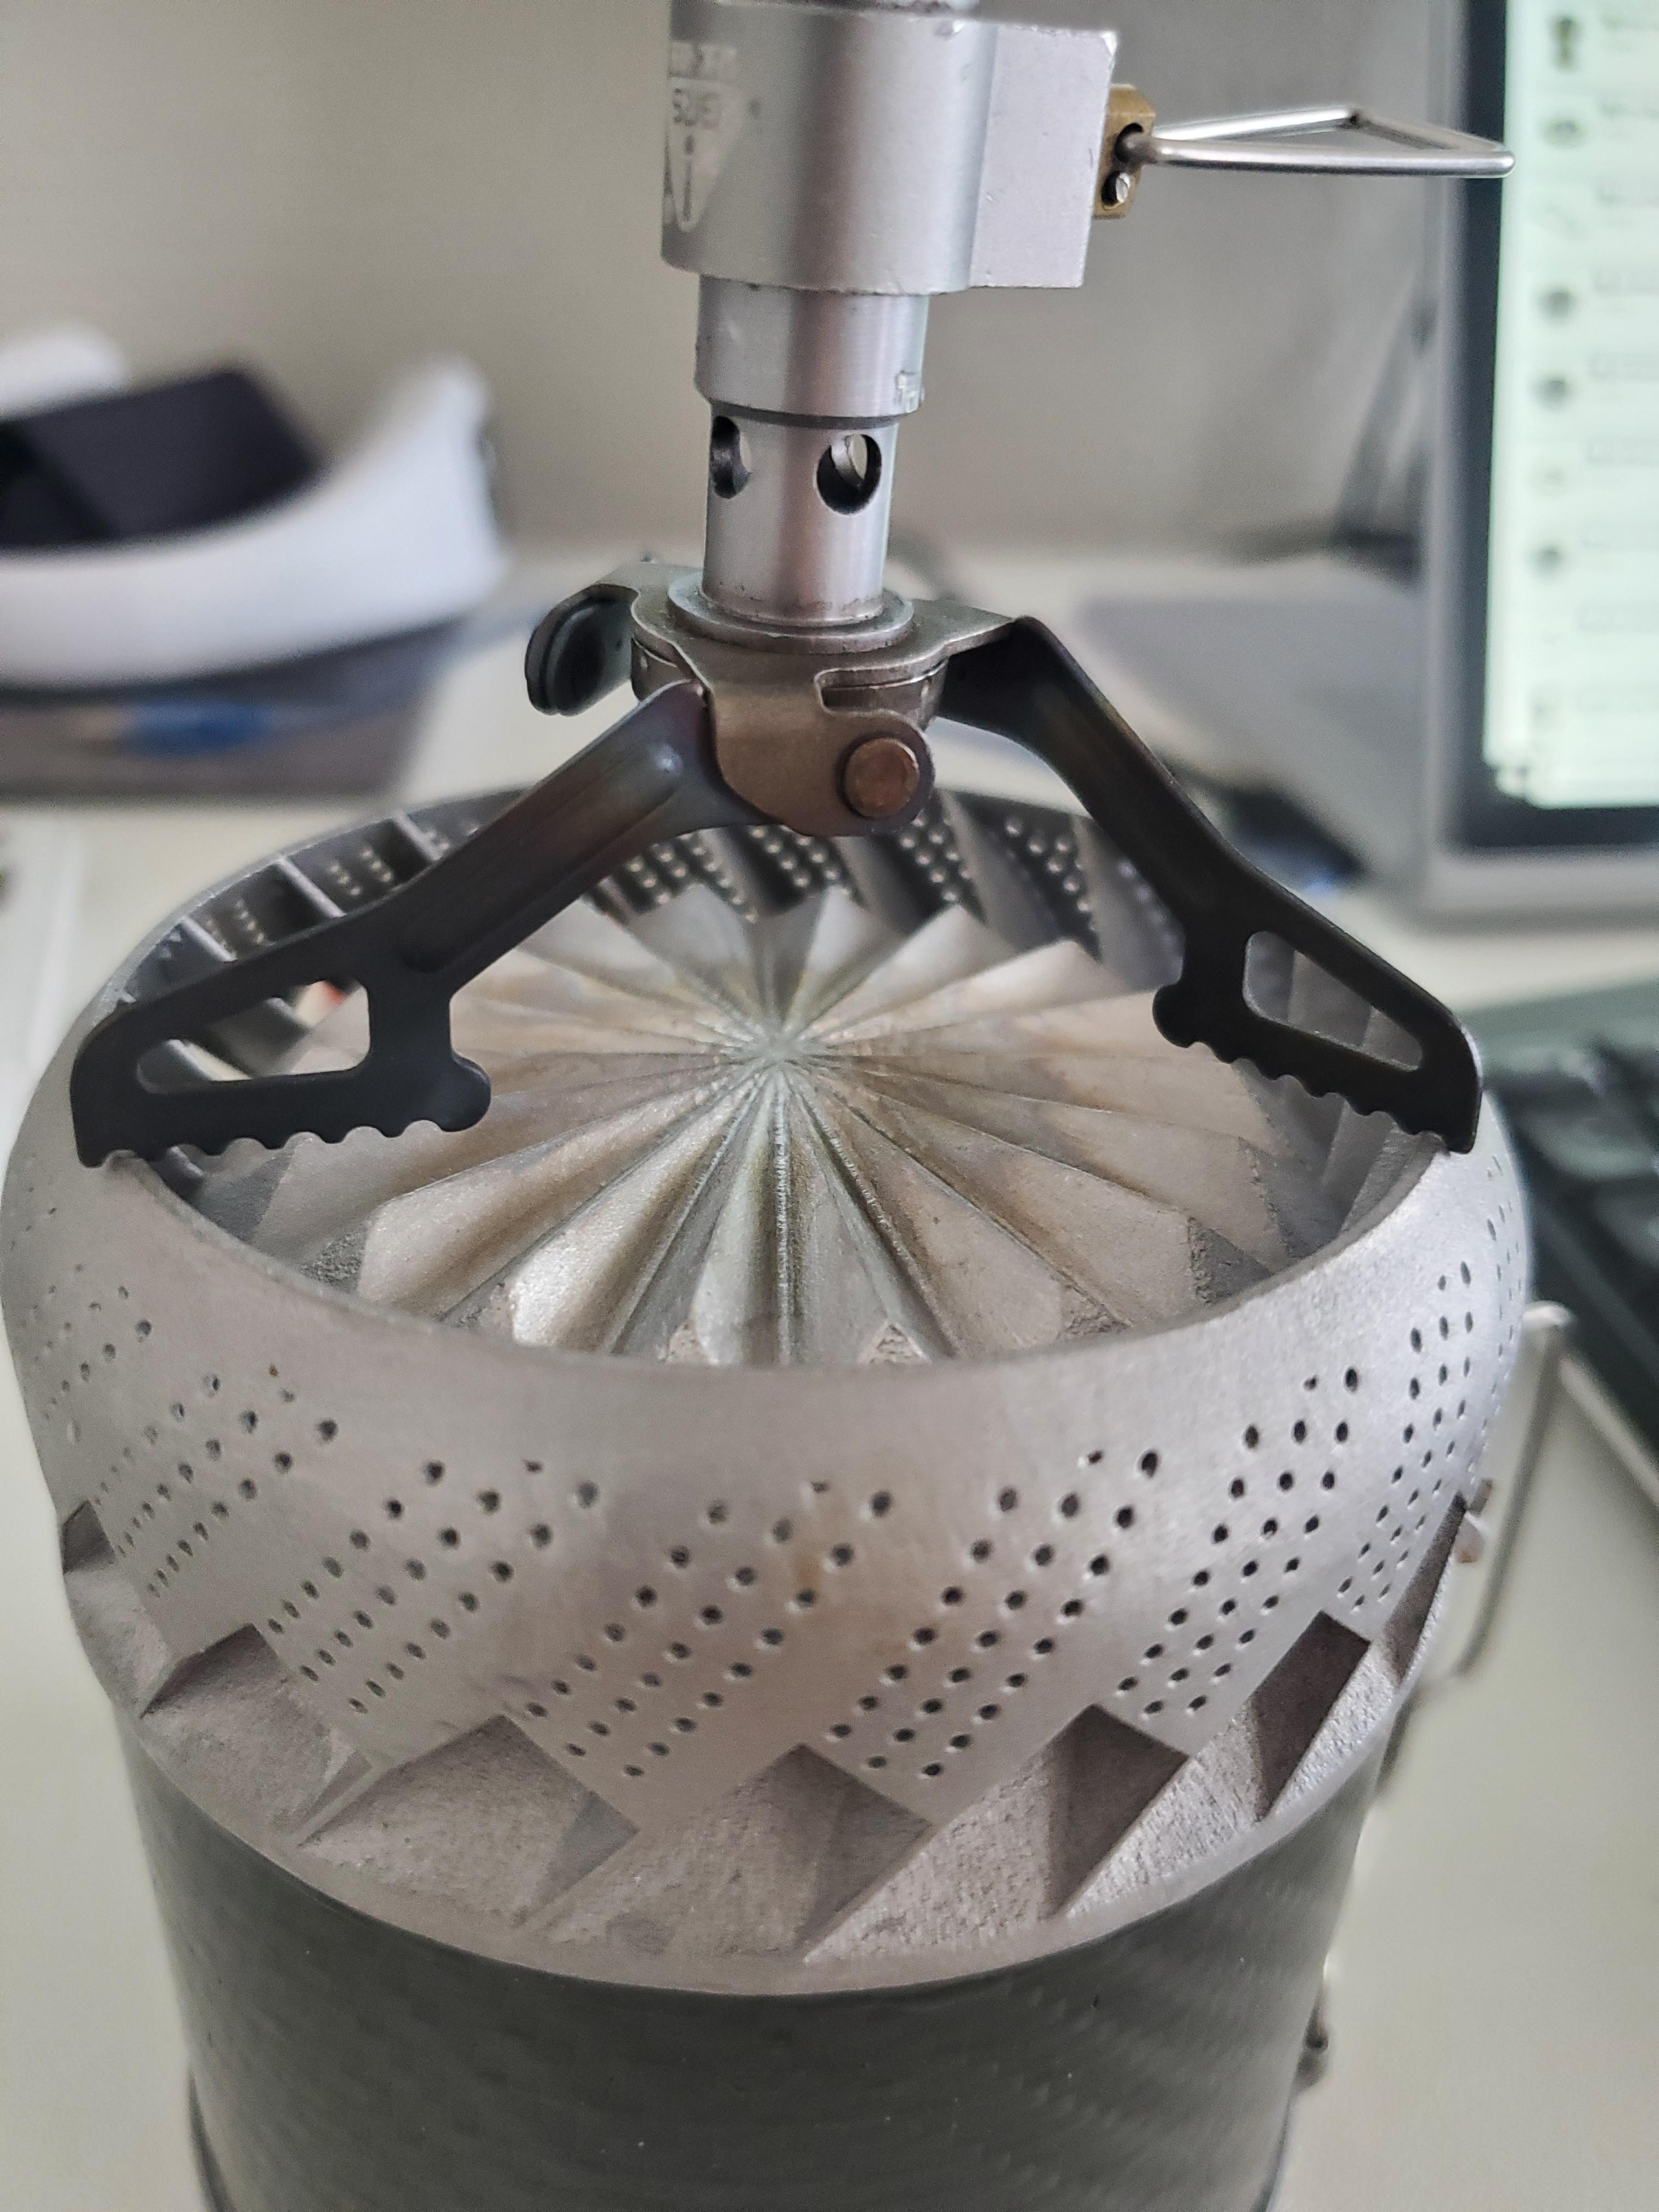
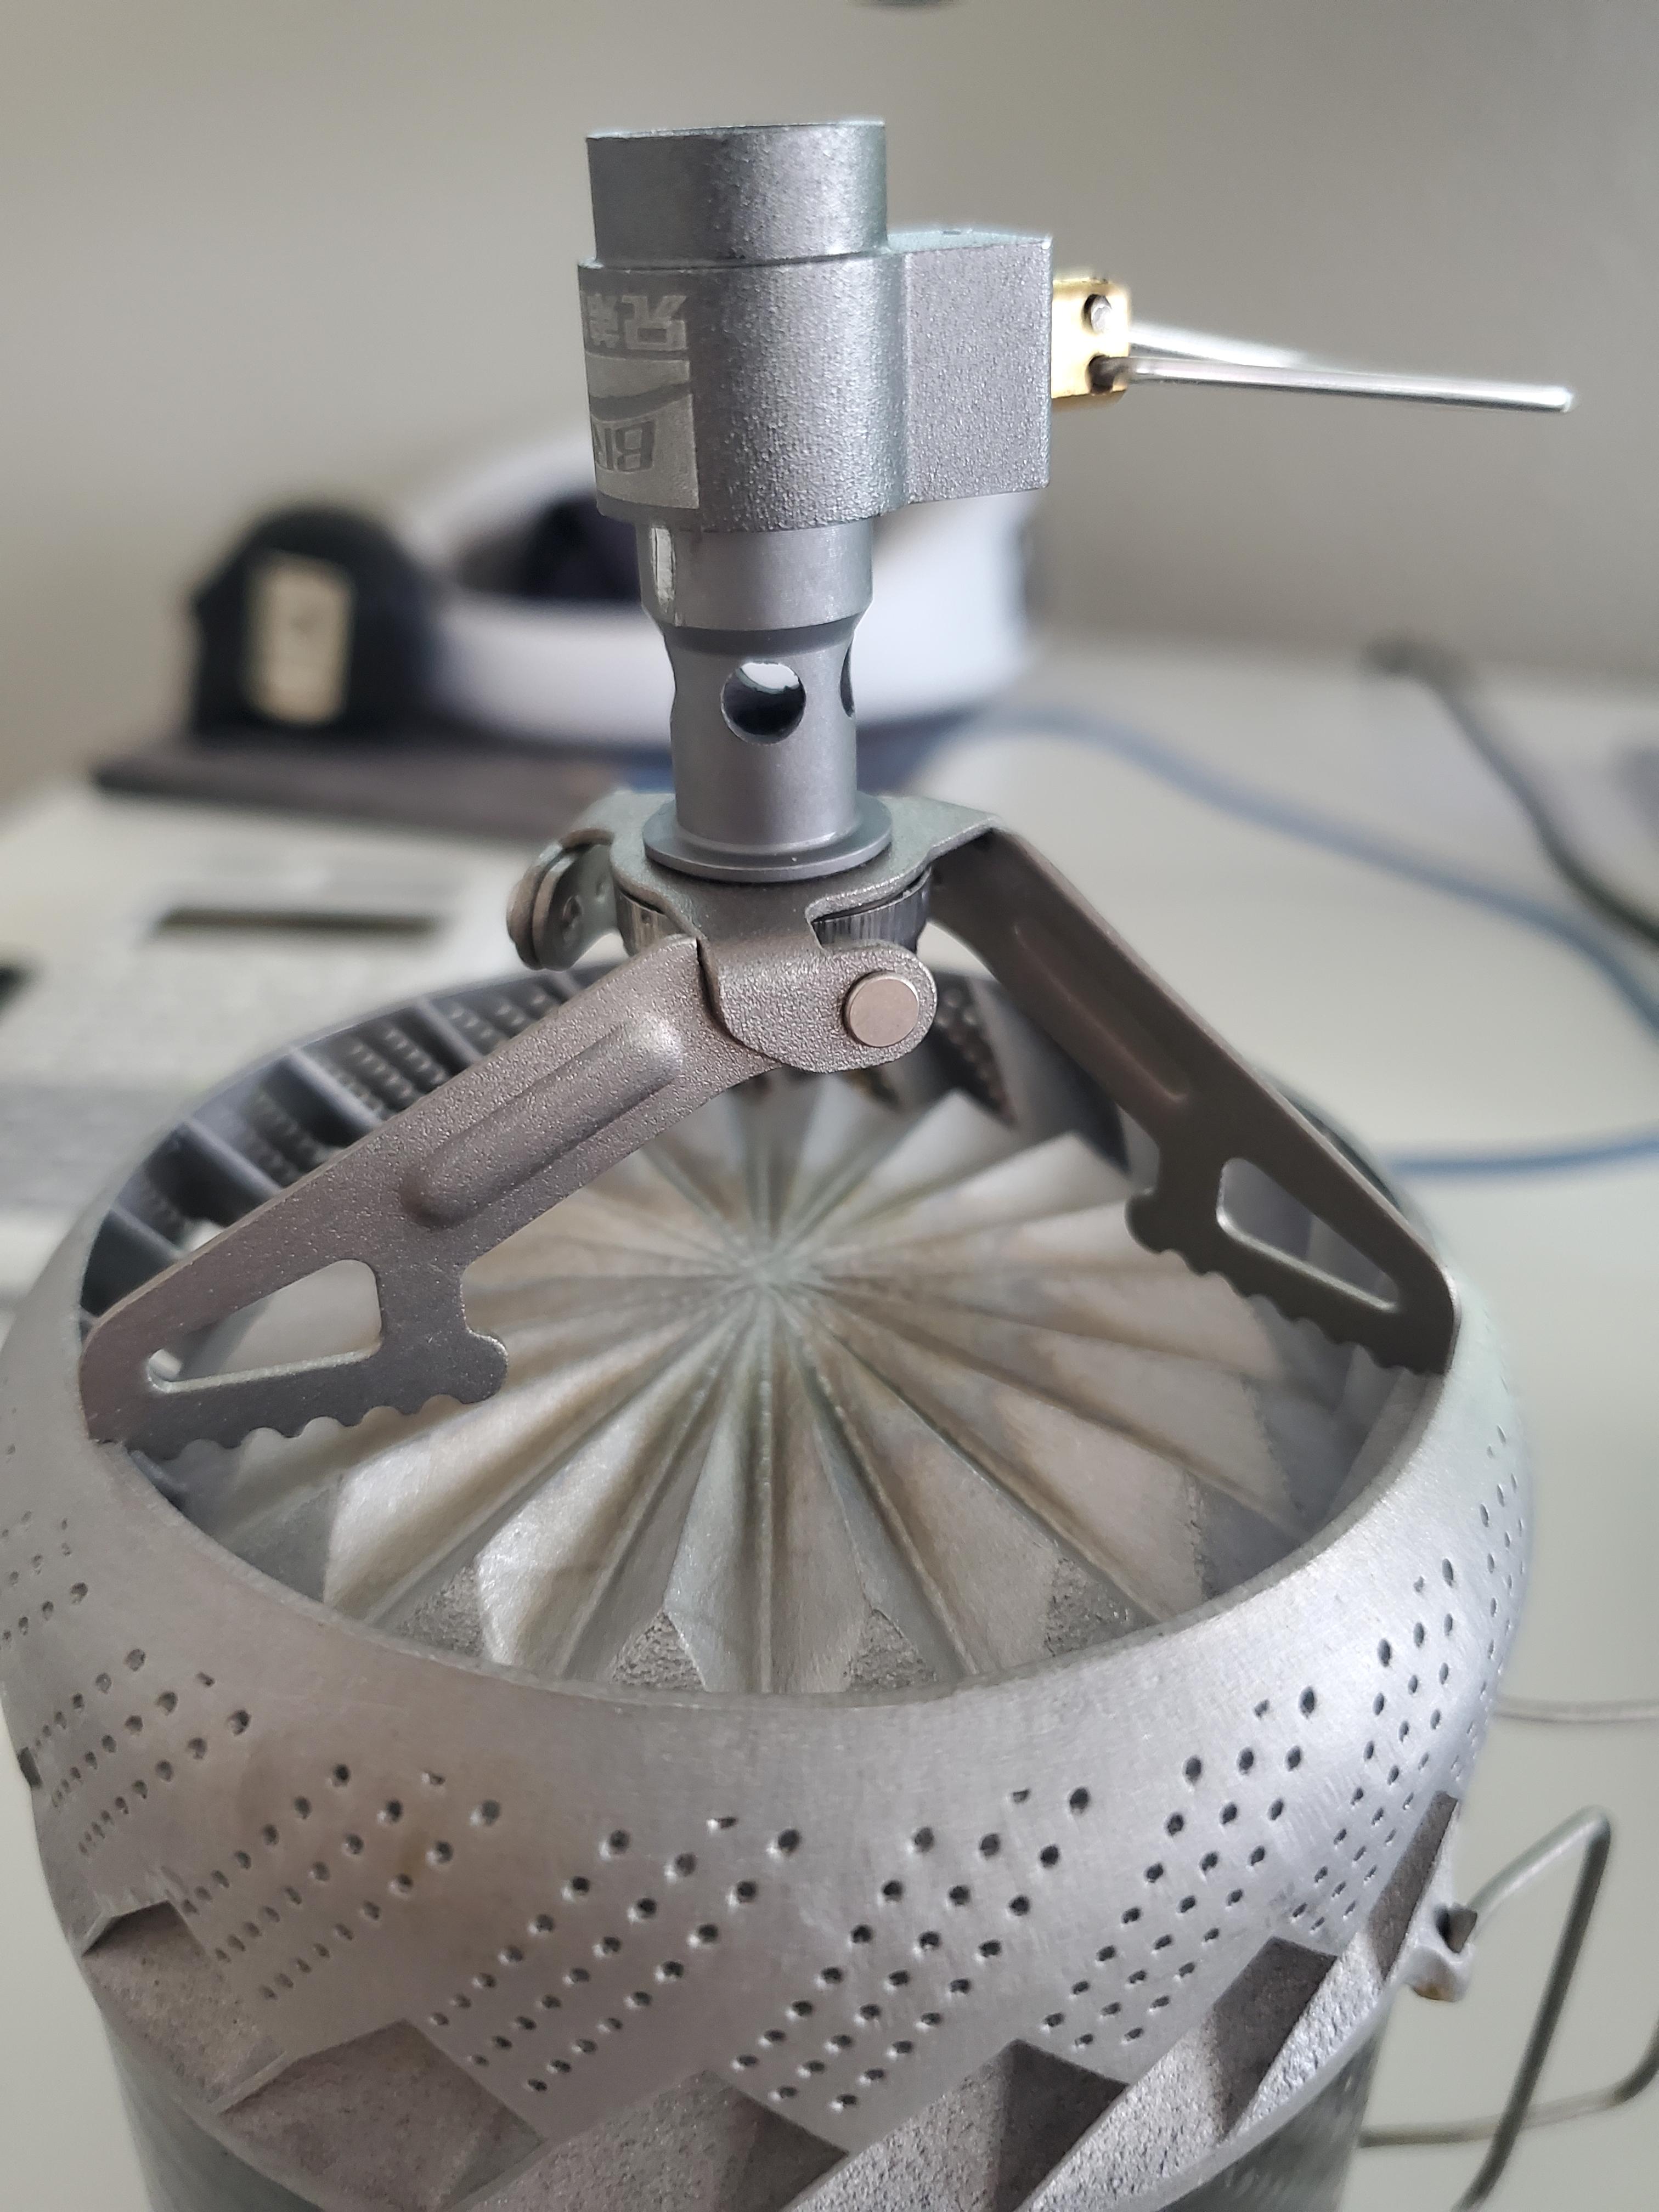
Here are some close ups of how the old and new one (with modified supports) fits on the JB support ring.
What do you guys think? One of them is a nock-off? Or a subtle change in the leg design to address the melting support leg issues that were being reported for a bit?

In looking at your last series of photos, the alignment of the stove to pot looks pretty critical as in not much room for error. Can you load the pot onto the stove with your eyes closed (or left handed)?
On another note, with your latest design, if you need to remove the pot support arms, you will reduce functionality of your system. It will be dedicated to the Joule Thief as you will not be able to use the BRS with any other pot. It may be simpler to use the existing pot support arms and add on a snap on skirt that extends below the burner. My 2 cents.
Roger has had some automated data logging devices using temperature contact probes before,
LabJack T7-Pro and little Kapton-encapsulated NTC sensors from ebay. The sensors go to 300 C, then they char. I was trying to measure the temperature at the bottom of the vortex chamber with the probe where the pink arrow points. Well, I now know it gets over 300 C!

Anything you noticed though that is wrong and might affect sizing/fit?
Don’t think so. The real internals are not-as-drawn, but that does not matter here.
aluminum just might be to thermally conductive for this use case.
You would need temperature measurements, but I don’t think it is a problem. The incoming air passing through all those holes will cool the metal a fair bit. I actually used this fact in the design of the Vortex stoves I was making.
assuming this doesn’t melt the O-rings in my stove and the plastic bits in the lindal valve…
O-rings: Viton, operating temp to 250 C. Probably OK.
Lindal valve plastic bits – um, yeah, dunno. Figure on a max of 100 C maybe, until more data.
I have concerns on combustion efficiency, IDK how much this widescreen will starve the flame of oxygen,
ALL small upright stoves with a blue flame have enough oxygen and will be running at about the same efficiency. The max power you get is due almost entirely to the size of the hole in the jet, which limits the amount of gas flowing.
IMHO: all the marketing spin about boil times is just that: SPIN. No sensible walker ever runs his stove flat out: that is very inefficient as most of the heat goes up the sides of the pot. OK: HX pots work better, but they weigh more. See
https://backpackinglight.com/heat-exchanger-pot-test-hx-haa-caffin/
My old BRS on the left, and my newer one on the right.
New one on right is by HAMANS: another large Chinese mfr of outdoors gear. A copy to be sure, but with enough subtle differences to keep the lawyers off?
the melting support leg issues that were being reported for a bit?
There were NO melted pot supports, ever. The arms are titanium, and you can NOT melt Ti with a propane fame. Just not possible. Oxy-acetylene may work.
Hard to see, but look at the pivot above the blue line in the middle. The bracket is twisted, and that took some force. There was NO melting. What had been seen was a bend in the support structure due to a seriously excessive force being applied.
Comment: the way the HX pots sits on the stove pot support arms (last few photos) seems a little precarious. A careless stir and the pot might fall over? Fine for the inventor, but is it safe for the market?
Cheers
Jon:
In looking at your last series of photos, the alignment of the stove to pot looks pretty critical as in not much room for error. Can you load the pot onto the stove with your eyes closed
I first photo of the stoves on the pot is my original BRS and is relatively easy for me to load onto the stove with one hand. It wasn’t at first but a couple times doing it to get past the learning curve has revealed its not to bad. Though it can and should be better.
The second photo of the stoves on the pot is a real PITA to get right. Its dangerous because it sits so precariously and it absolutely needs two hands to feel the alignment is right.
The point on stove versatility is great. This might be a decent starting point, but I think your right that there is much to consider that this doesn’t address. The journey never ends for us gear tinkerers does it? Onward to perfection!
Roger:
What an awesome response! I just ordered a set of 4 kapton-encapsulated thermistors and found some decent documentation that should let me use them relatively easily with an arduino.
The incoming air passing through all those holes will cool the metal a fair bit. I actually used this fact in the design of the Vortex stoves I was making
This makes a lot of sense, never even once considered, figures crossed that its the case.
ALL small upright stoves with a blue flame have enough oxygen and will be running at about the same efficiency
Good to know, Ill be on the lookout for orange/yellow flames during testing.
This actually might solve a mystery I had early on too. When testing the Soto Windmaster with the Joule Thief and Bandit, it always performs on the lower end of the spectrum compared to my other stoves. This is almost never the case when using the Soto Windmaster with any other pot, it’s always a top performer with anything except with these pots. Thinking back, I remember that it had a bit of yellow flame so I fired it up this morning after reading your response and sure enough! Its blue and yellow, so perhaps something about the windmaster and these pots is starving it for oxygen.
BRS Stove:
Yeah duh Tyler, should have known its not melting the titanium. I wasn’t thinking on that statement. What do you suspect the early pot support failures were related to? Annealing the titanium to some softer state perhaps combined with very large pot loads? I can’t remember where I saw it, but I do remember seeing a picture of a BRS failure where the legs themselves were warped and bent, not just the support ring they attach to.
Comment: the way the HX pots sits on the stove pot support arms (last few photos) seems a little precarious.
So the first photo of my older BRS sitting on the pot is surprisingly stable, definitely harder to knock it off the stove then it is to knock off my toaks 550. Though as Jon has eluded to, aligning it can be trickier than other stove/pot combos. The second photo of the now determined HUMANS BRS clone is way sketchy and completely fits into the “dangerous” category, one decent breeze or twitch of the hand while stirring will send it off the stove and spilling.
Thanks for the info/insights guys! Always appreciated, these kind of responses makes BPL such an awesome place.
What do you suspect the early pot support failures were related to? Annealing the titanium to some softer state perhaps combined with very large pot loads?
Bit of a mystery there. I don’t know.
I am reasonably sure that it was NOT annealing – partly because Ti does not anneal that way but mainly because that part of the stove is never even in the flames. Brute force or accident leading to it is all I can suggest.
Cheers
As far as I remember, the BRS pot supports were reported to soften and bend under the weight of a rather small pot.
Although they get red hot, hotter than on some other stoves, titanium should be able to withstand it. I suppose this Chinese titanium was an alloy with lower melting point. It seems they have fixed that, there are no recent complains on that.
One of the really clever things about the BRS-3000T is the way the pot supports are largely out of the flame. That way the arms don’t get hot enough to sag.

Cheers
I always use a windscreen. I haven’t read through all of the responses, but it seems that measurements are being made without a windscreen…indoors? In little or no wind? Or in real world (windy) situations? Sorry if I’ve misunderstood and wind screens are used in calculations.
Early in this thread, it was mentioned that carrying a system that weighed a pound(!!) was off putting to some hikers. Ya think? So kudos for developing a more efficient system that weighs less than that.
My huge titanium wind screen weighs 2 ounces and increases boil time for me, solo hiking, with a pocket rocket, significantly. Does an external, large wind screen serve the same function, essentially, at a lighter weight, as this system? Not trying to be a bummer here; you guys are far more sophisticated than me with everything involved. So sorry if I’m asking a stupid question.
Jerry mentioned early on that better efficiency would have to translate to not having to carry a second canister on a hike in order to make a practical difference. I agree with that.
The large windscreen that I use has punches in the top to allow tent stakes to thread through and hold a pot while wood chips burn below. So it serves as a back up if I miscalculate, or something else happens to wreck my fuel consumption. Or, as a simple one off use to save a boil from my canister.
To me, this sort of thing is the future of efficient fuel design. Wood chips saving two or three boils on a six to eight day trip equals not having to bring a second canister…?
Become a member to post in the forums.
advertisementYour privacy is protected: We do not transmit your user data to third-party ad platforms or advertisers, and we do not host third-party tracking pixels. Backpacking Light serves ads on its own custom, native, and internal platform.
 New Ultralight GearSee the latest releases in ultralight cottage-brand gear from small makers.