Introduction
There is a big difference between winter backpacking on highly-trafficked, packed snow trail corridors and winter backpacking in deep powder snow. This article offers some insight into how to pack for trips where you’re hiking predominantly on packed snow trails.
Hiking on packed snow trails is less intimidating than hiking in deep snow on snowshoes or skis, and if you’re into high-mileage trips, hiking packed snow trails allows you to cover a lot of distance. Areas where frequent human overland traffic (i.e., hiking, ski, snowshoe, fatbike, or snowmobile) keep trail corridors packed down provide opportunities that are more accessible to beginning and intermediate backpackers. US ranges that come to mind include the Whites and Adirondacks of the NE, the Rockies of SW Montana, NW and SE Wyoming, and N Colorado, and the coastal ranges of the California E Sierra, E Oregon, and N Cascades of Washington. Backpacking in deep snow, in remote wilderness far from trailheads and population centers – that’s a subject for another day.
I first published a winter backpacking gear list here in 2004, which was subsequently updated in 2014. That gear list was tailored for camping in snow shelters, and included various luxuries such as a saw, for cutting firewood and limbs to help add snow shelter structure.
In contrast, this article will focus less on camping and in-camp comfort and more on what I’m currently using when I’m trying to cover more miles. Consequently, this kit is tuned (for me) for efficiency (spending less time doing things involving gear) rather than minimizing every last ounce.
Some examples reflecting these choices include:
- Shelter – Choosing a lightweight tarp and bivy sack instead of a winter tent, but enjoying the comfort and warmth of a two-pad bed and mummy sleeping bag.
- Cooking – Choosing a stove that can melt snow as fast as possible, even in stormy conditions, rather than an ultralight stove that might require more care and fiddling to get the most out of it in winter conditions.
Summary of Context
- Locale – SE Wyoming / N Colorado (I currently live in Laramie, WY and my “home” hiking ranges include the Snowy and Sherman Ranges in WY and RMNP and surrounding areas in CO)
- Elevation – 8,000 to 12,000 ft (2440 to 3660 m)
- Terrain – mostly highly-trafficked trails, packed snow and ice, some deep snow / off-trail
- High temperatures – 10 to 32 F (-12 to 0 C)
- Low temperatures – 0 to 20 F (-18 to -7 C)
- Winds – moderate (up to 20 mph / 32 kph) in the forest; high (up to 50 mph / 80 kph or more) above the treeline
Download: our printable winter backpacking gear list (PDF)
Note: all weights reported in this article are the directly measured weights of my gear, not the manufacturer-reported weights.
Footwear & Traction System
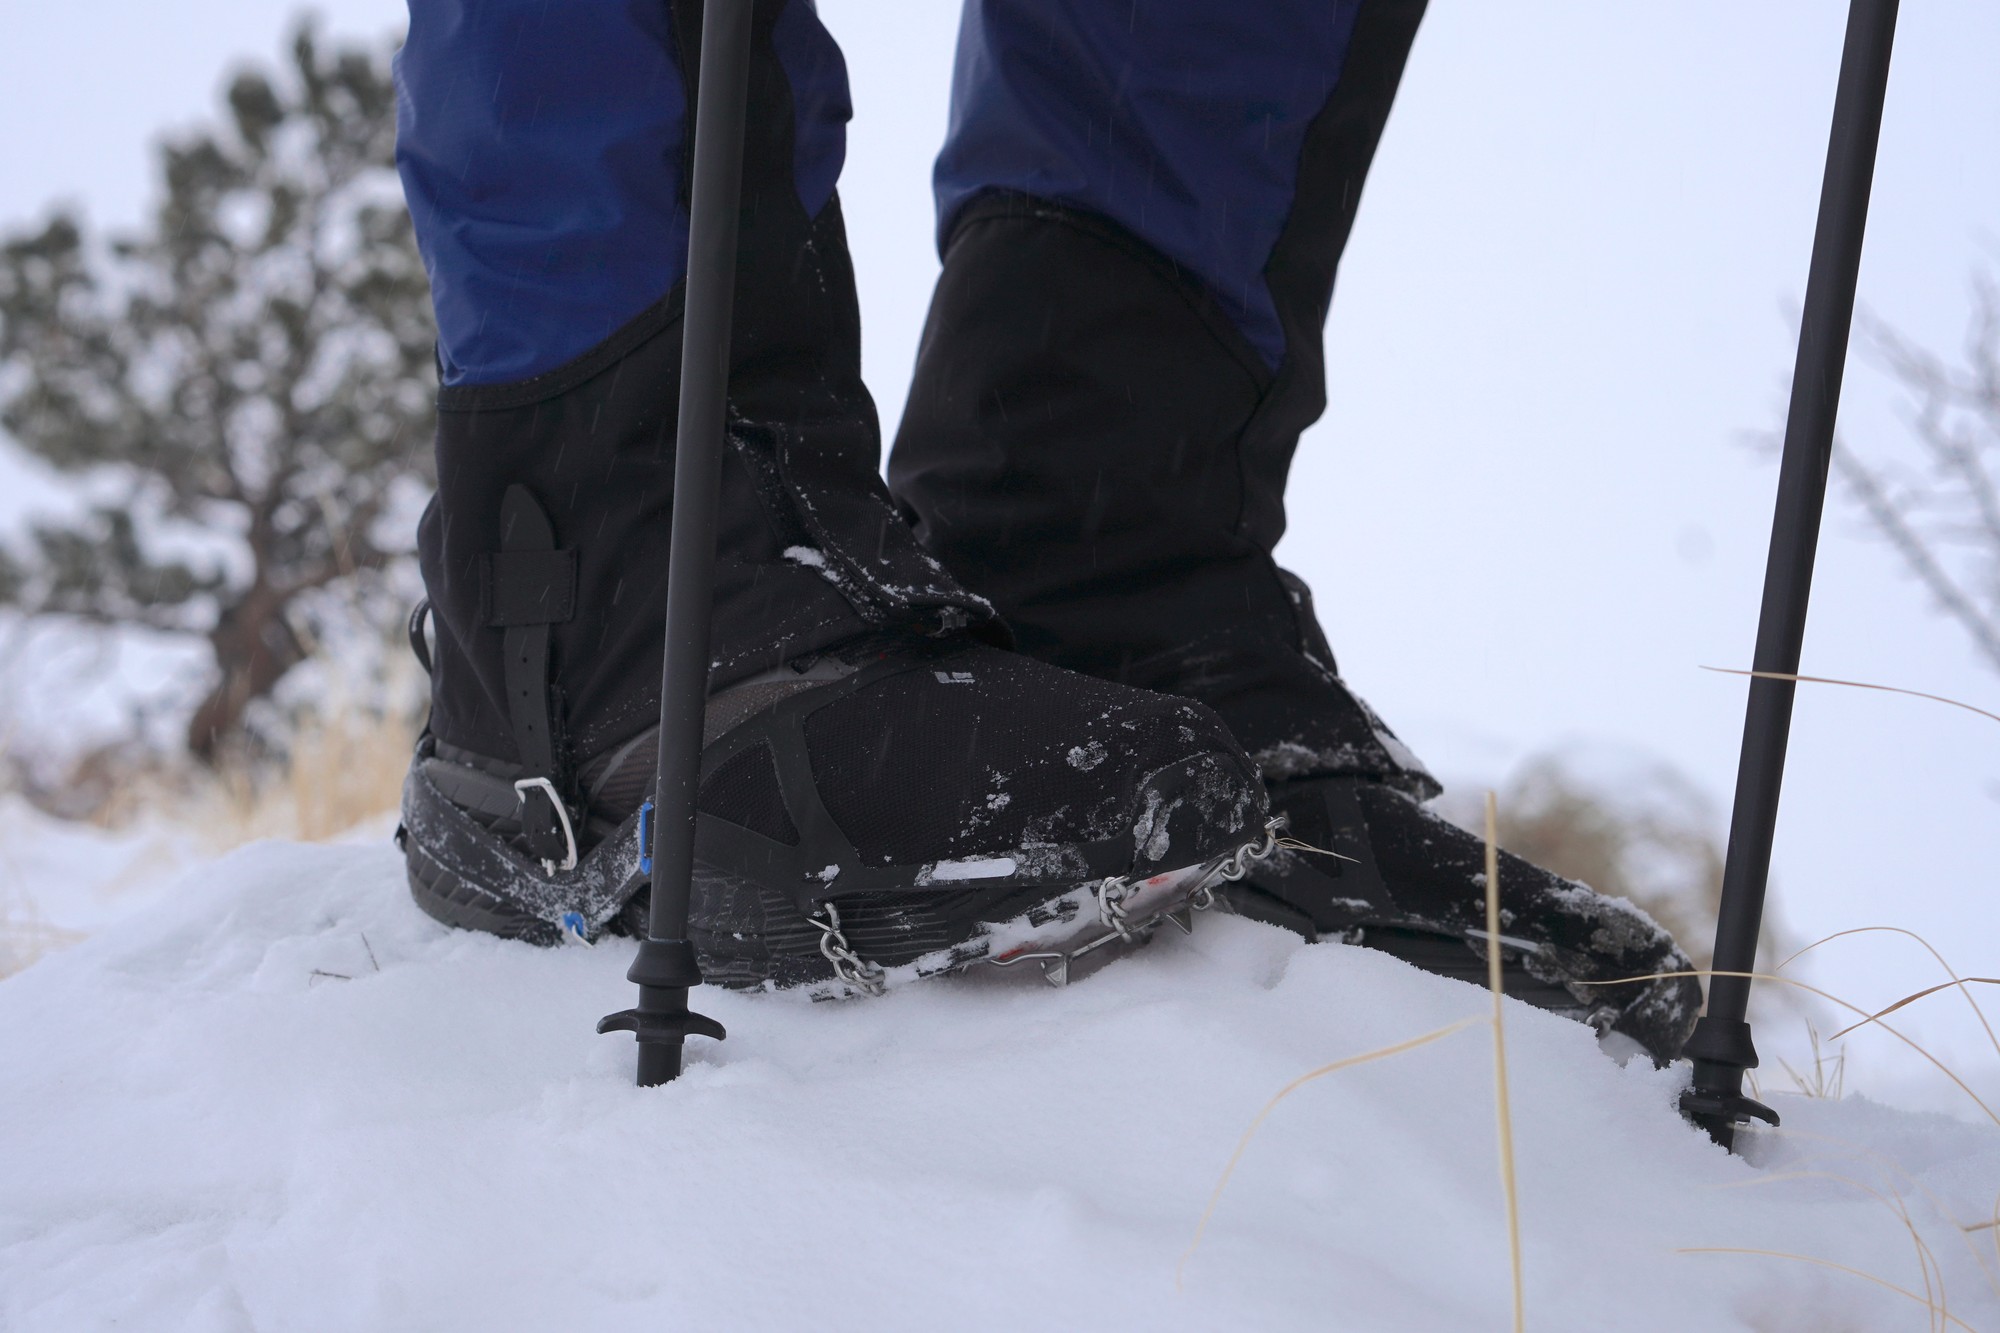
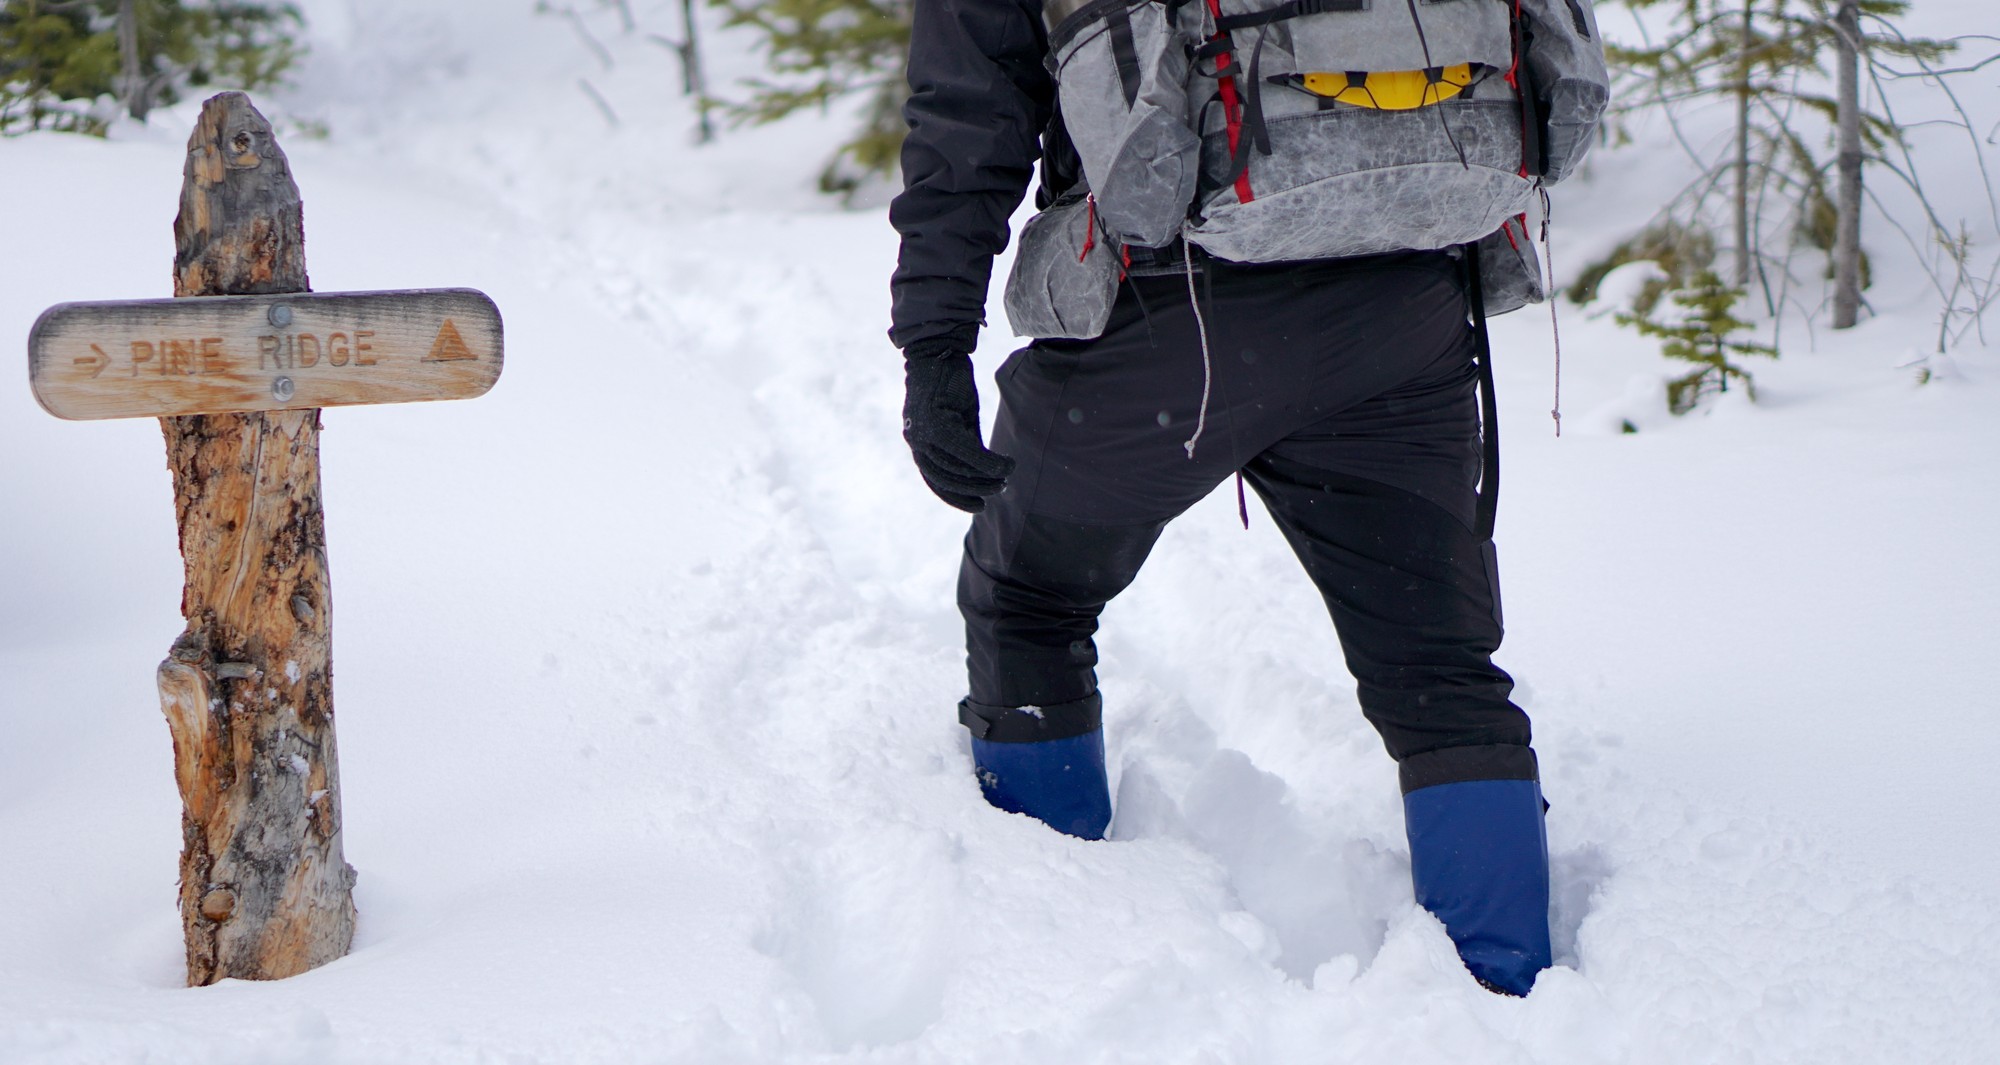
For high-mileage winter treks, I’ll hike highly-trafficked, snow-packed (and sometimes icy) trail corridors most of the time. That’s my rationale for building a lightweight, comfortable footwear system with a spike-based traction device instead of snowshoes or skis.
However, I’ll camp a few hundred yards away from those corridors, which may require me to walk through deeper snow to find campsites. I don’t really want to haul the weight of snowshoes just for this, so will rely on waterproof shoes and high gaiters to keep my feet as dry as possible while post-holing through deep snow.
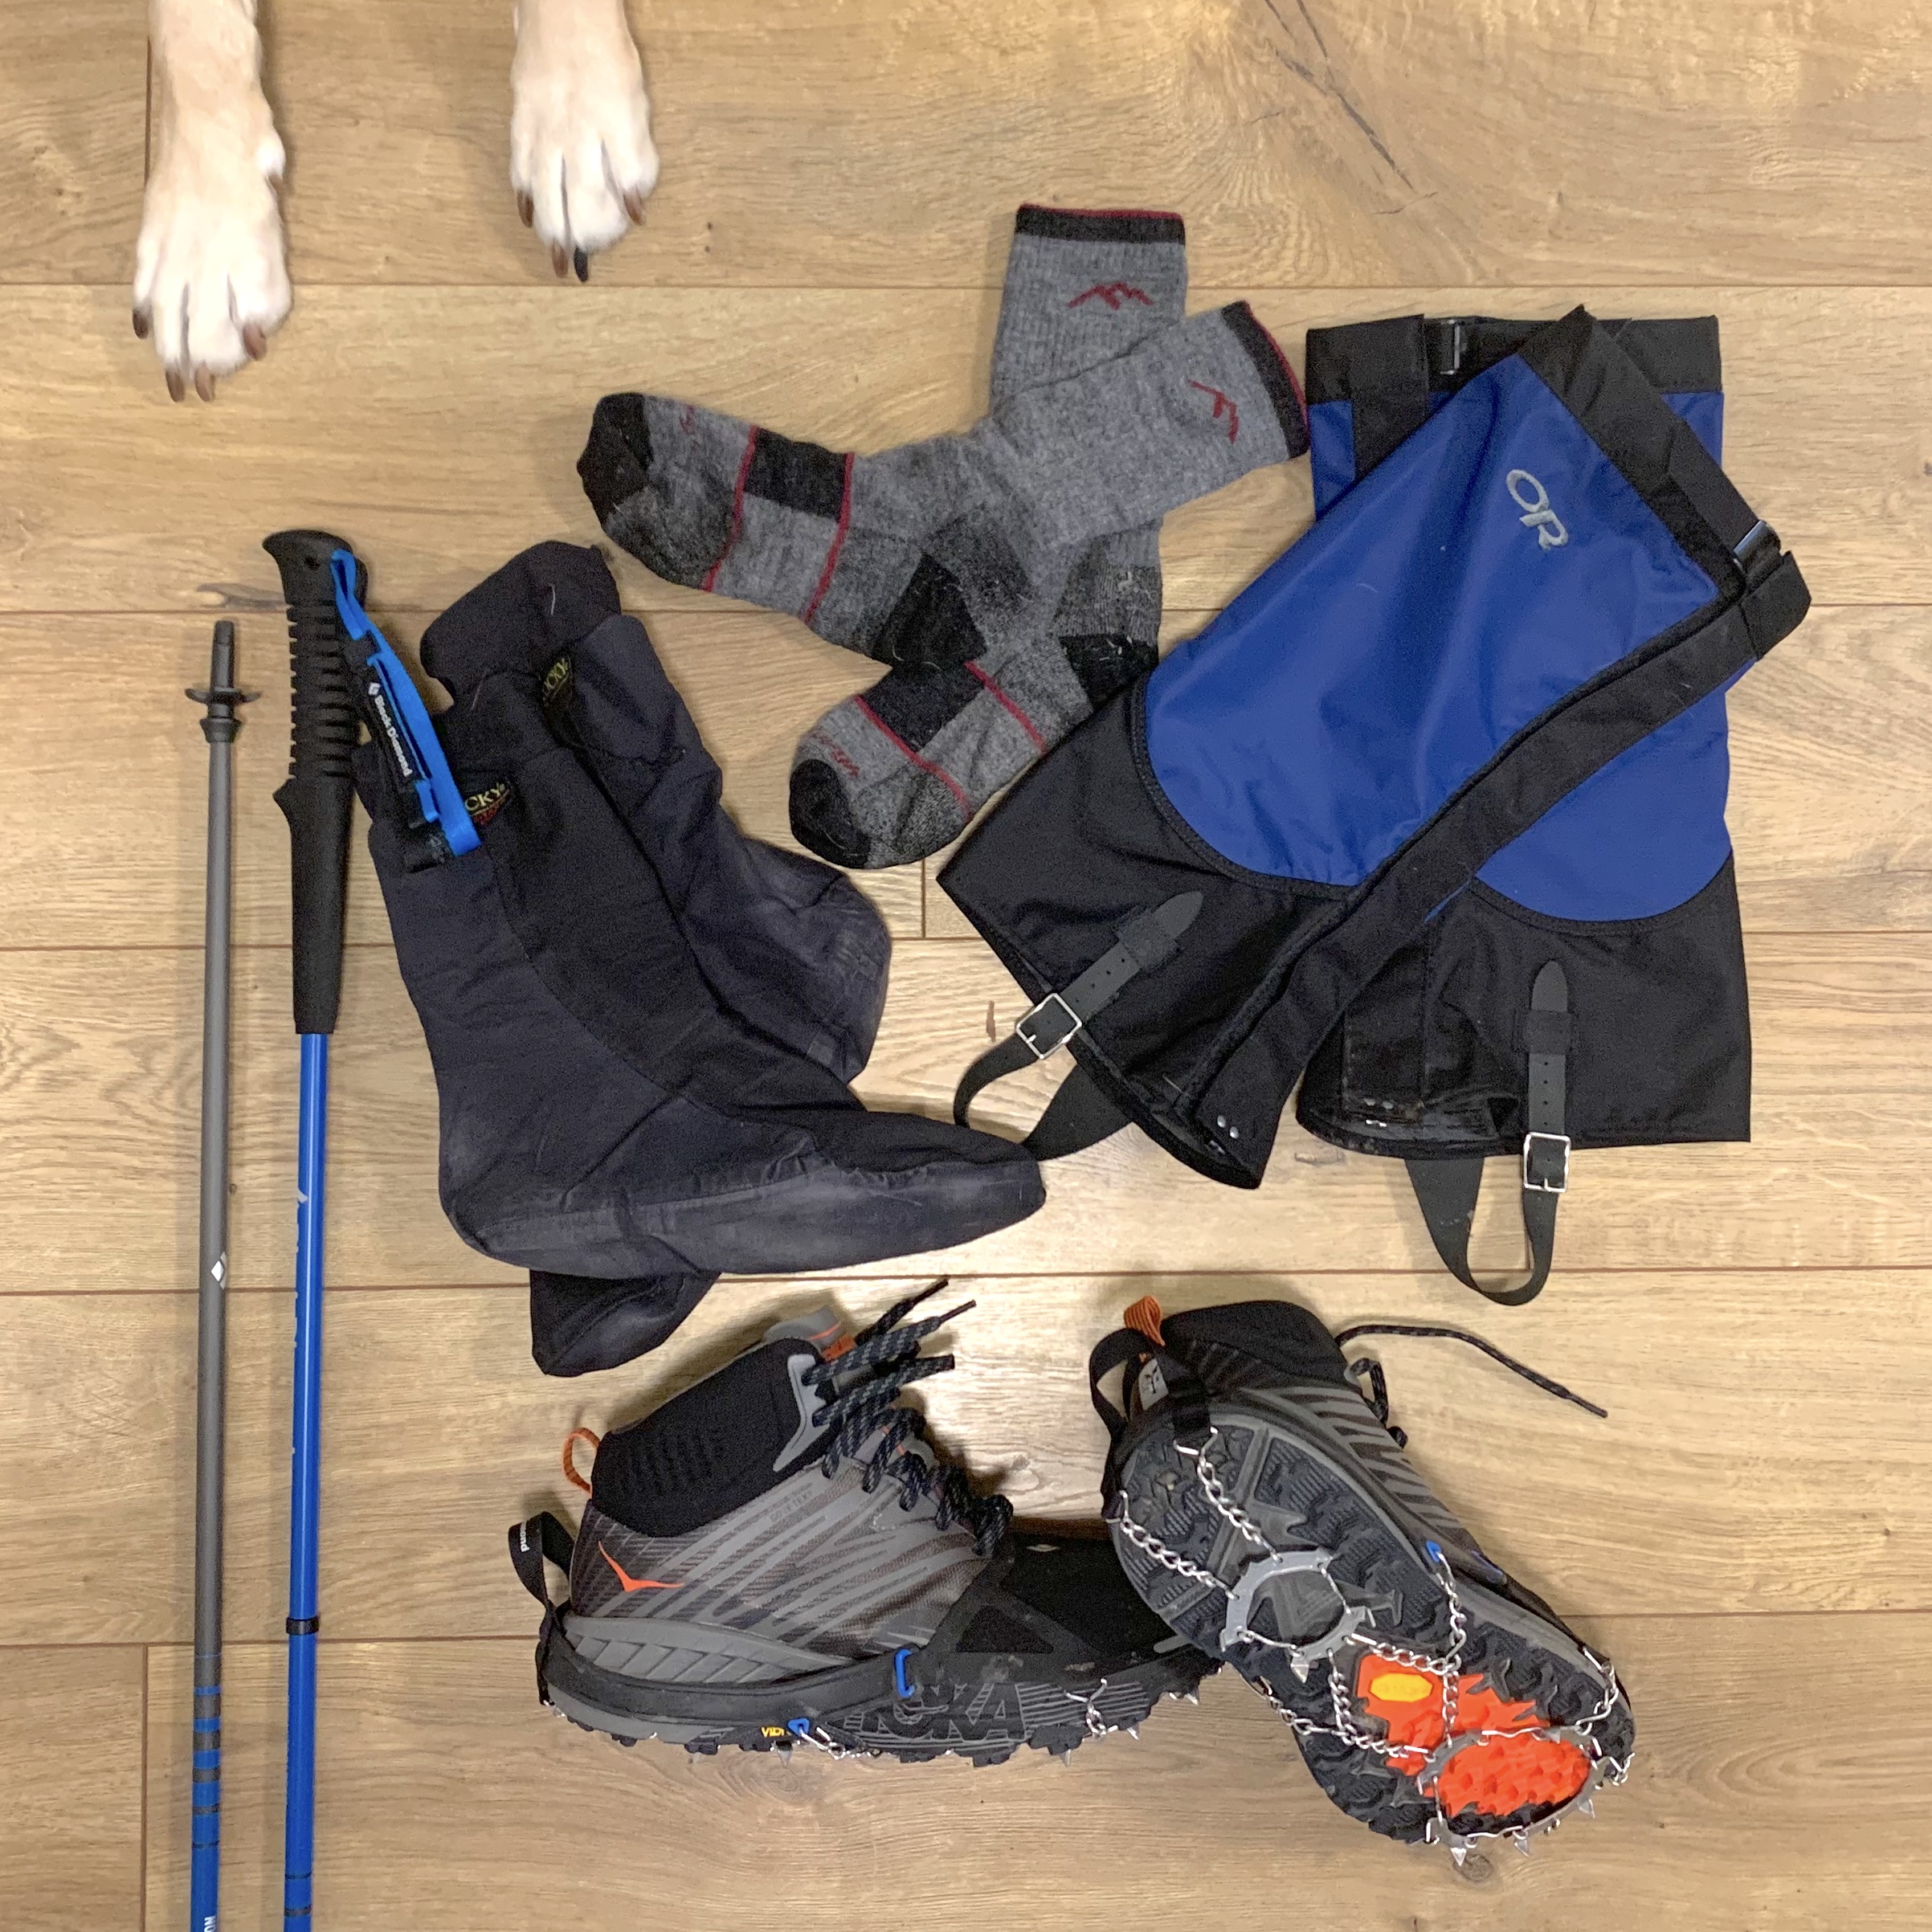
Footwear & Traction Gear Notes:
- TRAIL RUNNING SHOES / Hoka Speedgoat Mid GTX 2 (Size 9.5) / 26.0 oz (737 g) / high stack height provides good insulation from cold snow and ice, sized up one half to full size to accommodate thicker socks and sometimes, a waterproof sock
- TRACTION SPIKES / Black Diamond Distance Traction Spikes (Size L) / 8.2 oz (232 g) / soft-shell toe cover prevents snow and ice buildup on laces, and shorter spikes allow for less tripping while moving fast on icy trails
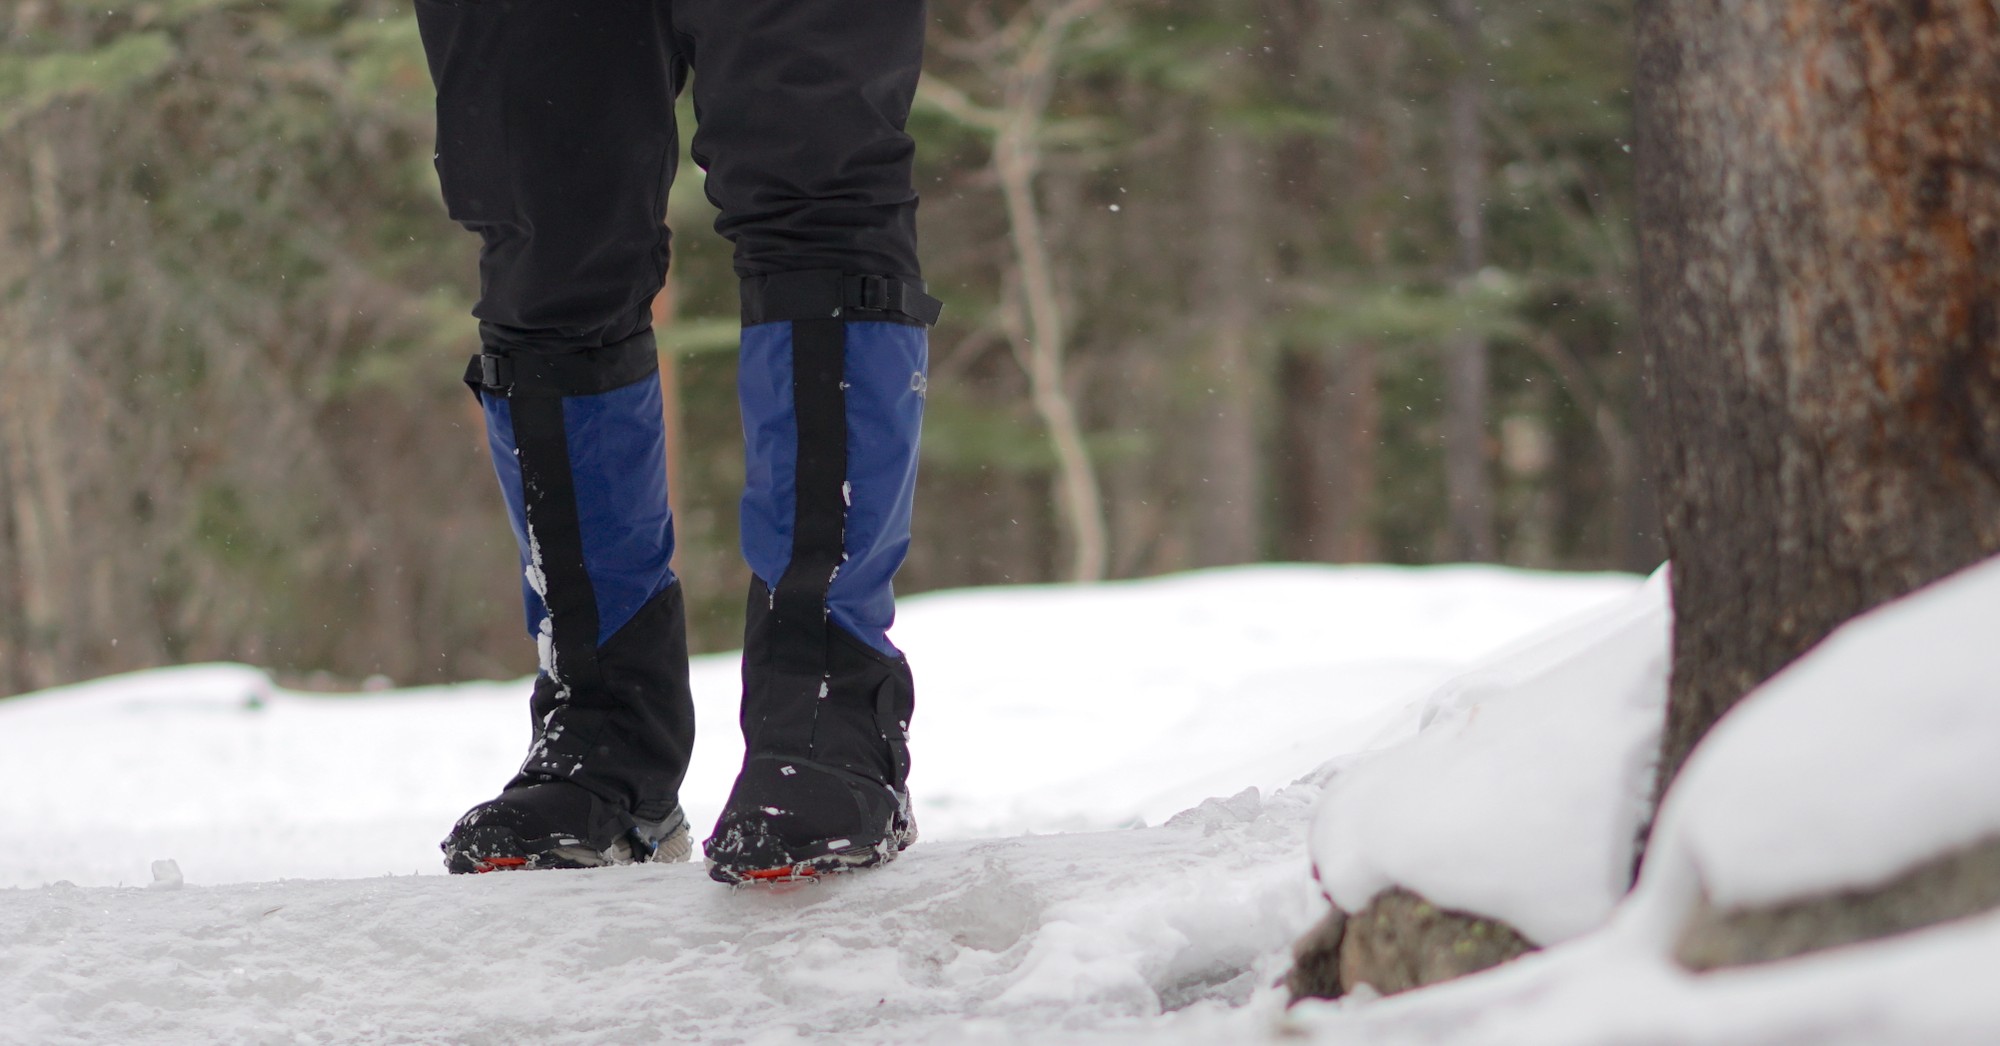
- CALF-HEIGHT GAITERS / Outdoor Research Verglas Gaiters (Size M) / 6.5 oz (184 g) / not as light as so-called ultralight gaiters, but packcloth ankle area is more durable for forest bushwhacking and errant spike-pokes from the other foot; I prefer the OR Helium Gaiter when I know I won’t be bushwhacking much
- WARM SOCKS / Darn Tough Full Cushion Boot Socks / 3.3 oz (94 g) / provides good insulation in cold temps
- WATERPROOF SOCKS / Rocky Gore-Tex Socks / 2.9 oz (82 g) / for hiking in extreme cold, and for added comfort when in camp; size up two (or more) full sizes to make them easier to take on and off, and to layer over thick insulating hiking socks
- ULTRALIGHT TREKKING POLES / Black Diamond Distance Carbon Running Poles / 6.4 oz (181 g) / adjustability isn’t needed for pitching the tarp in a storm pitch, snow baskets not needed for hiking on packed trails
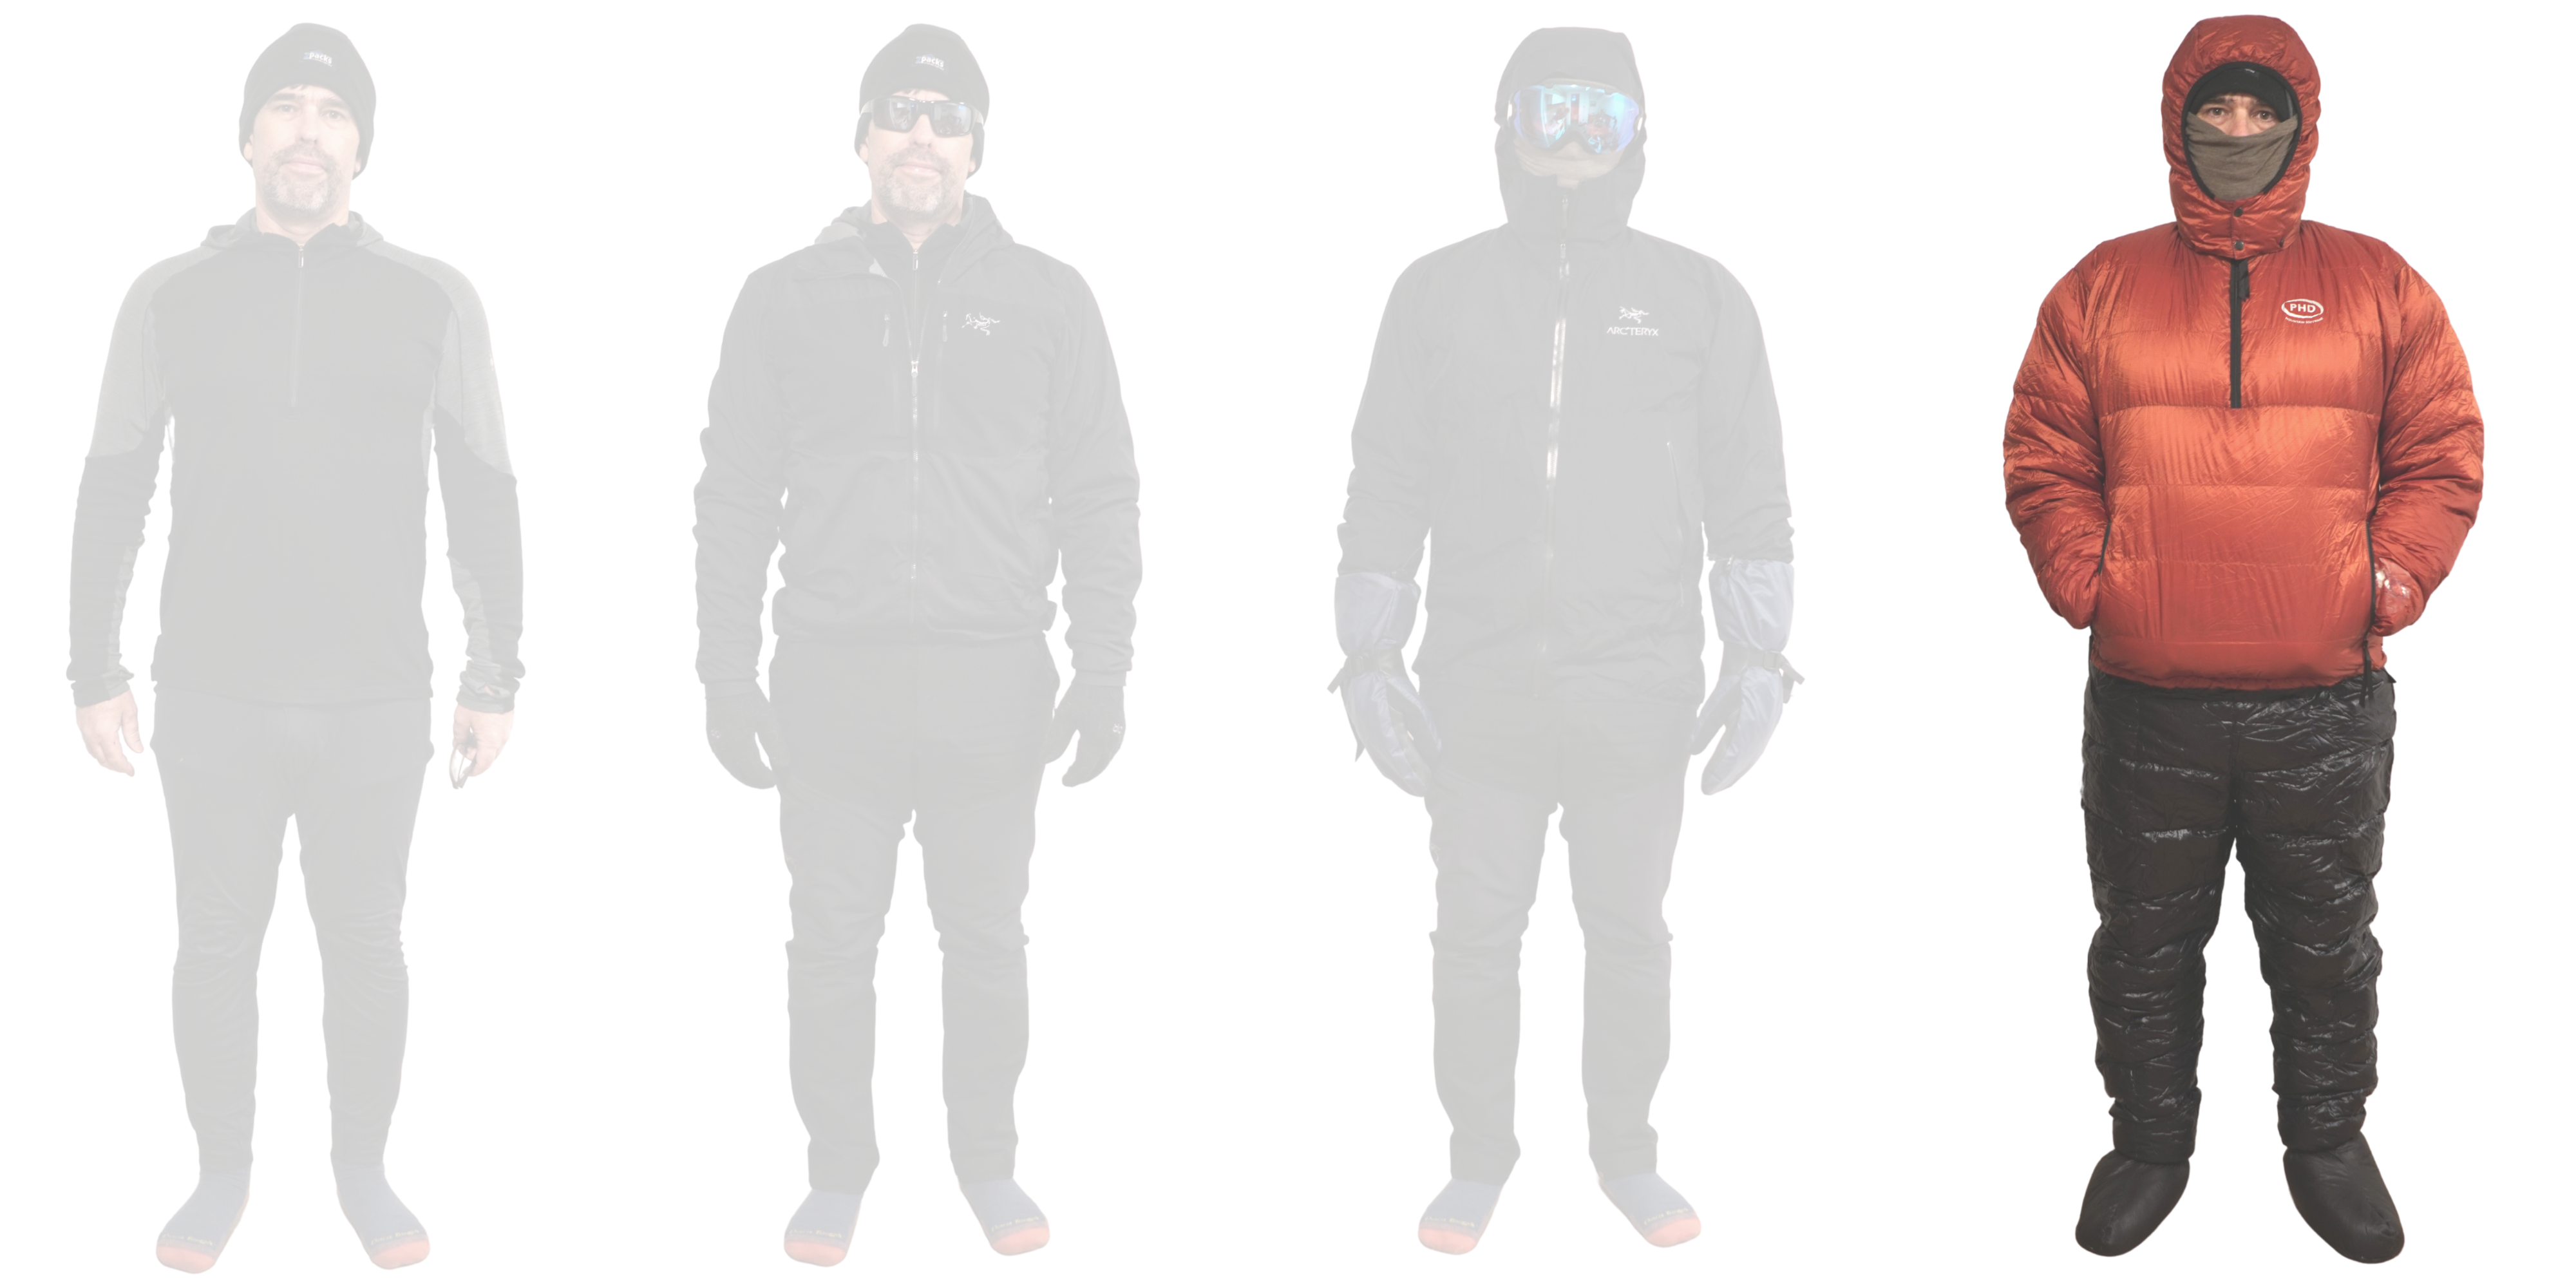
Clothing System
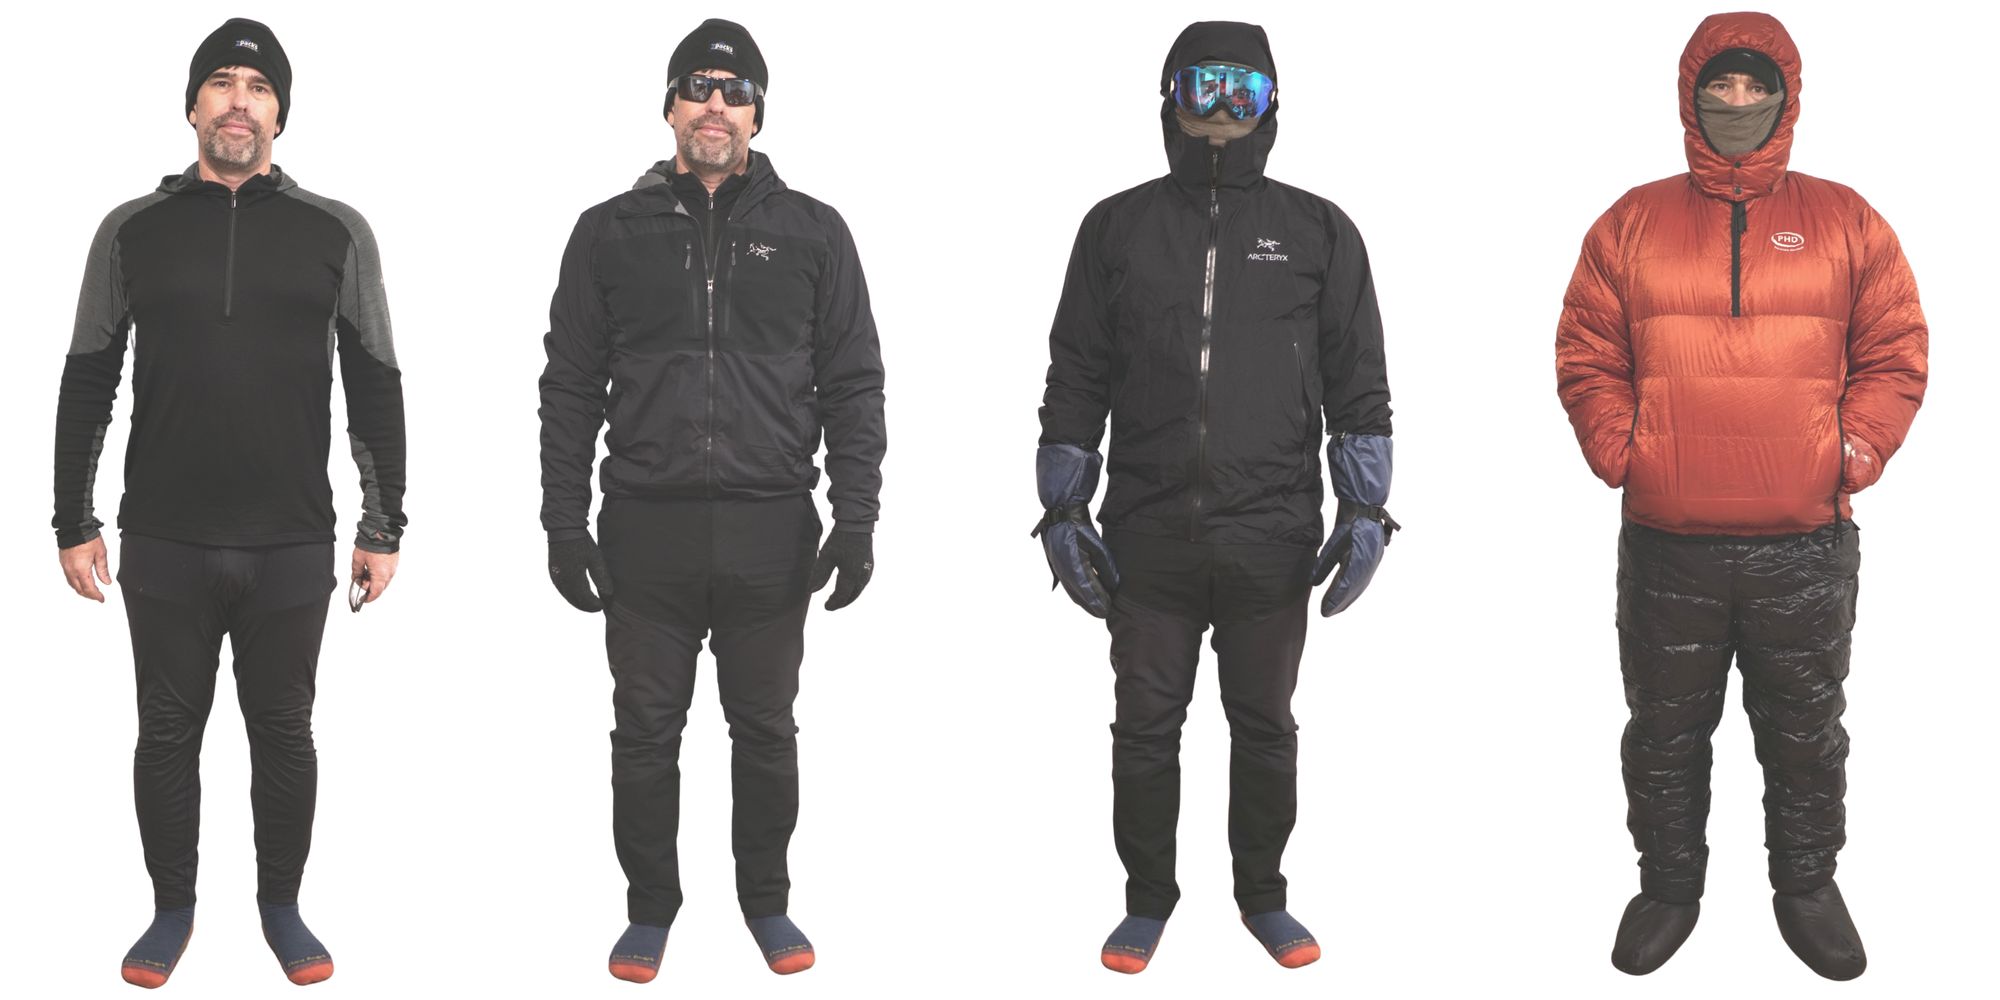
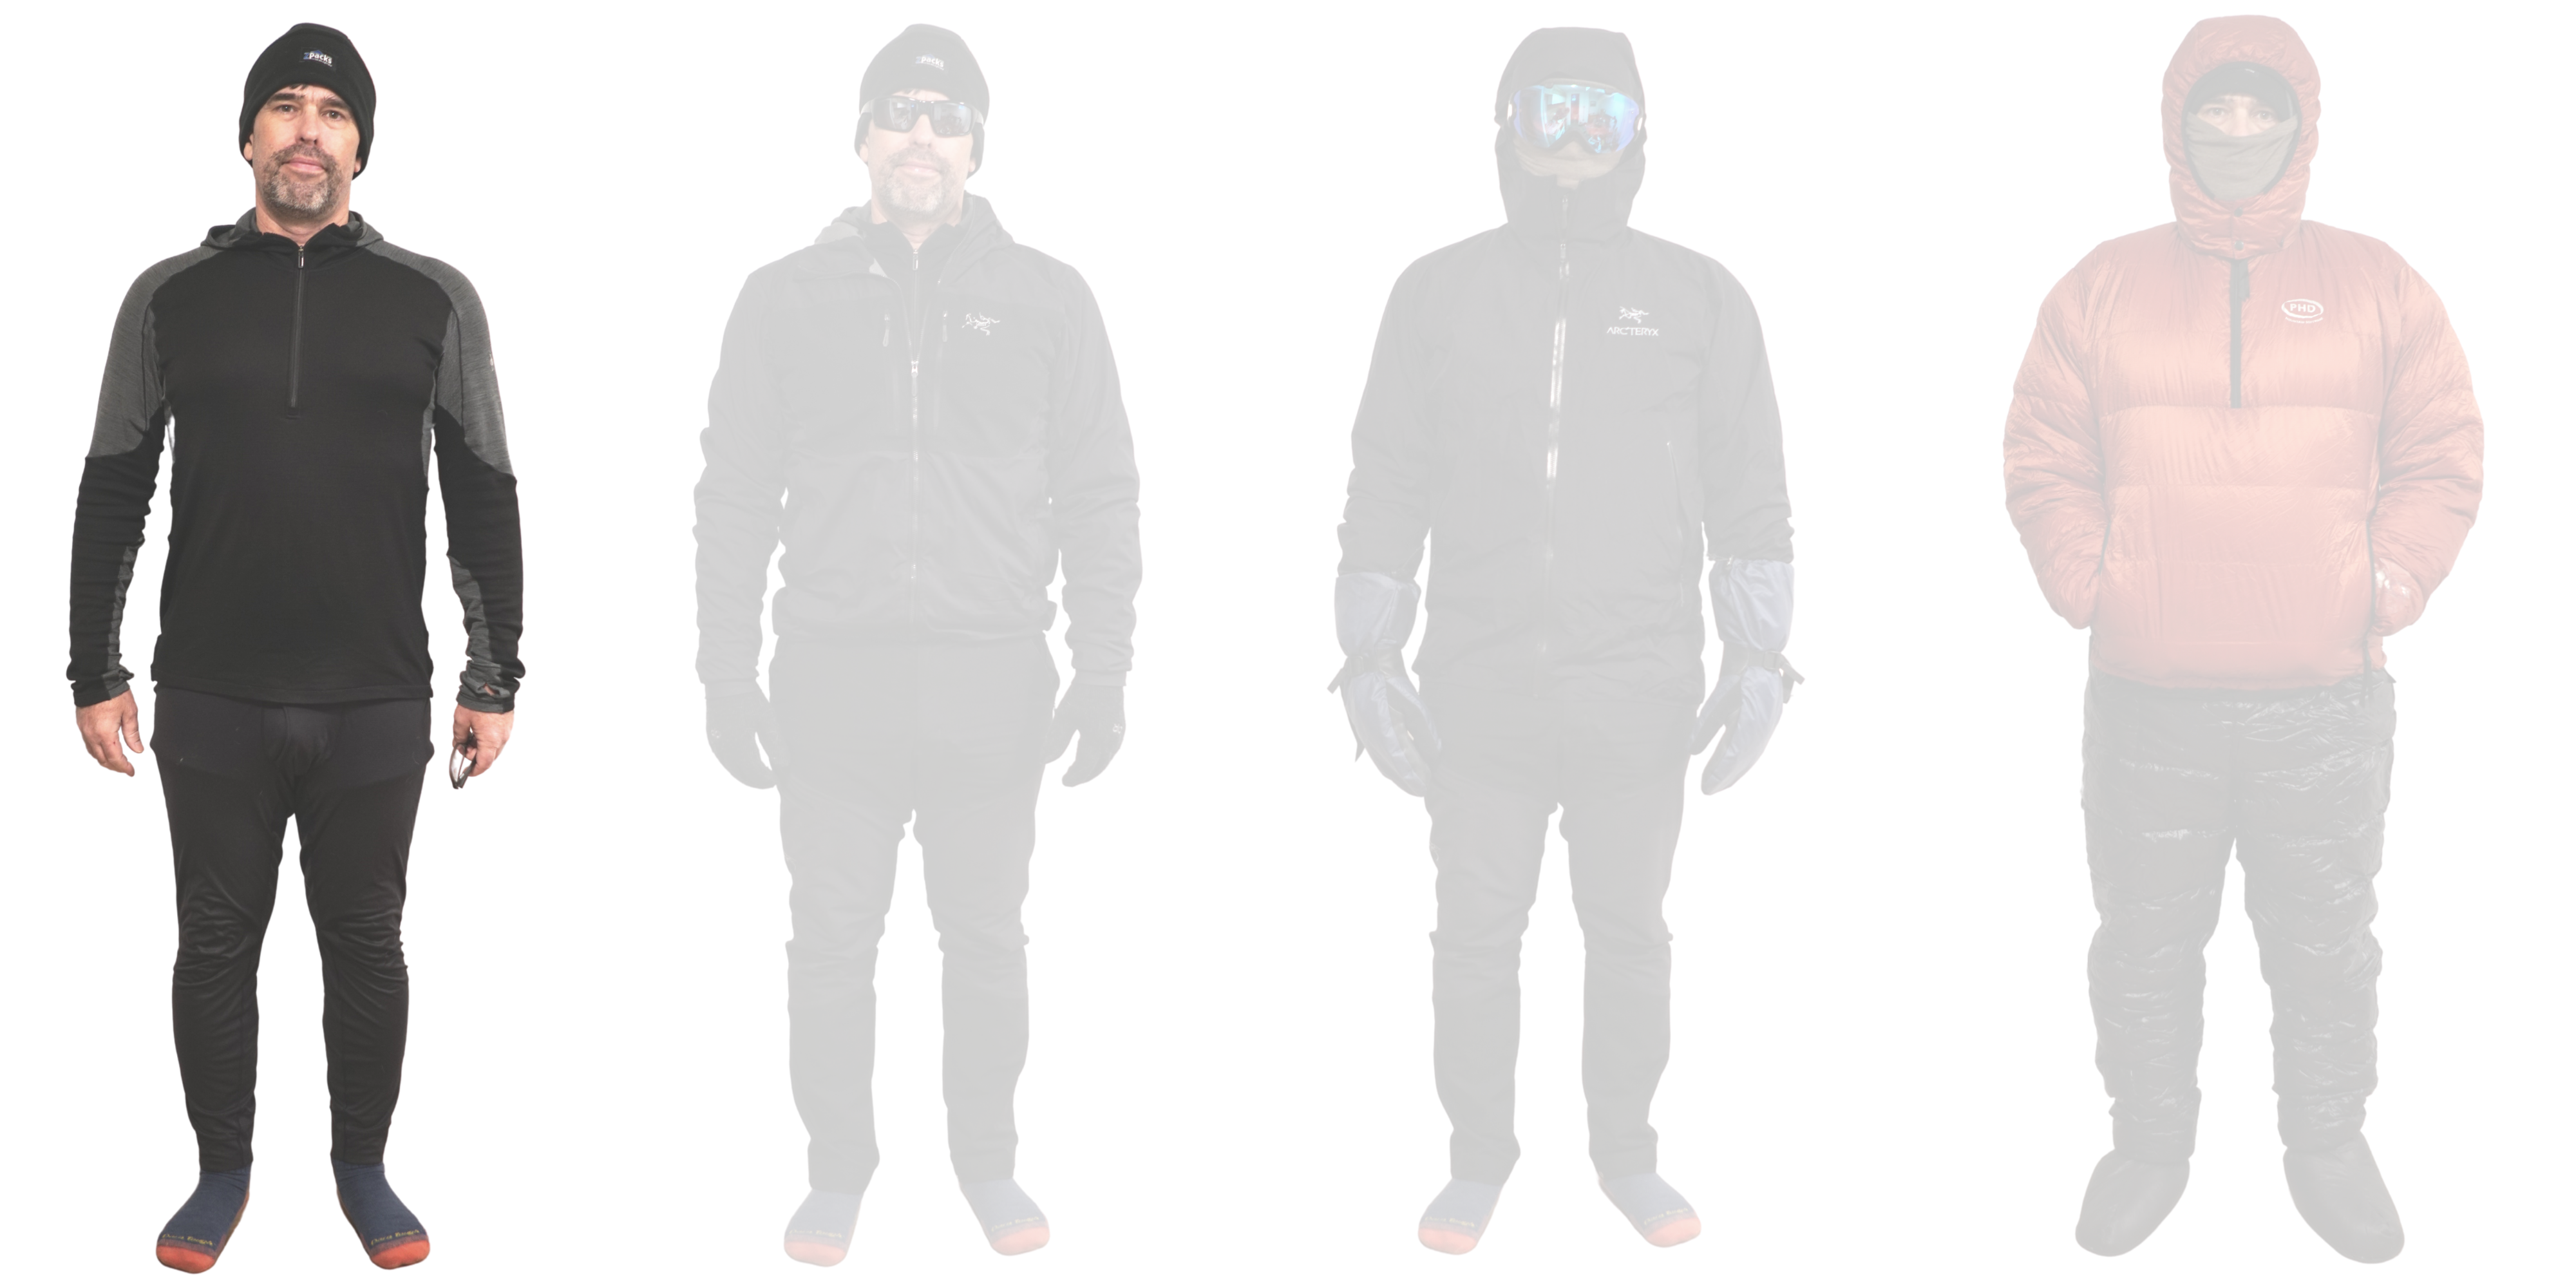
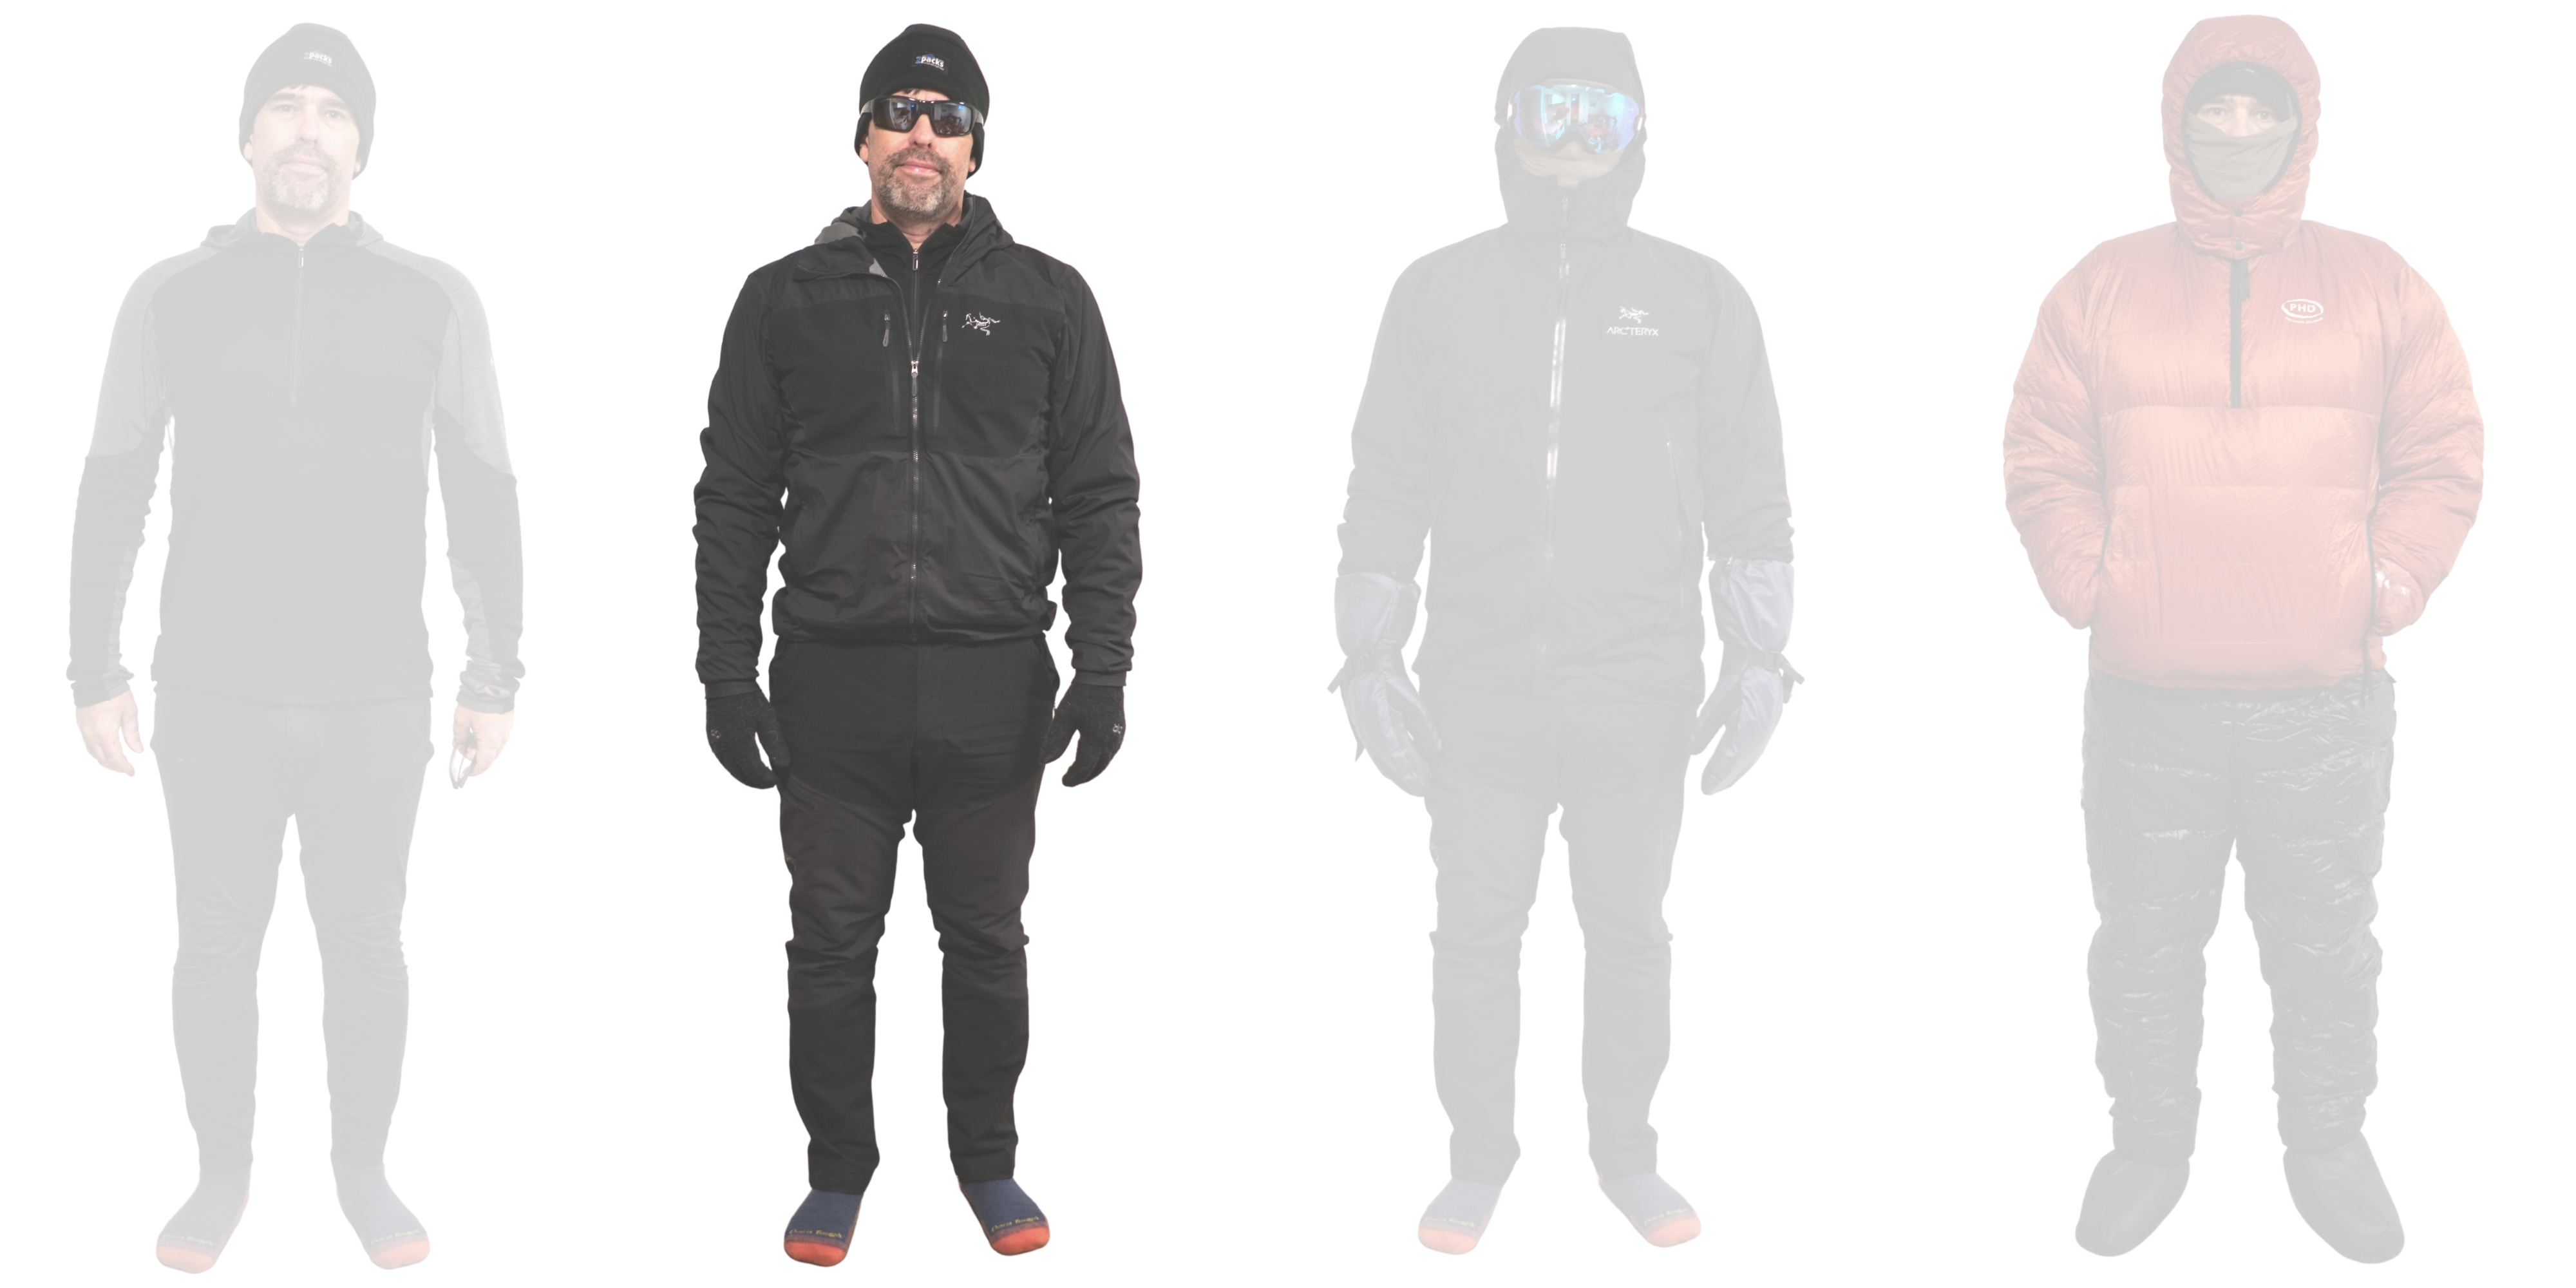
I like to think of my clothing in four layers:
- base – my next-to-skin layers
- hike – the clothing I wear for most conditions on the trail during the daytime
- storm – the clothing I add when temperature drops, precipitation gets heavy, or the wind increases
- camp – the insulation I use in camp while inactive, or in the sleeping bag on the coldest nights
Based on the conditions I’m expecting, I’d rather adjust the insulating capacity or storm-resistance of the pieces in any of these layers than adding more layers, which adds complexity to the system.
That said, I may not have the flexibility to pick and choose from various pieces of gear, so adding a layer becomes both practical and economical. For example, I own one active insulating jacket right now, and I’d be more apt to add my synthetic insulated vest to boost my hiking clothing warmth rather than add a new, more insulated active layer to my already-cluttered gear closet.
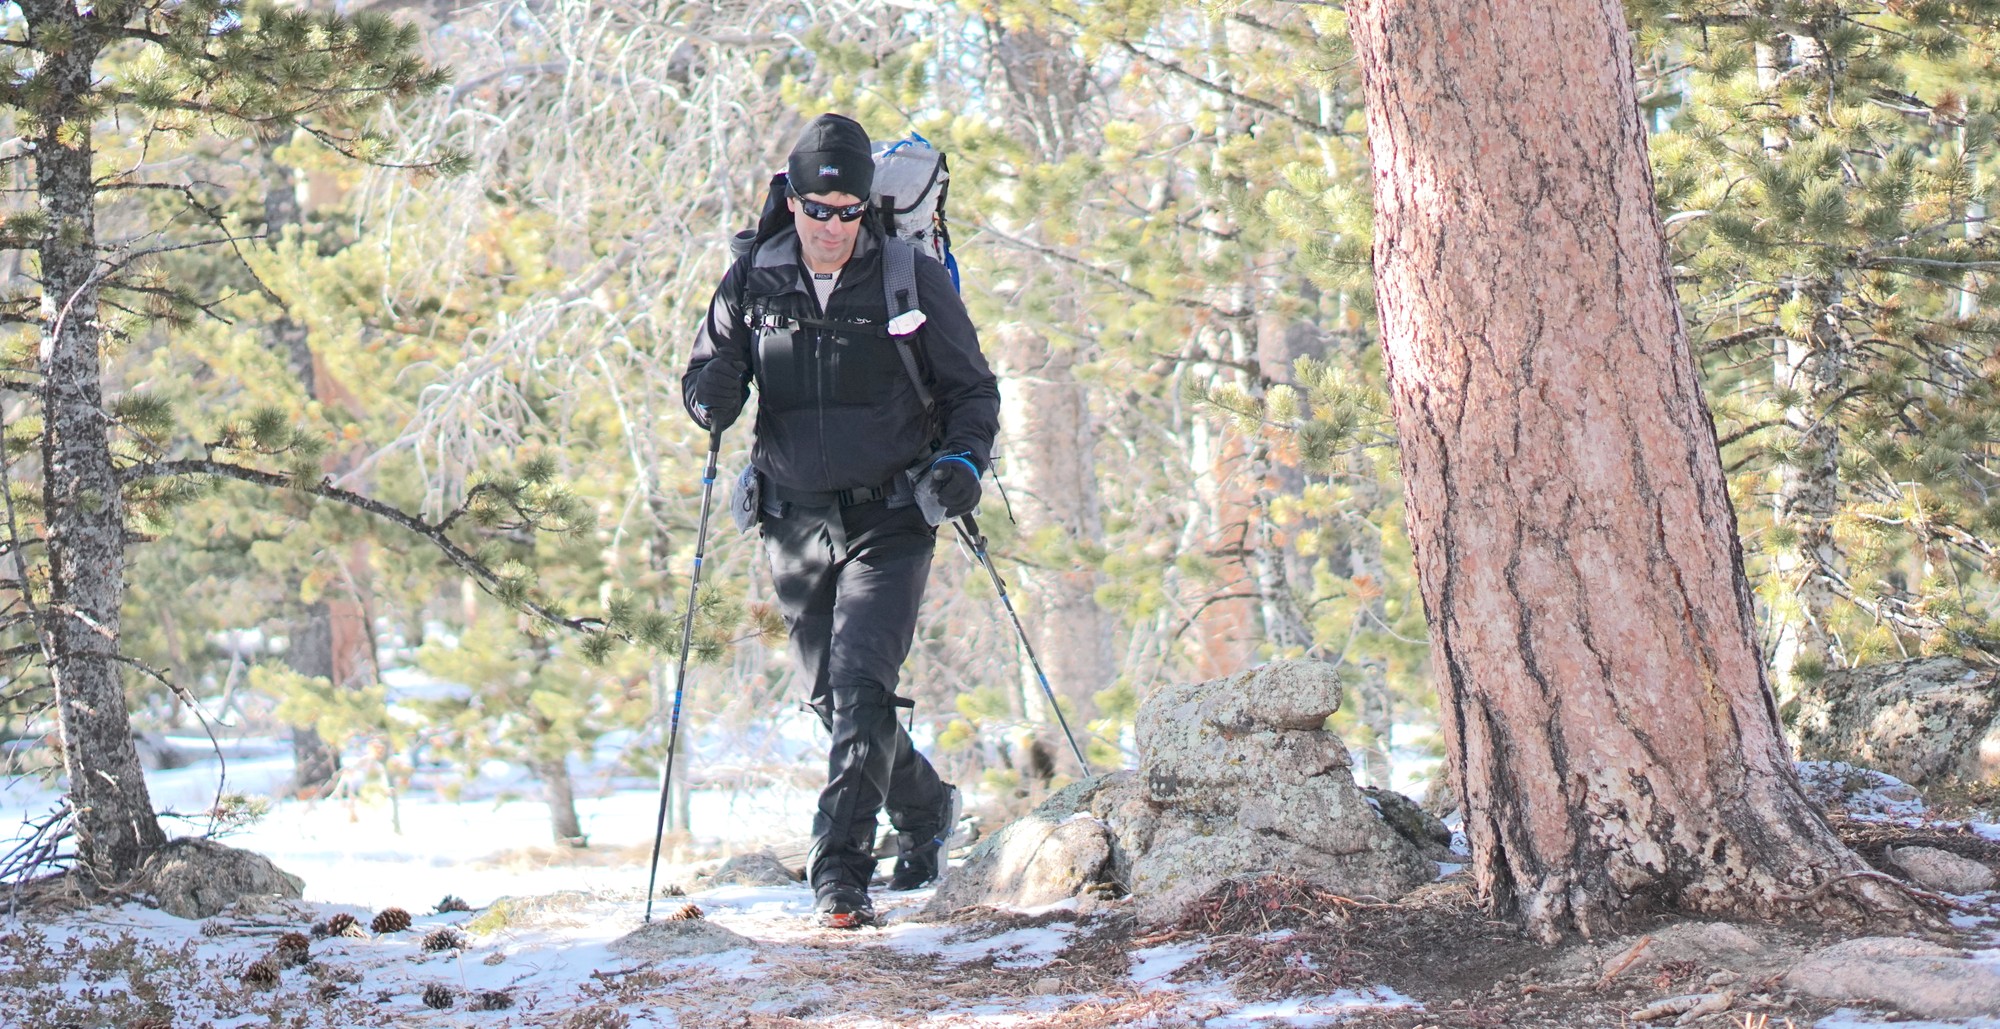
Hiking Clothing
The wind blows almost continuously in the winter season where I normally hike (SE Wyoming and N Colorado), so my standard hiking clothing is tuned to that normality. On a typical winter day, the temperature is 10 to 25 deg F (-12 to -4 deg C), with winds blowing in the range of 10 to 20 mph (16 to 32 kph). And so I dress for the wind chill temperature, not the ambient temperature. For example, on a day where the ambient temperature is 15 deg F (-5 deg C) and the wind is blowing 15 mph (24 kph), the wind chill temperature will be around 6 deg F (-14 deg C) (online wind chill calculator).
If I’m expecting cooler temperatures, I’ll increase my base layer weight, the weight of my active insulation layer, or just add an additional long or short sleeve crew base layer under the merino hoody. In addition, if I’m expecting colder temperatures and wind, and plan to wear the vapor barrier mitts most of the time while hiking, I’ll replace the heavier fleece gloves with a thinner fleece liner for a two-layer mitten system that allows me to take the mitten off for a few minutes without suffering cold hands in very windy conditions.
Hiking Clothing Notes:
- UNDERWEAR / Smartwool Merino 150 Boxer Brief / 3.1 oz (88 g) / lacks durability for long-distance days in the summer, but cozy and warm for winter hiking
- BASE LAYER BOTTOMS / Patagonia Lightweight Capilene Long Underwear Bottoms / 3.5 oz (99 g) / combine with soft-shell pants for a breathable pant system for winter cold and wind
- SOFTSHELL PANTS / Arc’teryx Sigma FL Pant / 12.6 oz (357 g) / blocks moderate wind while remaining breathable; sheds snow well; stretchy comfort for mobility
- BASE LAYER TOP / Smartwool PhD Light Hoody / 9.2 oz (261 g) / a cozy hood makes this a comfy layer
- ACTIVE LAYER SHELL / Arc’teryx Proton FL Hoody / 11.1 oz (315 g) / highly-breathable, lightly-insulated wind shirt
- BEANIE HAT / ZPacks Fleece Beanie / 0.9 oz (26 g) / light beanie combines with base layer and wind shirt hoods for adjustment to changes in cold and wind – I generally prefer a full-loft double-layer fleece beanie like this in the winter because of its balance of breathability vs. wind resistance
- FLEECE GLOVES / Outdoor Research Flurry Sensor / 2.5 oz (71 g) / for temperatures not requiring insulated mitts / high loft, good moisture and wind resistance, outstanding dexterity, and terrific fingertip sensor, especially with a smartphone GPS app
- SUNGLASSES / Smith Photochromic & Polarized / 1.4 oz (40 g) / sophisticated tech lens provides visual acuity in rapidly changing light during unstable winter weather, weight incudes a Pilotfish retainer strap
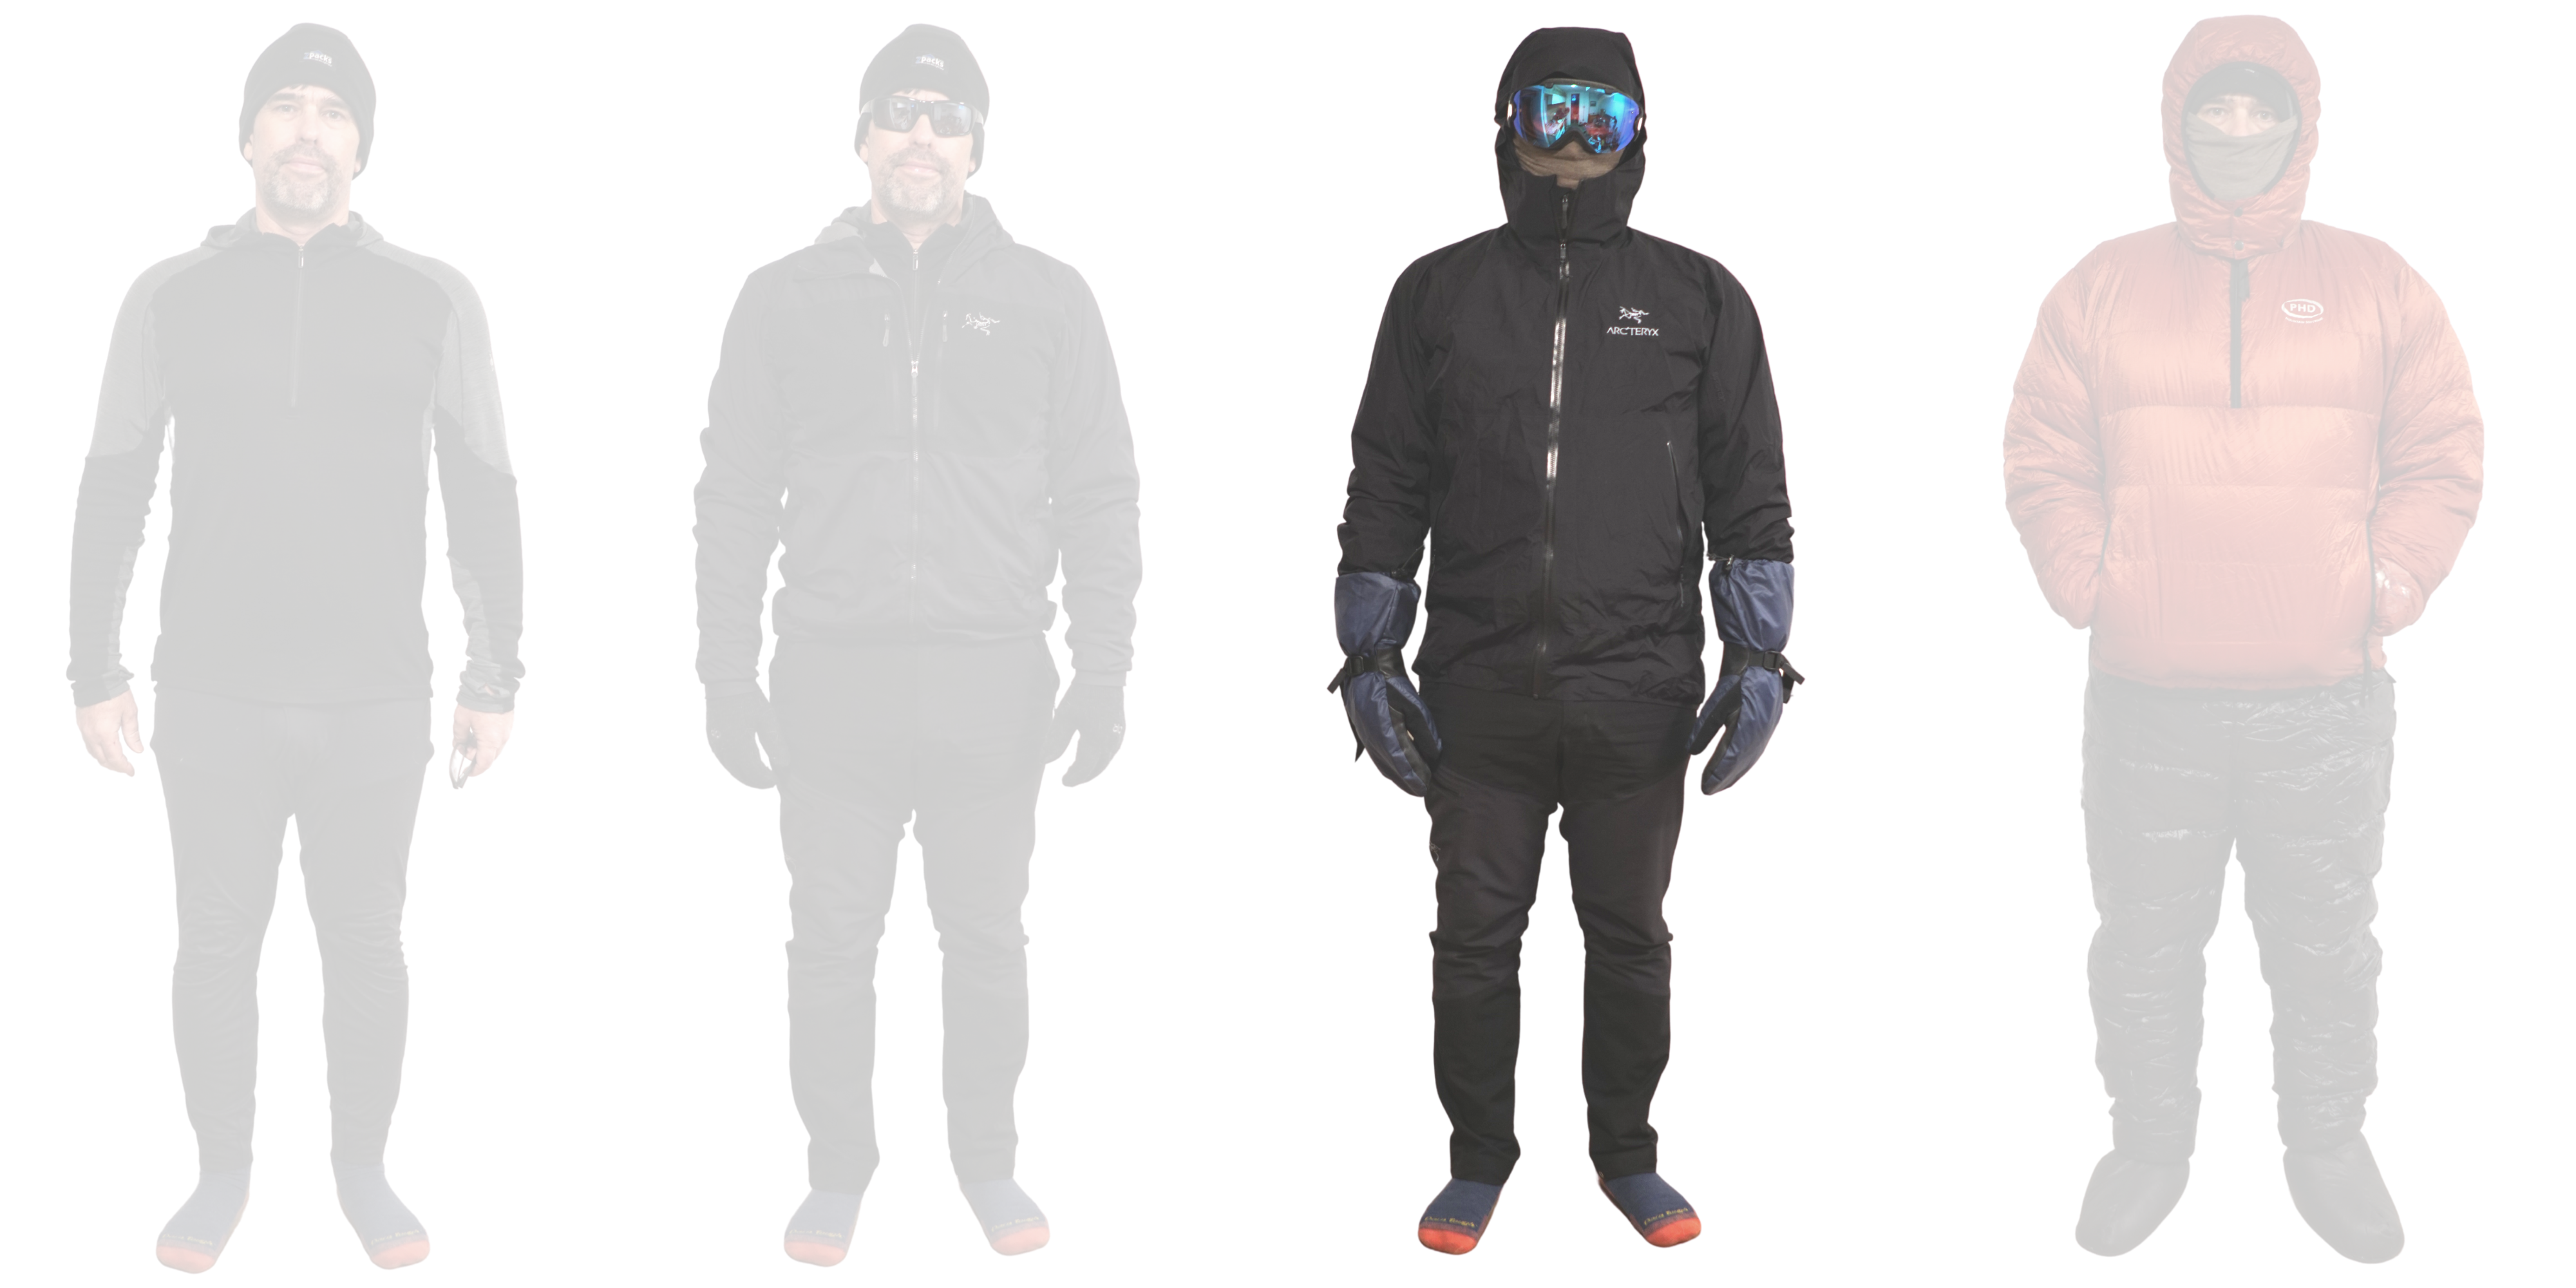
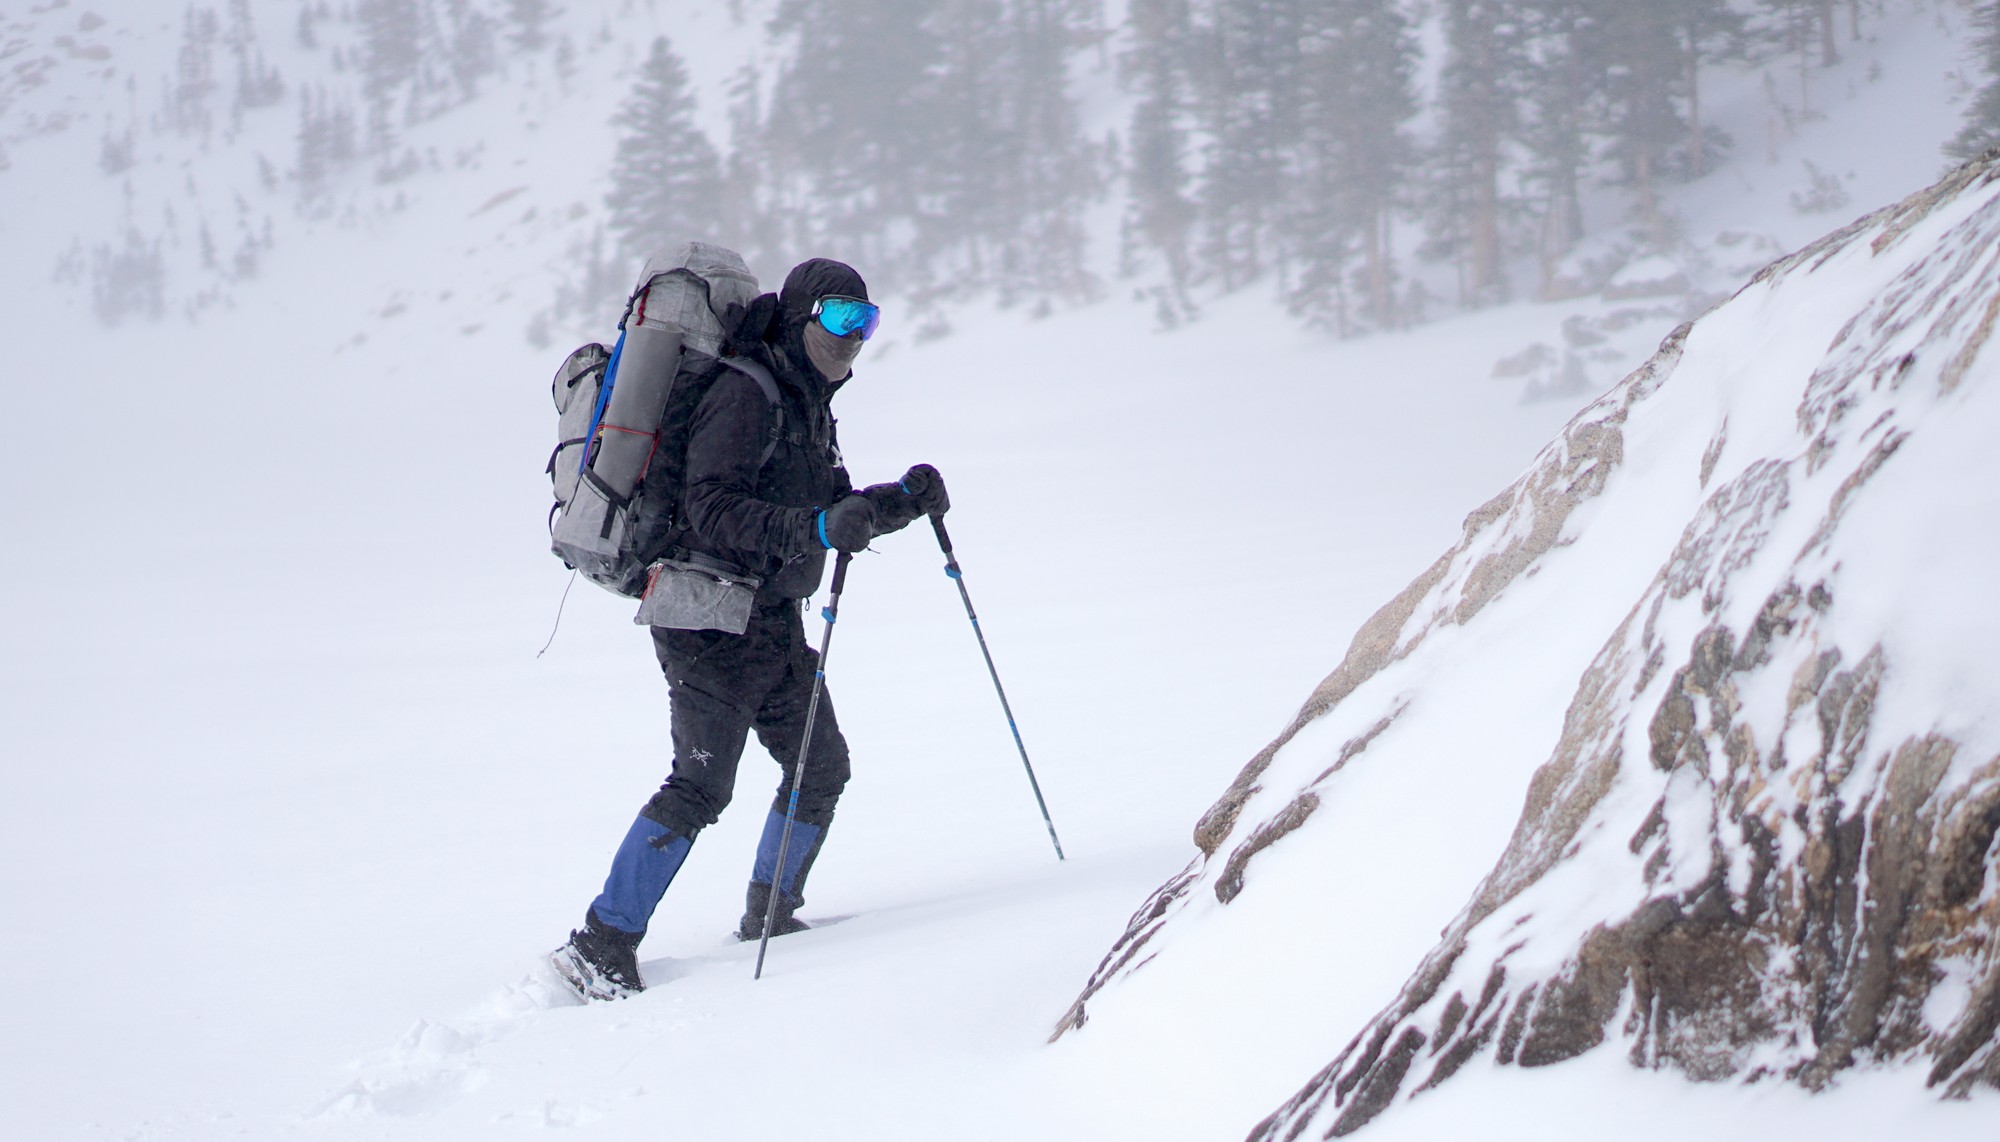
Storm Clothing
Additional storm clothing is predicated on the idea that I need to preserve body heat leaks and blowing spindrift ingress into my clothing system. If the weather forecast is calling for colder temperatures or higher winds, I’ll add a high-loft pile balaclava.
Storm Clothing Notes:
- STORM SHELL / Arc’teryx Zeta FL Jacket (Size L for layering) / 7.6 oz (215 g) / waterproof-breathable hardshell not usually needed in sub-freezing conditions when snowfall is light but essential when wind chills approach 0 F or colder or during heavy snowfall
- WATER-RESISTANT INSULATED MITTENS / RBH Designs Ultralight Vapor Mitts / 6.6 oz (187 g) / critical insurance in cold temperatures when the wind is blowing
- NECK GAITER / Merino Buff / 1.7 oz (48 g) / helps seal head and neck area in very cold temps
- SNOW GOGGLES / Smith Chromapop Snow Goggles / 4.9 oz (139 g) / for blizzards, light-responsive in sunny vs. overcast conditions, weight includes microfiber sleeve
In-Camp Clothing
My in-camp clothing meets one spec: maximum warmth-to-weight ratio. I would adjust the jacket, pants, and booties for more extreme (colder) conditions.
In-Camp Clothing Notes
- INSULATED PANTS / Western Mountaineering Flash Down Pants / 6.6 oz (187 g) / pull-on style difficult to use with shoes and spikes but lighter than side zip styles; would upgrade to a more insulated, side-zip pant in sub-zero F temperatures
- INSULATED JACKET / PhD Yukon K Hoody / 12.4 oz (352 g) / pullover-style, very warm hood; would upgrade to a heavier jacket in sub-zero F temperatures
- EXTRA SOCKS / Darn Tough Full Cushion Boot Socks / 3.3 oz (94 g) / dry socks for night
- INSULATED BOOTIES / Goosefeet Down Socks / 2.1 oz (60 g) / warmth while in sleeping bag and during late-night calls of nature
Sleeping & Shelter
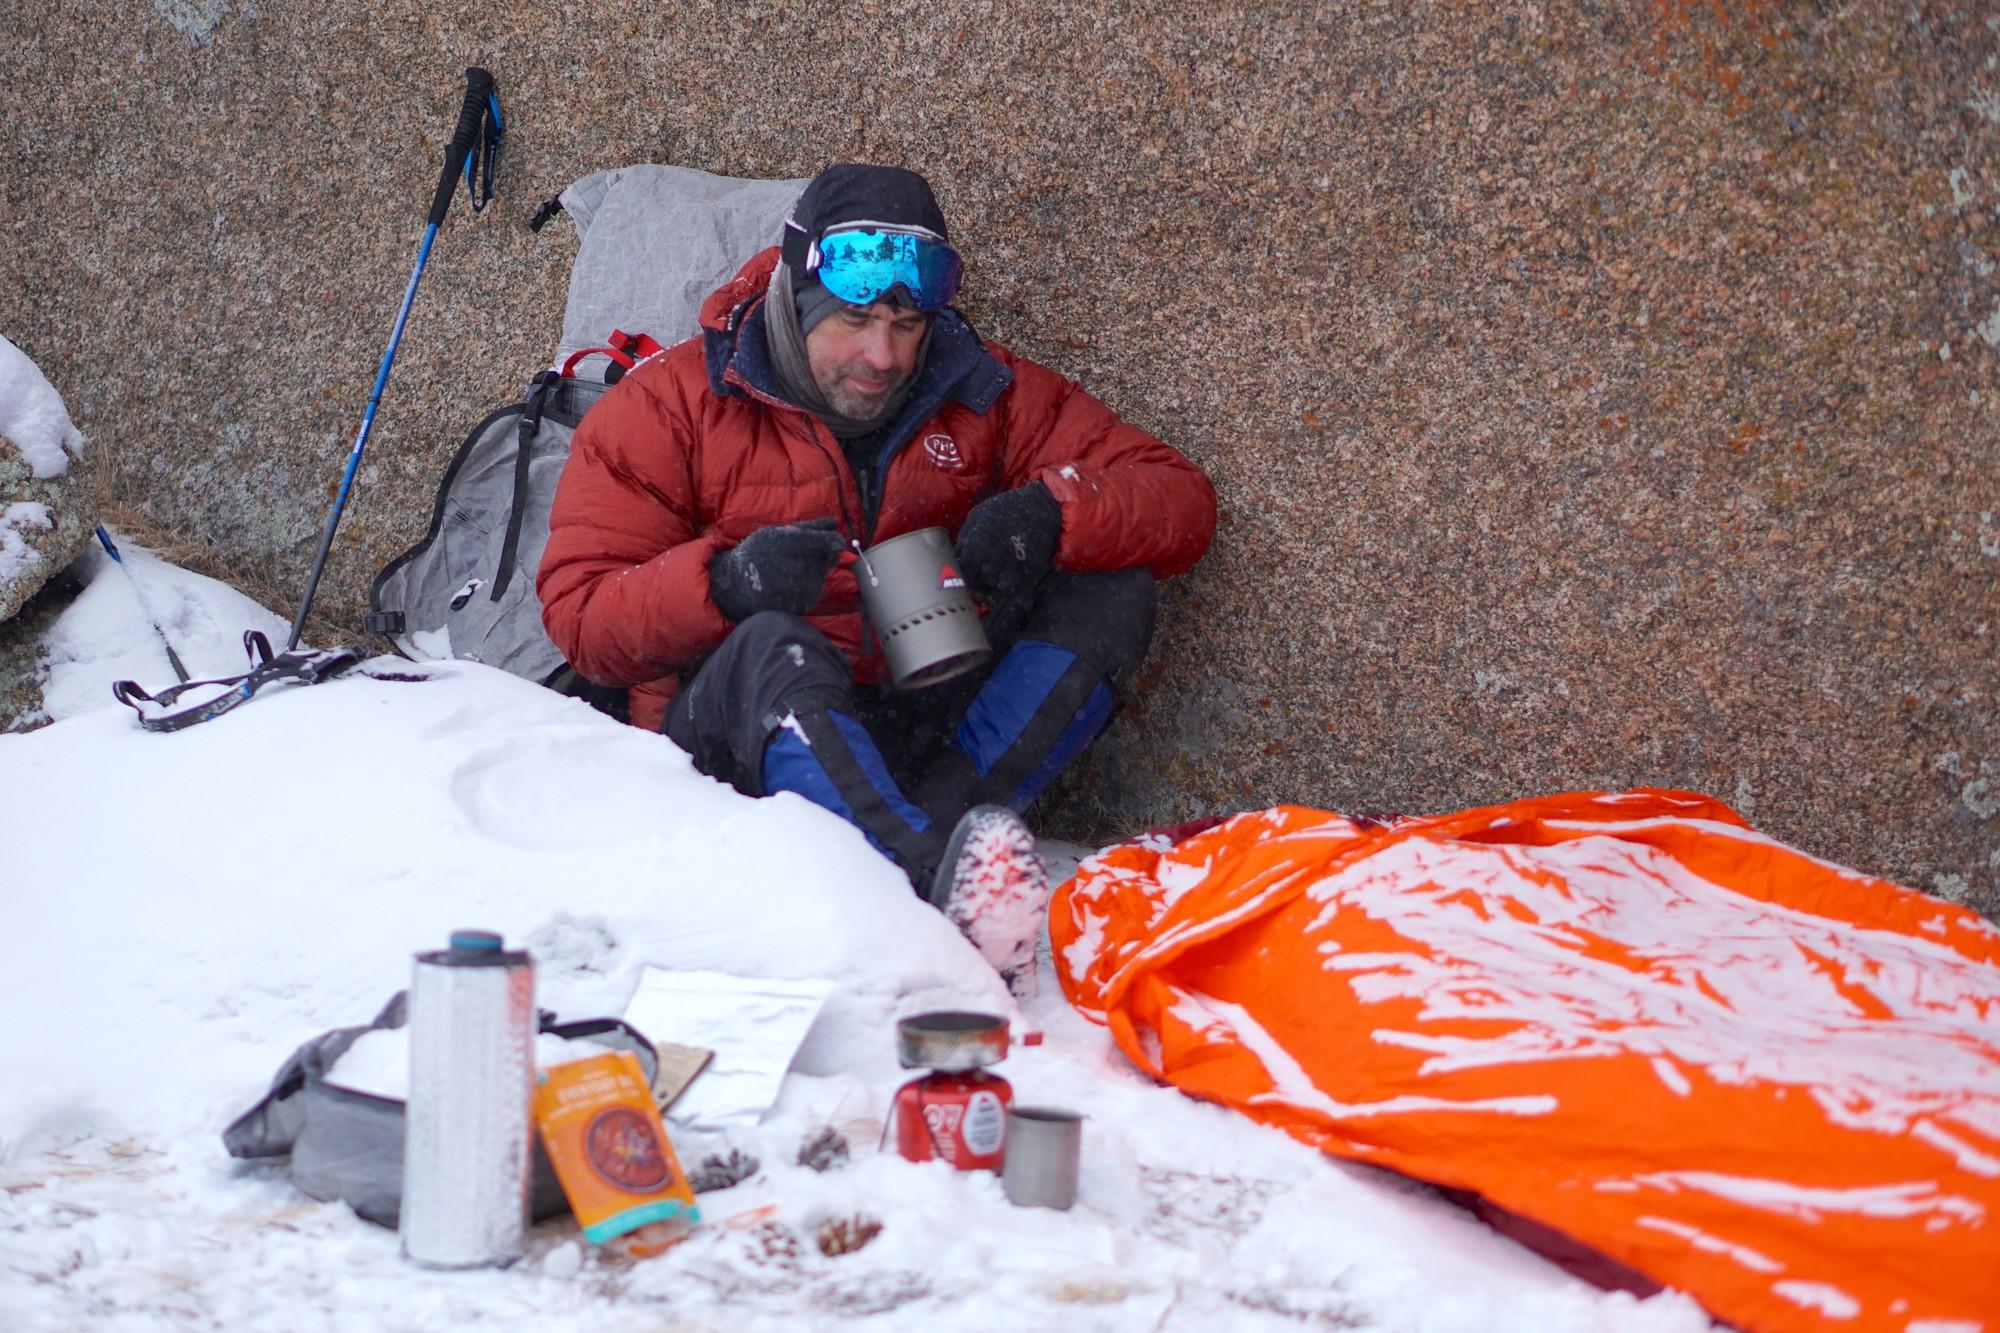
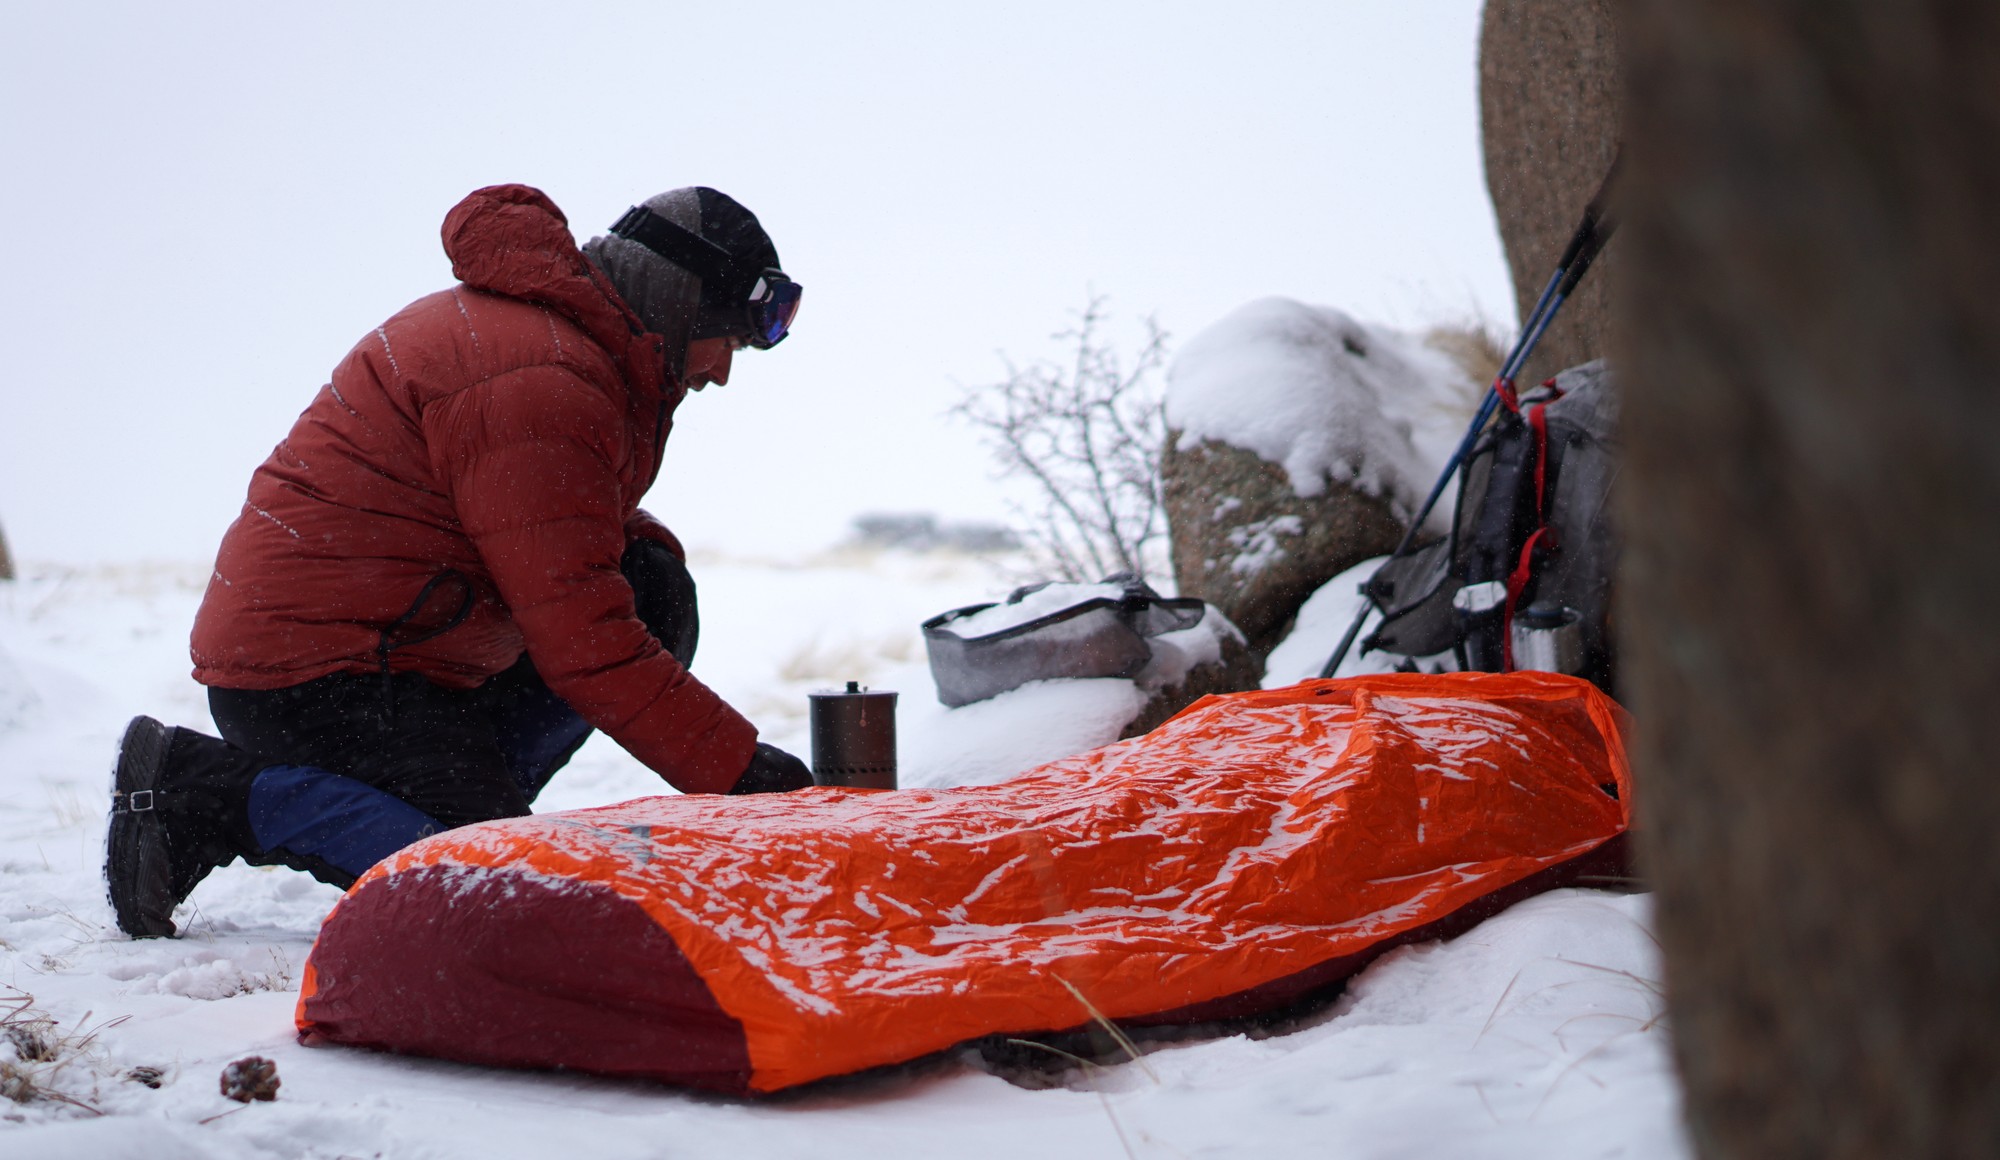
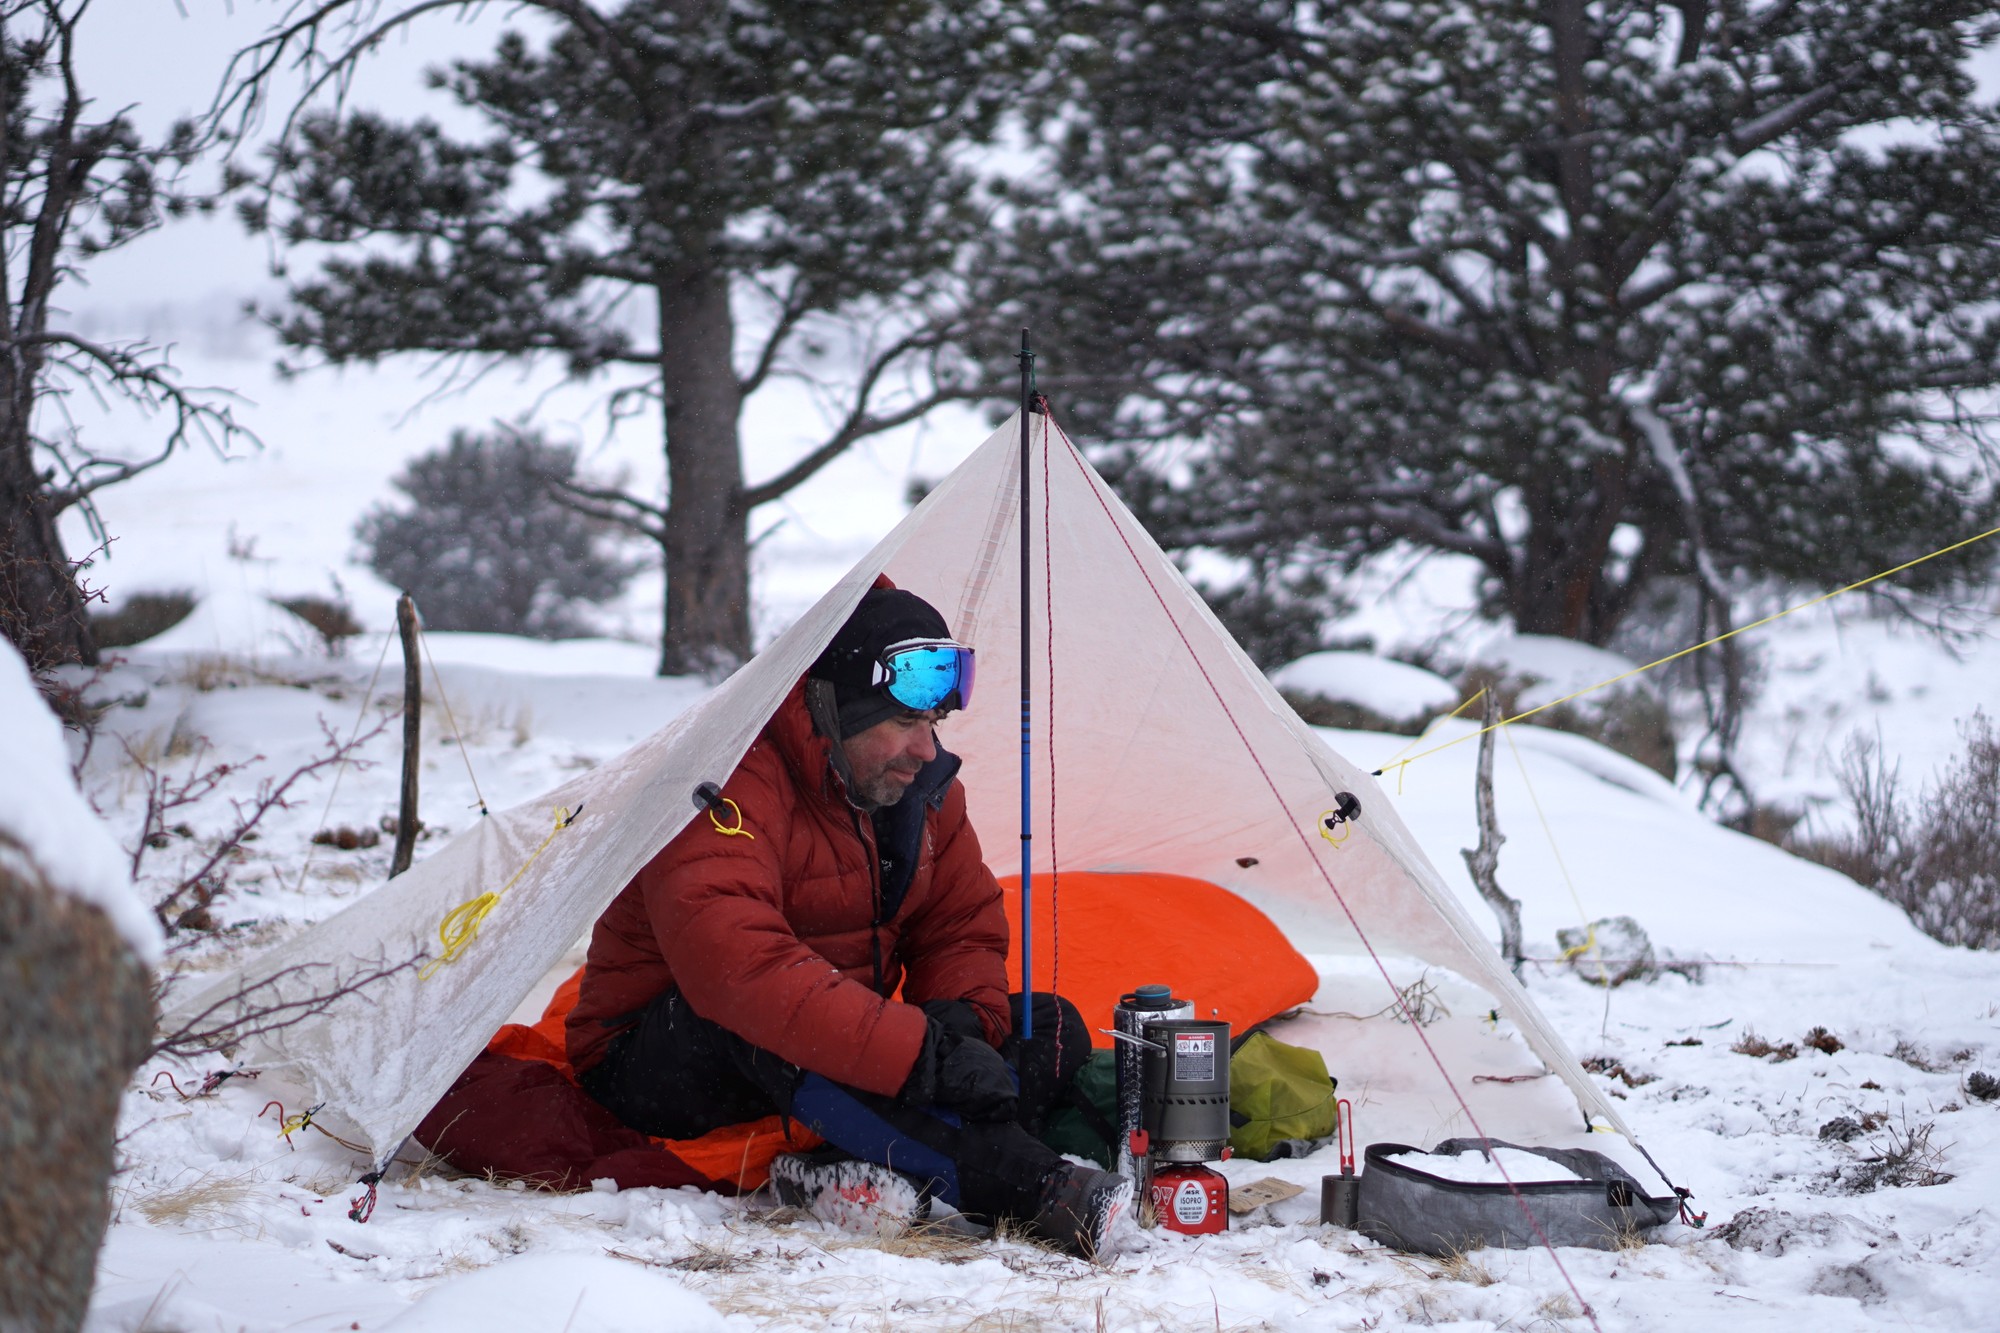
On most nights, I would find a sheltered camp deep in the forest. The mountains of SE Wyoming and N Colorado enjoy a high density of Sherman granite rock outcroppings, and it’s not often difficult to find sheltered places to sleep within their nooks and crannies. So the tarp usually stays in my pack, and the bivy is my main shelter. I’ll pitch the tarp at forested campsites during heavy snow events for some entry/exit protection for the bivy sack, or for a sheltered cooking site.
There’s a compelling argument to use a small pyramid instead of a tarp. Pyramids are easier to pitch and offer full-perimeter protection. I waffle back and forth between the two during the winter, as I really enjoy the creativity and art that comes with pitching a tarp in various configurations.
For subzero F (< -18 C) low temperatures, I add a synthetic overquilt to my mummy bag, and a thicker closed-cell foam pad.
Sleeping and Shelter Notes
- SNOW SHOVEL / Snowclaw Guide Shovel / 6.4 oz (181 g) / for sculpting campsite and bed
- SHELTER / Hyperlite Mountain Gear 8’6″ x 8’6″ Flat Tarp / 13.6 oz (346 g) / rarely pitched, except for cooking and shelter in heavy snow or high wind (included in weight – stuff sack and guylines on all attachment points)
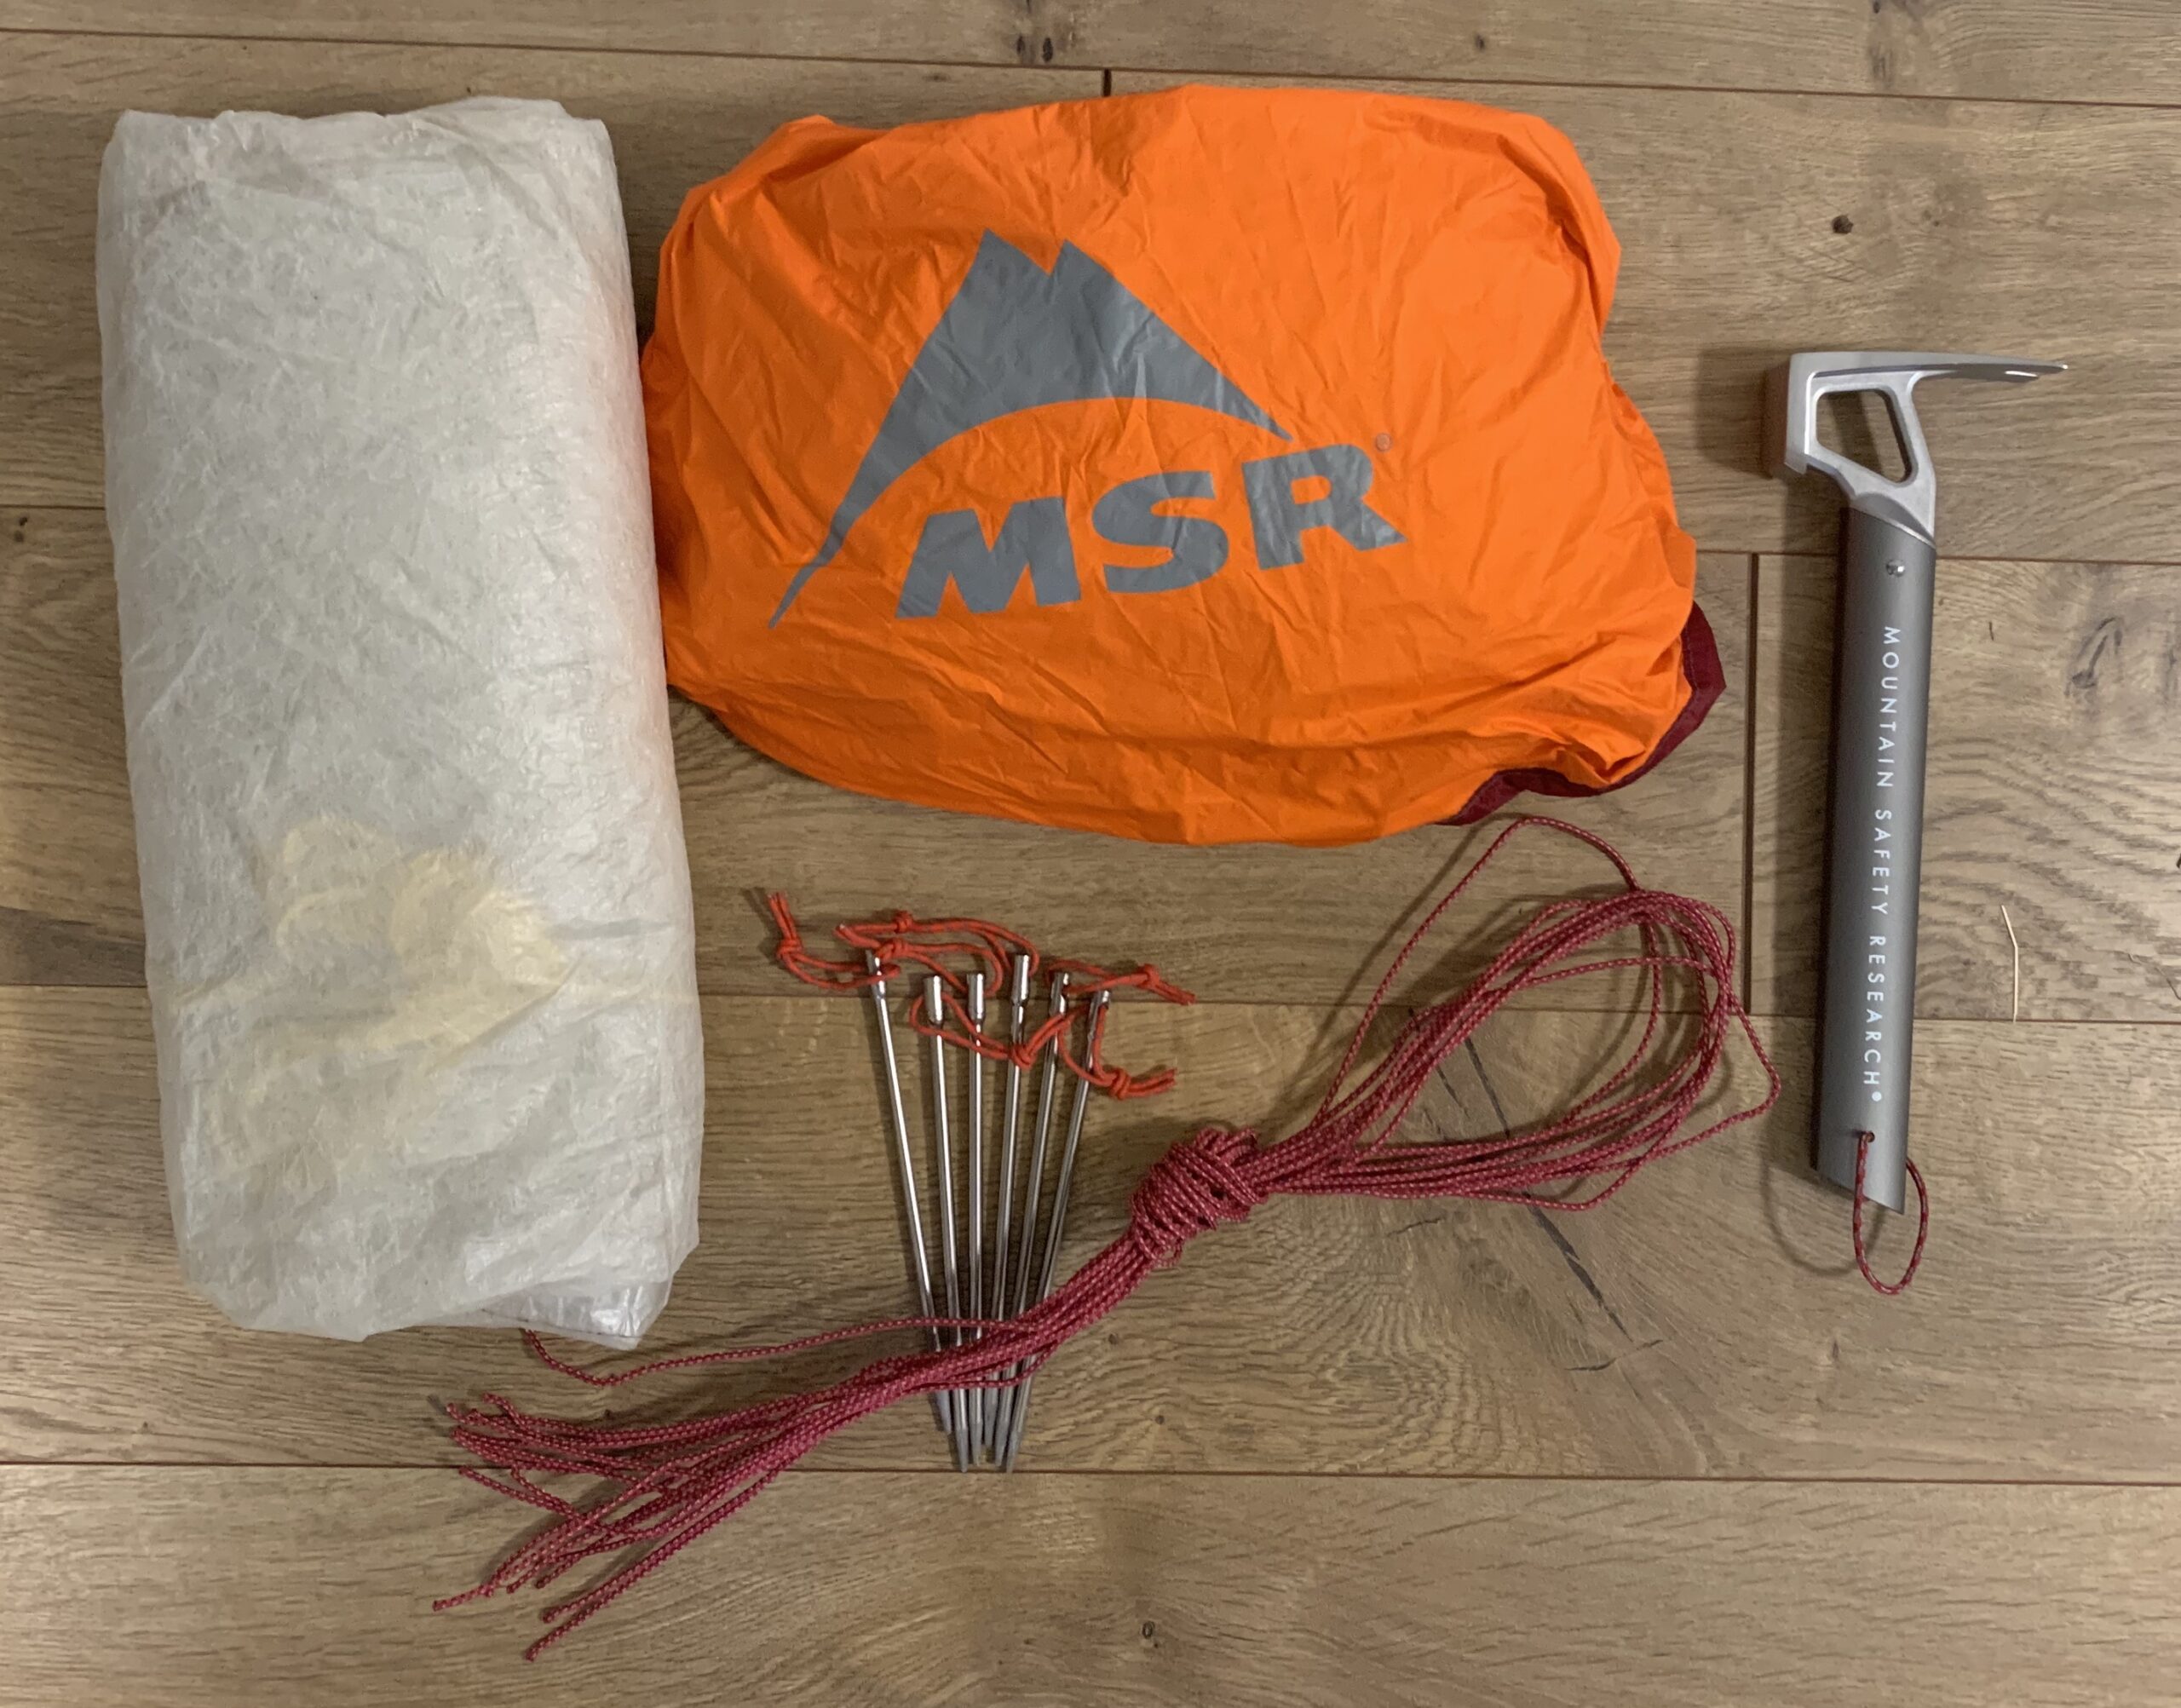
- BIVY SACK / MSR Pro Bivy / 8.6 oz (244 g) / fast and simple shelter without having to deal with stakes and guylines in winter
- STAKES / Vargo Titanium Nail Stakes / 0.5 oz (14 g) ea / used with the shelter for frozen ground; don’t opt for so-called ultralight versions of nail pegs (e.g., from Toaks or Vargo) – they aren’t strong enough for frozen ground
- EXTRA GUYLINE CORD / 32 ft x MSR Ultralight Utility Cord / 1.2 oz (34 g) / extra guyline lengths for pitching the shelter in deep snow, using sticks as deadman anchors, or rigging to trees
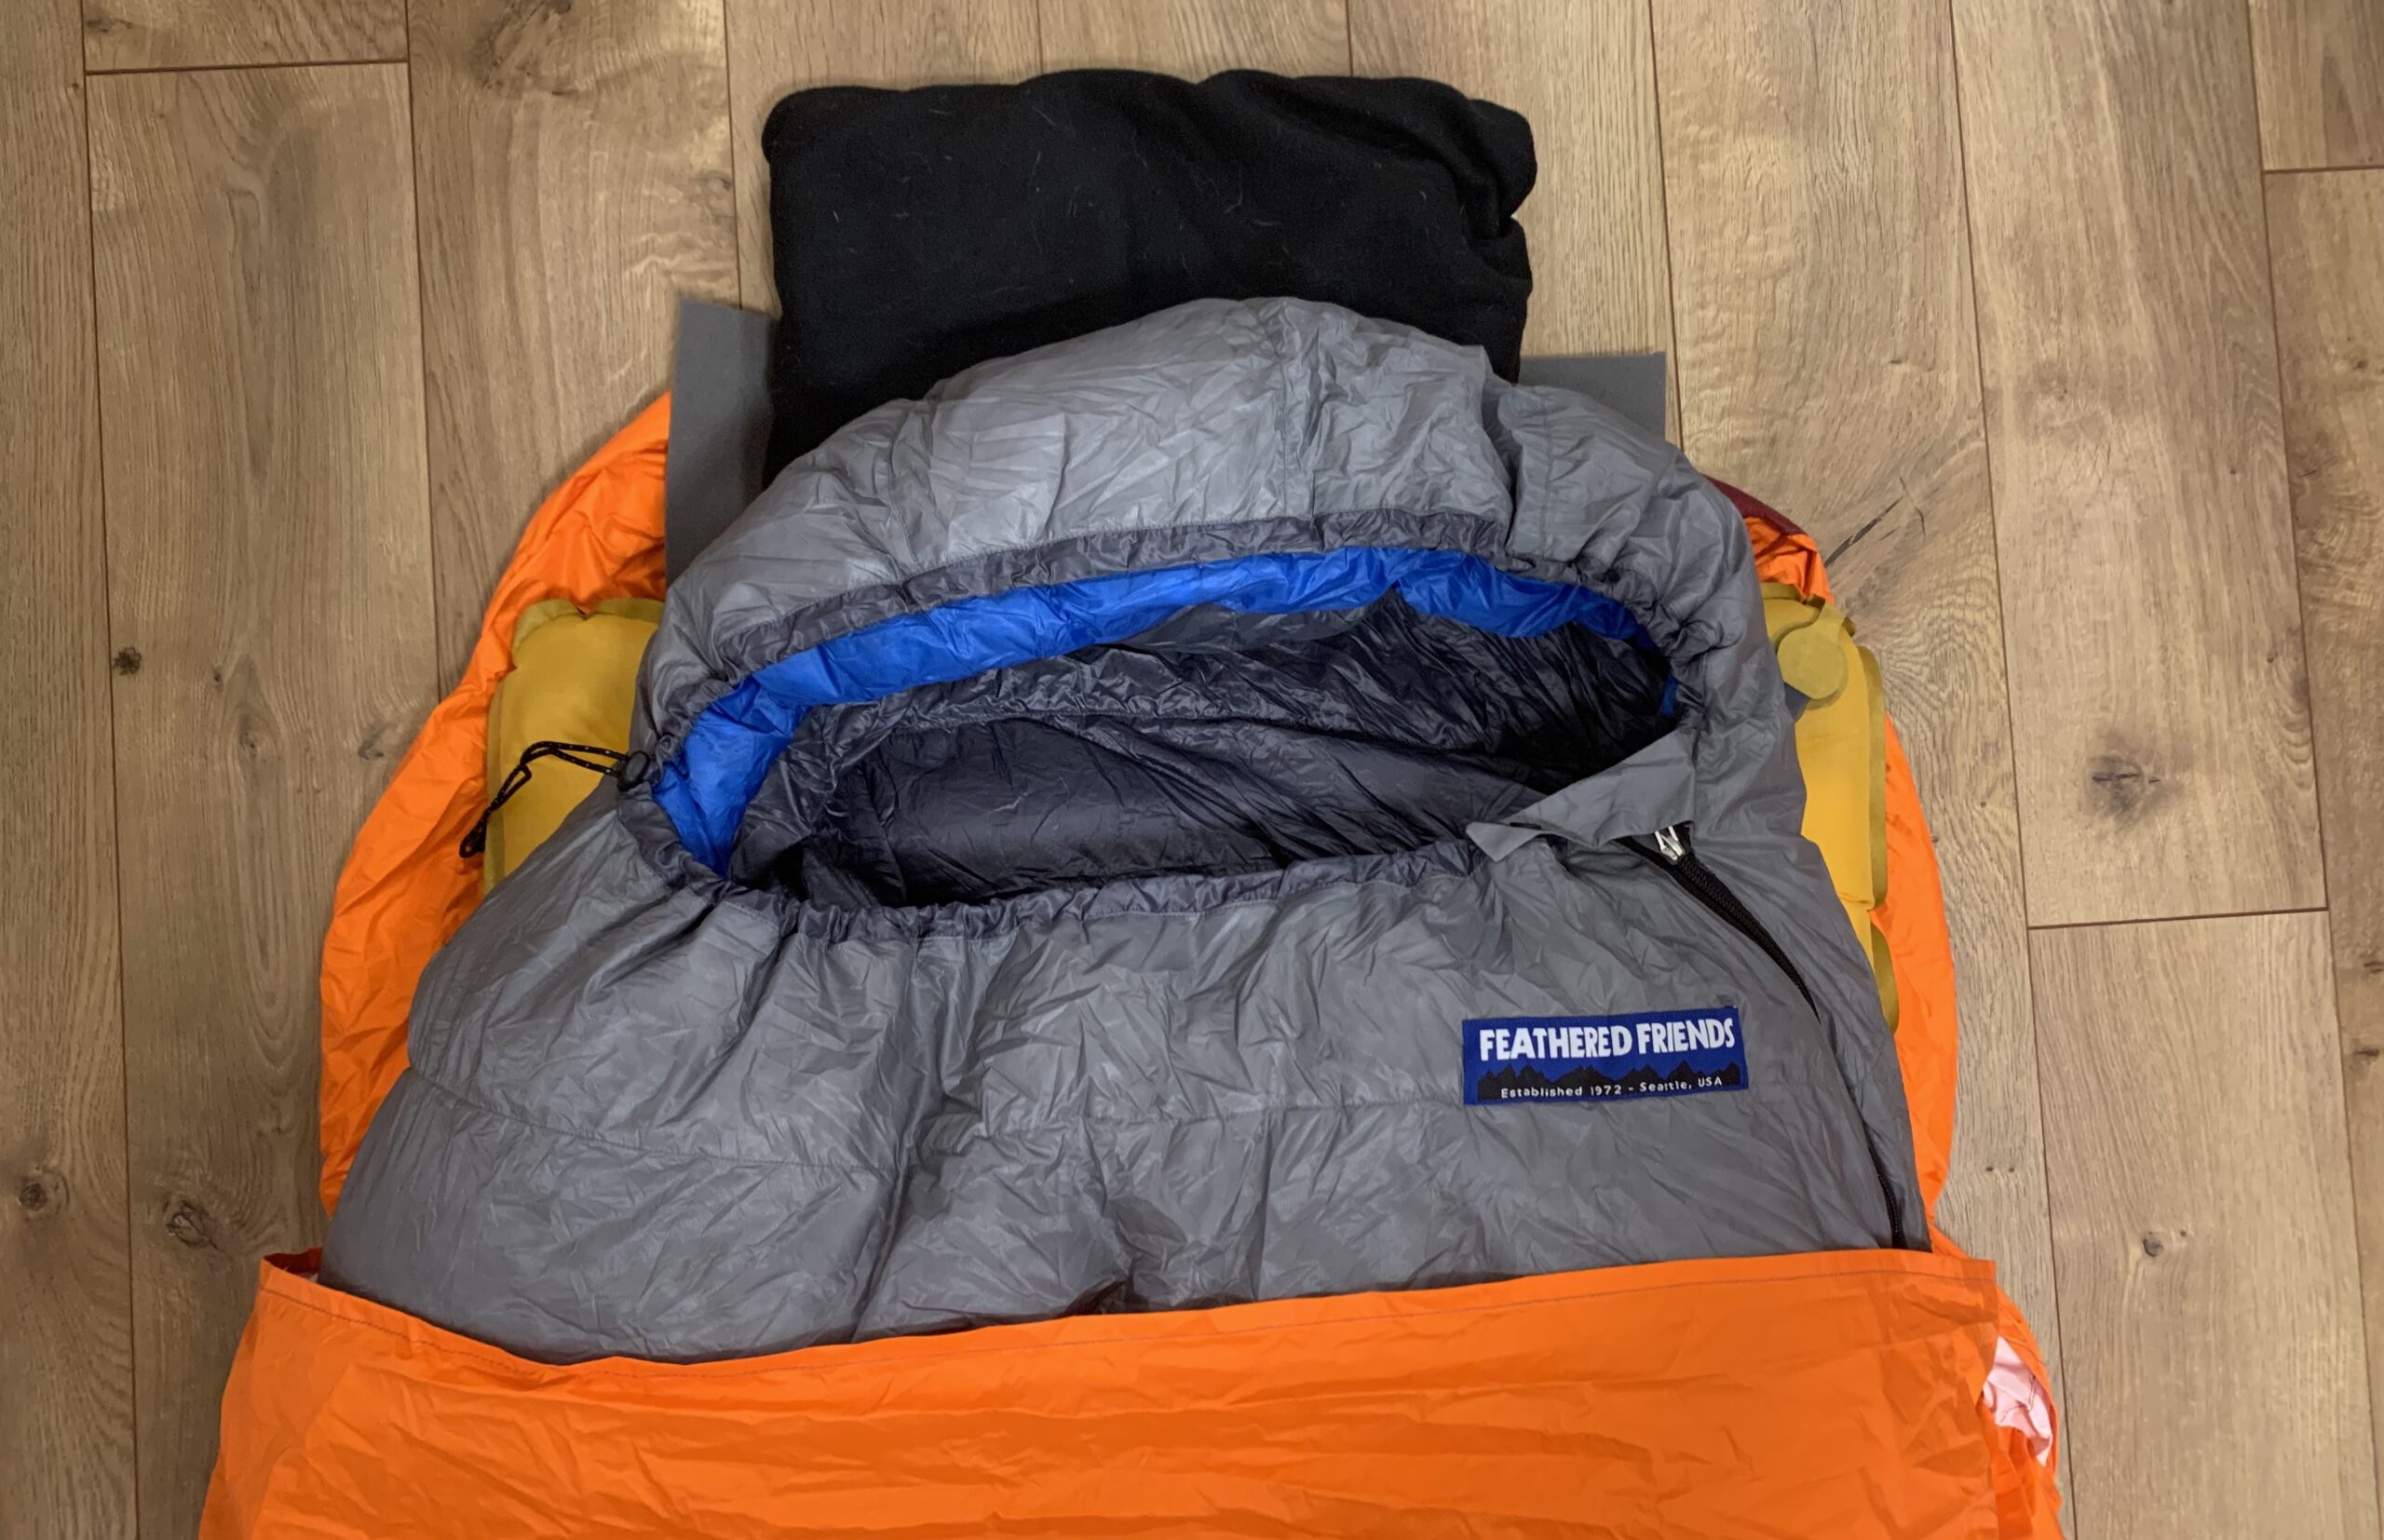
- SLEEPING BAG / Feathered Friends Lark UL 10 / 31.2 oz (885 g) / cozy and warm winter bag with water-resistant shell helps manage condensation in bivy; would upgrade to a warmer bag in sub-zero F temperatures, but when combined with in-camp insulating clothing, this is comfortable down to about -5 F (-21 C) for me while sleeping in a bivy sack on a windy night
- INFLATABLE SLEEPING PAD / Nemo Tensor Insulated (Regular/Wide) / 21.4 oz (607 g) / wide pad for comfort during long winter nights (included in the weight: pad inflation bag, 2.1 oz / 59 g)
- FOAM SLEEPING PAD / Gossamer Gear Thinlight Pad / 2.5 oz (71 g) / weight noted for the 1/8 in thick model; adds warmth for sleeping direct on snow; would upgrade to 1/4 in thick model for sub-zero F temps
- PILLOW / Hyperlite Mountain Gear Stuff Sack Pillow (Size L) / 4.0 oz (113 g) / I use open-cell foam (included in weight) and extra clothing to adjust height as needed to keep my spine aligned
Cooking & Food
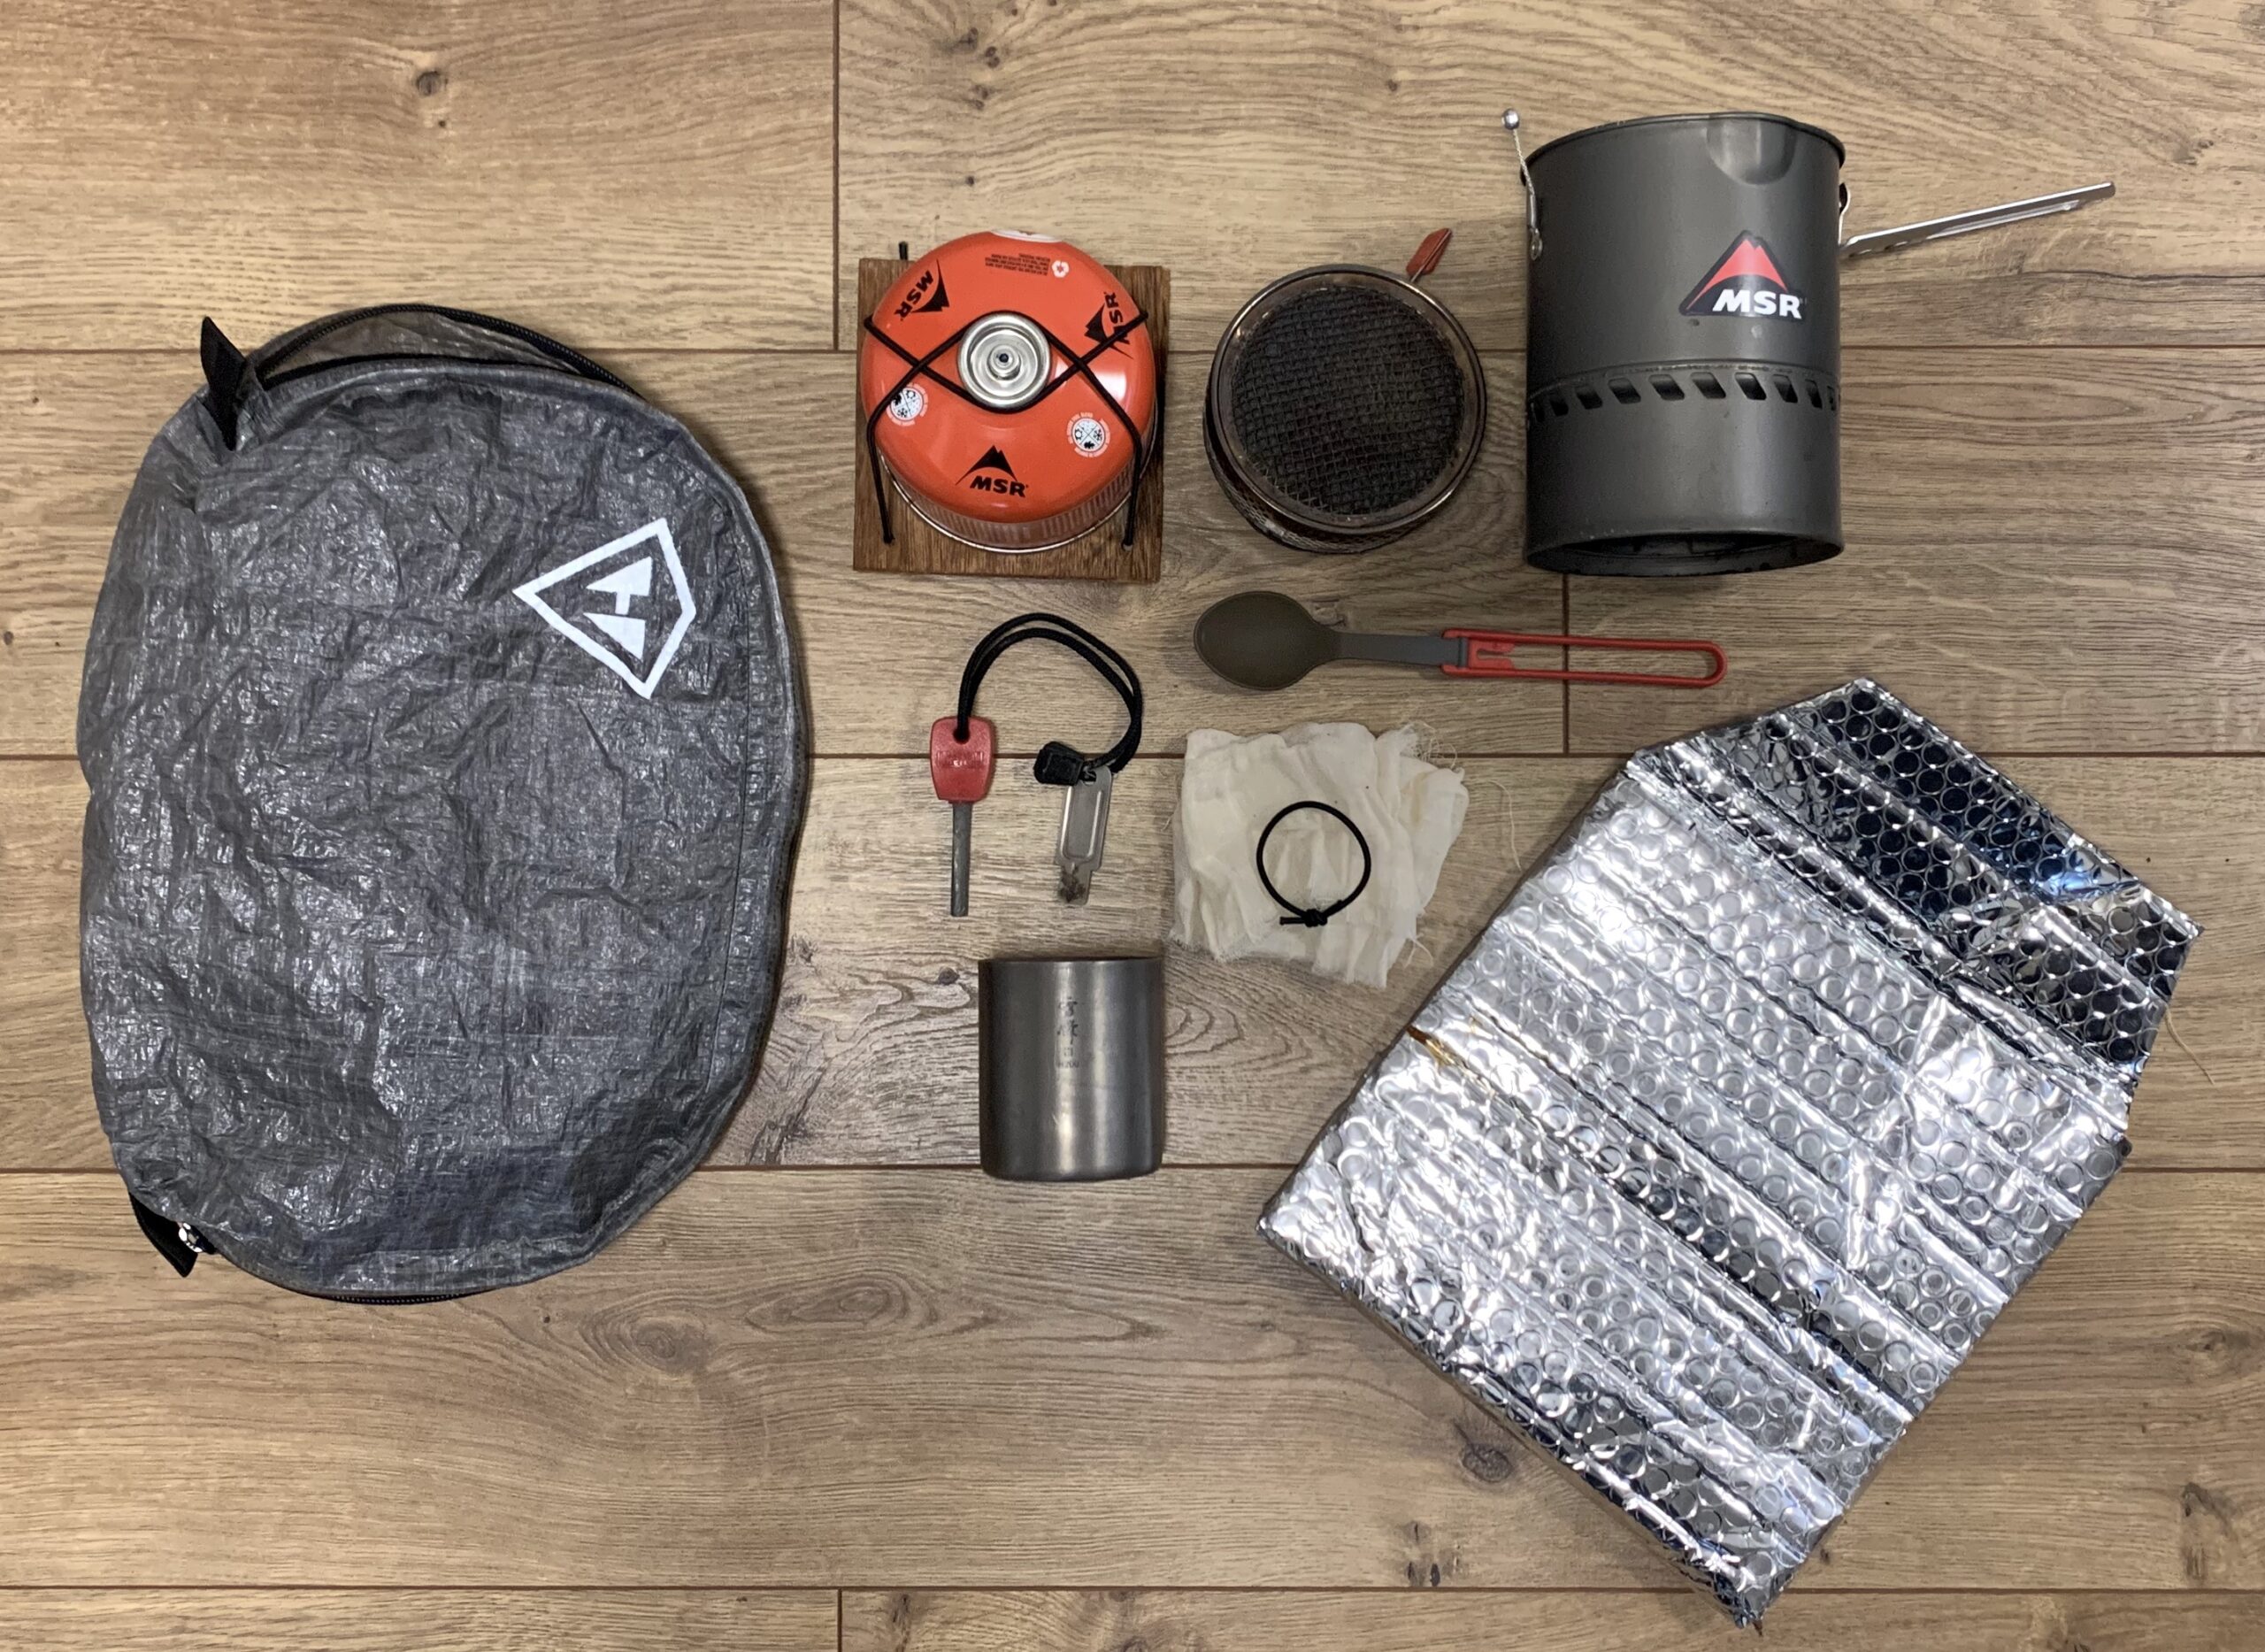
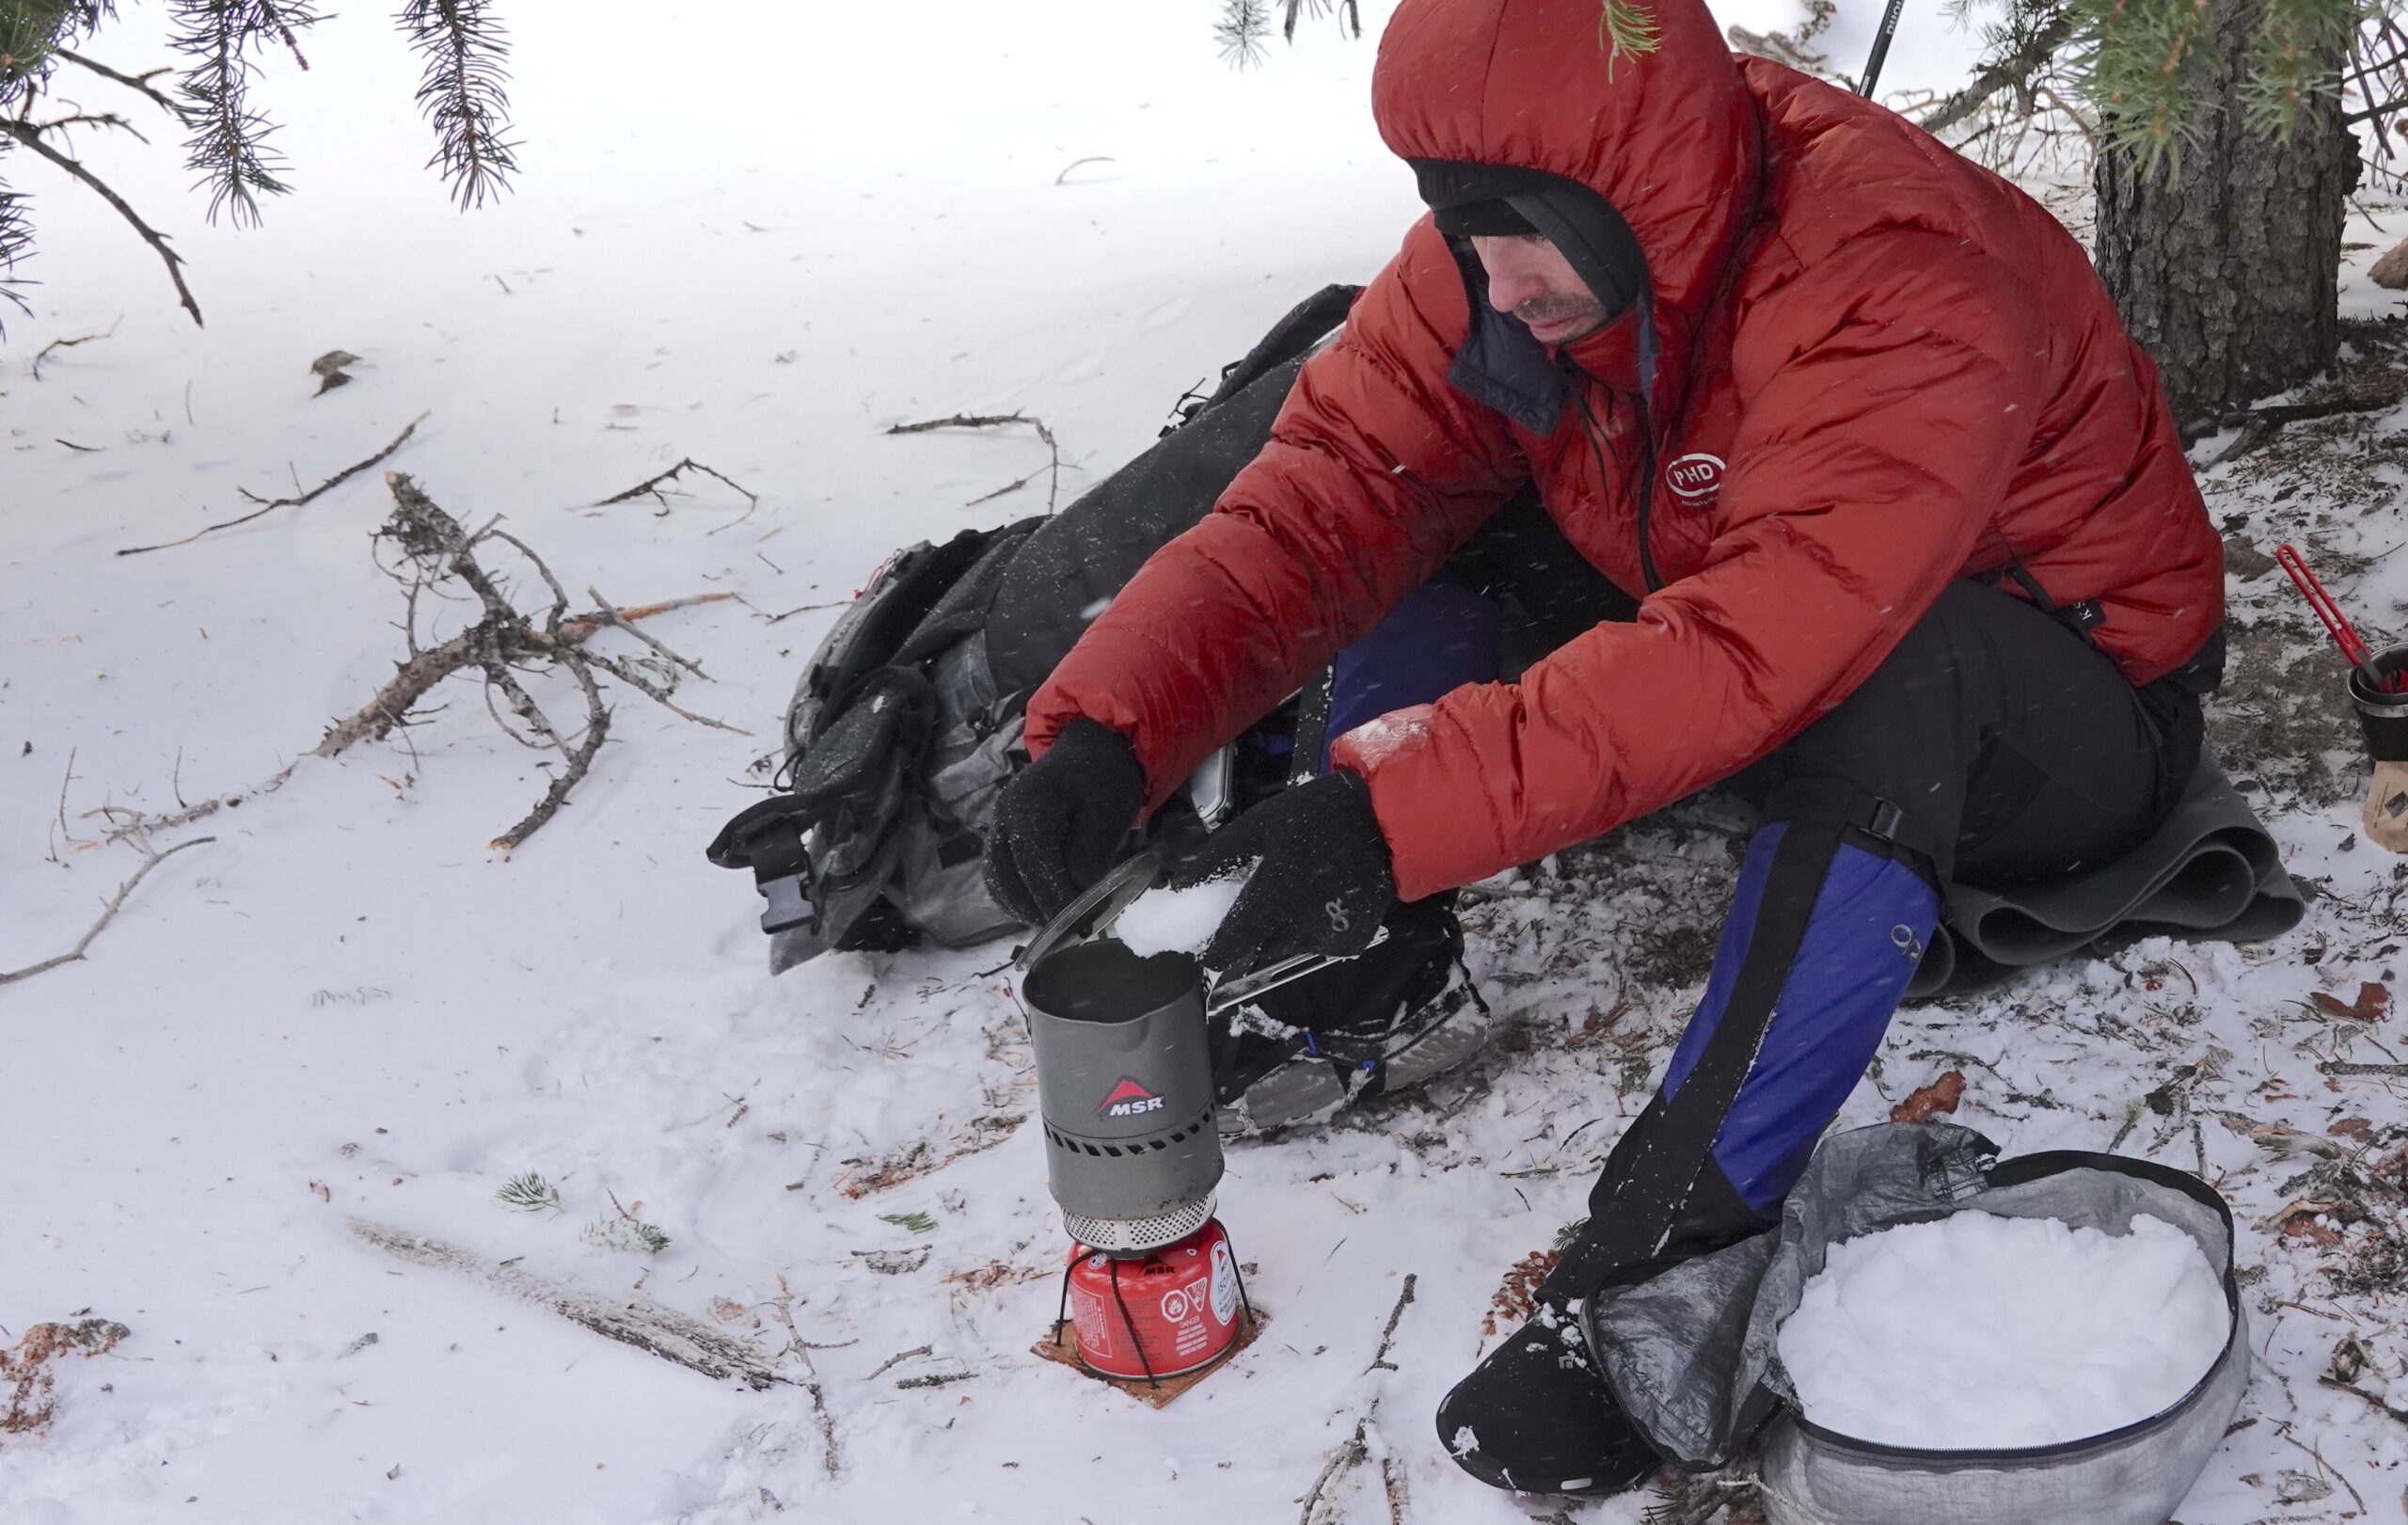
My decision to bring an MSR Reactor instead of a lighter stove like my Caffin V4 is based on my desire to make water from snow as fast and as simple as possible, especially when wearing mittens when the temperature is very cold.
Food is packaged for efficiency. No multi-course meals, nothing requiring extended cooking times. I make my own freeze-dried food in a Harvest Right Home Freeze Dryer.
Cooking Notes:
- STOVE / MSR Reactor Stove / 6.2 oz (176 g) / rapid and reliable snow melting and water boiling
- FUEL / MSR IsoPro (3.9 oz / 110 g net weight of fuel, 7.4 oz / 210 g gross weight of full canister) / / this size provides enough fuel to melt snow for water and cooking for trips up to 2 nights; will use the 220 g net size for longer trips
- STOVE BASE / MYOG wood / 1.5 oz (43 g) / 3mm hobby plywood base with shock cord attachments to secure fuel canister, used to stabilize canister on snow
- LIGHTER / Light My Fire Firesteel / 0.9 oz (26 g) / easy to use with mittens to light the stove
- POT / 1.0 L MSR Reactor Pot / 8.3 oz (235 g) / fast stove and small water volumes afford me the ability to use the small pot, but it’s still large enough for a solo snow-melting pot
- MUG / Snowpeak H200 Double-Wall Titanium / 2.1 oz (60 g) / double-wall titanium for coffee, tea, soup
- UTENSIL / MSR Folding Spoon / 0.4 oz (11 g) / I prefer plastic vs. metal for winter, this one is light and durable, doesn’t get brittle in the cold
- FOOD COZY / MYOG Reflectix & packing tape / 1.6 oz (45 g) / sized to fit my home-packaged freeze-dried meals in 10 x 10 in (25 x 25 cm) mylar bags
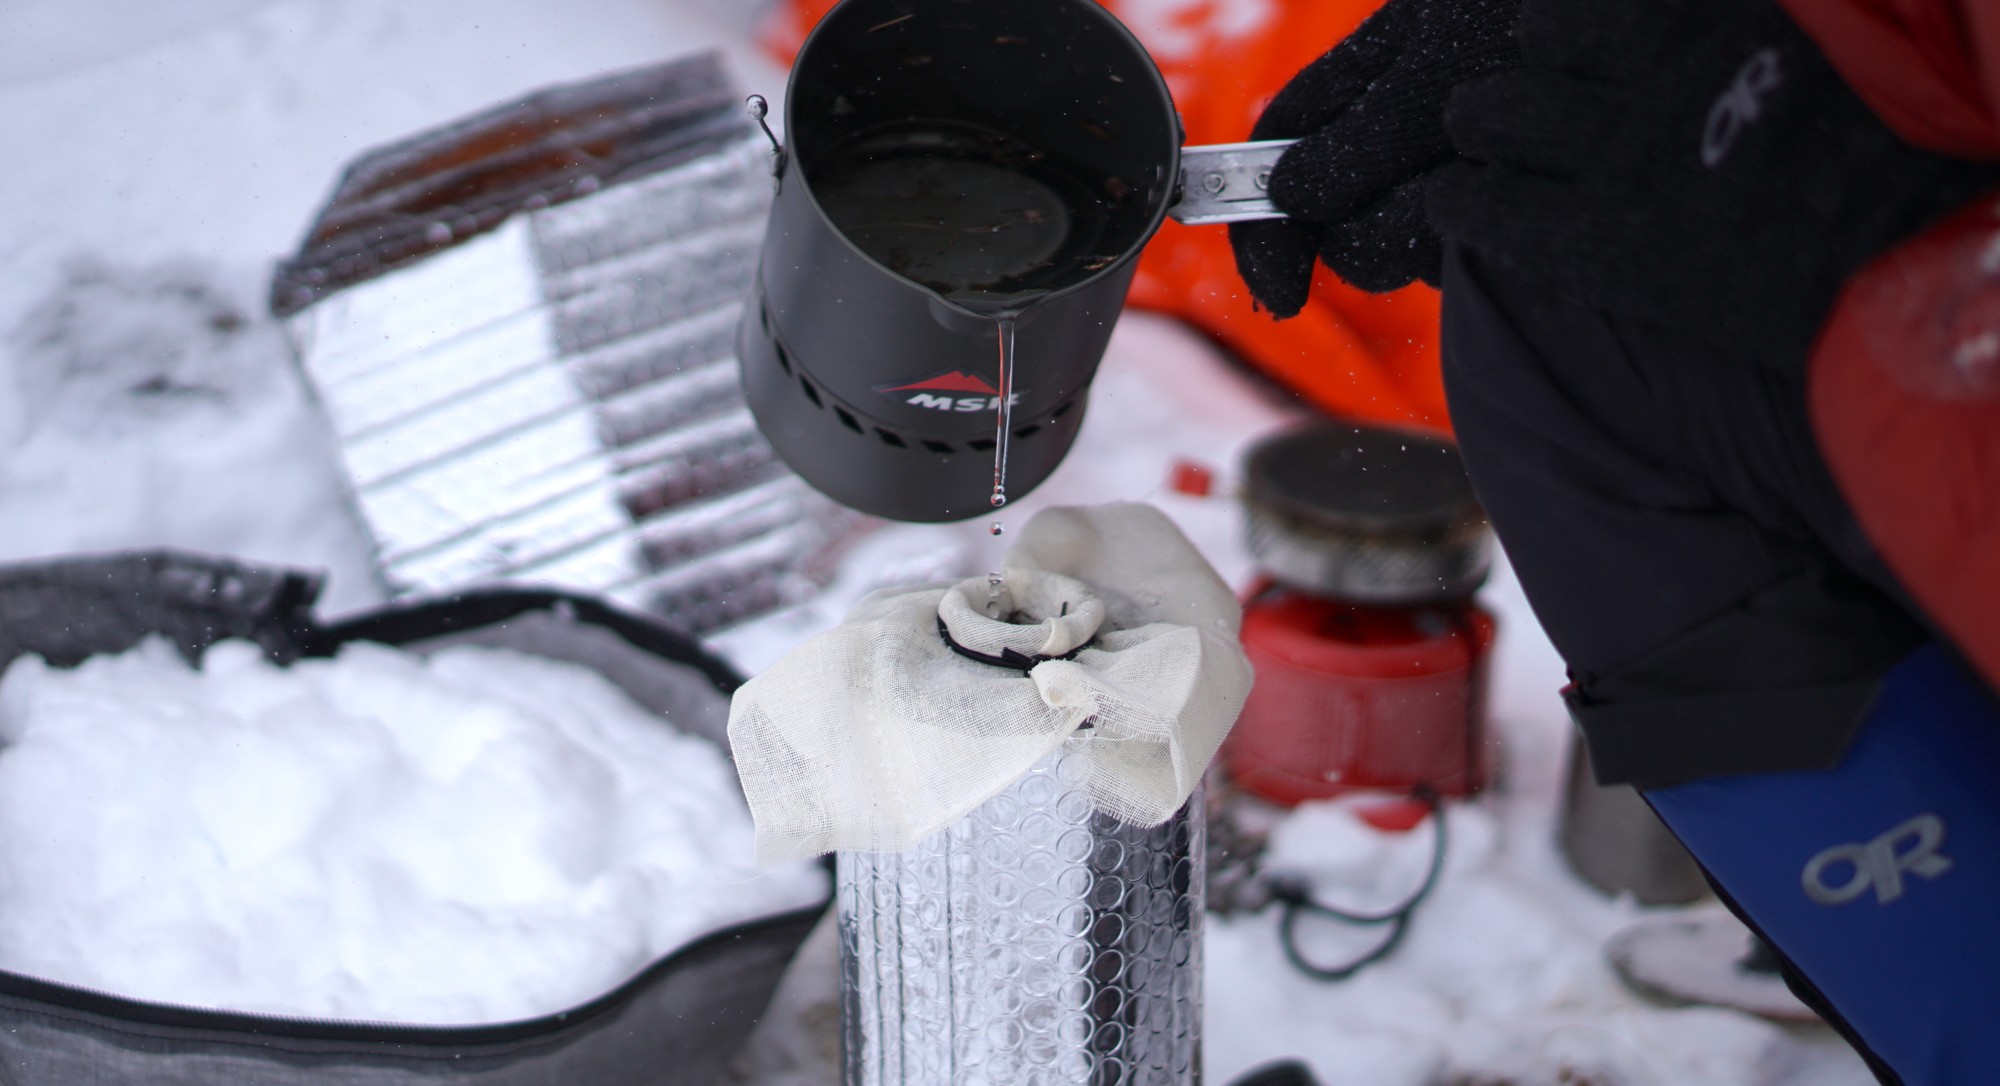
- DEBRIS FILTER / MYOG cheesecloth w/shockcord / 0.2 oz (6 g) / secure over water bottle mouth, pour melted snow from stove pot into bottle through filter
Food Notes:
- BREAKFASTS / 5 oz (142 g) per day / hot cereal with dried fruit, nuts, butter, coffee
- DAYTIME SNACKS / 16 oz (454 g) per day / salty nuts, potato chips, butter balls, chocolate, candy, soup, coffee
- DINNERS / 7 oz (198 g) per day / soup, MYOG freeze-dried meals (various recipes containing pasta, grain, or rice with sauce, legumes, veggies, and spices), tea
- FLAVOR ENHANCER / 1 oz (28 g) per day / flavored hydration tablets / because the flavor of melted snow is gross

Hydration & Water Treatment
Most of my drinkable water will come from melting snow. I usually won’t boil it (to save time and fuel), so will use the Aquamira as purification insurance from pathogenic bacteria and algae that can grow in old snow.
Hydration and Water Treatment Notes:
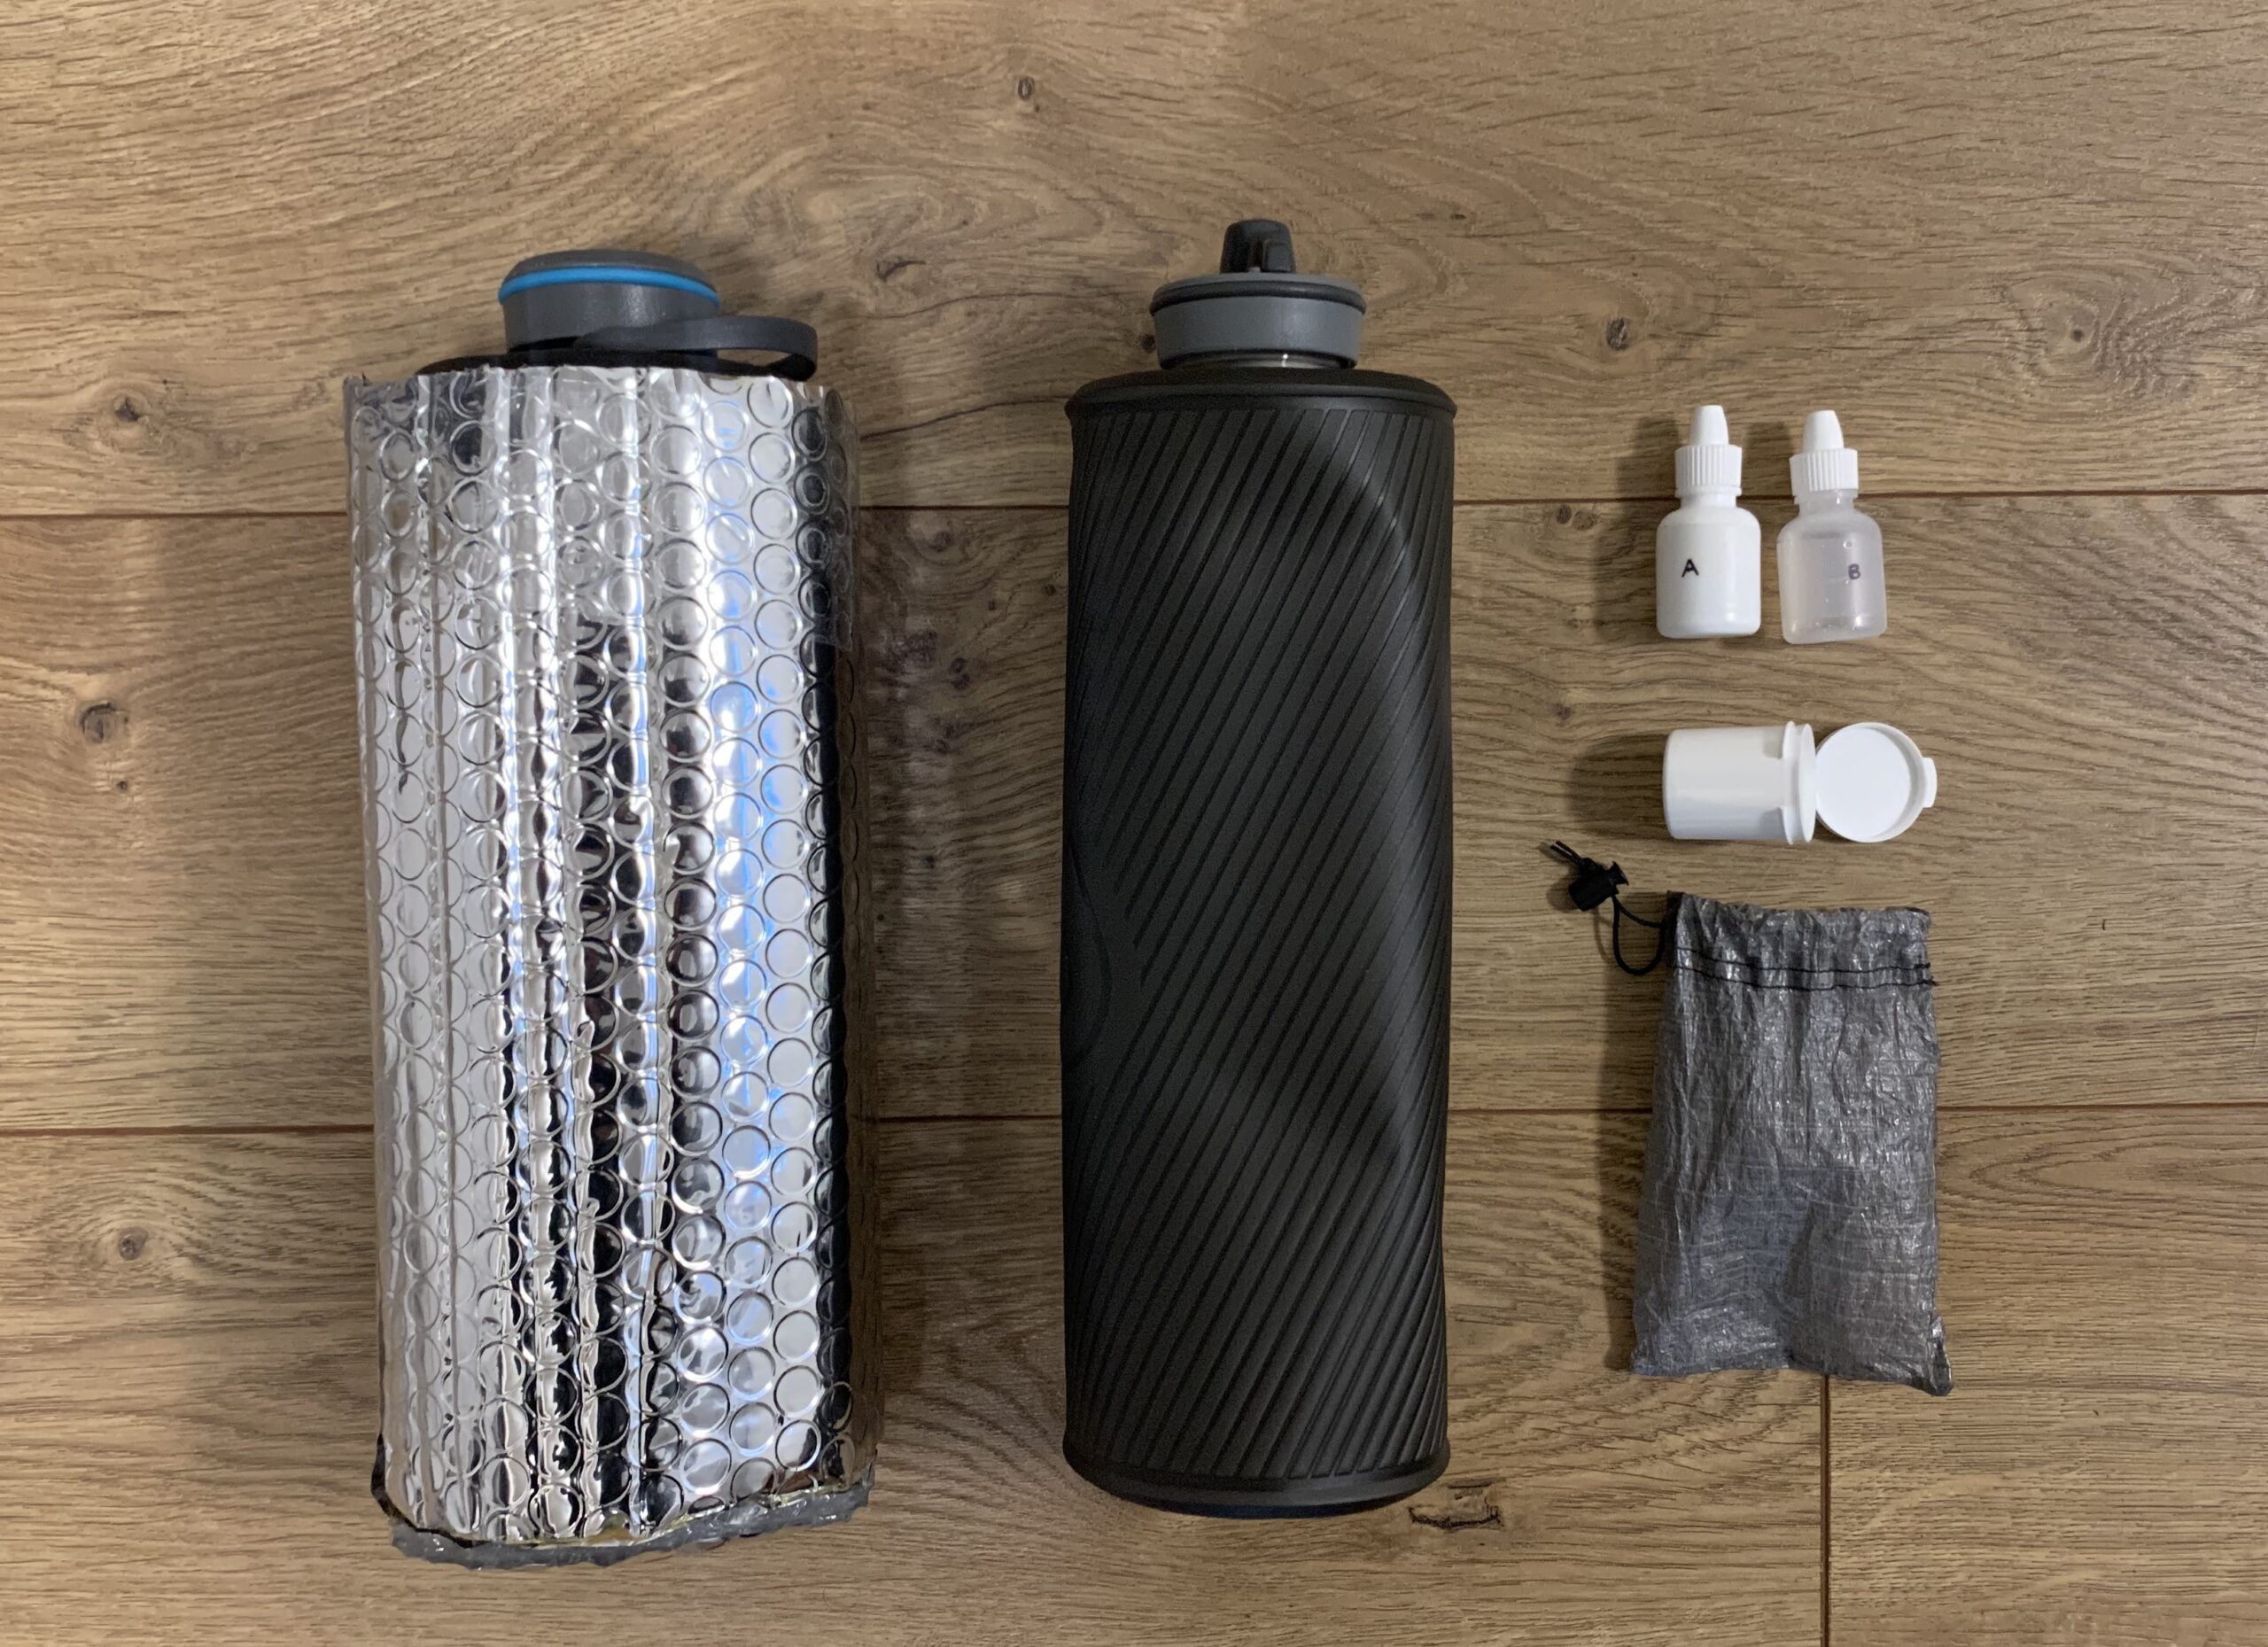
- BOTTLES / 2x Hydrapak Flux Bottle (1L) / 2x 3.1 oz (88 g) / form factor conveniently stows in my pack’s side pockets and bottle is easy to use while wearing mittens
- BOTTLE COZIES / 1x MYOG Reflectix and packing tape / 1.4 oz (40 g) / to keep water from freezing while hiking; I only take one cozy, and keep the 2nd bottle stuffed in my pack to prevent freezing
- WATER TREATMENT / Aquamira (mini kit) / 1.1 oz (31 g) / used to purify unboiled but melted snow for drinking water, weight includes 0.3 oz each of Part A and B, mixing camp, and DCF stow bag
Packing
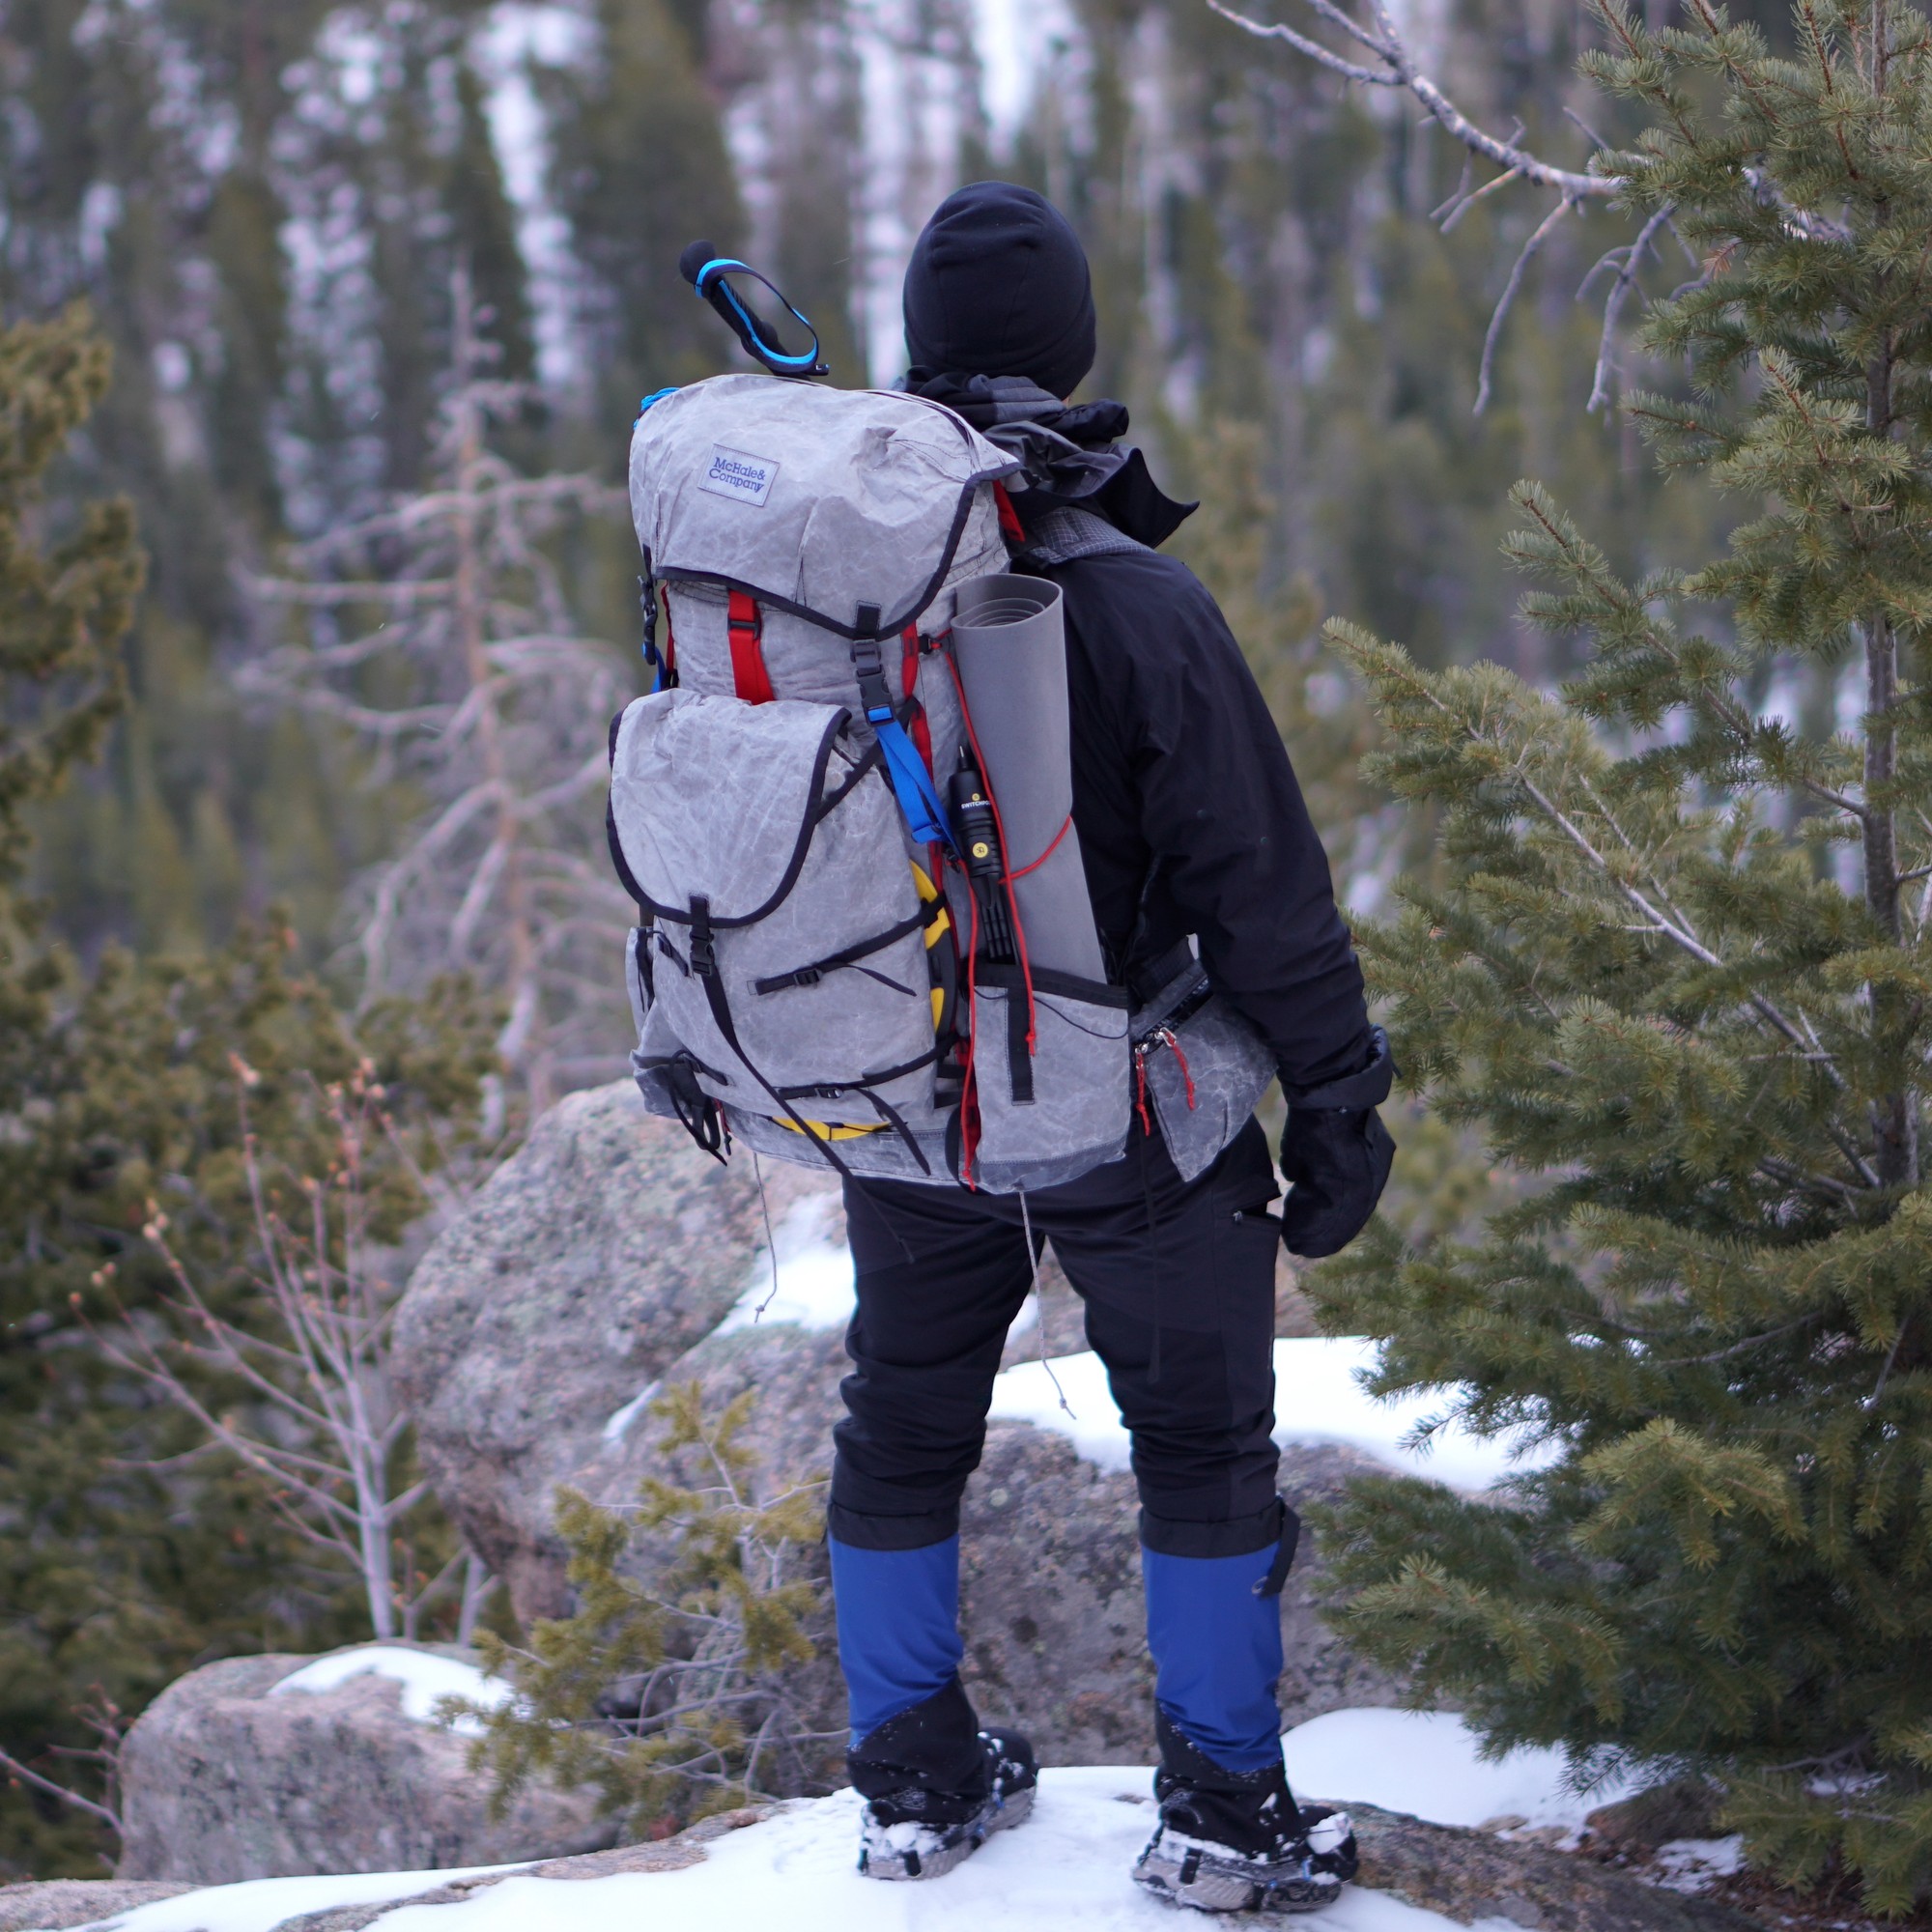
I usually select my pack last. I choose the smallest and lightest model I own to fit the gear I need, and that can comfortably carry the weight of that gear. In the winter, I prefer a pack that is a bit oversized for my kit. It’s easier to pack while wearing mittens.

Packing Notes:
- BACKPACK / McHale Windsauk / 3.8 lb (1.7 kg) / DCF internal frame pack rigged with rear accessory pocket, top lid, roll-top closure, top strap, water bottle pockets, and hip belt pocket
- INSULATION STORAGE / Sea to Summit Ultrasil Compression Sack (size M) / 2.9 oz (82 g) / for stowing sleeping bag, extra socks, booties, and down pants
- SHELTER & SLEEP STORAGE / Hyperlite Mountain Gear DCF Pod (Size 4400-L) / 1.4 oz (40 g) / for sleeping pad and inflation bag, tarp, stakes, extra guylines, and bivy sack
- FOOD STORAGE / Hyperlite Mountain Gear DCF Pod (Size 4400-L) / 1.4 oz (40 g) / keeps food conveniently organized and fits perfectly in pack body
- OTHER STOW BAGS / Hyperlite Mountain Gear DCF (assorted pods or stuff sacks) / 2.5 oz (71 g) / one for “other” gear (see below), and one for cooking gear (stove, fuel, mug, firestarter, spoon, and my hot lunch for that day)
Navigation & Electronics
I generally find electronics, and especially phones, difficult to use in cold winter conditions (especially while wearing mittens), and try to minimize my dependence on them. That said, navigating with a smartphone phone GPS app can save a lot of time, especially in a winter blizzard.
Navigation and Electronics Notes:
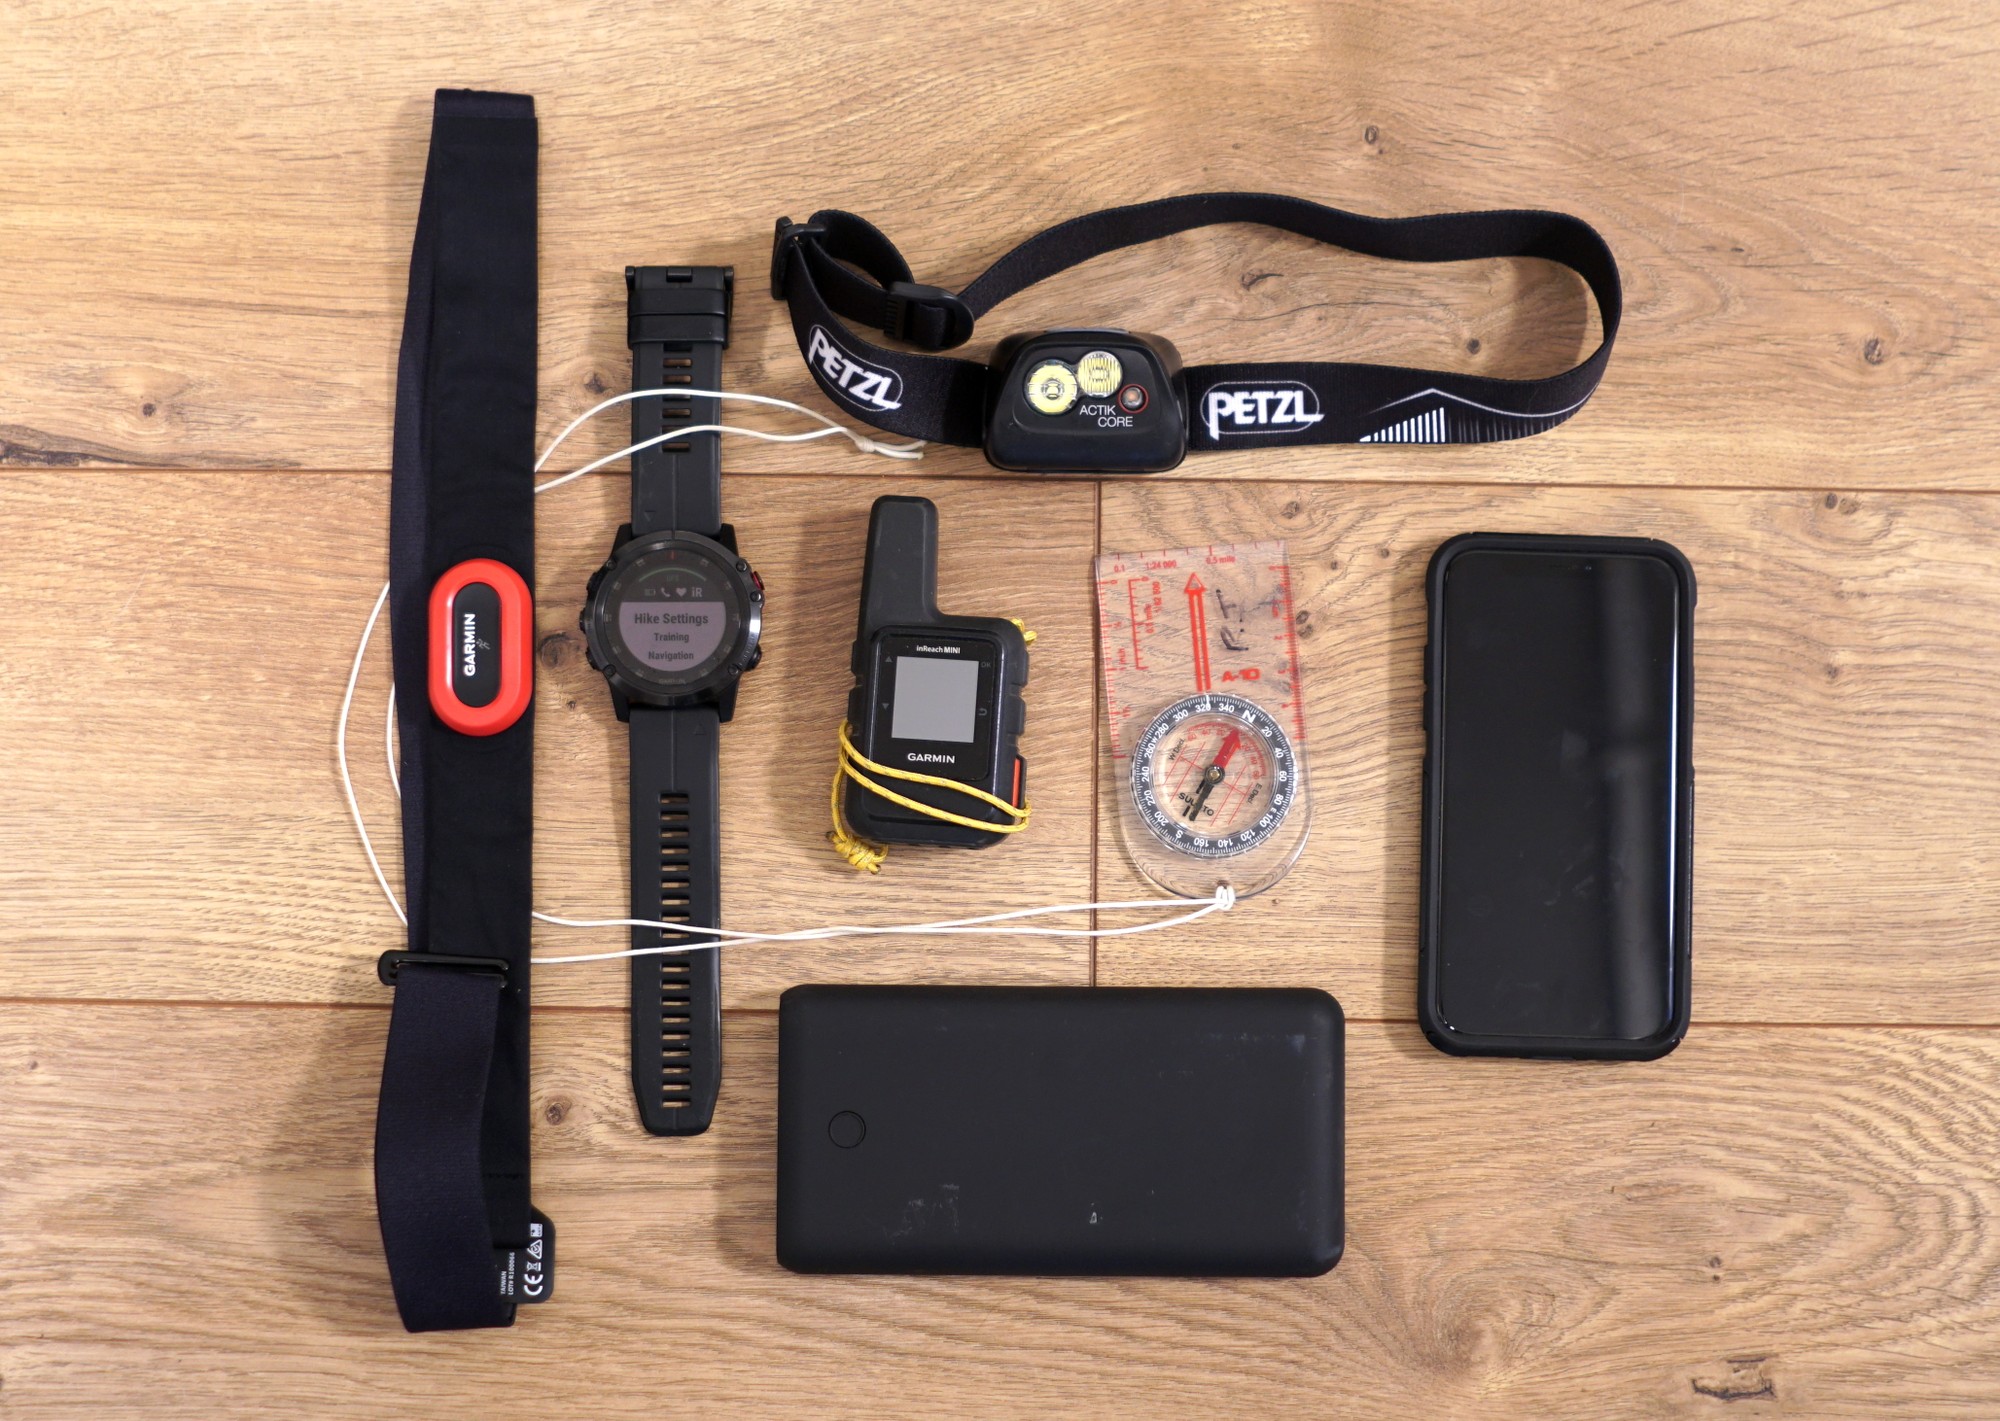
- SATELLITE COMMUNICATOR / Garmin inReach Mini / 3.5 oz (99 g) / used for messaging and tracking for my people back home
- WATCH / Garmin Fenix / 3.4 oz (96 g) / used for training
- HRM / Garmin Run HRM / 1.8 oz (51 g) / used for training
- SMARTPHONE / iPhone / 8.0 oz (227 g) / for GPS navigation and communications with the satellite communicator, weight includes protective case
- GPS APP / Gaia GPS / 0.0 oz (0 g) / GPS app for smartphone
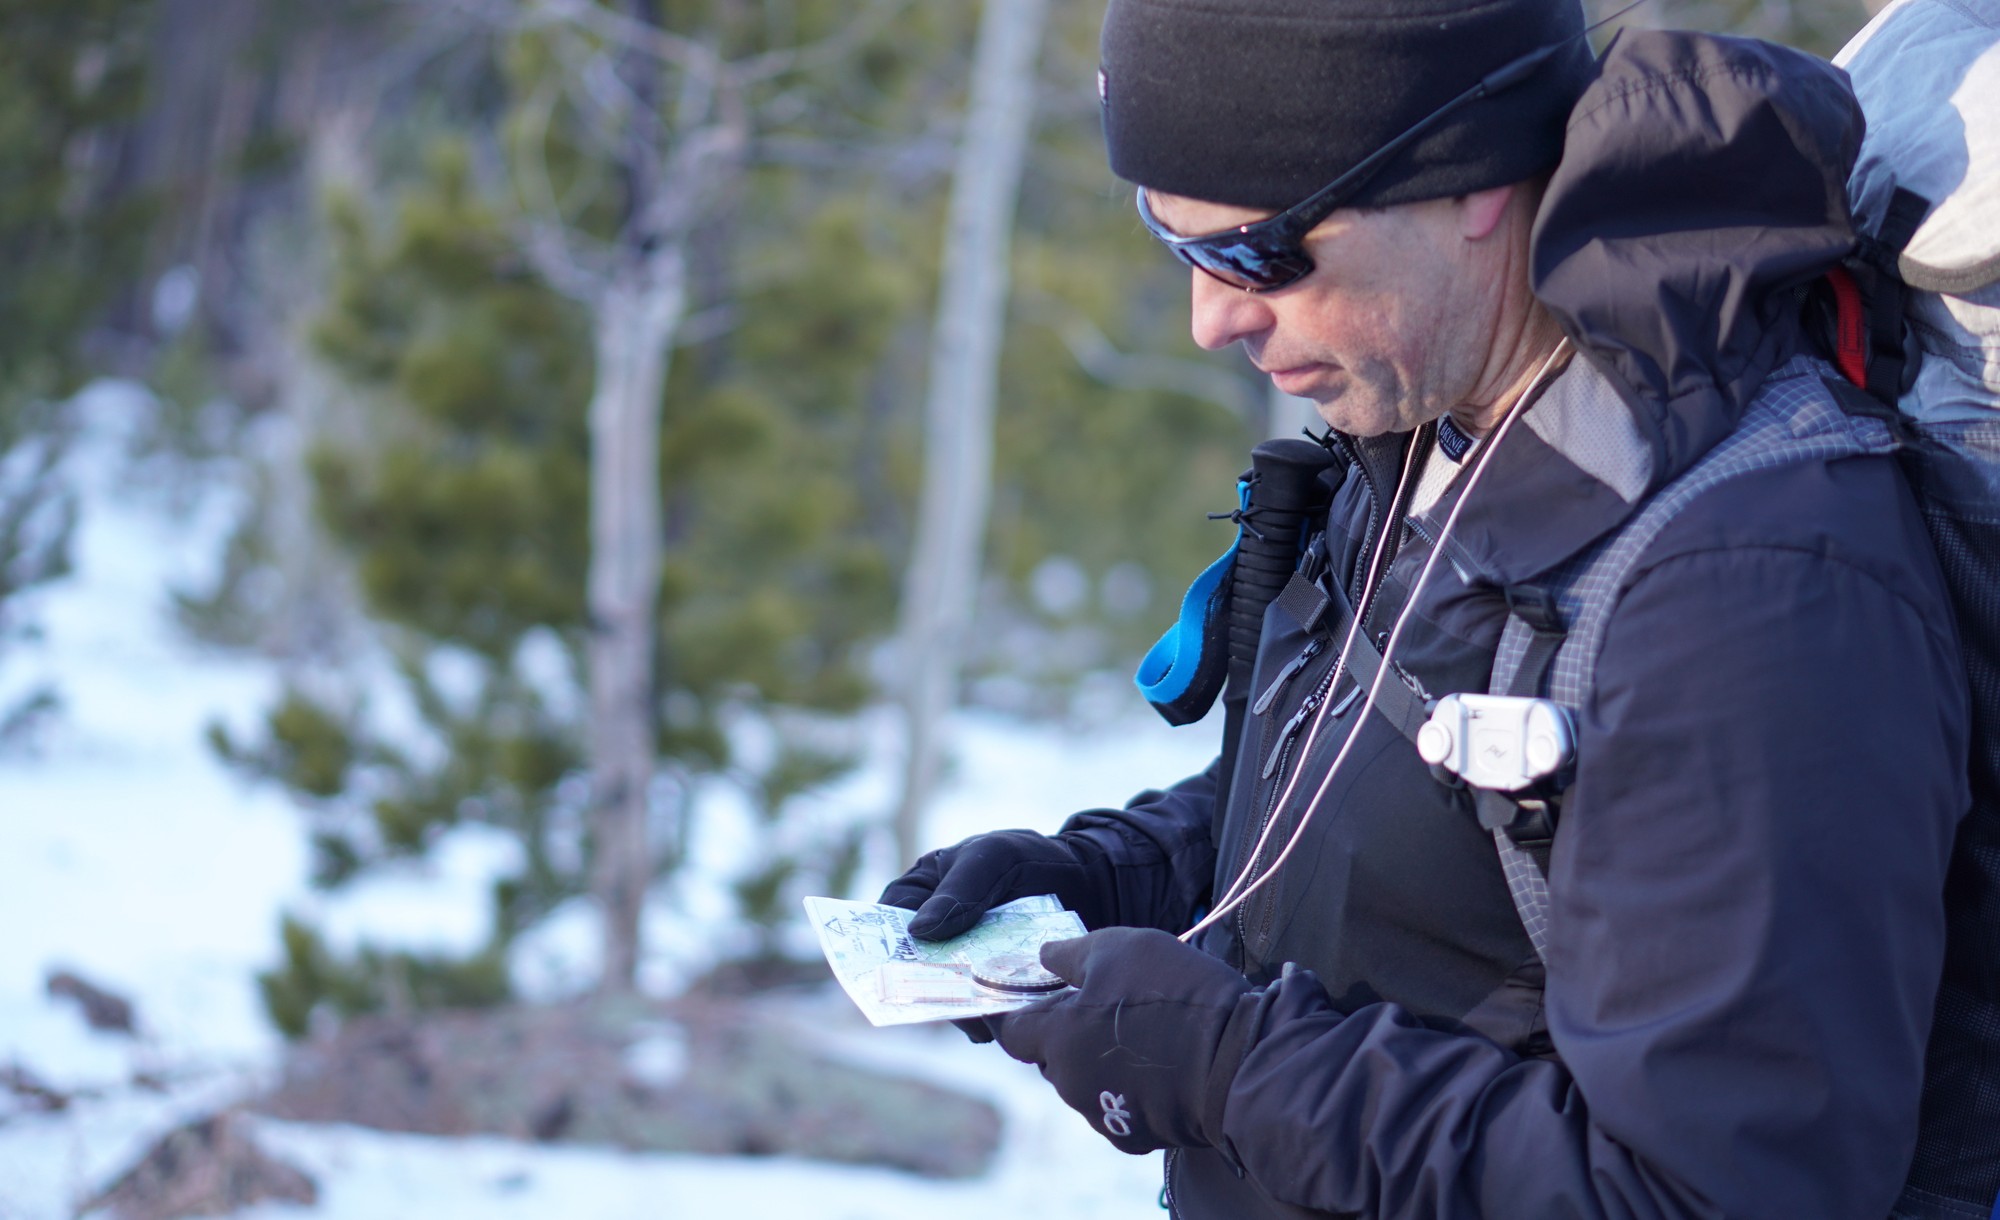
- PAPER MAP / MYOG / usually about 1.5 oz (43 g) / used with compass for blizzard nav or extreme cold, printed with a color laser printer using Rite in the Rain Duracopy Paper, which can be written on, folded, and printed on both sides
- COMPASS / Suunto A-10 / 1.0 oz (28 g) / used with paper map for blizzard nav or extreme cold, weight includes lanyard
- HEADLAMP / Petzl Actik Core 450 / 3.6 oz (102 g) / I bring a real headlamp in the winter, for navigating into the evening on short winter days, weight includes an extra battery
- POWER BANK / various models / 3-16 oz / 5,000-20,000 mAh depending on duration of trip – used to charge phone, watch, satellite communicator, and/or headlamp batteries
Other Gear
- FIRST AID KIT / 4 oz (113 g) / minor wound and blister care, meds
- REPAIR KIT / 2 oz (57 g) / tape, glue, sewing, fabric patches, pad repair
- FIRESTARTING KIT / 1.5 oz (43 g) / cotton tabs and solid fuel cubes in waterproof zip bag
- PERSONALS KIT / 6 oz (170 g) / toothbrush, toothpaste, floss, contact lens case and solution, anti-fog cloth, sunscreen, lip balm, bidet kit (hand sanitizer, dry cloth – use snow and evergreens for TP, mylar bag for packing out TP)
Caveats, Limitations, and Disclaimers
- The clothing, sleep, and shelter systems are tuned for dry (low humidity and dry snow) climates, like the North-Central US Rockies where I hike and camp the most. If you backpack in wetter (more rain) and or high-humidity environments during the winter, your list may look different – especially when it comes to your insulation (down vs. synthetic).
- I’ve selected hiking clothing, storm clothing, and shelter systems for below-the-treeline use where somewhat sheltered campsites can be found. Above the treeline in this region, winds can be fierce, and more clothing and more robust shelter will be needed.
- The footwear system is designed for trafficked trail corridors where the tread underfoot is predominantly packed snow. Less-trafficked or off-trail hiking in deep snow will require snowshoes or skis.
- In milder temperatures and/or less wind, less hiking clothing and thinner handwear may be needed than what is on my list here.
- Likewise, in sub-zero F temperatures, more insulation may be required in your base layers, active insulation layer, mittens, footwear, headwear, sleeping pads, and sleeping bag.
Related Content
- Want more winter know-how? Read Lightweight Backpacking in the Winter.
- As always, our community has some feedback on winter gear.
- Pick up some cold-weather injury tips in the Hypothermia and Frostbite episode of the Backpacking Light Podcast.
DISCLOSURE (Updated April 9, 2024)
- Backpacking Light does not accept compensation or donated/discounted products in exchange for product mentions or placements in editorial coverage. Some (but not all) of the links in this review may be affiliate links. If you click on one of these links and visit one of our affiliate partners (usually a retailer site), and subsequently place an order with that retailer, we receive a commission on your entire order, which varies between 3% and 15% of the purchase price. Affiliate commissions represent less than 15% of Backpacking Light's gross revenue. More than 70% of our revenue comes from Membership Fees. So if you'd really like to support our work, don't buy gear you don't need - support our consumer advocacy work and become a Member instead. Learn more about affiliate commissions, influencer marketing, and our consumer advocacy work by reading our article Stop wasting money on gear.

Discussion
Become a member to post in the forums.
Zach, when temps are that cold, I try to mitigate this with either a moulder strip or just a disposable handwarmer tucked between my plywood base and the bottom of the canister. Both work well.
I have the MSR Windburner, which I haven’t yet used to melt snow. How does it compare to the Reactor in this department?
Thanks for the very informative article. Of note , here in the Whites of NH though , it is the norm to carry both spikes and snowshoes , most trails aren’t necessarily packed out and even when trail reports indicate they are, it’s always recommended to carry both..
I’m still wondering about the wisdom of not bringing snowshoes on a trip like this. Of course local conditions rule. I was out for a day hike today on trails that were reported to be hard packed, but weren’t. Walking was really trudging, like walking in deep sand. Not postholing, but also would have been way easier with snowshoes, or possibly even grippers – just something for traction. I also noticed that our snow is hip deep off trail, so going to the toilet, gathering wood, etc. would have been a pain without snowshoes. Just a day hike so didn’t matter to me.

Thanks for this great article Ryan. I’m trying to piece together the evolution of your winter gear from your original 2004 article and 2014 update Winter Backpacking Checklist to your 2019 article Lightweight Backpacking Gear for Cold Winter Temperatures to this current article…and have a few questions.
I’ve been researching the pro-cons of Vapor Barriers and am trying to decide whether to try them out more extensively than my current use of bread bags in my shoes. Looking forward to your response. Thanks.
In Karen’s picture…nordic skis would be my choice for sure!
Do people know not to walk/snowshoe on ski tracks? It ruins them for the next skier.
Hmmmm. I see your tarp Ryan and shiver – shiver because I’ve slept under tarps in winter when I was too poor to afford a backpacking tent. I’m very comfortable in my Tarptent Moment DW (“solid” inner wall). But yes, it weighs more than a tarp, unless you include that ivy sack, that is.
But I do have a Tarptent Notch Li (Dyneema) tent that, all guyed out and fly edges staked down (I added stake loops) it would likely do very well in winter since it too has a “solid” inner wall. I’ll try it this winter.
My stove is an MSR Whisperlite Universal in petrol mode with a home made light plywood base and MSR windscreen.
For melting snow I have also taken my Trail Designs Sidewinder titanium Caldera Cone stove and burned available downed wood sticks of finger thickness. Works great with the Inferno insert for maximum heat and is far lighter than carrying extra white gas fuel.
BTW, my REI FLASH All Season air mattress (R 5.2) is warm to about -10 F. and after that to -20 F. with a 1/8″ closed cell floor underlayment pad I cut to mummy shape. After that I’d use my ridge rest foam pad under the FLASH mattress using my-20 F. LL Bean down mummy.
Dave,
I have a COUNCIL TOOL Wood Craft camp axe but I am absolutely not taking it backpacking. I’ll opt for the lighter “tent” hammer unless an equal weight “survival” Gerber type hatchet is available.
Become a member to post in the forums.