Topic
Esbit burner testing
Forum Posting
A Membership is required to post in the forums. Login or become a member to post in the member forums!
Home › Forums › Gear Forums › Gear (General) › Esbit burner testing
- This topic has 906 replies, 4 voices, and was last updated 1 year ago by
 DAN-Y.
-
AuthorPosts
-
Jun 29, 2018 at 1:45 am #3544393
So I’m still wondering: with these new ESBIT stoves, using the most efficient pot are any of them as efficient as a Caldera Cone, mating pot and BGET burner??
Jun 29, 2018 at 2:33 am #3544406Robert, view this video to see the type pot support I had used in my first test:

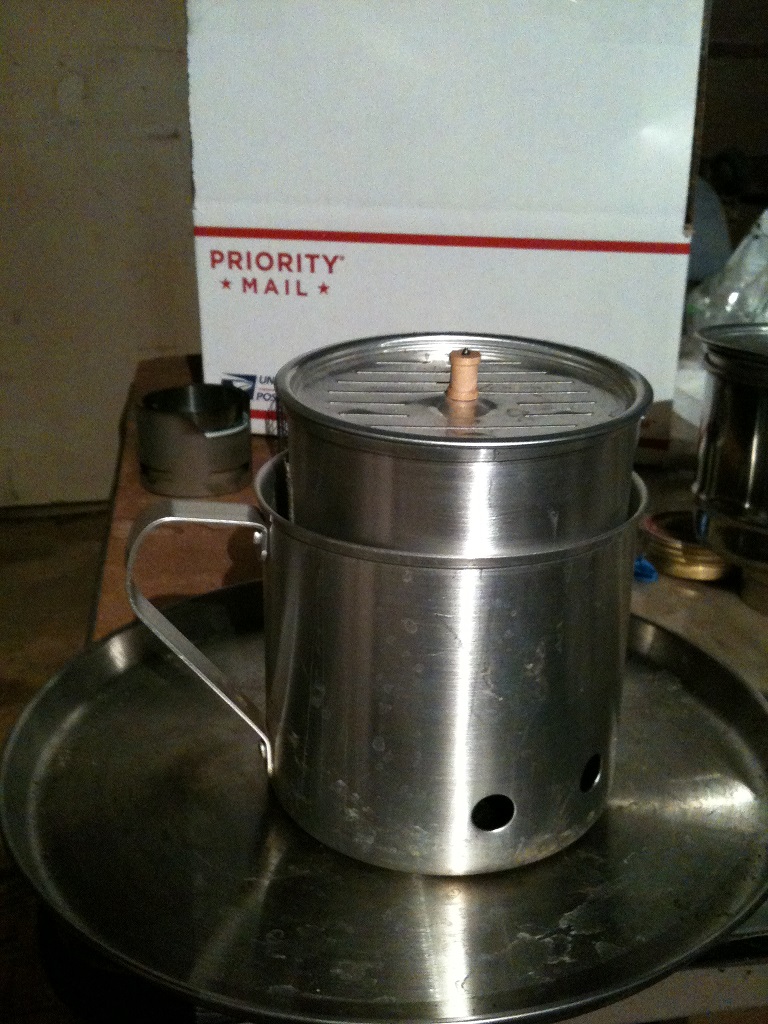
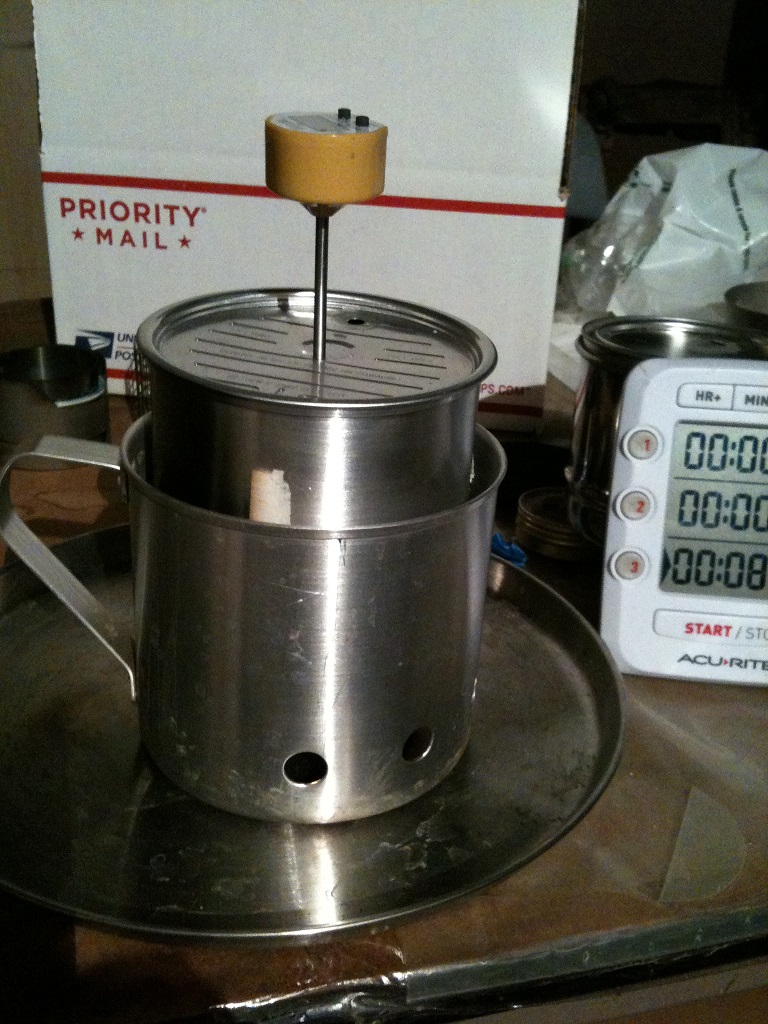
Eric, yes the 2 aluminum pot system is as efficient as a caldera cone system, maybe even better. The BGET is far better than the Trail Designs Graham Cracker. The 12 cm Imusa Mug aluminum windscreen can be used to hold a freezer bag full of mountain House while you pour water from the 3 cup 10 cm Imusa cup. The 10 cm cup nests completely inside the 12 cm windscreen/pot and can be covered with a plastic lid for storage. Using this new set-up I’ll be able to boil 3 cups of water with 1 large Esbit cube. A 3 wire hanging system can be added, can’t do that with a TD system. This new system supports the pot and adds protection from the wind just as the TD system does.
Jun 29, 2018 at 5:18 am #3544424Great video, thanks! I’ve not seen Imusa before, by the way. I think you rolled ridgeline is a fantastic detail, especially for holding the pot in a cone. An elegant solution.
Jun 29, 2018 at 2:13 pm #3544451Great video, thanks! I’ve not seen Imusa before, by the way. I think you rolled ridgeline is a fantastic detail, especially for holding the pot in a cone. An elegant solution.
If I had an Asahi, I would roll it to produce a more robust windsheild with reinforced holes for the wire suspension. I have too many projects on the table to go further on this project. I do know for sure that the BGET is the most efficient way to burn Esbit. It has great possibilities to create very lightweight water heating systems. It’s an easy Do It Yourself item. Can easily be purchased also ;-)
Even Eric will agree the BGET is the way to go.
Jun 29, 2018 at 11:52 pm #3544521Here is a set-up that would lend it’s self nicely to be used with esbit and to be suspended. Fully enclosed.
 Jul 8, 2018 at 2:51 am #3545934
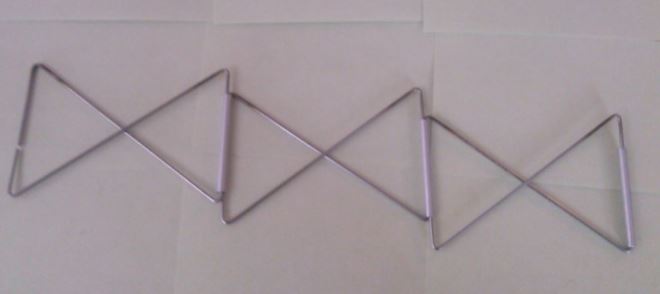
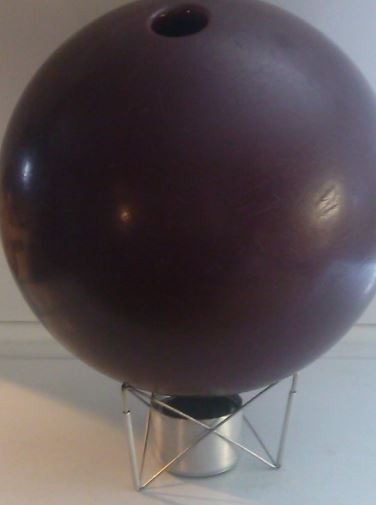
Robert, this pot support design might be of interest to you and others for an esbit stove. I found the photos on another forum. Design is by “birdbrain”


I like the opposing triangles ;-)
Jul 8, 2018 at 5:00 am #3545951Intriguing configuration, Dan. I wonder what kind of boiling time it delivers for a standard bowling ball with 2 Esbit tabs? I presume the interior is hollowed out for the water – how large do you suppose the chamber is? I can see enormous potential for the vessel, at least downhill, on a cold day…
Jul 8, 2018 at 9:21 am #3545963Looks like a bomb to me …
Cheers
Jul 8, 2018 at 11:05 am #3545965Interesting – it’s not really triangulated, it depends on the stiffness of the apex folds, and the cylinders holding the ends preventing them deflecting too much. Though it is triangulated in plan. Folding structures (usually much larger scale) are of particular interest.


Which reminds me, the Esbit shields ought to have a simple aircontrol mechanism, to open and close the vents, to adjust the heat. I’m aware of your sliding lid to the tray, but I mean on a cylindrical shield, some simple over-cylinder waste-coat that reveals or partially or totally closes the vent-holes. Just part of the design mix of the PERFECT Esbit shield/burner v.3743, revision IIX.(viii).3cx.
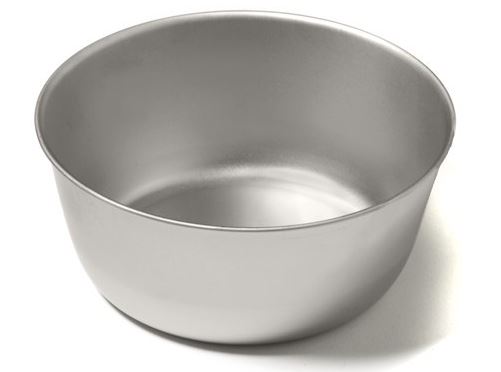
Jul 8, 2018 at 1:22 pm #3545968The <span style=”text-decoration: underline;”>Bowl</span>ing Ball ;) reminds me of some very helpful Esbit information given to us by Aaron Sorensen.
On page 3-4 in this thread Aaron Sorensen got really good boil results using a bowl instead of a straight walled pot.
https://backpackinglight.com/forums/topic/101822/page/4/#comments
I had purchased some aluminum bowls to do some testing but got side tracked and never completed the testing. The bowl shape has got to have some positive influence on Aarons great boil times.
Bob Gross said he uses the same bowl also.
More testing of bowls versus straight walled pots needs to be on our winter agendas.
 Jul 8, 2018 at 2:12 pm #3545974
The Snow Peak bowl
Aaron and Bob. Two guys with a bunch of knowledge, both banned from BPL.
Jul 8, 2018 at 9:21 pm #3545999Interesting, the shape of modern day crucibles for melting metals. Why the bowl shape bottoms and tapering sides. Because they are more efficient at heating the contents?????
Jul 8, 2018 at 9:46 pm #3546000I like that thought process, yeah, good question
Maybe time for a test?
Jul 11, 2018 at 10:25 am #3546363Interesting, the shape of modern day crucibles for melting metals. Why the bowl shape bottoms and tapering sides.
An interesting Q. I suspect but cannot prove that the ‘bowl’ or crucible design may go back a few thousand years. Primitive clay work.Cheers
Jul 13, 2018 at 2:39 am #3546595Ah well, guess I’ll stick to my 3 cup anodized aluminum pot and TD Sidewinder ti stove with the BGET burner. My last longer trip with it was in Nov. of ’17, the grand Canyon, N. Rim to S. Rim. Worked like a champ for both boiling water and true cooking.
That setup or the optional Inferno gassifier wood burner insert kit for wood has done well for me for several years in all seasons and temperatures. The Inferno insert is great for melting snow which is a “fuel intensive” procedure. That Inferno gassifier setup is hot!
When I use my handleless, ceramic lined “one egg skillet” I sit it on the two ti stakes that run thru about 3/4″ below the top of my outer stove. Love to fry omelettes and meat in it. (I’m a carnivore.)
P.S. Dan,
“WE DON’T NEED NO STINKIN’ HANDLES! ;o) Because I use a light pot gripper for the pot and skillet (and often for stuffing wood into the Inferno insert).
Jul 14, 2018 at 3:55 pm #3546749I’ll stick to my 3 cup anodized aluminum pot
Eric, the closest thing I could find to a 3 cup hard anodized pot is the OLICAMP Hard Anodized Light Pot, 1 L
Do you know of another aluminum 3 cup pot?
Jul 14, 2018 at 9:35 pm #3546777Dan, My 3 cup pot is from Open Country, as I recall. It came with the Sidewinder. I dunno if they are still available.
My pot is lower and wider than the Olicamp pot you linked to. The “wider-than-tall” pot shape is tested to be more efficient – probably not by much.
I appreciate your continued testing of ESBIT stoves. We ESBIT fans read every bit of your postings and the replies. Fascinating stuff. Love the videos.
However I’m STILL waiting for that “detuned” solid rocket fuel tablet that will fit in some kind of flame controllable Ti stove (to withstand the heat). ;o) A boy can dream…
BTW, does ESBIT burn hotter than the old (and noxious) US military Trioxane fuel tablets?
Jul 15, 2018 at 1:40 am #3546808Eric, your pot has no handles. My experience shows a pot must have handles. Further research today shows I’m not in the minority. Many others have indicated the same thing…handles are a must. We all know the ole saying ;) Hike Your Own Hike. I prefer the KISS principle in design of kits and stove building. “Keep It Super Simple” I don’t like extra pieces :-)
I don’t recall if the Trioxane burns hotter.
Jul 15, 2018 at 2:32 am #3546812Hi Dan
Well, you have to be able to pick the pot up, but most of my pots have no handles. Instead I use an MSR LiteLifter
https://www.msrgear.com/cookware/litelifter
Very stable and secure, and very light. Also featured in our review at
https://backpackinglight.com/msr_titan_pots_spotlite_review/Cheers
Jul 15, 2018 at 1:02 pm #3546846I keep the foil lid in place by leaving the MSR LiteLifter on top of it – that way I know where the LiteLifter is as well!
It’s just another piece to keep track of and a piece to fit into the pot for storage. But… I can see you need to stabilize your 2 person pot when stirring because the pot did not come with handles. Your other pot to the right has handles. ;) You had to “make it work” so enter the pot lifter.

Since your review in 2006, we’ve come a long way with pot designs:
 Jul 15, 2018 at 1:17 pm #3546849
Surely the idea is to use wisdom tech. In the first instance, by using telekinesis to move the pot, then when adequate mind control over matter is reached, to use mind control to directly excite the water molecules to heat them, thus obviating the need for physical fuel.
P.S. I always assumed MSR was an acronym for Metaphysical Synergetic Resonance..?Jul 15, 2018 at 9:42 pm #3546902Hi Dan
You know, 2006 is a long time ago! Oh well.
These days I just take the large pot and leave the kettle behind. Less weight. Ditto for clear plastic soup bowls: left behind.I am slightly puzzled about the pricing on the Toaks pots though. First 1.35 L pot $52.95; second one $54.95. Assuming I have interpreted the diagram correctly, why the difference?
On the other hand, pot 5, 1.6 L, $49.95: cheaper than the smaller pot.
Weird stuff.Cheers
Jul 19, 2018 at 8:58 pm #3547511@rmeurant, hey Robert. I’m liking your idea more and more everyday.
I used a 12cm pot as a windscreen and pot coozie/cozy/insulator. I left the handle on it so I can pick up the 10cm pot that contains the 1 cup of boiled water that 1 cup of freeze dried food has been added to rehydrate. The 12 cm windscreen remains hot for a nice length of time to keep the 10cm pot hot while the contents rehydrates. Once the food is ready, I pick up the 2 pots and start eating. I use a 3″ diameter carbon felt disc to pick it up, the handle is still hot. The BGET and ultra light pot support are still under the 10cm pot while I’m eating the pots contents. Once I’m finished eating, I wash the pot and place the BGET inside it along with other items for storage. The 10cm pot then goes back inside the 12cm for storage. It fits a little below the top rim of the 12cm pot. The pot support is opened wide and stays inside against the wall of the12cm windscreen. Makes for a nice nesting, compact kit. Place it inside a stuff sack and I’m ready to go.


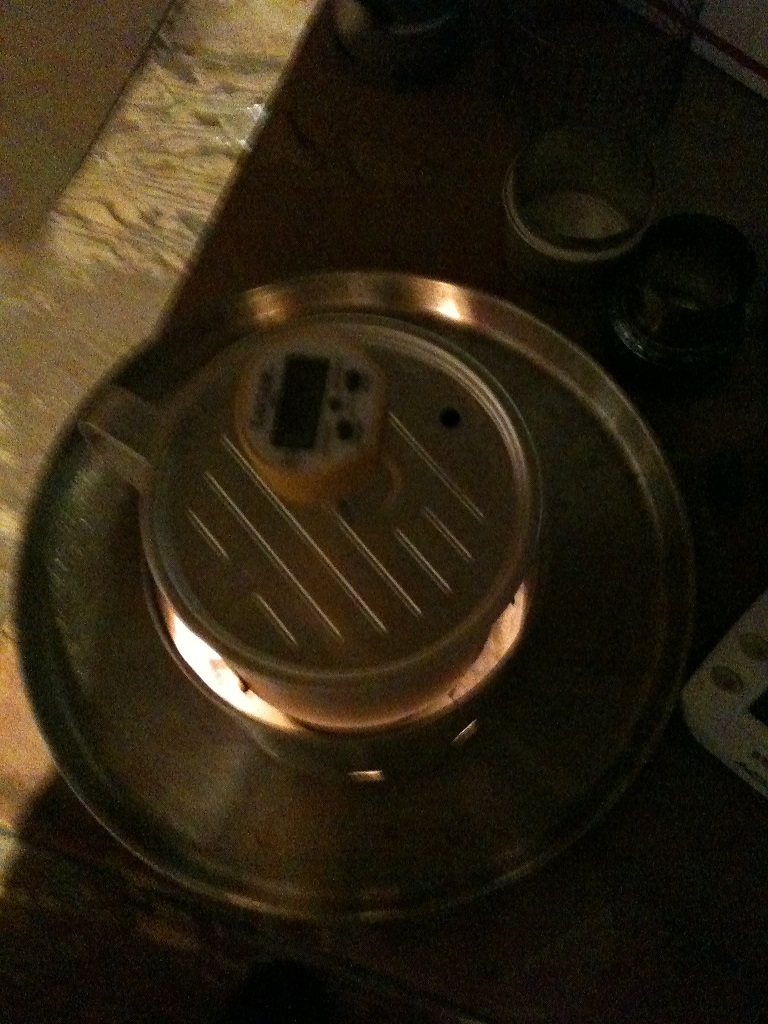
Top View. No flames come out from under the pot using a large Esbit cube inside a Titanium BGET.

And it can be supported by 3 wires when necessary ;)
Jul 20, 2018 at 4:52 am #3547594Glad to read of it, Dan.With my system, no vent holes, the assemblage can be placed on ignitable debris (forest floor), and not set fire to it (though nevertheless, I watch it carefully).
Jul 20, 2018 at 11:52 am #3547621Robert. I can see your set-up has a shallow container to allow oxygen to enter around your pot and down to the esbit. My outer container is robust and can be used as a stand alone storage unit for everything and also be the windscreen. I don’t use an iPhone or gps unit to text while hiking so the extra weight of the kit is acceptable. ;)
If I were wealthy, I would purchase light weight titanium pots to make the kit.
I like multipurpose items :-) I like options! I like modifying. I like how esbit burns but dislike the stench. I let it burn till it’s completely consumed so as not to have to blow it out and have a cloud of stinky, noxious whatever it is fill the air.
-
AuthorPosts
- You must be logged in to reply to this topic.
Forum Posting
A Membership is required to post in the forums. Login or become a member to post in the member forums!
Our Community Posts are Moderated
Backpacking Light community posts are moderated and here to foster helpful and positive discussions about lightweight backpacking. Please be mindful of our values and boundaries and review our Community Guidelines prior to posting.
Get the Newsletter
Gear Research & Discovery Tools
- Browse our curated Gear Shop
- See the latest Gear Deals and Sales
- Our Recommendations
- Search for Gear on Sale with the Gear Finder
- Used Gear Swap
- Member Gear Reviews and BPL Gear Review Articles
- Browse by Gear Type or Brand.


