Topic

MYOG Brian Green Esbit Tray

Viewing 25 posts - 1 through 25 (of 27 total)
Russ W BPL Member
PostedMar 6, 2022 at 9:34 am

My current BGET setup is getting long in the tooth and needs to be replaced.

Dan Yerski, i.e., Zelph, is no longer selling on his site.    It seems simple to make and Brian at one time had a pdf of the BGET template freely available on a website, but I can’t find an active link. Does anyone know where it might be available?


Russ W BPL Member
PostedMar 6, 2022 at 10:49 am

Well thank you Jon! You wouldn’t by chance have the measurements, or if you print out what you have at 100%, that will give you what you need?

PostedMar 9, 2022 at 7:37 am

Later this month I’ll have some modified titanium BGET’S with the breadpan corners listed on my sale site.

Craig BPL Member
PostedMar 11, 2022 at 1:08 am

Per dan’s post, here is a pic of one of his commercially sold Ti bget (with carbon cloth circle glued underneath) and bread tin folded corners to catch drips i bought last year

Craig BPL Member
PostedMar 11, 2022 at 1:09 am

And here is a pic of the traildesigns Ti gram cracker – you can see the raised sides to control burn, but no tray to hold the melted esbit
this is a key to not only mess control butalso performance – burn time is greatly reduced as melted esbit escapes and runs (you need a piece of foil under)

Craig BPL Member
PostedMar 11, 2022 at 1:33 am

And finally, here is my evolved bget when doing the above but with these mods:

folded corners like the bget

removable panels for the legs and sides – so you can size the side panels as needed for different rates of burn

a deeper tray- the bget,  jon’s stoves and my own exhaustive experiments taught me this – deeper side panels extend the burn time for simmers and longer boils, and the slightly deeper tray thsn the bget ensures you capture all of the melted esbit to burn, especially when i plonk in more than one cube

My innovation – based on the bget tray but with folds on sides like the gram cracker and adding one more fold – the extra folds on the edges of the drip tray to hold both the side and leg panels, which are then removable for packing

ive found no discernable difference between pepsi can and ti sheet – same performance, durability, but cost and availability of materials is a big difference.

i store it in the plastic daiwa hook box for safe keeping and to control mess and smell (ss i often carry it with small bic in my mug)


And here is my template (you can adjust the size of the tray eg depth

Matthew / BPL Moderator
PostedMar 11, 2022 at 6:38 am

Wow. That’s an interesting evolution of the BGET Lineage. Thanks for sharing that.

I’d be interested in seeing variations optimized for 4g tablets. Has anyone made something to contain the liquid and slow the burn of the smaller tablets?

Matthew / BPL Moderator
PostedMar 11, 2022 at 6:45 am

Yikes I just did the math on the premium I’m paying for the little tablets and suddenly I’m reconsidering my preference for them.

Craig BPL Member
PostedMar 12, 2022 at 5:42 pm

You can always just cut cubes to the size needed. I do all the time. You should have them in an odour proof ziplock anyway as they stink out gear even when in the unopened packets. Just score the cube with a knife and then they will break along the scored line in your hands.


You will probably need larger cubes anyway when using them in the real world eg cooking in the bush, also depending on the application.


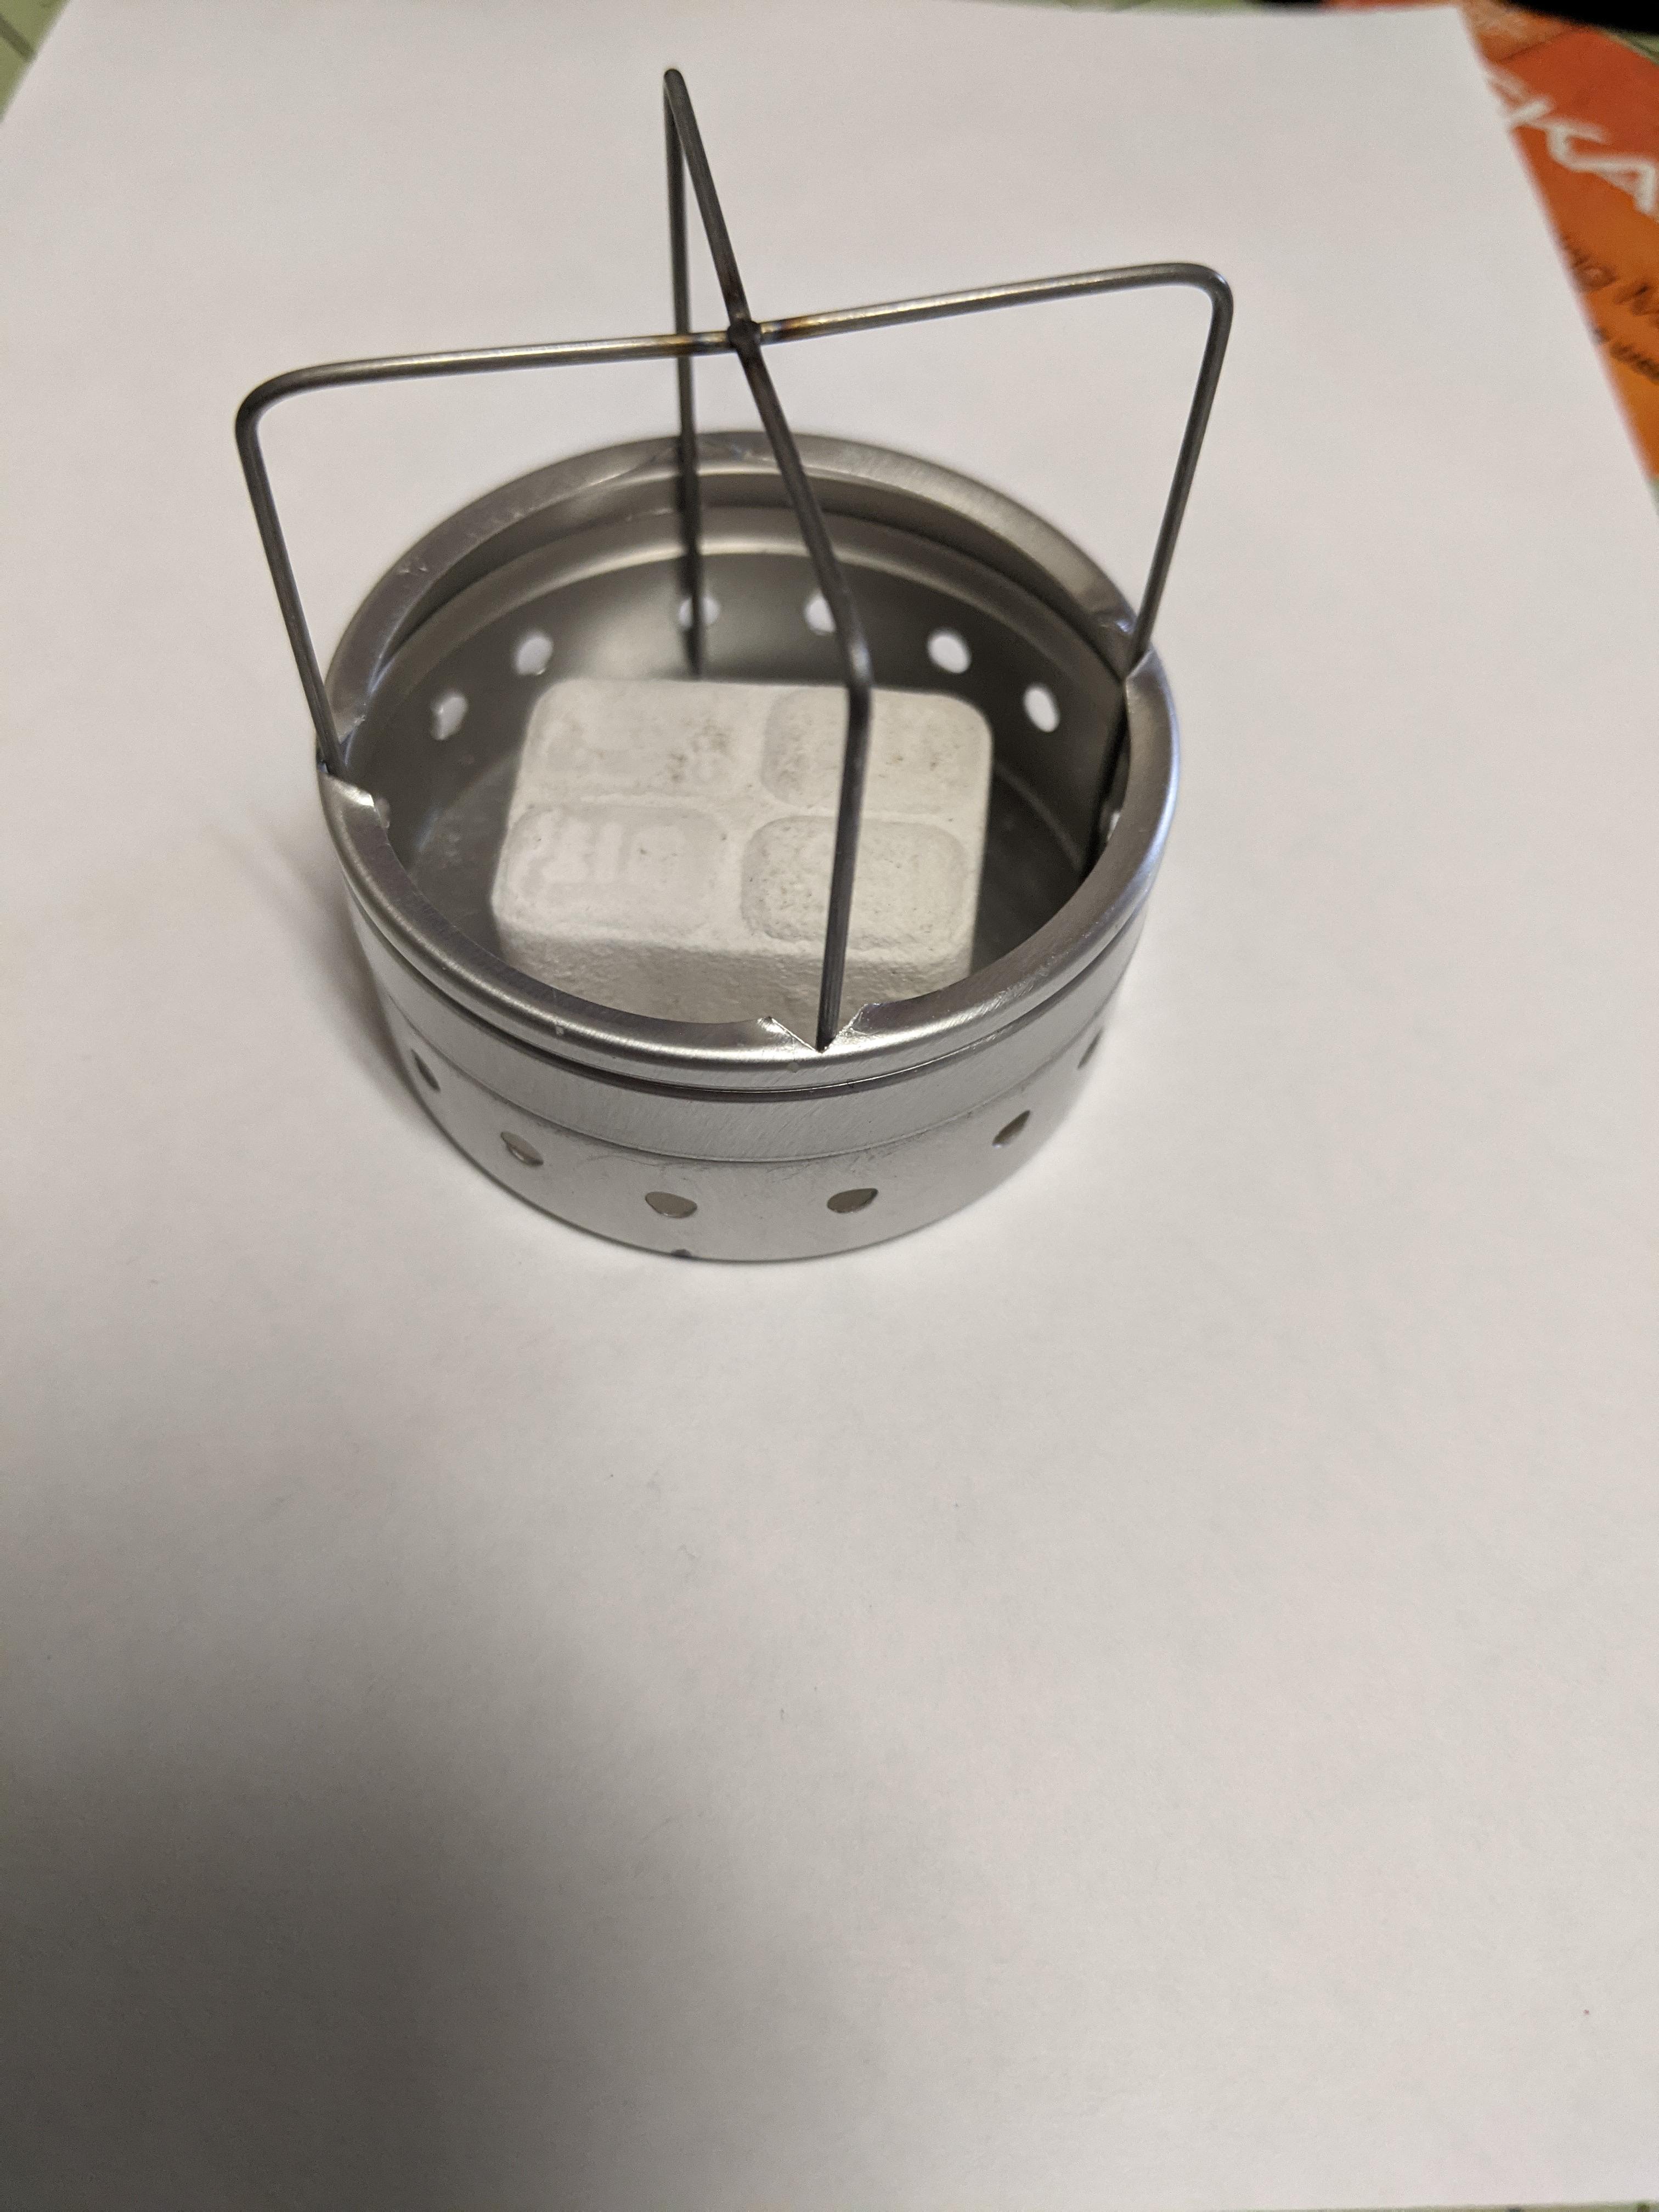
I’ve done quite a bit testing with a wide range of esbit burners and set ups both at home and in the bush for a number of meals (TD fissure, Jon Fong snow leopard/epicurean, BGET, coghlans, diy varieties) and authentic esbits (7, 14, , and 28’s), coghlans, and imported alternates,as well as different pots.


Esbits and esbit stoves are not linear and simple – they need experience to tune them to your particular need, as their performance and hence fuel needs varies greatly based on tablet size, the environment, and what style of heating you want them for. Stove design plays a part too, especially windscreen design.


I’m not convinced that there is enough material advantage between tablet brands when using them in a real life settings in the bush to warrant any worrying over them Esp when, as normal, there is a breeze or wind. I have measured a very slight advantage to esbits over competitors in indoor conditions. But in the bush you can lose up to 25-50% Performance over what you see in a sheltered room indoors. Eg with a highly optimised kit I find I typically need about 1.5 14g cubes to bring 2cups/500ml to a rolling boil at 8mins in windy bush settings, whereas I can get a boil with one cube in 6mins in ideal lab conditions.


Remember also that total burn times are only applicable if simmering  style of heating is wanted – if the objective is boiling water to sterilise that’s a different application. Because esbit burns non linearly and tapers down fast in  heat output in the last 50% of total burn time, so you need to tune the fuel load size according to your application eg different for front loaded heating in a short time if using to rolling boil, versus extended duration and lower heat output for longer if wanting to heat and then simmer.


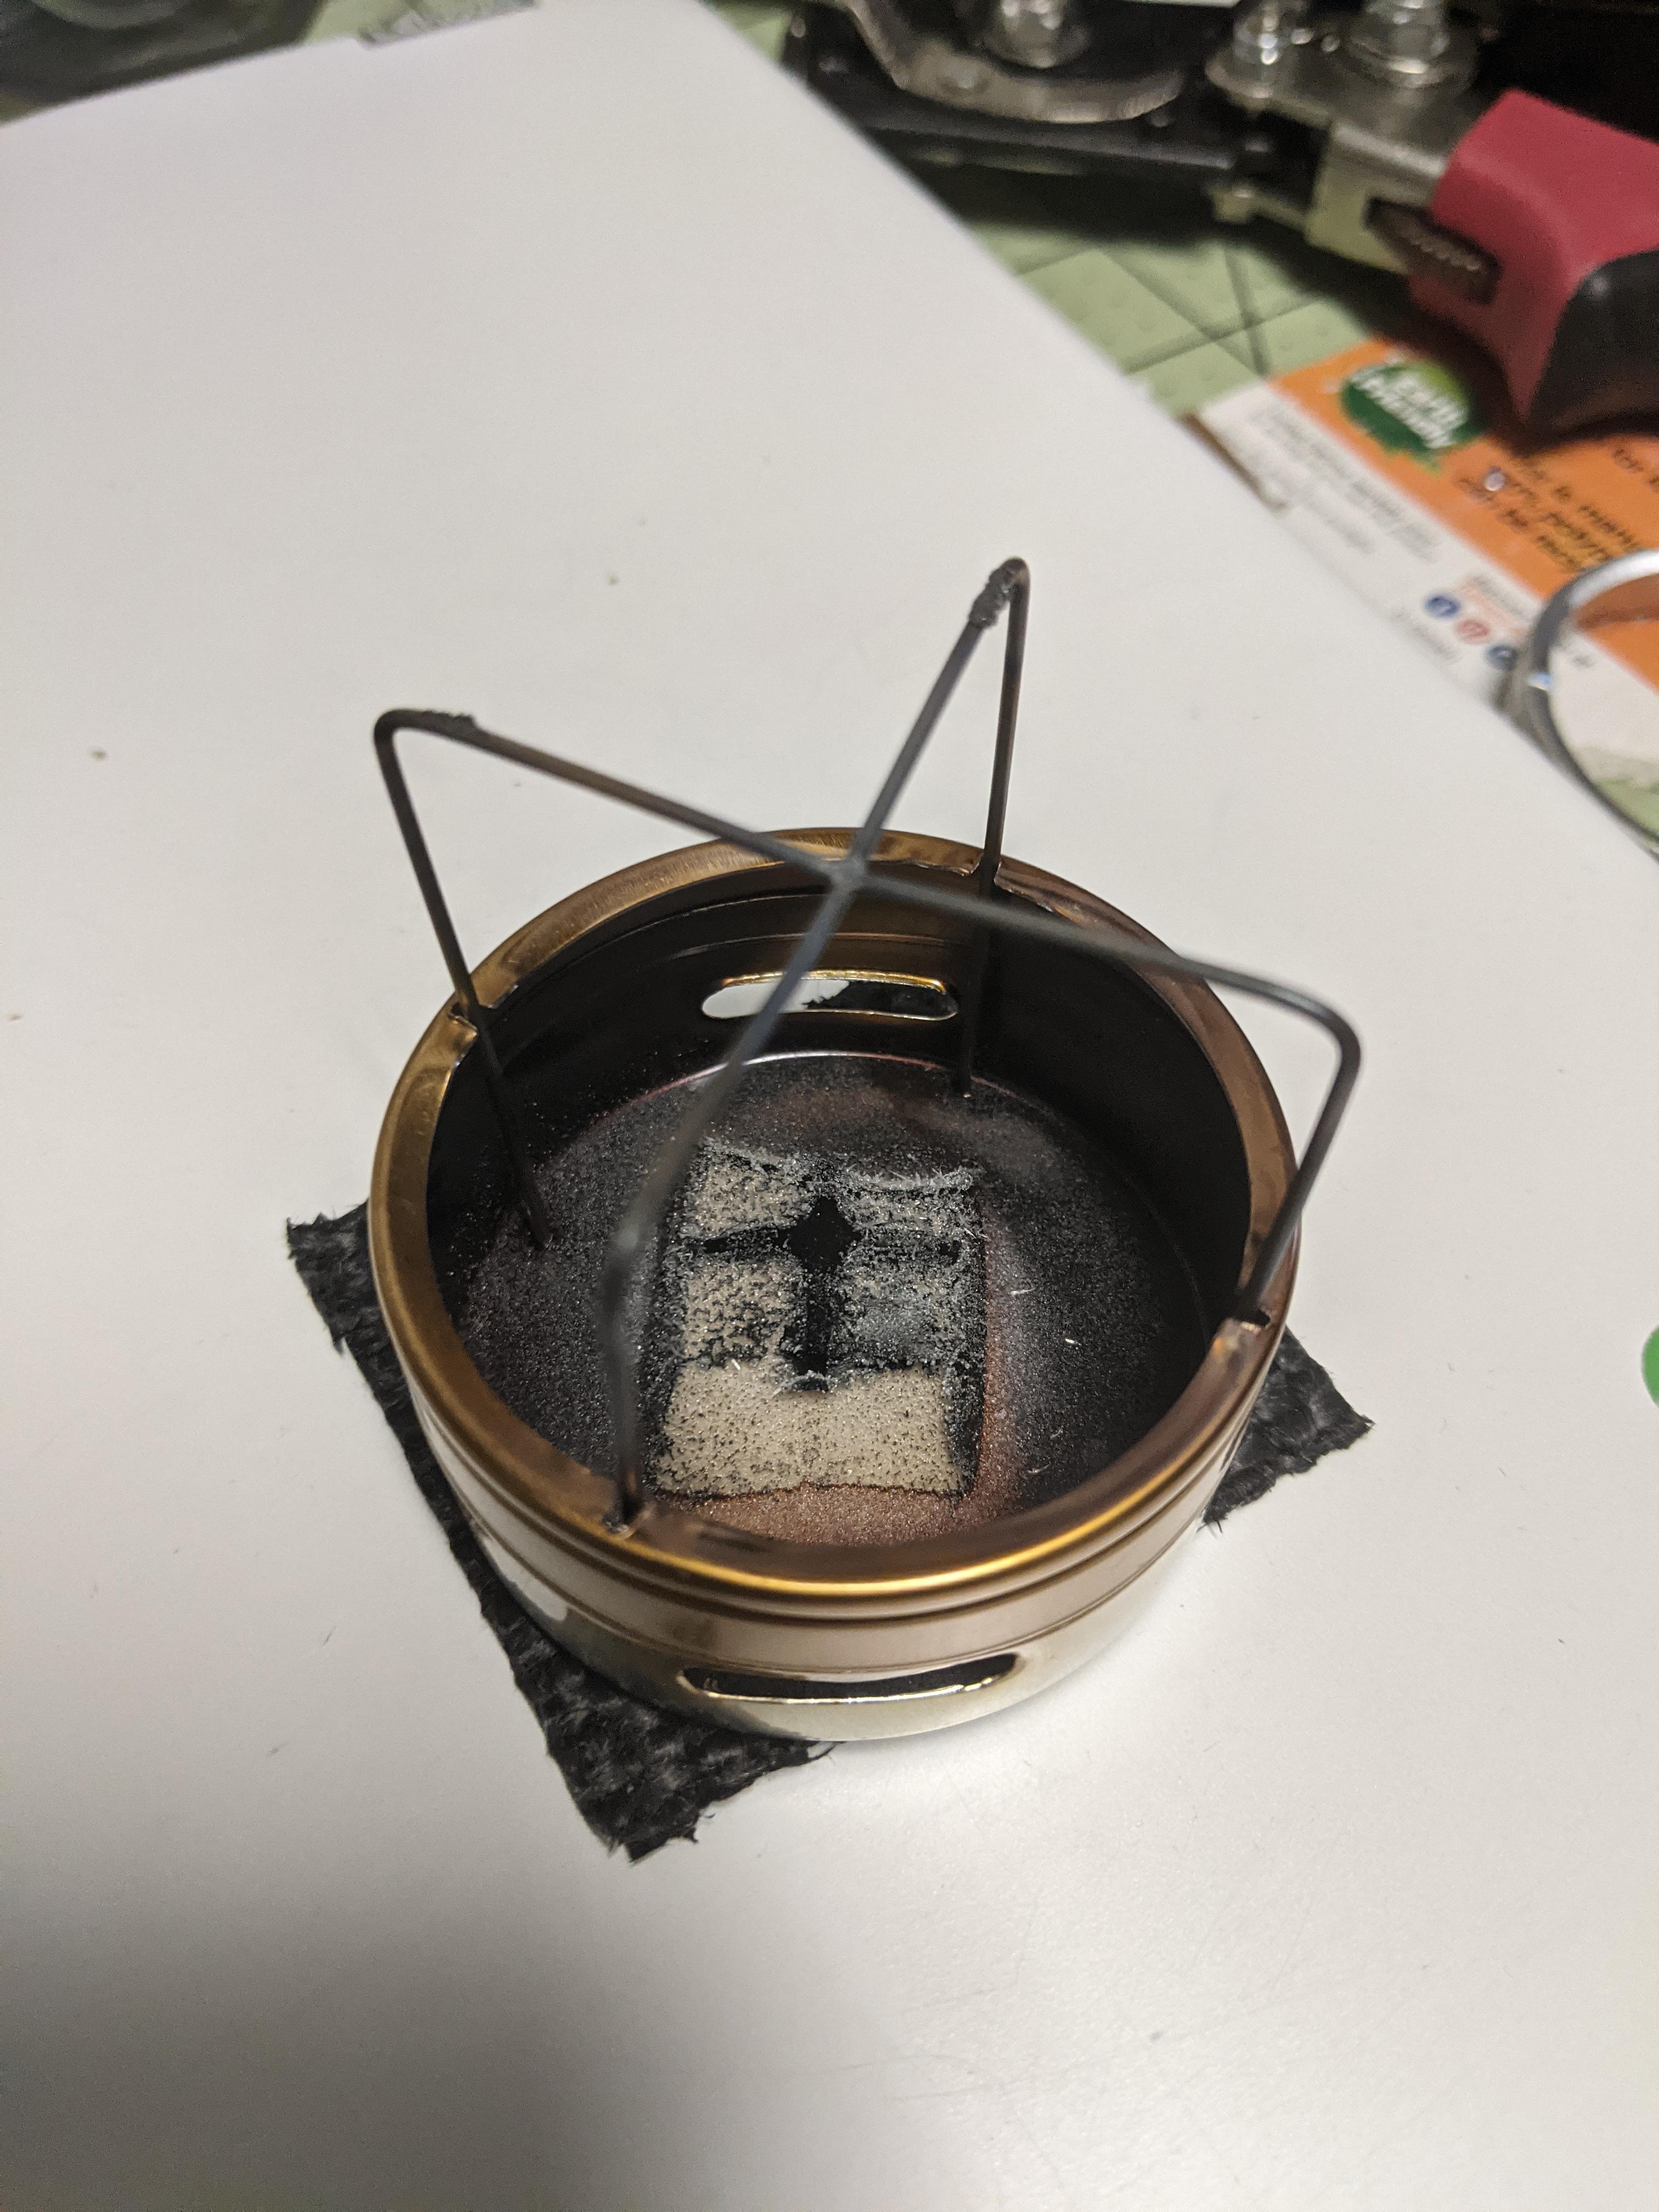
The fast hot application for boiling water – I find it’s better to go with two 14g cubes at the start – it’s more effective for a rolling boil than a reload halfway due to the on linear burn and greater heat output of 2 in their first 50% of burn phases.  You are left with residue of about 3/4 of a cube to dispose of when finished though. A snow leopard or fissure cone are best in these bush conditions and for boiling.


If it’s a coffee using already clean water, you don’t need a rolling boil,  just heating the water, so half the fuel, and about 7-14g cubes are good enough even in the real.


Of course, if just heating then simmering if the goal, then less fuel is needed, it’s better to go cube by cube as needed, and The epicureans etc by Jon are a good way to go for those types of cooking.
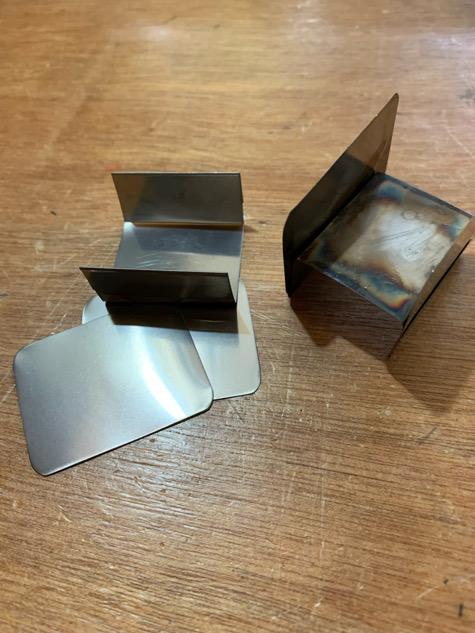
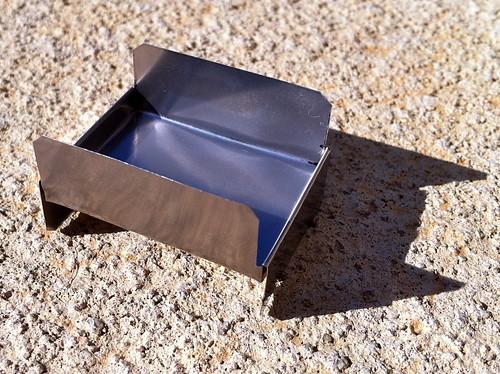
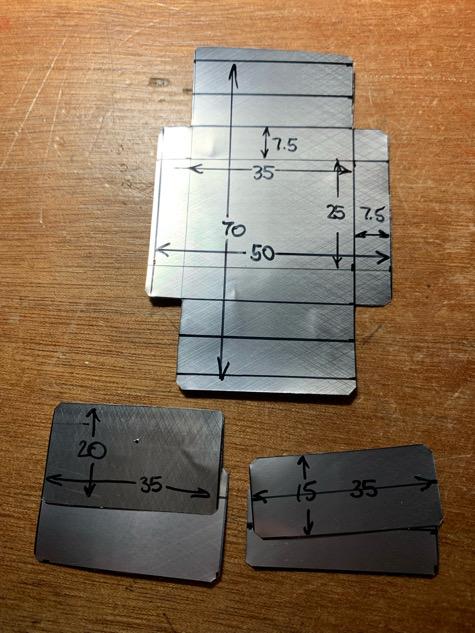
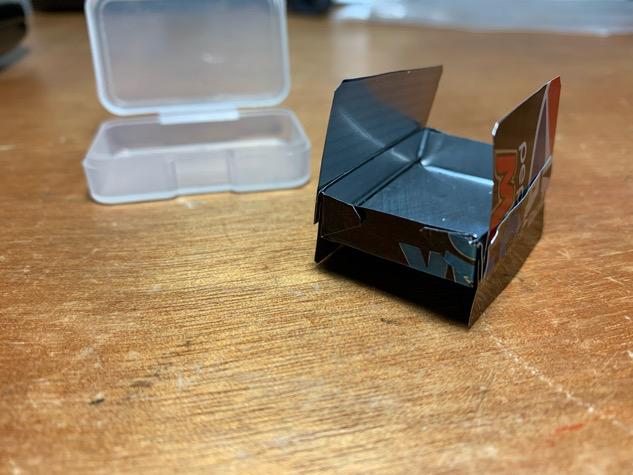
PostedMar 14, 2022 at 5:36 pm

Russ, look what I made today for a friend, weighs 7 grams , 2″ tall with integrated stainless steel pot support:

Craig BPL Member
PostedMar 14, 2022 at 7:38 pm

That’s a really neat innovation !!

PostedMar 15, 2022 at 8:59 am

Thank you Craig. I’m going to make a few for myself to do some water heating for hot chocolate. The pot support is at the right height so the bottom of the pot should remain clean. I’ll insulate the bottom of the container so that all of the esbit will be consumed and only a light ash will remain….no goo remaining.

PostedMar 18, 2022 at 8:38 am

Revised and improved. Boiled 2 cups using 10grams of esbit:

(the remaining 4 grams)

Craig BPL Member
PostedMar 18, 2022 at 3:10 pm

<p style=”text-align: left;”>Ooooh. That’s brill. Carbon cloth insul on bottom. I can see the new air vent optimisation too really looking spec now.it also looks to be burning very cleanly looking at the bottom on zoom. You must have really nailed the fuel-air mixture in the chamber and pot height so there is zero damping. Well done!</p>
<p style=”text-align: left;”>when do you start commercial sales? 😊</p>

PostedMar 18, 2022 at 3:39 pm

Tests showed that the esbit would start to slide around once the container got hot. The esbit melts at a certain point causing it to slide if not on a perfectly level surface so I created an indent in the center of the container to prevent sliding.

Indention:


PostedMar 18, 2022 at 5:59 pm

“Carbon cloth insul on bottom.”

It’s coarse woven fiberglass.

Craig BPL Member
PostedMar 19, 2022 at 7:05 pm

Yup thanks – standard over under weave also which is best for this (I used to build boats, paddles and motorbike parts). I still have a stock of full carbon, glass,  Kevlar and mixed cloths and roving weaves in different grades to play around with for small jobs – I’ve never really thought too much about the need until your stoves.
I still see a lot of heat transfer to the surface below.  I’ve been swapping between a hard layer with an air gap (bit of sofa can on twigs) or some sticks, under the setup, to create an air gap, to reduce heat conduction and protect surfaces (and the grass) better. Or just sit it on a flat rock surface if any around. Otherwise I still kill the moss or grass under.
Any suggestions?

PostedMar 21, 2022 at 2:27 pm

Use a 3 ply piece of Luan Mahogony plywood.

Oh the joys of snuffing out an esbit….yukk!!!

PostedMar 24, 2022 at 8:40 am

I felt a little weary about the wire pot supports on the Starlyte Stove model so I made a titanium support for it that worked just great.


Viewing 25 posts - 1 through 25 (of 27 total)
Loading...