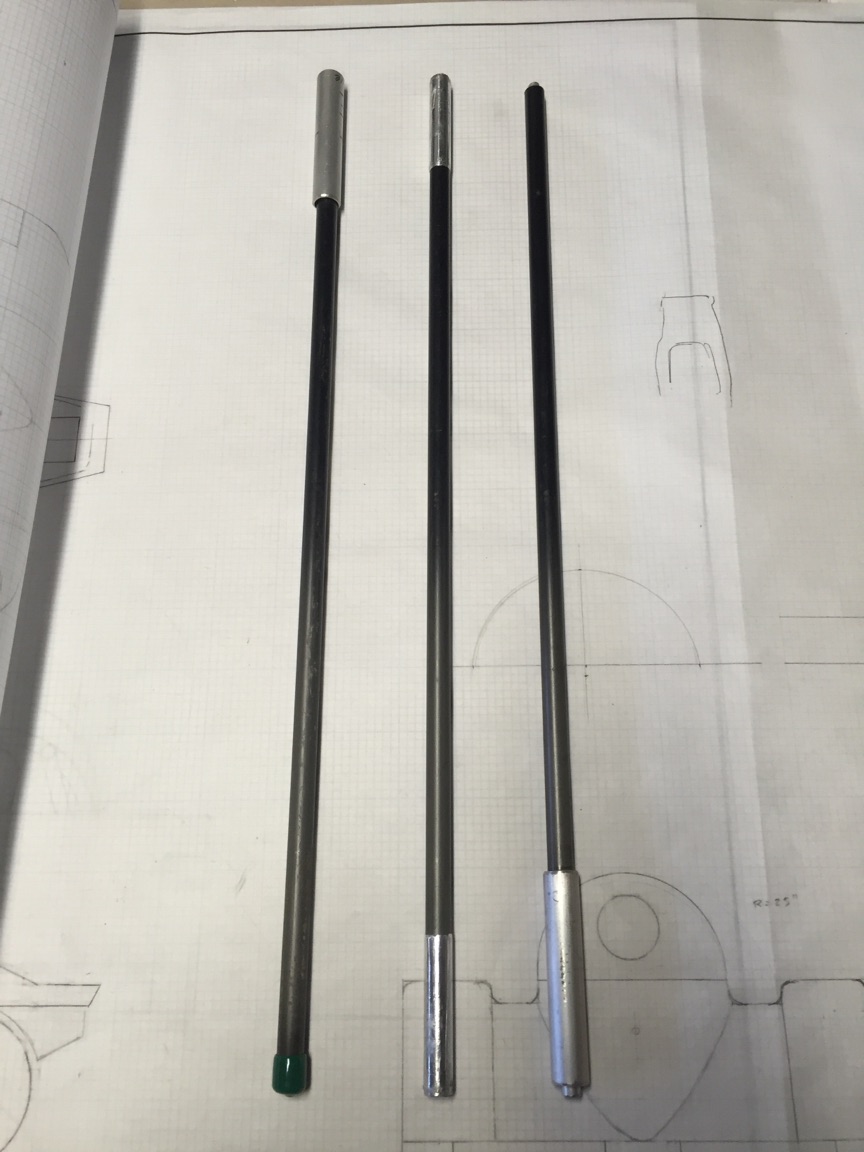
I like tarps but I don’t normally use trekking poles unless I expect to ford flowing water knee-deep or deeper, so I fabricated a pair of Carbon Fiber 3-section poles to use instead. Each section is 17″ long, for a total pole length of 51″. You can make them longer or shorter according to your needs and/or preferences.
Materials & Tools:
Two 3/8″ diameter x 48″ CF tubes
12″ of 1/2″ diameter aluminum tubing
16″ of 1/4″ diameter aluminum rod
Epoxy glue
3/8″ plastic rod end covers
2″ wide aluminum tape
Hack saw
Very small round file (I use 1/8″ diameter for 150 lb. Dyneema cord)
I used cheap, generic unidrectional CF tubes that I picked up from a local store for $20 each. Stronger and more rigid rolled, wrapped and braided tubes are available from various sources.
<div>
<div>
<div>
<div>
<div>
<div>Cut each each tube into two 15.5″ pieces and one 17″ piece, so all the poles would be the same length after the joints were installed. The top and bottom tube sections are made from the 15.5″ pieces; the middle sections are made from the 17″ piece.
</div>
<div>For the joints I took a “belt and suspenders” approach with both internal and external bracing. I believe external bracing alone is sufficient, and will shave a few grams off the total weight of the poles.</div>
<div></div>
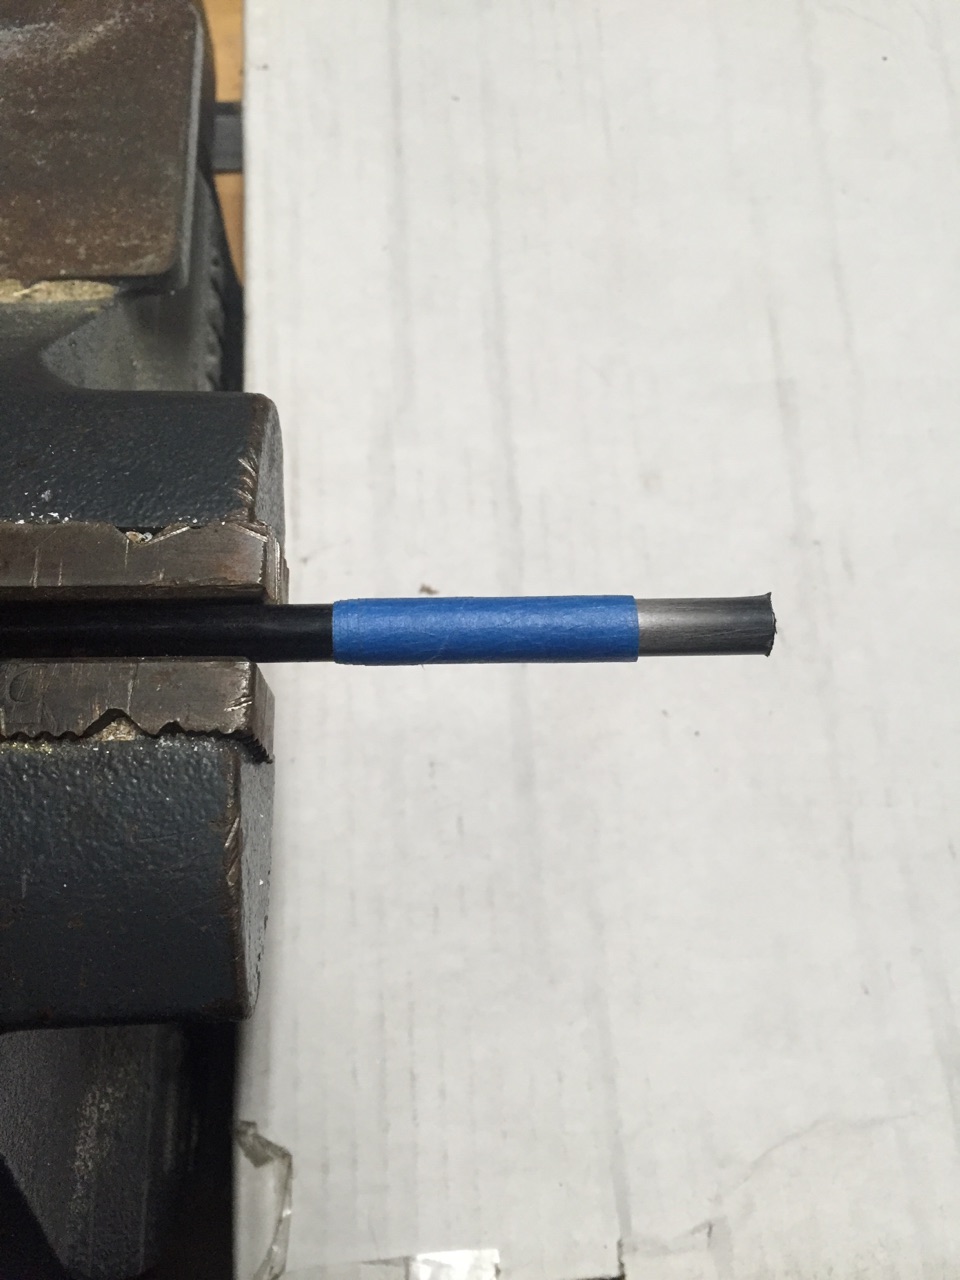
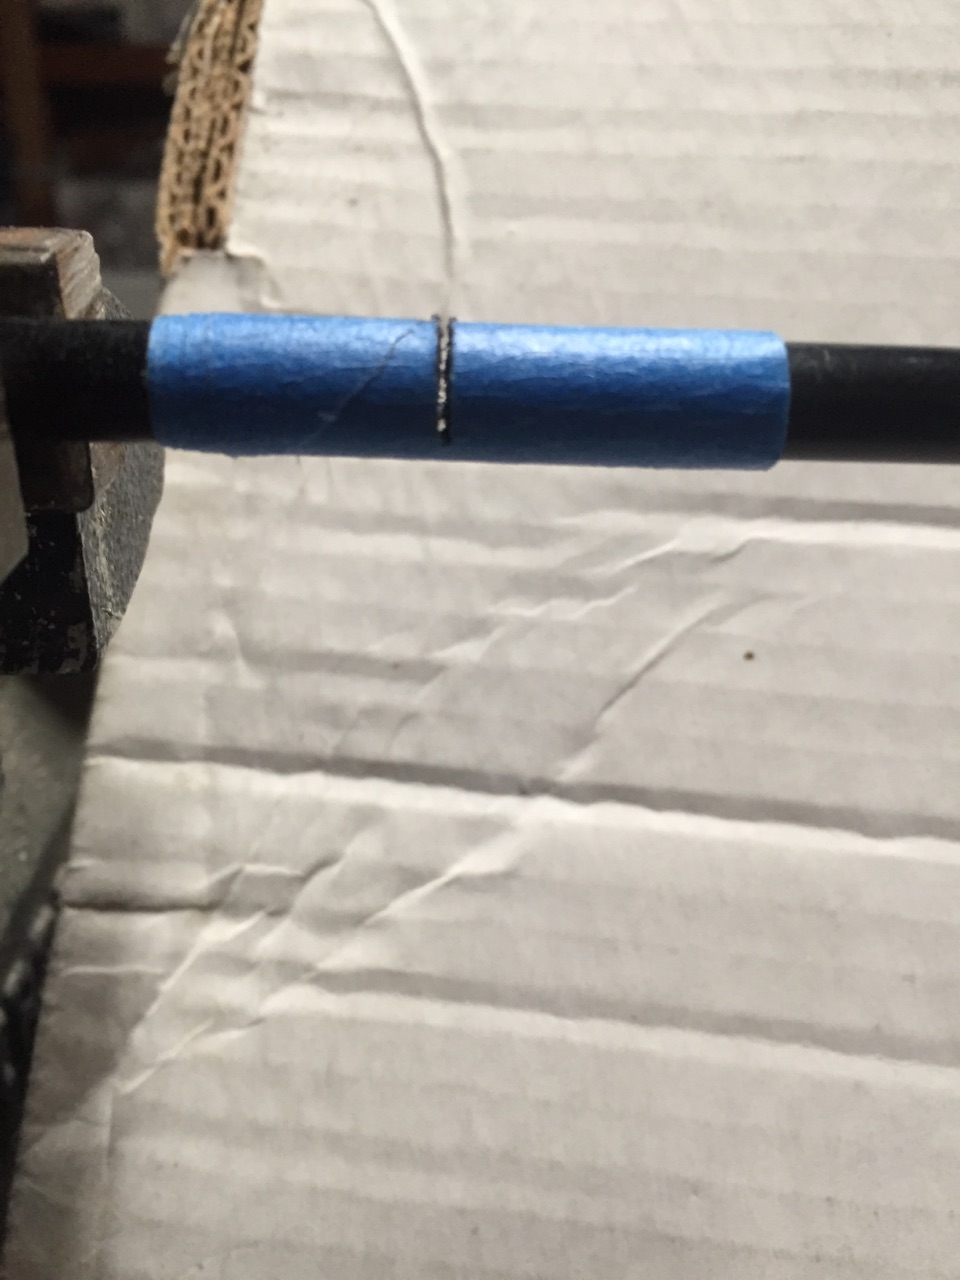
<div>For internal braces, 1/4″ diameter aluminum rod happens to fit perfectly inside the 3/8″ carbon tube. I cut four 3″ pieces of aluminum rod (two joints per pole), and epoxied them 1-1/2″ into the ends of the 15.5″ carbon tubes.</div>
<div></div>
For the external braces, 1/2″ diameter aluminum tubing happens to fit almost perfectly outside the 3/8″ carbon tubes. I cut four 3″ pieces of aluminum tube for the joints, then epoxied the aluminum to the carbon tubes 1-1/2″ from the end of the carbon tube, so that the ends of the 1/4″ aluminum rod and the 1/2″ aluminum tube would extend the same length. While the epoxy was setting I put another carbon tube into the joint so that everything would be aligned.
</div>
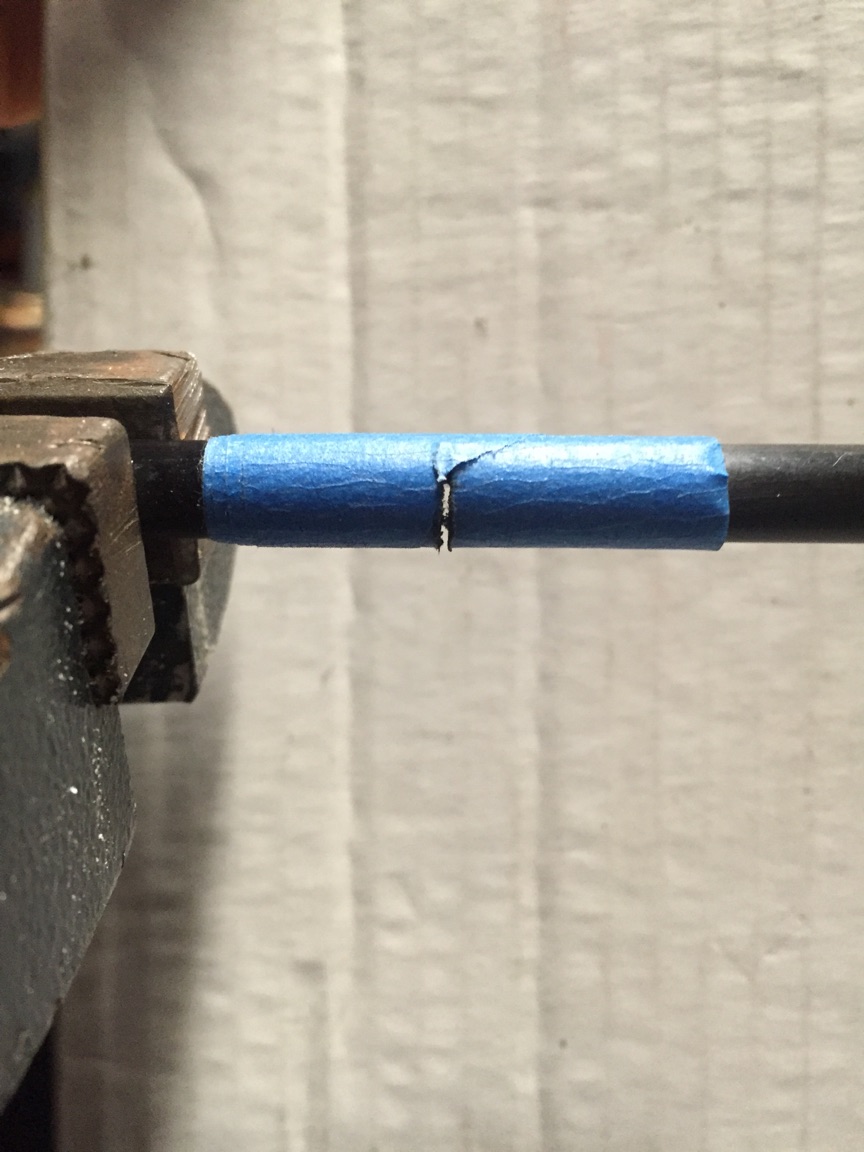
Once all the epoxy has set, I wrapped aluminum tape around each end of the 17″ pieces a few times to make them fit snuggly into the aluminum tubes. Wrap it a couple of times, see if it’s snug, add a few more wraps if necessary.
</div>
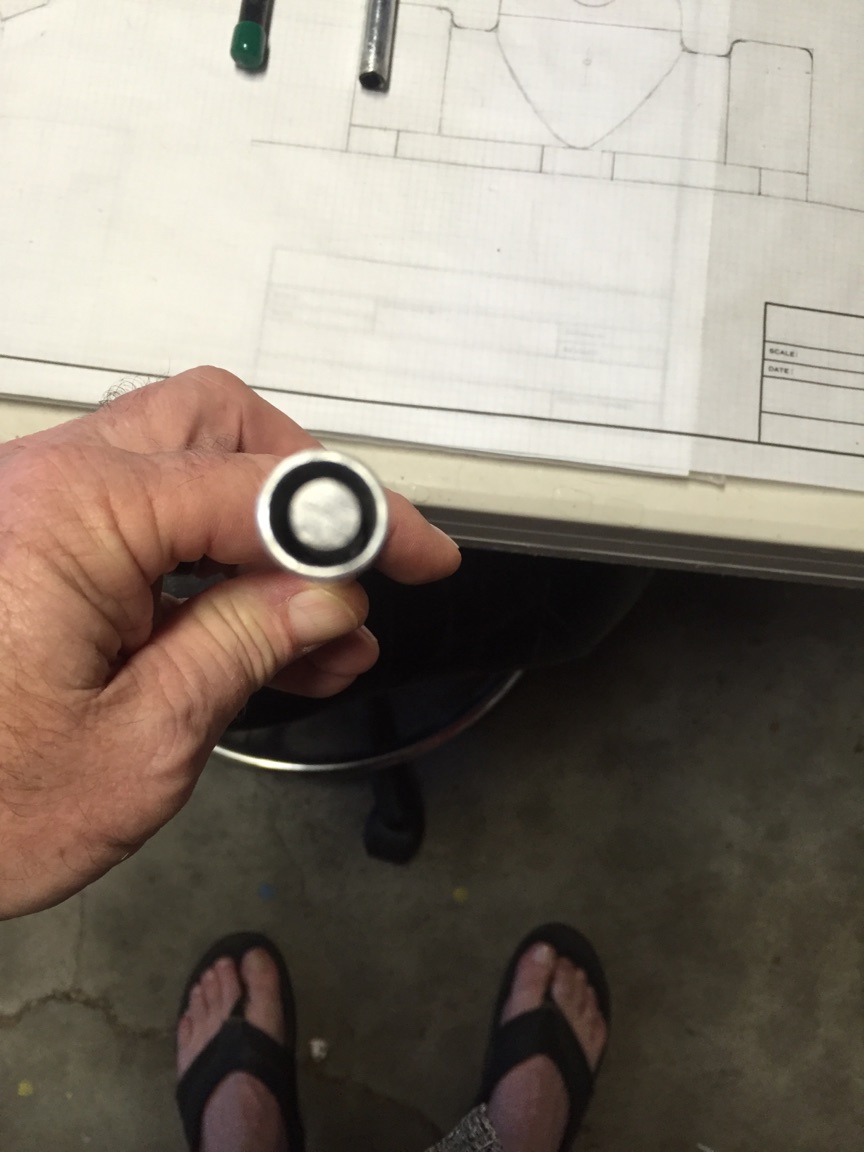
For the bottom end of the bottom poles I put little plastic rod end protectors from my local hardware store.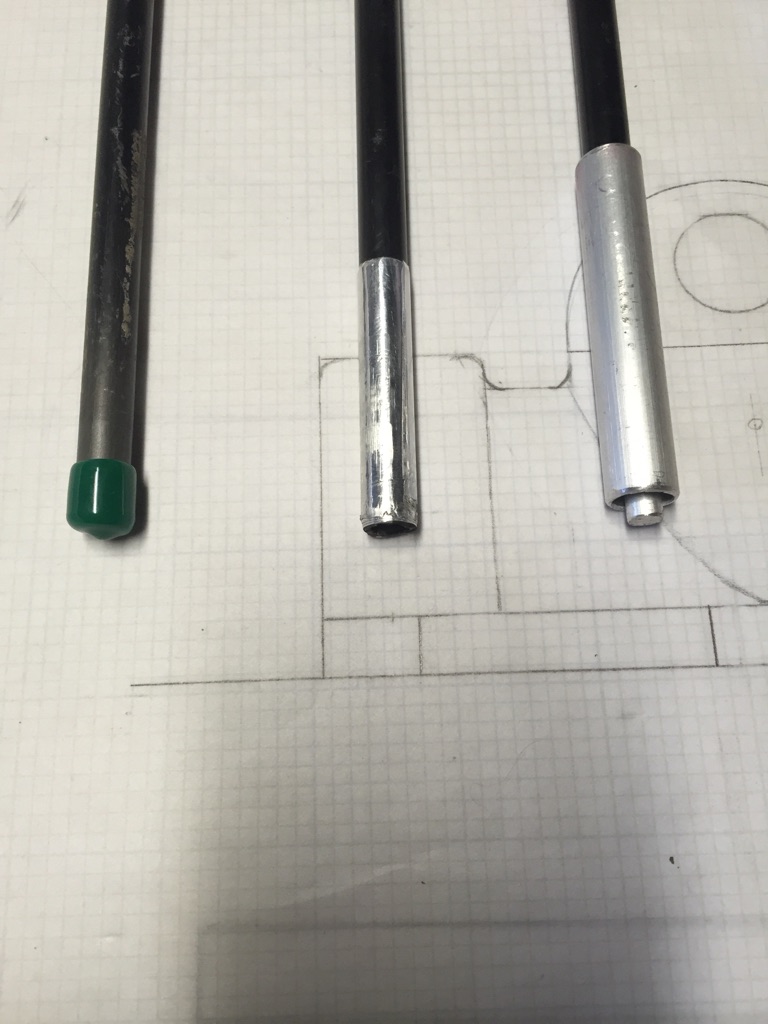

</div>
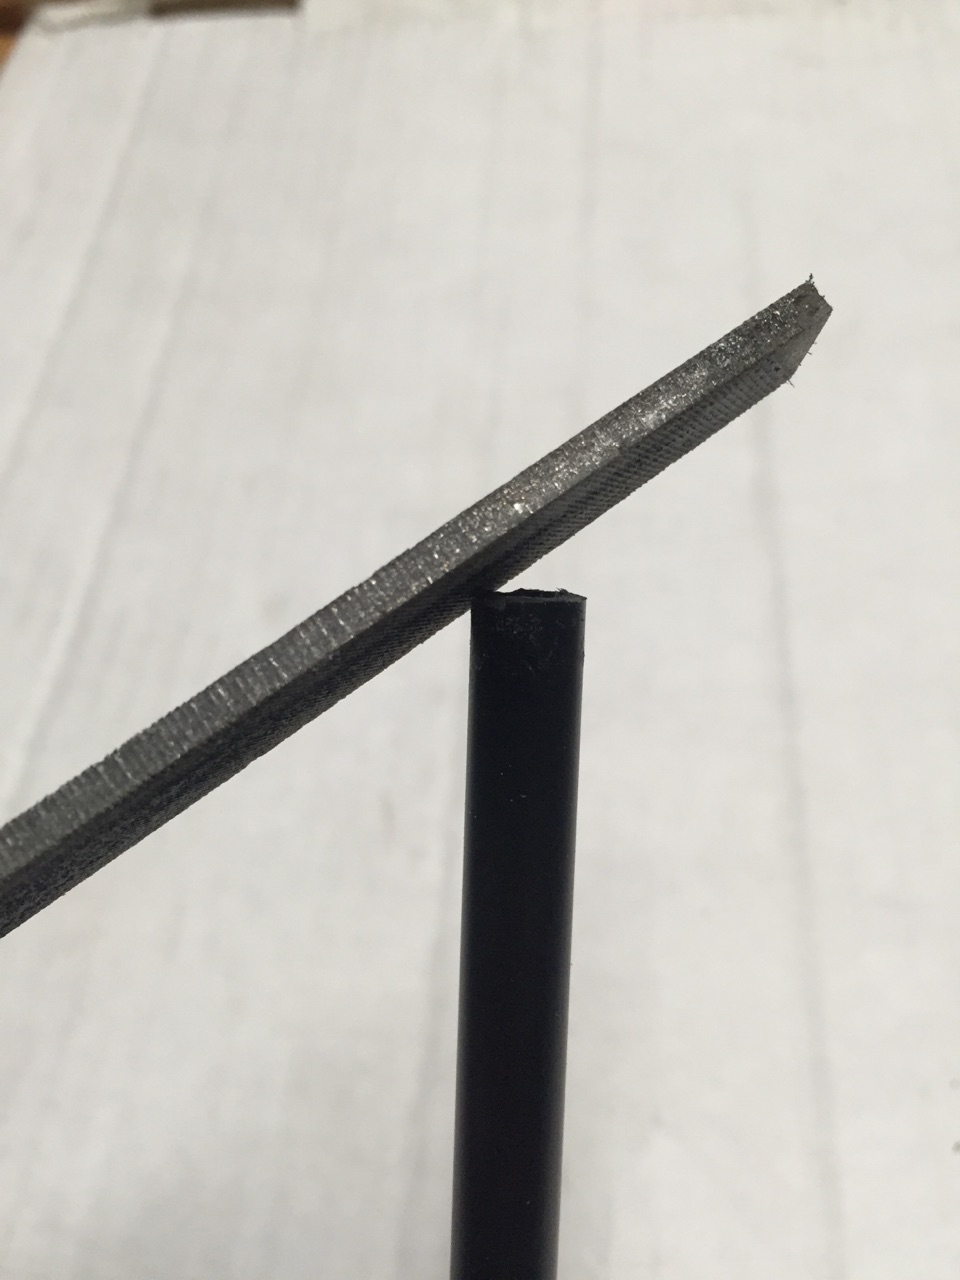
For the top of the poles I needed to make tiny saddles for the ridge line cord to run over and sit into, to keep the line in place. I cut two 1″ pieces of aluminum rod and filed one end of each into a little saddle. I tried to take a closer picture but my iPhone wouldn’t let me. If the saddle concept is not clear I’ll send you a drawing. After filing the saddles I epoxied the two aluminum rod pieces into the ends of the top tubes with about 1/4″ sticking up.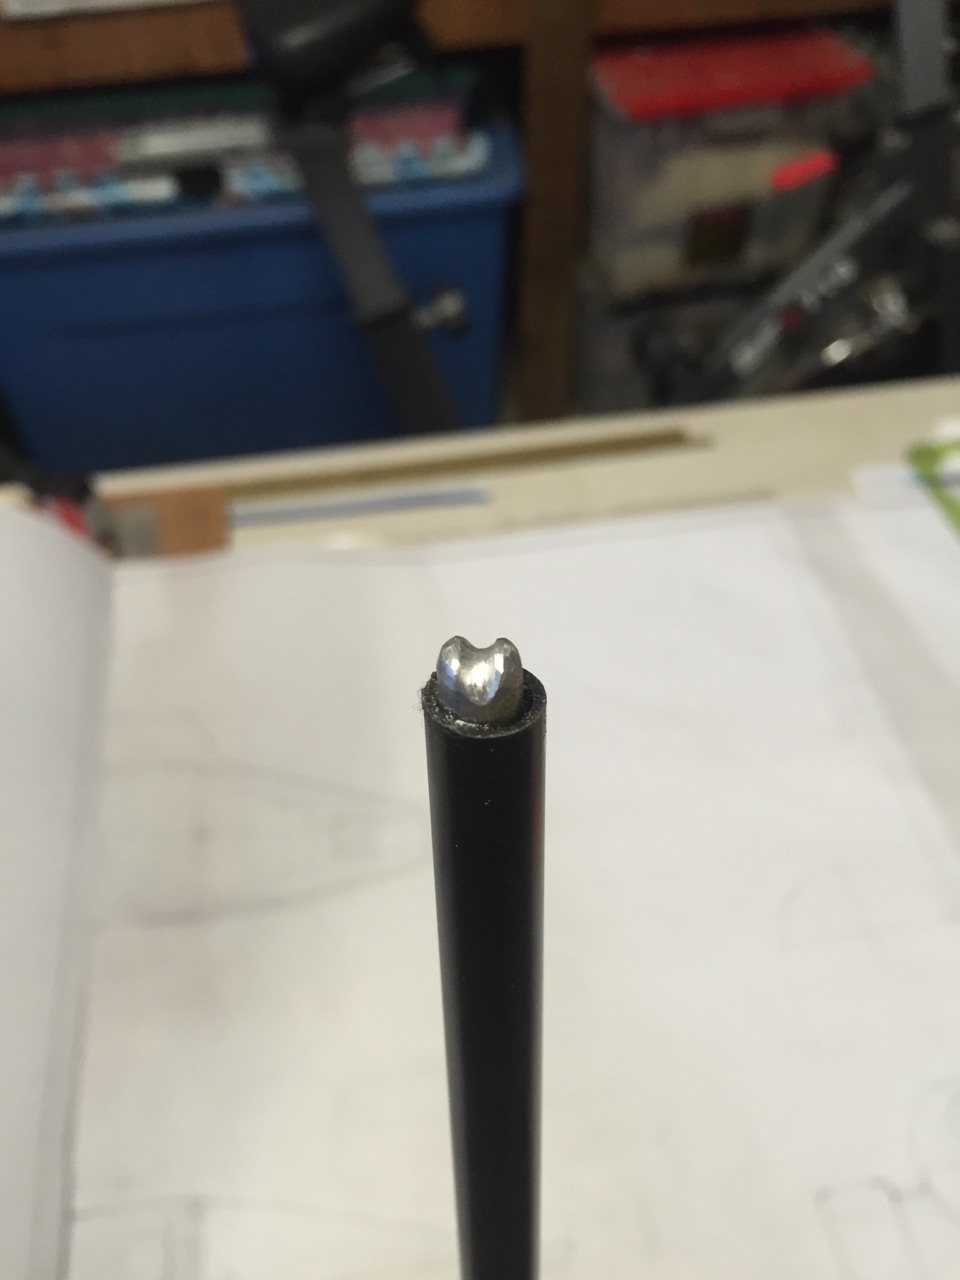
</div>
</div>
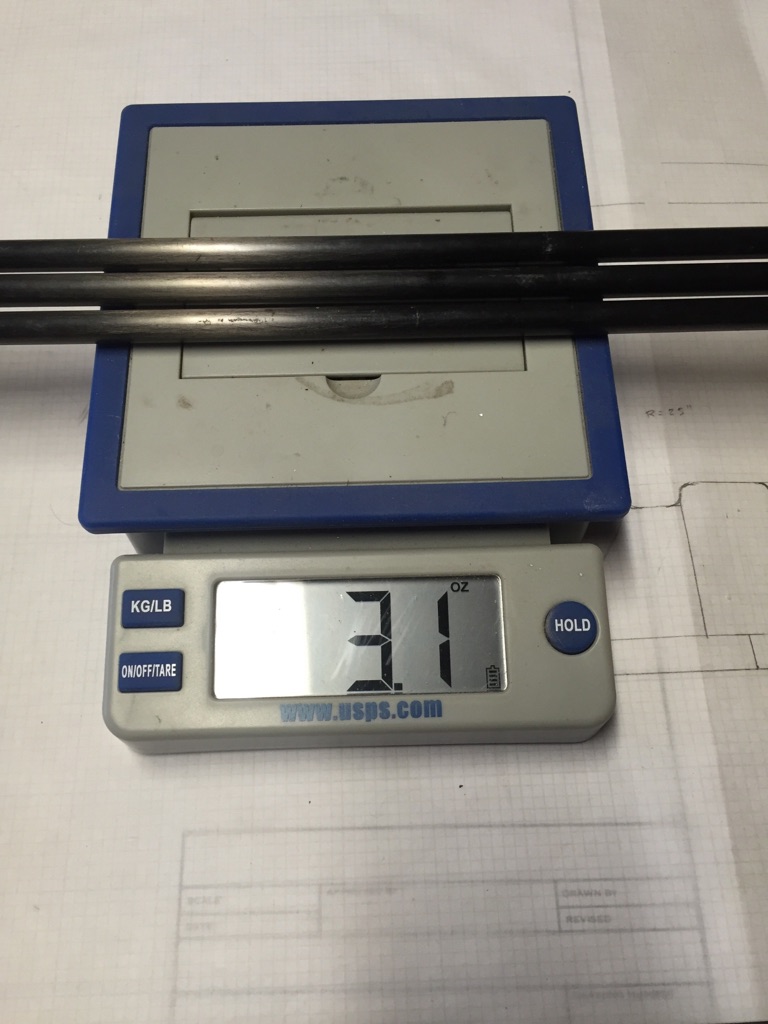
Finished poles weigh 3.1 oz each. You could shave that by skipping the internal bracing.