Topic

How to Make a "Polycryo" A-Frame Tarp


Forum Posting

A Membership is required to post in the forums. Login or become a member to post in the member forums!

Home Forums Gear Forums Make Your Own Gear How to Make a "Polycryo" A-Frame Tarp

Viewing 25 posts - 1 through 25 (of 53 total)
  • Author
    Posts
  • #3388920
    David Gardner
    BPL Member

    @gearmaker

    Locale: Northern California

    I’ve been making and selling “polycro” (cross-linked polyolefin heat-shrink plastic) tarps/tents for a few years now and have learned a lot in the process about what works well and how to construct them, so I thought I would share what I have learned.

    Materials & Tools:
    Duck Double-Thick Patio Door Insulation Kit
    Uline double-sided tape
    Scotch “Tough” Transparent Duct Tape (their glow-in-the-dark duct tape works well too)
    150 lb. 1 mm Spectra cord from http://www.ultralightdesigns.com
    Ten 7/8″ nylon washers (1″ works well too)
    1/8″ shock cord
    Blue masking tape
    X-acto or utility knife
    Sharpie pen
    Measuring tape
    Scissors
    1/8″ steel rod or tent stake
    Propane or butane torch or stove

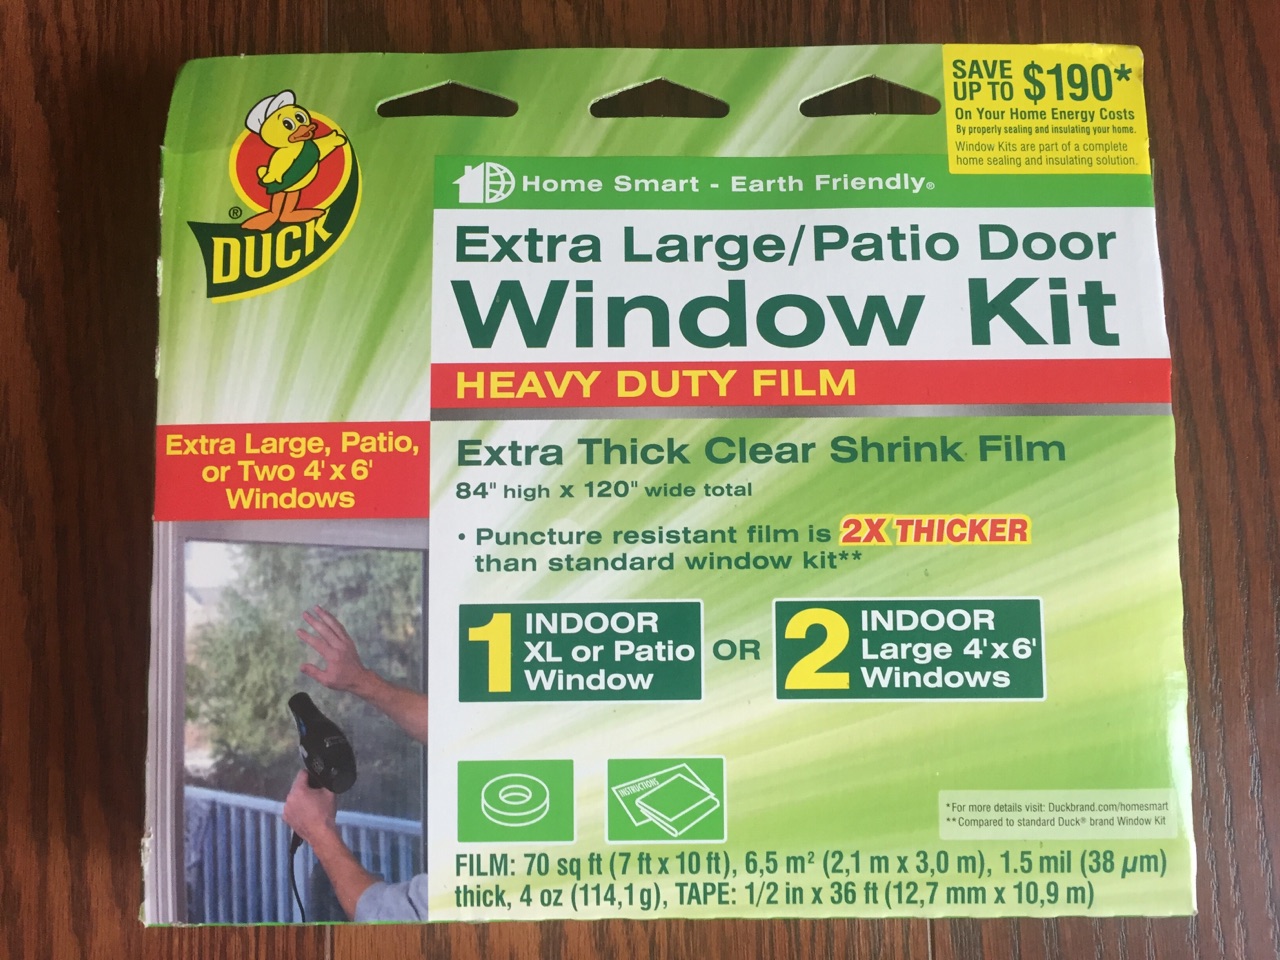
    I use Duck’s double-thick patio door insulation kits because as far as I know Duck is the only manufacturer which makes it in 1.5 mil thickness instead of .75 mil.

    I use Uline double-sided tape to “hem” the edges because it has far better adhesion and durability than the double-sided tape that comes with the kits.

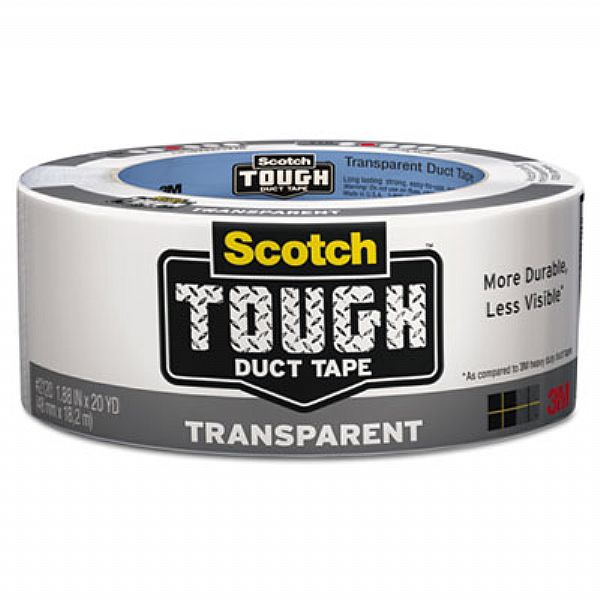
    I use Scotch “Tough” transparent duct tape because it has excellent adhesion and weather resistance. Colored tapes, especially dark colored tape, get hot in the sun and “creep.” In the past I used ripstop nylon sail repair tape, which is lighter and stronger than duct tape, but it doesn’t adhere well enough over the long run.

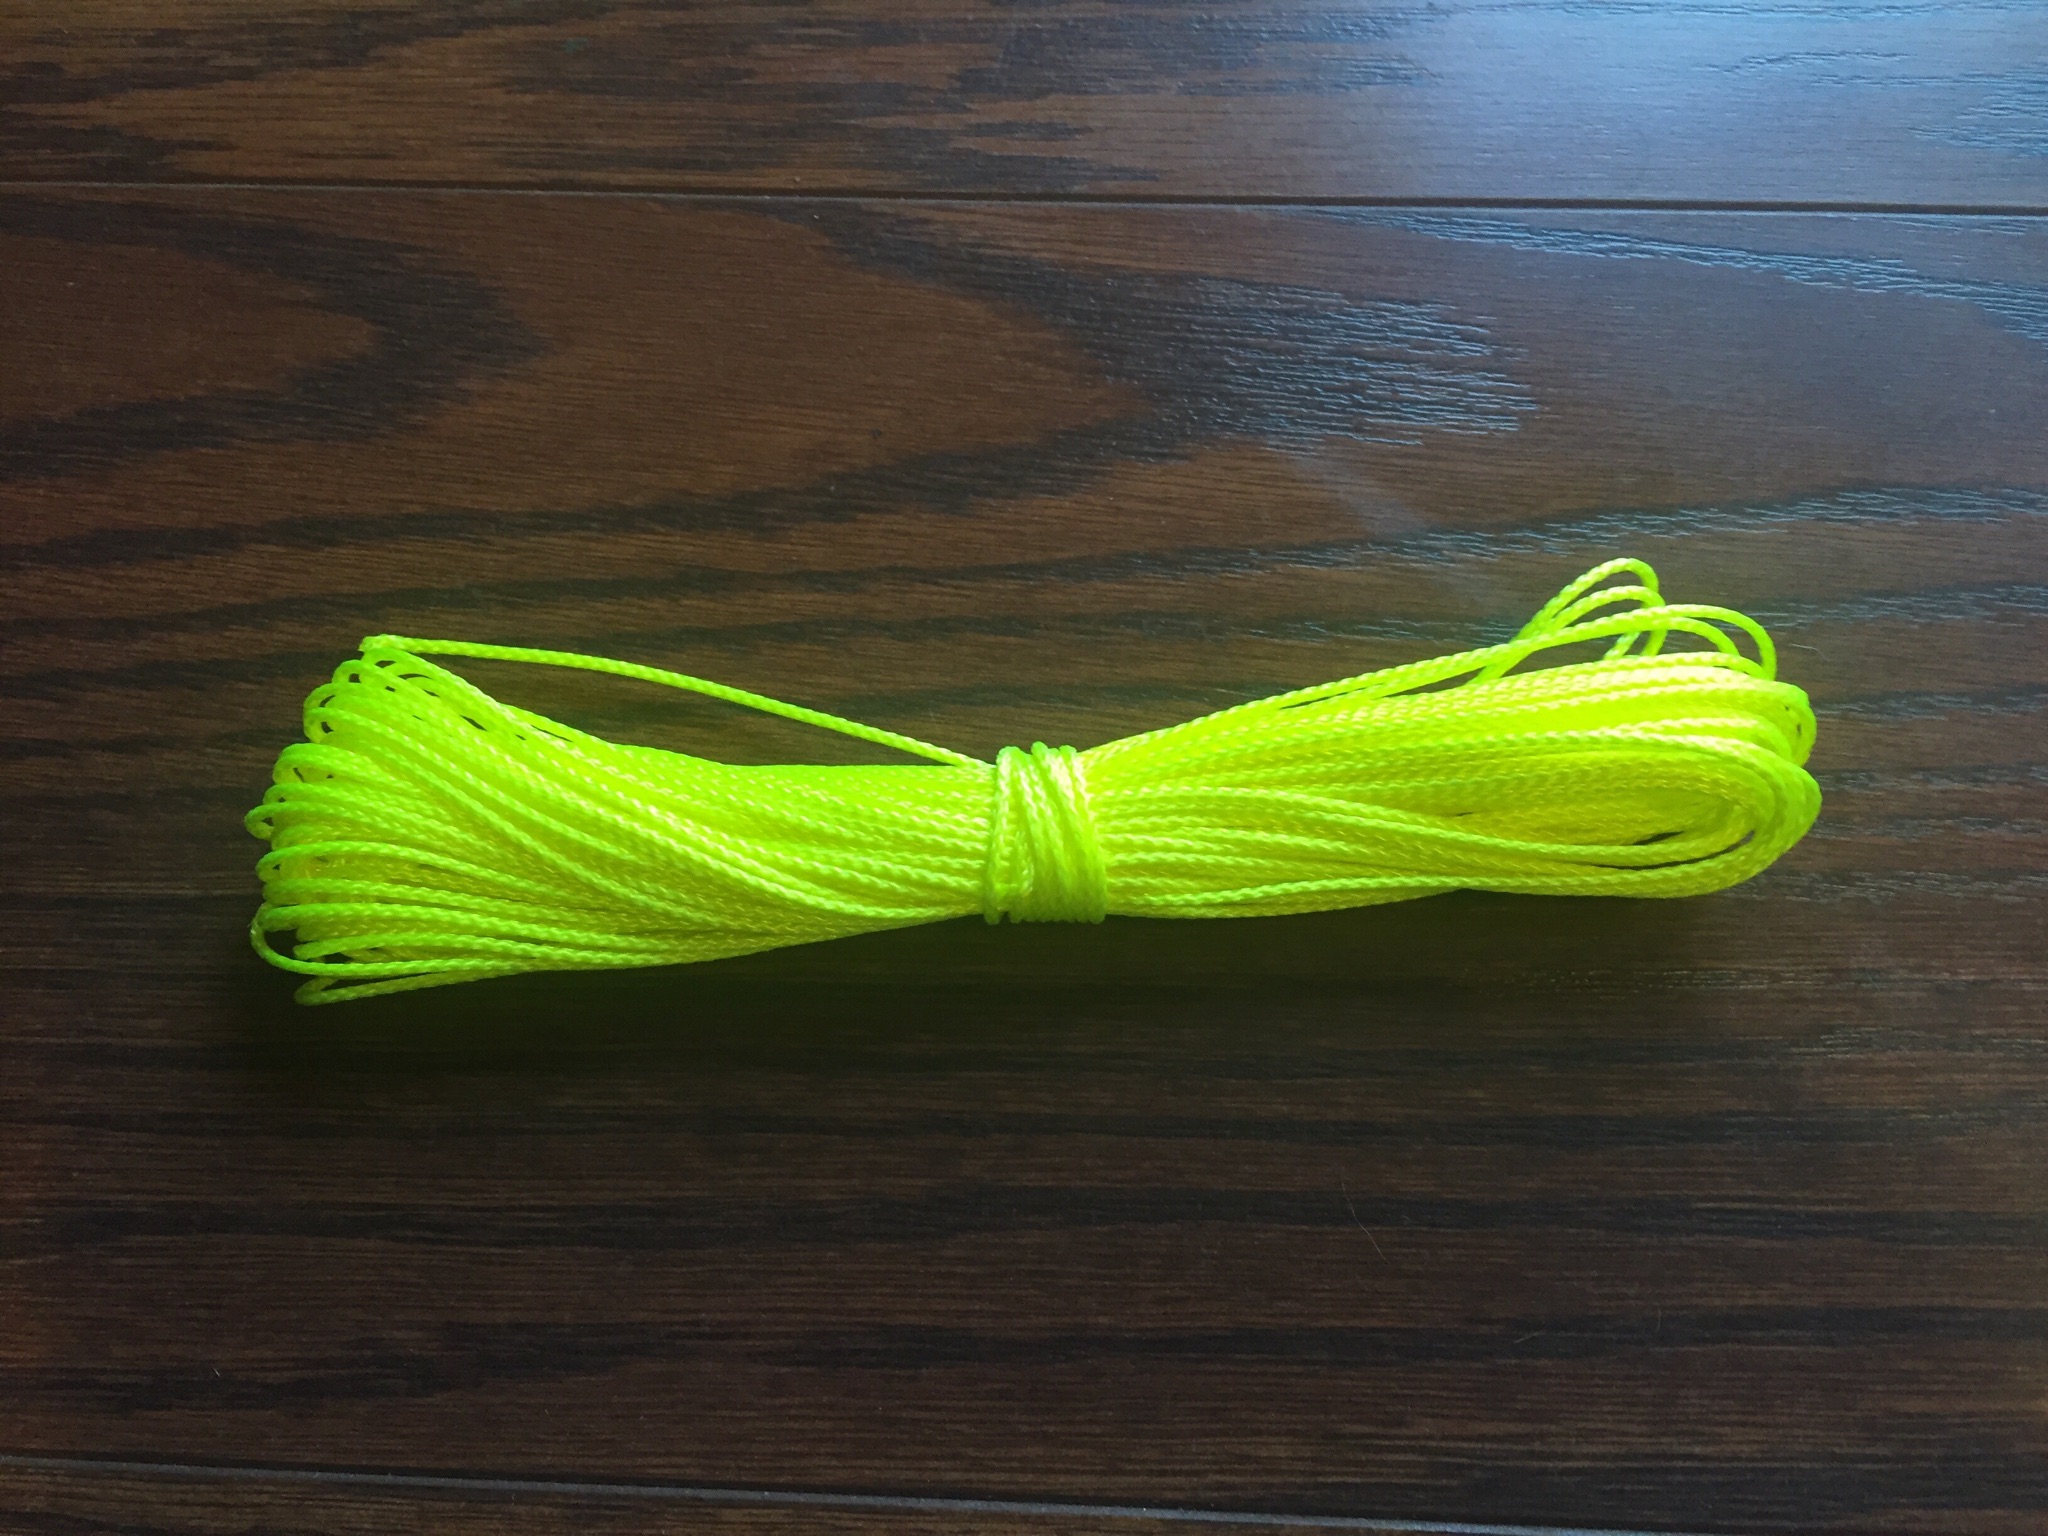
    I use Ultralight Design’s 150 lb. Spectra-core cord because it is bright yellow, knots well, and is plenty strong enough. I attached a fishing scale to the end of the ridge line cord of a tarp I had set up, pulled harder than I usually do to pitch the tarp, and it measured 25 lbs. of tension.

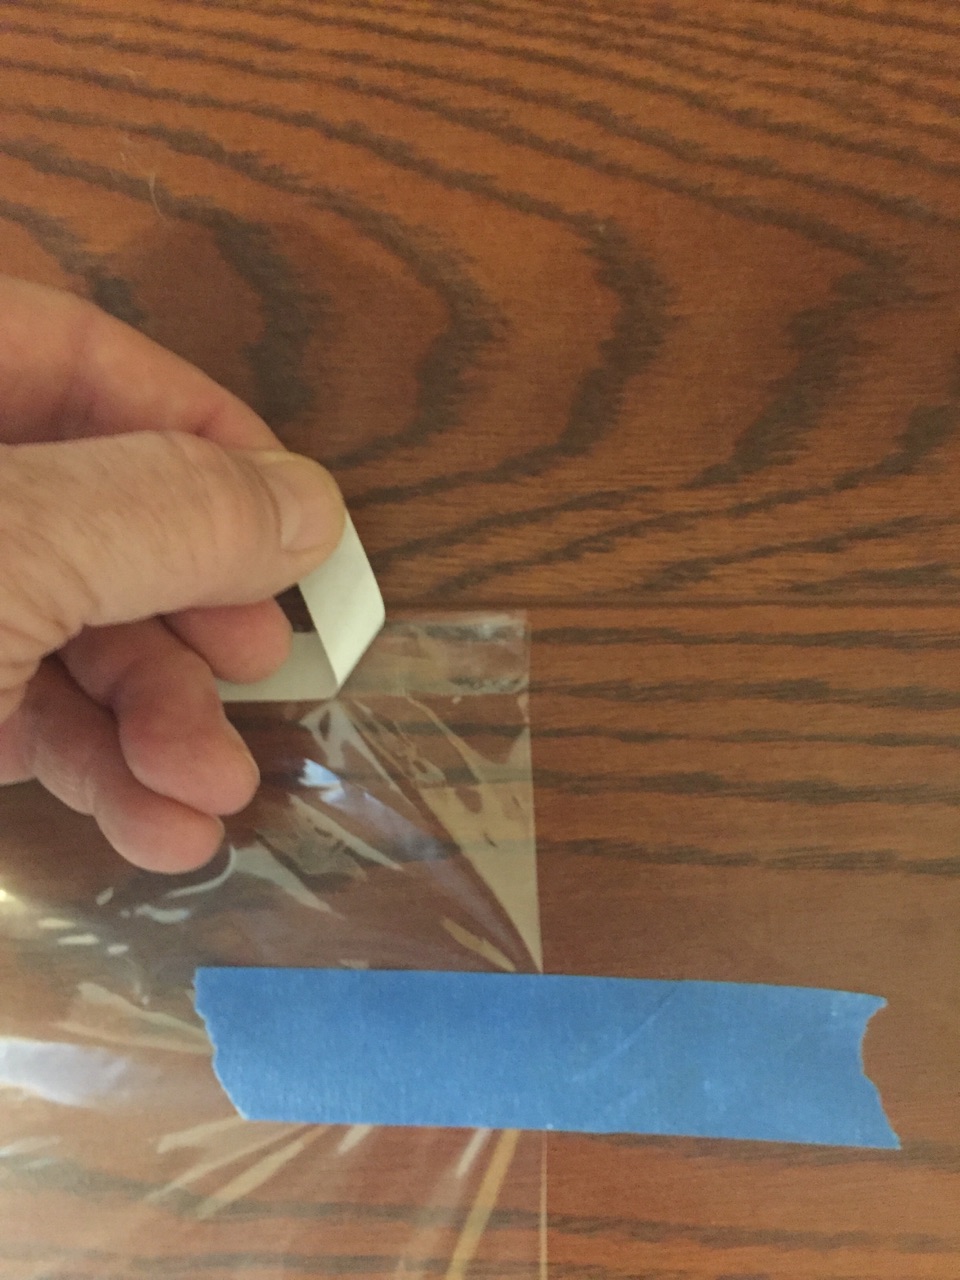
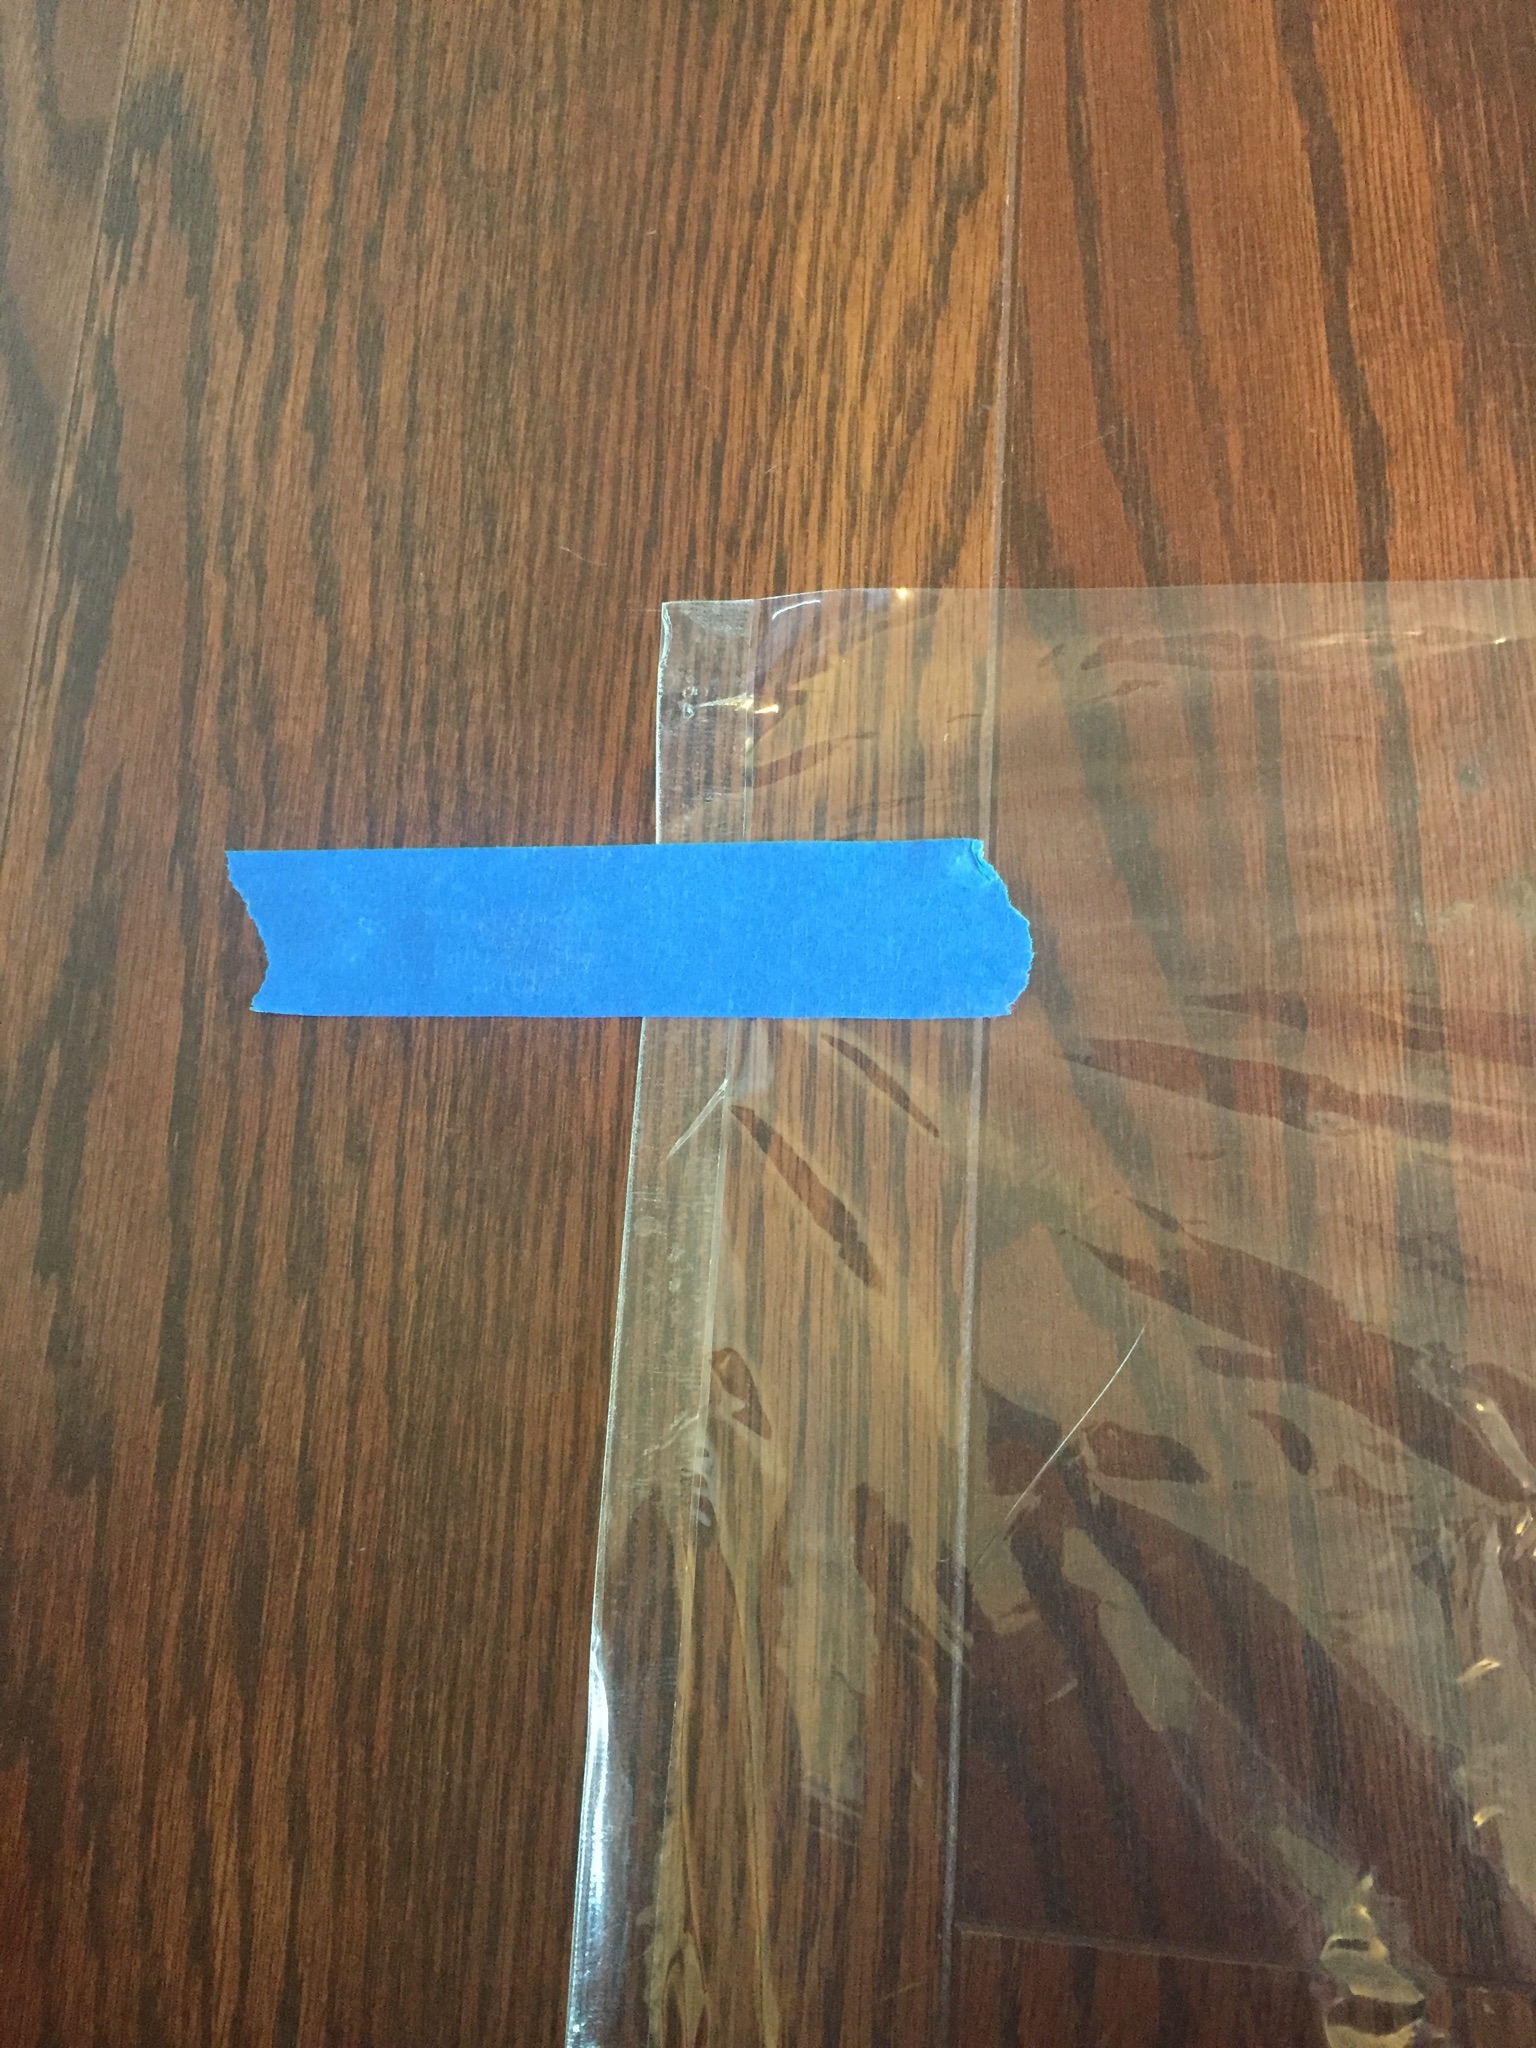
    Step 1 is to clear a large, hard floor area to work on and vacuum it thoroughly. The polycro is static-y out of the box and attracts the smallest motes of dust and pet hair. Then unpack the Duck kit, unfold the polycryo, and spread it carefully on the floor. Use blue masking tape to tape down the corners. You will want to put the tape about 1.5″ from the edge and parallel to the direction of the long edge, to hold the polycryo firmly while you “hem” the edge with double-sided tape.

    Next apply the double-sided tape as close to the edge as you can get it. The Uline tape comes with one side covered, so you can press down firmly to make it adhere fully while laying it down. I start about an inch past the edge of the tarp so that the edge will stay put as you pull while laying down the tape. When I’m done applying the tape to the edge I trim off the extra inch.

    The next photo shows the polycryo spread out and taped down to the floor, with about half of one long edge taped.

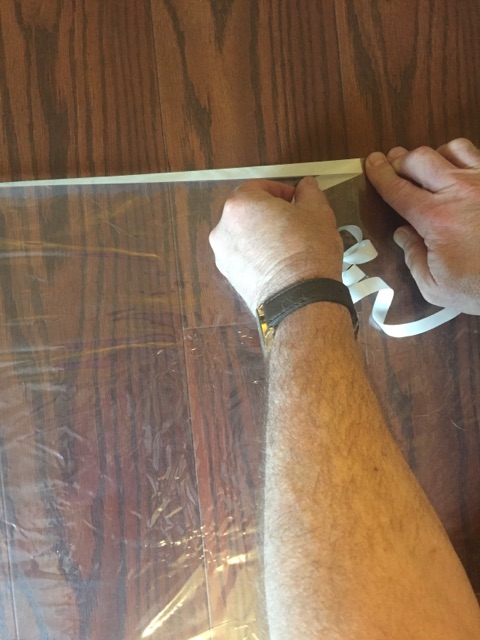
    Next peel the cover off the first couple of inches of tape and fold the edge over so the tape is sandwiched between. I like to work from right to left while making the hem.

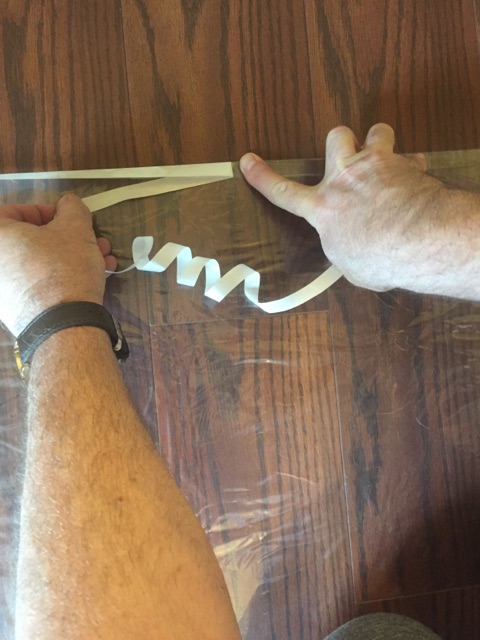
    Start pulling the cover strip off with your left hand while following closely with your right hand. You should peel the cover strip straight off so that you get a running fold. Plant your right pinkie, ring finger and middle finger firmly on the folded portion to hold it in place while following the fold with your index finger and pushing down firmly to adhere the tape. When your fingers are spread as wide as they will go, move your right hand closer to the peeling/folding point, as shown in the next three photos:


    When you’re finished with one long edge do the other. When both long edges are done, move the blue masking tape holding down the corners so they are parallel to the end. Proceed to apply tape and hem the ends of the tarp.

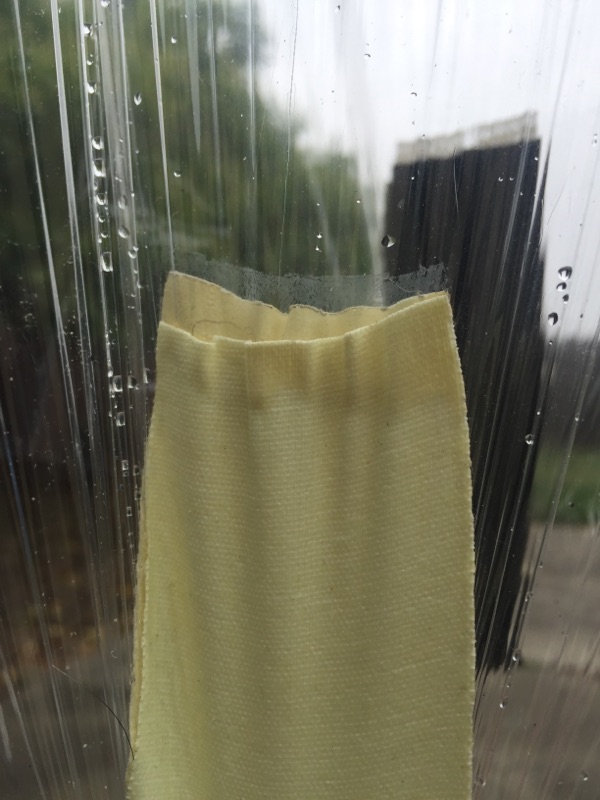
    When all four edges are hemmed you’re ready to start putting on the tie-outs. Use a tape measure and Sharpie pen to mark the middle of the ends, and to mark the long sides in 1/3 intervals (about 40″). Take 8 of the 7/8″ nylon washers and use the scissors to cut one side of each to make a flat edge that will go into the fold of the tape for the tie-outs, to spread out the forces. Smooth the cut edge with a file or sand paper. The remaining two washers will be used at the ridge line tie-outs and don’t need to be trimmed.

    I like to do the corner tie-outs first, then the ones on the long edges. Cut about 10″ of duct tape for each corner and side tie-out. Lift the polycryo and insert the tape sticky side up under the tarp, then press down firmly on the polycryo and rub and smooth it to get good adhesion and eliminate bubbles. Place a washer on the tape right by the corner or edge, with the flat side of the washer away from the tarp, then fold the tape back over on top of the polycryo:


    The technique is the same for all the corner and side tie-outs. Once all the corner and side tie-outs are done you’re ready to do the ridge line tie-outs.

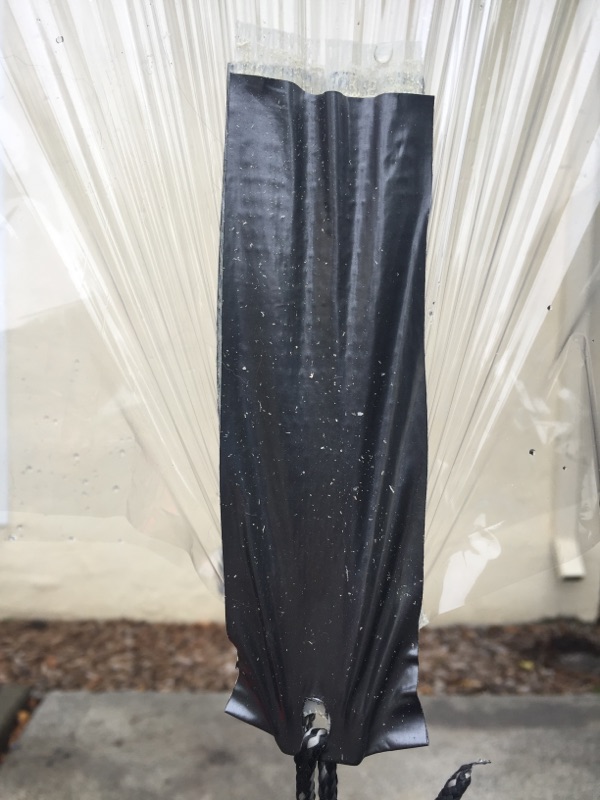
    The ridge line tie-outs are built up from several layers of overlapping and crossing duct tape because they are more highly stressed than the corners and sides. Start by cutting two 14″ pieces of duct tape. Lift the center of the tarp and insert the tape sticky side up about half its length under the tarp, press firmly on the tarp and adhere it to the tape and remove any bubbles.

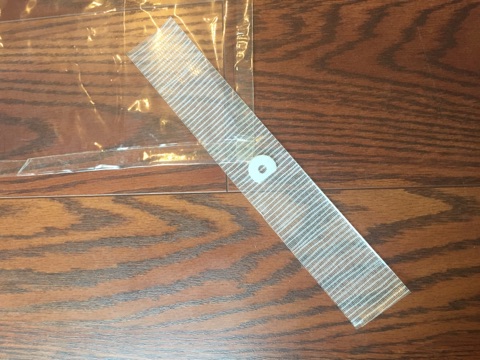
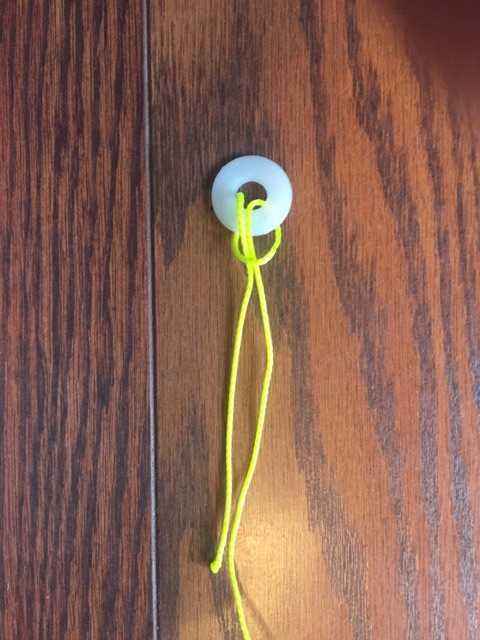
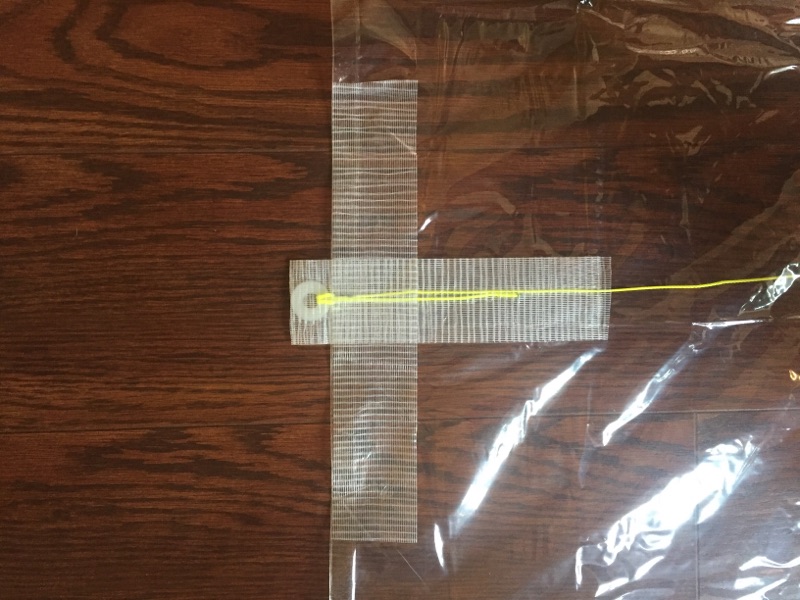
    Now it gets a little tricky. You’ll need to take one of the two round washers and tie one end of the Spectra cord around the washer, then place the washer on the tape at the edge of the tarp while placing the cord straight down the center of the tape under the tarp:

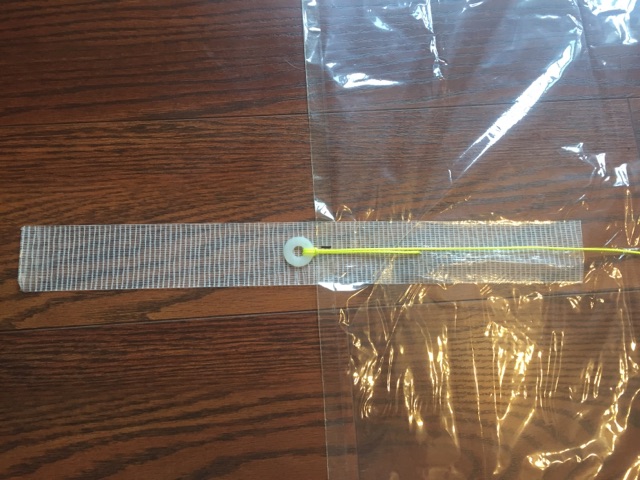
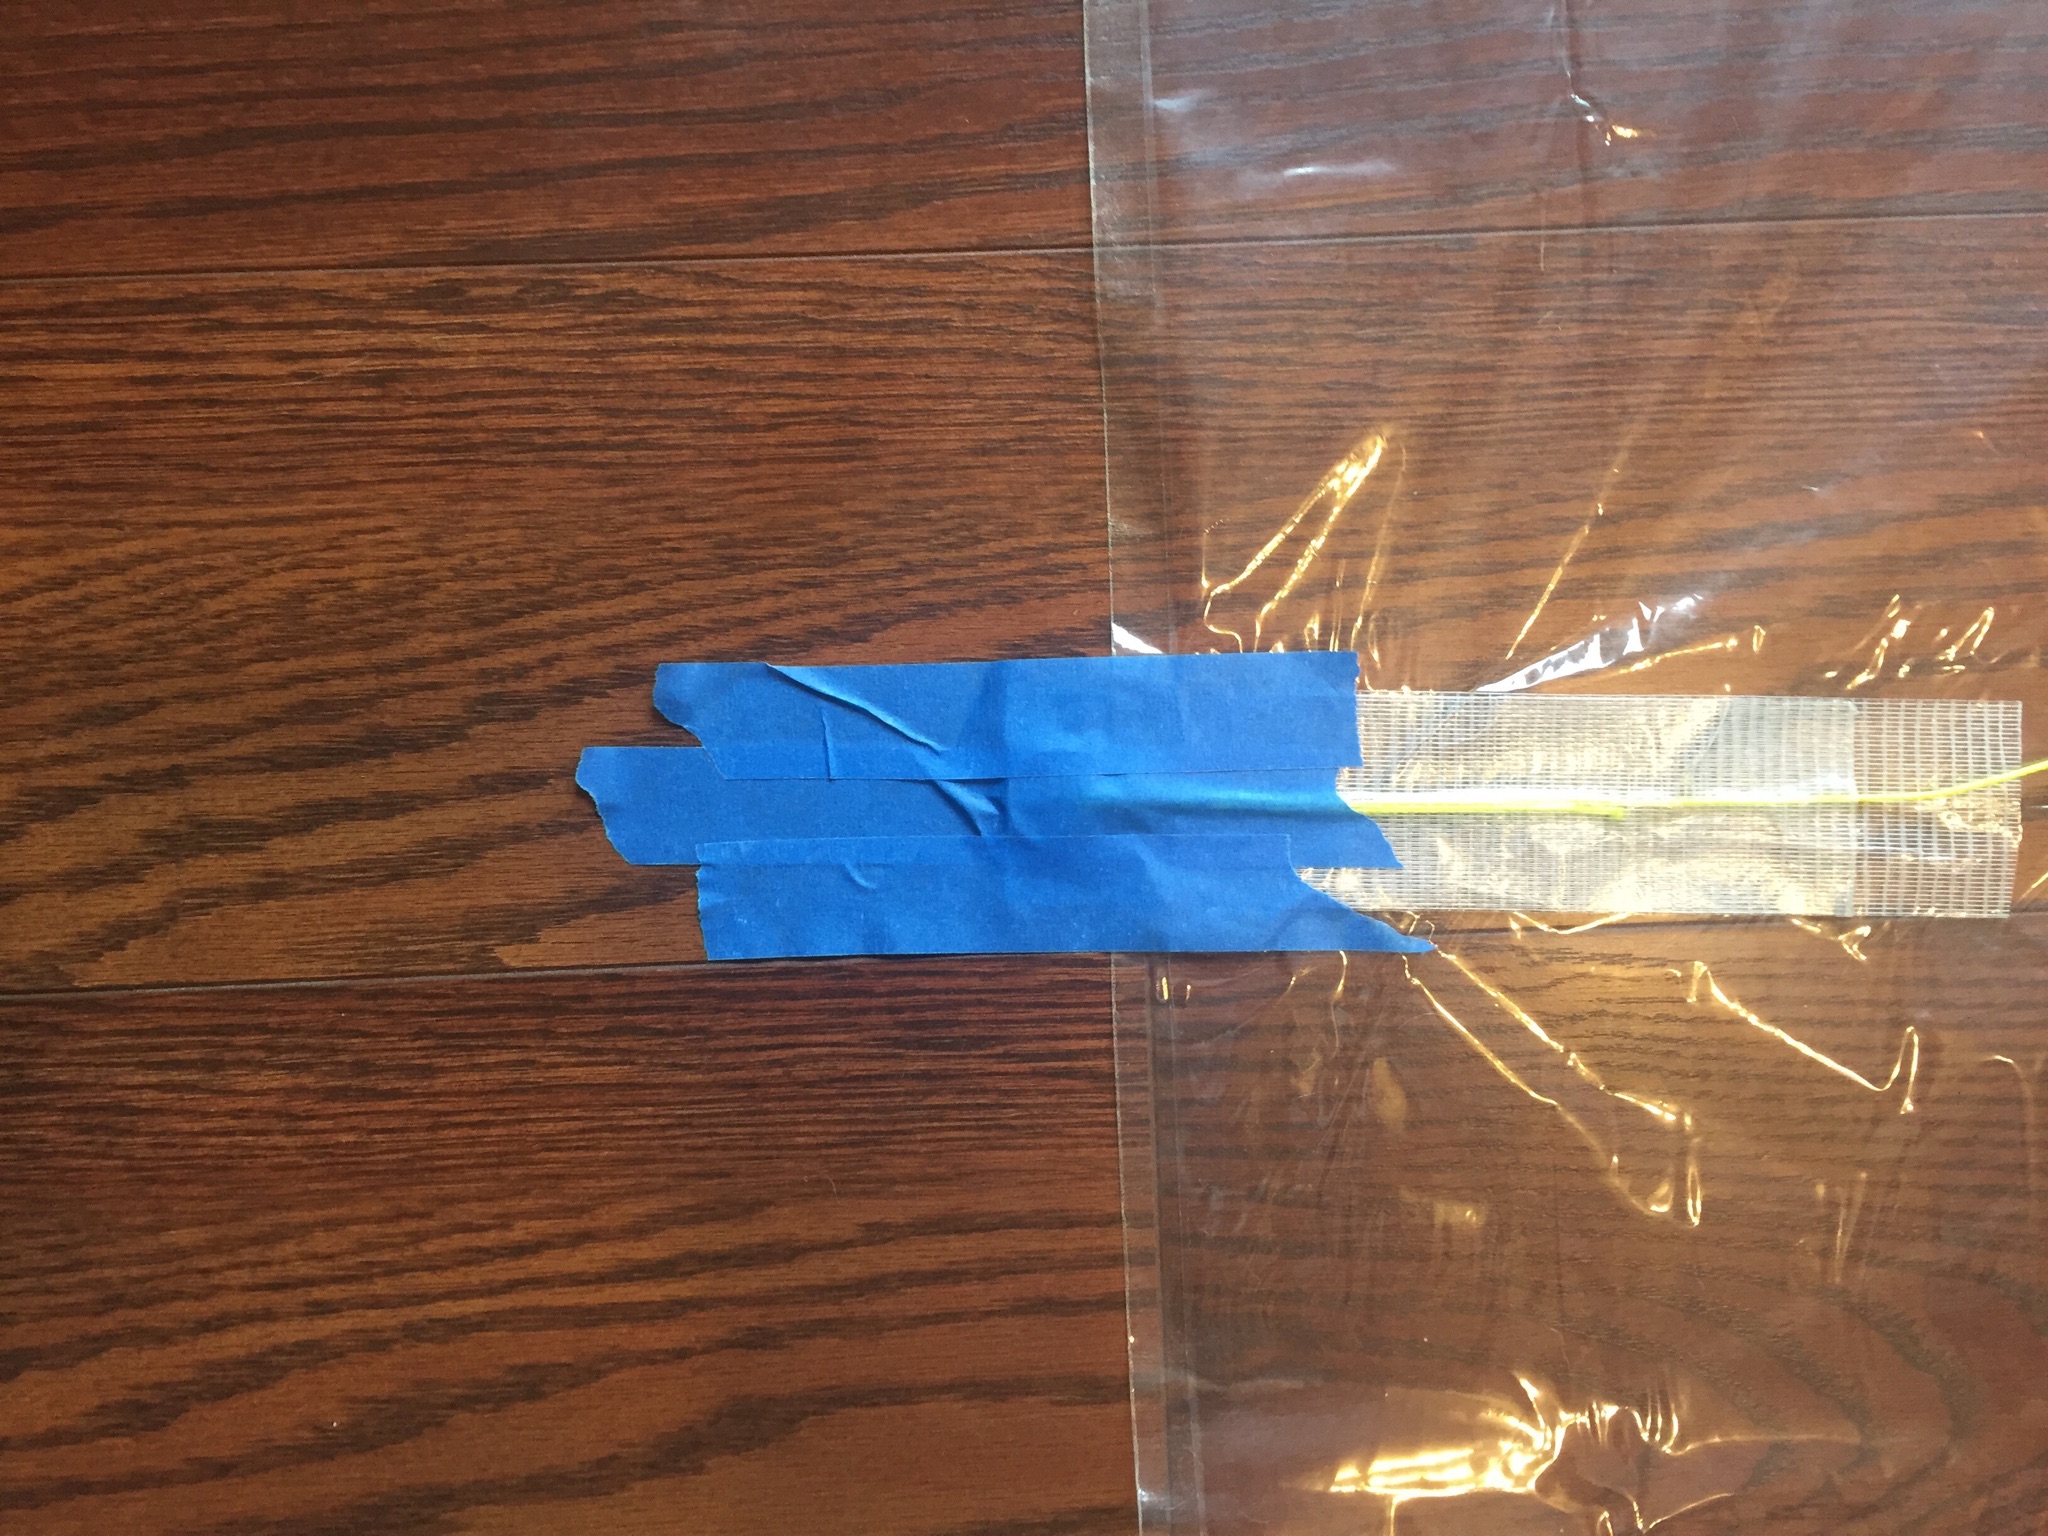
    Finally, fold the tape back over the washer and on top of the tape underneath. Press and rub to adhere the tape and eliminate bubbles. Now place blue masking tape on the tie out so it will be held firmly while you construct the ridge line tie-out at the other end.

    At the other end of the cord you’ll need to trim it and tie on the last round washer at just the right length. The right length is a hair shorter than the length of the tarp, so that when tension is applied to the ridge line tie-outs they will pull the tarp taut. Cut another 14″ piece of tape, lift the tarp, and insert the tape sticky side up about half its length under the tarp. Press and smooth. Then place the washer on the tape at the edge of the tarp while pulling gently on the cord. After the washer is in place fold the tape back over the washer on top of the tape underneath.

    Once the two ridge line tie-outs are fabricated, you are done with the underside of the tarp. Turn the whole thing over so the ridge line cord is now underneath. Cut two 10″ pieces of duct tape and place them cross-wise centered over the ridge line tie outs you have just made. Press and smooth.

    Next cut four 8″ pieces of tape, two for each end. Lift the ridge line tie out, place two tape pieces sticky side up under the tarp on either side of the tie out:

    Finally, fold the two pieces of tape back over the tarp on top of the tape below.

    With the tie-outs all done you are now ready to melt holes through the tape in the center of the washers. Heat the 1/8″ steel rod/tent stake with a torch or stove, and carefully push it through the center of the washers in the tie-outs:

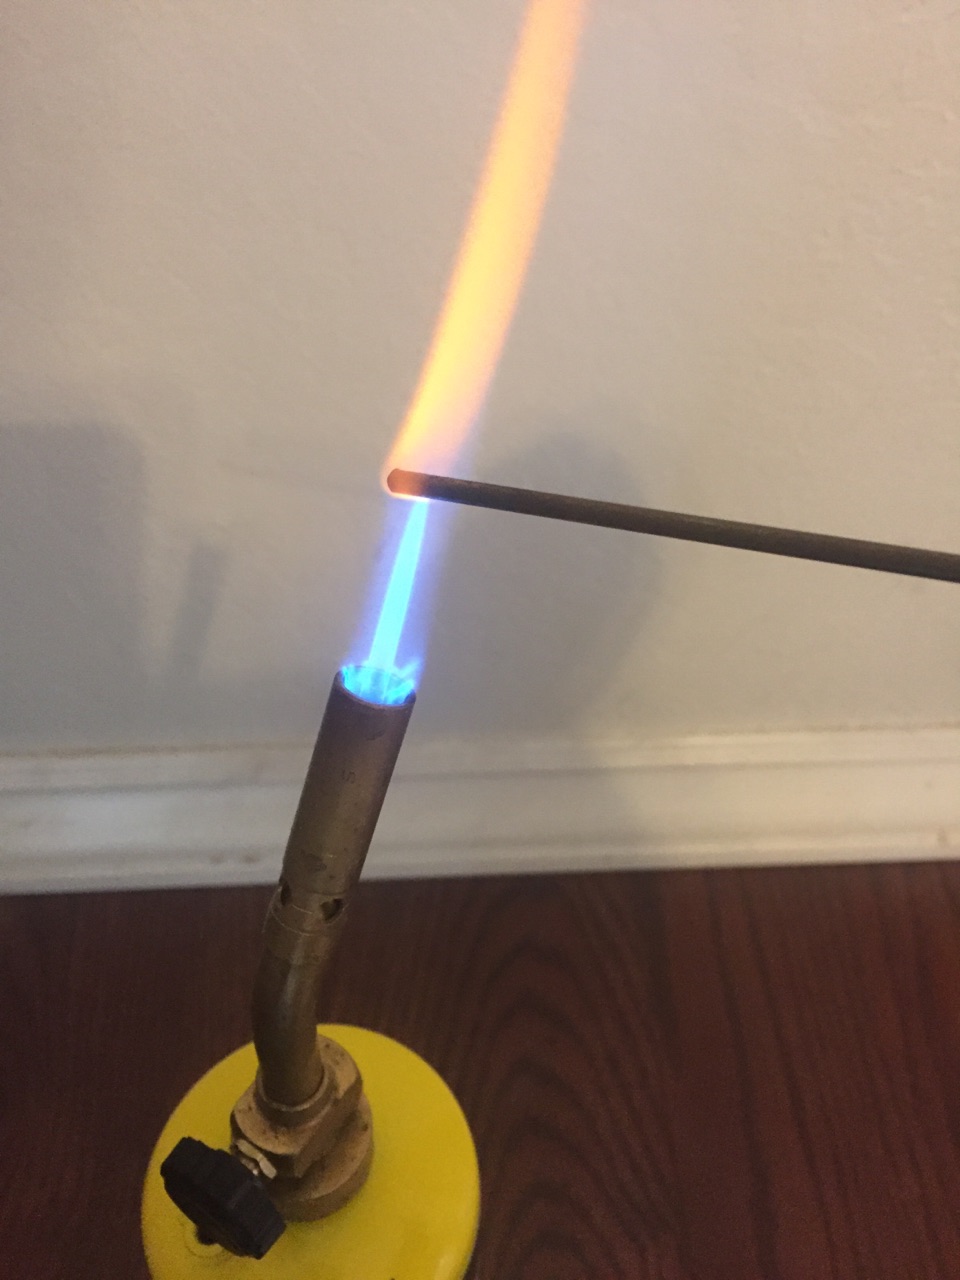
    In the pictures the tie outs are sitting on the floor because I had my camera in the other hand. In practice, lift the tie outs up and hold while pushing the hot steel rod through.

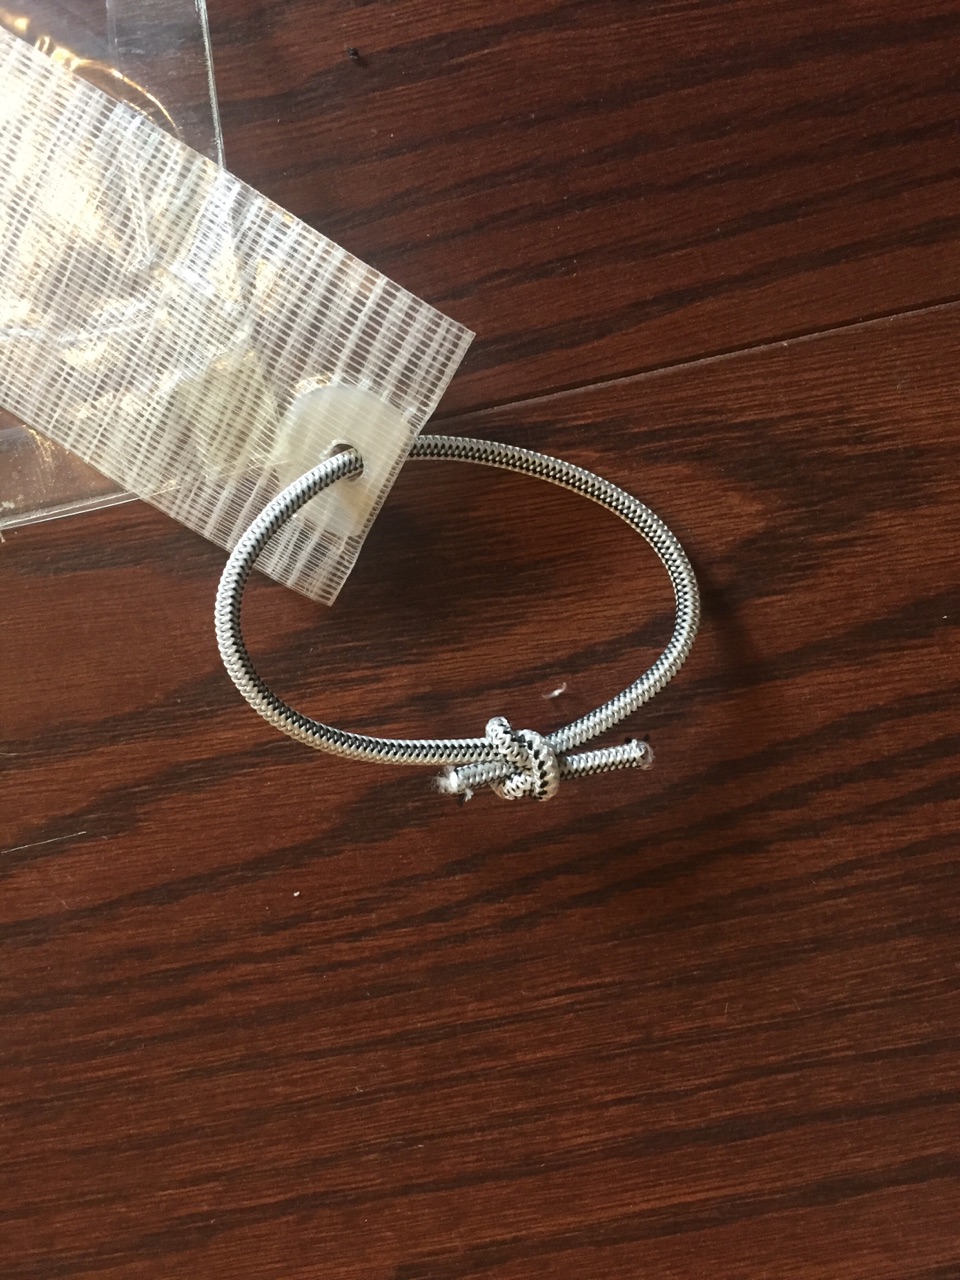
    Finally, cut eight 10″ pieces of shock cord and knot them in little circles through the corner and side tie outs. The shock cord loops give a nice tight pitch, but also act as a shock absorbers in windy conditions.

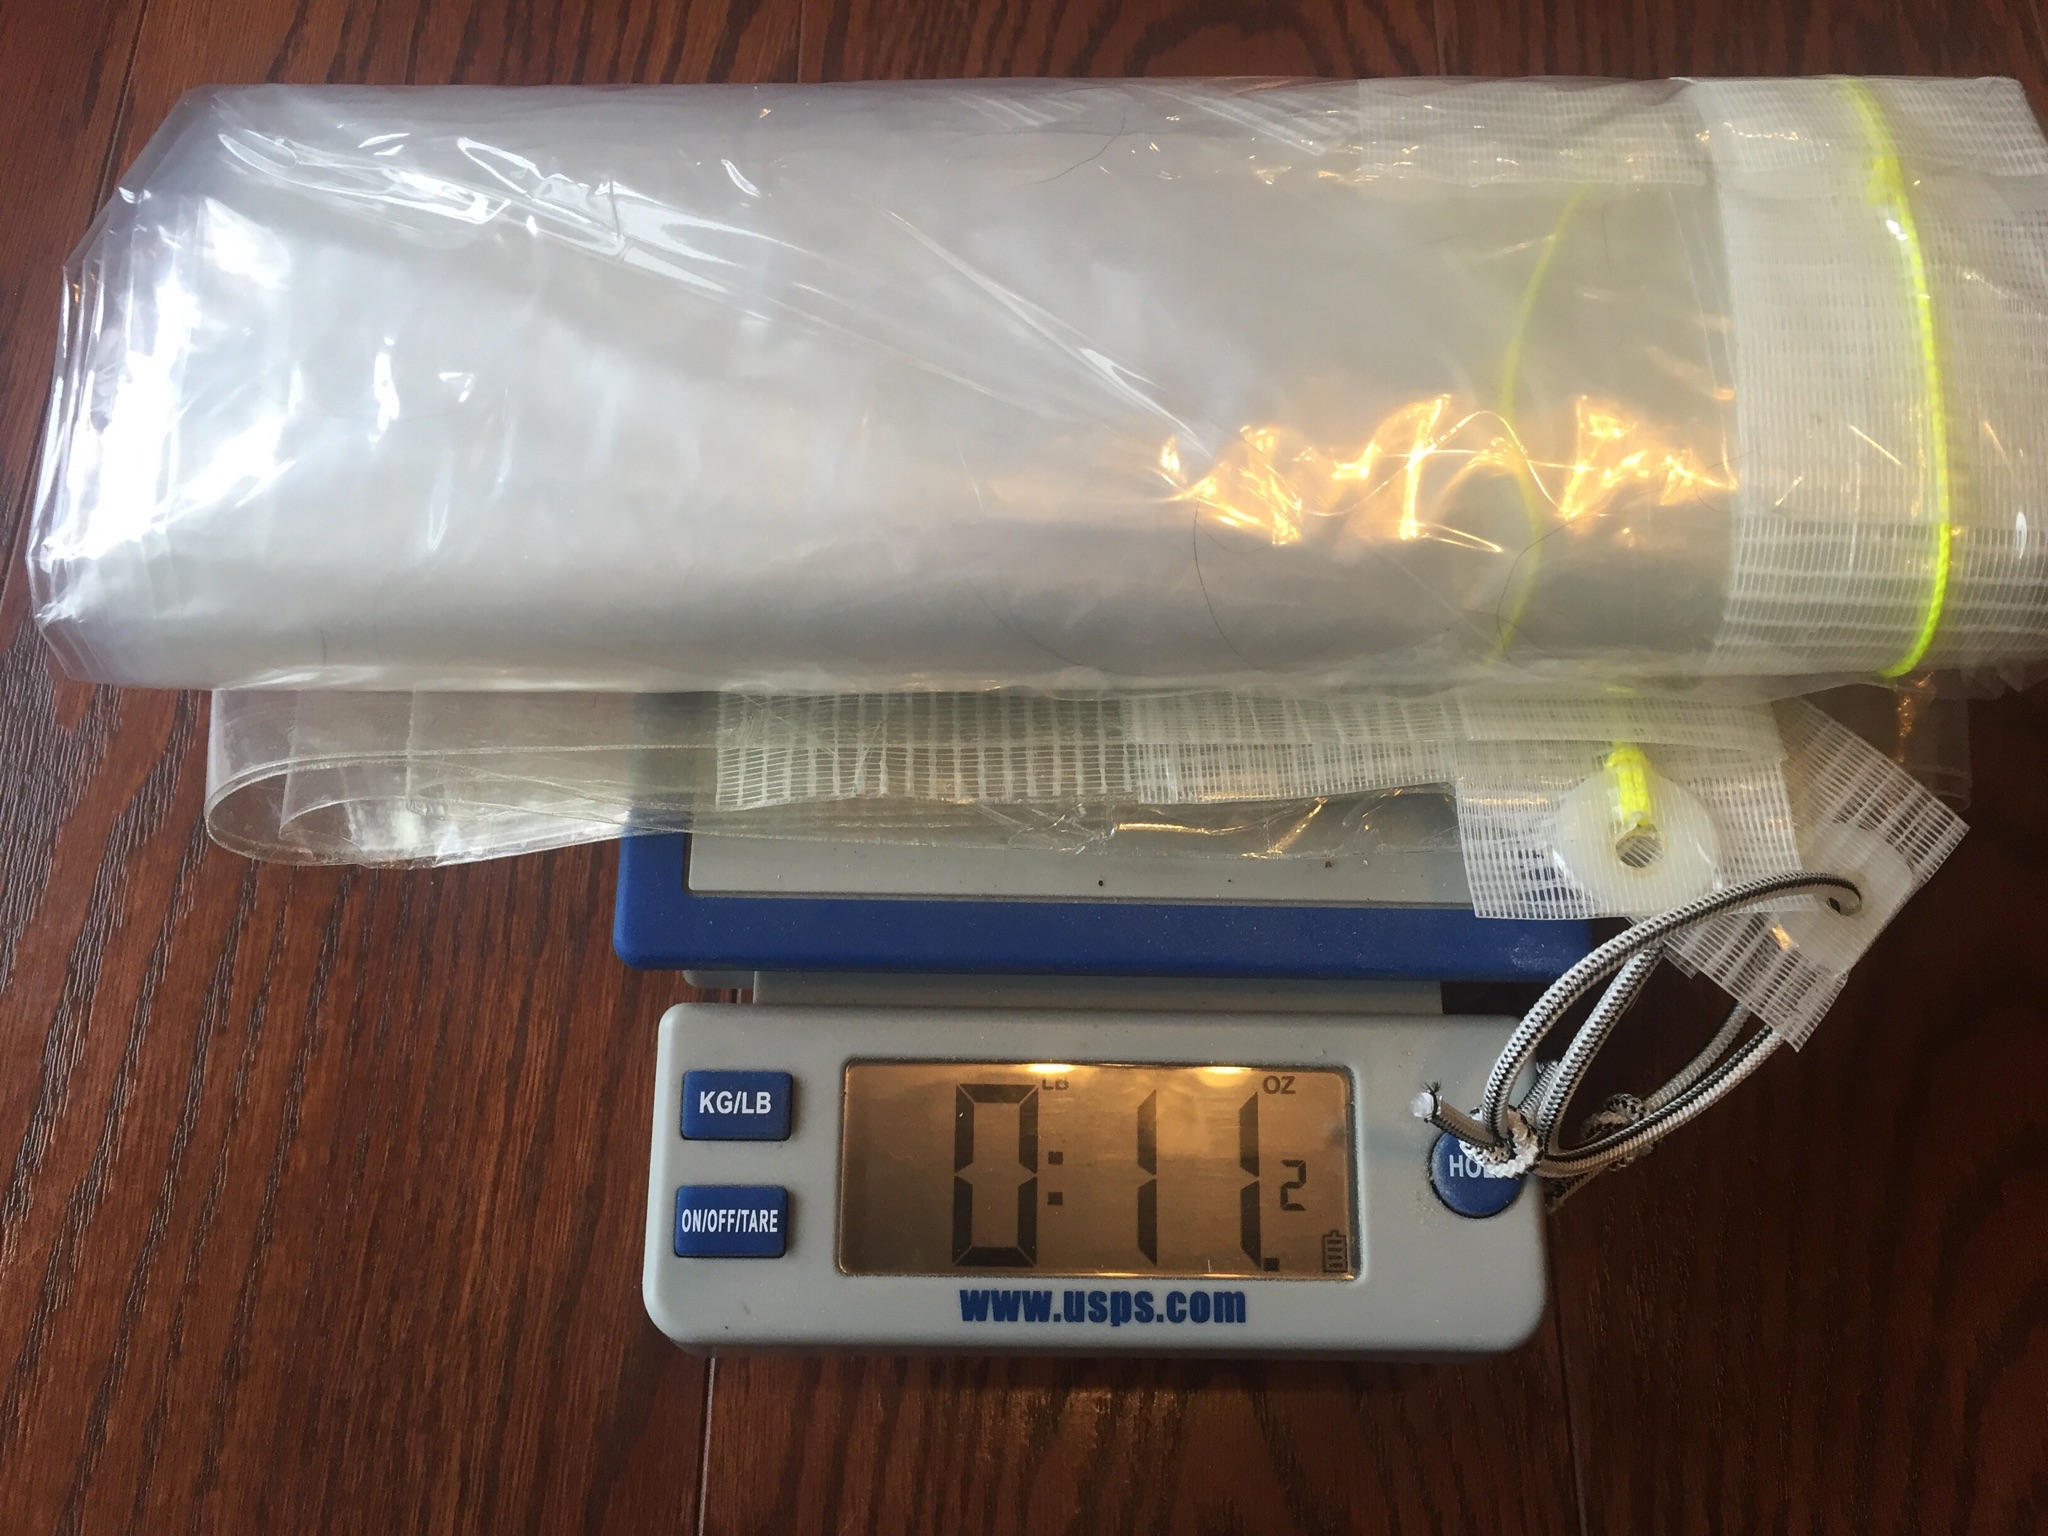
    Final weight: 11.2 ounces.

    You’ll need to tie another 10 feet or so of the Spectra cord to the ridge line tie outs so you can pitch the tarp. Also, since I often camp in the high Sierra on flat rocks or shallow sand where tent stakes are useless, I also attach about 3 feet of Spectra cord at each corner and side tie out with a little knotted loop at the end, so I can make big adjustable loops to put around rock anchors that I have collected.

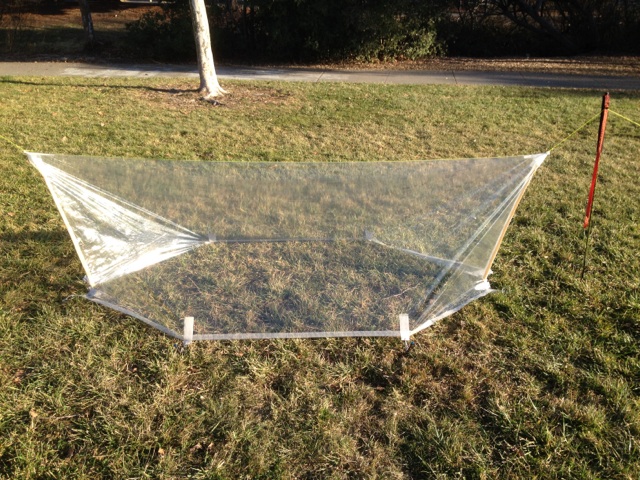
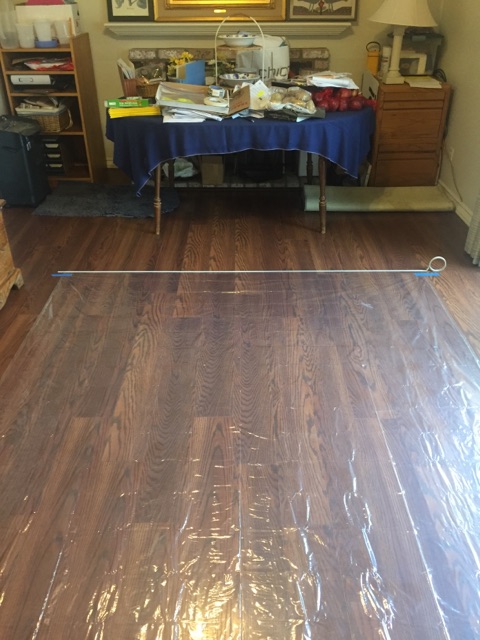
    The finished product (an earlier version with different tape) pitched:

    It is truly amazing to be able to fall asleep while looking up through your shelter at the starry sky. It’s also nice to know whether that critter sniffing around your shelter in the middle of the night is a bear or just something small like a skunk.

    Total cost: About $30-$40, depending on where you get your materials.

    Total time to construct (including taking pictures): Two hours

    #3389247
    Daryl and Daryl
    BPL Member

    @lyrad1

    Locale: Pacific Northwest, USA, Earth

    Thanks for the helpful post.  Lotta good ideas here.

    #3398945
    Matt Swider
    Spectator

    @sbslider

    Locale: Santa Barbara

    NIce tutorial.  I wish I had seen this before I built mine.  And completing in 2 hours is smokin fast, I don’t recall how long I took but thinking closer to 4 hours.

    #3399212
    David Gardner
    BPL Member

    @gearmaker

    Locale: Northern California

    The first one always takes the longest. Would be interested to see a picture of your final product.

    #3399214
    Matt Swider
    Spectator

    @sbslider

    Locale: Santa Barbara

    I bet you have and did not realize it.

    https://backpackinglight.com/forums/topic/59450/page/10/#post-3373344

    That post and the one following show pictures.  Your post linking to this thread is the post below those.  Next time I would go with your nylon washer approach, flattening the one side is a good approach IMO.


    After looking at my posts in the other thread I would say 4 hours was optimistic, maybe more like 8 . . .

    #3399424
    David Gardner
    BPL Member

    @gearmaker

    Locale: Northern California

    You’re right Matt, I have seen it. I remember wondering how the little carbon tubes for the tie outs would work out. They spread the forces out much more than the flat edge washer. Why would you go with washers next time?

    Your tarp came out about 1/2 oz lighter than mine. I suppose the difference is the ridge line cord and shock cord tie outs.

    Have you had a chance to use your tarp in the field?

    #3399466
    Matt Swider
    Spectator

    @sbslider

    Locale: Santa Barbara

    Hi David, I have not yet gotten to use my tarp out in the field.  I did have it set up in my yard for several days in the rain, and did it under it for a few minutes in the rain as well.  One of my pieces of tape began to creep during that event.  I did have a lot of tension on it though.

    Those black tubes are not carbon, but plastic irrigation tubing.  So they flex pretty well.  I think I would use the washers the next time just to try something different.

    I have not yet used this in the field, but now that it is in my mind I am thinking I will on the over night trip planned for later this month.

    Have you made/used one of these with the lighter polycryo?  i was thinking 11oz was a bit heavy, and the lighter material ought to work out fine also.

    #3399509
    David Gardner
    BPL Member

    @gearmaker

    Locale: Northern California

    I have made tarps with the thinner polycryo and they weigh about 40% less, but as one might expect they aren’t as durable. On the other hand, for $30-$40 you can make a new one each season.

    I’m going to hang a 20 lb weight from each of three sample tie-outs and put them out in the yard to test for creep. I’ll use 20 lb weights because that is the maximum tension I have measured on a pitched tarp tie out. One sample will be the transparent 3M tape, one will be 3M’s “heavy duty all-weather tough” dark silver tape, and the third will be Tenacious Tape. I think Tenacious Tape holds the best, but it is ridiculously expensive ($14 for 20″ versus $9 for a 20 yard roll of transparent duct tape, and each tarp requires at least 100″ of tape).

    #3399516
    Jon Fong / Flat Cat Gear
    BPL Member

    @jonfong

    Locale: FLAT CAT GEAR

    Great write up David!

    #3399546
    R
    Spectator

    @autox

    How come nobody used plastic D-rings for tie outs?  They’re perfect for this application.  Light, cheap, distribute load across the width of the tape and don’t entail poking a hole in anything. They don’t really wear, so if you retire a tarp, you can cut them out and re-use them on the next one.

    #3399566
    David Gardner
    BPL Member

    @gearmaker

    Locale: Northern California

    Thanks Jon.

    Rene: I’ve thought about the plastic D-rings but when I checked them out at a store they didn’t look to me like they could withstand the 15-25 lbs. of tension on a tie out. But I just ordered some to actually test so we’ll see.

    #3400048
    Mario Caceres
    BPL Member

    @mariocaceres

    Locale: San Francisco

    David, thanks for this great / detailed tutorial.  FYI, I had some 1/2″ Beastee Dee D-rings laying around.  (These are supposed to be stronger than regular D-Rings).  I weighted 50 Lbs on them without any problem.

    #3400147
    David Gardner
    BPL Member

    @gearmaker

    Locale: Northern California

    Mario, nice to know. The only issue is that I need to use full width duct tape (1.88″) for sufficient adhesion of tape to polycro. I just received some 2″ D-rings from County Brook Design in Alabama (through Amazon because I couldn’t find any 2″ D-rings locally) and tested them. They held 50 lbs too with no problem. The only issue is the weight. The D-rings weigh 5.14 grams each but the flat-edged nylon washers weigh only .57 grams. I use 8 side tie outs on my tarps, so it’s the difference between 41.2 grams for the D-rings versus 4.56 grams for the washers, which equals 36.64 grams or 1.31 ounces.

    I’ve never had a problem with the washers pulling through the tie out duct tape with 50 lbs. hanging on them, so I’ll stick with the washers.

    #3400148
    David Gardner
    BPL Member

    @gearmaker

    Locale: Northern California

    I just re-read the OP and realized I had made an error regarding the “right length” of the ridge line cord. In the OP I said: “The right length is a hair shorter than the length of the tarp, so that when tension is applied to the ridge line tie-outs they will pull the tarp taut.” I tried to edit the OP, but because it’s been more than two weeks since the OP of course BPL won’t let me.

    The correct description should be “The right length is a hair LONGER than the length of the tarp, so that when tension is applied to the ridge line tie-outs they will pull the tarp taut.”

    #3400168
    R
    Spectator

    @autox

    Re. D-rings.

    I was thinking of using several strips of tape narrow enough for the D-ring, aligned at different angles.  That would let you use a small, light ring and still get adequate adhesive area.  Covering a range of angles could be an improvement.  But if one 2″ strip holds better than two 1″ strips, maybe there’s not a win here.

    #3400192
    David Gardner
    BPL Member

    @gearmaker

    Locale: Northern California

    Rene, multiple tape strips is an interesting idea. Guess I’ll have to test that idea too. I’ll try three 1″ strips first, one straight and two to the sides. If that works, I’ll try 1/2″ strips next.

    #3400277
    R
    Spectator

    @autox

    Cool.  3 strips arranged as you describe is exactly what I was thinking.

    Here’s another option.

    The flat edge of your washer is probably about 3/4″ wide.  So you’re really only loading the middle 3/4″ of the tape at the fold, and you could probably trim the corners off once it’s folded.

    If you were to make that trim before you apply the tape, you’d have a notch in the middle of the 2″ strip that could fit it through a 3/4″ D-ring.  You’d probably want to apply a peel away backing to the tape so it won’t stick to itself when you put it through the ring.  You could add a 3/4″ strip through the middle as a re-enforcement.

    Up to the builder to decide if the trouble of this is worth a D-ring over the washer.  If you’re selling these, it could be offered as a premium option.  If you switch to a nylon fabric repair tape (assuming it has adequate strength/adhesion) and give it nice rounded corners, it would add a nice aesthetic touch.

    #3400315
    David Gardner
    BPL Member

    @gearmaker

    Locale: Northern California

    Rene, I used nylon fabric sail repair tape when I first started making tarps, but found that it did not have enough adhesion and “creeped” and one even came off completely in dry weather. So sail repair tape at least is not the best choice. Too bad too, because it is much lighter and stronger than duct tape. Have you tried, or do you know of, other types of nylon fabric repair tape?

    #3400441
    R
    Spectator

    @autox

    Ah, missed that you already tried sail repair tape.  I haven’t investigated adhesives on polycro.  Tenacious repair tape is mentioned in the other a-frame tarp thread (page 10, w/ pics), but only for surface re-enforcement, not shear loading.  I suppose you could try the double sided stuff you use for the edges with various light fabrics, much as is done w/ cuben re-enforcements.

    #3400456
    Mario Caceres
    BPL Member

    @mariocaceres

    Locale: San Francisco

    David, next time you build one It would be interesting to weight the tarp as you go along the process of building it.  It’s amaizing how from 4oz of the polycryo alone (Per info on the picture of the box you posted) it went to 11oz of your finished product. (per your own measure)   It would be interesting to weight the tarp 1) Policryo only, 2) polycryo with hemmed edges & 3) plastic washers alone and 4) Polycro with reinforcements/washers installed.

    #3400498
    R
    Spectator

    @autox

    I was wondering the same thing.  Don’t forget the weight of the bungies.

    #3400552
    David Gardner
    BPL Member

    @gearmaker

    Locale: Northern California

    I will weigh the next tarp I make at various stages of fabrication. I’m making one for a High Sierra trip this summer, although it’s a zippered floorless tent like in this picture and 12.5′ long instead of 10′. It’s the “regular” thickness instead of the double thickness I normally use because I haven’t been able to find any double-thickness material longer than 10′ and the zippered floorless tent needs more length for headroom and a backpack to fit inside. I will weigh just the material, then at each stage where I add more weight. The weight of the polycryo will be apples to oranges, but the number and size of the tie outs will be the same so we’ll be able to compare apples to apples in that regard.

    I’m waiting to build it until I can do the tape adhesion test I mentioned above so that I can use the best tape (although if the Tenacious Tape wins I’ll be using the second best tape because there’s no way I’m spending $75 just for the tape). Just picked up some polycryo at the local hardware store today so I’ll try to get the test done this weekend. I plan to spray the samples with a hose multiple times to see how moisture affects the tapes.

    #3400698
    David Gardner
    BPL Member

    @gearmaker

    Locale: Northern California

    Tape Test Results

    I tested four different tapes for tie outs: Gorilla Clear Repair, Scotch/3M “All Weather”, Scotch “Tough Transparent”, and Duck Glow-in-the-Dark. I decided not to test the Tenacious Tape because it’s so expensive I know I will never actually use it. It rained here last night, so it was a good simulation of real-world use. Each tie out was hung with 20 lbs of weight.

    Here is a picture of the test rig:

    The Gorilla Clear Repair failed almost immediately. Didn’t get to test adhesion because it wasn’t strong enough to hold the nylon washer in place, which tore out in less than 5 minutes.

    Next was the Scotch/3M “All Weather” tape. It creeped down about 1/2″ in 12 hours – you can see the creep area as a light gray area just above the tape. Fail. Not a bad thing, because it’s ugly.

    Then came the Duck Glow-In-The-Dark tape. It creeped about 3/16″ and started to de-adhere. Fail. The creep shows as a light colored area just above the tape. Too bad, because I really like the glow feature. It lets you see the perimeter of your tarp in the dark so you don’t stumble into it.

    Finally the Scotch/3M Tough Transparent tape. No creep, no de-adhering. Pass, which is cool because aesthetically I like it the best – transparent tape on a transparent tarp.

    #3400703
    Matt Swider
    Spectator

    @sbslider

    Locale: Santa Barbara

    great test.   Glad to hear the 3m tape did so well, as that is what I used on my tarp as well.  I did have a small issue I recall with it, but if I remember correctly I cut some 1″ widths and used that .  Best to stick with the 2″ width for these extended duration loads.

    #3400789
    Mario Caceres
    BPL Member

    @mariocaceres

    Locale: San Francisco

    David, I’m working on a Hoodless tarp-poncho out of Silpoly 1.1 PU 4000.  This fabric has great aged HH rating (over 3514mm) but being polyester and coated with PU in one side has lower tear strength (and probably tensile strenght)  than regular silnylon.  I would like to incorporate some “shock absorbers” at the tie-out points like in your design to better cope with gust winds when in tarp mode.  I have a couple of questions.  How much weight can you put in your 1/8″ shockcord loops 1) before they are fully stretched &  2) before the Fail (break)?

Viewing 25 posts - 1 through 25 (of 53 total)
  • You must be logged in to reply to this topic.
Forum Posting

A Membership is required to post in the forums. Login or become a member to post in the member forums!

Get the Newsletter

Get our free Handbook and Receive our weekly newsletter to see what's new at Backpacking Light!

Gear Research & Discovery Tools


Loading...