Companion forum thread to: How to Make a Lightweight Fuel Dispenser for Alcohol Stoves (the Snuffle Flask)
The Snuffle Flask is a lightweight fuel dispenser that works with any alcohol stove. Learn how to make one from items in your home.
Topic
Become a member to post in the forums.
Companion forum thread to: How to Make a Lightweight Fuel Dispenser for Alcohol Stoves (the Snuffle Flask)
The Snuffle Flask is a lightweight fuel dispenser that works with any alcohol stove. Learn how to make one from items in your home.
Wow. Amazing.
Cool work
This is very cool, but if you’re not too handy and want to go the quick route check out the Dual-Chamber Fuel Measuring Bottle at Litesmith.com. Not too bad for $3.95…
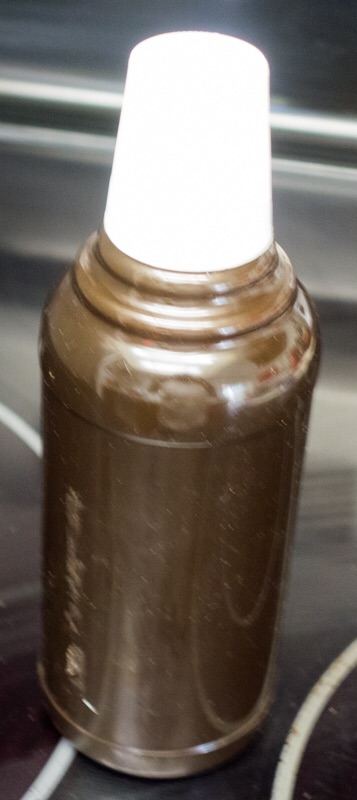
^Yes. I use one of those as well. I believe it is called a Bettix Bottle.
Gotta love the ingenuity and drive to perfect something like the Snuffle Flask.
Those “bettix” bottles are very familiar to us home brewers :)
What’s the name of that type of lighter? I’ve been looking all over but can’t find one.
First of all…. very nice article. Second…. you really missed the opportunity for some great names here! It is the “Lambda Stove”, so it just makes sense that you would call the fuel bottle the “Omega Moo”. Duhh! I mean, really, people, I get tired of doing all the heavy thinking around here. At least you didn’t name it the “Alpha Beta”…. :)

We tend to use bottle adapters for the oral syringes in the hospital pharmacy. They come in several styles and sizes.
http://www.medidose.com/Press-InBottleAdapter.aspx
http://www.totalpharmacysupply.com/baxa-adapta-cap-size-m-24-mm.html
Very cool! I used your “elegant” method but made it on my small lathe (Jet 1014 bench lathe).
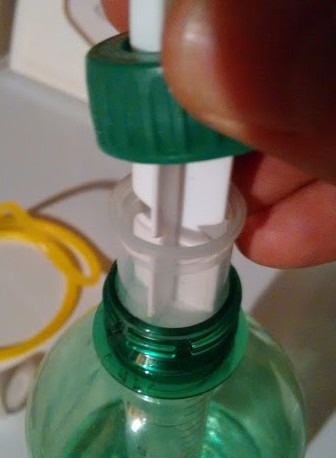
Cap Jig: I made a jig for the cap by taking a large(ish) dowel (OK – I cut about 20 cm off the end of a broom handle) and lathed it down to snugly fit the thread portion of the bottle from the inside. The result: I can easily screw a cap on and there is a space under it to cut the hole.
Cap: There are 2 types of caps. One has a ridge that seals to the inside edge of the bottle opening (the plug you mention) and the other is flat inside and seals to the top edge of the opening. I used the “no ridge” type. Using my jig (centered by the slight bump in the middle of the cap from the molding process), and without measuring, I cut out the hole using an Exacto knife. I then tried the plastic end of the plunger in the hole. Shaved the cap until it just fit and then I was done. Removed the cap and slid it over the plastic part of the plunger and then replace the rubber plug, The cap is secure because the thumb end of the plunger is larger and the cap won’t slide past either end.
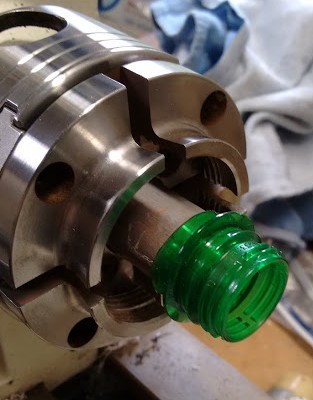
Syringe: No jig needed. Used a 20 ml syringe. (Graingers Item #: 45CR33) Mounted the syringe in the 4-way clamp and backed it up with a live tailstock. I then shaved the syringe grips to where the material was the same diameter all around.
Now the best part. No need for seals or O-rings. Slide the syringe body into the bottle and inserted the plunger. Screwed down the cap and the bottle simply seals against the syringe body. No leaks.
You can do the same thing using your method but it was much quicker and easier with the lathe. It took me about an hour to figure all this out and then I made about 4 of these things so far in about 10 minutes. I now have an easy way to measure 2-cycle engine oil. Gasoline additives (Seafoam). Adding bactericide to the humidifier. Oh and one for my alcohol stove. :o) Brilliant! Thanks so much for the idea!
Hank, can you post some photos?
Clever solution but complicated and time consuming.
I have been using re-purposed prescription mouth wash bottles for alcohol. The benefits are:
The only down-side is the weight at 1.75 ounces, but that is the price for gear that isn’t fragile.

Yes, I have used the mouthwash bottle as well (my favorite was “Act”). But I don’t typically use mouthwash so I had to wait for my wife to be done with her’s. I like the syringe because there is no fumble, no spills, you get more accurate measurements, (all as advertised) and I can obtain a soda bottle easy, cheap compared the mouthwash bottle. BTW, I didn’t like the “child proof” feature on the mouth wash bottle so I took a large nail clipper and snipped off the two catch points around the neck of the bottle.
I’m at work right now (shhh – don’t tell anybody) but when I get back home I’ll post some pics.
Oh and I forgot. The syringes were $9 for a bag of 25. So 36 cents each. I did have to buy the whole bag but I have made other more questionable “investments” for this sport. This one totally was worth it to me.
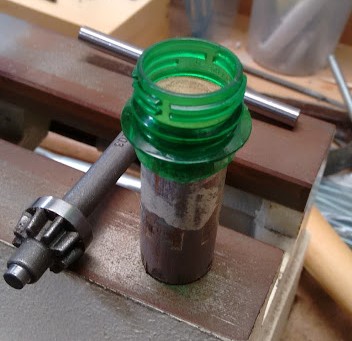
The Jig
The jig in the lathe
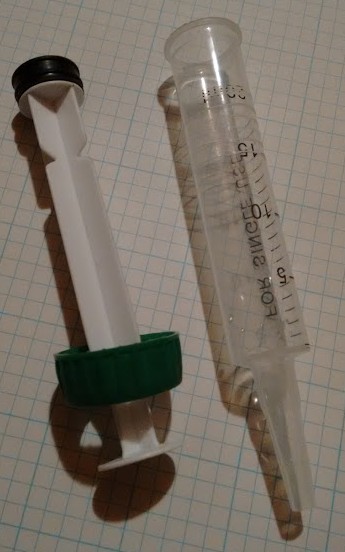
The finished syringe. I have to take off the rubber plug off the plunger to put the cap on. The ml marks look like they would rub off pretty easy so I scored over then from 15 to 20 ml.
No seal.

Weight of the unit. (oz)

Weight of the empty bottle. (oz)
Since the post was deleted that suggested just practice using a flip top bottle that is readily availability and needs no modification, I hesitate to post that this has worked fine for me. Especially using a stove like the Starlyte where you can save unburned fuel.
I do appreciate these ultra gear nerd articles though. Gets the creative juices flowing.
@Hank: I just used the bottle itself to cut the hole into the cap…
@Hank, measuring wearing off: Yes, same problem here. After about two days of hiking, the constant “alcohol waves” impaired the printed scales heavily. My solution: Hot glue. After gluing the syringe to the cap, heat the syringe again with you hairdryer, heat a spring steel spatula at the same time, then cover the length of the syringe with one bead of hot glue and immediately spread this bead thinly over all the syringe with the hot spatula. Voilà, the scales are protected premanently.
@ bigfoot: see the book of Mike Clelland, Ultralight backpackin’ tips, 153 amazing & inexpensive tips…, page 2, Manifesto, paragraph 5: “it’s okay to be nerdy”. So: Thanks for the compliment :-)
Bettix bottles: didn’t even know they exist! Thanks for the hint! I really appreciate the discussion.
Complexity: I have to admit that I now did a couple of “simple-simples”, just using hot glue, and they did not fail (so far…)
After all: SORRY I AM LATE! For no apparent reason, I have been locked out from posting until today.
Happy trails!
Urs
A follow-up after two years of use:
The “simple-simples” used to start leaking after two days of hiking. Even if resealed, using your lighter (pour all alcohol out and let the flask thoroughly dry out for a few hours first, for heavens sake!), alcohol seemed to find its way to “squeeze” between the hot glue and the syringe and the caps, so I now go with the coupling nut system. If the hot glue gets loose in this system, it’s still mechanically pressed together by the top nut.
Happy trail cooking!
Urs
Become a member to post in the forums.
 New Ultralight ShelterFreestanding silpoly shelter for lightweight adventures.
 Loading...