I'm kind of stunned that I'm the only Flat Cat fan.
Topic
Alcohol Solo Cook Set (Best and Lightest)
Become a member to post in the forums.
- This topic is empty.
Oh yeah…Dan, what are the markings on the 1.3L pot?
The .9L pot has 300 and 600mL markings….which, I don't find useful (rather have a 500mL mark for example).
IMHO, the optimal distance depends on the whole system– pot, fuel tablet platform/holder and the windscreen design and airflow. Of course the wind will effect it all too.
For a starting point, the classic Esbit folding stove measures roughly 45mm from the platform to the tips of the pot rest when set at the 45° angle detent.
My Ti Esbit wing stove spacing is more like 35mm maximum (the pot feet are stepped), but I think that is designed more for compactness and weight than optimal burn efficiency. I use it mostly for making hot drinks and soup where I'm looking more for hot water than a full boil.
As far as storing Esbit, I've used doubled zip-lock bags with success. My favorite is a screw-top aluminum container. I can get up to 8 tabs in the 1-1/2"x6-3/8" can that weighs 0.8oz.
What can I say. I absolutely love this setup. Just what Dan said. For 2 people there is no better setup IMHO. However recently I was searching for a solo setup. Buying another 0.6L Evernew + Ti Sidewinder would cost me $80. I'm dead sure it would be as awesome as my kit. But I went the cheap route and ordered an IMUSA mug setup from Zelph. It will come with his new StarlyteXL which should be usefull in 2-3 days trips. IMUSA mug with lid weigh 89 gram, the windscreen – 35 and the pot stand eh.. 3? So I'm a bit lighter than Evernew 0.6+Sidewinder combo and still durable. Needless to say this is much cheaper (actually more than a factor of 2).
I will post back after I use it in a field.
My plans for cooking: boil some 500-600ml of water. Pour water into plastic bag with food for cooking (dehydrating) but leave 200ml in pot. Put teabag into pot and put there the plastic bag with food and water. Put the pot into cozy. This way at the end I'll have both, the meal and the drink.
Kevperro said-"I'm kind of stunned that I'm the only Flat Cat fan"..
Your are not the only one..;)
Most folks that have directly ( and honestly) compared the two systems realise the FC Ti Bobcat system does everything a Sidewinder Cone does without any of the drawbacks.
Jon Fong is currently the Director of Engineering at a MFG firm in CA and it shows in the products Flatcat makes.
I don't agree with Jon on everything, but I have followed his progress as a stove builder for the last three years and his stuff is solidly engineered and tested.
He also never takes credit for something he did not design or try to patent anything based largely on 100 year old prior art and then act as though he has reinvented the wheel;)
He is a gentleman and a scholar.
"Dan, what are the markings on the 1.3L pot?"
500mL, 1000mL
Well well…that is better. I still wish they would add more markings….250, 500, 750,1000, etc. But…whatever.
Dan….tell you what, if you were ever wanting to change your 1.3L setup for my .9L setup, you just let me know.
Anyone can add their own markings. Piece of cake.
I have on my Toaks 750 mL which originally did not have any.
What process did you use? Chemical etching, ?
Dan (dandydan),
Looking to do the same efficiency calculations you used for a starlyte xl and my .9 evernew setup…but…what type of thermometer did you use?
I recently bought the lightweight acurite thermometer to measure air temperature when camping (~$8), though I was thinking of getting this one ->
https://traceable.com/4145.html
(mainly b/c its much more accurate, goes colder, and weighs .4 oz more than the acurite, and its reasonably priced).
But that still only goes up to 158*….so wouldn't work for boiling water.
So, if I didn't have a thermometer (I would also want something so I wouldn't have to keep opening up the lid…decreasing efficiency), I was thinking of using ice bath water, so I knew the starting temp (32*) and then bring it to boiling. However….without a thermometer I could only use "rolling boil" as an accurate, repeatable "end" to the boiling. I'm assuming when the water hits 212*, that it still takes more energy to get a rolling boil, correct? Correct me if I'm wrong, but a rolling boil is when the entire temperature of the water hits 212* and more energy continues to be applied, or….I don't know…I know there is also energy for the phase change from liquid to gas…but not sure of the physics here.
No etching. Etching is for sissies…
I prefer palpable markings which save me the time and hassle of using a flashlight in low light conditions. KISS in action.
Photos tell the story.
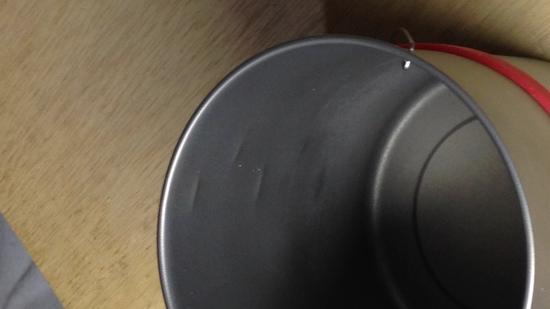
"Bumps" on the inside.
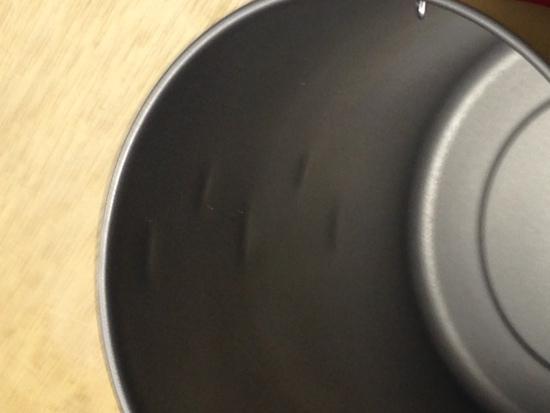
Bumps close-up. The ones lower in the photo denote whole cup markings while the upper ones are for 1/2 cup.
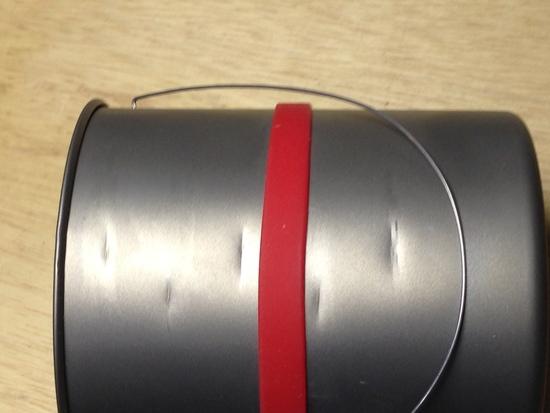
Outside view. Not pretty but I don't care – it's just a pot.

Mock-up of the procedure. The marking tool is a piece of steel wire (Ø0.039") held over a pencil mark made on the outside of the pot. A hammer is getting ready to whack the wire in order to have it make an indentation in the pot's skin. A dowel-type mandrel is used to support the back side (pot's inside), covered with a piece of a bicycle tube, whose purpose is to "give" under the indentation being made by the "tool", while at the same time preventing other areas of the pot from getting deformed.
What is missing here is the preparation step, where different measured volumes of liquid are poured in the pot, measurements get taken, and transferred into pencil marks onto the pot's outside.
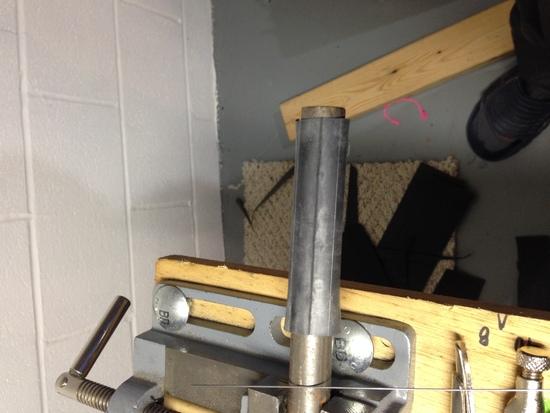
The rig.
A sturdy wooden dowel would get the job done instead of the steel one shown above. That's what I recall I used when I marked my first pot (thin Aluminum) back in '1974 or '75. Back then I used a small diameter nail held by pliers instead of the steel wire.
I put two round dimples in my Snow Peak Trek bowl. 1 at one cup and the other a two cups..
I just eyeball the half cup marks. Seems to work just fine:)
JohnJonas: I typically poor a big pot of the coldest tap water I can get, which is usually about 40F. I measure that by tossing in my Casio watch for a while since it's waterproof and has a temperature sensor. In the past I've just heated the water to a rolling boil and used 212F as the finish point. There are downsides to this approach, as some heat goes into changing the state of the water from liquid to gas, which starts around 205F I'm told. Still, I think it gives a reasonable approximation.
I have access to better thermometers now that I might use instead but I'm not sure how to get around needing a hole in the lid.
@Dan
Ok, thanks for your input. So, for the time being, I think I will do that ice water bath. That way I know without using a thermometer that it is exactly 32*. I just need to make sure I don't scoop up ice, since I don't want the extra energy required to change that state. And…without a good temperature probe thermometer, I'll stop at rolling.
I suppose it's shameless self-promotion if I mention my GOLD Gear cottage company Fanatic and Trekker cook sets. Both use the Ramjet XUL alcohol stove, which boils 500 ml of 70* F water in 6:30 minutes using 15 ml of fuel. Efficiency = 58.7%
FANATIC
Fanatic weight is 2.946 oz/82.5 g. Pour the boiling water into your freezer bag meal, put the bag in the cozy and top it off with the cozy lid. Water in the cozy is still 185* F after 30 minutes.
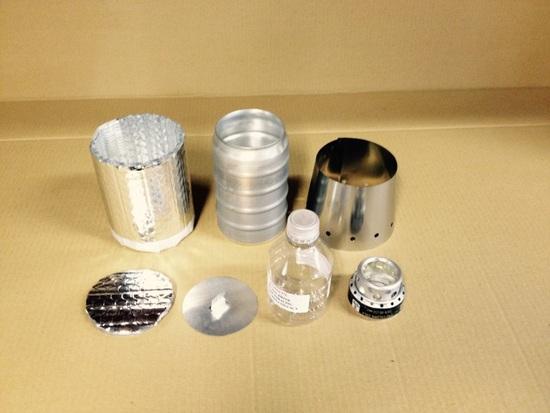
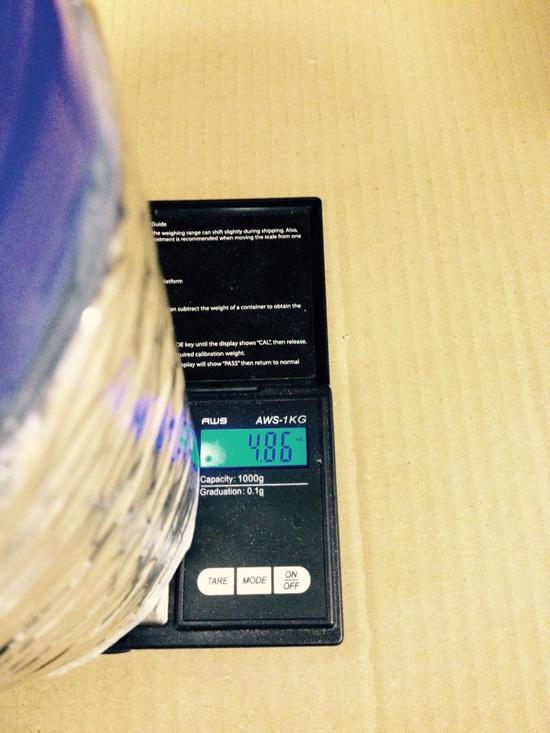
Fanatic Components: Ramjet XUL alcohol stove, GOLD Gear 700 ml all-aluminum BPA-free flat-bottom ribbed beer can pot, 8 oz fuel bottle; titanium windscreen & pot lid, cozy, cozy lid.
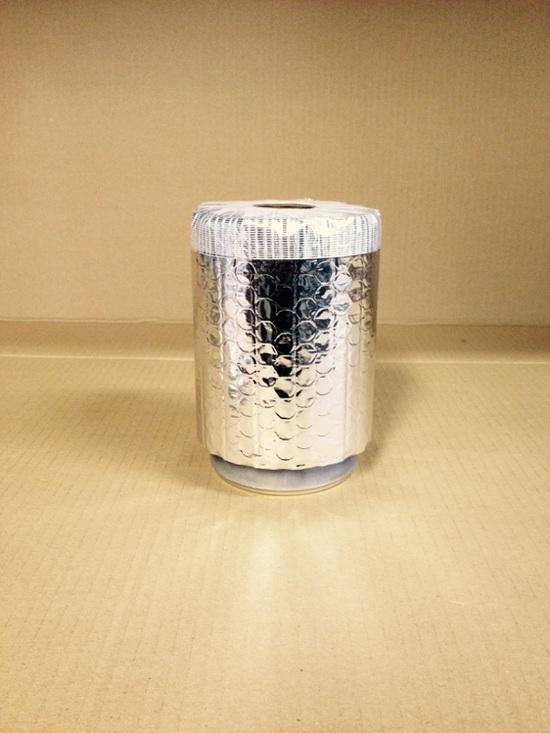
Everything packed into the can and covered with the cozy.

Fanatic weight
TREKKER
Trekker weight is 4.86 oz/136.1 g. Pour the boiling water into your freezer bag meal, put the bag in the cozy and top it off with the cozy lid, or just mix your food in the 1 qt food container. Water in the cozy is still 185* F after 30 minutes.
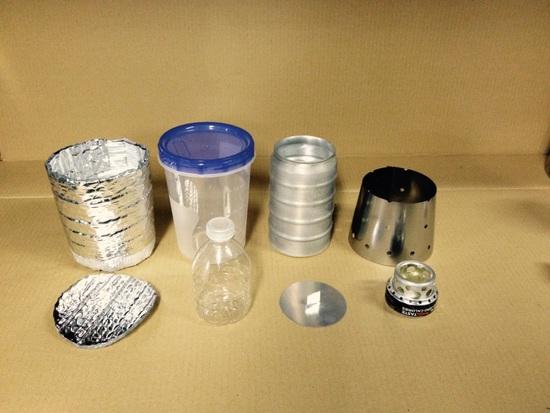
Trekker components: Generic 1 qt. twist-top food container, Ramjet XUL alcohol stove, GOLD Gear 700 ml all-aluminum BPA-free flat-bottom ribbed beer can pot, 8 oz fuel bottle; titanium windscreen & pot lid, cozy, cozy lid.
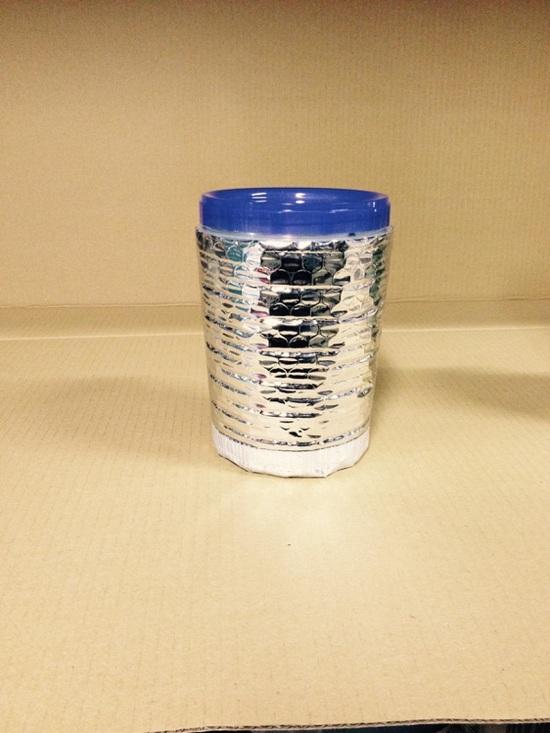
Trekker packed.
Trekker weight.
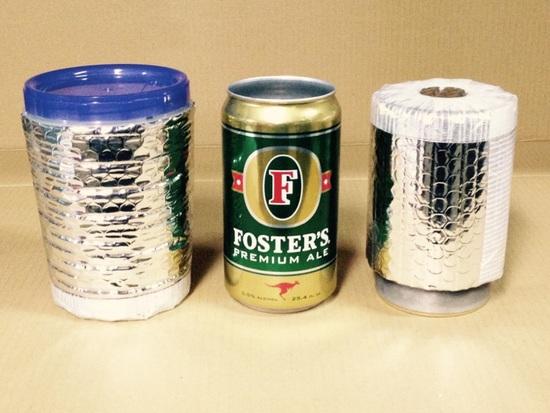
Trekker, Foster's Can, and Fanatic shown for size comparison.
I think the 1qt food container with the Trekker meets the OP's desire for a no-cook re-hydration container when going no-cook.
Any fans of the qiwiz dual fuel here? I live the sound of the starlyte but i'd like the option of using esbit too.
Andrew, I got a free mini esbitmizer with your name on it if you want one. You can simmer with it also.
The pot, stainless steel foil lid(more durable than aluminum), stainless steel wire pot supprt, aluminum pot support stabilizer, carbon felt ground protector and stainless steel Esbit tray combined total weight is 27 grams.
Foster pot has 2 cup+ capacity. The ridgeline in the center of the “F” is the 2 cup mark. The pot has an aluminum bottom and top rim.
The stove has integrated parts, nothing loose that can get lost.

Good discussion. As someone said above “Best is relative”
My criteria :
1. Operate at sea level and
2. At 0F and
3. I don’t want to mess with wicking
Most alcy stoves don’t fit all 3. The “0F” requirement has been very handy on cold mornings when other people’s stoves won’t light. And so I have been a fan of the pepsi pressurized stove and the white box stove. I melt snow with my White Box stove (and there’s a science to it). If you use the Al Open Country pots then no stove setup should go over $40. Another nicety, but not critical, is the ability for the stove to use several types of pots. Then you can grab any pot depending on the outing (like cook for 1, 2, or 3). Or if you see another pot you want to try— no problem. I use Ti and Al pots. I like Ti for its ding-proofness and Al for its faster boiling time (barely). Also these ‘pressurized’ alcy stoves maintain full heat right to the last drop. This is nice when you’re almost at a boil. You don’t want the flame to die out then.
For windscreen I just cut my own roof flashing.
Pot stand is a Ti triangle made by a guy here.
Fuel bottle — I like the 8oz evernews (haven’t seen them for a while) with a twist top red top for pouring.
Cozy: I only use 1/4” CCF pad when below 30F. Above 30F, I sometimes use a snap-together bowl. It holds the Ziploc easier.
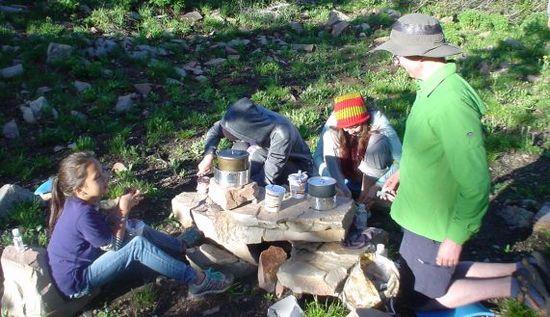
Here’s some trail pics in the Timpanogos. The pot on the left is a 1.3L Ti on a White Box. My friend borrowed to boil water for his 3 girls and him. The one on the right is a pepsi stove with Al pot. I noticed my brother placed the roof flashing upside down (see breathing holes). It worked anyway:
Here’s my Ti Kettle about to be placed on a pepsi stove:
And one of the daughters brought a can of ravioli. This was her first time backpacking. I didn’t want her to dump ravioli in my pots because I didn’t want to clean them. So she set the can right on top of the white box and did some constant stirring. It was hot in about 4 minutes:

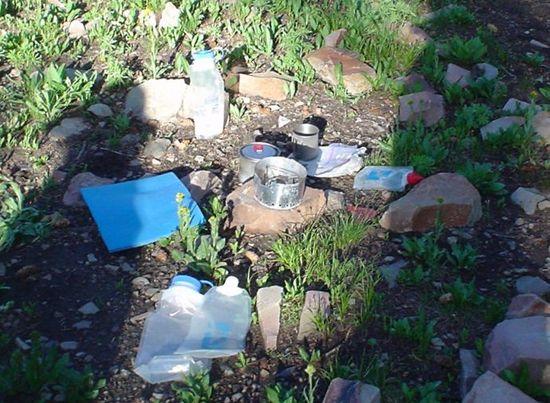
And if you spill your soup, the Timpanogos custodians will walk into your camp and clean it up:
Have fun with the clean quiet stoves.
-Barry
-The mountains were made for Tevas
Become a member to post in the forums.
advertisementYour privacy is protected: We do not transmit your user data to third-party ad platforms or advertisers, and we do not host third-party tracking pixels. Backpacking Light serves ads on its own custom, native, and internal platform.
 Titanium Pot GrabberUltralight titanium pot grabber weighing just 4.5 grams.