To BobOne:
Hi, Thanks for your interest, comments and sharing your ideas.
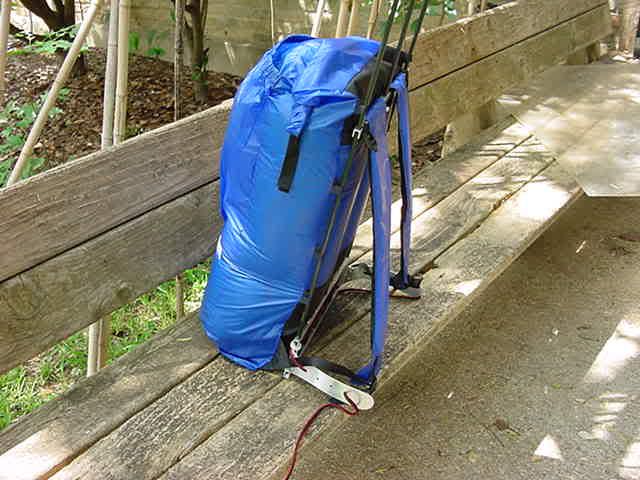
You post comes at an interesting time. I received some material last week that I maybe able to use with my Thermo Plastic frames. I have 5 different frames hanging in my workshop that are made to use the Thermo Plastic “pillows” as I have started to call them. The frames to most would seem a little weird. They even seem a little weird to me at times. They are mostly made for different weight “Pack Loads” from very light to 50 pounds or so.
My last one is a Mountain Hardware Exodus style, more or less much lighter clone. There are parts of the that frame that I like a lot and used some of their ideas and but with lighter materials. Their frame is about 4 pounds and for me that is really heavy.
The big question I keep coming back to is how heavy a pack do I expect to have to carry. This weight would be on “day one” after a resupply and what ever amount of water I might need for the season/area. I consider myself a ultra-light to SUL to Hyper-light backpacker and not one to carry much extra stuff. Enough for the season and some degree of comfort but not many extras. My standard pack load would be something for a warm weather AT area hike. The length of the hike isn’t important to me as I look at most hikes as a 3 to 5 day period and then a resupply. With this type of thinking even an AT Thru-Hike is just a bunch of 3 to 5 day walks. My full-up pack weight might go 9 to 14 pounds in warmer weather. I would expect somewhat more in colder weather maybe 30 pounds. I am working on a set of gear for a cold weather AT Hike and don’t have a good estimate of a top end weight yet.
Q-1. I am intrigued by what you’ve done with the CF arrow shafts, aluminum, and expanded thermoplastic, and have some speculations as to how to improve the frame while adding lightness.
A-1. The Carbon Fiber tubes are from FIBRAPLEX and are not arrow shafts. I do use arrows shafts but most have been Easton Aluminum Arrows.
Q-2. How about either substituting carbon fiber sheet for the aluminum wings on your version that combines CF arrow shafts with expanded thermoplastic, or using completely custom laid-up CF wings?
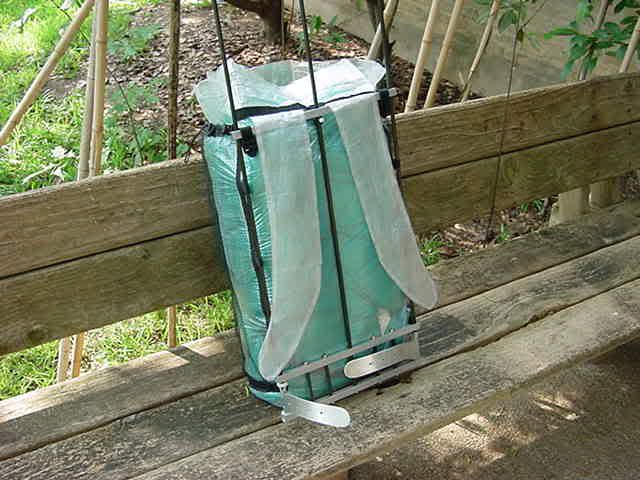
A-2. I agree that Carbon Fiber in some form is a good answer. I have looked into Carbon Fiber sheet material. It is very light and should be very strong but it comes at a high cost. I have also asked a place here in town that does custom laid-up Carbon Fiber work but decided that cost also was to high. I am not selling anything so when you do all that work for one or two pack frames it isn’t very cost effect. I expect one day I will make a new set of “wings” out of some of my thin (.016″) Titanium. You might say that Titanium isn’t cheap, no it isn’t, but I know how to work it and have the tools necessary.
Q-3. With either the sheet or the layup, the anti-frame end of the wing would terminate at the hips with a CF layup contoured onto a mold of your own personal hips, perhaps using hardware store expanding insulation foam as a casting material to make a female then male mold of your hip area.
A-3. As a clay artist of many years I spent a few years making a lot of plaster molds to include full body casts. It is possible to plaster cast sections of the body in a standing position so making the mold you speak of should be possible by several different methods.
Q-4. Similarly, I wonder if the square-section aluminum might for the sake of lightness be better replaced with more CF arrow shafts with sleeves bonded to their tips to allow a sliding mate with the other arrow shafts in any areas where it may be desirable to avoid bonding one arrow shaft directly to another to allow disassembly.
A-4. Again I am not using Carbon Fiber arrow shafts but I have looked for square section Aluminum. What I can get here in town in small amounts was not lighter and to special order lighter stuff would cost more than it was worth to me. The Easton arrow shafts I use come in sizes that let me slide one size over another size. My home-made arrow shaft trekking poles are a good example of that. I also have done that on a couple of my pack frames.
Q-5. I wonder how you have prevented the aluminum crosspieces from sliding on the arrowshafts…can’t tell from the pictures.
A-5. I have used a piece of larger arrow shaft over a smaller piece as a sleeve or spacer to keep the cross pieces in place on a couple of my frames. I also use a fitting like a bushing with a set screw in it and put it on the arrow shaft and just below the cross piece. The bushing doesn’t work as well as the arrow shaft spacer. The bushings do show up in at least two pictures if you know what and where to look. In one picture you can see the round top of the white nylon set screw.
Q-6. I have a little experience with perforated thermoplastic in a night wrist brace application, and the material used for that has fatigue problems in that application…..
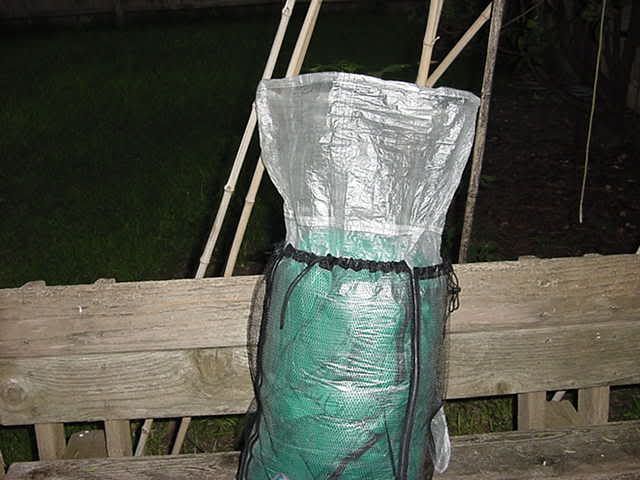
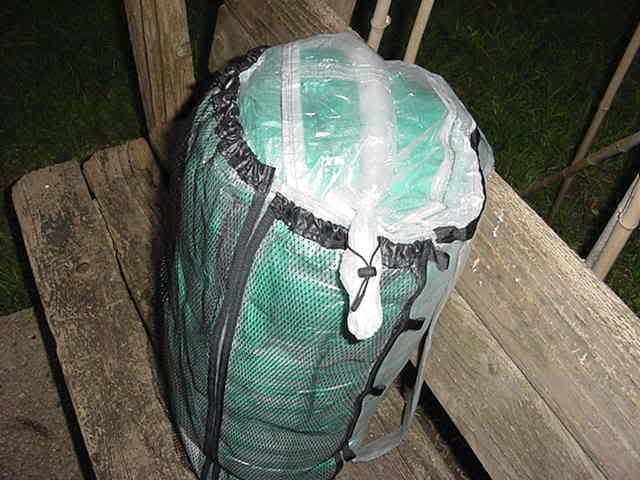
A-6. The engineer and my Doctor at the Cancer Center where I was treated were a big help in getting me (free) my first big bunch of Thermo Plastic to play with. The engineer did tell me that if I ever bought any not to buy what was made in China. They had problems with it. The stuff they were using now came from France but cost a little more. I have talked or emailed answers to at least 2 pack companies that are or were looking at Thermo Plastic to use someway. I believe Thermo Plastic is what Osprey is using in there hip belt that is put in a small oven and then put on the person to form to them when buying the pack. It is nice stuff but also isn’t cheap. I did buy two sheets (2′ by 3′).
Q-7. I also have one of the Stephensons, incidentally.
Q-7. I am sure you will not want to get rid of your Stephensons Pack/Frame?? but if you ever should I can provide it with a very good home.
If you want to conduct a less public discussion about this subject I can list my email for you.
==========
Thanks, Bill. It would be good to have the email capability, although I don’t have anything to guard about backpack designs or materials.
My interest is in improving the breed, and I hope to do more hiking again in the future. I like the idea of longer unsupported jaunts and lower base weight helps with that, of course. As does an external frame pack that will deal well with a heavy starting weight with weeks of food, but still carry well at lower loads. I’m also looking forward to expanding my technological payload as we move into the mobile computing/Internet era and come closer to working out the electrical power problems.
I’ll probably keep the Stephenson until I get something I like better sorted out, and I’ll have to get a lot of time away from other projects before that happens and I’m convinced that everything is better, so at least for now I’ll hang onto it.
Not to worry about frame “weirdness”. Most anything new is weird, and without new stuff we would not have much good stuff.
I think you might enjoy getting into CF fabrication. It’s not all that difficult, but would take experimentation if the idea is to get the strongest, lightest component for a given application due to the possibilities of fiber orientation and easily variable shape. My father, some time after his retirement, built several aircraft with fiberglass weaves and epoxy and polyester resins, and he’s not as patient or meticulous a craftsman as you are despite his engineering accomplishments. Aircraft Spruce and Specialty is a good place to get started (www.aircraftspruce.com). I long for the days when it was easier to walk into stores and browse for materials to play with, but there’s an awful lot out there on the web too. Your experience with plastic arts would seem to make it substantially easier than for some and you seem to have the patience and meticulousness that is the primary requirement for neat layups. In some ways, it’s not as satisfying as working metal, but the light parts make it worth it when weight matters and with enough work a satisfying finish level can be had that makes them enough fun to handle. All the fabrication shops charge an arm and a leg, I suppose that is because there is a lot of labor involved, and some material wastage; the materials are not cheap, but in the sizes we’re talking about, probably not prohibitive…but paying somebody else to do the experiments would be expensive while you can do it yourself. There’s also a labor shortage as these materials came to market largely after the schools abandoned manual skills and kids don’t grow up playing with materials the way they used to, and the U.S.-immigrant labor mostly doesn’t have experience with it either. Not too much tooling involved…off the top of my head, if you want to vacuum bag layups, which is nice, the vacuum pump is the biggest expense, especially with DIY vacuum bags around now. There are various power tools that help in shaping and smoothing cured layups that can add up a bit but it shouldn’t take too much for the parts we’re talking about. A decent rotary tool and a power file would be nice; neither needs to be very expensive. If I had more time to spend in the shop I’d definitely be doing more work with these materials.
I think the CF sheet price could come down a bit if more demand develops. It was hard to find anyone selling fabricated sheets until recently, and I think the market is still undeveloped. Once there was enough market to allow some larger runs, the labor content could be reduced enough to lower the price, I would think, and this could also be done overseas. I suspect that many of the people who would use prefab carbon fiber sheet haven’t yet figured out where to get any, such that there is latent demand. There are various statements afloat about a short supply and high prices on CF base materials at the moment, though.
A more durable expanded thermoplastic that will work at low temperatures like this body-cast material does seem attractive. I wonder if the weight of some of the parts could be reduced by trimming them down more to their contact surfaces with the body, then providing tailored mounts, or are you relying on some flex in the cylindrical shapes for cushioning? A tough-enough thermoplastic certainly seems possible but would not be quite a light as a CF layup.
I’m not sure where I got the CF arrow shaft confusion, but I went on a BPL reading binge after getting a membership in the last couple days, quickly ran out of actual member content (hope they get more quickly) and got lost in the forums, which don’t seem that active right now (maybe due to the season?). So I posted with increased fatigue and from memory of a lot of threads at once that was all rather unclear.
Are you using square sections in the frame to simplify joining? I wonder about using larger composite tubing with drilled holes, although that’ s not the strongest way with that sort of material…but I wonder whether it might suffice in this application. But even if that doesn’t work, I suspect it would be worth it in weight to develop a joining method for CF tubes…I looked around on the web a couple of years ago but didn’t find much work in this area, but someone must have done it as it’s would be too useful, and maybe it’s on the web by now. Wrapping and bonding is an obvious way but might tend toward a hand-hewn appearance; a disassemblable joint would seem to be possible too. Another way would be to build flanges by joining a pair of short outer sleeves for each joint that would then slide over the main CF tubes either to be bonded on or perhaps to use something removable like an arrow shaft spacer. I’d think that set screws on CF tubes might lead to early tube failure but again by sufficiently understressing materials it might be possible to get away with methods that might not be optimal if we could build everything we wanted easily.
I’m just thrilled and inspired that you’re doing all this and hope I’ll get enough time to do more one along these lines one of these days. Oh, by the way, I was looking at the luxurylite cots last night, and wondered if you might have considered experimenting with ways to make a lighter cot? It appears to my eye that some unneeded weight is tied up in the polycarbonate legs (substitute triangulated CF-shaft structures or a Ti or CF version of his legs?) and that CF might work as a substitute for his aluminum crosspieces for further lightness. Also, it appears that he stresses the hammock top against the aluminum crosspieces which get substantial flexion, where my initial estimation would be that less material strength would be required if he used the crosspieces as a fulcrum to tension the hammock top against some spectra lines near the opposite (ground) end of the legs and thus used the crosspieces more in compression. I suspect that substantial weight could be removed with those methods.