Topic

Ultra-Light External Frame Pack


Forum Posting

A Membership is required to post in the forums. Login or become a member to post in the member forums!

Home Forums Gear Forums Make Your Own Gear Ultra-Light External Frame Pack

  • This topic is empty.
Viewing 25 posts - 1 through 25 (of 84 total)
  • Author
    Posts
  • #1215673
    Bill Fornshell
    BPL Member

    @bfornshell

    Locale: Southern Texas

    I posted this when the "Forums" first started. I tried to post a picture but could not make it work. Now that I have it figured out here is the post.

    The Ultra-Light External Frame is made of Titanium and Carbon Fiber and weighs 6.6oz stripped. The Pack Bag was a "first draft" and made out of scrap material and with the shoulder straps brings the total weight of what you see to 17oz. The final pack bag will bring the total weight to under 16oz. The picture shows Aluninum Tubes which have been replaced with Carbon Fiber tubes. The Pack size is 2900cu inches plus the side and back mesh pockets.


    The hip belt, shoulder straps and back support has under gone many changes since the above was posted.

    I have been able to carry up to 26 pounds in the pack. However, once I got above 22 pounds the pack system was very un-comfortable to carry. That is OK as I expect the max I will ever carry is between 17 and 22 pounds.

    #1336819
    J R
    Member

    @ravenul

    Your pack frame is very ALICE-tastic!

    #1336851
    Bill Fornshell
    BPL Member

    @bfornshell

    Locale: Southern Texas

    You are correct. This was the first External Frame I made. It weighed 20oz and used the Army Ruck Frame as a model. The Army Frame weighed 32oz. All my frames are the same size as the Army Ruck Frame so I can use my old Army ALICE Packs on them for testing.


    #1336852
    Mike Storesund
    Member

    @mikes-1

    It looks like the right angles and edges might be uncomfortable. Would round tubing or flat stock wear better?

    #1336853
    Bill Fornshell
    BPL Member

    @bfornshell

    Locale: Southern Texas

    This is the second version of my Aluminum External Frame. I have striped away the extra stuff from version one and used Easton Aluminum arrow shafts. I went with four shafts thinking I needed the extra strength, I didn't. This frame weighed about 9oz. I put one of my old army packs on the frame, loaded it up with about 30 pounds of stuff and carried it on a few 3 mile walks. It worked great. About this time I started thinking about making the lower part of the frame out of Titanium.


    #1336854
    Bill Fornshell
    BPL Member

    @bfornshell

    Locale: Southern Texas

    Mike Storesund – SUBJECT: Right Angles – Check the evolution of the External Frame in the following posts.

    #1336855
    Bill Fornshell
    BPL Member

    @bfornshell

    Locale: Southern Texas

    In this version I made the bottom part of my External Frame out of Titanium and Easton Aluminum tubes for the up right support. I was able to get Carbon Fiber tubes from Fibraplex and replaced the Easton Aluminum tubes in version two. Between the use of Titanium and Carbon Fiber I was able to lower the weight from 8.9oz to 6.6oz for the stripped frame. For version three I changed the top frame cross support piece for better support.

    It was about this time I started thinking about different ways to improve air flow or ventilation into and around my back and waist area.


    #1336856
    Bill Fornshell
    BPL Member

    @bfornshell

    Locale: Southern Texas

    TEST VERSION 1 – Summer 2004:

    Only pictures at this time. The idea proved itself a winner on many hikes around San Antonio in the hot Texas sun. I am the first to admit that at this stage of the game the Moisture Wicking System looks a little werid. I knew I needed a different material and something that didn't look as strange as this version. It worked and that is what I was after. I was now on the hunt for another material.


    I mounted this on my Titanium/Carbon Fiber External Frame and used one of my light weight home made Pack Bags. I wanted to keep the weight as low as possible.

    The way the Moisture Wicking System is made almost no part of the Pack Bag touches you and pushes out at both the top and Bottom of the pack. This privides a nice large "window" between your pack and your back. The results of this large space is a pack system that is much cooler to carry. Much less moisture and or sweat for your garments to deal with.

    I still had to address the need to make my shoulder straps do the same. I was workin on that when in late August 2004, I discovered a lump on my throat. I had cancer. Things slowed down a bit as that was being sorted out.

    And then a very interesting thing occured.

    #1336858
    Bill Fornshell
    BPL Member

    @bfornshell

    Locale: Southern Texas

    Subject: Re:Moisture Wicking System

    If you have to get Radiation Treatments in the head/neck area they first make a mask for you to put on for each treatment. The mask, on your head, is clamped down to the table so the computer that directs the Radiation hits the same spot each time. For my treatment that was 35 times. They make the mask and do the machine set-up a few days before your treatment starts. When they made my mask I got on the table and closed my eyes. They put this warm something over my face and head. They pressed the stuff to form it against me. In a few minutes the stuff was hard and they removed it. They put it on and off several times as they adjusted it or something.

    When they removed it the first time I looked at it and asked to see it. My "make gear" brain was turning as I was realizing I might be able to use this for my Moisture Wicking System. It seemed to be mold-able and light weight. They showed me a small piece of the stuff in the "before" condition. You can see what this looks like in one of the pictures of me molding a shoulder strap piece.

    Anyway, my Doctor came in to see how it was going and we were stading around looking and talking about this stuff. I told him I wanted to know about this material for something I was making. He seemed to smile and said he was glad I had my mind on something besides the treatment. He gave me the phone number for the Cancer Therapy & Research Center PR person and told me to call her and ask about it. I called and told them what I was doing and could they find out where the stuff came from and how could I get a small amout of it. They called back a few days later with the company name and phone number. They also offered some left over scrap material to work with.

    My treatment started and a couple weeks later I asked about the stuff. I was given a bunch of small pieces. I made the small pieces into the hip belt and one shoulder strap and had some left over. I took it in one day attached to my pack to show my Doctor how I was using the stuff. He was able to get me a large piece.

    I was working on this slowly as I was getting my Radiation and Chemo treatments. As fast as I made the hip belt I didn't like the design. It worked but I didn't like the look of it. By this time I had made the upper frame cross piece and that more or less established the style of the design. I next made the shoulder straps and then remade the hip belt.

    If you look at the picture of me making the shoulder straps you will see a small piece of this plastic material. That small piece when heated stretched to make one side of the shoulder strap. I formed it around the same type blue foam stuff as I used for the frame cross piece. You can also see that form in the picture. For the back piece of the hip belt I used the form from the upper frame piece.

    My last Radiation Treatment was 13 January 2005. I have had my first 30 day follow-up visit with my Radiation Doctor. I took my pack in for him to see how it all turned out. I did really well through my 8 weeks of treatment. I think because I had something else to fouce on. Some of the side effects can take several months to a year or more to get out of your system. You just have to get past it and on with your life.


    #1336859
    Bill Fornshell
    BPL Member

    @bfornshell

    Locale: Southern Texas

    With the different changes I have made I am calling this Version 4. If you remember what looked like a double set of plastic pieces for the hip belt, well those were for the shoulder straps. I made one shoulder strap and didn't like it. The pieces from the shoulder straps were recycled into the what you see now for the hip belt. This is some amazing stuff. It has memory and if you don't change it to much when you reheat it, it will return to its original size.

    I expect to make a new lighter bag for this system. The complete set-up, Frame, Pack Bag and Moisture Wicking System weighs 27.8oz.
    Frame 6.8oz
    Pack Bag 10.49oz
    Moisture Wicking System 10.51oz

    I will be testing Ver 4 over the next few months near home and I am trying to arrange a 30 day or so hike someplace during the summer to give the system a real test.


    #1336860
    Bill Fornshell
    BPL Member

    @bfornshell

    Locale: Southern Texas

    I have been wearing my pack about everyday for a 4.5 mile hike. Since doing this I have tweaked the Moisture Wicking System some. The changes haven't been big, just to make it more comfortable as I add weight to my pack. Here are some pictures I took of me wearing the pack and a few of the pack alone. I made the Pack/Frame to carry 17 to 22 pounds and it does that very well. I have pushed the weight up to 26 pounds and It isn't comfortable at that weight.

    The different parts weigh:
    Titanium/Carbon Fiber Frame — 6.80oz
    Current Pack Bag — 10.49oz
    Moisture Wicking System — 10.51oz
    Current Total Weight — 27.80oz — [1pound -12ounces]

    The savings are in more areas than the weight. The improved efficiency to the hiker are in how much better you and your garments will work with a better way to wick moisture. You should be able to use Garments that cost a lot less than all the "High Cost High Tech" stuff that is now bogged down with the design of the current packs and their lack of moisture wicking qualities. The current packs have no real moisture wicking ability and in fact trap moisture and kill most if not all of the high tech materials ability to do what you have paid a lot of money for.

    I have been able to buy two (2' by 3') sheets of the Thermo Plastic material. I am working out a completely new design that assumes I will have all the plastic material necessary to build it the way I want to. Some of the molds are finished. The new version will be made to carry more weight. I may even work on a version of a Internal Type PAD Supported Pack like are now so popular. Make it with something that would work like a "frame sheet" with some additions to create the air pocket necessary to really help wick moisture. I would try and build the Pack and Moisture Wicking System as one unit. Maybe a complete system that would weigh as little as 16oz for a pack size like the one I am now using. This would be about 2900 to 3400cu inches with side mesh pockets and a full back mesh pocket. I can make a Pack Bag that size much lighter than the current Pack Bag I am now using.


    #1336861
    Richard Nisley
    BPL Member

    @richard295

    Locale: San Francisco Bay Area

    I have a different “make your own equipment” idea in mind and would like to use the material you mentioned. Will you share what it is and what it costs?

    Richard

    #1336865
    Bill Fornshell
    BPL Member

    @bfornshell

    Locale: Southern Texas

    The stuff is called “Thermoplastic”. You can see it on these two web sites:

    Link1

    “>Themoplastic Link 1

    I can’t make Link 2 work. Do a “copy/paste” and put it in the address block and it should open.

    http://www.otoclear.com/Pages/Thermoplastic.html

    You need to get to Link 2 if you want a price or to see what size sheet you might want. They will sell one sheet or more. Lawson Products only sells large amounts of the Thermoplastic. When you open Link 2 look for “Please Click Here To View Our Thermoplastic Sizes Page” This is a pdf file of the sizes available. The page also has a 1-800 number for the company BIONIX. This is who I bought my Thermoplastic from. After I looked at the Larson Products site and the fact that I had a lot of the Thermoplastic given to me I knew more about what I wanted than the person taking the order. There were very nice but were used to dealing only with stock numbers. The Thermoplastic they sold came from Larson but for some reason they had different stock numbers than Larson. The person I was talking to suggested I call Larson and gave me the name of the person they delt with. I said I would call Larson and then call them back. I called Larson. They told me what to ask for and asked what I was doing with the Thermoplastic. We talked about that and they told me that if I got to where I needed a lot of it to call them for a better price. I called BLONIX back and completed my order. The Thermoplastic comes in lots of different sizes and 3 different thickness’s. The stuff costs about $.115 a sq inch. This came out to $99 a sheet for 2′ by 3′. This may seem like a lot until you compair it to Titanium or some of the high tech stuff we use to make things.

    The material will stretch, look at the size of the holes in the pictures. The holes in what I am using started out as 1/8″. The up side is somethings will not take as large a piece of material to make but the down side is that it loses its strength as it is stretched.

    I have a growing list of things I want to try and make out of this material or be a part of.

    I want to thank Paul for help in getting one link to work.

    #1336866
    Richard Nisley
    BPL Member

    @richard295

    Locale: San Francisco Bay Area

    Bill,

    Thank you for providing information on the plastic you referred to. I very much enjoyed reading about and seeing the pictures of your project. I am looking forward to further updates on your ongoing external frame backpack project.

    Richard

    #1336868
    paul johnson
    Member

    @pj

    Locale: LazyBoy in my Den - miss the forest


    “>Themoplastic Link 2

    In your brower select the View Page Source, or View Source menu choice.

    A new window will open. (alternatively you could save this web page to a disk file & open it in Notepad or another similar text editor (better NOT to use a true Word Processor program like MSWord).

    Search the HTML text for a portion of the Link I added above, e.g. search for “Thermoplastic Link” (without the dbl-quotes).

    Look at the HTML ‘markup’ additions I made to your web address.

    This is a simple way to learn how to make active hyperlinks to URLs (aka Web Pages).

    Hope this info helps.

    BTW, good job on the pack. I appreciate you sharing all of your ingenuity & hard work with us all.

    May your health prosper in the days ahead.

    Sincerely,
    pj

    Addendum: Link 2 in your post appears to be “broken”. Let’s try Link1

    http://www.larsonproducts.com/products.html#Klarity

    “>Themoplastic Link 1

    #1336880
    Ryan Jordan
    Admin

    @ryan

    Locale: Central Rockies

    Bill, thanks a million for posting the awesome photos!

    The pack has really evolved. What great dedication you have to see the project through – and I’m sure it’s not actually through!

    #1336930
    P. Todd Foster
    Member

    @ptoddfaol-com

    Bill,
    What a treat! Brilliant example of how to evolve a design. The wiffle ball things were hysterical — until I realized what you’re heading to. Very, very smart work.

    I’m real interested in external UL pack frame that allows twisting flexion between shoulder and hips, AND has side arms out to pelvic crest on both sides to transfer load straight down onto pelvis. This is the holy grail of frames, far as I can tell.

    My ideal is a free standing frame like this, with which various bags could be interchangeably used. Internal frame packs are inflexibly fixed. Great to be able to switch on different size and type pack bags, even try out the Luxury Lite multiple tube idea.

    Thanks again, Todd in Tarzana (Cat City)

    #1337100
    David Spellman
    Member

    @dspellman

    I’ve passed some shots of the Stephenson GoLite external pack frame on to bill. The Stephenson has the “side wings” that transfer weight to the hipbelt, and it was pretty lightweight in its day, being made largely of welded thinwall aluminum tubing. The LuxuryLite frame transfers everything to a spot at the middle of the back of the hip belt,and relies on the stiffness of the hipbelt to transfer load to your iliac crest. The Stephenson GoLite frame wings transfer weight to the sides of the hipbelt as well as the back, so that the hipbelt itself need not be as big, thick or stiff. A lot of the older externals had the “wing” feature, including one Jansport that Bill found. The Stephenson also has a really interesting set of “floating” shoulder straps that aren’t really straps in the usual sense, but are sort of a thin net, with a spidernet-like suspension connection to the crossbar on the frame itself. Looks like it would allow a LOT of motion of both hips and shoulders, provide a lot of cooling and still be pretty dimensionally stable.

    Wonder if the design could be tied into Bill’s bill of materials and produce a new version?

    Todd’s got a point about an external frame; it’s far more versatile in terms of what you can tack onto it (pack bags, other gear). A couple of manufacturers (Mystery Ranch and Granite Gear come to mind) have toyed with the idea of internal frame packs with a single frame sheet/suspension system that is perfectly fitted to the user, but that will allow different size packbags to be installed. But with an external, you have an even wider range of possibilities…

    #1337987
    Bill Fornshell
    BPL Member

    @bfornshell

    Locale: Southern Texas

    I want to thank David for sending me the pictures of the old Stephenson external frame.

    I have made 2 versions of an external frame with the Stephenson like "wing-things" The first version was for a heavy winter pack load of maybe 30 plus pounds. I found an old Jansport pack that also had a "wing" like side support sort of like the Stephenson. I used the Jansport design for the second frame. The Jansport design is the one used with my G6 in the pictures.

    I bought a G6 pack here at BLC a few weeks ago to see if something like that might be big enough for my SUL – AT Thru-Hike. The pack is very well made but I am going to make another one very similar but with a few changes. For a hike as long as an AT Thru-Hike I want mesh side pockets and a mesh back pocket. I will make the pack sides 6" wide vs the 5" width of the standard G6. This will give me a place for 2 water bottles. The back mesh pocket will be for my tarp and any wet things I don't want to put inside the pack.

    I sleep in a Hammock and will use one of my Home-Made Poly Tube Air Mattress's in it. I will put Down baffles in the Air Mattress (DAM) when it is cold enough and take the Down out and use it with only air when it is warmer. Since I will not have a sleeping pad for pack support I will mount the pack on a new light weight external frame I have just finished. I have some pictures of my G6 attached to the external frame to see how it works.
    Image hosted by Photobucket.com
    Image hosted by Photobucket.com
    Image hosted by Photobucket.com
    Image hosted by Photobucket.com
    Image hosted by Photobucket.com

    My G6 weighs 3.44oz and the external frame less hip belt weighs 9.04oz. The three up-right Carbon Fiber side supports on the frame will not be cut until I finish the new pack bag.

    #1338008
    paul johnson
    Member

    @pj

    Locale: LazyBoy in my Den - miss the forest

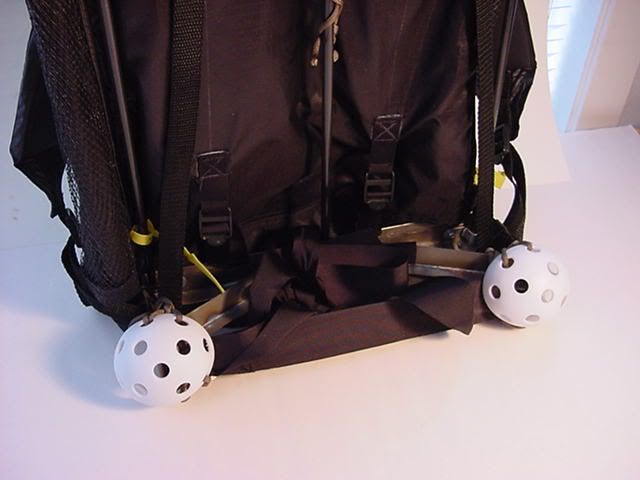
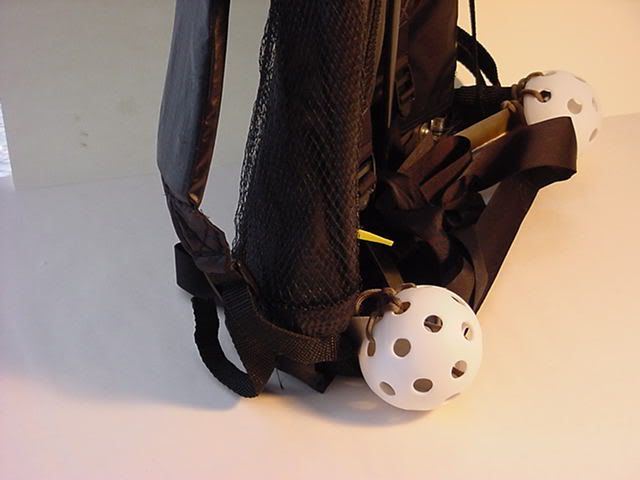
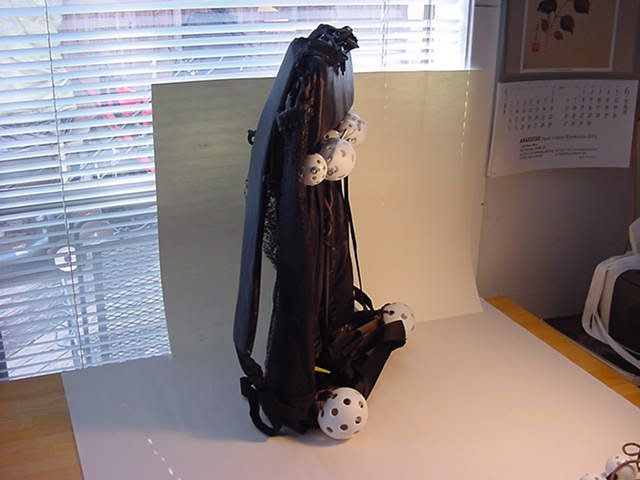
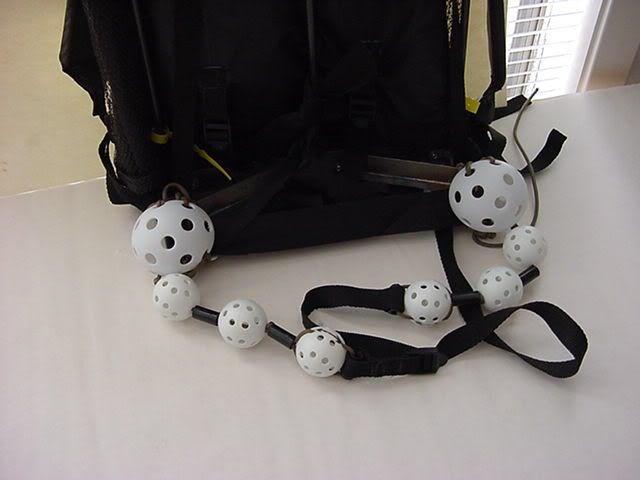
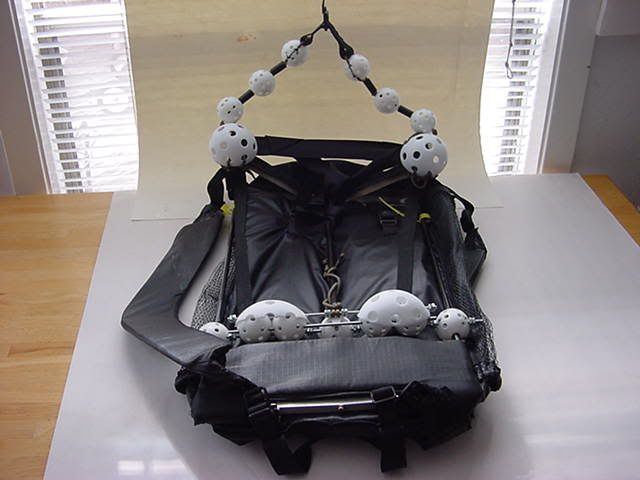
    Nice pics, Bill. Your cleverness & ingenuity never cease to amaze me. I’m an avid follower of all of your posts.

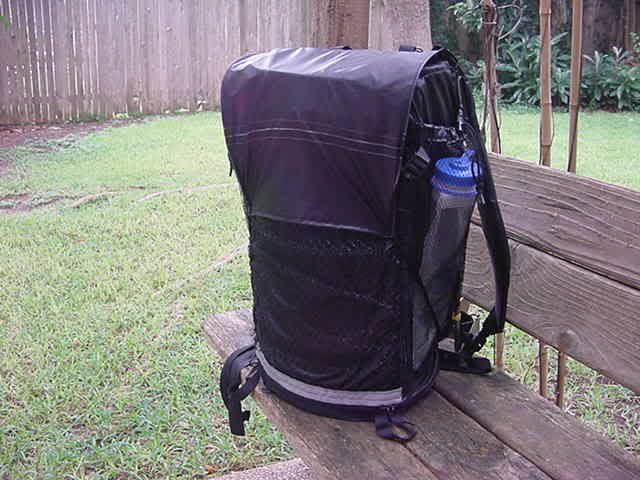
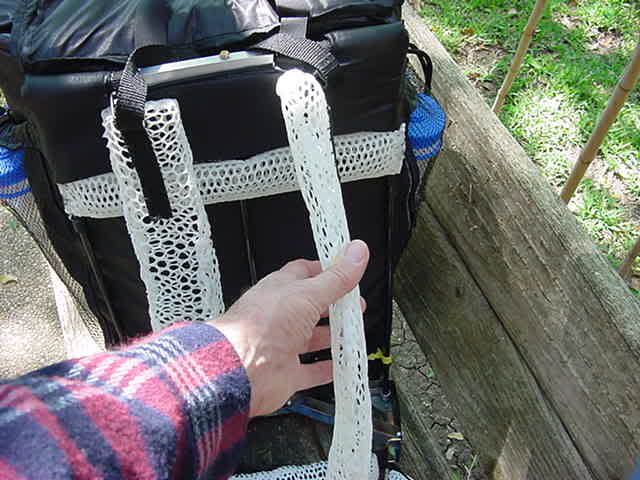
    Just some thoughts on mesh side water bottle pockets. I like ’em. They can be used for more than just water bottles.

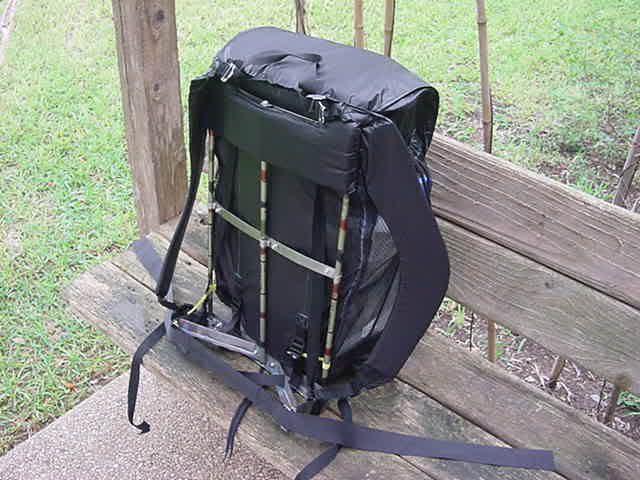
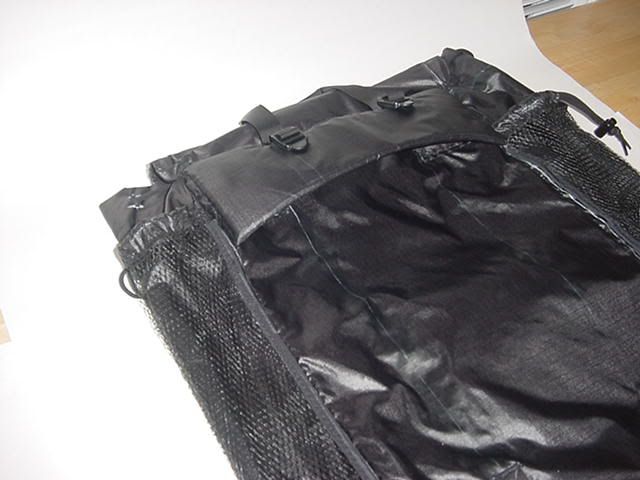
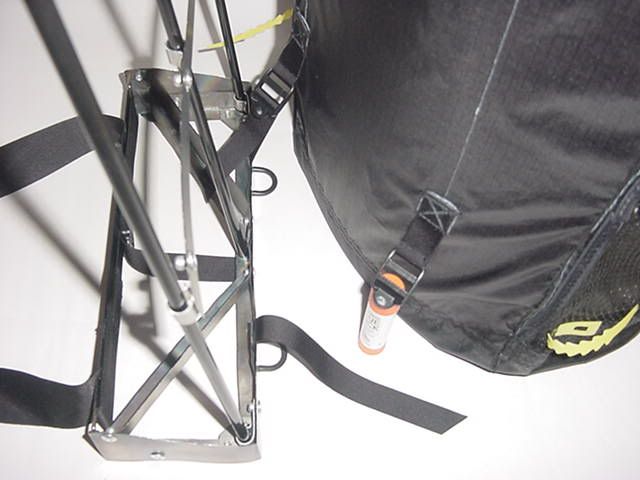
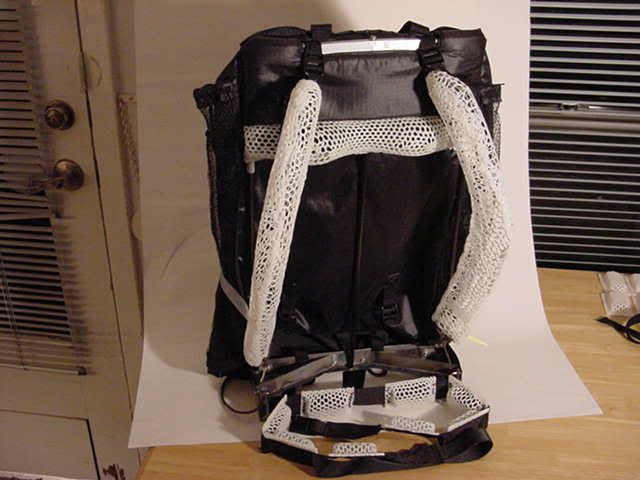
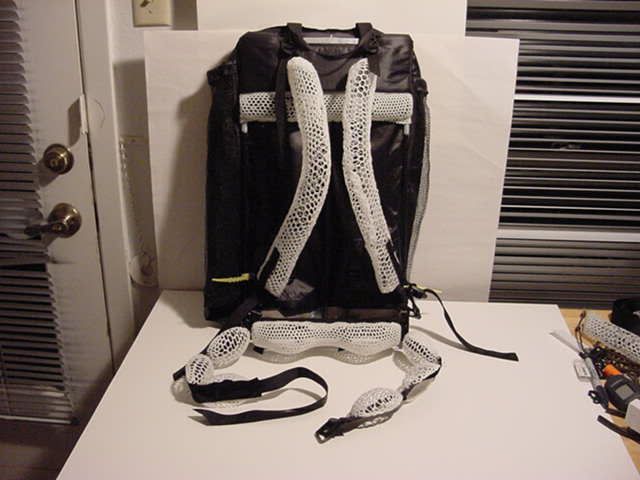
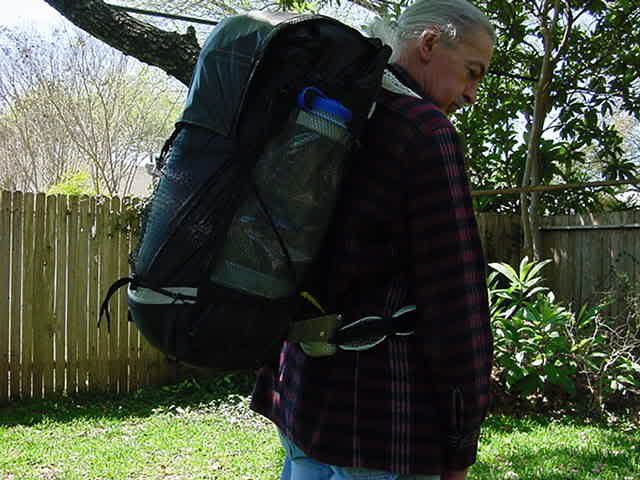
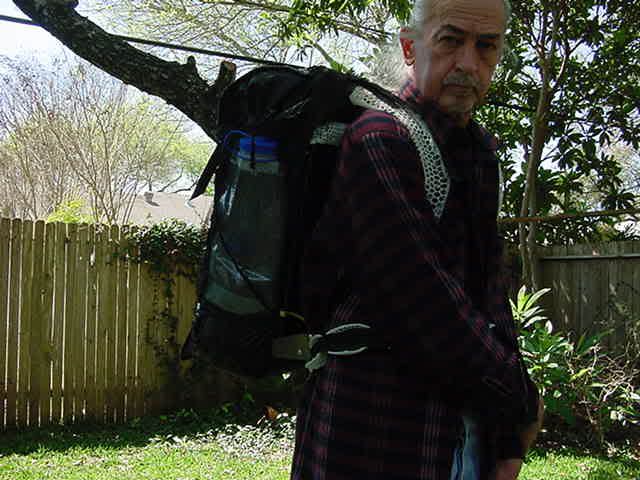
    However, my primary pack is a G5 which doesn’t have side pockets designed for easy access to a water bottle.

    If I’m not using a Platy bladder in my pack, but am using water bottles, here’s what I do. It’s a really low-tech, LW sol’n – no fabrication/sewing skills required.

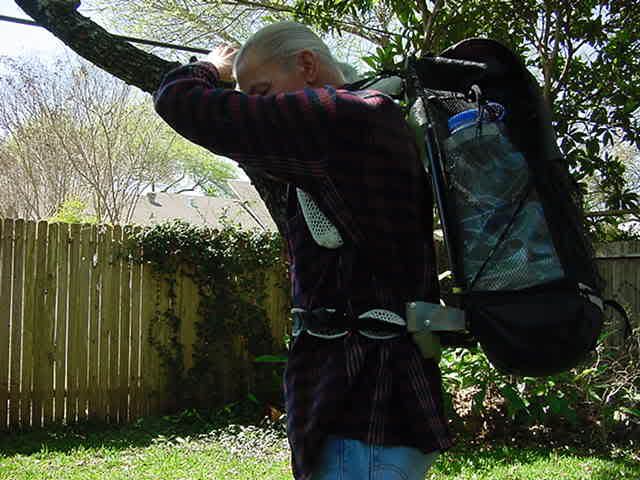
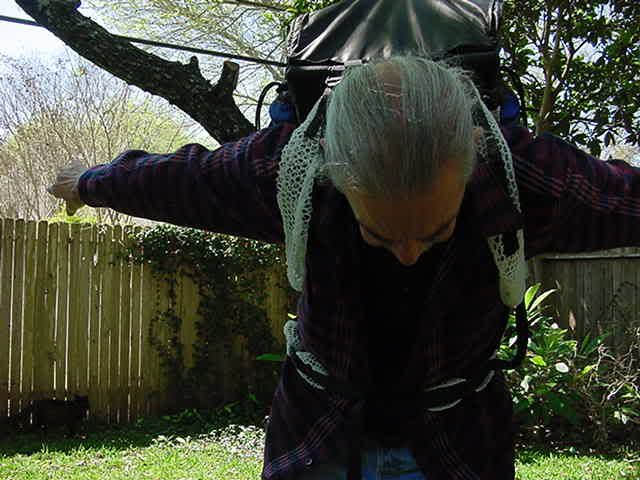
    On the G5 (which doesn’t have the typical water bottle pockets) & even some packs with slanted mesh water bottle pockets, many people, including myself, can’t reach the water bottles.

    [NOTE: this, in my case, is due to limited mobility of the shoulder joints. often this is a genetic issue with short/tight capsular ligaments of that joint (nothing one can do if it’s the ligaments that are “tight”). tight muscles, on the other hand, even if due to increased muscle tone from a lot of weight training, for instance, can be relaxed/stretched using PNF stretching techniques. just tryin’ to anticipate a future poster’s comments on “shoulder joint mobility” here. we now return to our regularly scheduled post…]

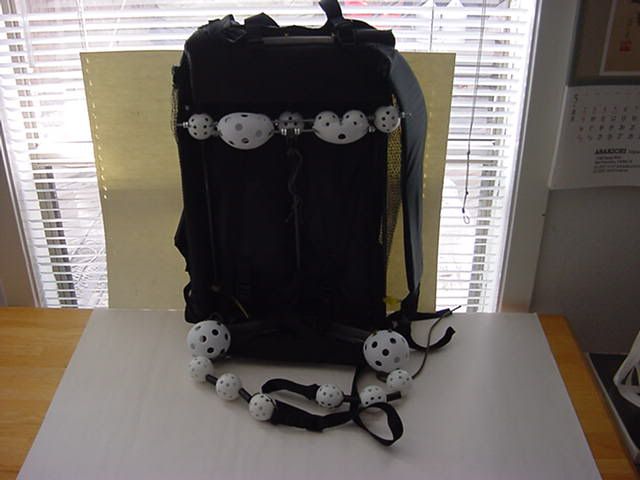
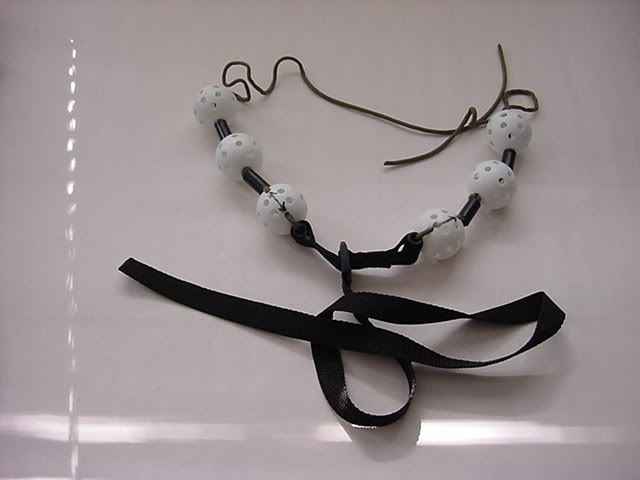
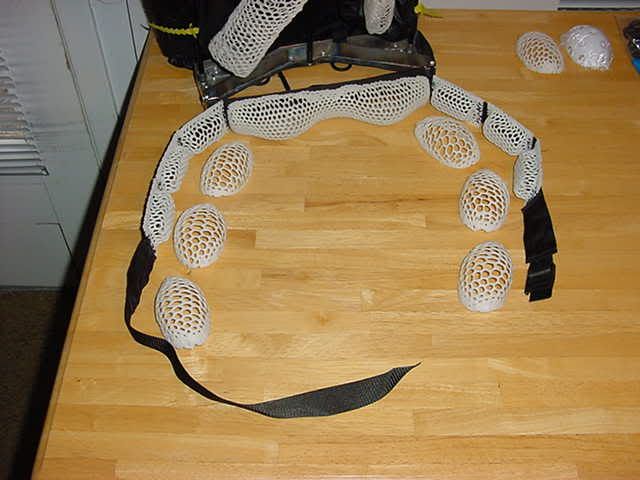
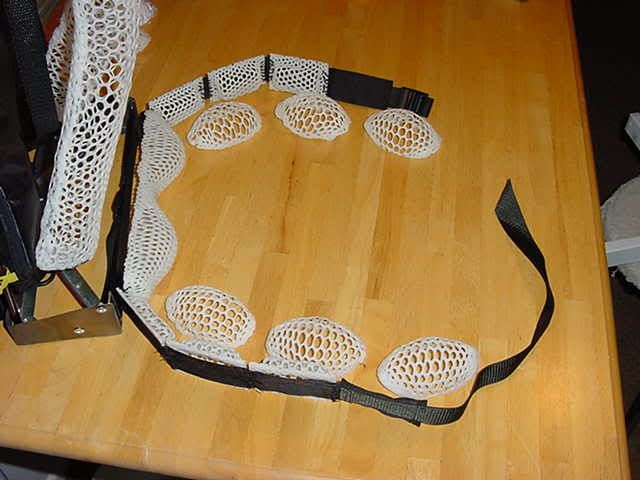
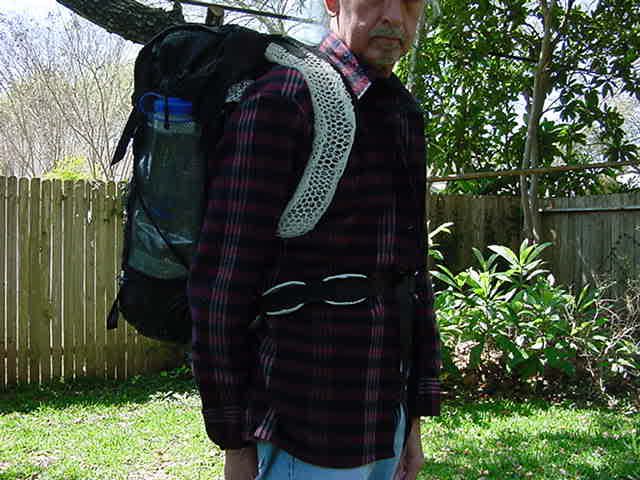
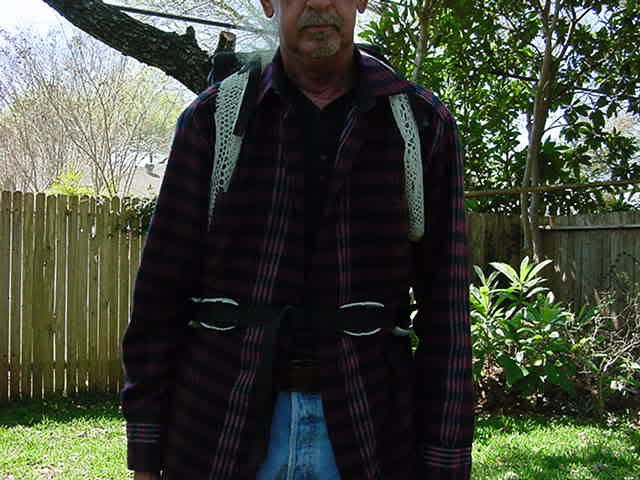
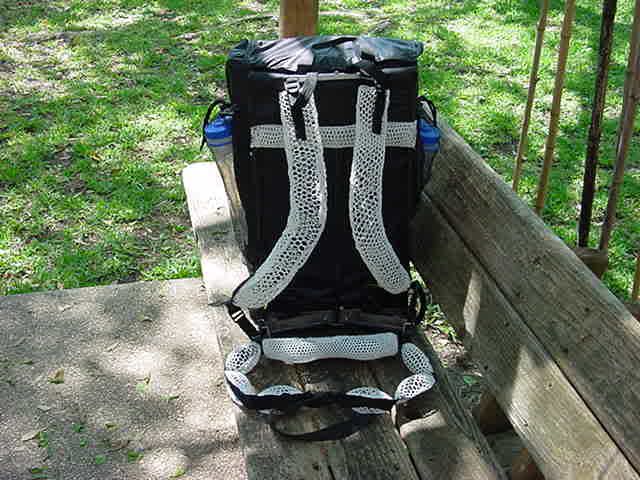
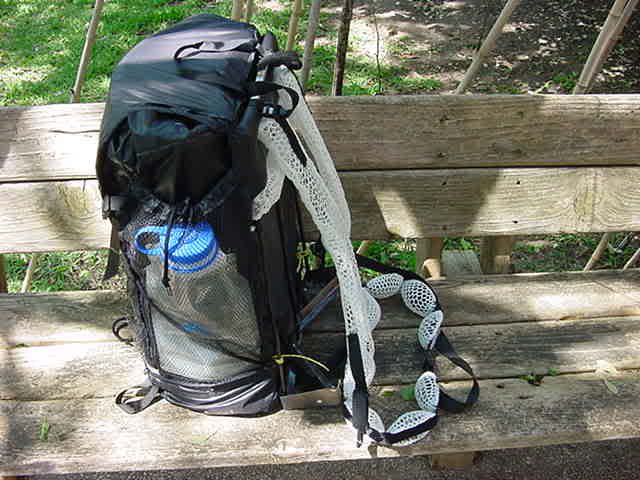
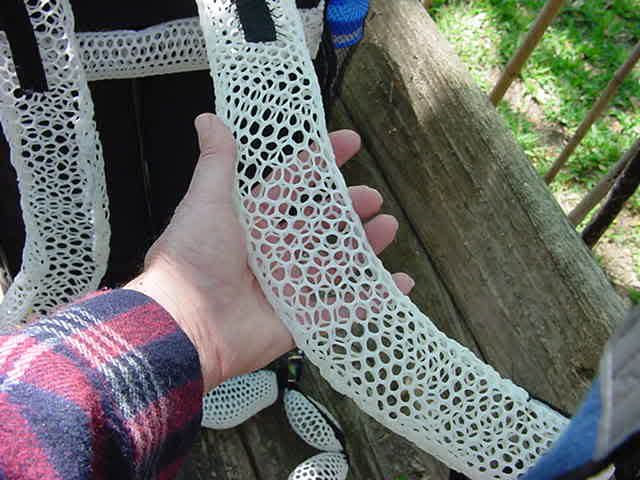
    I bought some bulk 1/8″ bungee & hook&loop (Velcro) fabric from REI. Oh…and also some mini-cord locks. Using either the bungee, or the hook&loop fabric, or both, “loops” are fashioned & merely looped around the shoulder straps (you can place them above or below the sternum strap – my G5 has the opt. sternum strap). They are a semi-permanent fixture now & are not removed each time the water bottle is accessed.

    When carried below the sternum strap, the “loop(s)” which now are wrapped around the 1L Platy, or Nalgene water bottle slides to the very bottom of the shoulder strap – at approx waist belt height.

    It’s very easy to reach down, slide the water bottle & loop up the shoulder strap & unfasten the water bottle since it’s now basically in front of me. Have a quick sip, refasten, let go of her, & let gravity go to work & slide the loop&bottle back down the strap.

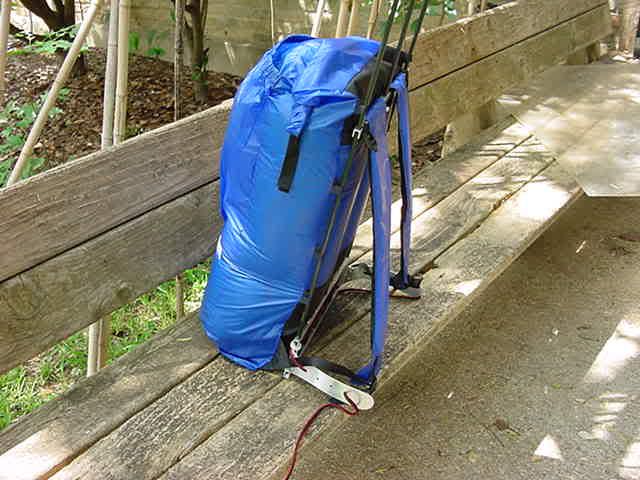
    Obviously, there isn’t even any mesh to protect the water bottle. I hike mainly on trail, so this isn’t an issue for me.

    #1338624
    Joshua Mitchell
    Member

    @jdmitch

    Locale: Kansas

    Bill,
    I’m very impressed by your design and manufacturing skills.

    Got a question. Maybe this is because I’ve not seen the GoLite Stephenson. On your newest rendition, those foldable aluminum sidewings attach to a hip belt, correct? Because I’m having a hardtime seeing how that could be comfortable otherwise.

    #1338635
    Bill Fornshell
    BPL Member

    @bfornshell

    Locale: Southern Texas

    Some place I think I wrote that I had not made the hip belt yet. The hip belt connects to the inside part of the Wing-Things. Here are a few pictures of both the old Stephenson and the old Jansport External Frames with the “Wing Things”. Then my version of both and with my prototype Moisture Management Hip Belt.

    Old Stephenson’s External w/Wing Things:
    Note: The pictures were sent to me by David Spellman and I assume he put the dimensions on the pictures with some computer program. Thanks David.
    Image hosted by Photobucket.com
    Image hosted by Photobucket.com
    Image hosted by Photobucket.com

    My Home-Made version of the Stephenson Wing Thing:
    Image hosted by Photobucket.com
    Image hosted by Photobucket.com

    Old Jansport External w/Wing Things:
    Image hosted by Photobucket.com
    Image hosted by Photobucket.com

    My version of the Jansport Wing Things w/Moisture Management Hip Belt Prototype:
    Image hosted by Photobucket.com
    Image hosted by Photobucket.com
    Image hosted by Photobucket.com

    #1338637
    paul johnson
    Member

    @pj

    Locale: LazyBoy in my Den - miss the forest

    Bill,

    great work. thanks for continuing to post. really appreciate it.

    #1338638
    Joshua Mitchell
    Member

    @jdmitch

    Locale: Kansas

    Thanks Bill, I gotta get me some tools…

    #1338713
    P. Todd Foster
    Member

    @ptoddfaol-com

    Bill,
    I’m finally moved in, so I’m catching up, kind of, with your pack evolution. Love the wings you’re trying, using thin metal so that the edge on force makes it rigid in that direction. Very nice work.

    Wondering what the latest is in your off-the-back ventilation work? Could be real useful out here in the desert, only 111 degrees today. Had to tram up onto San Jacinto for 7 mile jaunt this last evening to get some coolness.

    I’m adding another criterion to my pack wishful thinking: the ability to hike shirtless at times, when it’s as hot as it gets here. That is, without losing skin to pack and shoulder strap abrasion. This AND ventilation coolness on the back and under straps might just be beyond the possible. I don’t know, do you?

    Best, Todd in Cat City.

Viewing 25 posts - 1 through 25 (of 84 total)
  • You must be logged in to reply to this topic.
Forum Posting

A Membership is required to post in the forums. Login or become a member to post in the member forums!

Get the Newsletter

Get our free Handbook and Receive our weekly newsletter to see what's new at Backpacking Light!

Gear Research & Discovery Tools


Loading...