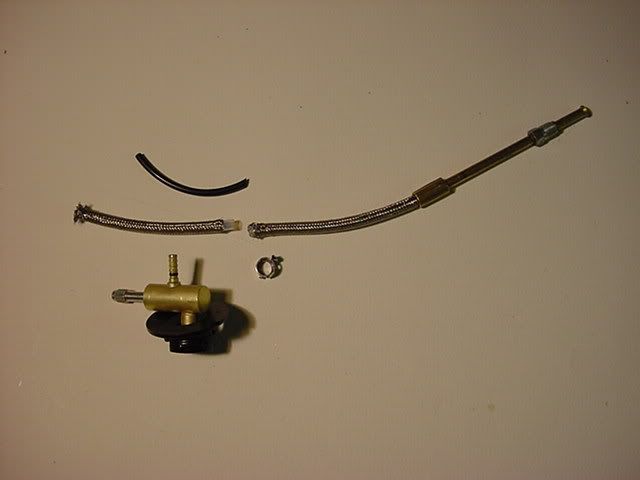
> Q1 – What I would love to see is the interior of the control valve. Is this just a standard needle valve?
> A1 – Is this what you are asking about?
Yep, thanks.
OK, standard needle valve. Hum – interesting. Thoughts which follow:
The needle valve is valving liquid. Consistent with performance. So liquid is going up the tube to the stove. It vaporises up there.
Other remote cartridge stoves are similar, but withOUT the big wire up a straight bit, and they work. I think the wire is simply an attempt at a heat exchanger, feeding back from the burner. Since other stoves don’t have one, …
Other stoves, like the Snow Peak GS200D, can be used with liquid feed. They do NOT have a massive lump of metal around the valve. So I think the beautiful finned diecast magnesium housing has the following functions: something to hold when you are mating the canister to the valve; something to protect the plastic clip which holds the canister; a stylish bit of marketing. Deduction from all this: you could safely leave the whole magnesium bit off. (I think …)
Apropos of other remote-cartridge stoves: I think it should be possible to make a stand which will hold a conventional cartridge in an inverted position so the valve can be easily adjusted. This means any remote-canister stove could be used. I will experiment, and report.
How did you get the pictures into the email???? If I succeed with the above, I may be able to post a pic of it.