Topic
Esbit burner testing
Forum Posting
A Membership is required to post in the forums. Login or become a member to post in the member forums!
Home › Forums › Gear Forums › Gear (General) › Esbit burner testing
- This topic has 906 replies, 4 voices, and was last updated 1 year ago by
 DAN-Y.
-
AuthorPosts
-
Jun 22, 2018 at 4:23 am #3543228
Dan: One key value of long-lasting threads like this, and BPL gear threads in general, is that they give the opportunity for BPLers to collectively refine designs for basic hiking gear – stove, tent, tarp, poles, rain gear, etc. Over time, there is the opportunity for (a few) very refined designs to be evolved – to one day maybe become classic designs, like (in my opinion) the Chouinard Pyramid, Bibler I-tent, MLD DuoMid, and Locus Khufu. Even the Ti shepherd hook, or MSR Carbon Core or Groundhog stakes. This design refinement can be a community effort – for those interested enough to participate – and that is the kind of admirable spirit and openness to ideas that I think you encourage in your threads. In such an effort, some might start specific designs, others develop and test them and maybe radically transform them, still others finalize them, yet others may one day commercially produce and market them. This could be considered to be akin to tradition art, where objects may evolve even over thousands of years, into highly refined artifacts that satisfy both physical (utilitarian) and metaphysical (symbolic, meaning, and aesthetic) demands (e.g, the prehistoric adz, which was developed into beautiful ceremonial artifacts in greenstone).
Quite by chance, I’ve just edited a paper on the radio-frequency inductively coupled plasma spheroidization of titanium metal powder. I had naively thought that titanium processing would be confined to working with commercially-provided sheet, rod, tube, etc. But the article pointed out that because of their high specific strength, titanium and titanium alloy metals present difficulty in machining products with complicated shape – which might well be required for aerospace and biomedical applications. A novel approach to avoid this problem is three-dimensional printing techniques, such as selective laser melting (SLM), which has apparently attracted considerable attention in producing titanium-based products of complicated shape. SLM can manufacture three-dimensional products with complex shapes directly, by melting metal powders, and forming new layers of the products.
It therefore occurs to me that a titanium folding tripod based on the form of the traditional African tripod carved from one piece of wood (previously illustrated) could be realized by such 3-D laser printing of Ti powders, and might even one day be commercially viable. That would avoid the difficulty in assembling it from three discrete pieces that intertwine, with all the compromises and hassles that would involve. A developed version of the one-piece shield-stove prototype suggested above could also one day be realized through 3-D Ti printing. And thanks for your kind words.
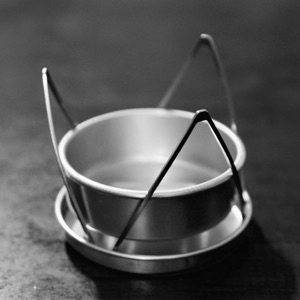
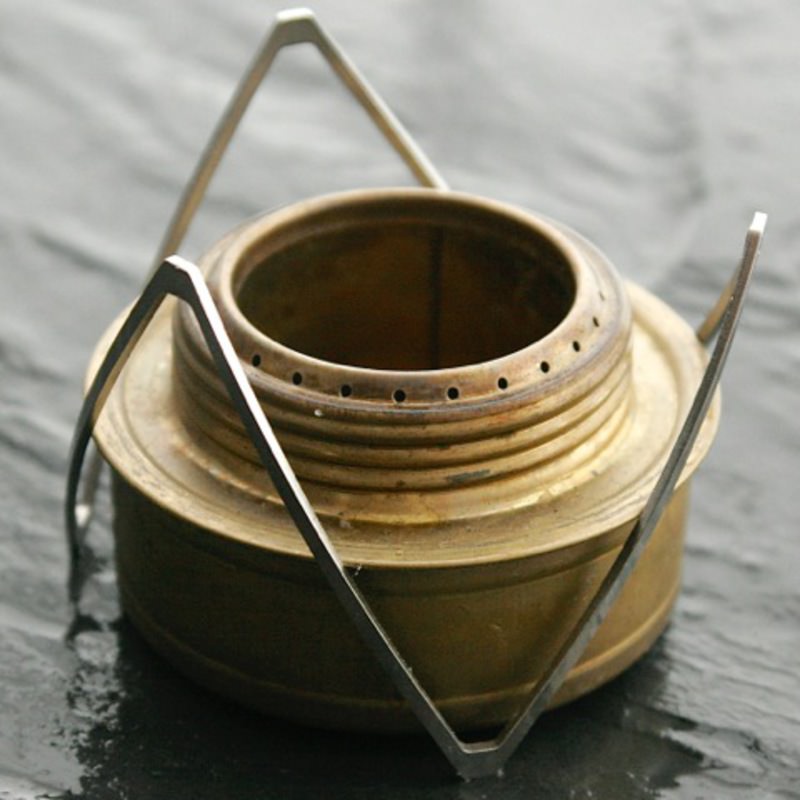
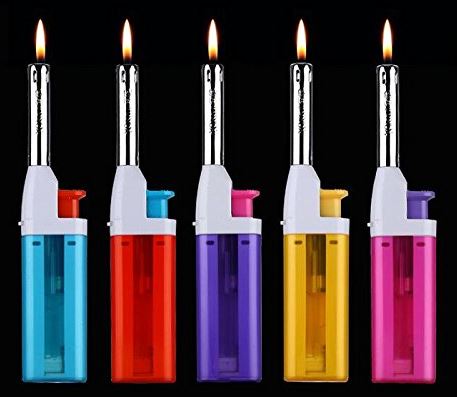
Jun 22, 2018 at 7:27 pm #3543304I really like your idea of the Ti wire in the Star of David shape. It would allow access to the esbit burner with a long nosed butane lighter. Your design would be excellent for Big Wall Climbers that suspend their stoves setting up camp on the sides of big walls.
Selective laser melting (SLM) wish I had that ability to do the tri-wing support.
I’m going to do some experimenting with your one-piece shield-stove ideas

Sharing ideas is what these forums are all about, we venture, we gain ;)
Wires in the double triangle formation:

Long Nose Butane lighter:
 Jun 22, 2018 at 11:17 pm #3543341
Dan and all
I found that welding Ti wire was extremely difficult – it usually needs to be done in an inert atmosphere as the surface oxide layer is so tenacious. That includes spot welding and brazing. But then I looked at two other factors and changed my mind a bit.
First, Ti wire can lose a LOT of strength when it reaches a certain temperature. It is not always the best choice.
Second, the weight difference between a length of Ti wire and a similar length of SS wire is miniscule, mainly because the total weight is also very small.
So for some things I switched to a similar gauge of SS wire – which can be spot welded and brazed quite easily. Making a Star of David in SS wire would be so simple.Cheers
Jun 23, 2018 at 1:53 am #3543352Thank you Roger for your insight into materials. I’ll be making the Star of David using stainless steel wire. It’s what I use on the pot supports for the Starlyte Stoves.
http://www.woodgaz-stove.com/starlyte-stove.php
I’m on vacation right now and will be doing some experimenting with the new project when I return. I’m intrigued about the esbit burning in an enclosed situation like we’ve been shown in Robert’s one-piece shield-stove.
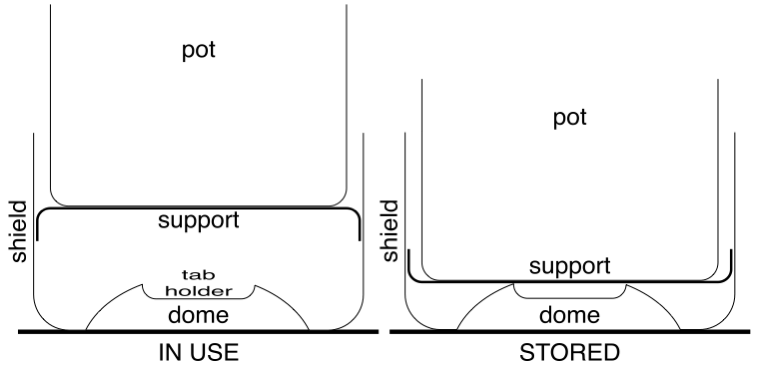
Jun 24, 2018 at 8:47 am #3543446I just need to add, that between the pot support and the Esbit dome/tray, there is wasted space when the system is packed. That can be mitigated if the pot support is semi-rigid or rigid, like thicker wire, and can be detached and reinserted at top of tray level. If the pot support has the triangular struts extend and fold down into short legs, and if the shield has short horizontal pairs of parallel horizontal cuts with the material pushed into the interior, the legs of the support can slot into the spaces created (between main shield and inner protrusions of the shield) when used to support the pot. For packing, remove the support, invert it, and replace slightly rotated to avoid the protrusions. (There is adequate space between pot circumference and shield inner circumference). This provides maximum inner storage space, so the pot can go inside and sit lower than when located for use.
That amount of minimal assembly/disassembly would be fine.Jun 24, 2018 at 9:36 am #3543449That, Robert, needs a good explanatory diagram!
Cheers
Jun 24, 2018 at 10:01 am #3543456Ok sorry Roger, also I’m not sure the internal protrusions would allow the legs to fit, without stretching the metal somehow. I’ll try a figure or two, soon.
Jun 24, 2018 at 10:06 am #3543457Tab A goes into slot B?
Cheers
Jun 24, 2018 at 10:07 am #3543458In progress, very hot here, mind not working well.
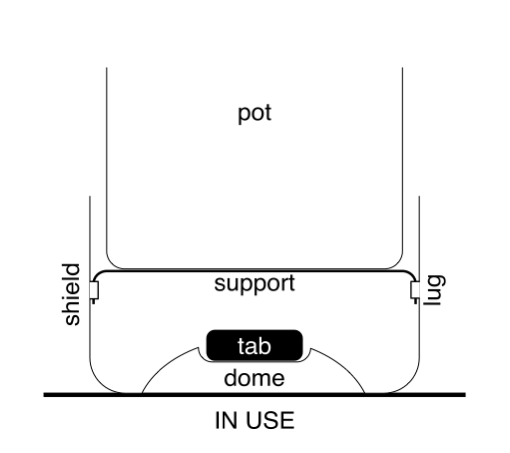
Jun 24, 2018 at 11:04 am #3543461 Roger above figures don’t show internal protrusions to hold pot support. learning to use new drawing software on iPad. Left is assembled for use, right is disassembled for storage. Below figure shows lugs to hold support. Not to scale.
 Jun 24, 2018 at 1:19 pm #3543476
Dimples are formed in surface of shield cylinder by cutting two horizontal lines, maybe 20 mm long, 10 mm apart, then “inverting” curvature to pop rectangle inside (haven’t tried that). Possibly drill small holes at each end of each line, before cutting line. Tiny circles in figure merely represent legs or lugs of pot support, they go down inside vesica formed by dimple to fix support in place (but tiny circles not as large as shown). For storage, Star of David support is removed, turned upside down, replaced in shield rotated 30*, to gain more storage space. Dimples in use would let in some air, might allow some flames to penetrate shield. By the way, all figures drawn with one tired index finger on iPad in the stupendous Vectornator. No measurements entered, except page size, Can’t even figure out how to draw squares not rectangles, or circles not ellipses. No help menu I can find yet, oh for the days of Aldus/Macromedia Freehand. NOT TO SCALE.
I’m not used to working with metal, but with card, I would have scored the vertical ends of the dimple rectangles, before trying to pop the rectangle to reverse curvature. With the metal, I would try scoring those short vertical lines with a blunt end, maybe a biro pen, before trying to pop them, not using a sharp edge.
Jun 24, 2018 at 10:23 pm #3543656Design constraint – width between adjoining dimples will constrain width of cut out space for pot handle nd to help lighting.
Also, one triangle probably enough for pot support, with triangle base adjacent to opening, apex opposite.
Jun 25, 2018 at 9:56 am #3543712OK, got that.
Air inlets where?Cheers
Jun 25, 2018 at 10:00 am #3543714Air inlets? Ha!
Only the periphery between pot and shield, and the “front” cut-out to allow space for the pot handle (not shown, except in earlier photos).
I had better measure the diameters and height of my present system. Will do.Jun 25, 2018 at 10:42 am #3543718Specifications of the As-built Shield and Evernew Pot & Lid
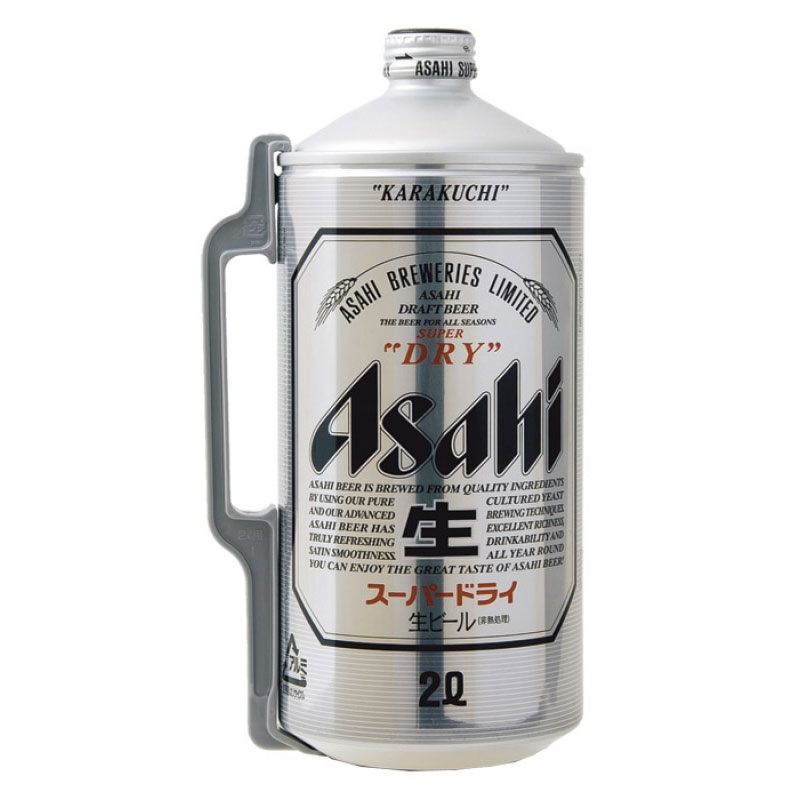
(This is for use with Esbit tripod, which fits nicely inside).Shield:
Outer diameter: 110.5 mm or a little less
Inner diameter: 110 mm
Height as cut: 71 mm
(Note The Asahi 2 L has a bend at the base, so narrows to about 76 mm in the bottom 10 mm or so vertical to reduce heat build-up on reentry. Because of this and base dome, Esbit tripod sits probably about 10-12 mm above planetary surface). The beer should definitely be consumed cold).
Height of sill of cut-out about 44 mm above planetary surface.
Width of cut-out at sill about 25 mm, increases to about 65 mm chord at head, but with rounding.
Dome of base must be about 10 mm high, 64 mm diameter.
Estimated alu foil thickness: 0.2±0.1 mm (?)Pot: Evernew Ti 400 cc
Base diameter about 95.5 mm.
Height 60 mm.Lid: Evernew Ti for this particular pot (bloody wonderful but tricky to snap tight – highly recommended, sold separately)
Diameter 106.5 mm
Height: 6 mm
Total height of pot + lid when snapped tight: 63+ mmSorry to use real units, but my slide calipers only have mm. Errors and omissions excepted.
Jun 25, 2018 at 10:48 am #3543719 Jun 26, 2018 at 9:45 pm #3543918
Air inlets? Ha!
Only the periphery between pot and shield, and the “front” cut-out to allow space for the pot handle (not shown, except in earlier photos).That is most interesting, can’t wait to make something similar and put the fire to it. I an well pleased with the power of Esbit and at the rate it burns when using the Brian Green Esbit Tray with bread pan corners. It’s what I’m going to use with my test kit. (still on vacation)
Jun 27, 2018 at 4:06 am #3543986
Atrier setsugekka / TriPod Titanium Power / 4g / 5,000 yen+tax
http://skyhighmw.blog112.fc2.com/blog-entry-1132.html


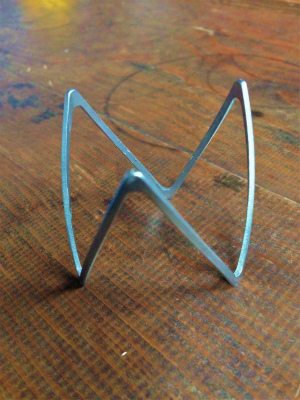
If not already implemented, the BGET could be made available in Ti in rainbow colors as per Evernew cups, or Tito shepherd stakes (AliExpress). I think Japan would be a good export market for those. A comparable product is a Ti or SS (can’t recall) octahedral pot support, refined design (see photo). In a dinky clear package, or clear container that could then be used for cooking oil (proportions might not be suitable). 2,500 or 3,000 ¥.
Jun 27, 2018 at 6:50 am #3544003P.S. I have found it helps to gulp when viewing the prices of some of this Japanese gear, and to try not to faint in the direction of the display shelves.
http://hikersdepot.jp/products/1282.html/
http://kyoto-setsugekka.sakura.ne.jp/www/Welcome.html
I’d produce the BGET Ti in maybe a blue, and a red.
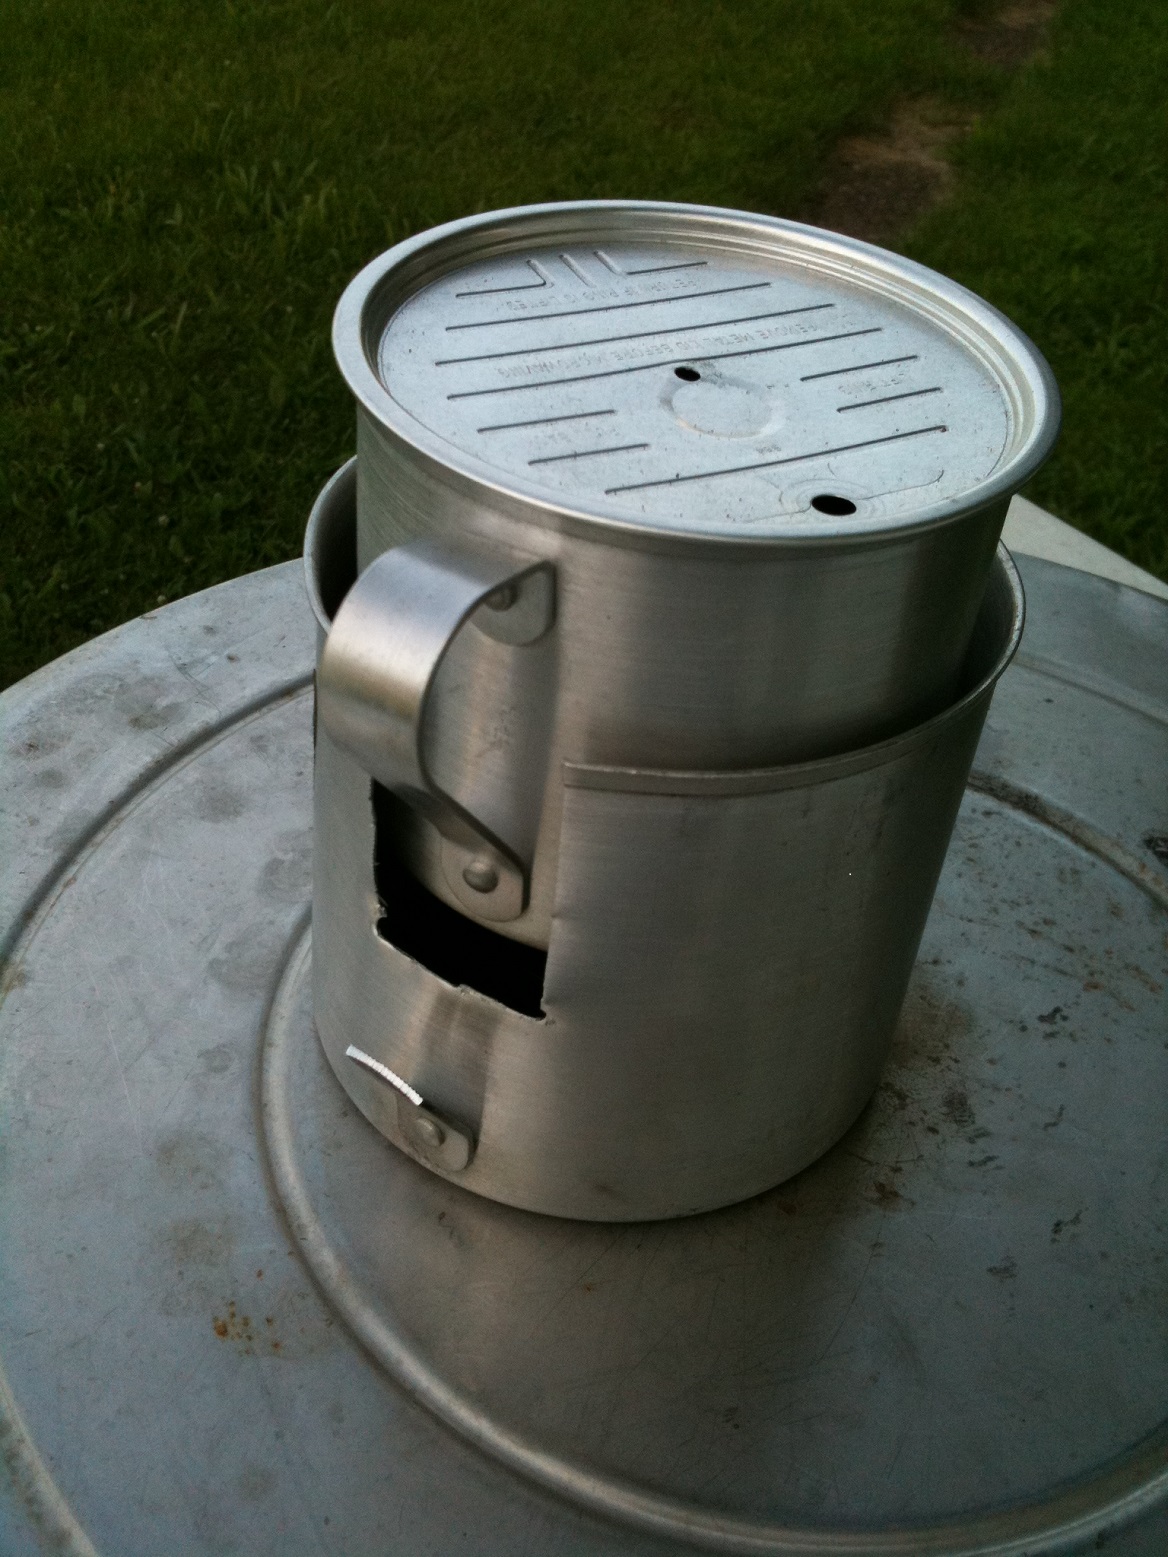
Jun 28, 2018 at 1:27 am #3544173I did a quick modification of a 12cm aluminum mug, cut the handle off. The 10cm Imusa mug has 2 cups of water out of the tap, and used three 4 gram esbits. I used a titanium pot support with insufficient holes and it has a lap joint closure. Water never boiled after waiting 20 min. It was a quick and dirty test to see how well the esbit burns inside the enclosed area. More tests to come in the following days.
The 10 cm mug nests flush inside the 12cm container for storage. Pot support fit around inside of 12 cm Sorry no photos, too large to upload :-(
$30.00US $ for that little ti/stainless and not even a pretty blue, pot support is a little high ;)
Jun 28, 2018 at 1:46 am #3544181got the photo to upload :-)
 Jun 28, 2018 at 2:18 am #3544183
$50 for the power (Ti powder) model. Have a good look at the various models at
http://kyoto-setsugekka.sakura.ne.jp/www/Welcome.html
and
http://moonlight-gear.com/?pid=64339949 (currently out of stock)
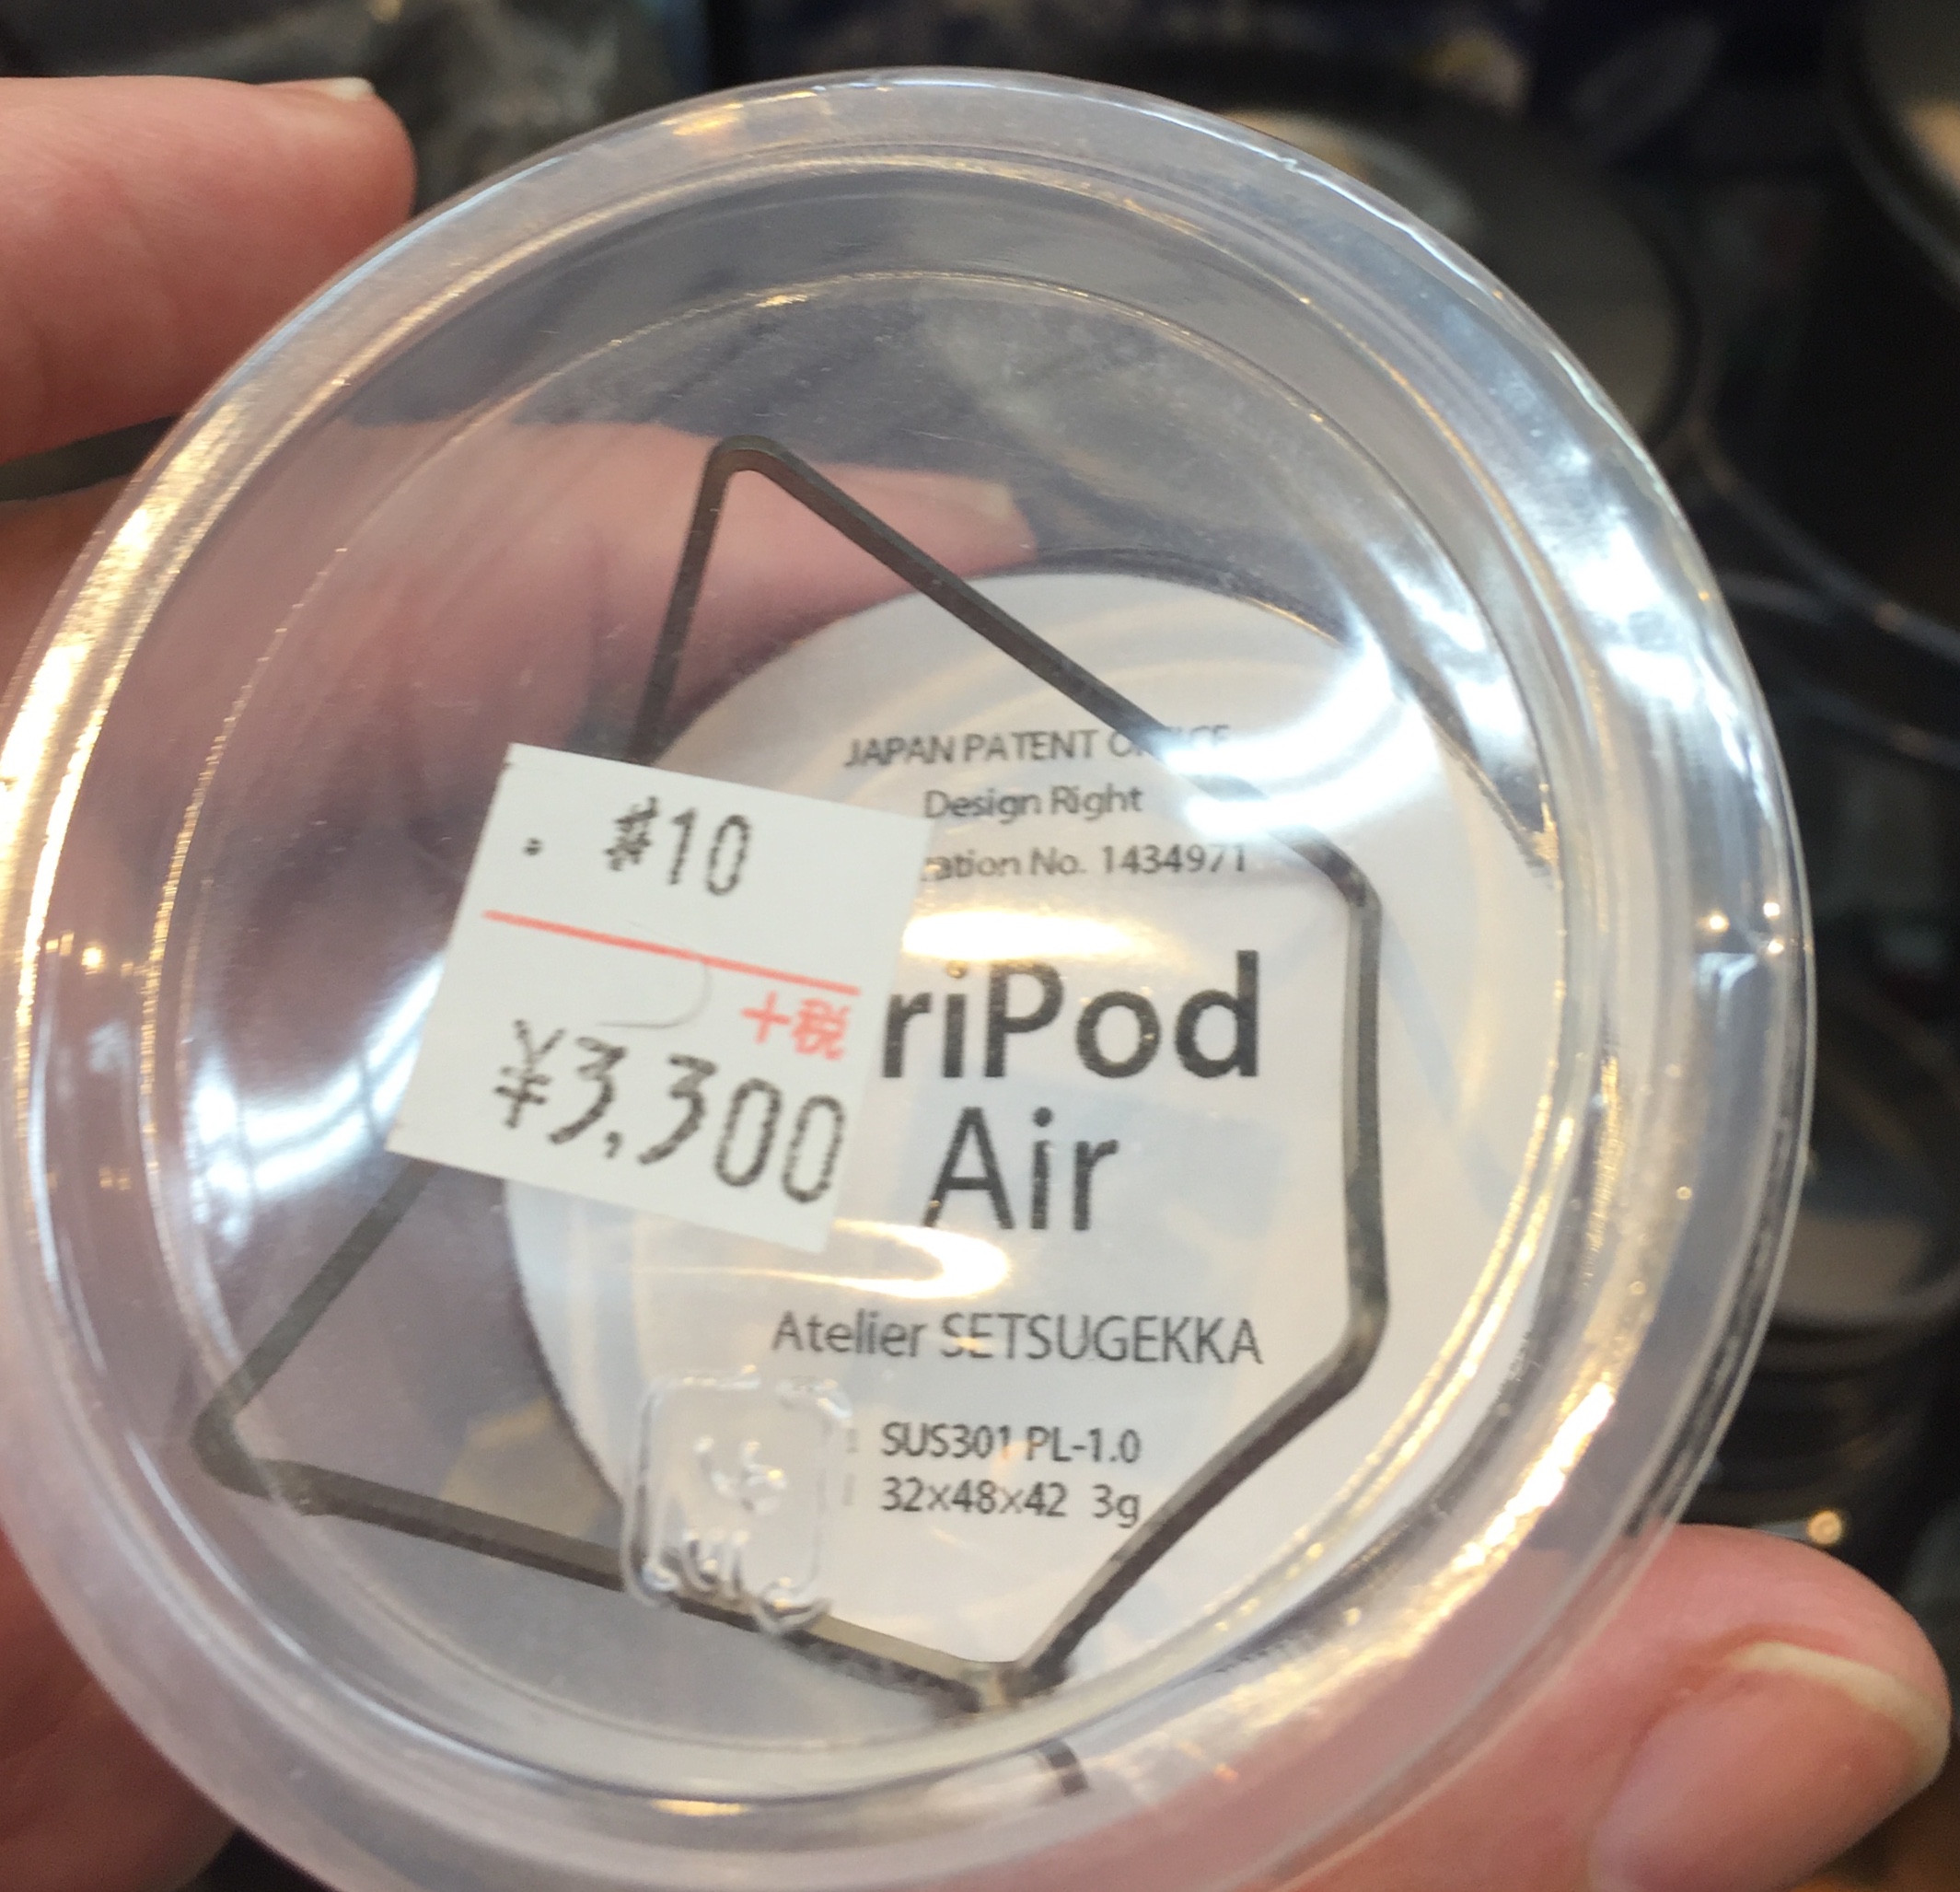
who quote 5,000 + 2,000 ¥ international shipping for the Tripod Ti power. These have been around for a few years, I photographed the one above (3,300 ¥) in 2015 I think, and usually see them in Japanese mountain stores when I visit. I suggested marketing the BGET there because with a little marketing, I think they would sell ok there – much interest in and appreciation of US cottage industry and refined design. The packaging wants to be right, but that’s not difficult to do.
My system works, the tripod almost rests on the top of the dome, though the legs carry its light weight, I think the air gets preheated entering between the shield and pot, and thru the front handle gap. The shield quickly gets too hot to touch. My coffe or water heats reasonably quickly. I stir it several times while heating. I don’t bring coffee to a boil, but a bit below boiling, steaming, too hot to put finger tip in, pot top is too hot to hold onto. I typically brew 310 ml, say 300 ml allowing a little remaining in the carton. The interior surface of the shield reflects the heat well.
Dan, I’d make a version (of my shield) and send it to you to try, but I’ve only ever found one of the 2L beer cans in the recycle bin at our apartment complex, despite checking it many many times. I’ll keep looking…
Jun 28, 2018 at 2:51 am #3544188Hi Dan
Comments offered from a fellow stovey, without bias.
I really think you need inlet air holes right at the bottom of the outer ‘pot’. Otherwise you are going to get poor combustion and the incoming air will be fighting the outgoing hot air. Lots of CO as well. I suspect that is the difference between your rig and Robert’s.
That Ti tripod – the expensive one. It looks as though it was laser-cut from Ti tubing. Very possible, but maybe a very expensive process. For small volumes (<100?) you could get the same thing by bending Ti wire to match and joining the ends with a crimp tube. Well, you could weld the ends together if you have the facilities (also $$$$).
Cheers
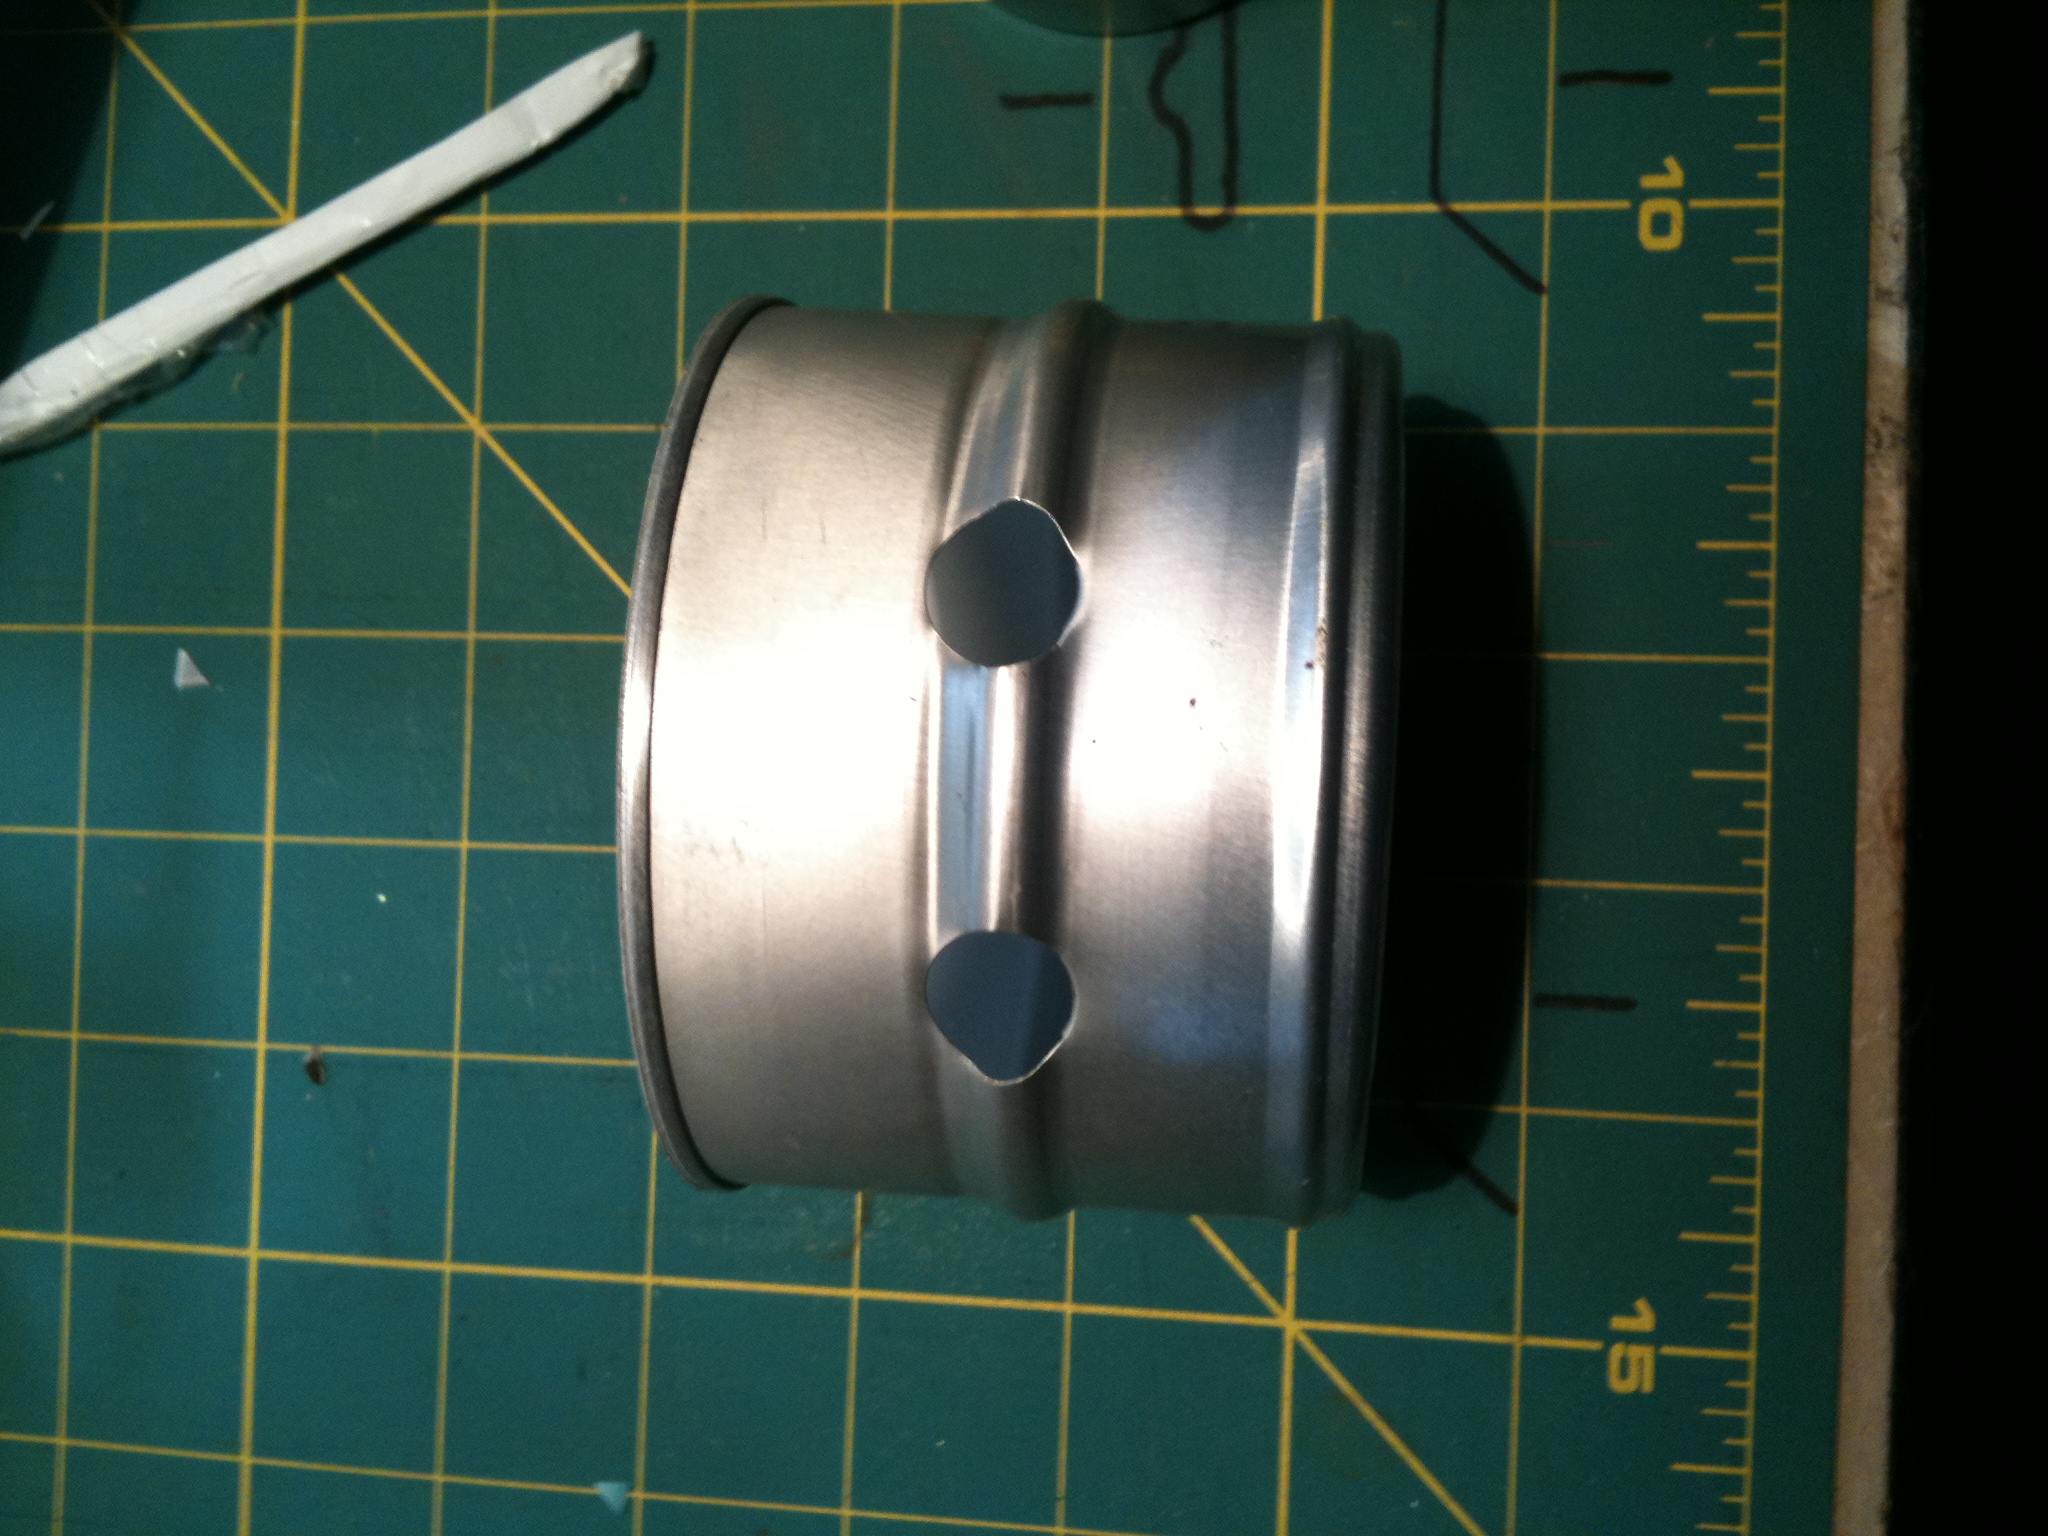
Jun 28, 2018 at 9:15 pm #3544322Further tests today leads me to believe that a better set-up would be a 12 cm Imusa Mug and a 10 cm Imusa Mug without handle. The 12 cm mug would have holes punched towards the bottom to allow air to enter from the bottom. The BGET would sit directly on the bottom of the 12 cm mug. I would use a titanium pot support with adequate air entry and exit holes. The 10 cm nests nicely inside the 12 cm for storage. 1 large Esbit cube would boil 2.5 cups of water no problem. Today I easily boiled 2 cups with starting water temp at 65 degrees, under calm conditions, in my garage. I realized complete combustion and very little soot deposited on the bottom of pot. No offensive odor given off while in heat mode. With a 3 point suspension it could be hung wherever a convenient spot is found.
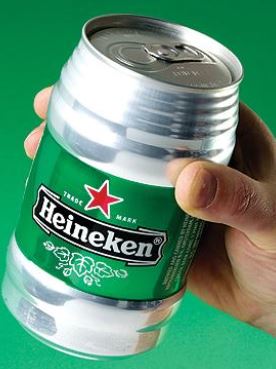
A lightweight set-up could be made with an aluminum Heineken Keg can and a Toaks 450 titanium cup. The dimensions are just right for a really nice “cuppa” kit. The keg is really strong when top is removed to the first large ridgeline. Air inlet holes would be punched into the lower ridgeline. A titanium pot support would be used to support the pot within the Heineken.
If I were to use an Asahi container I would add ridgelines for added strength and a place to add incoming air holes and a ridgeline for hanging wires to be attached to. I would not use a pot with protruding handles to make is so that a cut-out would not be necessary. Todays testing showed that an influx of air coming into the cut-out caused the esbit to be blown out several times after initial lighting of the cube.
If I were to use a Foster’s can I would add intake holes, and then form a ridgeline over them for a nice clean looking execution as seen in my attached photo.
Robert’s set-up is working well for him. I prefer something more rigid as far as the windshield/screen/suspension system. I think his is a great idea and thank him for the inspiration.
I have another 12 cm Imusa Mug to make another windshield/screen/suspension system for my own use


 Jun 28, 2018 at 11:55 pm #3544351
Dan, I take your point about structural stability, in terms of avoiding a handle cut-out, though the Asahi can with cut-out is pretty strong – no crinkles in a lot of use. I’m pleased to see your explorations, which are transforming the concept. But I think the notions of Esbit tray built-in to base dome, and shield supporting pot, are also worthwhile pursuing; these don’t require the Ti tripod, and assembly/disassembly is faster and more convenient. I wish I had your technical skills and similar workshop/tools also!
Maybe we have a slight difference in approach also. I’m less concerned with say rapid boiling of water (though I do want a system to be efficient), but want more to relax while I’m brewing my coffee. It becomes like a central ritual of my hiking, completely informal, but sipping my good coffee allows me to de-stress, and decide the world is all right, after all. Regards.
-
AuthorPosts
- You must be logged in to reply to this topic.
Forum Posting
A Membership is required to post in the forums. Login or become a member to post in the member forums!
Our Community Posts are Moderated
Backpacking Light community posts are moderated and here to foster helpful and positive discussions about lightweight backpacking. Please be mindful of our values and boundaries and review our Community Guidelines prior to posting.
Get the Newsletter
Gear Research & Discovery Tools
- Browse our curated Gear Shop
- See the latest Gear Deals and Sales
- Our Recommendations
- Search for Gear on Sale with the Gear Finder
- Used Gear Swap
- Member Gear Reviews and BPL Gear Review Articles
- Browse by Gear Type or Brand.



 Roger above figures don’t show internal protrusions to hold pot support. learning to use new drawing software on iPad. Left is assembled for use, right is disassembled for storage. Below figure shows lugs to hold support. Not to scale.