Topic

Yet Another DIY Stove Windscreen


Forum Posting

A Membership is required to post in the forums. Login or become a member to post in the member forums!

Home Forums Gear Forums Make Your Own Gear Yet Another DIY Stove Windscreen

Viewing 9 posts - 1 through 9 (of 9 total)
  • Author
    Posts
  • #3748395
    Rex Sanders
    BPL Member

    @rex

    Or YADIYSW, for grey-haired fans of YACC.

    Very rough tests, no field experience, probably been done before, could be optimized, good enough for me.

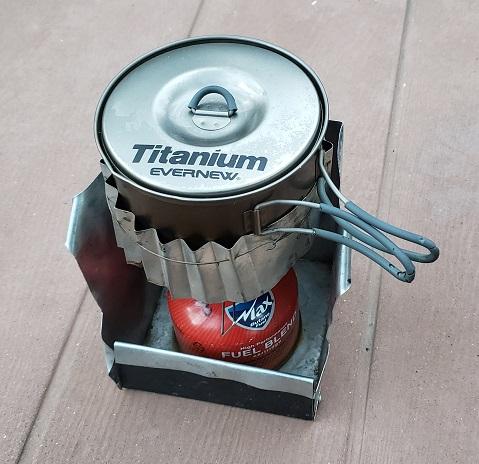
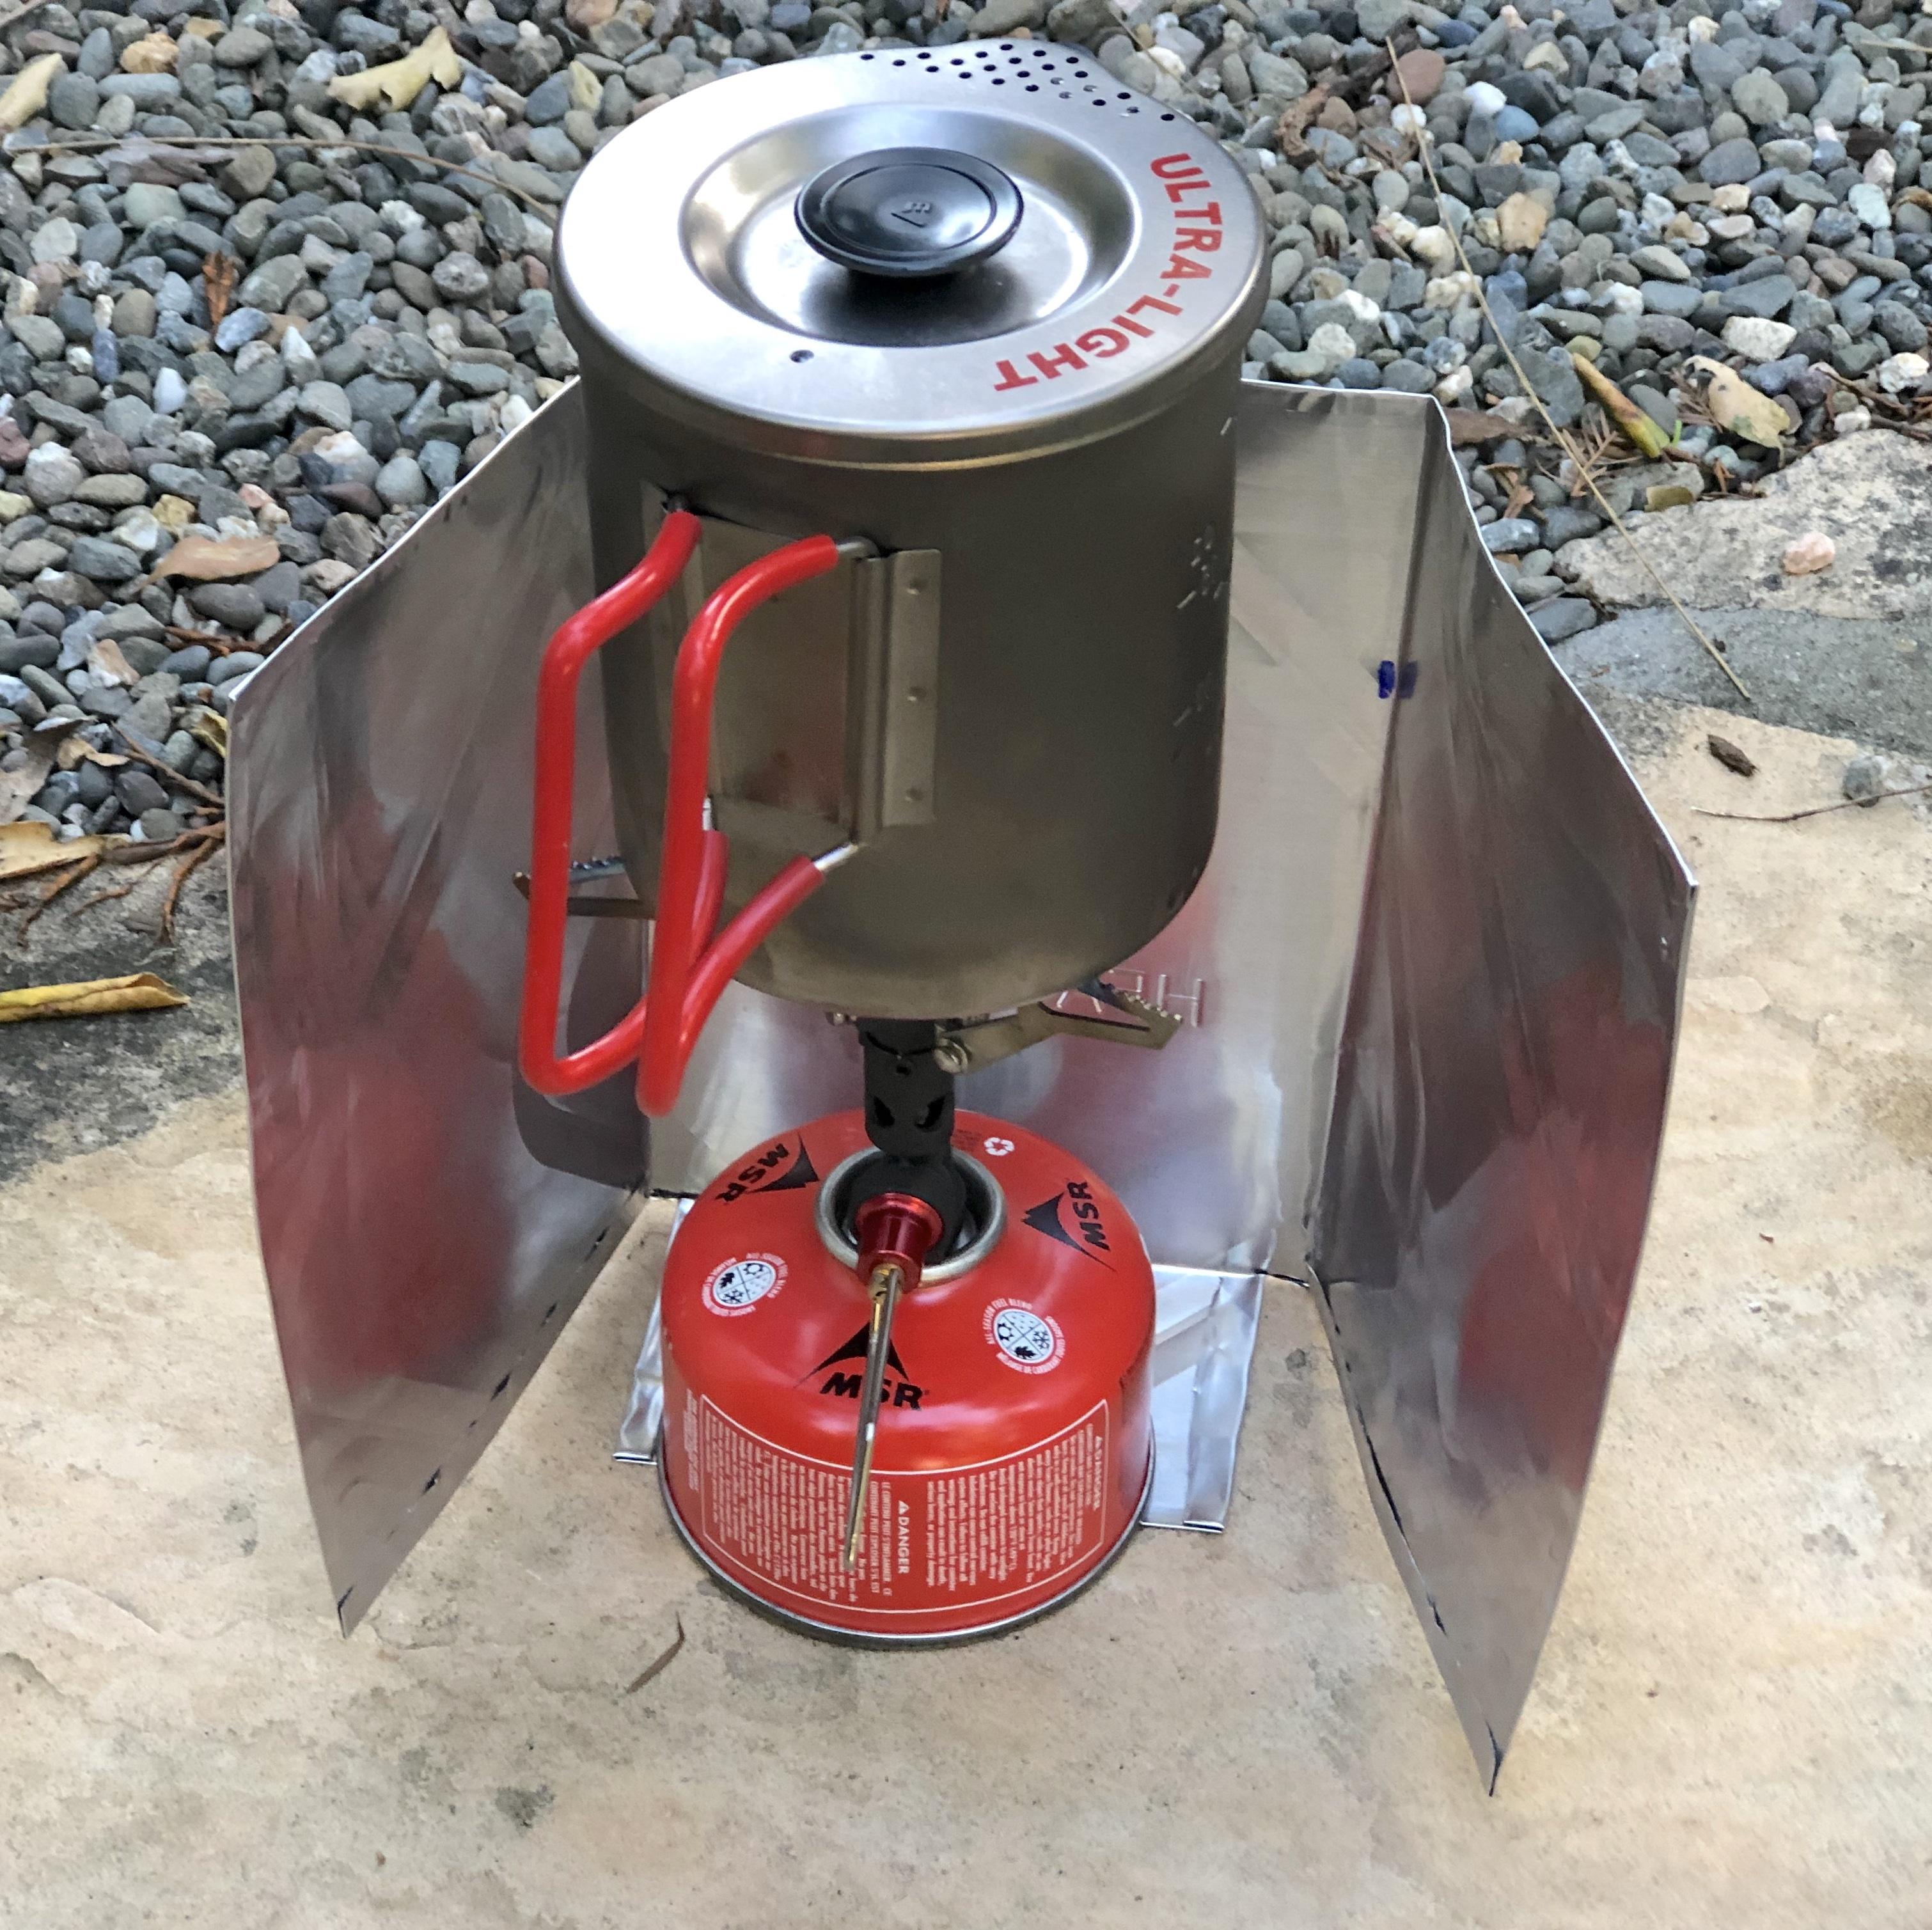
    The concept is pretty simple. Start a with an aluminum roasting pan from the supermarket, cut, fold, and crimp, and end up with this:

    The stove with canister sits on the bottom tab, holding the windscreen in place when it’s, you know, like windy.

    Brought about 600 ml tap water to boil, and high-simmered for another 15 minutes. Canister never got hot to the touch – barely warmed up at all.

    Ran more informal tests using a box fan:

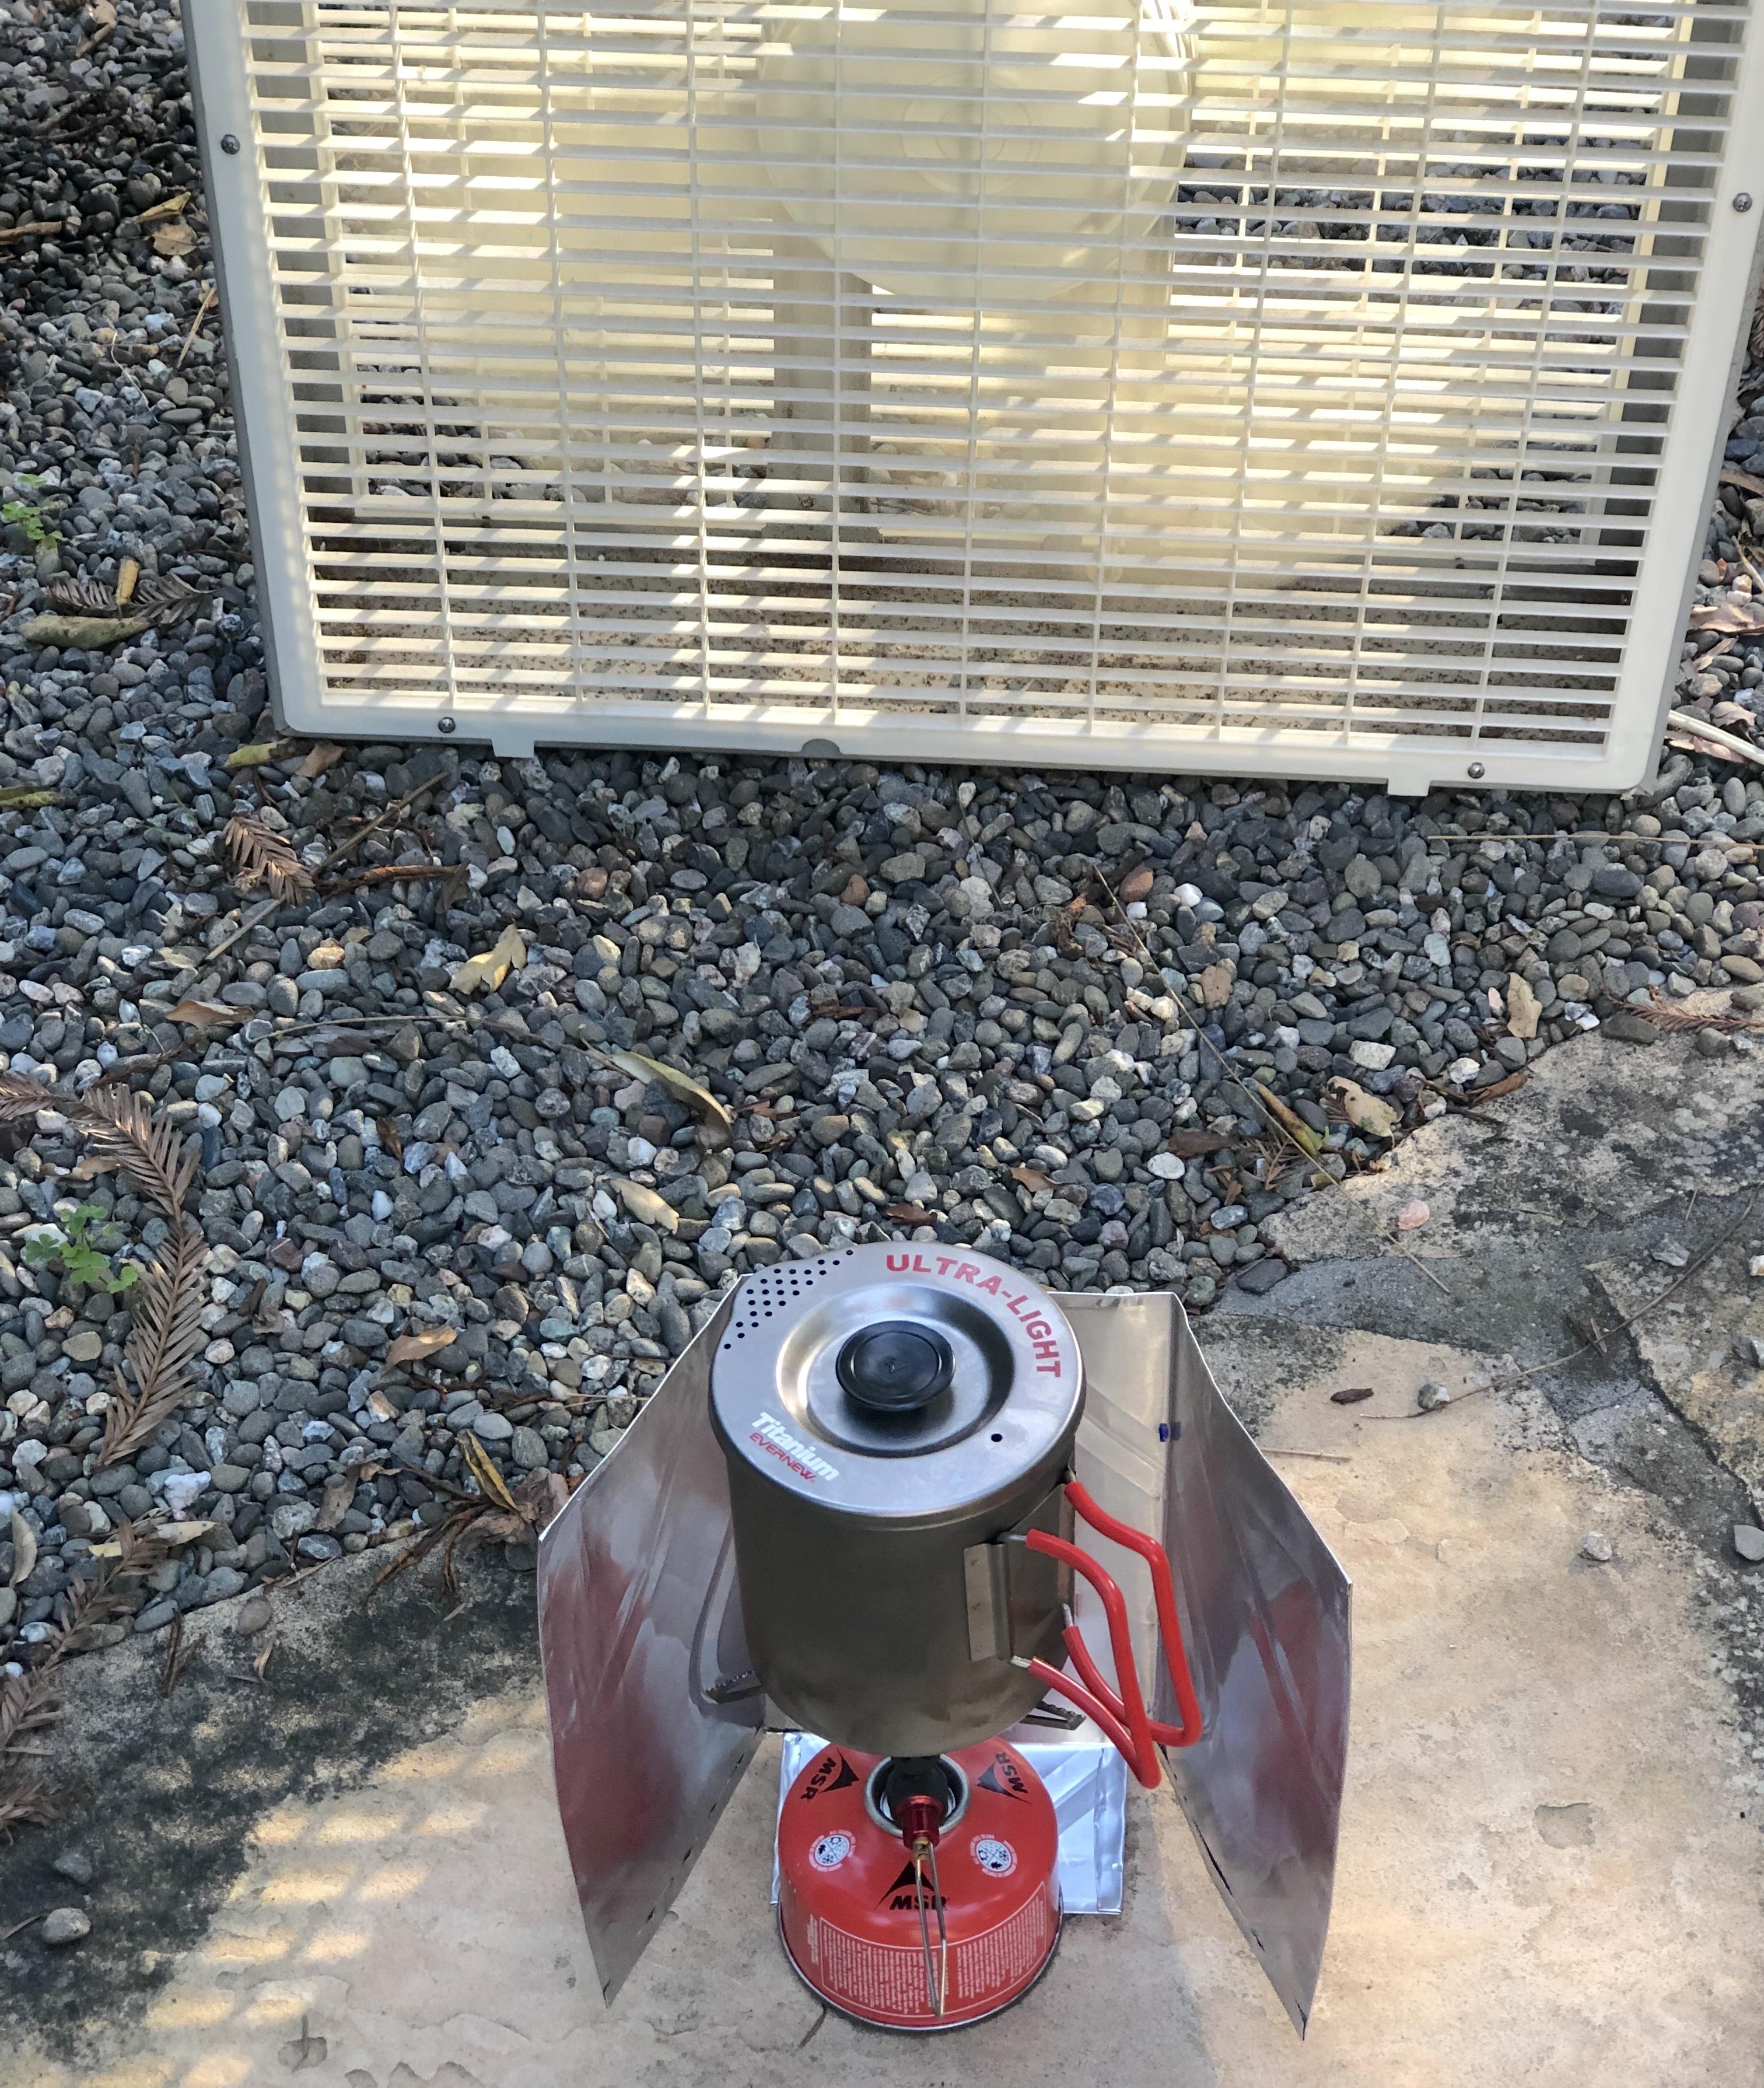
    Approximate times to reach vigorous boil from about 600 ml tap water.

    2:15 No fan with windscreen
    3:45 Fan with windscreen
    5:45 Fan without windscreen

    All tests done at the same half throttle, so fuel consumption should be comparable to boil time. Tests designed to see if the idea is worthwhile, not for comparison to other tests.

    Windscreen weight: 33 grams
    Final folded size: 125 x 190 mm
    Construction time: About an hour.

    Notes:

    – Trim and flatten the roasting pan into one big rectangular sheet of aluminum.

    – Don’t worry about exact dimensions.

    – Metal snips and a hard straight edge are your friend.

    – The tall side panels should be a little narrower than the tall back panel, to make folding for storage easier. I fold the bottom flap in first, then the side panels.

    – To start construction, I tri-folded the aluminum, then cut off part of the side panel bottoms to make the bottom flap. Along the way I folded over sharp edges about 6 mm, mostly to prevent damage to my fingers.

    – The bottom flap is about 60 mm deep, which fits well under my MSR Pocket Rocket Deluxe on a 110 gram canister. The outer flap edge is under the center of the canister, with the back panel not quite touching the back stove arm. Most upright canister stoves have similar dimensions, but check before measuring and cutting.

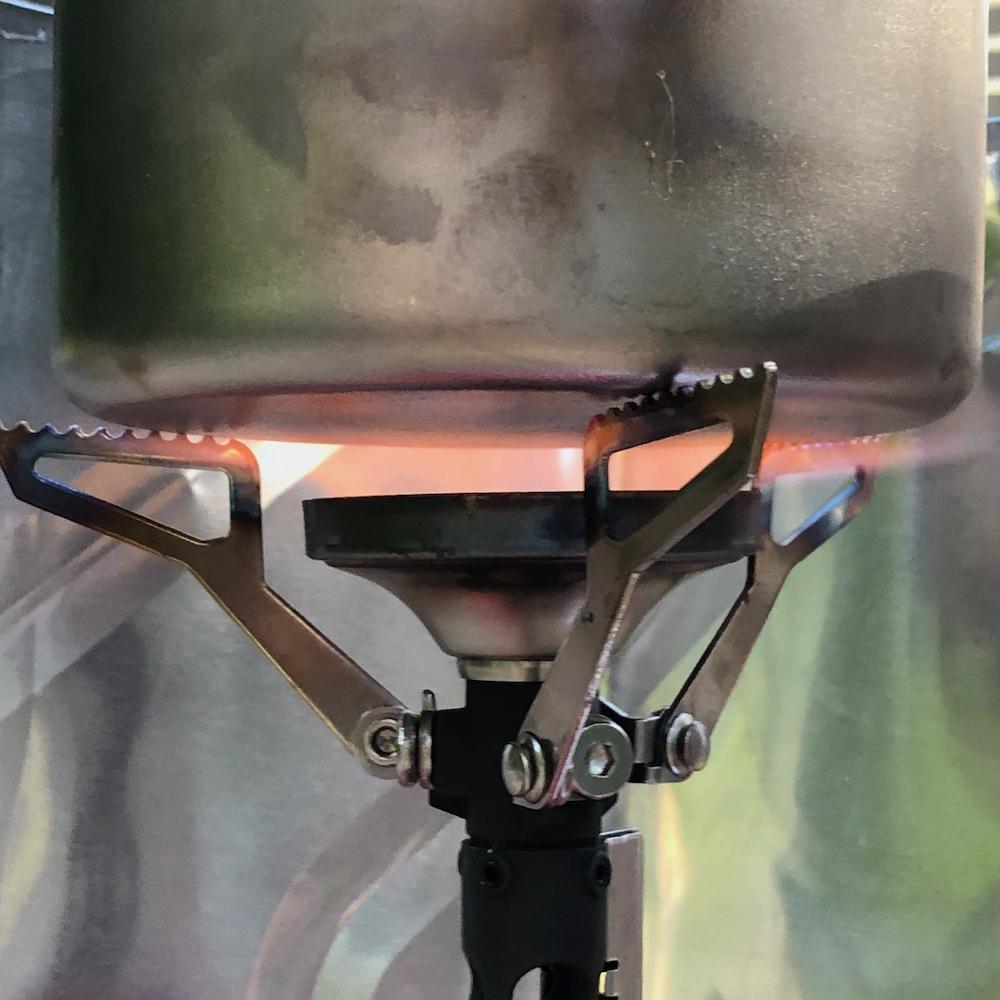
    – In case it’s not obvious, put the back panel into the wind, with the stove valve and pot handles downwind. It’s easy to move around if you forget, and the windscreen never got too hot to handle.

    – The PRD piezo igniter is opposite the valve. It’s easy to lean the back panel, click the igniter, then push the panel back.

    – In general, this windscreen should accomodate a wide range of stoves and pots. Might need tweaking for something unusual.

    – No, the folded windscreen doesn’t fit inside my pot with the lid on. I’ll need to carry it elsewhere.

    – Probably won’t last forever. Easy to recycle, easy to build a new one.

    – All the usual warnings apply. Don’t be stupid!

    – What doesn’t work: leaving the short side panels on and folding to form a three-layer aluminum base. Too lumpy, makes stove and pot less stable.

    – Also doesn’t work: no bottom tab/base. Blows around in the wind too much.

    – I was a bit disappointed that the windscreen didn’t have a weak Moulder effect. Might paint the windscreen interior black, hoping it will warm the canister some, but not too much.

    — Rex

    #3748596
    todd
    BPL Member

    @funnymo

    Locale: SE USA

    I think it’s a good windscreen!

    #3748610
    Rex Sanders
    BPL Member

    @rex

    Might want a sturdy envelope to keep sharp-ish folded windscreen edges and corners from damaging other gear in your pack. A few minutes with scissors, a readily-available source of small Tyvek sheets (if that’s your Priority :-), and Tyvek tape, produced this:

    Notes:

    – Leave about 10 mm around the edges to make inserting and removing the windscreen easier

    – Leave an extra 35 mm on one short edge to make an envelope flap to tuck in over the windscreen. I trimmed the side edges at an angle to make flap insertion easier.

    – Tyvek tape is wicked sticky. Handle carefully.

    – Weight: 6 grams

    Enjoy!

    — Rex

    #3748742
    Bill K
    BPL Member

    @offtraildog

    Hey Rex. Awesome! I like your design a lot and will be building one for my Toaks 550 and primus micron ti kit.  FWIW – I spray painted the bottom and up the side a bit of my Toaks with black stove paint. Never did any testing but titanium has such poor thermal conductivity I figured it can only help even if marginal.

    #3748753
    Rex Sanders
    BPL Member

    @rex

    Credit: I started with the second windscreen described in this video

    YouTube video

    Good construction tips, including rolling down the folded edges with a big socket-wrench socket.

    However, when I used this design on a windy day at GGG 2022, the windscreen literally blew away from the pot. Disappointed, I started cogitating on a simple solution.

    — Rex

    #3748765
    Jon Fong / Flat Cat Gear
    BPL Member

    @jonfong

    Locale: FLAT CAT GEAR

    So,  on the first design, you didn’t need air inlet holes?  Thanks.

    Both designs look pretty clean.

    #3748770
    Jerry Adams
    BPL Member

    @retiredjerry

    Locale: Oregon and Washington

    that’s sort of like

    I use this when car camping

    One thing is heat reflects from the burner, off the aluminum, to the canister

    If the canister is warm enough to start, then reflected heat will keep it going.  Down to 20 F with cheap butane.

    I also have the heat exchanger around my pot, but it would work without that

    #3748772
    Bill K
    BPL Member

    @offtraildog

    I had the same issue with the circular ones I used. Convenient to stick in pot but had to wrap around the canister tight otherwise it would blow away and I was uncertain of the risk of heating up the isobutane can.  I have been using my ridgerest I cut into a buttpad as a partial wind block (handhold while heating water) but glad you came up with the simple, effective solution of the bottom panel.  I am planning on taking (1) 110 canister for 11 days @10,000+ and need max efficiency.

    #3748781
    Rex Sanders
    BPL Member

    @rex

    Jon

    I never built the first design in TheGoatMumbler video. With the second design’s wide open front, didn’t see a need for air inlet holes. I took one photo while the fan was running showing the flames:

    Looks good to me, but I don’t spend a lot of time staring at canister stove flames under pots.

    Jerry

    With a larger aluminum pan, someone could make the bottom flap big enough to reflect heat upward. This modified design would still fold easily but weigh a few grams more.

    Or cobble something together with a second pan and aluminum foil tape. Or take a bottom reflector for cold weather. Hmmm …

    Bill

    Let us know how well this design works for you. Probably a long time before I get to 10,000+ feet elevation to try.

    Thanks all for your feedback.

    — Rex

Viewing 9 posts - 1 through 9 (of 9 total)
  • You must be logged in to reply to this topic.
Forum Posting

A Membership is required to post in the forums. Login or become a member to post in the member forums!

Get the Newsletter

Get our free Handbook and Receive our weekly newsletter to see what's new at Backpacking Light!

Gear Research & Discovery Tools


Loading...